Category: Bathroom Decor

  • 24 Stylish Laundry Sink Ideas That Upgrade Your Space

    24 Stylish Laundry Sink Ideas That Upgrade Your Space

    Your laundry sink does way more than you probably realize. It’s the unsung hero of stain removal, delicate washing, and those moments when you need to rinse something quickly without dragging it to the kitchen. But here’s the thing—most laundry sinks are buried in dark corners looking purely utilitarian. What if your sink could actually be a design feature that makes your whole laundry space feel more intentional and organized? In this guide, I’m sharing 24 laundry sink ideas that go beyond basic functionality. You’ll find budget-friendly hacks, smart layouts, upgraded fixtures, and styling tricks that turn your sink into a real focal point. Whether you’re renting, dealing with a tiny closet laundry, or planning a full remodel, there’s something here to elevate your space.

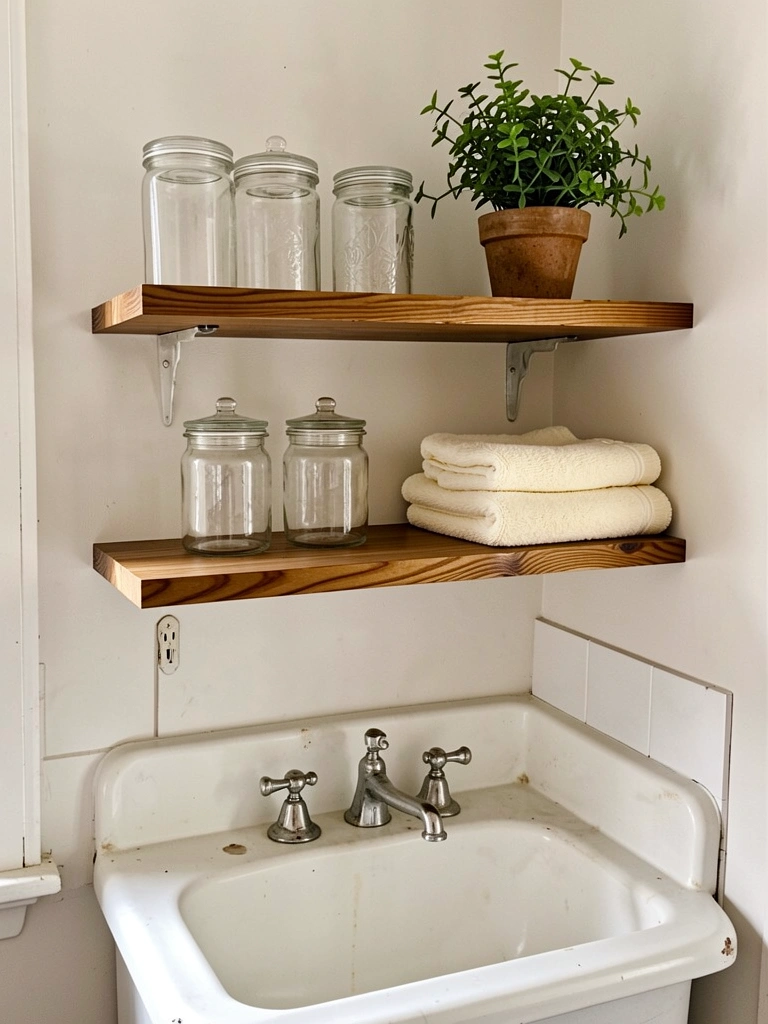
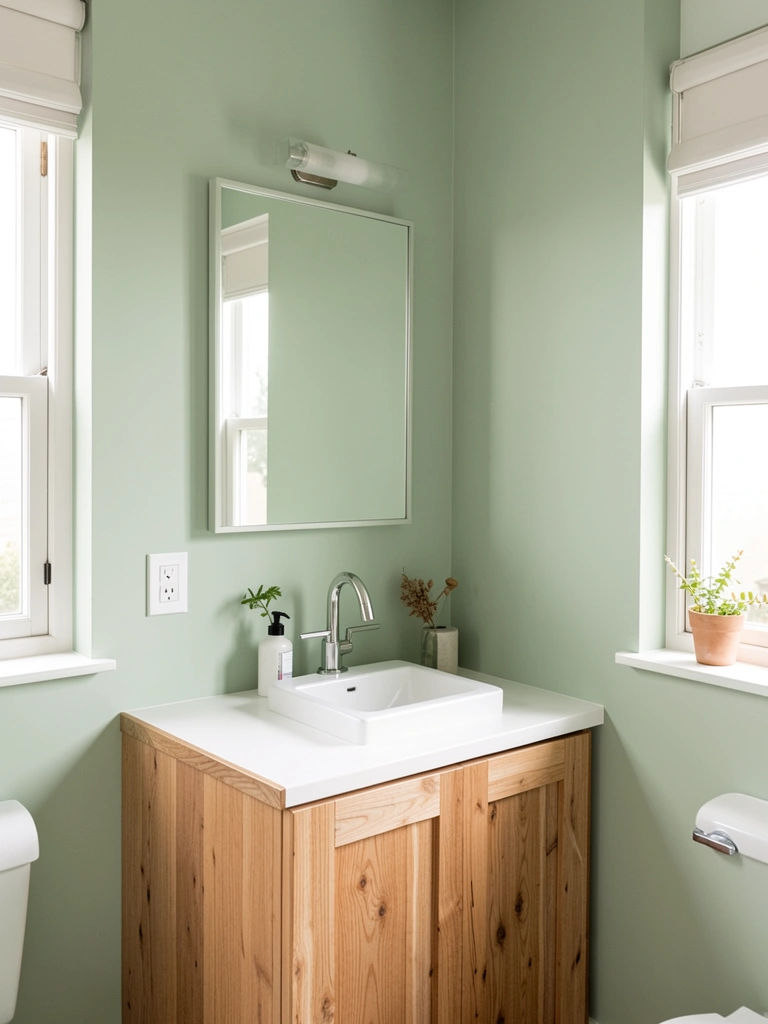
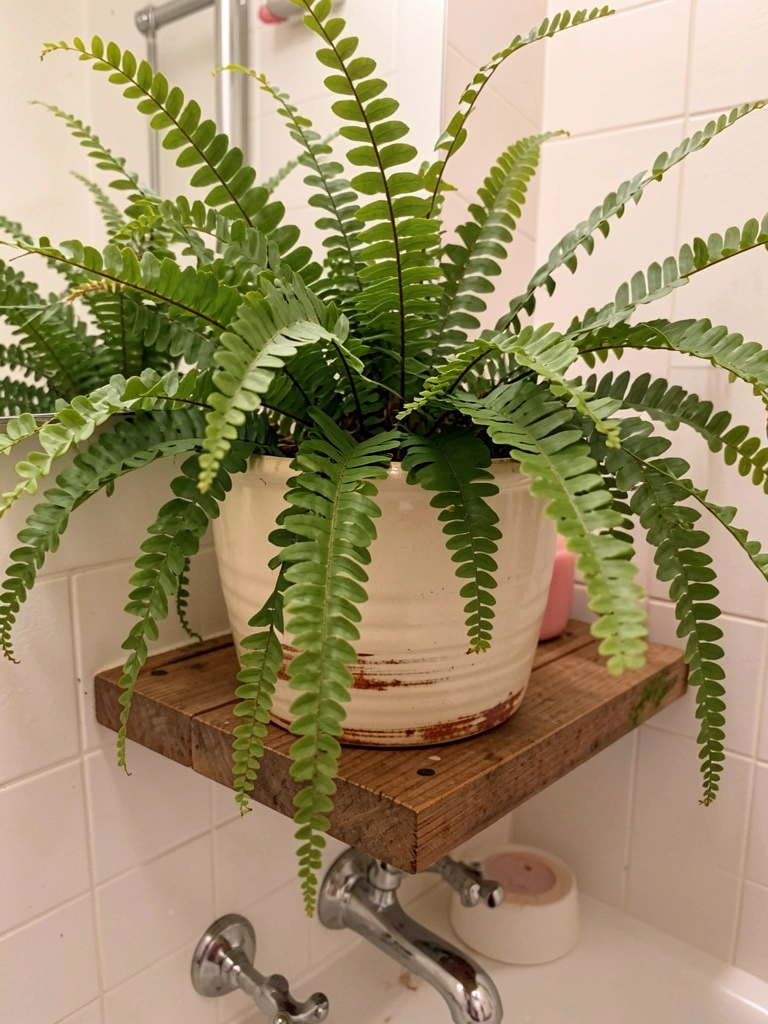
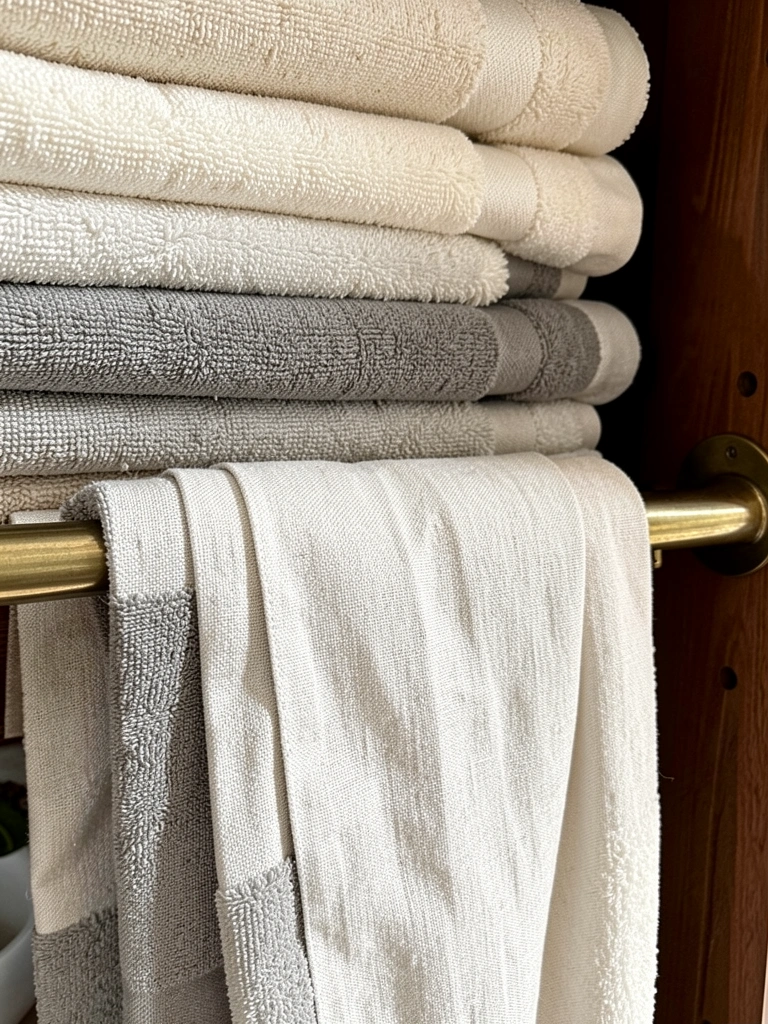
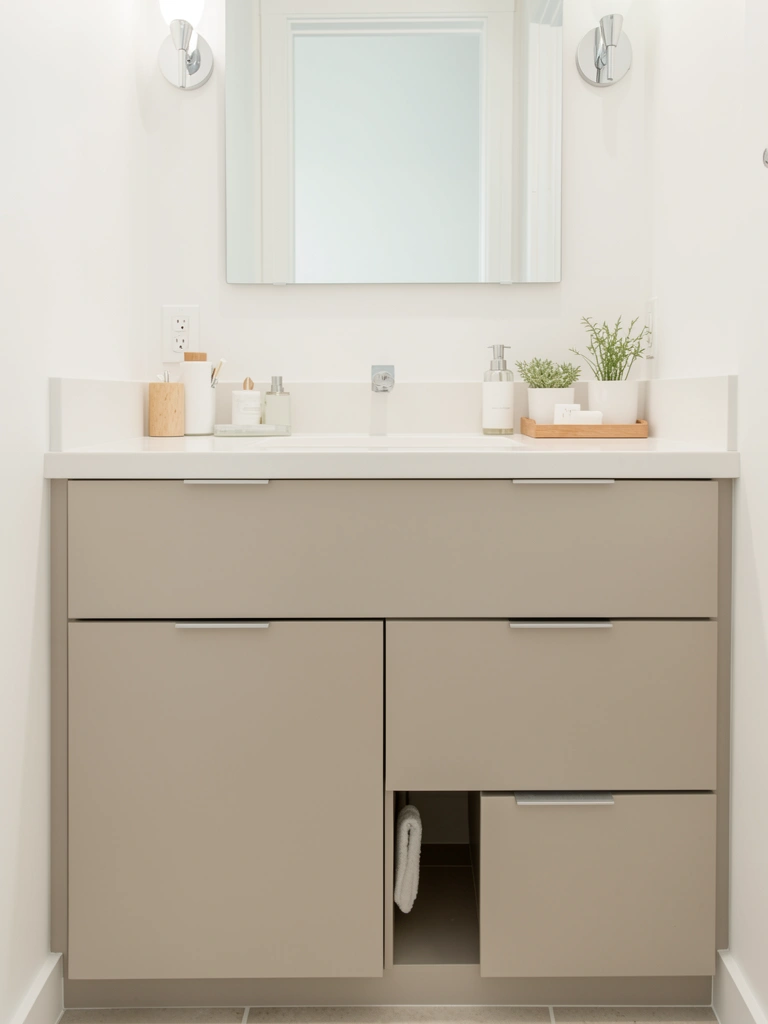
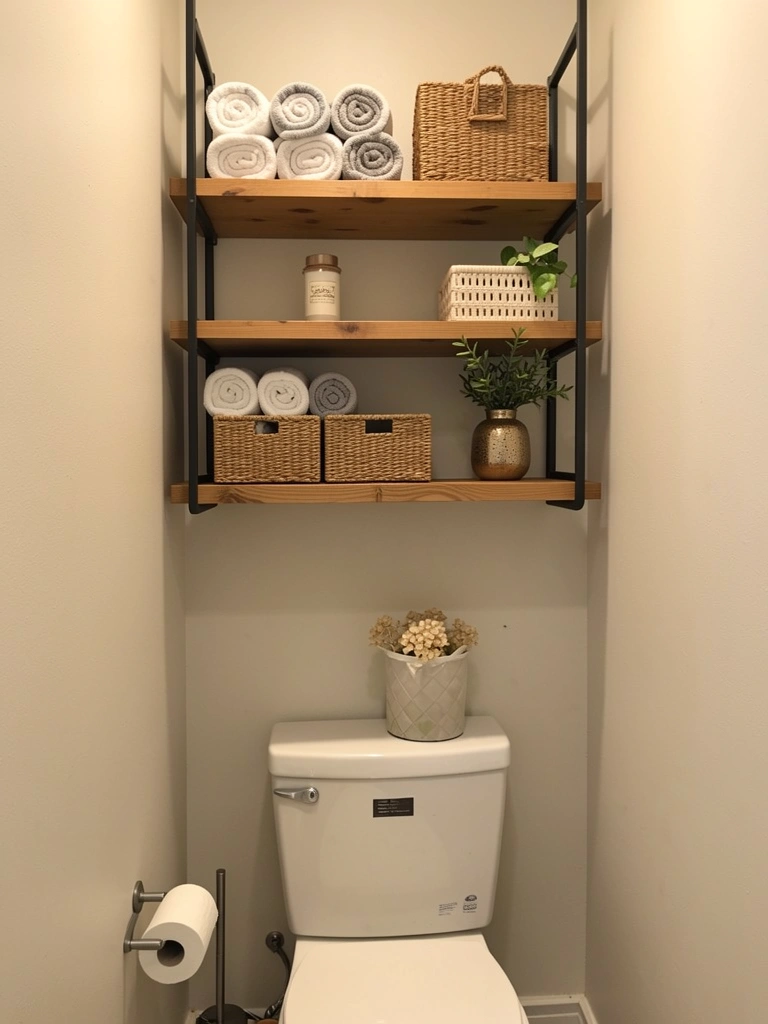
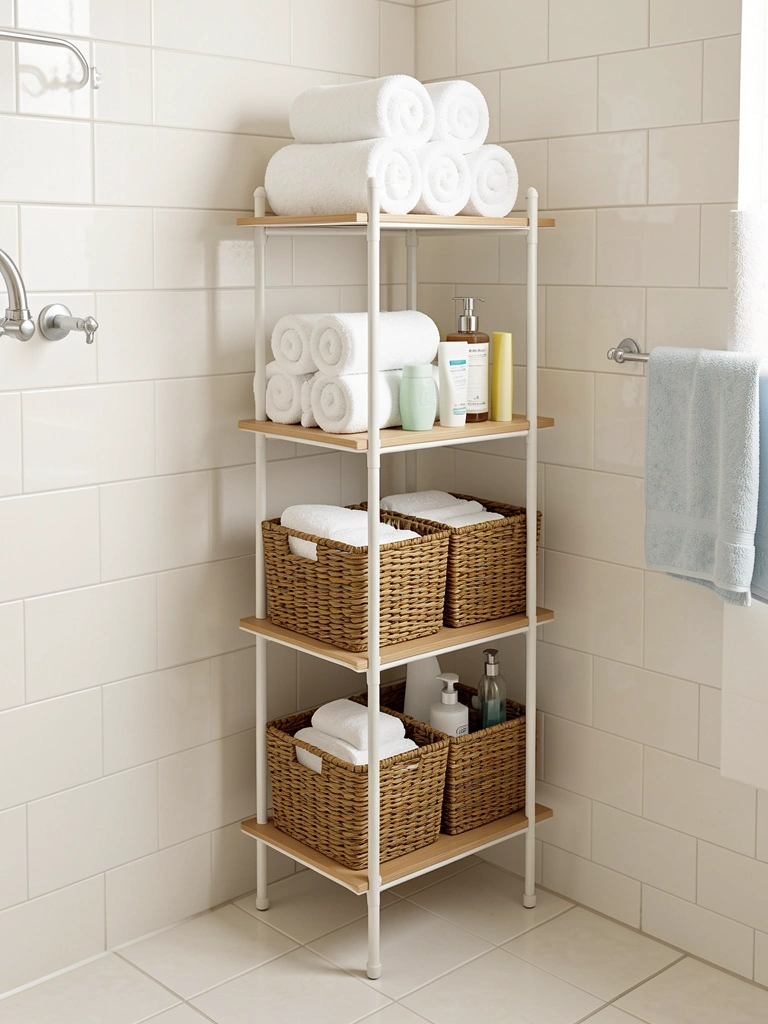
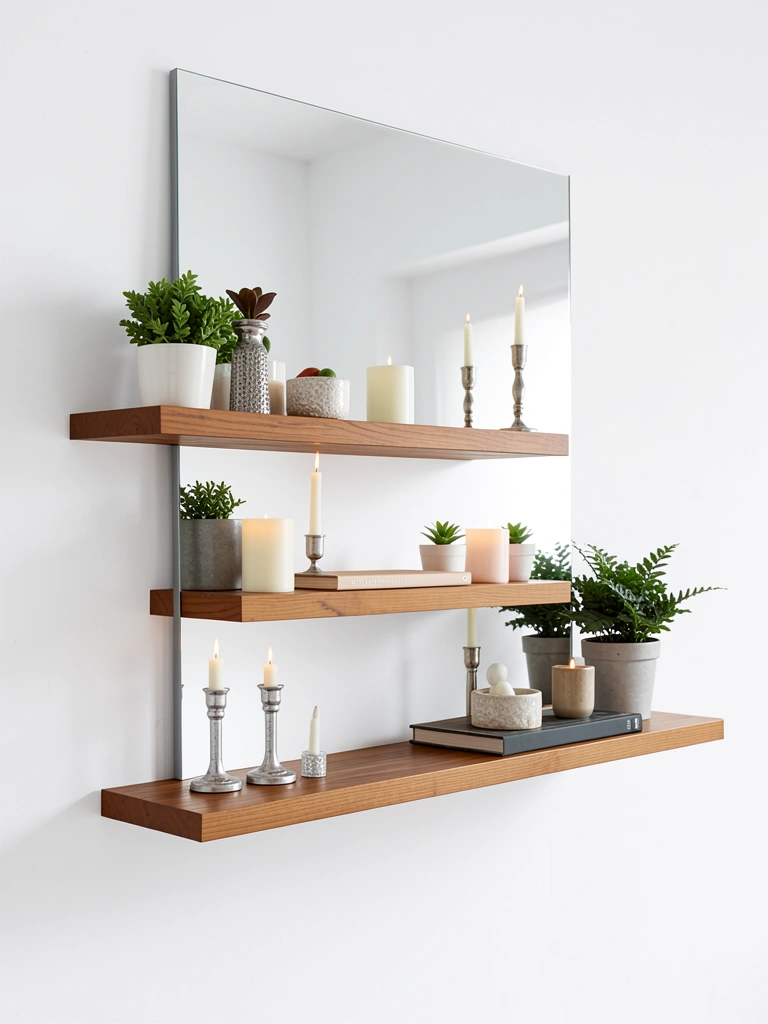
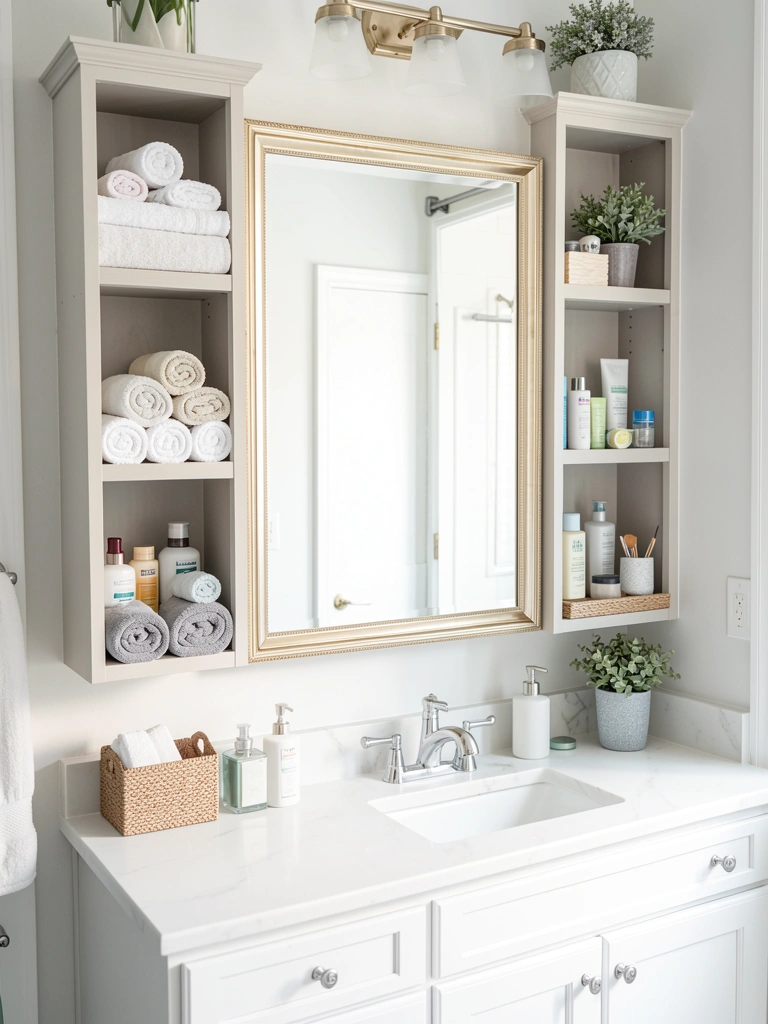
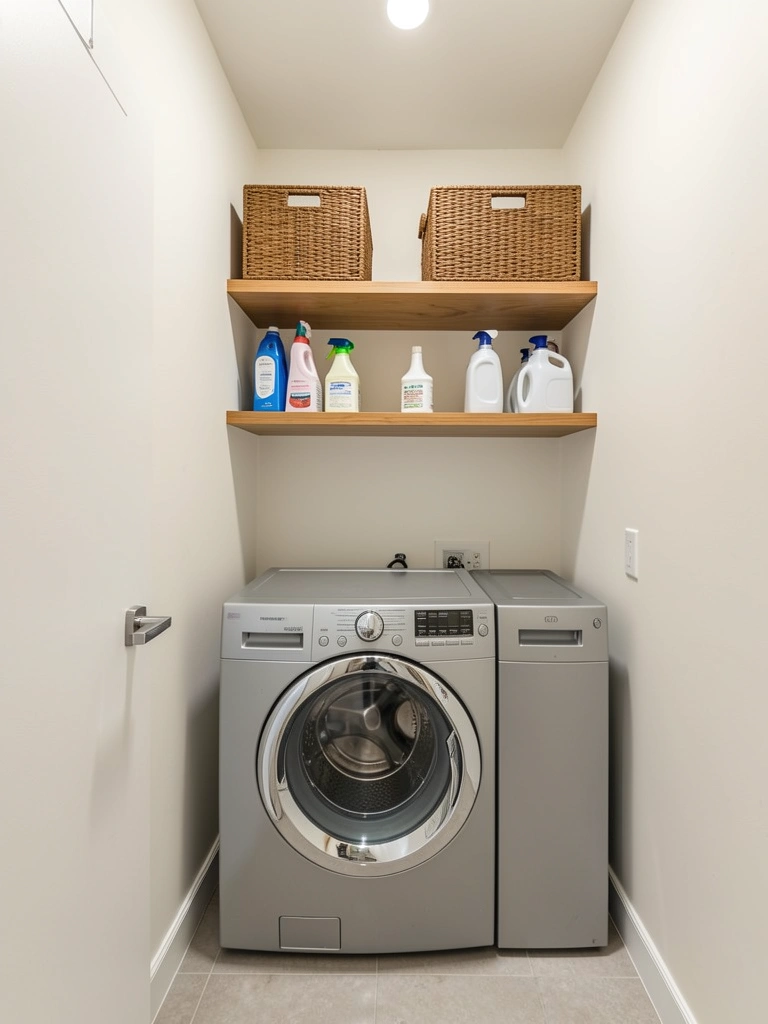
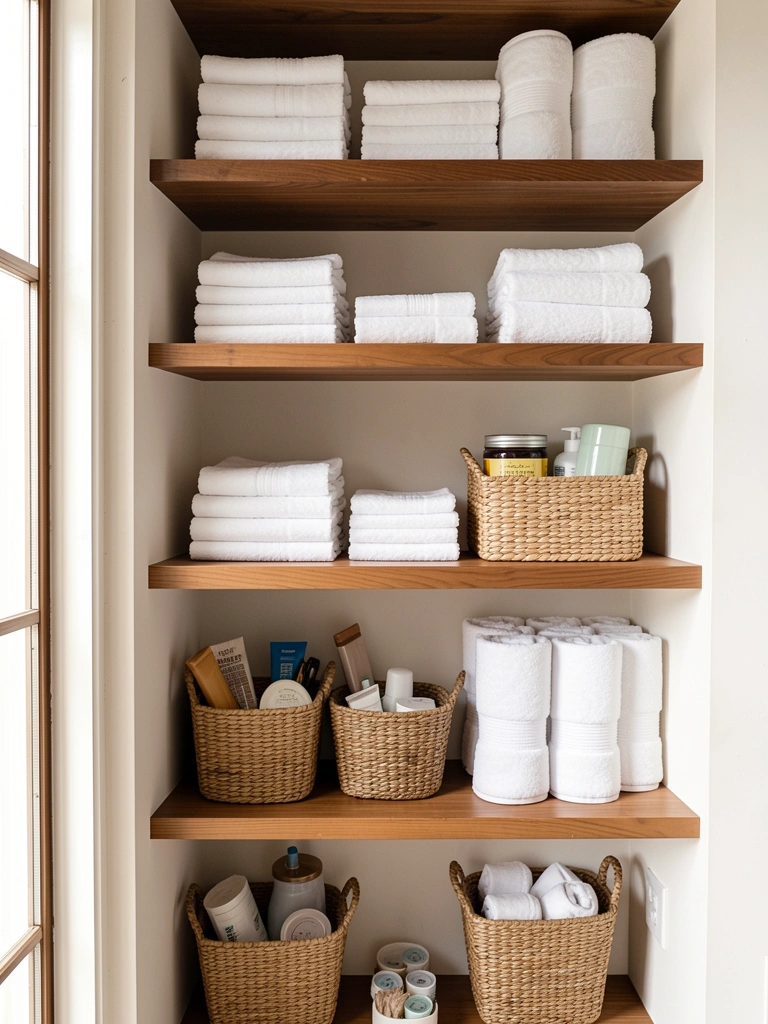
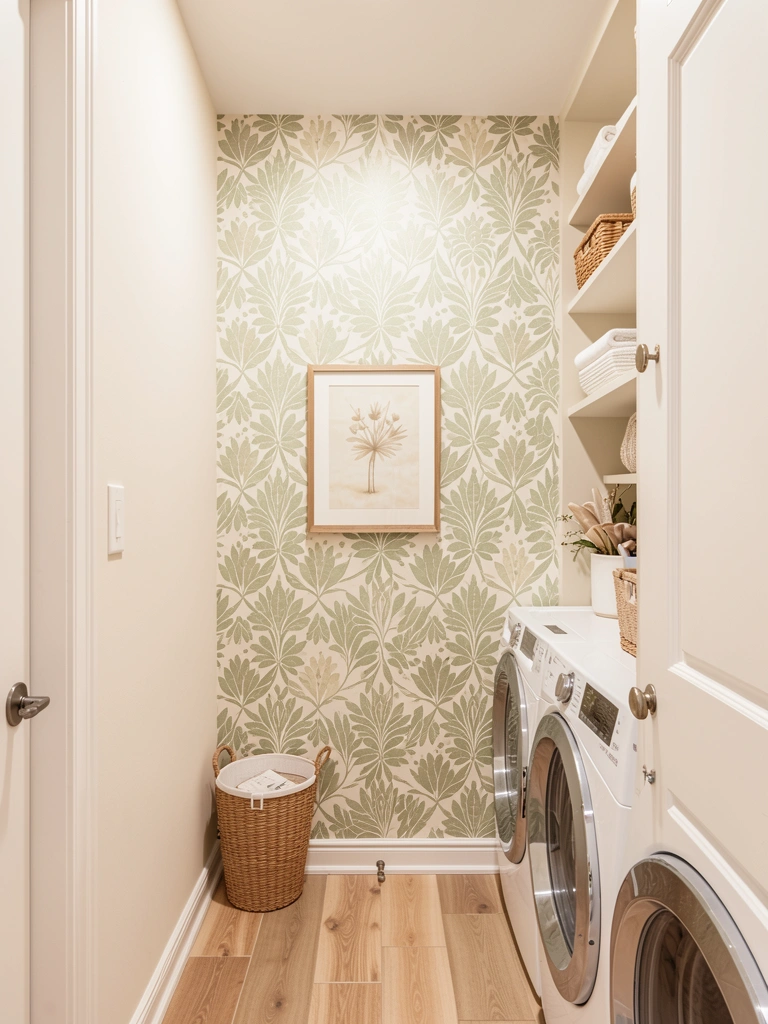
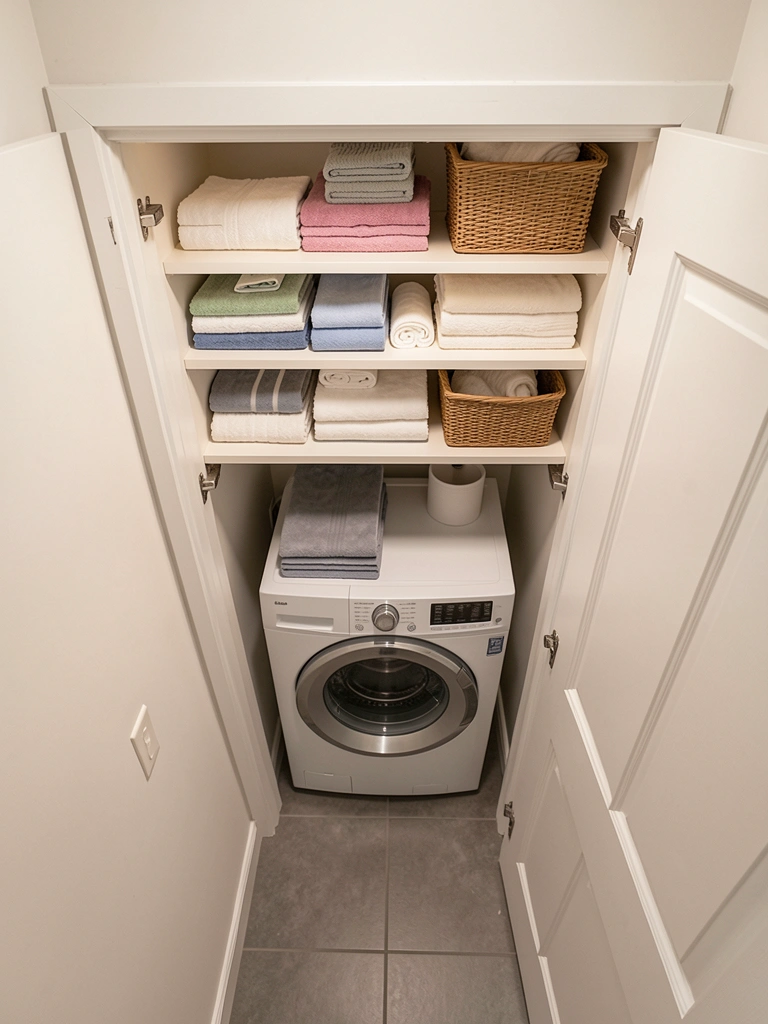
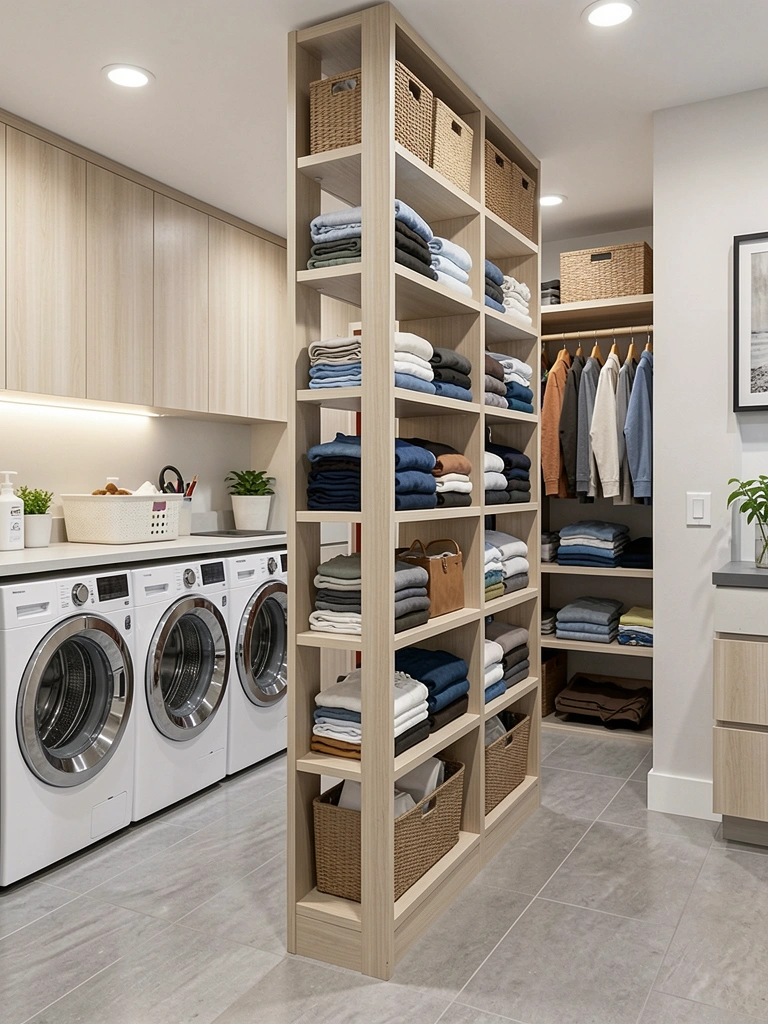
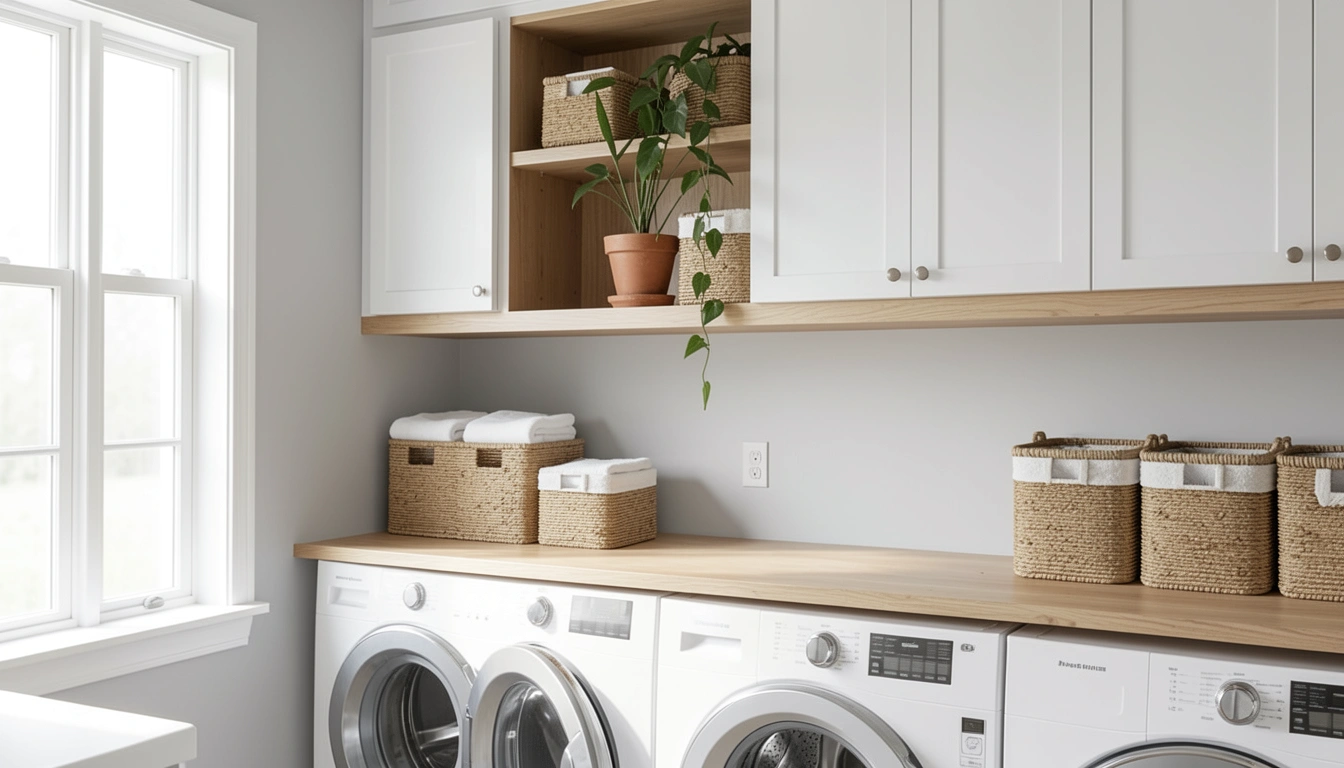
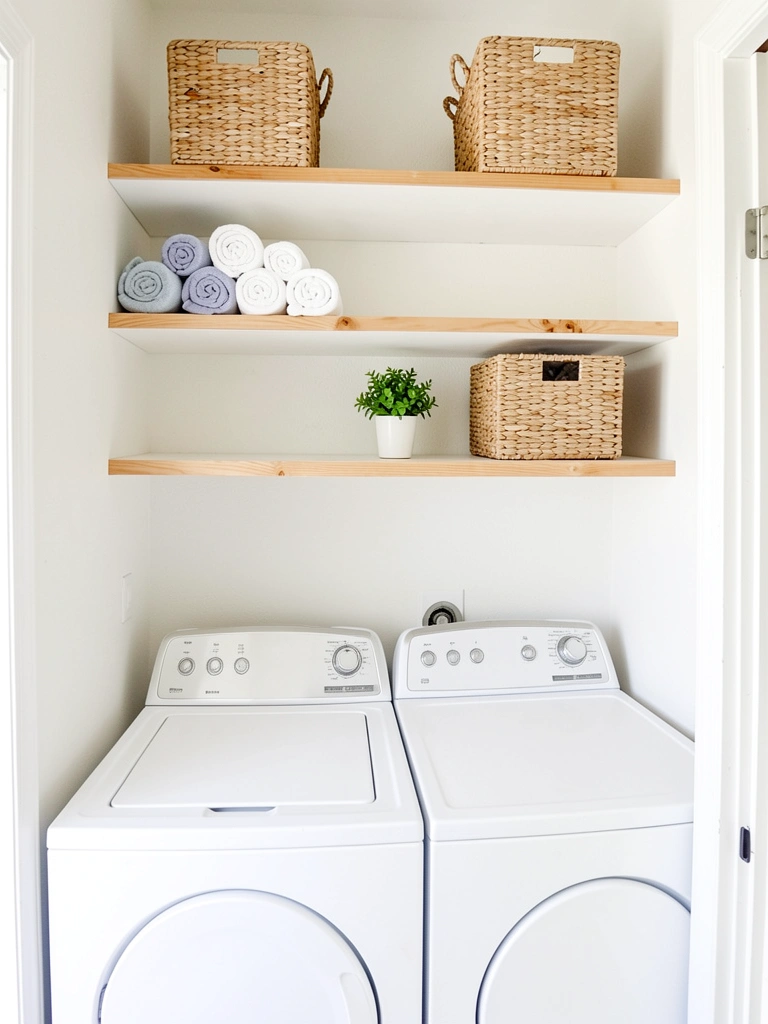
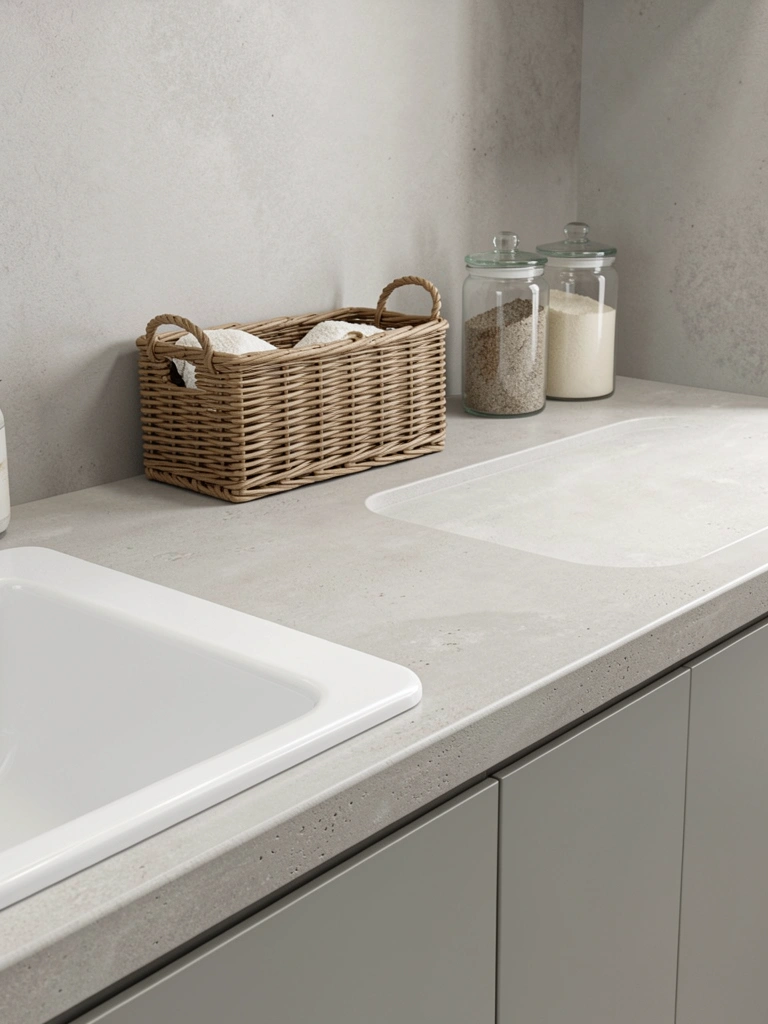
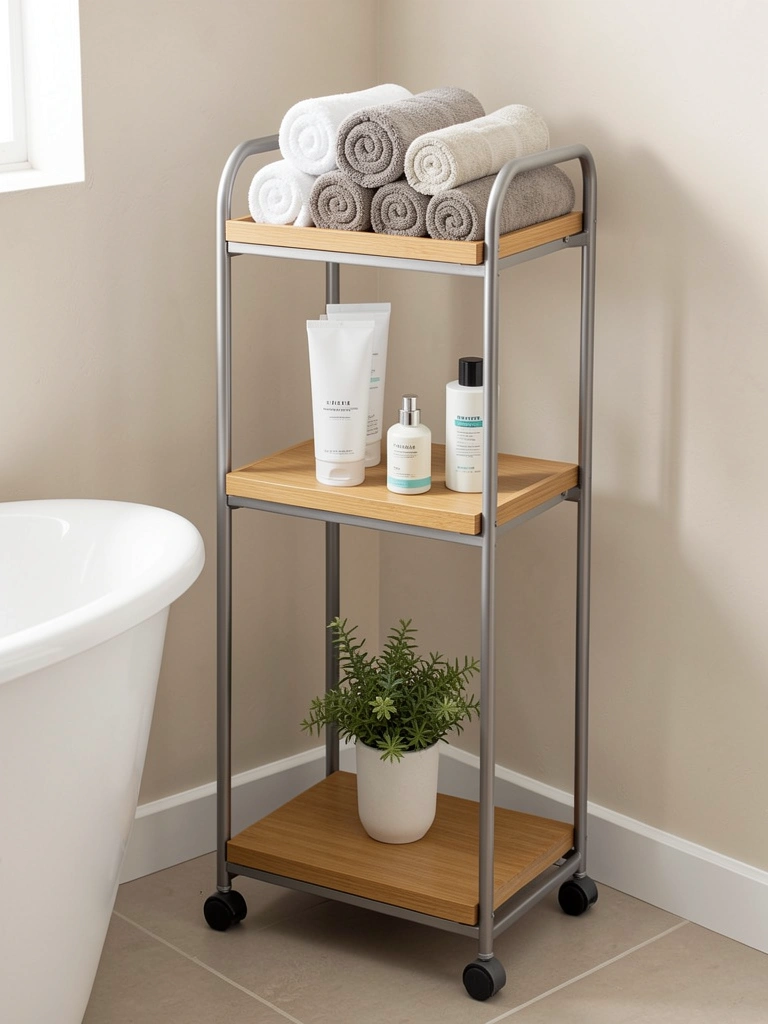
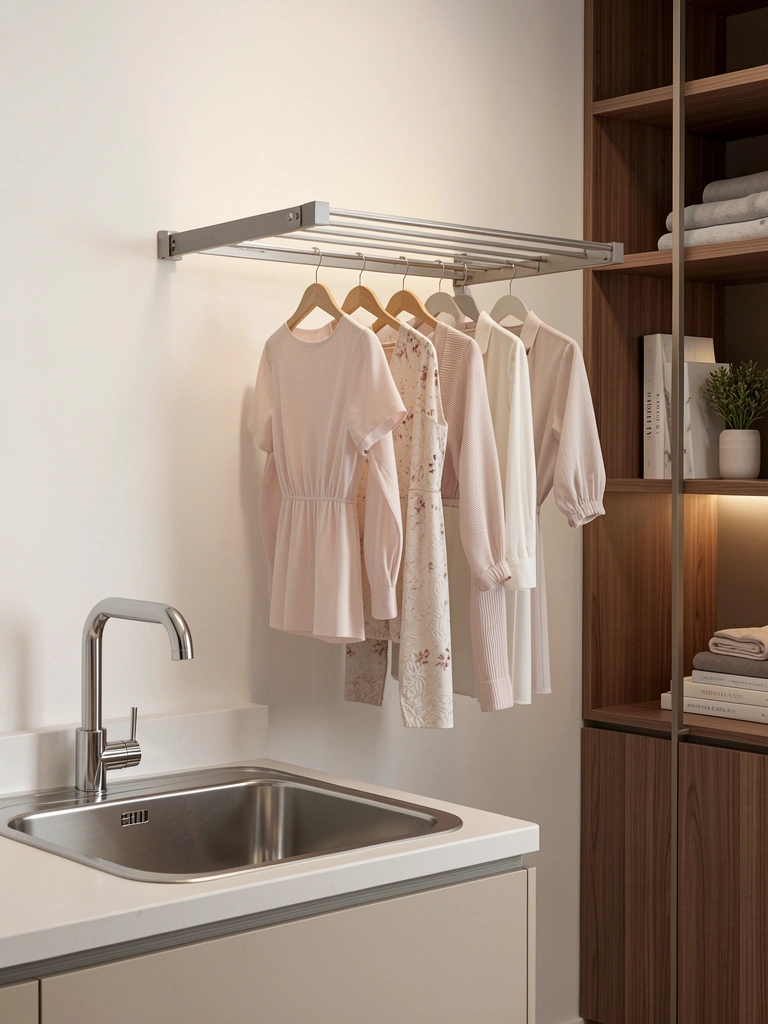
    1. Pair Your Sink with Open Shelving Above

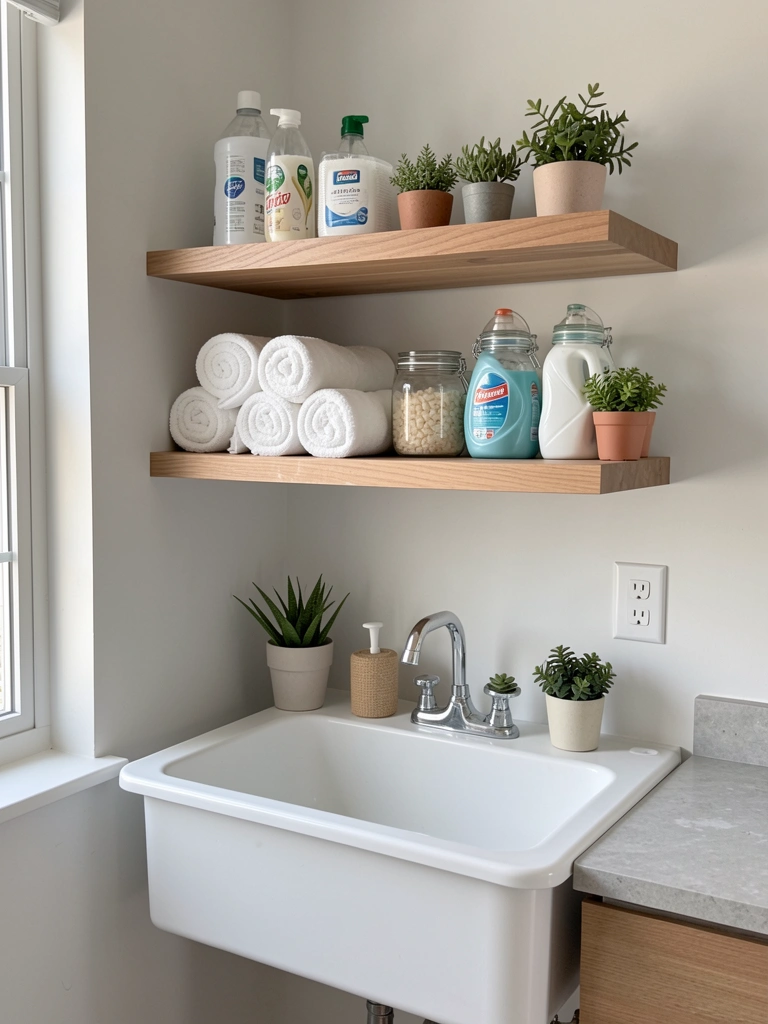
    Open shelving above your sink creates visual breathing room and makes supplies easy to grab mid-wash. This layout works especially well for small spaces because it avoids the clunky feel of upper cabinets.

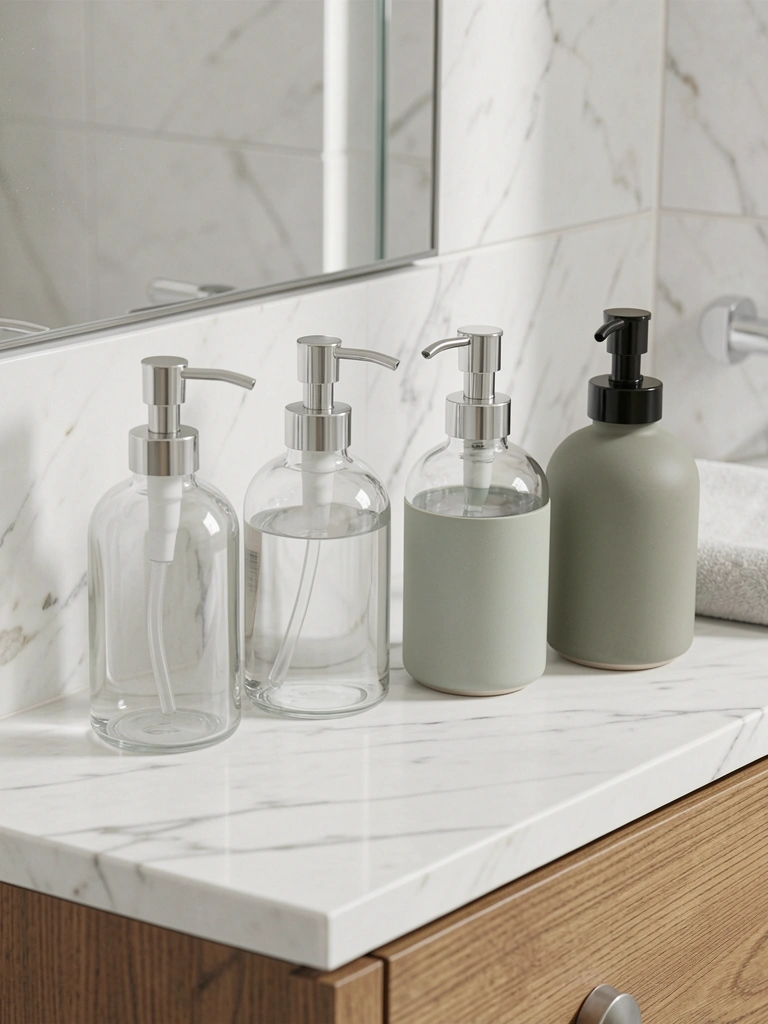
    Mount floating shelves 12-18 inches above your sink using heavy-duty brackets ($30-$60 for a set at Home Depot). Style them with rolled towels, storage jars, and one or two plants for personality. The key is keeping items functional but pretty—think clear containers for detergents instead of cluttered boxes.

    This setup takes about one afternoon to install and looks way more expensive than it is. The added visual interest makes your laundry space feel like an actual room, not just a chore zone.

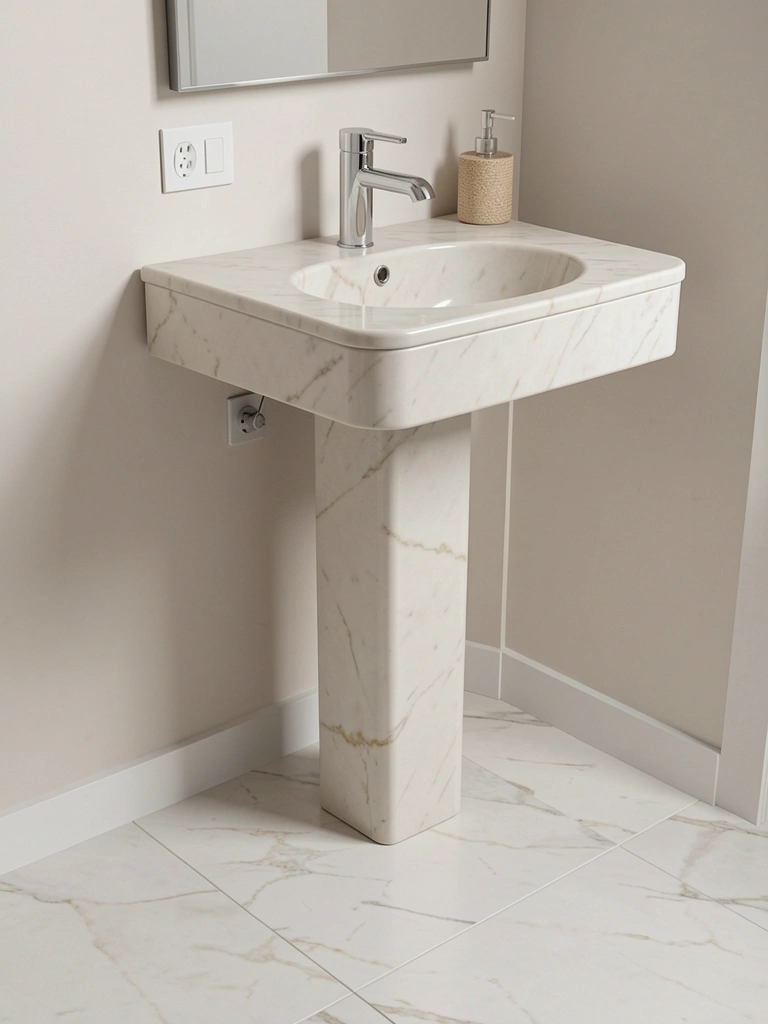
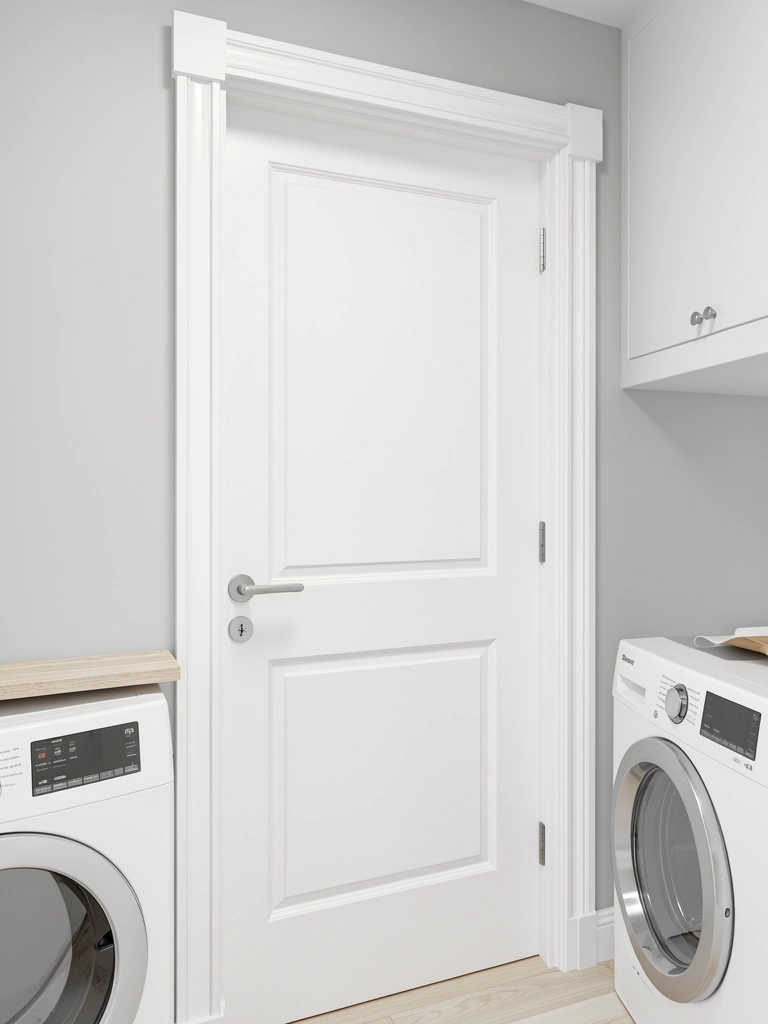
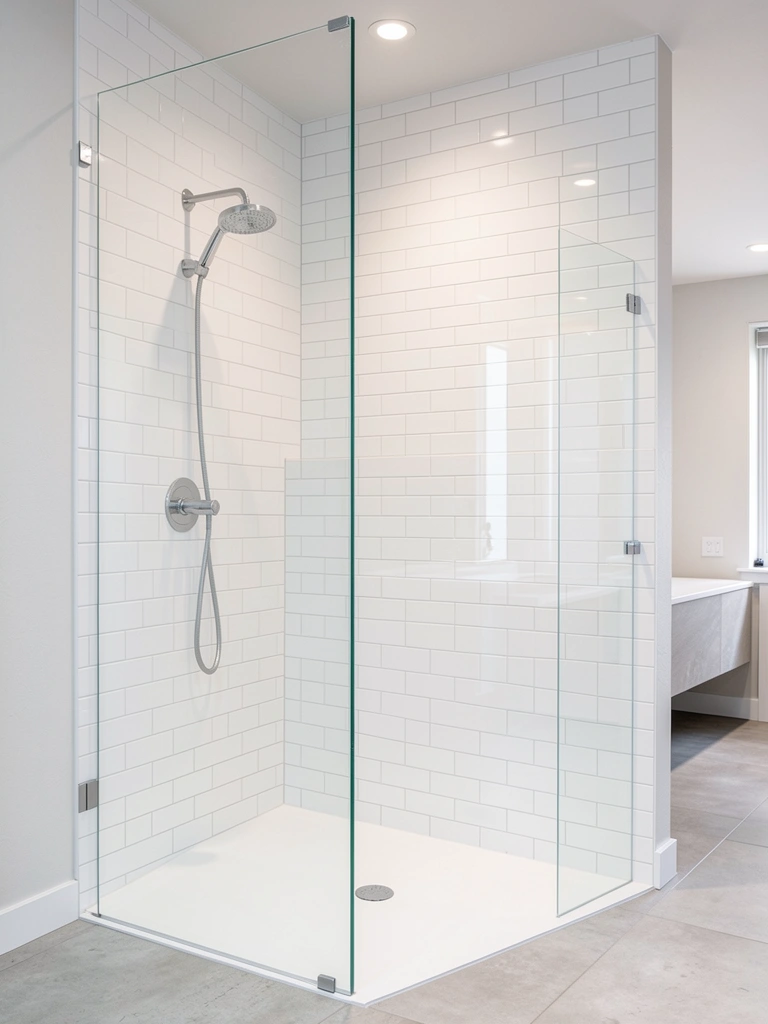
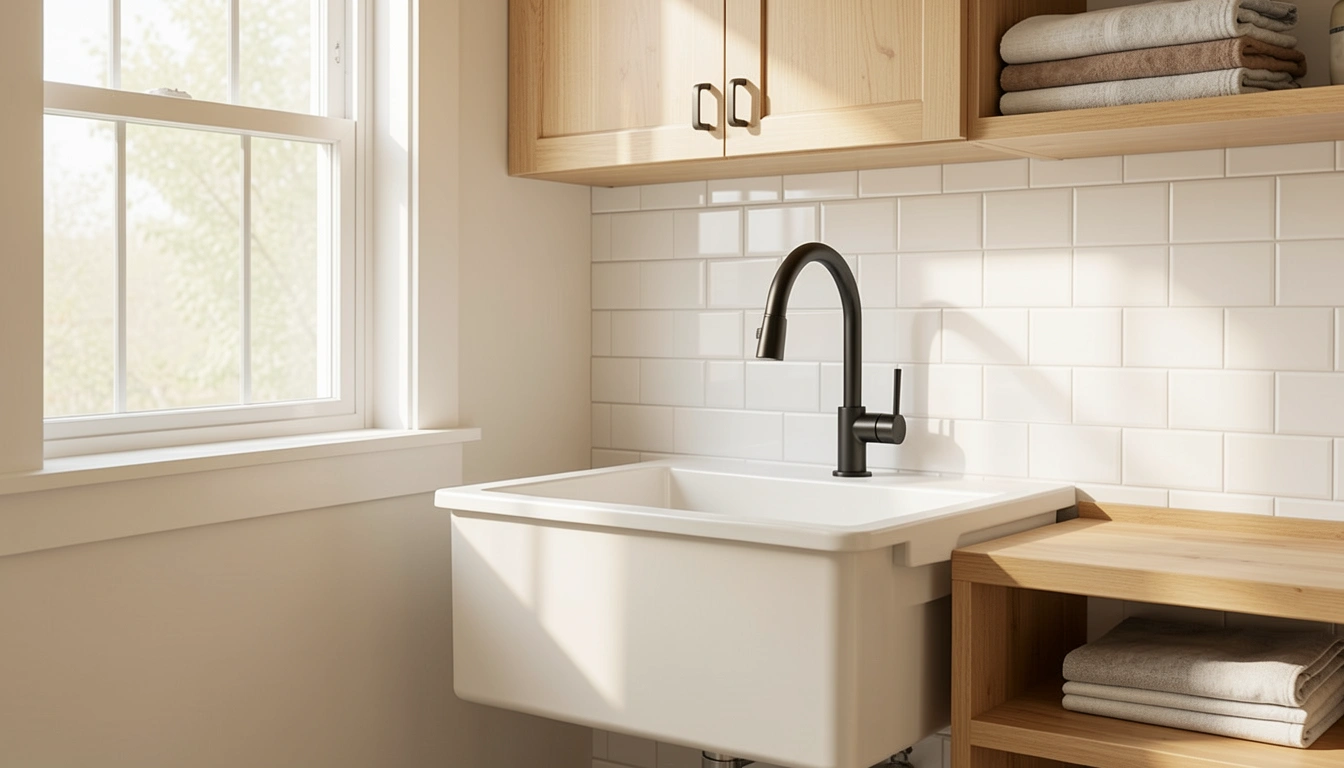
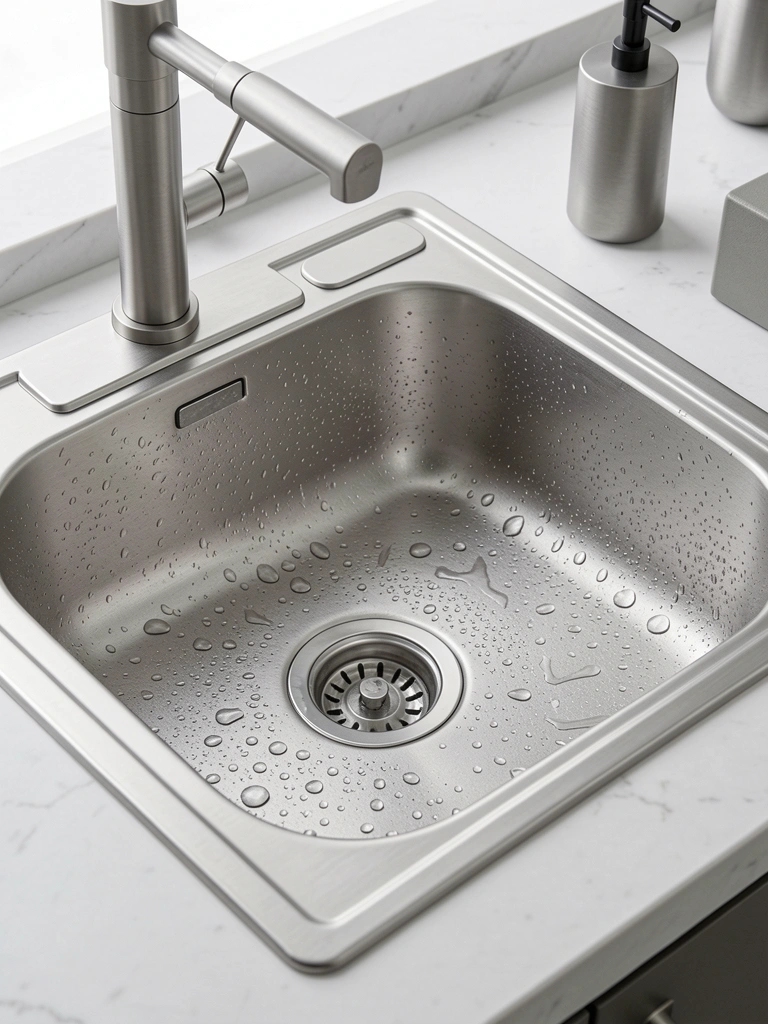
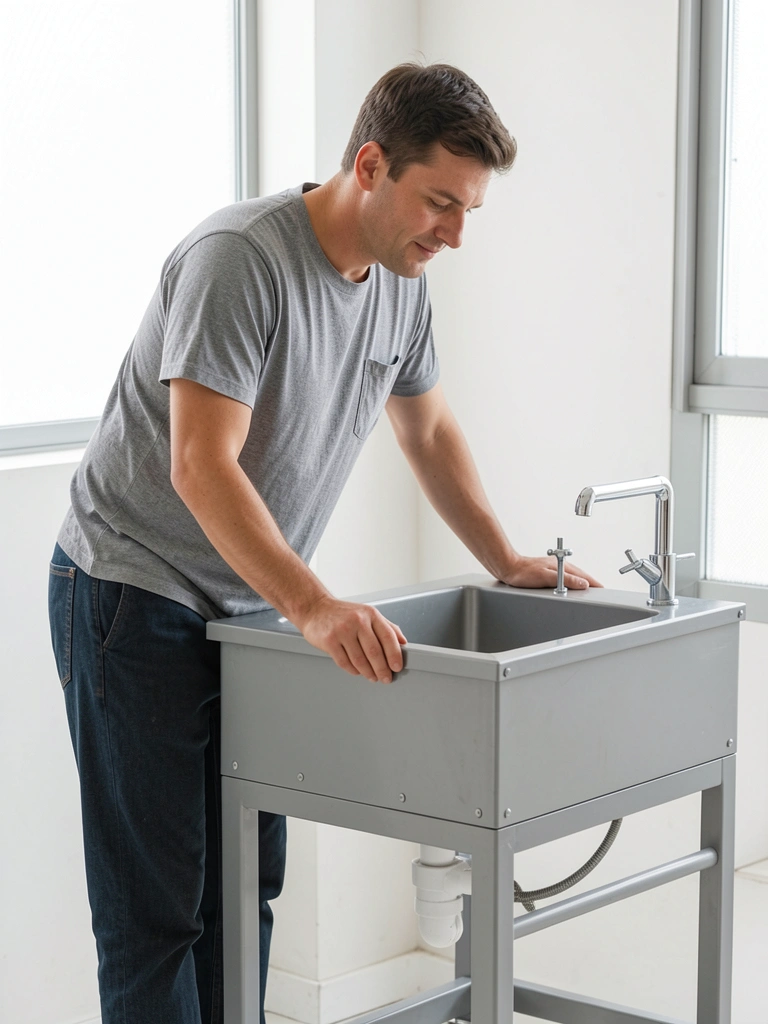
    2. Install a Deep Utility Sink for Serious Stain Work

    A deep utility sink gives you actual room to soak, scrub, and rinse without everything splashing onto the floor. Standard shallow sinks force you to hunch over and limit what you can wash.

    Swap your existing sink for a deeper model (20-25 inches deep instead of 10-12 inches). Brands like Kohler and Moen have quality options at $150-$400 depending on material. Installation takes about 2-3 hours if you’re handy, or hire a plumber for $100-$200 labor. The extra depth makes hand-washing delicates, treating tough stains, and pre-soaking linens infinitely easier.

    You’ll wonder why you didn’t upgrade sooner—especially when you’re tackling things like muddy baseball uniforms or wine-stained tablecloths.

    3. Choose a Utility Sink That Doubles as a Pet Wash Station

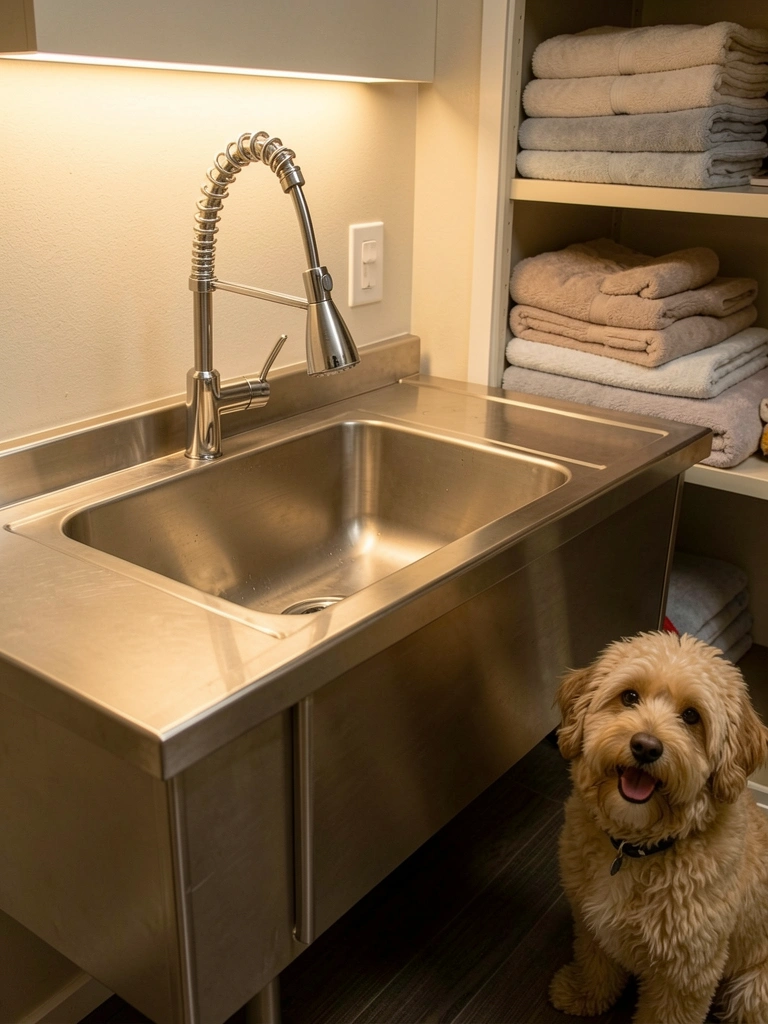
    Why have a separate pet bath when your laundry sink can handle both jobs? With the right sink and spray head, you get a real multi-purpose station.

    Look for sinks with adjustable spray heads (like a kitchen faucet upgrade) that let you rinse your dog, delicate items, or muddy shoes without fighting water pressure. Kohler’s Pet Spa line ($250-$350) even has specific features for this. If you’re renting, a clip-on spray attachment ($20-$40 on Amazon) works on most faucets.

    Set up a washable mat underneath ($15-$30) to catch splashes. This one upgrade serves so many purposes—muddy paws, garden tools, messy projects—that you’ll use it constantly beyond laundry duties.

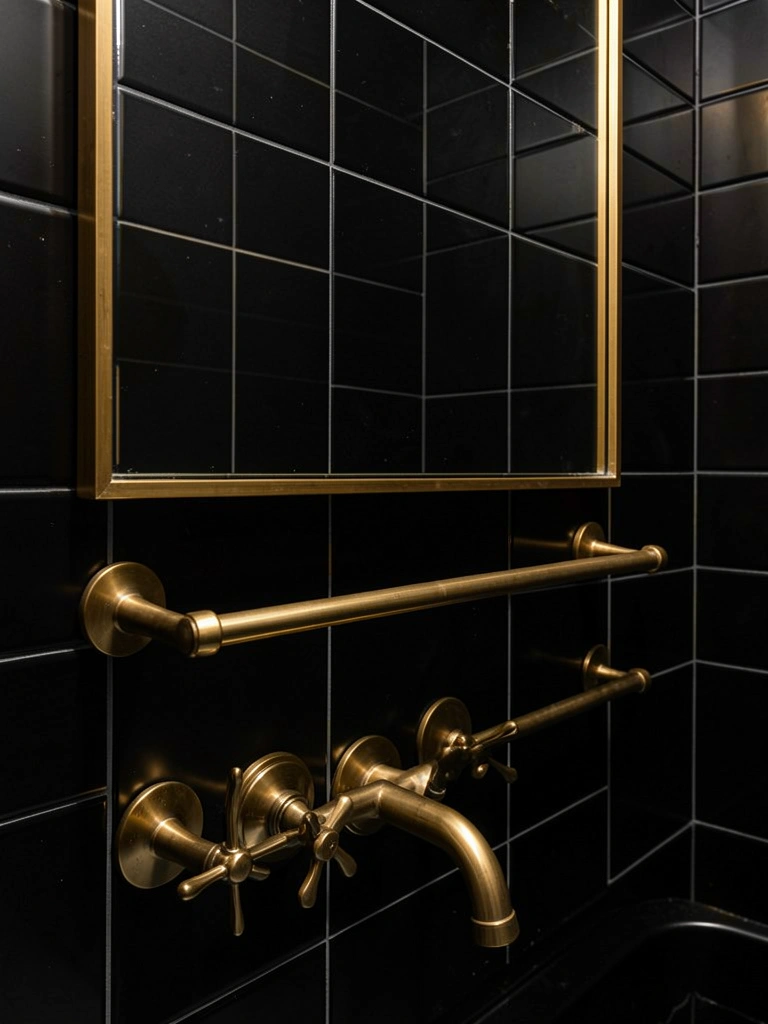
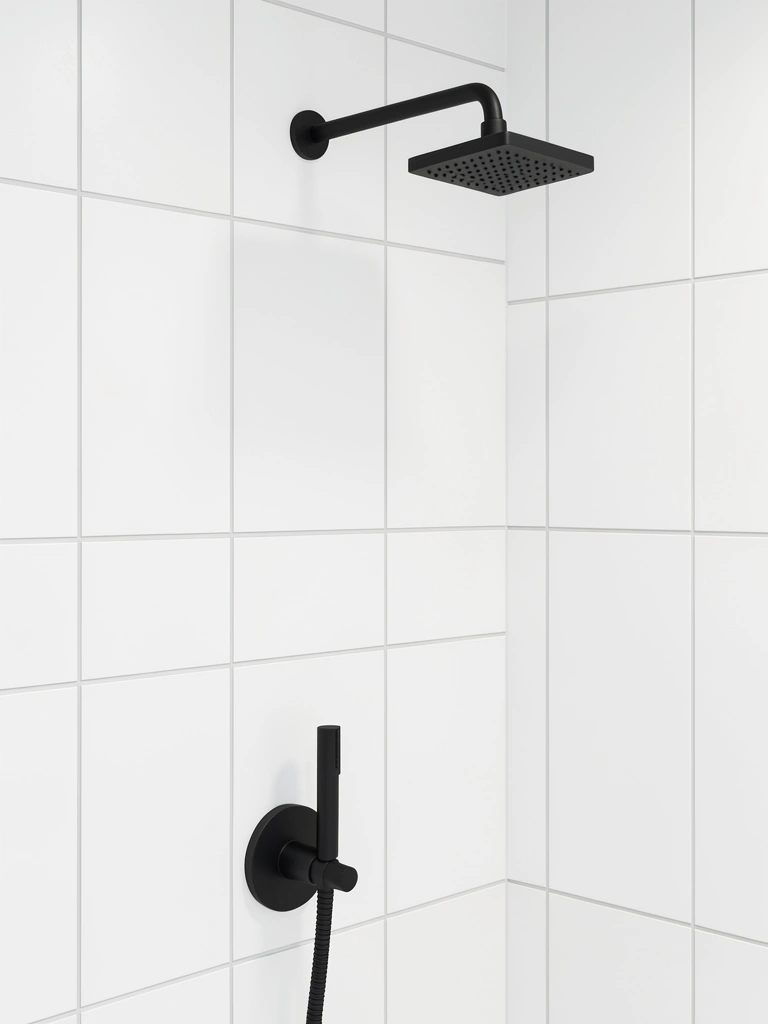
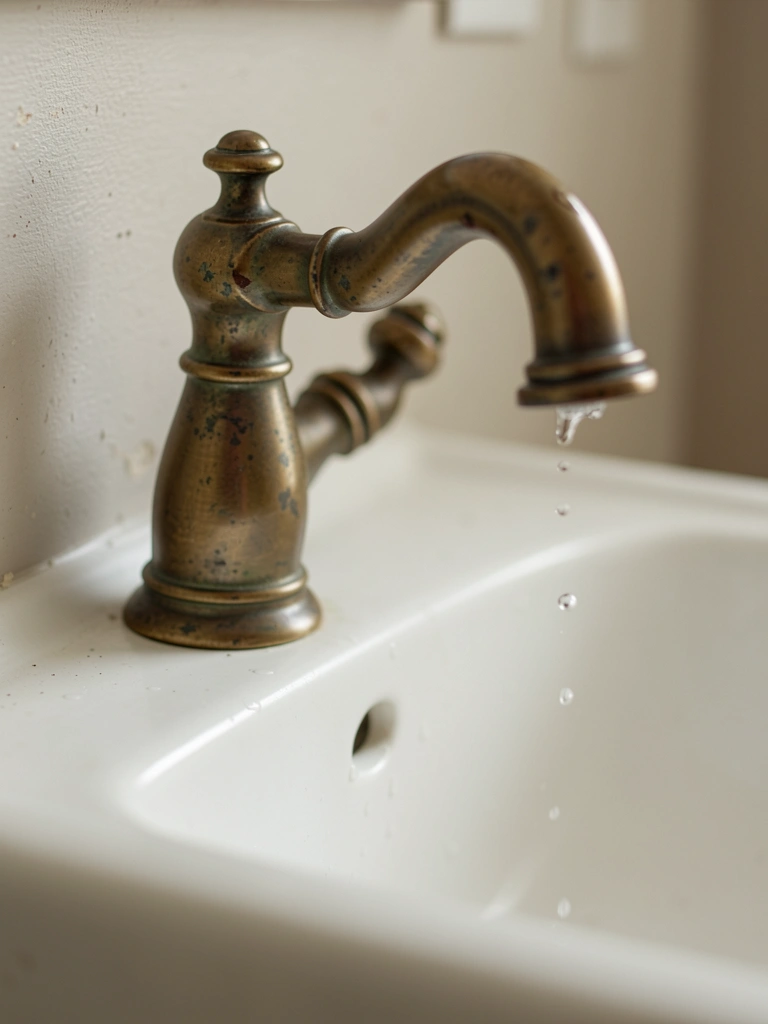
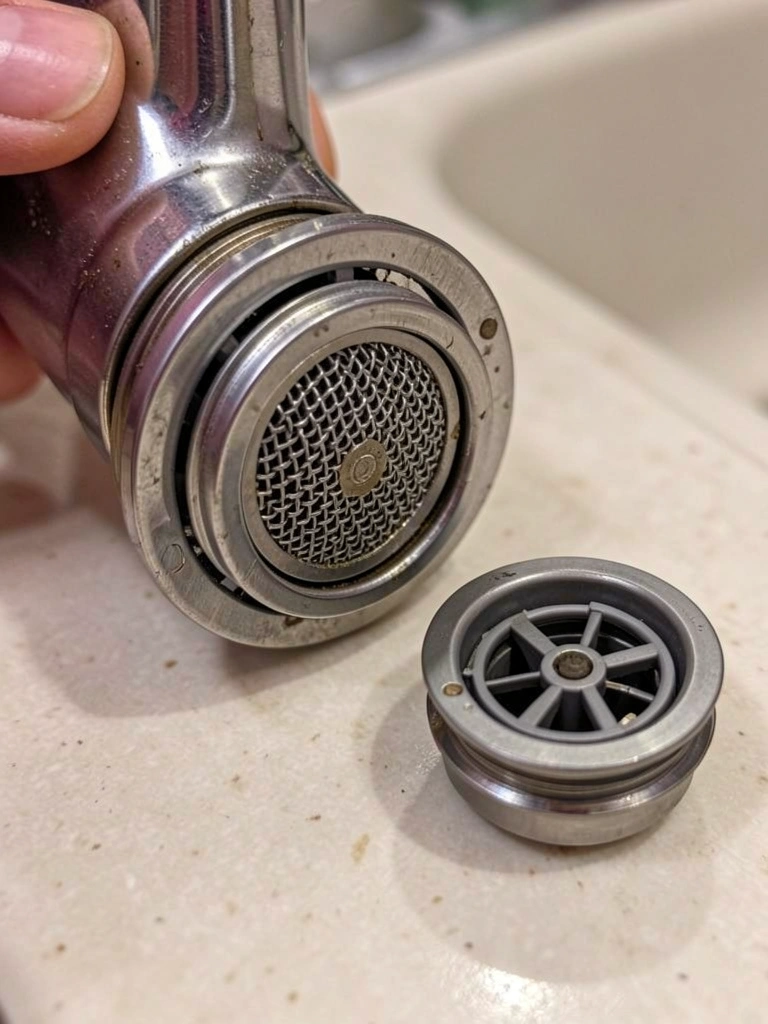
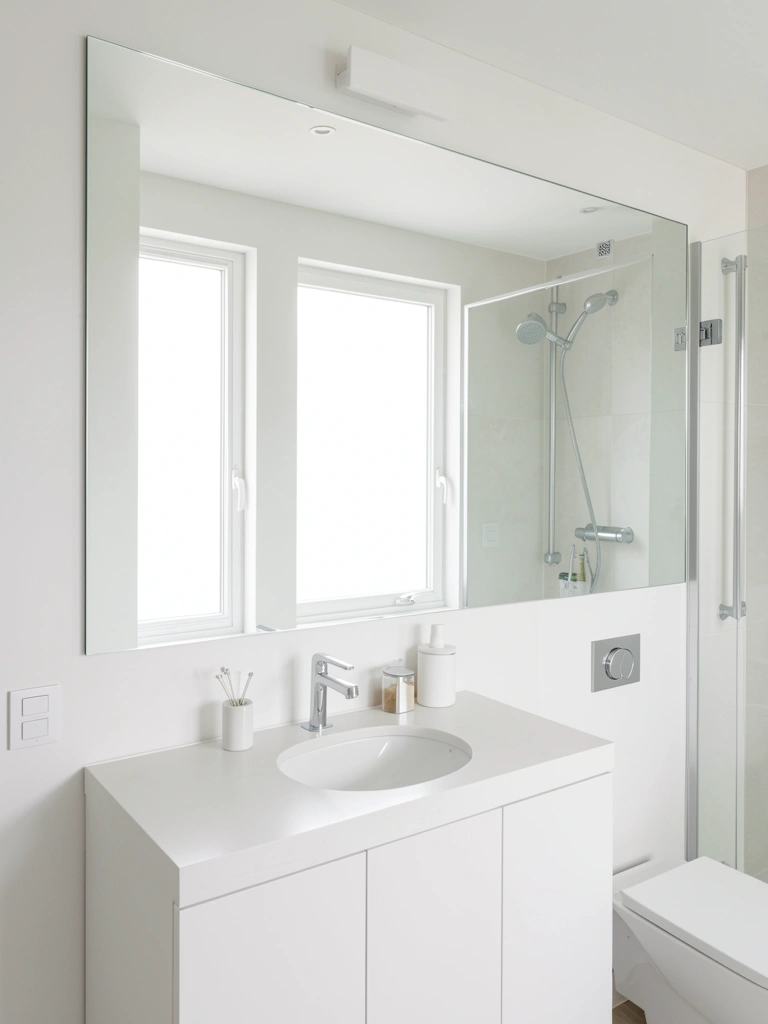
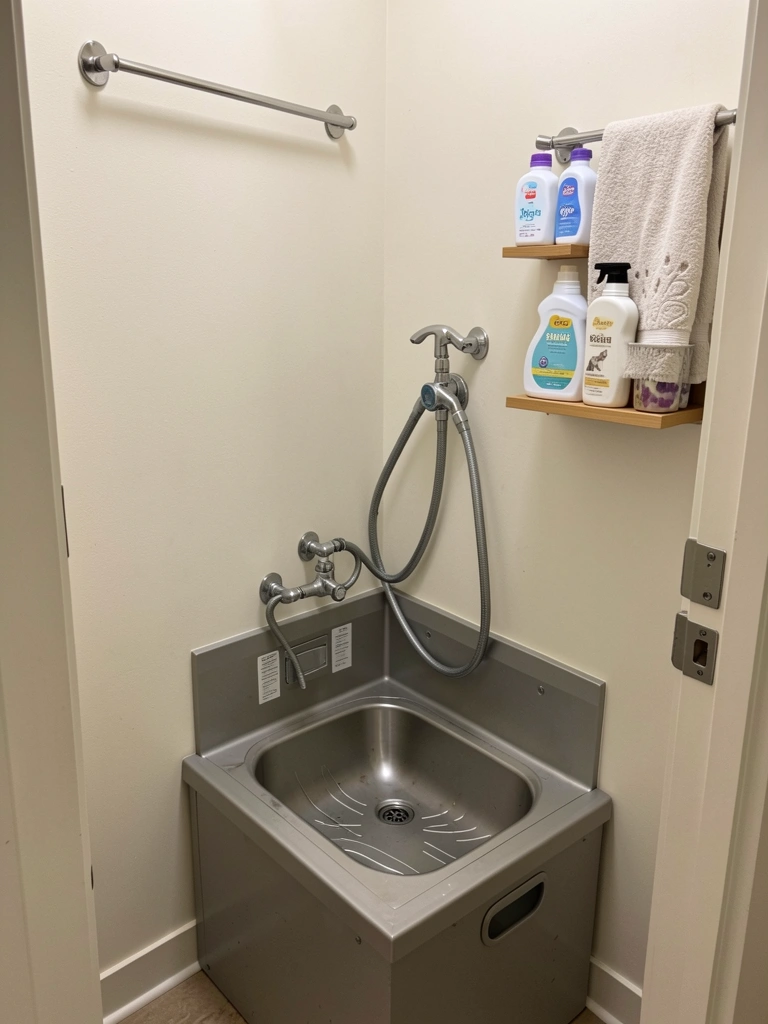
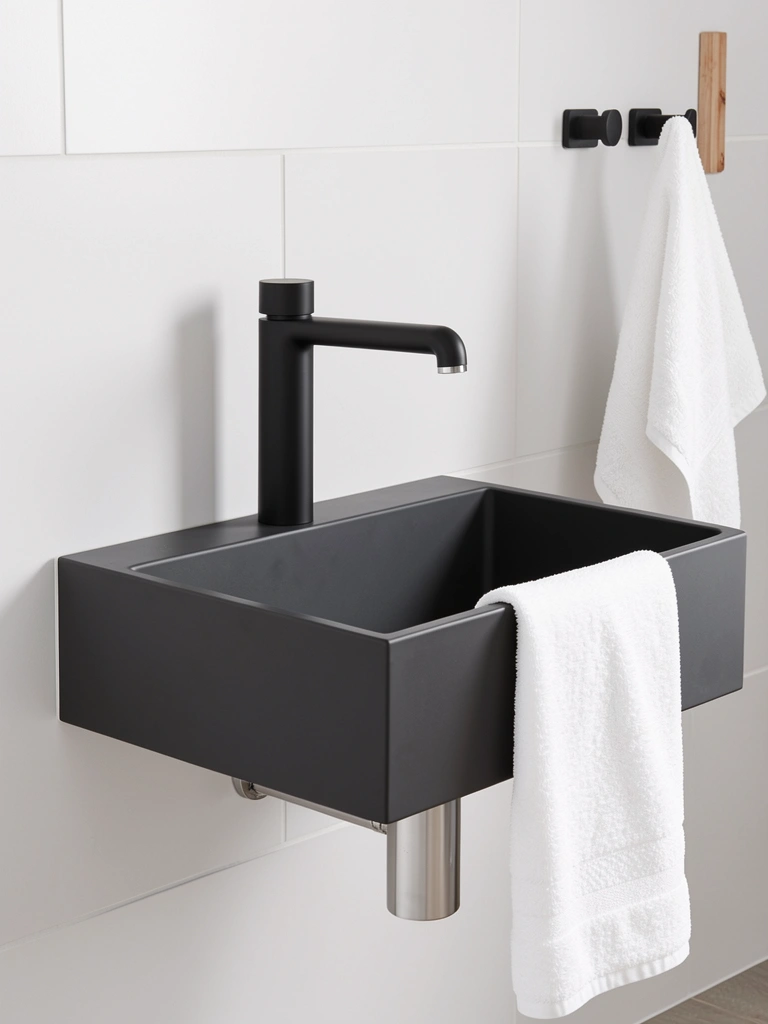
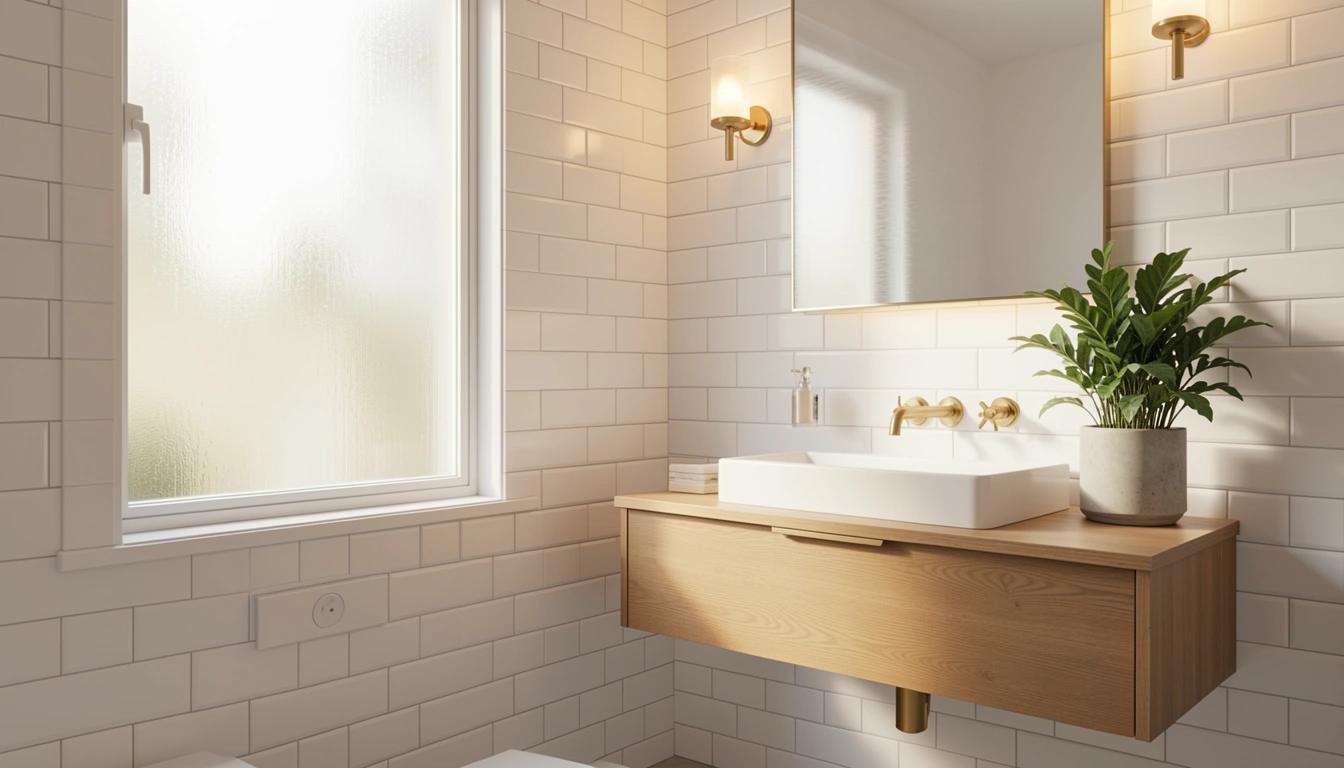
    4. Add a Faucet with a High Arc and Spray Function

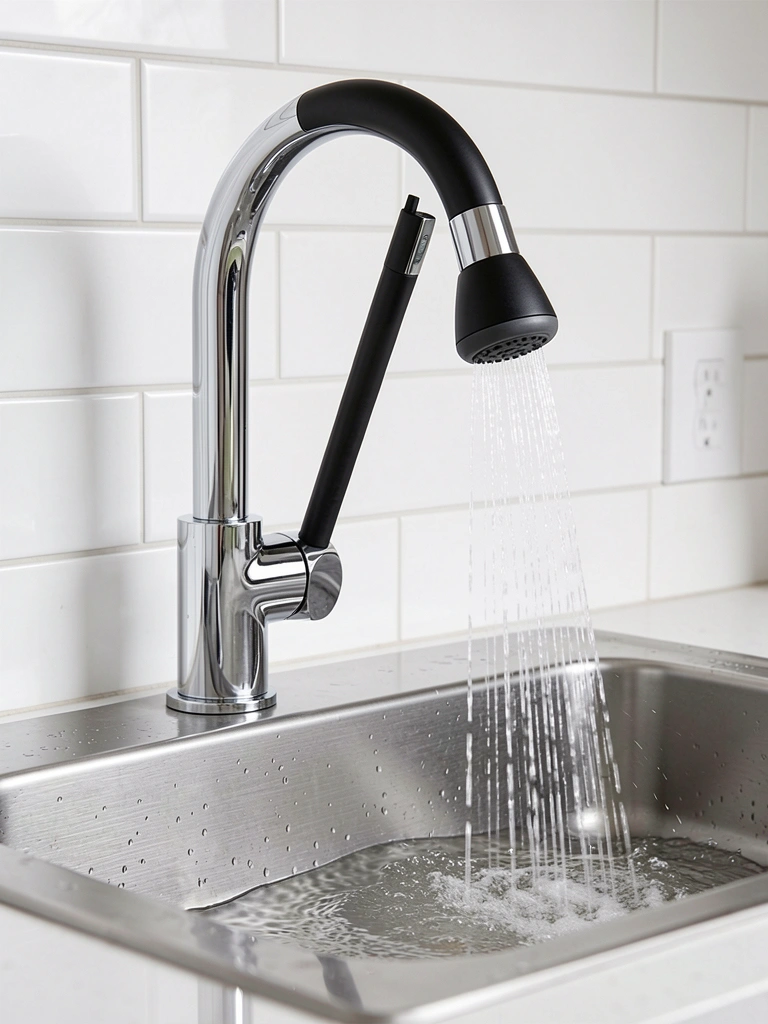
    Your faucet matters more than you think. A standard low-arc faucet limits what you can fit underneath, while a high arc with spray function handles literally everything from large comforters to muddy sneakers.

    Upgrade to a commercial-grade or residential high-arc faucet with a detachable spray head ($80-$250 depending on finish). Options like Moen Spot Resist or Delta Foundations offer durability at mid-range prices. Installation is straightforward if you’re replacing an existing faucet—about 30-45 minutes with basic tools, or hire a plumber for $50-$100.

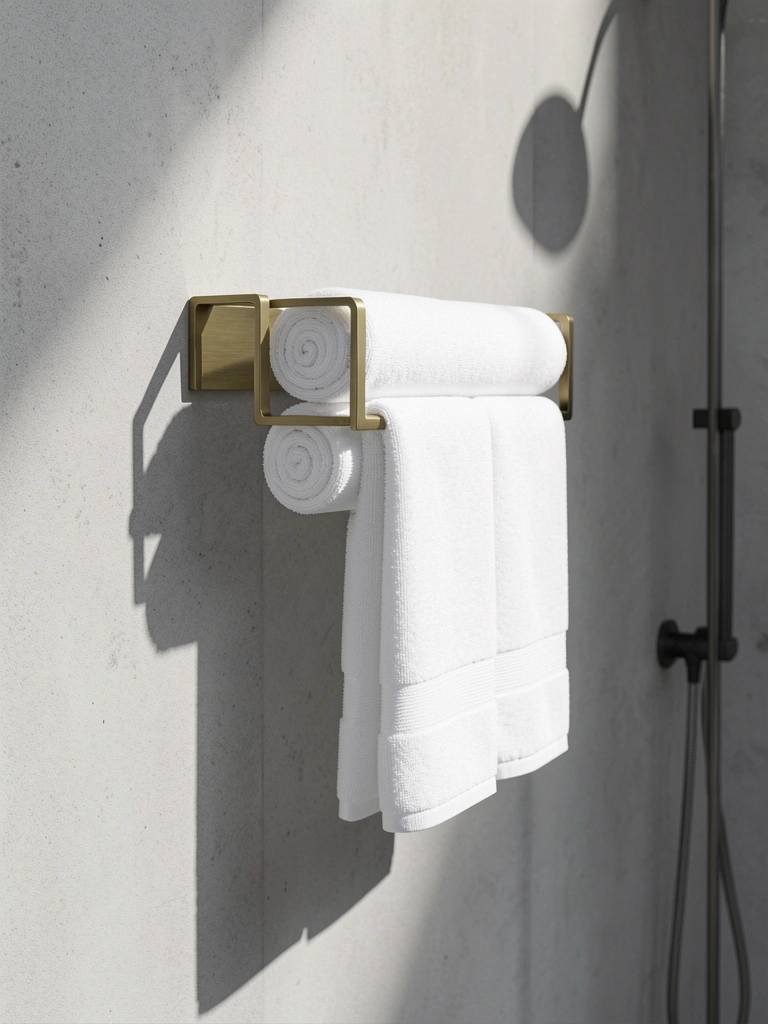
    The spray function becomes indispensable once you have it. You’ll suddenly tackle more laundry tasks at the sink rather than moving things around your home.

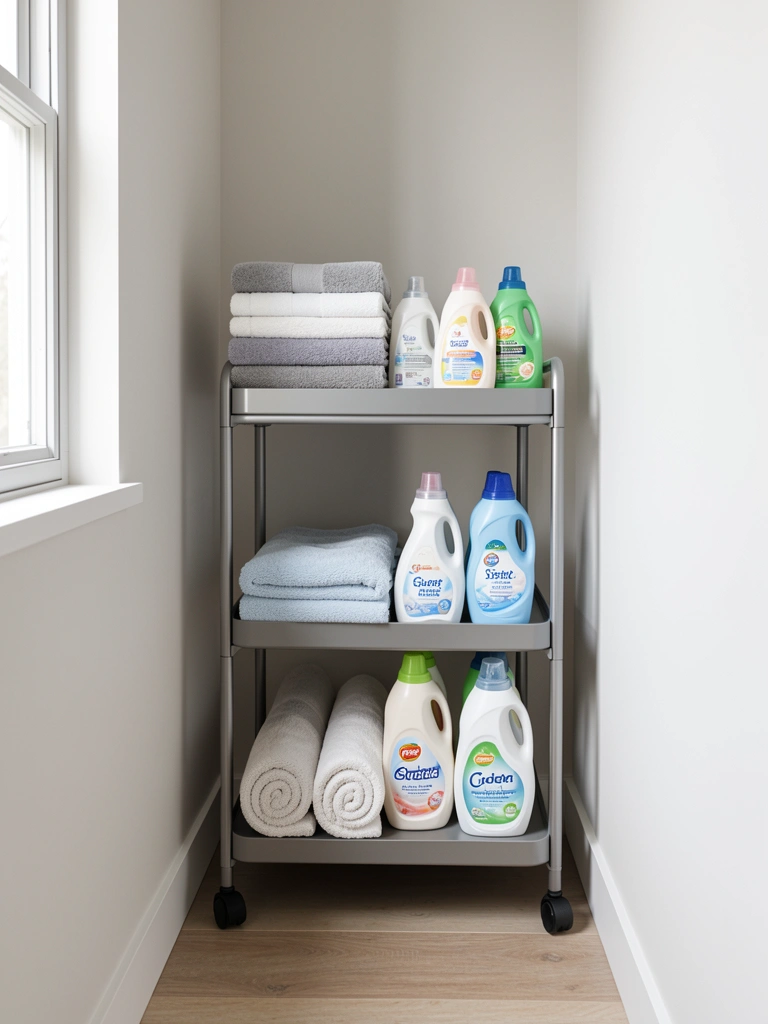
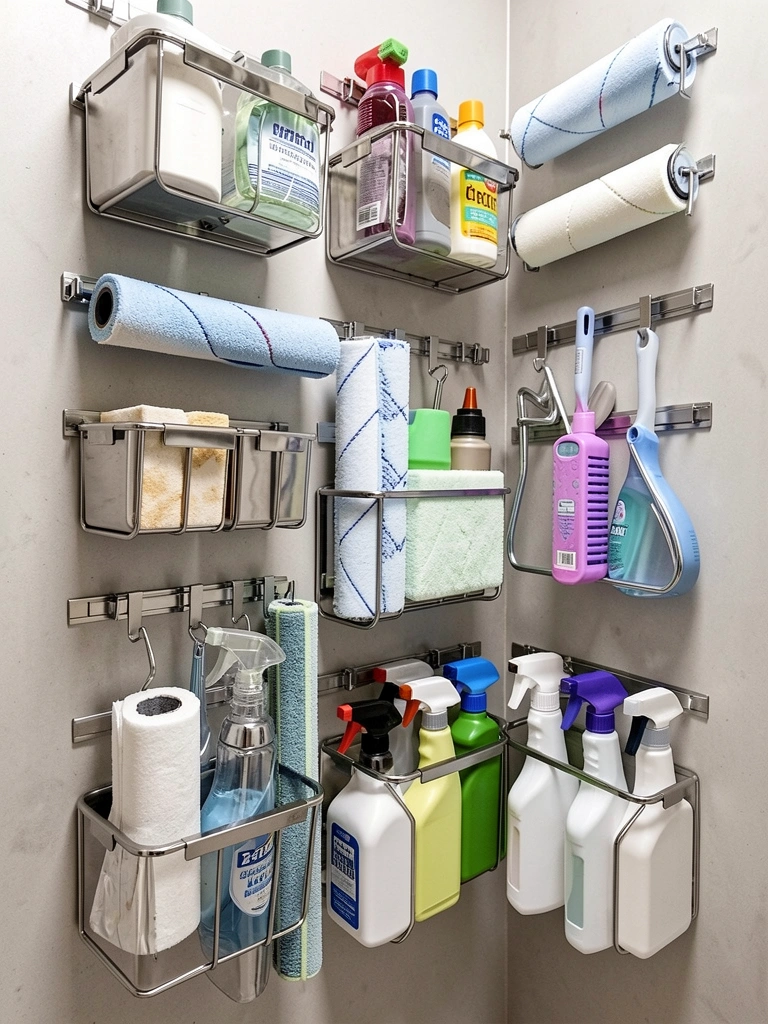
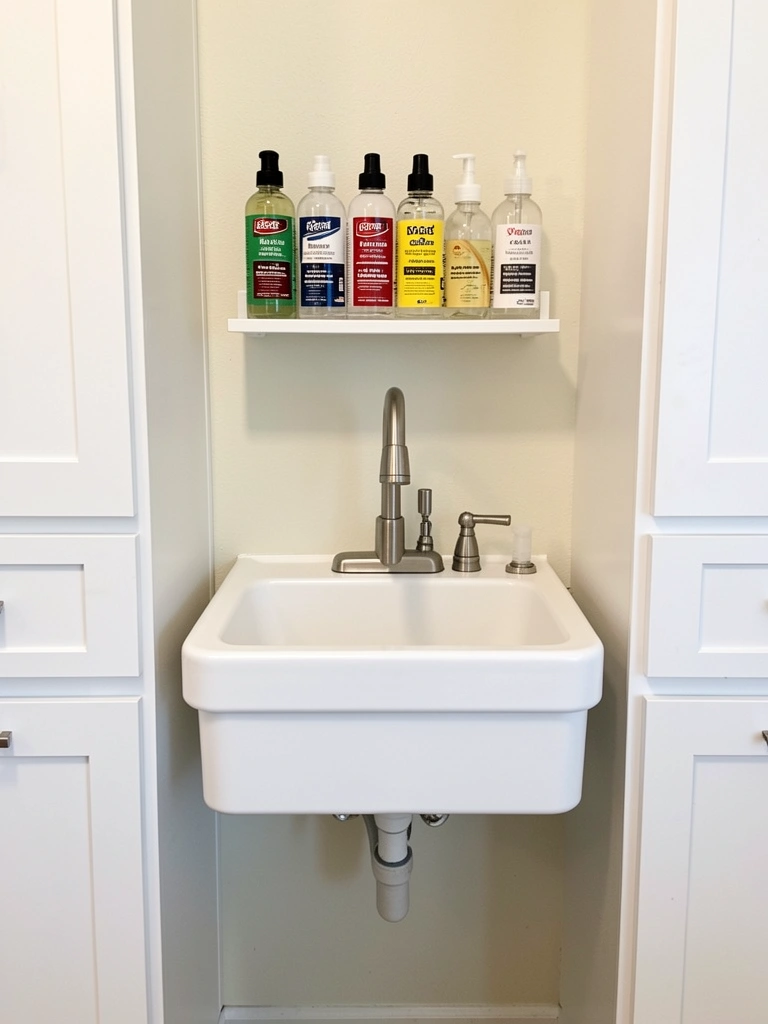
    5. Create a Stain-Treatment Station Right Next to the Sink

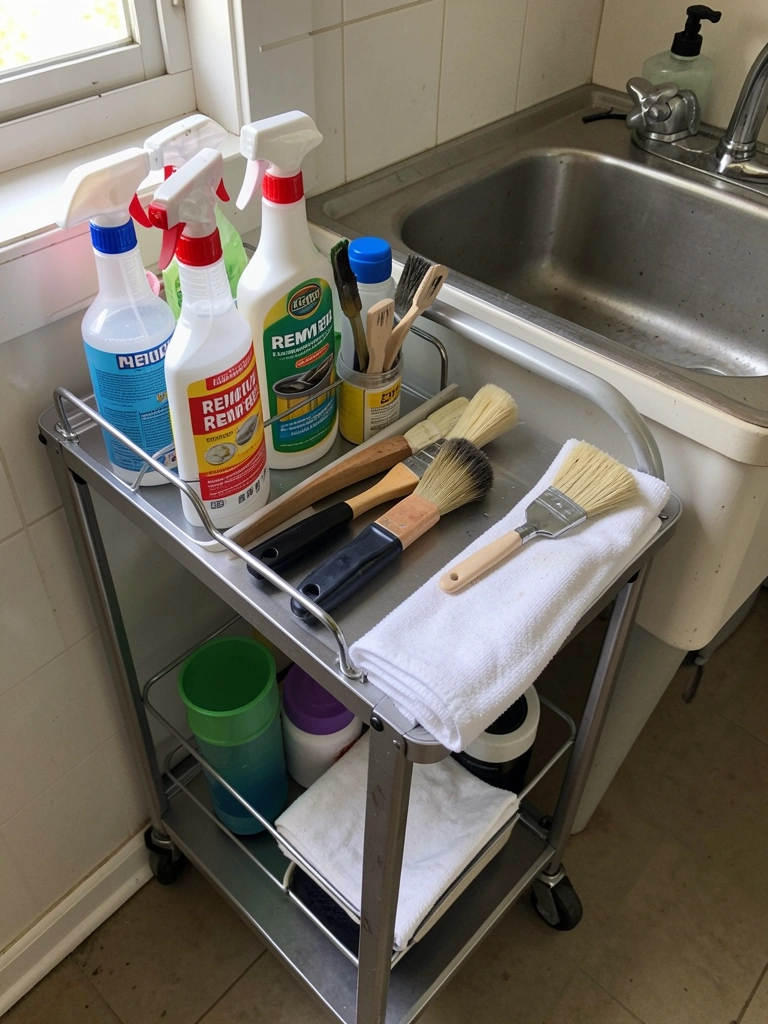
    Centralizing your stain supplies where you actually use them saves time and prevents random bottles scattered around your laundry room.

    Grab a rolling cart ($40-$80) or narrow table and dedicate it to stain treatment. Stock it with: hydrogen peroxide, oxygen bleach, a stain brush, white cloths, and spray bottles. Label everything clearly using a label maker ($15) or vinyl labels ($5).

    Position it right beside your sink so you can rinse and treat in one spot. This takes about one hour to set up and immediately makes you feel more organized. You’ll actually use that stain remover you bought because it’s not buried in a cabinet.

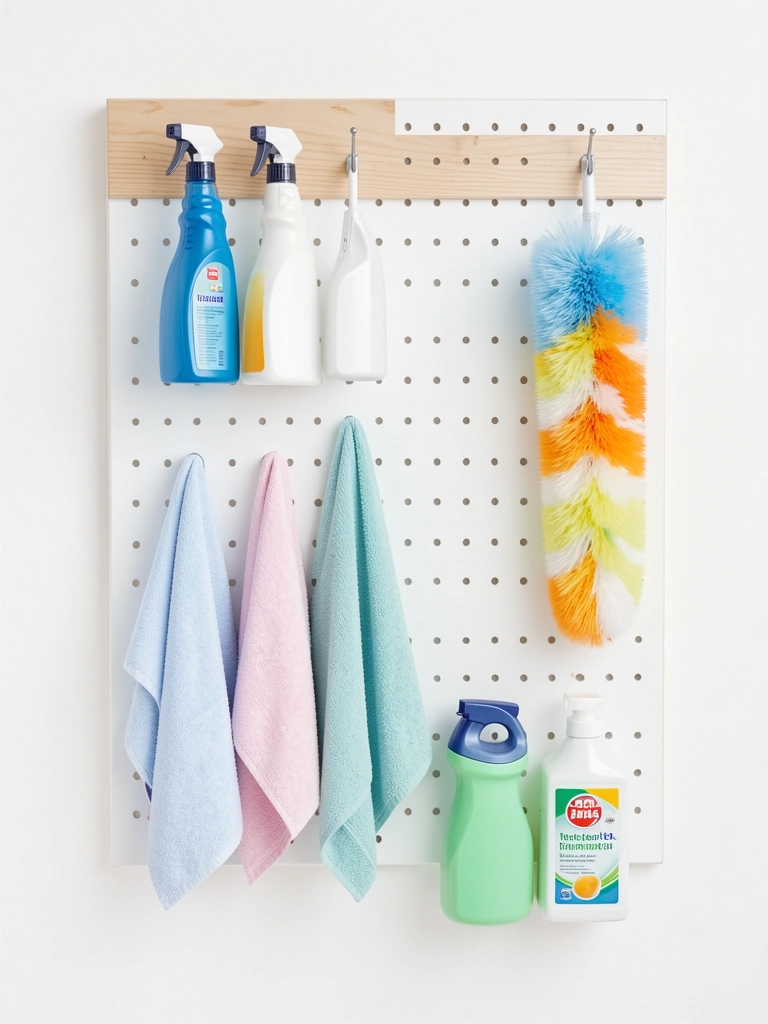
    6. Mount a Pegboard Above Your Sink for Hanging Tools

    A pegboard keeps your most-used tools visible and within arm’s reach while staying off your sink counter.

    Install a 4×8 foot pegboard ($20-$40 at Home Depot) above your sink using wall anchors. Paint it a warm color like sage green or taupe ($10-$15 for paint) to match your space. Add hooks and baskets ($1-$3 each) to hold brushes, lint rollers, and cleaning supplies.

    This setup takes one weekend and requires only basic tools. The visual impact is huge—suddenly your laundry room looks organized rather than cluttered. Everything you reach for frequently is right there instead of buried in drawers.

    7. Use a Sink Skirt to Hide Plumbing and Storage

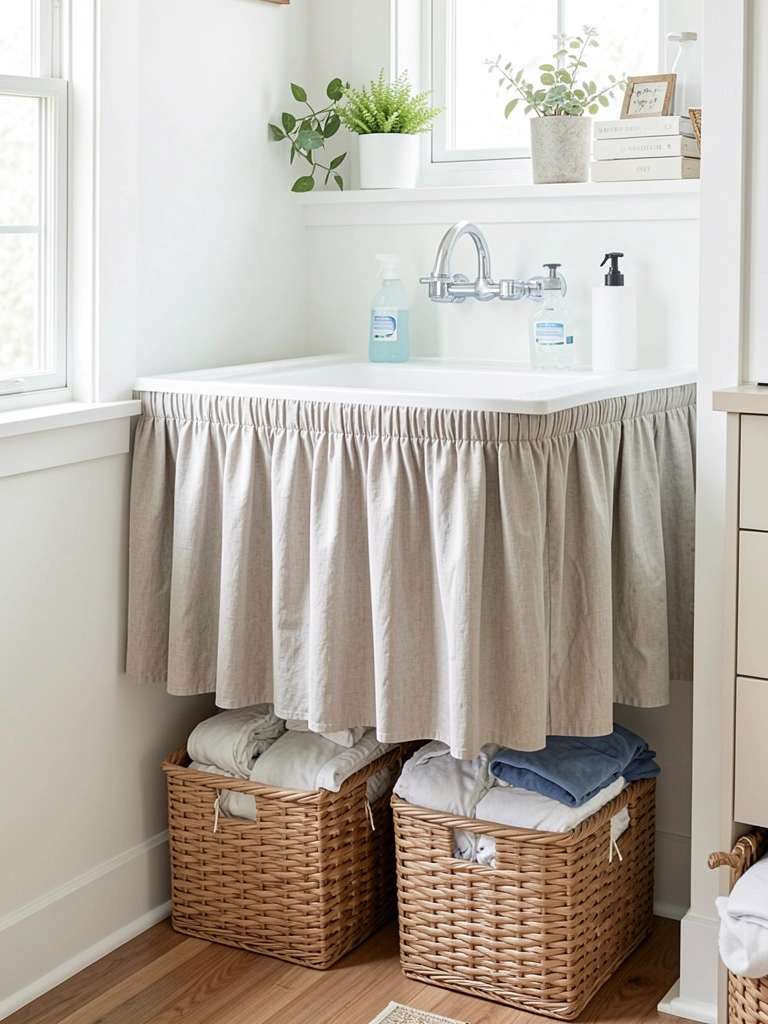
    If your sink stands alone and exposes pipes, a simple skirt hides plumbing while creating storage space for baskets or supplies underneath.

    Make or buy a sink skirt in cotton, linen, or even a plastic curtain liner ($25-$60). Mount it using tension rods, adhesive strips, or clips. Choose a neutral or warm tone that matches your room’s color scheme. This takes about 30 minutes to install and instantly makes your space look more polished.

    The bonus? That awkward under-sink area becomes functional storage for cleaning supplies, hampers, or extra linens. It’s a renter-friendly way to hide what you don’t want to see.

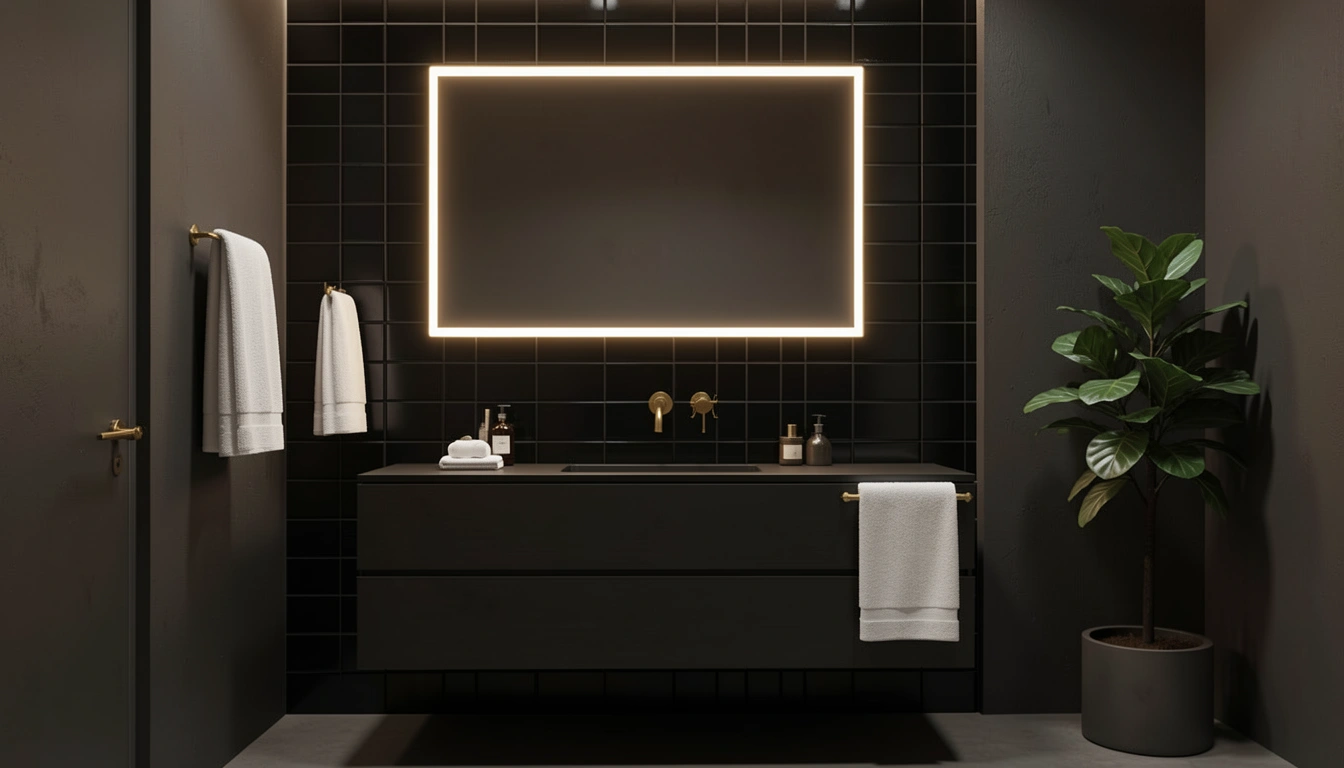
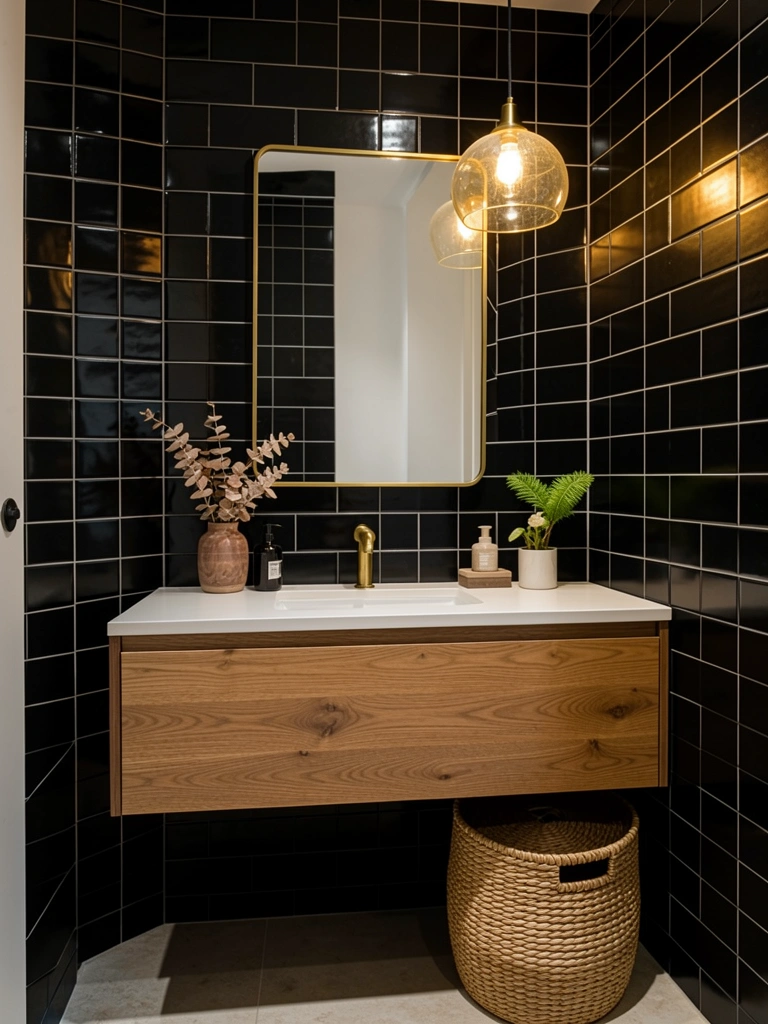
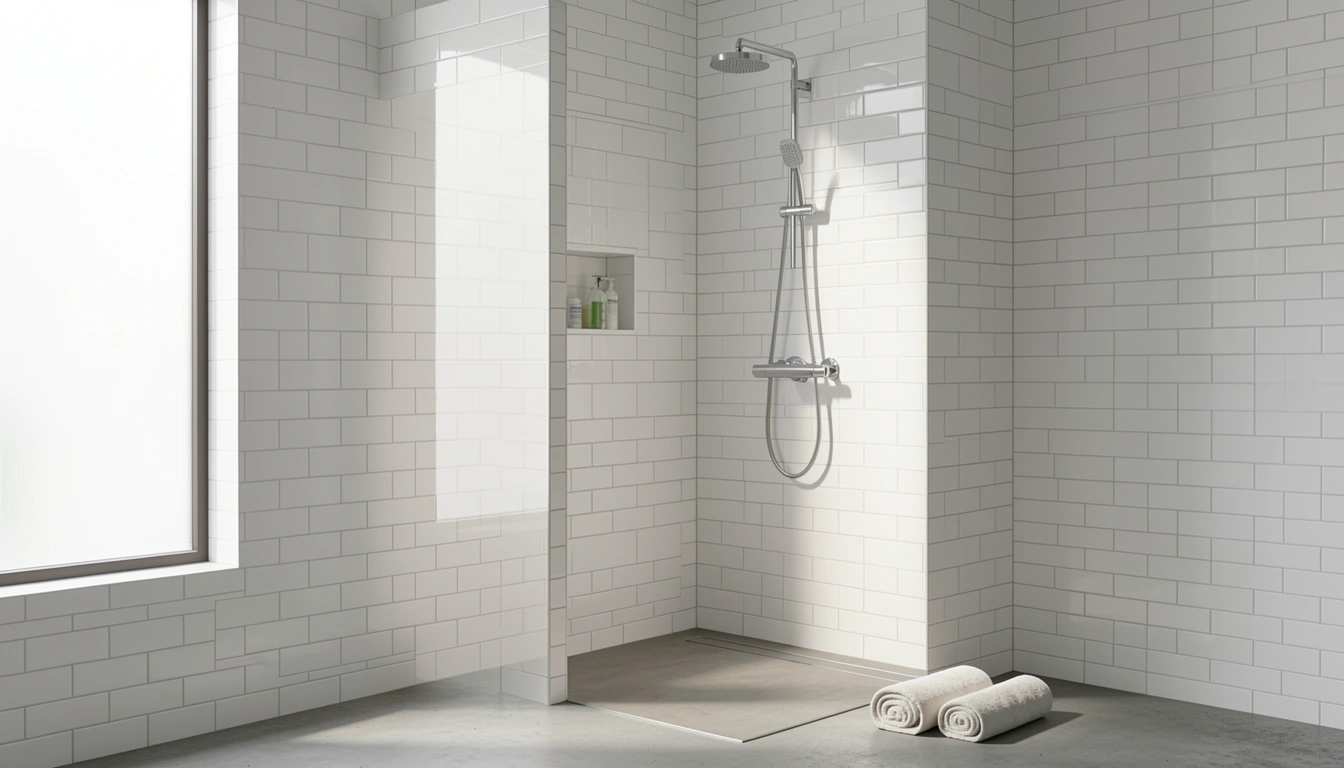
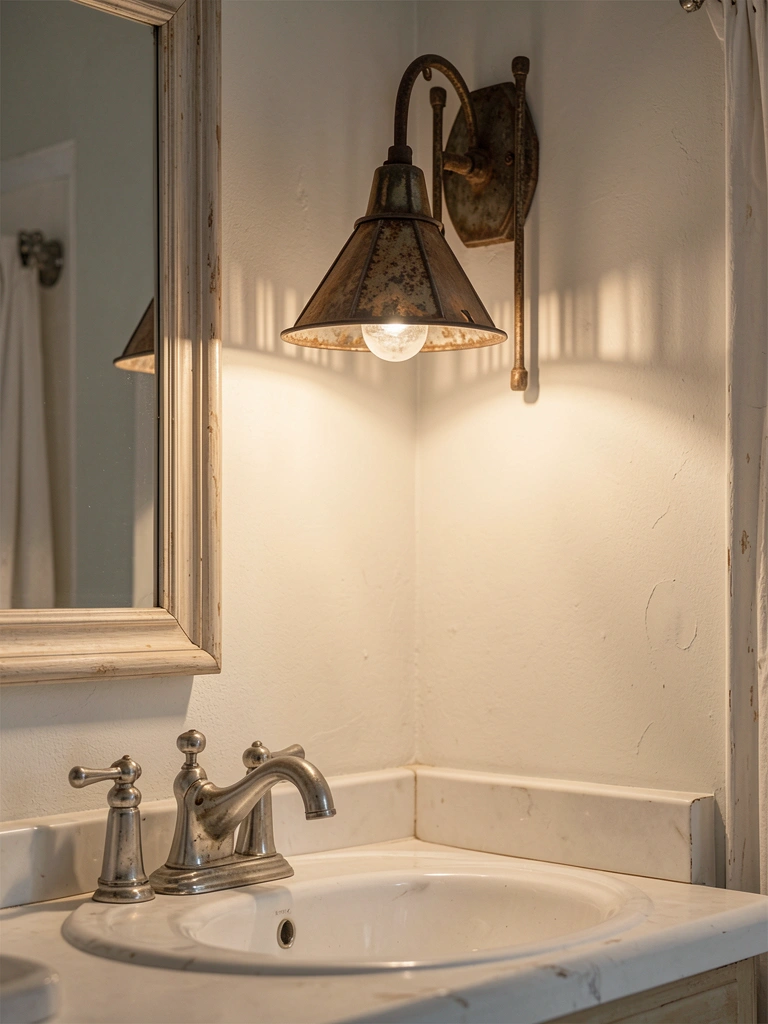
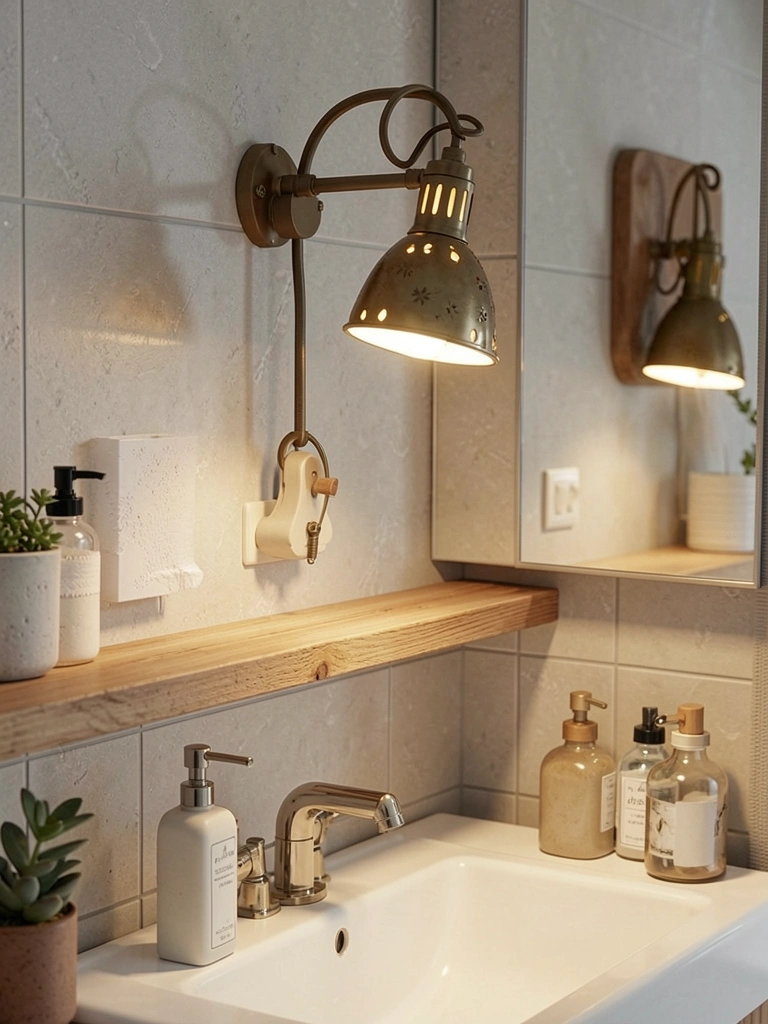
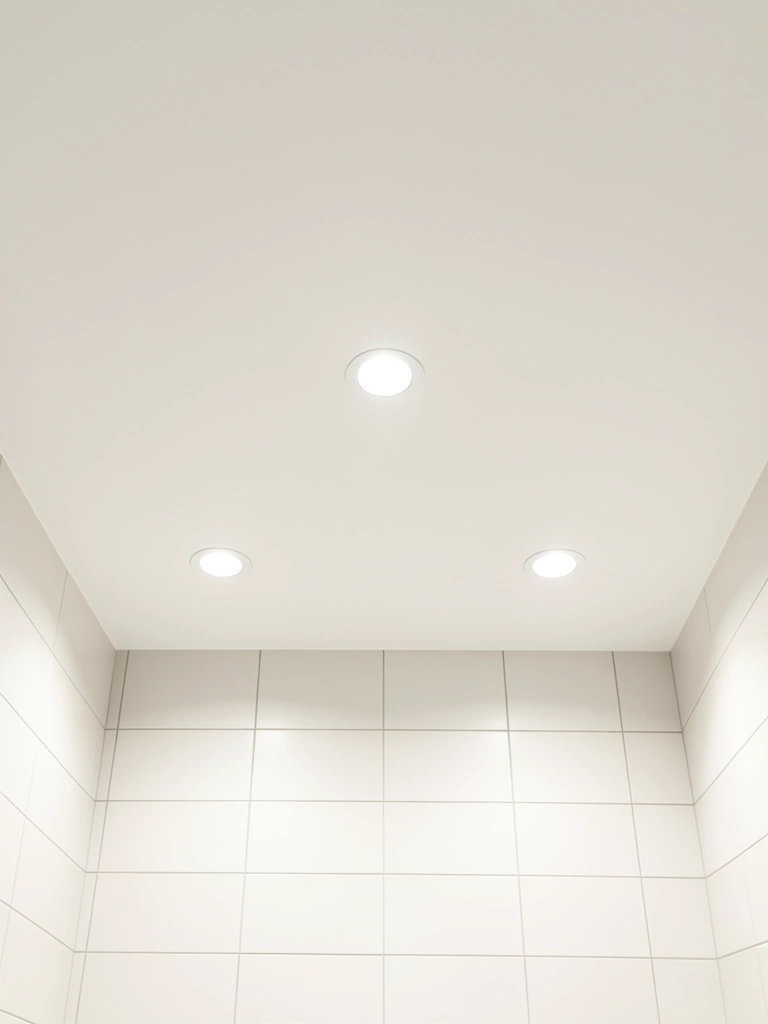
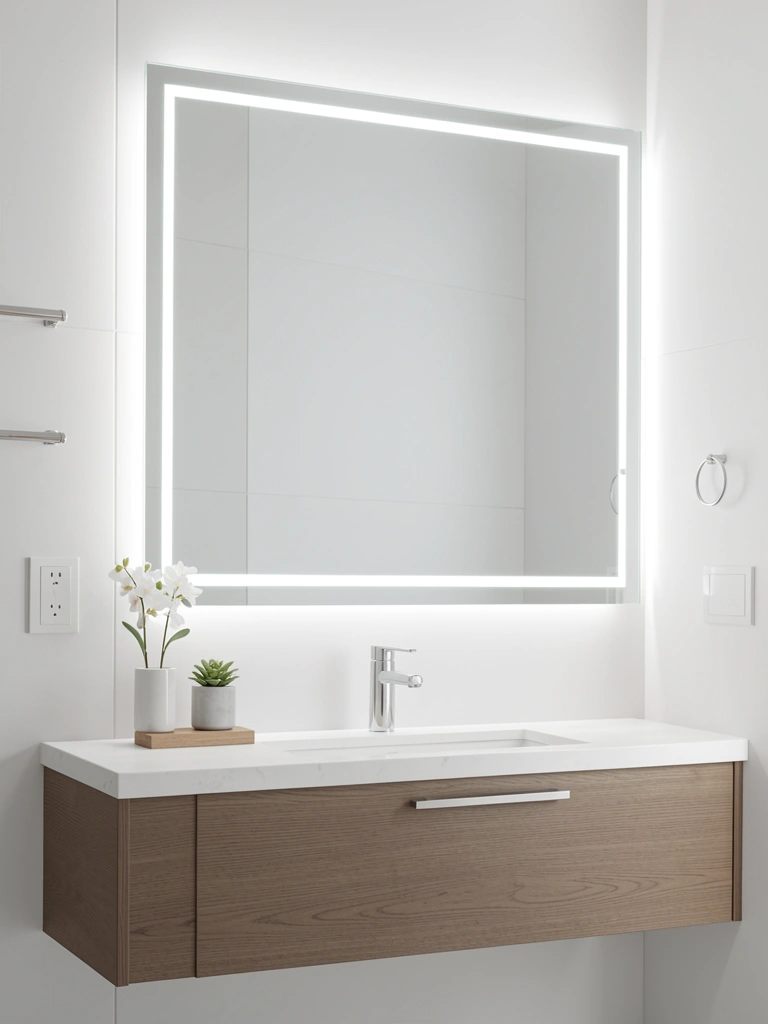
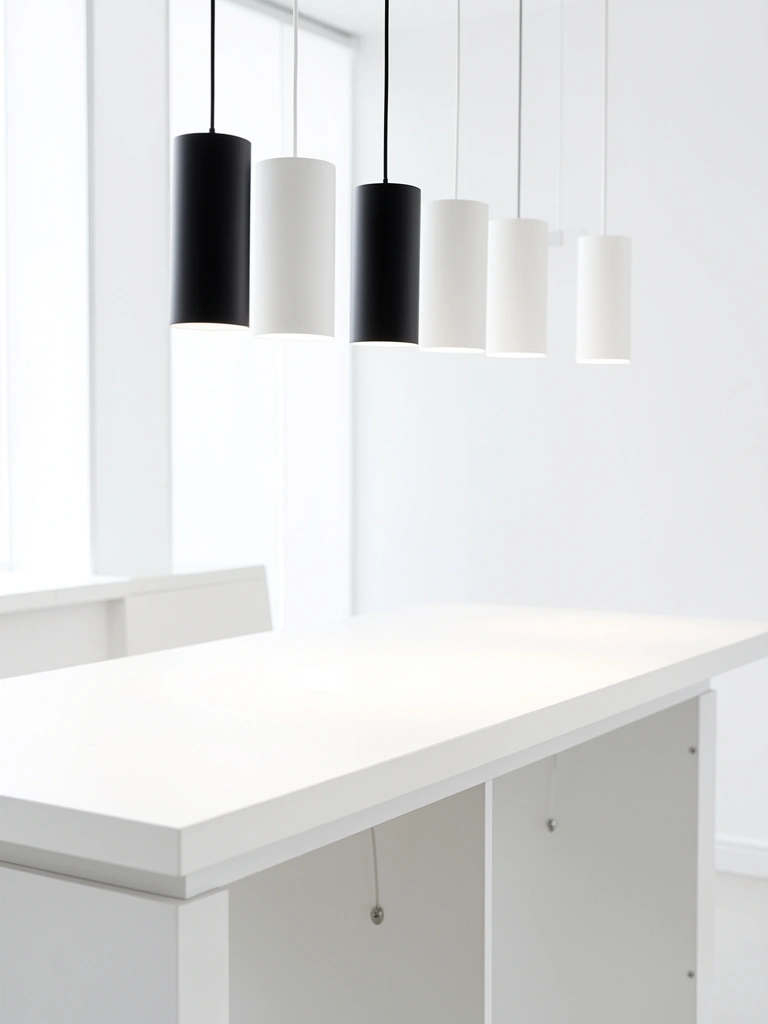
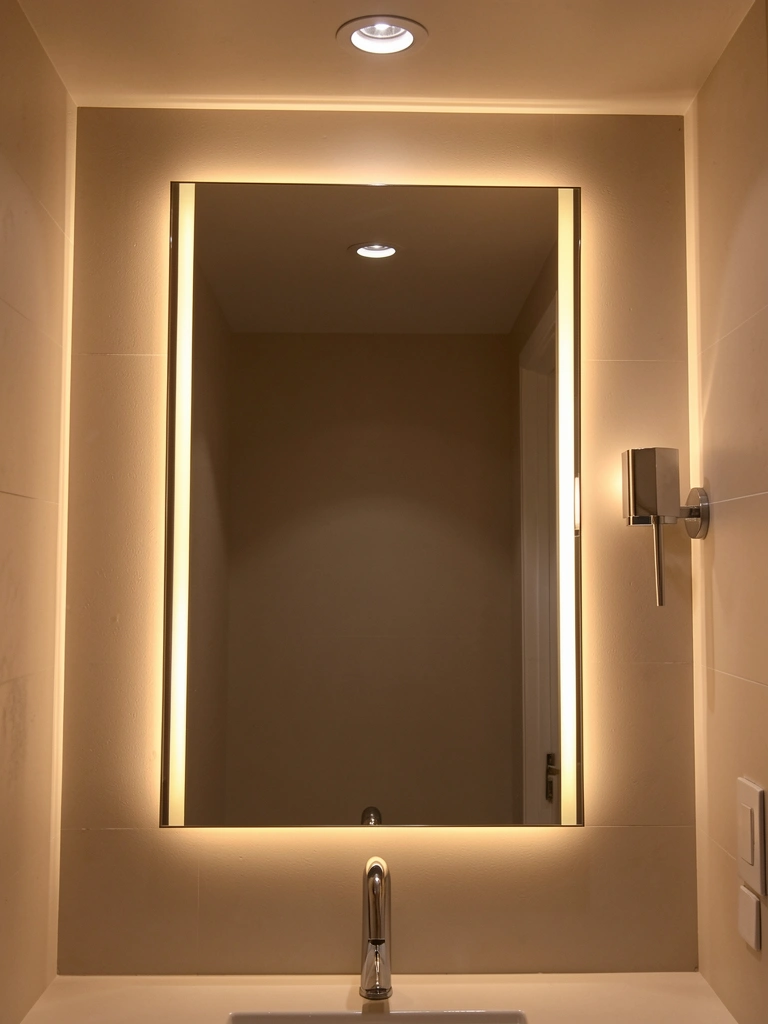
    8. Install Overhead Lighting Directly Above Your Sink

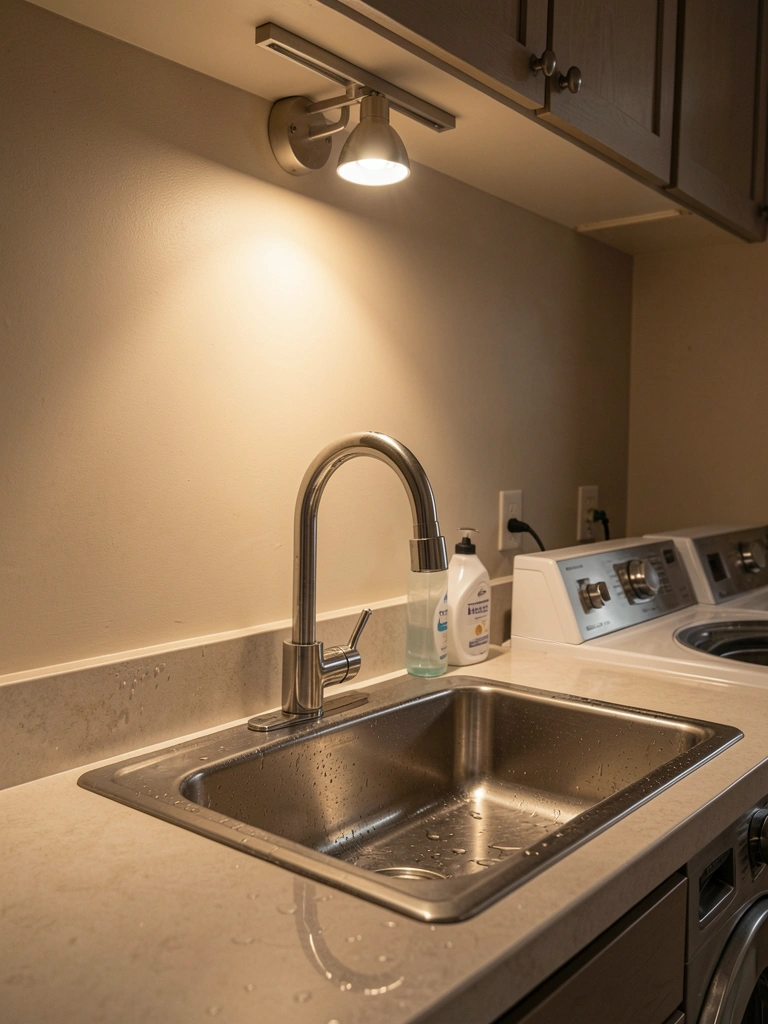
    Proper lighting above your sink makes stain spotting, delicate hand-washing, and detailed work easier and actually enjoyable.

    Add a single pendant light ($40-$150) or small track light ($50-$120) positioned 24-30 inches above your sink. Look for options in brushed brass, matte black, or ceramic for a design-forward look. Installation varies—if you’re replacing an existing fixture, it’s a 30-minute DIY job; if you’re adding new wiring, hire an electrician for $150-$300.

    Warm-toned bulbs ($10-$20) are key for a flattering space. Suddenly your sink feels like a real workstation instead of an afterthought corner.

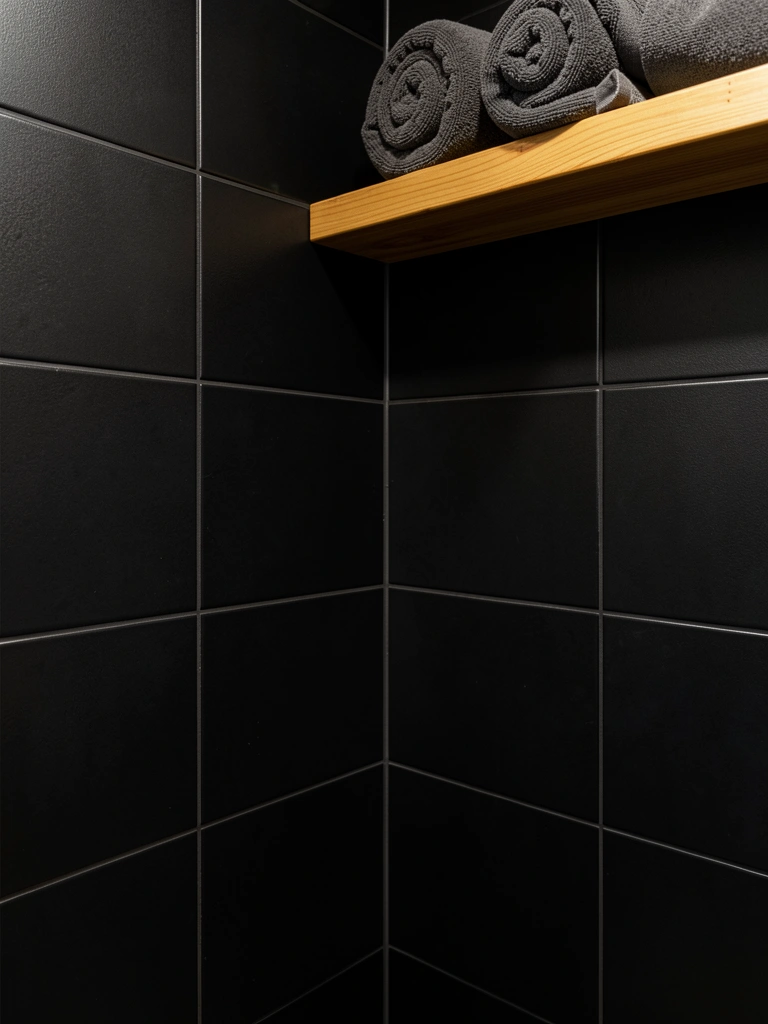
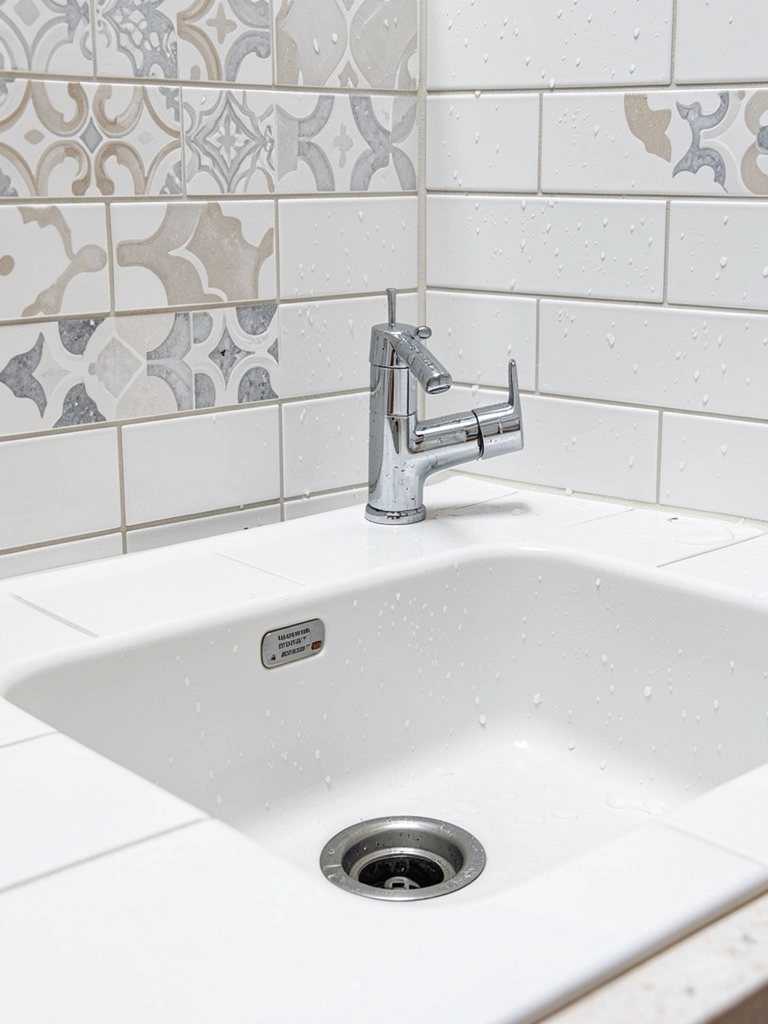
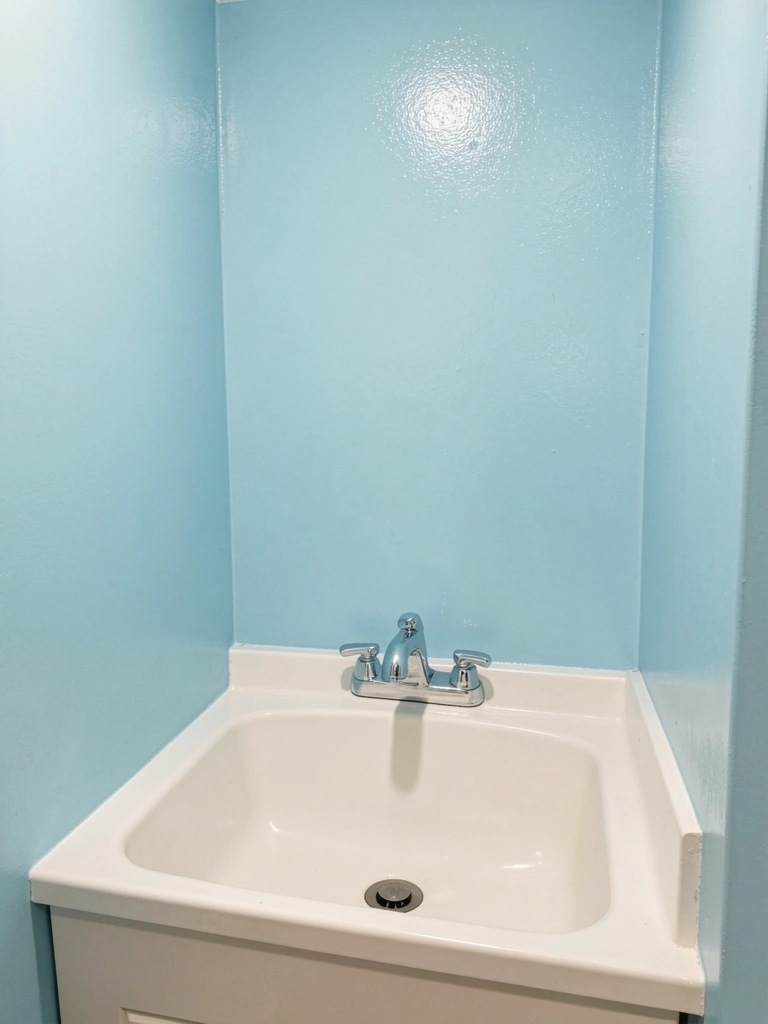
    9. Choose a Sink Material That Hides Water Marks

    Water spots on shiny surfaces are annoying and make your sink look dirty faster. A textured or matte finish hides this issue.

    Swap a polished stainless steel sink for a satin-finish or brushed stainless option ($150-$350). Alternatively, ceramic or cast iron sinks ($100-$250) develop a beautiful patina over time and hide spotting naturally. If you’re renting, you’re stuck with what’s there, but you can try matte finish spray paint designed for sinks ($20-$40) as a temporary upgrade.

    The practical benefit is less constant cleaning to keep it looking nice. Your sink stays photo-worthy without extra maintenance.

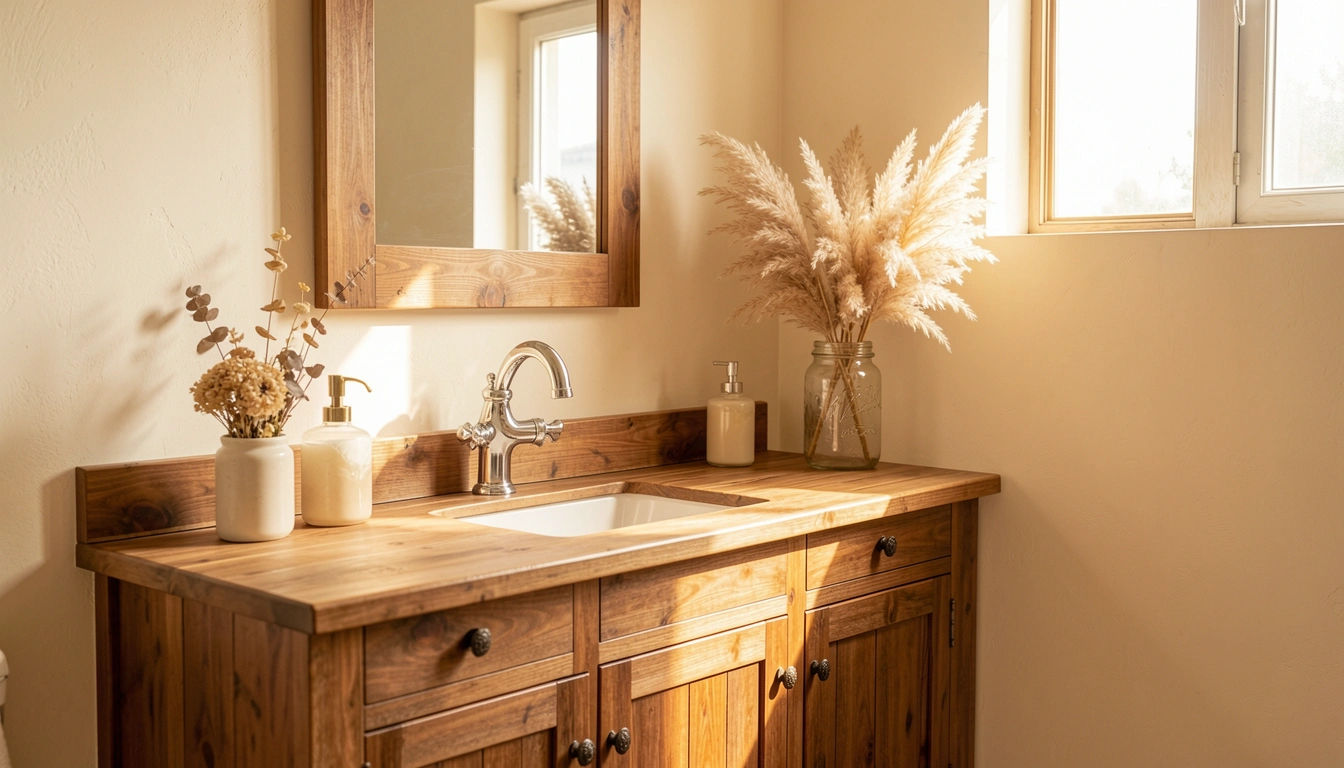
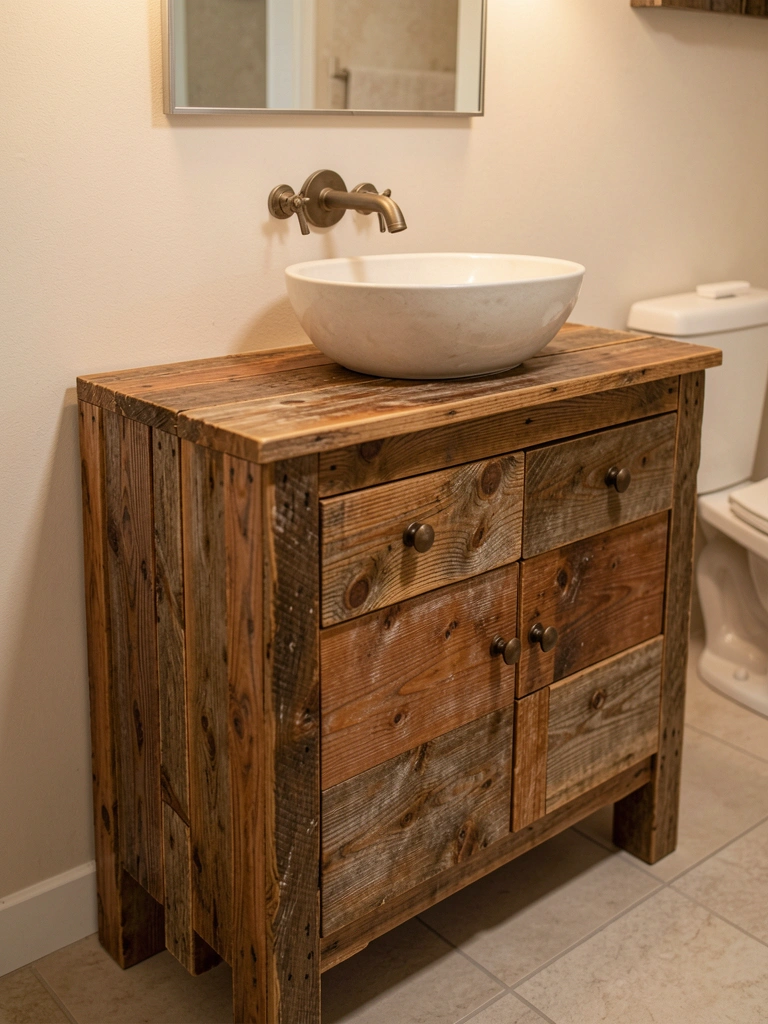
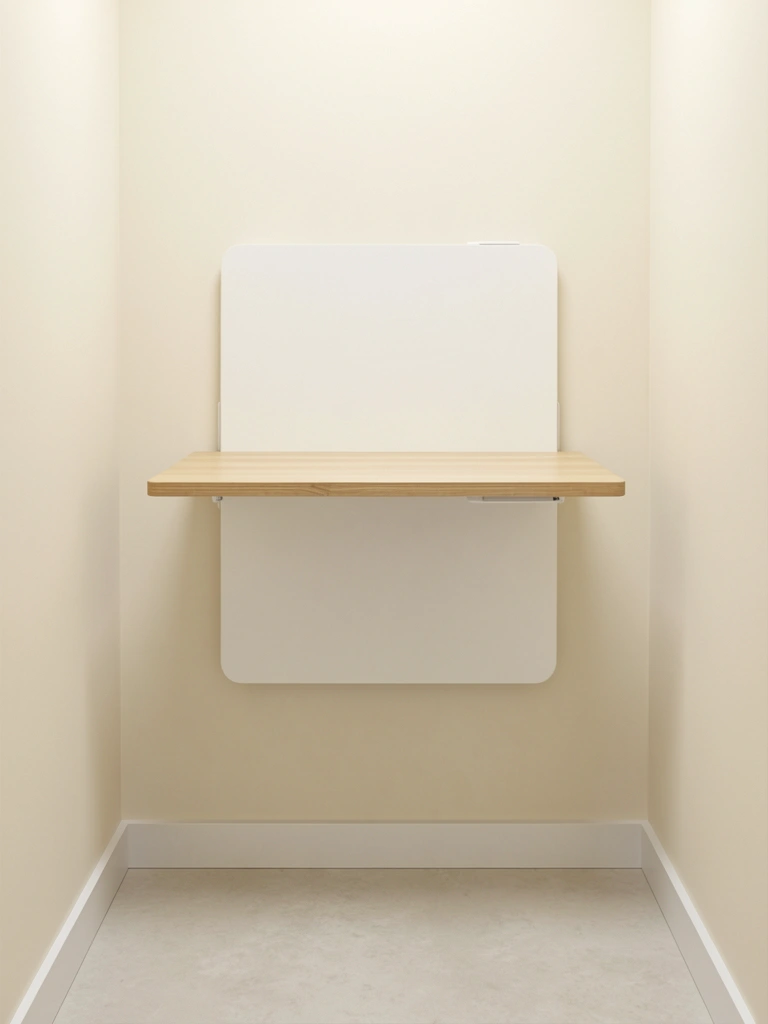
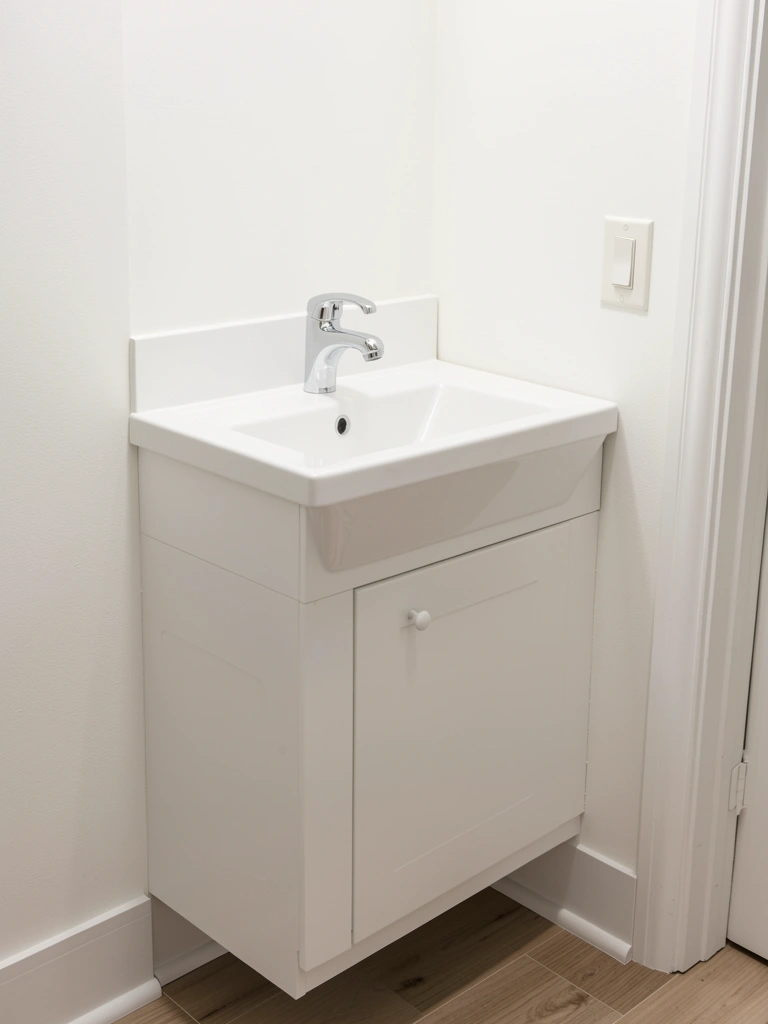
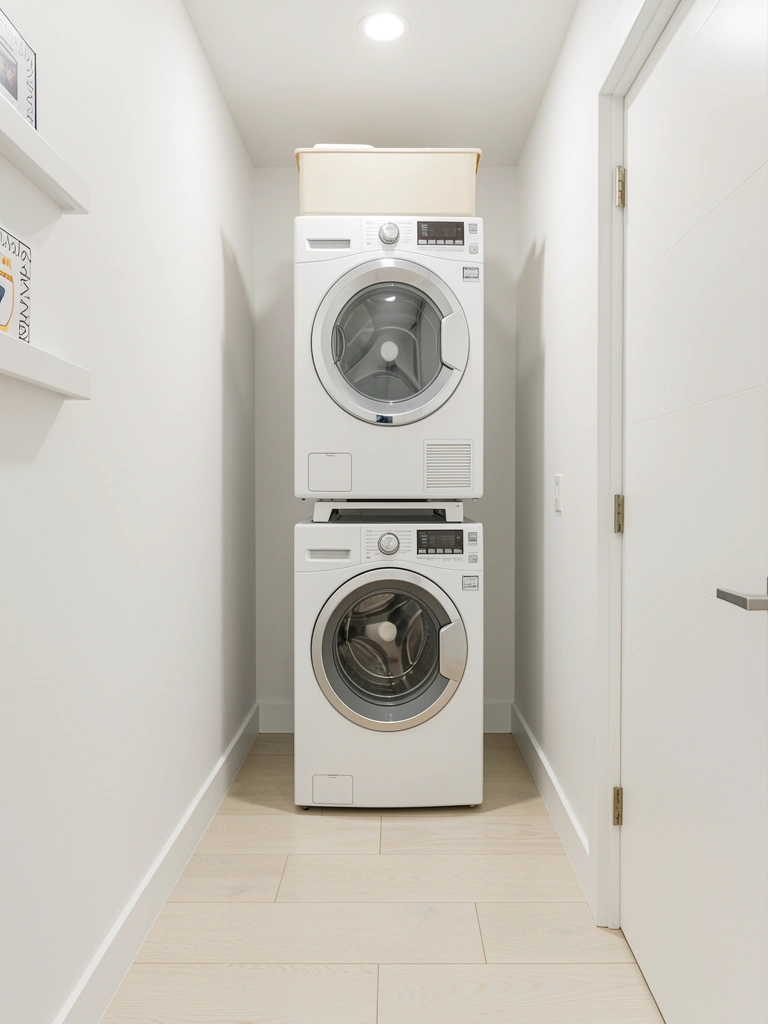
    10. Add a Secondary Small Sink Just for Delicates

    If you regularly hand-wash delicates, a smaller secondary sink means you’re not using up your entire main sink for a single item.

    Install a compact bar sink ($100-$200) if you have the wall space, or go ultra-minimal with a wall-mounted fold-down sink ($80-$150). These take up barely any room but provide dedicated space for careful washing. Installation is about one afternoon if there’s existing plumbing nearby, or a full day if you need new hookups.

    This indulgence might seem over-the-top until you own delicate items you’re nervous about washing. Suddenly you have a safe, dedicated spot without guilt.

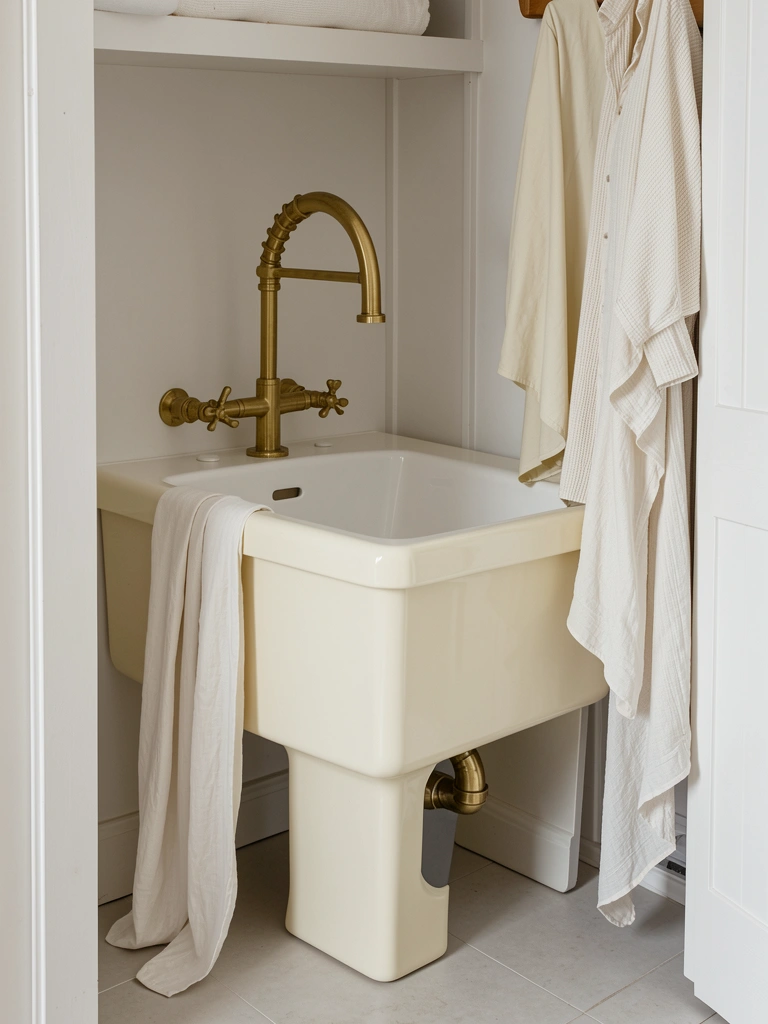
    11. Install a Faucet with Touchless Technology

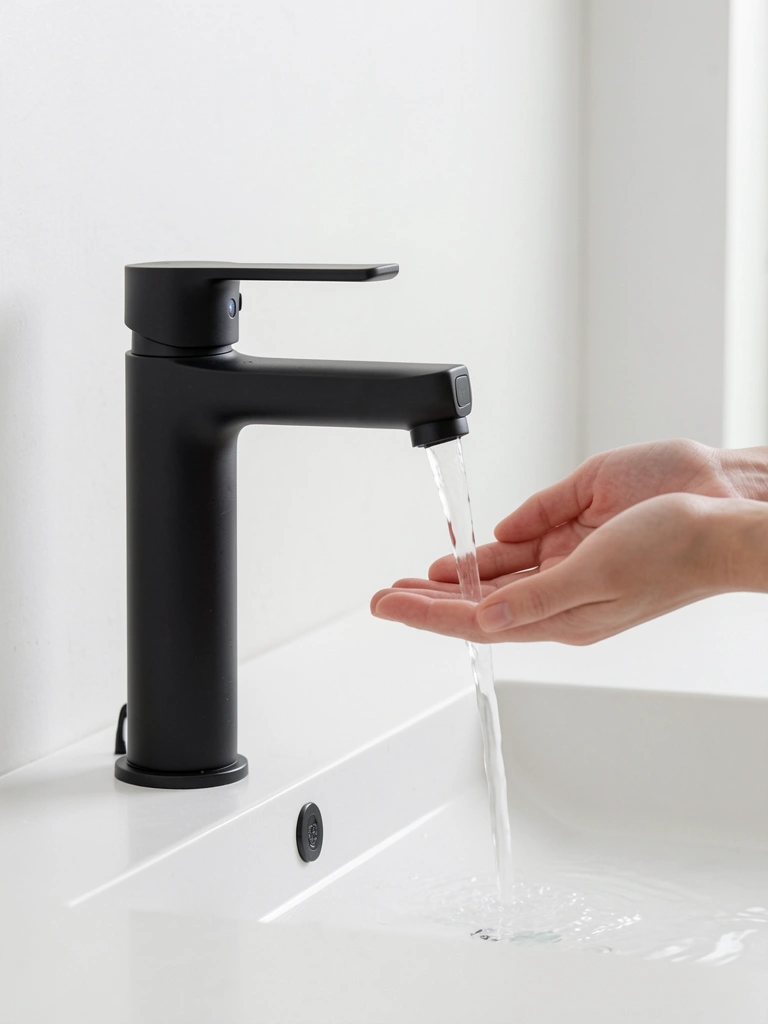
    Touchless faucets are practical beyond hygiene—they’re great when your hands are full of wet fabric or dirty with stain treatments.

    Upgrade to a motion-sensor faucet ($150-$300) designed for kitchen or utility sinks. Brands like Moen MotionSense or Delta Touch2O are reliable options. Installation is similar to a standard faucet swap—30-45 minutes DIY or hire help. Battery replacements run about $10-$20 every 2-3 years.

    The convenience factor is real. You’ll love not having to fiddle with handles when your hands are covered in detergent or holding a soaking garment.

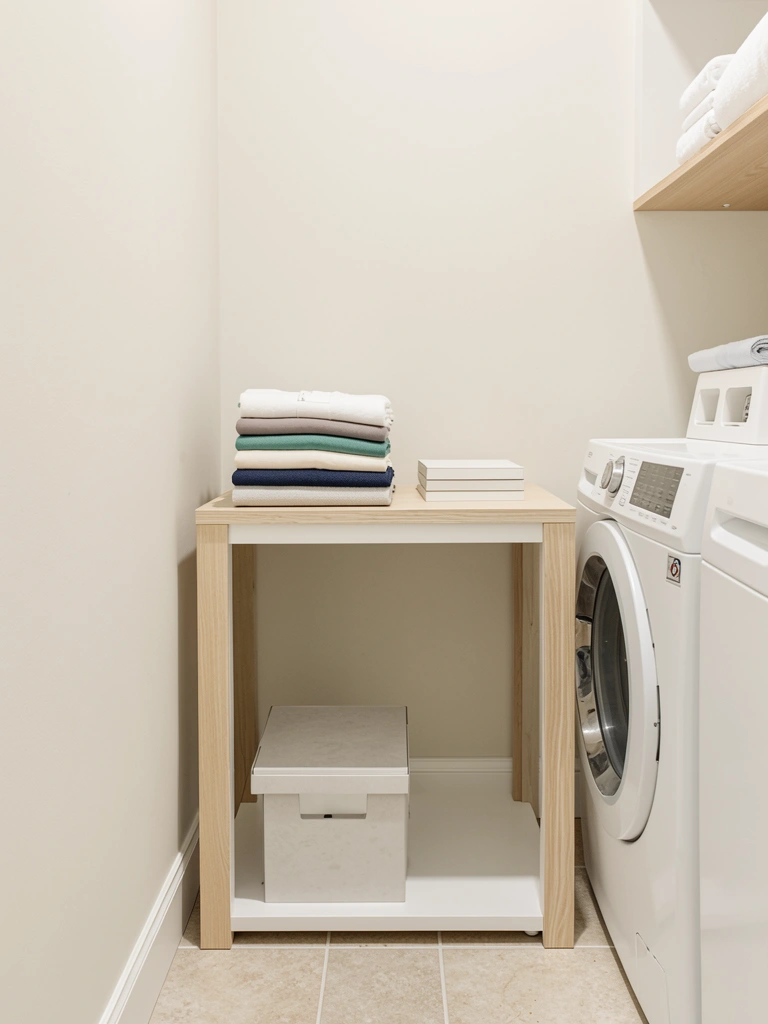
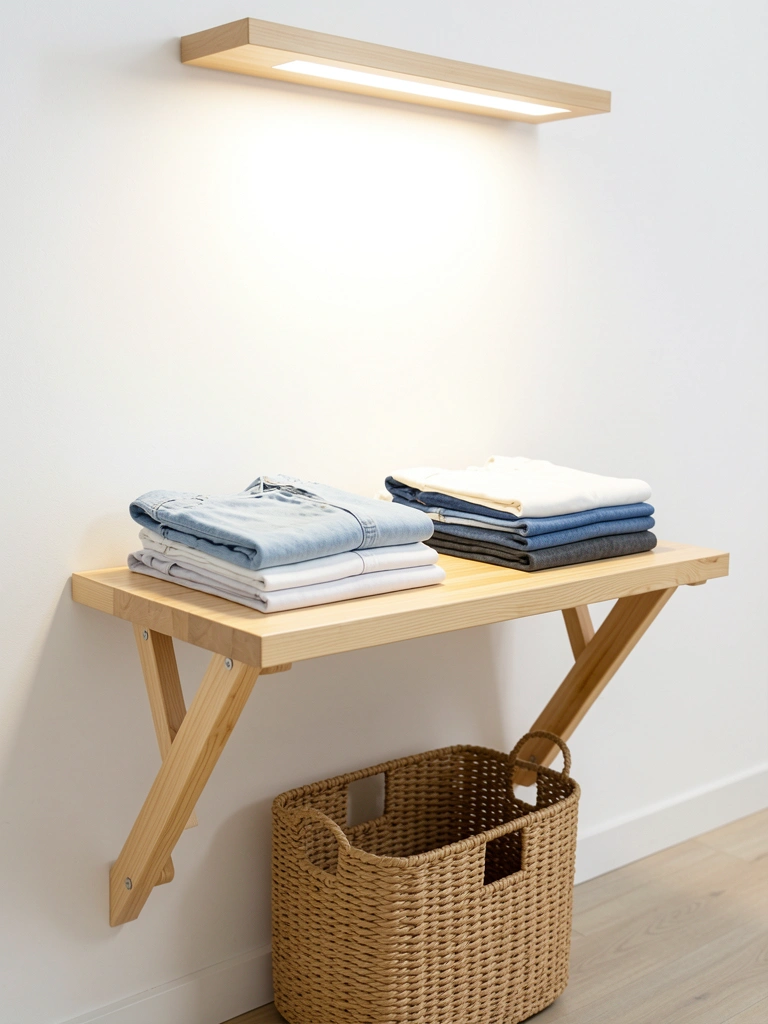
    12. Create a Folding Counter Next to Your Sink

    Positioning a folding surface right next to your sink keeps your workflow compact and prevents you from ferrying damp items around.

    Build or install a simple counter extension ($100-$300 for materials or $200-$500 installed). Standard depth is 24-30 inches. Use plywood or butcher block for a budget option, or choose a finished laminate surface. This takes one weekend as a DIY build or hire a handyman for $150-$300 labor.

    Once you have this, you’ll realize how many extra steps you were taking before. Wash, wring, fold—all in one compact area.

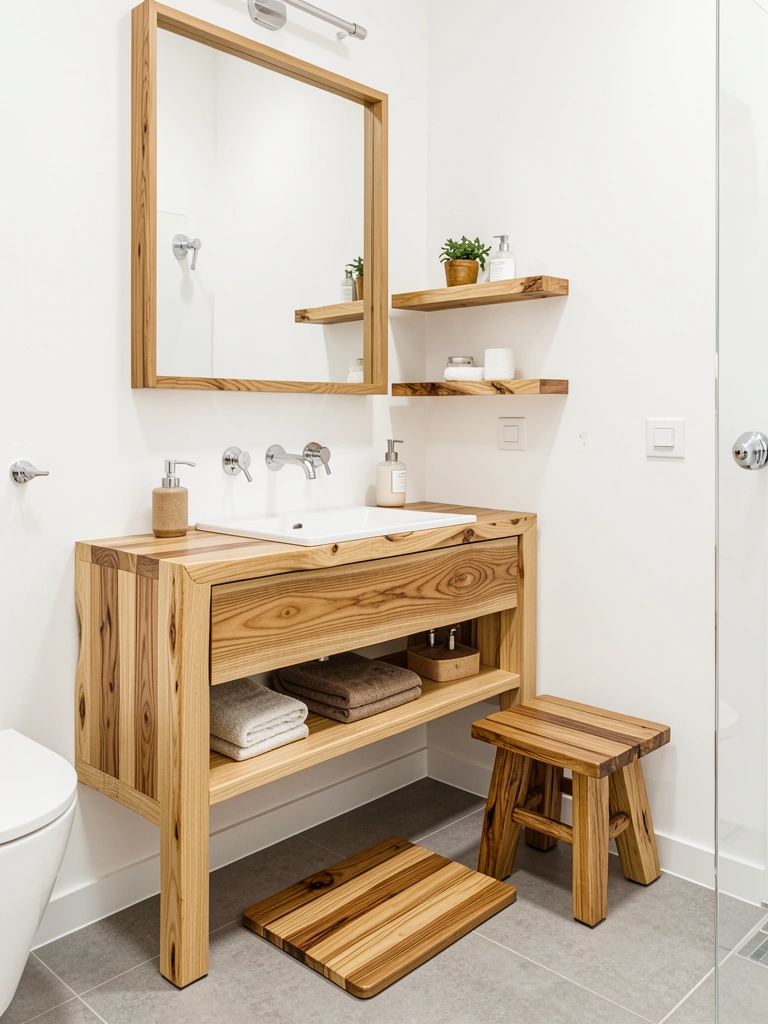
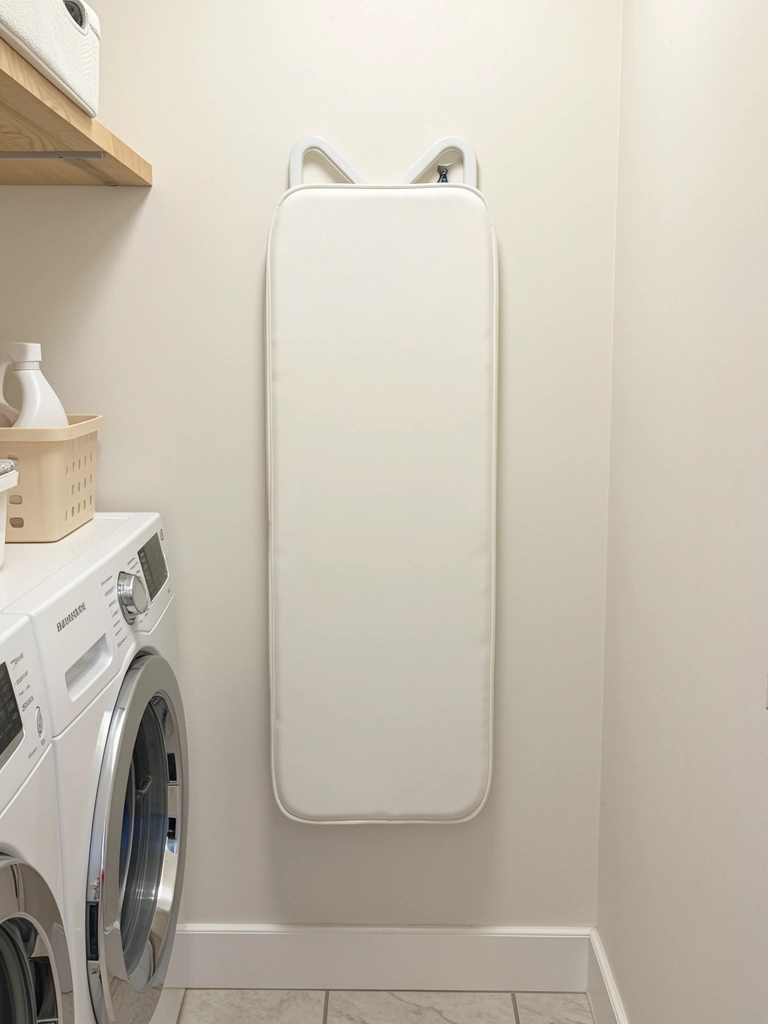
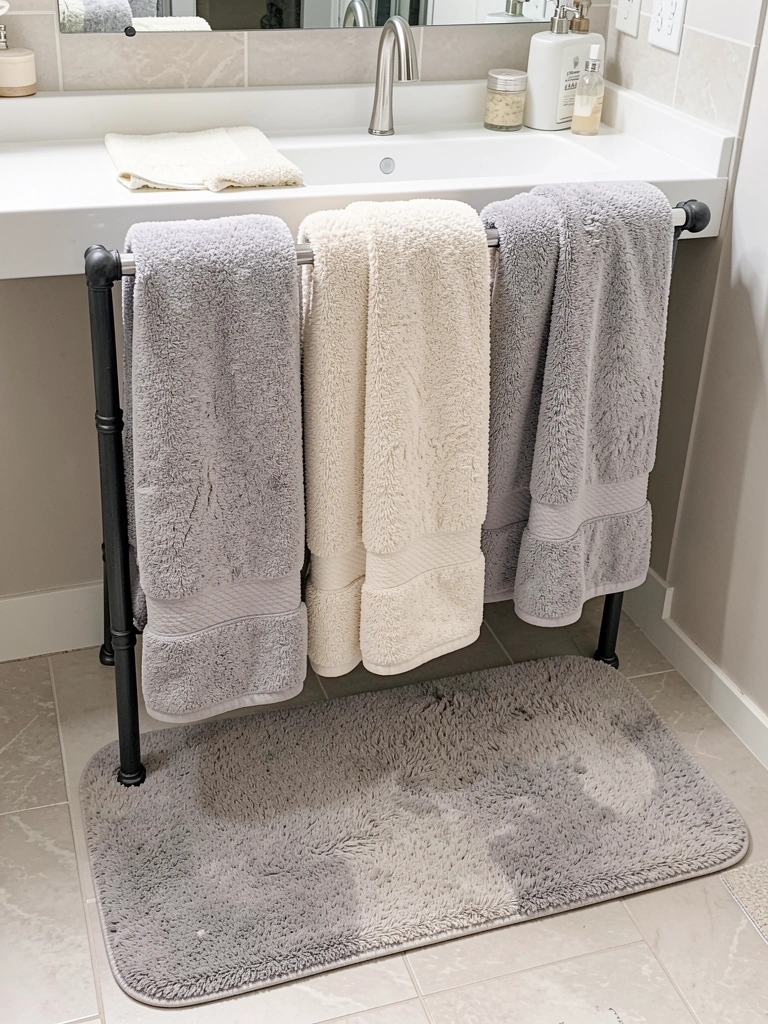
    13. Pair Your Sink with a Drying Rack on the Wall

    A drying rack right next to your sink means delicates go straight from wash to dry in one motion.

    Install a wall-mounted wooden drying rack ($60-$150) or a pull-out accordion-style option ($80-$180 from brands like Yamazaki). Mount it 12-18 inches from your sink if possible. Installation takes 30 minutes with basic tools. For renters, look for over-the-door options ($30-$60) as an alternative.

    This small addition saves so much time and gives your delicate items a proper place rather than draped over cabinets or radiators.

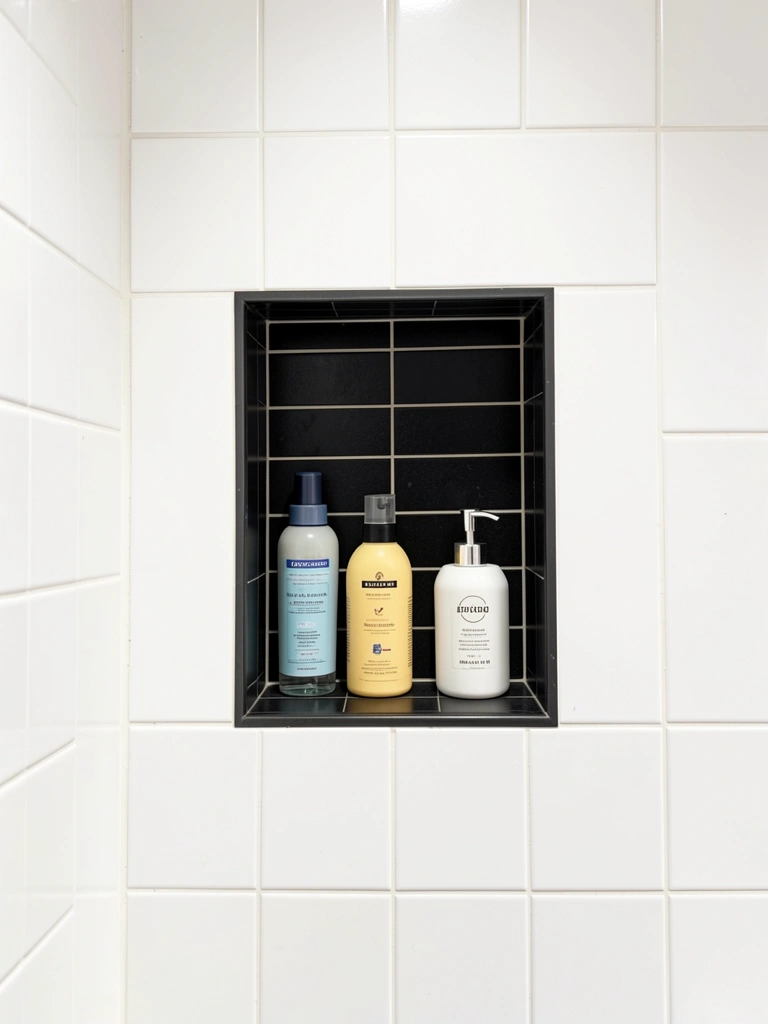
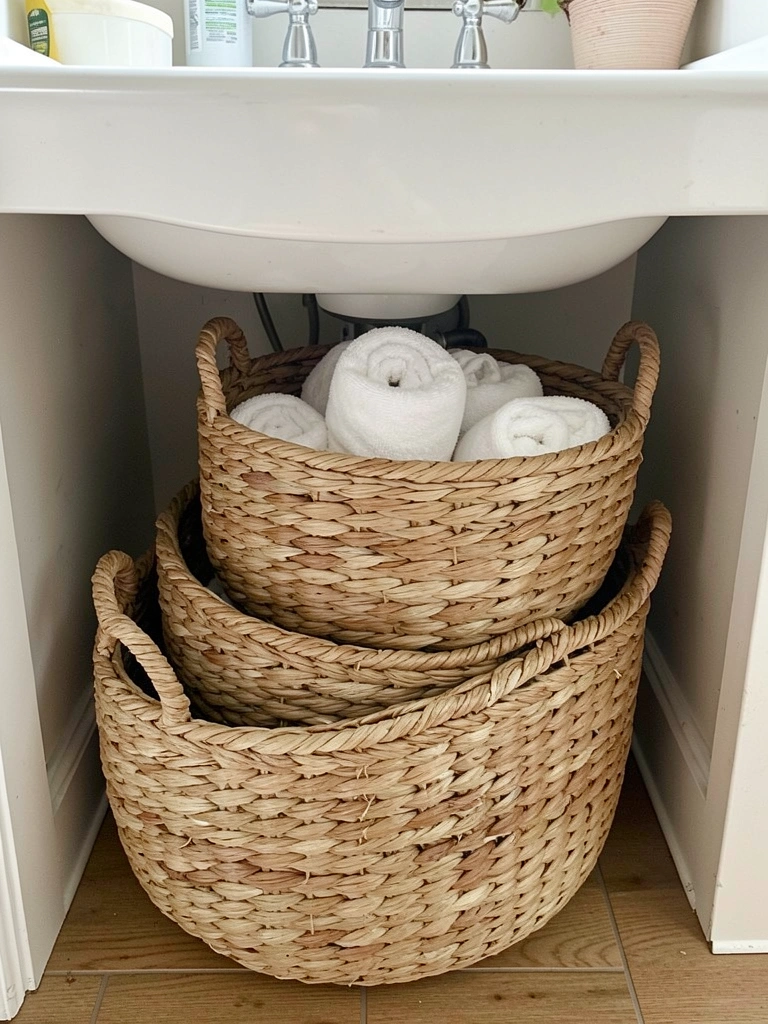
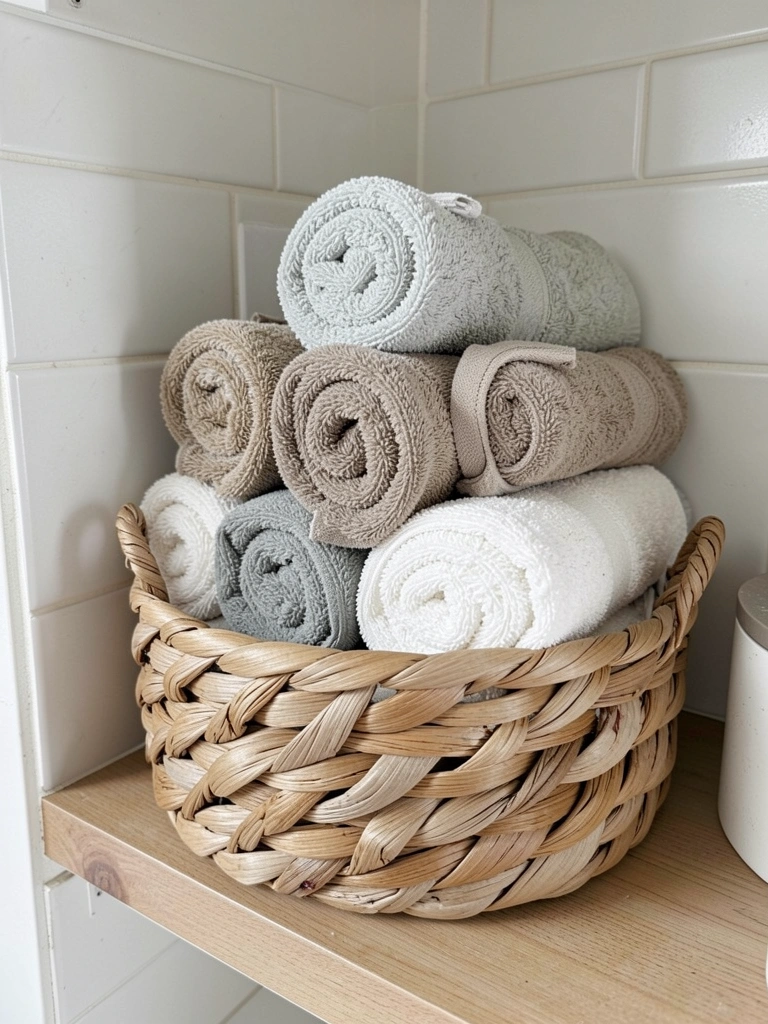
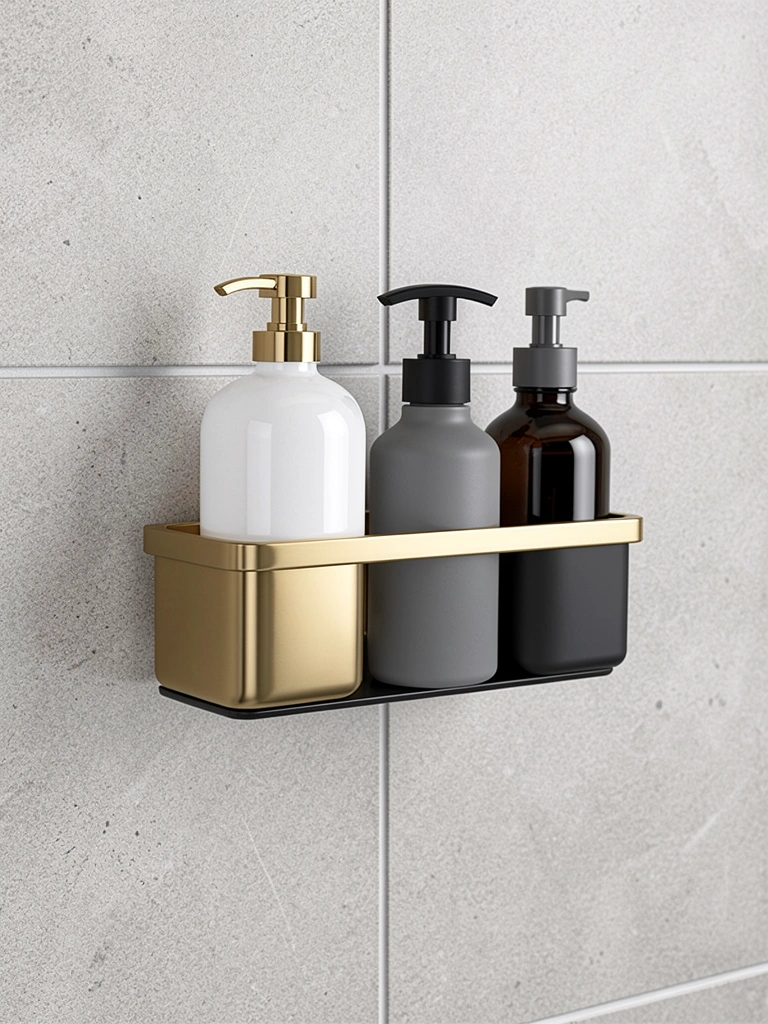
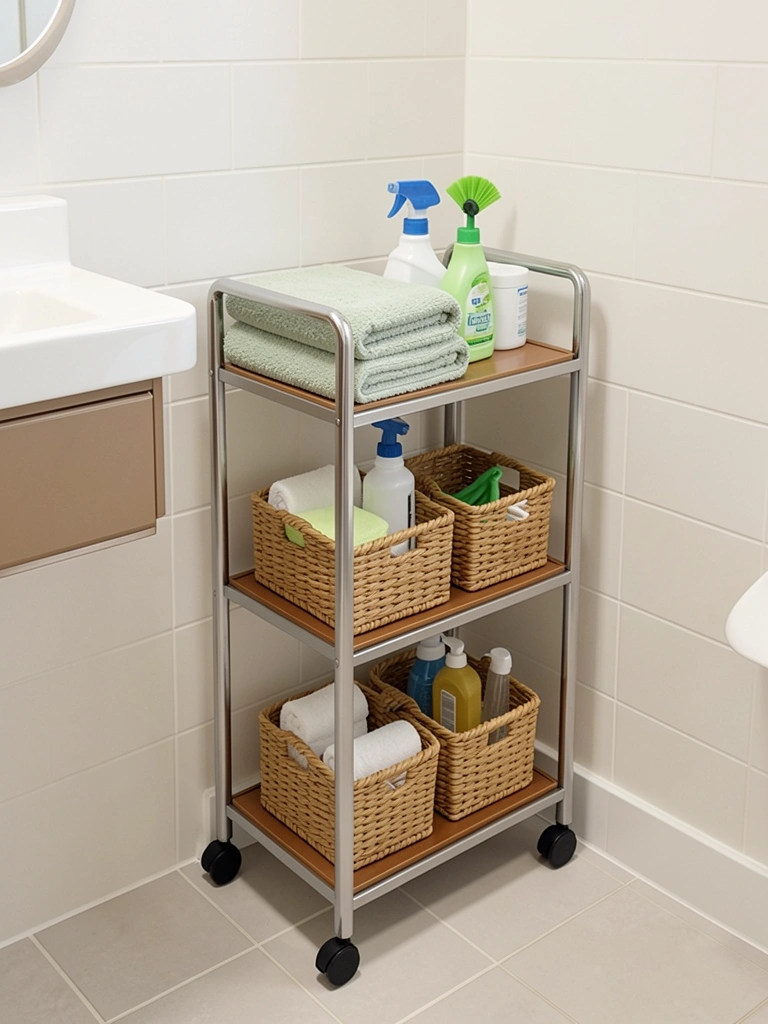
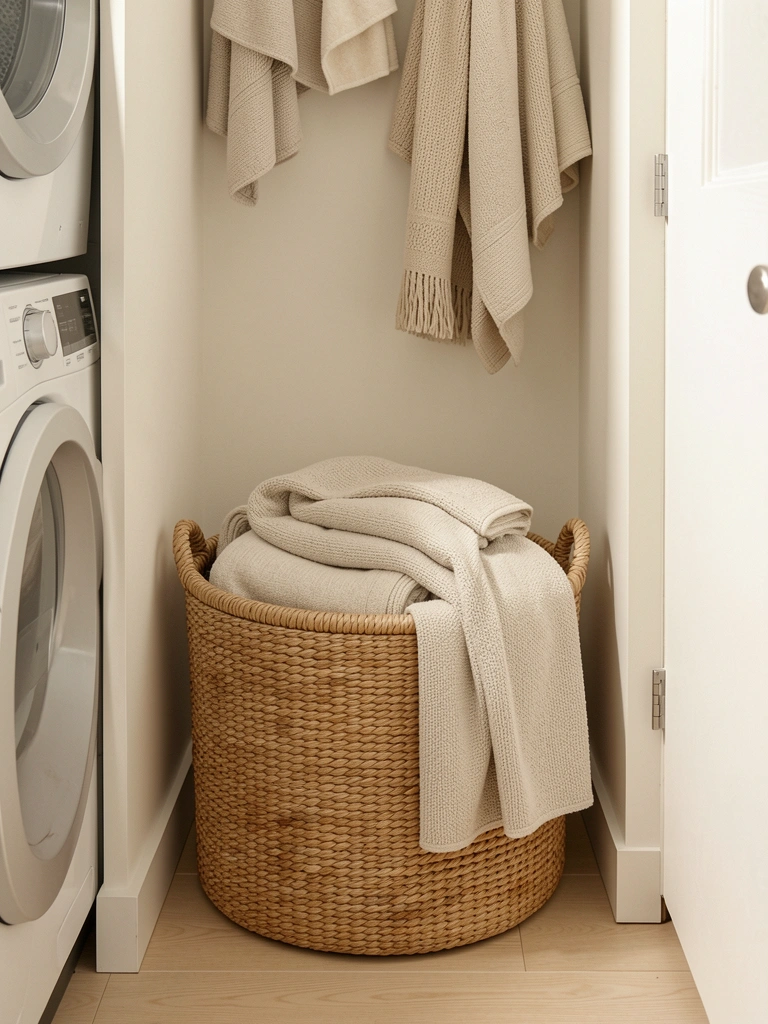
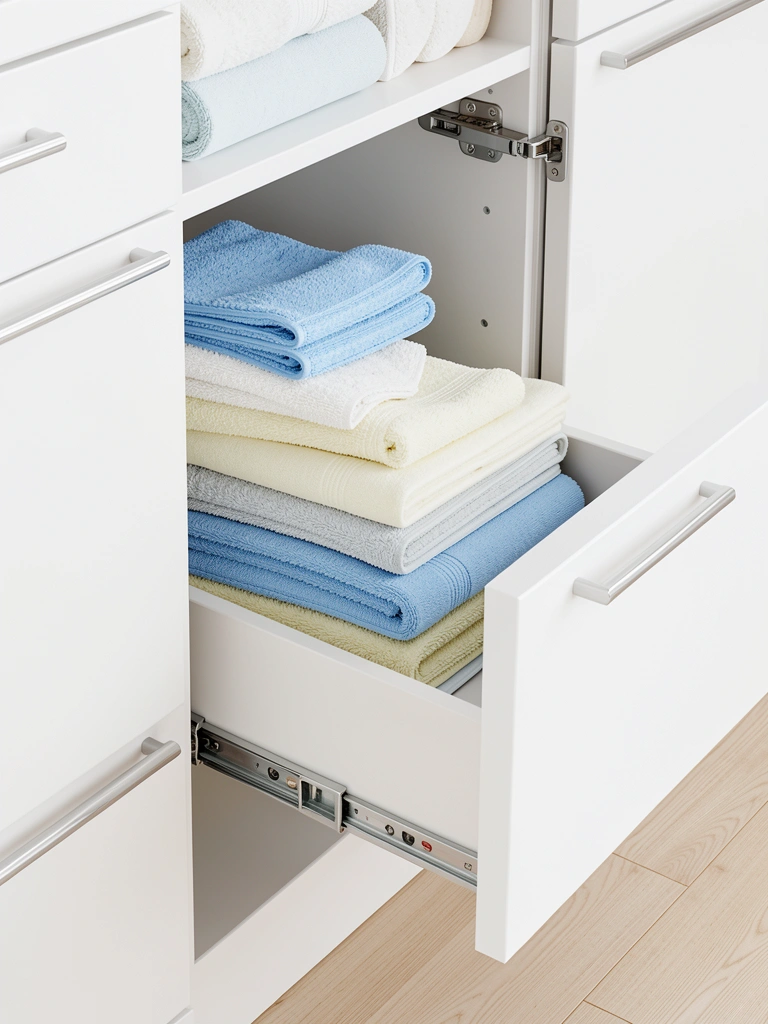
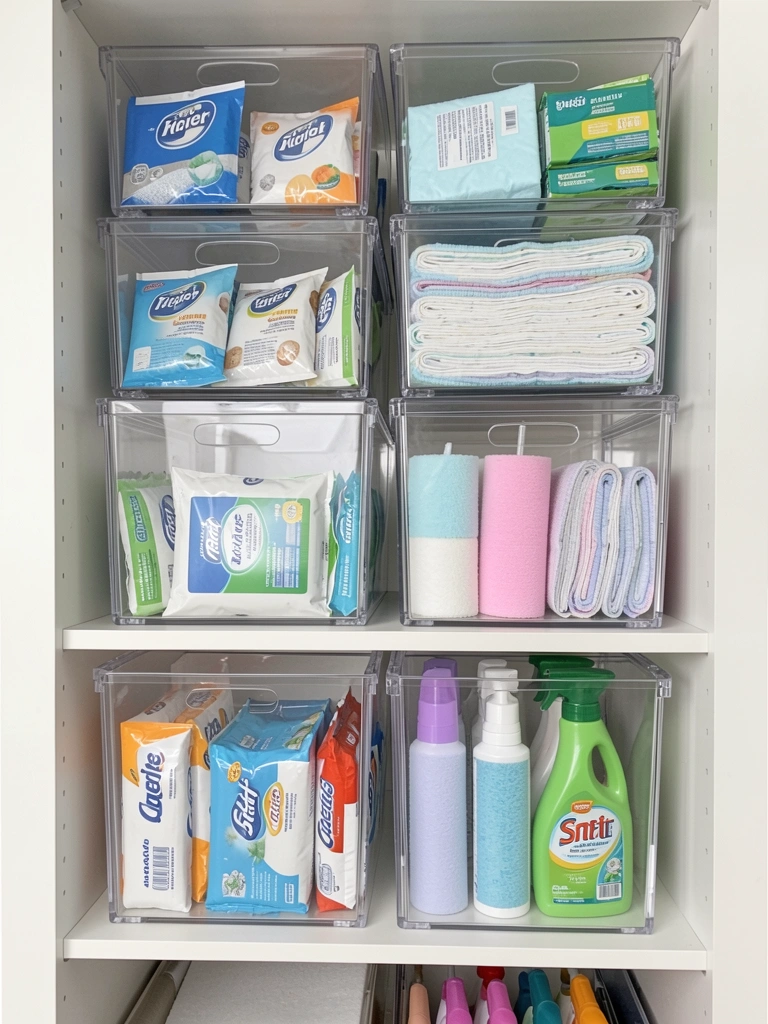
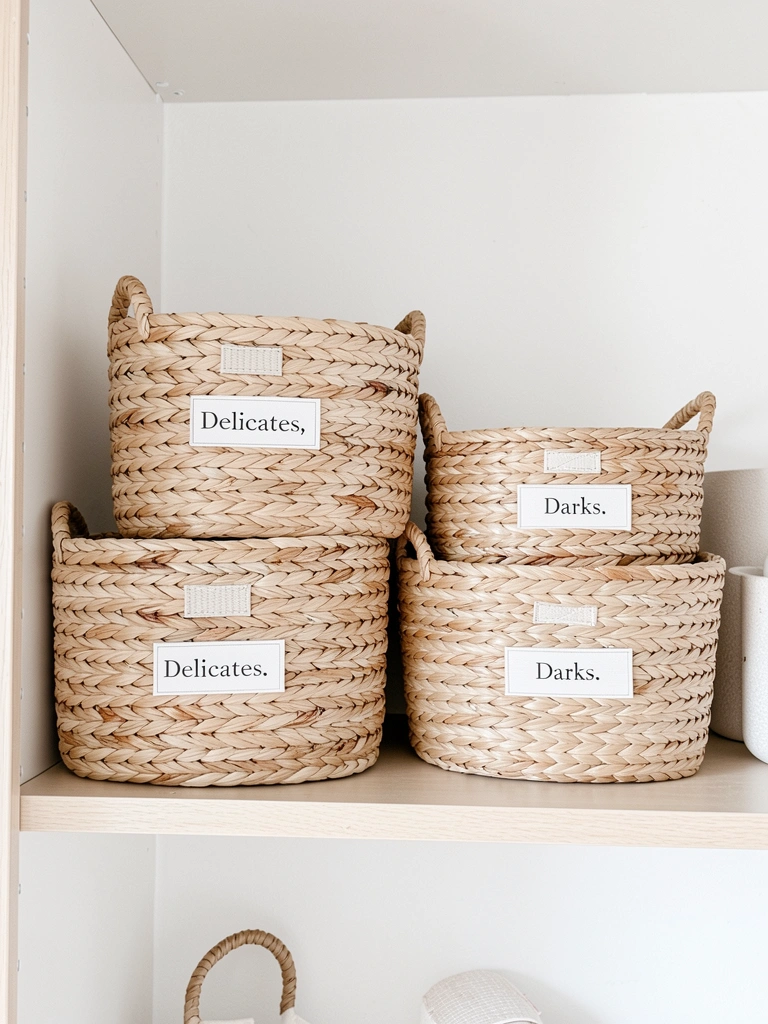
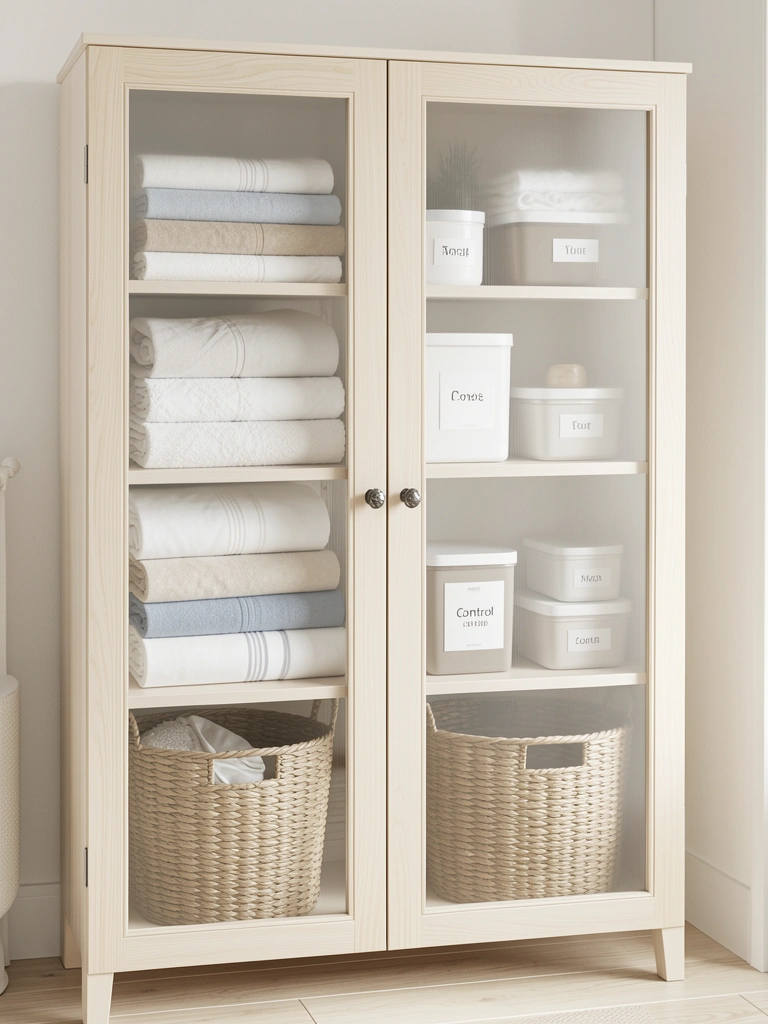
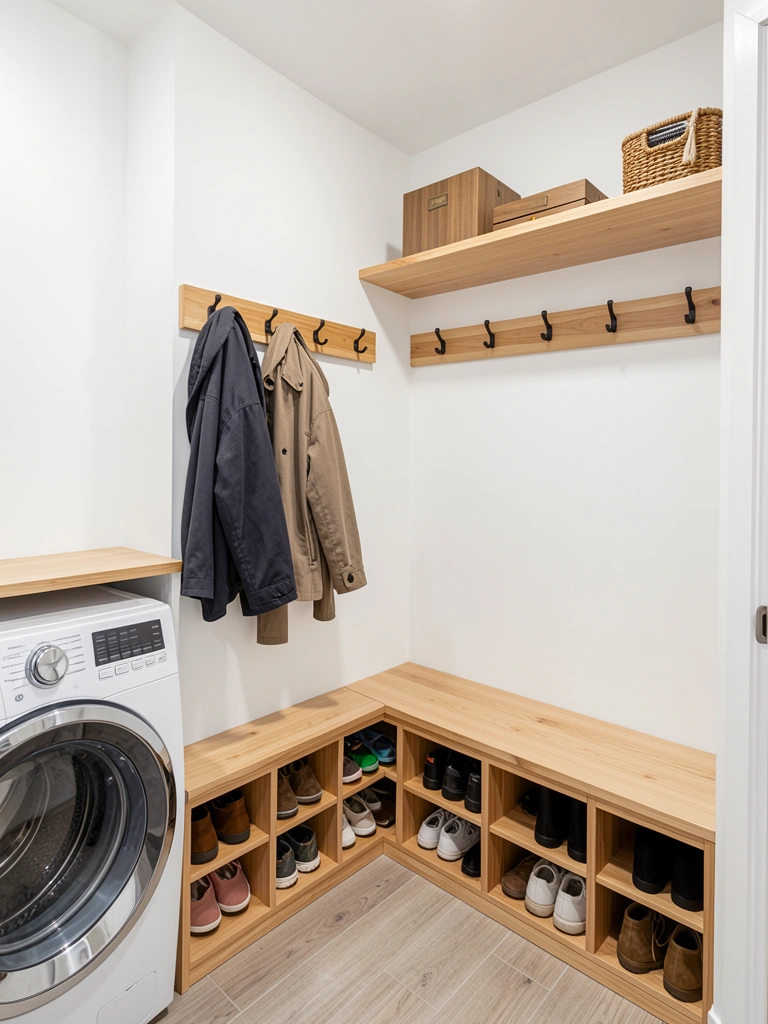
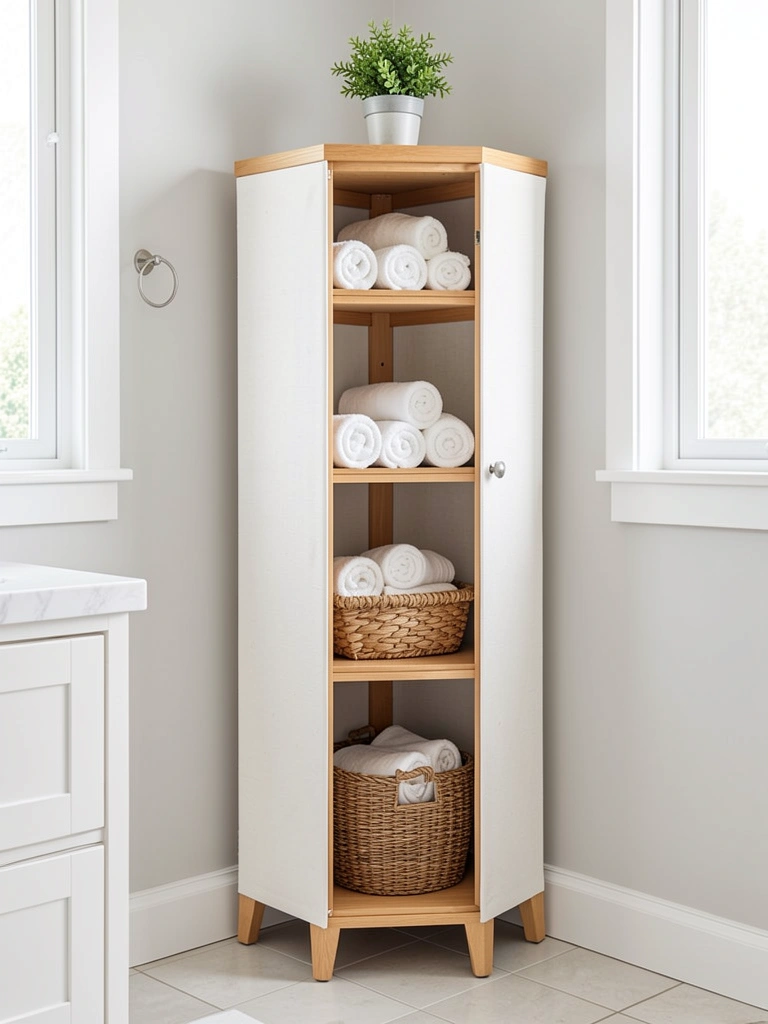
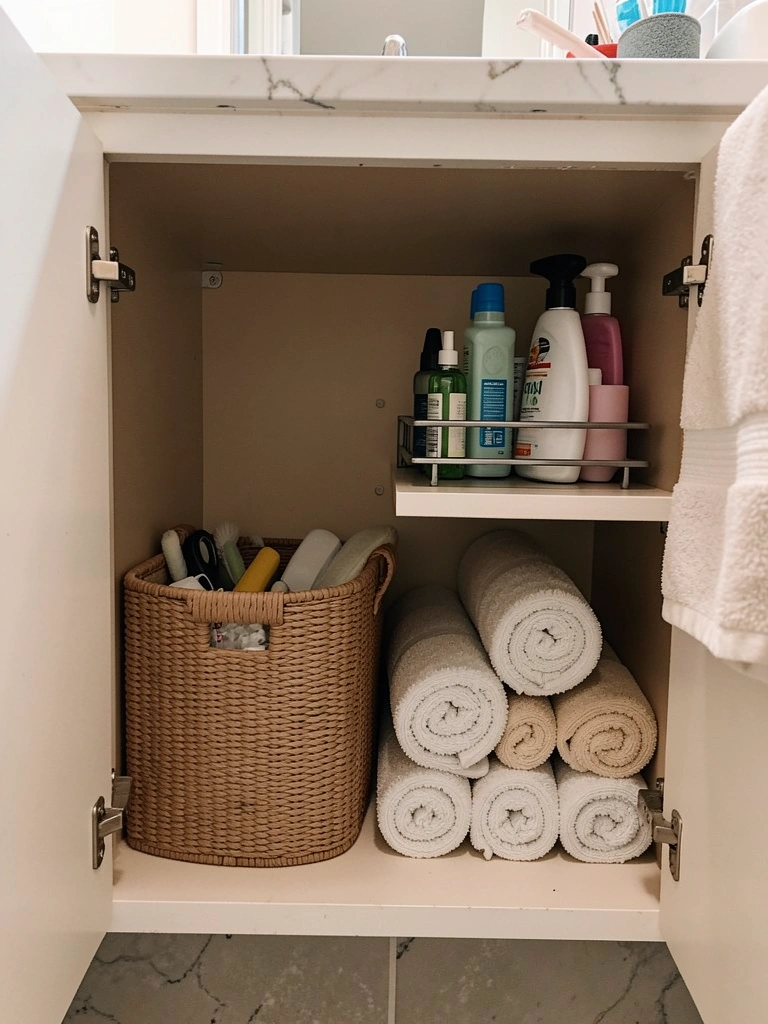
    14. Use Baskets Under the Sink to Organize Supplies

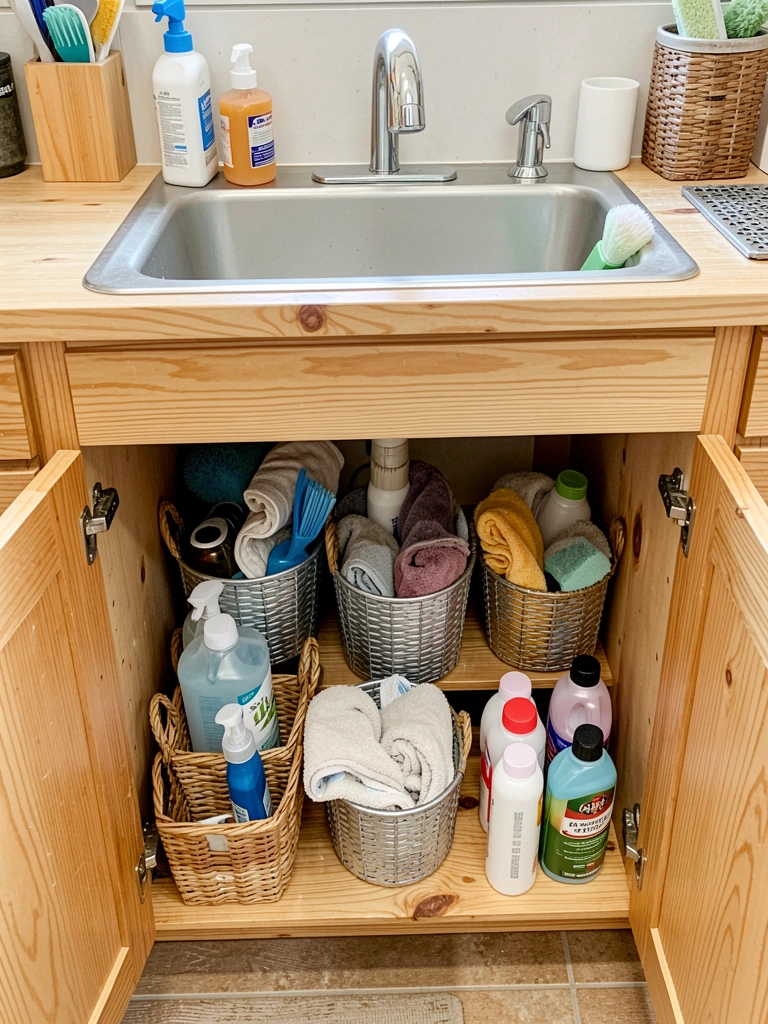
    That open space under your sink is prime real estate for hidden storage that keeps everything functional and out of sight.

    Grab 2-3 baskets ($20-$60 total from Target, IKEA, or Amazon) that fit your undersink space. Label them clearly: “Stain Treatments,” “Rags,” “Overflow Supplies.” Use baskets in natural materials or matte colors for a cohesive look.

    Spending 30 minutes organizing here pays dividends every time you use your sink. Everything has a home, and you’re not digging through piles of random items.

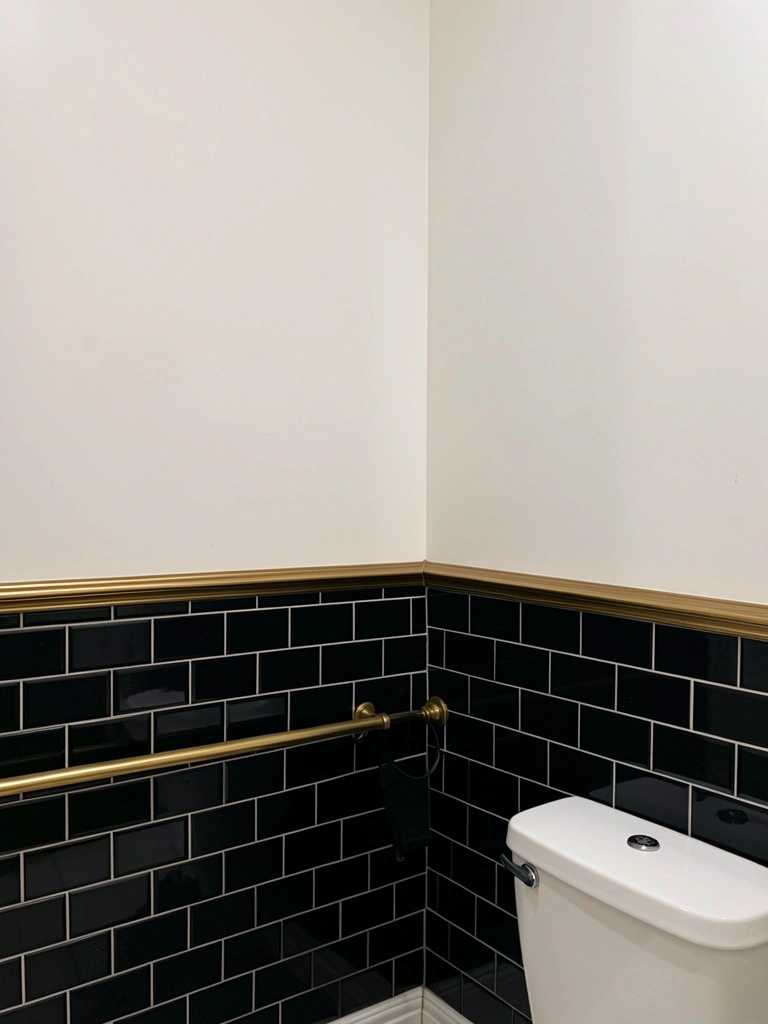
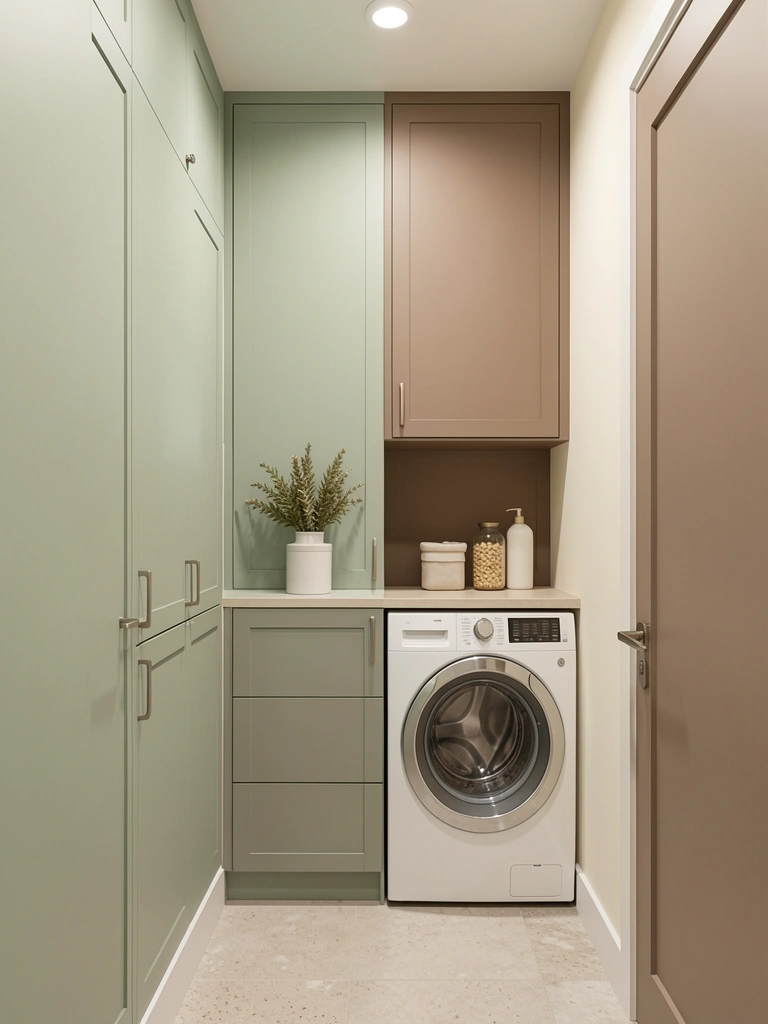
    15. Paint Your Sink Surround a Bold Accent Color

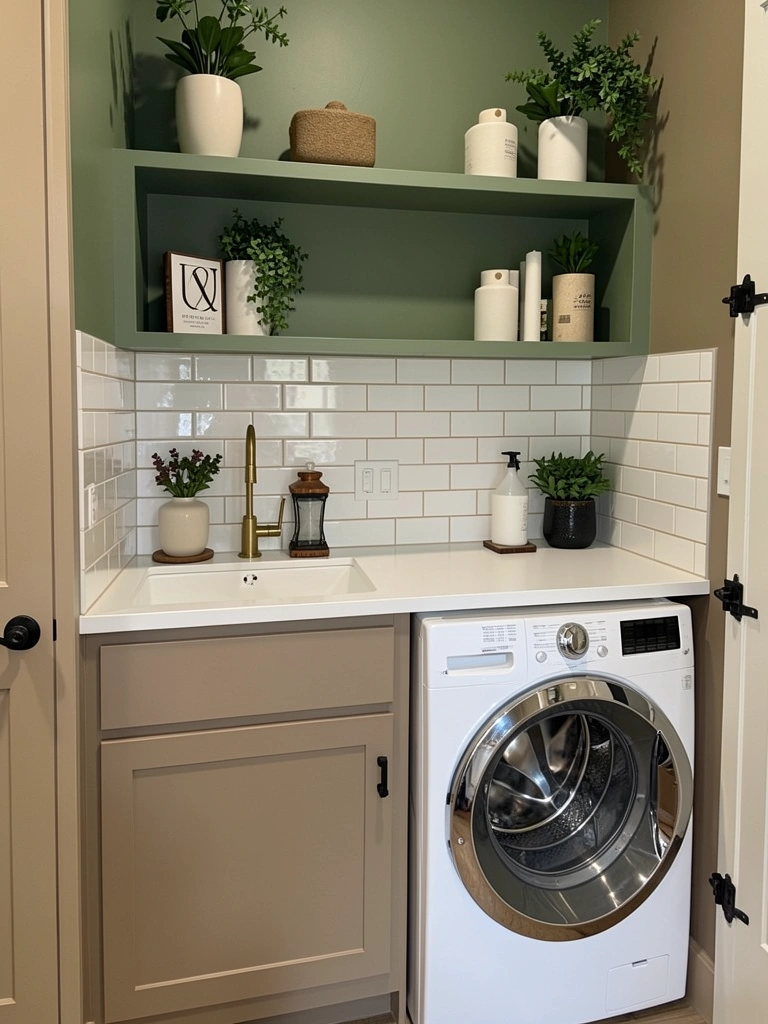
    Most laundry sinks have boring white or neutral walls. An accent color makes your sink area a focal point instead of an afterthought.

    Paint the wall directly above and around your sink in a bold but restful color—sage green, warm taupe, soft blue, or even navy ($15-$30 for paint). Use a semi-gloss or satin finish for moisture resistance. Two coats takes about 3-4 hours, and the impact is immediate.

    If you’re renting, use peel-and-stick wallpaper ($30-$50) in a pattern or solid color as a temporary solution. Your sink suddenly becomes an intentional design feature instead of just functional.

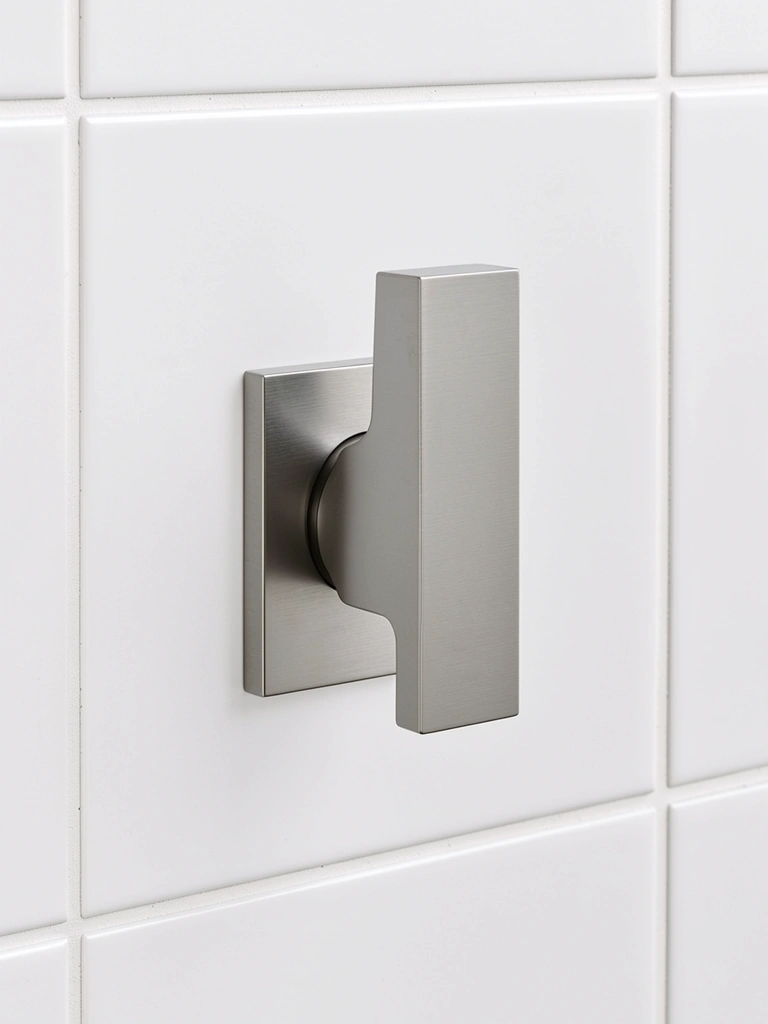
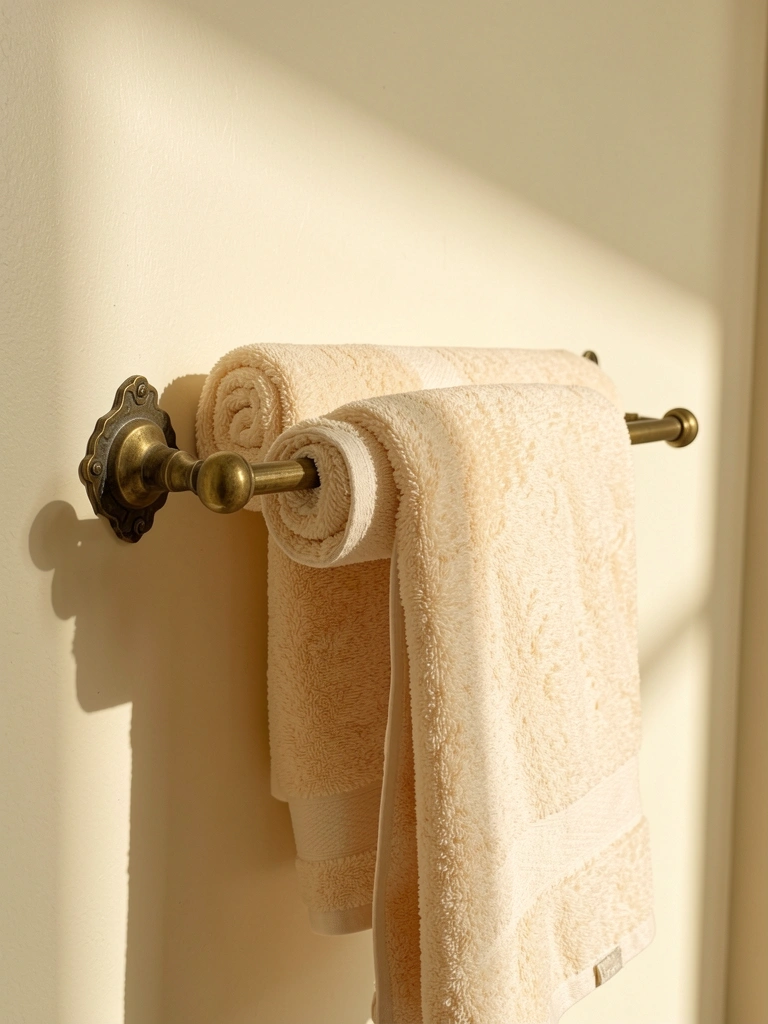
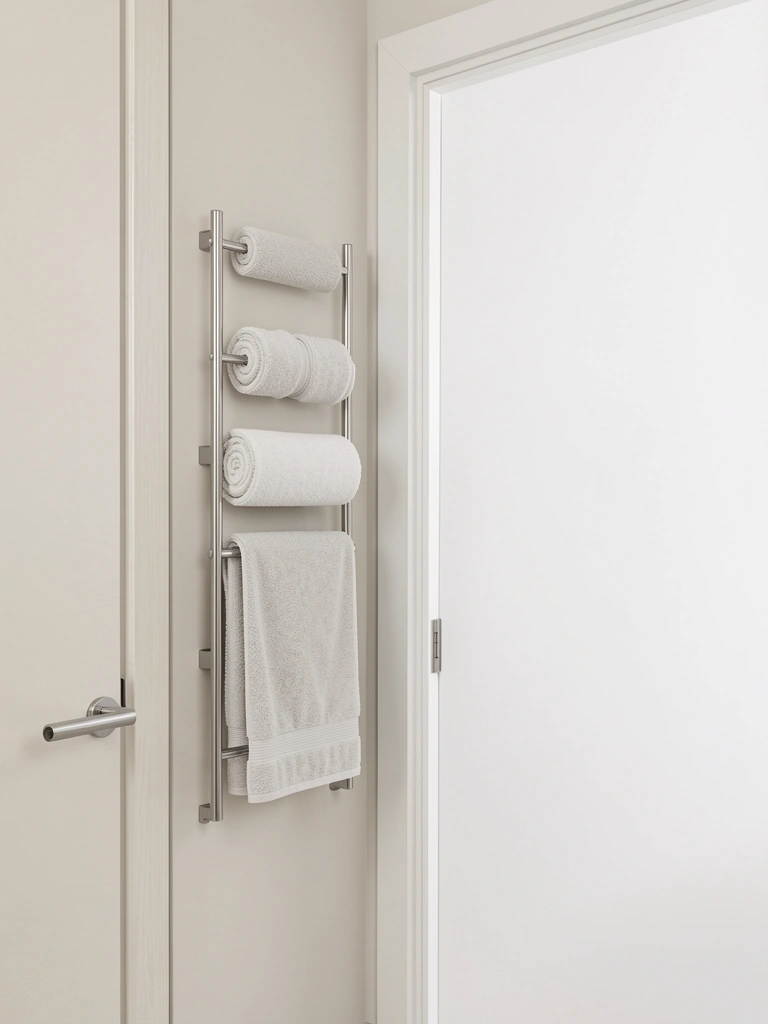
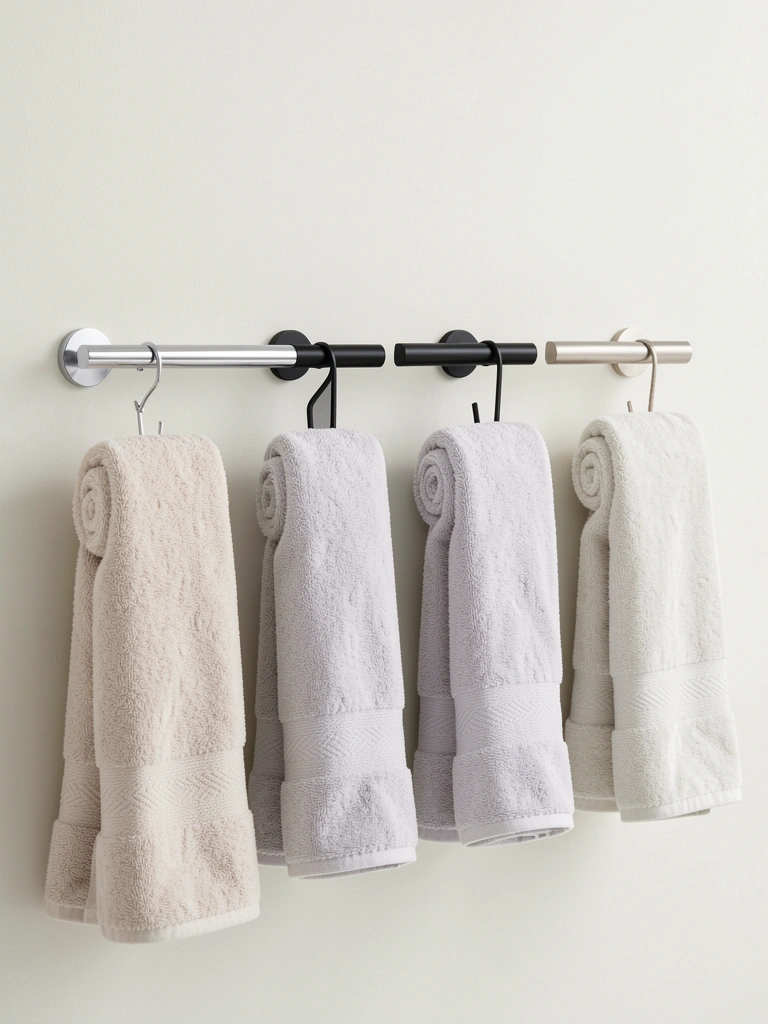
    16. Mount Hooks on Either Side of Your Sink for Towels

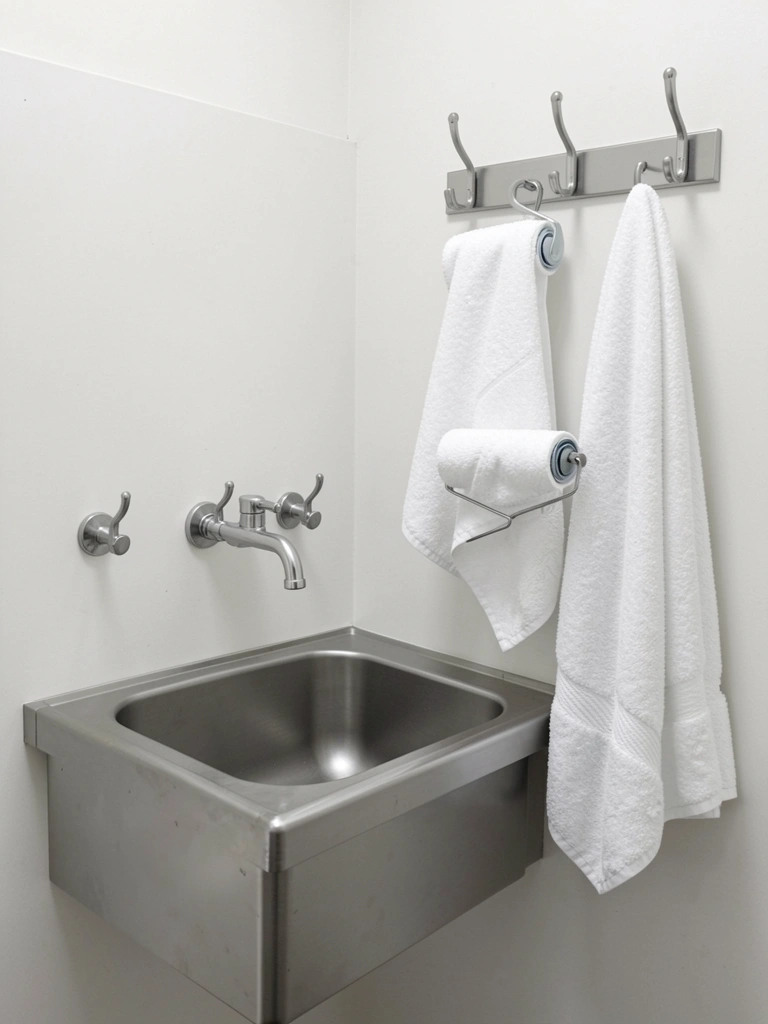
    Dedicated hooks keep hand towels and frequently-used tools within arm’s reach without taking up counter space.

    Install 2-4 sturdy hooks ($5-$15 each at Home Depot) on the wall beside your sink at comfortable arm height. Choose finishes that match your faucet—matte black, brushed nickel, or brass. Use wall anchors if you’re into studs, and installation takes 15 minutes.

    Hang your best hand towels here (preferably ones you like looking at) along with a lint roller, small spray bottle, or microfiber cloth. You’ll reach for them constantly, and they’re always clean and accessible.

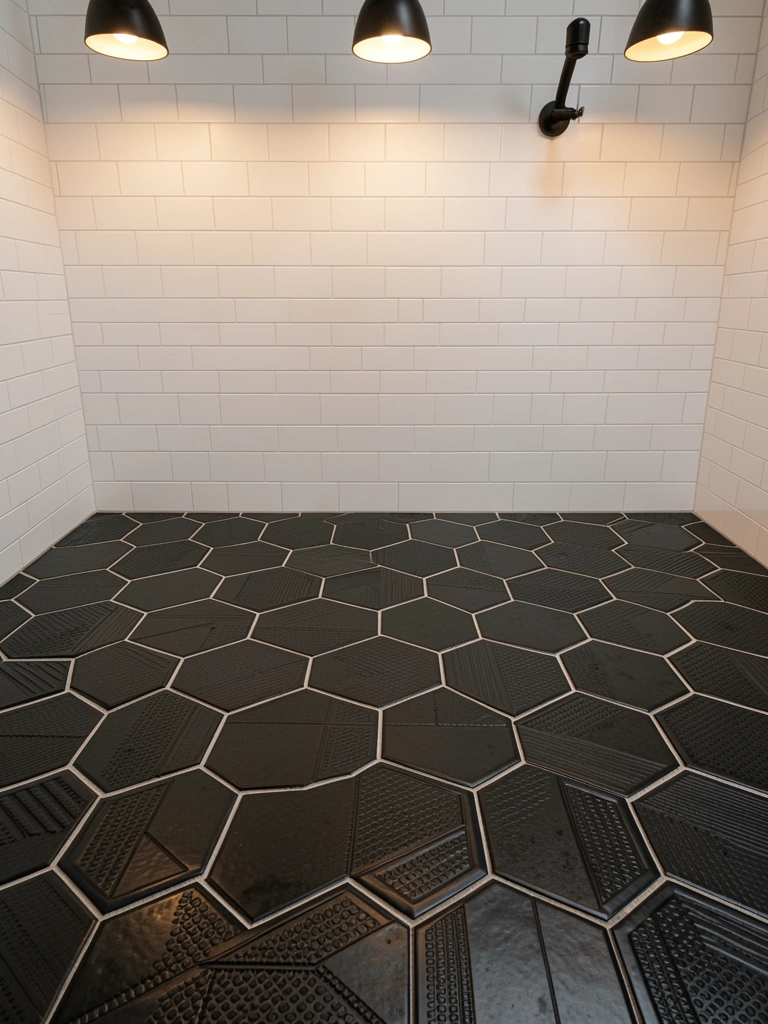
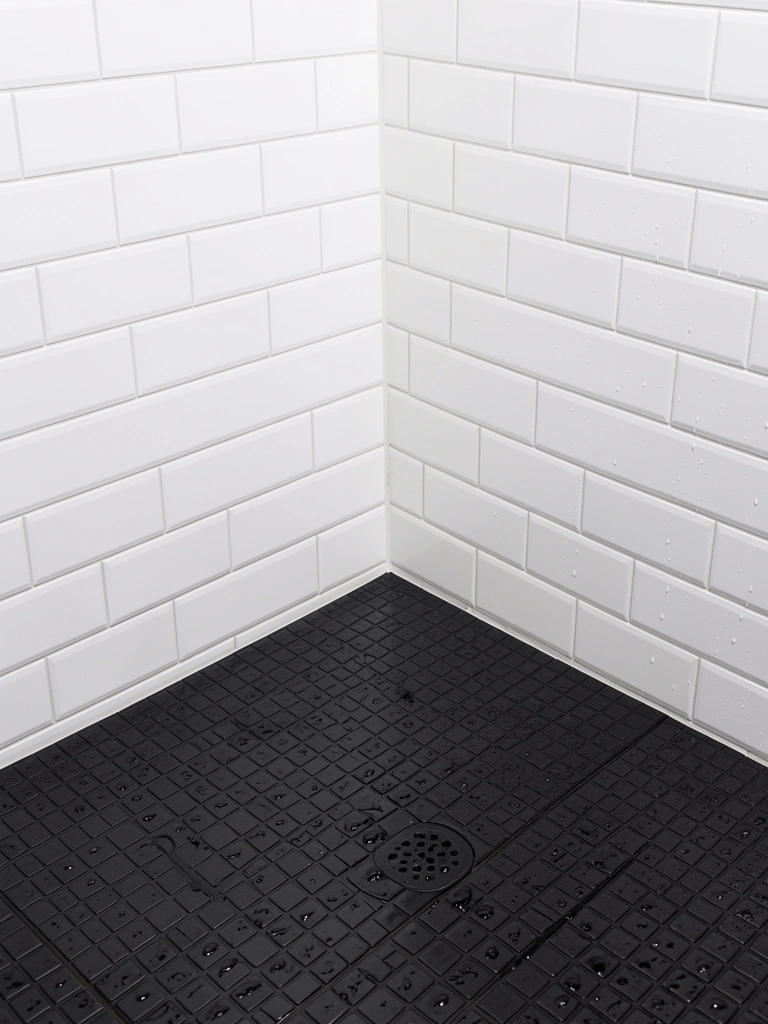
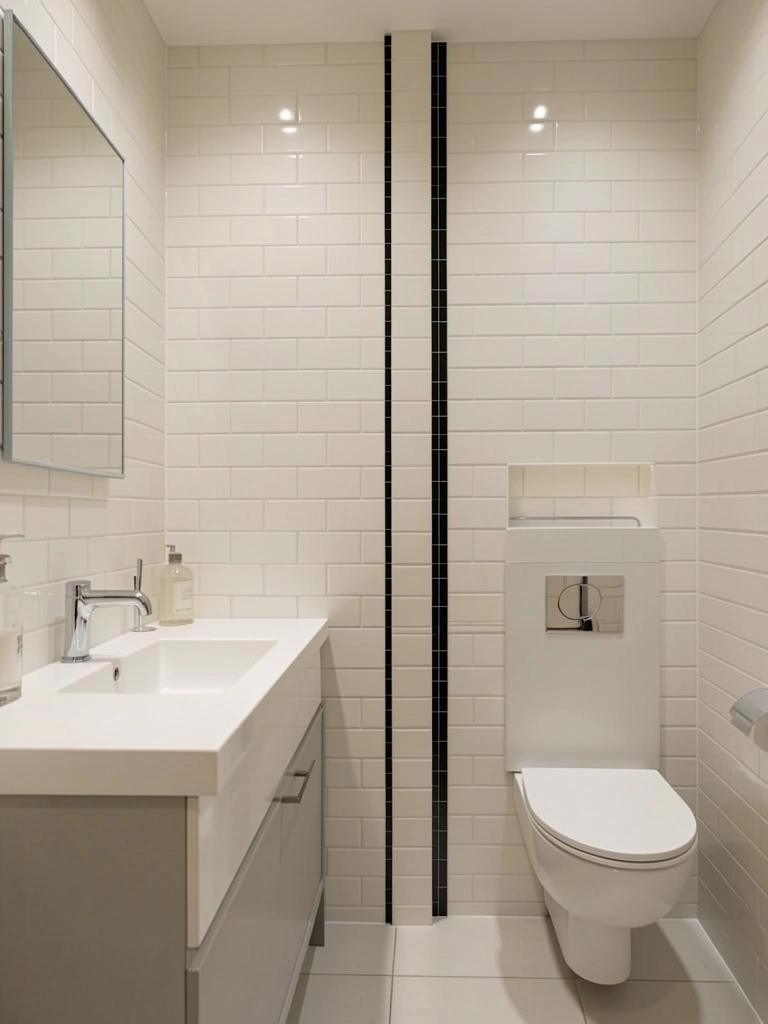
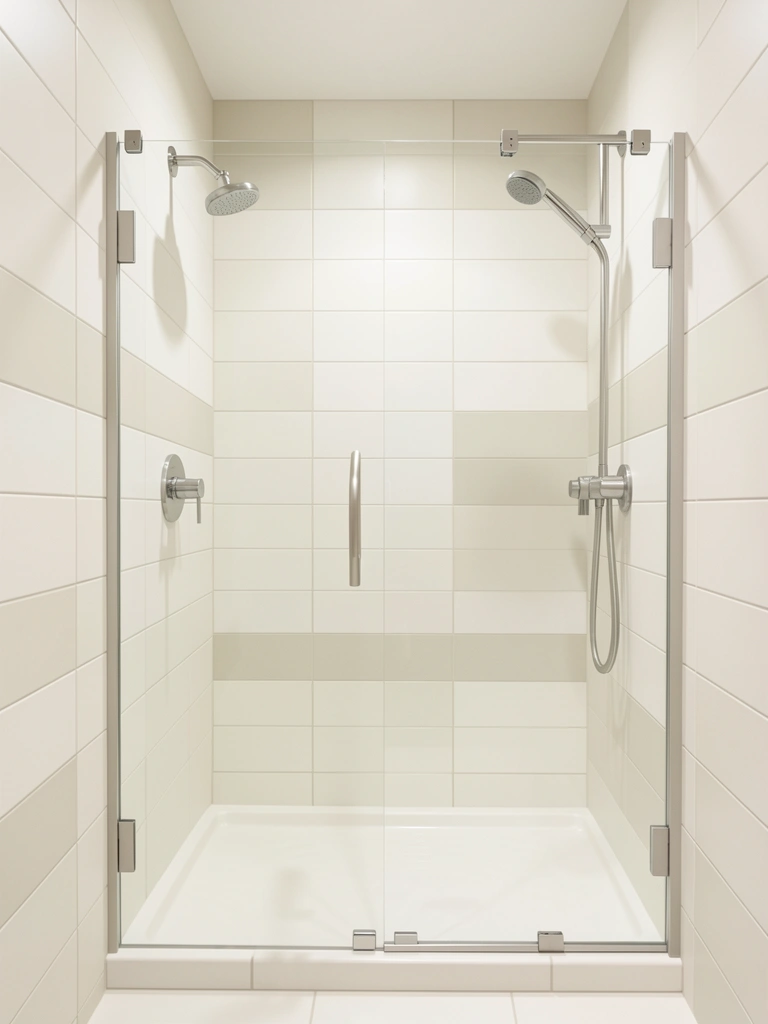
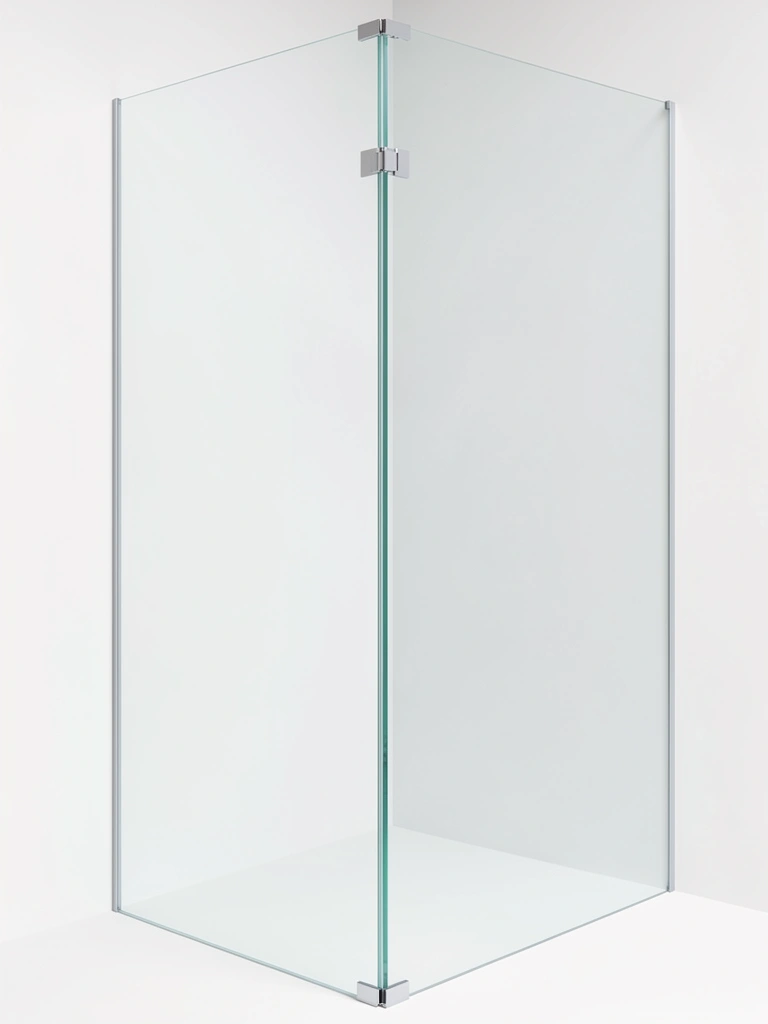
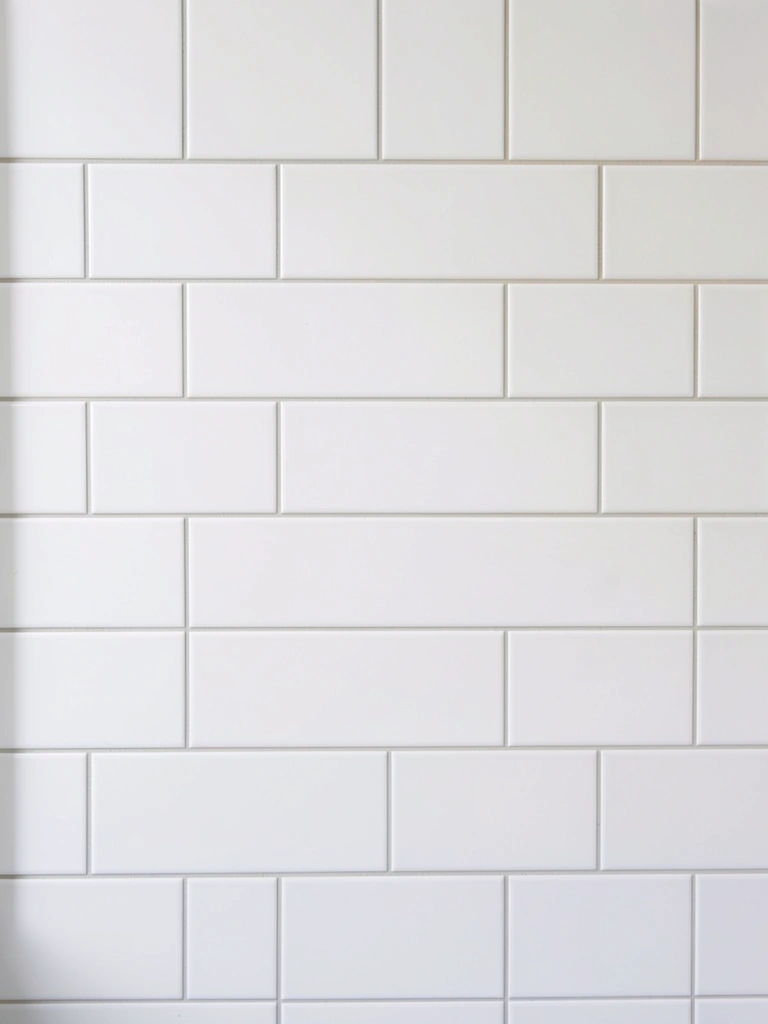
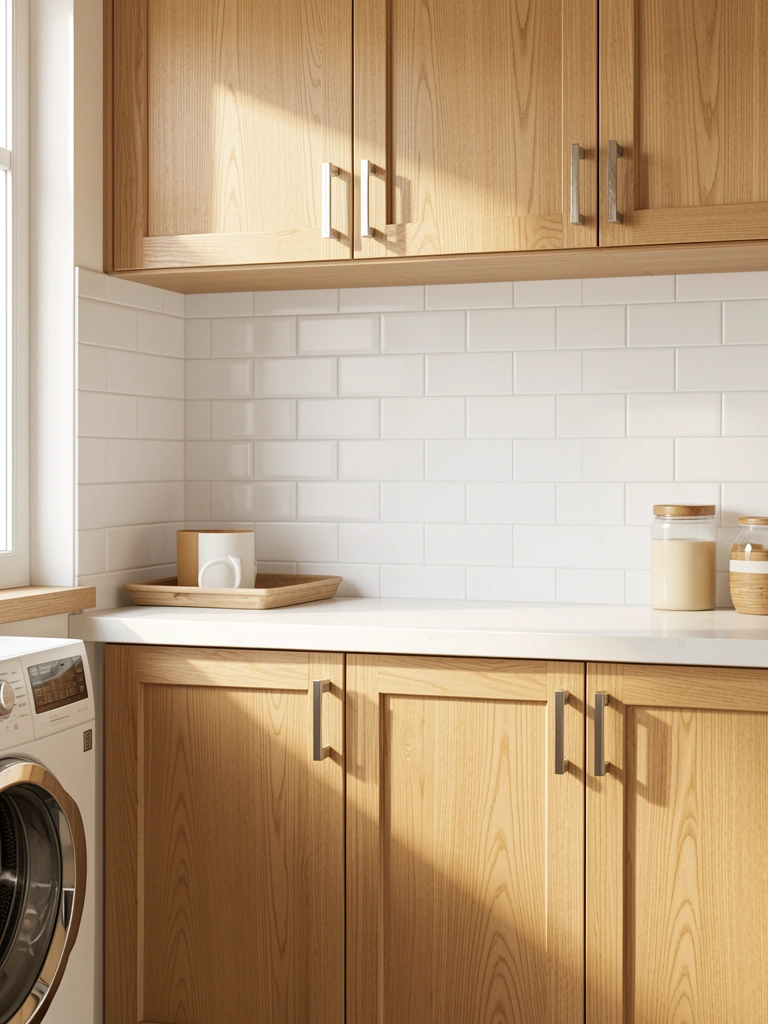
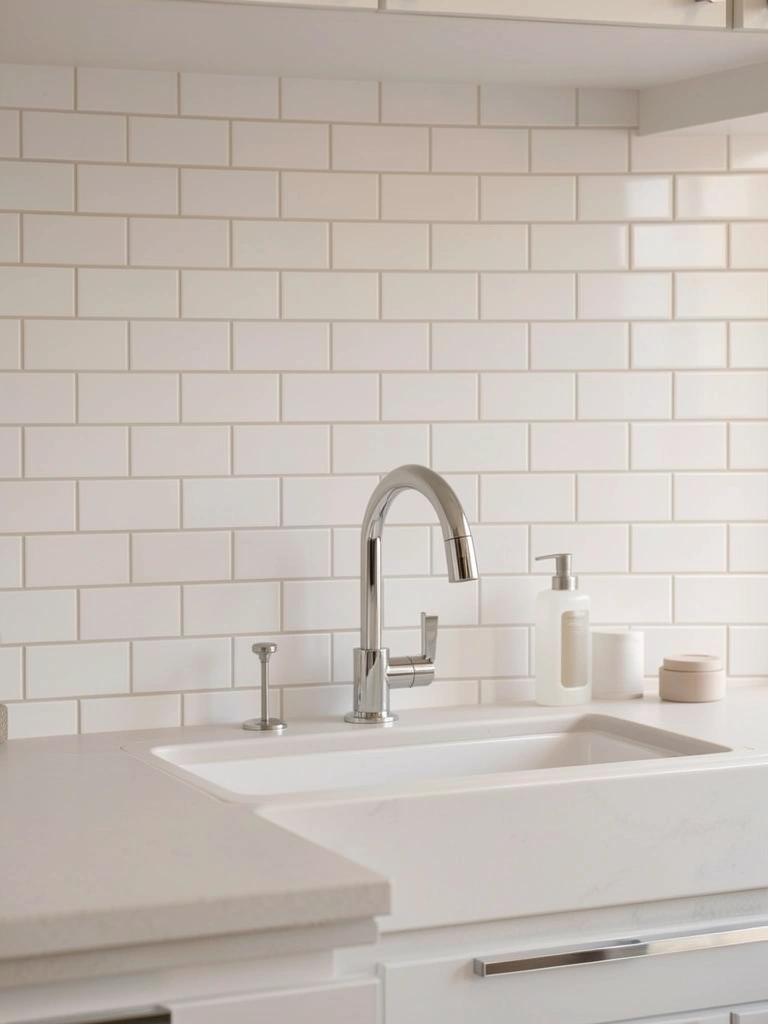
    17. Add a Backsplash Behind Your Sink for Easy Cleanup

    A backsplash protects your wall from water splashes and makes cleanup infinitely easier. Plus, it looks intentional and finished.

    Install subway tile ($1-$3 per tile plus grout, roughly $100-$250 total) or go quicker with peel-and-stick backsplash tiles ($30-$80 for a small area). Peel-and-stick takes one hour and requires zero grout; traditional tile takes one weekend and might require a professional ($150-$300 installation).

    The wall behind your sink stays clean and splashless. Even with frequent use, you’re just wiping down tile instead of worrying about water damage.

    18. Choose a Sink Height That Matches Your Frame

    A sink that’s too low or too high turns hand-washing into a frustrating slouch or painful reach.

    Standard sink heights are 30-36 inches from floor to rim. If you’re on the taller or shorter side, adjust slightly when installing. A new sink installed at the right height costs the same as one installed incorrectly, so ask your plumber about this.

    Spend five minutes thinking about your actual posture before installation. The comfort difference over months of use is huge, and you’ll reduce strain on your back.

    19. Install a Utility Sink with a Sloped Bottom for Drainage

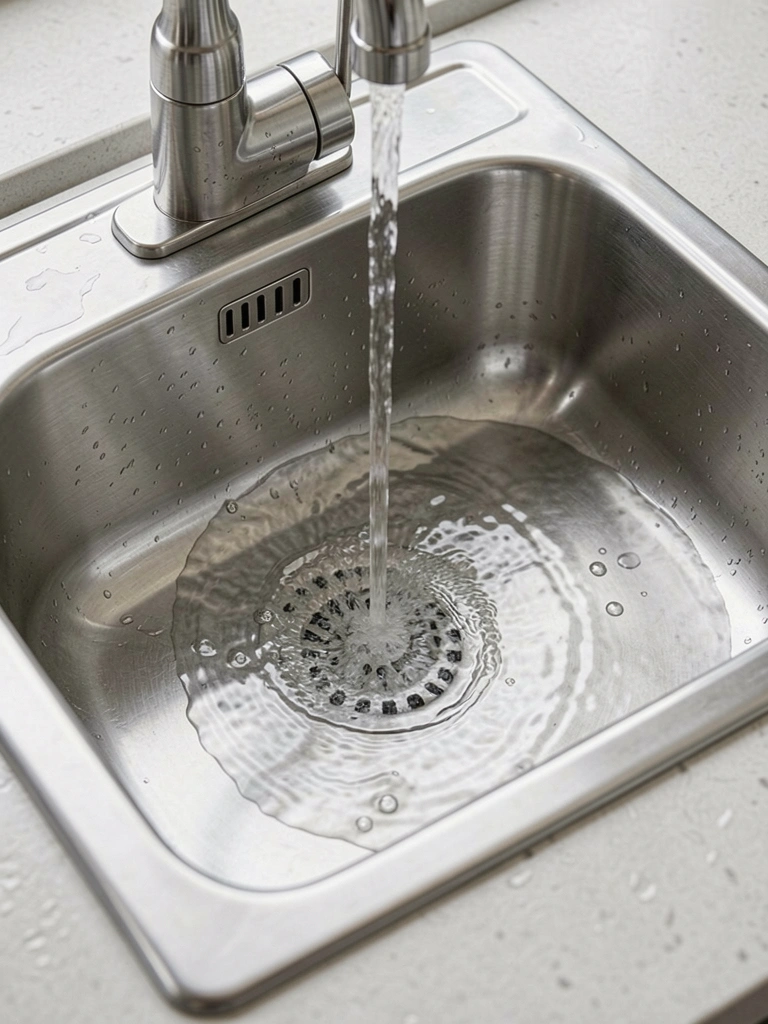
    A sink with a gentle slope to the drain prevents standing water and keeps things looking fresh, not stagnant.

    Most modern sinks have this feature built in, but if you’re replacing an older model, confirm the drain slope when ordering. It’s a small detail that prevents stagnant water issues and makes the sink easier to dry completely.

    This is something to verify rather than an action item, but it’s a often-overlooked feature that makes daily use more pleasant.

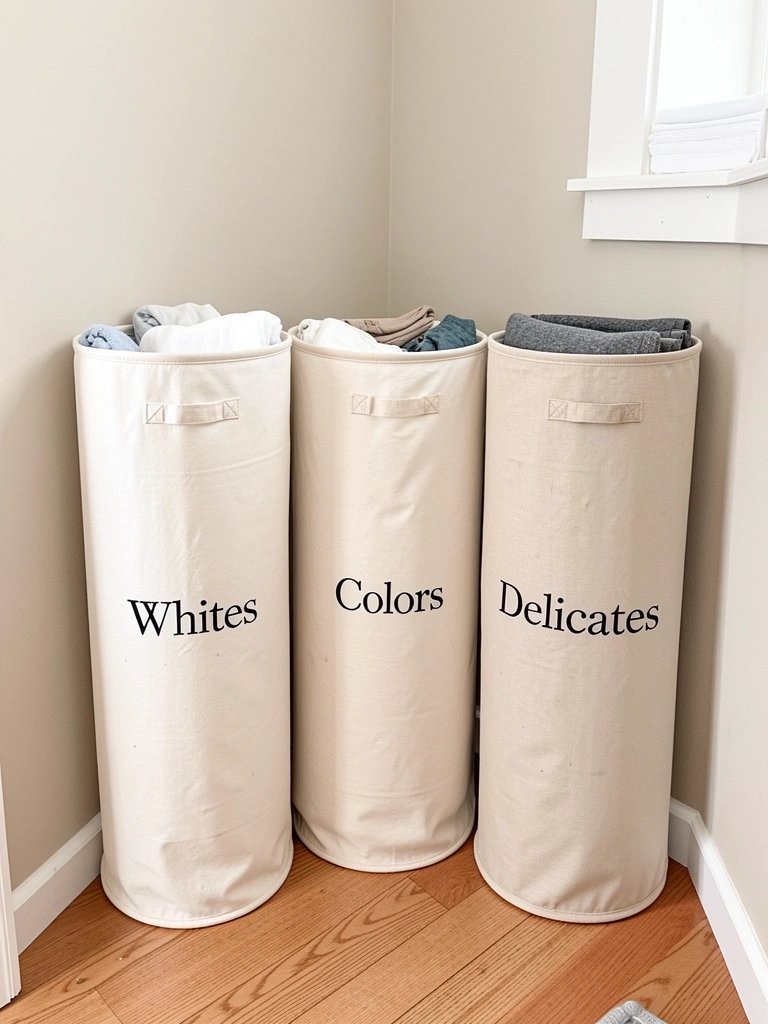
    20. Create a Wet Bag Station Beside Your Sink

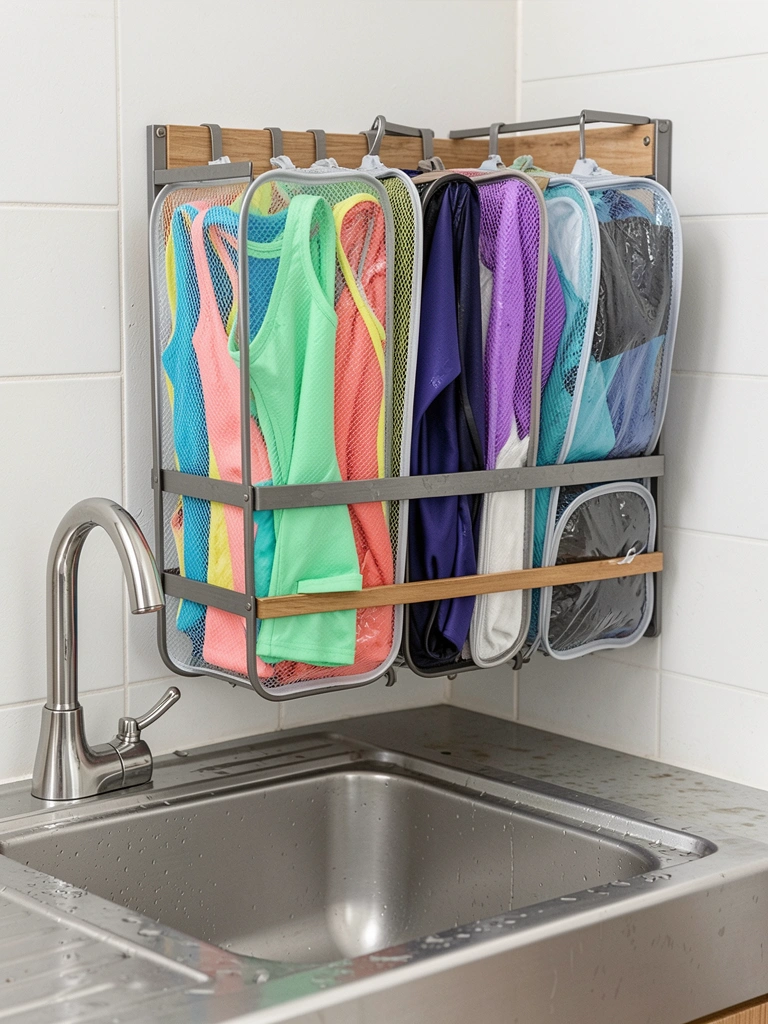
    Wet items need a designated holding spot separate from your regular laundry to prevent spreading moisture around. A compact wet bag station next to your sink keeps things contained.

    Install a shallow wall organizer ($30-$60) or mount 2-3 hooks ($5-$15) beside your sink for hanging mesh wet bags ($10-$25 each). Label bags by category: “Delicates,” “Activewear,” “Swimsuits.”

    This takes about one hour to set up and is especially useful if you have kids with sports gear or if you frequently hand-wash items. Everything has a containment zone instead of dripping on your floor.

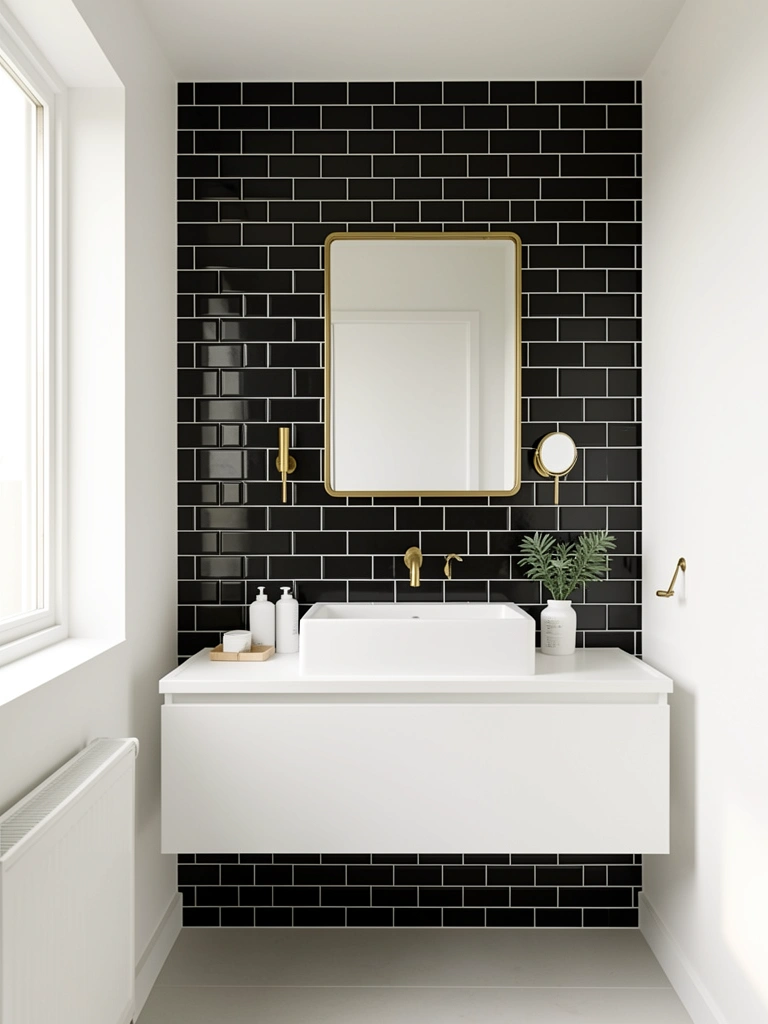
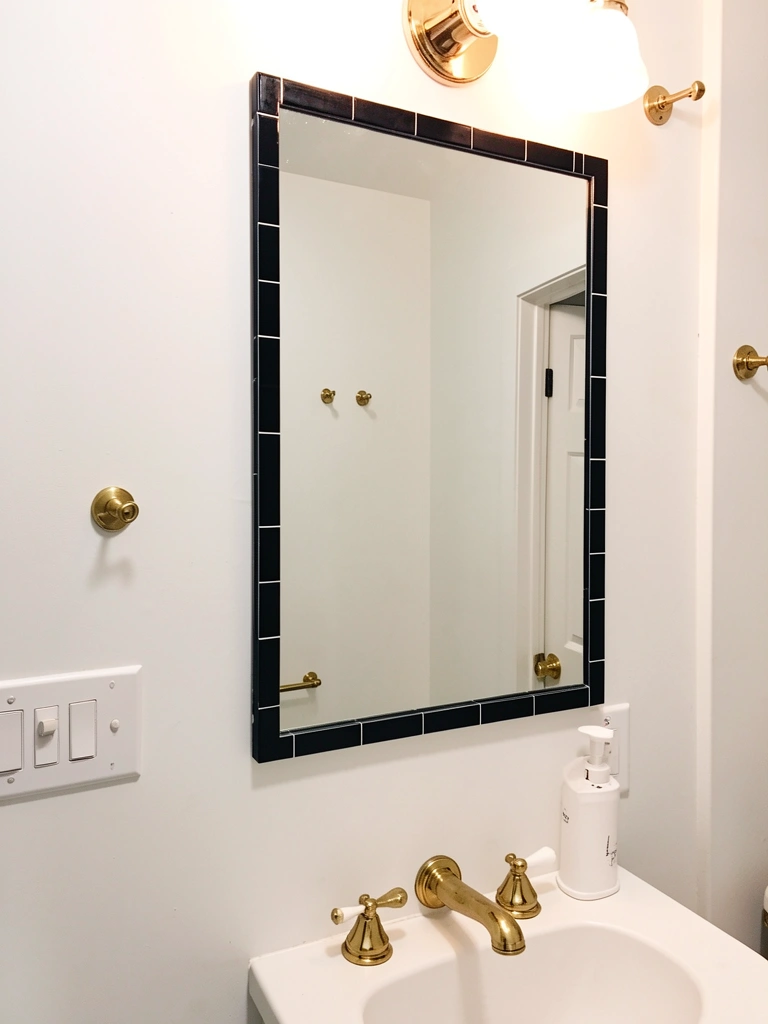
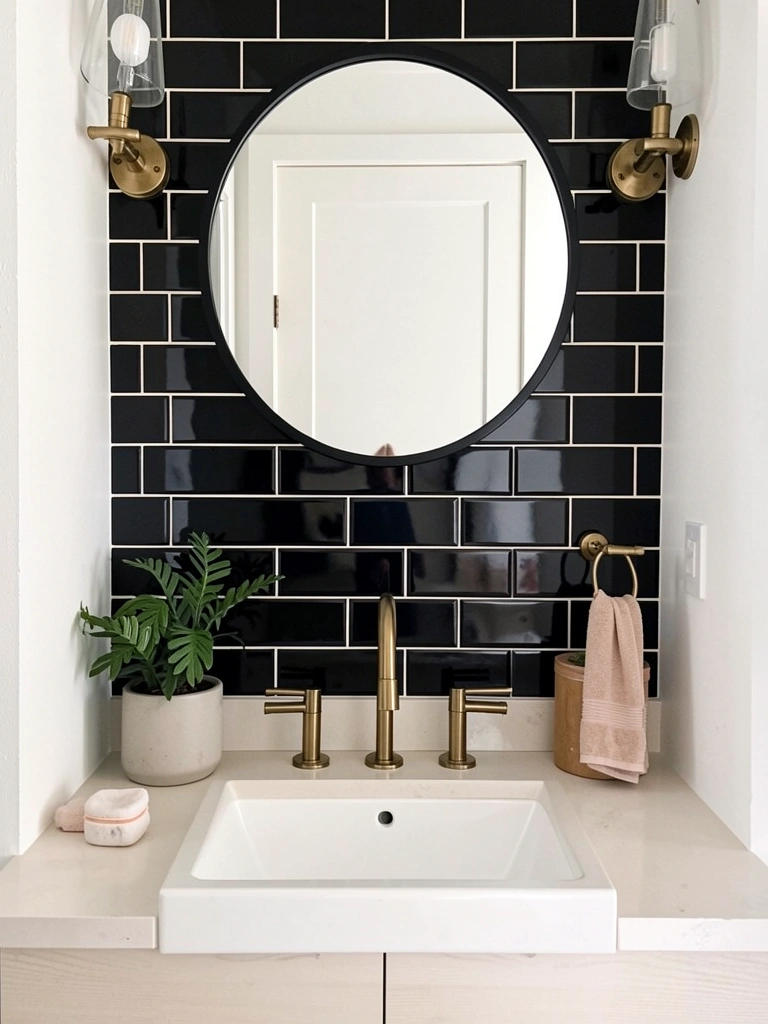
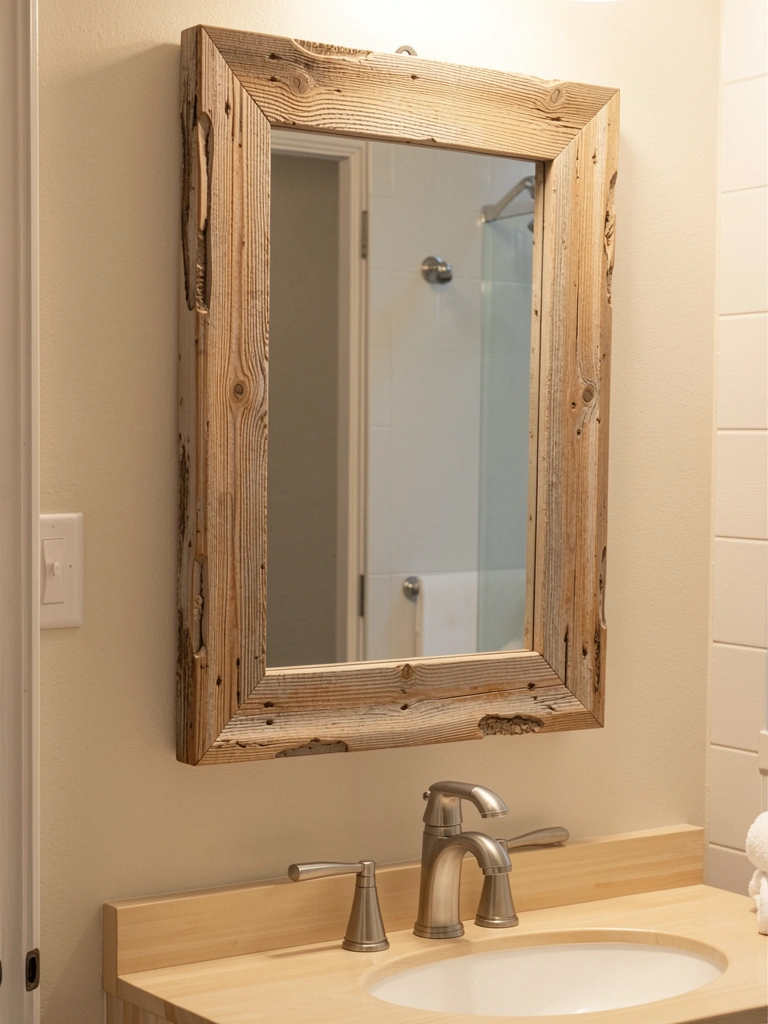
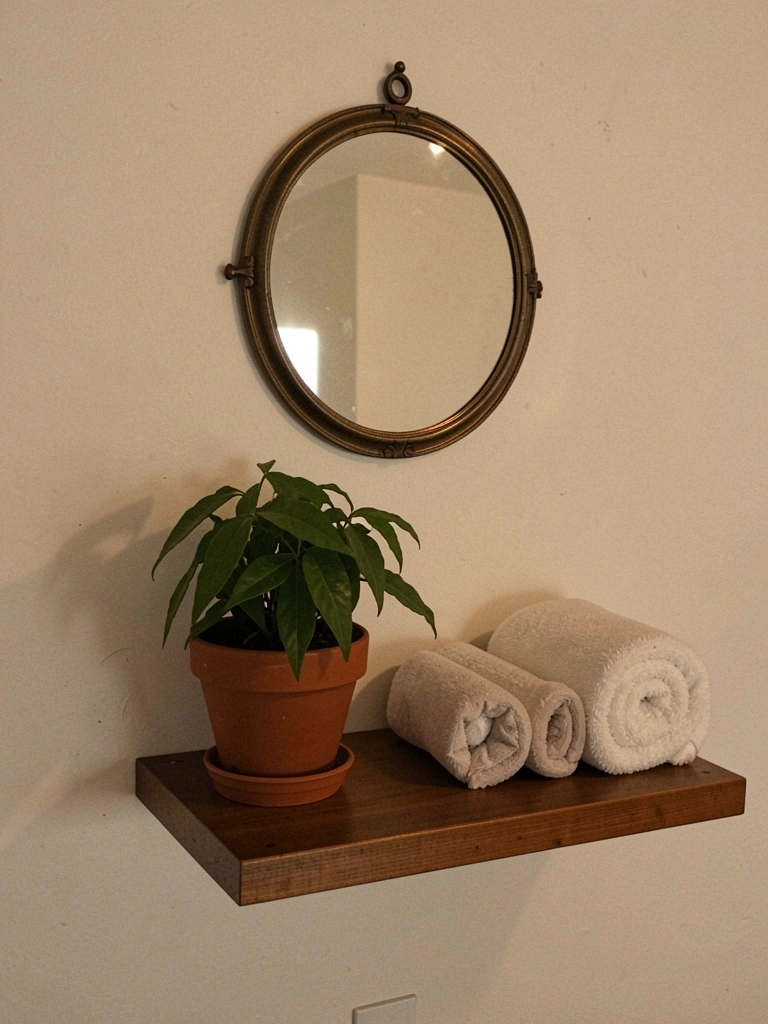
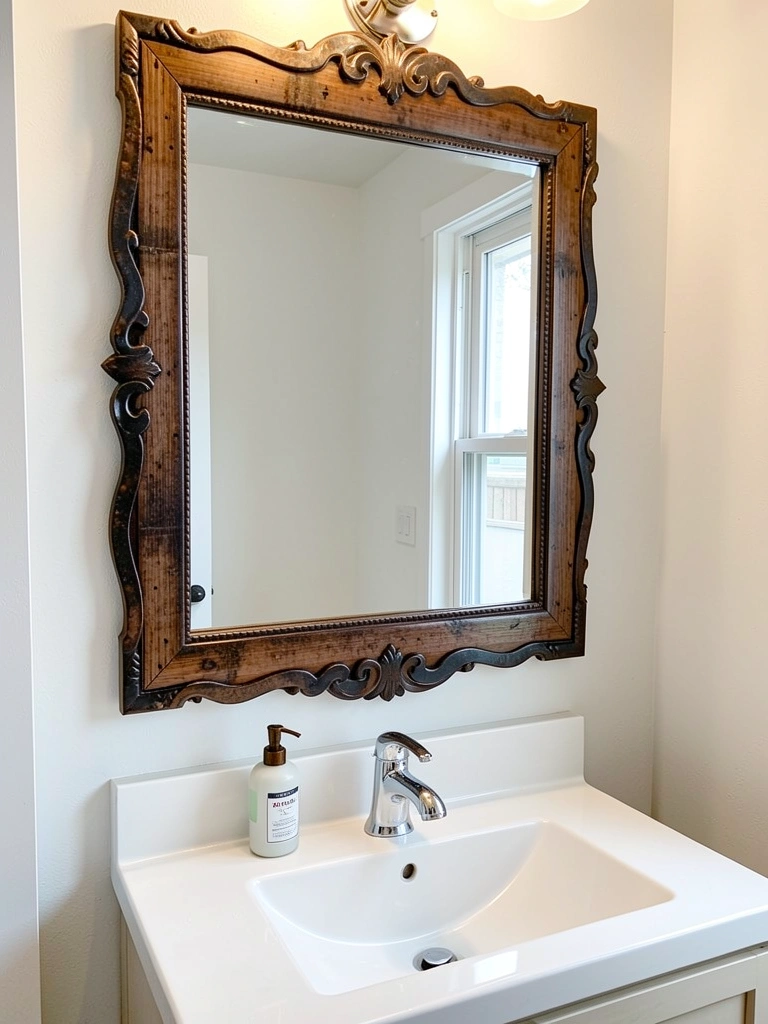
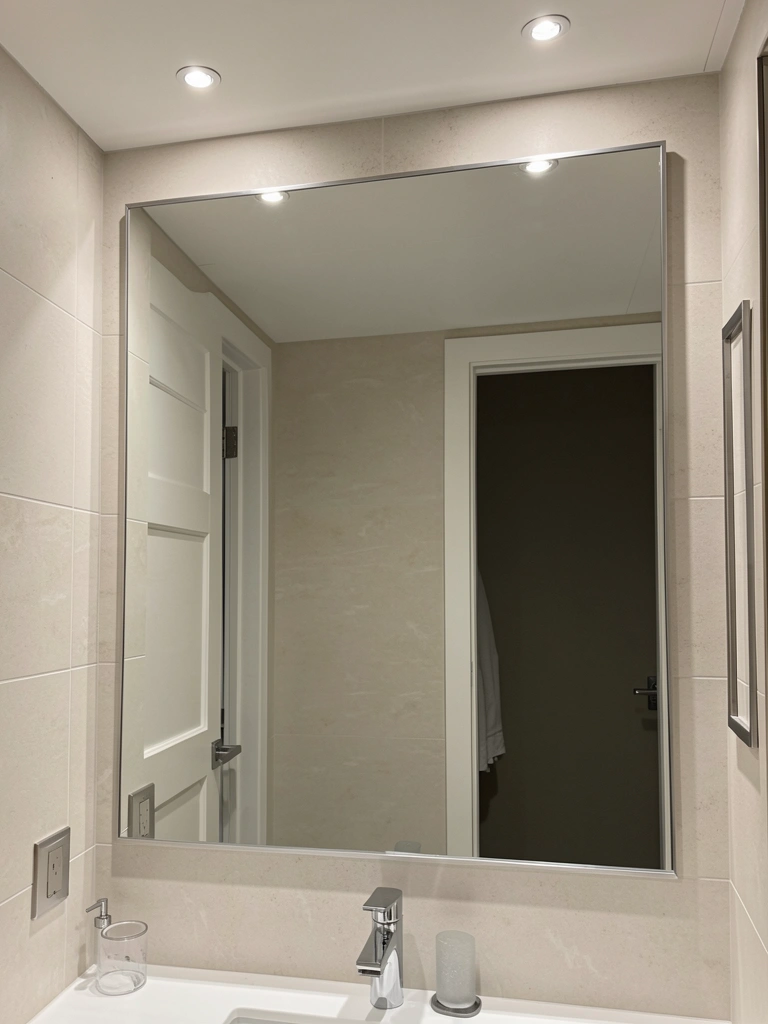
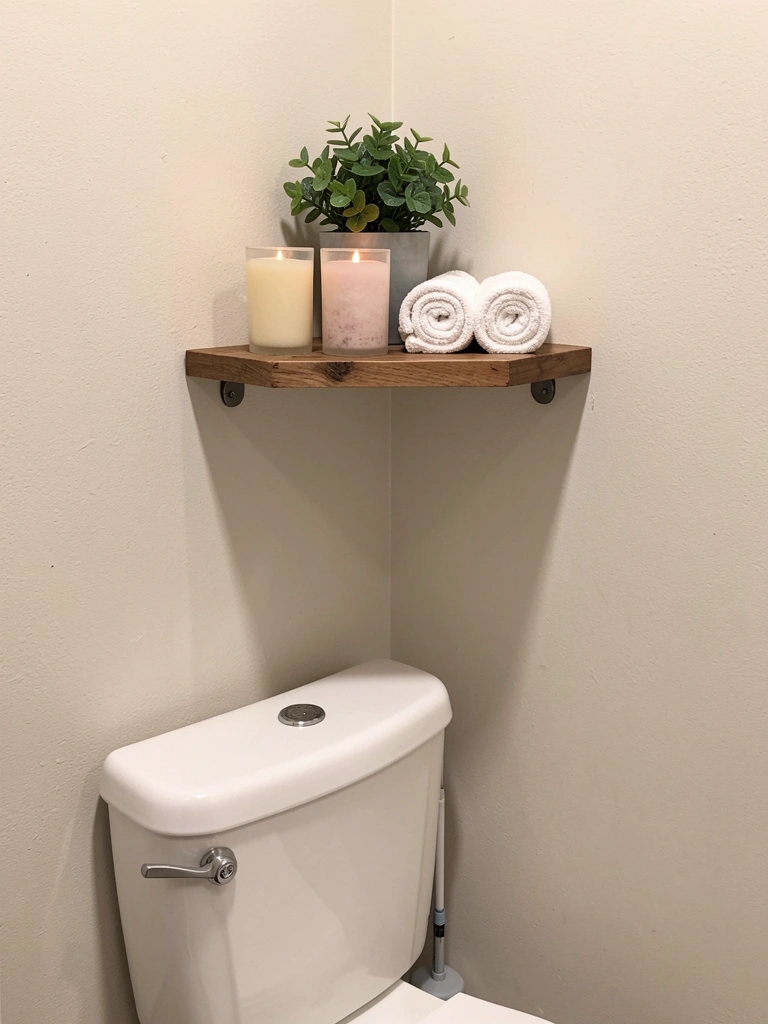
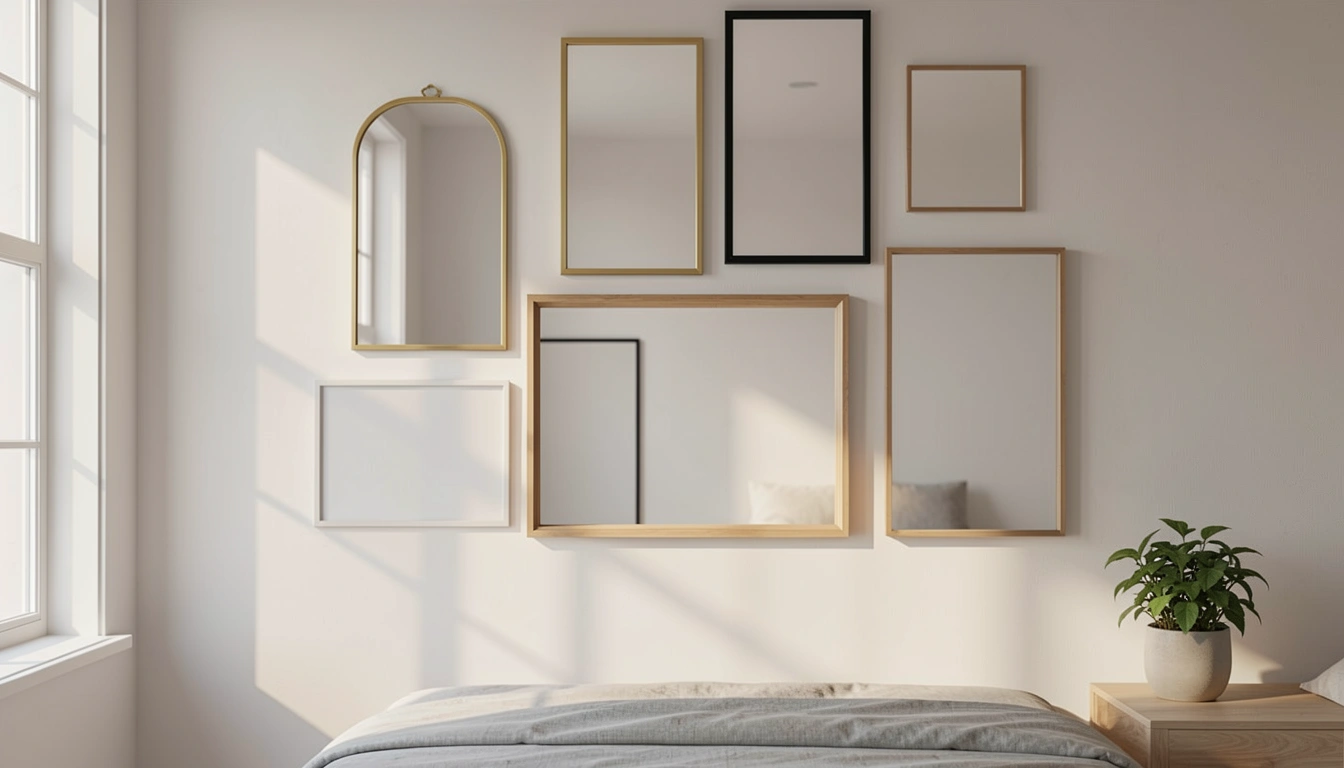
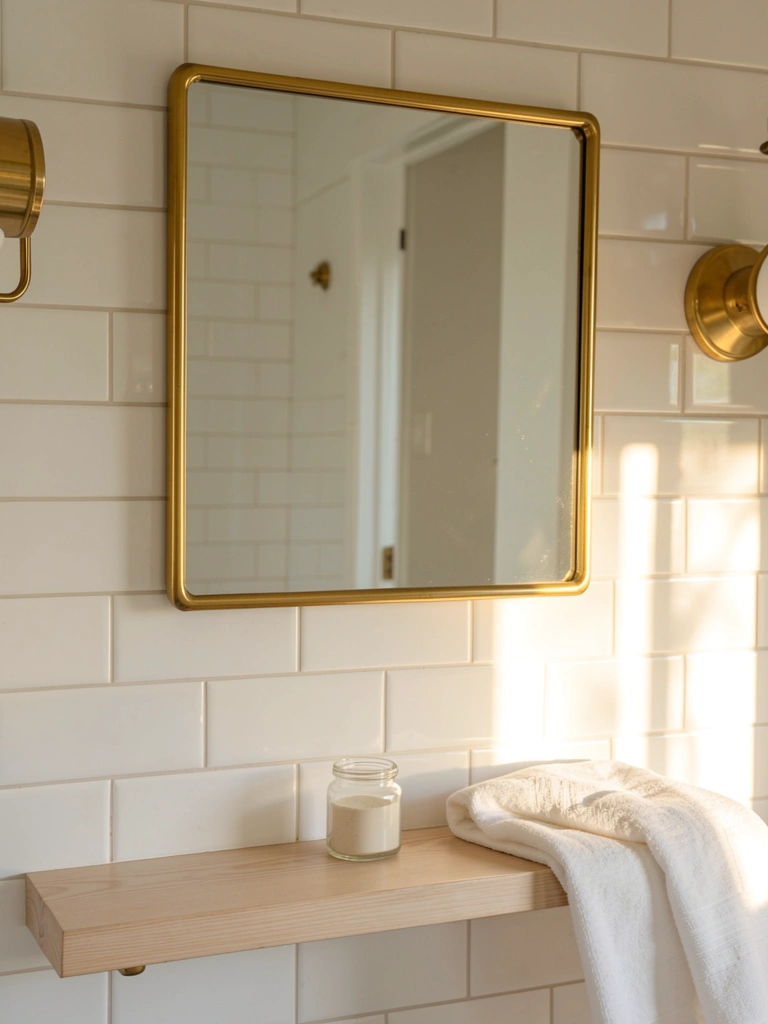
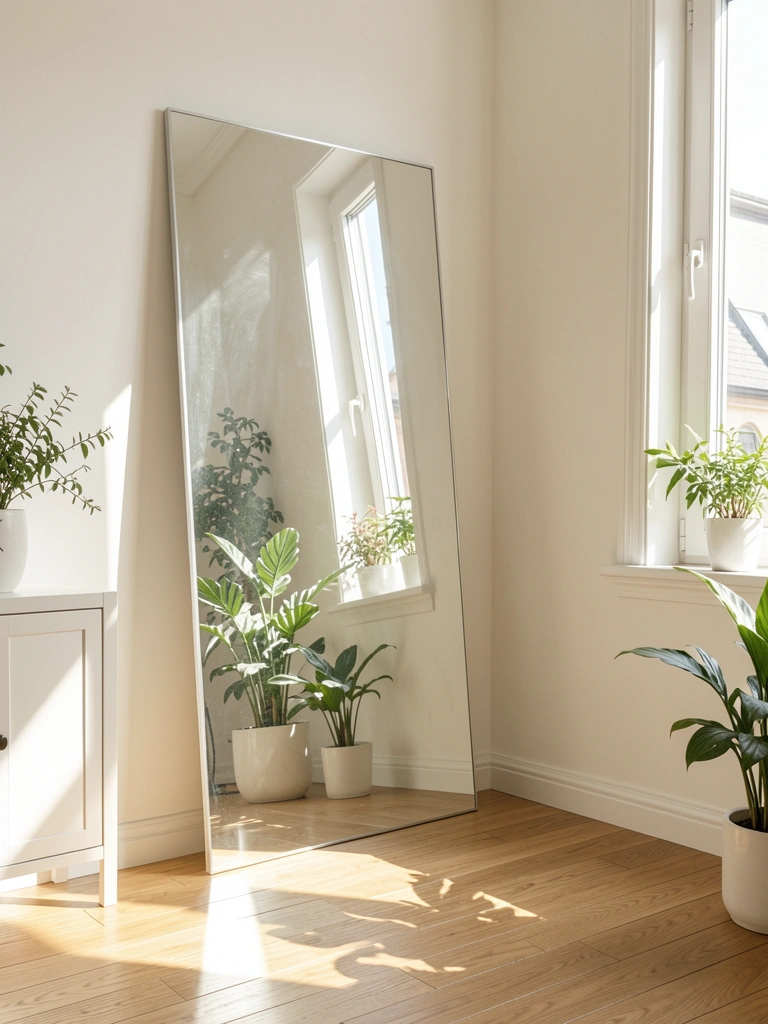
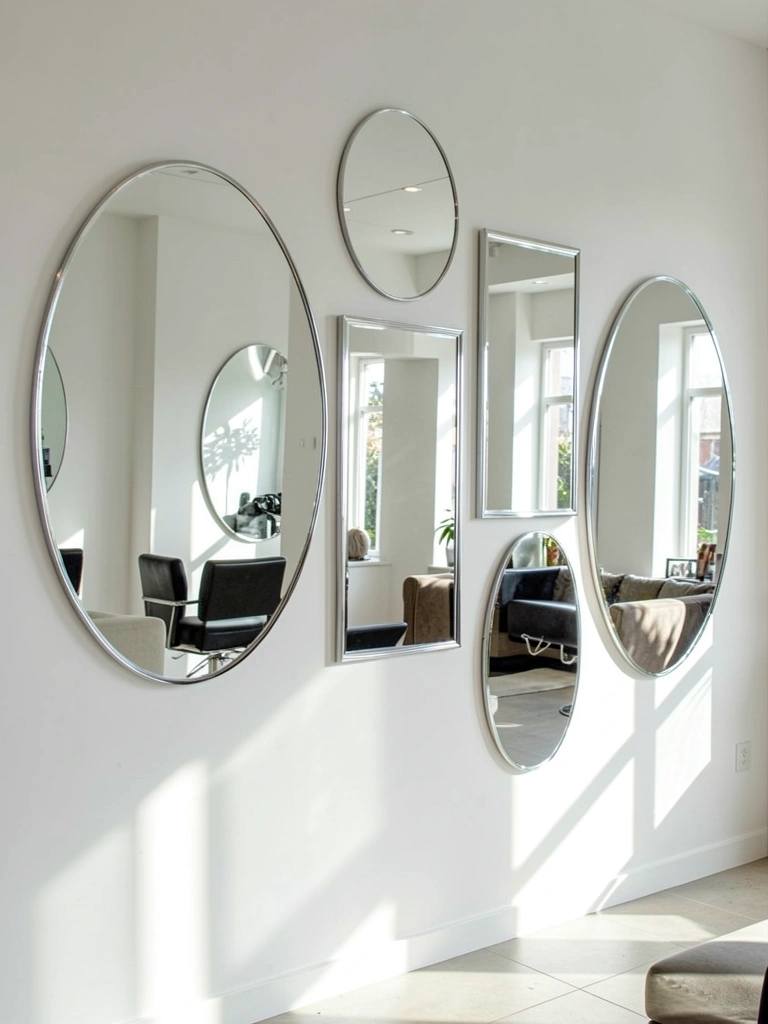
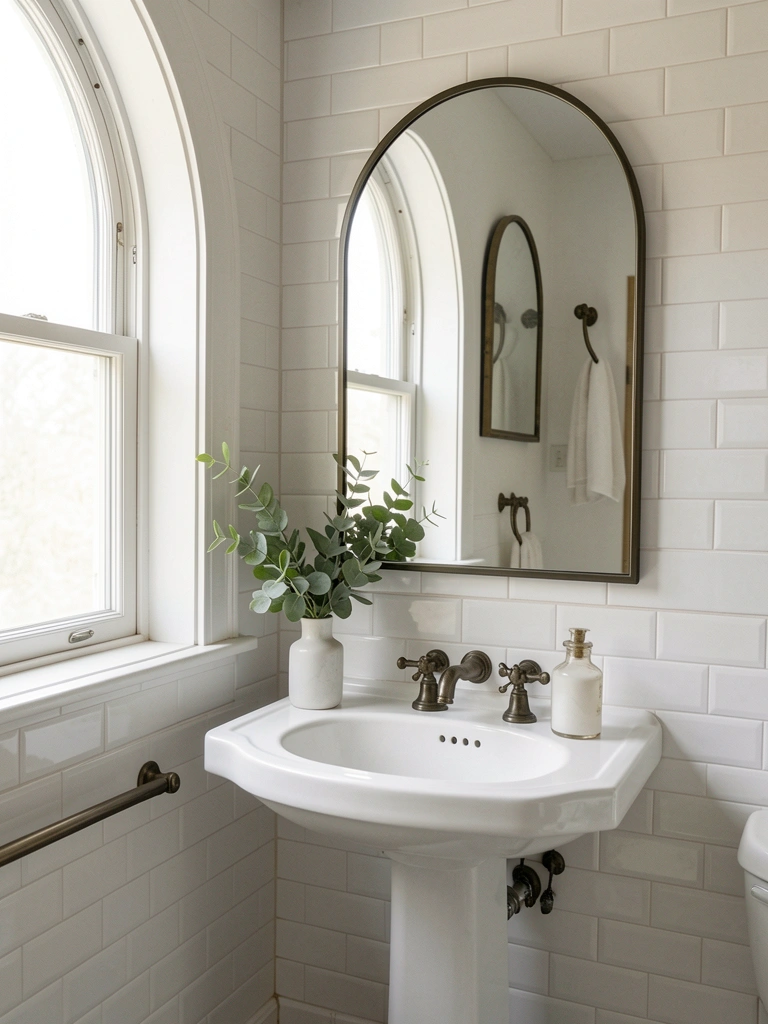
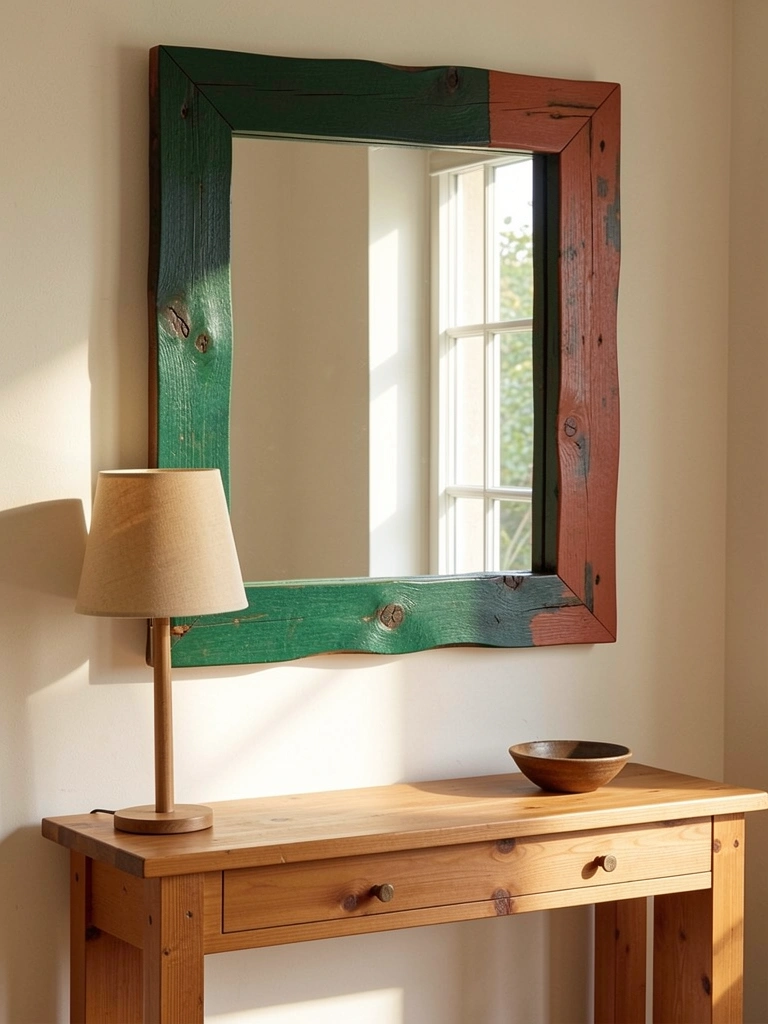
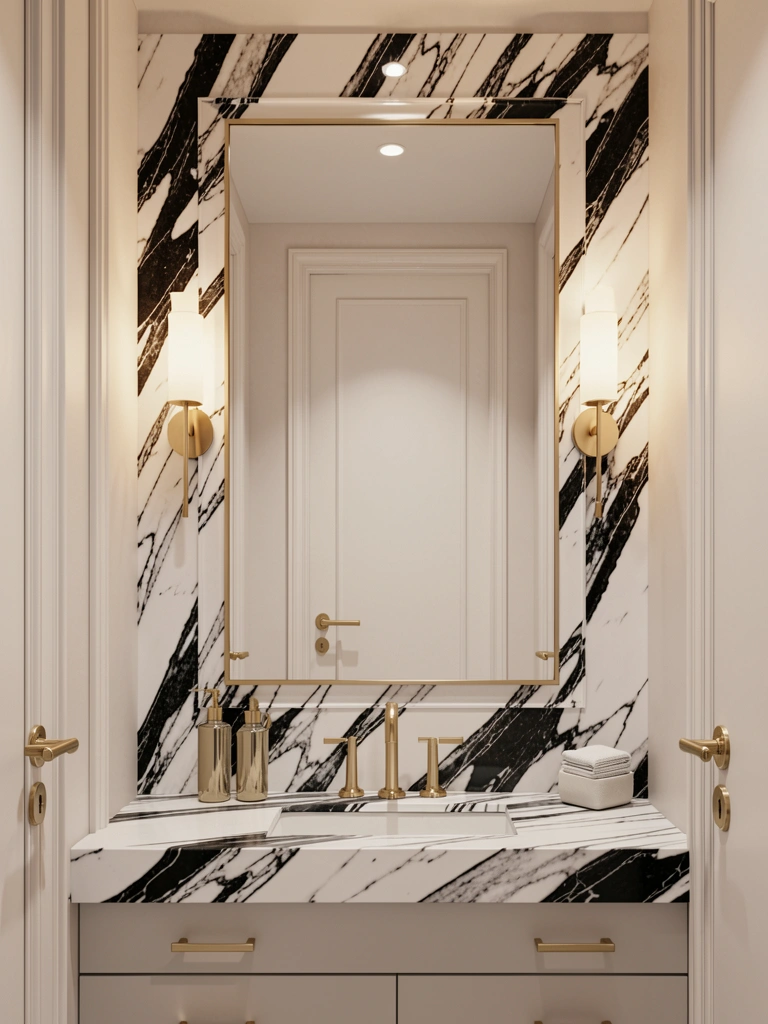
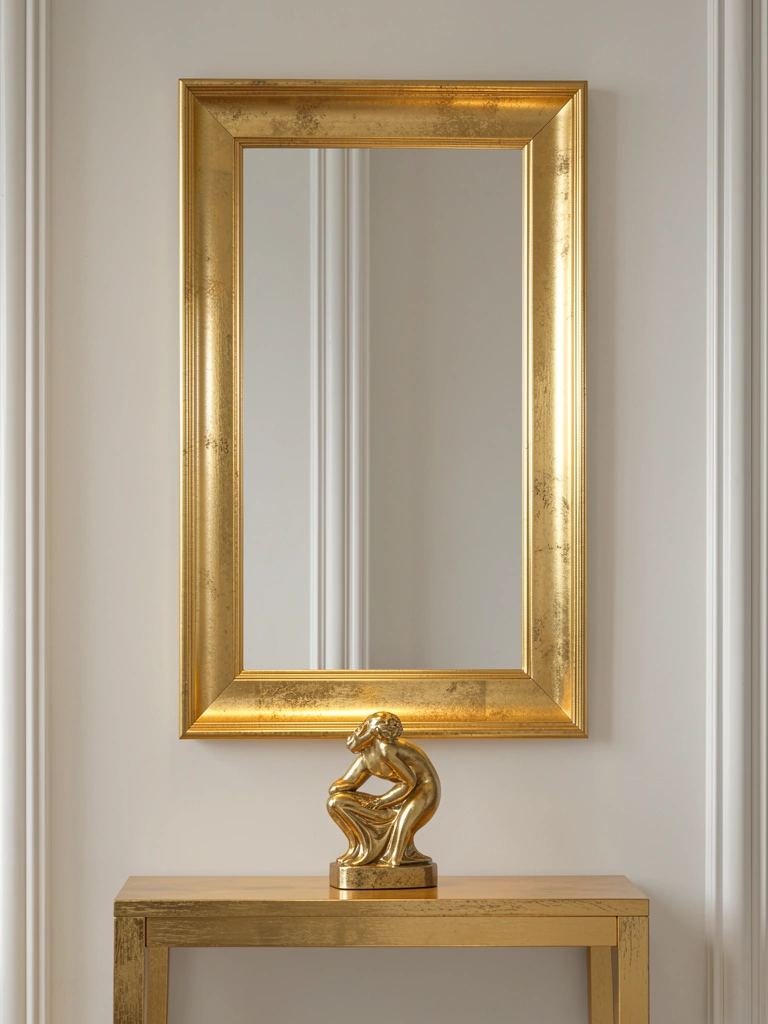
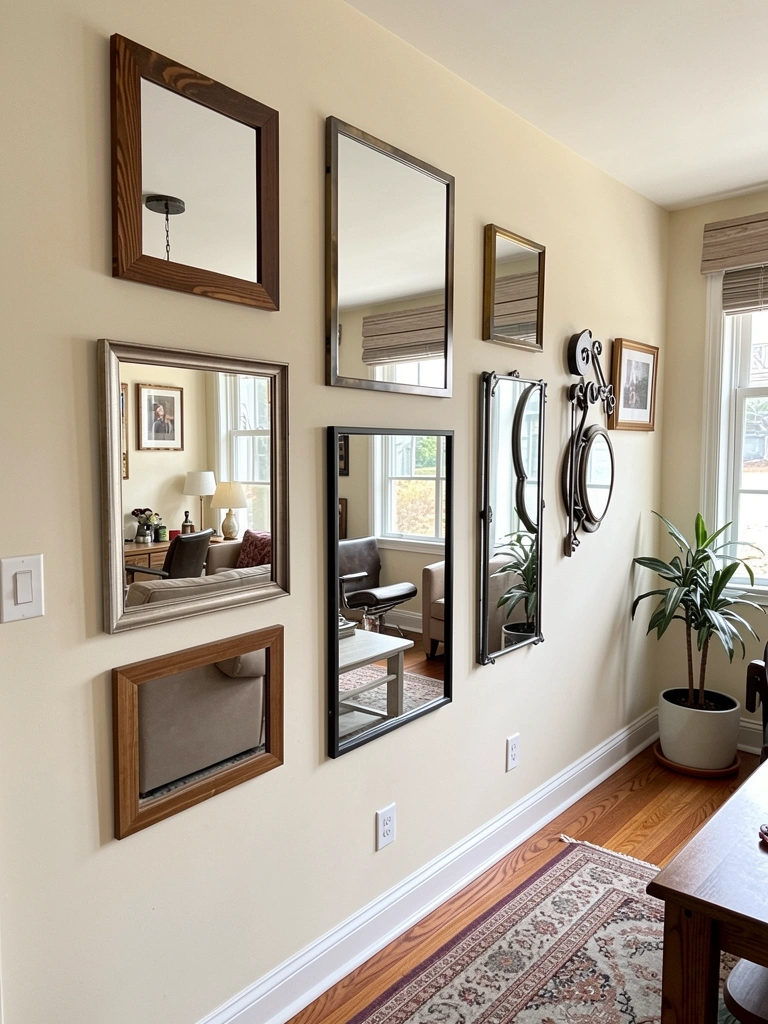
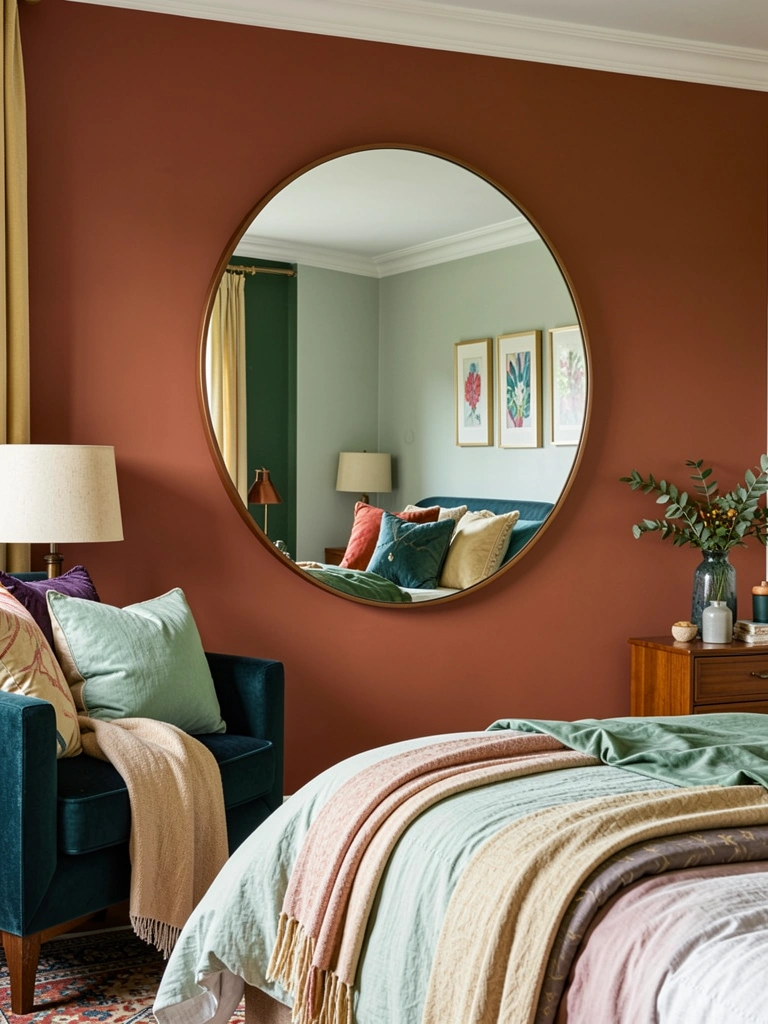
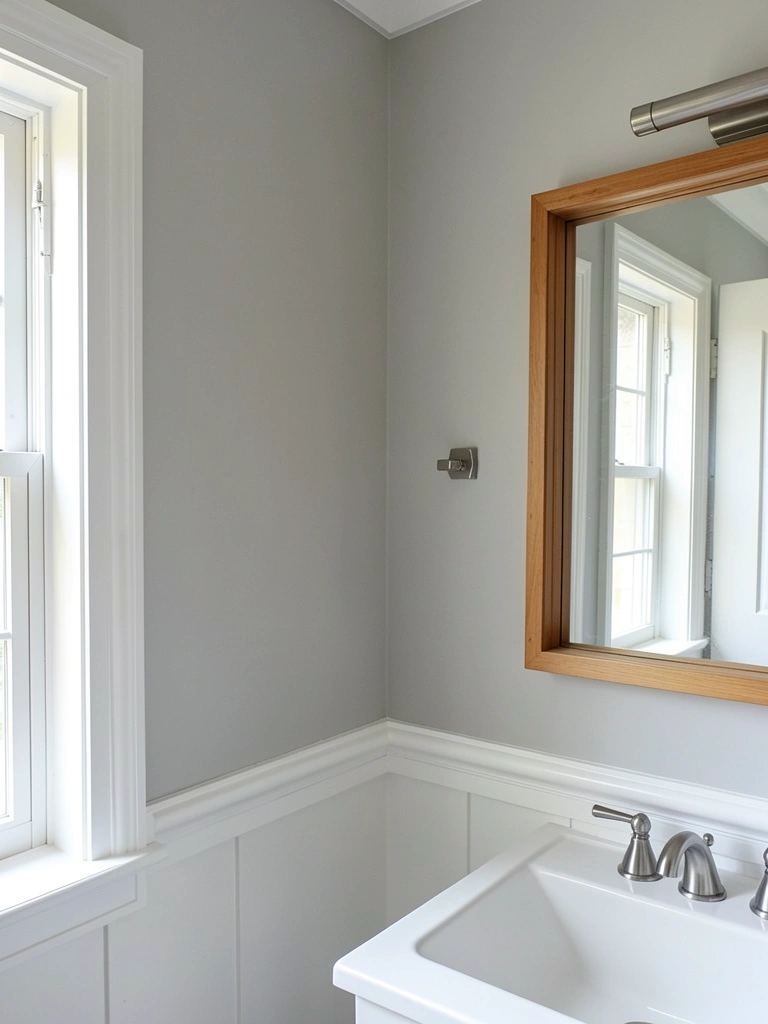
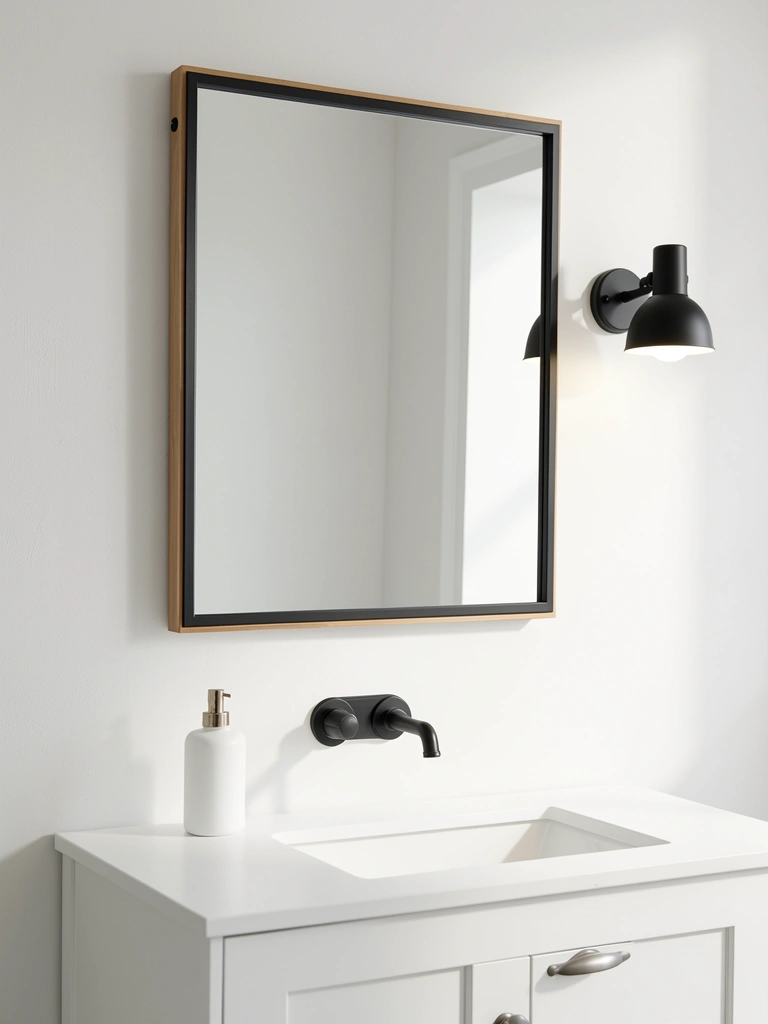
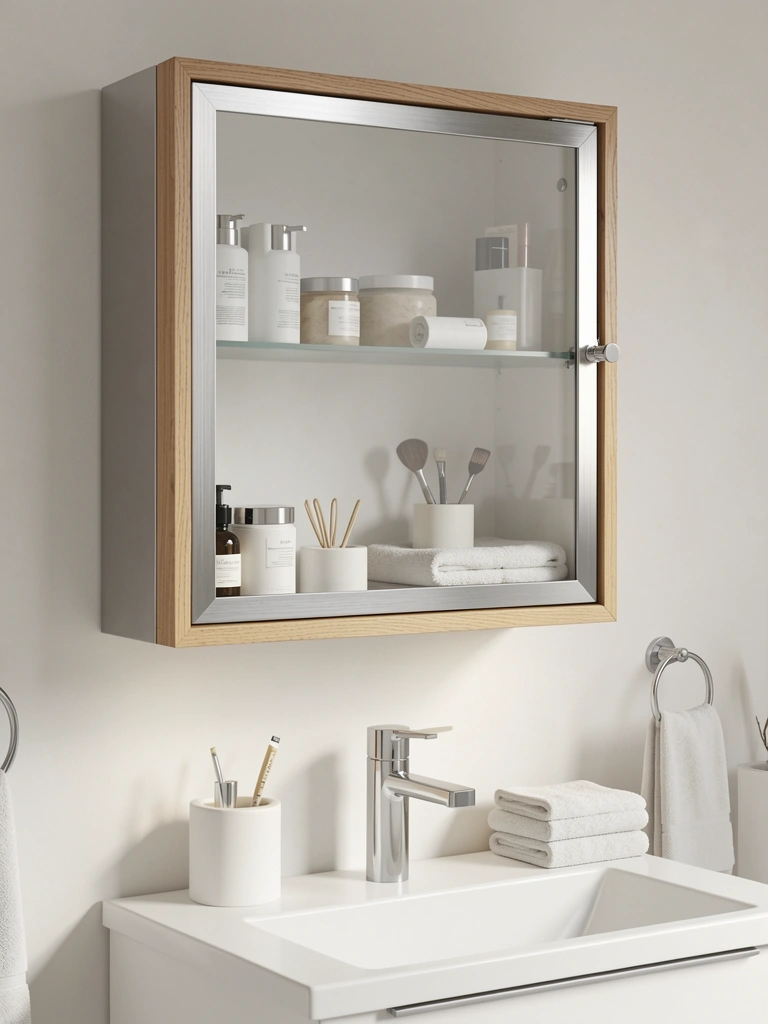
    21. Add a Mirror Above Your Sink for Styling Purposes

    A mirror makes your laundry space feel bigger, brighter, and more finished—plus, it’s practical for seeing stains or checking yourself after handling dirt.

    Mount a simple framed mirror ($20-$80 depending on size and frame) above your sink. Styles like brass-framed, black metal, or simple wood all work beautifully in laundry spaces. Installation takes 15-30 minutes with wall anchors.

    The psychological boost of a mirror makes the space feel intentional, not just utilitarian. It reflects light around the room and adds visual interest at zero ongoing cost.

    22. Use a Pull-Out Faucet Sprayer with Flexible Hose

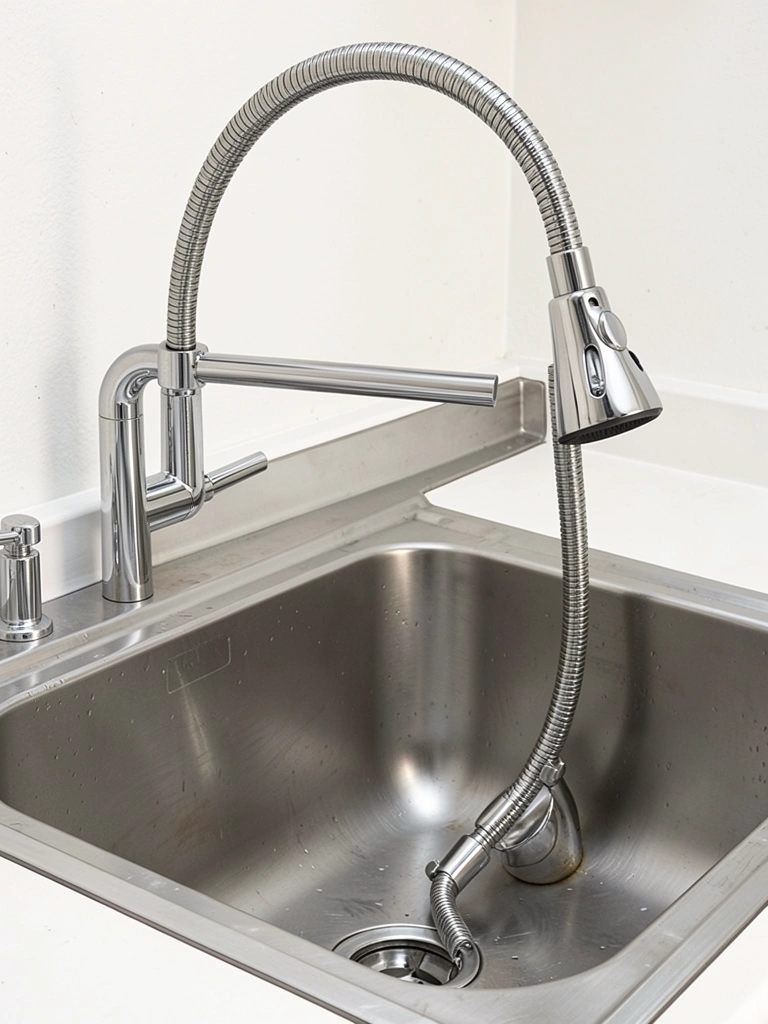
    A flexible hose extends your reach, letting you fill large buckets, clean awkward corners, or rinse large items without maneuvering them around.

    Upgrade to a pull-out or pull-down faucet ($100-$200) with a flexible hose. Brands like Kohler Simplice or Moen Align offer smooth, reliable operation. Installation is straightforward if you’re replacing a sink faucet—30-45 minutes or hire help for $50-$100.

    You’ll wonder how you managed without this tiny convenience. The extra reach handles probably 20% more of your laundry tasks without extra frustration.

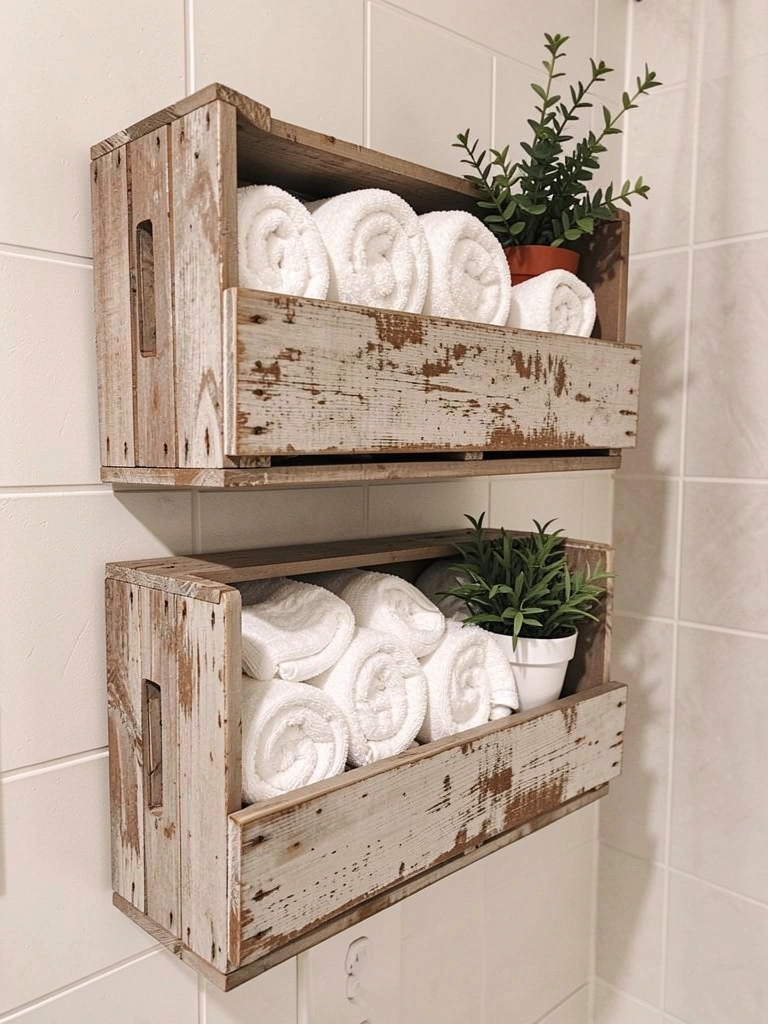
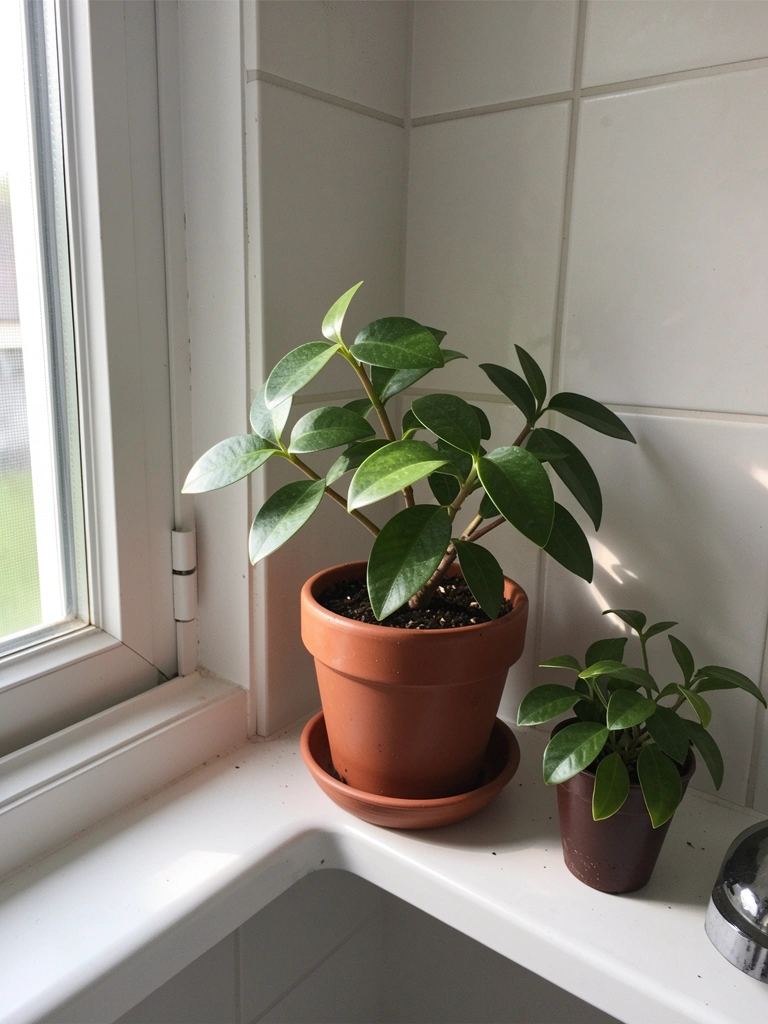
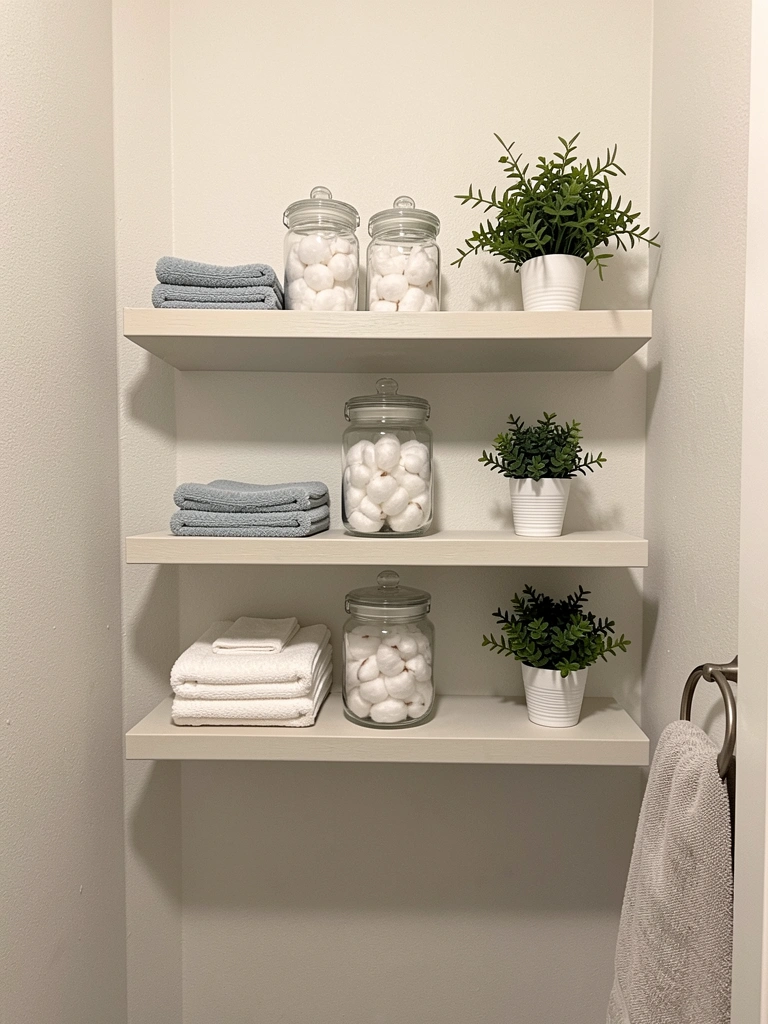
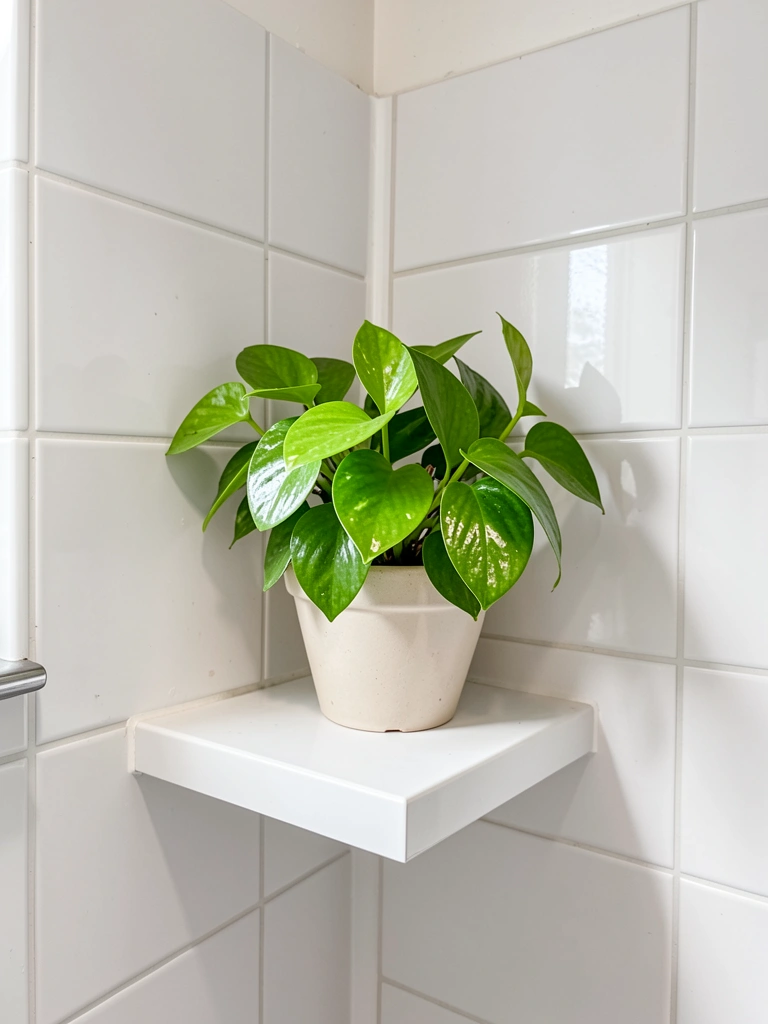
    23. Frame Your Sink Area with Open Shelving for Display

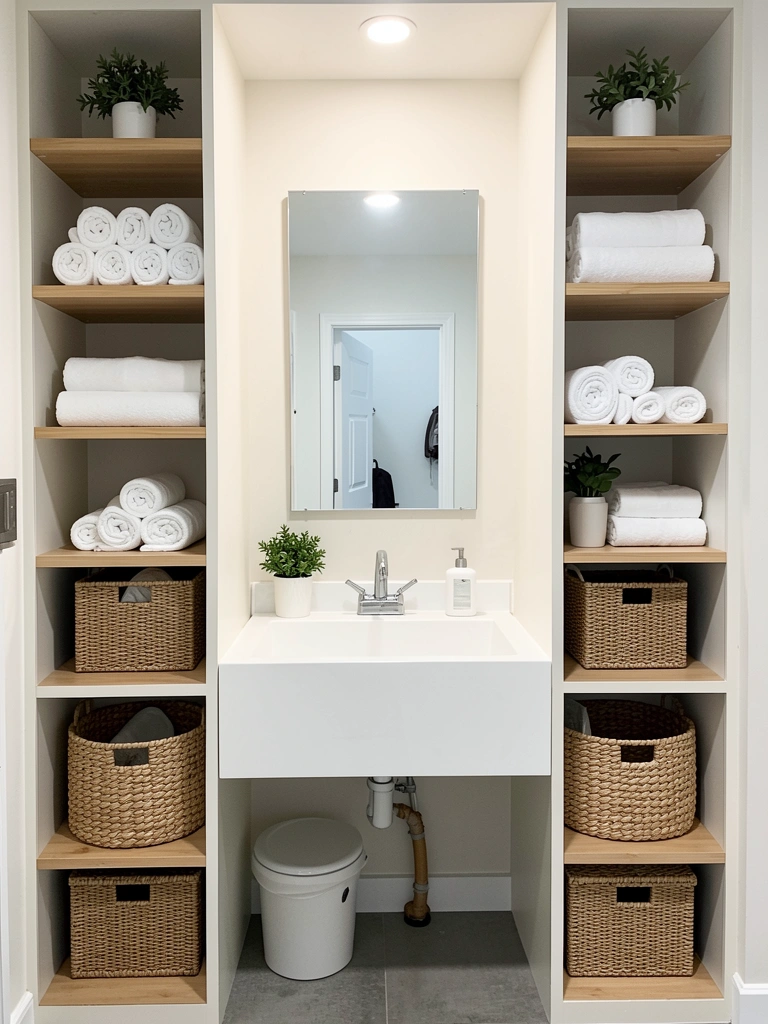
    Flanking your sink with shelving creates a designed look rather than a random corner, and it provides practical storage while looking beautiful.

    Install two matching shelving units ($100-$300 total) on either side of your sink using brackets and boards or pre-made units from IKEA or Home Depot. Keep styling minimal: rolled linens, woven baskets, and one or two small plants.

    This setup takes one weekend and makes your laundry room look like you actually designed it rather than just functional. The balance is visually calming and keeps supplies organized.

    24. Finish with a Moisture-Resistant Paint or Sealant

    The walls around your sink take moisture and splashing constantly. Regular paint deteriorates quickly; moisture-resistant paint lasts years longer.

    Use a semi-gloss or satin mildew-resistant paint ($20-$40 per gallon) instead of flat paint. Brands like Benjamin Moore Aura Bath & Spa or Sherwin-Williams ProClassic are specifically formulated for wet areas. Two coats takes 4-6 hours, and the difference in longevity is substantial.

    Your walls stay fresh and paint-perfect for years instead of developing water stains or peeling. It’s a small upfront investment that saves headaches.


    Save this post for your next laundry room refresh. Pick one idea this weekend—whether it’s adding hooks, installing a backsplash, or just upgrading your faucet—and watch how one small change makes the space feel completely different.

  • 24 Black Tile Bathroom Aesthetic Ideas That Look Bold & Chic

    24 Black Tile Bathroom Aesthetic Ideas That Look Bold & Chic


    Black tiles are having a major moment, and for good reason—they’re bold, sophisticated, and way more versatile than you’d think. Whether you’re working with a tiny powder room or a sprawling primary bath, black tiles can make your space feel like a high-end retreat without needing a massive budget. In this guide, you’ll find 24 specific ways to use black tiles that actually look chic (not cave-like), plus styling tricks, product recommendations, and budget hacks. From accent walls to floor patterns to unexpected details, these ideas work for renters, homeowners, and everyone in between. Let’s get into it.


    1. Create a Black Tile Accent Wall Behind Your Vanity

    An accent wall is the easiest way to bring black tiles into your bathroom without overwhelming the space. Black subway tiles behind your vanity create instant visual interest and anchor the entire room’s design.

    Subway tiles are affordable and timeless—expect to pay $3–$8 per square foot for basic black subway tiles. You’ll need about 15–30 square feet depending on your vanity width. Hire a pro (usually $15–$30 per hour labor, or $200–$400 for the whole wall), or DIY with a tile adhesive kit ($15–$25) if you’re handy. Installation takes a weekend if tackling it yourself. Shops like Home Depot, Wayfair, and Lowe’s stock tons of options in different finishes (matte, glossy, textured).

    Pro tip: Pair your black tile with light grout (white or gray) to make the grid pop and keep it feeling modern rather than heavy.

    Your bathroom instantly gains character and depth. The contrast between the black wall and light fixtures makes everything feel intentional and curated.


    2. Go Matte Black for a Softer, Less Reflective Look

    Matte black tiles feel different from glossy ones—they’re moodier, less reflective, and honestly way more forgiving of water spots and fingerprints. If you want black without the mirror-like shine, matte is your answer.

    Matte finishes cost roughly the same as glossy black tiles ($3–$8 per square foot), but the difference in how they photograph and feel in person is huge. Matte tiles hide dust, mineral deposits, and water marks better than glossy finishes, which saves you cleaning time. Look for matte finishes from brands like Daltile, Emser, or MSI at Home Depot or specialty tile shops.

    Pro tip: Matte tiles pair beautifully with brass or gold fixtures—the combination feels warm and intentional, not cold.

    You’ll get a spa-like calm that glossy tiles can’t deliver. Your space becomes easier to maintain and photographs beautifully in natural light.


    3. Mix Black and White Subway Tiles in a Checkerboard Pattern

    A checkerboard floor is playful, timeless, and instantly makes any bathroom feel intentional. Black and white subway tiles in a checkerboard layout brings personality without needing color elsewhere.

    You’ll need equal amounts of black and white subway tiles ($3–$8 per square foot each). For a 5×8-foot bathroom floor, budget around $200–$400 in tile alone plus labor or DIY time. Layout matters—have a clear floor plan before ordering to avoid waste. This is a medium DIY project or a great one to hire out ($400–$800 installed).

    Pro tip: Keep walls and fixtures neutral (white, natural wood, brass) so the floor becomes the star.

    The pattern creates movement and energy in your space. Guests will immediately notice it, and it’s totally timeless—you won’t get tired of it.


    4. Use Large-Format Black Tiles for a Seamless, Modern Look

    Large tiles (12×24, 18×36, or 24×48 inches) create clean lines with fewer grout joints, making your bathroom feel bigger and more sophisticated. Fewer grout lines also mean less cleaning.

    Large-format tiles run $5–$15 per square foot and require a skilled installer because they’re heavier and need proper substrate support. Installation labor is usually $25–$40 per hour or $500–$1,200+ for a shower enclosure. This isn’t a DIY project unless you have tile experience.

    Pro tip: Pair large black tiles with a single accent tile in a complementary color (cream, sage, terracotta) to add depth without fussiness.

    Your shower becomes a serene, minimalist statement. The seamless look feels high-end and spa-like, even in a modest bathroom.


    5. Install Black Hexagon Tiles for Geometric Interest

    Hexagon tiles add playful geometry without being over-the-top. They work beautifully on floors, in shower niches, or as accent strips.

    Black hexagon tiles cost $4–$10 per square foot, and they’re slightly trickier to install because of the angles. Budget extra labor time ($30–$45 per hour) for intricate layout. This is doable as a DIY project if you’re detail-oriented and patient.

    Pro tip: Mix matte and glossy hexagon tiles in the same area for subtle texture variation.

    The geometric pattern adds character and draws eyes down or around the room. It’s sophisticated enough for primary baths but playful enough for guest rooms.


    6. Apply Black Tiles to Just Your Shower Floor for Slip Safety and Style

    Black tiles on your shower floor serve double duty: they’re non-slip (especially textured matte varieties) and create visual separation from lighter walls. It’s practical and pretty.

    Textured black floor tiles run $4–$12 per square foot and are specifically designed for wet areas. A typical shower floor (3×3 feet) costs $40–$100 in tile plus installation. This is a moderate DIY project or a quick pro job ($200–$400 installed).

    Pro tip: Use textured tiles specifically rated for slip resistance—look for tiles marked “non-slip” or with a high coefficient of friction (COF).

    Your shower feels more intentional and safer. The textured finish adds visual interest while keeping your feet secure on wet surfaces.


    7. Frame Your Mirror with Black Tile Trim

    Instead of a framed mirror, create a custom border with thin black tiles. It’s cheaper than buying a new mirror frame and looks completely custom.

    Thin subway or pencil black tiles ($3–$6 per square foot) plus basic adhesive ($15) is all you need. Installation takes 1–2 hours if you’re comfortable with tile work. This is an easy DIY project that transforms a plain mirror into a designed feature.

    Pro tip: Grout with white or light gray to keep the border from feeling too heavy.

    Your mirror gains architectural detail and sophistication. It feels like you hired a designer, but you did it yourself for under $50.


    8. Create a Black Tile Stripe Running Around the Bathroom

    A horizontal stripe of black tiles at chair-rail height (about 36 inches up) adds structure and visual interest without committing your entire bathroom to dark tiles.

    You’ll need about 20–40 square feet of black tile depending on your room size ($60–$240 in tile). This is a medium DIY project or a quick pro install. Pair it with white subway tiles above and below for maximum impact.

    Pro tip: Run the stripe at a height that works for your space—it doesn’t have to be exactly at chair-rail height.

    The stripe gives your bathroom a finished, intentional look. It adds visual interest without feeling heavy or overwhelming.


    9. Use Black Tiles as a Wet Room Base

    Black tiles work beautifully as the foundation of a curbless, open wet room. The dark floor visually defines the shower zone and hides water spots better than light tiles.

    Black wet room tiles (textured, slip-resistant) cost $6–$12 per square foot. A complete wet room installation (including drainage, waterproofing, slope) runs $3,000–$8,000 installed depending on size and complexity. This is a professional-only project—waterproofing requires expertise.

    Pro tip: Pair black floor tiles with light walls to keep the space feeling open and bright.

    Your bathroom becomes a luxe, zero-threshold retreat. The clean lines and accessible design are both beautiful and functional.


    10. Add Black Tiles to Your Vanity Backsplash

    A backsplash behind your vanity is a low-commitment way to introduce black tiles. It’s visible, functional, and changes the whole vibe of your sink area.

    You’ll need roughly 8–12 square feet of black tile ($25–$60) plus basic adhesive. Installation is a straightforward DIY project (1–2 hours) or a quick pro job ($100–$200 installed). This is perfect if you’re renting—with permission, you can use temporary tile adhesive or peel-and-stick backsplash alternatives.

    Pro tip: Match your backsplash grout to your fixtures (white grout for a crisp look, or darker grout for cohesion).

    Your sink area instantly feels designed and spa-like. Water splashes are easier to wipe clean from tiles than painted drywall.


    11. Combine Black Tiles with Warm Wood Accents

    Black tiles paired with warm wood create balance—the darkness is offset by natural warmth. This combo feels both contemporary and inviting, not cold or industrial.

    Black tiles ($4–$10 per square foot) combined with a wood vanity ($300–$800 for a solid wood floating piece) creates a cohesive look. This mix works with both DIY and pro installation.

    Pro tip: Choose wood with warm undertones (walnut, oak, teak) rather than cool-toned wood or whitewash finishes.

    Your bathroom becomes warm and grounded. The black tiles feel less stark and more cozy, like a retreat rather than a showroom.


    12. Install Black Tiles as a Full Shower Enclosure for Ultimate Drama

    Going full black in your shower is bold but stunning when done right. It feels spa-like, hides everything, and creates a dramatic focal point.

    Full shower enclosure in black tile runs $40–$60 per square foot in materials and labor, so budget $2,000–$5,000 for a standard shower. This requires professional installation for proper waterproofing and slope. It’s a serious investment but worth it if you’re renovating anyway.

    Pro tip: Add a large window or skylight to keep the space from feeling too dark and claustrophobic.

    Your shower becomes a moody sanctuary. Stepping inside feels like entering a spa, and the all-black aesthetic is completely timeless.


    13. Mix Black Tiles with Colorful Grout for Unexpected Detail

    Your grout color matters just as much as your tile color. Bright white grout against black tiles creates graphic contrast; gray grout is more subtle; matching black grout is ultra-minimalist.

    Black tiles ($3–$8 per square foot) plus your choice of grout ($5–$15 per bag, one bag covers about 50–75 square feet). Grout color is a DIY-friendly choice—no extra labor cost, just your preference. Experiment with samples if possible.

    Pro tip: White grout photographs better and feels fresher; dark grout feels moodier and hides stains.

    The grout choice completely changes your tile’s personality. Experiment before committing to see what mood you want.


    14. Use Black Marble or Stone Look-Alike Tiles

    Black marble or stone-textured tiles feel more expensive and elegant than solid black. Veining and natural variation make them look upscale without the actual marble maintenance headache.

    Porcelain tiles that mimic black marble run $6–$15 per square foot (way cheaper than actual marble at $20–$40+). These tiles don’t stain, don’t etch from acids, and look just as good. Perfect for bathrooms.

    Pro tip: Actual black marble requires sealing and maintenance—porcelain imitations give you the look with zero fuss.

    You get a high-end, organic aesthetic without the expense and upkeep. Your bathroom feels luxurious and curated.


    15. Layer Black Tiles with Patterned or Textured Neighbors

    Mixing black tiles with patterned or textured neighbors creates an eclectic, designed look. It’s more interesting than solid black and easier to live with long-term.

    Black tiles ($4–$8 per square foot) paired with patterned tiles ($5–$12 per square foot) give you flexibility. Choose a pattern that complements without competing—geometric, terrazzo, or subtle florals work well. Installation labor is standard ($15–$30 per hour).

    Pro tip: Sketch out your pattern before ordering to avoid costly mistakes or leftover tile.

    The mix prevents your bathroom from feeling one-note. It’s interesting, personalized, and still cohesive.


    16. Create a Black Tile Niche Inside Your Shower

    A black tile niche inside your shower is perfect for storage and visual interest. It breaks up the expanse of white or light tiles beautifully.

    A small niche (12×24 inches) needs about 3–5 square feet of black tile ($15–$40). Niches built into existing showers are easier than retrofits. This is a moderate DIY project or a quick pro job ($150–$300).

    Pro tip: Make sure your niche is large enough to actually hold bottles—minimum 12 inches deep.

    Your shower gains storage and style in one move. It’s functional enough that you actually use it, but designed enough to feel intentional.


    17. Apply Black Tiles Just Inside Your Shower Entry for Visual Drama

    Black tiles right at the shower entry create a portal effect—a dramatic transition from the light bathroom into your dark, moody shower zone. It’s theatrical but works brilliantly.

    You only need 10–15 square feet of black tile ($30–$80) to create this effect. Install a thin row or two of black tiles right inside the threshold to define the shower space. DIY-friendly if you have basic tile skills.

    Pro tip: This works especially well if your shower floor is slightly raised or has a subtle step—the black tile reinforces that transition.

    Stepping into your shower feels like entering a sanctuary. The visual and psychological shift makes your daily shower feel more special.


    18. Match Black Tiles with Black Fixtures for a Minimalist, Monochromatic Look

    Go full monochromatic by matching your black tiles with matte black fixtures. It’s ultra-minimalist, cohesive, and feels like a luxury spa.

    Black matte fixtures (showerhead, towel bar, faucet) run $100–$400 each depending on quality. Tiles are your usual $4–$10 per square foot. The cohesion is what makes this work—everything feels intentional.

    Pro tip: Add one element of warmth (wood shelf, brass handle, or a plant) so the space doesn’t feel sterile.

    Your bathroom becomes a calm, monochromatic retreat. The lack of visual competition makes the space feel more spacious and serene.


    19. Use Thin Black Tile Strips to Define Different Bathroom Zones

    In an open bathroom or powder room, thin black tile strips can visually separate different zones without building walls. It’s clever spatial design that’s cheaper than construction.

    Thin black tile strips (pencil tiles or thin subway tiles, $3–$6 per square foot) are purely design elements. This is a DIY-friendly project that costs $40–$100 and takes a weekend.

    Pro tip: Vertical lines elongate spaces; horizontal lines break them up. Choose your direction based on your room’s proportions.

    Your space feels more organized and intentional. Visual boundaries make the layout feel more purposeful.


    20. Install a Black Tile Wainscot for a Classic, Upscale Look

    Wainscoting in black tiles is classic, upscale, and draws the eye down (visually enlarging the space). It’s popular in mid-century and contemporary design.

    Black tiles for wainscoting ($4–$8 per square foot) plus a metal trim piece at the rail height ($20–$50) create definition. Budget $400–$800 installed for an average bathroom. This is a moderate DIY project or a straightforward pro install.

    Pro tip: Use a metal trim at the top edge for a polished, intentional finish (not just grout and caulk).

    Your bathroom feels elevated and designed. Wainscoting adds architectural detail that reads as intentional and curated.


    21. Pair Black Tiles with Terrazzo or Speckled Countertops

    Black tiles with speckled or terrazzo countertops create harmony through echo—the counter picks up the black from the tiles, but adds warmth and movement.

    Black tiles ($4–$10 per square foot) paired with a terrazzo or quartz countertop ($60–$120 per square foot) work beautifully together. This is for people investing in their bathrooms, but it’s worth it.

    Pro tip: Choose a terrazzo or quartz with enough black speckles to echo your tiles without matching perfectly.

    The mix feels collected and intentional. Your vanity area becomes a curated, high-end focal point.


    22. Use Black Tiles in a Geometric Mosaic Pattern for Texture

    Geometric patterns (chevron, herringbone, basket weave) in black tiles add texture and movement. The offset pattern creates depth that solid black can’t achieve.

    Patterned tile layouts cost the same per square foot as standard tiles ($4–$10 per square foot) but require more skilled labor. Budget extra installation time ($25–$40 per hour). This is a project to hire out unless you’re experienced with tile.

    Pro tip: Chevron patterns are easier to DIY than herringbone—fewer complex cuts needed.

    Your bathroom gains visual interest and sophistication. The dimensional quality makes the space feel more designed and intentional.


    23. Layer Black Tiles with Warm Brass or Gold Accents

    Black tiles plus warm brass or gold fixtures create an inherently luxe combination. The warm metal prevents the black from feeling cold or industrial.

    Black tiles ($4–$10 per square foot) with brass fixtures ($150–$400 per piece) is an affordable way to add luxury vibes. Brass costs more than chrome, but it’s timeless and warm.

    Pro tip: Mix brass with matte black fixtures for a more contemporary look, or glossy black for classic elegance.

    Your bathroom reads as high-end and curated. The brass-and-black combo is sophisticated and totally timeless.


    24. Create a Ombre Effect with Black Tiles Fading Upward

    An ombre effect using black tiles fading into gray tiles is subtle, sophisticated, and adds depth without being over-the-top.

    This requires multiple gray tile shades ($4–$10 per square foot across different colors) plus careful layout planning. The labor is minimal if you’re gradual with your color transitions. This is a creative DIY project or a quick pro install ($500–$1,000 installed).

    Pro tip: Order samples in person to see how colors transition—slight variations create a smooth gradient.

    Your shower walls become a subtle art piece. The gradient adds sophistication and visual interest without feeling gimmicky or trendy.


    Save this post for your next bathroom refresh and bookmark one idea to try first. Black tiles aren’t as intimidating as they seem—start small with a single accent wall or niche, and you’ll see how transformative even one black tile element can be.

  • 23 Minimalist Shower Design Ideas for Clean, Modern Living

    23 Minimalist Shower Design Ideas for Clean, Modern Living


    Tired of shower clutter and design chaos? You don’t need a complete renovation to create a calm, modern shower space—just strategic choices that eliminate visual noise while keeping functionality simple. Whether you’re renting or remodeling, these 23 minimalist ideas range from free organizational tweaks to thoughtful upgrades that make your daily shower feel intentional and peaceful. We’ve included budget-friendly hacks alongside investment pieces, so you can start small or go all-in on creating the streamlined sanctuary you deserve. Let’s build a shower that’s beautiful precisely because it isn’t trying too hard.


    1. Embrace White Subway Tiles for Timeless Simplicity

    White subway tiles are the foundation of minimalist design—they’re clean, calming, and work with any décor style. The repetitive pattern creates visual rhythm without being busy, and white expands the space visually, making even small showers feel airy.

    Install subway tiles horizontally or in a staggered brick pattern for classic minimalism. Budget $3–8 per square foot for tiles, plus $8–15 per square foot for professional installation (or DIY if experienced). Thin grout lines in white or light gray keep the look seamless. If renting, peel-and-stick subway tile sheets ($25–40 per pack) give similar impact without permanent damage.

    The result? A shower backdrop so clean and calm that you’ll actually look forward to standing under the spray each morning.


    2. Install a Single Rainfall Showerhead for Spa Calm

    A single, oversized rainfall showerhead replaces multiple shower controls with one unified, luxurious element. It’s the definition of minimalist luxury—fewer visual elements, more sensory calm.

    Choose a 6-10 inch stainless steel rainfall head ($80–250 depending on brand). Hansgrohe and Delta offer eco-friendly options with water-saving aerators. Installation involves redirecting supply lines to come down from above; hire a plumber ($150–300 labor) unless you’re comfortable with basic plumbing. Budget one day for a pro installation. The wall becomes clutter-free because you’ve consolidated all the hardware into one elegant element.

    You’ll notice the shower feels instantly more meditative. That simple change from nozzle spray to steady cascade genuinely shifts your whole morning routine.


    3. Go Completely Clear of Shower Accessories

    The ultimate minimalist move: keep nothing visible in your shower except what you’re actively using. Store everything outside the shower space in a cabinet or drawer, and bring items in one at a time.

    Relocate bottles, loofahs, and razors to a pedestal cabinet or wall-mounted shelf outside the shower ($30–100 at IKEA, Target). Use a small white soap dish or magnetic soap holder ($8–15) for your only visible item. This takes 15 minutes to reorganize. It feels extreme, but it works: your shower becomes a blank canvas where your mind can actually rest instead of cataloging bottles.

    The serenity is real. Walking into an uncluttered space signals to your brain that it’s time to slow down and breathe.


    4. Choose Matte Black Fixtures Over Chrome

    Matte black fixtures offer modern minimalism without shine or reflection. They visually disappear into the background, letting the shower’s architecture shine instead of the hardware.

    Replace chrome fixtures with matte black stainless steel versions ($50–150 per piece). Brands like Moen and Pfister offer clean designs. Swapping handles and trim plates takes 30–45 minutes if you’re comfortable with basic tools. If not, hire a plumber ($75–150 labor). The matte finish hides water spots and fingerprints better than polished chrome, so maintenance drops significantly.

    Your shower looks intentionally designed rather than decorated. That subtle sophistication carries through your whole morning.


    5. Add a Niche Instead of Shelves or Caddies

    A recessed shower niche is built-in storage that doesn’t sit on the wall—it’s part of the wall. This eliminates the visual clutter of hanging shelves while keeping essentials within reach.

    Cut a rectangular opening in the wall (between studs) during shower renovation, typically 12-18 inches wide. Tile the interior to match surrounding walls. Cost: $150–400 depending on size and tile selection. This is a contractor job. For renters, adhesive niche inserts ($40–80) stick temporarily to walls and hold one or two items.

    You get functional storage that looks intentional rather than makeshift. Everything has a designated home, so the space automatically stays organized.


    6. Use Glass Doors Instead of Curtains

    Frameless glass doors make a small shower feel larger because you can see through to the shower space beyond. The simplicity is inherently minimalist—just glass and hinges, nothing else.

    Install 3/8-inch tempered glass frameless doors ($500–1,200 installed) or budget $200–400 for semi-frameless options with minimal hardware. Measure your opening carefully; installation takes 4–6 hours for a pro. Frameless doors require weekly squeegee-downs to prevent water spots (takes 2 minutes). If that sounds like too much maintenance, frameless with subtle silver frames ($300–700) offers a similar look with less spotting.

    The psychological effect is huge: you see into the shower, so it looks bigger and less enclosed. Plus, no mildewed curtains to replace.


    7. Paint Walls in Soft White or Light Greige

    If your shower doesn’t have tiles, paint creates a clean backdrop with zero visual drama. Soft, neutral colors—white, greige (warm gray-beige), or pale taupe—amplify the minimalist aesthetic.

    Use semi-gloss or satin paint rated for bathrooms ($30–50 per gallon) from Benjamin Moore, Sherwin-Williams, or Behr. Prep walls with primer and paint two coats. Budget 4–6 hours DIY or $200–400 labor for a pro. Paint protects drywall in non-tiled areas while keeping the space visually unified. The cost is almost nothing compared to tiling.

    The result feels gallery-like: calm, intentional, and focused on the shower experience itself rather than visual decoration.


    8. Install Low-Profile Grout for Seamless Lines

    Grout lines can either emphasize a pattern or disappear. Minimalist design favors disappearing. Use white or light gray epoxy grout and keep lines thin—as narrow as 2-3mm instead of the standard 3-4mm.

    Epoxy grout costs $15–30 per pound (more than standard grout but worth it for durability). Apply in 2-3mm lines during installation. This is a contractor detail; if DIYing, buy pre-mixed epoxy grout packs ($20–40 each). Installation takes the same time as standard grout; the difference is precision.

    Thinner, less-visible grout makes tiles appear to float as a unified surface rather than individual pieces. The visual calm is immediate.


    9. Choose a Rainfall Head with Built-In LED Lighting

    A rainfall head with integrated LED lighting combines your shower fixture with mood lighting—eliminating separate light fixtures in the shower. It’s functional minimalism: fewer elements, more purpose.

    Search for LED rainfall showerheads ($120–300) on Amazon or Wayfair. Options include temperature-activated color changes (blue when cool, red when warm) or adjustable settings. Installation is the same as a standard rainfall head (150–300 labor). The LED uses negligible energy and typically comes with a battery lasting 2+ years.

    You get ambient lighting that doubles as a design feature. The shower becomes a calming retreat without adding another fixture to your walls.


    10. Remove Everything Below the Shower Floor

    The shower floor is prime real estate for visual clutter. Remove the caddy entirely and commit to storing everything outside the shower. It’s the most radical minimalist move, and it actually works.

    Keep one magnetic soap holder ($8-15) or wall-mounted soap dish ($10-20) for bar soap. Everything else—shampoo, conditioner, razors—lives in a cabinet outside the shower. This takes 10 minutes to clear, and you’ll spend 5 minutes daily bringing items in and out. Yes, it’s an extra step, but it keeps the shower a true sanctuary.

    The psychological shift is profound. You enter an empty, open space instead of a cluttered stall. That simplicity sets the tone for a calmer whole morning.


    11. Opt for a Linear Drain Instead of Center Floor Drain

    Linear drains sit flush against the floor, creating a clean aesthetic line instead of a visible circular drain in the center. They’re modern, minimal, and they photograph beautifully.

    Install a stainless steel linear drain ($200–400 including grate) during shower renovation. Slope the floor 1/8 inch per foot toward the drain. Hire a tile pro for this ($300–600 labor). The drain is slightly more costly than standard options but worth the visual payoff. If you’re not renovating, skip this—it requires structural changes.

    Your shower floor looks sculptural and intentional. The sightline flows without interruption, making the space feel larger and more serene.


    12. Use Minimal-Hardware Handles and Controls

    Single-lever controls replace multiple handles and knobs with one unified element. No separate hot/cold knobs, no trim rings, no visual chaos—just one elegant lever that handles temperature and volume.

    Choose single-lever thermostatic handles in matte black or brushed nickel ($80–200). Brands like Hansgrohe and Kohler offer clean designs without visible trim plates. Installation involves 1-2 hours labor ($100–200). The thermostatic function also prevents sudden temperature changes, adding comfort alongside aesthetics.

    You’ve reduced hardware to its absolute minimum. The shower becomes about the water flow and experience, not the mechanism.


    13. Install Floating Shelves Over Towel Racks

    Instead of a bulky towel rack, install one simple floating shelf at the top of your shower area (outside the spray zone). It serves the same function but looks integrated and minimal.

    Choose a 12-18 inch floating shelf in white, natural wood, or metal ($30–100 from IKEA, West Elm, or Home Depot). Mount with heavy-duty floating shelf brackets ($20–40). Installation takes 30 minutes if you locate studs. Position it at head height just outside the shower. You get functional towel storage without the visual weight of a traditional rack.

    Your bathroom feels more like a gallery and less like a utility room. Towels are stored, not decorative clutter.


    14. Keep Walls Completely Free of Shelves or Hooks

    The ultimate minimalist choice: zero wall-mounted storage inside the shower. Every bottle, razor, and washcloth lives elsewhere. Your shower walls are pure surface.

    This requires commitment. Store everything in a cabinet, drawer, or pedestal organizer outside the shower ($25–80). Bring items in one at a time as needed. Yes, it’s inconvenient—it’s also meditative and forces intention around your shower routine.

    You enter a sanctuary instead of a storage unit. The wall space becomes breathing room for your mind.


    15. Choose Compact Fixtures for Small Spaces

    In small bathrooms, oversized fixtures feel cramped. Choose compact showerheads and trim—usually 8-10 inches for heads, 4-inch valve trim—that fit proportionally without overwhelming the space.

    Look for compact rainfall heads from Moen, Delta, or Kohler ($60–150) and matching trim plate ($40–80). Installation is standard. The smaller scale prevents the shower from feeling claustrophobic and keeps the minimalist aesthetic (less hardware = more space visually).

    Your small shower looks intentionally designed rather than squeezed in. Proportion matters, and the right scale makes a tiny space feel thoughtful.


    16. Use a Continuous Tile Pattern Instead of Borders

    Accent tiles and borders add visual interest but break minimalist simplicity. Run your tile pattern continuously across all walls—no breaks, no color changes, no decorative bands.

    Choose one tile—white subway, light gray square, or pale marble—and install it uniformly across the entire shower area ($3–12 per square foot). Skip accent trim or border treatments. This keeps the visual field calm and unified.

    The result looks expensive and intentional precisely because it isn’t trying to impress. Simplicity reads as sophistication.


    17. Invest in a Thermostatic Shower Valve

    Thermostatic valves maintain water temperature even when other faucets run in the house. They’re a smart tech upgrade that’s invisible but makes daily showers dramatically more comfortable.

    Install a thermostatic mixing valve ($150–300 for a quality model like Hansgrohe) with professional plumbing labor ($200–300**). This is a mid-renovation install. Once set to your preferred temperature, the valve holds steady. Safety is a bonus: sudden temperature spikes can’t occur.

    Your shower becomes predictable and luxurious. You set it and forget it, which is exactly what minimalist design should do—work so seamlessly you stop thinking about it.


    18. Go Monochromatic: Match Tiles, Grout, and Walls

    Monochromatic design amplifies minimalism. Use the same color family for tiles, grout, painted walls, and trim. White, greige, or soft taupe throughout creates visual unity and calm.

    Select tiles in one family (all white subway, for example), match grout closely ($0 extra planning), and paint remaining walls the same neutral tone ($30–50 per gallon). This creates seamless flow instead of visual transitions. Installation and painting are standard rates.

    The space feels spa-like because there’s no visual competition. Your eye rests instead of scanning for colors and breaks.


    19. Install a Frameless Enclosure With Minimal Hardware

    Frameless glass doors with minimal metal trim reduce visible hardware to almost nothing. You get an enclosure that disappears visually, letting the tile backdrop shine.

    Choose frameless doors with minimal hinges and trim ($400–900 installed). Seek out semi-frameless designs ($250–500) if full frameless is beyond budget. Installation takes 4–6 hours for a professional. The glass does require weekly squeegee maintenance to prevent spotting, but the visual payoff is worth it.

    Your shower looks like a permanent art installation rather than a bathroom fixture. The glass transparency makes even small spaces feel generous and open.


    20. Select Subtle Grout Colors That Blend With Tiles

    Matching grout to tile color is subtle but transformative. Instead of bold grout lines defining each tile, near-invisible grout lines unify the entire surface into one calm plane.

    Use epoxy or urethane grout in white or pale gray when installing white tiles ($15–30 per pound). Order grout samples alongside tile samples to verify the match. Installation technique is identical to standard grout; the visual difference is enormous.

    Tiles appear to float as a unified surface rather than individual units. This detail—barely noticeable to others—calms your brain every single time you step into the shower.


    21. Add One Statement Piece: A Modern Towel Rack

    Minimalism doesn’t mean zero personality. Include one thoughtfully chosen statement piece—a sculptural towel rack or bench—that anchors the space visually while remaining functional.

    Choose a modern towel rack in brass, stainless, or matte black ($100–300) from brands like Schoolhouse Electric, Anthropologie, or even IKEA’s minimalist lines. Position it just outside the shower as a visual focal point. Installation is straightforward (30 minutes DIY).

    This one piece signals that your bathroom is intentional, not just minimal. You get personality without clutter.


    22. Hide Plumbing Behind Walls or Cladding

    Exposed pipes (even if painted) add visual clutter. During renovation, run plumbing behind walls in walls or hide it behind minimal cladding panels. The result is an unbroken, serene surface.

    This requires structural planning during renovation. Budget varies widely ($500–2,000 depending on existing plumbing). For existing showers, minimalist chrome or matte black trim plates covering visible hardware help ($20–50 each). Not always possible in rentals or existing setups, but worth considering during renovation.

    You achieve a clean, resort-like aesthetic where the architecture feels intentional rather than patched together.


    23. Create a Cohesive Minimalist Palette: Three Colors Max

    Minimalist design thrives on color restraint. Choose three colors maximum for your shower—typically white, one neutral (greige, taupe, or pale gray), and one accent (matte black, brass, or brushed nickel).

    Plan your palette before purchasing anything. White tiles, greige paint, and black fixtures (no additional cost beyond standard selections) create visual harmony. This requires zero extra investment—just thoughtful choice during planning. The payoff is an intentional, gallery-like space.

    Limit your color choices, and the whole shower gains cohesion. The space reads as designed rather than accumulated, which is exactly what minimalism is.


    Save this post and try just one idea this weekend. Pick the easiest option first—maybe clearing your shower floor or swapping one fixture handle—and notice how much that small shift affects your whole routine. Which idea will you tackle first?

  • 26 Rustic Bathroom Styling Ideas With Warm, Natural Charm

    26 Rustic Bathroom Styling Ideas With Warm, Natural Charm

    There’s something about a rustic bathroom that makes you want to linger a little longer. Maybe it’s the warm wood tones, the weathered textures, or the way natural materials just feel more honest than sleek modern finishes. If your bathroom feels too cold or sterile, you’re not alone—but the good news is that rustic charm doesn’t require a full renovation. In this guide, you’ll discover 26 practical styling ideas that bring warmth, character, and that sought-after farmhouse feel to any size bathroom. From budget-friendly swaps to investment pieces, these ideas work whether you’re renting or own your home. Let’s create a space that feels like a retreat instead of just a pit stop.

    1. Swap Your Mirror Frame for Reclaimed Wood

    A framed mirror instantly upgrades the whole focal point of your bathroom. Look for reclaimed or distressed wood frames at antique shops, flea markets, or online retailers like Wayfair, Etsy, or Facebook Marketplace. The weathered texture adds authenticity that new wood simply can’t match.

    You can find budget options ($30–$80), mid-range vintage frames ($80–$150), or authentic reclaimed pieces ($150–$300). If you’re renting, lean toward frame-only mirrors you can hang with adhesive strips. Installation takes 10 minutes. Pro tip: measure your mirror opening first, then shop for frames—or buy a simple mirror and build a DIY frame from barn wood ($20–$40 in materials).

    The space around your sink becomes a design statement instead of an afterthought. Your guests will notice the difference immediately.

    2. Layer in Woven Baskets for Storage and Texture

    Woven baskets do double duty—they store your clutter and add visual warmth that plastic bins never will. Look for rattan, seagrass, or wicker at Target, IKEA, Anthropologie, or HomeGoods ($15–$60 per basket depending on size).

    Place them under your sink, on a floating shelf, or beside your toilet. They work in any bathroom layout and take zero installation time. Mix textures by combining tightly woven baskets with looser, more rustic options. Swap out items seasonally to keep things fresh. Pro tip: line baskets with kraft paper for a polished finish that hides what’s inside.

    Your bathroom instantly feels more organized and intentional. Plus, you can grab what you need without staring at labeled plastic containers.

    3. Hang Vintage Brass or Iron Fixtures

    Brass, bronze, and aged iron hardware feel authentically rustic in a way that polished chrome never does. Hunt for vintage fixtures at local antique shops, eBay, or Restoration Hardware ($20–$80 for towel bars; $40–$120 for faucets if you’re replacing).

    If you’re renting, adhesive towel bars exist, though mounted fixtures look more finished. Installation typically takes 30 minutes with basic tools. Mix old and new—a vintage faucet paired with modern plumbing works beautifully. Pro tip: slightly tarnished brass looks more authentic than bright, shiny pieces; don’t over-polish it.

    Your bathroom reads as curated rather than rushed. Guests will assume you hired a designer.

    4. Add a Wooden Ladder for Towel Hanging

    A wooden ladder gives you open towel storage that looks intentional and farmhouse-ready. Search Etsy, Target, or Amazon for rustic ladder racks ($30–$80), or find an actual old ladder at a flea market ($10–$40).

    Lean it against any wall or near your tub—no installation needed for renters. If it feels unstable, secure it to the wall with brackets ($5–$10). Roll your towels in cream, white, or gray tones for that coordinated rustic look. Pro tip: rotate seasonal colors to refresh the space without buying new towels.

    Your bathroom gains vertical interest and that cozy, lived-in charm. Towels become part of the decor instead of hidden away.

    5. Install Open Shelving in Natural Wood

    Open shelving shows off your styling and makes small bathrooms feel less cramped. Buy pre-made floating shelves from Home Depot, Wayfair, or IKEA ($20–$50 per shelf), or have a carpenter cut reclaimed wood ($50–$150 per custom shelf).

    Installation requires a drill and wall anchors (30 minutes). Style shelves with grouped items—mason jars for Q-tips, a small plant, stacked towels—to avoid looking cluttered. Keep colors cohesive: whites, creams, natural wood, and greenery. Pro tip: leave the top shelf mostly empty to prevent a crowded feeling.

    You create a gallery effect that makes your bathroom feel intentional and designed. It’s the perfect place to display soap, candles, or vintage finds.

    6. Paint Walls in Warm, Muted Earth Tones

    Warm neutrals—sage, warm beige, soft taupe, or creamy white—set the rustic mood instantly. Paint is the cheapest refresh possible ($30–$60 for a gallon; takes one weekend).

    Choose low-VOC paint from Benjamin Moore, Sherwin-Williams, or Behr for better air quality. Warm greens and taupes photograph beautifully and feel calming. Skip bright whites unless your space gets tons of natural light; they can feel sterile. Pro tip: test paint samples on your wall at different times of day before committing.

    Your bathroom goes from “generic” to “retreat” with one coat. The right neutral makes every other rustic element you add look better.

    7. Add a Vintage Clawfoot Tub (or Faux Claw Feet)

    A clawfoot tub is the ultimate rustic statement piece. Real vintage tubs run $400–$1,500 (and require plumbing help). Budget-friendly option: add adhesive claw feet to your existing tub ($40–$80 from Etsy or Amazon).

    If you own your home, a plumber can install a tub in one day ($100–$300 in labor). If you’re renting, stick with claw feet accents. The impact is surprisingly dramatic—it completely changes the vibe. Pro tip: pair it with a vintage wooden tub surround or simple open shelving nearby for maximum rustic effect.

    Your bathroom transforms into a spa-like retreat that begs for long soaks. This one piece becomes the focus of the entire room.

    8. Hang Shiplap or Peel-and-Stick Paneling

    Shiplap screams rustic farmhouse and costs far less than a full remodel. Real shiplap runs $80–$200 (plus installation), but peel-and-stick options work beautifully for renters ($40–$120 for a small bathroom).

    Apply it behind your sink, above your toilet, or on an accent wall. Installation takes 2–4 hours depending on room size. Paint it white, cream, or soft gray to match your color scheme. Pro tip: real shiplap holds more resale value if you own, but peel-and-stick is honestly convincing and damage-free.

    Your bathroom gains instant texture and depth. The vertical lines also make the space feel taller and more defined.

    9. Display Vintage Glass Bottles and Apothecary Jars

    Vintage glass finds add character and work with almost any bathroom style. Hunt flea markets, thrift stores, or Etsy for old apothecary jars, medicine bottles, and vintage glassware ($2–$15 each).

    Fill some with cotton balls, bath salts, or dried flowers. Leave others empty for that collected-over-time look. Grouping similar items creates a curated gallery feel. Pro tip: clear glass makes tiny bathrooms feel less cluttered; group odd numbers (3, 5, 7) of bottles for visual balance.

    You create a rustic display that doubles as storage. Guests will think you’ve been collecting these treasures for years.

    10. Bring in Greenery and Potted Plants

    Plants soften hard bathroom surfaces and add life. Choose low-light varieties like pothos, ferns, or snake plants if your bathroom is dim ($5–$20 per plant from Lowe’s, Home Depot, or a local nursery).

    Place them on shelves, the sink corner, or a small plant stand. Repot into rustic ceramic or terracotta containers ($3–$15 each). Bathrooms are naturally humid, which many plants love—just make sure you’re not overwatering. Pro tip: group 3–5 plants of varying heights for a “plant corner” effect.

    Your bathroom goes from sterile to serene. Plants improve air quality and give you something living to care for—it’s weirdly therapeutic.

    11. Use Vintage Wooden Crates as Wall Storage

    Wooden crates are cheap rustic storage that works as decor. Find them at Target, HomeGoods, Etsy, or local pallet suppliers ($10–$30 each).

    Mount them on your wall with brackets to create open shelving. Fill with rolled towels, toilet paper, or small baskets. They work great for renters too—just lean them on a shelf or stack them in a corner. Mix and match sizes for visual interest. Pro tip: sand rough edges slightly if they’re brand-new and don’t match your rustic vibe.

    You gain functional storage that looks intentional. Stacked crates create a design feature that actually stores your stuff.

    12. Switch to Rustic Soap Dispensers and Toothbrush Holders

    Small décor swaps make a huge difference. Replace plastic dispensers with ceramic, wood, or metal versions from Target, IKEA, or Anthropologie ($8–$25 each).

    Look for matte finishes, subtle patterns, or vintage-inspired designs. These sit on your counter every day, so choose pieces you actually love. Pair a wooden soap dispenser with a ceramic toothbrush holder for mix-and-match rustic charm. Pro tip: buy a set to save money and ensure colors match.

    Your bathroom counter instantly looks more refined. What seemed like tiny details suddenly read as intentional styling.

    13. Hang a Vintage-Style Medicine Cabinet

    A vintage medicine cabinet combines storage with farmhouse character. Find reclaimed or reproduction options on Etsy, Wayfair, or at local antique shops ($50–$150).

    Installation takes 30 minutes if you’re comfortable drilling; otherwise hire a handyman ($50–$100). The weathered finish hides imperfections better than modern cabinets. Pro tip: if wall mounting feels permanent, try a leaning medicine cabinet ($80–$120) that rests against the wall.

    You consolidate bathroom clutter into one beautiful focal point. Your daily routine suddenly feels a bit more stylish.

    14. Layer Soft, Neutral Textiles

    Soft, layered textiles make bathrooms feel warm and inviting. Mix textures—linen, cotton, waffle weave—in coordinated neutrals. Buy from Target, Restoration Hardware, or local linen shops ($10–$40 per towel).

    Stick to creams, soft grays, whites, and warm taupes. Layer towels by draping some over racks and stacking others neatly. Rotate seasonal colors to keep things fresh. Pro tip: buy quality towels once; they last longer and look better than cheap replacements you buy repeatedly.

    Your bathroom feels like a boutique hotel instead of a basic space. Soft textures make the room feel more touchable and inviting.

    15. Create a Rustic Vanity with a Vintage Base

    If your vanity is tired, a new base completely transforms the space. Reclaimed wood vanities cost $300–$800, or hunt Facebook Marketplace or Craigslist for vintage furniture to convert ($50–$150).

    You can also modify an existing vanity with a DIY stain or paint job ($30–$80 in materials; weekend project). Pair it with a simple porcelain or stone sink for maximum impact. Pro tip: darker wood (aged oak, walnut) reads more rustic than light blonde wood.

    Your entire bathroom feels more curated when the vanity itself has character. It becomes the anchor piece that everything else builds off.

    16. Add Vintage Mirrors Above Floating Shelves

    A second mirror in a vintage or ornate frame adds depth and rustic character. Find options at antique shops, Etsy, or HomeGoods ($25–$80).

    Hang it above a shelf or beside your main mirror for a collected-over-time look. Smaller mirrors don’t need to be functional; they’re purely for style. Pro tip: a round or octagonal frame feels more farmhouse than square.

    You create visual interest and make the space feel intentionally designed. Mirrors bounce light around, making even small bathrooms feel brighter.

    17. Install a Vintage-Style Faucet or Faucet Covers

    Faucets are functional art in rustic bathrooms. A vintage-inspired or actual vintage brass faucet runs $40–$150 (or $200–$600 for high-end reproductions).

    If you’re renting or can’t replace your faucet, buy adhesive faucet covers ($15–$30 from Amazon or Etsy) to change the look. If you own, a plumber can swap it in one hour ($50–$100 in labor). Pro tip: aged brass and oil-rubbed bronze look more authentically rustic than shiny chrome.

    Your sink becomes a focal point rather than an afterthought. This one detail anchors the entire rustic aesthetic.

    18. Paint or Stain Wooden Beams or Trim

    Wooden trim or exposed beams add serious rustic character. If you have original trim, refinish it with stain ($20–$30) or paint ($30–$50). Takes 3–4 hours and an afternoon to dry.

    If your bathroom is beamless, you can add decorative faux beams ($50–$150 for peel-and-stick options). Stain in walnut, oak, or weathered gray for authentic rusticity. Pro tip: sanding before staining gives a more professional finish but isn’t required for rustic charm.

    Trim draws the eye upward and makes spaces feel more architecturally interesting. Your bathroom goes from plain to purposeful.

    19. Style a Small Vintage Stool or Step Ladder

    A vintage wooden step stool is functional décor that costs next to nothing. Find one at flea markets, thrift stores, or Etsy ($15–$50).

    Use it beside your tub for a decorative towel rack, or keep it functional for reaching high shelves. The weathered finish automatically reads rustic. Pro tip: if the stool feels wobbly, use it for décor only (not stepping).

    You add a design element that looks collected rather than bought yesterday. It’s the kind of thing guests notice and compliment.

    20. Create a Rustic Soap or Candle Display

    Rustic soap and candle displays feel boutique and smell amazing. Source from local makers, Etsy, or specialty shops ($5–$15 per item).

    Arrange items on a wooden tray for a cohesive look. Mix textures—rough soap, smooth glass candles, plants—for visual interest. Change seasonings with scents (lavender in spring, vanilla in fall). Pro tip: rustic bar soaps in kraft paper look more authentic than plastic-packaged alternatives.

    Your counter becomes a mini-spa setup that makes daily routines feel special. Guests will assume you splurged on a designer.

    21. Hang Vintage-Inspired Lighting Fixtures

    Lighting sets mood and style. Vintage or vintage-inspired fixtures from Home Depot, Wayfair, or antique shops run $30–$100.

    Install pendants above your sink for task lighting that looks beautiful. Pair with warm bulbs (2700K color temperature) for that cozy glow. A handyman can install in 30–60 minutes ($50–$100 labor). Pro tip: pair vintage fixtures with modern dimmers so you can adjust the vibe.

    You control both the lighting and the aesthetic. The right fixture makes your bathroom feel like a destination, not just a utility space.

    22. Use Stone or Slate Accents

    Stone adds earthy, rustic texture without major renovation. Stone tile accents run $3–$8 per square foot ($50–$200 for a small project).

    Apply as trim around mirrors, shelf edges, or as a partial backsplash behind your sink. DIY installation with adhesive works if you’re comfortable. Otherwise, a handyman charges $100–$300 for a small stone project. Pro tip: mix stone with wood for maximum rustic contrast.

    You ground the space with natural materials that feel timeless. Stone ages beautifully and never looks dated.

    23. Add a Rustic Towel Hook or Rack

    Individual hooks add rustic character and flexible storage. Find vintage or vintage-style hooks at Etsy, Anthropologie, or Home Depot ($8–$20 each).

    Mount in a row above your toilet or beside your tub. Installation takes 20 minutes per hook with a drill. Mix metals—brass, bronze, iron—for an collected-over-time look. Pro tip: odd numbers (3, 5, 7) feel more designed than even numbers.

    You gain functional storage that doubles as décor. This simple detail makes your bathroom feel thoughtfully styled.

    24. Display Vintage Metal Bathtub Caddy or Wooden Tray

    A vintage caddy or wooden tray transforms your tub into a spa setup. Find options at flea markets, Etsy, or Amazon ($25–$80).

    Place across your tub to hold towels, candles, books, or a bath pillow. Wood or aged metal reads far more rustic than modern plastic. Pro tip: fill it intentionally—a rolled towel, a candle, and a small plant look curated; random clutter looks chaotic.

    Your tub becomes a retreat rather than just a place to wash. Styling it this way makes every bath feel like a mini-vacation.

    25. Incorporate Vintage Rugs and Bath Mats

    Soft, rustic rugs ground the space and add comfort. Look for vintage or vintage-inspired options at thrift stores, Etsy, or HomeGoods ($20–$80).

    Stick to neutral tones—cream, gray, soft taupe—that complement your rustic palette. Natural fibers (cotton, wool, jute) feel more authentic than synthetic. Pro tip: layer a smaller decorative mat over a functional bath mat for a designed look.

    Your feet hit soft, warm textures instead of cold tile. This small comfort detail makes your daily routine feel cozier.

    26. Style With Vintage Books and Stacked Decor

    Vintage books add warmth and a collected aesthetic. Find them at thrift stores for $1–$3 each or search Etsy for rustic bathroom book collections ($15–$40 per bundle).

    Stack them near your tub, on shelves, or on a small table. Tie with twine for rustic flair. Pair with plants and rolled towels for a cohesive vignette. Pro tip: arrange by color (cream, brown, white spines) for a subtle, calming effect.

    You create a lived-in, intentional look that feels personal. Your bathroom reads like you’ve spent time collecting pieces you actually love.


    Ready to add some warmth to your space? Save this post and pick just one idea to tackle this weekend—whether it’s swapping out your mirror frame or hanging a new towel rack. One small rustic touch often sparks the urge to refresh the rest of the room. Share this with anyone who needs a cozy bathroom glow-up.

  • 27 Bathroom Aesthetic Ideas That Make Your Space Feel Fresh & Modern

    27 Bathroom Aesthetic Ideas That Make Your Space Feel Fresh & Modern


    Your bathroom doesn’t need a complete overhaul to feel fresh and modern. Sometimes it’s the small touches—better lighting, smarter storage, a fresh coat of paint, or one statement piece—that completely shift how your space feels. Whether you’re renting, working with a tight budget, or ready to invest in something special, these 27 ideas will help you create a bathroom that actually feels good to be in. From quick weekend projects to thoughtful upgrades that work with your lifestyle, you’ll find actionable solutions that fit your situation. Let’s dive into ways to make your bathroom a space you genuinely want to spend time in.


    1. Paint Your Walls a Soft, Warm Neutral

    A fresh coat of paint is one of the fastest ways to change how a room feels. Warm neutrals like taupe, soft greige, or cream create an instantly calming backdrop that makes even small bathrooms feel larger and more spa-like.

    Choose a moisture-resistant bathroom paint in a satin or semi-gloss finish to handle humidity without peeling. Brands like Benjamin Moore Aura or Sherwin-Williams Duration run $30-$50 per gallon at hardware stores. A typical bathroom needs 1-2 gallons. The project takes 4-6 hours including drying time between coats. If you’re renting, peel-and-stick removable wallpaper in similar tones works just as well.

    Pro tip: Paint the ceiling the same color as your walls to make the space feel even more cohesive and open.

    You’ll notice right away how a neutral backdrop makes your fixtures and accessories stand out while creating that calm, retreat-like vibe.


    2. Upgrade to a Rainfall Showerhead

    Rainfall showerheads deliver that hotel-quality feel without the high price tag. The gentle water flow overhead creates a completely different shower experience than standard heads—less intense but way more relaxing.

    Look for $30-$100 options from brands like Delta, Moen, or Kohler at Home Depot or Wayfair. Installation takes 20-30 minutes if you’re handy (just unscrew the old head and screw on the new one). No plumbing experience needed. Pair it with a thermostatic mixer valve if your water temperature fluctuates, which prevents those shocking hot/cold spikes while you’re showering.

    The bonus? Many rainfall heads use less water than traditional showerheads, so your water bill actually goes down.

    This single upgrade makes your morning or evening shower feel like a real escape, not just a quick necessity.


    3. Add Floating Shelves Above the Toilet

    Floating shelves give you extra storage without eating into precious floor space. They’re perfect for towels, plants, bath products, or decorative items—basically using the wall you weren’t using anyway.

    Install 2-3 shelves using shelf brackets ($15-$30 per shelf at IKEA, Target, or Amazon). The project takes 1-2 hours with a drill and level. If renting, damage-free adhesive shelf brackets exist but won’t hold heavy weight. Start with lightweight items like rolled towels and small plants for the best look.

    Keep shelves styled loosely—too-packed shelves feel cluttered rather than organized. Alternate rolled towels with a small plant or a candle to create visual rhythm.

    Now you have storage that actually looks intentional and decorative, not like a cluttered grab-bag.


    4. Switch to LED Vanity Lighting

    Poor lighting is one of the biggest reasons bathrooms feel dated or dingy. LED vanity lights are brighter, last longer, and create flattering shadows compared to old incandescent bulbs—plus they save money over time.

    Replace single overhead fixtures with LED vanity bars ($40-$150) flanking your mirror from brands like Schoolhouse Electric, Restoration Hardware, or Target. Installation is simple if you have basic electrical skills, or hire an electrician ($100-$200 labor). Look for “warm white” (2700K) LEDs for a soft, inviting glow rather than harsh clinical white.

    The energy savings add up—LEDs use 75% less power than traditional bulbs and last 25,000+ hours.

    You’ll notice how much better you look and feel with proper, even lighting, and applying makeup or skincare becomes actually pleasant.


    5. Create a Spa-Like Experience with Bath Bombs

    You don’t need expensive renovations to create spa moments. Bath bombs and fizzy tablets add aromatherapy and luxury to every soak without requiring any installation or permanent changes.

    Buy sets of quality bath bombs ($20-$40 for 4-6) from brands like Lush, Herbivore, or even Target’s Good & Gather line. Store them in a pretty jar or ceramic bowl on your tub’s edge for easy grabbing. Pro tip: pair them with Epsom salt soaks ($5-$10) for muscle relaxation, or keep a small bundle of dried eucalyptus nearby for aromatherapy.

    Light a candle, dim the lights, and let the bath bomb do the work—this ritual takes zero skill but feels indulgent.

    Now your evening bath actually feels like a treat, not just a quick rinse-off.


    6. Install a Low-Flow Toilet or Faucet Aerator

    Water conservation doesn’t mean cold showers or weak flushes. Modern low-flow fixtures deliver normal performance while cutting water usage by 20-30%, which shows up directly on your water bill.

    Add an aerator to your faucet ($3-$8) by simply unscrewing the old one and twisting on a new one—takes 2 minutes and no tools needed. For a bigger impact, replace the whole faucet ($40-$150 depending on style) or upgrade your toilet to a dual-flush model ($200-$400 installed). These changes pay for themselves within 1-2 years on water savings alone.

    Check for WaterSense labels to ensure fixtures meet EPA standards for efficiency.

    Your shower still feels great, your toilet flushes perfectly, and you’re saving money every single month.


    7. Hang a Statement Mirror with Character

    A mirror is functional, but it’s also the perfect spot to add personality and make the room feel bigger. A statement mirror instantly upgrades the vibe from boring to intentional.

    Look for framed mirrors ($50-$200+) at West Elm, Anthropologie, or even Facebook Marketplace for vintage finds. Wood frames feel warm and organic; metal frames add modern edge. Size matters—go bigger than you think. A mirror that’s roughly the same width as your vanity works best. Installation takes 15 minutes with a stud finder and level.

    Renter tip: Use a damage-free hanging strip rated for mirrors if you can’t drill into walls.

    Suddenly your bathroom has a focal point that makes the whole space feel more put-together and spacious.


    8. Roll Your Towels and Display Them in a Basket

    Rolled towels look more polished than folded stacks and take up less visual space. This simple styling trick transforms towels from storage clutter into a decorative element.

    Roll each towel by starting from one short end and rolling tightly toward the other end. Stand them upright in a woven basket ($20-$50) from IKEA, Target, or HomeGoods. Use natural fibers like seagrass or rattan to keep the aesthetic calm. Place the basket on a shelf, in a corner, or under the sink where it’s visible but not in the way.

    This works as both storage and decor, and guests notice the thoughtful touch immediately.

    Your towels become a design element rather than something you feel awkward about leaving visible.


    9. Add Plants for Life and Color

    Plants improve air quality, add life to the space, and create that calming, spa-like feel without costing much. Even low-light bathrooms can host humidity-loving plants.

    Choose humidity-loving plants like pothos, snake plants, or ferns from any garden center ($5-$20 each). Pothos thrives even in low light and just needs occasional watering. Snake plants are nearly impossible to kill. Ferns love humidity, so they actually thrive in bathrooms. Use small pots to keep plants from dominating limited space.

    Water sparingly—most bathroom plants appreciate the humidity more than constant watering.

    You’ll notice how a few green plants immediately soften the space and make it feel more like a retreat than a utility room.


    10. Replace Cabinet Hardware with Modern Knobs or Pulls

    Cabinet hardware is a micro-upgrade with outsized impact. Swapping old handles for modern knobs or pulls instantly ages up your vanity without replacing the whole thing.

    Buy new hardware ($10-$40 per set) from IKEA, Wayfair, or Anthropologie in finishes like brass, matte black, or brushed nickel. Unscrew the old hardware, fill any old screw holes with a dab of wood filler if needed, and install the new pieces—takes 30 minutes for an entire vanity. This project requires just a screwdriver and works even if your vanity is rented (just save the old hardware to reinstall when you move).

    The change is subtle but immediately makes the whole vanity look newer and more intentional.

    One small detail like this shifts the whole vibe of your bathroom without any real effort or cost.


    11. Create a Feature Wall with Peel-and-Stick Wallpaper

    Peel-and-stick wallpaper lets you add pattern and personality without commitment—perfect for renters or anyone hesitant about permanent changes. One accent wall behind your vanity or toilet completely changes the room’s energy.

    Choose from brands like Spoonflower, Chasing Paper, or Amazon’s removable wallpaper ($20-$60 per roll). Patterns like geometric shapes, botanical prints, or subtle textures work well in bathrooms. The application takes 1-2 hours, and removal is literally just peeling—no damage if you go slowly.

    Pro tip: Measure twice, cut once. Some people use a credit card to smooth out bubbles as they apply.

    One patterned wall adds so much character that guests immediately notice and ask about it.


    12. Upgrade Your Shower Curtain to a Quality Fabric Version

    Cheap plastic shower curtains feel flimsy and look dated. A quality fabric curtain feels substantial and instantly upgrades your whole shower area, plus it actually lasts longer.

    Invest in a heavyweight fabric curtain ($30-$80) from Parachute, West Elm, or even Target’s higher-end Threshold line. Pair it with a quality liner ($8-$15) so the curtain stays dry and mold-free. Fabric curtains are machine-washable, so they stay fresher longer than plastic versions.

    Choose neutral colors or subtle patterns that coordinate with your walls and vanity.

    You’ll feel the difference immediately—there’s something luxurious about a substantial fabric curtain instead of that thin plastic feel.


    13. Install a Dimmer Switch for Lighting Control

    A dimmer switch lets your bathroom shift from bright morning light to calming evening ambiance with one adjustment. This single change makes your space feel way more spa-like and functional.

    Replace your standard light switch with a dimmer switch ($15-$30 from Home Depot or Lowes). If you’re comfortable with basic electrical work, installation takes 15 minutes. If not, an electrician charges $75-$150 for installation. Pair it with LED bulbs rated as “dimmable” (most modern LEDs are, but check the label).

    Renter tip: Some adhesive-mounted smart lights offer dimming without any installation.

    Now you can set the mood for your morning routine or create that spa vibe for evening wind-down.


    14. Organize Under-Sink Storage with Tiered Shelves

    The space under your sink is usually chaos, but tiered shelves or pull-out organizers make everything visible and reachable. No more hunting through piles of bottles and sprays.

    Install tiered shelf organizers ($15-$40) from IKEA, Target, or Amazon in about 20 minutes with no tools required. Use clear containers or labels for cleaning supplies, hair tools, and extra shampoo bottles. This makes everything easy to grab and keeps the area from looking like a jumble.

    Pro tip: Keep everyday items accessible at eye level and reserve top/back areas for backup supplies.

    You’ll save time searching for things and actually enjoy opening the cabinet instead of dreading what you’ll find.


    15. Add a Small Corner Shelf Unit

    Corners are usually wasted space in bathrooms. A corner shelf unit takes advantage of this dead zone and gives you practical storage that doesn’t eat into your walking space.

    Install a corner shelving unit ($40-$100) from IKEA, Wayfair, or Target. Most are lightweight enough for renters to use command strips or damage-free adhesive. The project takes 30-45 minutes with a level and drill. Stock it with rolled towels on lower shelves and decorative items like plants or candles on upper shelves for visual balance.

    This is especially helpful in small bathrooms where every inch counts.

    Suddenly you have storage that feels intentional rather than crammed, and your whole floor area opens up.


    16. Switch to Natural or Recycled Soap and Product Bottles

    What you put on your counter matters as much as the counter itself. Consolidating products into matching dispensers and bottles instantly makes the space look more curated and intentional.

    Buy matching glass or ceramic dispensers ($8-$20 each) from Muji, The Container Store, or Amazon. Transfer your everyday soaps, lotions, and shampoos into these bottles rather than having dozens of product containers. Label them with waterproof stickers if you like. Keep this on your counter, and tuck backups under the sink.

    Pro tip: Filling fancy soap bottles with cheap soap from bulk makes everything look luxe.

    Your counter looks editorial instead of cluttered, and guests will actually compliment your setup.


    17. Paint Your Vanity Cabinet a Bold Color

    If you own your vanity, paint it in a color that makes a statement. Bold, saturated colors like deep green, navy, or charcoal immediately make a bathroom feel more designed and personal than the standard white or wood-tone options.

    Use bathroom-grade paint in a semi-gloss finish ($20-$40) from Benjamin Moore, Sherwin-Williams, or Farrow & Ball. Prep by sanding lightly and priming, then apply 2-3 coats. The project takes one full weekend with drying time, or hire a painter ($300-$600). Renter? Skip this one, but consider peel-and-stick adhesive wood finishes to cover cabinet doors instead.

    Pair the bold base with brass hardware and neutral walls to let the vanity be the star.

    This single bold move makes your bathroom feel intentional and way more personalized than cookie-cutter boring.


    18. Add Task Lighting with a Clip-On Lamp

    If overhead lighting isn’t enough, a clip-on lamp gives you targeted light exactly where you need it—perfect for makeup application, skincare routines, or just creating ambiance.

    Find clip-on lamps ($20-$50) from IKEA, Target, or Amazon. Installation takes 2 minutes—just clip it to a shelf, mirror frame, or towel rack. Use a warm-white LED bulb for a soft glow. This works great for renters since there’s zero installation required.

    The beauty of a clip-on lamp is you can move it around based on your needs or reposition it if you change your layout.

    You get professional-level task lighting without wiring anything or committing to a permanent installation.


    19. Create a Spa Vibe with Scent and Candles

    Scent is instant atmosphere. Strategic candle placement transforms your bathroom from a purely functional space into somewhere you actually want to linger.

    Stock 3-5 quality candles ($15-$40 each) from brands like Jo Malone, Diptyque, or even Target’s Opalhouse line in scents like eucalyptus, lavender, or sea salt. Keep them on a shelf away from water splashes, or use them specifically during baths and bedtime routines. Unscented candles work too—it’s really the ambient light that matters.

    Pro tip: Match your candle scent to the vibe you want—energizing scents for mornings, calming ones for evenings.

    You’ll notice how quickly a lit candle shifts your bathroom from a chore space into a retreat.


    20. Swap Your Shower Caddy for a Sleek Wall-Mounted Version

    Plastic shower caddies that hang over the showerhead feel temporary and cluttered. A wall-mounted caddy looks purposeful, keeps water from pooling, and actually lasts longer.

    Install a wall-mounted caddy ($30-$60) from brands like Waterworks, Anthropologie, or even Amazon in finishes that match your fixtures. Most require drilling into tiles (25-30 minutes of work), but adhesive-mounted versions exist for renters. Position it at chest height so items are easy to grab, not stretched overhead.

    Renter-friendly option: Use tension rods in your shower corner to create an instant basket shelf for products.

    Your shower looks exponentially cleaner and more organized without bottles scattered across the tub floor.


    21. Install Recessed Lighting or Spotlights Above the Mirror

    Recessed lighting is more subtle than vanity bars but equally effective for creating shadow-free, professional lighting around your mirror. Spotlights are small enough to feel modern rather than bulky.

    Hire an electrician to install recessed LED fixtures ($200-$400 labor plus materials) or do it yourself if you have electrical experience ($30-$50 per fixture). These are permanent upgrades best for homeowners. The payoff is clean, integrated lighting that feels luxurious without being obvious.

    Pair recessed lights with a dimmer for full control over mood.

    Your reflection looks flawless in this lighting, and the whole bathroom feels more upscale and thoughtfully designed.


    22. Use Open Shelving to Display Favorite Towels and Decor

    Open shelving works best when you actually edit what goes on it. Display only items that genuinely look good together—it becomes decor rather than storage overflow.

    Install simple floating shelves ($25-$50 each) from IKEA or Wayfair, and style them with rolled towels, a small plant, a hardcover art book, and maybe one decorative object. Leave negative space so shelves don’t feel crammed. Rearrange seasonally if you want a fresh vibe.

    Pro tip: An odd number of items looks more intentional than an even number.

    Open shelving done right looks editorial and creates that calm, retreat-like vibe instead of chaotic.


    23. Add a Heated Towel Rack for Morning Comfort

    A heated towel rack is a small luxury that makes a huge difference on cold mornings. Warm towels feel indulgent, and the rack also gently dries towels so they don’t smell musty.

    Install an electric heated towel rack ($100-$300) requiring a 120V outlet (an electrician can add one for $150-$300). Most models warm up in 10-15 minutes. There are also plug-in versions ($40-$60) that work without hardwiring, though they’re less powerful. The installation takes an electrician 1-2 hours for hardwired versions.

    Consider this a homeowner investment, not a renter move, unless you find a plug-in version.

    Stepping out of the shower into a warm towel feels genuinely spa-like and makes your morning routine feel less rushed.


    24. Tile the Floor or Add a Luxury Bath Mat

    Flooring is either a big renovation or a simple mat upgrade. If you’re not ready to retile, a high-quality mat creates that spa comfort instantly.

    Buy a luxury bath mat ($30-$80) from Parachute, Pottery Barn, or Williams-Sonoma in naturally absorbent materials like Egyptian cotton or Turkish cotton. The weight and thickness matter—this is where you’ll feel the difference. Wash regularly and air-dry to keep it soft and prevent mildew. If you’re feeling bold, luxury vinyl plank or new tile ($800-$2,000 installed) transforms the whole feel for a permanent upgrade.

    Renter tip: A quality mat is your best friend for instant comfort without commitment.

    The moment your bare feet hit a soft, thick mat instead of cold tiles, your whole morning feels more luxurious.


    25. Install a Smart Thermostatic Shower System

    Smart showers let you preset your exact temperature and water pressure, then recall it every time—no more shocking temperature swings while you’re mid-shower. It’s a game-changer for consistency and safety.

    Invest in a thermostatic mixer or smart shower system ($300-$1,000 installed) from brands like Hansgrohe, Kohler, or Moen. This requires professional installation ($200-$400 labor) since it involves plumbing adjustments. Some systems sync with apps, so you can start warming up water before you even enter the bathroom.

    This is an investment upgrade worth it if you shower multiple times daily or have family members who have different temperature preferences.

    You’ll experience the luxury of perfectly consistent water temperature every single shower without having to adjust controls mid-rinse.


    26. Create a Minimalist Aesthetic with Hidden Storage

    Minimalist bathrooms feel calm because nothing competes visually. The trick is hidden storage that lets you put everything away while keeping daily items accessible.

    Install deep drawers or pull-out cabinets ($100-$300) in your existing vanity, or replace it entirely with a design-focused cabinet ($400-$1,000+). Use drawer dividers ($10-$20) to keep everything organized by category. Keep only your absolute essentials on the counter—maybe a soap dispenser and one candle.

    Pro tip: Closed storage is your friend in minimalist design. If you see it, it counts as clutter.

    With everything hidden away, your bathroom feels like a serene retreat rather than a cluttered utility room.


    27. Bring in Warm Wood Tones Through Accessories

    Wood adds instant warmth and organic softness to bathrooms. Mixing wood with tile or marble creates balance between natural and modern elements, preventing spaces from feeling cold.

    Add wooden accessories like a bath caddy ($30-$50), shelves ($40-$100), or stool ($25-$80) from IKEA, West Elm, or Wayfair. Look for sustainably sourced options or reclaimed wood for extra character. If you’re refinishing or upgrading your vanity, opt for natural wood tones instead of white for warmth. A simple wooden bath mat ($30-$60) brings the same organic feel.

    Pro tip: Mix wood tones—don’t feel like everything has to match perfectly. Variety looks more natural.

    You’ll notice how wood immediately softens the space and creates that warm, spa-like retreat feeling instead of cold or clinical.


    Save this guide for your next refresh, and pick just one idea to tackle this weekend. Even one small change shifts how your bathroom feels, and the best part? You don’t need a huge budget to create a space that actually makes you happy.

  • 24 Tiny Bathroom Ideas That Make Micro Spaces Look Big

    24 Tiny Bathroom Ideas That Make Micro Spaces Look Big

    Small bathrooms don’t have to feel cramped. With the right design choices and clever storage solutions, you can make even the tiniest bathroom feel spacious, functional, and beautiful. Whether you’re renting, renovating, or just tired of feeling squeezed in your current setup, these 24 ideas will help you maximize every inch. From paint colors to layout tricks to smart shopping picks, you’ll find budget-friendly hacks and investment pieces that actually work. Let’s turn your micro bathroom into a space you’ll love spending time in.

    1. Install a Floating Vanity to Open Up Floor Space

    A floating vanity instantly creates the illusion of more floor space by removing visual bulk beneath the sink. This single change makes bathrooms feel significantly larger than wall-mounted or pedestal options.

    Mount your vanity 12-15 inches off the ground using a sturdy wall-mounted bracket system (most require studs or heavy-duty anchors). Choose a 24-30 inch width to keep proportions right for small spaces. The gap below becomes extra storage for baskets or cleaning supplies. Install at 32-36 inches high for comfortable reach.

    Budget: $150-$400 for a quality floating vanity from IKEA, Wayfair, or Home Depot. DIY mounting takes 2-3 hours with basic tools. Renters can use removable adhesive backing options, though these hold less weight.

    The best part? You get an instant visual upgrade and an extra spot to stash items below. Your bathroom immediately feels airier and more modern.

    2. Go Big With Your Mirror to Reflect Light

    A oversized mirror bounces light around and creates depth, making even windowless bathrooms feel brighter and larger. The bigger the mirror, the bigger the impact on perception.

    Replace your standard medicine cabinet mirror with a frameless mirror that spans your entire vanity width, ideally 36-48 inches wide and 24-30 inches tall. Mount it 20 inches above the sink for comfortable eye level. Use D-clips or a professional mounting system for security.

    Budget: $40-$150 for a quality frameless mirror from Wayfair, Home Depot, or Amazon. Installation takes 30-45 minutes and requires basic tools. Pro tip: Position a second mirror on an adjacent wall if your layout allows to bounce light even more.

    The result? Your bathroom looks twice as spacious and receives natural light (or reflected artificial light) from unexpected angles. You’ll notice the brightness boost every morning.

    3. Paint Walls a Light, Cool Tone to Expand Perception

    Light, cool-toned paint is the cheapest way to make walls recede and space expand. Most small bathrooms benefit from staying light rather than going bold.

    Choose white, pale gray, soft greige, or barely-there blue in a semi-gloss or satin finish (moisture-resistant). These colors bounce light and make walls feel farther away than they are. Paint all four walls the same tone to avoid chunking up the space. Avoid dark or warm colors that close the room in.

    Budget: $25-$60 for quality bathroom paint (Benjamin Moore Aura, Sherwin-Williams Duration Home). DIY painting takes 3-4 hours for most small bathrooms. Professional help: $300-$600 depending on your area.

    Your walls recede visually, making the footprint feel noticeably larger. The light palette becomes a clean backdrop for fixtures and accessories.

    4. Choose a Walk-In or Corner Shower Instead of a Tub

    Ditching the tub in favor of a shower or corner unit frees up massive floor space and makes a huge visual difference in tiny bathrooms.

    Install a corner shower with glass enclosure (32-36 inches) or a walk-in shower with a low threshold or no threshold for easier access and cleaner sightlines. Use light-colored tile (white, pale gray, or soft stone tone) to keep the shower zone from feeling cramped. Add a small recessed shelf for toiletries instead of a caddy.

    Budget: $800-$2,500 for a full shower install depending on plumbing changes needed. Renter-friendly: Removable shower enclosure panels (3-wall kit) run $200-$500 and need no permanent installation.

    You gain floor space for movement and storage. The bathroom instantly feels more open and easier to navigate.

    5. Use Vertical Storage Shelves Above the Toilet

    The space above the toilet is prime real estate that most people waste. Vertical shelving transforms this area into functional storage without eating floor space.

    Mount open shelves (12-15 inches deep) directly above the toilet, spaced 12-14 inches apart vertically. Install 2-3 shelves depending on your ceiling height. Use solid wood, metal, or bamboo shelves for durability and style. Organize with baskets, small bins, or rolled towels for visual order.

    Budget: $50-$150 for three shelves with brackets from IKEA, Target, or Home Depot. Installation takes 1-2 hours with a drill and level. No plumbing required, so renters can negotiate removal deposits.

    Your hidden storage appears instantly. Towels, supplies, and decorative items move off counters and into view without cluttering the space.

    6. Add Recessed Lighting for a Cleaner Ceiling

    Recessed lights take up zero visual space and brighten rooms without the clutter of pendant or surface-mounted fixtures. In a tiny bathroom, ceiling real estate is precious.

    Install 3-4 recessed LED lights spaced 3-4 feet apart for even coverage. Use dimmable LED bulbs (3000K warm white or 4000K neutral) for flexibility. Pair with a small vanity light above the mirror for task lighting. Avoid oversized fixtures that dominate the small ceiling.

    Budget: $15-$30 per fixture (bulb + housing) from Home Depot or Amazon. DIY installation takes 2-3 hours if your ceiling has access. Renters: Skip recessed and add adjustable track lighting instead ($100-$200, rental-friendly).

    The ceiling feels higher and cleaner without bulky fixtures taking up visual space. Overhead lighting feels intentional rather than heavy.

    7. Add a Narrow Rolling Cart for Hidden Storage

    A 3-4 inch wide rolling cart slides into tight corners or next to the vanity, giving you mobile storage that can move when you need floor space.

    Choose a narrow vertical cart (8-12 inches wide) with 3-4 tiers. IKEA’s Råskog cart ($40-$50) or Target’s basic rolling cart ($30-$60) work perfectly. Stock it with rolled towels, small bins, travel supplies, or cleaning products. Keep items you use daily within reach on the middle shelf.

    Budget: $30-$80 for a quality cart from IKEA, Target, or Amazon. No installation required—just roll into place. Renters love this because it moves with you.

    You gain storage that’s both hidden and accessible. The cart pulls out when you need the corner space or stays put when stocked.

    8. Use Peel-and-Stick Tile to Add Visual Interest

    Peel-and-stick tiles add personality without the cost or permanence of real tile. Perfect for renters or anyone hesitant about commitment.

    Apply peel-and-stick tiles to one accent wall (behind the toilet, vanity, or as a shower backdrop). Choose light colors with subtle patterns (geometric, herringbone, or marble-look) to keep the space feeling open. Start at the center and work outward for best alignment. Smooth out air bubbles as you go.

    Budget: $1-$3 per tile (packs of 10-20). A standard wall needs 40-100 tiles, totaling $40-$150. Brands: Smart Tiles, Peel & Stick Plus from Amazon or Home Depot. Installation takes 1-2 hours and requires no tools—just clean walls and patience.

    Your bathroom gets instant personality and visual depth. The pattern draws the eye without overwhelming the tiny footprint.

    9. Swap Out Hardware for Slim, Modern Handles

    Oversized cabinet hardware visually crowds small bathrooms. Swapping to slim handles or recessed pulls makes everything feel less cluttered.

    Replace bulky knobs with slim bar handles (4-8 inches long) or recessed finger pulls that tuck almost invisibly into drawers. Choose brushed nickel, matte black, or natural brass to match your style. Most handles cost $5-$15 each and swap out with a simple screwdriver.

    Budget: $20-$50 total for new hardware depending on how many pieces you’re replacing. Swap takes 15-30 minutes. Keep old hardware in a drawer in case you need to switch back (great for renters).

    The vanity instantly looks less cluttered and more intentional. Slim hardware makes the whole area feel sleeker and more spacious.

    10. Install a Corner Shower Caddy or Wall Shelves Instead of Clutter

    Corner clutter shrinks bathrooms visually. A single organized shelf or caddy keeps shower supplies out of sight lines while staying accessible.

    Add a stainless steel corner caddy (tension-rod or suction-cup style) to hold shampoo, conditioner, and soap. Alternatively, install a small recessed niche (4×8 inches) if you’re renovating. Choose one small shelf rather than multiple caddies—this reads as intentional, not cluttered.

    Budget: $15-$40 for a basic tension-rod caddy from Target, IKEA, or Amazon. Recessed niche costs $150-$400 if built during renovation. Renter option: Use a suction-cup caddy ($10-$20) that sticks to tile and removes cleanly.

    Your shower looks spacious and organized. Everything has a spot, and you avoid the visual chaos of bottles scattered on the floor.

    11. Choose a Pedestal Sink or Wall-Mounted Option for Open Floor

    Pedestal sinks or slim wall-mounted options preserve floor space and sight lines compared to vanities, especially in the tightest bathrooms.

    Install a classic pedestal sink (20-24 inches wide) for the most open feel, or a compact wall-mounted sink (18-20 inches) for even more floor space. These sacrifice storage but maximize perception of space. Pair with wall-mounted faucets to keep the sink area clean and uncluttered.

    Budget: $150-$400 for a pedestal sink with faucet from Home Depot or Lowe’s. Wall-mounted sinks run $200-$500 if plumbing work is needed. A pedestal takes 2-3 hours to install (or hire a plumber for $200-$300).

    You gain precious floor space for movement and feel. Walking around the sink is easier, and the bathroom feels less compressed.

    12. Add a Small Accent Wall in Deep Color Behind the Toilet

    One small accent wall in a deeper tone draws the eye backward, creating an illusion of depth without overwhelming the tight space.

    Paint the wall directly behind the toilet (or vanity) in a deep jewel tone like navy, forest green, terracotta, or charcoal. Keep the other three walls light and neutral to prevent the space from feeling boxed in. Use high-quality bathroom paint in semi-gloss finish for durability.

    Budget: $25-$60 for quality paint. DIY application takes 2-3 hours for one wall. Professional painting: $200-$400 for the accent wall only.

    The accent wall creates visual depth and intrigue. Your eye travels backward into the space, making the bathroom feel larger than it actually is.

    13. Ditch Shower Curtain Rings and Use a Tension Rod

    Visible shower curtain rings and rods add visual clutter. A sleek tension rod or frameless enclosure keeps the eye moving without interruption.

    Install a tension rod (chrome, stainless, or matte black) mounted high and tight against the ceiling or top of the shower area. If budget allows, swap to a frameless glass enclosure to eliminate the rod entirely and open sightlines. Both options cost much less than full tile enclosures.

    Budget: $15-$40 for a quality tension rod from Amazon or Target. A basic frameless enclosure runs $200-$600 depending on size. Tension rods are renter-friendly; enclosures require professional installation.

    The overhead area feels clean and uninterrupted. Your eye moves through the shower zone without catching on hardware.

    14. Use Open Shelving Instead of a Closed Medicine Cabinet

    Open shelving lets the wall breathe instead of creating a dense medicine cabinet. When styled thoughtfully, open shelves feel curated rather than cluttered.

    Mount 2-3 shallow floating shelves (8-10 inches deep) above the vanity or toilet. Style with matching containers, rolled washcloths, plants, or a few decorative items. Keep items minimal and intentional—this is not junk storage, it’s display storage. Use woven baskets or glass jars to contain smaller items.

    Budget: $50-$120 for three shelves with brackets from IKEA, Wayfair, or Target. Installation takes 1.5-2 hours with a drill and level. Renters can use command strips for damage-free hanging (up to $40 for heavy-duty strips).

    The shelves feel purposeful and designed rather than crammed. Displayed items become part of your décor instead of hidden away.

    15. Install Slim Under-Vanity Lighting to Brighten the Sink Area

    Under-vanity lighting brightens the sink area without adding bulky fixtures. It also creates a hotel-like ambiance while being purely functional.

    Add LED strip lights (warm white, 2700K-3000K) under the floating vanity edge, running the length of the sink. Choose peel-and-stick adhesive LED strips for easy application or hire an electrician for hardwired options ($200-$400). Pair with a dimmer switch for flexibility. Position lights 2-3 inches from the edge for the best glow.

    Budget: $20-$50 for peel-and-stick LED strips from Amazon, Home Depot, or Target. DIY installation takes 30 minutes. Renters can plug into an outlet (battery versions run $30-$60).

    The sink area becomes brightly lit for grooming tasks, and the soft glow makes the space feel spa-like. Your bathroom transforms with one simple addition.

    16. Add a Narrow Towel Rack Behind the Door or on a Sidewall

    A tall, narrow towel rack stores towels without consuming floor or counter space. Mounting behind the door or on a sidewall keeps it out of the main sightline.

    Install a vertical towel rack (12-18 inches wide, 24-36 inches tall) on an empty sidewall or behind the bathroom door. Choose stainless steel, matte black, or natural wood to match your style. Space it 6-12 inches from the wall for easy towel hanging and removal. Mount with brackets rated for at least 20 pounds to support weight safely.

    Budget: $30-$80 for a quality towel rack from Target, IKEA, or Home Depot. Installation takes 30-45 minutes with basic tools. Renters: Use a leaning towel ladder ($25-$50) that doesn’t require wall mounting.

    Towels hang neatly off the floor and counter. You gain a dedicated spot that looks intentional rather than improvised.

    17. Paint Inside Cabinet Doors a Lighter Shade to Bounce Light

    Light-colored cabinet interiors bounce light deeper into storage and make open cabinets feel less like dark holes. This tiny detail has a big visual impact.

    Paint the inside surfaces of your vanity cabinet doors and interior walls with white or pale gray semi-gloss paint (moisture-resistant). Use a foam brush for even coverage and apply two coats for durability. This works whether cabinets are open for display or closed for storage—light interiors always feel more spacious.

    Budget: $15-$30 for small-batch bathroom paint. DIY painting takes 1-2 hours including drying time. No special tools needed beyond a foam brush.

    Opened cabinets reveal bright, organized interiors instead of dark compartments. The whole area feels lighter and more intentional.

    18. Choose a Compact Toilet with a Slimmer Tank

    Compact or corner toilets have slimmer profiles and leave more floor space visible. Modern designs take up noticeably less visual real estate than traditional toilets.

    Swap your standard toilet for a compact model (designed for small spaces) or a corner toilet if your layout allows. Brands like Toto Aquia, American Standard Cadet, or KOHLER San Souci make excellent compact options. These run $300-$600 installed versus standard toilets at $250-$450. Hire a plumber for removal and installation ($200-$400 labor).

    The toilet footprint shrinks by several inches, opening up floor space. Your bathroom feels less crowded and easier to navigate around.

    19. Use Mirrored Cabinet Doors to Multiply Light and Space

    Mirrored cabinet doors bounce light while providing functional storage. They’re one of the most effective visual tricks for expanding tight bathrooms.

    Install mirrored cabinet doors on your vanity (either replace existing doors or retrofit them with adhesive mirror panels). Choose frameless mirrors for a seamless look. Position at least one large mirror directly above the sink or spread smaller mirrors across cabinet fronts to catch and reflect light from multiple angles.

    Budget: $50-$150 to retrofit existing cabinet doors with adhesive mirror panels, or $200-$400 to replace doors entirely. DIY retrofit takes 1-2 hours. Professional installation: $150-$300.

    The reflected light makes the bathroom feel twice as wide. Mirrored storage becomes both functional and visually expansive.

    20. Mount a Corner Shelf for Dead Space Optimization

    Corner space is often wasted in small bathrooms. A single corner shelf transforms unused real estate into functional (or decorative) display.

    Install a corner shelf (12-16 inches per side) in any unused corner using L-brackets and wall anchors. Mount at eye level or above for best visibility. Style with small plants, candles, rolled washcloths, or decorative objects to keep it looking curated. Choose wood, metal, or glass to match your aesthetic.

    Budget: $20-$50 for a corner shelf with brackets from IKEA, Target, or Home Depot. Installation takes 45 minutes with a drill and level. Renter-friendly: Use command-strip corner shelves ($15-$30) that remove cleanly.

    Dead corner space becomes functional storage or styled display. Your bathroom uses every inch intentionally.

    21. Add a Narrow Freestanding Shelving Unit in an Unused Corner

    A slim freestanding shelving unit slides into corners and provides open storage without any wall work. It’s flexible, moveable, and instantly boosts capacity.

    Place a narrow shelving unit (12-15 inches wide, 36-48 inches tall) in a corner next to the toilet or beside the vanity. Choose bamboo, wood, or metal to match your décor. Stock shelves with rolled towels, small baskets for supplies, or decorative items. These units cost less than built-in shelves and require zero installation.

    Budget: $30-$80 from IKEA (Pinnig), Target, or Amazon. No installation needed—just place and style. Perfect for renters since it’s completely portable.

    You gain shelf space without drilling holes. The corner feels used and organized rather than empty and wasted.

    22. Use a Clear Shower Enclosure Instead of Frosted Glass

    Clear glass enclosures feel more spacious than frosted or patterned options. Sight lines extend through the shower, making the entire bathroom feel larger.

    Install a clear frameless glass shower enclosure (or replace frosted panels with clear ones) to maintain visual continuity. If privacy is a concern, add clear glass with minimal hardware or trim. The uninterrupted sightline makes the bathroom feel open even in tight quarters.

    Budget: $300-$800 for a custom frameless glass enclosure. Off-the-shelf kits run $200-$400. Installation takes 4-8 hours professionally or 8-12 hours as a complex DIY project. Hire a professional for best results.

    The shower becomes transparent rather than a visual barrier. Your eye travels through the entire space, making everything feel more open.

    23. Install Slim Sconces on Either Side of the Mirror Instead of One Overhead Light

    Two slim sconces flanking the mirror provide better task lighting than a single ceiling fixture, plus they take up way less visual space overhead.

    Mount a slim wall sconce (6-8 inches tall) on each side of your mirror, positioned 60-66 inches from the floor (eye level or slightly above). Choose modern styles with minimal bulk in chrome, brass, or matte black. Pair with dimmable LED bulbs (3000K warm white) for flexibility. This setup works beautifully in tiny bathrooms because it keeps the ceiling visually clear.

    Budget: $15-$40 per sconce from Target, Wayfair, or Amazon (total $30-$80). Electrical installation for a renter situation: plug-in swing-arm sconces run $50-$120 each and need no wiring. Professional hardwiring costs $200-$400.

    Your face gets flattering, shadow-free lighting for grooming. The overhead area stays clean and open without a bulky fixture.

    24. Declutter Counter Space and Commit to a Minimalist Vanity Setup

    An empty counter is the cheapest way to make any bathroom feel larger. Removing just a few items has an immediate, dramatic effect on how spacious the room feels.

    Keep only 3-5 essential items on your vanity: a soap or hand-wash dispenser, a small cup for toothbrushes, a hand towel, and perhaps one small plant or candle. Store everything else in drawers, cabinets, or the shelves you’ve added. Make decluttering a weekly habit to maintain the calm aesthetic.

    Budget: $0 if you already have items to move; $15-$30 if you need to buy matching containers or a soap dispenser. Decluttering takes 30 minutes to an hour the first time, then 10 minutes weekly to maintain.

    Your vanity becomes a serene, calming zone instead of a cluttered catchall. The empty counter space makes your whole bathroom feel larger and more peaceful.


    Pin this guide and try just one or two ideas this weekend. Small changes add up fast, and you might be shocked at how much bigger your tiny bathroom feels when you remove visual clutter and add smart storage. Your micro space deserves to feel intentional and calm.

  • 23 Framed vs Frameless Mirror Ideas to Match Any Decor Style

    23 Framed vs Frameless Mirror Ideas to Match Any Decor Style

    Choosing between framed and frameless mirrors shouldn’t feel like a design puzzle. The truth? Both styles work beautifully—it just depends on your space, your vibe, and what problem you’re trying to solve. Framed mirrors add personality and anchor a room with color and texture, while frameless options create clean lines and amplify light in tight spaces. Whether you’re decorating a tiny apartment, refreshing a bathroom, or building a gallery wall, we’ve gathered 23 specific ideas that show you exactly how to use each style. You’ll find budget-friendly solutions, investment pieces, DIY hacks, and styling tricks that work in real homes. Let’s find your perfect mirror match.

    1. Embrace Brass Frames for Warmth

    Brass frames bring instant warmth to any room without feeling heavy or dated. The soft metallic shine complements everything from modern to bohemian décor and looks equally good in bedrooms, entryways, or living rooms.

    Hunt for brass-framed mirrors at IKEA ($15-$30), Target ($25-$50), or Wayfair ($40-$120). The simplest option: pick a square or rectangular shape in basic sizes (24″x30″ or 30″x40″) and hang it solo over a console or vanity. Installation takes about 20 minutes—just use a level and wall anchors if you’re renting. The frame itself does the heavy lifting, so you don’t need styling tricks.

    Pair your brass mirror with warm wood tones and soft linens to let the metal shine. The golden glow makes skin look flattering in bathrooms and adds a luxury feel without breaking the bank.

    2. Go Frameless for Maximum Space Illusion

    Frameless mirrors are the secret weapon for small rooms because they create visual continuity—no interruption means your eye travels farther and the space feels bigger.

    Pick a large frameless mirror (36″x48″ or bigger) from IKEA ($20-$40), Amazon ($30-$80), or Home Depot ($25-$100). Lean it against the wall (renter-friendly, no installation) or hang it securely with heavy-duty brackets and wall anchors. A DIY approach: buy a raw mirror sheet from a local glass supplier ($50-$150) and have them polish the edges—you’ll save 40% versus retail. Takes 30 minutes to hang.

    The no-frame design reflects light and makes walls disappear, which means your room instantly feels more open. You’ll notice the difference immediately when you walk in—it genuinely changes how a cramped space functions.

    3. Mix Matte Black Frames with Minimalist Décor

    Matte black frames create striking contrast in minimalist homes without the shine of gloss finishes. They ground a space, add visual weight, and photograph beautifully—perfect if you love that modern Instagram aesthetic.

    Search for matte black mirrors at Article ($60-$150), West Elm ($80-$200), or Wayfair ($40-$120). Look for simple rectangular or square shapes; complex frames defeat the minimalist purpose. Mount them with a stud finder and strong anchors—matte black draws attention, so placement matters. Installation takes 25 minutes if you’re comfortable with a drill; hire a handyman ($50-$100) if you’d rather not. Budget-friendly option: buy a cheap framed mirror and spray-paint the frame with matte black spray paint ($8-$15, 10 minutes plus drying time).

    Matte black keeps your aesthetic clean and modern while adding subtle drama. Pair with white walls and natural wood, and your room looks intentionally curated rather than sparse.

    4. Use Scalloped Edges for Soft Femininity

    Scalloped edges blur the line between functional and artistic, adding playfulness without being over-the-top. This style works in kids’ rooms, adult bedrooms, or any space craving a touch of femininity and movement.

    Find scalloped mirrors at Anthropologie ($80-$180), Urban Outfitters ($60-$140), or Etsy ($50-$200). Sizes typically range 24″-36″ in diameter. Most come pre-hung and ready to mount; installation takes 15 minutes. If you love DIY, you can craft a scalloped frame using a wooden mirror kit and felt or fabric trim ($25-$50, 45 minutes) from craft stores. Renter tip: adhesive strips (Command Strips, $8) hold lightweight scalloped mirrors safely.

    The soft, wavy edges catch light beautifully and create shadow patterns that shift throughout the day. Your room gains personality without sacrificing function, and guests always ask where you found it.

    5. Layer Frameless Mirrors in a Gallery Wall

    A gallery wall of frameless mirrors multiplies light and creates an art installation that’s equal parts functional and decorative. Each mirror reflects the others, making the effect more dramatic than a single piece.

    Buy frameless mirrors in assorted shapes: circles ($15-$40), rectangles ($20-$50), ovals ($25-$60) from IKEA, Target, or Amazon. Arrange 5-7 mirrors on a white wall using mixed mounting methods (some hung, some leaning against floating shelves). Plan your layout on the floor first to avoid over-drilling. Hang using wall anchors rated for your mirror weight (check product specs). Allow 1-2 hours for layout and installation, especially if you’re a first-timer.

    The collection becomes a room focal point that brightens every corner. Light bounces endlessly, and visitors perceive the space as significantly larger and more luminous than it actually is.

    6. Choose Arched Mirrors to Soften Hard Angles

    Arched mirrors work in nearly every décor style because curves naturally soften modern’s sharp edges. The shape is classic without feeling dated—it bridges traditional and contemporary beautifully.

    Shop arched mirrors at West Elm ($120-$250), Wayfair ($60-$180), or Anthropologie ($100-$220). Sizes span 24″-40″ in height; most come in wood or metal frames. Installation takes 20-30 minutes with a level and wall anchors. Budget option: buy a basic arched mirror at Target ($40-$80) and upgrade the frame with paint or stain if needed. Renter hack: lean a large arched mirror against the wall behind a console table for impact without drilling.

    The gentle arch creates visual harmony in rooms where walls meet at hard corners. You’ll notice the space feels more balanced and serene—less angular, more welcoming.

    7. Install a Frameless Mirror Behind Floating Shelves

    A frameless mirror behind floating shelves is a styling trick that makes small shelving systems look like gallery displays. The mirror backdrop forces items forward and makes curated collections feel more intentional.

    Mount floating shelves at IKEA ($15-$40 each), Target ($20-$60), or Home Depot ($25-$80). Hang a frameless mirror (24″x36″ or 30″x40″) directly behind them using heavy-duty brackets. The mirror weight should be supported by sturdy wall anchors rated for 50+ pounds (check hardware ratings). Total time: 45 minutes to 1 hour if you’re installing shelves and mirror together. Pro tip: hire a handyman ($75-$150) if you’re not comfortable finding studs—this installation requires precision.

    Your shelves instantly become a styled display that photographs like a magazine spread. The mirror creates depth, multiplies light, and makes even a modest collection look curated and intentional.

    8. Paint a Bold Wood Frame for DIY Personality

    A thrifted wooden-framed mirror + paint = custom statement piece for under $30. This DIY idea gives you complete control over color and lets you match your existing décor exactly.

    Find a wooden-framed mirror at thrift stores ($5-$15), estate sales, or Facebook Marketplace. Grab paint in your chosen color—try deep jewel tones, soft pastels, or warm earth tones ($8-$12 per quart). Clean the frame, tape off the mirror with painter’s tape, and apply 2-3 coats of paint ($20 total time: 2 hours including drying). Seal with matte polycrylic ($6) if you want protection. No special skills required.

    Your custom mirror becomes a true focal point that matches your color scheme perfectly. People are always surprised it’s DIY—the finished look rivals store-bought pieces costing 3-5x more.

    9. Hang a Marble-Veined Mirror for Luxury Texture

    Marble-veined mirrors add instant luxury without actual marble prices. The veining catches light and adds visual interest that plain frames can’t match. Even small bathroom mirrors feel elevated with this detail.

    Search for marble-veined mirrors at Wayfair ($70-$180), West Elm ($100-$250), or Etsy ($60-$200). Most feature marble-look finishes in black-and-white or gray veining over resin or composite materials (not actual marble, which is heavy and fragile). Installation takes 15-20 minutes with standard wall anchors. Budget dupe: spray-paint a frame with faux marble spray paint ($12, 30 minutes) from craft stores—results aren’t identical but they’re surprisingly convincing.

    The veining mimics high-end materials, making your room feel more polished. Guests notice the detail immediately, and you’ll love how it grounds the space with quiet elegance.

    10. Install LED Backlighting Behind a Frameless Mirror

    LED backlighting transforms a basic mirror into functional art that brightens your bathroom or vanity area while adding a luxury vibe that feels like a spa retreat.

    Buy a large frameless mirror ($40-$100) and LED strip lights ($15-$40) from Amazon or Home Depot. Choose warm white (2700K) for bedrooms or cool white (4000K) for bathrooms. Mount the mirror using wall anchors, then adhere LED strips along the frame’s back edges using 3M strips. Total time: 30-40 minutes. Plug into a standard outlet (strips come with USB or plug adapters). Budget option: use peel-and-stick LED strips ($10-$20) for a removable, renter-friendly installation.

    Your mirror becomes a light source, which means better visibility and mood lighting in one go. Bathrooms look visibly brighter, and you’ll actually want to spend time at your vanity.

    11. Use Oversized Framed Mirrors in Small Rooms

    An oversized framed mirror in a small room creates the illusion of a second window and doubles your perceived square footage. The frame adds personality while the size does the heavy lifting.

    Find oversized framed mirrors (36″x48″ or 40″x50″) at Wayfair ($80-$200), IKEA ($60-$120), or furniture stores ($100-$300). Lean it against a wall (renter-safe, zero installation) or hang it with heavy-duty wall anchors rated for 60+ pounds. If you’re not comfortable drilling, lean-to mirrors with stands ($70-$150) work beautifully and move easily. Installation (if hanging): 20-30 minutes.

    The oversized frame becomes a statement piece that anchors the room while the mirror itself makes the space feel significantly larger. Natural light bounces around more efficiently, so you might even feel less need for artificial lighting.

    12. Create a Minimal Look with Ultra-Thin Frameless Designs

    Ultra-thin frameless mirrors are minimalism at its purest—just glass and polish. They disappear into walls while maximizing light, perfect for anyone who believes less is more.

    Shop ultra-thin frameless mirrors ($40-$120) at Design Within Reach, Article, or Wayfair. Most measure 24″-36″ in width; the thinness is the design feature. Hang using minimal metal brackets designed for frameless mirrors (usually included) and wall anchors. Installation takes 20 minutes. DIY workaround: buy a standard mirror and have a glass company polish the edges for a frameless appearance ($30-$50, 3-5 business days).

    The ultra-thin profile reads as intentional and curated rather than basic. Your wall becomes a study in simplicity, and the minimal visual weight means the mirror blends rather than dominates.

    13. Mix Metal Finishes in a Coordinated Set

    Mixing metal finishes used to be a décor no-no, but now it’s a trend. Three mirrors in brass, matte black, and rose gold feel intentional and collected, not mismatched.

    Choose three mirrors in similar shapes but different metal finishes. Source from IKEA, Target, and Wayfair ($25-$60 each, $75-$180 total). Arrange them asymmetrically on your wall—stagger heights and spacing so they read as curated. Use a level and painter’s tape to plan placement before drilling. Installation time: 45 minutes to 1 hour. Pro tip: keep frame styles minimal so the finish variations shine; ornate frames in mixed metals can feel chaotic.

    The mixed metals feel collected and intentional—like you found them over time rather than buying a matched set. Your wall becomes a conversation starter and feels more personal than a single statement mirror.

    14. Mount a Round Frameless Mirror in a Modern Bedroom

    Round frameless mirrors bring soft geometry to modern bedrooms while keeping lines clean. The shape is calming and the lack of frame makes it feel contemporary rather than traditional.

    Find round frameless mirrors in sizes 24″-36″ ($30-$80) at IKEA, Target, or Amazon. Mount using a specialized round mirror bracket system (usually two-part, rated for weight) and wall anchors. Installation takes 20 minutes. Renter hack: lean a round mirror against the wall or use adhesive mirror hangers ($10-$20, removable without damage). Budget option: thrift a wood-framed round mirror and remove the frame by carefully prying it off, then polish edges.

    The soft circle grounds your bedroom visually while keeping the aesthetic modern and clean. You’ll love how peaceful the rounded shape feels compared to angular mirrors.

    15. Add Rattan or Natural Wood Frames for Coastal Style

    Natural material frames like rattan and wood bring organic warmth and texture that screams coastal calm. They work in bathrooms, bedrooms, and entryways without feeling trendy or temporary.

    Search for rattan or wood-framed mirrors ($50-$150) at Wayfair, Anthropologie, or West Elm. Look for 24″-36″ sizes in natural finishes. If you can’t find exactly what you want, buy a basic framed mirror ($20-$40) and wrap the frame with rattan webbing ($10-$20) using strong adhesive—craft stores sell supplies. DIY time: 30 minutes. Direct installation: 20 minutes with standard wall anchors.

    The natural texture makes your space feel immediately warmer and more inviting. Rattan catches light softly and adds visual interest without competing with your other décor, giving your room an effortlessly curated coastal vibe.

    16. Lean a Floor-to-Ceiling Mirror for Instant Drama

    A floor-to-ceiling lean-to mirror is the ultimate space expander and requires zero permanent installation—perfect for renters or anyone hesitant about commitment.

    Buy a tall lean-to mirror (54″-72″ height) from IKEA ($80-$150), Target ($70-$130), or Wayfair ($100-$200). Choose a frame style that matches your aesthetic—minimal metal, wood, or simple designs work best. Lean it against the wall (no installation needed), or use a temporary mirror stand ($50-$100) for extra stability. Setup time: 5 minutes. Prop it in a corner or against a focal wall to maximize the reflection impact.

    Your entire room feels twice as spacious and twice as bright instantly. The mirror becomes a statement piece while functioning as pure practical magic—wear it like the accessory it is.

    17. Frame a Mirror with Sustainable or Reclaimed Wood

    Reclaimed or sustainable wood frames add character and story. Each grain pattern is unique, so your mirror becomes one-of-a-kind without feeling like a trendy statement piece.

    Source reclaimed wood mirrors from Etsy ($80-$250), local woodworkers, or specialty shops. Alternatively, buy a plain mirror and commission a local carpenter ($100-$300) to build a custom frame from reclaimed wood. DIY option: find salvage wood at architectural salvage yards ($10-$30) and build a simple frame yourself with wood glue and finishing nails—YouTube tutorials make it doable. Budget: 45 minutes to 2 hours depending on skill level.

    The natural imperfections in reclaimed wood create visual warmth that new materials can’t replicate. Your mirror tells a story of sustainability, and guests appreciate the thought behind choosing reclaimed materials over mass production.

    18. Install a Mirror Vanity with Built-In Storage

    A mirror-with-storage combo solves two problems at once: you get a good mirror for morning routines plus places to stash daily essentials, which is huge in small bathrooms.

    Find mirrors with integrated shelving ($100-$250) at Wayfair, Amazon, or specialty bathroom retailers. Most include two to four shelves built into the frame. Mount securely using heavy-duty wall anchors rated for combined mirror-plus-item weight (typically 50-80 pounds). Installation takes 30-40 minutes. Budget option: mount a regular mirror above floating shelves ($15-$40 each) to create your own storage effect at a fraction of the cost.

    You instantly gain counter space and reduce bathroom clutter. Everything you use daily is within arm’s reach, and the organized look makes your bathroom feel more spacious and intentional.

    19. Use a Gold Leaf or Metallic Finish Frame for Luxury

    Gold leaf frames are the quiet luxury update—not shiny or brassy, but warm and sophisticated. They work in traditional, modern, and eclectic spaces without feeling dated.

    Hunt for gold leaf or metallic frame mirrors ($80-$180) at Anthropologie, Etsy, or high-end home décor sites. If you love DIY, buy a basic wooden frame mirror and apply gold leaf yourself ($15-$25, 1-2 hours) using leaf kits from craft stores. Mount with wall anchors rated for frame weight (usually 20-30 pounds for standard sizes). Installation: 15 minutes.

    The warm metallic finish catches light and adds quiet sophistication without screaming “look at me.” Your entryway or powder room instantly feels more polished, and the gold complements nearly every other color in your home.

    20. Create an Asymmetrical Gallery Wall with Mixed Frames

    An asymmetrical gallery combining framed and frameless mirrors is maximalist done right—busy but intentional, never chaotic. This approach celebrates visual interest and personal style.

    Collect 6-8 mirrors in mixed styles: some framed ($15-$60 each), some frameless ($20-$50 each) from IKEA, Target, Wayfair, and Etsy. Choose a unifying element: all cool metal finishes, all warm wood tones, or all similar sizes (even if shapes vary). Lay them on the floor and arrange before hanging. Mount using appropriate hardware for each mirror type (wall anchors, specialized frameless brackets). Allow 2-3 hours for planning and installation, or hire a handyman ($100-$150) for precision.

    The mixed collection reads as intentional and artistic rather than random. Each mirror adds both function and visual texture, turning your wall into a gallery that reflects your personal taste and style evolution.

    21. Hang a Statement Mirror with Integrated Shelving

    Integrated shelving around or beside a mirror is a design-forward way to add storage and display space without mounting separate pieces.

    Look for mirror-with-shelving units ($150-$350) on Wayfair, Article, or specialist home sites. Most come as single-unit installations combining the mirror and shelves. Mount using heavy-duty wall anchors and a stud finder (critical for weight distribution). Installation time: 40 minutes to 1 hour. DIY approach: mount a statement mirror, then add a floating shelf ($15-$40) on each side using separate brackets for a custom look at half the price.

    You gain display space and a functional mirror in one cohesive piece. Styled shelves become part of your mirror display, creating a layered, gallery-like focal point that feels intentionally designed.

    22. Choose a Geometric or Hexagonal Frame for Modern Edge

    Geometric frames push your décor beyond circles and rectangles, adding architectural interest without being playful or whimsical. Hexagons and asymmetrical shapes read as intentionally modern.

    Find geometric mirrors ($60-$150) at Wayfair, Article, or specialized modern furniture retailers. Look for hexagons, pentagons, or asymmetrical shapes. Most work best in metal frames; wood can read as too trendy. Mount using standard wall anchors and a level (the angles require precision). Installation: 20-25 minutes. Budget option: DIY a geometric frame using wood or metal trim, then fit a mirror inside ($30-$50 in materials, 1-2 hours).

    The geometric shape adds a sculptural quality that elevates your space beyond standard mirrors. Modern without being cold, the sharp lines add personality while respecting a minimal aesthetic.

    23. Paint the Wall Behind Your Mirror for Added Depth

    Painting the wall behind your mirror frames it visually and adds depth to your room. A contrasting color draws your eye and makes the mirror a true focal point rather than an afterthought.

    Choose a paint color that contrasts with your mirror frame (dark walls with brass mirrors, light walls with black frames, colorful walls with minimal frames). Grab paint ($15-$25 per quart) from any hardware store in your chosen shade. Prime if needed, then paint the wall area behind and around your mirror ($20-$40 in supplies, 3-4 hours including drying). Mount your mirror after paint dries. Pro tip: use painter’s tape to mark your mirror’s footprint before painting, so you know exactly where it’ll hang.

    The accent wall transforms your mirror from a functional object into a designed focal point. The contrast adds dimension and draws people’s eyes—suddenly your mirror feels like intentional décor rather than a practical necessity.

    Save this post and pick your first mirror upgrade this weekend. Whether you go frameless for space or framed for personality, one small change shifts how your whole room feels—and honestly, your space deserves that attention.

  • 24 Narrow Laundry Room Ideas That Make Every Inch Count

    24 Narrow Laundry Room Ideas That Make Every Inch Count


    INTRODUCTION

    If your laundry room is basically a hallway with a washer tucked in, you’re not alone. Narrow spaces feel cramped, cluttered, and honestly? Kind of depressing. But here’s the thing: skinny laundry rooms have serious potential. With smart storage, clever layouts, and a few design tweaks, you can create a space that’s both functional and actually pleasant to spend time in. Over the next few minutes, you’ll discover 24 proven ideas that work because of your room’s shape, not in spite of it. From vertical storage hacks to multitasking zones, these solutions squeeze maximum efficiency into minimal footage. Let’s make your narrow laundry room work harder for you.


    1. Install Floating Shelves Above the Washer and Dryer

    Floating shelves are your best friend in tight spaces because they eat zero floor real estate. By mounting them directly above your stacked appliances, you create a tower of storage without blocking movement through the room.

    Measure the width of your appliances first, then grab floating shelves in 12–18-inch widths from IKEA, Home Depot, or Amazon ($20–$60 per shelf). Install heavy-duty brackets at 12–16-inch intervals using a stud finder. Leave 6–8 inches of clearance above the top appliance for safety and airflow.

    Pro tip: Use clear or woven baskets on the shelves so you can see supplies at a glance without everything looking cluttered.

    You’ll unlock precious vertical real estate and keep detergents, dryer sheets, and cleaning cloths within arm’s reach while folding. The best part? Zero DIY skills required if you hire a handyman for 30 minutes ($50–$100).


    2. Go Vertical With Tall, Narrow Cabinets

    Narrow spaces call for height, not width. A single tall cabinet can hold more than three wide ones while actually making your room feel bigger because it draws the eye upward.

    Look for 18–24-inch-wide pantry-style cabinets at IKEA, Wayfair, or Home Depot ($150–$400 depending on material and finish). Alternatively, stack two narrow shelving units and cap them with a cabinet topper. Install this against your longest wall to maximize floor clearance. Paint it a soft earthy tone (sage, taupe, or warm cream) to blend rather than dominate.

    Time estimate: 1–2 hours to assemble and install if you’re comfortable with basic hardware; $50–$150 for a handyman.

    The vertical investment pays off instantly—you get three times the storage of a squat dresser without eating into your already-tight walkway. Your laundry day feels less like an obstacle course.


    3. Use a Rolling Cart for Portable Supply Station

    Rolling carts are the renter’s secret weapon and a budget-friendly flex. They slide out when you need supplies, tuck away when you don’t, and move to wherever you’re folding clothes or treating stains.

    Grab a slim rolling cart with 2–3 tiers from IKEA ($35–$60), Amazon, or Target. Choose one in matte black, white, or natural wood to match your vibe. Stock shelves with detergent, stain spray, dryer sheets, lint rollers, and folded cleaning cloths in small bins.

    Pro tip: Label bins so everyone in the household knows where things belong—cuts down on chaos fast.

    When guests are coming, you roll it into a closet or laundry room corner. When you’re working, it’s right beside you. No commitment required, and you can take it with you if you move. That’s a win every way.


    4. Paint Walls in a Warm, Light Tone to Expand the Space

    Color does incredible things in tight rooms. Dark paint in a narrow space feels like a cave; light tones literally make walls recede and rooms appear deeper.

    Choose a soft, warm neutral like pale sage, warm taupe, soft cream, or barely-there greige. Brands like Sherwin-Williams (Accessible Beige, Sea Salt) or Benjamin Moore (Cloud White, Aegean Teal in whisper-light versions) run $30–$50 per gallon. You’ll need 1–2 gallons for a typical laundry room.

    Prep work takes 2–3 hours; painting takes another 2–4 hours depending on room size. DIY friendly—grab a roller and go. If you prefer pro work, expect $200–$400 labor.

    The payoff? Your room instantly appears 20% bigger, and the calming backdrop makes you feel less frazzled while folding endless socks. Bonus: light walls hide dust way better than you’d think.


    5. Mount a Slim Folding Station That Pulls Down From the Wall

    A fold-down table gives you a real work surface without eating floor space permanently. When you’re done folding, it clips up and disappears.

    Search for wall-mounted fold-down desks or tables ($60–$150 on Amazon or Wayfair). Look for ones 24–30 inches wide and 16–18 inches deep—perfect for folding a load. Mount it 30–36 inches high using wall anchors or studs.

    Installation time: 45 minutes to 1 hour if you’re handy; $50–$100 if you call someone.

    You get a dedicated folding zone without a permanent footprint. Collapse it, and your laundry room becomes pure passageway again. Genius for narrow spaces where multitasking is survival.


    6. Add Open Shelving With Woven Baskets for a Soft, Organized Look

    Open shelving lets you see everything and makes the room feel lighter than closed cabinets—but it only works if you commit to neat baskets and folded stacks.

    Install 3–4 floating wooden shelves (12–18 inches wide, $30–$60 each) across one wall. Pair with woven or fabric baskets ($10–$25 each from Target, IKEA, or Amazon) sized to fit the shelves perfectly.

    Pro tip: Fold items in thirds, stand towels upright like a filing cabinet, and use matching baskets so the eye doesn’t bounce all over.

    Time: DIY in 1–2 hours; full installation with help is 2–3 hours total.

    You get the airiness of open storage without feeling chaotic, plus everything’s visible so restocking is instant. This style photographs beautifully too—totally Pinterest-worthy.


    7. Install a Narrow Utility Sink for Hand-Washing Delicates

    A utility sink transforms your laundry room from “place where stuff happens” to a real hub. Hand-wash lingerie, pre-treat stains, rinse out mops—it’s invaluable.

    Look for compact utility sinks (18–24 inches wide) at Home Depot, Lowes, or Amazon ($150–$350 for sink + faucet combo). Mount to wall studs or install a simple pedestal model. You’ll need basic plumbing or $150–$300 in labor.

    DIY level: Medium to advanced if you’re handling plumbing yourself; hire a plumber for the water/drain hookup ($1–2 hours, $100–$300).

    Suddenly your laundry room has the functionality of a butler’s pantry. You can rinse delicates right after drying, treat tough stains immediately, and keep your bathroom sink available for actual hygiene. Quality-of-life upgrade, honestly.


    8. Use Tall Narrow Hampers to Sort Laundry Vertically

    Narrow hampers stack laundry up, not out, which is perfect for hallway-sized rooms. Three hampers (Whites, Colors, Delicates) take up about 3 square feet total but hold a huge volume.

    Grab slim fabric hampers from IKEA, Target, or Amazon ($12–$30 each). Labels ($3–$8 per set) keep everyone sorting correctly. Position in a corner or line them along one wall.

    Budget hack: Use sturdy laundry bags instead of hampers ($3–$5 each) and hang them on a wall-mounted rod. Free up even more floor space.

    Doing laundry becomes a sorting game instead of a guessing game. Kids know where to toss things, and you start each wash cycle organized. Simple but life-changing for households with multiple people.


    9. Hang a Pull-Out Drying Rack for Air-Dry Items

    Air-drying delicates and sweaters saves energy and extends fabric life—but you need hanging space. Wall-mounted pull-out racks are magic for narrow rooms.

    Search for accordion-style or pull-out wall-mounted drying racks ($50–$120 on Amazon or Wayfair). Mount at shoulder height above your folding counter or against a blank wall. When not in use, it collapses flush.

    Installation: 30 minutes with basic hardware; $30–$50 if someone helps.

    You get a dedicated air-dry zone without permanent clutter. Sweaters, silks, and delicates hang safely, and the whole thing disappears when you’re done. Energy-efficient and space-efficient.


    10. Install Peel-and-Stick Wallpaper in One Accent Wall

    One accent wall breaks monotony without overwhelming a tight space. Peel-and-stick wallpaper is renter-safe, budget-friendly, and reversible.

    Pick a peel-and-stick wallpaper in a subtle pattern (geometric, botanical, or textured) from Amazon, Target, or Etsy ($25–$60 per roll). Choose a wall that’s most visible—often the one opposite the door.

    Time: 2–3 hours for your first attempt; gets faster with practice. No permanent commitment—peel it off anytime.

    Suddenly your laundry room stops feeling utilitarian and starts feeling designed. It’s a small investment that makes a huge mood shift. Pick a pattern that matches your 2025 earthy color vibe (soft greens, warm taupes, natural textures).


    11. Mount a Narrow Ironing Board on the Wall

    A wall-mounted ironing board replaces the need for a bulky freestanding one that eats square footage you don’t have.

    Find a fold-down wall-mounted ironing board ($40–$80 at Target, Bed Bath & Beyond, or Amazon). Mount it 24–30 inches from the ground and at waist height when folded down. Use heavy-duty anchors or mount into studs.

    Installation: 30–45 minutes; $20–$40 if you need help.

    Bonus: Some fold-down boards include ironing supply hooks right on the board itself, so your iron and spray bottle hang organized in one spot.

    Iron clothes right where you fold them, then fold it away. Zero guilt about the un-ironed pile because your setup is so frictionless. That’s the dream.


    12. Add LED Under-Shelf Lighting for a Spa-Like Feel

    Lighting transforms a dungy basement or hallway laundry room into somewhere you don’t dread going. LEDs are energy-efficient and affordable.

    Grab warm white LED strip lights ($15–$40 for a multi-strip set on Amazon). Mount under each floating shelf using the included adhesive backing. Plug into an outlet or (for hardwired look) have an electrician install a dimmer switch ($100–$200 labor).

    DIY time: 30 minutes to install strips; zero tools required.

    Pro tip: Go warm white (2700K color temperature), not cool white or blue. It feels spa-like instead of clinical.

    Your laundry room becomes a bright, organized oasis instead of a cave. Folding feels meditative, not like a chore you’re rushing through. Lighting truly is the secret ingredient.


    13. Use Magnetic Shelves or Strips for Metal Baskets

    Magnetic strips let you use metal baskets and containers without drilling into walls—perfect for renters and anyone who wants damage-free organization.

    Install adhesive magnetic strips ($15–$35 for a set) on smooth wall surfaces or cabinetry. Use small metal storage baskets or containers ($5–$20 each from Target, Container Store, or Amazon) to clip on.

    Time: 10 minutes to install strips; instant gratification.

    Supplies hover on your wall, accessible and chic. You can rearrange baskets endlessly without tools. Industrial-meets-minimal, and it looks thoughtfully organized, not thrown-together.


    14. Stack Appliances to Free Up Floor Space

    If you have room for only one appliance footprint, stacking is non-negotiable. A stacked setup cuts your appliance floor space in half.

    Many modern washers and dryers stack easily; some require a stacking kit ($150–$300). If your current appliances aren’t stackable, compact side-by-side combos exist ($1,500–$3,000), or go with a washer/dryer combo unit ($800–$1,500) that does both in one.

    Pro tip: Ask your appliance retailer if your current units stack before you buy expensive kits.

    The freed-up floor makes your room feel twice as wide. Movement becomes easy, and you have space for a folding table, cart, or just breathing room. This might be the single best ROI for a narrow laundry room.


    15. Create a Hidden Hamper Using a Decorative Basket or Ottoman

    Hampers don’t have to scream “dirty laundry.” A beautiful basket or ottoman does the job invisibly, especially in a space that might open into a mudroom or hallway.

    Find a large woven basket ($30–$80 from West Elm, Target, or Wayfair) or a fabric storage ottoman ($40–$120) in neutral tones. Size it to hold 1–2 loads of laundry comfortably.

    Renter hack: Use a decorative basket with no installation required; moving day is seamless.

    From the hallway, it looks like intentional decor. From inside the laundry room, it’s your pre-wash catch-all. Guests never guess it’s a hamper, and your space feels curated instead of utilitarian.


    16. Install Slim Pull-Out Drawers or Shelves

    Pull-out drawers maximize what you can actually reach in a narrow cabinet. Things at the back aren’t lost forever.

    Add slim pull-out sliding shelves or drawer kits to existing cabinets ($30–$80 per shelf from IKEA, Home Depot, or Amazon). Install them in existing cabinetry using the hardware provided. Time: 45 minutes to 1 hour per shelf.

    Pro tip: Put heavier items (detergent, extra towels) on lower shelves so pulling doesn’t feel wobbly.

    Everything in your cabinet stays accessible. No more playing Jenga with detergent bottles or forgetting what’s crammed in the back. Organization becomes automatic.


    17. Use Vertical Hooks or Pegboard for Cleaning Tools

    Vertical hook systems keep tools visible and off the ground—critical in tight spaces where floor clearance is gold.

    Install a pegboard ($20–$50 from Home Depot or Lowes) on one wall or above your utility sink, or use simple adhesive hooks ($5–$15 for a set) if drilling isn’t an option. Hang spray bottles, microfiber cloths, a small broom, and hangers for delicate items.

    Installation: 30 minutes with a drill; 10 minutes with adhesive hooks (renter-friendly).

    Tools are always visible and ready. Your floor stays clear, and your wall becomes a functional design feature. No more hunting for the stain remover when you need it.


    18. Add a Narrow Console Table for Folding and Sorting

    A narrow console table is deeper than a desk but shallower than traditional furniture—perfect for folding without blocking movement in tight rooms.

    Search for slim console tables ($80–$200 at IKEA, Wayfair, Target, or West Elm) in 24–36 inch widths. Position it against the longest wall, and you’ve got a dedicated folding zone that looks intentional, not makeshift.

    Budget option: Use a long floating shelf ($30–$60) with a foldable cushion on top for ergonomic folding comfort.

    Folding becomes a real activity instead of chaos happening on top of the dryer. The space feels organized and purposeful. Plus, a pretty console looks like decor rather than “laundry room stuff.”


    19. Install Shelves Above the Door for Dead Space

    The space above a door is literally wasted real estate in every narrow room. Grab it with slim shelving.

    Mount floating shelves (12–15 inches wide) above your doorframe using heavy-duty brackets rated for weight ($40–$100 total). Use this space for lightweight items—folded linens, towel stacks, or decorative baskets.

    Installation: 30–45 minutes; requires a drill and level. Renter option: Use tension rods and fabric baskets instead of shelves ($20–$40).

    Suddenly you’ve created storage from zero floor space. It’s invisible until you step back and think, “Wow, why don’t I do this everywhere?” You just did, in your laundry room.


    20. Go Minimalist With a Neutral Color Palette and Decluttered Styling

    Narrow spaces feel smaller when packed with visual noise. A neutral, minimal approach creates the illusion of space—and actually makes the room feel calming.

    Declutter ruthlessly: toss expired products, donate unused cleaning tools, and keep only active supplies. Stick to a color palette of 2–3 neutrals (white, taupe, warm wood). Store everything in matching bins or baskets ($3–$10 each).

    Time: A dedicated Saturday afternoon to sort and organize. Budget: $30–$60 for matching storage containers.

    You’ll look around and feel peace instead of overwhelm. Minimalism in a tight space is like adding square footage. Your laundry room becomes a sanctuary, not a storage unit.


    21. Use Door-Mounted Storage for Supplies and Rags

    Door storage is invisible until you need it, making it perfect for tight rooms. Hook-style organizers or over-the-door racks multiply your storage without eating wall space.

    Install an over-the-door organizer ($15–$40 from Target or Amazon) on the back of your laundry room or closet door. Stock it with spray bottles, cleaning cloths, hangers, and lightweight supplies. Alternatively, add adhesive hooks ($5–$10) in a grid pattern.

    Time: 10 minutes; zero permanent commitment if using adhesive hooks.

    This storage only appears when the door opens—guests never know it’s there. You get a complete supply station without sacrificing an inch of wall or shelf space.


    22. Create a Pet-Washing Station in One Corner

    Pet owners: this one’s for you. A dedicated dog-washing corner in your laundry room means less fur in your bathroom and a dedicated cleanup zone.

    Install a compact pet grooming basin ($50–$150 from Amazon or Chewy) or a portable pet shower tub ($30–$80). Mount a wall-hung hose or faucet if you have existing plumbing access, or use a fill-bucket method ($0 if you already have buckets). Hang towels and store dog shampoo on a small shelf nearby.

    DIY level: Low to medium depending on plumbing access; $50–$200 if you need help with hookups.

    Muddy paws get rinsed before the rest of the house, and your laundry room becomes a true household hub. Pets get clean without drama, and cleanup happens where the mess belongs.


    23. Mount a Slim Shelving Unit as a Room Divider

    If your narrow laundry room connects to or opens into a mudroom, bedroom, or garage, a slim open shelving unit can define zones without fully blocking sightlines.

    Use open-backed floating shelves or a ladder-style shelf unit (18–24 inches wide, 60+ inches tall) from IKEA ($50–$150) positioned perpendicular to walls. The openness keeps the space feeling light while creating a subtle boundary.

    Pro tip: Use this divider shelf to display pretty baskets or rolled towels—it becomes decor, not just storage.

    You’ve created functional separation without walls or clutter. The room suddenly has zones instead of everything bleeding together in one narrow stretch.


    24. Invest in Smart Appliances for Workflow Efficiency

    Smart washers and dryers with app controls, moisture sensors, and cycle shortcuts make narrow-room laundry feel less like a chore.

    Look for smart-enabled washers ($600–$1,200) and dryers ($600–$1,200) from brands like LG, Samsung, or GE. These sync with your phone, send alerts when cycles finish, and adjust settings automatically. Alternatively, add a smart plug ($15–$30) to existing machines for basic remote controls.

    Budget hack: A smart plug gives you basic “turn it on/off remotely” without replacing appliances—huge savings if yours work fine.

    You’ll get alerts when laundry’s done, saving you from that moment of re-drying clothes because you forgot them. The efficiency is minor but genuinely nice, especially in a space where you’re trying to minimize time spent.


    25. Use Clear or Translucent Storage Containers So You Never Forget Supplies

    Open shelving looks messy if you can’t see into containers. Clear storage keeps things organized and visible—you never run out of supplies.

    Stock up on clear plastic bins ($3–$8 each from Container Store, Target, or Amazon) in 2–3 sizes. Label each with a label maker ($15–$25) or waterproof stickers ($3–$5). Stack them on shelves so you can see contents at a glance.

    Time: 30 minutes to assemble and label.

    You’ll never think “I’m sure we have dryer sheets” and then discover an empty box. Everything’s transparent, findable, and restockable. A tiny system that solves supply-hunting stress.


    26. Paint Cabinets a Bold Matte Color to Define the Space

    Bold cabinet color (not wall color) adds personality without overwhelming a tight space. Matte finishes feel modern and hide fingerprints better than glossy.

    Paint existing cabinets or buy pre-made ones in soft greens, warm taupes, matte black, or creamy whites ($150–$500 depending on cabinet size and whether you DIY or hire a pro). Matte finish paint costs $30–$50 per quart; a painter charges $300–$800 to spray-finish cabinetry.

    Budget DIY: Use painter’s tape and a brush; it takes longer but costs $40–$80 total. Pro result: Hire a painter for spray-finish ($300–$500).

    Your cabinetry becomes the anchor of the room instead of invisible background. The space feels designed, not default. It’s the final touch that makes everything feel intentional.


    PIN THIS FOR LATER: Save these ideas for your next laundry refresh. Pick just one to tackle this weekend—you’ll be surprised how even a small change (better lighting, one new shelf, a fresh paint color) shifts the whole vibe. Which idea are you trying first?

  • 26 Scandinavian Laundry Room Ideas for a Clean, Minimal Look

    26 Scandinavian Laundry Room Ideas for a Clean, Minimal Look


    Scandinavian design has a quiet magic—it makes even mundane tasks feel intentional and peaceful. If your laundry room feels chaotic or uninviting, you’re not alone. Most of us toss clothes in, grab them, and leave. But what if your laundry space could be a place you actually want to spend time? These 26 ideas blend Scandinavian minimalism with practical functionality, showing you how to create a clean, organized laundry room that works as hard as it looks good. From budget-friendly styling tricks to smart storage solutions, you’ll find ideas that fit your space and your lifestyle. Ready to make laundry less of a chore? Let’s go.


    1. Embrace Neutral Wall Colors for Calm Focus

    Neutral walls create the foundation of Scandinavian design. This isn’t boring—it’s deliberate. Soft whites, pale grays, and warm creams shrink visual clutter, making small spaces feel bigger and more serene.

    Paint your walls a warm white (like Benjamin Moore Cloud White or Sherwin Williams Alabaster) or a subtle gray-beige. These shades cost $30–$60 for paint and supplies, taking a weekend afternoon to complete. The payoff? Your space immediately feels more intentional. When walls are neutral, every organized basket and shelf becomes a design element rather than competing visual noise.

    Bonus: Neutral walls hide dust and lint better than bold colors, so your space stays looking fresh longer.


    2. Install Floating Shelves for Airy Storage

    Floating shelves embody Scandinavian design—they’re functional yet feel weightless. Unlike bulky cabinets, they make cramped laundry rooms look spacious and give you visual space to breathe.

    Install 2–3 shelves at varying heights using wall anchors (find kits at Home Depot or IKEA for $40–$80 per shelf). Arrange items with intention: group like items (detergent bottles together, folded linens in one stack), leave gaps between groups, and add one small plant for life. Installation takes 1–2 hours with a drill and level. Renters can use tension rods on shelves for a completely removable option.

    Your room gains storage without feeling cramped, and everything stays visible and accessible.


    3. Choose White or Natural Wood Cabinetry

    Scandinavian interiors favor natural wood or crisp white—never dark or heavy finishes. These colors let your space breathe while staying sophisticated.

    If replacing cabinets, choose unfinished pine or birch cabinetry from IKEA ($200–$600 for a small laundry setup) or local builders. Paint white cabinets yourself with Benjamin Moore Advance paint ($60–$100 for supplies, 2–3 days of work including drying time). Natural wood warms a cool white room without adding visual weight. Metal hardware in brushed nickel or black reinforces the minimal aesthetic.

    The result is a room that feels both contemporary and timeless, never trendy or fussy.


    4. Add a Utility Sink for Pre-Treating Stains

    A utility sink isn’t luxury—it’s practical Scandinavian design at its best. Pre-treating stains at a dedicated sink saves time and prevents laundry from spreading around your home.

    Install a wall-mounted utility sink (Kohler or Wayfair models $150–$400) with basic plumbing (hire a plumber or DIY if confident, $200–$500 labor). Alternatively, place a small pedestal sink in a corner ($300–$700 installed). Stock it with stain remover, a soft brush, and small cleaning cloths in one open jar. The narrow countertop stays clean because everything has a home.

    Your laundry workflow becomes smoother, and you’ll actually pre-treat items instead of throwing stained clothes back in the wash.


    5. Use Woven Baskets for Sorted Organizing

    Woven baskets are Scandinavian design’s secret weapon—they organize while looking naturally aesthetic. Unlike plastic bins, they add warmth and blend into a minimal space.

    Buy baskets in 2–3 sizes from IKEA ($10–$30 each, budget $40–$100 total) or thrift stores. Label them by fabric type (delicates, towels, sheets) or household member using a white label maker ($20–$40). Stack them on shelves or open under-sink storage. This system keeps laundry sorted before washing, cutting sorting time in half.

    The baskets age beautifully and become part of your décor rather than hidden eyesores.


    6. Install Drying Rods for Air-Dry Hanging

    Wall-mounted drying rods replace the need for a clothesline or drying rack, keeping your space streamlined and Scandinavian-simple.

    Mount a stainless steel or black rod (Wayfair, Target $25–$60) on a clear wall section using heavy-duty brackets. Choose rods 24–36 inches wide depending on your space. Installation takes 30 minutes and no special skills. Hang delicate items (sweaters, silk blouses) and air-dry without heat damage.

    You’ll save on energy costs while extending garment lifespan—peak Scandinavian efficiency meets care.


    7. Invest in Task Lighting That Works

    Good lighting isn’t luxury—it’s functional. Pendant lights or under-cabinet LED strips make folding easier and add visual interest to a minimal space.

    Install 1–2 pendant lights (West Elm, Article, or IKEA $40–$120 each) or LED strip lights ($20–$50) above your folding counter. Wiring costs vary; if you’re handy, DIY takes 2–3 hours; otherwise hire an electrician ($150–$300). Choose matte black, white, or brushed metal to stay Scandinavian. Task lighting prevents eyestrain and makes your space feel intentional—even utilitarian laundry becomes pleasant.

    Folding and sorting now happen in bright, shadow-free light, cutting time and mistakes.


    8. Create a Folding Counter with Natural Wood

    A dedicated folding counter stops clothes from piling on the dryer or floor. Scandinavian design prioritizes function, so this isn’t frivolous—it’s essential.

    Build or buy a butcher-block or pine folding counter ($150–$400 for 3–4 feet wide). Mount it at elbow height (about 36 inches) to reduce back strain. Include a shelf underneath for baskets. IKEA’s PINNIG bench ($80–$120) works as a budget option. Installation takes 1–2 hours with basic tools.

    You’ll fold faster, your back thanks you, and your laundry actually gets put away instead of living in a clean-clothes pile.


    9. Label Everything with Minimal Style

    Labels make organization visible and intentional—very Scandinavian. They also keep everyone in your household on the same page.

    Use a white label maker (Brother or DYMO $20–$40) to create simple black-text labels for baskets, shelves, and jars. Or hand-letter labels on kraft paper for a warmer touch. Label by category (towels, sheets, delicates) or room. Takes 30 minutes total. The investment? Nearly free, major payoff.

    Your family knows where things belong, maintenance stays effortless, and your space stays organized long-term.


    10. Keep Cleaning Supplies in Open Glass Jars

    Clear containers move supplies from “hidden clutter” to “intentional display.” Scandinavian design loves transparency—nothing hidden, everything purposeful.

    Transfer bulk laundry detergent and stain removers into clear glass jars from IKEA ($5–$15 each, budget $30–$50 total). Add simple labels and arrange on open shelving or a high shelf. This cuts visual clutter while keeping supplies visible so you reorder before running out.

    Your supplies become part of your design, and guests actually see an organized, beautiful space instead of mystery bottles.


    11. Use Scandinavian-Inspired Cabinetry Hardware

    Hardware is the jewelry of minimalist design—choose it thoughtfully. Scandinavian interiors favor understated metal finishes over ornate details.

    Replace cabinet hardware with brushed nickel or matte black knobs and pulls from IKEA or Wayfair ($3–$8 each, budget $40–$80 total). Installation takes 1–2 hours with a screwdriver and drill. Avoid brass, gold, or decorative finishes—they compete with your clean aesthetic.

    Your cabinets instantly feel more refined and intentional, proving that tiny details matter in minimal spaces.


    12. Paint Cabinets Soft Matte Black

    Matte black cabinets add depth to a minimal Scandinavian room without feeling heavy. It’s bold yet restrained—a signature Scandinavian contradiction.

    Paint cabinets with matte black Scandinavian paint (Benjamin Moore Chalkboard Black or Farrow & Ball Off-Black $60–$100 for supplies). Prep work takes 4–6 hours; painting takes 2–3 days with drying time. Alternatively, hire a painter ($400–$800). Use an undercoat to prevent chipping. Pair with light walls and bright task lighting so black reads as sophisticated, not cave-like.

    Your laundry room gains unexpected elegance and feels gallery-like rather than purely functional.


    13. Incorporate a Small Plant for Life

    One live plant softens a utilitarian space and aligns with Scandinavian design’s connection to nature. It needs minimal care but adds major visual interest.

    Choose a low-maintenance plant (snake plant, pothos, or ZZ plant $10–$25) in a neutral ceramic pot from Target or West Elm ($15–$30). Water weekly and place in indirect light. Position it on a high shelf or corner so it doesn’t interfere with laundry flow. The single plant creates a focal point without clutter.

    Your room gains life and softness, transforming it from purely functional to actually inviting.


    14. Install Open Shelving Above Washer/Dryer

    Most people waste the wall above their machines. Open shelving reclaims that vertical real estate in a Scandinavian-minimal way.

    Install floating shelves directly above your washer and dryer using heavy-duty wall anchors ($60–$120 for 2–3 shelves). Leave 12 inches clearance above the machines for safety. Stock with rolled towels, folded linens, and one small plant. Takes 2–3 hours to install. Renters: use leaning shelves instead (Wayfair $80–$150).

    You’ve added storage without eating floor space, and your room looks taller and more organized.


    15. Create a Sorting Station with Divided Hamper

    Pre-sorting laundry saves you from re-sorting clean clothes. A divided hamper embeds organization into your workflow—very Scandinavian efficiency.

    Buy or DIY a simple divided hamper from IKEA ($40–$80) or wood plans online. Label each section. Place it in a corner or against a wall so it doesn’t block traffic. This system means you move clean clothes from basket to basket without touching your floor.

    Laundry day becomes streamlined, and your floor stays clear of piles.


    16. Use Subway Tile or Simple Backsplash

    A simple tile backsplash protects walls from splashes while adding clean visual structure. White or pale tile keeps a Scandinavian room bright and open.

    Install subway tiles (3×6 or 4×8) with light grout in white or pale gray ($3–$8 per square foot, $80–$200 total for small space). Hire a tiler ($500–$1,000) or DIY if confident (takes 2–3 days). Alternatively, use peel-and-stick backsplash tiles for a removable renter option ($30–$60). Tiles are durable, wipeable, and age beautifully.

    Your walls stay protected and clean while your space maintains that Scandinavian gallery feel.


    17. Add a Wall Clock in Minimal Style

    A Scandinavian clock adds function without fuss. It keeps you aware of laundry cycles while adding understated style.

    Choose a minimalist clock from IKEA, Schoolhouse Electric, or Etsy ($15–$50). Look for simple geometric faces, wooden or metal details, and no unnecessary ornamentation. Mount it at eye level near your folding station. Installation takes 10 minutes with a nail.

    You’ll actually see when cycles finish, and your space gains a focal point that feels both beautiful and useful.


    18. Organize with Clear or Frosted Glass Doors

    Glass doors let you see what’s inside without visual chaos. Scandinavian design loves this balance—transparency without exposed clutter.

    Replace solid cabinet doors with glass or frosted-glass doors (IKEA $40–$80 per door) or upgrade to glass-front cabinets ($300–$600 for a unit). Organize interiors with intention: baskets, folded items, clear jars. Frosted glass hides imperfect organization while clear glass shows off neat stacks.

    You know what you have at a glance, items stay protected from dust, and your space reads as organized and calm.


    19. Paint Trim and Doors Crisp White

    Crisp white trim creates visual lines and makes rooms feel taller—classic Scandinavian proportion. It’s a small detail with outsized impact.

    Paint all trim, door frames, and doors Benjamin Moore Chalkboard White or Sherwin Williams Pure White ($30–$50 in supplies). This takes 1–2 weekend days. It costs almost nothing but makes your room feel professionally designed. White trim against pale walls creates clean visual separation without heaviness.

    Your room gains architectural interest and feels intentionally designed rather than an afterthought.


    20. Choose Minimalist Faucet Fixtures

    Faucet design matters in Scandinavian spaces. Choose single-handle or gooseneck styles with no unnecessary ornamentation—form follows function.

    Select a matte black or brushed stainless faucet from Wayfair, Home Depot, or Kohler ($60–$150). Avoid decorative handles or brass finishes. Installation takes a plumber 1–2 hours ($150–$300 labor) or DIY if you’re confident with plumbing. A good faucet lasts decades and stays beautiful through daily use.

    Your sink becomes a design statement rather than overlooked utility, and you actually enjoy using it.


    21. Hang Towels on Minimalist Rods

    Instead of hooks or bars, towel rods keep fabric organized and easily accessible. It’s a small upgrade that changes how your space functions and looks.

    Install 1–2 simple metal rods (IKEA $15–$30 each) at arm height using basic brackets. Space them 12–18 inches apart. Install takes 30 minutes with a drill. Roll or fold towels neatly on rods. Your clean towels stay visible and dust-free while serving as soft visual interest.

    Towels become part of your design rather than hidden in a cabinet, and grabbing what you need feels effortless.


    22. Create a Mudroom-Laundry Hybrid Space

    If your laundry room has extra space, extend it into a mudroom hybrid—combining laundry, coat storage, and a small seating area. Scandinavian design loves purposeful multifunctional spaces.

    Add a simple wooden bench ($100–$250), 3–4 coat hooks (IKEA $3–$8 each), and 1–2 shelves for shoes and items. Takes 2–3 hours to install. This transforms laundry into a multi-use hub where you change clothes, wash jackets, and sort items. Suddenly your laundry room serves your whole family.

    Your home gains an organized transition zone, and laundry becomes part of a larger workflow rather than isolated.


    23. Use Natural Stone or Concrete Countertops

    Natural materials feel Scandinavian and durable. A concrete or stone counter withstands water, stains, and heavy use while aging beautifully.

    Install a concrete or honed limestone counter ($200–$600 for a small space, DIY or hire installer $300–$800). Concrete takes 2–3 days to cure. These materials are low-maintenance, wipeable, and develop a patina that looks intentional. Light gray or cream tones stay neutral and bright.

    Your counter becomes a design feature—beautiful enough to display items on, tough enough for actual work.


    24. Add a Small Bench for Folding and Sitting

    A small bench creates an ergonomic folding station and a rare moment of rest—very Scandinavian in philosophy. It reframes laundry as a space for presence, not just chores.

    Buy or DIY a simple bench (IKEA PINNIG $80–$120 or furniture stores $150–$400). Position it under a window if possible. Use it for folding tasks or simply sitting while listening to music during laundry day. Takes 1 hour to set up.

    You now have a dedicated folding surface that reduces back strain, and the room feels more human and less purely utilitarian.


    25. Keep Surfaces Clear Except One Focal Point

    The most Scandinavian trick: empty space. Resist filling every surface. Leave counters nearly bare with just one intentional item.

    Declutter ruthlessly—keep only items you use daily (detergent, fabric softener) and return them to closed storage immediately after use. Display one living plant or a single art piece per shelf. This creates visual rest and makes your space feel calm rather than chaotic. Takes 30 minutes to reset.

    Your room gains breathing room, and everything that’s visible becomes meaningful rather than background noise.


    26. Design for Your Lifestyle, Not Perfection

    The final Scandinavian principle: design for your life, not an Instagram fantasy. Perfection isn’t Scandinavian—honest, functional, personalized spaces are.

    Choose organizational systems that fit how you actually work, not how you think you should. If you fold on the washer instead of a dedicated counter, accept that and optimize your washer’s surface. If baskets overflow sometimes, buy bigger baskets rather than fighting your reality. Scandinavian design embraces imperfection and practicality.

    Your laundry room becomes a space you love using rather than a place you dread—and that’s the real design win.


    Pin this list and try just one idea this weekend. Which tip speaks to you first? Start there, and watch how one small change starts a cascade of improvements. Small shifts create real transformation—and your laundry room deserves to feel like a thoughtfully designed space.

  • 28 Bathroom Interior Design Ideas for a Professional Look

    28 Bathroom Interior Design Ideas for a Professional Look

    Your bathroom doesn’t need a full renovation to look professionally designed. Small, strategic changes—from lighting upgrades to storage solutions—can completely shift how your space feels and functions. Whether you’re renting, working with a tight budget, or ready to invest in a few premium pieces, these 26 ideas prove that a polished bathroom is totally achievable. You’ll discover simple styling tricks, budget-friendly swaps, and investment upgrades that work together to create a space you actually want to spend time in. Let’s dive into ideas you can start this weekend.

    1. Paint Walls a Light Neutral Shade

    Light paint colors make small bathrooms feel bigger and create a calm, professional backdrop for your fixtures. Dark or bold colors can overwhelm tight spaces and date quickly.

    Choose soft whites, pale grays, or warm beiges as your base. Look for low-VOC paint (around $25–$40 per gallon) from brands like Benjamin Moore or Sherwin-Williams—better for air quality and longevity. This is a weekend DIY project if your walls are in decent shape; budget one day for two coats plus drying time. Primer + paint combo cans save money and time.

    A neutral wall becomes the perfect canvas for accessories you can swap seasonally or as your style evolves.

    2. Install Layered Lighting for Ambiance and Function

    One overhead light creates shadows and harsh glare—not professional-looking. Layered lighting means combining ambient (general), task (functional), and accent (mood) sources.

    Add a vanity mirror light ($30–$100) with LED bulbs above or beside your mirror for shadow-free makeup and grooming. Keep your existing overhead light and add a small wall sconce ($40–$80) on one side for accent lighting. Use warm white LED bulbs (2700K) throughout for a spa-like quality. Most are renter-friendly plug-in options or simple hardwired swaps. Total project time: 1–2 hours if you’re comfortable with basic wiring (or hire an electrician for $150–$300).

    Your bathroom now has the flexibility to be bright for cleaning or dim and relaxing for a bath.

    3. Swap Out Hardware for Brushed Gold or Matte Black

    Hardware is the jewelry of your bathroom—mismatched or dated pieces immediately read as unfinished. Updated finishes signal attention to detail.

    Replace cabinet pulls, towel bars, and faucet handles with brushed gold, matte black, or brushed nickel ($8–$20 per piece). These finishes are timeless, hide fingerprints better than chrome, and work with any style. Online sources like Amazon, Wayfair, or Rejuvenation have hundreds of options. Swapping pulls is a 10-minute DIY project per item. If your faucet is old or leaky, a full replacement runs $100–$500 depending on quality.

    This single change makes your entire bathroom feel intentional and curated—like a designer touched it.

    4. Add a Floating Vanity for Space and Cleanliness

    Floating vanities create visual space, make floor cleaning easier, and instantly modernize a bathroom. They’re the opposite of bulky, grounded cabinets.

    Install a pre-made floating vanity ($200–$800) or mount a simple reclaimed wood shelf with plumbing underneath. IKEA’s GODMORGON series ($200–$300) is a popular budget option that looks custom. Mounting requires wall studs or heavy-duty brackets; hire a handyperson for $150–$300 if you’re not confident. Wall-mounted faucets run $100–$400. Plumbing adjustments may need a pro ($200–$500).

    Your bathroom instantly gains a sense of openness, and you can actually sweep under the vanity instead of working around legs.

    5. Introduce Natural Materials Like Wood and Stone

    All white and chrome feels sterile. Adding warm materials like wood and stone creates depth and makes the space feel less clinical and more like a retreat.

    Incorporate a reclaimed or natural wood shelf ($40–$150), a stone soap dish ($15–$30), or a wooden bath caddy ($30–$80). Layer with neutral stone tiles on one accent wall ($80–$200 installed if DIY, or $300–$600 with a pro). Woven baskets ($20–$60) for storage add organic texture without clutter. These pieces are mostly renter-friendly if you skip permanent wall tiles.

    The bathroom now has warmth and character that polished chrome alone can’t deliver.

    6. Declutter With Matching Storage Containers

    Visible clutter reads as unprofessional and stressful. Matching containers signal organization and calm—even if what’s inside is chaotic.

    Grab a set of matching ceramic, glass, or concrete containers ($20–$60 for a set of 3–4) in white, gray, or natural tones. Fill them with cotton rounds, hair ties, extra toothbrushes, and grooming tools. Stack or arrange by frequency of use. Dollar stores, Target, IKEA, and Muji have affordable options. Takes 15 minutes to organize and makes a surprising visual difference.

    Your countertop instantly looks calm and intentional instead of cluttered and chaotic.

    7. Upgrade to a Rainfall Showerhead

    Standard showerheads spray directly down and feel utilitarian. A rainfall head creates that spa-like experience that makes you actually want to use your shower.

    Install a rainfall showerhead ($40–$150) with an arm and can ($60–$200 more). Most fit existing plumbing if you’re handy, or hire a plumber ($200–$400). Choose low-flow options (2.0 GPM) to save on water and energy bills. Chrome, brushed nickel, and matte black finishes all look professional. Takes 30–60 minutes for DIY; 1–2 hours with a pro.

    A warm shower under a rainfall head becomes the highlight of your morning—it’s a small luxury that feels completely worth it.

    8. Paint Cabinets Instead of Replacing Them

    Cabinet replacement is expensive and wasteful. Cabinet paint gives you a like-new look for a fraction of the cost.

    Clean cabinets thoroughly, sand lightly, prime with cabinet-grade primer ($20–$30), then apply two coats of semi-gloss or satin paint ($25–$40). Choose colors like sage, soft gray, navy, or classic white. This is a weekend DIY project or hire a painter for $500–$1,500 depending on size. Remove hardware beforehand and label everything. Add new pulls ($100–$200) to complete the refresh.

    Your cabinets look like a design choice rather than tired old fixtures—and you’ve saved thousands compared to replacement.

    9. Add a Textured or Patterned Tile Accent Wall

    Plain all-white or single-color tile is forgettable. An accent wall with pattern or texture creates visual interest without overwhelming the space.

    Choose a patterned or textured tile ($2–$8 per square foot) like Moroccan geometric, herringbone, or floral print. Install on one wall (shower back or behind toilet) for $200–$600 DIY or $400–$1,200 with a pro. Subway tile remains timeless; save patterned choices for accents to avoid dating your space. Grout color matters too—white reads bright, gray is more forgiving.

    Your bathroom gains personality and looks like you put thought into the design, not just default white everywhere.

    10. Swap Towels and Mats for Oversized, Quality Versions

    Thin, mismatched towels read as budget and dated. Plush, coordinated towels signal luxury and care.

    Buy a set of 3–4 oversized towels ($60–$150 from Pottery Barn, Parachute, or Brooklinen) and a matching bath mat ($30–$60). Choose neutral colors that work with your paint and hardware. Quality matters—higher GSM (grams per square meter) means plushier towels. Mid-range options ($15–$30 per towel) work great. Swap out mismatched, thin towels completely. Takes 10 minutes to implement.

    Your bathroom instantly feels more like a hotel or spa—that’s the power of quality basics.

    11. Install a Narrow Floating Shelf Above the Toilet

    The wall above the toilet is wasted space in most bathrooms. A floating shelf adds storage and styling opportunity without taking up floor space.

    Mount a slim wooden or metal shelf ($30–$80) using heavy-duty brackets and wall anchors (or studs, ideally). Keep it narrow (8–12 inches) so it doesn’t feel cramped. Style with a potted plant, a stack of rolled washcloths, a candle, or a small basket. IKEA, Wayfair, and Target have budget-friendly options. 30-minute DIY installation.

    This often-forgotten wall becomes a small design moment that adds function and visual interest.

    12. Switch to a Modern Faucet

    An outdated faucet is one of the first things people notice. Modern faucets have cleaner lines and better function—no leaky handles or low water pressure.

    Replace with a single-handle or widespread faucet ($80–$300) in brushed nickel, matte black, or brass. Look for water-efficient models (1.2–1.5 GPM) that cut your water bill. Brands like Moen, Delta, and Kohler offer good mid-range options. DIY swap takes 1–2 hours; a plumber handles it in 30 minutes for $150–$300 labor. Shutting off water valves and unbolting the old faucet is simpler than most people think.

    A modern faucet immediately upgrades your entire vanity area and improves daily function.

    13. Frame Your Mirror With a Stylish Border

    A bare mirror looks unfinished. Framing it draws focus and adds instant polish.

    Buy a mirror frame ($40–$150) that fits your existing mirror or replace both together. Wood, metal, or composite materials work well. Minimalist frames feel modern; ornate options work for traditional bathrooms. Mounting is straightforward with brackets ($20–$40). If your mirror is glued on, you may need to remove and reinstall it—hire a pro ($150–$300) if you’re nervous.

    Your mirror becomes a design feature rather than just a functional fixture.

    14. Add a Linen Cabinet or Ladder Shelf for Towel Storage

    Visible towel piles read as cluttered. Dedicated towel storage keeps things tidy and creates a spa-like aesthetic.

    Install a tall linen cabinet ($100–$400), a slim ladder shelf ($50–$200), or open shelving ($40–$150) in a corner or beside the toilet. Use woven baskets ($15–$40 each) to corral items and add texture. Rolled and stacked towels look more intentional than folded piles. Most pieces are simple to install or come pre-assembled.

    Your bathroom suddenly has the calm, organized feel of a high-end hotel instead of chaotic and makeshift.

    15. Use Peel-and-Stick Wallpaper for Pattern and Texture

    Wallpaper transforms a space with zero permanent commitment—perfect for renters and commitment-phobes. Modern options are actually pretty stylish.

    Choose a peel-and-stick wallpaper ($20–$60 per roll) from Spoonflower, Etsy, or Wayfair in a pattern that feels professional: geometric, botanical, or subtle texture. Avoid loud or trendy prints that date fast. Install on one accent wall (behind toilet, one shower wall, or vanity wall) for $0–$100 material cost and 2–4 hours of time. Removal is damage-free when you move.

    Your bathroom gains pattern and personality while staying totally removable—the best of both worlds.

    16. Upgrade Lighting in the Shower or Tub Area

    Dark shower corners feel claustrophobic. Good lighting makes the shower feel bigger and safer.

    Add recessed LED lights ($20–$50 per fixture) or a waterproof wall sconce ($40–$100) rated for wet areas. Install with an electrician ($200–$400 total for 2–3 lights) or DIY if you’re handy. Ensure all fixtures are rated IP65 or higher for moisture. Warm white (2700K) LEDs create a spa vibe; cool white (4000K) is more clinical. This is worth the investment because you’ll actually feel the difference every shower.

    Showering now feels less utilitarian and more like a moment of self-care.

    17. Create a Small Bar Cart or Cart-Style Storage Unit

    A rolling cart adds function and style—you can move it around and it looks intentionally designed, not just thrown together.

    Choose a narrow bar cart ($40–$100) in black metal, wood, or brass. Stock the top with rolled washcloths, the middle with bath products or towels, and the bottom with a plant or decorative basket. Carts are lightweight and mobile, so rearranging is easy. This works especially well in bathrooms without built-in storage.

    Your bathroom gains a curated, intentional look—like you’re a designer who actually lives there.

    18. Paint or Stain Your Vanity Base

    A stained or naturally finished vanity looks dated. Paint updates it instantly while staying cohesive with your room’s color scheme.

    Clean your vanity, sand lightly, apply primer and two coats of semi-gloss paint ($40–$80 total for supplies). Choose a soft green, gray, navy, or even warm white. Or apply a natural wood stain ($20–$40) to brighten or deepen the tone. This is a weekend DIY project if your vanity is in good condition. Swap hardware too ($100–$200) to complete the refresh.

    Your vanity becomes a statement piece instead of just a utilitarian fixture tucked under the sink.

    19. Add Scented Candles and Subtle Aromatherapy

    Fragrance signals care and cleanliness. Candles (minus the artificial “bathroom spray” scent) make your space feel intentional.

    Place one or two quality candles ($15–$40) from brands like Jo Malone, Diptyque, or even Target’s Good & Gather in corners of your vanity or shelf. Choose subtle scents: lavender, eucalyptus, unscented, or light citrus. Avoid heavy or artificial “clean” scents. Light them during baths or when you need a refresh. Add a small essential oil diffuser ($20–$50) on a shelf for continuous subtle fragrance without flame.

    Your bathroom smells like intention and care instead of generic cleaning products.

    20. Install Recessed Shelving in the Shower

    Shower bottles lined up on the tub edge look chaotic and make cleaning harder. Recessed shelving (or a shower niche) keeps everything tidy and accessible.

    Install a built-in shower niche ($200–$400 DIY or $400–$800 with a pro) if your walls can accommodate it. Or use adhesive shower shelves ($20–$50) for a non-permanent option. Choose clear glass bottles for shampoo, conditioner, and soap to keep things looking organized and intentional. Limit bottles to 5–7 essential items; donate the rest.

    Your shower instantly feels spa-like and edited instead of cluttered with a million half-empty bottles.

    21. Swap Your Shower Curtain for a Frameless Glass Door

    Shower curtains trap moisture, need constant cleaning, and look temporary. A glass door feels permanent, looks modern, and makes the space feel larger.

    Install a semi-frameless or frameless shower door ($400–$1,500) depending on size and customization. This is a pro job unless you’re very handy. It takes a few days to install properly. If that’s too pricey, a curved shower curtain rod with a quality fabric curtain ($50–$150) reads much better than standard versions—choose soft gray, white, or subtle pattern. Clean curtains weekly to prevent mildew.

    Your bathroom instantly looks more sophisticated and feels more spacious.

    22. Introduce a Potted Plant or Greenery

    A live plant adds life and freshness to what’s otherwise an impersonal space. Green also signals cleanliness and care.

    Choose a low-maintenance plant like pothos, snake plant, or dracaena ($15–$30) that tolerates humidity and low light. Place it on a shelf, window sill, or corner of your vanity. Use a ceramic pot ($10–$25) that coordinates with your bathroom’s color scheme. Water weekly if in bright light; less frequently if it’s in a corner. Most bathroom plants need less fussing than you’d think because humidity helps them thrive.

    Your bathroom now has a touch of life and freshness that makes it feel less sterile and more intentional.

    23. Use a Decorative Soap Dish and Quality Hand Soap

    Generic liquid soap dispensers are functional but impersonal. A nice soap dish with quality bar soap signals intentionality and care.

    Choose a marble, ceramic, or stone soap dish ($15–$40) that coordinates with your finishes. Fill it with a quality bar soap from Aesop, Herbivore, or even Whole Foods brands ($8–$15 per bar). Or use a simple glass or ceramic soap dispenser ($10–$30) with refillable liquid soap. The combo signals that you’ve thought about every detail.

    Visitors and you alike notice these small touches that signal a well-designed space.

    24. Frame Your Medicine Cabinet or Add a Modern Mirror Cabinet

    A basic recessed medicine cabinet looks dated. Framing it or upgrading to a modern design elevates the whole vanity area.

    Choose a surface-mount medicine cabinet ($50–$200) with a frameless or minimalist frame design instead of struggling with recessed installation. Soft-close doors ($100–$300 more) feel high-end. If your cabinet is already recessed, add a simple wood or metal frame around it ($40–$120) to modernize the look. Takes 30–60 minutes to install most surface models.

    Your medicine cabinet becomes a design feature you notice and appreciate daily instead of just functional storage.

    25. Upgrade Your Shower Routine With a Thermostatic Valve

    Inconsistent water temperature during a shower is annoying and unsafe. A thermostatic valve maintains exact temperature and prevents scalding—especially helpful if you have kids or elderly family members.

    Install a thermostatic shower valve ($150–$300 for the valve, plus $300–$600 labor) to replace a standard valve. Most require a plumber’s help. You set your ideal temperature once, and water maintains it even if someone flushes a toilet or uses another fixture. This is an investment but eliminates temperature surprises and feels luxurious.

    Showers become predictably comfortable and safe—a small daily luxury that pays dividends.

    26. Organize Under-Sink Storage With Compartments and Baskets

    The space under your sink is usually a black hole of chaos. Organized storage makes that space functional and keeps your bathroom looking clean.

    Add pull-out baskets ($15–$40), tiered shelves ($20–$50), and drawer dividers ($10–$30) to your under-sink cabinet. Sort items into categories: cleaning supplies, extra toiletries, first aid, plumbing tools. Use clear containers ($5–$15) to corral small items so they don’t disappear. Takes 30–45 minutes to organize and makes grabbing what you need actually feasible.

    The moment someone opens your cabinet, they see intentional organization instead of a jumbled mess—that’s a quiet confidence booster.

    Save this post and tackle one idea this weekend. Start with the quickest win (new hardware, lighting, or a paint refresh) and you’ll be amazed how a single change shifts your whole bathroom’s energy. Which idea are you trying first?