Small bathrooms don’t have to feel cramped. With the right design choices and clever storage solutions, you can make even the tiniest bathroom feel spacious, functional, and beautiful. Whether you’re renting, renovating, or just tired of feeling squeezed in your current setup, these 24 ideas will help you maximize every inch. From paint colors to layout tricks to smart shopping picks, you’ll find budget-friendly hacks and investment pieces that actually work. Let’s turn your micro bathroom into a space you’ll love spending time in.
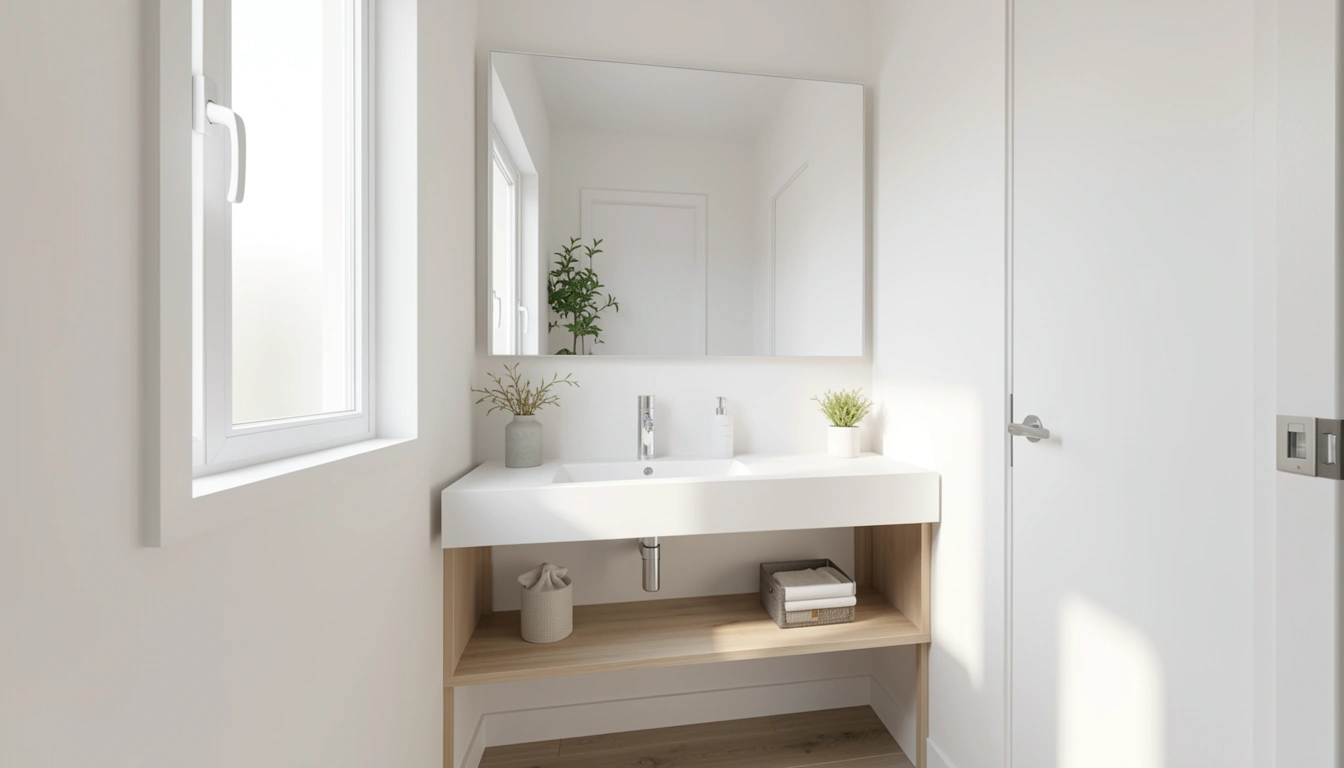
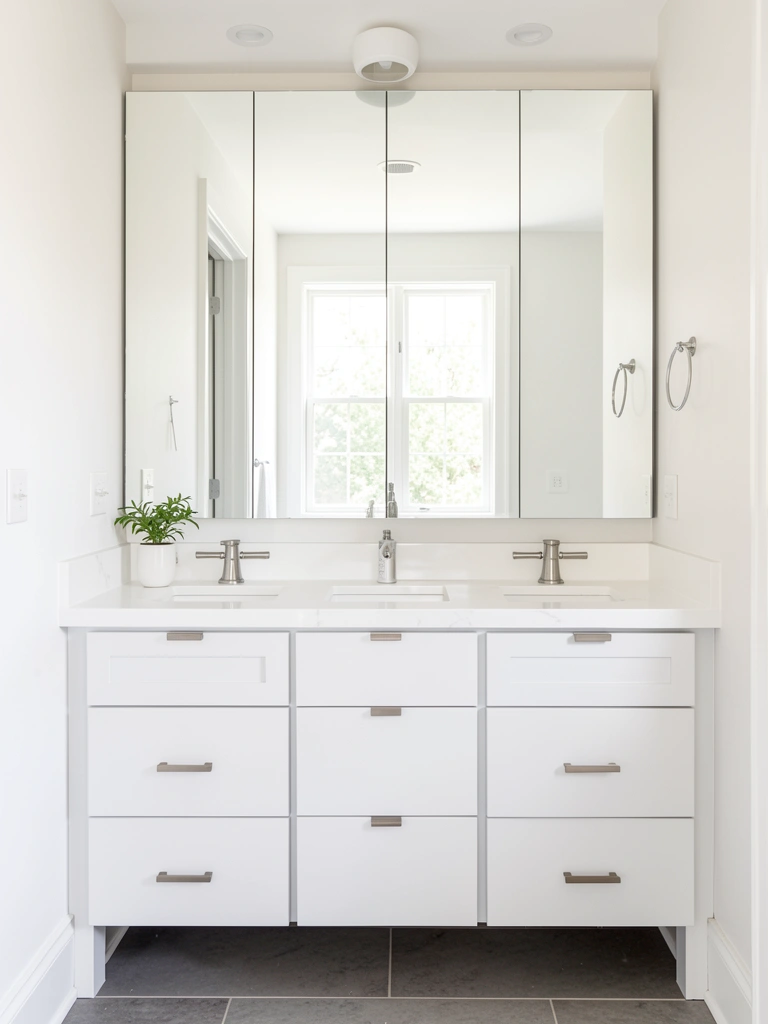
1. Install a Floating Vanity to Open Up Floor Space
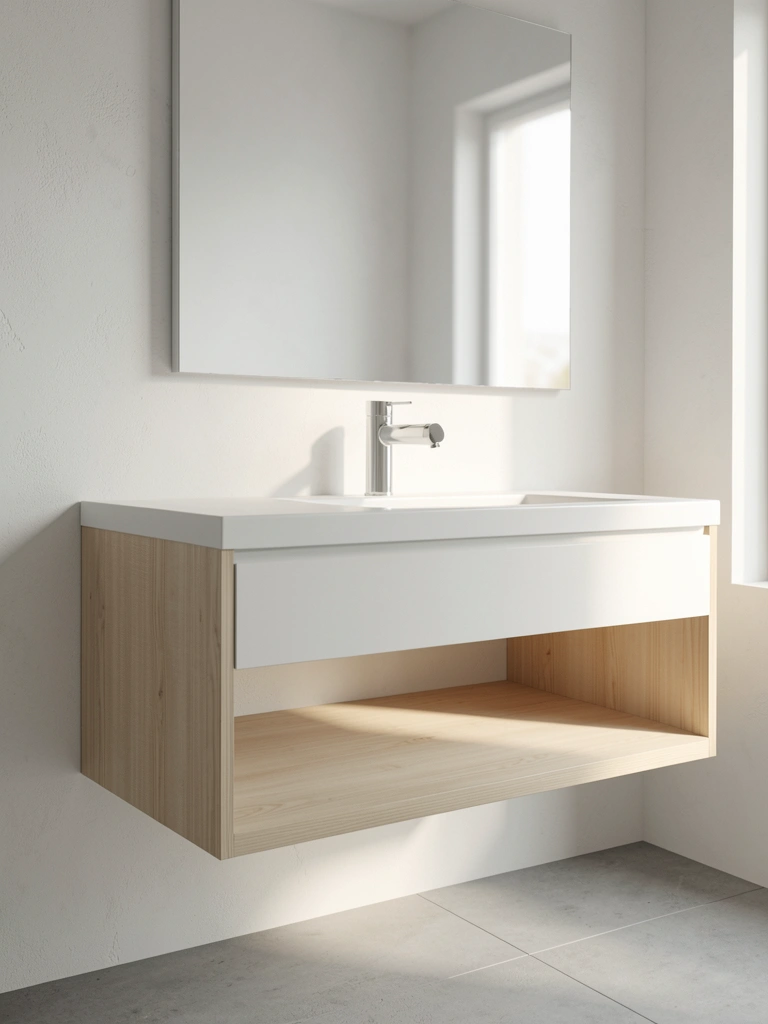
A floating vanity instantly creates the illusion of more floor space by removing visual bulk beneath the sink. This single change makes bathrooms feel significantly larger than wall-mounted or pedestal options.
Mount your vanity 12-15 inches off the ground using a sturdy wall-mounted bracket system (most require studs or heavy-duty anchors). Choose a 24-30 inch width to keep proportions right for small spaces. The gap below becomes extra storage for baskets or cleaning supplies. Install at 32-36 inches high for comfortable reach.
Budget: $150-$400 for a quality floating vanity from IKEA, Wayfair, or Home Depot. DIY mounting takes 2-3 hours with basic tools. Renters can use removable adhesive backing options, though these hold less weight.
The best part? You get an instant visual upgrade and an extra spot to stash items below. Your bathroom immediately feels airier and more modern.
2. Go Big With Your Mirror to Reflect Light
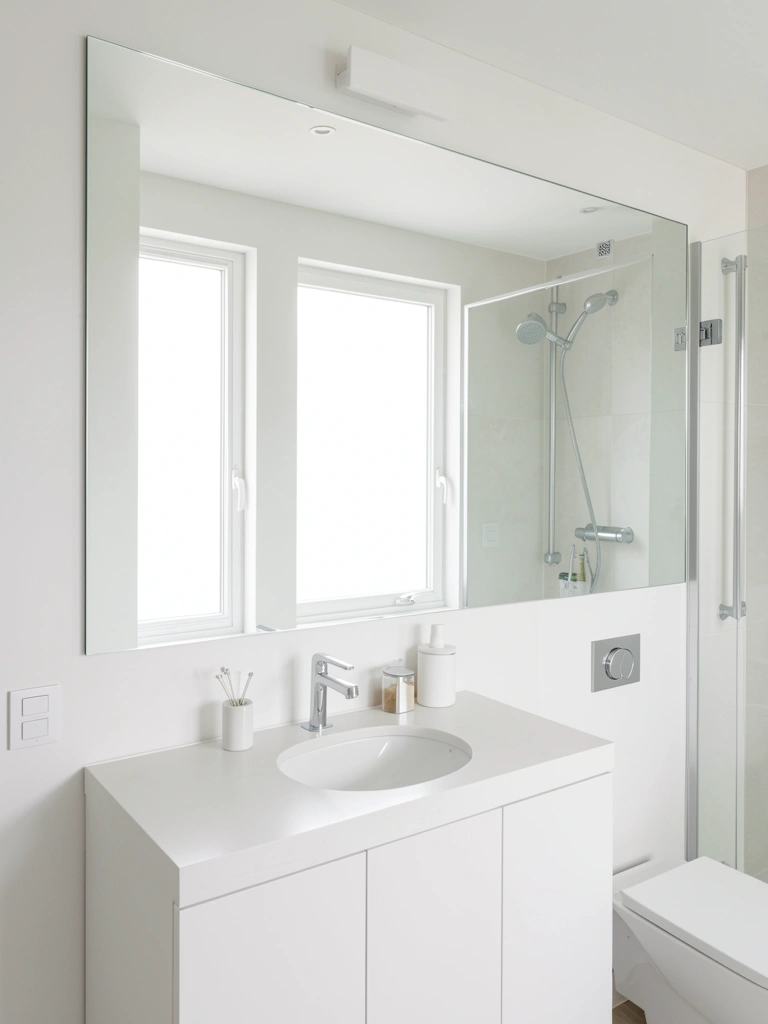
A oversized mirror bounces light around and creates depth, making even windowless bathrooms feel brighter and larger. The bigger the mirror, the bigger the impact on perception.
Replace your standard medicine cabinet mirror with a frameless mirror that spans your entire vanity width, ideally 36-48 inches wide and 24-30 inches tall. Mount it 20 inches above the sink for comfortable eye level. Use D-clips or a professional mounting system for security.
Budget: $40-$150 for a quality frameless mirror from Wayfair, Home Depot, or Amazon. Installation takes 30-45 minutes and requires basic tools. Pro tip: Position a second mirror on an adjacent wall if your layout allows to bounce light even more.
The result? Your bathroom looks twice as spacious and receives natural light (or reflected artificial light) from unexpected angles. You’ll notice the brightness boost every morning.
3. Paint Walls a Light, Cool Tone to Expand Perception

Light, cool-toned paint is the cheapest way to make walls recede and space expand. Most small bathrooms benefit from staying light rather than going bold.
Choose white, pale gray, soft greige, or barely-there blue in a semi-gloss or satin finish (moisture-resistant). These colors bounce light and make walls feel farther away than they are. Paint all four walls the same tone to avoid chunking up the space. Avoid dark or warm colors that close the room in.
Budget: $25-$60 for quality bathroom paint (Benjamin Moore Aura, Sherwin-Williams Duration Home). DIY painting takes 3-4 hours for most small bathrooms. Professional help: $300-$600 depending on your area.
Your walls recede visually, making the footprint feel noticeably larger. The light palette becomes a clean backdrop for fixtures and accessories.
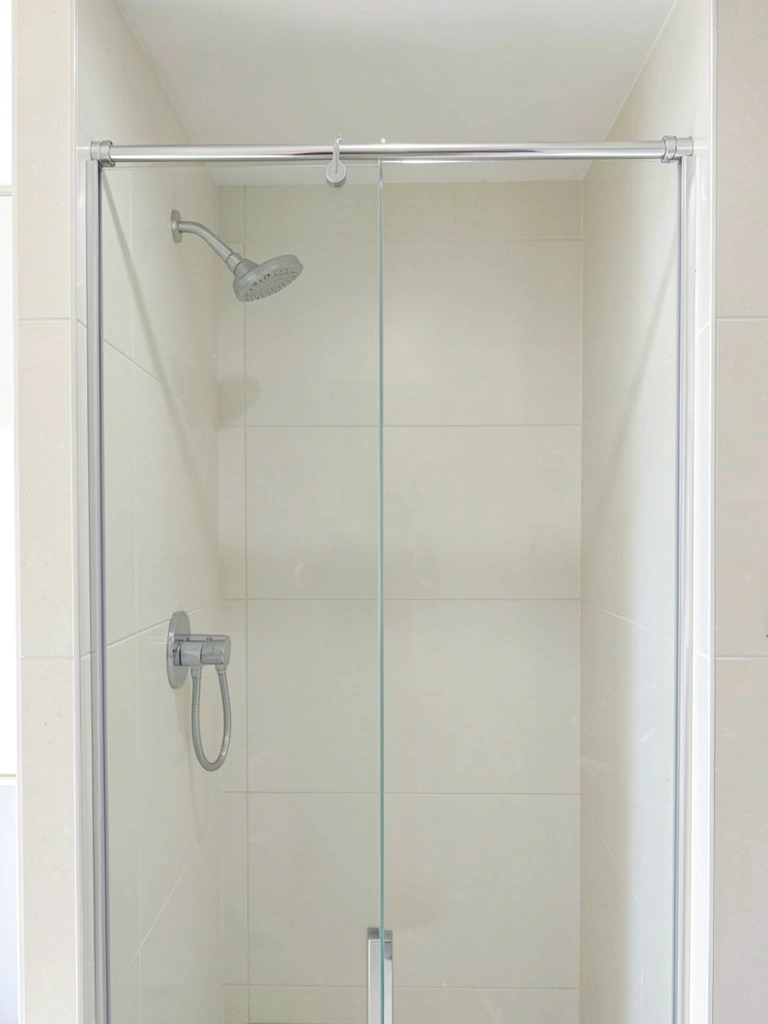
4. Choose a Walk-In or Corner Shower Instead of a Tub
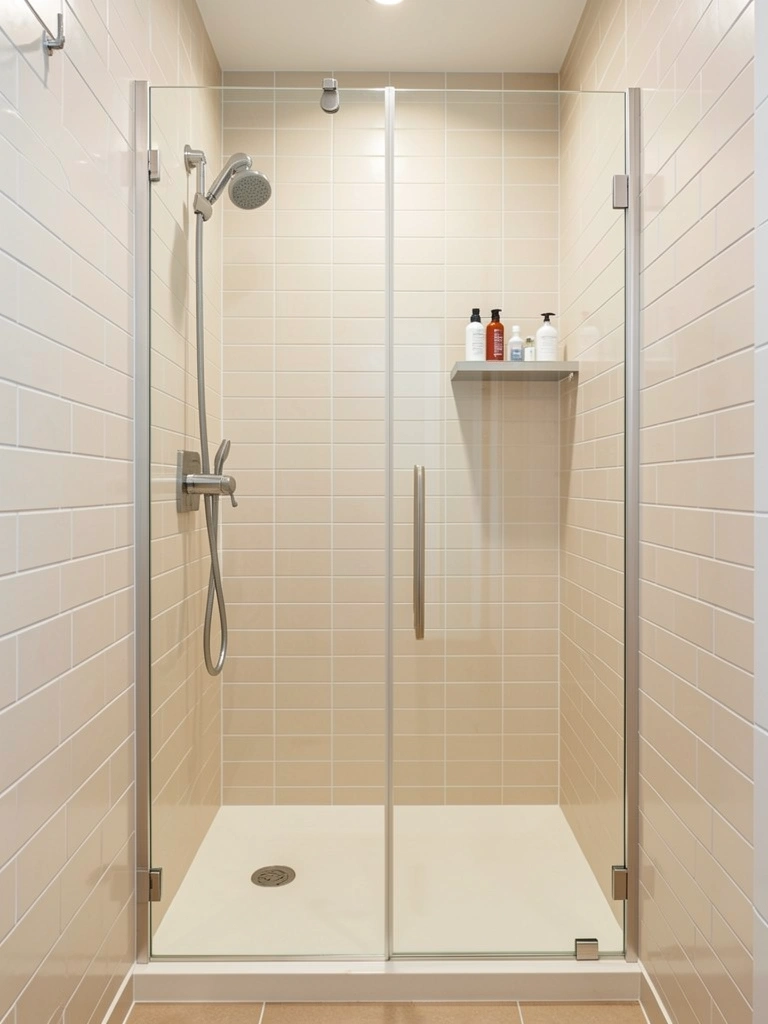
Ditching the tub in favor of a shower or corner unit frees up massive floor space and makes a huge visual difference in tiny bathrooms.
Install a corner shower with glass enclosure (32-36 inches) or a walk-in shower with a low threshold or no threshold for easier access and cleaner sightlines. Use light-colored tile (white, pale gray, or soft stone tone) to keep the shower zone from feeling cramped. Add a small recessed shelf for toiletries instead of a caddy.
Budget: $800-$2,500 for a full shower install depending on plumbing changes needed. Renter-friendly: Removable shower enclosure panels (3-wall kit) run $200-$500 and need no permanent installation.
You gain floor space for movement and storage. The bathroom instantly feels more open and easier to navigate.
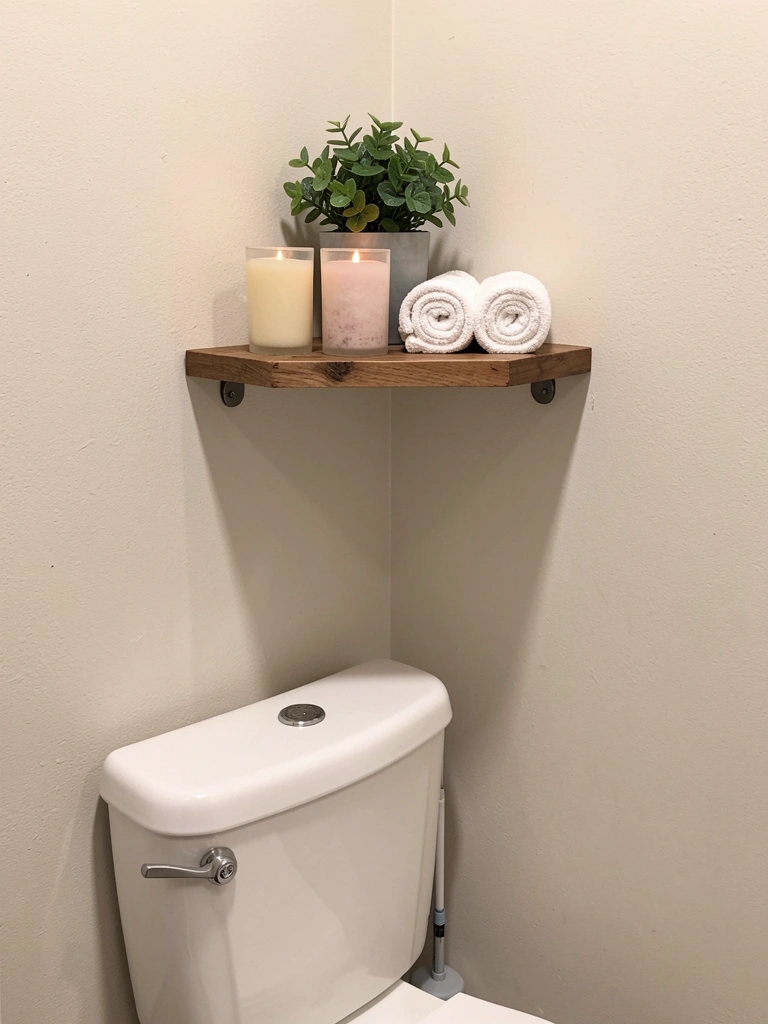
5. Use Vertical Storage Shelves Above the Toilet
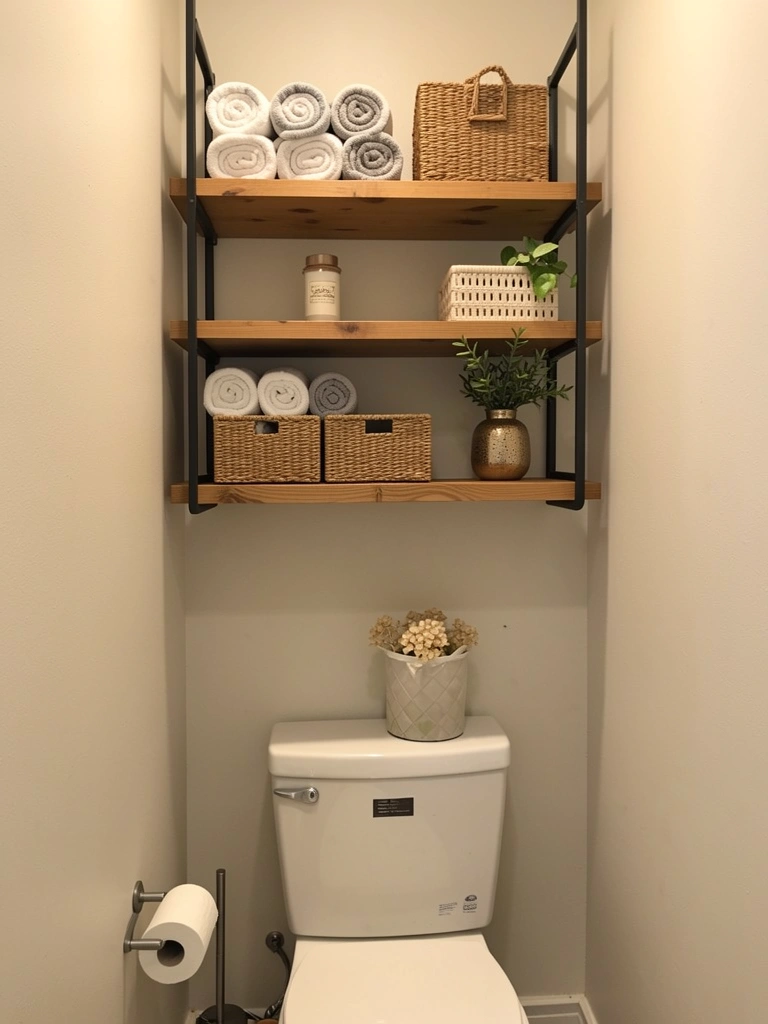
The space above the toilet is prime real estate that most people waste. Vertical shelving transforms this area into functional storage without eating floor space.
Mount open shelves (12-15 inches deep) directly above the toilet, spaced 12-14 inches apart vertically. Install 2-3 shelves depending on your ceiling height. Use solid wood, metal, or bamboo shelves for durability and style. Organize with baskets, small bins, or rolled towels for visual order.
Budget: $50-$150 for three shelves with brackets from IKEA, Target, or Home Depot. Installation takes 1-2 hours with a drill and level. No plumbing required, so renters can negotiate removal deposits.
Your hidden storage appears instantly. Towels, supplies, and decorative items move off counters and into view without cluttering the space.
6. Add Recessed Lighting for a Cleaner Ceiling
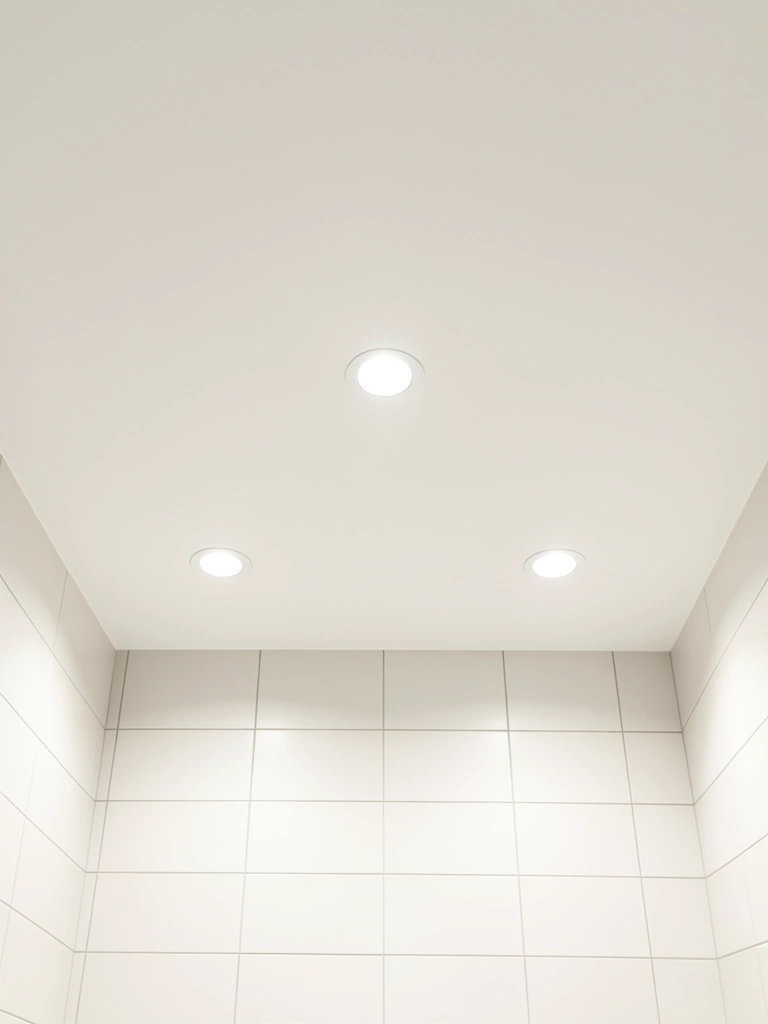
Recessed lights take up zero visual space and brighten rooms without the clutter of pendant or surface-mounted fixtures. In a tiny bathroom, ceiling real estate is precious.
Install 3-4 recessed LED lights spaced 3-4 feet apart for even coverage. Use dimmable LED bulbs (3000K warm white or 4000K neutral) for flexibility. Pair with a small vanity light above the mirror for task lighting. Avoid oversized fixtures that dominate the small ceiling.
Budget: $15-$30 per fixture (bulb + housing) from Home Depot or Amazon. DIY installation takes 2-3 hours if your ceiling has access. Renters: Skip recessed and add adjustable track lighting instead ($100-$200, rental-friendly).
The ceiling feels higher and cleaner without bulky fixtures taking up visual space. Overhead lighting feels intentional rather than heavy.
7. Add a Narrow Rolling Cart for Hidden Storage
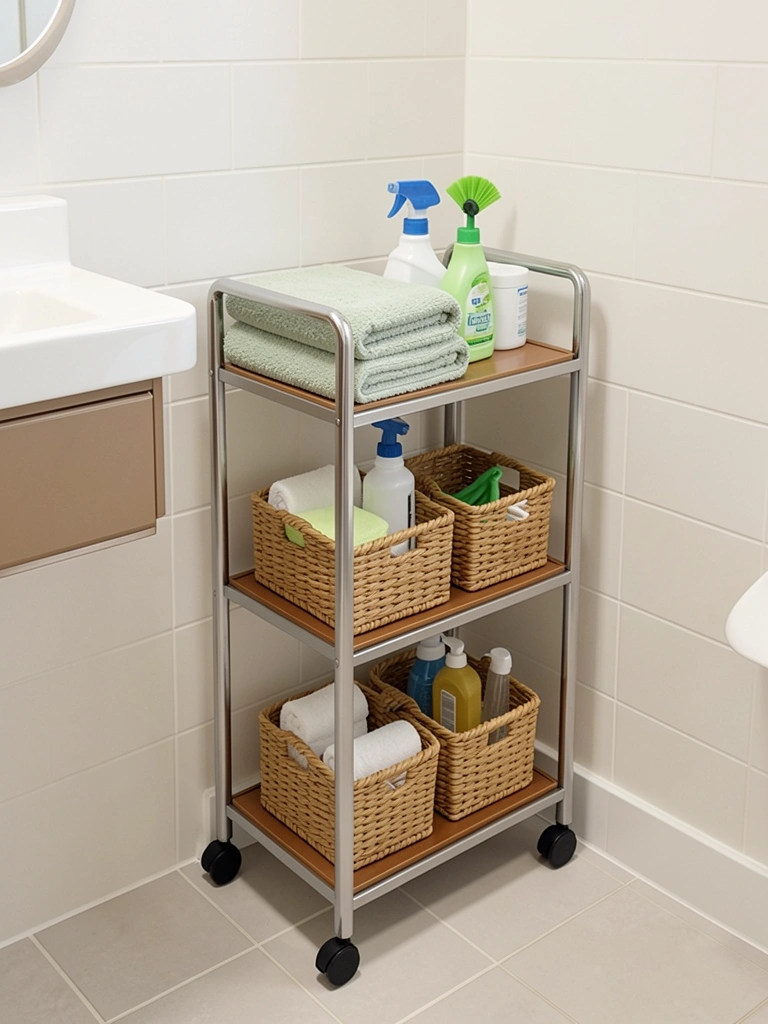
A 3-4 inch wide rolling cart slides into tight corners or next to the vanity, giving you mobile storage that can move when you need floor space.
Choose a narrow vertical cart (8-12 inches wide) with 3-4 tiers. IKEA’s Råskog cart ($40-$50) or Target’s basic rolling cart ($30-$60) work perfectly. Stock it with rolled towels, small bins, travel supplies, or cleaning products. Keep items you use daily within reach on the middle shelf.
Budget: $30-$80 for a quality cart from IKEA, Target, or Amazon. No installation required—just roll into place. Renters love this because it moves with you.
You gain storage that’s both hidden and accessible. The cart pulls out when you need the corner space or stays put when stocked.
8. Use Peel-and-Stick Tile to Add Visual Interest
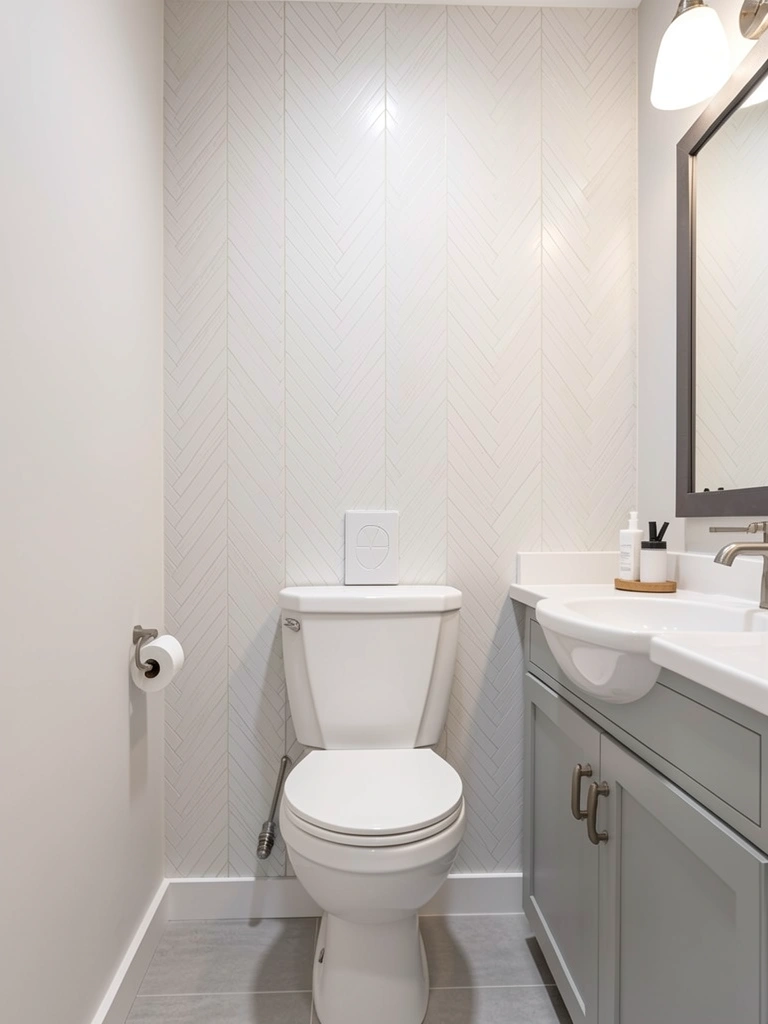
Peel-and-stick tiles add personality without the cost or permanence of real tile. Perfect for renters or anyone hesitant about commitment.
Apply peel-and-stick tiles to one accent wall (behind the toilet, vanity, or as a shower backdrop). Choose light colors with subtle patterns (geometric, herringbone, or marble-look) to keep the space feeling open. Start at the center and work outward for best alignment. Smooth out air bubbles as you go.
Budget: $1-$3 per tile (packs of 10-20). A standard wall needs 40-100 tiles, totaling $40-$150. Brands: Smart Tiles, Peel & Stick Plus from Amazon or Home Depot. Installation takes 1-2 hours and requires no tools—just clean walls and patience.
Your bathroom gets instant personality and visual depth. The pattern draws the eye without overwhelming the tiny footprint.
9. Swap Out Hardware for Slim, Modern Handles
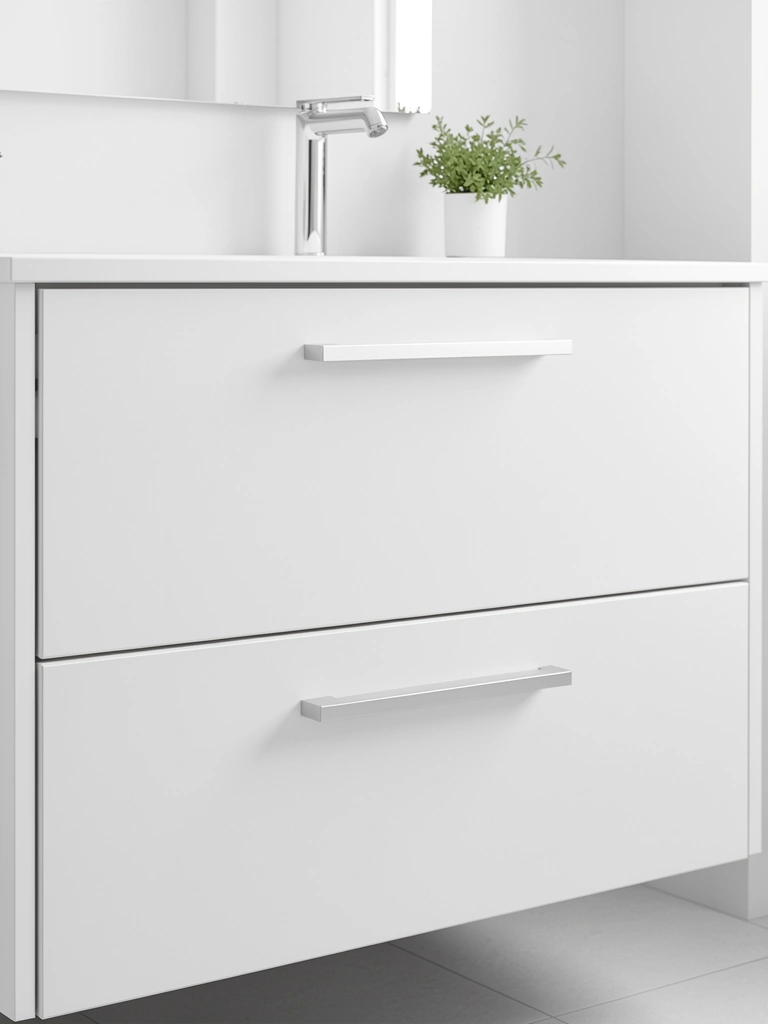
Oversized cabinet hardware visually crowds small bathrooms. Swapping to slim handles or recessed pulls makes everything feel less cluttered.
Replace bulky knobs with slim bar handles (4-8 inches long) or recessed finger pulls that tuck almost invisibly into drawers. Choose brushed nickel, matte black, or natural brass to match your style. Most handles cost $5-$15 each and swap out with a simple screwdriver.
Budget: $20-$50 total for new hardware depending on how many pieces you’re replacing. Swap takes 15-30 minutes. Keep old hardware in a drawer in case you need to switch back (great for renters).
The vanity instantly looks less cluttered and more intentional. Slim hardware makes the whole area feel sleeker and more spacious.
10. Install a Corner Shower Caddy or Wall Shelves Instead of Clutter
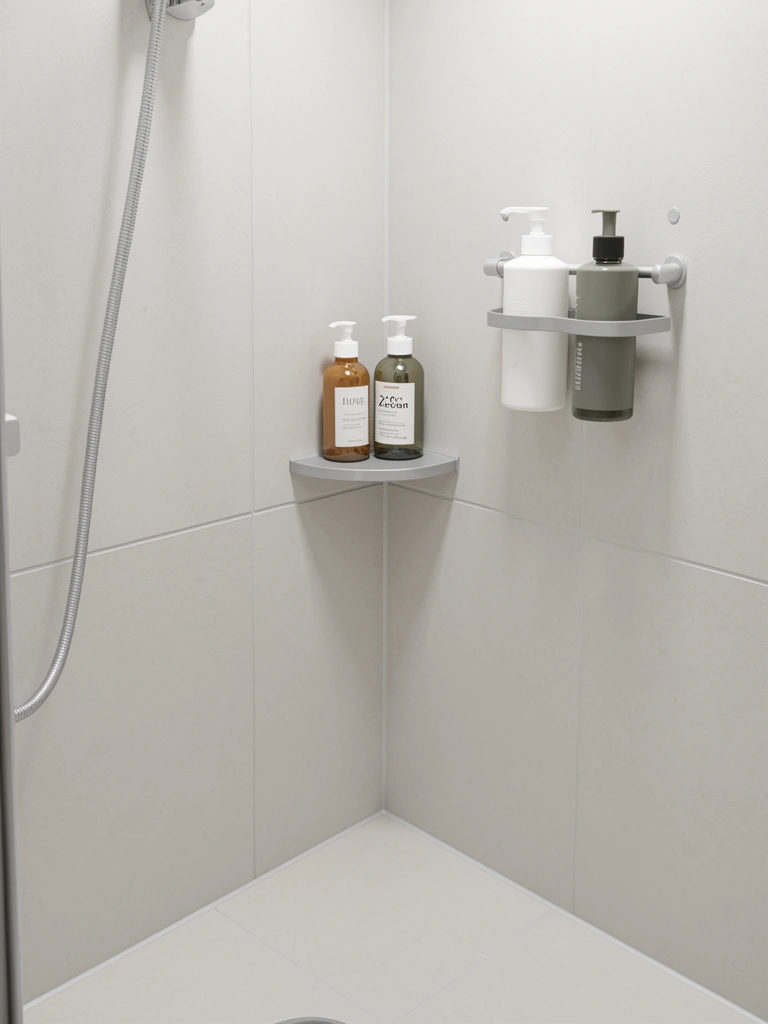
Corner clutter shrinks bathrooms visually. A single organized shelf or caddy keeps shower supplies out of sight lines while staying accessible.
Add a stainless steel corner caddy (tension-rod or suction-cup style) to hold shampoo, conditioner, and soap. Alternatively, install a small recessed niche (4×8 inches) if you’re renovating. Choose one small shelf rather than multiple caddies—this reads as intentional, not cluttered.
Budget: $15-$40 for a basic tension-rod caddy from Target, IKEA, or Amazon. Recessed niche costs $150-$400 if built during renovation. Renter option: Use a suction-cup caddy ($10-$20) that sticks to tile and removes cleanly.
Your shower looks spacious and organized. Everything has a spot, and you avoid the visual chaos of bottles scattered on the floor.
11. Choose a Pedestal Sink or Wall-Mounted Option for Open Floor
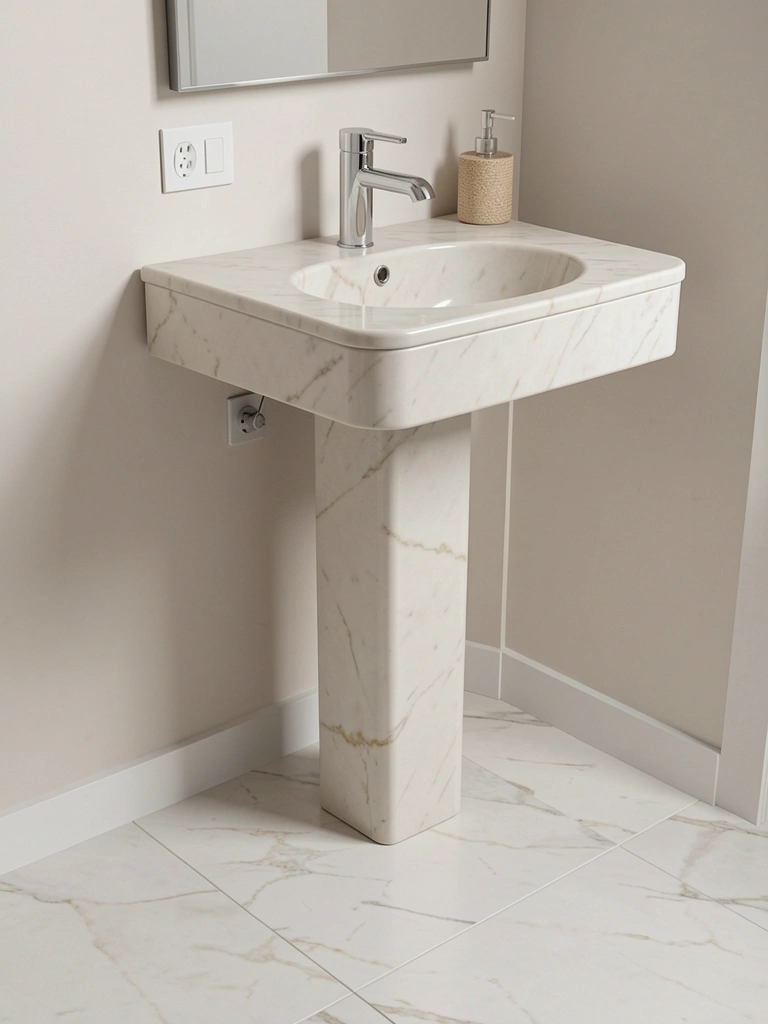
Pedestal sinks or slim wall-mounted options preserve floor space and sight lines compared to vanities, especially in the tightest bathrooms.
Install a classic pedestal sink (20-24 inches wide) for the most open feel, or a compact wall-mounted sink (18-20 inches) for even more floor space. These sacrifice storage but maximize perception of space. Pair with wall-mounted faucets to keep the sink area clean and uncluttered.
Budget: $150-$400 for a pedestal sink with faucet from Home Depot or Lowe’s. Wall-mounted sinks run $200-$500 if plumbing work is needed. A pedestal takes 2-3 hours to install (or hire a plumber for $200-$300).
You gain precious floor space for movement and feel. Walking around the sink is easier, and the bathroom feels less compressed.
12. Add a Small Accent Wall in Deep Color Behind the Toilet
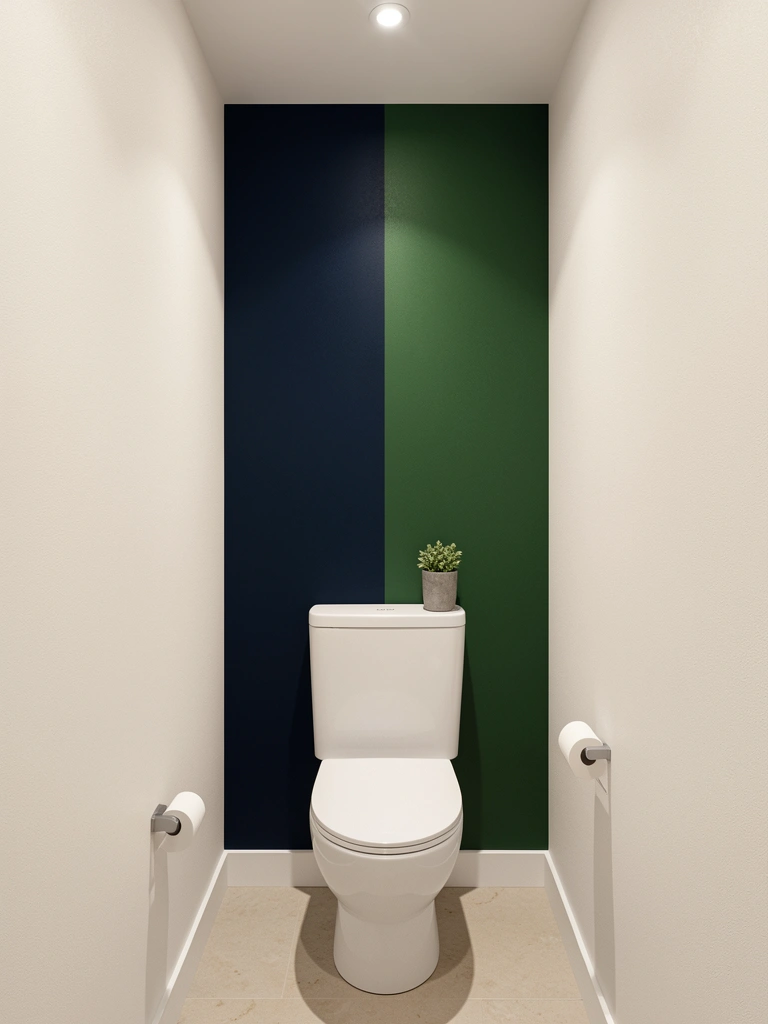
One small accent wall in a deeper tone draws the eye backward, creating an illusion of depth without overwhelming the tight space.
Paint the wall directly behind the toilet (or vanity) in a deep jewel tone like navy, forest green, terracotta, or charcoal. Keep the other three walls light and neutral to prevent the space from feeling boxed in. Use high-quality bathroom paint in semi-gloss finish for durability.
Budget: $25-$60 for quality paint. DIY application takes 2-3 hours for one wall. Professional painting: $200-$400 for the accent wall only.
The accent wall creates visual depth and intrigue. Your eye travels backward into the space, making the bathroom feel larger than it actually is.
13. Ditch Shower Curtain Rings and Use a Tension Rod
Visible shower curtain rings and rods add visual clutter. A sleek tension rod or frameless enclosure keeps the eye moving without interruption.
Install a tension rod (chrome, stainless, or matte black) mounted high and tight against the ceiling or top of the shower area. If budget allows, swap to a frameless glass enclosure to eliminate the rod entirely and open sightlines. Both options cost much less than full tile enclosures.
Budget: $15-$40 for a quality tension rod from Amazon or Target. A basic frameless enclosure runs $200-$600 depending on size. Tension rods are renter-friendly; enclosures require professional installation.
The overhead area feels clean and uninterrupted. Your eye moves through the shower zone without catching on hardware.
14. Use Open Shelving Instead of a Closed Medicine Cabinet
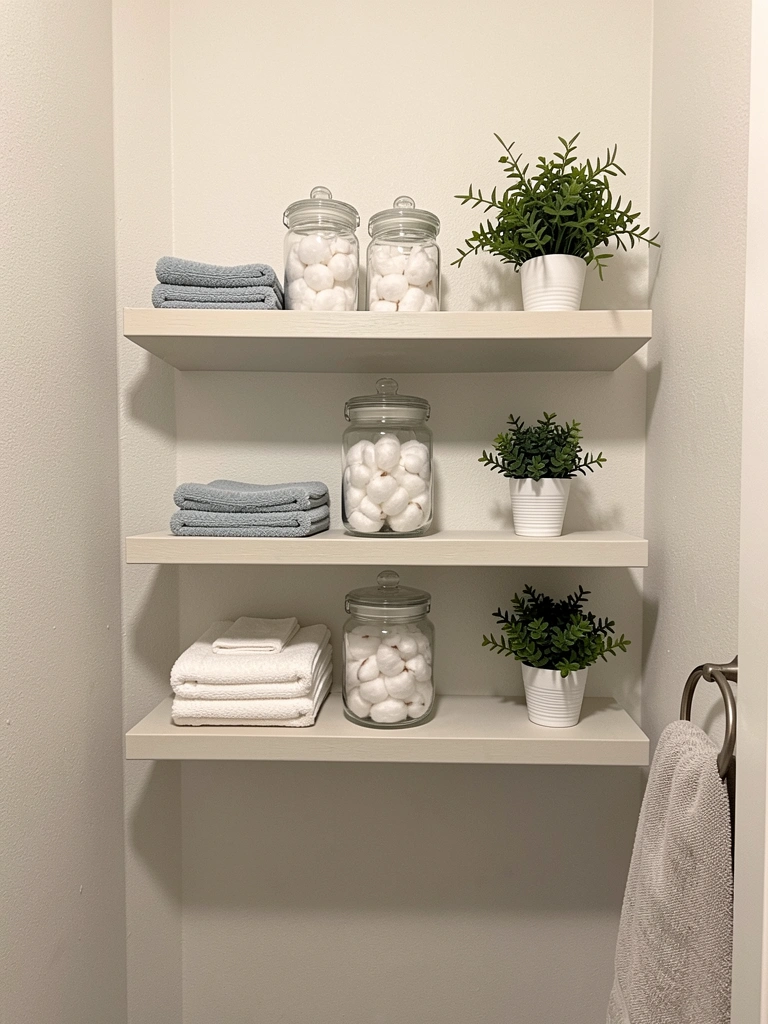
Open shelving lets the wall breathe instead of creating a dense medicine cabinet. When styled thoughtfully, open shelves feel curated rather than cluttered.
Mount 2-3 shallow floating shelves (8-10 inches deep) above the vanity or toilet. Style with matching containers, rolled washcloths, plants, or a few decorative items. Keep items minimal and intentional—this is not junk storage, it’s display storage. Use woven baskets or glass jars to contain smaller items.
Budget: $50-$120 for three shelves with brackets from IKEA, Wayfair, or Target. Installation takes 1.5-2 hours with a drill and level. Renters can use command strips for damage-free hanging (up to $40 for heavy-duty strips).
The shelves feel purposeful and designed rather than crammed. Displayed items become part of your décor instead of hidden away.
15. Install Slim Under-Vanity Lighting to Brighten the Sink Area

Under-vanity lighting brightens the sink area without adding bulky fixtures. It also creates a hotel-like ambiance while being purely functional.
Add LED strip lights (warm white, 2700K-3000K) under the floating vanity edge, running the length of the sink. Choose peel-and-stick adhesive LED strips for easy application or hire an electrician for hardwired options ($200-$400). Pair with a dimmer switch for flexibility. Position lights 2-3 inches from the edge for the best glow.
Budget: $20-$50 for peel-and-stick LED strips from Amazon, Home Depot, or Target. DIY installation takes 30 minutes. Renters can plug into an outlet (battery versions run $30-$60).
The sink area becomes brightly lit for grooming tasks, and the soft glow makes the space feel spa-like. Your bathroom transforms with one simple addition.
16. Add a Narrow Towel Rack Behind the Door or on a Sidewall
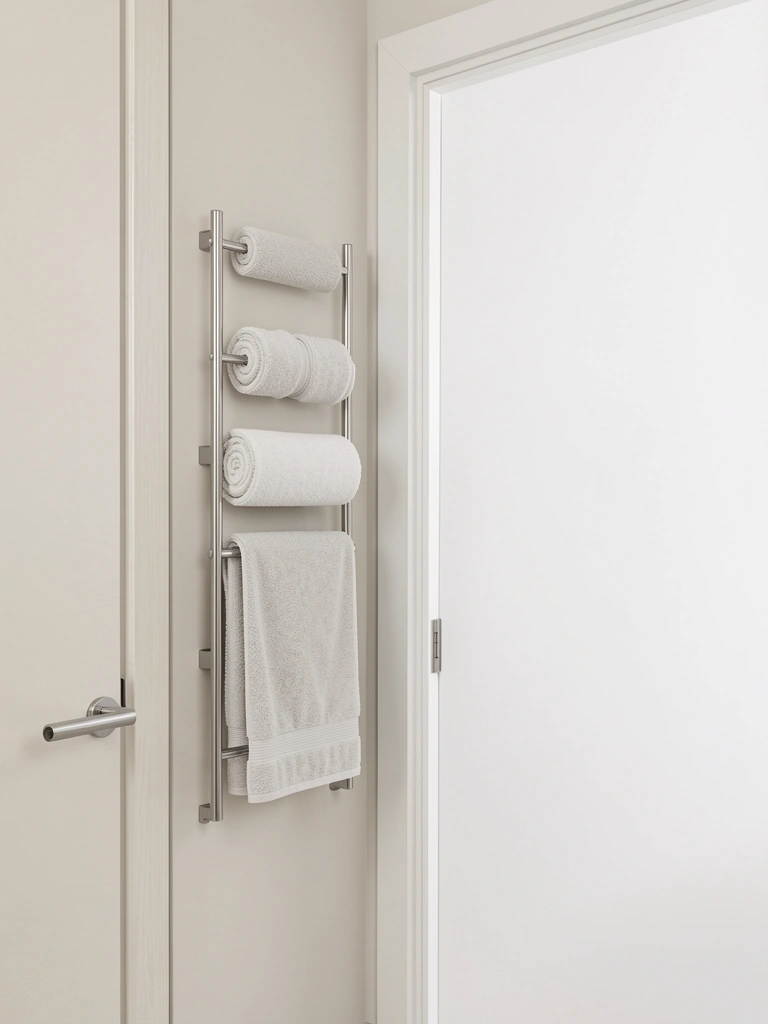
A tall, narrow towel rack stores towels without consuming floor or counter space. Mounting behind the door or on a sidewall keeps it out of the main sightline.
Install a vertical towel rack (12-18 inches wide, 24-36 inches tall) on an empty sidewall or behind the bathroom door. Choose stainless steel, matte black, or natural wood to match your style. Space it 6-12 inches from the wall for easy towel hanging and removal. Mount with brackets rated for at least 20 pounds to support weight safely.
Budget: $30-$80 for a quality towel rack from Target, IKEA, or Home Depot. Installation takes 30-45 minutes with basic tools. Renters: Use a leaning towel ladder ($25-$50) that doesn’t require wall mounting.
Towels hang neatly off the floor and counter. You gain a dedicated spot that looks intentional rather than improvised.
17. Paint Inside Cabinet Doors a Lighter Shade to Bounce Light

Light-colored cabinet interiors bounce light deeper into storage and make open cabinets feel less like dark holes. This tiny detail has a big visual impact.
Paint the inside surfaces of your vanity cabinet doors and interior walls with white or pale gray semi-gloss paint (moisture-resistant). Use a foam brush for even coverage and apply two coats for durability. This works whether cabinets are open for display or closed for storage—light interiors always feel more spacious.
Budget: $15-$30 for small-batch bathroom paint. DIY painting takes 1-2 hours including drying time. No special tools needed beyond a foam brush.
Opened cabinets reveal bright, organized interiors instead of dark compartments. The whole area feels lighter and more intentional.
18. Choose a Compact Toilet with a Slimmer Tank
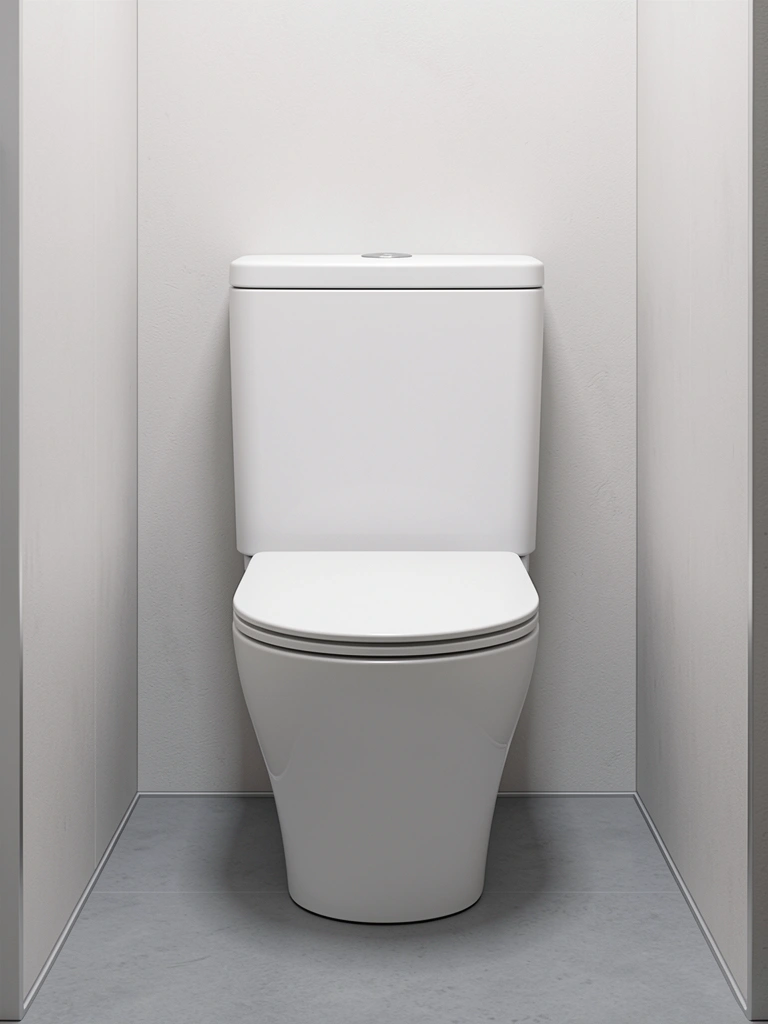
Compact or corner toilets have slimmer profiles and leave more floor space visible. Modern designs take up noticeably less visual real estate than traditional toilets.
Swap your standard toilet for a compact model (designed for small spaces) or a corner toilet if your layout allows. Brands like Toto Aquia, American Standard Cadet, or KOHLER San Souci make excellent compact options. These run $300-$600 installed versus standard toilets at $250-$450. Hire a plumber for removal and installation ($200-$400 labor).
The toilet footprint shrinks by several inches, opening up floor space. Your bathroom feels less crowded and easier to navigate around.
19. Use Mirrored Cabinet Doors to Multiply Light and Space
Mirrored cabinet doors bounce light while providing functional storage. They’re one of the most effective visual tricks for expanding tight bathrooms.
Install mirrored cabinet doors on your vanity (either replace existing doors or retrofit them with adhesive mirror panels). Choose frameless mirrors for a seamless look. Position at least one large mirror directly above the sink or spread smaller mirrors across cabinet fronts to catch and reflect light from multiple angles.
Budget: $50-$150 to retrofit existing cabinet doors with adhesive mirror panels, or $200-$400 to replace doors entirely. DIY retrofit takes 1-2 hours. Professional installation: $150-$300.
The reflected light makes the bathroom feel twice as wide. Mirrored storage becomes both functional and visually expansive.
20. Mount a Corner Shelf for Dead Space Optimization
Corner space is often wasted in small bathrooms. A single corner shelf transforms unused real estate into functional (or decorative) display.
Install a corner shelf (12-16 inches per side) in any unused corner using L-brackets and wall anchors. Mount at eye level or above for best visibility. Style with small plants, candles, rolled washcloths, or decorative objects to keep it looking curated. Choose wood, metal, or glass to match your aesthetic.
Budget: $20-$50 for a corner shelf with brackets from IKEA, Target, or Home Depot. Installation takes 45 minutes with a drill and level. Renter-friendly: Use command-strip corner shelves ($15-$30) that remove cleanly.
Dead corner space becomes functional storage or styled display. Your bathroom uses every inch intentionally.
21. Add a Narrow Freestanding Shelving Unit in an Unused Corner
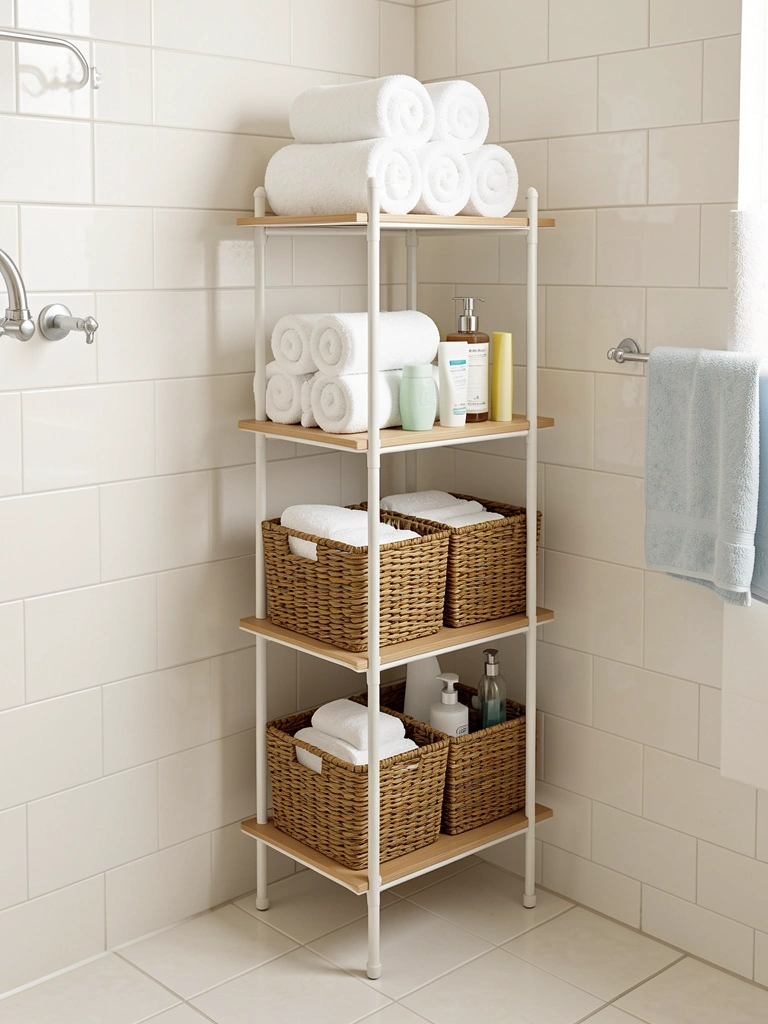
A slim freestanding shelving unit slides into corners and provides open storage without any wall work. It’s flexible, moveable, and instantly boosts capacity.
Place a narrow shelving unit (12-15 inches wide, 36-48 inches tall) in a corner next to the toilet or beside the vanity. Choose bamboo, wood, or metal to match your décor. Stock shelves with rolled towels, small baskets for supplies, or decorative items. These units cost less than built-in shelves and require zero installation.
Budget: $30-$80 from IKEA (Pinnig), Target, or Amazon. No installation needed—just place and style. Perfect for renters since it’s completely portable.
You gain shelf space without drilling holes. The corner feels used and organized rather than empty and wasted.
22. Use a Clear Shower Enclosure Instead of Frosted Glass
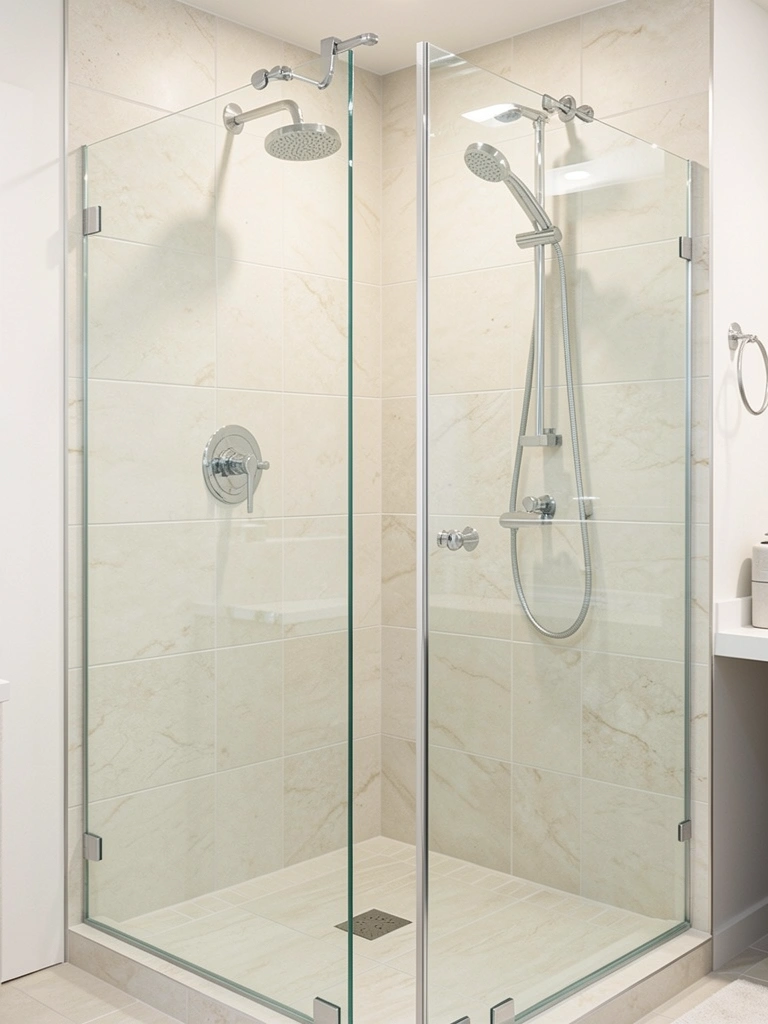
Clear glass enclosures feel more spacious than frosted or patterned options. Sight lines extend through the shower, making the entire bathroom feel larger.
Install a clear frameless glass shower enclosure (or replace frosted panels with clear ones) to maintain visual continuity. If privacy is a concern, add clear glass with minimal hardware or trim. The uninterrupted sightline makes the bathroom feel open even in tight quarters.
Budget: $300-$800 for a custom frameless glass enclosure. Off-the-shelf kits run $200-$400. Installation takes 4-8 hours professionally or 8-12 hours as a complex DIY project. Hire a professional for best results.
The shower becomes transparent rather than a visual barrier. Your eye travels through the entire space, making everything feel more open.
23. Install Slim Sconces on Either Side of the Mirror Instead of One Overhead Light

Two slim sconces flanking the mirror provide better task lighting than a single ceiling fixture, plus they take up way less visual space overhead.
Mount a slim wall sconce (6-8 inches tall) on each side of your mirror, positioned 60-66 inches from the floor (eye level or slightly above). Choose modern styles with minimal bulk in chrome, brass, or matte black. Pair with dimmable LED bulbs (3000K warm white) for flexibility. This setup works beautifully in tiny bathrooms because it keeps the ceiling visually clear.
Budget: $15-$40 per sconce from Target, Wayfair, or Amazon (total $30-$80). Electrical installation for a renter situation: plug-in swing-arm sconces run $50-$120 each and need no wiring. Professional hardwiring costs $200-$400.
Your face gets flattering, shadow-free lighting for grooming. The overhead area stays clean and open without a bulky fixture.
24. Declutter Counter Space and Commit to a Minimalist Vanity Setup
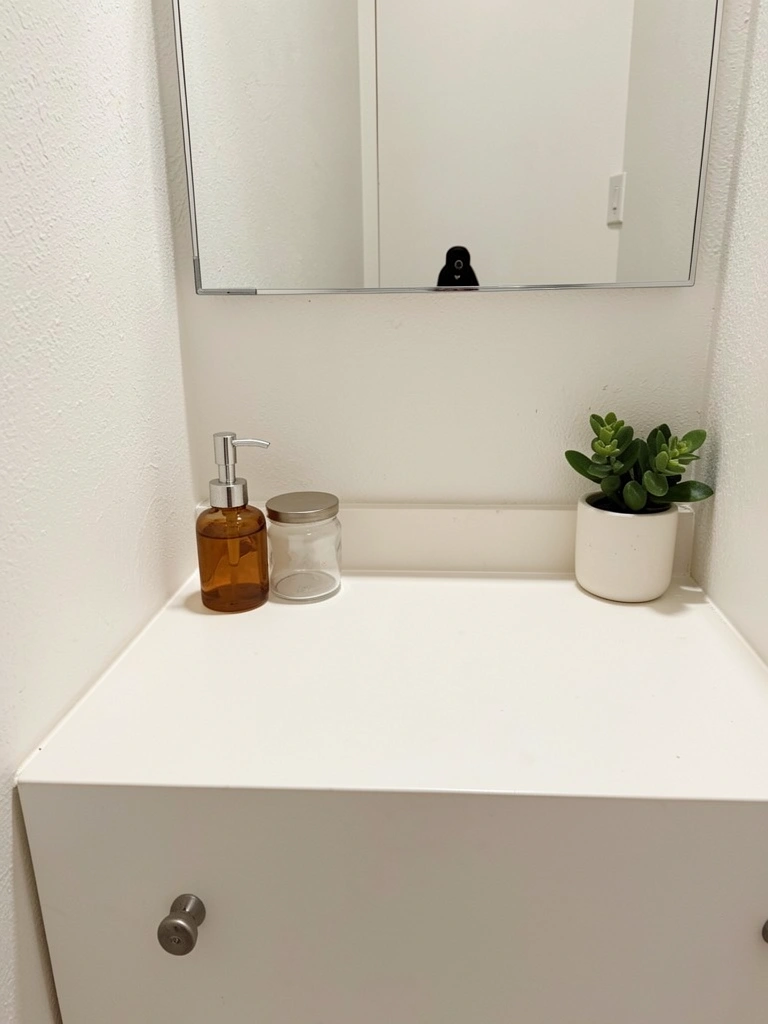
An empty counter is the cheapest way to make any bathroom feel larger. Removing just a few items has an immediate, dramatic effect on how spacious the room feels.
Keep only 3-5 essential items on your vanity: a soap or hand-wash dispenser, a small cup for toothbrushes, a hand towel, and perhaps one small plant or candle. Store everything else in drawers, cabinets, or the shelves you’ve added. Make decluttering a weekly habit to maintain the calm aesthetic.
Budget: $0 if you already have items to move; $15-$30 if you need to buy matching containers or a soap dispenser. Decluttering takes 30 minutes to an hour the first time, then 10 minutes weekly to maintain.
Your vanity becomes a serene, calming zone instead of a cluttered catchall. The empty counter space makes your whole bathroom feel larger and more peaceful.
Pin this guide and try just one or two ideas this weekend. Small changes add up fast, and you might be shocked at how much bigger your tiny bathroom feels when you remove visual clutter and add smart storage. Your micro space deserves to feel intentional and calm.
Leave a Reply