Category: Entryway Decor

  • 27 Carved Wooden Entry Door Ideas That Bring Artistic Detail to Your Home

    27 Carved Wooden Entry Door Ideas That Bring Artistic Detail to Your Home

    27 Carved Wooden Entry Door Ideas That Bring Artistic Detail to Your Home


    Introduction

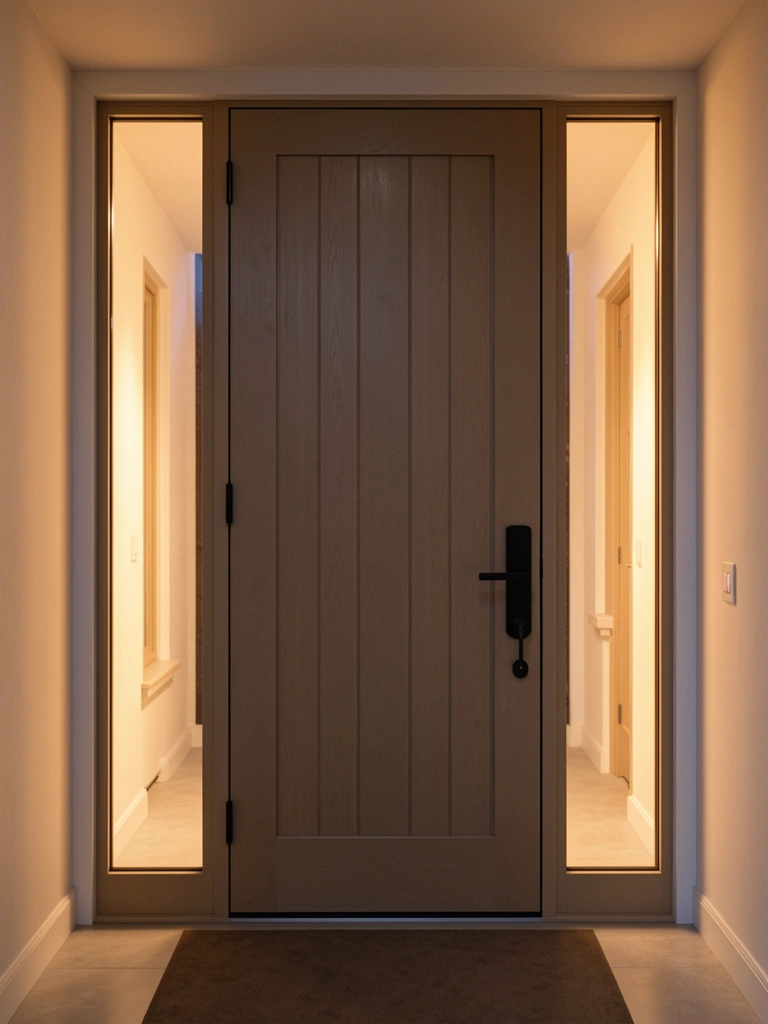
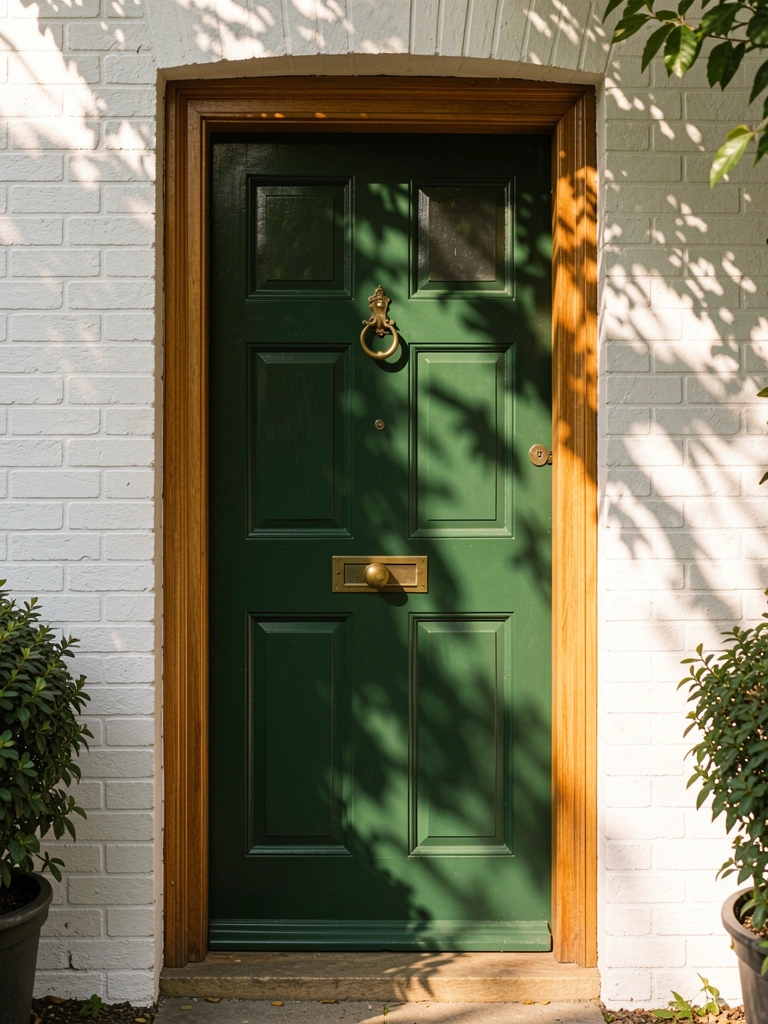
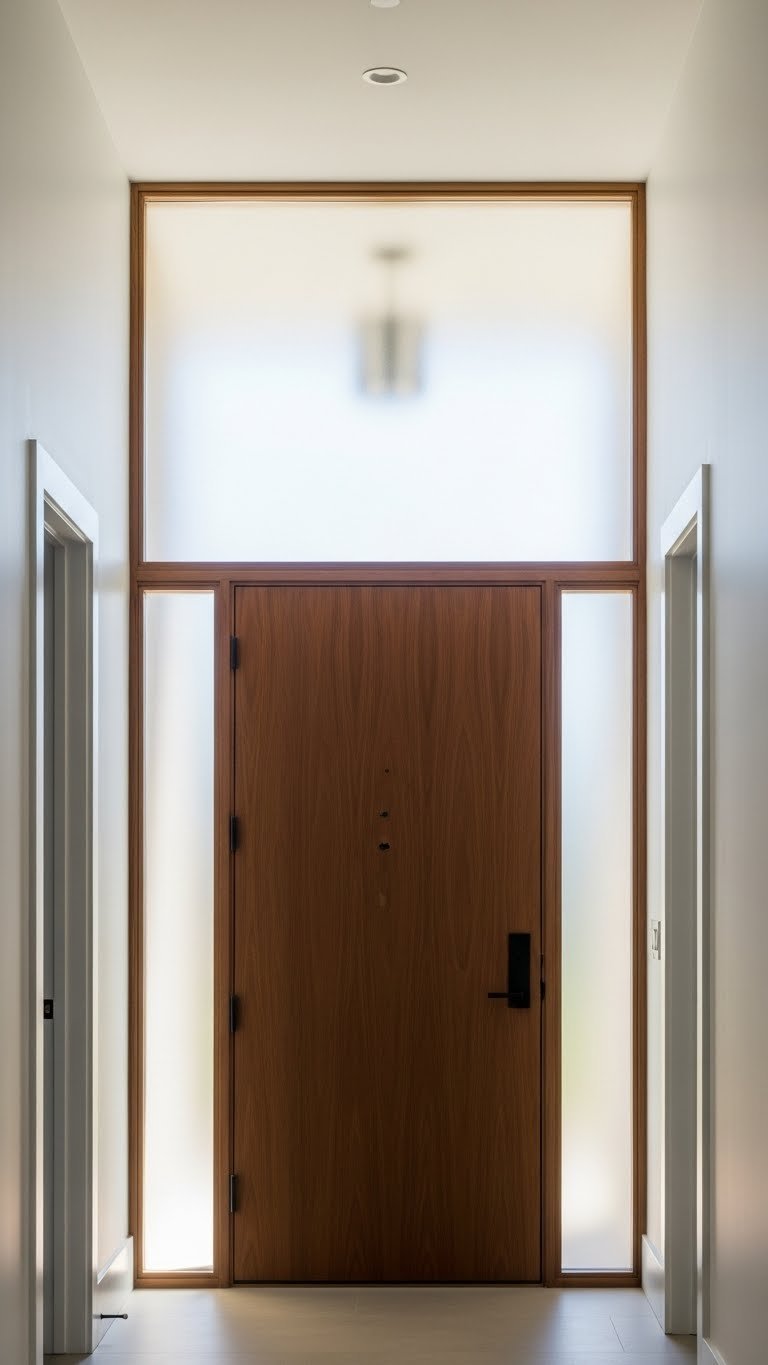
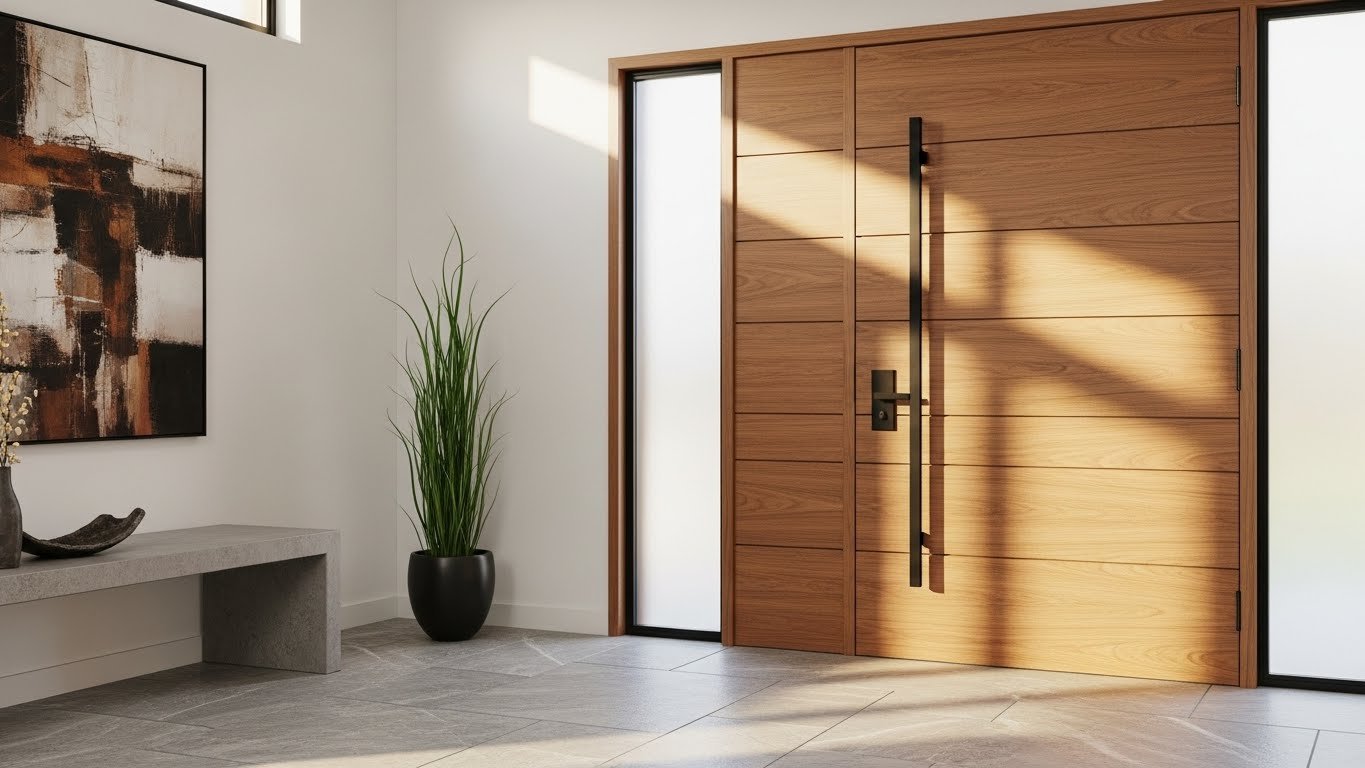
    Your front door is the first thing visitors see, and it’s also the first thing you see when you come home. If yours feels plain or outdated, you’re not alone—most standard doors lack personality. Carved wooden doors bring warmth, artistry, and an instant sense of craftsmanship that modern construction just can’t match. They catch light beautifully, create shadow play throughout the day, and signal that someone with taste lives behind them.

    The good news? You don’t need to blow your budget to add carved detail to your entry. From DIY relief-carving techniques to affordable pre-carved door panels, to splurging on a bespoke custom piece, there’s an approach for every budget and skill level. This guide walks you through 27 specific ideas—from renter-friendly panel upgrades to investment-level doors that genuinely increase curb appeal and home value.

    Let’s explore how carved wood can completely change the way your home feels.


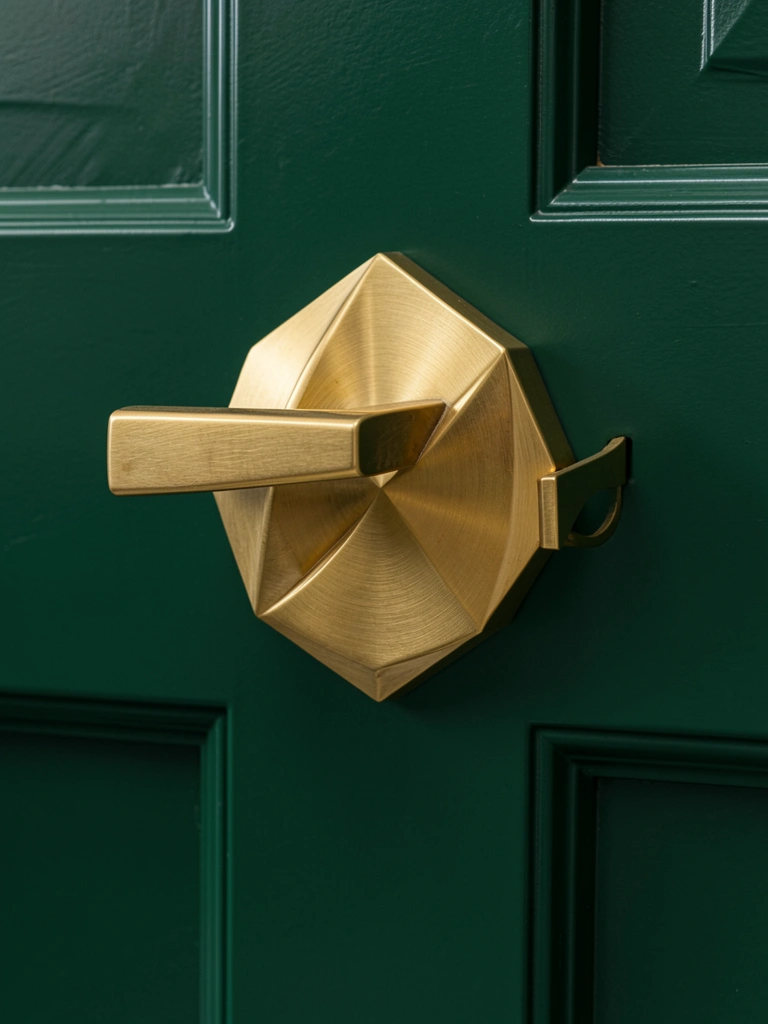
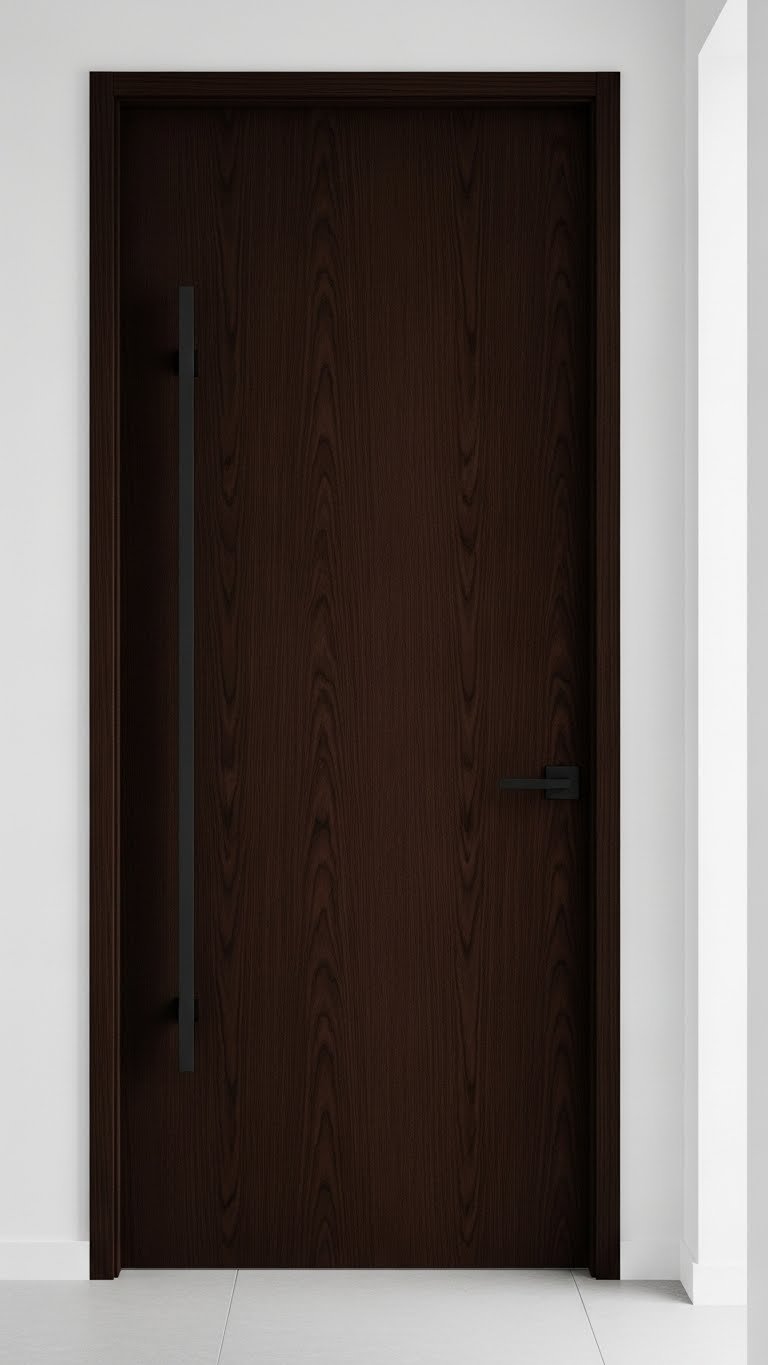
    1. Add Carved Overlays to a Plain Door

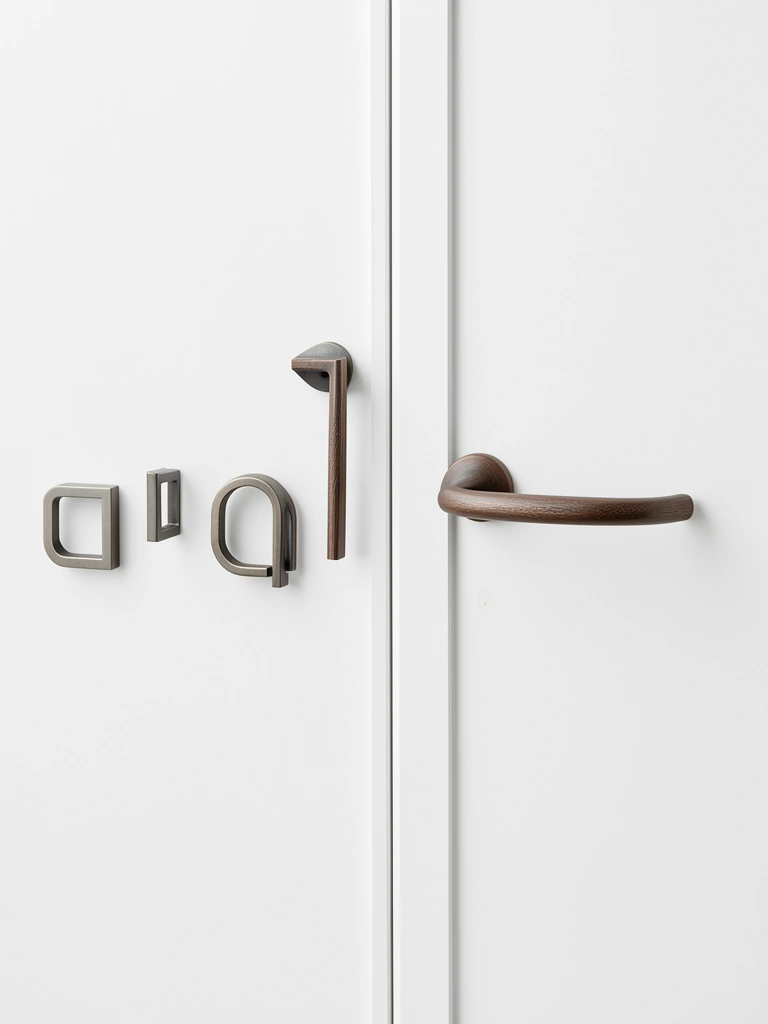
    A carved overlay is exactly what it sounds like: a pre-made carved wooden piece attached to your existing door. This is the renter-friendly hack because you can remove it when you move. Home Depot and Wayfair sell ready-made wood appliqués in styles ranging from Victorian medallions to modern geometric patterns.

    You’ll need construction adhesive, a level, and about 30 minutes. Measure your door, choose an overlay that fits proportionally (usually $40–$120), center it, and glue it down. If you rent, use removable adhesive strips instead of permanent glue. The result? Your boring door looks custom-carved without any actual carving. You can paint the overlay to match your door or contrast it—both look stunning.

    This upgrade works especially well on solid-core doors that are already slightly textured. The overlay adds depth and shadow without requiring any carpentry skills.


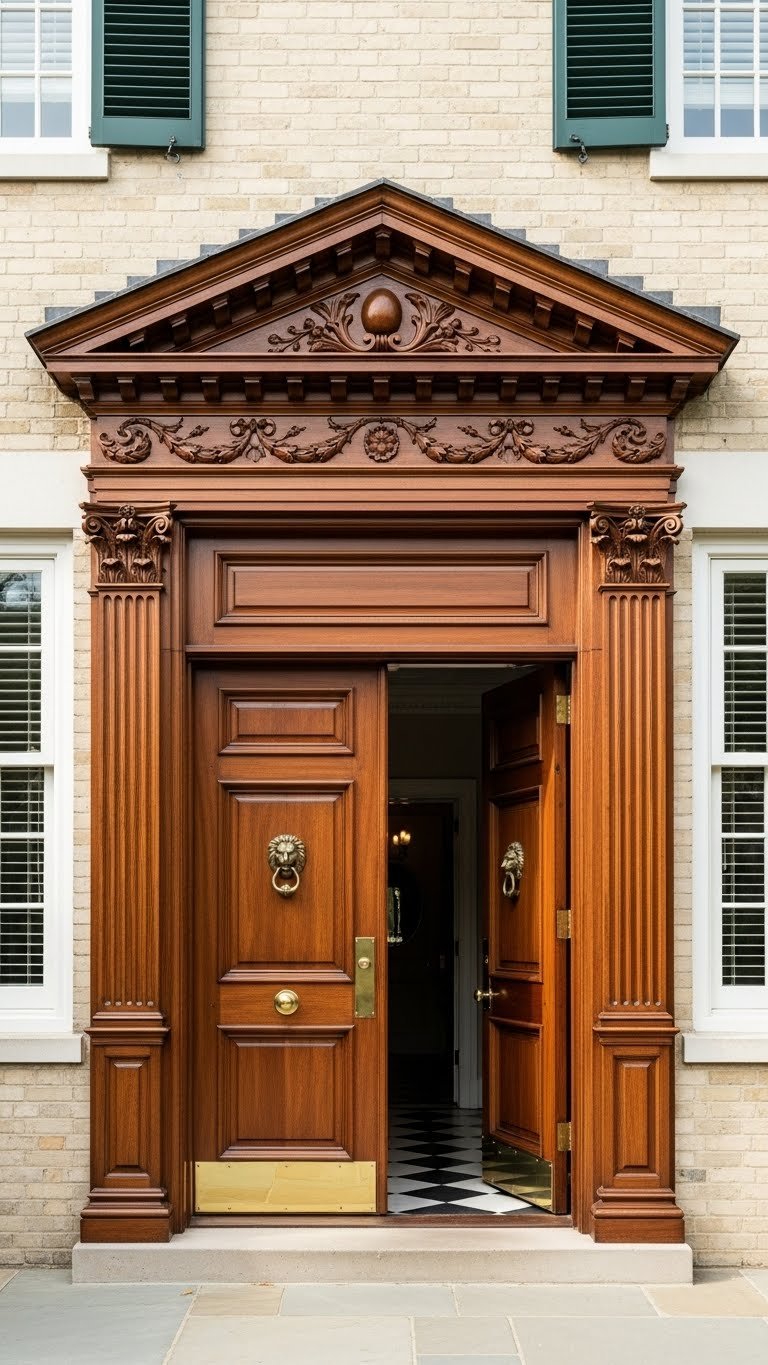
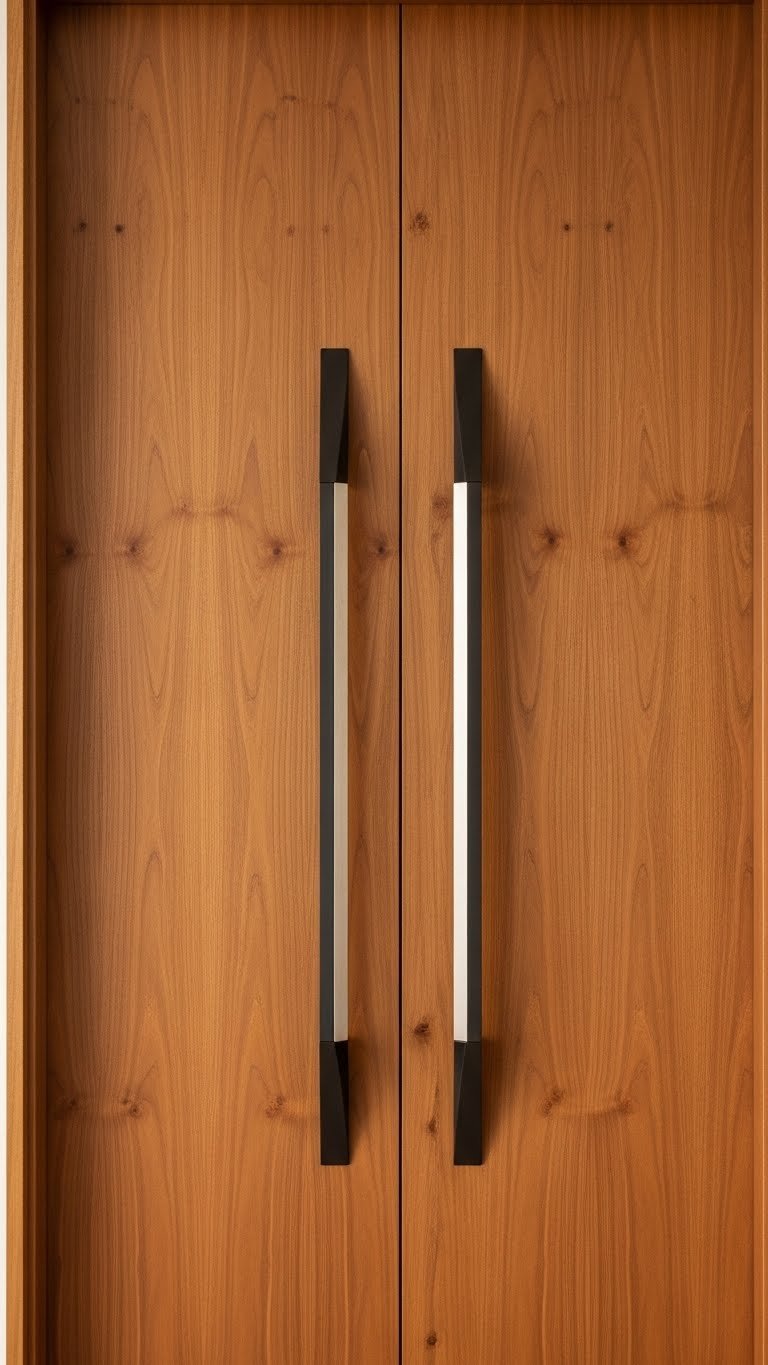
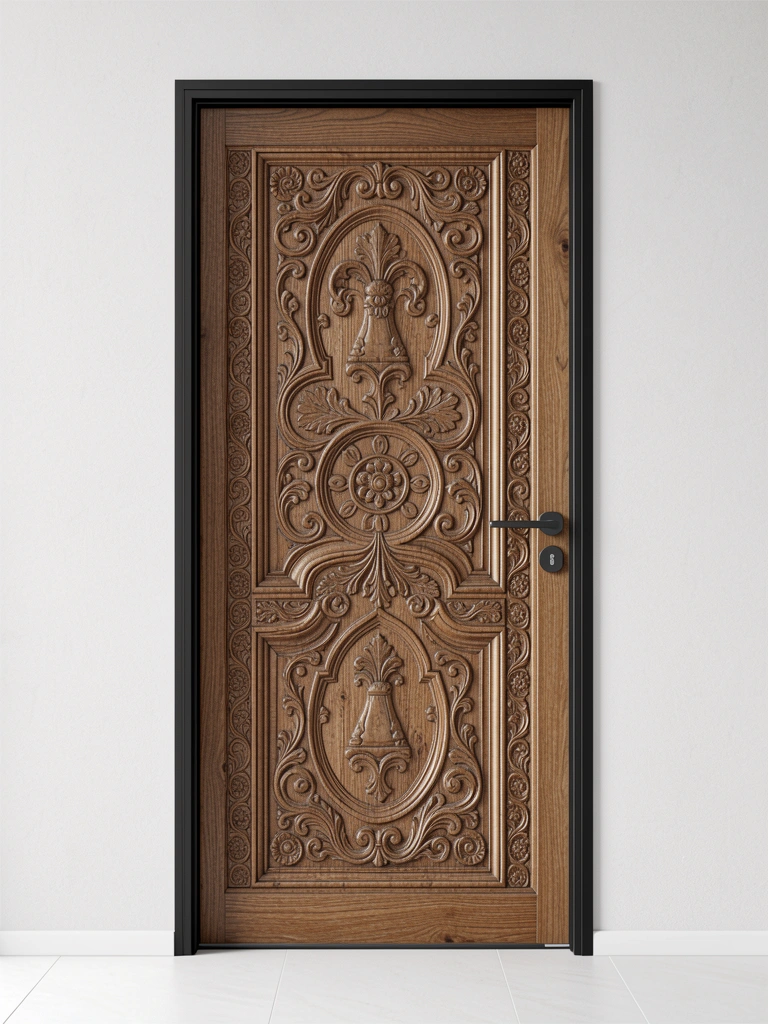
    2. Commission a Custom Full-Door Carving

    If you want something truly unique, hire a local woodcarver to design and execute a one-off carved door. This is an investment ($800–$2,500+), but you’re getting an heirloom piece. Look for woodcarvers through local art councils, etsy (search “custom carved wooden door”), or architecture firms who work with artisans.

    The process typically takes 4–8 weeks. You’ll discuss design themes with the carver—maybe your family crest, a landscape that means something to you, or abstract patterns that match your home’s style. They’ll work in hardwoods like walnut, oak, or cherry that age beautifully over decades.

    Custom carvings boost curb appeal dramatically and often become neighborhood conversation starters. Friends and family will notice immediately. This is the kind of detail that says “I care about quality” before anyone even steps inside.


    3. DIY Hand-Carved Relief Designs on Wood Panels

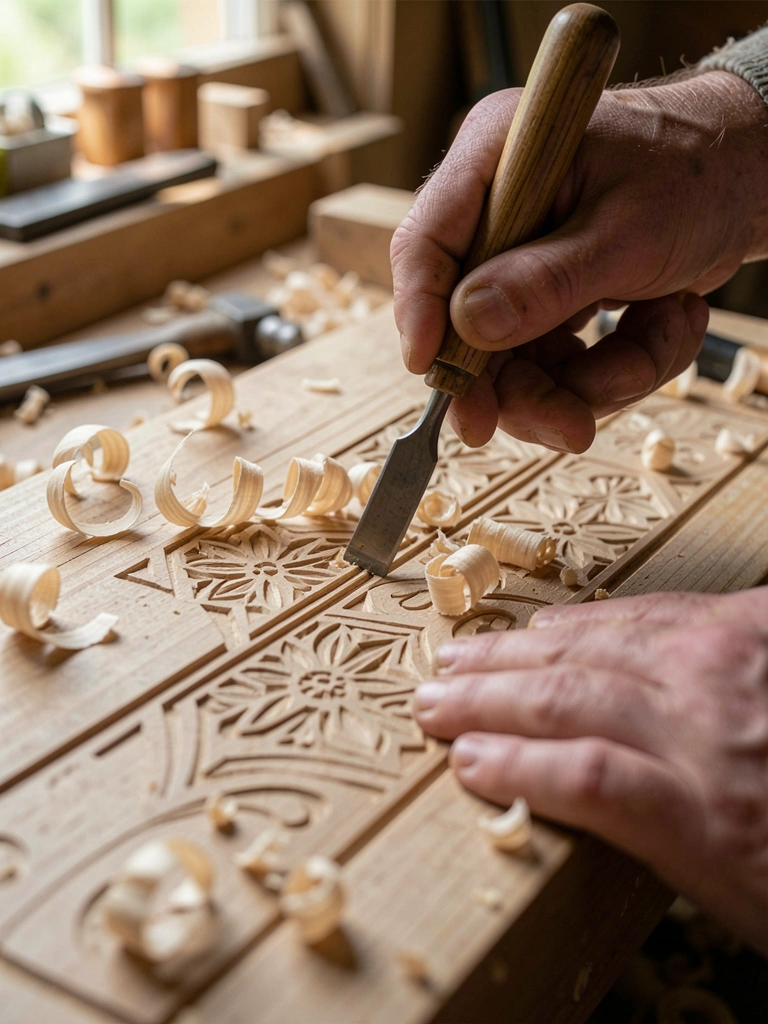
    Want to carve yourself? Start small with a wooden door panel or even a plywood insert you can attach to your current door. Basswood and butternut are beginner-friendly because they carve cleanly without splintering. Buy a basic carving chisel set ($20–$50 from Amazon or Rockler) and a pattern.

    Choose simple designs your first time: geometric borders, floral sprigs, or abstract lines. Sketch your pattern lightly with pencil, then work with the grain using shallow cuts (about 1/4-inch deep). This takes patience—expect 8–15 hours for a small panel—but the satisfaction is real. You’re literally creating art with your hands.

    Once carved, finish it with stain or paint, then mount it on your door frame or replace an existing panel. Many DIYers find this meditative, and the results look intentional rather than mass-produced. Your door becomes a conversation about your creative side.


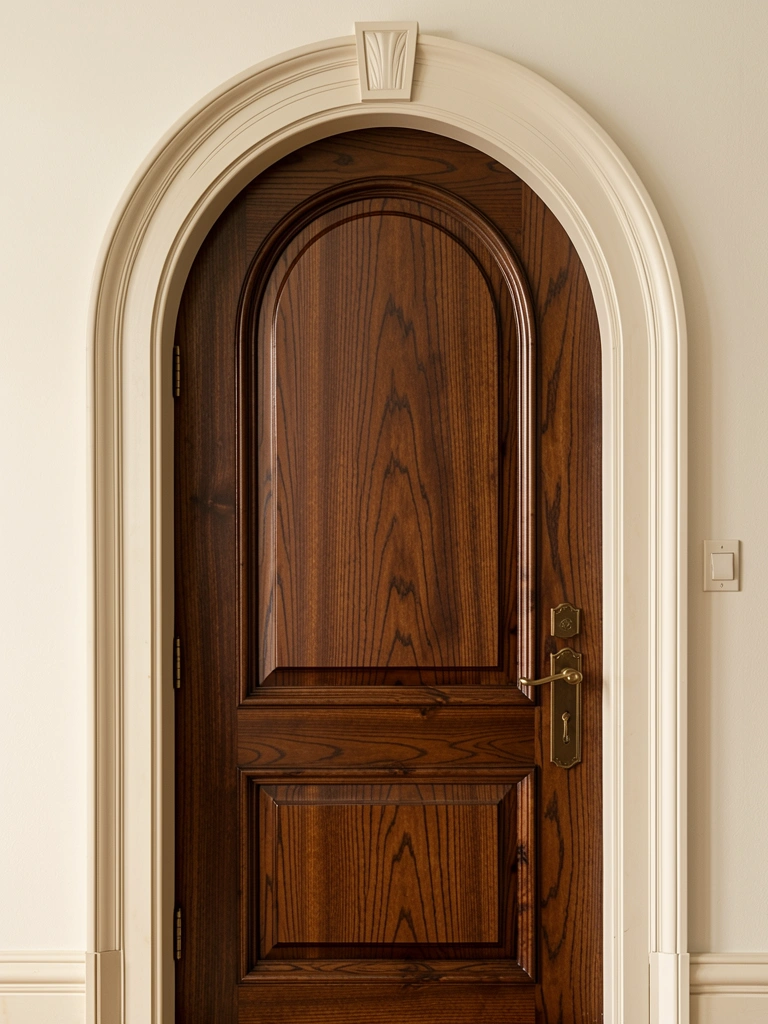
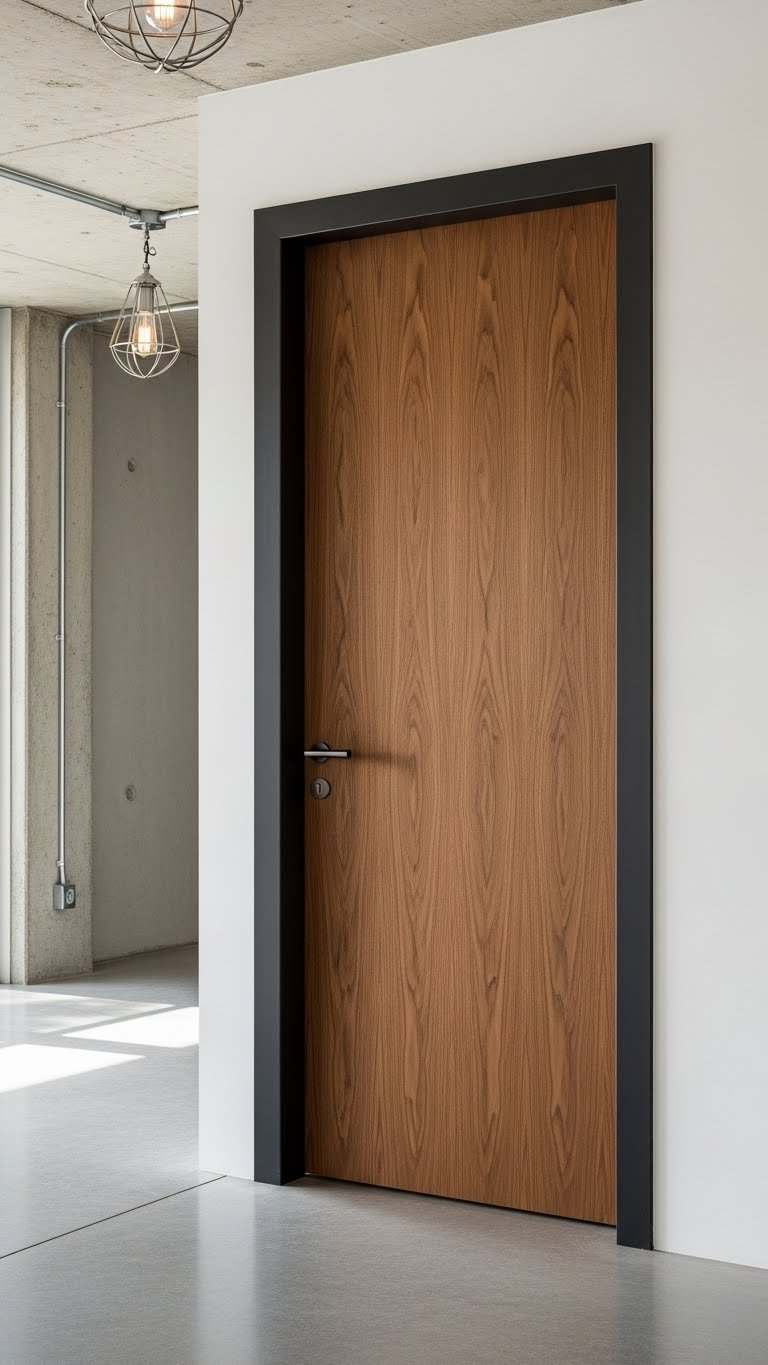
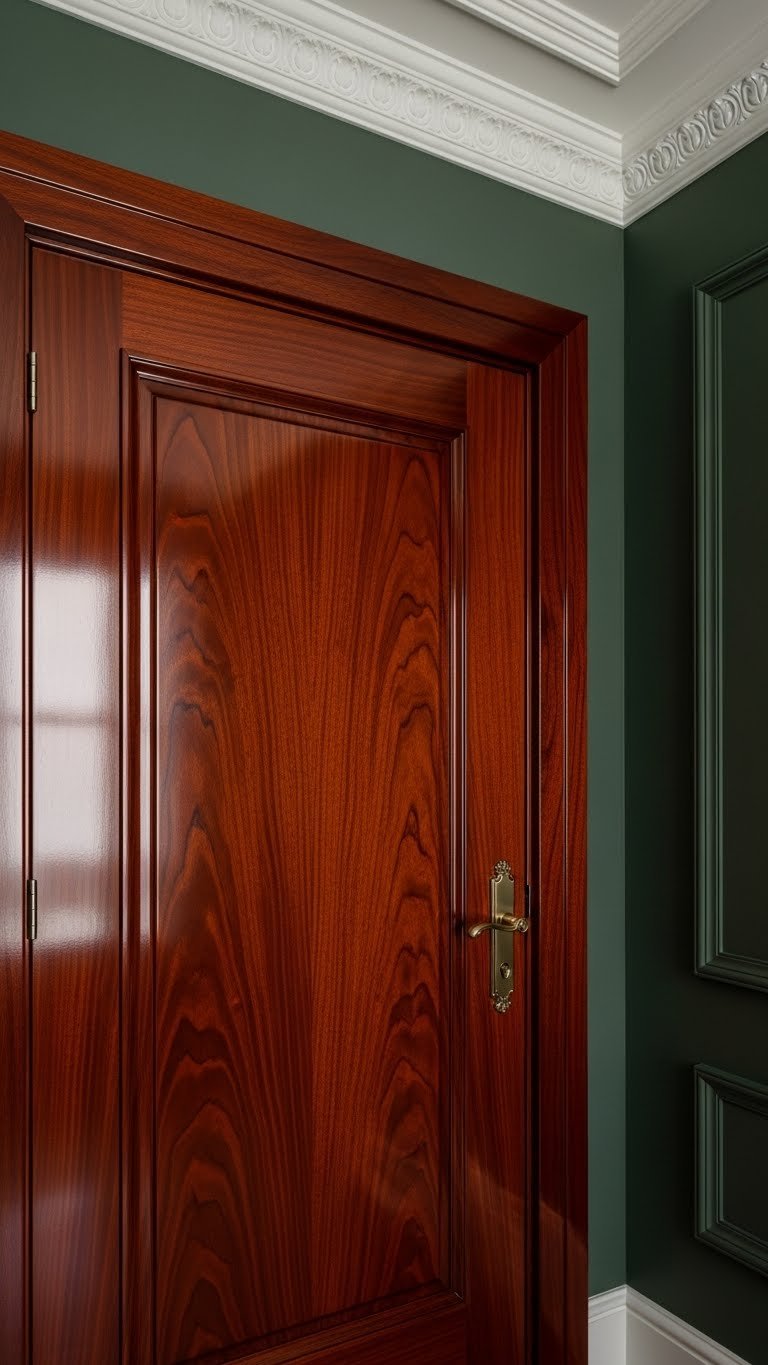
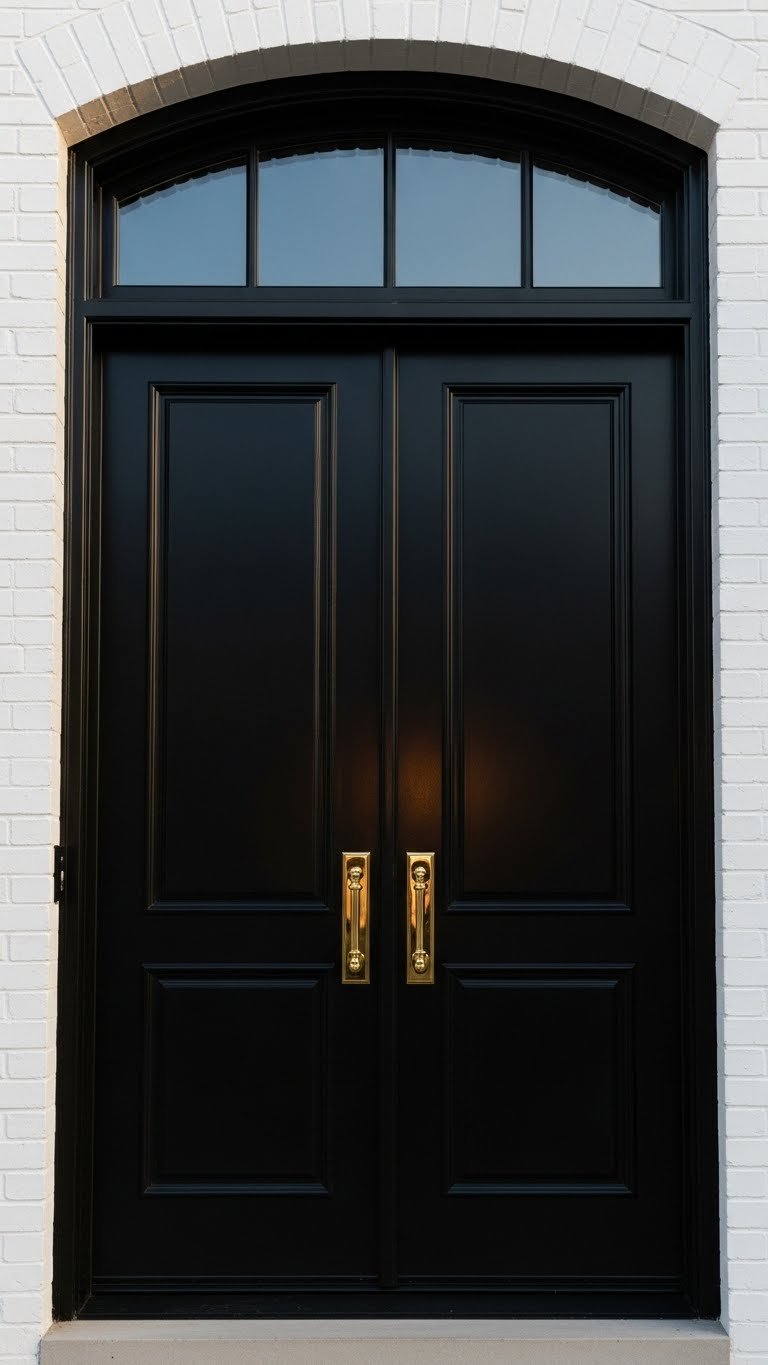
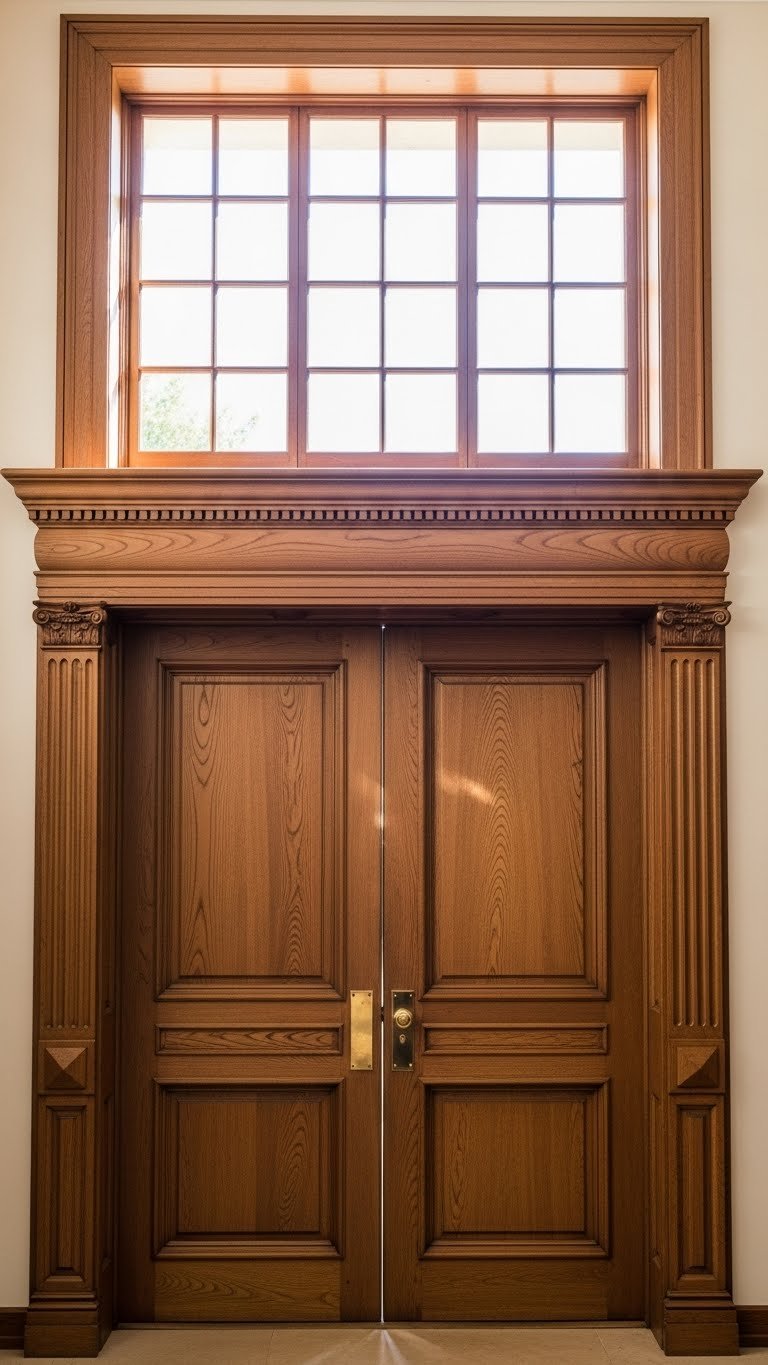
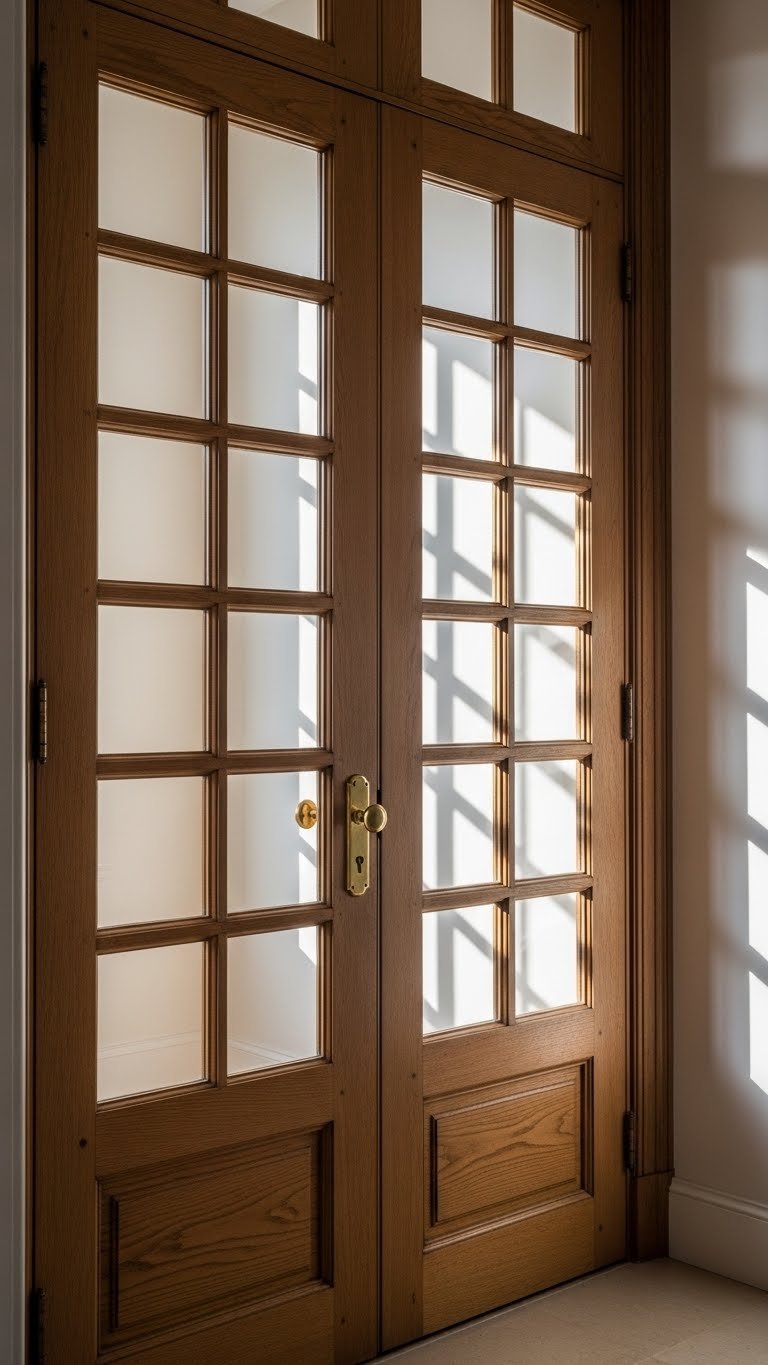
    4. Install Pre-Carved Door Panels from Heritage Brands

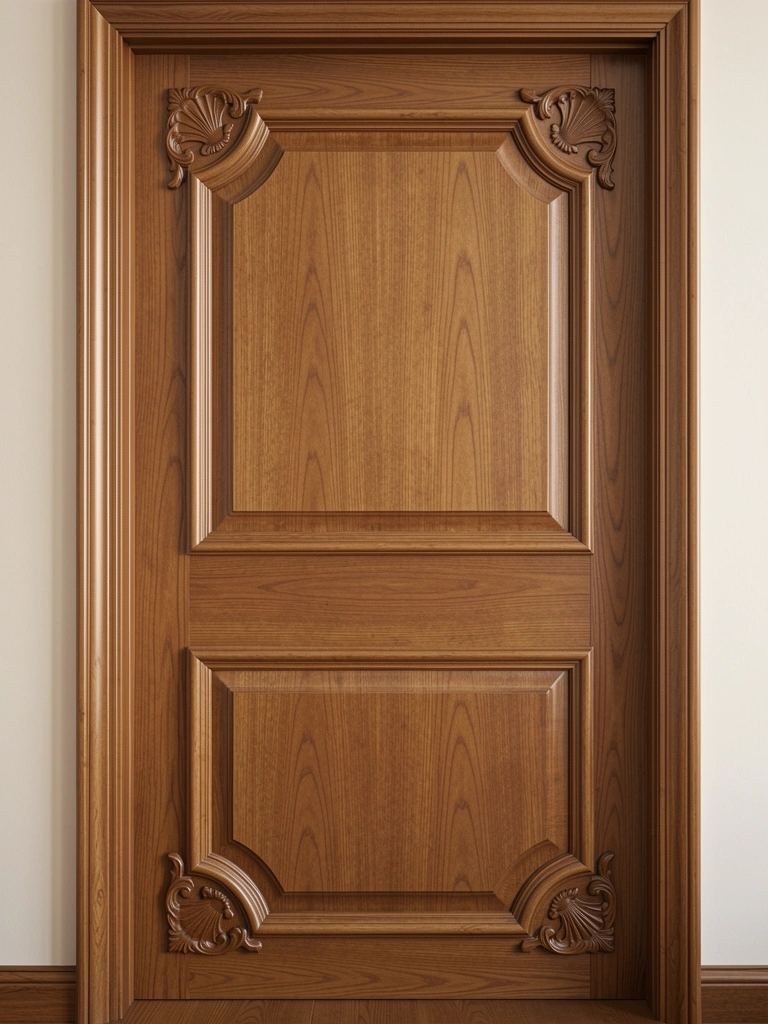
    Companies like ProVia, Therma-Tru, and Jeld-Wen offer pre-carved panel doors in dozens of styles. These aren’t cheap ($300–$800), but they’re factory-consistent, durable, and come with modern weatherproofing and energy ratings. You get carved artistry without the custom wait time.

    Popular carved styles include shell patterns (coastal feel), egg-and-dart molding (traditional), and geometric reliefs (contemporary). Browse their online galleries to see how different carvings photograph in different light conditions. Many showrooms let you touch samples—important because carving depth varies widely.

    Installation usually requires a professional unless you’re experienced with door frames. Budget $150–$300 for installation. The payoff? A door that looks like it cost thousands but functions perfectly and fits your home’s proportions exactly. These doors last 20+ years.


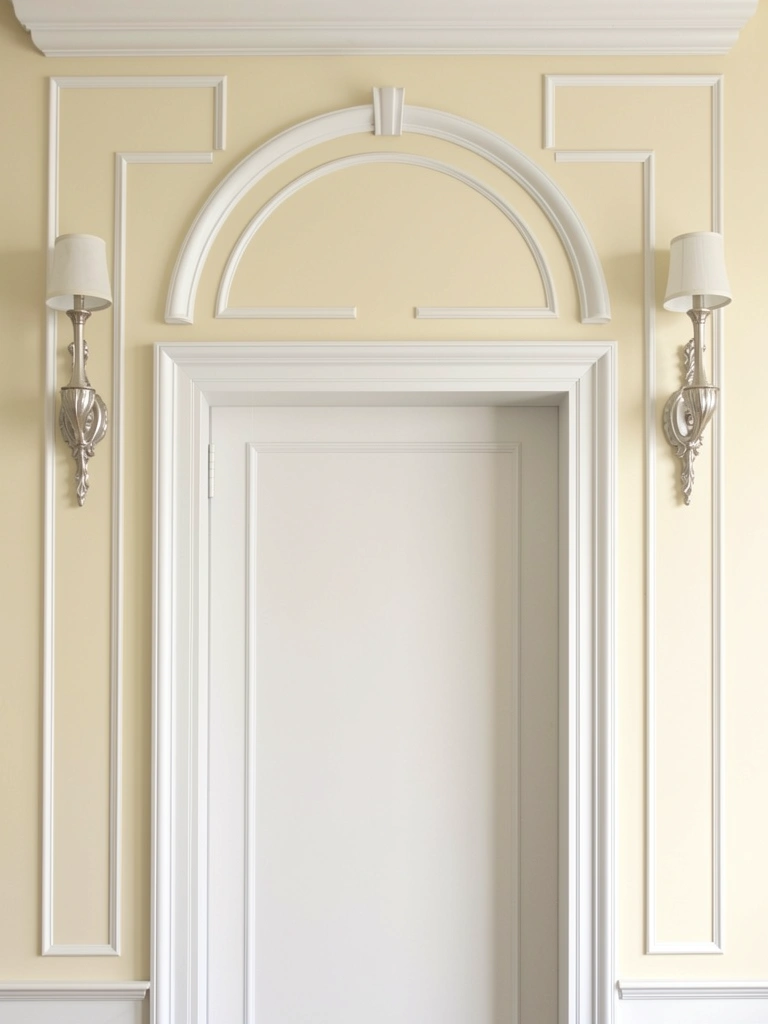
    5. Layer Carved Wooden Trim Around a Simple Door

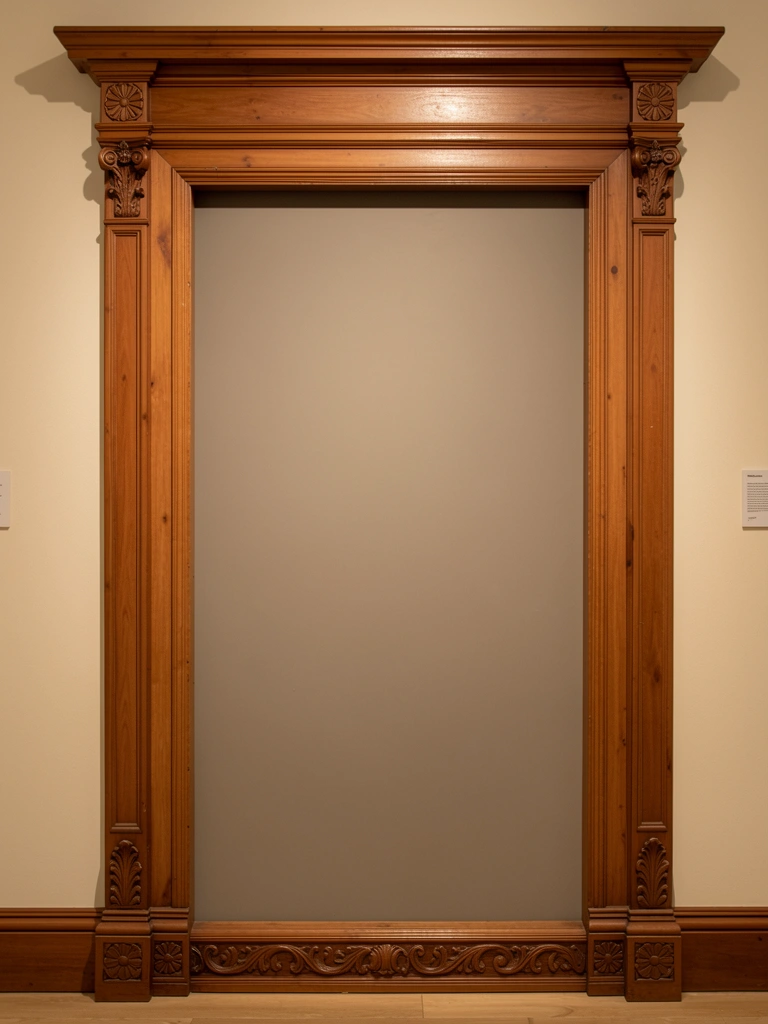
    You don’t have to carve the door itself—frame it with carved trim instead. Ornamental wood trim (also called “trim blocks” or “pediments”) comes pre-carved from specialty suppliers like Architectural Depot or Home Depot’s premium sections ($60–$300 depending on complexity).

    Mix and match pieces: a carved pediment above the door, carved corner blocks where trim meets the frame, carved baseboard pieces at the bottom. Install with construction adhesive and finish nails. This approach lets you customize the “intensity” of carving—use minimal pieces for subtle detail or go full Baroque if that’s your style.

    The best part? You’re adding architectural impact to your entire entryway, not just the door. The carving frames and showcases your door rather than competing with it. Light plays beautifully across layered trim, creating shadow and depth.


    6. Use Stain and Wood-Burning to Simulate Carved Detail

    If actual carving feels too ambitious, wood-burning (pyrography) creates the illusion of carved depth with far less physical labor. A wood-burning tool costs $15–$40. You sketch your design, then carefully burn it into the wood surface with a heated tip.

    The burned lines create shading and contrast that reads as carved from a distance. Use designs with fine lines: Celtic knots, botanical details, geometric patterns. You control the depth by burn time—lighter burns read as sketch-like, darker burns look more carved.

    This takes steady hands and patience (a small panel takes 3–6 hours), but the results look professionally detailed. Finish with stain to enhance the contrast between burned and unburned wood. It’s an affordable ($50–$150 in materials) way to get custom carved-looking detail without actual woodcarving skills.


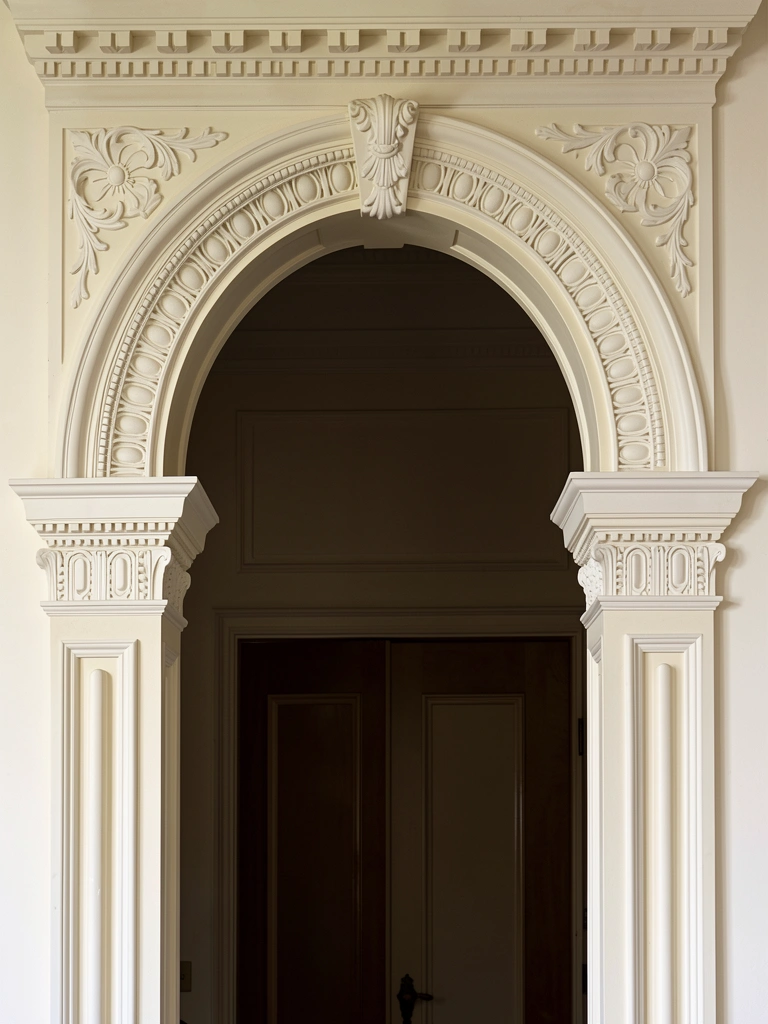
    7. Apply High-Relief Molding for Dramatic Shadow Play

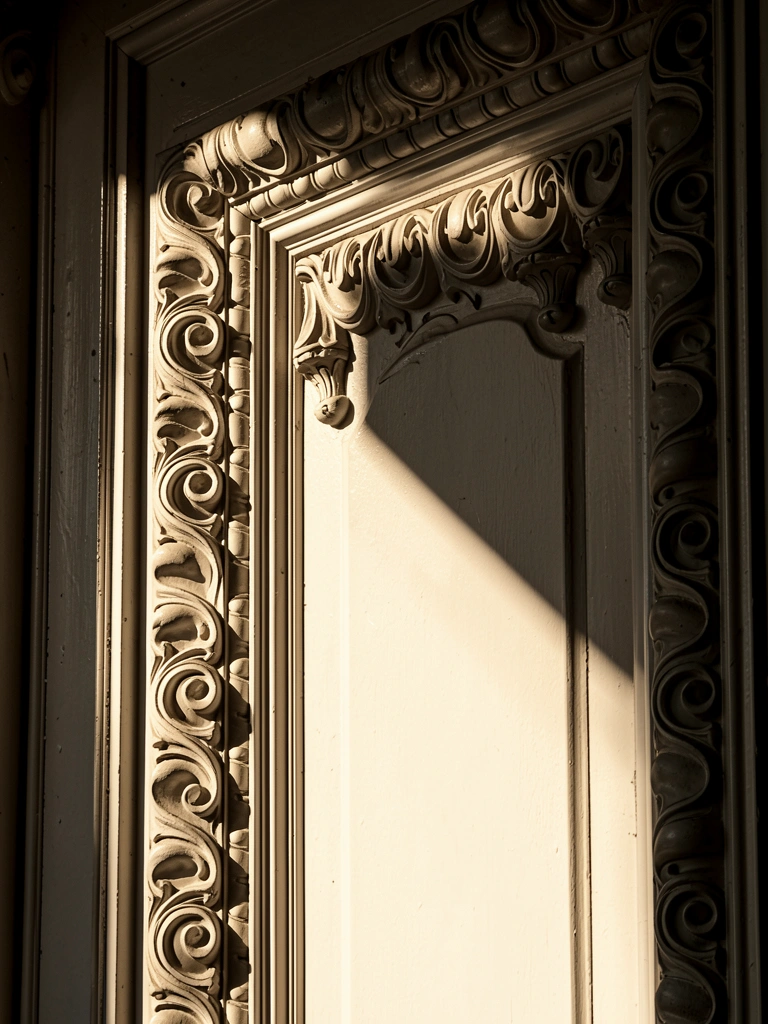
    High-relief molding sits 1+ inches proud of the door surface, creating dramatic shadows that change throughout the day. This style works especially well on doors that get good natural light.

    Buy pre-made high-relief molding pieces ($40–$150 each) from specialty millwork suppliers or heritage hardware companies. Popular profiles include dentil molding (small rectangular blocks), egg-and-dart (repeating oval and dart pattern), or ogee (S-curve profile). Install with polyurethane adhesive and brad nails, then paint or stain.

    The shadow play is the real payoff here—your door looks different at sunrise than at sunset, which sounds small but genuinely adds interest to your entryway. Visitors comment on the detail more with high-relief than with subtle carving because the depth is so visible.


    8. Create a Faux-Carved Look with Paint Techniques

    An artist’s hack: use paint and shading to fake carved detail. You’ll need acrylic paints in your base color plus darker and lighter shades, plus fine brushes.

    Study carved doors online and notice how light and shadow fall. Paint deeper shadows in areas that would be recessed, lighter highlights on areas that would be raised. Use a dry-brush technique and subtle color gradations. Done well, it reads as carved from several feet away. From close range, eagle-eyed visitors might notice, but the impact is still there.

    This costs under $30 in supplies and takes a weekend of work if you have any painting background. It’s perfect for renters or anyone hesitant to commit to permanent changes. The faux technique works best on relatively simple designs (geometric patterns, single motifs) rather than complex botanical scenes.


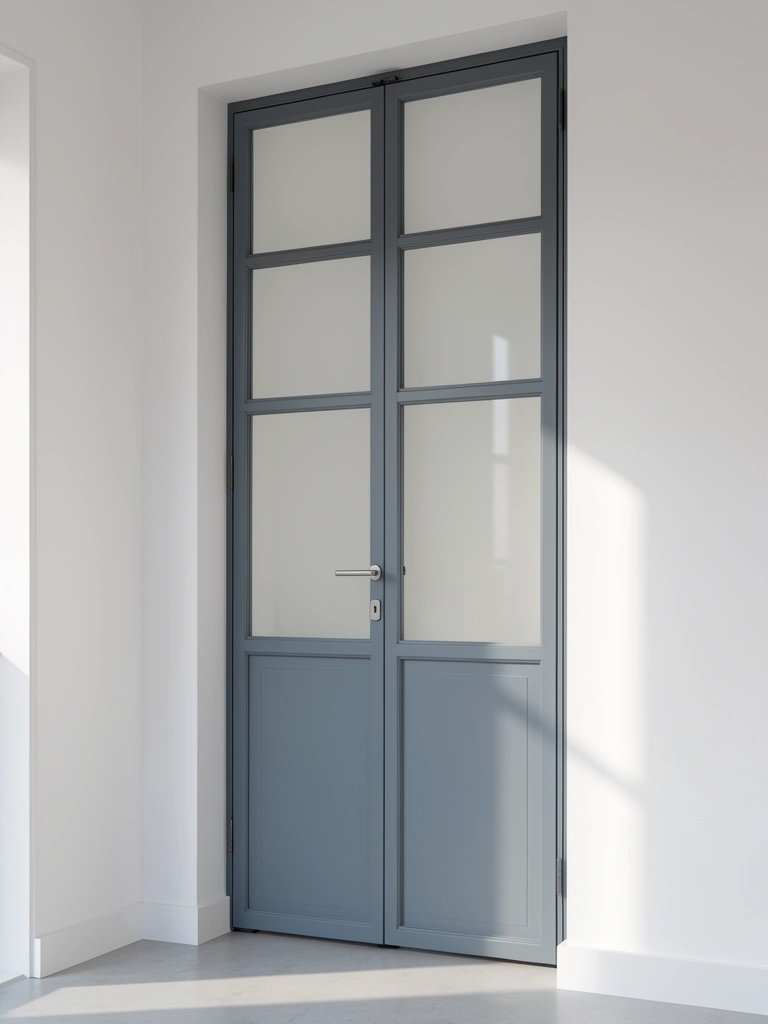
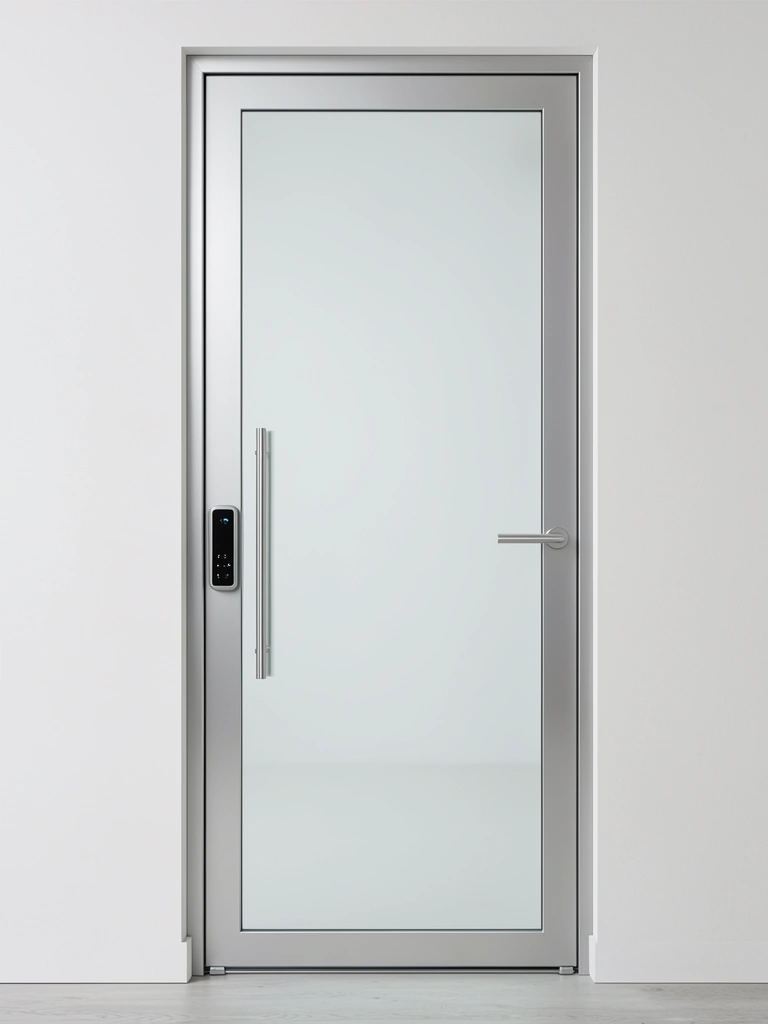
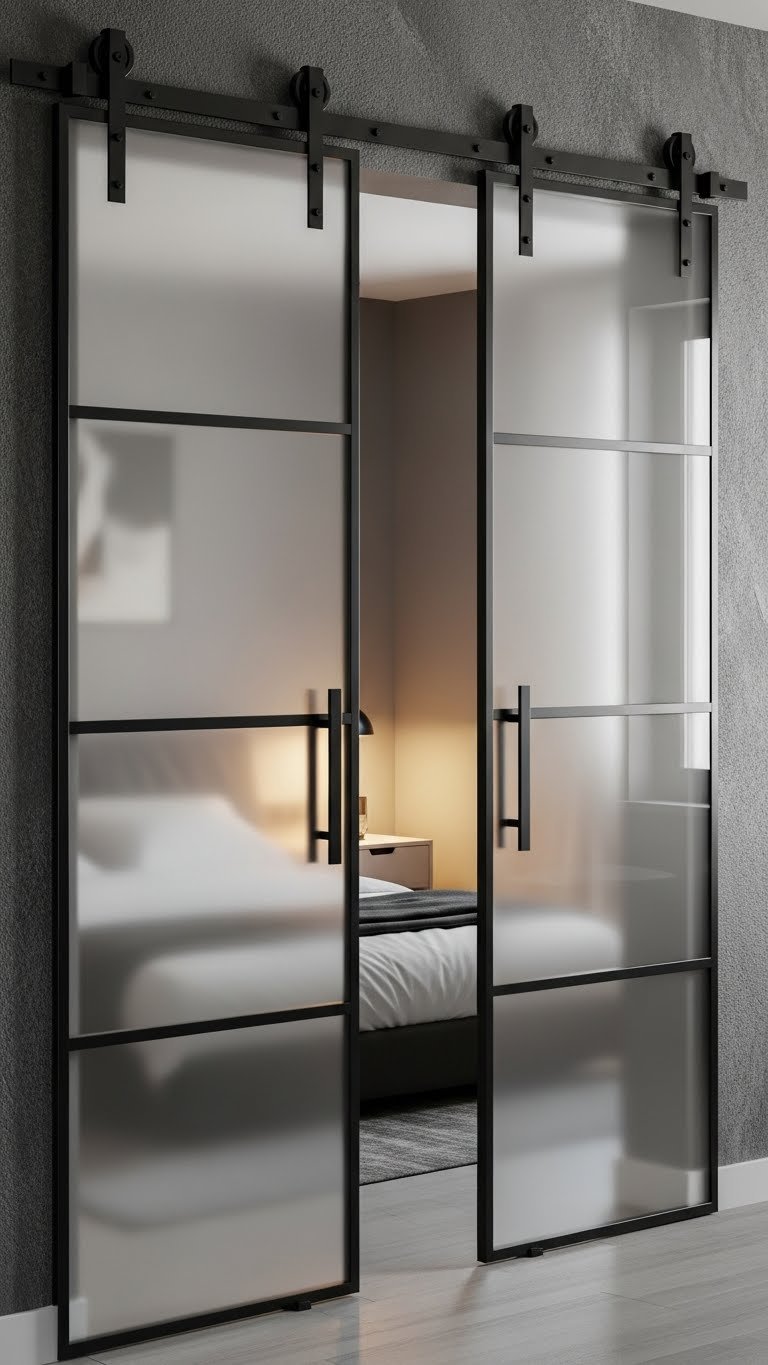
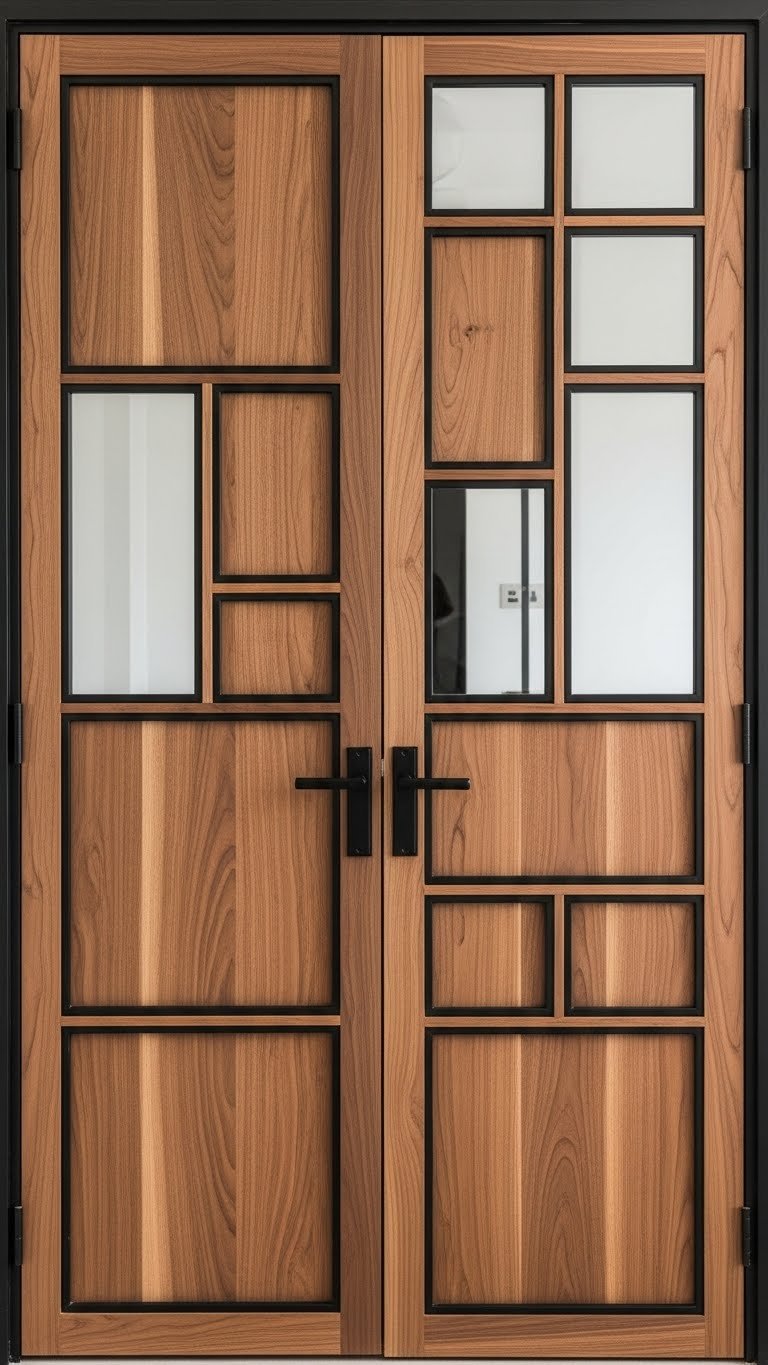
    9. Mix Carved Wood with Modern Minimalist Frames

    Pairing carved wood with contemporary framing creates visual tension that feels current, not dated. Install your carved panel (custom, pre-made, or DIY) within minimalist aluminum frames like those used in Crittall-style glass doors.

    The carved relief reads as heirloom or artisanal, while the slim aluminum frame signals modern sensibility. Add brushed gold or matte black hardware for additional contemporary contrast. This approach appeals to people who love traditional craftsmanship but live in modern homes.

    Order aluminum frames from specialty suppliers ($100–$300) and have them cut to your panel size. Installation takes a weekend if you’re comfortable with basic tools. The result looks designed-on-purpose rather than accidental, because the contrast is so intentional. Your door becomes a statement about honoring traditional skills in a contemporary context.


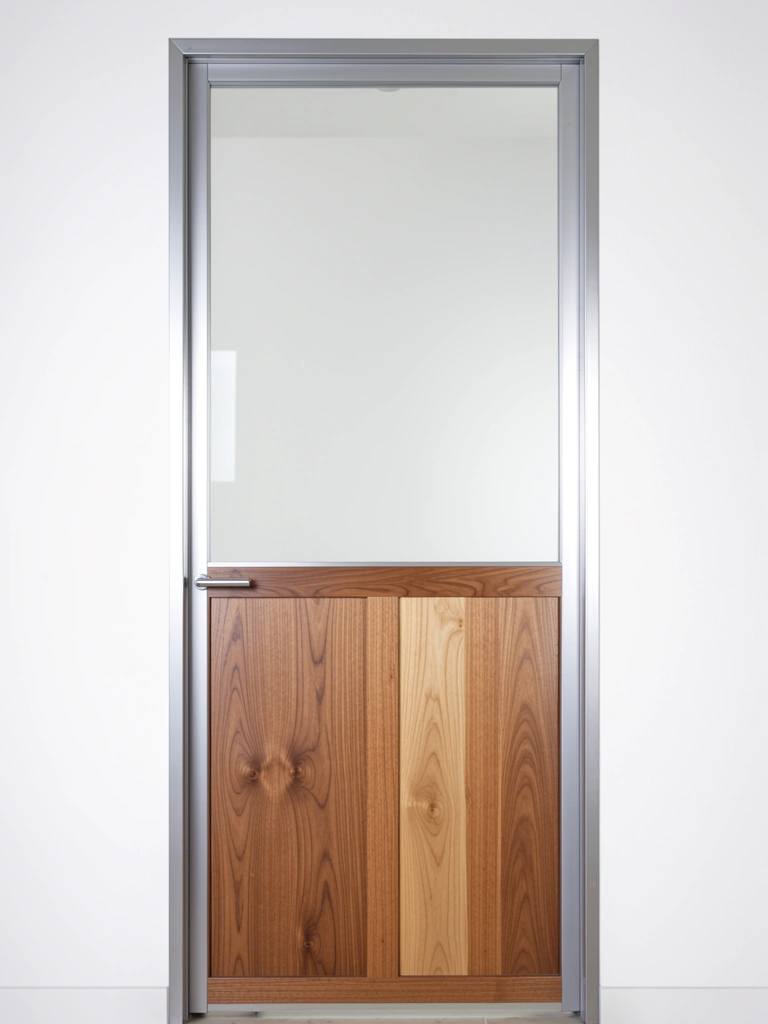
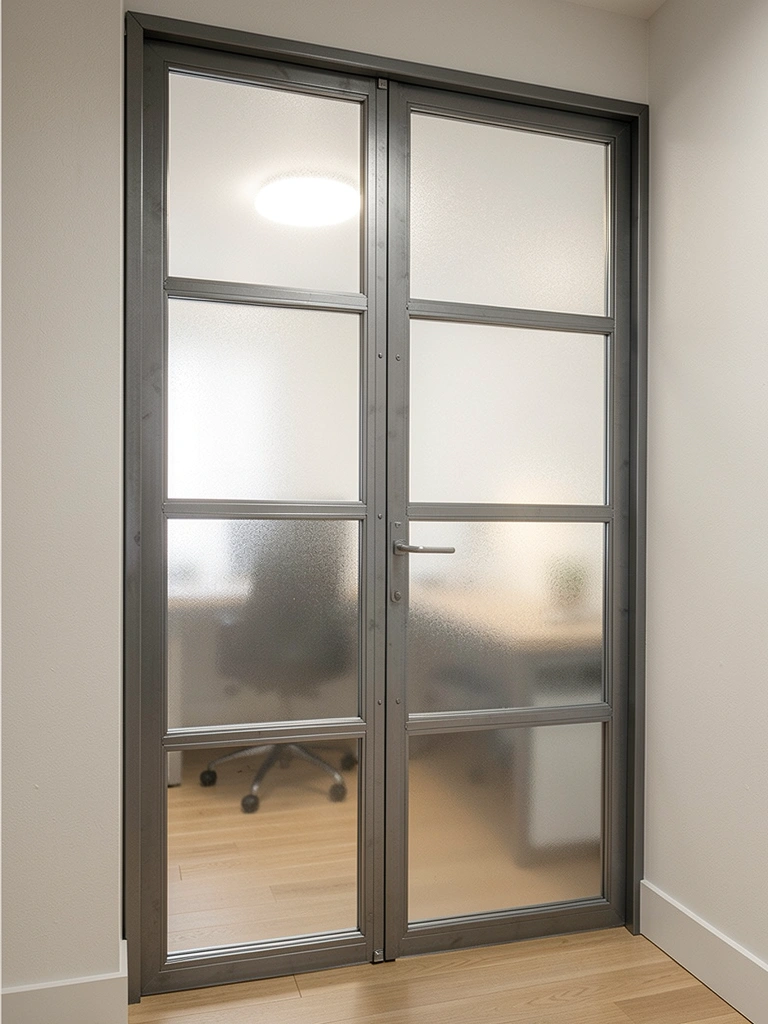
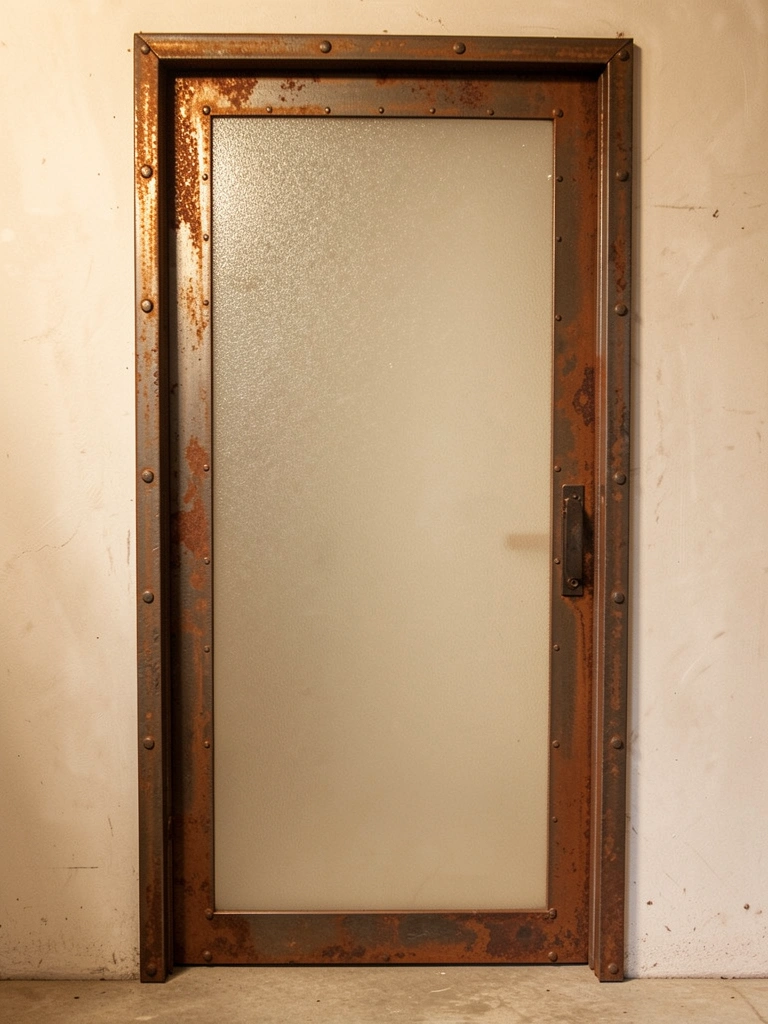
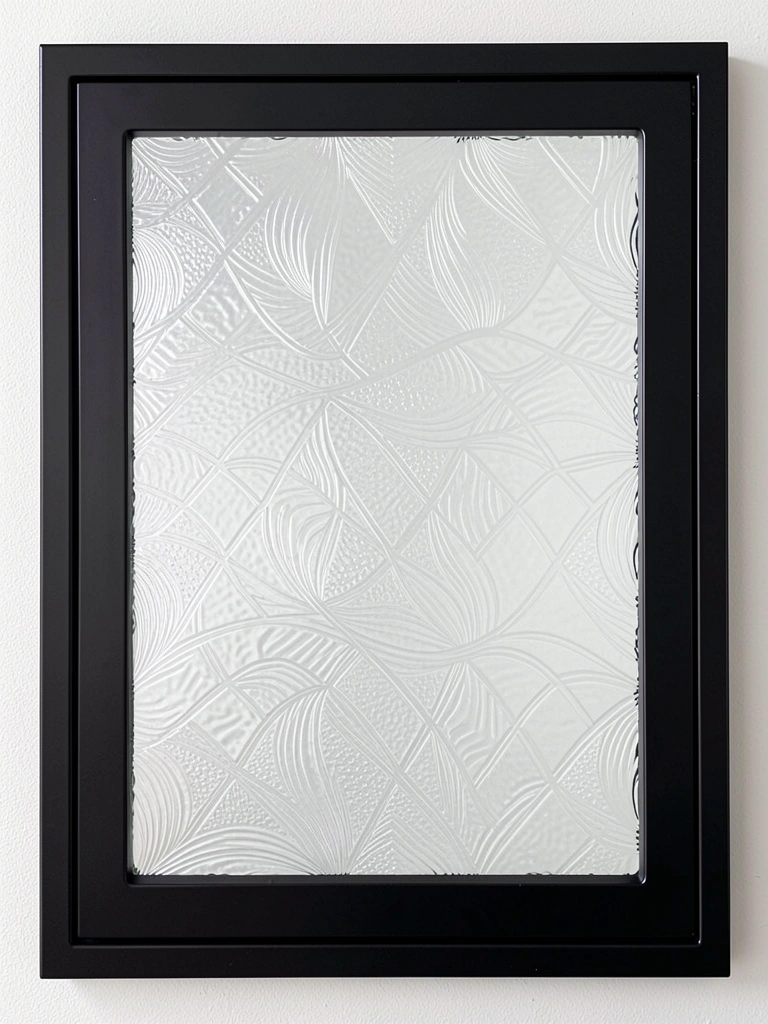
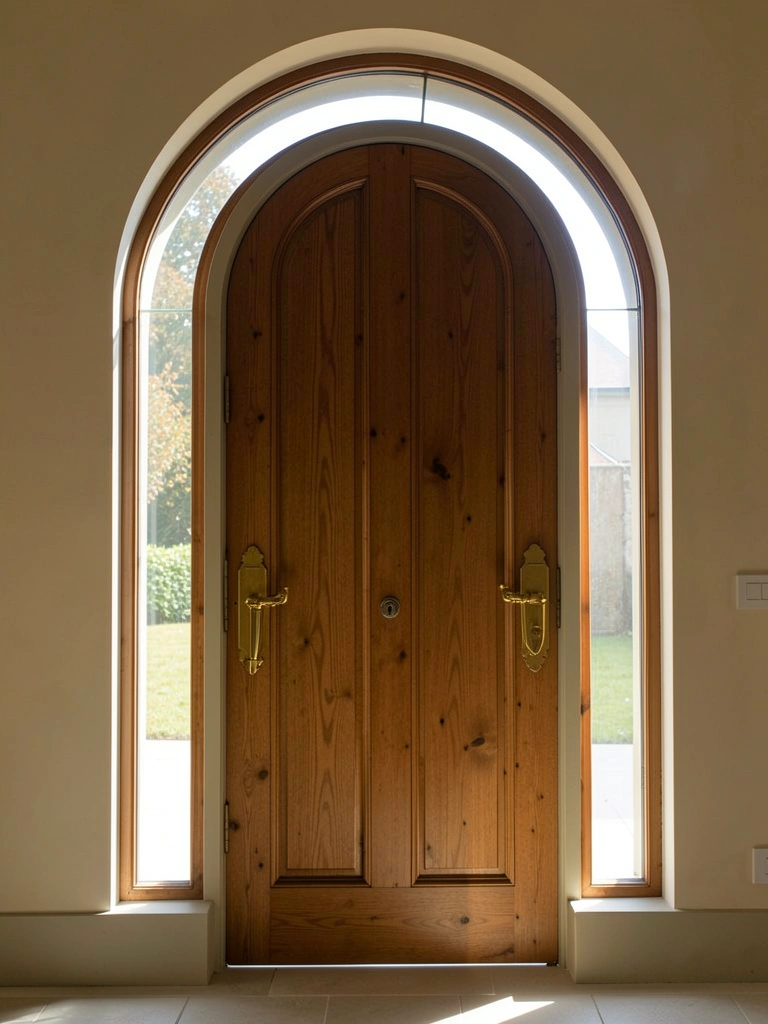
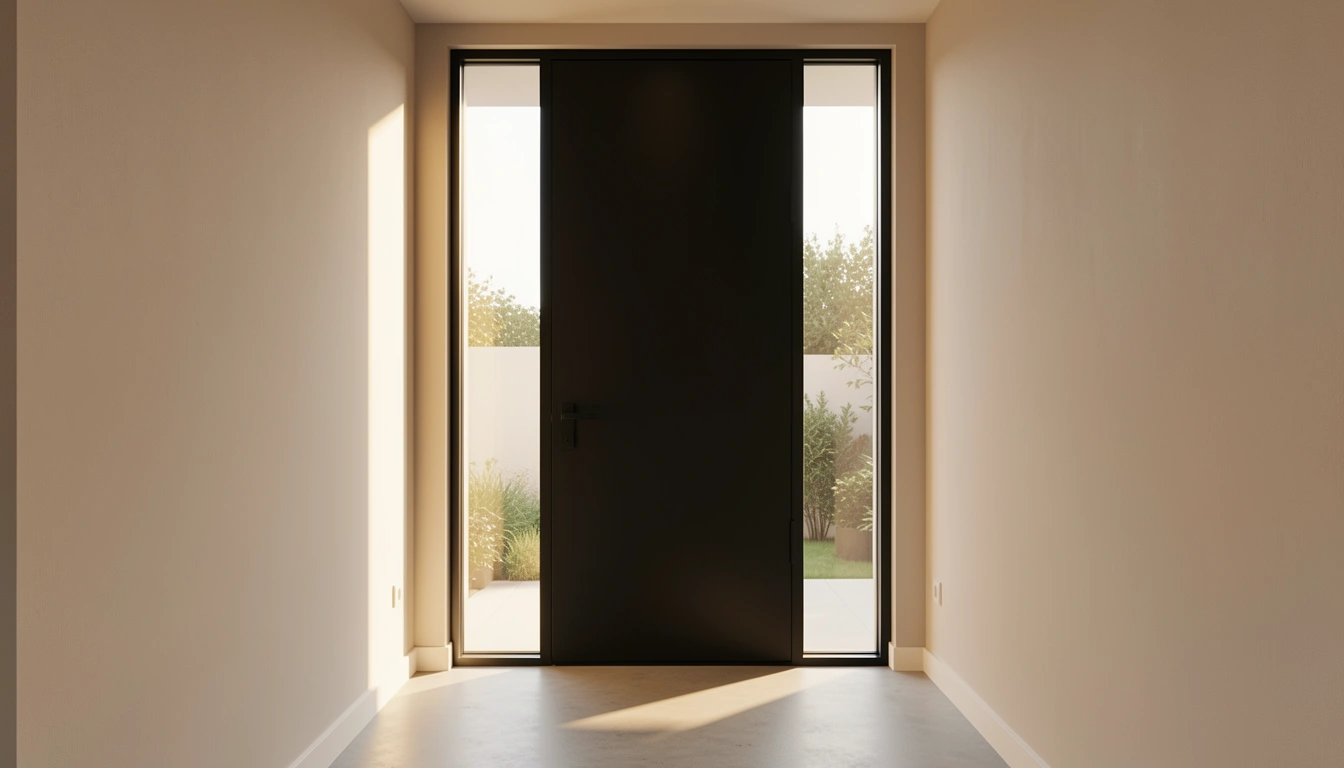
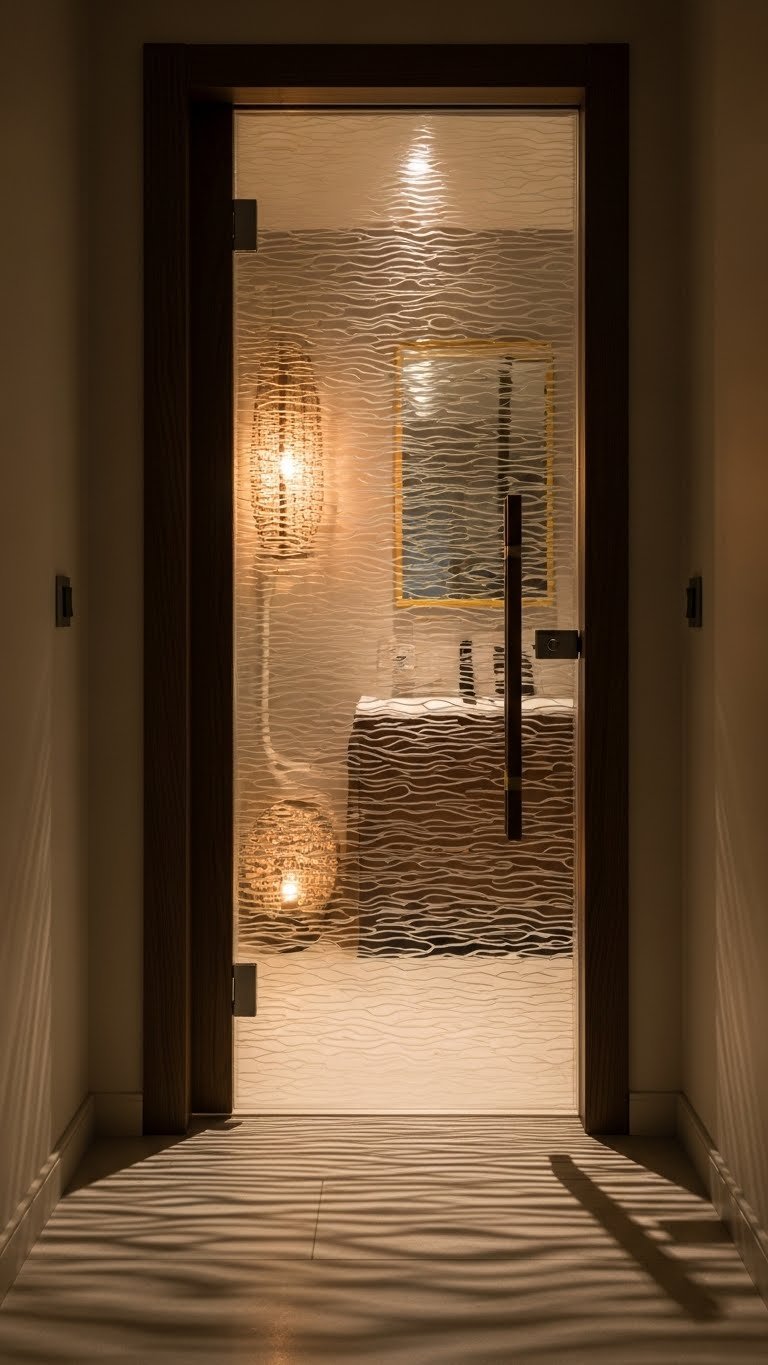
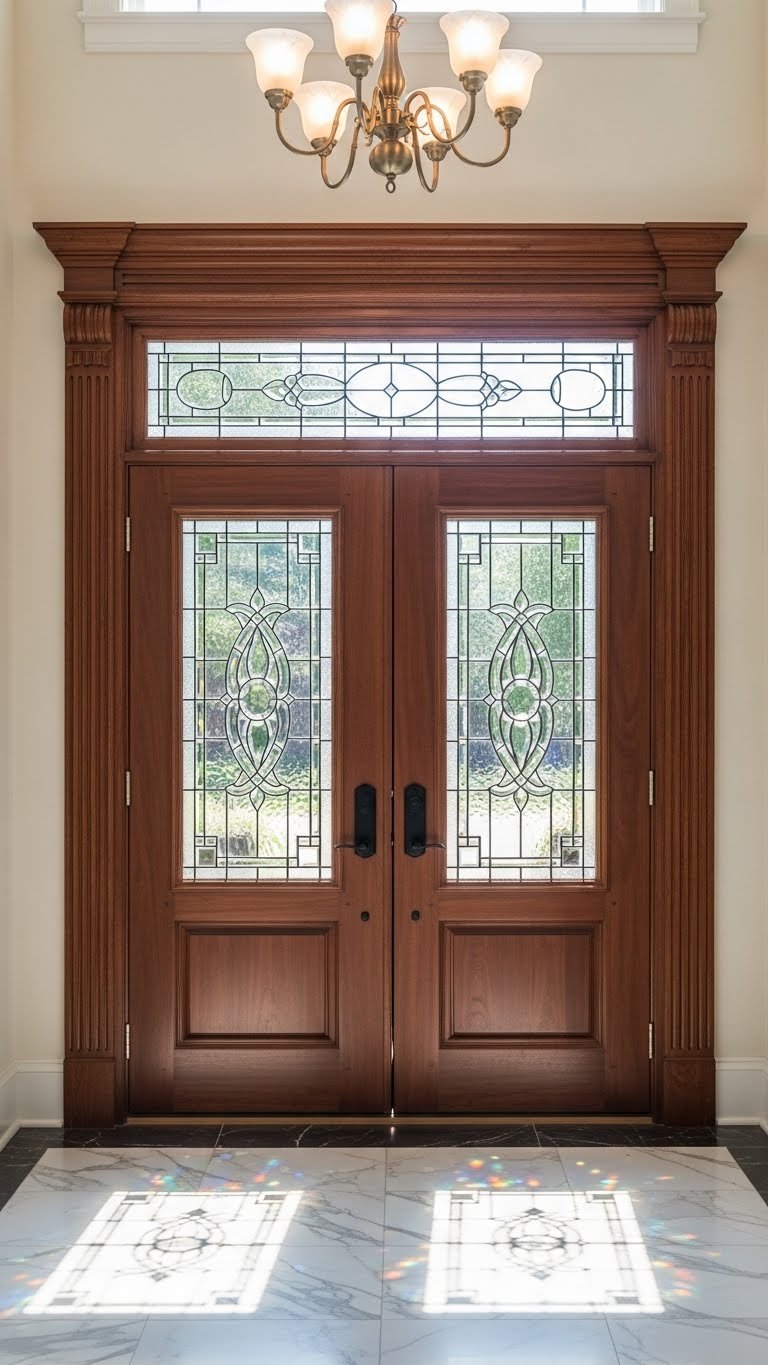
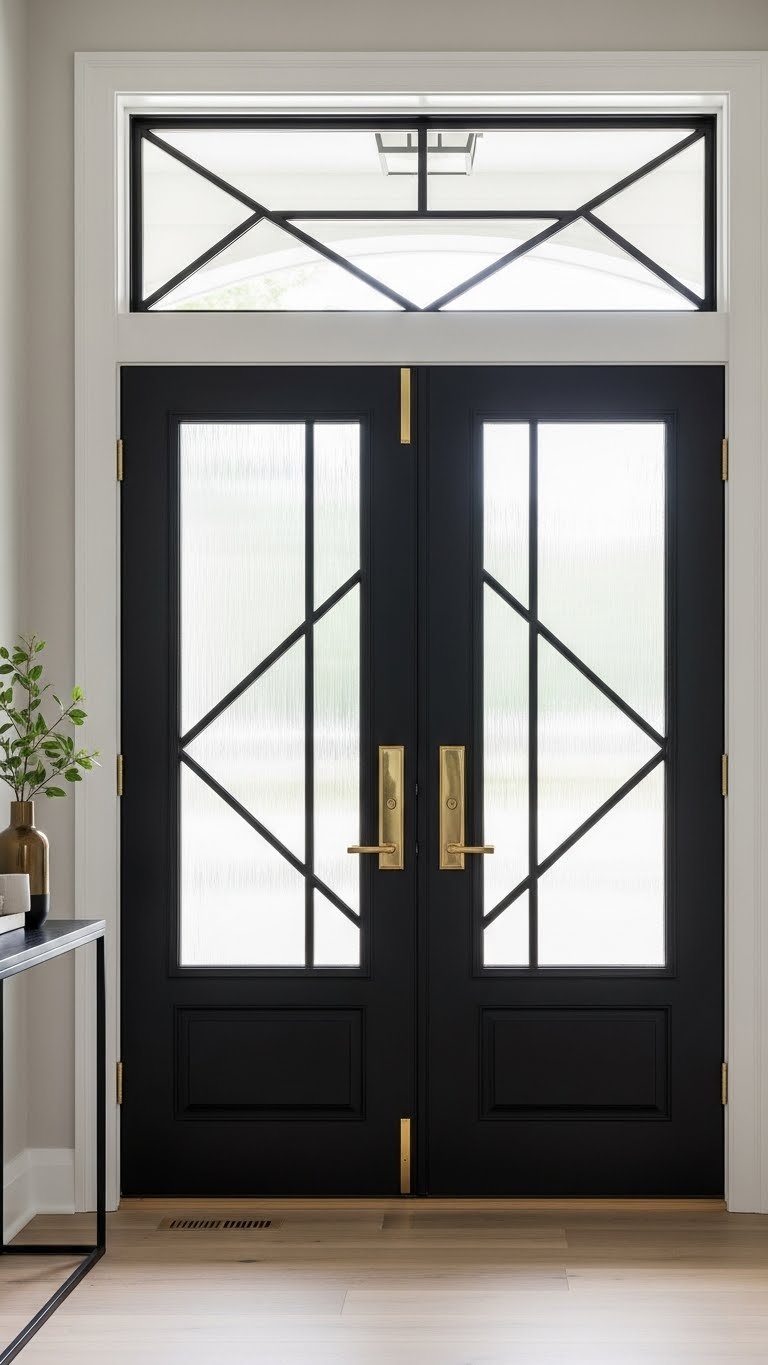
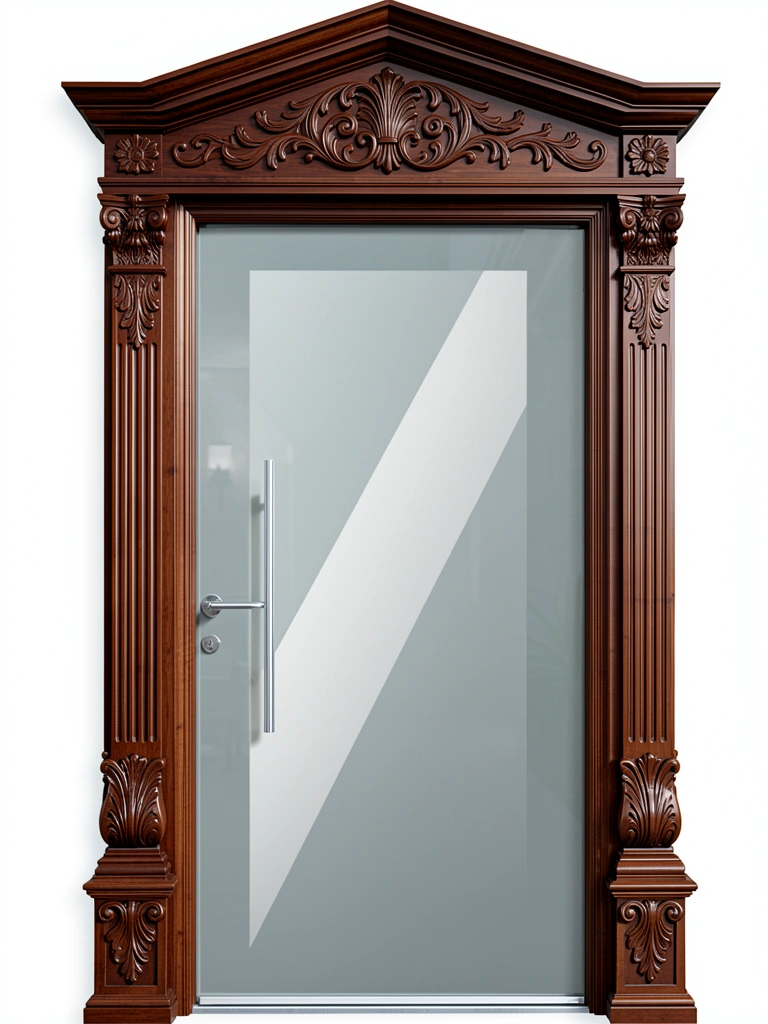
    10. Combine Carved Panels with Energy-Efficient Glass Insets

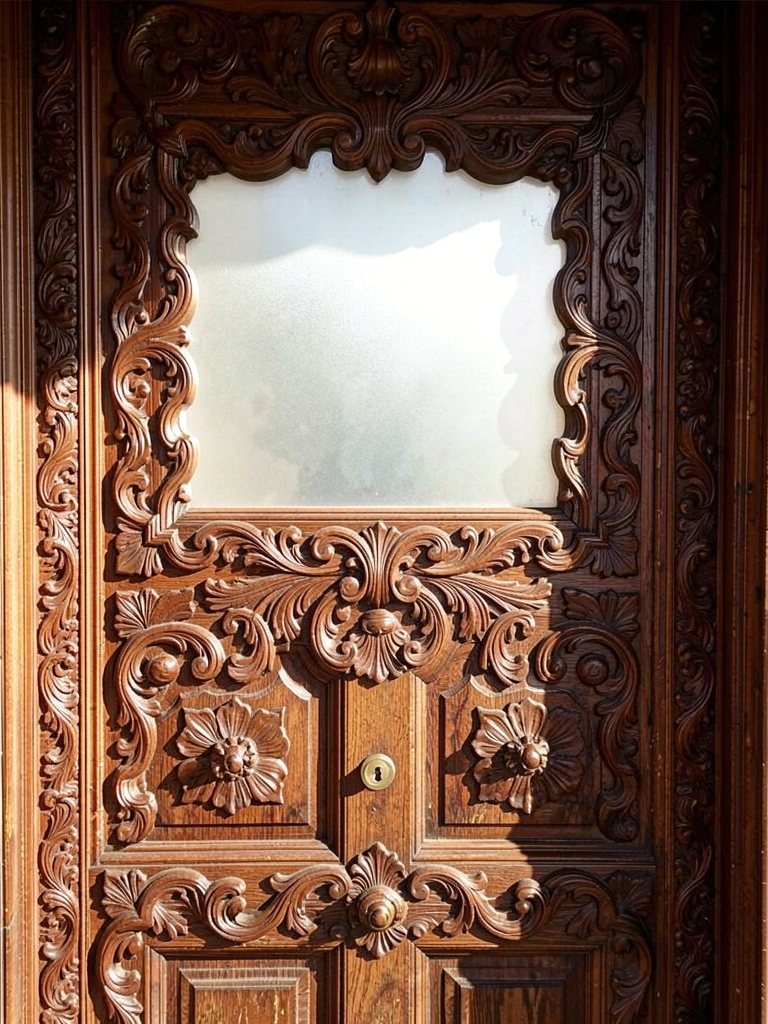
    You can have light flow and carved artistry. Order a pre-carved door with glass inset options (or have a custom carver incorporate a glass panel into the design). Frosted, obscured, or textured glass maintains privacy while letting light pour through.

    The carved wood frames the glass and draws attention upward. Light hits the carving and glass differently throughout the day, creating ever-changing visual interest. ProVia and similar brands offer this option ($400–$1,000). Custom carvers can design glass insets into one-off pieces too.

    This works beautifully in homes with dark entryways or limited natural light. The glass solves the practical problem while the carving satisfies the aesthetic desire for detail and interest. It’s the best of both worlds.


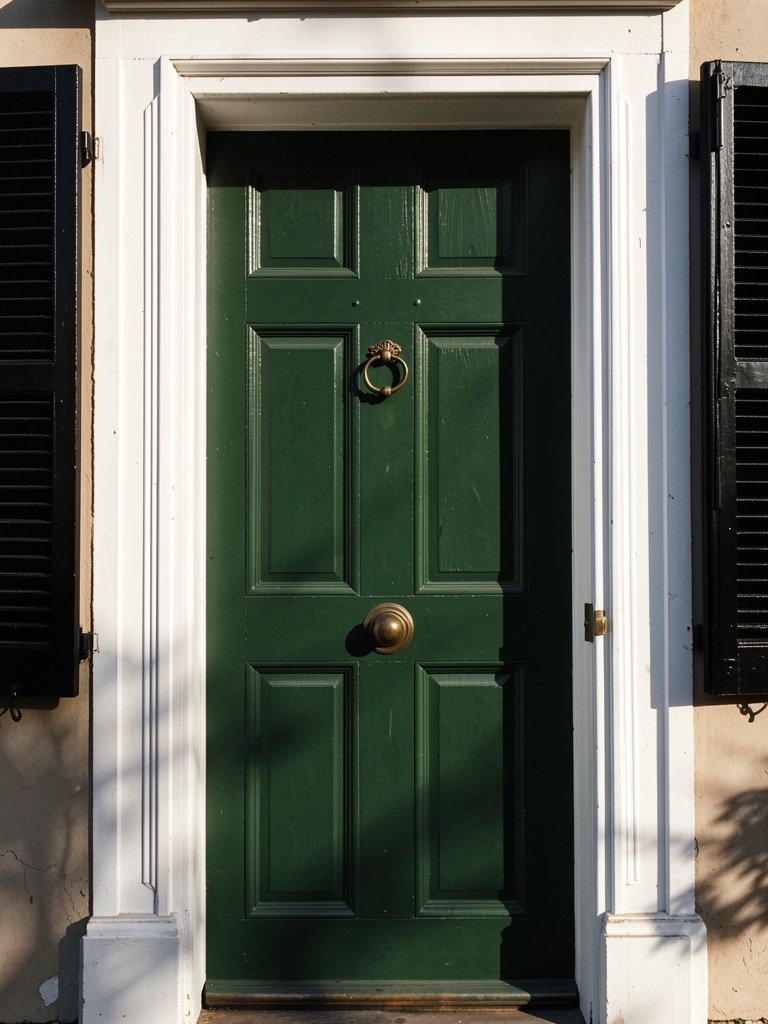
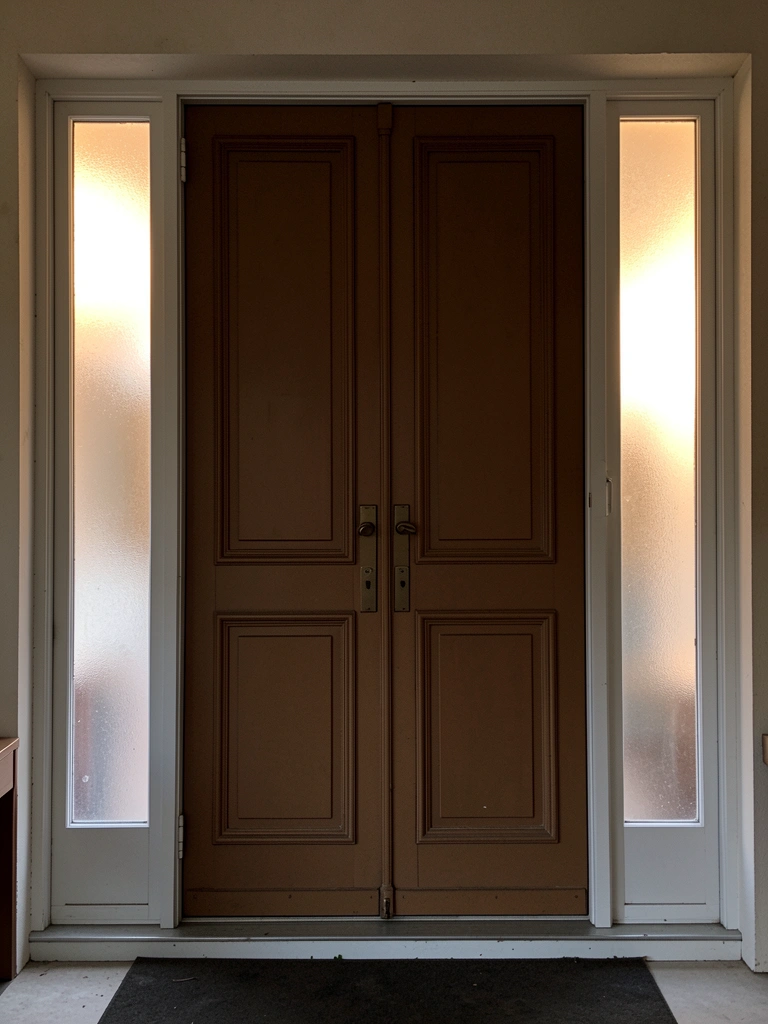
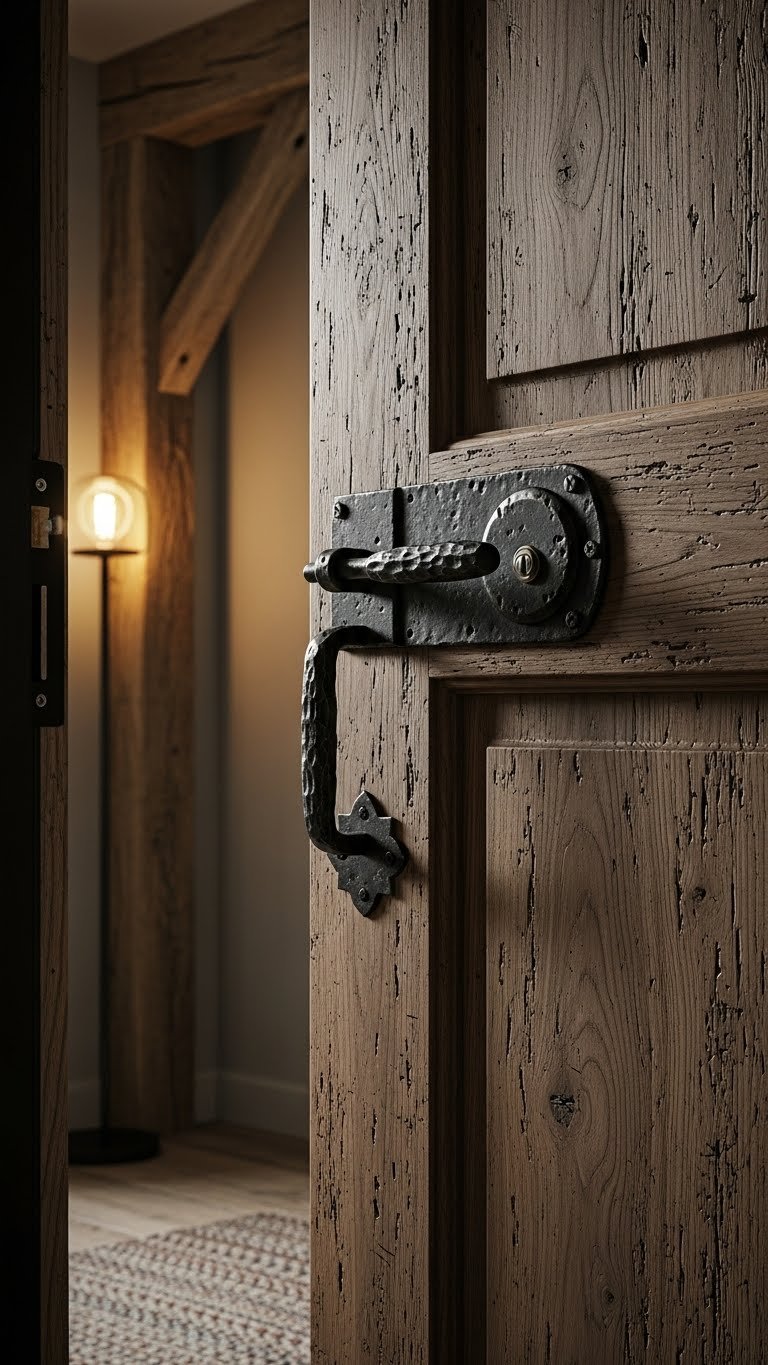
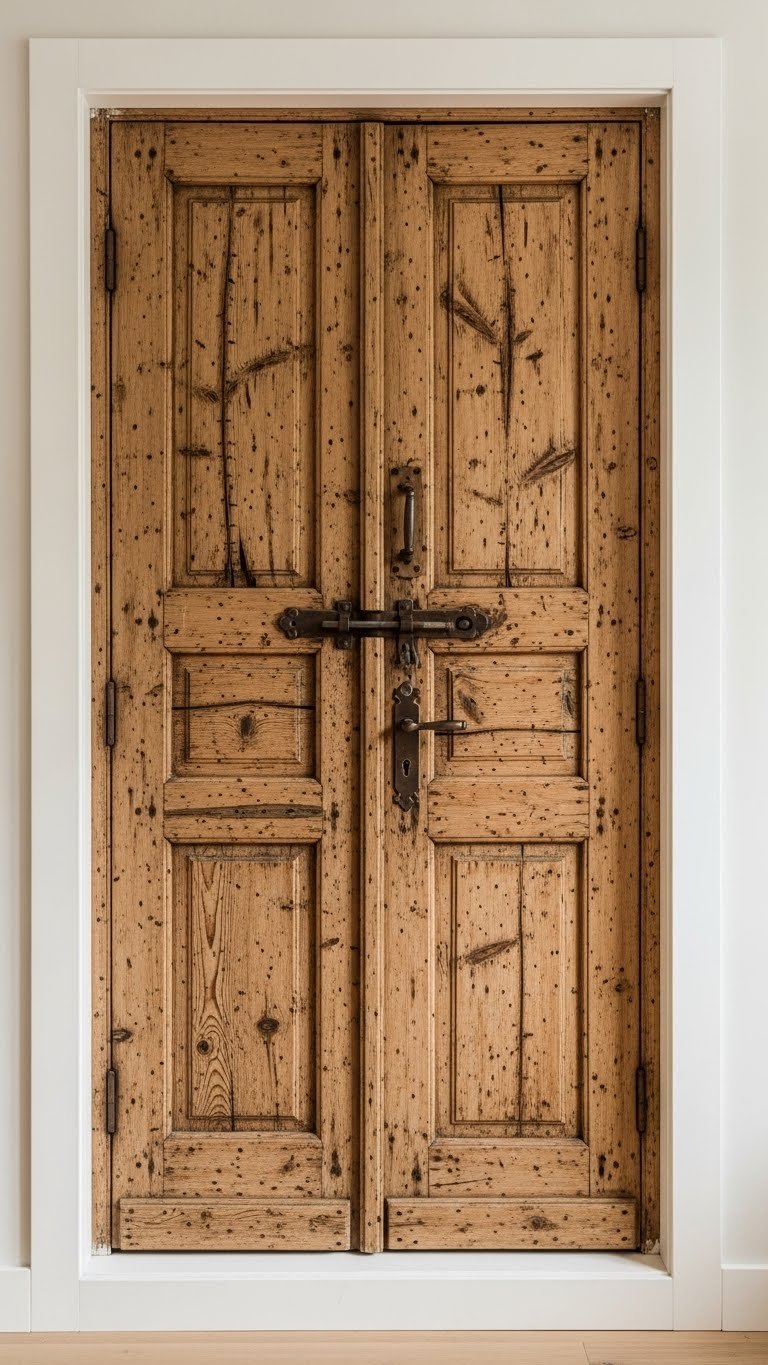
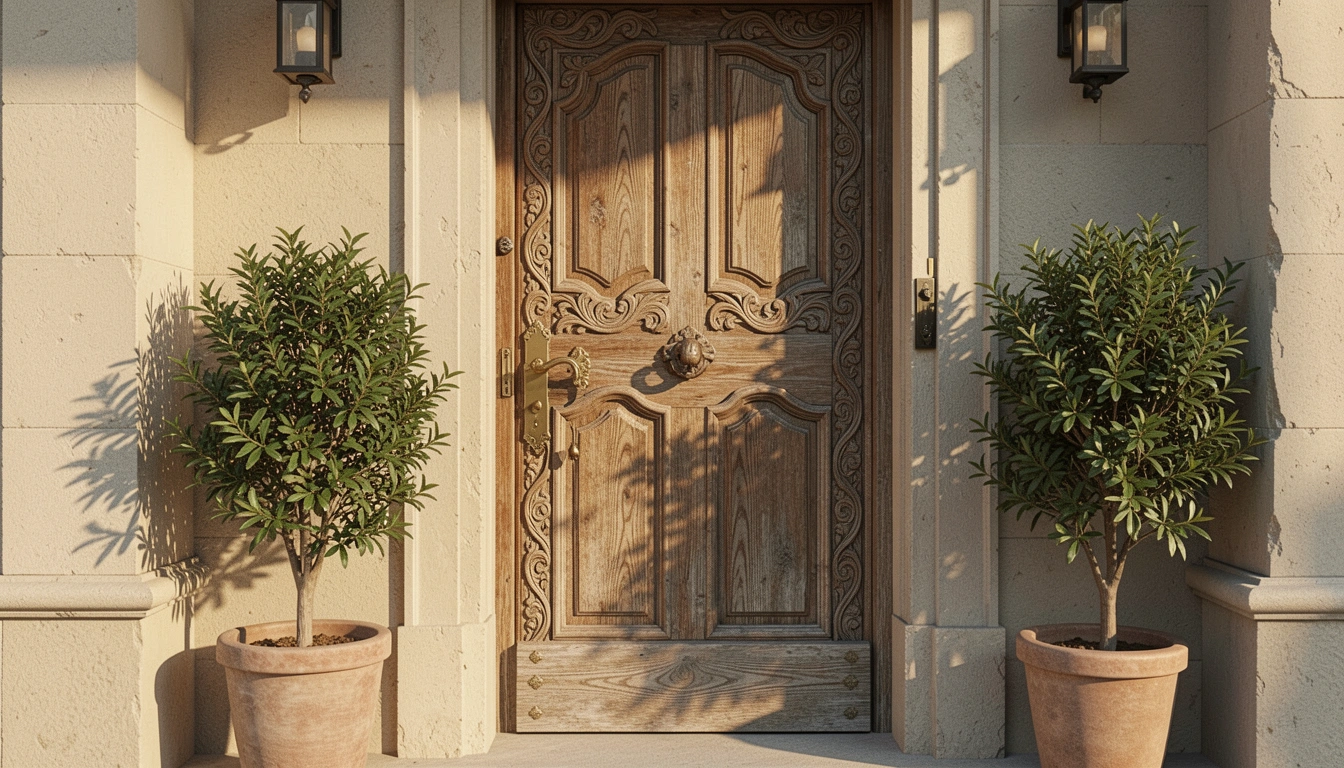
    11. Source Reclaimed Carved Doors from Salvage Yards

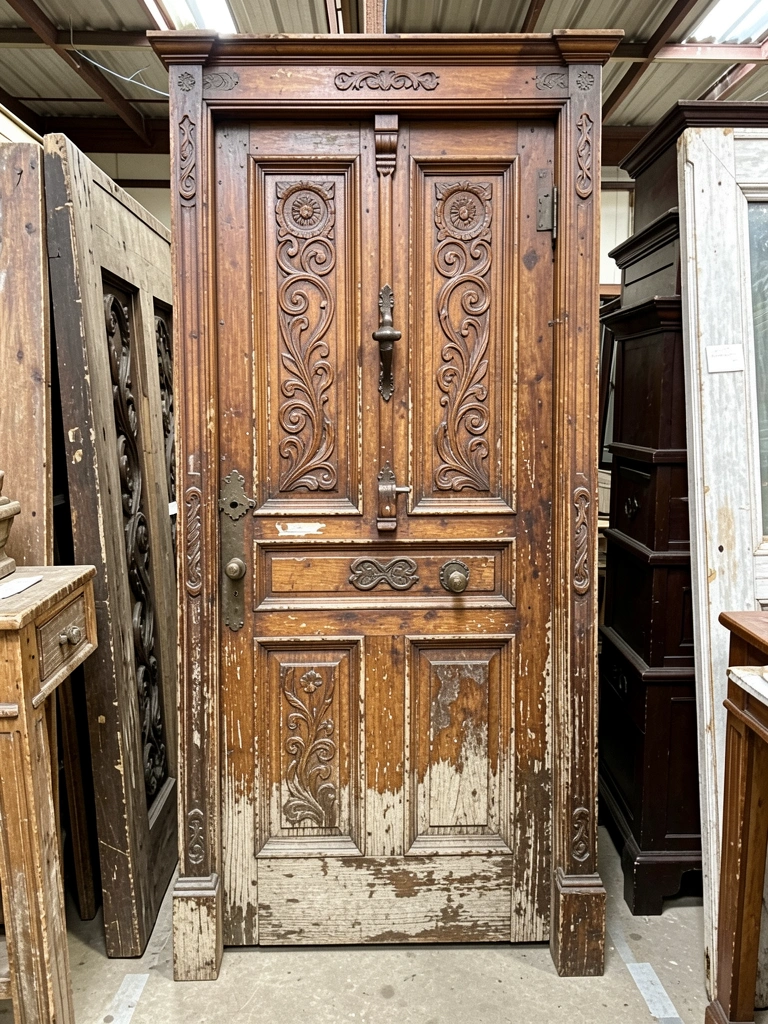
    Architectural salvage yards, estate sales, and online marketplaces (Etsy, Craigslist, Facebook Marketplace) frequently stock authentic carved doors from historic homes. These are genuinely one-of-a-kind, often 75+ years old, and packed with character that new doors can’t replicate.

    Prices vary wildly ($150–$1,500) depending on condition, wood type, and intricacy. Inspect carefully for dry rot, deep cracks, or damaged hinges. Many salvaged doors need rehinging or hardware replacement ($50–$150). You might need professional restoration if the carving is delicate ($200–$500).

    The payoff? An authentically beautiful door with actual history, genuine craftsmanship visible in every detail, and a story to tell. Salvaged doors age gracefully and often appreciate in value. This option especially appeals to people restoring historic homes or seeking genuine vintage character.


    12. Carve a Personal Monogram or Family Crest

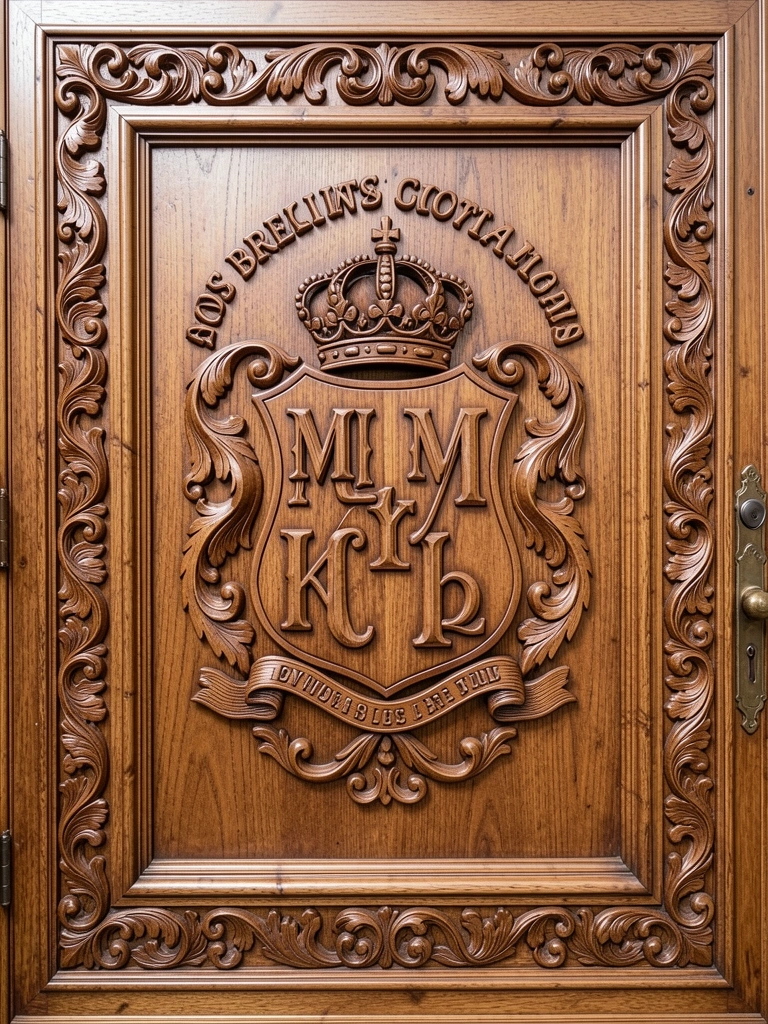
    Commission a carver to create a personalized monogram, family crest, or heirloom symbol on your door. This transforms your entry into a personal statement and often feels surprisingly timeless despite being completely custom.

    Work with a carver ($400–$1,200) to design something that reflects your family’s heritage, profession, or personal values. Heraldic designs, initials in Gothic script, family names with ornamental flourishes—all work beautifully in carved relief. Some carvers can incorporate meaningful dates or symbolic elements.

    The resulting door is unmistakably yours in a way nothing off-the-shelf could be. It signals that this home belongs to people who value heritage, identity, and permanence. Guests notice immediately and often ask about the story behind the carving.


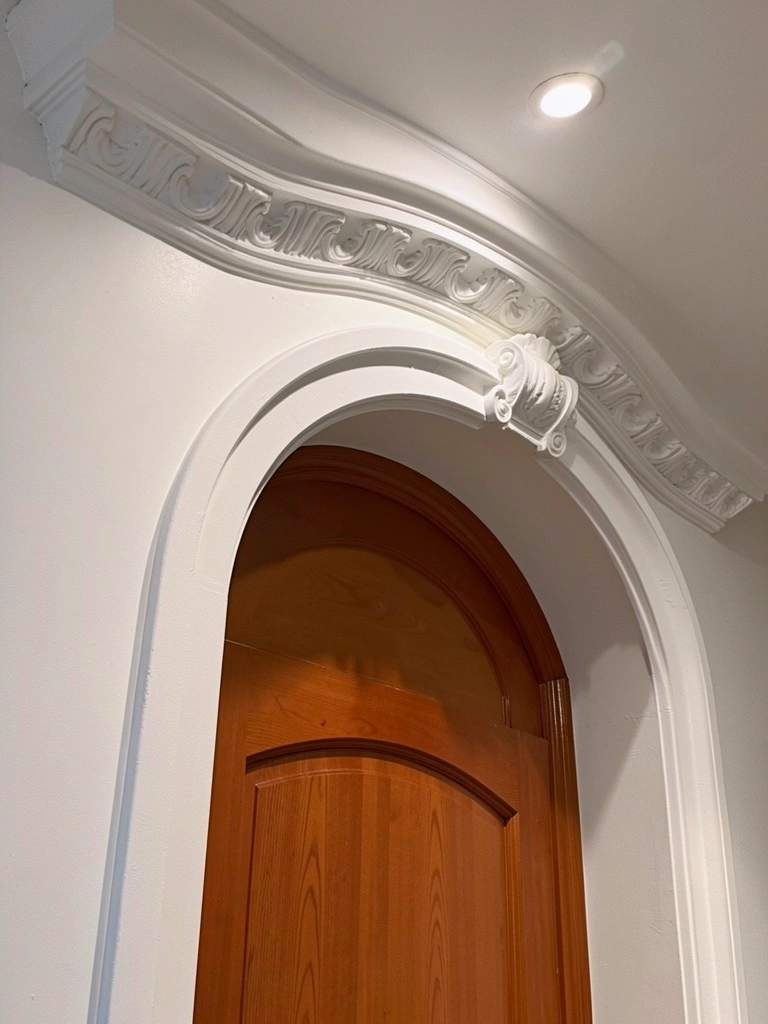
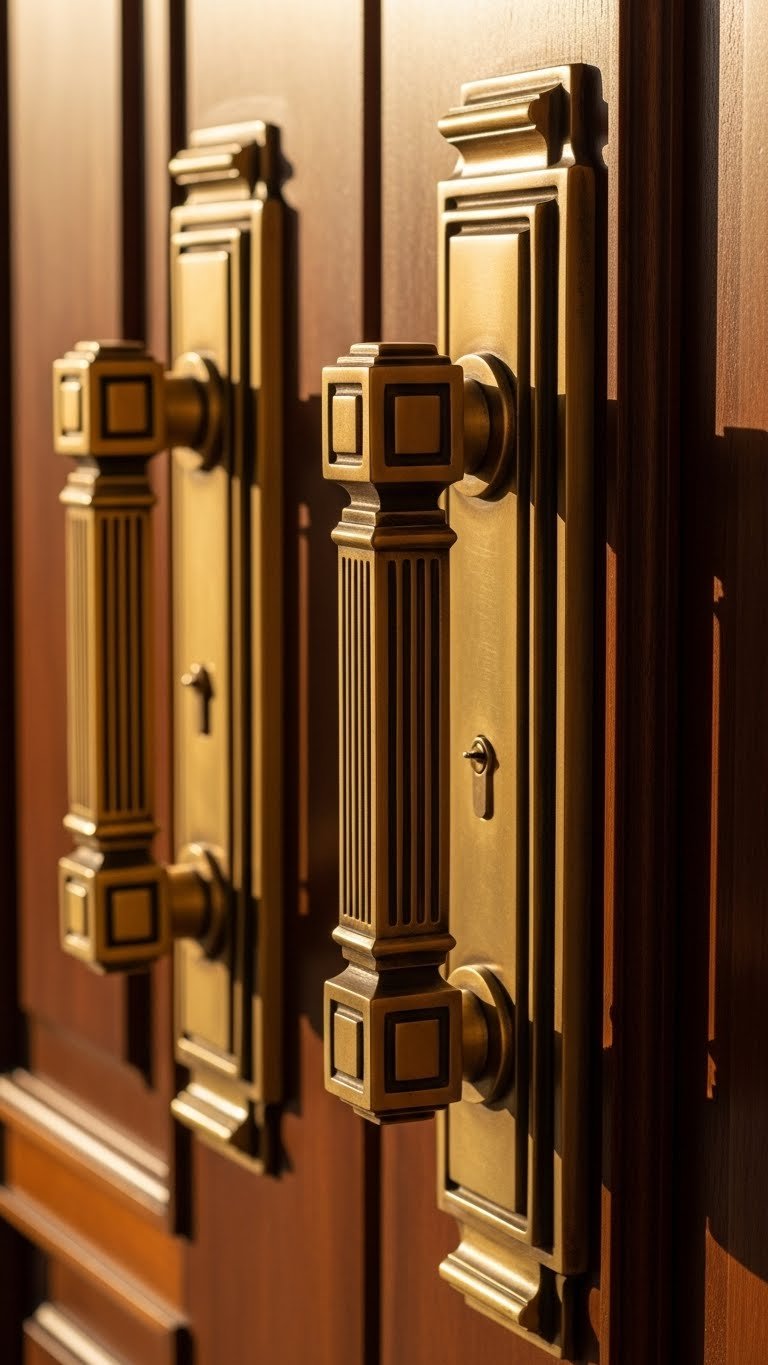
    13. Install Carved Corbels and Brackets Above the Door

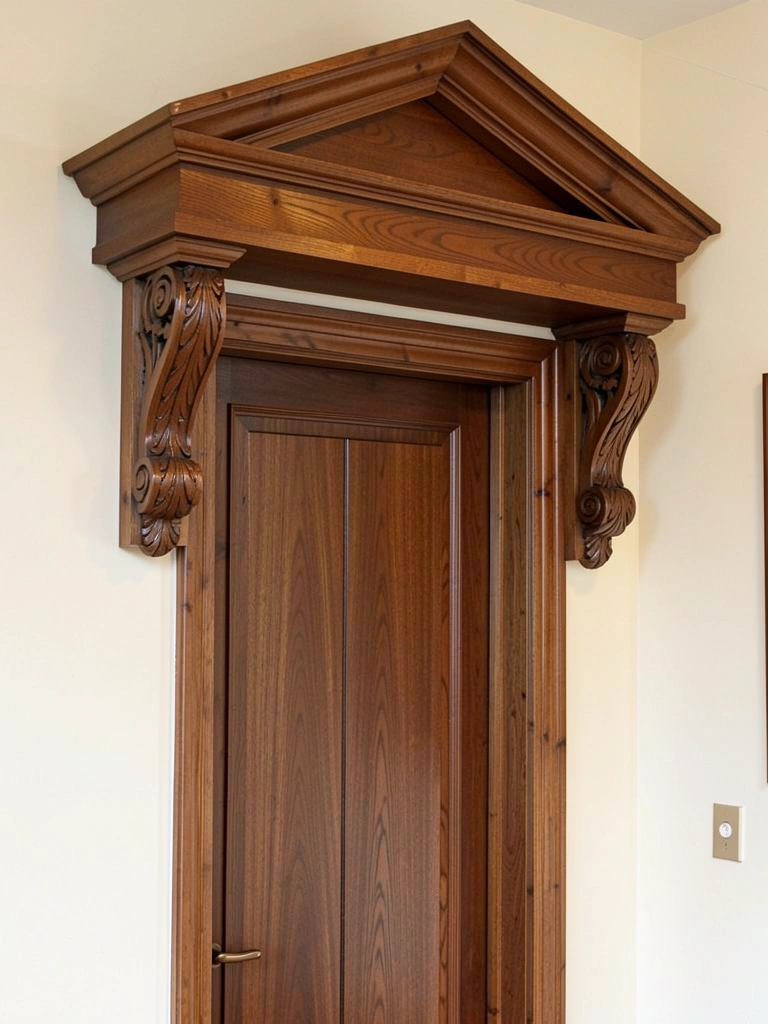
    Corbels and brackets are structural supports that also serve as decoration. Pre-carved versions add massive visual impact without touching the door itself. Think of them as the architectural “jewelry” for your entry.

    Hunt for salvaged corbels at architectural salvage yards ($50–$300 each depending on size and intricacy) or buy reproduction carved corbels ($40–$150) from millwork suppliers. Install them on either side of your door frame or under a pediment. Pair them with carved trim above the door for a layered, gallery-like effect.

    The visual weight these pieces add is remarkable—suddenly your entry feels substantial and intentional, like it belongs in a well-designed home. They photograph beautifully and catch light in ways that create shadow and depth.


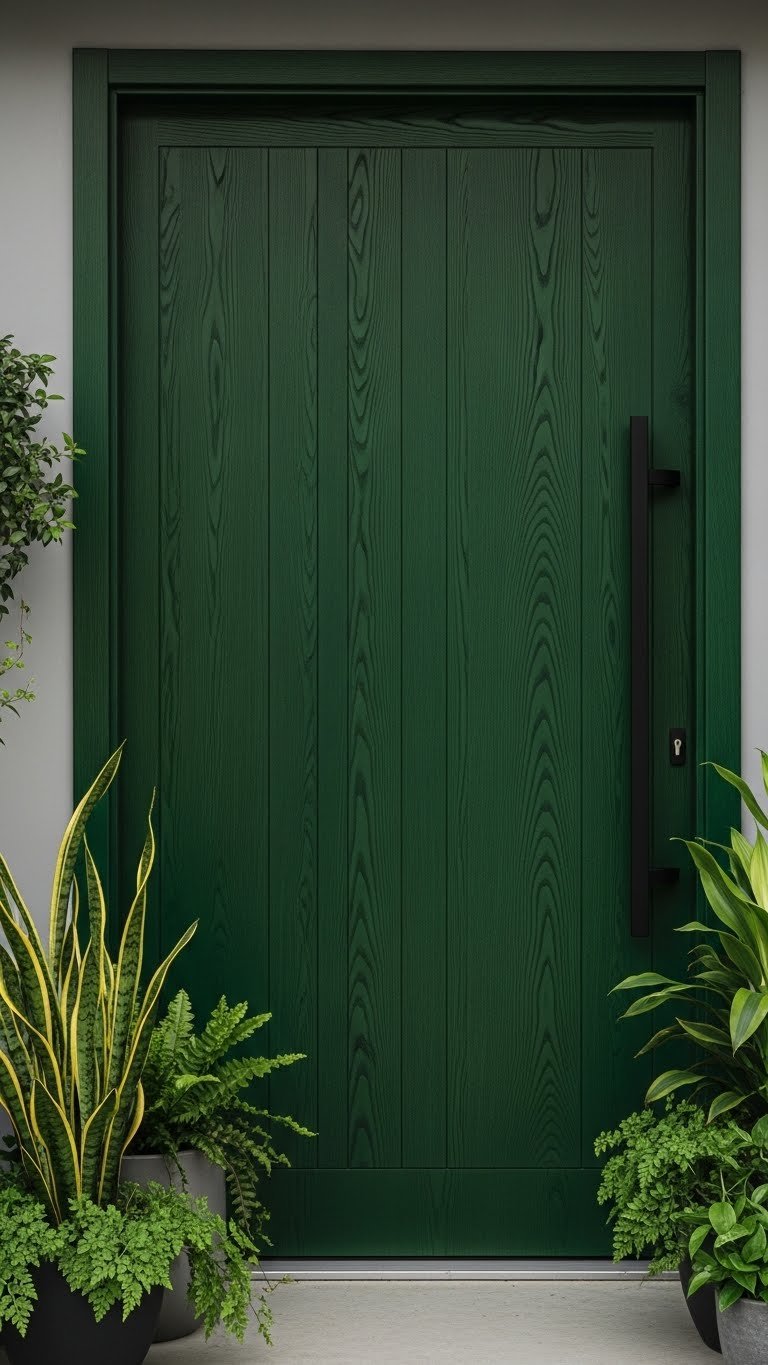
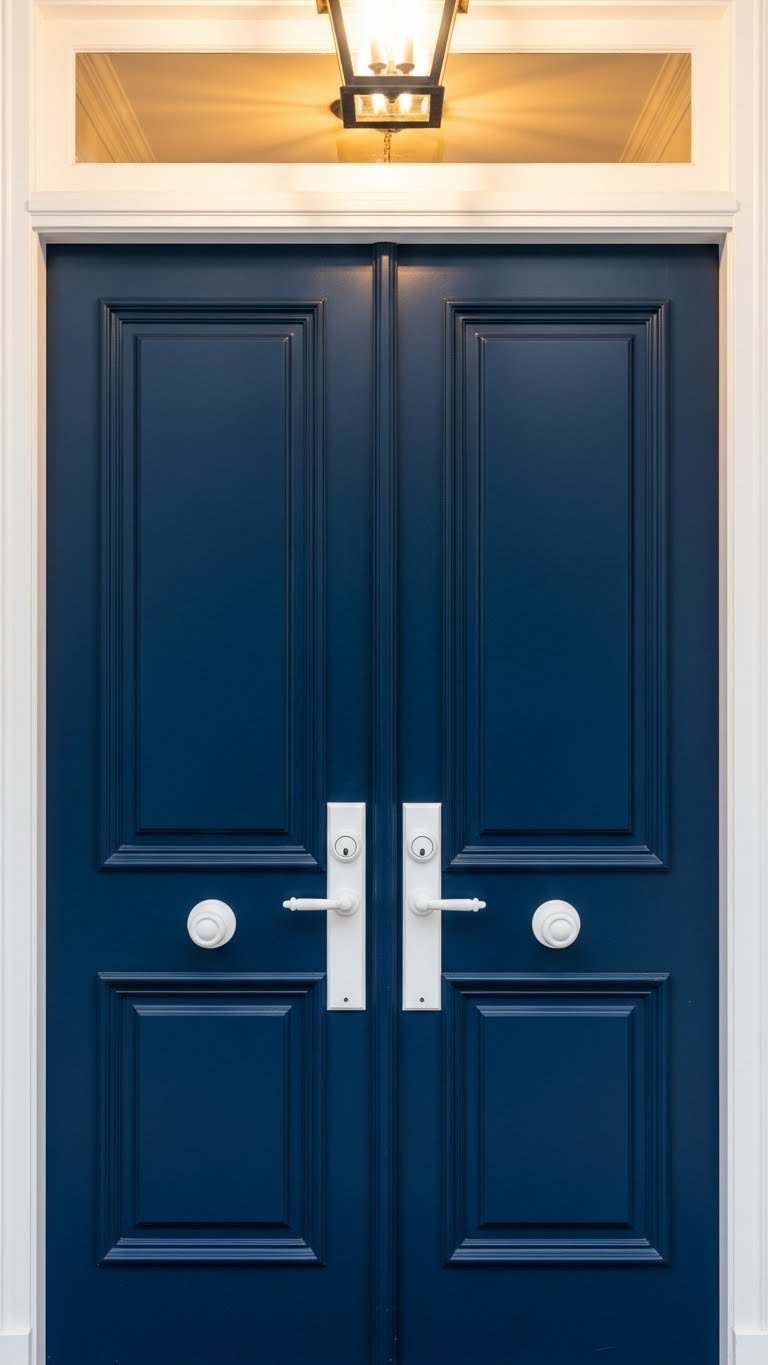
    14. Use Painted Carved Panels in Unexpected Colors

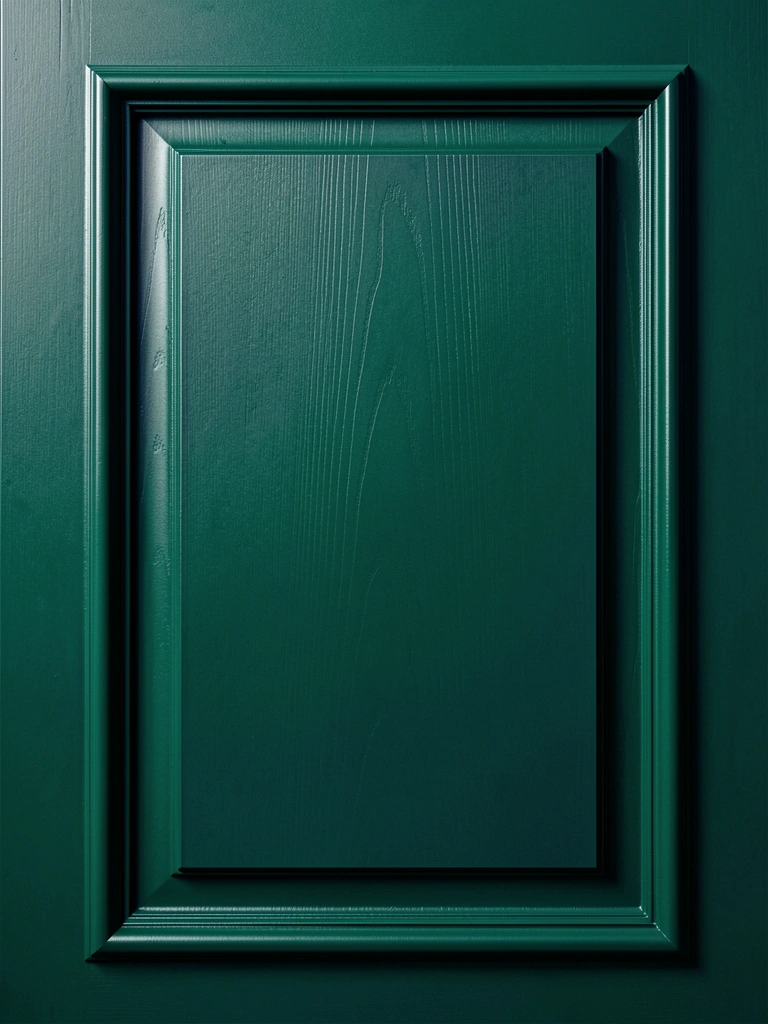
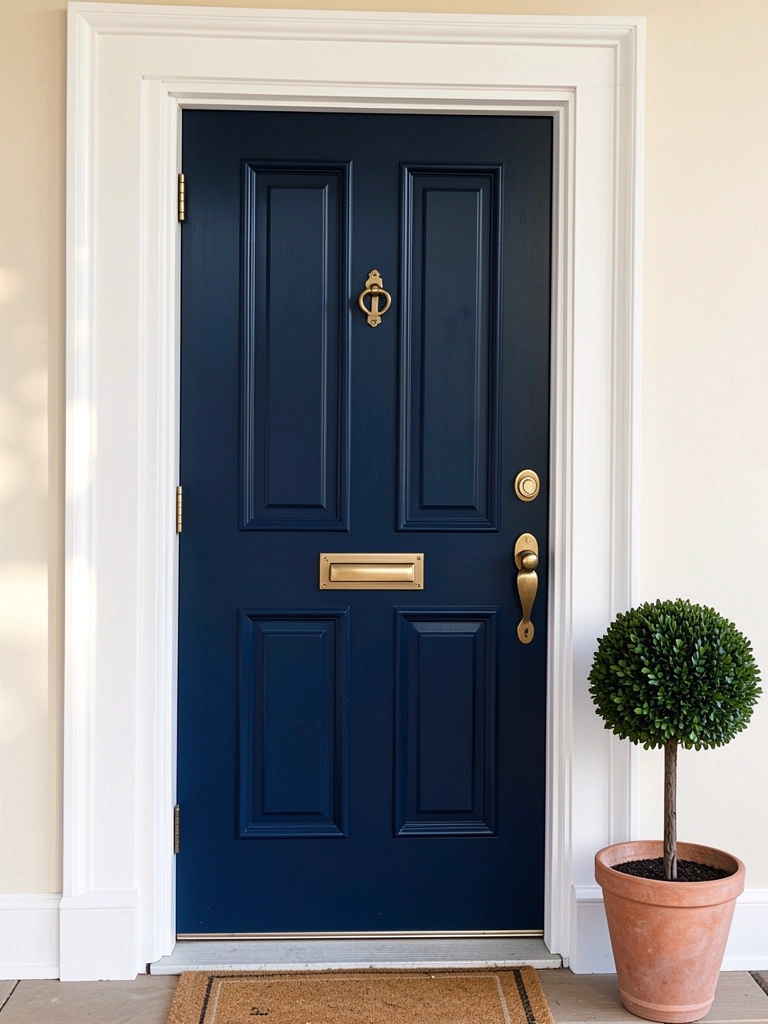
    Carved detail doesn’t require natural wood finish. Paint carved panels in rich, saturated colors like forest green, navy, charcoal, or even deep burgundy. The carving reads more dramatically against solid color because shadow and highlight pop.

    This approach modernizes traditional carved detail and pairs perfectly with 2025 color trends (dark green and navy dominate entry design right now). Paint with quality exterior paint ($30–$60 per gallon, 1 gallon covers most doors), preferably matte finish which showcases carving detail better than gloss.

    The psychological effect is interesting: colored carving feels more intentional and designed than natural wood carving. It signals “I chose this specific color to complement my home’s aesthetic” rather than “I installed a carved door because that’s what carved doors are.”


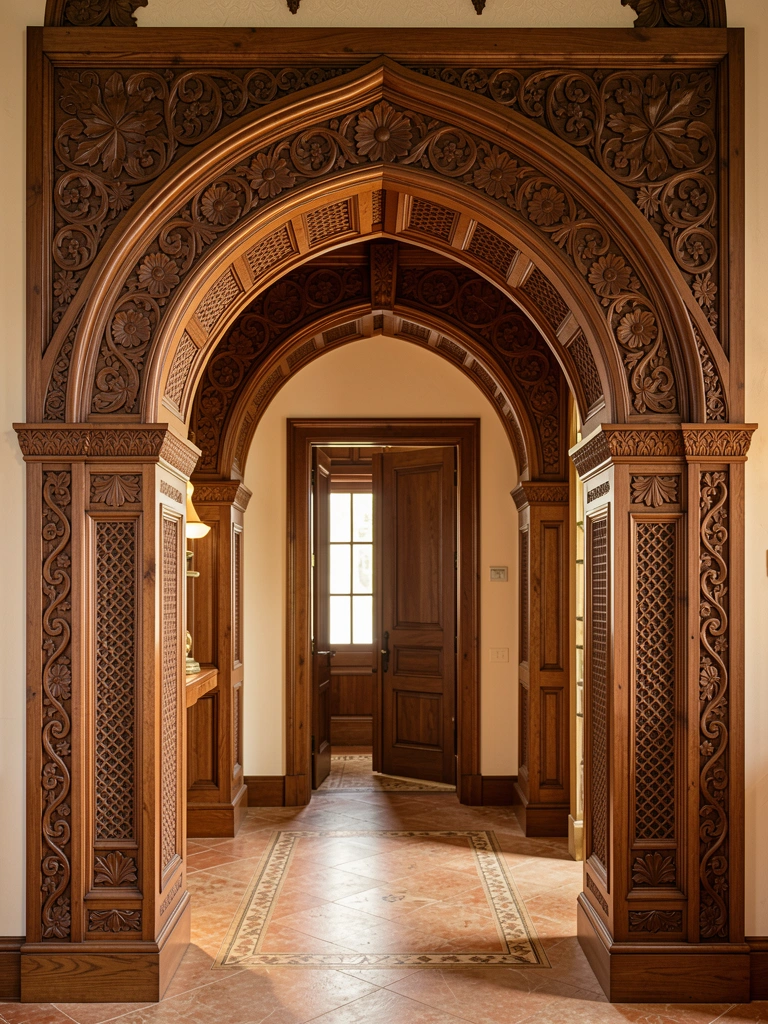
    15. Install Floor-to-Ceiling Carved Panels for Grand Entries

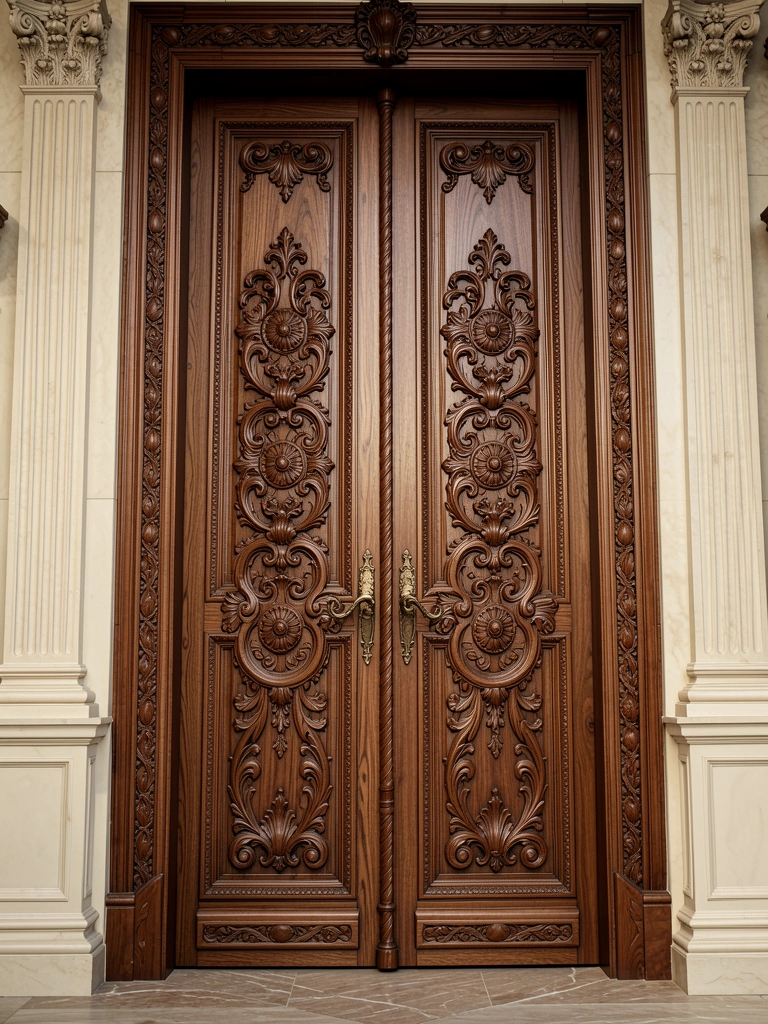
    If you have a tall entryway (9+ feet), go full grandeur with floor-to-ceiling carved panels. This is an investment ($1,500–$5,000+), but the impact is unmatched. Your entry becomes the home’s defining architectural feature.

    Custom carvers can design panels that extend the full height, or you can combine multiple standard carved panels. The scale alone commands attention—friends and family will be genuinely impressed by the ambition and beauty. Natural light plays across the entire surface, creating shadows that shift throughout the day.

    This works especially well in homes with double-height entryways or grand foyers. It’s the kind of detail that increases perceived home value, makes you feel proud every time you come home, and gives guests an immediate sense that they’re entering somewhere special.


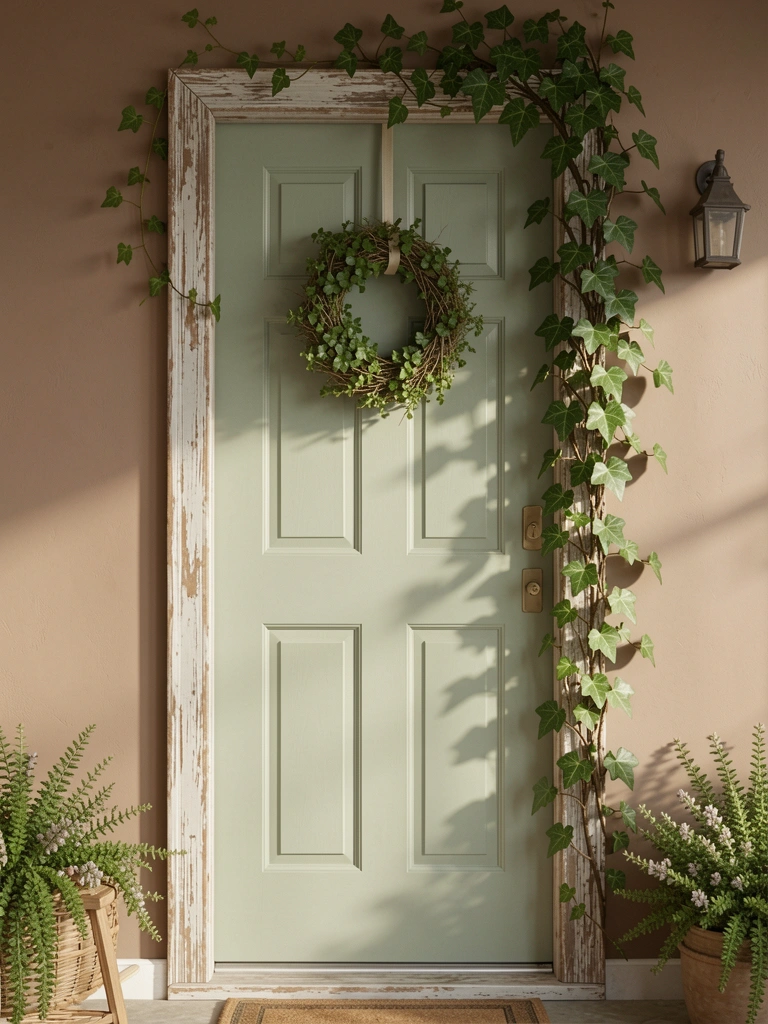
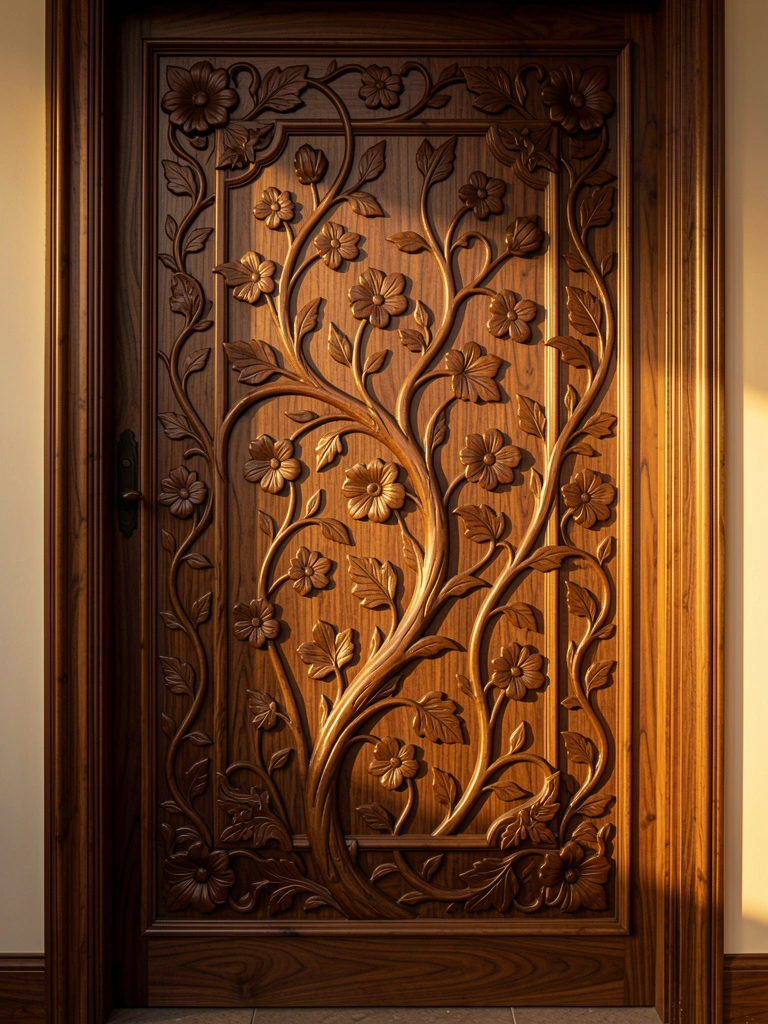
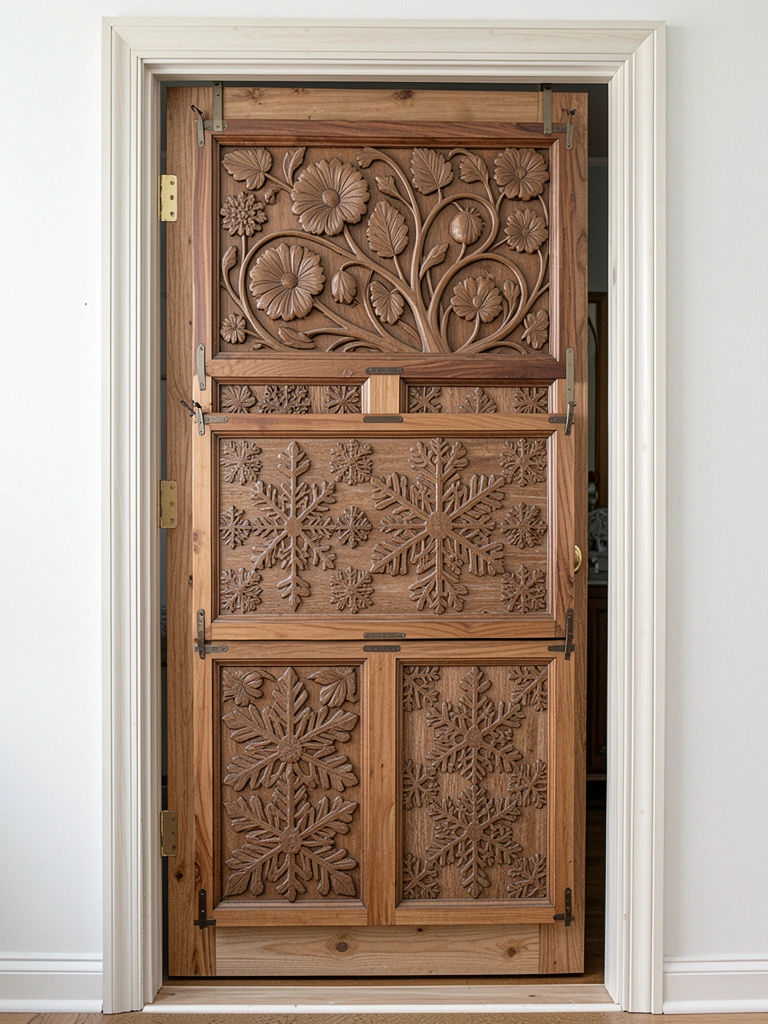
    16. Carve Botanical Motifs for a Garden-Inspired Entry

    Botanical carved doors feel warm and inviting—perfect for homes surrounded by gardens or for nature lovers. Carving techniques vary from realistic (photographic leaf detail) to stylized (flowing abstract plant forms).

    Commission a carver to design botanical-specific patterns ($600–$2,000) or search for pre-made botanical door panels on Etsy or specialty millwork sites. Ivy, acanthus leaves, ferns, flowers, vines—all read beautifully in carved relief. The natural subject matter feels timeless rather than trendy.

    This carving style pairs beautifully with natural materials elsewhere on your home (stone, brick, natural light) and creates a cohesive sense that your home honors the natural world. Visitors often comment that botanical doors feel more welcoming than purely geometric designs.


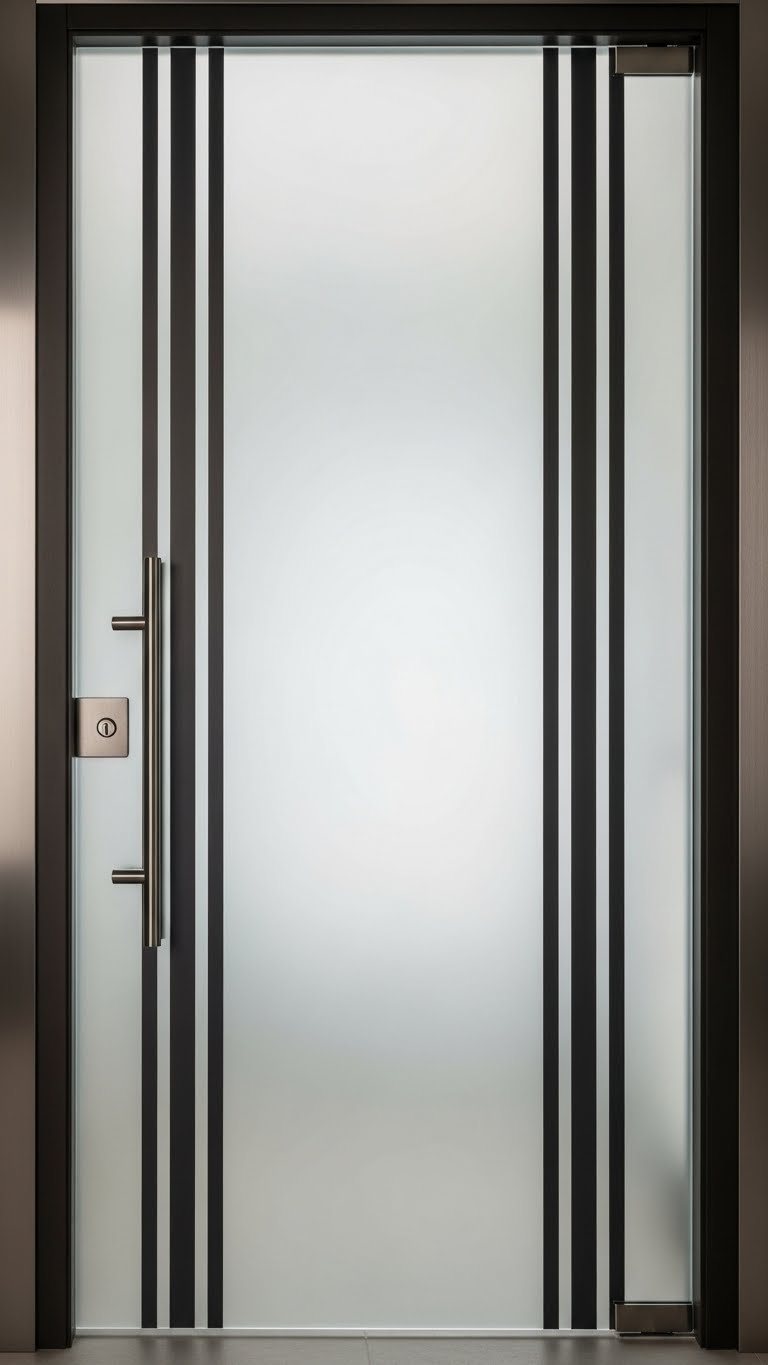
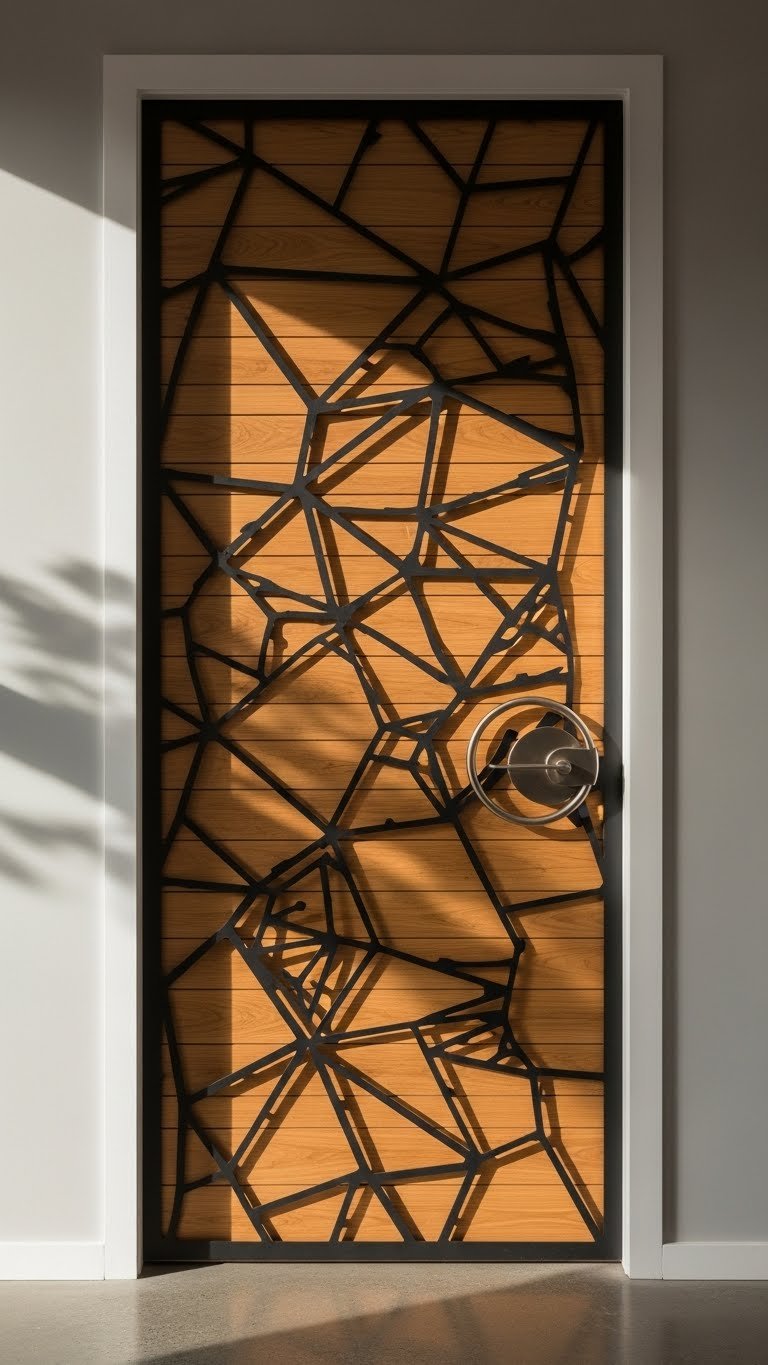
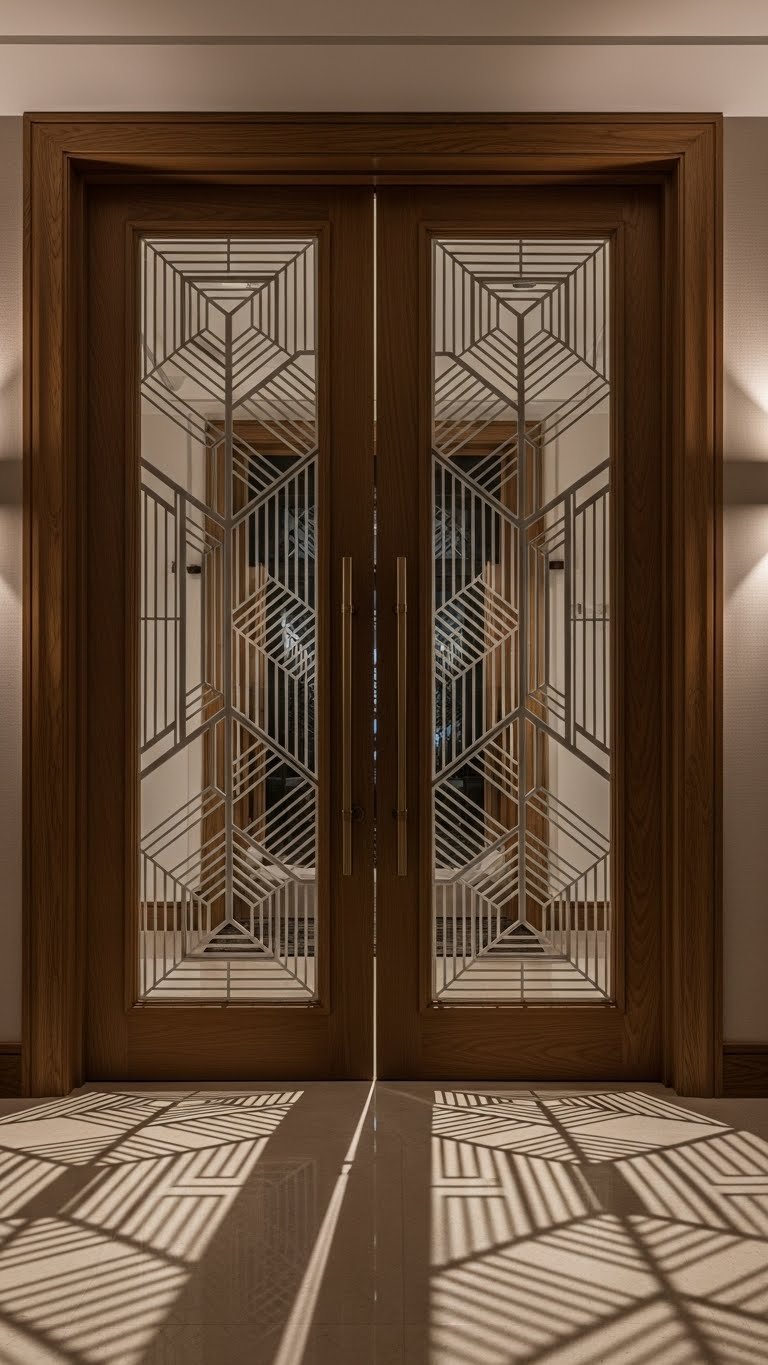
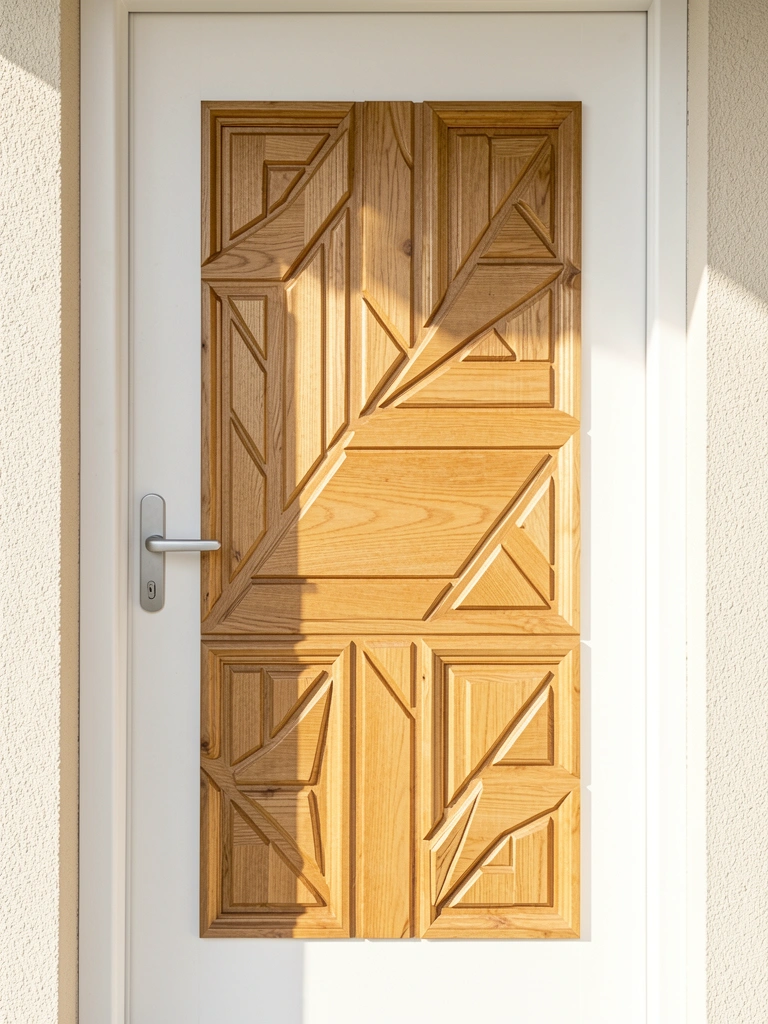
    17. Create a Geometric Art Deco Carved Pattern

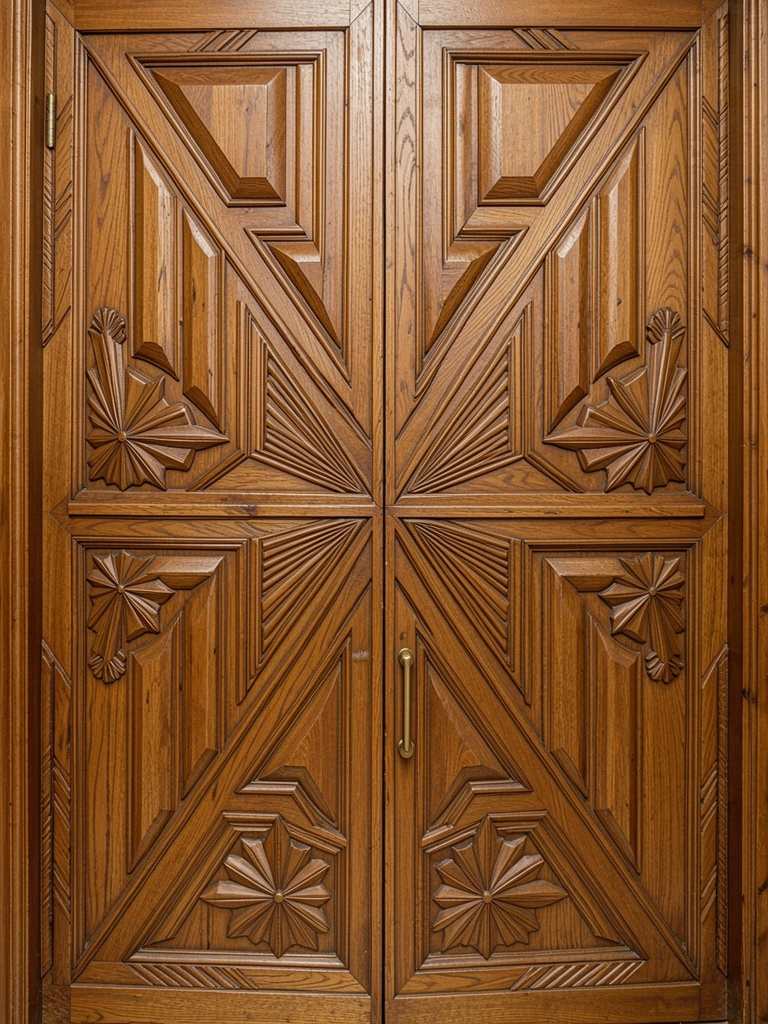
    Art Deco carved doors blend artistry with graphic design sensibility. If you love 1920s-30s aesthetics, this direction offers bold personality. Patterns include stepped triangles, starburst rays, chevrons, and geometric medallions.

    Work with a carver who understands Art Deco vocabulary ($700–$1,500) or search for Art Deco reproduction doors online. The geometric nature means the carving reads cleanly even from a distance—bold shapes are readable in ways that delicate filigree sometimes aren’t.

    Paint in high-contrast colors (black and white, dark green and gold) to amplify the graphic quality. This approach especially appeals to people who appreciate design history and want their home to reflect a specific era they love. It reads as intentional curation rather than generic decoration.


    18. Combine Shallow Hand-Carved Details with Modern Materials

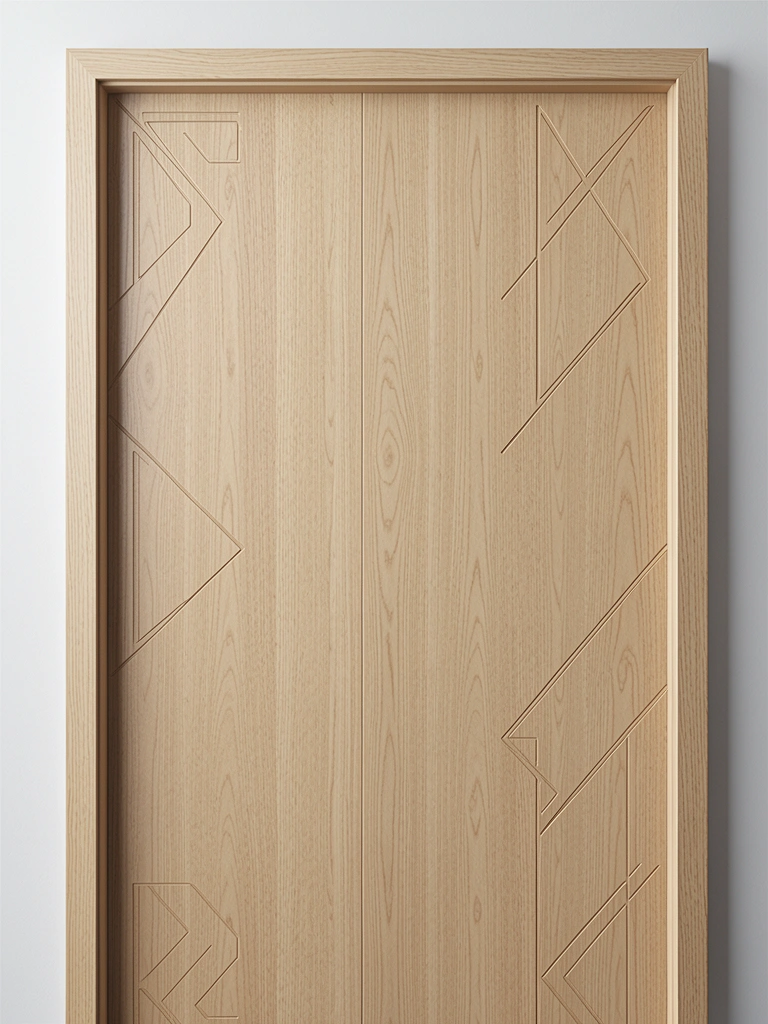
    Not all carved doors need to be ornate. Shallow hand-carving creates subtle detail that feels contemporary rather than traditional. Think delicate line work, abstract patterns, or minimal botanical elements rather than elaborate relief.

    Source or commission a simple carved panel ($200–$600 depending on complexity) with shallow carving (1/8-inch depth or less). This style pairs beautifully with contemporary hardware, minimalist frames, and modern colors. The carving reads more as “artistic detail” than “ornament,” which appeals to people who love design but reject ornamentation.

    Install within a slim aluminum frame for maximum contemporary impact. This approach offers carved beauty without the visual weight of traditional heavy carving. It’s for people who want craftsmanship and artistry without looking like they’re living in a museum.


    19. Install Interchangeable Carved Door Panels (Seasonal Updates)

    Some custom doormakers design frames that accept interchangeable carved panels, letting you swap designs seasonally or based on mood. This is the artsy answer to redecorating without reinstalling a door.

    Commission a framemaker to create a panel-swap system ($800–$2,000 initial setup) then order 2–4 different carved panels ($200–$500 each) in styles matching different seasons or aesthetics. Spring panels might feature flowering botanicals, autumn panels feature harvest imagery, winter panels might be geometric or snowflake-inspired.

    The payoff is creative satisfaction and the ability to refresh your entry’s look without major work. It’s like having a rotating art gallery on your front door. Friends notice when you change it, which becomes a fun conversation starter.


    20. Source Victorian-Era Carved Doors from Estate Sales

    Victorian doors are architectural jewelry—ornate, detailed, and crafted to last centuries. Estate sales and salvage yards frequently have authentic Victorian doors available for a fraction of their replacement cost.

    Expect to spend $300–$1,500 depending on condition and intricacy. Many need restoration (hinge repair, weatherproofing, refinishing) which adds $300–$800. But the craftsmanship you get is genuine—hand-carved details, real quarter-sawn oak or walnut, period-correct joinery.

    This option appeals to people restoring historic homes or those who love Victorian aesthetics. The authenticity can’t be replicated by new production doors. These doors develop character over time, showing wear in ways that feel noble rather than decrepit. They genuinely improve with age.


    21. Carve Narrative Scenes or Storytelling Elements

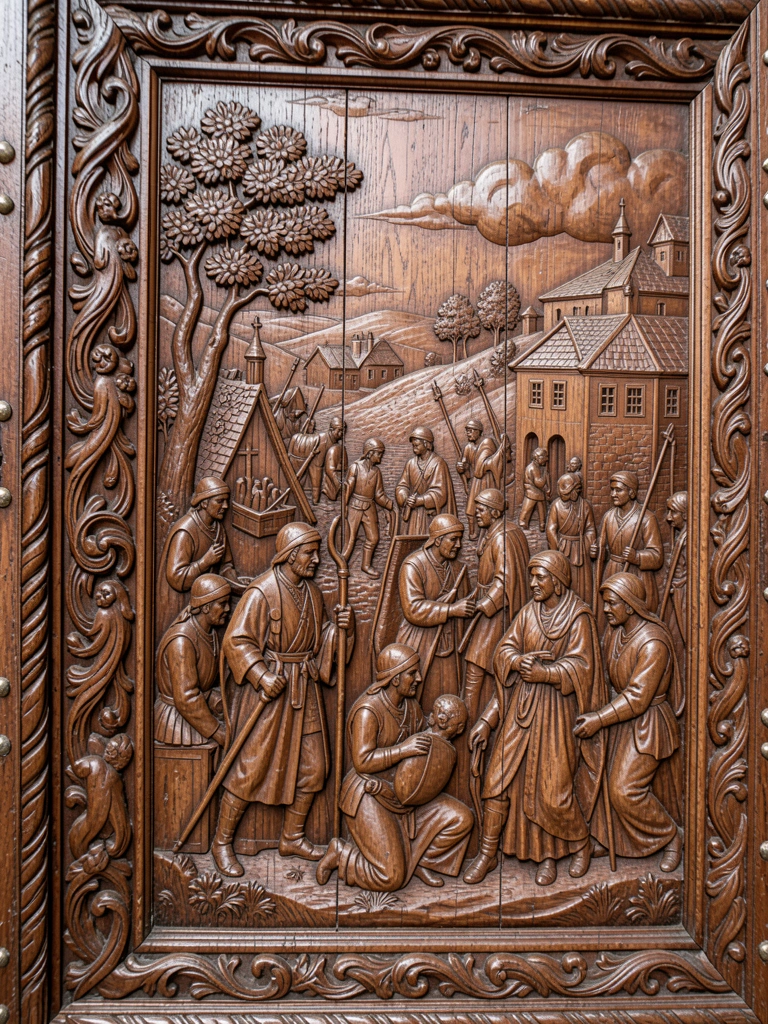
    Want your door to tell a story? Commission a carver to create a narrative scene. This might be a landscape meaningful to your family, a historical moment, a literary reference, or a personal story rendered in carved relief.

    This level of customization ($1,500–$3,500+) requires finding a skilled carver who can handle complex composition. Search for “narrative woodcarving” or ask local art councils for carver referrals. The process is collaborative—you describe the story, the carver creates sketches, you refine, then they carve.

    The result is genuinely one-of-a-kind—a door that expresses your family’s values, history, or imagination. It becomes a conversation piece that reveals something about who you are and what matters to you. Visitors spend time reading the carved narrative rather than just noticing “nice detail.”


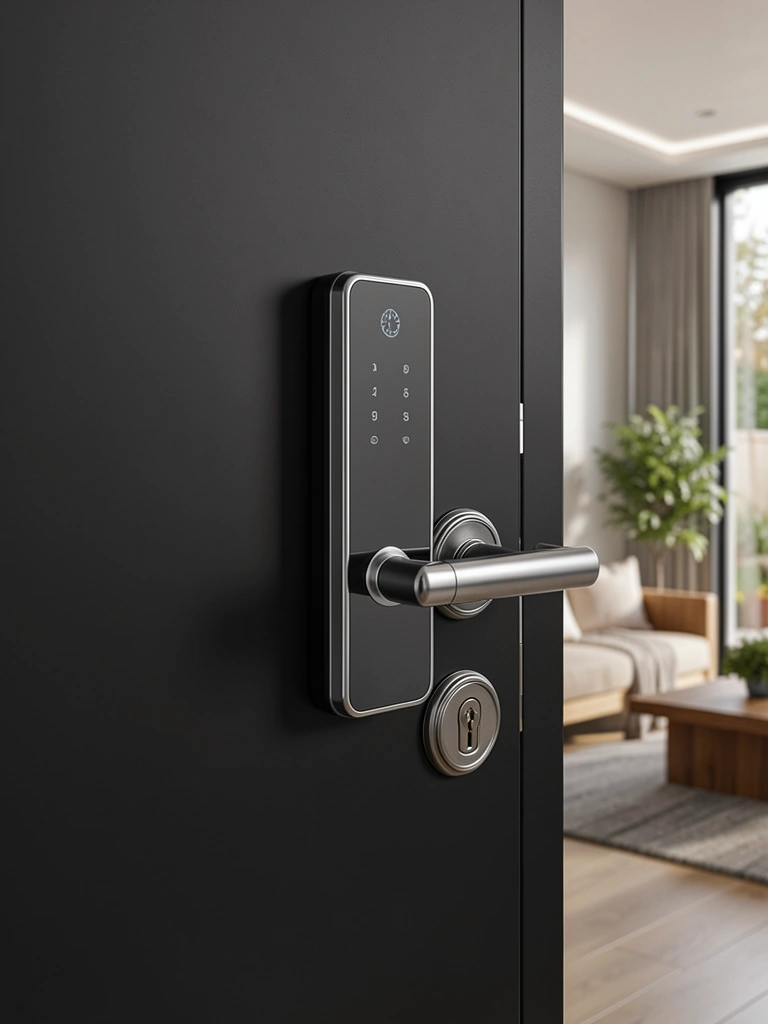
    22. Install Carved Door Panels with Integrated Smart Lock Housing

    Modern security doesn’t need to clash with carved beauty. Work with a carver and smart lock installer to integrate biometric or keypad locks into carved door designs. The lock housing becomes part of the overall composition rather than a visible intrusion.

    Some custom door makers ($1,200–$2,500) can route smart lock housing into pre-carved panels so the tech feels integrated rather than bolted-on. Matte black or brushed gold smart locks complement carved wood when positioned thoughtfully. Install by professionals who understand both carpentry and tech.

    The result balances old-world craftsmanship with contemporary security. You get traditional beauty plus modern convenience, without either feeling compromised. This appeals to people who want heritage aesthetic with zero sacrifice in functionality.


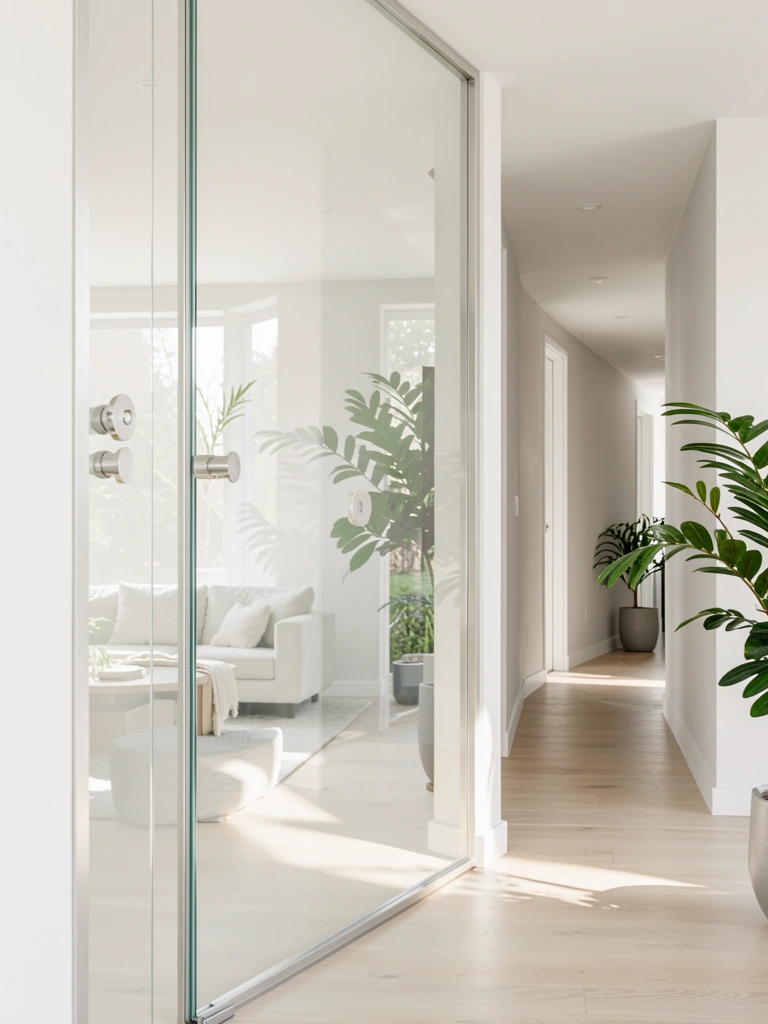
    23. Use Carved Door Surrounds to Frame Glass Entry Doors

    Glass doors look modern and minimalist but can feel cold. Frame them with carved wood surrounds that add warmth and traditional architectural detail. The contrast between minimal glass and ornate carved surround creates visual interest.

    Source pre-made carved surrounds ($300–$800) from millwork suppliers or have a carver design custom framing. Install as an architectural frame around your glass door entrance. The carved wood draws the eye and softens what might otherwise feel severe.

    This approach works beautifully in contemporary homes that could use more warmth, or traditional homes adding modern glass doors. The carved surround is visually dominant, so the glass reads as a contemporary insert within a traditionally framed entry rather than vice versa.


    24. Combine Carved Wood with Visible Brick or Stone

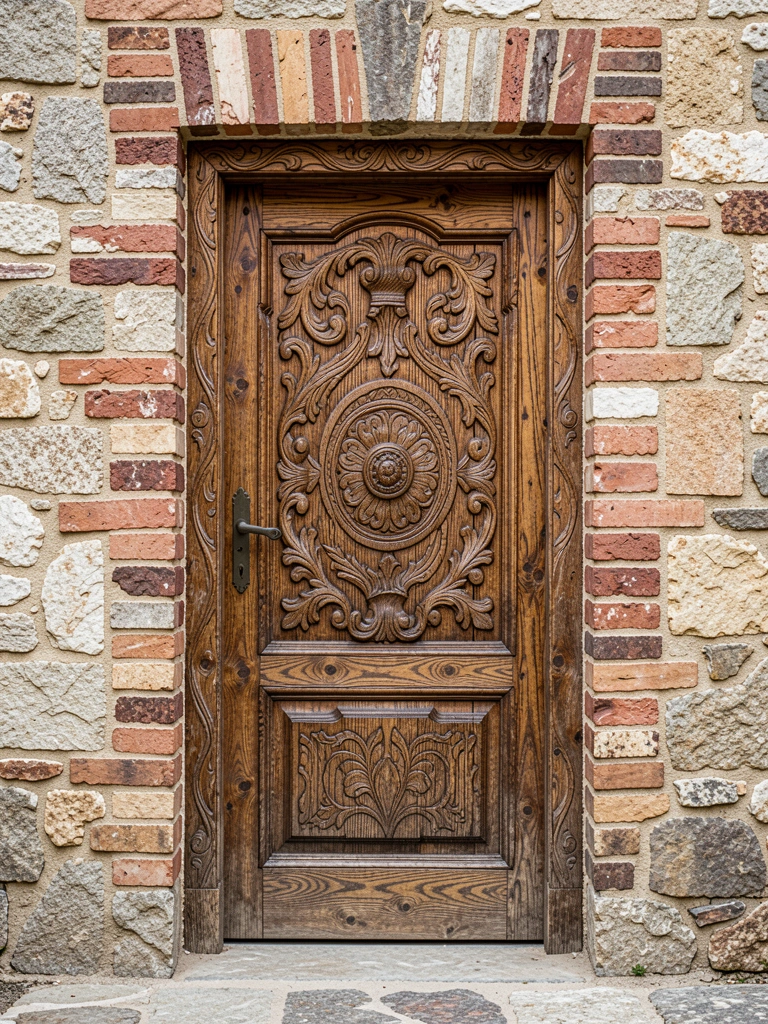
    The combination of carved wood door + exposed brick or stone entry creates textural richness that feels intentional and designer-driven. The different materials each get more visually interesting because they’re in contrast.

    Install a carved wood door (custom, salvaged, or pre-made) within a brick or stone surround. Paint or stain the carving to either complement or contrast with the masonry color. Traditionally carved doors pair beautifully with rustic surroundings; modern carved doors look chic against clean brick.

    This material mix appeals to people who value texture and authenticity in their homes. The natural materials—real carved wood, real brick—make the entry feel grounded and substantial. It reads as carefully considered rather than decorator-picked.


    25. Hand-Carve a Minimalist Abstract Pattern in Shallow Relief

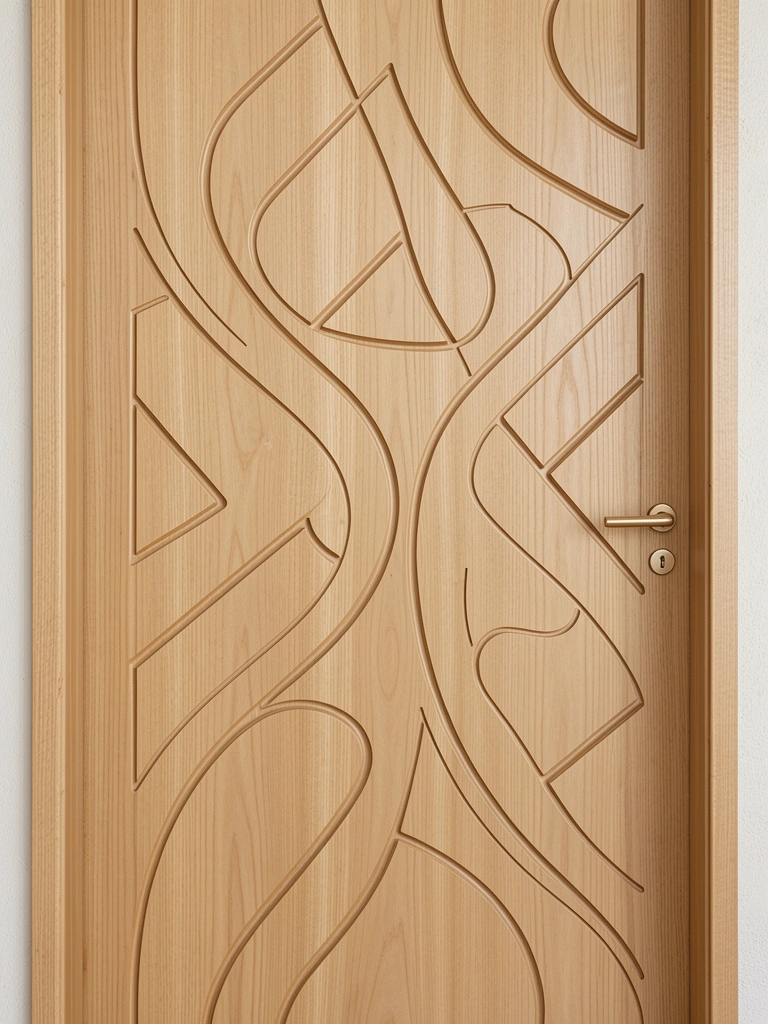
    Contemporary design often skips ornament in favor of abstraction. Hand-carve abstract patterns—flowing lines, geometric shapes, negative space—in shallow relief. This creates visual interest and artistic merit without traditional ornamentation.

    DIY this with basic carving tools ($50) or commission a carver who works in contemporary styles ($400–$1,000). The shallow depth keeps costs and time manageable while creating genuine artistic presence. Finish with stain or paint that highlights the carved shadows without adding visual noise.

    This approach appeals to minimalist aesthetics—you get artistic detail without decoration, craftsmanship without ornamentation. The carving feels intentional and contemporary rather than traditional or nostalgic.


    26. Create a Relief-Carved Landscape or Seascape

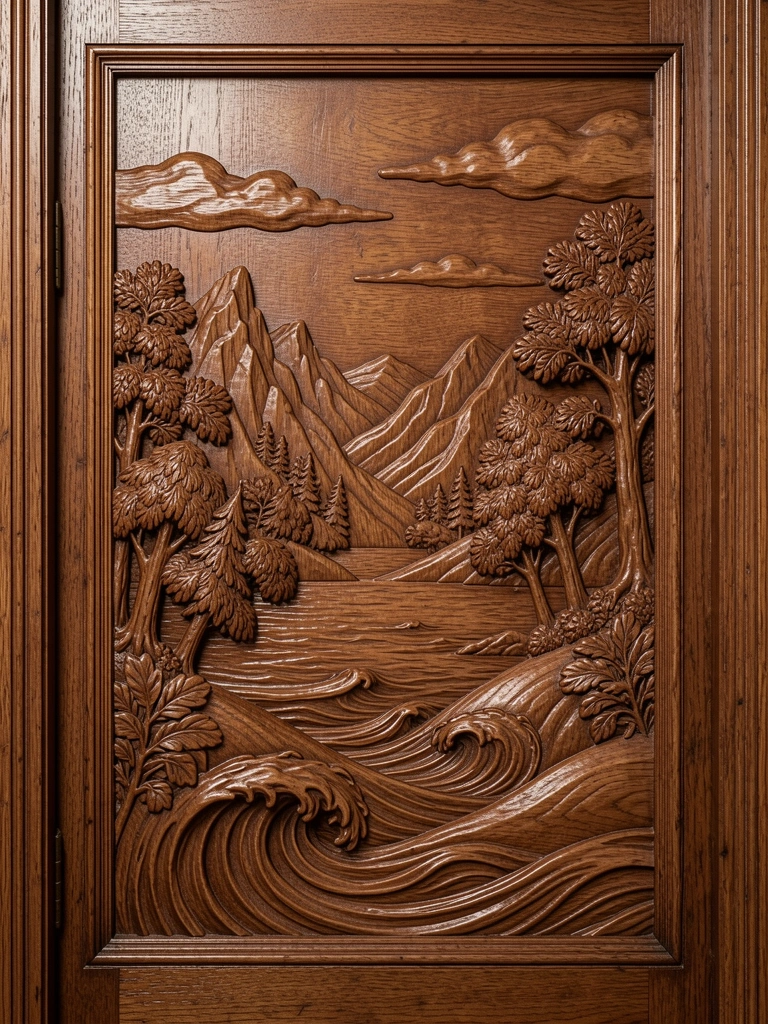
    Landscape carving lets you bring meaningful scenery to your entry. Commission a carver to render a view you love—mountain range, ocean scene, forest, desert—in relief. This creates a window-like quality even though it’s carved wood.

    Work with a carver to combine photo reference with artistic interpretation ($800–$2,000). The carving should have dimensional depth—foreground elements carved deeper, background elements shallower—to create visual recession. Light plays dramatically across landscapes, creating different moods at different times of day.

    This appeals to nature lovers and people who want their home to reflect what they value. A seascape carved door feels like you’re bringing the ocean home; a mountain landscape door signals your connection to wilderness. It’s personal without being literal.


    27. Install Multiple Carved Panels for an Accent Wall Effect

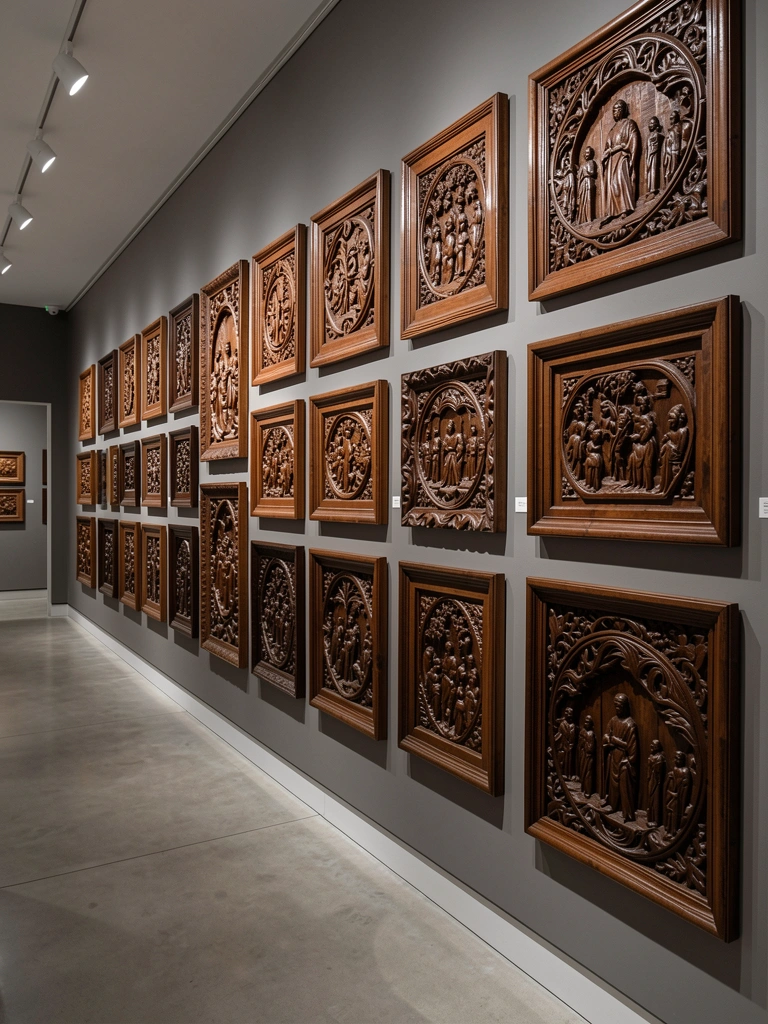
    Why stop at the door? Extend carved detail across your entire entryway by installing multiple carved panels (on walls, not just the door) in a coordinated design. This creates an accent wall effect that announces “you’re entering somewhere special.”

    Source matching or complementary carved panels ($60–$200 each) and arrange them in an intentional composition—grid pattern, asymmetrical gallery layout, or architectural arrangement. Install with adhesive and brad nails. This works beautifully with carved panels in similar styles but different sizes, creating visual rhythm.

    The effect is undeniably impressive. Your entryway becomes a gallery showcasing carved artistry. It reads as intentional curation rather than decoration. Guests immediately sense they’ve entered a home where beauty and craftsmanship matter.


    Closing

    Your entry door deserves to be more than functional—it should reflect the thoughtfulness and artistry inside your home. Whether you invest in a custom-carved masterpiece, source a salvaged treasure, DIY a personal design, or layer affordable carved trim around a simple door, you have options at every budget level. Pin this guide and pick one idea that speaks to you. Your home’s first impression will thank you.

  • 26 Mudroom Ideas That Keep Your Home Organized & Welcoming

    26 Mudroom Ideas That Keep Your Home Organized & Welcoming

    26 Mudroom Ideas That Keep Your Home Organized & Welcoming

    Introduction

    Your mudroom is the first impression guests get when they enter your home—and it’s usually the most chaotic. Shoes piled by the door, jackets draped over chairs, bags tossed on the floor. But here’s the truth: a well-organized mudroom doesn’t require a complete renovation. Whether you’re working with a dedicated room, a corner of your entryway, or a tight hallway space, small changes make a huge difference in how your home functions and feels.

    In this guide, you’ll discover 26 practical ideas that work for renters and homeowners, on tight budgets and larger investments. You’ll find DIY projects you can finish in an afternoon, budget-friendly shopping solutions, and smart design choices that keep clutter hidden but everything accessible. By the end, you’ll have a mudroom that actually works for your family—not against you.


    1. Install Floating Shelves Above the Bench

    Floating shelves add storage without eating floor space and create a visual anchor for your mudroom. They’re perfect for displaying baskets, storing seasonal items, or keeping everyday necessities at eye level where you’ll actually use them.

    Install shelves 12-18 inches above your bench or seating area using wall studs and a basic drill. Shelves run $15-$40 each at IKEA, Home Depot, or Amazon, plus hardware. This takes one afternoon and requires minimal tools. Fill them with matching storage baskets ($5-$20 each) to hide clutter while keeping things organized. Pro tip: arrange heavier bins on lower shelves and lighter decorative items on top for a balanced look.

    Your entryway instantly gains storage without looking cramped. Plus, you can see everything at a glance, making it easier to grab what you need on your way out.


    2. Create a Coat Rack Wall with Mixed Hooks

    Instead of a single row of identical hooks, install a gallery-style hook wall at different heights and finishes. This approach looks intentional (like you planned it) while being flexible enough to adjust as your needs change.

    Buy hooks in sets or individually from Target, Home Depot, or West Elm. Mix metals like brass, black metal, and natural wood—they’ll look curated rather than random. Plan for $20-$60 total depending on quantity. Install at varying heights so kids can reach some, adults use others. This DIY project takes 30 minutes once you’ve marked your studs. Alternative: use adhesive hooks ($1-$3 each) if you rent and want to avoid holes.

    You get functional storage that’s also a style statement. Kids can independently hang their own jackets, and visitors immediately know this is a place where things belong.


    3. Add a Cushioned Bench Seat with Hidden Storage

    A bench does triple duty: seating to tie shoes, a landing spot for bags, and hidden storage underneath. This is one of the most practical mudroom additions, especially for families.

    You have two options: buy a ready-made storage bench ($80-$300 from IKEA, Wayfair, or Target) or build one from scratch ($100-$200 in materials). If building, use a simple frame from plywood, add hinges to the top, and cushion with foam and fabric. Line the inside with bins that slide in and out. Takes one weekend if you’re handy; hire help if plumbing or electrical work is involved. Budget-friendly renters: look for ottomans with hidden compartments ($40-$100).

    Suddenly you have a place to sit while putting on boots, and all those random items have a designated home. Your entryway feels more intentional and less like a drop zone.


    4. Organize with Clear Labeled Storage Bins

    Clear bins let you see what’s inside without opening every container, making it faster to find what you need and easier for kids to put things back. Labels ensure everything stays where it belongs.

    Buy clear plastic bins in sets at Target, Costco, or Amazon—expect $20-$40 for a pack of 4. Get a label maker ($15-$25) or use waterproof stickers ($3-$8). Spend an hour sorting current mudroom clutter: winter gear, sports equipment, bags, shoes. Label each bin clearly. This costs almost nothing and takes minimal time. Pro tip: take a photo of bin contents and tape it inside the label for visual reference—especially helpful for kids and partners.

    Your mudroom becomes instantly more functional and looks calmer. Everything has a category, so there’s no question about where things go.


    5. Hang a Pegboard for Customizable Storage

    Pegboards are endlessly adjustable—rearrange hooks and baskets as your needs change. They’re perfect for the indecisive mudroom owner who might want to switch things up seasonally.

    Pegboards cost $20-$50 depending on size, with hooks and baskets running $1-$5 each. Paint the pegboard to match your décor before hanging (takes 30 minutes, adds visual polish). Install into studs with screws for security. You can reorganize in seconds—move a hook, swap a basket, try new configurations. Renters can use adhesive-backed pegboards ($30-$40) that won’t damage walls.

    You get a mudroom that adapts to your life instead of the other way around. Seasonal storage becomes easy, and you’ll actually use the space more effectively.


    6. Install Hooks Inside Closet Doors

    Don’t overlook the inside of your mudroom closet doors—that’s prime real estate for small items, bags, and accessories that clutter shelves.

    Install 4-6 hooks on the inside of each closet door using basic screws or removable adhesive hooks ($0.50-$2 per hook). This is genuinely a 10-minute project. Use this space for reusable shopping bags, light jackets, kids’ backpacks, or items you grab frequently. The door hides everything when closed, but you’ve doubled your usable storage.

    Suddenly your mudroom feels less cluttered without losing any function. This is the kind of small change that catches people off guard—they don’t even notice how organized you are until they open that door.


    7. Use Woven Baskets for Textured Storage

    Woven baskets add texture and warmth while hiding clutter. They photograph well on Instagram and feel more intentional than plastic bins, even though they’re just as functional.

    Look for seagrass, rattan, or woven baskets at Target, Wayfair, IKEA, or thrift stores. Sizes and prices vary—$15-$50 per basket depending on size. Group them by size or color for visual harmony. Label each basket if you want (or leave labels off if you prefer a cleaner look). Refresh the look seasonally by swapping which basket holds what. This costs nothing extra and takes 15 minutes to set up.

    Your mudroom shifts from “functional clutter zone” to “designed space.” Plus, baskets hide the mess while keeping things easy to access—nobody has to be perfect inside a closed basket.


    8. Create a Shoe Rack System

    Shoes are usually the biggest mudroom clutter culprit. A dedicated shoe rack keeps them off the floor and makes it obvious when someone’s left a pair out.

    Buy a ready-made shoe rack ($30-$100 at Target, IKEA, Amazon, or Wayfair) or build one from wood pallets and shelves ($40-$80 in materials). Store only shoes currently in rotation—move seasonal boots and winter gear to higher shelves or the garage. If you have kids, assign each child their own shelf section. This project takes 30 minutes to assemble or build. Pro tip: place a small tray under each shelf to catch dirt that falls from shoes.

    Your floor becomes instantly clearer and your morning routine faster—you can see which shoes you need without searching through a pile.


    9. Mount a Narrow Console Table for Keys and Mail

    A narrow console table (12-15 inches deep) doesn’t take up much space but gives you a designated landing spot for keys, mail, wallets, and other pocket items that usually get lost.

    Find a console table at IKEA, Target, Facebook Marketplace, or Wayfair in $60-$200 range. Pair it with a small tray for keys, a letter holder for mail, and a dish for loose items. Mount a mirror above it (bonus: makes the space feel larger). This setup costs $80-$250 total and takes 30 minutes to arrange. Renters can use a thin table without mounting anything—just push it against the wall.

    Now you have a place where everyone knows to check for keys and mail instead of searching through drawers and pockets. Your morning routine becomes smoother and less stressful.


    10. Install a Coat Closet Organizer System

    If you have a dedicated mudroom closet, maximize it with a double rod system that lets you hang more coats and bags without overcrowding a single rod.

    Install a closet rod divider or double rod system ($30-$70 from Home Depot or IKEA). Place heavier coats on the top rod and lighter jackets or bags on the bottom. This is a 20-minute installation if you’re comfortable with basic tools. Alternative for renters: use a tension rod hung at half-height to create two levels without permanent installation.

    Your closet can now hold double the outerwear without looking cramped or damaged. Plus, heavier coats don’t crush lighter layers.


    11. Add an Umbrella Stand for Rainy Days

    Umbrellas usually end up wet and dripping on the floor or folded awkwardly in the corner. An umbrella stand keeps them accessible and contained so water doesn’t damage your floors.

    Buy an umbrella stand ($15-$40 at Target, Amazon, or Home Depot) in a style that matches your entryway aesthetic. Metal, ceramic, or wood options exist at every price point. Place it by the door so it’s the first thing people see when they need an umbrella. This takes five minutes to set up and costs almost nothing. Pro tip: use a removable mat underneath to catch drips on tile or hardwood.

    Rainy days become less messy and more organized. Your guests will actually use the stand instead of creating a wet pile by the door.


    12. Use a Rolling Cart for Sports Equipment

    Sports gear multiplies fast, especially in families with kids. A rolling cart keeps equipment corralled, easy to grab, and simple to move out of the way when needed.

    Get a 3-tier rolling cart ($30-$70 from Target, Amazon, or IKEA) in a size that fits your space. Label each tier: “Soccer,” “Baseball,” “Skates,” etc. Kids can easily grab what they need without digging through bins. Roll it to the garage when you want the mudroom clear. This project takes 10 minutes to assemble and organize. Budget alternative: use a sturdy storage bin ($20-$40) and label the outside—less flexible but significantly cheaper.

    Everything has a home, and kids know exactly where their gear lives. Your mudroom doesn’t become a sports equipment explosion zone.


    13. Paint an Accent Wall in Soft Neutral Tones

    A single accent wall draws the eye and makes your mudroom feel designed, not just functional. Soft neutrals like sage, soft gray, or warm taupe create a welcoming vibe without overwhelming the space.

    Choose a high-quality paint in your preferred shade ($25-$40 per gallon). One wall typically requires 1-2 gallons. This is a weekend DIY project if you’re painting yourself, or hire a pro ($150-$300 for a mudroom). The difference this makes is surprising—suddenly your entryway feels intentional and inviting. Pro tip: test paint samples on your wall first and observe how light changes throughout the day.

    You get a completely refreshed space without a full renovation budget. Plus, a painted wall makes everything else you’ve organized look even more polished.


    14. Install a Slim Bench with Shoe Storage Below

    Similar to a full storage bench, but simpler: a bench with an open shelf underneath keeps shoes visible and easily accessible while creating a place to sit and lace up.

    Look for this specific style at IKEA ($70-$150), Wayfair ($100-$200), or Target ($60-$120). Or DIY one from a simple wood frame and shelf. This takes one afternoon to build or 20 minutes to assemble if you buy ready-made. The beauty is that shoes are visible and easy to grab. Pro tip: place a basket under the shelf for shoes you’re less likely to wear regularly.

    Getting ready becomes faster—you can see your options and sit while putting on shoes. The bench becomes a visual anchor for your entire mudroom.


    15. Use Ladder Hooks for Blankets and Scarves

    A decorative ladder is a creative, space-saving way to store scarves, blankets, throws, and light layers without needing shelf or closet space.

    Find a wooden ladder at Target, Wayfair, or thrift stores for $30-$80. Lean it against a wall (no installation needed). Drape scarves, blankets, and lightweight jackets over the rungs—they stay visible and are easy to grab. This works especially well in smaller mudrooms where shelf space is limited. Rearrange seasonally by rotating what’s on display.

    Your mudroom gets bonus storage while looking more like a boutique than a dumping ground. Plus, blankets and scarves are softer décor than typical storage bins.


    16. Create a Mudroom Command Center with a Bulletin Board

    A command center keeps the family schedule, school papers, and reminders visible so nothing gets lost in coat pockets or forgotten on desks.

    Mount a cork board or fabric pinboard ($15-$40 from Target or Amazon) in a central spot in your mudroom. Add a small shelf below for pens, markers, and adhesive notes. This takes 15 minutes to hang and organize. Alternatively, use a large whiteboard ($20-$40) if you prefer easy erasing and rewriting. Set a family rule: all permission slips and schedules go here before anything else.

    Nobody misses school events or forgets permission slips. Your stress level drops because you have one central place to check instead of asking everyone repeatedly.


    17. Install Wall-Mounted Cubbies for Each Family Member

    Cubbies assigned to each person create accountability—everyone knows where their stuff goes and can take ownership of their space.

    Buy a wall-mounted cubby unit ($80-$200 at Target, IKEA, or Wayfair) or DIY from wooden boxes and shelves ($60-$120 in materials). Label each cubby with a family member’s name. Smaller items like hats and gloves go in small baskets within each cubby. This project takes one afternoon to build or 20 minutes to assemble. Pro tip: include a hook inside each cubby for bags or jackets.

    Everyone knows exactly where their own items belong, and you spend less time managing other people’s clutter. Plus, it’s easier to delegate cleanup when each person has their own defined space.


    18. Use Adhesive Hooks for Renter-Friendly Storage

    Renters often avoid installing permanent fixtures, but adhesive hooks are damage-free and can hold surprising amounts of weight when used correctly.

    Buy heavy-duty adhesive hooks ($1-$5 each) from Target, Amazon, or Home Depot. Follow installation instructions carefully: clean the wall, let adhesive cure fully, and respect weight limits. These work great for jackets, scarves, light bags, and everyday items. Start with fewer hooks and add more as you test the weight capacity. If you move, simply remove the hooks—they leave no marks if applied correctly.

    You get a fully functional mudroom without damaging your rental. When you move, you take your organization system with you.


    19. Hang a Coat Tree for Corner Spaces

    Coat trees are perfect for tight spaces where wall mounting isn’t ideal. They’re freestanding, moveable, and surprisingly spacious.

    Find a coat tree at Target ($40-$100), IKEA ($30-$70), or Wayfair ($50-$150). Look for styles with multiple branches and a sturdy base. Position in a corner or unused space. You can hold 6-10 jackets and light bags on a single tree. This costs nothing to install—just unbox and place it. Alternative: use a tall narrow shelf unit ($60-$120) if you prefer storage to hanging.

    You’ve created storage without eating into your actual floor plan. It’s also easy to move if you need to rearrange your mudroom layout.


    20. Install LED Strip Lighting Under Shelves

    Under-shelf lighting makes your mudroom feel brighter, more sophisticated, and easier to navigate during early mornings and evenings.

    Buy adhesive LED strip lighting ($15-$35 per set) from Amazon, Target, or Home Depot. Installation takes 30 minutes: clean the shelf bottom, peel and stick the strip, plug into an outlet or battery pack. Most strip lights are dimmable and warm-toned, which feels more welcoming than harsh white light. This project is renter-friendly and requires no permanent installation.

    Your mudroom feels less like a utility space and more like an intentional entry point. Plus, finding things in shadows becomes easier.


    21. Use Door-Mounted Organizers for Small Items

    Over-the-door organizers with multiple pockets maximize vertical space for small items that usually end up scattered: gloves, hats, mittens, sunglasses, and keys.

    Get an over-the-door organizer ($15-$40 at Target, Amazon, or Container Store) with compartments sized for your needs. Hang on the inside of your mudroom closet door or main entry door using the included hooks. Assign each pocket a category so everyone knows where to find things. This takes five minutes to install and organize. Budget option: hang a shoe organizer ($10-$20) instead—it works just as well.

    Small items finally have a home instead of rolling around loose in drawers or pockets. Plus, the organizer stays hidden when the door closes.


    22. Create a Family Donation Box

    Keep a dedicated donation box in your mudroom so outgrown clothes and unused items don’t accumulate—they go straight into the box and out of your space.

    Find a sturdy box or bin ($10-$25) and label it clearly. When someone outgrows a jacket, shoes don’t fit, or you’re tired of an item, it goes in the box immediately. Once full, drop it off at a donation center. This takes seconds to set up and eliminates decision paralysis. Pro tip: take photos of donations for tax records if you itemize charitable deductions.

    Your mudroom stays right-sized because things leave as naturally as they arrive. Plus, knowing outgrown items will find a good home makes decluttering feel purposeful.


    23. Paint Hooks to Match Your Décor

    Mismatched hooks can feel chaotic, but painting them all the same color creates cohesion and makes the space feel designed rather than thrown together.

    Buy basic metal hooks ($0.50-$1.50 each) and spray paint them with color-matched paint ($5-$10 per can). This takes 30 minutes of prep and drying time. Choose a color that complements your mudroom walls—soft blue, sage, warm white, or soft gray all work beautifully. Hang at varying heights for visual interest while maintaining color harmony.

    Your mudroom instantly feels more intentional and pulled-together. The hooks become a design detail instead of just functional hardware.


    24. Add a Bench Cushion and Throw Pillows

    Seating is essential, but comfort is a luxury detail that makes your mudroom feel special rather than utilitarian. A cushion and a couple of pillows make sitting to tie shoes actually pleasant.

    Get a cushion ($30-$100 depending on size and quality) and throw pillows ($15-$40 each) from Target, Wayfair, West Elm, or Amazon. Choose colors and textures that complement your overall aesthetic. This costs nothing to install—just place them on your bench. Swap seasonally to keep things fresh and interesting. Pro tip: choose machine-washable covers for easy care.

    Your mudroom becomes a space you actually enjoy spending time in. Plus, it photographs better and feels more like an extension of your home’s style.


    25. Install Shelves Above Coat Hooks for Extra Storage

    Stacking hooks and shelves vertically means you use your full wall height instead of just eye level. This is ideal for smaller mudrooms where floor space is precious.

    Install floating shelves 12-18 inches above your coat hooks using basic hardware ($50-$100 total for shelves, hooks, and installation supplies). Use the shelves for seasonal items, baskets of gloves and hats, or display pieces. This project takes an afternoon if you’re comfortable with a drill. Renters can use removable adhesive shelves ($40-$80) to avoid holes.

    Your vertical wall space becomes fully functional storage. It’s surprising how much you can fit when you think in layers instead of just horizontally.


    26. Label Everything with a Consistent System

    The final piece of any organized space is clear labeling. When everyone knows exactly where things belong, your system actually works long-term.

    Get a label maker ($15-$25) and label every basket, cubby, shelf section, and storage bin. Use the same font and size throughout for visual consistency. Spend an afternoon labeling everything in your mudroom. This costs almost nothing and takes minimal time, but it’s the difference between organization that lasts and organization that falls apart within weeks. Pro tip: include a simple icon or color alongside text labels—helpful for kids still learning to read or anyone in a morning rush.

    Your entire system becomes self-explanatory. Nobody has to ask where things go, and kids can independently put items away. Your organized mudroom actually stays organized.


    Ready to Organize?

    Pin this post and pick one or two ideas to start with this weekend—don’t try to tackle everything at once. Even a simple bench, a set of hooks, or labeled baskets will make a visible difference in how your mudroom functions. Share this with anyone who’s drowning in entryway chaos. Which idea are you trying first?

  • 24 Metal Frame Door Styles That Feel Sleek & Contemporary

    24 Metal Frame Door Styles That Feel Sleek & Contemporary

    Metal frame doors have quietly become the ultimate modern upgrade—and for good reason. They’re the sweet spot between industrial edge and refined elegance, giving any space an instant dose of contemporary style without looking cold or sterile. Whether you’re drawn to industrial chic, minimalist sophistication, or something boldly statement-making, metal frames work harder than you’d expect. They flood rooms with light, maximize visual space, and photograph beautifully. The best part? You don’t need a complete renovation to get the look. This guide walks you through 24 metal frame door styles—from budget-friendly swaps to investment pieces—so you can pick ideas that fit your home, your timeline, and your wallet.

    1. Go Ultra-Slim Aluminum for Maximum Light

    Ultra-thin aluminum profiles are the difference between a door that looks heavy and one that disappears into the background. These slender frames maximize the glass-to-frame ratio, flooding your space with natural light and making rooms feel bigger than they are.

    Look for aluminum frames under 1.5 inches wide—brands like Technal and Enigma specialize in this. You’ll pay $600–$1,200 for a quality frameless or ultra-slim glass door installed, but the light gain is worth every penny. DIY installation isn’t recommended here; hire a professional to ensure proper sealing and alignment. The payoff? Your room becomes a light box, and that openness changes everything about how a space feels.

    2. Pair Matte Black Frames with Clear Glass

    Matte black is the sleek, non-negotiable choice for contemporary homes—it doesn’t scream or demand attention, it just looks intentionally designed. Pair it with crystal-clear glass (not frosted or tinted) to let that sophisticated finish shine without blocking views.

    Matte black resists fingerprints better than glossy finishes and works equally well on entryways, interior room dividers, or cabinet fronts. Budget $400–$900 for a standard interior pocket door with matte black aluminum frames; exterior doors run $1,000–$2,000+. Pro tip: Use matte black on just the frames and keep hardware in brushed gold or aged bronze for contrast. This combination reads premium without trying too hard.

    3. Install Sliding Pocket Doors to Save Floor Space

    Pocket doors slide flat into your wall cavity, eliminating the swing space that traditional hinged doors need. In small homes or apartments, this reclaims precious square footage while keeping that sleek metal-frame aesthetic.

    Pocket door kits with aluminum frames cost $300–$700 depending on size and whether you DIY or hire help. Installation requires opening your wall to fit the track mechanism—this is a weekend project for handy people or a half-day job for professionals. Enigma makes frameless glass pocket doors that look gallery-like; basic aluminum versions work just as well. You’ll suddenly be able to fit a chair, desk, or bed in a spot that felt too cramped before.

    4. Choose Crittall-Style Frames for Industrial Romance

    Crittall-style doors have a vintage industrial soul—think 1920s factory windows refined for 2025. The grid pattern of smaller panes creates visual interest while the metal frames add character without sacrificing light or openness.

    These doors cost $800–$1,800 installed, depending on whether you want authentic vintage panes or modern reproductions. They work beautifully as room dividers between kitchens and living spaces or as dramatic home office partitions. The trade-off: multiple panes mean more surface area to clean, but many people find that payoff worth it for the architectural impact. Your space gets instant depth and a touch of urban cool.

    5. Use Brushed Gold Hardware to Warm Up Black Frames

    Black frames can read cold in the wrong light, but add brushed gold hardware and suddenly the whole door feels warm and deliberately designed. This contrast is what separates “harsh” from “intentional.”

    Upgrade your handles, locks, and hinges separately for $40–$150 per door, or choose pre-configured doors with matching hardware from brands like ProVia or high-end suppliers. Brushed gold (also called champagne bronze) works because it’s warm without being shiny. Pair it with thin geometric handles or soft rounded pulls depending on your vibe. This single detail lifts an ordinary metal-frame door into gallery-quality territory.

    6. Add Textured Metal Finishes for Visual Drama

    Smooth matte finishes are clean, but textured metal creates depth and catches light in unexpected ways. Brushed, hammered, or embossed aluminum finishes add dimensionality that reads expensive even on budget doors.

    Textured aluminum frames cost about the same as standard finishes ($400–$1,000 for interior doors), but the visual impact is outsized. Look for options at specialty door suppliers or high-end home centers. The texture hides fingerprints better than smooth finishes, making it practical for high-traffic areas. Your door becomes a subtle focal point—something people notice without consciously knowing why.

    7. Go Frameless for the Ultimate Minimalist Look

    Frameless glass doors have zero visible frame structure—just glass held by hardware at the edges and top. It’s the minimalist extreme, and it reads as seriously high-end because technically, it is.

    Frameless doors run $1,200–$2,500+ installed, making them an investment piece. The glass edges are polished smooth and beveled for safety; hinges and top hardware are minimal and usually stainless steel or aluminum. This style works best in spaces with 8-foot-plus ceilings and clean architectural lines. The payoff is almost clinical purity—your space feels open, modern, and intentionally designed.

    8. Choose Warm Steel Finishes Instead of Chrome

    Warm steels (aged bronze, gunmetal, warm gray) feel more residential than cold chrome, which tends to look institutional. This finish bridges industrial and contemporary without going full matte black.

    Doors in warm steel finish cost $500–$1,200 installed, comparable to matte black but offering a lighter, warmer vibe. They work beautifully in transitional homes or spaces mixing mid-century and modern elements. The finish naturally develops character over time as it weathers slightly, adding authenticity. This is a great option if matte black feels too dramatic but you want clear metal-frame presence.

    9. Mix Glass Panels with Solid Metal Sections

    Partial glass doors give you the view and light of full-glass options but with more privacy and acoustic control. This mixed approach is practical for kitchens, bathrooms, and bedrooms.

    Custom mixed-panel doors run $700–$1,400, though you can find simpler versions starting at $400. You could also retrofit an existing door with partial frosting or add a metal kick plate to a full-glass door for about $100–$200. This hybrid approach solves the problem of wanting openness without complete transparency. Your kitchen stays connected to the living room visually while cooking smells and noise stay contained.

    10. Install Glass Doors with Privacy Tinting

    Privacy glass (frosted, textured, or slightly tinted) keeps the visual lightness of glass doors while actually protecting privacy. You get the contemporary aesthetic without the fishbowl feeling.

    Privacy glass retrofits cost $150–$300 per door if you’re upgrading existing glass, or $600–$1,200 for new privacy-glass doors installed. Frosted looks clean and minimalist; textured privacy glass (like rain or obscure patterns) adds personality. Bathroom doors, bedroom entryways, and home offices all benefit from this approach. Light still pours through, but no one can see your morning chaos happening on the other side.

    11. Use Industrial Steel Frames in Muted Colors

    Industrial steel doesn’t have to mean harsh black. Muted steels like anthracite, warm gray, or soft graphite deliver that industrial edge while feeling more refined and livable.

    Anthracite or neutral-tone aluminum frames cost the same as matte black—$400–$1,000 for interior doors. The benefit? These softer metals pair beautifully with both cool and warm wall colors. Anthracite works especially well in minimalist homes or Scandinavian-influenced spaces. You get industrial character without the drama, making it easier to evolve your decor around.

    12. Combine Metal Frames with Wood Panel Inserts

    Metal frames around wood panels create visual interest and warmth that full-glass doors can’t achieve. This mixed-material approach feels current and layered.

    Custom wood-and-glass doors run $800–$1,600 installed, though you can find pre-made options starting at $500. Use warm woods like walnut, oak, or reclaimed timber for contrast against matte black or steel frames. Acoustic benefits are real too—the wood absorbs sound better than glass. This style shines in transitional homes or anywhere you want to blend industrial with warmth.

    13. Install Floor-to-Ceiling Metal-Frame Glass

    When metal frames run floor-to-ceiling, they create architectural drama and maximum light without making you feel exposed. This is the premium move that changes how spaces relate to each other.

    Floor-to-ceiling installations run $1,500–$3,500+ depending on wall dimensions and complexity, but the transformation justifies the investment. Hire a professional—this isn’t DIY territory. The payoff is enormous: spaces feel bigger, brighter, and more connected. Your open-plan living area becomes a light-filled showcase. This works beautifully when you have high ceilings or want to make a real design statement.

    14. Choose Geometric Hardware Shapes Over Traditional Pulls

    Geometric hardware (hexagonal, angular, minimalist shapes) reads as more contemporary than traditional round or oval pulls. Small hardware detail, massive design impact.

    Upgrade handles and knobs for $30–$100 per door at IKEA, West Elm, or specialty hardware sites like Rocky Mountain Hardware. Geometric shapes work especially well with matte black or steel frames. This is the easiest upgrade to make modern feel intentional. One small detail that signals you’ve thought about every element.

    15. Add Acoustic Considerations with Dense Frame Materials

    If you’re using metal-frame glass as a room divider, denser frame materials and insulated glass reduce noise transmission. This matters for home offices, bedrooms, and creative spaces.

    Acoustic glass and reinforced metal frames cost $700–$1,500 installed—more than standard glass doors but less than full wall soundproofing. Choose doors with thermal breaks and insulated glass if noise control is your priority. The result? Your home office stays separate from household activity, even though it looks open and connected visually.

    16. Match Metal Finishes to Existing Hardware

    Coordinating your new metal-frame door finish to existing hardware (cabinet pulls, light switches, faucets) creates flow and makes your home feel cohesively designed rather than random.

    This costs nothing—it’s a design decision, not an upgrade. Audit your existing finishes before ordering. If your hardware is brushed gold, get brushed gold hinges on your new door. If you have chrome light switches, think about whether matte black doors will clash or contrast intentionally. Matching finishes feel more professional and considered. Your eye won’t snag on conflicting metals.

    17. Use Minimal Threshold Details to Keep Lines Clean

    Minimal threshold details (or flush thresholds) keep sight lines clean and uninterrupted. This detail matters more than you’d think for making doors feel contemporary.

    Standard thresholds are necessary for sealing and safety but can be updated to slim metal versions that blend into the floor. This is a custom specification ($100–$300 extra at installation time) but worth it for a seamless look. Professional installation ensures proper water sealing and code compliance. Your eye follows the door frame and glass, not a clunky threshold bump.

    18. Explore Ultrathin Steel Cable Frames

    Steel cable hanging systems are ultra-contemporary and create an almost floating effect. The cables are nearly invisible, making glass appear suspended.

    Cable-hung glass doors are a high-end option running $1,500–$2,800+ installed because they require custom fabrication and structural consideration. This is the design statement move—something most people haven’t seen in a residential home. It photographs beautifully and reads as thoughtfully designed. Your door becomes architecture, not just functional hardware.

    19. Consider Reclaimed Metal Frames for Eco-Minded Homes

    Reclaimed metal frames combine sustainability with authentic vintage character—they’ve actually got stories to tell. This appeals to eco-conscious homeowners who don’t want to sacrifice style.

    Reclaimed and repurposed metal frames cost $500–$1,200 depending on source and customization. Check salvage yards, architectural reclamation companies, or Etsy sellers who specialize in vintage door hardware. Manufacturing emissions drop by nearly 40% when using recycled materials versus new aluminum, according to the National Renewable Energy Laboratory. Your door is unique, sustainable, and conversation-worthy.

    20. Pair Aluminum Frames with Bold Statement Glass

    Patterned or textured glass in clean metal frames creates visual interest without complexity. The frame’s simplicity lets the glass be the star.

    Decorative glass doors cost $600–$1,400 installed. Look for subtle geometric patterns, rain textures, or frosted designs rather than loud colors. The metal frame keeps the overall effect contemporary instead of ornate. This approach works beautifully for powder rooms, home bars, or anywhere you want personality without overwhelming minimalism.

    21. Install Aluminum Doors with Integrated Smart Locks

    Smart locks integrated seamlessly into metal frames eliminate visible deadbolts and make your door look forward-thinking. Biometric and app-controlled options keep the aesthetic clean.

    Smart lock retrofits cost $200–$500 for the lock itself; installation runs $100–$300. Brands like Level and August make locks that work with aluminum frames without disrupting the visual line. You get keyless entry, access logs, and remote control without changing the door’s appearance. This is the practical luxury upgrade—it looks the same but functions intelligently.

    22. Choose Doors with Thermal Breaks for Energy Efficiency

    Thermal breaks (insulating strips within metal frames) keep temperature stable and reduce condensation without visible aesthetic change. This is invisible luxury that saves money and energy.

    Thermally broken aluminum doors cost $100–$300 more than standard frames but lower your heating and cooling bills noticeably. This is especially valuable in climates with temperature swings. Look for doors labeled “thermally broken” or with insulating polyamide strips inside the aluminum. Energy-efficient glass paired with thermal breaks creates real climate control. You’re paying slightly more upfront but saving long-term.

    23. Embrace Mixed-Metal Hardware for Eclectic Edge

    Mixing metals (brushed gold with matte black, aged bronze with steel) is now considered high-design rather than a mistake. This curated eclecticism reads as intentional and creative.

    You’re already buying different hardware pieces, so mixing finishes costs nothing—it’s pure design choice. Pair warm metals (gold, bronze) with cool metals (black, gunmetal) for visual tension that feels contemporary. This works especially well in maximalist or eclectic homes. Your door becomes a design statement rather than following rules.

    24. Combine Metal Frames with Wooden Thresholds or Handles

    Pairing metal frames with natural wood handles or trim strips warms up the industrial edge and adds textural richness. This hybrid approach feels current and grounded.

    Wooden threshold accents or handle wraps cost $50–$150 to add; you can source warm walnut, oak, or reclaimed wood from local suppliers. This combination appears in contemporary Scandinavian and Japanese-inspired homes where natural and industrial elements coexist. Your door reads as modern but not cold, sleek but not sterile. The warmth makes the space feel more livable.

    Save this post and start with one style that speaks to your space—whether it’s the bold matte black pairing or the minimal frameless approach. Metal frame doors shift how light moves through your home, and that change happens faster than you’d expect. Which style will you try first?

  • 24 New Door Design Ideas Trending for Modern Homes

    24 New Door Design Ideas Trending for Modern Homes

    Your front door sets the tone for everything inside—but here’s the thing: you don’t need a full renovation to make it count. Whether you’re renting, own a cozy apartment, or have a sprawling house, door design choices can completely refresh how your home looks and feels. The good news? Trending door ideas for 2025 range from free styling tricks to investment pieces that boost both curb appeal and functionality. From matte black finishes and minimalist frames to smart locks and sustainable materials, we’ve rounded up 24 actionable door design ideas you can start implementing this weekend. Some take 15 minutes, others are weekend projects—all deliver real impact. Let’s dive in and find the perfect upgrades for your space.

    1. Go Oversized with a Single-Slab Matte Black Door

    An oversized single-slab door makes a bold architectural statement that screams modern luxury. This trend works especially well on homes with traditional or farmhouse exteriors, creating an instant contrast that catches the eye and photographs beautifully.

    The matte black finish is forgiving—it hides fingerprints and wear better than glossy alternatives. Pair it with brushed gold or matte black hardware ($40–$150 for quality pulls and handles) to avoid a flat look. Installation typically requires professional help if you’re replacing an existing door ($200–$800 labor), but renting? Frame a matte black accent door in your entryway with removable wallpaper or paint. Time investment is one weekend for paint, one day for a professional door swap.

    The depth and shadow play of a matte finish creates dimension in photos and makes your entry feel intentional. Your home becomes the one neighbors actually notice.

    2. Embrace Minimalist Frames for Maximum Light

    Thin-frame doors and windows have become the gold standard for modern minimalism. These ultrathin aluminum profiles ($300–$1,200 per door) maximize glass while minimizing visual clutter, making small spaces feel larger and allowing light to flow freely between rooms.

    Brands like Technal and Enigma specialize in frames under 1 inch wide. If you’re renting, this isn’t for you—but homeowners can install these as interior room dividers in one to two days with a professional. The payoff? Your space breathes. You get better sightlines, cleaner aesthetics, and the psychological benefit of openness. Pair with frameless hardware or recessed handles to complete the minimalist look.

    These doors work in bedrooms, bathrooms, and home offices. The less frame you see, the more your interior design becomes the focus.

    3. Add Sidelights for Luxury Entrance Drama

    Sidelights instantly elevate any entry and aren’t just for fancy homes. These vertical glass panels run $150–$600 each and can be retrofitted into existing doorways without replacing the main door. They flood entryways with natural light while maintaining privacy through frosted or textured glass options.

    If you’re in a rental, this isn’t feasible—but homeowners should consider sidelights their next upgrade. A professional installation takes one day. Pair them with the oversized door trend for a high-impact combo that adds perceived value and warmth. The morning light that pours through sidelights becomes a feature you’ll actually look forward to experiencing daily.

    The bonus? Visitors see your entryway’s personality before they even walk in.

    4. Install Pocket Doors to Reclaim Floor Space

    Pocket doors slide directly into wall cavities, saving valuable floor space compared to traditional swing doors. Perfect for small bedrooms, bathrooms, or powder rooms, these cost $200–$600 installed and make rooms feel instantly more spacious.

    Brands like Enigma offer stylish options in various finishes and materials. Installation typically requires a professional ($300–$500 labor) because you need to open the wall and add a track system—generally a one-day project. Renters, this isn’t an option, but homeowners in compact homes should absolutely explore this. The accessibility boost alone (no door swing interference) changes how you move through tight spaces.

    You regain square footage without renovation. Suddenly your small bedroom or bathroom functions better and photographs larger.

    5. Choose Dark Green for Bold, Sophisticated Color

    Matte black gets all the attention, but dark forest green is the color quietly stealing the show for 2025. It pairs beautifully with any exterior and feels more timeless than trendy. A fresh coat of exterior-grade paint ($30–$80 per gallon) transforms any door in one afternoon.

    Choose a satin or matte finish to avoid shine—it looks more upscale and hides drips. Pair with warm brass or oil-rubbed bronze hardware ($20–$100) for a sophisticated look. This works for renters too (get landlord approval first), and you can always repaint before moving. The beauty of green is it complements landscaping, stone, brick, and modern siding equally well.

    Your entry becomes a talking point. Guests remember the green door more than any other detail.

    6. Install Smart Locks with Biometric Access

    Smart locks with biometric fingerprint or facial recognition ($200–$500) are no longer luxury tech—they’re practical for busy households and renters with roommates. Brands like August, Level, and Ultraloq integrate with your smartphone and home automation systems.

    These doors lock/unlock via fingerprint, PIN, or app, eliminating key fumbling. Installation takes 30 minutes (no tools needed—just unscrew your old deadbolt). The real benefit? Temporary access codes for guests, packages, or cleaners. You never hunt for keys again. Works for renters if your lease allows hardware changes (removable installation options exist).

    Security feels effortless, and you’ll catch yourself smiling at the convenience. Your morning routine gets smoother.

    7. Layer Textured Hardware for Personality

    Generic door hardware is disappearing fast. The new approach? Layered or statement hardware that combines geometric shapes, mixed metals, and textures ($40–$200 per set). Think brushed bronze pulls paired with matte black handles, or sculptural geometric knobs that double as art.

    Brands like Anthropologie, CB2, and specialty hardware shops offer designer-quality pulls starting at $20 each. Swapping hardware takes 15 minutes with a screwdriver—renter-friendly and reversible. Start with one statement pull and pair it with simpler handles elsewhere on the door. The texture and intentionality catch light differently throughout the day, adding depth to your entry.

    Your door becomes a conversation piece. That one special pull makes everything feel designed, not default.

    8. Use Crittall-Style Glass Doors for Room Division

    Industrial Crittall-style glass doors with black metal grids ($400–$1,500) are having a major moment for creating visual separation without blocking light or sound. These doors divide open-plan homes into distinct zones while maintaining that airy, connected feeling.

    Installation typically takes one day and requires a professional ($300–$600). They work best in homes with higher ceilings and modern or transitional aesthetics. Renters, unfortunately, these require wall modifications. The payoff is huge though: you get a designated office, studio, or bedroom that feels separate without losing natural light or the sense of space. The industrial-chic look pairs perfectly with matte finishes and minimal hardware.

    Your open floor plan gains purpose and flexibility. Suddenly you can close off a work area while keeping the visual openness.

    9. Paint Your Door Matte Navy for Subtle Drama

    While matte black dominates, matte navy ($30–$80 for quality exterior paint) offers similar sophistication with a slightly warmer, more approachable vibe. Navy reads as classic rather than trendy, making it ideal if you want longevity without commitment anxiety.

    Navy pairs beautifully with white trim, warm wood, or charcoal siding. Paint the door in one afternoon using high-quality exterior satin or matte finish (two coats). This works perfectly for renters—and unlike black, navy stains less noticeably between cleanings. The blue-black tone works with any hardware style, from traditional brass to modern matte black. Add a simple wreath or planter to warm up the look.

    Your entry feels polished and intentional. Navy gives you sophistication without trying too hard.

    10. Swap Out Hardware for Instant Refresh

    Sometimes you don’t need a new door—you need new hardware. Swapping your pull and deadbolt ($40–$150 for quality pieces) takes 15 minutes and delivers shocking impact. Old brass? Upgrade to brushed gold, matte black, or aged bronze for an immediate refresh.

    Shop Target, IKEA, Wayfair, or specialty brands like Rejuvenation. This is the ultimate renter hack—remove old hardware and reinstall it before you move. Pro tip: get a set that includes both handle and deadbolt for visual cohesion. Choose geometric or sculptural shapes over simple knobs for a more curated feel. The right hardware can make a $50 door look like a $500 door.

    That single change makes your entire entry feel intentional. Visitors notice—and you’ll touch that pull dozens of times daily.

    11. Install Energy-Efficient Glass Panels

    If you’re replacing your door anyway, go for energy-efficient glass with Low-E coating ($600–$1,500). This special glass reflects heat in summer and retains warmth in winter, lowering energy bills by 10–15% and cutting UV damage to interior furnishings.

    Brands like Pella, ProVia, and Marvin offer these options. Installation requires a professional ($200–$500 labor). This isn’t a quick fix, but it’s an investment that pays dividends if you live somewhere with temperature extremes. The glass looks identical to standard glass but performs dramatically better. Pair with weatherstripping for maximum efficiency.

    Your heating and cooling costs drop noticeably, and your interior colors stay vibrant longer. Energy efficiency feels good in your wallet and on the environment.

    12. Create a Sliding Barn Door Interior Feature

    Sliding barn doors ($300–$800 with hardware) have moved beyond farmhouse—they’re now a sleek space-saving solution for bedrooms, home offices, or pantries. The horizontal glide mechanism saves floor space while looking contemporary in the right setting.

    Install on a track system ($150–$400 labor) in one day. Choose wood finishes (reclaimed, weathered, or painted) or modern materials like metal. Pair black hardware with matte finishes for a refined look. Renters, some track systems mount to trim only—ask your landlord about damage-free installation. The novelty of a sliding door never gets old, and guests genuinely enjoy the functional design element.

    Your home feels more intentional. That sliding mechanism becomes a small daily pleasure.

    13. Apply Frosted or Textured Glass for Privacy

    Frosted or textured glass films and replacement panels ($50–$300) give you privacy without sacrificing light—perfect for bathrooms, bedrooms, or office doors. These create an artistic, light-diffusing effect that’s far more interesting than solid doors.

    Apply static-cling films ($15–$40 per sheet) in 30 minutes for a renter-friendly option, or upgrade to permanent etched glass ($200–$300 professionally installed). Popular patterns include geometric shapes, wavy lines, or simple frosting. The light still flows freely, but you can’t see inside. Pair with clean hardware and modern frames for a spa-like feel.

    Your private spaces stay private while feeling open. The soft light diffusing through frosted glass becomes a design feature, not a limitation.

    14. Upgrade to Sustainable Bamboo or Reclaimed Wood

    Sustainable woods like bamboo and reclaimed oak ($800–$2,000 installed) reduce manufacturing emissions by nearly 40% compared to standard materials, per the National Renewable Energy Laboratory. Reclaimed wood doors carry authentic character—each grain pattern is unique.

    These require professional installation ($200–$600 labor). The upfront cost is higher, but reclaimed wood doors often increase home value and last decades. Bamboo offers similar benefits with a lighter aesthetic. This isn’t for renters, but homeowners in eco-conscious homes should absolutely explore this. The craftsmanship and longevity mean you’re investing, not spending.

    Your entry tells a story. Every visitor comments on the authentic beauty and knows you chose sustainability.

    15. Paint Your Door Sage Green for Calm Curb Appeal

    If forest green feels too bold, soft sage green ($30–$80) brings the nature trend indoors while feeling calmer and more approachable. This muted tone works beautifully on traditional, transitional, and even modern homes.

    Apply exterior-grade satin paint in one afternoon (two coats). Pair with soft brass hardware and natural wood trim for a cohesive look. Sage reads as intentional without demanding attention, making it perfect if you want to sell later—it’s neutral enough not to feel trendy. Works great for renters too, and the soft color hides wear better than bright hues.

    Your entry feels like a peaceful retreat before you even step inside. Sage green is the color that makes people take a breath and smile.

    16. Add a Sleek Recessed Handle for Minimalist Looks

    Recessed or invisible handles ($80–$300 installed) are the ultimate minimalist move—your door essentially becomes a flat surface with no protruding hardware. These hidden handles require a custom door or professional modification but deliver stunning visual cleanliness.

    Installation takes 2–3 hours for a skilled carpenter ($150–$300 labor). Best with flat modern doors in solid colors. This won’t work for renters, but it’s the ultimate solution if you hate visible hardware breaking up clean lines. The minimalist payoff is huge—your door becomes part of your wall, not a focal point.

    Your space feels intentionally designed and uncluttered. The absence of hardware becomes a statement in itself.

    17. Install a Glass Door Partition for Home Office

    Frameless glass partitions ($400–$1,200 installed) let you create a dedicated home office without losing light or openness. These doors swing or slide and create acoustic separation without visual barriers.

    Professional installation takes one day ($300–$500 labor) and requires removing drywall sections. Perfect for remote workers who need a defined workspace but hate the boxed-in feeling of traditional office walls. Pair with matte hardware for a refined look. Renters, this requires landlord approval and wall modification—check your lease first.

    You get a professional work environment that doesn’t sacrifice your home’s openness. Focus and productivity improve when you have a dedicated space.

    18. Paint Hardware Gold for Luxury on a Budget

    Brushed gold or champagne hardware ($60–$200 for new pieces, or DIY-paint existing hardware for $10) pairs beautifully with matte black and green doors. Metallic finishes catch light and add perceived luxury without the luxury price tag.

    Paint existing hardware using specialty metallic spray paint ($8–$15 per can) in 30 minutes per piece—or buy new designer pulls. Brushed finishes hide fingerprints better than polished gold. This works for renters (you can repaint before leaving) and homeowners. The gold-against-matte contrast is incredibly sophisticated and photographs beautifully.

    Suddenly your door looks curated and expensive. That single accent color makes everything feel intentional and polished.

    19. Choose Weathered Gray for Modern Farmhouse

    Weathered gray ($30–$80 in exterior satin) splits the difference between bold and neutral—it’s sophisticated enough for modern spaces but warm enough for farmhouse aesthetics. This color trend is gaining serious traction because it works everywhere.

    Apply in one afternoon using quality exterior paint. Pair with black hardware and white trim for farmhouse vibes, or matte gold and concrete for modern looks. Weathered gray hides dirt and weathering naturally, making maintenance easier than lighter colors. Perfect for renters and homeowners alike—it’s neutral enough that future buyers won’t hate it.

    Your entry looks intentionally designed without being trendy. Weathered gray ages beautifully and becomes more charming over time.

    20. Install Aluminum French Doors for Light

    Aluminum French doors ($600–$1,500 installed) with slim frames maximize glass while providing that classic French aesthetic with modern efficiency. Perfect for creating transitions between indoor and outdoor spaces.

    Professional installation takes one day ($200–$400 labor). Choose between single or double panels depending on your space. Aluminum resists rust and weathering, making these ideal for coastal homes. Pair with energy-efficient glass for climate control benefits. Renters, these require structural modification—likely not an option.

    You gain seamless connection to outdoor spaces. That visual expansion makes even small yards feel part of your living area.

    21. Apply Protective Film to Glass Doors

    Security and protective window films ($100–$400 professionally installed) strengthen glass doors against impact while offering privacy and UV protection. These films make breaking glass much harder—a serious safety upgrade.

    DIY application costs $30–$60 but requires patience; professional installation ($200–$300) ensures bubble-free perfection. Films come in clear (protective only) or frosted (privacy + protection). This isn’t glamorous but it’s practical—especially important if you live in areas with break-ins or extreme weather. Works for renters with landlord approval.

    Your glass doors become safer without losing aesthetics. That peace of mind is worth the investment alone.

    22. Install a Geometric Pattern on Frosted Glass

    Custom geometric frosted patterns ($150–$400 for professional application) turn your frosted glass into art. Patterns like hexagons, triangles, or custom designs add visual personality without compromising privacy.

    Hire a glass specialist or apply removable vinyl stickers ($20–$50) yourself in 1–2 hours. This works perfectly for bathrooms, office doors, or bedroom entries. Renters can use removable vinyl versions. The pattern catches light beautifully throughout the day and creates a stunning visual effect from both sides of the door.

    Your bathroom or office door becomes a design feature. That geometric pattern makes a functional privacy solution feel intentional and artful.

    23. Go Frameless for Maximum Minimalism

    Completely frameless glass doors ($1,200–$2,500 installed) represent the ultimate minimalist statement—pure glass with barely visible hardware. These custom doors require structural support and expert installation but deliver unmatched visual cleanliness.

    This is a significant investment ($300–$500 labor) and only for homeowners committed to minimalism. Installation takes 1–2 days. Works best in modern homes with clean aesthetics and high-quality surrounding finishes. The wow factor is undeniable—your door becomes almost invisible, letting architecture and interior design shine.

    Your space becomes maximally open and light. Frameless doors create an almost gallery-like aesthetic that impresses everyone who enters.

    24. Add LED Strip Lighting Around Your Door Frame

    LED strip lighting ($40–$150 for quality strips, plus $100–$200 installation) installed around your door frame creates dramatic ambiance and practical nighttime visibility. Warm white LEDs add luxury without harshness.

    Install strips in a weekend using adhesive backing and connecting to a simple plug-in power source. Choose dimmable options ($80–$150) for maximum flexibility. This works beautifully on both interior and exterior doors—especially striking on frosted or glass doors. Renters can use battery-powered LED strips ($20–$50) for a temporary solution.

    Your entry becomes a focal point morning and night. That subtle glow transforms your door into an architectural feature that photographs beautifully.

    Save this post and pick one idea to tackle this weekend—whether it’s swapping hardware in 15 minutes or planning a bigger door upgrade. Your entry deserves to feel as good as it looks.

  • 27 Rustic Entryway Decor Ideas That Feel Warm & Welcoming

    27 Rustic Entryway Decor Ideas That Feel Warm & Welcoming

    Your entryway is the first impression guests get of your home—and it should feel like a warm hug, not a stark hallway. If you’re craving that cozy, rustic vibe but don’t know where to start, you’re not alone. Many people default to minimalist, cold entryways when what they really want is something inviting and textured. The good news? You don’t need a major renovation or a huge budget to create an entryway that makes everyone who walks through your door feel welcome. These 27 ideas blend affordable DIY projects, smart shopping finds, and styling tricks that work for renters and homeowners alike. Whether you’re working with a tiny foyer or a generous landing, you’ll find actionable steps to build a rustic entryway that feels authentically yours.

    1. Layer a Woven Bench with Textured Throws

    A wooden bench serves double duty as seating and a focal point—but it needs the right textures to feel rustic and inviting. Drape a chunky knit throw or linen blanket over the back, then add one textured pillow. This creates visual interest and signals to guests that they can actually sit down and stay awhile.

    Hunt for benches at thrift stores, Facebook Marketplace, or IKEA’s PINNIG collection ($40–$100). Look for unfinished wood or pieces with visible grain and patina. Pair it with throws from Target ($20–$40) or Etsy ($30–$60) in cream, natural fibers, or soft rust tones. The whole project takes 30 minutes to style once you’ve gathered pieces.

    Add a woven basket underneath for storing shoes or scarves—this anchors the setup and adds another layer of texture. Your entryway becomes an instant gathering spot instead of just a pass-through.

    2. Install Shiplap or Shiplap-Style Wallpaper

    Real shiplap transforms a plain wall into a farmhouse-ready backdrop, but the installation takes time and skill. If you’re renting or want a faster fix, shiplap-style wallpaper ($25–$50 per roll from Peel & Stick collections at Amazon or Wayfair) gives the exact same visual effect without commitment.

    Install it on one accent wall above a console table or around your entryway door frame. Application takes 2–4 hours with two people. If you’ve never hung wallpaper, give yourself a full afternoon and watch a YouTube tutorial first—or hire a professional ($150–$300).

    The texture catches light beautifully and ages like real wood, especially if you choose papers with slight color variation or weathered finishes. Your entryway gains instant architectural character and becomes a photo-worthy focal point.

    3. Add a Rustic Wood Coat Rack with Hooks

    Functional style starts with good coat storage—and a rustic wood coat rack does both beautifully. Choose reclaimed or distressed wood from Etsy ($40–$120), Home Depot’s farmhouse section ($30–$100), or salvage local wood pieces yourself if you’re handy.

    Pair it with cast-iron hooks ($2–$5 each at hardware stores) for authentic rustic appeal. Mount it 60 inches from the floor so coats hang without dragging. Installation takes 20–30 minutes with a drill and level. Renter-friendly alternative: use a tension rod with S-hooks or a leaning ladder propped against the wall.

    Suddenly your entryway has a home for everything—keys, bags, scarves, hats. Guests know exactly where to hang their coats, and your floor stays clutter-free. The visual weight of the wood also grounds the space and makes it feel less transitional.

    4. Create a Welcome Bench with Storage Underneath

    If you have the space and budget, a storage bench is the ultimate entryway workhorse. Look for Ottoman storage benches from IKEA, West Elm, or Wayfair ($150–$400). Choose one in natural wood, upholstered linen, or weathered finishes. Make sure the height is 16–18 inches so it’s actually comfortable to sit on while putting on shoes.

    Line the interior with vintage fabric or kraft paper for a rustic feel. Fill it with seasonal blankets, shoe storage, scarves, or guest slippers. This project takes zero minutes if you buy ready-made, or 2–3 hours if you’re building a custom piece from reclaimed wood (DIY kits available on Etsy and YouTube).

    Your entryway becomes organized, functional, and visually grounded. Guests see a thoughtfully designed space, not a dumping ground for coats and shoes.

    5. Hang a Large Rustic Mirror with a Wood Frame

    A large mirror makes tiny entryways feel spacious and bounces light around the room. Choose one with a chunky wood frame in natural, weathered, or whitewashed finishes. Look at Wayfair ($100–$300), Etsy ($80–$250), or thrift stores ($15–$50 for vintage finds).

    Mount it at eye level (57–60 inches from the floor) above a console or dresser. If you’re renting, lean it against the wall on a decorative easel or secure it with heavy-duty picture hangers. Installation takes 15–20 minutes with a level and drill.

    The space opens up visually, and guests see themselves before stepping further inside—a subtle but important detail in hospitality. The texture of the frame adds rustic character even when the mirror does most of the reflecting work.

    6. Paint Your Door a Warm Jewel Tone

    According to 2025 design trends, dark emerald and burgundy are dominating palettes (22% and 20% of designer preference respectively). Your front door is the perfect place to experiment with jewel tones since it’s high-impact but relatively contained.

    Paint it deep emerald, rich burgundy, or dark forest green for rustic warmth. Use exterior-grade paint from Benjamin Moore, Sherwin-Williams, or Behr ($30–$50 per quart). One door takes one afternoon to paint—no experience needed, just tape the frame carefully and use two coats.

    The color creates an instant focal point and signals personality before anyone even steps inside. Pair it with aged brass or black hardware for authentic rustic appeal. Your front door becomes a design statement rather than an afterthought.

    7. Layer Rugs for Texture and Warmth

    One flat rug feels corporate; layered rugs feel intentional and cozy. Start with a larger natural fiber base (jute, sisal, or untreated wool) in cream or tan, then layer a smaller patterned or textured rug on top in rust, forest green, or warm gray tones.

    Search for options at IKEA ($15–$80), Ruggable ($40–$150), Etsy ($50–$200), or Home Depot. Jute rugs are budget-friendly; wool or vintage rugs add heirloom character. Layering takes 5 minutes. Secure the bottom rug with rug pads to prevent slipping.

    The textured layers catch light, add visual interest, and define the entryway space. They also make the area feel warmer underfoot and less harsh—a subtle signal that this is a welcoming threshold, not a utility zone.

    8. Display Potted Plants and Greenery

    Living greenery brings warmth and life to an entryway without cost or commitment concerns (okay, low commitment if you pick hardy varieties). Group 3–5 potted plants of varying heights on a console, shelf, or floor beside a mirror.

    Choose low-maintenance plants like pothos, snake plants, or ZZ plants ($5–$15 each at Lowe’s, Home Depot, or local nurseries). Mix terracotta, ceramic, and woven baskets for visual variety. Watering and placement takes 10 minutes; upkeep is minimal if you pick the right varieties.

    Guests notice greenery immediately—it signals care and life rather than sterile emptiness. Plants also improve air quality as a bonus. The rusticity comes from the variety of pot textures, the natural leaf movement, and the organic feel they bring to an otherwise still space.

    9. Use Vintage Baskets for Shoes and Scarves

    Storage doesn’t have to look organized to feel functional—vintage baskets add rustic character while hiding clutter. Hunt for woven baskets at thrift stores ($5–$20 each), IKEA ($10–$30), Target ($15–$40), or Etsy ($20–$50). Mix sizes, shapes, and materials: seagrass, rattan, woven reeds, and wicker all work.

    Label them with small tags or tags painted with chalkboard paint if you want clarity (optional—the beauty is in the rustic ambiguity). Arrange them on the floor, on a shelf, or stacked for vertical storage. This project takes 15 minutes to gather and position.

    Everything has a home without looking sterile or over-designed. The mixed textures and natural materials create authentic rustic charm, and you can actually use the space for its intended purpose: storing the things people need near the door.

    10. Install Open Shelving Above a Console Table

    Open shelving adds architectural character and gives you room to display rustic decor without breaking the bank. Install 2–3 floating shelves ($40–$100 each from IKEA, Home Depot, or Wayfair) 12–18 inches above a console. Use reclaimed or barn wood for authenticity.

    Installation takes 1–2 hours with a drill, level, and wall studs (or heavy-duty anchors for drywall). Style the shelves with a mix of pottery, small plants, stacked books, vintage finds, and negative space. Aim for a curated-but-lived-in look rather than gallery-perfect.

    Your entryway gains vertical storage and becomes a display space for things you actually love. Guests see personality on those shelves—collections, memories, travels—not just generic decor. The shelves also break up wall space and prevent the entryway from feeling cramped or empty.

    11. Add a Decorative Ladder for Blankets and Hats

    A leaning ladder is functional rustic decor—perfect for displaying blankets, scarves, hats, or lightweight baskets without permanent installation. Find vintage wooden ladders at thrift stores, Etsy ($60–$150), or Facebook Marketplace ($20–$50). Look for pieces with visible weathering or patina.

    Drape chunky knit blankets or linen throws across the rungs, then tuck in rolled scarves, hats, or small baskets. The whole setup takes 10 minutes and requires zero tools. Lean it at a slight angle against the wall (it won’t fall over if you angle it right).

    This adds vertical visual interest and makes your entryway look intentionally styled rather than hastily thrown together. The texture of the wood, blankets, and woven items creates a cozy vignette that actually serves a purpose.

    12. Hang Vintage Hooks Along the Wall

    Mix vintage hooks of different styles, materials, and colors for authentic rustic character. Hunt at thrift stores ($1–$3 each), Etsy ($3–$8), and salvage shops ($5–$15). Porcelain, brass, wrought iron, and ceramic all work together when arranged thoughtfully.

    Stagger them at varying heights (58–68 inches from the floor) for visual interest rather than lining them up perfectly straight. Installation takes 30–45 minutes with a drill, wall studs, and anchors. Paint the wall behind the hooks a soft warm tone (cream, pale terracotta, or sage) to make the hooks stand out.

    Your entryway becomes a curated gallery of functional art. Each hook tells a small story, and the collection feels intentional rather than random. This is especially effective if you’re into vintage collecting—your hooks become part of the display, not hidden hardware.

    13. Create a Rustic Console Table Styling

    A well-styled console table becomes the anchor of your entryway and sets the tone for the whole space. Choose a table in natural wood, reclaimed finishes, or gray-washed tones ($100–$300 from IKEA, Wayfair, West Elm, or thrift stores).

    Style the top with a layered mix: a small mirror leaning behind, one potted plant, 2–3 vintage ceramic pieces or books, and one sculptural object (driftwood, a candle, a brass vessel). Keep one side open for guests to set down keys or phones. Place a basket underneath for out-of-sight storage. Styling takes 20 minutes.

    The console becomes the greeting point—a moment of calm and beauty that says “you’re welcome here.” The mix of heights, textures, and objects feels curated but not fussy, and guests subconsciously register all that intentional thought as hospitality.

    14. Paint an Accent Wall in Warm Earth Tones

    If jewel tones feel too bold, warm earth tones (terracotta, warm ochre, soft tan, or dusty rust) are equally rustic and more forgiving. Paint one wall as an accent to create intimacy without overwhelming the small space.

    Use warm-toned paint from Sherwin-Williams, Benjamin Moore, or Behr ($25–$40 per gallon). Test samples on your wall first—colors shift dramatically depending on your lighting. Painting one wall takes 2–3 hours and requires minimal skill (tape, prime if needed, and apply two coats). Hire a painter for $150–$250 if you want professional results.

    The warm backdrop instantly makes your entryway feel inviting and grounded. It also provides a rich canvas for displays—mirrors, artwork, and plants pop against these tones. Guests feel the warmth immediately upon entry, which is exactly what rustic design is about.

    15. Mix Vintage and New for Authentic Charm

    The “grandma chic” and vintage mash-up trend is huge in 2025—mixing old treasures with new pieces creates authentic rustic warmth. Pair a vintage dresser or chest ($40–$150 from thrift stores or Etsy) with a new upholstered bench ($150–$300) or swap a modern mirror above antique hooks.

    The key is balance: hit 60% vintage and 40% new, or vice versa. Group items by material (wood, metal, woven) rather than era for visual cohesion. This styling approach takes 1–2 hours of thoughtful arrangement, but the payoff is a space that feels collected and intentional rather than matching-set sterile.

    Your entryway becomes a conversation starter. Guests notice the mix of old and new and immediately sense that you’re not following a catalog design—you’re creating something genuinely yours. This approach also means you can update one or two new pieces without scrapping the whole look.

    16. Install Limewashed Walls for Texture

    Limewashing creates rustic architectural texture without looking flat or sterile. The finish has natural color variation and ages beautifully. Apply limewash ($25–$40 for supplies) yourself with a brush for an intentionally imperfect finish, or hire a specialist ($300–$600 for one wall).

    DIY takes 3–4 hours and looks better if you embrace the imperfection. Watch YouTube tutorials for technique—the key is applying in varied layers for authentic texture. The finish is also breathable, making it great for older homes.

    Your entryway gains texture and depth that flat paint can never achieve. Limewashed walls look aged but fresh, creating a European countryside vibe. The finish also hides imperfections better than modern paint, which is a huge bonus if your walls aren’t perfect.

    17. Add Vintage Signage and Typography

    Custom or vintage signs add personality and direction to your entryway. Search Etsy ($25–$80) for hand-painted wooden signs reading “Welcome,” your family name, or a meaningful word. Or DIY one with a wooden board ($10), paint ($5), and stencils ($5).

    Painting or stenciling a sign takes 1–2 hours. Mount it above your console or directly above the entry door at eye level (60 inches from the floor). If renting, lean it against the wall on a decorative stand.

    The sign immediately communicates warmth and intention. Guests know they’re entering a space where people live and love, not just passing through. Signage also draws the eye upward, making the space feel taller and less cramped.

    18. Style Open Shelving with Books and Objects

    Open shelves need intentional styling so they read as curated rather than cluttered. The rustic-maximalist trend of 2025 embraces pattern drenching and intricate details—apply this by mixing stacked books, pottery, plants, and negative space on your shelves.

    Arrange items in groups of three (odd numbers look more natural), stagger heights, and leave breathing room between clusters. Use vintage books in warm tones ($3–$10 each at thrift stores), ceramic vessels ($10–$30), and small potted plants ($5–$15). This styling takes 30–45 minutes but updates instantly if you rotate pieces.

    Your shelves become a display of your taste and interests without looking overdone. The mix of objects, heights, and textures creates visual richness. Guests linger mentally when they see shelves styled this thoughtfully—it signals that your home is a place where beauty and personality matter.

    19. Install Wallpaper on the Ceiling for Drama

    The 2025 trend of wallpaper on ceilings is perfect for rustic entryways. Choose a subtle geometric, botanical, or patterned design in warm tones (cream, tan, rust, forest green). Look at Ruggable, Spoonflower, or Wayfair’s ceiling collections ($30–$80 per roll).

    Hire a professional for installation ($200–$400) unless you’re experienced with overhead wallpaper work. Application takes 4–6 hours depending on ceiling size. Keep walls neutral so the ceiling becomes the focal point.

    This unexpected touch signals sophistication and intentional design. Guests look up (literally) and notice the detail—creating an “oh, I didn’t expect that” moment that makes your space memorable. The patterned ceiling also makes the space feel larger and more defined than a plain white ceiling.

    20. Create a Mudroom Zone with Cubbies

    If you have even a small amount of wall space, cubbies solve the “where does everything go?” problem while looking intentionally designed. Build simple wooden cubbies ($150–$400 in materials for DIY, or $300–$800 for custom installation) or install a system from IKEA or Etsy ($100–$250).

    Line each cubby with a woven basket, label it for family members, and fill with shoes, hats, gloves, and scarves. DIY construction takes one weekend; buying pre-made takes one afternoon to install. Renter-friendly: use over-door organizers or hanging fabric cubbies ($30–$60).

    Every family member has a designated space, and your entryway stays organized and welcoming. The labeled cubbies add personal charm, and visitors immediately understand the system without asking. This functional design move also prevents the “coat pile” chaos that makes entryways feel chaotic.

    21. Layer Textures with Woven Wall Hangings

    Woven wall hangings add organic rustic texture without permanent commitment. Look for macramé wall hangings, woven tapestries, or fiber art on Etsy ($40–$120), Urban Outfitters ($50–$100), or thrift stores ($10–$30).

    Hang one large piece as a focal point above your console, or group 2–3 smaller pieces for more impact. Installation takes 15 minutes with picture hangers. The woven fibers catch light beautifully and create depth.

    The natural materials instantly elevate your entryway aesthetic. Guests see craftsmanship in the weaving, which signals that you value thoughtful, handmade things. The texture also softens the hard edges of walls and floors, making the space feel warmer.

    22. Add a Vintage Mirror with Distressed Finish

    A distressed mirror adds rustic character and bounces light, making tight spaces feel more open. Hunt for heavily distressed or whitewashed mirrors at thrift stores ($15–$50), Wayfair ($80–$200), Etsy ($60–$150), or Pier 1 if available locally.

    Choose irregular, weathered finishes over uniform distressing—the imperfection is the point. Mount at eye level (57–60 inches from the floor). Installation takes 15 minutes.

    The weathered frame adds visual interest even when you’re not looking in the mirror. The reflection itself makes your entryway feel larger and brighter, while the rustic finish keeps it warm rather than cold. This is especially valuable in dark entryways or spaces without windows.

    23. Hang Vintage Brass or Iron Sconces

    Vintage lighting adds warmth and functionality to a rustic entryway. Find brass or iron sconces at Etsy ($50–$150 each), thrift stores ($10–$40), or Anthropologie ($100–$200).

    Install one on each side of a mirror or doorway for balanced visual weight. Electrical work takes 1–2 hours if you’re comfortable with wiring, or hire an electrician ($100–$200 per sconce). Renter-friendly option: use battery-operated sconces ($30–$60) with no wiring required.

    The warm glow of vintage sconces creates instant ambiance. Guests feel welcomed by the lighting, which is psychologically linked to hospitality. The aged brass or iron also adds architectural character that modern lighting can’t match.

    24. Display a Collection of Vintage Pottery

    Rustic design celebrates handmade objects, and a collection of vintage pottery is the perfect vehicle for that. Thrift stores, Etsy, pottery studios, and estate sales have endless options ($5–$40 per piece). Look for cream, rust, or earth-toned ceramics with visible glazing imperfections—these add character.

    Arrange in groups of 3–5 pieces, clustering by color or shape. Leave breathing room so each piece reads individually. Display on shelves, console tops, or floor groupings. This curating takes 30–45 minutes but creates a focal point that speaks volumes about your taste.

    A pottery collection signals that you appreciate handmade, imperfect beauty. Guests notice the individual pieces and often ask about them—conversation starters are welcome in rustic entryways. The display also ages beautifully; you can add pieces over time.

    25. Create Contrast with Bold Trim Painting

    Contrasting trim creates rustic architectural interest without major renovation. Paint your walls one color (cream, soft white, warm tan) and your trim, baseboards, and doorframes in a darker tone (forest green, charcoal, deep navy, or rich brown).

    Use quality trim paint from Benjamin Moore or Sherwin-Williams ($25–$40 per quart). Prep takes 2–3 hours; painting takes 1–2 hours. This is slightly more involved than wall painting but doable for most skill levels. Hire a painter for $300–$600 if you want perfection.

    The contrast immediately reads as intentional and high-end. Trim becomes architecture rather than invisible background. This strategy also makes the space feel more defined and finished, even if everything else is minimal.

    26. Layer Vintage Textiles as Wall Hangings

    Textile wall hangings add warmth, pattern, and rustic texture without the commitment of wallpaper. Hang vintage kilim rugs, linen fabrics, or woven blankets ($20–$80 each from thrift stores, Etsy, or specialty shops) as living art.

    Use simple wooden rods and brackets ($10–$30 per rod) or hang fabrics directly to the wall using painter’s tape and picture hangers for renter-friendly installation. Arrangement takes 30–45 minutes. Rotate seasonally to refresh the look.

    The layered textiles create visual richness and warmth. Each piece tells a story—travel, heritage, craft—which makes the entryway feel like a collected home rather than a decorated showroom. The patterns also hide wall imperfections and break up large blank walls.

    27. Install a Natural Wood Ceiling Beam

    A ceiling beam—real or faux—creates instant rustic character and architectural drama. Real exposed beams cost $500–$2,000+ and require professional installation. Faux beams ($100–$300 from IKEA, Home Depot, or Wayfair) look surprisingly authentic and are DIY-installable in 2–4 hours with a drill and fasteners.

    Real or faux, choose honey-toned wood or weathered finishes. Mount horizontally across your entryway or above the doorway for maximum visual impact. Renter-friendly: lean a decorative beam against the wall above your console (won’t work for all spaces, but adds temporary character).

    A ceiling beam draws the eye upward, making the space feel taller and more architecturally interesting. It also signals craftsmanship and intentional design. Even a faux beam fools the eye convincingly and costs a fraction of real renovation.


    Ready to warmth-up your entryway? Save this post and pick one idea that speaks to you—start with something small like a new mirror or basket setup, then layer in more texture over time. Which idea are you trying first?

  • 25 Arched Door Frame Concepts That Add Classic Architectural Charm

    25 Arched Door Frame Concepts That Add Classic Architectural Charm

    Arched door frames do something special—they add instant architectural character that transforms an ordinary entryway into a focal point worthy of admiration. Whether you’re updating a tired entry, refreshing an interior doorway, or planning a new build, arched frames offer timeless elegance that works with nearly any design style. The good news? You don’t need a complete renovation to add this classic touch. We’ve gathered 25 achievable concepts ranging from simple trim upgrades to statement-making architectural features. Each idea includes realistic pricing, DIY options, and styling tips so you can choose what works for your space and budget. Let’s explore how to bring architectural charm into your home, one arched frame at a time.

    1. Paint Arches a Contrasting Accent Color

    A fresh coat of paint on your arch creates drama without structural work. This budget-friendly hack costs just $15–$40 for quality paint and a small brush, taking only an afternoon to complete. Choose a color that contrasts with your walls—deep forest green, charcoal, or matte black all photograph beautifully and draw the eye upward.

    Apply painter’s tape carefully along the arch curve, then use a small angled brush for precision. A second coat ensures rich color. The result? Your arch becomes an architectural statement piece that costs less than dinner out. This works beautifully for renters too—just ask about semi-permanent paint or plan a touch-up when you move.

    2. Add Decorative Crown Molding Along the Arch

    Crown molding traces your arch’s curve and adds instant sophistication. Pre-made curved molding runs $50–$150, while installation takes a weekend if you’re comfortable with basic carpentry—or hire a pro for $200–$400. The payoff? Your arch looks professionally designed and dramatically more polished.

    Measure your arch carefully and order flexible or pre-curved molding that matches your style. Paint or stain it to coordinate with your trim. The curves catch light beautifully, adding depth and visual interest. If DIY feels risky, hiring a handyperson is worth the investment for flawless results. Your entry gains a custom, high-end appearance that guests notice immediately.

    3. Install Arched Shiplap Inside the Frame

    Shiplap-lined arches create cozy, farmhouse-inspired charm with excellent texture and visual interest. Material costs run $40–$100 for a standard doorway, plus a weekend for installation. This project is moderately challenging but totally achievable for confident DIYers with basic tools.

    Cut shiplap pieces to follow your arch’s curve (a jigsaw helps here), then secure with finishing nails and wood glue. Paint everything white or a soft neutral for cohesion. The horizontal lines draw focus upward, making your entry feel intentional and styled. Light reflects off the texture beautifully in photos and real life. This works particularly well for cottage or rustic aesthetics.

    4. Create a Faux Arch with Trim and Paint

    No actual arch? Build one with clever trim work and paint. For $30–$80 in materials and a few hours of work, you can sketch an arch design, install curved trim pieces, and paint to create dimensional illusion. This hack works surprisingly well and requires only basic DIY skills.

    Use flexible trim or segment straight pieces to trace your desired arch curve. Secure with finish nails and wood filler to cover gaps. Paint the interior arch and trim a unified color to enhance the 3D effect. Highlight with subtle shadow or shading for extra depth. Guests will think it’s architectural—you’ll know it’s clever design on a budget.

    5. Frame Your Arch with Matching Sidelights

    Arched doors paired with flanking sidelights create luxury entry presence. Sidelight installations run $400–$1,200 depending on glass quality and size, plus $200–$500 for professional installation. This investment significantly boosts curb appeal and natural light. Hire a professional for accurate measurements and weatherproof sealing.

    Choose frosted or clear glass depending on privacy needs. The visual balance of an arch with symmetrical sidelights feels formal and welcoming. Your entry gains the high-end look typically seen in $500K+ homes. If budget is tight, consider this a long-term investment—potential home buyers notice quality entry features.

    6. Install Recessed Lighting Inside the Arch

    Uplighting your arch creates drama and makes the feature pop after dark. Recessed lights cost $30–$80 per fixture; plan for 2–4 depending on arch size. Professional installation runs $150–$300. The theatrical effect is absolutely worth the investment for both aesthetics and wayfinding.

    Hire an electrician to run wiring safely inside the wall cavity and position lights to graze the arch curve. LED bulbs (warm white, 2700K) provide ambiance without heat or high electric bills. Your arch glows beautifully in evening photos, and visitors feel welcomed by the intentional lighting. This elevates your entry to boutique-hotel quality.

    7. Apply Gold Leaf Detailing Along the Arch Edge

    Gold leaf adds luxury and glamour without renovation expense. Kits cost $20–$40, and the project takes 2–3 hours. Results look expensive and photograph beautifully—perfect for statement entries or formal living areas. This DIY project requires patience but no special skills beyond following instructions carefully.

    Prep your arch surface, apply adhesive sizing, then carefully apply thin gold sheets following the curve. Seal with matte varnish to prevent tarnishing. The subtle shimmer catches light and adds refinement. Your arch becomes a conversation piece that guests admire. This pairs gorgeously with matte black or navy paint.

    8. Hang Decorative Wrought Iron Over the Arch

    Wrought iron adds romantic, Old World character while staying open and airy. Decorative iron pieces run $80–$250 installed above your arch. This styling choice suits Mediterranean, Spanish Colonial, or traditional homes beautifully. Installation takes just an hour once you’ve chosen your piece.

    Search “wrought iron arch toppers” at Etsy, Home Depot, or specialty iron shops. Choose designs with scrollwork that complements your door style. The iron becomes architectural jewelry that frames your entry elegantly. Guests perceive your home as thoughtfully designed and architecturally significant.

    9. Build a Bookshelf Alcove Inside Your Arch

    Transform your arch into functional, beautiful display space. Custom alcove shelving runs $150–$400 depending on depth and materials. This moderate DIY project takes a weekend and requires basic carpentry skills. The payoff? A charming built-in that adds architectural depth and character.

    Build shallow shelves (6–8 inches deep) within or just below your arch, then style with books, plants, and meaningful objects. Paint shelves to match trim or contrast subtly. Your arch becomes a functional focal point rather than purely decorative. This works beautifully in hallways, bedrooms, or living rooms seeking more character.

    10. Add Ornamental Corbels Beneath the Arch

    Corbels add classical support and visual weight to your arch. Pairs cost $40–$120, plus $50–$150 for installation. They work whether your arch is structural or decorative, and they’re available in countless styles from ornate to minimal. Installation takes an hour or two for a confident DIYer.

    Choose corbels that echo your arch’s aesthetic—carved wood for traditional, simple geometric forms for modern, scrolled iron for romantic. Paint or stain to coordinate with existing trim. Corbels create the illusion of structural support and add Old World charm. Your entry suddenly looks like it belongs in a design magazine.

    11. Paint a Trompe-l’Oeil Shadow Beneath the Arch

    Trompe-l’oeil (fool the eye) shadow painting adds sophisticated depth using only paint. Supplies cost $15–$30, and the project takes 3–4 hours. This advanced DIY project looks professional when executed carefully and utterly transforms your arch’s presence.

    Use charcoal or soft gray paint mixed at varying opacity levels. Apply along the arch’s underside and sides to create shadow depth. Blend carefully with a dry brush for naturalistic effect. Photograph your finished arch in different lighting—the dimension is stunning. This technique works beautifully with minimalist or contemporary interiors seeking subtle refinement.

    12. Install a Curved Glass Panel Insert

    Glass inserts modernize classic arches while maintaining elegance and allowing light flow. Custom curved glass costs $200–$500, plus installation. This works beautifully for interior doors needing privacy-with-openness balance. Professional installation ensures proper sealing and safety.

    Choose clear glass for maximum light, frosted for privacy, or textured for visual interest. The glass arch catches light beautifully throughout the day. Your space feels simultaneously open and intentionally defined. This update works for contemporary, transitional, or minimalist aesthetics seeking functional beauty.

    13. Add Floating Shelves Flanking Your Arched Entry

    Flanking shelves create symmetry and functional styling space without crowding your arch. Two 24-inch shelves cost $60–$150, plus $50–$100 for installation. This easy addition takes an afternoon and instantly adds sophistication and visual interest to your entry.

    Mount shelves at matching heights on both sides of your arch, approximately 12–18 inches out from the frame. Style with personal objects, plants, and artwork that complement your aesthetic. The symmetry draws eyes to your beautiful arch while adding functionality. This works particularly well in hallways or living rooms with blank flanking walls.

    14. Frame Your Arch with Architectural Wallpaper

    Wallpaper within your arch adds pattern and personality with zero structural work. Quality wallpaper runs $20–$60 per roll, plus 2–3 hours for application. This renter-friendly update creates major visual impact and photographs beautifully. Choose patterns that complement your overall aesthetic—geometric, damask, botanical, or abstract all work.

    Prep your arch surface carefully, then apply wallpaper following the curve. Trim edges precisely. The patterned arch becomes a focal point that grounds your entire entry aesthetic. When you move, removal is straightforward (choose removable options for peace of mind). Your arch gains personality and design intentionality instantly.

    15. Install Vintage Sconces Flanking the Arch Base

    Sconces add functional light and dramatic symmetry. Pairs cost $60–$200, plus $100–$200 for electrical installation if adding new circuits. This investment adds both aesthetic and practical value. Professional installation ensures safe wiring and secure mounting.

    Choose sconces that echo your arch’s design language—traditional brass for classic arches, sleek metal for contemporary styles, ornate iron for romantic aesthetics. The symmetrical lighting frames your arch beautifully and creates welcoming ambiance. Evening photos and real-life experience both improve significantly. This feels like a luxury hotel entrance.

    16. Create a Curved Ceiling Detail Above Your Arch

    Mirroring your arch curve in the ceiling above creates architectural unity and sophistication. Custom curved drywall or soffit runs $500–$1,500 depending on complexity. This professional installation takes 3–5 days but creates stunning spatial flow and cohesion. Hire an experienced drywall contractor for best results.

    Work with a contractor to design ceiling curves that echo your arch’s proportions. Finishing and painting take additional time but complete the integration beautifully. Your entire entry feels professionally designed and architecturally considered. The ceiling curve creates visual movement and elegance that elevates your entire home’s perception.

    17. Stain Your Arch a Rich Contrasting Wood Tone

    If your arch is wood, restaining creates drama without replacement expense. Stain costs $15–$30, and the project takes one afternoon. This easy update works beautifully for transitioning from light to dark color schemes or refreshing tired existing wood. Basic DIY skills suffice—just follow stain instructions carefully.

    Sand the arch lightly to remove existing finish, apply stain in thin coats following wood grain direction, then seal with matte or satin varnish. The contrasting wood tone creates visual interest and sophistication. Your arch becomes a design anchor for the entire entry. This simple update often looks like a major renovation to guests.

    18. Mount a Statement Mirror Inside Your Arch

    An arched mirror hung within or opposite your arch creates visual drama and amplifies light. Decorative arched mirrors cost $80–$300. This renter-friendly styling choice works beautifully in entryways, hallways, or living room entry walls. No installation needed—just hang and enjoy.

    Choose a mirror that echoes your arch’s proportions for maximum visual impact. Position to reflect natural light and make spaces feel larger. The mirrored arch creates depth and elegance while serving practical purpose. Guests often comment on how bright and spacious your entry feels. This single styling choice elevates your entire space’s perception.

    19. Add Beadboard Wainscoting Around Your Arch

    Beadboard adds cottage charm and textural interest. Panels cost $40–$100, plus $75–$200 for installation. This project takes a weekend and creates authentic architectural character that works beautifully in traditional, farmhouse, or cottage-inspired homes. Basic carpentry skills help, but many DIYers accomplish this successfully.

    Measure your space carefully and cut beadboard to fit around your arch base. Secure with finish nails and wood filler, then paint. The vertical detailing makes ceilings appear taller while adding warmth and personality. Your arch becomes part of a cohesive, intentionally designed entry rather than an isolated feature.

    20. Install Decorative Tile Inside the Arch

    Decorative tilework adds Mediterranean or Spanish Colonial charm. Quality tile costs $50–$150 per linear foot, plus $100–$300 for professional installation. This moderate investment creates stunning visual impact and works beautifully for homes with ethnic or global design influences. Professional installation ensures proper setting and longevity.

    Work with a tile specialist to design your pattern and create a template matching your arch’s curve. Installation requires precision but looks absolutely professional. The patterned tile becomes a natural focal point that guests admire. Your arch gains personality and cultural design richness.

    21. Create a Neon Glow Along the Arch Interior

    Neon adds trendy, contemporary edge to classic arches. Custom neon installations cost $200–$600. This statement-making choice works beautifully in modern, eclectic, or maximalist interiors. Professional neon shops handle custom fabrication and safe installation.

    Choose warm white or subtle color (pale pink, soft blue) that complements your space without overwhelming. Neon glows beautifully in evening photos and creates unique visual interest. Your arch becomes a design conversation piece that reflects contemporary aesthetic sensibility. This works particularly well for creative homes, studios, or forward-thinking interiors.

    22. Paint a Subtle Ombré Effect Across Your Arch

    Ombré painting creates artistic, sophisticated depth without dramatic contrast. Paint costs $20–$40; project time is 4–5 hours. This moderate DIY project looks complex but follows straightforward technique and creates gallery-worthy results. Patience and careful blending create the magic.

    Choose two or three coordinating colors and blend with dry-brush technique moving gradually across your arch. Work slowly, allowing colors to merge naturally. Photograph the finished arch in different lighting—the depth is gorgeous. This artistic touch works beautifully in modern, eclectic, or creative homes seeking distinctive character.

    23. Install a Sliding Barn Door Within Your Arch

    Barn doors add rustic functionality while maintaining your arch’s visual impact. Sliding door hardware and door panel cost $150–$400, plus 3–4 hours for installation. This moderate DIY project creates stunning farmhouse-contemporary character and functional space division without major construction.

    Mount your barn door track securely above the arch opening, then hang the door panel. Choose wood grain or metal styles coordinating with your aesthetic. The door glides smoothly while your arch remains visible and beautiful. This hybrid approach combines architectural elegance with practical functionality and trendy farmhouse style.

    24. Embed Rope or Cord Lighting Along the Arch Curve

    Rope lighting adds warmth and ambiance without permanent installation. LED rope light kits cost $25–$60. This renter-friendly, plug-in option takes 30 minutes to install and creates immediate atmospheric transformation. Perfect for those hesitant about permanent upgrades.

    Clean your arch surface, apply adhesive rope light strips following the curve, then plug into nearby outlet. Warm-white bulbs (2700K) create cozy ambiance; cooler tones feel more contemporary. Your arch glows beautifully in evening hours and photographs wonderfully. This affordable update feels like intentional atmospheric design.

    25. Commission Custom Carved Wood Details for Your Arch

    Custom carvings add bespoke artistic character and luxury. Professional wooden carvers charge $400–$1,500+ depending on complexity. This investment creates truly one-of-a-kind architectural detail that increases perceived home value significantly. Commission work typically takes 4–8 weeks.

    Work with a skilled woodcarver to design custom details reflecting your aesthetic and home’s architectural period. Floral motifs suit traditional homes; geometric patterns complement contemporary spaces. Carved details catch light beautifully and become conversation pieces guests admire closely. Your arch becomes personalized architectural art.

    26. Add Architectural Plaster Molding with Historic Details

    Plaster molding recreates historic architectural grandeur beautifully. Ornamental plaster pieces cost $100–$300, plus $150–$400 for professional installation. This investment creates authentic period character for historical homes or anyone seeking sophisticated classical detail. Installation requires skilled craftspeople for best results.

    Choose molding patterns that echo your home’s architectural period—Victorian, Georgian, Greek Revival, or Neoclassical designs all work beautifully. Professional installation ensures proper placement, adhesion, and finishing. Your arch becomes a refined architectural statement that guests perceive as original to the home. Paint to match trim for seamless integration or leave natural plaster for texture and patina.


    SAVE THIS POST for your next entryway refresh. Pick just one idea from this list and tackle it this weekend—you’ll be amazed how an arched frame transforms your entire entry’s character and curb appeal. Which concept speaks to you?

  • 25 Stylish Door Ideas That Instantly Upgrade Your Home’s Look

    25 Stylish Door Ideas That Instantly Upgrade Your Home’s Look

    Your front door is the first thing people see—and the first thing you see every morning. But here’s the thing: small tweaks to your entryway, interior doors, and hardware can completely shift how your entire home feels. Whether you’re renting, own a cozy apartment, or have a sprawling house, there are door upgrades that work for your space and budget. From bold color choices to smart hardware swaps to clever glass solutions, we’ve rounded up 25 actionable ideas that range from free styling tricks to investment pieces worth every penny. Pick one, try it this weekend, and watch how much difference one small element can make. Let’s dive in.

    1. Paint Your Front Door Matte Black for Sleek Drama

    Matte black doors deliver instant sophistication without screaming “look at me.” The finish absorbs light rather than reflecting it, creating depth and making your entryway feel intentional.

    Start with a quality exterior paint like Sherwin-Williams Urbane Bronze or Benjamin Moore Black Panther—these are formulated to resist fading and weathering. Prep your existing door by cleaning, sanding lightly, and priming if needed. Budget: $30–$60 for paint and primer. The application takes 2–3 hours (including drying between coats), and it’s totally doable as a weekend DIY. If your door has ornate detailing you want to preserve, matte black shows off texture beautifully.

    The payoff is huge—suddenly your entrance looks curated and modern, and it works with nearly any home style. Your guests will notice the refinement immediately.

    2. Swap Standard Hardware for Brushed Gold Handles

    Hardware is jewelry for your door—and brushed gold is having a major moment. It’s warm, unexpected, and feels more expensive than it actually is.

    Replace your builder-grade brass or chrome knobs with brushed gold versions from Wayfair, Amazon, or specialty brands like Rejuvenation (prices range $25–$80 per handle). For renters, adhesive-backed hardware switchers exist, though permanent installation is stronger. Installation takes 15 minutes with a screwdriver; just unscrew the old handle and screw in the new one. The trick is matching your door style—lever handles work for contemporary doors, while knobs suit traditional spaces.

    This single swap makes your door look intentional and designer-approved. Visitors will assume you’ve done way more to your space than you actually have.

    3. Go Bold with Forest Green or Navy Statement Doors

    Dark jewel tones like forest green or navy create drama without the heaviness of black. They photograph beautifully and signal that you have taste.

    Benjamin Moore’s “Calico Green” or “Gentleman’s Gray” (which leans navy) are Pinterest darlings. Paint runs $25–$40, and the application is identical to matte black: 2–3 hours plus drying time. Jewel tones work especially well on homes with classic architecture—they feel timeless rather than trendy. Pair with brass or bronze hardware to amplify the luxury feel.

    Your entryway becomes a focal point that makes people stop and actually see your home. It’s the kind of decision that feels brave but reads as design-forward.

    4. Install Minimalist Frameless Glass Doors for Clean Separation

    Frameless glass doors look like they’re floating—they blend into walls while creating clear spatial division. Perfect for open-concept homes that need subtle room breaks.

    Glass door kits from IKEA ($150–$250) or specialized glass door suppliers are renter-friendly options that bolt to existing frames. Permanent installation runs $400–$800 and requires a professional. The magic is in the lack of visible frame—it maximizes light and views while maintaining privacy through frosted or textured glass options. Cleaning is easy with a microfiber cloth and glass cleaner.

    You get spatial definition without closing off your home. Rooms feel bigger, light flows freely, and the effect is undeniably modern.

    5. Add Sidelights to Oversized Doors for Symmetrical Grandeur

    Sidelights transform an ordinary entry into something memorable. They flood your hallway with natural light while framing the door beautifully.

    Retrofit sidelights require professional installation ($800–$2,000) and aren’t renter-friendly, but the investment is worth it if you own. For renters, decorative sidelight decals ($15–$30) mimic the look. The real upgrade comes from pairing sidelights with an oversized single-slab door—it’s the modern luxury entry that costs less than you’d think if you DIY the door and hire a pro for glass work.

    Your entrance becomes architectural. Guests feel welcomed the moment they approach, and your hallway gets a brightness boost all day long.

    6. Use Textured Metal Finishes for Tactile Luxury

    Textured finishes—brushed metal, hammered brass, embossed surfaces—add depth that smooth finishes can’t match. They’re tactile, photogenic, and feel intentional.

    Seek out brushed stainless steel, hammered bronze, or powder-coated metal handles from Design Within Reach, Schoolhouse Electric, or Anthropologie ($40–$120 per handle). Installation is 15 minutes with basic tools. The texture catches light differently depending on time of day, so your door literally changes throughout the day. Pair with matte finishes on the door itself to avoid competing shines.

    You get visual interest and a sensory experience every time you touch the hardware. It’s a small detail that reads as high-end craftsmanship.

    7. Paint Interior Doors in Jewel Tones for Unexpected Drama

    Interior doors are forgotten real estate. Painting them in jewel tones creates visual intrigue without major renovation.

    Choose Benjamin Moore, Farrow & Ball, or Sherwin-Williams jewel-tone options like “Calypso Green” or “Gentleman’s Gray” ($25–$40 per can). Interior paint dries faster than exterior, so 1–2 hours per door is realistic. Prep is key: clean, sand, and prime for best adhesion. A single door takes one can; multiple doors might need two depending on coverage.

    Suddenly your hallway feels curated and intentional. Visitors notice the confidence in your color choices, and it costs virtually nothing compared to replacing doors.

    8. Choose Reclaimed Wood Doors for Eco-Luxury

    Reclaimed wood doors combine sustainability with undeniable character. No two are identical, and they often feature hardware salvaged from their original use.

    Search Etsy, local salvage yards, or specialty reclaimed wood retailers for authentic pieces ($300–$1,200+). Installation typically requires professional help ($200–$400). The payoff: a door with history, lower manufacturing emissions (reclaimed wood reduces production impact by nearly 40%), and conversation-starting beauty. Pair with modern hardware to bridge rustic and contemporary styles.

    You’re investing in something genuinely unique that gets better with age. It’s also a climate-conscious choice that feels anything but preachy.

    9. Install Crittall-Style Glass Doors for Industrial Charm

    Crittall-style doors—slim metal frames with large glass panels—maximize light while channeling industrial sophistication. They’re the sweet spot between privacy and openness.

    Authentic Crittall doors run $800–$2,000+, but excellent reproductions from Wayfair or specialist suppliers cost $300–$700. Installation depends on whether you’re retrofitting (professional only, $400–$800) or using a kit for existing frames. The appeal is the contrast: delicate frames against bold glass. Works beautifully for home offices, room dividers, or creating visual connection between spaces.

    Light flows through effortlessly while you maintain privacy. It’s the kind of choice that makes a rental or modest home look intentionally designed.

    10. Apply Frosted Glass Film for Privacy Without Losing Light

    Frosted film gives you privacy and light simultaneously—and it’s totally removable for renters. It’s one of the smartest budget hacks available.

    Buy frosted glass film from Amazon, Home Depot, or Etsy ($15–$40 per roll) and apply it to existing glass doors following the included instructions. Installation takes 20–30 minutes and requires only a spray bottle and squeegee. No permanent adhesive; it peels off cleanly. For maximum impact, apply to interior doors or bathroom/bedroom windows where privacy matters most.

    You get bathroom-level privacy on any glass door for less than a coffee subscription. It’s renter-friendly, reversible, and honestly one of the best small investments you can make.

    11. Paint Double Doors for Maximum Impact Entry

    Double doors double the drama. Painting both in a cohesive color creates an architectural moment that reads as luxury.

    Choose a color and execute as you would a single door, but apply to both panels for visual impact ($40–$60 total for paint, 3–4 hours). Symmetrical hardware matters here—matching handles on each door is essential. The trick is committing to the color on both doors; if you’re nervous, test on one door first.

    Your entryway becomes gallery-quality. The symmetry is inherently satisfying, and visitors feel the intentionality immediately.

    12. Upgrade to Energy-Efficient Glass Doors and Windows

    Energy-efficient glass reduces your heating and cooling costs while cutting your home’s carbon footprint. It’s an investment that pays for itself over time.

    Quality energy-efficient doors from Andersen, Pella, or Marvin run $800–$2,000 installed, but rental-friendly thermal door inserts ($50–$150) work too. Professional installation takes one day, and the payoff is measurable: expect 15–25% energy savings depending on your climate. Look for “Low-E” coatings and dual-pane glass.

    Your utility bills drop, your home stays more comfortable, and you’re making a climate-smart choice. Long-term owners see ROI within 5–10 years.

    13. Use Geometric Handle Designs for Bold Personalization

    Geometric handles inject personality without being loud. They’re sculptural, modern, and surprisingly affordable.

    Hunt for geometric designs on Wayfair, DWR, or independent designers on Etsy ($30–$100 per handle). Installation is standard screwdriver work (15 minutes). Geometric pieces work best on minimalist doors—too much competing pattern reads as chaotic. Pair with solid-color doors in black, white, or jewel tones for maximum impact.

    Your door becomes a subtle design statement. It’s the kind of detail that makes people realize you’ve thought about every element.

    14. Paint Interior Doors White for Clean Minimalism

    White doors create seamless flow and make spaces feel larger. It’s minimalism at its simplest and most effective.

    Use Benjamin Moore Swiss Coffee or Sherwin-Williams Alabaster (soft whites that don’t look sterile) in a semi-gloss or satin finish for easy cleaning. Budget $20–$35 per door for paint, 1–2 hours per door. Semi-gloss hides imperfections while remaining practical for high-traffic areas. Apply two coats for even coverage.

    Your hallway gains visual spaciousness. Rooms feel connected rather than compartmentalized, and the effect is effortlessly curated.

    15. Install Powder-Coated Metal Doors for Coastal Durability

    Powder-coated metal resists rust, salt spray, and moisture—essential for coastal living or humid climates. It’s the practical choice that doesn’t compromise on style.

    Specialty coastal door suppliers offer powder-coated options ($600–$1,500). Installation is professional work ($300–$600). The coating creates a hard, durable finish that lasts decades without chipping or fading. Colors range from soft grays to deeper tones. Maintenance is virtually nonexistent—just rinse with fresh water occasionally.

    Your door stands up to harsh conditions while looking intentional. Coastal homeowners especially see the payoff in longevity and zero rust concerns.

    16. Add Monochrome Black & White Design for Timeless Appeal

    Monochrome schemes—black doors on white trim or vice versa—never feel dated. The contrast is visually striking and works with any home style.

    Paint your door in one color and ensure trim is the opposite. Use Benjamin Moore Chantilly Lace (white) with Black Panther (black) or similar high-contrast pairs ($30–$50 total, 2–3 hours). The key is crisp, clean lines; any fuzziness between colors reads as unfinished. Use painter’s tape for precise edges.

    Your entryway gains architectural clarity. The simplicity is sophisticated, and it photographs beautifully from any angle.

    17. Choose Pastel-Toned Doors for Soft Contemporary Vibes

    Pastel doors like dusty pink, sage green, or soft blue are having a major moment. They’re bold without being aggressive, offering personality while maintaining calm.

    Popular pastels include Farrow & Ball “Calluna” (mauve), “Book Room Blue,” or “Pigeon” ($25–$40). Pastels show imperfections more than darker colors, so prep your surface carefully. Budget 3–4 hours including drying time. Pair with white or cream trim to let the pastel breathe.

    Your entry becomes a personality beacon. It signals confidence in color without commanding the room—a subtle form of self-expression.

    18. Install Smart Locks for Tech-Forward Security

    Smart locks offer convenience and peace of mind. Keyless entry means no fumbling for keys, and remote access is genuinely useful.

    Brands like Level Lock, August, or Yale run $100–$300, and most are easy DIY installs (20–30 minutes with an electric drill). Some integrate with your phone or voice assistants. Renter note: some models retrofit into existing locks without permanent changes. The security features—activity logs, temporary codes for guests—are surprisingly comforting.

    You never wonder if you locked the door. The convenience becomes addictive, and the security layer is substantial.

    19. Layer Textured Wallpaper Around Entry Doors for Subtle Drama

    Wallpaper around doorways creates an unexpected design moment. It frames the door while adding dimension to flat walls.

    Removable wallpaper from Spoonflower, Peel & Stick sites, or traditional wallpaper runs $30–$80 per roll. Focus on one accent wall or doorway to avoid overwhelming the space. Application takes 1–2 hours and doesn’t require primer if using peel-and-stick. Choose textured patterns like grasscloth or embossed botanicals for visual interest that photographs beautifully.

    Your hallway gains gallery-quality detail. It’s the kind of layered thinking that makes spaces feel intentionally designed rather than default.

    20. Use Barn Doors for Rustic-Modern Charm

    Barn doors slide rather than swing, saving space while adding farmhouse-meets-modern appeal. They’re conversation starters with genuine functionality.

    DIY barn door kits from IKEA, Home Depot, or specialty shops cost $150–$400 installed yourself. Professional installation runs $300–$600. The hardware does most of the visual heavy lifting—choose matte black for modern appeal or aged brass for traditional. Ensure your wall can support the weight before committing.

    Your bedroom or closet gains architectural interest. The sliding motion is satisfying, and it’s often more practical than swinging doors in tight spaces.

    21. Paint Doors in High-Gloss Finish for Luxury Shine

    High-gloss doors amplify luxury and create visual interest through reflection. They’re bold but undeniably striking.

    Use premium gloss paint like Benjamin Moore or Sherwin-Williams Emerald line ($40–$60). Preparation is critical—sand the surface smooth, apply primer, and use quality brushes to avoid brush strokes. Budget 3–4 hours plus extra drying time for glossy finishes. The shine intensifies jewel tones and creates depth that matte finishes can’t achieve.

    Your door becomes art. Light dances across it throughout the day, and the shine signals deliberate design choices.

    22. Install Brass or Copper Hardware for Warm Vintage Appeal

    Brass and copper hardware bring warmth and a cottage-core sensibility. Vintage-inspired handles feel timeless without being dated.

    Find authentic or reproduction brass/copper hardware on Etsy, Anthropologie, or specialty hardware sites ($30–$100 per handle). Installation is standard (15 minutes). These metals develop patina over time—some people love the aged look, others prefer shiny. Choose based on your desired aesthetic and maintenance preferences.

    Your door gains warmth and character. Brass works especially well with natural wood doors or vintage-inspired interiors, creating a cohesive, intentional look.

    23. Use Bamboo Doors for Sustainable, Contemporary Appeal

    Bamboo is a genuinely sustainable material—it’s fast-growing, captures carbon, and looks undeniably modern. It’s eco-friendly without sacrificing style.

    Bamboo doors from suppliers like Architectural Depot or specialty eco-brands run $300–$800. Installation typically requires professional work ($200–$400). The appeal is environmental credibility combined with visual warmth. Bamboo has visible grain that’s more interesting than many hardwoods, and it’s surprisingly durable.

    You’re making a climate-conscious choice that reads as design-forward. Bamboo brings natural warmth and authenticity to modern spaces.

    24. Create Contrast with Solid Doors Against Glass Walls

    Solid doors paired with glass walls create visual drama through contrast. One anchors the space while the other maintains airiness.

    Paint or stain a solid wood door in a bold color ($25–$40 for paint, or solid doors run $200–$600), then frame it with glass walls or Crittall-style dividers. The contrast is inherently photogenic and creates clear spatial definition. Installation varies by situation, but the principle is about deliberate visual balance.

    Your space gains sophisticated composition. The eye moves across the mix of solid and transparent surfaces, creating depth and intentionality.

    25. Use Leather or Fabric-Wrapped Hardware for Ultra-Personalization

    Leather or fabric-wrapped handles offer ultra-personalized tactile luxury. They’re rare, custom, and genuinely luxe-feeling.

    Commission custom wrapped handles from independent makers on Etsy or specialist metalworkers ($80–$200 per handle, custom). Alternatively, wrap existing handles with leather strips or linen using contact adhesive (DIY: $10–$20, 30 minutes per handle). The wrapped texture feels expensive and personal—no two are quite identical if hand-wrapped.

    Your door becomes genuinely one-of-a-kind. Every time you touch it, you feel the quality and intentionality. It’s a subtle luxury that only you and close visitors will appreciate—but that’s part of the appeal.

    26. Paint Exterior Door Frames in Contrasting Colors for Graphic Impact

    Painted door frames create graphic depth and frame your door like art. It’s a detail most people miss but that completely transforms your entry.

    Paint your door frame in a complementary or contrasting color to your door using exterior-grade paint ($25–$40). White frame + black door or sage frame + cream door are popular combinations. Application takes 2–3 hours and requires careful edging with painter’s tape. This works whether your door is painted or stained wood.

    Your entry becomes architectural and intentional. The framed effect makes your door feel like a deliberate design moment rather than a default building element.


    Save this post and pick one idea to tackle this weekend. Whether you go bold with color or subtle with hardware, you’ll be amazed at how much a single door detail elevates your entire space. Which upgrade are you trying first?

  • 23 Frosted Glass Door Ideas That Add Privacy & Soft Light

    23 Frosted Glass Door Ideas That Add Privacy & Soft Light


    Privacy doesn’t have to mean giving up natural light—and frosted glass doors prove it. Whether you’re looking to add a spa-like retreat to your bathroom, create separation in an open-concept home, or simply add visual interest to a plain entry, frosted glass offers that perfect balance. You get seclusion without the claustrophobic feel of solid doors. The best part? These ideas work whether you’re renting or own your space, and many cost less than you’d think. Ready to let soft light in while keeping prying eyes out? Here are 23 frosted glass door ideas that do both.


    1. Frosted Film on Existing Glass Doors

    Frosted film is the renter’s dream—no installation required, completely removable, and dramatically changes how light moves through your space. It’s one of the easiest privacy upgrades you can make.

    Brands like 3M Frosted Glass Film and Gila come in rolls you apply with just water and a squeegee. The process takes about 30 minutes per door and costs $15–$40. You smooth it onto existing glass, trim the excess, and you’re done. No tools, no landlord drama. The frosted effect diffuses light beautifully while keeping your view completely private. If you change your mind, peel it off cleanly—most quality films leave no residue.

    Pro tip: Apply film in horizontal strips if you want to maintain some view at eye level from the inside.

    Your door instantly becomes a soft light source instead of a see-through barrier, and guests can’t see directly into your space.


    2. Textured Frosted Glass as Bathroom Entry

    A textured frosted glass door at your bathroom entrance creates that spa retreat feeling while keeping everything private. The texture adds depth that plain glass can’t match.

    Custom frosted doors from brands like Architectural Depot or local glass suppliers run $200–$600 depending on size and texture pattern. Standard textured patterns include rain, snowflake, and wave designs. Installation takes a professional about 2–3 hours. If you’re renting, you can also buy a pre-made frosted glass interior door from big-box stores for $150–$300 and have it installed temporarily. The textured surface catches light differently depending on the time of day, creating visual interest while maintaining total privacy.

    This update makes your bathroom feel intentional and peaceful—like a real retreat you designed, not just a functional room.


    3. Etched Glass with Custom Patterns

    Custom etched glass takes frosting to an art form. Instead of uniform frosting, you get patterns, designs, or even your initials. It’s a statement piece that feels curated, not just functional.

    Etched glass costs $300–$800 depending on pattern complexity and door size. You can order pre-designed etched doors from suppliers like Wayfair or Home Depot (ready-made options $200–$500), or commission custom work from local glass shops (add $200–$400 for bespoke design). Installation takes 1–2 hours. Popular patterns include geometric lines, botanical motifs, and art deco designs. Some etching is done chemically (permanent), while other options use frosted film with etching detail (removable).

    The difference is immediate—your entry or bathroom stops feeling generic and starts feeling intentional and personal.


    4. Frosted Glass Pocket Door for Small Spaces

    Pocket doors that slide into walls save precious floor space, and frosted versions let light flow through your home without sight lines. Perfect for studio apartments or tight hallway layouts.

    Frameless frosted glass pocket doors cost $400–$1,200 installed, or opt for budget-friendly framed versions at $200–$500. Brands like Enigma Pocket Doors specialize in glass pocket solutions. Installation takes 3–5 hours and may require wall reinforcement (check with your installer). The door glides silently into a cavity, opening up your space visually and physically. You get privacy without the bulky visual presence of a swinging door.

    You’ll notice how much bigger your space feels when you’re not blocked by a swinging door, and light distributes evenly instead of being cut off.


    5. Partial Frosting for Borrowed Light

    Why frost the entire door when you can keep the top clear for light and frost just the lower half for privacy? This hybrid approach is clever and costs less than full frosting.

    Half-frosted doors can be custom-ordered for $250–$500, or you can apply frosted film to just half of an existing door ($10–$20 for materials). The line between frosted and clear can be straight, stepped, or wavy depending on your style. Application takes 20–30 minutes if you’re using film. This strategy maximizes natural light in dark hallways or entryways while blocking the view from below waist height—perfect if you want privacy from sitting eye level but don’t want to lose overhead light.

    Your hallway or entry becomes noticeably brighter while staying completely private at eye level—the best of both worlds.


    6. Frosted Glass Cabinet Doors for Bathroom Storage

    Frosted glass cabinet doors hide clutter while keeping your bathroom feeling open and airy. You see the mass and shape of items, but not the mess—or the less-attractive bottles.

    Frosted glass cabinet doors run $80–$200 per pair from suppliers like IKEA, Wayfair, or Rejuvenation. If you already have cabinets, you can replace just the doors. Installation is typically a DIY job taking 30–45 minutes with a drill and screwdriver. Alternatively, apply frosted film to existing glass cabinet doors for $15–$30. The frosted surface shows the silhouette of stored items, giving the impression of an organized, curated space without actually demanding perfection inside.

    Your bathroom looks instantly more intentional, and you can hide that pile of half-empty bottles without sacrificing the open-concept vibe.


    7. Frosted Glass Room Dividers for Open Layouts

    Open-concept living doesn’t mean zero privacy. Frosted glass room dividers carve out zones while keeping your space feeling connected and light-filled.

    Frosted glass room dividers cost $150–$400 for standing screens or $600–$2,000 if you’re installing permanent room dividers. Brands like Room Dividers Now offer frosted glass options. Portable screens take zero installation time, while built-in dividers take 2–4 hours. The frosted surface creates visual separation—you can’t see exactly what’s happening on the other side, but light still passes through. This works beautifully for creating a bedroom nook in a studio or separating a home office from a living room.

    Your open space now feels like multiple rooms with purpose, and you gain privacy without the heaviness of solid walls.


    8. Frosted Film with Decorative Borders

    Frosted film on its own looks clean and modern, but adding a decorative border in metallic or colored tape elevates it to intentional design. It’s an easy customization that costs almost nothing extra.

    Full frosted film costs $15–$40, and decorative border tape (metallic, colored, or patterned) adds just $5–$15. Apply the film first, then run the border tape down the edges or frame a section in the middle. Total time: 30–40 minutes. This technique works beautifully on entryways and creates a contemporary look that photographs well. Popular border options include matte black tape, brushed gold, and colored vinyl stripes in navy or forest green.

    The finish feels designer-curated, and guests notice the detail—it looks intentional rather than like a quick privacy fix.


    9. Frosted Glass Sliding Barn Door

    Frosted glass barn doors combine industrial style with privacy—they’re a statement piece that actually solves a problem. Perfect for bedrooms, bathrooms, or home offices.

    Frosted glass barn doors cost $300–$900 depending on size and frame material. Brands like Wayfair, Home Depot, and Amazon carry ready-made options. Installation requires mounting a track to your wall (about 2–3 hours with basic tools, or hire a handyperson for $150–$250). The glass provides privacy while the black or brushed metal frame reads as contemporary-rustic. Frosted glass with a dark metal frame is especially popular right now and photographs beautifully.

    Your bathroom or bedroom entrance becomes a design feature instead of just a functional door, and you get that Instagram-worthy moment every time you open it.


    10. Frosted Glass Closet Doors

    Frosted glass closet doors let light into your closet while keeping your clothes and storage hidden from view. It’s a small change that makes your bedroom feel bigger and brighter.

    Frosted glass sliding closet doors cost $200–$500 per pair to replace existing doors. IKEA, Home Depot, and Wayfair carry options. If you already have glass closet doors, frosted film ($20–$40) is a free-to-rent alternative. Installation takes 1–2 hours (or 20 minutes with film). You can also request mirrored frosted glass if you want partial reflection with privacy. The frosted surface bounces light while your closet stays beautifully hidden.

    Light penetrates deeper into your bedroom, and the closet feels like part of the overall design rather than a dark, cluttered void.


    11. Frosted Glass Shower Enclosure

    A frosted glass shower enclosure keeps your bathroom feeling open and bright while you shower privately. It’s functional privacy that looks intentional.

    Frosted glass shower enclosures range from $400–$1,500 depending on whether you’re installing a new one or frosting an existing shower door. Pre-made frosted enclosures from brands like Kohler, American Standard, or Home Depot start around $500–$800. Installation takes 4–6 hours professionally. Alternatively, apply frosted film to an existing clear shower door for $30–$60. The frosted glass prevents fogging better than some clear options and maintains privacy without blocking light or making your bathroom feel enclosed.

    Your shower stays dry-looking even after use, and your bathroom feels spa-like instead of steamy and claustrophobic.


    12. Frosted Glass Interior Doors Throughout a Home

    Replace all your interior solid doors with frosted glass versions to completely change how light and space flow through your home. It’s a bigger project, but the payoff is dramatic.

    Interior frosted glass doors cost $150–$350 per door (or $300–$600 if custom). Budget for 3–5 doors in a typical home: $900–$2,500 total. If you’re renting, this isn’t practical, but homeowners can frame this as a long-term investment. Installation takes about 1–2 hours per door. Pre-made options from Home Depot, Lowe’s, and Wayfair are usually cheaper than custom orders. The entire home becomes cohesive, bright, and flowing—light travels through multiple rooms, and every space feels connected.

    Your home feels up to 30% brighter, and the open feel makes even small spaces read as generous.


    13. Frosted Glass with Etched Address Numbers

    Etched address numbers on a frosted glass entry door serve double duty—functional wayfinding and artistic detail. It’s a small customization that feels incredibly intentional.

    Etched address numbers on a frosted door add $50–$150 to a custom glass order, or you can use vinyl address stickers ($15–$30) on frosted film-covered doors. Etching is permanent; vinyl is removable. Either approach takes 10–15 minutes. You can opt for modern sans-serif numbers, ornate fonts, or even custom designs. The numbers show up beautifully against frosted glass because the etching catches light differently than the surrounding surface.

    Your entry becomes instantly more welcoming and finished, and guests can actually find your house—no more confusion.


    14. Frosted Glass Between Kitchen and Dining Room

    If you have an open kitchen-dining layout that feels chaotic when you’re cooking, a frosted glass partition solves the problem without closing you off completely.

    A permanent frosted glass partition costs $800–$2,000 installed, but a temporary frosted panel or sliding door system runs $300–$800. Installation for permanent options takes 4–6 hours; temporary systems are quicker. This works especially well if you rent—some removable frosted glass divider panels cost $200–$400 and install in under an hour with tension rods or clips. You stay connected visually and can still chat while cooking, but cooking smells and splashing water stay contained.

    You can finally cook without spraying your dining guests, and the kitchen feels like its own intentional space rather than spilling into your living area.


    15. Frosted Glass with Colored Tints

    Tinted frosted glass goes beyond standard white frosting—subtle colors like soft blue, sage green, or blush add personality while maintaining privacy.

    Tinted frosted glass costs $250–$600 for custom orders, or frosted film in tinted colors runs $20–$50. Popular tint options include pale blue, soft green, and warm gray. Application takes 30–45 minutes for film. Tinted frosting works beautifully in bedrooms or bathrooms where you want calm, spa-like vibes. The tint is subtle enough not to look childish, but distinctive enough to feel intentional and modern.

    Light filtering through tinted frosted glass creates a gentle, colored glow instead of harsh white light—your space feels curated and peaceful.


    16. Frosted Glass Door with Clear Glass Panels

    Mix frosted and clear glass panels within a single door for visual interest and strategic light flow. It’s a design choice that catches the eye.

    Mixed frosted-and-clear doors cost $400–$900 custom-ordered, or you can create this effect with frosted film and vinyl clear sections for $25–$50 on an existing glass door. Installation takes 45 minutes for film or 2 hours for a replacement door. Popular patterns include geometric grids, horizontal bands, or random asymmetrical sections. The contrast between frosted and clear creates visual depth and allows you to control where light enters.

    This design detail looks far more expensive and intentional than a fully frosted door, and the light patterns change throughout the day.


    17. Frosted Glass Café Doors (Half-Height Doors)

    Frosted glass café doors are half-height doors perfect for kitchens and between open spaces. You get privacy at eye level but maintain visual connection and easy flow.

    Frosted glass café doors or Dutch doors cost $250–$600 custom-ordered. Some ready-made options are available for $200–$400. Installation takes 2–3 hours. The traditional “café door” design lets you control the top and bottom independently, or you can get a fixed half-frosted, half-clear option. This style is both functional and charming—it’s a design choice that’s experiencing a comeback.

    You maintain connection with whoever’s on the other side while keeping cooking clutter hidden and heat contained in the kitchen.


    18. Frosted Glass with Geometric Patterns

    Geometric etched patterns offer frosted privacy with artistic flair. It’s like functional art on your doors.

    Geometric-patterned frosted glass doors cost $350–$800 for custom orders. Many glass suppliers and online retailers like Etsy have artisans offering geometric designs. Pre-made geometric frosted doors from big-box retailers run $200–$500. Installation takes 1–2 hours. The pattern is permanent if etched, or removable if done with frosted film. Patterns can be symmetrical or random, minimalist or complex. Popular designs include Art Deco lines, modern hexagons, and abstract botanical-inspired geometry.

    The geometry catches light and casts beautiful shadows, turning your door into a light fixture that’s also beautifully functional.


    19. Frosted Glass for Home Office Privacy

    A frosted glass office door or divider lets you close off your work zone visually from the rest of your home while keeping light flowing and maintaining a sense of connection.

    Frosted glass office doors or partitions cost $200–$600. Temporary solutions like frosted panels or removable sliding doors work well for renters ($150–$400). Installation ranges from 30 minutes (removable options) to 3 hours (permanent doors). This setup is especially useful if your office shares a wall with a living area—noise is still somewhat contained, light flows through, and clients on video calls see a professional frosted background rather than your living room chaos.

    You gain professional separation without the heavy, closed-in feeling of solid walls, and your office looks intentional and distinct.


    20. Frosted Glass Transom Windows Above Doors

    Add a frosted glass transom (a horizontal window panel) above a solid door to let light in without sacrificing privacy. It’s an architectural detail that feels elevated.

    Frosted glass transoms cost $200–$500 installed and work best with solid doors in interior spaces. Installation takes 2–3 hours and may require framing adjustments. This is especially useful if you want a solid door for soundproofing but don’t want to lose natural light. Transoms are increasingly popular in modern farmhouse and contemporary designs.

    Light penetrates deep into hallways and rooms you’d normally keep dim, and the architectural detail makes your home feel thoughtfully designed.


    21. Frosted Glass Door Film with Motion-Activated Frosting

    Smart frosted glass film changes from clear to frosted with the flip of a switch or a tap on your phone. It’s high-tech privacy that feels futuristic.

    Smart frosted glass film costs $500–$1,500 installed (or up to $3,000 for premium brands like Gauzy or View). It requires a power source and can integrate with your smart home system. Installation takes 3–4 hours. This technology is still premium pricing, but costs are dropping as it becomes more mainstream. You get on-demand privacy without permanent frosting—perfect if you want a clear view sometimes and privacy others. It’s especially popular for bathroom windows and office glass partitions.

    This investment-level technology gives you the best of both worlds: clear glass when you want it, frosted privacy when you need it, all with a button press.


    22. Frosted Glass with Brass or Copper Hardware

    Elevate a simple frosted glass door with warm metal hardware in brass, copper, or rose gold. The hardware becomes a design accent against the neutral frosted surface.

    Frosted glass doors with metal frames cost $300–$700 when ordered with coordinating hardware. You can also upgrade hardware on existing frosted doors for $50–$150 (replacement handles and hinges). Installation for new hardware takes 30–45 minutes. Popular finishes include brushed brass, matte copper, and rose gold. These warm metals feel contemporary and expensive against the cool frosted glass.

    The hardware turns a functional door into a design moment, and the warmth of the metal balances the coolness of the frosted glass.


    23. Frosted Glass Barn Doors with Sliding Hardware

    Frosted glass barn doors on heavy sliding hardware create a dramatic, modern statement while providing total privacy. It’s a design choice that feels intentional and architectural.

    Frosted glass barn doors with sliding hardware cost $600–$1,500 as a set. Installation takes 3–4 hours and requires solid wall mounting (check wall structure first). Brands like Wayfair, Anthropologie, and specialty barn door suppliers carry frosted glass options. The hardware finish—matte black, brushed nickel, or industrial steel—becomes a design element. Frosted glass paired with heavy metal hardware reads as premium and intentional.

    These doors are a statement piece. They’re functional privacy that also serves as art—the kind of detail that makes your space feel thoughtfully designed rather than just decorated.


    Save this post for your next door refresh or privacy upgrade. Try just one idea this weekend—whether it’s frosted film on an existing door or a complete door replacement, even a small change makes a real difference in how your space feels and functions.

  • 27 Veneer Door Design Ideas That Add Texture & Elegance to Any Entryway

    27 Veneer Door Design Ideas That Add Texture & Elegance to Any Entryway

    Your front door is the first thing guests see—and it deserves to be memorable. Whether you’re renting or own your home, a veneer door is your secret weapon for adding texture, warmth, and undeniable elegance without a total overhaul. Veneer doors offer the look of solid hardwood, sustainable materials, and endless design possibilities at a fraction of the cost. From subtle wood grain patterns to bold geometric textures and two-tone finishes, there are so many ways to turn your entryway into something special. In this guide, you’ll discover 27 specific veneer door ideas that work with every style—minimalist, industrial, coastal, or cozy traditional. Pick one that speaks to you, and watch your entryway instantly become the statement piece your home deserves.

    1. Layer Matte Black Veneer with Brushed Gold Hardware

    Matte black veneer creates dramatic sophistication while staying timeless. Pair it with brushed gold or bronze hardware to elevate the look without breaking the bank.

    This combo works because the contrast between dark matte and warm metal feels high-end and intentional. Most veneer doors accept new hardware easily—just drill out the existing holes. Brushed gold handles run $30–$80 from IKEA, Wayfair, or Home Depot. Installation takes 15 minutes with a basic drill. The result? Your door looks like it belongs in an architect’s portfolio. Even renters can swap hardware back before moving.

    Pro tip: Choose geometric or minimalist handle shapes to match the modern vibe of matte finishes.

    2. Go Two-Tone with Warm Wood and Soft White

    Split finishes aren’t just for cabinets anymore. Divide your veneer door horizontally with warm wood on top and crisp white below for visual interest.

    This breaks up a tall entryway and feels intentional rather than trendy. Use painter’s tape to mark your midpoint precisely, then apply two coats of finish. This works best on flat veneer doors. Cost: $15–$40 for quality paint or stain. Time: one weekend including dry time. The two-tone effect adds dimension and makes narrow entries feel wider. You can also do this as a removable temporary look with contact paper for renters.

    Bonus: This styling photograph beautifully on social media and works with almost any home style.

    3. Embrace Natural Wood Grain with Matte Finish

    Skip the paint and let the wood speak. A matte-finish veneer door showcasing natural grain is warm, organic, and endlessly versatile.

    Matte finishes enhance grain visibility and hide fingerprints better than gloss. Most quality veneer doors come pre-finished this way, or you can sand and apply a matte topcoat yourself. If ordering new: $200–$500 installed. If refinishing an existing door: $30–$60 for materials, 4–6 hours labor. The appeal here is authenticity—it looks like real hardwood without the maintenance headaches of solid wood. Your entryway becomes warm and inviting without trying too hard.

    This pairs beautifully with either modern or traditional interiors.

    4. Add Linear Texture with Horizontal Slat Veneer

    Textured veneer doors with linear patterns create visual depth and architectural interest without being fussy. Horizontal slats feel contemporary and calm.

    These doors come from specialty manufacturers or you can commission a custom veneer with routed texture. Cost: $400–$700 for a quality textured veneer door. Pre-made options: $250–$400. Installation: hire a pro, $100–$200. The texture catches light differently throughout the day, so your door never looks flat or boring. It’s a bolder choice than solid color but still sophisticated. Renters: this works if your lease allows door replacement, or you could temporary-install with removable hinges.

    The result is a door that looks like it came from a high-end hotel or boutique retail space.

    5. Combine Vertical Grain with Deep Forest Green

    Deep jewel tones pair perfectly with visible wood grain. Forest green veneer feels earthy, sophisticated, and connects your entryway to nature.

    Forest green works on both modern and traditional homes. Start with a veneer door in natural wood, then stain it with quality wood stain in forest green ($10–$25 per can). Apply two thin coats. Time: 3–4 hours plus drying. You’ll see the grain pattern show through the colored stain beautifully. This finish hides dust and minor scratches well. The color feels intentional and curated, not accidental. Maintenance is minimal—just wipe down occasionally.

    Your guests will comment on this one every single time they visit.

    6. Create a Shiplap-Style Look with Vertical Veneer Segments

    Love the shiplap trend? Get the look with a custom veneer door featuring vertical board patterns without the maintenance of real wood.

    This style works beautifully in coastal, farmhouse, or modern-cottage homes. Order custom from specialty door makers or modify existing veneer with routed channels. Cost: $300–$600 for custom textured veneer. A whitewash or light-stain finish ($10–$30 in product) completes the look. Installation: $100–$150 by a pro. The effect is charming and photograph-worthy. Unlike real shiplap, veneer won’t swell or warp in humidity. Renters might struggle with this one—it’s permanent—but homeowners will love the coastal-cabin vibe.

    This transforms a basic entryway into somewhere guests want to linger.

    7. Mix Dark Wood Veneer with Frosted Glass Panels

    Combine the elegance of dark veneer with glass panels for light without sacrificing privacy. Frosted glass softens the drama of dark wood.

    This hybrid approach gives you the best of both worlds: statement color and brightness. Order semi-custom doors with frosted glass inserts, or retrofit existing veneer with adhesive frosted film ($20–$50 per sheet). Frosted glass diffuses light beautifully while keeping interiors private. Installation time: 30 minutes for film, 2–3 hours if replacing panels professionally. The contrast between matte dark wood and soft frosted glass reads as sophisticated and intentional. This works especially well in narrow entryways where you want to bounce light through without opening the space completely.

    Your door becomes both a practical light source and a design focal point.

    8. Stain Veneer in Warm Honey with Geometric Metal Inlay

    Take veneer texture to the next level with subtle metal inlays. Brass or copper geometric patterns against warm wood feel handcrafted and luxe.

    This is an investment piece, but the payoff is stunning. Commission custom veneer with routed channels, then inlay thin brass or copper stripping (available from specialty woodworkers). Total cost: $600–$900 installed. Alternatively, apply brass geometric tape as a temporary overlay for $30–$50. The metal reflects light and adds visual movement. This approach works best with warm wood tones. It’s not for every home, but if you love architectural details, this is your statement.

    The finished look feels like a piece of functional art rather than just a door.

    9. Use Reclaimed-Look Veneer in Distressed Walnut

    Reclaimed wood vibes without the environmental impact or structural concerns. Distressed walnut veneer captures authenticity with stability.

    Manufacturers now create veneer with hand-scraped texture and color variation that mimics reclaimed wood. Cost: $300–$500 for quality distressed veneer doors. The surface shows knots, grain variation, and subtle color shifts that look genuinely aged. No special maintenance needed—the finish hides wear beautifully. Installation: $100–$150 by a pro. This style pairs perfectly with farmhouse, industrial, or cottage aesthetics. The door looks like it has a story without being fragile or needing constant care.

    Guests will swear it’s authentic reclaimed wood—you’ll just know better.

    10. Paint Veneer in Navy with a High-Gloss Finish

    Navy with high-gloss finish screams polished elegance. The shine adds formality and catches light dramatically.

    High-gloss finishes require prep work: sand the existing finish lightly, apply primer, then two coats of high-gloss paint. Cost: $40–$80 in quality paint. Time: full weekend including drying. Pro tip: use painter’s tape around hardware and trim for clean lines. High-gloss shows fingerprints more than matte, but it’s easier to wipe clean. Navy + gloss works especially well on traditional or coastal homes. Maintain the shine by buffing with a soft cloth occasionally. The result feels formal and timeless.

    Your door becomes an architectural detail people comment on for years.

    11. Layer Soft Greige Veneer with Woven Rattan Hardware

    Greige (gray + beige) is the neutral everyone’s obsessed with. Pair soft greige veneer with organic hardware for understated sophistication.

    Greige veneer works as a universal backdrop—it complements almost every interior style. Most veneer doors come in greige, or stain existing wood with greige-toned stain ($15–$30). Woven rattan handles ($40–$80) add warmth and texture. Time: 20 minutes to swap hardware, 4 hours if staining. The beauty here is that greige feels intentional without being bold. It’s calming and modern. This is perfect if you’re not ready for statement colors but want your door to feel designed.

    The combination of soft color and natural texture creates a welcoming, contemporary entryway.

    12. Create Drama with Black Matte Veneer and Hidden Hardware

    Minimalism taken to its peak: a black veneer door where hardware almost disappears. This reads as architectural and expensive.

    This look requires either a door designed with integrated hardware or careful placement of slim, flush-mount handles. Cost: $350–$600 for doors with design integration. Standard doors + slim hardware addition: $150–$250. Installation: $100–$150 by a pro. The payoff is a clean, gallery-like entryway. This style works best on larger doors where the scale allows hardware to feel intentional. It’s bold and not for everyone, but if you love the minimalist aesthetic, it’s perfect.

    Your entryway becomes an exercise in restraint and contemporary design.

    13. Mix Natural Cherry Veneer with Copper Accents

    Cherry veneer is warm, rich, and naturally sophisticated. Add copper hardware for an unexpectedly modern twist on tradition.

    Cherry wood has been around forever, but pairing it with contemporary copper hardware feels fresh. Order cherry veneer doors ($200–$450) or stain existing veneer with cherry stain ($15–$25). Copper hardware: $50–$100. Installation: $100–$150 for doors, 15 minutes for hardware. The warm reddish tones of cherry look especially beautiful in homes with brass fixtures or warm-toned walls. Copper will develop a patina over time, adding character. This isn’t trendy—it’s timeless with a slightly updated edge.

    The result is a door that feels both classic and subtly sophisticated.

    14. Apply Wood-Grain Contact Paper Over Solid Color Veneer (Renter-Friendly)

    Renters, this is your hack: apply peel-and-stick wood-grain contact paper over existing veneer for instant warmth without damage.

    Contact paper with realistic wood-grain patterns comes from Amazon, Target, or home improvement stores ($15–$30 per roll). Clean the door thoroughly, measure carefully, and apply smoothly using a squeegee. Time: 30–45 minutes. The quality has improved so much that it looks surprisingly authentic from a few feet away. When you move, peel it off—no landlord drama. This works best on flat doors without existing texture. The limitation is durability in high-traffic areas, but for most entryways, it lasts years.

    It’s the fastest, cheapest way to completely change your door’s vibe.

    15. Stain Veneer in Espresso with Tall, Slim Hardware

    Espresso stain is bolder than black—rich and warm with visible grain. Pair it with tall, linear hardware for a gallery-like look.

    Espresso stain ($15–$30) applied over existing light veneer requires light sanding and two coats. Time: 4–6 hours plus drying. The deep color hides dust and shows wood grain beautifully. Tall hardware (like a long bar handle, $40–$80) emphasizes vertical space and feels architectural. This combo transforms basic entryways into design statements. The espresso tone is dark enough for drama but warm enough to feel inviting. Maintenance: occasional dusting, maybe a re-seal every few years.

    Your door stops being background and becomes part of the story.

    16. Layer Light Oak Veneer with Woven Wall Hanging Above

    Veneer doors work with styling too. Light oak veneer + complementary wall decor create a curated entryway that feels intentional.

    Light oak veneer ($180–$350) pairs beautifully with natural materials and bohemian styling. Add woven wall hangings, sculptures, or textile art above ($40–$150). This approach turns your door into part of a larger design story. Time to install: 2 hours for door, 30 minutes for wall styling. The combination of warm wood grain and handmade textiles feels artisanal and thoughtful. This works especially well in homes with eclectic, maximalist, or bohemian aesthetics. You’re not just hanging a door—you’re creating an experience.

    Your entryway becomes an extension of your design personality.

    17. Use Ultra-Slim Profile Veneer with Oversized Clear Glass Panels

    Maximize light while keeping the sophistication of veneer. Use a veneer door with oversized glass panels and slim frame profiles.

    This hybrid approach works best on doors with panel inserts. Order semi-custom doors with minimal wood frame around large glass sections ($400–$700). The veneer frame can be any finish—greige, natural wood, or even matte black. Time: 2–3 hours for installation by a pro. The payoff is an incredibly bright, airy entryway that still feels designed and sophisticated. This style particularly suits modern homes or darker entryways needing more light. You get the visual interest of a designed door without blocking natural light.

    Your entry becomes the brightest, most welcoming room in the house.

    18. Paint Veneer in Warm Terracotta for a Layered Boho Look

    Terracotta isn’t just for pots—it’s a stunning entryway color. Warm, earthy terracotta veneer feels collected and artistic.

    Terracotta stain or paint ($12–$25) applied over existing light veneer creates warmth immediately. The color variation in natural terracotta finishes means no two doors look exactly identical—which adds charm. Time: 4–5 hours including two coats. Pair with rustic hardware or natural materials for a complete bohemian look. Terracotta works beautifully in Southwestern, Mediterranean, or eclectic homes. The warm tone is inviting and feels slightly unexpected. Maintenance is minimal—terracotta hides wear naturally.

    Your entryway instantly transports people to somewhere warm and welcoming.

    19. Create a Colorblocked Door with Painted Veneer Sections

    Colorblocking elevates your door from one-note to architectural. Use painter’s tape to divide veneer doors into geometric sections, then paint each differently.

    Choose 2–3 complementary paint colors and plan your blocks with tape. This requires precision but pays off dramatically. Paint cost: $30–$60 total. Time: full weekend. The trick is choosing colors that feel intentional together—try greige + terracotta, or navy + cream. This approach works best on flat panel doors without existing texture. It’s bold but modern, and unexpected enough that guests will immediately notice. This is perfect if you want statement without going all-in on one color.

    Your door becomes a miniature art installation rather than a background detail.

    20. Combine Blonde Wood Veneer with Sculptural Brass Hardware

    Blonde wood veneer feels Scandinavian and light. Sculptural brass hardware adds unexpected personality and craftsmanship.

    Blonde veneer doors come naturally light or can be achieved with whitewashed or cerused stain. Cost: $200–$400 pre-finished, or $20–$35 in stain product for existing doors. Sculptural hardware (look for artisan pieces on Etsy or specialty hardware sites) runs $60–$150 and becomes a conversation starter. Installation: 30 minutes for hardware, 4 hours if staining. The combination feels collected and thoughtful, not mass-produced. Blonde wood + brass creates warmth without heaviness. This works especially well in minimalist, Scandinavian, or light-filled homes.

    Your door becomes both functional and a small sculpture worthy of a design publication.

    21. Use Weathered Gray Veneer for a Coastal Modern Look

    Weathered gray veneer captures that coastal, driftwood aesthetic without the fragility of real weathered wood. It’s stable, sophisticated, and inherently stylish.

    Weathered gray veneer doors come pre-finished from manufacturers ($250–$450) or you can achieve the look with gray-blue stain over existing veneer ($15–$30). The finish typically includes hand-scraped or varied grain to mimic genuine weathering. Time to apply: 4–5 hours plus drying. Pair with silver or whitewashed hardware ($40–$80). The result feels like a beach cottage or modern coastal home. This color is forgiving—it hides dust and shows character over time. Maintenance is minimal.

    Your entryway instantly communicates calm, collected coastal style.

    22. Apply Geometric Laser-Cut Metal Overlay to Veneer Door

    Take texture to another level with laser-cut metal overlays. Geometric patterns cast shadows and create visual depth beyond the door itself.

    This is a premium option: commission custom laser-cut metal overlays from specialty makers or online platforms ($400–$800 installed). The overlay can be matte black, copper, or brass. Installation requires careful alignment but transforms the door into functional art. Time for installation: 2–3 hours by a pro. Maintenance is minimal—the metal is sealed. This works best on larger doors where the pattern scale reads clearly. It’s an investment piece but absolutely one-of-a-kind. Not for renters, but perfect for homeowners who want architectural drama.

    Your door becomes a sculptural element that changes throughout the day as light shifts.

    23. Pair Warm Walnut Veneer with a Modern Steel Frame

    Industrial-modern: walnut veneer within a steel frame. The contrast between organic wood and industrial metal feels contemporary and collected.

    This requires either ordering a semi-custom door with steel framing or retrofitting existing doors with a metal frame kit. Cost: $500–$800 installed. Walnut veneer ($200–$400) + steel frame ($200–$300) + installation labor ($100–$150). The steel frame emphasizes the door’s scale and creates a gallery-like presentation. This style suits modern, industrial, or loft-style homes. Walnut’s warmth softens the steel’s hardness, creating balance. Maintenance: occasional dust, and wipe the steel frame monthly to prevent dust buildup.

    Your door becomes an architectural statement that reads as intentional and designed.

    24. Stain Veneer in Rich Mahogany with Polished Bronze Hardware

    Mahogany veneer is warm, rich, and inherently elegant. Pair it with polished bronze for a refined, traditional aesthetic that never feels dated.

    Mahogany stain ($15–$30) applied to existing light veneer requires light sanding and two careful coats. Time: 5–6 hours plus dry time. Polished bronze hardware ($50–$120) ages beautifully and develops a darker patina over years. The combination reads as established, refined, and timeless. This works especially well in homes with traditional architecture or dark, moody interiors. Mahogany’s depth hides dust and minor scratches. Maintenance: occasional dusting and maybe a re-seal every few years.

    Your entryway feels like it belongs in a historic home or exclusive private club.

    25. Layer Soft Cream Veneer with Warm Brass Accents Throughout

    Cream veneer is a neutral that reads as soft and intentional. Repeat warm brass accents (hardware, house numbers, lighting) for a layered, curated look.

    Cream veneer ($180–$350) or cream stain ($15–$25) works as a universal backdrop. Layer warm brass throughout: handle ($60–$100), house numbers ($30–$60), porch light ($40–$80). The repeated metal creates visual continuity. Time: 2 hours to install door, 1 hour for coordinating hardware. This approach works with almost every design style. Cream is timeless and doesn’t compete with other design elements. The layered brass feels collected and sophisticated without being loud.

    Your entryway reads as intentionally designed and warm, not accidental.

    26. Use Textured Bark-Look Veneer for Organic Drama

    Bark texture veneer feels raw, organic, and architectural. It’s dramatically textured but still refined—not rustic-rough.

    Bark-textured veneer comes from specialty manufacturers and creates genuine three-dimensional surface variation. Cost: $350–$600 for quality bark-texture doors. Installation: $100–$150 by a pro. The texture photographs beautifully and feels like functional sculpture. This works best in contemporary, industrial, or nature-inspired homes. The surface hides dust and fingerprints naturally. Time commitment: just installation, no staining or painting needed. Maintenance is minimal—occasional dusting.

    Your door becomes a tactile, organic focal point that invites touch.

    27. Paint Veneer in Soft Blush Pink for Unexpected Elegance

    Blush pink is having a moment, and it’s sophisticated, not cutesy. Soft pink veneer feels modern, slightly unexpected, and endlessly elegant.

    Blush pink paint ($20–$35 per gallon) requires primer on existing veneer to ensure even coverage. Two coats recommended. Time: 4–5 hours including prep. The key is choosing a muted, dusty blush rather than bright pink—this reads as refined. Pair with minimal hardware (matte black or brushed nickel, $40–$80) to keep it sophisticated. This color works especially well in contemporary homes with mostly neutral interiors. The door becomes a subtle statement that guests comment on. Blush pink ages gracefully and feels current without being trendy.

    Your entryway becomes an unexpectedly elegant and welcoming introduction to your home.


    Save this post and try one idea this week. Whether you go bold with color, embrace natural wood grain, or layer hardware details, your veneer door is about to become the most-noticed feature in your entryway. Start with what speaks to you, and watch how quickly a single design choice changes everything.

  • 26 Wooden Double Door Design Ideas That Feel Grand & Timeless

    26 Wooden Double Door Design Ideas That Feel Grand & Timeless

    Double doors make a statement the moment you walk through them. Whether you’re designing a new entry, refreshing your home’s focal point, or creating that wow factor for guests, wooden double doors offer warmth, sophistication, and lasting appeal that never goes out of style. The right design can completely reshape how your space feels—more open, more welcoming, more you. We’ve gathered 26 design ideas that range from budget-friendly styling tweaks to investment-worthy architectural upgrades. Each one works with different home styles, budgets, and skill levels. Let’s find the double door design that makes your home feel like the sanctuary you deserve.

    1. Paint Classic Doors in Matte Black

    Matte black doors instantly elevate any entryway with sleek, contemporary appeal while maintaining the warmth of wood underneath. This color works on traditional, modern, and transitional homes alike—it’s the design chameleon that fits everywhere.

    Pick a high-quality exterior paint designed for wood doors (Benjamin Moore’s Aura or Sherwin-Williams Emerald are reliable choices). You’ll need two coats, so plan for a full day of work including drying time between coats. Cost runs $30–$80 for paint plus brushes and primer. The transformation is dramatic: your doors become a bold architectural feature rather than just functional. Pair with warm metallics like brushed gold or antique brass hardware for contrast.

    Your entry instantly looks intentional and curated—the kind of design choice people notice and remember.

    2. Add Glass Panels for Light Flow

    Glass panels divide visual weight while flooding your entryway with natural light, making even small foyers feel open and welcoming. This works beautifully in homes lacking windows near the entry.

    You can retrofit existing solid doors with glass inserts (requires professional installation, $400–$1,200 per pair) or replace with pre-made glass-panel doors from specialty retailers. Frosted or textured glass options provide privacy while maintaining the light benefit. Installation takes one day for professionals. If you’re keeping existing doors, consider temporary peel-and-stick frosted film ($15–$40) for a renter-friendly test run.

    Light streams through your entryway all day, making the space feel bigger and brighter than it actually is.

    3. Install Oversized Hardware for Drama

    Hardware is the jewelry of your doors—oversized or sculptural handles immediately elevate the entire aesthetic. This is an easy, renter-friendly upgrade that changes everything about how your doors look.

    Replace standard handles with larger statement hardware from sources like Anthropologie ($60–$150 per handle), Rejuvenation ($80–$200), or even IKEA ($20–$60 for bold geometric options). Most handware swaps take 20 minutes per door using a basic screwdriver. Keep the old hardware in a labeled bag in case you move. Pro tip: match your hardware finish to other metals in your space (if your light fixtures are brushed gold, choose brushed gold handles too).

    Your doors gain unexpected personality and luxury presence without any structural changes.

    4. Create Symmetry with Identical Side Panels

    Symmetrical sidelights frame your double doors and create formal, balanced architecture that photographs beautifully. This is ideal if you’re renovating your entry or adding architectural interest to a plain facade.

    This requires professional installation ($800–$2,500 depending on size and materials) as it involves structural changes. Sidelights can be frosted, clear, or textured glass. Installation typically takes one to two days. If you’re renting or not ready for commitment, you can achieve similar visual balance by hanging large rectangular mirrors on each side of existing doors ($50–$200 for mirrors).

    The space feels more grand, more intentional, and perfectly framed for that Instagram-worthy entry moment.

    5. Embrace Natural Wood Grain with Clear Finish

    Sometimes the best design is letting the wood speak for itself. Clear finishes (rather than paint or stain) showcase authentic grain patterns, knots, and color variation that add character and warmth.

    Choose doors made from quality wood like mahogany, oak, or walnut where the grain is genuinely beautiful. Seal with water-based polyurethane ($20–$40 per quart) for protection without darkening the wood. Application takes 4–6 hours including drying between coats; easier if you hire someone ($300–$600 labor). Maintenance involves occasional resealing every 3–5 years depending on weather exposure.

    You get authentic, timeless beauty that feels connected to nature and craftsmanship.

    6. Mix Wood with Steel Frames (Industrial Chic)

    Combining wood with steel frames creates that coveted industrial-meets-warm vibe. The thin metal lines add contemporary structure to natural wood, perfect for modern farmhouse or industrial homes.

    This requires custom doors or retrofitting, typically $1,000–$2,500 from specialized fabricators. Check local custom door makers or browse platforms like Etsy for artisan builds. Installation time varies but expect one to two days. This is an investment piece, but the visual impact is worth it—you’re creating a genuine architectural focal point.

    Your doors become a conversation piece that blends warmth and edge in unexpected ways.

    7. Stain Doors in Rich Walnut

    A rich walnut stain deepens the wood’s natural beauty while creating a luxe, grounded aesthetic that works in traditional, transitional, and modern spaces. It’s timeless without feeling dated.

    Sand existing doors lightly (2–3 hours labor, or $100–$200 if hiring someone), then apply walnut stain in 2–3 coats ($15–$30 for stain). Let each coat dry fully between applications. Total project time: one weekend. Seal with polyurethane for protection. Pro tip: test stain on a hidden area first—walnut can range from warm medium brown to deep chocolate depending on the brand.

    Your doors gain depth and richness that makes the entire entry feel more intentional and high-end.

    8. Add Decorative Glass with Geometric Patterns

    Patterned glass combines privacy with artistry. Geometric or Art Deco designs add personality while maintaining light flow and a contemporary edge.

    Install etched, frosted, or decorative glass inserts via professionals ($600–$1,500 depending on pattern complexity). Alternatively, apply frosted film with geometric patterns ($30–$80 per door) for a renter-friendly option. Peel-and-stick films last 5–7 years before needing replacement. Custom etching on existing glass requires sending doors to specialists, which takes 2–3 weeks.

    Your doors become functional art that guests notice and admire immediately.

    9. Paint Doors in Deep Forest Green

    Forest green brings calm sophistication to an entryway while feeling less bold than black. It’s trending in 2025 and pairs beautifully with brass, black, or natural wood hardware.

    Use exterior-grade paint in rich green (Sherwin-Williams Urbane Bronze or Forest Green run $30–$60). Plan two coats with 24-hour drying between them. Total labor: one day. This color grounds a space and feels intentional—not trendy for the sake of trending. It works especially well on homes with white, cream, or gray trim.

    Your entry feels curated, calm, and distinctly you—the kind of color choice that makes people ask, “where did you find that green?”

    10. Install Oversized Door Numbers for Personalization

    Oversized door numbers are functional design that immediately personalize your home’s identity. They’re visible from the street, add architectural interest, and tell visitors exactly where to find you.

    Source statement numbers from Rejuvenation ($40–$80), Etsy artisan sellers ($50–$150), or even hardware stores like Ace ($20–$40). Mount them centered above the doors or on the frame using appropriate hardware for your door material. Installation takes 30 minutes. Choose materials that complement your hardware finish (brass, black steel, copper, or natural wood).

    Your home gains a professional, welcoming presence that says you’ve thought about every detail.

    11. Create a Monochromatic Entry (Black Doors, Black Frame)

    Full monochromatic black creates striking drama—doors, frame, hardware all in coordinated black tones. This works for modern, minimalist, and even traditional homes seeking edge.

    Paint doors and trim in the same matte black finish (same $30–$80 paint investment as before). Choose black hardware to make it disappear into the design rather than contrast. This technique requires precision and clean lines, so be meticulous with painter’s tape. The final look is gallery-like and intentional—very 2025 modern.

    Your entryway becomes a statement space that photographs beautifully and feels deliberately designed.

    12. Add Transom Windows Above Double Doors

    Transom windows sit above doors, maximizing natural light and adding architectural interest. This instantly makes an entry feel taller, brighter, and more grand.

    Retrofitting requires professional installation ($800–$2,000 depending on size) with structural considerations. This is typically a renovation project rather than a quick swap. Installation takes 2–3 days. If you’re renting, recreate the visual effect with a large rectangular mirror or decorative shelf mounted above doors ($50–$200).

    Your entry becomes a light-filled sanctuary that feels bigger than it actually is.

    13. Use Reclaimed or Antique Wood Doors

    Reclaimed doors bring history, character, and environmental consciousness. Each door tells a story through its patina, grain variation, and authentic aging.

    Source reclaimed doors from salvage yards, architectural salvage shops, or online marketplaces like Craigslist, Facebook Marketplace, or specialty retailers ($300–$1,500 per pair depending on age and wood type). Have them inspected for soundness—some antique doors need restoration. Plan $200–$600 for professional conditioning or refinishing. Installation is standard. Pro tip: reclaimed wood is sustainable and unique, so no two doors look identical.

    You get genuinely one-of-a-kind doors that feel connected to heritage and handcraftsmanship.

    14. Install French-Style Doors with Grid Patterns

    French doors featuring grid-patterned glass panels create structured elegance while maintaining light flow. The geometric divisions feel classic and intentional.

    French-style doors run $400–$1,200 per pair depending on glass quality and wood type. Installation is standard door replacement. Muntins (the grid dividers) can be removable for easy cleaning or permanent for authentic aesthetics. This style pairs beautifully with traditional or transitional homes and works surprisingly well in modern settings for contrast.

    Your entry gains refined European influence without feeling costumey—just genuinely elegant.

    15. Paint Doors in Soft Sage Green

    Sage green is the softer, more contemporary cousin of forest green. It brings calm, nature-connection, and subtle sophistication without the boldness of deeper greens.

    Use exterior paint in sage or dusty celadon (Benjamin Moore’s Healing Aloe or equivalent, $30–$60). Two coats recommended for even coverage. This color works beautifully with natural brass, gold, or black hardware. Total time: one weekend for painting and drying.

    Your entry feels peaceful and intentional—a welcoming threshold that sets a calm tone for your home.

    16. Add Brass or Gold Hardware for Warmth

    Hardware finishes dramatically impact overall aesthetic. Brushed gold or warm brass adds luxury and cohesion if coordinated with other metals throughout your home.

    Upgrade handles, hinges, and locks to brushed gold or warm brass ($80–$200 per set depending on quality). Brands like Rejuvenation, Anthropologie, or even Amazon have affordable options. Swapping hardware takes 45 minutes with a basic screwdriver. Match finishes with your light fixtures and kitchen hardware for cohesion.

    Your doors feel curated and high-end—small details create big impact on the overall aesthetic.

    17. Create Contrast with Light Doors and Dark Trim

    Playing contrast between door color and trim color creates visual interest and architectural definition. Light doors with dark (or vice versa) trim structure the space beautifully.

    Keep doors in natural or light-stained wood, paint trim in deep charcoal or navy ($20–$40 for trim paint). Use painter’s tape to ensure crisp lines between door and trim. This technique works in virtually any home style and immediately looks intentional. Total time: one to two days including prep and drying.

    Your entry gains clear architectural definition and visual sophistication.

    18. Install a Door Pediment (Decorative Arch Above)

    A pediment—the decorative arch or triangular element above doors—adds formal, architectural grandeur. This is a signature feature of traditional and colonial-style homes.

    Pedestals can be purchased as additions ($200–$800 depending on ornamentation) or custom-built by a carpenter ($600–$2,000 labor). Installation requires professional mounting. This is an investment piece with significant visual impact. It works best on homes with at least 9-foot ceiling height to maintain proportions.

    Your doors become a true architectural focal point that feels authentically heritage-inspired.

    19. Sand and Seal Doors to Show Natural Beauty

    Sometimes refurbishing existing doors to show their natural beauty beats replacing them. Sanding removes old finishes and surface damage, revealing authentic wood grain underneath.

    Professional sanding and sealing runs $300–$800 depending on door condition. DIY is possible if doors are in decent shape ($30–$60 for sandpaper and sealer, plus 8–10 hours labor). This process takes 2–3 days for professionals including drying time. The result is doors that feel renewed without being replaced.

    Your original doors are restored to museum-quality beauty with rich, lustrous character.

    20. Paint Doors in Deep Navy Blue

    Navy is the bold choice that works everywhere. It’s sophisticated enough for traditional homes but contemporary enough for modern spaces—the color that never goes out of style.

    Choose exterior paint in true navy, not black-navy (Sherwin-Williams Naval or Benjamin Moore’s Hale Navy are standards, $30–$60). Two coats ensure rich color and coverage. Navy pairs beautifully with white trim, brass hardware, or even sculptural black handles. Total time: one weekend.

    Your entry gains confident, timeless appeal that feels both classic and current.

    21. Add Leaded or Beveled Glass Details

    Leaded or beveled glass combines light refraction with traditional craftsmanship. It adds artistic depth and vintage charm while maintaining privacy through texture.

    Custom leaded glass inserts run $800–$2,000 depending on pattern complexity. Beveled glass retrofit costs $400–$1,200. These pieces last indefinitely and increase home value. Pro tip: beveled glass is more durable than leaded glass for high-traffic entries. Installation takes one to two days.

    Light passing through your doors creates moving patterns that make your entry feel like a gallery space.

    22. Install Modern Minimalist Hardware

    Minimalist hardware—thin, geometric, understated—complements modern and transitional doors by letting the doors themselves be the focus.

    Choose simple, well-designed handles from Rejuvenation ($40–$100), Wayfair ($25–$80), or Danish design retailers ($60–$150). These pieces are often easier to install and clean than ornate options. Geometric or D-shaped pulls are current and work well on all wood finishes. Installation: 20 minutes per door.

    Your doors look intentionally designed rather than accessorized—clean, contemporary beauty.

    23. Paint Doors in Rich Plum or Burgundy

    Rich plum or burgundy is the color for homeowners seeking something beyond standard greens and blues. It’s luxe, unexpected, and deeply sophisticated.

    Use exterior paint in deep jewel tones (Benjamin Moore’s Caliente or Sherwin-Williams Red Bay, $35–$65). This color requires meticulous prep and two coats for true saturation. It pairs especially well with brass, natural wood, or warm metallics. Total time: one to two days for painting and drying.

    Your entry becomes genuinely memorable—the kind of bold color choice people ask about and admire.

    24. Create Asymmetrical Visual Interest with Mixed Stains

    Using two subtly different wood stain tones on each door creates organic, artistic variation. This technique works beautifully for custom builds or creative refinishing projects.

    Choose two coordinating stain colors (warm walnut and golden oak, or espresso and natural, $15–$30 for stains). Mask each door to apply different stains, sealing both with matching clear coat. This requires precision but yields genuinely unique results. DIY time: one full day. Professional execution: $300–$600.

    Your doors become subtle works of art—each one slightly different, creating organic, intentional beauty.

    25. Install Textured or Carved Wood Panels

    Carved or textured wooden panels add dimensional craft to doors. Whether geometric, botanical, or abstract, carved details create light-catching depth that reads as bespoke.

    Custom carved doors run $1,500–$4,000 per pair from specialty craftspeople (check Etsy or local carpenters). Pre-made carved panels are available for retrofit ($600–$1,500). This is an investment piece for homeowners seeking genuine handcrafted architecture. Installation takes one to two days.

    Your doors become functional sculpture—the kind of detail that makes guests pause and ask about the craftsmanship.

    26. Layer Multiple Design Elements (Hardware + Paint + Glass)

    The most impactful doors combine multiple elements: color, hardware, glass, and architectural details. Layering creates depth and deliberate sophistication.

    Start with a solid color foundation (matte black or navy), upgrade hardware to statement-making pieces ($100–$200), add glass panels if possible ($400–$1,000), and frame with contrasting trim or transom windows. Budget for multiple upgrades: $800–$2,500 total depending on how many elements you layer. This comprehensive approach requires planning but yields a genuinely magazine-worthy entry.

    The result is an entryway that feels completely intentional and beautifully designed—the focal point everyone notices and admires.


    Pin this guide and start with one element this weekend—maybe it’s fresh hardware or a bold paint color. Small upgrades to your double doors create surprising impact, and your entry deserves to feel as welcoming as the home behind those doors.