Choosing between framed and frameless mirrors shouldn’t feel like a design puzzle. The truth? Both styles work beautifully—it just depends on your space, your vibe, and what problem you’re trying to solve. Framed mirrors add personality and anchor a room with color and texture, while frameless options create clean lines and amplify light in tight spaces. Whether you’re decorating a tiny apartment, refreshing a bathroom, or building a gallery wall, we’ve gathered 23 specific ideas that show you exactly how to use each style. You’ll find budget-friendly solutions, investment pieces, DIY hacks, and styling tricks that work in real homes. Let’s find your perfect mirror match.
1. Embrace Brass Frames for Warmth
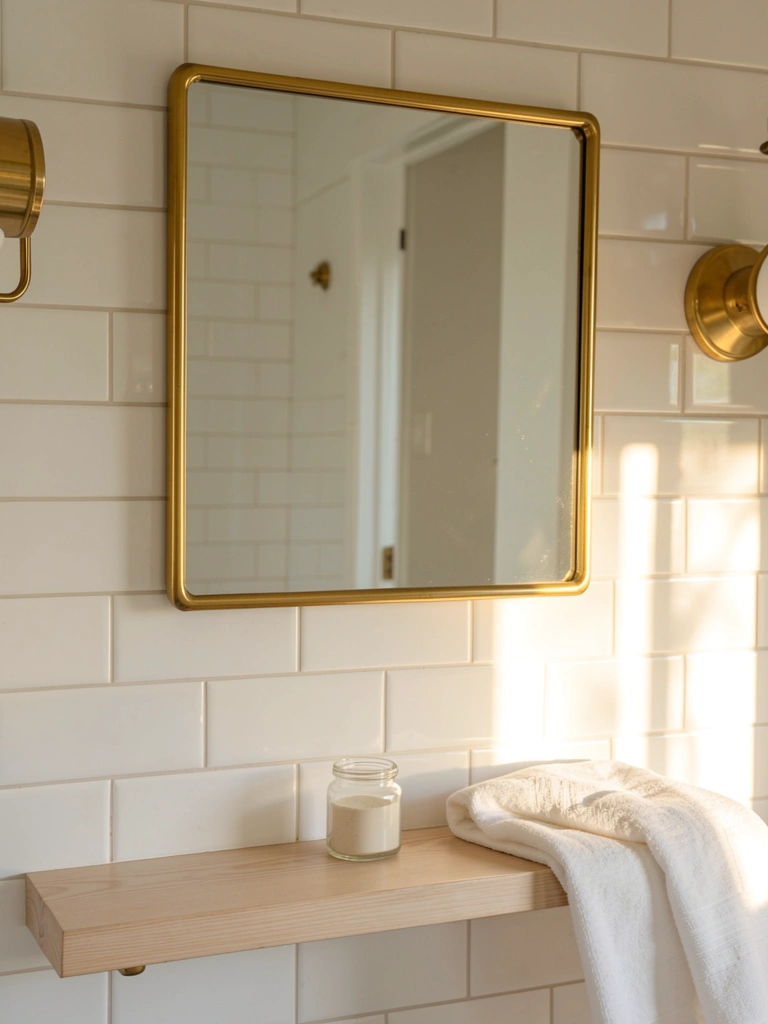
Brass frames bring instant warmth to any room without feeling heavy or dated. The soft metallic shine complements everything from modern to bohemian décor and looks equally good in bedrooms, entryways, or living rooms.
Hunt for brass-framed mirrors at IKEA ($15-$30), Target ($25-$50), or Wayfair ($40-$120). The simplest option: pick a square or rectangular shape in basic sizes (24″x30″ or 30″x40″) and hang it solo over a console or vanity. Installation takes about 20 minutes—just use a level and wall anchors if you’re renting. The frame itself does the heavy lifting, so you don’t need styling tricks.
Pair your brass mirror with warm wood tones and soft linens to let the metal shine. The golden glow makes skin look flattering in bathrooms and adds a luxury feel without breaking the bank.
2. Go Frameless for Maximum Space Illusion
Frameless mirrors are the secret weapon for small rooms because they create visual continuity—no interruption means your eye travels farther and the space feels bigger.
Pick a large frameless mirror (36″x48″ or bigger) from IKEA ($20-$40), Amazon ($30-$80), or Home Depot ($25-$100). Lean it against the wall (renter-friendly, no installation) or hang it securely with heavy-duty brackets and wall anchors. A DIY approach: buy a raw mirror sheet from a local glass supplier ($50-$150) and have them polish the edges—you’ll save 40% versus retail. Takes 30 minutes to hang.
The no-frame design reflects light and makes walls disappear, which means your room instantly feels more open. You’ll notice the difference immediately when you walk in—it genuinely changes how a cramped space functions.
3. Mix Matte Black Frames with Minimalist Décor

Matte black frames create striking contrast in minimalist homes without the shine of gloss finishes. They ground a space, add visual weight, and photograph beautifully—perfect if you love that modern Instagram aesthetic.
Search for matte black mirrors at Article ($60-$150), West Elm ($80-$200), or Wayfair ($40-$120). Look for simple rectangular or square shapes; complex frames defeat the minimalist purpose. Mount them with a stud finder and strong anchors—matte black draws attention, so placement matters. Installation takes 25 minutes if you’re comfortable with a drill; hire a handyman ($50-$100) if you’d rather not. Budget-friendly option: buy a cheap framed mirror and spray-paint the frame with matte black spray paint ($8-$15, 10 minutes plus drying time).
Matte black keeps your aesthetic clean and modern while adding subtle drama. Pair with white walls and natural wood, and your room looks intentionally curated rather than sparse.
4. Use Scalloped Edges for Soft Femininity

Scalloped edges blur the line between functional and artistic, adding playfulness without being over-the-top. This style works in kids’ rooms, adult bedrooms, or any space craving a touch of femininity and movement.
Find scalloped mirrors at Anthropologie ($80-$180), Urban Outfitters ($60-$140), or Etsy ($50-$200). Sizes typically range 24″-36″ in diameter. Most come pre-hung and ready to mount; installation takes 15 minutes. If you love DIY, you can craft a scalloped frame using a wooden mirror kit and felt or fabric trim ($25-$50, 45 minutes) from craft stores. Renter tip: adhesive strips (Command Strips, $8) hold lightweight scalloped mirrors safely.
The soft, wavy edges catch light beautifully and create shadow patterns that shift throughout the day. Your room gains personality without sacrificing function, and guests always ask where you found it.
5. Layer Frameless Mirrors in a Gallery Wall
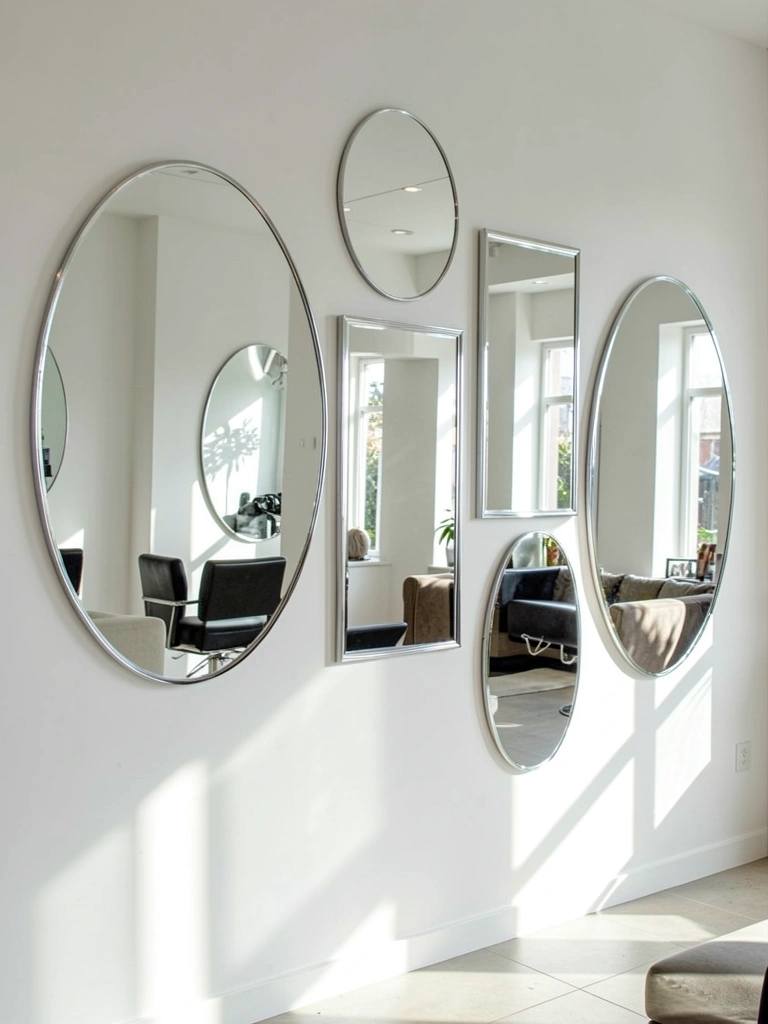
A gallery wall of frameless mirrors multiplies light and creates an art installation that’s equal parts functional and decorative. Each mirror reflects the others, making the effect more dramatic than a single piece.
Buy frameless mirrors in assorted shapes: circles ($15-$40), rectangles ($20-$50), ovals ($25-$60) from IKEA, Target, or Amazon. Arrange 5-7 mirrors on a white wall using mixed mounting methods (some hung, some leaning against floating shelves). Plan your layout on the floor first to avoid over-drilling. Hang using wall anchors rated for your mirror weight (check product specs). Allow 1-2 hours for layout and installation, especially if you’re a first-timer.
The collection becomes a room focal point that brightens every corner. Light bounces endlessly, and visitors perceive the space as significantly larger and more luminous than it actually is.
6. Choose Arched Mirrors to Soften Hard Angles
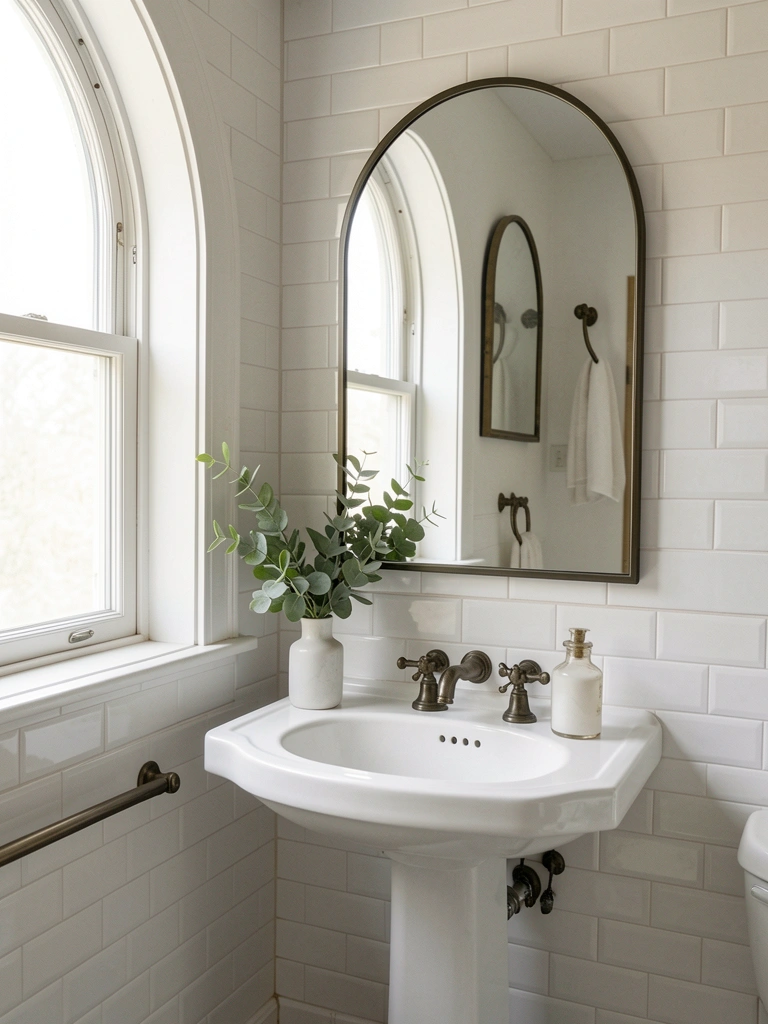
Arched mirrors work in nearly every décor style because curves naturally soften modern’s sharp edges. The shape is classic without feeling dated—it bridges traditional and contemporary beautifully.
Shop arched mirrors at West Elm ($120-$250), Wayfair ($60-$180), or Anthropologie ($100-$220). Sizes span 24″-40″ in height; most come in wood or metal frames. Installation takes 20-30 minutes with a level and wall anchors. Budget option: buy a basic arched mirror at Target ($40-$80) and upgrade the frame with paint or stain if needed. Renter hack: lean a large arched mirror against the wall behind a console table for impact without drilling.
The gentle arch creates visual harmony in rooms where walls meet at hard corners. You’ll notice the space feels more balanced and serene—less angular, more welcoming.
7. Install a Frameless Mirror Behind Floating Shelves
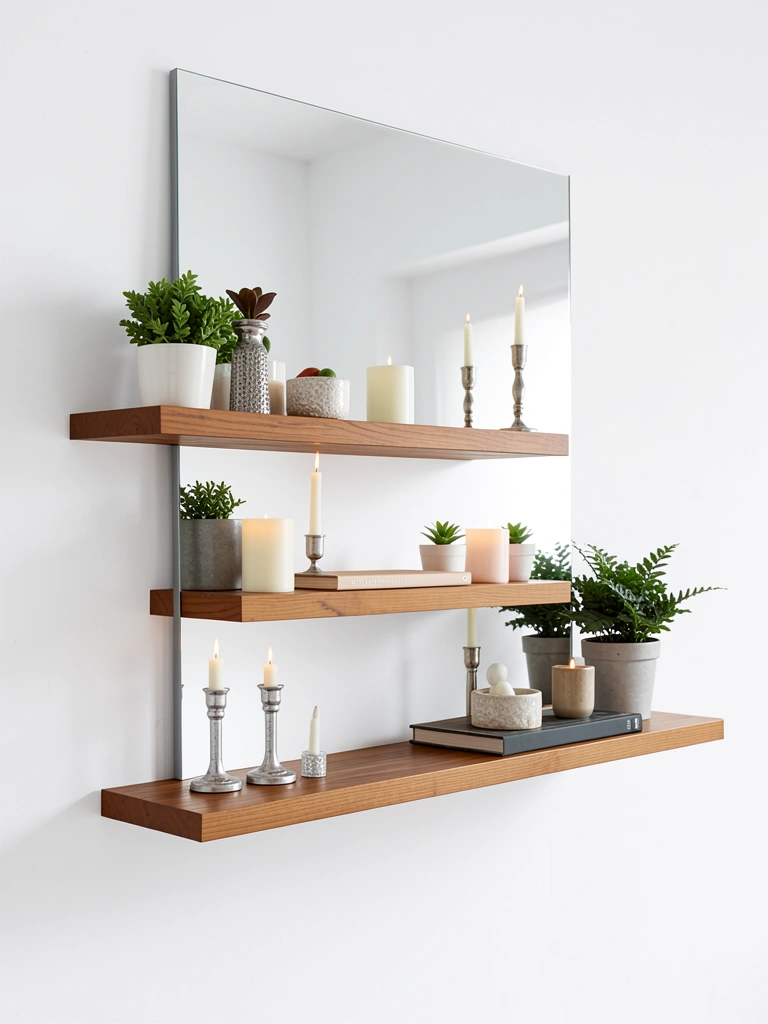
A frameless mirror behind floating shelves is a styling trick that makes small shelving systems look like gallery displays. The mirror backdrop forces items forward and makes curated collections feel more intentional.
Mount floating shelves at IKEA ($15-$40 each), Target ($20-$60), or Home Depot ($25-$80). Hang a frameless mirror (24″x36″ or 30″x40″) directly behind them using heavy-duty brackets. The mirror weight should be supported by sturdy wall anchors rated for 50+ pounds (check hardware ratings). Total time: 45 minutes to 1 hour if you’re installing shelves and mirror together. Pro tip: hire a handyman ($75-$150) if you’re not comfortable finding studs—this installation requires precision.
Your shelves instantly become a styled display that photographs like a magazine spread. The mirror creates depth, multiplies light, and makes even a modest collection look curated and intentional.
8. Paint a Bold Wood Frame for DIY Personality
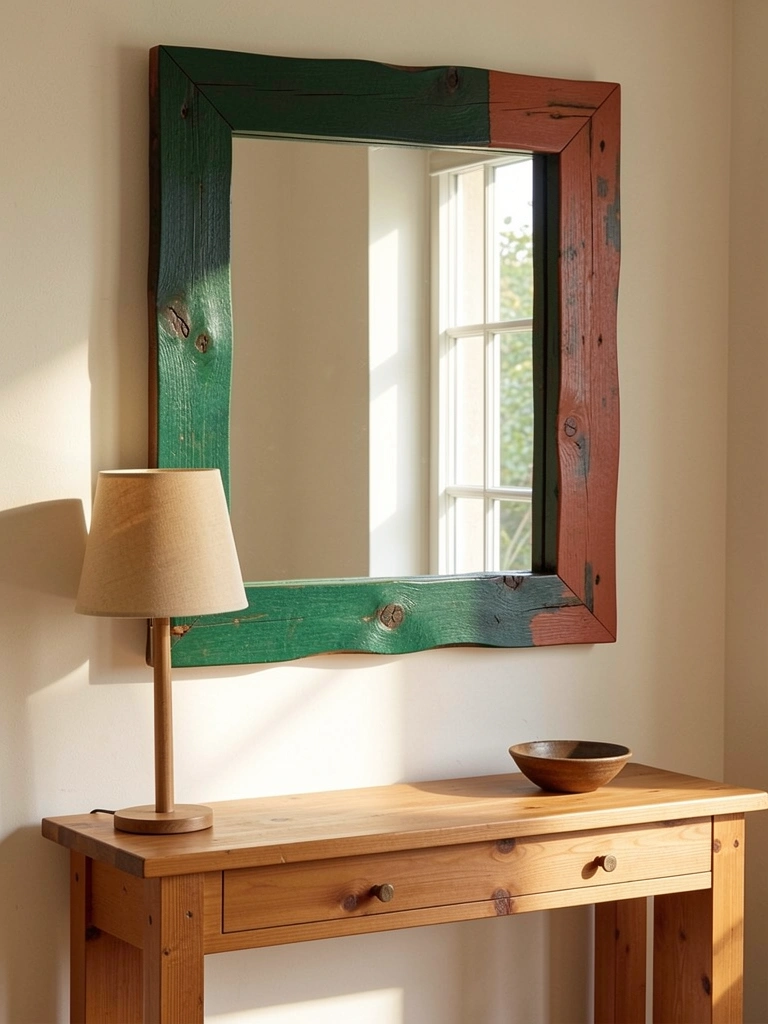
A thrifted wooden-framed mirror + paint = custom statement piece for under $30. This DIY idea gives you complete control over color and lets you match your existing décor exactly.
Find a wooden-framed mirror at thrift stores ($5-$15), estate sales, or Facebook Marketplace. Grab paint in your chosen color—try deep jewel tones, soft pastels, or warm earth tones ($8-$12 per quart). Clean the frame, tape off the mirror with painter’s tape, and apply 2-3 coats of paint ($20 total time: 2 hours including drying). Seal with matte polycrylic ($6) if you want protection. No special skills required.
Your custom mirror becomes a true focal point that matches your color scheme perfectly. People are always surprised it’s DIY—the finished look rivals store-bought pieces costing 3-5x more.
9. Hang a Marble-Veined Mirror for Luxury Texture
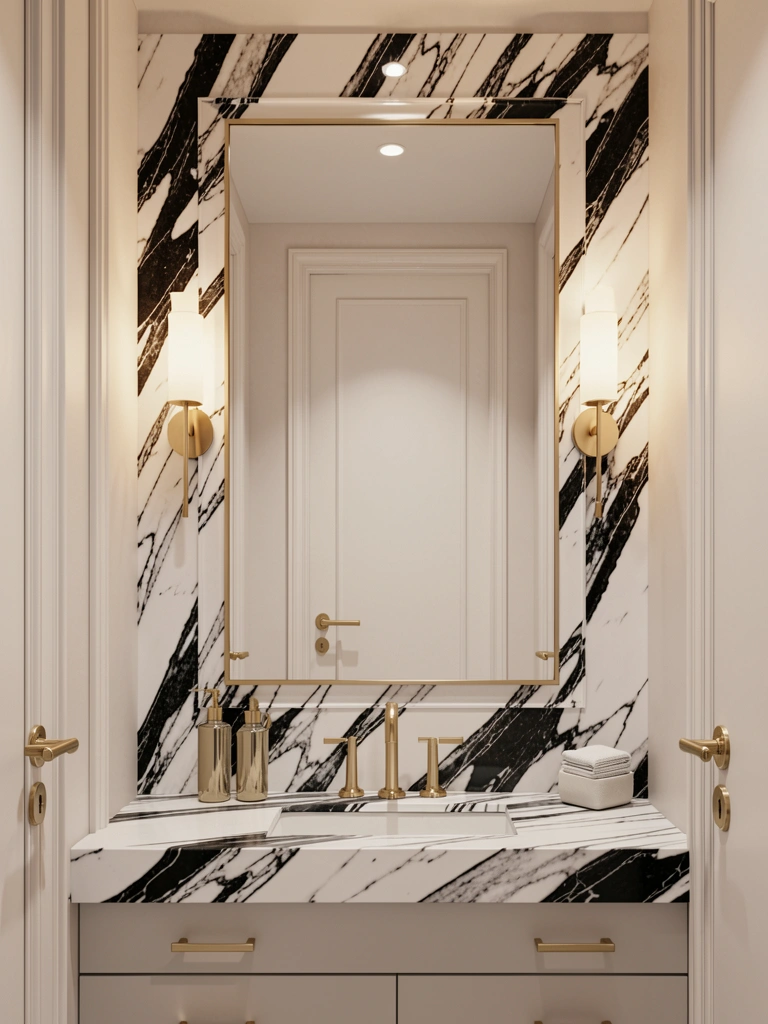
Marble-veined mirrors add instant luxury without actual marble prices. The veining catches light and adds visual interest that plain frames can’t match. Even small bathroom mirrors feel elevated with this detail.
Search for marble-veined mirrors at Wayfair ($70-$180), West Elm ($100-$250), or Etsy ($60-$200). Most feature marble-look finishes in black-and-white or gray veining over resin or composite materials (not actual marble, which is heavy and fragile). Installation takes 15-20 minutes with standard wall anchors. Budget dupe: spray-paint a frame with faux marble spray paint ($12, 30 minutes) from craft stores—results aren’t identical but they’re surprisingly convincing.
The veining mimics high-end materials, making your room feel more polished. Guests notice the detail immediately, and you’ll love how it grounds the space with quiet elegance.
10. Install LED Backlighting Behind a Frameless Mirror
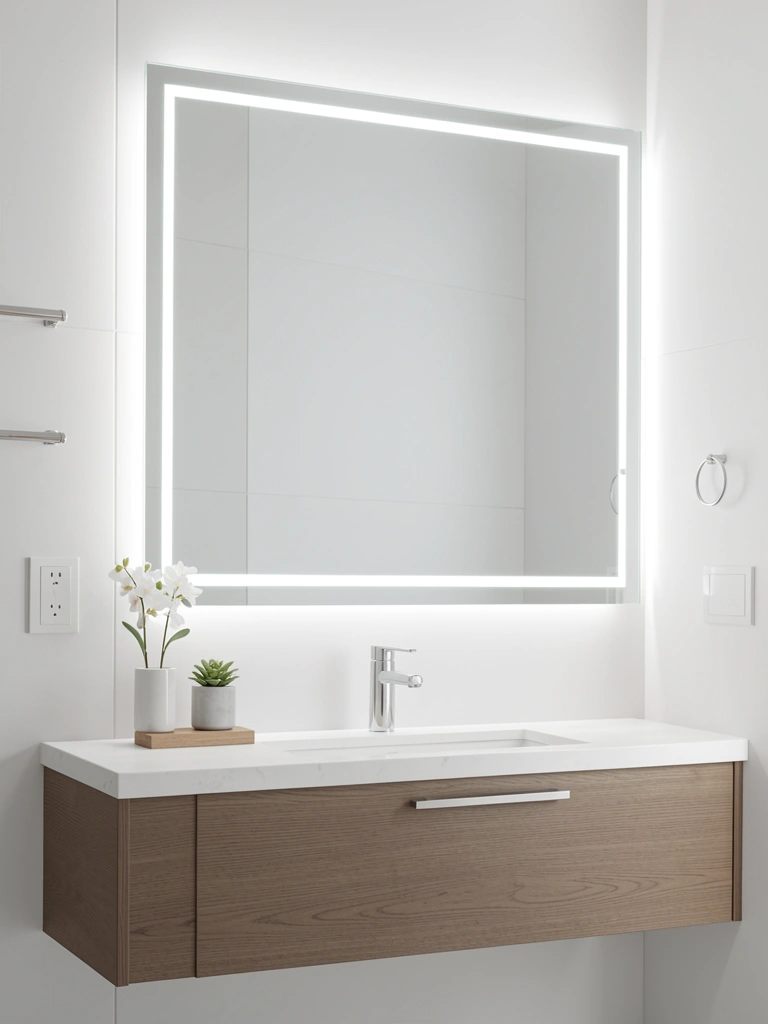
LED backlighting transforms a basic mirror into functional art that brightens your bathroom or vanity area while adding a luxury vibe that feels like a spa retreat.
Buy a large frameless mirror ($40-$100) and LED strip lights ($15-$40) from Amazon or Home Depot. Choose warm white (2700K) for bedrooms or cool white (4000K) for bathrooms. Mount the mirror using wall anchors, then adhere LED strips along the frame’s back edges using 3M strips. Total time: 30-40 minutes. Plug into a standard outlet (strips come with USB or plug adapters). Budget option: use peel-and-stick LED strips ($10-$20) for a removable, renter-friendly installation.
Your mirror becomes a light source, which means better visibility and mood lighting in one go. Bathrooms look visibly brighter, and you’ll actually want to spend time at your vanity.
11. Use Oversized Framed Mirrors in Small Rooms

An oversized framed mirror in a small room creates the illusion of a second window and doubles your perceived square footage. The frame adds personality while the size does the heavy lifting.
Find oversized framed mirrors (36″x48″ or 40″x50″) at Wayfair ($80-$200), IKEA ($60-$120), or furniture stores ($100-$300). Lean it against a wall (renter-safe, zero installation) or hang it with heavy-duty wall anchors rated for 60+ pounds. If you’re not comfortable drilling, lean-to mirrors with stands ($70-$150) work beautifully and move easily. Installation (if hanging): 20-30 minutes.
The oversized frame becomes a statement piece that anchors the room while the mirror itself makes the space feel significantly larger. Natural light bounces around more efficiently, so you might even feel less need for artificial lighting.
12. Create a Minimal Look with Ultra-Thin Frameless Designs
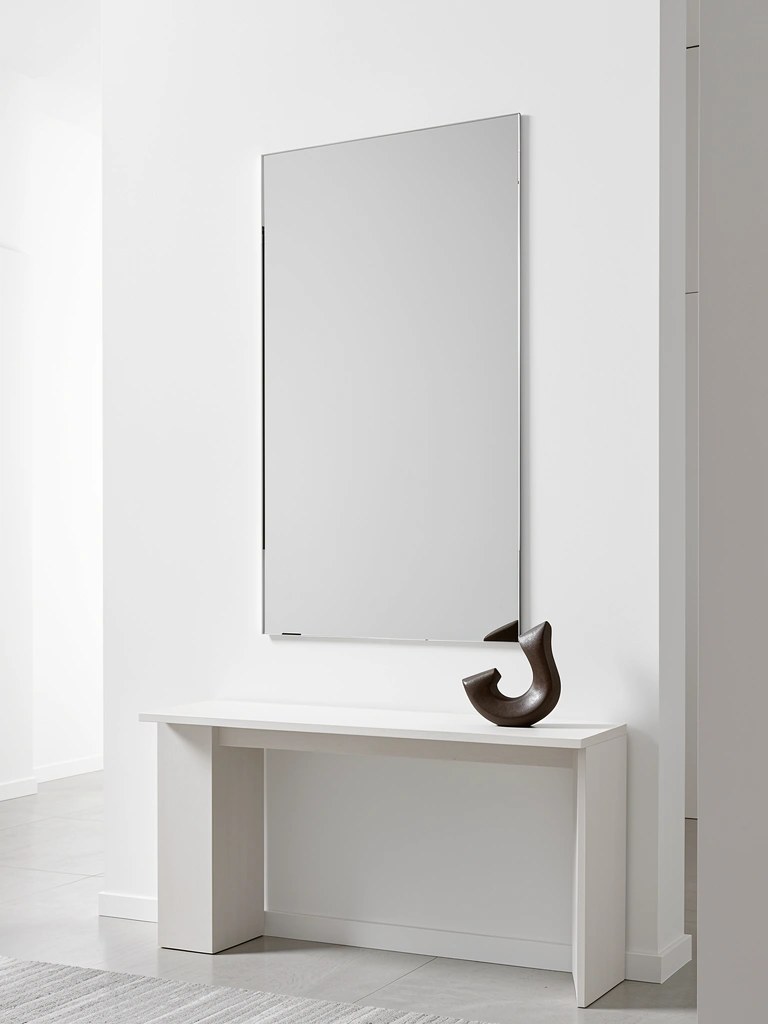
Ultra-thin frameless mirrors are minimalism at its purest—just glass and polish. They disappear into walls while maximizing light, perfect for anyone who believes less is more.
Shop ultra-thin frameless mirrors ($40-$120) at Design Within Reach, Article, or Wayfair. Most measure 24″-36″ in width; the thinness is the design feature. Hang using minimal metal brackets designed for frameless mirrors (usually included) and wall anchors. Installation takes 20 minutes. DIY workaround: buy a standard mirror and have a glass company polish the edges for a frameless appearance ($30-$50, 3-5 business days).
The ultra-thin profile reads as intentional and curated rather than basic. Your wall becomes a study in simplicity, and the minimal visual weight means the mirror blends rather than dominates.
13. Mix Metal Finishes in a Coordinated Set
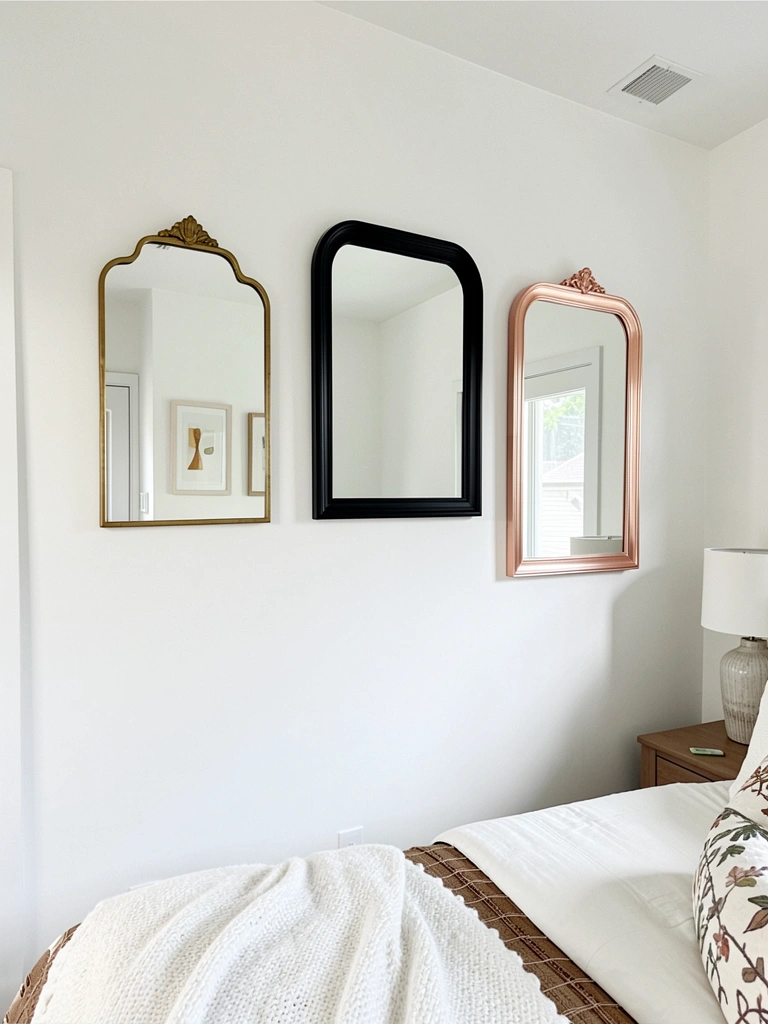
Mixing metal finishes used to be a décor no-no, but now it’s a trend. Three mirrors in brass, matte black, and rose gold feel intentional and collected, not mismatched.
Choose three mirrors in similar shapes but different metal finishes. Source from IKEA, Target, and Wayfair ($25-$60 each, $75-$180 total). Arrange them asymmetrically on your wall—stagger heights and spacing so they read as curated. Use a level and painter’s tape to plan placement before drilling. Installation time: 45 minutes to 1 hour. Pro tip: keep frame styles minimal so the finish variations shine; ornate frames in mixed metals can feel chaotic.
The mixed metals feel collected and intentional—like you found them over time rather than buying a matched set. Your wall becomes a conversation starter and feels more personal than a single statement mirror.
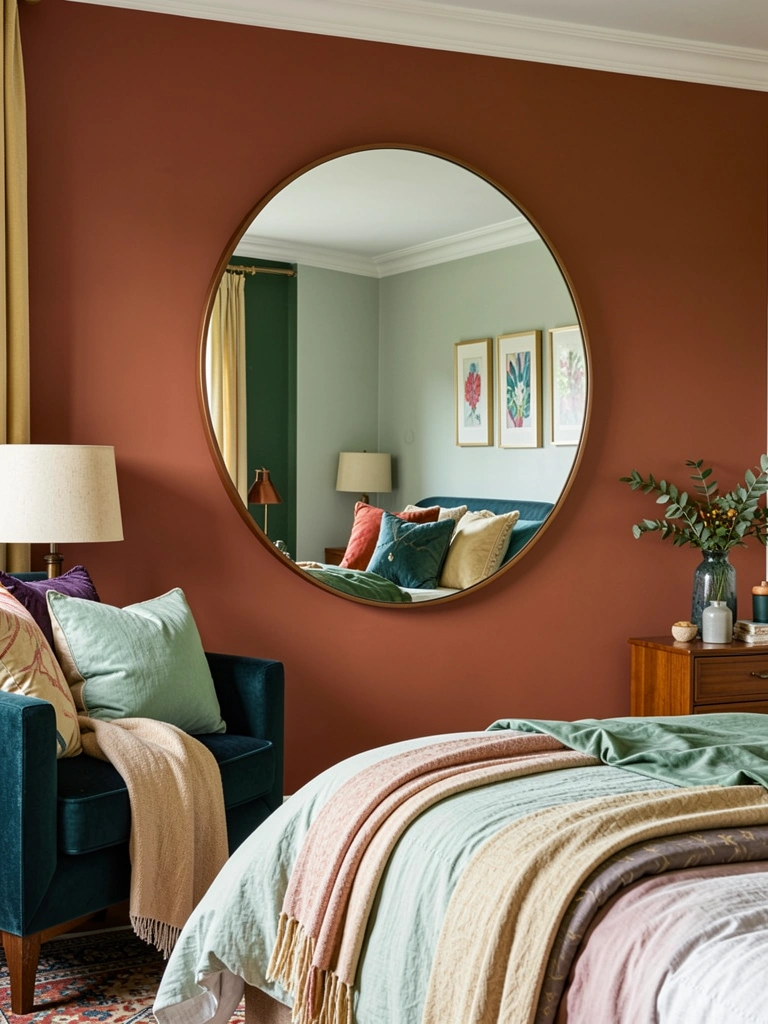
14. Mount a Round Frameless Mirror in a Modern Bedroom

Round frameless mirrors bring soft geometry to modern bedrooms while keeping lines clean. The shape is calming and the lack of frame makes it feel contemporary rather than traditional.
Find round frameless mirrors in sizes 24″-36″ ($30-$80) at IKEA, Target, or Amazon. Mount using a specialized round mirror bracket system (usually two-part, rated for weight) and wall anchors. Installation takes 20 minutes. Renter hack: lean a round mirror against the wall or use adhesive mirror hangers ($10-$20, removable without damage). Budget option: thrift a wood-framed round mirror and remove the frame by carefully prying it off, then polish edges.
The soft circle grounds your bedroom visually while keeping the aesthetic modern and clean. You’ll love how peaceful the rounded shape feels compared to angular mirrors.
15. Add Rattan or Natural Wood Frames for Coastal Style

Natural material frames like rattan and wood bring organic warmth and texture that screams coastal calm. They work in bathrooms, bedrooms, and entryways without feeling trendy or temporary.
Search for rattan or wood-framed mirrors ($50-$150) at Wayfair, Anthropologie, or West Elm. Look for 24″-36″ sizes in natural finishes. If you can’t find exactly what you want, buy a basic framed mirror ($20-$40) and wrap the frame with rattan webbing ($10-$20) using strong adhesive—craft stores sell supplies. DIY time: 30 minutes. Direct installation: 20 minutes with standard wall anchors.
The natural texture makes your space feel immediately warmer and more inviting. Rattan catches light softly and adds visual interest without competing with your other décor, giving your room an effortlessly curated coastal vibe.
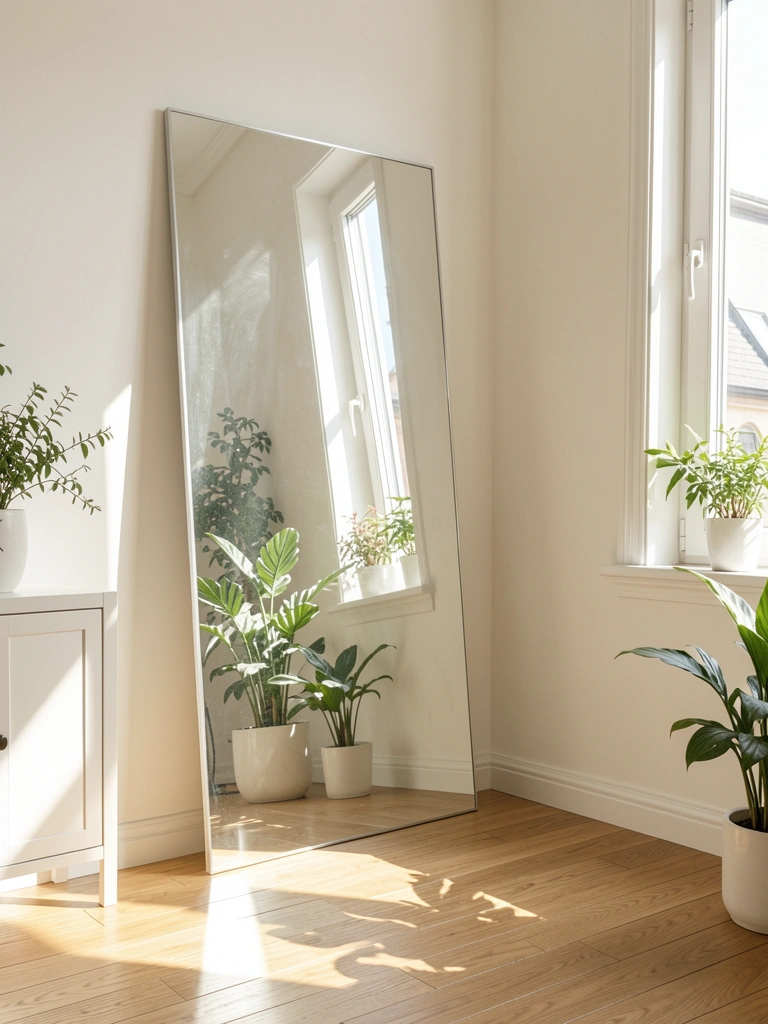
16. Lean a Floor-to-Ceiling Mirror for Instant Drama

A floor-to-ceiling lean-to mirror is the ultimate space expander and requires zero permanent installation—perfect for renters or anyone hesitant about commitment.
Buy a tall lean-to mirror (54″-72″ height) from IKEA ($80-$150), Target ($70-$130), or Wayfair ($100-$200). Choose a frame style that matches your aesthetic—minimal metal, wood, or simple designs work best. Lean it against the wall (no installation needed), or use a temporary mirror stand ($50-$100) for extra stability. Setup time: 5 minutes. Prop it in a corner or against a focal wall to maximize the reflection impact.
Your entire room feels twice as spacious and twice as bright instantly. The mirror becomes a statement piece while functioning as pure practical magic—wear it like the accessory it is.
17. Frame a Mirror with Sustainable or Reclaimed Wood
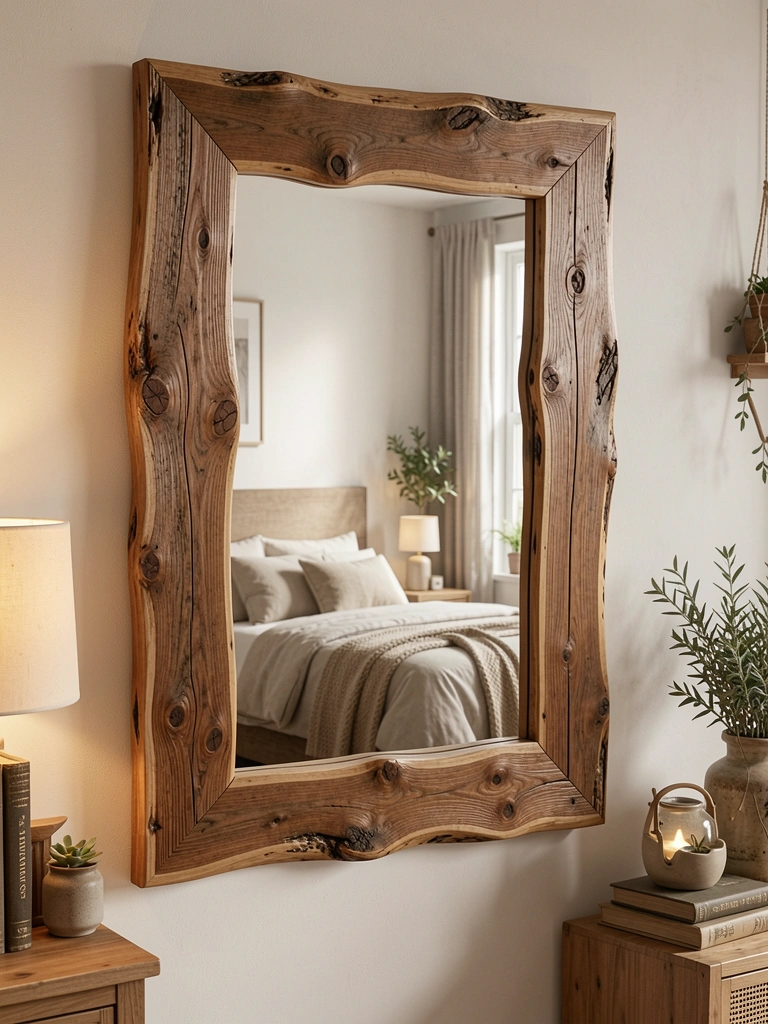
Reclaimed or sustainable wood frames add character and story. Each grain pattern is unique, so your mirror becomes one-of-a-kind without feeling like a trendy statement piece.
Source reclaimed wood mirrors from Etsy ($80-$250), local woodworkers, or specialty shops. Alternatively, buy a plain mirror and commission a local carpenter ($100-$300) to build a custom frame from reclaimed wood. DIY option: find salvage wood at architectural salvage yards ($10-$30) and build a simple frame yourself with wood glue and finishing nails—YouTube tutorials make it doable. Budget: 45 minutes to 2 hours depending on skill level.
The natural imperfections in reclaimed wood create visual warmth that new materials can’t replicate. Your mirror tells a story of sustainability, and guests appreciate the thought behind choosing reclaimed materials over mass production.
18. Install a Mirror Vanity with Built-In Storage
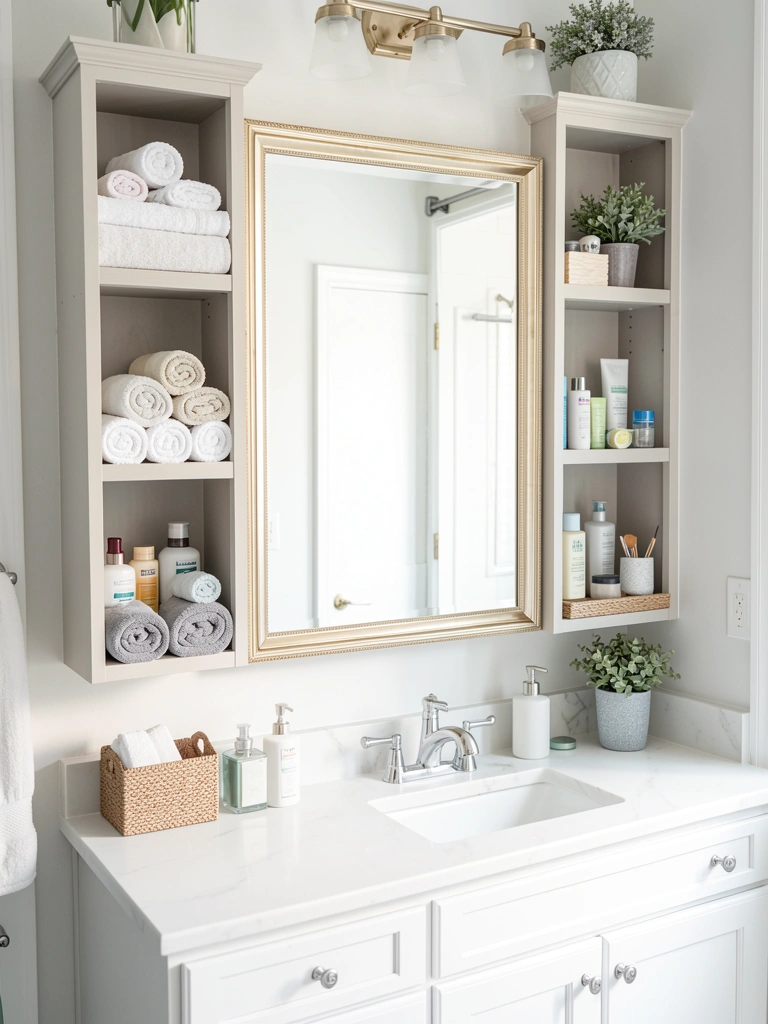
A mirror-with-storage combo solves two problems at once: you get a good mirror for morning routines plus places to stash daily essentials, which is huge in small bathrooms.
Find mirrors with integrated shelving ($100-$250) at Wayfair, Amazon, or specialty bathroom retailers. Most include two to four shelves built into the frame. Mount securely using heavy-duty wall anchors rated for combined mirror-plus-item weight (typically 50-80 pounds). Installation takes 30-40 minutes. Budget option: mount a regular mirror above floating shelves ($15-$40 each) to create your own storage effect at a fraction of the cost.
You instantly gain counter space and reduce bathroom clutter. Everything you use daily is within arm’s reach, and the organized look makes your bathroom feel more spacious and intentional.
19. Use a Gold Leaf or Metallic Finish Frame for Luxury
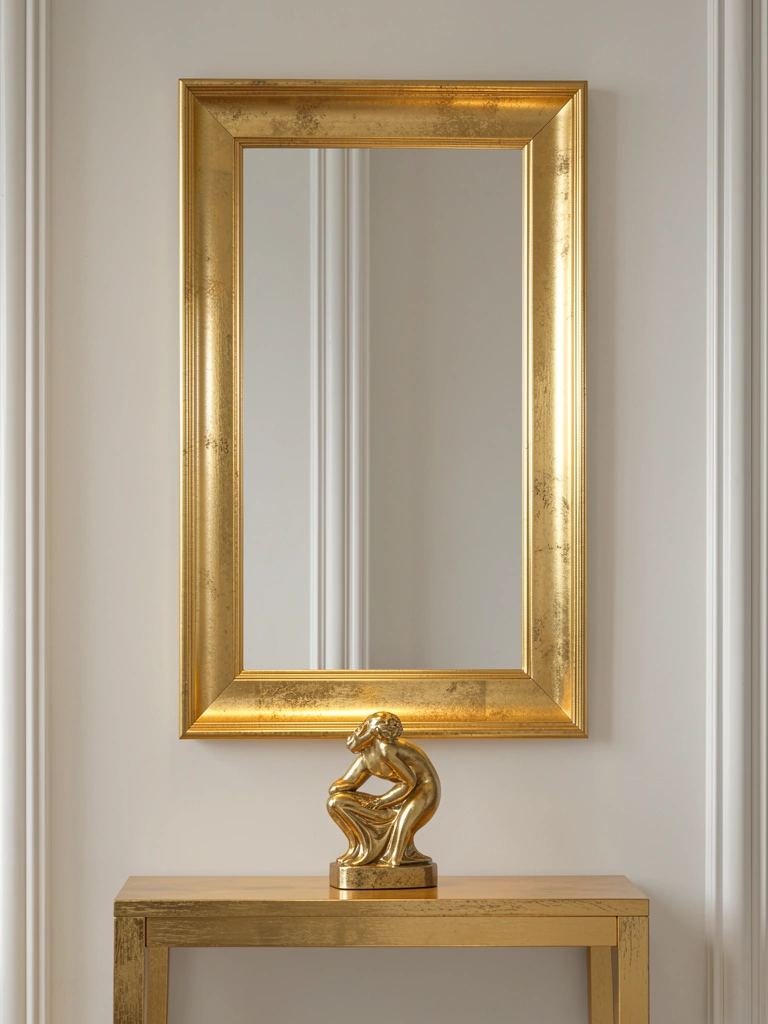
Gold leaf frames are the quiet luxury update—not shiny or brassy, but warm and sophisticated. They work in traditional, modern, and eclectic spaces without feeling dated.
Hunt for gold leaf or metallic frame mirrors ($80-$180) at Anthropologie, Etsy, or high-end home décor sites. If you love DIY, buy a basic wooden frame mirror and apply gold leaf yourself ($15-$25, 1-2 hours) using leaf kits from craft stores. Mount with wall anchors rated for frame weight (usually 20-30 pounds for standard sizes). Installation: 15 minutes.
The warm metallic finish catches light and adds quiet sophistication without screaming “look at me.” Your entryway or powder room instantly feels more polished, and the gold complements nearly every other color in your home.
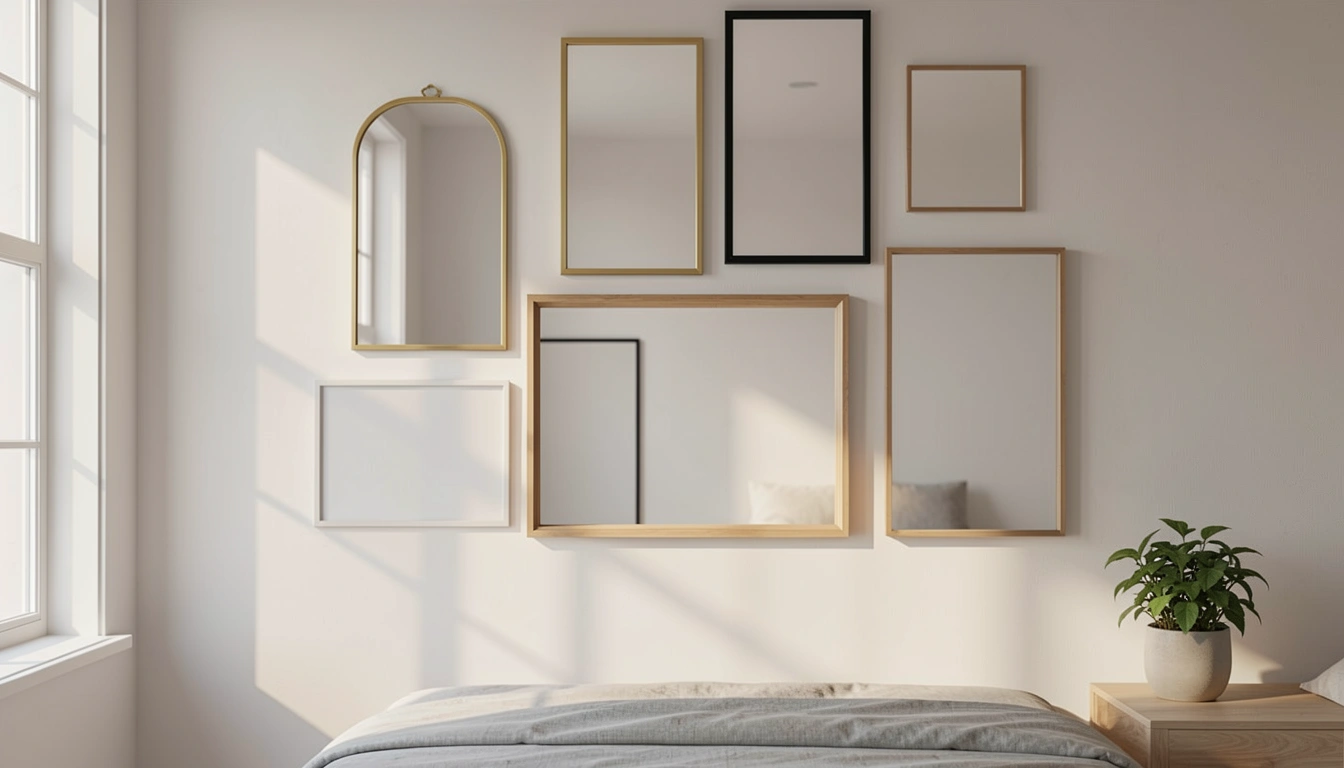
20. Create an Asymmetrical Gallery Wall with Mixed Frames
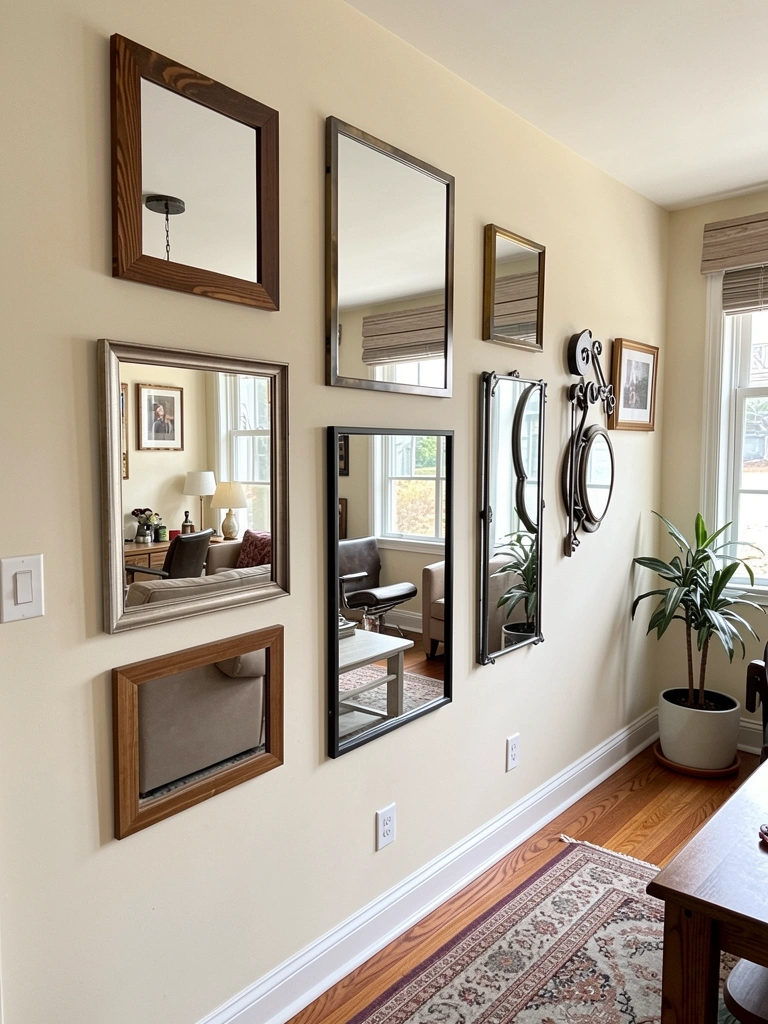
An asymmetrical gallery combining framed and frameless mirrors is maximalist done right—busy but intentional, never chaotic. This approach celebrates visual interest and personal style.
Collect 6-8 mirrors in mixed styles: some framed ($15-$60 each), some frameless ($20-$50 each) from IKEA, Target, Wayfair, and Etsy. Choose a unifying element: all cool metal finishes, all warm wood tones, or all similar sizes (even if shapes vary). Lay them on the floor and arrange before hanging. Mount using appropriate hardware for each mirror type (wall anchors, specialized frameless brackets). Allow 2-3 hours for planning and installation, or hire a handyman ($100-$150) for precision.
The mixed collection reads as intentional and artistic rather than random. Each mirror adds both function and visual texture, turning your wall into a gallery that reflects your personal taste and style evolution.
21. Hang a Statement Mirror with Integrated Shelving

Integrated shelving around or beside a mirror is a design-forward way to add storage and display space without mounting separate pieces.
Look for mirror-with-shelving units ($150-$350) on Wayfair, Article, or specialist home sites. Most come as single-unit installations combining the mirror and shelves. Mount using heavy-duty wall anchors and a stud finder (critical for weight distribution). Installation time: 40 minutes to 1 hour. DIY approach: mount a statement mirror, then add a floating shelf ($15-$40) on each side using separate brackets for a custom look at half the price.
You gain display space and a functional mirror in one cohesive piece. Styled shelves become part of your mirror display, creating a layered, gallery-like focal point that feels intentionally designed.
22. Choose a Geometric or Hexagonal Frame for Modern Edge

Geometric frames push your décor beyond circles and rectangles, adding architectural interest without being playful or whimsical. Hexagons and asymmetrical shapes read as intentionally modern.
Find geometric mirrors ($60-$150) at Wayfair, Article, or specialized modern furniture retailers. Look for hexagons, pentagons, or asymmetrical shapes. Most work best in metal frames; wood can read as too trendy. Mount using standard wall anchors and a level (the angles require precision). Installation: 20-25 minutes. Budget option: DIY a geometric frame using wood or metal trim, then fit a mirror inside ($30-$50 in materials, 1-2 hours).
The geometric shape adds a sculptural quality that elevates your space beyond standard mirrors. Modern without being cold, the sharp lines add personality while respecting a minimal aesthetic.
23. Paint the Wall Behind Your Mirror for Added Depth
Painting the wall behind your mirror frames it visually and adds depth to your room. A contrasting color draws your eye and makes the mirror a true focal point rather than an afterthought.
Choose a paint color that contrasts with your mirror frame (dark walls with brass mirrors, light walls with black frames, colorful walls with minimal frames). Grab paint ($15-$25 per quart) from any hardware store in your chosen shade. Prime if needed, then paint the wall area behind and around your mirror ($20-$40 in supplies, 3-4 hours including drying). Mount your mirror after paint dries. Pro tip: use painter’s tape to mark your mirror’s footprint before painting, so you know exactly where it’ll hang.
The accent wall transforms your mirror from a functional object into a designed focal point. The contrast adds dimension and draws people’s eyes—suddenly your mirror feels like intentional décor rather than a practical necessity.
Save this post and pick your first mirror upgrade this weekend. Whether you go frameless for space or framed for personality, one small change shifts how your whole room feels—and honestly, your space deserves that attention.
Leave a Reply