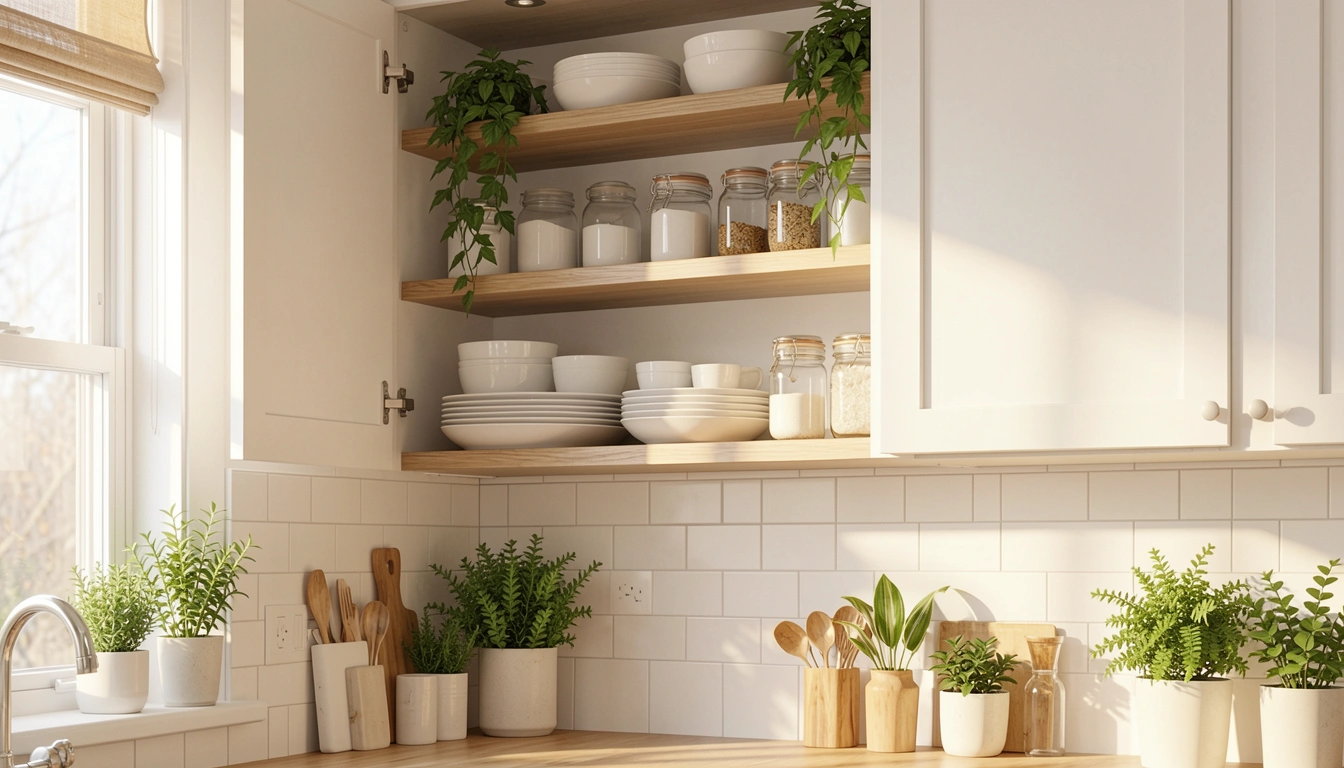
You’re staring at your upper cabinets and wondering: How do I actually use this space without it looking like chaos? Whether you’re a renter working with what you’ve got or a homeowner ready to maximize storage, upper cabinets are prime real estate that most people leave half-empty or stuffed beyond recognition. The good news? With the right strategies, you can turn those cabinets into a beautiful, functional part of your kitchen that works for you, not against you. These 26 ideas range from free organizing hacks to smart storage investments—and most take less than an hour to implement. Let’s find the ones that fit your style and space.
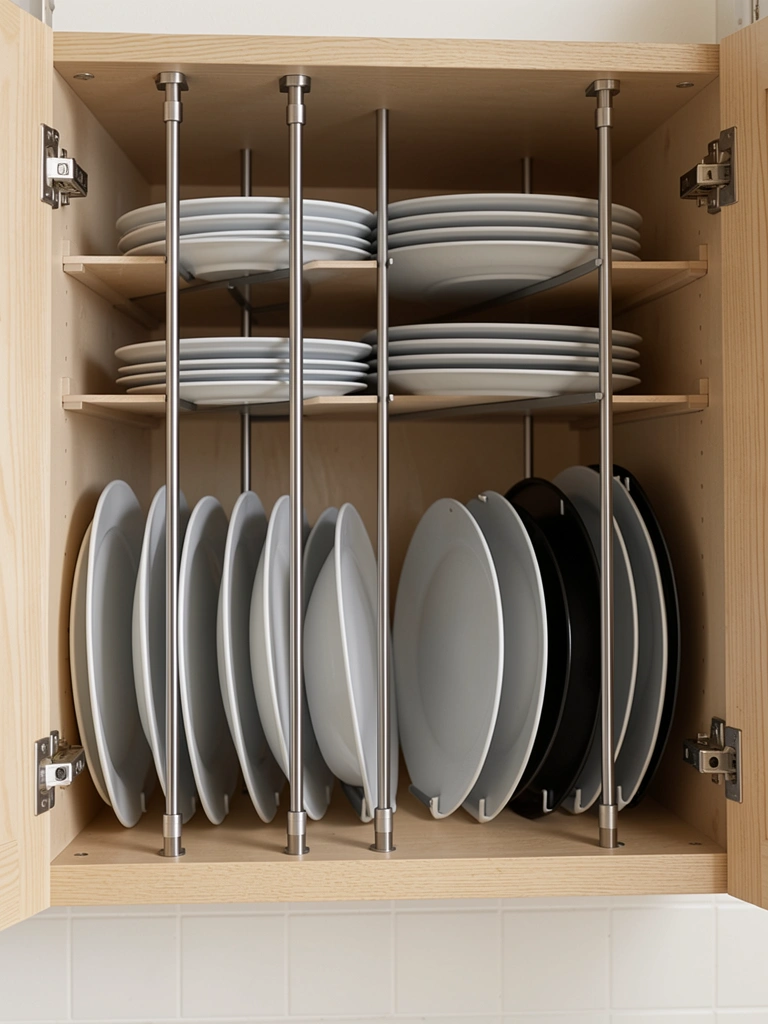
1. Stack Plates Vertically in Slots

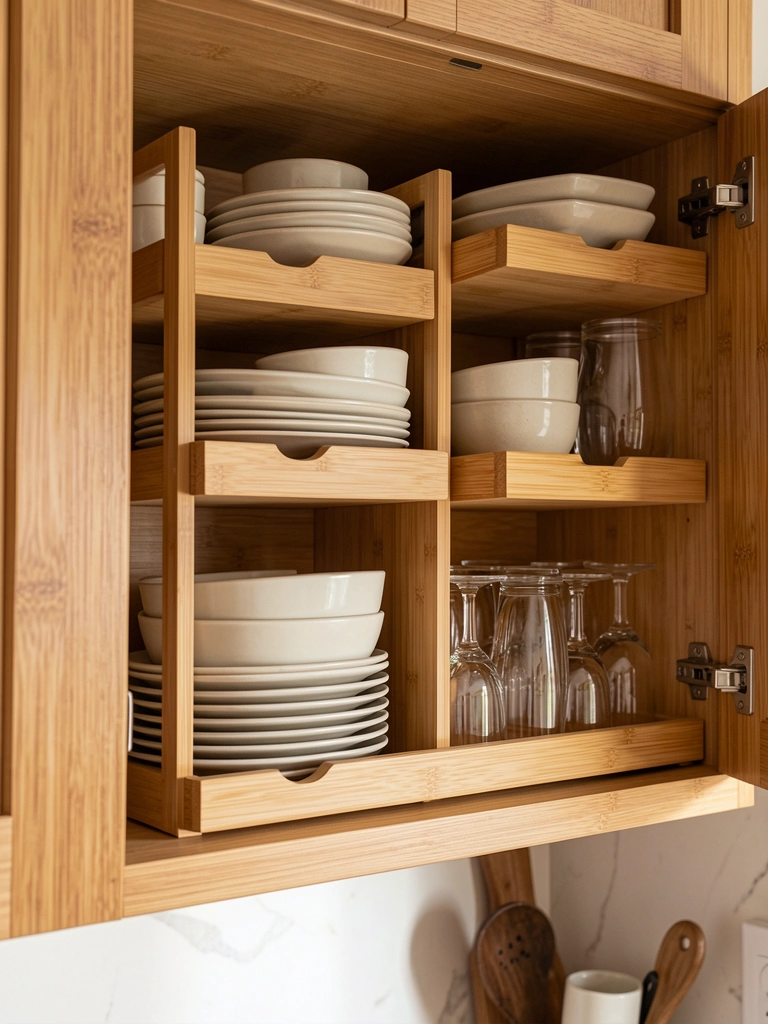
Vertical storage lets you see every plate without digging through stacks. Instead of piling dishes flat, use a simple plate rack divider (around $15-30 from IKEA or Target) to stand plates on their edge inside an upper cabinet.
You’ll fit nearly double the dishes in the same footprint, and grabbing what you need takes seconds instead of shuffling through a precarious stack. Installation is basically sliding the divider into place—no tools required. If you’re renting, lean the divider against the cabinet back; it stays put without damage. Bonus: this also works brilliantly for baking sheets, cutting boards, and serving platters.
Your morning coffee routine gets faster when you’re not playing Jenga with your dishes.
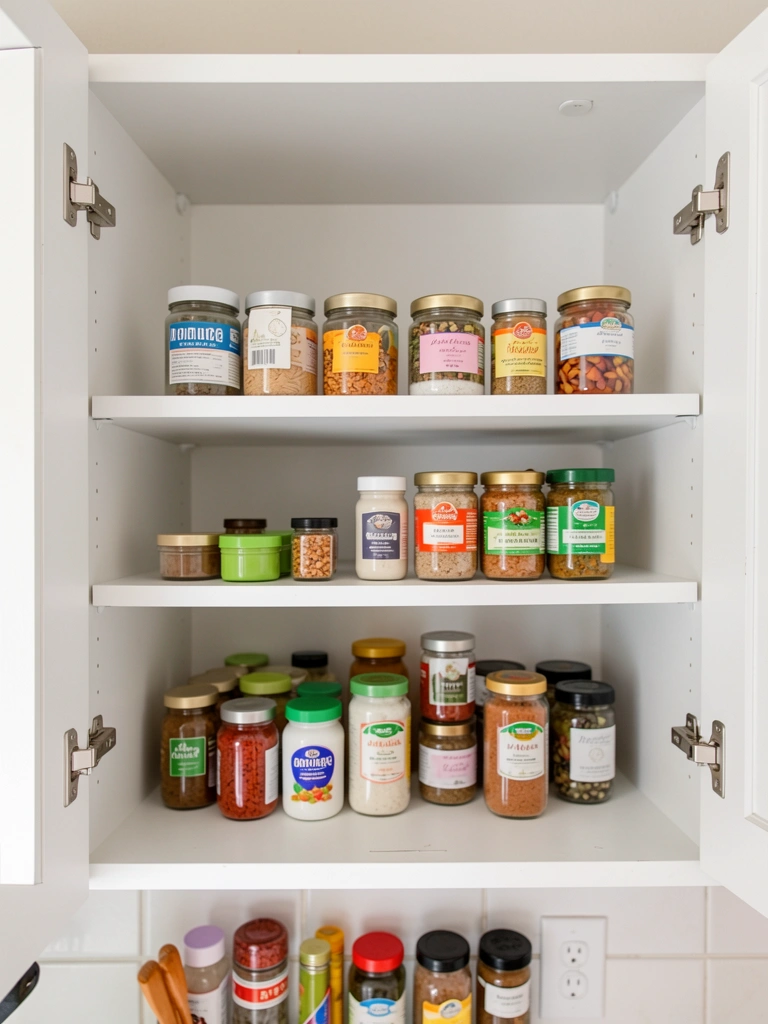
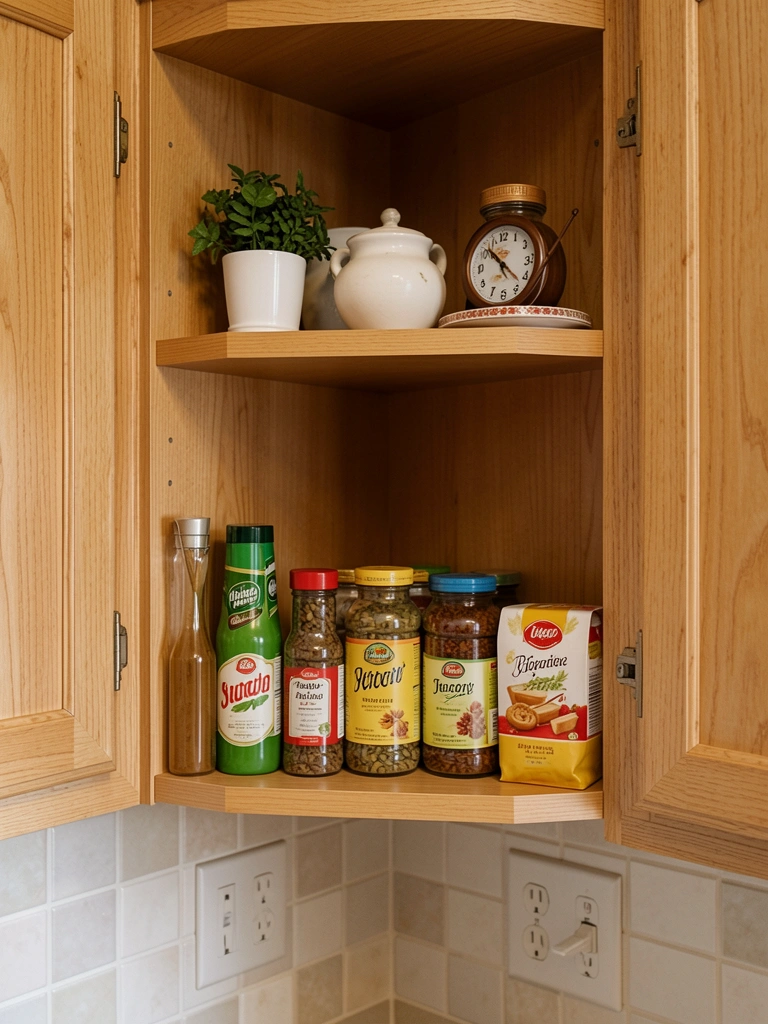
2. Use Clear Glass Containers for Dry Goods
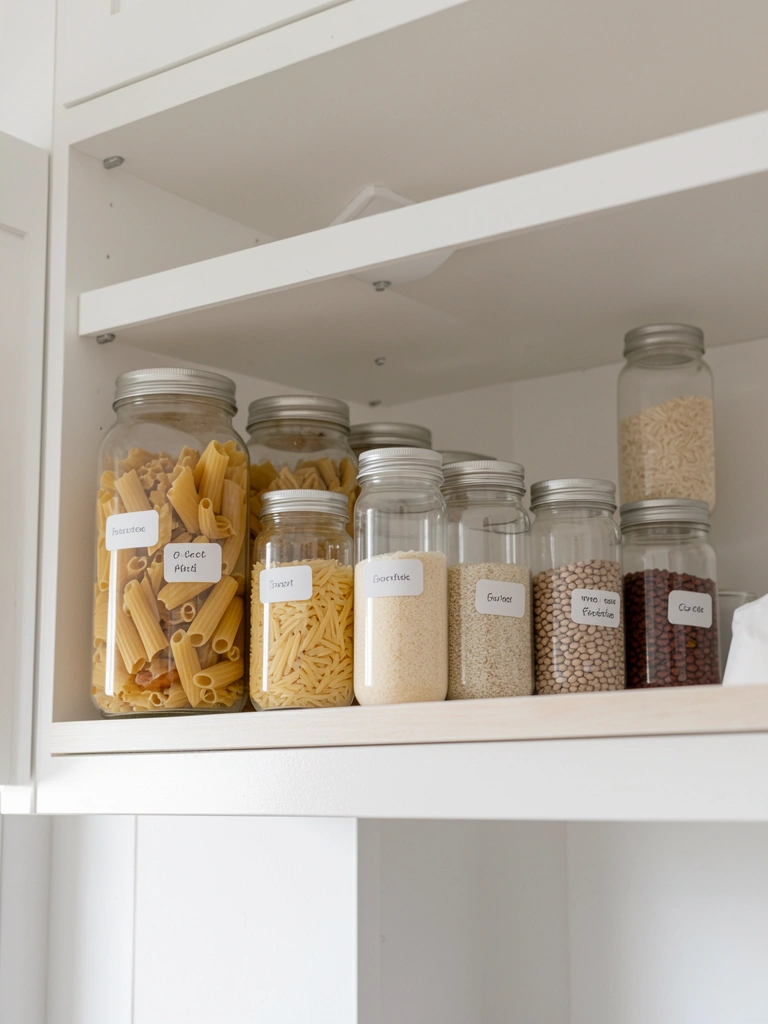
Clear containers let you see what you have and when you’re running low—no more mystery cabinets. Pour flour, pasta, cereal, and rice into uniform glass or plastic containers ($1-3 each, bulk at Target or Amazon) and label them with masking tape or printed labels.
This swap takes about 20 minutes and immediately makes your cabinets look intentional and organized. You’ll use about 30% less cabinet space since these containers stack efficiently and eliminate bulky original packaging. Add a label maker (around $20-30) if you want a polished look, but tape works just fine. The real win? You’ll actually know what you have, which means less food waste and fewer duplicate purchases.
Suddenly your upper cabinets become a pantry showcase instead of a catchall.
3. Add Adjustable Shelf Dividers
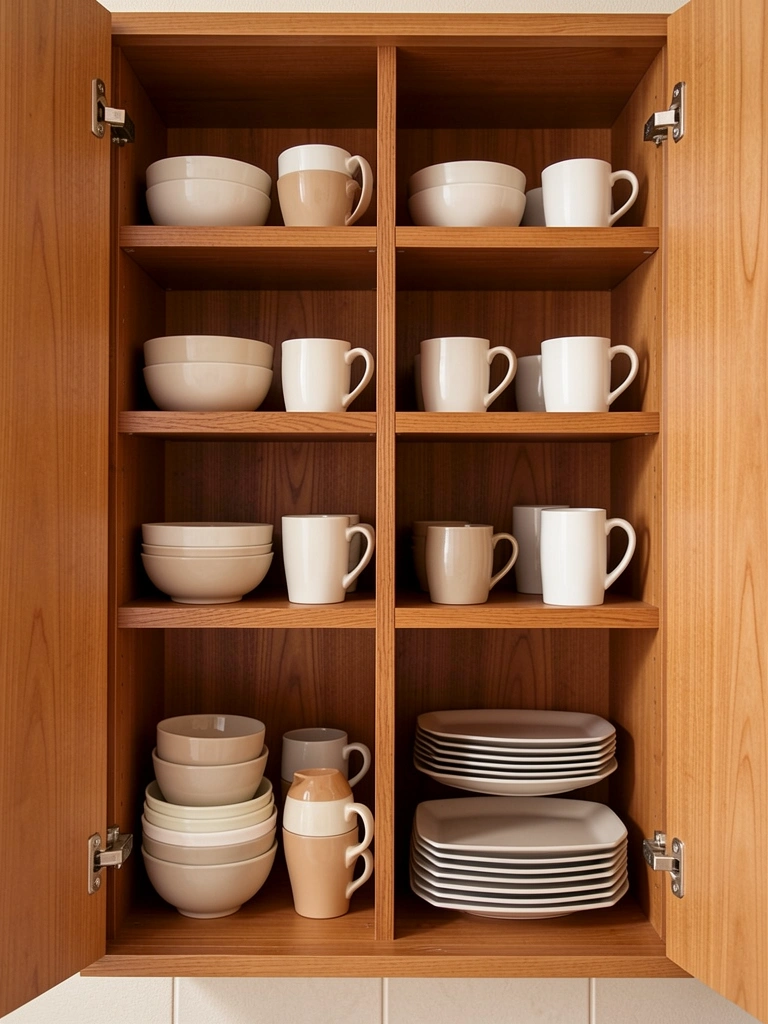
Dividers prevent stacks from toppling and help you designate zones for different items. Grab adjustable shelf dividers ($8-15 per set, available at Container Store, IKEA, or Wayfair) and position them to create separate sections within each shelf.
Set up zones: bowls in one section, mugs in another, serving dishes in a third. It takes about 10 minutes to arrange, and you’ll stop knocking over stacks every time you reach for something. These work for renters too—they simply rest on the shelf with no installation. Pro tip: stagger the divider heights so you can see all items at a glance, especially in back corners.
You’ll stop playing “cabinet Tetris” every morning and actually enjoy opening your cabinets.
4. Install Pull-Down Shelves for Back Corners
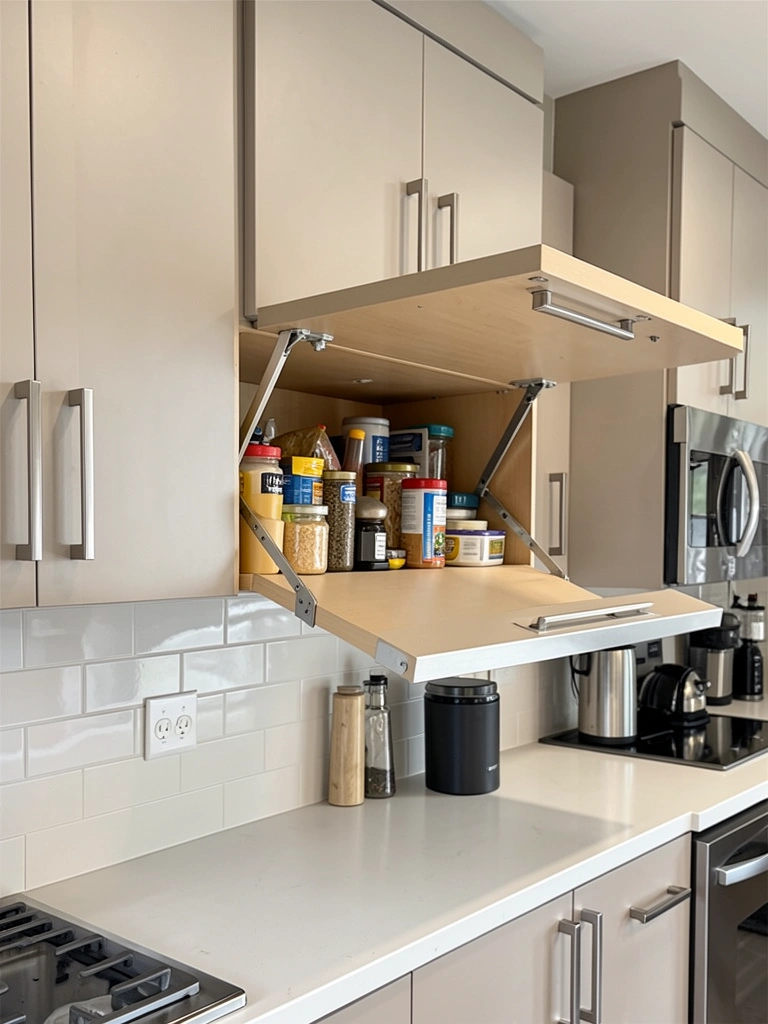
Dead zones in the back of deep cabinets waste space you’ve already paid for. A pull-down shelf ($40-80, available at Home Depot or Amazon) is a sliding mechanism that brings items forward when you pull a handle.
These work best in cabinets 12+ inches deep, and installation takes about 30 minutes with basic tools (or hire someone for $50-100 labor). You’ll reclaim 20-30% more usable space just by making back items accessible. These pair perfectly with clear containers so you can actually see what’s hiding back there. Renter? Skip this one—it requires permanent installation—but homeowners should seriously consider it.
Suddenly those forgotten items in the cabinet’s cave become part of your everyday rotation.
5. Hang Small Shelves Inside Cabinets
Vertical thinking: add a second layer of storage without sacrificing accessibility. Use floating shelves ($15-40 depending on size, from IKEA, Amazon, or Wayfair) mounted about 6-8 inches above your main shelf.
Most can hold 5-10 pounds of lightweight items like spices, tea, or small jars. Installation takes 20 minutes with basic hardware; use a level and stud finder (or ask at the hardware store for help). This doubles your upper cabinet capacity and keeps frequently used items at eye level. Make sure shelves don’t block cabinet lighting if you have it, and leave enough clearance to close the door.
You’ve essentially given yourself an extra shelf without taking up any additional cabinet space.
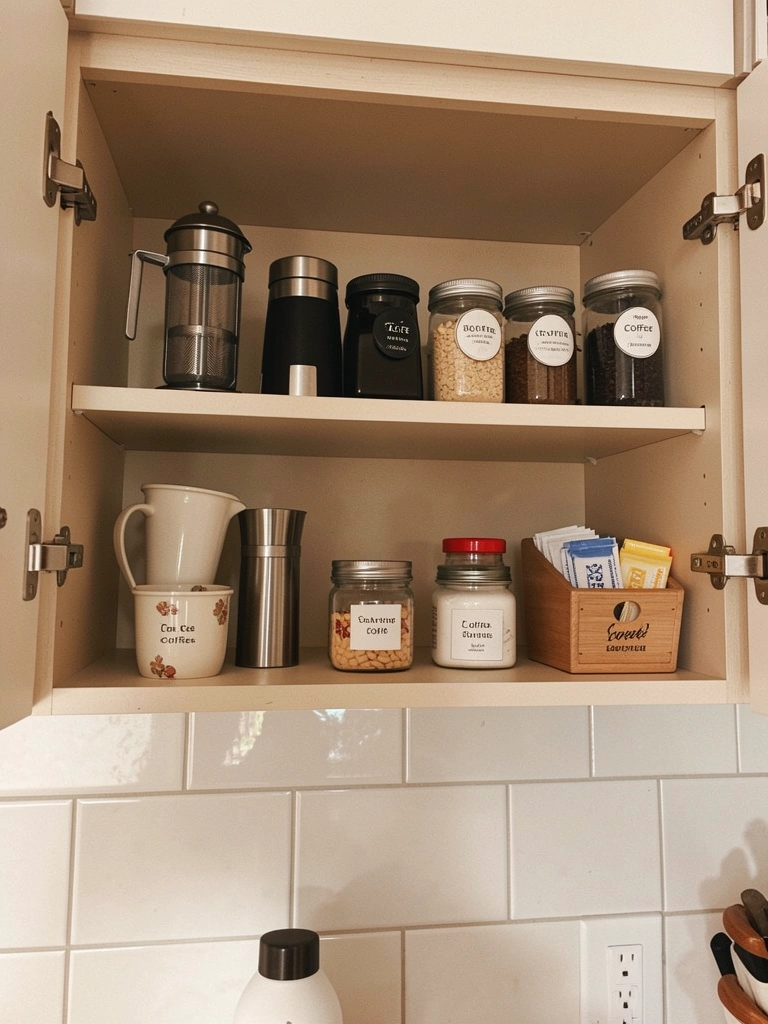
6. Create a Coffee Station in One Cabinet
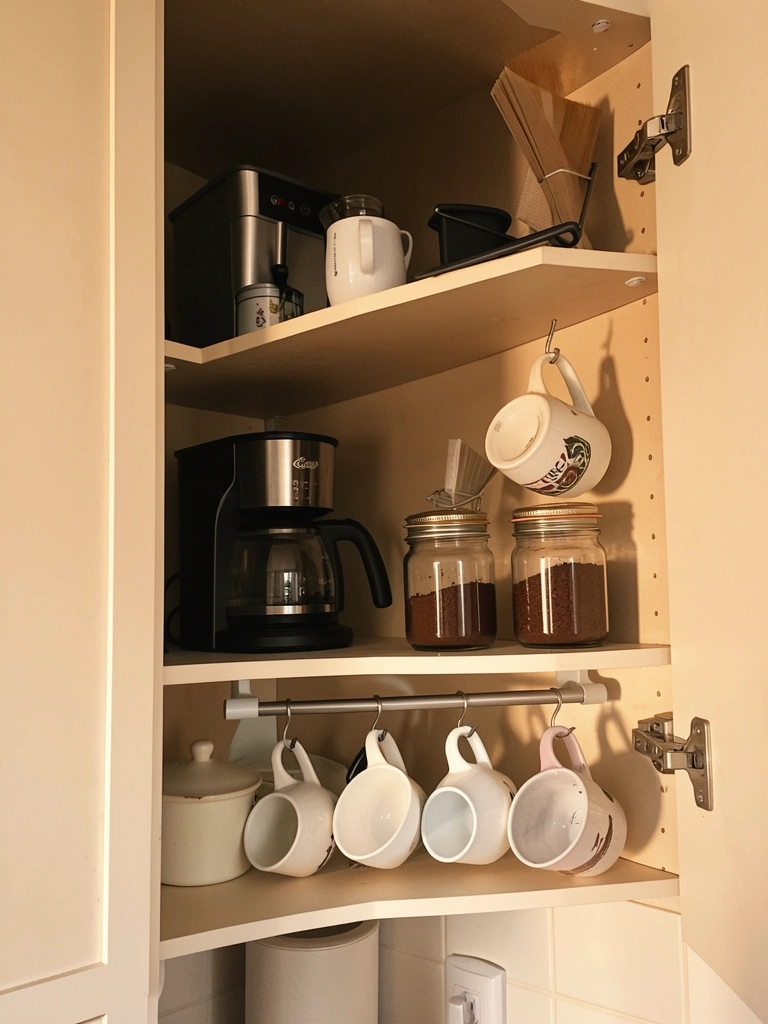
Grouping related items saves time and gives you a designated space to start your day. Dedicate one upper cabinet and use small hooks or a rail ($10-20, Home Depot or Amazon) to hang mugs directly inside the cabinet.
Store ground coffee, filters, and sweeteners on the shelf below. Plug in a small coffee maker on the counter just below this cabinet if you have the counter space, or keep a French press inside. Setup takes about 15 minutes, and every morning you walk straight to your coffee station instead of hunting through three cabinets. This works great for renters if you use adhesive hooks instead of screwing anything in.
Your cabinet becomes your caffeine command center—organized and ready the moment you need it.
7. Use Tiered Shelf Risers for Height Variation
Tiered risers help you see multiple items on one shelf instead of just what’s in front. Buy shelf risers or small risers ($12-25 per set, from Container Store or Amazon) that create stepped heights.
Arrange glassware or mugs from back to front, tallest to shortest, so you can see everything at once. This takes 10 minutes to arrange and lets you fit 40% more items while keeping everything visible and accessible. These work especially well in glass-door cabinets where the display is part of your kitchen decor. Simple risers also help prevent scratches on your shelves from frequent reaching and grabbing.
Your upper cabinets now feel intentional and styled—like you actually planned this layout.
8. Mount a Magnetic Spice Rack Inside Cabinet Door
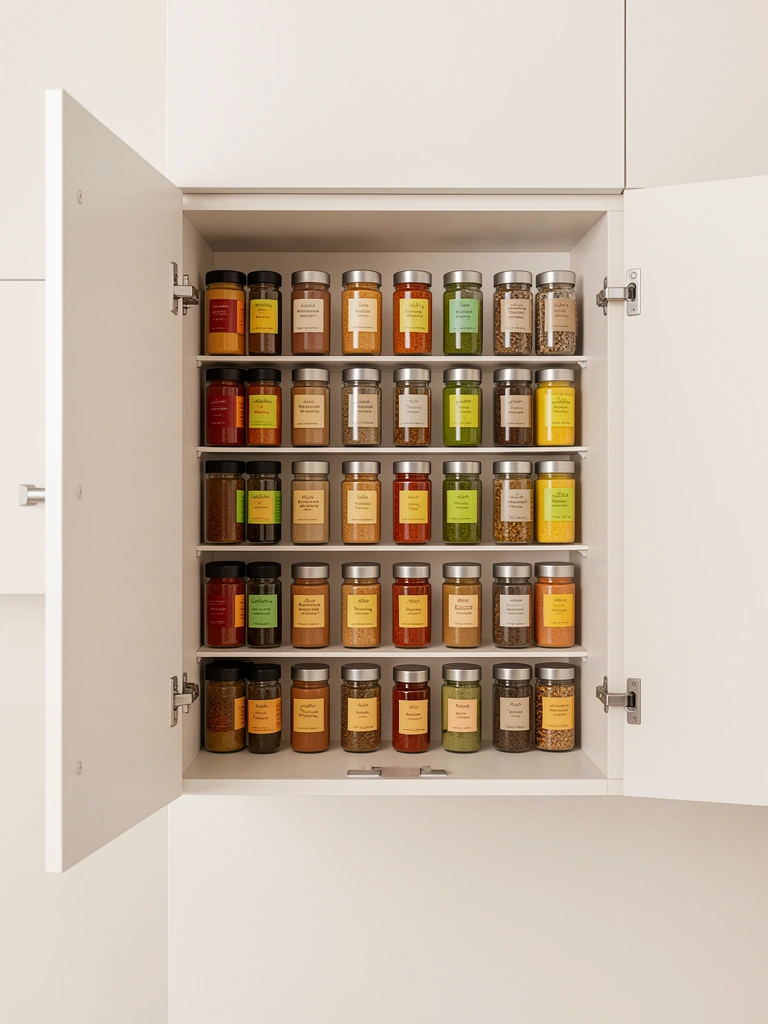
Cabinet door real estate is often wasted—use it for spices that would normally crowd your shelf. Buy magnetic spice containers ($30-50 for a set of 12-24, from Amazon, Target, or Wayfair) and stick them to the inside of your cabinet door.
Installation takes 5 minutes (just peel and stick), and you’ll free up a shocking amount of shelf space. Make sure the door still closes fully and that spices aren’t in direct sunlight. Label each container with a permanent marker so you know what’s what. This setup works for renters since magnetic containers peel off without damage.
You’ve reclaimed an entire shelf’s worth of space just by thinking vertically inside your cabinet door.
9. Stack Bowls with Separators Between Layers
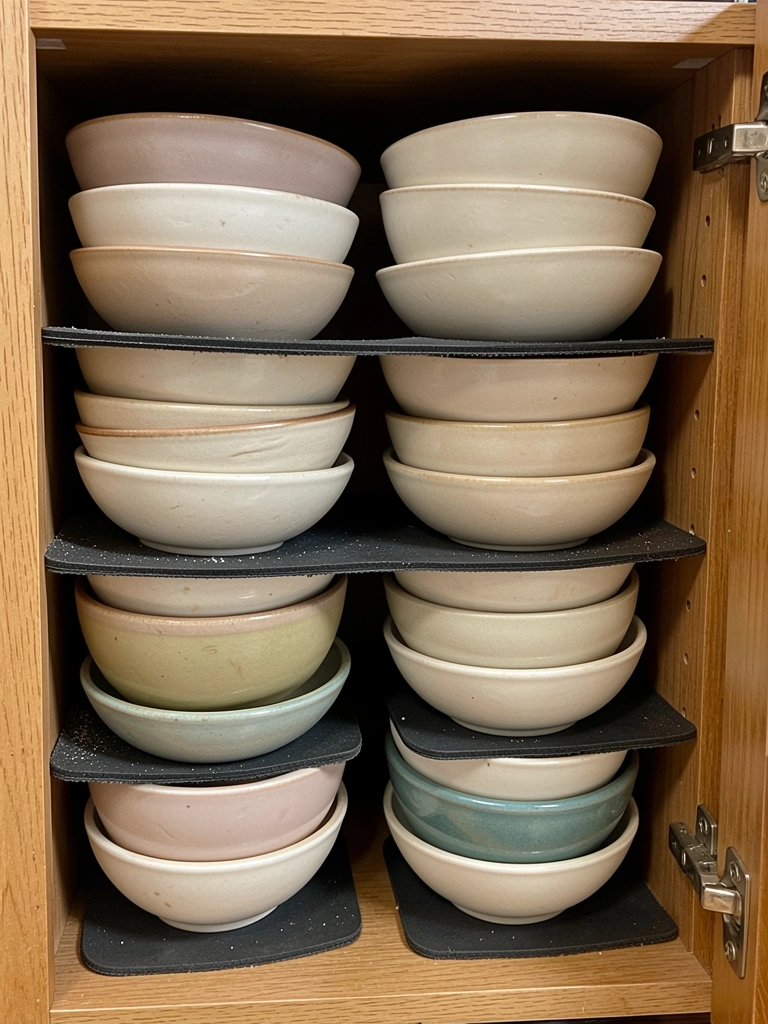
Stacking bowls without protection leads to chips and makes the bottom ones impossible to reach. Use thin rubber shelf liners ($8-12 per roll, Home Depot) or small paper plates between bowl layers to separate them.
This keeps stacks stable and lets you actually pull out a single bowl from the middle without disturbing the whole tower. Arrange by size (small to large, bottom to top) for visual balance. Takes about 10 minutes to set up and prevents expensive breakage. You can also use coffee filters or parchment paper in a pinch—completely free.
You’ll actually be able to grab one bowl without carefully disassembling a ceramic puzzle.
10. Install Tension Rods for Vertical Dividing
Tension rods ($5-12 per rod, Home Depot or Amazon) create vertical dividers for flat items like baking sheets and platters—no installation or tools needed.
Simply stretch them across your cabinet at the width you want. This keeps large flat items from sliding around and makes them easy to grab without touching everything else. Takes 5 minutes to install; works perfectly for renters. You can create multiple sections: one for baking sheets, one for platters, one for cutting boards. The rods won’t damage cabinet walls, and you can reposition them anytime.
Flat items stay put, organized, and actually accessible instead of creating an avalanche when you reach for one.
11. Label Everything (Even Temporary)
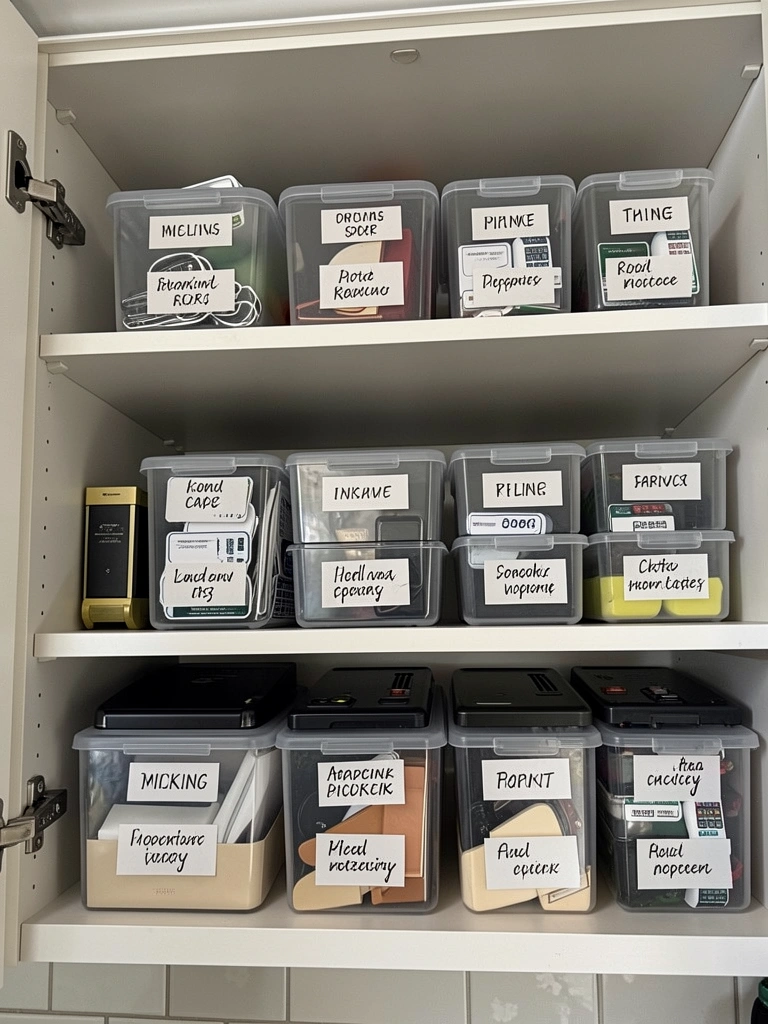
Labels take 30 seconds per item but save weeks of “where is that?” frustration. Use a label maker ($20-50, Amazon or Target) or simple masking tape and a marker.
Label containers with contents and the purchase date so you know what’s in there and when it’ll expire. This seems basic, but it’s the difference between a cabinet that looks organized and one that actually functions organized. Take a photo of your labeled setup and pin it so you can reference it when restocking. Works for both permanent installations and rental-friendly setups.
The investment of 10 minutes labeling saves you 100 times that in searching and wasted food.
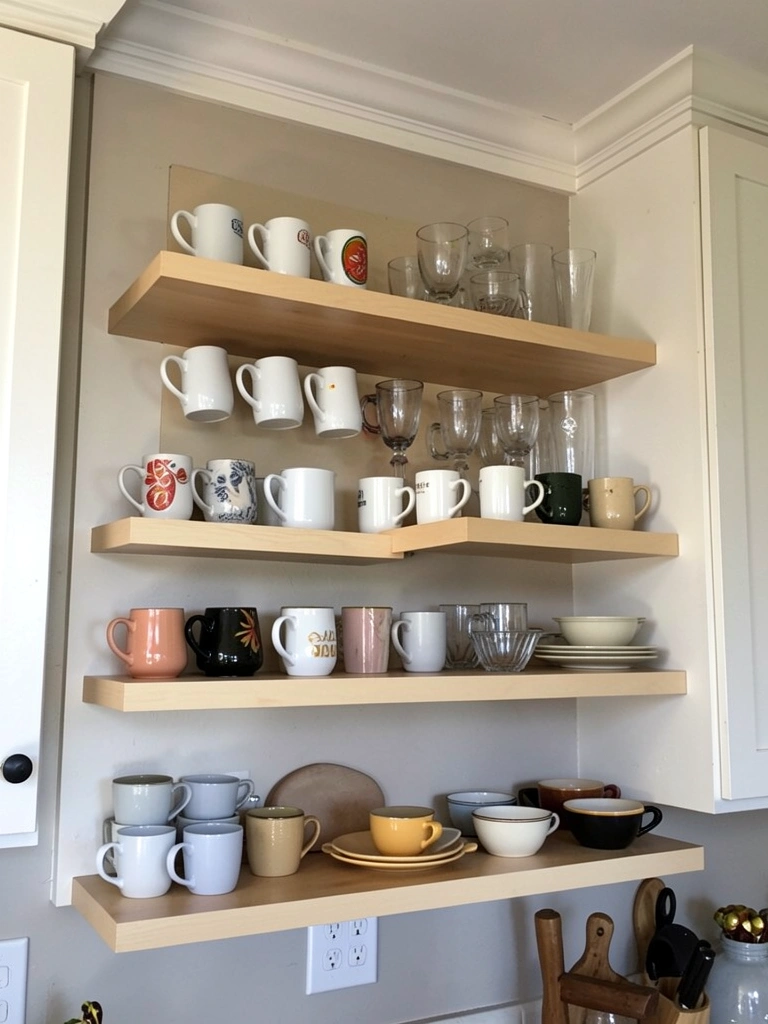
12. Create a Drinking Glass Graduated Display
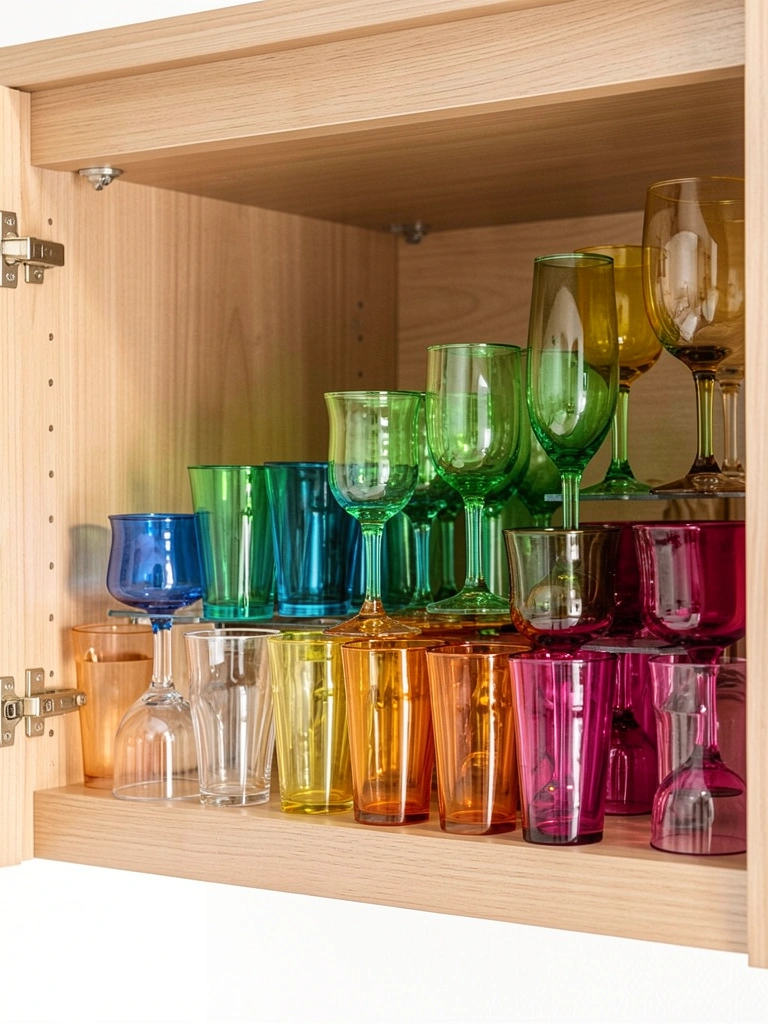
Glasses look beautiful when arranged intentionally—and it’s actually functional. Sort glasses by size, then arrange from smallest to largest, left to right.
If you have multiple colors, create a subtle gradient. This takes 5 minutes to arrange and makes your cabinet look curated rather than random. Your morning water grab becomes effortless because you know exactly where each glass size lives. This setup shows especially well in glass-door cabinets where the display becomes part of your kitchen’s visual story.
You’ll want to open those cabinets just to look at them—bonus points if guests admire your organization.
13. Use Bamboo or Wood Shelf Organizers
Bamboo organizers align with sustainable kitchen trends and look naturally warm. Buy bamboo shelf risers or dividers ($15-35 per piece, Wayfair, Target, or Amazon) for a biophilic touch.
They’re sturdy enough for daily use and add an earthy, organized aesthetic that photographs beautifully. Setup takes 10 minutes, and bamboo blends seamlessly with warm wood cabinet tones that are trending this year. These are sturdier than plastic options and last longer. Plus, bamboo is renewable—a bonus if you’re thinking about your kitchen’s environmental footprint.
Your cabinets suddenly feel intentional and eco-conscious, not just efficient.
14. Hang a Small Wire Shelf Riser
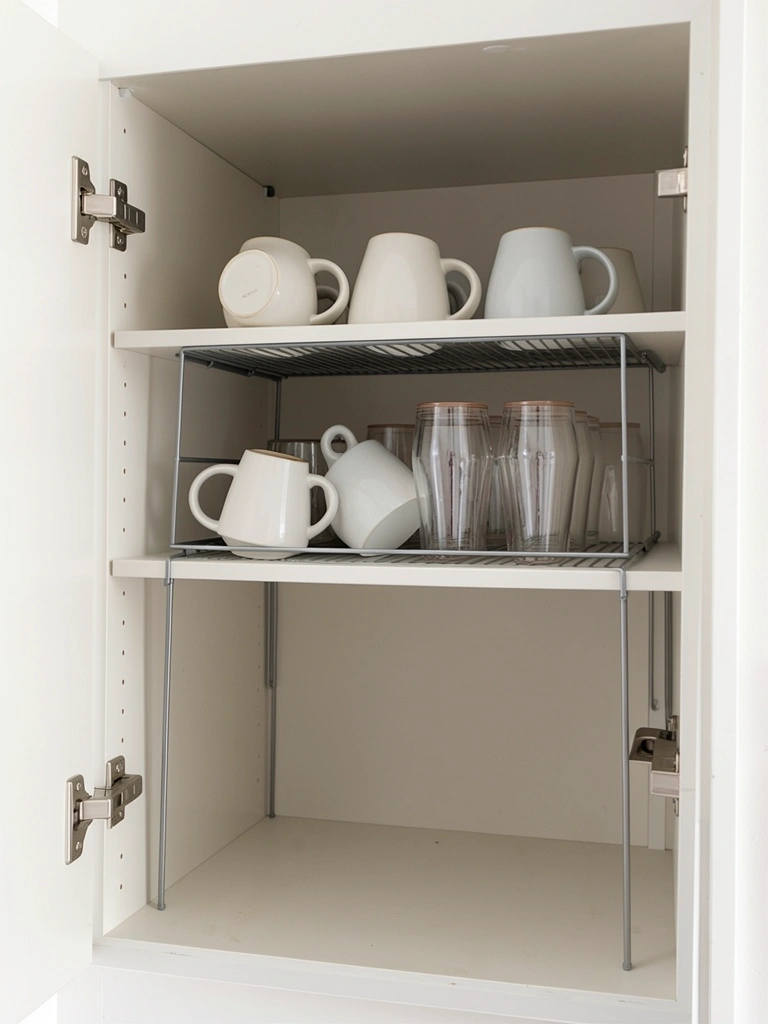
Wire risers are lightweight and don’t take up visual space—they look almost invisible but double your storage. Grab a compact wire riser ($10-20, IKEA or Amazon) and place it on your existing shelf.
This creates a second tier for frequently used items like mugs or glasses. It weighs almost nothing, so even delicate cabinets handle it fine. Arrange heavy items below and lighter ones above. Takes 5 minutes to place and adjust. The wire construction lets light pass through, so it doesn’t create a “cave” effect in your cabinet.
You’ve essentially added a whole new shelf without permanent installation or extra hardware.
15. Dedicate a Snack Shelf for Kids or Easy Access
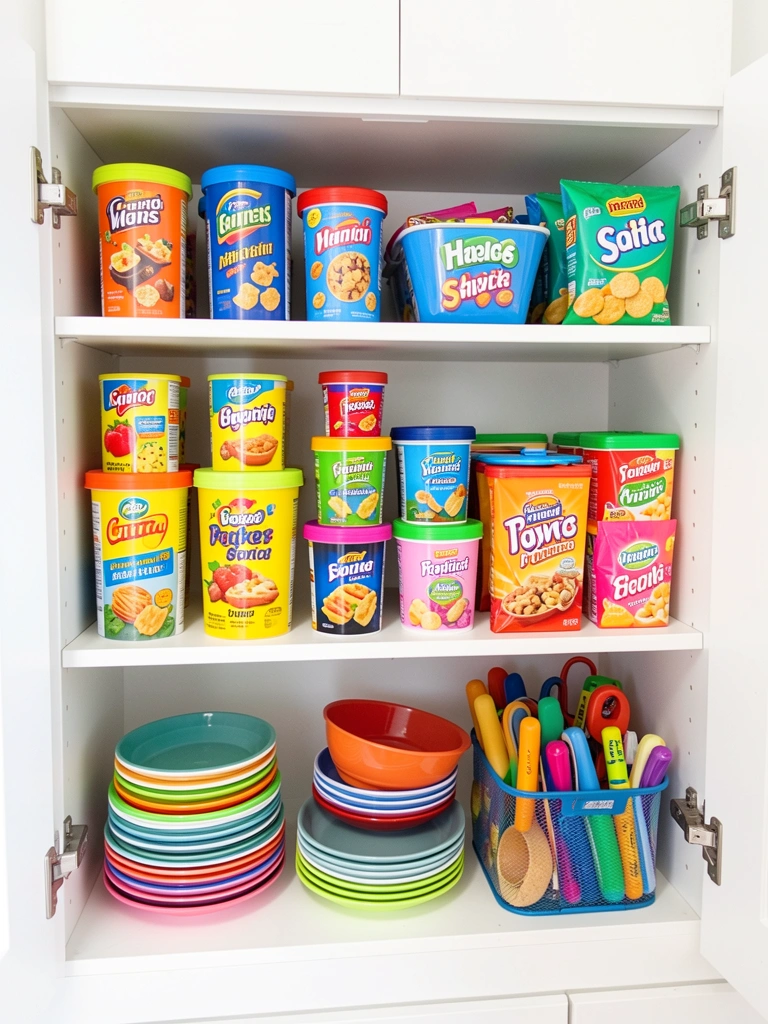
One easily accessible shelf for daily-use items saves reaching and searching multiple times a day. Pick a cabinet at comfortable reaching height and stock it with your most-used items: snacks, everyday dishes, coffee mugs.
Use clear containers ($1-2 each, Target) so everyone knows what’s available. Label the shelf “Everyday Grab Zone” if you have kids, so they know this cabinet is their go-to. Reorganize once a week when items get jumbled. This prevents constant cabinet hunting and gets other household members to actually put things back in the right place.
You’ll stop hearing “where’s the…” fifty times a day because everything they need is in one predictable spot.
16. Add LED Strip Lighting Under Cabinet Shelves
Lighting makes it easier to see what you have and adds a luxury feel. Install battery-operated or plug-in LED strips ($15-40, Amazon, Target, or Home Depot) under each shelf.
These take 10-15 minutes to stick (peel-and-stick backing) or mount with small brackets. Warm white LEDs look most inviting; cool white feels more modern. The brightness helps you see back corners and makes reaching for items safer. Battery-operated strips work great for renters; plug-in strips suit homeowners with nearby outlets. Motion-activated versions ($25-35) are extra convenient if your cabinet location allows it.
Opening your cabinet now feels special—and you can actually see what’s inside, which is a nice bonus.
17. Use Magazine Holders for Vertical Cookbook Storage
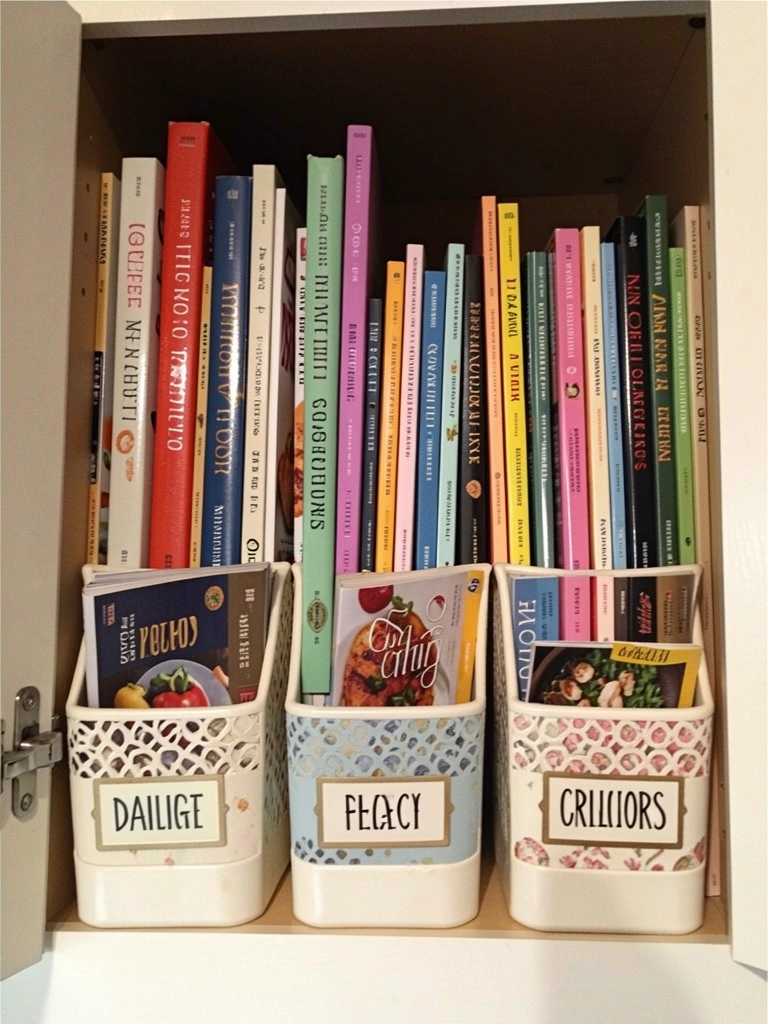
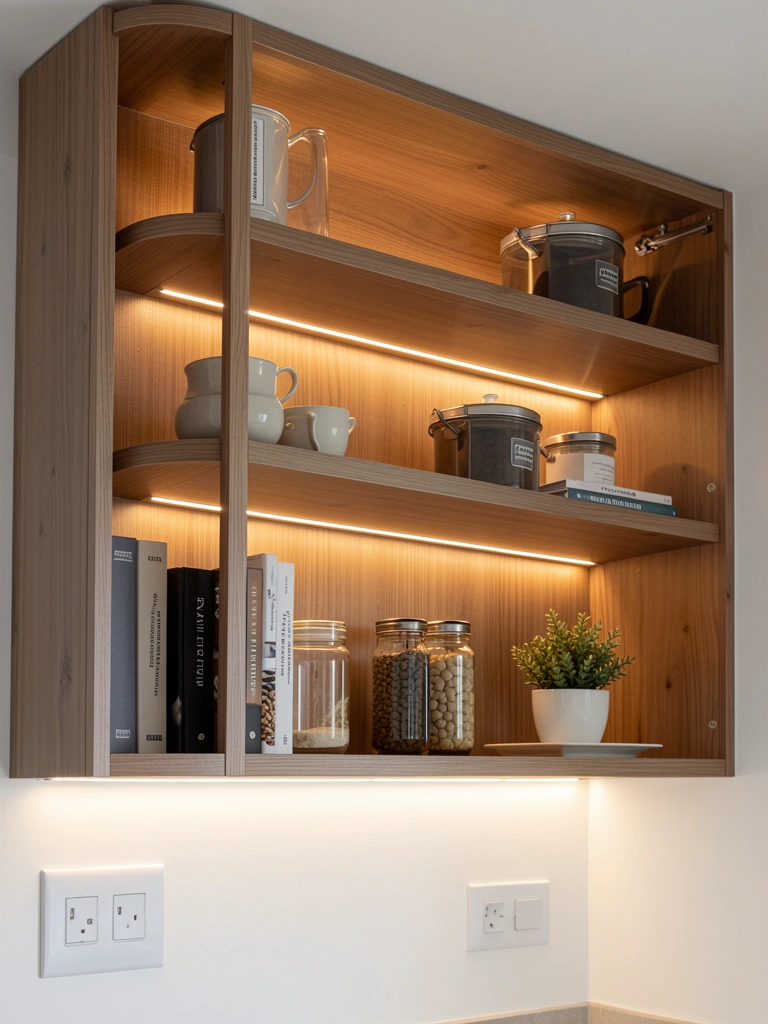
Cookbooks take up tons of horizontal space—stand them vertically like a library. Buy magazine holders or bookends ($3-8 each, Target, IKEA, or Dollar Tree) and arrange cookbooks upright.
Group by category: baking in one section, quick weeknight meals in another, international cuisines together. This takes 15 minutes to organize and makes your go-to recipes instantly findable. You see all the spines at once, so you’re reminded of cookbook options you might have forgotten. This works beautifully in open shelving too.
Your cookbooks become an accessible reference library instead of a jumbled pile you never touch.
18. Create a Tea and Coffee Accessory Zone
Grouping beverages and their accessories prevents searching through three cabinets. Use a small bin or container ($5-12, Target or Container Store) to corral tea infusers, filters, stirrers, and sweeteners in one cabinet.
Label the bin and place it next to your mugs and coffee storage. Takes 10 minutes to set up. Add a small shelf riser if you want a second tier for overflow. Everyone in your household will know exactly where to find what they need, and you’ll stop having tea supplies scattered across multiple cabinets.
Your morning beverage routine becomes streamlined because everything lives in one concentrated zone.
19. Use Nesting Bowls and Stackable Containers
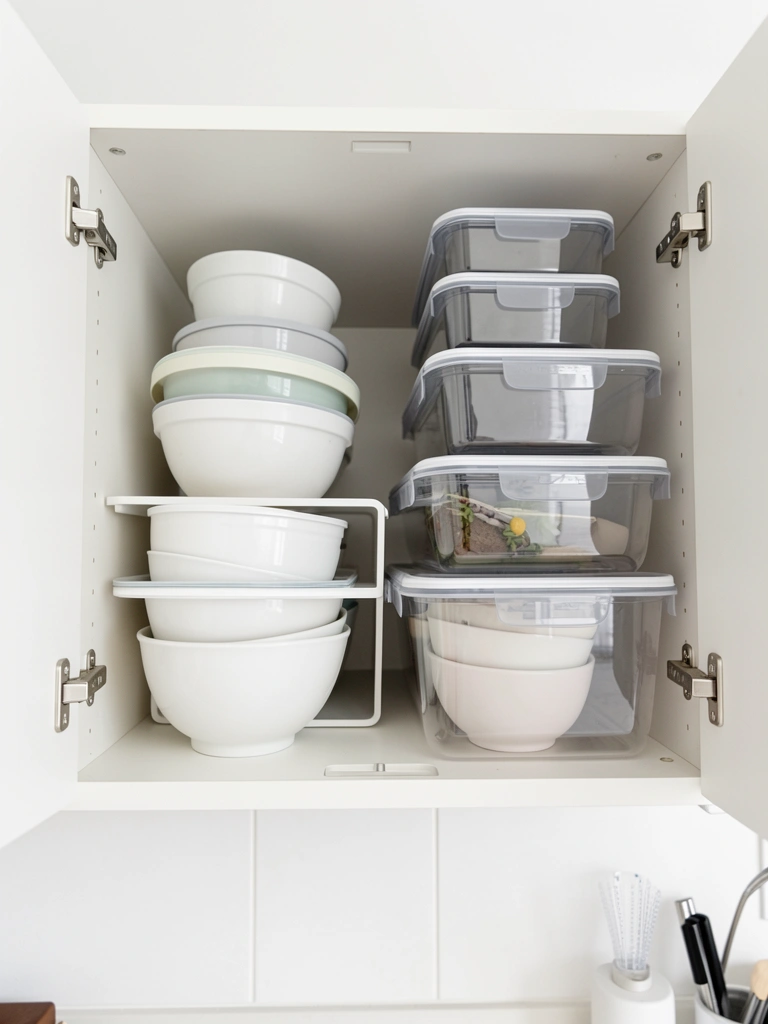
Nesting items are space-saving genius. Buy nesting bowls ($12-25, Target or Amazon) and stackable containers ($10-20 for sets, Container Store) that fit snugly inside each other.
This reduces the footprint of items you already own by 40-50%. Arrange them at the front of your shelf so you can easily grab one without disturbing the others. Takes 5 minutes to nest and stack. Look for light colors or transparent materials so items are easy to identify. This approach works especially well for small cabinets where every inch matters.
You’ve freed up unexpected space just by rearranging what you already have—zero extra cost.
20. Mount a Pegboard Inside Your Cabinet Door
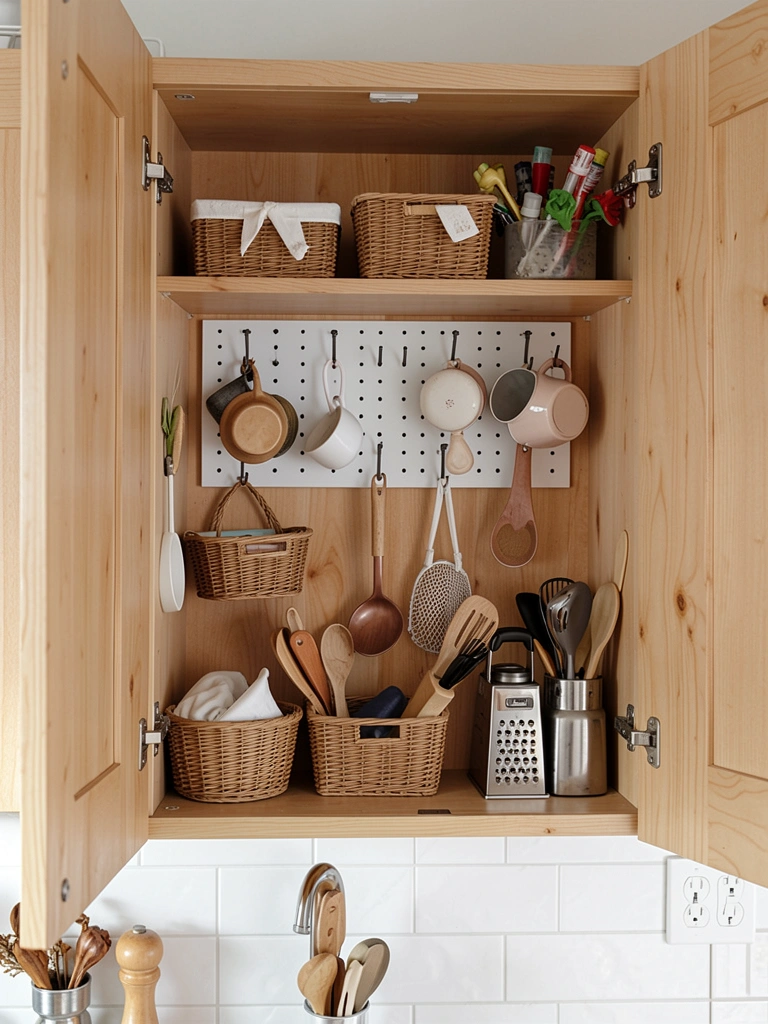
Pegboard transforms cabinet door space into a customizable storage solution. Buy a small pegboard ($8-15, Home Depot) and peg hooks ($0.50-2 each) to create a customizable grid.
Hang small baskets, measuring spoons, whisks, or cleaning cloths—whatever works for your flow. Takes 20 minutes to mount and arrange (use small nails or adhesive strips for renters). Rearrange anytime without guilt. The best part? You can see everything at a glance, so you actually use these tools instead of forgetting you own them.
Your cabinet door becomes a personalized organization hub that grows and changes with your needs.
21. Designate One Cabinet as a Vase and Serving Piece Showcase
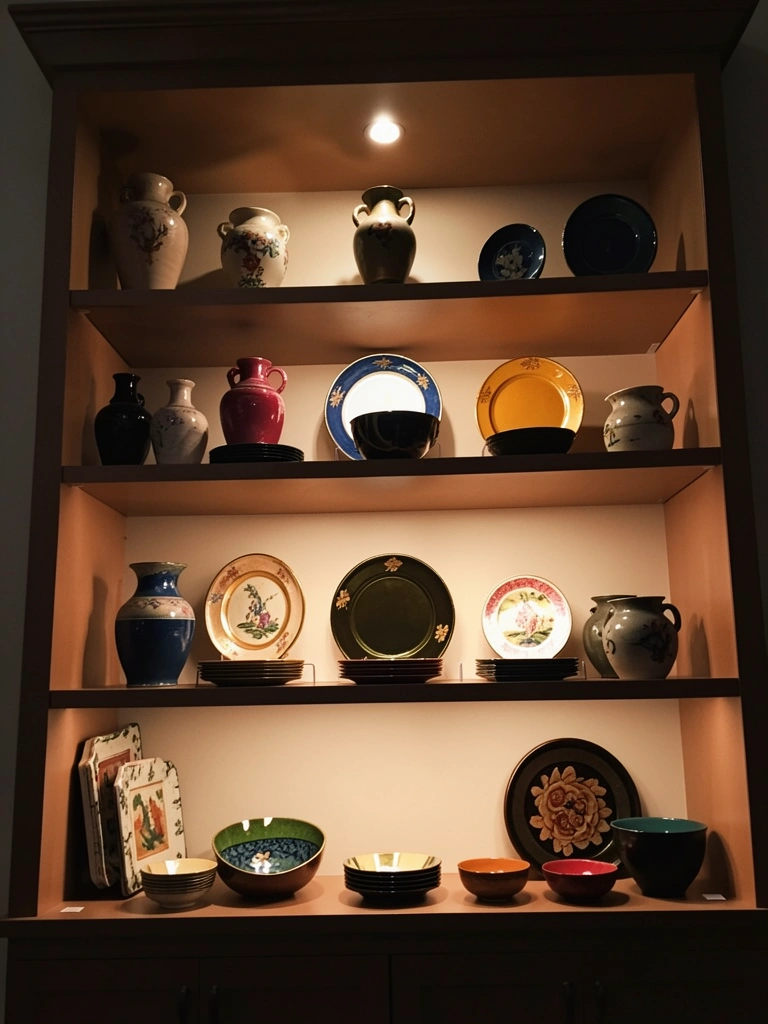
Vases and serving pieces are too pretty to hide—display them strategically. Pick one cabinet to be your showcase and arrange pieces by height, color, or type.
Use shelf risers to create visual interest and fit more items in the space. This takes 15 minutes to arrange but transforms your cabinet from storage into decor. Leave some breathing room so items don’t look crowded. This display actually encourages you to use serving pieces instead of letting them collect dust. Works beautifully with glass-door cabinets where the display becomes permanent kitchen art.
Opening this cabinet feels like visiting a mini gallery in your kitchen.
22. Add Drawer Organizers to Cabinet Shelves
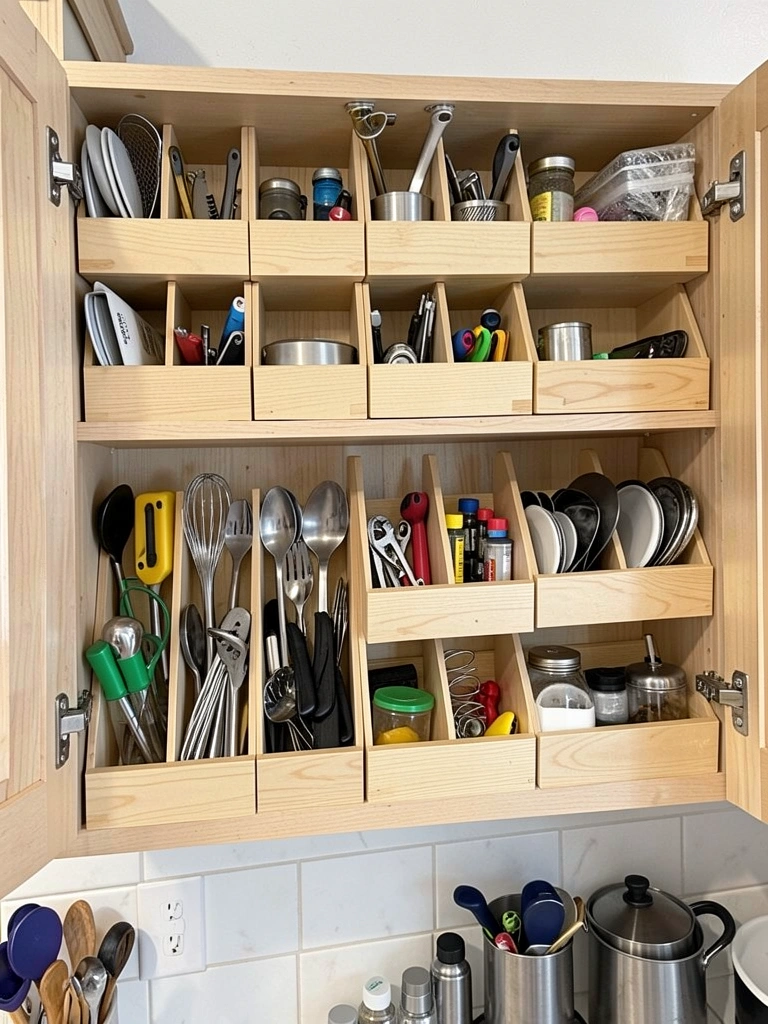
Drawer organizers aren’t just for drawers—they create instant compartments in cabinets. Buy a set of small organizers ($10-20, Target or Container Store) and place them on your shelf.
Divide utensils, measuring spoons, kitchen twine, and other small items into sections. Takes 10 minutes to place and fill. This prevents small items from scattering around and makes everything instantly findable. Most are stackable, so you can create multiple layers if needed. Perfect for the “junk drawer” items that don’t have a home.
Your miscellaneous items now have structure and purpose instead of chaos.
23. Use Lazy Susan Turntables for Corner Access
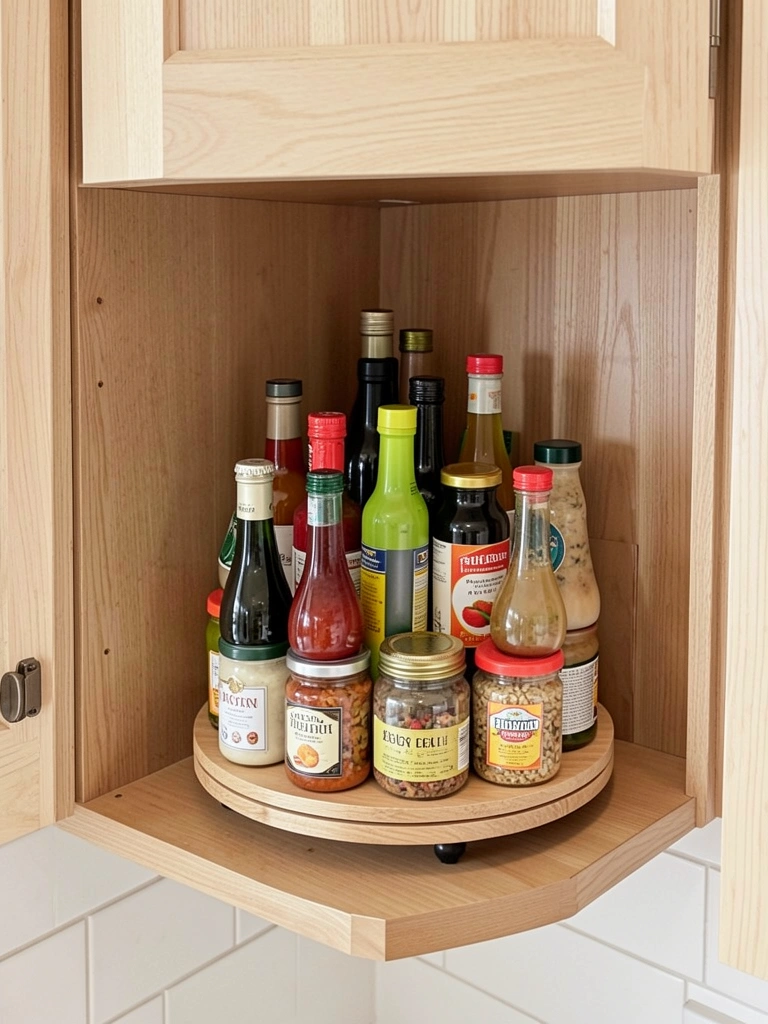
Corner cabinets are notoriously hard to reach—a lazy Susan makes back items accessible. Buy a small lazy Susan ($8-15, IKEA or Target) and place it in corner cabinets.
Arrange bottles, jars, or containers in a circle, and spin to find what you need. This takes 5 minutes to install and reclaims dead corner space you previously couldn’t access. Works best with lighter items that spin easily. The rotation means nothing gets lost in the back, and you actually use items stored there.
What used to be an inaccessible black hole now rotates into easy reach.
24. Create Pantry-Style Groupings by Meal Type
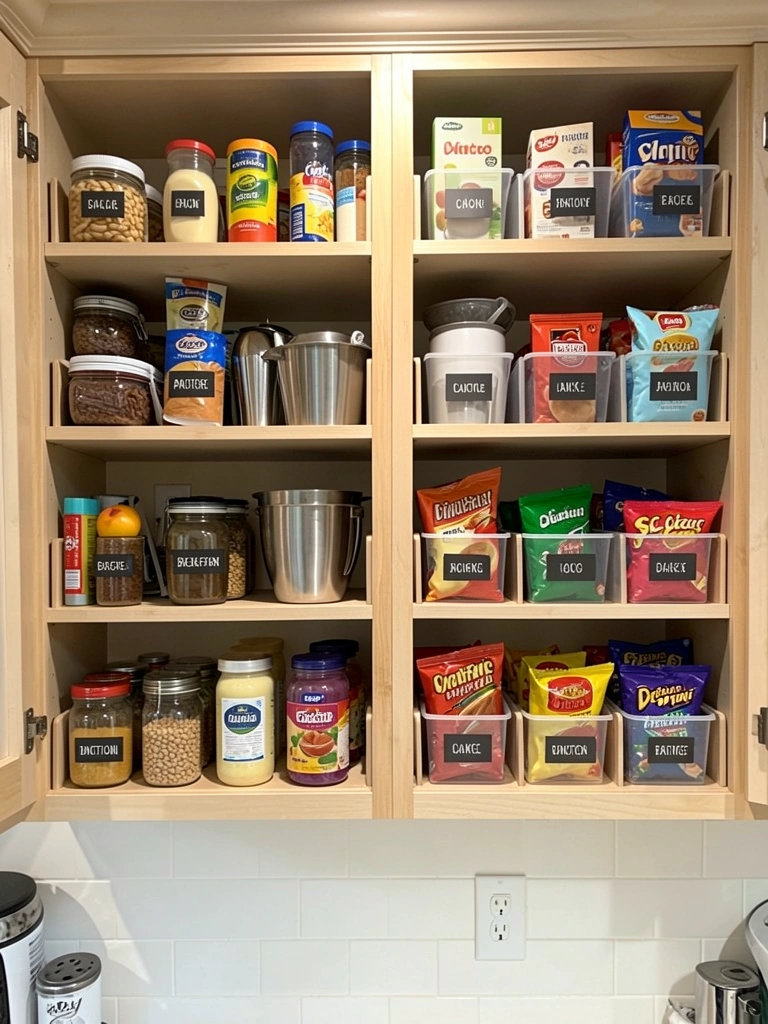
Organizing by how you cook saves time mid-meal. Group breakfast items (oats, cereal, coffee) on one shelf, baking supplies on another, snacks together using small bins ($5-10 each, Target).
Label each section and take a photo so household members know where to restock. Takes 20 minutes to reorganize but saves you 100 times that in prep time. You’ll naturally gravitate toward the right cabinet first because items are logically grouped. This approach especially helps families because everyone knows exactly where breakfast items or snack containers live.
Cooking becomes faster because everything you need for one task lives in one predictable zone.
25. Use Kraft Paper Liners for Clean Shelves
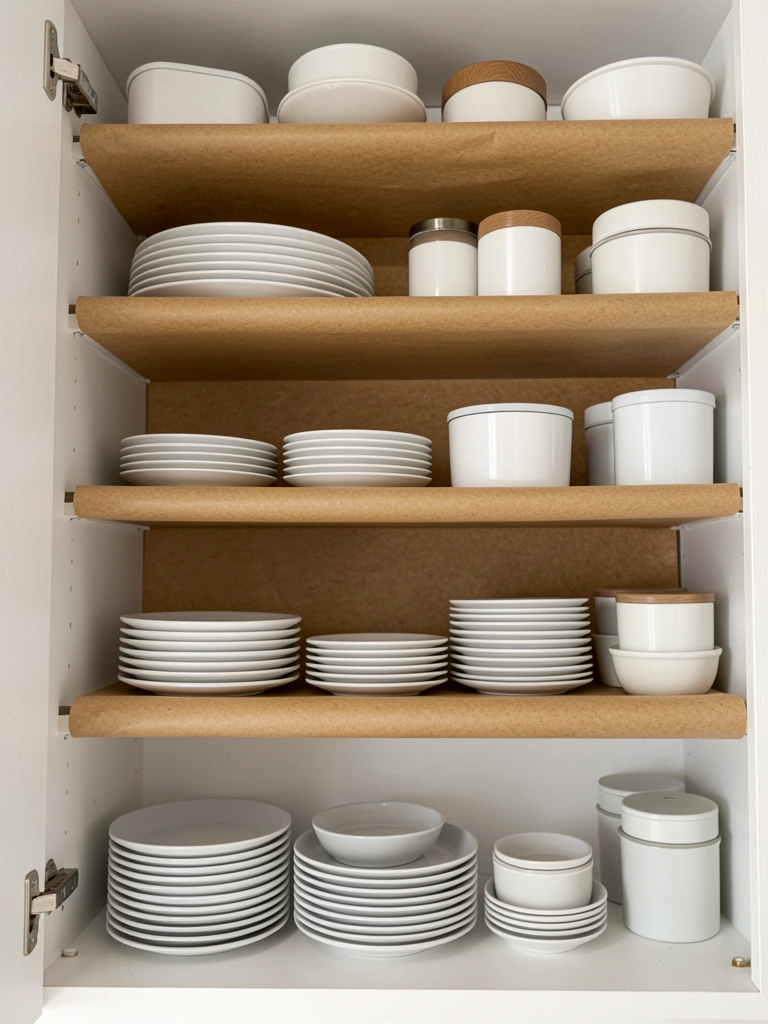
Cabinet liners protect your shelves and add a design element. Use textured kraft paper or bamboo liners ($8-15 per roll, Amazon or Target) to line your shelves.
This takes 15 minutes to measure and cut, and it protects your cabinet finish from spills and scratches. Paper liners are renter-friendly—just peel them off without damage when you move. They also add a subtle texture that photographs beautifully, especially in open-concept kitchens. Change them seasonally if you like a quick refresh without actual rearranging.
Your cabinet interior suddenly looks intentional and protected instead of bare wood.
26. Invest in a Small Corner Shelf Unit for Unused Nooks
Final level: tackle truly awkward spaces with corner-specific solutions. Buy a small corner shelf unit ($25-50, Home Depot or Wayfair) designed to fit cabinet corners.
These are angled to maximize corner space and make back items accessible. Installation takes 20-30 minutes and requires basic tools, but you’ll reclaim 15-20% of an otherwise unusable corner. This is best for homeowners since it requires permanent mounting. If you rent, stick with removable solutions like lazy Susans or bins that fit the corner instead.
You’ve just claimed square footage of storage you didn’t even know existed.
Save this post for your next kitchen refresh. Pick one or two ideas and tackle them this weekend—you’ll be amazed how much calm and functionality a little cabinet strategy brings to your daily routine.
Leave a Reply