Your bathroom probably doesn’t feel like a retreat right now. Maybe it’s cramped, outdated, or just… uninspiring. The good news? You don’t need a massive renovation to change that. Whether you’re renting, working with a small space, or simply ready for a refresh, these 25 ideas range from zero-budget styling tricks to splurge-worthy upgrades that’ll make your daily routine feel less like a chore and more like self-care. You’ll discover which changes give you the biggest impact for your time and money, plus renter-friendly options that won’t get your deposit dinged. Let’s get started.
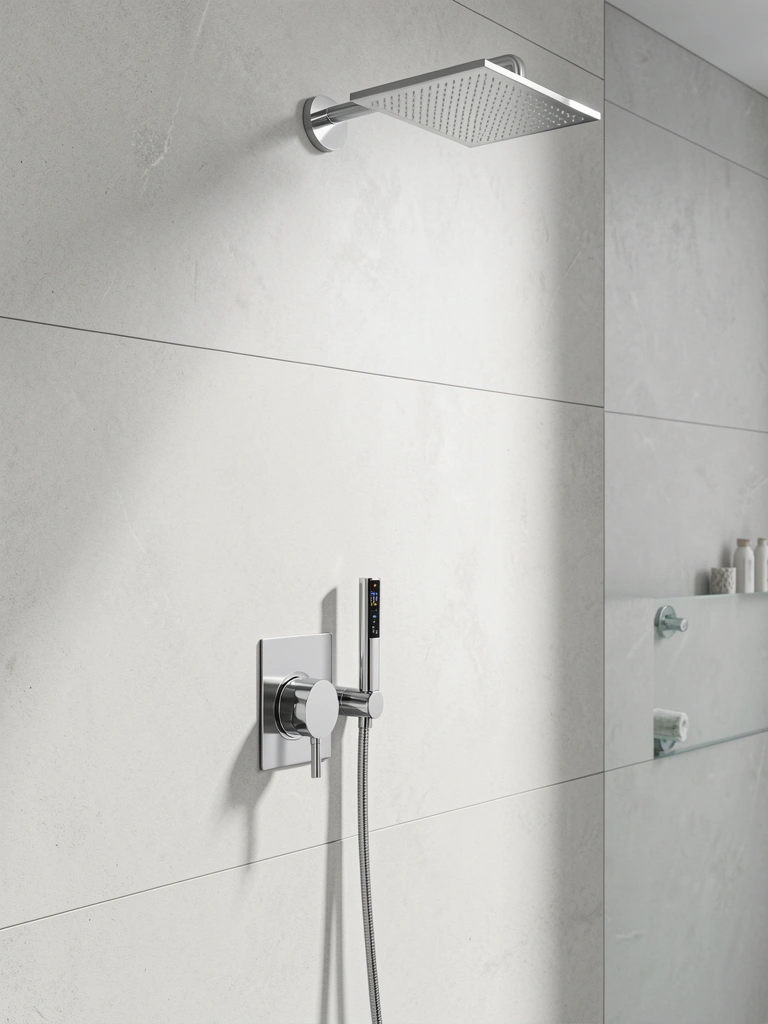
1. Install a Rainfall Showerhead for Spa Mornings
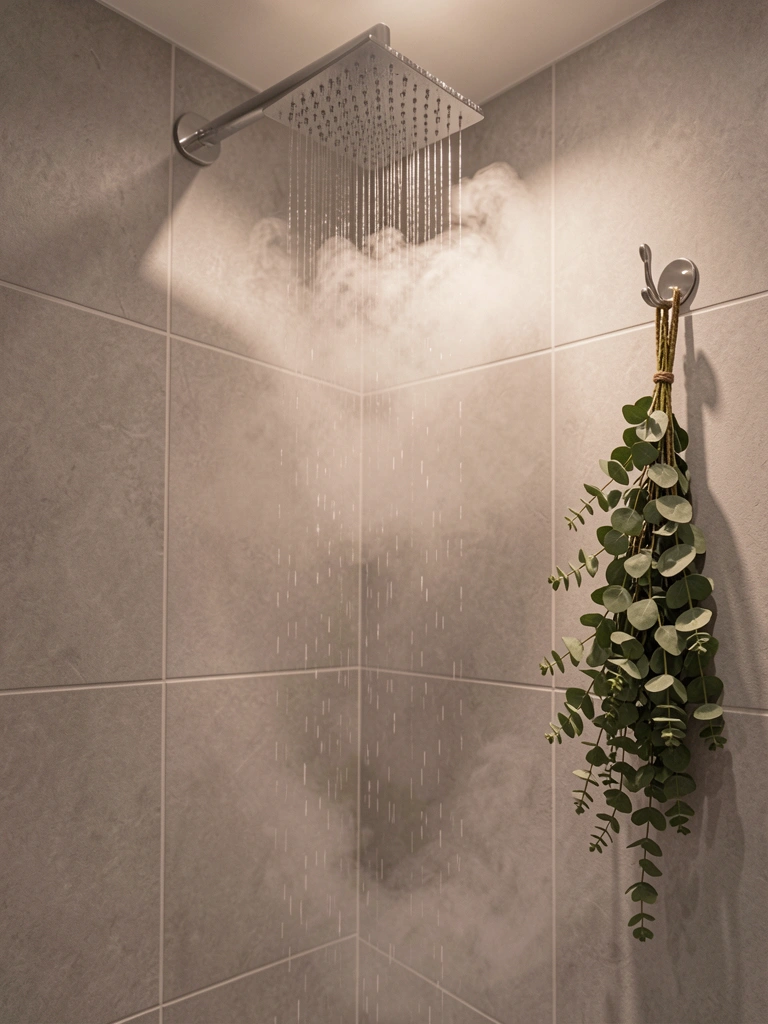
A rainfall showerhead transforms your shower from purely functional to genuinely relaxing. The oversized head distributes water evenly and creates that luxe spa feeling you’re paying for at hotels—except now it’s in your own home.
Look for models with 8-12 inch diameters at retailers like Home Depot or Amazon (expect $40–$150 depending on finish and pressure settings). Installation takes about 30 minutes if you have basic plumbing comfort; otherwise, hire a plumber for $100–$200. Pro tip: pair it with a handheld secondary showerhead for rinsing efficiency. Renter-friendly alternative: some rainfall heads screw directly onto existing pipes without permanent changes.
You’ll notice the difference the first morning—showers feel indulgent instead of rushed, and the wider coverage means easier rinsing without that harsh water pressure.
2. Add Floating Shelves for Open Storage That Feels Airy
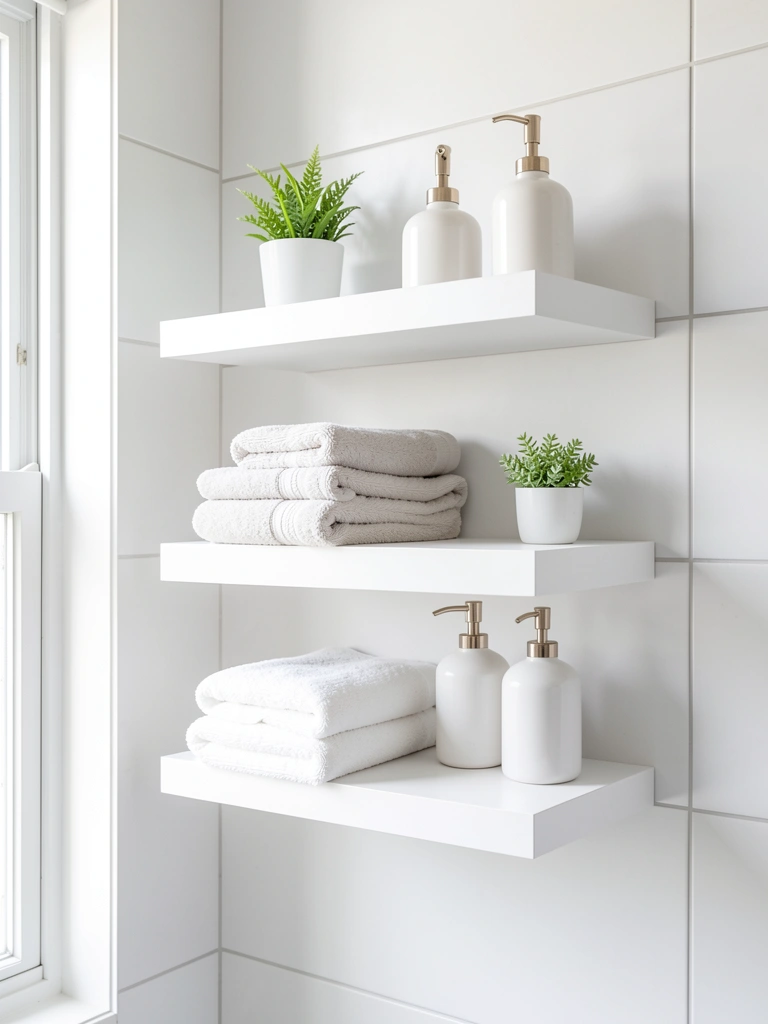
Floating shelves eliminate the visual weight of bulky cabinets while giving you actual storage. They make small bathrooms feel bigger because you can see wall space behind them.
Install 2–3 shelves using a wall stud finder and heavy-duty brackets ($30–$60 at IKEA, Target, or Home Depot). The whole project takes one hour with a drill and level. Paint them to match your wall for seamless blending, or choose contrasting wood for warmth. Renter tip: removable adhesive shelves exist but won’t handle heavy items—stick to decor and light towels.
The result is bathroom walls that look curated instead of cramped, plus instant access to everyday items without digging through drawers.
3. Paint Your Walls a Soft, Spa-Inspired Color
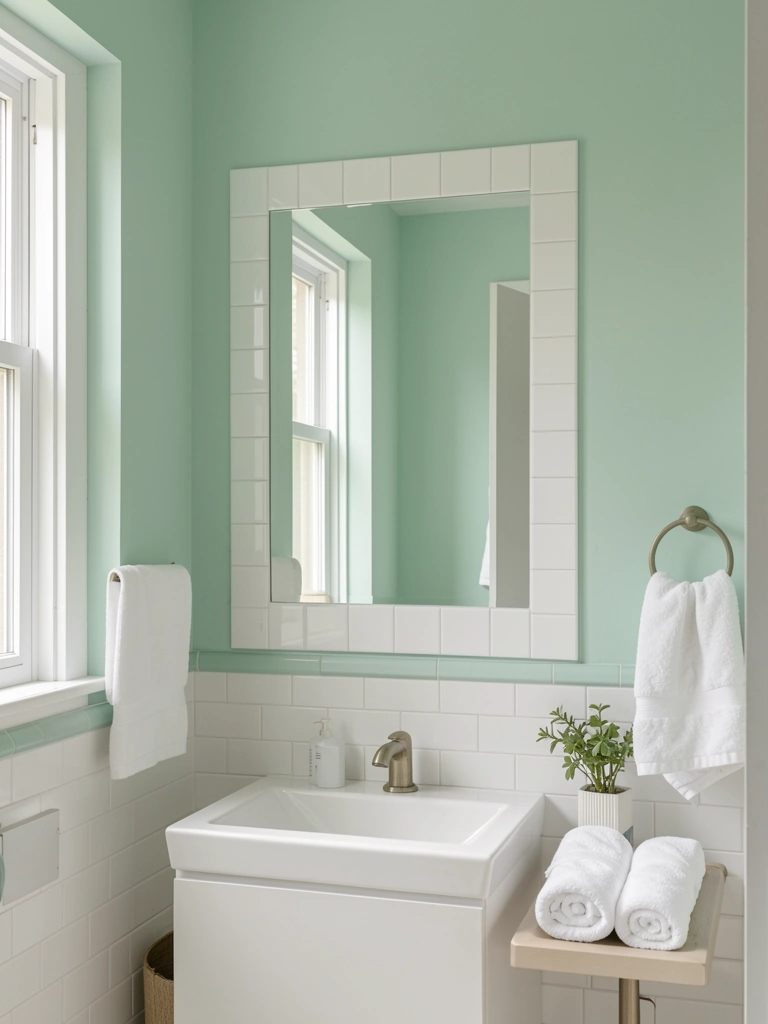
Pale blues, seafoam greens, and warm creams make bathrooms feel larger and calmer instantly. Color is the cheapest way to reset a room’s entire vibe.
Buy 2–3 gallons of bathroom-safe paint (mildew-resistant is crucial) from Benjamin Moore, Sherwin-Williams, or budget brands like Behr ($40–$60 per gallon). Prep takes a few hours; painting takes one full day. Choose eggshell or semi-gloss finishes for moisture protection. If you’re renting, use peel-and-stick wallpaper in similar tones instead—removable and just as impactful.
Your bathroom stops feeling dingy and starts feeling intentional. Even a small shift in color affects your mood every single time you walk in.
4. Swap Out Hardware for Instant Modernity
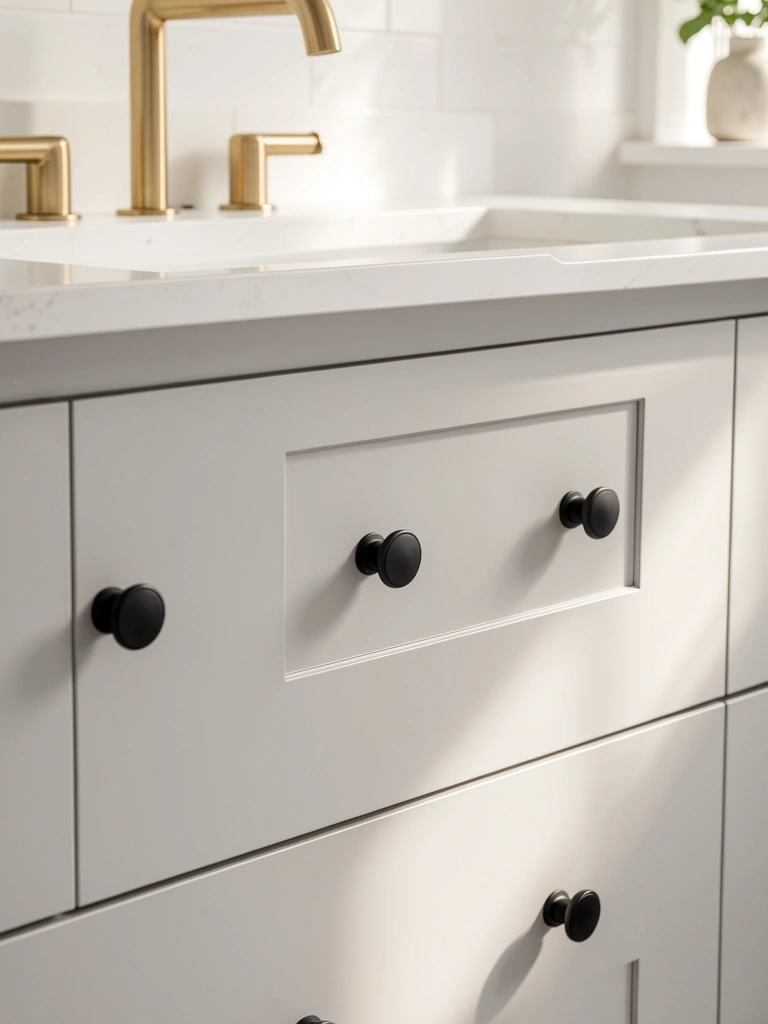
Cabinet hardware is the jewelry of bathroom design. Changing it out takes 30 minutes and costs almost nothing, yet it completely updates your space.
Find replacement pulls and knobs at Wayfair, Amazon, or Home Depot in finishes like matte black, brushed gold, or polished chrome ($2–$8 per piece). Remove old hardware with a screwdriver and replace it—no special skills needed. Buy extras for future touch-ups. Pro tip: coordinate hardware across faucets, lights, and cabinet knobs for cohesion.
Old, dated hardware disappears, and suddenly your vanity looks contemporary and intentional.
5. Use a Peel-and-Stick Backsplash for Renter-Friendly Updates
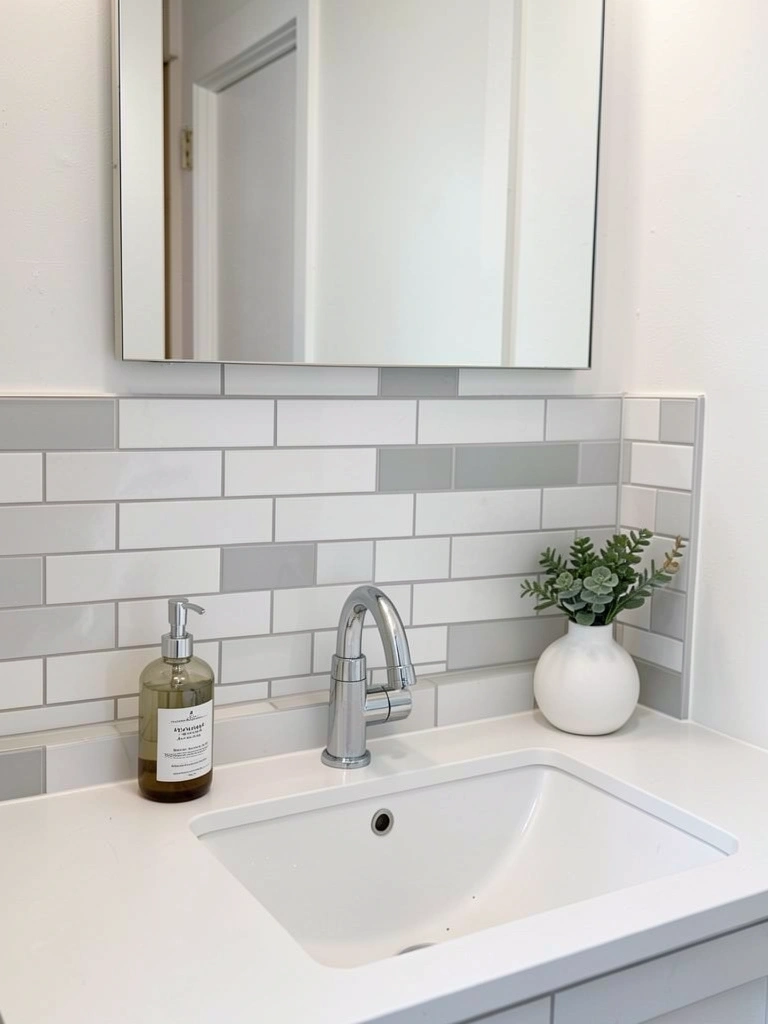
If you can’t commit to permanent tile, peel-and-stick backsplash is your secret weapon. It looks high-end, costs under $50, and leaves no damage when you move.
Find options at Home Depot, Wayfair, or Amazon (subway tiles, geometric, marble-look—$20–$45 for coverage). Clean your wall thoroughly, measure twice, then apply slowly from the center outward (45 minutes). Trim excess with a utility knife. The adhesive holds for years but removes cleanly.
Your backsplash becomes a design focal point instead of blank wall, and the grout-free aesthetic reads as modern and fresh.
6. Invest in a Low-Flow Toilet to Save Water and Money
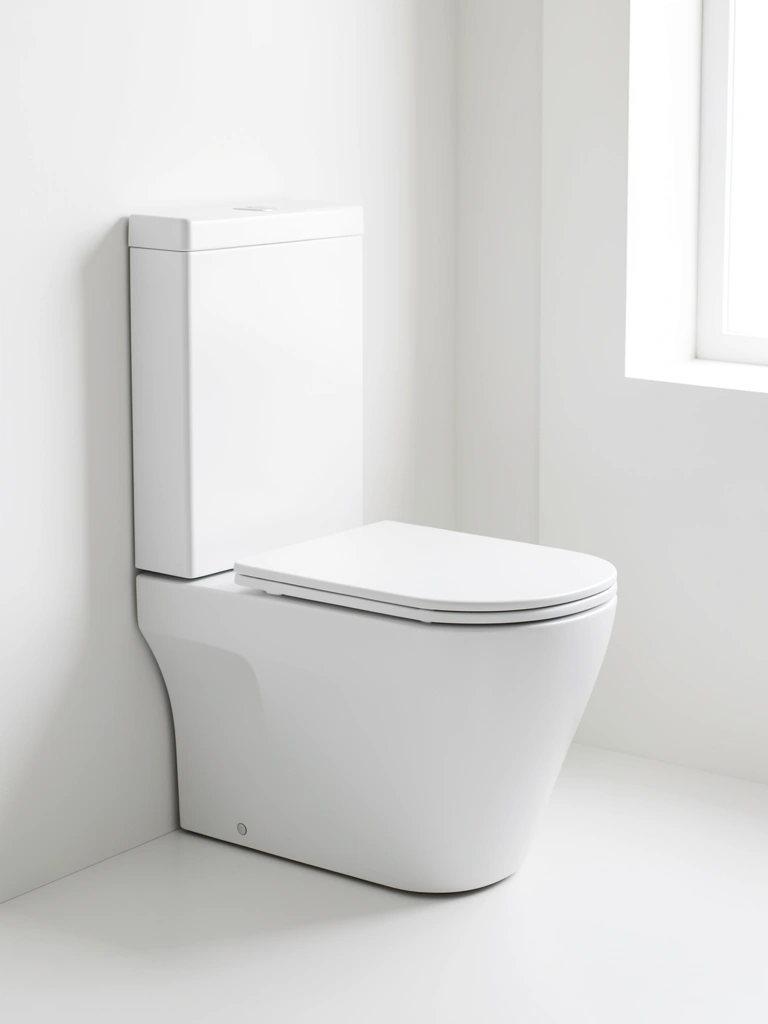
Older toilets waste up to 7 gallons per flush. Modern low-flow models use 1.28 gallons and look better too—a win for your water bill and the planet.
Replace your toilet with a dual-flush model from Kohler, American Standard, or budget brands like Glacier Bay ($150–$500 installed). Hire a plumber for the swap ($200–$400 labor), or DIY if you’re handy with a wrench (1–2 hours). Rebate programs in many regions cut the cost further.
Your water bill drops noticeably, and you get the bonus of a sleek, updated bathroom fixture that works harder and looks cleaner.
7. Layer Lighting for Functionality and Ambiance
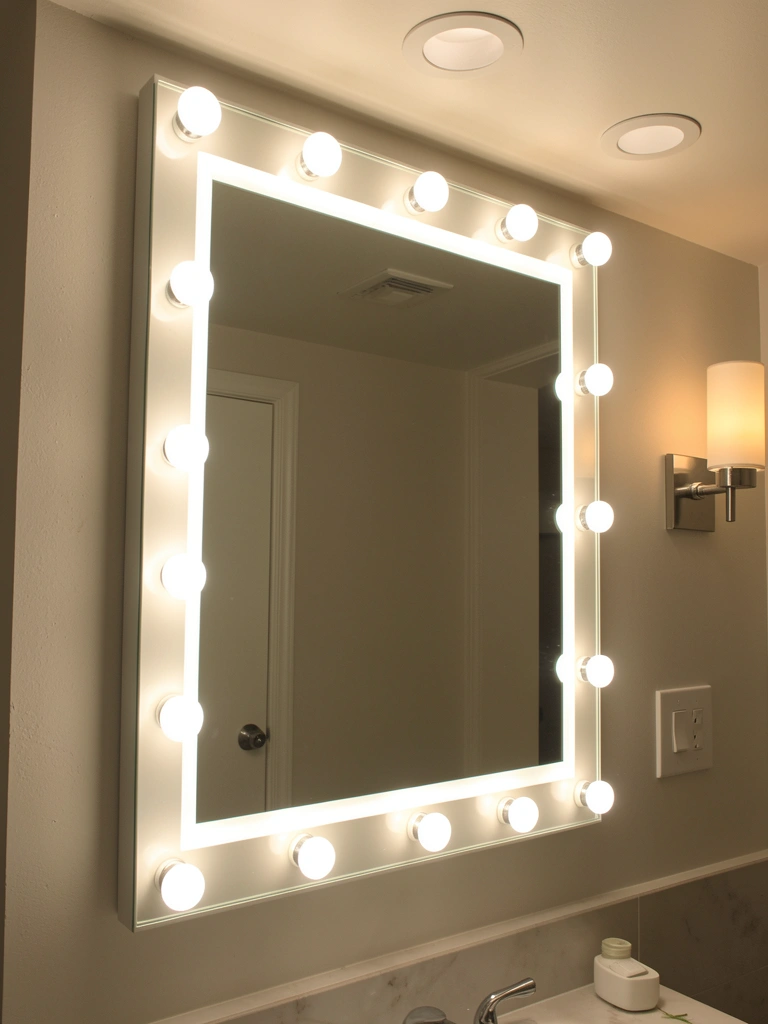
Bathroom lighting that’s too bright creates harsh shadows; too dim feels cave-like. Layering overhead, mirror, and accent lights lets you adjust to your mood.
Install a dimmer switch (Home Depot, $15–$30, 30 minutes) and swap bulbs for warm LED options ($8–$15 per bulb). Add a small wall sconce or lit mirror ($50–$200) for task lighting. Use 2700K color temperature bulbs for flattering, spa-like warmth. Renter tip: some wireless LED strips stick on and power from batteries.
You’ll have lighting for getting ready efficiently and lighting for soaking in the tub. The same bathroom works for both now.
8. Declutter with Smart Under-Sink Organization
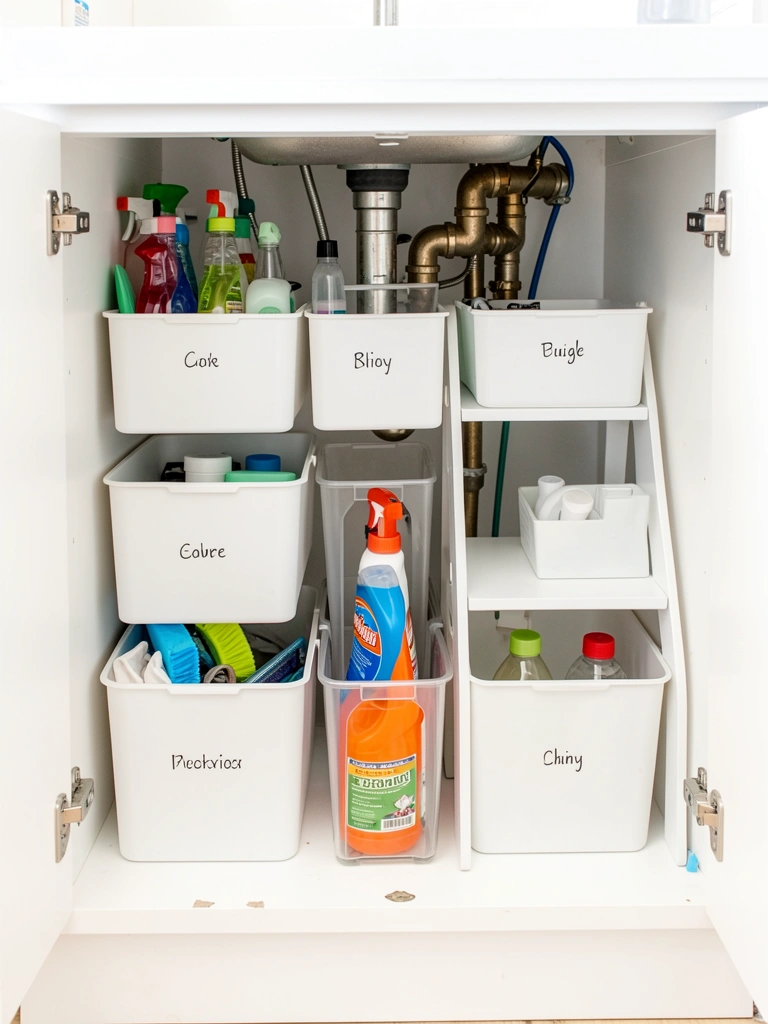
Everything under your sink probably lives in chaotic piles. Smart bins and shelves make it accessible and protect pipes from splash damage.
Buy a shelf riser ($20–$40, IKEA or Target) to double your vertical space, then add matching storage bins ($30–$50 for a set). Label everything with a label maker ($12–$25). Use a tension rod to hang cleaning spray bottles (Home Depot, $5–$10). This project takes one hour and requires zero tools.
Opening your cabinet stops being embarrassing. You know where everything is, and it actually stays organized because each item has a designated spot.
9. Replace Your Shower Curtain with a Glass Door
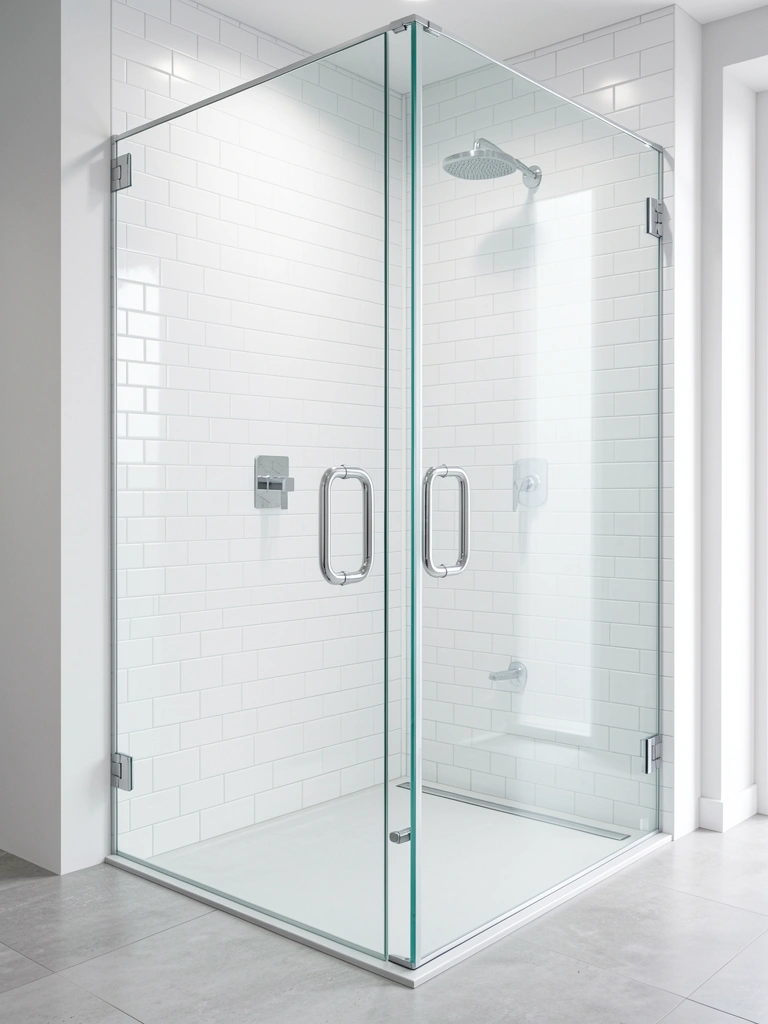
Shower curtains trap humidity, collect mildew, and feel cramped. A glass door opens up your bathroom visually and feels more spa-like.
Frameless glass doors cost $400–$1,500 installed depending on your shower size and customization. Semi-frameless and framed options run $300–$700. Hire professionals for measurement and installation (1–2 days). Renter alternative: a high-quality, mildew-resistant curtain liner and track rod can look intentional if styled well.
Your bathroom instantly feels larger, more luxurious, and easier to clean—no more moldy corners hiding in fabric folds.
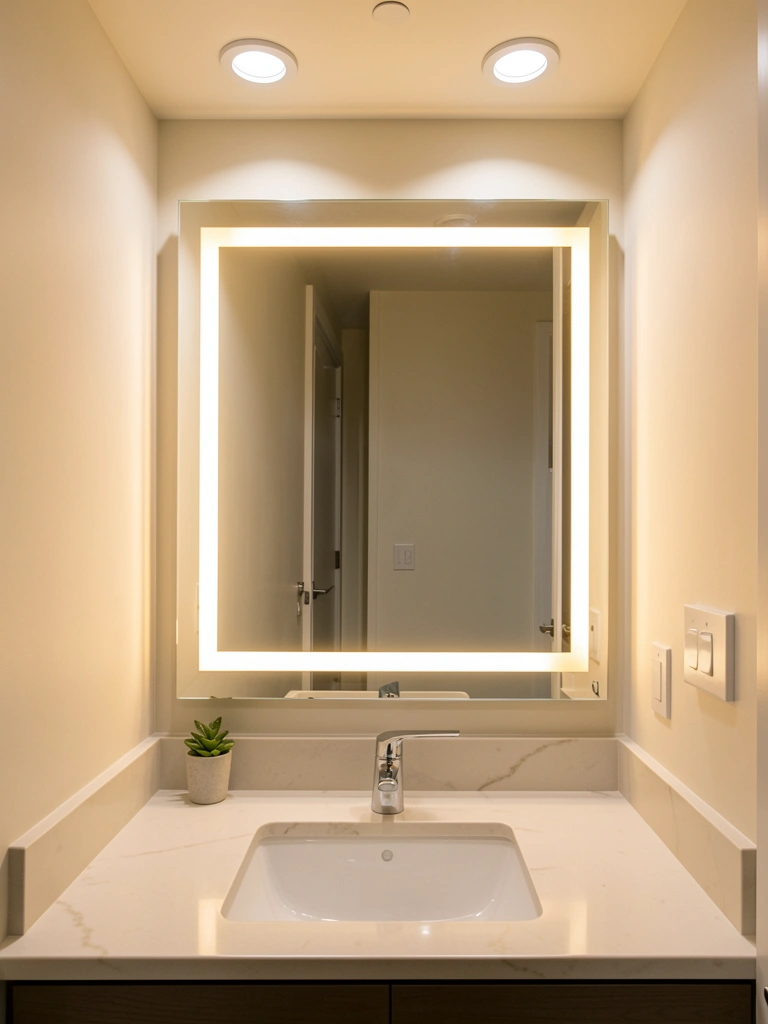
10. Add a Statement Mirror to Anchor the Space
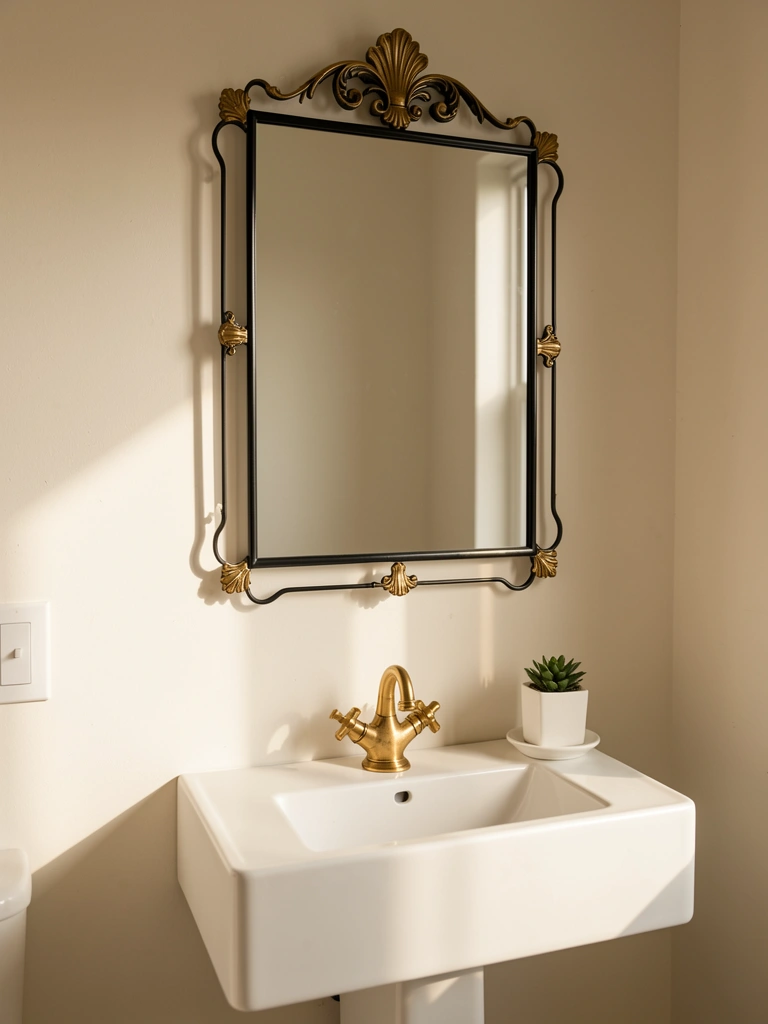
Your basic builder’s mirror doesn’t have to stay. A statement mirror becomes the room’s anchor point and changes the whole aesthetic.
Shop for 24–36 inch statement mirrors at Wayfair, West Elm, CB2, or Target ($80–$300). Choose from ornate, modern, arched, or geometric shapes. Mount securely with appropriate hardware for your wall type (30 minutes, $10 in hardware). Pro tip: oversized mirrors reflect light and make small bathrooms feel twice as big.
Your bathroom stops looking generic. That one focal point sets the tone for everything else in the room.
11. Switch to Organic Towels and Linens for a Luxury Feel

Scratchy, synthetic towels downgrade your entire bathroom experience. Organic cotton towels feel genuinely luxe and last longer—better for the planet too.
Find organic towels from Parachute ($35–$60 per towel), Brooklinen ($40–$70), or budget-friendly Target organic lines ($20–$35). Buy in a cohesive neutral color. Wash in cold water and hang dry to preserve softness. Even two or three premium towels draped visibly elevates the whole space.
Every time you grab a towel, you notice the quality. That small sensory upgrade makes your routine feel more thoughtful.
12. Install Heated Flooring for Winter Comfort
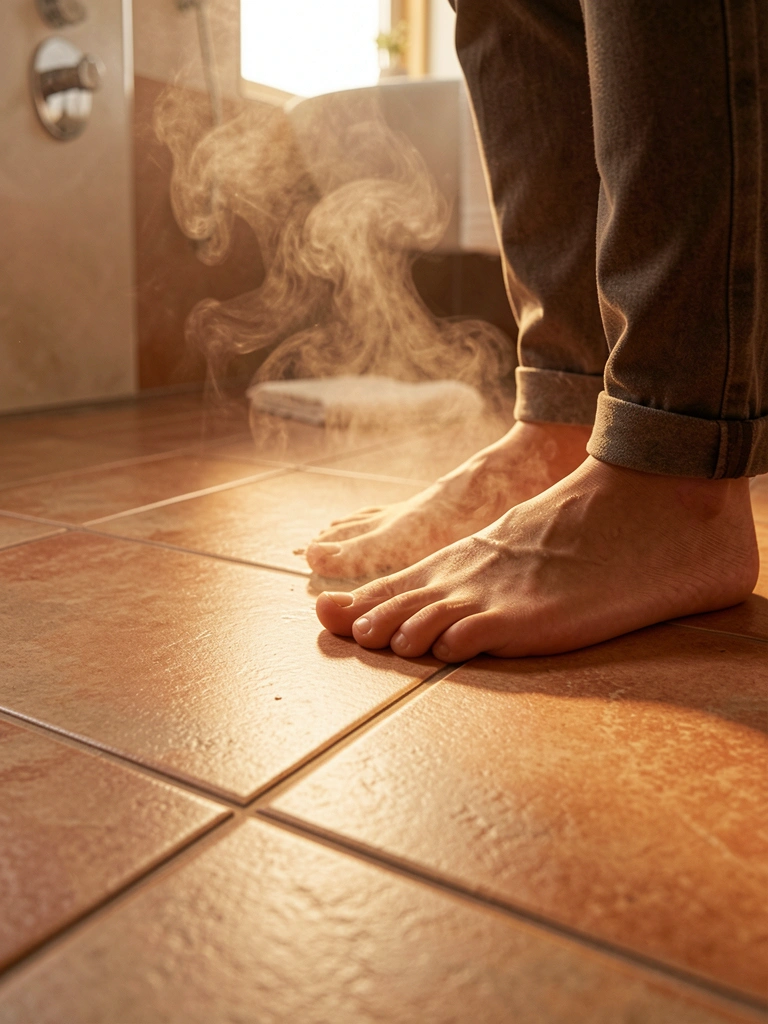
Cold tile on bare feet is one of winter’s small annoyances. Heated flooring costs way less than you’d think and feels genuinely luxurious.
Electric heated floor mats (non-permanent) cost $200–$600 and plug into an outlet—perfect for renters. Permanent radiant heating systems run $1,500–$2,500 installed but last decades. Warm up your floor with a mat under a bath rug for an instant upgrade (one hour install). Thermostats let you set exact temps.
Your morning bathroom routine loses that jarring cold shock. Even a small heated patch under your sink makes a noticeable difference in comfort.
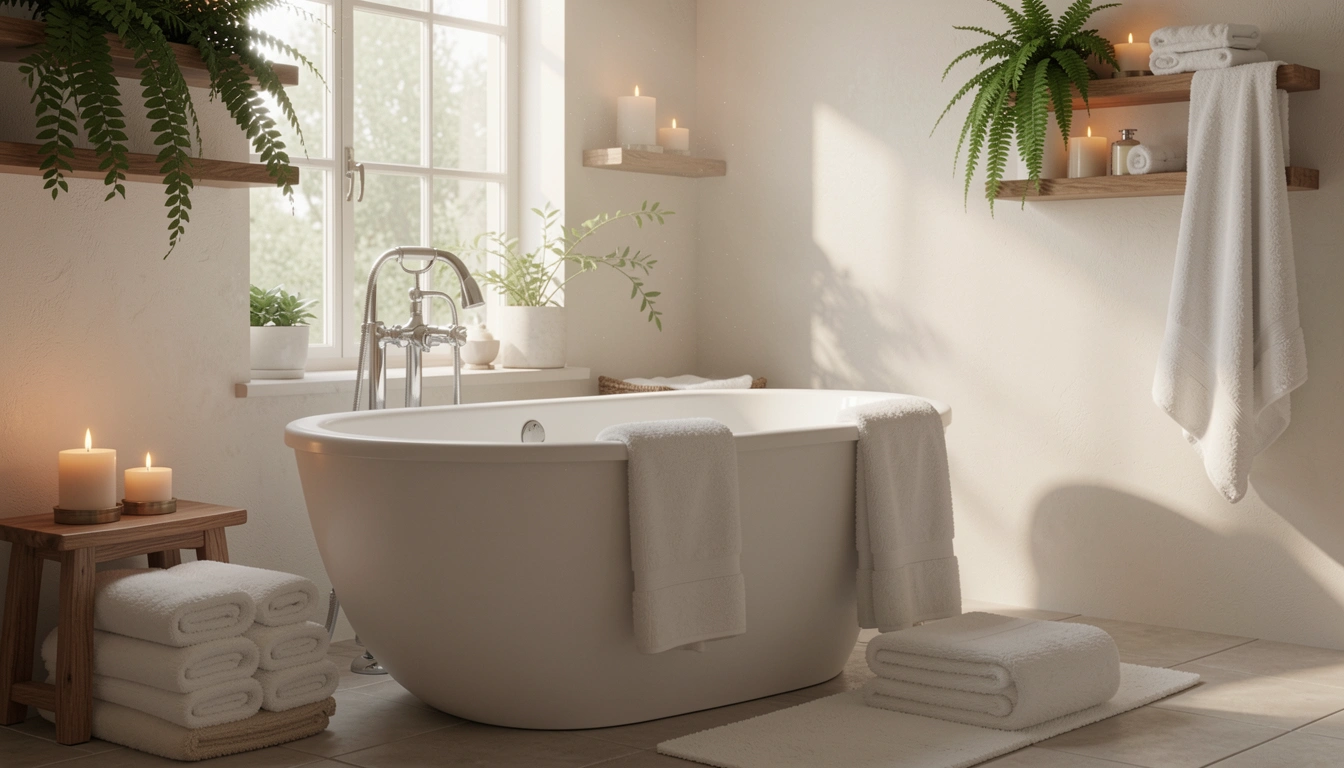
13. Create a Spa Nook with Plants and Greenery

Live plants thrive in humid bathrooms and instantly create a retreat feel. They’re budget-friendly, renter-approved, and air-purifying.
Buy 3–5 low-maintenance plants like pothos, snake plant, or eucalyptus from Home Depot, Lowe’s, or a local nursery ($10–$30 each). Place them on shelves, hang them from hooks, or set them on the floor. Water weekly and enjoy their humidity-loving nature. Pro tip: eucalyptus in the shower creates an aromatherapy effect as steam releases its scent.
Your bathroom stops feeling sterile and starts feeling alive. Plants add color, oxygen, and a genuine spa-like quality that’s free to maintain.
14. Upgrade to a Double Vanity (or Split Shelving for Renters)
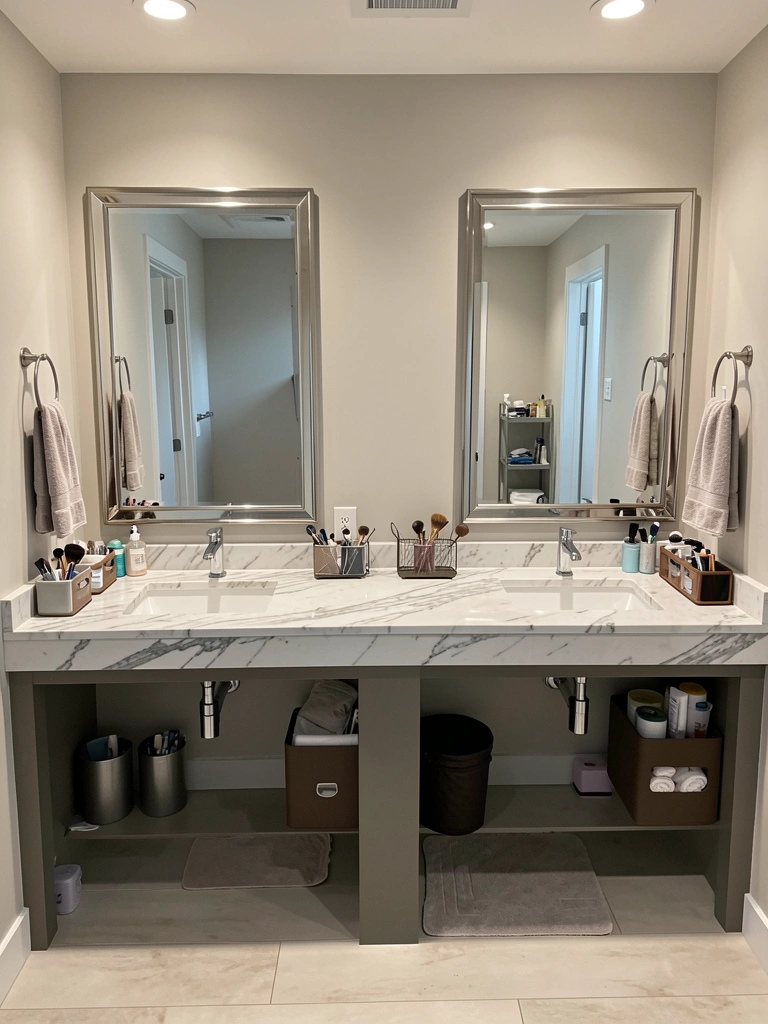
Sharing one sink creates morning friction. A double vanity (or split shelving system) gives everyone their own space without morning arguments.
A double vanity costs $400–$1,500 installed (labor included). If you’re renting, create a “split” using two narrow shelves ($40–$80 each) with separate storage containers ($20–$50 per set). Paint the middle section differently to define each side visually. Installation takes 2–3 hours for a full vanity, 30 minutes for shelf approach.
Your bathroom becomes functional for two people. No more negotiating counter space during peak hours.
15. Paint Your Vanity for a Custom Look
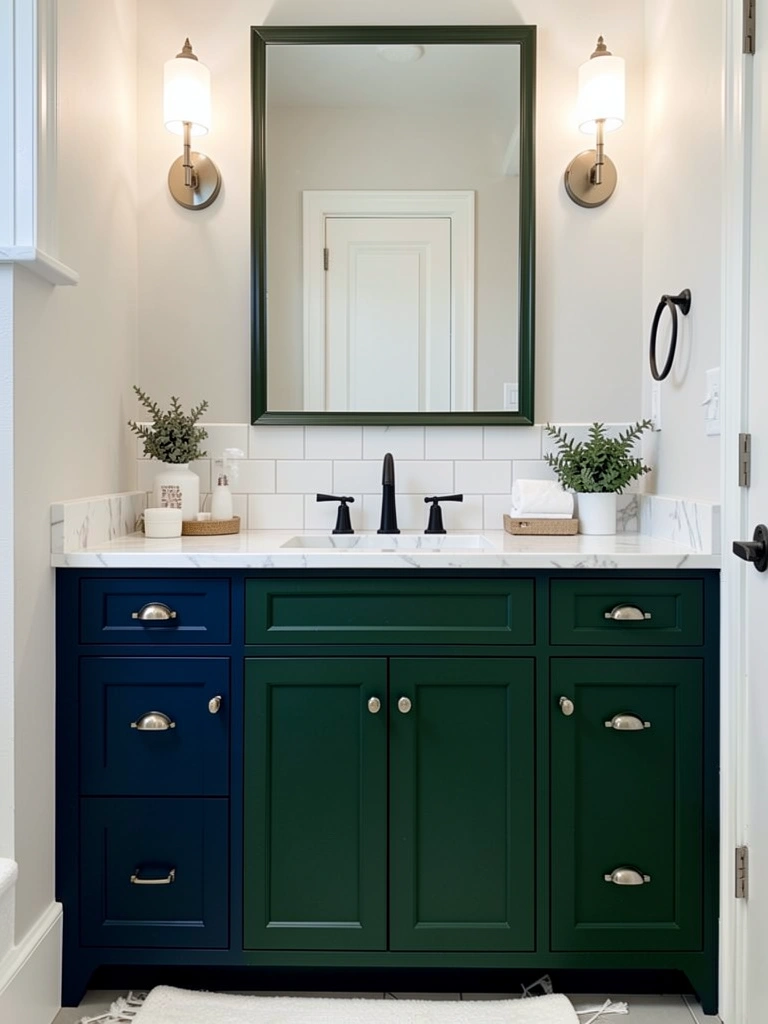
Your basic builder vanity can look custom with quality paint. It’s a weekend project with massive visual payoff.
Use bathroom-safe, semi-gloss paint in colors like deep blue, forest green, or soft gray ($30–$50). Prime the vanity first (primer costs $10–$15). Sand lightly between coats. Two coats take full day plus 24 hours drying. Pair new paint with updated hardware for maximum impact. Renter tip: this works on rental vanities if you document before/after and restore it when moving.
Your dated vanity becomes the bathroom’s focal point. That color update makes everything feel intentional and designer-chosen.
16. Install a Soaking Tub as Your Wellness Centerpiece
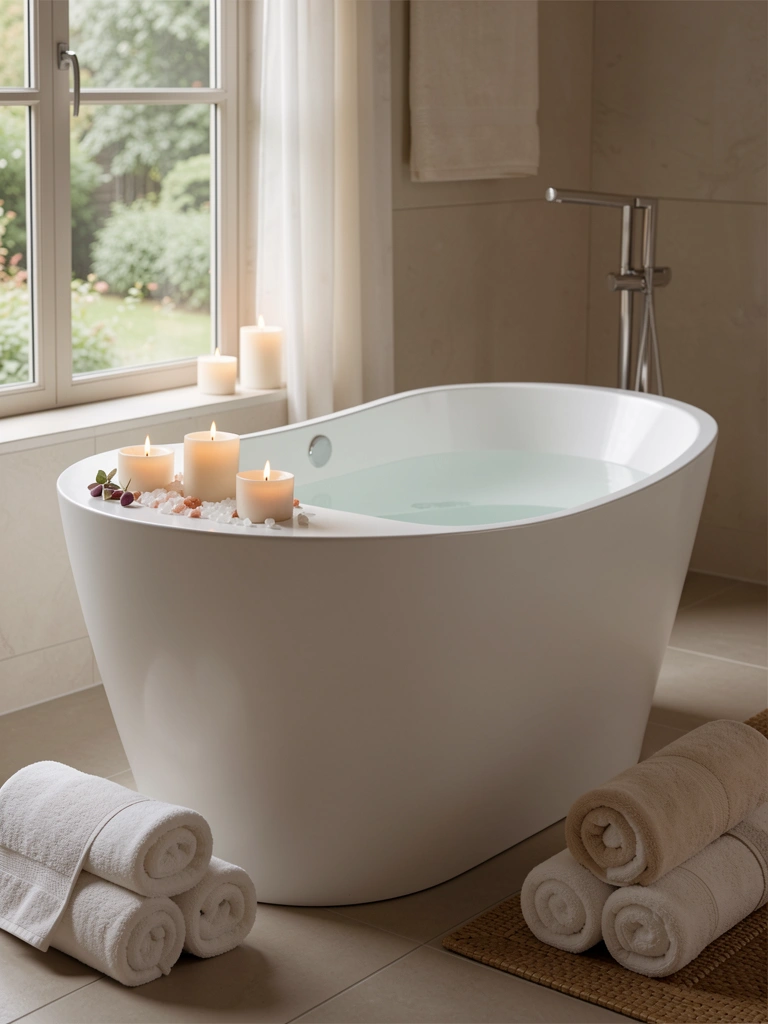
A soaking tub says “self-care” louder than any other fixture. It doesn’t need a huge bathroom—even small spaces can fit one with smart placement.
Freestanding soaking tubs cost $400–$2,000 depending on material and finish. Installation requires plumbing adjustments ($500–$1,500 labor). If you can’t commit, alcove tubs work in existing spaces ($300–$800). A smaller, Japanese-style soaking tub fits tight spaces ($300–$600). Position it by a window if possible for natural light.
You have an actual escape within your home. Soaking becomes a ritual, not just cleaning yourself quickly before bed.
17. Use Textured Wallpaper for Depth Without Clutter
Flat paint gets boring. Textured wallpaper adds dimension and interest without needing accessories cluttering your shelves.
Peel-and-stick textured wallpaper is $15–$40 per roll (Wayfair, Amazon, Home Depot). You need 2–4 rolls for an accent wall (one hour application). Choose subtle textures like linen, grasscloth, or soft geometric prints. Pair with one accent wall painted a different color for impact. This removes cleanly when you move.
Your walls have visual interest now. The texture catches light throughout the day and feels intentional without being loud.
18. Organize with Vertical Baskets and Wall Hooks

Vertical storage keeps floors clear and makes your bathroom feel organized instead of cramped. Woven baskets add warmth too.
Install wall hooks ($1–$5 each, Home Depot) and mount 3–5 woven baskets ($15–$40 each at Target, IKEA, Wayfair). Use baskets for towels, under-sink backups, and cleaning supplies. Label each basket so everyone knows what goes where. Installation takes one hour with a drill.
Your bathroom functions better and looks intentional. Everything has a home, so it actually stays organized instead of slowly descending into chaos.
19. Install Thermostatic Shower Controls for Consistent Comfort
Surprise scalding water mid-shower is dangerous and jarring. Thermostatic controls maintain your set temperature no matter what.
Thermostatic mixers cost $200–$500 installed (professional installation recommended, $150–$300 labor). They prevent temperature fluctuations and protect against sudden hot water spikes—crucial if you have kids or elderly family. Brands like Hansgrohe and Moen offer reliable options. Installation typically takes 2–3 hours.
You shower safely and comfortably, knowing the temperature will stay exactly where you set it. No more dramatic yelps when someone flushes.
20. Use a Color-Blocked Wall for Visual Impact
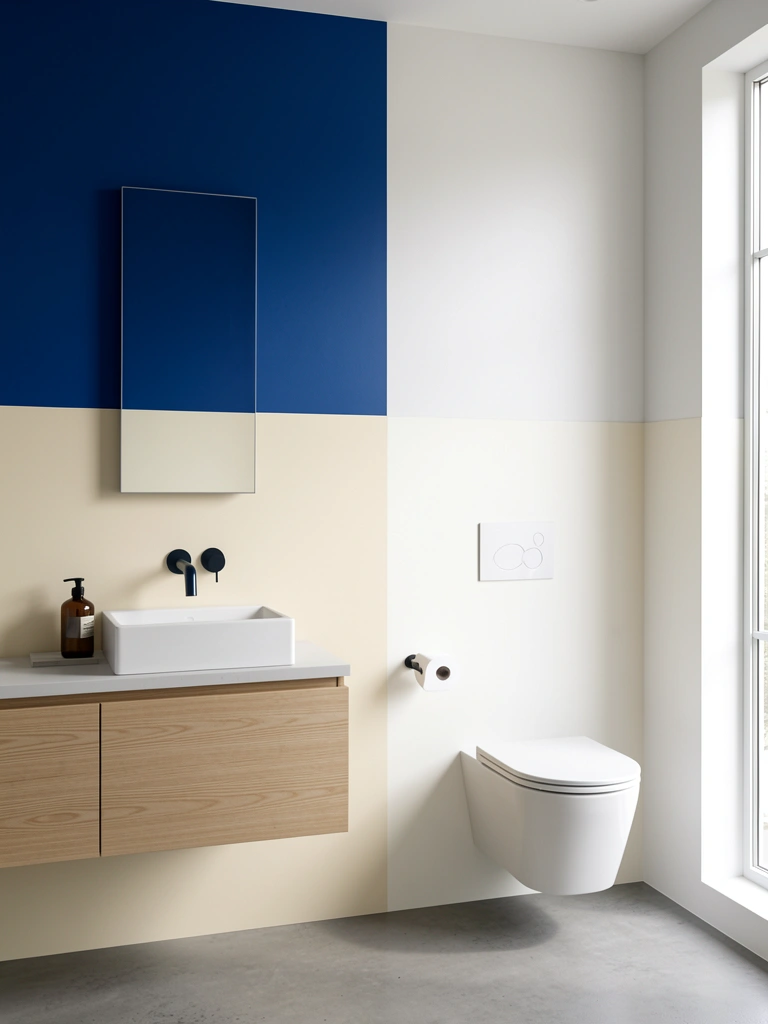
Paint doesn’t have to be one flat color. A color-blocked wall creates visual interest and modern sophistication.
Choose two complementary colors (one deep, one neutral) and paint a clean horizontal line at roughly mid-wall height or three-quarter height. Use painter’s tape for sharp edges. Primer, two coats, plus tape removal takes one full day. Paint costs $40–$80 total. This technique works great in small bathrooms because it breaks up wall space strategically.
Your bathroom stops looking boring and reads as intentionally designed. That one graphic wall becomes a conversation piece.
21. Add a Rainfall Effect with a Ceiling-Mounted Showerhead

Ceiling-mounted rainfall heads create a completely different shower experience than standard wall mounts. You feel like you’re under actual rain.
Install a 12+ inch rainfall head ($80–$250, Home Depot, Amazon) with ceiling plumbing work ($200–$400 labor). This requires a plumber—not a DIY project. Pair it with a handheld secondary head if you want flexibility. The whole installation takes half a day.
Your shower becomes genuinely luxurious. That first moment under overhead rainfall makes you feel like you’re at a resort, not your own bathroom.
22. Create Low-Maintenance Surfaces with Sealed Concrete or Polished Tiles
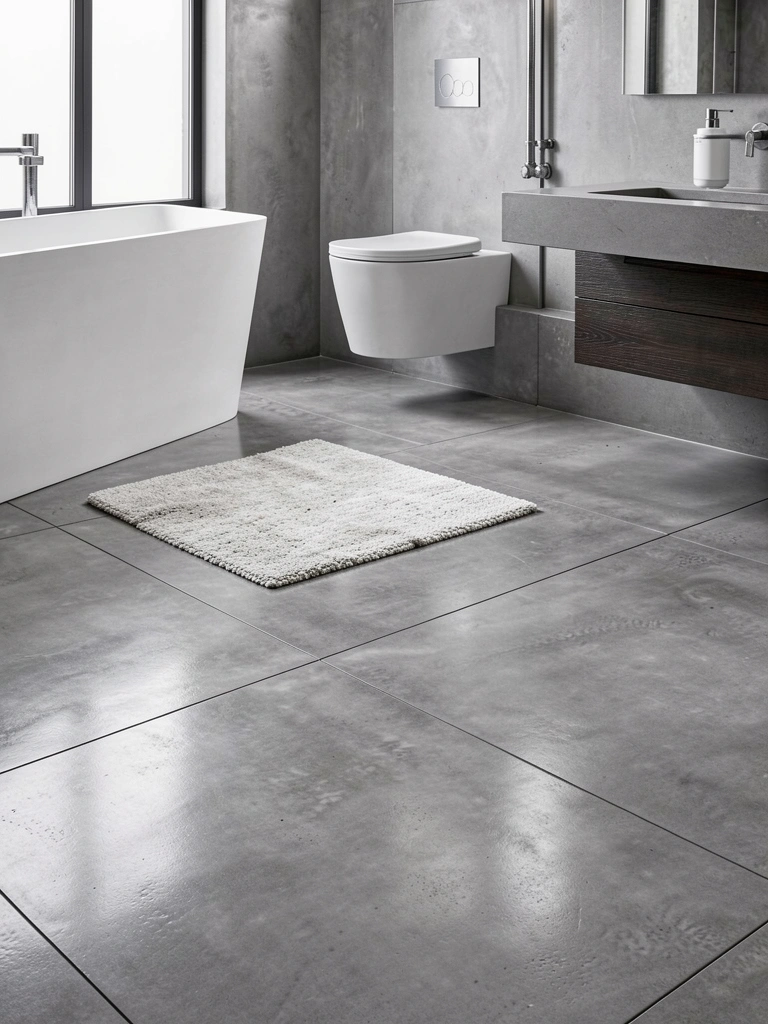
High-maintenance finishes (porous stone, unfinished wood) create constant cleaning stress. Sealed concrete or polished tiles stay pristine with minimal effort.
Polished concrete costs $3–$12 per square foot installed (DIY sealers run $30–$60). Large polished porcelain tiles are $5–$15 per square foot installed. Both resist staining, moisture, and mildew. Sealing takes one day and lasts 2–3 years. Maintenance is literally just regular mopping.
Your bathroom stays beautiful without constant vigilance. Cleaning becomes a quick task instead of a deep-scrubbing nightmare.
23. Brighten with LED Bulbs and Smart Lighting
Incandescent and old CFL bulbs eat energy and cast unflattering light. LED bulbs save money, last longer, and look warmer or cooler as you choose.
Swap your existing bulbs for LED equivalents ($8–$15 per bulb) in warm white (2700K) or daylight (5000K). Smart bulbs add app control and scheduling ($20–$50 each). A full bathroom bulb swap costs $40–$100 and saves you $10–$15 monthly on energy. No installation needed—just swap and twist.
Your bathroom looks better lit immediately, your electric bill drops, and you’re not changing bulbs every six months anymore.
24. Build Custom Shelving Around Your Toilet Tank
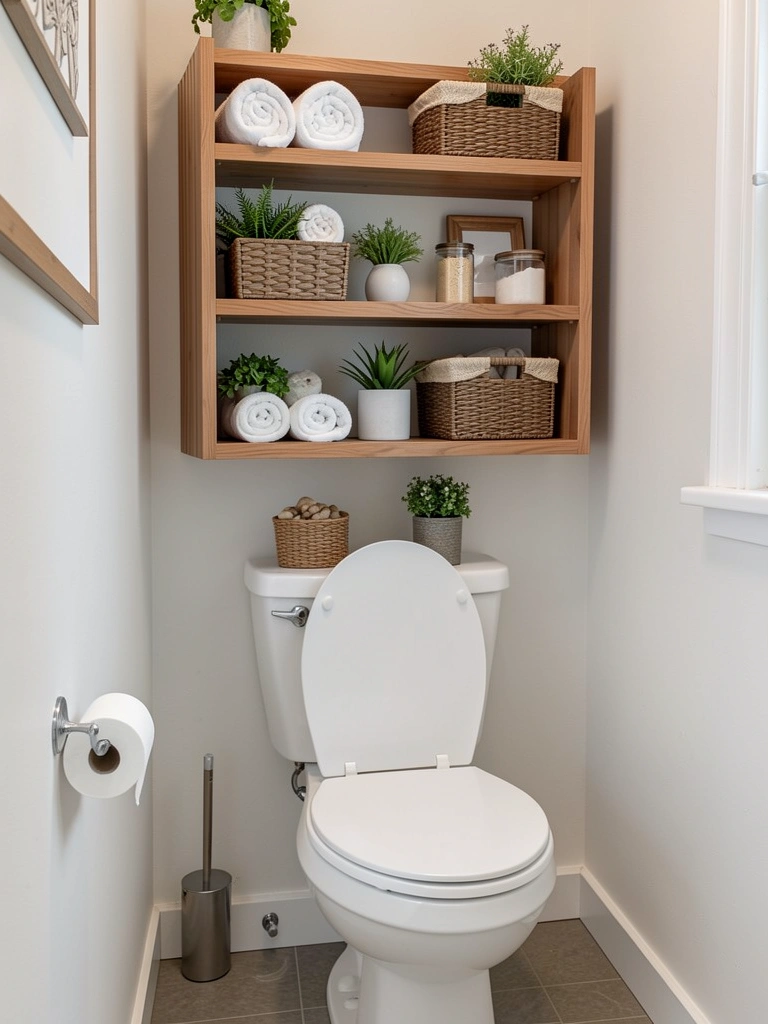
The wall above your toilet is prime real estate. Custom shelving turns wasted space into display and storage.
Build or install 3–5 shelves around your toilet ($100–$300 for materials and hardware if DIY, $400–$800 if hiring help). Use space for rolled towels, plants, candles, and books. Install within one weekend if comfortable with basic carpentry—otherwise hire a handyman (4–6 hours labor). Make shelves deep enough for baskets to hide clutter behind.
You double your storage instantly without eating floor space. That once-blank wall becomes functional and stylish.
25. Install a Heated Towel Rack for Luxury Warmth
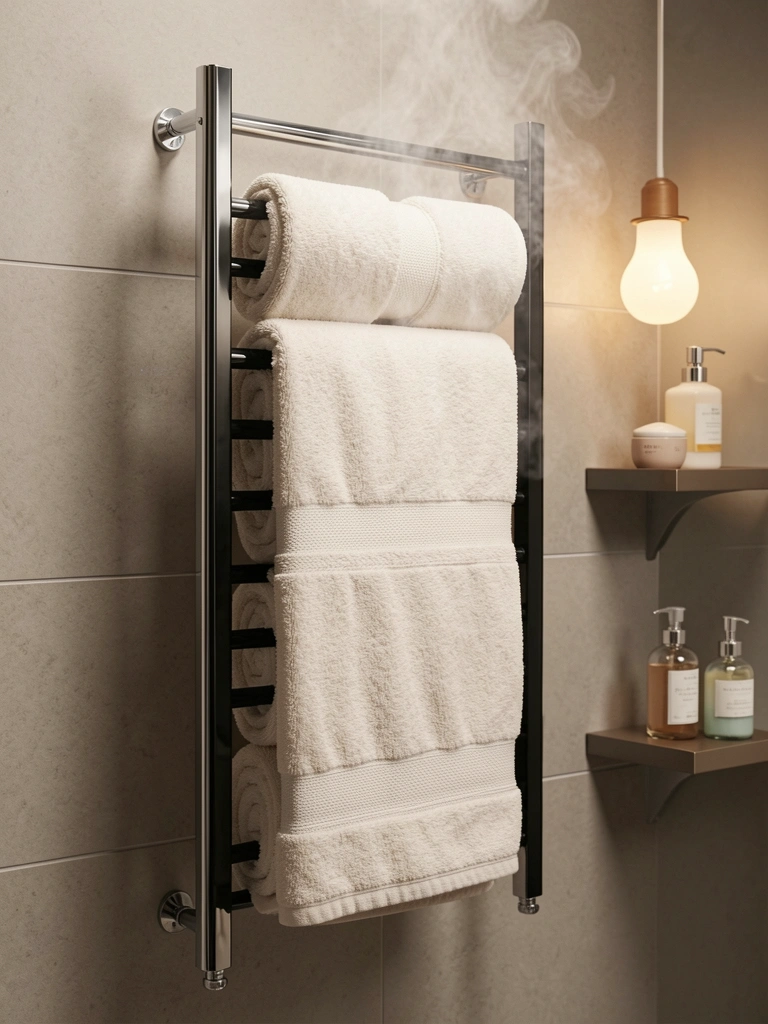
Warm towels elevate your post-shower experience from okay to genuinely luxurious. Modern racks are efficient and affordable.
Plug-in heated towel racks cost $60–$150 (plug into outlet, no wiring needed). Hardwired models run $150–$400 with installation. Both heat towels in 20–30 minutes. Choose from chrome, matte black, or brass finishes to match your hardware. Even renters can use a plug-in model without commitment.
Stepping out of the shower wrapping yourself in a warm towel feels like a spa day. This one upgrade changes how your whole routine feels.
26. Design an Open-Shelving “Spa Shelf” as Visual Anchor
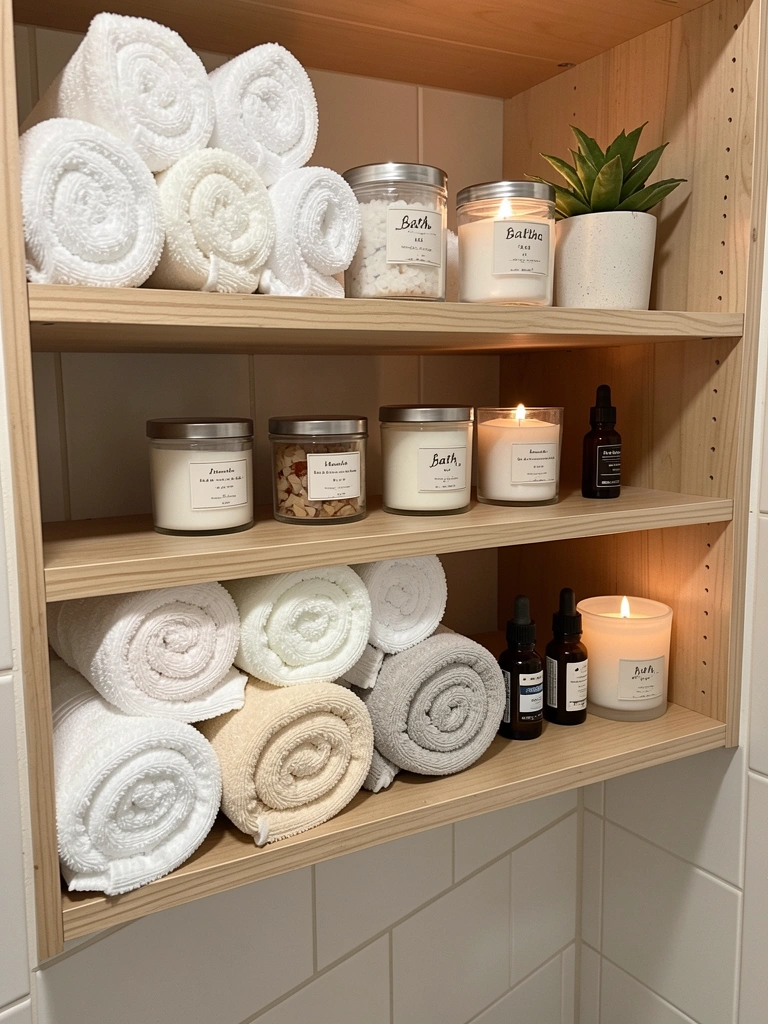
Instead of hiding everything in cabinets, style one open shelf as your bathroom’s visual anchor. It’s both functional and gorgeous.
Use a floating shelf ($40–$80) or your existing shelving. Style it with rolled towels in your color palette, 3–5 small plants, candles, glass jars with bath salts ($10–$20 for a set), and one small decorative object. Leave breathing room—don’t cram it full. Refresh seasonally. This takes 30 minutes to set up, then maintain by rotating items monthly.
Your bathroom looks curated and intentional, like someone stylish lives here. That one beautiful shelf becomes Instagram-worthy, and you actually enjoy looking at it.
Save this post and try one idea this weekend—you’ll be shocked how much a single update changes how your bathroom feels. Which one are you tackling first?
Leave a Reply