INTRODUCTION
If your laundry room is basically a hallway with a washer tucked in, you’re not alone. Narrow spaces feel cramped, cluttered, and honestly? Kind of depressing. But here’s the thing: skinny laundry rooms have serious potential. With smart storage, clever layouts, and a few design tweaks, you can create a space that’s both functional and actually pleasant to spend time in. Over the next few minutes, you’ll discover 24 proven ideas that work because of your room’s shape, not in spite of it. From vertical storage hacks to multitasking zones, these solutions squeeze maximum efficiency into minimal footage. Let’s make your narrow laundry room work harder for you.
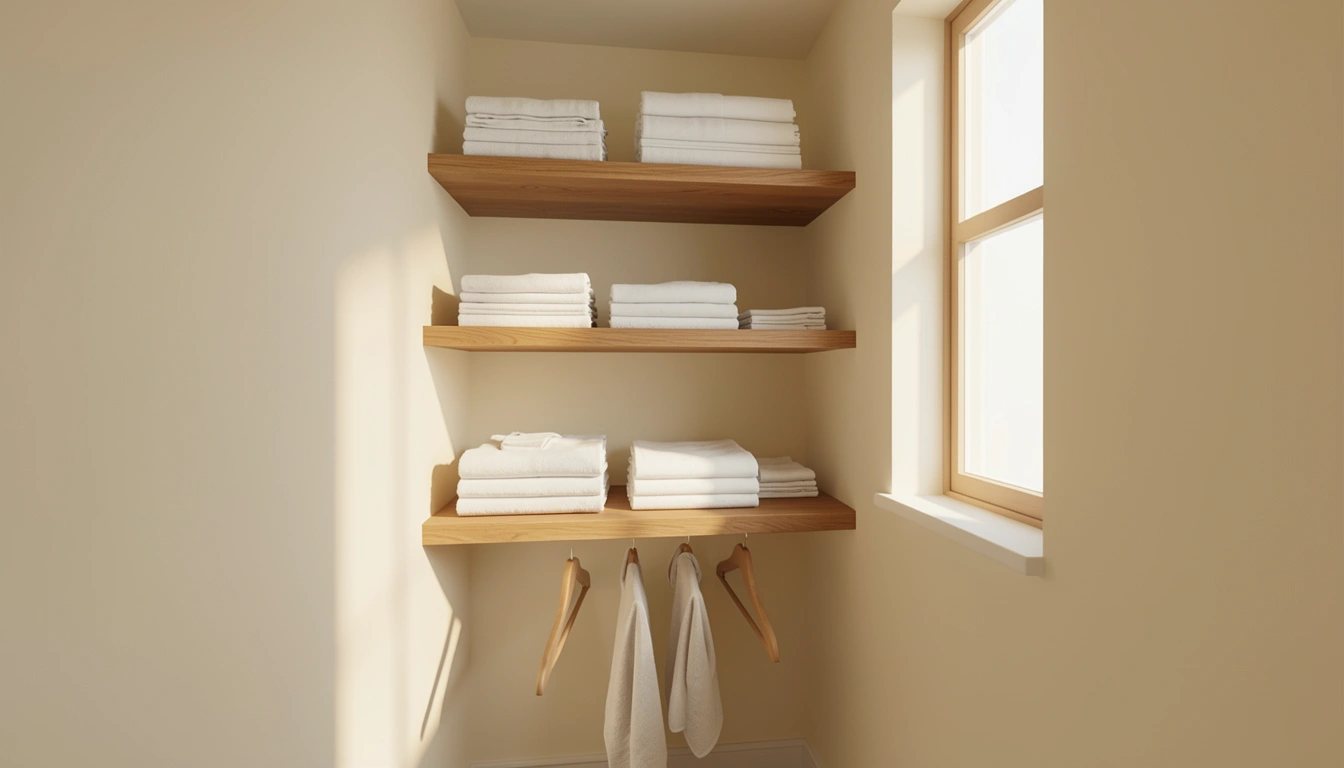
1. Install Floating Shelves Above the Washer and Dryer
Floating shelves are your best friend in tight spaces because they eat zero floor real estate. By mounting them directly above your stacked appliances, you create a tower of storage without blocking movement through the room.
Measure the width of your appliances first, then grab floating shelves in 12–18-inch widths from IKEA, Home Depot, or Amazon ($20–$60 per shelf). Install heavy-duty brackets at 12–16-inch intervals using a stud finder. Leave 6–8 inches of clearance above the top appliance for safety and airflow.
Pro tip: Use clear or woven baskets on the shelves so you can see supplies at a glance without everything looking cluttered.
You’ll unlock precious vertical real estate and keep detergents, dryer sheets, and cleaning cloths within arm’s reach while folding. The best part? Zero DIY skills required if you hire a handyman for 30 minutes ($50–$100).
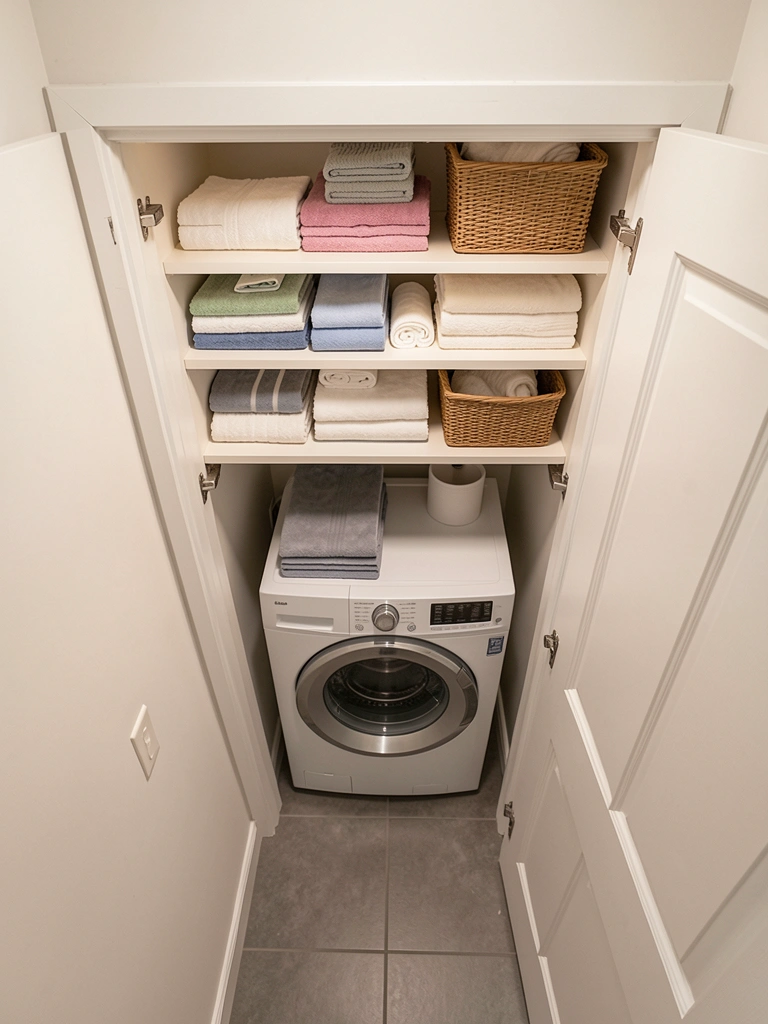
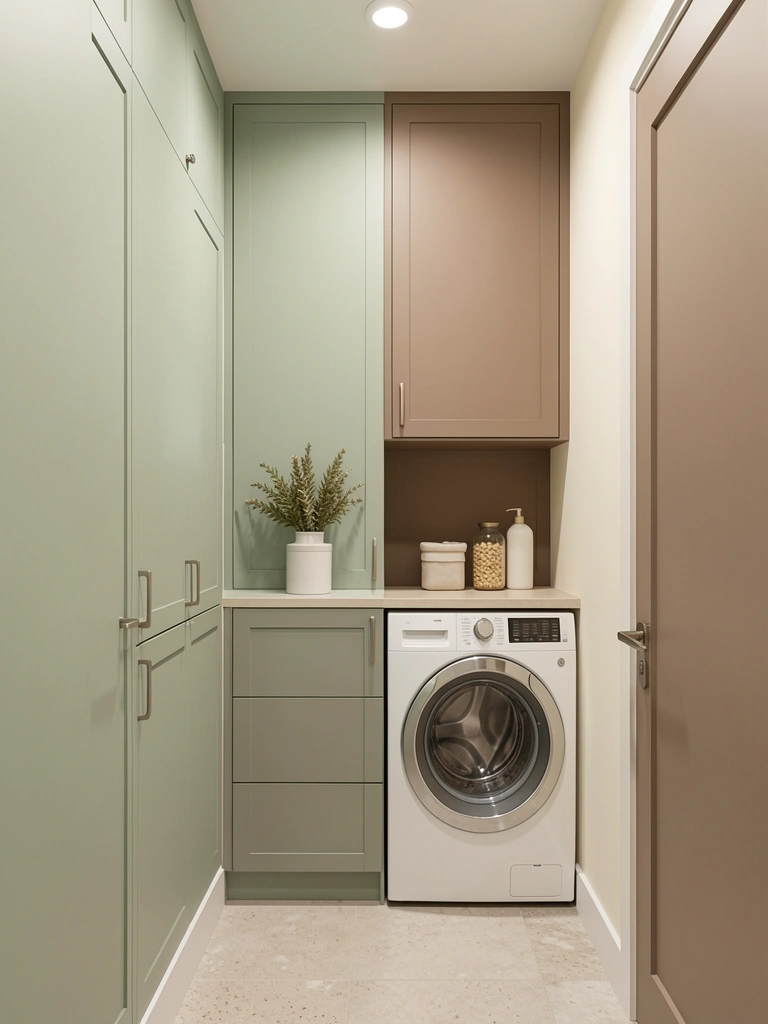
2. Go Vertical With Tall, Narrow Cabinets
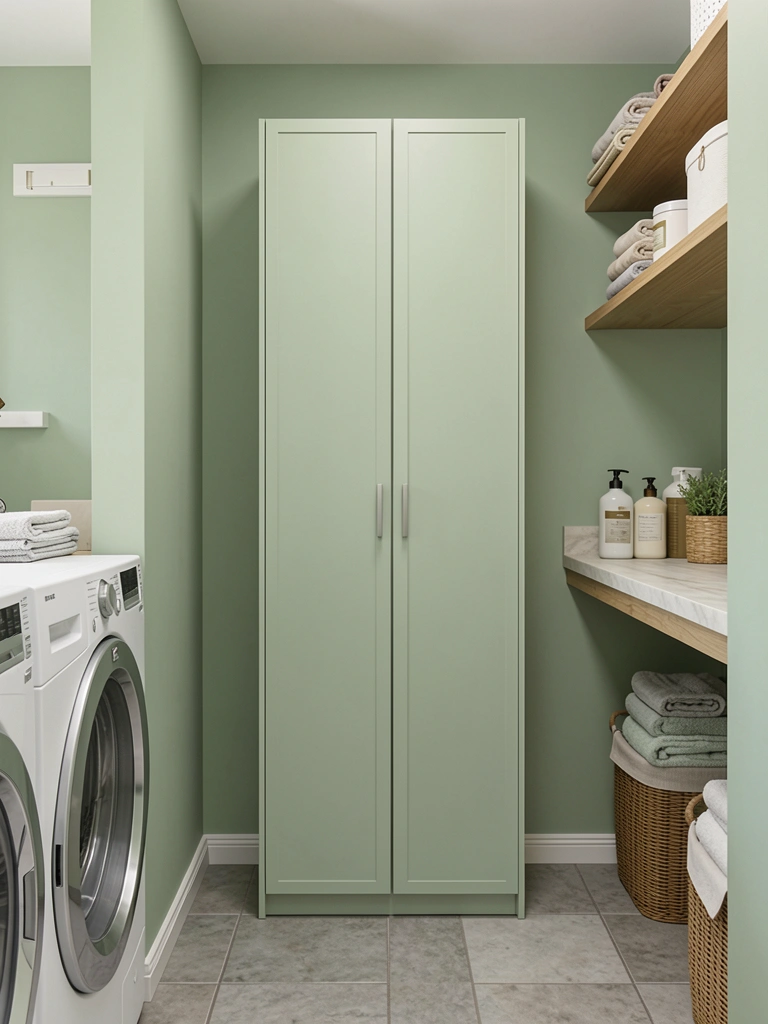
Narrow spaces call for height, not width. A single tall cabinet can hold more than three wide ones while actually making your room feel bigger because it draws the eye upward.
Look for 18–24-inch-wide pantry-style cabinets at IKEA, Wayfair, or Home Depot ($150–$400 depending on material and finish). Alternatively, stack two narrow shelving units and cap them with a cabinet topper. Install this against your longest wall to maximize floor clearance. Paint it a soft earthy tone (sage, taupe, or warm cream) to blend rather than dominate.
Time estimate: 1–2 hours to assemble and install if you’re comfortable with basic hardware; $50–$150 for a handyman.
The vertical investment pays off instantly—you get three times the storage of a squat dresser without eating into your already-tight walkway. Your laundry day feels less like an obstacle course.
3. Use a Rolling Cart for Portable Supply Station
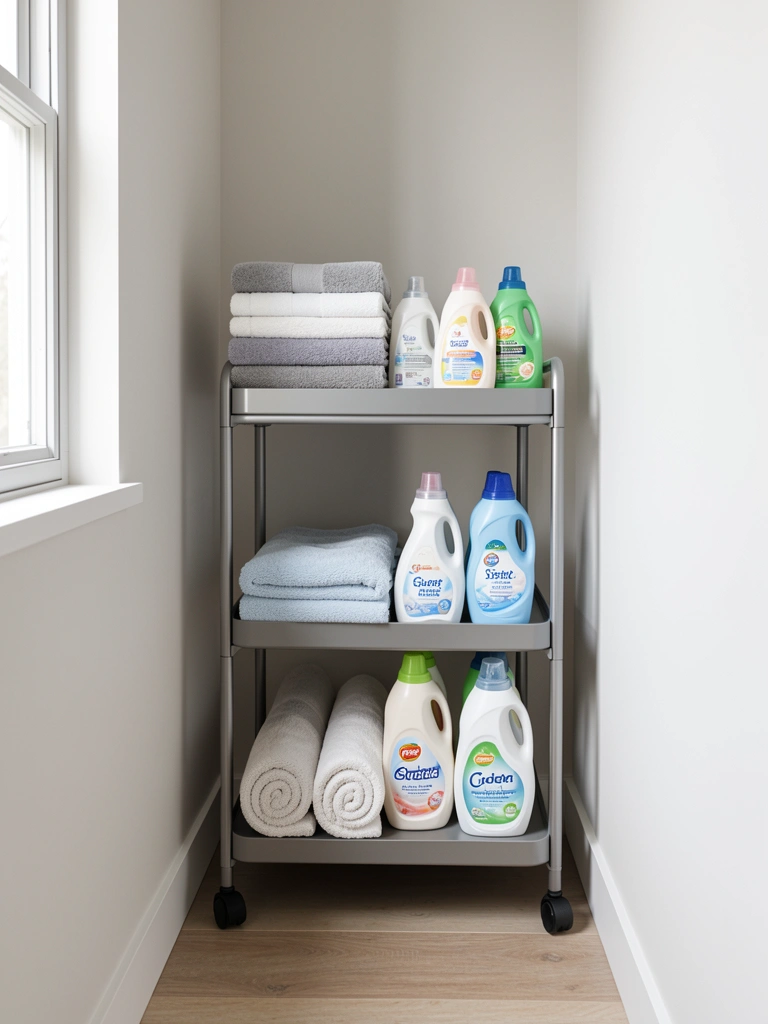
Rolling carts are the renter’s secret weapon and a budget-friendly flex. They slide out when you need supplies, tuck away when you don’t, and move to wherever you’re folding clothes or treating stains.
Grab a slim rolling cart with 2–3 tiers from IKEA ($35–$60), Amazon, or Target. Choose one in matte black, white, or natural wood to match your vibe. Stock shelves with detergent, stain spray, dryer sheets, lint rollers, and folded cleaning cloths in small bins.
Pro tip: Label bins so everyone in the household knows where things belong—cuts down on chaos fast.
When guests are coming, you roll it into a closet or laundry room corner. When you’re working, it’s right beside you. No commitment required, and you can take it with you if you move. That’s a win every way.
4. Paint Walls in a Warm, Light Tone to Expand the Space
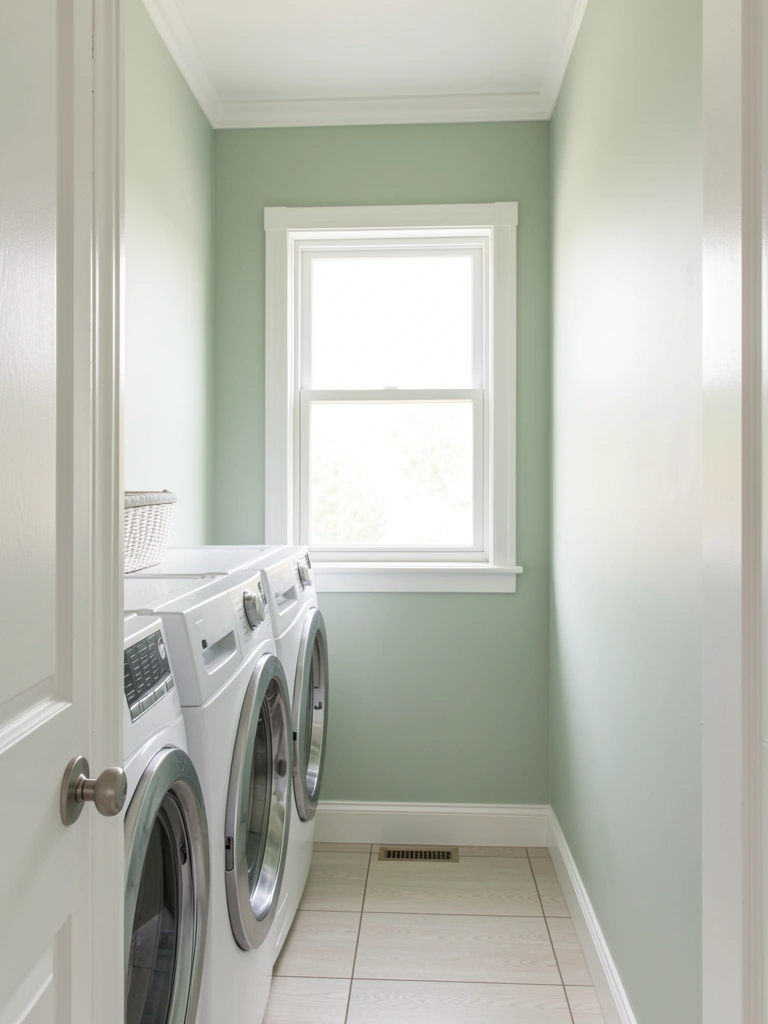
Color does incredible things in tight rooms. Dark paint in a narrow space feels like a cave; light tones literally make walls recede and rooms appear deeper.
Choose a soft, warm neutral like pale sage, warm taupe, soft cream, or barely-there greige. Brands like Sherwin-Williams (Accessible Beige, Sea Salt) or Benjamin Moore (Cloud White, Aegean Teal in whisper-light versions) run $30–$50 per gallon. You’ll need 1–2 gallons for a typical laundry room.
Prep work takes 2–3 hours; painting takes another 2–4 hours depending on room size. DIY friendly—grab a roller and go. If you prefer pro work, expect $200–$400 labor.
The payoff? Your room instantly appears 20% bigger, and the calming backdrop makes you feel less frazzled while folding endless socks. Bonus: light walls hide dust way better than you’d think.
5. Mount a Slim Folding Station That Pulls Down From the Wall
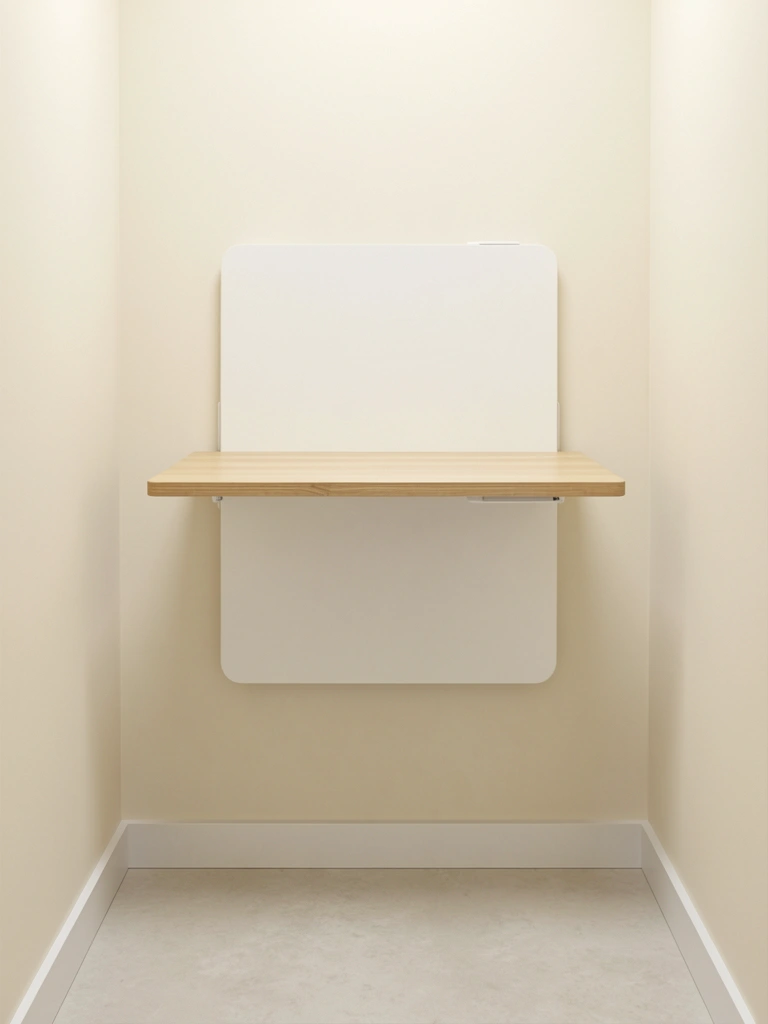
A fold-down table gives you a real work surface without eating floor space permanently. When you’re done folding, it clips up and disappears.
Search for wall-mounted fold-down desks or tables ($60–$150 on Amazon or Wayfair). Look for ones 24–30 inches wide and 16–18 inches deep—perfect for folding a load. Mount it 30–36 inches high using wall anchors or studs.
Installation time: 45 minutes to 1 hour if you’re handy; $50–$100 if you call someone.
You get a dedicated folding zone without a permanent footprint. Collapse it, and your laundry room becomes pure passageway again. Genius for narrow spaces where multitasking is survival.
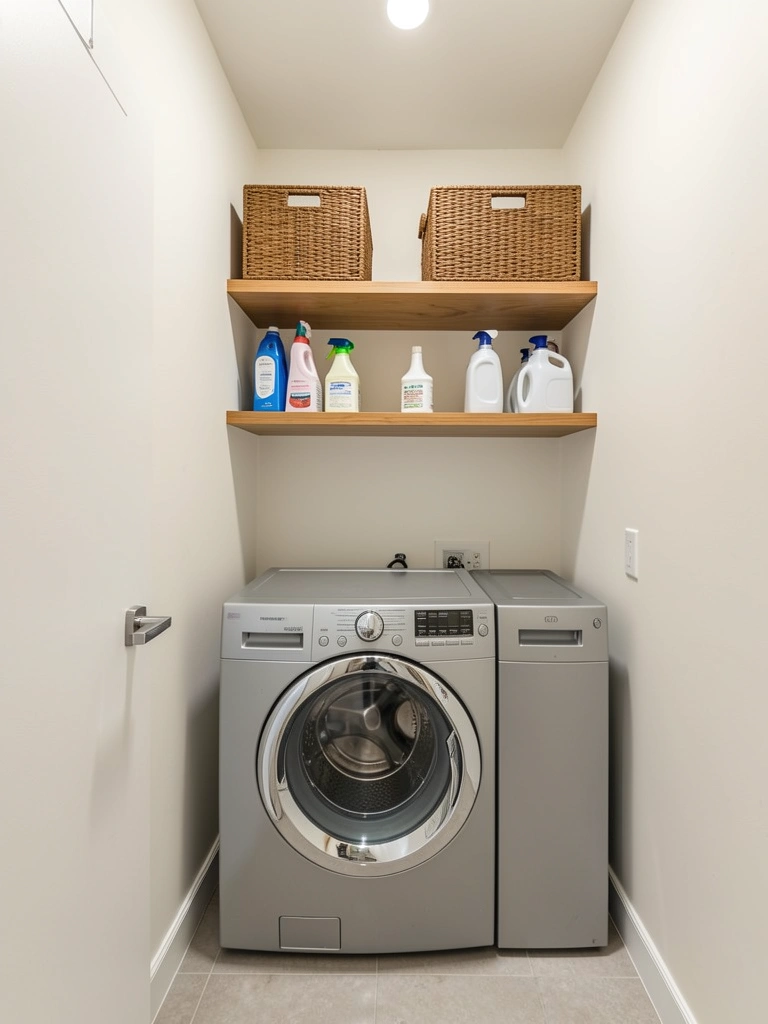
6. Add Open Shelving With Woven Baskets for a Soft, Organized Look
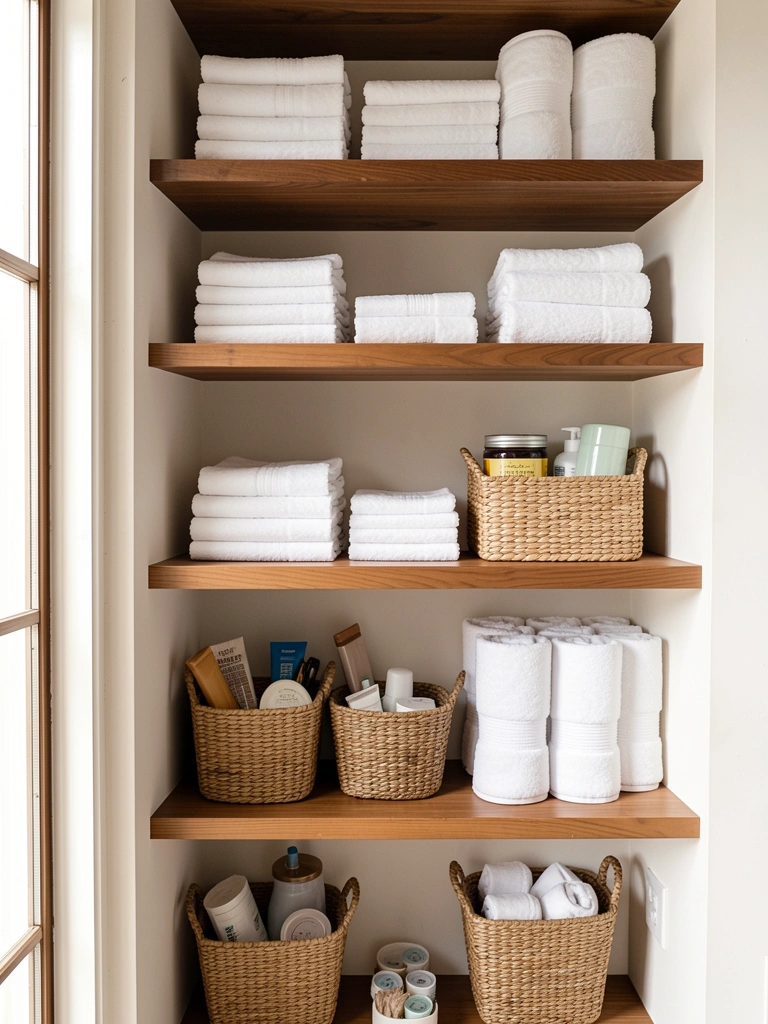
Open shelving lets you see everything and makes the room feel lighter than closed cabinets—but it only works if you commit to neat baskets and folded stacks.
Install 3–4 floating wooden shelves (12–18 inches wide, $30–$60 each) across one wall. Pair with woven or fabric baskets ($10–$25 each from Target, IKEA, or Amazon) sized to fit the shelves perfectly.
Pro tip: Fold items in thirds, stand towels upright like a filing cabinet, and use matching baskets so the eye doesn’t bounce all over.
Time: DIY in 1–2 hours; full installation with help is 2–3 hours total.
You get the airiness of open storage without feeling chaotic, plus everything’s visible so restocking is instant. This style photographs beautifully too—totally Pinterest-worthy.
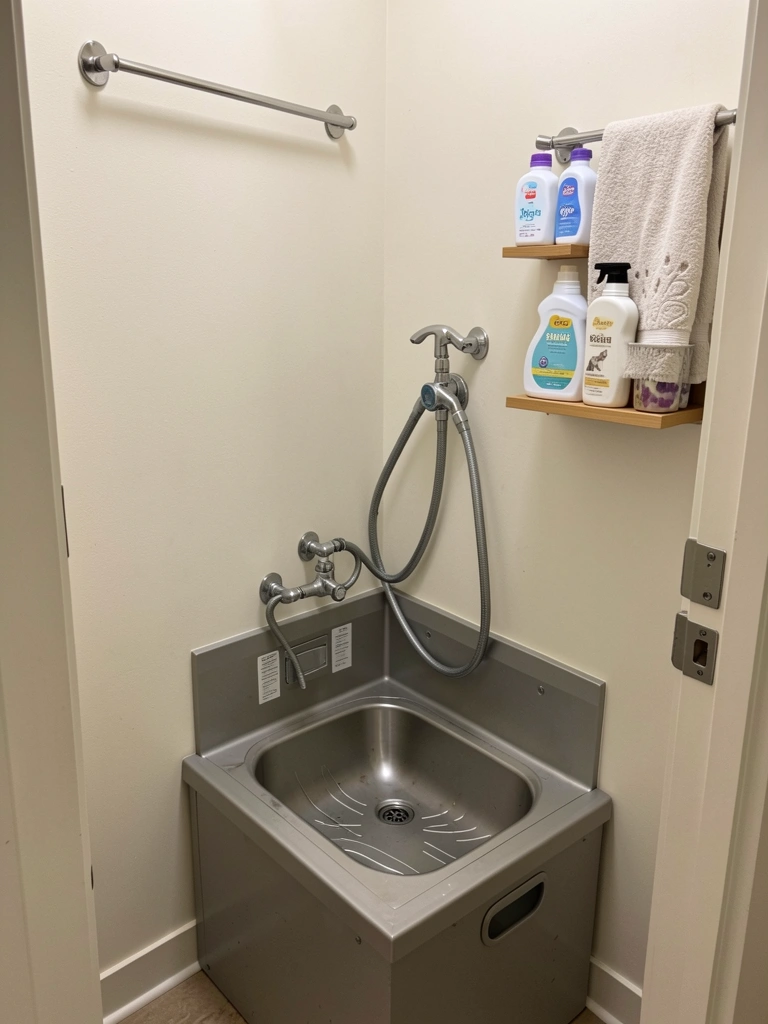
7. Install a Narrow Utility Sink for Hand-Washing Delicates
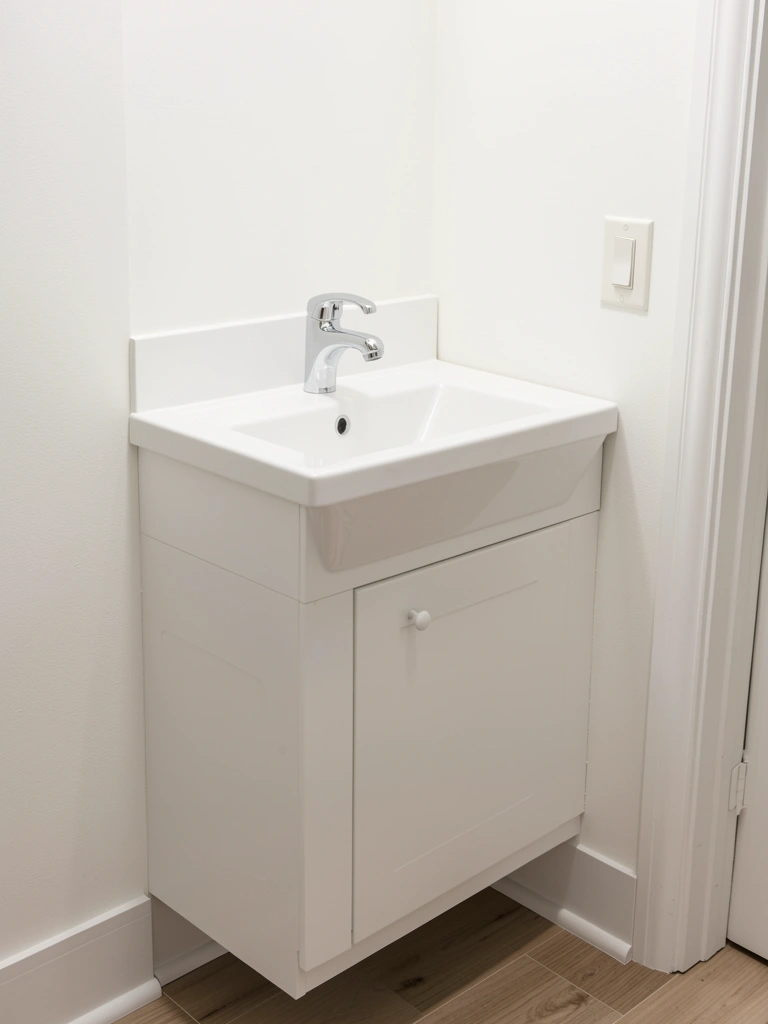
A utility sink transforms your laundry room from “place where stuff happens” to a real hub. Hand-wash lingerie, pre-treat stains, rinse out mops—it’s invaluable.
Look for compact utility sinks (18–24 inches wide) at Home Depot, Lowes, or Amazon ($150–$350 for sink + faucet combo). Mount to wall studs or install a simple pedestal model. You’ll need basic plumbing or $150–$300 in labor.
DIY level: Medium to advanced if you’re handling plumbing yourself; hire a plumber for the water/drain hookup ($1–2 hours, $100–$300).
Suddenly your laundry room has the functionality of a butler’s pantry. You can rinse delicates right after drying, treat tough stains immediately, and keep your bathroom sink available for actual hygiene. Quality-of-life upgrade, honestly.
8. Use Tall Narrow Hampers to Sort Laundry Vertically
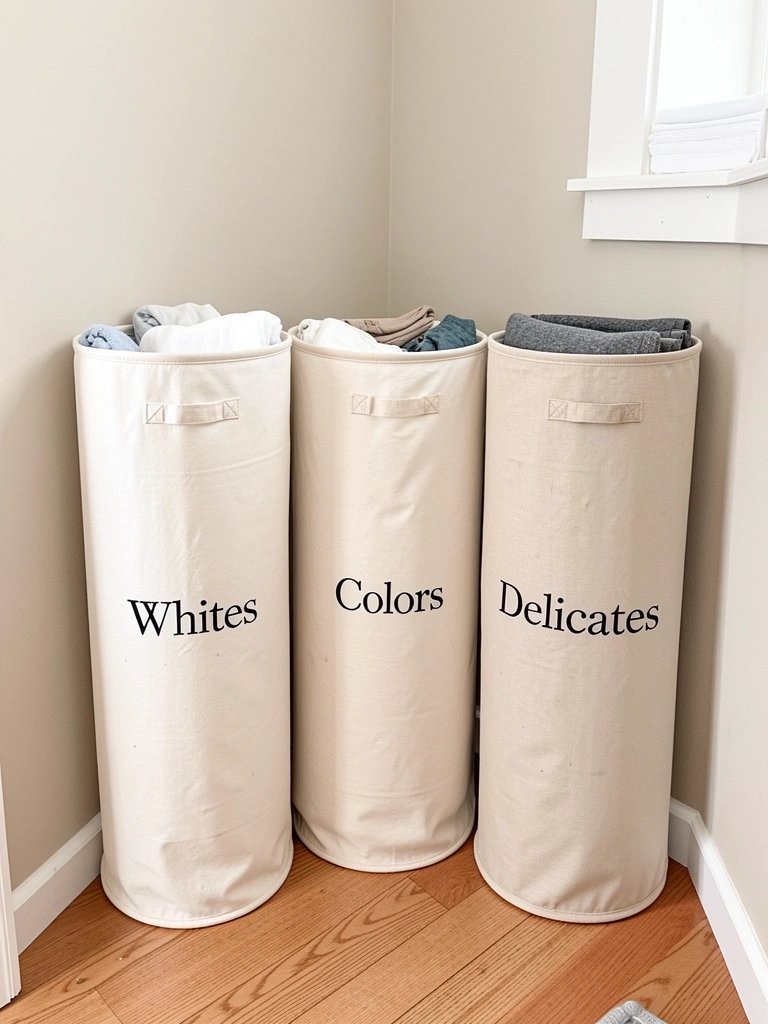
Narrow hampers stack laundry up, not out, which is perfect for hallway-sized rooms. Three hampers (Whites, Colors, Delicates) take up about 3 square feet total but hold a huge volume.
Grab slim fabric hampers from IKEA, Target, or Amazon ($12–$30 each). Labels ($3–$8 per set) keep everyone sorting correctly. Position in a corner or line them along one wall.
Budget hack: Use sturdy laundry bags instead of hampers ($3–$5 each) and hang them on a wall-mounted rod. Free up even more floor space.
Doing laundry becomes a sorting game instead of a guessing game. Kids know where to toss things, and you start each wash cycle organized. Simple but life-changing for households with multiple people.
9. Hang a Pull-Out Drying Rack for Air-Dry Items

Air-drying delicates and sweaters saves energy and extends fabric life—but you need hanging space. Wall-mounted pull-out racks are magic for narrow rooms.
Search for accordion-style or pull-out wall-mounted drying racks ($50–$120 on Amazon or Wayfair). Mount at shoulder height above your folding counter or against a blank wall. When not in use, it collapses flush.
Installation: 30 minutes with basic hardware; $30–$50 if someone helps.
You get a dedicated air-dry zone without permanent clutter. Sweaters, silks, and delicates hang safely, and the whole thing disappears when you’re done. Energy-efficient and space-efficient.
10. Install Peel-and-Stick Wallpaper in One Accent Wall
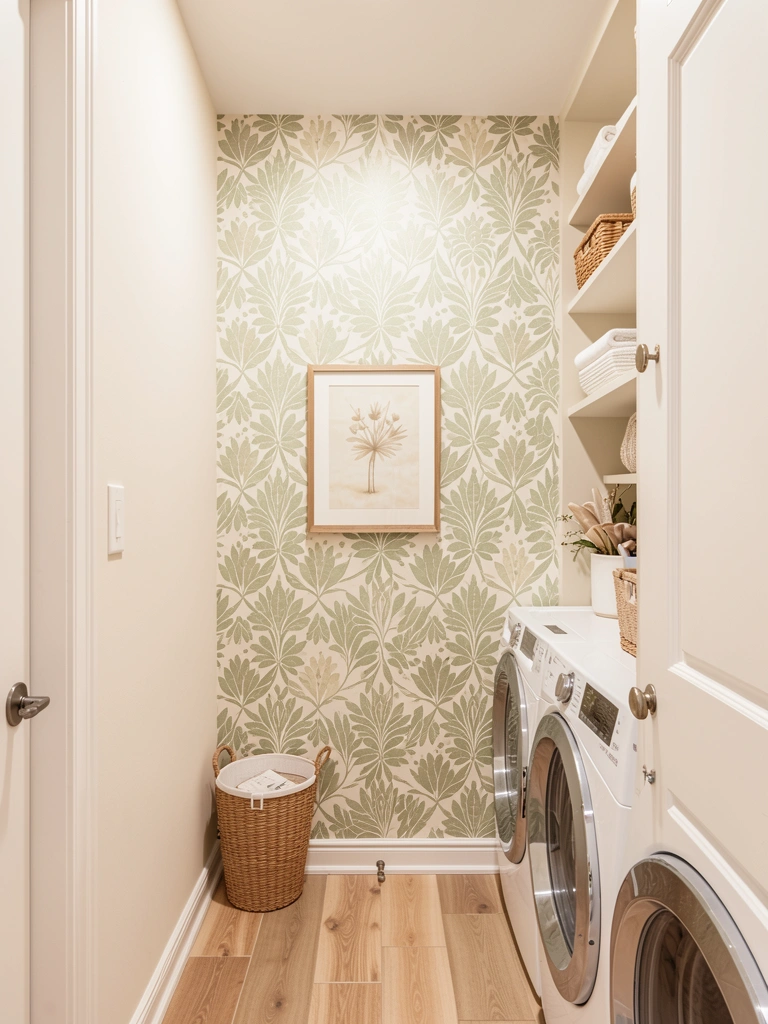
One accent wall breaks monotony without overwhelming a tight space. Peel-and-stick wallpaper is renter-safe, budget-friendly, and reversible.
Pick a peel-and-stick wallpaper in a subtle pattern (geometric, botanical, or textured) from Amazon, Target, or Etsy ($25–$60 per roll). Choose a wall that’s most visible—often the one opposite the door.
Time: 2–3 hours for your first attempt; gets faster with practice. No permanent commitment—peel it off anytime.
Suddenly your laundry room stops feeling utilitarian and starts feeling designed. It’s a small investment that makes a huge mood shift. Pick a pattern that matches your 2025 earthy color vibe (soft greens, warm taupes, natural textures).
11. Mount a Narrow Ironing Board on the Wall
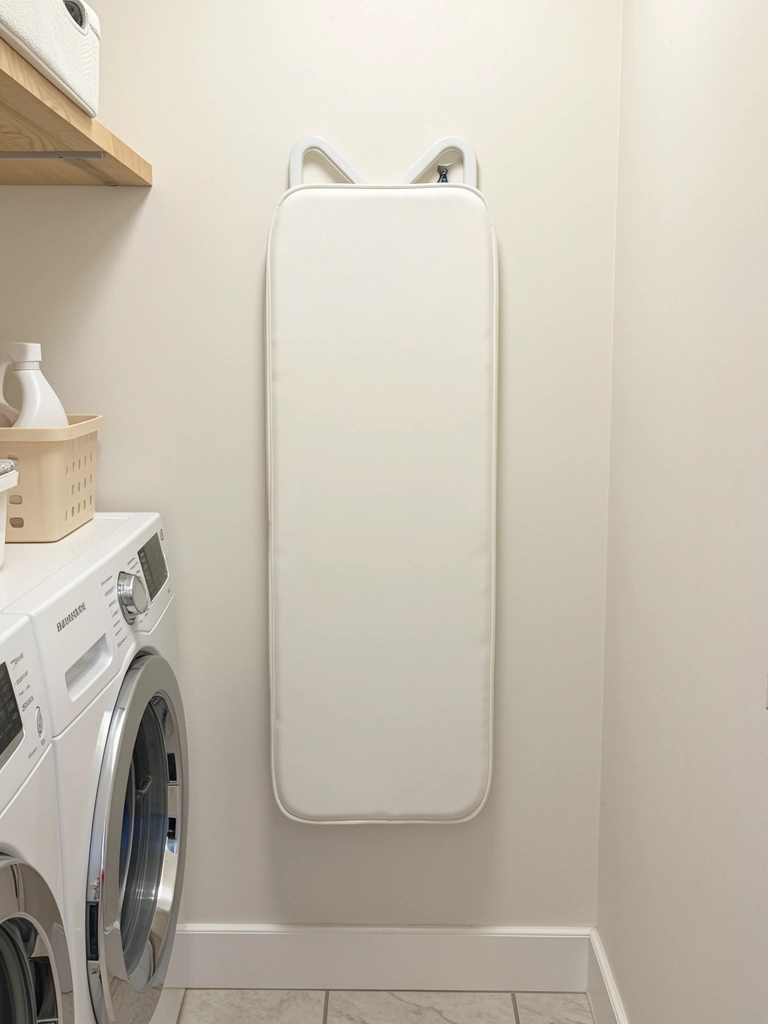
A wall-mounted ironing board replaces the need for a bulky freestanding one that eats square footage you don’t have.
Find a fold-down wall-mounted ironing board ($40–$80 at Target, Bed Bath & Beyond, or Amazon). Mount it 24–30 inches from the ground and at waist height when folded down. Use heavy-duty anchors or mount into studs.
Installation: 30–45 minutes; $20–$40 if you need help.
Bonus: Some fold-down boards include ironing supply hooks right on the board itself, so your iron and spray bottle hang organized in one spot.
Iron clothes right where you fold them, then fold it away. Zero guilt about the un-ironed pile because your setup is so frictionless. That’s the dream.
12. Add LED Under-Shelf Lighting for a Spa-Like Feel

Lighting transforms a dungy basement or hallway laundry room into somewhere you don’t dread going. LEDs are energy-efficient and affordable.
Grab warm white LED strip lights ($15–$40 for a multi-strip set on Amazon). Mount under each floating shelf using the included adhesive backing. Plug into an outlet or (for hardwired look) have an electrician install a dimmer switch ($100–$200 labor).
DIY time: 30 minutes to install strips; zero tools required.
Pro tip: Go warm white (2700K color temperature), not cool white or blue. It feels spa-like instead of clinical.
Your laundry room becomes a bright, organized oasis instead of a cave. Folding feels meditative, not like a chore you’re rushing through. Lighting truly is the secret ingredient.
13. Use Magnetic Shelves or Strips for Metal Baskets
Magnetic strips let you use metal baskets and containers without drilling into walls—perfect for renters and anyone who wants damage-free organization.
Install adhesive magnetic strips ($15–$35 for a set) on smooth wall surfaces or cabinetry. Use small metal storage baskets or containers ($5–$20 each from Target, Container Store, or Amazon) to clip on.
Time: 10 minutes to install strips; instant gratification.
Supplies hover on your wall, accessible and chic. You can rearrange baskets endlessly without tools. Industrial-meets-minimal, and it looks thoughtfully organized, not thrown-together.
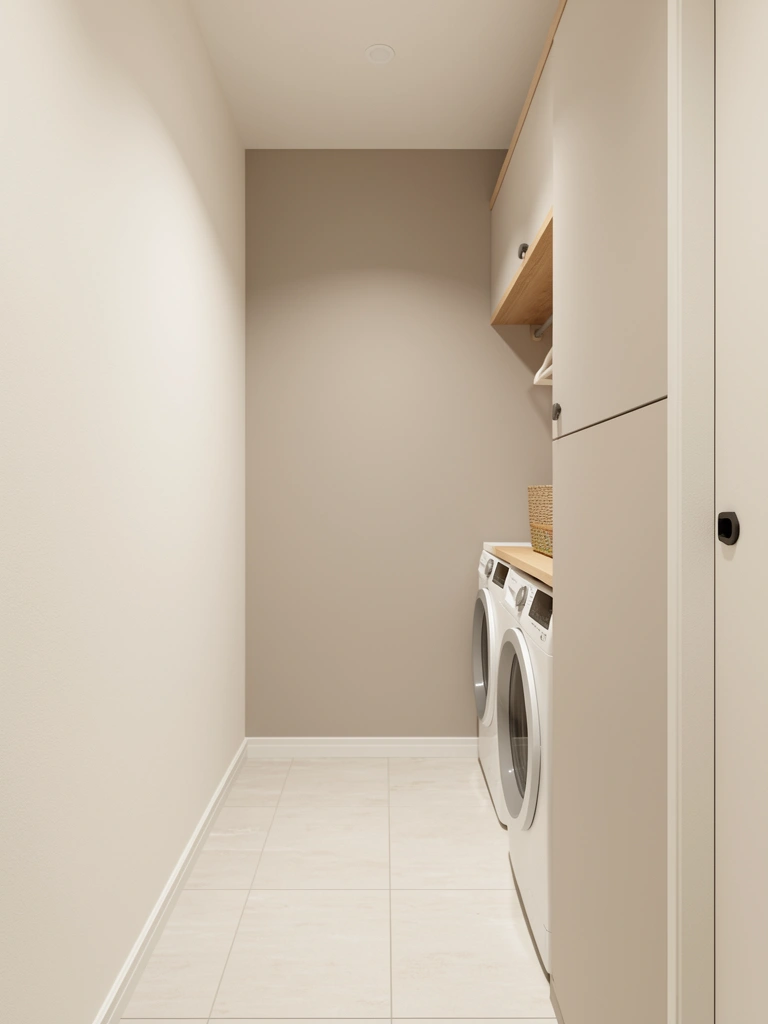
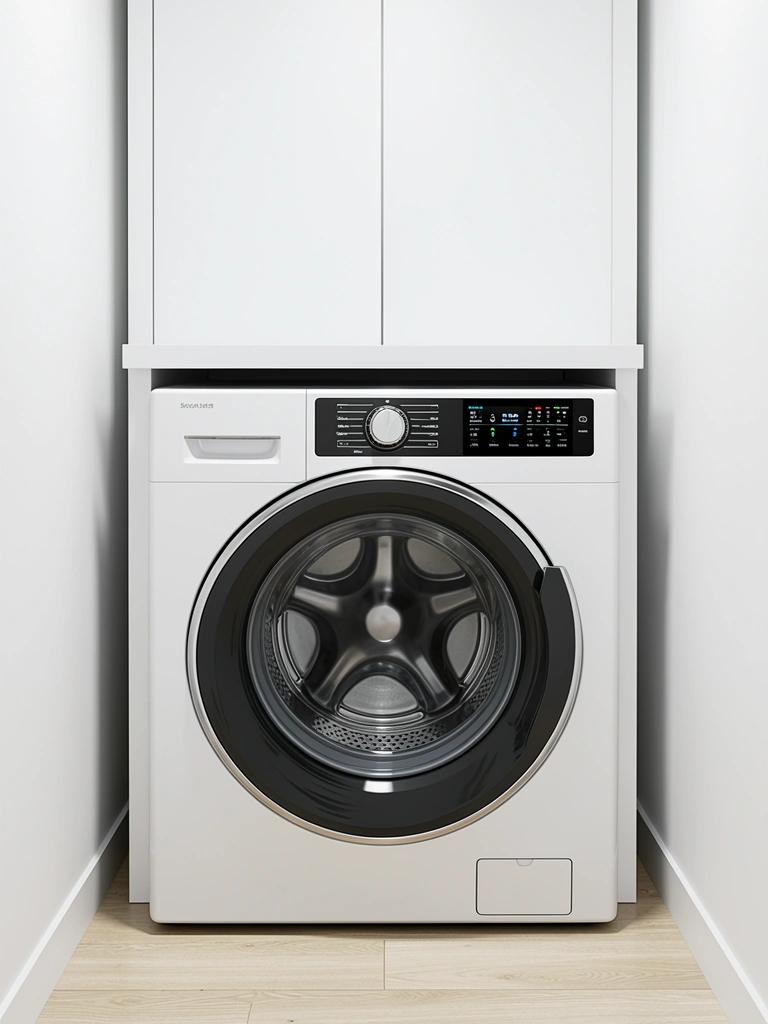
14. Stack Appliances to Free Up Floor Space
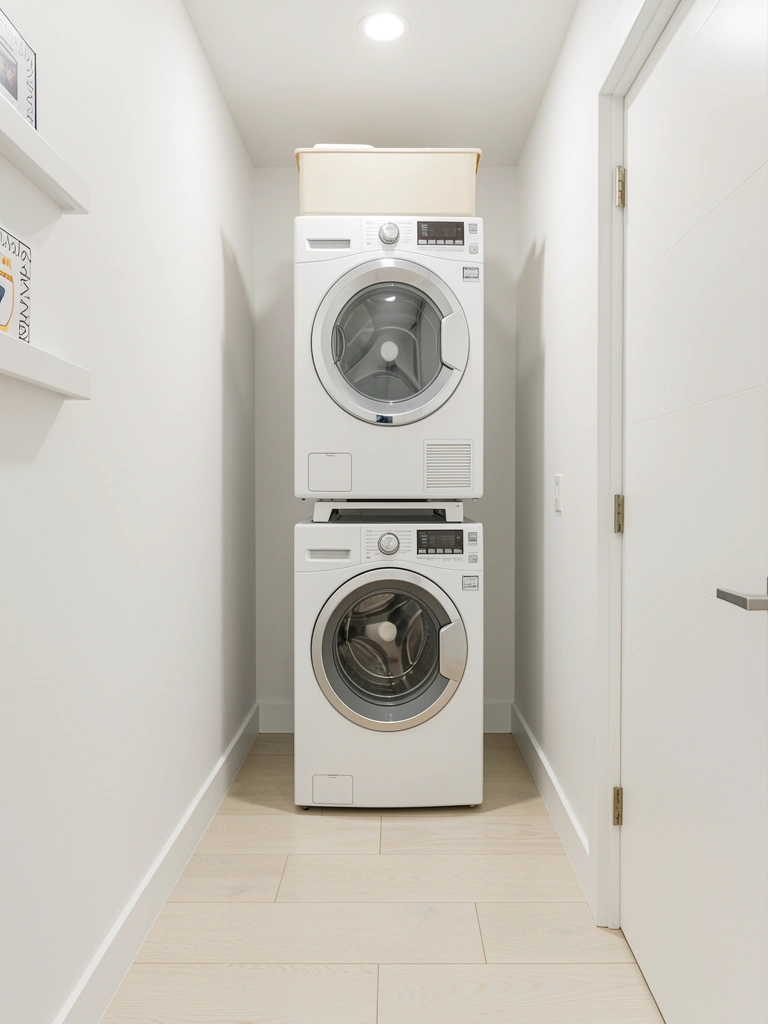
If you have room for only one appliance footprint, stacking is non-negotiable. A stacked setup cuts your appliance floor space in half.
Many modern washers and dryers stack easily; some require a stacking kit ($150–$300). If your current appliances aren’t stackable, compact side-by-side combos exist ($1,500–$3,000), or go with a washer/dryer combo unit ($800–$1,500) that does both in one.
Pro tip: Ask your appliance retailer if your current units stack before you buy expensive kits.
The freed-up floor makes your room feel twice as wide. Movement becomes easy, and you have space for a folding table, cart, or just breathing room. This might be the single best ROI for a narrow laundry room.
15. Create a Hidden Hamper Using a Decorative Basket or Ottoman
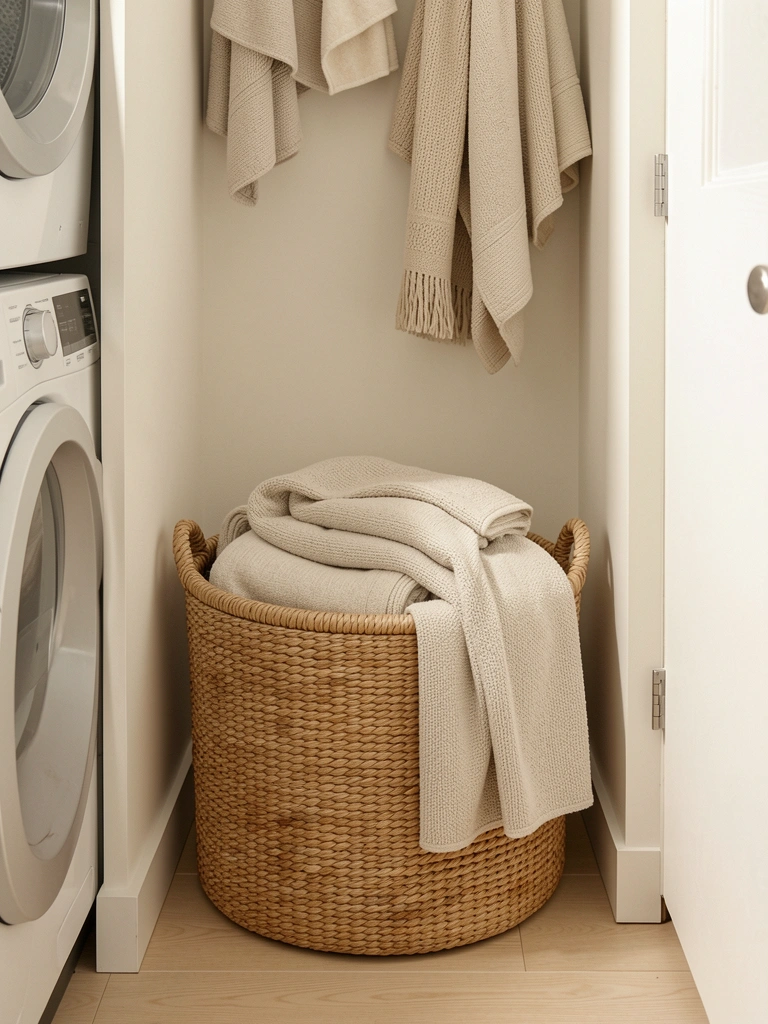
Hampers don’t have to scream “dirty laundry.” A beautiful basket or ottoman does the job invisibly, especially in a space that might open into a mudroom or hallway.
Find a large woven basket ($30–$80 from West Elm, Target, or Wayfair) or a fabric storage ottoman ($40–$120) in neutral tones. Size it to hold 1–2 loads of laundry comfortably.
Renter hack: Use a decorative basket with no installation required; moving day is seamless.
From the hallway, it looks like intentional decor. From inside the laundry room, it’s your pre-wash catch-all. Guests never guess it’s a hamper, and your space feels curated instead of utilitarian.
16. Install Slim Pull-Out Drawers or Shelves
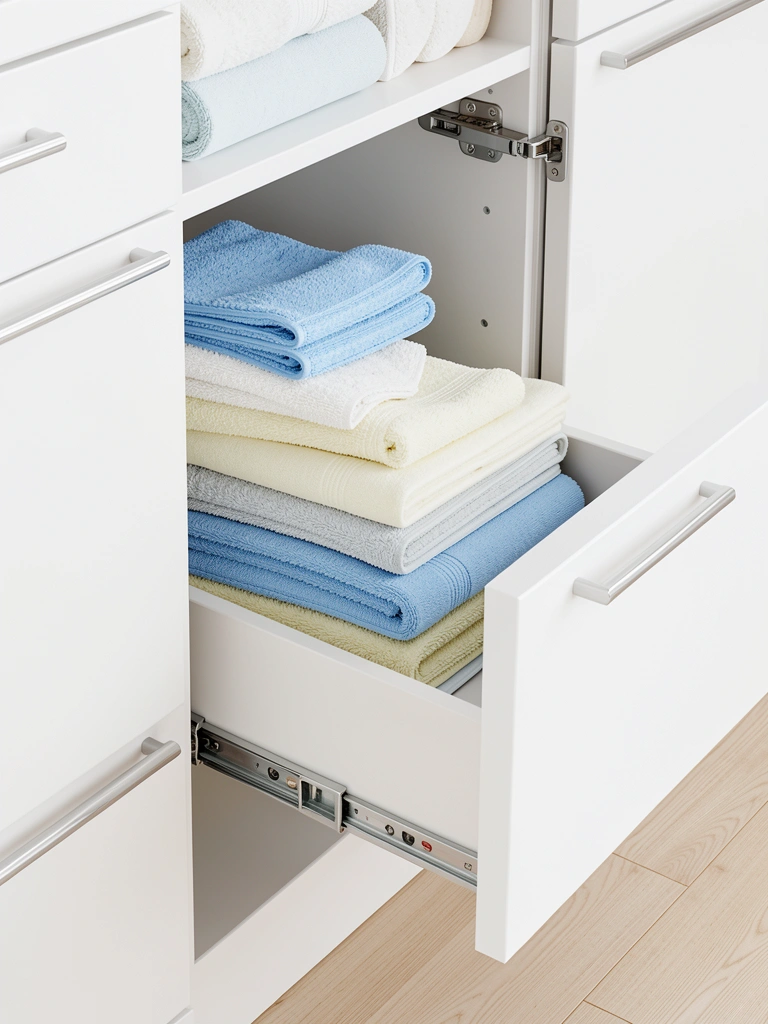
Pull-out drawers maximize what you can actually reach in a narrow cabinet. Things at the back aren’t lost forever.
Add slim pull-out sliding shelves or drawer kits to existing cabinets ($30–$80 per shelf from IKEA, Home Depot, or Amazon). Install them in existing cabinetry using the hardware provided. Time: 45 minutes to 1 hour per shelf.
Pro tip: Put heavier items (detergent, extra towels) on lower shelves so pulling doesn’t feel wobbly.
Everything in your cabinet stays accessible. No more playing Jenga with detergent bottles or forgetting what’s crammed in the back. Organization becomes automatic.
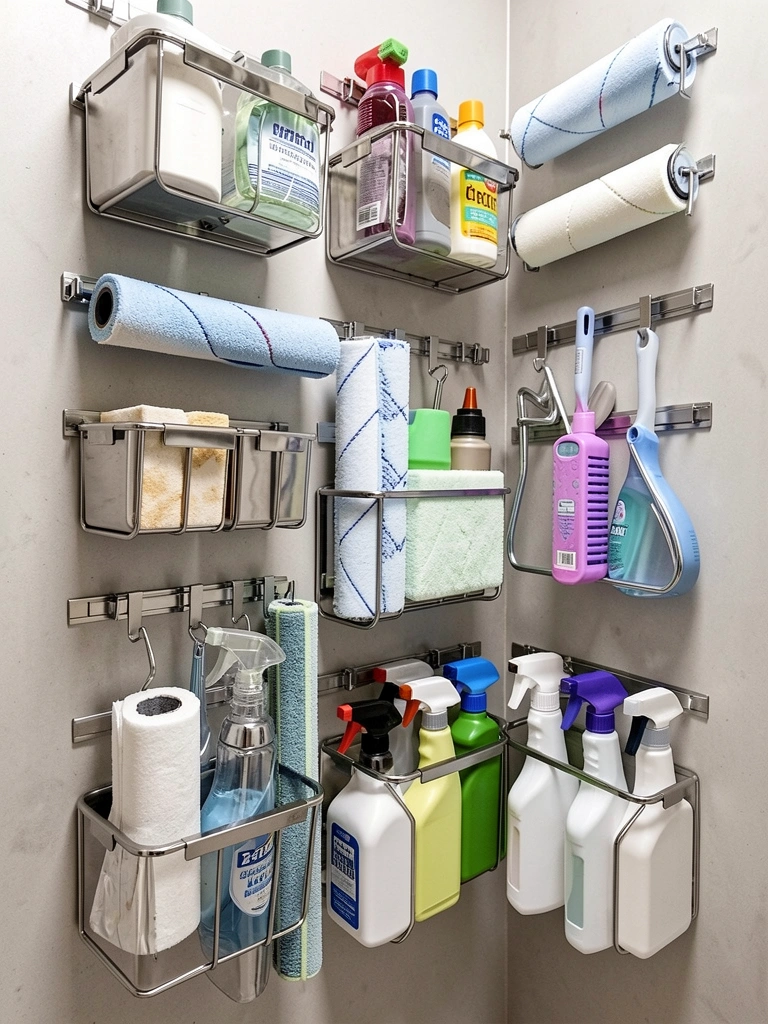
17. Use Vertical Hooks or Pegboard for Cleaning Tools
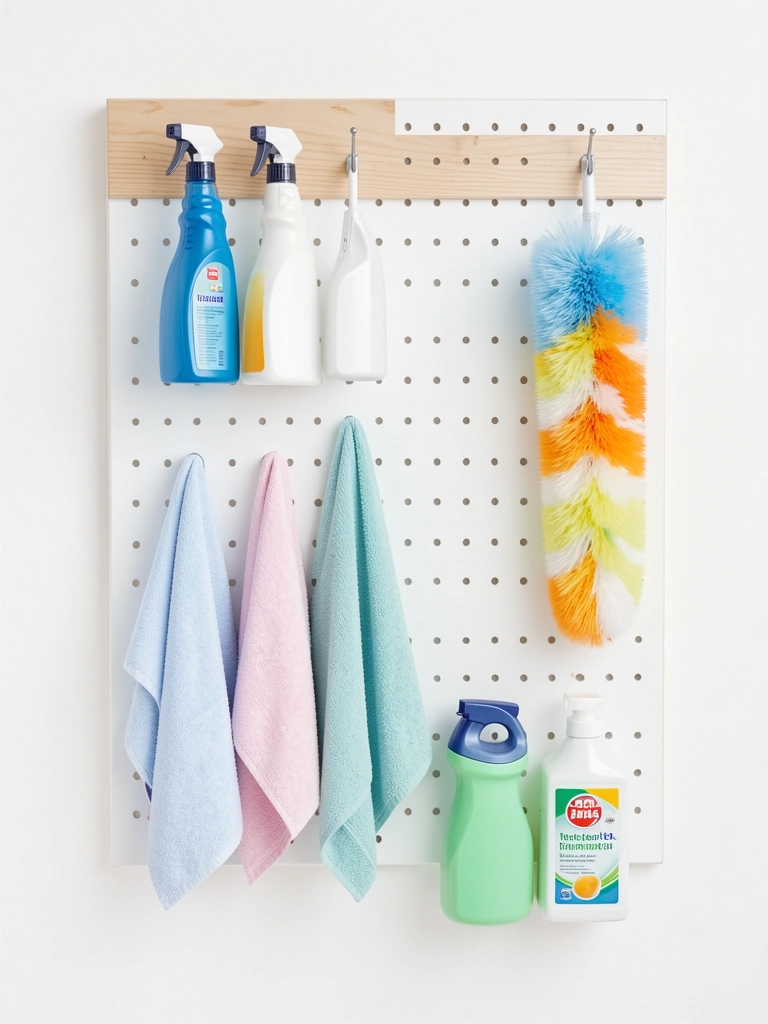
Vertical hook systems keep tools visible and off the ground—critical in tight spaces where floor clearance is gold.
Install a pegboard ($20–$50 from Home Depot or Lowes) on one wall or above your utility sink, or use simple adhesive hooks ($5–$15 for a set) if drilling isn’t an option. Hang spray bottles, microfiber cloths, a small broom, and hangers for delicate items.
Installation: 30 minutes with a drill; 10 minutes with adhesive hooks (renter-friendly).
Tools are always visible and ready. Your floor stays clear, and your wall becomes a functional design feature. No more hunting for the stain remover when you need it.
18. Add a Narrow Console Table for Folding and Sorting
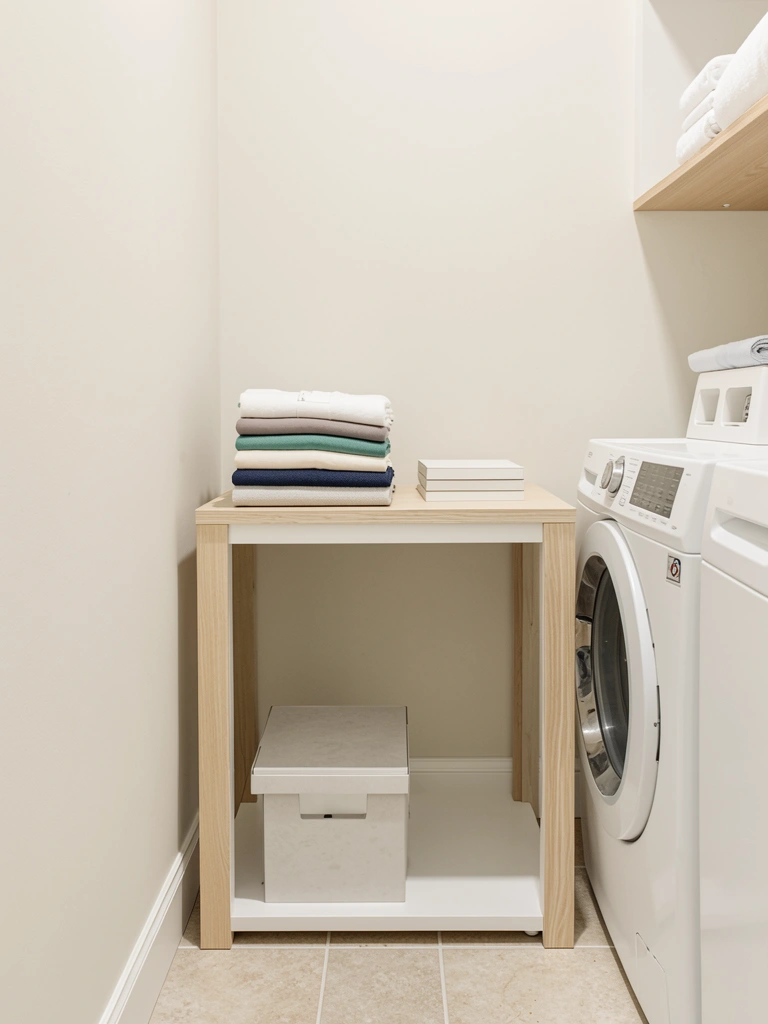
A narrow console table is deeper than a desk but shallower than traditional furniture—perfect for folding without blocking movement in tight rooms.
Search for slim console tables ($80–$200 at IKEA, Wayfair, Target, or West Elm) in 24–36 inch widths. Position it against the longest wall, and you’ve got a dedicated folding zone that looks intentional, not makeshift.
Budget option: Use a long floating shelf ($30–$60) with a foldable cushion on top for ergonomic folding comfort.
Folding becomes a real activity instead of chaos happening on top of the dryer. The space feels organized and purposeful. Plus, a pretty console looks like decor rather than “laundry room stuff.”
19. Install Shelves Above the Door for Dead Space
The space above a door is literally wasted real estate in every narrow room. Grab it with slim shelving.
Mount floating shelves (12–15 inches wide) above your doorframe using heavy-duty brackets rated for weight ($40–$100 total). Use this space for lightweight items—folded linens, towel stacks, or decorative baskets.
Installation: 30–45 minutes; requires a drill and level. Renter option: Use tension rods and fabric baskets instead of shelves ($20–$40).
Suddenly you’ve created storage from zero floor space. It’s invisible until you step back and think, “Wow, why don’t I do this everywhere?” You just did, in your laundry room.
20. Go Minimalist With a Neutral Color Palette and Decluttered Styling
Narrow spaces feel smaller when packed with visual noise. A neutral, minimal approach creates the illusion of space—and actually makes the room feel calming.
Declutter ruthlessly: toss expired products, donate unused cleaning tools, and keep only active supplies. Stick to a color palette of 2–3 neutrals (white, taupe, warm wood). Store everything in matching bins or baskets ($3–$10 each).
Time: A dedicated Saturday afternoon to sort and organize. Budget: $30–$60 for matching storage containers.
You’ll look around and feel peace instead of overwhelm. Minimalism in a tight space is like adding square footage. Your laundry room becomes a sanctuary, not a storage unit.
21. Use Door-Mounted Storage for Supplies and Rags
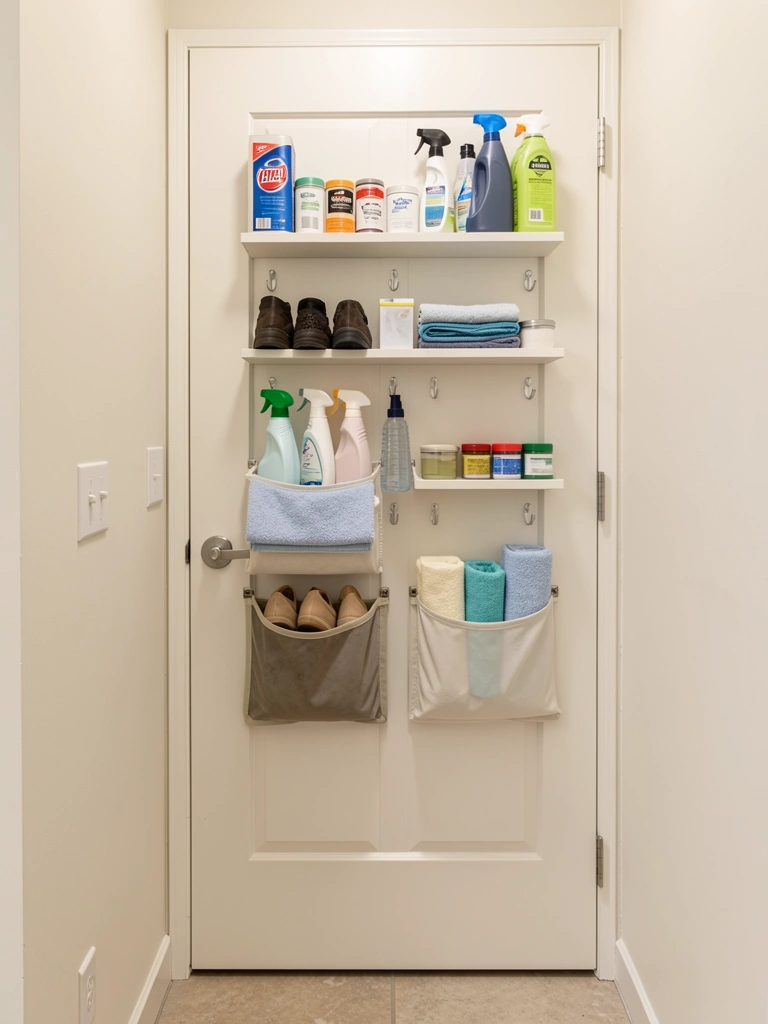
Door storage is invisible until you need it, making it perfect for tight rooms. Hook-style organizers or over-the-door racks multiply your storage without eating wall space.
Install an over-the-door organizer ($15–$40 from Target or Amazon) on the back of your laundry room or closet door. Stock it with spray bottles, cleaning cloths, hangers, and lightweight supplies. Alternatively, add adhesive hooks ($5–$10) in a grid pattern.
Time: 10 minutes; zero permanent commitment if using adhesive hooks.
This storage only appears when the door opens—guests never know it’s there. You get a complete supply station without sacrificing an inch of wall or shelf space.
22. Create a Pet-Washing Station in One Corner
Pet owners: this one’s for you. A dedicated dog-washing corner in your laundry room means less fur in your bathroom and a dedicated cleanup zone.
Install a compact pet grooming basin ($50–$150 from Amazon or Chewy) or a portable pet shower tub ($30–$80). Mount a wall-hung hose or faucet if you have existing plumbing access, or use a fill-bucket method ($0 if you already have buckets). Hang towels and store dog shampoo on a small shelf nearby.
DIY level: Low to medium depending on plumbing access; $50–$200 if you need help with hookups.
Muddy paws get rinsed before the rest of the house, and your laundry room becomes a true household hub. Pets get clean without drama, and cleanup happens where the mess belongs.
23. Mount a Slim Shelving Unit as a Room Divider
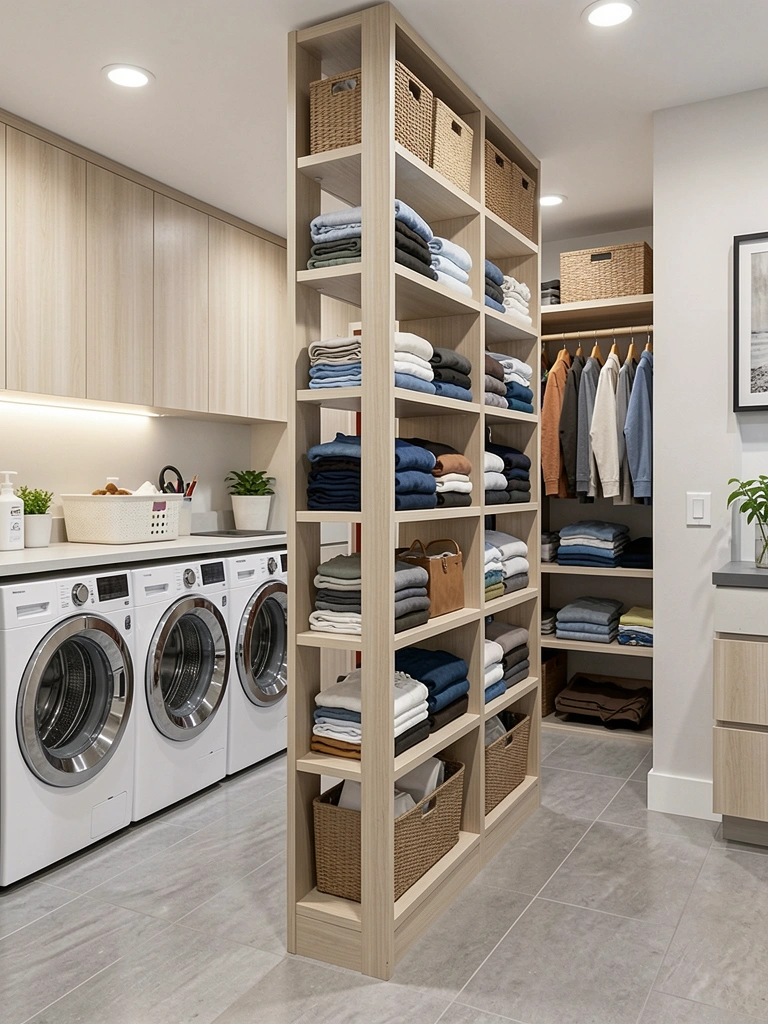
If your narrow laundry room connects to or opens into a mudroom, bedroom, or garage, a slim open shelving unit can define zones without fully blocking sightlines.
Use open-backed floating shelves or a ladder-style shelf unit (18–24 inches wide, 60+ inches tall) from IKEA ($50–$150) positioned perpendicular to walls. The openness keeps the space feeling light while creating a subtle boundary.
Pro tip: Use this divider shelf to display pretty baskets or rolled towels—it becomes decor, not just storage.
You’ve created functional separation without walls or clutter. The room suddenly has zones instead of everything bleeding together in one narrow stretch.
24. Invest in Smart Appliances for Workflow Efficiency
Smart washers and dryers with app controls, moisture sensors, and cycle shortcuts make narrow-room laundry feel less like a chore.
Look for smart-enabled washers ($600–$1,200) and dryers ($600–$1,200) from brands like LG, Samsung, or GE. These sync with your phone, send alerts when cycles finish, and adjust settings automatically. Alternatively, add a smart plug ($15–$30) to existing machines for basic remote controls.
Budget hack: A smart plug gives you basic “turn it on/off remotely” without replacing appliances—huge savings if yours work fine.
You’ll get alerts when laundry’s done, saving you from that moment of re-drying clothes because you forgot them. The efficiency is minor but genuinely nice, especially in a space where you’re trying to minimize time spent.
25. Use Clear or Translucent Storage Containers So You Never Forget Supplies
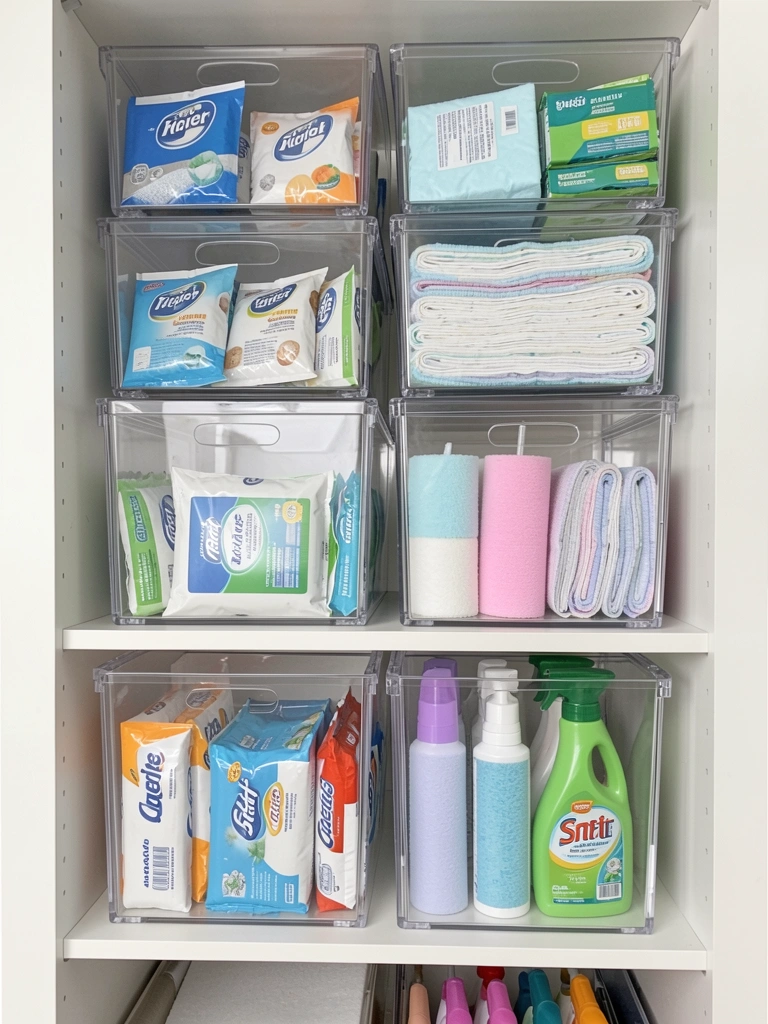
Open shelving looks messy if you can’t see into containers. Clear storage keeps things organized and visible—you never run out of supplies.
Stock up on clear plastic bins ($3–$8 each from Container Store, Target, or Amazon) in 2–3 sizes. Label each with a label maker ($15–$25) or waterproof stickers ($3–$5). Stack them on shelves so you can see contents at a glance.
Time: 30 minutes to assemble and label.
You’ll never think “I’m sure we have dryer sheets” and then discover an empty box. Everything’s transparent, findable, and restockable. A tiny system that solves supply-hunting stress.
26. Paint Cabinets a Bold Matte Color to Define the Space
Bold cabinet color (not wall color) adds personality without overwhelming a tight space. Matte finishes feel modern and hide fingerprints better than glossy.
Paint existing cabinets or buy pre-made ones in soft greens, warm taupes, matte black, or creamy whites ($150–$500 depending on cabinet size and whether you DIY or hire a pro). Matte finish paint costs $30–$50 per quart; a painter charges $300–$800 to spray-finish cabinetry.
Budget DIY: Use painter’s tape and a brush; it takes longer but costs $40–$80 total. Pro result: Hire a painter for spray-finish ($300–$500).
Your cabinetry becomes the anchor of the room instead of invisible background. The space feels designed, not default. It’s the final touch that makes everything feel intentional.
PIN THIS FOR LATER: Save these ideas for your next laundry refresh. Pick just one to tackle this weekend—you’ll be surprised how even a small change (better lighting, one new shelf, a fresh paint color) shifts the whole vibe. Which idea are you trying first?
Leave a Reply