Your kitchen doesn’t need a $50,000 renovation to feel brand new. With 27 strategic upgrades you can tackle this weekend—many for under $100—you’ll create a space that feels refreshed, functional, and totally yours. Whether you’re renting, on a budget, or just looking for quick wins, these ideas range from zero-dollar styling tweaks to game-changing cabinet updates. Most take just a few hours, and all deliver that “wow, did you do this yourself?” reaction from guests. Let’s dig into the exact upgrades that make the biggest impact without the big price tag.
1. Paint Your Cabinet Doors One Bold Color
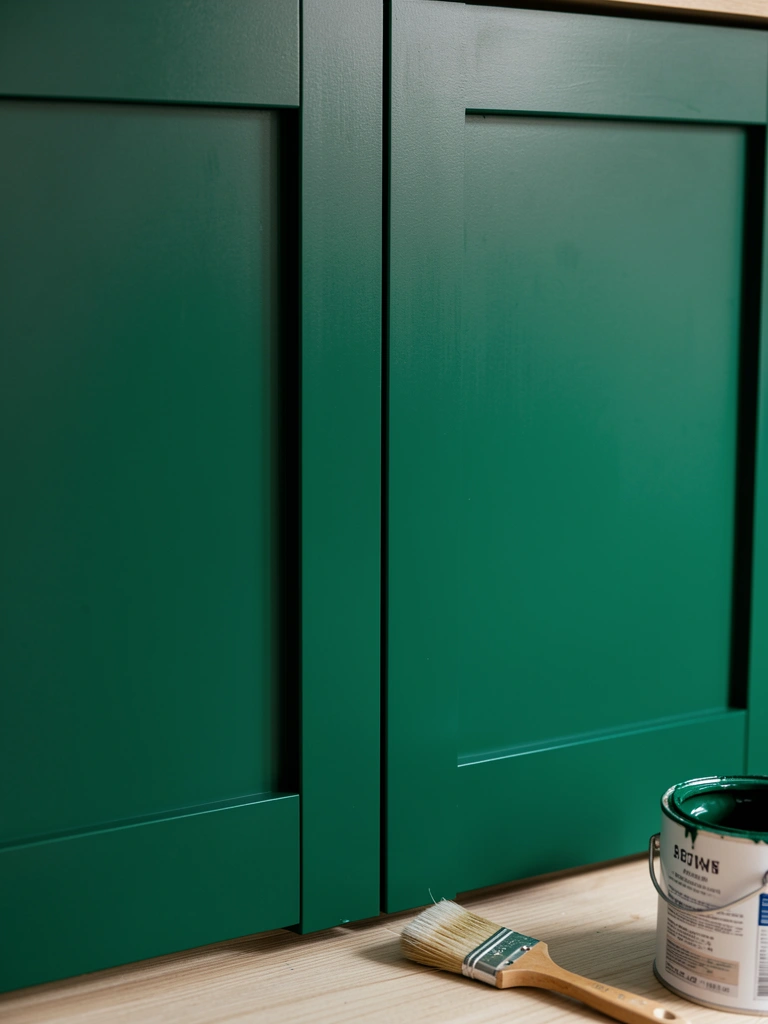
Cabinet paint is the fastest way to shift your kitchen’s entire vibe without replacing anything. One or two cans of quality cabinet-specific paint (like Benjamin Moore Advance or Rustoleum Cabinet Transformations) can refresh dated wood or white cabinetry in an afternoon.
Choose bold earth tones like forest green, warm brown, or navy blue—these dominate 2025 trends and pair beautifully with existing countertops. Prep is key: clean cabinets thoroughly, sand lightly, and apply primer before paint. Expect to spend $30–$80 on materials and 4–6 hours on labor (including drying time between coats). If you’re renting, removable peel-and-stick cabinet film offers a non-damaging alternative for $25–$60.
Your kitchen goes from tired to intentional instantly. The best part? One color shift changes how the entire room feels without touching anything else.
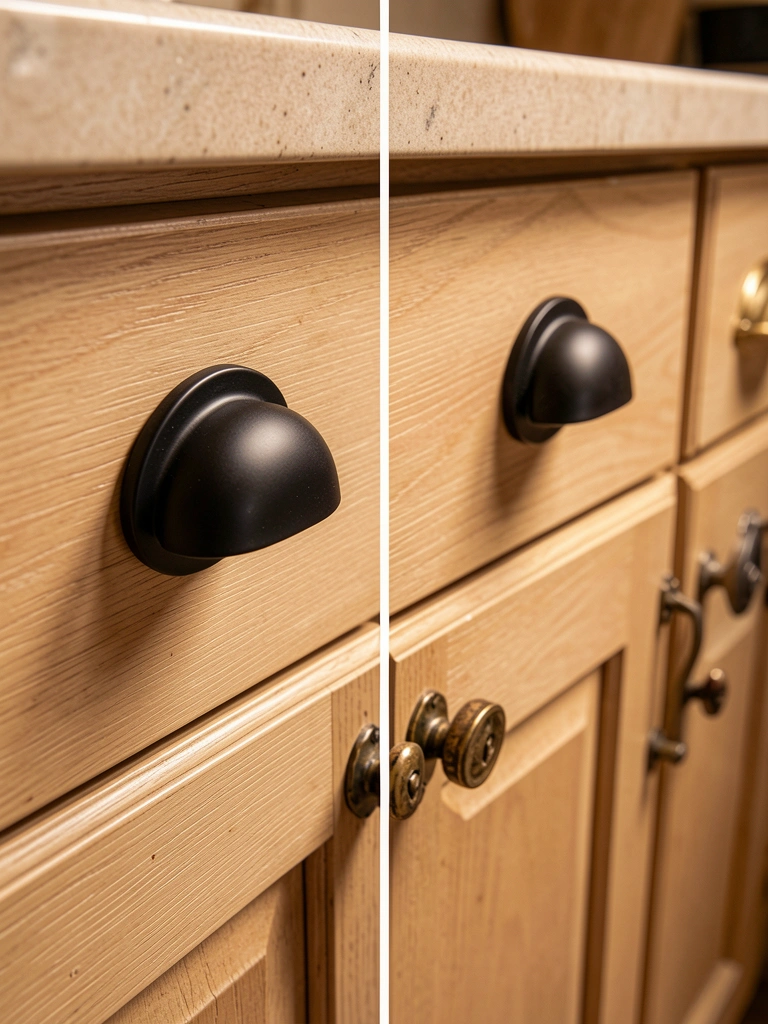
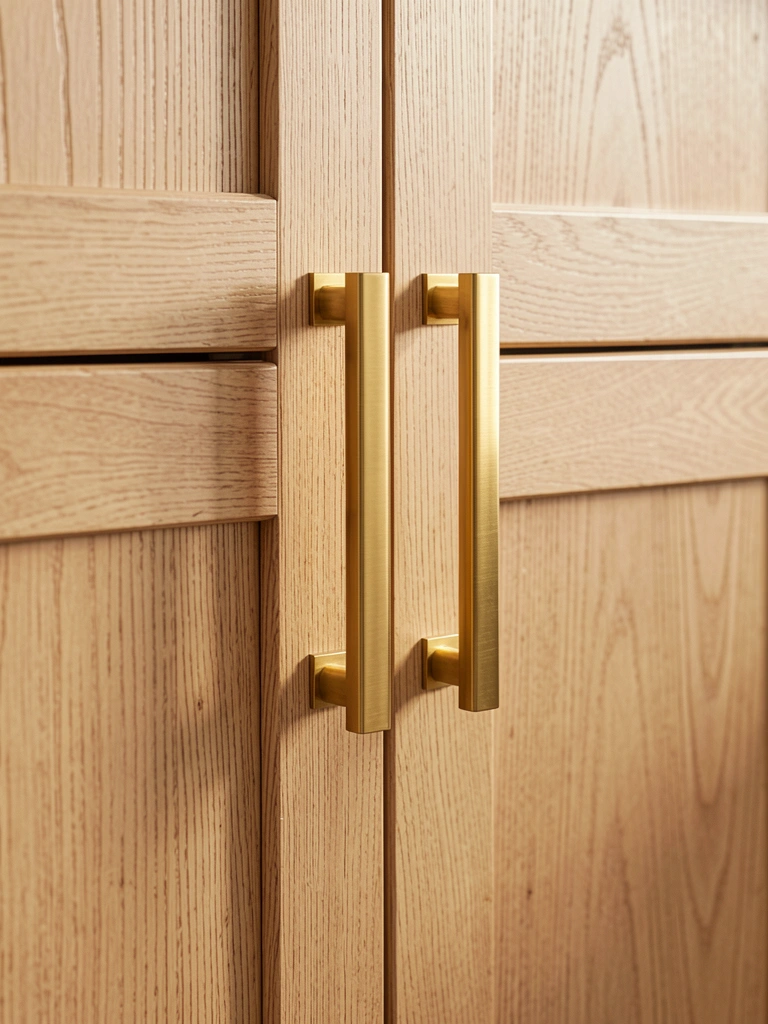
2. Swap Out Hardware for Modern Handles
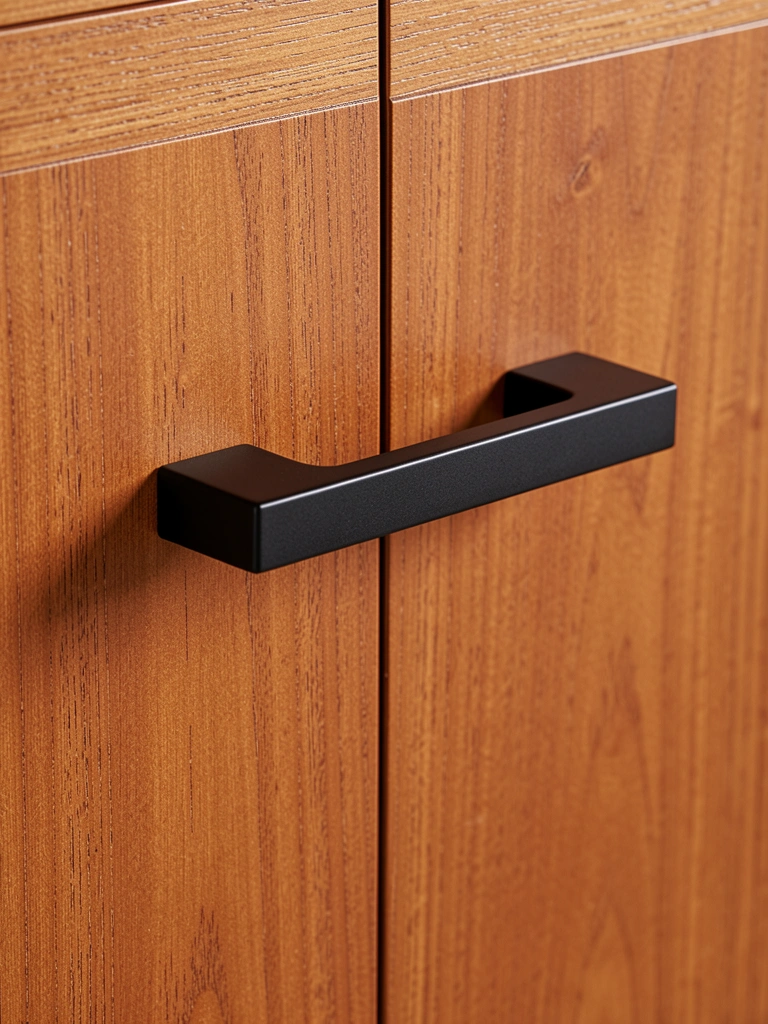
Hardware is the jewelry of your kitchen—the fastest change you can make for maximum visual impact. Removing old brass or silver pulls and replacing them with matte black, brushed gold, or stainless steel handles completely modernizes your look.
Order hardware from IKEA ($2–$8 per handle), Target ($3–$10), or Amazon ($5–$15), then unscrew old handles and swap them in. Keep old hardware in a labeled bag (you’ll need it if you move or rent). Budget $40–$100 for a full kitchen and plan 30–60 minutes of work. Pro tip: take a photo of your cabinet layout before you start so you remember which handles go where.
You’ll be amazed how one small detail pulls the entire kitchen into focus. It’s a three-minute upgrade per cabinet, and your space feels current and curated.
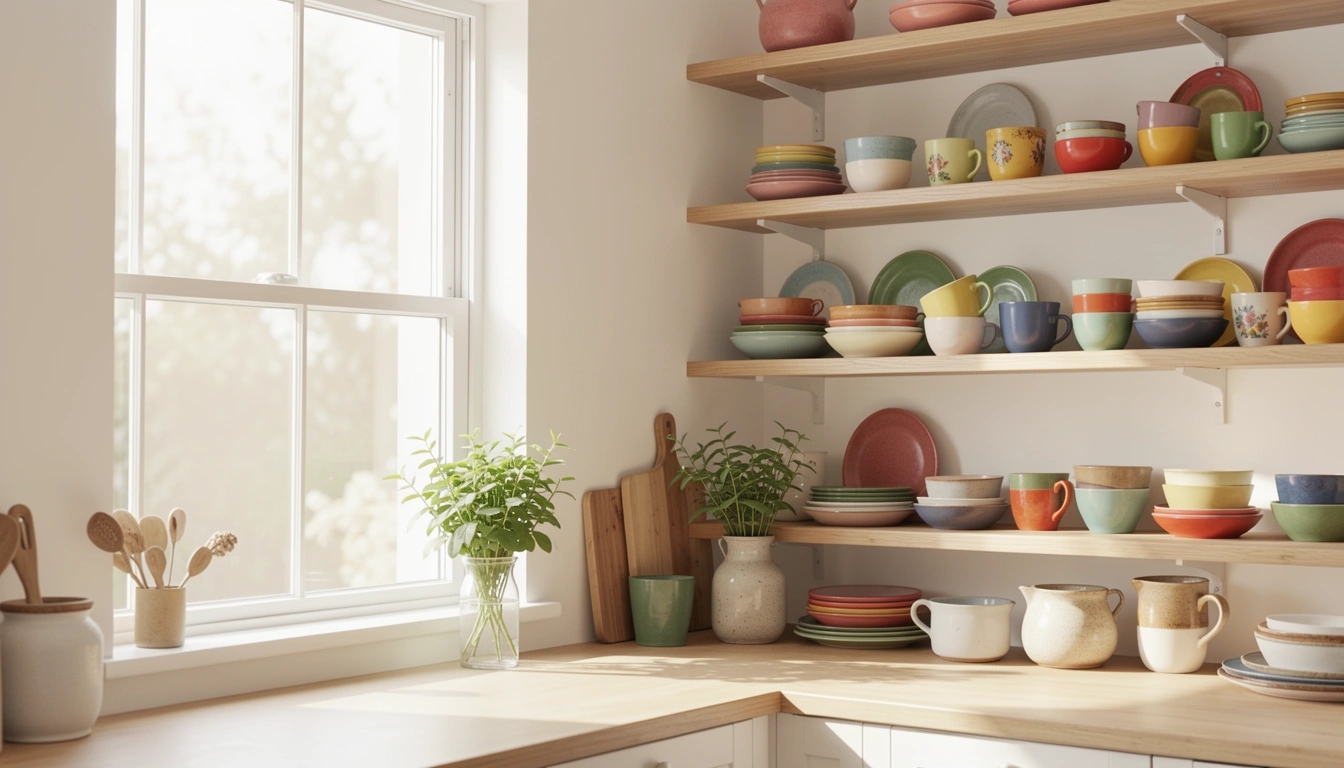
3. Add Open Shelving Above Counters
Open shelving creates an airy, intentional kitchen while maximizing vertical storage. Install floating shelves ($30–$100 per shelf) from Home Depot or Wayfair, or use affordable brackets and reclaimed wood for a rustic feel.
Style shelves with a mix of everyday items (bowls, glasses) and pretty accents (plants, cookbooks, small vases). Keep one shelf mostly empty to avoid visual clutter. Installation takes 1–2 hours if you have a stud finder and basic drill skills; rent a drill bit set for $10–$15 if needed. Renter tip: use command hooks and damage-free shelving for $15–$40.
Your kitchen looks taller, brighter, and more intentional. Open shelving draws the eye upward, making the entire space feel larger and more curated.
4. Install Peel-and-Stick Wallpaper on One Wall
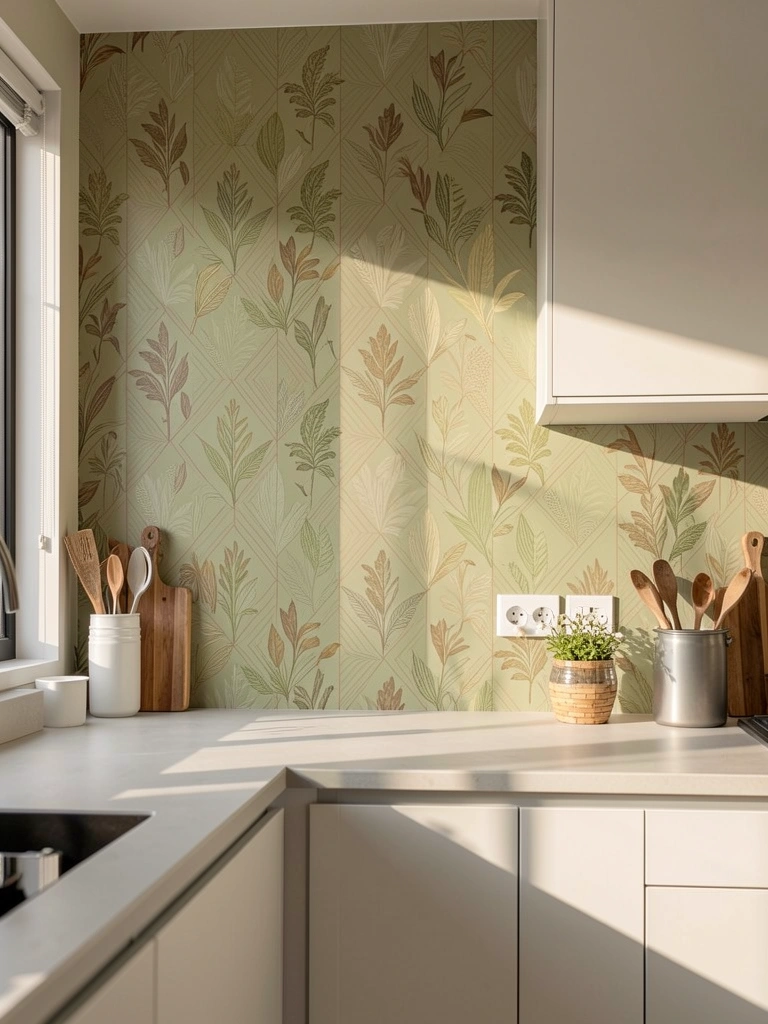
A statement wall adds personality without permanent commitment. Peel-and-stick wallpaper from Spoonflower ($25–$60), Wayfair ($20–$50), or Amazon ($15–$40) comes pre-cut and sticks directly to clean walls.
Choose botanicals, geometric prints, or soft textures in earth tones to match 2025 trends. Remove your old outlet covers, measure your wall carefully, and apply slowly from top to bottom. Budget 1–2 hours and $25–$60 total. The beauty? If you hate it, you peel it off with zero damage. Renter paradise.
One wall completely changes how your kitchen photographs and feels. You’ve added personality, pattern, and visual interest without a permanent commitment.
5. Replace Your Kitchen Faucet
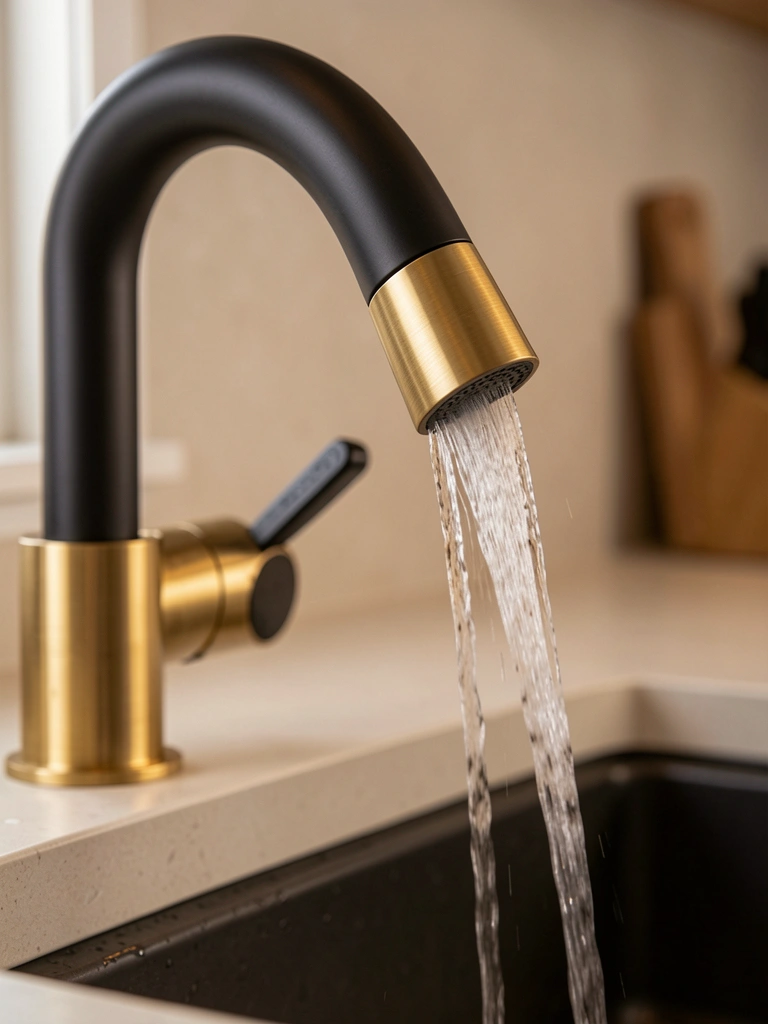
A new faucet is one of the highest-ROI upgrades—it gets used dozens of times daily and instantly signals “updated kitchen.” Swap your old faucet for a modern pull-down or touchless model from Moen, Delta, or Kraus ($80–$250).
Most faucets install in 30 minutes to 1 hour using basic tools (wrench, screwdriver). Turn off the water supply under the sink first. YouTube has excellent step-by-step videos if you’re DIY-ing. If you’re nervous, hire a plumber for $100–$200 in labor. Total cost: $80–$450 installed.
Your sink becomes a focal point you actually enjoy using. That smooth, modern faucet works harder and looks infinitely better than what you had before.
6. Paint Your Kitchen Island Base

If you have an island, paint the base to create contrast and draw attention to your kitchen’s centerpiece. Use the same cabinet paint you’d use on cabinets—it’s durable and comes in every color.
Paint the island base (not the countertop) in a color that contrasts with your walls. Deep green, navy, or charcoal gray work beautifully with lighter counters and backsplashes. Budget $30–$60 on paint and 2–3 hours on labor. Prep and paint in thin coats for a smooth finish.
Your island becomes an architectural feature, not just functional counter space. The contrast grounds your kitchen and adds visual interest from every angle.
7. Upgrade Your Kitchen Lighting Fixtures
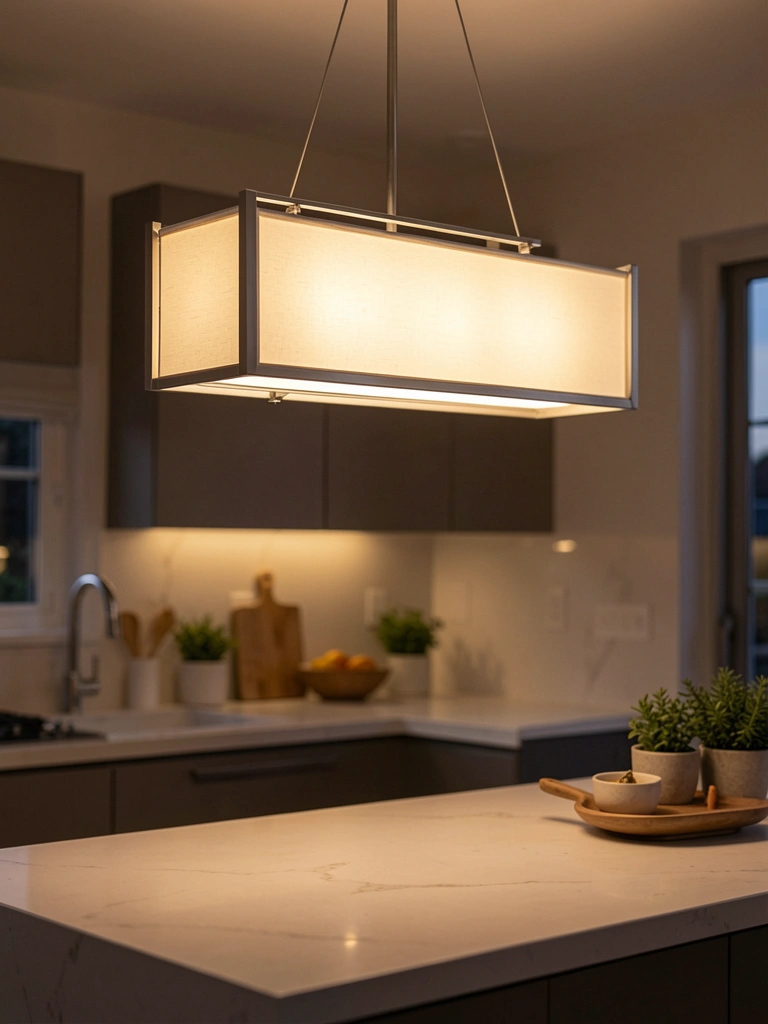
Lighting is the second-biggest visual impact factor after color (84% of designers prioritize it). Swap out dated ceiling fixtures or install pendant lights over your island or sink for $40–$200 per fixture.
Shop IKEA, Target, Wayfair, or Home Depot for modern styles in brass, black, or mixed metals. Installation usually takes 1–2 hours if you’re comfortable with basic wiring, or hire an electrician for $150–$300 in labor. Layer your lighting: overhead fixtures + under-cabinet strips + pendant lights create depth and warmth.
Your kitchen immediately looks more designed and feels more inviting. Better lighting actually makes you enjoy cooking more—you see what you’re doing and feel energized.
8. Add Under-Cabinet LED Strip Lighting
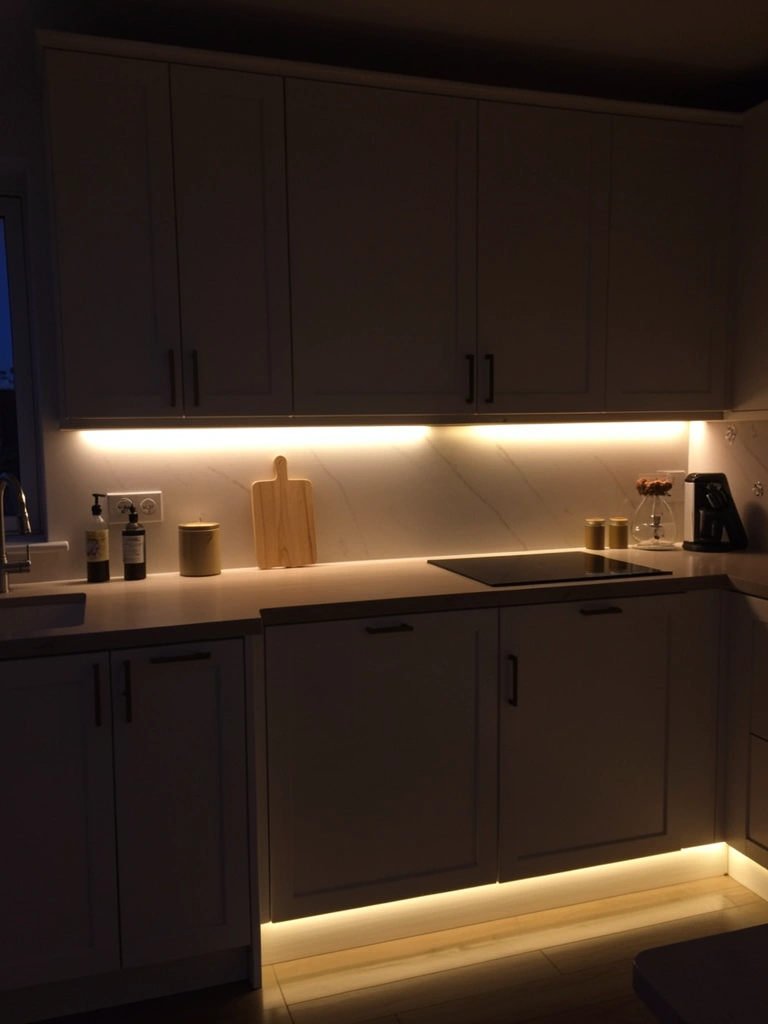
Under-cabinet lighting is affordable, dramatic, and totally renter-friendly. Plug-in LED strips ($25–$80 from Amazon or Home Depot) stick to the underside of your cabinets and shine down onto your counter.
No wiring required—just peel, stick, and plug in. Choose warm white light (2700K) for coziness or cool white (4000K) for visibility. Installation takes 15 minutes. You can hide the cord behind cabinets or run it to an outlet. This upgrade literally illuminates your workspace and creates ambiance for entertaining.
Your countertops glow, your kitchen feels like a restaurant, and you’ve actually made cooking easier. Plus, it photographs beautifully—perfect for social media if that’s your thing.
9. Refresh Your Backsplash with Peel-and-Stick Tiles
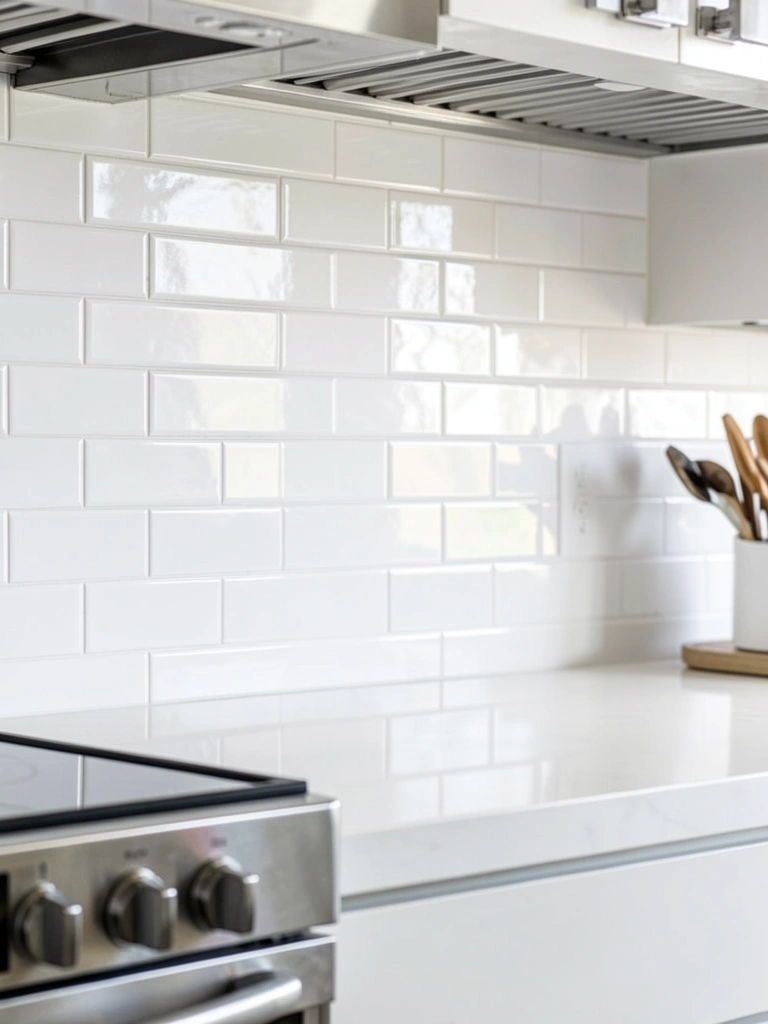
New backsplash tiles cost $500+ installed, but peel-and-stick versions ($30–$100 for standard kitchen size) look nearly identical and install in an afternoon.
Choose subway tiles, geometric patterns, or textured finishes from Wayfair, Amazon, or Home Depot. Measure your backsplash area, clean the wall thoroughly, and apply tiles from left to right in straight lines. Budget 2–3 hours. If you mess up, peel tiles off and reposition—no harm done. Best part? Completely renter-approved and damage-free.
Your kitchen instantly looks polished and intentional. A fresh backsplash ties everything together and makes the whole space feel curated.
10. Organize Lower Cabinets with Pull-Out Drawers

Deep lower cabinets are black holes where things get lost. Sliding pull-out drawer organizers ($30–$80 per drawer) from IKEA, Target, or Amazon let you access everything without crawling.
Measure your cabinet width and depth, then order pull-out drawers that fit. Installation takes 30–60 minutes with basic tools—usually just screwing them to the cabinet sides. You’ll instantly know where everything is and actually use your pots and pans instead of the same three.
Your kitchen becomes functional, not just pretty. You’ll save time cooking because you’re not digging through cabinets, and you actually use that fancy cookware gathering dust.
11. Paint Your Kitchen Walls a Warm Earth Tone
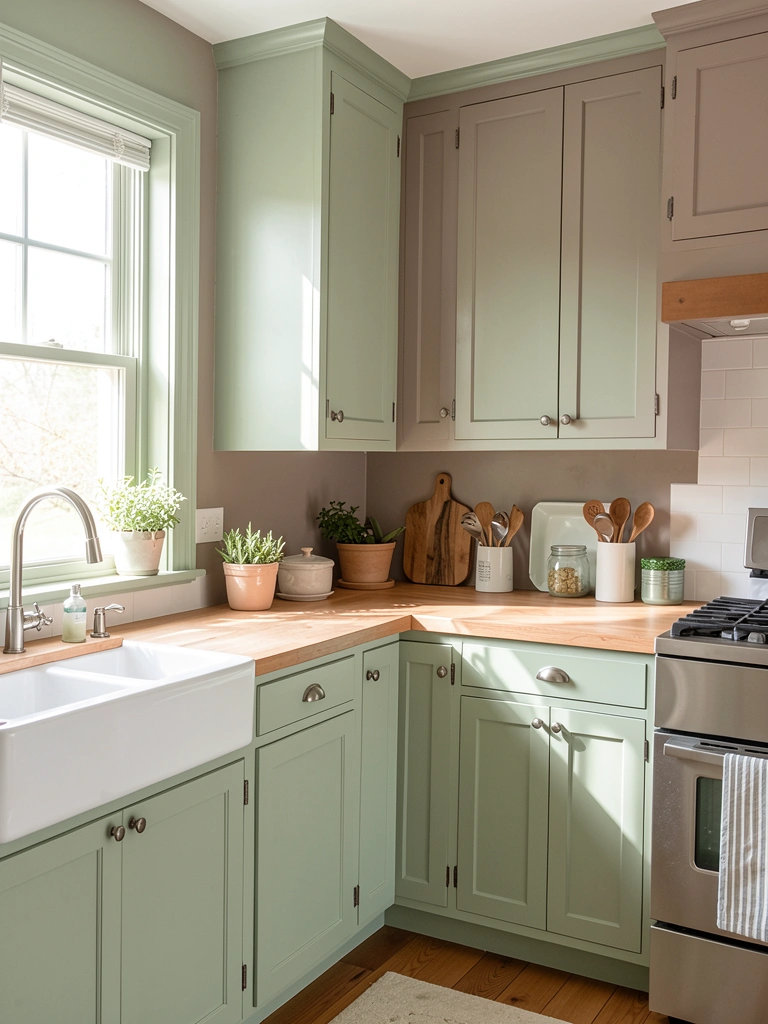
All-white and gray kitchens are officially out (76% of designers prefer earth tones). Painting your walls sage green, warm brown, soft blue, or taupe ($30–$60 per gallon, covers ~350 sq ft) is the biggest mood shift you can make.
Lighter earth tones feel spacious and calming; darker tones add drama and sophistication. Use quality paint (Benjamin Moore, Sherwin-Williams) for durability. Plan 1–2 days for two coats in an average kitchen. Renter note: paint sticks are renter-friendly on most leases—confirm with your landlord first.
Your kitchen stops feeling dated and starts feeling intentional. The right wall color makes your cabinets, counters, and fixtures all look better than before.
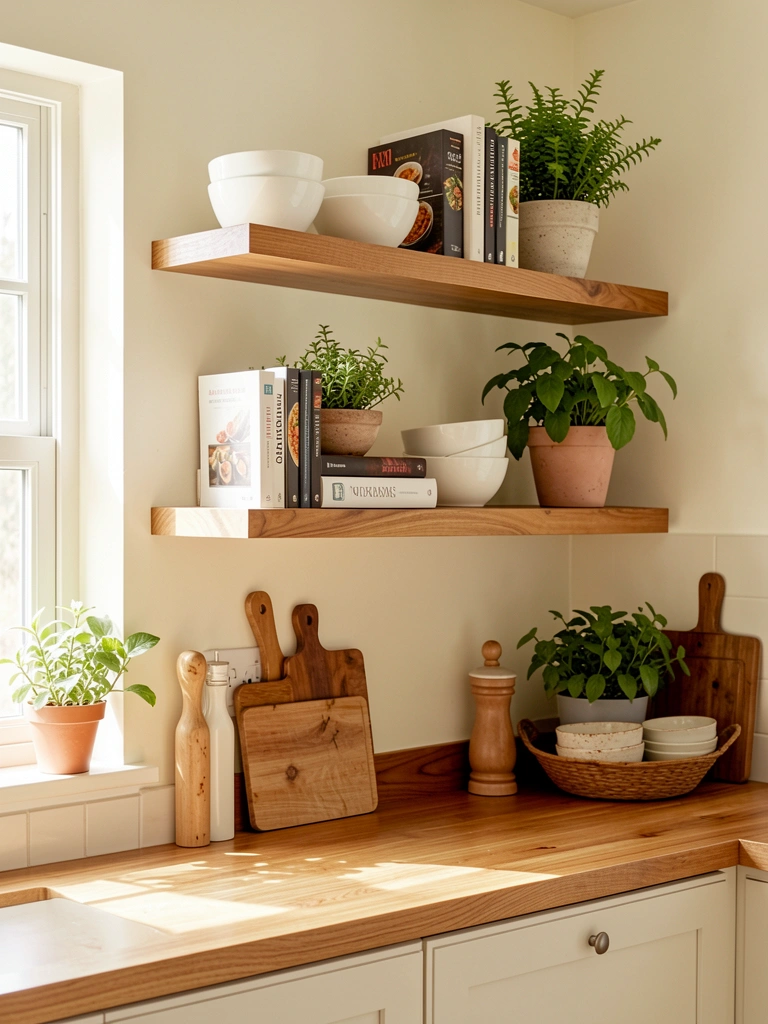
12. Install Floating Corner Shelves

Corners are wasted real estate—floating shelves maximize storage and add visual interest. Install corner shelves ($20–$60 each) in the unused corners of your kitchen.
These work beautifully above counters or in dining areas. Style them with everyday items (cookbooks, plants, small appliances) or decorative accents. Installation takes 30–45 minutes per corner if you locate studs properly. Renter alternative: use tension rods and lightweight shelves for a damage-free option.
You’ve solved the “I have nowhere to put anything” problem without taking up floor or counter space. Plus, styled corner shelves make your kitchen look magazine-worthy.
13. Add a Kitchen Runner Rug
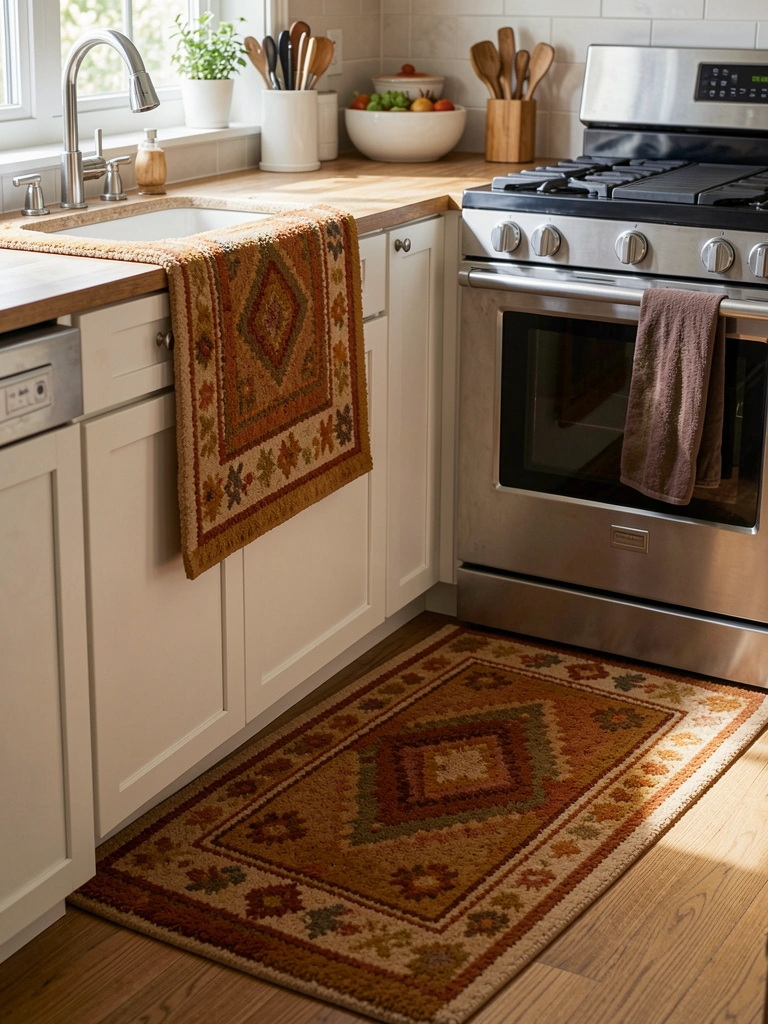
A rug adds warmth, defines the workspace, and ties colors together. Choose a durable kitchen runner ($30–$100) in patterns or solid earth tones from IKEA, Target, or Wayfair.
Look for low-pile, washable rugs that can handle spills and foot traffic. Place runners in high-traffic zones (in front of the sink or stove) rather than under foot traffic patterns. Most rugs are machine-washable—a huge bonus. Non-slip rug pads ($10–$20) keep it secure and protect your floor.
Your kitchen instantly feels cozier and more intentional. A rug defines the space and makes cooking feel less utilitarian and more enjoyable.
14. Declutter and Style Open Shelves Intentionally
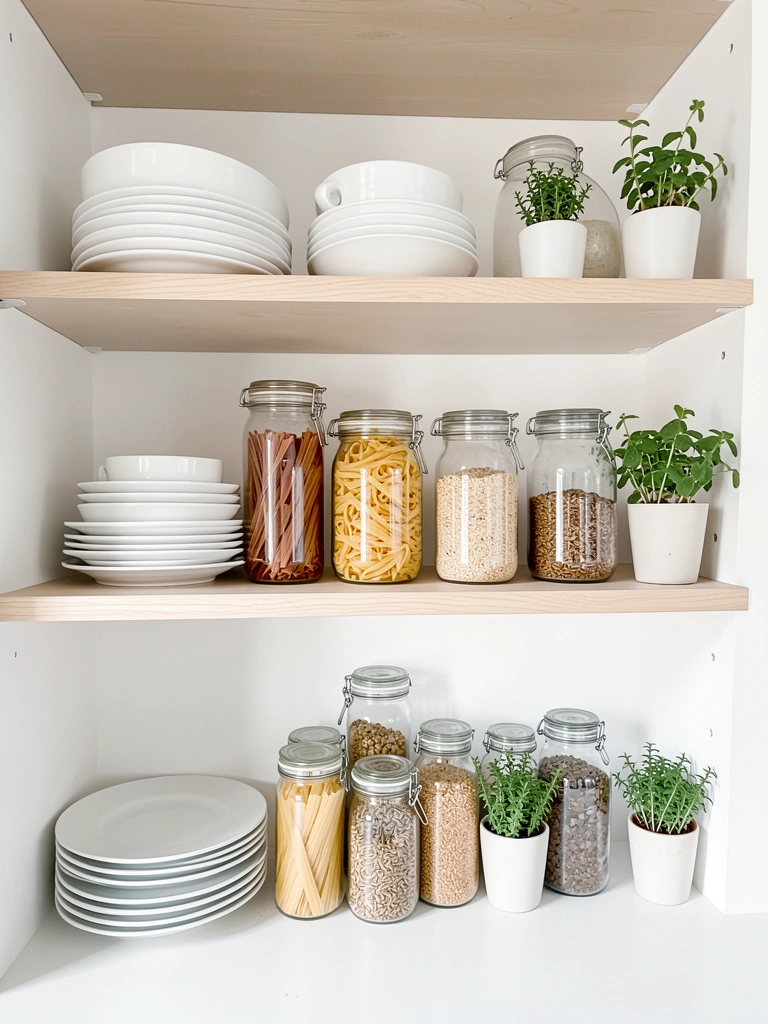
If you already have open shelving, styling it properly prevents that cluttered, chaotic look. Remove everything, then return only items that are beautiful, functional, or both.
Group similar items (white bowls together, glass jars in a row), leave breathing room between groups, and add small plants or books for visual interest. Use matching containers for grains, pasta, and dry goods from IKEA ($2–$8 per container). Plan 1–2 hours for a full refresh. The rule: if an item doesn’t make you happy or isn’t useful, it doesn’t belong on display.
Your shelves look intentional and curated instead of cluttered. You’ll actually enjoy looking at your kitchen, and guests will be impressed by how organized you are.
15. Upgrade Your Kitchen Sink
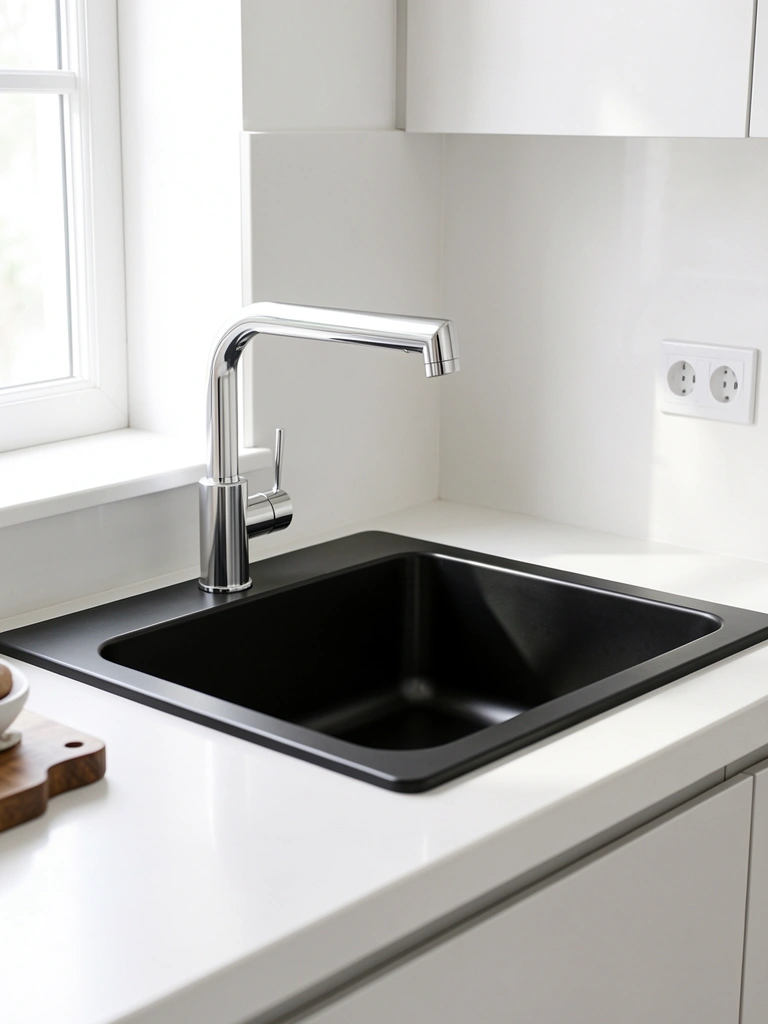
A new sink is like a fresh start for your whole workspace. Replace your old sink with a modern stainless steel or black composite sink ($150–$400) from Lowe’s, Home Depot, or Wayfair.
Installation depends on your current setup. If you’re replacing like-for-like, it’s 2–3 hours of DIY work. If you need new plumbing, hire a plumber for $200–$400. Total cost: $150–$800 installed. Double-basin sinks offer flexibility; single-basin sinks feel more modern and spacious.
Your sink becomes a focal point you actually enjoy using. A fresh, gleaming sink changes the entire tone of your kitchen and makes you want to keep it clean.
16. Add Glass Shelves Above Cabinets
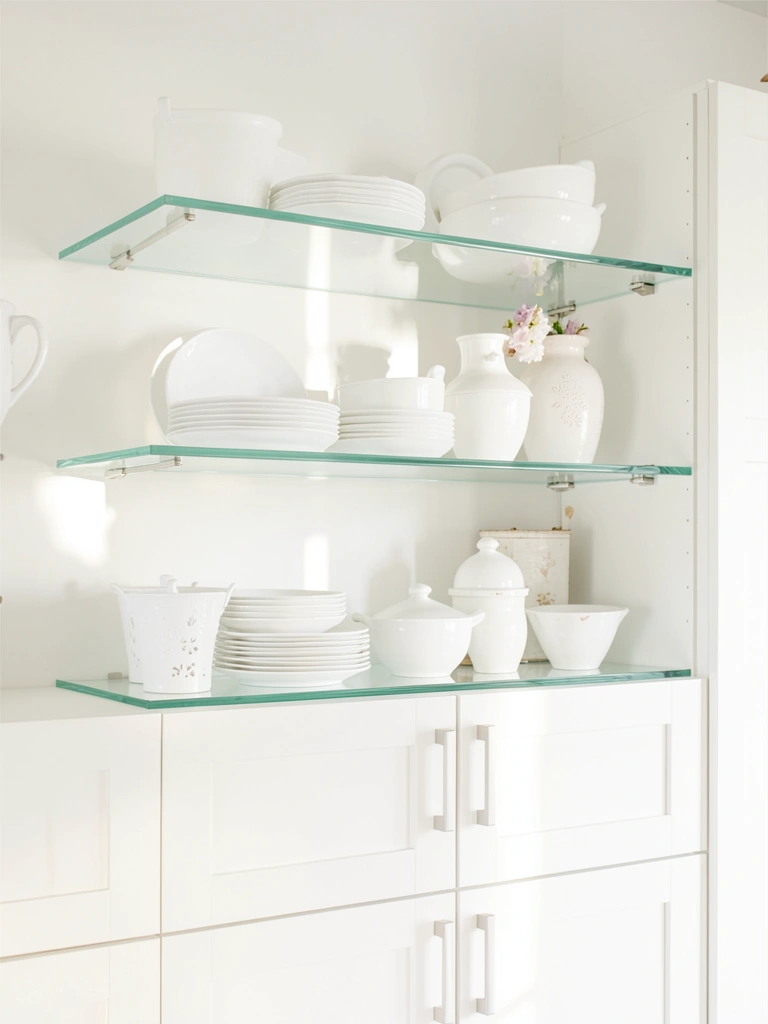
The space above cabinets is unused square footage. Install clear or frosted glass shelves ($30–$80 each) to display serving pieces, cookbooks, or decorative items while keeping your workspace visually open.
Glass shelves feel lighter than wood and work in both modern and traditional kitchens. Measure the wall width carefully, install brackets, and arrange items intentionally. Budget 45 minutes to 1 hour for installation. Keep items minimal to avoid a cluttered look—less is more here.
You’ve maximized vertical storage without adding visual weight. Glass creates an illusion of openness while giving you functional display space.
17. Paint Your Kitchen Door Bold
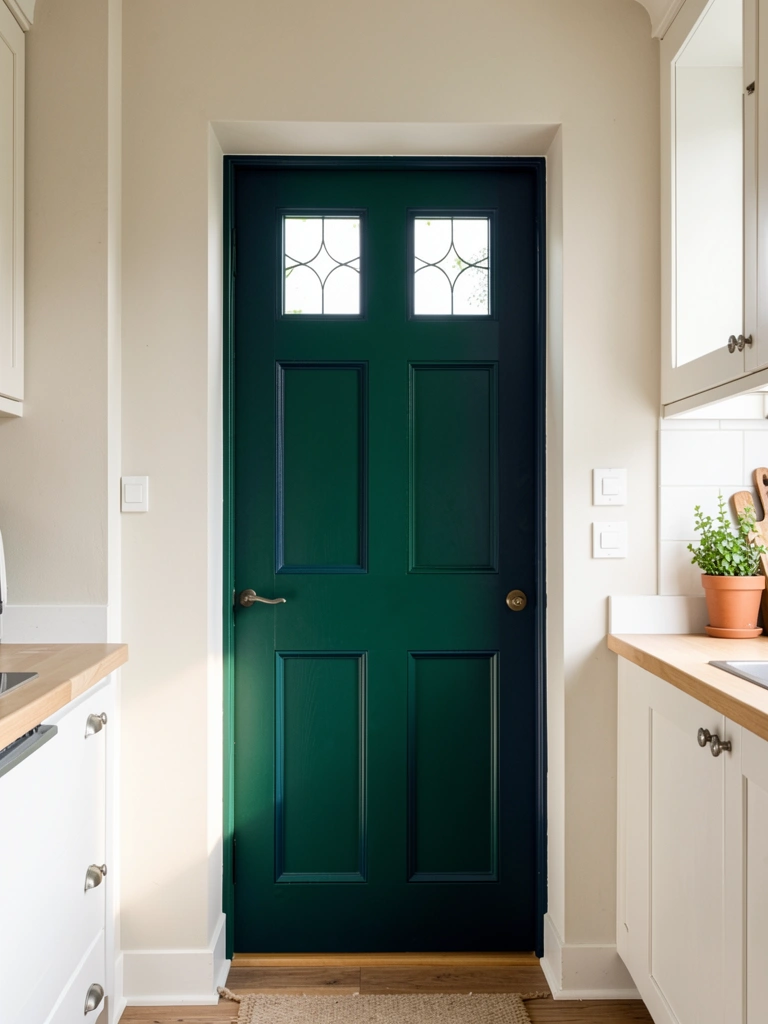
Your kitchen entry door deserves attention. Paint it bold—forest green, navy, deep charcoal, or warm terracotta ($20–$40 in specialty paint) for instant personality.
Remove the door from hinges, lay it flat, and paint both sides in two coats. Reinstall and swap the hardware for a coordinating color if you want extra polish. Total time: 4–6 hours spread over two days (including drying). Renter note: you can paint it back to white before moving—no landlord drama.
One bold door completely changes how your kitchen feels when you enter. It’s a signature move that signals you care about design details.
18. Install a Magnetic Spice Rack on the Side of Cabinets
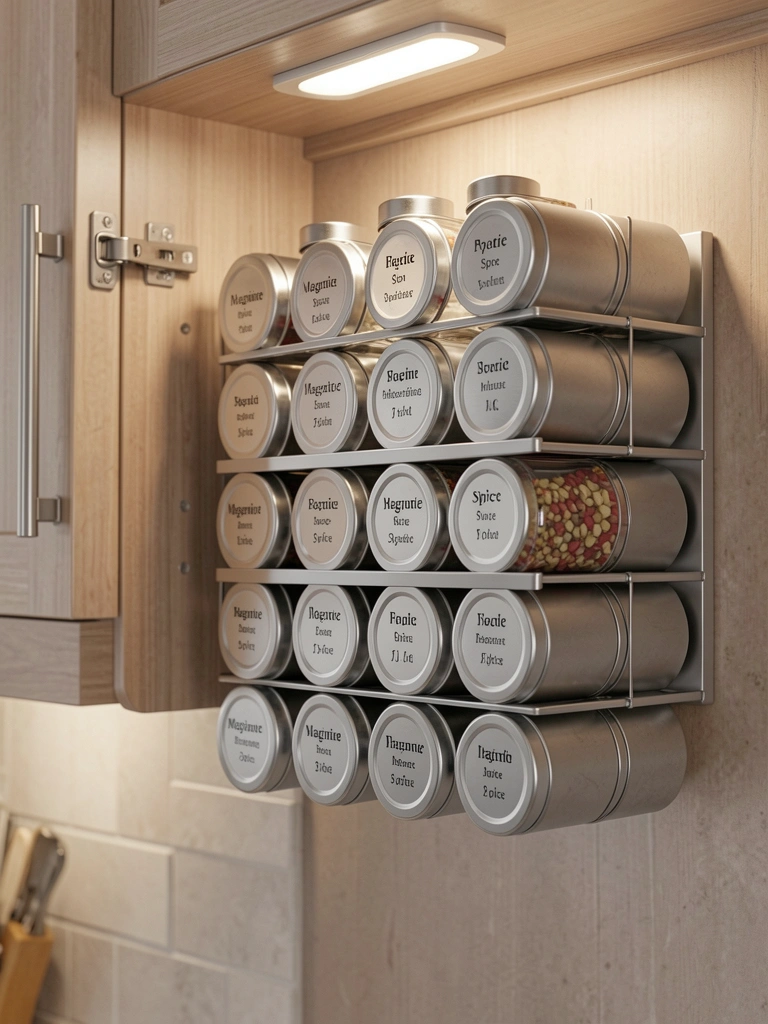
Spices scattered across drawers are chaos; a magnetic rack puts them at your fingertips. Use magnetic spice tins ($30–$60 for a set) and mount a magnetic strip ($10–$20) on the side of your cabinets or fridge.
This works beautifully next to your stove for easy access while cooking. Magnetic tins keep spices fresh longer than cardboard boxes. Installation takes 15 minutes—just stick or screw the magnetic strip and pop tins on. Instantly organized and so functional.
You can find every spice in seconds, not dig through three drawers. Your cooking becomes faster and more enjoyable.
19. Refresh Your Drawer Pulls and Cabinet Hardware
Drawer pulls get overlooked but they’re constantly visible. If you updated cabinet handles but missed drawers, now’s the time. Replace all drawer pulls with matching hardware ($2–$10 per pull).
Consistency creates polish. Match new pulls to your cabinet handles for a curated look. Budget $20–$50 for a full kitchen’s drawers and 30–45 minutes of work. It’s the finishing touch that ties everything together.
Your kitchen looks intentional from every angle. Small details add up to big design impact.
20. Create a Mini Herb Garden on Your Windowsill

Fresh herbs beat dried every time. Line your brightest windowsill with potted herbs ($3–$8 each from garden centers) in matching pots for an intentional, functional garden.
Choose herbs you actually cook with: basil, rosemary, thyme, and parsley. Water regularly and snip as you cook. Investment: $20–$40 for 4–6 plants and pots. Renter note: they move with you when you leave.
Your kitchen smells incredible, and you’re literally harvesting dinner from your window. Fresh herbs elevate your cooking instantly and add living green to your space.
21. Swap Your Cabinet Handles for Gold or Brass
If you want to add warmth without bold color, upgrade to brushed gold or brass hardware ($4–$12 per handle). This finish is having a major moment and pairs beautifully with wood cabinets or earth-tone paint.
Order from IKEA, Wayfair, or restoration hardware stores and swap handles in under an hour. Brass and gold feel warm and luxe but are totally achievable on a budget. Budget $40–$100 for a full kitchen.
Your kitchen instantly feels more elevated and warm. That single metallic upgrade signals you pay attention to thoughtful design choices.
22. Add a Pegboard for Organized Cookware
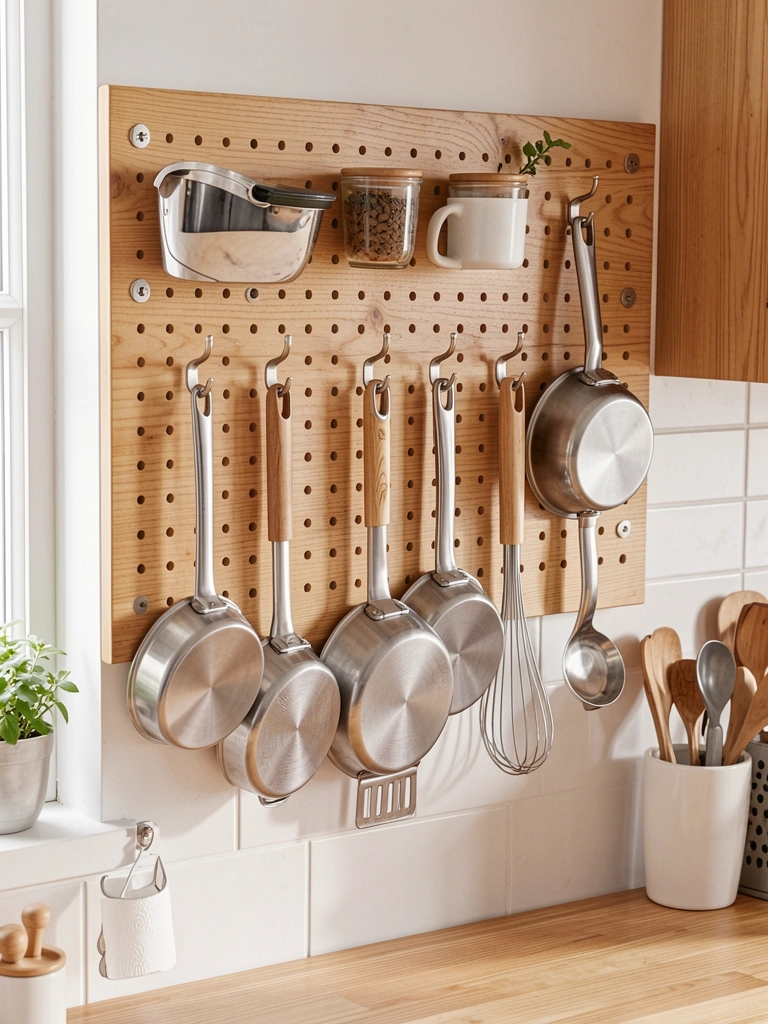
Open wall space is storage opportunity. Install a pegboard ($20–$50 from Home Depot) above counter or prep space with hooks ($15–$30 for a set) to hang frequently-used tools.
Pegboards work beautifully next to your stove or in prep zones. Paint the board to match your walls or leave natural wood for farmhouse vibes. Installation takes 45 minutes to 1 hour. Arrange items functionally (utensils near the stove, rarely-used items out of the way).
Your most-used tools are within arm’s reach, and your kitchen looks more thoughtfully organized. Pegboards work double duty: functional storage and intentional styling.
23. Install a Small Bar Cart for Beverage Storage
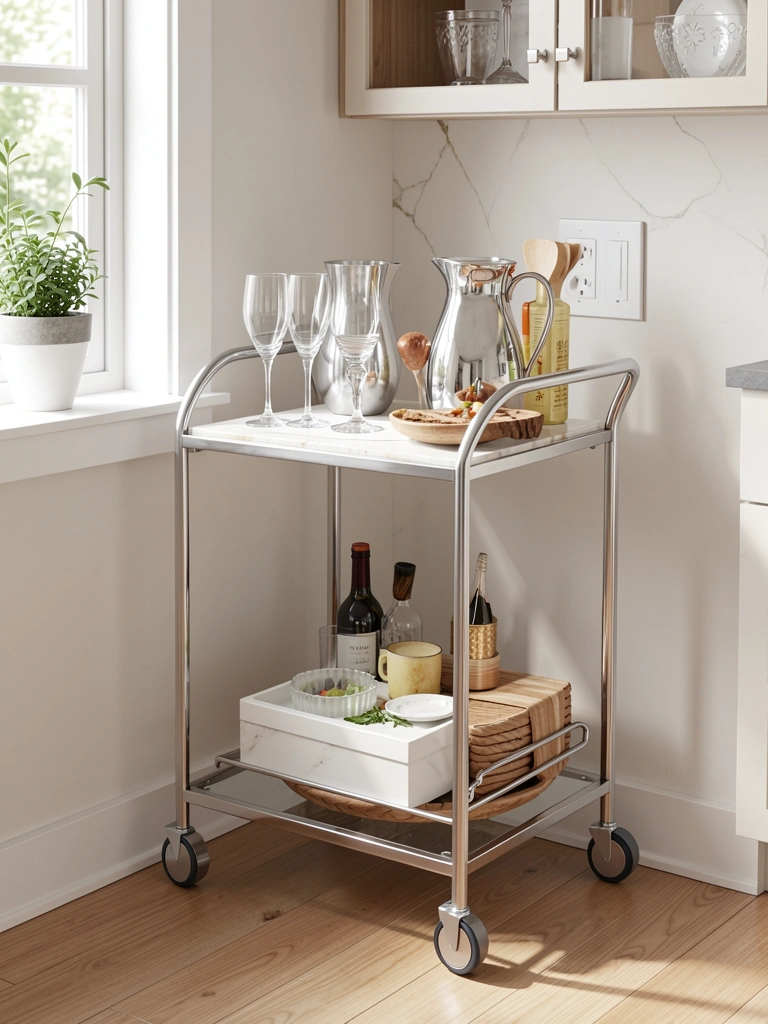
Bar carts maximize small spaces while adding mobile storage. Tuck a 3-tier cart ($40–$100 from Target, IKEA, or Wayfair) in a kitchen corner or next to the fridge.
Stock it with glasses, beverage bottles, coffee supplies, or entertaining items. Carts roll, so you can move it wherever you need extra counter space. This is especially brilliant for smaller kitchens. Invest in a cart with wheels for maximum flexibility.
You’ve created functional storage that doubles as a design element. When guests arrive, move it to the dining area for drinks—style and function combined.
24. Paint Your Kitchen Ceiling a Soft Color
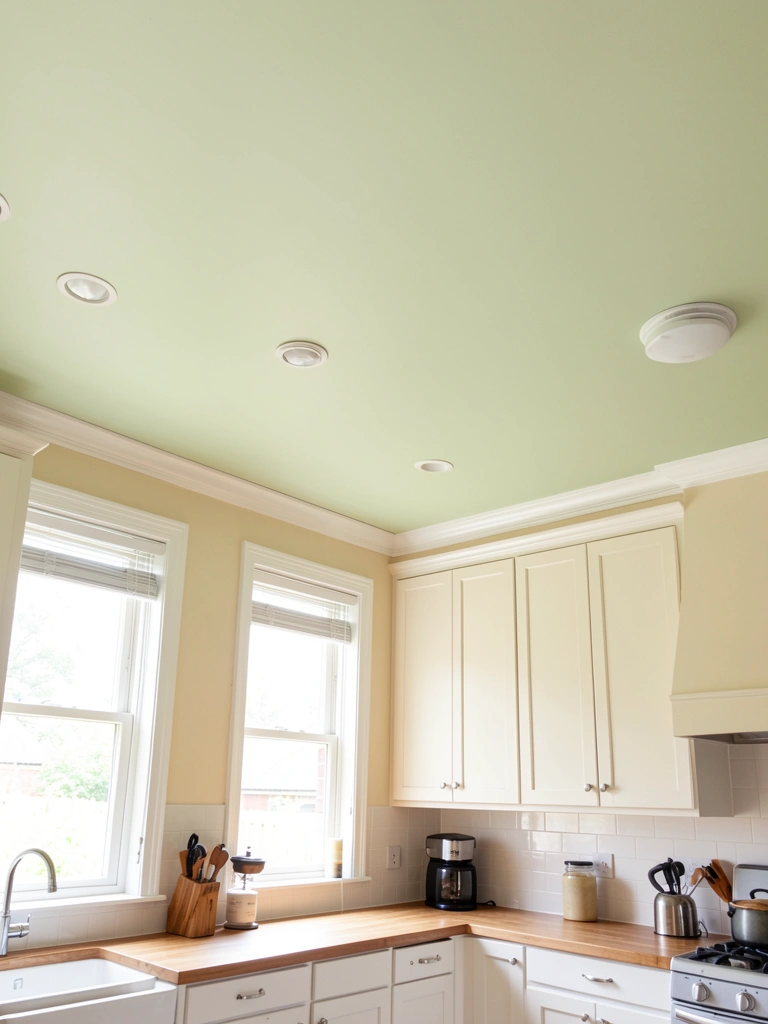
Most ceilings are white—boring. Paint yours a soft, light version of your wall color ($30–$40 for ceiling paint, same coverage) for a finished, intentional look.
Lighter ceiling colors make the room feel taller; deeper colors feel cozier but require really good lighting. For small kitchens, stick to very light creams or soft whites. Larger kitchens can handle slightly deeper tones. Budget 2–3 hours and plan for potential ladder work. This feels fancy but costs almost nothing.
Your kitchen looks more complete and intentional. A painted ceiling signals that you’ve thought about every detail, not just the walls.
25. Upgrade Your Kitchen Lighting with Dimmers

Dimmers let you control the mood—bright for cooking, soft for entertaining. Install dimmer switches ($15–$30 each) in place of standard switches. This works especially well with recessed lights or pendant fixtures.
Basic installation takes 15–20 minutes per switch if you’re comfortable with wiring. If not, a handyman charges $50–$100 per switch. Total cost: $15–$130 per switch installed. Suddenly your kitchen feels restaurant-quality—and actually more functional for different times of day.
You control the vibe from bright and energetic to soft and welcoming. Dimmers are the secret weapon of good lighting design.
26. Add Glass Cabinet Doors to One Section
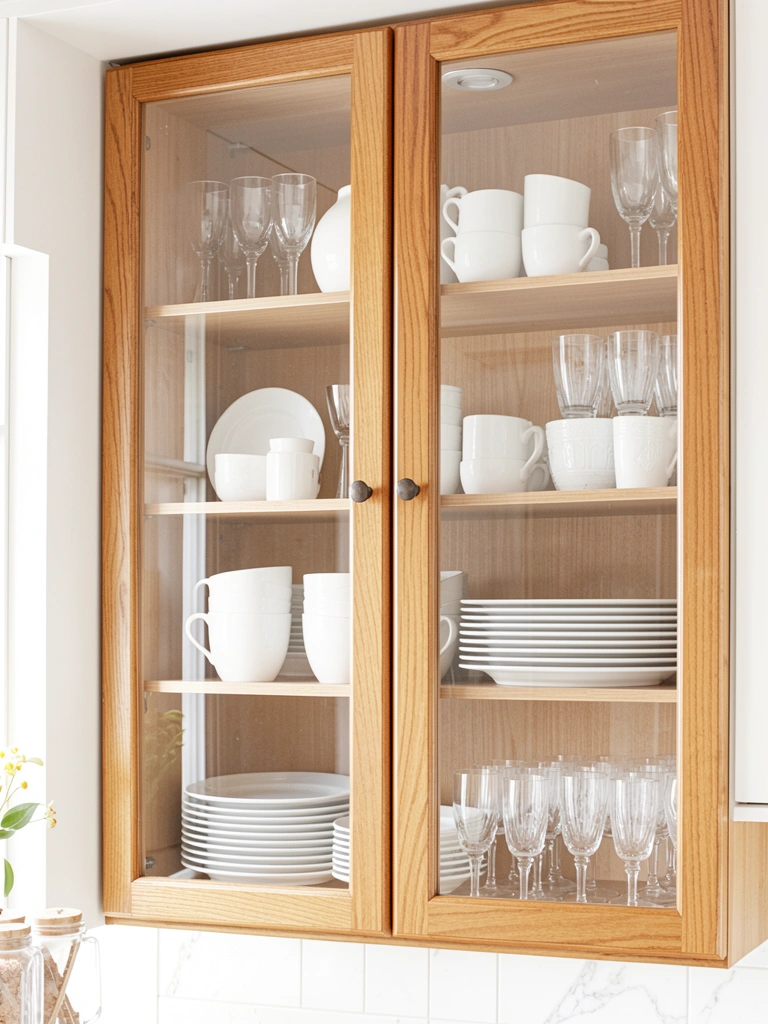
Glass cabinet doors replace one section of solid cabinetry to display beautiful dishes or glassware. Order glass door panels ($50–$150 each) from custom cabinet makers or IKEA for simpler styles.
Installation depends on your cabinet style. For IKEA or simple builds, it’s DIY-friendly (30–60 minutes). For custom cabinets, hire a pro. This upgrade works beautifully for showcasing matching dishware, glass collections, or cookbooks. Keep items styled and minimal—this is display space, not storage space.
One glass door section breaks up solid cabinetry and adds visual lightness. Your kitchen feels more curated and less utilitarian.
27. Organize Under Your Sink with Pull-Out Organizers
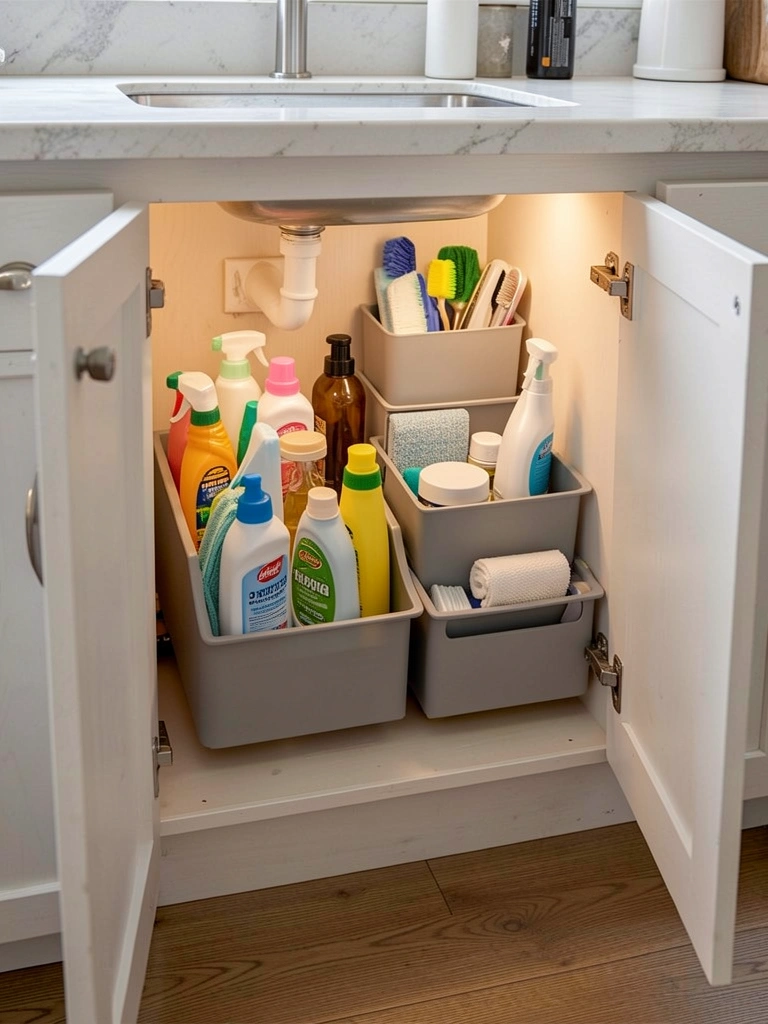
The space under your sink is typically chaos—pipes, old bottles, random supplies. Pull-out organizers ($25–$60 per set) from IKEA, Target, or Amazon maximize this awkward space.
Install a sliding drawer caddy, tension rods to hold bottles, or tiered shelves. Everything becomes visible and accessible instead of crammed in a dark corner. Installation takes 30 minutes. Pro tip: use spray bottles and matching containers to corral cleaning supplies—it looks intentional, not random.
You’ve reclaimed dead space and actually organized something that’s typically a disaster zone. Guests never see under your sink, but you’ll feel that calm every time you open the cabinet.
Save this post and pick your top three upgrades—you can totally knock them out this weekend. Which idea are you tackling first? Share this with a friend who’s been wanting a kitchen refresh but thought it had to be expensive or complicated.
Leave a Reply