Mirror walls have officially replaced boring paint as the go-to accent feature for 2025, and here’s the best part: you don’t need a designer budget to pull it off. Whether you’re renting a blank apartment or own a small room that feels cramped, a mirror wall creates depth, bounces light everywhere, and honestly just looks cool. The trick? You don’t have to cover an entire wall—you can start small, mix frame styles, and build your perfect reflection setup piece by piece. We’ve rounded up 25 doable ideas that range from totally free to surprisingly affordable, all designed to work in real homes with real constraints. Pick one that matches your space and skill level, and let’s get started.
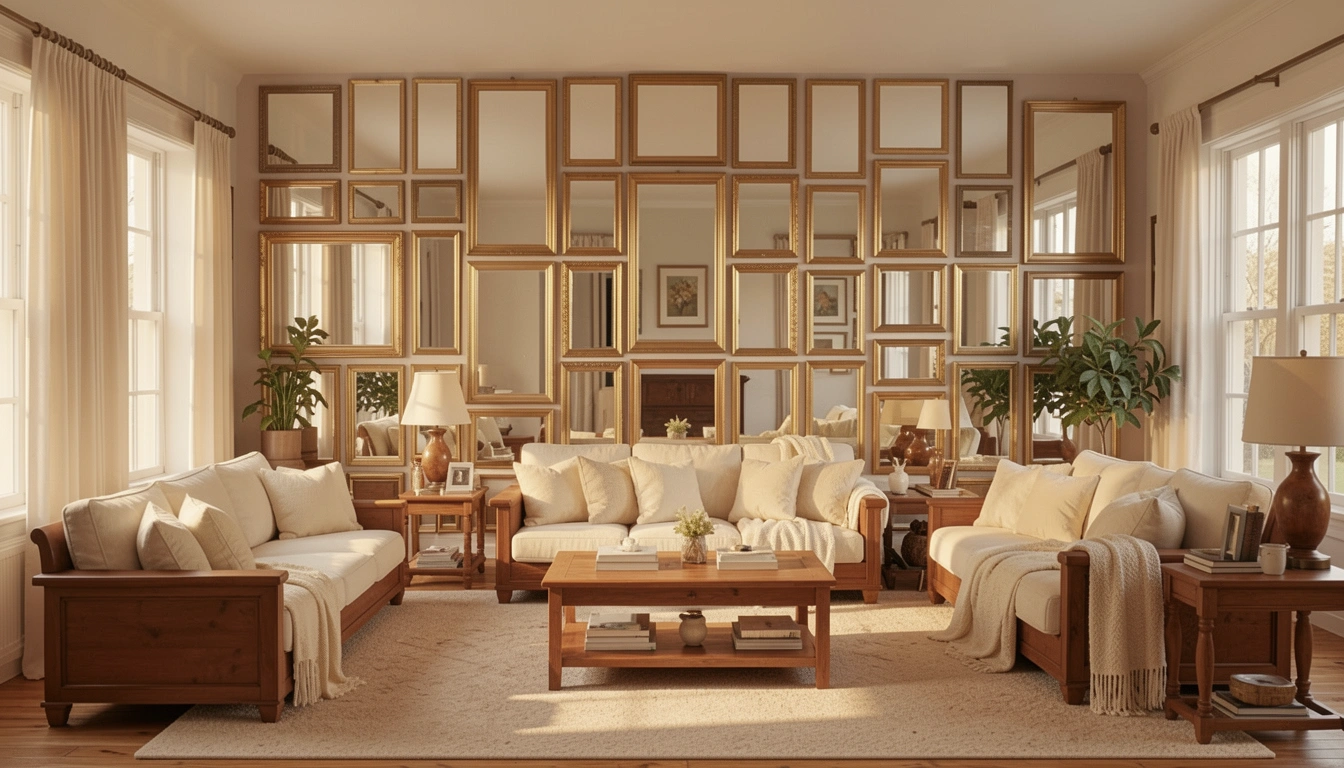
1. Create a Mismatched Mirror Grid on Any Wall
A mismatched mirror grid gives you a curated, intentional look without the pressure of perfection. The beauty is that no two frames have to match—that’s the whole point. Grab mirrors from thrift stores, IKEA, Target, and Amazon in sizes ranging from 8 inches to 18 inches. Prices run $8–$50 per mirror, and you can start with just 4-6 and add more over time.
Lay them out on the floor first to plan your arrangement, then use a level and painter’s tape to mark holes before hanging. This takes about an hour for a dozen mirrors, and you only need basic nails or wall anchors. The result? A focal wall that looks designer-curated but totally budget-friendly. Renters can even use adhesive hooks rated for mirrors under 5 pounds each.
Your wall becomes a working piece of art that reflects light and draws the eye naturally to your best features—whether that’s a pretty dresser or a cozy reading nook.
2. Use Peel-and-Stick Mirror Tiles for Zero Commitment
Peel-and-stick mirror tiles are the renter’s secret weapon—no nails, no damage deposits lost, and you can rearrange whenever you want. Each tile typically costs $3–$8, and a pack of 12 runs about $30–$50. Brands like Art3d, Yardwe, and Amazon basics make solid options that actually stick.
Clean your wall with rubbing alcohol, let it dry completely, then peel and press each tile into place. You can arrange them in grids, staggered patterns, or even create waves. Takes about 20 minutes for a whole wall. The tiles come in 6×6, 12×12, or even hexagonal shapes if you want to get creative.
You get a mirror wall that looks expensive but costs less than two dinners out. Plus, if you move or change your mind, they peel right off without leaving residue. Perfect for apartments, temporary spaces, or anyone testing the waters before committing.
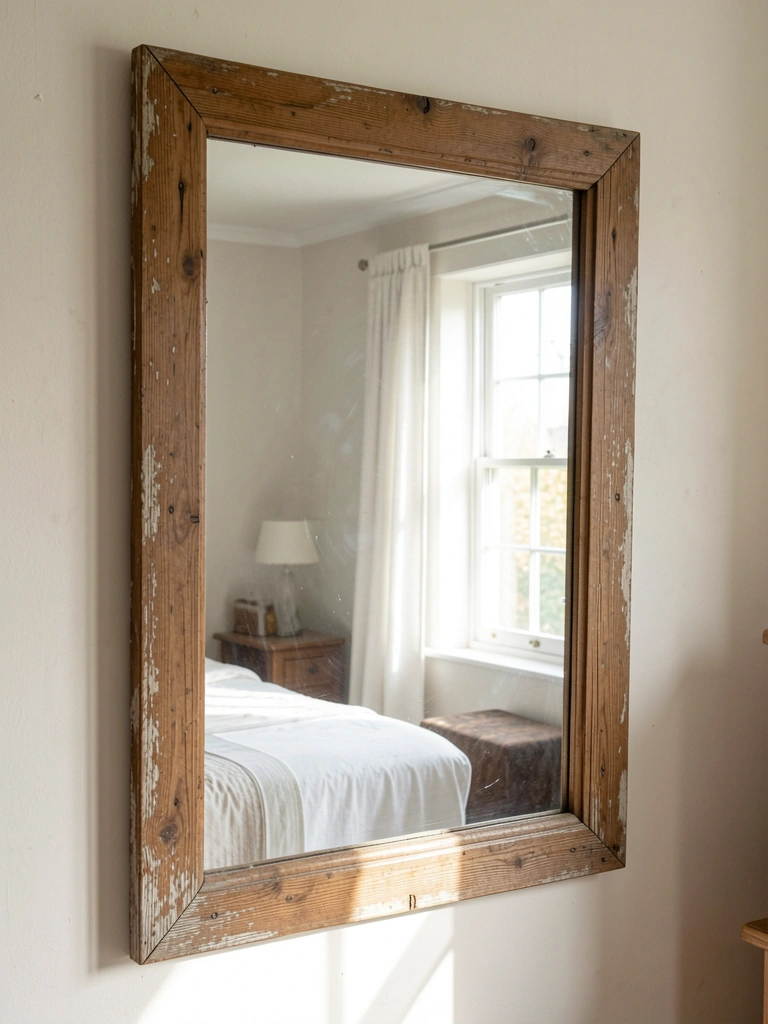
3. Frame Thrifted Mirrors with Moldable Wood Trim
Found a gorgeous mirror at Goodwill or a yard sale but hate the frame? Buy moldable wood trim strips (about $1–$3 per strip) from Home Depot or Lowe’s and wrap them around the edge. It’s like giving your mirror a custom upgrade for pocket change. This works especially well on frameless or plastic-framed mirrors.
Measure your mirror’s perimeter, cut the trim to size with a basic saw or ask the store to cut it, then secure it with mirror adhesive or small nails on the back. Stain or paint it to match your space—takes 30 minutes plus drying time. You can do 3-4 mirrors for under $25 total.
The effect looks handcrafted and elevated, and you’ve essentially customized a thrifted find into something that looks like it came from a boutique. It’s the kind of detail that makes people ask where you got it.
4. Build a Leaning Mirror Wall for Temporary Spaces
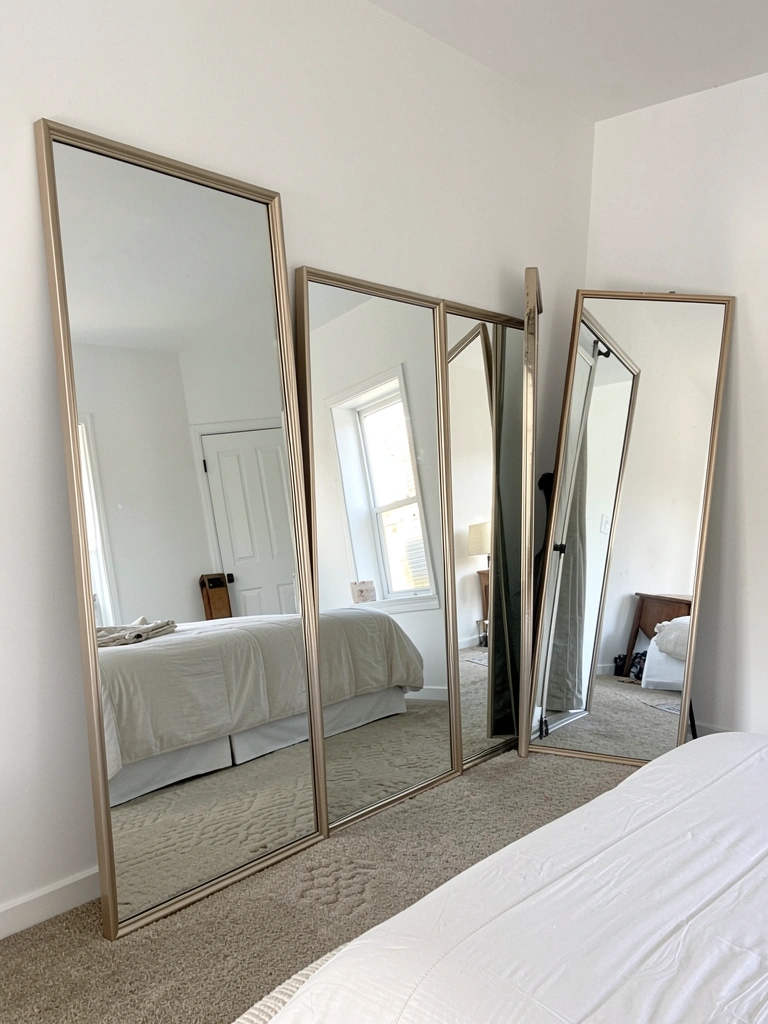
Don’t want to commit to wall holes? Lean a collection of full-length or large mirrors against your wall in a casual cluster. This works especially well in bedrooms, entryways, or rental spaces where you want impact without permanence. Grab mirrors from IKEA, Target, or Facebook Marketplace for $30–$150 each, depending on size.
Arrange them at slightly different angles—some upright, some tilted—to create visual interest. They’ll stay in place on their own if they’re leaning against the wall. No tools needed, no damage, and you can rearrange them whenever the mood strikes.
You get a gallery-like statement wall that looks intentional and expensive, but you can take it with you when you leave. It’s the easiest way to test out a mirror wall before going full-install.
5. Create a Sunburst Mirror Wall for Dramatic Impact

A sunburst mirror does the heavy lifting all by itself—you don’t need a grid of mirrors when one statement piece delivers all the drama you need. These range from $40–$300 depending on size and material, with solid mid-range options at Target, Wayfair, and Amazon around $60–$120.
Hang it at eye level or slightly above for maximum visual impact. This is a one-nail, one-afternoon project. The radiating pattern catches light beautifully throughout the day and photographs gorgeously, so it’s perfect if you love a room that looks good on camera.
Position it as a focal point above a bed, sofa, or dresser, and let it become the conversation starter. One sunburst mirror can make a plain wall feel intentional and expensive without any additional styling needed.
6. Mix Metal Frames with Natural Wood for Eclectic Style

Combining metal and wood frames creates visual interest without looking chaotic. Grab a mix from thrift stores, IKEA, and budget retailers like Target—you’re looking at $10–$40 per frame. The key is choosing frames in complementary finishes: matte black, brushed gold, and natural wood work beautifully together.
Stick to 2-3 metal tones maximum and keep the wall color neutral so the frames become the stars. Arrange them with roughly equal spacing—a level and tape measure take the guesswork out. Plan for about 45 minutes to an hour for a wall of 8-10 mirrors.
The mix of materials looks collected over time rather than matchy-matchy, which reads as more thoughtfully designed. You’ve created a wall that looks like you have serious decorating taste without any of the stress.
7. Paint Mirror Frames to Match Your Accent Color
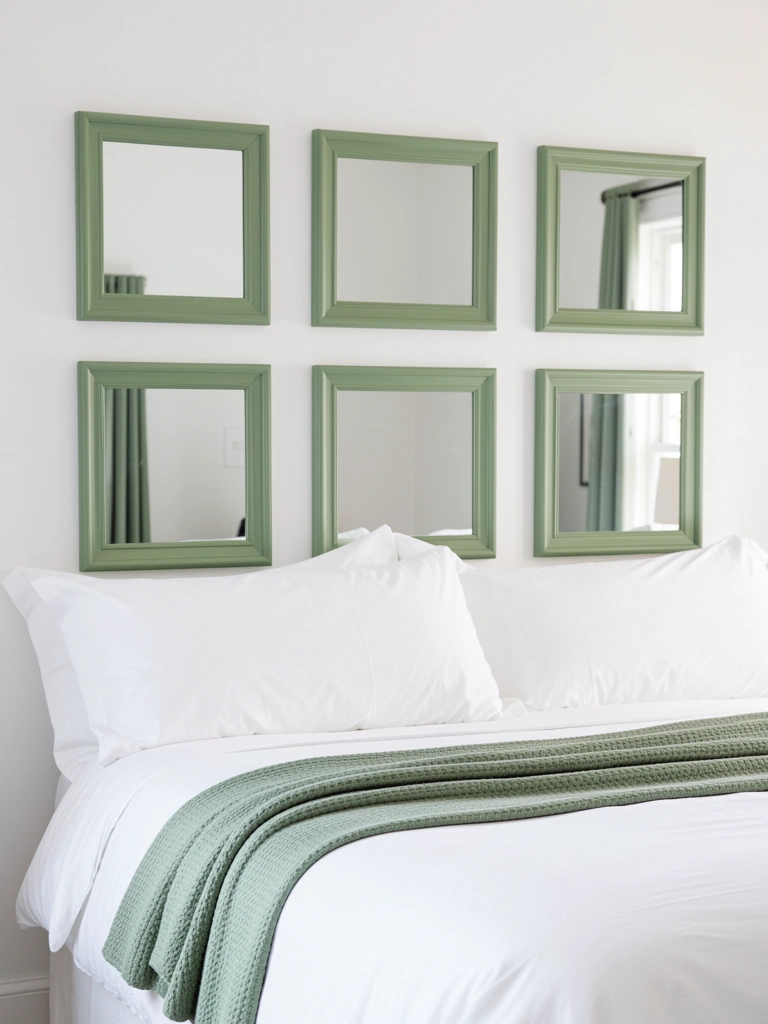
Have mirrors in mismatched or dated frames? Paint them all in one accent color to tie them together instantly. Use spray paint or acrylic paint designed for plastic/metal, about $2–$4 per can from hardware stores. You only need one or two cans depending on how many mirrors you’re doing.
Remove mirrors from frames if possible, lay frames on cardboard, and spray 2-3 light coats in your chosen color. Let them dry per the paint instructions (usually 24 hours), then reinstall the mirrors. This takes 20 minutes hands-on time plus drying.
Suddenly your budget mirrors look cohesive and intentional. The painted frames become a design feature that ties into your room’s color story, making the whole wall feel planned rather than randomly assembled.
8. Use Adhesive-Backed Mirror Panels for Backsplash Effect
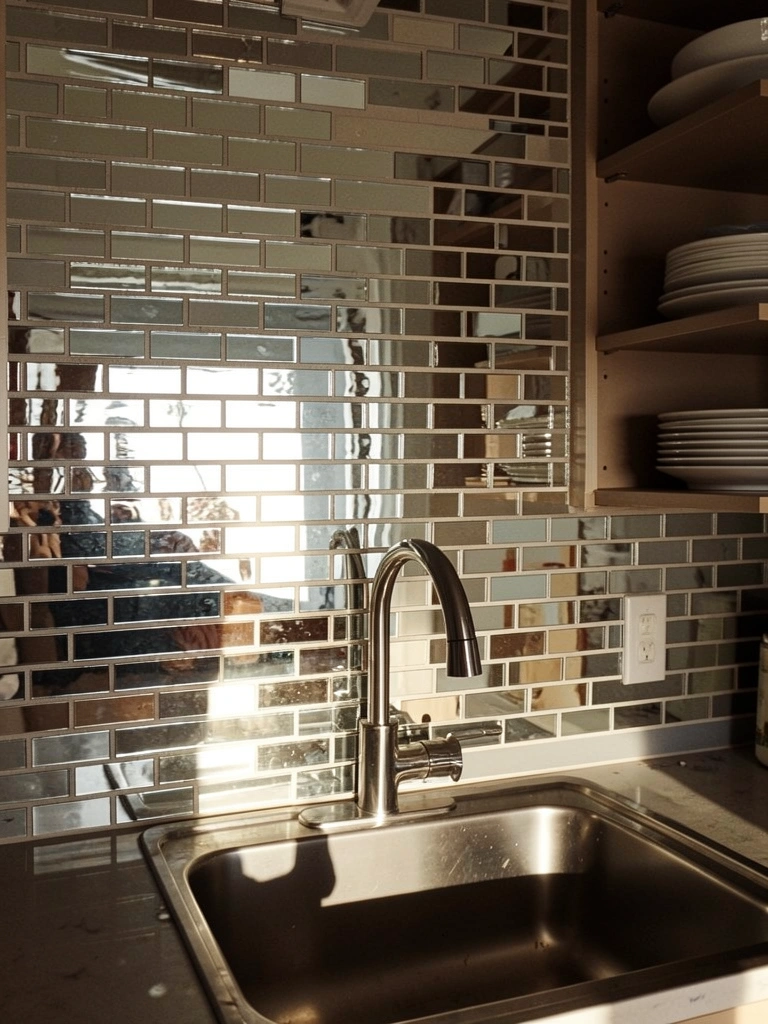
Transform a kitchen or bathroom wall with adhesive-backed mirror panels that look like a custom backsplash but cost a fraction of tile. These run $20–$50 for a pack that covers 10-15 square feet, depending on tile size. Brands like Art3d and Mirrored offer various styles including subway, hexagon, and mosaic patterns.
Clean and dry your wall thoroughly, then peel and stick panels in your chosen pattern. Use a level and spacers to keep lines straight. A 3×4 foot area takes about 30 minutes. You can also do partial walls—just above a sink or stove—for a budget-friendly pop of reflection.
Your kitchen or bathroom instantly reads more polished and spa-like. Mirrors amplify light where you need it most (near sinks and cooking areas), and the effect photographs beautifully.
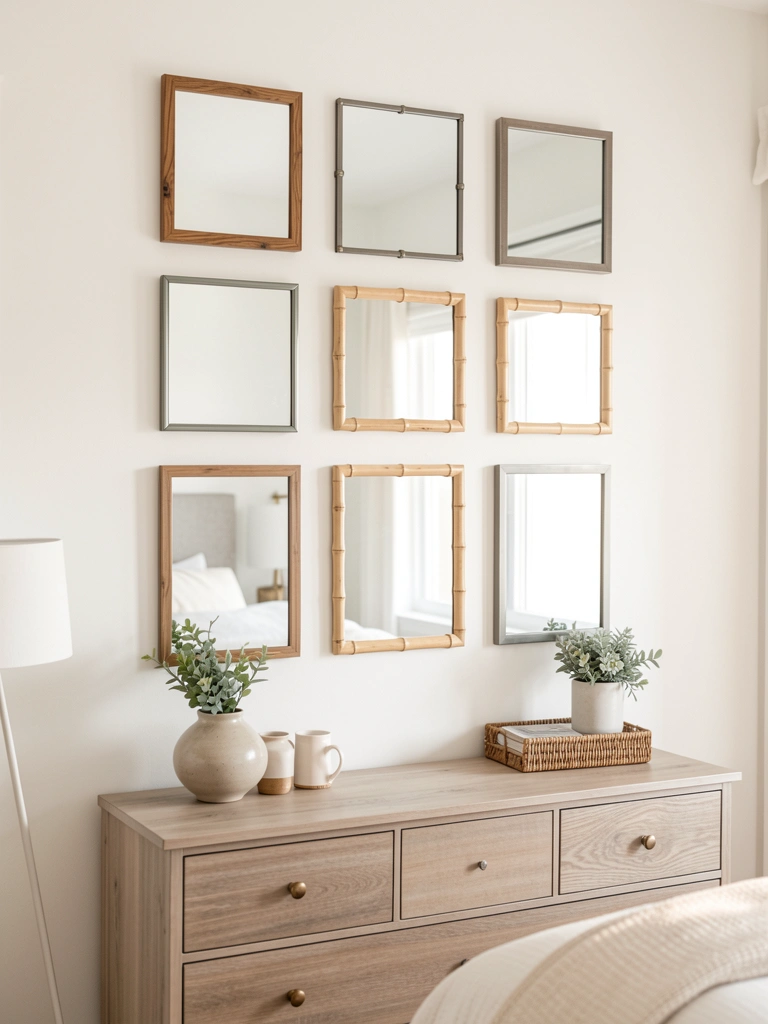
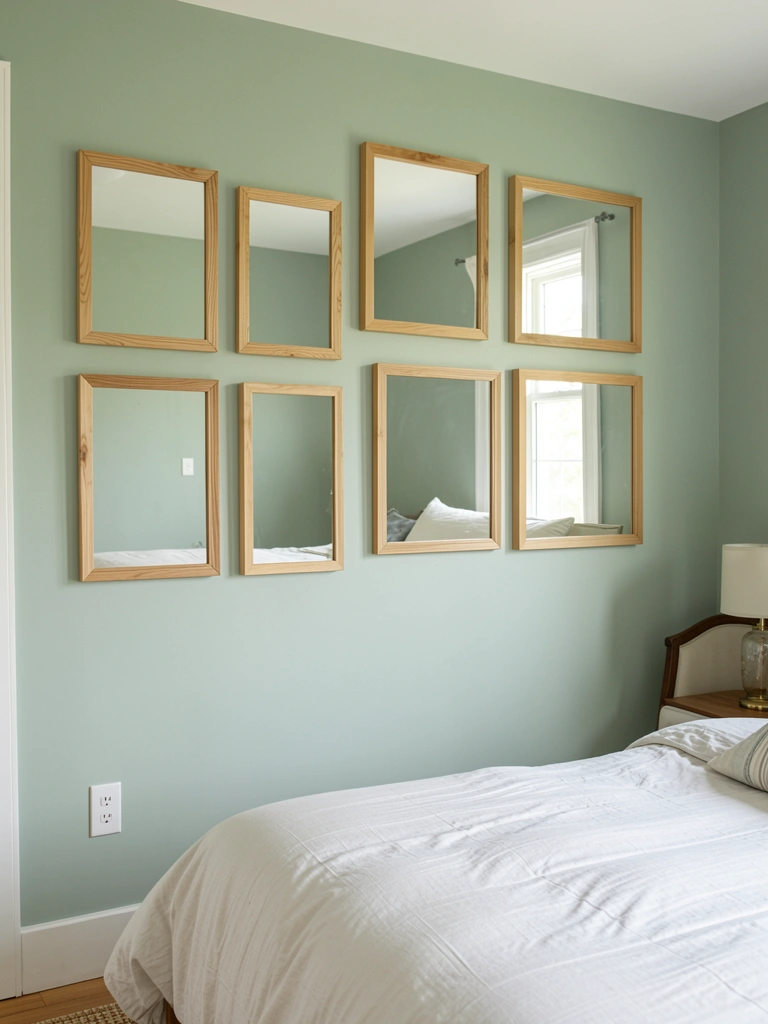
9. Hang Mirrors in Matching Frames for Minimalist Impact
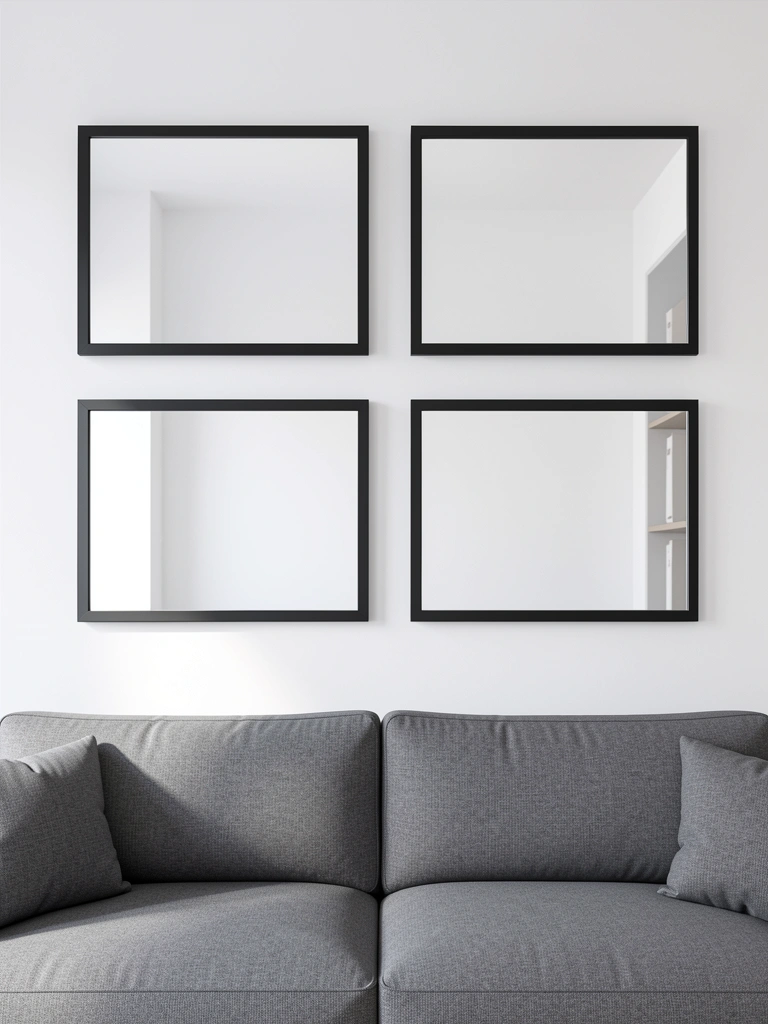
Sometimes the most sophisticated look is the simplest one. Six to nine matching mirrors in identical frames create a clean, editorial aesthetic. Hunt for frames on sale at IKEA, Target, or Wayfair—look for deals on $15–$30 items that work when bought in multiples.
Measure and mark your wall to create evenly spaced rows. Use a level and painter’s tape. This takes about an hour total and looks strikingly polished when finished. The uniformity is calming and reads as intentionally designed.
Your wall becomes a study in minimalist elegance—no visual chaos, just clean lines and reflected light. This approach works especially well in small spaces because it emphasizes order rather than clutter.
10. Add Vintage Ornate Frames for Maximalist Flair
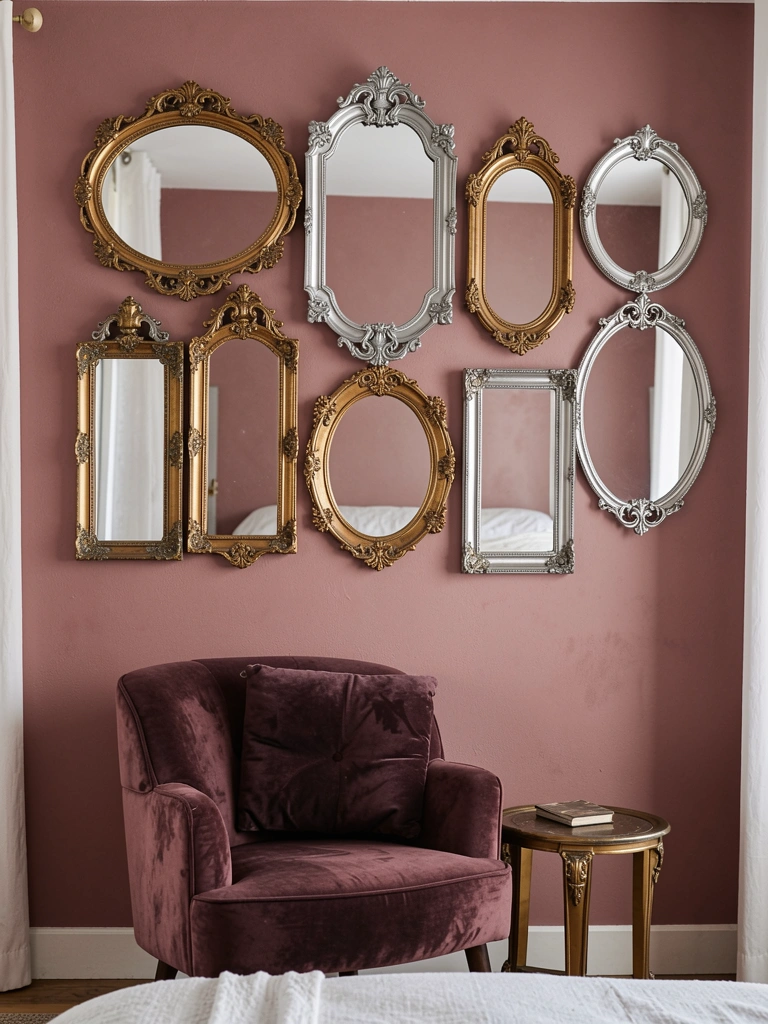
For the maximalist at heart, layer ornate frames in mixed metals and finishes for a luxe, collected-over-time vibe. Hunt thrift stores and Facebook Marketplace for vintage frames—you’ll find ornate options for $3–$15 each. The hunt is half the fun.
Arrange them in a loose salon style (asymmetrical but balanced). Don’t worry about perfect spacing—the point is abundance and personality. Hang 12-15 frames in a 4×5 foot area for maximum impact. Takes 1-2 hours but creates an incredible focal point.
Your wall looks like you’ve been collecting beautiful frames forever, even if you actually found them in one weekend. The mix of golds, silvers, and patinas catches light differently throughout the day, creating depth and movement.
11. Frame Mirrors with Rope or Jute for Coastal Vibes
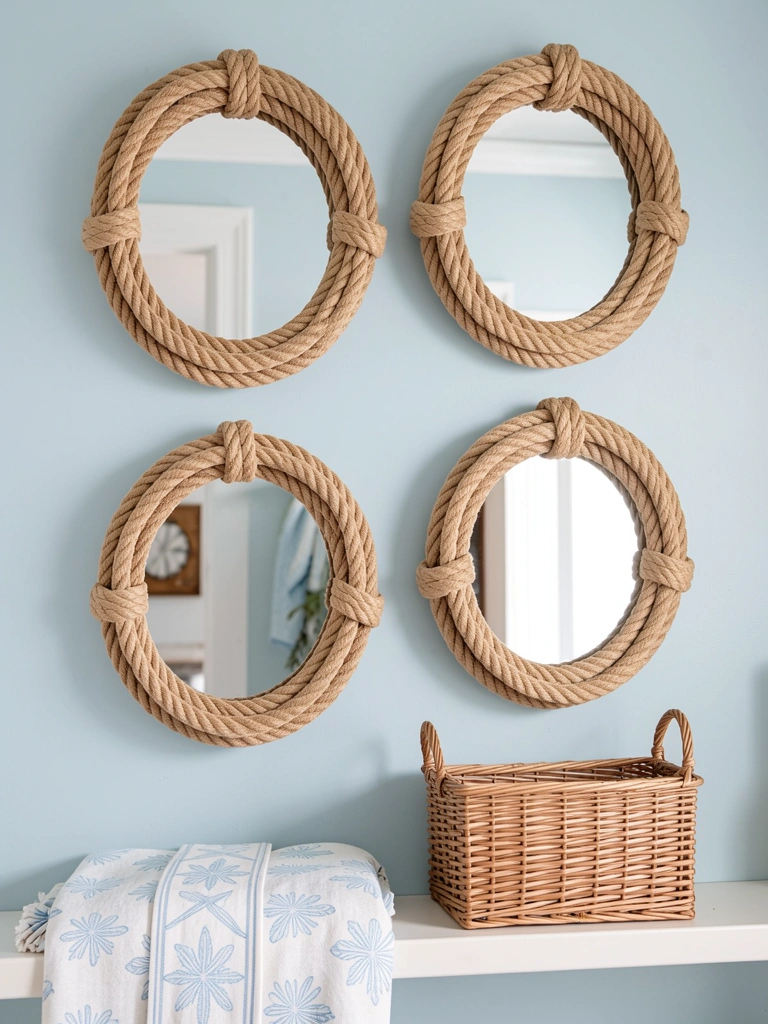
Give any basic mirror instant coastal charm by wrapping the edge with natural rope or jute cord. Grab rope at any hardware store for $2–$5 per mirror, plus fabric glue or hot glue (about $3). This works on any size mirror—8 inches to 24 inches.
Measure the perimeter, cut rope to length, then hot glue it around the mirror’s edge in one smooth layer or a coiled pattern. Let glue dry completely (15 minutes) before hanging. Takes about 10 minutes per mirror.
You’ve taken a plain mirror and given it personality and texture for less than $10. Rope-wrapped mirrors feel summery and relaxed, perfect for bedrooms, bathrooms, or entryways that need a breezy aesthetic.
12. Hang Mirrors at Varying Heights for Visual Movement
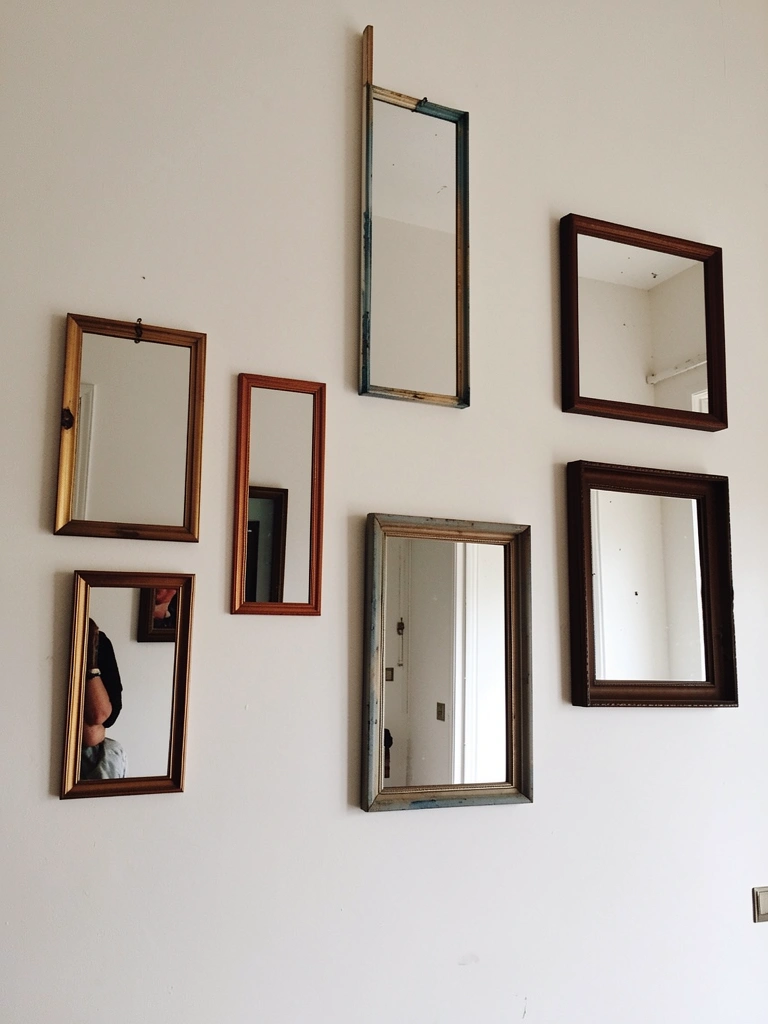
Rather than aligning mirrors in neat rows, stagger them at different heights for a more dynamic, interesting composition. This arrangement actually draws more light around the room and creates visual interest that makes spaces feel larger.
Plan your layout by marking heights on painter’s tape first—the highest mirror might be 6-8 inches below the ceiling, the lowest around 5 feet up. Space them about 4-6 inches apart. Hang with a level to keep individual mirrors straight even though the arrangement is asymmetrical.
The varying heights create movement and sophistication. Your eye travels across the wall rather than getting stuck in one spot, which makes the space feel more dynamic and deliberately curated.
13. Use Mirrored Shelves to Double as Display and Reflection
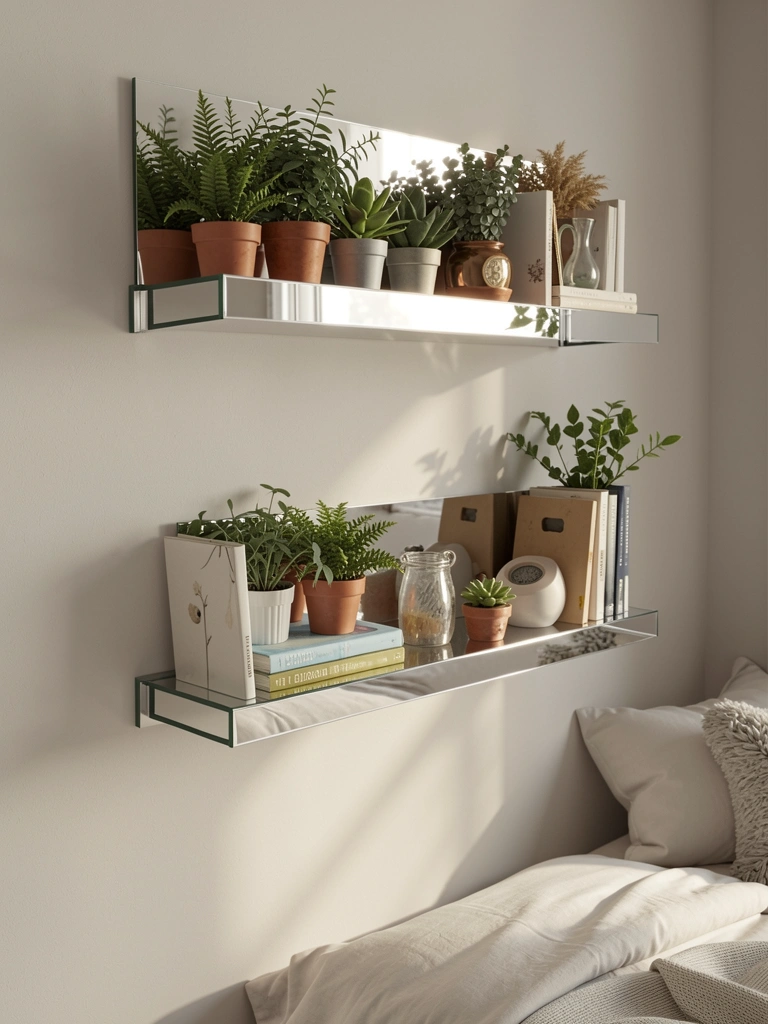
Mirrored shelves are like getting two design features in one—functional storage plus light-bouncing reflection. These run $25–$80 per shelf from Target, Wayfair, or Amazon. Mount them at different heights (one at 48 inches, one at 60 inches) for visual interest.
Install according to package instructions using a level and wall studs. Takes about 30-45 minutes for two shelves. Fill with plants, books, and small decor pieces that’ll look even more interesting with their reflections behind them.
You’ve created a mini gallery wall that’s also genuinely useful. The mirrored backing makes your small collection of objects appear doubled, which makes open storage feel less bare and more intentional.
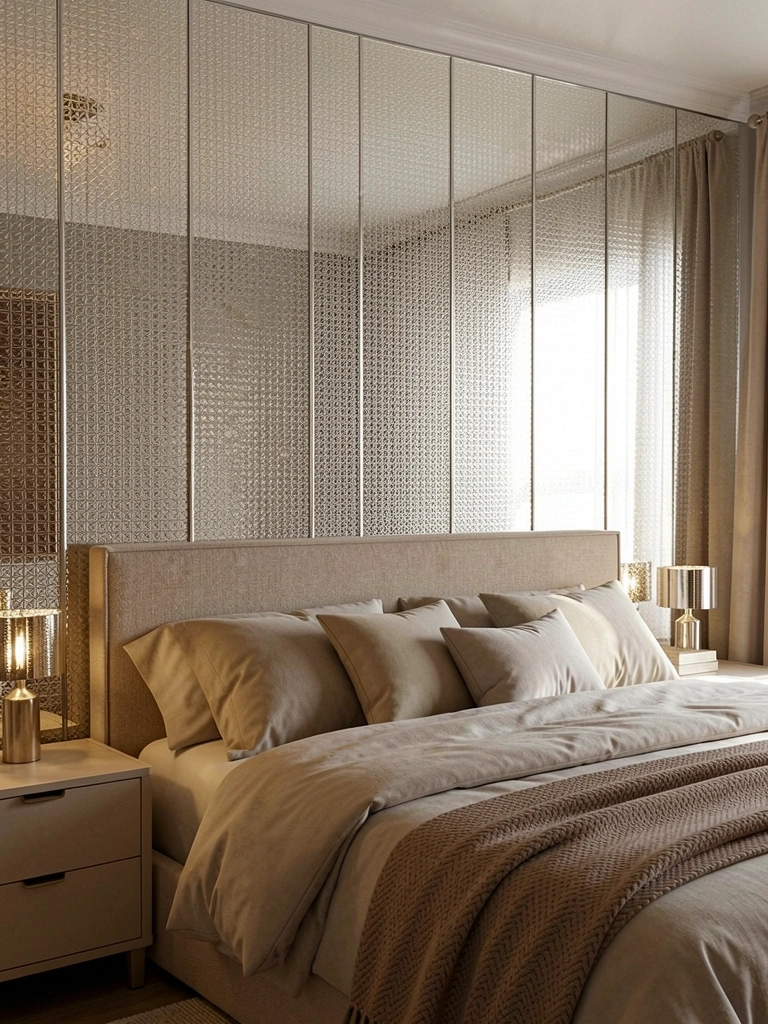
14. Create a Mirror Accent Wall Behind Your Bed
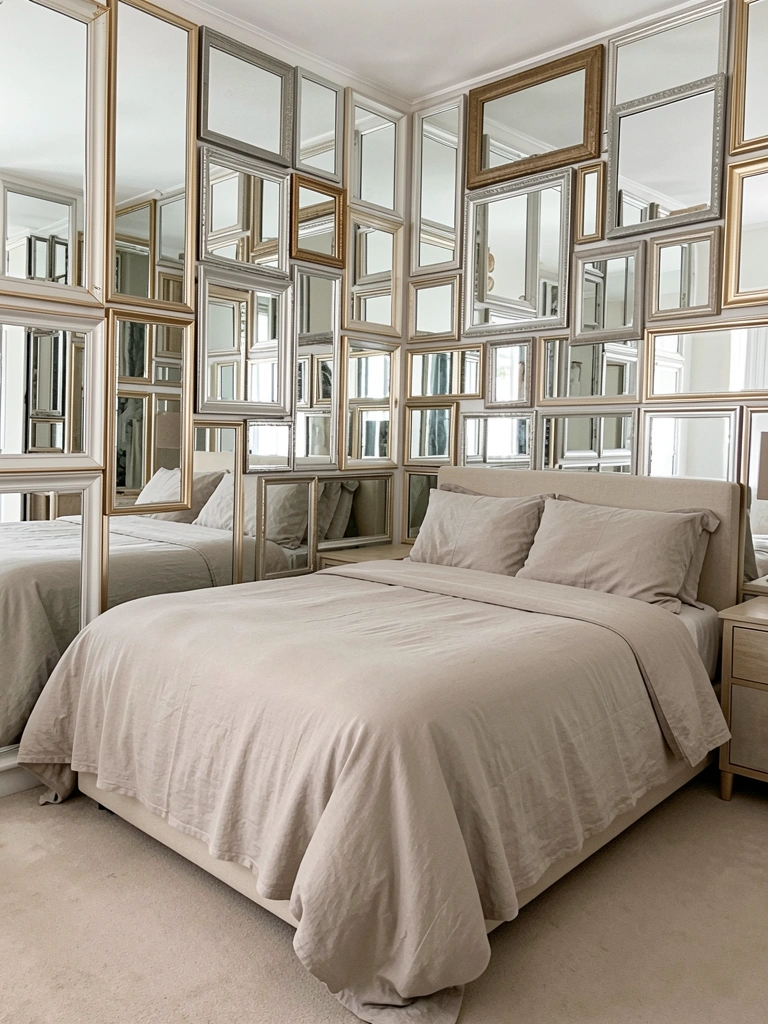
Make your bed the ultimate focal point by creating a full mirror wall behind it. This is the most dramatic version of the mirror wall idea and works especially well in smaller bedrooms where it makes the space feel twice as large. Budget $200–$500 for a full wall, depending on whether you use adhesive tiles or individual framed mirrors.
If using tiles: Install a grid of adhesive-backed mirror panels following the manufacturer’s instructions. If using individual mirrors: Plan your arrangement carefully, then hang with a mix of methods (nails for sturdy frames, adhesive strips for lighter options). Budget 2-3 hours for a full wall.
Your bedroom becomes a sanctuary that feels open, bright, and spacious. You’ll notice the difference immediately—more light, more perceived space, and a wow factor that doesn’t come from expensive bedding.
15. Mount Mirrors Inside a Gallery Wall Grid
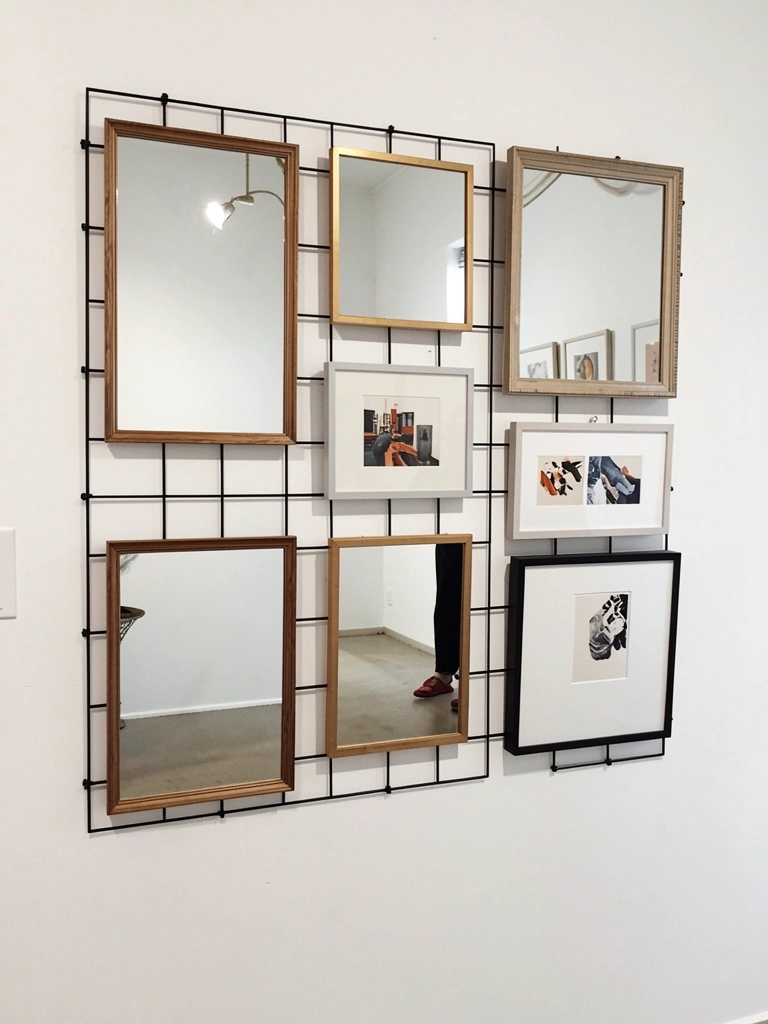
If you want structure without commitment, use a gallery wall hanging system (like the Command Gallery Wall Kit, $15–$30). These systems use adjustable templates so you can arrange and rearrange mirrors and art without re-measuring constantly.
Lay out your design using the template, mark holes with painter’s tape, then install all pieces at once. Takes about an hour for an 8-10 piece wall. The best part? You can swap pieces in and out whenever you want without new holes.
You get a polished, curated look that’s also flexible. If you want to swap a mirror for art or rearrange things seasonally, just pop them out and rearrange. It’s the gallery wall for people who like options.
16. Paint a Bold Frame Color to Make Mirrors Pop
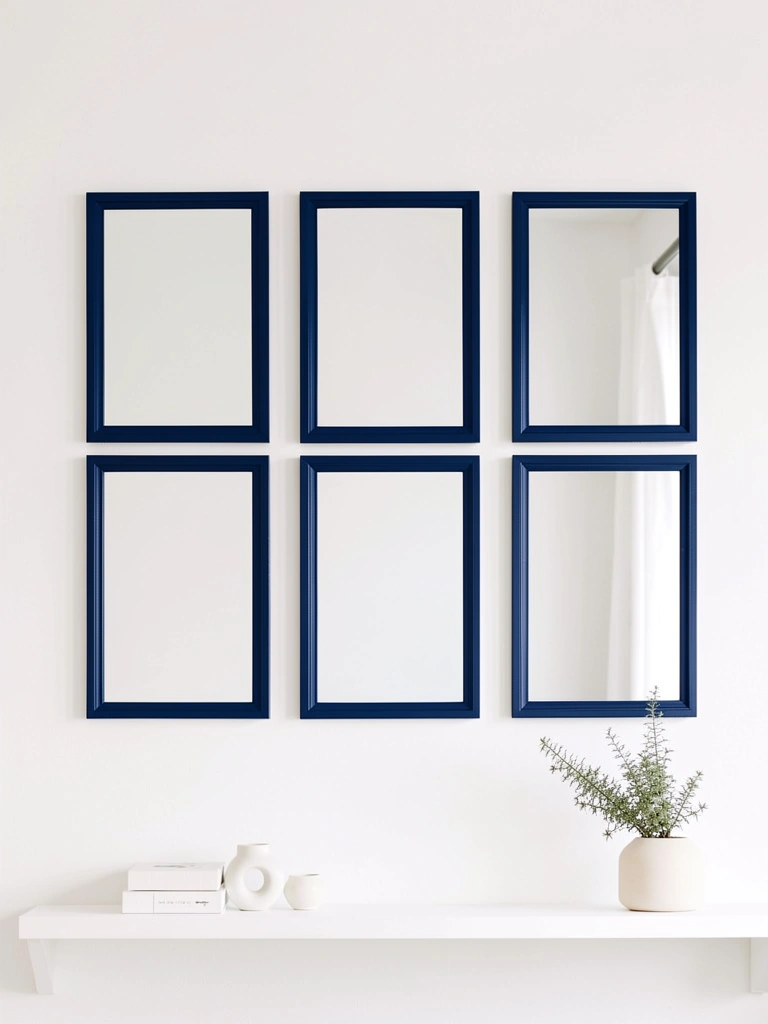
Forget natural wood or gold—a bold frame color makes mirrors into actual art installations. Paint frames in jewel tones (navy, emerald, terracotta) or moody neutrals (charcoal, chocolate) using spray paint or brush-on acrylics. Cost: $2–$5 per frame.
Remove mirrors from frames, paint frames in 2-3 coats, then reinstall. Drying time is 24 hours between coats. Hands-on time is minimal. The result looks sophisticated and intentional without being trendy.
You’ve turned simple mirrors into statement pieces that complement your room’s color palette. The bold frame color does the heavy lifting design-wise, so you can keep your wall arrangement simple and let color do the talking.
17. Use Mirror Film on Existing Frames for Easy Upgrades
Have a beautiful frame but damaged or dull mirror glass? Reflective mirror film ($15–$25 per roll) lets you upgrade the reflective surface without replacing the whole mirror. Brands like Gila and 3M make high-quality options.
Clean the glass thoroughly, measure your mirror, then carefully apply the film following package directions. Takes about 15-20 minutes per mirror. Trim excess with a utility knife. The result looks brand new.
You’ve revived an old mirror without replacing it—perfect for frame lovers who just need to refresh the reflective surface. It’s a waste-conscious upgrade that costs pennies compared to buying new.
18. Hang Mirrors with Decorative Chains for Hardware Details

Skip basic picture hooks and hang mirrors from decorative chains for an extra design detail that costs almost nothing. Grab chains at hardware stores for $1–$3 per foot. Brass, gold, and matte black chains work well with most decor.
Attach chains to ceiling-mounted hooks (rated for your mirror’s weight), then attach the mirror to the chain’s hook using wire or chain links. Takes about 10 minutes per mirror. The chains become a design feature rather than invisible hardware.
The suspended effect makes mirrors feel like intentional art installations rather than just decorative objects. It’s a tiny detail that reads as thoughtfully designed and adds verticality to your wall arrangement.
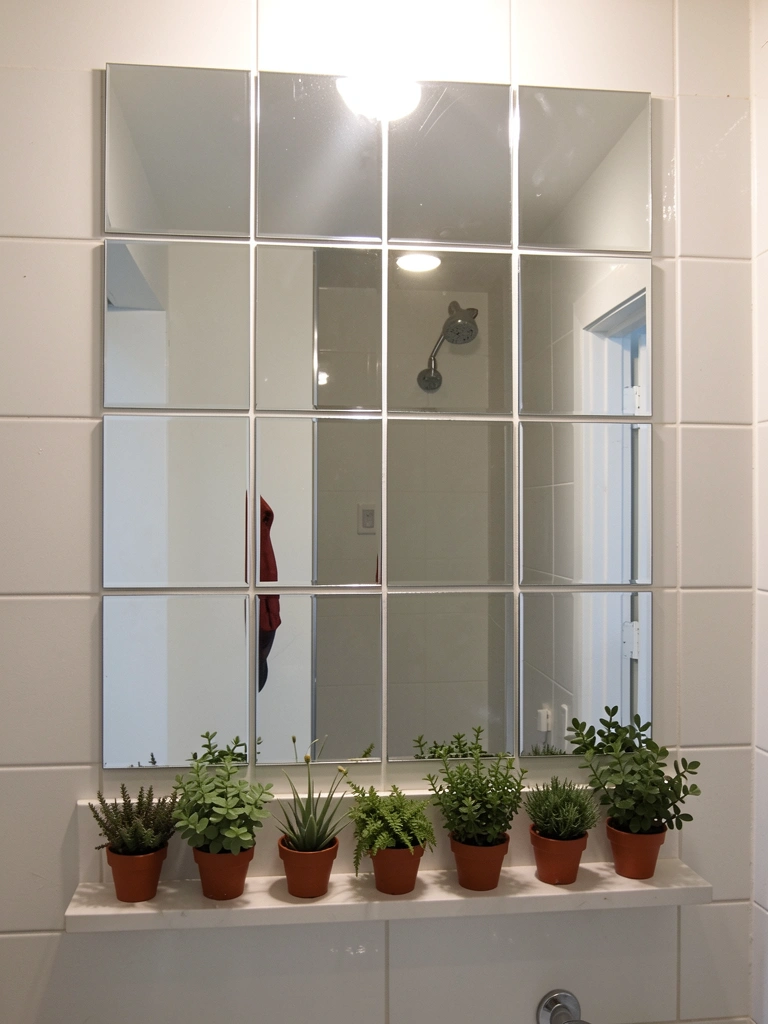
19. Create a Tileable Mirror Wall in Rental Bathrooms
Bathrooms are the perfect testing ground for mirror walls, and adhesive tiles make them renter-friendly. A small bathroom wall (about 3 feet wide by 4 feet tall) needs roughly $40–$60 in adhesive mirror tiles (about 12-15 tiles at 12×12 inches each).
Clean the wall, dry completely, then stick tiles in a grid pattern using a level as you go. Takes about 30 minutes. If you ever move, they peel right off without damage.
Your bathroom instantly looks larger, brighter, and more spa-like. The reflected light bounces around the small space, making it feel less cramped. You also get practical benefits—more light around the sink for grooming and a cleaner aesthetic than plain paint.
20. Use Oversized Mirrors to Make Small Rooms Feel Bigger
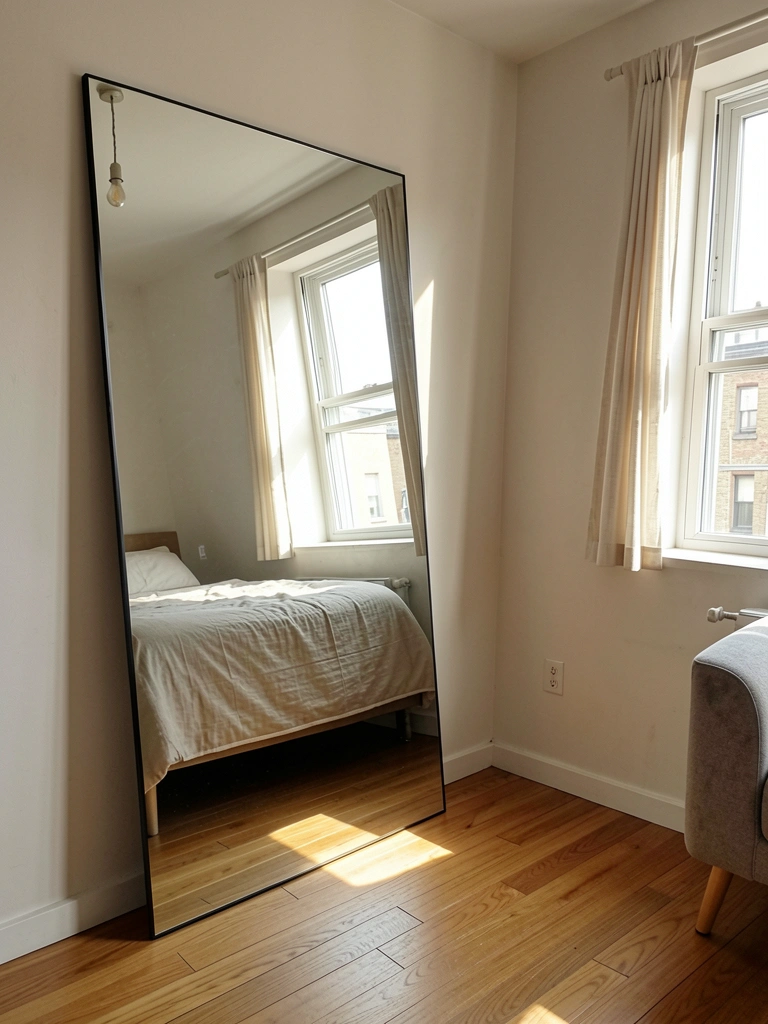
One gigantic mirror does what a dozen small mirrors can’t—it makes a small room feel genuinely spacious. Oversized mirrors start around $80–$150 at IKEA, Target, and Wayfair, with premium options at $150–$300 from furniture stores. Leaning them against the wall (no hanging needed) is the easiest approach for renters.
Position your oversized mirror opposite the window or a light source so it bounces natural light around. The reflection should capture the best parts of your room—artwork, good seating, or the view. Even if you only lean one large mirror against a wall, it makes an immediate difference in perceived space.
Suddenly your small bedroom or apartment feels airy and light. You’ve essentially doubled your visual square footage without any renovation, and the effect is immediate and noticeable the moment you enter the room.
21. Add LED-Framed Mirrors for Subtle Ambient Light
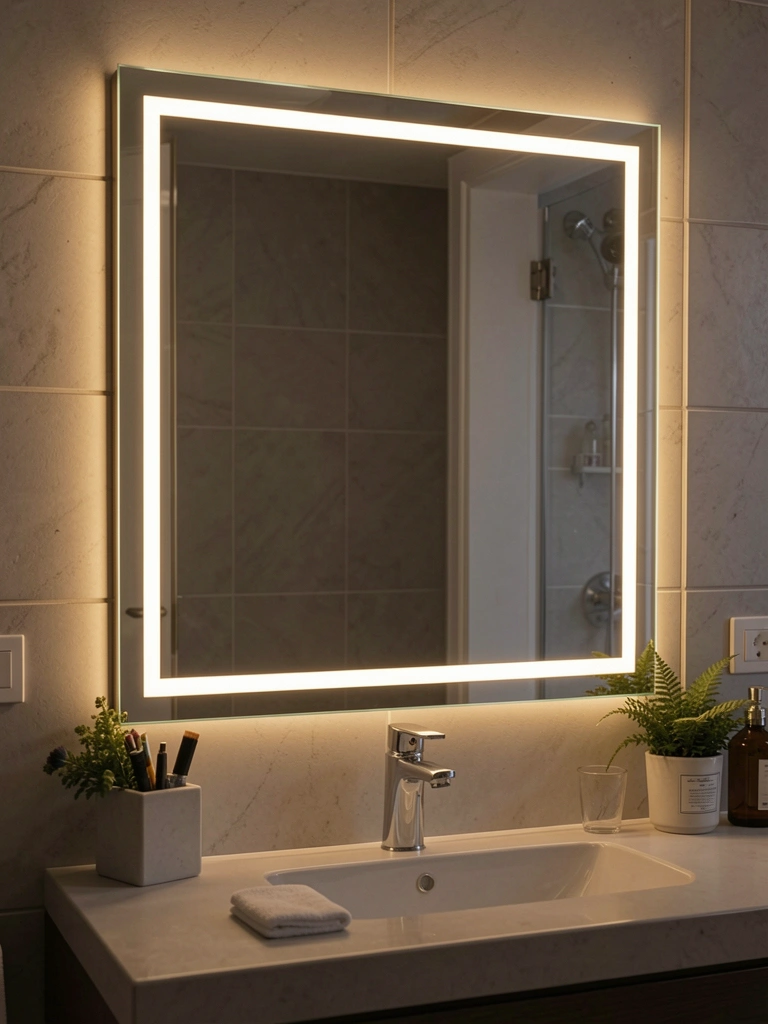
LED mirror frames add ambient light without the commitment of a full backlit mirror. These frame kits run $15–$40 and attach to your existing mirror with adhesive strips. Brands like GKLIGHTING and LED-Strip-Light make quality affordable options.
Measure your mirror’s perimeter, apply the adhesive strip around the edge, plug into any outlet (or battery-powered for portability), and adjust brightness with a remote. Takes 10 minutes. Choose warm white for bedrooms or cool white for bathrooms.
You’ve added functional lighting plus a subtle, modern design element. The warm glow makes your space feel intentional and spa-like, especially in bedrooms or entryways. It’s affordable and totally reversible for renters.
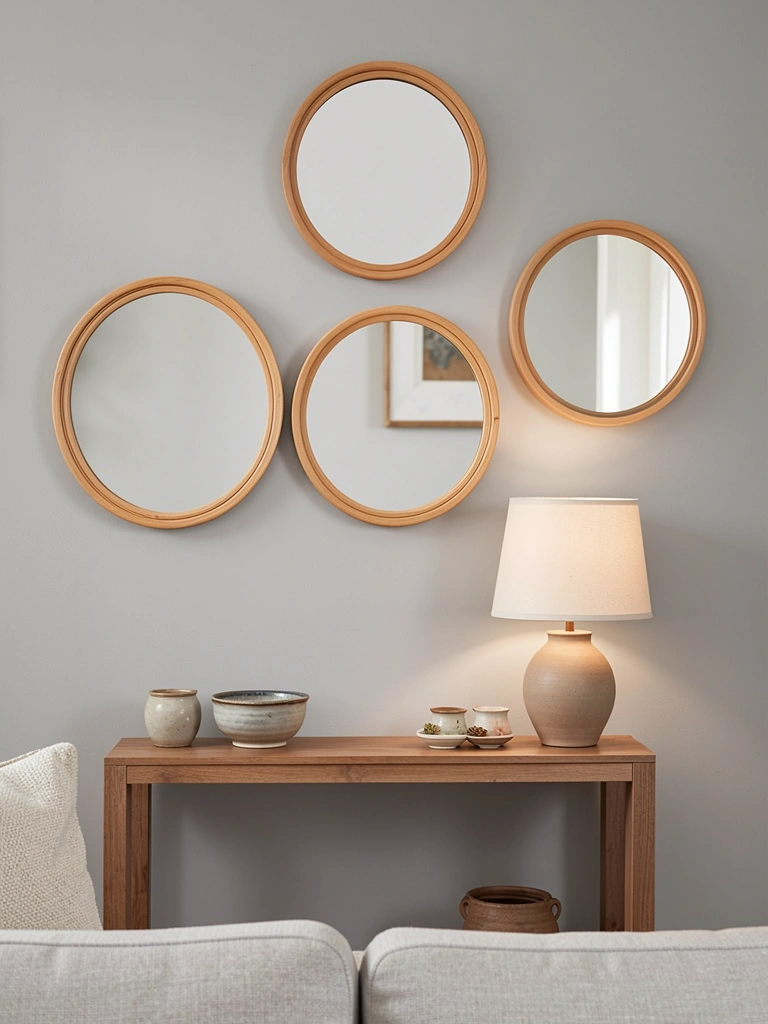
22. Arrange Mirrors in Asymmetrical Salon Style

Salon-style (asymmetrical) arrangements look more artistic and personal than grids. This works especially well when you have mirrors in different sizes and styles that you want to celebrate rather than coordinate. Mix shapes—round, rectangular, oval—and frame styles freely.
Plan your layout on the floor first, taking a photo to reference as you hang. Use painter’s tape to mark where each piece goes. Trust your eye for balance rather than perfect spacing. Takes 1-2 hours to hang a full wall but looks incredibly curated.
The asymmetrical arrangement feels like you’ve collected these pieces thoughtfully over time. It’s more forgiving of imperfect spacing and actually celebrates the variety rather than hiding it—perfect if your mirrors came from different stores or thrift shops.
23. Use Mirrored Wallpaper for Quick Impact
Mirrored wallpaper gives you a mirror wall without actual mirrors—it’s reflective but has surface texture that’s easier on the eyes than solid glass. Costs $30–$60 per roll depending on quality, and covers about 50-60 square feet. Brands like Muriva and Holden make beautiful options.
Apply using standard wallpaper paste and a roller. If you’re not comfortable with wallpaper application, ask a local handyman—costs usually run $100–$200 in labor for a small wall. Takes 2-3 hours DIY or 1-2 hours with professional help.
You get a mirror wall aesthetic with less glare and easier maintenance than real mirrors. The subtle pattern makes the reflective effect more sophisticated and less clinical-feeling.
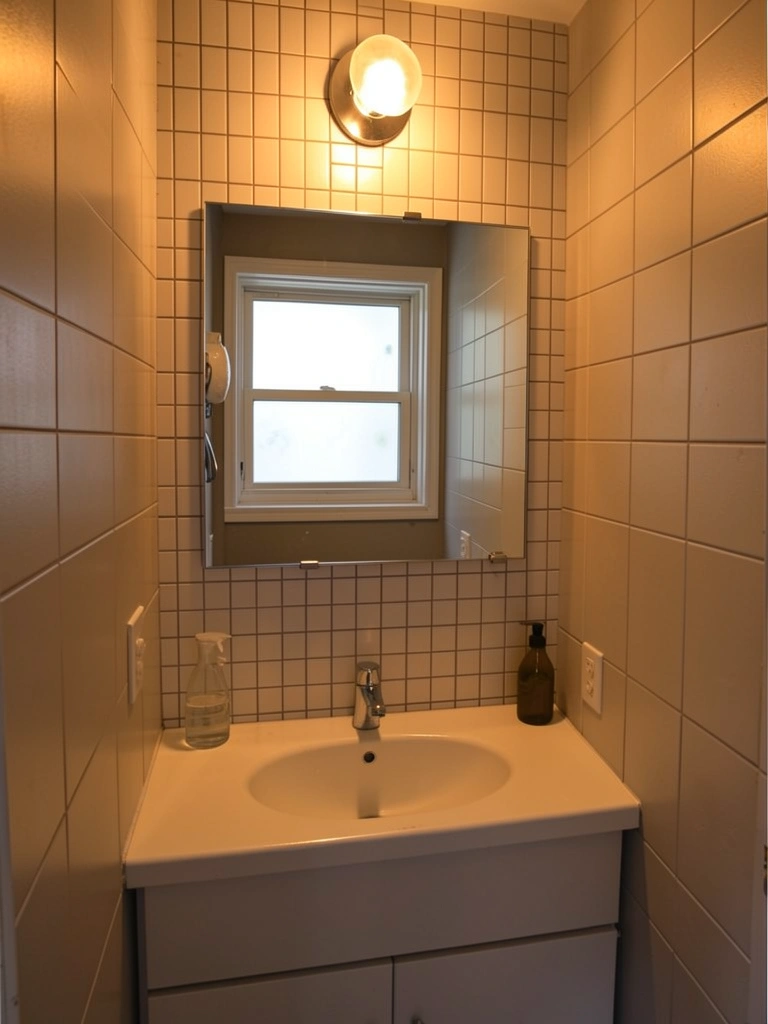
24. Frame Your Existing Mirror with Decorative Trim
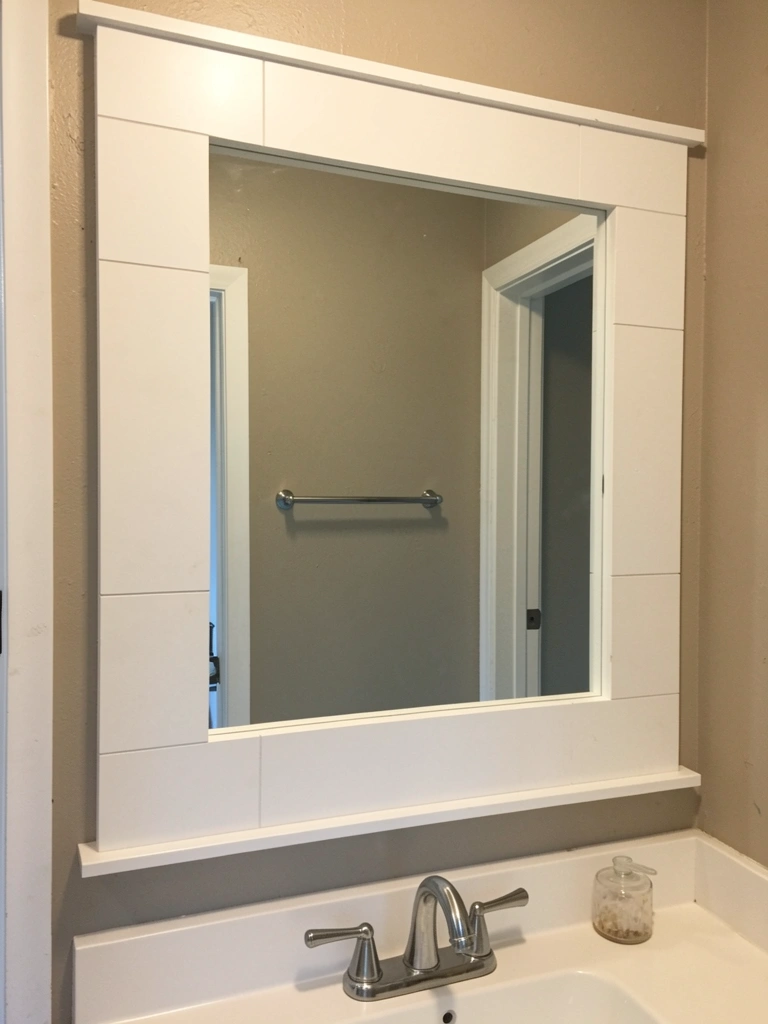
If you have a plain, builder-basic bathroom or bedroom mirror, frame it with decorative trim (shiplap, beadboard, or trim molding) for architectural interest. Materials cost $20–$50 depending on mirror size and trim style, from Home Depot or Lowe’s.
Measure around your mirror, cut trim pieces to fit, then secure with nails or adhesive. Caulk gaps, paint to match your wall, and you’re done. Takes about 1-2 hours for a standard bathroom mirror. The effect is immediate and high-impact.
Your plain mirror now looks like a designed feature rather than a basic builder install. The frame gives it weight and importance—suddenly that mirror is part of your room’s design rather than just functional glass.
25. Layer Mirrors with Wood Shelving for Styled Walls
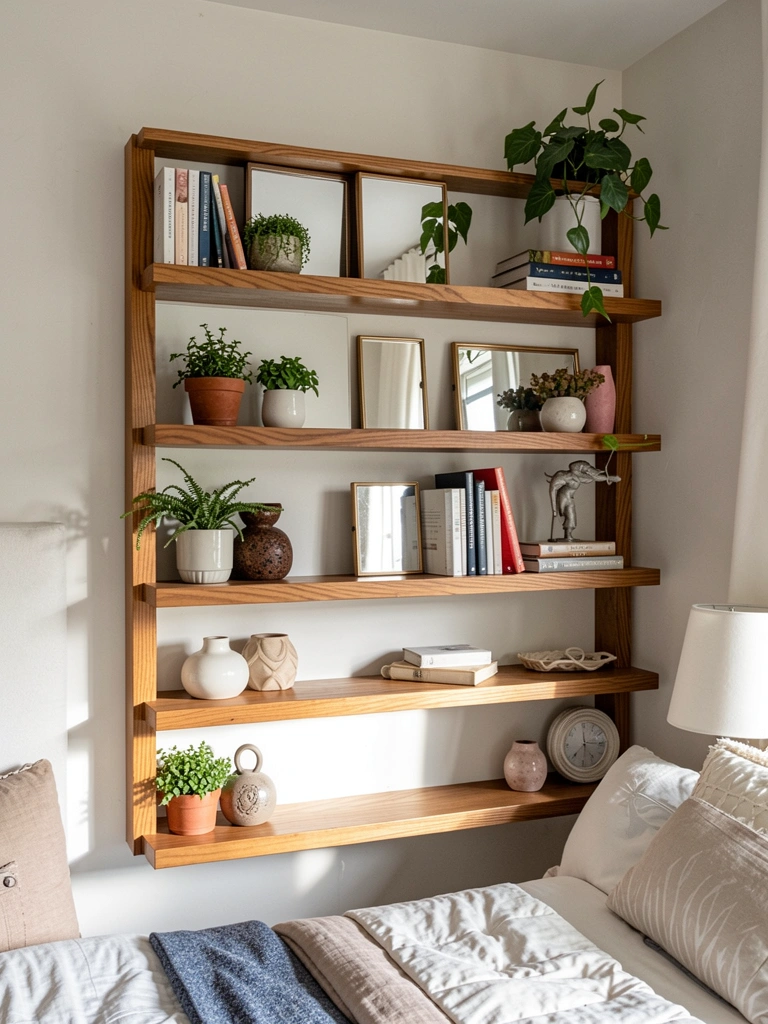
Combine mirrors with open shelving for a wall that’s both reflective and functional. Install a simple 3-shelf unit ($40–$100 from IKEA or Target) and arrange small mirrors alongside books, plants, and decor. The mix of materials and objects creates visual interest while the mirrors keep the wall feeling light.
Position mirrors to reflect light toward dark corners. Vary the sizes of mirrors and objects for an organic, curated look. This arrangement works especially well in bedrooms, living rooms, or home offices where you want storage plus design impact. Takes about 1 hour to install shelves plus 30 minutes to style.
You’ve created a wall that’s beautiful, functional, and reflects light strategically. The combination of mirrors and objects feels intentional and collected rather than random, and you actually have useful storage.
26. Paint Your Wall a Light Color to Amplify Mirror Reflections
Here’s an underrated trick: the color of your wall directly affects how effectively mirrors work. Paint walls in soft, light colors (cream, pale gray, soft sage, light blue) and mirrors bounce light around beautifully. Darker walls absorb light and reduce the mirror effect.
If you’re painting anyway, choose a pale, cool-toned color that’ll work as your backdrop. One gallon of paint costs $25–$40 and covers most rooms. Takes an afternoon to paint. The difference mirrors make when the wall is light versus dark is genuinely noticeable.
By pairing mirrors with a thoughtful wall color, you amplify the light-bouncing effect and create a brighter, airier room. It’s a small decision that has a major impact on how well your mirror wall actually performs.
Save this post and try just one idea this weekend. Whether you start with adhesive tiles, a single oversized mirror, or a mismatched grid, you’ll see the difference immediately. Pick the approach that feels most achievable for your space and skill level—budget-friendly mirror walls don’t require perfection, just intention.
Leave a Reply