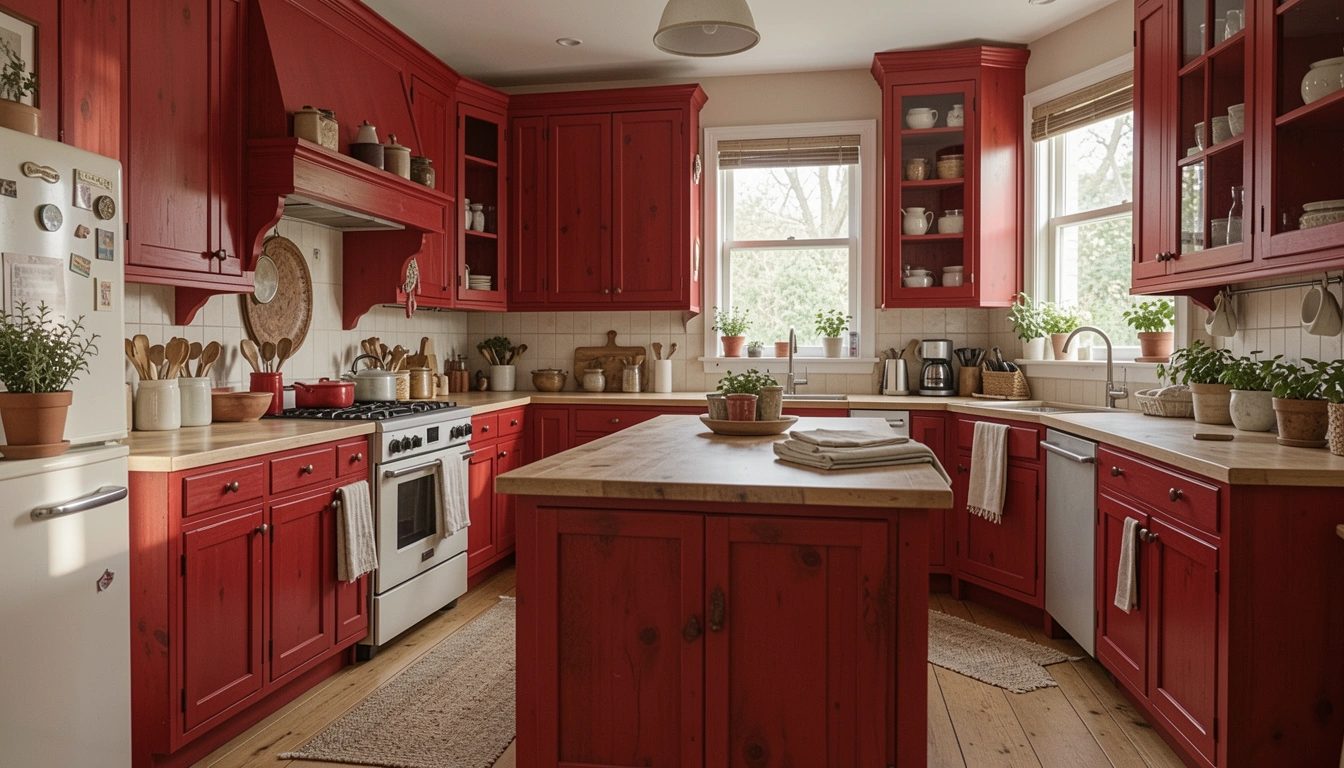
My red wood kitchen cabinets stared back at me every morning. Warm, yes. But heavy. The reddish tones swallowed the light, making the room feel closed in.
I'd tried white dishes. Glossy ones. They clashed. The space still looked dated, unbalanced.
One day, I stepped back. Saw it needed calm layers, not fights.
How to Decorate Red Wood Kitchen
This shows you how I settle a red wood kitchen. It goes from heavy to balanced. You'll end up with a space that feels open and lived-in. Simple changes make it work.
What You’ll Need
- Neutral linen kitchen towels set of 6 in cream
- Jute area rug 5×7 feet natural weave
- Faux fiddle leaf fig plant 4 feet tall
- Matte black metal wall sconces pair
- Woven seagrass baskets set of 3 medium
- Beige ceramic vase large 12 inches
- Soft gray linen curtains 84 inches panels
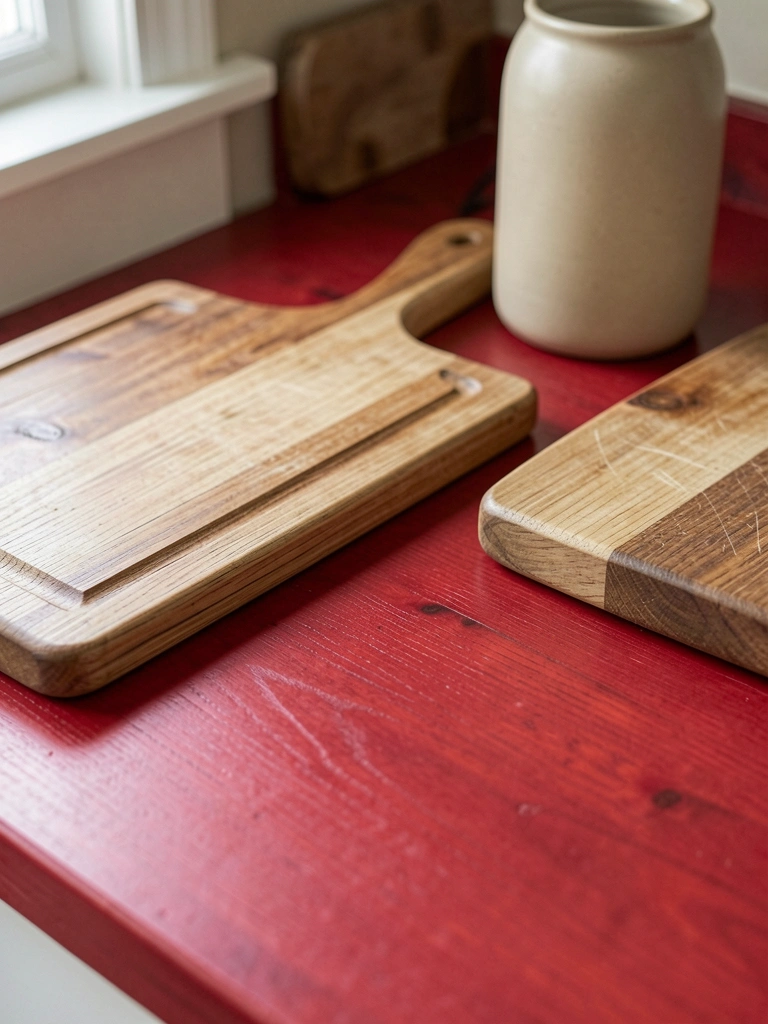
- Wood cutting board extra large walnut
Step 1: Clear Counters for Breathing Room
I start by wiping counters bare. No stacks of plates or gadgets. Just space. The red wood needs air around it—otherwise, it crowds everything.
Visually, light bounces now. The wood warms without overwhelming. People miss how empty feels full here. Insight: red tones advance, so pull back items.
Avoid cramming "essentials." I did that once—counters looked messy fast. Now, I limit to three pieces max. One wood cutting board extra large walnut angled in the corner does it.
The room shifts. Feels wider already.
Step 2: Ground with Floor Texture
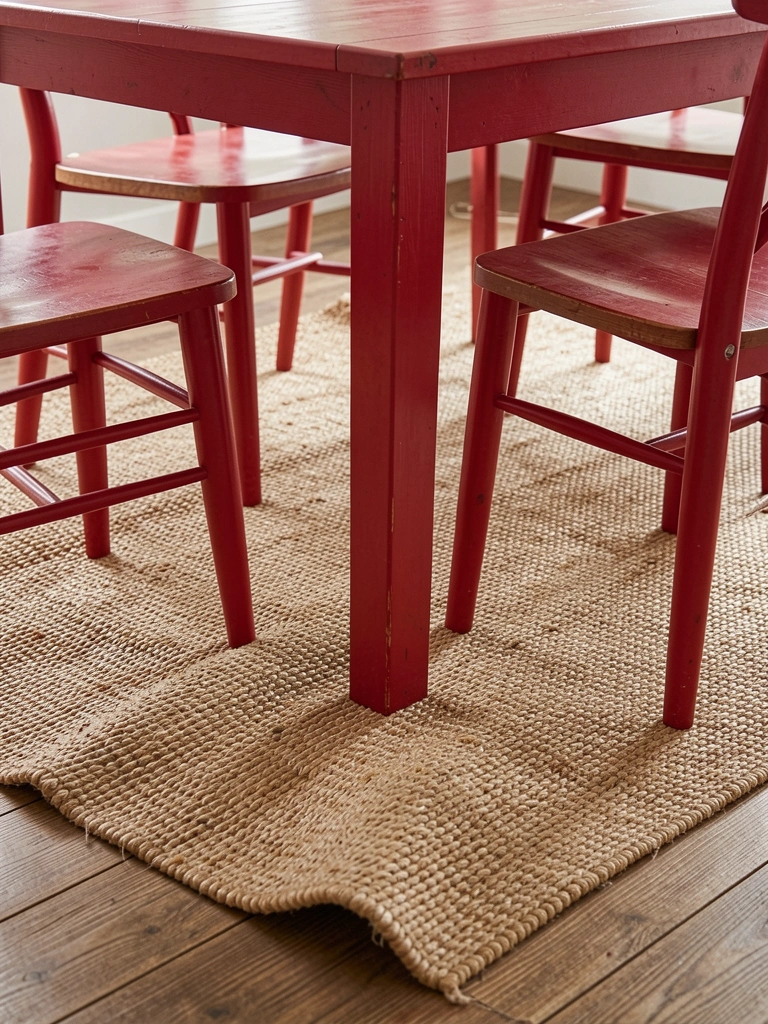
Next, I roll out a rug. Not wall-to-wall. Just under the table or island. Jute in natural tones tempers the red wood's intensity.
The floor warms up, pulls eyes down gently. Balance happens—wood cabinets meet earth tones. Most overlook floor as the anchor. It steadies bold cabinets.
Don't center it perfectly. Off-center feels real. I edged mine toward the sink once. Avoid slick synthetics—they fight the wood grain.
Now, walking in feels grounded. Steps soften.
Step 3: Layer Greenery for Soft Contrast
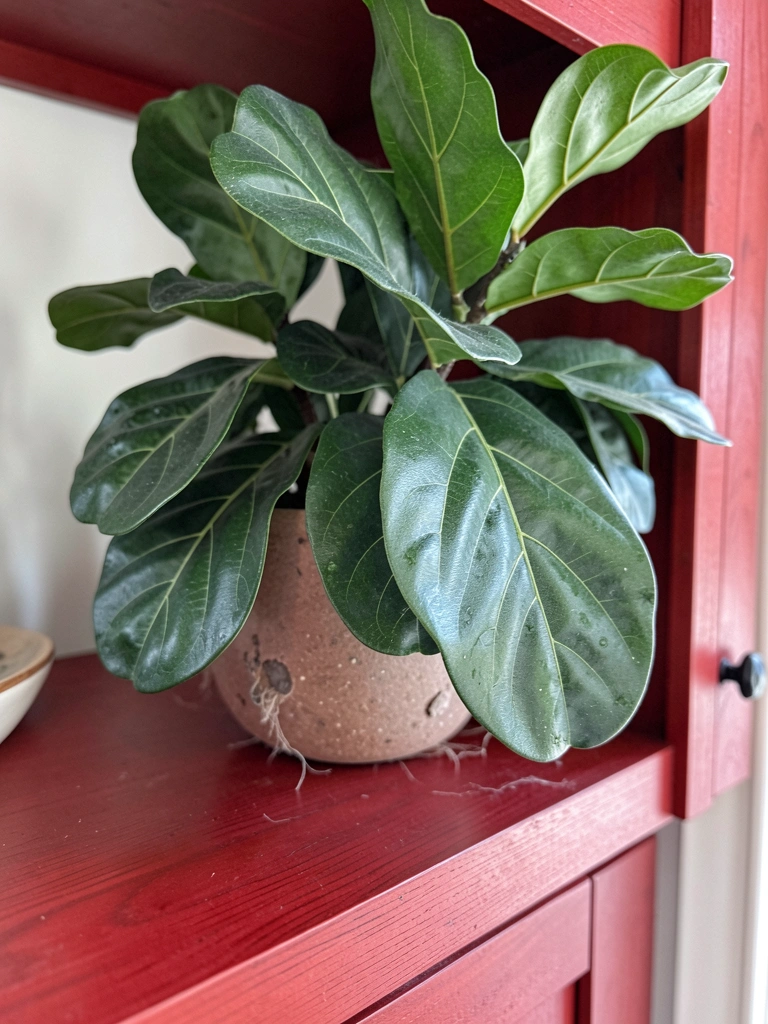
I add one plant. Tall, like a faux fiddle leaf fig plant 4 feet tall. Place it where red meets white walls.
Green cuts the warmth without clashing. Light filters through leaves, softening shadows. Insight: plants bridge wood to modern. They add height people forget.
Skip clusters. One strong plant breathes better. I overcrowded mine early—looked jungle chaos.
Kitchen feels alive, taller.
Step 4: Hang Textiles High
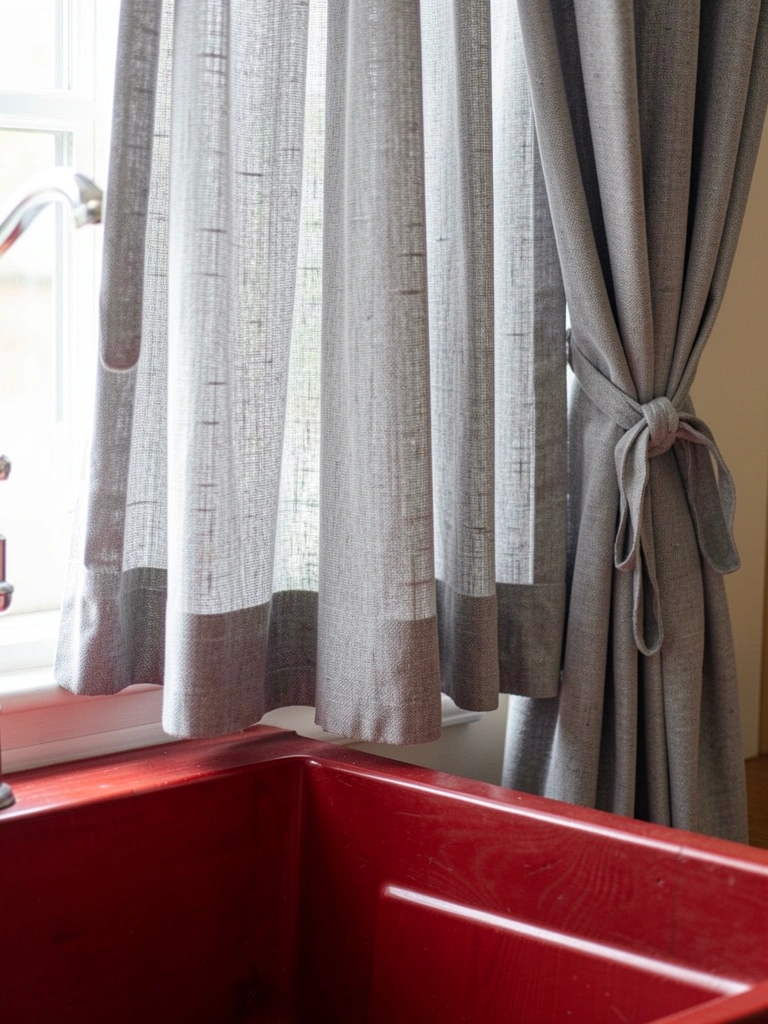
Curtains go up next. Soft gray linen curtains 84 inches panels, floor-length but loose.
Gray cools the red without graying it out. Window light diffuses, evens tones. Folks miss how fabric scales the room—too short chops it.
Don't rod-mount tight to frame. Let them puddle slightly. I stiffened mine once—felt hotel bland.
View softens. Space flows.
Step 5: Tuck Baskets Low
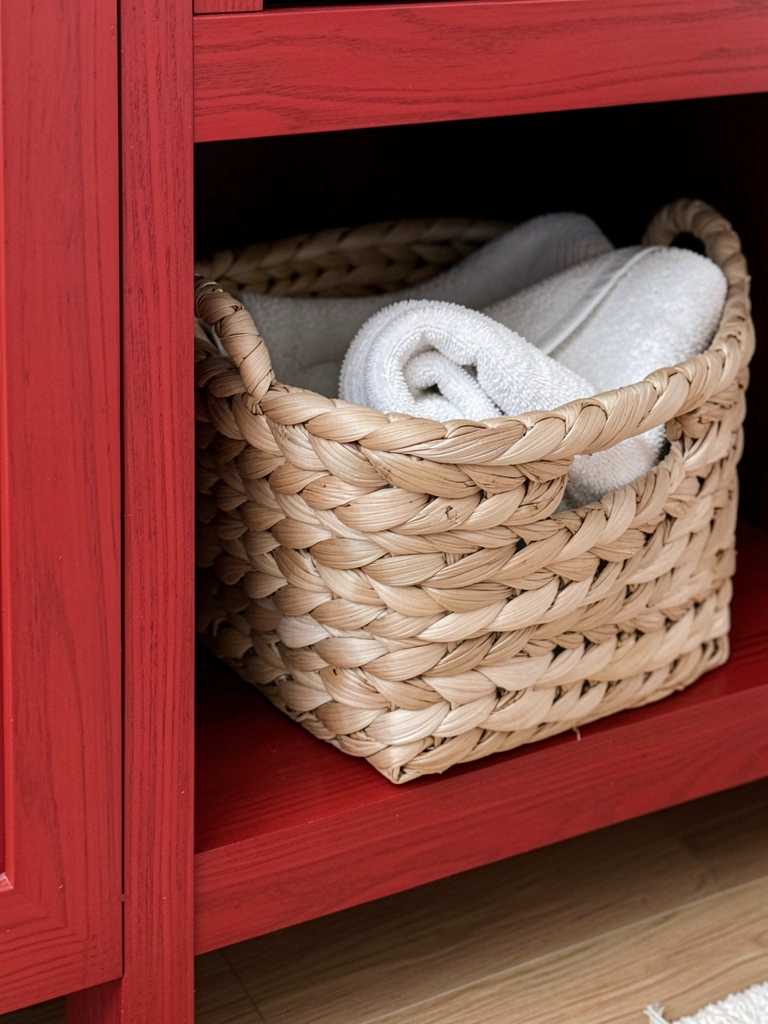
Baskets hide odds like towels. Woven seagrass baskets set of 3 medium under open shelves or counters.
Texture echoes wood subtly. Low placement balances tall cabinets. Insight: storage shows—neat hides life.
Avoid overfill. Half-full looks used. Full ones tip.
Clutter vanishes. Base feels solid.
Step 6: Spot Light Walls
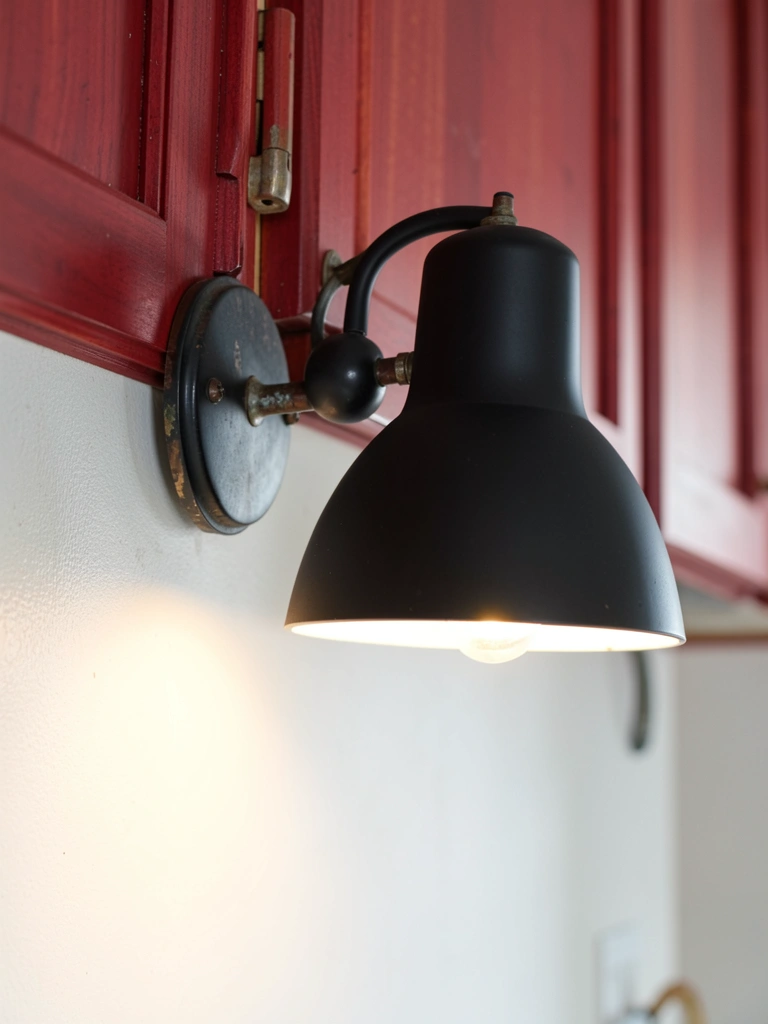
Sconces finish it. Matte black metal wall sconces pair flank a window or shelf.
Black grounds red warmth. Glow pools on walls at night, adds depth. People skip wall light—overhead flattens.
Mount at eye level, not uniform. One higher feels organic.
Evening shifts cozy. Balanced.
Why Neutrals Work Best Here
Red wood pulls strong. Neutrals let it lead.
I layer creams, beiges. They wrap without competing.
- Cream towels absorb glare.
- Beige vases echo tones softly.
- Grays in fabric cool edges.
Test one at a time. See how light hits.
Handling the Red's Warmth
That reddish hue builds heat fast.
Counter it low. Rug and baskets first.
- Green plants diffuse it mid-room.
- Black accents anchor ends.
Stand back after each. Adjust one inch.
Everyday Tweaks That Last
Kitchens shift with use.
Spot clean rug weekly. Dust leaves.
- Swap vase filler seasonally—dried pampas now.
- Rotate towels for even wear.
It stays balanced year-round.
Final Thoughts
Start with counters. One change shows fast.
Your red wood kitchen holds character. These layers settle it.
Walk in tomorrow. It'll feel right. You've got this.
Leave a Reply