LED backlighting is the easiest way to make your TV wall feel like a designer showstopper—and you don’t need to hire anyone or spend a fortune to pull it off. Whether you’re renting or own your home, adding glow behind your screen instantly elevates your entire living room. The right lighting hides cables, creates mood, and makes binge-watching feel like an experience instead of just staring at a screen. In this guide, you’ll discover 25 specific LED setups you can recreate, from simple plug-and-play kits to permanent installations that rival high-end media rooms. We’ll cover every budget level, walk you through setup steps, and show you which options work best for renters versus homeowners. Let’s make your TV wall the focal point your space deserves.
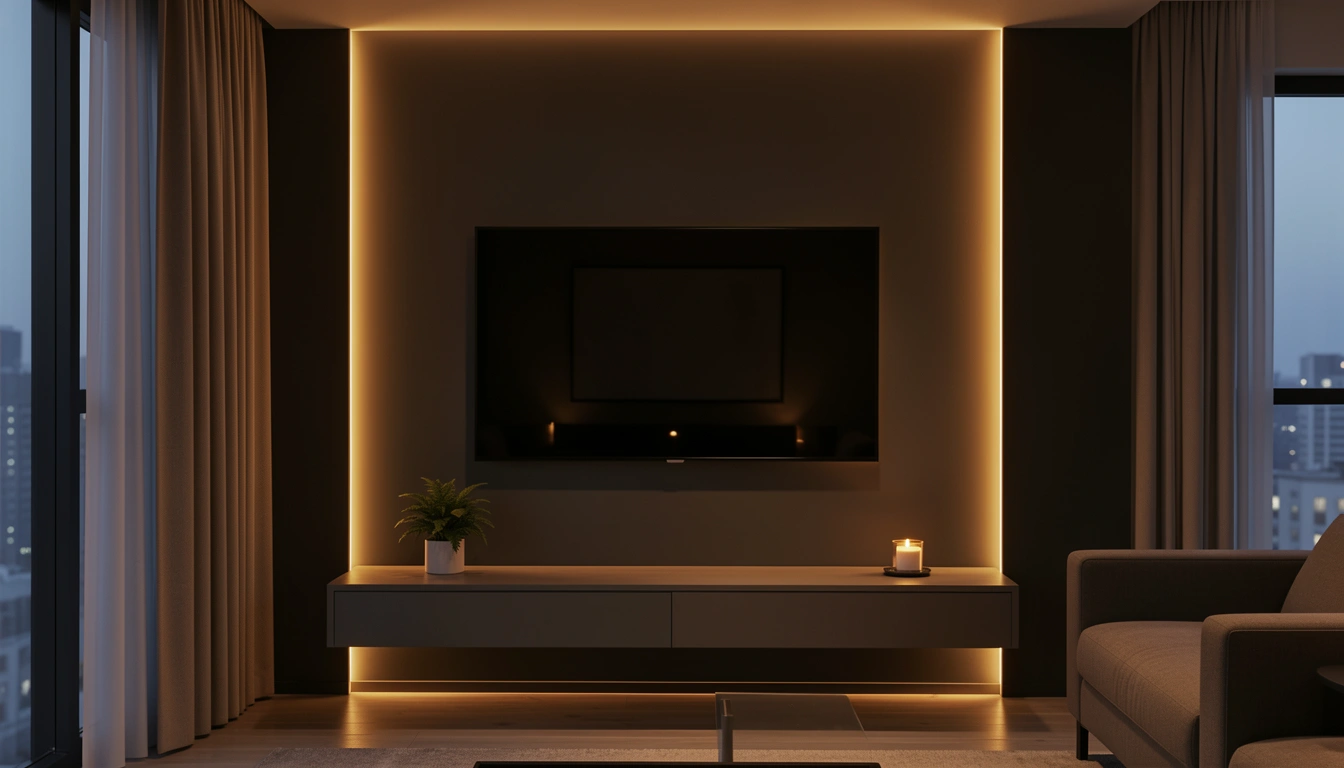
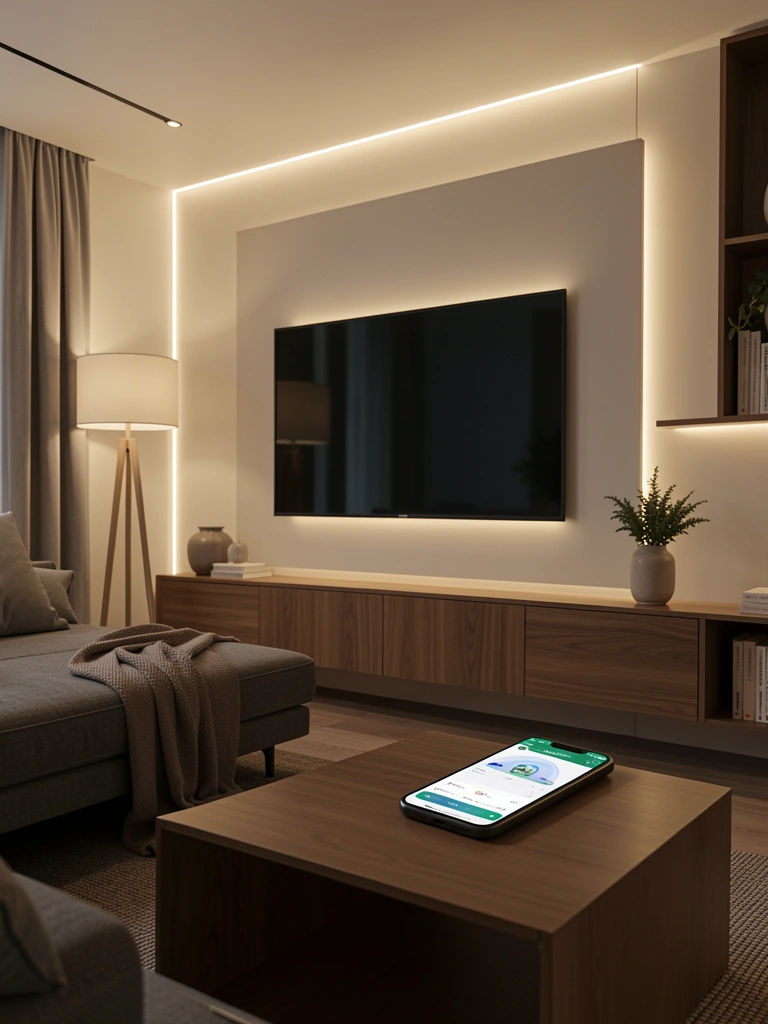
1. Warm Amber Strips Behind a Floating Console
Warm amber LEDs behind your console create an instant spa-like glow that makes your seating area feel more inviting. This setup is perfect for living rooms because the light bounces off the wall and softens the entire space without being too bright for TV watching.
Use adhesive-backed LED strip lights (around $20–$40 from Amazon or Home Depot) and run them along the back edge of your floating console, then continue up the wall behind your TV. Most strips plug into a USB port or standard outlet, so installation takes 10–15 minutes—just peel, stick, and plug in. If your console doesn’t have access to an outlet, use battery-powered strips instead ($15–$30).
Pro tip: Choose dimmable LED kits so you can adjust the brightness depending on whether you’re watching during the day or settling in for evening shows. The ability to dim makes a huge difference in comfort and prevents eye strain.
Your TV wall becomes the warm, welcoming anchor of your room—the kind of space that makes guests ask, “How did you make this look so good?”
2. Recessed Lighting Behind a Wall-Mounted TV
Recessed lighting behind a wall-mounted TV is the most permanent, polished solution—this is what high-end media rooms use. The light sits hidden inside the wall itself, creating an almost invisible halo effect that appears to float your screen.
This requires opening up your drywall and installing recessed light cans during construction or renovation—so it’s best for homeowners planning a major update (cost: $200–$500+ including materials and professional installation). If you’re comfortable with basic drywall work, you can DIY this over a weekend, but most people hire an electrician for safety.
The payoff? Your TV literally glows without any visible hardware, and you get adjustable brightness via a dimmer switch. Recessed lights also run cooler than strip lights, so they won’t damage wall paint or finishes.
This approach is not renter-friendly, but if you own your home and want a permanent, luxury-level finish, recessed lighting is worth the investment.
3. Colorful RGB Strips for Entertainment Spaces
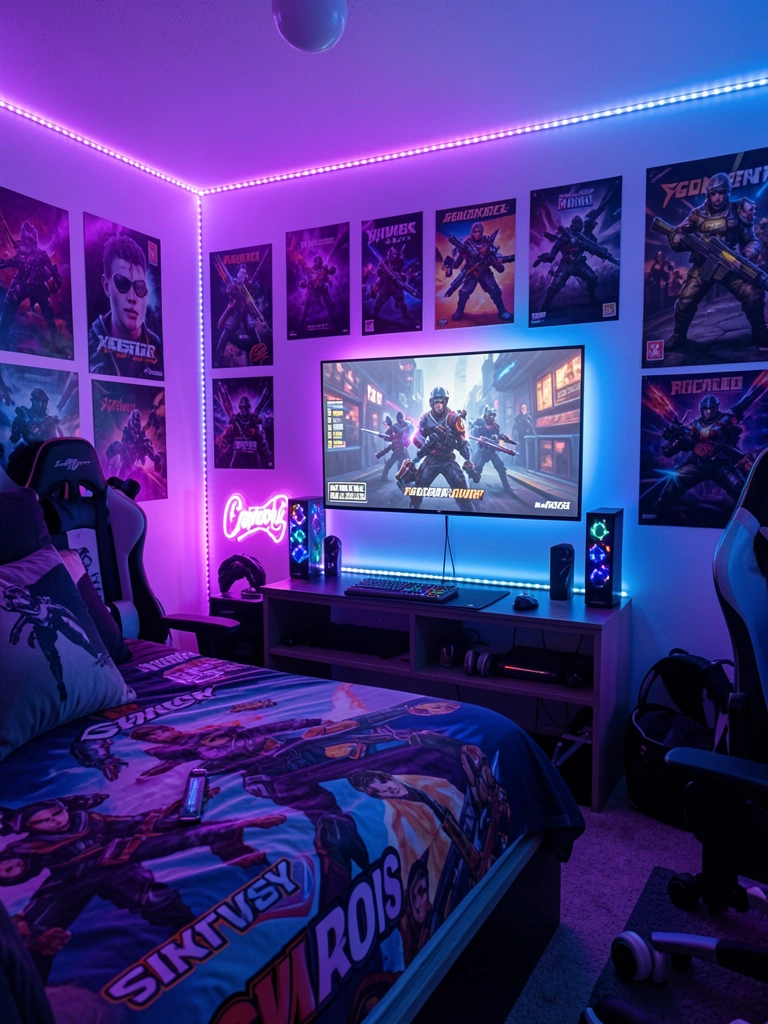
RGB (color-changing) LED strips let you shift your entire TV wall’s mood in seconds—purple for gaming, cool blue for movie nights, warm amber for relaxing. These are perfect if you want flexibility and fun without committing to one color.
Buy an RGB LED strip kit with a remote control ($30–$60 from Amazon, Best Buy, or Walmart) and install it the same way you’d use warm strips. Most remote-controlled RGB kits let you pick from hundreds of colors and set them to music or ambience modes. Setup takes 10–15 minutes.
Pro tip: If you’re using this in a bedroom or living room, stick with subtle, muted tones (soft purples, cool grays) rather than neon brights, so the lighting complements your room instead of overwhelming it. Save the bright colors for game rooms or entertainment spaces where intensity feels natural.
Your TV wall becomes a dynamic, interactive focal point that adapts to your mood—whether you’re concentrating, relaxing, or just having fun.
4. Floating Shelves with Built-In LED Edges
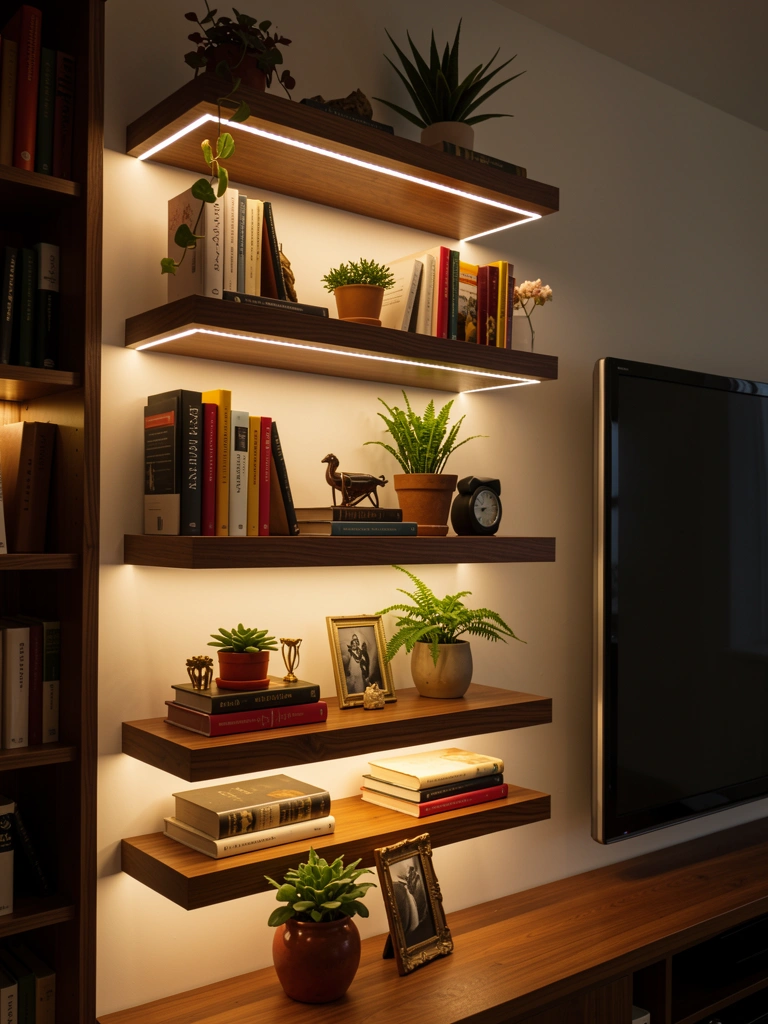
Floating shelves with LED edges create a gallery-wall effect—your TV becomes part of a curated display rather than the only thing on the wall. This works beautifully in smaller spaces where you want style and storage combined.
Install 3–4 floating shelves around your TV using standard brackets ($40–$80 per shelf), then run adhesive LED strips along the front or bottom edge of each shelf ($40–$80 total for all strips. Set books, small plants, or decorative objects on the shelves—the LED backlighting highlights these items and draws the eye around the entire wall. Total installation time: 1–2 hours (longer if you’re drilling into studs yourself; faster if you use toggle bolts for renters).
Pro tip: Leave the shelves minimal—3–4 items per shelf maximum—so the lighting is the real star. Too much clutter makes the space feel chaotic instead of curated.
Your TV wall now feels like a thoughtfully designed display rather than just a screen on a blank wall—way more interesting and intentional.
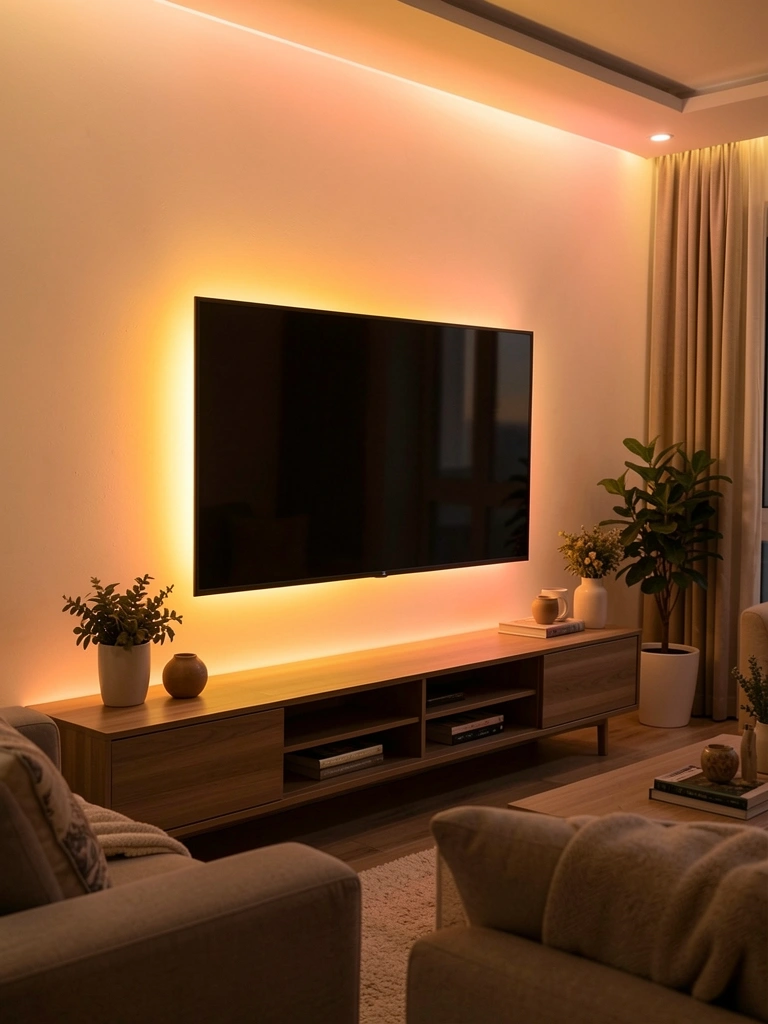
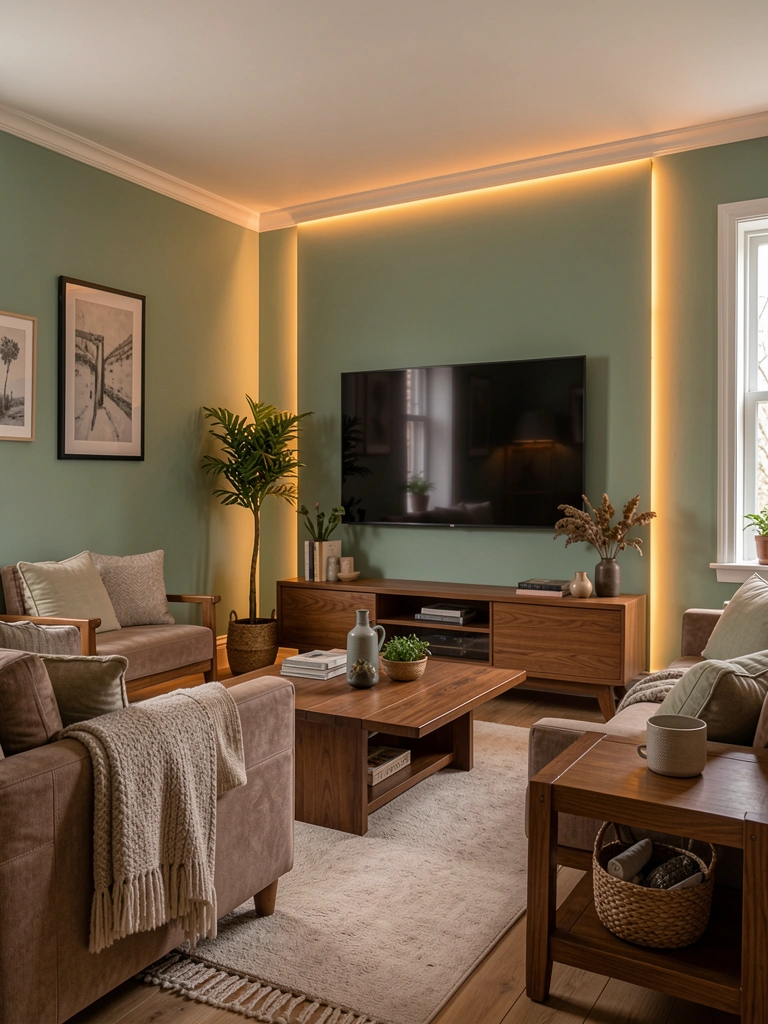
5. Accent Wall Paint + Strip Lights for Drama
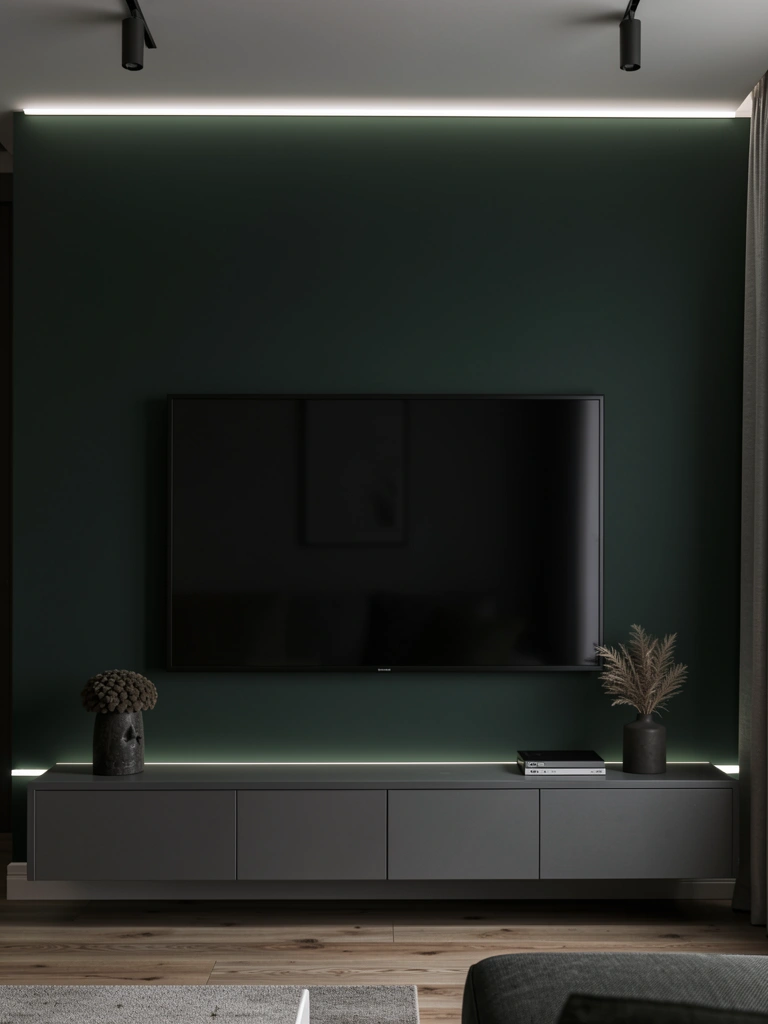
A dark-colored accent wall makes LED backlighting pop dramatically—the light creates contrast and makes your TV literally stand out. Pair this with a fresh paint color and inexpensive LED strips for a total refresh.
Paint your TV wall a deep charcoal, forest green, or navy ($30–$60 for paint and supplies; 1–2 days of drying time). Once dry, add warm or white LED strips along the top edge of the wall and behind your console ($40–$80). The dark wall absorbs light during the day but glows beautifully at night. This combo costs $70–$140 total and takes 1–2 weekends (including drying time).
Pro tip: Pair a dark wall with a light-colored console (natural wood or white) so the TV area doesn’t feel too heavy. The contrast keeps the space balanced.
Your living room gains instant sophistication—the dark wall makes your TV the hero, and the backlight adds upscale resort vibes.
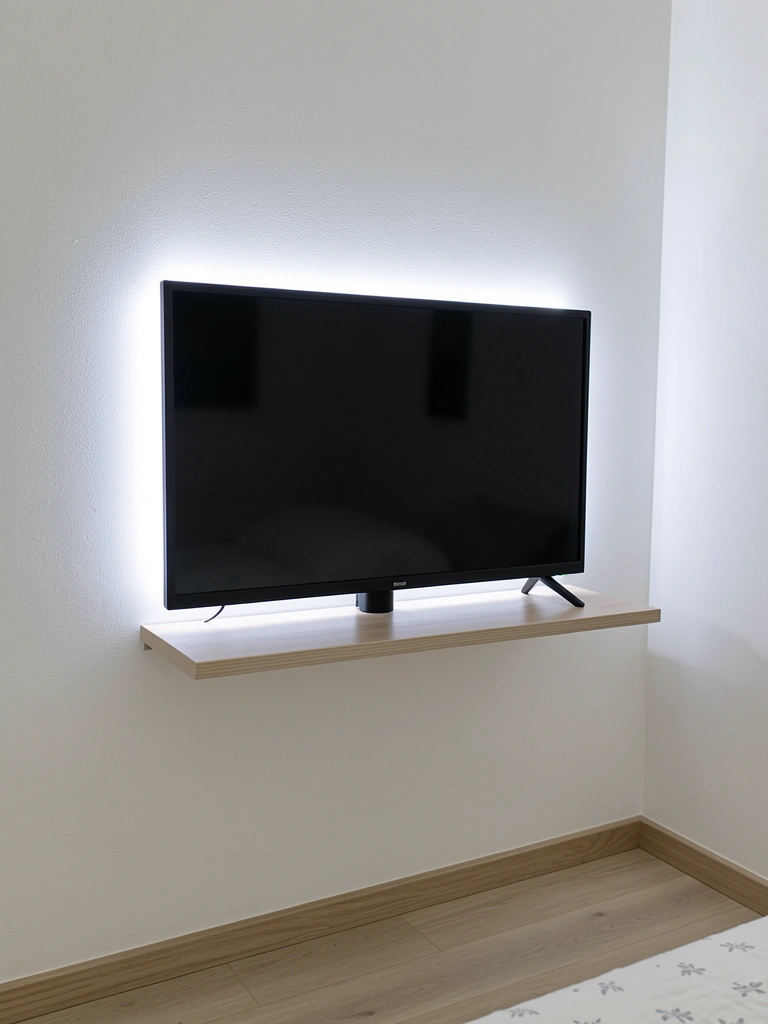
6. Under-Console LED Lighting for Nighttime Navigation

Under-console LED lighting serves double duty: it looks sophisticated and lets you safely navigate your living room at night without tripping over furniture or stubbing your toe on the console leg.
Install LED strips along the bottom front edge of your console or directly on the floor below it ($20–$40 for adhesive strips). Choose cool white or soft blue tones for nighttime navigation—these don’t create glare if you’re watching TV. Set the strips to a low brightness level and you’re done in 10 minutes.
Pro tip: Motion-sensor LED strips ($35–$50) turn on automatically when you walk past, so you’re not paying power for lighting that’s on 24/7. Renters love this option because it’s completely removable.
Your space becomes both more functional and more stylish—plus you’ll never stub your toe on that console leg again.
7. Corner Lighting for Small Spaces

If your TV sits in a corner (common in small apartments or studios), corner-specific LED placement makes the space feel bigger instead of cramped. Running lights up both walls behind the TV creates dimension.
Install vertical LED strips on both walls meeting at the corner ($40–$80 total), positioned 2–3 inches behind where your TV will mount. This takes 20–30 minutes and doesn’t require any permanent installation if you use adhesive strips. Choose warm white for a cozy feel or cool white for a modern vibe.
Pro tip: Use a corner-specific mounting bracket for your TV so the screen sits flush against both walls, and let the LED glow frame it from behind. This makes even a small corner look intentional and designed.
Your corner transforms from awkward dead space into a welcoming, intentional focal point.
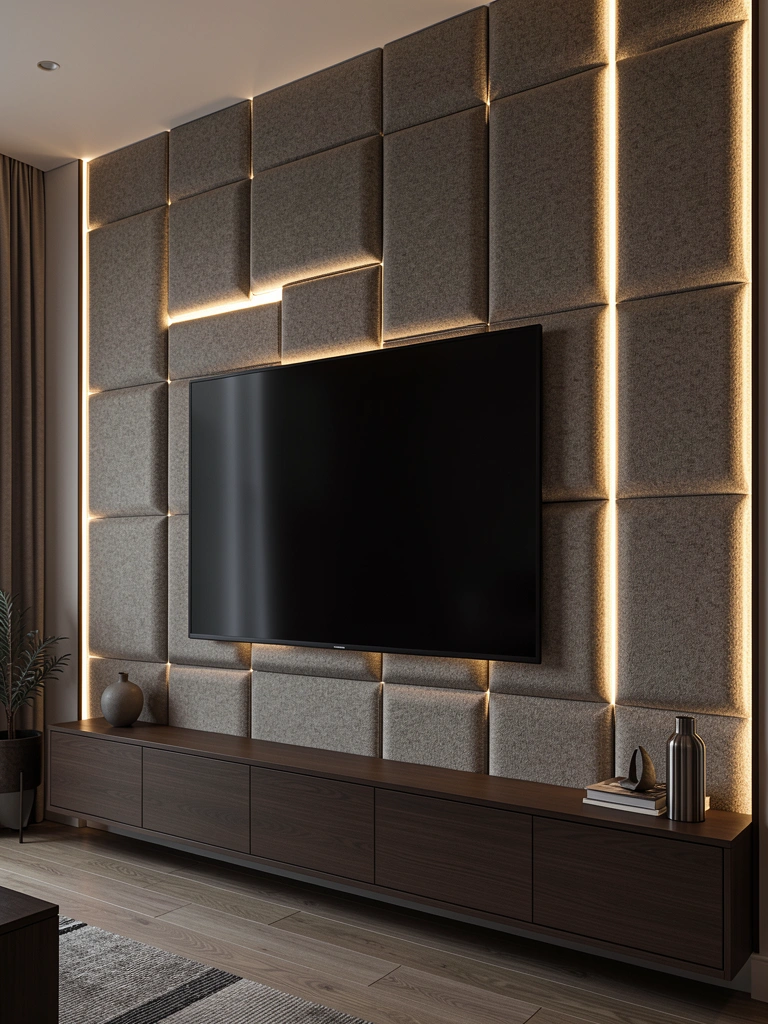
8. Backlighting Behind Textured Wall Panels
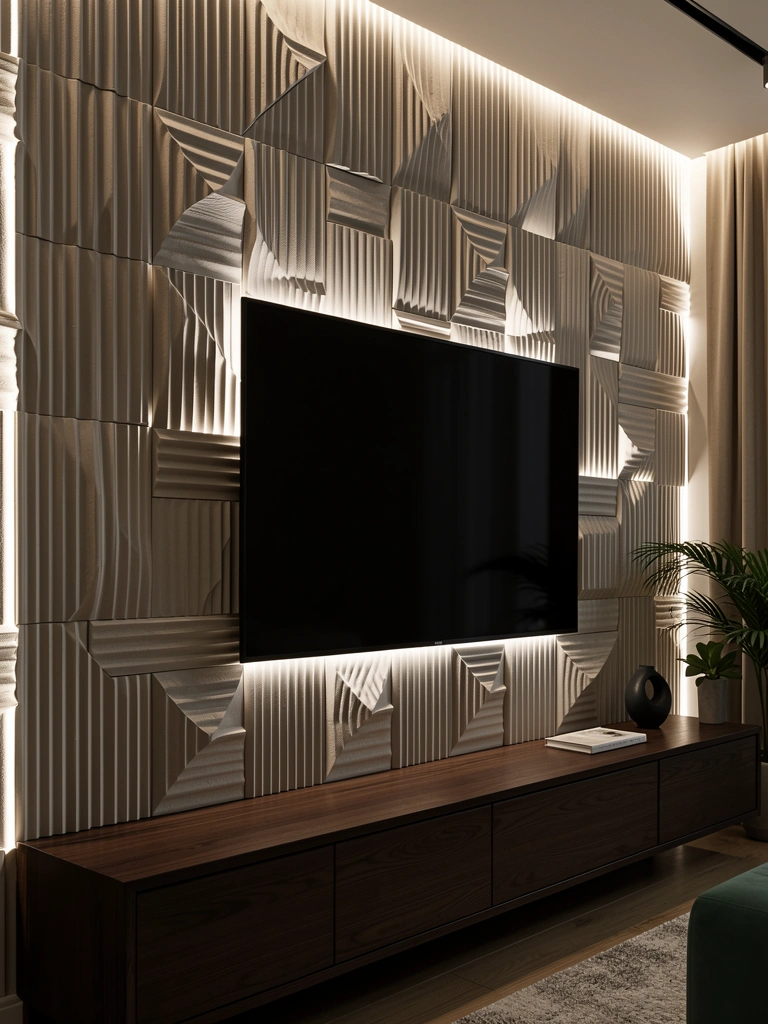
Textured wall panels (fluted wood, 3D geometric tiles, micro cement) behind a TV create visual interest, and LED backlighting behind them adds another layer entirely—the light plays off the texture and creates moving shadows.
Install 3D wall panels behind your TV ($80–$200 for panels covering a 6–8 ft section; see Home Depot, Wayfair, or Amazon). Once the panels are secure, run LED strips behind them if possible (often there’s a small gap between the panel and wall), or position strips to graze across the panel surface from the side. Setup time: 1–2 hours if you’re comfortable with basic wall installation; otherwise, hire a handyman ($100–$200 labor).
Pro tip: Choose warm amber LEDs for this setup—the light bouncing off textured surfaces looks richest when it’s warm-toned.
Your TV wall gains architectural detail and personality—it’s no longer flat, it’s truly dimensional.
9. Smart LED Strips Controlled by Your Phone
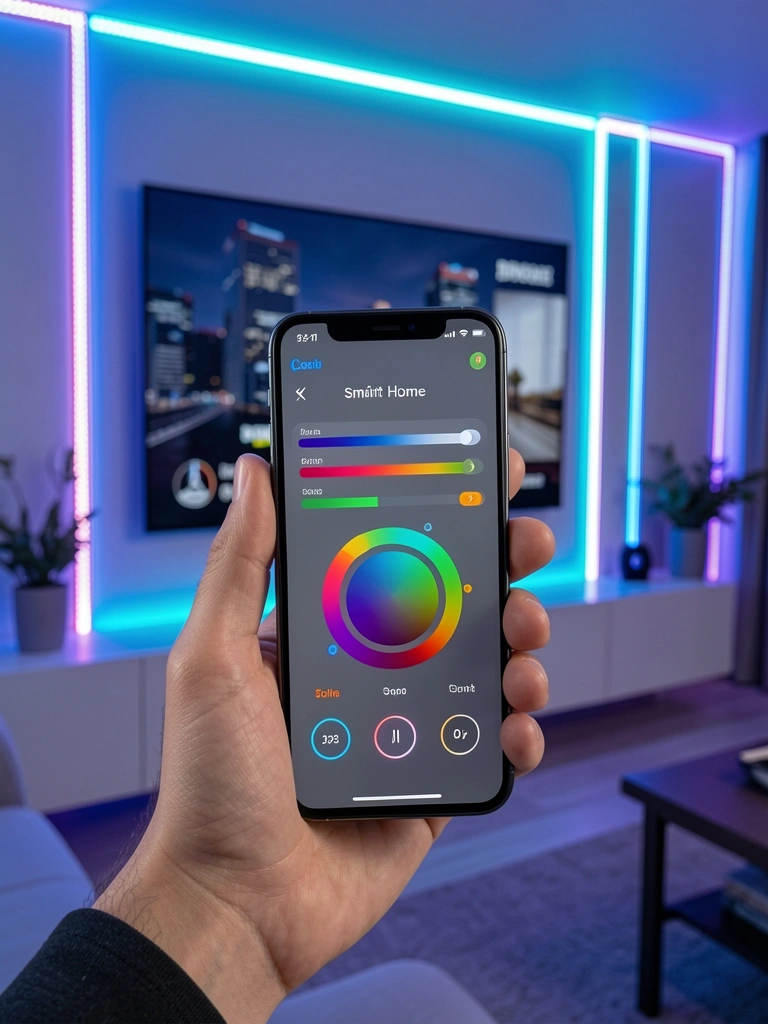
Smart LED strips sync with apps on your phone, meaning you can change brightness and color from your couch—or set them to turn on automatically when you press play on your TV.
Buy a smart LED strip kit (Google Home or Alexa-compatible) from brands like Wyze, Nanoleaf, or LIFX ($40–$80). Download the app, connect to WiFi, and control everything from your phone. Many smart strips also integrate with voice assistants, so you can say “Alexa, dim the TV lights” without reaching for a remote. Installation takes 15 minutes.
Pro tip: Set a schedule so your LED lights gradually brighten in the morning or dim at night—a nice ambient touch if you use your TV area for more than just watching shows.
Your TV wall becomes part of your smart home ecosystem—convenience meets style.
10. Fireplace Mantel-Style Lighting Above Your TV
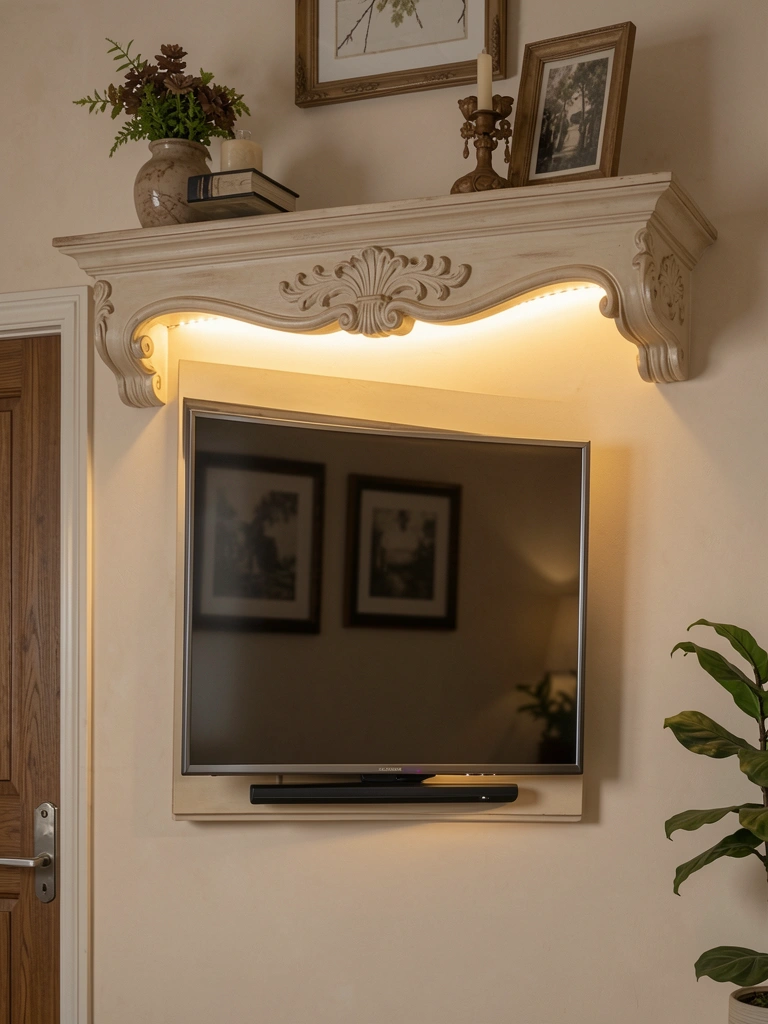
If your TV is mounted high on the wall, add a decorative ledge or faux mantel shelf directly above it, then backlight the shelf so the glow frames your screen like a piece of art.
Install a floating shelf or faux mantel beam above your TV ($40–$100, depending on material; use strong brackets rated for the weight). Run warm LED strips along the underside so light cascades down. This setup takes 1–2 hours and costs $80–$150 total. It’s not renter-friendly since it requires wall drilling, but it’s stunning for homeowners.
Pro tip: Add small decorative objects (candles, a small plant) on top of the shelf so your TV wall feels like an intentional art display.
Your TV wall now has the presence of a fireplace mantel—warm, inviting, and genuinely beautiful.
11. Color-Changing Strips That Match Your Mood Ring
Some newer LED strips have “circadian” or mood-matching modes that gradually shift color throughout the day, mimicking natural sunlight—great for keeping your energy aligned with your body’s clock.
Look for advanced LED kits from Philips Hue, Nanoleaf Aurora, or LIFX Color A19 ($60–$100+). These kits offer preset scenes that shift from cool morning tones to warm evening tones automatically. Setup takes 15 minutes and they’re smartphone-controlled.
Pro tip: Use the “sunrise simulation” mode in the morning to help you wake up, and the “sunset” mode in the evening to signal your body it’s time to relax. This is especially helpful if your living room lacks natural light.
Your TV wall becomes biologically aligned with your natural rhythms—subtle but genuinely transformative for how you feel in your space.
12. LED Strips Behind Floating Media Consoles with Cable Clips
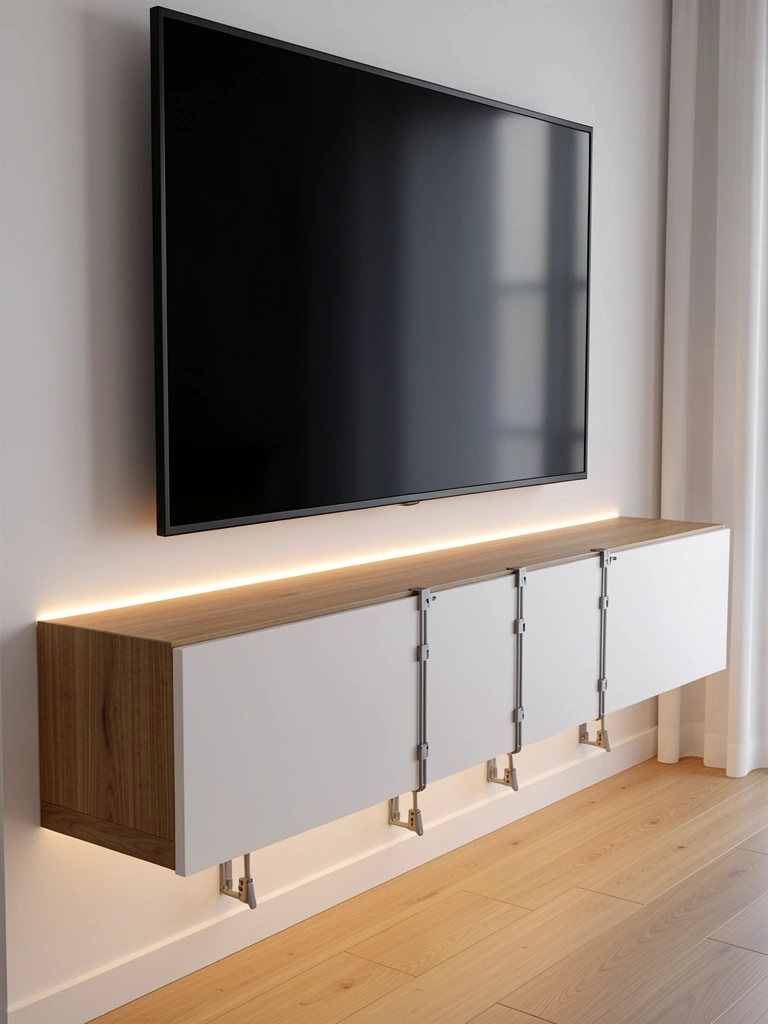
Floating consoles look best when cables are hidden—but if you need to run cables visually, pairing them with backlighting makes the setup feel intentional instead of messy. Backlit cable clips become a design feature.
Mount a floating console ($100–$250), then run adhesive cable clips down the front in a vertical or zigzag pattern ($15–$25). Thread your cables through the clips, then add LED strips behind the console so the glow highlights the clean cable management ($30–$50). Total setup: 1–2 hours.
Pro tip: Use matte black or white cable clips that match your console color, so they read as design elements rather than functional clutter. The backlight will make them feel intentional.
Your floating console now looks professionally installed—cable management becomes part of your aesthetic.
13. Two-Tone Backlighting for Depth

Using two different LED colors on opposite sides of your TV creates stunning visual depth—the contrast makes your wall feel less flat and one-dimensional.
Install warm white LED strips on one side of your TV and cool white on the opposite side ($60–$100 total). If you’re using two separate kits, each can have its own dimmer switch, so you can adjust one side independently. This takes 30 minutes and creates a gallery-lighting effect similar to what you’d see in a high-end art installation.
Pro tip: Stick with subtle warm and cool tones (not neon brights) unless you’re going for a full “entertainment space” vibe. Nuance looks more sophisticated.
Your TV wall gains museum-quality lighting—it feels curated and carefully thought through.
14. LED Strips Inside Glass or Lucite Shelving

Glass or lucite shelves with internal LED backlighting create an ultra-modern, almost jewelry-box effect—especially stunning if you’re displaying collectibles, books, or decorative objects.
Install glass floating shelves ($60–$120 each) on either side of your TV using specialty glass-shelf brackets. Run slim LED strips horizontally inside each shelf ($40–$80 total). The light glows through the glass and highlights whatever objects sit on the shelves. Setup time: 2 hours (install shelves, then carefully position LED strips inside, then arrange items). This option works best for homeowners because permanent installation is needed.
Pro tip: Keep displayed items minimal—5–7 pieces per shelf—so the light and items feel curated rather than cluttered.
Your TV wall becomes a modern art installation—functional display meets ambient lighting.
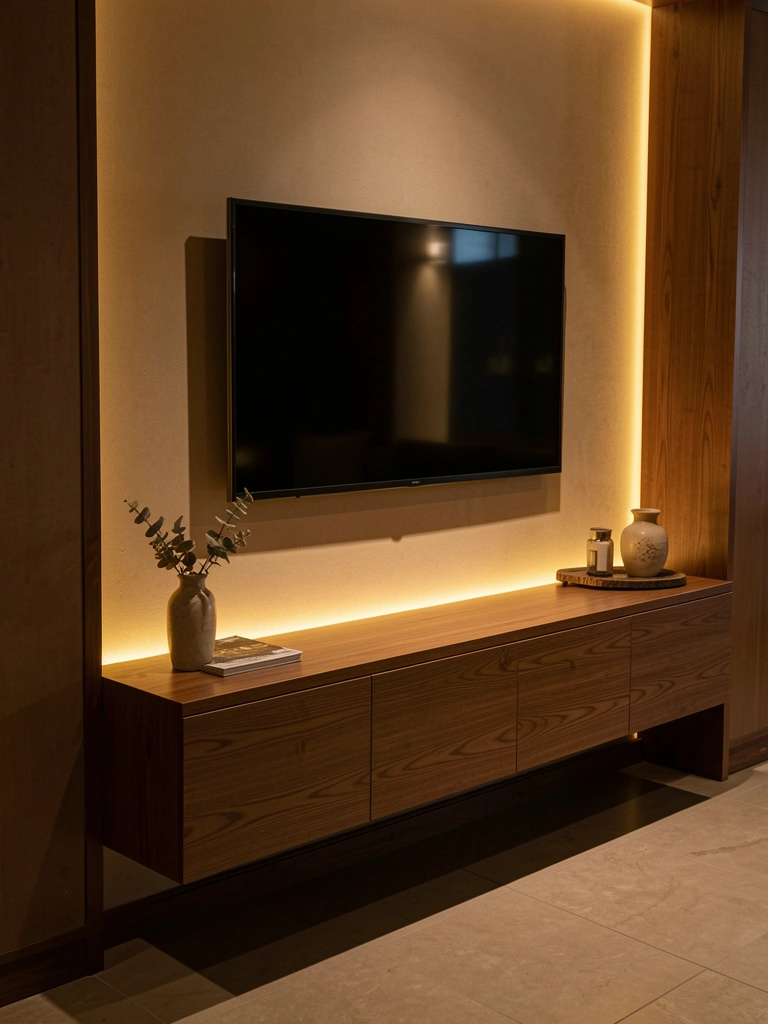
15. Warm Strips Behind a Slatted Wood Accent Wall
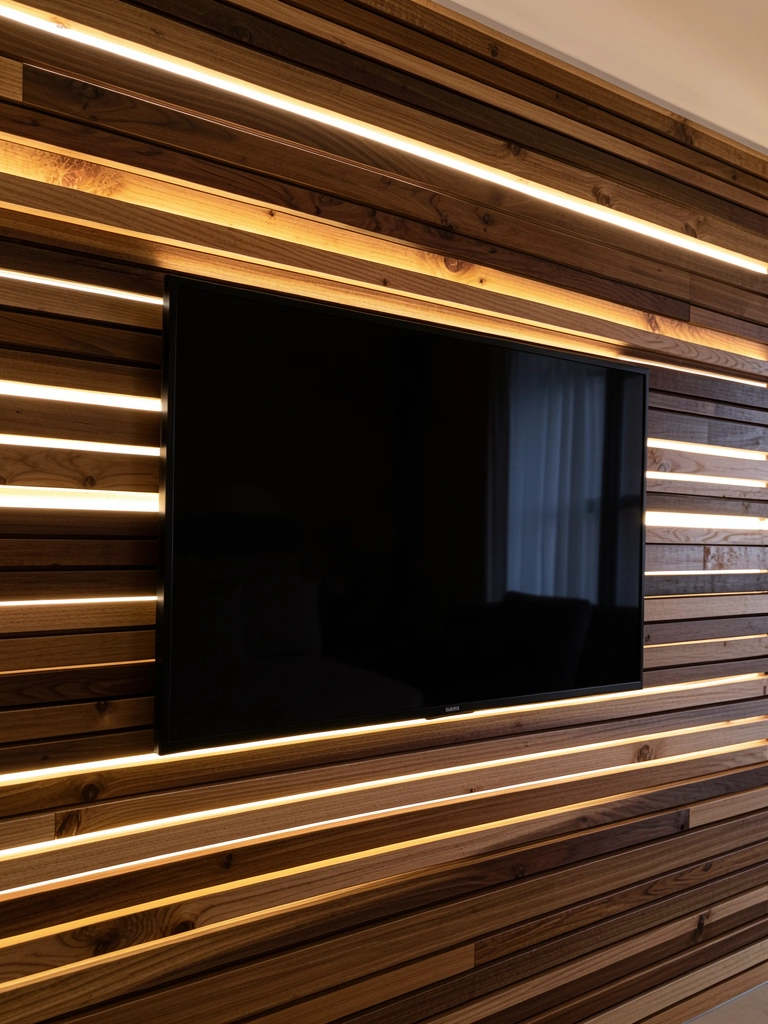
Slatted wood is one of the hottest TV wall trends right now, and adding backlighting makes it even better—the glow highlights the texture and depth of the wood.
Install slatted wood panels across your TV wall ($150–$300 for panels covering a 6–8 ft section; see brands like shiplap kits on Amazon or Home Depot). Position LED strips behind the slats so light filters through the gaps ($40–$80. Installation takes 2–4 hours depending on your comfort level with wall work; renters can use peel-and-stick slatted panels ($100–$200) that stick directly to the wall and pull off cleanly.
Pro tip: Choose warm amber or warm white LEDs to complement natural wood tones. Cool white can make wood look washed out.
Your TV wall gains the warmth and texture of a luxury cabin or resort—instantly more inviting and design-forward.
16. Circular or Oval Backlighting for Modern Mounted TVs
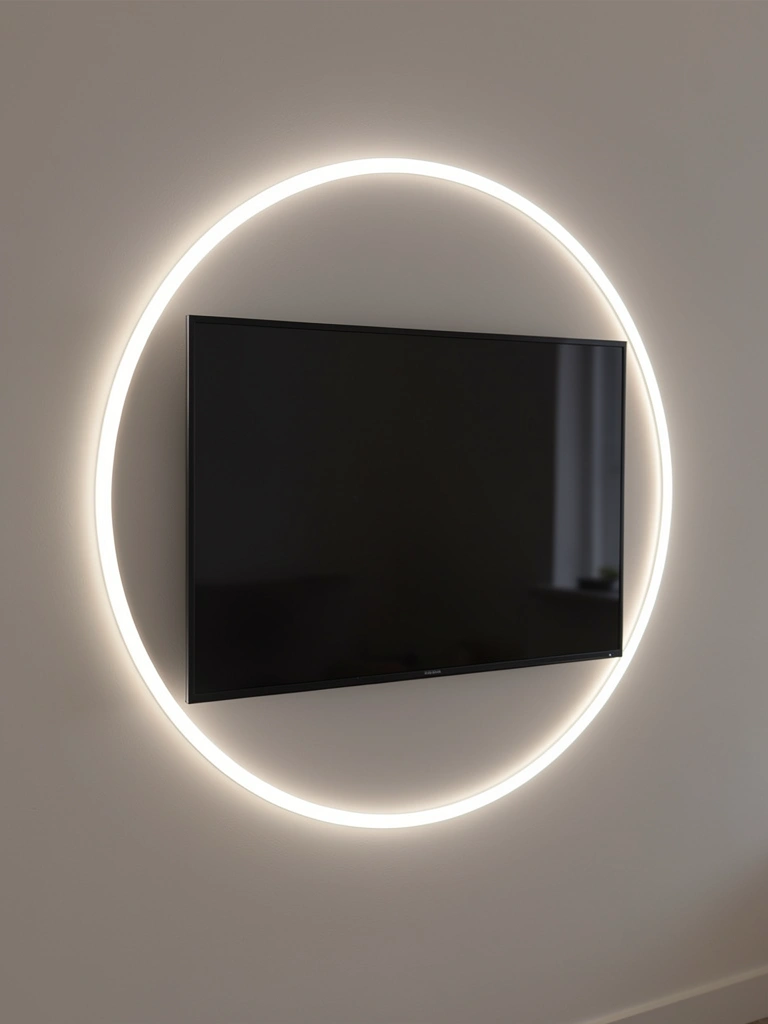
Instead of traditional rectangular backlighting, create a circular or oval “halo” behind your TV—this is trending in ultra-modern homes and media rooms.
Use flexible LED strips to create a geometric shape behind your TV: measure your TV dimensions, then apply strips in a circular or oval pattern directly behind the screen ($50–$100 for premium flexible strips). Alternatively, use pre-made circular LED panels from brands like Nanoleaf ($80–$200) that create the halo effect without custom bending. Setup time: 30 minutes to an hour.
Pro tip: Keep the rest of your wall minimal so the circular light becomes the focal point. A solid-colored wall (white, soft gray) works best.
Your TV wall gains an artistic, forward-thinking vibe—it looks like something straight out of a design magazine.
17. Budget-Friendly $15 LED Kit for Renters
Not ready to spend big? A basic $15–$20 adhesive LED strip kit from Amazon or Walmart gives you the glow effect without commitment—perfect for renters or anyone testing the waters.
Buy a basic plug-in LED strip (warm white or cool white), peel the adhesive backing, and stick it directly behind your TV or along your console edge (15 minutes). These cheap kits aren’t dimmable or color-changing, but they do exactly what they’re supposed to: add ambient glow. If you decide you want something fancier later, you can peel it off without damage.
Pro tip: Cheap LED strips often run warm, so placement matters—don’t stick them anywhere heat-sensitive like near wooden cabinets directly.
You get professional-looking backlighting for the price of two coffee runs—it’s the fastest, cheapest way to elevate your TV wall.
18. Layered Lighting: LEDs + Track Lights + Recessed Ceiling Lights
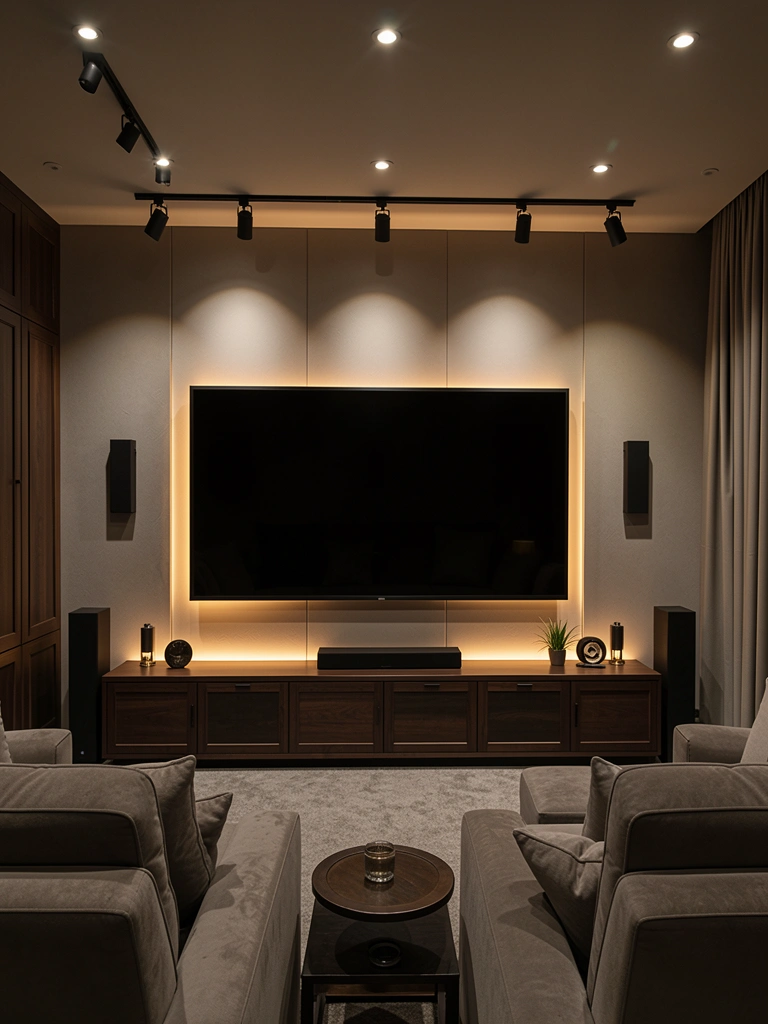
For the ultimate TV wall experience, layer multiple light sources: backlighting, overhead track lights, and recessed ceiling fixtures working together. This is what luxury media rooms use.
Start with LED backlighting behind your TV ($40–$80). Add track lights mounted on the ceiling ($80–$150) to provide accent lighting. Install recessed ceiling lights ($200–$400+ professional installation) for ambient fill light. You’ll need a dimmer switch that controls all three sources ($30–$50) so you can adjust mood. Total cost: $350–$680+ and professional installation is worth it here ($300–$500 labor).
This is a major project best suited for homeowners planning a media room refresh, but the payoff is a genuinely luxury lighting experience.
Your TV wall becomes a professional theater experience—every lighting layer serves a purpose, and mood control is total.
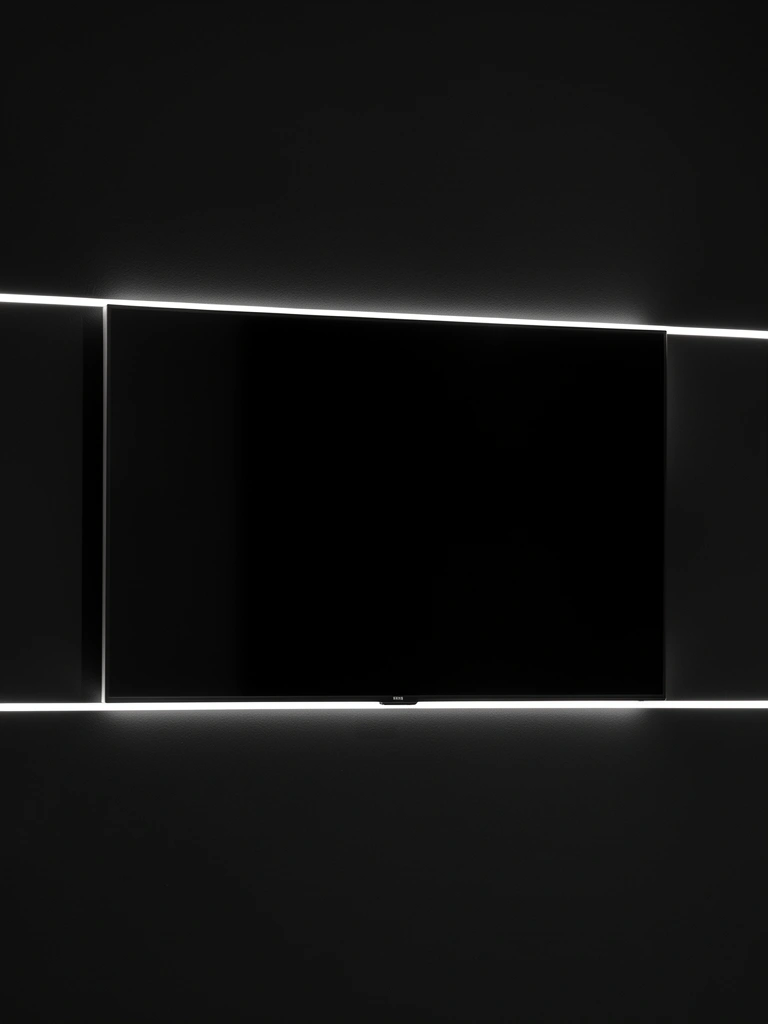
19. Minimalist Single-Line LED Strip (Floating Wall Effect)

If you want backlighting that’s barely noticeable and super-minimalist, use a single thin LED strip running horizontally at the TV’s center point instead of framing the entire perimeter.
Buy a slim, single-line LED strip ($20–$30) and position it horizontally directly behind your TV (or just above where the console meets the wall). The single line creates a subtle halo effect without overwhelming the space. Setup time: 10 minutes.
Pro tip: This works beautifully if your TV is mounted on a plain, light-colored wall where a subtle glow reads as intentional rather than an accident.
Your TV wall gains a whisper of light rather than a shout—refined and modern, not trying too hard.
20. Color-Coded LEDs Matching Your Room’s Palette
Instead of choosing LED color randomly, pick a tone that echoes your room’s existing palette—this creates cohesion rather than feeling like a random addition.
If your room uses warm neutrals and wood, choose warm amber or golden LEDs ($40–$60). If your room is cool-toned (grays, blues), choose cool white or soft blue LEDs ($40–$60). The key is intentionality: your backlighting should feel like part of your room’s design, not an afterthought. Setup: 15 minutes.
Pro tip: Grab a paint chip or fabric swatch of your room’s dominant color and bring it to the store when shopping for LED strips so you can match tones.
Your TV wall feels like it was always meant to be part of your room’s design—coordinated and thoughtful.
21. LED Strips on Shelves Around the TV (Not Behind It)

Instead of backlighting just the TV, light up shelves around it—this approach makes your TV part of a larger lit display rather than the solo focus.
Install 4–6 floating shelves around your TV ($150–$300 total), then run LED strips along the front edge of each shelf ($60–$100 total for all strips). Add books, plants, and small decorative objects to each shelf. The LEDs highlight the entire wall rather than just the screen. Setup time: 3–4 hours (drilling, mounting shelves, positioning lights).
Pro tip: Keep shelf styling minimal and don’t match every shelf—vary heights and object types so it feels curated, not matchy-matchy.
Your entire TV wall becomes a lit art installation—way more interesting than backlighting the screen alone.
22. Dimmable LEDs That Match Your Room’s Smart Home Setup
If you already have smart home tech (Alexa, Google Home), get LED strips that integrate so you can control them with the same app and voice commands as your other devices.
Buy LED strips compatible with your existing smart home system ($50–$100 for Alexa or Google Home-compatible options from brands like Wyze, LIFX, or Nanoleaf). Link them to your smart home hub during setup (15 minutes), then add them to automation routines—for example, “Movie mode” dims your LEDs while turning off other lights.
Pro tip: Set up voice commands like “Alexa, TV time” to automatically adjust all your room’s lighting to your preferred movie-watching brightness.
Your TV wall lighting becomes part of your overall smart home experience—one less thing to manually adjust.
23. Backlit Acoustic Panels (Function + Light)
Acoustic panels serve double duty in a media room: they control sound and they look good. Adding LED backlighting behind them makes them even more of a statement.
Install acoustic panels across your TV wall ($100–$250 for several panels; see brands like GIK Acoustics or Amazon basics options). Position LED strips behind the panels so light glows around the edges ($50–$80). This works best if there’s a small gap between panels and the wall. Setup time: 2–3 hours for installation and light positioning.
Pro tip: Choose neutral panel colors (white, gray, beige) so the backlighting pops visually without color clash.
Your TV wall becomes a sound studio meets luxury lounge—it actually works harder than it looks.
24. Vertical LED Channels for Wall-Mounted TV Cables
If you have multiple cables running down your wall to a console or wall outlet, use vertical LED channels that hide cables while adding architectural lighting interest.
Install aluminum cable channels vertically along your wall ($30–$60 for channels from Amazon or Home Depot), then run your cables through the channels. Position LED strips inside the channels so light illuminates the cable paths ($40–$70). This transforms functional cable management into a design feature. Setup time: 1–2 hours.
Pro tip: Use matte black or white channels that match your wall color—the LED backlighting inside them becomes the visual feature, not the channel itself.
Your cable management transforms into architectural lighting—practical and genuinely stunning.
25. Warm LEDs Behind Dark Marble or Stone Accent Wall
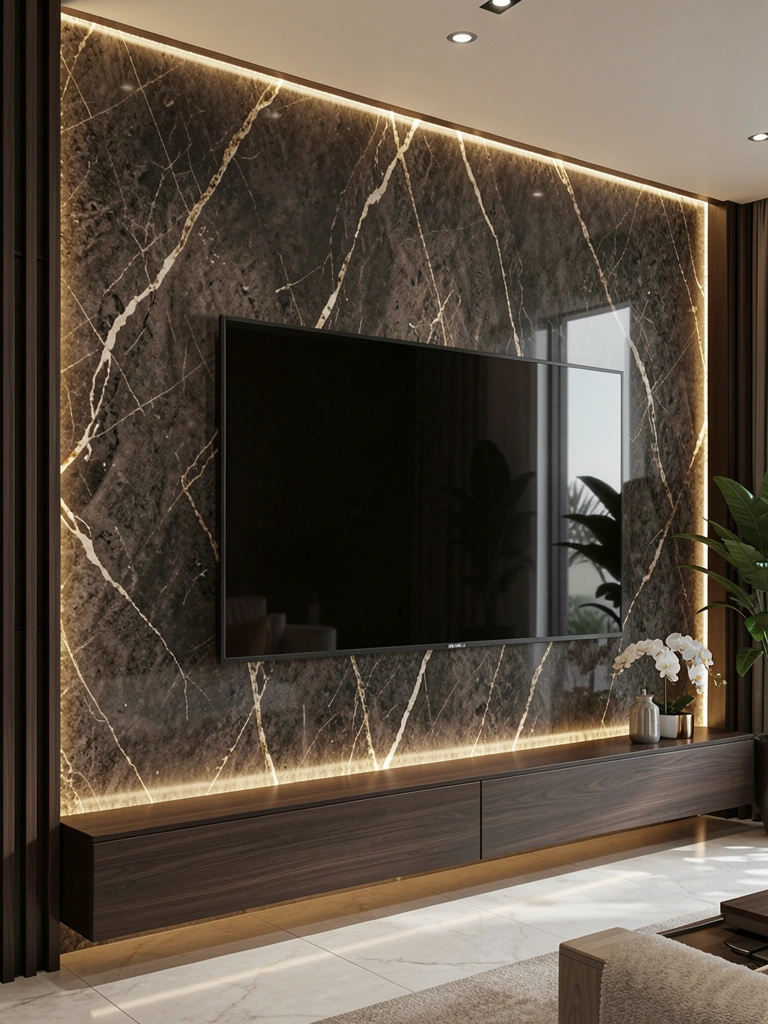
If you’ve invested in a high-end stone or marble accent wall, backlighting showcases the material’s natural beauty—warm LEDs highlight texture and veining.
Install a stone or marble veneer accent wall ($300–$800 depending on material quality and wall size; professional installation recommended). Position warm LED strips behind or below the stone ($50–$80) so light grazes across the stone’s surface. The backlighting will highlight every texture and vein, making the material feel even more luxurious. Setup time: 4–6 hours if hiring a professional.
Pro tip: Warm amber LEDs are best for stone—they enhance natural warmth and make even cool-toned marble look sophisticated.
Your TV wall becomes a legitimate luxury focal point—the backlit stone is worth lingering on.
26. DIY Edison Bulb String Lights + LED Strips Combo
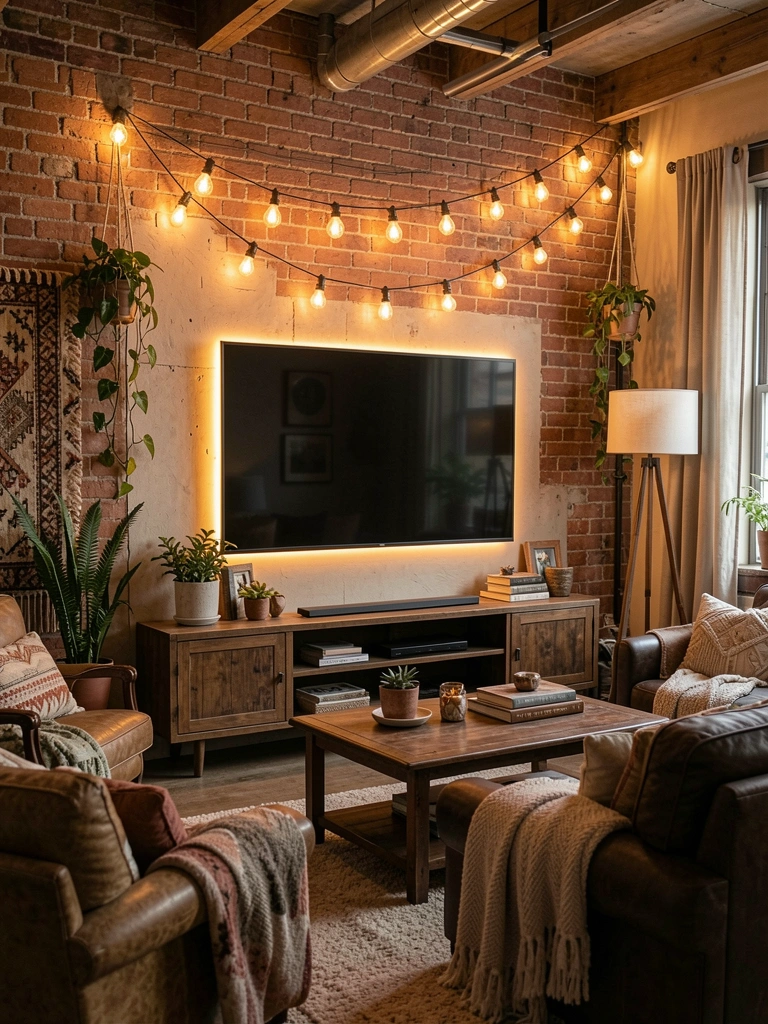
Mix aesthetics by combining Edison bulb string lights (trendy, vintage-inspired) with modern LED backlighting—great for eclectic or industrial-style spaces.
Buy Edison bulb string lights ($30–$50 from Target, IKEA, or Amazon) and hang them horizontally above your TV using hooks or nails (15 minutes setup). Layer in warm LED strips behind your screen or console ($40–$80). The combination feels intentional—like you’re mixing vintage and modern on purpose. This option is renter-friendly if you use adhesive hooks and plug-in lights.
Pro tip: Keep the rest of your wall minimal so the dual lighting sources feel like a choice, not visual chaos.
Your TV wall gains character and warmth—it looks collected, eclectic, and genuinely personal.
Save this post for your next TV wall refresh—pick one idea and tackle it this weekend. You’ll be amazed how much better your space feels with just a little glow behind your screen. Which setup is calling your name?
Leave a Reply