Your living room walls are like a blank canvas—and right now, they’re probably looking a little too plain. Whether you’re staring at builder beige or just tired of the same old look, your walls have the power to make or break your entire space. The good news? You don’t need a major renovation or a huge budget to make a real difference. These 27 ideas range from free styling tricks to smart investment pieces, and most can be done in a single weekend. From gallery walls and statement paint colors to smart lighting and textured finishes, you’re about to discover exactly how to make your living room feel intentional, inviting, and totally you. Let’s dig in.
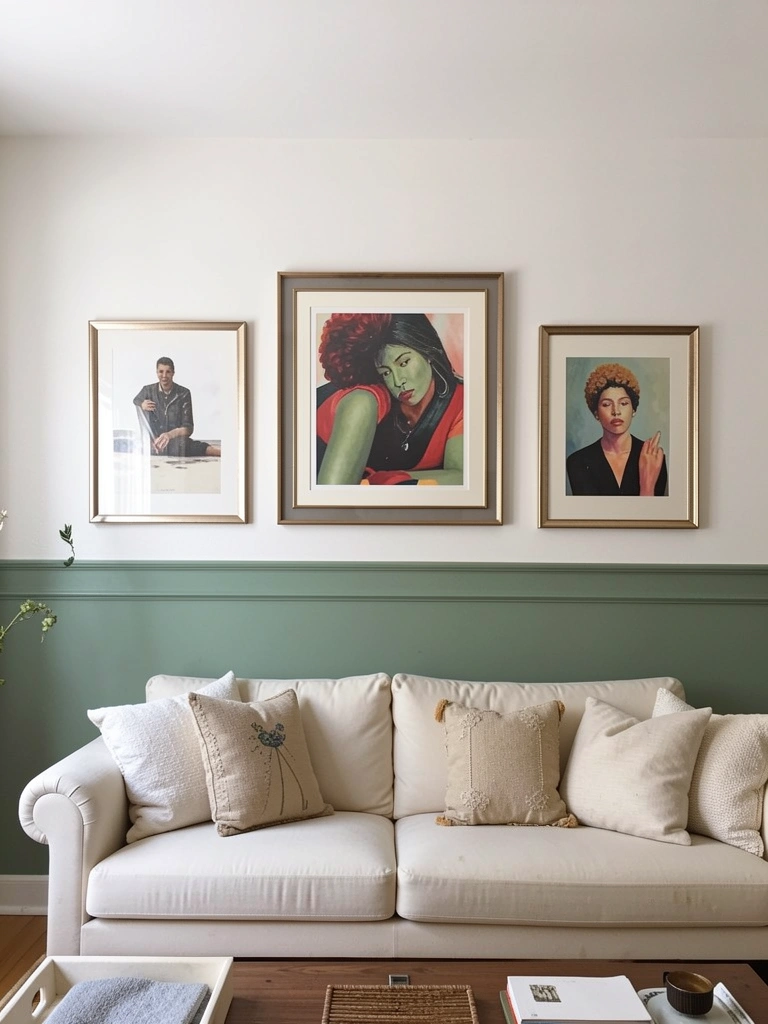
1. Create a Gallery Wall Without Nails
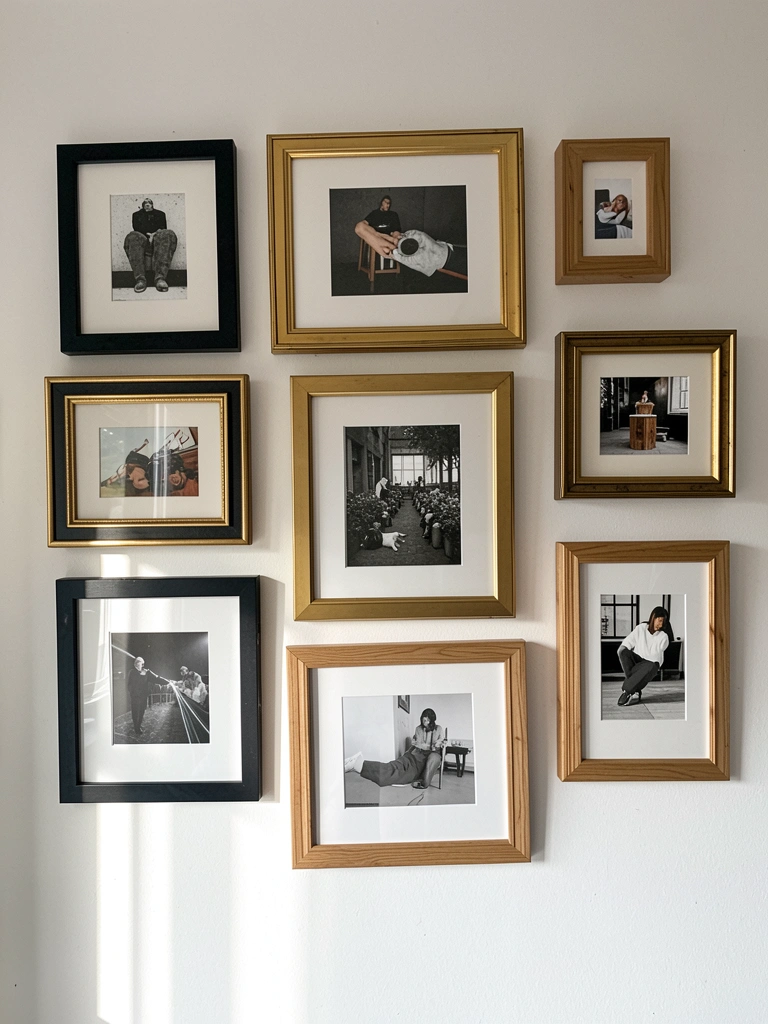
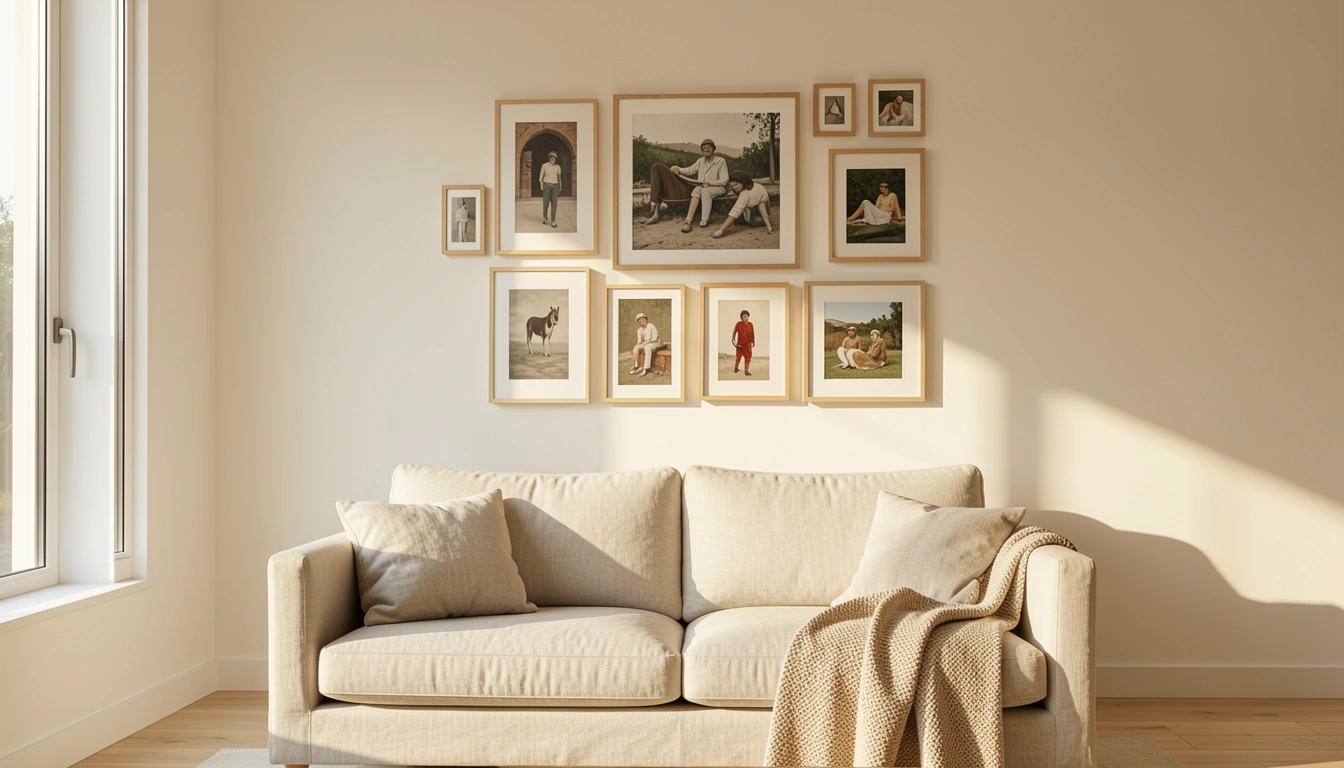
A gallery wall is the easiest way to add personality and visual interest without commitment. This works especially well in rentals since damage-free methods exist now.
Start by collecting frames in complementary finishes—mix black, gold, and natural wood for visual depth. Command strips or damage-free adhesive hooks ($10–$25) let you hang without drilling. Lay everything out on the floor first using painter’s tape to mark frame positions on your wall before hanging anything. This prevents costly mistakes. Mix print sizes and styles: a large botanical print, smaller geometric designs, and personal photos create dynamic energy.
The result? A focal point that makes your space feel curated and lived-in, without looking like a showroom.
2. Paint an Accent Wall in a Jewel Tone
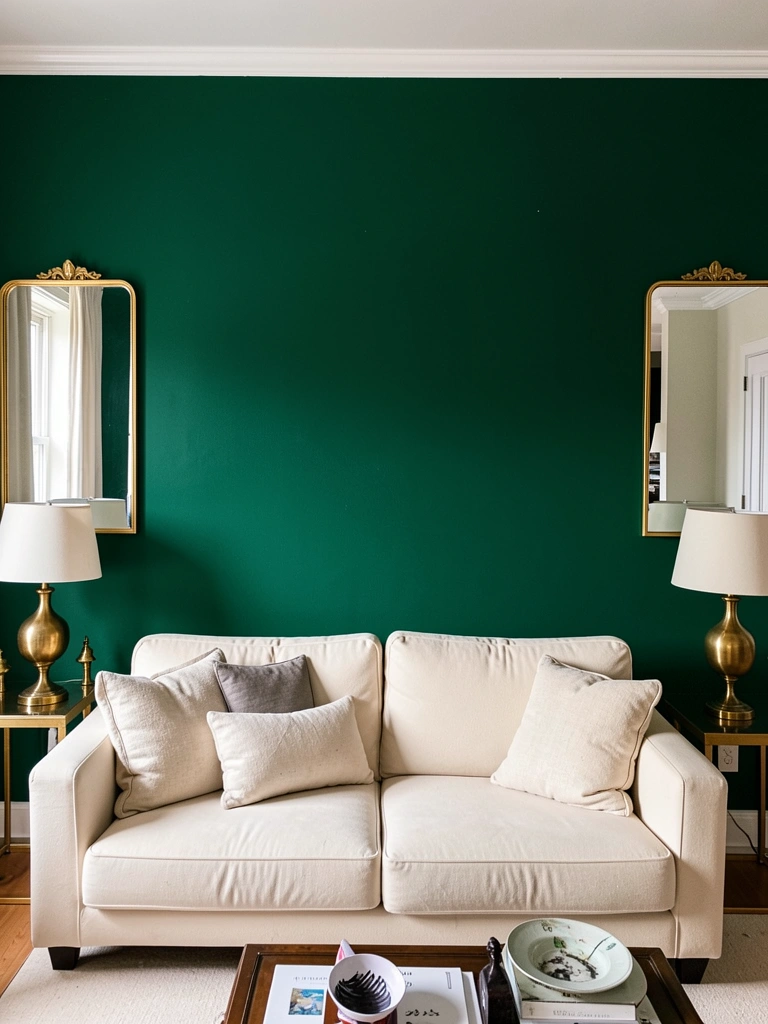
Jewel tones—emerald, burgundy, and chocolate brown—are having a major moment, and painting one accent wall is the fastest way to ride this trend.
Choose the wall opposite your seating area so it becomes a natural focal point. Buy two quarts of paint ($30–$50 per quart) and test it on that wall first; colors read completely different depending on lighting. Emerald photographed beautifully and feels sophisticated without feeling heavy. A single weekend project with a roller and basic supplies (brushes, drop cloth, painter’s tape from any hardware store). The key is using quality paint—cheaper options require multiple coats and streak easily.
Your living room instantly gains depth and personality. Suddenly everything in the room—your furniture, art, and decor—pops against that rich background.
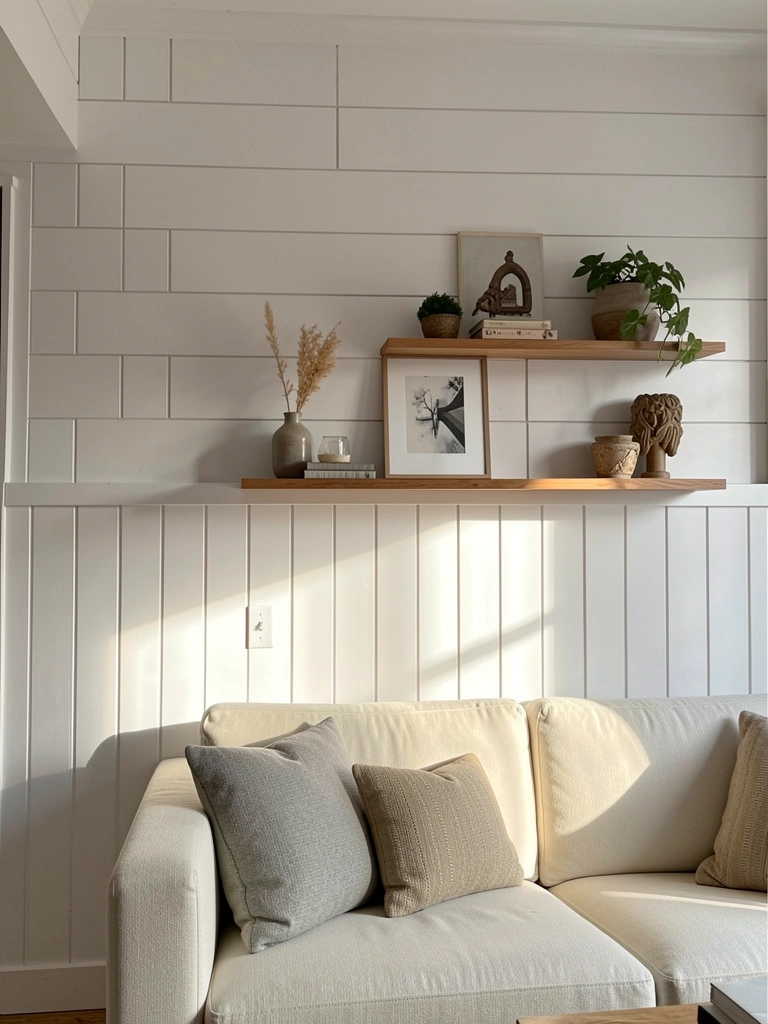
3. Hang Large-Scale Floating Shelves
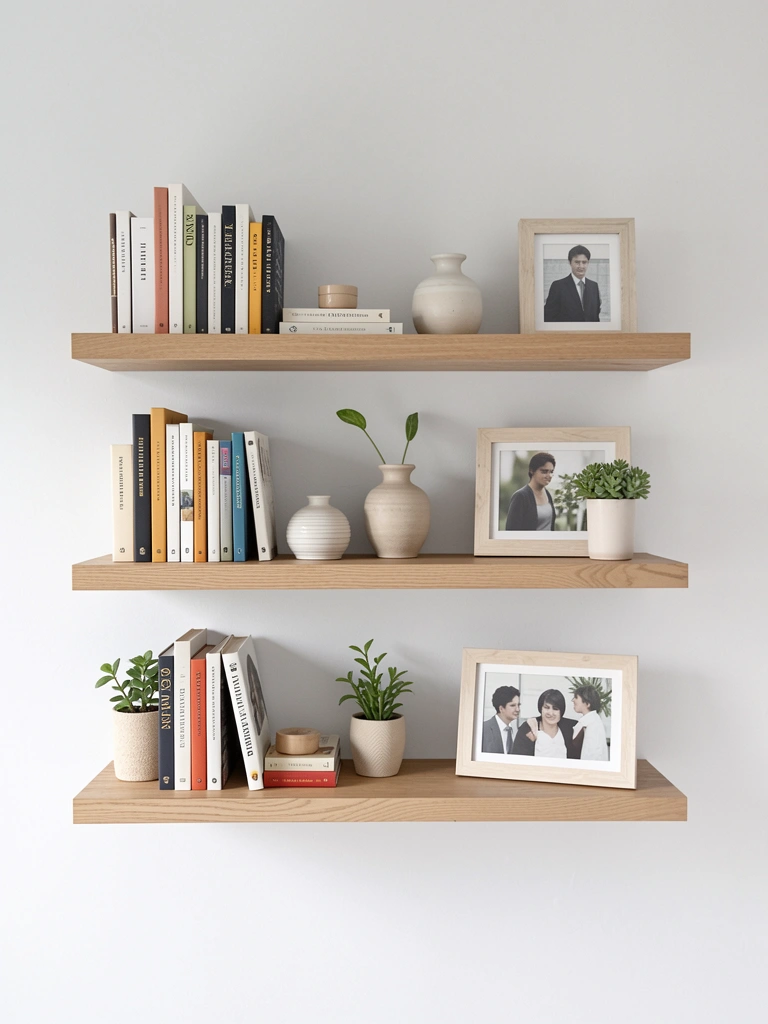
Floating shelves add storage and a place to display decor without eating up floor space—perfect for small living rooms.
Install wooden floating shelves ($40–$150 per shelf depending on size and material) using a stud finder and heavy-duty brackets. IKEA and Home Depot offer affordable options. Style them with books layered horizontally, a potted plant or two, and a few decorative objects spaced to avoid clutter. Leave some breathing room; overstuffing looks chaotic rather than curated. Mount shelves at varying heights for visual interest, or keep them level for clean lines—both work depending on your aesthetic.
This setup gives your walls dimension and function while letting you rotate decor seasonally. Plus, you’ve created a styling opportunity that actually feels intentional.
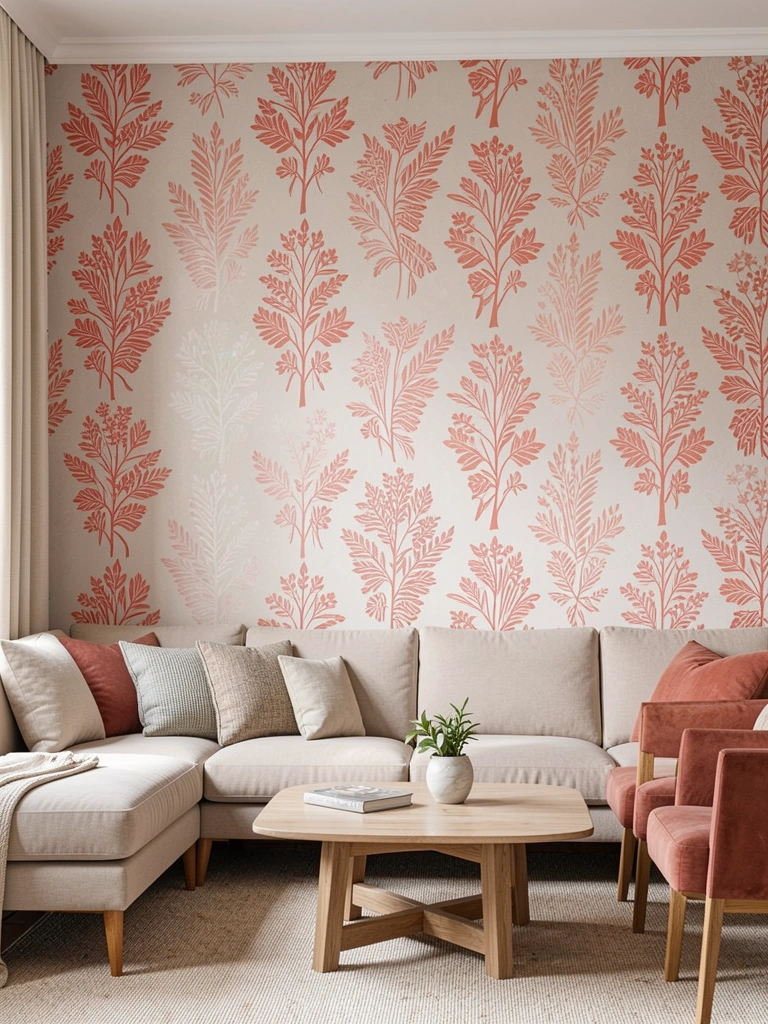
4. Add Removable Wallpaper to One Wall

Removable wallpaper is the renter’s secret weapon—beautiful pattern and zero guilt when you move.
Pick a peel-and-stick design in geometric, botanical, or striped patterns ($25–$60 per roll from Spoonflower, Target, or Amazon). One accent wall typically needs 2–3 rolls. Prep your wall by cleaning and smoothing any bumps. Carefully measure and cut wallpaper to size, then apply slowly, smoothing out air bubbles as you go. This takes 1–2 hours the first time, but honestly? It gets easier. Stick to one statement wall rather than the whole room to avoid overwhelming your space.
When you’re done, you have a designer-quality accent wall that cost less than most light fixtures. And if you change your mind, it peels right off without damage.
5. Install Picture Lights Above Artwork
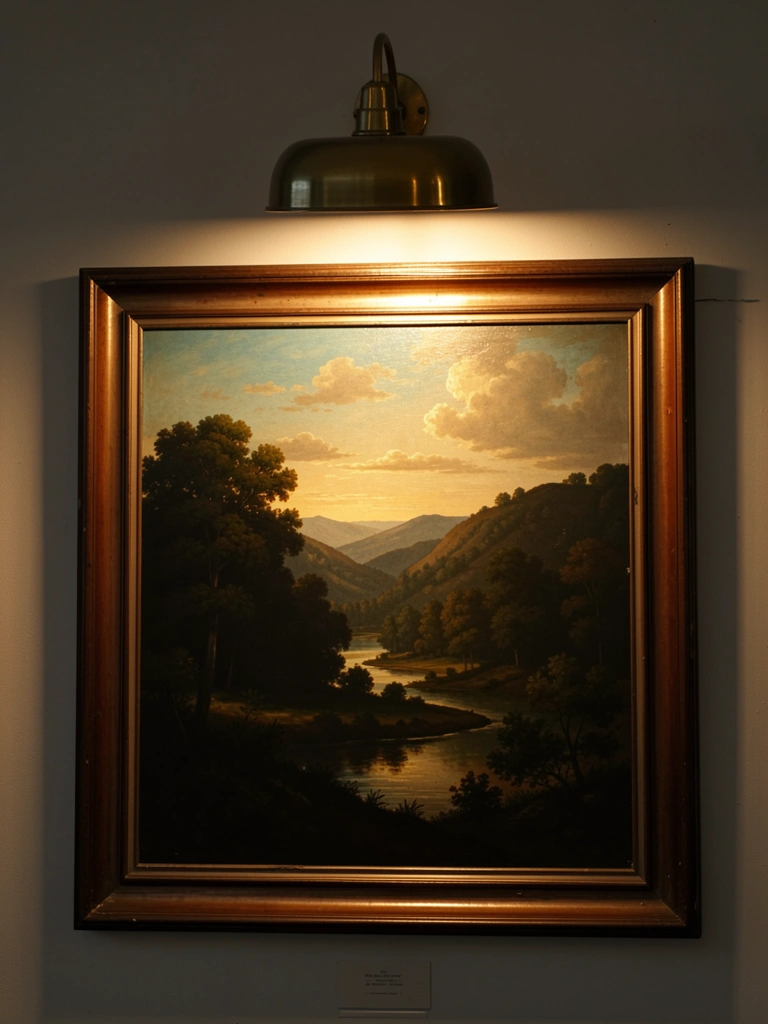
Picture lights are an overlooked detail that elevates your room instantly and adds a museum-quality touch.
Install brass or black picture lights ($40–$120 per fixture from Rejuvenation, West Elm, or Amazon) directly above framed artwork or mirrors using standard mounting hardware. They plug into wall outlets, so no electrician needed. The warm glow highlights artwork at night while adding ambient lighting to your space. Choose fixture width to match your artwork—most come in 16″, 20″, and 24″ widths. This works especially well on larger pieces or important focal points.
Your gallery wall or statement print now has professional lighting that changes how it looks from morning to night. It’s an investment detail that visitors genuinely notice.
6. Use Stick-On Shiplap for Texture
Shiplap texture adds depth and farmhouse charm without the actual installation headache (or cost).
Adhesive shiplap panels ($1–$3 per panel from Lowes, Home Depot, or Amazon) come in packs of 10–12. A single accent wall needs about 25–40 panels depending on size. Prep your wall by cleaning and smoothing it, then apply panels from bottom to top, staggering seams slightly for authenticity. This is a 2–3 hour DIY project that requires zero tools. Paint the panels after installation if you want a different color than the standard white—this adds dimension if you use a soft gray or warm beige.
Your walls now have tactile, visual interest that photographs beautifully and makes your space feel collected rather than blank.
7. Hang an Oversized Mirror to Bounce Light
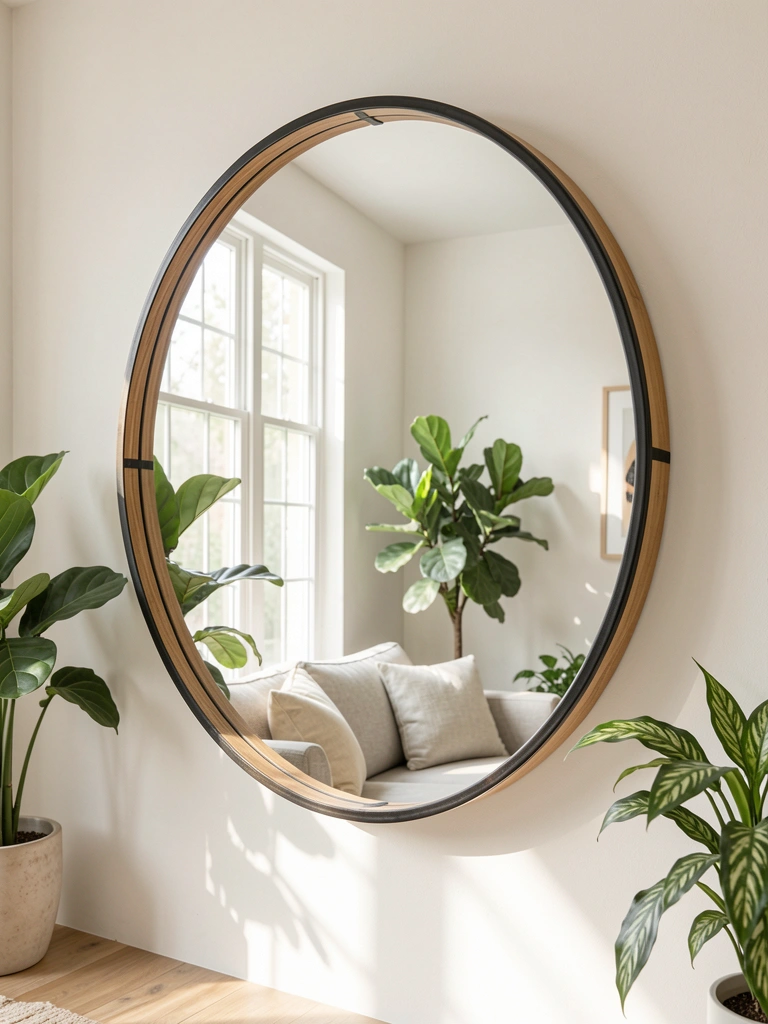
A large mirror serves double duty: it expands your space visually and amplifies natural light, making your room feel bigger and brighter.
Choose a statement mirror ($50–$300 depending on frame and size) in a shape that matches your aesthetic—arched, round, rectangular, or sunburst styles all work. West Elm, Wayfair, Article, and even Target have options. Mount it at eye level on a wall opposite your windows so it reflects light back into the room. Use a stud finder and proper wall anchors; large mirrors need secure hanging. The frame finish (wood, brass, black metal) should coordinate with your existing hardware and light fixtures.
Light bounces around your room more, and suddenly the space feels more open. Plus, mirrors are timeless decor that work with any style.
8. Paint Your Ceiling a Soft Contrast Color
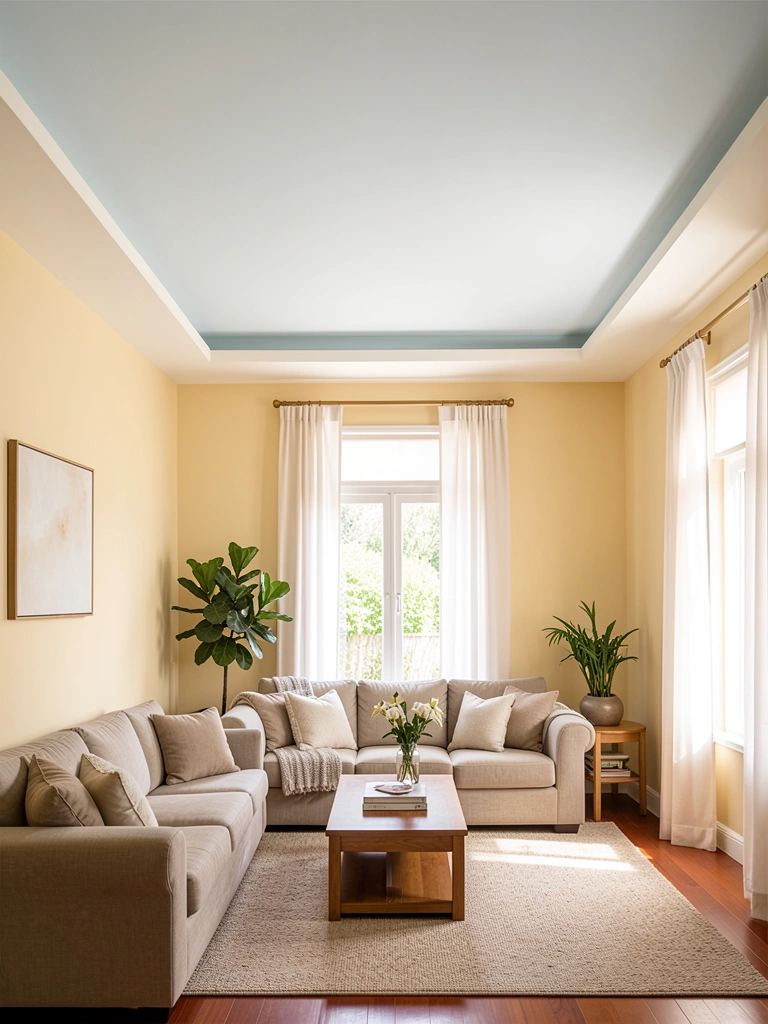
Painting your ceiling a lighter shade than your walls—or even a coordinating soft color—adds unexpected sophistication and makes rooms feel taller.
Choose a paint color one shade lighter than your wall color, or go neutral cream or soft gray ($30–$50 for paint, plus $100–$200 if you hire help). Ceiling painting requires extra prep: move furniture, tape edges carefully, and invest in a sturdy ladder and extended roller. If you’re uncomfortable with heights, this is worth hiring out. The technique: paint in sections, keeping a wet edge to avoid lap marks. This takes a full day for a standard living room if you’re doing it yourself.
Once done, your room gains architectural interest and feels more polished. Suddenly your ceilings aren’t just forgotten space—they’re part of your design.
9. Layer Textured Throw Pillows and Blankets
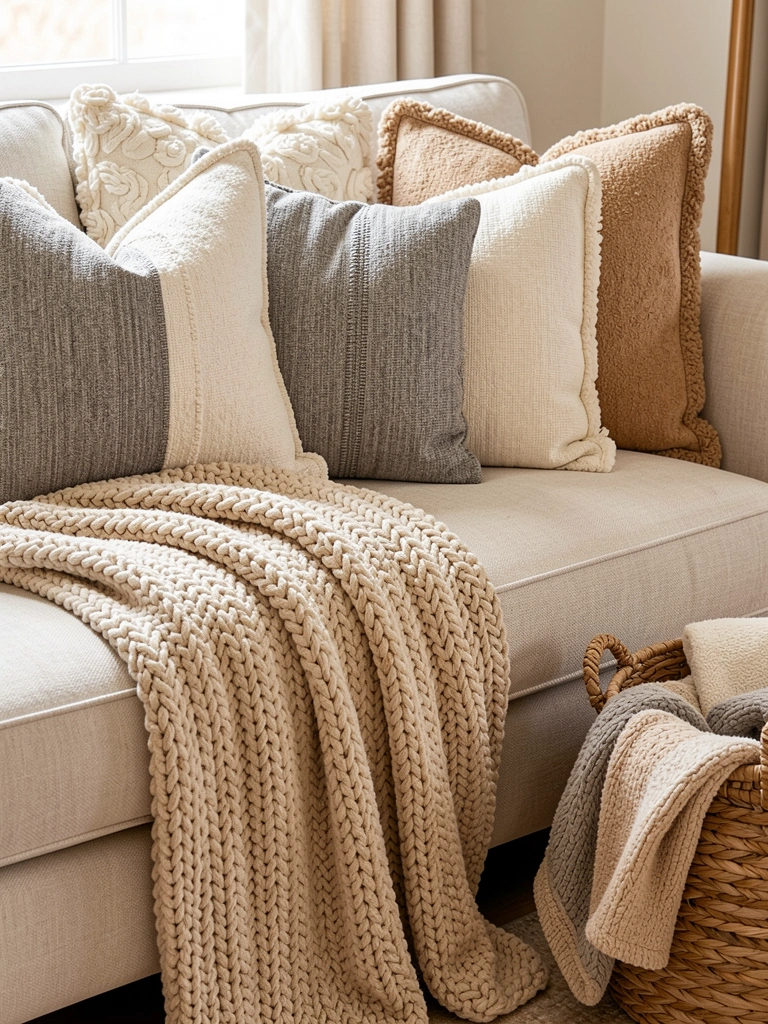
Texture adds depth and warmth to blank walls, especially when pillows and throws work together in a coordinated palette.
Collect throw pillows and blankets in complementary textures: linen, bouclé, velvet, and chunky knit ($15–$50 per pillow, $30–$100 per throw blanket from CB2, Pottery Barn, Target, or Etsy). Mix neutral colors—cream, gray, warm taupe—with one accent color to tie back to your wall palette. Layer pillows by size, with larger ones in back and smaller ones in front. Drape a throw casually rather than perfectly folding it; this feels more livable and styled.
Your sofa now looks inviting and collected rather than showroom-stiff. The layered textures create visual and tactile interest that makes your space feel intentional.
10. Create a Color-Blocked Wall Design
Color-blocking—painting walls in two distinct colors—is modern, graphic, and surprisingly easy to DIY.
Plan your design: horizontal split at chair-rail height (about 32″ from the floor), vertical half-and-half, or an asymmetrical division. Get two quarts of paint ($30–$50 each) and use painter’s tape to create clean lines where colors meet. The tape is your secret—apply it firmly, paint your first color up to the line, let it dry, then apply tape along the edge and paint your second color. Remove tape carefully while paint is still slightly tacky for the cleanest edge. This takes 3–4 hours plus drying time.
Your wall becomes a design statement that feels deliberate and modern. The color division creates visual interest without being overwhelming.
11. Display Woven Wall Hangings and Macramé
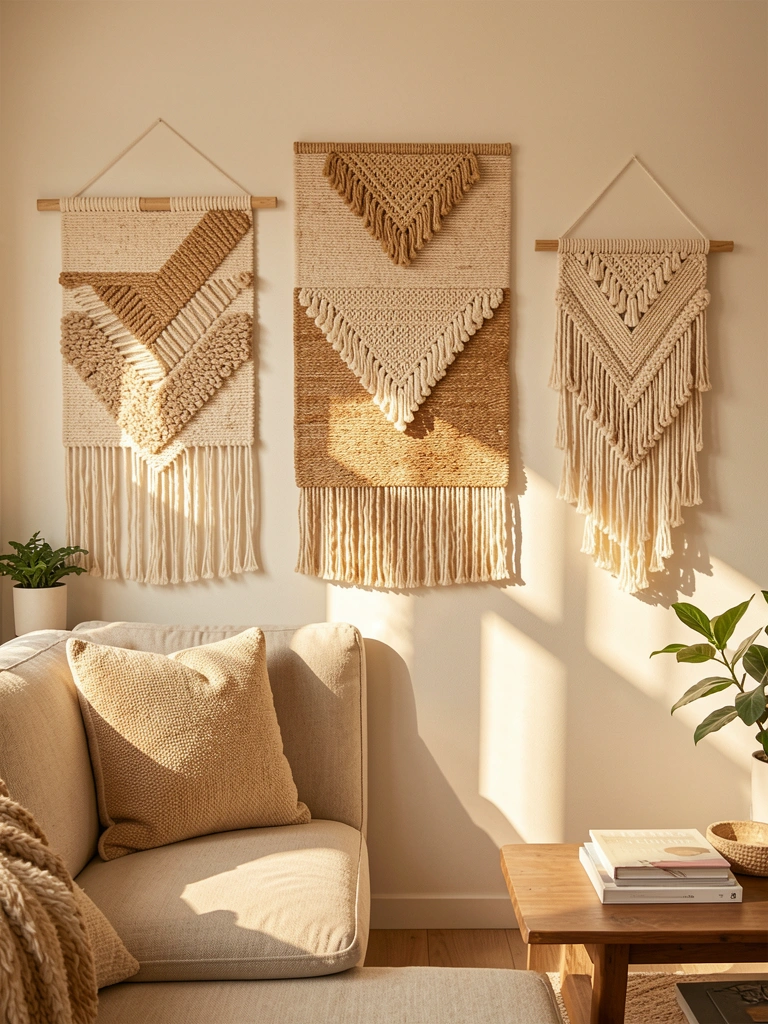
Woven and macramé wall hangings add organic texture and warmth—especially beautiful in rooms with neutral palettes or minimalist vibes.
Hunt for woven wall hangings and macramé ($15–$80 per piece from Etsy, World Market, or West Elm) in sizes ranging from 12″ to 36″ wide. Vary the weaves—some tight and geometric, others loose and flowing—for visual interest. Hang them using simple nails or hooks at varying heights to create an asymmetrical gallery effect. Group pieces in clusters of 2–3 rather than spreading them around; this feels more intentional. Natural fibers in cream, tan, and gray coordinate with most palettes.
These pieces add warmth and artisanal character that feels more personal than mass-produced decor. They’re particularly great in bohemian, modern minimalist, or scandinavian-inspired spaces.
12. Install Architectural Molding or Trim Work
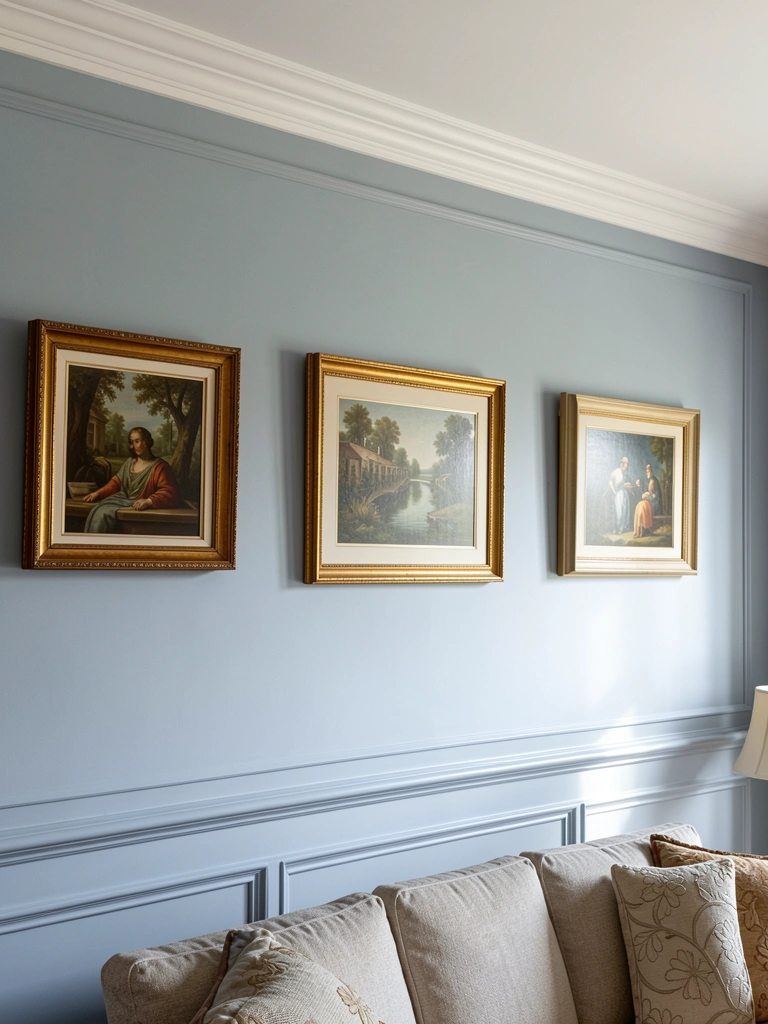
Architectural molding adds instant character and makes rooms feel more polished and intentional—no faux finishes required.
Install crown molding ($1–$5 per linear foot for materials, plus $3–$8 per foot for labor if hired) along your ceiling line, or add a chair rail halfway down walls ($0.50–$2 per linear foot). These are permanent upgrades but worth it for owned homes. Renters: check your lease, but removable molding options exist. A handyman or carpenter can install these professionally ($200–$500 depending on room size and complexity), or experienced DIYers can tackle it with a miter saw, level, and construction adhesive. Takes 2–4 hours per wall.
Your room suddenly feels established and refined. Molding anchors your space and makes walls feel less flat and more architectural.
13. Hang String Lights or Fairy Lights
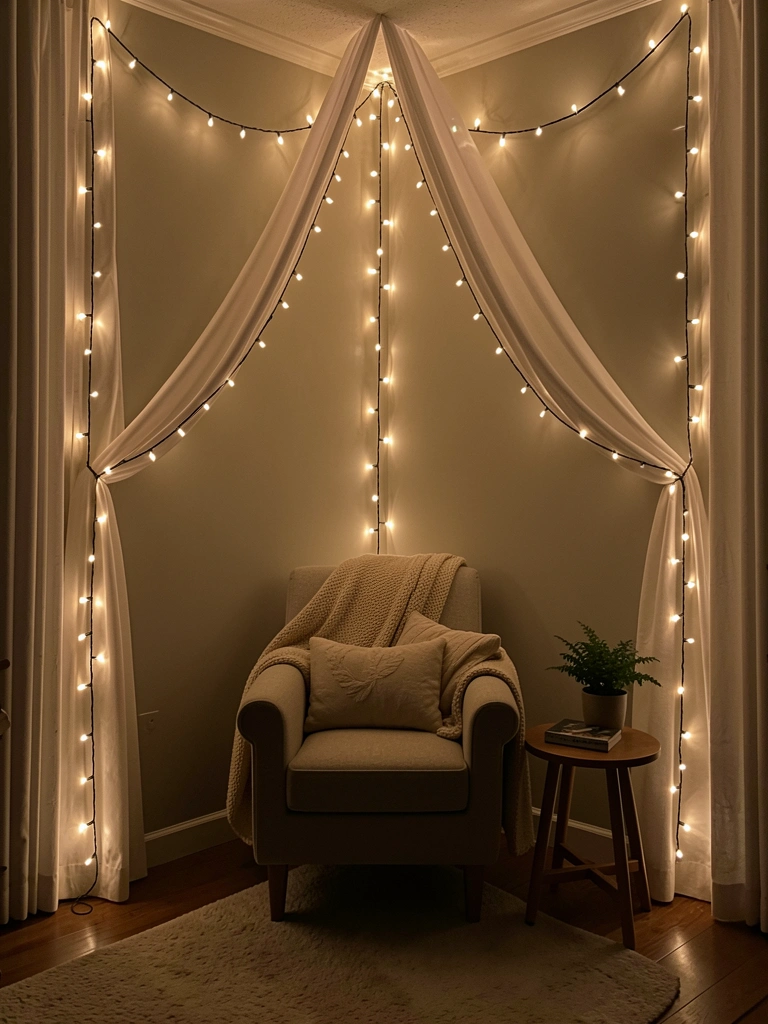
String lights add instant cozy ambiance and work in any decor style from modern to bohemian.
Drape warm white string lights ($15–$40 from Target, Amazon, or Urban Outfitters) above a seating area, behind furniture, or along a shelf. Battery-operated options work well for renters since they don’t require outlet access. Intertwine lights through plants or frame a gallery wall with them for subtle glow. Warm white (2700K color temperature) feels more inviting than cool white. This takes 15 minutes to hang and adds zero permanent damage.
Your room gains intimate, layered lighting that feels magical at night without being childish. It’s the difference between a space that feels functional and one that feels genuinely welcoming.
14. Use Oversized Abstract Art as a Focal Point
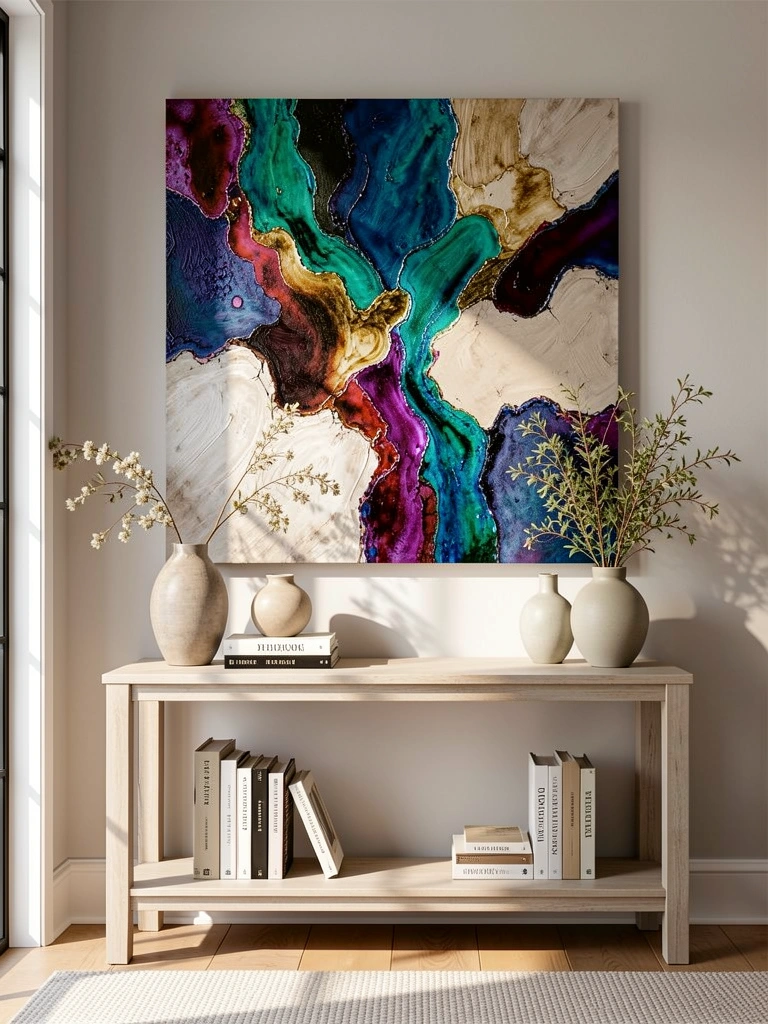
One large, impactful piece of art works harder than a gallery of small prints—it anchors your entire room.
Invest in large-format abstract art ($100–$500+ from Etsy, Minted, Saatchi Art, or local galleries) or print high-quality reproductions ($20–$60 from Ikonick or Desenio). Choose a piece with colors that coordinate with your wall palette and other furniture. Hang it at eye level, centered on a wall, leaving breathing room around it. Pro tip: art that’s 60–75% of your sofa width creates the most balanced proportion. Frame it simply so the art, not the frame, is the star.
This one piece becomes your room’s hero, instantly elevating everything around it. Visitors notice it immediately, and it gives you a color palette to build the rest of your decor around.
15. Apply Textured Paint Finish for Depth
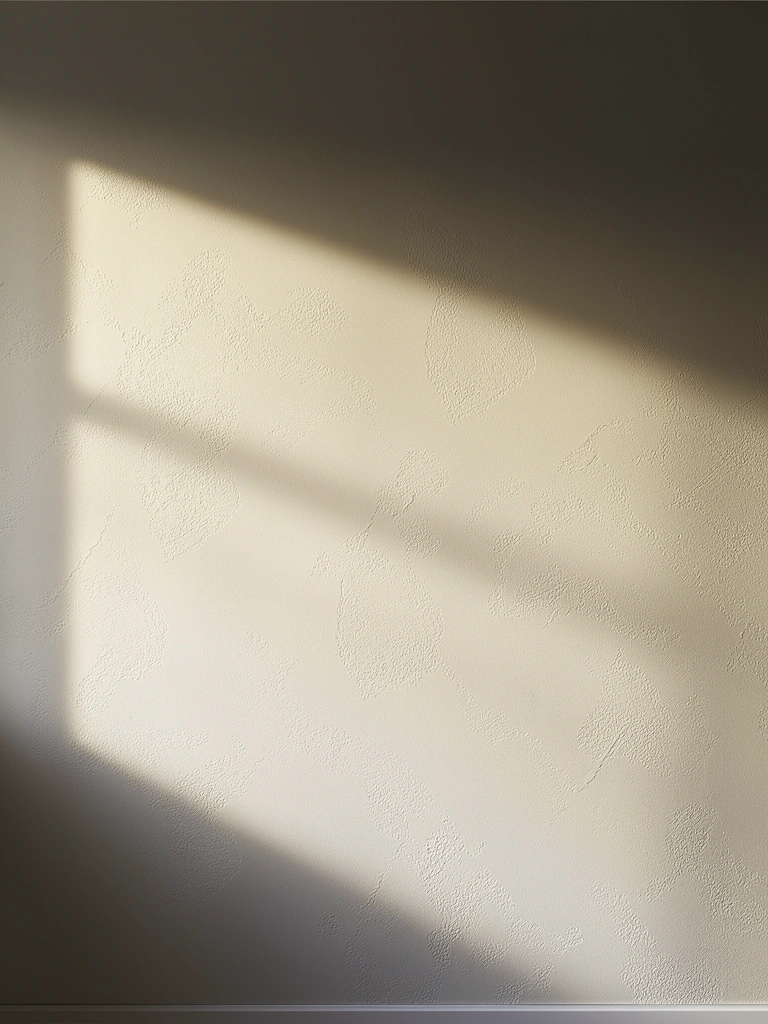
Textured paint adds dimension to flat walls without committing to permanent treatments like wallpaper or molding.
Add texture to your paint using specialized additives ($10–$20 per container) mixed into standard paint, or buy pre-textured paint ($35–$50 per gallon). Techniques include knockdown texture (spray and flatten), popcorn (don’t—it dates instantly), or subtle sand texture for organic depth. Apply with a roller or spray gun depending on texture type. This takes 2–3 hours per wall and requires patience, but creates lasting visual interest. Always test on cardboard first to see how the texture looks in your actual lighting.
Your walls gain subtle sophistication and movement that plain paint can’t deliver. Texturing especially works in rooms with strong natural light where shadows play across the surface beautifully.
16. Mount Floating Wooden Shelves for Plants
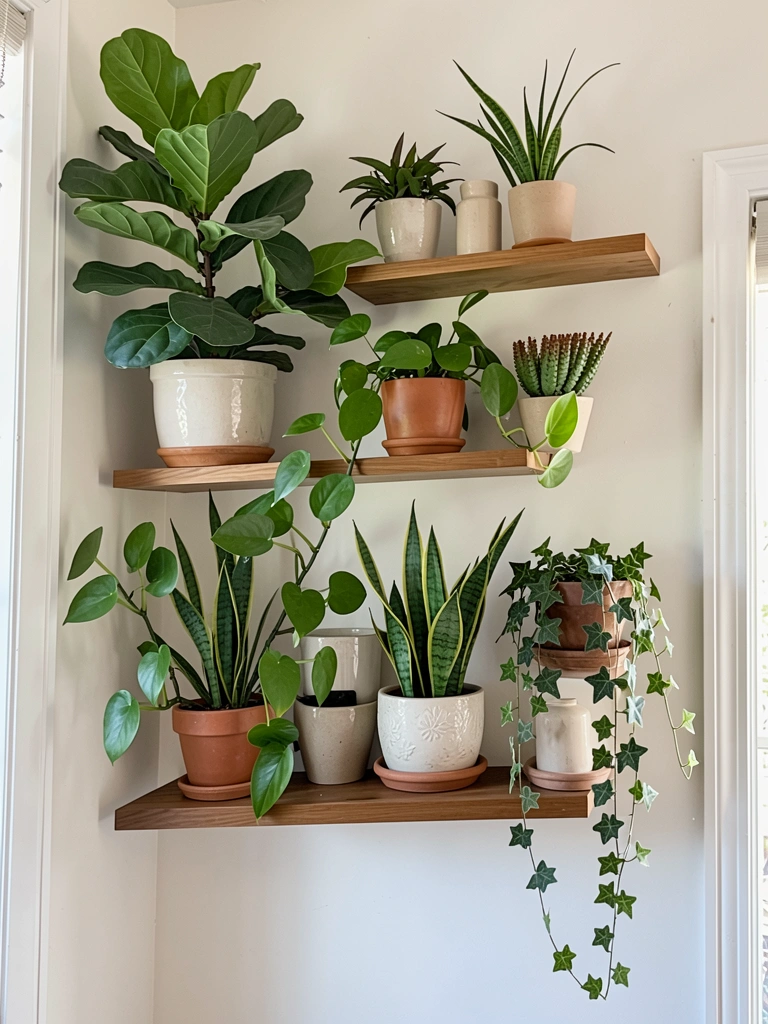
A living wall of plants on floating shelves brings nature indoors and adds organic beauty without taking up floor space.
Install wooden shelves ($40–$150 each from IKEA, West Elm, or hardware stores) using a stud finder and heavy-duty brackets rated for plant weight. Stagger them at different heights for visual interest—aim for 12–18″ between shelves so plants have room. Add potted plants that thrive indoors with moderate light: pothos, snake plants, fiddle leaf figs, or ZZ plants ($5–$40 per plant from local nurseries or online). Use coordinating pots in terra cotta, ceramic, or neutral tones. Water according to each plant’s needs; most prefer soil that dries slightly between waterings.
Your walls come alive with color and movement. Plants improve air quality while adding organic beauty that’s impossible to fake with decor alone.
17. Paint Vertical Stripes for Modern Edge
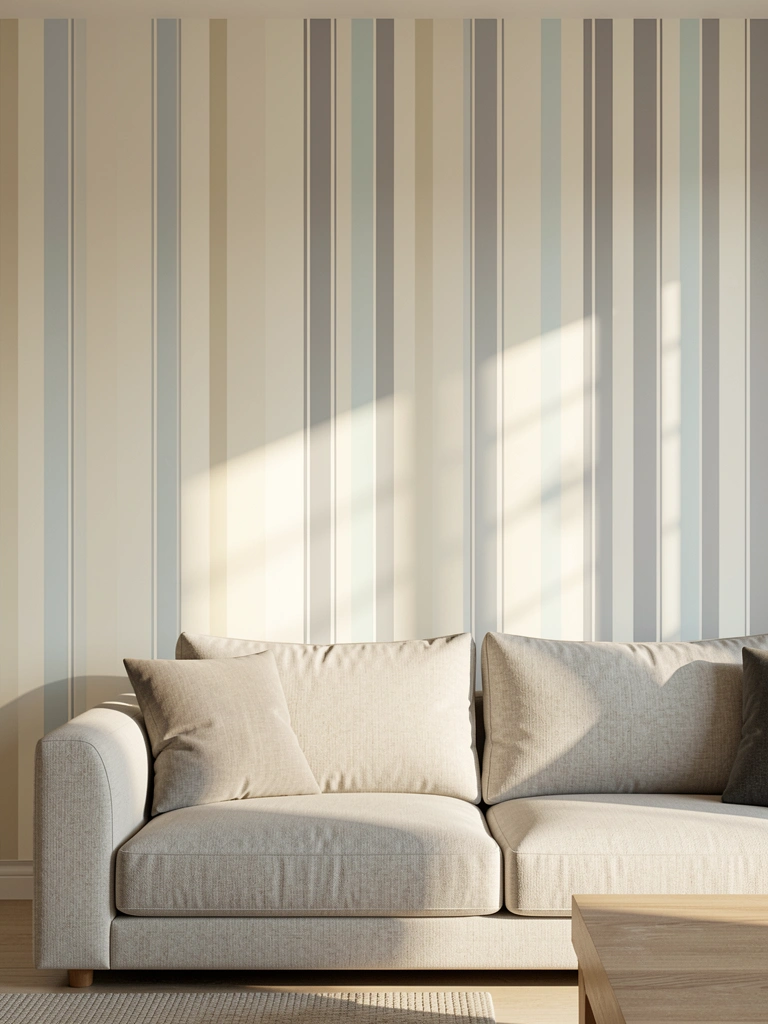
Vertical stripes create height and visual motion while staying sophisticated rather than playful when done in a neutral or monochromatic palette.
Pick two complementary paint colors ($30–$50 each for two quarts) in similar tones: cream and soft gray, or warm white and pale taupe. Use painter’s tape to create 4–6 inch wide stripes, ensuring edges are firmly sealed. Paint your first color on the entire wall, let dry completely, then tape off alternating stripes and paint your second color. Remove tape while paint is slightly tacky. This takes 4–5 hours including drying time between coats.
The result feels intentional and modern without being bold. Vertical stripes are particularly effective in rooms with lower ceilings because they draw the eye upward, making spaces feel taller.
18. Hang a Statement Chandelier or Pendant Light
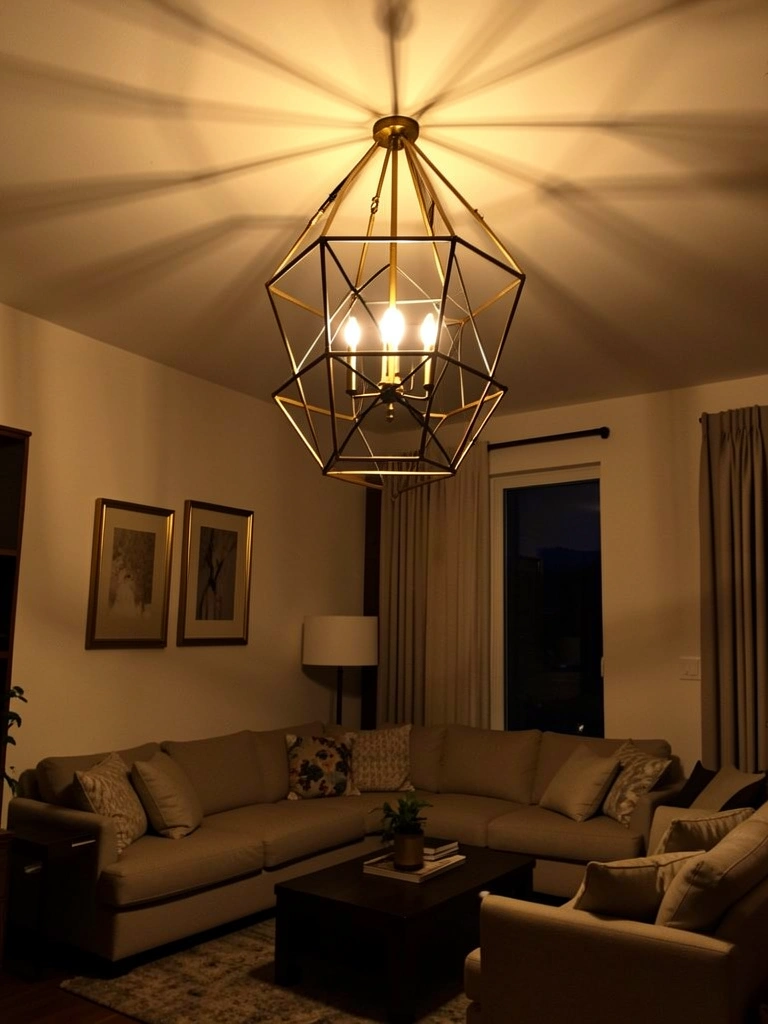
Statement lighting does triple duty: it provides illumination, adds sculptural interest, and anchors your room’s overall design.
Invest in a dramatic chandelier or pendant light ($150–$600+ from West Elm, Rejuvenation, Article, or local lighting stores). Choose styles that coordinate with your aesthetic: geometric modernism, ornate brass vintage, or sculptural minimalism. Professional installation costs $100–$300, but most fixtures can work with existing wiring. Hardwiring requires an electrician; plug-in options exist for renters (though less glamorous). This is a longer-term project but creates immediate impact.
Your ceiling gains architectural interest, and the quality of light transforms your room. Suddenly, functional lighting becomes a design statement.
19. Create a Feature Wall with Geometric Wall Decals

Removable geometric decals offer pattern without the commitment of wallpaper, perfect for renters or indecisive decorators.
Apply peel-and-stick geometric wall decals ($20–$50 per set from Etsy, Amazon, or Wayfair) in patterns that coordinate with your existing palette. Clean your wall thoroughly before applying. Position decals carefully—most can be repositioned but work better when placed thoughtfully the first time. Mix shapes and sizes for visual interest, or keep them uniform for cleaner lines. This takes 1–2 hours and requires zero tools.
Your walls gain modern graphic interest without permanent commitment. If you tire of the pattern, peel it off cleanly. Geometric decals work especially well in contemporary and scandinavian-inspired spaces.
20. Layer Vintage and New Frames on a Bookshelf
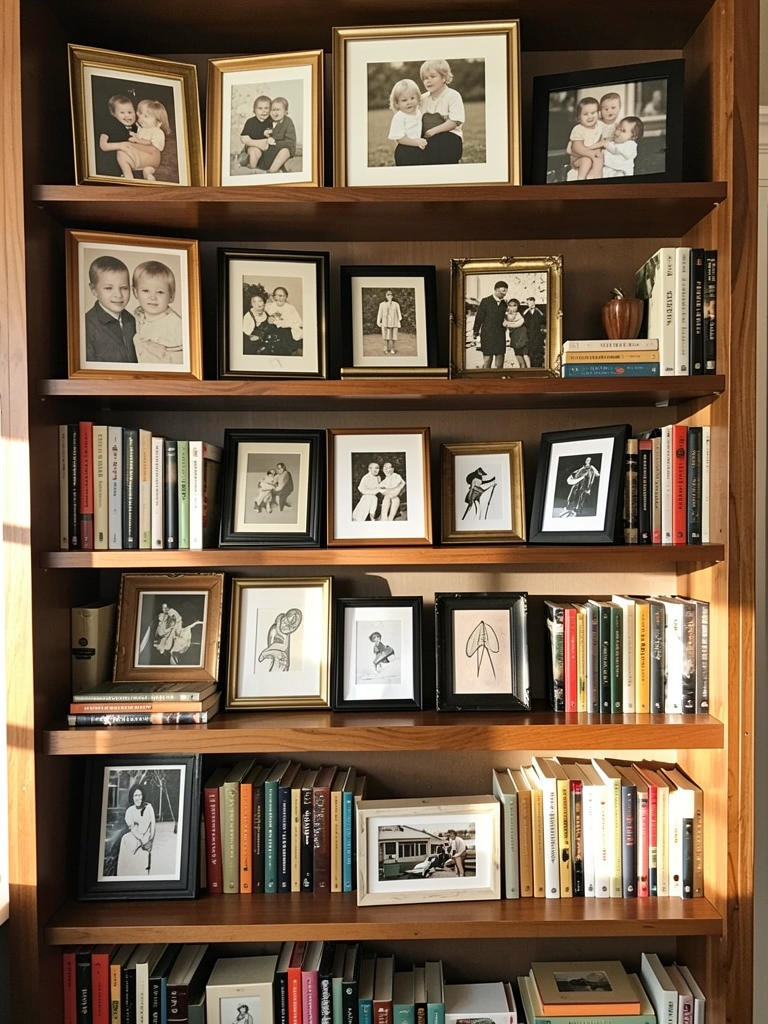
Styling shelves with layered frames, photos, and books creates a collected, curated look that makes your space feel personal.
Gather a mix of frame styles and sizes (vintage finds from thrift stores, new frames from Target or IKEA—budget $5–$30 per frame) and populate them with family photos, prints, and meaningful images. Layer frames at varying angles—some standing upright, some leaning slightly—to create movement. Intersperse with stacked books, small plants, and decorative objects. Pro tip: Odd numbers and varying heights are more visually interesting than symmetry. This styling takes 30–45 minutes and costs under $100 for most shelves.
Your shelves transform from storage into a personal gallery that tells your story. Visitors immediately sense the intentionality and personality radiating from your walls.
21. Stencil a Geometric or Botanical Pattern
Stenciling adds custom pattern without the expense of wallpaper or the commitment of a mural—and it looks surprisingly professional.
Purchase reusable wall stencils ($15–$35 from Etsy, Amazon, or craft stores) in botanical or geometric designs. Use spray adhesive ($5) to hold the stencil in place, then carefully apply paint with a foam roller or stencil brush ($10–$20). Work in small sections, reapplying adhesive between each stencil placement. Choose your accent color to coordinate with existing decor—soft sage on cream, or soft gray on white work beautifully. This takes 4–6 hours for a full wall but feels like custom design.
Your walls gain personality and hand-crafted beauty that feels intentional. Stenciled patterns especially photograph well, so expect Instagram-worthy results.
22. Arrange Books as Wall Art (Leaning Stacks)
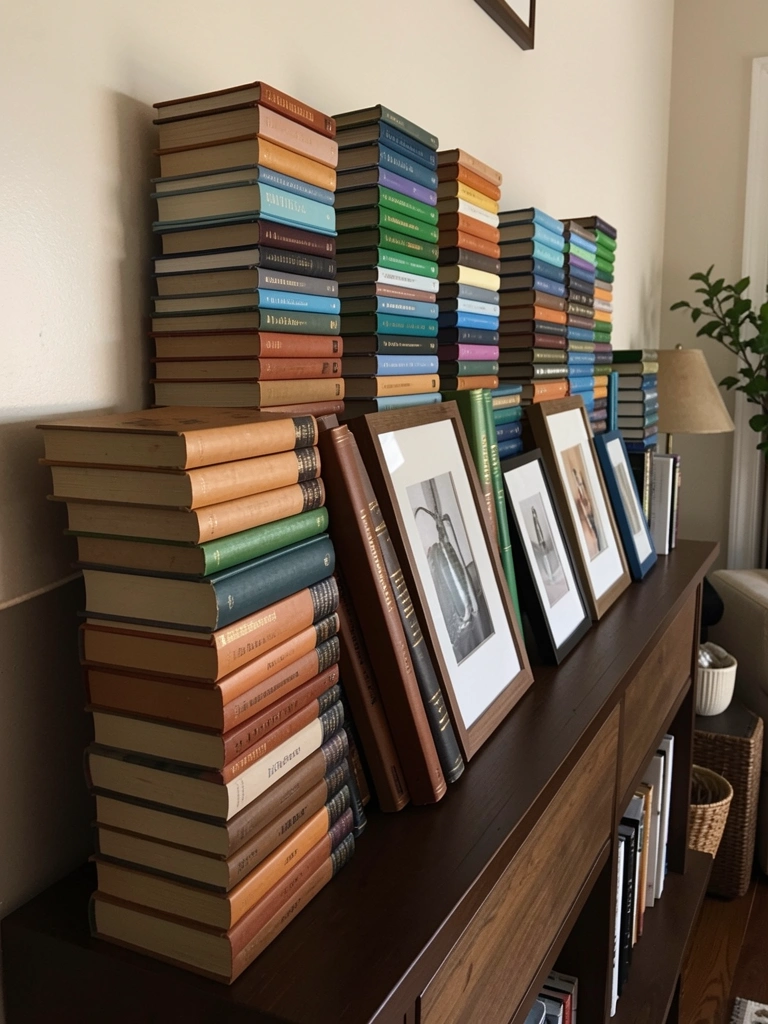
Leaning book stacks create visual interest and work as accessible art if you arrange them by color into ombré groupings.
Collect books you love (mix of reads, design books, and pretty vintage finds) and arrange them in stacks of 3–5, leaning against your wall or on a console. Sort by color to create gradient effects: ombré from light to dark, or cluster warm and cool tones separately. Group 3–4 stacks together rather than spreading single books around. Prop frames or small artwork between stacks to break up horizontal lines. This costs nothing if you use books you own and takes 20 minutes to arrange.
Your wall gains unexpected texture and becomes a conversation starter. Plus, books are functional beauty—you can actually read them when inspiration strikes.
23. Install Acoustic Panels for Sound and Style
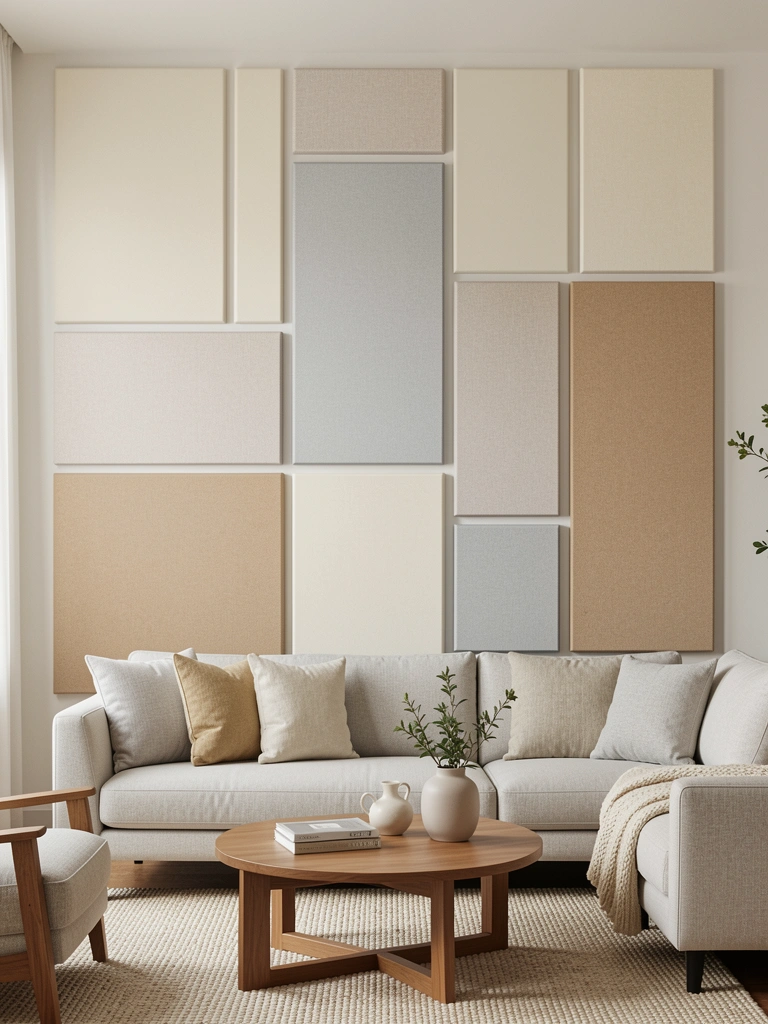
Acoustic panels solve two problems at once: they reduce echo and create textured wall art that looks intentional rather than purely functional.
Choose stylish fabric-covered acoustic panels ($50–$150 per panel from GIK Acoustics, Primacoustic, or Amazon Basics). Install them on a feature wall using a combination of adhesive and fasteners for maximum security. Arrange asymmetrically for visual interest—vary panel sizes and spacing rather than creating a grid. Neutral fabric colors (cream, gray, warm beige) work with most decor. Professional installation isn’t necessary, but measure carefully before committing to placement.
Your room gains both aesthetic appeal and improved sound quality. Especially valuable if you have hard floors or work from home and need sound dampening.
24. Create a Wallpapered Accent Nook
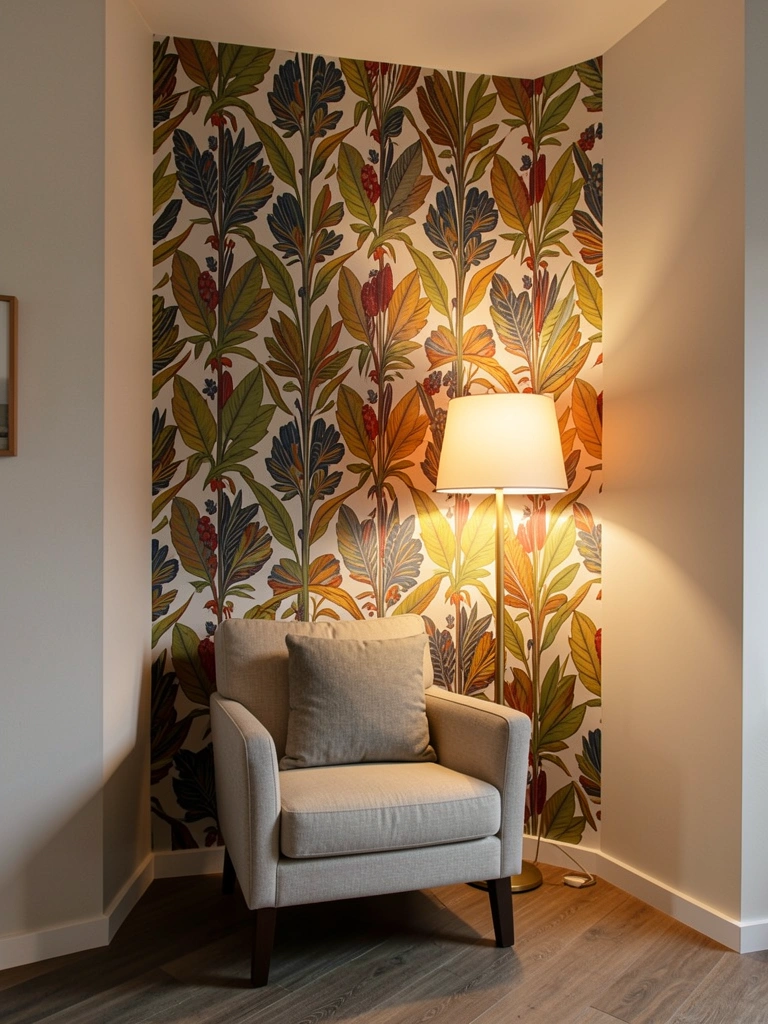
Wallpapering a nook or alcove creates drama while containing pattern so it doesn’t overwhelm your entire room.
Choose one wall or alcove for bold patterned wallpaper ($30–$100 per roll from Spoonflower, Anthropologie, or Wayfair). Select a pattern that feels slightly more adventurous than you’d use on all walls: geometric, botanical, or striped. Prep your wall carefully by removing old wallpaper, filling holes, and sanding smooth. Apply wallpaper following manufacturer instructions, working in small sections and smoothing bubbles carefully. Hire a pro if you’re uncomfortable ($300–$600 for one accent wall), or DIY if you’re patient ($50–$150 in materials, 4–6 hours of work).
Your nook becomes a cozy retreat with pattern-forward personality. The contained wallpaper feels intentional rather than chaotic, and it encourages you to linger in that space.
25. Mount Wooden Crate Shelving for Rustic Charm
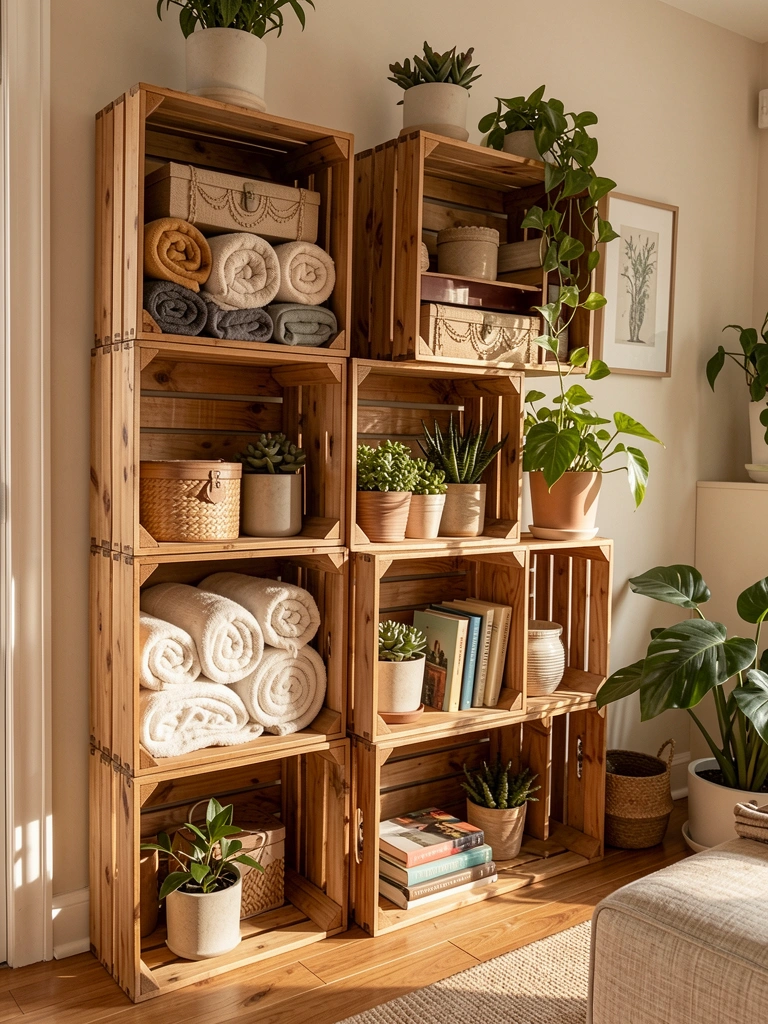
Wooden crate shelves add rustic charm and functional storage while being remarkably budget-friendly and flexible.
Stack and secure wooden crates ($10–$20 each from Home Depot, Etsy, or local hardware stores) using L-brackets and construction adhesive for permanent installation, or use furniture pads and gravity for renter-friendly flexibility. Arrange crates in various configurations: stacked towers, scattered asymmetry, or grid patterns. Arrange crates in your desired wall pattern, then style them with rolled textiles, plants, books, and decorative boxes. This takes 1–2 hours to install and style.
Your walls gain rustic warmth and unexpected functionality. Crate shelving works especially well in farmhouse, industrial, and eclectic spaces.
26. Paint a Subtle Gradient Wall
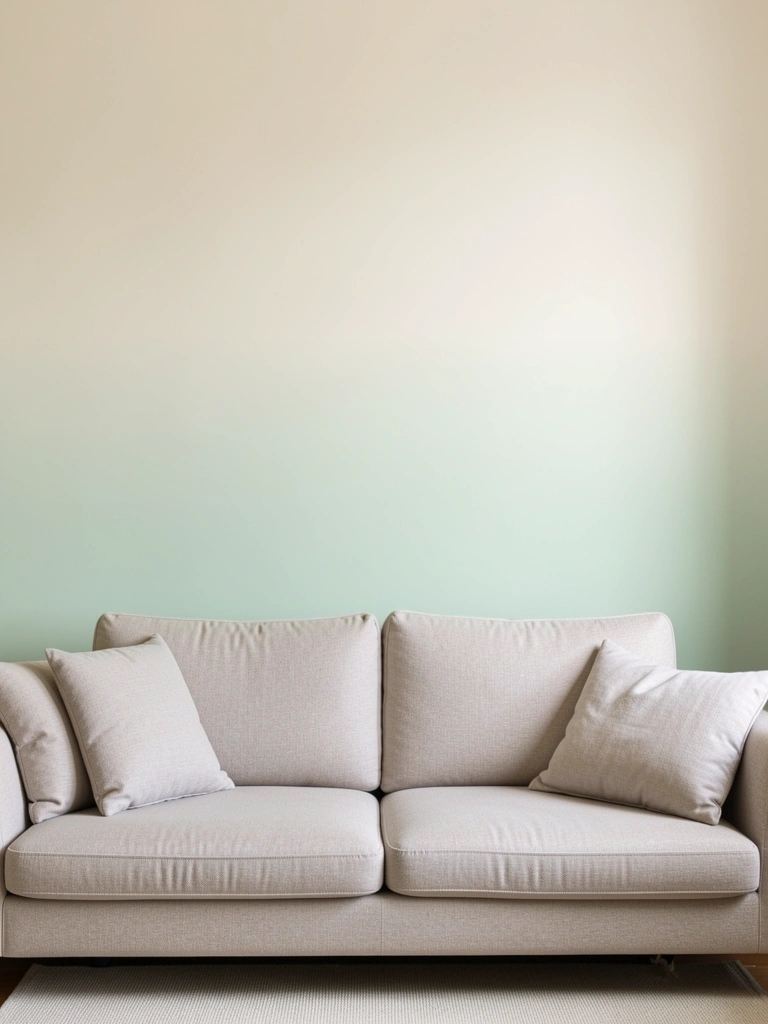
Gradient walls add sophisticated movement and depth without feeling overwhelming—especially when you choose colors in the same family.
Select two complementary paint colors in the same tonal family ($30–$50 each for two quarts): cream to soft sage, or pale blue to warm white. Paint your top color first, creating a 12–18″ section at the top. Mix paint colors 50/50 for your transition zone, then paint your bottom color. Blend the middle section using a dry brush technique—this creates smooth gradients rather than harsh lines. Takes 3–4 hours plus drying time.
Your walls gain subtle sophistication and visual movement that photographs beautifully. Gradient walls work particularly well in modern minimalist and contemporary spaces.
SOFT CTA:
Save this post for your next weekend project and pick one idea that makes your heart happy. Whether you go bold with color, add texture with layers, or invest in statement lighting, your walls are about to thank you. Try just one change this weekend—we promise you’ll be amazed at what a difference it makes.
Leave a Reply