
Introduction
There’s nothing worse than cooking in a kitchen that feels cold, sterile, or unwelcoming. You spend so much time there—prepping meals, making coffee, gathering with loved ones—and yet so many kitchens feel more like showrooms than homes. The good news? You don’t need a full renovation to make your kitchen feel warm and inviting. Whether you’re renting, working with a tight budget, or ready to invest in your space, these 27 ideas will help you create a kitchen where you actually want to spend time. From simple styling tricks to smart storage solutions, you’ll discover ways to add texture, color, personality, and function—all while keeping your kitchen cozy and practical. Let’s make your kitchen a place you love.
1. Layer Warm Earth Tones for Instant Comfort
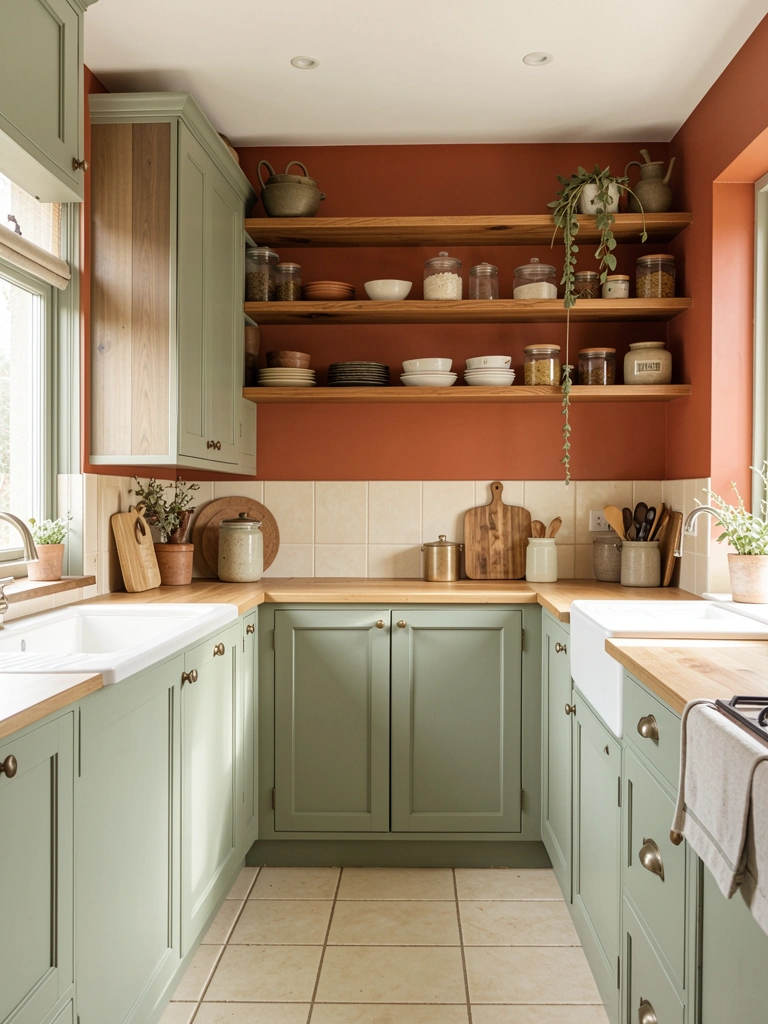
Earth tones create an immediate sense of calm and warmth that white or gray kitchens simply can’t match. You’re moving away from that cold, clinical feel and toward something that feels like home.
Paint a feature wall in warm terracotta, sage green, or soft ochre ($30-$60 for quality paint). Pair it with wood-toned cabinets or stain existing ones to deepen their color. If you rent, removable peel-and-stick wallpaper in earth tones offers the same impact with zero commitment. The beauty of these colors is that they age gracefully and hide everyday wear better than white.
Pro tip: Choose matte finishes over glossy—they feel more sophisticated and hide fingerprints better.
The result? Your kitchen instantly becomes a space that feels settled and welcoming, like somewhere you’d linger over breakfast.
2. Add Open Shelving to Display Personality
Open shelving breaks up heavy cabinet lines and lets you showcase things you actually love instead of hiding everything away. It’s the kitchen equivalent of displaying your personality on your sleeve.
Install floating shelves using a level and wall anchors ($20-$50 for three shelves plus hardware; YouTube tutorials make this DIY-friendly). Style with a mix of cookbooks, ceramic dishes, small plants, and practical items like oil bottles. Keep one or two shelves for everyday dishes you use often—this prevents the “museum display” trap.
Real talk: Open shelving requires regular tidying, so only go this route if you’re okay with light maintenance.
You’ll notice how much lighter your space feels when some wall space breathes, and visitors immediately see the real, lived-in version of your home.
3. Swap Handles for Fingerpull Simplicity
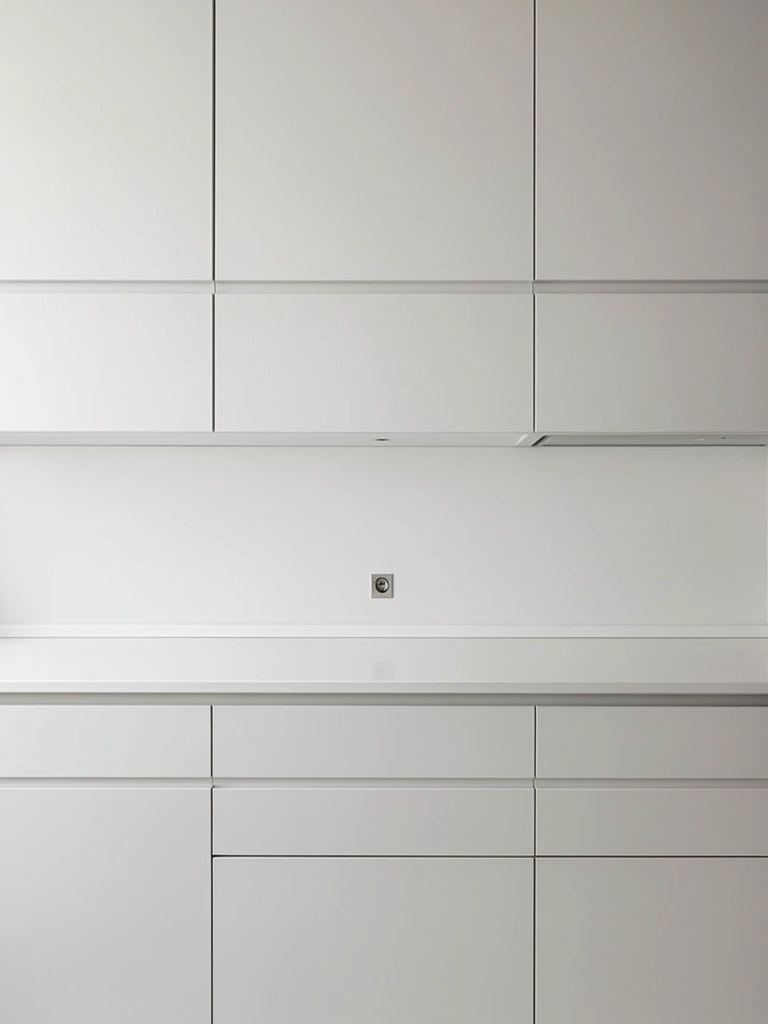
Handle-free cabinets have gone mainstream because they actually make your kitchen feel less cluttered, even when storage is full. The streamlined look creates visual calm.
Replace hardware with integrated fingerpull handles ($200-$400 for a full kitchen restock) or invest in cabinets with built-in push-to-open mechanisms. Brands like Lioher offer ergonomic solutions that feel natural to use. For renters, adhesive fingerpull handles work temporarily on cabinet faces without damaging them.
This update takes 1-2 hours if you’re replacing existing hardware, or you can do it gradually over time.
Your kitchen immediately looks more refined, and the simplified lines make the space feel larger and more intentional.
4. Introduce Textured Materials Like Fluted Cabinets
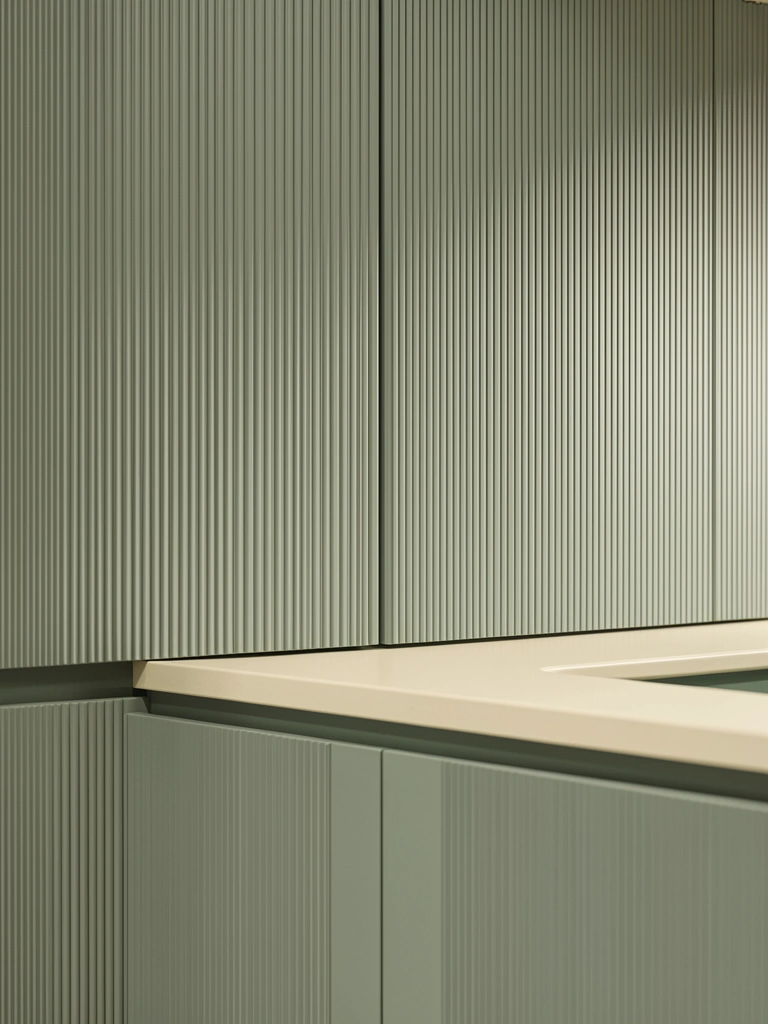
Flat, uniform finishes make kitchens feel impersonal. Texture adds dimension, visual interest, and a sensory quality that makes your space feel more sophisticated and welcoming.
Choose fluted cabinet fronts for lower cabinets ($150-$300 per cabinet face for custom versions, or $80-$150 for pre-made fluted panel inserts). Mix textures by pairing fluted cabinets with smooth counters or textured backsplash. Plaster-finish range hoods are another trending option ($400-$800) that add organic movement.
Not ready to commit? Removable textured wallpaper or contact paper on one wall tests the look risk-free ($15-$30).
The depth and light-play from textured surfaces makes your kitchen look professionally designed without feeling sterile or cold.
5. Create a Hidden Scullery for Open-Plan Mess Control
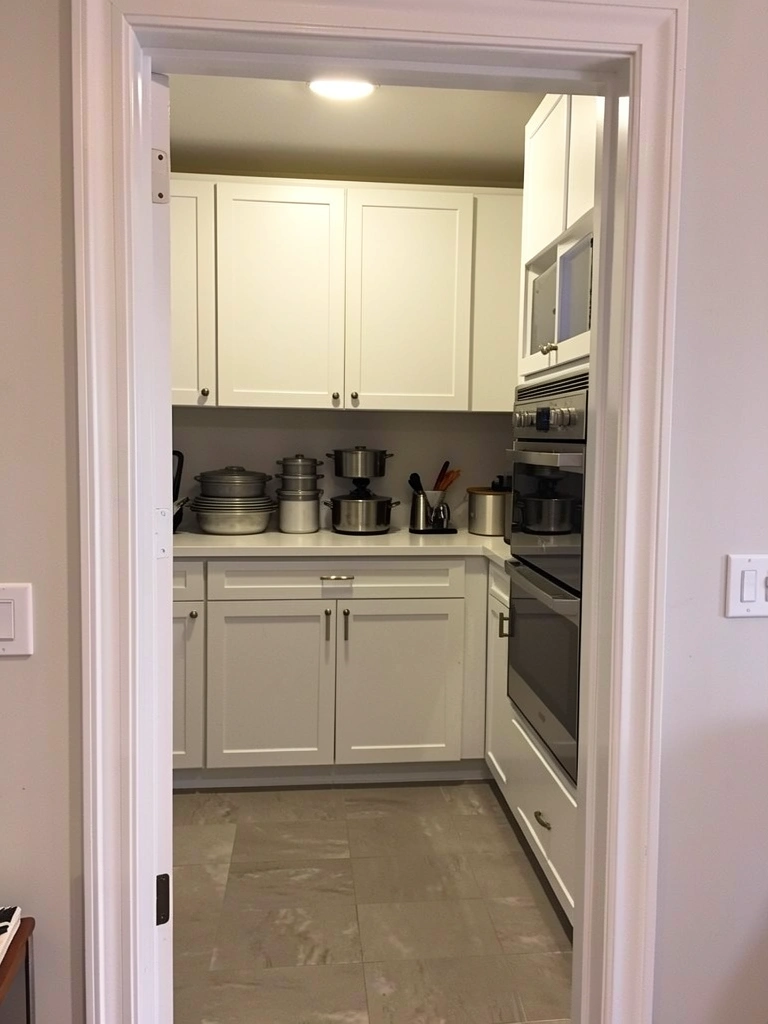
Open-plan kitchens are beautiful until dirty dishes and food prep chaos become visible from the living room. A hidden scullery or butler’s pantry solves this while maintaining the open aesthetic.
If you have a hallway, closet, or small adjacent room, install cabinetry to create a prep and cleanup zone ($800-$2,000 for basic built-ins, or use a tall cabinet system for $300-$600). This hides the blender, food processor, and pile of cookware while keeping your main kitchen looking serene. Renters can achieve this with a rolling utility cart behind a decorative screen.
A few days project with proper planning or one afternoon if you’re using ready-made solutions.
Your guests see a calm, curated kitchen while you have functional space for actual cooking behind the scenes.
6. Mix Bold Cabinet Colors with Neutral Counters
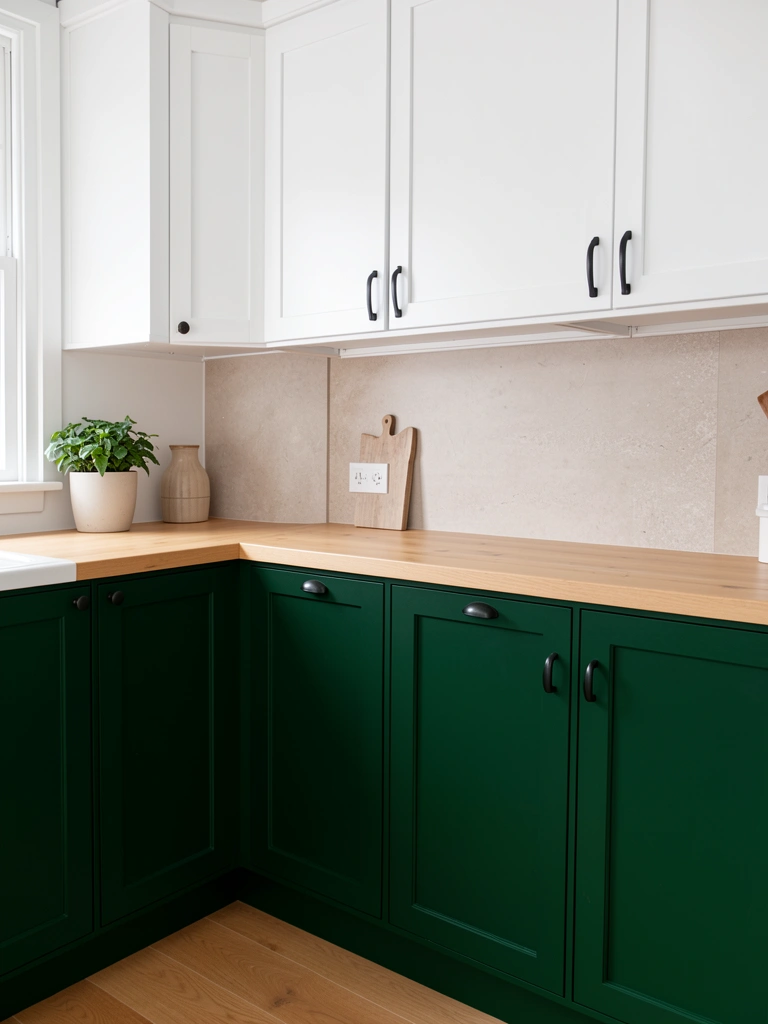
The days of all-white kitchens are done—71% of design professionals report clients now want color that reflects their personality. Bold cabinets make a statement while neutral counters keep the overall effect balanced.
Paint or refinish lower cabinets in deep jewel tones like forest green, navy, or terracotta ($200-$600 including primer and labor if DIY, or $800-$1,500 with professional help). Keep uppers white or natural wood, and choose a timeless countertop like light granite or butcher block ($30-$100+ per square foot). Cabinet paint lasts 3-5 years before touch-ups; consider semi-gloss or satin finishes for durability.
Weekend project for DIY painters; 3-5 days if hiring help.
Your kitchen becomes the room people actually want to hang out in—bold enough to have character but balanced enough to stay timeless.
7. Install Warm Lighting in Layers
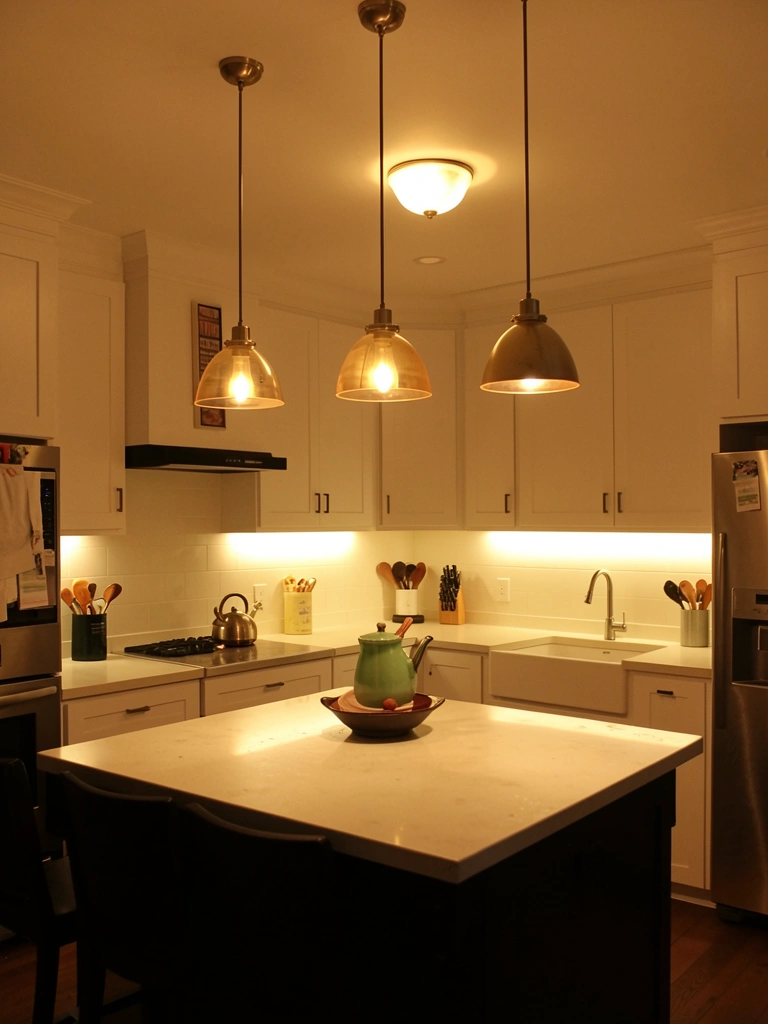
Single overhead lighting creates harsh shadows and cold energy. Layered lighting (ambient, task, accent) makes your kitchen feel like a welcoming retreat you actually want to spend time in.
Add under-cabinet LED strips ($30-$80 for a kit, super easy to install), hang pendant lights over islands or counters ($60-$300 per fixture), and install a dimmer switch on overhead lights ($15-$40). Use warm white bulbs (2700K color temperature) instead of cool white for instant coziness. This combination takes 2-3 hours if you’re comfortable with basic wiring, or hire an electrician ($150-$400).
Pro tip: Battery-operated puck lights work for renters with zero installation stress.
The warmth of layered lighting makes your kitchen feel like a restaurant-quality space rather than a utilitarian work zone.
8. Embrace Retro Earth Tones and 1970s Vibes
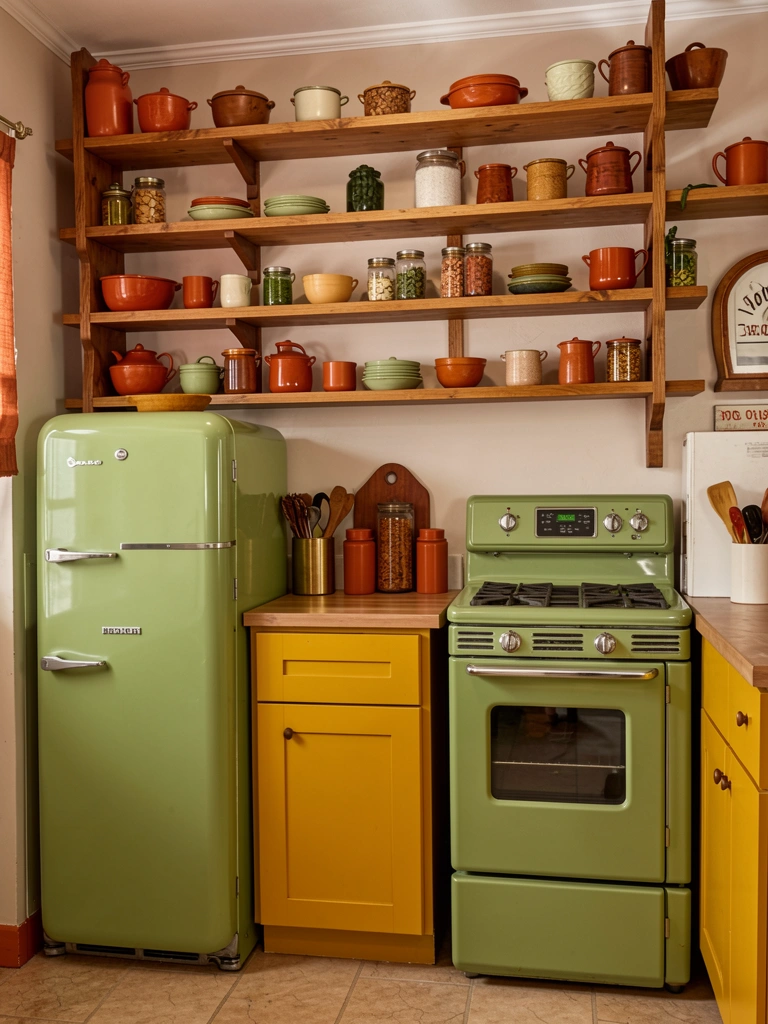
Retro styles are making a major comeback—52% of design professionals predict a 1970s bright, earthy tone revival. Embracing these tones feels personal and intentional rather than trendy.
Choose one vintage-inspired element like an avocado-green stove ($300-$800 for new vintage-style appliances, or hunt used models for $50-$300), mustard or olive cabinet paint ($150-$400 to refinish), or a warm wood backsplash ($200-$600). Mix with modern elements like stainless steel hardware or contemporary countertops to keep it feeling current rather than campy.
Start with paint or smaller accents before committing to appliances.
This approach celebrates warmth and personality while avoiding the feeling of being stuck in a time warp.
9. Add a Combination Island with Built-In Seating
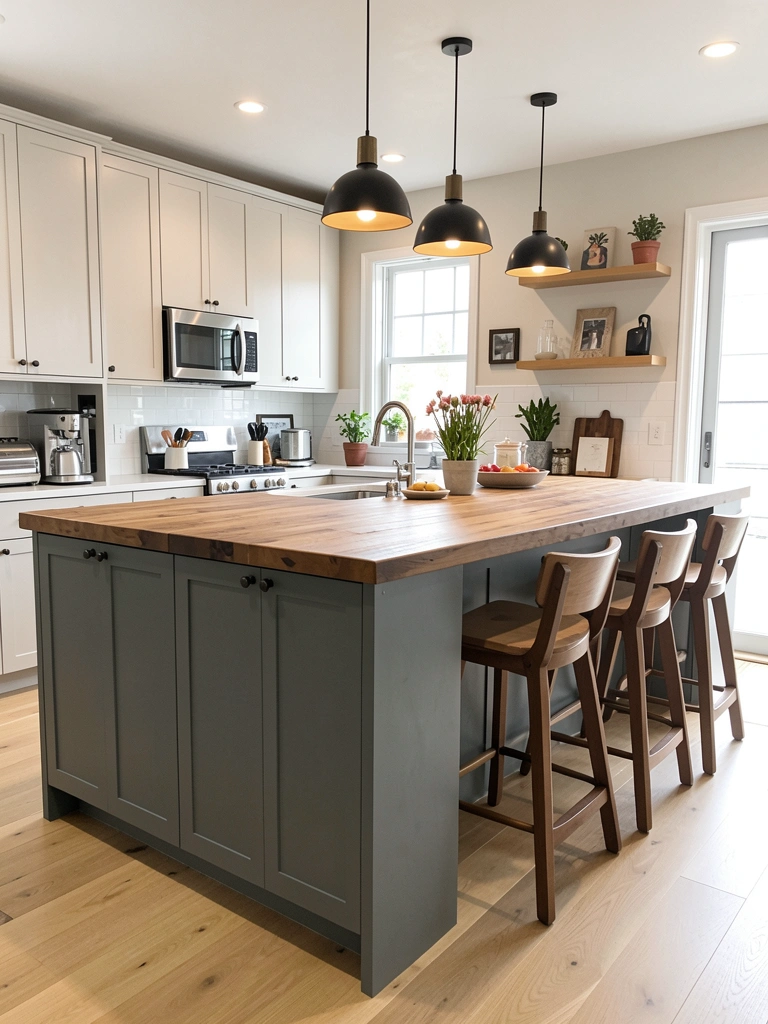
Islands that combine 50-60% closed storage with open seating solve the dual problem of needing storage and gathering space without turning your kitchen into a warehouse.
Install or upgrade to a combination island with bottom cabinets for cookware and pantry items plus an open side for barstool seating ($1,000-$3,000 for mid-range options, or $300-$800 for a simple base kit to customize). This gives you functional storage hidden from view plus a social hub for entertaining. Pair with 2-3 comfortable bar stools ($80-$200 each).
A weekend project with a pre-made base, or 2-3 days with custom building.
Now your kitchen serves triple duty: cooking, storage, and gathering place—all without visual clutter.
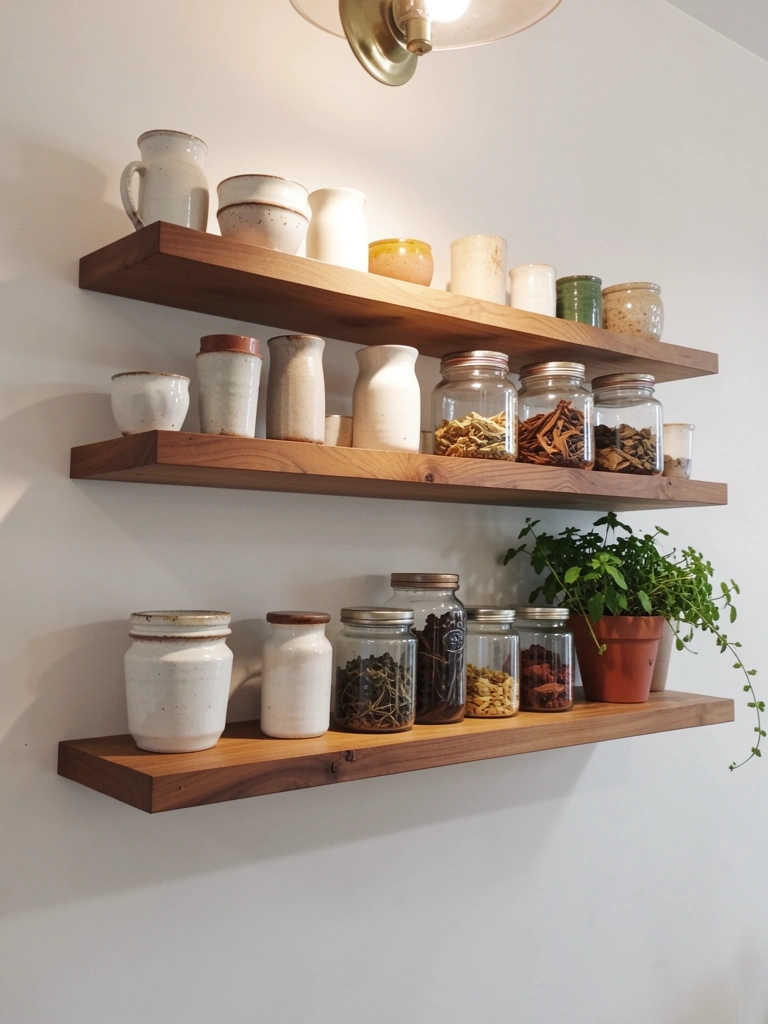
10. Style Open Shelves with Cookbooks and Plants
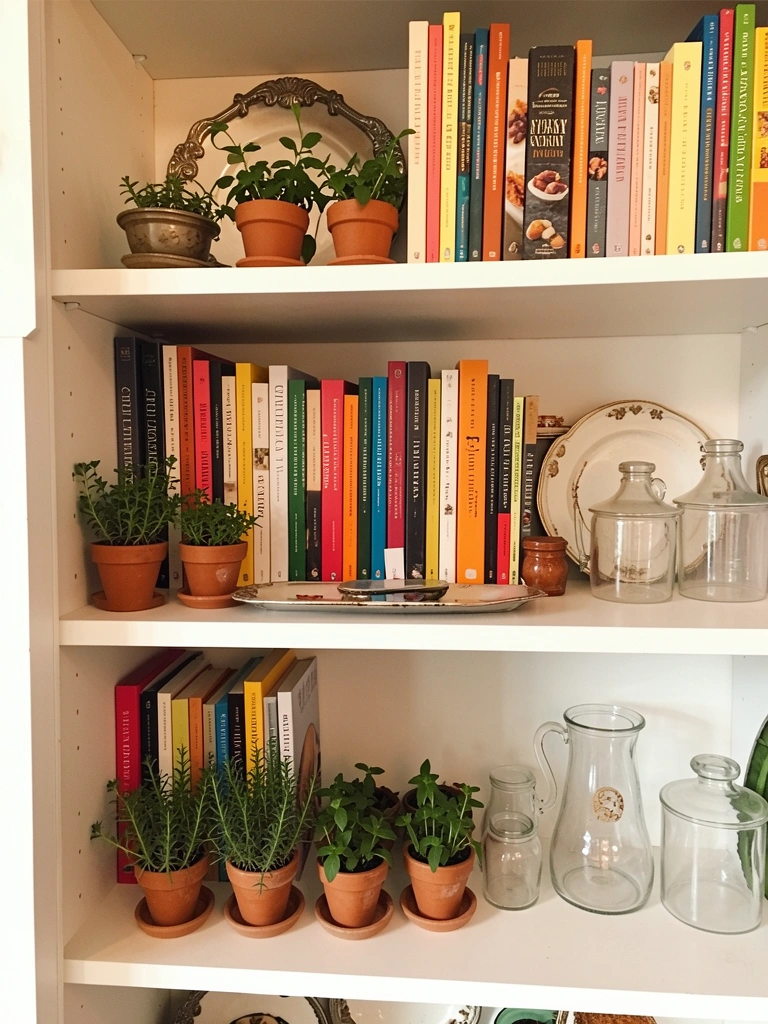
Open shelves are only cold and sterile if they’re empty or perfectly styled like a showroom. Real personality comes from mixing function with beautiful objects you actually use and love.
Arrange cookbooks by color or size, add 2-3 potted herbs or small plants per shelf, and include dishes or serving pieces you use regularly. Layer in books, ceramics, and greenery so shelves look curated but lived-in. This styling costs just the price of plants ($5-$15 each) and maybe a few new ceramics if you want them ($10-$40 per piece).
Pro tip: Group items in odd numbers (3s and 5s) for a more sophisticated look than perfect pairs.
Your shelves become a visual story of who you are, making your kitchen feel personal rather than prescriptive.
11. Install a Range Hood That Doubles as Decor
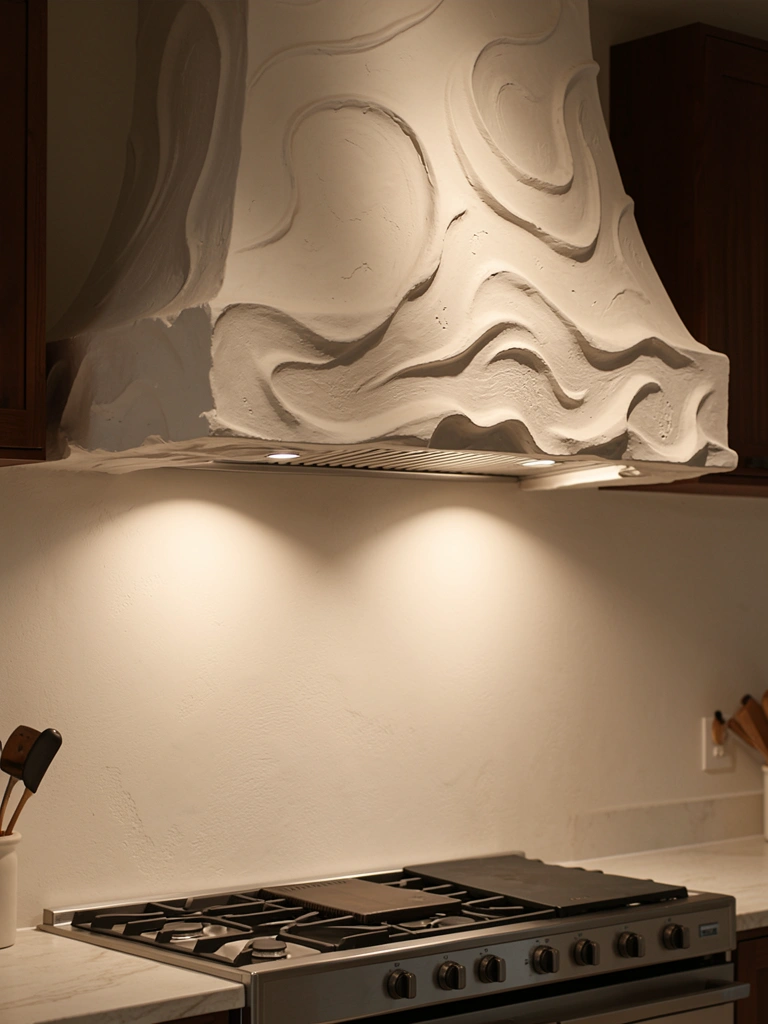
Traditional metal hoods are purely functional and often visually heavy. A textured or sculptural hood becomes the kitchen’s focal point and adds that organic warmth trend is calling for.
Invest in a plaster-finish or textured range hood ($400-$1,200) or opt for a painted steel hood in a bold color ($200-$600). These statement pieces add architectural interest without sacrificing ventilation. If you rent or want flexibility, a removable wood or plaster-look wall treatment above your stove creates a similar effect ($80-$200).
Installation requires professional help for ventilation work ($300-$600 in labor).
Your kitchen gains a sculptural element that catches light and creates visual warmth while handling the practical job of removing cooking odors.
12. Create a Coffee or Beverage Station
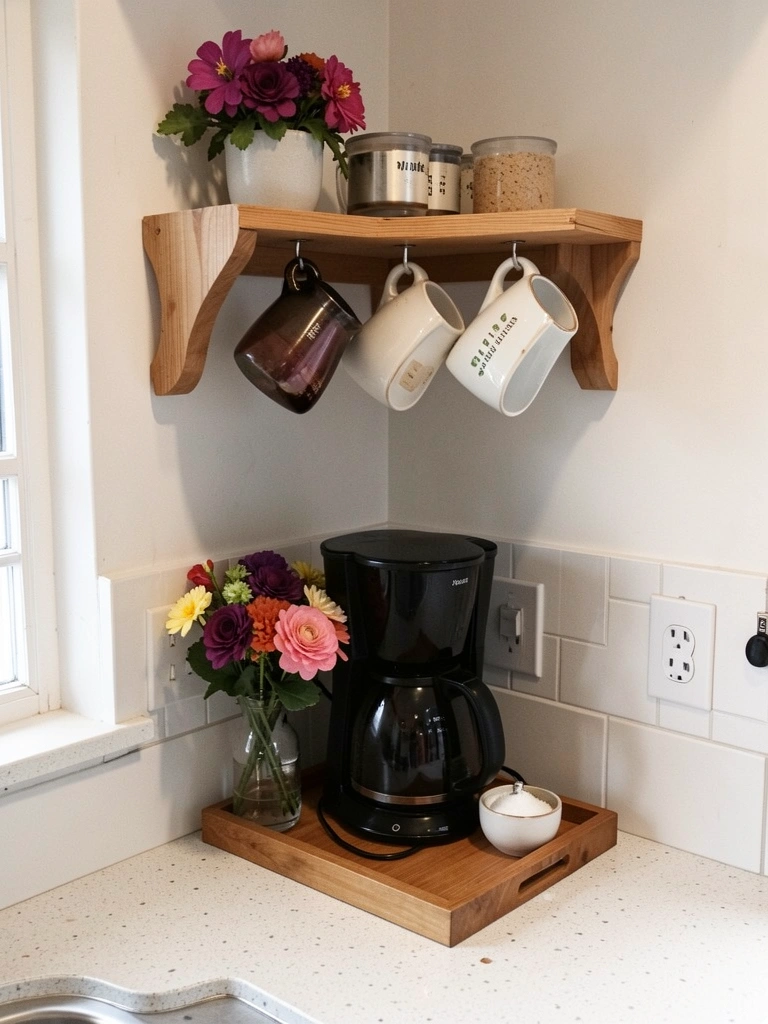
A dedicated coffee or beverage station creates a moment of ritual and gives that area of your kitchen distinct personality and purpose. It’s the first thing people see in the morning and sets the tone for your whole day.
Dedicate one shelf, small table, or corner counter to coffee supplies ($0 if you’re repurposing existing furniture). Add a simple wooden tray ($15-$40), a few matching mugs ($30-$60 for a set), and fresh flowers or greenery ($5-$15 weekly). Group everything in one small zone so it feels intentional rather than chaotic.
Free with items you already have, or $60-$120 to refresh it properly.
This tiny ritual space makes your kitchen feel like a café you genuinely want to visit rather than just a place to grab things quickly.
13. Paint Lower Cabinets in Jewel Tones
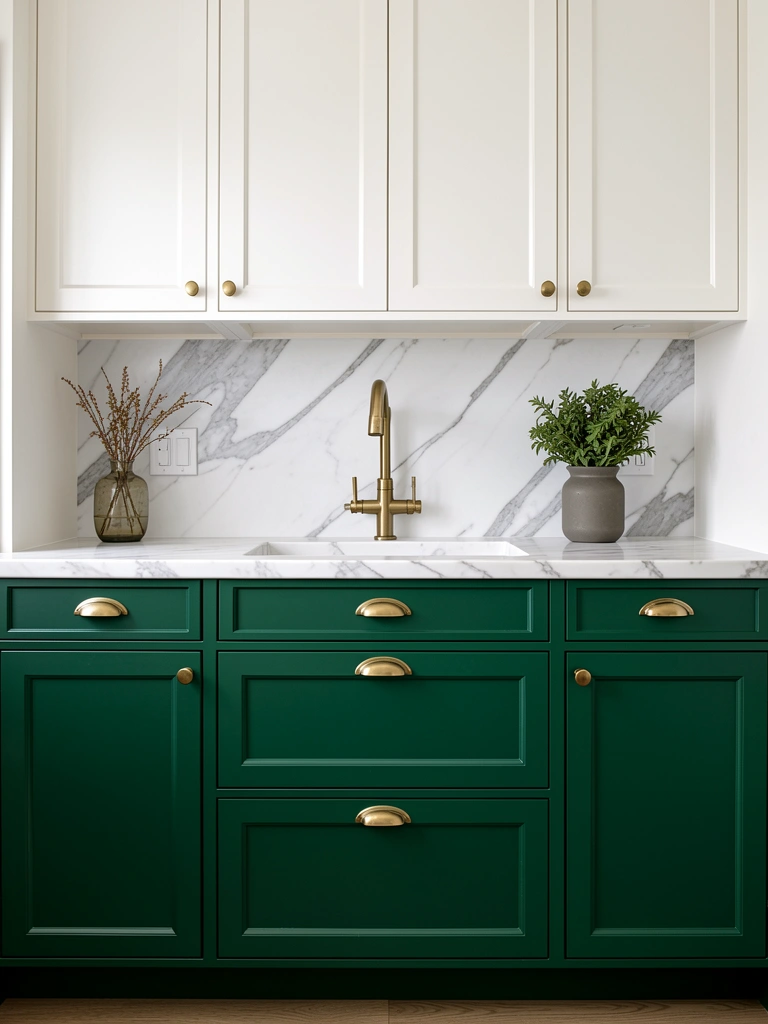
Two-tone cabinetry with bold lower tones and lighter uppers feels both modern and warm. It creates visual interest without overwhelming your entire space with color.
Paint lower cabinets in emerald, sapphire, or deep navy ($200-$400 for quality paint and primer, or $800-$1,500 with professional application). Keep uppers white or natural wood. Add brass or gold hardware ($2-$8 per knob, around $50-$200 total) to tie the color together. Satin or semi-gloss finishes are more durable than matte for high-traffic cabinet doors.
A weekend DIY project or 2-3 days with professional help.
Your kitchen instantly looks elevated and intentional, with enough visual contrast to feel dynamic rather than flat.
14. Add Warm Wood Accents and Shelving
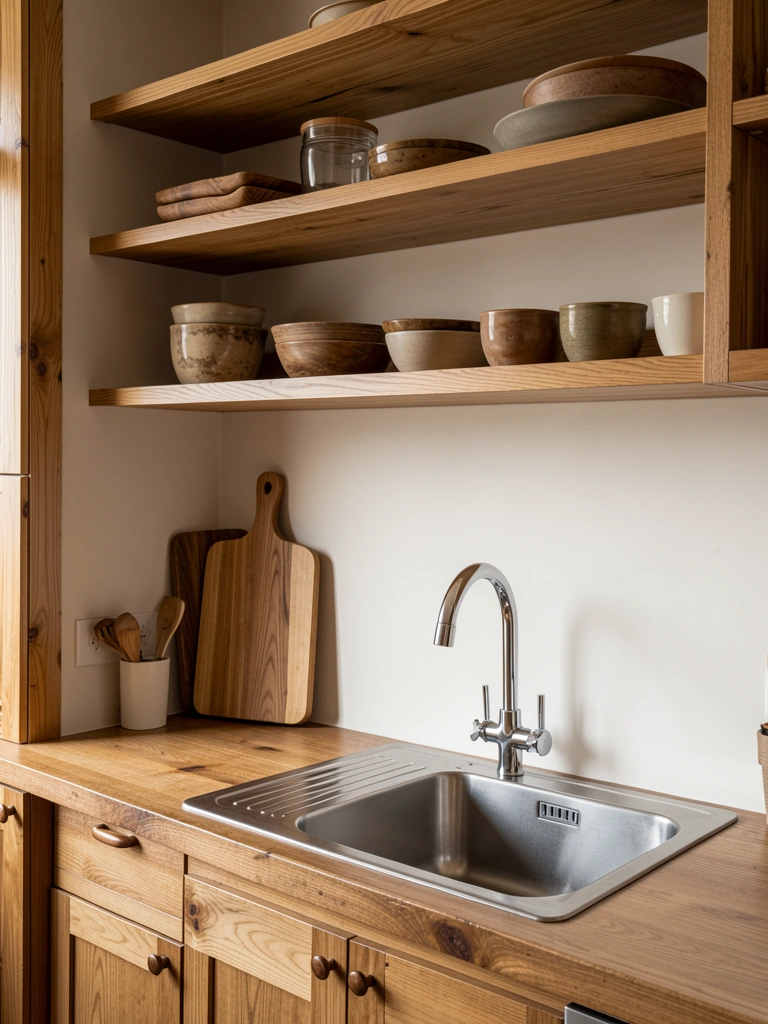
Wood softens modern or minimalist kitchens and adds natural warmth that no paint color can replicate. It ties your space to nature and feels inherently welcoming.
Install warm wood floating shelves ($60-$150 for one shelf), upgrade to wood cabinet faces ($300-$800 depending on size), or add a wood beam range hood backing ($200-$600). Choose oak, walnut, or cedar in medium to warm tones rather than bleached white. Mix wood tones gently—two complementary woods are fine, three or more can feel chaotic.
DIY floating shelves take 1-2 hours; cabinet upgrades take a weekend or professional installation.
Wood brings organic texture and warmth that makes your kitchen feel less like an appliance showroom and more like a home.
15. Style Your Countertops as Display Space
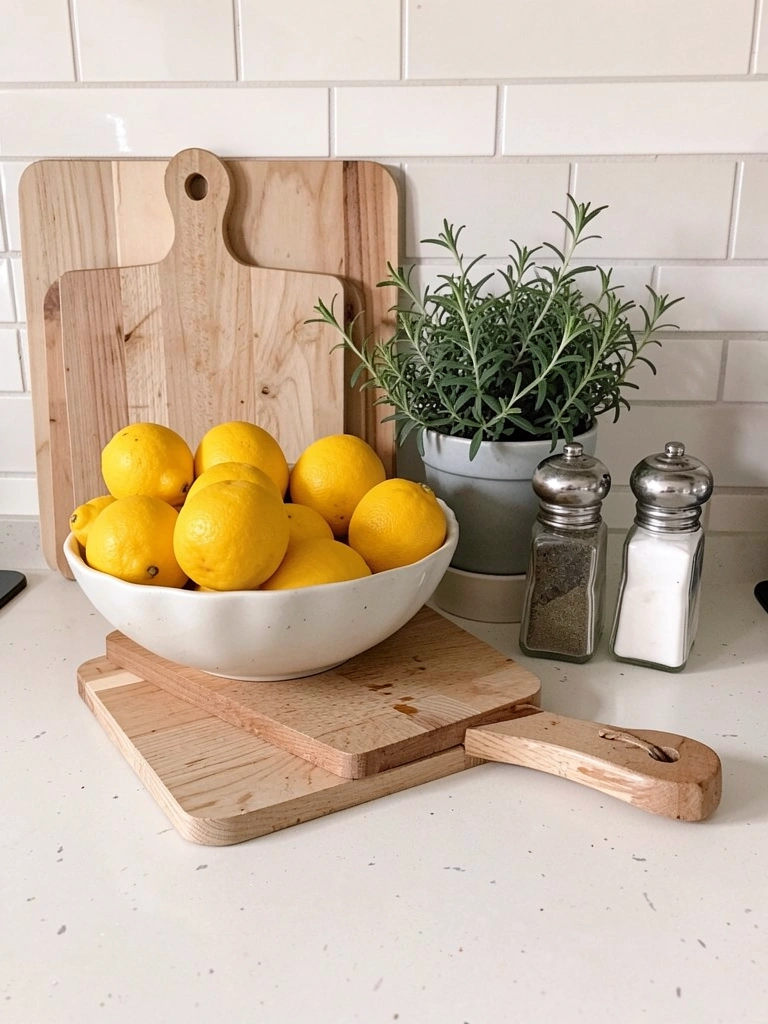
Rather than clearing everything off counters (which feels cold and sterile), curate what you keep visible for a lived-in aesthetic that’s still organized.
Keep 3-4 beautiful items on your counter: a wooden cutting board, a potted herb, a bowl of seasonal fruit, and maybe a small ceramic dish. Group them on one side to preserve workspace. Everything else stays in drawers or cabinets. Switch seasonal items to keep it fresh ($0 if you’re rotating things you own, $15-$30 for seasonal decor).
Takes 15 minutes to style and 5 minutes to maintain daily.
Your counters become a small gallery of intentional style rather than either a cluttered mess or a barren workspace.
16. Install Wallpaper or Peel-and-Stick Accents

Wallpaper is the fastest way to add color and pattern without commitment (especially removable versions). It instantly makes a kitchen feel designed rather than generic.
Apply peel-and-stick wallpaper to one accent wall ($20-$60 for a roll covering about 28 sq ft). Choose warm botanical, geometric, or subtle patterns rather than loud designs. Removal is as simple as peeling when you want a change. Alternatively, hire a professional wallpaper hanger for $300-$800 if you’re doing traditional wallpaper.
DIY peel-and-stick takes 1-2 hours; traditional wallpaper takes 4-6 hours professionally.
One patterned wall completely shifts your kitchen’s energy from blank and cold to warm and designed.
17. Create a Dining Nook for Gathering
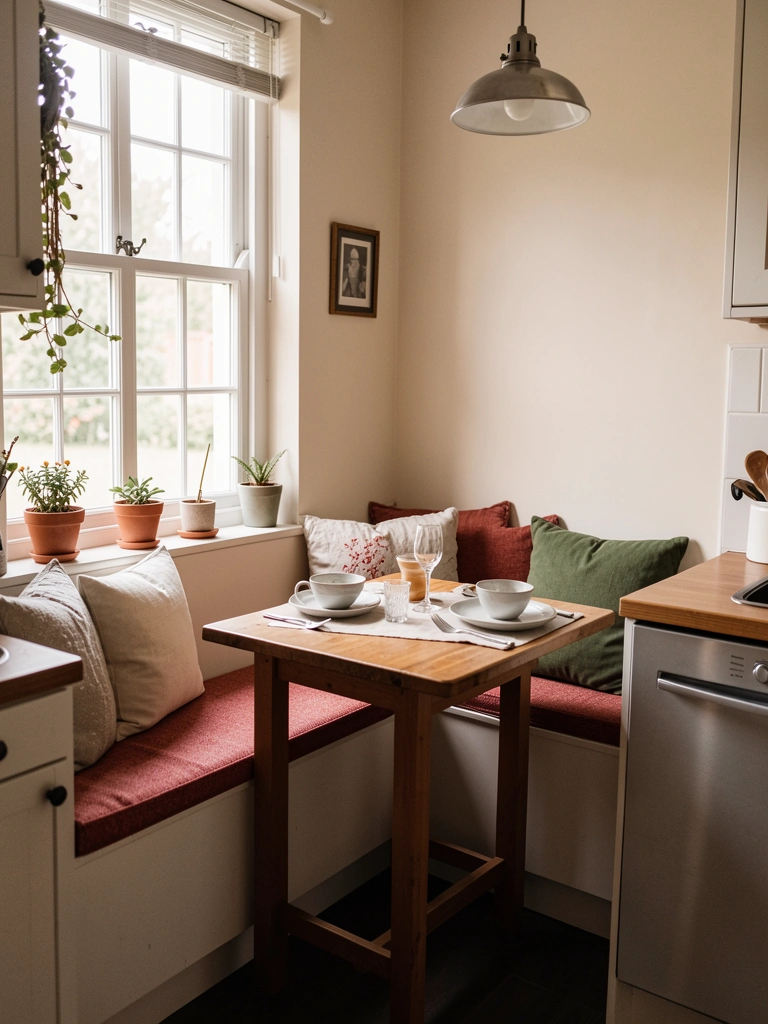
A dining nook transforms an awkward corner into a cozy gathering spot and gives your kitchen more purpose than just cooking. It’s where memories get made over breakfast.
Use a window corner to install a built-in bench ($400-$1,200 with professional building, or $100-$300 for a simple DIY frame) plus a small table ($100-$400) and cushions ($30-$80). If space is tight, a café-style table and two chairs ($150-$400 total) creates the same effect. This works even in tiny kitchens—just 4×4 feet is enough.
DIY simple benches over a weekend; professional builds take 2-3 days.
Suddenly your kitchen feels like an experience—a place where you linger and connect rather than just pass through.
18. Layer in Greenery and Live Plants
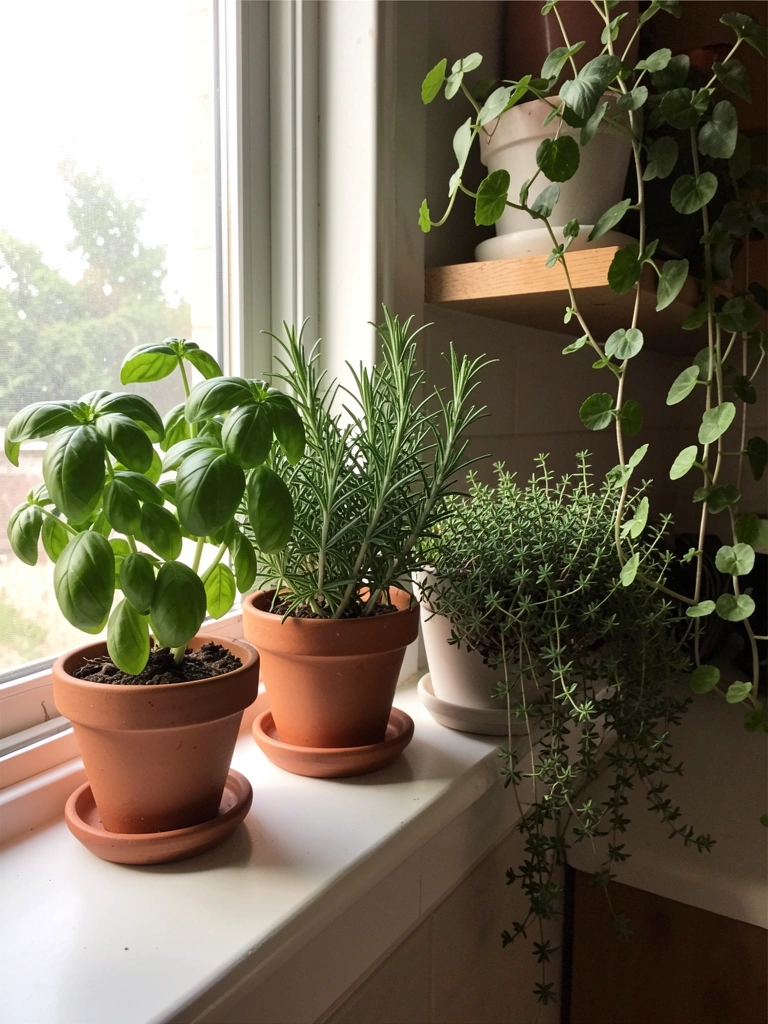
Plants soften hard lines and connect your kitchen to nature while serving practical purposes like fresh herbs for cooking. The visual effect is instantly warmer and more alive.
Place potted herbs on sunny windowsills ($3-$8 per plant), add trailing plants to shelves ($5-$15 each), and use a rolling plant stand in a corner ($40-$100) for multiple greenery. Choose low-maintenance plants like snake plants, pothos, or actual herbs you’ll use. Water on a simple schedule (most herbs need water 2-3 times weekly).
Free if you propagate from cuttings; $30-$60 to populate several spots properly.
Green instantly makes your kitchen look alive, intentional, and warmer—plus you get fresh herbs for cooking.
19. Use Warm Metallic Hardware and Fixtures
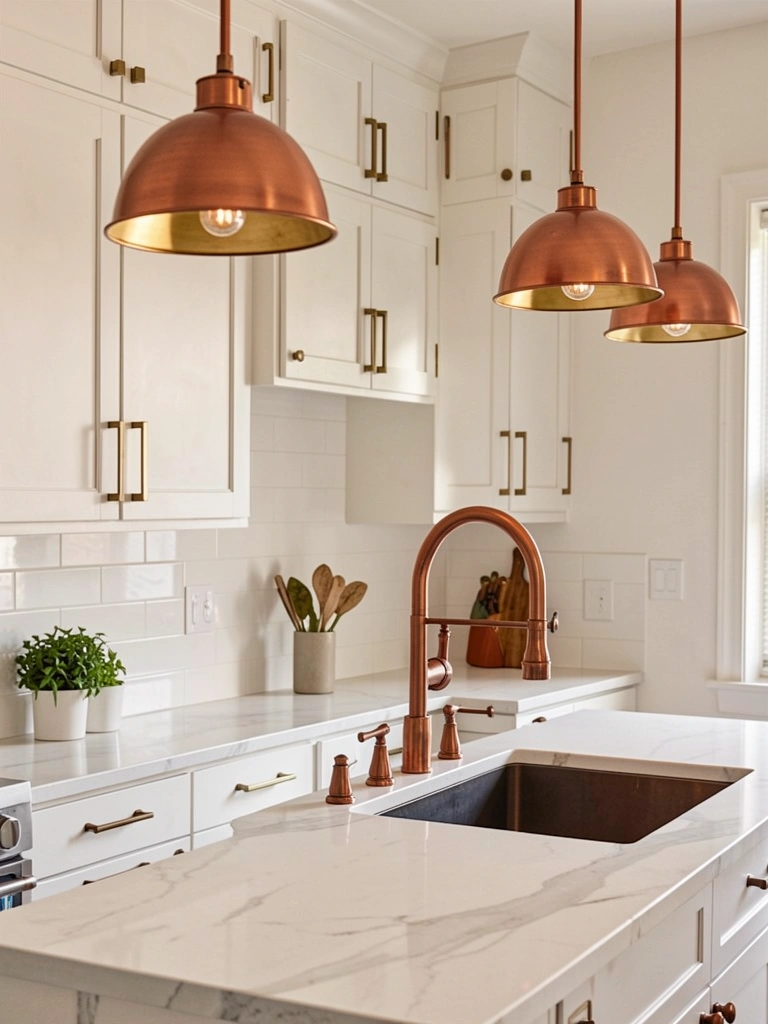
Hardware is a small detail with outsized impact. Warm metals like brass, copper, and rose gold feel infinitely cozier than cold stainless steel or chrome.
Replace cabinet knobs and pulls with warm brass or copper hardware ($2-$8 per piece, $50-$300 for a full kitchen). Upgrade faucet trim if possible ($100-$400 for a new fixture), or add matching pendant lights ($80-$300 each) to tie everything together. This subtle shift creates visual warmth throughout your space.
Hardware replacement takes 1-2 hours and requires just a screwdriver.
These small warm-metal touches create a cohesive, intentional aesthetic that feels both sophisticated and inviting.
20. Build Textured Backsplash Variety
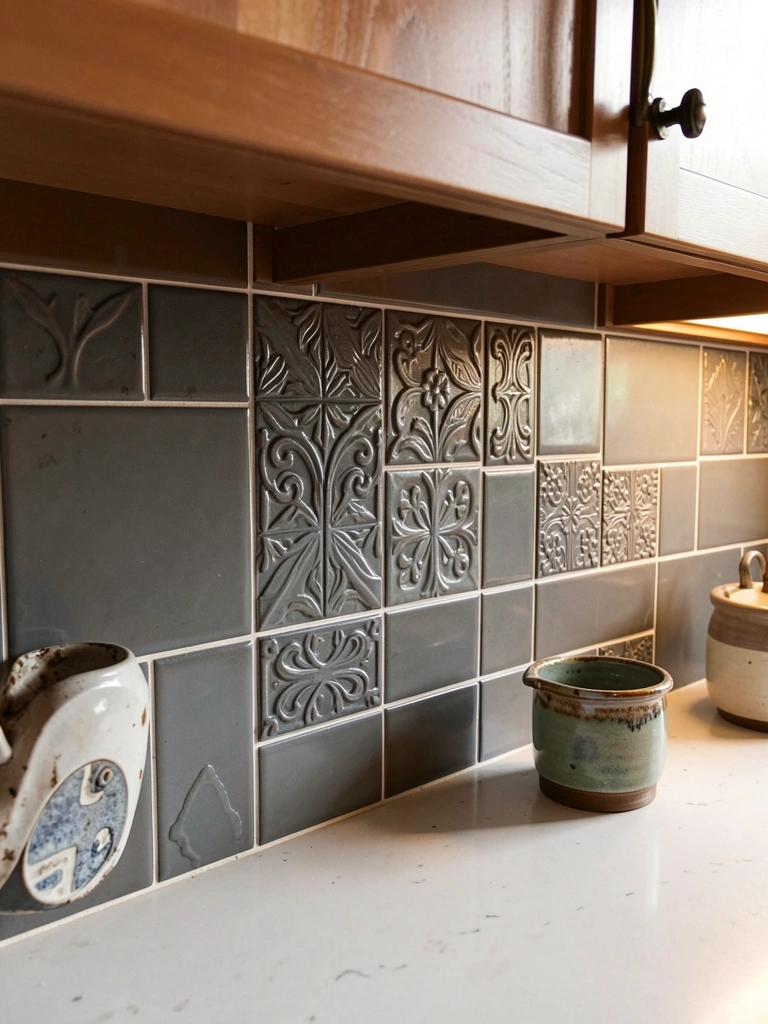
A uniform, flat backsplash feels sterile. Mixing textures creates depth and makes your kitchen feel designed and considered rather than generic.
Combine matte and glossy tiles ($5-$15 per square foot), add relief or raised patterns ($10-$20 per square foot), or mix ceramic styles ($8-$25 per square foot). A 3×6 foot backsplash costs $150-$600 in materials plus $400-$800 in installation. Go bold with color or pattern here—this is the perfect place to take risks since it’s just one wall.
2-3 day professional project, or a long weekend for ambitious DIYers.
A textured, interesting backsplash becomes a focal point that elevates your entire kitchen aesthetic.
21. Organize with Beautiful, Functional Storage
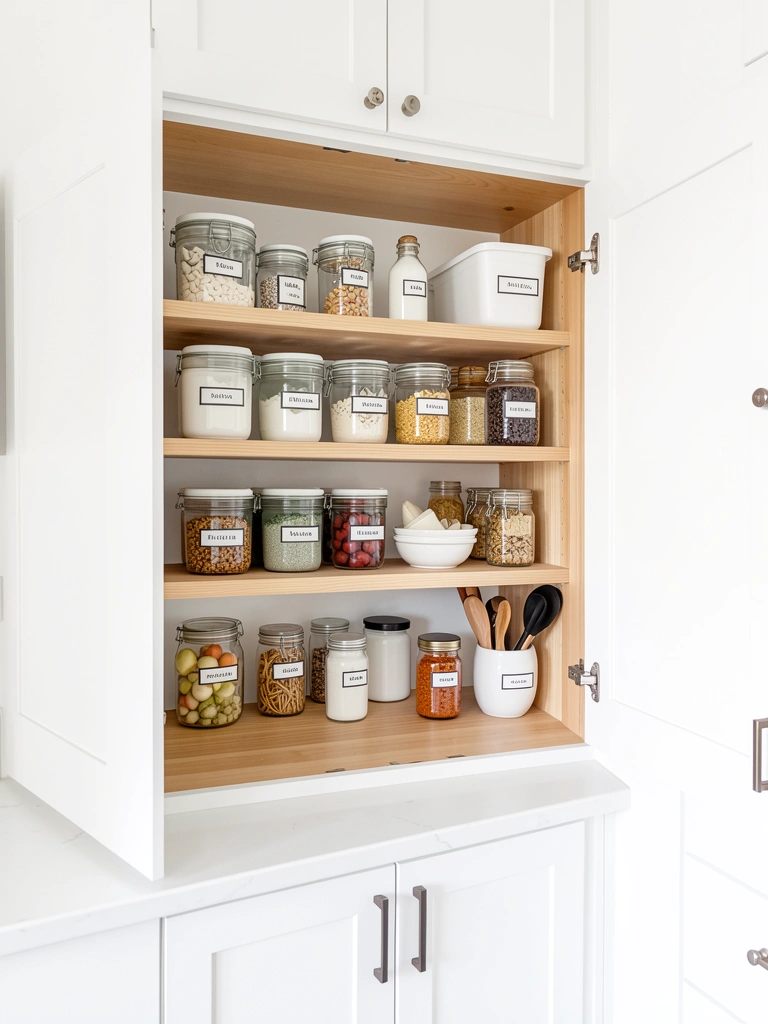
Functional storage doesn’t have to be boring. Beautiful organization systems make you actually want to open your cabinets and keep things tidy.
Invest in matching storage containers for pantry items ($30-$80 for a set of 5-6), labeled glass jars for dry goods ($20-$50 for a set), and drawer dividers ($15-$40). Choose warm wood, ceramic, or warm-toned glass rather than clear plastic or chrome. Label everything with a label maker ($15-$30) for a polished look. This creates visual calm when cabinet doors open and makes cooking more efficient.
One weekend afternoon to implement across your kitchen.
Organization suddenly feels aspirational rather than chore-like, and your kitchen runs more smoothly because everything has a home.
22. Integrate Outdoor Spaces for Extended Living
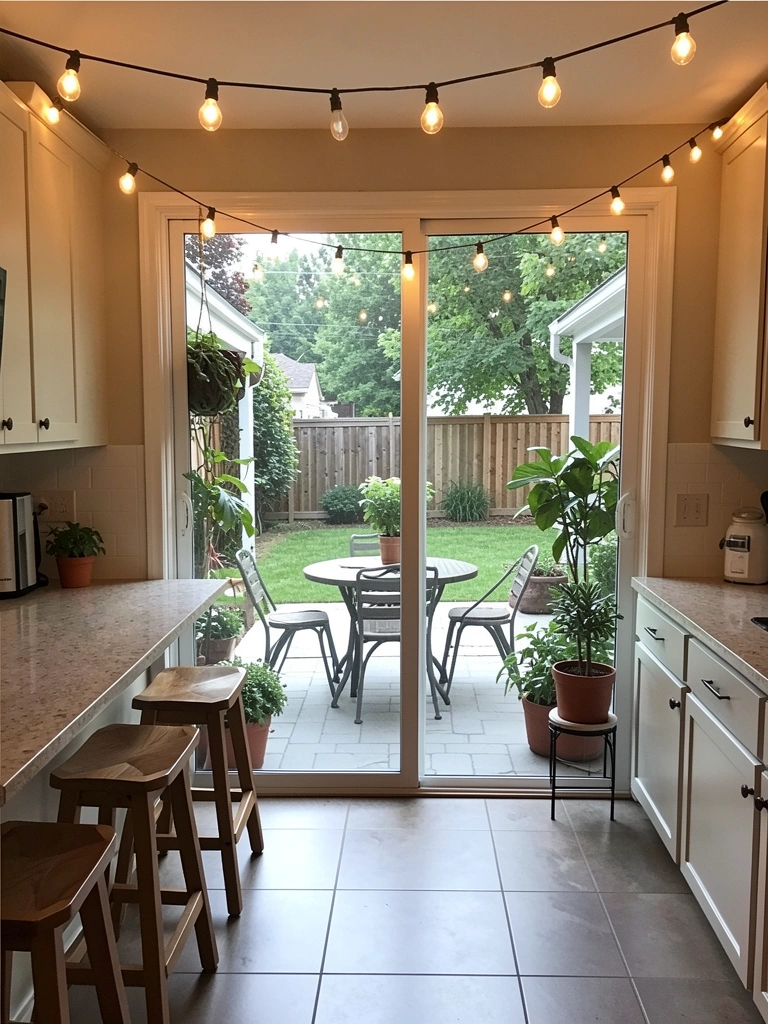
Blending indoor and outdoor kitchens extends your living space and creates flexibility for cooking, entertaining, and gathering. Your kitchen becomes a gateway to larger experiences.
Install a pass-through window or sliding door ($200-$600 for new doors, or style existing ones with matching outdoor furniture) that connects to a covered patio or deck. Place matching bar stools or a small table just outside to blur the line between spaces. Use durable outdoor materials that coordinate with your indoor kitchen aesthetic ($200-$600 for quality outdoor furniture).
A weekend styling project or 2-3 days if adding new doors.
Your kitchen visually and functionally expands, creating more room for gathering and entertaining without actually expanding the building.
23. Add Task Lighting Over Work Zones
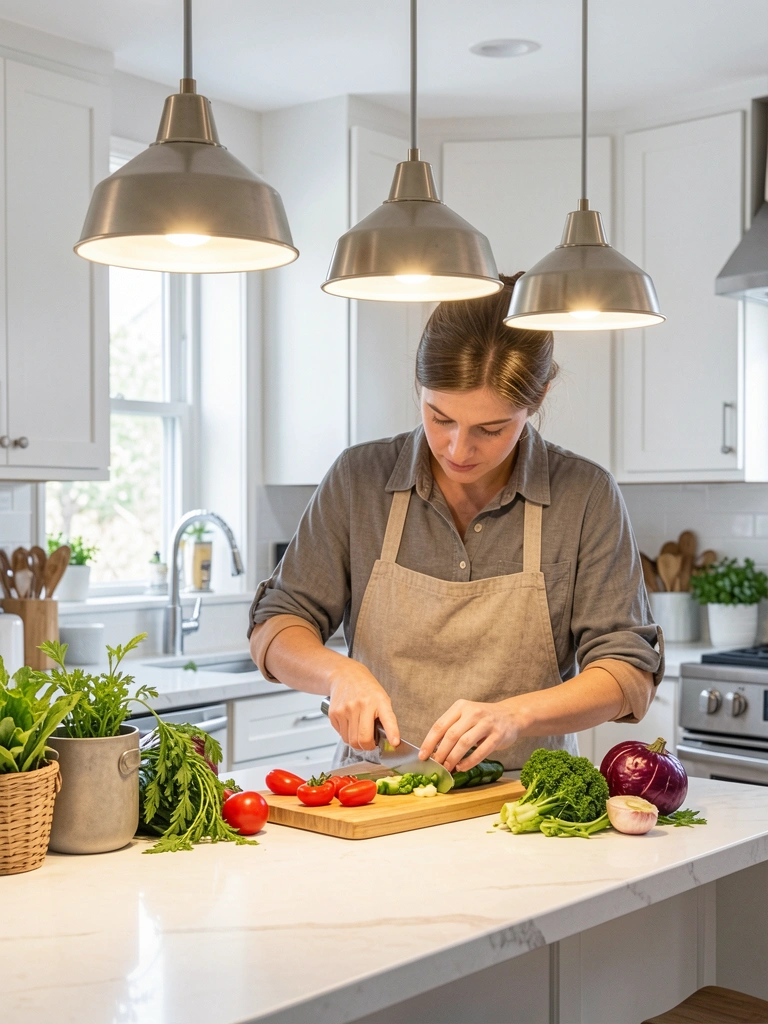
Proper lighting over your prep and sink areas is essential for safety and mood. Good task lighting makes cooking feel less like a chore and more like an experience.
Hang focused pendant lights directly over your prep counter or sink (18-24 inches above the surface) using pendant kits ($60-$200 each) or a professional electrician’s help ($150-$300). Space them 24-30 inches apart. Choose warm white bulbs (2700K) and adjustable brightness for flexibility. This is separate from ambient lighting and serves purely functional purposes.
DIY takes 2-3 hours if you’re comfortable with wiring; hire help if unsure.
When you can actually see what you’re doing without shadows, cooking becomes more enjoyable and your kitchen feels less like a dark dungeon.
24. Design Multifunctional Zones for Flexibility
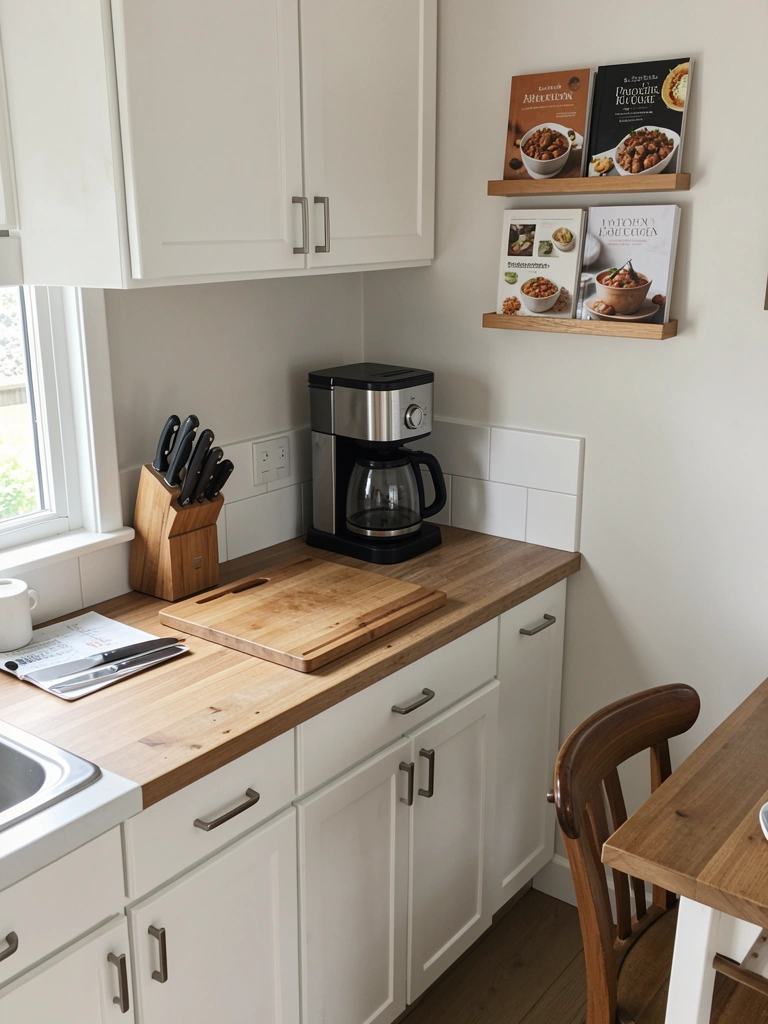
Modern life demands kitchens that do multiple jobs. Creating defined zones for different activities makes your space feel organized and functional rather than chaotic.
Dedicate corner zones for: prep work (with cutting board and knife storage, $50-$150), beverages (coffee/tea station, $0-$80), recipes (cookbook display, $0-$30), and quick dining (bar or nook, $100-$400). Use open shelving or small tables to physically separate zones while keeping everything visible. Lighting and storage define each zone without needing walls.
Takes 1-2 hours to rearrange and style existing items; $200-$400 if adding furniture.
Your kitchen becomes a responsive space that adapts to what you need rather than forcing one rigid use pattern.
25. Layer Textures with Fabric and Soft Materials
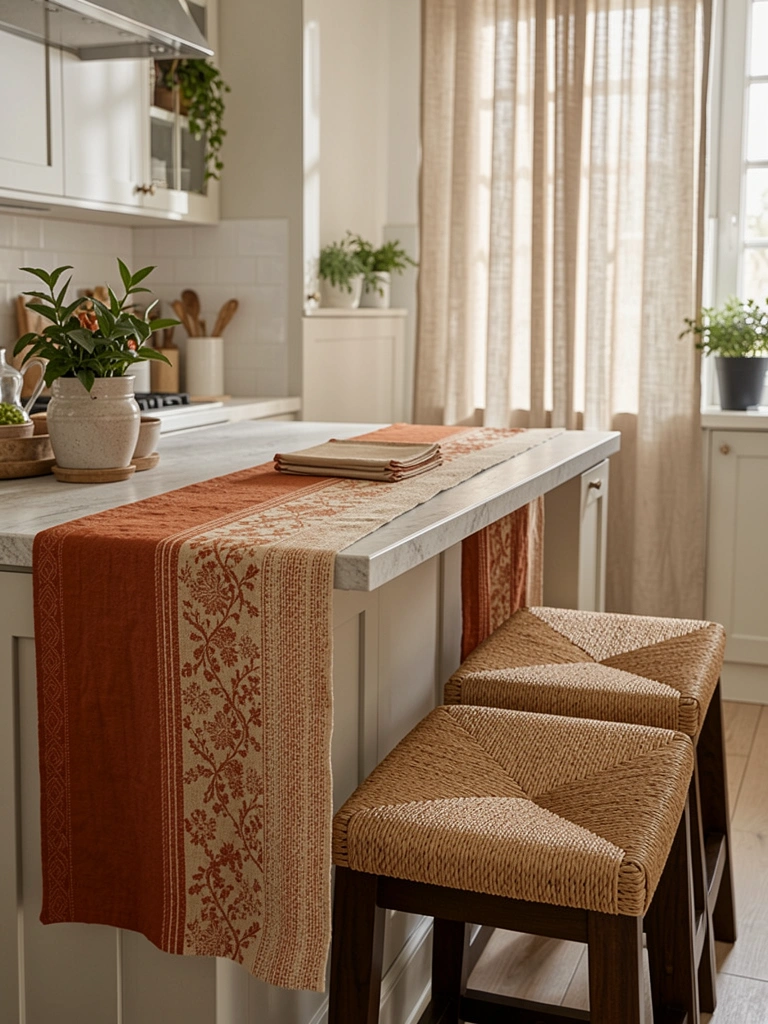
Hard materials and flat surfaces make kitchens feel cold. Layering in soft textures like textiles, linens, and woven elements creates surprising warmth in a typically hard space.
Add a kitchen runner rug in warm tones ($40-$120), hang linen curtains over windows ($50-$150), and layer seat cushions on bar stools ($20-$50 each). Choose natural fibers like cotton, linen, and wool that age beautifully and feel good to touch. Opt for warm neutrals or earth tones that complement your cabinet colors.
Takes 1-2 hours to hang and style.
These soft touches make your kitchen feel less like a surgical space and more like a cozy, lived-in room you want to spend time in.
26. Create Contrast with Matte Black Accents
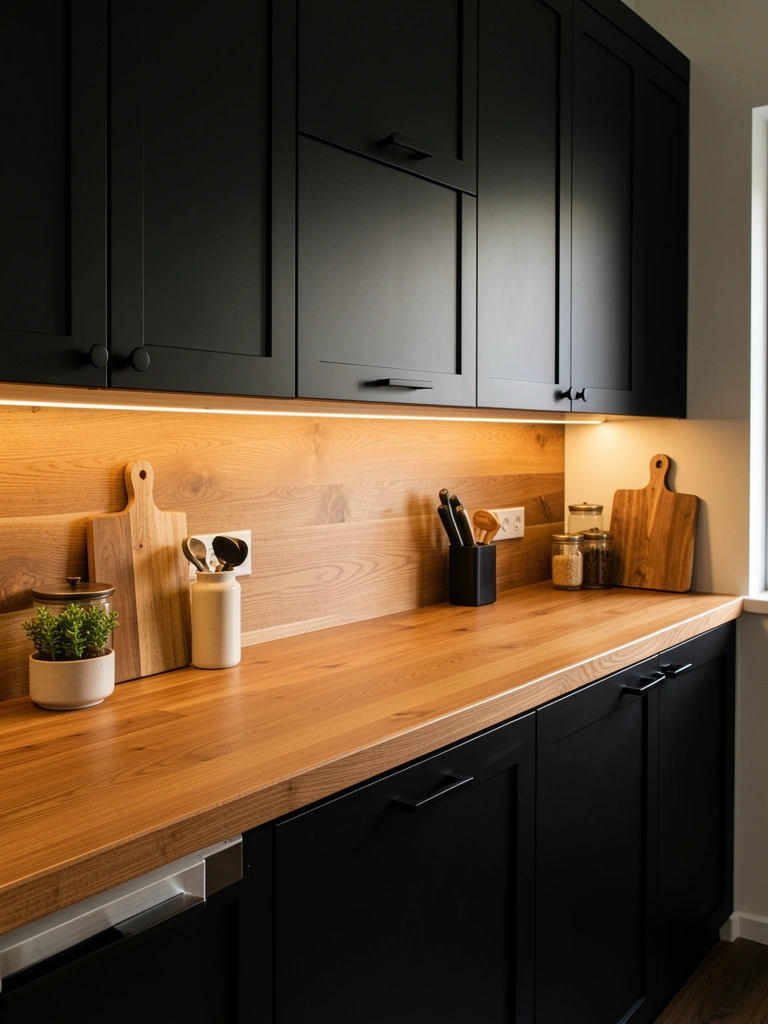
Matte black isn’t cold when paired with warm wood and earth tones—it adds sophistication and visual contrast that elevates your entire kitchen aesthetic.
Paint upper cabinets or an island in matte black ($150-$400 for high-quality finish), add matte black hardware ($50-$200), or install a matte black range hood ($300-$800). Pair this boldness with warm wood countertops, honey-toned open shelving, or copper accents to prevent the space from feeling too dark. Matte finishes hide fingerprints and dust better than glossy alternatives.
A weekend painting project or $800-$1,500 with professional application.
The contrast between warm wood and sophisticated matte black makes your kitchen look intentionally designed and gallery-quality.
27. Personalize with Collected Objects and Meaning
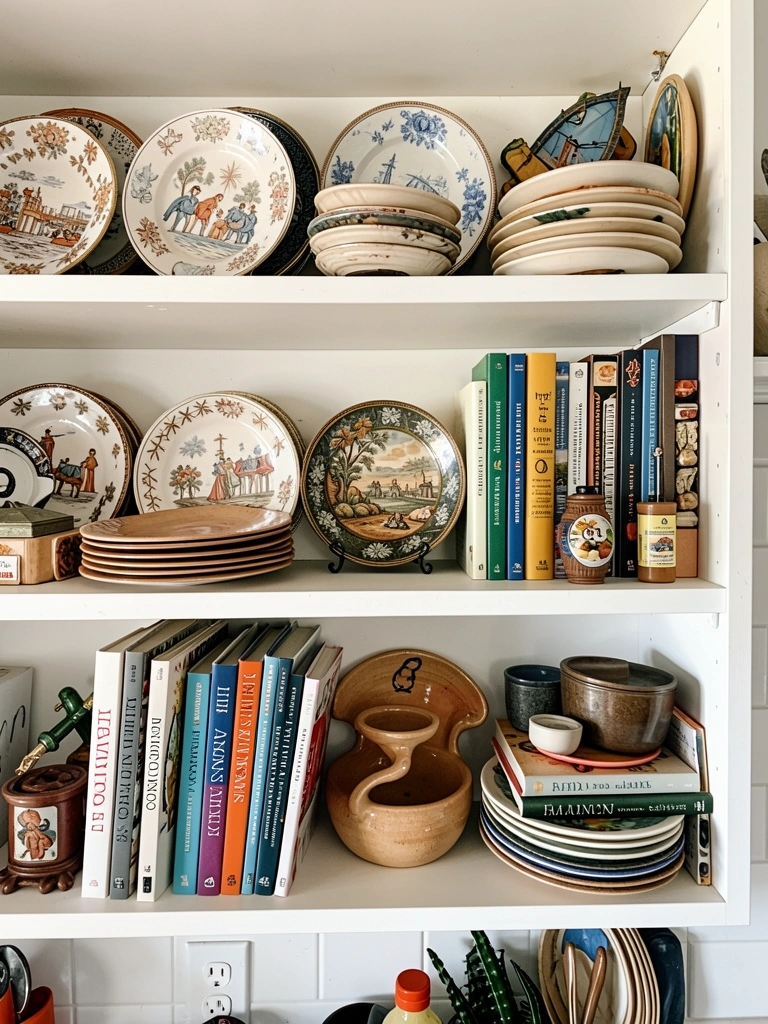
The warmest kitchens aren’t the most expensive or perfectly styled—they’re the ones filled with objects and memories that mean something to you. Personalization is what transforms a house into a home.
Display items you’ve collected, inherited, or made: vintage serving dishes ($10-$50 at thrift stores), family cookbooks, handmade ceramics from artists you love, or souvenirs from meaningful trips. Arrange them thoughtfully on open shelves or in a small gallery wall. Rotate pieces seasonally or when your mood shifts. This costs whatever you want to spend on items you genuinely love.
10 minutes to rearrange; ongoing joy.
Your kitchen tells the story of who you are and what you value, making it the most beautiful and inviting room in your home—not despite its imperfections, but because of them.
Save this post and try just one idea this weekend—you’ll be surprised how much personality a single small change brings to your kitchen. Which idea resonates with you most?
Leave a Reply