Small spaces don’t have to feel cramped or chaotic—they just need smarter layouts. Whether you’re working with a studio apartment, a tiny bedroom, or an open-concept living area, the right arrangement can make your home feel bigger, more organized, and genuinely enjoyable to live in. These 27 ideas focus on flow, functionality, and creating distinct zones that make each area serve multiple purposes without looking cluttered. You’ll discover free rearrangement tricks, budget-friendly furniture hacks, and strategic design moves that actually work in real homes. Let’s find the layout that transforms how you move through your space.
1. Define Zones Without Walls Using Area Rugs
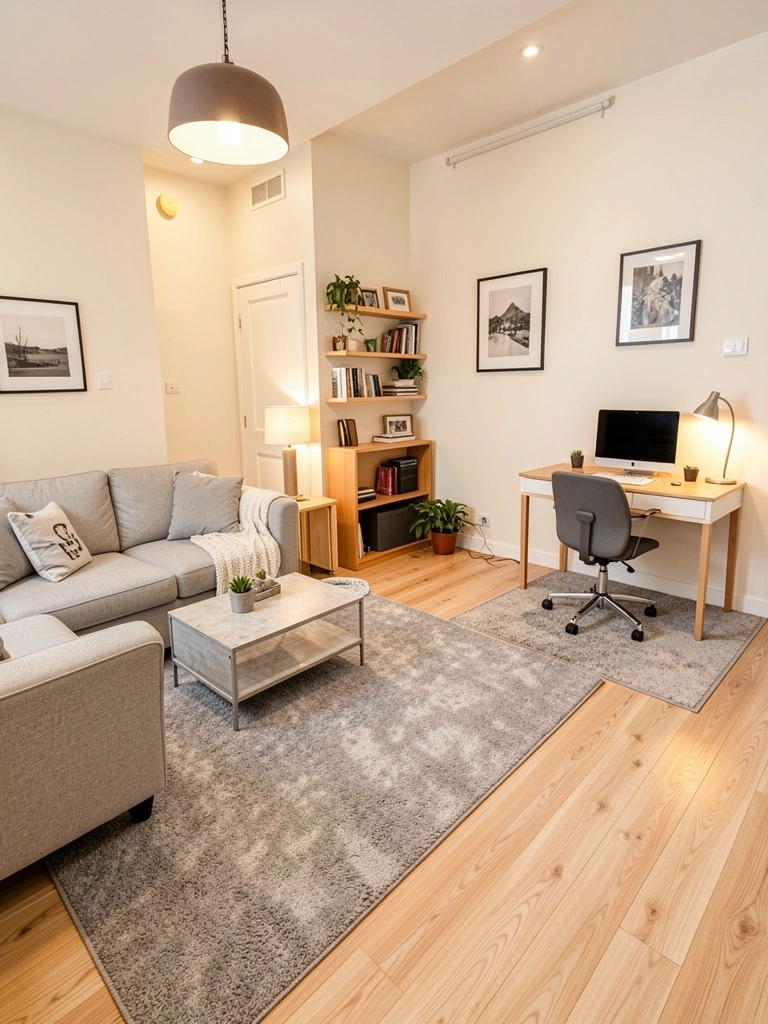
Area rugs are the cheapest way to create visual boundaries and make separate zones feel intentional. Instead of an open room feeling like everything blends together, a rug under your seating area and another under your bed or desk signals “this is living space” and “this is work space.”
Layer rugs strategically to define function without building walls. A 8×10 rug runs $40–$150 from Target or Wayfair; budget-friendly options start at $20–$30. This takes zero minutes to implement—just unroll and arrange furniture on top. Pro tip: slightly overlapping rugs in neutral tones (cream, warm gray, natural jute) tie zones together visually while keeping them distinct.
Your layout instantly becomes organized and your eyes rest in each area. Plus, rugs soften hard floors and add warmth that makes small spaces feel less sterile.
2. Angle Furniture to Open Up Sightlines
Pushing furniture flush against walls feels logical in tiny rooms, but it actually makes spaces feel smaller and more cramped. Floating or angling key pieces creates diagonal sightlines that make your room appear longer and wider.
Position your sofa at a 45-degree angle to the wall, or float your bed away from the headboard wall. This works best when you have at least 2–3 feet of clearance. You’re not moving furniture far—just 12–18 inches out. It takes 10 minutes to try and costs nothing. The trade-off: you lose a tiny bit of walkable floor space, but you gain psychological openness that’s worth it.
The room feels spacious and less like furniture was shoved in. You’ll notice the difference the moment you sit down—there’s breathing room.
3. Use Vertical Storage to Reclaim Floor Space
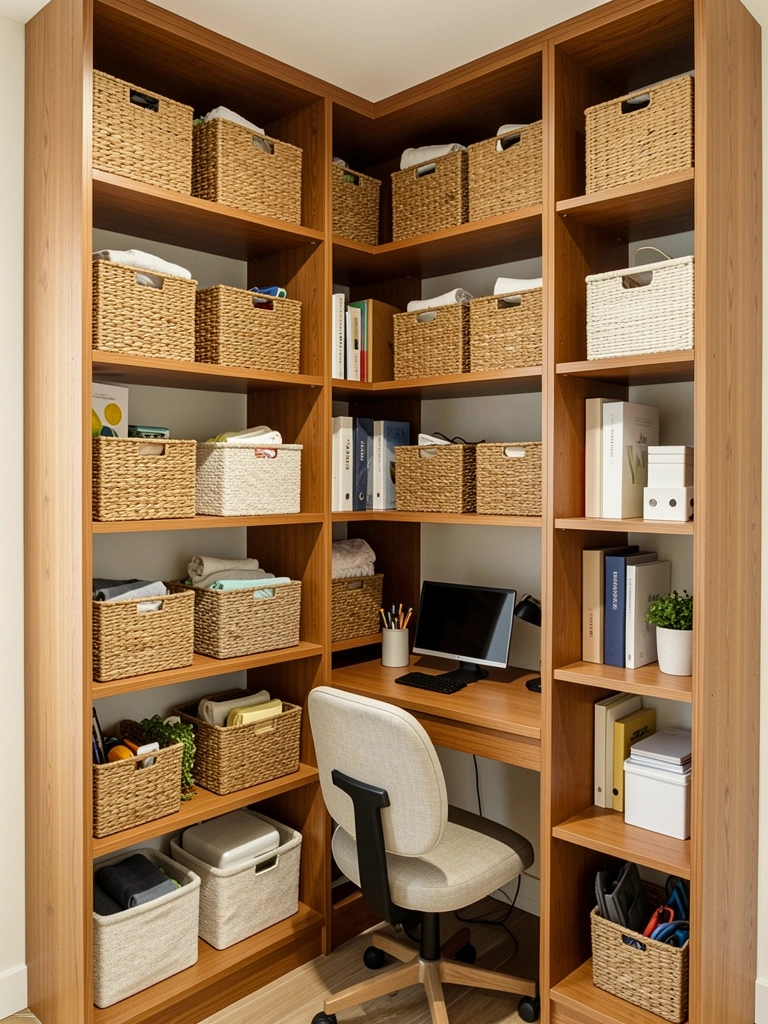
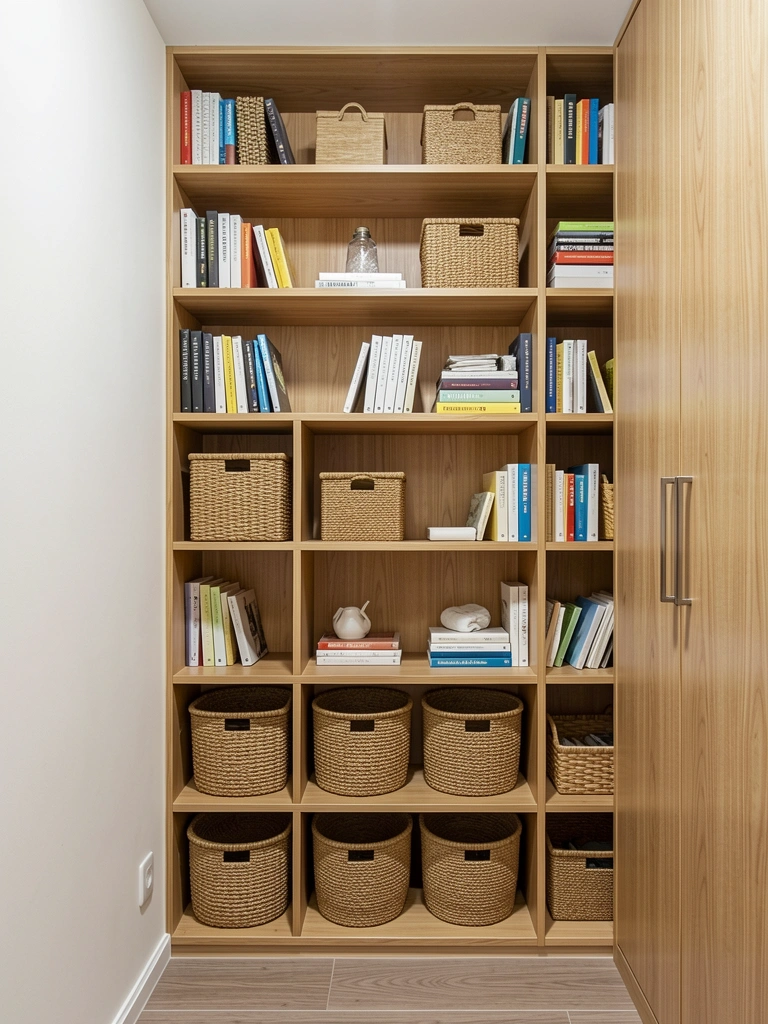
Floor space is precious in small homes, so stop storing things horizontally. Wall-mounted shelves, tall bookcases, and vertical organizers pull clutter off the ground and give your room breathing room.
Install floating shelves ($15–$50 per shelf at Home Depot or IKEA) or invest in a tall, narrow bookcase ($80–$200 from Target or Wayfair). Add matching baskets ($10–$30 each) to keep items hidden but accessible. Installation takes 1–2 hours for shelves if you’re handy, or hire help for $50–$100. Renter-friendly: lean tall bookcases against walls and style with lightweight decorative baskets.
You’ll see 30% more usable floor space, and your room looks intentionally organized rather than chaotic. Plus, everything you need is visible and within reach.
4. Choose Furniture with Built-In Storage
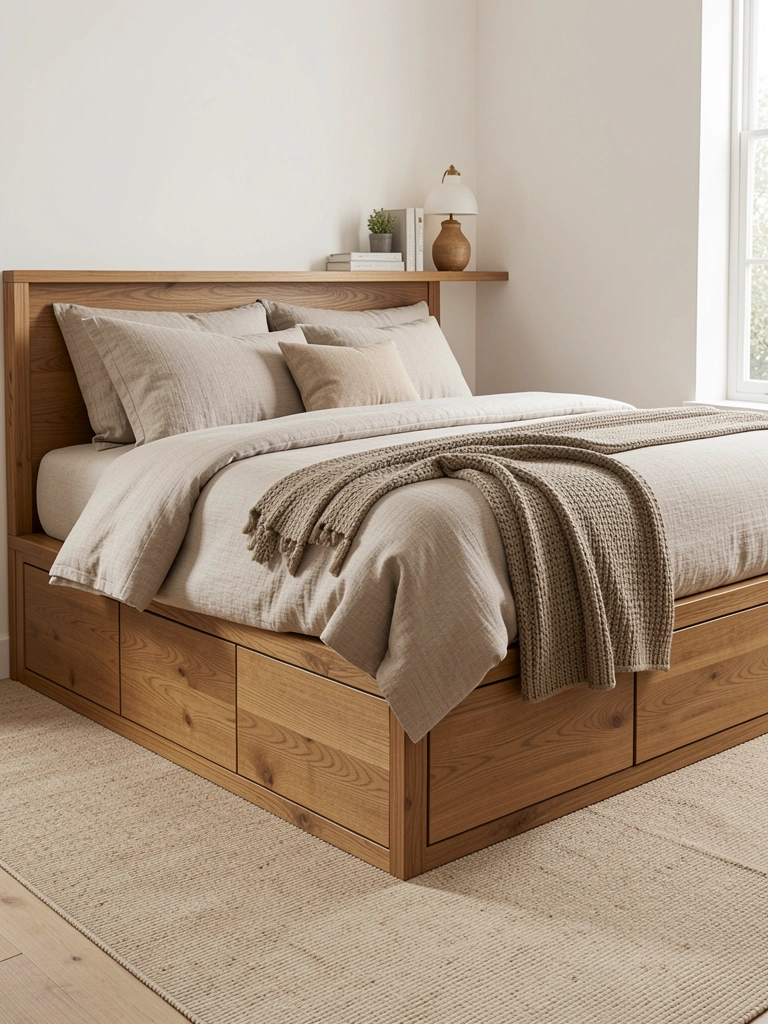
Every piece of furniture should earn its place in a small home. Beds with drawers, ottomans with hidden storage, and console tables with shelves combine function and style without taking up extra square footage.
A bed frame with storage drawers costs $200–$500 (IKEA, Wayfair, Amazon) versus $150–$300 for a basic frame—a small premium that gives you an extra closet’s worth of space. An ottoman with storage runs $80–$250 and works as seating, footrest, or hidden storage. Assembly takes 1–2 hours and is usually a weekend project. Budget hack: thrift a wooden trunk ($20–$60) and use it as a coffee table and storage combo.
You eliminate the need for a separate dresser or shelving unit. Your bedroom looks simpler while storing significantly more, and daily tidying becomes faster because everything has a designated place.
5. Create a Multipurpose Zone with a Folding Desk
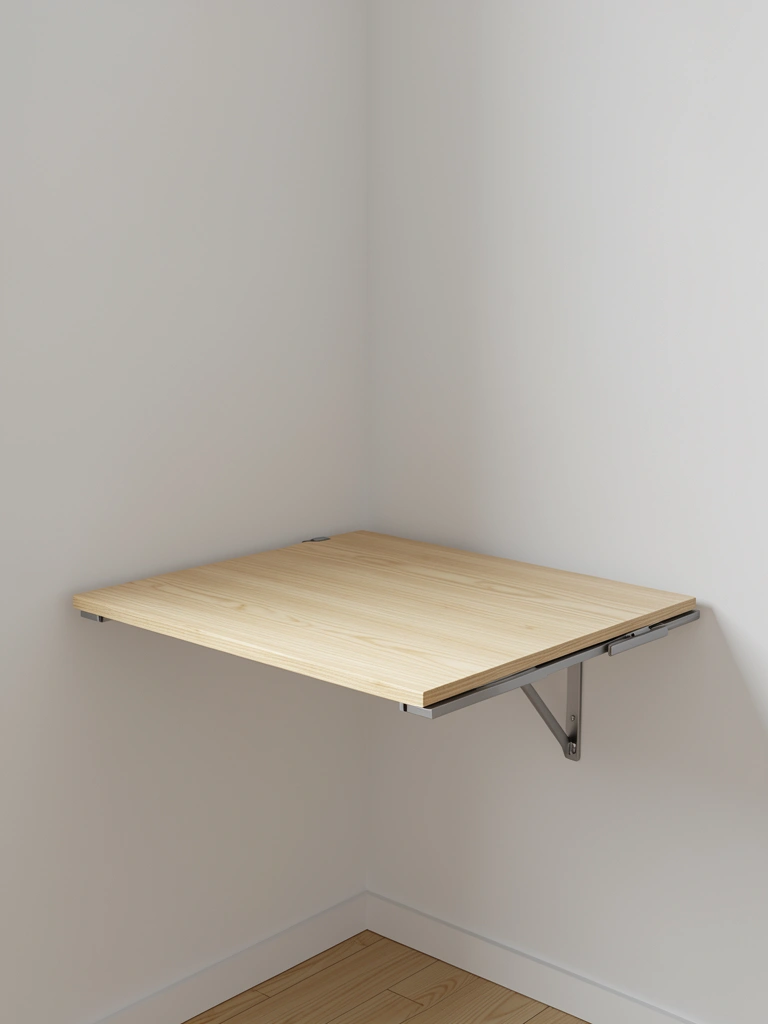
Working from home in a small space doesn’t mean sacrificing your living area to a permanent desk. A folding desk mounts to the wall and closes flat when not in use, giving you a workspace that disappears.
A wall-mounted folding desk costs $60–$150 and takes 30 minutes to install (drill two holes, mount brackets). When folded down, it looks like a slim shelf; when open, it’s a full work surface. Pair it with a rolling chair ($50–$120) that tucks under a table or in a closet. Renter note: some floating desks come with adhesive strips instead of wall damage.
You reclaim your living space and maintain a dedicated work zone without cramping your room. The boundary between “work hours” and “rest time” becomes visual and psychological—a real win for small-space remote workers.
6. Arrange Seating in a Conversation Layout
In tight living rooms, traditional seating—sofa facing a TV—eats up precious space and creates a one-directional layout. Arranging chairs to face each other encourages conversation and makes the space feel intentional and social.
Skip the large sectional and use two armchairs ($150–$300 each from Target, IKEA, or Wayfair) facing each other with a small round table between them. This “conversation pit” layout uses 30% less floor space than a sofa-plus-chairs setup and works beautifully in studios or one-bedrooms. Rearrange in 20 minutes; no assembly required. Pro tip: choose chairs with curved arms (2025 trend alert!) to soften the geometry and add visual softness.
Your space becomes a living room for actual living—reading, chatting, relaxing—not just watching. Plus, two modest chairs look cleaner and more design-forward than one oversized sectional wedged into a corner.
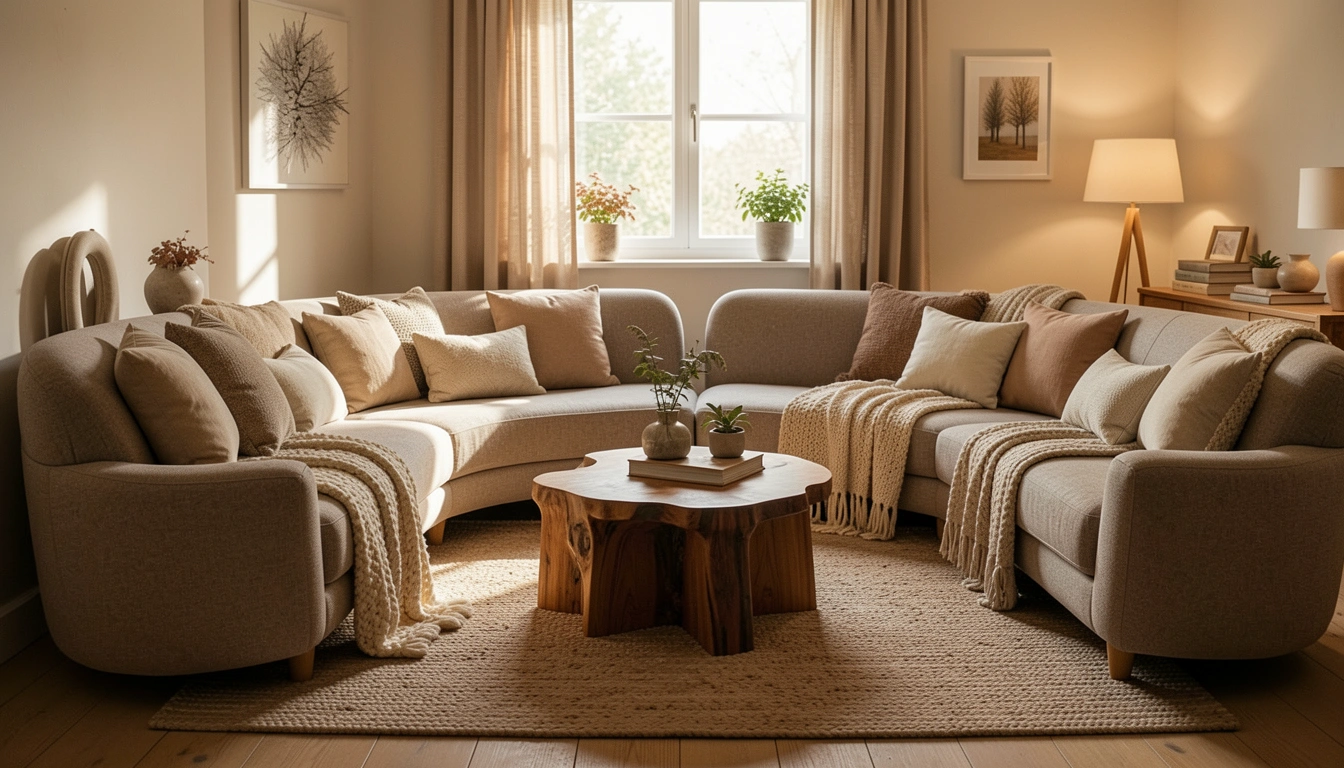
7. Use Curved Furniture to Soften Space and Improve Flow
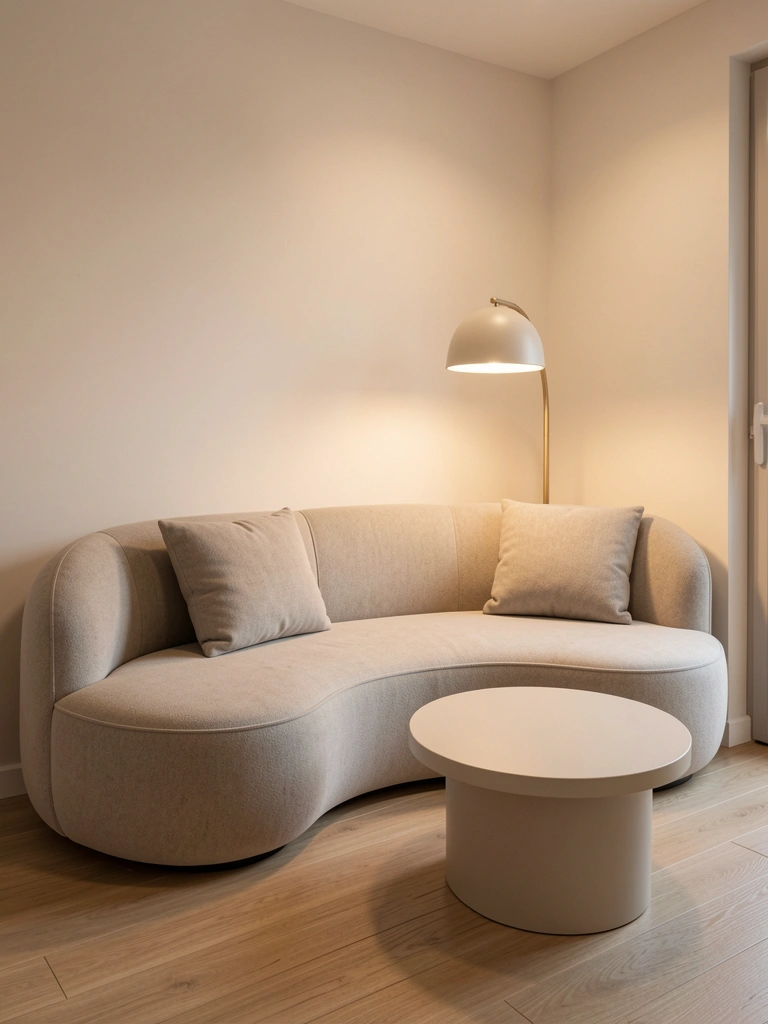
Sharp-cornered furniture creates visual tension and makes small rooms feel more cramped. Curved sofas, round tables, and bulbous shapes soften geometry and improve how you move through your space.
A curved sofa costs $400–$1,000 (Wayfair, Article, West Elm) and takes up similar footprint to a straight sofa while feeling more spacious. Pair it with round side tables ($80–$200) and curved mirrors ($40–$120). Swap angular floor lamps for ones with gentle curves. You’re not buying more—just choosing softer shapes. This takes 1–2 hours to rearrange and style. Budget hack: use curved storage baskets instead of boxy shelving units ($20–$50 each).
The room feels bigger and more inviting because your eye moves smoothly instead of stopping at sharp angles. Walking and sitting become more comfortable, and the space reads as intentionally designed.
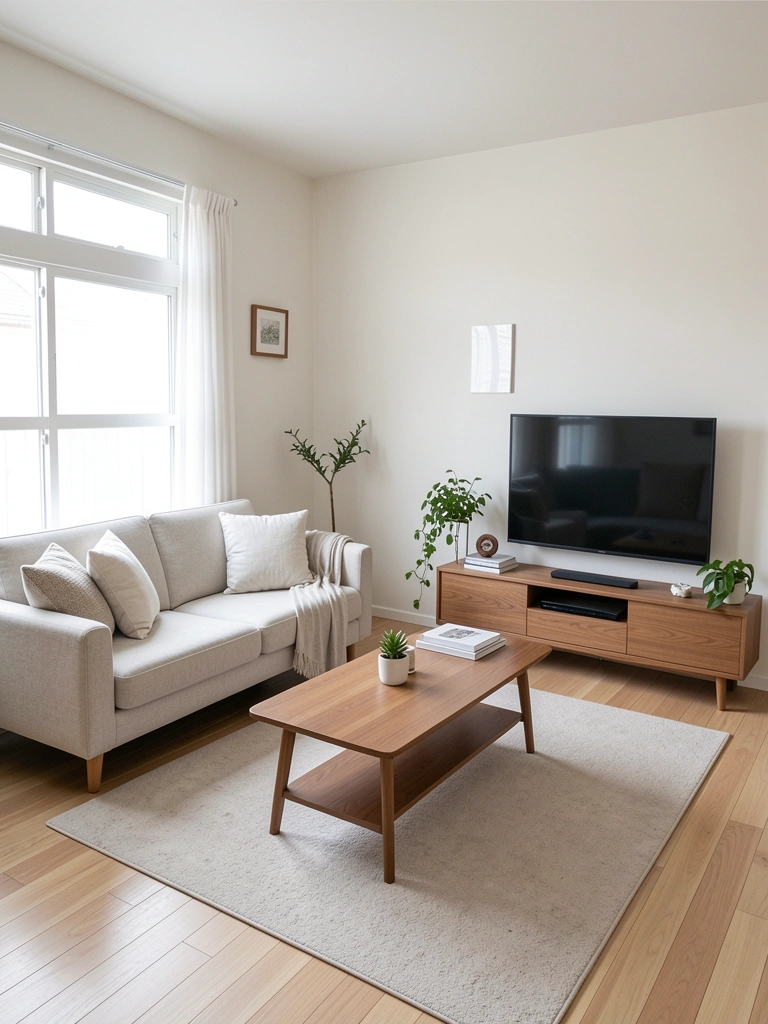
8. Mount a TV on the Wall to Free Up Floor Space

TV stands are floor-space killers—especially the ones that take up 2–3 feet of width. Wall-mounting your TV saves significant square footage and creates a cleaner aesthetic that makes rooms feel bigger.
A wall mount costs $20–$60 and installation takes 30 minutes if you have basic tools (or hire a handyman for $75–$150). You’ll need to run cables behind the wall or use a cable concealer ($10–$20). If you’re renting, use an adhesive-backed mount or rent-friendly stand. Skip the furniture-style console and use floating shelves ($30–$80) below the TV for streaming devices and decor.
Your floor opens up instantly and the room feels modern and spacious. Plus, you can rearrange your furniture freely without planning around a bulky stand—a game-changer for small-space flexibility.
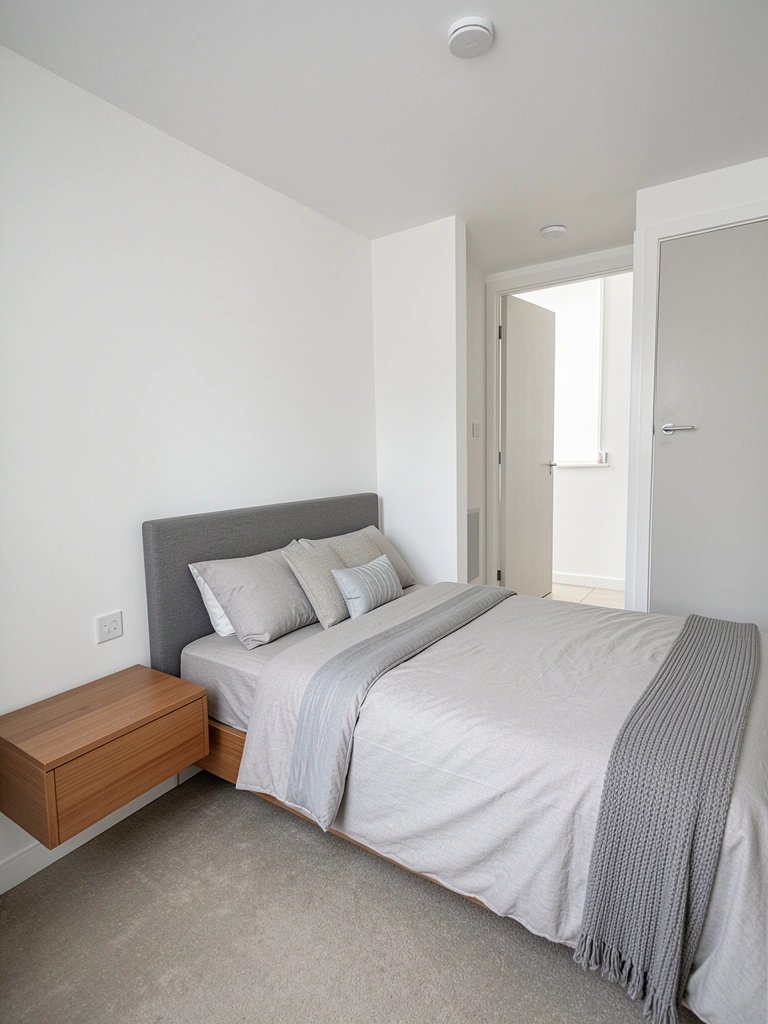
9. Install Floating Nightstands Instead of Full Dressers
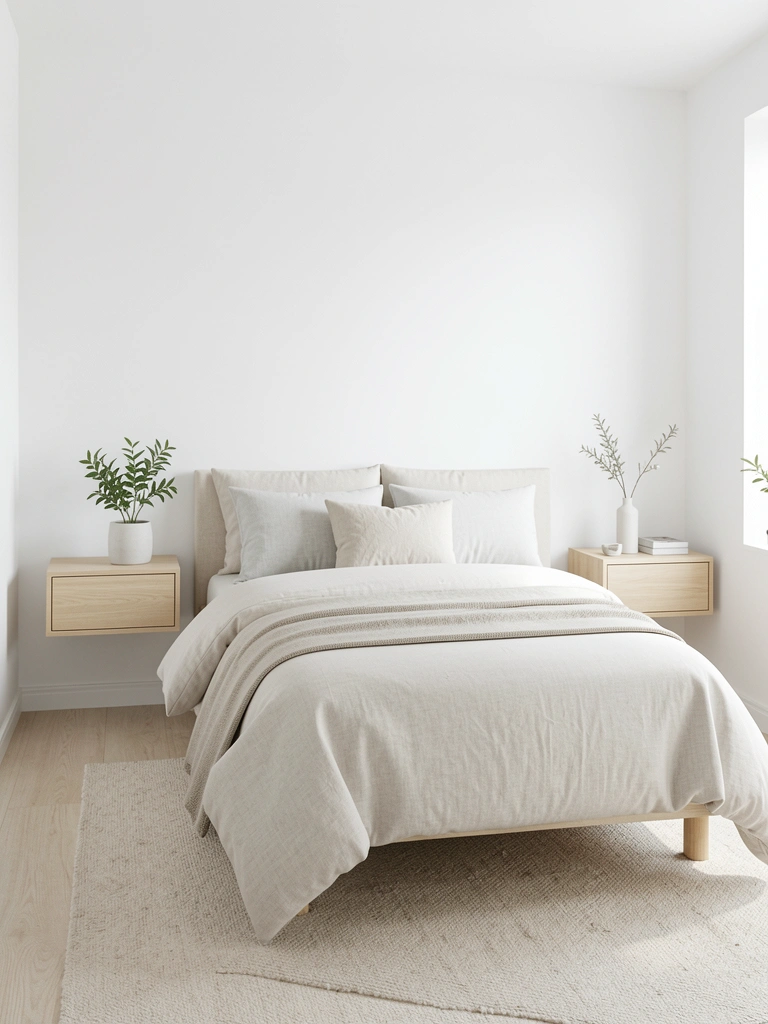
A full bedroom dresser can consume 15% of a tiny room’s usable floor space. Floating nightstands give you bedside storage and surface space without eating floor area or blocking sight lines.
Floating nightstands cost $40–$100 each and mount to the wall using brackets (30 minutes per shelf to install). They typically offer 1–2 small drawers for essentials. For hanging storage, add a narrow wall-mounted cabinet ($50–$150) or pegboard system ($30–$80) to handle the items a dresser would hold. Renter-friendly: lean a small dresser against the wall or use rolling drawer carts that tuck under the bed.
Your bedroom floor opens up and the space reads as intentionally designed rather than packed. The bed becomes the focal point, and the room feels larger because furniture isn’t grounded to the floor.
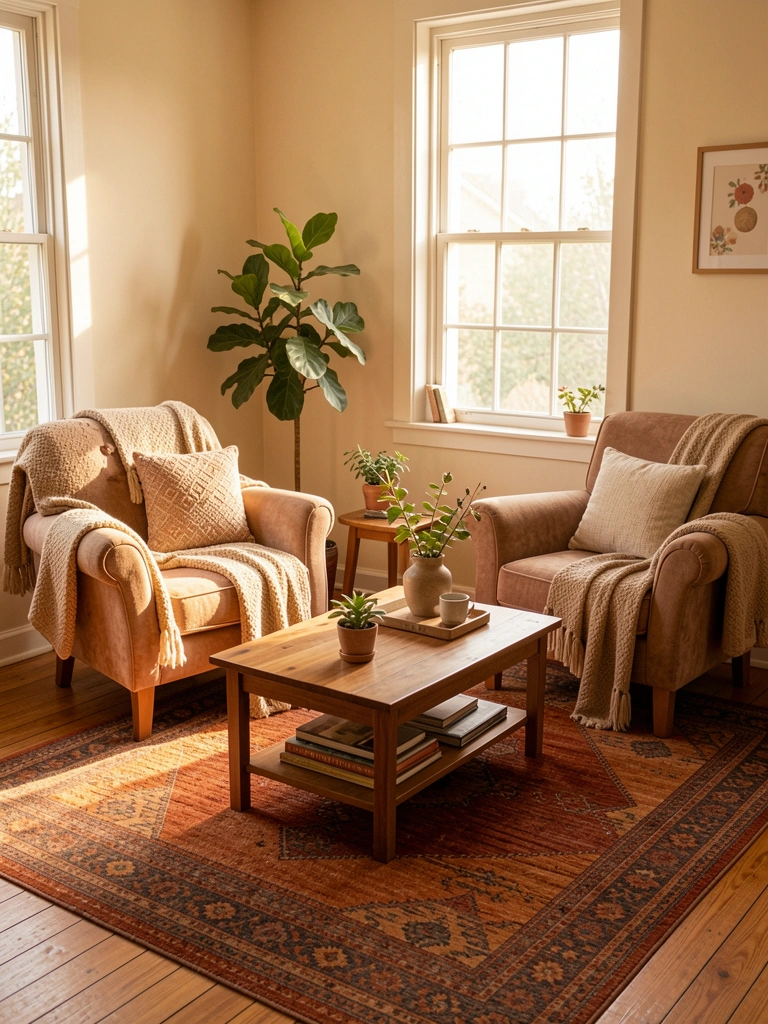
10. Create a Reading Nook in an Unused Corner
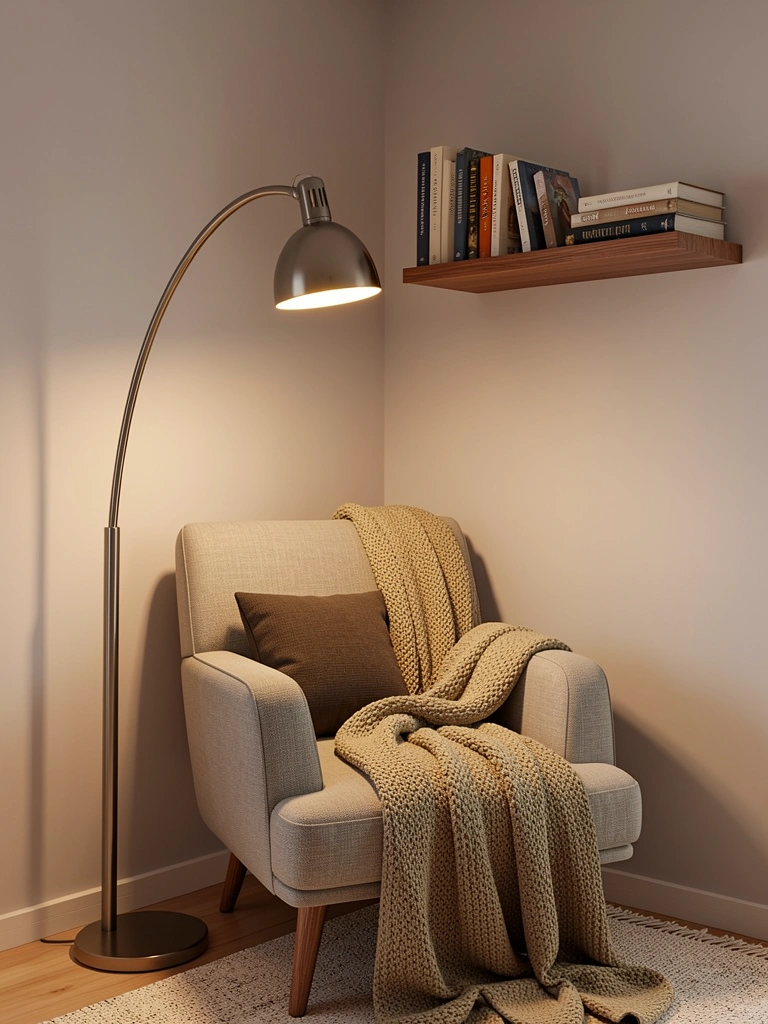
Unused corners are missed opportunities. A small reading nook uses dead space and gives your home a functional, intentional zone that makes it feel complete.
Choose an armchair or lounge chair ($120–$300) that fits your corner. Add a curved floor lamp ($60–$150) for task lighting and a floating shelf ($20–$50) above for books. Layer a throw blanket ($20–$60) and a small side table ($30–$80). This entire setup takes 2–3 hours to assemble and style. Budget option: use a vintage chair from a thrift store ($20–$60) and a lamp you already own.
You’ve created a retreat within your home that encourages rest and separates your space into functional zones. Plus, it’s Instagram-worthy, which means you’re more likely to use and enjoy it.
11. Use Pocket Doors or Curtains to Hide Clutter Zones
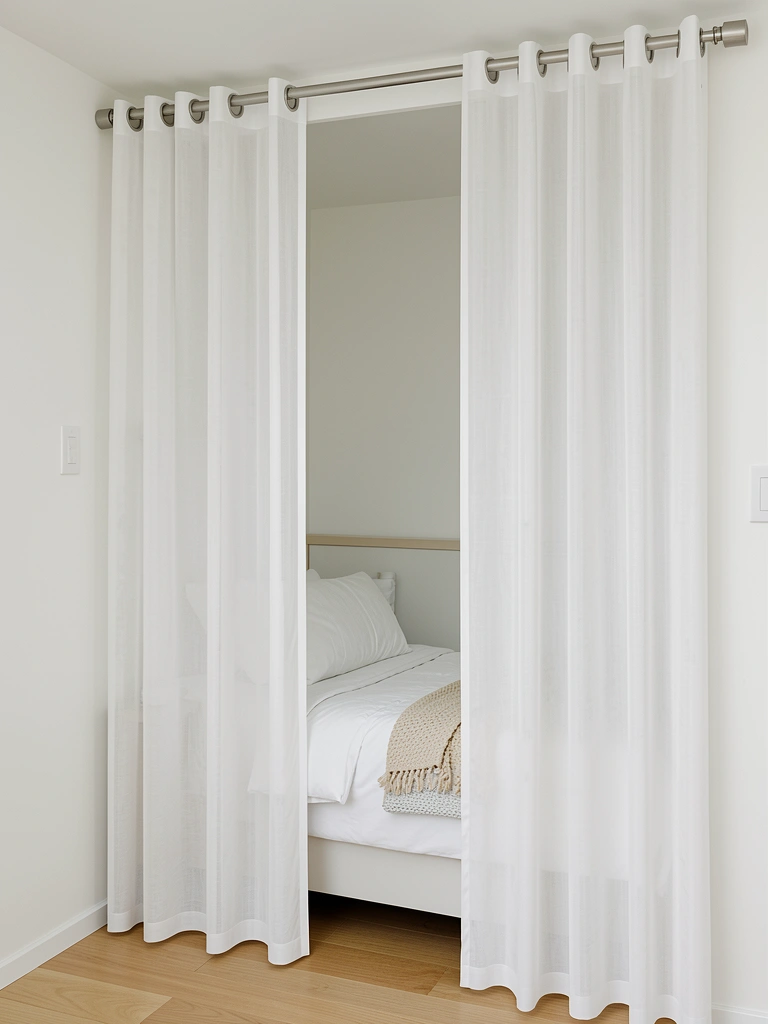
Not all your small space needs to look perfect all the time. A simple curtain rod and fabric panel or pocket door can hide a work area, storage zone, or clutter corner when you need it to.
A tension rod and fabric panel costs $15–$40 and installs in 5 minutes with zero tools needed. Alternatively, a pocket door retrofit costs $500–$1,500 if you’re upgrading your actual door hardware (professional installation). For renters, stick-on track systems ($20–$50) offer a damage-free alternative. Pair with a neutral linen or cotton panel ($15–$40) that matches your decor.
You get the flexibility to “close off” your workspace or storage area instantly when guests arrive or you want to mentally reset. This psychological boundary is powerful for small spaces and costs almost nothing to implement.
12. Position Your Bed as a Room Divider
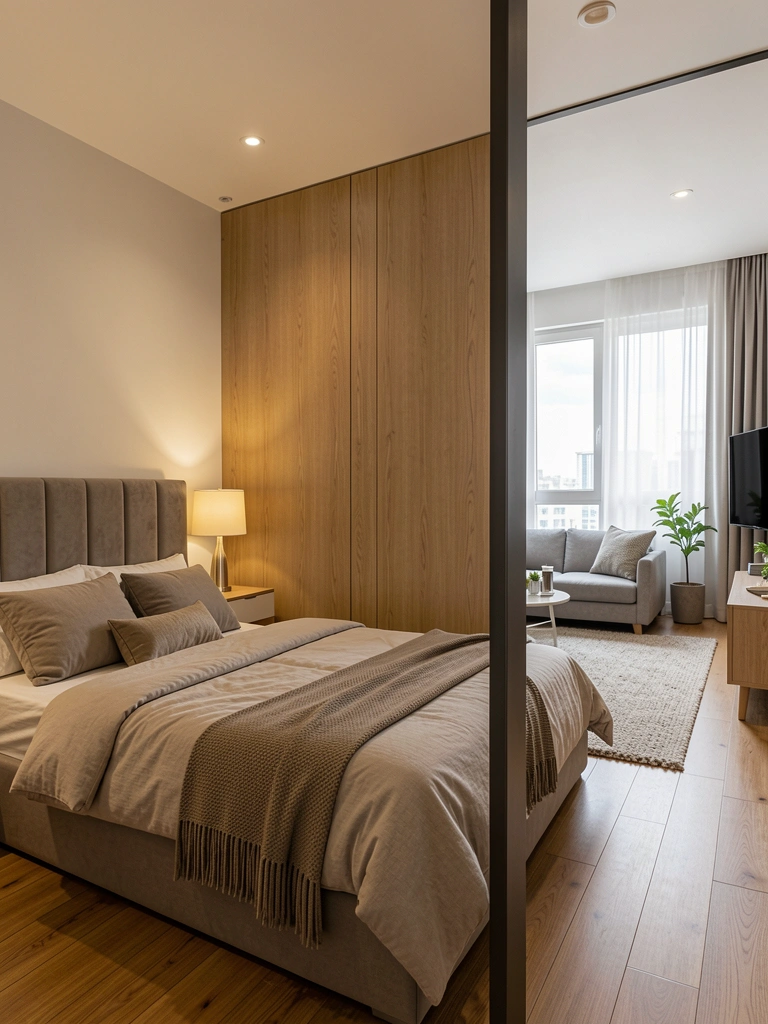
In studios or open-concept spaces, your bed can do double duty as a room divider that separates your sleeping area from your living area without using square footage for walls.
Position your bed perpendicular to the wall or use a bed with a tall headboard ($300–$800) that creates a visual barrier. For budget builds, attach a curtain rod above your bed ($15–$30) and hang lightweight fabric ($15–$40) to create a soft partition. Arrange seating on the other side to define the living zone. This rearrangement takes 1–2 hours and costs $0 if you’re moving existing pieces.
Your studio feels like two separate rooms even though it’s one open space. The psychological separation between sleeping and living areas improves rest and makes your home feel intentionally zoned.
13. Invest in a Murphy Bed for Maximum Flexibility
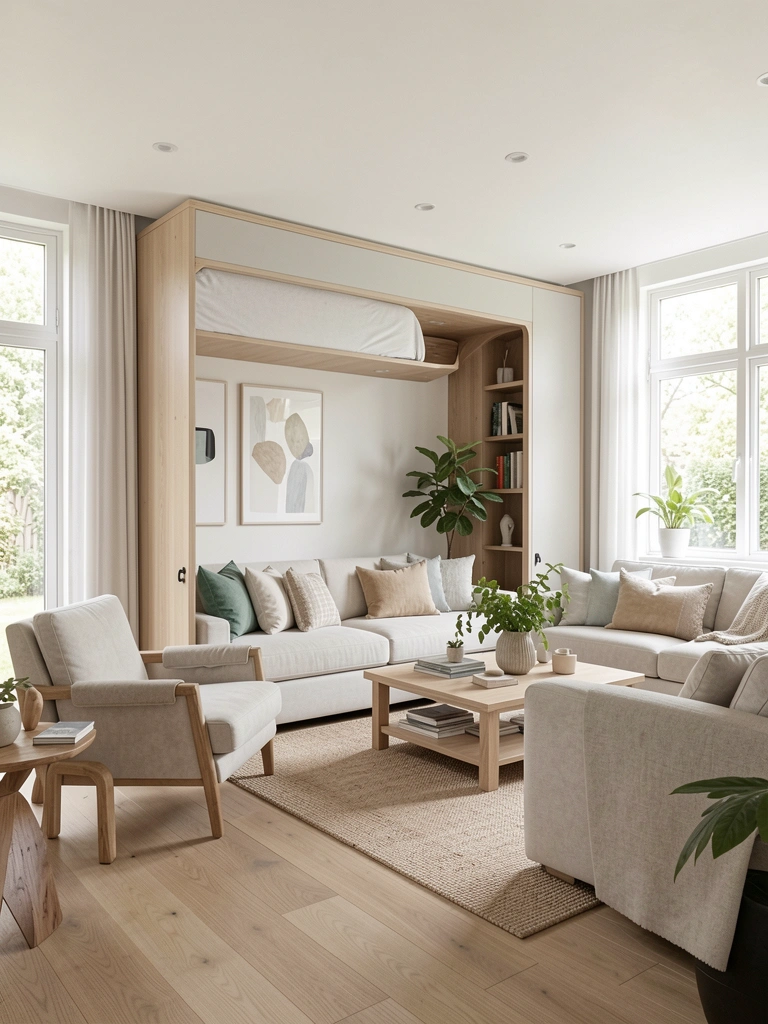
If you’re serious about small-space living and want maximum flexibility, a Murphy bed folds into your wall and reveals your entire floor during the day—essentially giving you two rooms in one space.
A Murphy bed frame costs $500–$2,500 depending on quality and customization (IKEA, Resource Furniture, Wayfair). Installation takes 4–8 hours professional time ($200–$500 labor). Some models include built-in storage and desks. This is an investment piece but gives you genuinely usable space. Renter note: some companies make non-permanent options ($200–$600).
You reclaim your entire living space during the day and have a full bed at night. This is the single best layout hack for studios or micro-apartments where you’re sacrificing a room to sleeping space.
14. Choose Furniture at Human Scale, Not Oversized
Oversized furniture is the #1 layout mistake in small spaces. Cramming a sectional designed for a living room into a studio makes everything feel cramped and awkward. Right-sized furniture makes your space feel larger and allows actual flow.
Measure your space first. A loveseat ($200–$500) instead of a sectional, a slim coffee table ($60–$150) instead of a chunky one, and a narrow console ($100–$300) instead of a wide dresser keep proportions balanced. Shopping at IKEA, Article, and West Elm helps because they offer compact-scale pieces built for apartments. Spend 30 minutes measuring and sketching before buying anything. Pro tip: take photos of your space and overlay furniture to scale using apps like MagicPlan (free).
Your room feels spacious and intentional because furniture matches the space, not fights it. You’ll have actual room to walk, and the layout reads as designed rather than squeezed.
15. Float Your Bed Away from Walls for Airflow
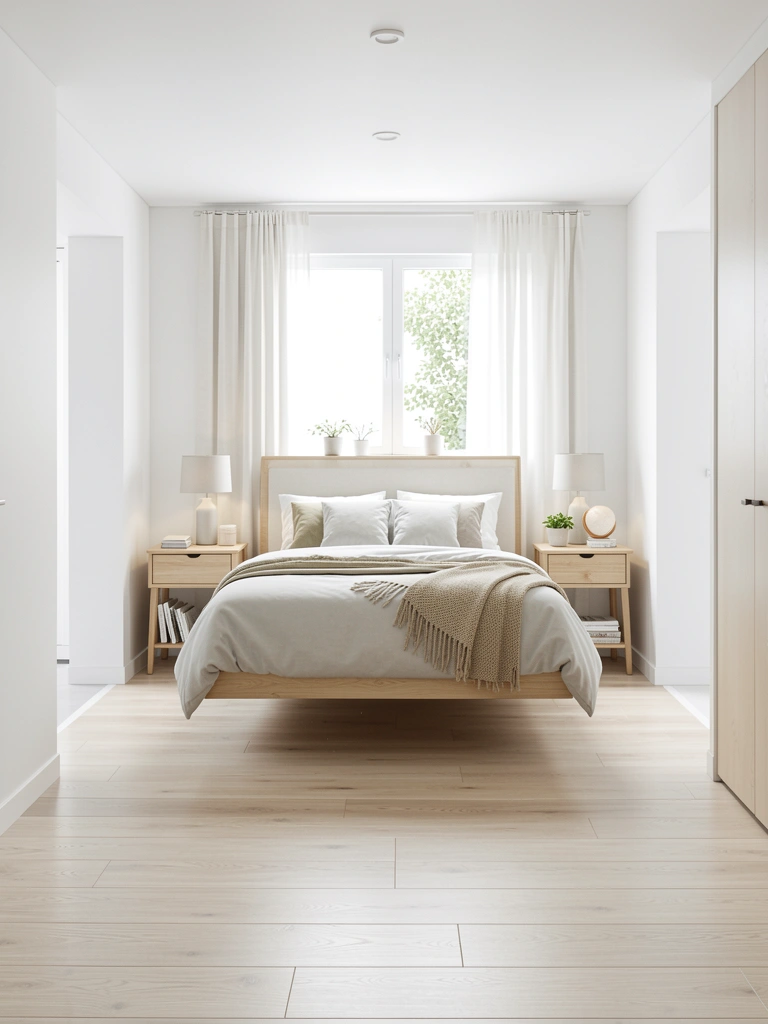
Pushing your bed into a corner or against a wall is logical for tiny rooms but creates dead space and makes the room feel static and cramped. Floating your bed creates visual balance and actually opens up sightlines.
Position your bed 18–24 inches from the walls if you have the footprint. Add matching nightstands on each side ($50–$150 each) to balance the composition. Ensure at least 2 feet of walking space on all sides for safety and comfort. This rearrangement takes 20 minutes and costs nothing. Pro tip: a low platform bed ($300–$600) works better for floating because it sits lower visually and doesn’t block sightlines.
The room feels symmetrical and spacious even though you’re using the same footprint. Plus, floating your bed makes the space feel like a designed bedroom rather than a bedroom that’s been crammed into an apartment.
16. Use Vertical Dividers Like Tall Plants or Bookcases
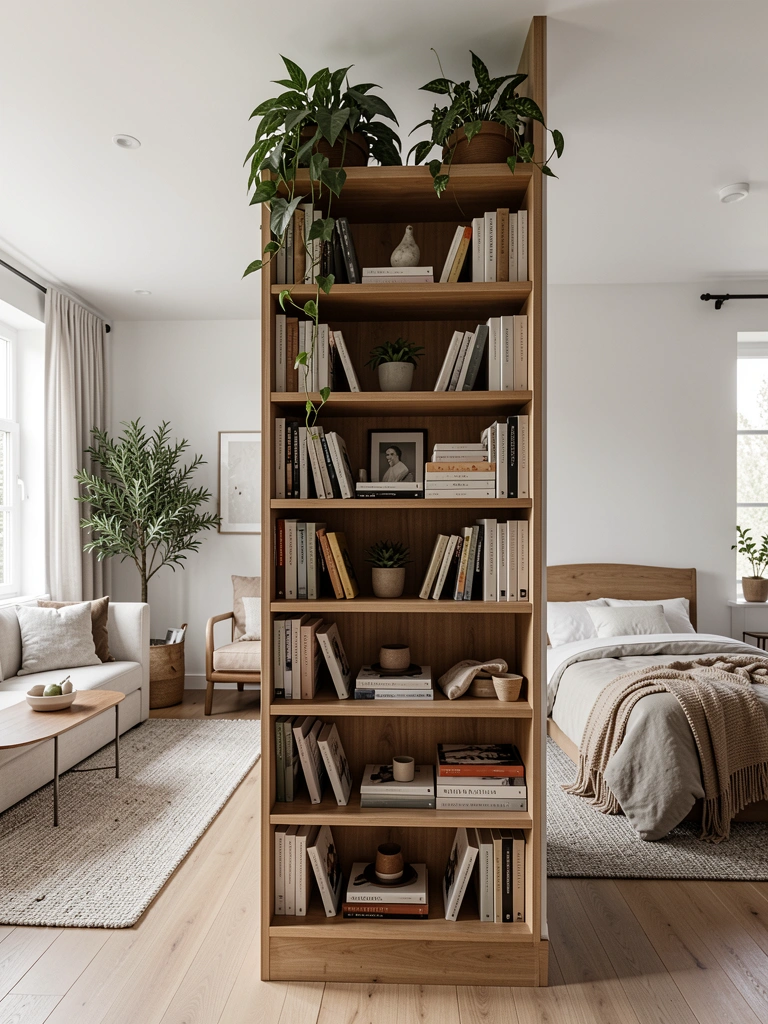
A tall but narrow divider—a bookcase, plant wall, or curtain rod—separates zones without blocking light or making the space feel segmented. It’s the “soft wall” for small spaces.
A tall narrow bookcase ($100–$250) or plant shelf ($80–$200) placed strategically creates a visual boundary. Alternatively, use a large potted plant or fiddle leaf fig ($30–$80) to mark a zone change. Install in 30 minutes for lightweight pieces; heavier bookcases take 1–2 hours. Renter-friendly: lean bookcases and skip wall mounting entirely. Budget hack: use PVC pipe and shelves ($50–$100 total) to DIY a tall divider.
Light filters through, so your space doesn’t feel divided—just intentionally zoned. The divider becomes a design feature and a functional tool for separating activities without sacrificing openness.
17. Add a Console Table Behind Floating Furniture
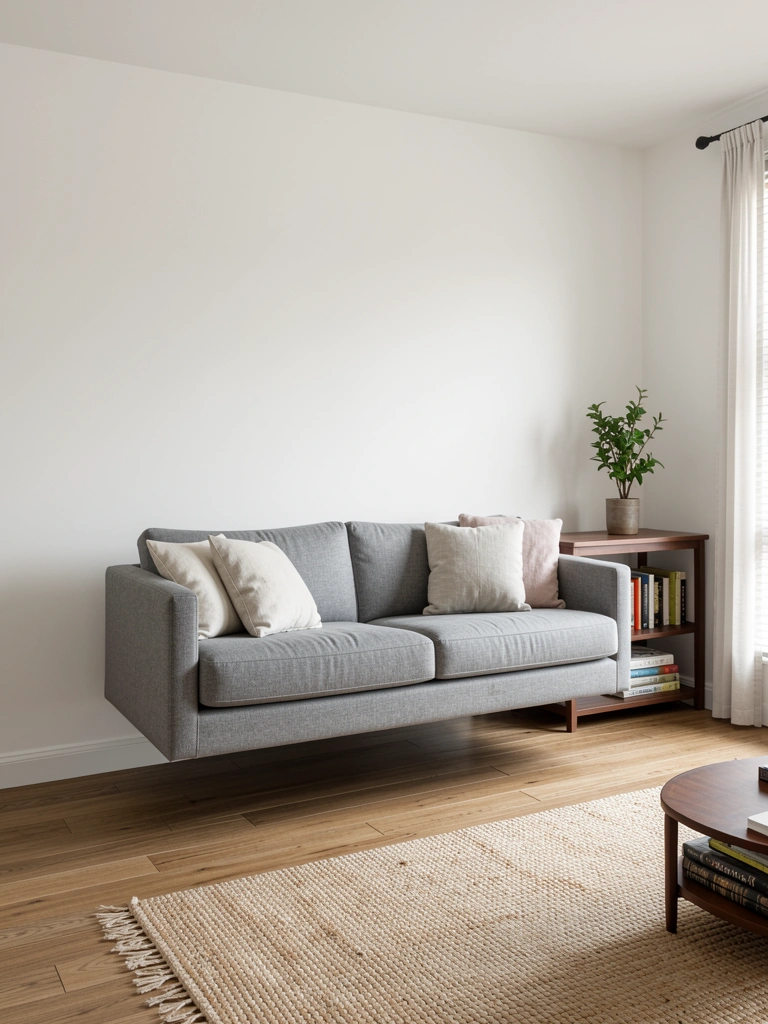
When you float furniture in a small room, the back of your sofa or chair faces the room awkwardly. A slim console table behind floated seating gives you storage, display, and hides the back of the furniture.
A narrow console table ($80–$250) fits in the 12–18 inch gap behind your sofa. Look for one with shelves for storage ($100–$300) or a sleek design that reads as intentional. This setup takes 10 minutes to arrange once your furniture is positioned. Budget option: use a floating shelf ($30–$50) and style it with plants, books, and decor. Pro tip: a console behind your sofa creates a natural entryway and visual boundary between zones.
You’ve turned awkward dead space into functional storage and display. The back of your room now looks designed rather than unfinished, and you’ve gained accessible storage.
18. Install a Fold-Down Dining Table for Flexible Entertaining
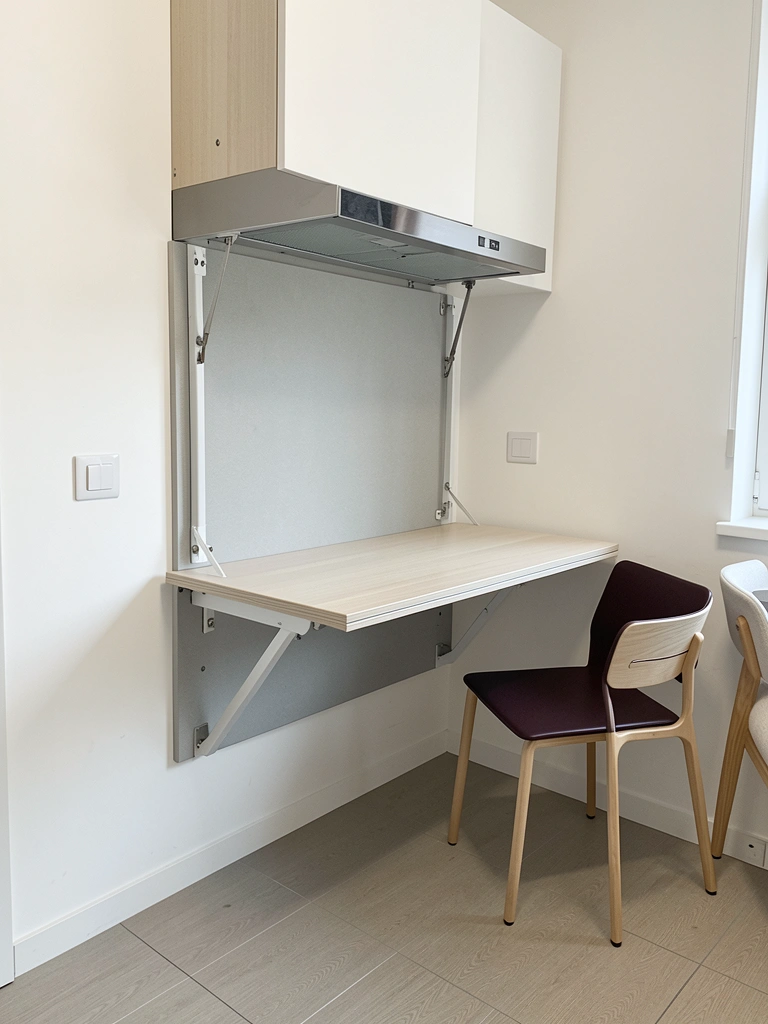
Dedicated dining tables consume precious real estate in small homes. A wall-mounted fold-down table offers dining functionality when you need it and disappears when you don’t.
A wall-mounted fold-down table costs $80–$250 (IKEA, Wayfair, Amazon) and installs in 30 minutes. You’ll need folding chairs ($40–$100 each, 2–4 of them) that stack or hang on wall hooks ($5–$15). When not in use, fold everything flat against the wall and use that space for movement or display. Storage: hang chairs on wall pegs to keep them out of the way.
You have a full dining surface for cooking projects, homework, or entertaining without sacrificing daily living space. It’s a flexible solution that adapts to how you actually use your home instead of forcing you into a single layout.
19. Create Activity Zones with Distinct Lighting
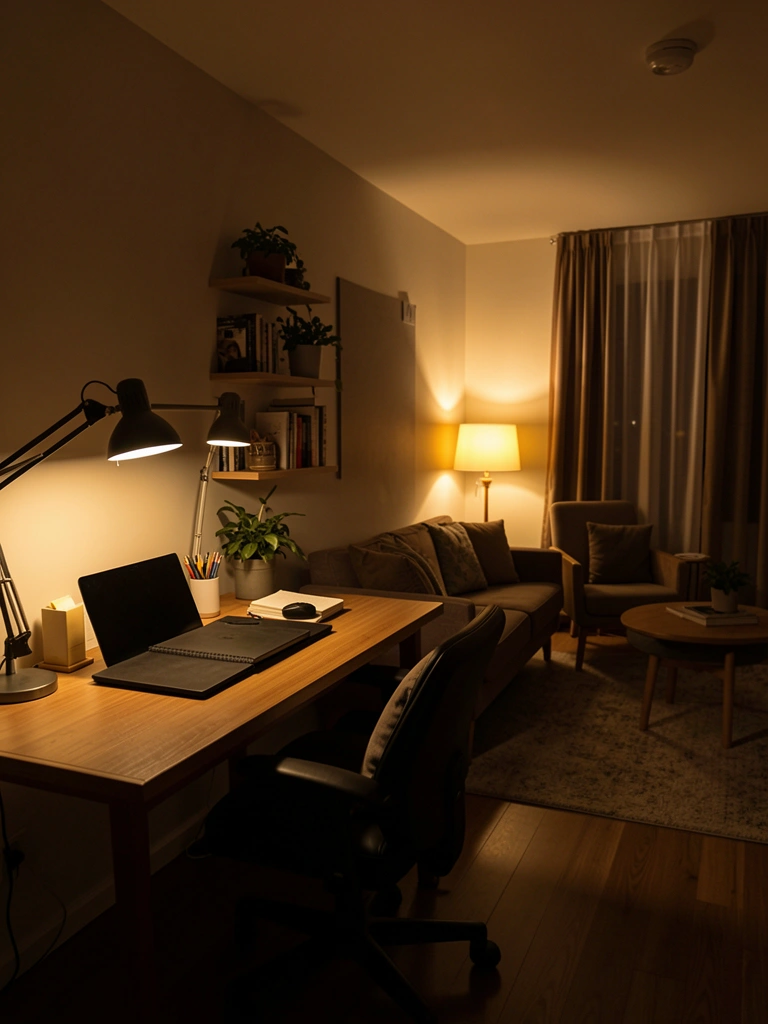
Identical bright lighting makes small spaces feel flat and undifferentiated. Distinct lighting for different zones—work area, sleeping area, living area—creates visual separation and helps your brain recognize functional boundaries.
Layer your lighting: task lighting ($30–$80) over your desk, overhead lights ($40–$120) in the main living area, and accent lamps ($50–$150) near seating. Dimmers ($15–$40 per switch) let you adjust brightness by zone and mood. Installation depends on fixtures—simple clips take 5 minutes; hardwired lights take longer. Budget hack: use string lights ($15–$30) and battery-operated LED candles ($10–$20) to layer soft ambiance.
Different zones feel like separate spaces even though you’re in one room. Plus, the ability to adjust lighting affects your mood and productivity—a psychological shift that’s powerful in small spaces.
20. Arrange Furniture in an “L” Shape to Define Corners
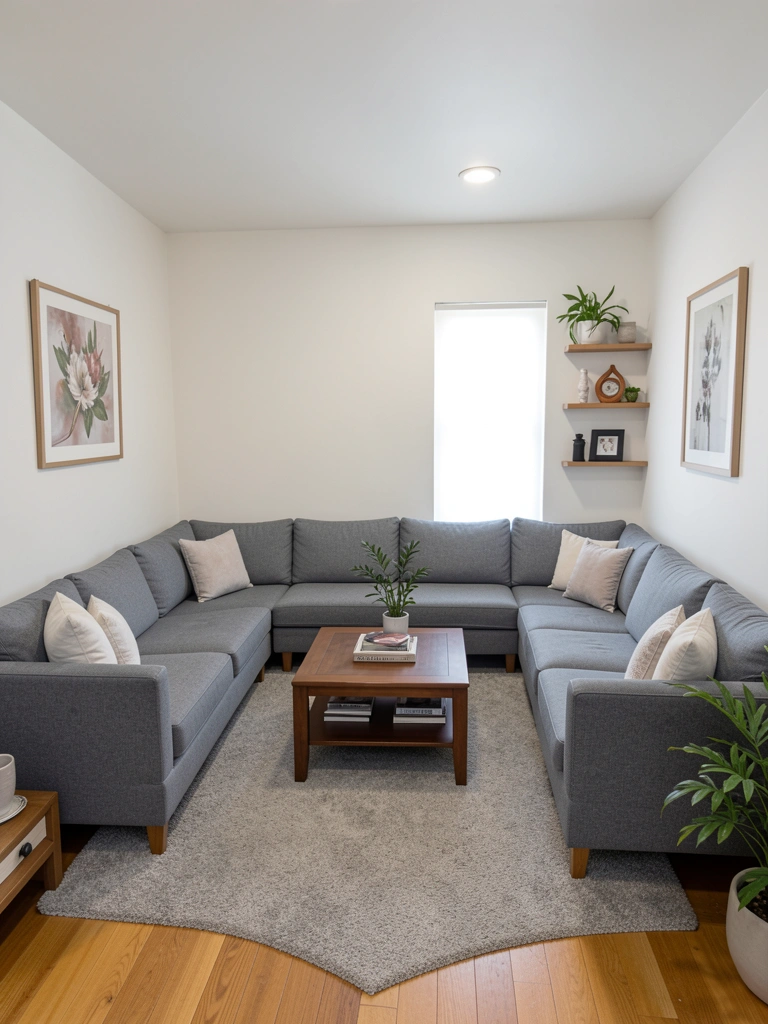
In tiny living rooms, arranging seating in an L-shape along two walls maximizes space and creates a cozy, intimate corner for activities. It’s more efficient than floating furniture when you lack floor space.
Position a sofa or loveseat along one wall ($200–$600) and a chair or second seating piece along an adjacent wall ($100–$300). Add a small corner coffee table ($60–$150) at the intersection. This layout takes 30 minutes to arrange and creates a natural conversation area. Pro tip: ensure you maintain 2–3 feet of walkway to bedroom and kitchen so traffic flow doesn’t get blocked.
You’ve created a defined, intimate seating zone that uses corners efficiently and makes the room feel purposeful. The L-shape is inherently balanced and looks intentional without taking up a lot of visual real estate.
21. Use Narrow Shelving to Store Without Protruding
Wall-mounted shelving that’s only 8–10 inches deep projects less into your room than bookcases or dressers. Narrow shelving lets you maximize vertical storage without eating precious floor and walking space.
Install narrow floating shelves ($20–$50 each) in sets of 3–5 running floor-to-ceiling. Space them 12–15 inches apart. Add matching storage baskets ($15–$30 each) to keep items hidden. Installation takes 2–3 hours if drilling into studs yourself or 1–2 hours for a handyman ($50–$150 labor). Renter-friendly: use tension-rod shelves ($30–$80) that don’t require wall holes.
You’ve created an entire closet’s worth of storage without using an inch of floor space. Your room stays open and walkable while storing everything you need within arm’s reach.
22. Position a Bar Cart as a Mobile Storage & Bar Unit
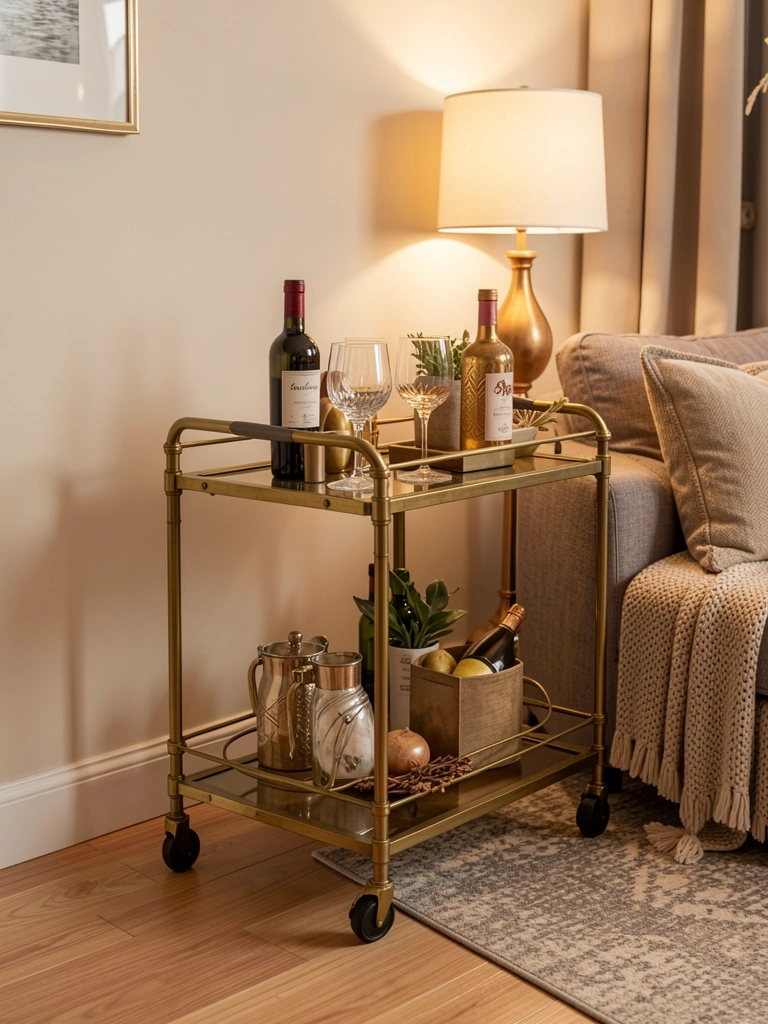
A bar cart serves multiple purposes in tiny homes: it’s mobile storage, a display piece, a beverage station, and an easy way to tidy up by corralling small items. It takes up minimal floor space and looks designed rather than cluttered.
A bar cart costs $40–$150 (Target, Wayfair, Amazon, or thrift stores $15–$40) and has 3–4 tiers for stacking bottles, glasses, books, or decor. Wheels make it mobile—roll it into the living area when entertaining and back to the bedroom when storing. No assembly required (most come ready-to-use). Pro tip: style it with just 3–5 items to avoid looking cluttered; less is more in small spaces.
You’ve added functionality and style without sacrificing precious square footage. It’s a design statement that actually serves your daily life, plus you can rearrange it instantly depending on your needs.
23. Install Sliding Barn Doors to Hide Storage

Sliding barn doors are trendy and functional—they hide storage without swinging open and eating floor space like traditional hinged doors. Plus, they’re a design statement that makes small spaces feel intentional.
A barn door retrofit costs $150–$400 for hardware and door ($75–$250 from Etsy, Amazon, or hardware stores). Installation takes 2–3 hours if DIY or $150–$300 with professional help. Renter-friendly: removable adhesive door systems ($100–$200) exist but require a more structured setup. Pro tip: white or natural wood barn doors are timeless and pair with any decor style.
Your storage looks like a design feature, not a cramped closet. Plus, the sliding mechanism is satisfying and adds a touch of personality to your layout.
24. Use a Kitchen Island on Wheels for Flexibility
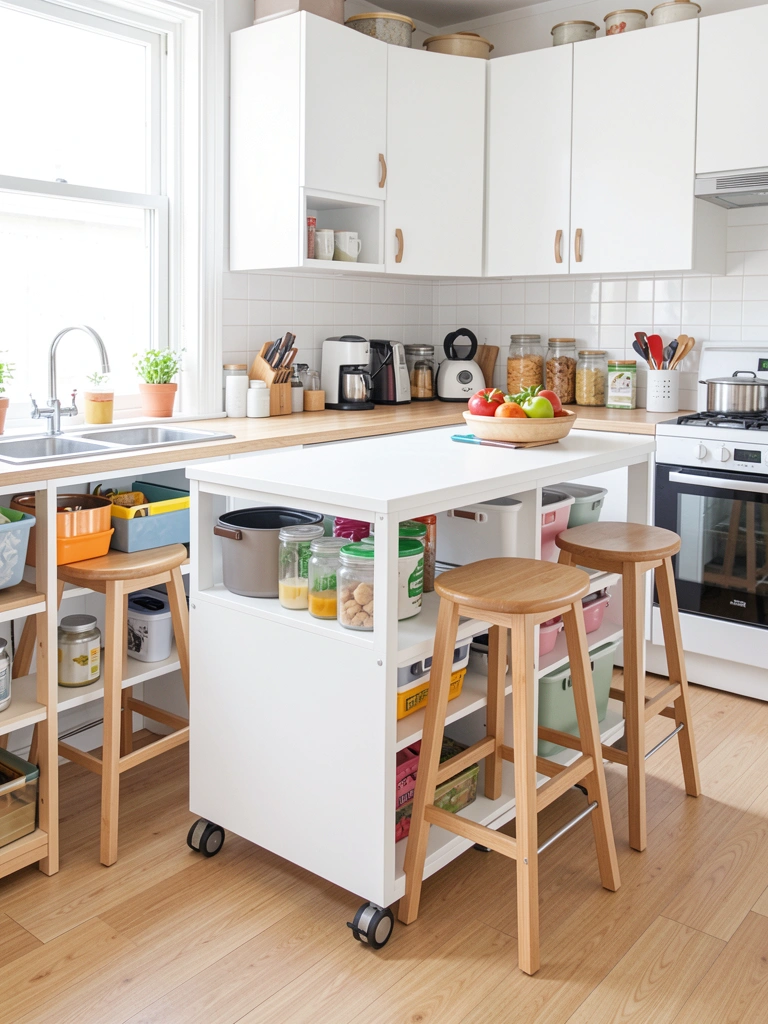
In tiny kitchens, a mobile island adds counter space and storage without permanently eating floor space. You can roll it out when you need extra prep space and tuck it into a corner otherwise.
A rolling kitchen island costs $150–$400 (IKEA, Wayfair, Target) and typically includes storage below and counter space on top. Some have bar seating for 2–3 people. Assembly takes 1–2 hours. Budget hack: use a rolling cart ($30–$80) as a beverage station or produce storage. Pro tip: choose one with locking wheels so it doesn’t slide when you’re working on it.
Your kitchen becomes flexible—you gain counter space on-demand without losing the ability to move through the space. Plus, it’s perfect for small entertaining where you want guests to perch while you cook.
25. Arrange a Seating Nook Under a Window
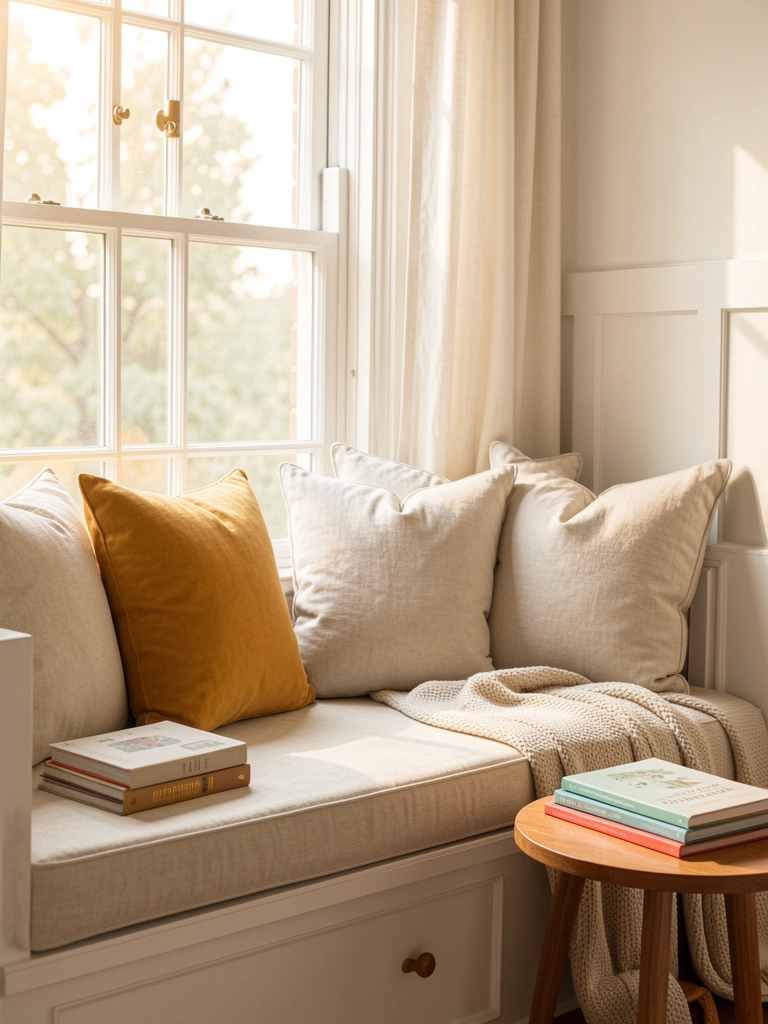
Windows are natural gathering spots. A seating nook under a window uses a space that might otherwise feel empty and creates an inviting, functional zone that’s perfect for reading or working.
Use an **existing window sill or add a *cushioned bench ($150–$400)* or low storage bench ($100–$250). Layer with throw pillows ($15–$40 each), a throw blanket ($20–$60), and a small side table ($40–$100). Assembly takes 30 minutes to 1 hour. Budget option: stack cushions on the sill without buying a bench ($30–$60 for quality cushions). Natural light is free and makes this zone feel special.
You’ve created a retreat that uses existing architecture and daylight. This zone becomes your favorite spot in the home—a win for both function and mental health in a small space.
26. Hang a Pegboard Wall to Organize Vertical Space
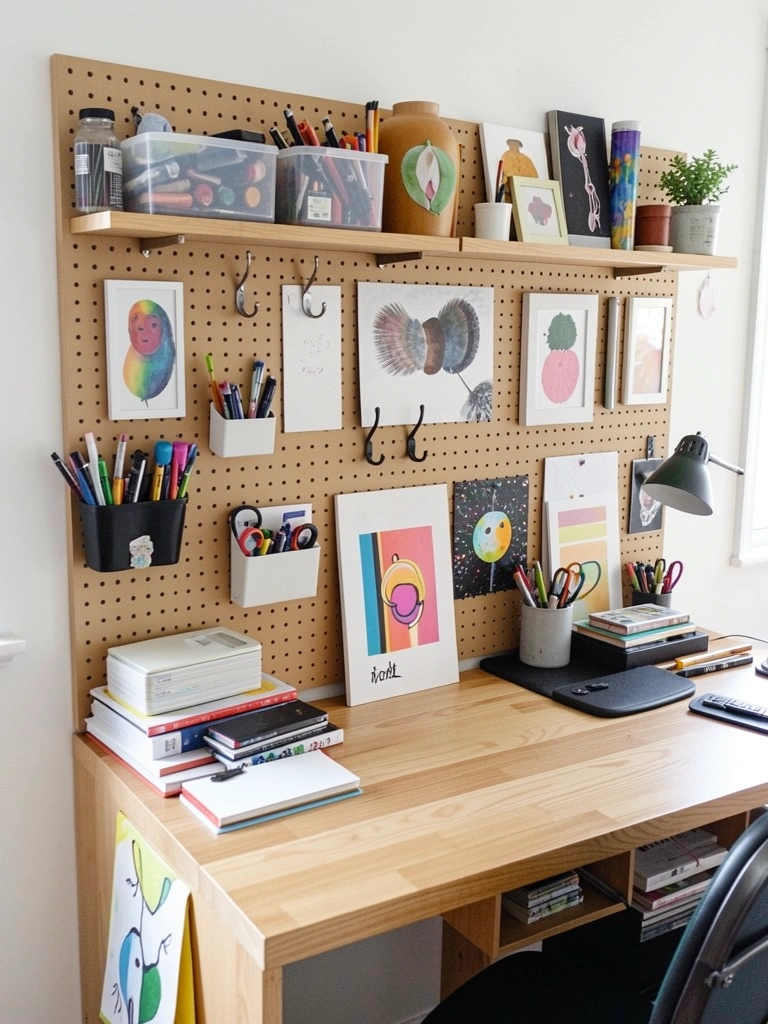
A pegboard wall is the ultimate small-space organizational hack. Every item is visible, accessible, and the pegboard itself becomes a design feature. It’s flexible (you can rearrange hooks instantly) and uses pure vertical space.
A pegboard sheet costs $10–$30 and you’ll need hooks ($0.50–$2 each). Installation takes 1–2 hours into studs. Paint it a color that matches your decor ($10–$20 for paint) to make it feel intentional rather than utilitarian. Use it for art supplies, kitchen tools, keys, headphones—anything you need close. Renter-friendly: adhesive pegboards ($20–$50) skip the drilling.
Your small space becomes organized and you’re not hunting for items anymore. Plus, a styled pegboard looks creative and intentional, turning practical storage into a design moment.
27. Define Activity Zones with Paint Color or Wallpaper
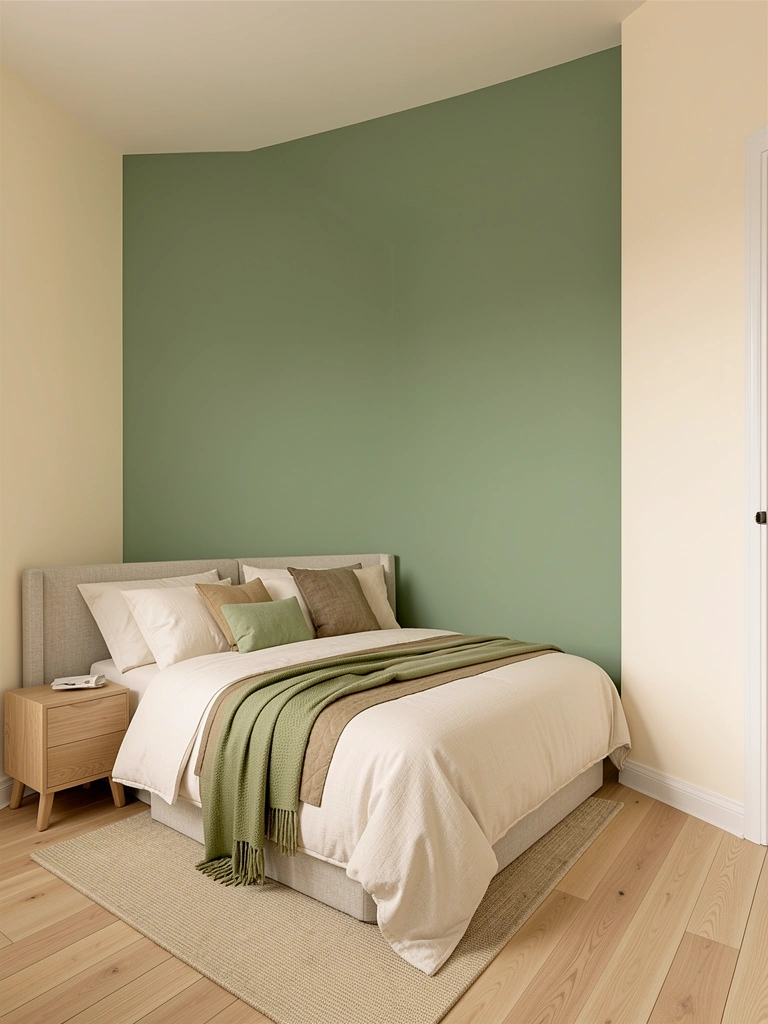
Color is the cheapest way to visually separate zones without building walls or taking up space. Painting one wall in a deeper or different tone creates a subtle but powerful visual boundary between areas.
Paint one wall in a complementary color ($20–$50 for paint) in your sleeping area or accent wall—forest green, warm terracotta, dusty blue, or rich cream. Alternatively, use removable wallpaper ($20–$40 per roll) which is renter-friendly. This takes 3–4 hours and zero furniture. Pro tip: choose warm, earthy tones (2025 trend!) that make spaces feel intentional rather than cold.
Your space reads as two distinct zones even though you’ve only changed the color. The psychology of this shift is huge—your brain recognizes functional separation and you feel more organized despite the same square footage.
Save this post and pick one layout idea to try this weekend. Small spaces respond instantly to intentional arrangement—you’ll feel the difference the moment you shift furniture or add a single divider. Share this with anyone living small or renting; these hacks work in any home regardless of ownership.
Leave a Reply