If you’re serious about your coffee, your espresso station deserves more than just a machine shoved in the corner. This isn’t about being pretentious—it’s about creating a space that makes your morning ritual feel special and keeps everything you need within arm’s reach. Whether you’re working with a tiny apartment kitchen or a sprawling home setup, there are countless ways to style and organize your espresso corner so it looks Instagram-worthy while staying functional. We’ve gathered 26 specific ideas that blend aesthetics with practicality, from budget-friendly styling tricks to investment-worthy upgrades. You’ll find options for renters, DIY enthusiasts, and anyone looking to elevate their daily caffeine routine. Let’s dive into ways to make your espresso station a focal point you’ll actually want to show off.
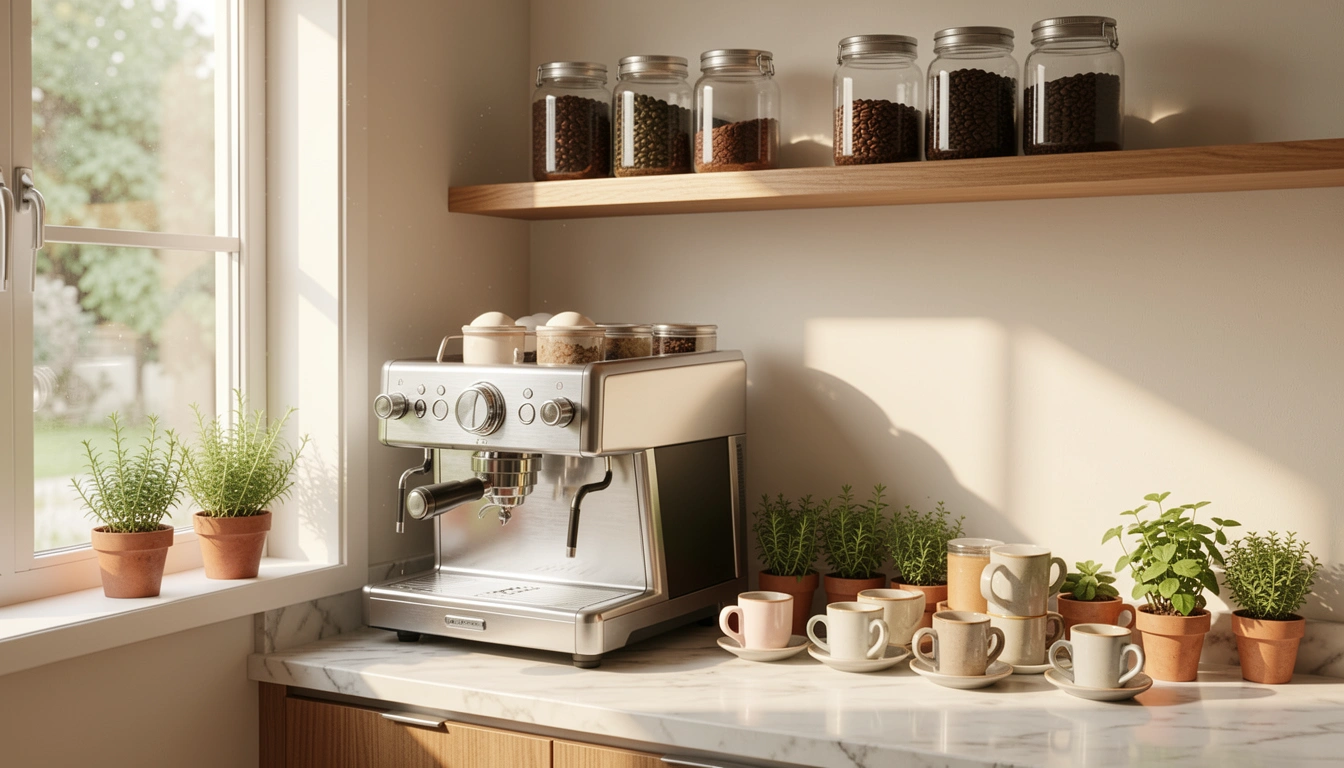
1. Mount a Floating Shelf Above Your Machine
A floating shelf above your espresso machine gives you display space without eating up counter real estate. This keeps frequently used items visible and accessible while creating visual interest at eye level.
Install a sturdy floating shelf (24-36 inches) in brushed brass, matte black, or walnut wood ($30-$80 from IKEA, Home Depot, or Amazon). You’ll need basic tools and about 30-45 minutes to mount it securely into wall studs. Add museum-quality adhesive strips underneath to prevent slipping. Paint your wall behind the shelf a soft sage green or pale gray to make the shelf pop against the backdrop.
Pro tip: Keep only three to five items on display—your favorite mug, a small plant, coffee beans in a glass jar, and maybe a coffee-themed print. Overcrowding defeats the purpose.
Your espresso corner instantly becomes a styled vignette that draws the eye every morning. Plus, you free up valuable counter space below for your machine and grinder.
2. Invest in a Premium Espresso Machine With Sleek Design

Your machine is the hero of your station—choose one that’s as beautiful as it is functional. A well-designed espresso machine becomes a focal point, not something you hide away.
Look for machines with stainless steel or painted metal bodies in black, white, or brushed finishes ($300-$700+ from brands like Gaggia, Breville, or Rocket). Mid-range options ($200-$400) from Rancilio or Lelit offer excellent aesthetics without the luxury price tag. Measure your space first, then choose a compact model if counter room is tight. Pro tip: Match your machine’s finish to your other kitchen hardware (sink faucet, cabinet handles) for cohesion.
Spend time at a specialty coffee shop to compare machines in person before buying online. This investment pays dividends every single day you use it.
3. Create a Dedicated Grinder Station Nearby
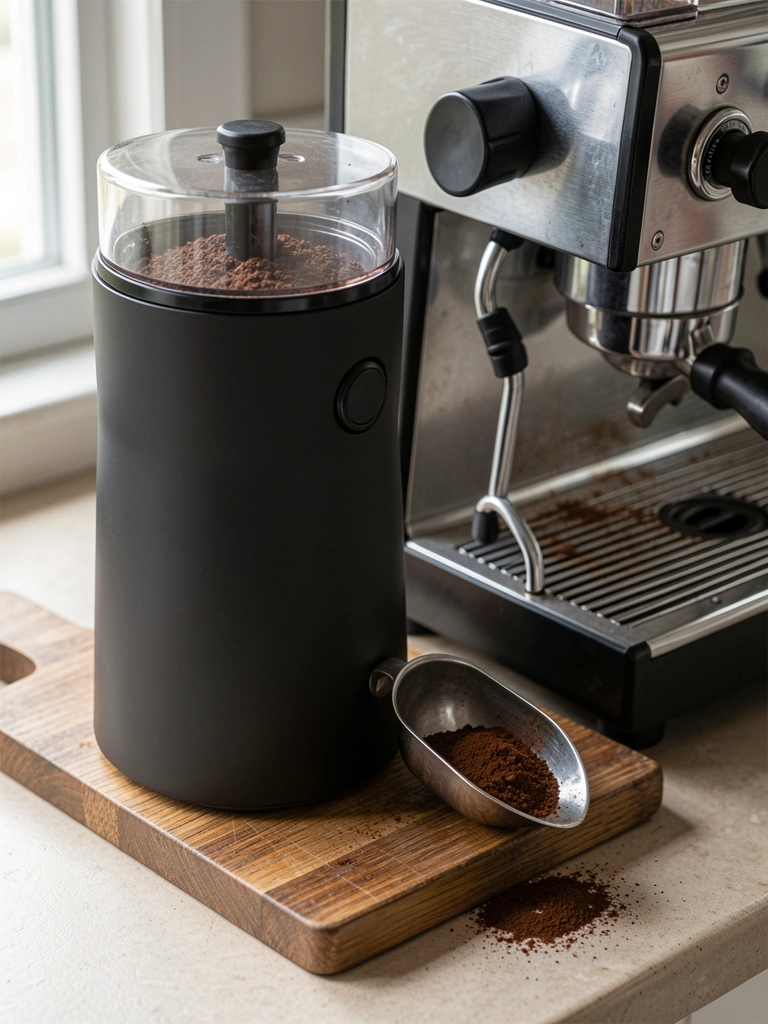
A separate grinder zone keeps your station organized and prevents coffee grounds from scattering everywhere. Grouping your grinder slightly away from your machine actually makes the workflow smoother.
Choose a burr grinder (conical or flat) that matches your machine’s aesthetic—matte black, stainless, or brushed finishes ($80-$200 from Baratza, Wilfa, or Fellow). Set it on a small wooden trivet or bamboo mat ($15-$30) to define the space and protect your counter. Leave 6-8 inches between your grinder and machine for easy movement. Add a small metal scoop and a brush nearby for cleanup.
Pro tip: Keep a damp microfiber cloth folded under your grinder to catch stray grounds during grinding.
This dedicated zone makes grinding feel intentional rather than chaotic, and it keeps your counter cleaner overall. Your mornings become calmer when everything has its place.
4. Install a Chalkboard Label System for Coffee Bean Varieties

A simple labeling system keeps your coffee organized and looks charming in the process. This is especially helpful if you rotate beans regularly or experiment with different roasts.
Grab a pack of small chalkboard labels or kraft paper labels with whiteboard markers ($10-$15 from Target or Amazon). Label your glass jars by origin, roast date, or roast level. Wipe and relabel as you rotate beans—it takes two minutes but keeps your station feeling curated. Use jars with airtight lids ($3-$8 each) to keep beans fresh longer.
Pro tip: Write the roast date and recommended brew method on the label for reference.
Now your coffee collection looks intentionally displayed rather than randomly stored. Visitors will notice the care you’ve taken, and you’ll actually know which bean you’re grabbing.
5. Use Marble or Concrete Countertop Trim for Visual Impact
A short marble or concrete piece acts as a tiny shelf accent that elevates your whole station without a full countertop replacement. This is renter-friendly if you use non-permanent mounts.
Find a scrap marble, granite, or concrete slab (12-18 inches) at a stone supplier or Etsy ($20-$60), or use adhesive-backed marble contact paper ($15-$25 for smaller surfaces). If you own, secure it permanently; if renting, use reversible mounting tape ($10) on your current countertop. Position it under your floating shelf or behind your machine as a backsplash accent.
Pro tip: Pair a light marble with a dark machine, or a dark concrete with white ceramics for strong visual contrast.
This simple addition makes your station look intentionally designed, like you consulted an interior designer rather than just plugged in a machine. The contrast draws the eye and makes your space feel curated.
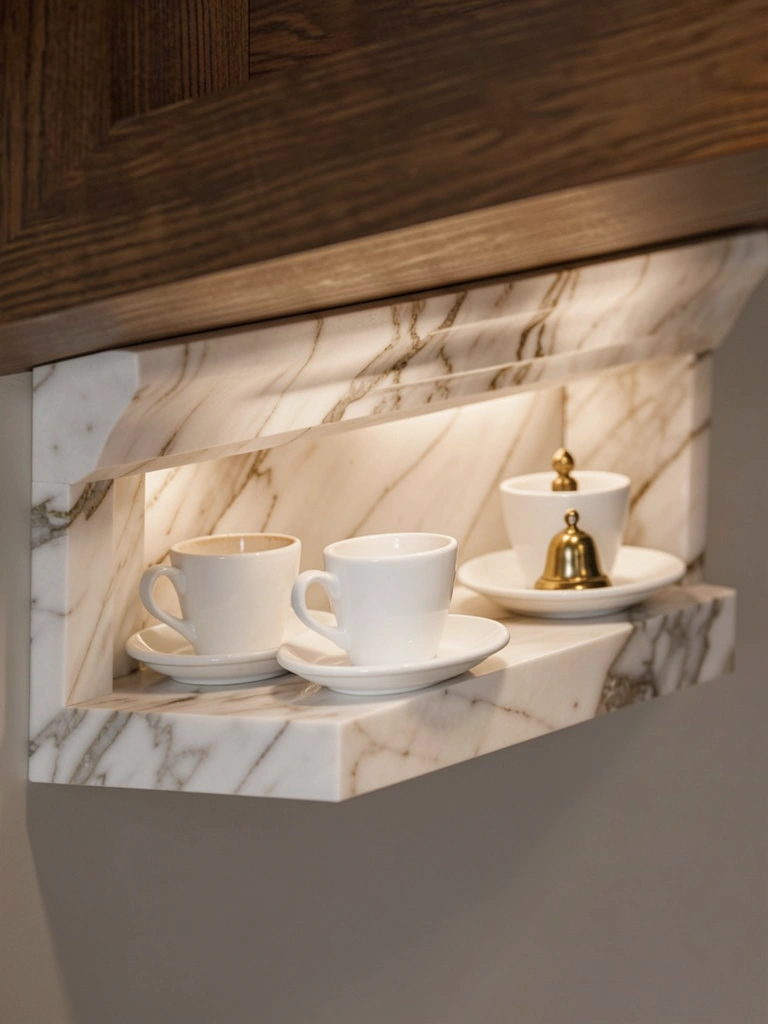
6. Style Your Espresso Cups Like a Café Would
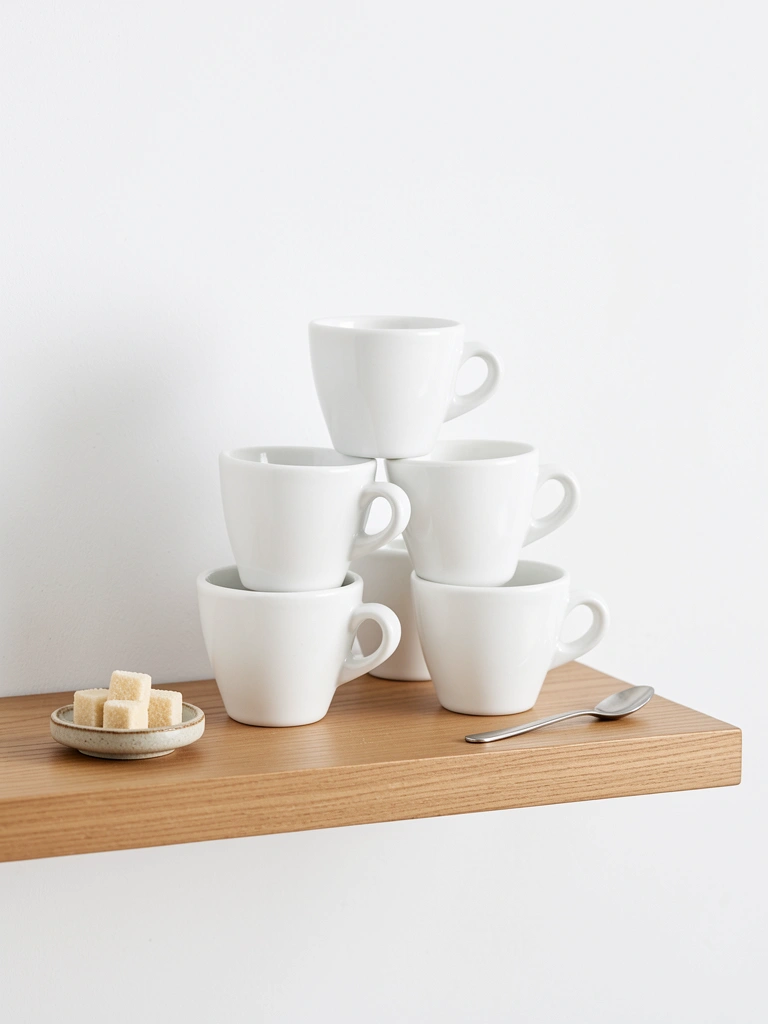
Matching cups aren’t just for show—they make your station feel intentional and café-like. A collection of mismatched mugs looks casual; curated espresso cups look designed.
Choose a ceramic espresso cup set (4-6 cups) in white, cream, or soft gray ($40-$80 from Anthropologie, West Elm, or specialty coffee brands). Look for cups sized specifically for espresso (2-3 ounces), not regular mugs. Stack them on your floating shelf or in an open cabinet so they’re visible and grabbable. Add a matching sugar dish and small spoon ($15-$25) for authenticity.
Pro tip: Buy one extra set so you can cycle one into the dishwasher while using the other.
Sipping from a proper espresso cup (instead of a regular mug) actually changes how you taste and appreciate your coffee. Your morning ritual feels less rushed, more intentional.
7. Add Warm Ambient Lighting With a Pendant or Flush Mount
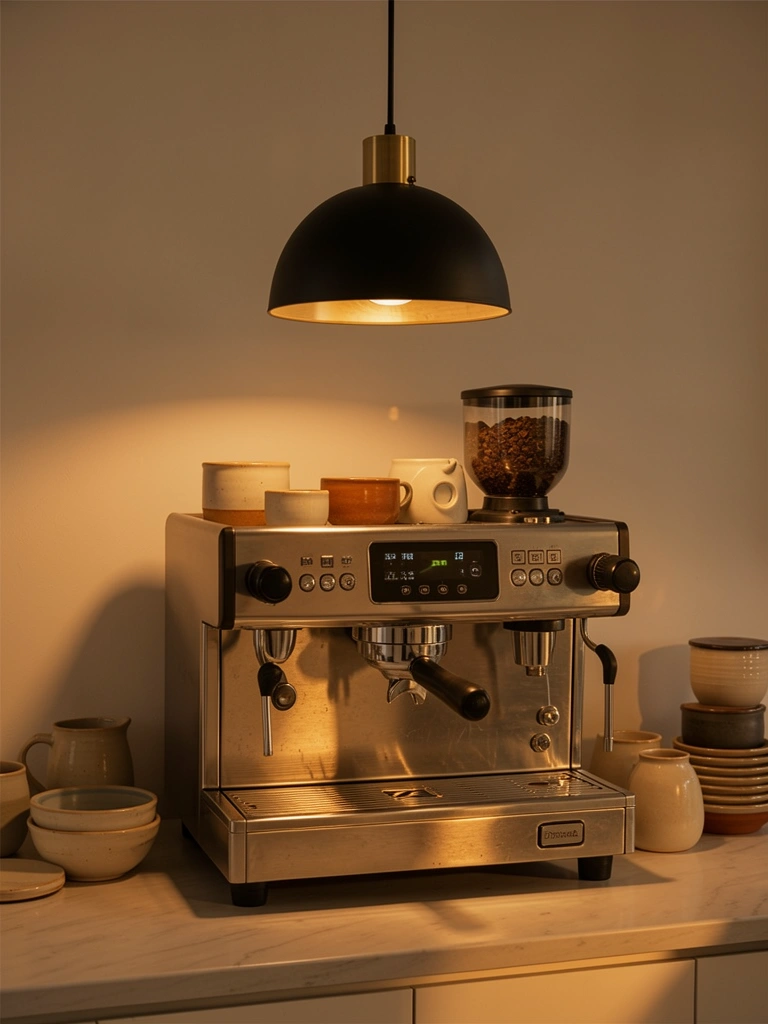
Overhead lighting that’s too bright or cold ruins a station’s ambiance. Warm, focused light makes your morning coffee feel like a spa experience instead of a clinical task.
Install a modern pendant light (8-12 inches diameter) in brass, matte black, or ceramic ($50-$150 from West Elm, CB2, or Amazon) directly above your station. Opt for warm white bulbs (2700K color temperature, 60-75 watts equivalent). If you rent, use a plug-in pendant with an outlet converter ($30-$60 from Amazon). Position it so light falls directly on your machine and cup area but not in your eyes.
Pro tip: Add a dimmer switch ($15-$30) so you can adjust brightness based on time of day.
Your station transforms from a functional corner into an inviting ritual space. The warm light makes everything look better and actually helps you appreciate the moment you’re in.
8. Arrange a Small Succulent or Herb Garden Nearby

Live plants soften your station and improve air quality. A tiny plant collection adds life and color without taking up serious space or requiring constant maintenance.
Choose low-maintenance plants like succulents, pothos, or snake plants in small ceramic pots ($8-$15 each from Etsy, Home Depot, or a local nursery). Place them on your floating shelf, window sill, or on a small wooden plant stand ($20-$40) next to your machine. These plants need watering only once every 2-3 weeks. Keep them out of direct water splash from your espresso machine.
Pro tip: Use a small brass plant mister ($8-$12) to water them—it becomes part of your station’s aesthetic.
You get cleaner air, a splash of green that photographs beautifully, and a reminder to slow down while you’re making your coffee. Plants make spaces feel alive and welcoming.
9. Build a Custom Wooden Base or Riser for Your Machine
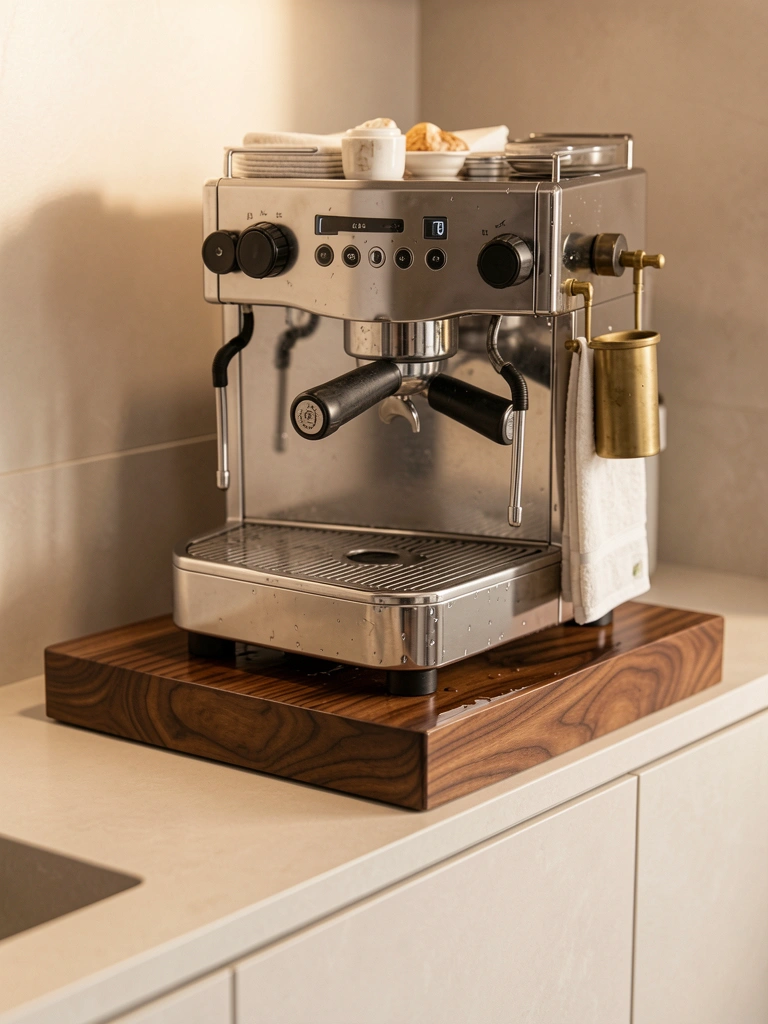
Elevating your machine on a custom base protects your counter, improves your posture, and creates visual separation that makes your station feel intentional. This is a weekend DIY project that pays aesthetic dividends.
Build a wooden riser from walnut, oak, or bamboo using basic woodworking ($30-$80 in materials if you DIY, or $80-$200 if you commission from Etsy). Seal it with food-safe polyurethane. Mount a brass or stainless steel towel bar on one side ($15-$25) to hang your bar towels or a small cloth. The riser should be 6-8 inches tall to reduce strain when tamping.
Pro tip: Add a water-resistant mat on top before placing your machine to protect the wood.
Your machine sits like a piece of art on display, and your back thanks you for the ergonomic improvement. The riser also catches spills before they hit your counter.
10. Hang a Brass or Wooden Shelf Rack for Towels and Supplies
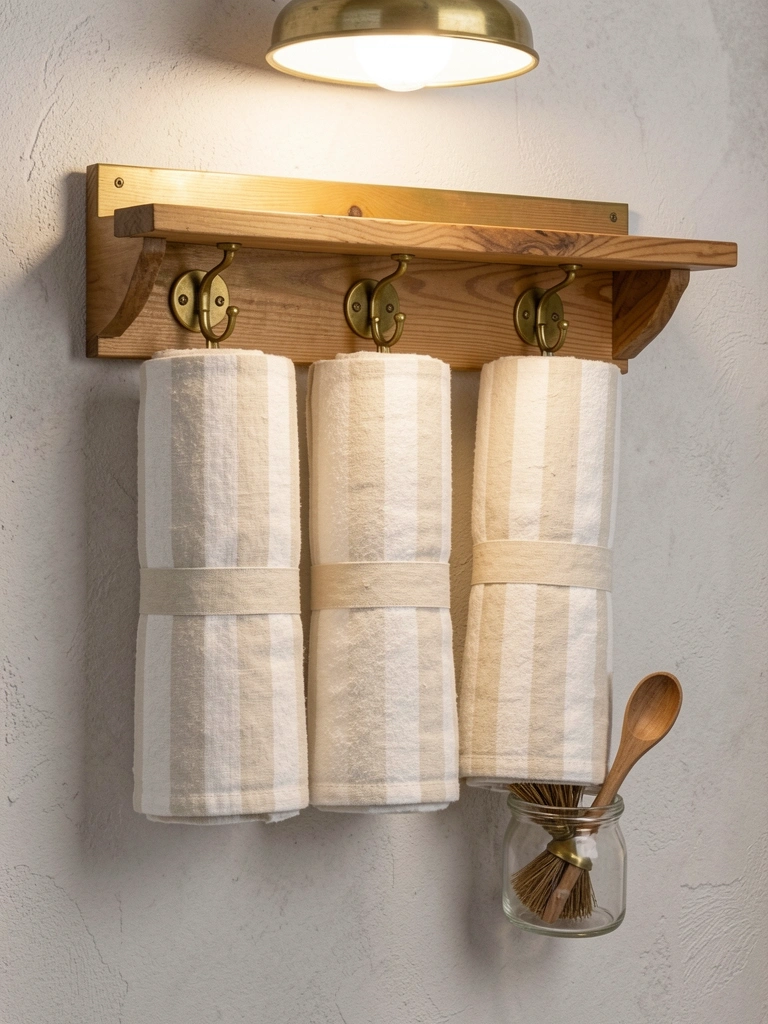
A wall-mounted rack keeps your supplies organized and within reach without cluttering your counter. This is both functional and provides another design element.
Install a brass, wood, or black metal shelf with hooks ($25-$60 from Anthropologie, Wayfair, or etsy) about 12-18 inches to the right of your machine. Mount it securely (15-30 minutes with basic tools and wall anchors). Hang clean linen bar towels ($15-$30 for a set of 3) in neutral colors. Store your cleaning brush, purge bucket cloth, and spare scoops on the shelf below.
Pro tip: Fold towels into thirds lengthwise before hanging—it looks intentional and takes up less space.
Now your supplies are hidden from view but instantly grabable. Your station looks like a proper café corner rather than a cluttered countertop.
11. Create a Coffee Tasting Journal Display
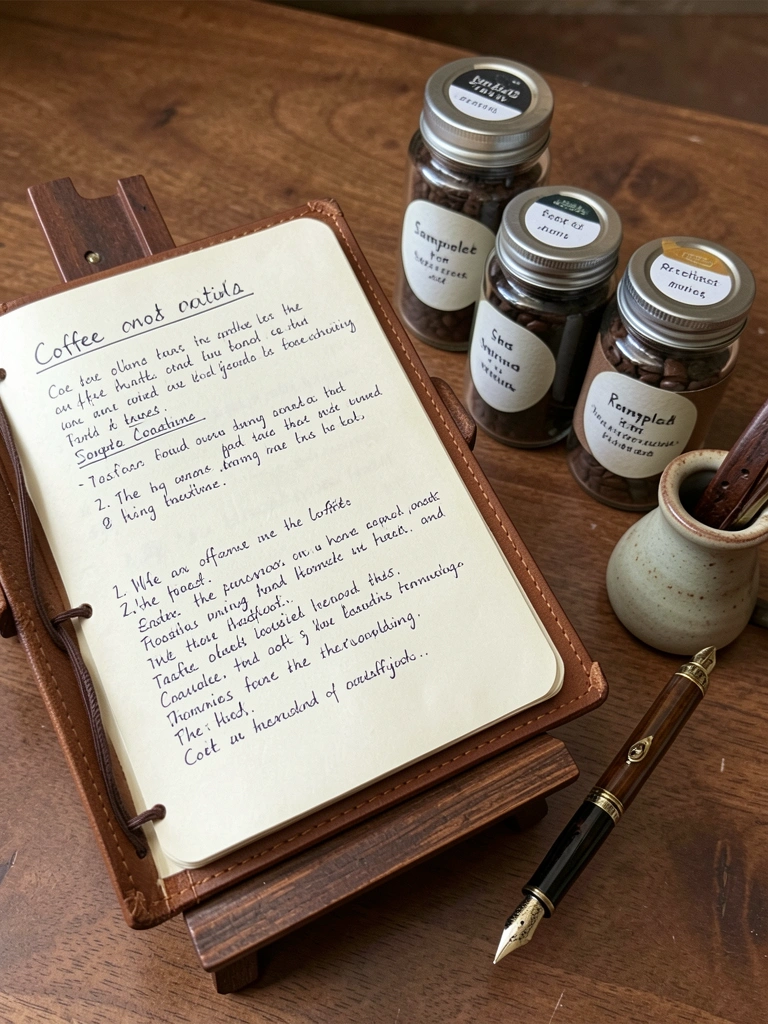
Documenting your coffees adds a personal touch and genuinely improves your palate over time. A displayed journal becomes part of your station’s story.
Buy a small leather-bound notebook or get a printable tasting journal template ($15-$30 or free online) and keep it on a small wooden stand or cookbook holder ($10-$20) next to your machine. Create simple columns: Origin, Roast Date, Roast Level, Tasting Notes, Rating. Use a nice pen ($10-$50 depending on how fancy you want to get) to encourage regular note-taking. Rotate which page is visible to create a fresh look weekly.
Pro tip: Take a photo of interesting tasting notes and share them on Instagram—it’s surprisingly engaging.
This simple habit deepens your appreciation for good coffee and gives your station a scholarly, intentional vibe. Visitors always ask about the notebook.
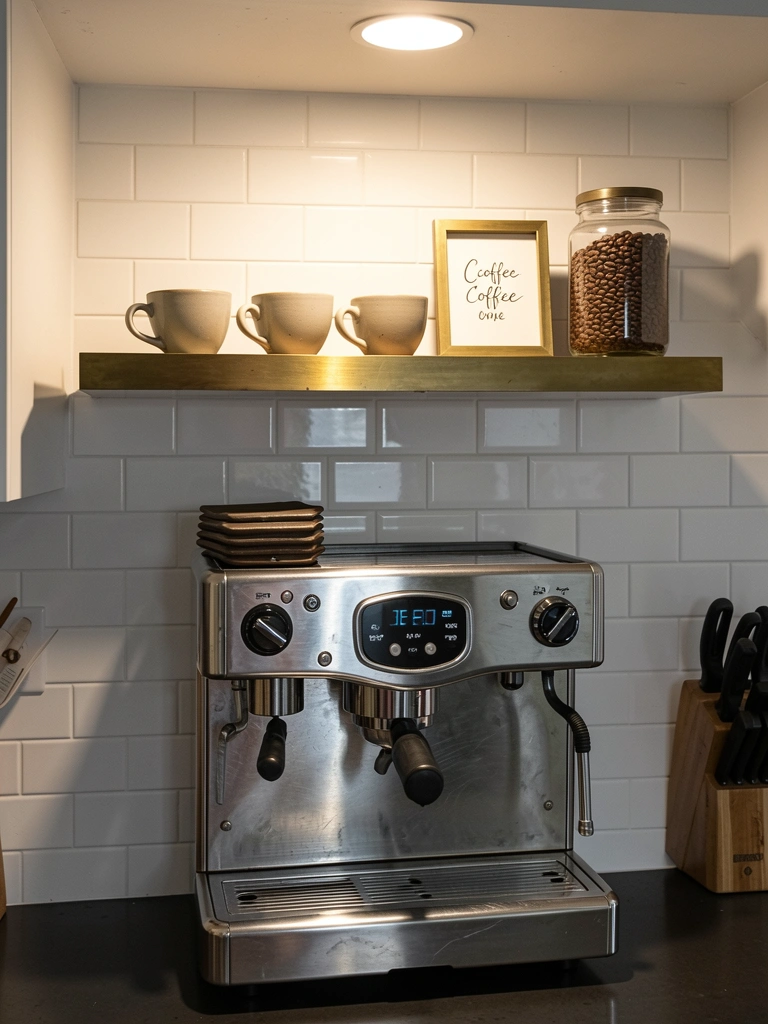
12. Install an Open Shelving Unit for Machine Accessories
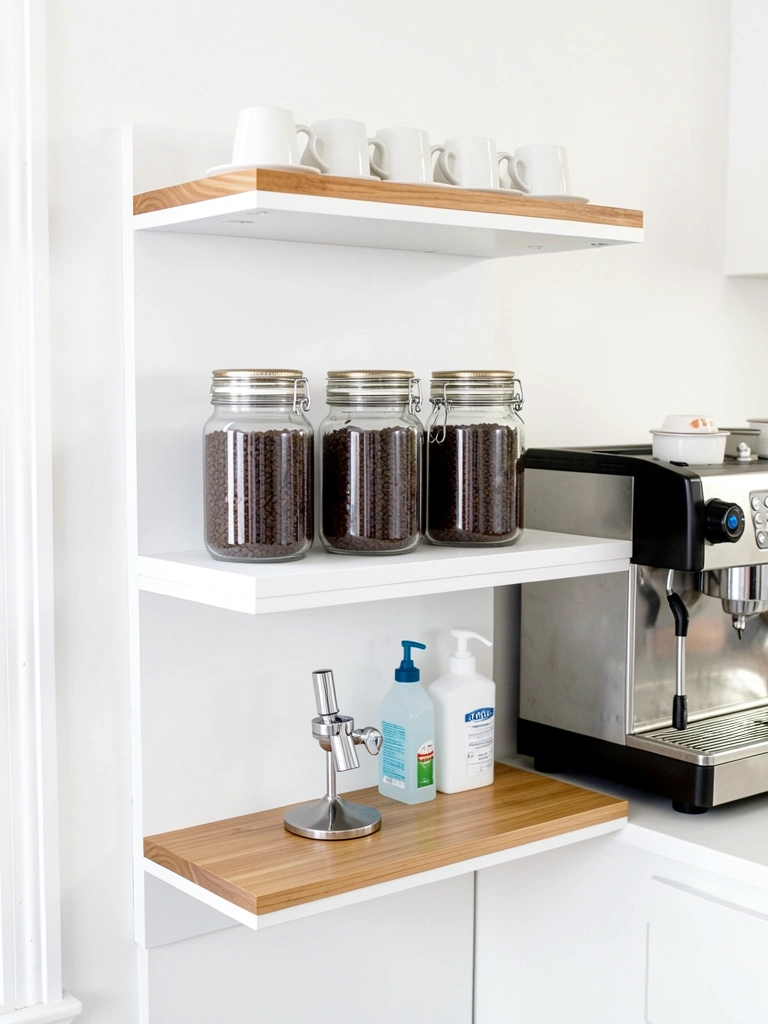
Open shelving keeps all your accessories visible and accessible while creating a gallery-like display that showcases your equipment. This works especially well for small kitchens where you want vertical storage.
Choose a slim open shelf unit in white, natural wood, or black metal ($50-$150 from IKEA, Target, or Amazon). Position it 12-24 inches to the side of your machine where you can easily reach accessories. Dedicate each shelf: cups on top, beans in the middle, tools and cleaning supplies on the bottom. Keep items organized by category so everything has a clear home.
Pro tip: Use matching containers and keep the back wall clean and minimal to avoid visual clutter.
Your accessories become part of the design instead of hidden away. Everything you need is one step away, and the display actually encourages you to maintain and organize regularly.
13. Use a Statement Backsplash Tile or Peel-and-Stick Wallpaper
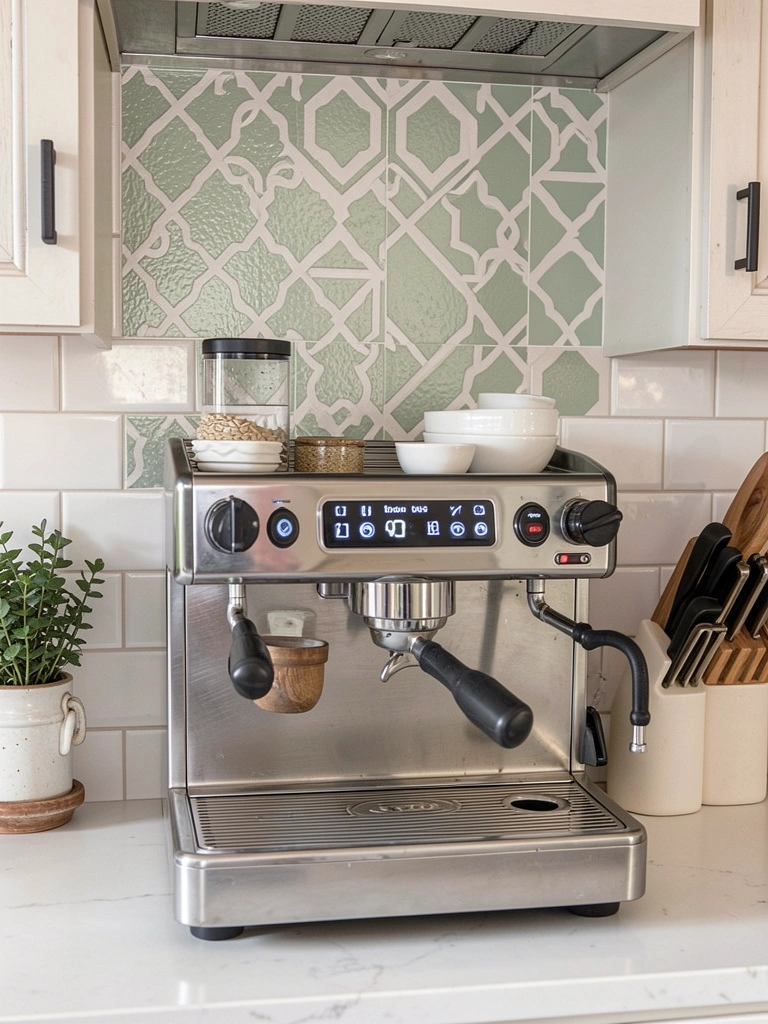
A small backsplash behind your machine adds texture and visual interest without a major renovation. Peel-and-stick options are renter-friendly and surprisingly durable.
Apply peel-and-stick wallpaper or tile stickers ($20-$50 for a small section from Amazon, Wayfair, or Etsy) to the wall directly behind your machine. Choose geometric patterns, soft colors (sage, cream, dusty pink), or classic subway tile designs that complement your machine’s finish. The entire project takes 15-20 minutes with just a smooth squeegee. If renting, remove it anytime without damage—it’s designed for that.
Pro tip: Clean and dry the wall thoroughly before applying. Use a credit card or squeegee to remove air bubbles as you go.
Suddenly your station feels like a professionally designed café corner instead of a random countertop. The backsplash frames your machine beautifully and makes the space photograph incredibly well.
14. Curate a Small Coffee Table Book or Brewing Guide Collection
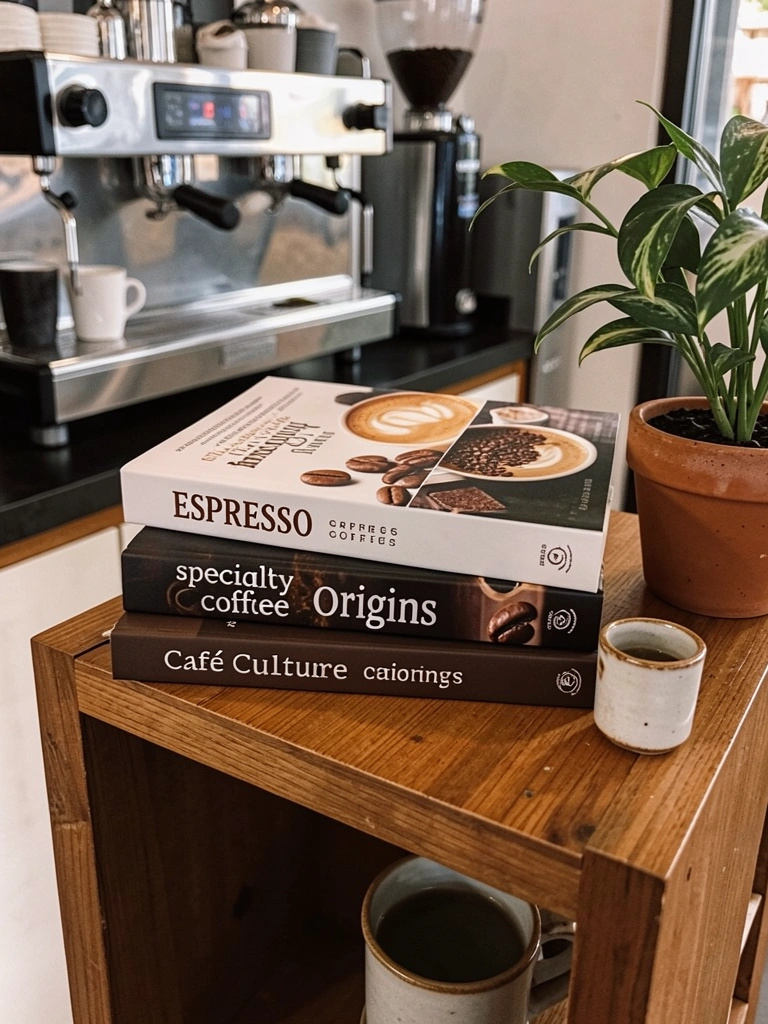
Coffee books serve double duty—they look beautiful and actually teach you about your hobby. A small curated stack signals that you’re serious about your craft.
Choose 2-4 coffee-focused books ($30-$60 total from Amazon, Barnes & Noble, or specialty coffee shops) such as “The Espresso Compendium” or “Coffee: A Guide to Buying, Brewing & Enjoying.” Stack them horizontally on your floating shelf or on a small wooden stand ($10-$20). Rotate the visible book every month to keep your display fresh.
Pro tip: Visit your local library first to see which books you actually love before buying.
These books become conversation starters and actually improve your brewing knowledge. Browsing a page while your espresso extracts adds a meditative quality to your routine.
15. Position a Small Mirror or Reflective Surface Behind the Station
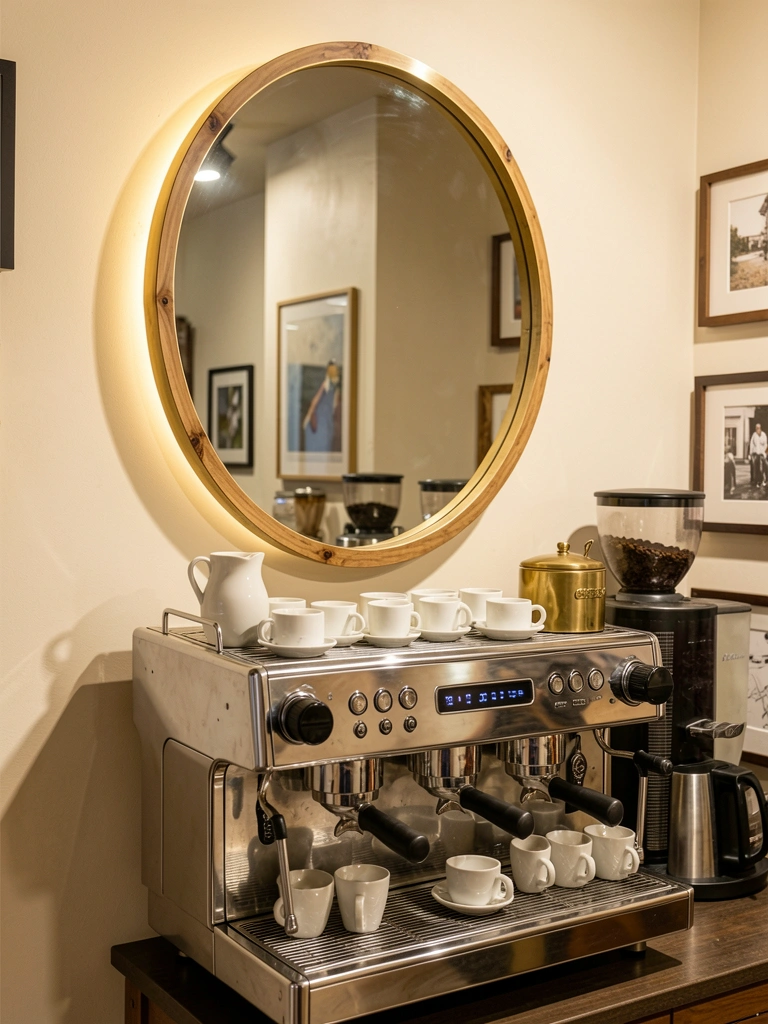
A mirror multiplies light and makes your corner feel larger and more polished. It’s an easy design trick that professional cafés use constantly.
Hang a simple round mirror in brass, wood, or matte black ($30-$80 from Anthropologie, West Elm, or IKEA) directly behind your machine at eye level. This bounces light around the corner and creates visual depth. Position it so your machine’s reflection looks intentional, not accidental. Paint the wall behind the mirror a soft neutral tone (cream, soft gray, pale sage) so the reflection enhances rather than clutters.
Pro tip: A brass mirror pairs beautifully with stainless steel machines; wood frames work with all aesthetics.
Your corner suddenly feels brighter and more expansive. The reflection creates a professional café aesthetic that’s surprisingly sophisticated.
16. Create a Labeled Storage System for Filter Baskets and Portafilters
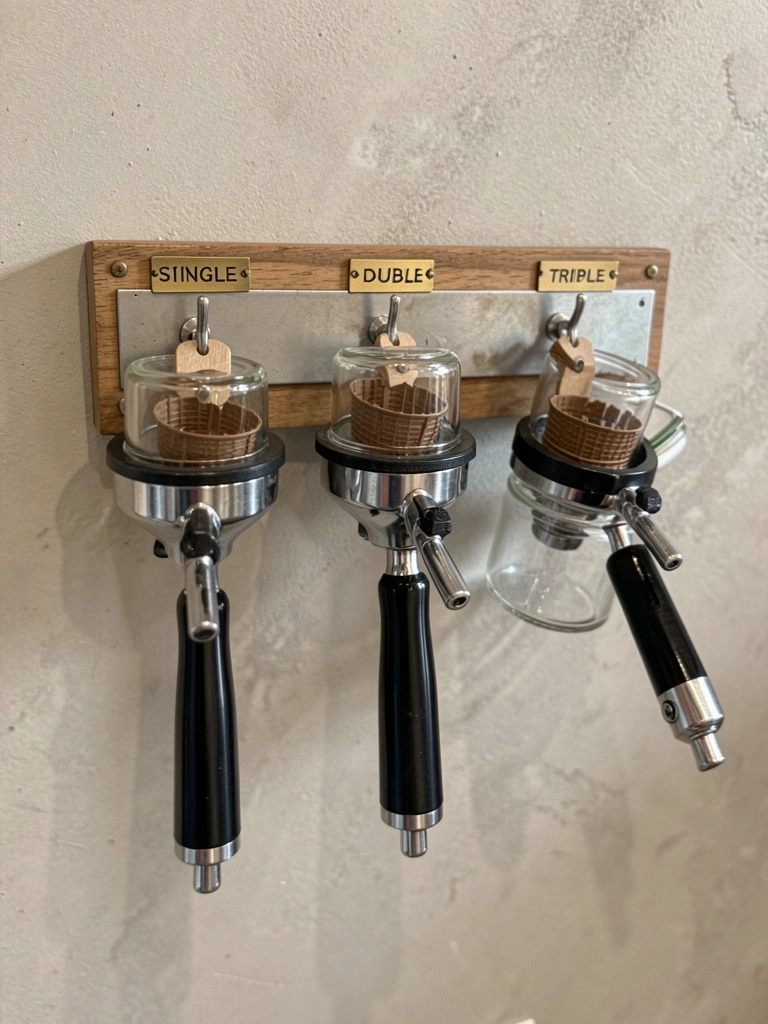
Keeping your portafilters and baskets organized means you’ll always grab the right size and your station looks systematically curated. This is ideal for those who own multiple sizes.
Build or buy a small wooden or metal organizer with hooks ($25-$60 from Etsy, Amazon, or custom woodworker) mounted 24-30 inches above your machine. Label each hook with small brass or wooden tags ($10-$20 set) identifying what hangs there. Store extra filter baskets in matching glass containers ($3-$5 each) with corresponding labels. Everything should be visible and accessible.
Pro tip: Keep a small cheat sheet showing basket sizes and their uses—laminate it for durability ($5).
This system looks professional and actually saves you time every morning. No more digging through drawers looking for the right basket.
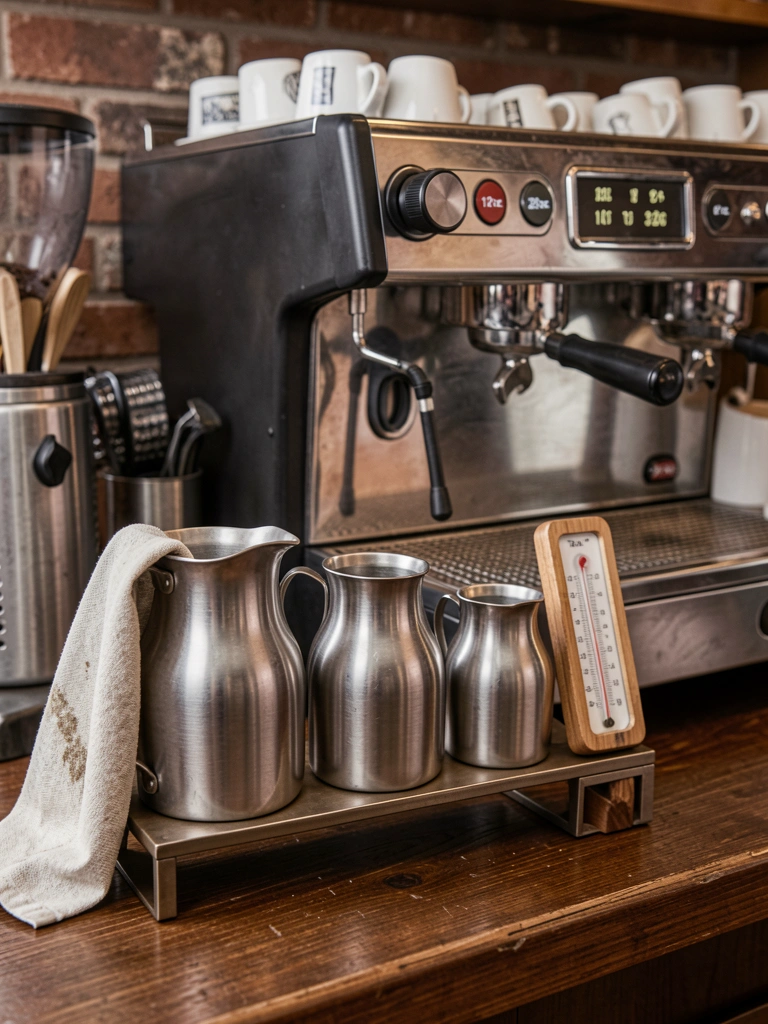
17. Incorporate a Small Water-Resistant Counter Mat Under Your Machine
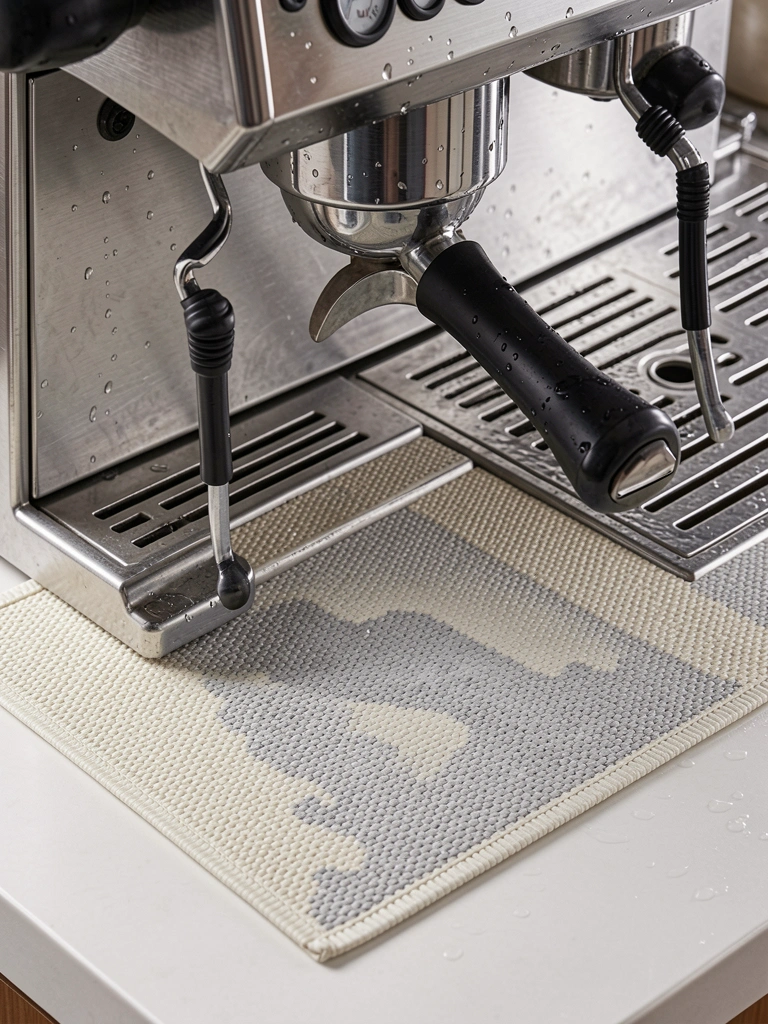
A water-resistant mat protects your counter from espresso splashes and steam, plus adds visual grounding to your station. It’s a small detail that makes everything feel more intentional.
Choose a small woven or silicone counter mat (12×18 inches) in neutral tones like cream, gray, or black ($15-$30 from Amazon, Williams Sonoma, or CB2). Look for ones specifically labeled “water-resistant” or “easy-clean.” Wipe it down daily and hand wash weekly. The mat defines your machine’s footprint and catches small spills before they reach your counter.
Pro tip: Match the mat’s texture to other elements in your station—if you have a woven basket, choose a similar texture for cohesion.
Your counter stays protected and your station looks intentionally bounded, like a designated café corner rather than just a machine randomly placed. Small details like this signal attention to design.
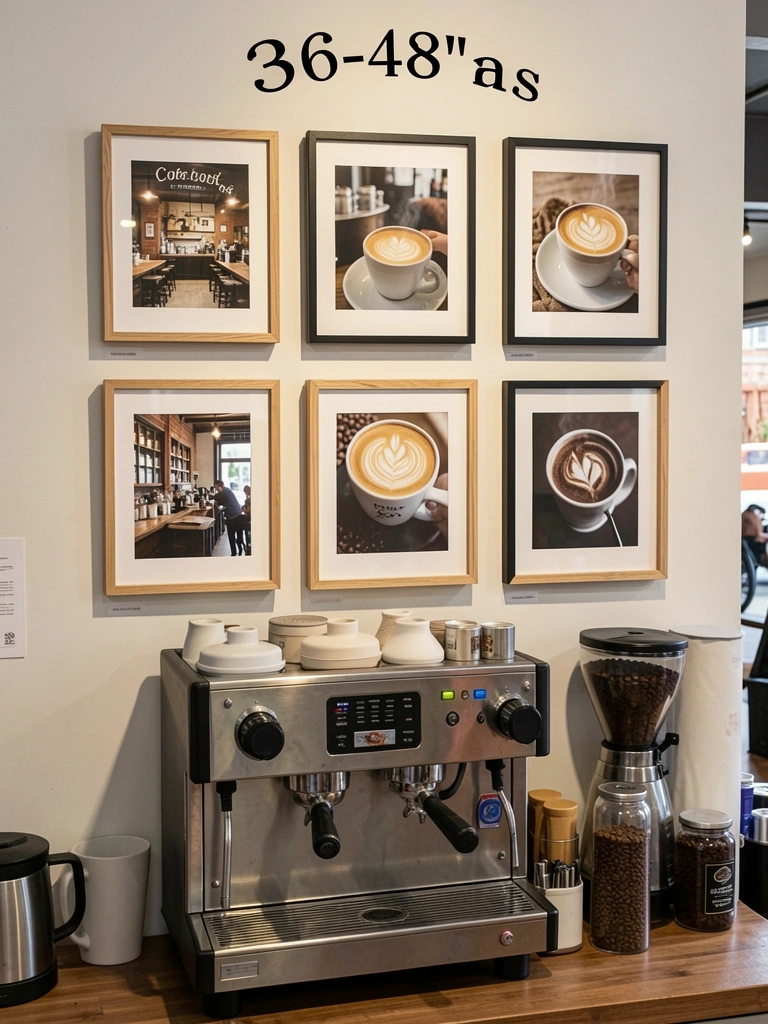
18. Display Espresso Extraction Guides or Brewing Charts on the Wall
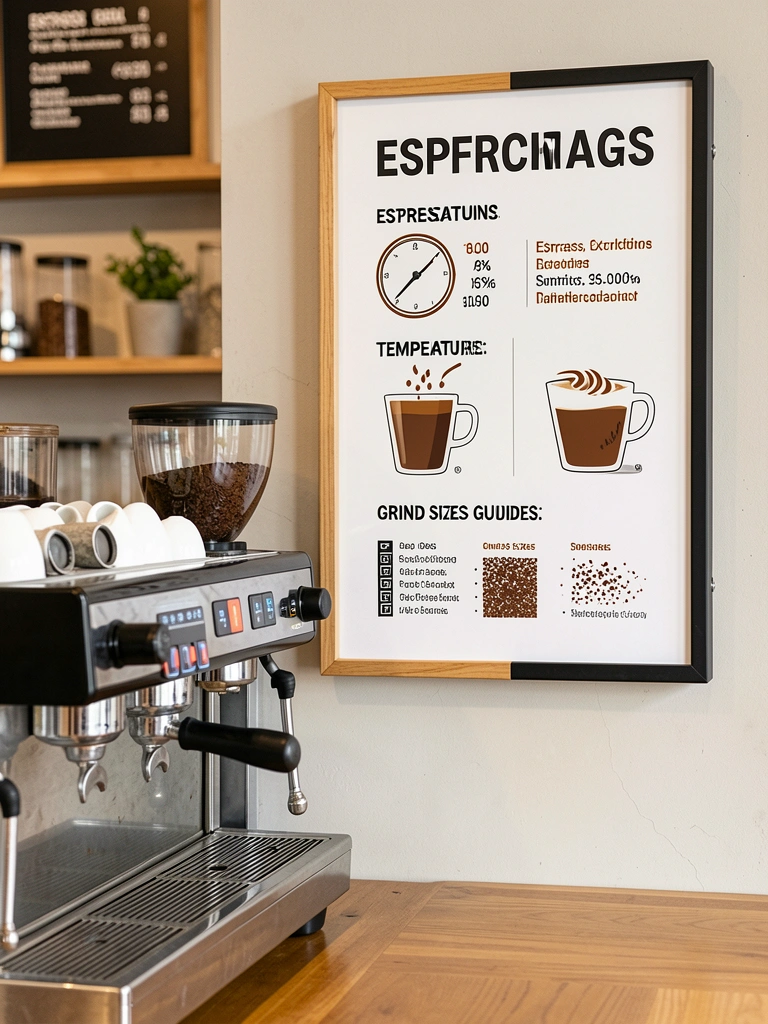
A visual guide on your wall turns your station into a learning hub. It’s both functional and shows you take your coffee seriously.
Create or buy a printed espresso guide ($15-$40 from Etsy shops specializing in coffee infographics) and frame it in a simple black or natural wood frame ($10-$25 from IKEA or Target). Mount it 36-48 inches high, directly in your line of sight when working. Include extraction ratio guides, temperature references, and grind size suggestions. You can also find free printables online and print them at home ($5 for ink and paper).
Pro tip: Laminate your printed guide so you can write notes on it with dry-erase markers without damaging the original.
Now you have a constant reference that actually improves your consistency. You’ll learn faster and troubleshoot brewing problems more effectively when guidelines are literally in front of you.
19. Style Your Station With a Color-Coordinated Ceramic Collection

Choosing ceramics in a coordinated color palette unifies your station and makes it feel designed rather than randomly assembled. Cohesive styling photographs beautifully too.
Select your dominant color (white, cream, soft gray) and add one or two accent colors (soft sage, dusty pink, warm terracotta) across your espresso cups, milk pitcher, sugar bowl, and saucers ($50-$150 total for a complete set from Anthropologie, Etsy, or specialty coffee retailers). Keep all pieces in this color family so they work together visually. Mix textures—glossy, matte, or textured finishes—to add interest while maintaining color cohesion.
Pro tip: Find one beautiful set you love and build around it rather than buying random pieces.
When everything coordinates, your station looks intentionally curated, like you’ve studied café design. It’s a small thing that makes a massive visual difference.
20. Install a Timer or Interval Training Clock for Brewing Consistency
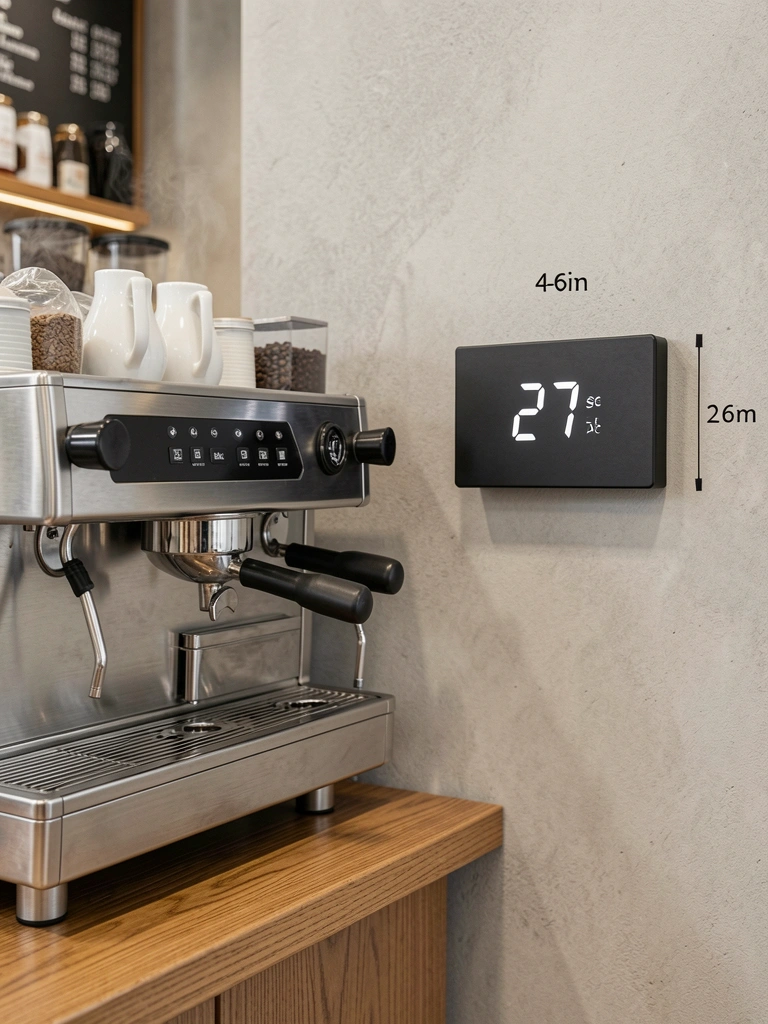
A visible timer keeps you accountable to proper extraction times and adds a professional touch. It’s a small tool that genuinely improves your shots.
Mount a wall-mounted interval timer or smartphone-sized display ($20-$50 from Amazon) within arm’s reach of your machine. Choose one in black, brass, or stainless steel to match your machine’s finish. Use it every single shot to ensure consistent 25-30 second extractions. Pro tip: Use a small digital kitchen timer ($8-$15) that clips onto a shelf if wall mounting isn’t an option.
Over time, you’ll internalize timing, but a visible reference keeps you honest while building muscle memory. Your shots become noticeably more consistent.
21. Create a Dedicated Milk Frothing Station With a Separate Pitcher Holder
Having dedicated pitchers for milk work makes your workflow smoother and keeps your station organized. A small stand makes this collection look intentional rather than cluttered.
Get a small wooden or metal pitcher rack ($20-$40 from specialty coffee retailers or Amazon) and position it 18-24 inches from your machine, ideally on the left if you’re right-handed. Store 3-4 stainless steel milk pitchers in different sizes ($15-$25 each: 12oz, 20oz, 32oz) so you match pitcher size to drink size. Add a milk thermometer holder ($5-$10) and a small folded towel rack ($8-$15) directly on or next to the stand.
Pro tip: Only wet-wash pitchers and dry immediately—never let them sit with milk residue.
Your milk work goes faster because you’re not hunting for the right pitcher. The dedicated station also signals that you take microfoam seriously.
22. Add Ambient Scent With Coffee or Subtle Fragrance Candles
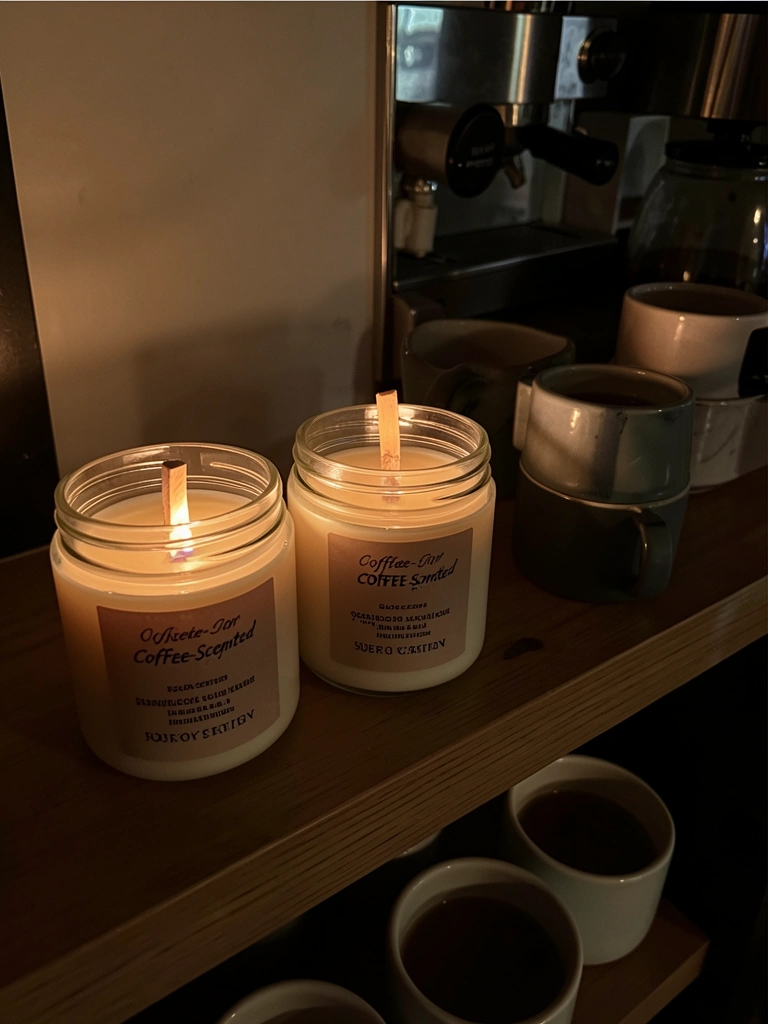
Scent completes the café experience and makes your space feel welcoming. Choose fragrance thoughtfully so it enhances rather than competes with your coffee’s aroma.
Place 1-2 soy candles ($15-$30 each from Jo Malone, Diptyque, or local coffee-scented artisans) on a shelf 18-24 inches away from your espresso machine (distance is important so fragrance doesn’t interfere with coffee aroma). Opt for subtle scents—coffee, vanilla, cedarwood, or unscented (let the coffee smell be the star). Light candles during evening shots or when you want to extend your ritual.
Pro tip: Never put scented candles directly next to your machine—the heat will throw off the fragrance diffusion and might interfere with your tasting experience.
Your morning or evening coffee moment becomes multi-sensory. The combination of warmth, light, and subtle scent turns a practical task into a luxurious pause.
23. Display Your Espresso Machine Manual or Service Records in a Small Frame
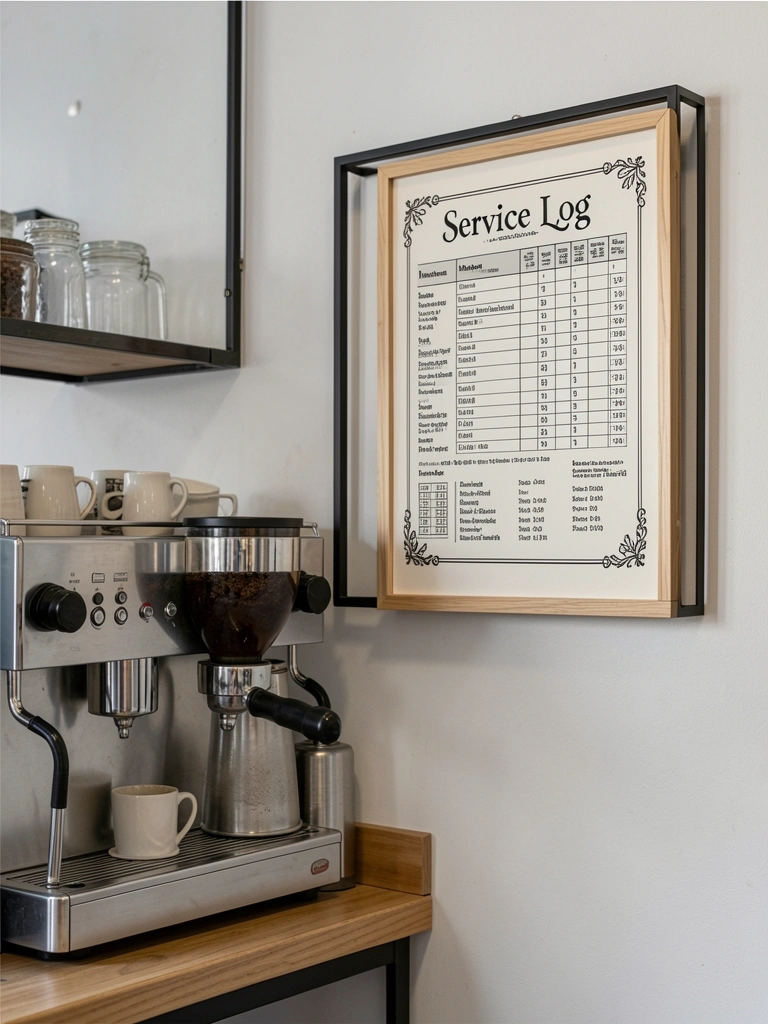
Your machine’s documentation becomes part of the design when framed thoughtfully. It shows you maintain your equipment and actually encourages regular care.
Frame a photocopy of your machine’s manual cover or create a printed “Service Log” template ($15-$30 for framing from IKEA or local framing) and hang it 12-18 inches to the left of your machine. Use a laminated version so you can write maintenance dates directly on it with dry-erase markers. Include descaling dates, cleaning checks, and any repairs. Update it monthly.
Pro tip: Design your own service log template using Canva (free) and print it—it’s much more personal than a basic chart.
This simple frame keeps you accountable to maintenance and signals serious dedication to your equipment. Regular upkeep extends your machine’s life significantly.
24. Invest in Sound-Dampening Mats or Acoustic Panels for Noise Control

If your grinder or machine is loud, sound dampening makes your ritual feel calmer and protects your ears. This is an underrated design element that affects your actual experience.
Install thin acoustic panels or self-adhesive sound-dampening mats ($40-$100 from Amazon or specialty audio retailers) on the wall directly behind your machine, covering about 2-3 feet of wall space. Choose neutral colors (gray, cream, charcoal) that blend with your existing wall. These reduce grinding and machine noise by 40-50% without looking institutional. Mounting takes 20-30 minutes.
Pro tip: Acoustic panels also improve espresso machine stability by reducing vibration transfer.
Your station becomes quieter and more peaceful. A calmer morning ritual genuinely affects your entire day’s vibe.
25. Create a “Clean-Up Station” With Dedicated Baskets for Used Pucks and Towels

A designated cleanup zone keeps your station tidy and signals that maintenance is built into your routine. It’s a small organizational detail that makes a real difference.
Place two small woven or metal baskets ($15-$30 for a pair from Target, Anthropologie, or Amazon) on the floor or on a low shelf directly under your machine station. Label one “Spent Pucks” and one “Towels.” Use the pucks basket for espresso grounds (compost these daily), and the towels basket for daily cleanup cloths. Check both baskets every morning before you start.
Pro tip: Compost your spent pucks—they’re valuable for gardens and reduce waste.
This system keeps your station looking clean and functional. You never get overwhelmed by coffee grounds or piled dirty towels, and maintenance becomes automatic.
26. Frame Personal Coffee Shop Photos or Travel Coffee Culture Shots
Personal photos on your wall connect your home station to the wider coffee community and remind you why you love this ritual. It’s a final design layer that makes the space truly yours.
Print and frame 3-4 of your favorite coffee shop photos or travel coffee culture moments ($30-$80 for printing and simple frames from Target, IKEA, or local frame shops). Arrange them in a small gallery formation directly above or to the side of your station at eye level. Mix frame styles (wood, black metal, different sizes) for visual interest. Leave 2-3 inches between frames.
Pro tip: Include photos from coffee shops you love, latte art you’ve created, or specialty coffee regions you want to visit.
Your station becomes a personal shrine to your coffee journey. Visitors see your passion reflected in these images, and you get daily inspiration every time you use your machine.
Save this post for your next weekend and pick one idea to start with this weekend—even just adding a floating shelf or some matching espresso cups changes how your whole station feels. Share with anyone you know who’s serious about their coffee at home.
Leave a Reply