Introduction
Tired of staring at blank balcony walls? A vertical garden transforms cramped outdoor space into a lush green retreat—no sprawling floor needed. Whether you’re renting a tiny city apartment or squeezing greenery into a narrow balcony, these 24 ideas prove you don’t need much room to grow. From wall-mounted planters and hanging baskets to trailing ivy cascades and DIY trellis systems, we’ve packed smart solutions for every budget and skill level. You’ll discover how to layer plants overhead, maximize wall space, and create the mini oasis you’ve been dreaming about. Ready to go vertical? Let’s grow.
1. Mount Wall Planters for Instant Green
Wall planters are the fastest way to add color without eating up floor space. These pocket-style holders attach directly to railings, walls, or fences, letting you plant upward instead of outward.
Grab stainless steel or resin wall planters ($15–$40 per piece) from Home Depot, IKEA, or Amazon. Install with weatherproof anchors in about 30 minutes—even renters can use adhesive strips. Fill with low-maintenance geraniums, sedums, or trailing ivy. Space them 8–12 inches apart in a zigzag pattern for visual rhythm.
Pro tip: Mix terracotta and metal for a Boho-Scandi vibe, or stick to one material for minimalist clean lines.
You’ll go from blank wall to blooming vertical garden in a single afternoon. The best part? These planters hold up through seasons and create an instant focal point that makes your balcony look intentional.
2. Hang Planters at Different Heights
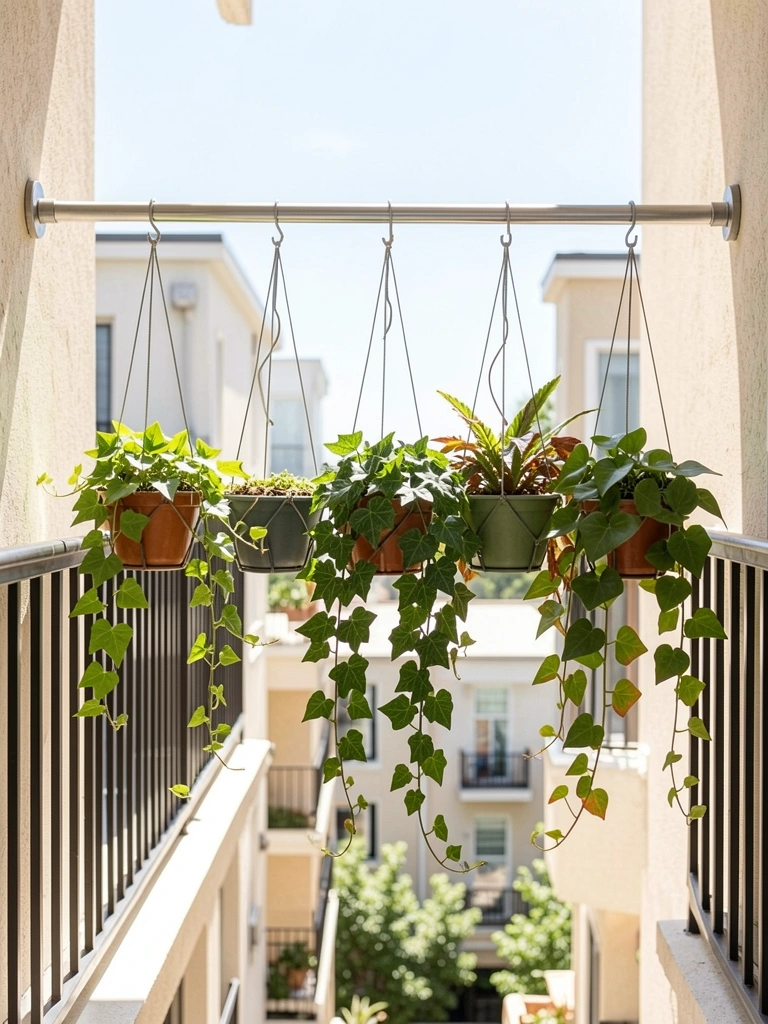
Hanging planters create dimension and draw the eye upward, making even small balconies feel bigger. Vary heights to avoid a monotonous look and maximize every inch of space.
Use S-hooks and sturdy ceiling brackets to anchor ropes, chains, or macramé holders ($10–$50 per setup). Suspend planters 12, 24, and 36 inches from the floor using adjustable rope or metal hangers. Choose trailing plants like pothos, string of pearls, or creeping fig that naturally cascade downward.
Time investment: 20 minutes for setup if your balcony has solid beams. No overhead structure? Tension rods between railings work too.
Pro tip: Group three planters together in odd numbers for more visual impact than scattering singles.
Your eye travels vertically, and suddenly your tiny balcony becomes a garden tower. Guests will ask where you found the space.
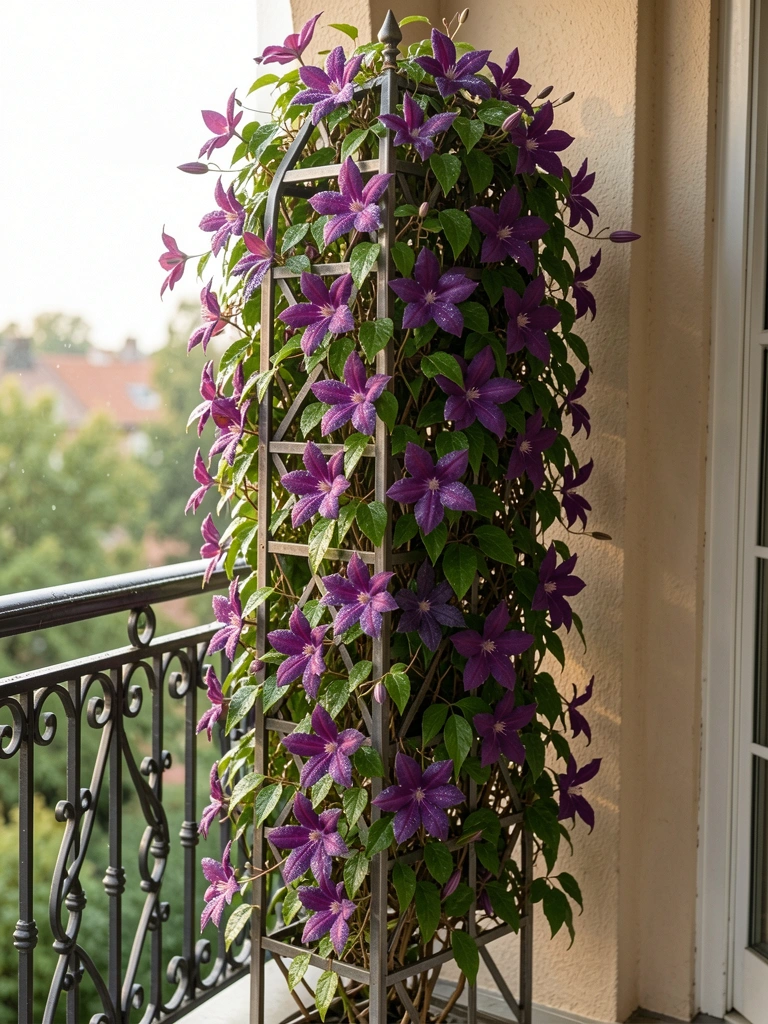
3. Build a Corner Trellis Wall System
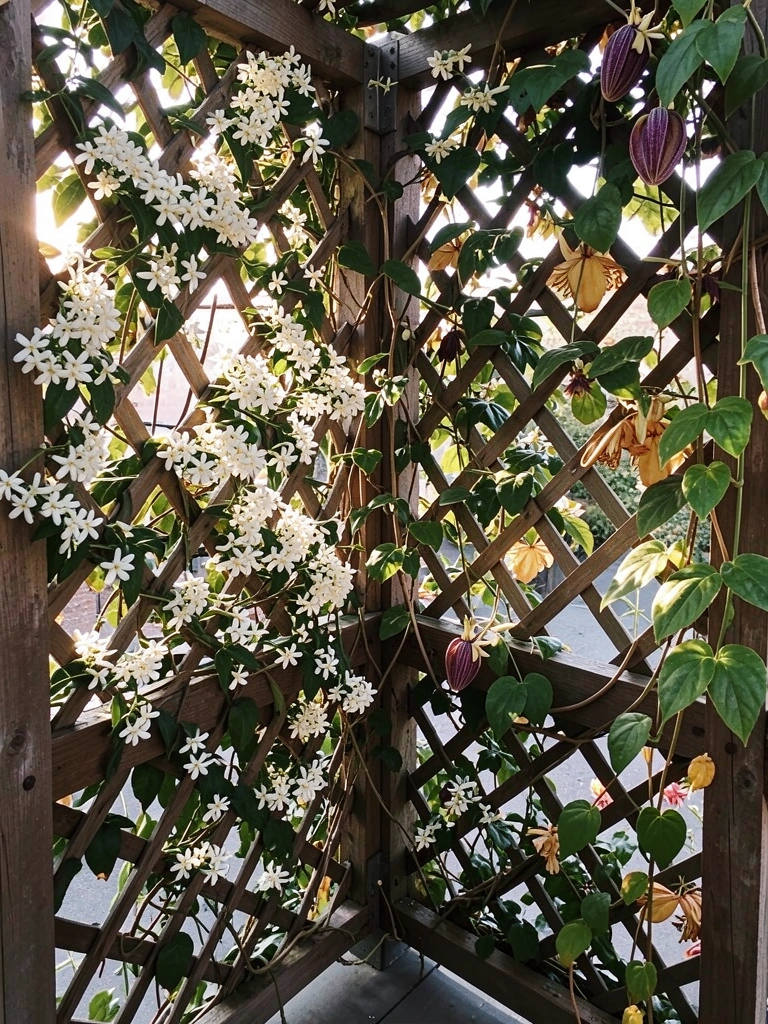
A trellis system transforms a bare corner into a living green wall. This architectural approach works for renters (adhesive strips) and homeowners alike, giving you a frame to train climbing plants.
Buy a wooden or metal lattice trellis ($30–$100) from Home Depot or Wayfair. Mount using weatherproof brackets or, for renters, lean a freestanding trellis against the corner. Plant climbing varieties like jasmine, clematis, or passion flower at the base. Train tendrils upward using soft plant ties or garden twine as they grow—takes about one weekend to set up.
Budget option: Build a simple X-frame from bamboo stakes ($5–$10) and zip-tie it to your railing.
This living wall blocks unsightly views, creates privacy, and becomes a stunning focal point. Within one season, you’ll have a completely transformed corner.
4. Use Tiered Plant Stands for Compact Stacking
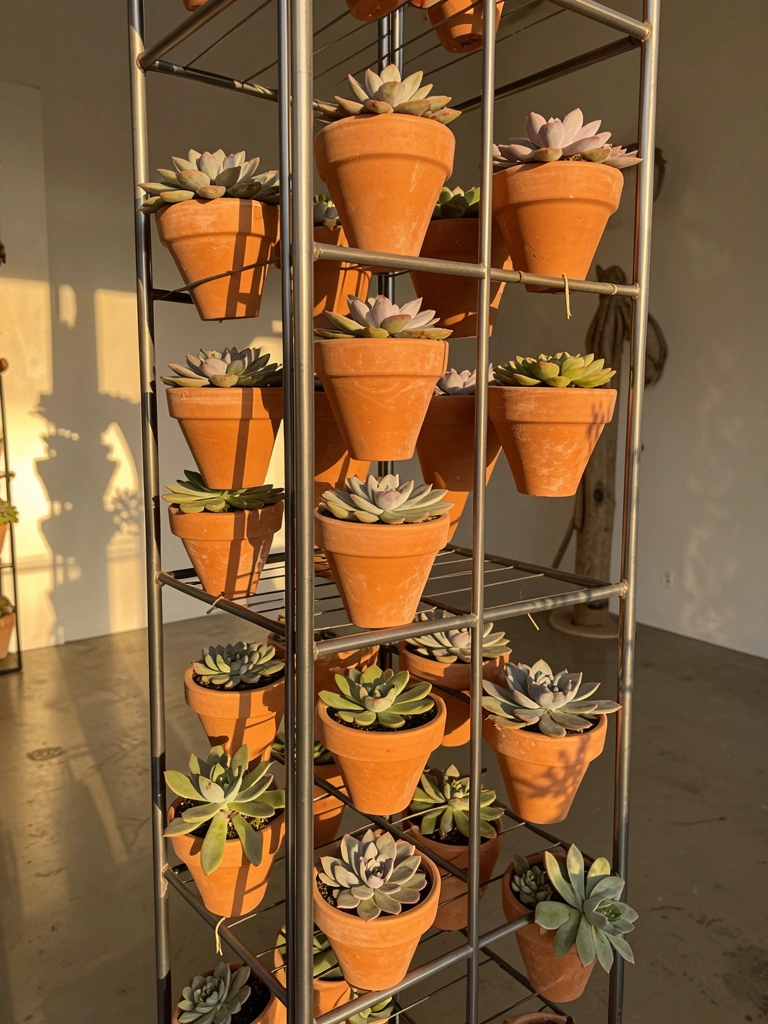
Tiered plant stands pack dozens of plants into a compact footprint. They’re especially valuable for small balconies where floor space is precious.
Shop three-tier metal or wood stands ($25–$70) from Target, IKEA, or Wayfair. Choose weatherproof aluminum or treated wood. Load each level with pot sizes that graduate from large (bottom) to small (top). Succulents, sedums, and echeveria thrive in this setup since they’re low-maintenance and don’t require constant water runoff.
Setup time: 15 minutes. Stack from heaviest to lightest for stability.
Pro tip: Arrange pots by color (all terracotta, or a mix of white and terra) for a cohesive look that photographs beautifully.
One stand replaces what would normally need a corner or strip of wall. You get instant vertical drama with zero renting hassle.
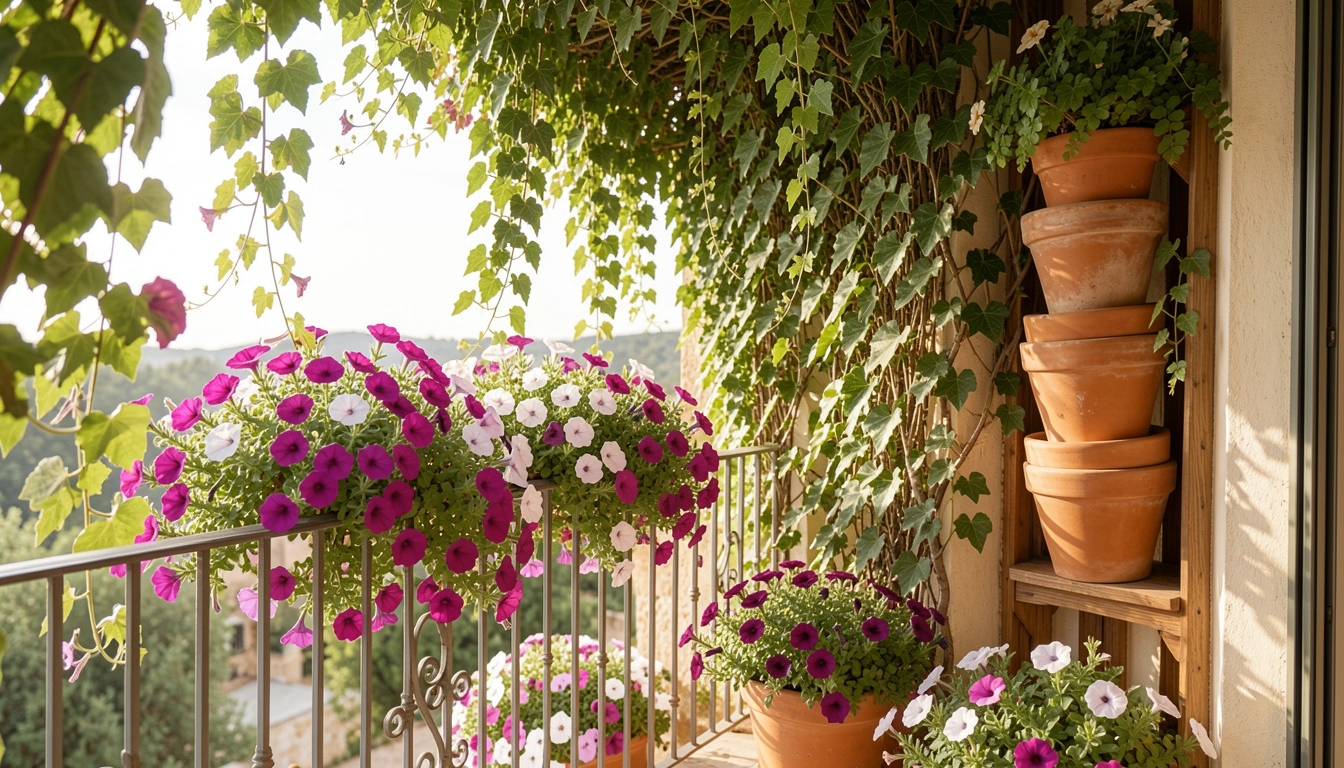
5. Install Railing Planter Boxes for Edge Appeal
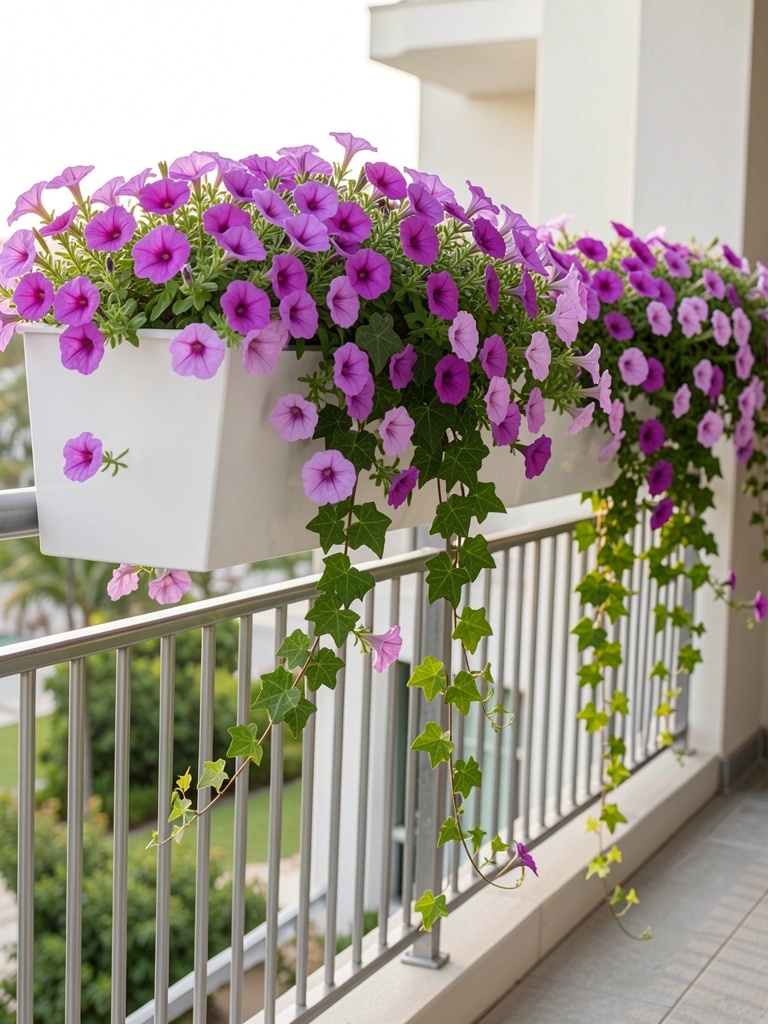
Railing planters are clever because they use an otherwise unused surface—the edge itself. These boxes hug your railings and let trailing plants spill over dramatically.
Buy railing-mounted planter boxes ($20–$60 per box) designed for your railing width from Amazon or Home Depot. Look for ones that clamp or slide onto metal railings without permanent installation—perfect for renters. Fill with trailing varieties like petunias, bacopa, or ivy geraniums. Water daily in heat since they dry faster being elevated.
Install two or three boxes depending on your railing length, taking about 30 minutes total.
Budget hack: Use PVC pipe cut lengthwise ($8–$15 total) with drainage holes drilled in—attach with zip ties.
Suddenly your railing becomes a flowering cascade visible from street level. The visual payoff is huge for minimal space sacrifice.
6. Create a Vertical Herb Garden on a Pocket Wall
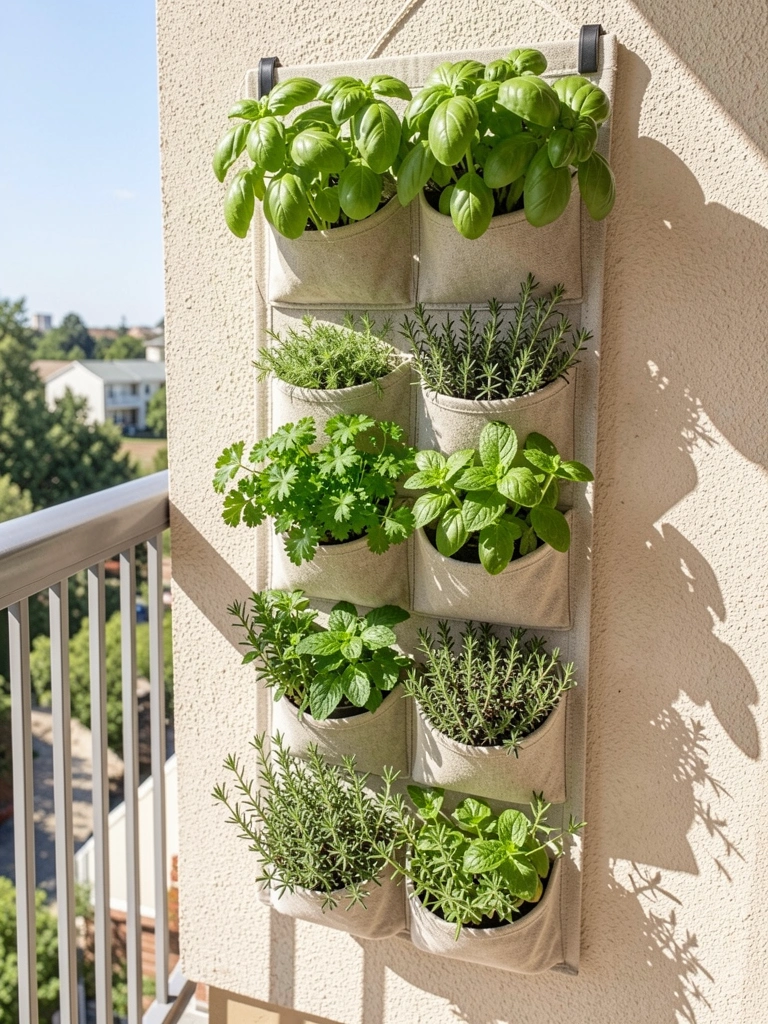
Vertical pocket planters are the hack nobody expects—and they’re cheap. Use an over-the-door shoe organizer or fabric wall pocket holder to grow fresh herbs steps away from your kitchen.
Grab a clear pocket organizer ($10–$20) from Target or Amazon and mount it on an interior balcony wall or inside-facing railing. Fill each pocket with potting soil and tuck in herb seedlings: basil, parsley, mint, oregano. Pockets drain easily with a water tray underneath.
Setup: 10 minutes. Herbs mature for harvest in 4–6 weeks.
Pro tip: Rotate herbs to sunnier pockets as needed since vertical gardening means some pockets get more light than others.
Fresh herbs on demand without taking up counter space. Plus, the whole setup costs less than a single market bouquet.
7. Layer Climbing Vines on Vertical Supports
Vertical support structures (obelisks, spirals, or cones) let vines climb while staying compact. They look architectural even when bare and transform into flowering focal points by mid-season.
Purchase a metal obelisk trellis ($20–$50) from garden centers or Amazon. Place it in a large pot (16–20 inches diameter) with quality potting mix. Plant a single climbing vine at the base: clematis, honeysuckle, or morning glory. As it grows, gently tie tendrils to the frame using soft ties or twine.
Time to maturity: 6–8 weeks before you see real climbing action.
Budget option: Use bamboo stakes lashed together with twine ($5–$10 total) for the same effect.
One compact obelisk creates a vertical garden statement that’s both architectural and alive. Your balcony instantly gains height and drama.
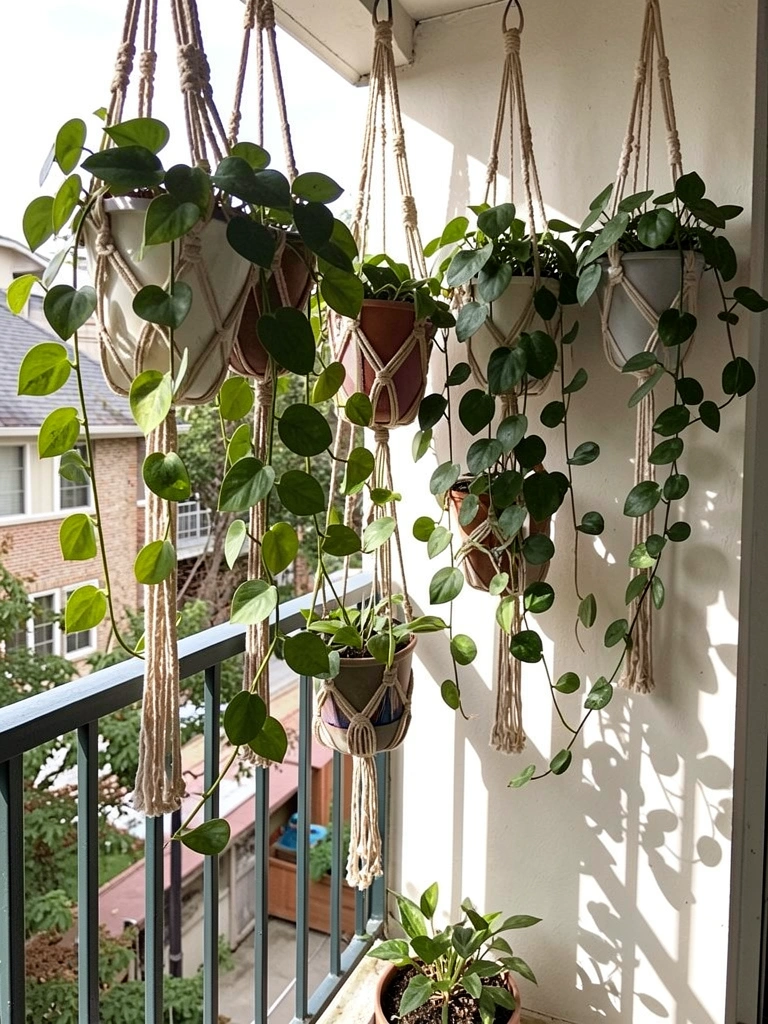
8. Hang Macramé Plant Hangers in Layers
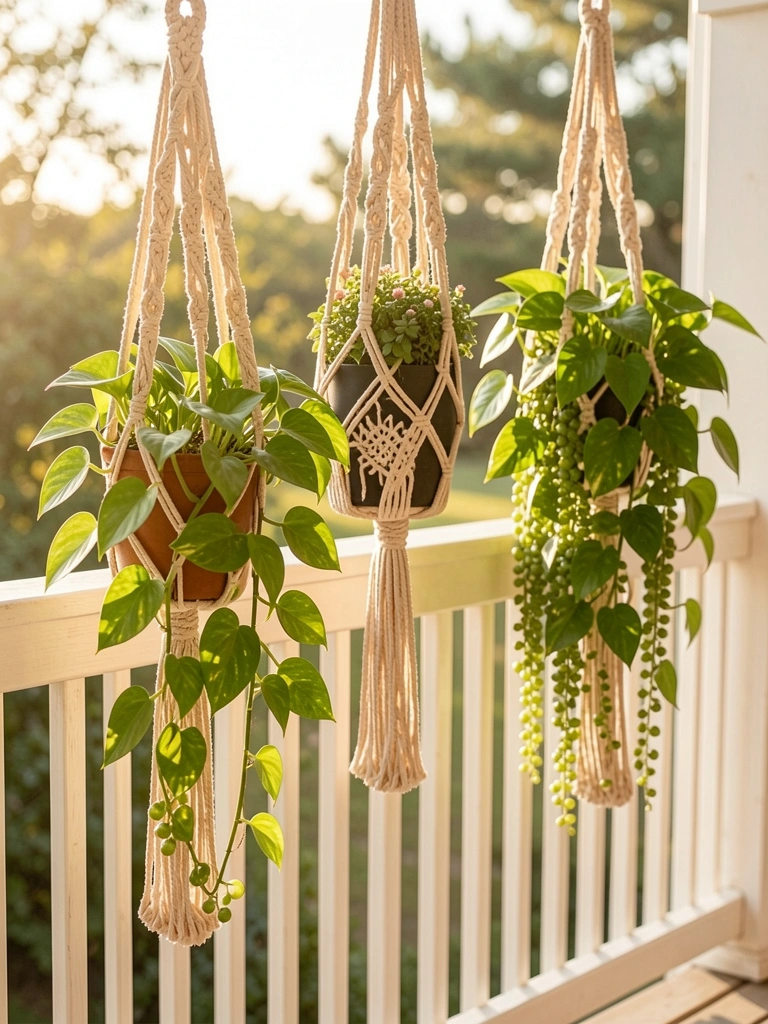
Macramé hangers add texture and bohemian charm while suspending plants at varying heights. They’re inexpensive and create an instantly cozy aesthetic.
Buy handmade or DIY macramé hangers ($8–$30 each) from Etsy or Urban Outfitters, or make your own from cotton rope ($2–$5 per hanger). Hang from a ceiling beam or tension rod using sturdy S-hooks. Place trailing plants like pothos, string of pearls, or burro’s tail in 6–8-inch pots.
Setup time: 15 minutes if buying pre-made; 1–2 hours if you DIY the macramé knots (lots of YouTube tutorials make it doable).
Pro tip: Mix plain rope with macramé for texture variety, or go all-in with matching hangers for maximalist vibe.
Your balcony becomes a boho paradise, and layered plants create the illusion of a much larger garden space.
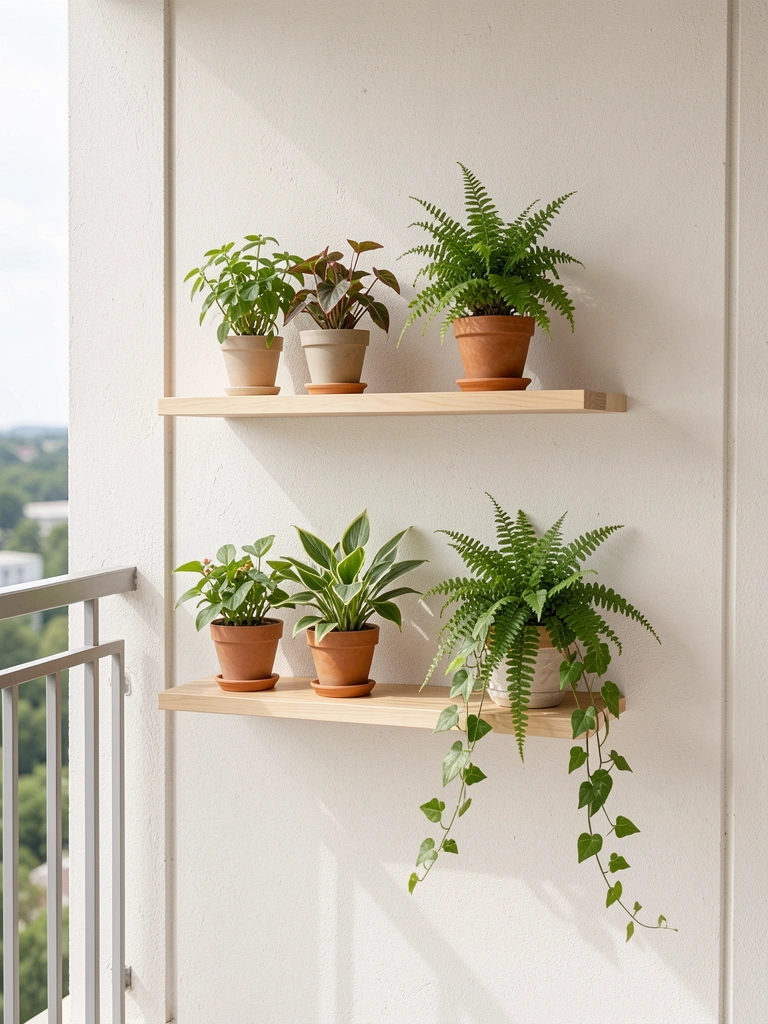
9. Build Shelving Units for Vertical Plant Display
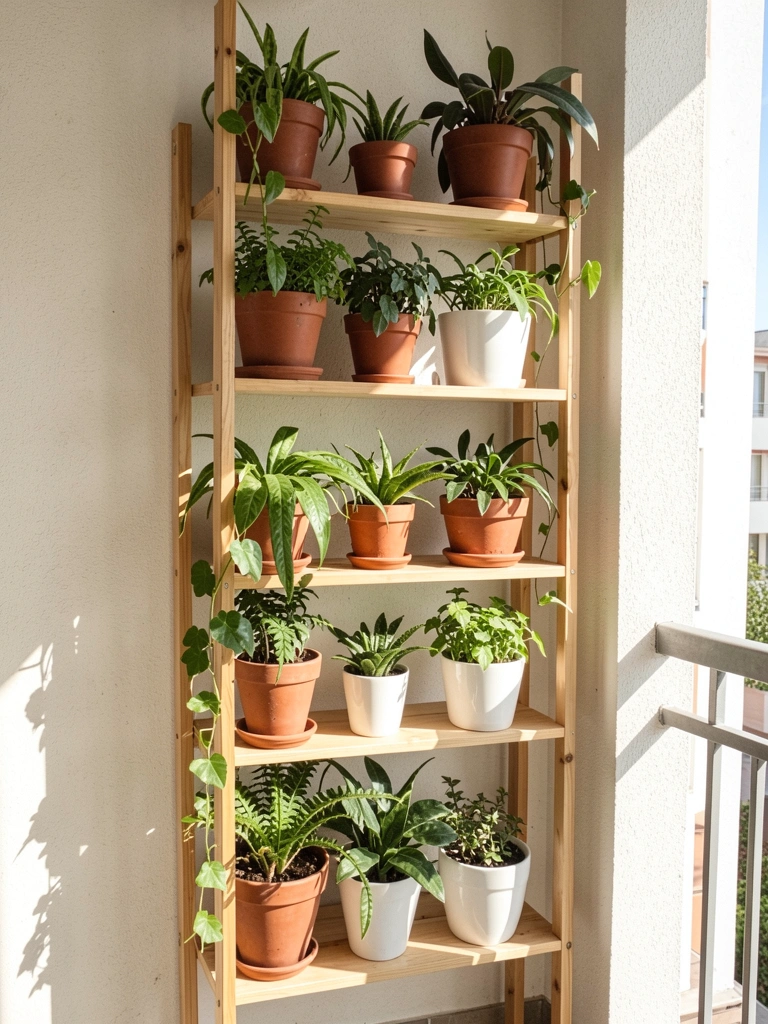
Vertical shelving turns your balcony into a plant gallery. Stacked shelves let you display dozens of plants in a minimal footprint, perfect for collectors or small spaces.
Install a narrow wall-mounted shelving unit ($50–$150) from IKEA (the Hejne or similar) or custom shelves from Home Depot. Use weatherproof wood or metal. Mount two to four shelves spaced 12–15 inches apart. Layer pots of varying heights and colors: small succulents on top, trailing plants on edges to cascade down.
Installation takes 1–2 hours with a drill and level. Renters can use adhesive strips for lighter shelves or freestanding ladder-style shelves instead.
Pro tip: Group plants by color (all white pots, or alternating terracotta and gray) for a curated look that photographs beautifully.
You’ve created a living plant wall that feels like intentional design, not random clutter. Perfect for showing off your growing collection.
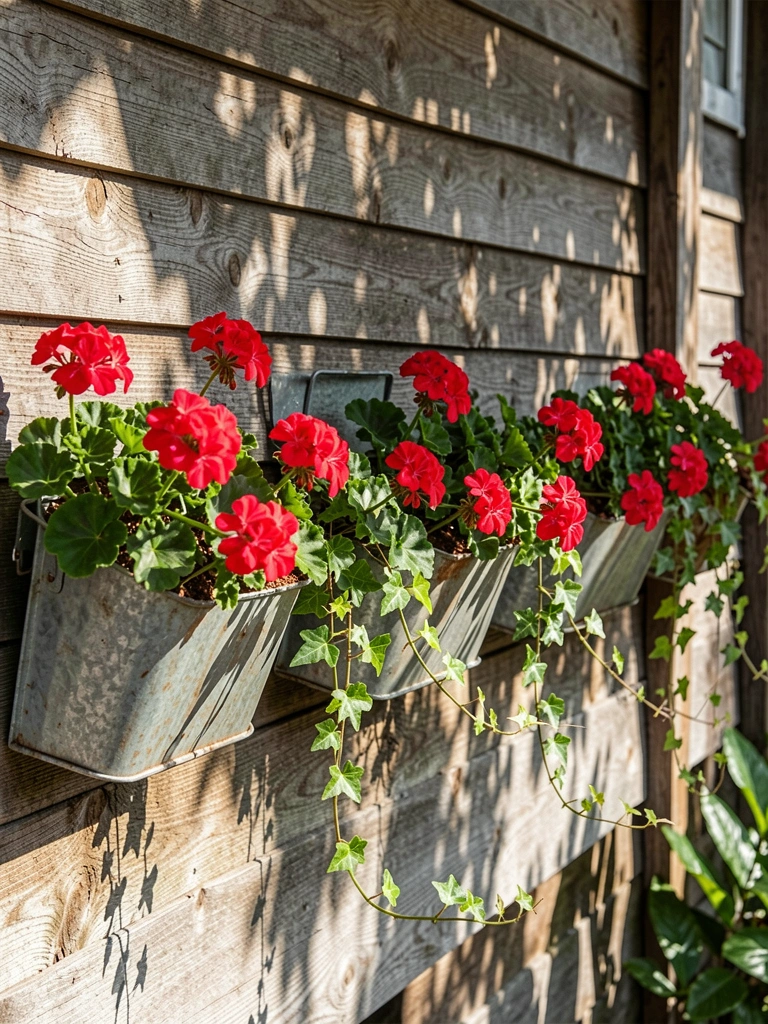
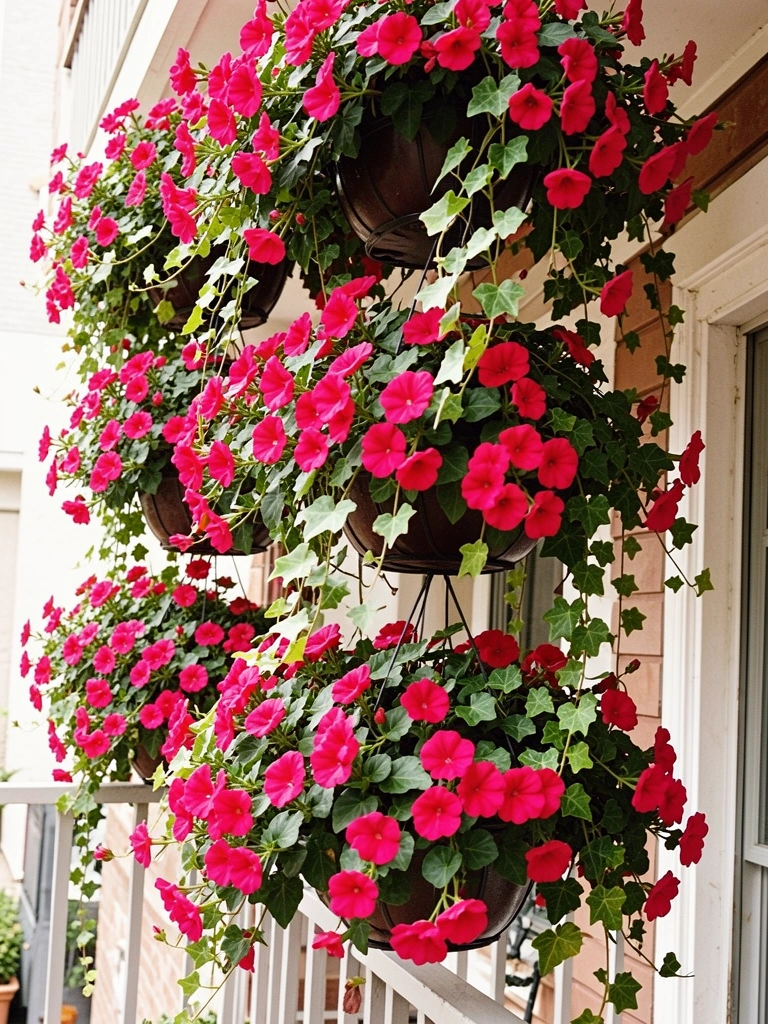
10. Install Hanging Window Boxes Below Railings
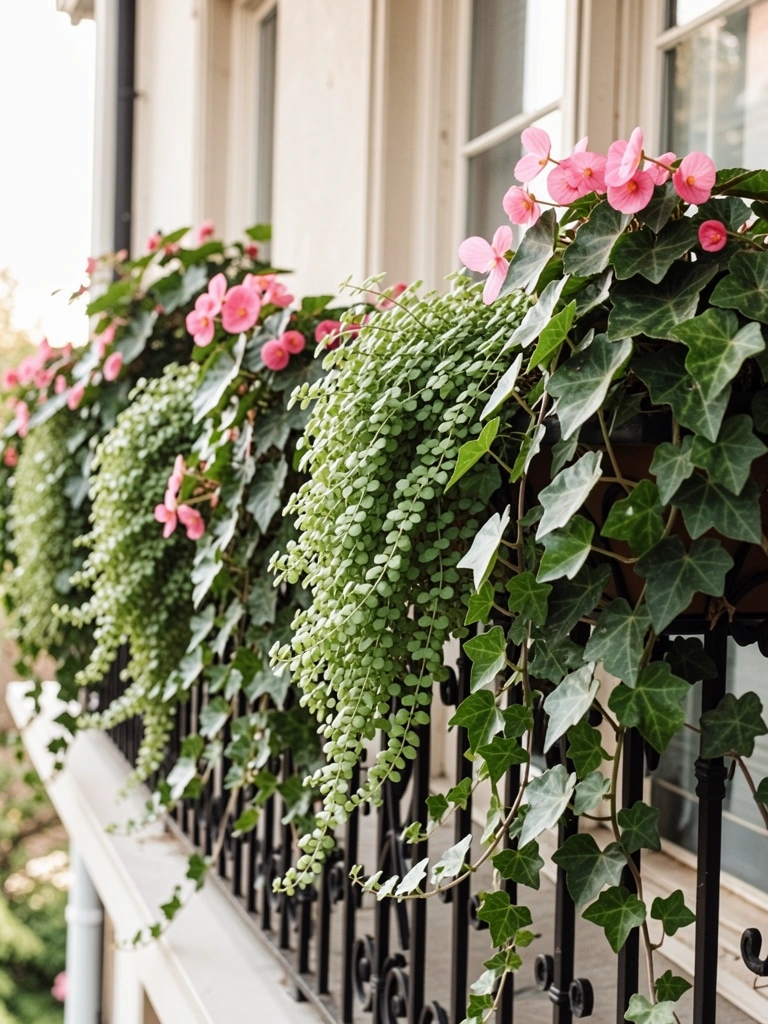
Window boxes mounted on the exterior side of your railing create a waterfall effect. They’re visible from below and maximize your visual impact.
Attach weatherproof window boxes ($15–$40 each) to the underside of your railing using heavy-duty brackets. Fill with trailing plants that naturally cascade: ivy geraniums, calibrachoa, or creeping phlox. Plan for multiple boxes along the length of your railing.
Mounting takes 30 minutes for 2–3 boxes. These drain easily and are less work than overhead hanging baskets.
Budget option: DIY boxes from PVC pipe or reclaimed wood ($8–$12) mounted with zinc-plated brackets.
From street level, your balcony looks like a blooming cascade. Neighbors notice, guests comment—and you’ve used zero floor space.
11. Grow Vertical Strawberries in Stacked Pots
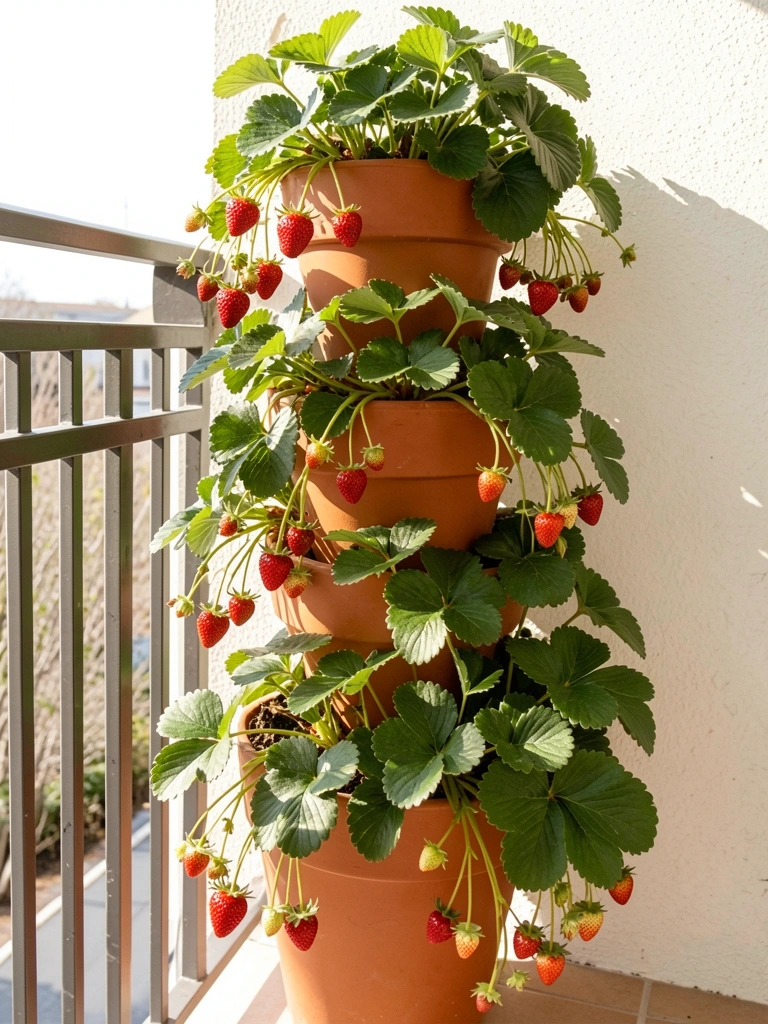
Stacking pots vertically is the smartest hack for growing strawberries in small spaces. Each tier produces its own crop while trailing varieties spill over dramatically.
Stack three 10-inch terracotta pots ($5–$10 each) offset to create openings. Plant alpine or trailing strawberry varieties in each opening. Water from the top; water trickles down. Use quality potting mix and fertilize weekly during growing season.
Harvest ready: 8–10 weeks after planting. Setup takes 20 minutes.
Pro tip: Stagger pot openings so strawberries cascade out of each pot, creating a three-tier fruit tower.
You’ll pick fresh strawberries steps from your door. This setup becomes a conversation starter and surprisingly productive micro-garden.
12. Use Tension Rods to Hang Trailing Plants
Tension rods are a renter’s best friend—they require zero installation yet hold surprising weight. Perfect for suspending multiple hanging planters across your balcony’s width.
Thread a weatherproof tension rod ($15–$30) horizontally between two points on your railing or balcony frame. Tension to secure. Use S-hooks and chains ($2–$5 per setup) to hang three to five planters spaced evenly. Choose trailing varieties like devil’s ivy, philodendron, or string of pearls.
Setup time: 15 minutes. No tools required.
Pro tip: Hang planters at slightly different heights using chains of varying lengths for visual interest.
You’ve created a floating garden that feels permanent but leaves zero damage. This is the renter MVP move.
13. Create a Living Wall with Felt Pockets
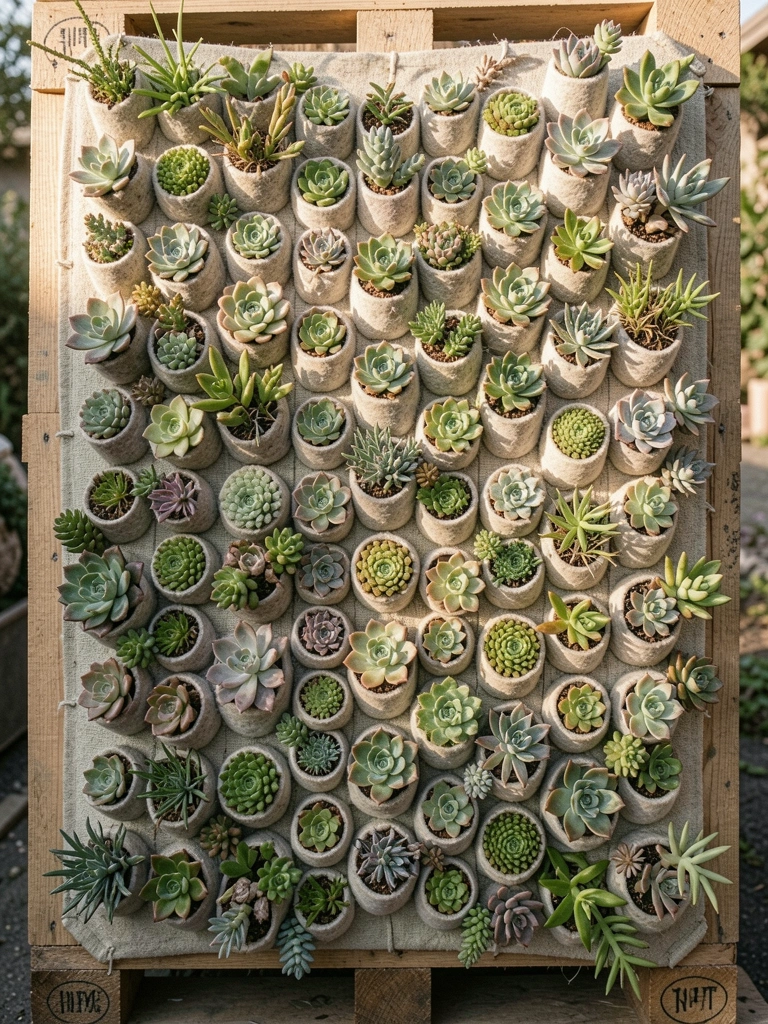
Felt pocket wall systems are modular living walls that work for any balcony size. You can buy pre-made or DIY one in an afternoon.
Purchase a prefab felt wall planter ($40–$100) from Amazon or specialty garden shops, or make your own from a wooden pallet and landscape fabric ($15–$25). Create 12–20 pockets using felt or sturdy fabric. Fill each with cactus soil and tuck in succulents, sempervivum, or sedums—plants that don’t need constant moisture.
DIY build: 2–3 hours. Mounting: 30 minutes. Setup is renter-friendly with adhesive strips or lean against a wall.
Pro tip: Arrange succulents by color progression (green to purple to pink) for a stunning ombre effect.
Your balcony becomes a living art installation. These systems photograph incredibly well and make your space feel like a boutique garden.
14. Install Herb Ladder Shelving for Cooking Herbs
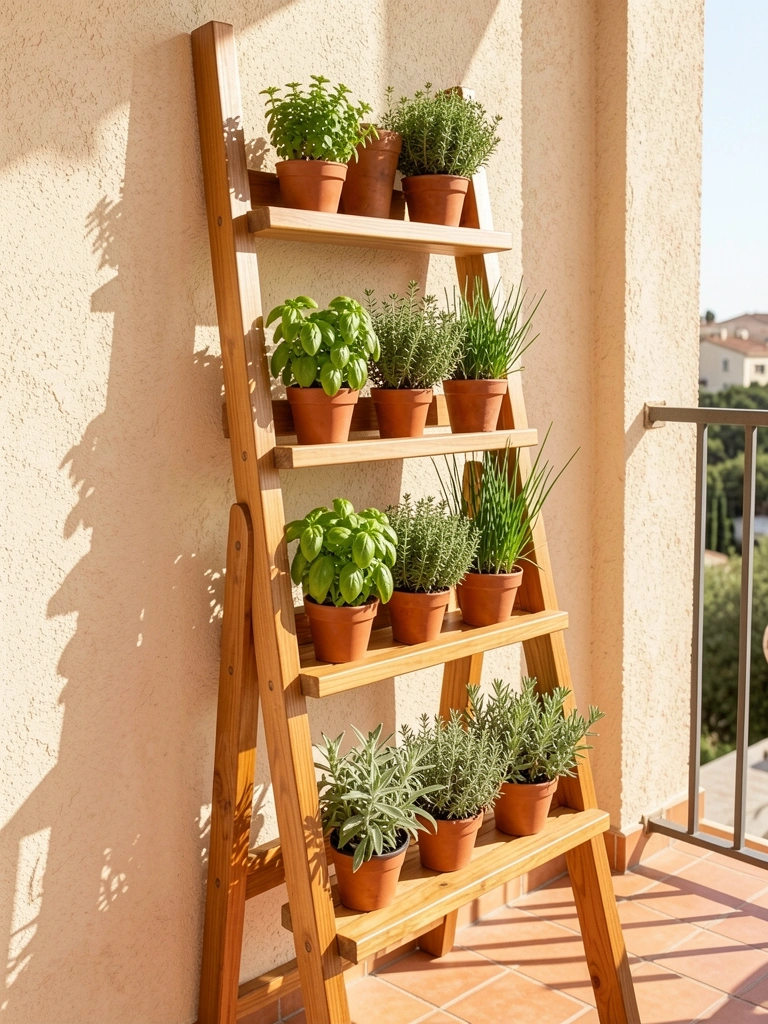
A ladder shelf is both sculptural and functional—perfect for displaying cooking herbs where you see them daily. This works for renters since it’s freestanding.
Buy a wooden ladder shelf ($30–$60) from Target, IKEA, or Amazon. Position it against your sunniest balcony wall. Space pots 6–8 inches apart on each rung. Stick to herbs: basil, thyme, oregano, chives, parsley—all sun-lovers and culinary staples.
Setup: 5 minutes. Herbs harvest-ready in 4–6 weeks.
Budget option: Create a DIY ladder from two 2×2 boards and rope rung ($10–$15 total, takes 1 hour).
Fresh herbs at arm’s reach make cooking better. Plus, the ladder itself becomes a styled element that looks like you meant to arrange it that way.
15. Layer Vertical Moss Poles for Climbing Plants
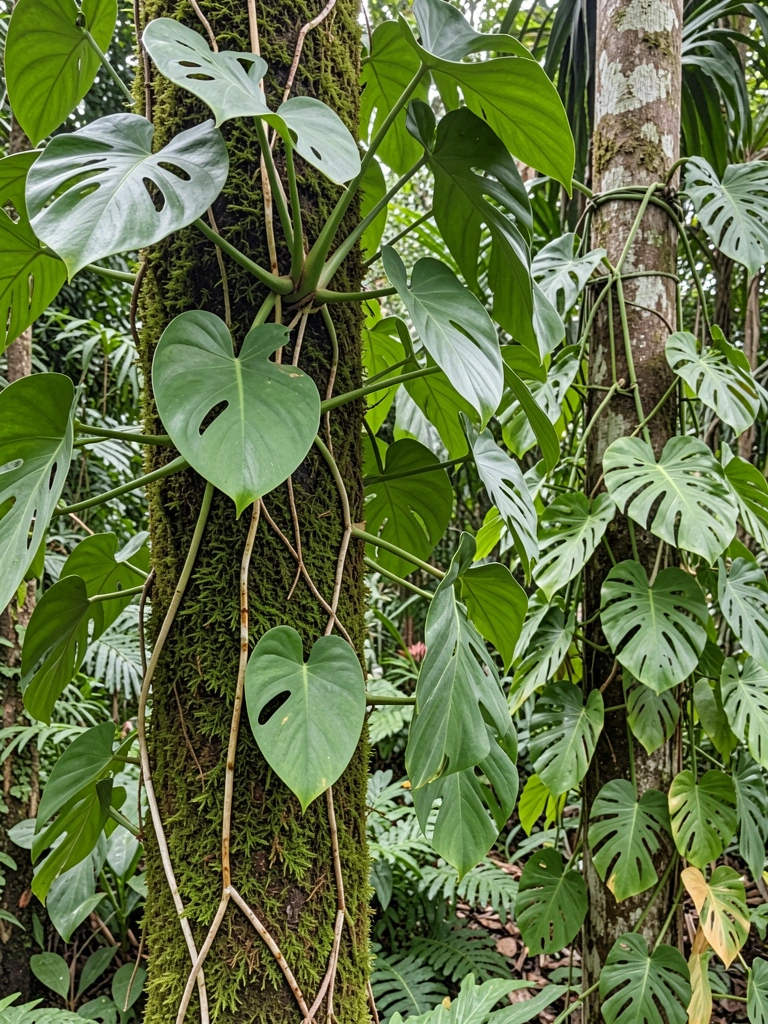
Moss poles mimic how tropical plants climb trees in nature. They create vertical support while providing moisture for aerial roots to grip.
Make a DIY moss pole using a PVC pipe ($10) wrapped in sphagnum moss ($5) secured with fishing line ($2). Insert into a large pot with potting mix. Plant Monstera deliciosa or climbing philodendron at the base. As it grows, mist the moss regularly to keep aerial roots happy.
Setup: 30 minutes. Plants establish in 6–8 weeks.
Pro tip: Use multiple moss poles at varying heights in larger pots for a jungle effect.
Within months, your Monstera looks mature and tropical. This is an investment hack that pays off in years of growth and visual impact.
16. Hang Basket Arrangements in Tiered Rows
Multiple hanging baskets create abundance and drama. Tiering them at different heights prevents a flat, uniform look.
Buy four to six wire hanging baskets ($5–$15 each) from garden centers. Use different lengths of chains or rope to hang at staggered heights from a ceiling beam or tension rod. Fill each with a trailing plant mix: ivy geraniums, fuchsia, bacopa, and trailing ivy. Combine one upright plant with 2–3 trailing varieties per basket.
Setup: 45 minutes for assembly and hanging. Water daily in warm months.
Pro tip: Plant all baskets identically for a formal look, or mix plant combinations for eclectic charm.
Your balcony becomes a flower shop display. The abundance reads as intentional design and absolutely maximizes a vertical space.
17. Build a Vertical Succulent Wall with Adhesive Backing
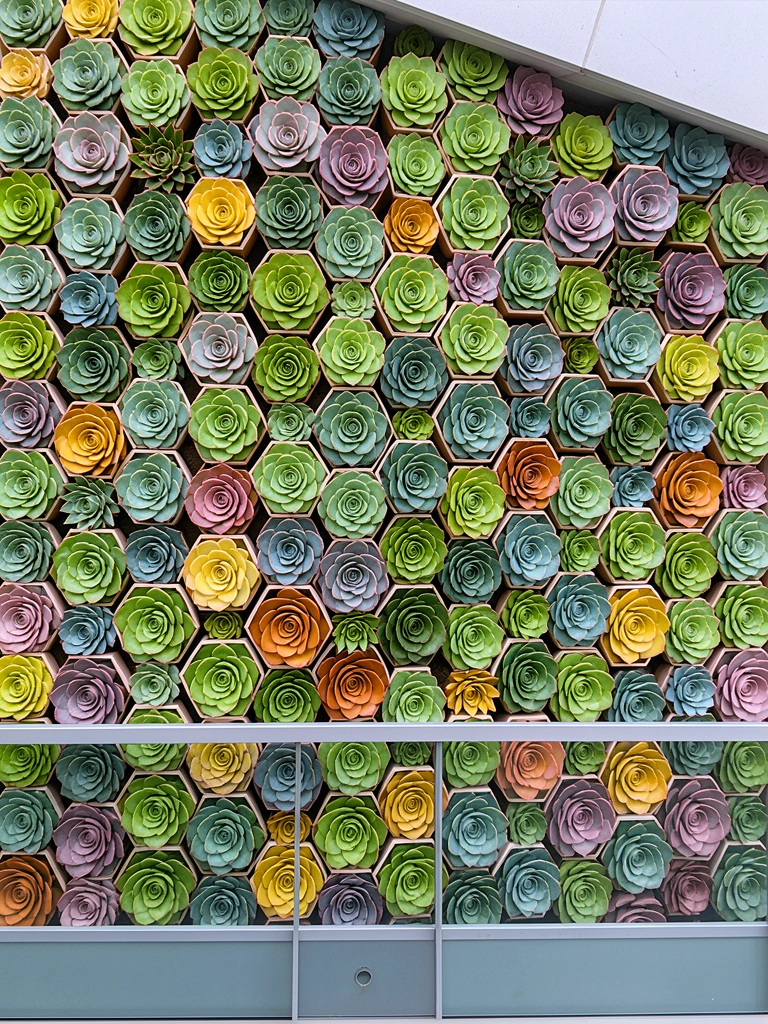
Succulent walls look futuristic and require minimal water since these plants are drought-tolerant. Adhesive backing makes installation painless—perfect for renters.
Use foam frames designed for succulents ($40–$80) from specialty garden shops or Amazon, or create your own using floral foam secured to a wooden frame. Insert rosette succulents (echeveria, aeonium, sempervivum) pre-planted into gaps. Mount on your balcony wall using adhesive strips or lightweight brackets.
Setup: 1 hour for mounting and arranging plants. Water sparingly (once every 2–3 weeks) by misting.
Budget option: Create a geometric pattern on a plywood backing using hot glue and small potted rosettes ($30–$50 total, 2 hours DIY).
This becomes an Instagram-worthy focal point. The geometric precision reads as intentional design, and succulents forgive neglect.
18. Suspend Glass Terrariums from Chains
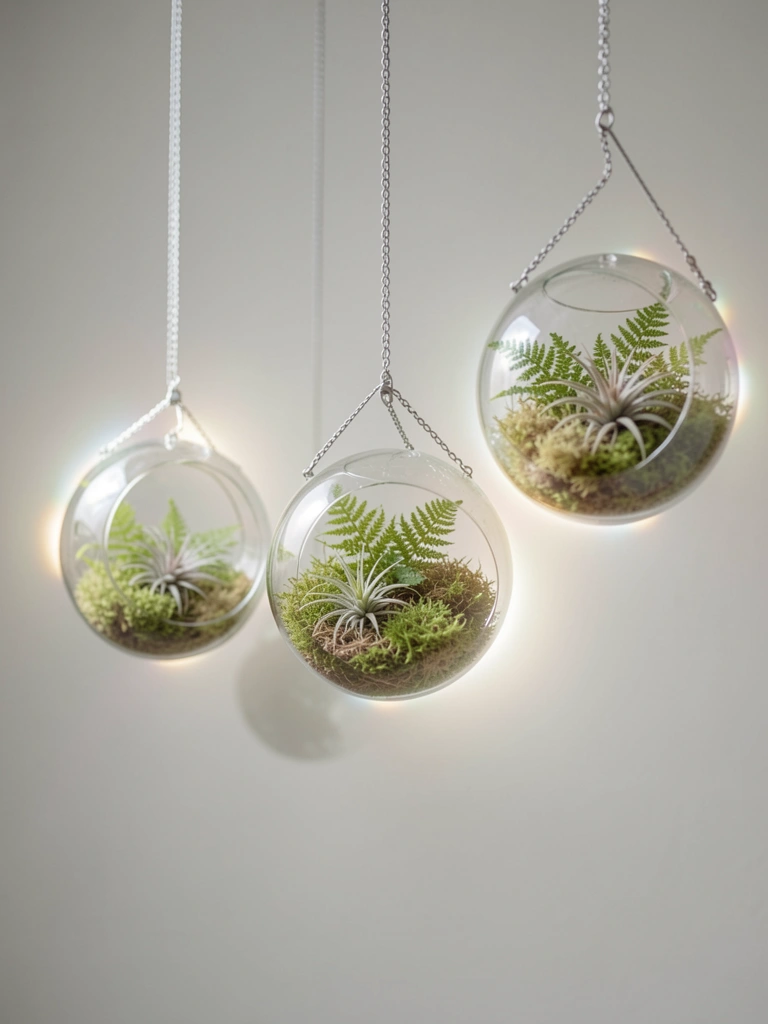
Glass terrariums are sculptural and bring a modern, botanical vibe. Hanging them creates floating focal points with zero floor impact.
Buy clear glass air plant terrariums ($8–$20 each) from Urban Outfitters, Etsy, or garden shops. Suspend using sturdy chains and hooks from your balcony beam or tension rod. Fill with a small fern, moss, and an air plant or tillandsia. Terrariums need minimal water—mist once weekly.
Setup: 20 minutes. Setup is renter-friendly.
Pro tip: Group three terrariums at heights that create a diagonal line for visual flow.
These become living jewelry. Guests lean in to examine them, and your balcony feels curated and thoughtful.
19. Create a Bamboo Frame for Trained Vines
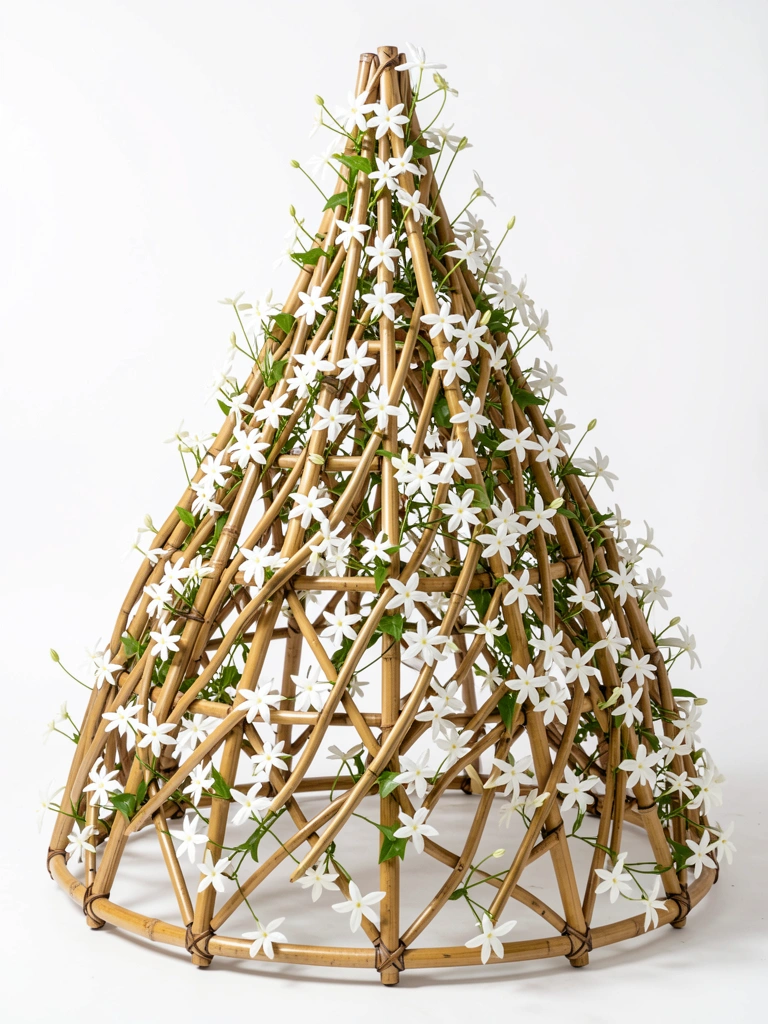
Bamboo trellises offer Japanese-inspired aesthetics while being budget-friendly. Vines trained onto bamboo look intentional and architectural.
Purchase a decorative bamboo trellis ($15–$40) from garden centers or Amazon in shapes like fan, pyramid, or ladder. Plant a single vine variety at the base: jasmine, clematis, or honeysuckle. Gently tie stems to bamboo as they grow using soft ties. These look beautiful even bare in winter.
Setup: 20 minutes. Vines establish in 6–8 weeks, flowering by season two.
Pro tip: Group two bamboo frames of different heights for layered interest.
One bamboo frame looks like a design feature, not a plant hack. The minimalist elegance elevates your whole balcony.
20. Mount Floating Shelves for Rotating Plant Displays
Floating shelves create clean lines and let you rotate plants seasonally without permanent commitment. Perfect for collectors who like to refresh their displays.
Install two to three narrow floating shelves ($20–$50 each) using heavy-duty brackets rated for weight. Mount at different heights. Rotate seasonal plants every 4–6 weeks: spring bulbs, summer bloomers, fall foliage, winter berries. Group plants in odd numbers and alternate heights for visual rhythm.
Installation: 1–2 hours with a drill. Renters can use freestanding ladder shelves ($25–$60) instead.
Pro tip: Use uniform pots in one or two colors to create a cohesive backdrop for rotating plants.
Your balcony feels fresh and intentional every season. This approach also lets you enjoy more plants without cramming everything permanently.
21. Grow Air Plants on Cork Mounts for Wall Space
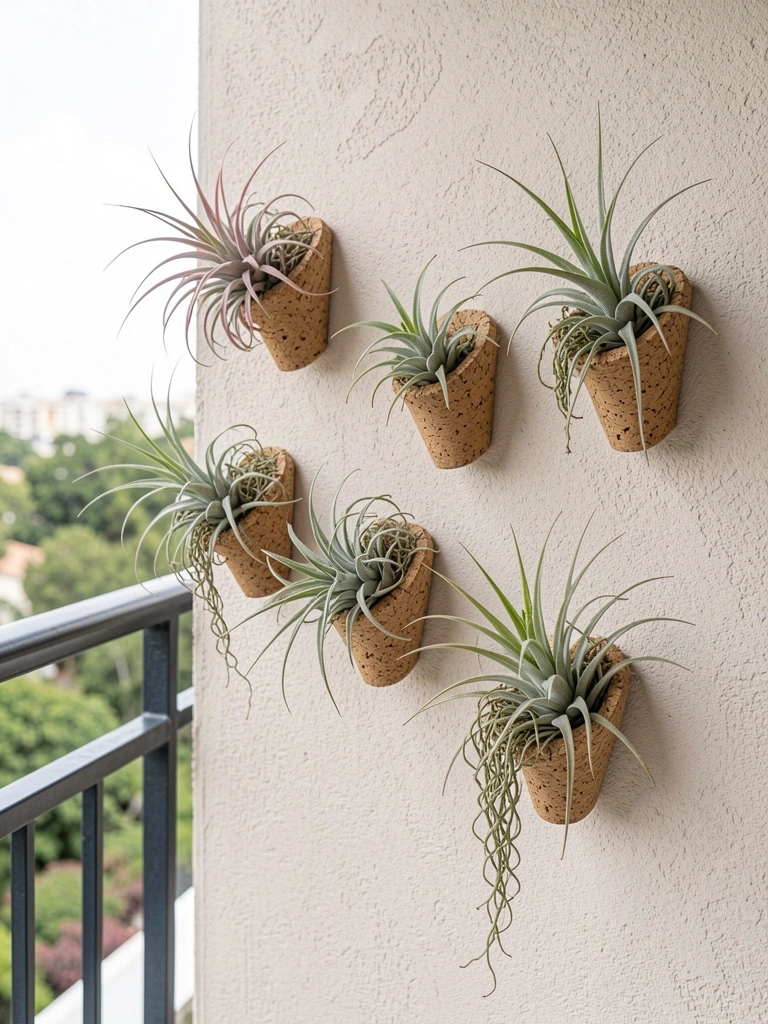
Air plants require zero soil, making cork mounts ideal wall décor. They’re sculptural, require minimal maintenance, and add serious design cred.
Buy cork mounts or wood slices ($3–$10 each) and attach to your balcony wall using adhesive strips or brackets. Secure air plant specimens (tillandsia xerographica, ionantha, or stricta) using waterproof sealant or small zip ties. Mist plants once weekly with spray water.
Setup: 30 minutes. Renter-friendly and damage-free.
Budget option: Use pieces of weathered wood ($5) and hot glue ($2) per mount—same effect, less cost.
Your wall becomes a living sculpture gallery. Air plants look high-maintenance but are actually the opposite, perfect for busy balcony gardeners.
22. Build a Vertical Root Prop Wall for Water Rooting
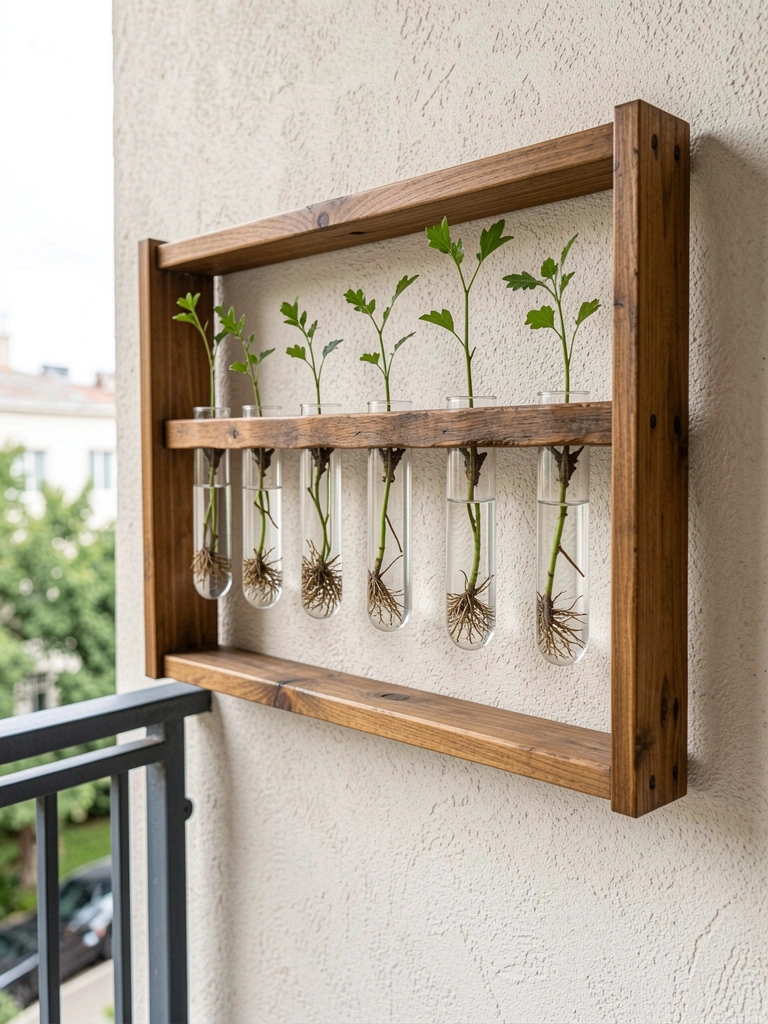
A propagation wall lets you root plant cuttings in water while displaying them beautifully. It’s both functional and artistic.
Create a wooden frame ($10–$20 in wood scraps) and secure glass test tubes or propagation vessels ($1–$3 each) into drilled holes. Fill tubes with water and insert cuttings from pothos, philodendron, coleus, or begonia. Change water weekly. Once roots develop, transplant into soil.
DIY assembly: 2–3 hours of measuring, drilling, and finishing. Setup on wall: 30 minutes.
Pro tip: Use a frame that tilts slightly so cuttings remain fully submerged.
Guests ask constantly about this living science project. It’s both beautiful and functional—plus you get dozens of free propagations for gifts or future plants.
23. Install a Rain Gutter Vertical Garden System
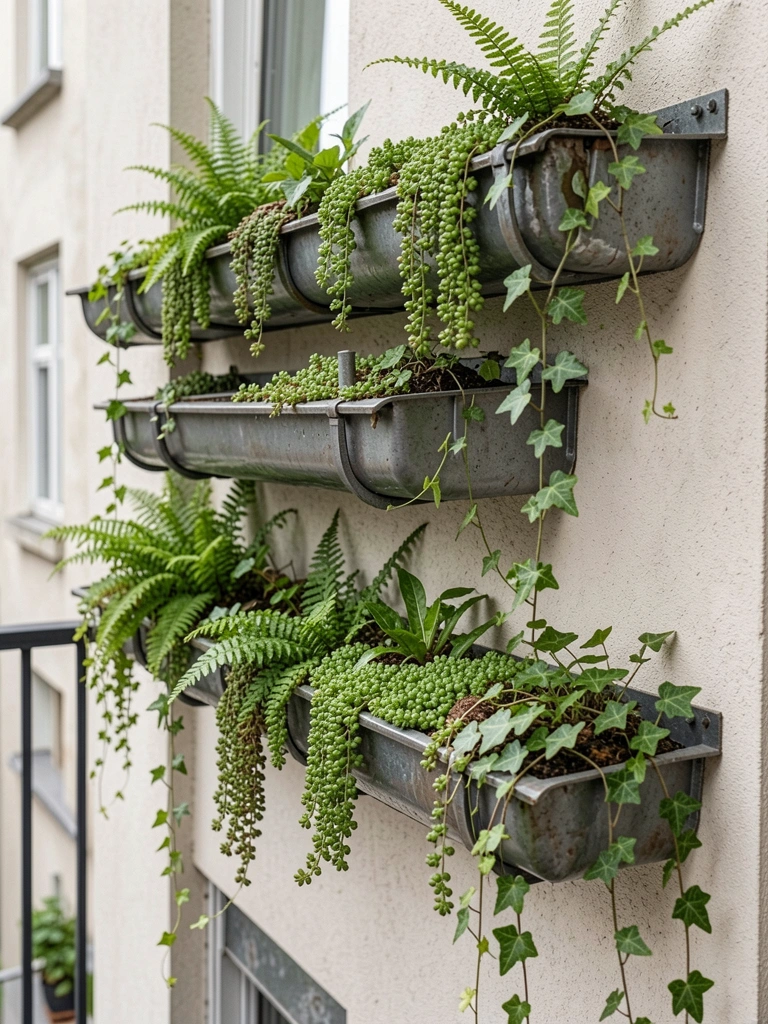
Rain gutters are surprisingly effective as shallow planting systems. They’re inexpensive, drain well, and create instant waterfalls of greenery.
Mount aluminum rain gutters ($3–$8 per 5-foot section) on your balcony wall using brackets at a slight downward angle. Drill drainage holes if needed. Fill with potting soil and tuck in trailing or shallow-rooted plants: sedums, ivy, small perennials, or seasonal flowers. Stagger multiple gutters vertically for maximum impact.
Installation: 1–2 hours with a level and screws. Cost per system: $20–$40.
Pro tip: Use end caps to contain soil, and place a drip tray below if you want to catch water.
This transforms your wall into a linear garden. It’s industrial-chic and reads as intentional design, not a hack.
24. Hang Woven Baskets with Trailing Plants
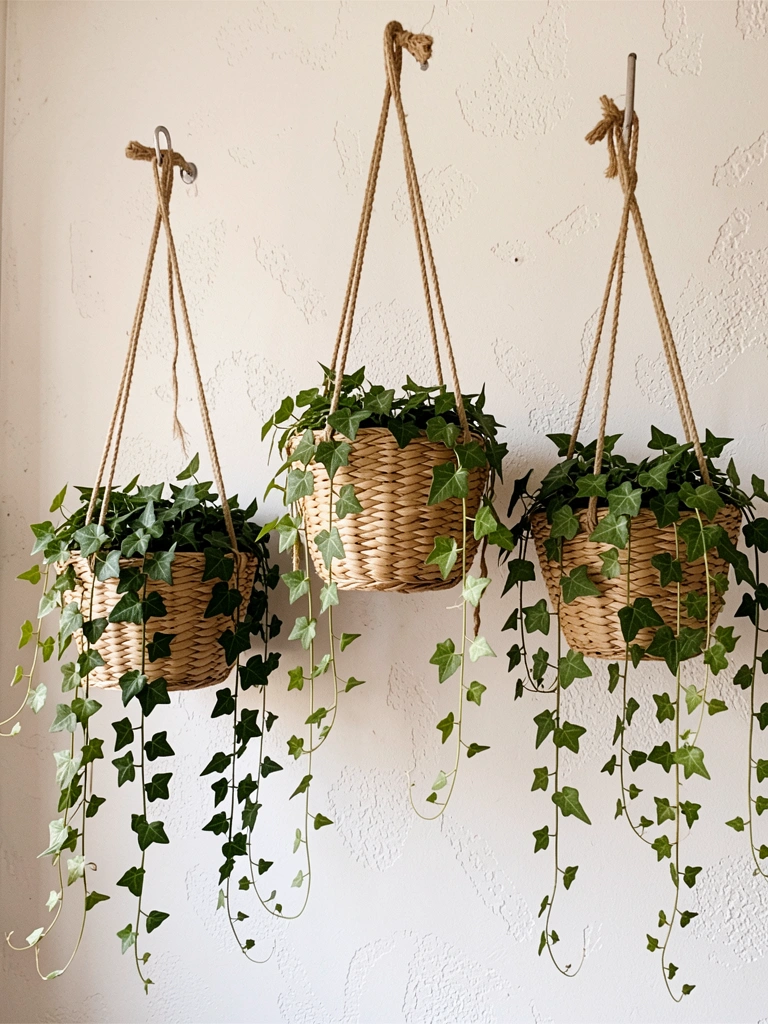
Woven hanging baskets add texture and warmth. Natural materials pair beautifully with trailing plants for a boho-luxe look.
Shop handwoven hanging baskets ($15–$40) from Home Goods, Etsy, or World Market. Suspend from jute or rope using S-hooks. Line baskets with coir fiber or moss, then fill with potting soil. Plant trailing varieties: pothos, philodendron, string of pearls, or dichondra. Water regularly since baskets dry faster than pots.
Setup: 20 minutes. Plants establish in 3–4 weeks.
Pro tip: Group three baskets at different heights in odd numbers, or create a full wall with five-plus baskets for maximum texture.
Your balcony becomes a textile garden. These look expensive and curated while remaining budget-friendly and renter-appropriate.
25. Layer Vertical Pallet Gardens with Staggered Compartments
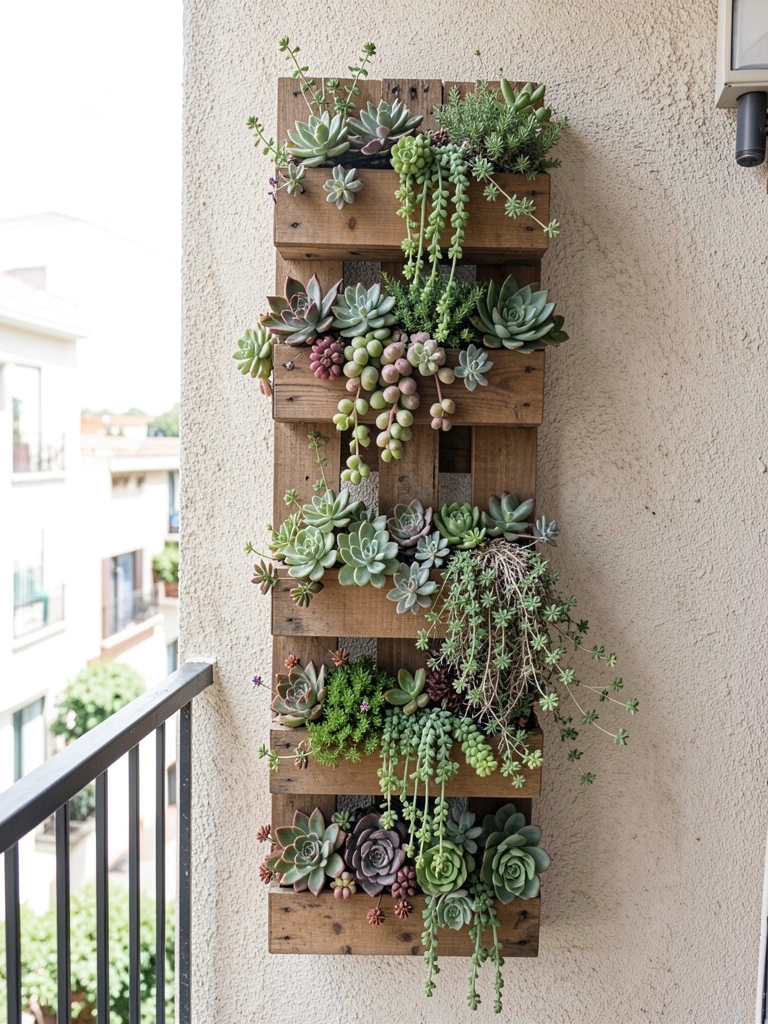
Pallet gardens are the original DIY vertical solution. When compartments are staggered, plants cascade at different levels for maximum visual drama.
Repurpose a wooden shipping pallet (often free from hardware stores, ~$0) or buy a pre-built pallet planter ($30–$50). Create staggered compartments using landscape fabric, cardboard, or metal dividers. Fill with potting soil and arrange plants by height: taller upright plants toward one edge, trailing varieties on the other.
DIY assembly: 2–3 hours. Mounting: 45 minutes with heavy-duty brackets.
Pro tip: Paint the pallet white, gray, or natural wood stain before planting so it becomes an intentional design feature.
Pallet gardens photograph beautifully and cost almost nothing. This is the ultimate renter-friendly, budget-conscious vertical solution.
26. Create Tiered Vertical Vegetable Towers
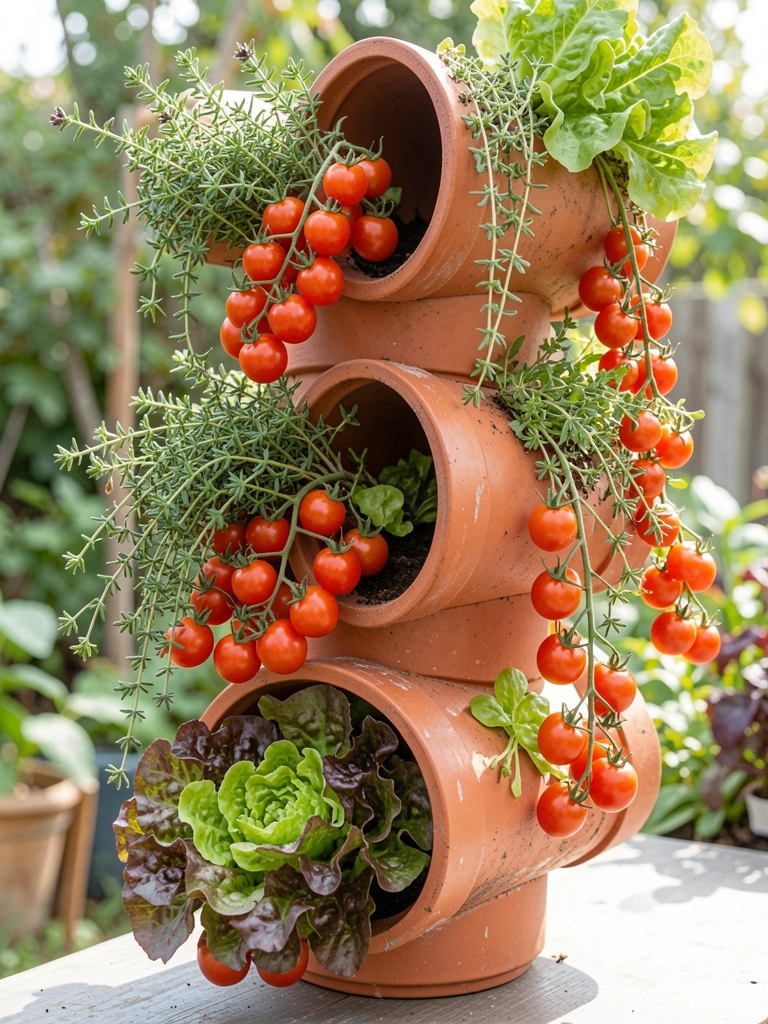
Vertical vegetable towers maximize productivity in minimal space. They’re perfect for balconies where you want to harvest fresh vegetables steps away.
Stack three to four large terracotta pots (graduating from 16 inches at base to 10 inches at top) with drainage holes drilled in the sides. Offset each pot slightly so plants cascade out. Fill with potting soil and plant cherry tomatoes at the base (stake with a center pole), herbs (basil, parsley) in middle sections, and trailing varieties (lettuce, bush beans) at the top.
Setup: 30 minutes. Harvest ready in 8–10 weeks. Water heavily since vertical systems dry faster.
Pro tip: Use self-watering containers or drip tape to reduce daily watering chores.
One compact tower produces dozens of vegetables. This is practical abundance that looks intentional and beautiful while feeding your kitchen.
Closing CTA
Save this post for your next balcony refresh and pick one idea this weekend. Whether you go minimal with a single moss pole or full bohemian with cascading baskets everywhere, vertical gardens work at every scale—and your balcony will finally feel like the lush retreat it deserves to be.
Leave a Reply