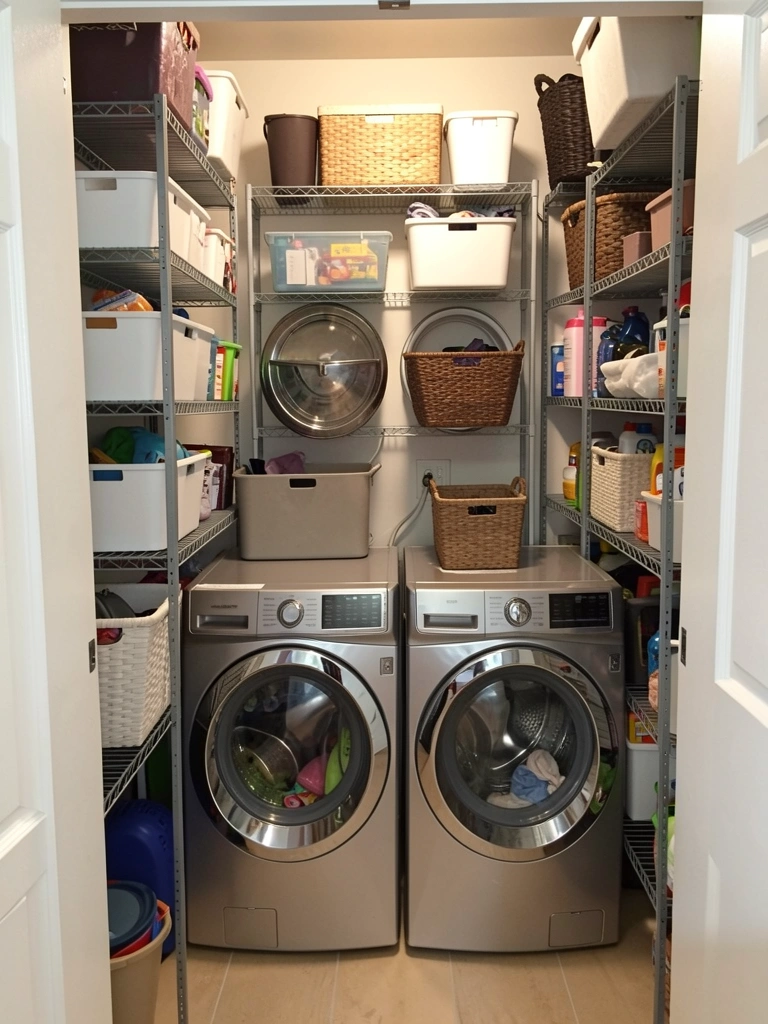
Your laundry room doesn’t need its own dedicated space—and honestly, nobody wants to stare at appliances all day. If you’re working with a bedroom closet, hallway nook, or spare corner, washer-dryer closets are the secret weapon for keeping your home looking intentional while hiding the messiest part of your routine. These 23 designs show you exactly how to disguise bulky machines, create functional storage above and beside them, and make your closet feel like an intentional design choice instead of an afterthought. Whether you’re renting, living in a tiny apartment, or just tired of clutter, you’ll find ideas that work with your space, your budget, and your lifestyle. Let’s turn that unused closet into a laundry powerhouse that actually looks good.
1. Install Bi-Fold Doors to Hide Everything When Closed
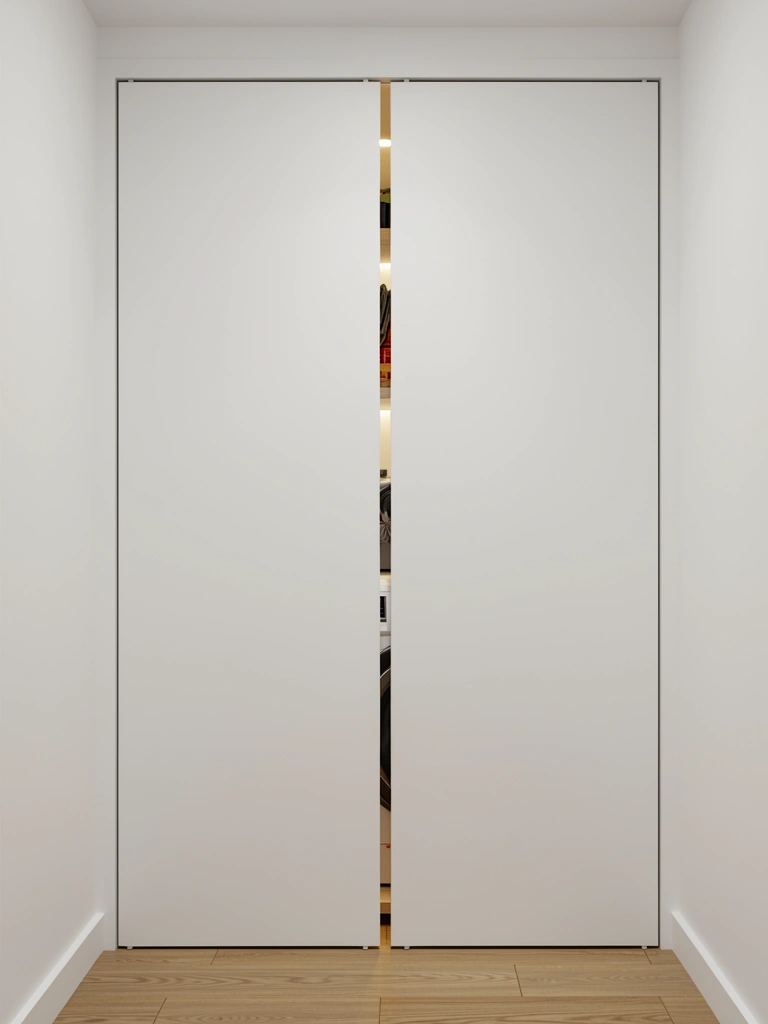
Bi-fold doors are the quickest way to make laundry appliances disappear from view. When closed, your closet looks like a built-in cabinet—when open, you’ve got full access to your machines and storage without fighting with space-eating swing doors.
Install bi-fold doors over your existing closet opening or doorway. Most kits run $80–$300 depending on size and material, available at Home Depot or Lowe’s. Measure your opening carefully, and if you’re renting, use adhesive-backed track instead of drilling. Installation takes 2–4 hours if you’re handy; hire a handyperson for $150–$300 if not. Pair them with soft-close hinges for a premium feel.
The payoff? Your laundry space becomes invisible, and you reclaim visual calm in your hallway or bedroom. Plus, bi-fold doors hide spills and lint without requiring a dedicated room.
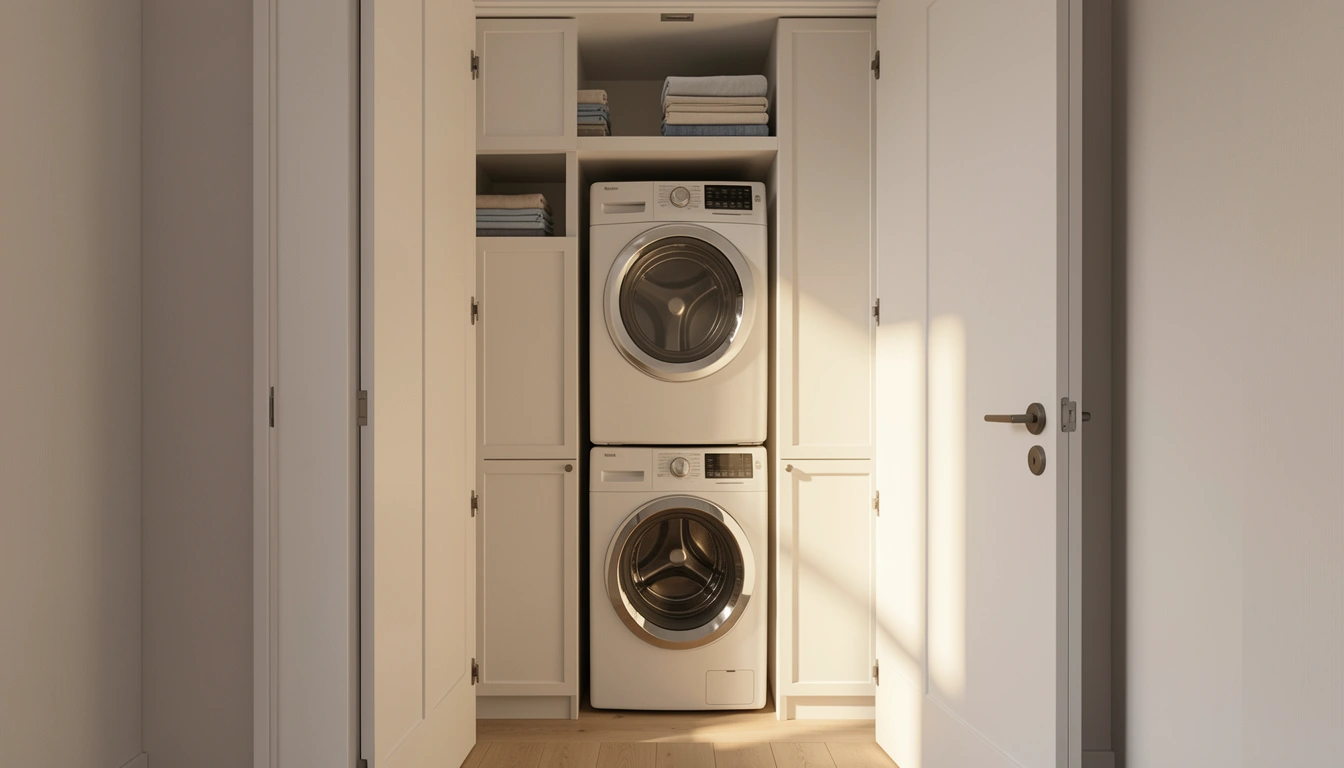
2. Stack Appliances Vertically to Maximize Tiny Spaces
Stacking a compact washer over a compact dryer cuts your floor footprint in half. This works beautifully in closets where side-by-side won’t fit, giving you room for a utility sink, storage shelves, or a small folding table underneath.
Choose compact models (usually 27–28 inches wide) designed for stacking. LG and Samsung make excellent smart stackables at $1,200–$2,000 for the pair. Budget-friendly alternatives from Haier or GE start around $700–$1,000. If your closet ceiling is standard height, this setup fits perfectly. Hire a pro to ensure proper ventilation and water hookups—critical for preventing mold.
Suddenly, your tiny closet becomes a fully functional laundry station with room to spare. You’ll have breathing room for a small shelf or hanging rack, making the whole space feel less claustrophobic.
3. Paint Inside Walls a Bold, Energizing Color
Paint is free energy. When your washer-dryer closet is tucked away behind doors, you can go bold with wall color without overwhelming your home. Sage, dusty blue, warm taupe, or even soft terracotta add personality and make the space feel intentional instead of purely utilitarian.
Choose a semi-gloss or satin-finish paint (more durable against moisture). Benjamin Moore or Sherwin-Williams offer excellent color palettes at $35–$60 per gallon. Mask off edges and paint in two coats—takes about 1 hour. Ensure your closet has some ventilation to prevent paint from peeling due to dryer heat and humidity.
You’ll notice the shift immediately: opening those doors to a pretty, color-coordinated space makes laundry feel a little less like a chore. It’s a small mood boost that changes how you feel about doing loads.
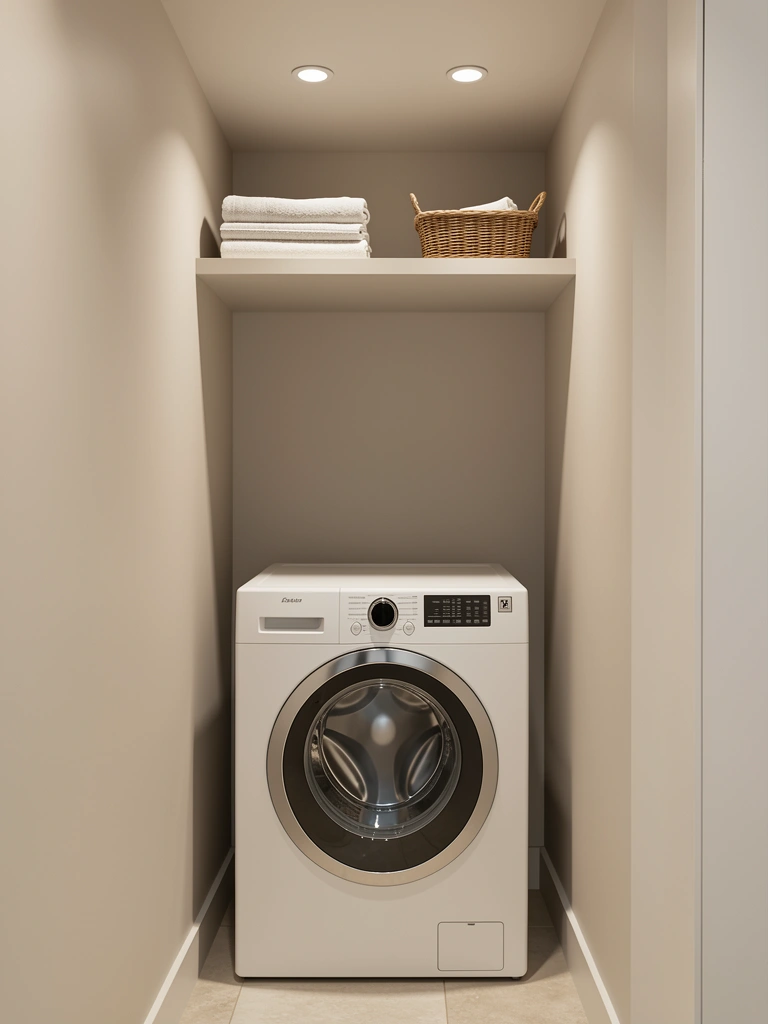
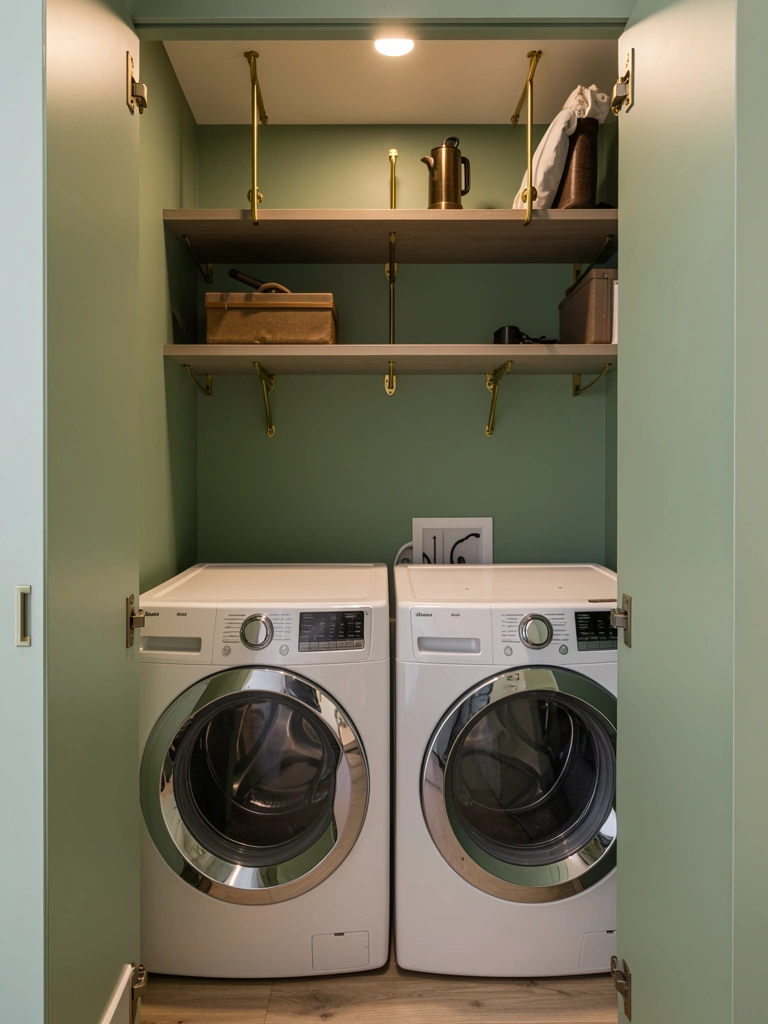
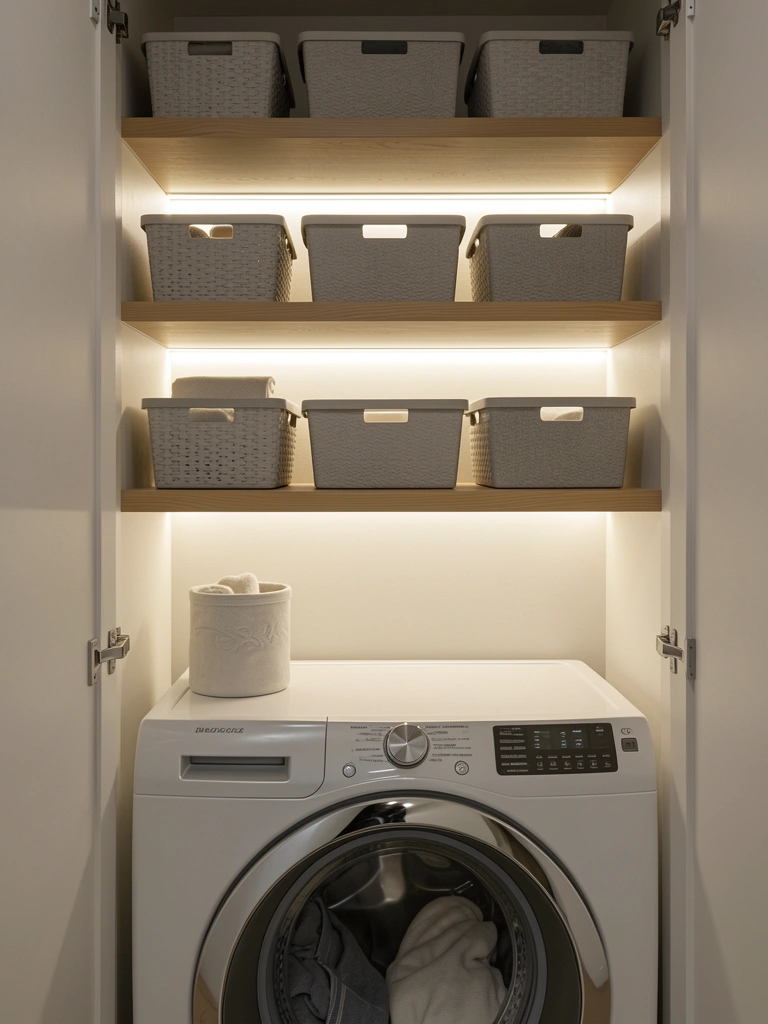
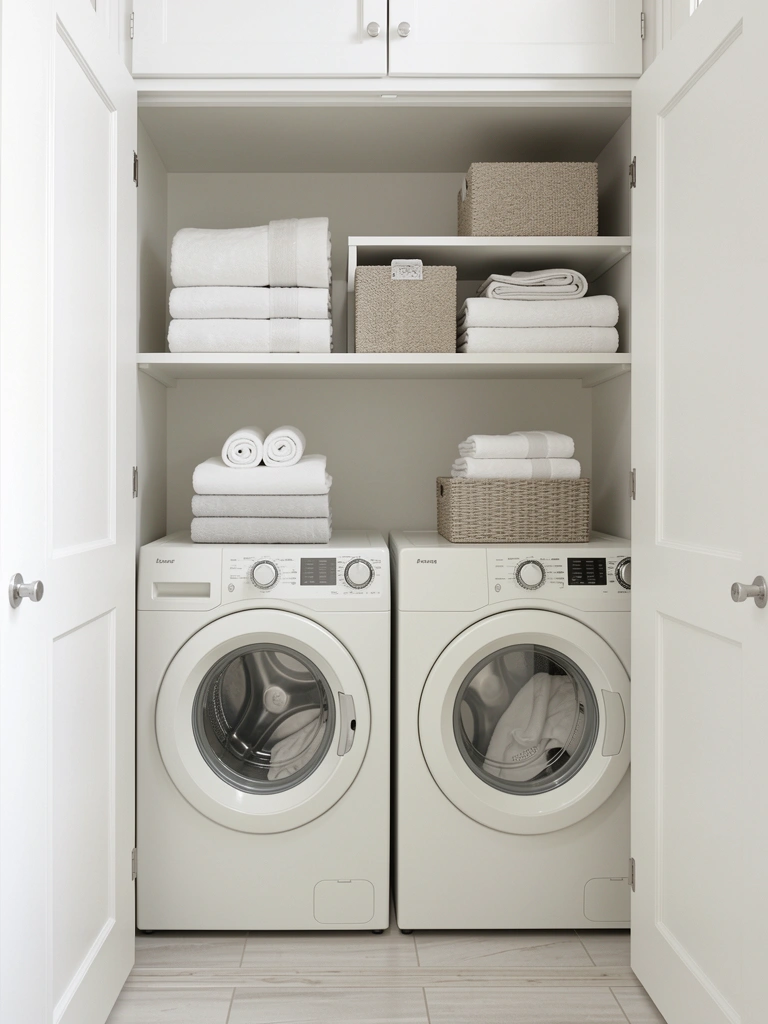
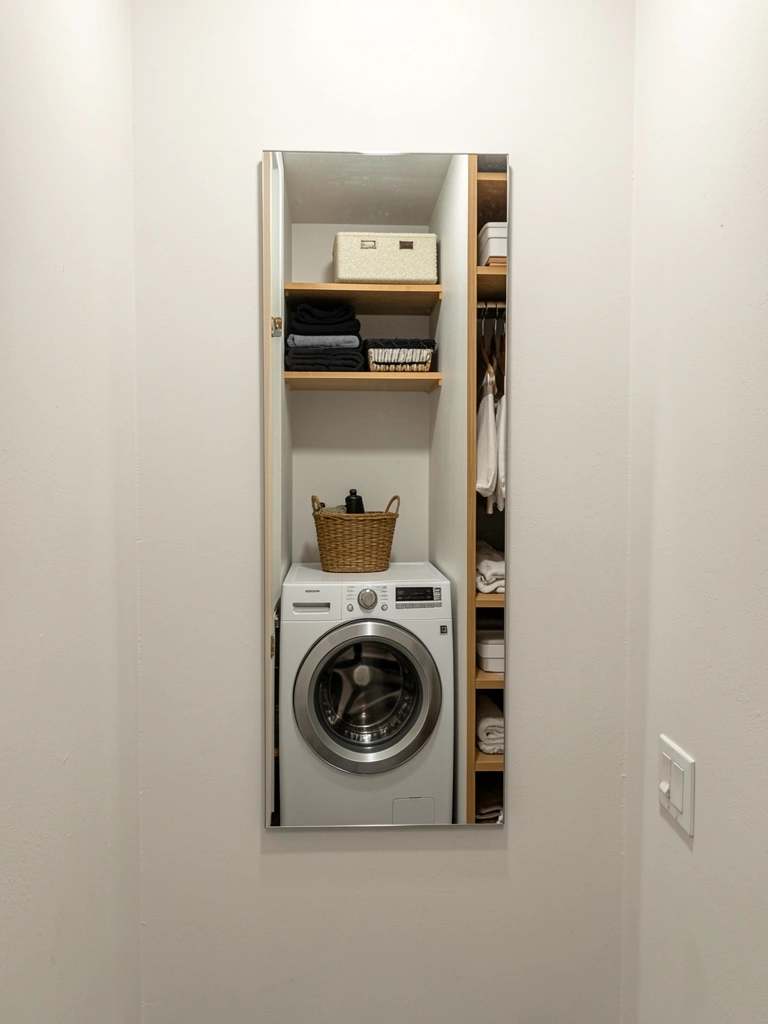
4. Add Floating Shelves Above Appliances for Storage
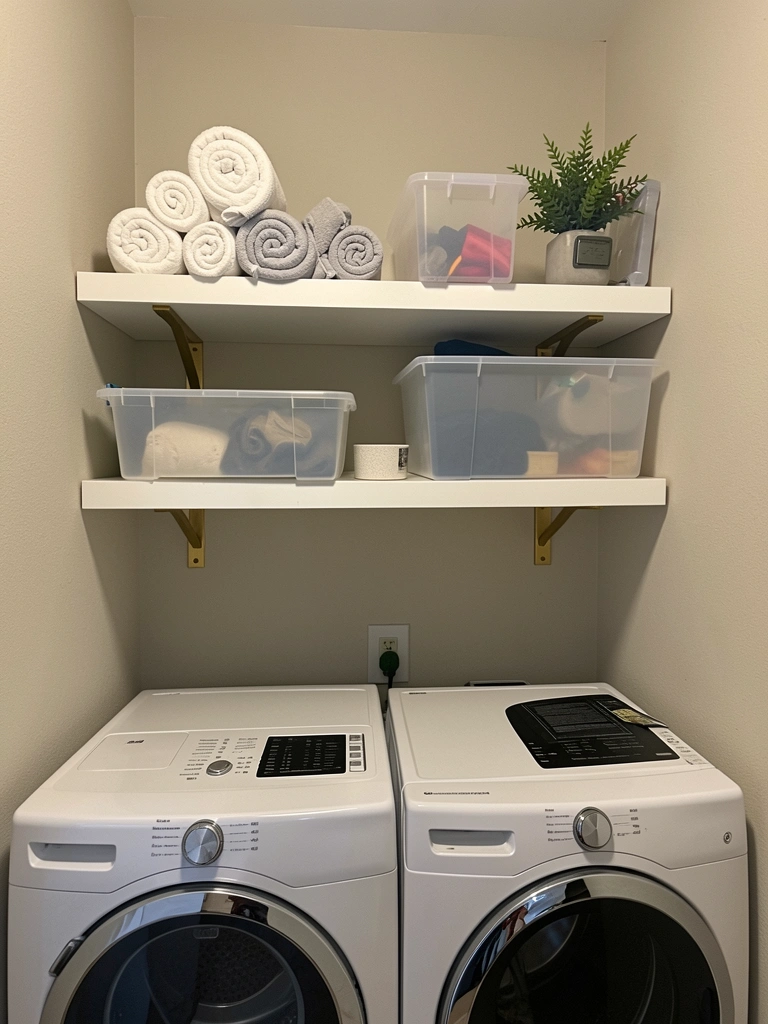
Floating shelves above your stacked or side-by-side machines reclaim vertical space for linens, detergent, softener, and cleaning supplies. They create a polished, organized look without eating floor space.
Mount shelves 12–18 inches above your dryer using heavy-duty floating brackets rated for 25–50 lbs. IKEA’s LACK shelves are budget-friendly ($20–$30 each), or invest in custom-cut wood from Wayfair or West Elm ($80–$150 each). Install brackets with a stud finder—non-negotiable for weight distribution. Budget 1–2 hours if you’re comfortable with a level and drill; hire an expert for $50–$100 if not.
Suddenly you’ve transformed dead space into a linen closet. Your supplies are within arm’s reach, and the shelves give the closet a finished, design-forward appearance instead of industrial.
5. Use Peel-and-Stick Wallpaper for Renter-Friendly Color
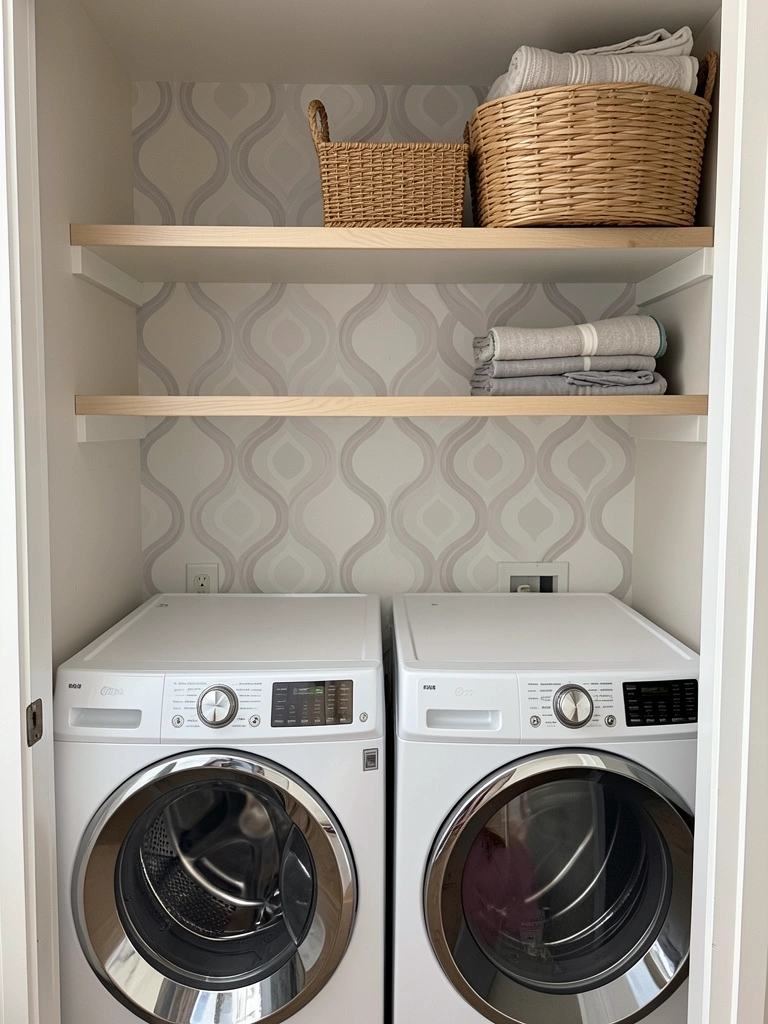
Renters rejoice: peel-and-stick wallpaper brings pattern and warmth without damaging walls. Geometric prints, subtle textures, or soft botanical patterns add visual interest and help you personalize your laundry space.
Choose peel-and-stick from Spoonflower, Etsy, or Target ($25–$60 per roll). Clean walls thoroughly, measure your closet depth and width, and apply smoothly, working out bubbles as you go. Takes about 1–2 hours. When you move, peel it off—no landlord drama. For extra adhesion, use a vinyl primer underneath.
Your closet goes from blank canvas to curated space instantly. It looks intentional and designed, not like you just crammed appliances into a hole in the wall.
6. Install a Utility Sink Beside the Dryer
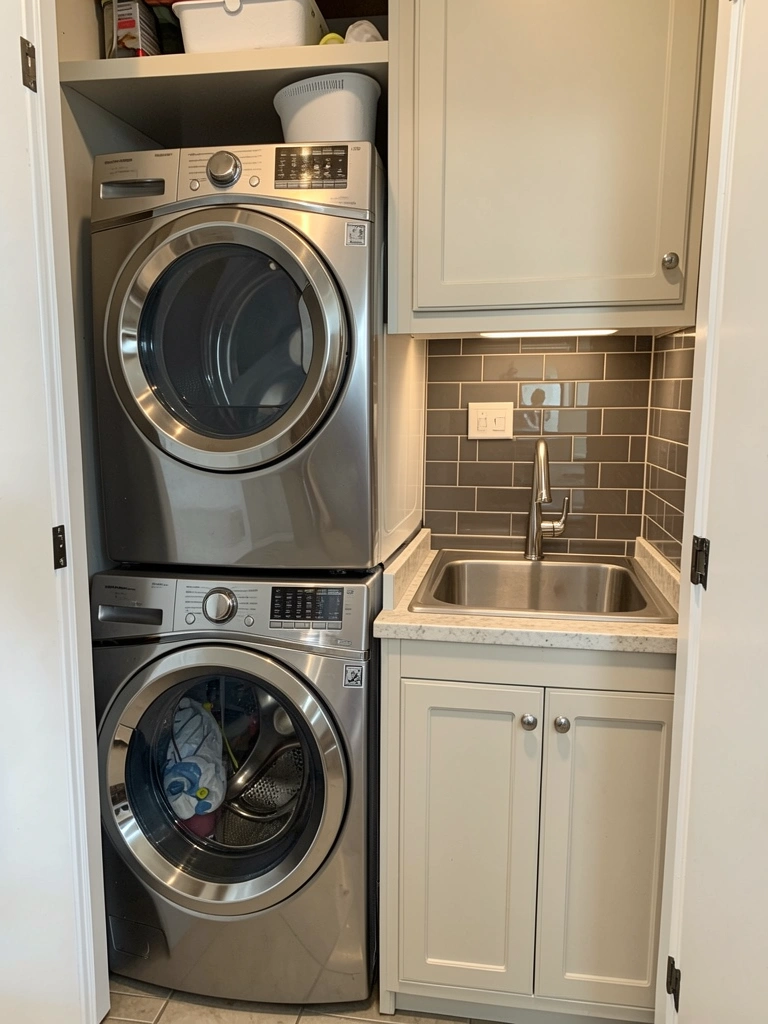
A utility sink lets you hand-wash delicate items, pre-treat stains, and clean pet paws without trekking to the bathroom. Laundry becomes more functional and multi-purpose.
A compact utility sink runs $150–$400 (stainless steel lasts longer than plastic). Installation includes water and drain hookups—hire a plumber for $200–$400 of labor. Alternatively, use a freestanding utility cabinet with a sink insert ($100–$250) that needs no plumbing, just a hose connection to an existing water line. The whole project takes 1–2 days with a pro.
You’ll stop avoiding hand-wash items and discover how much easier pre-treating becomes when you have a dedicated sink. It’s the upgrade that pays dividends if you wear delicate fabrics or have pets.
7. Install a Fold-Down Ironing Board Inside the Door
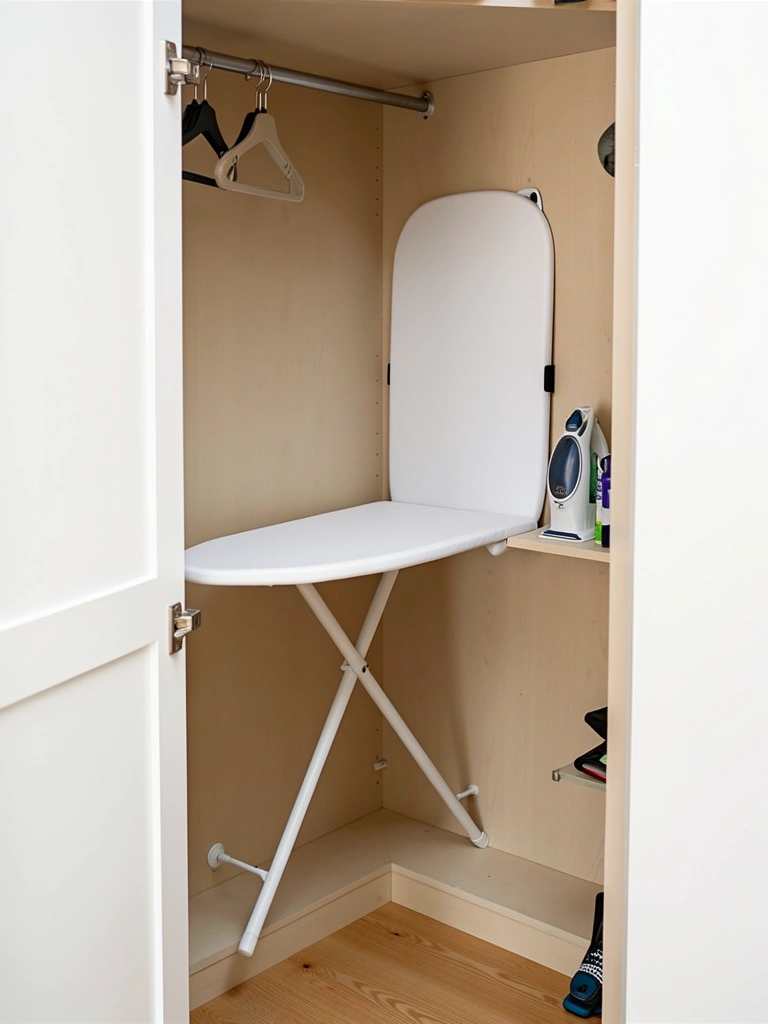
Mount an ironing board on the inside of your closet door, and you’ve got a hidden pressing station that requires zero additional floor space. When closed, nobody knows it’s there.
Choose a fold-down ironing board designed for wall mounting ($40–$100 from Amazon or Target). Mark studs, drill pilot holes, and secure with heavy-duty screws. Mounting takes 30 minutes. This works best if your door swings inward and you have 18+ inches of clearance when it’s open. Renters can use a freestanding ironing board instead—still hidden, still accessible.
You’ve just solved the “where do I press my clothes” dilemma without buying a standalone board or ironing table. Wrinkled shirts become history.
8. Add LED Strip Lighting Under Shelves for Task Light
Recessed overhead lights leave shadows where you need them most. LED strip lighting under shelves illuminates your appliances and work surfaces, making the space safer and easier to navigate.
Purchase warm white LED strips ($15–$50 from Amazon) with adhesive backing or brackets. Run them along the underside of shelves using the included clips or adhesive. This is completely renter-friendly—no hardwiring required. Installation takes 15 minutes. Plug into an outlet or connect to existing closet wiring if you’re comfortable with electrical work (or hire an electrician for $50–$100).
Now you can actually see stains, read labels, and navigate the space without squinting. The warm glow makes the closet feel more designed and less dungeon-like.
9. Frame Appliances with Matching Cabinet Doors
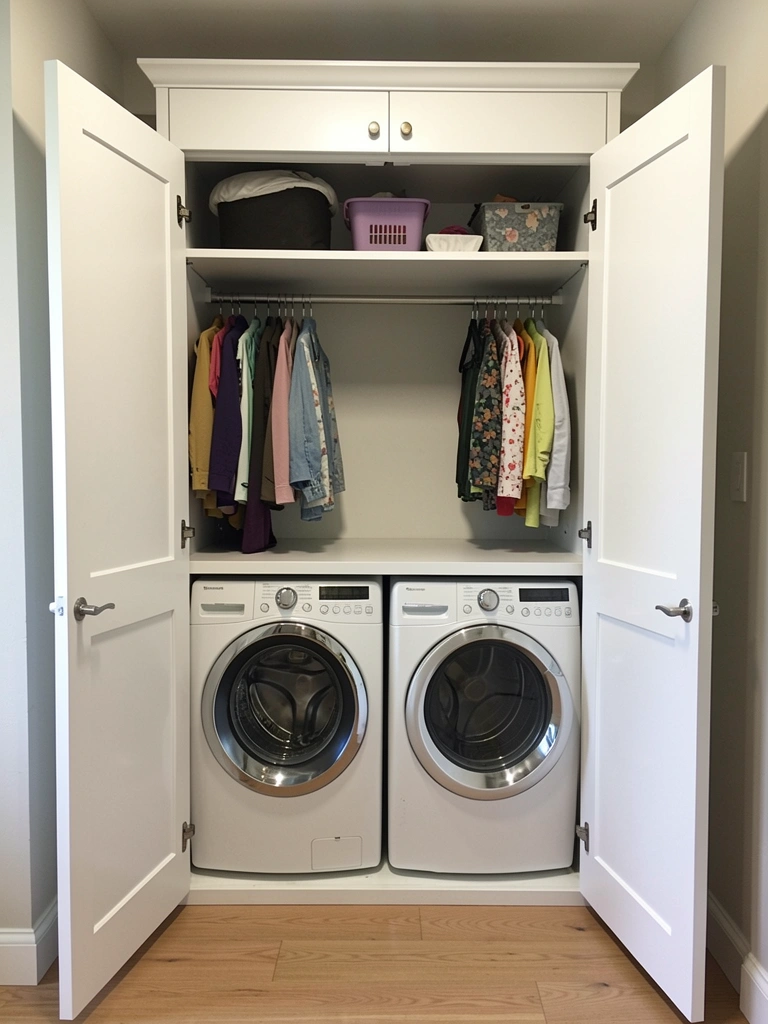
Build or buy cabinet doors that frame your machines like an intentional built-in, creating a cohesive, high-end appearance. This is the most polished solution, though it requires more investment and DIY skill.
Custom cabinet doors cost $400–$1,200, while ready-made shaker doors from IKEA or Wayfair run $150–$400 per pair. Installation involves mounting hinges, aligning doors, and ensuring they close flush. This is a weekend project if you’re confident with tools, or hire a carpenter for $300–$600 of labor. You’ll need basic carpentry skills or a pro’s help.
Your laundry closet stops looking like an appliance graveyard and starts looking like a design choice. Guests won’t even know your washer-dryer lives there—it just looks like part of the wall.
10. Use Clear Bins and Labels to Organize Supplies Visually
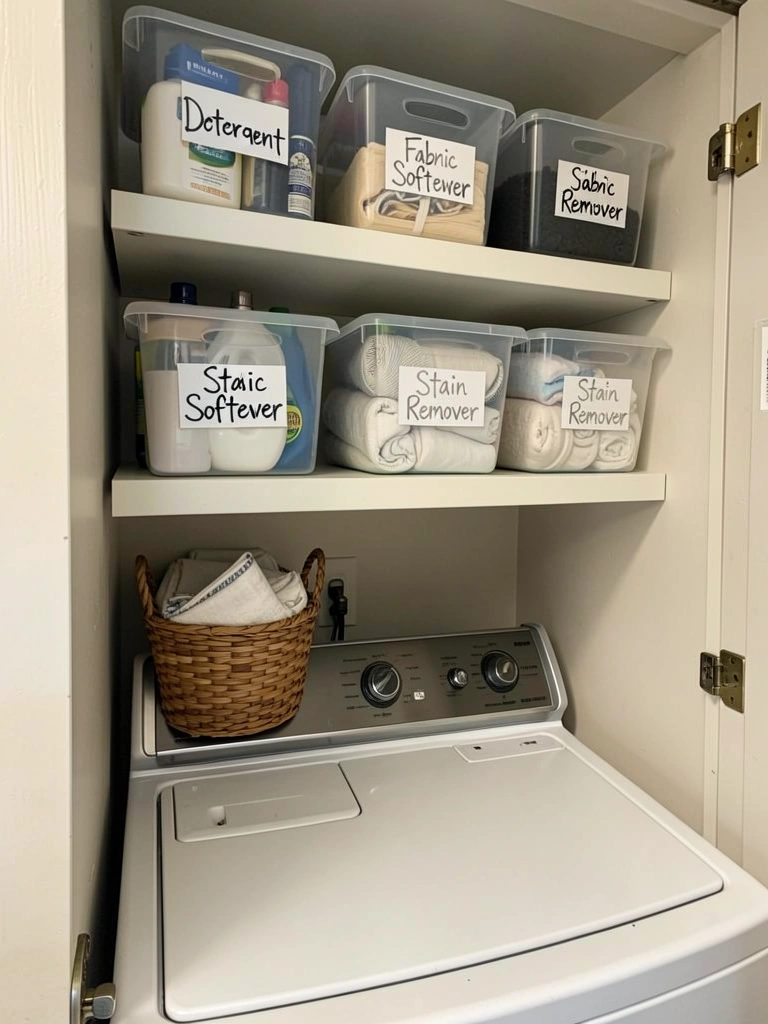
Clear bins let you see what you’re running low on without opening every cabinet. Combined with simple labels, they create a streamlined, organized appearance that photographs beautifully.
Buy clear plastic bins from Target or Container Store ($3–$15 each, depending on size). Label with a label maker or waterproof tape and permanent marker. Takes 30 minutes to organize and label everything. Use consistent sizing so shelves look intentional and not chaotic.
Your supply closet becomes a visual inventory system. You’ll notice immediately when you’re low on detergent, and the overall aesthetic reads as “curated,” not “cluttered.”
11. Install a Tension Rod for Hanging Delicates
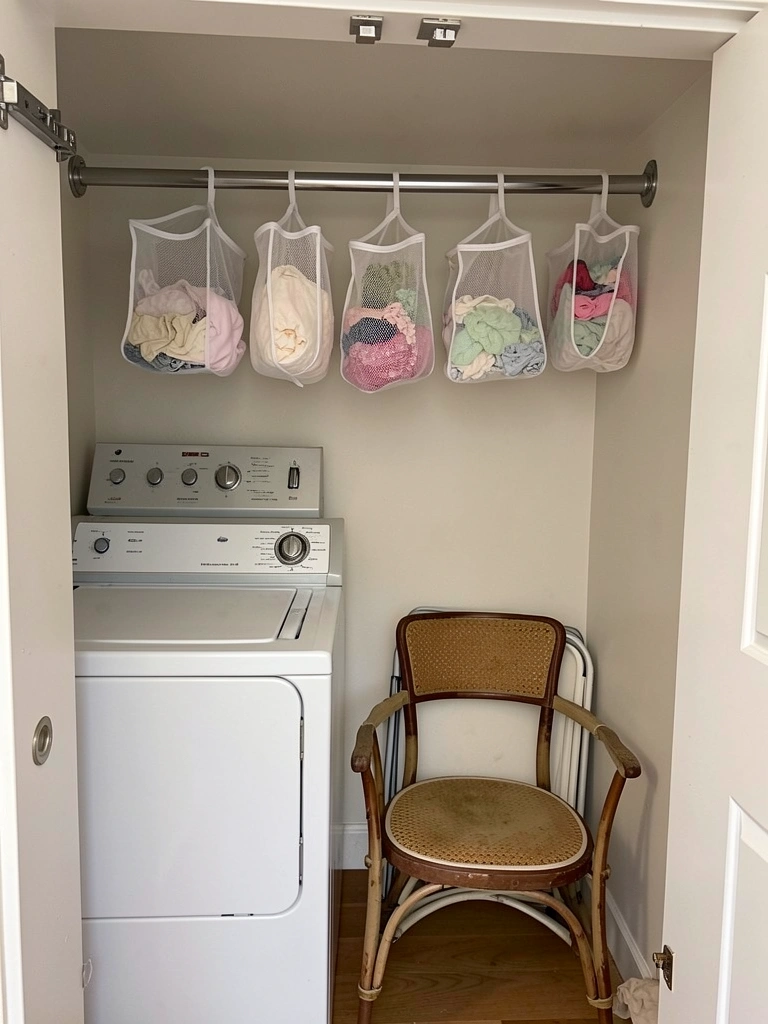
A simple tension rod hung above your machines creates a drying station for air-dry items without requiring any permanent installation. Mesh bags protect delicates while they hang, and the setup is completely renter-friendly.
A tension rod costs $10–$25 and takes 5 minutes to install—just adjust it to fit your closet width. Grab mesh laundry bags from Amazon ($15–$30 for a set of 3–4). No tools needed. Renters and homeowners alike will love this solution’s simplicity.
Delicate sweaters and lingerie air-dry safely while remaining accessible, and you free up drying time on your dryer for heavier loads. It’s a small addition that solves a real problem.
12. Paint Appliances White or Charcoal for Cohesion
Old or mismatched appliances break the aesthetic. Appliance paint designed to withstand heat and humidity can refresh them to match your closet’s color scheme—white for modern looks or charcoal for drama.
Use appliance-specific epoxy paint like Rust-Oleum Metallic Appliance Epoxy ($20–$40 per can). Prep surfaces thoroughly with sandpaper and degreaser, apply two coats, and let cure for 24 hours. This is a 2–3 hour DIY project. If your appliances are too far gone (rust, deep dents), this won’t fully hide damage, but for color mismatches, it’s transformative.
Suddenly, your machines look intentional, not like budget hand-me-downs. They blend into your design instead of screaming “this is old stuff I stuffed in a closet.”
13. Create a Pull-Out Step Stool for Tall Shelves
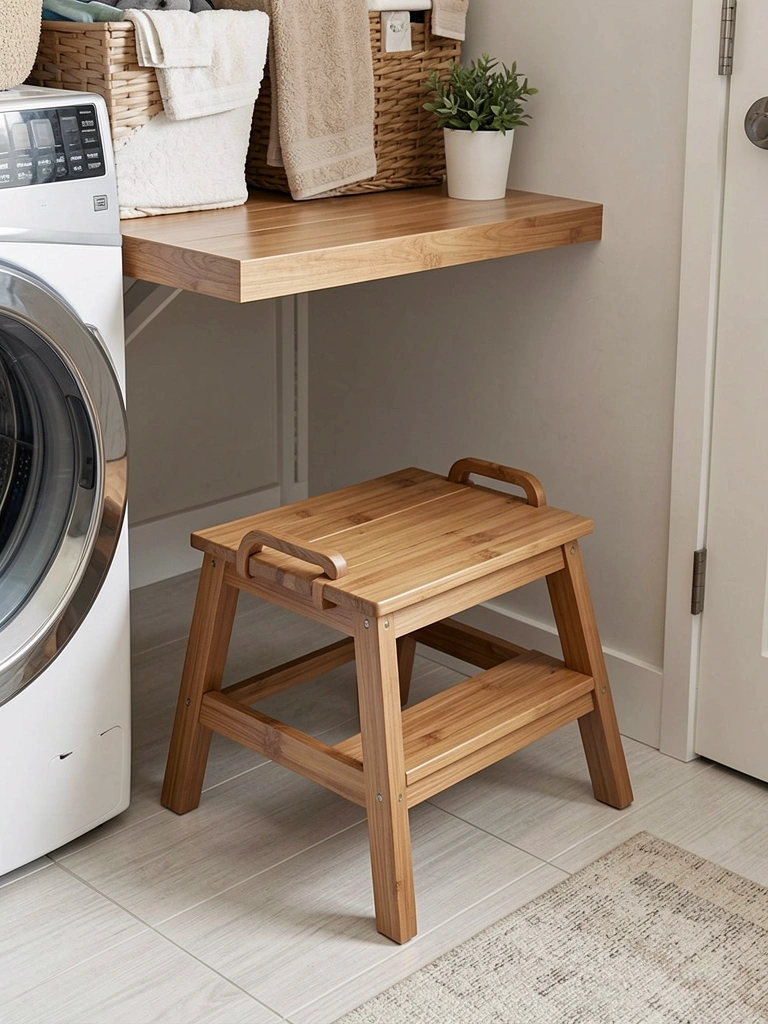
If your shelves run high, a slim pull-out step stool lets you reach without climbing on appliances or furniture. It hides neatly under shelves and keeps things safe and accessible.
A compact pull-out stool runs $30–$80 from Target, IKEA, or Amazon. Slide it under a shelf, and it takes up zero visual or floor space. Takes 30 seconds to deploy. Choose one with handles for safety and stability.
Reaching your highest shelves becomes easy, and you eliminate the temptation to climb on your dryer (safety win). Plus, it’s easy to move if you need it elsewhere in your home.
14. Add a Rolling Hamper That Fits Under or Beside Appliances
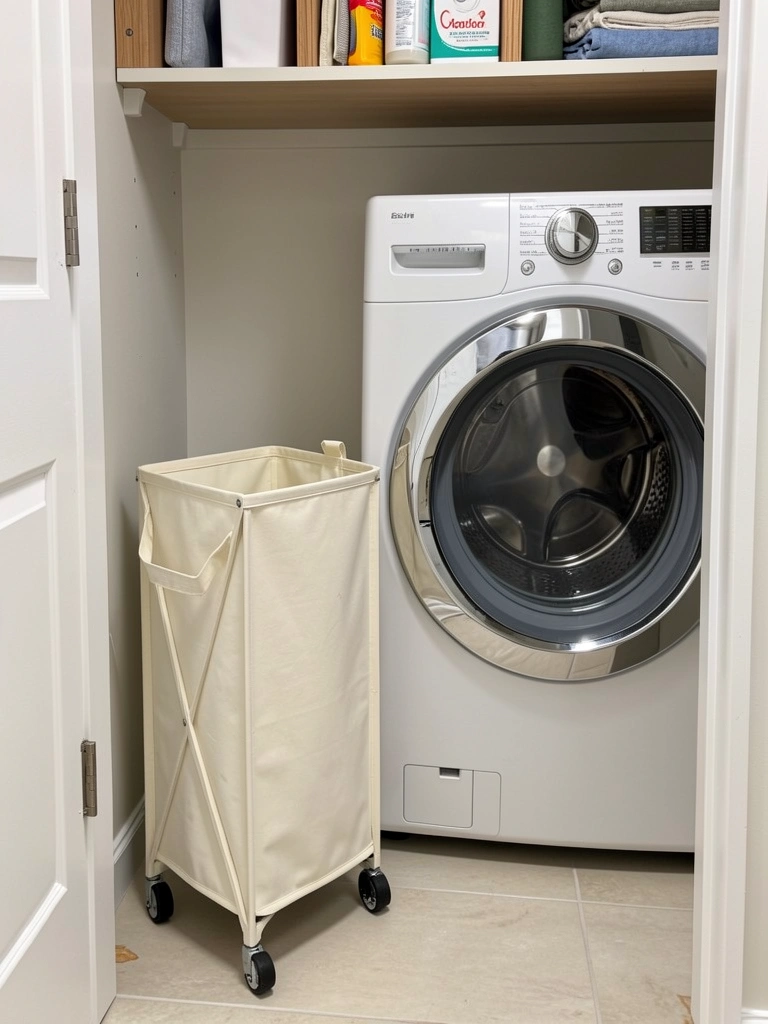
A low-profile rolling hamper slides beside or under appliances without eating valuable floor space. Wheels let you move it during cleaning, and it keeps dirty laundry contained and out of sight.
Look for slim, low-profile hampers designed for small spaces at Target or IKEA ($25–$60). Canvas or linen finishes look more intentional than plastic. Measure your clearance before buying to ensure it fits without blocking access to knobs or doors. Takes 2 minutes to assemble.
Dirty laundry stops living in a pile on your floor and instead waits neatly beside your machines. You’ll notice the psychological shift—laundry day feels more organized and less overwhelming.
15. Install Magnetic Spice Jars for Detergent Pods Storage
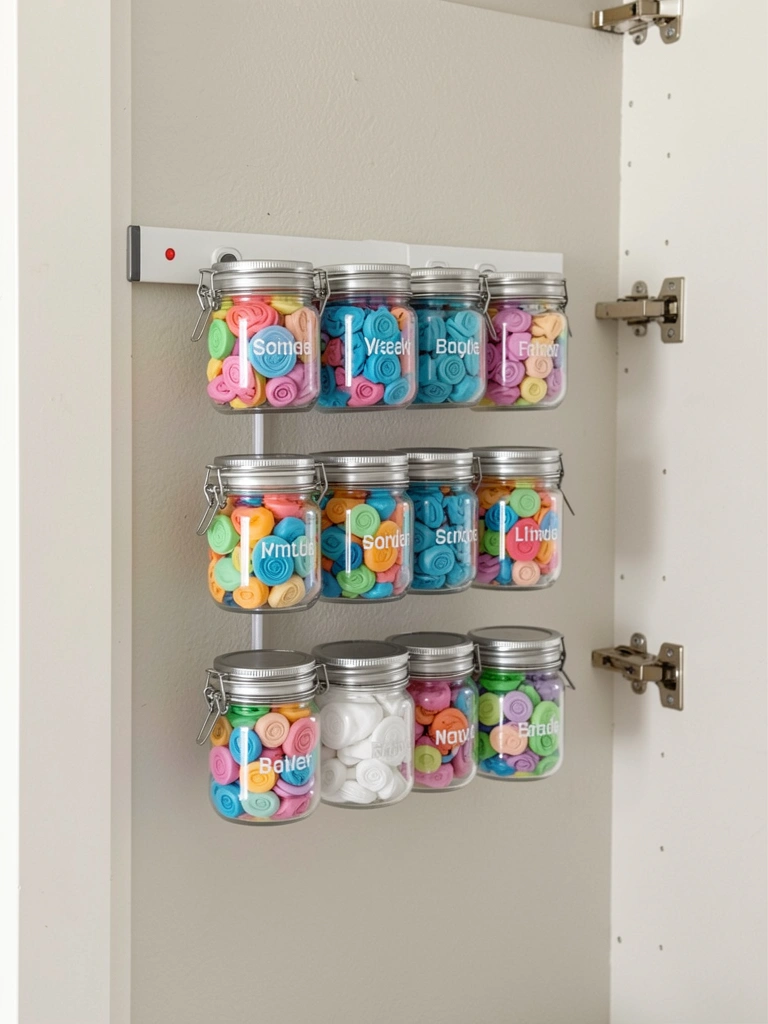
Detergent pods loose in bottles take up shelf space and look messy. Transfer them into small magnetic jars mounted on a strip, and suddenly you have a space-saving, visually pleasing storage system.
Buy a magnetic strip ($10–$20) and small magnetic jars ($2–$5 each) from Amazon. Mount the strip on your closet wall with heavy-duty adhesive or screws, then arrange filled jars. Takes 30 minutes. This works especially well if you use pods exclusively and want to reduce clutter on shelves.
Your detergent becomes a design element, not clutter. You see exactly how many pods you have, and the setup looks intentional and sophisticated.
16. Use Adhesive Hooks to Hang Cleaning Tools
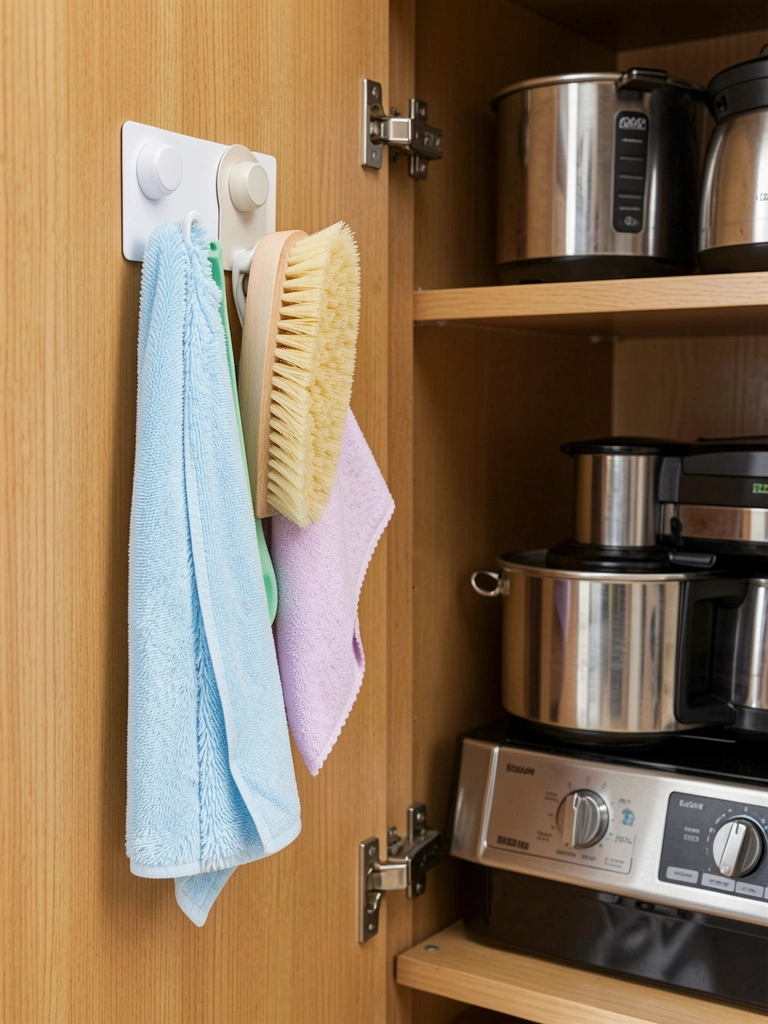
Adhesive hooks make use of wasted wall space without requiring holes or installation expertise. Hang your stain-removal brushes, cleaning cloths, and dusters where you need them most.
Command hooks run $1–$5 each and work beautifully on closet walls. Pick a spot that doesn’t obstruct appliance access, and hang 4–6 hooks at waist height. Installation is instant and completely renter-friendly. Clean the wall first so adhesive sticks.
Your most-used cleaning supplies hang within arm’s reach, eliminating the frustration of hunting for a stain brush mid-laundry. It’s small but mighty.
17. Mount a Small Mirror Inside for Stain-Checking
A mirror lets you inspect clothes for missed stains before folding and doubles the visual space, making a tiny closet feel less cramped. It’s functional and design-smart.
Choose a narrow or rectangular mirror ($15–$50 from IKEA, Target, or Wayfair). Mount it at eye level on a side wall using heavy-duty adhesive or clips. Takes 10 minutes and requires no drilling. If renting, use a leaning mirror on a shelf instead.
You’ll catch stains before they set, and the reflected light bounces around your closet, making it feel bigger and less dungeon-like. It’s a small touch with surprisingly big impact.
18. Install a Recessed Shelf Between Wall Studs

A recessed shelf takes advantage of space between wall studs without protruding into your closet. It’s the hidden-gem solution for maximizing storage without losing floor room.
This is a more advanced DIY project or a good hire for a handyperson ($100–$250 of labor). You’ll need to remove drywall between studs, add a frame, and install shelving. Takes one weekend. This works best if your closet is already between studs where you want storage.
You gain functional shelf space that looks built-in and intentional. It’s the kind of detail that makes a space feel professionally designed.
19. Add a Small Rolling Cart for Sorting and Folding
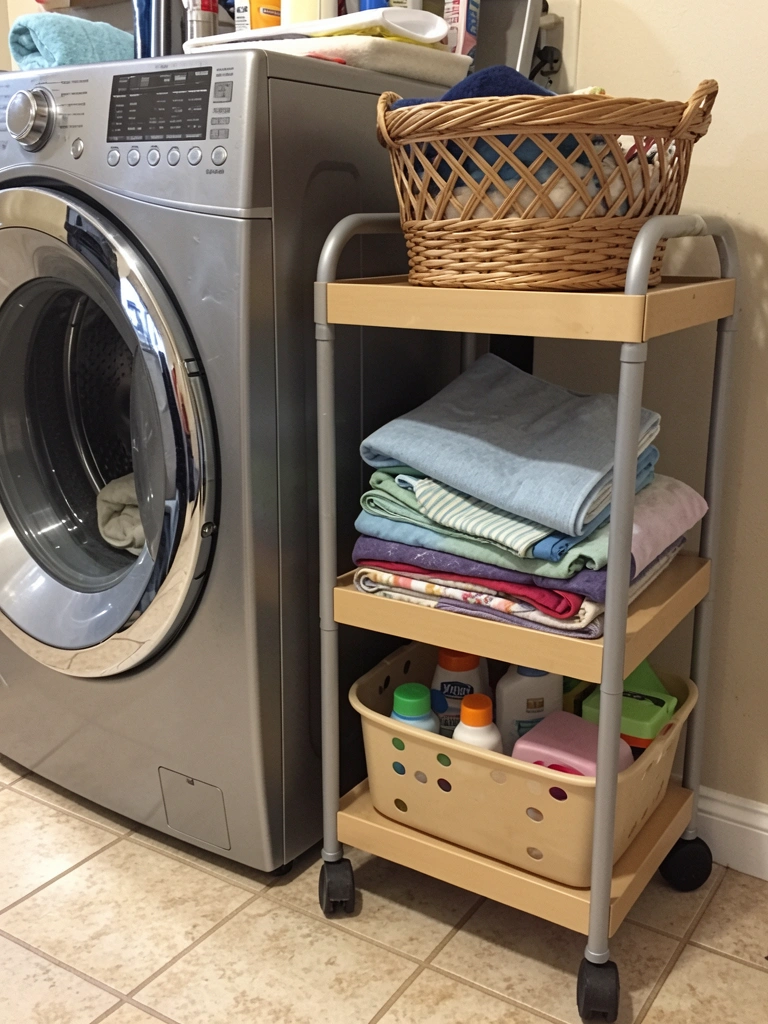
A narrow rolling cart fits beside appliances and gives you mobile sorting, folding, and storage. When not in use during laundry day, wheel it to a corner or into a closet.
Look for slim three-tier carts designed for small kitchens or bathrooms—they work perfectly in laundry closets at $50–$120 from Target, IKEA, or Amazon. Choose metal over plastic for durability. No assembly required for many models; takes 5 minutes if it does. You lose no permanent floor space because it rolls when not in use.
Laundry day becomes more organized. You sort, fold, and store all in one spot, then wheel your clean laundry to the bedroom. It’s a mobile station that adapts to your rhythm.
20. Use Vertical Hangers for Freshly Dried Garments
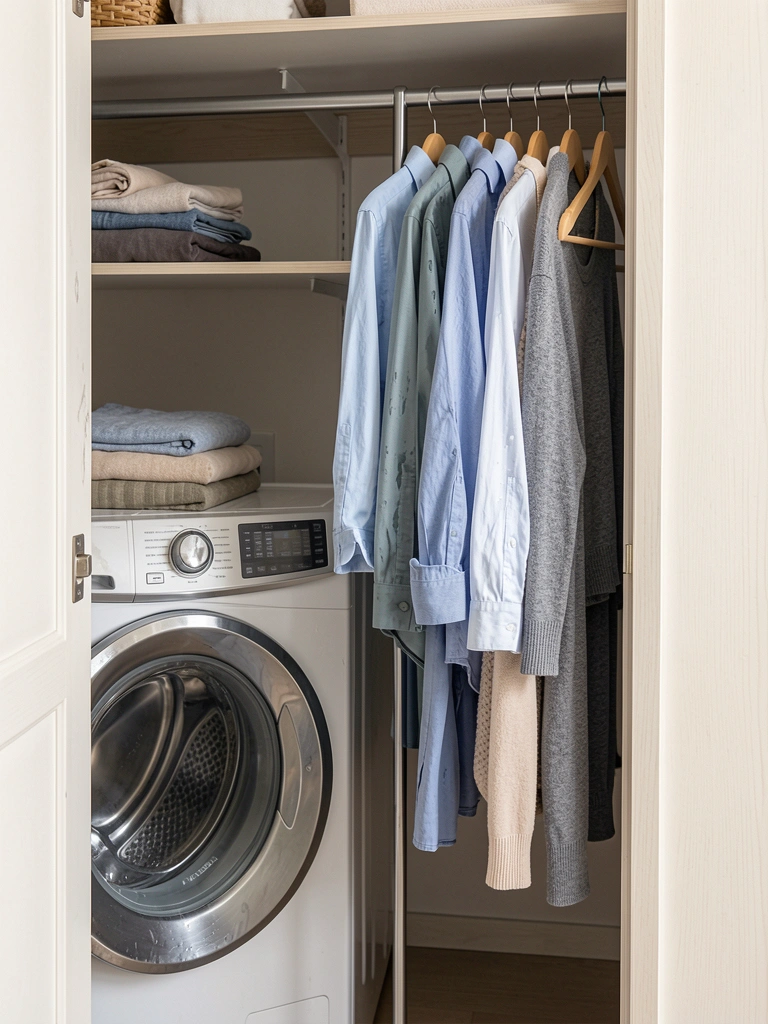
A cascading vertical hanger keeps freshly dried items from wrinkling on the floor or getting re-wrinkled while stacked in baskets. It’s a temporary parking spot for clothes between dryer and closet.
Cascading hangers cost $15–$30 and mount easily on a rod or hook in your closet. Takes 5 minutes. Look for slim designs that don’t eat floor space. Choose one that holds 10–15 items comfortably without crowding.
Your clothes go directly from dryer to hanger, staying fresh and wrinkle-free while you finish other loads. It’s a small workflow improvement that keeps things moving.
21. Paint a Chalkboard Wall Section for Laundry Notes
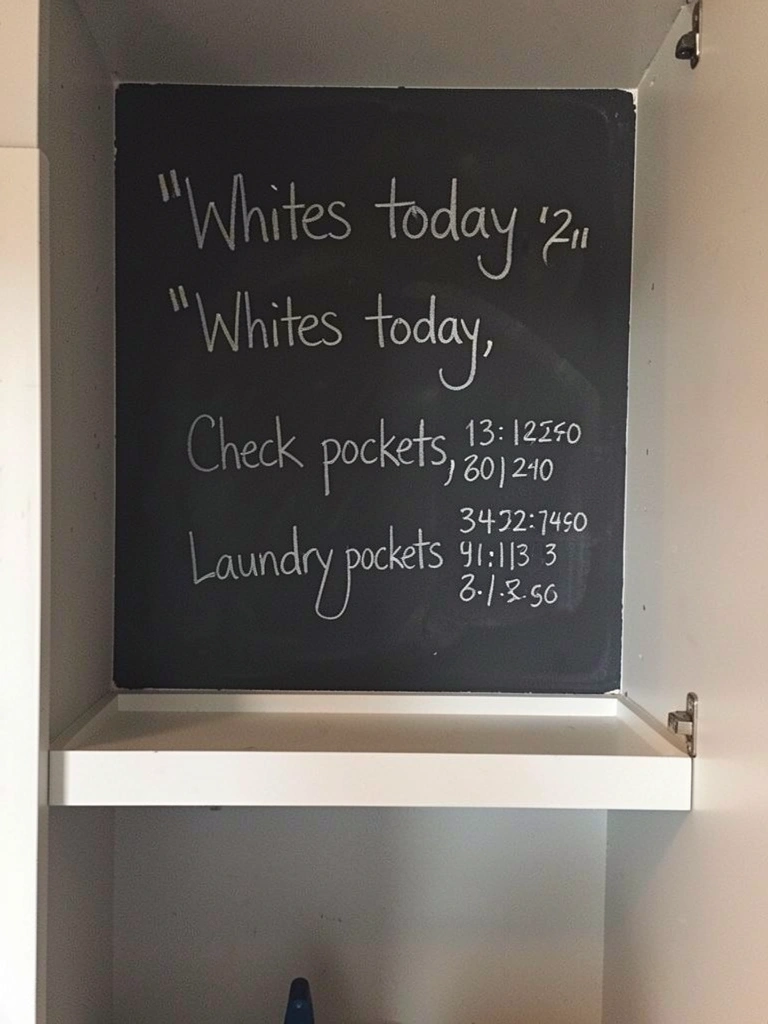
Designate a small wall section for chalkboard paint and use it for laundry reminders, schedules, or notes about delicate items. It keeps information front-and-center without taking up shelf space.
Chalkboard paint runs $15–$30 per quart. Paint a 2–3 foot section of your closet wall in 1–2 hours (two coats). Keep chalk and an eraser nearby. This is completely removable if renting—paint over it with regular paint when you leave.
You’ve created a low-tech information hub for your laundry routine. Family members see reminders, delicate-care notes, and schedules at a glance. It simplifies communication and prevents forgotten steps.
22. Create a Scent Station with Pods and Droppers
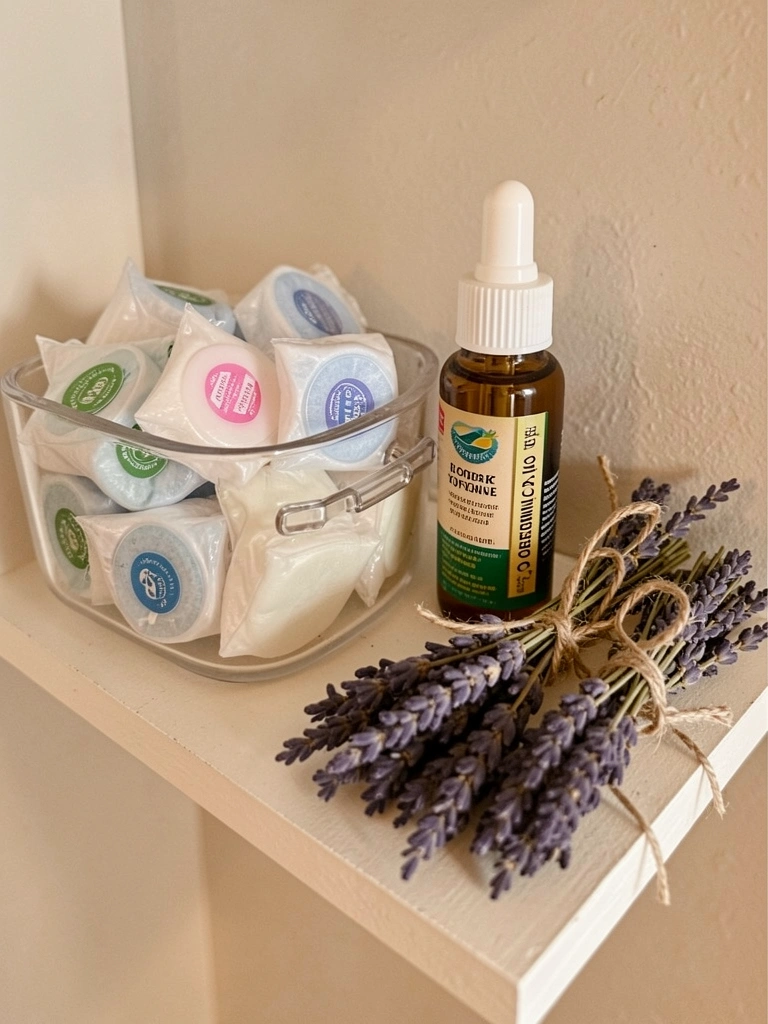
Detergent is functional, but scent can make your laundry ritual feel like self-care. Create a dedicated shelf for fabric softener, scent boosters, and even DIY scent sprays.
Collect 3–4 beautiful containers from HomeGoods or IKEA ($5–$20 total). Fill with your favorite scents: Downy pods, Febreze, Dreft, or DIY sprays made with water and essential oils. Label with small tags or stickers. Arrange on a dedicated shelf for visual appeal.
Your laundry routine goes from chore to ritual. The scent station makes you want to do laundry, and the space looks intentional and curated instead of purely utilitarian.
23. Install Adjustable Shelving for Future-Proofing
Adjustable shelving adapts as your needs change. You can accommodate growing storage needs, larger bins, or new appliances without a full renovation.
Adjustable shelving kits run $40–$150 per unit, depending on depth and material. Install with brackets and shelf pins—a weekend DIY project, or hire a handyperson for $75–$150 of labor. Measure your closet dimensions before ordering to ensure proper fit.
Years from now, if your appliance needs change or your storage demands shift, your shelving adapts instead of forcing a redesign. It’s future-proofing that pays dividends.
Save this post and pick one or two ideas to try this month—even small additions like adhesive hooks or clear bins make your laundry space feel more organized and intentional. Share it with anyone juggling appliances in tight spaces!
Leave a Reply