Author: Clara Bennett

  • 24 Smart Small Bedroom Layouts That Maximize Every Inch

    24 Smart Small Bedroom Layouts That Maximize Every Inch


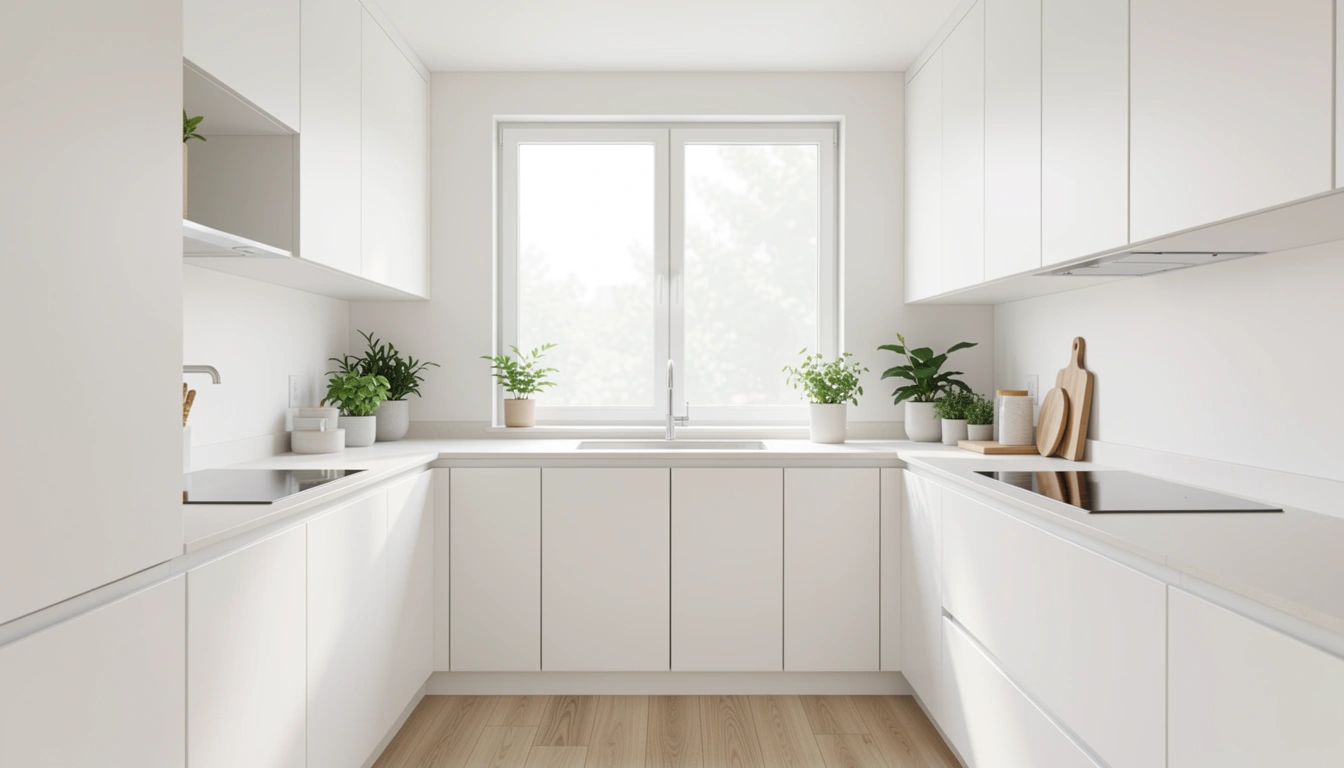
    Small bedrooms don’t need to feel cramped or uncomfortable—they just need the right strategy. Whether you’re working with a tiny apartment, a guest room, or a child’s space, smart layouts can make every inch count. You’ll learn 24 actionable ideas that blend practical furniture placement, visual tricks, and storage hacks to create a bedroom that feels larger, more relaxing, and genuinely yours. From renter-friendly solutions to investment upgrades, these tips work whether you’re starting from scratch or refreshing what you already have. Let’s turn that small space into your favorite retreat.


    1. Float Your Bed Away from Walls

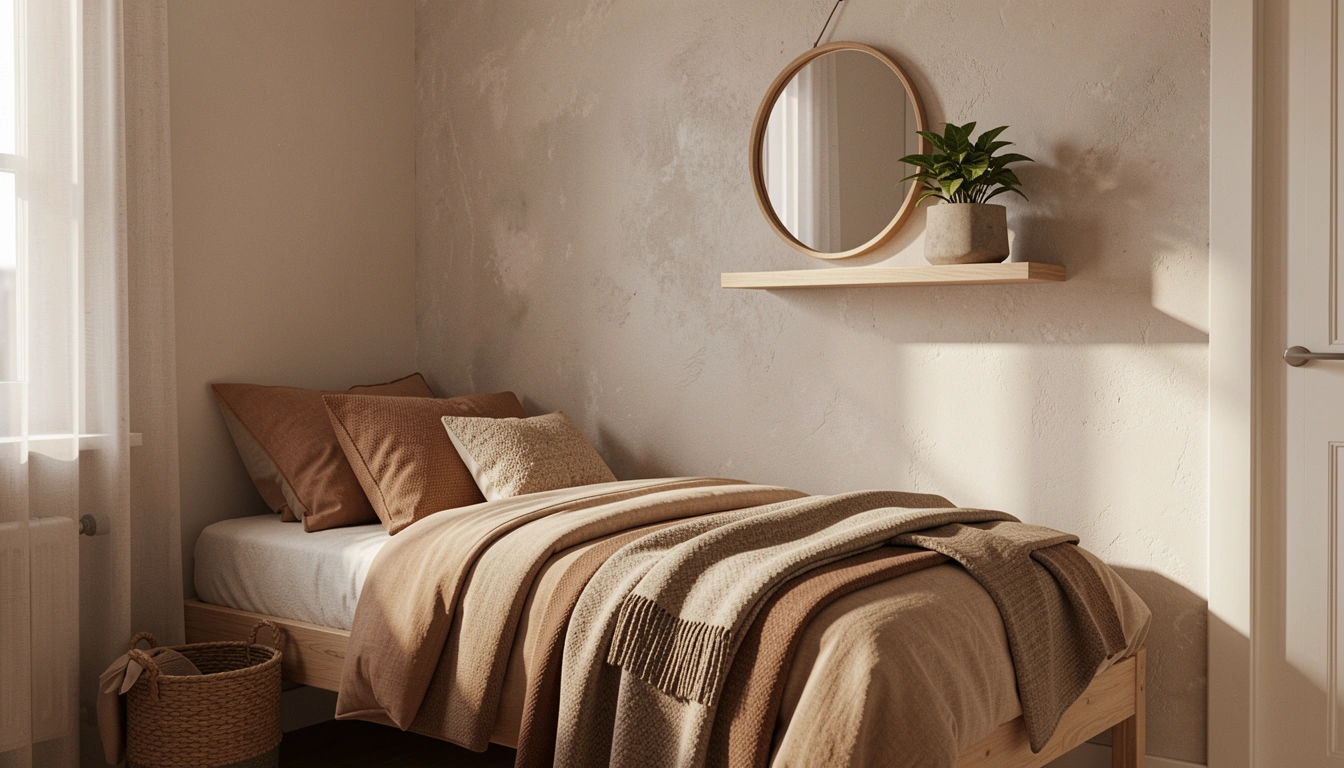
    Pushing your bed against the wall might seem logical, but floating it actually makes rooms feel bigger and more intentional. This layout creates visual flow and gives you functional space on multiple sides—perfect for rearranging without major upheaval.

    Measure your room first. You’ll typically need at least 2-3 feet of clearance on at least two sides to make this work. If you have one side against a wall, that’s fine; just float the foot end into the room. Add a layered area rug beneath to anchor the bed (looks polished, costs $60–$200). Position compact nightstands or floating shelves ($30–$150 each) to keep the footprint minimal.

    This setup works beautifully with curved headboards, which fit 2025’s organic furniture trend perfectly and soften the room’s overall look.

    The best part? You’ll feel less boxed in, and guests have easier access to help make beds or tidy up.


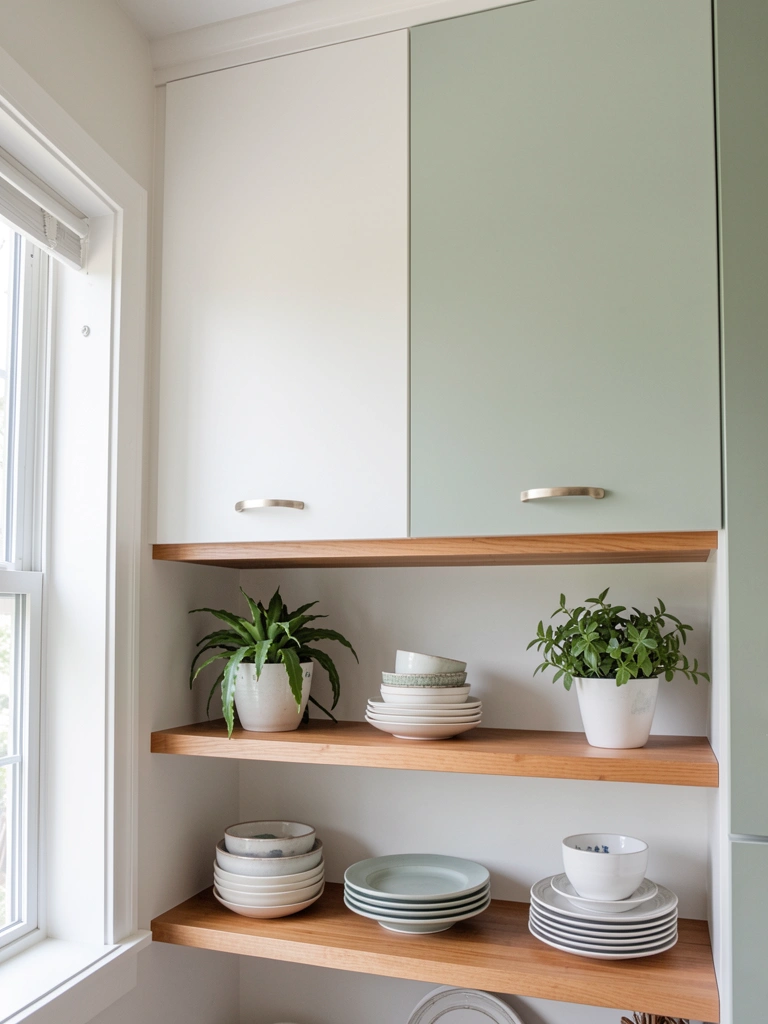
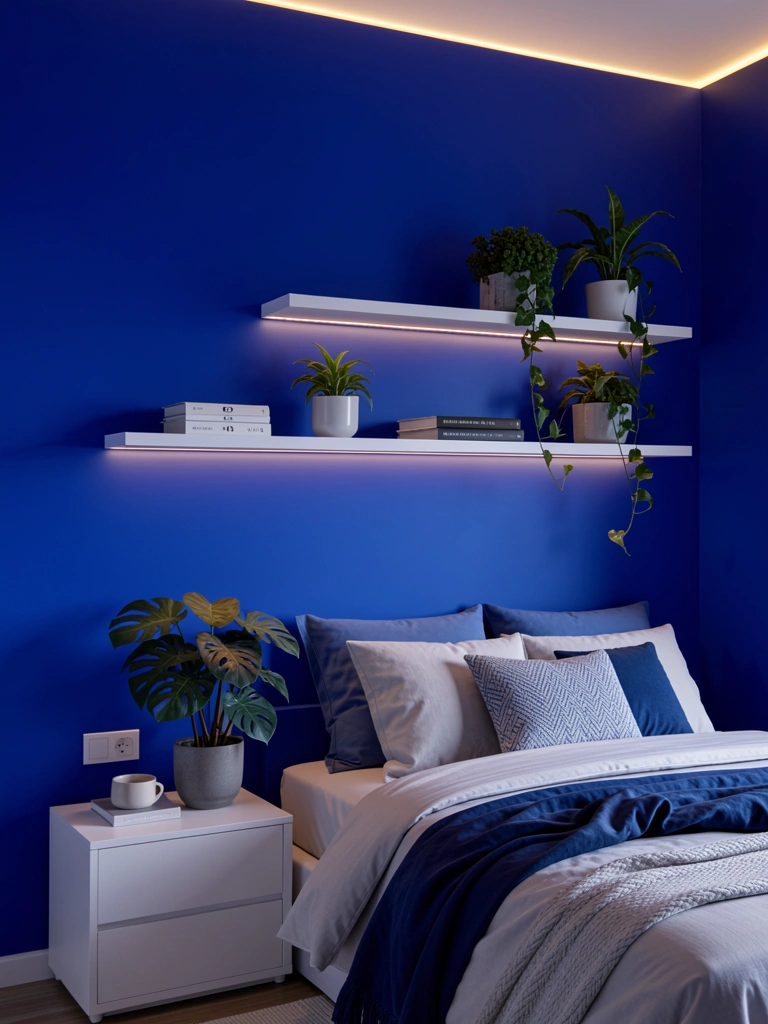
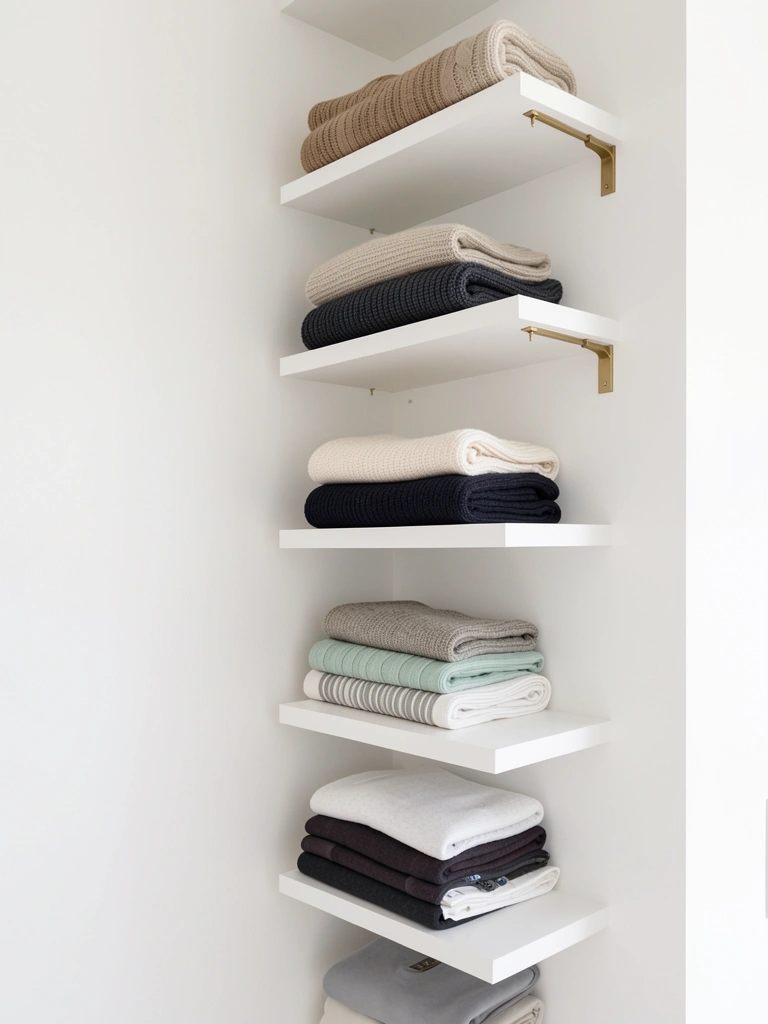
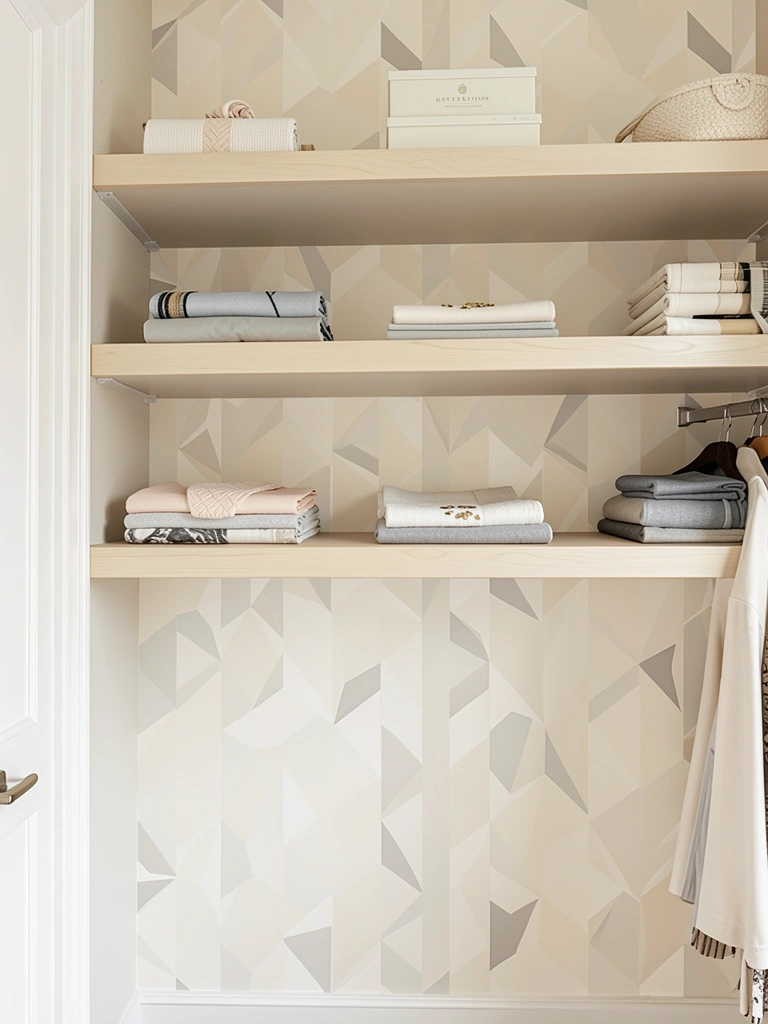
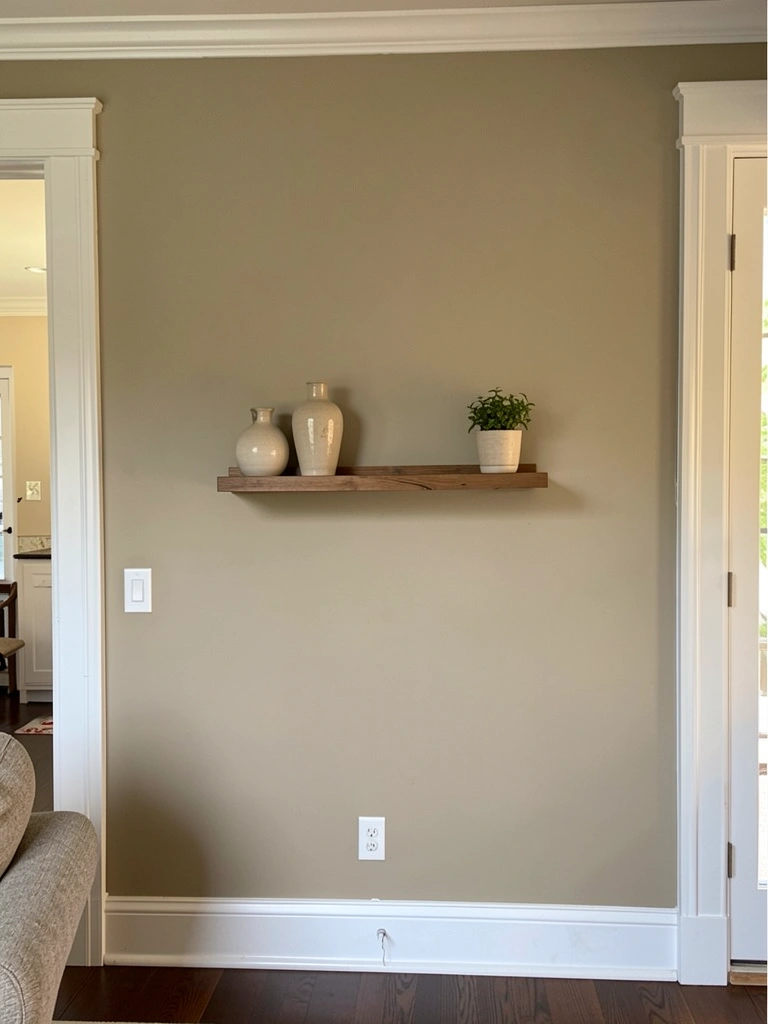
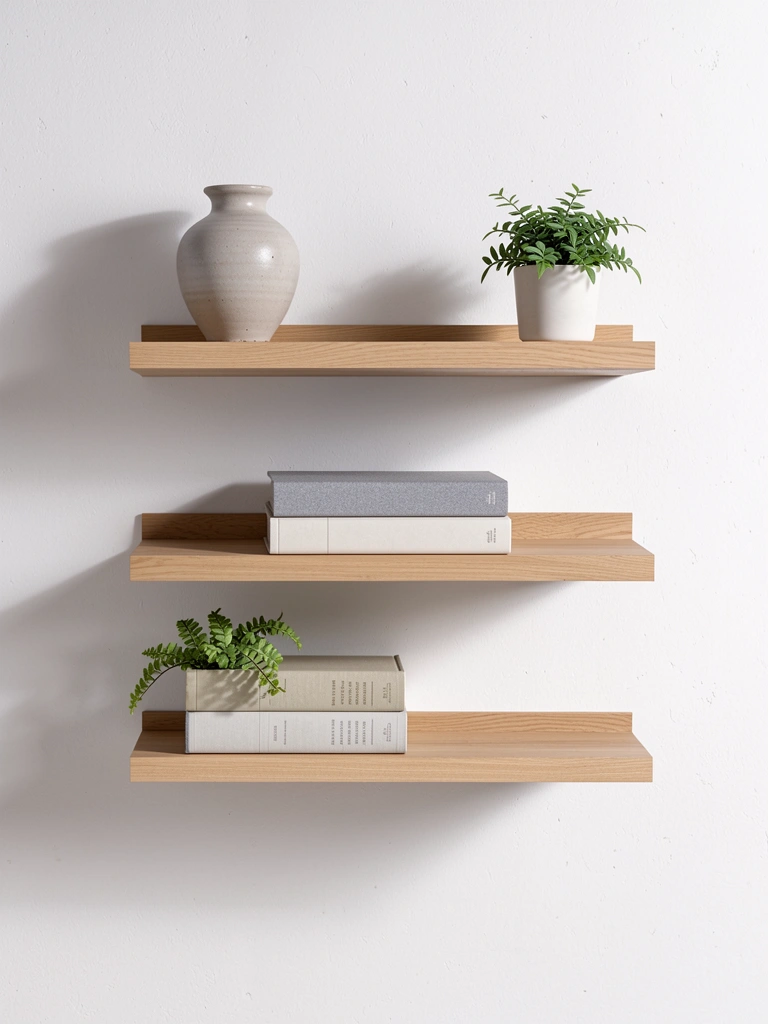
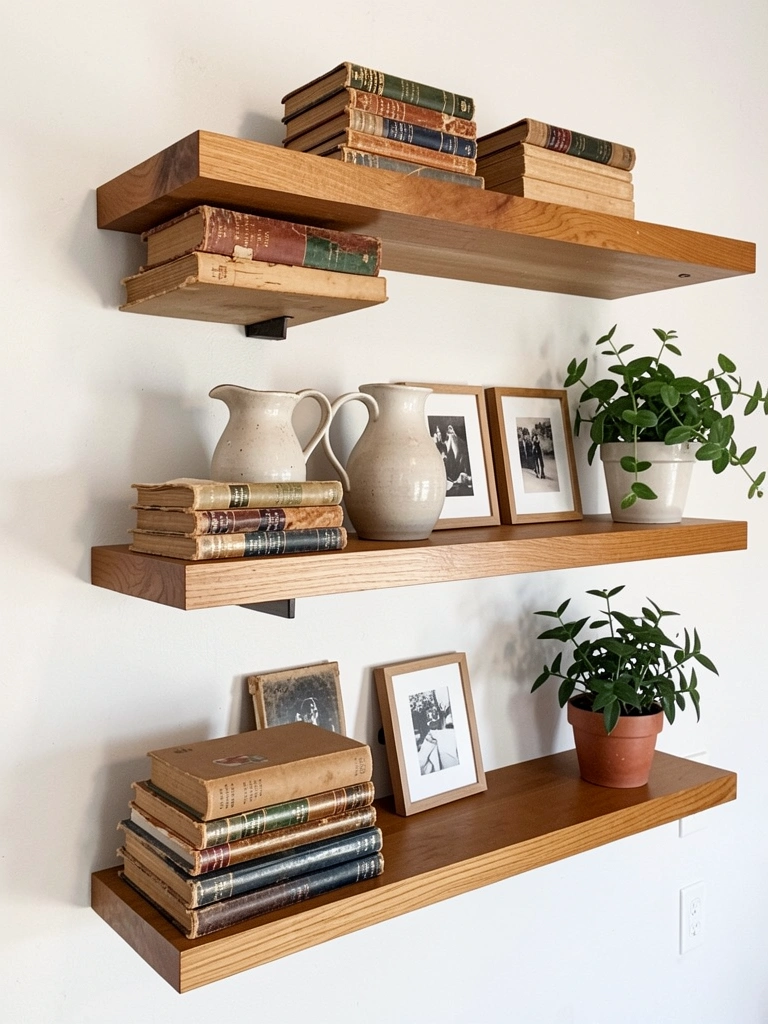
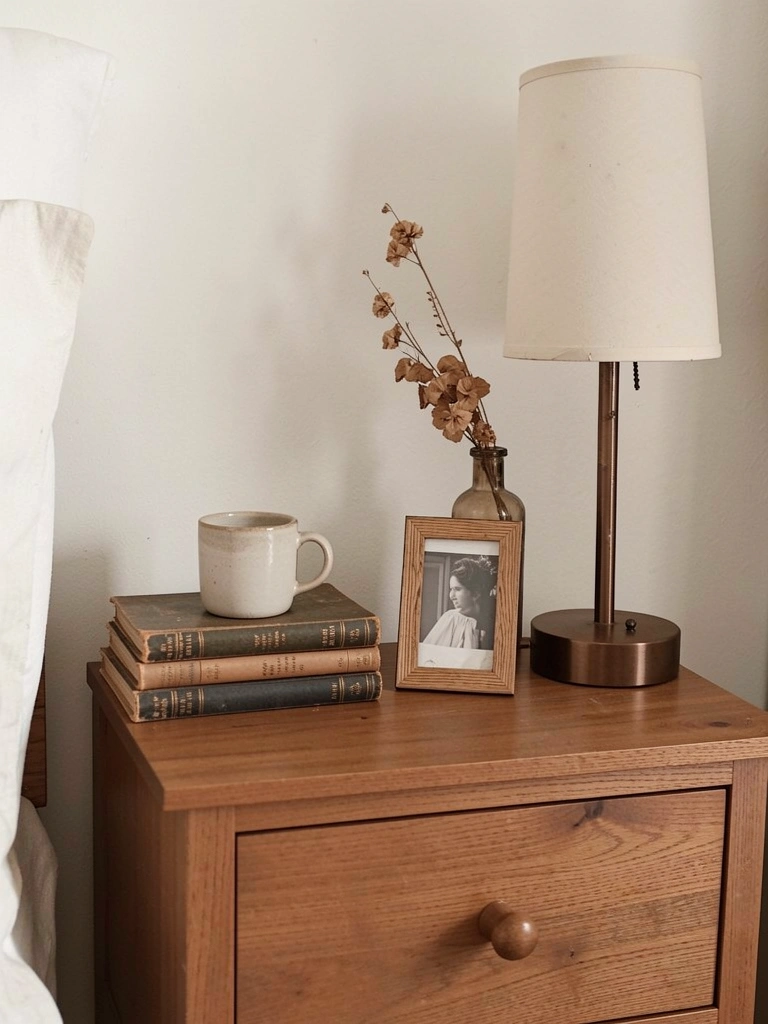
    2. Install Floating Shelves Above the Nightstand

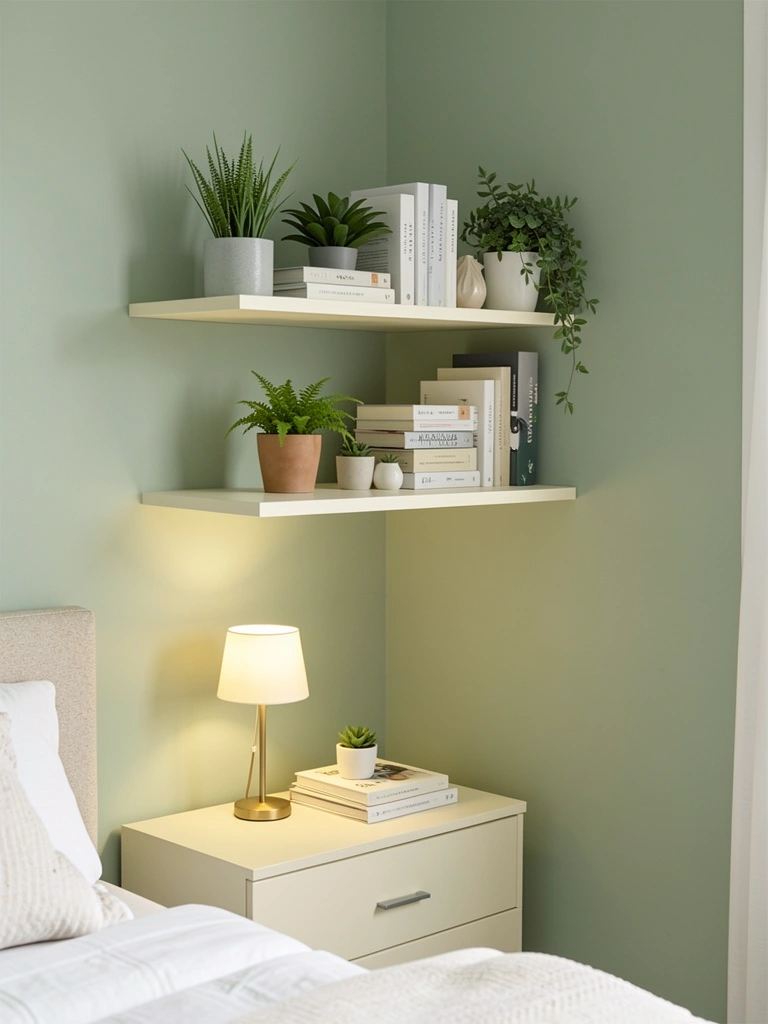
    Nightstands take up floor space you probably don’t have. Floating shelves give you storage and styling without the bulk, and they’re a renter-friendly alternative to traditional furniture.

    Install two shelves at different heights above your bed’s headboard area or alongside it ($20–$80 for shelves plus installation hardware). Use the lower shelf for a reading lamp and the upper one for books, small plants, or a framed photo. This vertical approach pulls the eye upward, making ceilings feel higher.

    Look for shallow shelves (8–10 inches deep) at IKEA, Target, or Wayfair. If you’re renting, use damage-free adhesive shelves ($15–$30) instead of drilling.

    Add decorative items mindfully—too much clutter defeats the purpose. Stick to five or fewer objects per shelf.

    Your bedroom gains storage and visual interest without consuming precious floor real estate.


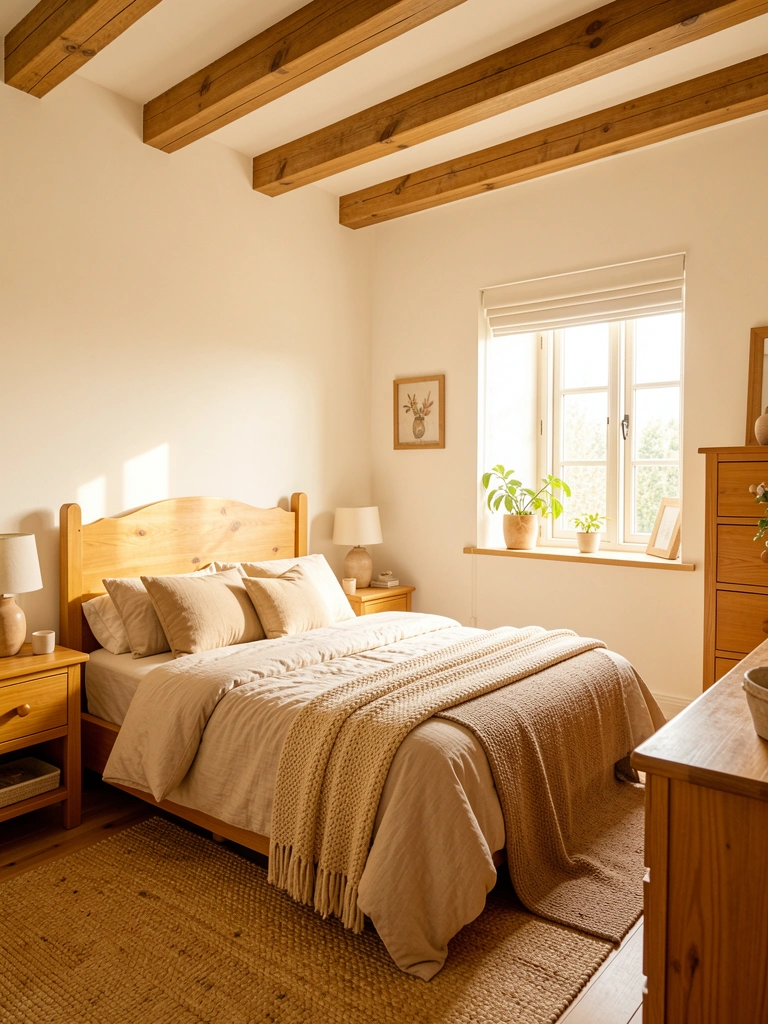
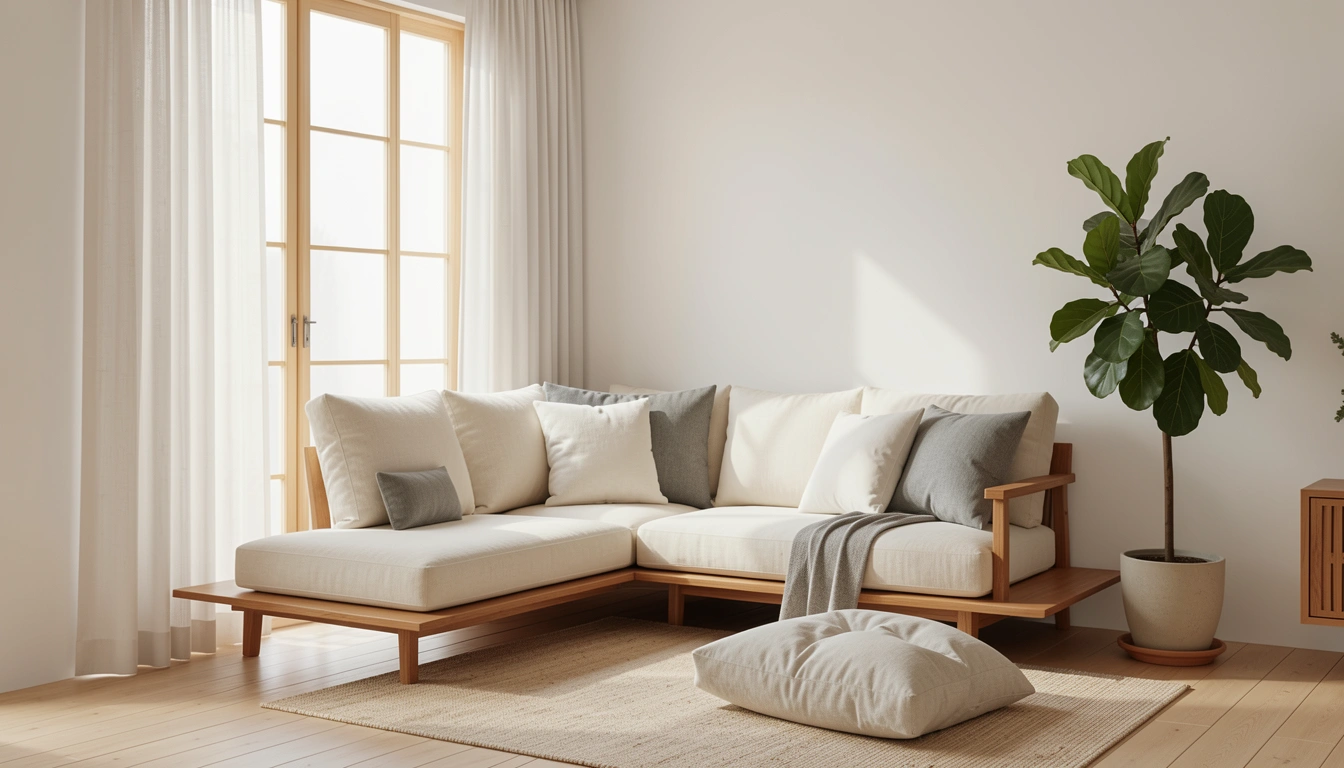
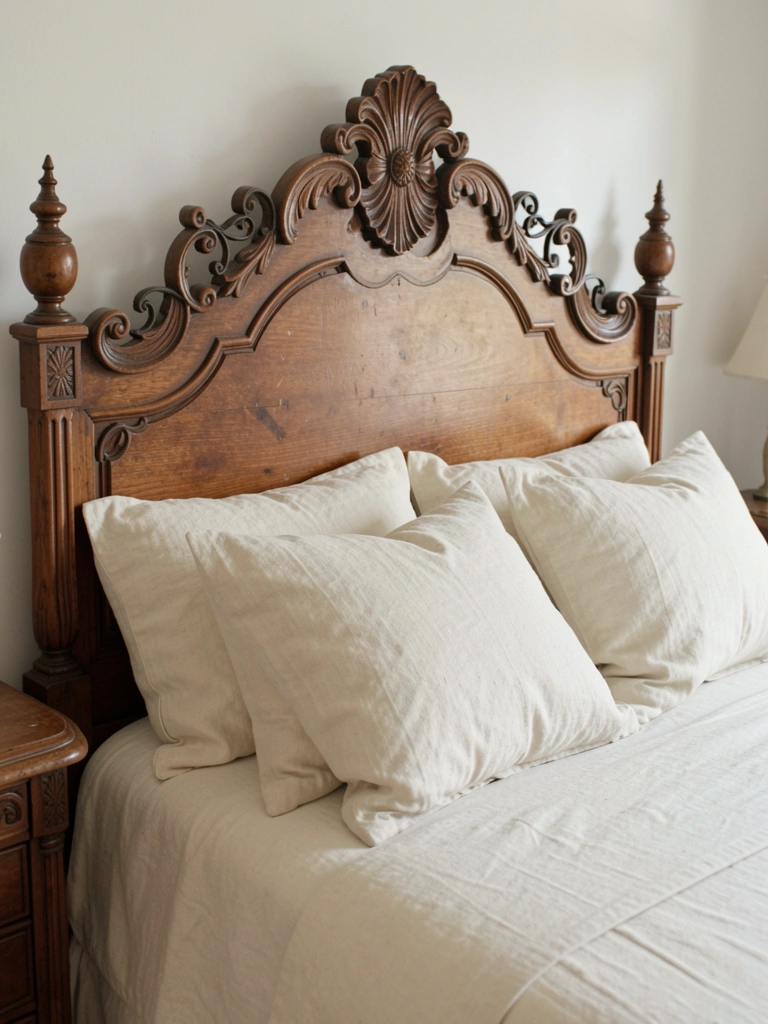
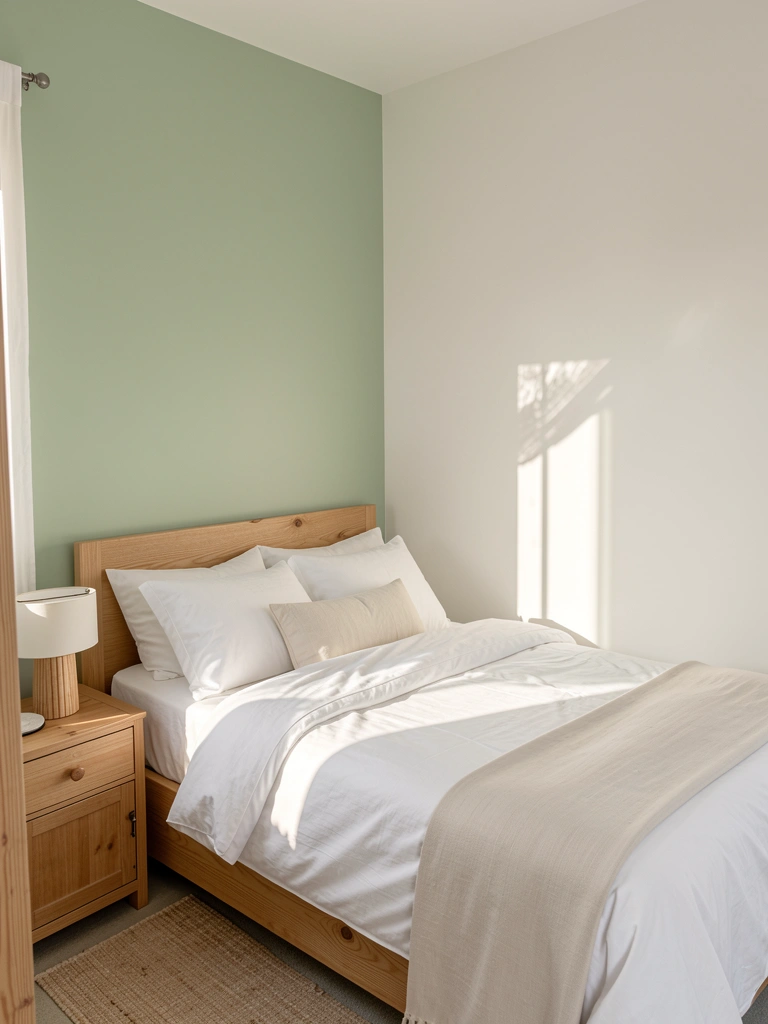
    3. Choose a Low-Profile Platform Bed

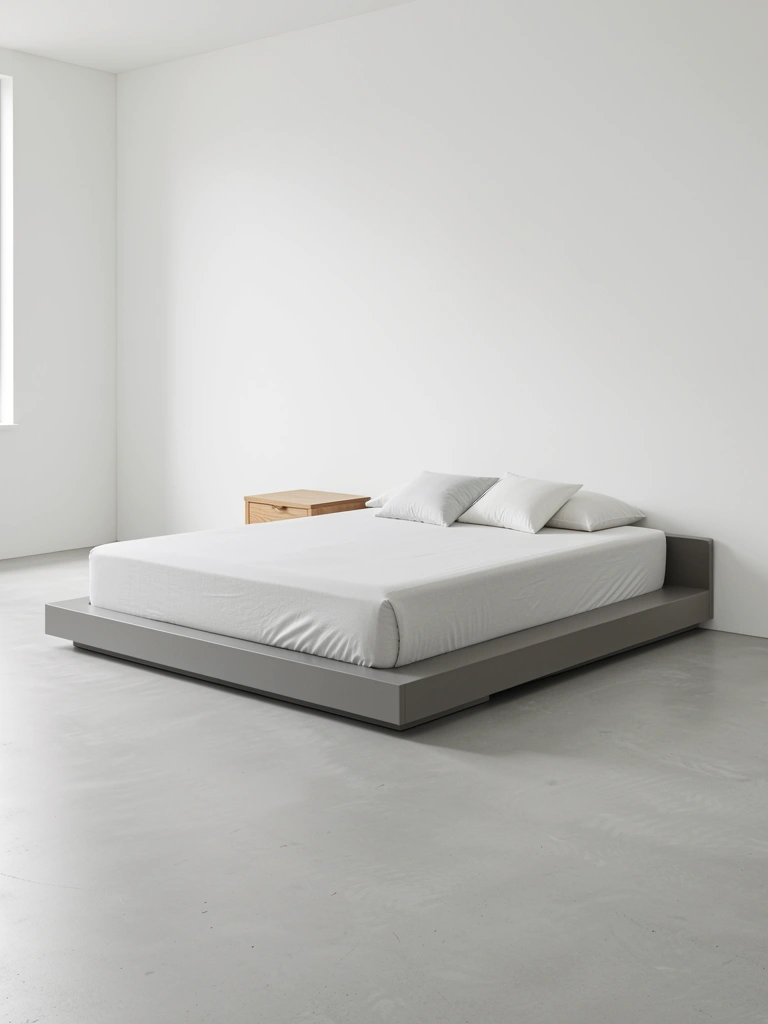
    Platform beds with minimal legs or no legs at all create a sense of spaciousness because you can see the floor underneath. They’re also perfect anchors for 2025’s organic modernism trend with their clean, grounded aesthetic.

    Invest in a quality platform bed ($300–$800) from brands like Article, West Elm, or Wayfair. Solid wood or curved headboards align with trending natural materials and organic shapes. The lower visual mass makes even a 10×12 room feel less cramped.

    Skip the box spring entirely—platform beds don’t need one. This saves money and floor space.

    Pair it with low nightstands (under 24 inches tall) to maintain the airy feel throughout the space.

    The open floor plane around your bed makes the room feel significantly more open and easier to clean.


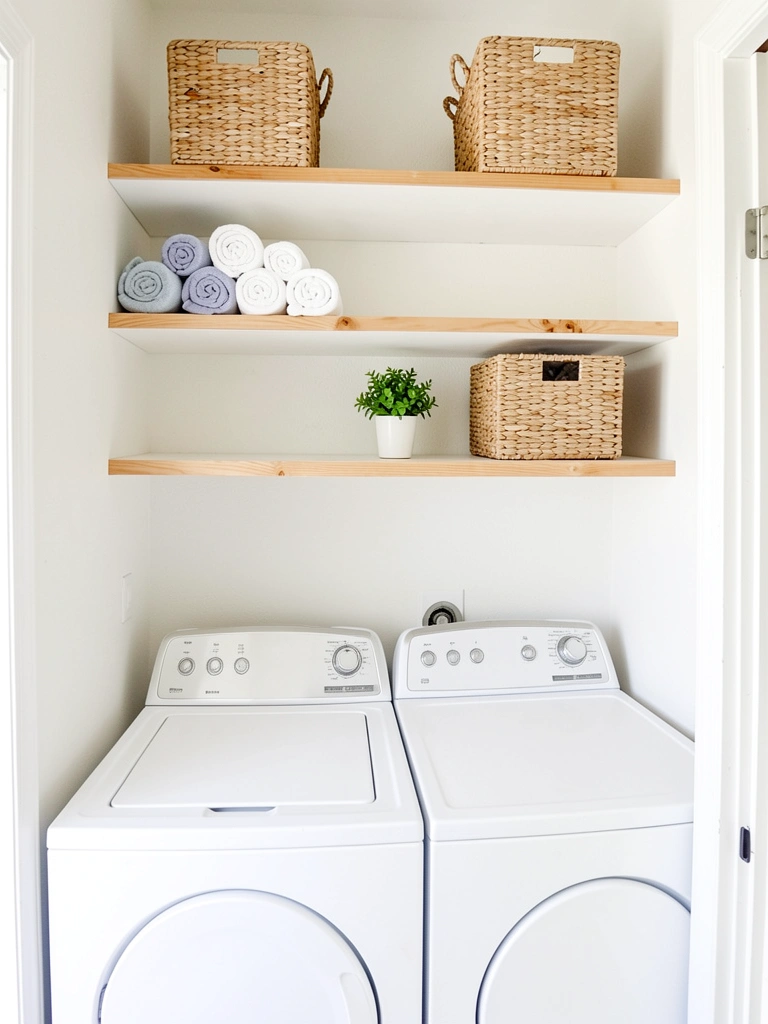
    4. Use Corner Shelving Units for Dead Space

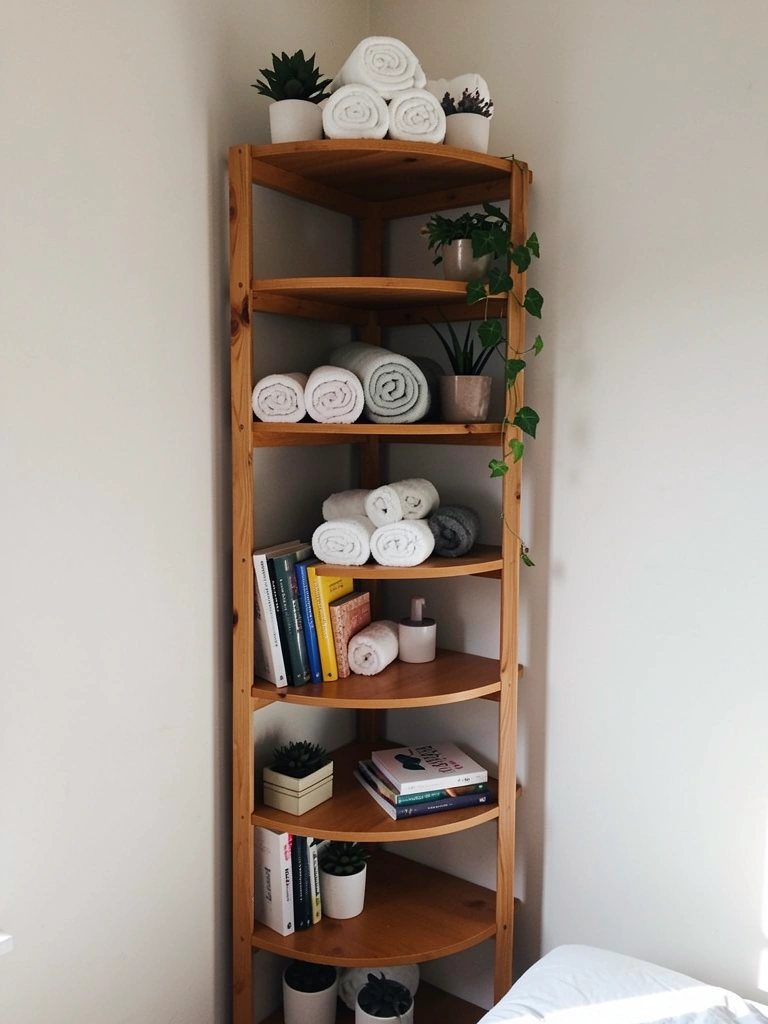
    Bedroom corners are easy to ignore, but they’re valuable real estate. Corner shelving units ($50–$200) utilize that awkward angle without taking up floor square footage anywhere else.

    Choose a narrow unit (12–18 inches wide) to maintain walkways. Stack rolled towels, display books, or position a small plant on each shelf to add height and life to the corner. Open shelving looks less heavy than closed storage in small spaces.

    Wood or metal options work well. Consider a DIY approach with floating corner shelves ($25–$60) if you’re handy and comfortable drilling into wall studs.

    Style with items you use regularly so it doesn’t become a forgotten dust collector.

    This smart use of dead space gives you storage without eating into your already-limited floor plan.


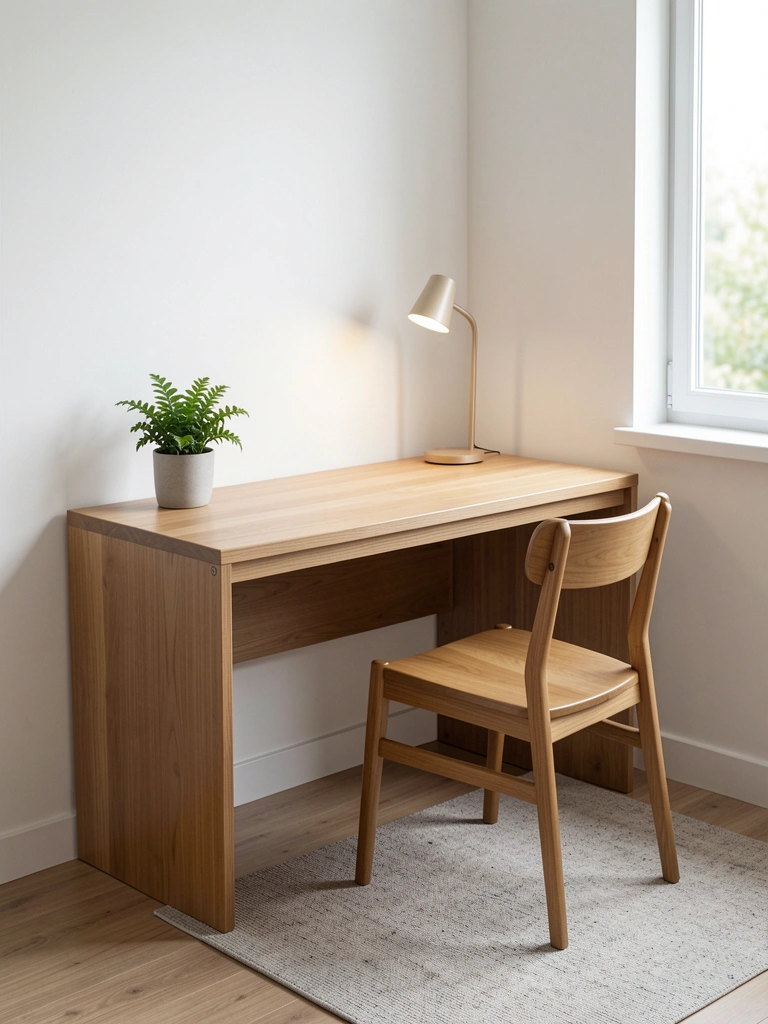
    5. Mount a Slim Desk Against One Wall

    If you work or study from home, a floating desk ($100–$300) against a wall gives you function without dominating the room. Mount it at standard desk height (28–30 inches) and tuck a slim chair underneath when you’re not using it.

    Look for desks 36–48 inches wide and 18–20 inches deep on Wayfair, IKEA, or Amazon. Pair with floating shelves above for supplies and décor. This setup keeps visual clutter contained to one wall.

    Cable management matters in small spaces. Use adhesive clips ($8–$15) or a wall-mounted cable box ($15–$30) to keep cords invisible.

    When paired with a chair that slides under the desk, you reclaim square footage instantly during off-hours.

    You get a dedicated workspace without sacrificing bedroom breathing room.


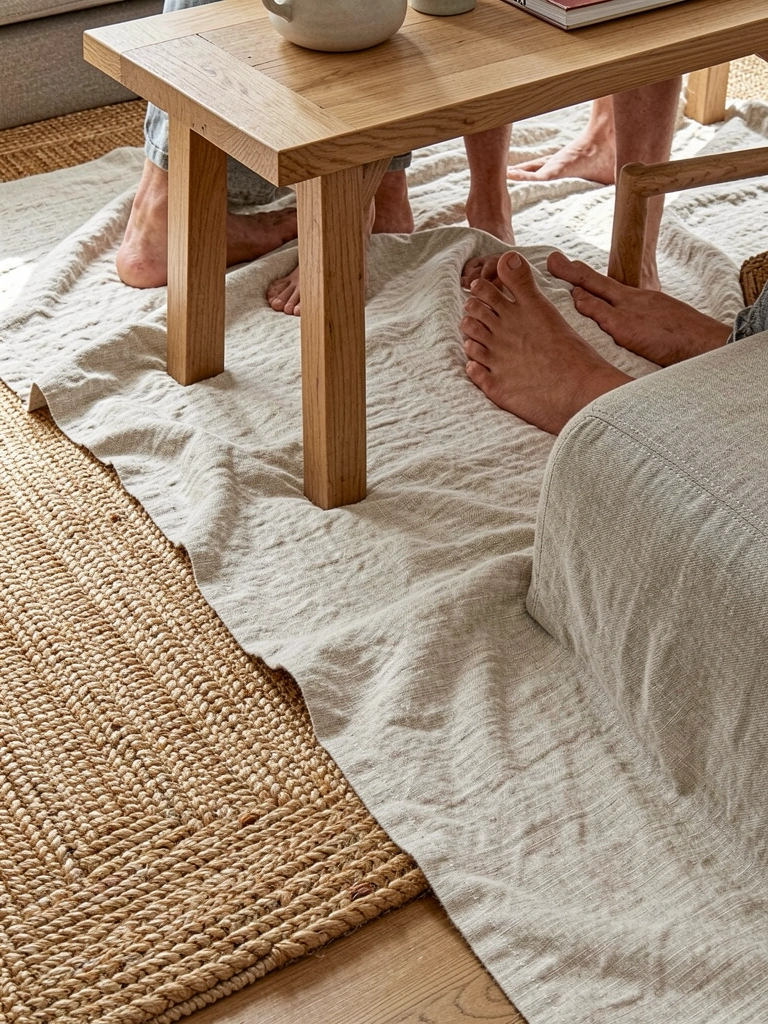
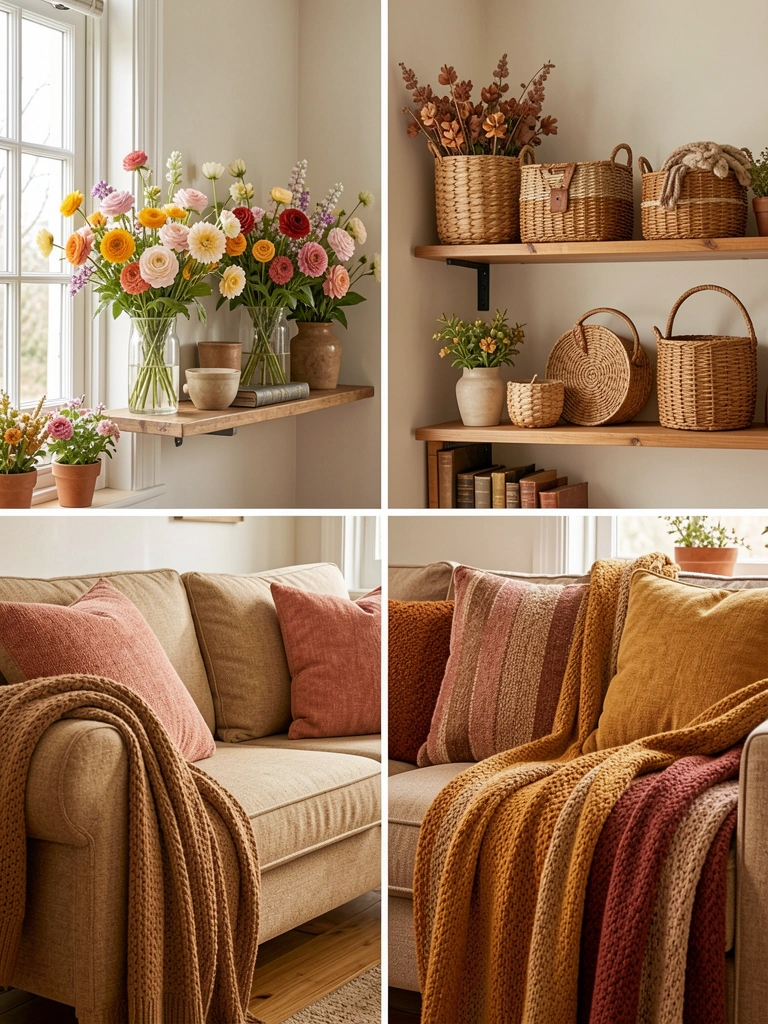
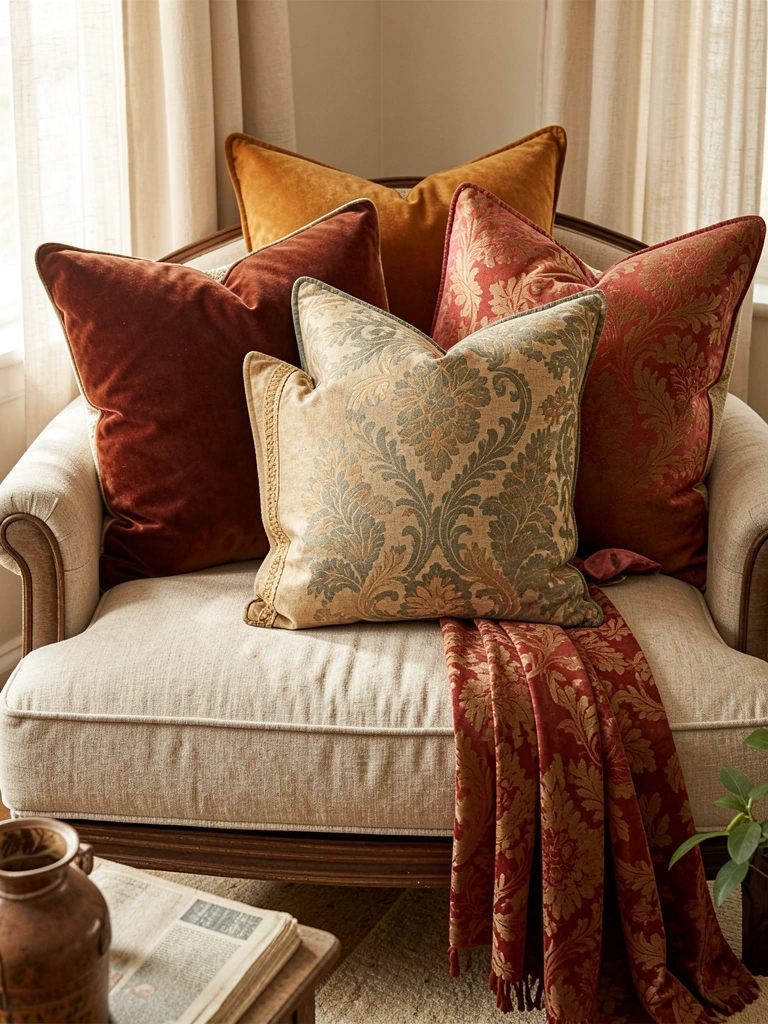
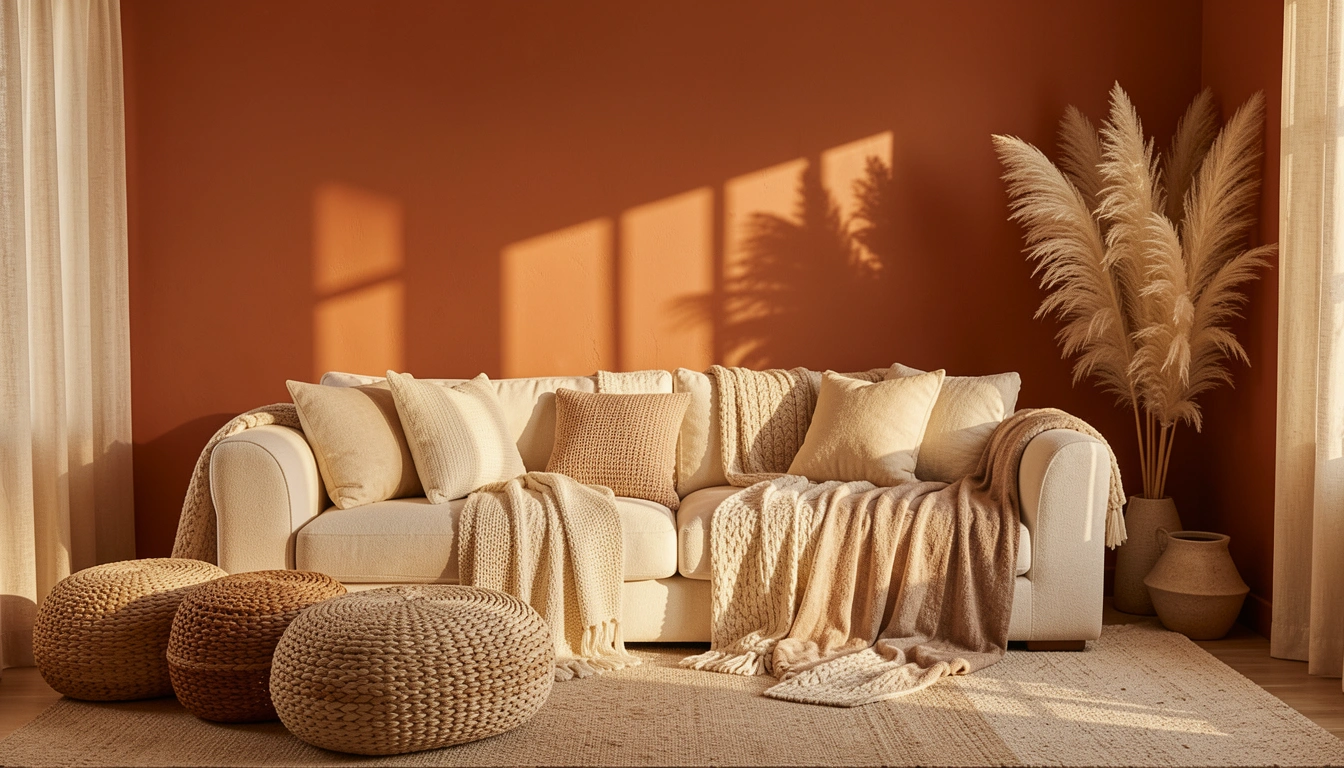
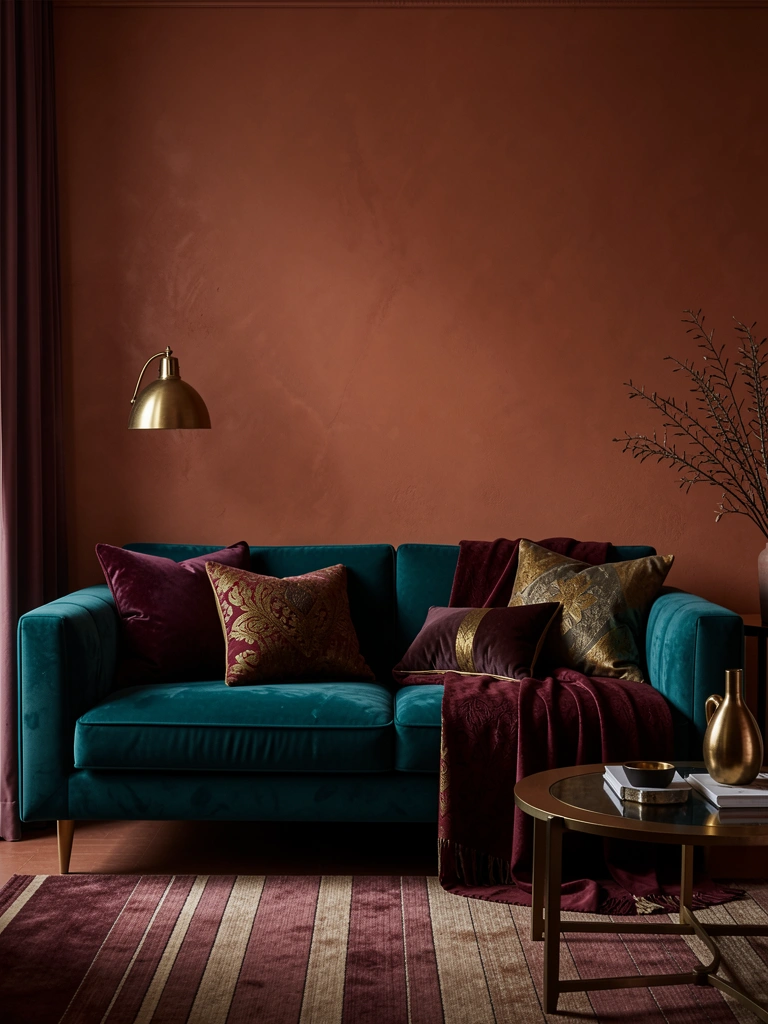
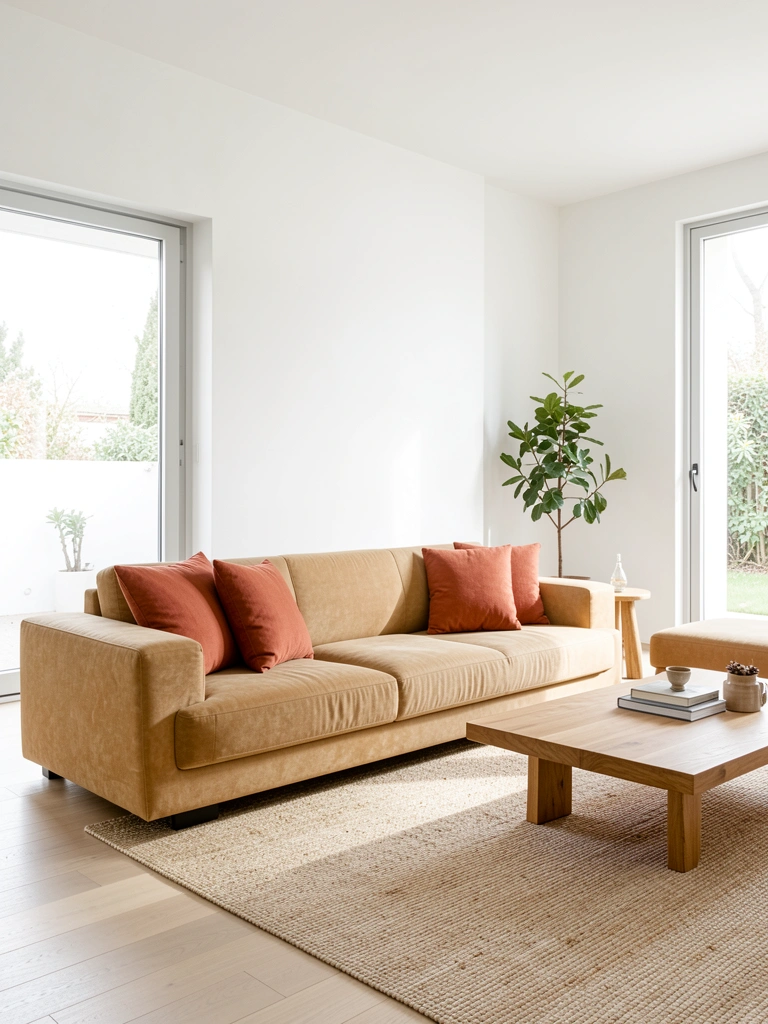
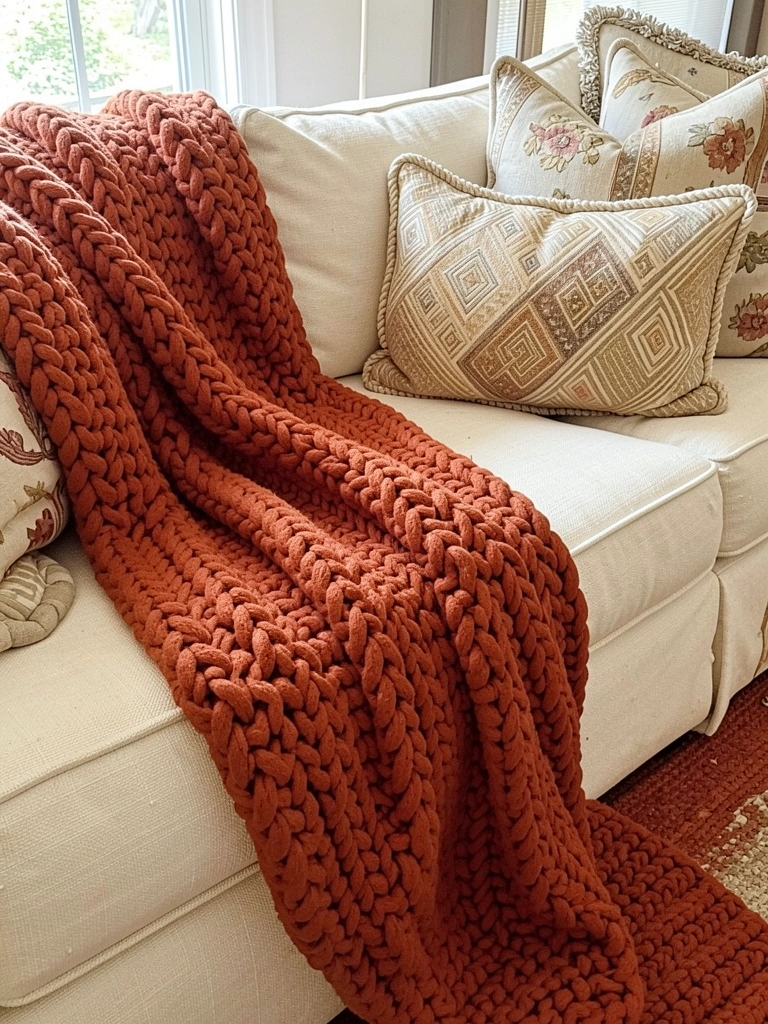
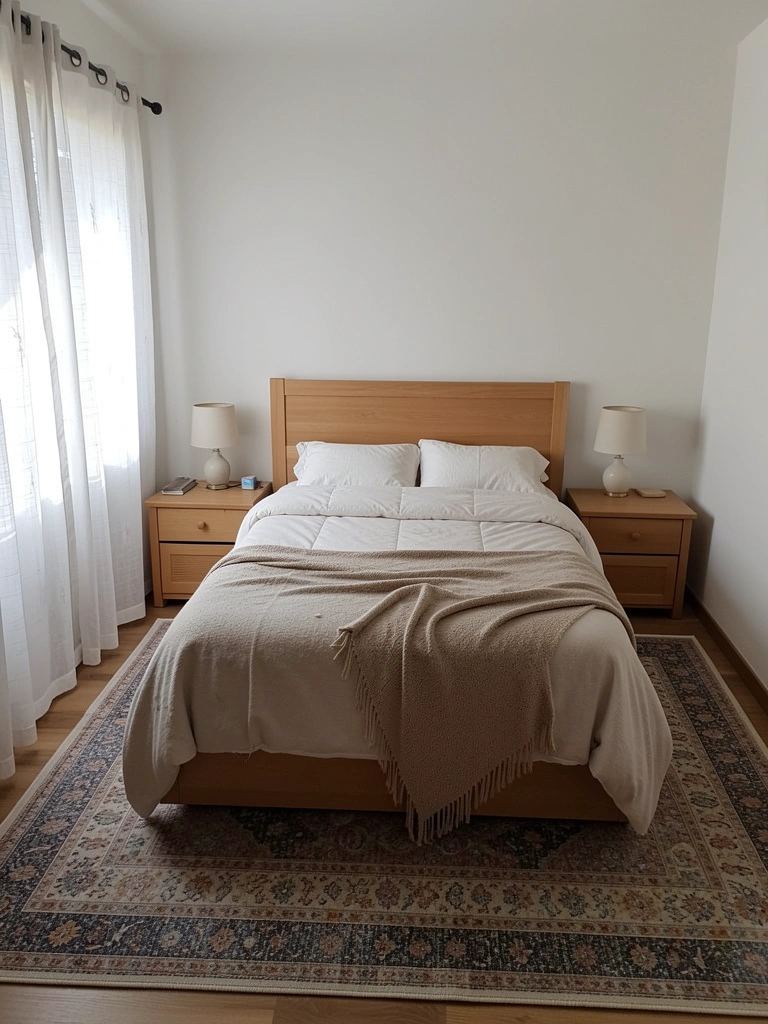
    6. Layer Textured Rugs for Warmth and Dimension

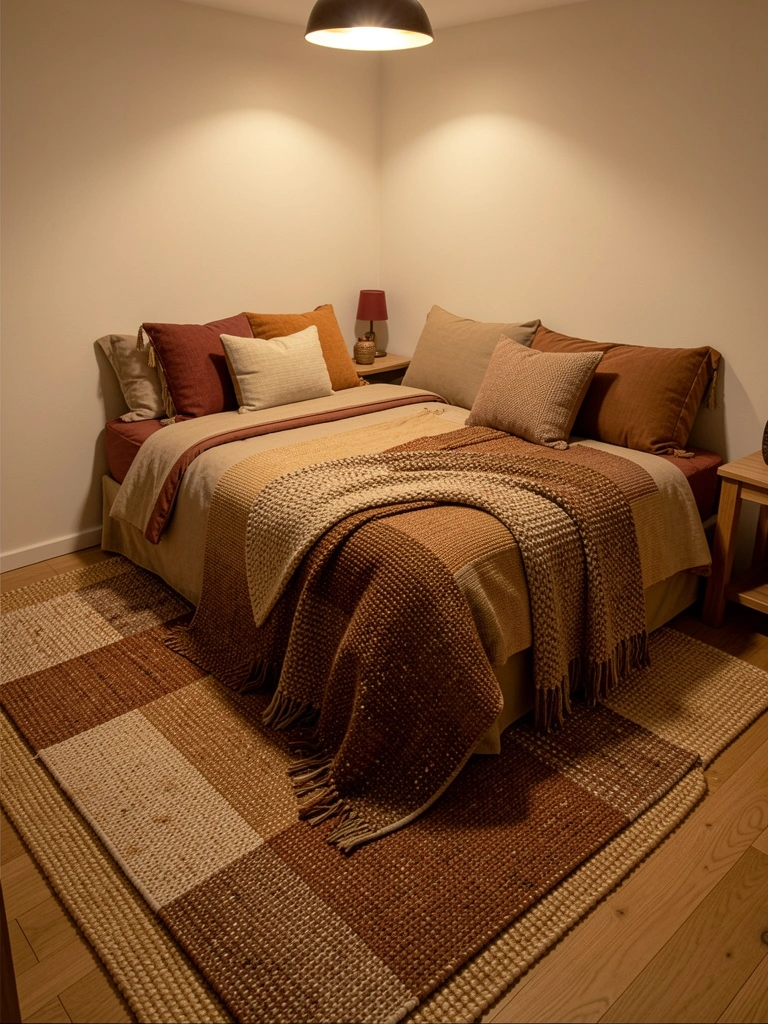
    Textured rugs bring 2025’s tactile warmth trend into play while defining zones in a compact layout. Layering rugs adds visual interest and makes the space feel more intentional and cozy.

    Start with a jute or natural fiber base rug ($100–$250 for a 5×8) in a neutral tone. Layer a smaller wool or flatweave rug on top ($80–$200) in a complementary shade or subtle pattern. This combination creates depth and softness underfoot.

    Shopping tip: anchor the bed’s foot end with the layered rugs. It visually grounds the bed and creates a small sitting area if space allows.

    Real talk—layered rugs do require more vacuuming, but the warmth and design payoff is worth it.

    Your bedroom feels more curated and inviting, and the textures make it read as a refined retreat rather than just a sleeping space.


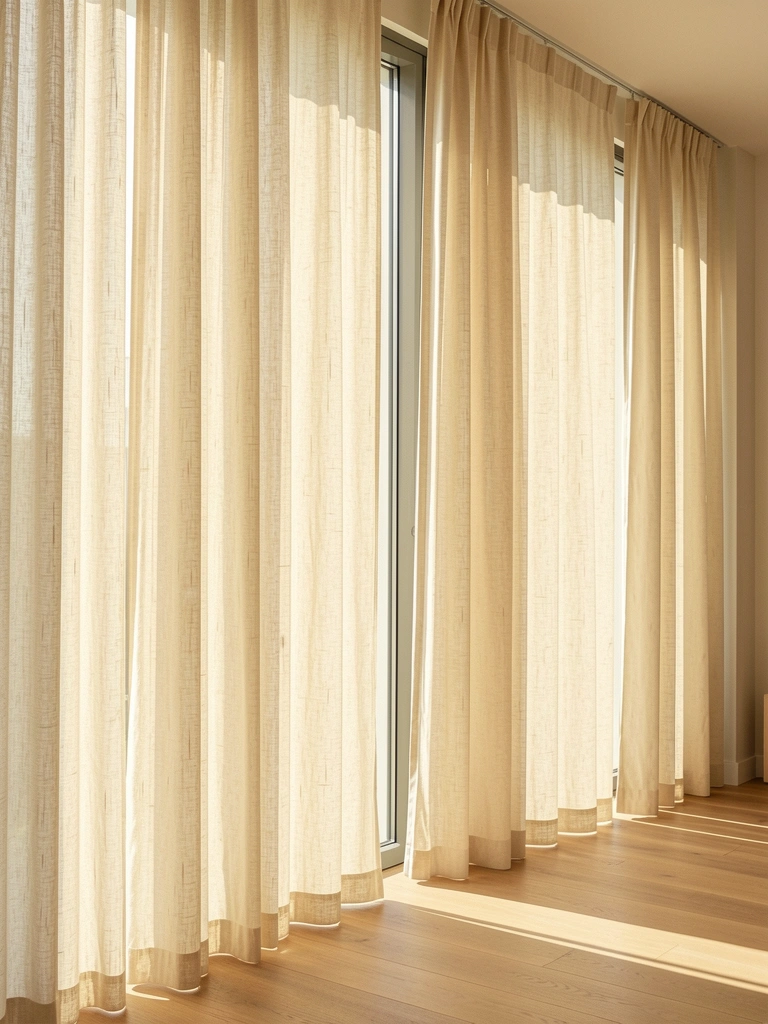
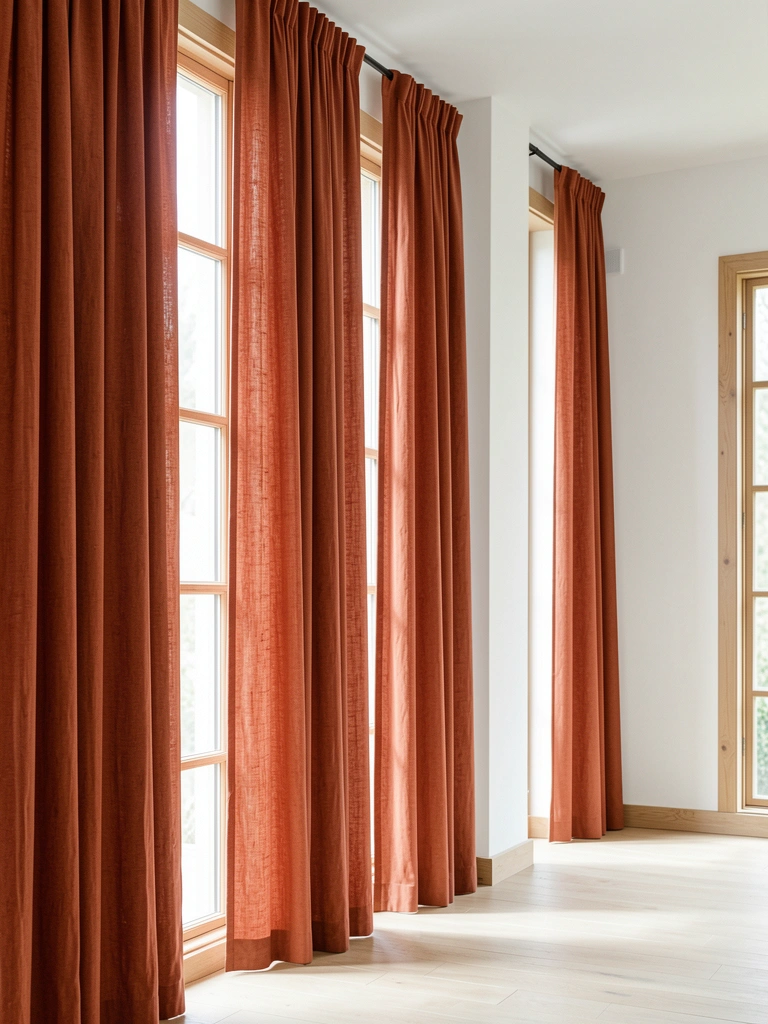
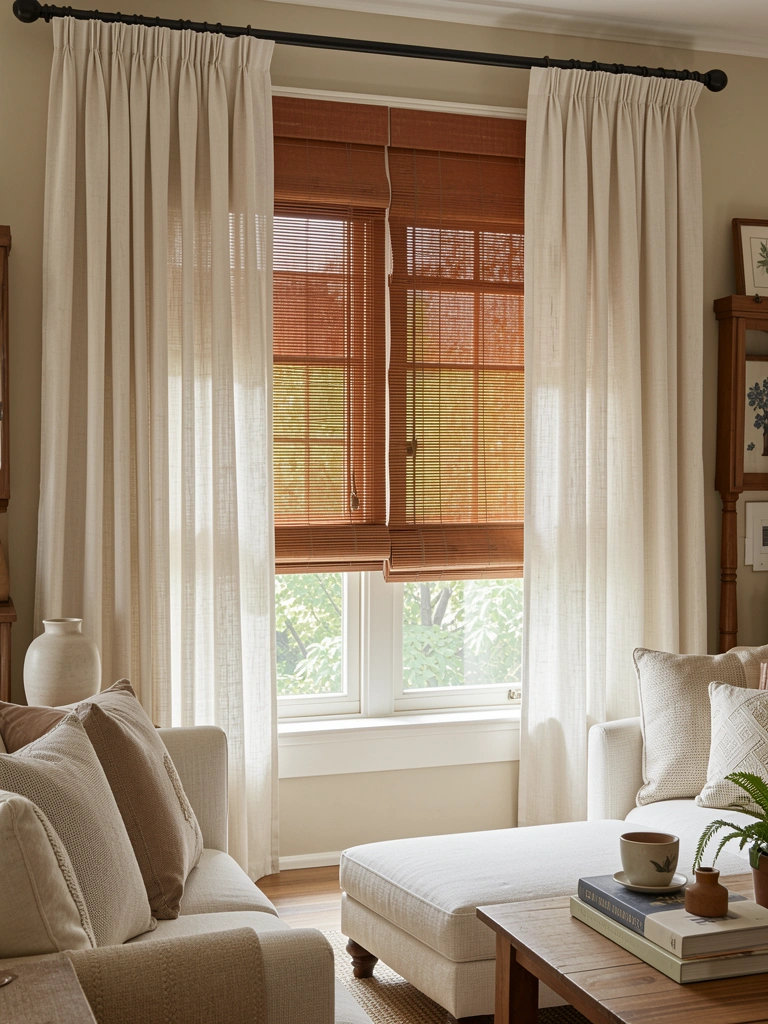
    7. Install a Ceiling-Mounted Curtain Rod

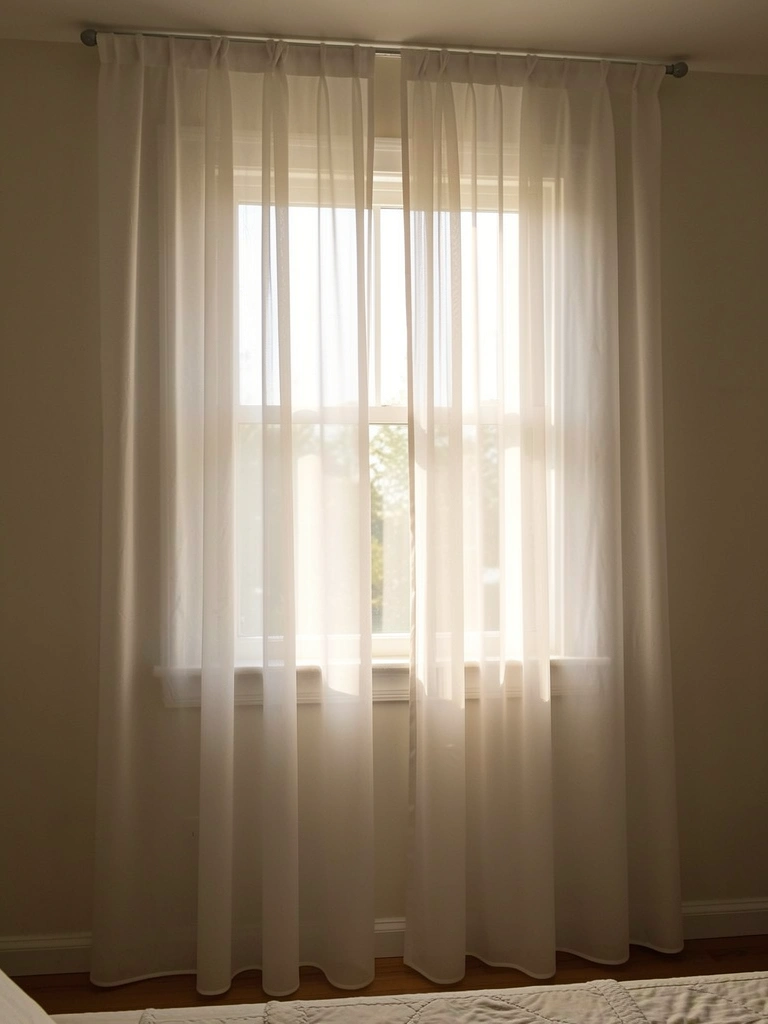
    Hanging curtains all the way from ceiling to floor creates instant luxury and makes ceilings look higher—a visual hack every small room needs. This aligns perfectly with 2025’s floor-to-ceiling curtain trend.

    Mount your curtain rod as close to the ceiling as possible ($15–$40 for rod and brackets). Hang lightweight fabric—sheers, linen blends, or cotton—that filters light softly without adding visual weight ($40–$120 per panel). Let the curtains just kiss the floor for drama.

    Measure twice before drilling. If you’re renting, ask your landlord or use adhesive-backed temporary rods ($30–$60).

    Avoid heavy velvet or blackout curtains in small rooms unless paired with sheer layers.

    The vertical line draws the eye upward and makes your entire room feel more expansive and serene.


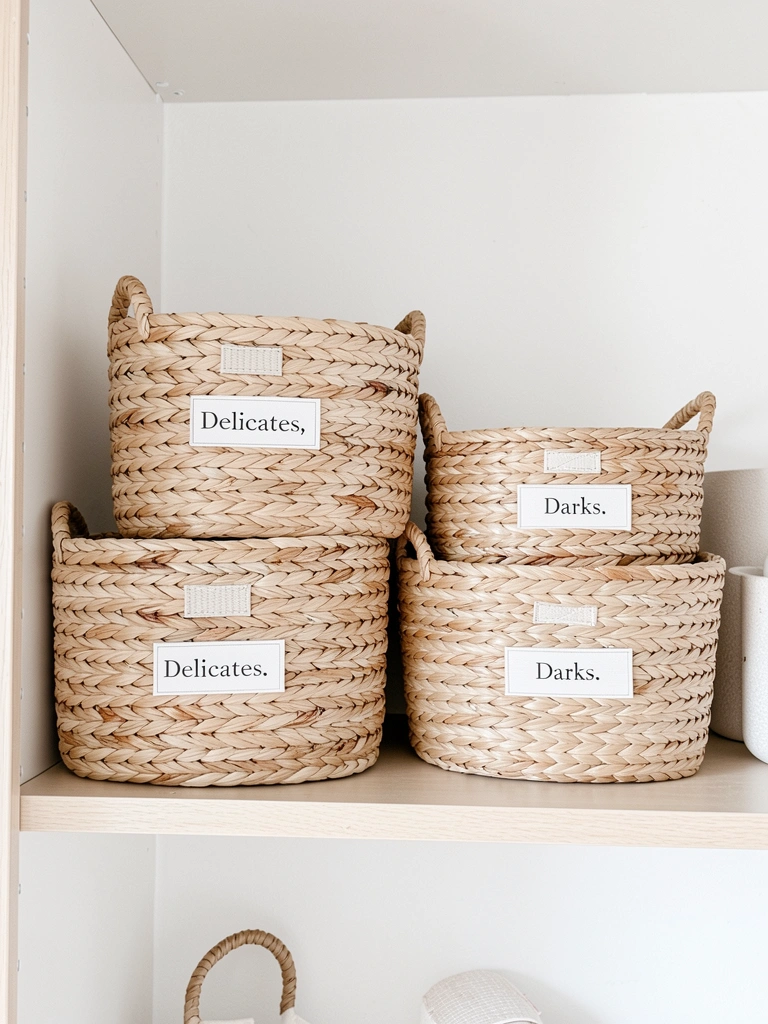
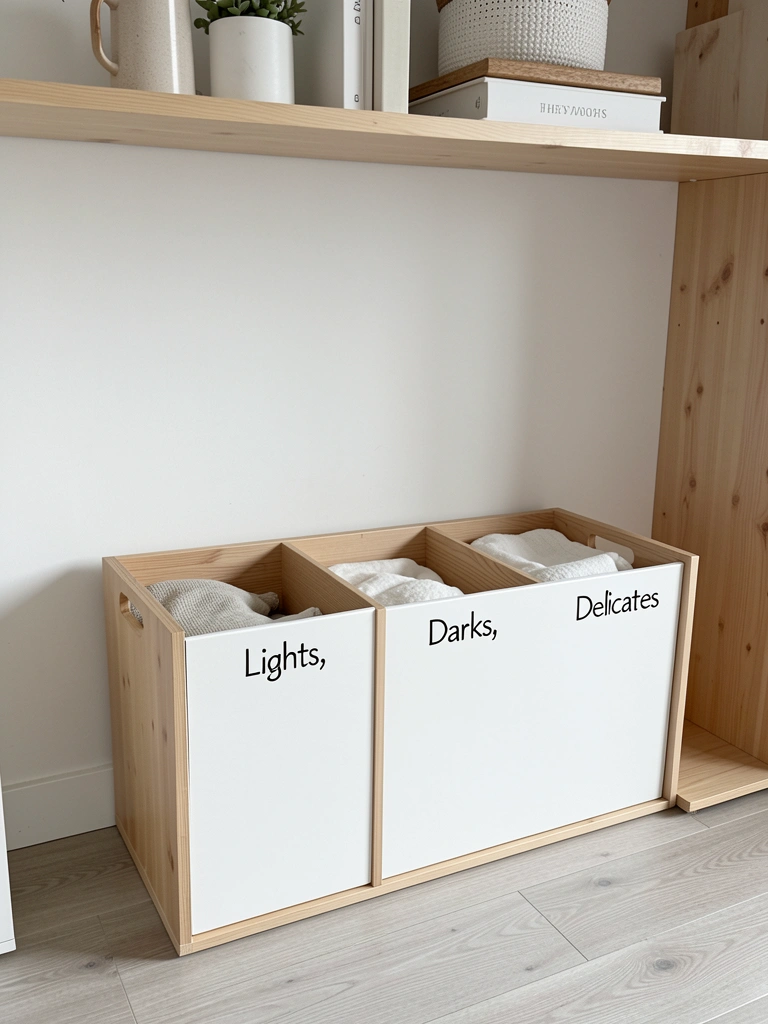
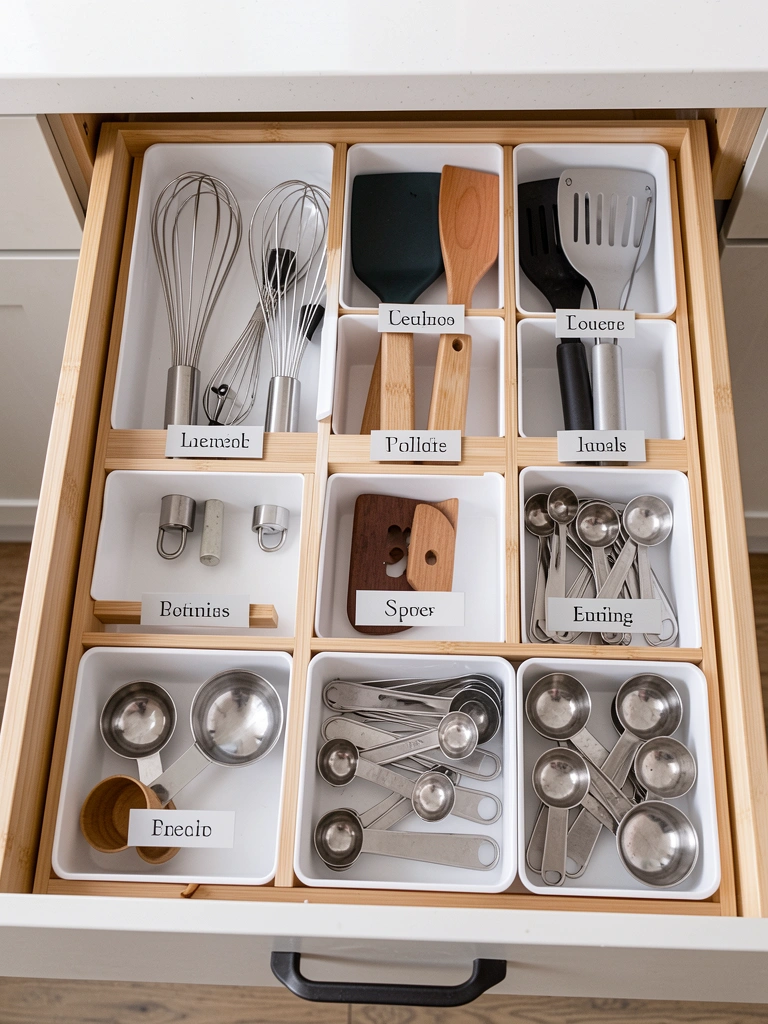
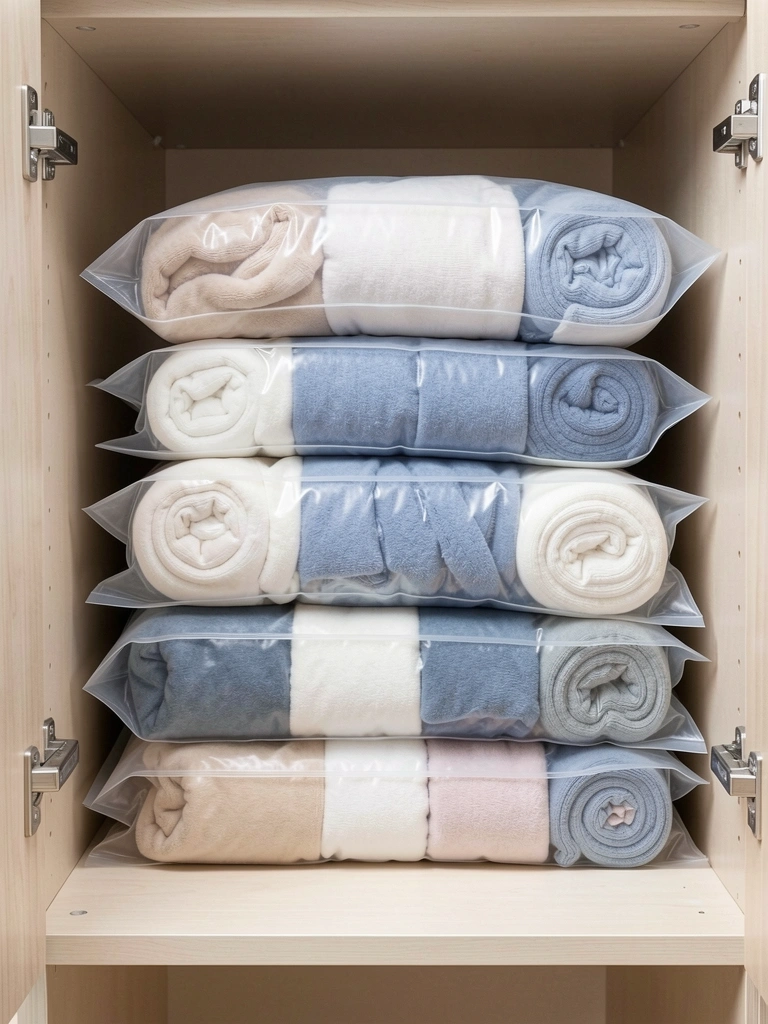
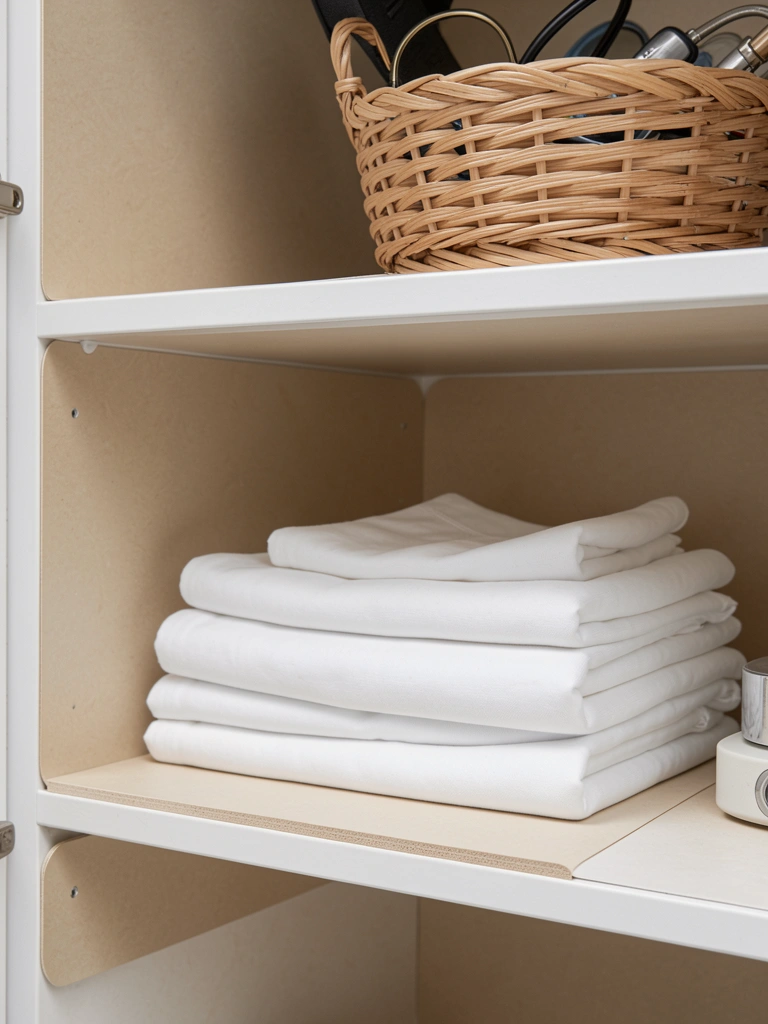
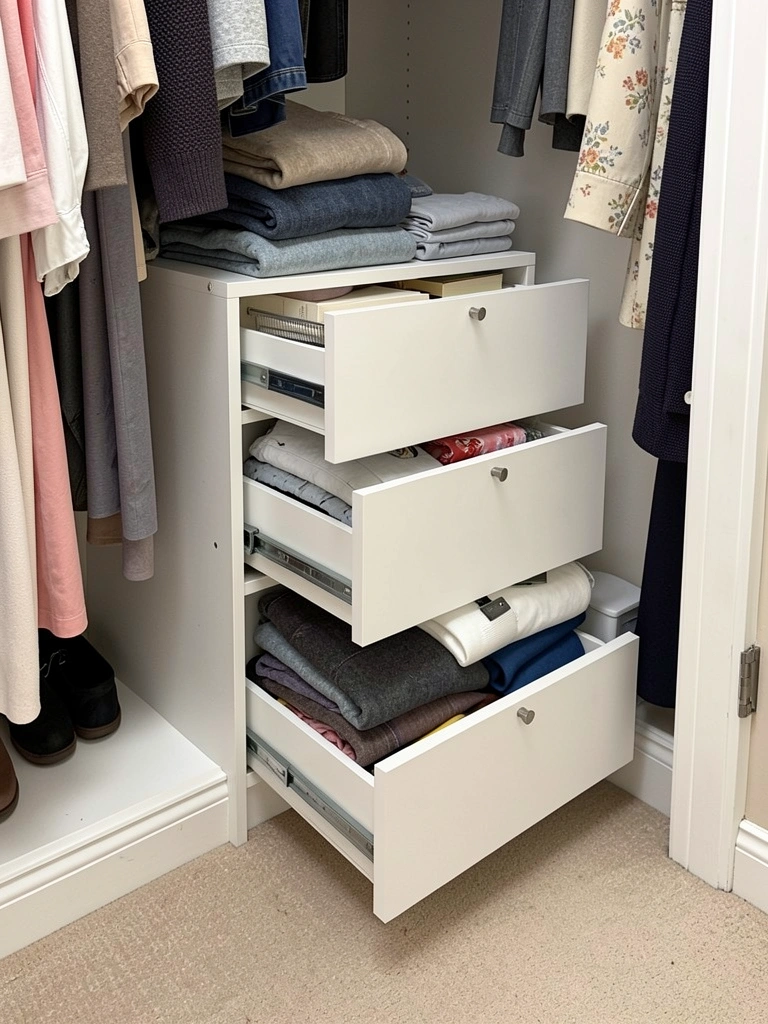
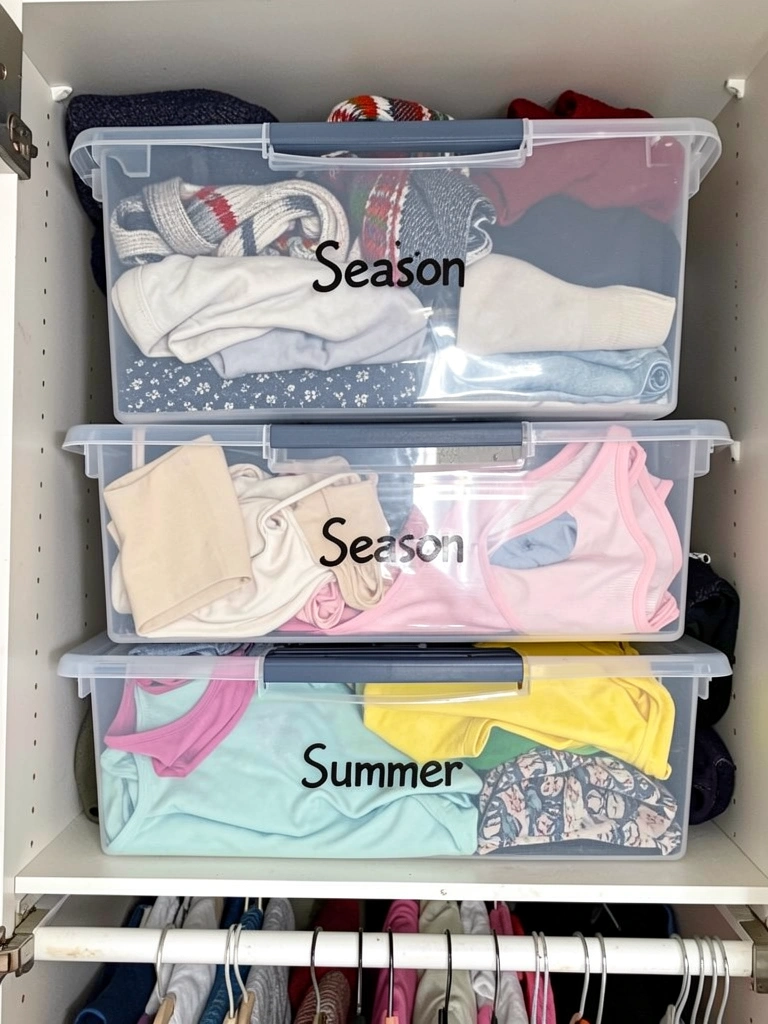
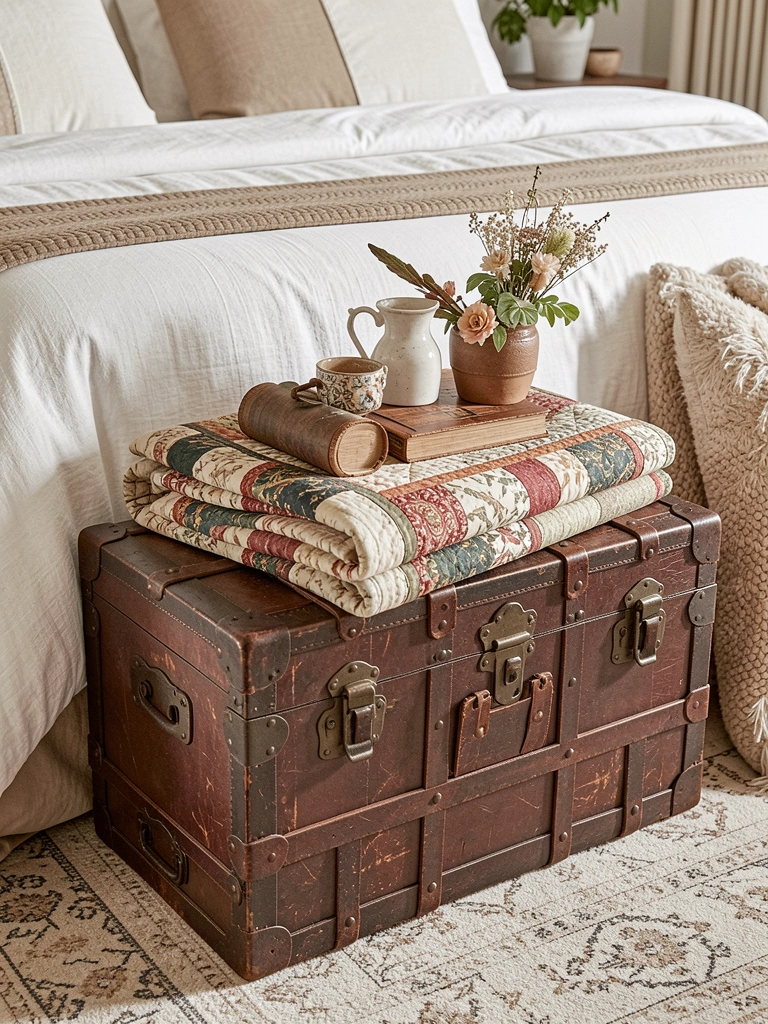
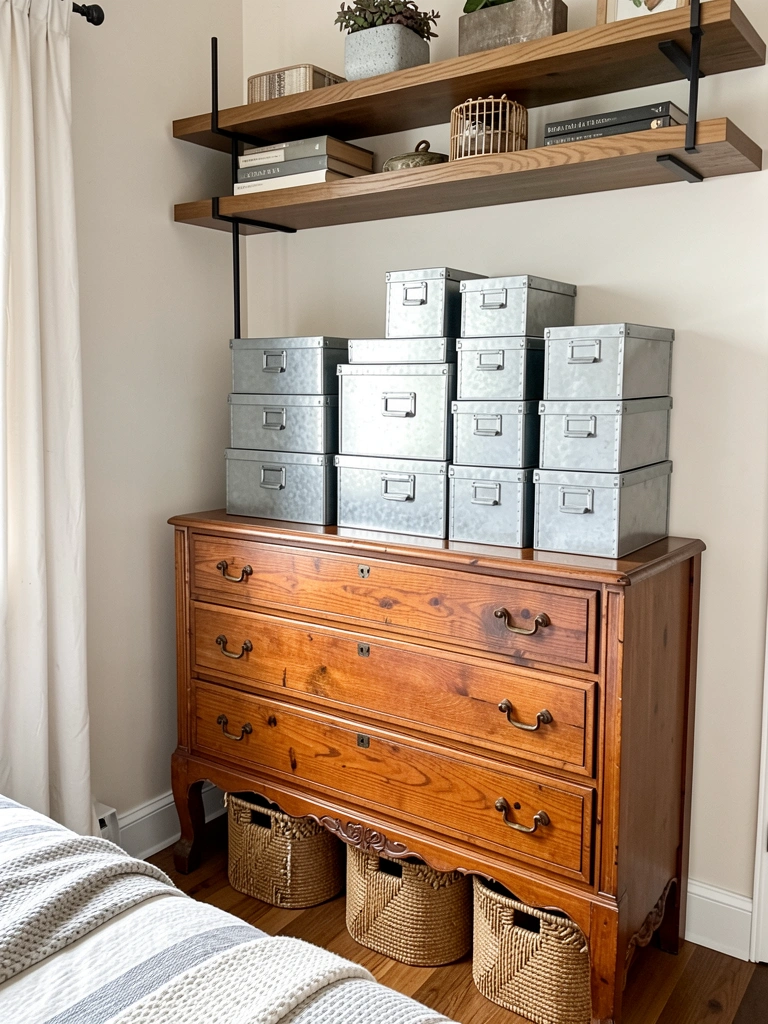
    8. Use Under-Bed Storage Containers

    Under-bed storage is a small room’s best friend. Clear or soft-colored containers ($15–$50 each) let you see contents without opening them, which speeds up finding what you need and maintains the room’s calm aesthetic.

    Measure the clearance under your bed (platform beds work best for this). Flat storage containers (4–6 inches tall) fit neatly and hold off-season clothing, extra bedding, or sentimental items. Rolling containers ($20–$40) make access even easier.

    Label them for quick identification. Choose neutral colors (cream, gray, natural wood tones) to keep visual noise down.

    Pro tip: rotate seasonal items quarterly so you’re not storing summer clothes during winter.

    You’ve essentially doubled your storage capacity without adding visible furniture to the room.


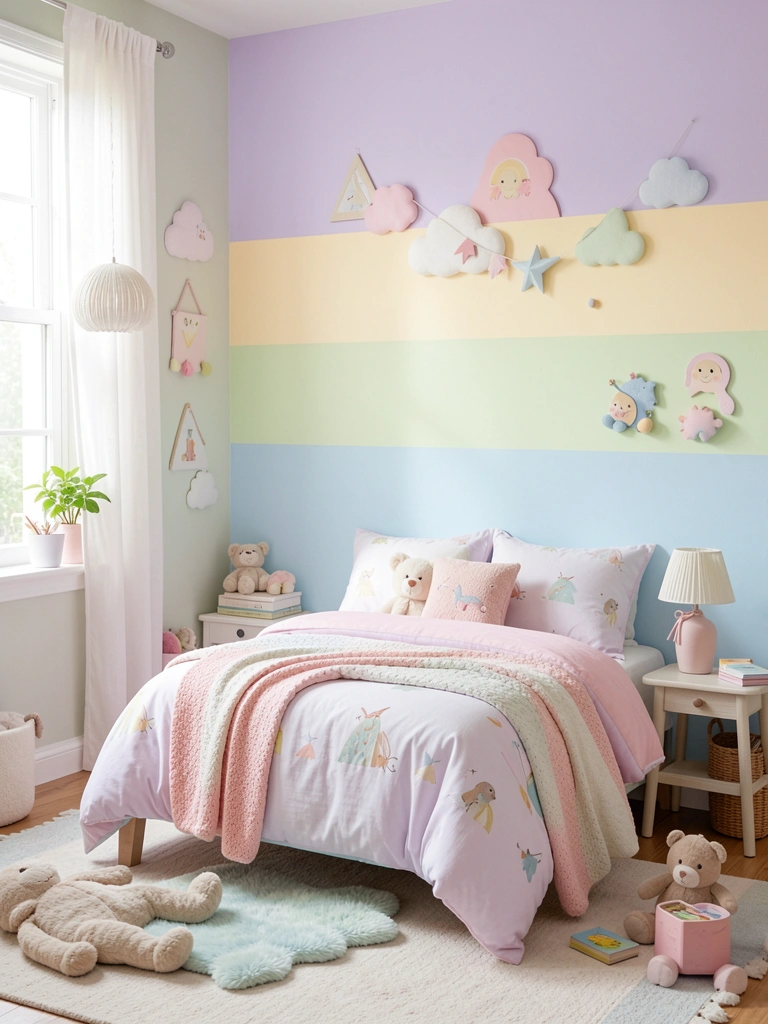
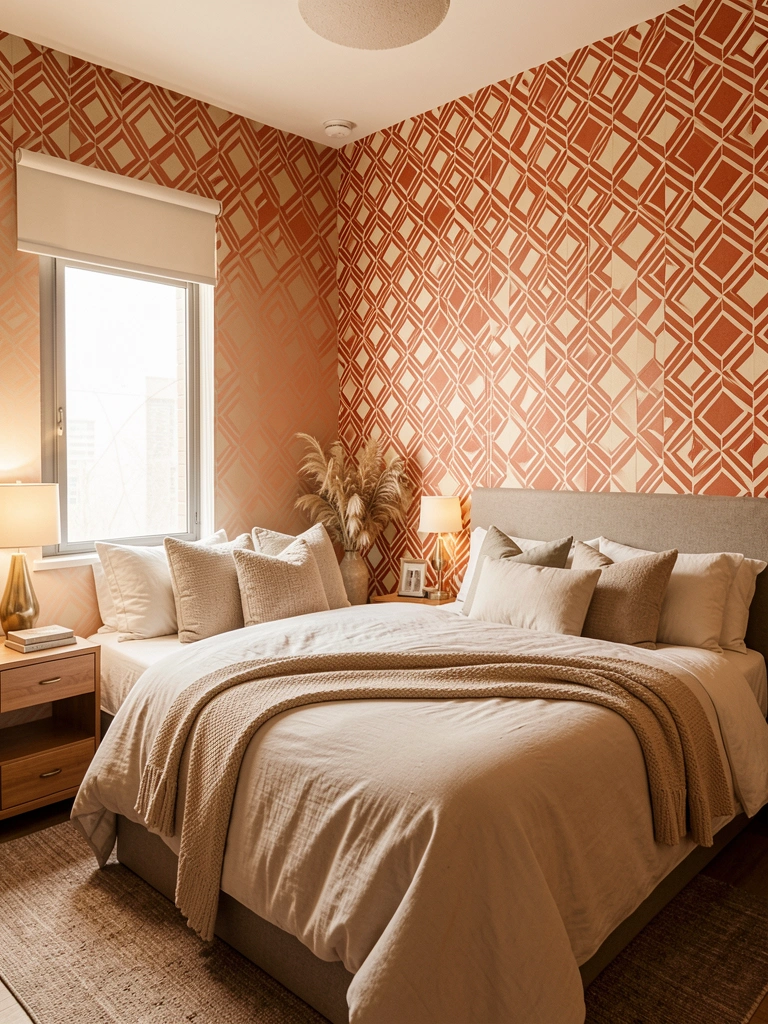
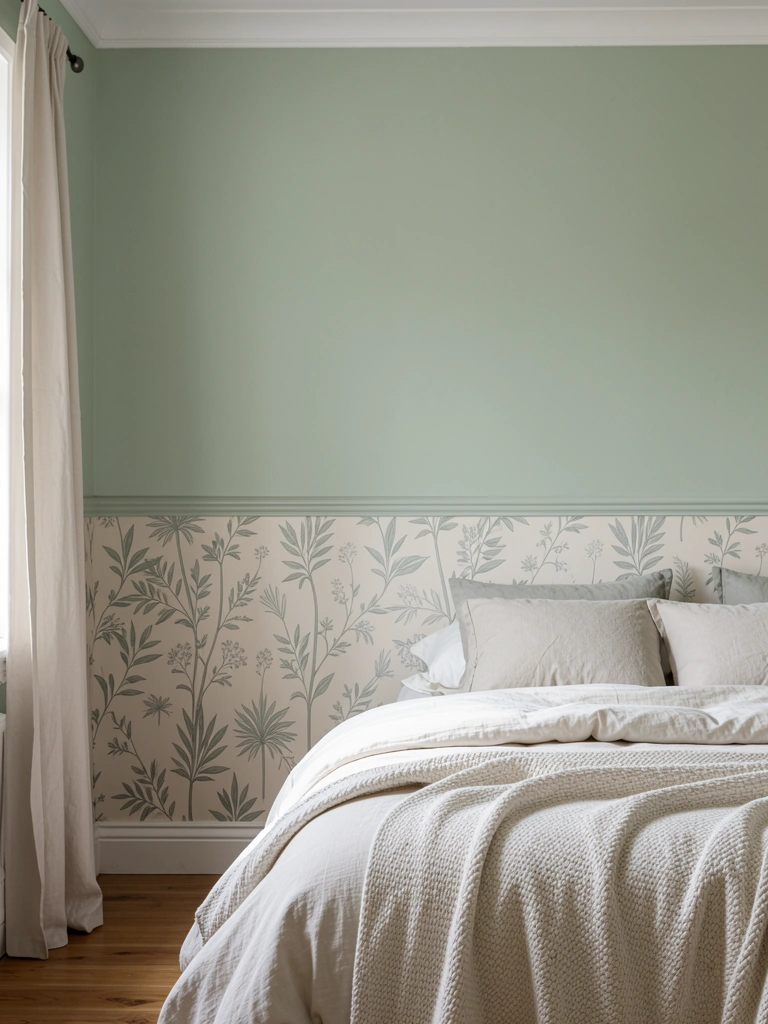
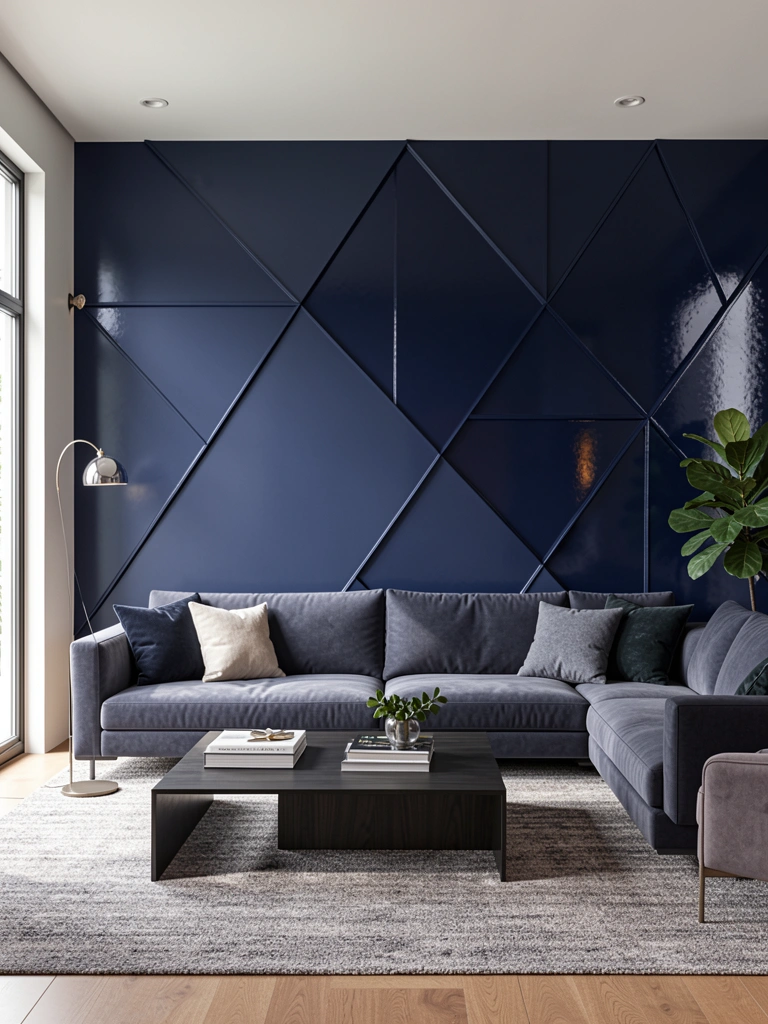
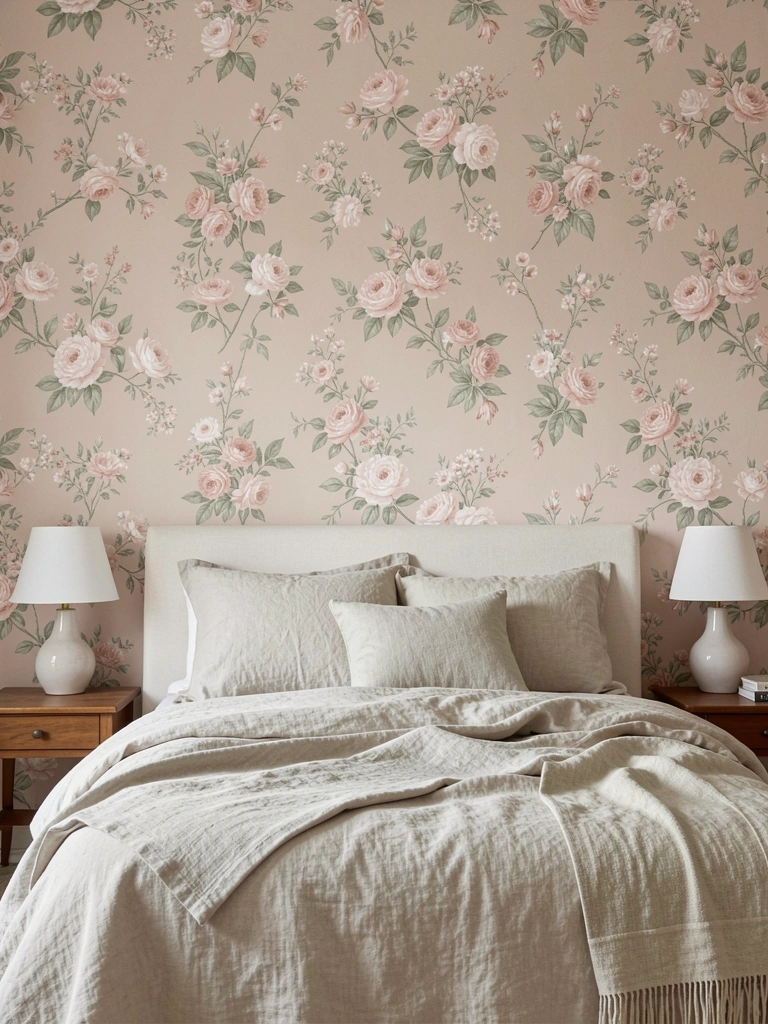
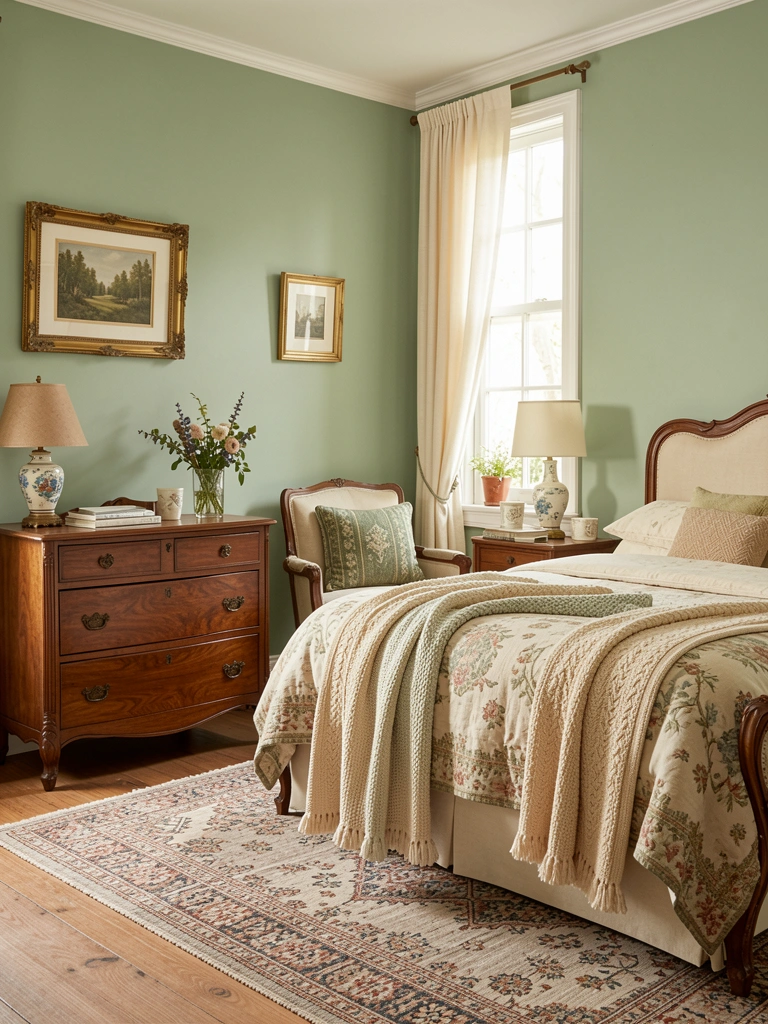
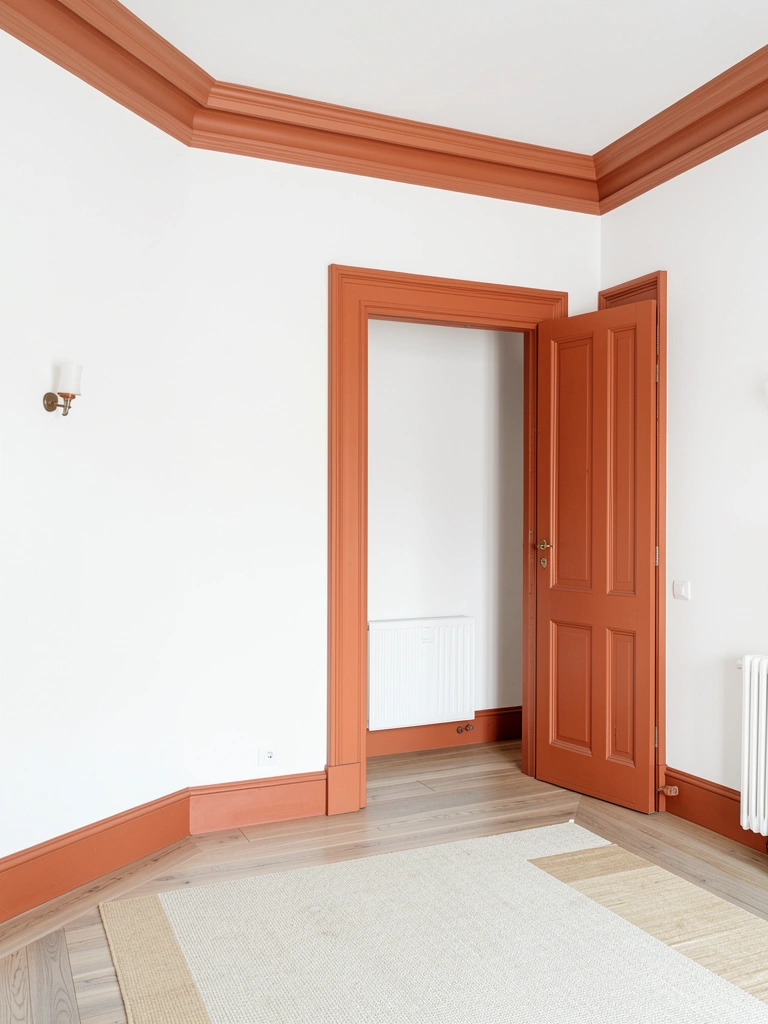
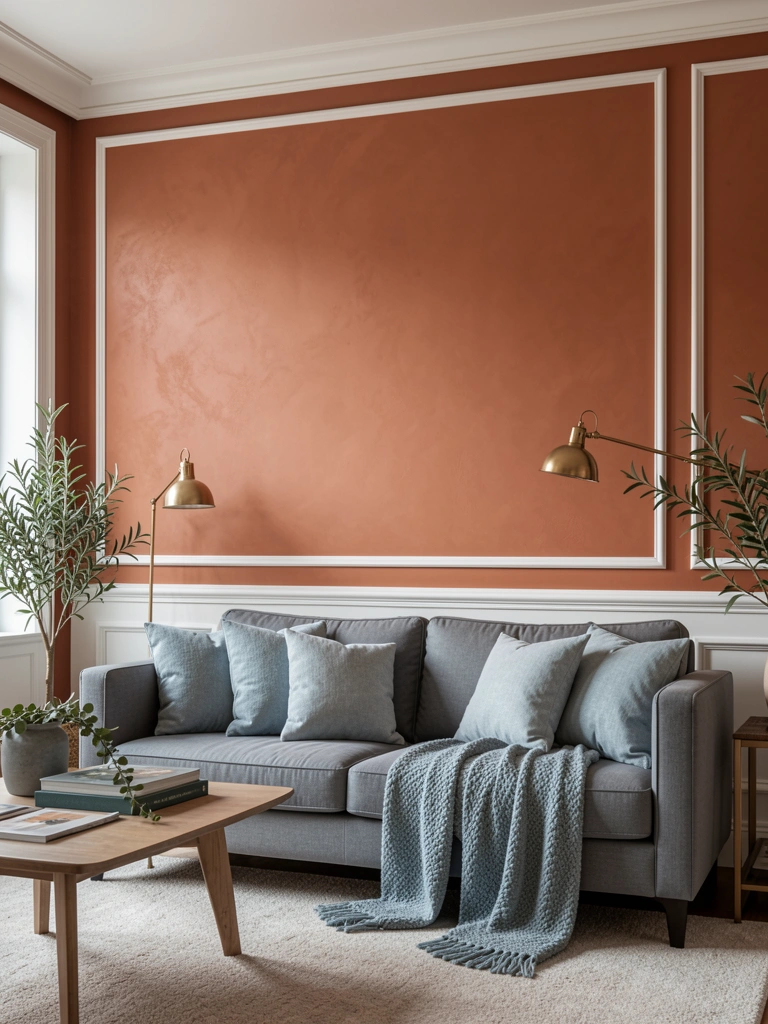
    9. Paint Walls a Soft, Light Color

    Color psychology matters in small spaces. Soft, light colors reflect light and expand the perceived room size, while dark walls can make compact bedrooms feel even smaller and heavier.

    Paint walls in soft neutrals (warm white, pale gray, soft sage) or muted pastels ($30–$60 per gallon; professional painting runs $300–$800 for a small room). Flat or matte finishes hide imperfections better than glossy, and they photograph beautifully on Pinterest.

    If you rent, ask your landlord for permission or use removable wallpaper ($20–$60 per roll) in light tones instead.

    Pair light walls with warm-toned wood furniture and layered textures (following trend toward earth tones and natural materials) so the space doesn’t feel sterile.

    The result? More light bounces around, your room feels 10–20% larger, and you’ve created a calm foundation for any décor style.


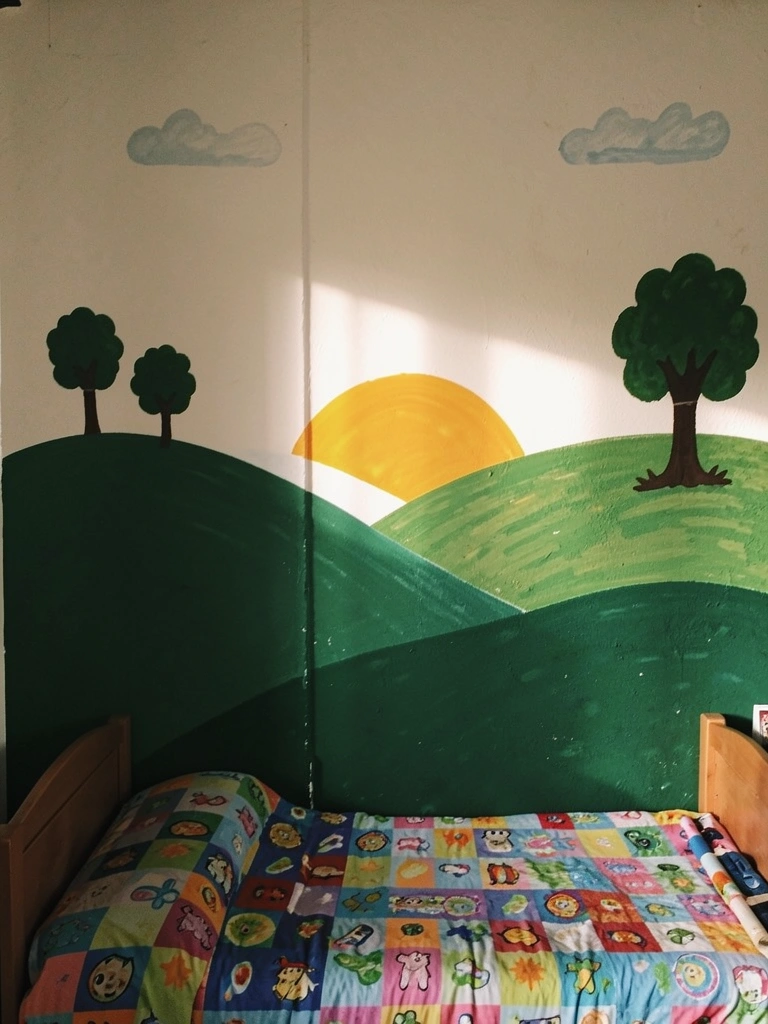
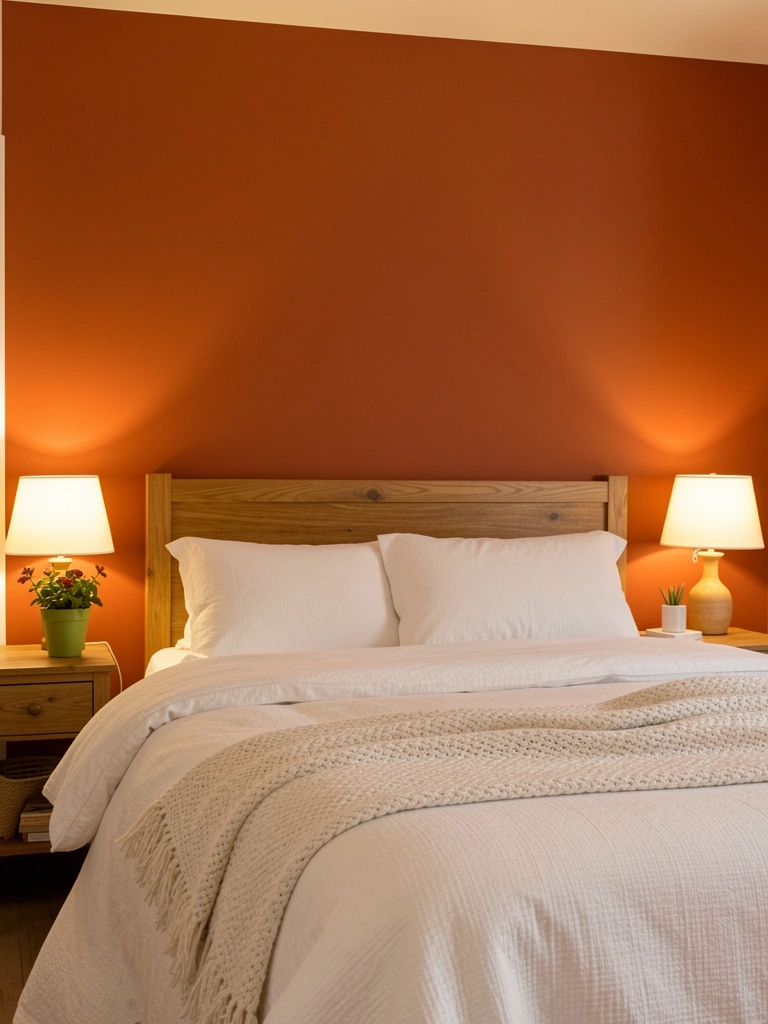
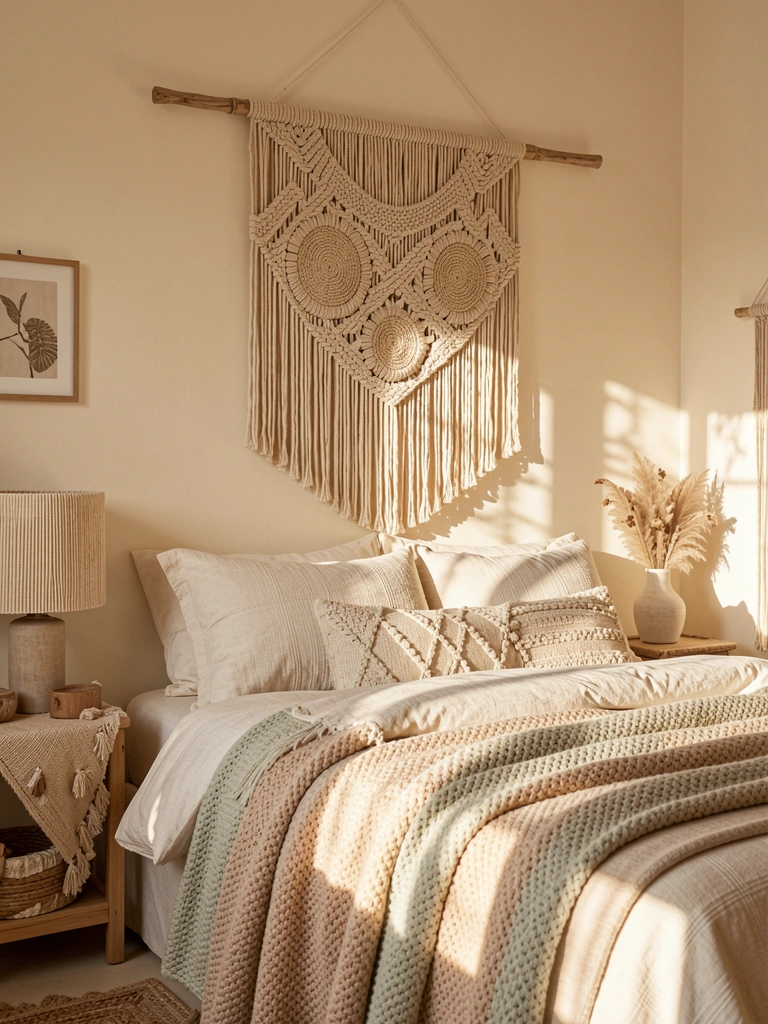
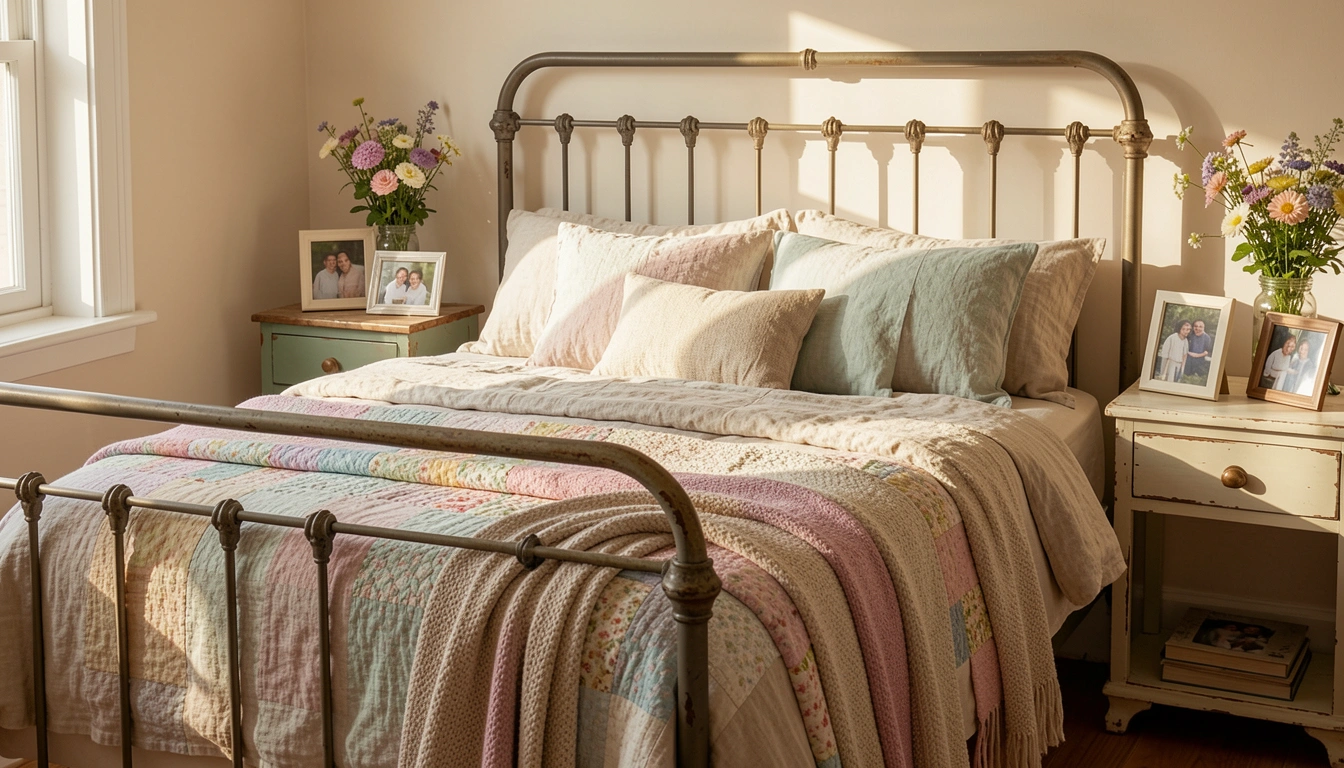
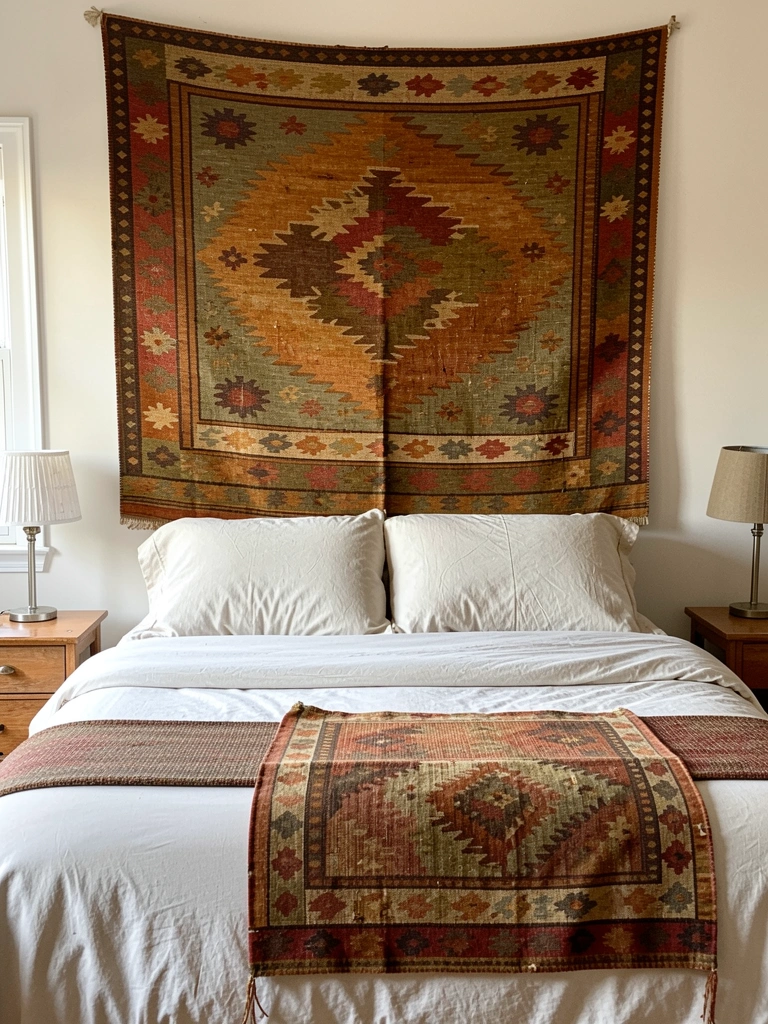
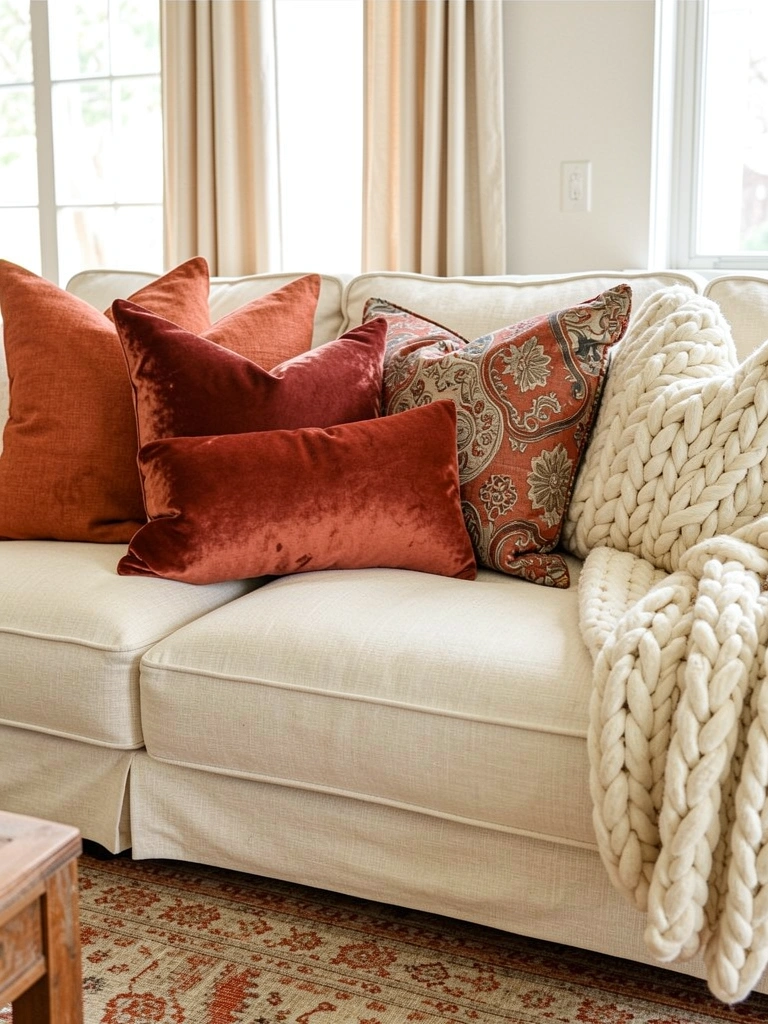
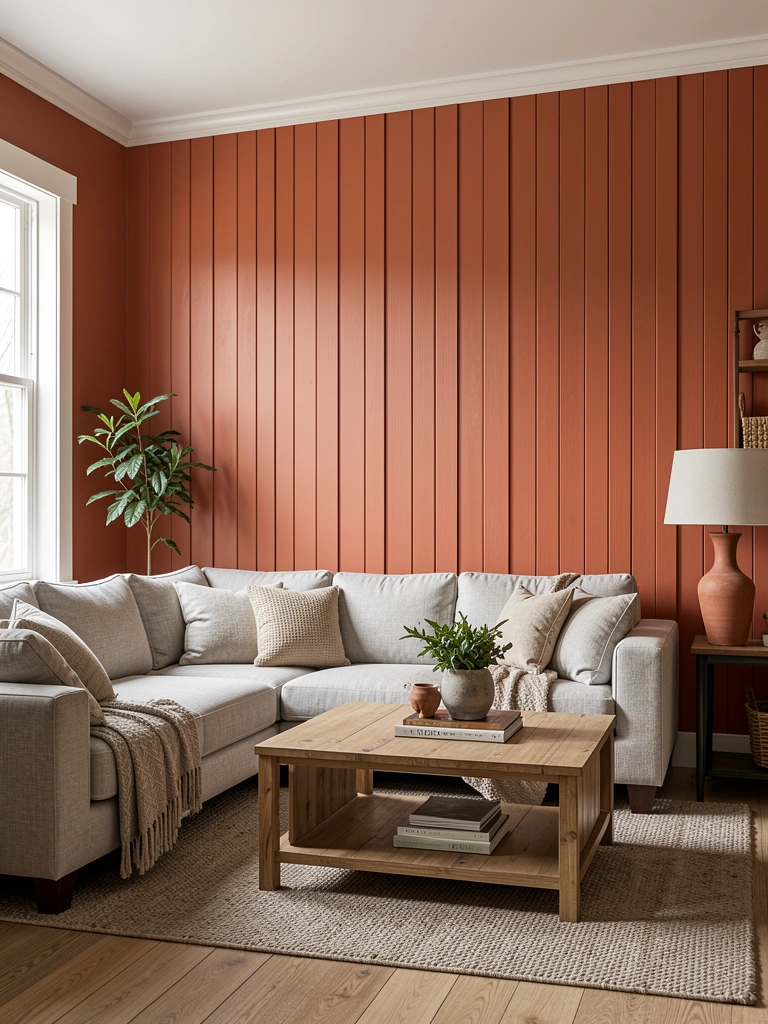
    10. Add a Statement Headboard Without Floor Space

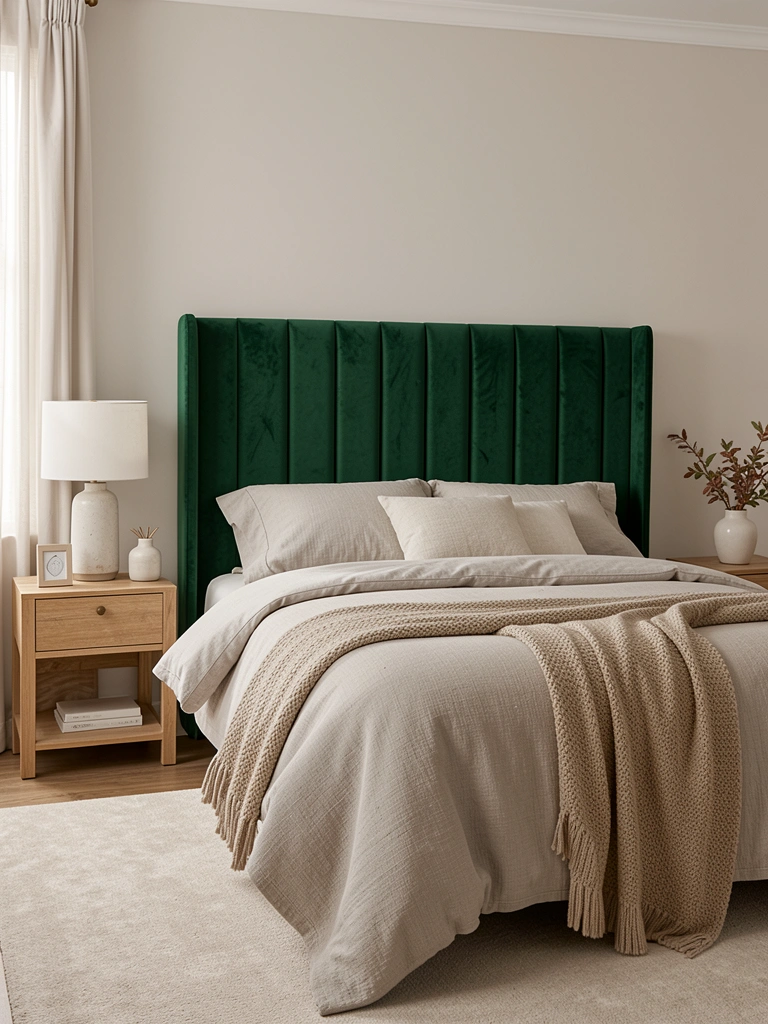
    A wall-mounted headboard adds personality and luxury without consuming floor square footage. This trend is huge for 2025, and it’s the perfect focal point for small rooms.

    Mount a headboard directly to the wall ($150–$600) in upholstered, wood, or metal finishes. Choose bold colors (cherry red, aubergine, forest green) or natural textures (rattan, raw wood) to align with current trends. Upholstered headboards add softness and sound absorption too.

    DIY option: create a fabric headboard using tapestry and temporary adhesive ($30–$80 total, renter-friendly).

    Pair the statement headboard with simple bedding so it remains the star.

    Your bed becomes a bedroom anchor that looks intentional and high-end, while the rest of the room stays minimal and open.


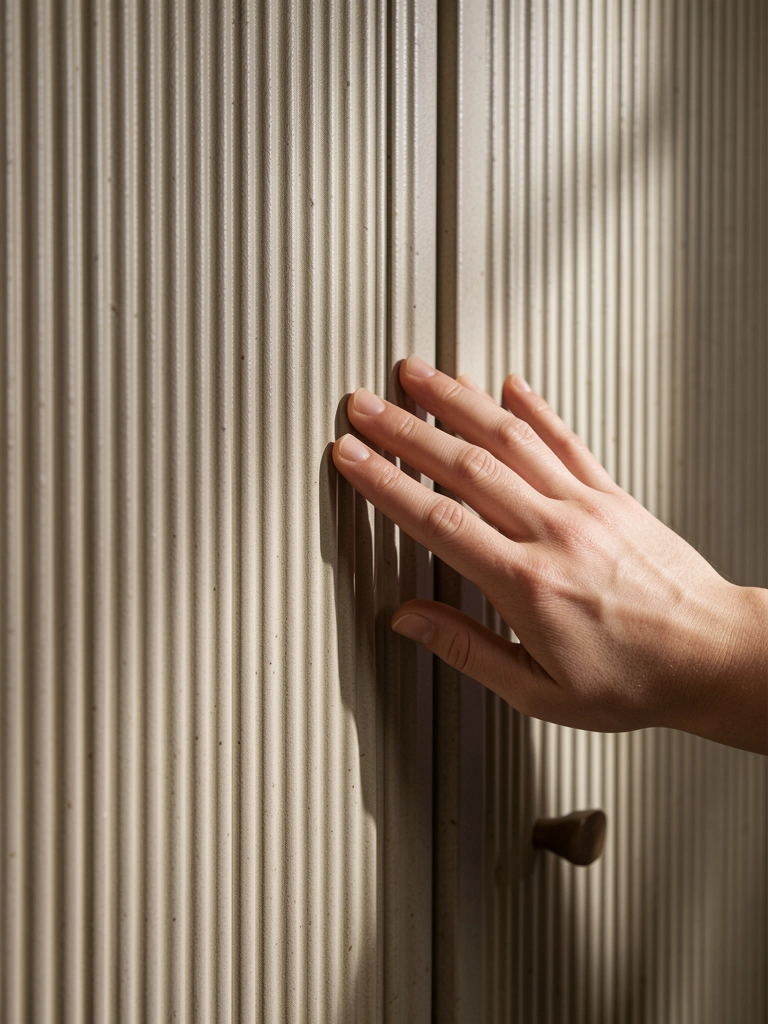
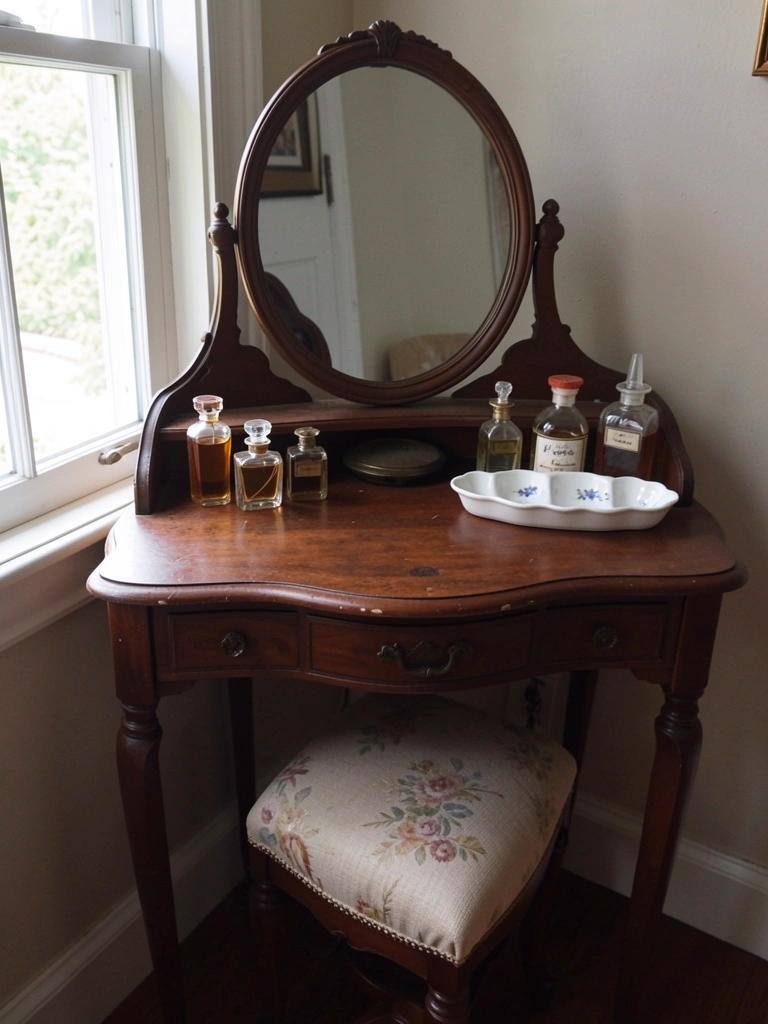
    11. Swap Straight Furniture for Curved Pieces

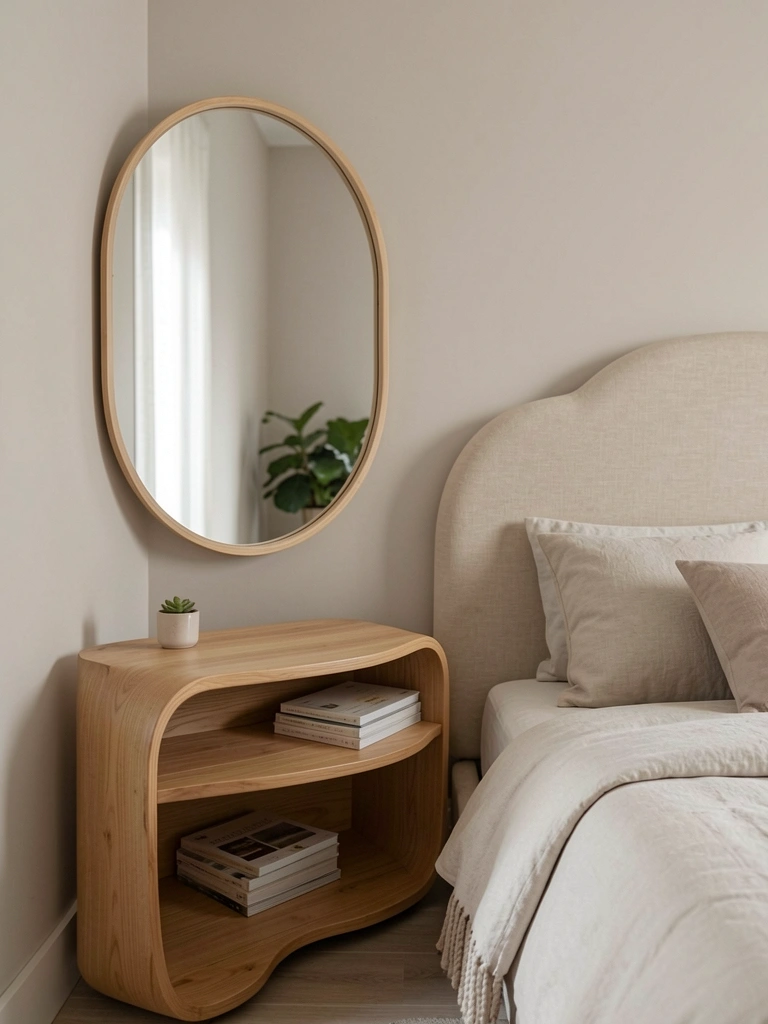
    Straight, angular furniture can make small rooms feel harsh and cramped. Curved and organic shapes—a major 2025 trend—soften the environment and make spaces feel more relaxed and spacious.

    Gradually swap angular pieces for curved versions. Look for curved nightstands ($100–$300), rounded mirrors ($50–$200), and soft headboards ($200–$500) from brands like Article, West Elm, or local vintage shops. These pieces cost similar prices to their angular counterparts.

    Curved furniture reflects light differently and creates visual softness that reduces the “boxed in” feeling.

    Start with one curved element—maybe a rounded mirror—and build from there if budget is tight.

    The organic shapes make your room feel calmer and more intentional, and visitors always notice the sophisticated difference.


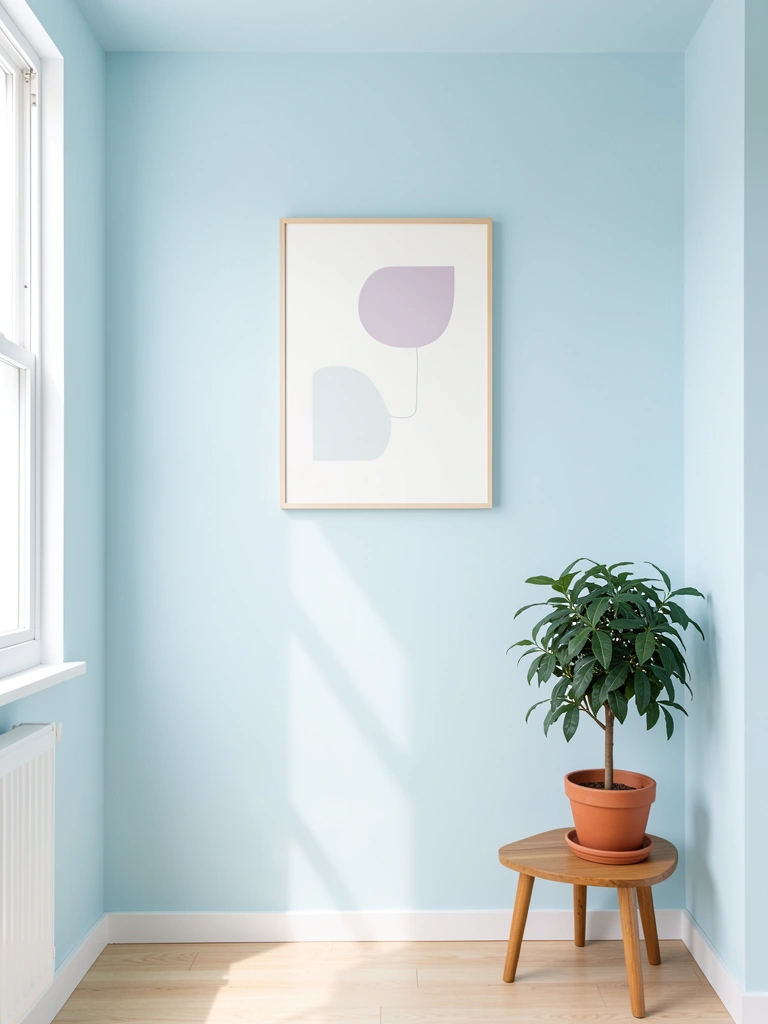
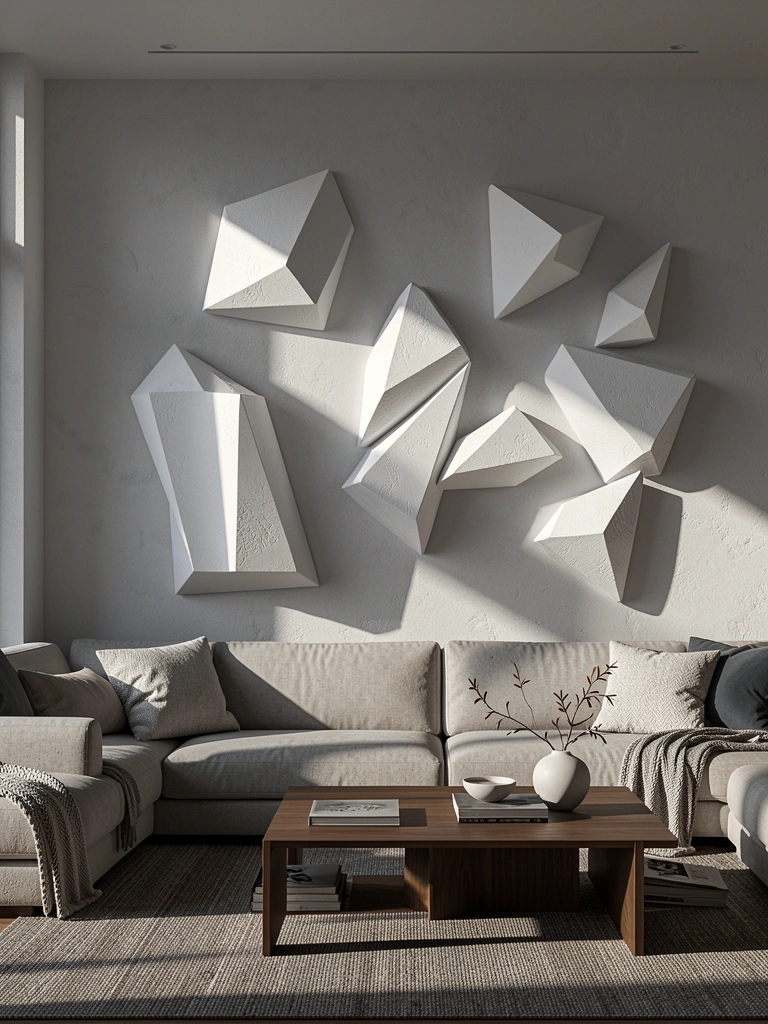
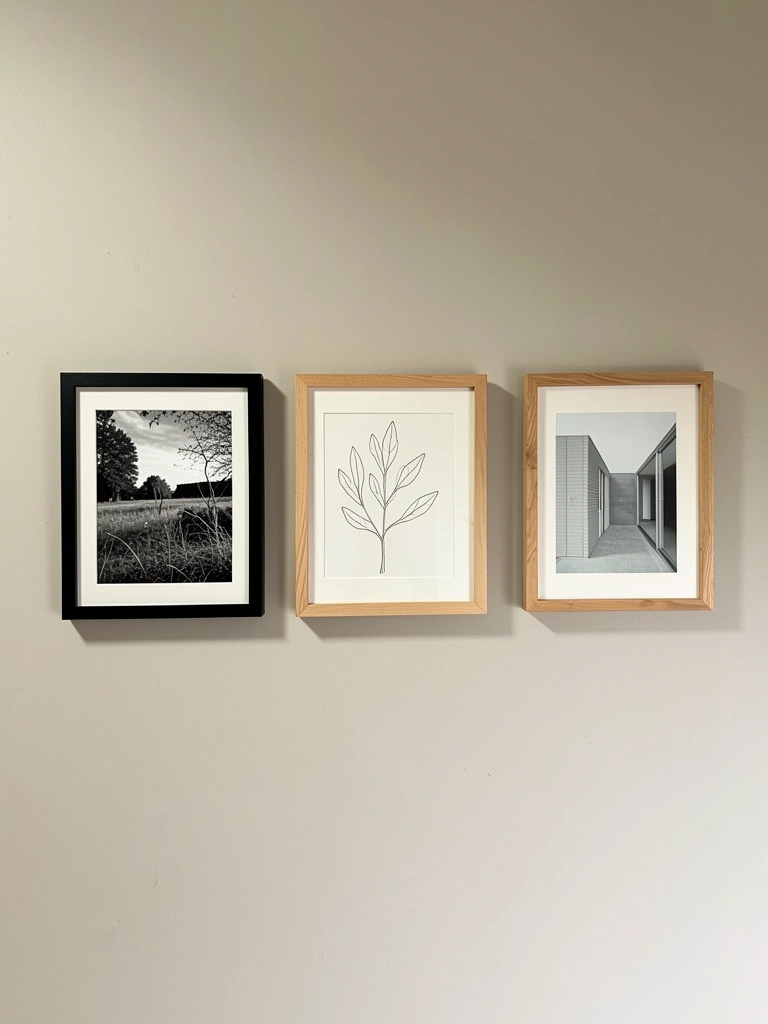
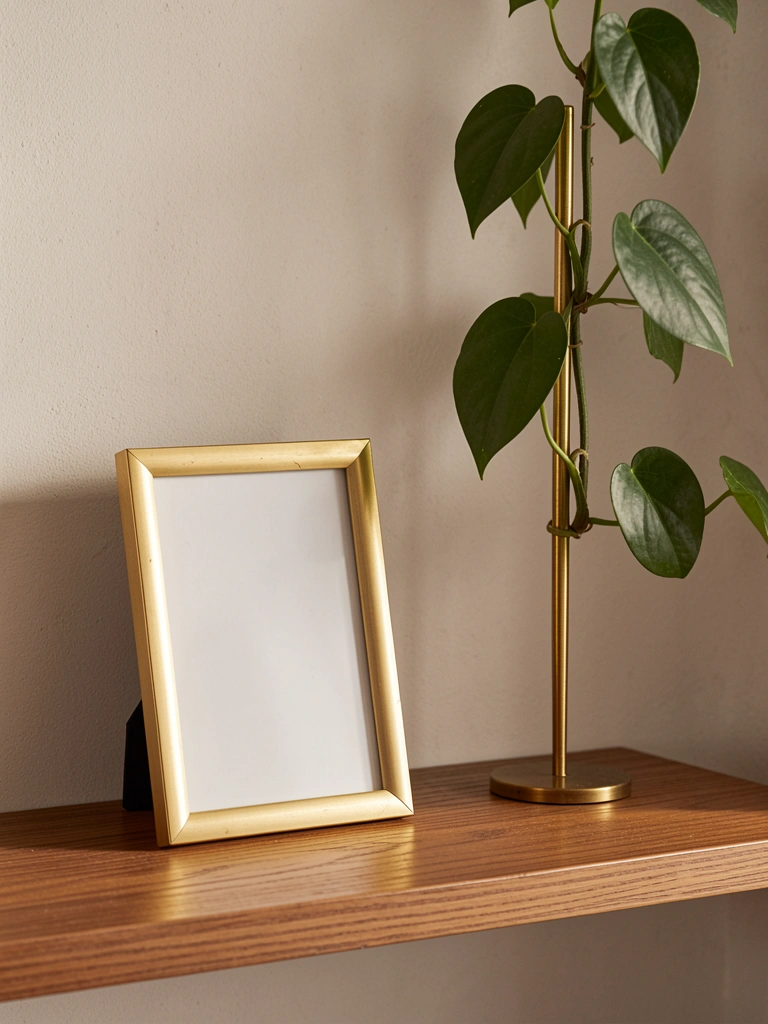
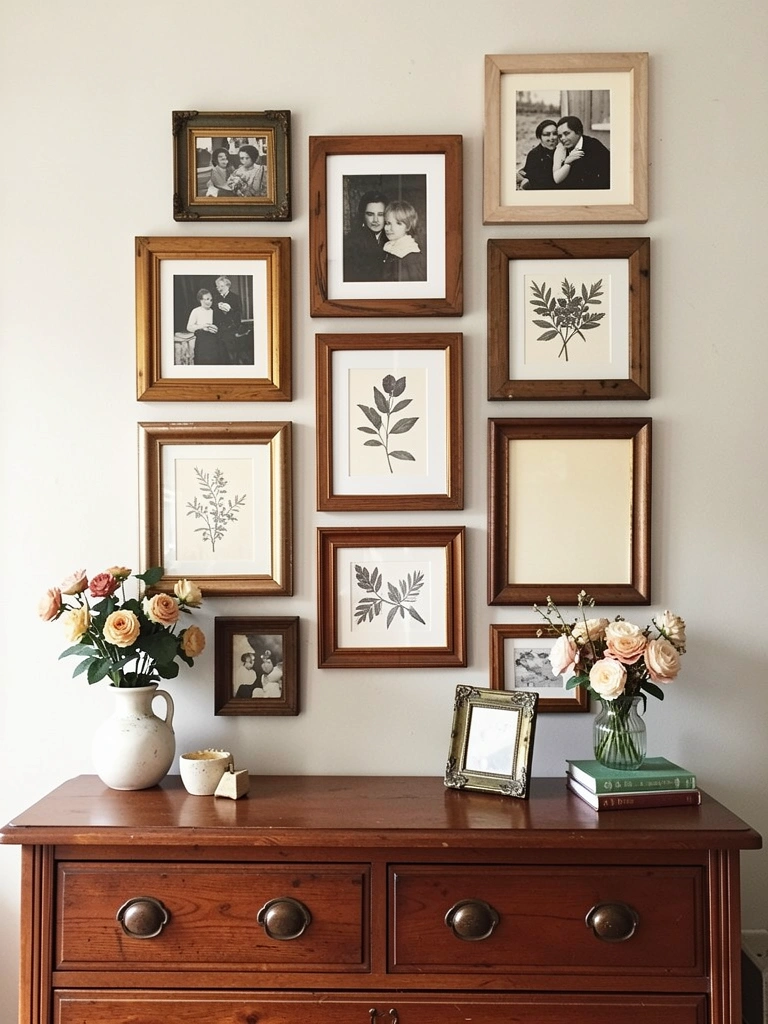
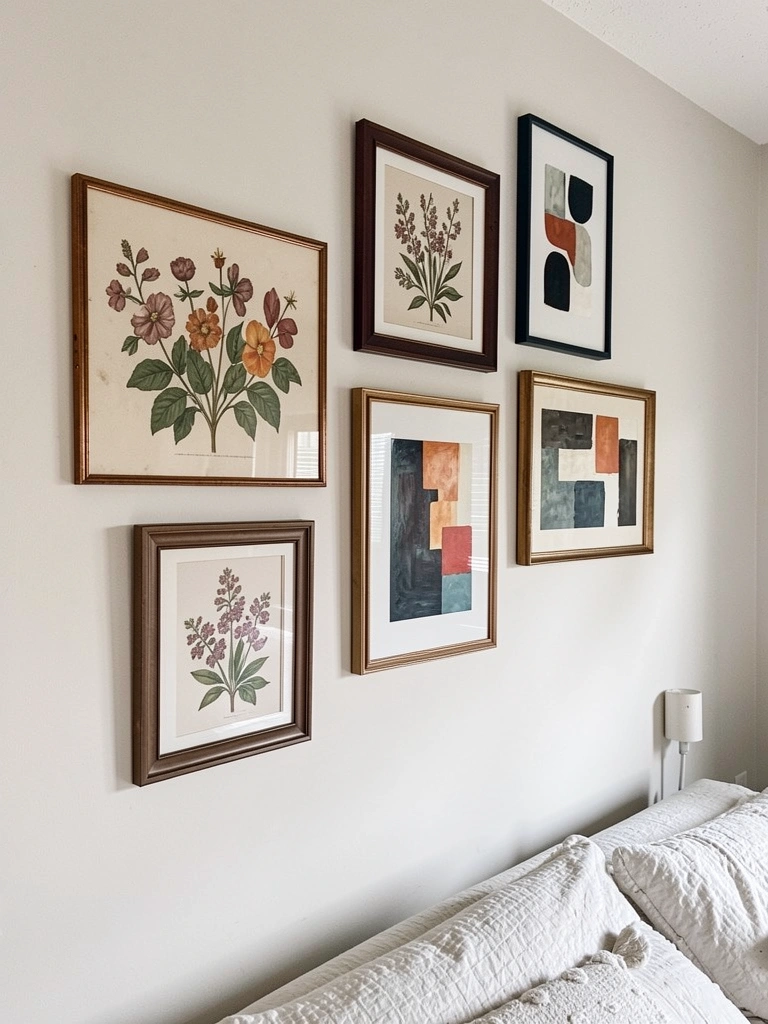
    12. Maximize Vertical Wall Space with Art

    Instead of relying on furniture to fill visual space, use wall-mounted art. This maximizes impact while keeping the floor open. Large-scale prints and gallery walls are huge for 2025 personalization.

    Create a gallery wall above your bed or on an empty wall using 5–9 frames ($30–$150 depending on frame quality and art). Mix frame styles and sizes for visual interest. Art can be affordable prints from Etsy or Minted ($15–$50 each) or thrifted frames ($5–$15) paired with printables you love.

    Vary heights and spacing for a curated look—use painter’s tape to map it out before hanging anything.

    Budget hack: Print personal photos or download affordable digital art from Etsy ($5–$20) and frame them yourself.

    Your walls become a reflection of your personality, and the art draws the eye upward, making ceilings feel higher.


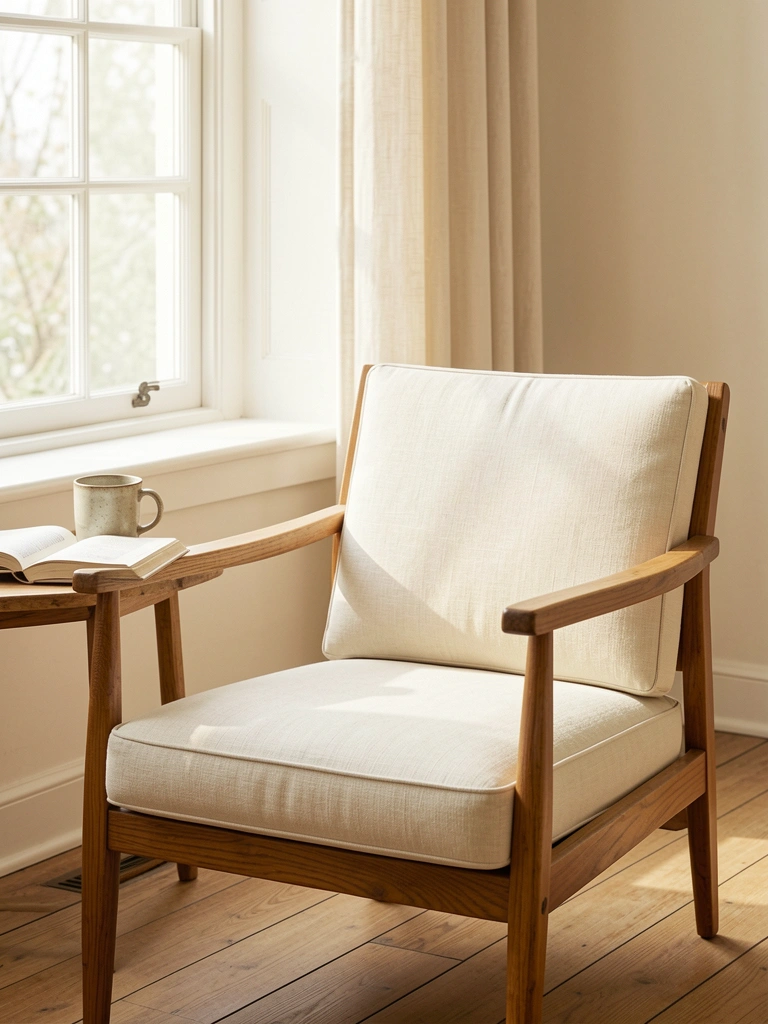
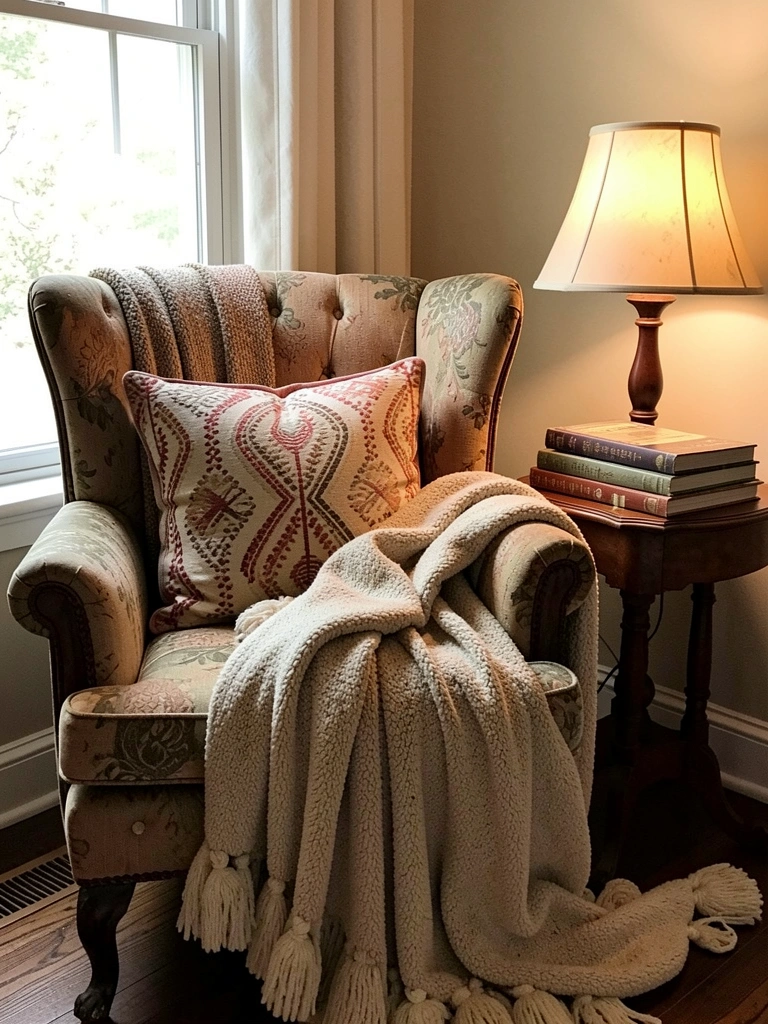
    13. Install a Corner Reading Nook

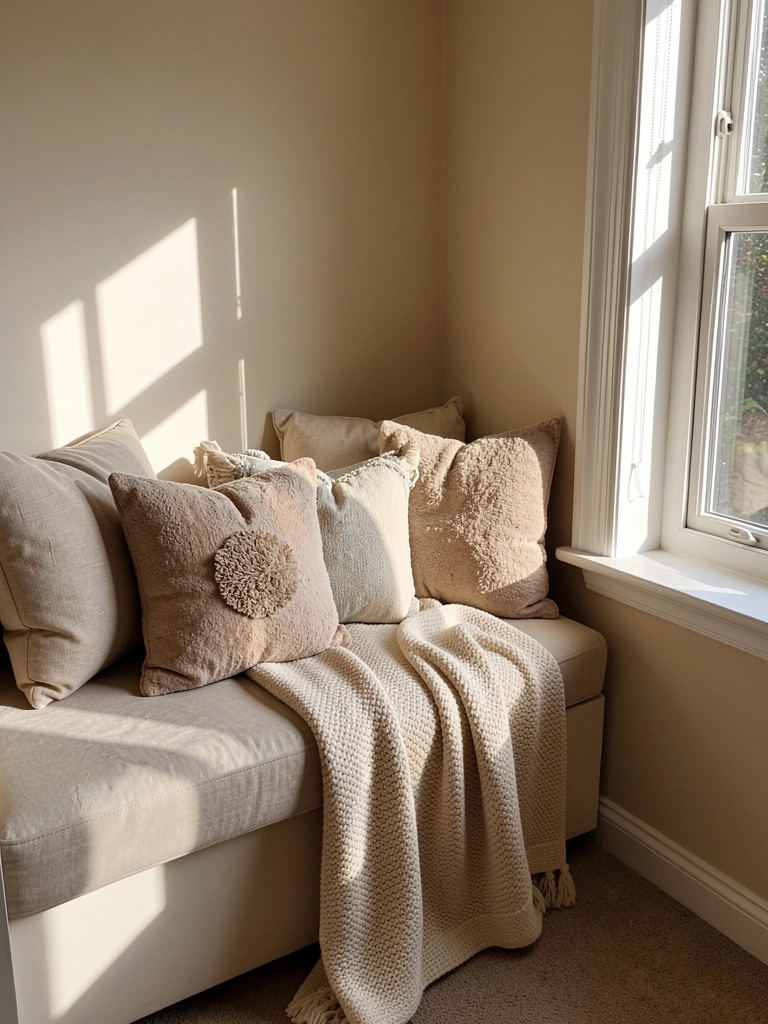
    A reading nook transforms a neglected corner into a functional retreat. This uses dead space while creating a secondary focal point that makes the room feel intentional.

    Position a compact armchair ($200–$600) or window seat ($300–$1000) in your room’s quietest corner, ideally by a window. Layer it with cushions ($20–$80), a throw blanket ($30–$100), and a small side table ($50–$150). Add a clip-on reading lamp ($25–$50) for ambiance.

    Budget option: use a floor cushion ($30–$60) with pillows propped against the wall instead of a chair.

    Include a small bookshelf or floating shelf nearby to keep reading material within arm’s reach.

    You’ve created a dedicated retreat space within your bedroom where you can read, journal, or simply escape without leaving the room.


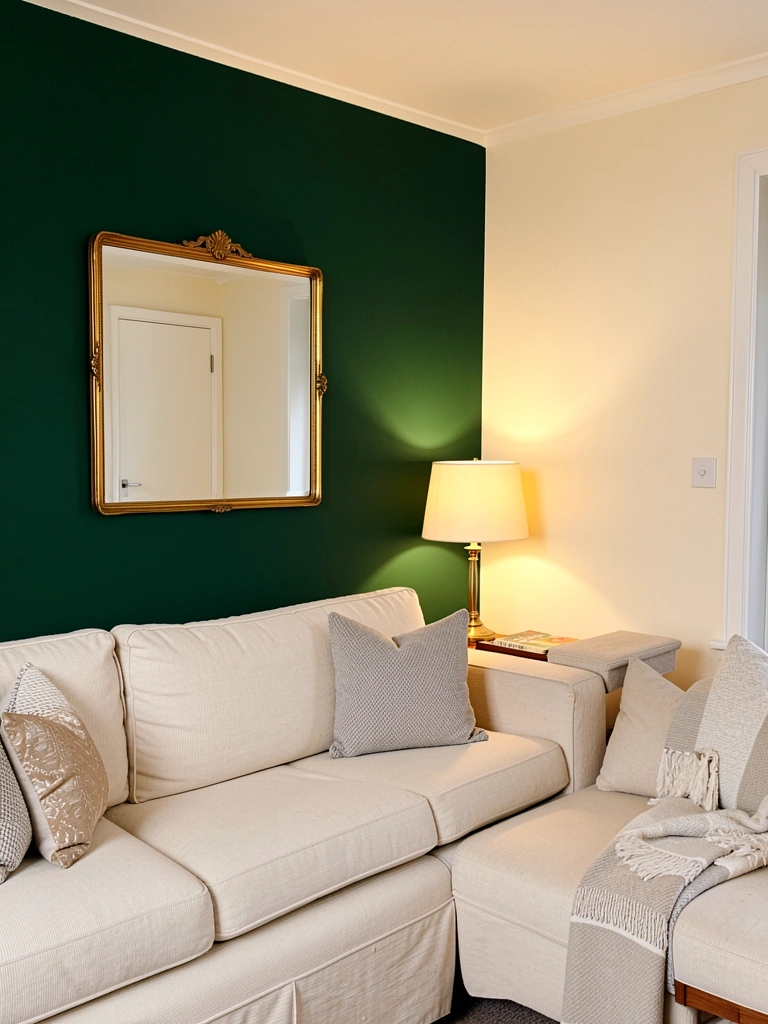
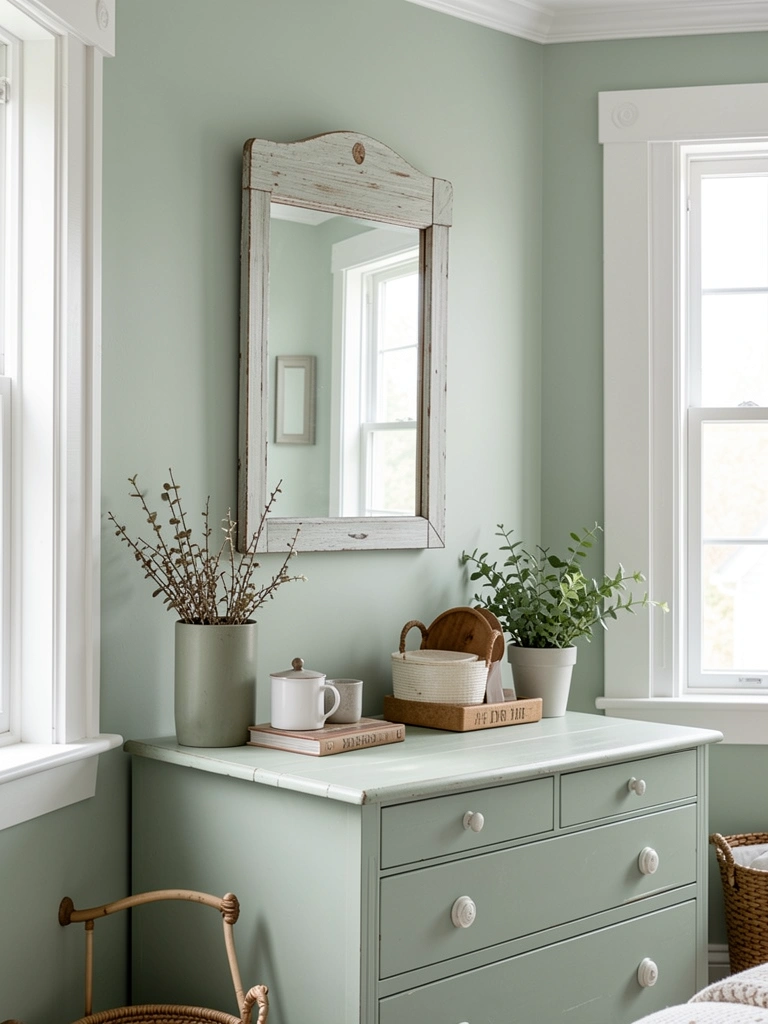
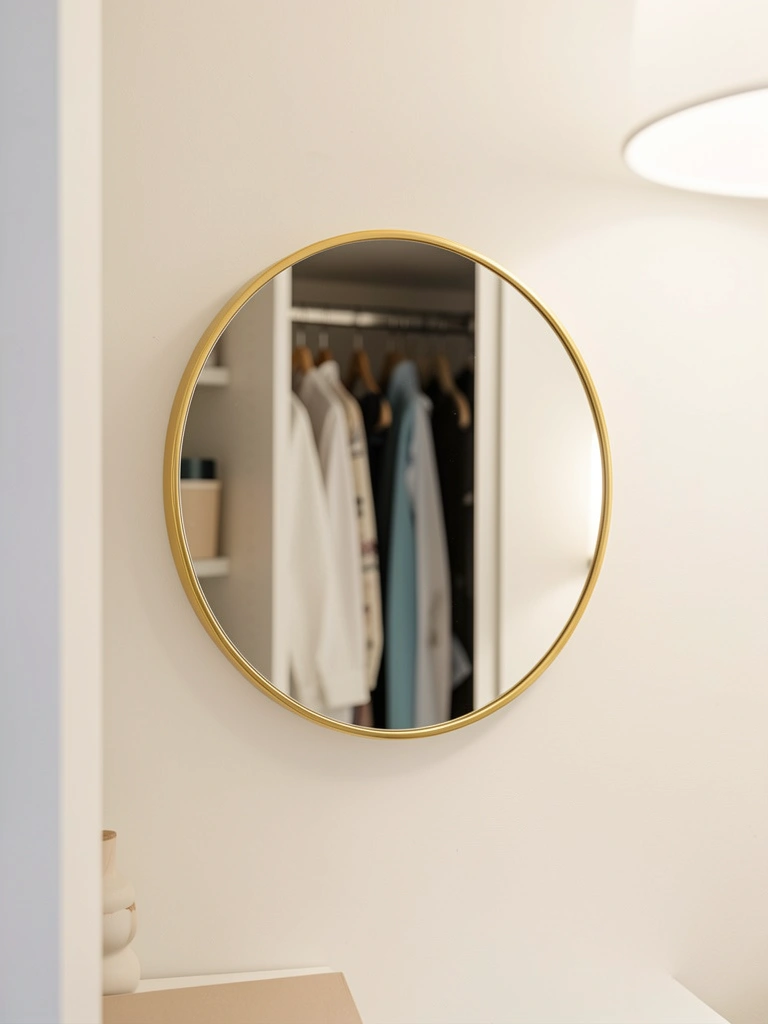
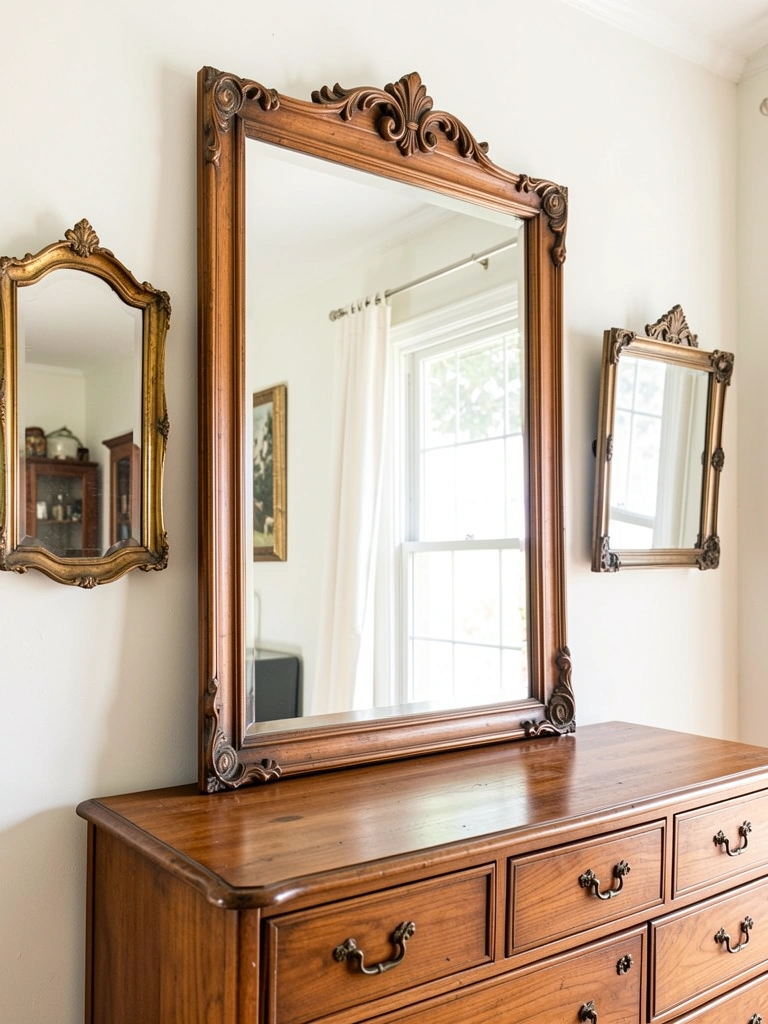
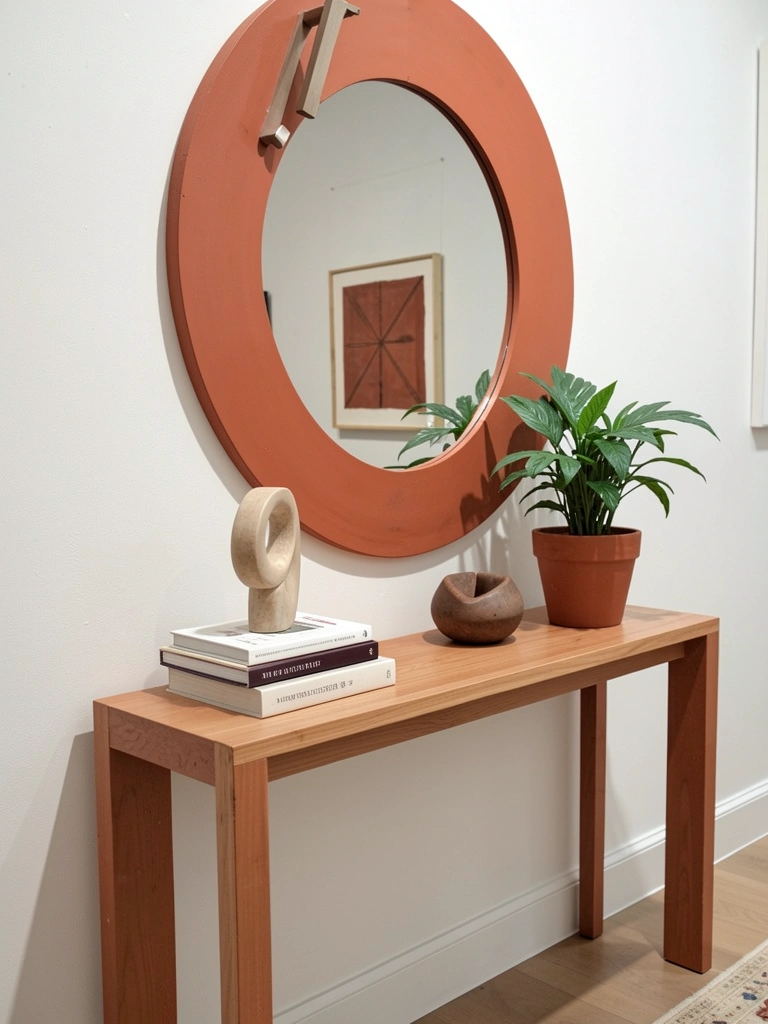
    14. Use Mirrors to Reflect Light and Space

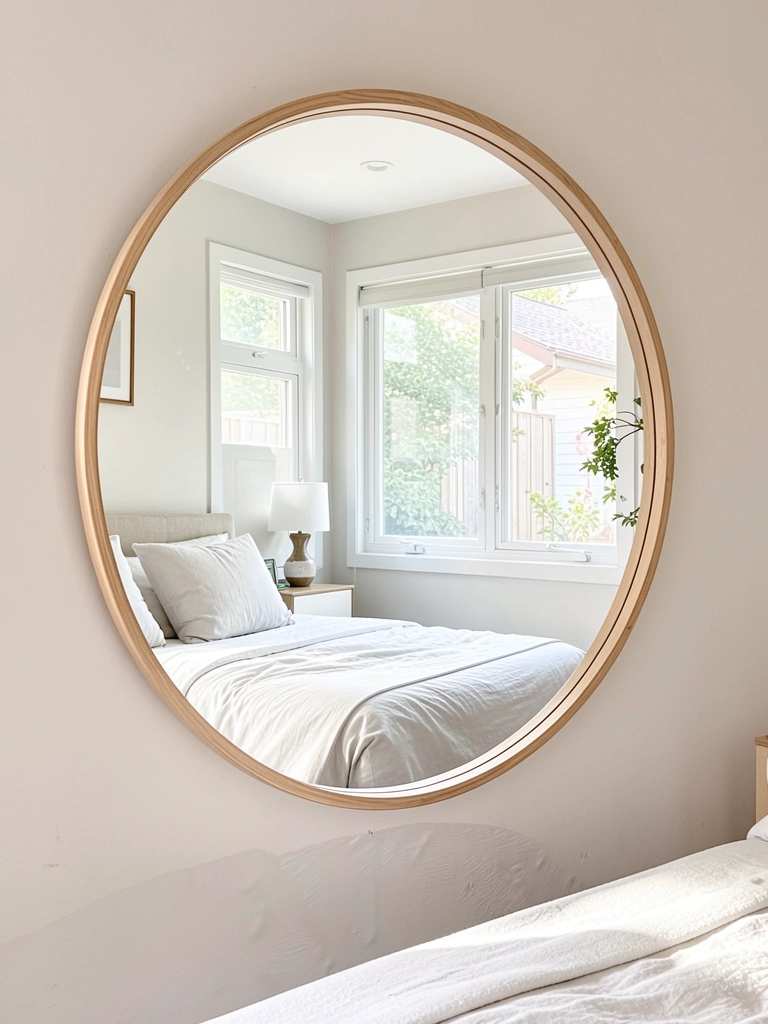
    Mirrors are psychology tricks that make small rooms feel twice as big. They bounce light around and create the illusion of depth—absolutely essential for compact spaces.

    Hang a large mirror (at least 24×36 inches, $50–$250) opposite your window to reflect natural light back into the room. Leaning mirrors work for renters. Rounded or arched frames align with 2025’s organic shapes trend beautifully.

    Position it to reflect your best views—not the clutter. Avoid hanging mirrors opposite the bed if it makes you uncomfortable; instead, place them on adjacent walls.

    Budget option: thrift large mirrors ($10–$30) and refresh the frame with spray paint ($8–$12).

    Your room feels significantly larger, naturally brighter, and more open—one of the highest-ROI small-space hacks available.


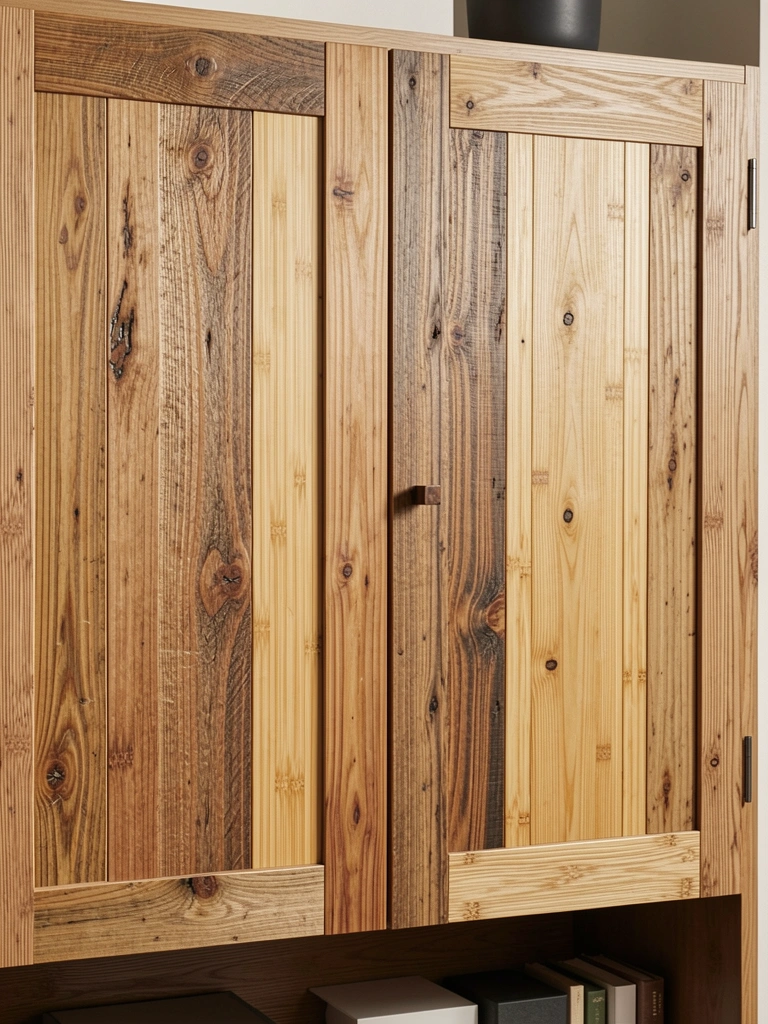
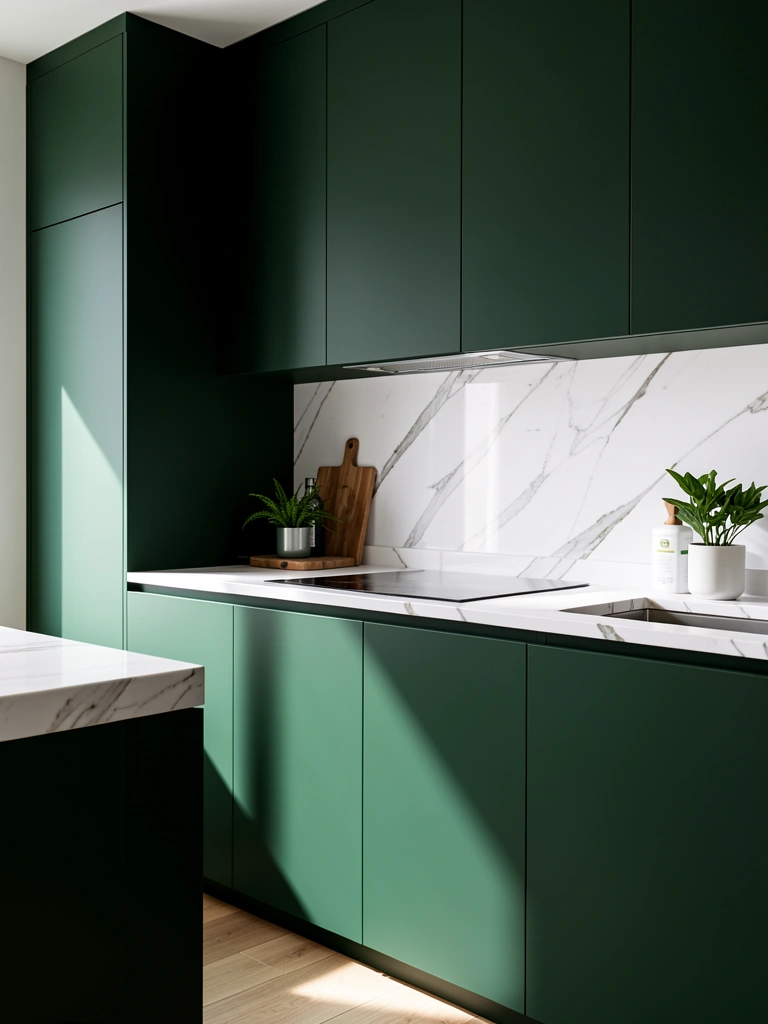
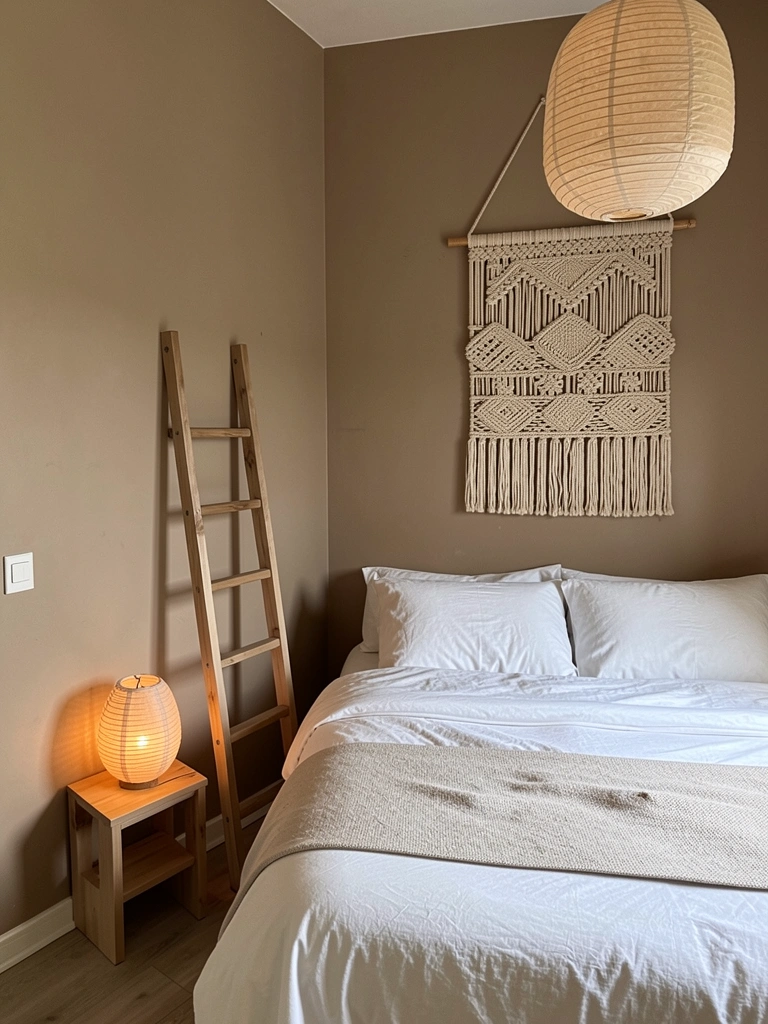
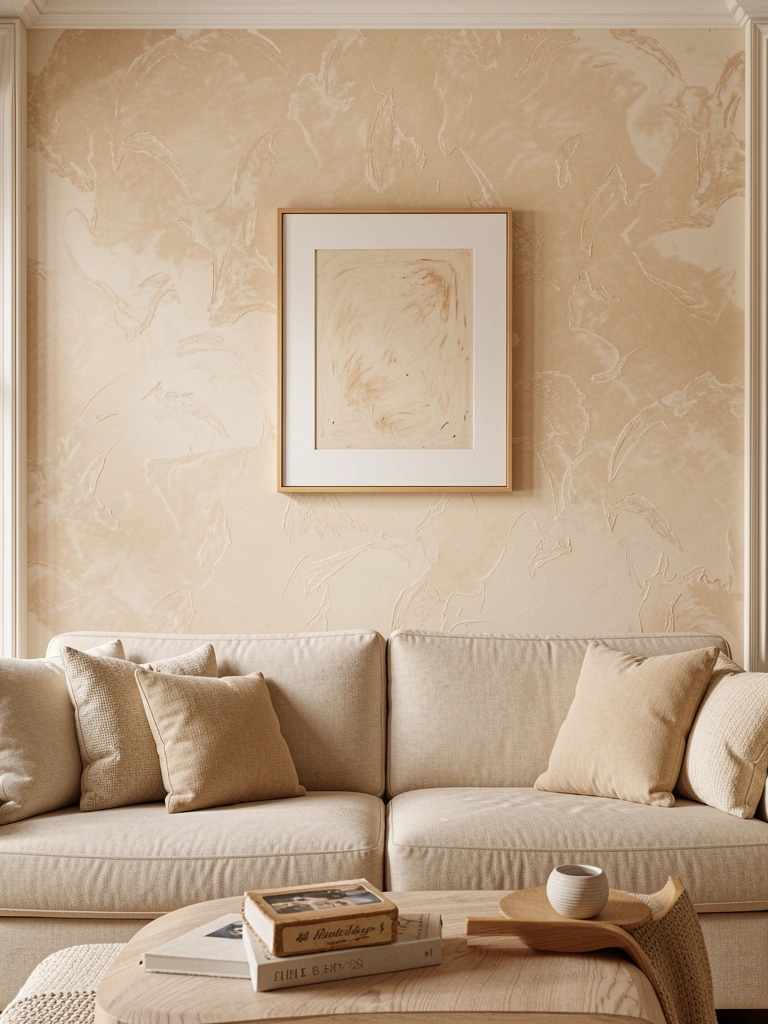
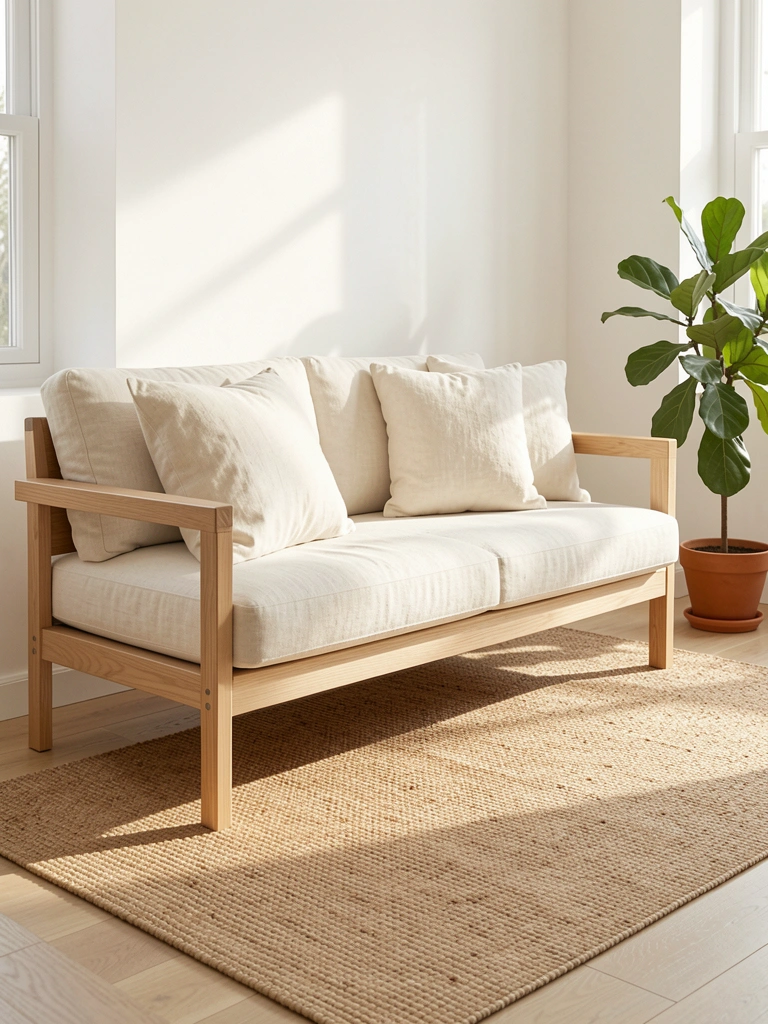
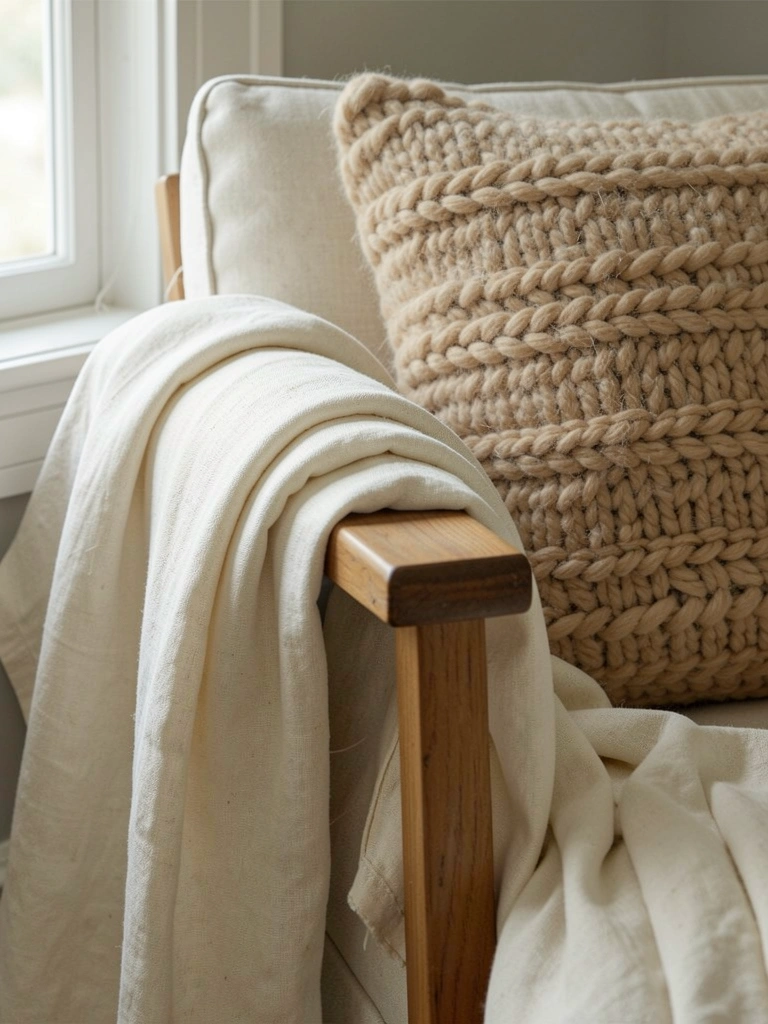
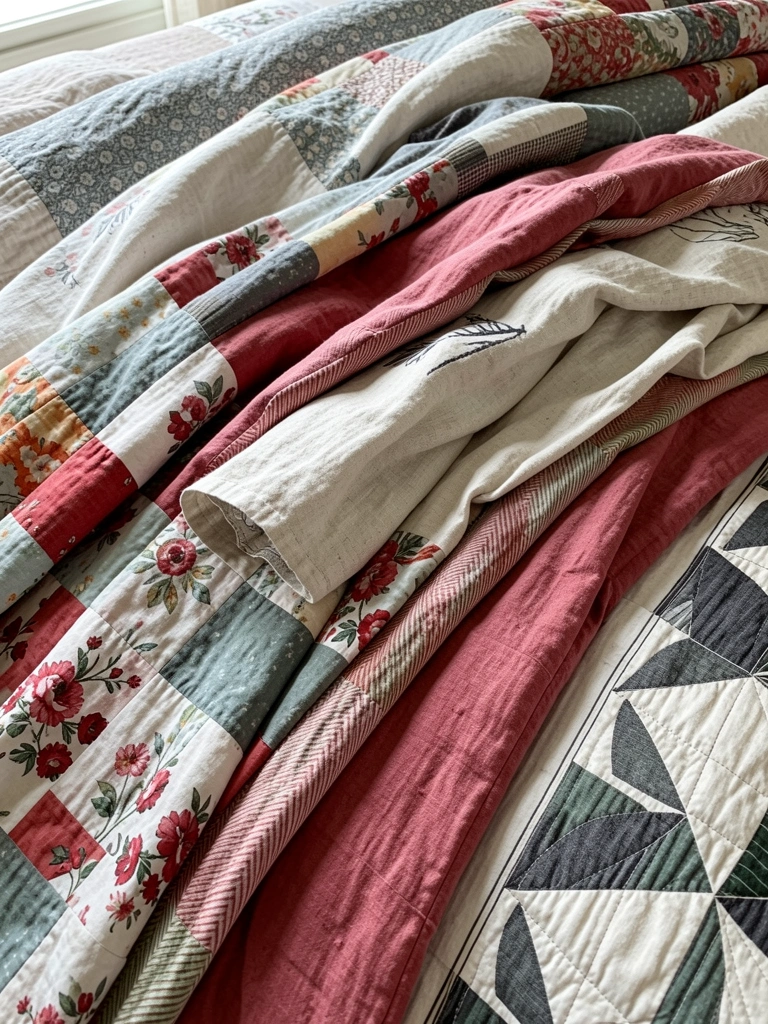
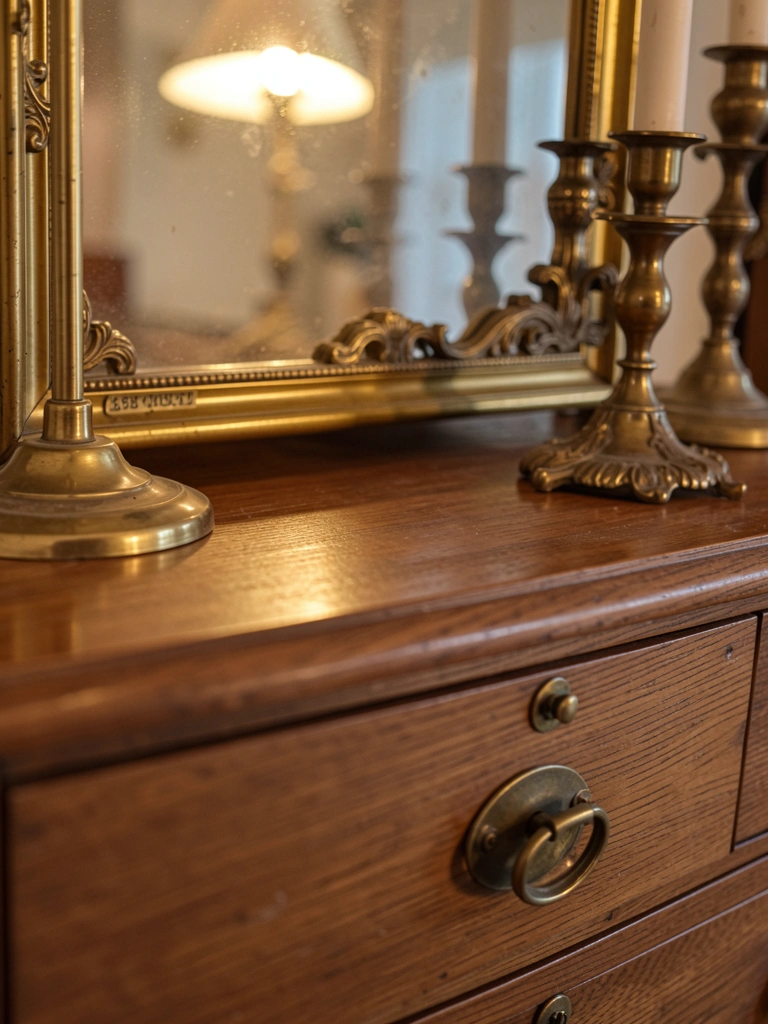
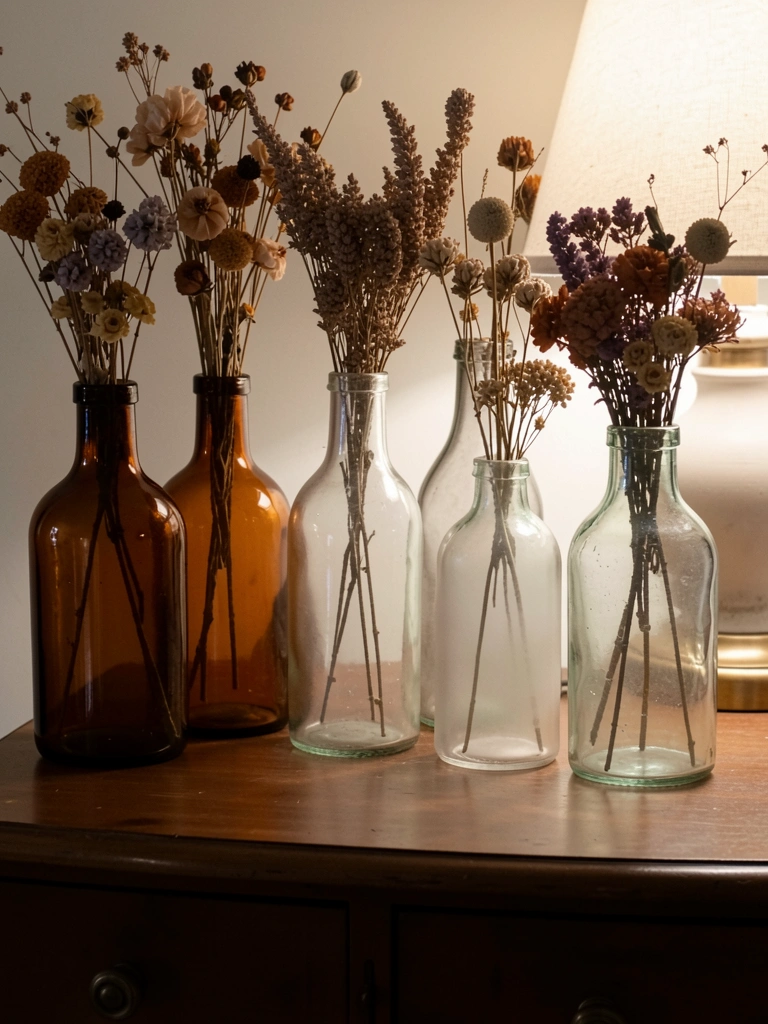
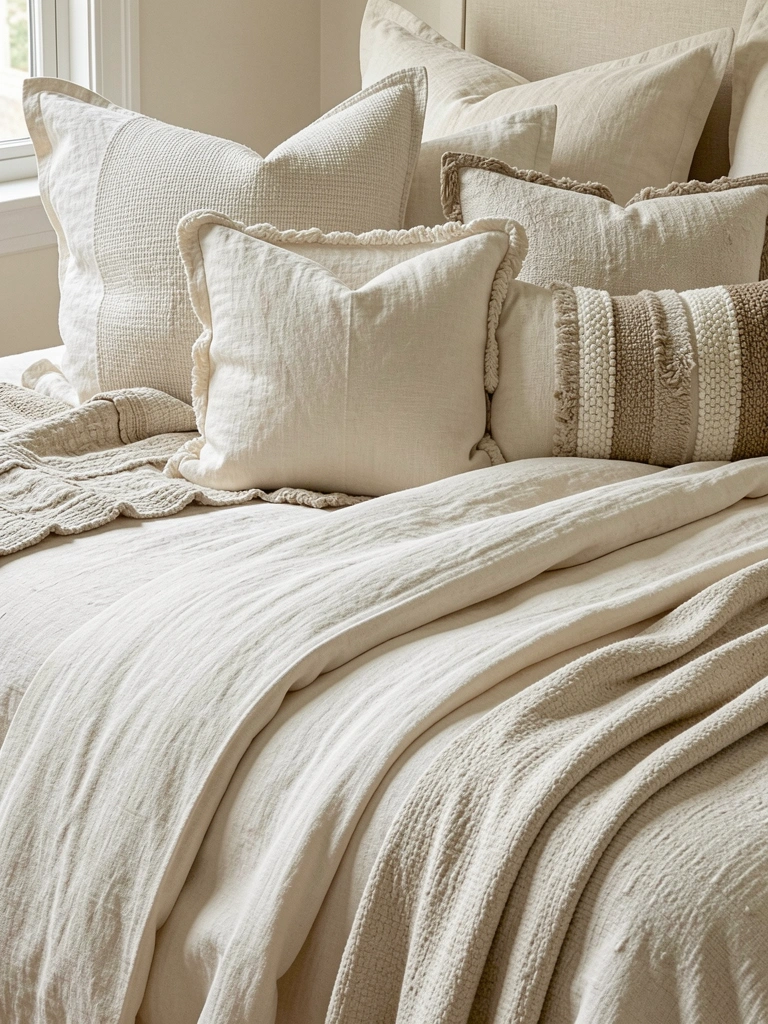
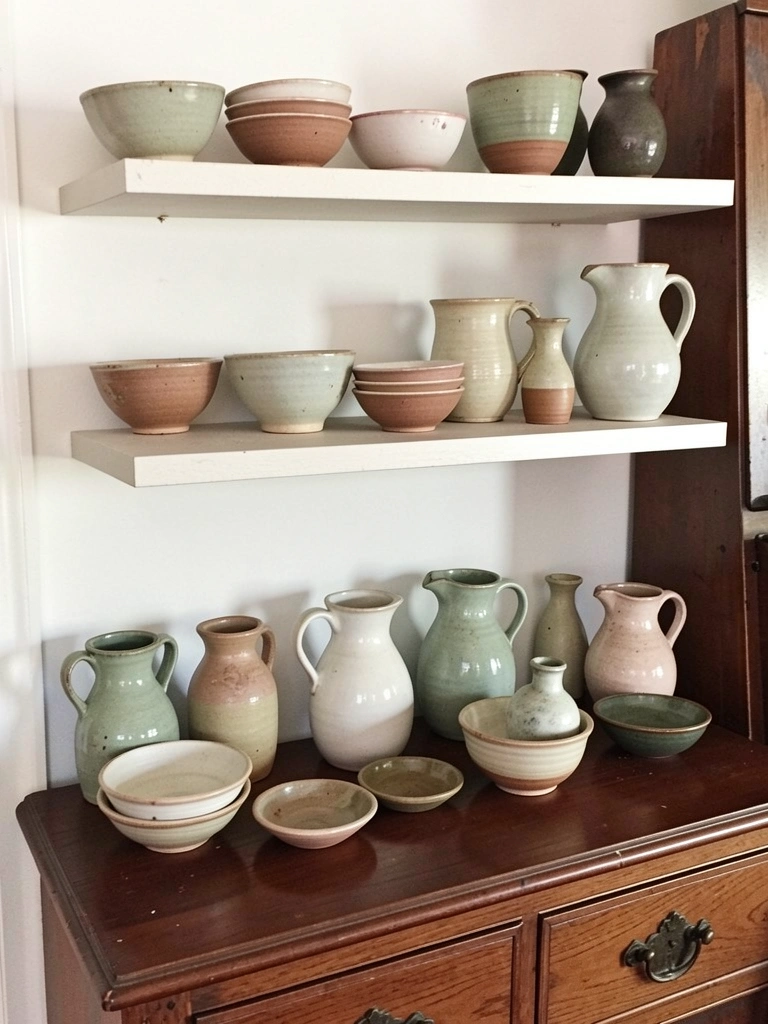
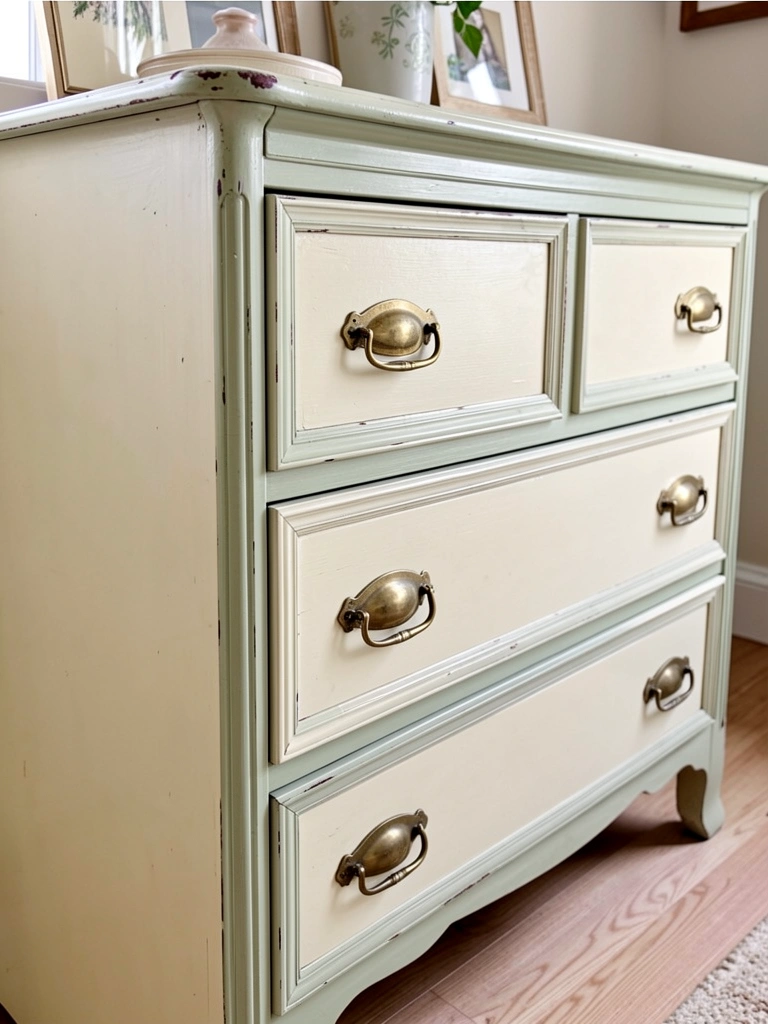
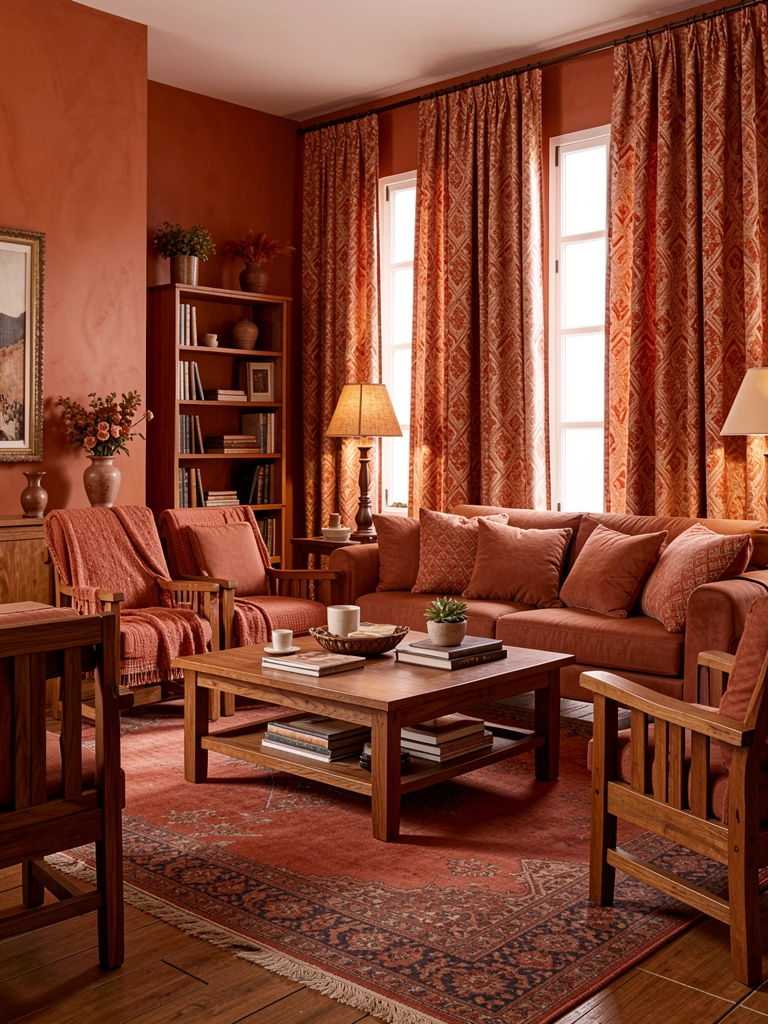
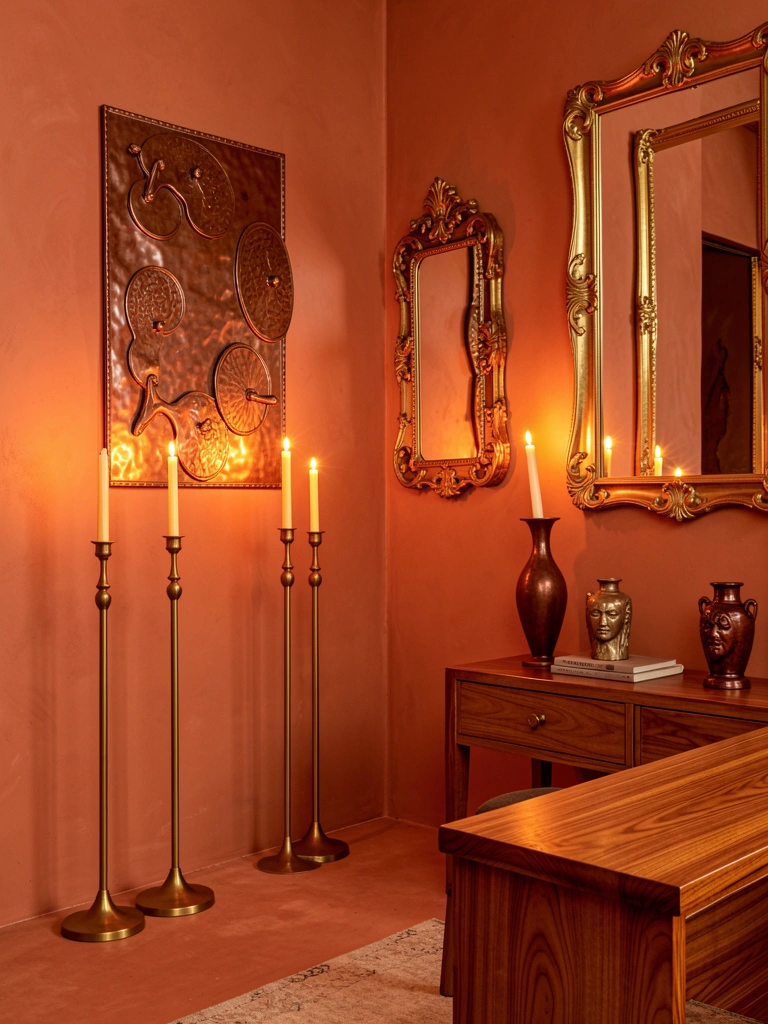
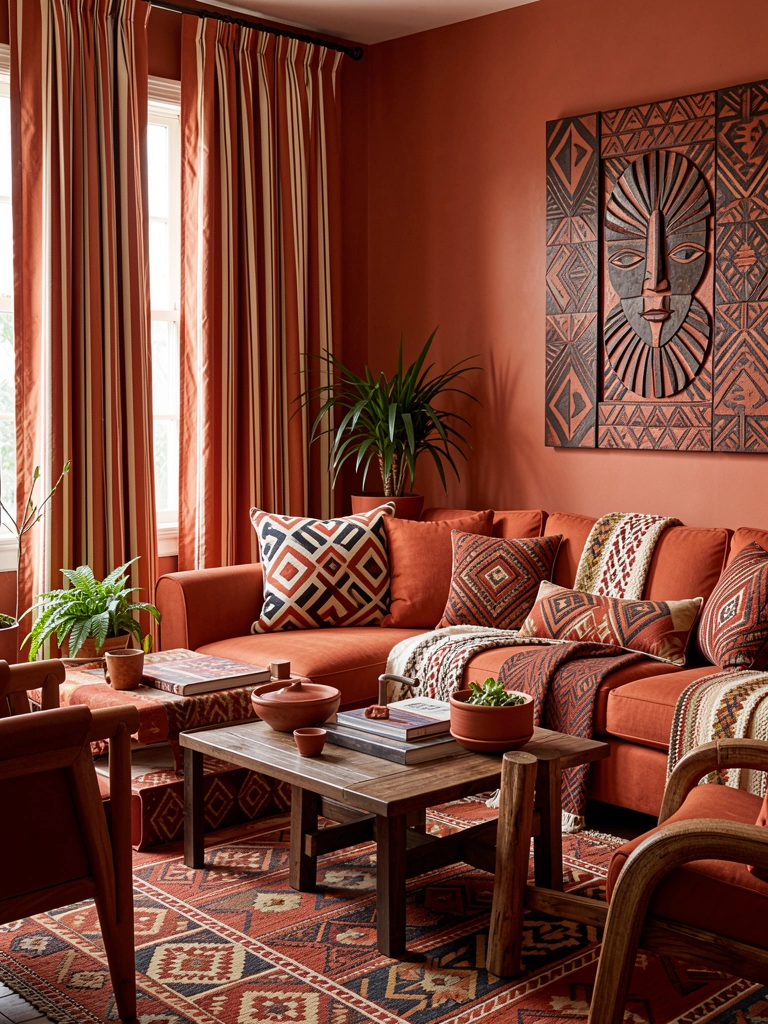
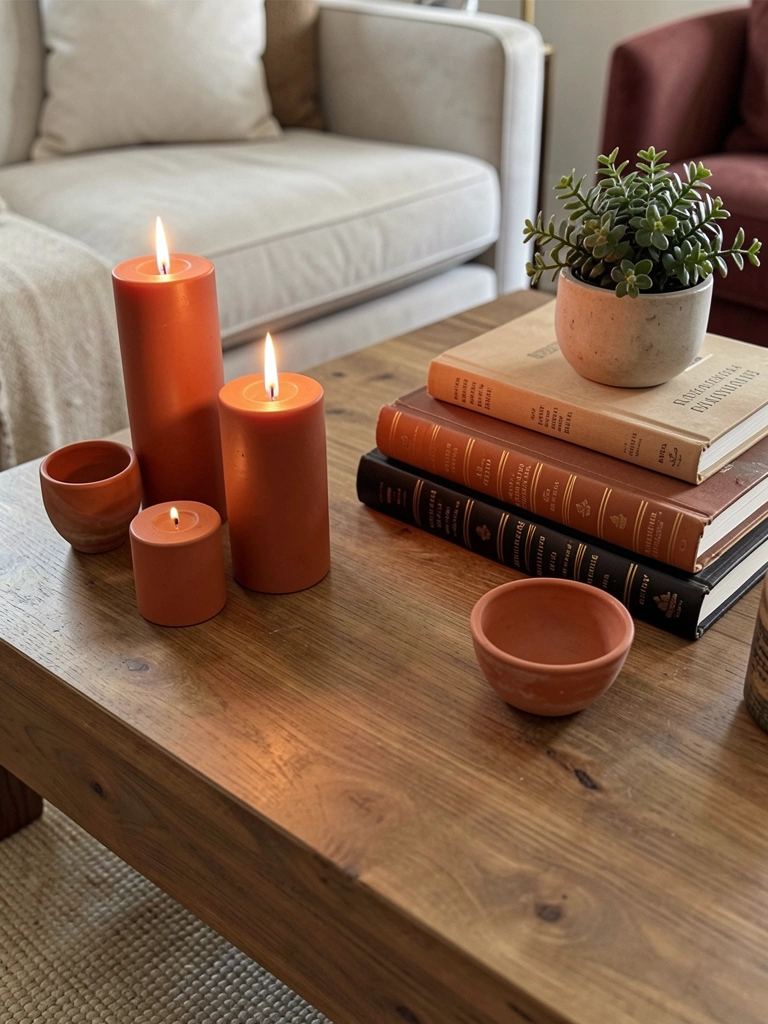
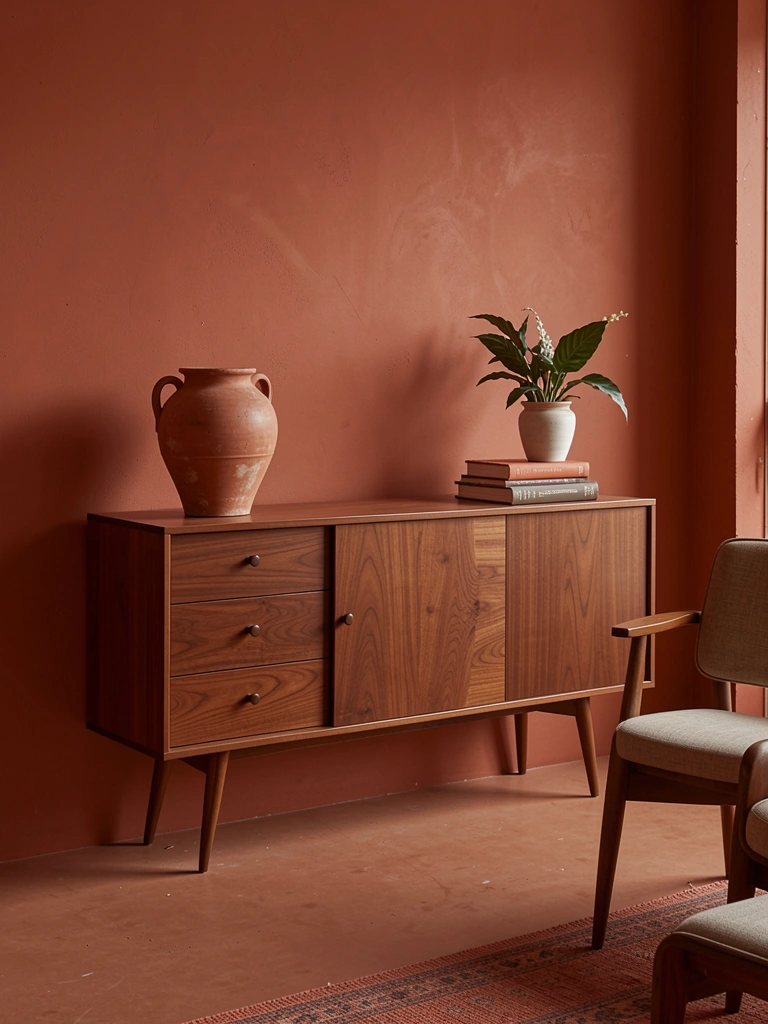
    15. Incorporate Natural Materials and Raw Textures

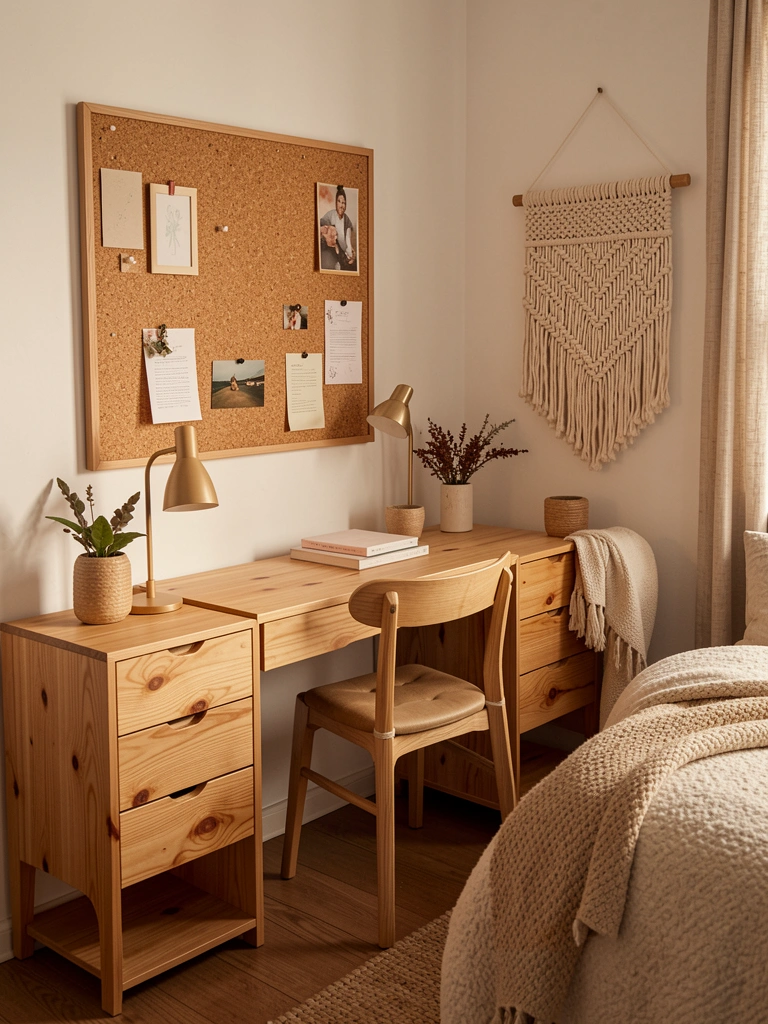
    Natural materials like cork, jute, raw wood, and stone align with 2025’s biophilic and sustainability trends while adding warmth to compact spaces. They ground the room and make it feel lived-in and intentional.

    Swap one nightstand for solid wood ($100–$250), add a cork bulletin board ($20–$50), or layer a jute rug ($80–$200). Incorporate woven wall hangings ($30–$120) or a rattan headboard ($200–$500). These materials photograph beautifully and feel tactile.

    Real talk: natural materials show dust and wear, but that’s part of their charm—they age gracefully.

    Mix raw textures with softer fabrics (linen, cotton, wool) so the room feels balanced rather than rustic.

    The resulting bedroom feels grounded, warm, and connected to nature—creating a sanctuary vibe even in a tiny space.


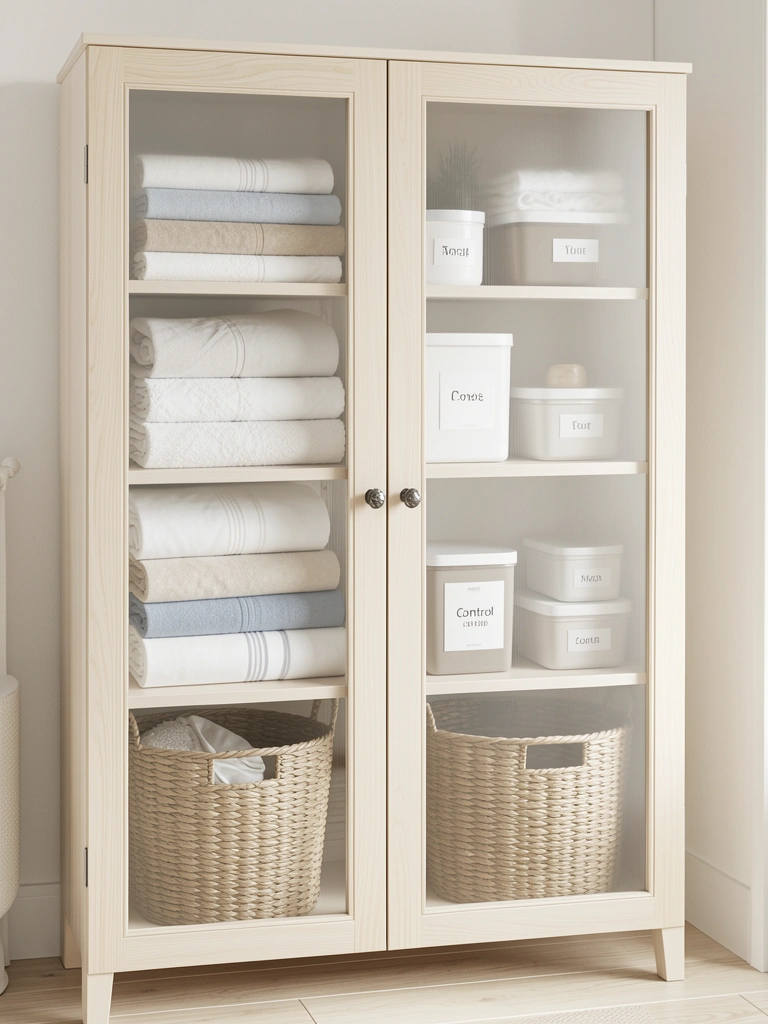
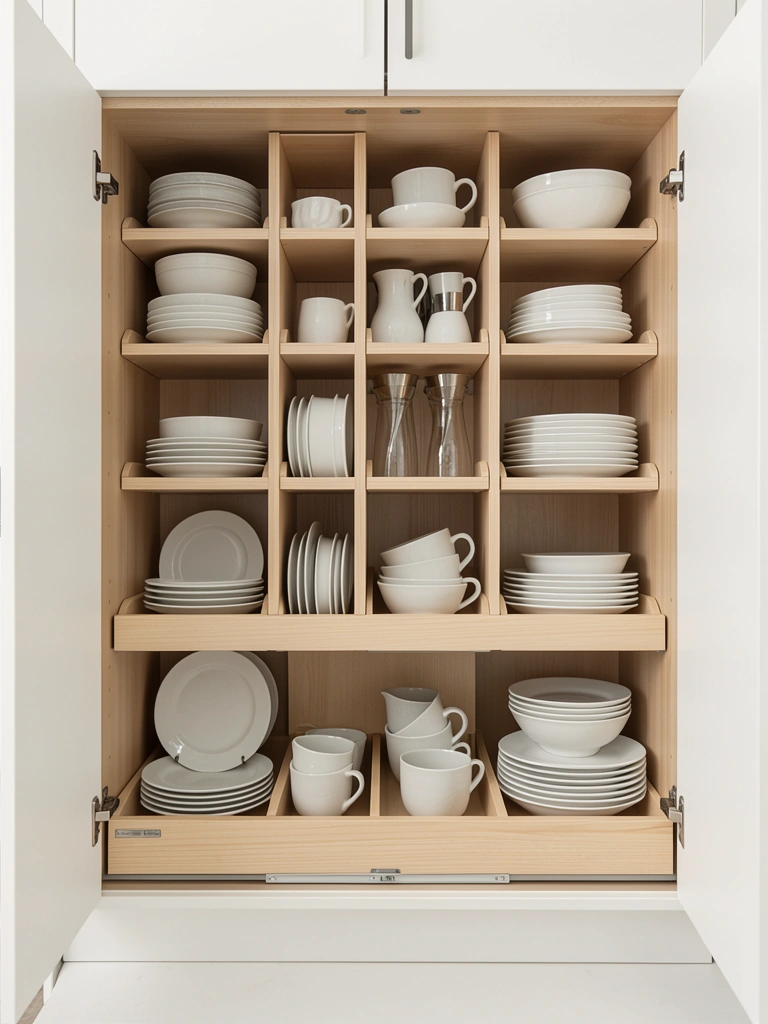
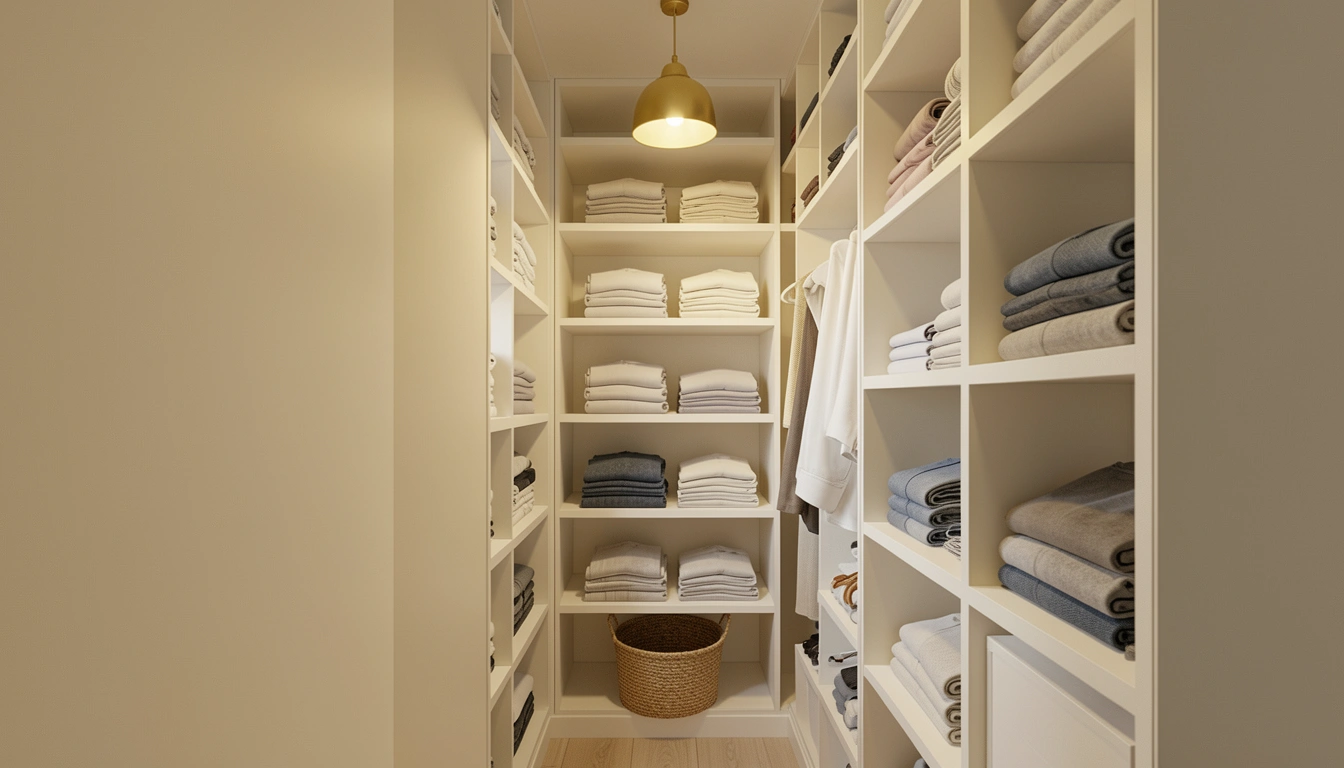
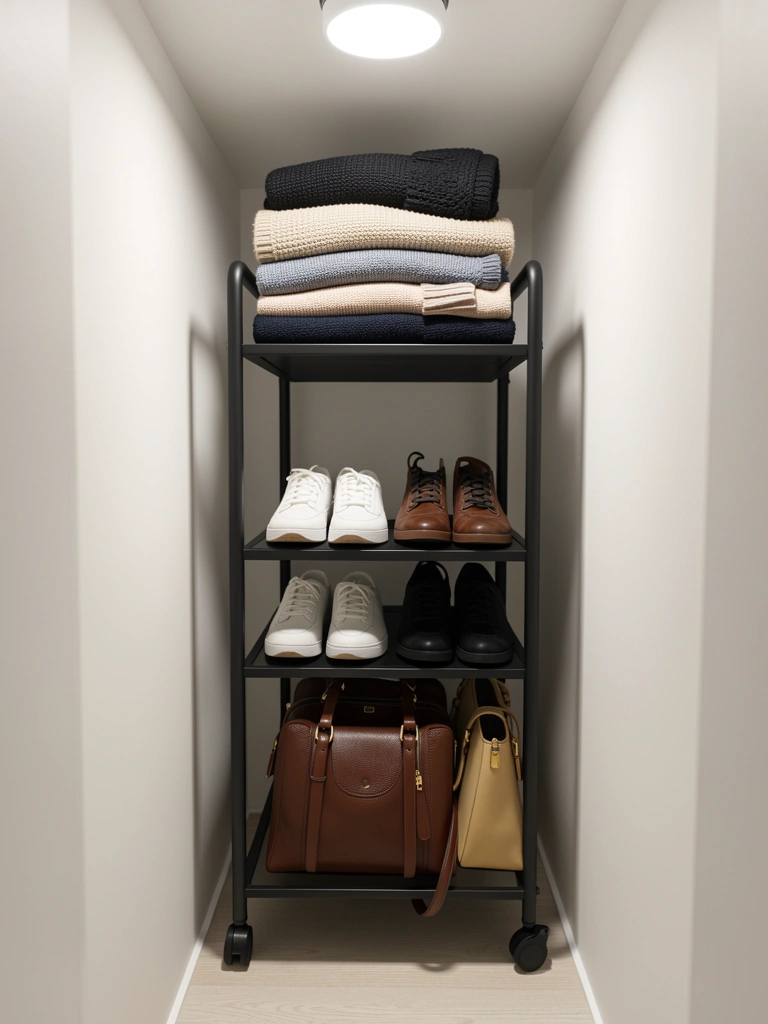
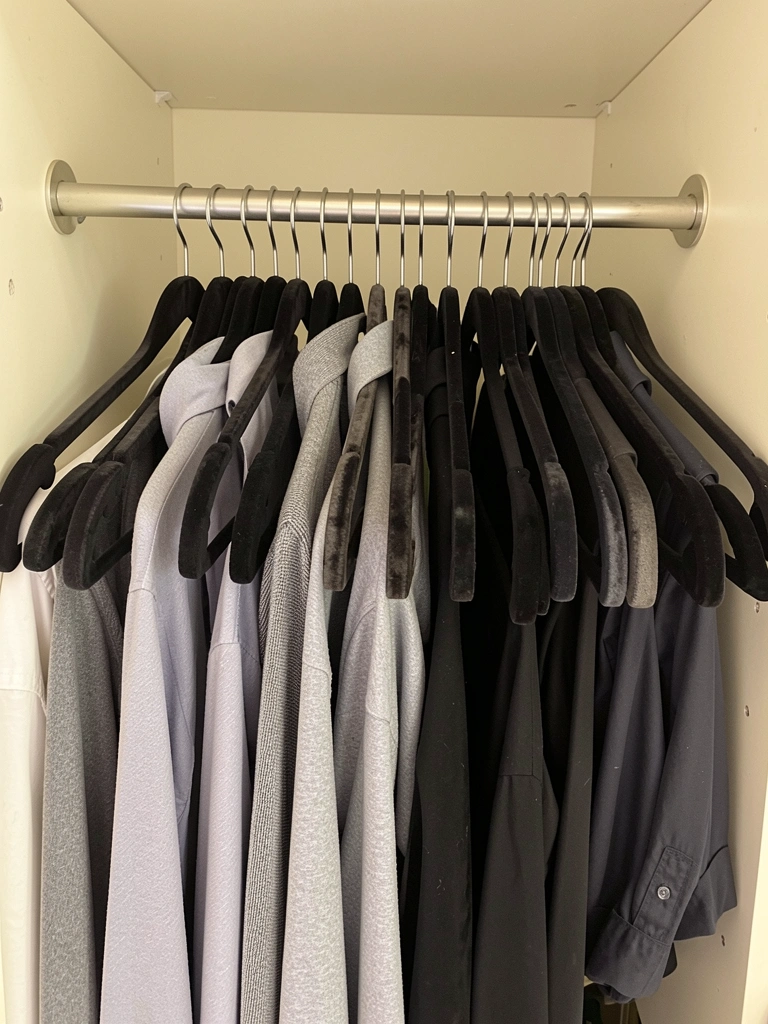
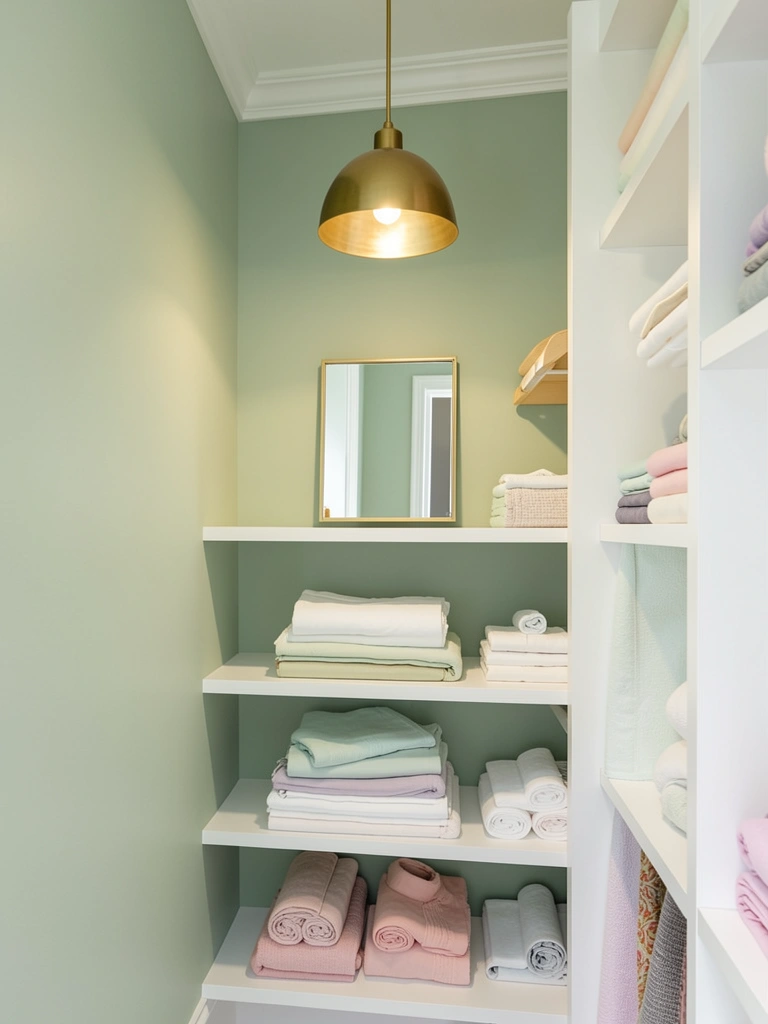
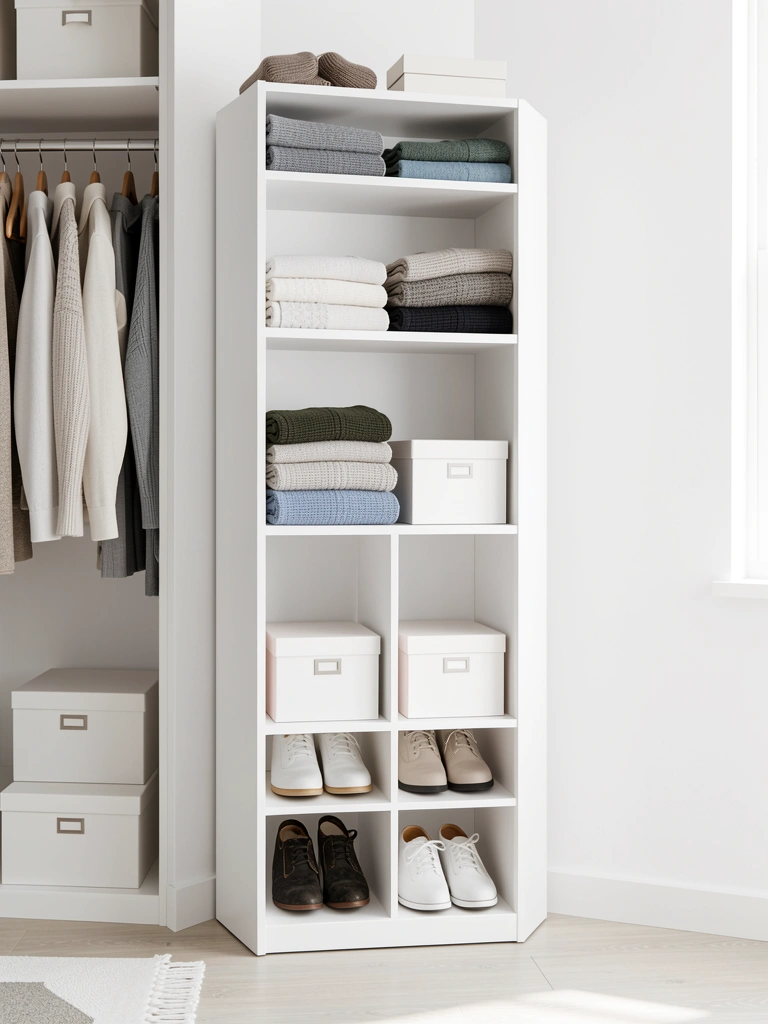
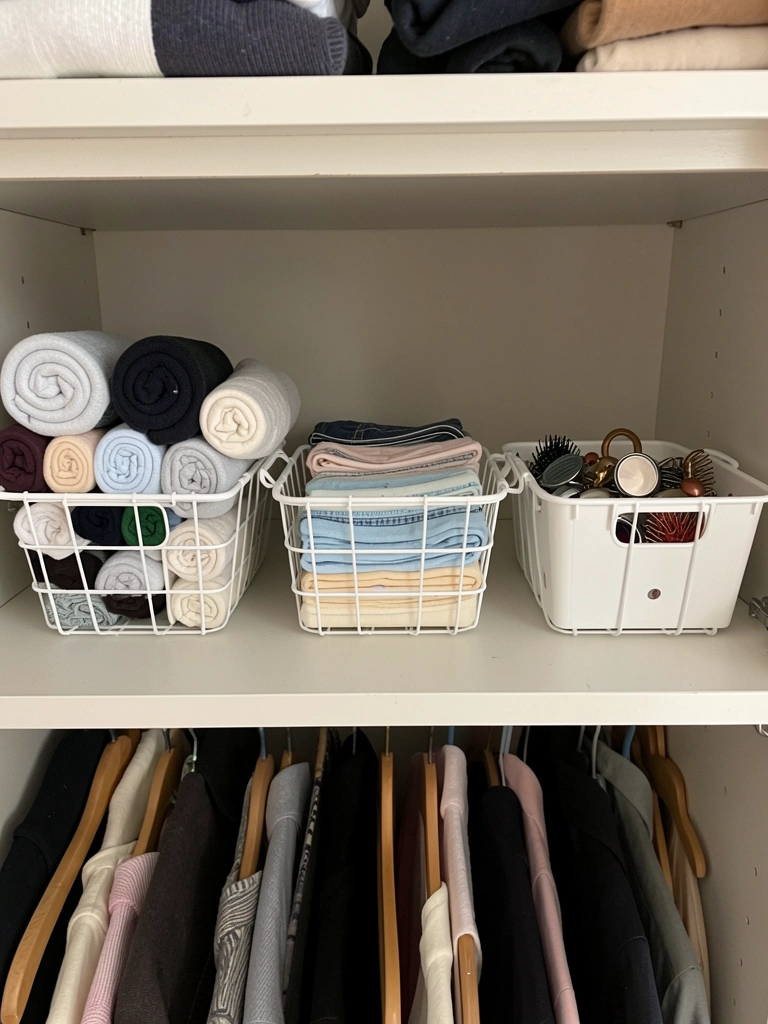
    16. Create a Capsule Wardrobe Closet System

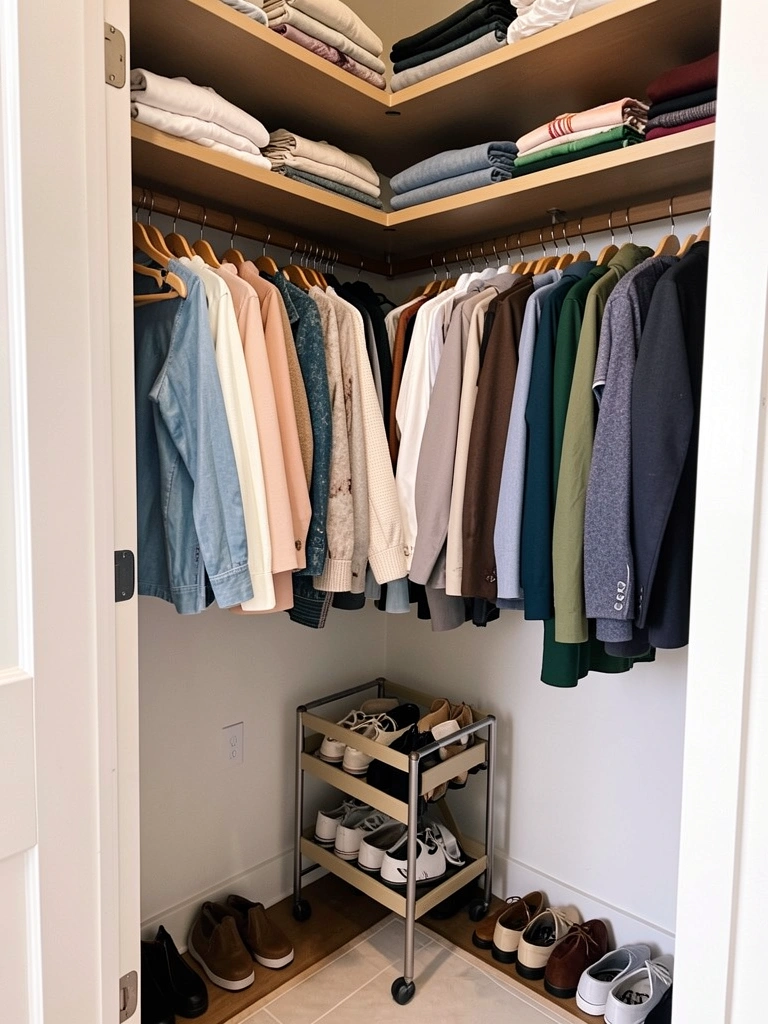
    Small bedroom = small closet. A capsule wardrobe system lets you own fewer clothes that work harder, reducing visual clutter and mental stress.

    Build a capsule of 30–40 items in a cohesive color palette (neutrals with 2–3 accent colors). Use matching wooden hangers ($20–$50 for a set of 10) and fold vertically so you see every piece. Add floating shelves ($30–$80) above for folded items. Use a slim rolling cart ($40–$100) for shoes.

    Shopping: Invest in quality basics from Uniqlo, Gap, or Everlane rather than many cheap pieces.

    Fewer items mean less visual noise, easier mornings, and a bedroom that stays tidier with minimal effort.

    You’ll discover that you wear the same 20 pieces anyway—why not embrace it and create more space?


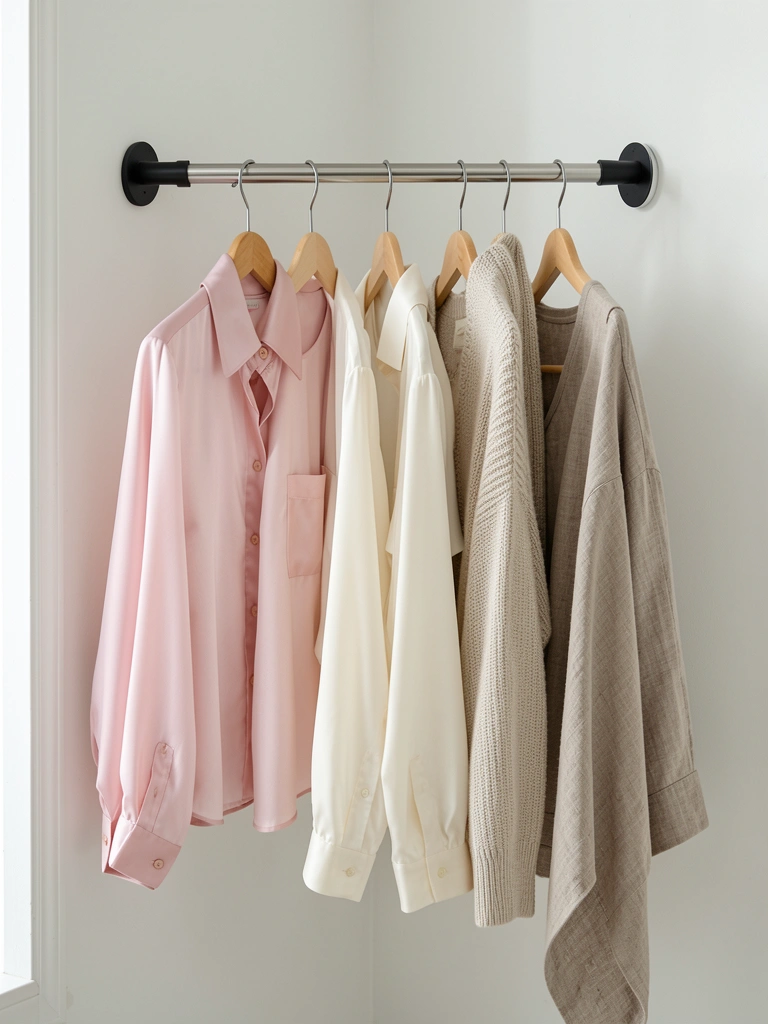
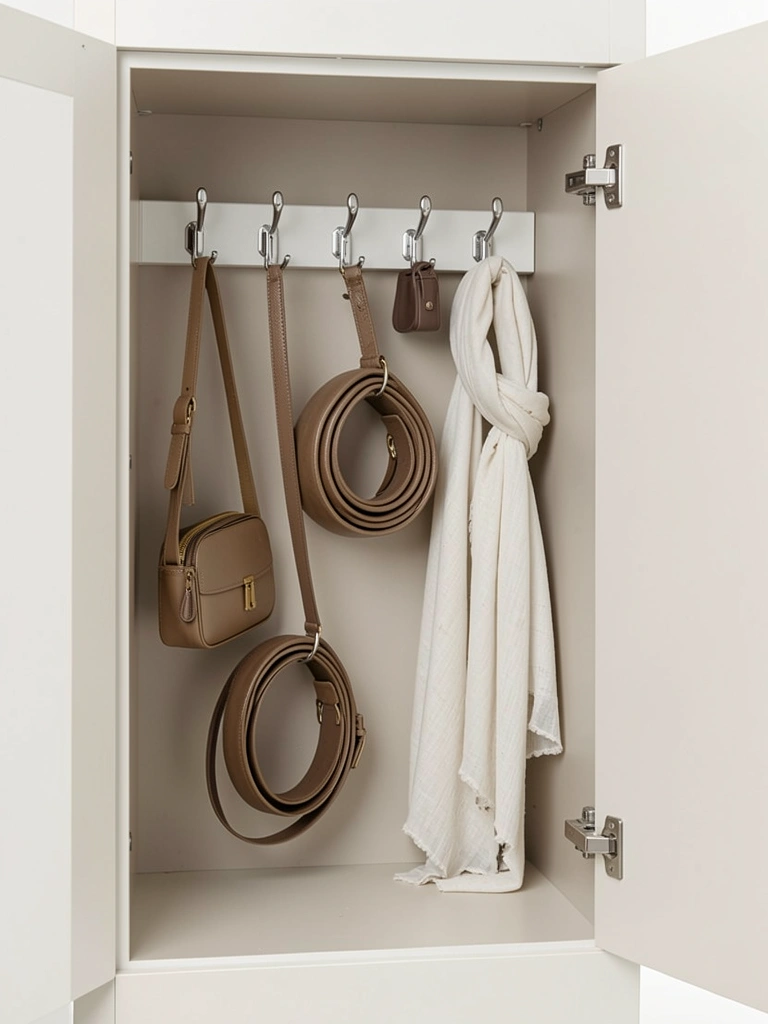
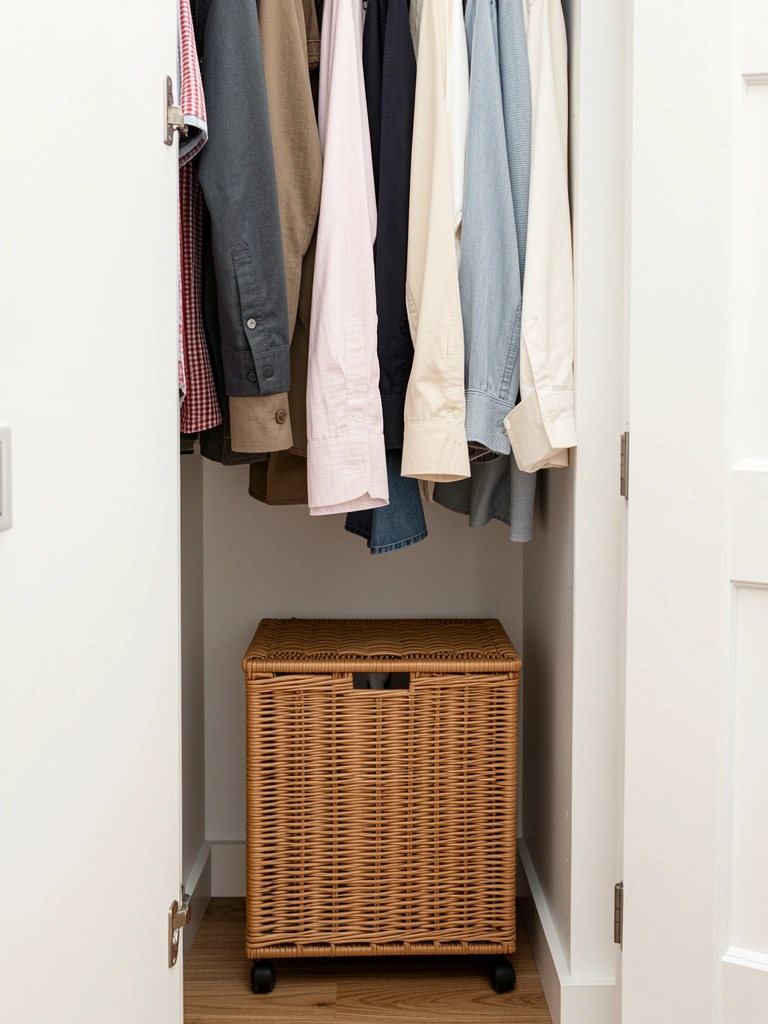
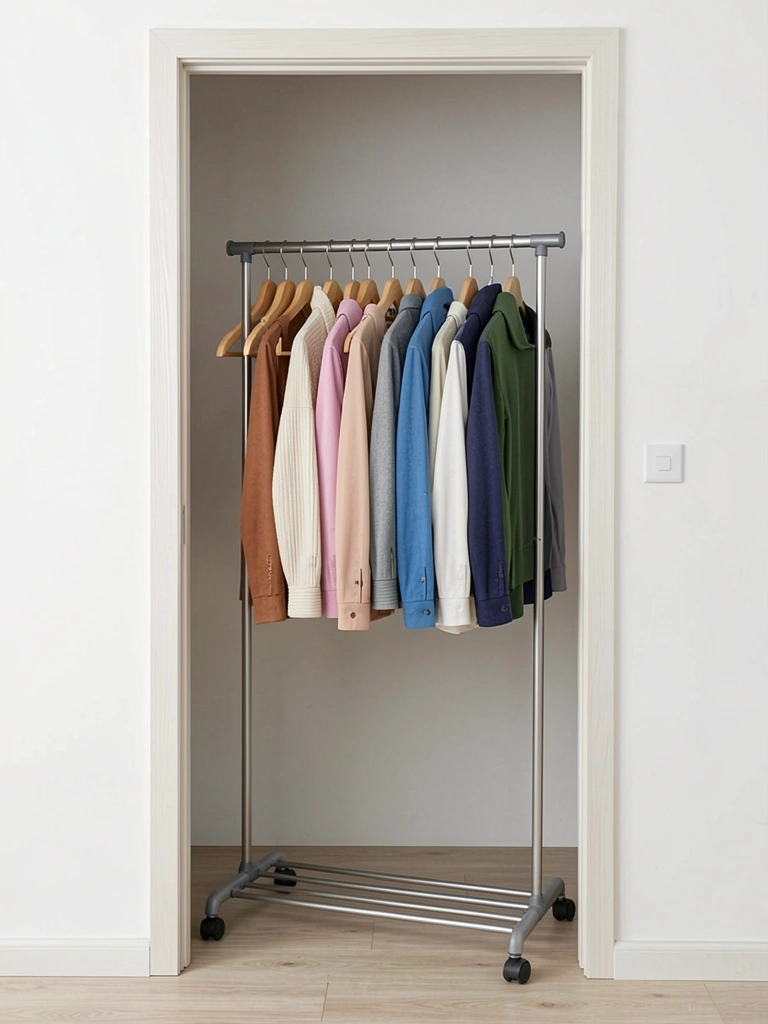
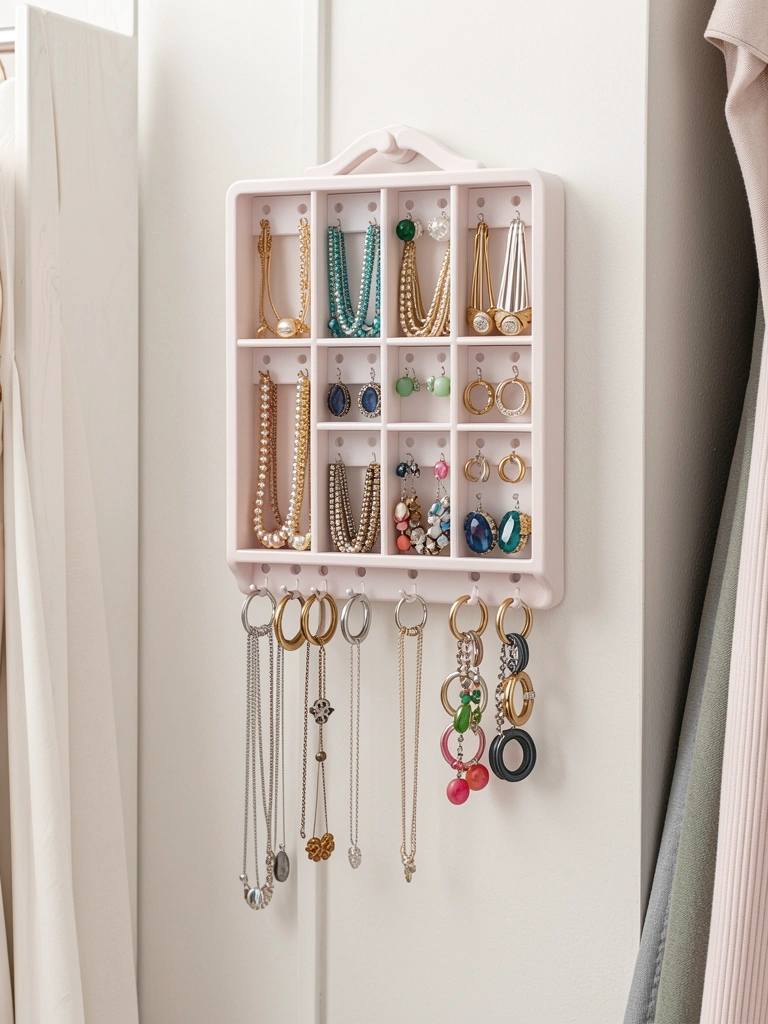
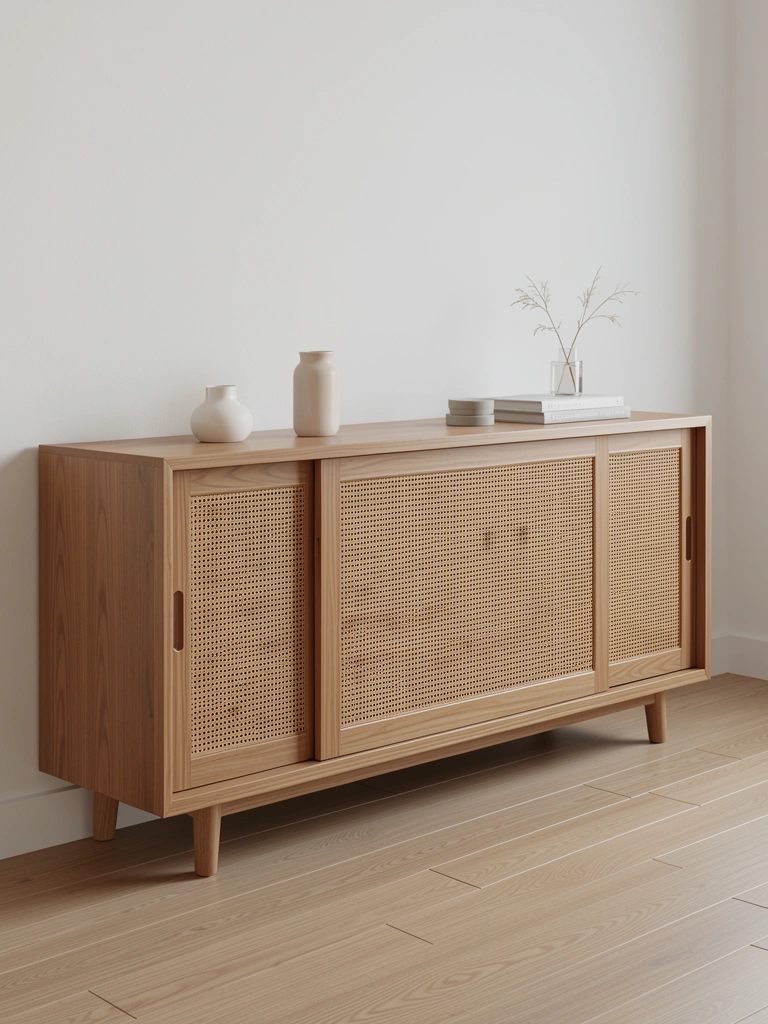
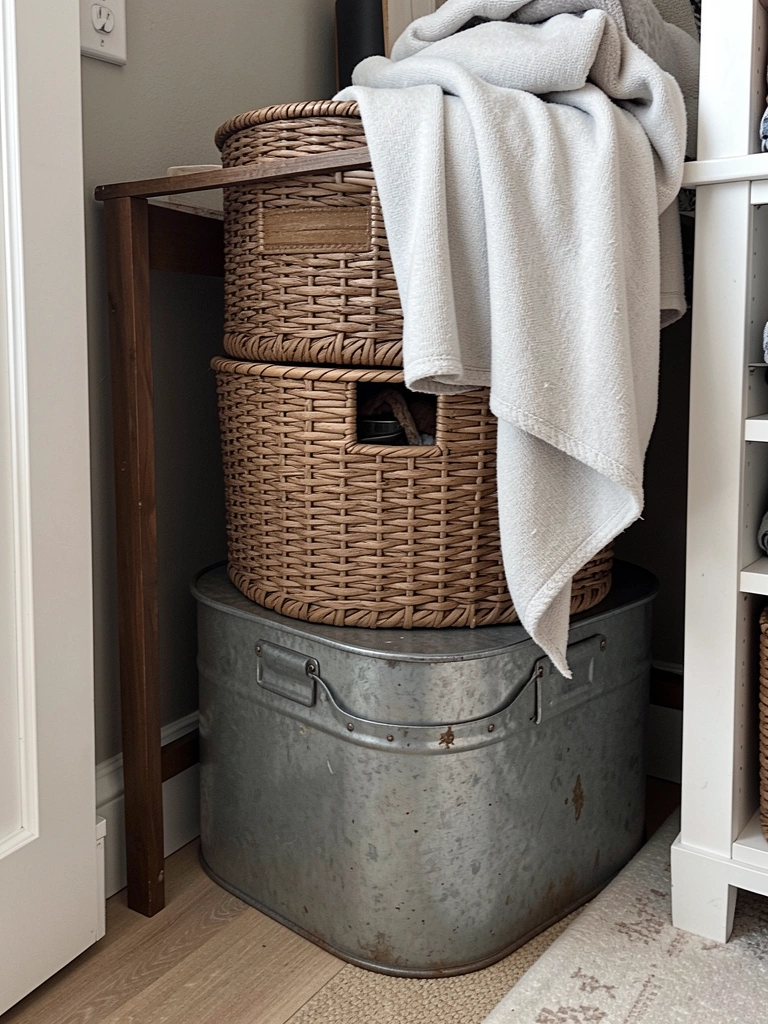
    17. Mount a Narrow Wardrobe or Clothing Rack

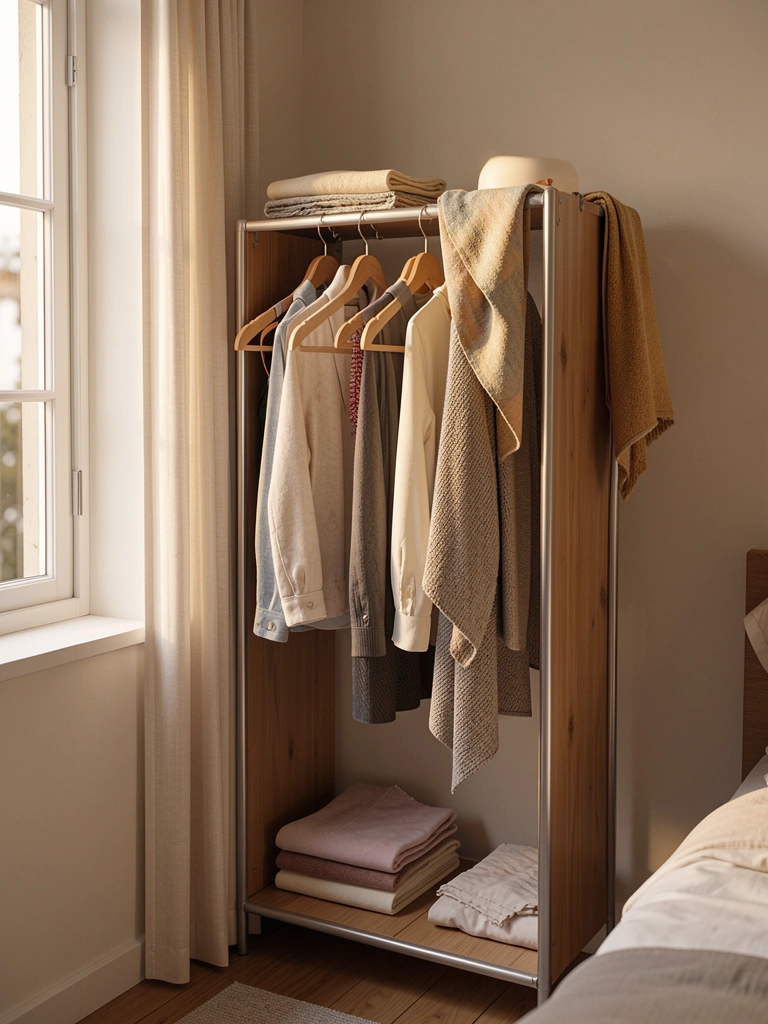
    If your closet doesn’t exist or is absurdly small, a standalone wardrobe or open clothing rack becomes functional art while saving the limited closet space for off-season storage.

    A narrow wardrobe (18–24 inches wide) costs $150–$400 from IKEA, Wayfair, or vintage sellers. An open clothing rack ($80–$300) works if you’re stylish with your selections (showing too many chaotic clothes defeats the purpose).

    Style it intentionally with current outfits and a few special pieces. Add a basket beneath for accessories or off-season items ($30–$80).

    Position it where it’s visually anchored—a corner, beside a window, or as a room divider—not floating randomly.

    The arrangement becomes a styling focal point and solves storage without requiring major furniture moves or renovations.


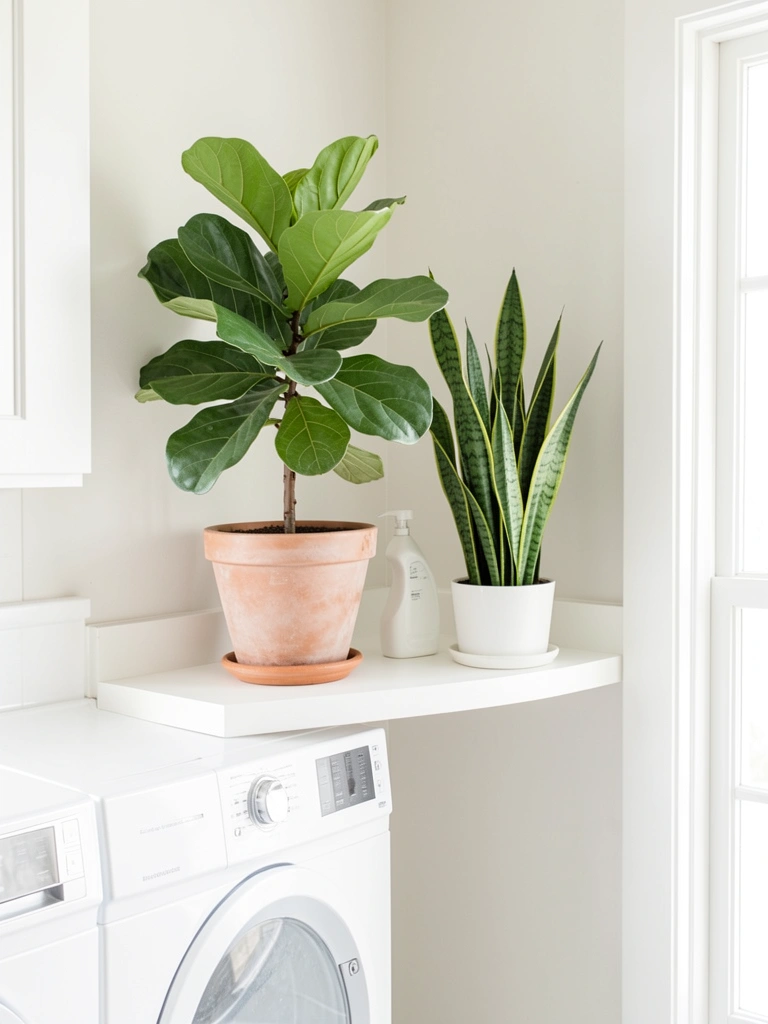
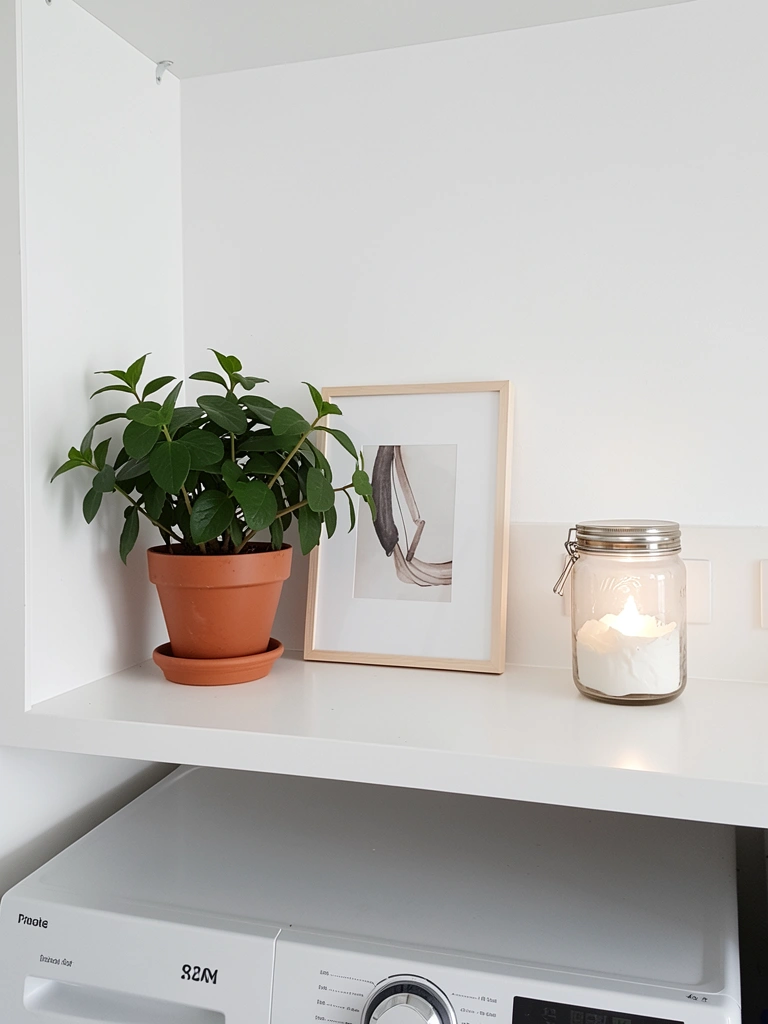
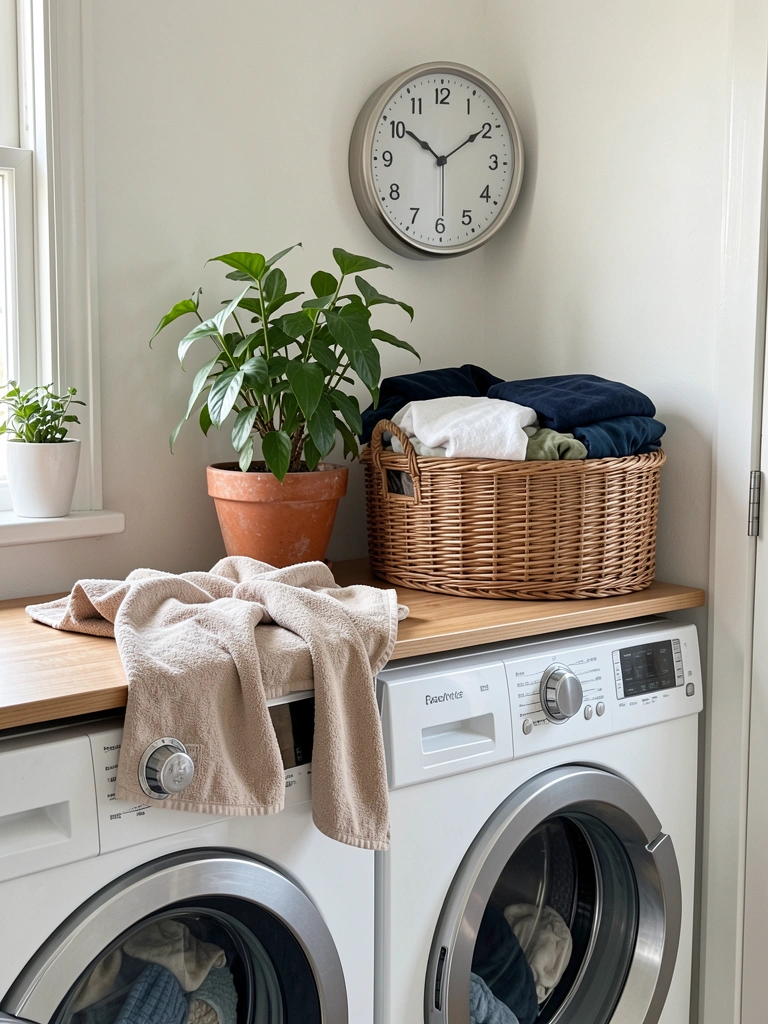
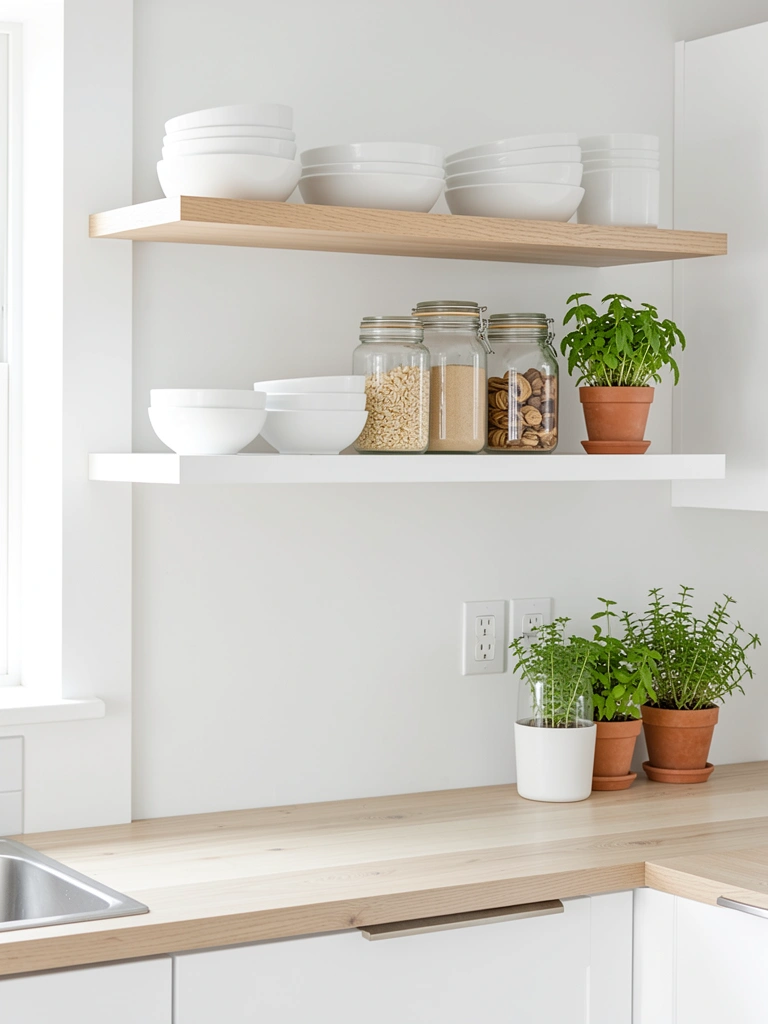
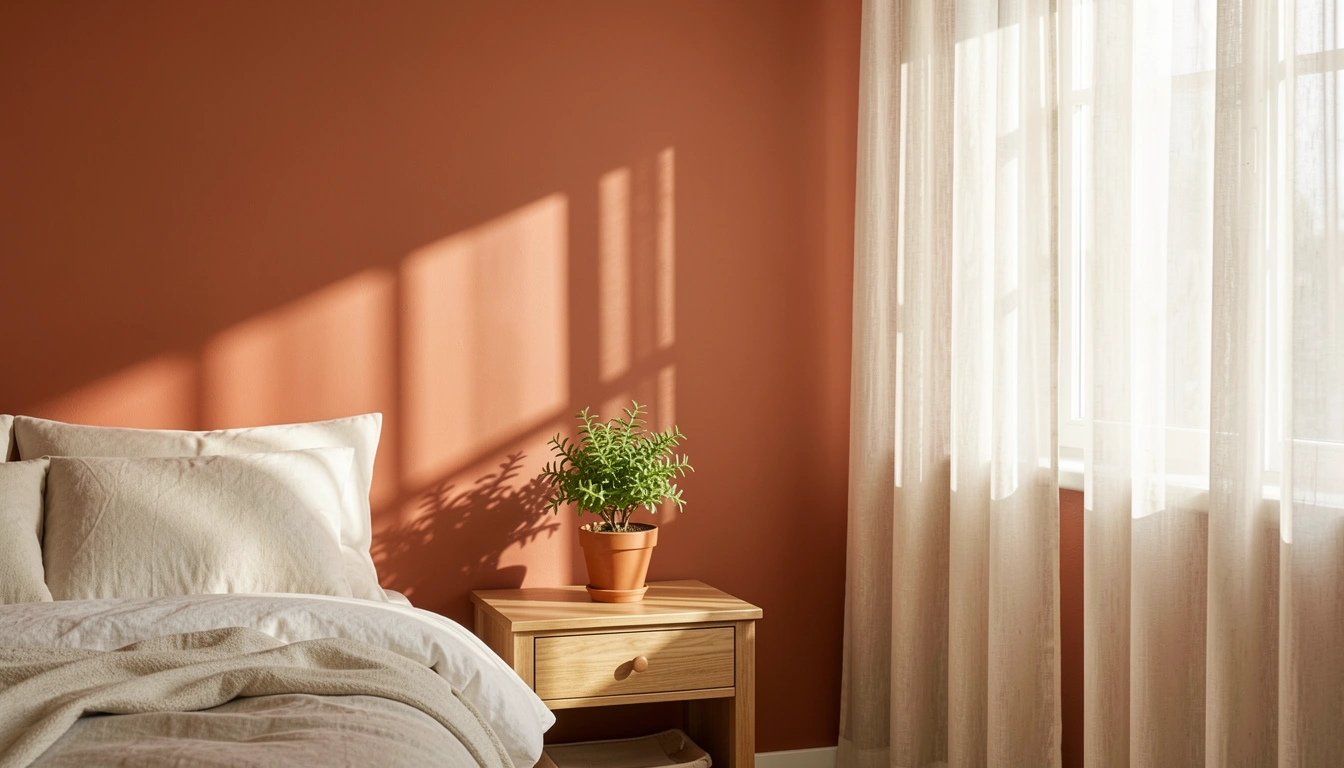
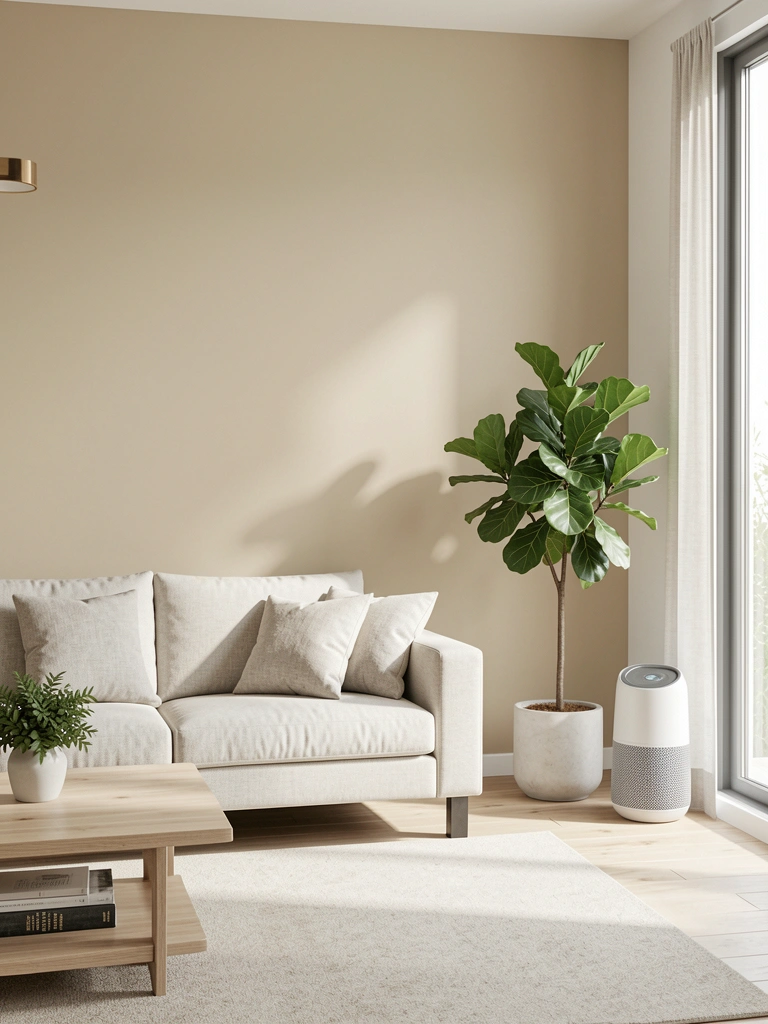
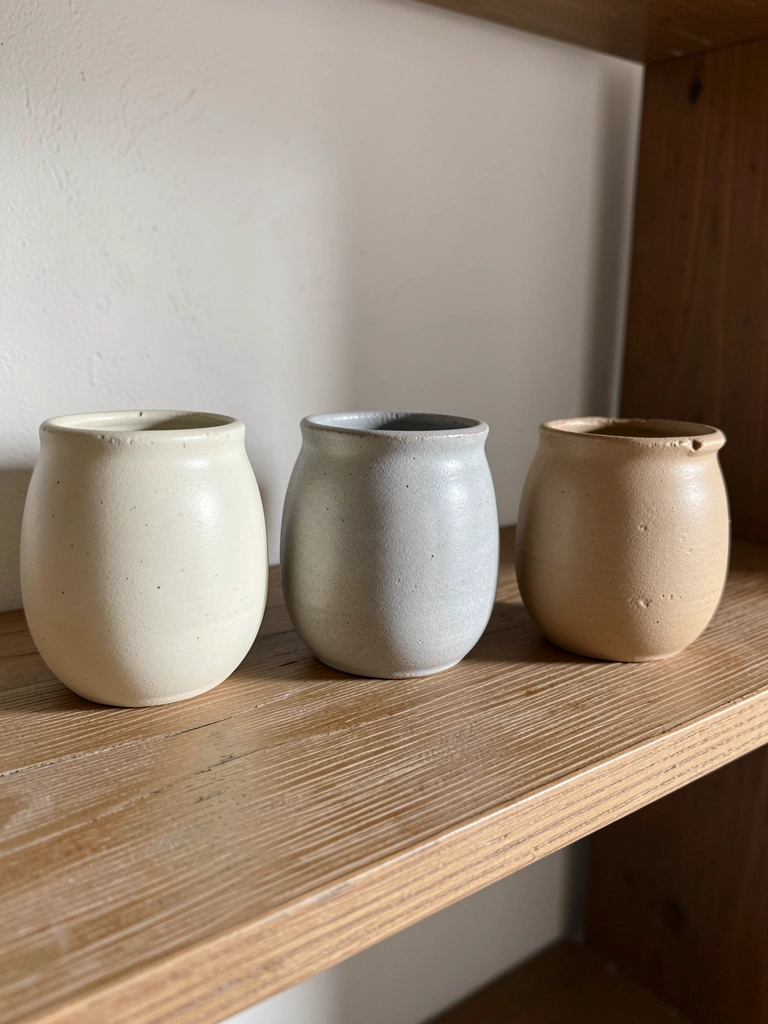
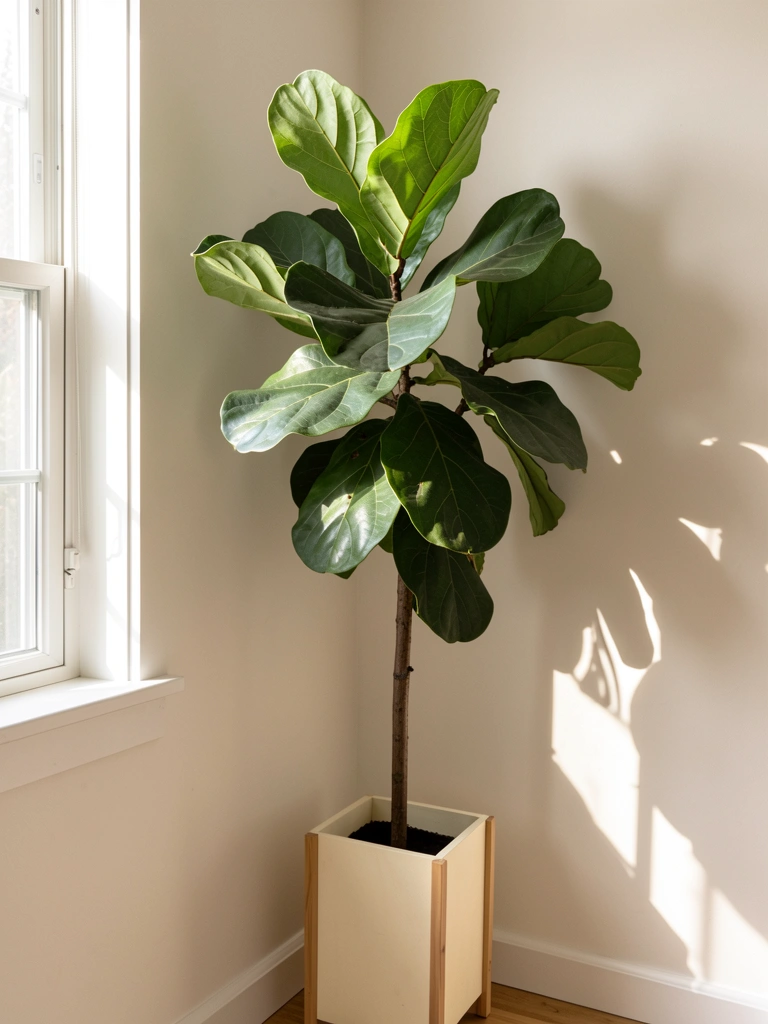
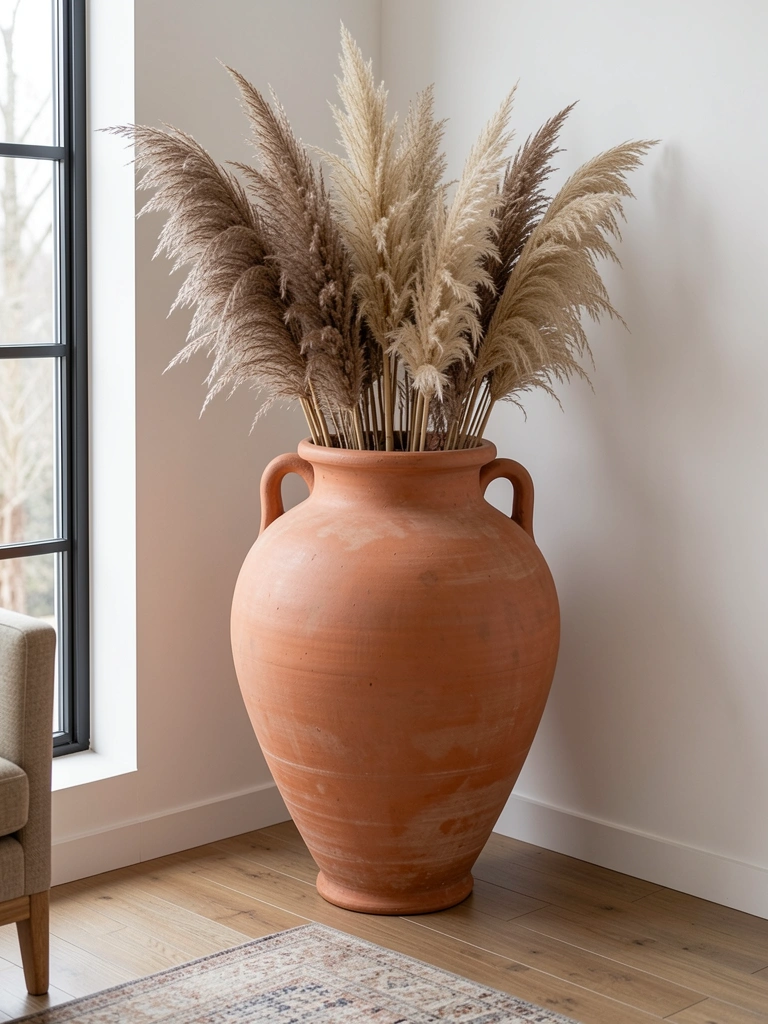
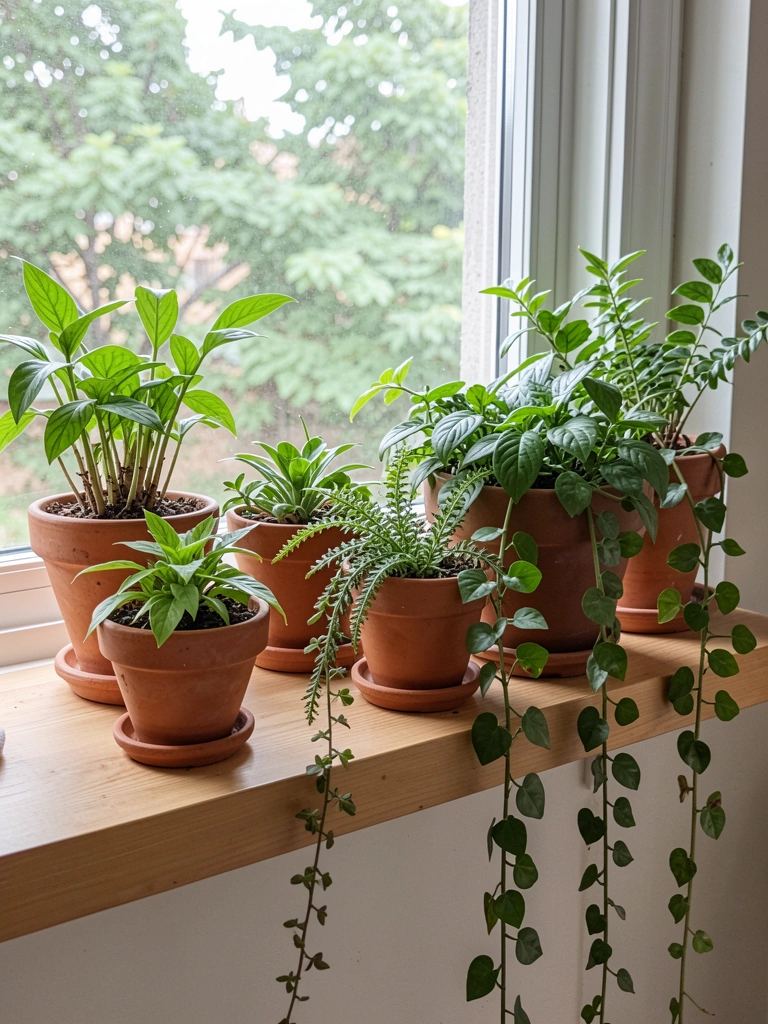
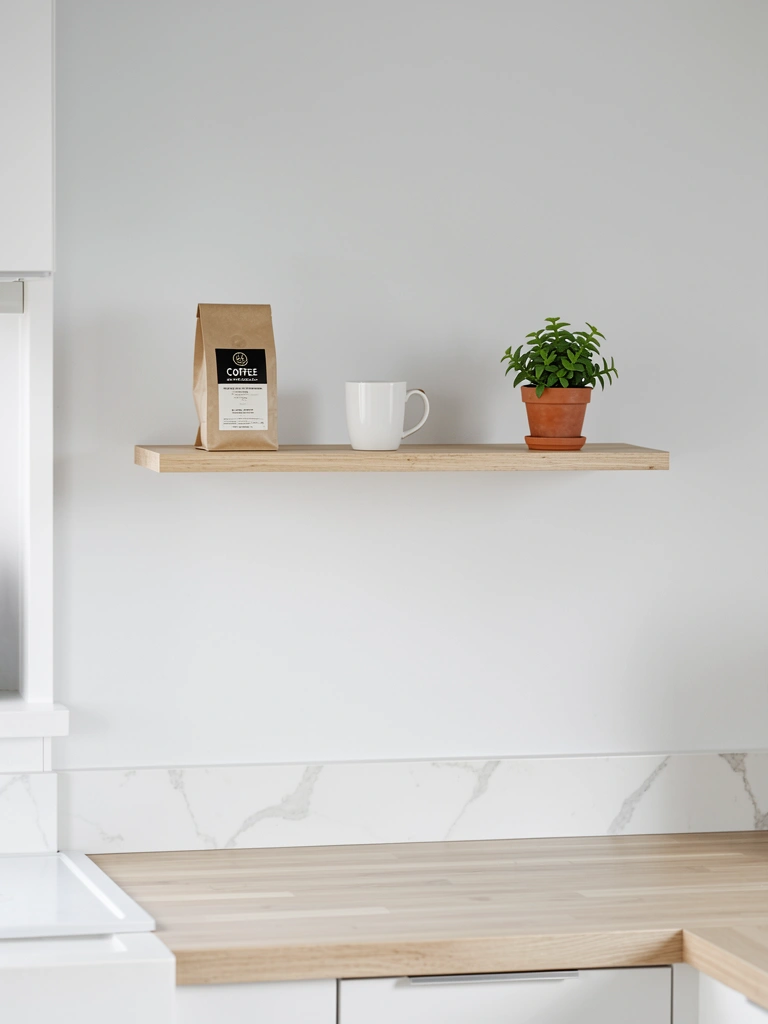
    18. Add Biophilic Elements with Low-Maintenance Plants

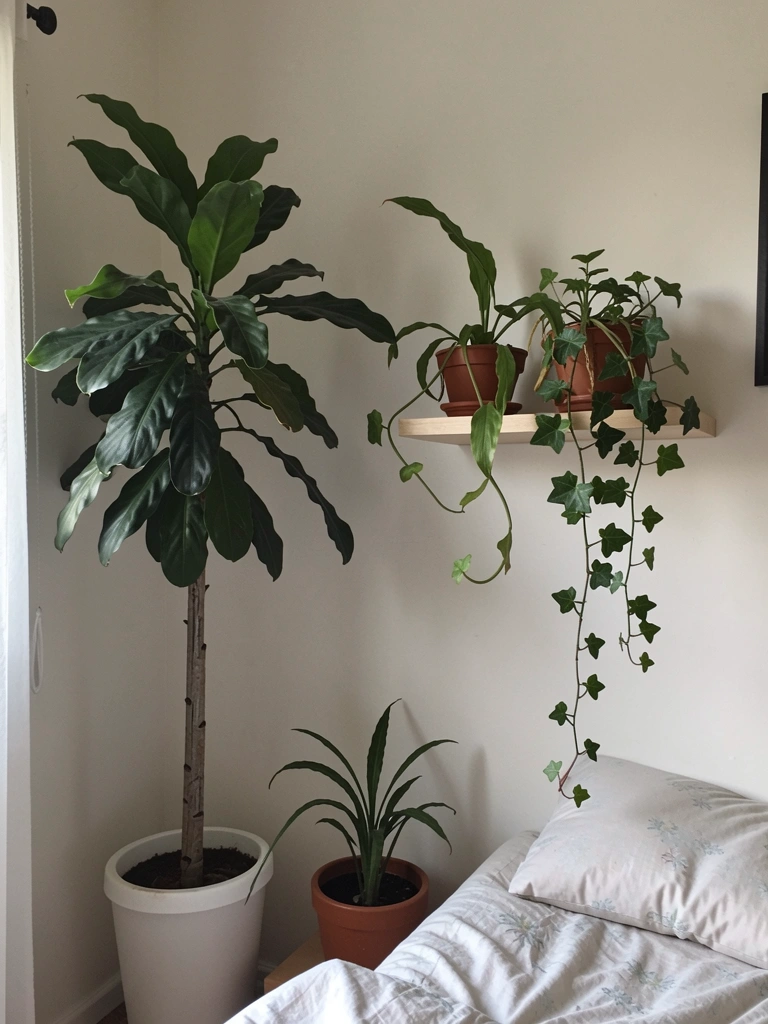
    Plants bring calm, improve air quality, and align with 2025’s biophilic trend perfectly. They make small spaces feel alive and connected to nature without consuming much physical space.

    Choose low-maintenance plants (pothos, snake plant, ZZ plant, calathea) that tolerate lower light ($10–$30 each). Position them at different heights using shelves and plant stands ($20–$80) to draw the eye upward. Use ceramic or terracotta pots ($8–$25 each) that photograph beautifully.

    Cluster plants in one corner rather than scattering them to keep the room feeling organized.

    Watering schedule: most tropical houseplants need water every 7–10 days depending on light and season. Set a phone reminder if you forget easily.

    Your bedroom becomes a living, breathing retreat that purifies air and boosts mood without requiring floor space.


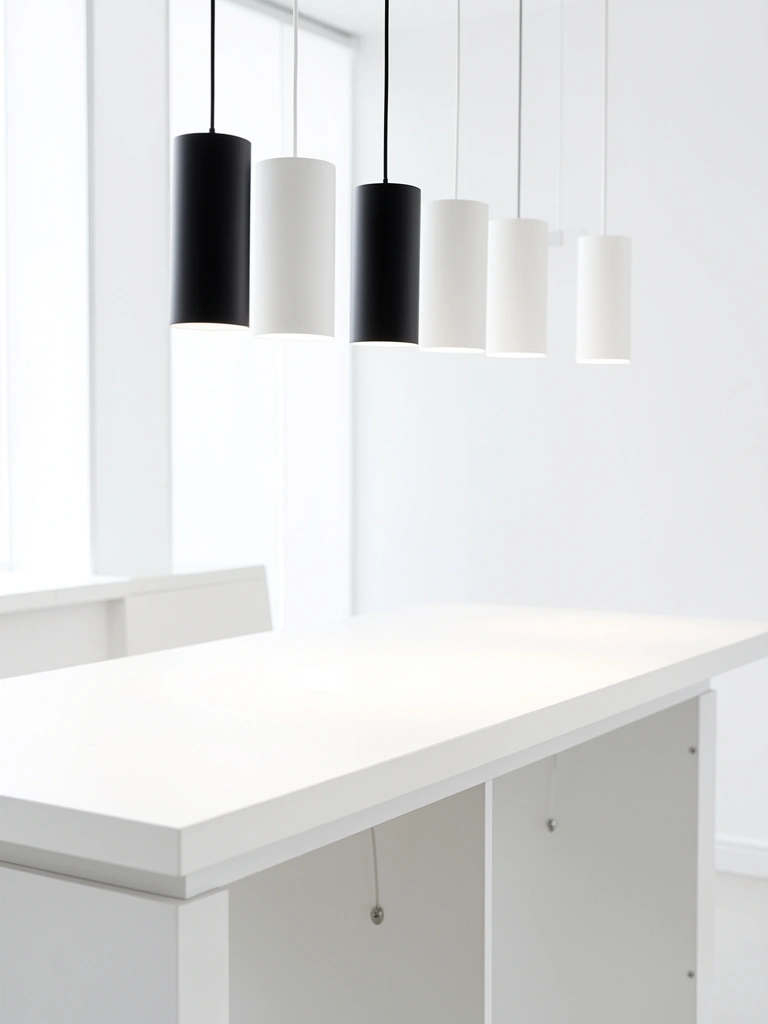
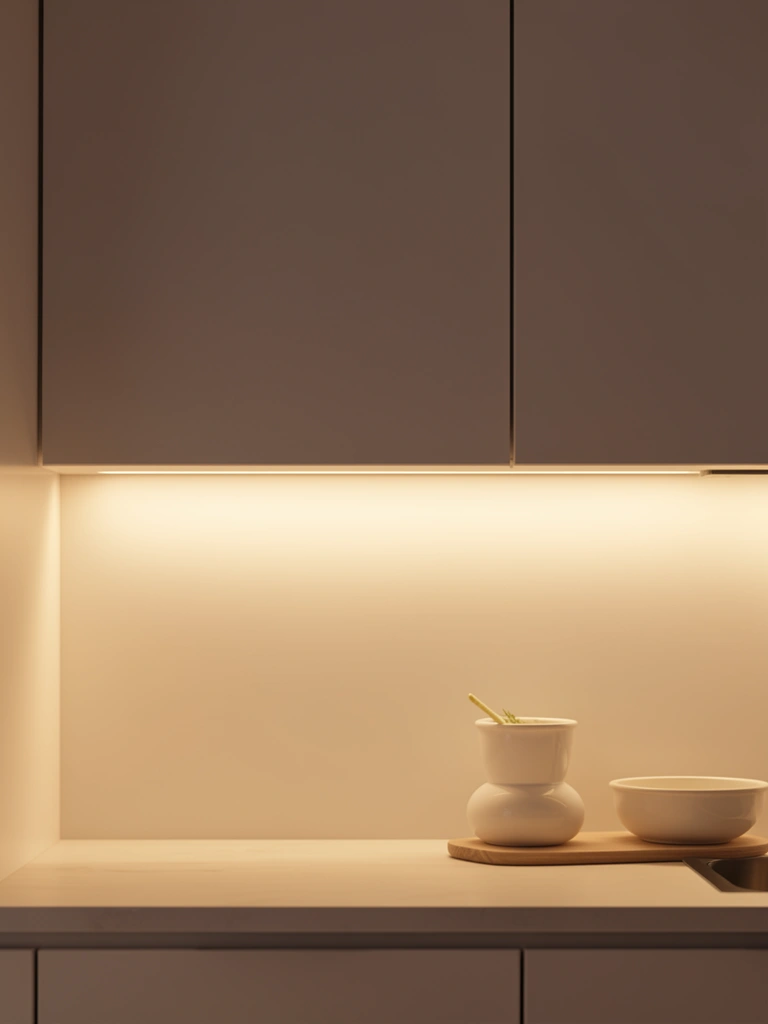
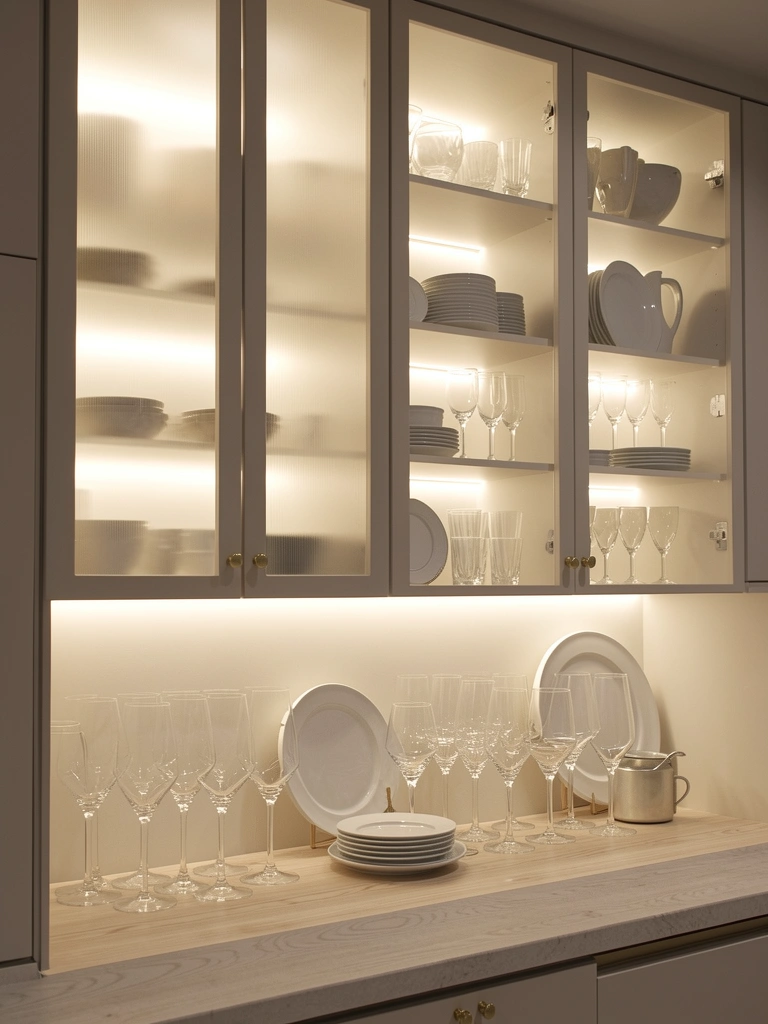
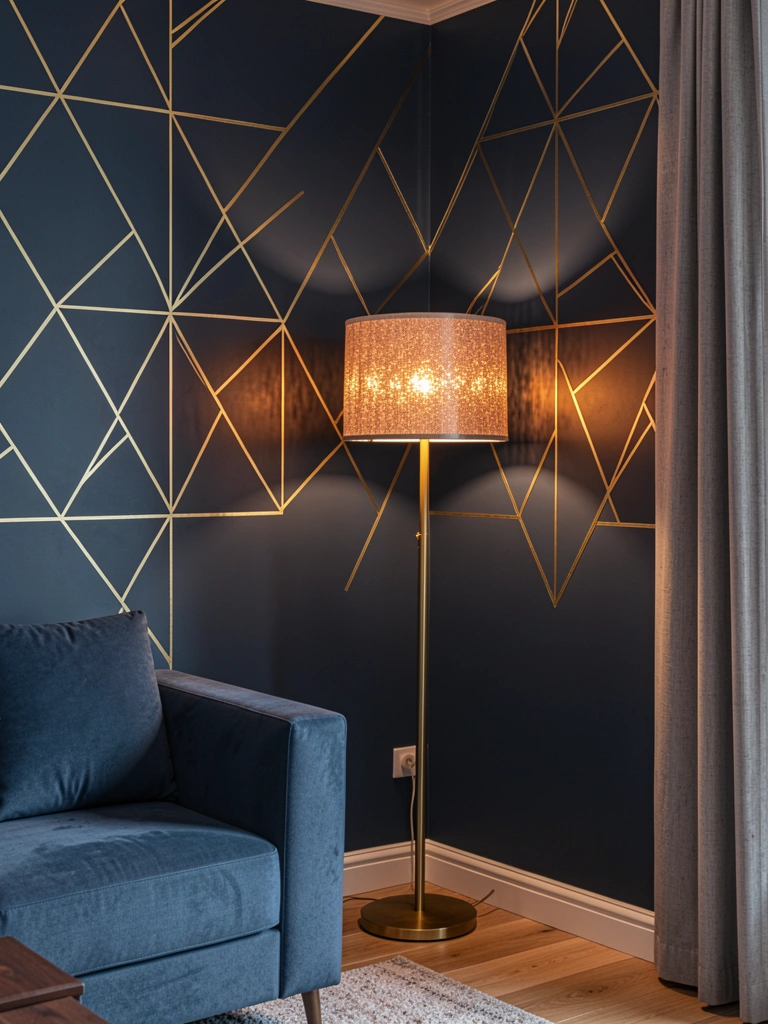
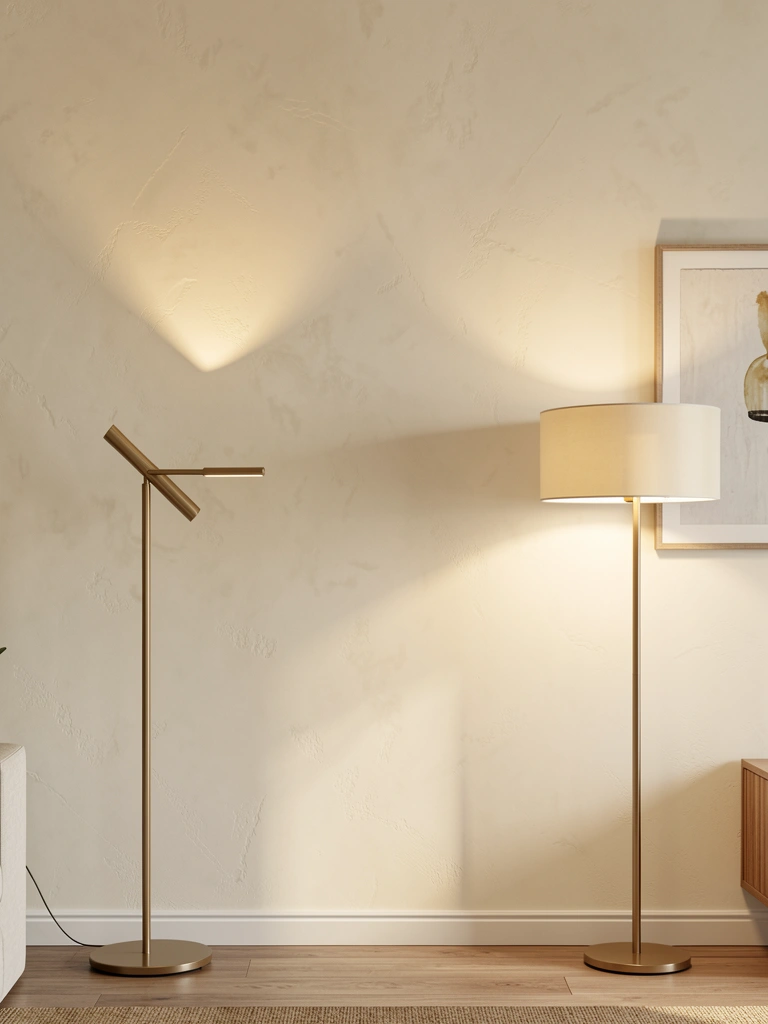
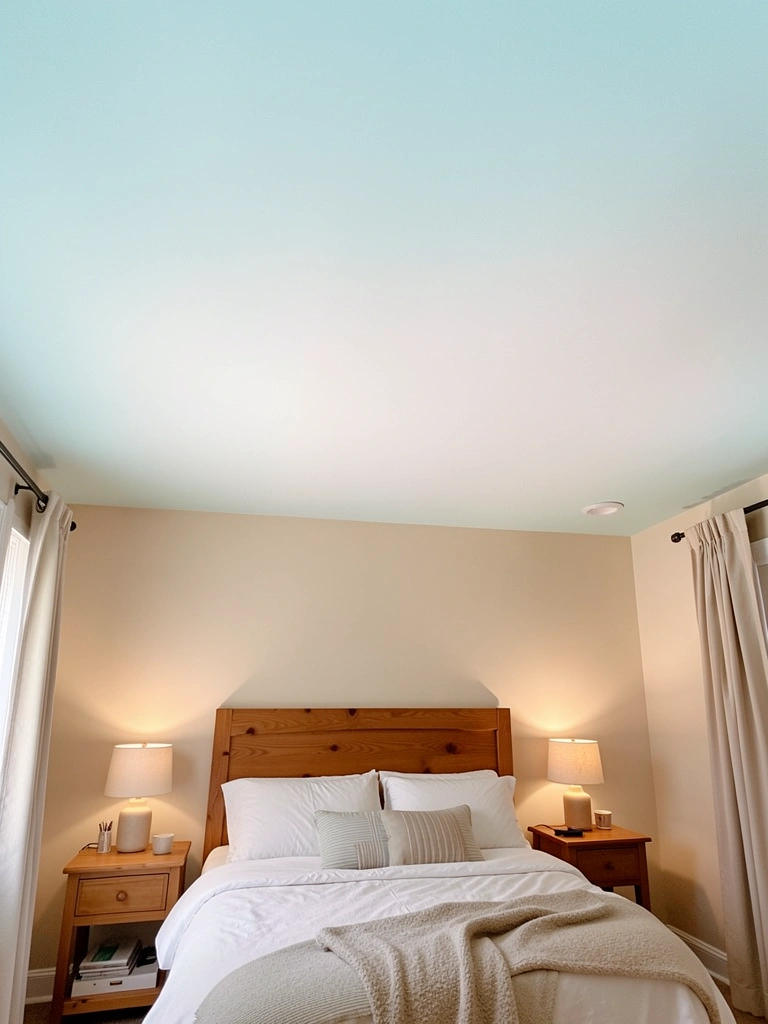
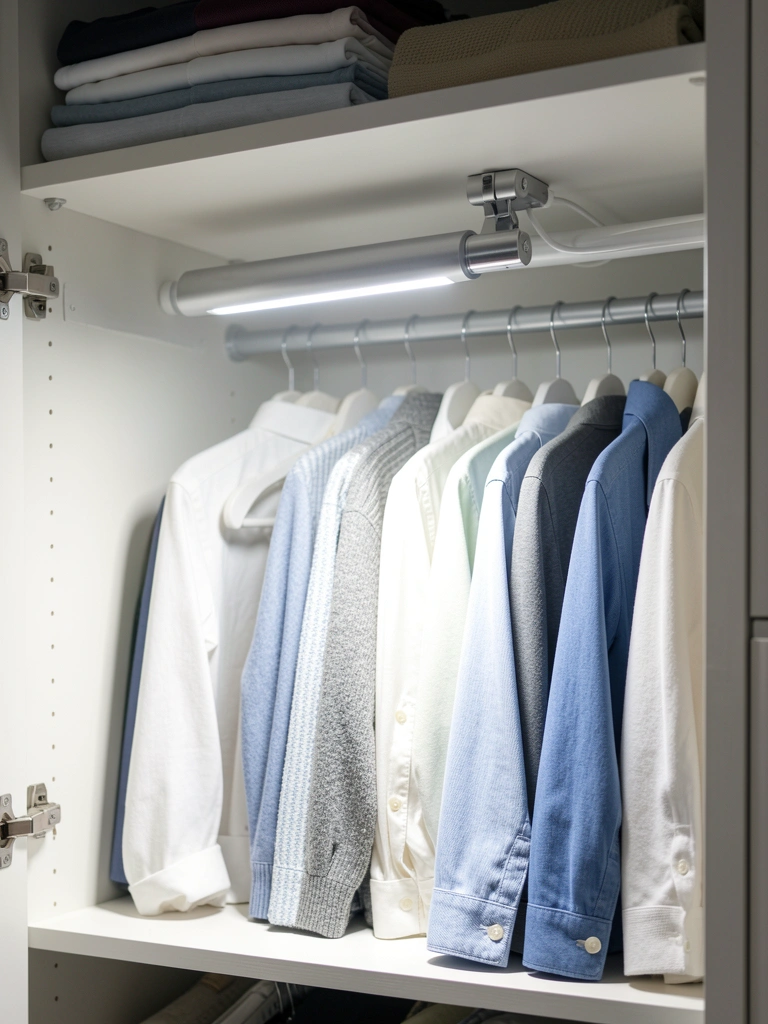
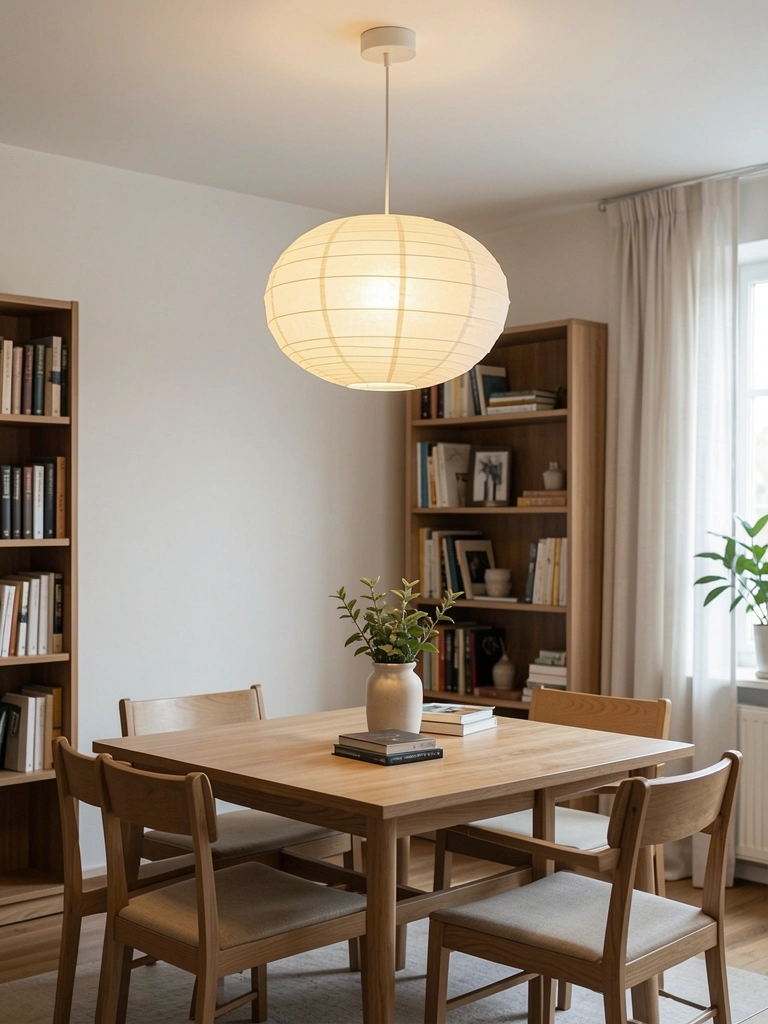
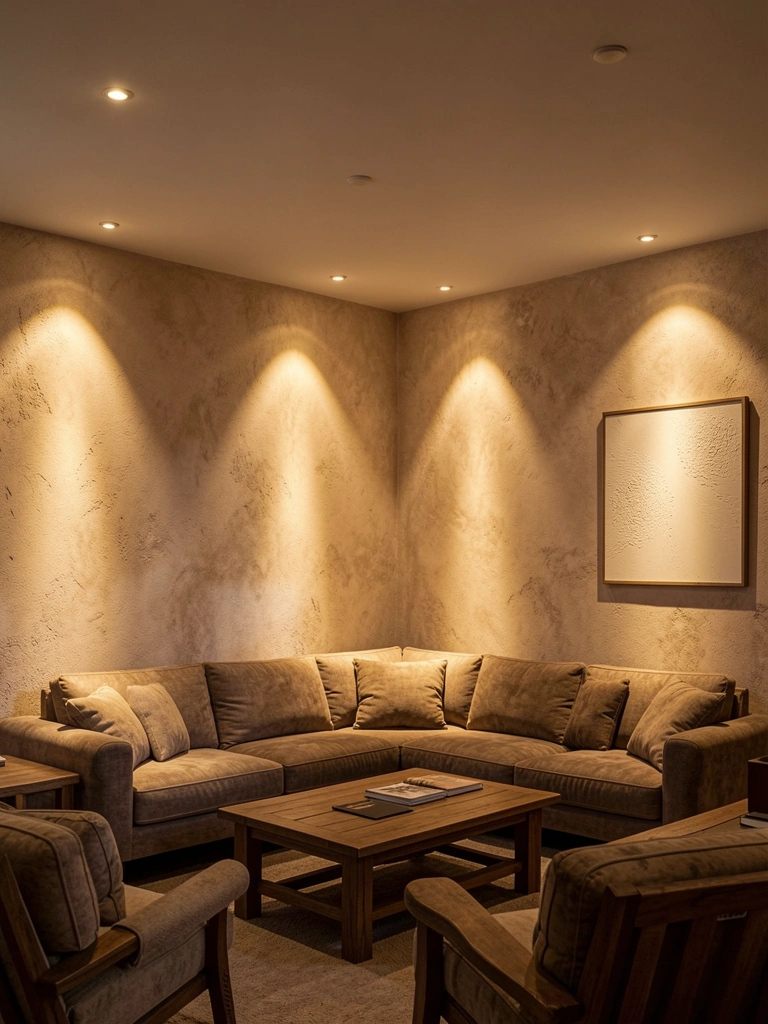
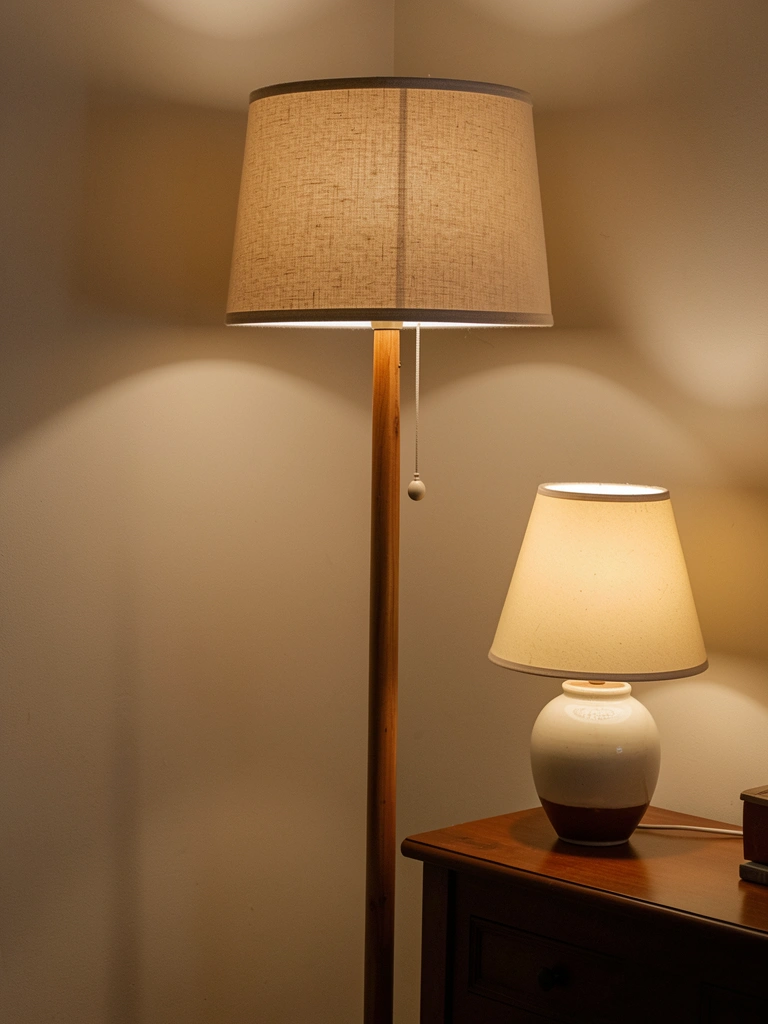
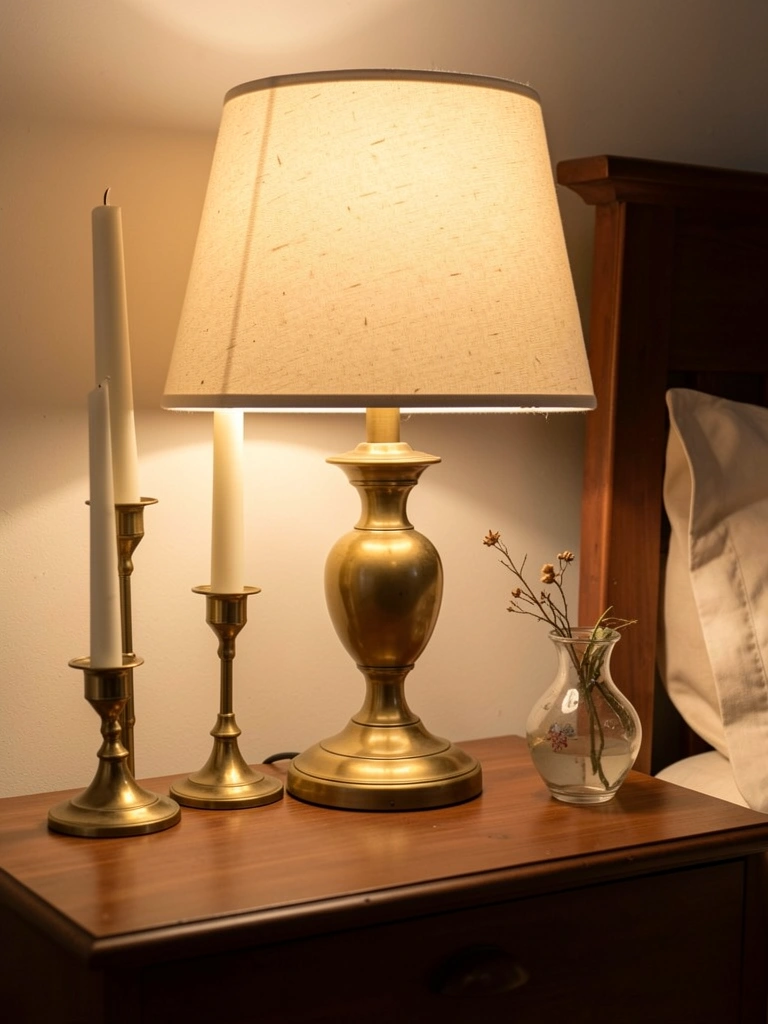
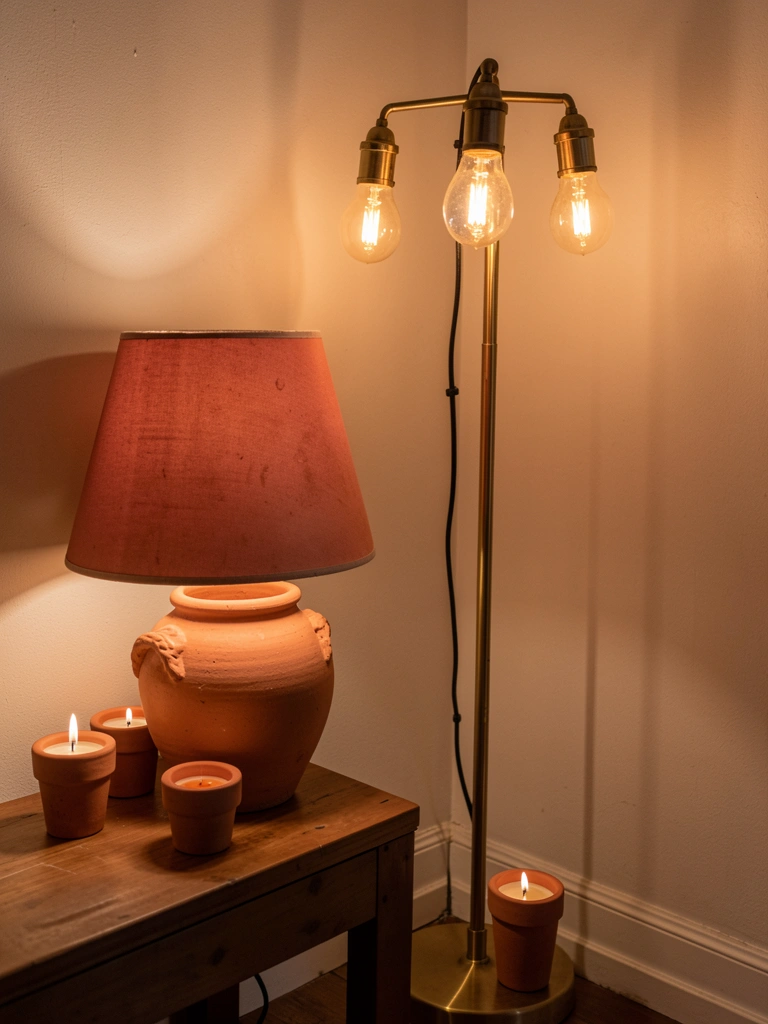
    19. Use Layered Lighting Instead of One Overhead Light

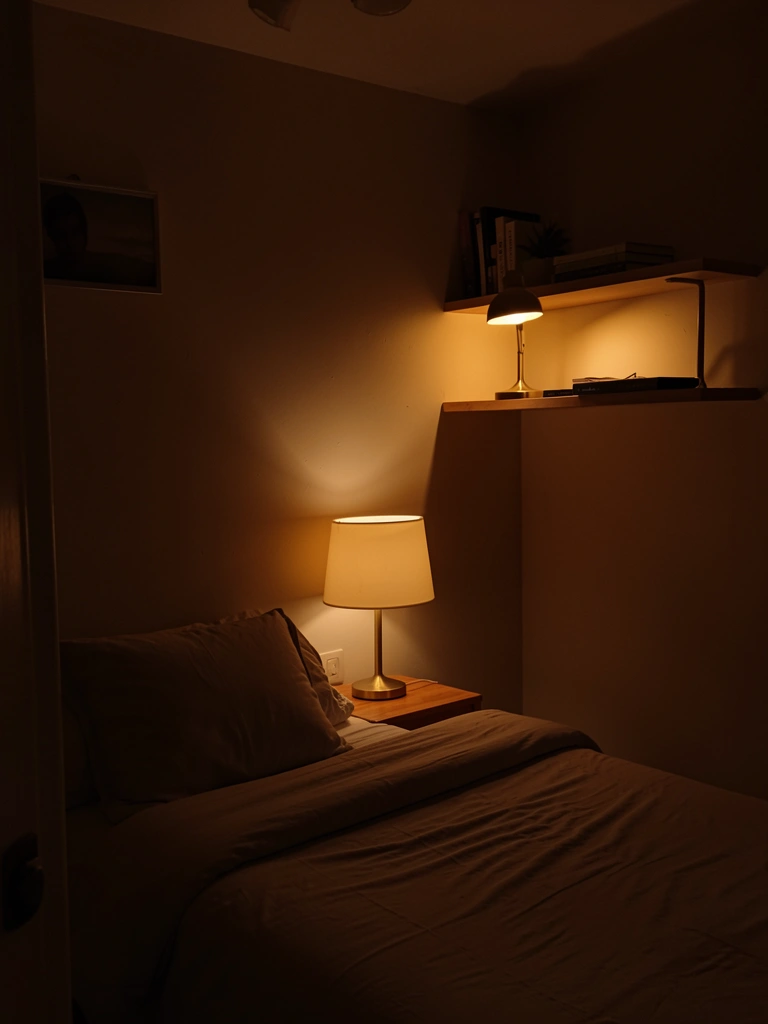
    Overhead lights alone make small rooms feel harsh and institutional. Layered lighting (overhead, task, ambient) creates depth and allows you to control mood throughout the day.

    Install a dimmer switch on overhead lights ($15–$30 installation). Add a reading lamp on your nightstand ($30–$80), a clip-on lamp for your desk ($25–$50), and string lights or a small floor lamp in a corner ($20–$60). Use warm-toned bulbs (2700K) to avoid cold, sterile vibes.

    Budget hack: battery-operated LED fairy lights ($10–$20) create ambiance without needing outlets.

    Layers let you adjust for morning energy, midday focus, and evening wind-down—all within the same small footprint.

    The result is a bedroom that feels warmer, more intentional, and adaptable to your needs rather than one-note and harsh.


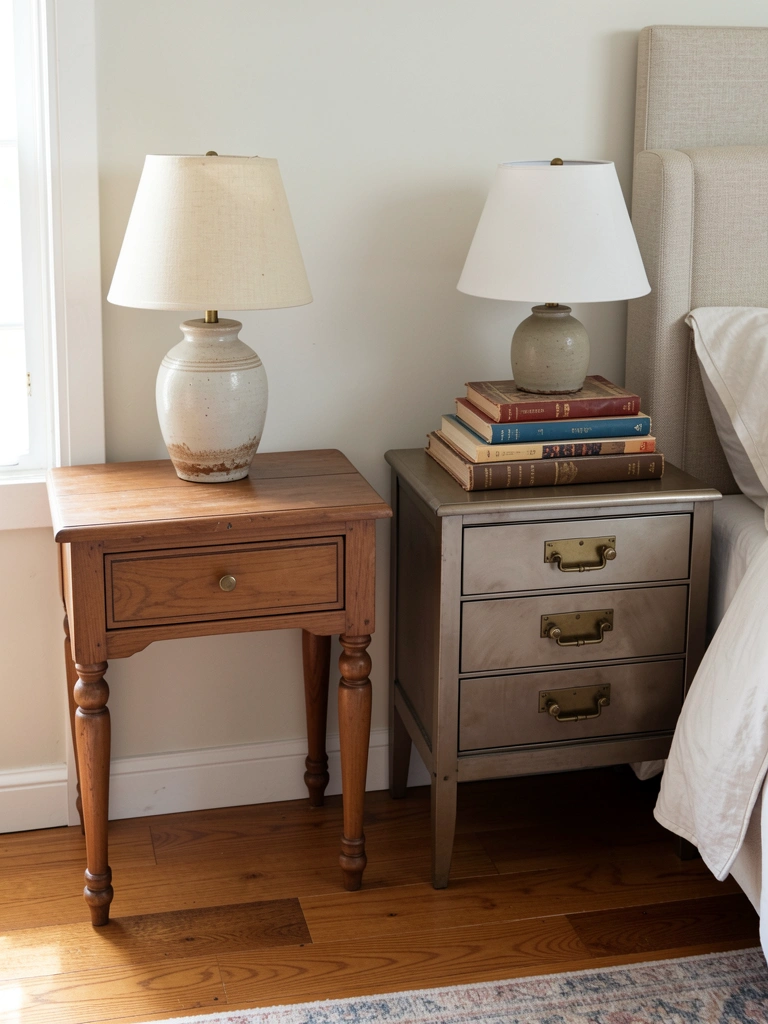
    20. Install Floating Bedside Tables Instead of Nightstands

    Nightstands with legs take up floor space. Floating bedside tables ($60–$150 per side) create the same function with zero visual weight, making the room feel more open.

    Mount shallow floating shelves (10–12 inches deep) at the height of your mattress top ($40–$100 per shelf plus installation). Use one on each side if your layout allows, or just one on your preferred side. They hold lamps, water, books, and skincare without dominating the space.

    DIY: build simple floating shelves using reclaimed wood and heavy-duty brackets ($50–$100 total, if you’re handy).

    Style each shelf minimally—a lamp, one book, and maybe a small plant. Restraint keeps them from looking cluttered.

    You maintain all the nightstand functionality while gaining that crucial floor space that makes small rooms breathable.


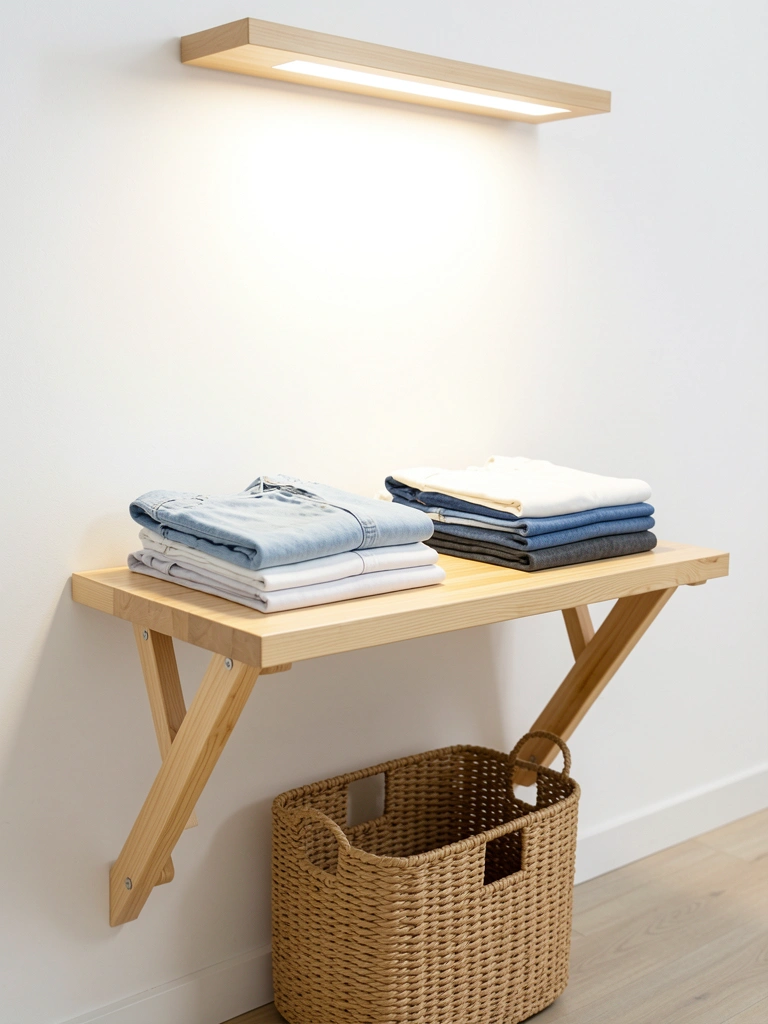
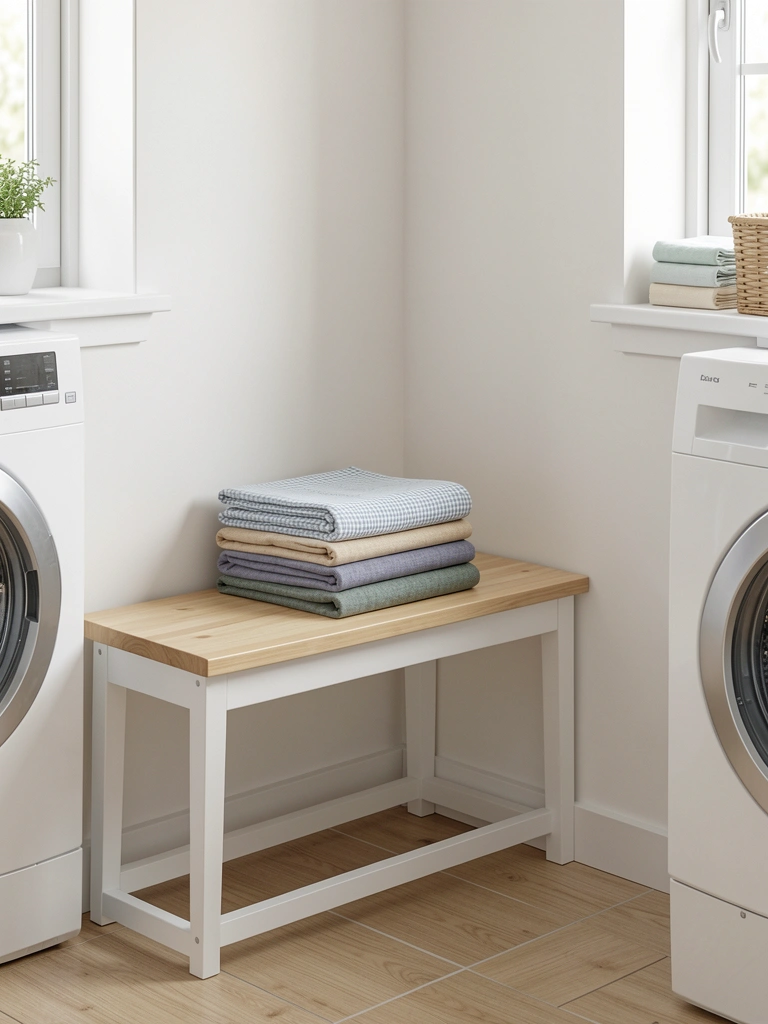
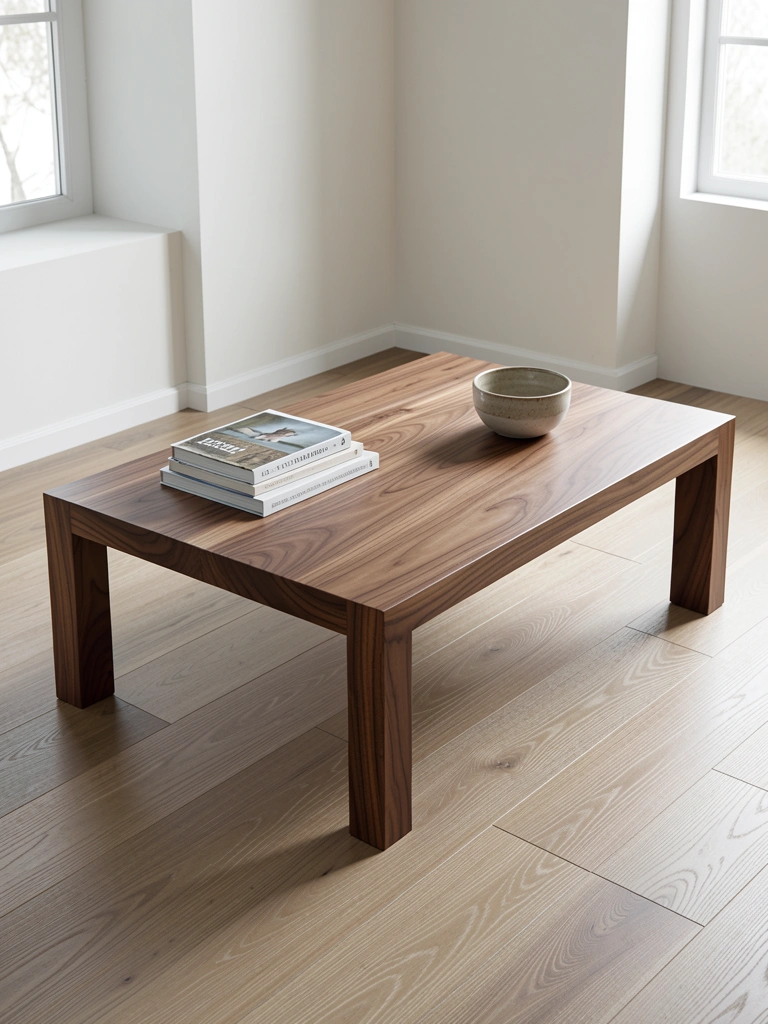
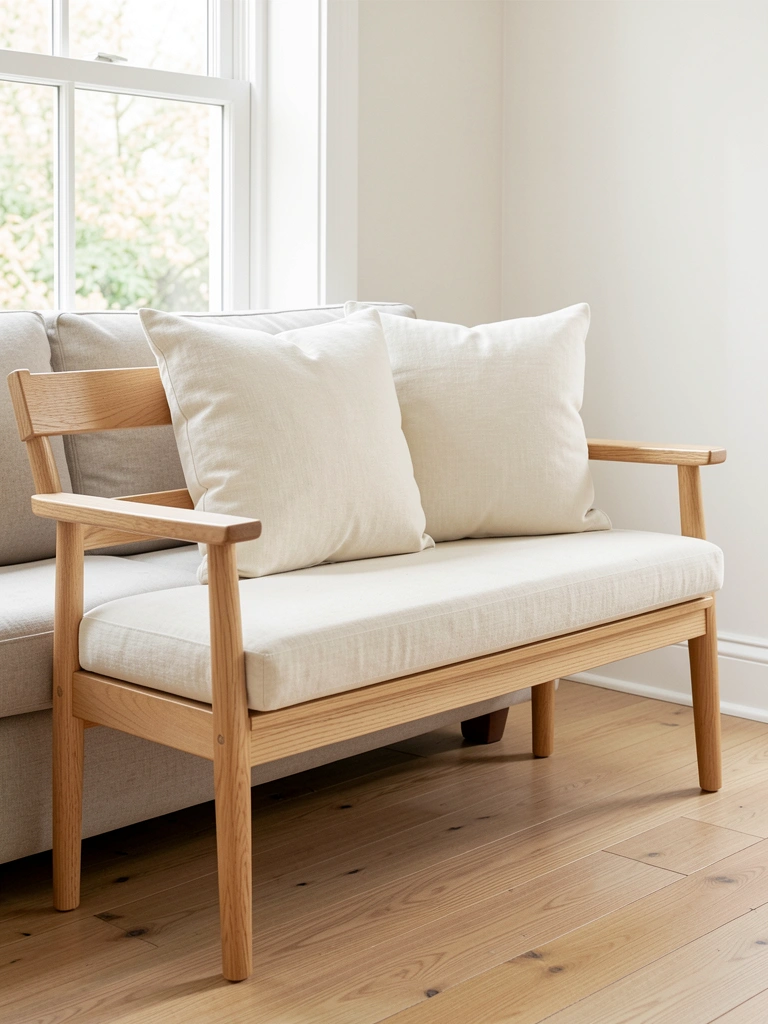
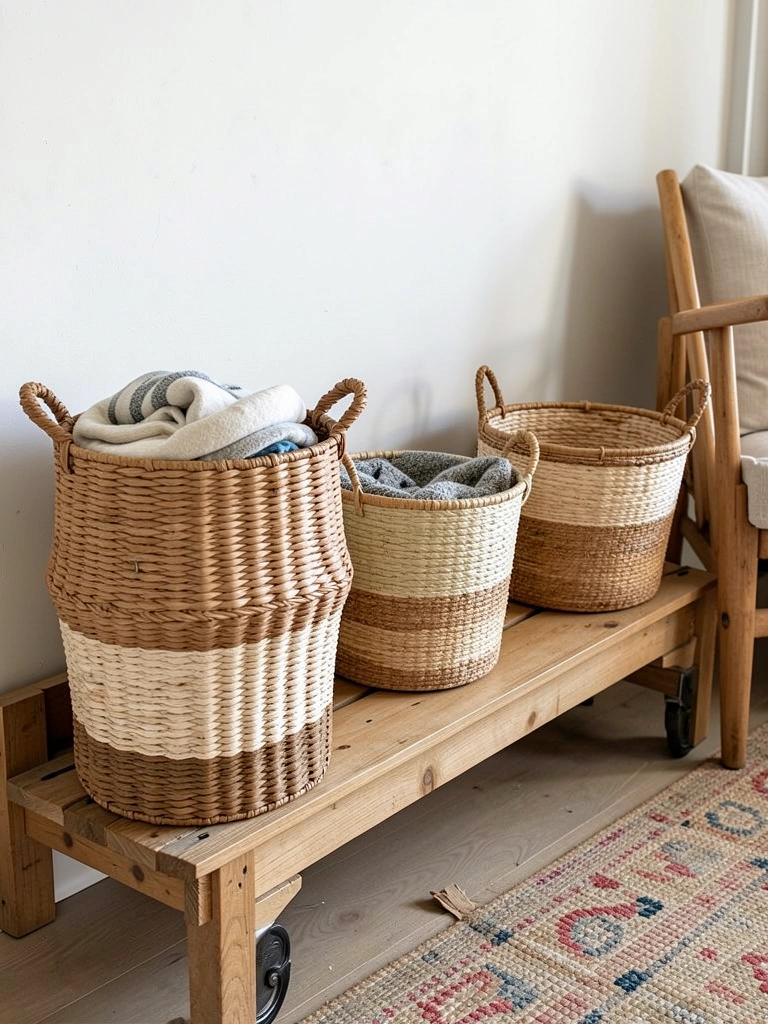
    21. Opt for a Bench at the Foot of the Bed

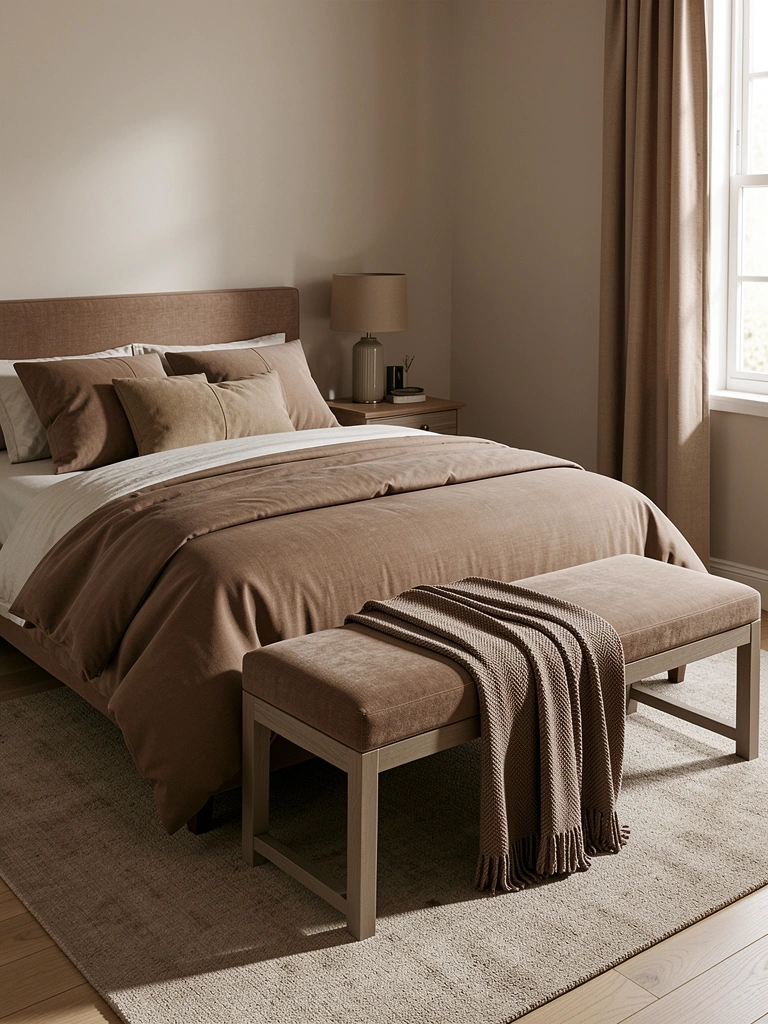
    A bench at the bed’s foot adds style and function without the bulk of a dresser or storage unit. It’s practical for folding clothes and visually anchors the bed while maintaining flow.

    Choose a narrow bench ($150–$400) in upholstered or wood finishes that matches your aesthetic. Look for low-profile options (under 18 inches tall) so they don’t block views or feel heavy. Rounded designs align with 2025’s organic furniture trend.

    Position it only if you have the floor space—if it blocks walkways, skip it and use wall-mounted storage instead.

    Style with a folded throw blanket ($30–$100) for texture and to keep it looking intentional, not like laundry storage.

    This simple addition creates a finished, designed look and gives you a landing spot for daily outfit decisions.


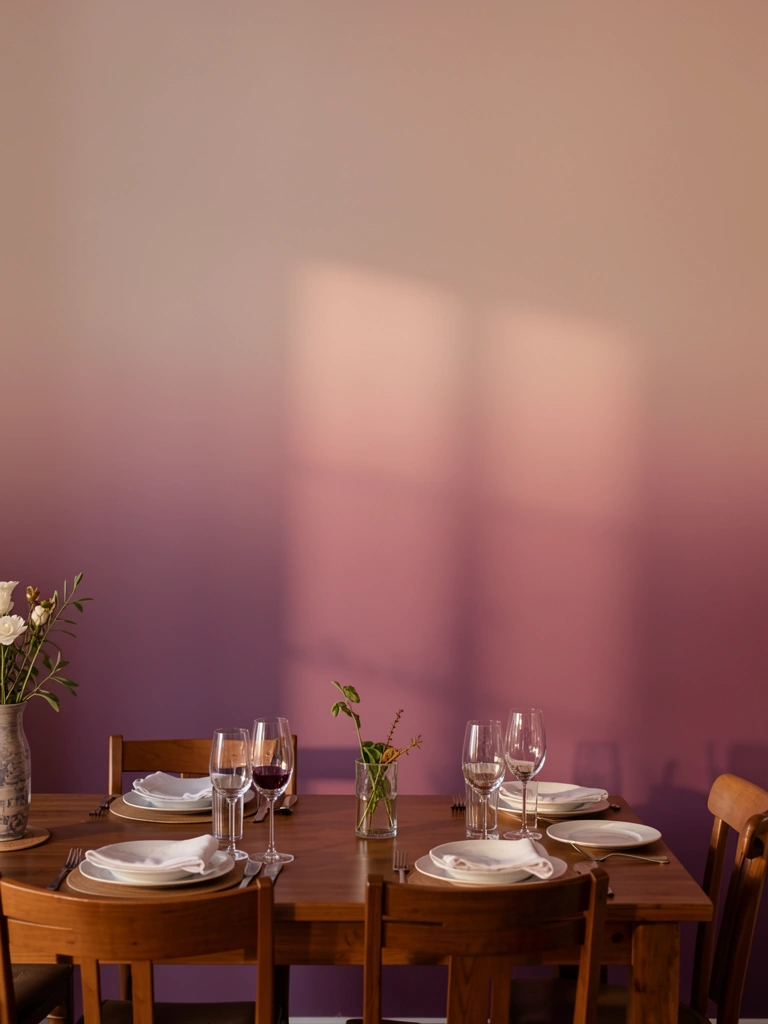
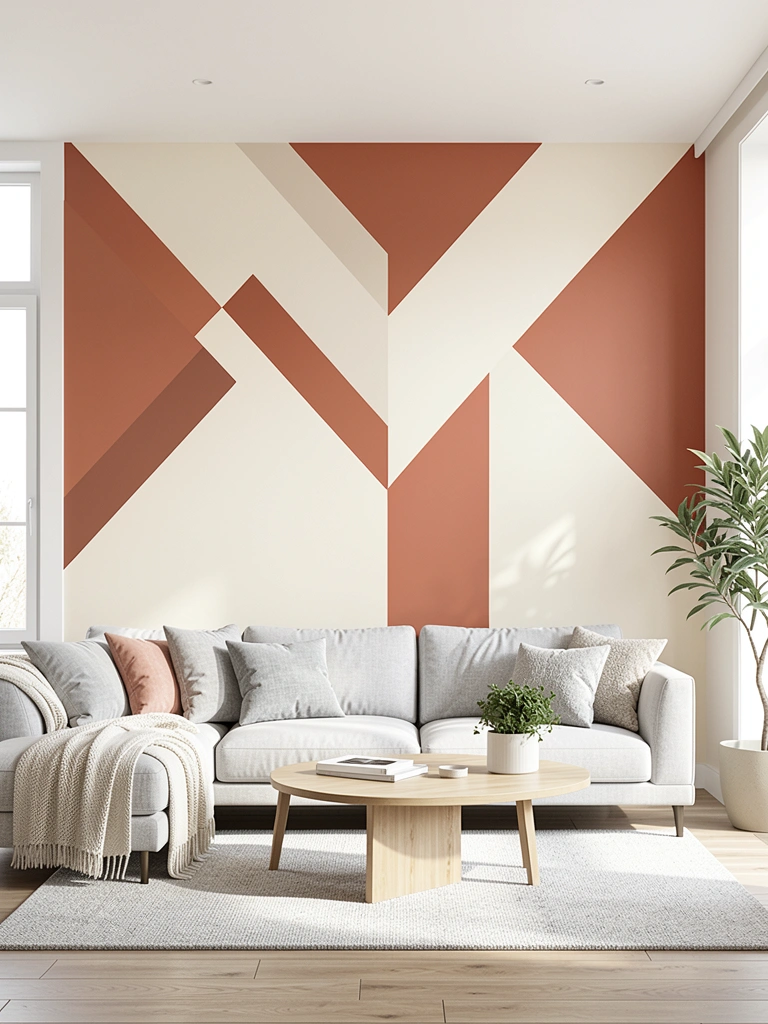
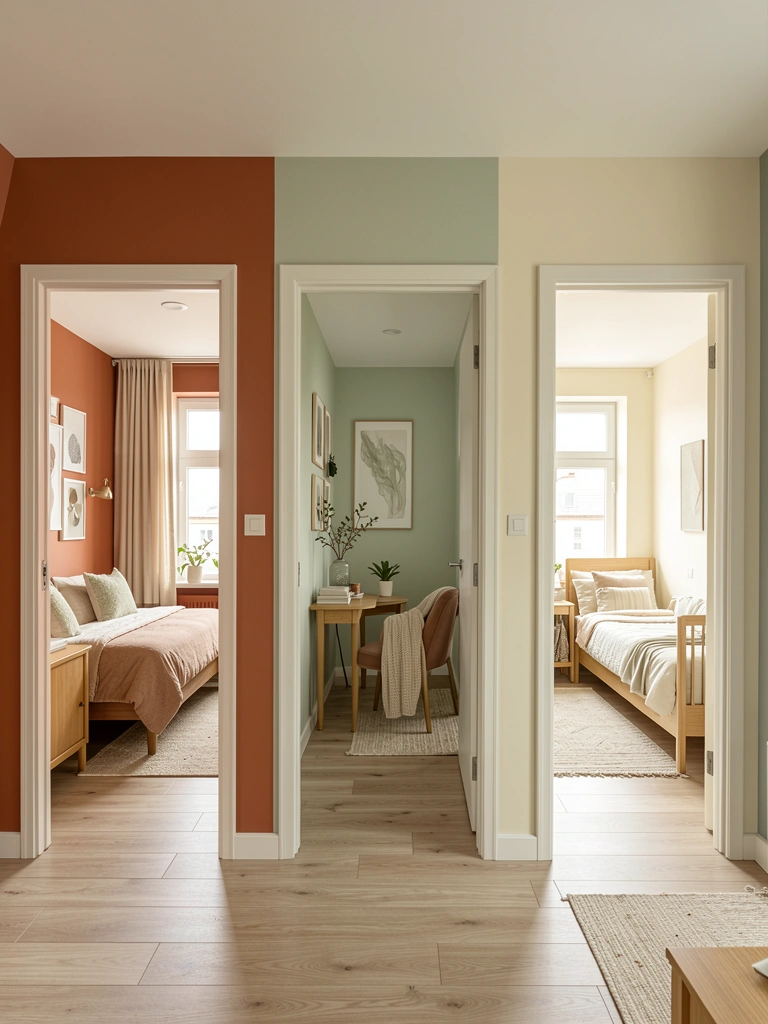
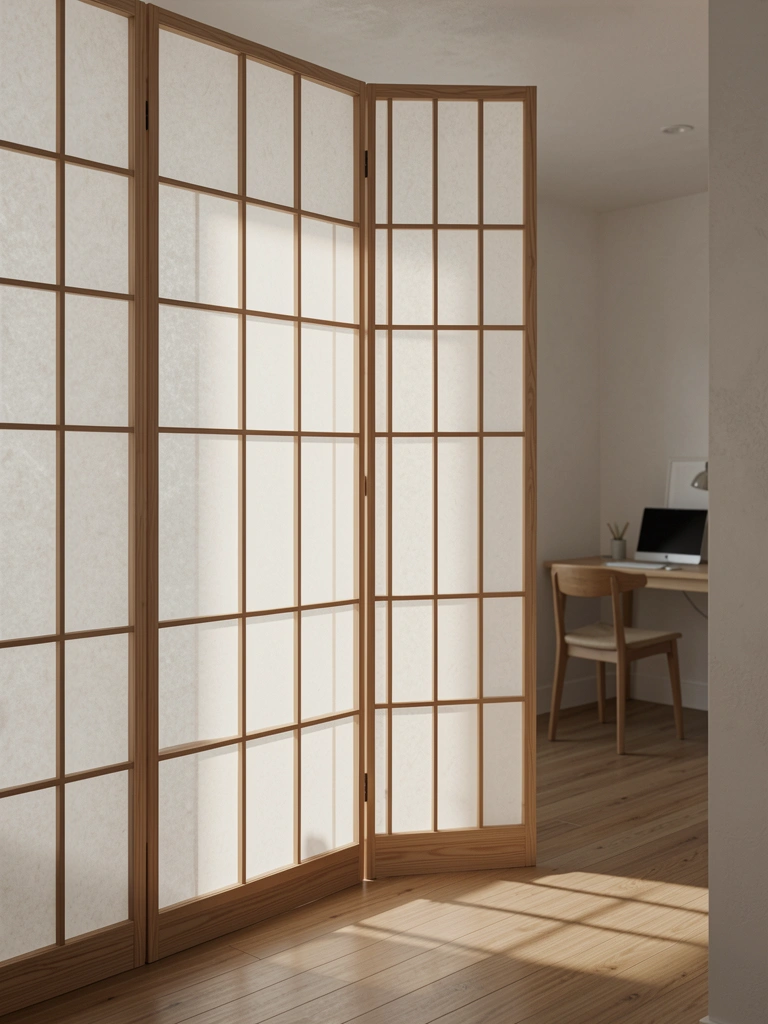
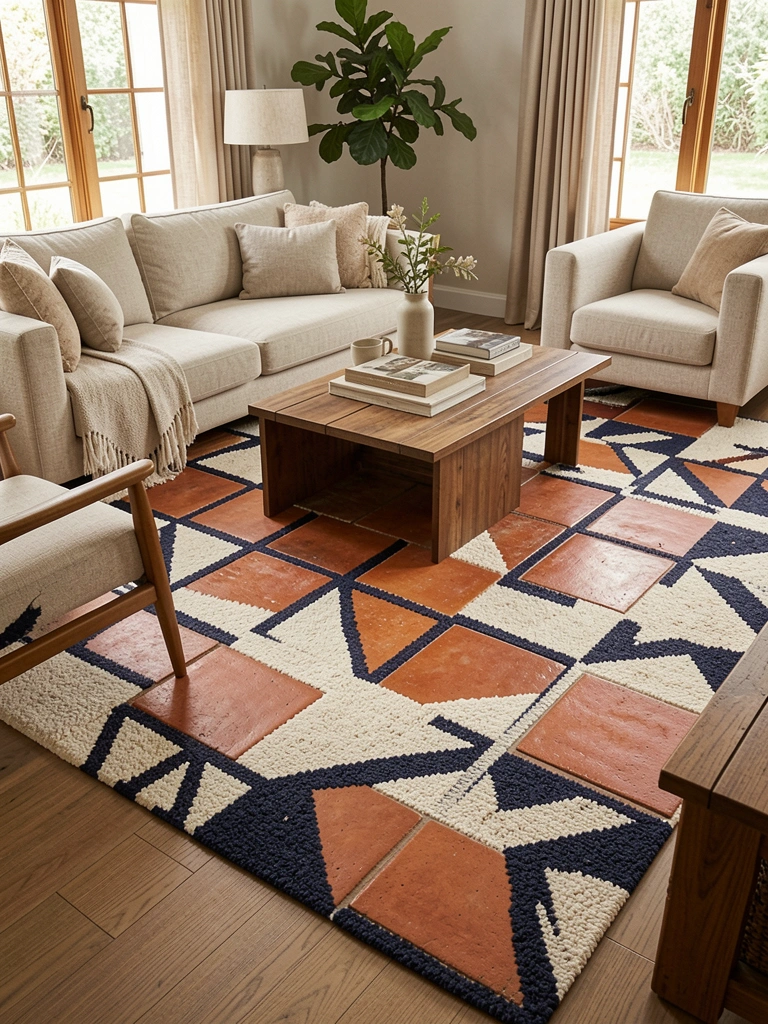
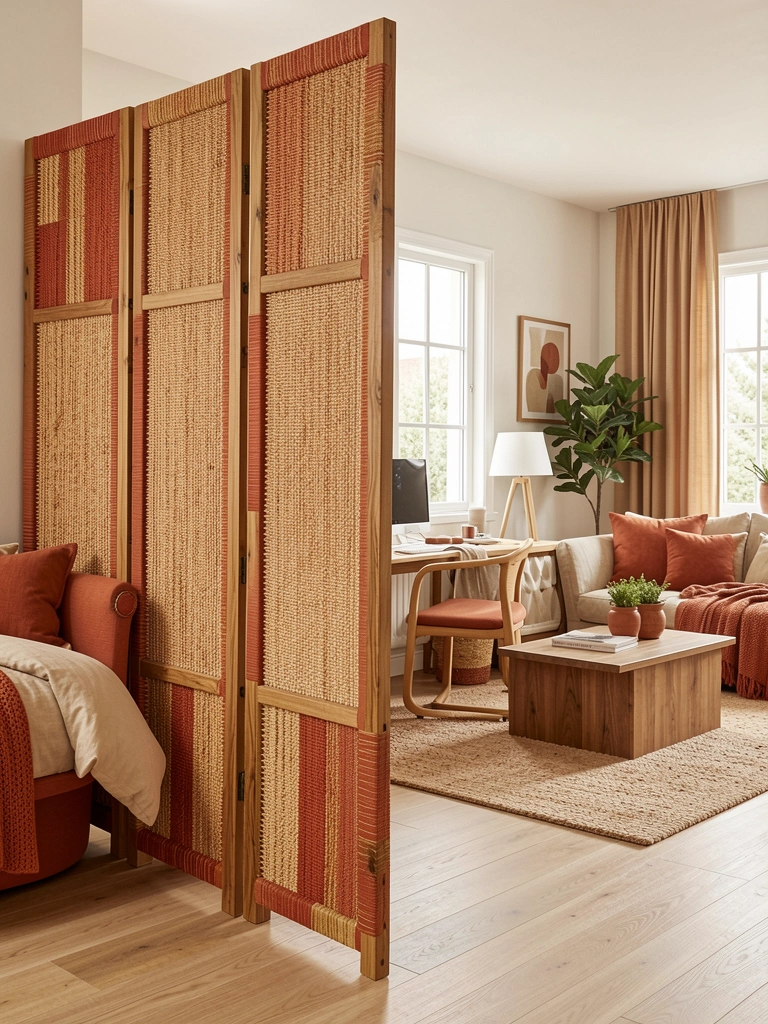
    22. Create Zones with Rugs and Lighting

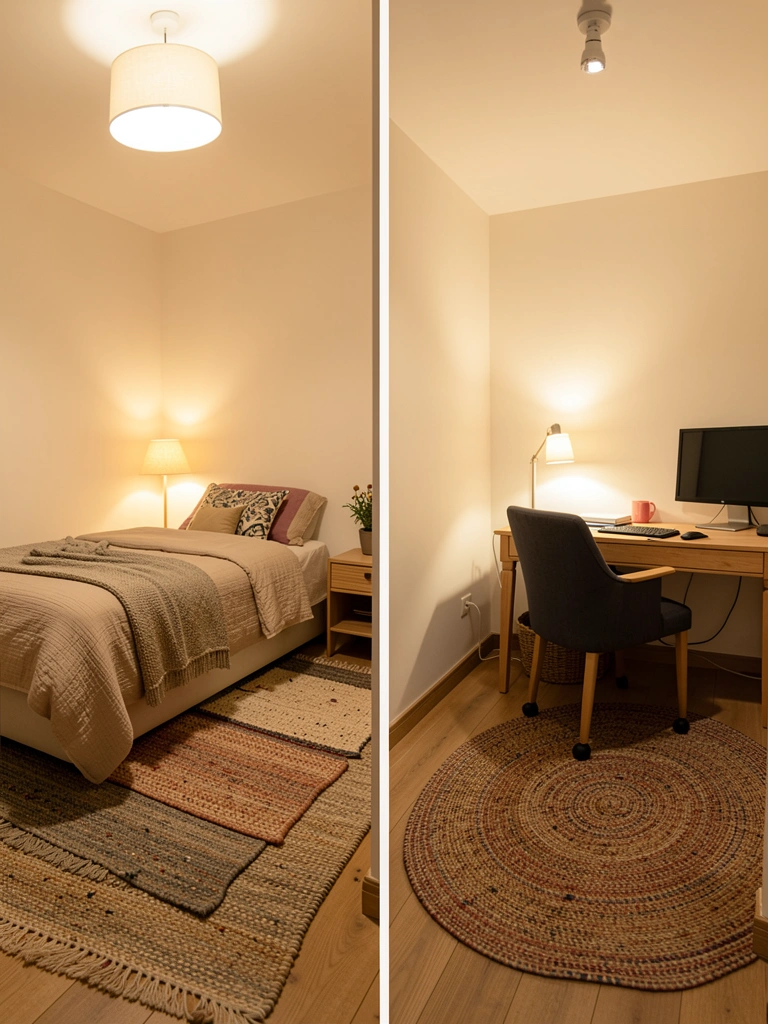
    Zone-ing makes small rooms feel intentional and larger by creating distinct purposes within one space. Rugs and lighting define these zones without walls or furniture barriers.

    Use different rugs to anchor sleeping, working, and lounging areas ($150–$400 total). Layer lighting—ambient overhead, task lighting at a desk, warm light in a reading corner—to reinforce each zone’s purpose. This costs less than adding furniture.

    Even in a 100-square-foot bedroom, you can suggest separate zones through design choices rather than physical barriers.

    Paint accent walls to subtly define zones, or use curtains if you share a space with a partner who has different schedules.

    Your tiny bedroom suddenly feels more sophisticated and multifunction, expanding its practical capacity.


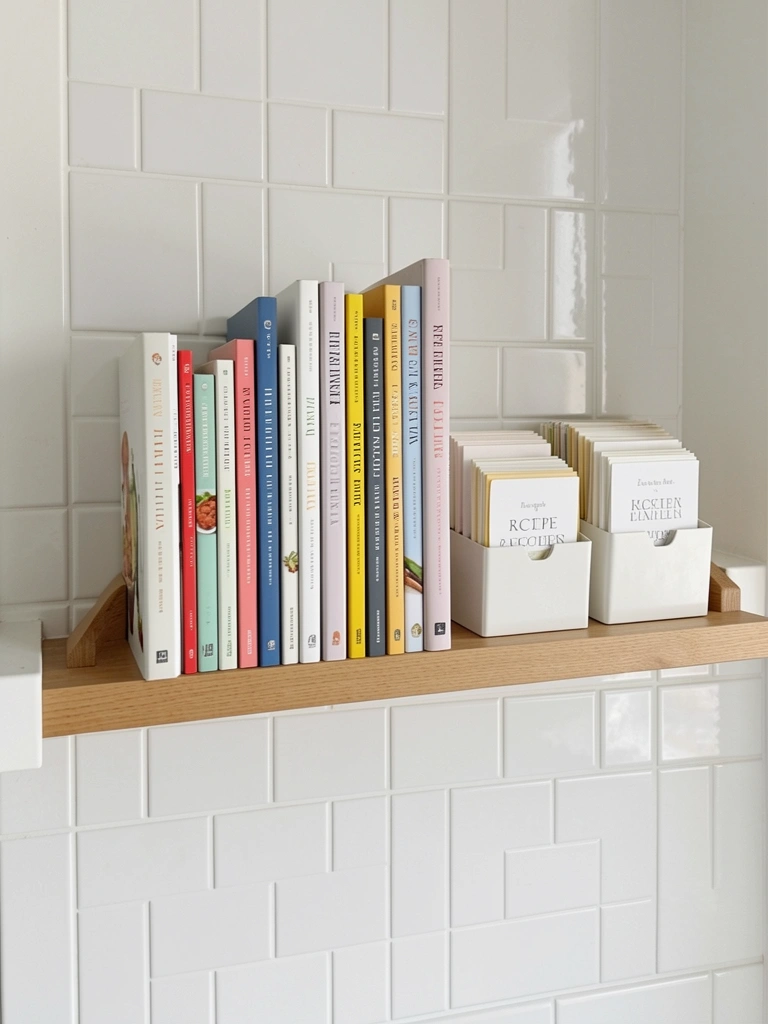
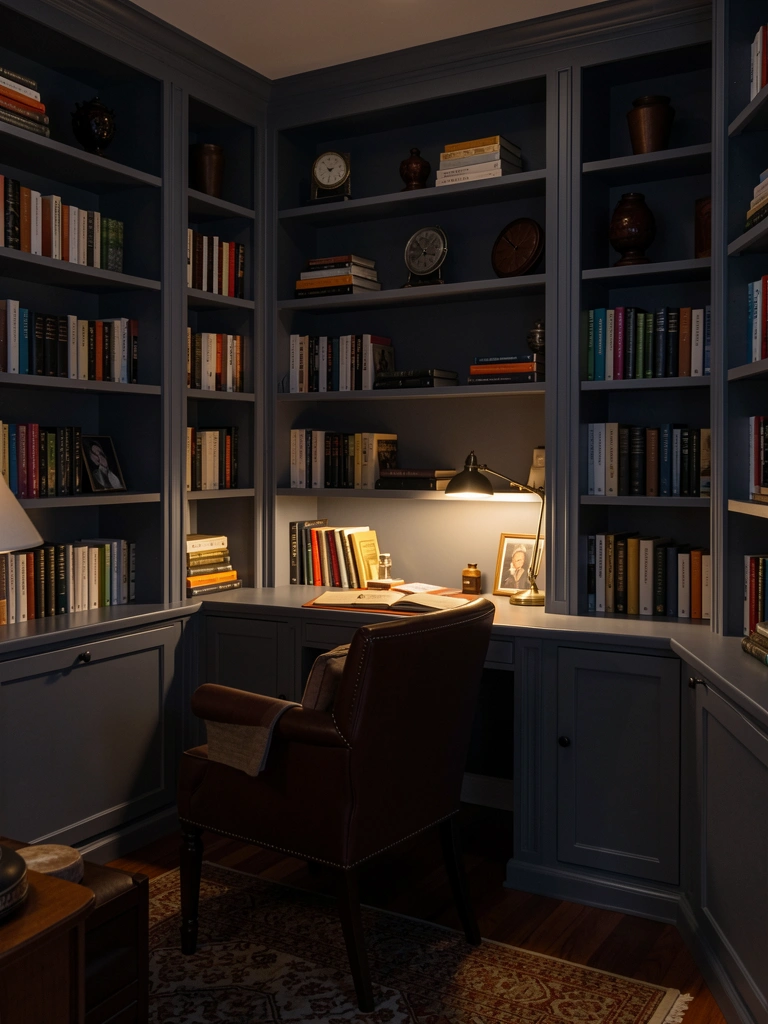
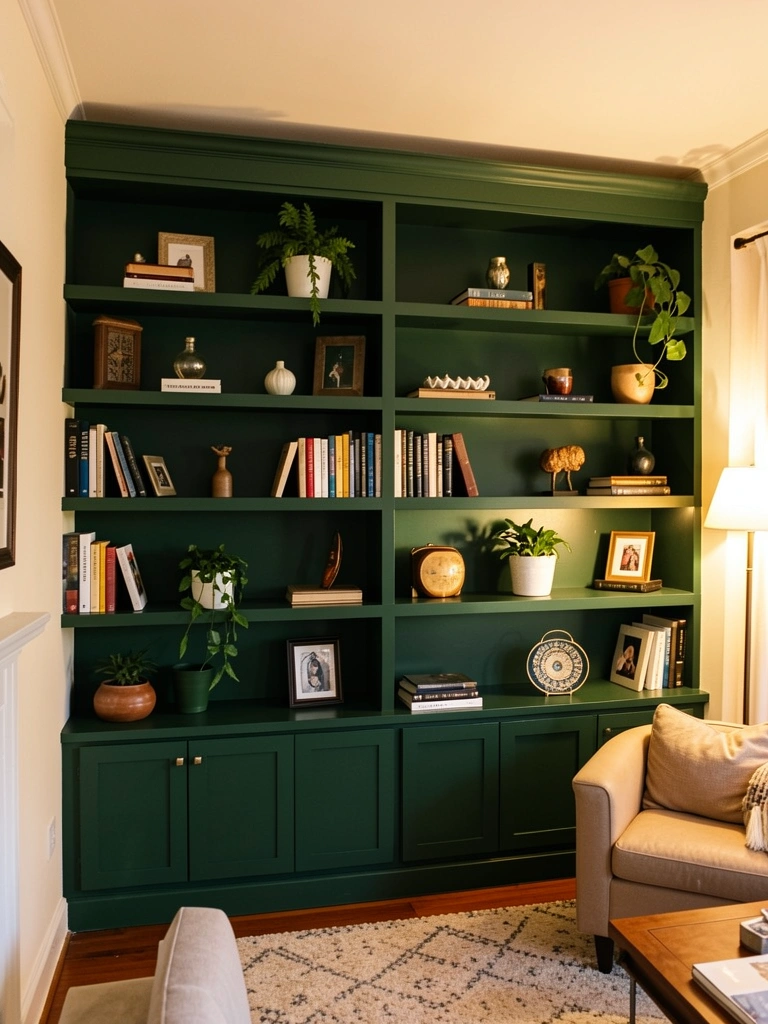
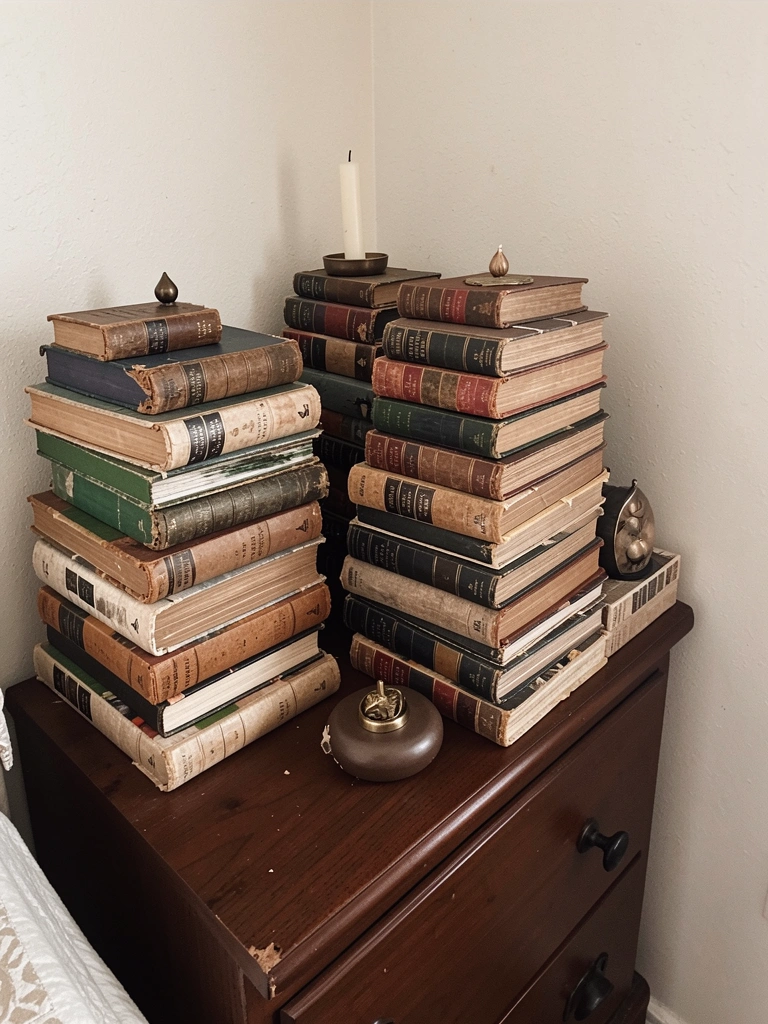
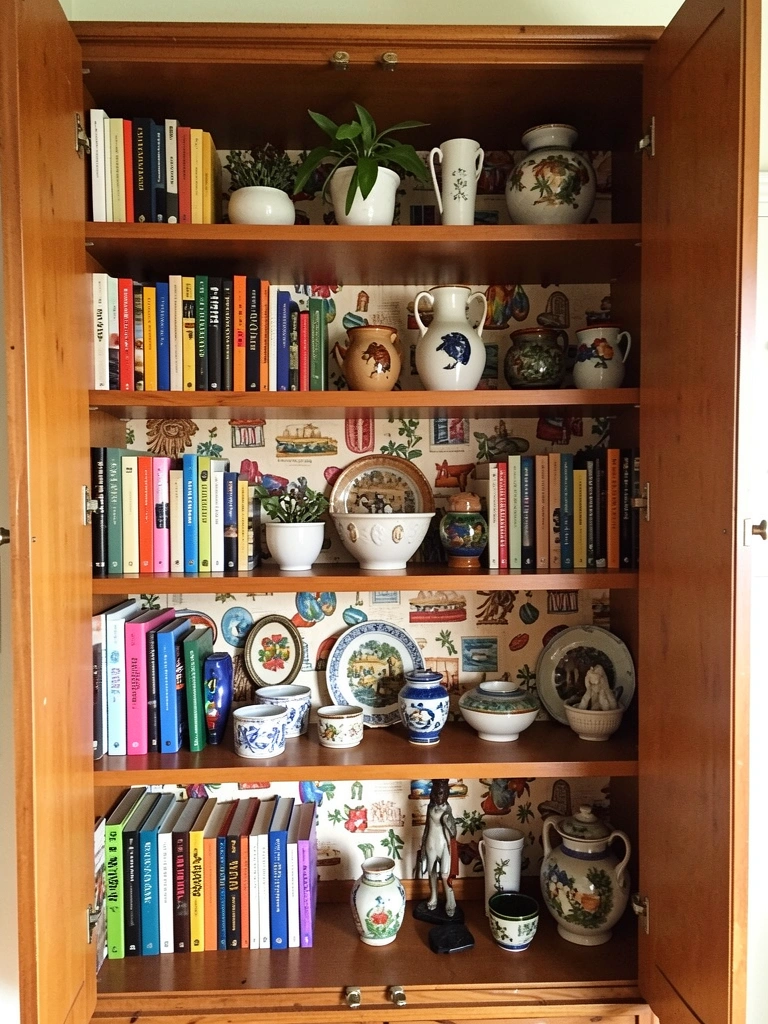
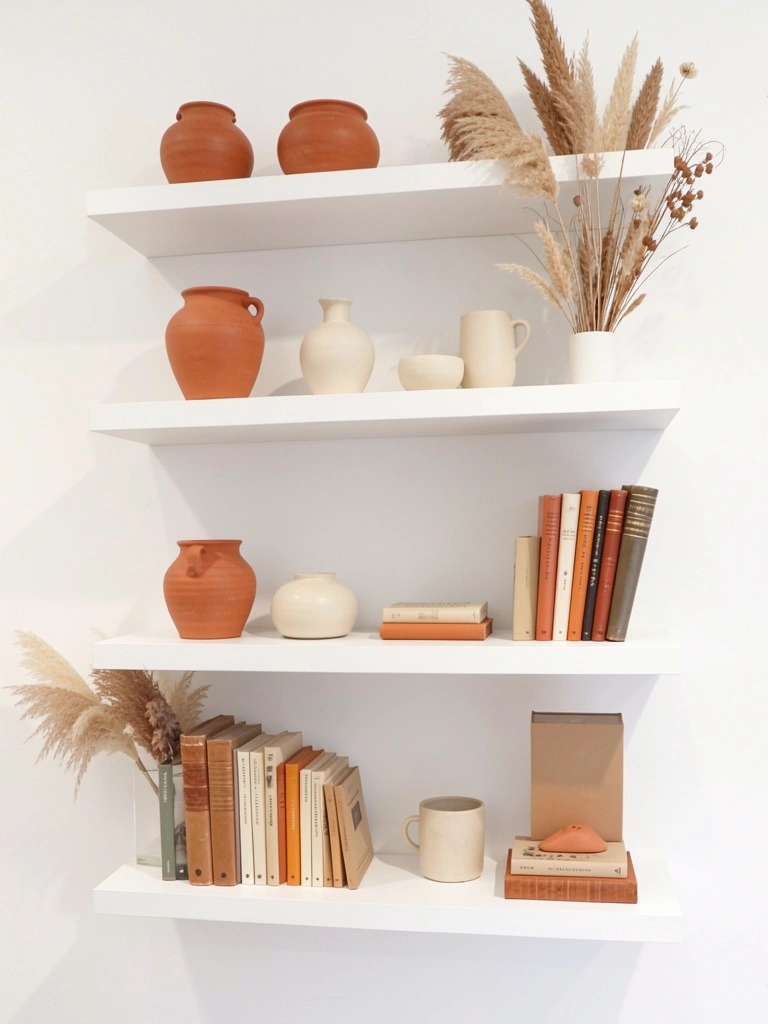
    23. Go Vertical with a Tall Narrow Bookcase

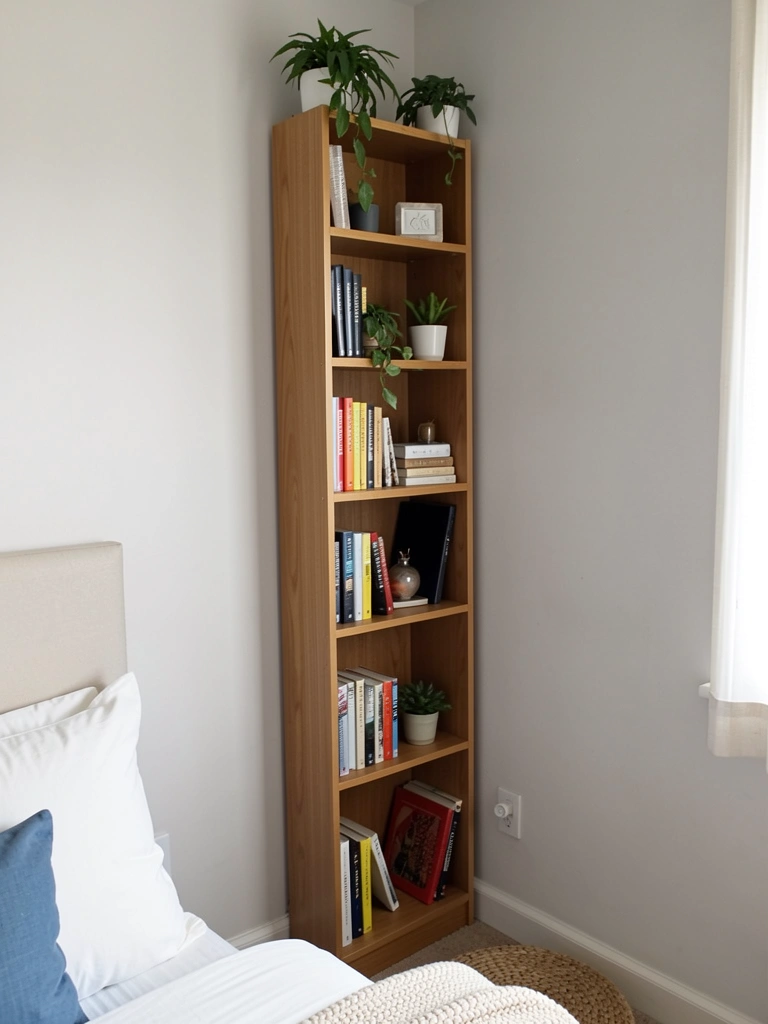
    Tall, narrow bookshelves ($100–$300) draw the eye upward and make ceilings feel higher—perfect for small rooms. They store significant items (books, décor, plants) in a compact footprint.

    Look for bookshelves 18–24 inches wide and 72+ inches tall from IKEA, Target, or vintage shops. Position in a corner or along a single wall to anchor the room without cutting through traffic patterns.

    Styling: alternate books horizontally and vertically, add small plants and art objects, and leave some shelves partially empty so it doesn’t feel cluttered.

    Tall shelves work beautifully with rounded corners or open shelving designs to feel less institutional.

    You’ve created significant visual interest and storage in under two square feet of floor space.


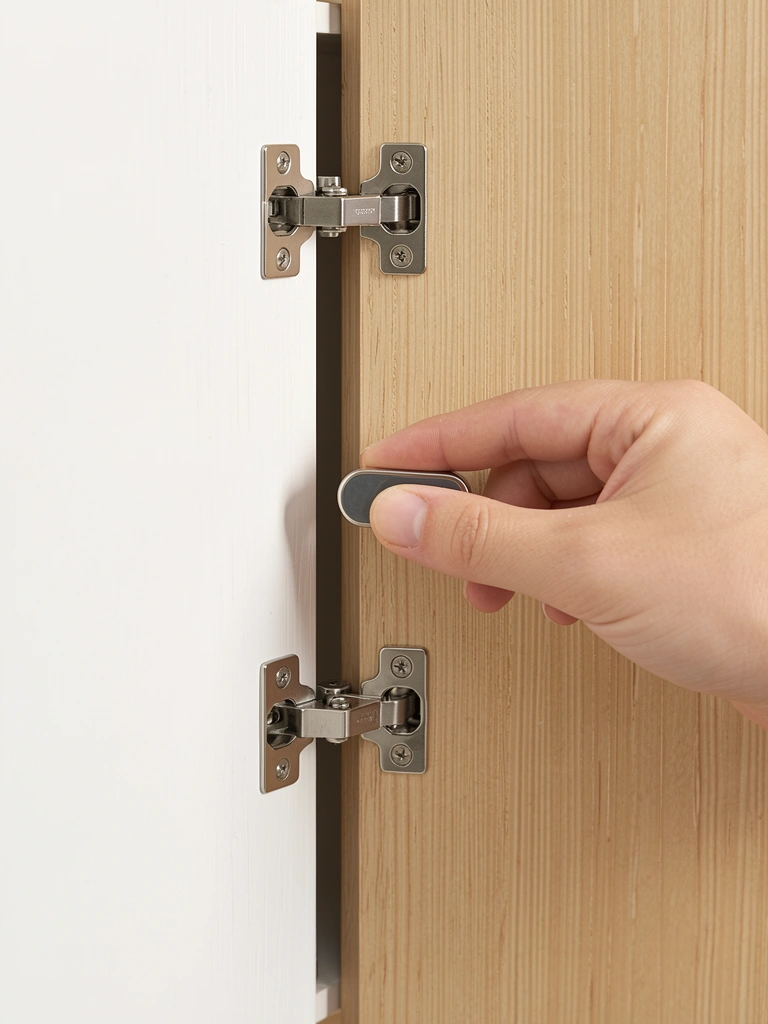
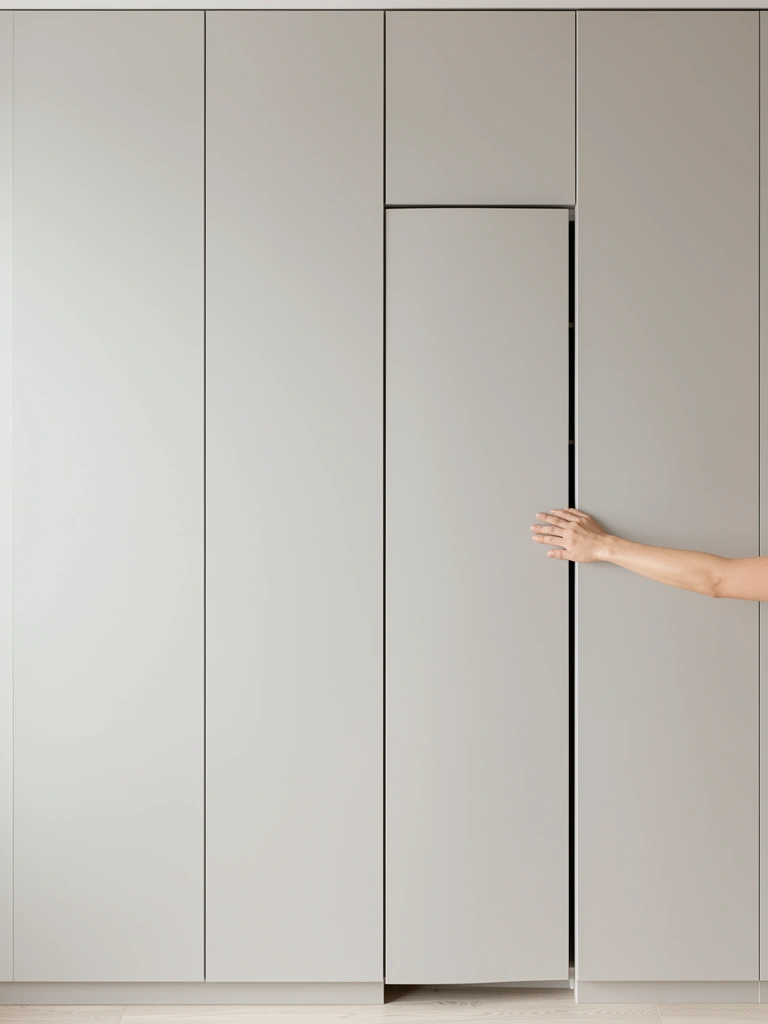
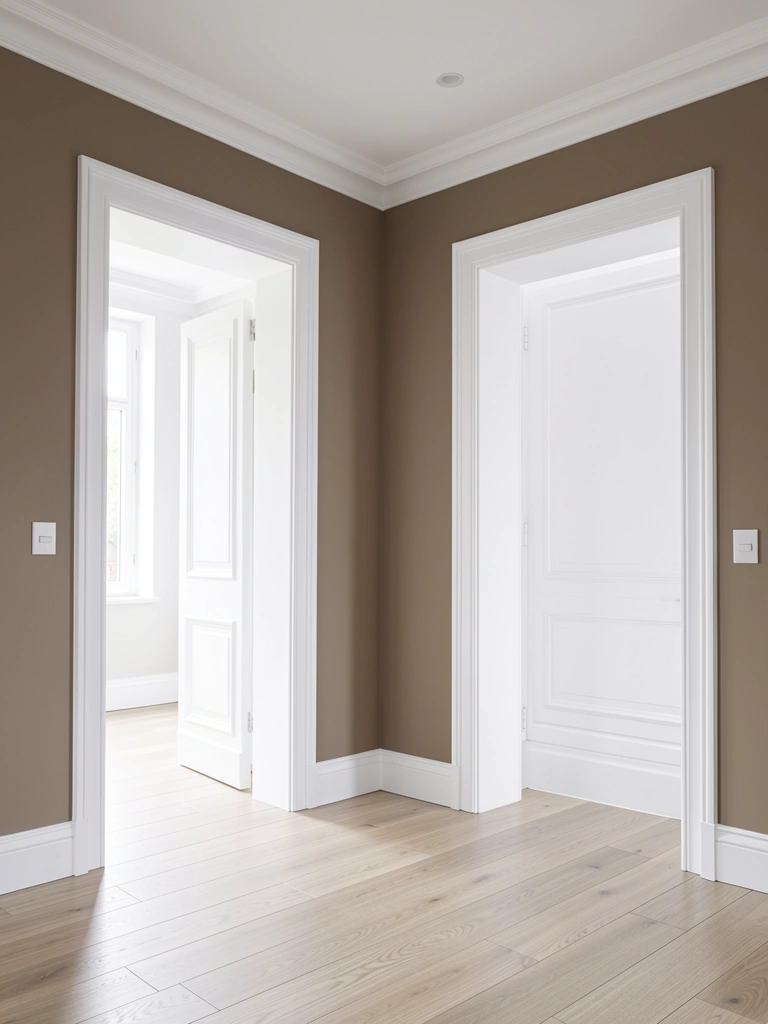
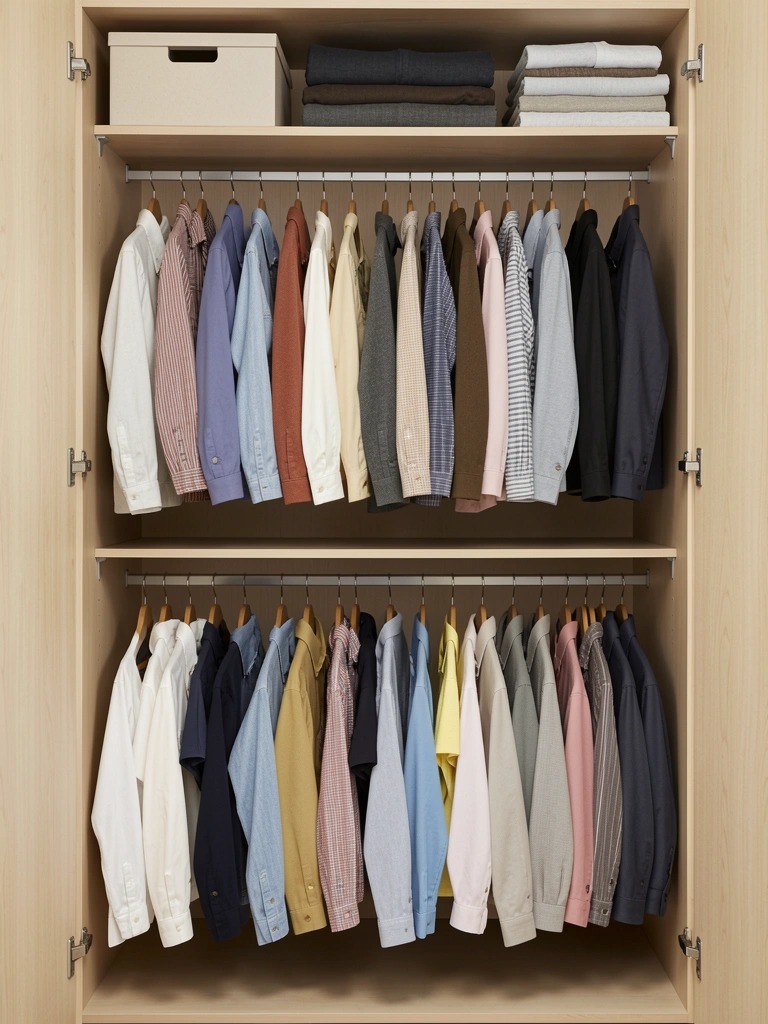
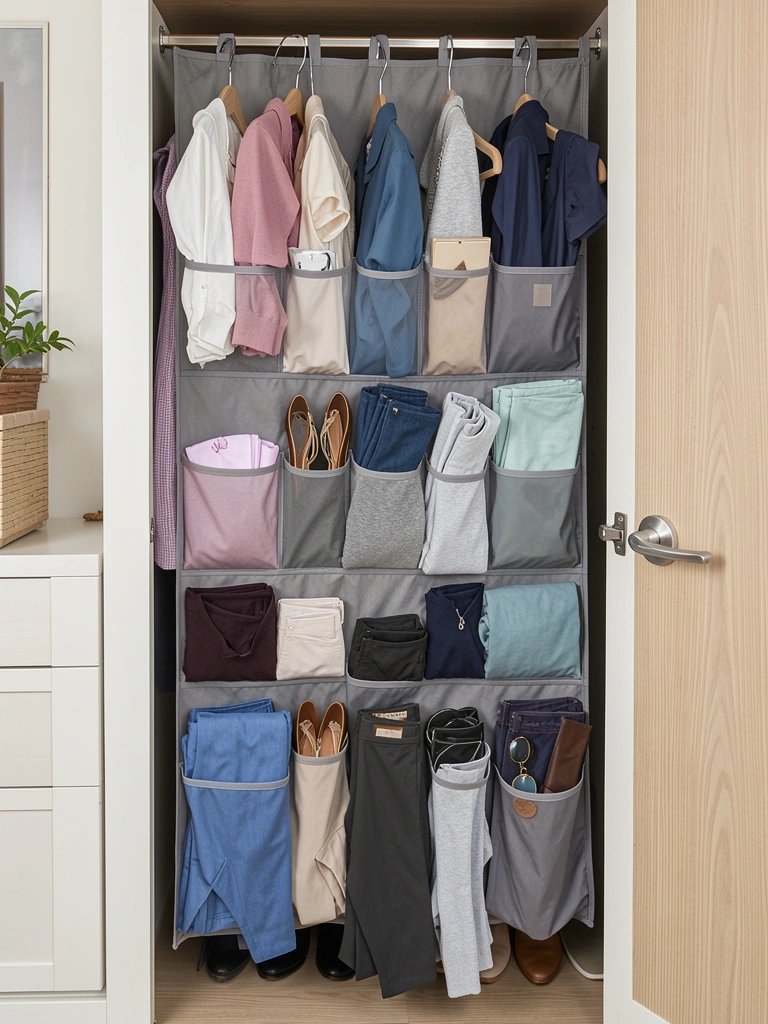
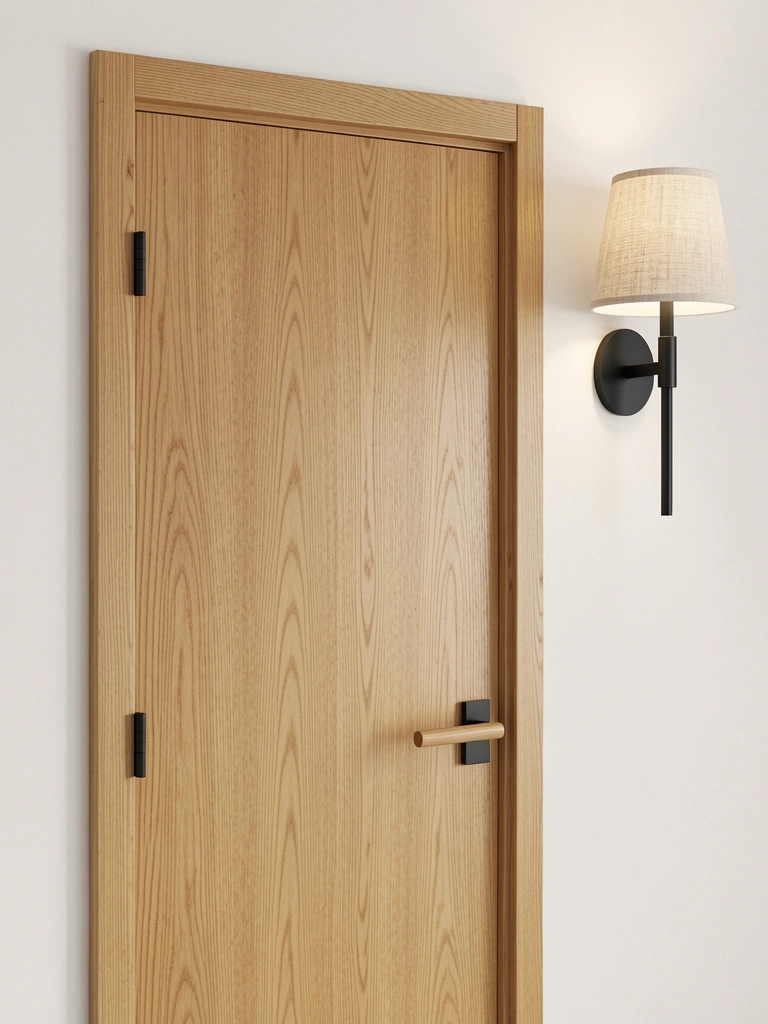
    24. Use a Sliding Barn Door for Closet Access

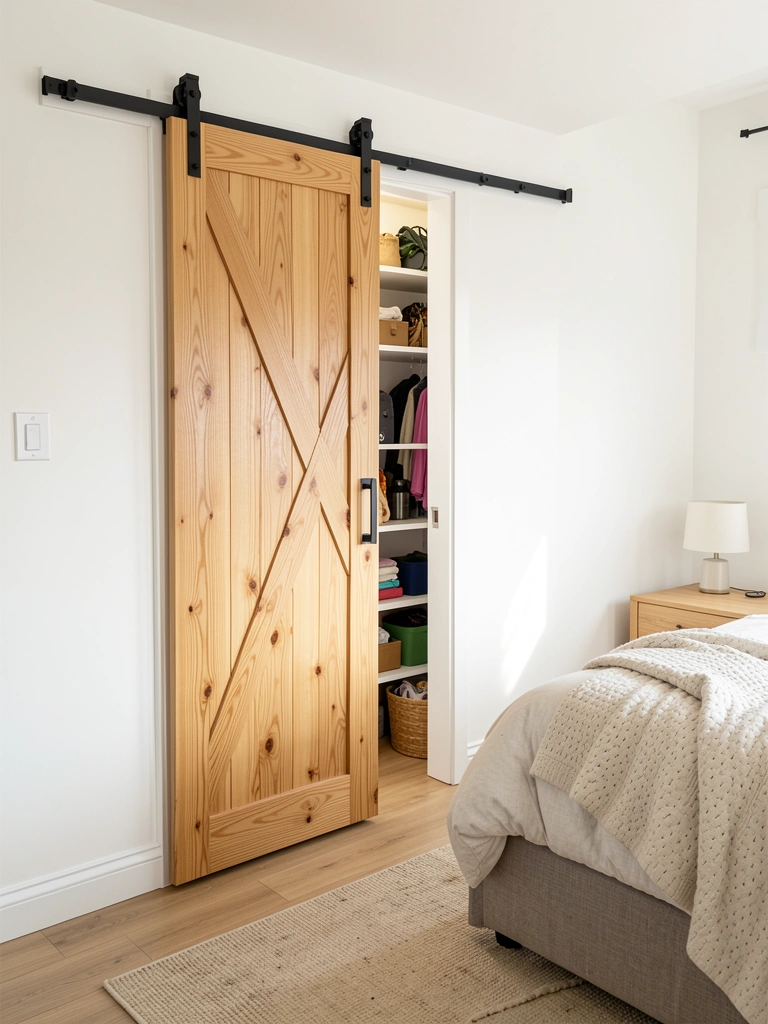
    Swing-out closet doors eat into floor space. A sliding barn door ($300–$800 installed) saves room while adding farmhouse or modern charm depending on your style.

    Install a barn door track system ($150–$400 in materials; DIY installation saves $200–$300 labor). Paint or stain it to match your room’s aesthetic. The door slides flat against the wall, never blocking pathways.

    Renter option: Adhesive-backed or command-mounted temporary sliding door systems exist but are less stable; check with your landlord first.

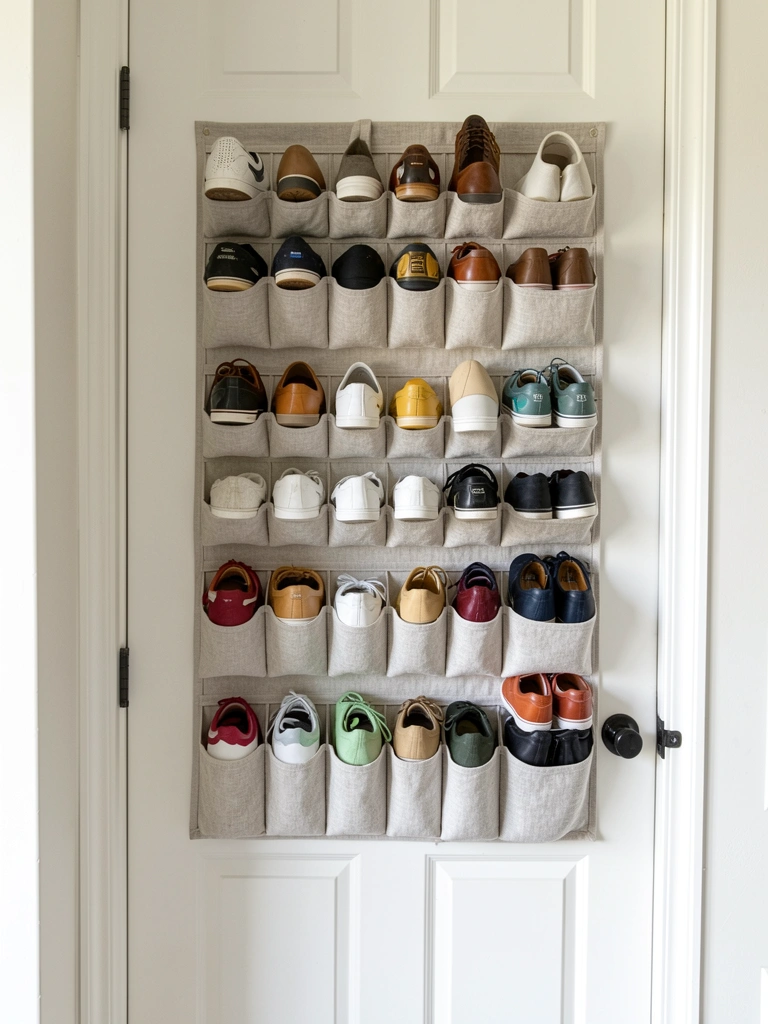
    Organize the closet interior with vertical hanging, floating shelves, and labeled bins to maximize every inch.

    This upgrade makes your bedroom feel more designed and intentional while solving a real spatial problem.


    Save this post and try just one idea this weekend—you might be surprised how even the smallest change creates a noticeably calmer, more spacious bedroom. Share this with anyone drowning in a tiny room who needs a win.

  • 26 Scandinavian Laundry Room Ideas for a Clean, Minimal Look

    26 Scandinavian Laundry Room Ideas for a Clean, Minimal Look


    Scandinavian design has a quiet magic—it makes even mundane tasks feel intentional and peaceful. If your laundry room feels chaotic or uninviting, you’re not alone. Most of us toss clothes in, grab them, and leave. But what if your laundry space could be a place you actually want to spend time? These 26 ideas blend Scandinavian minimalism with practical functionality, showing you how to create a clean, organized laundry room that works as hard as it looks good. From budget-friendly styling tricks to smart storage solutions, you’ll find ideas that fit your space and your lifestyle. Ready to make laundry less of a chore? Let’s go.


    1. Embrace Neutral Wall Colors for Calm Focus

    Neutral walls create the foundation of Scandinavian design. This isn’t boring—it’s deliberate. Soft whites, pale grays, and warm creams shrink visual clutter, making small spaces feel bigger and more serene.

    Paint your walls a warm white (like Benjamin Moore Cloud White or Sherwin Williams Alabaster) or a subtle gray-beige. These shades cost $30–$60 for paint and supplies, taking a weekend afternoon to complete. The payoff? Your space immediately feels more intentional. When walls are neutral, every organized basket and shelf becomes a design element rather than competing visual noise.

    Bonus: Neutral walls hide dust and lint better than bold colors, so your space stays looking fresh longer.


    2. Install Floating Shelves for Airy Storage

    Floating shelves embody Scandinavian design—they’re functional yet feel weightless. Unlike bulky cabinets, they make cramped laundry rooms look spacious and give you visual space to breathe.

    Install 2–3 shelves at varying heights using wall anchors (find kits at Home Depot or IKEA for $40–$80 per shelf). Arrange items with intention: group like items (detergent bottles together, folded linens in one stack), leave gaps between groups, and add one small plant for life. Installation takes 1–2 hours with a drill and level. Renters can use tension rods on shelves for a completely removable option.

    Your room gains storage without feeling cramped, and everything stays visible and accessible.


    3. Choose White or Natural Wood Cabinetry

    Scandinavian interiors favor natural wood or crisp white—never dark or heavy finishes. These colors let your space breathe while staying sophisticated.

    If replacing cabinets, choose unfinished pine or birch cabinetry from IKEA ($200–$600 for a small laundry setup) or local builders. Paint white cabinets yourself with Benjamin Moore Advance paint ($60–$100 for supplies, 2–3 days of work including drying time). Natural wood warms a cool white room without adding visual weight. Metal hardware in brushed nickel or black reinforces the minimal aesthetic.

    The result is a room that feels both contemporary and timeless, never trendy or fussy.


    4. Add a Utility Sink for Pre-Treating Stains

    A utility sink isn’t luxury—it’s practical Scandinavian design at its best. Pre-treating stains at a dedicated sink saves time and prevents laundry from spreading around your home.

    Install a wall-mounted utility sink (Kohler or Wayfair models $150–$400) with basic plumbing (hire a plumber or DIY if confident, $200–$500 labor). Alternatively, place a small pedestal sink in a corner ($300–$700 installed). Stock it with stain remover, a soft brush, and small cleaning cloths in one open jar. The narrow countertop stays clean because everything has a home.

    Your laundry workflow becomes smoother, and you’ll actually pre-treat items instead of throwing stained clothes back in the wash.


    5. Use Woven Baskets for Sorted Organizing

    Woven baskets are Scandinavian design’s secret weapon—they organize while looking naturally aesthetic. Unlike plastic bins, they add warmth and blend into a minimal space.

    Buy baskets in 2–3 sizes from IKEA ($10–$30 each, budget $40–$100 total) or thrift stores. Label them by fabric type (delicates, towels, sheets) or household member using a white label maker ($20–$40). Stack them on shelves or open under-sink storage. This system keeps laundry sorted before washing, cutting sorting time in half.

    The baskets age beautifully and become part of your décor rather than hidden eyesores.


    6. Install Drying Rods for Air-Dry Hanging

    Wall-mounted drying rods replace the need for a clothesline or drying rack, keeping your space streamlined and Scandinavian-simple.

    Mount a stainless steel or black rod (Wayfair, Target $25–$60) on a clear wall section using heavy-duty brackets. Choose rods 24–36 inches wide depending on your space. Installation takes 30 minutes and no special skills. Hang delicate items (sweaters, silk blouses) and air-dry without heat damage.

    You’ll save on energy costs while extending garment lifespan—peak Scandinavian efficiency meets care.


    7. Invest in Task Lighting That Works

    Good lighting isn’t luxury—it’s functional. Pendant lights or under-cabinet LED strips make folding easier and add visual interest to a minimal space.

    Install 1–2 pendant lights (West Elm, Article, or IKEA $40–$120 each) or LED strip lights ($20–$50) above your folding counter. Wiring costs vary; if you’re handy, DIY takes 2–3 hours; otherwise hire an electrician ($150–$300). Choose matte black, white, or brushed metal to stay Scandinavian. Task lighting prevents eyestrain and makes your space feel intentional—even utilitarian laundry becomes pleasant.

    Folding and sorting now happen in bright, shadow-free light, cutting time and mistakes.


    8. Create a Folding Counter with Natural Wood

    A dedicated folding counter stops clothes from piling on the dryer or floor. Scandinavian design prioritizes function, so this isn’t frivolous—it’s essential.

    Build or buy a butcher-block or pine folding counter ($150–$400 for 3–4 feet wide). Mount it at elbow height (about 36 inches) to reduce back strain. Include a shelf underneath for baskets. IKEA’s PINNIG bench ($80–$120) works as a budget option. Installation takes 1–2 hours with basic tools.

    You’ll fold faster, your back thanks you, and your laundry actually gets put away instead of living in a clean-clothes pile.


    9. Label Everything with Minimal Style

    Labels make organization visible and intentional—very Scandinavian. They also keep everyone in your household on the same page.

    Use a white label maker (Brother or DYMO $20–$40) to create simple black-text labels for baskets, shelves, and jars. Or hand-letter labels on kraft paper for a warmer touch. Label by category (towels, sheets, delicates) or room. Takes 30 minutes total. The investment? Nearly free, major payoff.

    Your family knows where things belong, maintenance stays effortless, and your space stays organized long-term.


    10. Keep Cleaning Supplies in Open Glass Jars

    Clear containers move supplies from “hidden clutter” to “intentional display.” Scandinavian design loves transparency—nothing hidden, everything purposeful.

    Transfer bulk laundry detergent and stain removers into clear glass jars from IKEA ($5–$15 each, budget $30–$50 total). Add simple labels and arrange on open shelving or a high shelf. This cuts visual clutter while keeping supplies visible so you reorder before running out.

    Your supplies become part of your design, and guests actually see an organized, beautiful space instead of mystery bottles.


    11. Use Scandinavian-Inspired Cabinetry Hardware

    Hardware is the jewelry of minimalist design—choose it thoughtfully. Scandinavian interiors favor understated metal finishes over ornate details.

    Replace cabinet hardware with brushed nickel or matte black knobs and pulls from IKEA or Wayfair ($3–$8 each, budget $40–$80 total). Installation takes 1–2 hours with a screwdriver and drill. Avoid brass, gold, or decorative finishes—they compete with your clean aesthetic.

    Your cabinets instantly feel more refined and intentional, proving that tiny details matter in minimal spaces.


    12. Paint Cabinets Soft Matte Black

    Matte black cabinets add depth to a minimal Scandinavian room without feeling heavy. It’s bold yet restrained—a signature Scandinavian contradiction.

    Paint cabinets with matte black Scandinavian paint (Benjamin Moore Chalkboard Black or Farrow & Ball Off-Black $60–$100 for supplies). Prep work takes 4–6 hours; painting takes 2–3 days with drying time. Alternatively, hire a painter ($400–$800). Use an undercoat to prevent chipping. Pair with light walls and bright task lighting so black reads as sophisticated, not cave-like.

    Your laundry room gains unexpected elegance and feels gallery-like rather than purely functional.


    13. Incorporate a Small Plant for Life

    One live plant softens a utilitarian space and aligns with Scandinavian design’s connection to nature. It needs minimal care but adds major visual interest.

    Choose a low-maintenance plant (snake plant, pothos, or ZZ plant $10–$25) in a neutral ceramic pot from Target or West Elm ($15–$30). Water weekly and place in indirect light. Position it on a high shelf or corner so it doesn’t interfere with laundry flow. The single plant creates a focal point without clutter.

    Your room gains life and softness, transforming it from purely functional to actually inviting.


    14. Install Open Shelving Above Washer/Dryer

    Most people waste the wall above their machines. Open shelving reclaims that vertical real estate in a Scandinavian-minimal way.

    Install floating shelves directly above your washer and dryer using heavy-duty wall anchors ($60–$120 for 2–3 shelves). Leave 12 inches clearance above the machines for safety. Stock with rolled towels, folded linens, and one small plant. Takes 2–3 hours to install. Renters: use leaning shelves instead (Wayfair $80–$150).

    You’ve added storage without eating floor space, and your room looks taller and more organized.


    15. Create a Sorting Station with Divided Hamper

    Pre-sorting laundry saves you from re-sorting clean clothes. A divided hamper embeds organization into your workflow—very Scandinavian efficiency.

    Buy or DIY a simple divided hamper from IKEA ($40–$80) or wood plans online. Label each section. Place it in a corner or against a wall so it doesn’t block traffic. This system means you move clean clothes from basket to basket without touching your floor.

    Laundry day becomes streamlined, and your floor stays clear of piles.


    16. Use Subway Tile or Simple Backsplash

    A simple tile backsplash protects walls from splashes while adding clean visual structure. White or pale tile keeps a Scandinavian room bright and open.

    Install subway tiles (3×6 or 4×8) with light grout in white or pale gray ($3–$8 per square foot, $80–$200 total for small space). Hire a tiler ($500–$1,000) or DIY if confident (takes 2–3 days). Alternatively, use peel-and-stick backsplash tiles for a removable renter option ($30–$60). Tiles are durable, wipeable, and age beautifully.

    Your walls stay protected and clean while your space maintains that Scandinavian gallery feel.


    17. Add a Wall Clock in Minimal Style

    A Scandinavian clock adds function without fuss. It keeps you aware of laundry cycles while adding understated style.

    Choose a minimalist clock from IKEA, Schoolhouse Electric, or Etsy ($15–$50). Look for simple geometric faces, wooden or metal details, and no unnecessary ornamentation. Mount it at eye level near your folding station. Installation takes 10 minutes with a nail.

    You’ll actually see when cycles finish, and your space gains a focal point that feels both beautiful and useful.


    18. Organize with Clear or Frosted Glass Doors

    Glass doors let you see what’s inside without visual chaos. Scandinavian design loves this balance—transparency without exposed clutter.

    Replace solid cabinet doors with glass or frosted-glass doors (IKEA $40–$80 per door) or upgrade to glass-front cabinets ($300–$600 for a unit). Organize interiors with intention: baskets, folded items, clear jars. Frosted glass hides imperfect organization while clear glass shows off neat stacks.

    You know what you have at a glance, items stay protected from dust, and your space reads as organized and calm.


    19. Paint Trim and Doors Crisp White

    Crisp white trim creates visual lines and makes rooms feel taller—classic Scandinavian proportion. It’s a small detail with outsized impact.

    Paint all trim, door frames, and doors Benjamin Moore Chalkboard White or Sherwin Williams Pure White ($30–$50 in supplies). This takes 1–2 weekend days. It costs almost nothing but makes your room feel professionally designed. White trim against pale walls creates clean visual separation without heaviness.

    Your room gains architectural interest and feels intentionally designed rather than an afterthought.


    20. Choose Minimalist Faucet Fixtures

    Faucet design matters in Scandinavian spaces. Choose single-handle or gooseneck styles with no unnecessary ornamentation—form follows function.

    Select a matte black or brushed stainless faucet from Wayfair, Home Depot, or Kohler ($60–$150). Avoid decorative handles or brass finishes. Installation takes a plumber 1–2 hours ($150–$300 labor) or DIY if you’re confident with plumbing. A good faucet lasts decades and stays beautiful through daily use.

    Your sink becomes a design statement rather than overlooked utility, and you actually enjoy using it.


    21. Hang Towels on Minimalist Rods

    Instead of hooks or bars, towel rods keep fabric organized and easily accessible. It’s a small upgrade that changes how your space functions and looks.

    Install 1–2 simple metal rods (IKEA $15–$30 each) at arm height using basic brackets. Space them 12–18 inches apart. Install takes 30 minutes with a drill. Roll or fold towels neatly on rods. Your clean towels stay visible and dust-free while serving as soft visual interest.

    Towels become part of your design rather than hidden in a cabinet, and grabbing what you need feels effortless.


    22. Create a Mudroom-Laundry Hybrid Space

    If your laundry room has extra space, extend it into a mudroom hybrid—combining laundry, coat storage, and a small seating area. Scandinavian design loves purposeful multifunctional spaces.

    Add a simple wooden bench ($100–$250), 3–4 coat hooks (IKEA $3–$8 each), and 1–2 shelves for shoes and items. Takes 2–3 hours to install. This transforms laundry into a multi-use hub where you change clothes, wash jackets, and sort items. Suddenly your laundry room serves your whole family.

    Your home gains an organized transition zone, and laundry becomes part of a larger workflow rather than isolated.


    23. Use Natural Stone or Concrete Countertops

    Natural materials feel Scandinavian and durable. A concrete or stone counter withstands water, stains, and heavy use while aging beautifully.

    Install a concrete or honed limestone counter ($200–$600 for a small space, DIY or hire installer $300–$800). Concrete takes 2–3 days to cure. These materials are low-maintenance, wipeable, and develop a patina that looks intentional. Light gray or cream tones stay neutral and bright.

    Your counter becomes a design feature—beautiful enough to display items on, tough enough for actual work.


    24. Add a Small Bench for Folding and Sitting

    A small bench creates an ergonomic folding station and a rare moment of rest—very Scandinavian in philosophy. It reframes laundry as a space for presence, not just chores.

    Buy or DIY a simple bench (IKEA PINNIG $80–$120 or furniture stores $150–$400). Position it under a window if possible. Use it for folding tasks or simply sitting while listening to music during laundry day. Takes 1 hour to set up.

    You now have a dedicated folding surface that reduces back strain, and the room feels more human and less purely utilitarian.


    25. Keep Surfaces Clear Except One Focal Point

    The most Scandinavian trick: empty space. Resist filling every surface. Leave counters nearly bare with just one intentional item.

    Declutter ruthlessly—keep only items you use daily (detergent, fabric softener) and return them to closed storage immediately after use. Display one living plant or a single art piece per shelf. This creates visual rest and makes your space feel calm rather than chaotic. Takes 30 minutes to reset.

    Your room gains breathing room, and everything that’s visible becomes meaningful rather than background noise.


    26. Design for Your Lifestyle, Not Perfection

    The final Scandinavian principle: design for your life, not an Instagram fantasy. Perfection isn’t Scandinavian—honest, functional, personalized spaces are.

    Choose organizational systems that fit how you actually work, not how you think you should. If you fold on the washer instead of a dedicated counter, accept that and optimize your washer’s surface. If baskets overflow sometimes, buy bigger baskets rather than fighting your reality. Scandinavian design embraces imperfection and practicality.

    Your laundry room becomes a space you love using rather than a place you dread—and that’s the real design win.


    Pin this list and try just one idea this weekend. Which tip speaks to you first? Start there, and watch how one small change starts a cascade of improvements. Small shifts create real transformation—and your laundry room deserves to feel like a thoughtfully designed space.

  • 25 Handle-Free Cabinet System Ideas for a Clean, Sleek Kitchen

    25 Handle-Free Cabinet System Ideas for a Clean, Sleek Kitchen

    Introduction

    Handleless cabinets are everywhere right now, and for good reason—they create that premium, minimalist look without the visual clutter of traditional hardware. If you’re drawn to clean lines and a kitchen that feels serene rather than busy, you’re in the right place. The best part? You don’t need a full renovation to achieve this look. Whether you’re renting, on a budget, or ready to invest in a complete refresh, we’ve rounded up 25 realistic ideas to give your kitchen that sleek, handle-free vibe. Some are free styling tweaks, others are affordable upgrades, and a few are investment pieces that’ll last for years. Let’s find your starting point.

    1. Opt for Push-to-Open Cabinet Doors

    Push-to-open mechanisms let you open cabinets with just a light touch—no handles needed. These spring-loaded hinges are hidden inside the cabinet frame, making the exterior completely smooth and seamless.

    Installation typically takes 2–4 hours per cabinet if you’re handy, or hire a professional for around $100–$300 per door. Brands like Blum and Grass make reliable mechanisms available on Amazon, Home Depot, or directly from cabinet suppliers. If you already have cabinets, retrofit kits exist for $15–$40 per door—a smart budget option.

    The result is a sophisticated, touch-activated feel without a single visible hinge or handle. Your kitchen instantly shifts toward that high-end, spa-like aesthetic.

    2. Install Recessed Grip Pulls (Nearly Invisible)

    Recessed pulls are indented directly into the cabinet edge, so you grip the groove rather than a protruding handle. They’re minimal, sculptural, and super functional.

    Buy pre-routed cabinet doors or ask a local woodworker to route grooves into existing doors for around $20–$50 per door. Ready-to-assemble options from IKEA or Wayfair start at $30–$80 per door. It’s a DIY-friendly upgrade if you’re comfortable with a router, or a weekend project for a handyperson.

    You get the handleless look with zero visible hardware, and your fingers naturally find the groove. Kitchen storage becomes tactile and intuitive rather than fussy.

    3. Paint Cabinets in a Matte Moody Color

    Matte finishes eat light and create depth—pair this with moody colors like forest green, navy, or warm charcoal, and your cabinets look curated and intentional without handles drawing the eye.

    Use high-quality cabinet paint (Sherwin-Williams ProClassic or Benjamin Moore Advance) at $60–$100 per gallon; you’ll need 2–3 gallons for a full kitchen. Hire a pro for $1,500–$2,500, or DIY over a weekend for primer, paint, and drying time. This completely eliminates the need for handles—the color becomes the focal point instead.

    The matte finish disguises fingerprints better than gloss, and your kitchen feels intentional and modern. No handles means less visual noise and more breathing room.

    4. Try Integrated Toe-Kick Drawers

    Instead of decorative toe-kicks, create shallow pull-out drawers at foot level for flat items like baking sheets, cutting boards, or serving platters. The drawer face is flush with the cabinet line—no handles required.

    Custom woodworkers or high-end cabinet retailers can build these for $150–$400 per drawer. Semi-custom options from brands like Dura Supreme or Kraftmaid start around $200–$300. DIY kits and rails are available on Amazon for $50–$100 if you want to retrofit existing cabinets.

    You reclaim often-wasted space and add hidden storage without any visual clutter. Your kitchen base feels continuous and clean rather than broken up by hardware.

    5. Use Cabinet Doors with European Horizontal Grain

    European horizontal grain (veneer grain running left-to-right rather than top-to-bottom) creates visual interest without needing handles. The grain lines become your “pull point” visually.

    Browse semi-custom brands like Kraftmaid, Dura Supreme, or Waypoint at Home Depot or Lowe’s; expect $100–$200 per door for this veneer style. Full-custom woodworkers offer bespoke grain matching for $200–$500 per door. Many are available as ready-to-assemble options on Wayfair or specialty cabinet sites for $80–$150 per door.

    The horizontal grain draws your eye across the cabinet face, making the absence of handles feel intentional. Your kitchen reads as modern and carefully designed rather than sparse.

    6. Apply Handleless Adhesive Backing Strips

    If you rent or can’t modify cabinets permanently, self-adhesive grip strips ($10–$25 per set) stick onto door edges and create a subtle pull-point. They’re thin, unobtrusive, and removable.

    Search Amazon or Wayfair for “adhesive cabinet grips” or “pull strips for cabinet doors.” Installation takes 10 minutes—just clean the surface, measure, and stick. Most adhesive strips are stainless steel or black plastic and come in 24–36 inch rolls.

    Your rented kitchen suddenly feels intentional and modern, with zero permanent changes. Landlord-approved and damage-free when you move.

    7. Combine Matte Black Cabinets with Brass Accents Elsewhere

    Go full handleless on upper cabinets but add minimal brass accents on lower drawers—this creates visual interest without cluttering the space. Matte black reads sleek; brass feels warm and intentional.

    Matte black cabinet paint runs $60–$100 per gallon; brass drawer pulls (kept small, 2–3 inches) cost $8–$20 each from Etsy, West Elm, or Hardware Hut. Professional painting + hardware installation costs around $1,500–$2,000. DIY painting takes a weekend plus drying time.

    You balance minimalism with personality. The brass catches light and adds warmth, while handleless uppers keep sightlines clean. Your kitchen feels both modern and grounded.

    8. Install Motion-Activated Cabinet Lighting

    Pair handleless cabinets with motion-activated LED strips inside—when you approach or open a door, lights automatically come on. It’s subtle, smart, and makes your kitchen feel high-tech without being fussy.

    Motion-sensor LED kits cost $20–$60 per kit and install in 30–45 minutes. Brands like GE Enbrighten, Philips Hue, or simple battery-powered options on Amazon offer reliable choices. Hire an electrician for hardwired options at $100–$200 per cabinet.

    The lighting makes your handleless cabinets feel premium and functional. Contents are visible, easy to grab, and the touchless interaction reinforces the minimalist aesthetic.

    9. Choose Frameless Cabinet Boxes with Flush Fronts

    Frameless cabinets (also called European-style) have no face frame, making doors sit directly on the box edges. Combined with handleless design, they’re the ultimate minimalist expression.

    Budget frameless options start at $150–$250 per linear foot through semi-custom retailers like Wayfair, IKEA, or home center brands. High-end custom frameless runs $400–$800+ per linear foot. A 10-foot kitchen could range from $1,500–$8,000 depending on depth.

    The flush, seamless appearance makes your kitchen feel like a luxury hotel or high-end home. Storage becomes architectural rather than furniture-like.

    10. Paint Existing Handles to Match Cabinets

    If you can’t afford new cabinets yet, paint existing handles the same color as your cabinet face. They’ll visually recede and the handleless effect happens instantly.

    Matching cabinet paint ($60–$100 per quart) covers handles in 1–2 thin coats. Preparation takes 15 minutes; drying is 2–4 hours. This is a free-to-$50 weekend project that creates immediate visual impact.

    Handles virtually disappear against the cabinet surface. Your kitchen reads as clean and cohesive, buying you time before a full renovation.

    11. Install Sleek Linear Pulls Positioned as Finger Grooves

    Linear pulls are thin, horizontal bars positioned at the door’s top or bottom edge. They’re minimalist hardware that almost reads as part of the door structure.

    Quality linear pulls from Schwinn Hardware, Etsy, or specialty sites cost $5–$15 per pull; budget $100–$300 for a full kitchen. Installation is DIY-friendly with a drill and 30 minutes per door. Hire help for $200–$400 if you want professional alignment.

    The continuous line feels architectural rather than decorative. Your eye follows the pull’s geometry rather than seeing it as “hardware,” which softens its visual impact.

    12. Opt for Lacquered Matte Finishes Over Gloss

    Lacquered matte finishes feel less corporate than glossy (which can read cheap or plastic). They’re smooth, durable, and photograph beautifully—perfect if you’re going handleless and want that high-end feel.

    Professional lacquering costs $1,200–$2,500 for a full kitchen, or DIY spray applications at $100–$200 in materials. Semi-custom lacquered doors start at $120–$200 per door through Home Depot, Lowes, or Wayfair.

    The matte sheen catches light subtly, making your cabinets feel premium without gloss’s slickness. Handleless + matte lacquer = luxury apartment vibes.

    13. Create a Hidden Pantry with Handleless Doors

    Build a floor-to-ceiling handleless cabinet door that conceals a pantry behind an otherwise smooth wall. Push-to-open mechanisms keep the front completely blank.

    Custom woodworkers or high-end cabinet shops build these for $800–$2,000 depending on size and finish. Semi-custom options through Kitchen Cabinet Depot or similar sites run $400–$800. DIY is possible if you’re handy with basic carpentry and hidden hinges.

    Your kitchen maintains minimalist sightlines while gaining serious storage. The hidden pantry feels like a design secret rather than functional necessity.

    14. Combine Handleless Upper Cabinets with Open Shelving Below

    Go handleless on upper storage (closed, keeping clutter hidden) and install open shelves below for display items. This balances minimalism with personality.

    Handleless upper cabinets cost $150–$400 per linear foot depending on finish and depth. Open shelving brackets and shelves run $30–$100 per shelf through IKEA, Wayfair, or Home Depot. Combined refresh runs $1,500–$3,500 for an average kitchen.

    You get clean, modern lines overhead with warm, collected style below. Open shelving lets you curate what’s visible—it becomes part of your décor rather than visual clutter.

    15. Use Textured or Fluted Door Surfaces

    Fluted or textured cabinet fronts add dimension without requiring visible hardware. The ridges and shadows give handleless cabinets visual interest and a handcrafted feel.

    Fluted semi-custom doors cost $150–$250 per door through Wayfair, Home Depot semi-custom lines, or Etsy woodworkers. Custom textured finishes run $200–$400 per door. Existing cabinets can be wrapped or resurfaced with textured veneers for $100–$200 per door.

    The texture makes your cabinets feel tactile and designed rather than flat and utilitarian. Your kitchen reads as intentional and curated, even without a single visible handle.

    16. Install Minimalist Touch-Latches for Soft Opening

    Touch-latches (also called push-to-latch or push-catch mechanisms) let you open cabinets with a nudge, and soft-close hinges ensure they shut quietly. It’s handleless + luxe functionality.

    Quality soft-close hinges cost $15–$30 per hinge and are available on Amazon, Home Depot, or specialty hardware sites. Touch-latch kits run $10–$25 per door. Professional installation is $300–$600 for a full kitchen, or DIY in 3–4 hours with basic tools.

    Your kitchen operates silently and smoothly. No more slamming doors or fumbling with handles—everything feels deliberately designed and premium.

    17. Paint Cabinets in Warm Natural Wood Tones

    Instead of stark white, paint handleless cabinets in warm wood tones (walnut, oak, honey, light maple). The warmth becomes your focal point; handles aren’t missed.

    Cabinet paint in warm tones runs $60–$120 per gallon; you’ll need 2–3 gallons for a full kitchen. Professional application costs $1,500–$2,500. DIY prep, paint, and cure time spans a long weekend. Pre-stained semi-custom doors are available for $120–$200 per door.

    Warm wood reads cozier and more approachable than white or stark grays. Your handleless kitchen feels inviting rather than cold—the opposite of minimalist sterility.

    18. Add Integrated Dividers and Hidden Organization

    Since handleless exteriors are so clean, maximize interior organization with custom dividers, pull-out baskets, and tiered shelving. Organization becomes invisible but game-changing.

    Custom interior dividers and pull-out organizers cost $50–$200 per cabinet through Container Store, Wayfair, or specialist woodworkers. DIY options with IKEA or Amazon basics run $20–$80 per cabinet. Professional woodshop installation is $300–$800.

    Your smooth exterior hides immaculate organization. Opening a door feels rewarding—everything has its place, making daily use effortless and meditative.

    19. Combine Handleless with Waterfall Edge Countertops

    Pair handleless cabinets with waterfall-edge countertops in matching material. The continuous line makes your kitchen feel architectural and premium—no hardware needed when the design is this cohesive.

    Waterfall edges add $30–$80 per linear foot to countertop costs (so $300–$800 for a typical kitchen island). Material costs for quartz or solid surface run $80–$150 per linear foot total. Custom work through a fabricator is typically $50–$150 per linear foot for installation and finishing.

    The continuous material flow makes your kitchen read as intentionally designed, like museum or boutique design. Minimalism feels luxe rather than bare.

    20. Install Under-Cabinet Lighting with No Visible Hardware

    Conceal LED strips under upper cabinets (recessed into the cabinet overhang or behind a slim trim). No visible wires, no visible switches, no clutter—just clean illumination.

    Recessed LED kits cost $40–$100 per run and install in 1–2 hours. Hire an electrician for hardwiring at $150–$300 per installation. Simple battery-powered options from Amazon or Home Depot start at $15–$40 and need no professional help.

    The indirect lighting makes your kitchen feel like a restaurant or boutique space. It’s handleless sophistication plus functional ambiance—your counters are always visible and beautifully lit.

    21. Choose Stainless Steel or Aluminum Cabinet Boxes

    Metal (stainless steel or aluminum) handleless cabinets give your kitchen an industrial, professional feel. They’re durable, easy to clean, and ultra-modern.

    Stainless or aluminum semi-custom cabinets cost $250–$500 per linear foot through specialty kitchen retailers or online sites like MOD or Blu Dot. Custom metal work runs $400–$800+ per linear foot. These are investment pieces, but they last decades.

    Your kitchen looks like a professional culinary space. The sleek metal finish pairs perfectly with handleless design for an ultra-modern aesthetic.

    22. Use Reclaimed or Sustainable Wood Fronts (Handleless)

    Reclaimed wood or bamboo handleless cabinets offer eco-friendly style with character. No visible handles mean the wood’s natural beauty and grain are the design story.

    Reclaimed wood cabinets run $200–$500+ per door depending on sourcing and customization. Sustainable bamboo options (also antimicrobial) cost $150–$300 per door. Semi-custom sustainable options through Wayfair or eco-focused retailers start at $120–$200 per door.

    You get handleless minimalism with warm, natural character. The wood tells a story—vintage or sustainable—making your kitchen feel thoughtful rather than sterile.

    23. Create a Seamless Pantry Wall

    Design an entire wall (or galley) of continuous handleless cabinets with no visual breaks. Everything becomes one seamless architectural feature rather than separate cabinet boxes.

    Seamless full-wall cabinetry runs $300–$600 per linear foot through high-end custom builders. Semi-custom options from specialist retailers cost $150–$300 per linear foot. This is a $3,000–$10,000+ project but the payoff is showstopping cohesion.

    Your kitchen or pantry becomes a polished, gallery-like space. The unified surface feels intentional and contemporary rather than utilitarian.

    24. Install Handleless Glass-Front Display Cabinets

    Go handleless with glass-front doors on uppers for displaying dinnerware or glassware. The glass-to-handle-free pairing feels gallery-like and curated.

    Glass-front handleless doors cost $100–$200 per door through semi-custom retailers or Wayfair, IKEA, Home Depot. Frosted glass is less finicky than clear (doesn’t show fingerprints). Installation is DIY-friendly or professional at $200–$500 for a full set.

    Your kitchen becomes a display of beautiful items rather than purely hidden storage. Handleless glass fronts create an open, museum-quality aesthetic.

    25. Pair Dark Handleless Cabinets with Bright Countertops

    Go bold with dark, moody handleless cabinets (forest green, navy, deep charcoal) and pair them with light, bright countertops. The contrast is striking without needing visible hardware to define the space.

    Dark cabinet finishes in paint or stain cost $60–$100 per gallon; full kitchen application is $1,200–$2,500 professional or DIY over a long weekend. White or light quartz countertops run $80–$150 per linear foot, so budget $1,500–$3,000 for typical kitchen.

    The high-contrast design reads modern and intentional. Your dark handleless cabinets look sophisticated rather than heavy because the bright counter balances the mood.


    Save this post for your next kitchen refresh. Whether you pick push-to-open mechanisms, paint existing handles to blend in, or dream about a full handleless renovation, there’s an idea here for your budget and skill level. Try one this weekend—your kitchen will thank you.

  • 23 Minimalist Kitchen Storage Ideas That Cut Clutter Fast

    23 Minimalist Kitchen Storage Ideas That Cut Clutter Fast

    23 Minimalist Kitchen Storage Ideas That Cut Clutter Fast

    Introduction

    If your kitchen counters look like a catch-all for every gadget, jar, and utensil you own, you’re not alone. But here’s the thing: a cluttered kitchen doesn’t just look messy—it makes cooking harder and stresses you out every time you walk in. The good news? You don’t need a complete renovation to fix it. Minimalist storage isn’t about owning less (though that helps); it’s about being smart about where everything lives and making it easy to find what you use. Whether you’re renting, renovating, or just tired of chaos, these 23 ideas will help you create a kitchen that feels spacious, functional, and genuinely yours. Let’s clear some space and get cooking.


    1. Install Floating Shelves Above Counter Space

    Floating shelves replace bulky cabinets and give you open storage that doesn’t eat up floor space. They’re perfect for displaying items you actually use daily—glassware, cookbooks, or pantry staples in glass containers.

    Mount shelves 12-18 inches above your counter at eye level for easy access and visual impact. Use $40-$150 per shelf depending on materials (wood, metal, or composite). Installation takes 1-2 hours with a drill and level; renters can use adhesive-mounted options for $20-$50. Fill them with uniform containers—white ceramic, clear glass, or natural wood—to keep the look cohesive. Group similar items together (all mugs, all grains) rather than mixing everything randomly.

    This approach opens up your counters and turns storage into part of your décor. You see what you have, so you’re less likely to buy duplicates or forget ingredients.


    2. Use Clear Glass Containers for Pantry Visibility

    Clear containers eliminate mystery items hiding in the back of your pantry and make your storage system actually visible. You’ll know exactly what you need to buy.

    Swap out boxes and bags for clear glass or plastic containers ($1-$5 each from Target, IKEA, or Amazon). Add minimalist labels using a label maker ($15-$30) or masking tape and a pen. Spend one afternoon decanting everything—it’s meditative and takes about 2-3 hours depending on how much pantry you have. Stack containers vertically or in rows so you can see everything at a glance. Pro tip: Take a photo of your labeled containers before organizing to remember what goes where.

    Your pantry becomes functional and beautiful. No more expired items lurking in mysterious packages, and restocking is a breeze.


    3. Install a Pegboard Wall for Hanging Tools

    A pegboard keeps frequently used tools off counters and within arm’s reach without taking up cabinet space. Every item has a designated spot, so you know exactly where to find (and return) things.

    Mount a pegboard ($20-$50) on any wall with stud finders and screws; adhesive-backed options work for renters ($15-$30). Add hooks, small baskets, and shelves ($10-$30 total). Takes 1-2 hours to install and style. Hang your most-used utensils, small pots, and measuring tools. Leave negative space (empty holes) intentionally—it’s part of the minimalist look and gives you room to adjust.

    Your counters stay clear, tools are visible and easy to grab, and you’ve created a functional kitchen artwork that actually works.


    4. Declutter Your Drawers with Divider Systems

    Drawer dividers transform chaotic junk drawers into organized zones where everything has a home. You’ll find things faster and actually close drawers smoothly.

    Buy a drawer divider set ($15-$40 from IKEA, Target, or Amazon—bamboo or plastic) and spend 15-30 minutes sorting and placing items. Keep only utensils and tools you use at least monthly; donate or recycle the rest. Use each section for one category: measuring tools, whisks, spatulas, etc. Vertical dividers prevent items from sliding around and maximize visible space.

    Your drawers become a satisfying system where you can find what you need without shuffling through clutter. Opening a drawer no longer feels like a small disaster.


    5. Mount a Magnetic Knife Strip to Free Up Block Space

    Knife blocks take up valuable counter space and often hold knives you never use. A magnetic strip is sleeker, takes minimal space, and looks intentional.

    Install a magnetic knife strip ($20-$60 from Amazon, Williams Sonoma, or Sur La Table) on a wall or the side of a cabinet using mounting hardware ($5-$10. Takes 30 minutes. Mount at a height where you can safely reach without stretching. Keep only knives you actually use—a chef’s knife, paring knife, and one serrated knife cover most cooking tasks. Wipe the strip occasionally to keep knives secure.

    Your counters open up, and you get a minimalist focal point that shows off quality knives. Bonus: knives stay sharper longer when they’re not rattling in a wooden block.


    6. Create a Coffee Station in One Corner

    Corralling coffee items into one area keeps supplies grouped logically and prevents them from spreading across your kitchen. Everything you need is in one spot—no hunting for filters or that one mug.

    Pick a corner with access to a plug and water source ($0 if using existing space). Use a small table, cart, or shelf ($30-$100 from IKEA, Amazon, or Target). Organize: coffee maker, grinder, and mugs on the surface; filters, beans, and sugar in a small basket or container ($10-$20). Install a small peg rail or hooks above for hanging mugs ($15-$25). Set up takes 1-2 hours.

    Your coffee ritual becomes a calm, contained moment each morning. The rest of your kitchen stays free of coffee chaos, and guests know exactly where to find cups.


    7. Use Vertical Dividers for Baking Sheets and Cutting Boards

    Stacking sheets and boards wastes space and makes it impossible to grab one without moving five others. Vertical storage means you see everything and grab what you need instantly.

    Buy a vertical divider set ($15-$30 from IKEA, Container Store, or Amazon) sized for your cabinet. Spend 20 minutes organizing. Stand baking sheets, cutting boards, and trays upright like files in a folder, one per slot. Keep only two cutting boards (wood and plastic) and two to three baking sheets—this is plenty for most cooking.

    Your cabinet becomes efficient, and you’ll actually reach for items you couldn’t find before. Less wasted cabinet space, more usable items.


    8. Consolidate Spices into Uniform Jars with Labels

    Mismatched spice containers and unclear labels waste money (you forget what you have and rebuy) and cabinet space. Uniform containers create visual calm and actually help you cook faster.

    Buy empty spice jars ($0.50-$1.50 each; bulk from Amazon, Container Store, or Specialty Bottle). Get a label maker or use kraft labels and a pen ($15-$30 for maker). Decant all spices into jars over 1-2 hours. Label each jar clearly with the spice name and ideally the date purchased. Organize alphabetically or by cuisine type (baking, Italian, Asian). Keep only spices you’ve used in the past year.

    You’ll cook more adventurously when spices are visible and easy to find. Your cabinet looks curated, not chaotic, and you’ll stop overbuyering duplicates.


    9. Install Under-Sink Pull-Out Baskets

    Under-sink space is usually a dark void where things disappear. Pull-out baskets make everything accessible and keep cleaning supplies and sponges separated from food storage.

    Get pull-out baskets ($20-$50 per basket; IKEA, Target, or Amazon). They slide right into existing cabinet space—no installation needed. Organize one for cleaning supplies, one for sponges/brushes, and leave one area clear for your trash bin if it lives there. Takes 10 minutes to sort and place. Wipe baskets monthly to prevent mildew.

    Everything under your sink becomes visible and grabbable. No more reaching to the back and disturbing a pile of mystery items. Much safer to keep cleaning products in a designated area away from food.


    10. Add a Door-Mounted Spice Rack

    Cabinet doors are wasted real estate. A door-mounted rack holds spices, extracts, or small jars without eating into cabinet shelves.

    Install a door-mounted spice rack ($15-$40 from Amazon, Target, or specialty kitchen stores). Adhesive or screw-mounted options both work. Takes 15 minutes to install and fill. Use it for frequently used spices, extracts, or small jars of nuts and dried herbs. Keep items under 5 pounds so the door isn’t weighted down.

    Your cabinet shelves free up instantly, and you’ve created a second storage layer that’s completely out of the way but easily accessible.


    11. Create a Drink Station with Labeled Containers

    Drink items scattered across multiple cabinets mean you’re constantly hunting for a mug or can’t find the tea. Grouping everything in one spot saves time and looks intentional.

    Pick a lower cabinet or shelf kids can reach (if applicable). Arrange: mugs on hooks or in a small stand ($10-$20), glasses in a contained area, tea/coffee items in labeled containers ($5-$15 for containers). Takes 30 minutes to organize. Stock only cups and glasses you actively use—keep two to three per person in your household.

    Everyone knows where to find a drink cup, and your cabinet stays organized without looking like you’re trying too hard. A functional, accessible system beats a Pinterest-perfect but inaccessible one.


    12. Use Stackable, Modular Cabinet Organizers

    Cabinets with just one shelf waste vertical space. Stackable organizers create extra levels and let you fit more without creating a precarious tower.

    Buy stackable organizers ($20-$50 per set from IKEA, Container Store, or Amazon). They’re adjustable and require zero installation—just place them on your shelf. Organize dishes, bowls, or glasses with one set per item type. Takes 20 minutes to arrange. Leave a small gap between levels for easy access and visibility.

    Your cabinet instantly feels more spacious and organized. You fit more into less space, and everything remains easy to access without unstacking items.


    13. Mount a Narrow Shelf Above the Stove

    The wall above your stove is prime real estate for oils, vinegars, or salt that you need while cooking. It keeps the counter clear and puts essentials at hand level.

    Mount a narrow shelf ($15-$40) using stud finder and brackets ($10-$15 hardware). Takes 1 hour. Place only heat-safe items here: salt, pepper, oils, and vinegars in glass containers. Keep a 6-8 inch clearance from the stovetop so nothing melts. Store heavy items lower on the shelf closer to the wall.

    Cooking becomes more fluid when essentials are right there. Your counters stay clear, and you save cabinet space. The look is functional and chic—no clutter, just what you need.


    14. Designate a Zone for Single-Use Appliances

    Small appliances scattered across cabinets and counters create visual chaos. Grouping them in one zone (ideally tucked away) keeps them accessible but contained.

    Pick a lower cabinet, shelf, or a small cart ($0 if using existing space; $30-$80 if buying a cart). Store air fryer, toaster, blender, and other single-use items here. Keep power cords in a small cable organizer ($5-$10). Takes 30 minutes to relocate and organize. Only keep appliances you use at least monthly—donate or sell the rest.

    Your counters transform instantly. You get a dedicated spot for tools you need but don’t want visible, and the rest of your kitchen stays open and breathable.


    15. Install Hooks Inside Cabinet Doors for Tea Towels

    Tea towels draped over drawer handles or stacked in a drawer wrinkle and take up space. Cabinet door hooks keep them organized, hidden, and easy to grab.

    Add adhesive hooks or screw-mounted hooks ($5-$15 per set) to the inside of a cabinet door. Takes 10 minutes. Hang tea towels neatly rolled or folded. Keep four to six towels maximum—enough for a week’s use before laundry day.

    Your drawers open up, and towels are accessible without cluttering your counters. A small-space hack that feels intentional, not like a storage hack.


    16. Create a Baking Supplies Corner

    Baking supplies scattered through three cabinets make it impossible to set up for baking. A dedicated baking zone has everything in one spot—no hunting, no excuses.

    Designate a large cabinet, shelf, or small cart ($0-$50 if buying a cart). Group: mixing bowls, measuring tools in a container ($5-$15), baking sheets standing vertically ($0 using dividers), and dry ingredients in labeled containers ($10-$20 for containers). Takes 1 hour to organize. Keep only mixing bowls you regularly use—two or three is plenty.

    Setting up to bake becomes a pleasure instead of a treasure hunt. Everything lives in one intuitive zone, and you’re more likely to actually bake when it’s this easy to access supplies.


    17. Use a Small Cart for Frequently Rotated Items

    A rolling cart gives you extra storage that can move wherever you need it. Use it for items you rotate seasonally or need fast access to without permanent shelf installation.

    Get a slim rolling cart ($40-$120 from IKEA, Target, or Amazon). Stock it with frequently used condiments, oils, or cookbooks. Takes 20 minutes to set up. Position it in a corner, next to the fridge, or anywhere it’s convenient. Use only three tiers—more gets top-heavy and looks cluttered.

    You’ve added functional storage without permanently modifying your kitchen. If you rearrange, it moves with you. Perfect for renters or anyone who likes flexibility.


    18. Install a Pull-Down Pantry System

    Deep cabinets waste space because items in the back disappear. A pull-down or pull-out system brings everything forward so you see and access everything easily.

    Install a pull-down or pull-out shelf system ($40-$100 from Amazon, Wayfair, or specialty kitchen organizers). Professional installation runs $50-$150, or DIY with hardware (30 minutes-1 hour). Organize canned goods, small jars, and packaged items in order of use (most frequent in front). Keep only items you use within three months.

    Your deep cabinet becomes usable, and you’ll stop losing food in the back. The system pays for itself in wasted groceries prevented.


    19. Organize Snacks in a Lidded Container for Kids or Shared Access

    Snacks loose in a cabinet or scattered across the pantry means constant searching and spilled crumbs. A single lidded container contains everything and teaches kids (or guests) where snacks live.

    Get a large clear container with a lid ($15-$30 from Target, Container Store, or Amazon). Fill with individual snack packs or pre-portioned items. Label it clearly if it’s for specific people (“Kids’ Snacks”). Takes 20 minutes to organize. Refill weekly or as needed.

    Everyone knows where snacks are, you reduce packaging waste, and your cabinet stays tidy. A system that actually works for families or roommates sharing space.


    20. Mount Magnetic Strips for Can Storage

    Cans roll around cabinets and take up surprising amounts of shelf space when stacked. Magnetic strips hold them safely on walls or cabinet sides, creating vertical storage.

    Install a magnetic strip ($15-$30 from Amazon; make sure it’s food-safe and rated for weight). Mount it on the side of a cabinet or a wall near your cooking zone using screws and anchors ($5). Takes 20 minutes. Use it for canned tomatoes, beans, or broth—items you use weekly. Limit to 5-8 cans so it doesn’t get too heavy.

    You’ve freed up valuable shelf space and created a visual, accessible storage system. Cans are always visible, and you never forget what you have on hand.


    21. Create a Drawer Divider System for Utensils and Gadgets

    An organized utensil drawer saves time and prevents the frustration of digging through a tangled mess. Dividers create zones where each item has a home.

    Buy a customizable drawer divider set ($20-$40 from IKEA, Target, or Amazon; bamboo or plastic). Organize by type: whisks together, spatulas together, measuring tools together. Takes 30 minutes. Keep only utensils you’ve used in the past three months—donate or recycle broken or redundant items.

    Your drawer opens smoothly, and you find what you need instantly. A small change that makes daily cooking smoother and less frustrating.


    22. Use Vacuum-Seal Bags for Seasonal or Bulky Items

    Bulky items like extra linens or seasonal decorations waste enormous cabinet space. Vacuum-seal bags compress them down to a fraction of their size and keep everything visible in one spot.

    Buy vacuum-seal bags ($1-$3 per bag from Target, Amazon, or grocery stores) and a hand pump or vacuum sealer ($15-$40; most homes already have one). Store seasonal kitchen items, table linens, or extra towels. Takes 30 minutes-1 hour to pack and seal. Stack bags vertically in a designated cabinet or closet shelf so you can see labels and grab what you need.

    You’ve dramatically freed up space without discarding anything. Perfect for storing backup supplies without creating clutter.


    23. Install a Narrow Shelf for Cookbooks and Recipes

    Cookbooks scattered through cabinets or piled on counters look chaotic. A dedicated shelf displays them beautifully and keeps them accessible for inspiration and actual cooking.

    Mount a narrow shelf ($20-$40) at eye level or slightly above counter height. Takes 1 hour with stud finder and hardware ($10-$15). Keep only cookbooks you’ve cooked from at least twice and actively reference. Store recipes in a small box or filing system ($10-$20). Stand books upright with decorative bookends ($10-$20) or lay them flat if space is tight.

    Your kitchen has a thoughtful focal point, and cookbooks become inspiration rather than clutter. The shelf adds character while staying functional and minimal.


    Ready to reclaim your kitchen? Save this post and pick one or two ideas to try this weekend. Even small changes add surprising calm to your cooking space. Share this with anyone drowning in kitchen clutter—they’ll thank you for the roadmap.

  • 27 Wall Design Painting Ideas That Completely Transform a Space

    27 Wall Design Painting Ideas That Completely Transform a Space

    Your walls are probably the biggest blank canvas in your home—and they’re also the easiest thing to change. Whether you’re renting, own your place, or just want to refresh without major renovation stress, the right wall treatment can completely shift how a room feels. Gone are the days of basic beige and boring white. Today’s trending wall designs mix color psychology with texture, lighting, and personalization to create spaces that actually feel yours.

    The 27 ideas below cover everything from quick paint refreshes to sculptural installations. You’ll find budget-friendly options you can tackle alone, mid-range upgrades that make a real impact, and investment pieces that last. Most importantly, every single one is achievable—even if you’ve never painted before. Let’s turn that blank wall into your new favorite feature.


    1. Paint an Accent Wall in Deep Forest Green

    Forest green is having a major moment for good reason—it brings nature inside while feeling sophisticated and calming. An accent wall in this shade creates drama without overwhelming the entire room, and it pairs beautifully with both modern and traditional décor.

    Pick one wall (usually the one you see first when entering) and measure it carefully. Purchase high-quality paint in forest green from Benjamin Moore, Sherwin-Williams, or even budget-friendly options at Home Depot ($25–$45 per gallon). You’ll need primer, two paint rollers, and drop cloths. The whole project takes one afternoon (3–4 hours). Apply primer first, then two coats of paint, waiting 2–3 hours between coats.

    Pro tip: Pair this wall with warm metallic accents (gold picture frames, brass sconces) to keep it from feeling too heavy.

    Your room instantly gains a sophisticated focal point that makes guests stop and ask about your design choices. The color draws the eye and creates visual depth you didn’t have before.


    2. Add Warm Earthy Neutrals for Zen Calm

    Warm earthy neutrals—think caramel, warm taupe, soft sand—are the antidote to cool grays that dominated the last five years. These shades feel grounding and promote the biophilic design trend that makes spaces feel naturally restorative.

    Choose a shade like Benjamin Moore’s Wheat Sheaf or Sherwin-Williams Accessible Beige ($30–$50 per gallon). These warm neutrals work as your main color across all four walls or as a base for other elements. Budget one weekend for two coats on an average bedroom. The key is using a high-quality roller and applying thin, even coats to avoid streaking.

    Bonus: These neutrals photograph beautifully in natural light, making your space Instagram-ready without trying.

    The difference is subtle but powerful—your room stops feeling sterile and starts feeling like a sanctuary. Natural wood furniture and plants suddenly look intentional rather than random.


    3. Create an Ombre Wall Effect for Depth

    An ombre effect on a single accent wall creates visual interest and dimension without committing to one solid color. It’s easier than you’d think and looks professionally designed.

    Get two coordinating paint colors in the same family (light and dark versions—around $30–$50 total). Divide your wall into three or four horizontal sections with light pencil marks. Paint the top section with the lighter shade, the bottom with the darker shade, and blend the middle section by wet-brushing where they meet. This takes 2–3 hours and requires steady hands but no special skills. YouTube has tons of ombre tutorials if you want to watch beforehand.

    Pro tip: Use a wide brush (not a roller) for the blending section to create softer transitions.

    You’ll get architectural dimension and color gradation that makes walls look taller and spaces feel more curated. It’s especially striking in dining rooms or entryways.


    4. Install Metallic Accents for Glam Reflection

    Metallic accents—gold, silver, or rose gold—bounce light around small spaces and add instant glamour without major commitment. They work with nearly every color and style.

    Use peel-and-stick metallic wall decals ($15–$40 on Amazon or Wayfair) in geometric patterns, or go minimal with a few gold-painted wooden shelves. Alternatively, stencil metallic paint directly onto your walls using painter’s tape ($20–$60). This takes 1–2 hours and requires zero experience. Apply metallic paint with a foam roller over your base color.

    Bonus: Metallics photograph beautifully under any lighting, instantly elevating your space.

    The light-reflecting quality makes rooms feel larger and brighter, especially in apartments without tons of windows. Your eyes naturally get drawn to the shimmer, which creates visual interest and makes small spaces feel intentionally designed.


    5. Try Stenciled Patterns for Personality

    Stenciling adds custom personality without the commitment of wallpaper or the mess of murals. You can create patterns that match your exact aesthetic and color scheme.

    Buy a stencil template online ($10–$30 on Etsy or Amazon) in a pattern you love—geometric, botanical, or abstract. Use painter’s tape to secure it, then apply paint with a foam roller or sponge brush in a contrasting color ($20–$40 for paint). One accent wall takes 4–6 hours but is genuinely relaxing. Work in small sections to avoid sliding the stencil.

    Pro tip: Test the pattern on poster board first to visualize spacing and color contrast.

    The custom pattern becomes a signature feature of your space—it’s what makes your room yours rather than cookie-cutter. Guests always comment on stenciled walls because they look high-effort but are actually very doable.


    6. Paint Venetian Plaster for Luxe Texture

    Venetian plaster creates a high-end, textured finish that reflects light in subtle, sophisticated ways. It’s more durable than regular paint and looks like you hired a professional—even if you DIY’d it.

    Purchase a Venetian plaster kit ($40–$80) from Home Depot or online. You’ll apply it with a steel trowel in thin, overlapping layers, allowing each coat to dry. Budget one full day for one accent wall and be prepared for a learning curve on your first attempt (YouTube tutorials are essential). Alternatively, hire a pro ($200–$400 for one wall), which guarantees a flawless finish.

    Bonus: This finish is genuinely durable and hides wall imperfections better than regular paint.

    Your walls gain depth and light-play that changes throughout the day. The tactile quality makes the room feel curated and special, and it photographs with professional-grade texture.


    7. Use Soft Pastels to Brighten Small Spaces

    Soft pastels—powder blue, muted blush, sage green, pale lavender—reflect light and make compact rooms feel open and breathable. They’re trendy but timeless and work across all décor styles.

    Choose a pastel from Benjamin Moore or Sherwin-Williams ($30–$50) that feels calm to you. Apply two coats with a quality roller. This takes one afternoon and requires zero experience. Pastels work best when paired with white trim and minimal, light-colored furniture to maximize the airy effect.

    Pro tip: Pastel walls photograph beautifully in natural light, making even tiny spaces look dreamy.

    Your small room suddenly feels intentional rather than cramped. The soft color brings psychology of calm into your daily life, and natural light bounces around differently, making the space feel brighter overall.


    8. Paint Moody Walls for Built-In Coziness

    Deep, moody colors like navy, deep plum, or charcoal on built-ins or smaller rooms create dramatic sophistication and surprisingly cozy intimacy. These colors pair beautifully with warm lighting.

    Select a shade like Benjamin Moore Silhouette or Sherwin-Williams Naval ($30–$50). Apply two coats to your built-ins or accent wall. Budget 4–5 hours for careful application, as darker colors need good coverage. Pair this wall with warm-toned lighting (soft white bulbs, not cool white) to avoid cave-like vibes.

    Pro tip: Test your color in the actual room at different times of day—moody colors look different in morning light versus evening.

    The result is a cocoon-like space that feels sophisticated and collected. Moody walls make you want to spend time in the room, and they’re surprisingly excellent for productivity (offices feel serious, bedrooms feel restful).


    9. DIY a Nature-Inspired Mural

    Nature murals bring biophilic design into your space without the cost of custom artists. Simple landscapes, botanical branches, or abstract trees are doable for beginners and create a focal point.

    Grab acrylic paint in earth tones ($20–$40), paint brushes, and a design sketch (print from Pinterest or draw freehand). Start simple—mountains, trees, and sky take about 6–8 hours spread over two days. Use light pencil marks to sketch your design first, then paint over them. Seal with matte polyurethane for durability ($15).

    Bonus: Murals are renter-friendly if you use removable primer first (talk to your landlord about a security deposit swap).

    You get a one-of-a-kind focal point that no store-bought art can replicate. Murals make rooms feel personal and connected to nature, which research shows reduces stress and improves mood.


    10. Apply High-Gloss Finishes for Light Reflection

    High-gloss and satin finishes reflect light differently than matte paint, making small or dark hallways, bathrooms, and entryways feel brighter and more spacious. This is a subtle upgrade with real impact.

    Use high-gloss paint in white or a pale neutral ($30–$50). Apply two coats with a foam roller for even coverage and fewer brush marks. Budget one afternoon. Note: Gloss shows fingerprints, so it’s best for walls you don’t touch frequently. Satin (semi-gloss) offers 70% of the reflection with better durability.

    Pro tip: High-gloss works beautifully in bathrooms and mudrooms where humidity and cleaning are regular—it’s genuinely more durable than matte.

    Your hallway or bathroom becomes noticeably brighter without adding actual light fixtures. The reflective quality creates visual depth and makes tight spaces feel less cramped.


    11. Layer 3D Sculptural Wall Art

    3D sculptural pieces have replaced flat posters as the go-to wall art. They create shadow play, visual interest, and genuine depth that photographs amazingly.

    Purchase 3D wall art from Amazon, Wayfair, or Urban Outfitters ($40–$150 per piece) in materials like resin, wood, or metal. Arrange 3–5 pieces on your wall in an asymmetrical grouping using a level and a stud finder. Installation takes 30 minutes per wall. Alternatively, make your own from foam shapes and paint ($20–$40) for a budget version.

    Bonus: Lighting matters hugely—position a directional light source to cast shadows and maximize dimension.

    Your wall becomes an art installation rather than a decorative afterthought. The textured, three-dimensional quality makes rooms feel curated and collected, and it changes throughout the day as light hits it differently.


    12. Paint Full-Spectrum Rainbow Walls for Kids’ Rooms

    Full-spectrum color blocks (subtle rainbow versions) in pastels bring playfulness without overstimulation. Kids love the visual interest, and soft pastels keep the vibe calm.

    Paint horizontal or vertical color blocks using painter’s tape and soft pastel paint ($40–$60 for 4–5 colors). Measure equal sections, tape them off, and paint each section a different pastel shade. Budget one full day. Pro tip: Use painter’s tape and paint slowly for clean edges.

    Bonus: Kids can help with painting, making it a fun project they feel ownership over.

    The result is a personalized room that sparks creativity and joy. The soft rainbow keeps energy playful rather than chaotic, and it photographs beautifully for memories.


    13. Use Removable Wallpaper for Pattern + Flexibility

    Removable wallpaper gives you bold pattern and texture without paint-and-prime commitment—perfect for renters or commitment-phobes. Modern peel-and-stick options look genuinely beautiful.

    Select peel-and-stick wallpaper from Spoonflower, Wayfair, or Amazon ($25–$75 per roll). Measure your wall carefully and order extra to account for pattern matching. Application takes 2–4 hours depending on wall size and pattern complexity. Smooth out bubbles with a squeegee as you go. Removal is gentle and leaves no damage when done correctly.

    Pro tip: Prep your wall by cleaning it thoroughly and letting it dry completely—adhesion is everything.

    You get the impact of wallpaper (pattern, visual interest, personality) without the permanent commitment. Your space feels designed and intentional, and you can swap it out whenever you want a change.


    14. Blend Warm Whites with Wood Tones

    Warm whites with beige undertones have replaced cool whites as the go-to neutral. They pair beautifully with natural wood and create a connected, organic feel.

    Choose a warm white like Benjamin Moore Swiss Coffee or Sherwin-Williams Alabaster ($30–$50). Apply two coats across your space. The transformation happens when paired with natural wood furniture, woven textures, and warm lighting. Budget one weekend for an average room.

    Bonus: These warm whites actually look clean and intentional—they don’t show dirt like pure whites can.

    Your room gains cohesion and warmth that cool whites can’t match. The combination of warm white walls and wood tones creates a naturally sophisticated backdrop for any décor style.


    15. Create Bold Sapphire or Emerald Accent Walls

    Bold jewel tones like sapphire blue and emerald green are having a moment for creating drama and sophistication. These colors work best as accent walls or in smaller rooms.

    Select a high-quality blue or green from Sherwin-Williams or Benjamin Moore ($35–$55). Apply two coats to one or two walls. Use proper primer if you’re covering a light color with dark paint (crucial for even coverage). Budget one full day. Pair bold colors with warm lighting to keep the space from feeling cold or severe.

    Pro tip: Paint test patches and observe them at different times of day—bold colors change dramatically with light.

    Your room develops serious personality and visual impact. Bold accent walls make a statement about your style and create a curated, intentional aesthetic that feels anything but cookie-cutter.


    16. Incorporate Geometric Patterns with Tape

    Geometric patterns created with painter’s tape are less commitment than stencils and offer more control. Chevrons, stripes, and color blocks are beginner-friendly and look professionally designed.

    Use painter’s tape to create your pattern, then paint between the taped sections in two coordinating colors ($40–$60 total). Budget 4–6 hours, including tape setup. Remove tape while paint is still slightly wet for the cleanest lines. Pro tip: Use high-quality painter’s tape—cheap tape bleeds and ruins lines.

    Bonus: Geometric patterns work in any room style and photograph beautifully for sharing.

    Your wall becomes a graphic focal point that feels modern and intentional. Geometric patterns add energy and visual interest without the commitment of wallpaper or the complexity of murals.


    17. Paint Shelving Backs in Contrasting Colors

    Painting the back walls of open shelving (or built-ins) in a contrasting color makes styled items pop and adds depth to your space. It’s an easy upgrade many people overlook.

    Paint the interior back panels of shelves in a bold or complementary color ($20–$40). This takes 1–2 hours and requires no special skills—just painter’s tape, a small brush, and precision. The color should either match your accent wall or complement it dramatically.

    Pro tip: This works especially well if you already have built-in shelving you want to refresh without a full room repaint.

    Your shelves become a designed element rather than just storage. The contrasting background makes whatever you display look more intentional and curated, and it’s an affordable way to add visual interest and depth.


    18. Use Paint + Wallpaper Combo for Custom Interest

    Combining paint and wallpaper (or paint with painted borders) creates custom visual interest without overwhelming the space. This technique works beautifully in bedrooms and dining rooms.

    Paint your upper walls one color ($30–$50), then apply peel-and-stick wallpaper to the lower half ($25–$75). Draw a straight line at the midpoint with painter’s tape for clean edges. Budget one full day. Alternatively, paint the entire wall, then add a painted stripe or border using contrasting paint and painter’s tape ($40–$60 total).

    Bonus: This technique makes average-height ceilings feel taller.

    You get visual layering and custom design that feels collected and intentional. The combination of techniques creates depth and personality that solid color alone can’t achieve.


    19. Create Ombre Ceilings for Unexpected Drama

    Ombre ceilings are an underrated trick that makes rooms feel taller and adds subtle drama. It’s an unexpected detail that impresses.

    Paint your ceiling white in the center, gradually transitioning to a soft color at the edges ($40–$60 for two paint colors). Use painter’s tape to create horizontal bands, starting with light pencil marks for guides. Budget 4–6 hours for an average ceiling and use a quality angled brush for precision. A ladder is essential.

    Pro tip: Enlist a friend—ceiling painting is legitimately easier with two people.

    Your room gains architectural interest and visual height. Ombre ceilings make spaces feel designed and thoughtful, especially in bedrooms and small bathrooms.


    20. Apply Chalk Paint for Textured Matte Finish

    Chalk paint creates a velvety, matte finish that feels organic and cottagecore. It adheres well to most surfaces and doesn’t require primer on previously painted walls.

    Purchase chalk paint ($20–$50 per quart) from Annie Sloan, Rust-Oleum, or even craft stores. Apply two thin coats with a foam roller, allowing drying time between coats. Budget one afternoon. Chalk paint requires a protective sealant topcoat ($15–$25) to prevent dust transfer, but it’s worth it for the gorgeous matte finish.

    Bonus: Chalk paint works on furniture too, so you can create a coordinated look.

    Your walls gain a sophisticated, velvety-soft appearance that photographs beautifully. The matte finish feels artistic and intentional, especially in bedrooms and dining rooms with vintage or farmhouse styles.


    21. Paint an Accent Wall Behind Your Bed

    An accent wall directly behind your bed creates a cocoon-like effect and makes the bed feel like the hero of the room. It’s a high-impact, low-commitment upgrade.

    Choose your favorite moody or warm color ($30–$50) and paint only the wall behind your bed. Alternatively, extend it slightly wider for more drama. Budget 2–3 hours for just one wall. This strategy works beautifully with darker colors because it’s contained to one small area.

    Pro tip: Make sure your bed is positioned in front of this wall—don’t hide it behind nightstands.

    Your bedroom instantly becomes more designed and intentional. The focus naturally draws to your bed, making the room feel like a personal retreat rather than an afterthought.


    22. Mix Matte and Gloss Paint on Same Wall

    Mixing matte and gloss finishes on the same wall creates subtle texture and light-play that looks custom and sophisticated. It’s an advanced trick that feels simple once you try it.

    Paint your wall in sections: some areas matte, some areas gloss in the same or coordinating colors ($50–$80 total). Use painter’s tape to define sections clearly. Budget 4–5 hours, allowing drying time between finish changes. This technique works beautifully with geometric shapes or ombre effects.

    Pro tip: The gloss sections should have a purpose (around shelving, window frames, or in a geometric pattern)—random gloss looks accidental.

    Your wall gains subtle sophistication and texture that catches light throughout the day. The mixed finishes create visual interest that photographs beautifully and feels genuinely high-end.


    23. Paint Color Capsules for Curated Cohesion

    Color capsules (curated palettes of 3–4 coordinating colors used throughout your home) create flow and intention across multiple rooms. It’s how designed homes feel collected rather than random.

    Select a primary color, an accent color, and neutrals from Benjamin Moore or Sherwin-Williams that complement each other. Paint different rooms in different colors from your palette ($100–$150 total for multiple rooms). Budget one weekend per room. The key is repeating at least one color across rooms so they feel connected.

    Bonus: Color capsules are easier to plan using online color tools from paint brands.

    Your entire home gains cohesion and intentional design. Moving through rooms with coordinating colors makes spaces feel like they belong together, and the overall aesthetic feels significantly more curated.


    24. Create a Textured Wall Using Sponge Technique

    Sponge texturing creates subtle depth and organic interest without the expense of Venetian plaster. It’s accessible, budget-friendly, and genuinely charming.

    Purchase a natural sea sponge ($5–$10) and two coordinating paint colors ($40–$60). Apply your base color, let it dry, then dab the second color on using the sponge in a dabbing (not wiping) motion. Budget 3–4 hours for one wall. The key is using a light hand—you want subtle texture, not obvious sponge marks.

    Pro tip: Practice your technique on poster board first to get the pressure and spacing right.

    Your wall gains organic, handmade character that looks intentional and charming. The texture catches light and creates shadow play, making your space look more carefully designed than flat paint.


    25. Paint Doorframes and Trim in Contrasting Colors

    Painting trim and doorframes in a contrasting color (usually white or a bolder shade) instantly adds architectural interest and sophistication. It’s an overlooked detail with major impact.

    Use semi-gloss trim paint in white or your chosen color ($30–$50) and apply two coats with a small brush or trim roller. Budget one afternoon for average trim. Tape walls carefully to keep paint off them. Semi-gloss is more durable and easier to clean than matte on trim.

    Bonus: Crisp white trim makes walls feel more like art—it frames them beautifully.

    Your room gains defined architecture and visual sophistication. The contrast between wall color and trim creates clean lines that make spaces feel more intentionally designed and professionally finished.


    26. Install Woven Tapestry Wall Art Over Paint

    Layering woven textiles (macramé, tapestries, woven wall hangings) over painted walls combines color, texture, and organic interest. It’s an easy way to add personality without changing paint.

    Mount a large woven tapestry or macramé ($40–$150 from Etsy, Urban Outfitters, or Amazon) on a painted accent wall using a sturdy hanging rod or hooks. This takes 30 minutes including measuring and hanging. The combination of paint color + texture creates a designed, intentional focal point.

    Pro tip: Choose natural fibers and neutral palettes for timeless appeal, or go bold with dyed textiles if your style leans eclectic.

    Your wall becomes a multidimensional focal point that combines color, texture, and artisanal craft. Woven pieces add warmth and bohemian sophistication that flat art alone can’t achieve.


    27. Paint a Feature Wall in Sustainable, Low-VOC Paint

    Choosing low-VOC (volatile organic compound) or eco-friendly paint is a health-conscious upgrade that matters, especially for bedrooms and nurseries. Modern eco-paints perform beautifully without the chemical smell.

    Purchase low-VOC paint brands like Benjamin Moore Natura, Sherwin-Williams Harmony, or Seventh Generation ($40–$65 per gallon). Performance is identical to conventional paint—you get the same coverage and durability with fewer chemicals. Budget one weekend for average room painting. Many eco-paints come in gorgeous colors, so you’re not sacrificing aesthetics.

    Pro tip: Eco-paints dry slightly faster and have minimal odor, so you can reenter the room sooner.

    You create a healthier indoor environment, especially important in bedrooms where you spend hours breathing. The bonus? Eco-paint brands often have beautiful color options, so your health-conscious choice never compromises style.


    Save this post for your next wall refresh and pick just one idea to tackle this weekend—even renters can try removable wallpaper or accent wall paint. Share it with anyone redesigning, and let us know which technique you’re most excited about trying.

  • 24 Very Small Closet Ideas That Transform Micro-Spaces

    24 Very Small Closet Ideas That Transform Micro-Spaces

    If you’re staring at a closet the size of a shoebox and wondering how you’ll ever fit your life into it, you’re not alone. Micro-closets are a real challenge—but they’re also a golden opportunity to get creative. The secret isn’t more space; it’s smarter storage, strategic styling, and a few tricks that professional organizers swear by. Whether you’re renting a studio, living in a dorm, or just stuck with an awkwardly small bedroom closet, these 24 ideas will help you maximize every inch. You’ll learn how to use vertical space like a pro, choose furniture that actually fits, and organize in a way that makes getting dressed easier, not harder. Ready to make your micro-closet feel twice as big? Let’s go.

    1. Install Floating Shelves Up to the Ceiling

    Floating shelves are the secret weapon of small-space organizing because they don’t eat floor space and draw your eye upward, making ceilings feel higher. Install shelves every 12-15 inches apart, starting about 6 inches from the floor and going as high as you comfortably reach. Floating shelves typically cost $15-$50 each at Target, IKEA, or Home Depot, and installation takes about an hour per shelf with basic tools.

    The key is securing them properly to wall studs using wall anchors rated for your closet’s weight capacity. Start with 2-3 shelves and add more as you see what works. For renters, removable adhesive shelves exist, though they hold lighter loads.

    You’ll gain usable storage that doesn’t require floor footprint. Suddenly, that wasted vertical space becomes prime real estate for off-season items, shoes, or folded essentials.

    2. Use Over-the-Door Hooks for Bags and Accessories

    An over-the-door hook organizer is the easiest no-commitment solution for cluttered surfaces. These adhesive or screw-in racks mount on the inside of your closet door (or the back of a bedroom door if your closet is doorless) and instantly corral bags, belts, scarves, and hats.

    A basic over-the-door hook rack costs $8-$20 at Target or Amazon, takes 5 minutes to install, and holds surprisingly much. Adhesive versions work for renters and require zero tools. Check weight limits if you’re storing heavy bags.

    You’ll reclaim shelf or rod space that was buried under clutter. Plus, you see all your accessories at a glance, so getting ready moves faster and you actually use what you own.

    3. Add a Slim Rolling Cart Between the Rod and Wall

    If your micro-closet has any gap between the hanging rod and the side wall, a slim rolling cart slides into that wasted space and becomes instant storage for folded items, shoes, or accessories. Look for carts designed specifically for narrow spaces—typically 12-18 inches wide, costing $40-$80 at IKEA, Target, or Wayfair.

    The beauty of a rolling cart is flexibility: you can slide it out when you need to access hanging clothes or reorganize. Three tiers give you multiple zones for different clothing categories. Measure your space first to ensure it fits.

    Your hanging rod suddenly feels less crowded, and you’ve added three whole shelves of storage without any installation. The cart also makes it easier to grab what you need without disrupting everything else.

    4. Swap Out a Standard Rod for an Adjustable Double Rod

    A standard single rod wastes half your vertical hanging space. Replace it with an adjustable double rod system, which lets you hang short items (like tops and blazers) on top and longer pieces (like dresses and coats) below. Double rod kits cost $30-$70 at Home Depot, IKEA, or Amazon, and installation takes 30-45 minutes.

    Measure your closet depth and width before buying. Most systems adjust to fit spaces from 24-48 inches wide. If you rent, some tension-rod versions don’t require wall holes and work surprisingly well.

    You’ll roughly double your hanging capacity without expanding the closet footprint. This alone can be the difference between an overstuffed nightmare and an organized, breathable wardrobe.

    5. Go Vertical with Shoe Cubbies or Wall-Mounted Organizers

    Shoes are closet space killers because they sit on the floor taking up real estate. Mount a fabric or wire shoe organizer on the inside of your closet door, wall, or even over a rod to store 12-24 pairs vertically instead of piling them on the floor. These organizers run $15-$40 at Target, Bed Bath & Beyond, or Amazon and attach with adhesive or screws.

    Over-the-door options work best for renters. Wire versions hold more weight and last longer than fabric, though fabric looks sleeker. Sort by season or style to make finding the right shoe quick.

    Your closet floor suddenly opens up, making the space feel bigger. You’ll also see every shoe you own without digging, so you actually wear what you’ve bought.

    6. Declutter Ruthlessly Before Adding Anything

    Before you buy a single organizational tool, be honest about what stays and what goes. Pull everything out, try things on if unsure, and create three piles: keep, donate, sell. Aim to remove at least 20-30% of what you own. This one step makes every other hack actually work.

    Set a timer for 2-3 hours to avoid decision fatigue. Use the “one year” rule: if you haven’t worn it in a year and it doesn’t make you happy, it goes. Keep quality basics, one version of similar items, and pieces that fit your current life.

    You’ll be amazed how much space you suddenly have. A decluttered micro-closet often feels spacious enough without any storage hacks—though combined with other tricks, you get even more breathing room.

    7. Choose Slim Velvet or Felt Hangers to Slim Down the Rod

    Switching from chunky plastic hangers to slim velvet or felt hangers saves roughly 1-2 inches of rod space per garment—and when you have 30+ items hanging, that adds up fast. Plus, velvet prevents slipping, so you can pack the rod more densely without clothes sliding off.

    A set of 50 slim velvet hangers costs $20-$30 at Target, Amazon, or Container Store. One weekend project to swap them all out. Keep 3-4 wooden hangers for heavy coats; swap everything else to velvet.

    Your closet rod now holds significantly more without looking chaotic. Getting dressed becomes easier because clothes don’t shift every time you grab something, and the slim profile makes the space feel less cluttered visually.

    8. Paint Walls a Light Neutral or Soft Moody Tone

    Color dramatically affects how big or small a space feels. Light neutrals (cream, soft gray, pale taupe) reflect light and expand the perceived space. If you want something moodier, soft sage, dusty blue, or warm greige still feel intimate without shrinking the closet further. Avoid dark colors in micro-closets unless you’re adding significant lighting.

    Closet paint costs $20-$40 per gallon at any hardware store, and you need just 1-2 gallons for a small space. Painting takes 2-3 hours once prep is done. Renters: use removable peel-and-stick wallpaper in light tones instead ($15-$25).

    A fresh coat of paint costs almost nothing compared to buying new storage and makes the space feel refreshed. You’ll notice the change every time you open the door—suddenly it feels intentional, not like a cramped afterthought.

    9. Add a Small Mirror to Reflect Light and Check Outfits

    A mirror serves double duty: it bounces light around, making the closet feel bigger and brighter, and it lets you check your full outfit without leaving the space. Mount a 20-24 inch round or rectangular mirror at eye level on the wall or door.

    A basic mirror costs $15-$40 at IKEA, Target, or Wayfair. Use adhesive strips (renter-friendly) or small nails. Position it opposite or near your light source to maximize reflection.

    The psychological effect is real—suddenly the space feels open and functional. You can try on outfits without stepping outside, which saves time and lets you make sure colors and fit actually work before committing.

    10. Install Peel-and-Stick Wallpaper for Renter-Friendly Style

    If you can’t paint or want to switch styles seasonally, peel-and-stick wallpaper gives you design flexibility without landlord drama. Choose light patterns (vertical stripes, subtle geometrics, or small-scale prints) to keep the space from feeling cramped. Avoid busy patterns in micro-closets.

    Quality peel-and-stick wallpaper runs $15-$35 per roll at Target, Wayfair, or Amazon. One roll typically covers about 28 square feet. Installation takes 1-2 hours and requires just a squeegee and a patient hand.

    Your closet instantly looks designed instead of utilitarian. Plus, you can peel it off cleanly when you move without damage—game-changer for renters who want their spaces to feel personal.

    11. Use Vacuum Storage Bags for Seasonal Bulky Items

    Bulky off-season items (winter coats, summer dresses, holiday decorations) take up prime closet real estate. Vacuum storage bags compress these items to about 1/3 their original size, freeing up shelf or floor space for daily-wear pieces.

    A set of 5-10 vacuum bags costs $10-$20 at Target, Walmart, or Amazon. Store them on high shelves where you access them seasonally, not frequently. Label clearly with permanent marker or printed labels.

    You’ll reclaim significant shelf space while keeping everything accessible. Come December, your winter coats don’t crowd out current outfits; they’re compressed and stored neatly above.

    12. Install a Narrow Cubby Shelving Unit Against the Wall

    If your closet has wall space but limited floor room, a narrow cubby unit (typically 12-18 inches deep and 30-36 inches wide) provides tons of vertical storage without protruding far. These units are shallower than standard shelves, so they don’t block the door or require much depth.

    A basic cube shelf unit costs $40-$100 at IKEA, Target, or Wayfair. Assembly takes 1-2 hours and requires just a screwdriver. Anchor it to the wall for safety, especially if you stack items.

    Your micro-closet suddenly has organized zones: tops on one tier, bottoms on another, accessories on a third. Everything’s visible and within reach, so getting dressed becomes a simple grab-and-go process.

    13. Add a Pull-Out Hamper to Hide Laundry

    A small pull-out hamper (or even a slim fabric laundry bag on a frame) hides dirty clothes without requiring a separate corner of your room. Look for narrow designs, around 12-18 inches wide, costing $25-$60 at Target, Bed Bath & Beyond, or Amazon. Wheeled bases make it easy to drag to the washer.

    Position it under your hanging rod or on the closet floor. If your closet is doorless, a hamper with a lid keeps odors contained and looks neater.

    Your bedroom looks instantly tidier because dirty clothes vanish into the closet instead of piling on the floor. Laundry day is also easier since you can just roll the hamper to the washing machine.

    14. Use Tension Rods to Create Dividers for Folded Items

    Tension rods aren’t just for hanging clothes—use them vertically on shelves to create dividers that keep folded stacks separated and upright. This prevents toppling stacks from collapsing into each other and makes individual items easy to grab without dismantling the whole pile.

    Tension rods cost $8-$15 each at IKEA, Target, or hardware stores. Buy 2-4 per shelf depending on your shelf width. Installation is instant; just twist and place. No tools needed.

    Your shelves look intentional and stay organized longer. Grabbing a shirt doesn’t require rebuilding an entire stack, which saves time and frustration on busy mornings.

    15. Maximize the Door with Behind-the-Door Shelving

    If your closet door swings inward, mount a thin over-the-door shelf unit on the back to store lightweight items like scarves, belts, socks, or shoes. These are lower-profile than hook organizers and act like small shelves.

    Over-the-door shelf units cost $20-$40 at Target, Amazon, or The Container Store. Weight limits are usually 5-15 pounds, so stick to lightweight items. Installation takes 10 minutes.

    You’ve essentially gained a second closet wall without any floor space. This is perfect for small accessories that would otherwise get lost in drawers or piles.

    16. Install Task Lighting with a Small LED Clip Lamp

    Poor lighting makes a small closet feel cramped and shadowy. A simple LED clip lamp ($15-$25 at IKEA, Target, or Amazon) clamps onto a shelf or rod and brightens the whole space. Battery-powered options work for renters and require zero wiring.

    Install it at eye level or slightly above to avoid glare. One lamp often suffices for a micro-closet, though two can work if you have deep shelving. Warm white bulbs (2700K) feel cozier; cool white (4000K) shows true colors for outfit matching.

    Suddenly you can see what you’re grabbing, and the space doesn’t feel like a dungeon. Getting dressed becomes actually enjoyable, and you’ll notice you wear more of your wardrobe because you can see everything clearly.

    17. Fold Using the KonMari or File Fold Method

    How you fold matters in micro-closets. The KonMari or “file fold” method stands items vertically so you can see each piece without unstacking. This maximizes shelf depth and makes inventory easier. Once you see what you have, you stop buying duplicates.

    Spend 1-2 hours refolding your entire closet using online tutorials (search “KonMari fold” or “file fold method”). No tools or purchases needed. This is pure organizational technique.

    Your shelf capacity doesn’t increase, but your usable capacity does because you can actually access items without destroying the pile. Plus, the visual improvement is remarkable—shelves look intentional and controlled.

    18. Add Adhesive Shelf Liners for Easy Cleaning

    Adhesive shelf liners protect closet shelves from dust, stains, and damage—especially important in small spaces where clutter lingers. They also make shelves quieter when sliding baskets or stacks around.

    Adhesive shelf liner costs $8-$15 per roll at Target, Bed Bath & Beyond, or Amazon. Measure your shelves, cut the liner to size, and stick it down. Takes 30 minutes for a whole closet. Peel and replace every 1-2 years.

    Your shelves stay cleaner longer, and baskets slide smoothly without catching on rough wood. It’s a small upgrade that extends the life of your storage furniture and keeps everything looking neat.

    19. Use Small Wire Baskets to Corral Socks, Underwear, and Accessories

    Tiny items get lost in micro-closets unless corralled. Small wire baskets (typically 6-10 inches wide) group socks, underwear, tights, belts, and accessories so you can grab a whole category at once. Wire lets you see what’s inside without opening.

    A set of 3-5 small wire baskets costs $15-$30 at Target, IKEA, or Amazon. Stack them on shelves or under hanging rods. Label the front of each basket with a printed or handwritten label for quick recognition.

    Mornings are faster when you know exactly which basket holds what. You also rediscover items you forgot you owned, so you stop buying duplicates.

    20. Install a Slim Rolling Rack for Extra Hanging Space

    If your closet genuinely can’t fit everything, a slim rolling rack (typically 24-36 inches wide) extends your hanging capacity without requiring wall installation. Position it just outside your closet or at the end of your bed. Perfect for seasonal overflow or current-rotation pieces.

    A basic rolling rack costs $30-$70 at Target, Wayfair, or Amazon. Look for designs with wheels that lock to prevent shifting. Compact models fit in tight spaces.

    You’ve doubled your hanging capacity without construction. The rack also makes it easy to rotate seasonal clothes—just move the rack in and out as seasons change.

    21. Mount a Narrow Hanging Organizer for Daily Outfit Planning

    A hanging organizer with multiple pockets (usually 5-7 slots) lets you pre-plan daily outfits, which cuts morning decision-making time in half. Some people use each pocket for Monday through Friday; others use pockets for outfit types (casual, work, weekend).

    A slim hanging organizer costs $15-$35 at Target, Container Store, or Amazon. Choose designs with clear pockets so you can see contents. Hang on the back of your closet door.

    You’ll get ready faster because decisions are made during calm moments, not rushed mornings. Plus, you’re more likely to actually wear outfit combinations because they’re visible and pre-planned.

    22. Use a Slim Dresser or Chest in Your Closet

    If you have any floor space (even 2-3 feet), a slim 2-4 drawer dresser fits into the corner and provides drawer storage for socks, underwear, and folded layers. Look for depths of 12-15 inches so it doesn’t protrude into walkways.

    A narrow dresser costs $50-$150 depending on quality and style at IKEA, Target, or Wayfair. This is an investment piece but lasts years and frees up bedroom drawers for other purposes. Assembly takes 1-2 hours.

    Suddenly your micro-closet becomes a complete dressing room with hanging and drawer storage. You’re not storing clothes throughout your bedroom; they’re all contained in one place.

    23. Use Clear Plastic Boxes for Off-Season Visibility

    Clear plastic boxes (instead of opaque cardboard) let you see what’s inside without opening them, which is crucial in tight spaces where you need to maximize high shelves. Label each box with a printed label or masking tape.

    A set of 3-4 clear storage boxes (medium size) costs $20-$40 at Target, Walmart, or Container Store. Measure your shelf depth and width before buying. Stack them wisely to avoid top-heavy situations.

    You’ll remember what’s stored where and can grab seasonal items without unpacking multiple boxes. Plus, clear boxes look neater than miscellaneous bags or unlabeled boxes.

    24. Install a Slim Jewel Rack or Jewelry Organizer

    Jewelry easily tangles or gets lost in micro-closets. A slim wall-mounted organizer (often mirrored, typically 12-18 inches wide) keeps necklaces, earrings, and rings visible and accessible. Some designs double as mirrors.

    A wall-mounted jewelry organizer costs $20-$50 at Target, Wayfair, or Amazon. Use adhesive strips or small nails to mount. Takes 10 minutes. If you prefer non-wall options, over-the-door jewelry organizers also work ($15-$30).

    You’ll stop layering necklaces in a tangled mess on a shelf. Everything’s visible, so you actually wear your jewelry, and getting ready feels organized instead of chaotic.


    Ready to tackle your micro-closet? Pick one or two ideas that address your biggest pain point—whether that’s vertical space, lighting, or visibility—and start this weekend. You’ll be amazed how one small change opens up your whole closet. Bookmark this post and share it with anyone else drowning in a tiny closet space; they’ll thank you.

  • 27 Japandi Scandinavian Interior Ideas That Blend Warmth & Minimal Calm

    27 Japandi Scandinavian Interior Ideas That Blend Warmth & Minimal Calm


    If you love the idea of a calm, uncluttered home but crave warmth instead of cold minimalism, Japandi is your answer. This design blend marries Japanese simplicity with Scandinavian coziness—think clean lines paired with natural textures, neutral palettes softened by organic materials, and intentional spaces that actually feel livable. The beauty? You don’t need a massive budget or a complete renovation. Whether you’re renting or own your home, these 27 ideas let you layer in Japandi elements gradually, building a space that feels both serene and inviting. Let’s explore how to create that peaceful, warm sanctuary you’ve been dreaming about.


    1. Anchor with a Low-Profile Natural Wood Sofa

    A low sofa is the foundation of Japandi design—it grounds the room visually while keeping sightlines open. Natural wood frames (oak, walnut, or teak) paired with light linen upholstery create that perfect balance of warmth and calm.

    Look for sofas under $800 at IKEA, Article, or West Elm that feature wood legs and simple silhouettes. If you’re renting, many stores offer affordable options ($400–$600) that move easily. Time commitment: just the delivery and setup. The result? Your room immediately feels more spacious and intentional, even if everything else stays the same. The low profile signals restraint while the natural materials whisper warmth.


    2. Paint Walls in Soft, Warm Neutrals

    Skip stark white. Instead, choose warm neutrals like greige, soft taupe, or pale cream that anchor Japandi spaces. These colors feel intentional without being bold, creating a serene backdrop for your life.

    Benjamin Moore’s “Accessible Beige” or Sherwin-Williams “Urbane Bronze” (in lighter versions) work beautifully—paint costs $25–$50 per gallon, and a room takes one weekend. Rent-friendly alternative: removable wallpaper in neutral tones ($30–$60 per roll). The transformation is subtle but powerful. Your furniture pops against the calm backdrop, and the room instantly feels more restful and cohesive.


    3. Layer Woven Textures Through Area Rugs

    Multiple rugs create visual interest and define zones without walls. Combine a larger jute base ($100–$300) with a smaller, lighter natural-fiber rug layered on top ($50–$150). This adds warmth underfoot while maintaining that clean Japandi aesthetic.

    Wayfair, Rugs USA, and Article carry excellent options in sisal, jute, and linen. Layering takes five minutes and zero skill. Renters love this because you can remove it anytime. You immediately notice how the textures warm up the space and make seating areas feel more defined and intentional.


    4. Install Floating Wooden Shelves with Negative Space

    Floating shelves embody Japandi restraint—they’re functional but feel light. Install 2–3 shelves using simple brackets ($15–$40 per shelf kit) and leave 40% of each shelf empty. This “breathing room” is core to the aesthetic.

    Home Depot and Lowes stock easy-install options that take 30–45 minutes with a drill. Renters: adhesive shelves exist but floating shelves are worth the small holes. What you see isn’t a cluttered display but a curated collection. The negative space becomes as important as the objects, creating visual calm and focus.


    5. Choose Japanese Ceramic Pieces for Display

    Ceramics are the jewelry of Japandi design. Seek out Japanese-inspired pieces (or actual Japanese imports) with imperfect, organic glazes—think cream, dove gray, soft charcoal, and warm sand tones.

    Etsy sellers specializing in Japanese ceramics offer pieces from $20–$80; local pottery studios and HomeGoods often stock similar items ($15–$50). One or two statement pieces work better than many. Arrange them on open shelving or a simple console. These tactile objects make your space feel handcrafted and intentional, telling a story about what matters to you.


    6. Add a Large Potted Plant as a Living Accent

    One large plant beats a collection of tiny ones in Japandi spaces. A fiddle leaf fig, monstera, or tall pothos creates a vertical element that feels calming rather than cluttered.

    Nurseries and garden centers stock healthy plants ($25–$60); planters run $20–$50 depending on material. Water weekly and rotate monthly for even growth. Five minutes of care weekly keeps it thriving. The living element softens hard lines, improves air quality, and gives your eye something natural to rest on. You’ll notice how it anchors the room without demanding attention.


    7. Incorporate a Low Coffee Table in Solid Wood

    A low wooden coffee table grounds the seating area. Look for simple designs without fussy details—straight legs, minimal apron, and natural finishes are key.

    Article, CB2, and West Elm offer solid-wood options from $150–$400; budget finds at IKEA run $60–$150. One weekend to choose and arrange. The low profile keeps sightlines open while the wood warmth ties in with your sofa and shelving. Your whole seating arrangement suddenly feels intentional and connected.


    8. Layer in Neutral Linen and Wool Textiles

    Soft furnishings should feel natural—linen throws ($30–$80), wool pillows ($25–$60), and cotton blankets ($40–$100) in creams, warm grays, and soft taupes. These materials breathe and age beautifully.

    Target, H&M Home, and Etsy stock affordable options; higher-end versions at Schoolhouse Electric or Aesop run $80–$150. Drape one throw over your sofa and add 2–3 pillows. This takes minutes but completely softens the room’s feeling. You get texture, coziness, and that “lived-in calm” aesthetic without clutter.


    9. Use Shoji Screens to Define Zones Without Walls

    Shoji screens are the ultimate Japandi solution for open spaces or renters. They divide rooms gently, filter light beautifully, and move easily if you need to reconfigure.

    Wayfair and Amazon stock options from $80–$300; higher-end versions at Design Within Reach run $400–$700. Assembly takes 20–30 minutes. The beauty? Light still flows, the room doesn’t feel cramped, and you’ve created two distinct zones. You get privacy and definition without permanent walls or that claustrophobic feeling.


    10. Install Large Windows or Curtains That Frame Light

    Natural light is foundational to Japandi calm. If you have windows, keep them clear. If you need privacy, choose linen or cotton curtains in cream, warm white, or soft gray ($40–$120 per panel).

    Hang curtains high and wide to maximize light flow—it takes an afternoon with a drill. Renters can use tension rods or adhesive hooks. The transformation is immediate: the room feels brighter, airier, and more peaceful. Natural light makes every element glow and reduces your need for artificial lighting during the day.


    11. Choose Minimal Hardware and Fixtures in Matte Black or Wood

    Details matter in Japandi design. Swap out shiny brass fixtures for matte black, brushed nickel, or natural wood hardware. These finishes feel intentional and modern while staying warm.

    Home Depot and Wayfair stock matte black knobs and pulls from $5–$15 each; light fixtures run $40–$150. One weekend to swap handles and update one light fixture. These small changes make your space feel thoughtfully designed, not generic. Your eye registers the intentionality immediately.


    12. Create a Dedicated Media Corner with Hidden Storage

    A media area doesn’t have to be cluttered. Use a console with closed storage ($150–$400) and hide wires and devices inside. Keep the TV wall clean—no visible cables, no clutter.

    Article and CB2 offer smart options; IKEA’s BESTÅ system ($100–$250) is renter-friendly if you secure it to studs. One afternoon to install and hide cables. The result is a functional space that doesn’t scream “media room.” It stays calm and intentional while still serving your needs.


    13. Add Warm Lighting with Paper Lantern Pendant Lights

    Harsh overhead lights clash with Japandi aesthetics. Instead, choose paper or fabric pendant lights in cream, white, or natural paper ($40–$120 each) that diffuse warm light softly.

    Pair with warm-toned bulbs (2700K color temperature). Installation takes 30–45 minutes if you’re comfortable with electrical work; otherwise hire an electrician ($100–$200). The lighting immediately becomes warmer and more inviting. You notice the difference every evening—the room feels like a retreat instead of a space to pass through.


    14. Display Books Spine-Out With Intentional Spacing

    Japandi doesn’t mean no books—it means intentional ones. Display books you actually love, spine-out, with breathing room between clusters. Aim for 40% empty shelf space.

    You already own books—this costs nothing and takes 15 minutes to arrange. Renters and owners both benefit. Your shelves immediately feel curated and personal instead of cluttered. Visitors notice the intentionality, and you enjoy living with items you genuinely value.


    15. Install Warm-Toned Recessed or Track Lighting

    Recessed or track lighting keeps ceilings clean while providing functional illumination. Choose warm white bulbs (2700K) in brushed nickel or matte black fixtures ($30–$80 per light).

    Professional installation runs $200–$500 for 3–4 lights; DIY is possible if you’re handy. One weekend project. Your room glows instead of shines, and the hidden fixtures maintain that clean aesthetic. Evenings become more peaceful because the lighting supports calm rather than stark brightness.


    16. Use a Natural Fiber Credenza for Storage

    A credenza or console with doors hides necessities while adding warmth. Look for natural wood with rattan, cane, or woven panels ($200–$600).

    Article, West Elm, and Design Within Reach carry excellent options; budget-friendly finds at IKEA or Article run $150–$400. One afternoon to position and fill. This piece serves double duty: it’s functional storage and an intentional design element that adds personality without clutter.


    17. Arrange Seating in Small Clusters Rather Than Rows

    Instead of one sofa facing a TV, create intimate seating clusters. Pair your sofa with two simple wooden chairs ($150–$300 each) angled toward each other around a small table.

    You likely already have seating—rearranging costs nothing and takes 20 minutes. Renters appreciate this because it doesn’t require installation. The room immediately feels more social and intimate. You notice how conversations flow better and the space feels intentionally designed for connection rather than consumption.


    18. Paint an Accent Wall in Soft Sage or Warm Gray

    One accent wall adds depth without overwhelming. Choose soft sage, warm gray, or pale terracotta instead of dramatic colors. Japandi favors restraint.

    Paint costs $30–$50; one wall takes 3–4 hours. Renters can use removable wallpaper instead ($30–$60 per roll). The subtle color shift makes your room feel intentional and designed. You get personality without losing that calming foundation.


    19. Incorporate a Simple Wooden Bench for Layered Seating

    A simple wooden bench adds seating, visual interest, and texture. Pair it with a thin cushion and neutral pillows for comfort without bulk.

    Benches run $100–$300 at Article, West Elm, or IKEA. One afternoon to place and style. It works in entries, at sofa feet, or under windows. This piece feels like a design choice, not an afterthought. You get extra seating without cramming more furniture into your space.


    20. Create a Reading Nook With a Single Chair and Natural Light

    Dedicate one corner to reading. A single chair ($200–$500) with good natural light and a small table ($50–$150) creates a retreat within your room.

    Target, West Elm, and Article stock comfortable options. One weekend to style the corner. This signals to your brain that this is a calm space—and it actually is. You’ll find yourself using it more than you expected, and the intentional coziness improves your daily rhythm.


    21. Display Woven Baskets as Functional Art

    Woven baskets store items while adding organic texture and warmth. Choose natural materials like rattan, seagrass, or jute ($20–$60 each).

    HomeGoods, Target, and Etsy stock beautiful options. Arrange 2–3 at different heights for visual interest. This takes 15 minutes. The baskets immediately make your space feel warmer and more organized. They’re functional and beautiful—exactly what Japandi design is about.


    22. Hang Framed Black-and-White Photography or Minimalist Line Art

    Art should feel intentional in Japandi spaces. Choose black-and-white photography or minimalist line drawings ($30–$100 per print) in simple frames ($15–$40 each).

    Etsy, Minted, and local galleries offer excellent options. Arrange 3–5 pieces with plenty of space between them. One afternoon to hang. These pieces become focal points without overwhelming the room. Your walls feel thoughtful and curated rather than decorated.


    23. Layer Lighting With Floor and Table Lamps

    Avoid relying on one overhead light. Instead, add a floor lamp ($60–$150) and a table lamp ($40–$100) in warm metals or wood with linen shades.

    Target, West Elm, and Schoolhouse Electric carry options for every budget. One evening to position and plug in. Your room now has multiple light sources that let you adjust the mood. Evening suddenly feels more intentional and peaceful. You notice how different lighting layers change the room’s feeling throughout the day.


    24. Choose a Neutral Upholstered Ottoman Instead of a Hard Coffee Table

    An upholstered ottoman serves as coffee table, footrest, and extra seating. Choose neutral linen or wool ($100–$300) in warm tones.

    Article, West Elm, and IKEA stock options. One afternoon to place and style. This piece feels softer and more welcoming than a hard table. Guests naturally feel more comfortable, and you get flexible functionality. It’s the kind of choice that makes people say your space “feels different.”


    25. Style a Floating Workspace Within the Living Room

    If you work from home, create a dedicated desk area that doesn’t shout “office.” Use a narrow wooden desk ($100–$300) and a simple chair ($80–$200) tucked into a corner or defined by a small rug.

    This takes one afternoon to arrange. Renters appreciate how moveable it is. Your work area feels intentional and calm—which actually improves focus. You also maintain the living room’s serene feeling because the workspace blends rather than dominates.


    26. Introduce Warm Metals Sparingly: Brass or Gold Accents

    While matte black works beautifully, subtle warm metal accents (brass, warm gold, or brushed copper) add gentle luxury. Use sparingly: one picture frame, plant stakes, or a small decorative object.

    HomeGoods, Target, and Etsy stock affordable pieces ($10–$40 each). No installation needed. One or two warm-metal pieces feel like a styling detail rather than a trend. Your space gains sophistication without losing its calm foundation.


    27. Commit to a Rotation System for Seasonal Styling

    Japandi embraces seasonality. Rotate textile colors, plant types, and display items with the seasons—cream and pale wood in spring, warm rust and deep textiles in fall, cool grays in winter, soft greens in summer.

    This costs nothing except attention and time. Each season, spend 30 minutes swapping textiles and rearranging displays. Your space never feels stale, and you’re forced to engage intentionally with your environment. The room feels alive and connected to the outside world, which is deeply Japandi.


    Save this post for your next refresh and try one idea this week—even just rearranging your seating or adding a single plant shifts everything. Which idea will you start with?

  • 27 Vintage Bedroom Styling Ideas That Bring Nostalgic Beauty

    27 Vintage Bedroom Styling Ideas That Bring Nostalgic Beauty

    Introduction

    Vintage style doesn’t mean your bedroom feels stuck in the past—it means creating a space filled with personality, history, and pieces that tell your story. If you’re tired of the bland minimalism that dominates most bedrooms, or you’re craving warmth that mass-produced furniture just can’t deliver, you’re ready for a nostalgic refresh. The beauty of vintage styling is that it mixes perfectly with modern comfort, giving you a room that’s uniquely yours without feeling cluttered or chaotic. Whether you’re a seasoned thrifter or picking up your first secondhand find, these 27 ideas will show you exactly how to layer vintage charm into every corner. You’ll discover how to blend old and new, where to find authentic pieces on any budget, and the styling tricks that make vintage bedrooms feel both cozy and intentional.


    1. Layer Your Bed With Handmade Quilts Instead of Duvets

    A quality quilt tells a story in a way sleek duvets simply can’t. Quilts add instant warmth, texture, and often carry real history—whether you’re inheriting a family piece or finding one at an estate sale.

    Shop for vintage quilts at thrift stores, estate sales, or online at Etsy ($30–$150 for authentic pieces). Look for quilts with tight, even stitching as a sign of quality. Layer 2–3 quilts across your bed, letting them bunch naturally rather than making them look perfectly tucked. A weekend project to source and style. Pro tip: If you love the look but want new construction, brands like Schoolhouse Electric make modern-made quilts with vintage aesthetics ($200–$400).

    Your bedroom becomes a conversation starter, and you’ll actually want to spend time there. The bonus? Quilts photograph beautifully for your own inspiration board.


    2. Hunt Secondhand Nightstands for One-of-a-Kind Bedside Charm

    Nightstands don’t need to match or be expensive. Mixing two different vintage pieces creates visual interest and saves you hundreds compared to buying a matching set new.

    Scout Facebook Marketplace, Craigslist, local antique shops, and estate sales for wooden nightstands ($20–$80 each). Look for sturdy construction and minimal damage; cosmetic chips add character. Grab one mid-century modern side table, one Victorian-era piece—the mix is what makes it work. Takes one afternoon to source and style. If the finish looks tired, a simple wood stain or paint refresh takes 2–3 hours and costs under $15.

    You’ll save $300+ compared to buying a matched bedroom set, and your bedside will feel collected and curated rather than catalog-ordered.


    3. Add Vintage Brass Accents for Warm, Glowing Hardware

    Brass hardware and accessories instantly warm up a bedroom and tie vintage pieces together cohesively. It’s a detail that catches light and adds subtle luxury without shouting.

    Replace modern handles with vintage brass drawer pulls ($3–$8 per pull on Amazon or Etsy; budget $30–$50 for a full dresser refresh). Hunt thrift stores for brass picture frames, candlesticks, and mirrors ($5–$15 each). This is a free-to-$50 update requiring no special skills. Pro tip: Mix brass with aged wood and cream linens to avoid feeling too shiny or theme-park-y.

    Your accessories suddenly feel elevated and cohesive, and the warm tones make the entire room feel more inviting and lived-in.


    4. Style Floating Shelves With Collected Books and Vintage Objects

    Books are both functional storage and beautiful bedroom decor—they add color, texture, and the cozy feeling of a personal library without needing a full bookcase.

    Install floating shelves ($15–$40 per shelf plus hardware at Home Depot) or use existing shelving. Stack books by color or vary them horizontally and vertically for visual interest. Fill gaps with thrifted ceramics, vintage bottles, or framed photos. This is a weekend project—simple drilling if you’re comfortable, or hire help ($50–$100). Pro tip: Group odd numbers of objects (3, 5, 7) for a styled look that feels intentional, not accident.

    Your walls gain personality and storage simultaneously, and you’ll create the perfect backdrop for photos while keeping bedside reading within arm’s reach.


    5. Hang Vintage Floral Wallpaper on One Accent Wall

    Grandmillennial style loves bringing back florals—but done right, it’s sophisticated, not grandma’s guest room. One accent wall adds personality without commitment anxiety.

    Choose removable wallpaper ($15–$30 per roll) if renting, or traditional wallpaper ($20–$50 per roll) if you own. Brands like Rifle Paper Co. and Anthropologie offer vintage-inspired florals in modern colorways. A weekend DIY project for one wall (2–3 hours for beginners), or hire a pro ($150–$300). Pair florals with calm solid walls in cream, sage, or soft gray to keep things balanced. Pro tip: Smaller-scale prints photograph better and feel less busy in person.

    This single wall shift makes your entire bedroom feel intentional and collected, giving you something beautiful to wake up to without the commitment of full-room wallpaper.


    6. Collect Vintage Glass Bottles for a Vanity Vignette

    Vintage glass bottles are cheap, beautiful, and endlessly available at thrift stores. Clustered together, they become an instant vignette that reads as thoughtfully styled.

    Shop thrift stores for vintage bottles ($0.50–$3 each) and fill them with dried flowers, branches, or leave empty for a minimalist look. Group in odd-numbered clusters (3, 5, 7) on your dresser or nightstand. Completely free if you’re upcycling bottles you have; budget $5–$15 for thrifted ones. No time investment beyond shopping—this takes 10 minutes to arrange. Pro tip: Vary the heights and colors for more visual interest than matching sets.

    You’ll create a focal point that changes your dresser from functional storage to a styled display, and it costs nearly nothing.


    7. Drape Vintage Textiles as Wall Hangings or Bed Runners

    Vintage textiles (scarves, runners, tapestries, small rugs) are affordable alternatives to art and add instant warmth and pattern to bare walls or bed foot.

    Find vintage kilims, woven runners, or textile scarves at estate sales, Etsy, or local antique shops ($10–$50 for smaller pieces; $50–$150 for larger tapestries). Hang with a simple rod, peel-and-stick hooks (renter-friendly), or drape casually across the bed. 10 minutes to style—no installation required if draping. Mix colors and patterns with confidence; that’s the vintage charm. Pro tip: Layer 2–3 smaller textiles together for more visual impact than one large piece.

    You’ll add warmth, color, and collected-over-time charm to an entire wall without needing to frame or hang traditional art.


    8. Source a Statement Headboard From Antique Stores

    A vintage headboard is the ultimate focal point—it frames your bed beautifully and instantly elevates the entire room without needing to update everything else.

    Hunt antique stores, estate sales, and Facebook Marketplace for wooden or iron headboards ($50–$200 for solid pieces; investment-level ones up to $500). Look for sturdy construction; minor damage adds character. Measure your bed carefully before shopping. DIY mounting takes 1–2 hours or hire help ($75–$150 labor). Pro tip: Paint a tired headboard in soft cream or sage to refresh it without losing vintage character.

    This single piece becomes the anchor of your entire bedroom design, making everything else feel intentionally curated around it.


    9. Layer Mismatched Vintage Area Rugs for Textural Depth

    Layering rugs isn’t just a design trick—it adds visual interest, warms up hard floors, and is way cheaper than buying one expensive new rug.

    Source vintage rugs from estate sales, Etsy, or local rug cleaners ($20–$100 per rug; budget $50–$150 for 2–3 rugs total). Start with a larger neutral base rug, then layer a patterned vintage piece on top, letting the base show at the edges. Free project—just arrange and layer. Mix patterns and colors; the key is grounding colors (rust, navy, cream) that tie it together. Pro tip: Get rugs professionally cleaned once if buying older pieces ($30–$60 per rug).

    Your bedroom gains warmth, texture, and a collected, lived-in feeling that reads as intentionally styled rather than matchy-matchy new.


    10. Paint Your Walls in Soft, Warm Vintage Tones

    The right wall color can make or break a vintage bedroom—cool grays flatten the space, while warm earth tones make vintage pieces sing and create instant coziness.

    Choose warm neutrals like soft sage, muted terracotta, cream, or warm gray ($30–$50 per can). Brands like Farrow & Ball, Benjamin Moore, and even Sherwin-Williams have beautiful vintage-inspired palettes. DIY painting takes one full day for a bedroom; hiring a pro runs $300–$500. Test paint on your walls first (most stores sell sample sizes for $3–$5). Pro tip: Vintage pieces look richer against warm, slightly aged-looking walls rather than bright white.

    Your vintage furniture instantly looks more cohesive, and the warm backdrop makes the entire room feel inviting rather than cold or sterile.


    11. Collect Vintage Picture Frames for a Gallery Wall

    A gallery wall of mismatched vintage frames is the perfect way to display personal photos, vintage prints, or even blank matting for a collected, gallery-like feel.

    Hunt thrift stores for vintage wooden frames in different sizes and finishes ($1–$5 each; budget $20–$40 for 6–8 frames). Mix with new prints from Etsy ($5–$15 each) or use photos you already have. Lay frames on the floor first to plan placement, then hang—a weekend afternoon project requiring basic tools or $50–$100 if hiring help. Pro tip: Frame in an asymmetrical arrangement rather than a grid for a more intentional, collected look.

    You’ll create a focal point that celebrates your life and memories while adding sophisticated visual depth without saying a word.


    12. Incorporate Vintage Metal or Woven Baskets for Storage

    Vintage baskets solve the “where do I hide things?” problem while looking intentionally collected rather than cluttered.

    Score vintage woven baskets, metal storage bins, or wire crates at thrift stores or Etsy ($3–$20 each). Stack 2–3 in a corner, under a console, or use to corral blankets and textiles. Completely free if you’re organizing what you already own. Group odd numbers for a styled look. Pro tip: Label small baskets with hand-written tags for a cottage-core vibe that’s both functional and pretty.

    Your bedroom gains hidden storage and texture, while maintaining the clean, intentional look you want without visible clutter.


    13. Add Vintage Mirrors in Unexpected Sizes and Frames

    Vintage mirrors reflect light, make rooms feel bigger, and are available in endless styles—from ornate wood frames to simple iron designs.

    Find vintage mirrors at antique shops, estate sales, or Facebook Marketplace ($10–$50 for modest sizes; investment pieces up to $150). Mix frame styles and sizes; hang one large statement mirror alongside 2–3 smaller ones. Hanging takes 15 minutes; propping against a wall works beautifully too and is renter-friendly. Pro tip: Lean rather than hang for a relaxed, collected feel—it photographs beautifully too.

    You’ll brighten your space naturally, create visual interest on your walls, and gain practical mirrors without the stark, modern look of frameless styles.


    14. Layer Vintage Linens in Cream, Ivory, and Soft Neutrals

    Vintage linens in neutral tones create a soft, hotel-like bed that feels expensive and intentional—the foundation of a beautiful vintage bedroom.

    Shop Etsy, estate sales, or specialty linen retailers for vintage cotton and linen sheets ($20–$60 per set). Stick to creams, ivories, and warm whites for a cohesive, calming look. Layer sheets with lightweight blankets, quilts, and throw pillows. Budget 2–3 hours styling a bed the first time; afterward it’s instinctive. Pro tip: Vintage linens often feel softer than new ones—look for tight weaves and quality construction.

    Your bed becomes the focal point—inviting, comfortable, and so beautiful you’ll actually want to make it daily.


    15. Hang Vintage Fabric Scarves as Soft Window Treatments

    Fabric scarves are a cheap, renter-friendly way to add color and movement without committing to traditional curtains.

    Collect vintage silk scarves from thrift stores ($1–$3 each; grab 3–5 for a window) or use scarves you already own. Drape over a simple curtain rod ($15–$30) or tension rod ($10–$20). Takes 10 minutes to style. Layer scarves in colors that coordinate with your palette but aren’t matching—vintage charm means imperfection. Pro tip: Use lightweight scarves to let light filter through during the day; layer heavier ones at night for privacy.

    You’ll add instant color, softness, and a uniquely styled window treatment that costs under $30 and works in rentals.


    16. Display Collections of Vintage Ceramics and Pottery

    Collections tell stories. Vintage ceramics, whether handmade pottery or vintage kitchenware repurposed as decor, add warmth and personality instantly.

    Find vintage ceramics, pottery, and handmade bowls at estate sales, antique shops, or Etsy ($2–$15 per piece). Display on shelves or a dresser—grouping similar colors or styles creates a curated look. Budget $20–$50 for a nice starter collection. Arrange in 10 minutes by grouping colors or sizes together. Pro tip: Mix functional pieces (small bowls) with purely decorative ones for a lived-in, collected feel.

    Your shelves gain warmth and storytelling, and you support artisans and small makers rather than mass production.


    17. Create a Vintage Vanity or Dressing Table Setup

    A vintage dressing table is the ultimate bedroom luxury—functional storage, beautiful styling opportunity, and a cozy nook for your morning routine.

    Hunt for a small vintage desk or dressing table ($30–$100 at estate sales) and a matching stool ($15–$50). Add a simple mirror ($10–$30) and group vintage bottles, trays, and accessories. Takes 2–3 hours to source and style. Pro tip: Even a small side table can work; the key is grouping objects intentionally on top to feel purposeful rather than cluttered.

    You’ll create a beautiful, functional corner that makes your morning routine feel special and gives your bedroom a sophisticated, collected feel.


    18. Blend Vintage and Modern Art on Your Walls

    Mixing vintage prints with contemporary art keeps your room from feeling like a museum while honoring the vintage aesthetic.

    Pair vintage botanical prints or old illustrations ($5–$20 each on Etsy) with modern art prints ($10–$30 from indie artists). Frame in similar wood tones to unify the look. Hang at varying heights for a gallery feel. Budget 2–3 hours for a wall of 5–8 pieces. Pro tip: Stick to a consistent color palette (warm neutrals, jewel tones, earthy colors) to tie different eras together.

    Your walls feel sophisticated and collected rather than themed, and you’re supporting both vintage makers and contemporary artists.


    19. Use Vintage Trunks or Chests for Bed-End Storage

    Vintage trunks are beautiful storage solutions that add authentic charm and actually function as hidden space—practical and pretty simultaneously.

    Find vintage trunks or storage chests at estate sales or antique shops ($25–$75 for solid ones). Place at the foot of your bed or against a wall—instantly adds depth and style. Use for off-season clothes, extra quilts, or blankets. Takes 15 minutes to position and style. Pro tip: Top with a folded quilt or throw to make it look intentionally decorated rather than just storage.

    You’ve gained hidden storage while adding a focal point that reads as collected and intentional.


    20. Layer Vintage Throw Pillows in Different Textures

    Pillow layering is the simplest way to add softness, texture, and vintage charm to your bed or seating areas.

    Score vintage or vintage-inspired throw pillows at thrift stores ($3–$10 each), Target ($15–$25), or Etsy ($20–$40 for quality artisan pillows). Mix 4–6 pillows in different fabrics—velvet, linen, cotton prints—in coordinating colors. Arrange casually; imperfection is the point. 10–15 minutes to style. Pro tip: Larger pillows in the back, smaller in front, for layered visual interest.

    Your bed becomes exponentially more inviting and cozy-looking, and the mixed textures add sophistication without trying too hard.


    21. Paint or Stain Wooden Furniture for a Vintage Refresh

    That thrifted dresser with great bones but tired finish? Paint or stain it and you’ve got a custom piece for $30–$50 instead of $300 new.

    Choose vintage-friendly paint colors (cream, sage, soft blue, or warm gray) in matte finish ($25–$40 per can). Use chalk paint or milk paint for an aged look. Sand lightly, prime, and paint in one weekend. Keep original hardware for authenticity. Pro tip: Distress edges slightly for a lived-in, genuinely vintage vibe rather than too-perfect finish.

    Your thrifted find transforms into a custom piece that matches your palette and looks professionally styled.


    22. Add Vintage Books as Decorative Stacks

    Books are instant decor and convey collected taste and refinement—stack them on nightstands, dressers, and shelves for texture, color, and personality.

    Gather vintage or secondhand books from thrift stores ($0.50–$2 each). Stack horizontally on nightstands or shelves; lean vertically on shelves for variety. Free project if using books you own; budget $10–$30 for a nice collection from thrift stores. Top stacks with small objects (candles, bowls, framed photos) for styled impact. Pro tip: Choose books with beautiful spines or vintage covers for visual cohesion.

    You’ll add color, texture, and narrative to your space while supporting used bookstores and building an affordable library.


    23. Incorporate Vintage Brass Bedside Lamps or Candlesticks

    Vintage brass lighting is functional and beautiful—it casts warm light and instantly makes your bedroom feel more sophisticated and intentional.

    Hunt thrift stores for vintage brass lamps or candlesticks ($5–$15 each). Pair with new linen shades ($15–$30 each) if originals are damaged. Position on nightstands for ambient lighting. Takes 5 minutes to plug in or style—no installation needed. Pro tip: Layer brass lamps with battery-operated candles in brass holders for extra warmth without fire risk.

    Your bedroom lighting feels warm and curated, and you’ll actually want to keep lights on rather than switching to harsh overhead options.


    24. Style Your Nightstand With Vintage Books and Small Treasures

    Nightstands are the easiest place to practice styling—keep them functional but beautiful by grouping objects intentionally.

    Gather books, small vessels, framed photos, and objects you already own or thrift ($0–$20 total). Arrange in groups of 3–5 objects; add a small plant or dried flowers. Leave some breathing room—fullness without clutter. Takes 15 minutes to style. Pro tip: Vary heights and shapes for visual interest; don’t line things up in neat rows.

    Your bedside becomes a mini gallery that supports your sleep routine while looking intentionally curated.


    25. Add Vintage Wallpaper to the Inside of Open Shelving

    This under-the-radar trick adds pattern and color while keeping the main wall calm—perfect for small spaces or renters.

    Line open shelves with removable wallpaper or decorative paper ($10–$20 per roll; Spoonflower offers custom options). Apply to the back wall of shelves only—instant pattern without overwhelming the room. Takes 1–2 hours for multiple shelves. Renter-friendly with removable wallpaper. Pro tip: Choose wallpaper that echoes your bedroom palette to tie the room together without clashing.

    Your shelves suddenly feel styled and intentional—the pattern frames your displayed items beautifully.


    26. Create a Vintage Reading Nook With a Comfortable Chair

    A vintage chair transforms a corner into a cozy reading sanctuary—function meets styling perfectly.

    Find a vintage upholstered chair at thrift stores or estate sales ($30–$100 for solid pieces). Reupholster if needed ($150–$300 with a pro) or keep existing fabric if it’s charming. Add a small side table ($15–$40), warm lamp ($15–$30), and throws. Takes 1 afternoon to source and style. Pro tip: Position near a window for natural reading light during the day.

    You’ve created a retreat within your bedroom—a beautiful, functional corner that invites you to slow down and actually use your space.


    27. Mix Vintage and Contemporary Storage for Functional Beauty

    The secret to modern vintage bedrooms is blending old and new—it keeps things from feeling theme-park-y while honoring the aesthetic.

    Combine vintage wooden furniture with modern metal storage, contemporary shelving, and new textiles. Mix thrifted pieces ($20–$75 each) with affordable modern options (IKEA, Target, Wayfair). Budget $200–$500 for a full bedroom refresh using this mixed approach. Arrange over 2–3 weekends as you source items. Pro tip: Tie it together with consistent color palette and materials (warm woods, brass, cream, earthy tones).

    Your bedroom feels collected and intentional rather than themed, and you’ve created a space that’s genuinely yours—not a catalog page.


    Save this post and pick one idea to tackle this weekend. Start with the easiest win—whether that’s layering pillows or hunting for one thrifted treasure—and watch your bedroom transform into a space that actually feels like home. Share this with anyone craving vintage warmth over mass-produced blandness.

  • 25 Terracotta Living Room Decor Ideas Full of Warm Earthy Tones

    25 Terracotta Living Room Decor Ideas Full of Warm Earthy Tones

    If you’re craving a space that feels cozy, grounded, and endlessly Instagram-worthy, terracotta is your answer. This warm earthy tone brings instant personality to any living room—whether you’re renting or own your home. Terracotta works beautifully as a wall color, through furniture choices, or woven into accents and textiles. The best part? It pairs seamlessly with almost every decorating style, from boho to mid-century modern to maximalist. In this guide, you’ll discover 25 specific ways to bring terracotta warmth into your living room, from budget-friendly tweaks to investment pieces that’ll make your space feel like a design magazine spread. Get ready to fall in love with this timeless hue.

    1. Paint One Accent Wall in Warm Terracotta

    A single terracotta wall anchors your entire room without overwhelming the space. This is the easiest way to test the color if you’re hesitant about committing fully.

    Choose a quality paint in a warm terracotta shade (try “Burnt Clay” or “Rust” from Benjamin Moore or Sherwin-Williams). Prep your wall with primer, then apply two coats with a roller for smooth coverage. The entire project takes one weekend, costs $30–$60 for paint, and requires zero decorating experience. Renters can use peel-and-stick wallpaper in terracotta instead for a temporary solution.

    Once that wall goes up, your room gains instant depth and warmth. Everything else—your furniture, art, and accessories—suddenly looks more curated and intentional.

    2. Layer Terracotta Throw Pillows in Mixed Textures

    Throw pillows are the fastest way to inject terracotta into your living room without any commitment. Mix textures to create visual interest and depth that prevents the look from feeling flat.

    Grab pillows in different materials: linen, velvet, cotton, and even chunky knit covers. Look for $15–$40 per pillow at IKEA, Target, Wayfair, or local thrift stores. Mix solid terracotta with geometric patterns, stripes, or abstract designs in coordinating colors like cream, olive, and burnt orange. Layer 4–6 pillows on your sofa for that effortless, lived-in maximalist vibe.

    Your sofa becomes a focal point that draws people in. The texture mix makes the space feel collected and sophisticated, not matchy or overdone.

    3. Use Terracotta as Your Color-Drenching Base

    Color drenching—saturating a space in varying shades of one hue—is the 2025 design trend replacing flat accent walls. Terracotta is perfect for this approach because it has so many tonal variations.

    Paint walls in a medium terracotta, layer in a darker rust-tone rug, add curtains in a lighter apricot-terracotta blend, and choose furniture with warm wood finishes. This creates a cohesive envelope that makes your room feel intentionally designed. Budget $200–$500 for paint, rug, and curtain updates. Most of these items are available at Home Depot, Wayfair, and West Elm.

    The result? A room that feels immersive and intentional, like you’ve stepped into a curated experience. Everything works together instead of competing.

    4. Incorporate a Terracotta Patterned Area Rug

    An area rug in terracotta tones grounds your seating arrangement and defines the living room space. Patterned rugs add visual interest without requiring you to commit to solid color walls.

    Search for $80–$250 rugs at Wayfair, Rugs USA, or Target featuring geometric, Moroccan, or tribal patterns in terracotta. Look for natural fibers like jute or wool if possible—they add texture and durability. Lay the rug under your coffee table and sofa so it anchors the whole seating zone.

    Your furniture arrangement suddenly feels intentional and cozy. The rug also softens footsteps and adds warmth underfoot—both practical and beautiful.

    5. Style Open Shelving with Terracotta Ceramics

    Terracotta pottery and ceramics are natural on open shelves—they look collected, artful, and deliberately styled. This works especially well if you have a bookshelf, media console, or floating shelves visible in your living room.

    Hunt for terracotta vessels at thrift stores ($3–$15 each), HomeGoods ($10–$40), or Etsy ($20–$80 for handmade pieces). Mix sizes and shapes: vases, bowls, planters, and decorative vessels. Style them with dried pampas grass, books, and layered textures. Spend $50–$150 total for a beautiful, collected look.

    Your shelves transform from cluttered storage into a design statement. Guests will think you’re a seasoned decorator, even if you threw it together in an afternoon.

    6. Add Terracotta Curtains for Soft Warmth

    Terracotta curtains soften natural light while bringing warmth to your living room. This is one of the most impactful ways to use the color because of how light interacts with fabric.

    Look for linen or linen-blend curtains in terracotta at $60–$150 per panel from West Elm, CB2, or Etsy. Choose lightweight fabrics for that airy feeling, or heavier ones if you want room-darkening capability. Hang them floor-to-ceiling to make your ceilings look higher and create an intentional frame around windows.

    When sunlight filters through terracotta fabric, your whole room glows. It’s like adding a permanent golden-hour filter to your living space.

    7. Create a Cozy Reading Nook with Terracotta Accents

    A reading nook anchored by terracotta pieces becomes an instant retreat within your living room. This is perfect if you want terracotta warmth without committing to wall color.

    Choose a corner near a window, add a comfortable armchair ($200–$600), drape a terracotta linen or wool throw ($40–$80), and style a side table with a small lamp, plant, and terracotta mug. Add a small bookshelf or basket for storage. Total investment: $300–$750 depending on furniture quality.

    You’ll find yourself settling into this corner regularly. It becomes the most-used spot in your living room because it feels special and separated from the rest of the space.

    8. Mix Terracotta with Deep Jewel Tones

    Terracotta pairs beautifully with 2025’s trending bold colors like teal, oxblood, and deep emerald. This creates a moody, maximalist aesthetic that’s anything but boring.

    Combine terracotta walls with a jewel-toned sofa or accent chair ($400–$1,200), layer in jewel-toned pillows and throws, and add brass or gold lighting fixtures. Incorporate artwork featuring both color families. Budget $600–$1,500 total for a fully coordinated look.

    The combination feels sophisticated and intentional. It’s bold without being chaotic, and it proves terracotta is far more versatile than expected.

    9. Use Terracotta Pottery as a Statement Piece

    A single large terracotta pottery piece becomes a focal point that anchors your entire room. This maximalist approach celebrates the beauty of a single statement object.

    Source a large urn, sculptural vessel, or hand-thrown ceramic at a local pottery studio, antique shop, or Etsy ($80–$300). Place it empty in a corner, or fill it with dried pampas grass and branches for added height and texture. Let it be the star—everything else should complement it.

    This one piece tells a story. It looks intentional, cultured, and instantly elevates your living room aesthetic.

    10. Layer Terracotta with Warm Metallics

    Warm metallics—brass, copper, and gold—amplify terracotta’s richness and create a glowing, cohesive effect. This combination feels naturally elevated and collected.

    Add brass or copper lighting fixtures ($40–$200), gold-framed mirrors ($30–$150), and metallic wall art or sculptures ($20–$100). Choose warm-toned wood furniture to complement. Total investment: $100–$500 depending on your starting point.

    Your room takes on a warm glow, especially in evening light. The metallic accents catch and reflect light, making the space feel more luxe and intentionally styled.

    11. Create Pattern Drenching with Terracotta Motifs

    Pattern drenching uses the same color across different patterns and textures for cinematic depth. Terracotta works beautifully for this because it ties everything together visually.

    Layer terracotta stripes, geometric patterns, Moroccan motifs, and abstract designs across pillows, curtains, rugs, and wall art. Mix 3–4 different terracotta patterns in your room. Budget $200–$600 for rug, curtains, pillows, and art combined.

    The effect is immersive and intentional. Your living room feels thoughtfully curated, like each piece was chosen to work with everything else.

    12. Paint Your Trim and Doors Terracotta

    Instead of painting walls, try painting architectural elements like door frames, baseboards, and trim in terracotta. This is a subtle approach that adds character without commitment.

    Paint doors, frames, and trim in warm terracotta using quality trim paint ($25–$40). The paint job takes a weekend and requires basic painting skills. This works beautifully in rooms with high ceilings or lots of architectural detail where you want to highlight those elements.

    The warmth draws your eye upward and around the room. Your space gains personality and polish without feeling bold or overwhelming.

    13. Add a Terracotta Feature Wall Using Shiplap or Textured Wallpaper

    Shiplap or textured wallpaper in terracotta adds depth that flat paint can’t achieve. This is trending and works especially well in modern farmhouse or rustic-inspired spaces.

    Install shiplap and paint it terracotta ($150–$400 in materials and time), or apply textured peel-and-stick wallpaper in terracotta ($40–$80 for a roll). Both create visual interest and are renter-friendly if you choose removable wallpaper. The project takes a weekend.

    Your walls gain architectural interest. Even a simple room feels designed and intentional with textured, colored walls.

    14. Style Your Coffee Table with Terracotta Accessories

    A well-styled coffee table anchors your living room seating area. Terracotta accessories make this styling feel warm and intentional without requiring major changes.

    Layer terracotta candles ($5–$15 each), a small terracotta dish or bowl ($10–$30), stacked books, and a small potted plant. Keep it simple—3–5 objects look more curated than a cluttered table. Budget $30–$80 for styling pieces.

    Your living room gains a focal point that looks magazine-ready. Guests will notice the intentional styling, and you’ll enjoy a thoughtfully arranged space.

    15. Hang Terracotta-Toned Artwork and Photography

    Artwork ties color schemes together and adds personality. A gallery wall of terracotta-toned art makes a statement without requiring wall paint or major furniture changes.

    Frame prints from Etsy ($10–$30 per print), vintage terracotta photography, or your own images. Create a gallery wall using command strips for renters or nail hangers for homeowners. Budget $60–$200 total for 5–8 pieces and frames.

    Your walls become personal and expressive. A gallery wall transforms a blank wall into a curated collection that reflects your style and taste.

    16. Introduce Terracotta Through Window Treatments Beyond Curtains

    Roman shades, roller shades, or woven bamboo blinds in terracotta offer a modern alternative to curtains while maintaining warmth. Layering window treatments adds depth.

    Choose terracotta roman shades ($60–$150) or woven shades ($40–$100) and pair them with lightweight cream curtains ($60–$100). The combination is functional and visually interesting. Both options are easy to install in a couple of hours.

    Your windows become an intentional design element. The layered approach makes your living room look professionally decorated.

    17. Use Terracotta Planters for a Biophilic Boost

    Grouping plants in terracotta planters at different heights creates a living display that connects you to nature. This biophilic approach supports wellness and mood.

    Buy terracotta planters ($5–$20 each) and fill them with low-maintenance plants: pothos, snake plant, philodendron, or spider plant ($8–$15 each). Cluster them on shelves, windowsills, or floor corners. Budget $50–$100 for a substantial plant display.

    Your room becomes fresher and more alive. Studies show plants improve mood and air quality—plus they look beautiful grouped in terracotta.

    18. Create Visual Flow with Low-Profile Furniture in Warm Tones

    Low-profile furniture creates an airy feeling while allowing terracotta accents to shine. This approach maximizes visual flow, especially in smaller living rooms.

    Choose a sofa with slim legs and low arms ($500–$1,200), pair it with a low wooden coffee table ($150–$400), and layer terracotta pillows on top. The furniture doesn’t visually block the room, making the space feel bigger and more open.

    Your living room feels spacious and intentionally designed. The low-profile furniture provides a clean backdrop for terracotta warmth without visual heaviness.

    19. Mix Terracotta with Vintage and Mid-Century Modern Pieces

    Terracotta’s earthy warmth pairs perfectly with mid-century modern and vintage pieces. This creates a collected, nostalgic aesthetic that feels curated over time.

    Layer terracotta walls or accents with a vintage credenza ($200–$600), mid-century chairs ($300–$800), and terracotta ceramics found at antique shops ($10–$100 each). The color brings warmth to cool modern lines while keeping the look sophisticated.

    Your room tells a story of collected pieces and intentional choices. The mix of eras feels personal and lived-in rather than matched or overdone.

    20. Use Terracotta Textiles Beyond Pillows: Blankets and Throws

    Terracotta throws and blankets add texture and warmth to your sofa. Layering different textile weights creates visual depth and encourages cozy lounging.

    Drape a chunky knit terracotta throw ($40–$80) over your sofa, layer with linen or velvet pillows, and add a woven blanket ($30–$60) for extra warmth. Fold them loosely for that effortless, styled look. Total: $100–$200 for multiple textiles.

    Your sofa becomes irresistibly cozy. Guests automatically want to curl up here, and you’ll find yourself using this space more often.

    21. Paint Furniture Pieces in Terracotta

    Paint thrifted or existing wooden furniture terracotta for a DIY update that costs almost nothing. This is perfect for renters who can’t paint walls.

    Find wooden furniture at thrift stores ($10–$50), sand it lightly, prime it, and paint with terracotta paint ($15–$25). The project takes a Saturday afternoon. You can use leftover paint from a wall project to cut costs.

    You’ve created a custom piece that coordinates with your room’s color scheme. Furniture you already own gains new personality and purpose.

    22. Define Zones with a Terracotta-Bordered Room Divider

    In open-concept living rooms, a room divider creates visual separation and privacy while adding design interest. Terracotta-toned dividers maintain warmth while defining space.

    Choose a woven, wooden, or fabric room divider ($80–$250) in warm terracotta or neutral tones with terracotta accents. Place it strategically to divide your seating area from a work or sleeping zone. Most require no installation.

    Your open living room gains structure and privacy. The divider creates multiple functional spaces within one room.

    23. Layer Terracotta with Cool Neutrals for Balance

    Pairing terracotta with cool neutrals like soft grey, white, or cool blue prevents the space from feeling too warm or overwhelming. This balance feels sophisticated and timeless.

    Paint one terracotta wall and keep others white or soft grey ($40–$80 total for paint). Choose a grey sofa ($400–$1,000) and layer with cool-toned pillows. Add a few terracotta accents to tie everything together. Budget $500–$1,200 total.

    Your room feels balanced and intentional. The cool neutrals keep terracotta from feeling heavy, while the terracotta keeps the room from feeling cold.

    24. Create a Terracotta-Focused Styling Vignette on a Console Table

    A small vignette on a console, mantle, or credenza is an easy way to experiment with terracotta styling. This works beautifully as an entry point to your living room.

    Style a terracotta-framed mirror ($30–$80), stack 2–3 books with warm-toned spines, add a small sculptural object or plant ($15–$40), and include a candle ($5–$15). Keep it minimal—4–5 items look more intentional than a crowded table. Budget $60–$150.

    Visitors notice this intentional styling immediately. It sets the tone for your whole living room and makes your space feel designed.

    25. Layer Terracotta Lighting for Ambient Warmth

    Lighting in terracotta tones creates ambient warmth that enhances the color throughout your room. Layered lighting (overhead, task, and ambient) also improves functionality.

    Choose a terracotta ceramic table lamp ($40–$100), add a brass floor lamp with warm bulbs ($60–$150), and display terracotta candle holders ($5–$20 each). Use warm-toned LED bulbs ($5–$15 per bulb) for that golden glow. Total investment: $150–$300.

    When you dim the overhead lights and layer in terracotta-toned lamps and candles, your room glows. This transforms your living room into a warm, welcoming retreat.

    Save this post for your next living room refresh. Start with one or two ideas this weekend—whether it’s new throw pillows or painting that one accent wall. You’ll be amazed at how much warmth and personality terracotta brings to your space.

  • 23 Minimal Countertop Coffee Setup Ideas for Clean, Simple Living

    23 Minimal Countertop Coffee Setup Ideas for Clean, Simple Living


    If you’re tired of cluttered kitchen counters but can’t live without good coffee, you’re not alone. The minimal coffee setup trend proves you don’t need fancy machines or tons of gear to brew something amazing—just thoughtful choices and smart spacing. Whether you work from home, live in a small apartment, or simply crave a calming morning ritual, these 23 ideas show you exactly how to create a beautiful, functional coffee corner that takes up almost no room. You’ll discover budget-friendly hacks, DIY solutions, and smart product picks that keep your counter clean and your coffee routine simple. Let’s build your perfect minimal setup.


    1. Choose a Pour-Over Dripper Over an Espresso Machine

    A pour-over dripper is the minimalist’s best friend—it’s compact, beautiful, and requires zero electricity. Unlike bulky espresso machines that hog counter space, pour-overs like Chemex, Melitta, or ceramic cones take up roughly the same footprint as your mug.

    All you need is the dripper ($15–$40), reusable metal filters ($5–$10), and hot water. Brands like Chemex double as décor pieces, so they look intentional on display. The brewing process takes 3–4 minutes and becomes a mindful ritual. You can store everything in a small drawer or cabinet when guests come over.

    Pro tip: Pair it with a gooseneck kettle ($25–$50) for better control and a more meditative pour. The ritual itself becomes part of your morning, not just the caffeine hit.

    Your counter stays clear, your coffee tastes better, and you’ve got one fewer appliance taking up real estate.


    2. Install a Floating Shelf Above Your Counter

    Vertical storage is a game-changer for small counters—it lets you display coffee essentials without eating up surface space. A floating shelf adds functionality while keeping your counter bare and calm.

    Mount a slim wooden shelf ($20–$60) about 12–18 inches above your counter using a wall bracket kit. Store your coffee beans, a spare mug, and maybe a small plant. This takes about 30 minutes with a drill and level. Renters can use command strips and removable adhesive shelves ($15–$30) that won’t damage walls.

    Pro tip: Keep the shelf to three items max—coffee beans, one mug, one small decoration. More than that and you’ve defeated the minimalist purpose.

    Now you’ve got everything within arm’s reach but completely off your counter.


    3. Use a Narrow Wooden Tray to Define Your Coffee Zone

    A tray corrals your coffee setup and makes it feel intentional rather than scattered. It also makes cleanup faster and creates a visual boundary that makes even a small area feel organized.

    Pick a simple wooden tray ($15–$35) that fits your counter width—aim for 12–18 inches long and 6–10 inches deep. Place your dripper, mug, beans, and spoon on it. When you’re done brewing, you can slide the whole tray to the side or tuck it into a cabinet. This works especially well in kitchens where counter space blends into living areas.

    Pro tip: Choose a tray with low sides so it doesn’t feel boxy. Natural wood ($20–$30) photographs better than plastic.

    Your setup looks curated, not chaotic—and cleanup takes seconds.


    4. Store Beans in Glass Jars with Minimalist Labels

    Clear glass jars keep beans fresh, visible, and beautiful—no bulky coffee bags taking up space or looking messy. Labels add a personal touch without clutter.

    Buy food-grade glass jars ($2–$5 each at IKEA or Target) with tight-sealing lids. Print or hand-write simple labels on kraft stickers ($5 for a pack). Store beans in a cool, dark cabinet, then keep one open jar on your tray or shelf for active use. This setup takes 10 minutes.

    Pro tip: Use airtight containers rated for coffee storage if shelf life matters to you. Label with roast date so you use beans at peak freshness.

    Your coffee corner looks intentional and organized, and your beans stay fresher longer.


    5. Switch to Single-Serve Pourover Packets for Travel Days

    Some days you want even less commitment than a manual brew. Single-serve pouches attach directly to mugs and brew in 90 seconds with no extra gear.

    Brands like Voila ($0.60–$1.50 per packet), Blue Bottle, or Dripkit ($1–$2 each) take up almost no space and travel anywhere. Keep a sleeve of 5–10 in a drawer ($5–$15 per box). Great for workdays, travel, or when you’re running late.

    Pro tip: These aren’t cheap long-term, but they’re perfect for occasional use or testing new roasters before committing to bulk beans.

    On chaotic mornings, you skip the ritual but keep the quality—no extra counter clutter required.


    6. Invest in a Gooseneck Kettle That Doubles as Décor

    A gooseneck kettle is the single most useful tool for pour-over coffee—and it looks intentional enough to leave on display. The thin spout gives you precise control and makes brewing feel like a ritual.

    Pick one in matte black or stainless steel ($35–$80). Brands like Fellow, Hario, or even basic Amazon options ($25–$40) work great. The aesthetic is so clean that it becomes part of your décor, so you don’t need to hide it away. If you have limited counter space, get a small kettle (1–1.5 liter capacity) that heats faster and takes up less room.

    Pro tip: Electric gooseneck kettles ($50–$100) heat water faster than stovetop versions, saving you 2–3 minutes every morning.

    Your counter looks intentionally styled, not like you’re storing appliances.


    7. Create a “Coffee Only” Drawer for Supplies

    If you don’t have counter space or want to hide your setup when not in use, a dedicated drawer keeps everything organized and accessible.

    Use a drawer divider kit ($10–$20) to create sections: one for filters, one for beans, one for stirring spoons, and one for backup supplies. Takes 15 minutes to set up. Everything stays dust-free and ready to grab. This works perfectly if your kitchen opens onto a living room or if you prefer a completely minimal counter aesthetic.

    Pro tip: Use small glass or ceramic containers inside the drawer so you can see what you have at a glance.

    Your morning setup is literally one drawer pull away, and your counter stays completely bare when you want it to.


    8. Pair a Small Water Dispenser with Your Setup

    If you don’t want to wait for kettle water or heat the stove every morning, a filtered water dispenser (hot and cold) eliminates a step. Compact models fit anywhere.

    Look at Instant Pot Ace ($100–$150) or smaller filtration pitchers with built-in heaters ($60–$120). Some just need to be filled once and keep water at optimal brewing temperature all day. Takes 5 minutes to set up and fill. You get instant hot water without the kettle ritual—trade-off is more counter space, but it’s minimal compared to a full espresso machine.

    Pro tip: If you’re tight on space, a simple filtered water pitcher ($20–$40) still works—just keep it in the fridge and heat water traditionally.

    You shave minutes off mornings while maintaining a streamlined, modern setup.


    9. Use Neutral Color Palette for All Your Coffee Gear

    Colors that clash make a space feel chaotic—even if it’s minimal. Matching your coffee gear to a neutral palette (white, cream, gray, natural wood) makes the setup look intentionally curated rather than random.

    When shopping for mugs, kettles, trays, and dripper handles, aim for these tones. You don’t need matching sets (too sterile), but similar color families create visual calm. A white ceramic dripper, a cream mug, a gray kettle, and a natural wood spoon feel harmonious. Takes zero extra effort—just choose intentionally when you buy.

    Pro tip: Add one accent color (like a deep green plant) to break the monotony without adding clutter.

    Your coffee corner looks serene and designed, not like random kitchen tools scattered around.


    10. Mount a Slim Spice Rack for Coffee Additions

    If you like to add cinnamon, honey, or cocoa to your coffee, a slim wall-mounted spice rack keeps these extras accessible without cluttering your counter.

    Install a narrow wooden rack ($15–$30) with 3–4 shelves about 18 inches above your counter. Fill small glass jars ($1–$2 each) with your additions. Installation takes 20 minutes with basic tools. Renters can use command-strip wall organizers ($10–$15) that don’t require drilling.

    Pro tip: Label jars with small stickers so you can find everything quickly. Keep the rack to essentials only—cinnamon, honey, a sweetener, maybe cocoa.

    Now your flavor add-ons are displayed and organized, not tucked away in cabinets where you forget about them.


    11. Choose a Reusable Metal Filter Instead of Paper

    Reusable metal filters cut plastic waste, save money long-term, and look sleeker than bulky paper stacks. They’re also easier to store.

    Buy a stainless steel mesh filter ($5–$15) that fits your dripper. Rinse after each use and air-dry. No more buying boxes of paper filters ($4–$8 monthly). After 50 uses, you’ve paid for itself. Storage is simple—one small filter takes up barely any space.

    Pro tip: Metal filters let more oils through than paper, creating a slightly richer cup. Some people prefer this; others prefer paper’s cleaner taste. Try both.

    You eliminate packaging waste while simplifying your supplies to literally one reusable item.


    12. Add a Single Small Plant to Your Setup

    One small plant near your coffee area adds life and freshness without overcomplicating your space. Biophilic design (adding nature) reduces stress—perfect for a morning ritual.

    Pick a low-maintenance plant like a pothos, snake plant, or succulent ($8–$20 from a nursery or grocery store). Put it in a small ceramic pot ($5–$10) that matches your color palette. Water weekly or biweekly—barely any maintenance. One 4-inch plant takes up minimal counter or shelf real estate.

    Pro tip: Choose a plant that thrives in whatever light your kitchen gets. Succulents need bright light; pothos handle lower light.

    Your coffee corner goes from functional to calming—a plant makes even a tiny setup feel more intentional and peaceful.


    13. Build a Mobile Coffee Cart on a Slim Bar Cart

    If you want flexibility (morning kitchen vs. home office), a slim bar cart keeps your entire setup mobile. Everything stays together and off your main counter.

    Choose a narrow bar cart ($40–$100) with two or three tiers. Arrange your kettle, dripper, mugs, and beans vertically. Roll it wherever you need coffee. Takes 5 minutes to set up once. This works great if you have multiple rooms where you work or if you’re renting and want to take it with you.

    Pro tip: Pick a cart in black metal or wood to match your style. Make sure wheels lock so nothing tips over while brewing.

    Your setup is portable, organized, and completely clears your main kitchen counter when you’re not brewing.


    14. Use Minimalist Coffee Scoops and Spoons

    A proper scoop and spoon aren’t just functional—beautiful ones become part of your displayed setup rather than junk drawer items.

    Buy a single wooden coffee scoop ($5–$15) and one small brass or wood spoon ($3–$10). These double as décor and keep your setup complete. You need only one of each—no drawer full of duplicates. Quality versions last years and age beautifully.

    Pro tip: Wooden items develop character with use, while brass or copper can patina over time—both look more intentional than plastic.

    You’ve streamlined your tool count to essentials that are beautiful enough to display permanently.


    15. Install Under-Cabinet Lighting for Your Coffee Zone

    Under-cabinet LED strips add ambiance and make your setup feel like a café—all while using minimal power and taking zero counter space.

    Install self-adhesive LED strips ($15–$30) under your upper cabinet. Plug into a nearby outlet or use battery-powered strips ($20–$40). Takes 10 minutes. Warm white light (2700K) creates a café vibe; cool white (4000K) feels modern and energizing. This especially works if your coffee setup is in a kitchen-living room blend.

    Pro tip: Choose dimmable strips ($25–$50) so you can adjust mood based on time of day or your energy level.

    Your minimal coffee corner suddenly feels like a boutique café, and the soft light makes mornings more peaceful.


    16. Stock One High-Quality Mug You Actually Love

    Instead of a cabinet of mugs, own one beautiful mug you genuinely love. You’ll use it daily and it becomes part of your identity.

    Invest in a single quality mug ($25–$60) from brands like Kinto, Heath Ceramics, or local potters ($20–$80). Choose a size that fits your morning ritual—typically 10–12 oz for pour-overs. This becomes your signature mug, and you don’t need backups for looks. If guests come over, they’ll use something else; that’s fine.

    Pro tip: Pick a mug with a slight handle that fits your hand well. Test in-person if possible—grip matters more than looks.

    Your morning coffee ritual feels special, and you’ve eliminated the need for a whole drawer of mediocre mugs.


    17. Create a Coffee Menu Card on Your Counter

    A small recipe card or menu keeps brewing ratios and times visible—eliminating the need to google or remember mid-brew. It also looks intentional and adds personality.

    Write or print a card ($1–$5) with your standard brew ratio (e.g., 1:16 coffee to water), brew temperature, and time. Stick it in a small wooden stand ($3–$8) or frame it. This doubles as decor and functional reference. Takes 10 minutes to create.

    Pro tip: Use chalk markers or a dry-erase card if you like experimenting with ratios. Make it beautiful enough that it’s part of your display.

    You never fumble through brewing again—and your card becomes a small piece of art that shows visitors you take coffee seriously.


    18. Use a Cloth Napkin or Small Towel as a Workspace Mat

    A cloth napkin or small linen towel defines your coffee zone without taking permanent space. It also catches spills and adds texture to your setup.

    Place a simple linen napkin ($3–$8) or kitchen cloth under your brewing area. Choose natural fibers in cream, gray, or white to match your palette. This gives you a defined “coffee zone” within your counter and adds warmth. Easy to wash and reuse indefinitely.

    Pro tip: Look for vintage or handwoven cloths at thrift stores ($1–$3) for more character. Linen ages beautifully.

    Your setup gains a grounded, intentional feel—and you’ve got a protective layer that catches drips.


    19. Set a Daily Brew Time and Stick to It

    Consistency turns your minimal coffee setup into a ritual that anchors your whole day. Pick a brew time and protect it.

    Commit to brewing at the same time daily—8 AM, for example. Block 10 minutes on your calendar. This isn’t about rules; it’s about creating a moment of calm before chaos. Your minimal setup makes this ritual fast and enjoyable. Over time, this becomes your favorite part of the day.

    Pro tip: Prep the night before (grind beans, fill your kettle) so morning setup takes literally 60 seconds.

    Your coffee ritual becomes the most grounding part of your day, and your minimal counter supports this instead of complicating it.


    20. Combine Coffee Supplies with Morning Journaling

    If you journal, meditate, or read, pair your coffee ritual with these practices. One compact corner handles multiple morning essentials.

    Place your coffee setup next to a small journal and pen on your counter or a small table ($0 if you already have these). Brew coffee, sit for 5–10 minutes, and journal or read. This transforms coffee from fuel into a full mindfulness practice. No extra gear needed—just intentional spacing.

    Pro tip: Keep a small tray or placemat to define this zone so your morning ritual feels separated from everyday bustle.

    Your mornings shift from rushed to peaceful, and your minimal setup supports a daily practice that changes everything.


    21. Choose Biodegradable Filters (If You Use Paper)

    If you prefer paper filters, switching to unbleached or bamboo filters aligns with minimalist values—less waste, simpler supply chain, guilt-free disposal.

    Buy unbleached filters ($3–$6 per 100-pack) from brands like Melitta or full-circle. These break down naturally and feel less wasteful than bleached paper. Storage is the same as regular filters—barely any counter or cabinet space.

    Pro tip: Some people find unbleached filters slightly papery in taste. Try both and see which you prefer. If cost matters, paper (bleached or not) is cheaper than metal filters initially.

    You keep your ritual simple while knowing your coffee’s environmental footprint is minimal.


    22. Mount a Small Clock Above Your Coffee Zone

    A small clock keeps brewing time visible and adds to the “coffee zone” feel without taking counter space. It’s both functional and décor.

    Install a slim minimalist clock ($15–$40) on the wall above your coffee area. Choose a design with minimal details—simple hands, no numerals, or just dots at 12, 3, 6, 9. Keeps you on track for brew time while adding intentional style. Installation takes 5 minutes.

    Pro tip: Pick one in black, white, or brass to match your coffee setup’s color palette. A kitchen timer works too if you already have one on your phone.

    Now your brewing area feels complete and almost-café-like without adding any clutter to your counter.


    23. Keep a Backup Brewing Setup in a Compact Tote

    Travel, vacations, or impromptu coffee needs happen. A compact tote holds a complete backup setup that’s grab-and-go.

    Pack a small collapsible dripper ($20–$40), reusable cup ($8–$15), portable filters, and spoon into a canvas tote ($10–$25). Store on a shelf or in your car. When you travel or need coffee on the go, everything’s ready. Takes 10 minutes to pack.

    Pro tip: Include a small bag of your favorite beans ($5–$10 for single-origin traveler bags) so you’re never without good coffee.

    You’re prepared for coffee anywhere—and your home counter stays completely minimal because everything’s in one portable kit.


    Save this post for your next minimal setup refresh. Pick one idea this weekend—maybe it’s the mug, the tray, or the floating shelf—and watch how a single change makes your mornings calmer and your counter cleaner.