Author: Clara Bennett

  • 28 Bathroom Interior Design Ideas for a Professional Look

    28 Bathroom Interior Design Ideas for a Professional Look

    Your bathroom doesn’t need a full renovation to look professionally designed. Small, strategic changes—from lighting upgrades to storage solutions—can completely shift how your space feels and functions. Whether you’re renting, working with a tight budget, or ready to invest in a few premium pieces, these 26 ideas prove that a polished bathroom is totally achievable. You’ll discover simple styling tricks, budget-friendly swaps, and investment upgrades that work together to create a space you actually want to spend time in. Let’s dive into ideas you can start this weekend.

    1. Paint Walls a Light Neutral Shade

    Light paint colors make small bathrooms feel bigger and create a calm, professional backdrop for your fixtures. Dark or bold colors can overwhelm tight spaces and date quickly.

    Choose soft whites, pale grays, or warm beiges as your base. Look for low-VOC paint (around $25–$40 per gallon) from brands like Benjamin Moore or Sherwin-Williams—better for air quality and longevity. This is a weekend DIY project if your walls are in decent shape; budget one day for two coats plus drying time. Primer + paint combo cans save money and time.

    A neutral wall becomes the perfect canvas for accessories you can swap seasonally or as your style evolves.

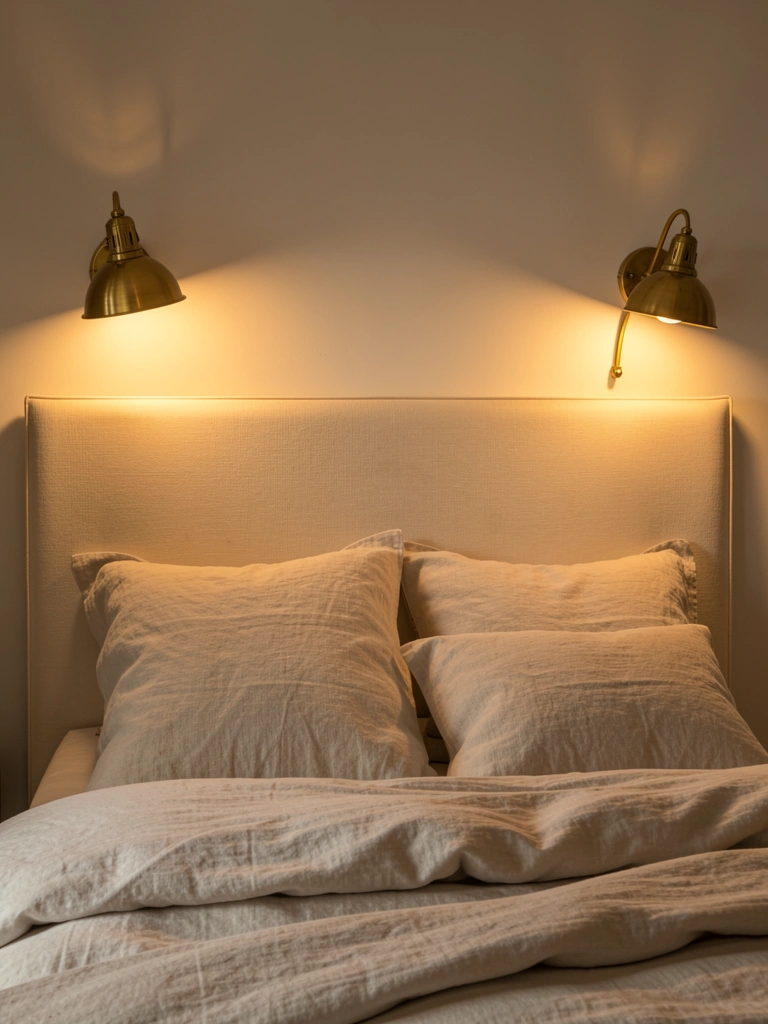
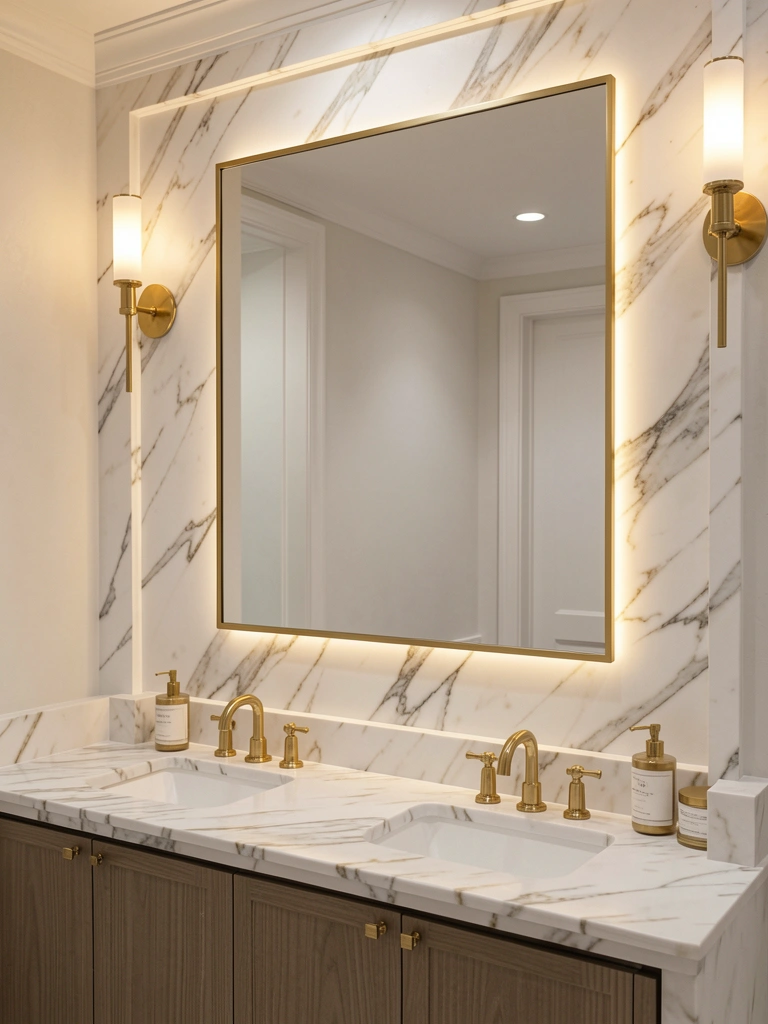
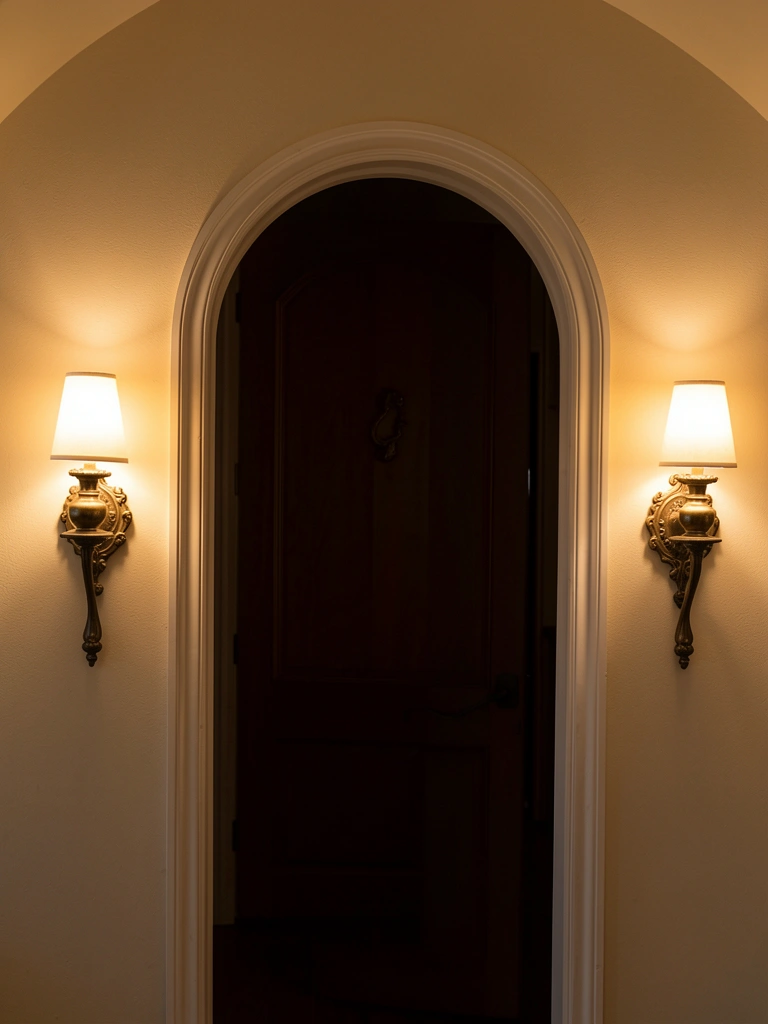
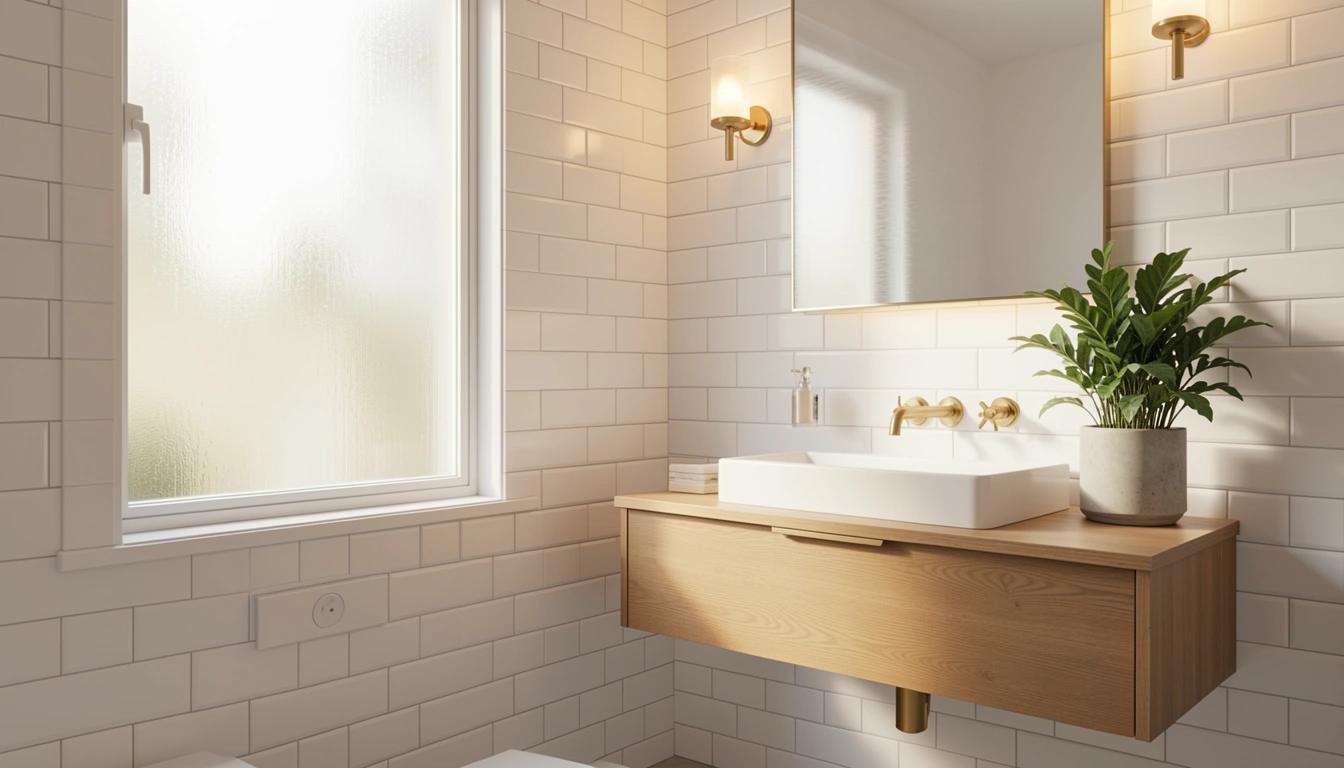
    2. Install Layered Lighting for Ambiance and Function

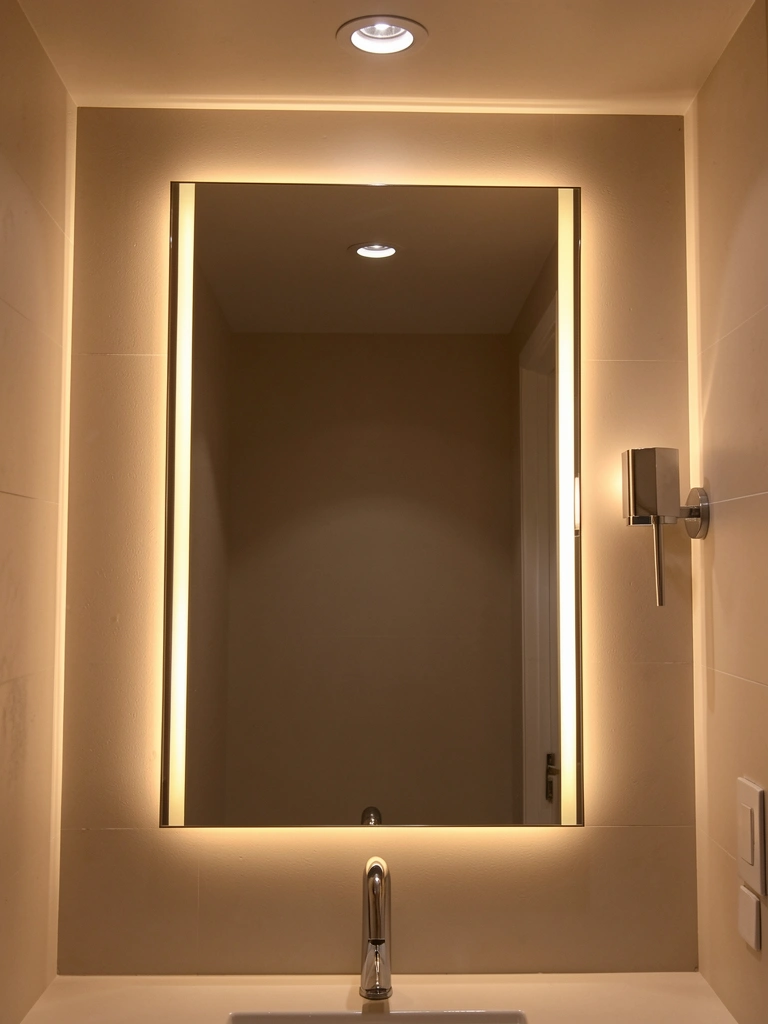
    One overhead light creates shadows and harsh glare—not professional-looking. Layered lighting means combining ambient (general), task (functional), and accent (mood) sources.

    Add a vanity mirror light ($30–$100) with LED bulbs above or beside your mirror for shadow-free makeup and grooming. Keep your existing overhead light and add a small wall sconce ($40–$80) on one side for accent lighting. Use warm white LED bulbs (2700K) throughout for a spa-like quality. Most are renter-friendly plug-in options or simple hardwired swaps. Total project time: 1–2 hours if you’re comfortable with basic wiring (or hire an electrician for $150–$300).

    Your bathroom now has the flexibility to be bright for cleaning or dim and relaxing for a bath.

    3. Swap Out Hardware for Brushed Gold or Matte Black

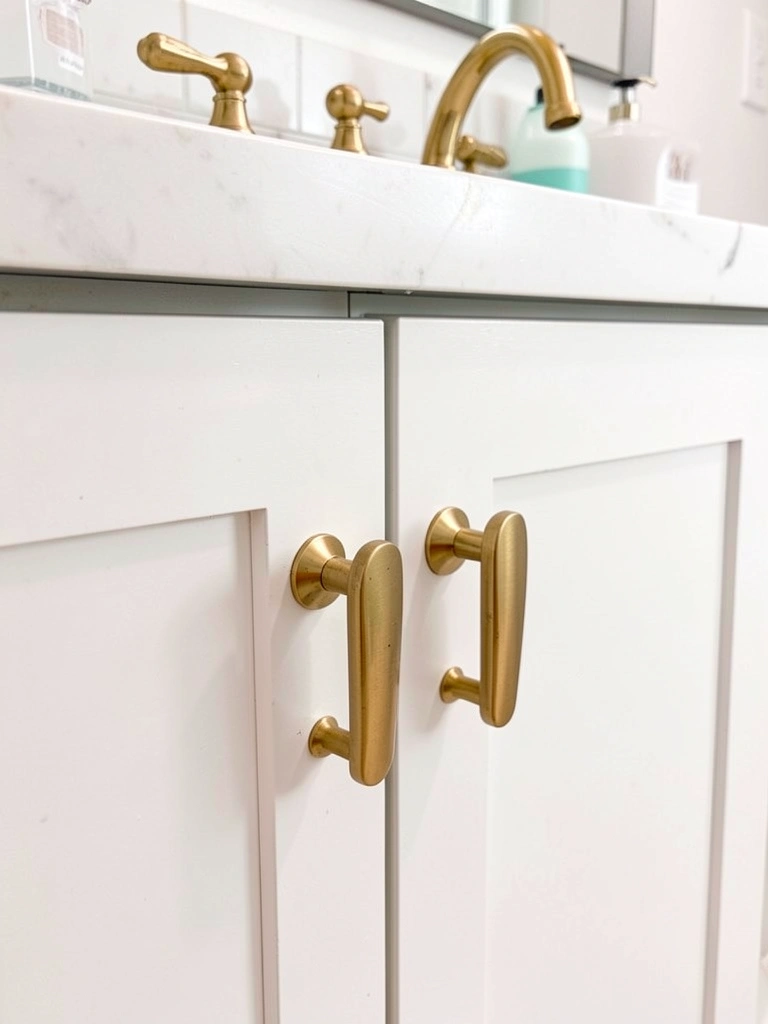
    Hardware is the jewelry of your bathroom—mismatched or dated pieces immediately read as unfinished. Updated finishes signal attention to detail.

    Replace cabinet pulls, towel bars, and faucet handles with brushed gold, matte black, or brushed nickel ($8–$20 per piece). These finishes are timeless, hide fingerprints better than chrome, and work with any style. Online sources like Amazon, Wayfair, or Rejuvenation have hundreds of options. Swapping pulls is a 10-minute DIY project per item. If your faucet is old or leaky, a full replacement runs $100–$500 depending on quality.

    This single change makes your entire bathroom feel intentional and curated—like a designer touched it.

    4. Add a Floating Vanity for Space and Cleanliness

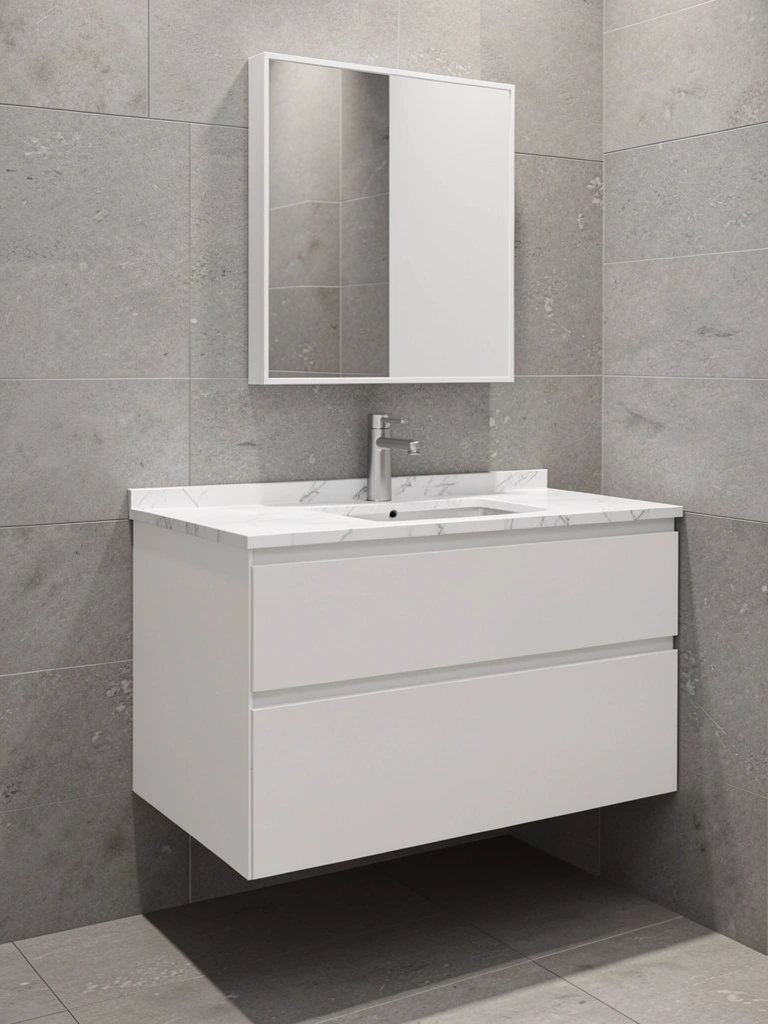
    Floating vanities create visual space, make floor cleaning easier, and instantly modernize a bathroom. They’re the opposite of bulky, grounded cabinets.

    Install a pre-made floating vanity ($200–$800) or mount a simple reclaimed wood shelf with plumbing underneath. IKEA’s GODMORGON series ($200–$300) is a popular budget option that looks custom. Mounting requires wall studs or heavy-duty brackets; hire a handyperson for $150–$300 if you’re not confident. Wall-mounted faucets run $100–$400. Plumbing adjustments may need a pro ($200–$500).

    Your bathroom instantly gains a sense of openness, and you can actually sweep under the vanity instead of working around legs.

    5. Introduce Natural Materials Like Wood and Stone

    All white and chrome feels sterile. Adding warm materials like wood and stone creates depth and makes the space feel less clinical and more like a retreat.

    Incorporate a reclaimed or natural wood shelf ($40–$150), a stone soap dish ($15–$30), or a wooden bath caddy ($30–$80). Layer with neutral stone tiles on one accent wall ($80–$200 installed if DIY, or $300–$600 with a pro). Woven baskets ($20–$60) for storage add organic texture without clutter. These pieces are mostly renter-friendly if you skip permanent wall tiles.

    The bathroom now has warmth and character that polished chrome alone can’t deliver.

    6. Declutter With Matching Storage Containers

    Visible clutter reads as unprofessional and stressful. Matching containers signal organization and calm—even if what’s inside is chaotic.

    Grab a set of matching ceramic, glass, or concrete containers ($20–$60 for a set of 3–4) in white, gray, or natural tones. Fill them with cotton rounds, hair ties, extra toothbrushes, and grooming tools. Stack or arrange by frequency of use. Dollar stores, Target, IKEA, and Muji have affordable options. Takes 15 minutes to organize and makes a surprising visual difference.

    Your countertop instantly looks calm and intentional instead of cluttered and chaotic.

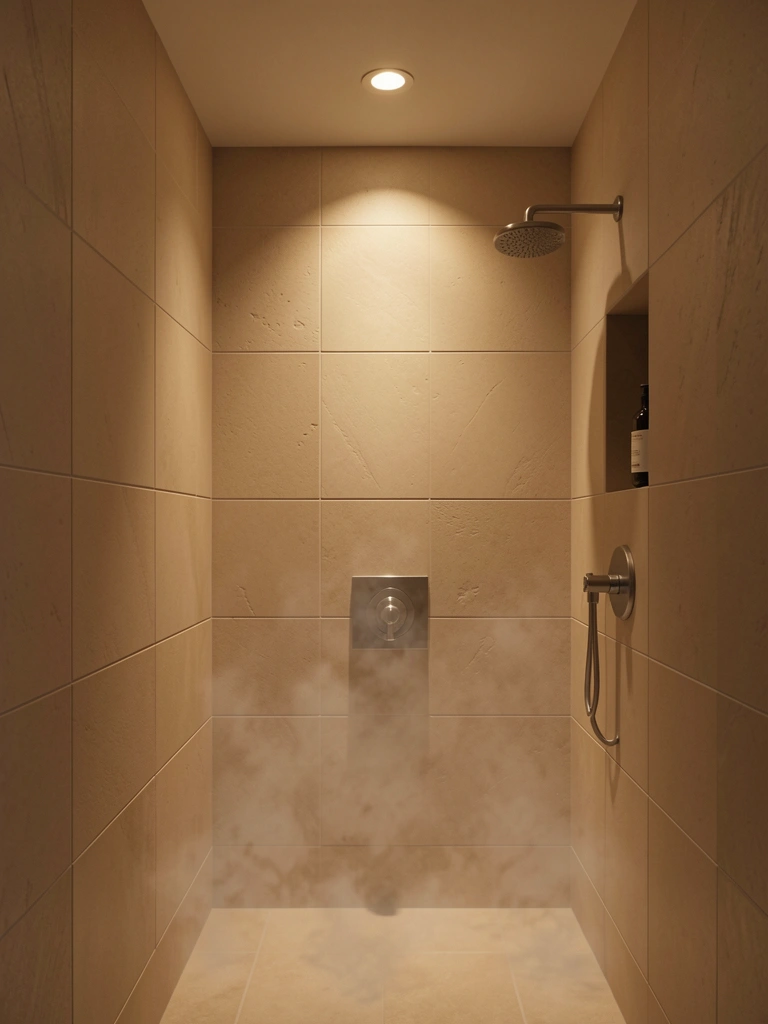
    7. Upgrade to a Rainfall Showerhead

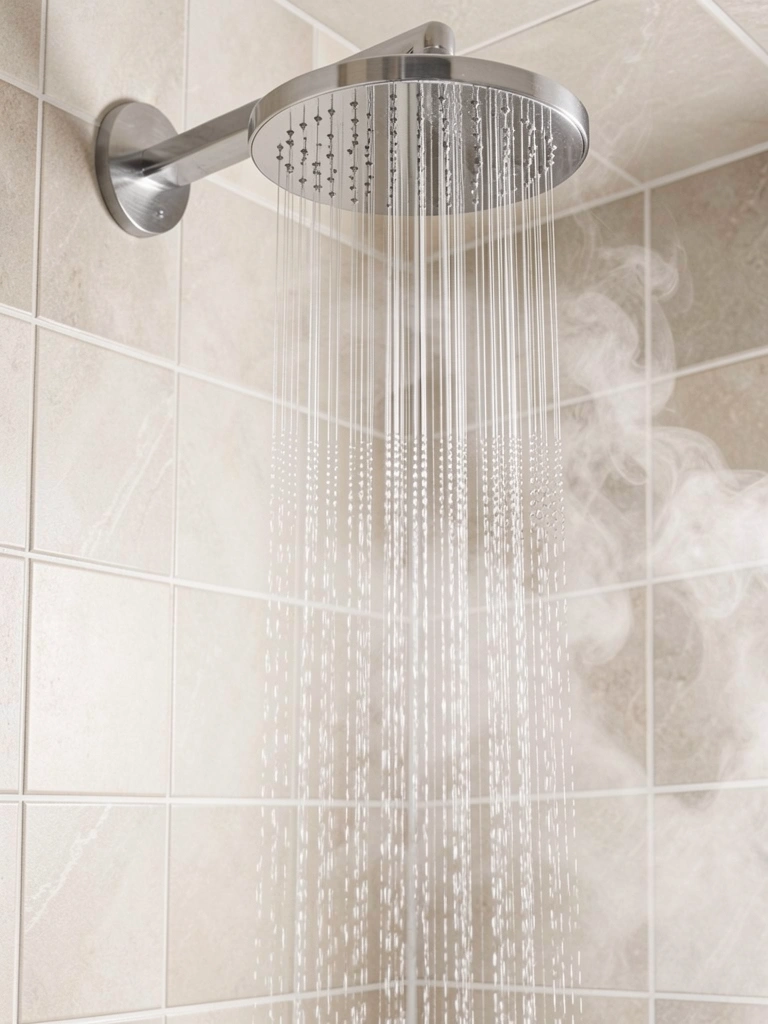
    Standard showerheads spray directly down and feel utilitarian. A rainfall head creates that spa-like experience that makes you actually want to use your shower.

    Install a rainfall showerhead ($40–$150) with an arm and can ($60–$200 more). Most fit existing plumbing if you’re handy, or hire a plumber ($200–$400). Choose low-flow options (2.0 GPM) to save on water and energy bills. Chrome, brushed nickel, and matte black finishes all look professional. Takes 30–60 minutes for DIY; 1–2 hours with a pro.

    A warm shower under a rainfall head becomes the highlight of your morning—it’s a small luxury that feels completely worth it.

    8. Paint Cabinets Instead of Replacing Them

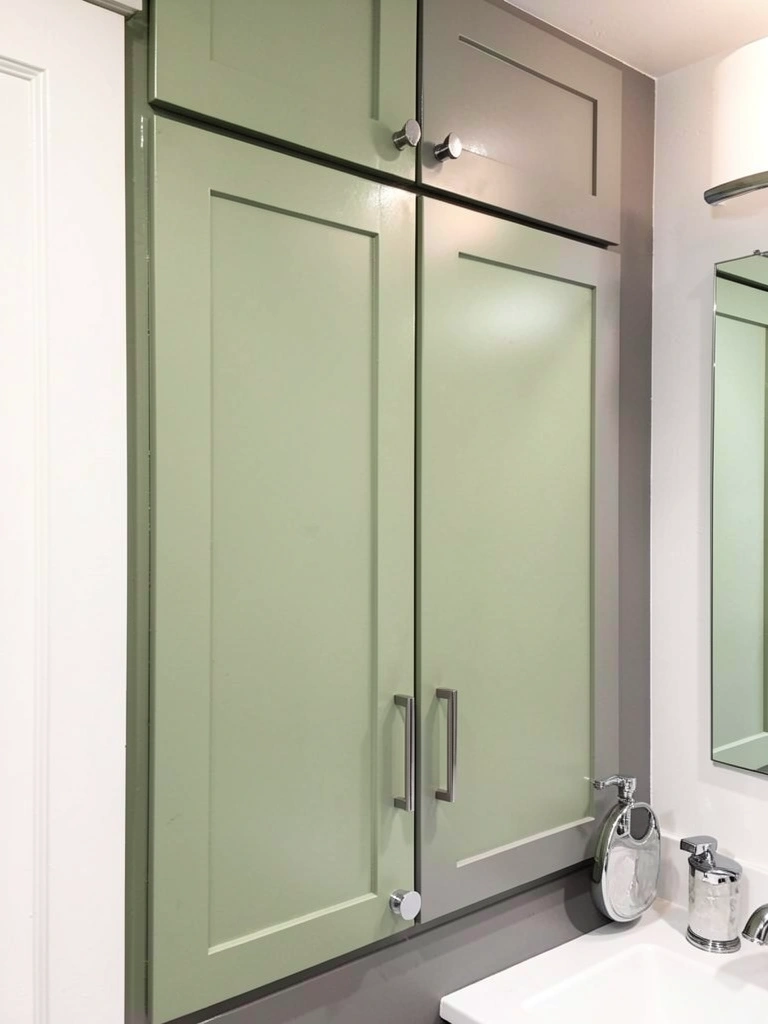
    Cabinet replacement is expensive and wasteful. Cabinet paint gives you a like-new look for a fraction of the cost.

    Clean cabinets thoroughly, sand lightly, prime with cabinet-grade primer ($20–$30), then apply two coats of semi-gloss or satin paint ($25–$40). Choose colors like sage, soft gray, navy, or classic white. This is a weekend DIY project or hire a painter for $500–$1,500 depending on size. Remove hardware beforehand and label everything. Add new pulls ($100–$200) to complete the refresh.

    Your cabinets look like a design choice rather than tired old fixtures—and you’ve saved thousands compared to replacement.

    9. Add a Textured or Patterned Tile Accent Wall

    Plain all-white or single-color tile is forgettable. An accent wall with pattern or texture creates visual interest without overwhelming the space.

    Choose a patterned or textured tile ($2–$8 per square foot) like Moroccan geometric, herringbone, or floral print. Install on one wall (shower back or behind toilet) for $200–$600 DIY or $400–$1,200 with a pro. Subway tile remains timeless; save patterned choices for accents to avoid dating your space. Grout color matters too—white reads bright, gray is more forgiving.

    Your bathroom gains personality and looks like you put thought into the design, not just default white everywhere.

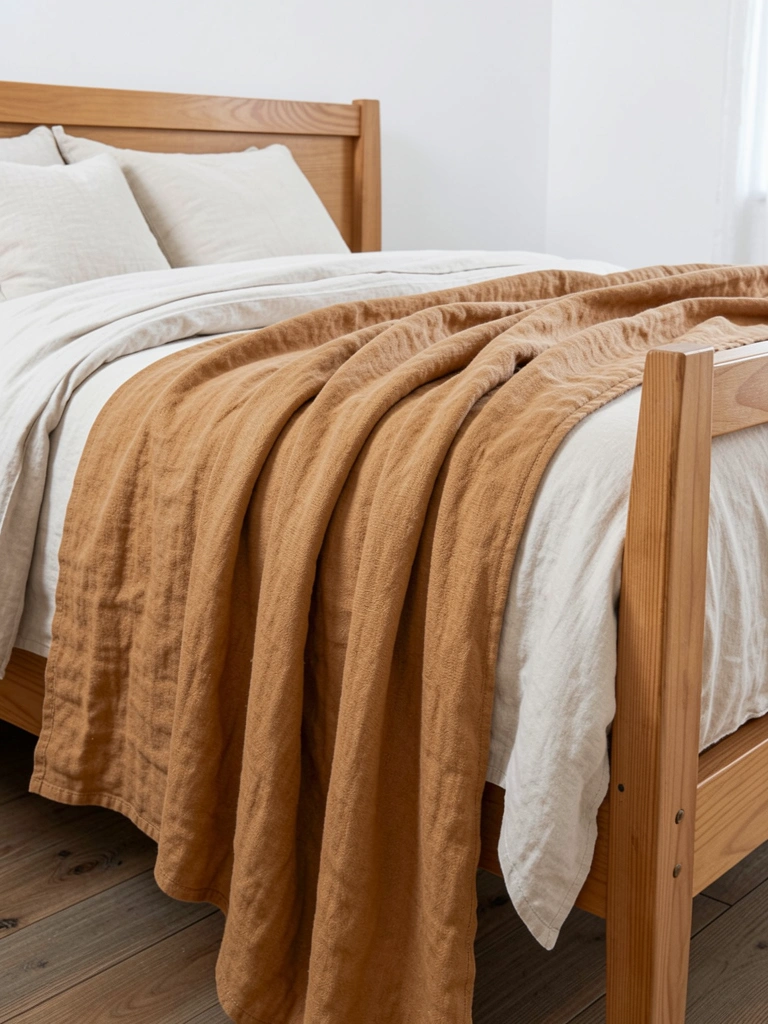
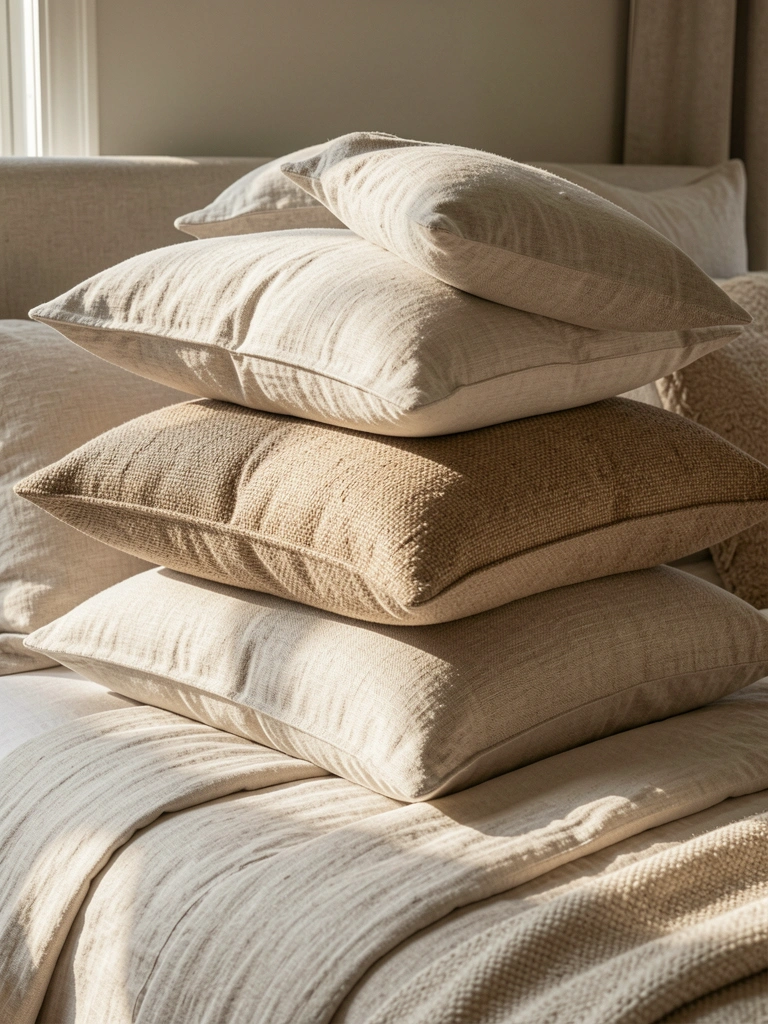
    10. Swap Towels and Mats for Oversized, Quality Versions

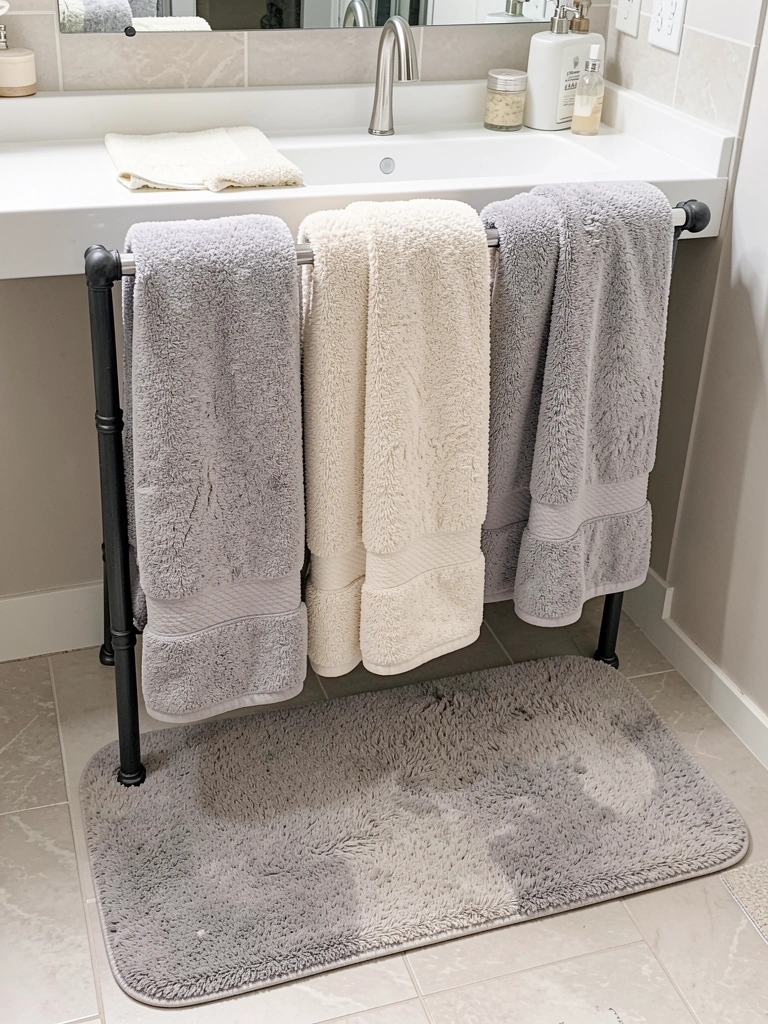
    Thin, mismatched towels read as budget and dated. Plush, coordinated towels signal luxury and care.

    Buy a set of 3–4 oversized towels ($60–$150 from Pottery Barn, Parachute, or Brooklinen) and a matching bath mat ($30–$60). Choose neutral colors that work with your paint and hardware. Quality matters—higher GSM (grams per square meter) means plushier towels. Mid-range options ($15–$30 per towel) work great. Swap out mismatched, thin towels completely. Takes 10 minutes to implement.

    Your bathroom instantly feels more like a hotel or spa—that’s the power of quality basics.

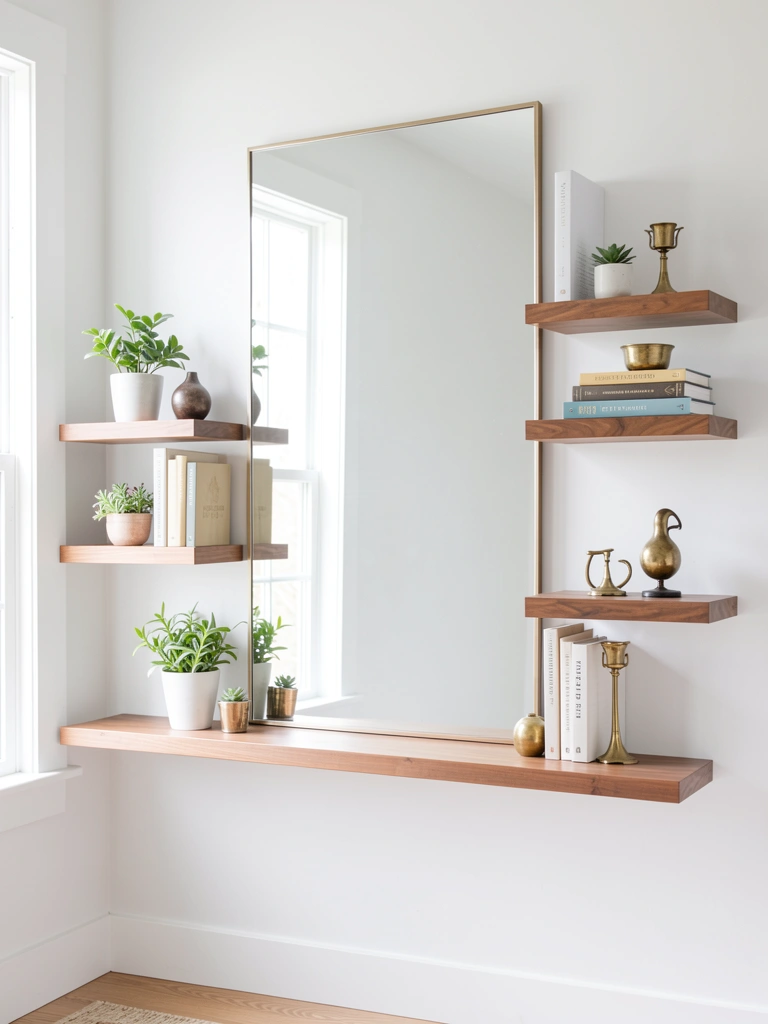
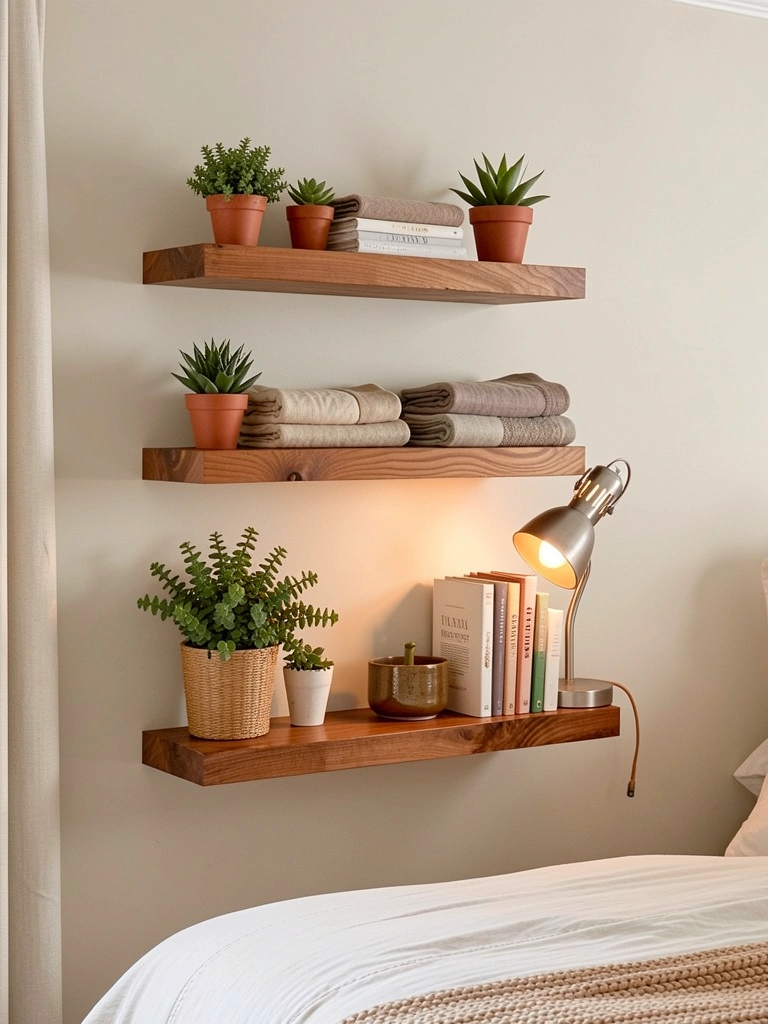
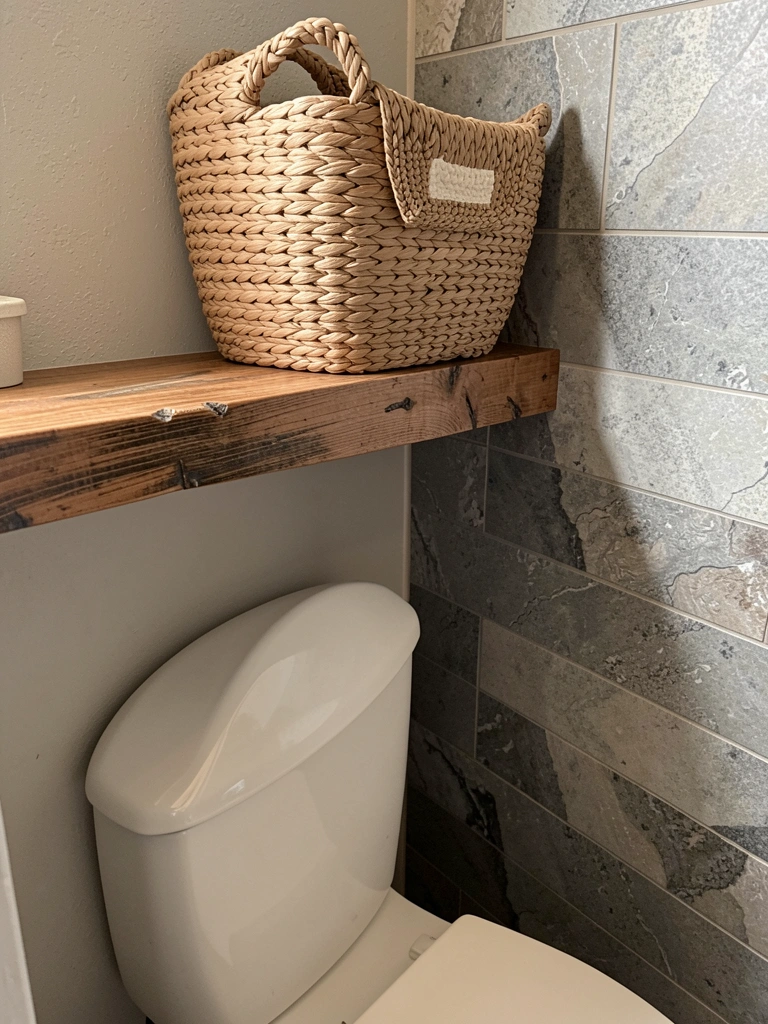
    11. Install a Narrow Floating Shelf Above the Toilet

    The wall above the toilet is wasted space in most bathrooms. A floating shelf adds storage and styling opportunity without taking up floor space.

    Mount a slim wooden or metal shelf ($30–$80) using heavy-duty brackets and wall anchors (or studs, ideally). Keep it narrow (8–12 inches) so it doesn’t feel cramped. Style with a potted plant, a stack of rolled washcloths, a candle, or a small basket. IKEA, Wayfair, and Target have budget-friendly options. 30-minute DIY installation.

    This often-forgotten wall becomes a small design moment that adds function and visual interest.

    12. Switch to a Modern Faucet

    An outdated faucet is one of the first things people notice. Modern faucets have cleaner lines and better function—no leaky handles or low water pressure.

    Replace with a single-handle or widespread faucet ($80–$300) in brushed nickel, matte black, or brass. Look for water-efficient models (1.2–1.5 GPM) that cut your water bill. Brands like Moen, Delta, and Kohler offer good mid-range options. DIY swap takes 1–2 hours; a plumber handles it in 30 minutes for $150–$300 labor. Shutting off water valves and unbolting the old faucet is simpler than most people think.

    A modern faucet immediately upgrades your entire vanity area and improves daily function.

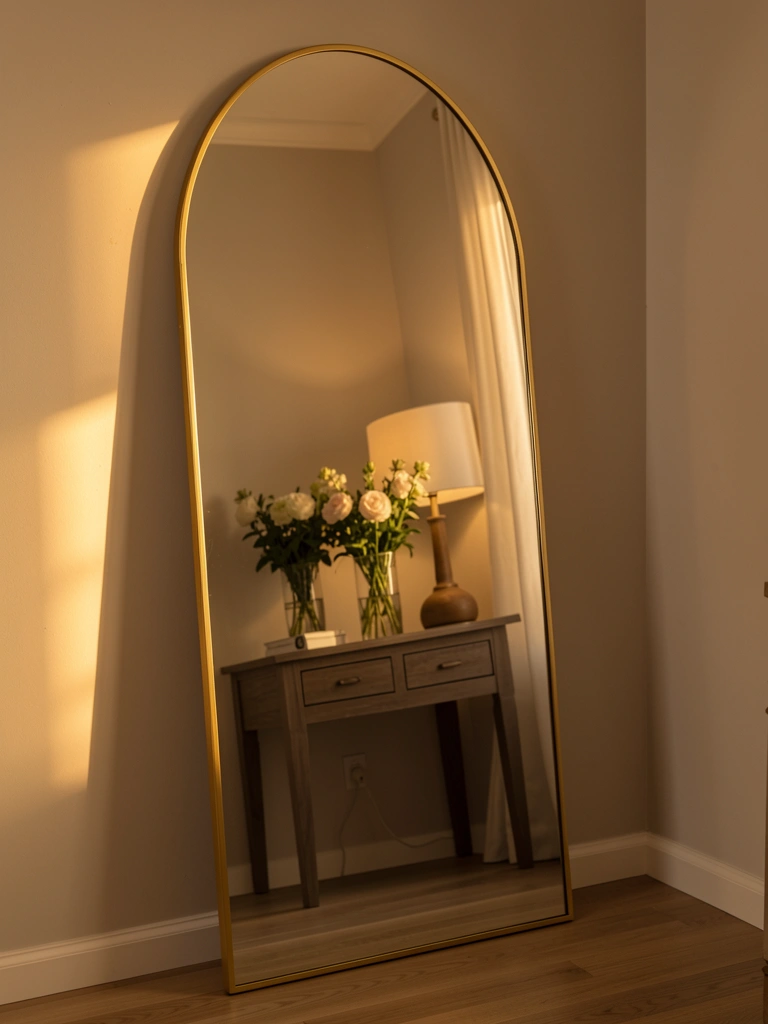
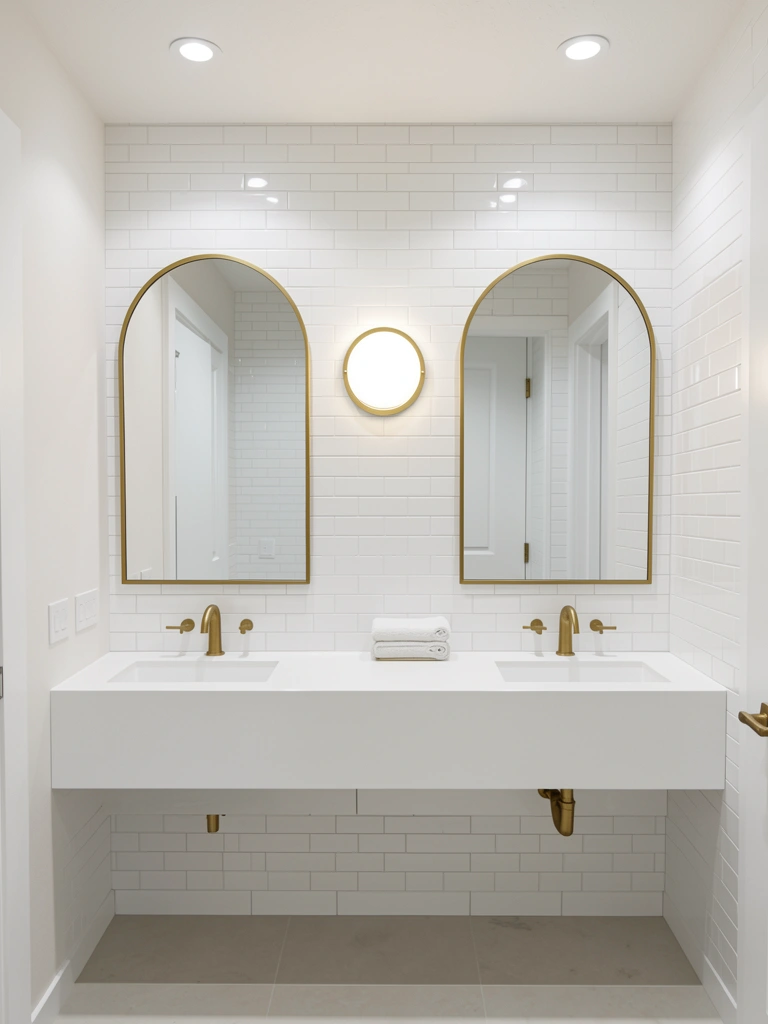
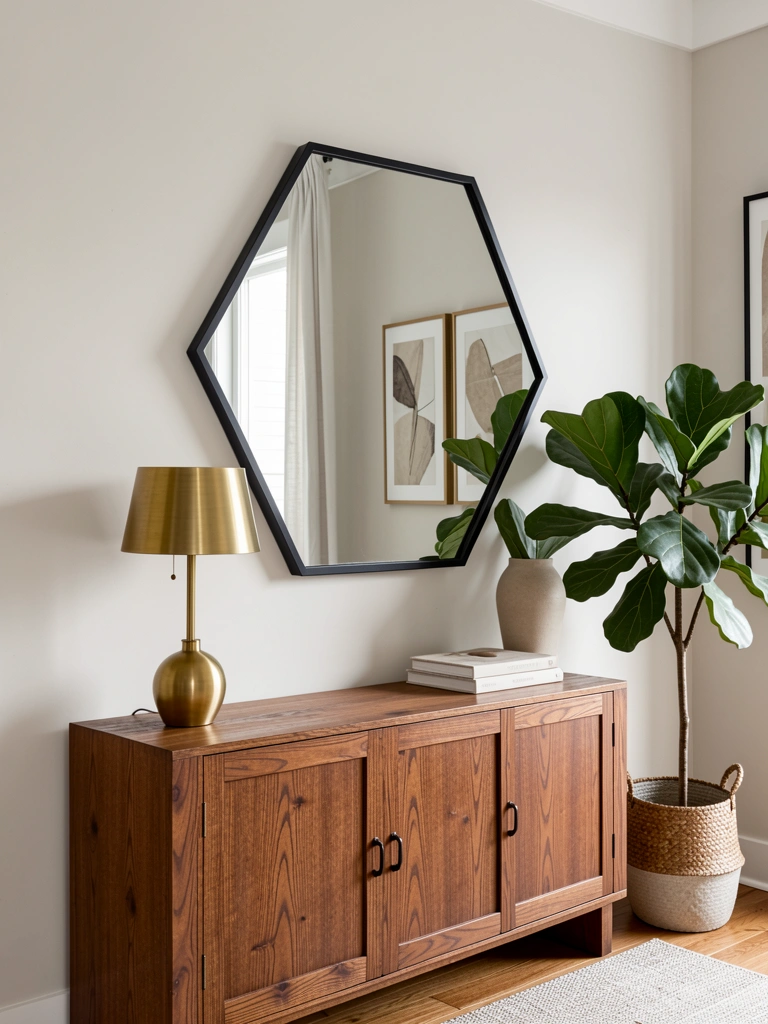
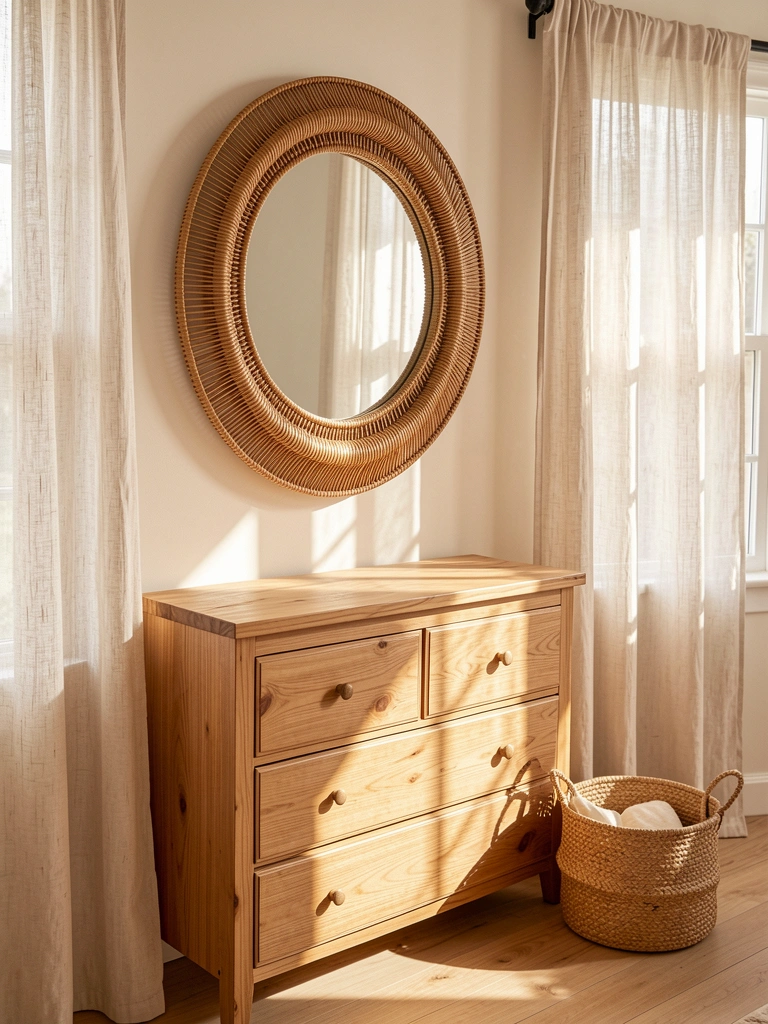
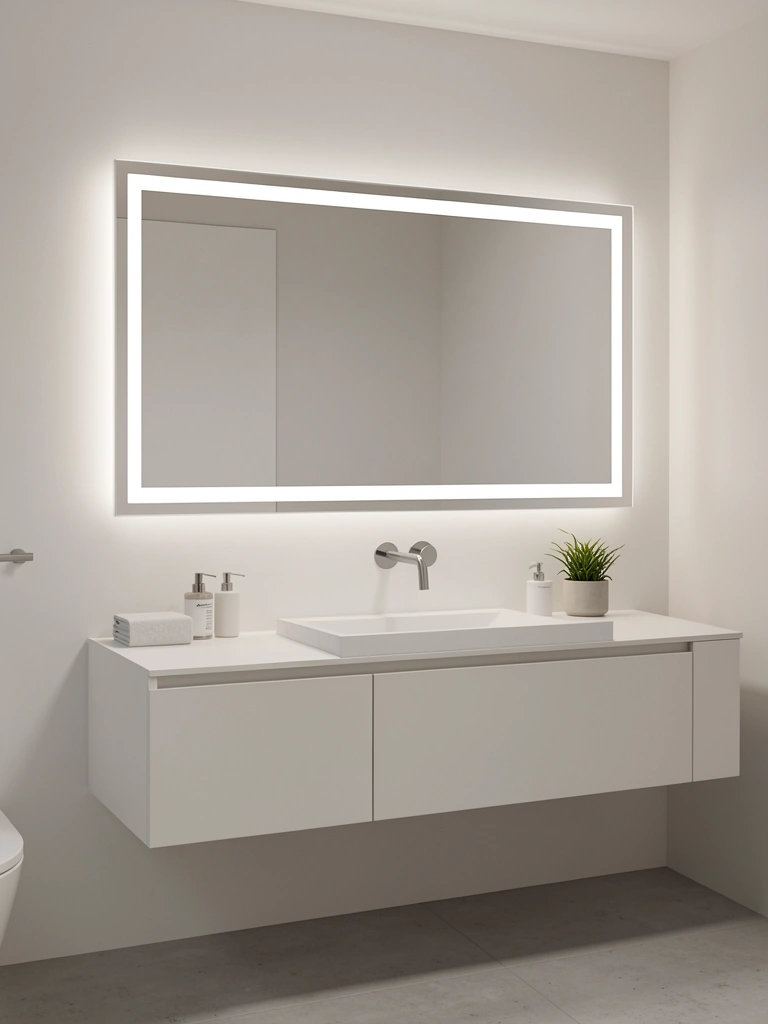
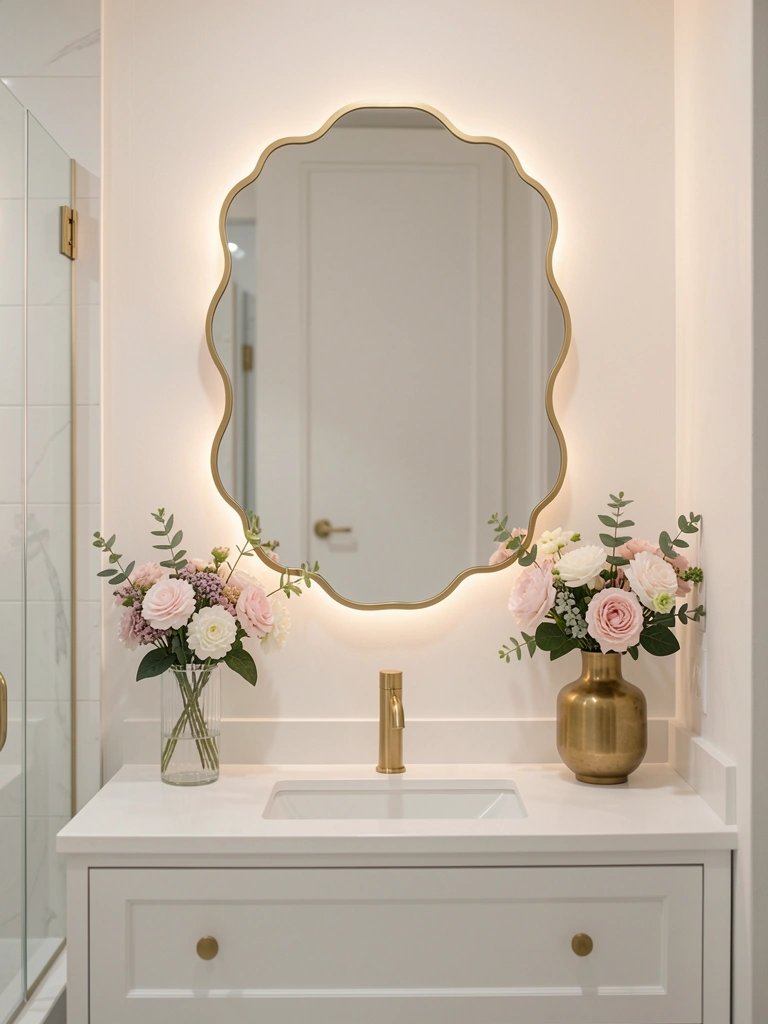
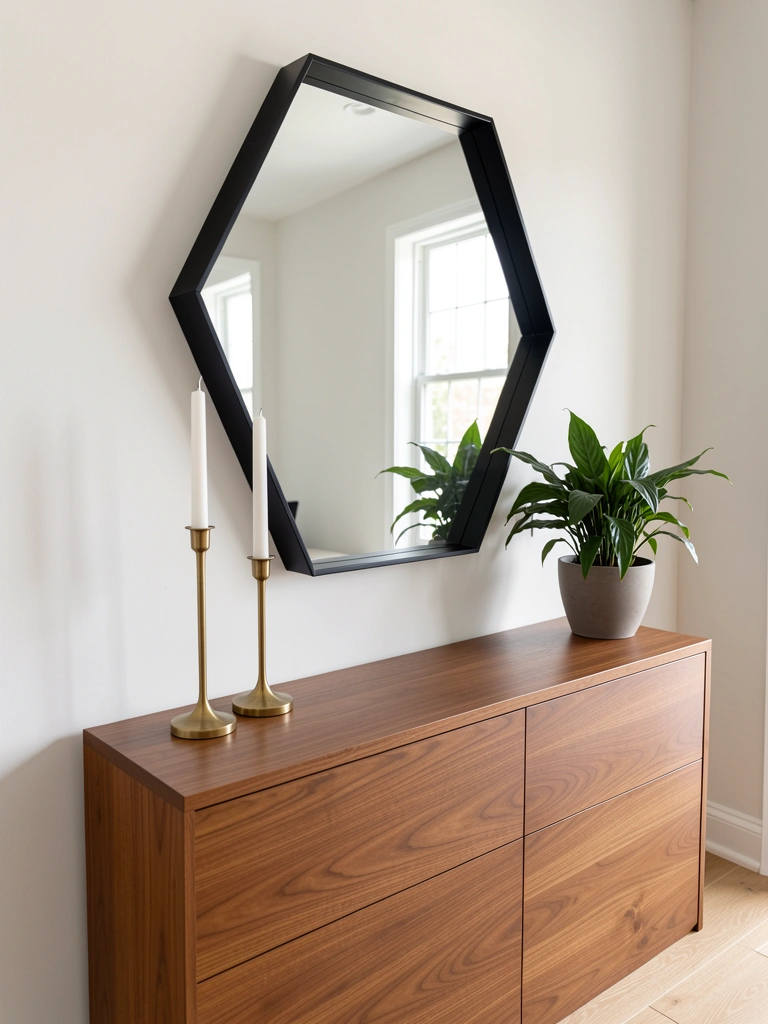
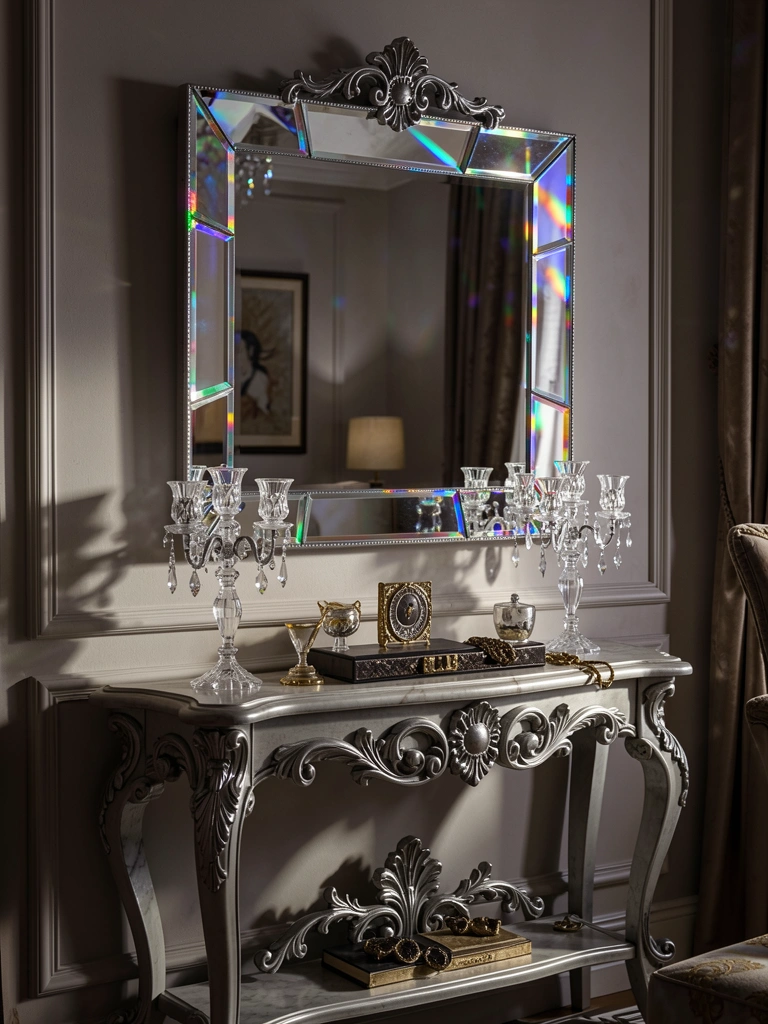
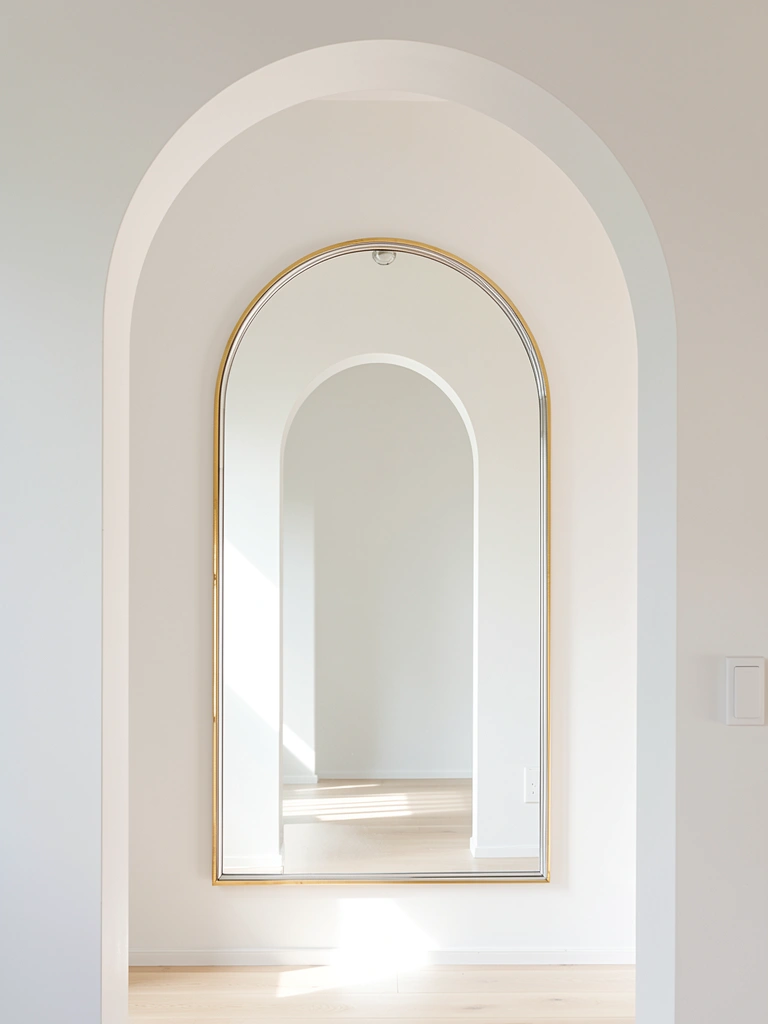
    13. Frame Your Mirror With a Stylish Border

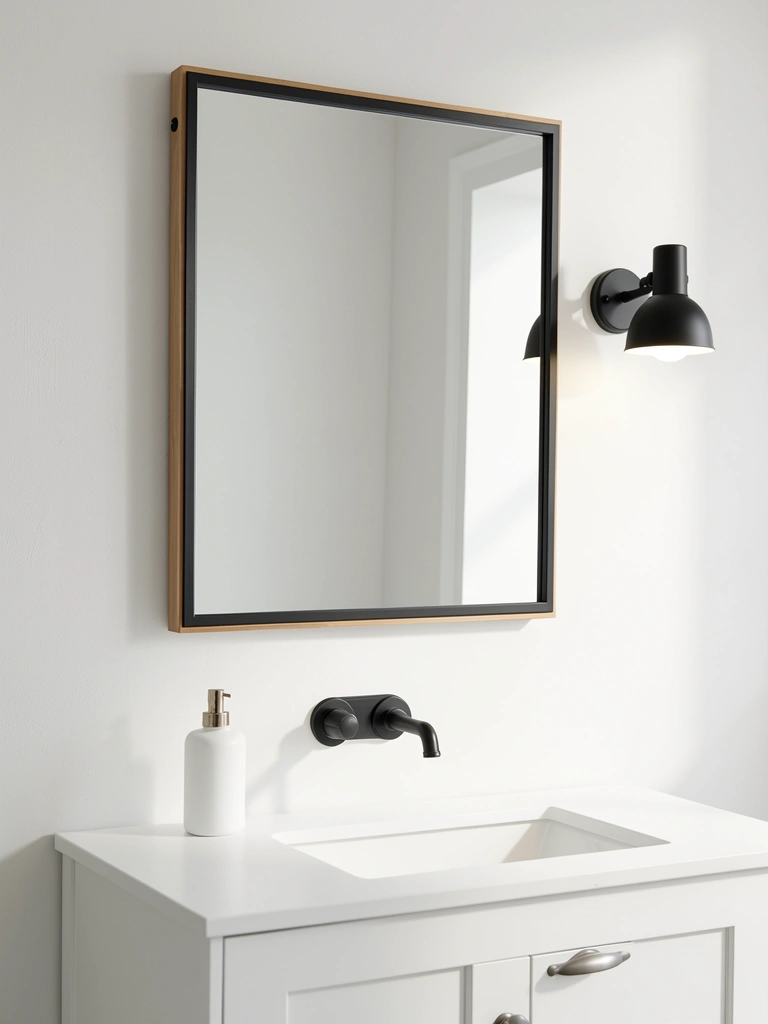
    A bare mirror looks unfinished. Framing it draws focus and adds instant polish.

    Buy a mirror frame ($40–$150) that fits your existing mirror or replace both together. Wood, metal, or composite materials work well. Minimalist frames feel modern; ornate options work for traditional bathrooms. Mounting is straightforward with brackets ($20–$40). If your mirror is glued on, you may need to remove and reinstall it—hire a pro ($150–$300) if you’re nervous.

    Your mirror becomes a design feature rather than just a functional fixture.

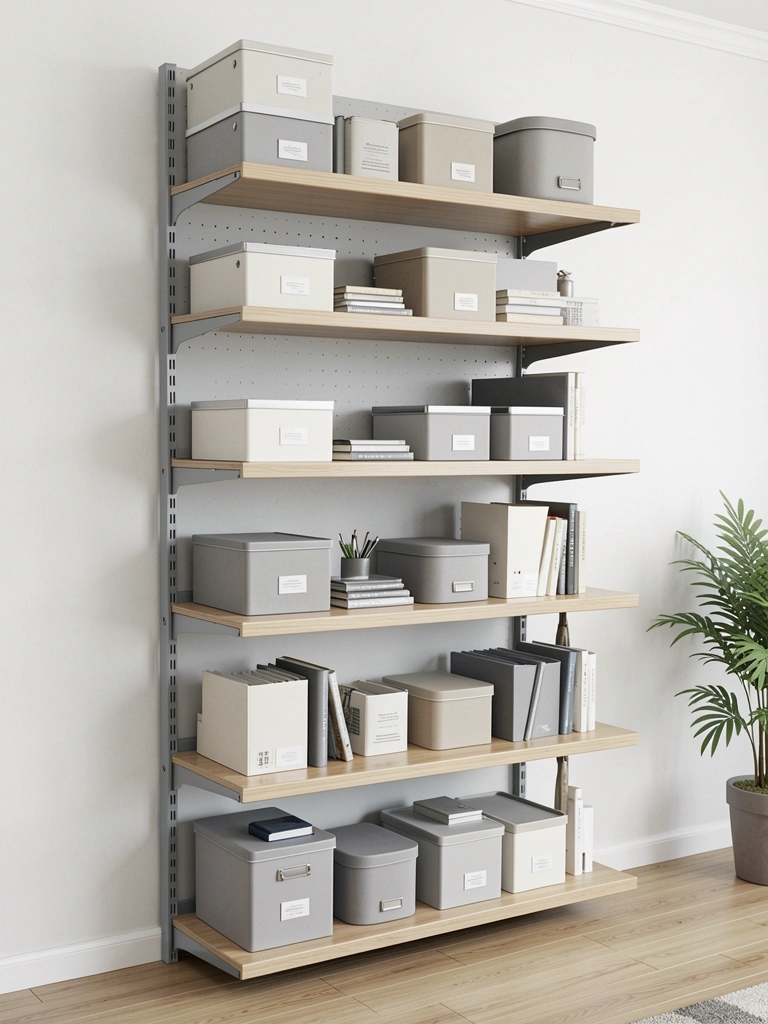
    14. Add a Linen Cabinet or Ladder Shelf for Towel Storage

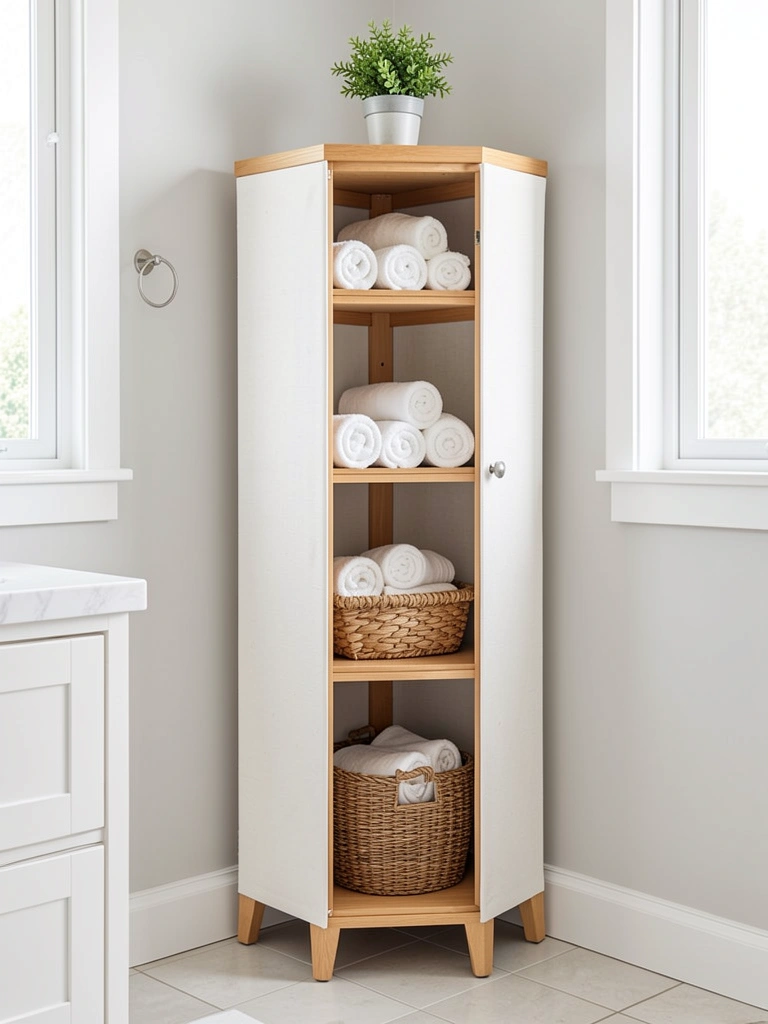
    Visible towel piles read as cluttered. Dedicated towel storage keeps things tidy and creates a spa-like aesthetic.

    Install a tall linen cabinet ($100–$400), a slim ladder shelf ($50–$200), or open shelving ($40–$150) in a corner or beside the toilet. Use woven baskets ($15–$40 each) to corral items and add texture. Rolled and stacked towels look more intentional than folded piles. Most pieces are simple to install or come pre-assembled.

    Your bathroom suddenly has the calm, organized feel of a high-end hotel instead of chaotic and makeshift.

    15. Use Peel-and-Stick Wallpaper for Pattern and Texture

    Wallpaper transforms a space with zero permanent commitment—perfect for renters and commitment-phobes. Modern options are actually pretty stylish.

    Choose a peel-and-stick wallpaper ($20–$60 per roll) from Spoonflower, Etsy, or Wayfair in a pattern that feels professional: geometric, botanical, or subtle texture. Avoid loud or trendy prints that date fast. Install on one accent wall (behind toilet, one shower wall, or vanity wall) for $0–$100 material cost and 2–4 hours of time. Removal is damage-free when you move.

    Your bathroom gains pattern and personality while staying totally removable—the best of both worlds.

    16. Upgrade Lighting in the Shower or Tub Area

    Dark shower corners feel claustrophobic. Good lighting makes the shower feel bigger and safer.

    Add recessed LED lights ($20–$50 per fixture) or a waterproof wall sconce ($40–$100) rated for wet areas. Install with an electrician ($200–$400 total for 2–3 lights) or DIY if you’re handy. Ensure all fixtures are rated IP65 or higher for moisture. Warm white (2700K) LEDs create a spa vibe; cool white (4000K) is more clinical. This is worth the investment because you’ll actually feel the difference every shower.

    Showering now feels less utilitarian and more like a moment of self-care.

    17. Create a Small Bar Cart or Cart-Style Storage Unit

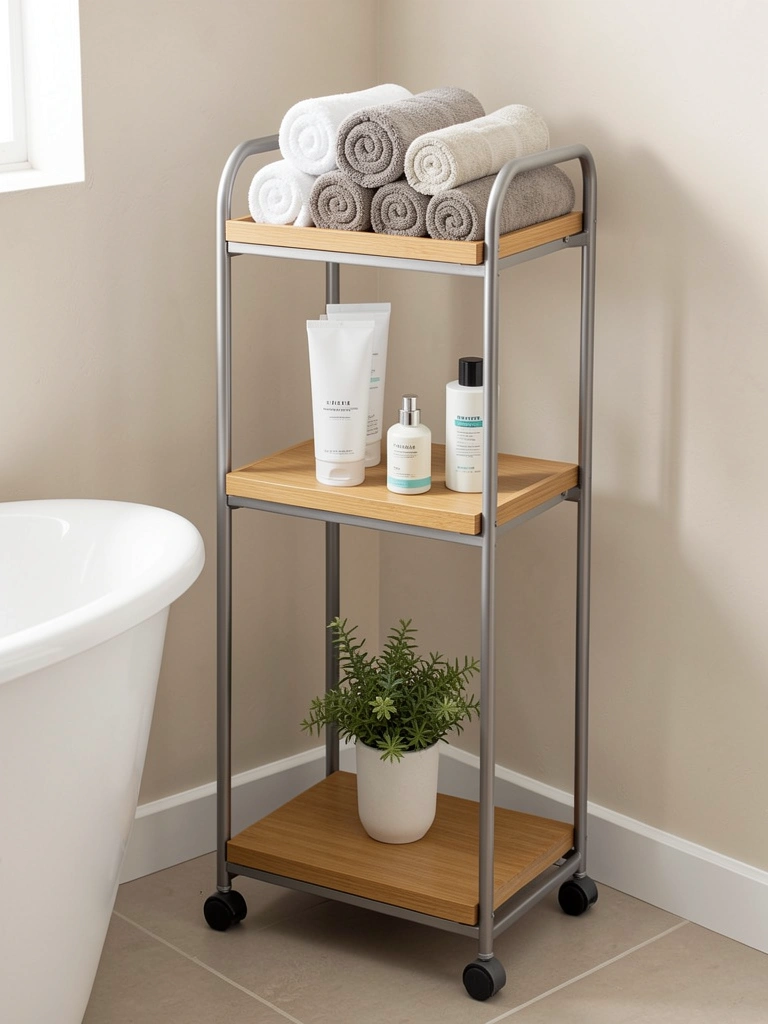
    A rolling cart adds function and style—you can move it around and it looks intentionally designed, not just thrown together.

    Choose a narrow bar cart ($40–$100) in black metal, wood, or brass. Stock the top with rolled washcloths, the middle with bath products or towels, and the bottom with a plant or decorative basket. Carts are lightweight and mobile, so rearranging is easy. This works especially well in bathrooms without built-in storage.

    Your bathroom gains a curated, intentional look—like you’re a designer who actually lives there.

    18. Paint or Stain Your Vanity Base

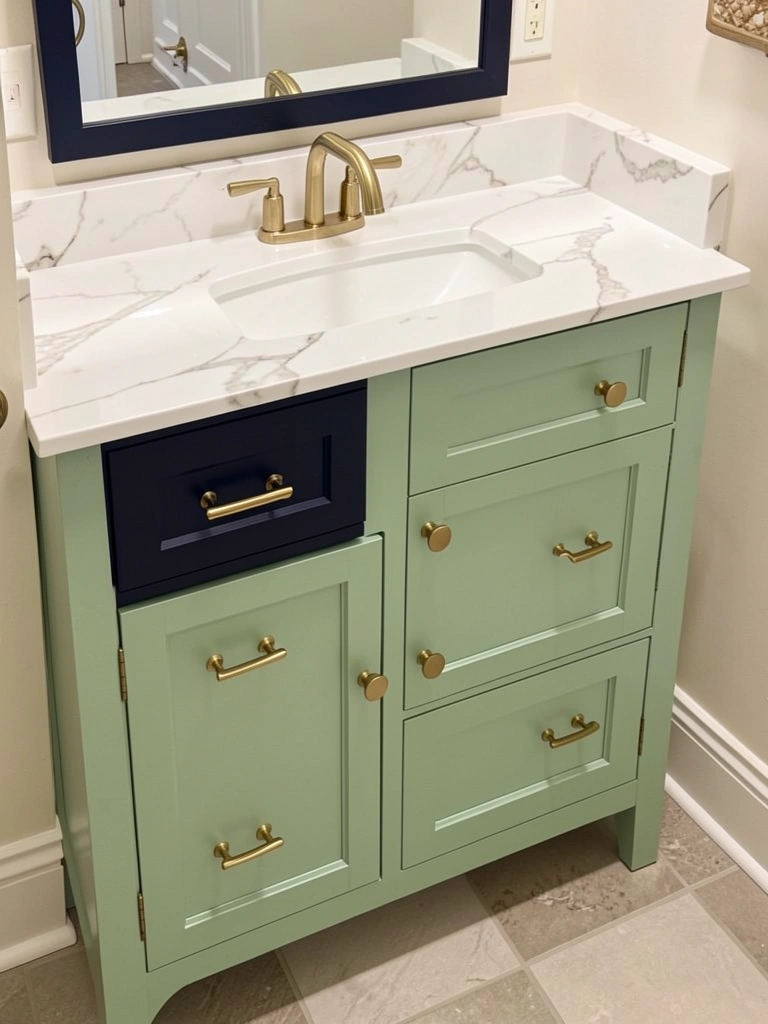
    A stained or naturally finished vanity looks dated. Paint updates it instantly while staying cohesive with your room’s color scheme.

    Clean your vanity, sand lightly, apply primer and two coats of semi-gloss paint ($40–$80 total for supplies). Choose a soft green, gray, navy, or even warm white. Or apply a natural wood stain ($20–$40) to brighten or deepen the tone. This is a weekend DIY project if your vanity is in good condition. Swap hardware too ($100–$200) to complete the refresh.

    Your vanity becomes a statement piece instead of just a utilitarian fixture tucked under the sink.

    19. Add Scented Candles and Subtle Aromatherapy

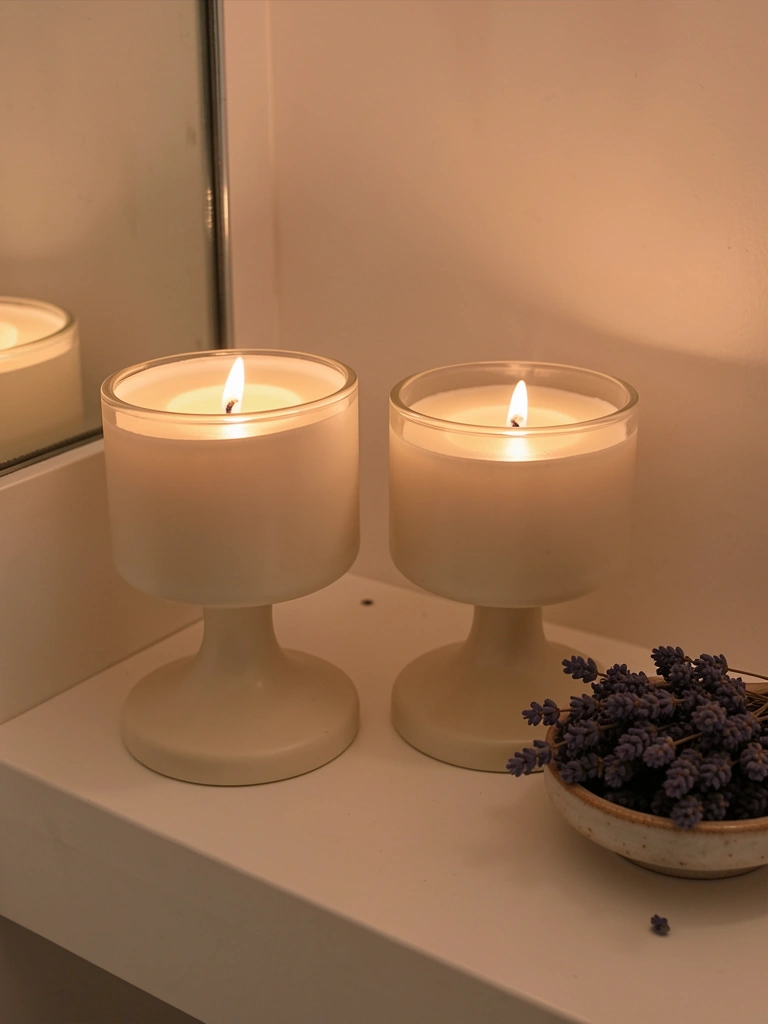
    Fragrance signals care and cleanliness. Candles (minus the artificial “bathroom spray” scent) make your space feel intentional.

    Place one or two quality candles ($15–$40) from brands like Jo Malone, Diptyque, or even Target’s Good & Gather in corners of your vanity or shelf. Choose subtle scents: lavender, eucalyptus, unscented, or light citrus. Avoid heavy or artificial “clean” scents. Light them during baths or when you need a refresh. Add a small essential oil diffuser ($20–$50) on a shelf for continuous subtle fragrance without flame.

    Your bathroom smells like intention and care instead of generic cleaning products.

    20. Install Recessed Shelving in the Shower

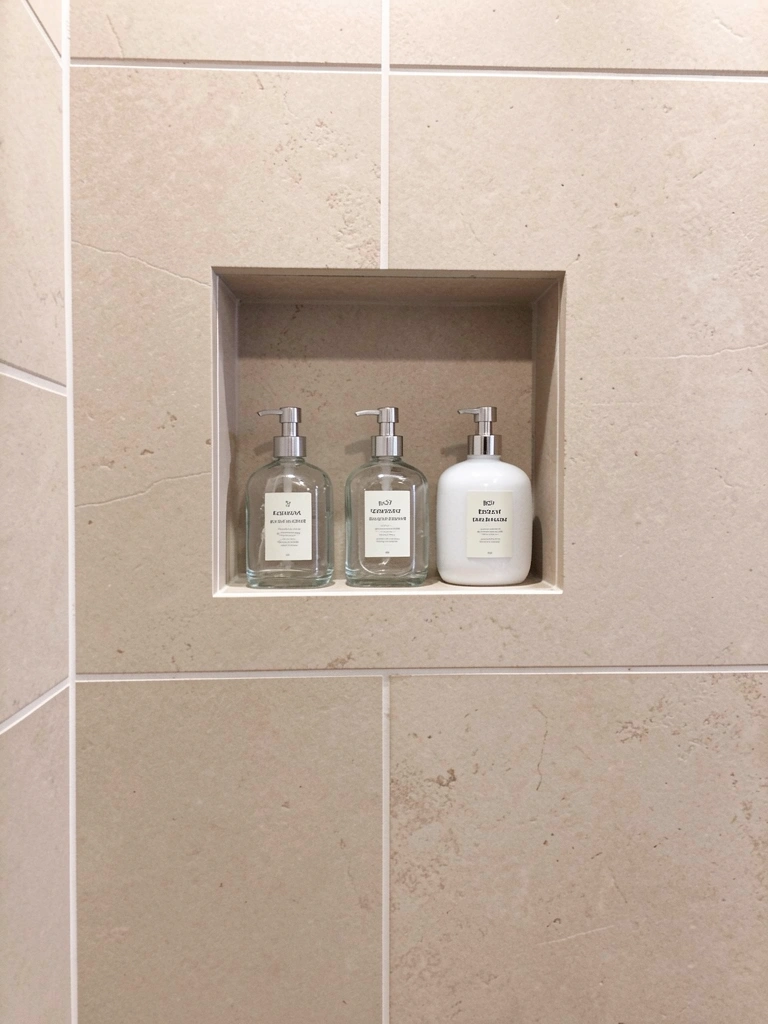
    Shower bottles lined up on the tub edge look chaotic and make cleaning harder. Recessed shelving (or a shower niche) keeps everything tidy and accessible.

    Install a built-in shower niche ($200–$400 DIY or $400–$800 with a pro) if your walls can accommodate it. Or use adhesive shower shelves ($20–$50) for a non-permanent option. Choose clear glass bottles for shampoo, conditioner, and soap to keep things looking organized and intentional. Limit bottles to 5–7 essential items; donate the rest.

    Your shower instantly feels spa-like and edited instead of cluttered with a million half-empty bottles.

    21. Swap Your Shower Curtain for a Frameless Glass Door

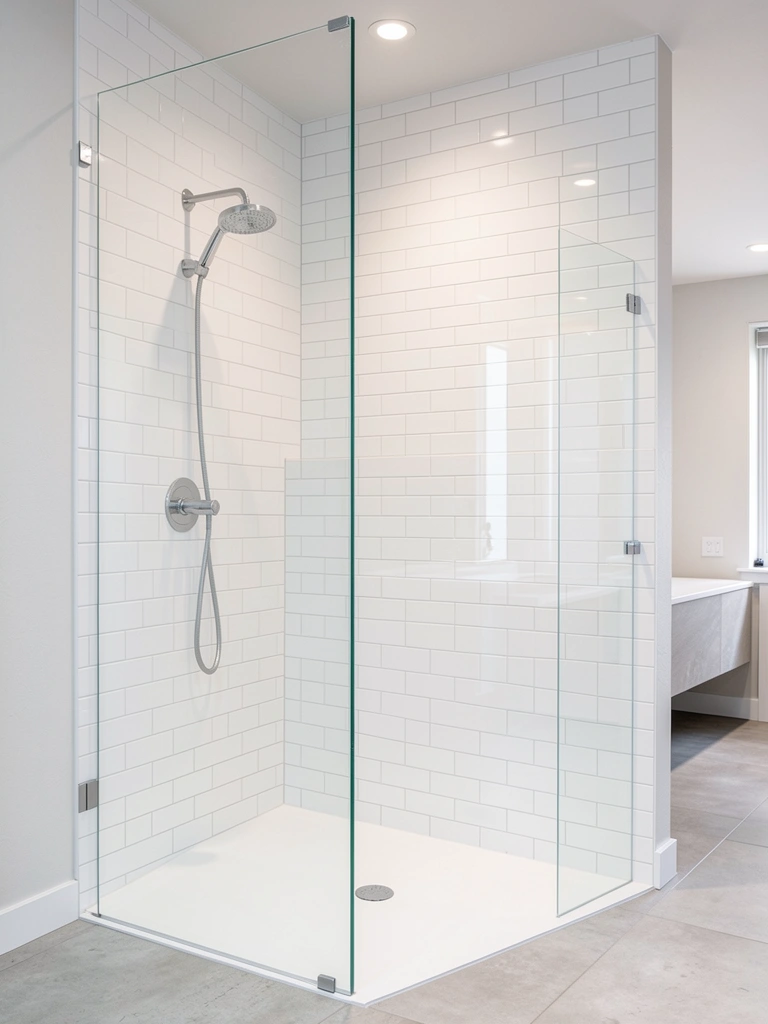
    Shower curtains trap moisture, need constant cleaning, and look temporary. A glass door feels permanent, looks modern, and makes the space feel larger.

    Install a semi-frameless or frameless shower door ($400–$1,500) depending on size and customization. This is a pro job unless you’re very handy. It takes a few days to install properly. If that’s too pricey, a curved shower curtain rod with a quality fabric curtain ($50–$150) reads much better than standard versions—choose soft gray, white, or subtle pattern. Clean curtains weekly to prevent mildew.

    Your bathroom instantly looks more sophisticated and feels more spacious.

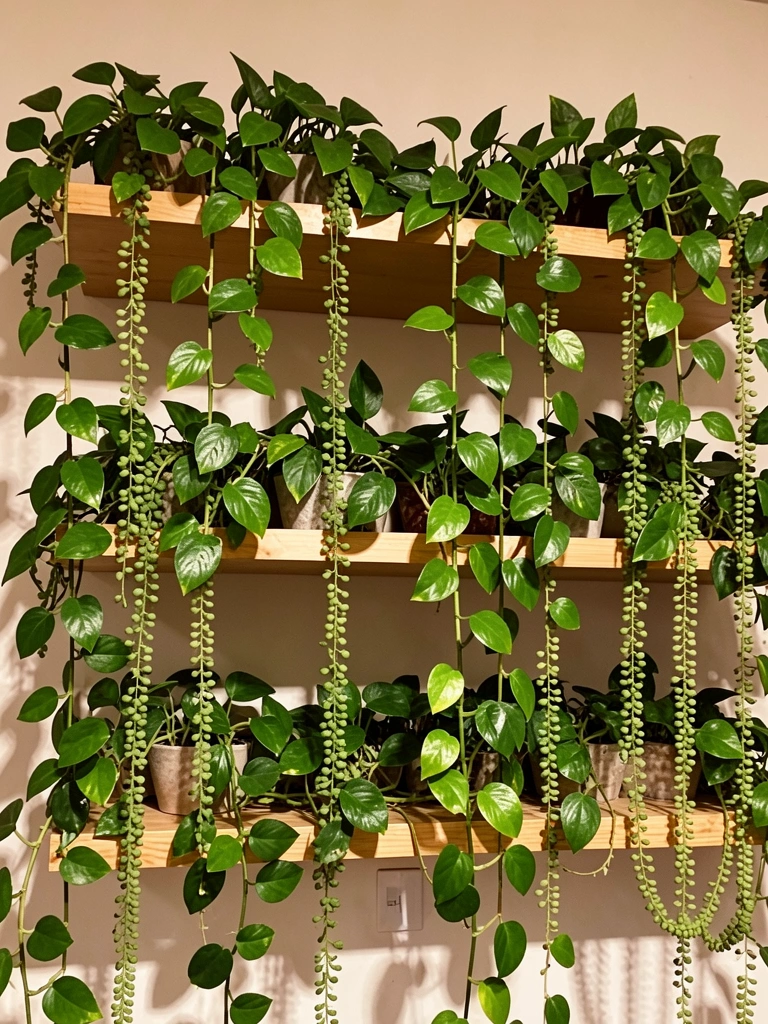
    22. Introduce a Potted Plant or Greenery

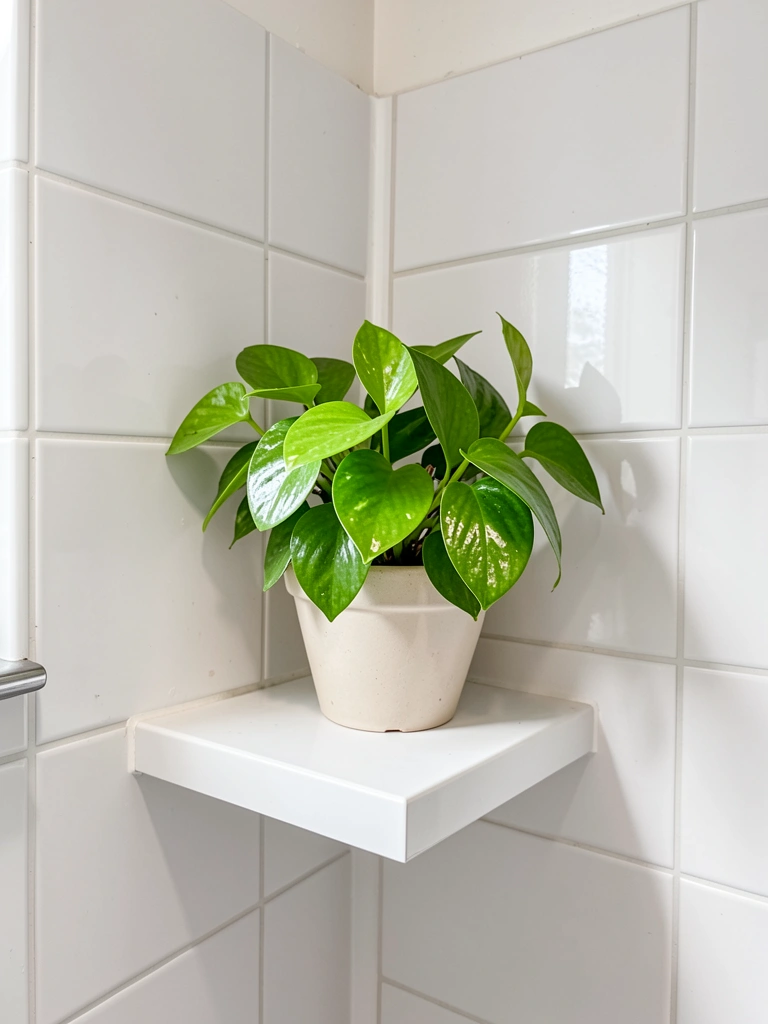
    A live plant adds life and freshness to what’s otherwise an impersonal space. Green also signals cleanliness and care.

    Choose a low-maintenance plant like pothos, snake plant, or dracaena ($15–$30) that tolerates humidity and low light. Place it on a shelf, window sill, or corner of your vanity. Use a ceramic pot ($10–$25) that coordinates with your bathroom’s color scheme. Water weekly if in bright light; less frequently if it’s in a corner. Most bathroom plants need less fussing than you’d think because humidity helps them thrive.

    Your bathroom now has a touch of life and freshness that makes it feel less sterile and more intentional.

    23. Use a Decorative Soap Dish and Quality Hand Soap

    Generic liquid soap dispensers are functional but impersonal. A nice soap dish with quality bar soap signals intentionality and care.

    Choose a marble, ceramic, or stone soap dish ($15–$40) that coordinates with your finishes. Fill it with a quality bar soap from Aesop, Herbivore, or even Whole Foods brands ($8–$15 per bar). Or use a simple glass or ceramic soap dispenser ($10–$30) with refillable liquid soap. The combo signals that you’ve thought about every detail.

    Visitors and you alike notice these small touches that signal a well-designed space.

    24. Frame Your Medicine Cabinet or Add a Modern Mirror Cabinet

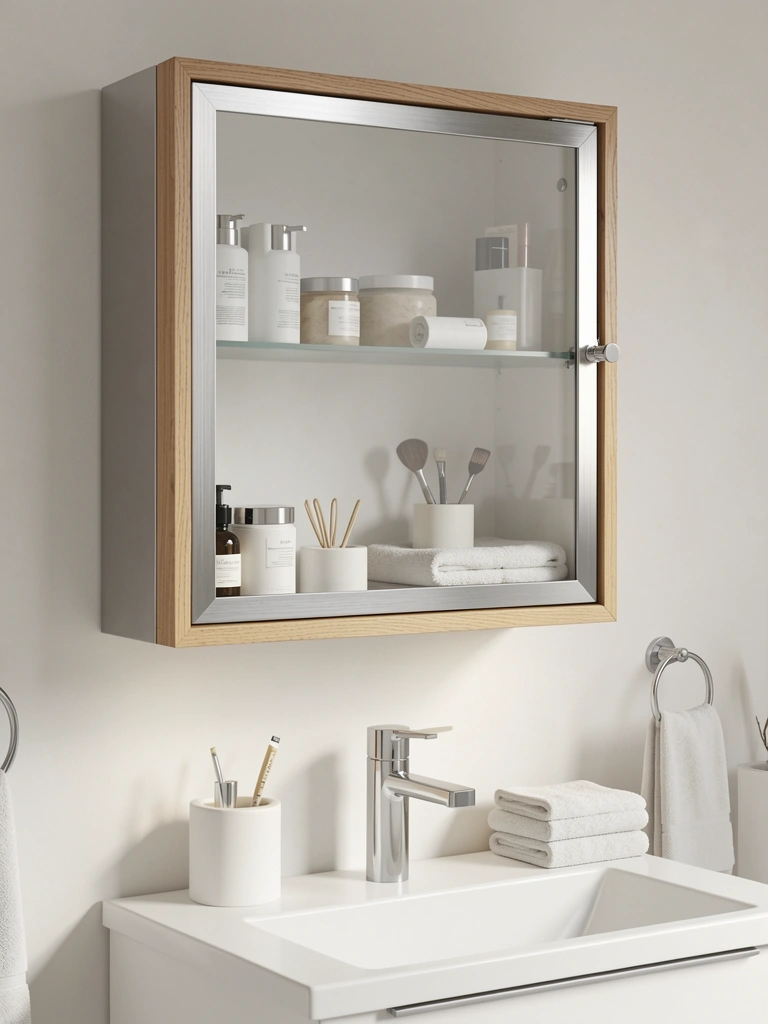
    A basic recessed medicine cabinet looks dated. Framing it or upgrading to a modern design elevates the whole vanity area.

    Choose a surface-mount medicine cabinet ($50–$200) with a frameless or minimalist frame design instead of struggling with recessed installation. Soft-close doors ($100–$300 more) feel high-end. If your cabinet is already recessed, add a simple wood or metal frame around it ($40–$120) to modernize the look. Takes 30–60 minutes to install most surface models.

    Your medicine cabinet becomes a design feature you notice and appreciate daily instead of just functional storage.

    25. Upgrade Your Shower Routine With a Thermostatic Valve

    Inconsistent water temperature during a shower is annoying and unsafe. A thermostatic valve maintains exact temperature and prevents scalding—especially helpful if you have kids or elderly family members.

    Install a thermostatic shower valve ($150–$300 for the valve, plus $300–$600 labor) to replace a standard valve. Most require a plumber’s help. You set your ideal temperature once, and water maintains it even if someone flushes a toilet or uses another fixture. This is an investment but eliminates temperature surprises and feels luxurious.

    Showers become predictably comfortable and safe—a small daily luxury that pays dividends.

    26. Organize Under-Sink Storage With Compartments and Baskets

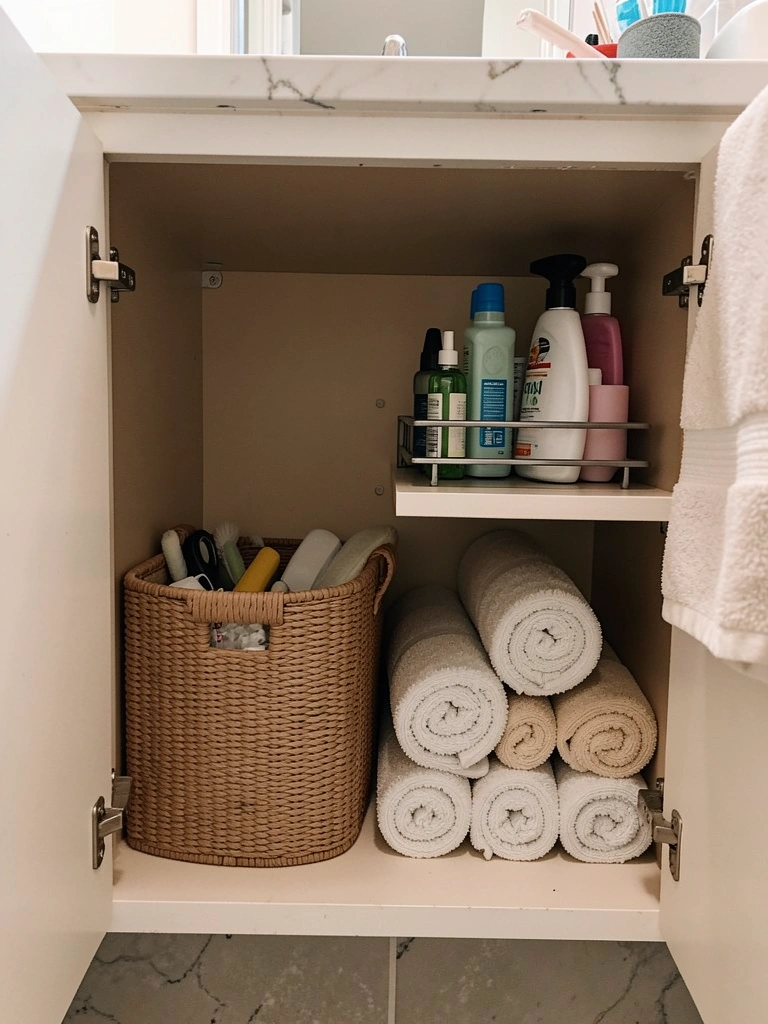
    The space under your sink is usually a black hole of chaos. Organized storage makes that space functional and keeps your bathroom looking clean.

    Add pull-out baskets ($15–$40), tiered shelves ($20–$50), and drawer dividers ($10–$30) to your under-sink cabinet. Sort items into categories: cleaning supplies, extra toiletries, first aid, plumbing tools. Use clear containers ($5–$15) to corral small items so they don’t disappear. Takes 30–45 minutes to organize and makes grabbing what you need actually feasible.

    The moment someone opens your cabinet, they see intentional organization instead of a jumbled mess—that’s a quiet confidence booster.

    Save this post and tackle one idea this weekend. Start with the quickest win (new hardware, lighting, or a paint refresh) and you’ll be amazed how a single change shifts your whole bathroom’s energy. Which idea are you trying first?

  • 26 Bookshelf Design Concepts That Make a Statement

    26 Bookshelf Design Concepts That Make a Statement


    Your bookshelf doesn’t have to be just storage—it can be a reflection of who you are and a focal point that anchors your entire room. Whether you’re renting, own your space, or working with a small apartment, there’s a bookshelf idea here that fits your budget and style. From DIY solutions that cost under $50 to statement pieces worth the splurge, these 26 concepts range from clever styling tricks to architectural upgrades that completely change how your space feels. You’ll discover ideas for floating shelves, multifunctional displays, portable options for renters, and personalized curated collections that hit the trending “bookshelf wealth” aesthetic without breaking the bank. Ready to make your shelves something worth showing off? Let’s dive in.


    1. Paint Your Wall Behind Shelves a Bold Accent Color

    A bold wall color behind your shelves instantly becomes a design anchor that costs almost nothing. This simple trick makes your books, plants, and objects appear more intentional and curated without adding a single item.

    Choose a deep jewel tone (emerald, navy, burgundy) or a warm terracotta if you want drama, or go soft sage for subtlety. Paint one wall behind your shelves using standard interior paint—about $20-$30 per gallon, and most walls need just one gallon. This is a weekend DIY project (4-6 hours with drying time) that requires only a brush and basic prep. Alternatively, peel-and-stick wallpaper ($25-$50) works great for renters.

    The contrast makes everything on your shelves look more intentional. Your whole room suddenly feels more designed, even if nothing else changed.


    2. Swap Standard Shelves for Floating Cantilevered Ones

    Floating shelves create an airy, modern look that makes small spaces feel bigger and more intentional. They eliminate the visual weight of a traditional bookcase frame, making your collection appear more editorial.

    Install floating shelves using heavy-duty wall anchors (around $3-$5 per shelf online) if you’re renting, or toggle bolts ($10-$20) for permanent installation into studs. Most floating shelves cost $30-$100 per shelf depending on material and size. This is a 2-3 hour install if you’re comfortable with a drill, or hire a handyperson ($50-$100). The key is spacing them 12-15 inches apart for visual rhythm.

    Your collection now has breathing room. The display looks more curated, less cluttered, and definitely more contemporary than a traditional unit.


    3. Mix Books Horizontally and Vertically for Visual Interest

    Breaking the “all vertical” rule makes your shelf look styled rather than just stocked. Horizontal stacking creates visual breaks and instantly reads as more intentional—it’s the hallmark of bookshelf wealth styling.

    Start by grouping books by color or size. Stack 3-4 books horizontally, place a small object or plant on top, then continue with vertical books. This costs nothing since you’re using books you already own, and takes about 30 minutes to rearrange. There’s no “wrong” way to do this—it’s about balance and breathing room.

    Your shelves now look like they’re styled by someone who knows design. The mix of orientations creates movement and makes even a basic collection look curated.


    4. Add Integrated LED Strip Lighting for Luxury Vibes

    Integrated lighting transforms your shelves from daytime-only display into an evening feature, plus it highlights your collection and makes books readable. LED strip lights are affordable luxury that feels high-end.

    Purchase warm white LED strip lights (10-20 feet, $15-$40 on Amazon) with adhesive backing and a remote control. Install them along the underside of each shelf during a 30-minute one-time setup. Plug into a nearby outlet or use battery packs ($10-$20) for cord-free options. Warm white (2700K) feels cozy; cool white (4000K) looks more contemporary.

    Your shelves become a design feature after dark. The warm glow makes everything look intentional and gallery-worthy—a small investment with major visual impact.


    5. Create a Gallery Wall Above or Around Your Shelves

    Adding framed art above your shelves extends your display vertically and makes the whole arrangement feel more curated. This is bookshelf wealth styling at its core—mixing objects, art, and intention.

    Gather frames in 3-4 coordinating styles (all gold, mixed metals, or all black) from IKEA, Target, or thrift stores ($2-$10 per frame). Print photos or art from Etsy, Unsplash, or your own photos ($0-$5 per print at local shops). Arrange frames above or around shelves using the salon-style method: hang them 2 inches apart in a cluster. Takes 1-2 hours to arrange and hang.

    Your shelves now feel part of a larger, intentional display. The whole wall becomes a focal point that tells a story about who you are.


    6. Use Modular Shelving Systems for Flexible Rearrangement

    Modular systems let you rearrange without tools or reinstalling—perfect if you rent, move frequently, or like to refresh your space. Brands like IKEA’s Kallax or Muuto offer affordable flexibility.

    IKEA Kallax ($60-$180 depending on size) comes in cubes you can adjust or move to other units. Muuto Compile ($300-$600) offers premium modular options. These systems take 1-2 hours to assemble and require no wall installation if you don’t need extra stability. You can rearrange shelves in minutes—no tools required.

    You’re never stuck with a layout you don’t love. This is perfect for renters or anyone who refreshes their decor frequently.


    7. Style with Odd Numbers and Vary Heights for Balance

    Design rules like odd numbers and varying heights aren’t just Pinterest clichés—they actually work. This styling principle makes arrangements feel intentional rather than random, and it costs nothing to apply.

    Look at each shelf section individually. Group items in threes or fives: a stack of books, a plant, a sculpture. Keep objects at different heights using books as risers. Avoid symmetry or evenly spaced items—asymmetry reads as more curated. This takes 20-30 minutes to restyle and uses items you already own.

    Your shelves immediately look more designed. The eye travels across the arrangement naturally, and everything feels balanced without looking staged.


    8. Invest in High-Quality Wood Shelves with Metal Brackets

    Quality materials elevate your entire space. Real wood shelves with solid metal brackets read as intentional and last for years—worth the investment if you’re settling into a home.

    Solid wood shelves (walnut, oak, or birch) cost $50-$150 per shelf depending on size and wood type. Premium metal brackets (matte black, brass, or steel) run $20-$50 per pair. This is a 4-6 hour installation for someone handy, or hire help ($150-$300). The wood can be stained or left natural. Real wood and quality brackets create a gallery-quality look that feels intentional.

    These shelves become architectural elements. They anchor your room and feel permanent in a way that cheap materials never do.


    9. Use a Room Divider Bookshelf to Define Space

    Double-sided bookshelves solve multiple problems: they provide storage, create visual separation in open layouts, and give you display space on two sides. This is multifunctional design at its best.

    Look for freestanding tall shelving units ($150-$500 depending on size and material) that can stand alone without wall mounting—brands like IKEA, Wayfair, or Article have options. Install it perpendicular to divide your space visually. Style both sides intentionally to create a room divider that works as art. Takes 2 hours to assemble and position.

    You get double the display space and a subtle way to define separate zones. Your space instantly feels more intentionally designed.


    10. DIY Pallet Shelves for Rustic Charm Under $50

    Repurposing wooden pallets is one of the cheapest ways to get custom shelving with character. Perfect for renters or anyone on a tight budget.

    Find free pallets at local businesses or buy reclaimed ones ($10-$30 each). Sand the wood, stain or paint it ($10-$20), and cut to your desired shelf length. Mount using sturdy L-brackets ($10-$20). This is a full weekend project if you’re building from scratch, or simpler if you’re just mounting pre-cut pallet pieces. Requires basic tools: saw, sander, drill.

    You’ve created custom shelves for less than $50. They look artisanal and intentional—the kind of thing people assume took professional design work.


    11. Add Woven Baskets for Hidden Storage and Texture

    Baskets serve double duty: they hide clutter while adding warmth and texture. This is practical styling that makes shelves feel intentional rather than haphazard.

    Purchase woven baskets in rattan, seagrass, or wicker ($15-$50 depending on size) from IKEA, Target, or HomeGoods. Tuck them between book stacks for a natural look, or use them to corral objects. No installation needed—just place and arrange. Takes 15 minutes to style around them. Baskets mask visible clutter while adding visual interest.

    Your shelves look more organized without looking sterile. Baskets add warmth and texture while solving the “where do I put miscellaneous items?” problem.


    12. Display Personal Collections for Authentic Storytelling

    Instead of mixing everything, dedicate a shelf to something you collect or love. This is bookshelf wealth in its truest form—curated objects that tell your story.

    Choose what you already own: books on a specific topic, vintage cameras, art books, travel souvenirs, ceramics. Arrange them with intentional spacing—avoid overcrowding. Use risers or stacked books to vary heights. This costs nothing since you’re using items you own, and takes 30-45 minutes to thoughtfully arrange.

    Your shelves now reflect your actual interests and taste. People notice and comment on personal collections far more than random decor.


    13. Paint Shelves a Contrasting Color to the Wall

    Painting shelves a contrasting color creates architectural interest and makes your collection pop. This is a design trick that feels custom without much effort.

    Choose a color that contrasts with your walls: dark shelves on light walls, or light shelves on dark walls. Use semi-gloss or high-gloss paint ($15-$25 per quart) for durability and easy cleaning. This is a weekend project requiring only paintbrushes and drop cloths—2-3 coats with drying time. Remove shelves if mounted, paint them on a tarp, then reinstall. Or paint in place if careful.

    The contrast draws the eye and makes your display look more intentional. Your shelves become an architectural feature, not just utilitarian storage.


    14. Create a Reading Nook Beneath Wall-Mounted Shelves

    Combining shelves with seating creates a functional reading zone that feels intentional and luxurious. This works in small spaces when done right.

    Mount floating shelves 12-18 inches above a cushioned bench ($100-$300), window seat, or low chair. Style shelves with your favorite books and a small reading light. Keep items on lower shelves lightweight so they don’t feel oppressive over seating. This is a full weekend project if building from scratch, or 2-3 hours if just adding shelves above existing seating.

    You’ve created a retreat space that feels intentional and nurturing. It’s the kind of corner that makes people linger in your home.


    15. Use Brass, Black, or Gold Brackets for Visual Interest

    Making brackets a visible design feature—rather than hiding them—reads as intentionally curated. This small detail elevates the entire look.

    Choose brackets that complement your style: matte black ($15-$40 per pair) for industrial vibes, brass or gold ($20-$60) for warm glam, or stainless steel ($10-$30) for sleek modern. Mount them so they’re visible—they’re part of the design now. Installation is the same as standard shelves (3-4 hours with a drill), but the visual impact is higher.

    Your shelves look like they were designed with intention. The brackets become a design element rather than an afterthought.


    16. Mix in Decorative Objects Like Sculptures or Vases

    Books alone can look one-note. Adding sculptures, vases, or decorative objects creates visual interest and makes your collection feel intentional.

    Thrift stores, HomeGoods, and target have affordable decorative objects ($5-$30 each). Choose pieces that matter to you or photographs well. Arrange them with odd-numbered groupings: a stack of three books, a sculpture, another stack of books. Avoid visual chaos by keeping colors somewhat coordinated or mixing neutrals. Takes 20-30 minutes to restyle and uses items you may already own.

    Your shelves now feel like a curated gallery. The mix of books and objects reads as more sophisticated and intentional than books alone.


    17. Install Corner Shelves to Maximize Dead Space

    Corner space is often wasted. Installing corner shelves maximizes every inch and creates an unexpected design moment.

    Corner shelves cost $20-$50 each and require 1-2 hours to install with wall anchors or studs. Mount them at varying heights for visual interest. Keep items lightweight—a few books, a small plant, a light sculpture. Corner shelves work especially well in small apartments where every inch matters.

    You’ve solved the awkward corner problem while adding display space. It’s a smart, space-saving move that people notice.


    18. Go Minimalist with Negative Space and Breathing Room

    Less is more. Styling shelves with significant empty space reads as confident, wealthy, and intentional—the opposite of cluttered.

    Curate ruthlessly: keep only books you love or will reread, and limit decorative objects to one or two per shelf. Leave at least 30-40% of each shelf empty. Use neutral or coordinating colors. This costs nothing and takes 30-45 minutes to edit and rearrange.

    Your shelves look curated by someone with taste and intention. The breathing room makes everything look more valuable and considered.


    19. Incorporate Trailing Plants for Softness and Life

    Adding trailing plants brings life, softness, and a sense of abundance to your shelves. Plants make any space feel more curated and lived-in.

    Choose low-maintenance trailing plants: pothos, string of pearls, or hoya ($10-$20 per plant in small pots). Place pots on shelves so vines cascade down. Or propagate cuttings from plants you already own. They need bright indirect light and occasional watering. As a bonus, they’re affordable and low-stress. Takes 10 minutes to position plants thoughtfully.

    Your shelves now have movement and life. Green vines soften hard edges and make the display feel warm rather than sterile.


    20. Use Thematic Stacking for A “Coffee Table Book” Display

    Creating “coffee table book” stacks on lower shelves makes your collection both beautiful and browseable. This is bookshelf wealth aesthetic done right.

    Purchase or gather visually interesting books on topics you love: travel, photography, art, design ($20-$50 per book, or free from library). Stack them horizontally on lower shelves where they’re easy to grab and flip through. Arrange stacks by size or color for a polished look. Top each stack with a small object—a plant, sculpture, or decorative piece. This takes 30 minutes to arrange thoughtfully.

    Your shelves become a living collection that people want to interact with. The display reads as sophisticated and intentional, not just storage.


    21. Install Adjustable Shelves for Flexible Organization

    Adjustable shelves solve the problem of uneven books or objects and let you reconfigure as your collection grows. This is practical smart design.

    Look for systems with adjustable shelf pegs ($20-$60 for a full unit) or modular bracket systems ($50-$150). Most IKEA systems and mid-range bookcases offer this. Adjust shelf heights to fit what you’re storing—tall books on one shelf, smaller objects above. This costs nothing extra if you’re buying a new unit, and takes 30-45 minutes to customize once assembled.

    Your shelves adapt to your actual needs rather than forcing your collection into fixed spaces. You can rearrange as your interests evolve.


    22. Create a Monochromatic Shelf Section for Visual Calm

    Dedicating a shelf or section to a single color palette creates a visual moment of calm and reads as intentionally curated. This is simple but impactful styling.

    Gather books in your chosen color palette—thrift stores and library sales make this easy and affordable ($1-$5 per book). Arrange by shade, darkest to lightest. Mix in one neutral object or plant. This costs nearly nothing if sourcing used books, and takes 30 minutes to arrange.

    That shelf becomes a visual anchor. People notice the intentionality immediately, and it elevates your entire display.


    23. Add Task Lighting with Small Sculptural Lamps

    Small lamps on shelves serve dual purposes: they provide task lighting while adding sculptural interest. This is both functional and beautiful.

    Find small table lamps, desk lamps, or sculptural lights ($30-$80 from IKEA, Target, Article, or thrift stores). Choose a style that matches your aesthetic—brass and linen for glam, ceramic for artisanal, wood for warm. Place on a sturdy shelf with books nearby for reading light. Plug into a nearby outlet or use battery-powered options ($20-$40). Takes 15 minutes to position and plug in.

    Your shelves now have atmosphere. The warm glow makes everything feel more intentional and creates a cozy moment.


    24. Rotate Your Display Seasonally or Quarterly

    Rotating your display keeps things fresh and makes you feel like you’re getting new decor for free. Seasonal changes feel intentional and show you care about your space.

    Choose a rotation schedule: seasonal (spring, summer, fall, winter) or quarterly. Swap out 20-30% of items each time—change plants, rotate book displays, swap accent objects. Store off-season items in a closet or under the bed. This costs nothing, takes 30-45 minutes, and makes your space feel refreshed. It’s also a great way to rediscover items you own.

    Your shelves feel alive and intentional. People notice the care you take, and it keeps your own interest fresh too.


    25. Style Portable Shelves for Rental Flexibility

    Renters deserve beautiful shelves too. Portable, no-drill options give you custom display without wall holes or permanence.

    Look for freestanding tall shelving units ($80-$250) from IKEA, Wayfair, or Amazon that need no wall mounting. Brands like Yamazaki Home ($200-$400) offer premium aesthetic options if you want to invest. Assemble in under 2 hours, style to fit your taste, and take it with you when you move. No landlord issues, maximum design impact.

    You get the bookshelf you want without sacrificing your security deposit. Portable doesn’t mean compromising on style—many of these look like built-in luxury.


    26. Combine Books with Framed Quotes or Affirmations

    Mixing framed quotes or affirmations with your books adds personality and intention. This is bookshelf wealth that reflects your values.

    Print favorite quotes or affirmations from Etsy ($1-$5 each as digital prints) or design your own. Frame them cheaply using dollar store or thrift frames ($1-$5 each). Arrange frames among book stacks—they become conversation pieces that reveal what matters to you. Takes 20-30 minutes to arrange thoughtfully.

    Your shelves now tell a story about who you are. The mix of books and personal messages feels authentic and inspiring.


    SOFT CTA:

    Save this post and pick one idea to tackle this week. Start small—maybe it’s just rearranging what you already have or adding a basket. You’ll be surprised how much one small change shifts the energy of your room. Share this with a friend who needs a bookshelf glow-up, and let me know which idea you try first.

  • 25 Linen Curtain Inspiration for Airy, Natural Interiors

    25 Linen Curtain Inspiration for Airy, Natural Interiors

    25 Linen Curtain Inspiration for Airy, Natural Interiors

    Linen curtains have become the go-to choice for anyone craving a light-filled, natural living space. Unlike heavy synthetics, linen breathes—literally and aesthetically—creating rooms that feel open and lived-in rather than formal or stiff. Whether you’re drawn to them for their hypoallergenic qualities, sustainable appeal, or simply their ability to softly diffuse light, linen offers endless styling possibilities. The challenge? Figuring out which linen look matches your space and how to layer, color, and hang them for maximum impact.

    This guide rounds up 25 linen curtain ideas—from budget-friendly hacks to investment-worthy pieces—plus styling tricks to help you create the airy, natural-feeling living room you’ve been imagining. You’ll find options for renters, DIY enthusiasts, and anyone ready to upgrade their windows without breaking the bank. Let’s dive in.


    1. Choose Warm Linen Tones Over Stark White

    Pure white linen can read cold and clinical in living rooms, especially if your home leans cozy or eclectic. Warm neutrals—sand, oatmeal, soft taupe, warm gray—are far more forgiving and create instant comfort. They pair beautifully with natural wood, warm metals like brass, and earth-toned furnishings.

    Linen in these softer hues is often available at mid-range retailers like Target, Wayfair, and IKEA for $30–$80 per panel. You can also search specialty linen suppliers like Etsy for custom dyed options in $40–$120 per panel. Most standard panels come in 84″, 96″, or 108″ lengths. The beauty of warm neutrals is they hide dust slightly better than white and won’t need washing quite as frequently—a real win for busy households.

    The result is a room that feels welcoming from the moment you step in. Warm linen plays well with virtually any décor style and makes your space feel intentional rather than accidental.


    2. Layer Sheer Linen with Blackout Panels

    Layering sheer linen with a blackout panel gives you the best of both worlds: daytime lightness and nighttime privacy. During the day, the sheer lets gentle filtered light through. At night, pull the heavy panel closed for complete darkness and added insulation.

    Pair a sheer linen panel ($25–$50 per panel) with a thermal blackout curtain ($40–$100 per panel). IKEA’s Räcka sheers are budget-friendly starters; Target’s Project 62 line offers linen-look options. For better quality, try Curtarra or Etsy sellers specializing in European linen. Installation takes about 30 minutes using a double curtain rod ($15–$40) from any hardware store.

    Mounting rods at the ceiling and letting both layers pool slightly on the floor creates visual height and a designer touch—no interior decorator required. This setup also improves insulation, helping keep your room cooler in summer and warmer in winter.


    3. Go Floor-to-Ceiling for Dramatic Height

    If your living room feels boxy or ceilings seem low, floor-to-ceiling curtains are a free styling hack that makes walls feel taller and rooms feel bigger. Hang your rod as close to the ceiling as possible—even 6 inches higher than the window frame makes a difference.

    For a 9-foot ceiling, order 96–108″ panels (these cost roughly the same as 84″ at most retailers). If your window is standard 36–48″ wide, plan for two panels per window ($50–$150 total). Hang them on a simple metal rod ($10–$25) using bracket hardware ($15–$30). Renter tip: use removable adhesive hooks and a lightweight tension rod instead for $20 total.

    You’ll see an immediate change in how spacious your room feels. Paired with a neutral palette and minimal patterns, this creates a calm, gallery-like backdrop that lets your furniture and décor shine.


    4. Use Linen + Embroidery as Statement Artwork

    Instead of hanging art next to plain curtains, choose linen with embroidered details—florals, geometric patterns, or abstract stitching—to make the window itself the focal point. Embroidered linen is more niche but worth the search.

    Look on Etsy ($80–$200 per panel), specialty boutiques, or retailers like Anthropologie ($100–$180). You can also buy plain linen and have embroidery added by a local seamstress for $30–$80 per panel labor cost, assuming you provide the base fabric. Allow 2–4 weeks for custom work.

    The payoff is a one-of-a-kind window treatment that doubles as art. It becomes a conversation starter and eliminates the need for additional wall hangings, which can make small spaces feel cluttered.


    5. Pair Linen with Warm Terracotta or Rust

    Earthy tones like terracotta, rust, and warm ochre are trending hard for 2025 and look stunning in linen. These colors feel natural without being boring, and they complement almost any living room style—from bohemian to modern minimalist.

    Terracotta or rust linen panels are available from Wayfair ($35–$90), Target ($40–$70), and specialty linen shops ($60–$150). If your local stores don’t stock these shades, check Amazon or Etsy. Pro tip: order samples before committing. Most retailers ship fabric swatches free so you can see how the color looks in your actual light.

    Pair rust linen with brass or gold hardware and natural wood furniture for a cohesive, warm aesthetic. The color reads as sophisticated rather than trendy, so you won’t tire of it quickly.


    6. Embrace Linen’s Wrinkled Texture—Don’t Iron It

    New linen owners often panic when their curtains arrive wrinkled. The secret? Stop fighting it. Linen’s crinkled texture is part of its charm—it reads as organic and high-quality, not sloppy. Resisting the urge to iron saves you time and honors the fabric’s natural character.

    Hang your linen panels immediately upon arrival and let them settle for 24–48 hours. Most wrinkles relax naturally as gravity does the work. If you absolutely must reduce wrinkles, use a handheld steamer ($20–$50) rather than an iron, keeping it 6 inches away from fabric.

    This approach also means linen becomes lower-maintenance. You’ll wash less frequently, worry less about perfection, and embrace a more relaxed aesthetic overall. Your curtains will look intentionally textured rather than carelessly wrinkled.


    7. Create a Color-Drenching Look with Matching Walls

    Color drenching—matching your curtain color to your wall color—creates an immersive, cocoon-like space that feels curated and bold. It’s less common than you’d think, which means it stands out.

    Start with a soft sage, warm gray, or dusty olive linen panel ($40–$100). Have walls painted in a matching or near-matching shade using paint samples from your local hardware store to test first. Paint costs $30–$60 per wall, and application is a weekend DIY or hire a pro for $500–$1,500 depending on room size.

    The trick is choosing subtle colors—overly saturated shades can feel overwhelming in a living room where you spend hours. Test your color choice in different lights (morning, afternoon, evening) before committing to painting entire walls.

    The result is a space that feels intentionally designed rather than haphazardly decorated. Bonus: matching colors make rooms feel larger because there’s no visual interruption.


    8. Mix Linen with Decorative Trim for Personality

    Adding trim to plain linen instantly elevates the look from basic to custom. A contrasting ribbon, braid, or fringe along the bottom (or sides) adds personality without overwhelming the space.

    Purchase plain linen panels ($30–$80) and decorative trim ($10–$30 per yard) from fabric stores like Joann Fabrics or online retailers like Mood Fabrics. Have a seamstress attach the trim for $20–$50 per panel, or DIY with a sewing machine if you’re comfortable (allow 2–3 hours per pair). Renter option: use fabric glue for temporary trim attachment ($5–$10).

    This customization makes your curtains feel intentional and tailored without the custom-order price tag. It’s also a simple way to tie in accent colors already present in your décor—like matching a trim color to throw pillows or wall art.


    9. Hang Linen with Pinch Pleat Tops for Formality

    Pinch pleats give linen a structured, formal look—perfect if you want to elevate your living room beyond casual. The regular folds create visual rhythm and make the curtains hang beautifully.

    Buy pre-made pinch pleat linen panels ($60–$150 per pair) from retailers like Wayfair, Pottery Barn, or Restoration Hardware. Alternatively, purchase plain linen and have a seamstress add pinch pleats for $30–$60 per panel. Installation takes about 30 minutes with a standard curtain rod and hooks ($20–$50).

    Pinch pleats work especially well in traditional or transitional living rooms where you want structure without maximalism. They also keep fabric neatly controlled, reducing the amount of floor space the curtains occupy when open.


    10. Layer Linen Over Roman Shades for Hybrid Elegance

    Combining linen curtains with linen roman shades offers maximum flexibility and a designer-approved look. Use shades for daytime privacy and light control, then close curtains for nighttime drama.

    A roman shade in linen costs $60–$200 depending on width, and linen curtain panels run $40–$100 per pair. Budget $150–$400 total for both window treatments. Retailers like Wayfair, Target, and Amazon offer affordable options; Etsy and specialty shops offer premium versions. Installation is straightforward—mount the shade inside the window frame and hang curtains on a rod positioned 4–6 inches outside the frame.

    This layered approach makes your living room feel intentionally designed and gives you true control over light, privacy, and ambiance throughout the day. It’s also practical for rooms where one treatment alone doesn’t cut it.


    11. Choose Sustainable, Certified Organic Linen

    If sustainability matters to you, seek out GOTS-certified (Global Organic Textile Standard) or Oeko-Tex certified linen—proof the fabric meets strict environmental and safety standards. These certifications reduce greenwashing guesswork.

    Certified organic linen typically costs $70–$180 per panel but ensures no harmful pesticides were used in growing flax and no toxic dyes were applied. Try specialty retailers like Etsy sellers with transparency pages, Patagonia’s Home line, or European linen suppliers that often emphasize certifications.

    Choosing certified fabric means your home supports better farming practices and safer manufacturing. It’s a small choice with tangible impact, and the quality of certified linen often justifies the premium price point.


    12. Go Ultra-Sheer for Minimalist, Airy Rooms

    If you want maximum light with just a whisper of coverage, ultra-sheer linen delivers. This works beautifully in modern, minimalist, or Scandinavian-inspired spaces where airiness trumps privacy.

    Sheer linen panels cost $20–$60 per panel and are stocked at IKEA, Target, Wayfair, and West Elm. Check fabric weight when ordering—look for descriptions like “semi-sheer” or “lightweight” if you want genuine transparency. Installation takes 15 minutes on a simple rod ($10–$20).

    The trade-off is minimal privacy from outside. This style works best if your living room doesn’t face the street or if you’re comfortable with silhouettes visible from outside during evening hours. Pair with a privacy plant or tall bookshelf as an alternative barrier.


    13. Combine Linen with Metallic Hardware for Subtle Luxury

    Swapping standard silver hardware for brass, gold, or copper instantly adds sophistication without changing the curtains themselves. The metallic catches light and draws the eye upward, enhancing the visual impact of floor-to-ceiling treatments.

    Brass or gold curtain rods cost $20–$80 depending on quality. Mid-range options from Target, Wayfair, and Amazon offer the look without the price tag of designer hardware. Pair with matching finials ($10–$30 per pair) and brackets ($15–$40 per set).

    This small upgrade feels luxurious because metal hardware catches light and reads as intentional. It’s especially effective with warm-toned linen like sand, taupe, or rust. Budget 30 minutes for installation if you’re comfortable with basic hardware mounting.


    14. Create a Biophilic Look with Linen + Living Plants

    Pairing natural linen with living plants creates a biophilic living room—a space that connects you to nature and boosts mood and air quality. The neutral backdrop lets greenery take center stage.

    Invest in 2–3 larger plants ($30–$100 each from local nurseries or online retailers) and 5–8 smaller plants ($5–$20 each). Low-light linen-friendly plants include pothos, snake plants, and ZZ plants (forgiving if your linen blocks significant light). Total plant investment: $100–$300. Pair with simple ceramic or concrete planters ($10–$40 each) for a cohesive look.

    The result is a living room that feels alive—literally. Plants improve air quality, soften the space, and give you something living to care for. The natural colors of soil and foliage complement linen beautifully.


    15. Use Linen Side Panels to Frame a Focal Point

    Rather than covering your entire window with full-width curtains, use narrower linen panels as side panels to frame artwork, a fireplace, or architectural features. This approach lets natural light flood in while creating visual structure.

    Order narrower panels ($20–$50 each) or have full-width panels altered by a seamstress ($15–$30 per panel) to fit your specific width. Hang on a simple rod or tension wire ($10–$20). Installation takes 20 minutes.

    This technique makes your living room feel intentionally designed and maximizes light. It works especially well in spaces with interesting architectural features you want to emphasize or in rooms where privacy isn’t a concern.


    16. Wash Linen Curtains in Cool Water to Prevent Shrinkage

    Linen requires gentle care to maintain its beauty and prevent shrinkage. Washing in cool water and air-drying preserves fabric integrity and extends the life of your curtains by years.

    Wash linen curtains every 3–6 months using cold water and mild detergent. Skip the dryer—hang dry instead to avoid shrinkage (linen can shrink 5–10% if machine dried). If you must machine wash, use a delicate cycle with cold water and dry on low heat. Air-drying is genuinely free and takes 24–48 hours.

    Proper care means your linen curtains will feel softer and look better over time rather than deteriorating. It’s also the most budget-conscious approach—replacing curtains is expensive, while gentle washing costs nothing.


    17. Layer Two Different Linen Tones for Texture

    Instead of matching pairs, choose two linen panels in similar but distinct neutral tones to create subtle depth. The slight color variation adds visual interest without feeling chaotic.

    Buy two panels in complementary shades ($40–$100 each) from a single retailer so colors coordinate harmoniously. Examples: warm gray + oatmeal, sand + taupe, or pale linen + warm white. Hang both panels on a single rod ($15–$30) and let them overlap slightly in the middle for a natural, relaxed look.

    The effect is textured and intentional—like you carefully curated the combination rather than defaulting to matching pairs. This approach works beautifully in eclectic or modern farmhouse spaces.


    18. Hang Linen with Grommets for Modern Simplicity

    Grommet-top linen curtains slide directly onto the rod for a clean, modern look with zero fussy details. They work beautifully in contemporary living rooms and are genuinely easier to install than traditional methods.

    Grommet-top linen panels cost $40–$120 per pair from retailers like IKEA, Target, West Elm, and Wayfair. You’ll need a slim metal rod ($15–$40) that fits through the grommets. Installation takes 10 minutes—just slide and done. If you find panels you love that aren’t grommet-top, have a seamstress add grommets for $30–$50 per panel.

    The streamlined look makes living rooms feel contemporary and fuss-free. Grommets also mean you can move the curtains quickly and smoothly throughout the day—no hooks catching or resistance.


    19. Choose Linen with Built-In Thermal Lining for Year-Round Comfort

    If temperature control matters to you, select linen panels with built-in thermal backing. This adds insulation without sacrificing the light, airy feel of pure linen on the front.

    Linen-cotton blend with thermal lining costs $60–$150 per pair and is available from retailers like Wayfair, Amazon, and specialty linen shops. The backing typically adds R-value ratings of 2.5–3.5, improving energy efficiency noticeably. Installation is identical to standard linen—about 30 minutes.

    Thermal backing means your living room stays cooler in summer and warmer in winter, potentially reducing energy bills. The front still looks and feels like traditional linen, so aesthetic doesn’t suffer.


    20. Use Linen Curtains to Define Zones in Open-Plan Spaces

    In open-plan living spaces, linen curtains on a ceiling track can softly define zones without the heaviness of walls or room dividers. This creates visual separation while maintaining airiness and light flow.

    Install a ceiling-mounted track ($30–$80) with linen panels ($50–$100 per panel) to create a flexible divider. Sheer linen works best here—it blocks sightlines while letting light through. Rental-friendly option: use a tension rod and removable adhesive hooks ($20–$40 total).

    This approach gives you privacy when needed while keeping the space feeling open during the day. It’s especially useful in studio apartments or one-bedroom homes where living and sleeping areas share a room.


    21. Mix Linen Curtains with Natural Wood Blinds for Layering

    Combining linen curtains with wooden blinds inside the window frame creates a sophisticated, layered look with maximum light and privacy control. Both materials complement each other beautifully.

    Wooden blinds cost $40–$150 depending on width and quality; linen panels add $50–$120 per pair. Budget $150–$300 total. Retailers like Wayfair, IKEA, and Target stock both options. Installation takes about 45 minutes for the full setup.

    This combination looks intentional and expensive without requiring a designer budget. It’s especially effective in transitional or eclectic spaces where you want both structure and softness.


    22. Choose Pale Linen for Small Living Rooms to Maximize Light

    In smaller living rooms, pale or white-toned linen is a visual magic trick—it bounces light, expands the space visually, and prevents the room from feeling cramped or dark.

    Pale linen panels in cream, pale sand, or soft gray cost $30–$80 per pair from all major retailers. Hang them floor-to-ceiling (order 96–108″ lengths) using a rod positioned close to the ceiling. Renter option: use a tension rod and removable hooks ($20) to avoid damaging walls.

    Pale linen makes small rooms feel 20–30% larger because the eye travels upward rather than being stopped by the window. Pair with minimal furniture and light wall colors to amplify this effect even further.


    23. Embrace Linen Texture by Choosing Slubby Weaves

    Some linen is smoother; other linen features intentional “slubs”—irregular yarns that create subtle texture. Slubby linen reads as more organic and artisanal, adding visual depth without patterning.

    Slubby or textured linen costs the same as smooth linen ($30–$100 per panel) but offers more visual interest in muted color palettes. Search for terms like “slubby linen,” “nubby weave,” or “raw linen” on Etsy, specialty retailers, or high-end fabric shops.

    This texture makes plain linen feel more intentional and less flat. It’s especially effective in minimalist or modern spaces where smooth materials can sometimes feel sterile.


    24. Pair Linen with Rope Tiebacks for Casual Elegance

    Simple rope tiebacks instantly add character and make linen feel more casual and intentional. They cost almost nothing but elevate the entire look.

    Rope tiebacks cost $5–$20 per pair and are available at IKEA, Target, hardware stores, or online retailers. Alternatively, use a fabric scrap, twine, or even a leather belt ($0–$15). Install rope hardware hooks ($5–$10 per pair) on either side of the window to hold tiebacks in place. Total time: 20 minutes.

    Rope complements linen beautifully because both materials feel natural and organic. This combination works in bohemian, farmhouse, and coastal-inspired spaces—basically anywhere you want to feel relaxed and authentic.


    25. Create a Monochromatic Room with Linen Accents Beyond Curtains

    Take linen styling beyond curtains by incorporating the same fabric or tone into throw pillows, upholstered furniture, or area rugs. This monochromatic approach feels designer-curated and calming.

    Layer linen curtains ($50–$120) with linen throw pillows ($20–$50 each), a linen-upholstered chair or sofa ($300–$1,200), and a linen or linen-blend area rug ($200–$600). Start with just curtains and pillows if budget is tight—add bigger pieces over time. All major retailers stock linen home goods now.

    Monochromatic linen styling creates a serene, cohesive space that feels intentionally designed. The varying textures (sheer, woven, brushed) within the same color family prevent monotony while maintaining calm.


    Save this post for your next refresh and pick one idea to try this weekend—linen curtains are easier to style than you’d think. Share with any friends dreaming of airier, more natural-feeling living rooms.

  • 26 Bedhead Design Ideas That Instantly Upgrade Your Bedroom

    26 Bedhead Design Ideas That Instantly Upgrade Your Bedroom

    Your headboard is the first thing you see when you wake up and the last thing before sleep—so why settle for boring? A great bedhead instantly anchors your entire bedroom and sets the mood for your space. Whether you’re renting, renovating, or just ready for a refresh, the right headboard choice can make your room feel intentional, cozy, and uniquely yours.

    We’ve rounded up 26 bedhead design ideas that range from budget-friendly DIY projects to statement investment pieces. You’ll find renter-friendly options, sustainable materials, curved modern styles, vintage finds, bold color plays, and nature-inspired designs. Pick one that speaks to you, or mix and match ideas to create your perfect bedroom sanctuary. Let’s get started.

    1. Curve Your Walls With Rounded Upholstered Headboards

    Curved headboards replace harsh angles with organic softness that makes your entire bedroom feel more calming. The rounded shape echoes nature and pairs beautifully with the trend toward organic modernism gaining traction among interior designers.

    Look for upholstered headboards with smooth, pillow-like curves at retailers like West Elm ($400–$800), Article ($300–$600), or Wayfair ($200–$500 for budget options). For renters, consider a freestanding curved headboard panel (often under $150) that leans against the wall—no installation required. Installation takes about 30 minutes if wall-mounted, or zero minutes if freestanding.

    Pro tip: Pair your curved headboard with matching curved mirrors or nightstands to reinforce the soft, flowing aesthetic throughout your room.

    The best part about curved headboards is how they soften the whole vibe of your space—suddenly your bedroom feels like a retreat, not just a place to sleep.

    2. Layer Rich Textures With Patterned Upholstery

    Mixing textures and patterns on your headboard creates visual interest and the cozy depth everyone’s after in 2025. Layered fabrics—think velvet, linen, and woven materials together—add tactile richness that makes your bed irresistible.

    Search for patterned upholstered headboards at CB2 ($400–$900), Etsy (handmade options $300–$1,200), or Restoration Hardware for luxury picks. If you’re handy, buy a plain wooden headboard frame ($80–$150) from IKEA or Home Depot and have it professionally upholstered ($150–$300) with patterned fabric of your choice—total investment under $500. This route takes one weekend for ordering, one week for upholstery completion.

    Budget hack: Visit local upholsterers for custom work; often cheaper than brand-name retailers and you get exactly what you want.

    You’ll notice how much personality a patterned headboard brings compared to plain painted drywall—suddenly your bedroom tells your story.

    3. Go Dark and Moody With Deep Jewel Tones

    Deep aubergine, forest green, and navy headboards are having a major moment as statement color accents that feel sophisticated, not overwhelming. These jewel tones create drama while still maintaining a calm, grounding energy in your sleep space.

    Shop statement color headboards at Pottery Barn ($600–$1,400), Article ($400–$700), or hunt vintage treasures at local consignment shops. For renters, Removable wallpaper in jewel tones applied to a basic headboard frame creates impact without commitment ($30–$80, takes 1–2 hours). Alternatively, paint a wooden headboard yourself with premium interior paint ($40 total, 1 afternoon project).

    Pro tip: Pair dark headboards with light walls and bedding to keep the room from feeling cave-like; balance is key.

    The result? A bedroom that feels grown-up, intentional, and like a true sanctuary instead of just a sleeping corner.

    4. Install Floor-to-Ceiling Curtains Behind Your Headboard

    Dramatic floor-to-ceiling curtains behind your bed act as both headboard and light-control solution. They add architectural height, softness, and a hotel-like polish that instantly elevates your space.

    Purchase lightweight linen or linen-blend curtain fabric ($15–$30 per yard from Joann Fabrics, Fabric.com, or Etsy). You’ll need roughly 4–6 yards depending on your bed width. Hang a simple ceiling-mounted curtain rod ($25–$50 from IKEA or Home Depot). DIY installation takes 1–2 hours; total project cost $100–$200. For renters, use tension rods ($20–$40) instead of drilling, though they work best on narrower windows.

    The elegant drape creates visual softness and makes your bedroom feel intentional and layered—plus you gain privacy and light control in one move.

    5. Embrace Raw Wood With Floating Shelving Headboards

    Floating shelves as headboard storage combine function with raw, natural material appeal. This trend aligns perfectly with 2025’s focus on organic modernism and sustainable design choices.

    Install floating shelves from IKEA ($15–$40 per shelf), Home Depot ($20–$60), or Wayfair ($30–$80). You’ll need a stud finder, wall anchors, and a drill—basic setup takes 2–3 hours for three shelves. Total cost: $100–$200 for shelves plus installation supplies. For renters, lean wooden ladder shelves against the wall behind your bed ($60–$150) for a similar aesthetic without wall damage.

    Style your shelves with a mix of books, plants, and meaningful objects to create personality without clutter.

    Your headboard becomes both beautiful and practical—you gain display space and a nature-inspired focal point that makes your room feel more collected and less empty.

    6. Add Warm Ambient Lighting With Bedhead Wall Sconces

    Wall sconces flanking your headboard serve double duty: they’re a design statement and they provide mood-setting light that beats harsh overhead fixtures. Warm lighting promotes better sleep and creates that spa-like atmosphere everyone craves.

    Shop bedside sconces at Rejuvenation ($200–$400 per pair), Anthropologie ($150–$350), or budget options at Target ($50–$100 per pair) and IKEA ($40–$80). Professional installation runs $150–$300; DIY with basic electrical knowledge takes 2–3 hours per sconce. Total project: $300–$700 installed. Renters: opt for plug-in wall sconces ($60–$150 per pair) that require no wiring.

    Pro tip: Choose warm-toned bulbs (2700K color temperature) for relaxation, and opt for dimmable options if possible.

    Once you install sconces, you’ll never want harsh overhead lighting again—the soft glow makes your bedroom feel like a luxury hotel retreat every single night.

    7. Create Textured Depth With Woven Wall Hangings

    Woven wall hangings and macramé bring texture, warmth, and handmade character that mass-produced decor can’t match. They work beautifully as a low-pressure alternative to traditional headboards.

    Find large woven hangings on Etsy ($60–$300 for artisan pieces), West Elm ($150–$400), or Anthropologie ($100–$300). For a budget option, Target and Urban Outfitters carry woven pieces ($40–$100). Hang with a simple wooden dowel and leather straps ($15–$30 from craft stores) or adhesive hooks ($5–$10). Installation takes 15 minutes; total cost $50–$150 for an affordable statement.

    The artisanal quality adds personality and story to your bedroom—unlike cookie-cutter alternatives, your space becomes uniquely yours.

    8. Paint an Accent Wall in Warm Earth Tones

    An accent wall in earth tones—terracotta, warm ochre, or soft clay—creates warmth and grounds your space without overwhelming it. This budget-friendly option works especially well if you’re renting (check your lease first).

    Purchase premium interior paint in your chosen tone from Benjamin Moore ($40–$70 per gallon), Sherwin-Williams ($35–$60), or budget brands at Home Depot ($20–$40). One gallon covers approximately 400 square feet; you’ll likely need just one can for a single wall. DIY painting takes 4–6 hours including prep and drying. Total cost: $25–$70. Renters: ask your landlord, or use removable wallpaper in earth tones ($30–$60) as a compromise.

    Pro tip: Paint the wall behind your headboard, not the full room, for maximum impact with minimal commitment.

    An accent wall instantly makes your bedroom feel intentional and warm—it’s one of the biggest design shifts you can make for under $50.

    9. Mix Cherry Tones With Dark Wood Headboards

    Cherry-themed decor is surging in popularity, with search trends up 100% year-over-year. Dark cherry wood headboards offer timeless elegance and pair beautifully with warm lighting and jewel-toned accents.

    Search for dark cherry wood headboards at Wayfair ($400–$1,200), Etsy ($300–$1,500 for solid wood pieces), or consignment shops for vintage finds ($200–$600). Real cherry wood represents an investment but lasts decades; laminate alternatives run $200–$500. Assembly or professional installation takes 2–4 hours. Budget alternative: Paint an existing headboard with cherry-toned stain ($20–$40, 1 afternoon project).

    Pair your cherry headboard with warm brass hardware and jewel-tone textiles to maximize the luxe effect.

    The deep richness of cherry wood elevates your entire bedroom aesthetic—it feels collected, intentional, and timeless rather than trendy or temporary.

    10. Layer Vintage and Handmade for Eclectic Personality

    Mixing vintage, handmade, and one-of-a-kind pieces creates personality that no single purchased headboard can match. Eclectic layering is very 2025—moving away from sterile minimalism toward nostalgic maximalism done right.

    Scout vintage headboards at local antique shops ($100–$500), Facebook Marketplace ($50–$300), Craigslist, or Etsy ($150–$600). Mix pieces by hanging a vintage quilt ($100–$400) alongside a reclaimed wood panel ($80–$250). Arrange multiple pieces as a gallery-style headboard using picture-hanging hardware ($20–$50). Assembly takes 2–3 hours; total project $150–$500.

    Pro tip: Look for pieces with patina and history rather than trying to match perfectly—the imperfections are the beauty.

    This approach tells the story of your life through design—every piece has meaning, and your bedroom becomes a reflection of your travels, values, and aesthetic journey.

    11. Install Marble or Stone Cladding for Luxury

    Stone or marble cladding brings raw, natural texture and undeniable luxury to your headboard space. This trend aligns with 2025’s focus on raw materials and organic surfaces.

    Real marble or granite cladding costs $400–$2,000+ installed through contractors or tile specialists. For a more affordable option, use peel-and-stick marble tile ($50–$150 from Amazon, Wayfair, or Home Depot) that mimics the look without the price tag. Professional installation takes 1–2 days; DIY peel-and-stick application takes 4–6 hours. Budget alternative: Paint drywall with marble-effect paint technique ($30–$50 in supplies, 1 afternoon DIY project).

    This investment creates a focal point that photographs beautifully and feels gallery-worthy every time you look at it.

    12. Go Minimalist With a Simple Wooden Frame Headboard

    Sometimes less is more—a clean wooden frame headboard offers sophistication through simplicity. This works beautifully in minimalist bedrooms and pairs perfectly with other 2025 trends like organic materials and calm aesthetics.

    Purchase or DIY a simple wooden frame headboard from IKEA ($60–$200), Article ($150–$400), or build your own from reclaimed wood at a local mill ($100–$300 in materials). DIY construction takes one weekend; IKEA assembly takes 1–2 hours. Total cost: $60–$300. This option works perfectly for renters since it’s non-permanent and can be moved.

    Style with minimal pillows and no throw blankets for a Scandinavian-inspired calm that feels intentional and restful.

    The stripped-down approach lets your other bedroom elements shine—plants, artwork, natural light—while your headboard provides subtle structure without visual noise.

    13. Add Dramatic Height With Tall Fabric-Covered Panels

    Oversized fabric panels extending from headboard to ceiling create architectural drama and make your bedroom feel more spacious and gallery-like. This bold approach works especially well in rooms with high ceilings.

    Install floor-to-ceiling fabric panels using a combination of wooden framing ($100–$200 from Home Depot) and upholstery fabric ($30–$60 per yard). Professional installation runs $400–$1,000; ambitious DIYers can tackle it in 1–2 weekends. Total project: $500–$1,500. For renters, use removable fabric panels ($100–$300) attached with adhesive strips.

    The towering height instantly makes your bedroom feel more intentional and luxe—suddenly your space reads as designed, not default.

    14. Combine Cork and Wood for Organic Warmth

    Cork and wood together create warmth, texture, and sustainability—three huge 2025 design priorities. This natural combination feels organic without being trendy or over-the-top.

    Purchase cork tiles ($30–$80 per sheet from Home Depot, Etsy, or specialty suppliers) and wooden slats ($40–$100 from lumberyards). Arrange in a geometric pattern and adhere to a plywood backing using construction adhesive ($15–$30). Mount to your wall using standard wall anchors ($10–$20). DIY project takes one full weekend; total cost $150–$300. For a quicker option, order a pre-made cork headboard ($200–$500) from online retailers.

    Pro tip: Cork naturally insulates sound and absorbs moisture, making it both beautiful and functional.

    The combination creates a bedroom that feels grounded and nature-connected—your space becomes a sustainable sanctuary, not just a room.

    15. Layer Geometric Wallpaper With Complementary Paint

    Geometric wallpaper on your headboard wall creates pattern interest without overwhelming your entire room. Pairing it with solid walls keeps the look balanced and intentional.

    Find geometric wallpaper at Spoonflower ($25–$50 per roll for custom designs), Anthropologie ($40–$80 per roll), or Wayfair ($20–$60). Installation takes 4–6 hours if you’re experienced; hire a pro for $300–$500. For renters, peel-and-stick geometric wallpaper ($15–$40 per roll) applies easily without damage. Total DIY cost: $60–$120; professional installation: $400–$650.

    Pair with warm or neutral paint on remaining walls to let your patterned wall be the star of the show.

    The pattern draws the eye and gives your bedroom personality without creating visual chaos—it’s the perfect balance between minimal and memorable.

    16. Commission Custom Art or a Mural Headboard

    Art-led personalization is huge in 2025—a custom mural or large art piece behind your bed becomes your headboard statement. This approach is completely unique to your space and style.

    Hire a local mural artist ($500–$2,000+ depending on wall size and complexity) or commission a custom painting from Etsy artists ($300–$1,500). Alternatively, purchase large-scale art prints ($50–$300 from Minted, Etsy, or galleries) and frame them DIY-style. For a budget approach, use removable wall decals ($30–$100) or paint your own mural with stencils ($20–$50) and paint ($30–$60).

    Pro tip: Choose artwork that speaks to your sleep goals—calming florals, nature scenes, or abstract patterns in soothing colors.

    Your bedroom becomes a personal art gallery—every time you wake up, you’re greeted by something beautiful and meaningful that no one else has.

    17. Install Floating Shelves With Lighting for Functional Style

    Floating shelves with built-in lighting combine storage, style, and practical ambient light—a trifecta for modern bedrooms. This works beautifully if you love reading or displaying collections.

    Install floating shelves ($25–$60 each from IKEA, Home Depot, or Article) paired with under-shelf LED lighting ($20–$50 per light from Amazon or Home Depot). Professional installation runs $150–$300; DIY with basic tools takes 2–3 hours per shelf. Total project: $150–$250 for two shelves with lighting. Renters: use adhesive-backed shelves ($30–$80) with battery-powered LED lights ($15–$40).

    Style shelves with a mix of books standing vertically and horizontally, small plants, and meaningful objects—aim for “collected” rather than cluttered.

    You’ll gain both display space and task lighting, eliminating the need for a traditional nightstand while creating a cozy reading nook atmosphere.

    18. Choose Linen or Organic Fabric Upholstery for Sustainability

    Sustainable materials are non-negotiable in 2025 design—an organic linen or wool headboard aligns your bedroom with eco-conscious values while feeling incredibly luxe and touchable.

    Shop organic upholstered headboards at Parachute ($600–$1,200), Etsy (sustainable makers, $400–$1,500), or Article ($300–$700). These pieces are durable investments—quality linen and wool last 10+ years. For budget-conscious shoppers, purchase a basic headboard and have it re-upholstered in organic linen fabric ($50–$80 per yard from Organic Fabric Company, Etsy) for $200–$400 total.

    Pro tip: Linen gets softer and more beautiful with time—it’s an investment that improves rather than ages.

    You’re creating a bedroom that feels luxe and intentional while knowing your materials are sustainably sourced—that peace of mind translates into better sleep.

    19. Add Curved Side Panels for a Cocoon Effect

    Curved side panels flanking your headboard create an intimate cocoon effect—they psychologically wrap around you and enhance that sanctuary feeling. This design aligns with the organic modernism trend gaining momentum.

    Commission a custom curved headboard with panels ($1,000–$2,500 from specialty furniture makers) or find pre-made versions at high-end retailers ($800–$2,000). For a budget DIY approach, attach curved wooden frames ($200–$400 in materials) and upholster in fabric ($150–$300). Professional installation takes 1–2 days; DIY takes one weekend. This is more of an investment piece but transforms your entire sleep experience.

    The enclosed feeling naturally promotes relaxation and better sleep—you’re literally creating a nest within your bedroom.

    20. Mix Stripes and Florals With Grandmillennial Patterns

    Grandmillennial aesthetics mix vintage grandma charm with millennial sensibilities—stripes paired with florals create playful, nostalgic personality that feels both retro and fresh in 2025.

    Find patterned upholstered headboards combining stripes and florals at Wayfair ($300–$700), Etsy ($250–$900), or Urban Outfitters ($400–$800). Alternatively, purchase a plain headboard and layer with a patterned throw ($50–$150) across the top to test the look before committing. Installation or assembly takes 1–2 hours; total cost $150–$400 for a statement piece.

    Style with coordinating pillows in complementary patterns—the key is intentional mixing, not random clashing.

    The playful pattern mix brings personality and nostalgia to your space—your bedroom becomes a conversation starter and feels uniquely yours.

    21. Install Brass or Gold Hardware and Framing

    Brass and gold hardware framing a simple headboard elevates it from basic to boutique-hotel-worthy. Metallic accents are having a major moment in luxury bedroom design.

    Purchase brass framing strips ($30–$80 per 8-foot section from Home Depot, Wayfair, or specialty hardware stores) and attach to the edges of your existing headboard using brass screws ($10–$20). Add brass wall sconces ($150–$400 per pair) on either side for cohesion. Installation takes 2–3 hours; total cost $200–$500. For renters, lean freestanding brass-framed panels ($100–$300) against the wall.

    Pro tip: Mix warm brass with cool chrome or nickel for an intentional eclectic vibe, or stick with one metallic finish for sleek consistency.

    The warm metallic detail catches light beautifully and makes your headboard feel curated and luxe—suddenly your bedroom looks professionally designed.

    22. Layer Taxidermy or Botanical Prints as Headboard Art

    Large-scale art prints hung above your bed function as a headboard while adding personality and sophistication. Botanical and nature themes align with 2025’s biophilic design trend.

    Find large art prints from Minted ($30–$150), Etsy ($20–$200), or vintage shops ($10–$100). Purchase picture frames ($20–$100 each depending on size) from IKEA, Target, or Home Depot. Arrange 2–4 prints in a gallery wall configuration using picture-hanging hardware ($15–$30). Installation takes 1–2 hours; total cost $100–$400 for a complete gallery.

    Pro tip: Vary frame finishes (wood, brass, black) for an intentionally eclectic look rather than matching frames perfectly.

    Your bedroom transforms into a personal gallery—the art becomes the focal point and sets the mood for your entire space.

    23. Create a Headboard Wall With Decorative Molding

    Decorative molding creates architectural detail and visual interest even on a blank wall. This approach works beautifully with any paint color and creates shadow depth through dimensional lines.

    Purchase decorative molding ($2–$15 per foot from Home Depot, Lowe’s, or lumber mills) and have a carpenter install ($300–$800 for a full headboard wall) or DIY with a miter saw and construction adhesive ($150–$300 in materials plus 1–2 weekends of work). Paint to match or contrast your wall color ($20–$40 in paint). Total professional installation: $400–$900; ambitious DIY: $200–$400 plus sweat equity.

    For renters, use peel-and-stick molding ($30–$80 that mimics the look without installation.

    The dimensional detail makes your headboard feel gallery-like and intentional—it’s architectural sophistication without requiring a major renovation.

    24. Combine Multiple Textures With a Patchwork Headboard

    Mixing multiple textures in a patchwork headboard design creates tactile richness and visual depth. This approach celebrates 2025’s love of layered, textured design.

    Collect fabric remnants ($5–$20 each from fabric stores, Etsy, or thrift shops) and have an upholsterer create a custom patchwork headboard ($400–$800) or DIY with a wooden frame ($100–$150) and adhesive ($20–$30). Assembly takes 1–2 weekends for a DIY project; professional creation takes 1–2 weeks. Total cost: $150–$400 DIY, $500–$900 professional.

    Pro tip: Stick to a cohesive color palette (all neutrals or all jewel tones) to keep the patchwork looking intentional rather than chaotic.

    The mixed textures become a meditation point—running your hand across different fabrics creates a grounding, sensory experience before sleep.

    25. Go Minimalist-Chic With a Simple Headboard Rail

    A single thin horizontal rail serves as a subtle headboard that adds definition without visual weight. This works beautifully in modern, minimalist, or Scandinavian-inspired bedrooms.

    Install a headboard rail ($30–$80 from IKEA, West Elm, or Article) using standard wall anchors ($10–$20) and basic tools. Installation takes 15–30 minutes; total project cost $50–$100. This ultra-budget option works perfectly for renters and small spaces.

    Style with minimal pillows and keep surrounding wall space open to maximize the clean, airy aesthetic.

    Sometimes the most elegant design choice is restraint—your headboard becomes a quiet architectural detail rather than a loud statement.

    26. Install a Bed Canopy Frame for Drama and Softness

    A canopy bed with draped fabric creates instant drama, intimacy, and a hotel-luxury vibe. The enclosed feeling promotes better sleep while the soft fabric diffuses light beautifully.

    Purchase a canopy bed frame ($400–$1,500 from Wayfair, Article, West Elm, or Etsy) or buy a canopy frame attachment ($80–$200) to convert your existing bed. Add sheer fabric ($20–$50 per panel from fabric stores) or lightweight linen ($30–$60). Assembly takes 2–4 hours; total project $150–$300 for fabric upgrade on existing bed, $600–$2,000 for a full canopy bed frame.

    Pro tip: Choose lightweight fabrics that allow light through without blocking circulation—sheer linen or gauze work beautifully.

    Sleeping under a canopy transforms your bedroom into a personal retreat—the soft enclosure creates security and the filtered light promotes deeper, more restorative sleep.


    Save this guide for your next bedroom refresh. Try just one headboard idea this weekend—whether it’s adding brass hardware, installing a simple rail, or layering new throw pillows—and notice how that single focal point shifts your entire room’s energy.

  • 24 Oversized Mirror Concepts That Add Drama & Luxury

    24 Oversized Mirror Concepts That Add Drama & Luxury

    Looking to make a small room feel bigger or turn a bland wall into a showstopper? Oversized mirrors are the secret weapon that designers have been using for years—and 2025 is the year to go bold. They’re not just functional; they’re statement pieces that bounce light around, create depth, and instantly elevate any room from basic to boutique. Whether you’re renting or own your space, we’ve rounded up 24 distinct oversized mirror concepts that range from DIY hacks you can pull off this weekend to investment pieces that’ll become the focal point everyone notices. Let’s explore how to add drama, luxury, and light to your home without breaking the bank.

    1. Lean a Floor-to-Ceiling Gold-Framed Mirror for Instant Impact

    A leaning floor-to-ceiling mirror instantly draws the eye upward and makes ceilings appear higher than they actually are. This works beautifully in entryways, bedrooms, or living rooms where you need a focal point without commitment.

    Look for arched or rectangular mirrors with brushed gold frames at Wayfair ($300–$600) or Article ($250–$500). The key is finding one that’s at least 6 feet tall to make the real impact. Installation is zero—just lean it against the wall on a slight angle and you’re done. Make sure the floor beneath can handle the weight and the wall behind is clear of outlets.

    The beauty of this approach is you can move it when you rearrange furniture or if you’re renting. Your space gains architectural interest and a sense of openness you didn’t know was possible.

    2. Create a Sunburst Mirror Wall in Your Entryway

    Sunburst mirrors with their dramatic radiating design turn a blank wall into gallery-worthy art. The geometric rays catch and scatter light in multiple directions, creating depth and visual interest that a single large mirror can’t match alone.

    Mix three to five sunburst mirrors in graduated sizes and arrange them in an offset pattern. Brands like Target ($40–$120 per mirror), West Elm ($80–$200), and Etsy artisans ($100–$300) offer options in brass, black metal, and wood finishes. Mounting takes 30 minutes with a level and picture hangers rated for mirror weight. The trick: alternate sizes and leave 3–6 inches between each mirror for breathing room.

    This creates a custom gallery effect that makes your entryway feel curated and collected over time. Plus, visitors always ask where you found them.

    3. Install a Frameless Oversized Mirror to Expand Small Spaces

    Frameless mirrors are minimalist powerhouses that make cramped rooms breathe without adding visual clutter. The clean edges trick the eye into seeing more space, and there’s no chunky frame stealing attention.

    Hunt for 4–5 foot frameless mirrors at IKEA ($50–$80), Home Depot ($60–$150), or Overstock ($70–$120). Mount them horizontally above a dresser or console to expand the sense of width, or vertically between two windows to pull in natural light. Installation is straightforward with heavy-duty mirror hangers and a stud finder (30 minutes for most people). Make sure the wall can support it—drywall anchors work for lighter mirrors under 30 pounds, but studs are always safer.

    You’ll notice the room feels open and airy instead of boxed-in. Renter-friendly tip: lean a large frameless mirror instead of mounting it.

    4. Pair Curved Mirrors with Soft Arches for Organic Flow

    Curved and arched mirrors soften hard architectural angles and bring an organic, flowing energy to rooms. The gentle curves feel modern yet timeless, and they photograph beautifully for your home inspo board.

    Look for arched mirrors in Granite Lane’s Ora collection ($280–$450), Article ($200–$350), or Wayfair ($150–$300). Choose marble-backed, brass-framed, or wood-framed options depending on your style. Mount them single or in pairs on either side of a vanity or console for symmetrical elegance, or mix sizes and materials for a curated look. Installation takes 45 minutes and requires standard wall anchors or studs.

    The curves create a gentler visual experience that makes bathrooms and bedrooms feel more like retreats. Your eye naturally slows down and relaxes around soft shapes.

    5. Go Bold with a Black Metal Geometric-Framed Oversized Mirror

    Matte black frames create high-contrast drama and pair beautifully with modern or industrial interiors. A geometric shape adds architectural interest and looks genuinely expensive even at mid-range price points.

    Scout Target ($80–$180), West Elm ($150–$300), Article ($200–$400), or artisan shops on Etsy ($150–$350) for geometric options like hexagons, octagons, or trapezoid shapes. The larger the better—aim for at least 30 inches wide. Mounting is straightforward with standard wall hangers and takes 20–30 minutes. Position it above a console, on a focal wall, or flanking doorways for unexpected edge.

    The contrast between matte black and lighter wall colors makes your space look intentionally designed. People think you hired an interior designer.

    6. Lean Multiple Mirrors of Varying Heights for Dynamic Asymmetry

    Layering mirrors in different frames, sizes, and finishes creates a collected, curated aesthetic without needing to commit to permanent mounting. This trend reads as high-design and works in almost any style.

    Find mirrors at IKEA, Target, Wayfair, and local thrift stores to mix finishes without breaking your budget. Aim for a range: one statement piece (36–48 inches), two medium mirrors (24–30 inches), and one smaller accent mirror (18–24 inches). Vary the frame materials—rattan, wood, brass, and black metal all play well together. Lean them against the wall or a large piece of furniture and arrange in an asymmetrical cluster. Total time: 10 minutes. Cost: $100–$400 depending on brands.

    This approach feels intentional and allows you to swap pieces out when you want a refresh. Plus, it’s renter-approved since nothing is permanently mounted.

    7. Install an Oversized Mirror Behind a Bed for Bedroom Luxury

    A large mirror behind your bed becomes an architectural backdrop that makes the bedroom feel deeper and more spa-like. It’s becoming the go-to luxury upgrade in high-end hotels and modern homes.

    Choose a frame in brass, black metal, or natural wood to match your bed or wall color. Sizes range from 4 feet to 8 feet wide at Wayfair ($400–$1,200), West Elm ($500–$1,500), or custom framers ($600–$2,000+). Installation requires professional help or very careful DIY work with studs and heavy-duty mounting hardware (allow 2–3 hours for installation). Make sure the mirror is secure before moving furniture in front of it.

    Waking up and seeing your bedroom reflected back feels luxurious and calming. The extra light bounces around and makes mornings feel brighter.

    8. Use a Rattan-Framed Mirror for Coastal or Bohemian Vibes

    Rattan and natural fiber frames bring warmth and textural interest to modern, coastal, or bohemian spaces. They’re lighter than metal or wood frames, making installation easier while adding serious style points.

    Find rattan mirrors at Target ($60–$150), Wayfair ($80–$200), Etsy ($100–$250), or Anthropologie ($120–$280). Look for round or oval shapes in natural or whitewashed finishes. Mount horizontally in bedrooms or bathrooms for a relaxed beach-house feel. Installation takes 20 minutes with standard wall hangers. The rattan naturally softens edges and pairs well with warm wood tones and natural textiles.

    This material choice adds organic warmth that cooler metal frames can’t replicate. Your room feels vacation-ready without trying too hard.

    9. Create a Gallery Wall with Mix-and-Match Mirror Shapes

    Gallery walls with mirrors create focal points that work in hallways, living rooms, and dining areas. Mixing shapes and sizes feels modern and deliberate rather than matchy-matchy.

    Collect mirrors from IKEA ($30–$80), Target ($40–$120), Wayfair ($50–$150), and thrift stores ($10–$40) to keep costs down while maintaining variety. Aim for 5–9 mirrors total in graduated sizes. Map out your arrangement on kraft paper first, then install using picture hangers and a level. Allow 2–3 hours for spacing and mounting. The beauty: you can add or swap mirrors anytime without major adjustments.

    This creates visual interest that a single large mirror can’t match. Guests notice the thoughtfulness of the composition.

    10. Mount a Marble-Backed Oversized Mirror for Luxury Texture

    Marble-backed mirrors combine reflective function with artistic texture, making them functional art pieces. They’re increasingly popular in luxury bathrooms and master bedrooms where you want every detail to shine.

    Brands like Granite Lane’s Ora mirror ($280–$450), CB2 ($200–$400), or custom framers ($400–$1,000+) offer marble backing options in Carrara, Calacatta, or black marble. The backing adds weight, so professional installation is strongly recommended (budget $150–$300 for labor). Mount this as a statement piece above a vanity, dresser, or console where it becomes the focal point of the room.

    The veining in marble is naturally unique, so you’re essentially hanging one-of-a-kind art. Bathrooms and bedrooms feel noticeably more refined.

    11. Lean an Oversized Round Mirror for Sculptural Statement

    Round mirrors are timeless and work in nearly every style, but an oversized version leans into sculptural drama. A 36–48 inch round mirror becomes architectural rather than just functional.

    Hunt for large round mirrors at Wayfair ($150–$400), Article ($200–$500), West Elm ($250–$600), or CB2 ($180–$420). Black metal, brass, and natural wood frames all photograph beautifully. Lean it rather than mount for maximum flexibility—just ensure it’s on level ground and won’t tip. Cost and time investment: $200–$600 and 10 minutes setup.

    This shape reads as intentional and creates a strong focal point. Your eye is naturally drawn to the circle, making the space feel curated.

    12. Install a Smart LED Mirror for Tech-Forward Bathrooms

    Smart LED mirrors combine functionality with modern tech, offering features like adjustable brightness, anti-fog coating, and even Bluetooth speakers in premium models. They’re gaining fast in modern bathrooms and master suites.

    Prices range from $250–$800 at Amazon, Wayfair, and specialty lighting stores. Look for brands like Kohler, Artemis, or Baño Design. Features include dimmable LED backlighting, demister (anti-fog), magnified sections, and touch controls. Installation requires an electrician if you’re hardwiring (budget $200–$400 labor), or opt for plug-in models ($250–$400). Allow 2–4 hours for professional installation.

    You’ll save time getting ready with perfect lighting, and the anti-fog feature means no more wiping. Morning routines feel more spa-like with adjustable brightness.

    13. Hang an Oversized Mirror on a Brick or Textured Accent Wall

    Pairing a large mirror with a textured accent wall (brick, shiplap, or stone) creates depth and visual richness. The reflective surface plays beautifully against matte textures for high-impact drama.

    Choose a mirror frame in brass, bronze, or matte black that complements your brick color. Sizes from 36–60 inches work best to make a real statement. Find options at West Elm ($250–$700), Article ($200–$600), Wayfair ($150–$500), or custom framers. Installation takes 45 minutes to an hour and requires studs or heavy-duty anchors. Position it at eye level, slightly off-center for dynamic asymmetry.

    The textured wall becomes a backdrop that makes the mirror feel intentional and designed. Light reflects off the irregularities, creating subtle shadows and depth.

    14. Layer a Large Mirror Over Artwork for Unexpected Contrast

    Breaking the grid by layering a mirror over or beside artwork challenges conventional gallery wall rules and creates intrigue. This works especially well in hallways, dining rooms, or entryways where people linger.

    A large rectangular or square mirror (30–48 inches) paired with 2–3 pieces of artwork creates visual complexity. Source mirrors at IKEA, Target, Wayfair ($50–$200) and artwork from local galleries, Etsy, or Minted. Arrange with slight overlaps and varied heights for a collected feel. Installation takes 1.5–2 hours to plan and hang properly using a level. The key: map everything on kraft paper first.

    This approach reads as gallery-curated and sophisticated. You’re basically creating museum-quality walls in your home.

    15. Use a Scalloped-Edge Mirror to Add Playful Elegance

    Scalloped-edge mirrors bring a playful-yet-elegant energy to bathrooms and bedrooms, blending curves with structure. They’re having a major moment in 2025 and feel fresh without being trendy or dated.

    Brands like Anthropologie ($150–$300), West Elm ($180–$350), Target ($80–$180), and Etsy artisans ($120–$280) offer scalloped options in various finishes. Sizes range from 24–36 inches, perfect for bathroom walls or bedroom accent walls. Installation is standard (20 minutes with wall hangers). The scallops catch light beautifully and add dimension that straight edges don’t have.

    The undulating edges feel sophisticated while maintaining a sense of fun. Your bathroom becomes a space you actually want to spend time in.

    16. Install a Floor-to-Window Mirror to Amplify Natural Light

    Positioning an oversized mirror to face a window maximizes natural light reflection, making rooms feel brighter and more open even on cloudy days. This is a designer hack that actually works.

    Lean or mount a tall, wide mirror (5–7 feet) perpendicular to your primary window or glass door. Find options at Wayfair ($250–$600), Article ($300–$700), or CB2 ($200–$500). Choose a thin frame to minimize visual weight. Installation takes 30–45 minutes for mounting, or skip mounting entirely and lean it for flexibility. The angle matters—position it to catch the most light during the time of day you’re in that room most.

    Mornings become brighter and the entire room feels more energized. You might even save on lighting costs by relying more on bounced natural light.

    17. Create an Oversized Mirror Accent Wall in One Room

    A full mirror accent wall is the ultimate statement trend—think of it as wallpaper made of reflective surfaces. It’s bold, unexpected, and completely changes how a room feels.

    Source mirrors at IKEA, Target, and thrift stores ($40–$150 per mirror, total project cost $500–$2,000 depending on wall size). Plan your grid on paper first, mixing frame colors or keeping them uniform. This is a weekend project that requires 4–6 hours for planning, measuring, and mounting. Use a level obsessively. The effect: infinite reflection, drama, and unexpected depth that photographs beautifully.

    Your room becomes a talking point. This trend works in bedrooms, powder rooms, or unexpected spaces like a closet entry.

    18. Mount an Oversized Hexagon Mirror for Geometric Edge

    Hexagon mirrors split the difference between round and geometric—they’re contemporary without feeling trendy or cold. A large 40–50 inch hexagon becomes an architectural focal point.

    Look for hexagon options at West Elm ($250–$500), Wayfair ($150–$400), Article ($200–$550), or specialty shops like Etsy artisans ($200–$400). Frame options include matte black, brass, or wood. Mount it above a console, entryway table, or on a bedroom wall. Installation takes 30–45 minutes with standard hardware. The geometric shape feels modern yet timeless enough to stay in style.

    People notice geometric shapes before they notice round mirrors—it’s more memorable. Your space reads as thoughtfully designed rather than randomly decorated.

    19. Pair Oversized Mirrors with Brass or Gold Leaf Framing

    Brass and gold leaf finishes instantly elevate mirrors into luxury territory, catching and reflecting light in ways matte frames can’t. This works beautifully in entryways and bedrooms for a collected-art feel.

    Brands like Anthropologie ($200–$400), Rejuvenation ($300–$600), CB2 ($250–$500), and custom framers ($400–$1,200) offer gold and brass-framed mirrors. Look for finishes labeled “antique brass,” “warm gold,” or “gold leaf” to avoid looking too shiny. Sizes from 36–60 inches work best to showcase the frame’s beauty. Leaning these is often better than mounting to preserve the frame’s finish. Cost: $250–$800 depending on size and quality.

    The warmth of brass bounces light differently than cooler metals. Your space gains an instantly collected, gallery-like sophistication.

    20. Install a Venetian-Style Oversized Mirror with Beveled Edges

    Venetian mirrors with beveled edges create prismatic light effects—essentially turning your mirror into a functional light fixture. These feel luxury and work in traditional, maximalist, or eclectic spaces.

    Find Venetian-style mirrors at Anthropologie ($300–$600), Wayfair ($150–$400), CB2 ($200–$500), or Etsy artisans ($250–$600). Beveled edges catch light and create rainbow sparkles, so position near a light source or window. Sizes from 30–48 inches maximize the effect. Installation takes 45 minutes, and they’re heavy, so use studs or heavy-duty anchors. Professional installation recommended for pieces over 40 inches.

    These mirrors become a light source themselves, especially beautiful at night. Guests comment on the sparkling light effects immediately.

    21. Lean Multiple Oversized Mirrors Back-to-Back for Room Dividing

    Using oversized leaning mirrors as subtle room dividers works in open-concept spaces, studios, or lofts where you want to create visual separation without actual walls. It’s flexible, renter-approved, and surprisingly functional.

    Source two matching or similar large mirrors (48–72 inches) at IKEA ($80–$150 each), Wayfair ($150–$300 each), or thrift stores ($50–$100 each). Lean them back-to-back between spaces or at an angle. Make sure they’re on level, stable flooring—use painter’s tape or rug anchors underneath to prevent slipping. Total time: 15 minutes. Cost: $150–$600 depending on quality.

    This creates a subtle boundary that makes spaces feel defined without claustrophobia. Light flows freely while defining separate zones.

    22. Mount an Arched Oversized Mirror Over a Fireplace Mantel

    An arched mirror above a fireplace becomes an architectural feature that draws the eye upward. This classic placement works in traditional, transitional, and even modern farmhouse spaces.

    Choose an arched frame in wood, brass, or matte black that complements your mantel style. Sizes from 36–60 inches work best to fill the space without overwhelming it. Find options at Wayfair ($200–$500), Article ($250–$600), West Elm ($300–$700), or custom framers. Mount securely into studs above the mantel (allow 1 hour for installation). The key: position it high enough that you see the reflection comfortably when sitting.

    The upward arch mimics traditional architecture and makes rooms feel intentionally designed. The reflection bounces firelight around for added ambiance.

    23. Create a Powder Room Statement with a Dramatic Oversized Mirror

    Powder rooms are the perfect place to take mirror risks—it’s a small, intimate space where a bold mirror becomes the undisputed focal point and sets the tone for your entire home.

    Invest in a statement piece here: Anthropologie ($250–$500), CB2 ($200–$450), West Elm ($300–$600), or custom framers ($400–$900+). Look for unexpected finishes like velvet-wrapped, sculptural brass, or marble-backed. An oversized mirror in a small space makes the powder room feel sophisticated and gallery-like. Installation takes 30 minutes and requires studs due to the weight. This is worth the investment because guests see it first.

    Powder rooms with bold mirrors become memorable and Instagram-worthy. First impressions matter, and this sets the tone for your entire home.

    24. Layer a Large Mirror with Floating Shelves for Functional Art

    Pairing an oversized mirror with floating shelves around or beside it creates functional art—storage that doubles as display and keeps the space organized while maintaining visual interest.

    Mount a large mirror (36–48 inches) centered on the wall, then add 2–4 floating shelves around it at IKEA ($20–$60 per shelf), Target ($25–$80), or Home Depot ($30–$100). Shelves work best if positioned 12–18 inches to the sides or above/below the mirror. Total installation time: 2–3 hours with a level and stud finder. Style with small plants, books, and objects that reflect your personality. The mirror opens the space while shelves provide practical storage.

    You get a focal point that’s also functional—storage without bulk. People admire how thoughtfully the wall is organized.


    Save this post for your next room refresh and try one concept this weekend. Whether you go bold with a sunburst wall or lean a simple oversized mirror in the corner, your space will feel noticeably bigger, brighter, and more intentional. Which mirror idea will you tackle first?

  • 23 L-Shaped Sofa Design Ideas That Maximize Comfort & Layout

    23 L-Shaped Sofa Design Ideas That Maximize Comfort & Layout

    An L-shaped sofa is one of the smartest furniture investments you can make—it combines seating capacity with smart space planning, giving you room for lounging, entertaining, and actually living. But choosing the right L-shaped sofa goes beyond just finding one that fits; it’s about maximizing comfort, traffic flow, and the entire look of your room. Whether you’re working with a sprawling open-plan living area or a cozier space, there are strategic ways to position, style, and configure your L-shaped sectional to make it work harder for your daily life. We’ve gathered 23 design ideas that show you exactly how to make your L-shaped sofa the anchor of a room that feels both beautiful and functional—no design degree required.

    1. Anchor a Curved L-Shape in an Open-Plan Zone

    Curved L-shaped sofas are having a major moment because they soften room layouts and feel more intimate than sharp right angles. A gently curved sectional positioned away from walls creates an invisible boundary in an open-plan space, naturally zoning the living area without a wall or room divider.

    Start by measuring your floor space and positioning the curve to face the main focal point—typically the TV or a fireplace. Curved sectionals are available from Blu Dot, Article, and Wayfair ($1,200–$3,500 depending on size and fabric). The slight arc takes up roughly the same floor space as a traditional L, but the visual impact is softer and more conversational. It takes about 2–3 hours to assemble (often doable solo with help from a friend).

    Pro tip: A curved sectional works best when you float it rather than tuck it tight into corners—this lets the silhouette shine and improves traffic flow. You’ll immediately notice how much more open and designed your living room feels.

    2. Layer Warm Lighting Behind Your L-Shaped Sofa

    Poor lighting can make even a beautiful sofa feel flat and uninviting. Adding warm light sources behind your L-shaped sectional—whether recessed ceiling lights, wall sconces, or a tall arc floor lamp—completely changes the mood and makes the space feel more intentional and spa-like.

    Install recessed lights ($15–$40 per fixture, plus installation) if you’re open to minor electrical work, or opt for a portable arc floor lamp ($80–$300) that requires zero installation. Position the lamp behind the corner or along the back edge so light spills onto the wall and softly illuminates the sofa from behind. This takes 15 minutes for a lamp or a weekend for electrical work.

    Renter-friendly option: A tripod floor lamp with a dimmer bulb achieves the same cozy effect without any commitment. You’ll notice the entire room suddenly feels warmer, more intimate, and far more magazine-worthy.

    3. Define Traffic Flow with Your L-Shape Placement

    The way you position your L-shaped sofa can either invite movement through your space or create an awkward traffic jam. The best layouts leave at least 18–24 inches of clear walking space on the open sides of your sectional and ensure the “short leg” of the L faces toward main entry points or the kitchen, keeping sightlines open.

    Measure your doorways and natural movement paths before deciding on your L orientation. Sketch a quick floor plan (free with Pinterest’s room planning tools or Canva) to test different angles. Moving furniture typically takes 30 minutes to an hour and requires zero budget.

    Pro tip: The most functional L-shapes have the long run perpendicular to windows or the TV, and the short leg angled slightly inward—this maximizes the view while keeping the room from feeling blocked. Suddenly, navigating your living room feels effortless, and guests naturally flow through your space instead of feeling trapped.

    4. Mix Modular Pieces to Customize Your Configuration

    Modular L-shaped sofas are the ultimate in flexibility—if life changes (you move, your family grows, you want a new layout), you can reconfigure or swap pieces without buying a new sofa. Many brands now offer sectionals that let you move the corner unit, add more seating, or shift the footprint entirely.

    Look for brands like Article, West Elm, Room & Board, or Blu Dot ($1,500–$4,000+ for full modular systems) that clearly sell individual sections separately. A basic modular L with corner unit and 2–3 seating pieces costs roughly the same as a fixed sectional but gives you way more control. Assembly takes 2–4 hours depending on complexity.

    Bonus: Many modular sofas have interchangeable cushion covers, so you can refresh the look (or hide wear) without replacing the whole sofa. Your space adapts to life changes instead of the other way around.

    5. Float Your L-Sofa for a Designed, Open Feel

    Pushing your L-shaped sofa flush against walls is a default move—but floating it (positioning it away from walls, typically over a rug) instantly makes your room feel more high-design and spacious. This layout works especially well in open-plan homes and larger living rooms where anchoring a rug under the sofa creates a natural focal point.

    Start with a large area rug ($100–$400) that extends under the front two-thirds of your sectional. Float the sofa over the rug, leaving 12–18 inches on all visible sides. Add a coffee table or ottoman in front to complete the anchored look. This costs only the price of a rug and takes zero installation time.

    Pro tip: A floating arrangement feels most intentional when you add a console table or side table behind the sofa—it gives the back a finished look and adds styling surface. Your living room immediately reads as thoughtful and spacious, even in smaller areas.

    6. Choose Performance Fabrics for Real-Life Living

    Performance fabrics (microfiber, Crypton, polyester blends) resist stains, pet damage, and wear way better than traditional linen or cotton—and modern performance fabrics feel just as soft and look just as good. If you have pets, kids, or just want a sofa that survives spills, this is non-negotiable.

    Sofas upholstered in performance fabrics run $800–$3,500 depending on size, and they cost roughly the same as traditional fabrics these days. Brands like Room & Board, West Elm, Wayfair, and Article clearly label performance options. Most performance fabrics can be spot-cleaned with mild soap and water—takes 5 minutes per spill.

    Pro tip: Ask about “performance fabric blend”—this gets you 80% of the durability benefit at a slightly lower price point. You’ll feel confident letting people actually sit on your sofa without panic.

    7. Add a Low-Profile Sectional for a Modern, Relaxed Vibe

    Low-profile sectionals (shorter backs, thin arms, elevated on thin or no-show legs) feel more modern and refined than traditional deep-backed sofas, and they optically open up even smaller rooms since you can see more wall and floor space around them. These are ideal if you want a sofa that feels like furniture, not a bulky block.

    Brands like Blu Dot, Hay, and Article specialize in low-profile sections ($1,200–$3,000). The trade-off: slightly less back support, so they’re better for perching and lounging than deep napping. Assembly is similar to standard sofas (2–3 hours).

    Styling bonus: Low-profile sofas photograph beautifully and work with minimalist or modern interiors. Your room instantly feels more intentional and less “furnished,” more “designed.”

    8. Incorporate a Chaise Lounge Leg for Lounging

    An L-shaped sectional with one leg extended into a chaise lounge section gives you a place to stretch out and truly recline—perfect if you like reading, napping, or just collapsing after a long day. The chaise transforms your sectional from “seating for guests” to “actually comfortable for you.”

    Look for “L-shaped sectional with chaise” on Wayfair, Overstock, or Amazon ($900–$2,500 depending on size and material). A chaise adds roughly 2–3 feet to one leg of your L. Installation and setup take 3–4 hours (often easier with help).

    Pro tip: Position the chaise where you most naturally recline—often at the end that faces a window or the TV. This one addition totally changes how you use your sofa daily.

    9. Style Your L-Sofa with Layered Throw Pillows and Textures

    Throw pillows and layered textures are the fastest way to make an L-shaped sofa look curated, expensive, and intentionally styled. A mix of textures (bouclé, velvet, linen) in a cohesive color palette instantly upgrades the visual appeal without any structural changes.

    Buy a mix of throw pillows ($20–$60 each) from Target, West Elm, or Amazon—aim for 5–7 pillows depending on your sofa size. Layer them by height and texture, leaving one corner arm exposed for a relaxed feel. Add a chunky throw blanket ($40–$120) draped casually over the back or armrest. This takes 10 minutes to arrange and costs $100–$400 for a complete styling refresh.

    Pro tip: Stick to a 3-color palette (two neutrals + one accent color) to avoid a chaotic look. Suddenly, your sofa looks magazine-ready and way more expensive than it actually was.

    10. Position Your L-Sofa to Support Conversation Areas

    L-shaped sofas naturally encourage conversation because they create a gathering spot where multiple people can sit facing one another—they’re inherently more social than a standard linear sofa. To maximize this, position your L perpendicular to other seating (armchairs, ottomans) so people can easily make eye contact and chat.

    Position your L approximately 3–4 feet from a coffee table, then angle 1–2 accent chairs across from it at roughly 90 degrees. This takes 15–20 minutes to arrange and costs nothing beyond furniture you might already have.

    Result: Your living room naturally becomes a gathering spot. Guests sit down and conversations flow more naturally—there’s no awkward “staring at a TV” vibe unless you want one.

    11. Choose an Oversized L-Sectional for Cloud-Like Comfort

    Oversized, cloud-like L-shaped sofas (extra-deep seats, plush cushioning, wide armrests) prioritize sink-in comfort over formal elegance—they’re meant for actual lounging, not just looking at. If your living room is your retreat, not your showroom, a plush L-sectional is worth the investment.

    Brands like Pottery Barn, Crate and Barrel, Room & Board, and Wayfair offer oversized options ($1,500–$4,000+). The trade-off: these sofas are deeper (require more floor space) and heavier (trickier to move). Most are firm enough to support proper posture when you do sit upright. Assembly typically takes 3–4 hours.

    Pro tip: Pair an oversized sectional with firm throw pillows for lumbar support, so you’re comfortable whether you’re lounging or working from home. The best part? You’ll actually want to be in your living room instead of retreating to the bedroom.

    12. Use an L-Sectional to Divide Open-Plan Spaces Visually

    In open-plan living, an L-shaped sectional can act as a visual and functional divider between your living room and dining area without needing a wall or room divider. The back of the sofa becomes a subtle boundary, and the seating arrangement naturally defines which zone is for what.

    Position your L with the open side facing the main living area (fireplace, TV, windows) and the back angled slightly toward the dining or kitchen zone. No structural changes needed—it’s just strategic positioning. This costs nothing and takes 30 minutes to arrange.

    Result: Suddenly your open-plan space feels intentional and zoned. People understand that the L-sofa area is for relaxation, and the other side is for dining—without any cramped, closed-off feeling.

    13. Pair Your L-Sofa with a Statement Accent Wall

    A strategically chosen accent wall behind your L-shaped sofa draws the eye, adds depth, and makes the seating area feel like an intentional focal point. Deep, muted colors (sage green, warm terracotta, soft navy) work best because they complement most sofa fabrics without feeling overwhelming.

    Paint your chosen wall with 2–3 cans of quality paint ($15–$35 per can) and a weekend of work (or hire a painter, $300–$800 depending on wall size). Neutral sofas show best against bold walls; patterned sofas need more muted walls.

    Pro tip: Add floating shelves or artwork to the accent wall to layer visual interest. Your living room suddenly feels intentionally designed instead of accidentally arranged.

    14. Select a Warm, Earthy Color for Timeless Appeal

    Warm, earthy colors (camel, clay, sand, warm greige, soft terracotta) are trending because they feel calming, work with almost any decor style, and age beautifully. Unlike trendy jewel tones, earthy L-sofas stay relevant for 7–10 years, making them a smart long-term investment.

    Choose your sofa color before committing—order free fabric swatches from Wayfair, Article, or brand websites and look at them in your space’s actual lighting for 2–3 days. This costs nothing and prevents a major color-regret situation. Most sofas in neutral tones cost the same as other colors.

    Bonus: Neutral-toned L-sofas pair easily with statement pillows, throws, or artwork, so you can refresh your look without replacing the whole sofa. Earthy tones feel sophisticated and intentional instead of “default beige.”

    15. Add an Ottoman or Poufs for Flexible Seating

    An ottoman or poufs add flexibility—they’re extra seating when guests come over, a footrest when you’re relaxing, a side table for drinks or a laptop, or even hidden storage in some designs. They’re the most multifunctional furniture piece you can buy for your L-shaped setup.

    Purchase an ottoman ($200–$600) or two small poufs ($80–$150 each) in a complementary fabric—try Article, West Elm, Wayfair, or Overstock. Position it 12–18 inches in front of your L-sofa as a visual anchor. No assembly needed for most poufs (ottomans take 15 minutes).

    Pro tip: Choose performance fabrics for ottomans too if you have pets or kids—they take a beating. One ottoman instantly adds flexibility and makes your living room feel less “rigid furniture” and more adaptable to real life.

    16. Maximize Space with a Right-Facing L vs. Left-Facing L

    The direction your L-shaped sofa faces (left or right) dramatically affects traffic flow and how your room feels. Before ordering, sketch your room’s layout and test both directions to see which maximizes function and sight lines. Right-facing means the chaise or open leg extends to the right; left-facing means it extends left.

    Measure your room walls, doorways, and windows with a measuring tape (free or under $15), sketch it out on paper or use a free app like Planner 5D, and position your L both ways. This takes 20 minutes and costs nothing. Most retailers offer both options for similar pricing.

    Pro tip: The best direction depends on your room’s fixed elements (fireplace, TV, windows)—position the open leg of your L toward the room’s main focal point. Choosing correctly means better sight lines, easier traffic flow, and a room that just feels right.

    17. Invest in High-Quality Cushion Cores for Longevity

    Not all L-shaped sofas are built the same. High-density foam cushion cores (rated 1.8 density or higher) hold their shape for 7–10 years; cheap foam flattens within 2–3 years. When shopping, ask about cushion construction and insist on high-density foam for longevity.

    When comparing sofas at the same price point, always ask about cushion density, frame material (hardwood is better than plywood), and suspension type (eight-way hand-tied is best). Better construction costs roughly $200–$400 more upfront but extends your sofa’s life by 5+ years. This translates to saving thousands long-term.

    Pro tip: Read reviews specifically mentioning “cushion durability after 2 years” to see real-world longevity feedback. Investing in better cushion quality now means your L-sofa stays comfortable and beautiful instead of sagging after a few years.

    18. Create a Reading Nook in Your L-Sofa Corner

    The corner seat of an L-shaped sofa is prime real estate for creating a cozy reading or lounging nook. Position your L with the corner unit near a window (if possible) and style it with a reading lamp, side table, throw blanket, and pillows. It becomes a designated retreat spot.

    Arrange your L with the corner closest to natural light, add a swing-arm wall lamp ($50–$150) or a small floor lamp ($40–$120), and style with a side table ($80–$200) and a chunky throw blanket ($40–$100). Total setup cost: $170–$570. Takes 1–2 hours to arrange and light.

    Result: You have a defined retreat space that makes you actually want to read instead of scrolling on your phone. The corner nook becomes the most-used spot in your living room.

    19. Select a Pet-Friendly L-Sofa Fabric and Layout

    If you have pets, choose an L-shaped sofa that can withstand fur, claws, and accidents without showing wear. Performance fabrics are pet-proof, but fabric color and weave also matter—darker tones and tighter weaves hide pet hair better than light, fluffy textures.

    Select a performance fabric sectional ($1,000–$3,500) in a darker neutral tone (charcoal, warm gray, chocolate). Brands like Article, Wayfair, and West Elm clearly label pet-friendly options. Pair your sofa with a pet blanket or throw ($30–$80) on the most-used section to protect upholstery and provide a designated pet spot.

    Pro tip: Position your L so the chaise or long side doesn’t block your pet’s access to other rooms—pets like open sightlines and freedom of movement. Your sofa stays fresher and your pet feels included instead of excluded.

    20. Incorporate Wooden Legs for Warmth and Visual Lift

    Sofas on wooden legs (especially tapered or mid-century styles) look lighter, less bulky, and more intentionally designed than low-slung sofas on tracks or skirted bases. The visible floor under the sofa optically opens up your room. Most modern L-sofas come with at least minimal legs, but you can sometimes upgrade to nicer wood for $100–$300.

    When ordering your L-sofa, ask about leg options and costs—some retailers offer free upgrades from plastic to wood. If your existing sofa has low skirting, adding legs ($150–$400 for professional installation) is sometimes possible with a furniture repair specialist.

    Styling advantage: Wooden legs add warmth and make your sectional look more like a designed piece than a generic “couch.” The improved sight lines under the sofa instantly make your room feel more open.

    21. Use an L-Sofa to Create a Symmetrical Living Room Layout

    An L-shaped sofa is perfect for creating symmetrical, formal layouts—position it as one “wall” of a seating group and mirror the arrangement with matching accent chairs, side tables, and lamps on either side. This works beautifully in more traditional or transitional living rooms.

    Position your L with the long side parallel to one wall, then add matching side tables ($150–$300 each) and lamps ($80–$200 each) on either end. Add symmetrical accent chairs ($300–$700 each) if space allows. Arrange artwork and decor in balanced pairs. This takes 1–2 hours and costs $600–$1,500+ depending on pieces chosen.

    Pro tip: Symmetrical layouts feel more intentional and formal—they’re ideal if you love a curated, magazine-ready look. Your living room immediately reads as thoughtfully designed instead of casually thrown together.

    22. Hide Unsightly Storage Underneath with a Raised Platform

    If you need hidden storage and your L-sofa has clearance underneath, a low platform or riser can elevate your sectional while creating space for storage baskets, bins, or even a compact bar cart. This works especially well if your sofa sits on legs rather than a skirt.

    Add a low platform (DIY with pallets and casters, $50–$150, or purchase a ready-made platform, $300–$600) and style underneath with woven baskets ($30–$100 each). This takes 1–2 hours to install and organize.

    Practical bonus: You gain functional storage while the hidden base keeps everything looking clean and curated. Your living room stays organized without appearing cluttered.

    23. Layer an Area Rug to Define Your L-Sofa Seating Zone

    An area rug ties together all your living room elements and visually defines your L-shaped seating zone as one intentional grouping. The rug should extend under at least the front two-thirds of your sectional and ideally under a coffee table in front.

    Purchase a large area rug ($200–$800) in a neutral tone or subtle pattern that complements your sofa color. Lay it down before arranging your L-sofa to ensure proper placement. This takes 15 minutes and costs $200–$800.

    Pro tip: A rug in a slightly warmer tone than your sofa (or a subtle pattern) prevents the space from feeling flat. The rug anchors the seating and instantly makes your room feel more finished and intentional—like the layout was actually planned instead of accidentally arranged.

    Save this post and try at least one idea this weekend—whether it’s repositioning your L-sofa to face a new direction, adding throw pillows and a cozy throw, or investing in better lighting behind your sectional. Small changes compound fast, and your living room deserves to feel like the most comfortable room in your home.

  • 23 Comfy Bedroom Ideas That Feel Warm & Hug-Like

    23 Comfy Bedroom Ideas That Feel Warm & Hug-Like


    Introduction

    Your bedroom should feel like a hug the moment you walk in—but if yours feels cold, flat, or uninspired, you’re not alone. The bedroom design trends that dominated the last few years (looking at you, minimalist gray) have left a lot of us craving warmth and personality. The good news? Creating a cozy, inviting space doesn’t require a complete overhaul or a huge budget. Whether you’re a renter with limited options or a homeowner ready to invest, these 23 ideas blend trending techniques with practical solutions. You’ll discover how to layer textures, mix patterns confidently, incorporate natural materials, and add those personality-packed details that make your space feel authentically yours. Let’s build a bedroom that actually feels as good as it looks.


    1. Layer Textured Walls Without Commitment

    Textured walls add instant depth and visual interest without requiring paint or permanent changes. They’re the secret behind bedrooms that feel expensive and thoughtfully designed, not sterile.

    Start with peel-and-stick textured wallpaper (Budget: $30–$80 per wall) from brands like Spoonflower or Wayfair—renters love this option since it removes cleanly. If you own, consider textured paint techniques like suede finish or faux plaster ($15–$40 per gallon, plus 2–3 hours of application). Another renter-friendly hack: hang lightweight fabric panels (linen or linen-blend) on one accent wall for soft, tactile appeal ($20–$60).

    Pro tip: Pair textured walls with smooth bedding to create contrast. The tactile combo makes your space feel sophisticated and layered.

    Your bedroom suddenly looks like it was styled by someone with a clear vision. Guests will notice the thoughtful details, and you’ll feel the difference every time you enter.


    2. Swap Sharp Furniture for Curved Pieces

    Curved furniture replaces the clinical feel of sharp angles with organic calm—exactly what sleep sanctuaries need. Even one curved statement piece shifts the entire room’s energy.

    Invest in a curved headboard ($200–$600 for quality wood options on Wayfair, Article, or West Elm). Can’t splurge? Start with curved nightstands ($80–$180) or a round mirror ($50–$150) with a soft wooden frame. Budget option: Look for vintage curved pieces on Facebook Marketplace or Craigslist ($30–$100). IKEA’s curved shelves ($30–$50) also work beautifully for plants and decor.

    Installation takes 1–2 hours (or hire help for $50–$100). The shift is subtle but powerful—your brain registers the space as calmer and more inviting instantly.

    You’ll notice yourself relaxing more quickly when bedtime arrives. Rounded lines feel supportive, not demanding.


    3. Introduce Earth Tones Through Accent Bedding

    Earth tones ground bold designs and create a naturally calming palette—but they work best as accents layered over neutrals, not as your entire room.

    Choose one statement bedding color from this palette: terracotta, warm ochre, sage green, or warm taupe ($40–$100 for quality sheets from Parachute, Brooklinen, or Pottery Barn). Layer it with neutral base sheets (cream or soft gray, $30–$60). Add throw pillows in complementary earth tones ($15–$40 each). Swap out bedding takes 15 minutes, and it’s totally renter-friendly.

    Pro tip: Mix matte and slightly textured fabrics (like linen and cotton) in these warm tones for depth that photos don’t even capture.

    The room feels grounded and intentional without being monotone. You’ve created a cohesive look that actually encourages better sleep.


    4. Add Floor-to-Ceiling Curtains for Drama

    Floor-to-ceiling curtains instantly elevate any bedroom by drawing the eye upward and controlling light like nothing else can. They’re genuinely transformative for small spaces too.

    Measure from your ceiling (not the window top) to the floor, then add 1–2 inches for a subtle puddle. Buy linen or linen-blend curtains ($50–$150 per panel, depending on width). Attach a simple curtain rod ($20–$50 from IKEA, Target, or Home Depot) close to the ceiling. You’ll need 2–4 hours and possibly a second person. Renters: Damage-free adhesive rods exist ($15–$25) though they work best on smooth walls.

    Pro tip: Slightly longer curtains that just kiss the floor photograph beautifully and feel more luxe than standard hemmed panels.

    Your room instantly looks taller and more intentional. Light control becomes genuinely restful—no more harsh morning sun or street light.


    5. Mix Patterns Confidently: Stripes + Florals

    Pattern mixing (the grandmillennial trend) feels intimidating but creates personality that solid colors can’t match. The key is sticking to a color palette and varying scale.

    Start with one bold pattern (florals, stripes, or geometric) on wallpaper or one statement pillow ($20–$80). Choose 2–3 coordinating colors. Layer in a second pattern in a different scale—if you use large florals, add small stripes or polka dots ($15–$40 per pillow). Use solid complementary pillows as anchors between patterned ones.

    Paint or wallpaper takes 2–4 hours. Pillow swaps take minutes and cost nothing if you already have extras.

    Pro tip: Start small—swap pillows before committing to wallpaper. You’ll build confidence fast.

    Suddenly your bedroom looks curated and playful, not generic. This is where your personality finally shows.


    6. Source Vintage Pieces for Authentic Soul

    Vintage and handmade pieces tell a story that mass-produced furniture simply cannot. They add character, sustainability, and often cost far less than new alternatives.

    Hunt on Facebook Marketplace, Craigslist, or Etsy for solid wood nightstands ($20–$80), dressers ($30–$150), and chairs ($15–$60). Thrift stores like Goodwill or local vintage shops offer deals too. For handmade textiles, explore Etsy quilts or throws ($40–$150). Bonus: Many vintage pieces need refinishing, which adds personalization (DIY with spray paint or take to a professional for $50–$150).

    Allow 1–2 weeks for hunting and 2–4 hours for refinishing if needed.

    Pro tip: Mix one vintage statement piece with 70% new/modern items to avoid chaotic “antique store” vibes.

    Your bedroom becomes a reflection of your taste and history, not a showroom. Visitors genuinely compliment the authenticity.


    7. Paint an Accent Wall in Cherry Red or Deep Green

    A single accent wall in a statement color like cherry red or forest green wakes up neutral rooms without overwhelming the space. Cherry searches spiked 100% year-over-year—there’s a reason this hue is everywhere.

    Choose your wall (usually the one behind your bed). Measure the square footage and buy 2 quarts of quality paint ($15–$25 per quart, Sherwin-Williams and Benjamin Moore offer rich jewel tones). Invest in good brushes and painter’s tape ($15–$20). The actual painting takes 2–3 hours plus drying time.

    Renters: Use removable wallpaper in these colors instead ($30–$80).

    Pro tip: These deep tones look richer in soft, warm lighting—consider adding a bedside lamp or warm string lights nearby.

    The room instantly feels intentional and sophisticated. Suddenly neutral bedding and simple furniture look curated instead of bland.


    8. Layer Rugs for Warmth and Definition

    Layered rugs add warmth, define sleeping spaces, and create the texture that makes bedrooms feel genuinely cozy. This trend works in rentals and owned homes alike.

    Start with a large neutral base rug (jute, sisal, or wool, 8×10 ft: $80–$250) as your foundation. Layer a smaller patterned or textured rug on top (5×8 ft: $50–$150). Budget option: Use what you already own or check vintage/thrift stores ($10–$40). Higher-end option: Invest in one exceptional wool or natural fiber rug ($200–$500) that anchors the entire room.

    Laying takes 15 minutes. Rugs are totally renter-friendly—just roll them up when you move.

    Pro tip: Angle the top rug slightly (even just 5 degrees) for a styled, intentional look.

    Your feet land on warmth instead of cold flooring. The room feels instantly more sophisticated and less institutional.


    9. Add Plants for Biophilic Calm

    Plants boost calm through biophilic design—your brain literally responds positively to living things. They’re also forgiving if you’re not a “plant parent” yet.

    Start with low-maintenance plants: pothos, snake plants, ZZ plants, or rubber plants ($10–$30 each). Group 3–5 plants at varying heights on floating shelves ($20–$60) or a corner stand ($30–$80). Place one large statement plant (fiddle leaf fig or monstera, $30–$80) near your window. Pots add cost ($5–$40 each depending on style).

    Installation takes 1–2 hours for shelves; daily care is minimal (weekly watering).

    Pro tip: Plants on shelves at eye level have more visual impact than floor-level placement. Group odd numbers (3 or 5) together for visual balance.

    The room becomes a living space—literally. Sleep quality improves when you’re surrounded by growth and greenery.


    10. Choose Quality Natural Bedding in Linen or Wool

    Natural bedding (linen, organic cotton, merino wool) elevates sleep quality and aligns with the luxury sustainability trend. These fabrics feel genuinely different and last years longer.

    Invest in 100% linen sheets ($80–$150 per set from Parachute, Etsy, or Brooklinen). Add a merino wool throw blanket ($50–$120 from Woolroom or Everlane). Both improve over time—they actually get softer with washing. Budget option: Start with one organic cotton sheet set ($40–$80) and build from there.

    Shopping takes 30 minutes; setup is immediate.

    Pro tip: Linen wrinkles naturally—this is charming, not a flaw. Embrace it.

    Climbing into bed becomes a tactile experience that encourages better sleep. You’ll notice yourself relaxing faster and sleeping deeper.


    11. Create a Statement Headboard with Fabric or Wood

    A statement headboard anchors your bed as the room’s focal point without requiring major renovation. Fabric and wood options both work beautifully.

    For renters: Hang removable fabric panels ($30–$80) or use a peel-and-stick headboard decal ($20–$60). For owners: Invest in an upholstered headboard ($200–$600) or a solid wood statement headboard ($300–$800 from Article, West Elm, or local woodworkers). DIY option: Build one from plywood and fabric for $50–$150.

    Installation ranges from 30 minutes (fabric panels) to half a day (wood). Some pieces ship ready-to-hang.

    Pro tip: Choose headboard fabric in a texture that contrasts with your walls—matte linen against smooth walls creates depth.

    Your bed becomes the undeniable centerpiece. The room organizes visually around this one strong statement.


    12. Hang Large-Format Art That Reflects Your Taste

    Large artwork personalizes a room more effectively than any trendy accessory. Art-led design is having a moment because it actually works—it communicates who you are.

    Find art on Etsy, Minted, local galleries, or print-on-demand sites ($20–$200 depending on size and quality). Frame it at Michael’s, Framebridge, or a local framer ($40–$150 for framing). Go oversized—one 36″x48″ print has more impact than five small ones. Budget hack: Print high-quality digital files yourself ($5–$15) and use affordable frames from IKEA ($15–$40).

    Hanging takes 30 minutes. Changing art out later is renter-friendly.

    Pro tip: Choose art in colors that already exist in your room for instant cohesion. Abstract, botanical, or vintage styles all photograph beautifully.

    Your bedroom finally feels like it belongs to you, not a generic rental or showroom. Visitors immediately notice the curated, intentional style.


    13. Install Floating Shelves for Plants and Styling

    Floating shelves provide storage and styling real estate without taking floor space—they’re renter-friendly, budget-conscious, and endlessly functional.

    Buy wooden floating shelves ($20–$50 each from IKEA, Home Depot, or Amazon). Install floating shelf brackets ($15–$30 per shelf, included with some shelves). The actual installation takes 1–2 hours with basic tools. Renters: Adhesive shelves exist ($15–$40) but work best on smooth walls and with light items only.

    Styling takes as long as you want—start simple with just plants and books.

    Pro tip: Style shelves with odd numbers of items (3, 5) and alternate between practical (books, storage boxes) and decorative (plants, art).

    You’ve added personality and function without visual bulk. The shelves become another design layer instead of clutter.


    14. Invest in Quality Lighting Beyond the Ceiling Fixture

    Lighting fundamentally changes how a room feels—harsh overhead lights drain energy, while layered warm lighting invites rest. This is one investment that pays off immediately.

    Add a bedside lamp with a warm bulb ($30–$80 from Article, Target, or IKEA). Include a floor lamp for reading ($40–$150). Upgrade bulbs to warm 2700K LED bulbs ($3–$10 each—these are crucial). A small reading light clipped to a headboard ($15–$40) adds functionality. Total: $100–$280 for a complete lighting refresh.

    Setup takes 30 minutes. Bulb swaps take 5 minutes but create massive visual and emotional shifts.

    Pro tip: Avoid cool-toned (blue) light after sunset—it disrupts sleep. Stick to warm (yellow) tones in your bedroom.

    Your room becomes genuinely relaxing. Evening wind-down becomes easier because the lighting supports it.


    15. Layer Throw Pillows in Coordinating Textures

    Throw pillow layering is the easiest way to add texture, color, and personality without commitment. You can swap them seasonally or whenever you crave change.

    Start with a neutral base pillow in linen or cotton ($20–$40). Add a patterned pillow in your accent color ($15–$35). Include a velvet or textured pillow ($20–$50) for luxury feel. Aim for 4–6 pillows total on a standard bed. Budget hack: Use pillows you already own and thrift stores ($5–$15 each).

    Shopping and arranging takes 1 hour.

    Pro tip: Mix matte and slightly shiny textures (matte linen + subtle velvet) for a styled, dimensional look.

    Your bed becomes inviting and layered. Every time you enter the room, you see intentional styling that says “this matters.”


    16. Add a Cozy Reading Nook with a Chair and Throw

    A reading nook transforms unused corner space into a sanctuary within your sanctuary. It’s not luxury—it’s necessity for people who actually read in bed.

    Find a comfortable chair ($100–$300 new, $30–$100 vintage from Craigslist or Facebook Marketplace). Add a small side table ($30–$80). Drape a chunky throw blanket ($40–$120). Include a clip-on reading light ($15–$40). Total investment: $150–$540, customizable to your budget.

    Setup takes 2 hours (move furniture, arrange, add lighting).

    Pro tip: Position the nook near a window for natural reading light during the day.

    You’ve created a dedicated retreat space. Instead of scrolling in bed, you now have an intentional spot for actual rest and reading.


    17. Swap Out Cabinet Hardware for Brass or Wood Details

    Hardware might seem small, but brass, wood, or matte black pulls instantly update existing furniture. This is a 15-minute refresh that costs under $50.

    Replace existing hardware on dressers or nightstands with brass pulls ($2–$8 per pull from IKEA, Wayfair, or local hardware stores). Wood knobs ($3–$10 each) work beautifully on rustic pieces. You’ll need a drill (or ask a handy friend). Total cost: $20–$50 for a full dresser. Takes 30–45 minutes.

    Renters: This modification is removable—keep original hardware and reinstall when you move.

    Pro tip: Mix metals in one room (brass + wood) as long as they’re the same warmth tone (both warm, not mixing warm brass with cool chrome).

    Your existing furniture suddenly looks intentional and updated. This single change can make a dated piece feel current.


    18. Paint Wooden Furniture in Earth Tones or Soft Pastels

    Refreshing wooden furniture with paint is cheap, high-impact, and deeply satisfying. You’re literally creating new pieces from what you already own.

    Choose paint in soft earth tones (sage green, warm taupe, terracotta) or soft pastels (cream, blush) from Benjamin Moore, Sherwin-Williams, or craft stores ($15–$25 per quart). Sand lightly ($0 if you already have sandpaper, $10–$20 if buying), apply 2–3 coats ($0–$10 in brushes), and seal if desired ($10–$20). Total cost: $35–$75 per piece.

    Painting takes 4–6 hours plus drying time spread across 2–3 days.

    Pro tip: Use chalk paint for easy application—it requires less prep and fewer coats than standard paint ($12–$18).

    You’ve transformed a piece into exactly what your room needed. Suddenly that old thrifted nightstand fits your aesthetic perfectly.


    19. Layer Window Treatments: Sheer + Blackout Options

    Layered window treatments give you light control and style—exactly what sleep spaces need. You get softness during the day and total darkness when needed.

    Install a lightweight tension rod near the window ($15–$30) with blackout panels ($30–$80 per panel). Add sheer linen curtains on a second rod ($40–$100 per pair) mounted higher or on the same rod. Renters: Adhesive rods work if your walls are smooth ($15–$25). Total: $100–$235.

    Installation takes 1–2 hours. Layering is totally renter-friendly since nothing is permanent.

    Pro tip: Sheer fabrics in cream or warm gray let filtered light in without washing out your room’s colors.

    You control light like never before. Early mornings feel peaceful instead of jarring, and nap time is genuinely dark when you need it.


    20. Incorporate Raw Materials: Cork, Marble, or Reclaimed Wood

    Raw materials ground modern designs with earthy authenticity. They read as thoughtful and expensive even when sourced affordably.

    Add a cork bulletin board or wall tiles ($20–$60, easily installed on renters’ walls). Swap nightstands for a marble-topped option ($80–$250) or DIY by placing a marble slab on a simple frame ($50–$150). Source reclaimed wood planks for a headboard ($50–$200 from salvage yards, Etsy, or building demolition sites). Each adds organic texture without trend-chasing.

    Projects range from 15 minutes (hanging cork) to 2–3 hours (assembling reclaimed wood).

    Pro tip: Mix raw materials with softer textures (linen, wool, plants) so your room doesn’t feel cold or industrial.

    Your room gains sophisticated, grounded energy. It looks like it belongs to someone who knows what they’re doing—even if you’re figuring it out as you go.


    21. Use Removable Wallpaper for Quick Pattern Impact

    Removable wallpaper is the renter’s secret weapon and a low-commitment way to add pattern. You get bold design without permanent commitment.

    Choose from Spoonflower, Etsy, Wayfair, or Peel & Stick Wallpaper brands ($20–$80 per roll depending on coverage). Measure your walls carefully. Installation takes 2–4 hours and requires patience but no tools. Removal is genuinely painless—just peel slowly.

    Total cost: $30–$100 for one accent wall.

    Pro tip: Apply wallpaper to one wall only for impact. Two walls can overwhelm a bedroom.

    Your room changes completely. When you move, you take it with you—zero damage, zero stress.


    22. Create Texture Contrast with Smooth vs. Chunky Fabrics

    Texture contrast is how high-end styling happens—mixing matte linen, soft velvet, chunky knits, and smooth cotton creates depth that photos actually capture.

    Start with smooth linen or cotton sheets as your base ($40–$80). Layer a chunky knit throw ($40–$120). Add smooth velvet pillows ($20–$50 each). Include a linen throw pillow ($15–$35). The key is intentional contrast, not matching textures.

    Shopping takes 1–2 hours. Arrangement is immediate.

    Pro tip: Group similar textures together (all smooth or all chunky) rather than alternating—it looks more intentional.

    Your bed becomes genuinely touchable and inviting. Visitors immediately notice how good it looks and feels.


    23. Add a Small Vintage Rug or Textile as Wall Art

    Hanging textiles as wall art is underrated—it adds craftsmanship, color, and personal history in one move. Vintage rugs and textiles tell stories.

    Find small vintage rugs or handwoven textiles ($20–$80) on Etsy, Facebook Marketplace, or thrift stores. Mount on a simple hanging rod ($10–$20) using basic hooks ($5–$10). Installation takes 30 minutes.

    Budget hack: Fold a favorite textile and lean it on a shelf instead of wall-mounting.

    Pro tip: Choose textiles in colors that already exist in your room for cohesion. A single textile becomes an art piece, not random clutter.

    You’ve added warmth and personality while supporting handmade craftsmanship. The room feels collected and intentional—like somewhere real people live.


    Pin this list for your next bedroom refresh. Try just one idea this weekend and watch how it shifts the entire vibe. Your cozy sanctuary is closer than you think.

  • 25 Natural Fiber Bedding Themes for Breathable, Relaxing Nights

    25 Natural Fiber Bedding Themes for Breathable, Relaxing Nights

    Introduction

    You know that feeling when you slip into bed and can finally breathe? That’s what natural fiber bedding does—it cools you down when you’re too warm, warms you up when you need it, and lets your skin actually breathe instead of getting clammy and uncomfortable. Whether you struggle with night sweats, overheating, or just want a bedroom that feels like a luxury retreat, natural fibers are the upgrade that actually delivers. Over the next few minutes, we’re walking through 25 specific bedding themes and styling ideas that use linen, cotton, hemp, and other breathable materials to create a bedroom that works with your body instead of against it. From budget-friendly swaps to investment pieces, you’ll find options that fit your lifestyle and sleep style.


    1. Go All-In with Pure Linen Sheets

    Pure linen sheets are the foundation of breathable luxury bedding. Linen regulates temperature like nothing else—it pulls moisture away from your skin and dries quickly, so you won’t wake up sweaty.

    Hunt for 100% linen sheets at Parachute ($150–$300), Brooklinen ($120–$200), or budget-friendly alternatives at Target ($40–$80). Linen wrinkles naturally, which adds to the charm, not against it. Expect 15 minutes to put them on your first time (the texture takes getting used to). Pro tip: Wash linen in cold water and air dry to preserve its lifespan—most quality linens last 5+ years with care.

    Your mornings feel instantly lighter when you’re not peeling yourself off sweaty sheets. Linen bedding becomes the reason you actually want to make your bed.


    2. Layer Two Cotton Weights for Temperature Control

    Different cotton weights serve different purposes—percale for crisp coolness, sateen for soft drape. Layering them means you adjust to seasons without buying new sets.

    Start with percale cotton sheets (crisp, cool; $60–$120 at Target or Amazon) as your base. Add a lightweight cotton blanket ($40–$80 at Bed Bath & Beyond or IKEA) on top for spring and fall, then swap it for a heavier quilt in winter. This takes zero skill—just try different combinations and see what works. Budget hack: Buy one quality set and one mid-range backup so you always have clean sheets.

    You’ll stop flipping your pillow to the cool side because your whole bed stays at the right temperature. The flexibility alone saves money because you’re not buying season-specific bedding.


    3. Mix Linen and Cotton for the Hybrid Sweet Spot

    Some nights you want linen’s breathability; other nights you crave cotton’s softness. Why choose? Linen duvets paired with cotton sheets give you the best of both.

    Grab a linen duvet cover ($100–$200 at Parachute or Etsy small makers) and pair it with quality cotton sheets ($60–$120). The duvet cover washes separately, so you can refresh the look seasonally without replacing everything. Takes 10 minutes to swap. Pro tip: Look for linen-cotton blends ($80–$150) if full linen feels too textured—they’re softer right out of the wash.

    This combination looks intentional and elevated without feeling fussy. Most people comment on how “resort-like” your bed looks, and you’re actually sleeping better.


    4. Use Hemp Pillowcases for Extra Durability

    Hemp is tougher than linen or cotton, so if you want bedding that survives years of washing, hemp pillowcases are your answer. They’re also naturally hypoallergenic and antimicrobial.

    Search for pure hemp pillowcases on Etsy ($35–$60 per pair) or try hemp-blend pillowcases at Target ($20–$40). They wrinkle like linen but feel softer initially. First wash: cold water, gentle cycle. Expect 5 minutes to put them on. Budget option: Buy just two hemp pillowcases for your side of the bed and test before committing to more.

    After a year of use, hemp pillowcases look better than cotton ones did after three months. They’re the investment piece that actually pays for itself in longevity.


    5. Create a Neutral Texture Stack with Waffle Weave

    Waffle weave adds visual interest and improves breathability—air pockets trap cooling air without adding bulk.

    Pick up a waffle-weave cotton duvet ($80–$150 at IKEA, Target, or Amazon) in cream, oatmeal, or gray. Layer it with a smooth linen throw ($60–$100) for contrast. Takes 20 minutes to style the full bed. Pro tip: Waffle weave shows wrinkles less than flat linen, so it photographs beautifully and requires less fussing.

    Your bed looks more expensive than it actually is because the texture does all the visual work. Guests always ask where you got “the fancy bedding.”


    6. Add a Linen Bed Skirt for Hidden Storage Magic

    A linen bed skirt hides under-bed storage and softens the whole room’s appearance. It’s one of those finishing touches that makes a bedroom look styled rather than slapped together.

    Buy a pre-made linen bed skirt ($50–$120 at Target, Wayfair, or Amazon) or DIY one using linen fabric ($30–$50 for fabric plus 30 minutes of basic sewing). Measure your bed first—full, queen, and king sizes matter. Slip it on after sheets, before your duvet. Budget hack: Use a flat linen sheet and safety pins if sewing feels intimidating.

    Suddenly your bedroom looks intentional and put-together. Plus, you’ve gained invisible storage for seasonal items or extra bedding.


    7. Switch to Organic Cotton for Sensitive Skin

    Conventional cotton is heavily pesticide-treated. If you have eczema, sensitive skin, or just want fewer chemicals touching your body eight hours a night, organic cotton is worth the upgrade.

    Look for GOTS-certified organic cotton sheets at Parachute ($150–$250), Coyuchi ($120–$200), or Organic Threads ($90–$150). They’re softer than conventional cotton and actually get softer with every wash. Takes 15 minutes to put on; you’ll notice the difference immediately. Pro tip: Many organic brands offer sample sets so you can try before committing.

    Within two weeks, your skin will feel less irritated in the morning. The long-term payoff is fewer wake-ups from itching and genuinely better sleep quality.


    8. Layer Linen Pillows in Mixed Sizes

    Stacking different pillow sizes and shades creates visual depth and lets you customize your comfort level. Mix textures so your bed looks effortlessly styled.

    Buy linen pillowcases in various sizes: standard ($30–$60), king ($35–$70), and body pillow ($40–$80) options from Etsy makers or Parachute. Fill them with down or buckwheat pillows based on your preference. Takes 10 minutes to arrange. Budget hack: Start with one pillowcase and add more over time as your budget allows.

    Your bed instantly looks like a designer styled it. You’re also supporting better neck alignment because you have pillow options.


    9. Use a Linen Throw Blanket as a Seasonal Swap

    Instead of buying completely new bedding for summer versus winter, rotate throw blankets made from different natural fibers. Linen for hot months, wool for cold ones, cotton for spring and fall.

    Grab a quality linen throw ($60–$120 at Etsy, Anthropologie, or Amazon) for warm seasons and rotate it out for a wool throw ($80–$150) come fall. Store off-season throws in a cedar chest to protect from moths. Takes 5 minutes to swap. Pro tip: Keep throws folded on a bench at the foot of your bed for easy access and visual appeal.

    You’re essentially getting four different beds’ worth of styling for the cost of one set, plus your room feels intentionally seasonal without overspending.


    10. Invest in a Linen Duvet Cover That Fits Your Aesthetic

    Linen duvet covers are the easiest way to shift your bedroom’s entire vibe seasonally. They’re durable enough to last years and look better the more you wash them.

    Choose from neutral linen ($100–$200), dyed options ($120–$180 for sage, terracotta, or navy), or patterned linen ($130–$220) at Etsy, Parachute, or Brooklinen. Insert your down duvet inside (15 minutes, feels awkward the first time but gets easier). Wash on cold, gentle cycle. Pro tip: Button closures stay secure better than ties during washing.

    Once you go linen duvet, you won’t go back—the wrinkled texture reads as “intentionally relaxed” rather than “I haven’t made my bed.” It’s the shortcut to that effortlessly styled look.


    11. Pair Natural Fiber Sheets with Vintage Quilts

    Combining modern natural fiber sheets with vintage quilts (found at thrift stores or inherited from family) creates a bedroom that feels like yours, not like a catalog page.

    Start with quality natural fiber sheets as your base ($60–$150), then layer a vintage or thrifted quilt ($20–$80 from estate sales, Etsy, or local antique shops). The sheets show off the quilt without it getting lost in synthetic fabrics. Takes 20 minutes to arrange. Budget hack: Check Facebook Marketplace and Craigslist before Etsy—you’ll find deals.

    Your bedroom tells a story now instead of looking generic. People notice the intentionality and want to know the history of each piece.


    12. Try Bamboo Rayon Sheets for Silky Softness

    Bamboo rayon sheets offer the softness of silk without the price tag or care hassle. They’re thermoregulating, hypoallergenic, and actually breathable despite their silky feel.

    Look for 100% viscose from bamboo sheets at Ettitude ($120–$180), Cariloha ($100–$150), or Amazon ($50–$100 budget option). They feel slippery at first—embrace it. Wash warm, tumble dry low. Takes 20 minutes to put on because they slide around. Pro tip: Use a duvet cover to keep sheets anchored if slipping bothers you.

    You get luxury softness without night sweats. Some people sleep cooler on bamboo rayon than any other natural fiber option.


    13. Create a Monochromatic Natural Palette

    Sticking to a monochromatic palette of natural tones makes your bedroom feel intentional and serene. Natural fibers shine when they’re the star, not competing with colors.

    Choose all natural fiber basics in cream/beige/oatmeal: linen sheets ($100–$200), cotton duvet ($120–$180), linen throw ($60–$100), and natural fiber pillows ($80–$150). Let texture—not color—be your visual interest. Takes 30 minutes to shop and style. Budget hack: Start with one or two pieces and add over time to avoid sticker shock.

    Your bedroom becomes a visual oasis. The lack of color noise actually helps you sleep better because your brain isn’t processing visual clutter.


    14. Use Linen Curtains to Echo Your Bedding

    Matching your curtains to your bedding creates a unified, high-design look without being matchy-matchy. Linen works especially well because wrinkles feel intentional across an entire room.

    Buy linen curtain panels ($80–$160 per panel at Etsy or Design Within Reach) to echo your linen bedding colors. Hang floor-to-ceiling if possible for drama. Takes 30 minutes to hang (or hire a handyman for $50–$100). Pro tip: Choose the same linen weight so they photograph together cohesively.

    Suddenly your room looks like it was designed by someone who knows what they’re doing. The continuity makes everything feel more expensive and intentional.


    15. Add a Natural Fiber Bed Runner for Visual Interest

    A bed runner (a decorative length of fabric across the foot) adds a designer touch without committing to a full new duvet. Plus, it protects your bedding from dust and spills.

    Find or make a linen bed runner ($30–$60 purchased, or DIY with $15–$25 of linen fabric). Drape it across your bed’s foot at a slight angle. Takes 5 minutes to arrange. Budget hack: Use a linen scarf or throw folded lengthwise if you don’t want to invest in a dedicated runner.

    You’ve added a polished finishing touch that makes your bed look professionally styled. Guests always comment on this detail.


    16. Incorporate Hemp Fabric Accents Gradually

    You don’t need to overhaul everything at once. Start by adding one or two hemp accents to your existing bedding to test the material without overspending.

    Buy one hemp throw pillow ($25–$50 on Etsy or Amazon) or hemp accent throw ($40–$80) and place it on your bed for two weeks. See how it feels, how it washes, whether you like the texture. Takes 5 minutes to style. Pro tip: Hemp softens significantly with washing, so don’t judge it until after the first wash.

    If you love it, gradually add more hemp pieces. If you don’t, you’ve only invested $50 instead of hundreds on a full set.


    17. Mix Natural Fiber Sheets with a Silk Pillowcase

    Combining breathable natural fiber sheets with a silk pillowcase gives you the best of both worlds: cool sleeping surfaces plus silk’s hair and skin benefits.

    Add one 100% mulberry silk pillowcase ($30–$80 on Amazon, Etsy, or Blissy) to your natural fiber sheet setup. The silk reduces friction on your hair and face while the linen or cotton keeps your body cool. Takes 5 minutes to add to your pillows. Pro tip: Hand wash the silk pillowcase to extend its life.

    You wake up with smoother hair, fewer sleep creases on your face, and the same cool sleep quality. It’s a small luxury that compounds over time.


    18. Try Linen-Cotton Pillowcases for Softness Without Texture

    Pure linen takes time to soften. If you want linen’s benefits right away without the initial stiffness, linen-cotton blends are the compromise.

    Search for 50/50 linen-cotton pillowcases ($25–$50 at Target, IKEA, or Etsy). They’re softer than pure linen immediately but still breathable. Takes 15 minutes to put on your first set. Budget hack: Buy two pairs so you always have one clean while the other is drying.

    You get improved breathability without sacrificing softness. Most people prefer this blend to pure linen for pillowcases specifically.


    19. Create Contrast with a Textured Knit Throw Blanket

    Smooth natural fiber sheets pair beautifully with chunky knit throws. The texture contrast makes your bed look magazine-worthy and adds coziness without overheating.

    Layer a chunky cotton or wool knit throw ($60–$120 from Etsy, Anthropologie, or Target) over your smooth linen or cotton duvet. Drape it casually at the foot or fold it neatly. Takes 10 minutes to style. Pro tip: Choose a throw in a slightly different shade to create visual depth.

    Your bed becomes a focal point people want to curl up in. The textural variety keeps the room from feeling flat or boring.


    20. Switch to Natural Fiber Mattress Pads for Added Breathability

    If you’re overheating even with good sheets, the issue might be your mattress itself trapping heat. A natural fiber mattress pad acts as a cooling barrier.

    Add a cotton or wool mattress pad ($80–$200 depending on size) between your mattress and sheets. Wool is especially thermoregulating—it cools you down when hot and warms you when cold. Takes 10 minutes to apply. Pro tip: Wash your mattress pad monthly to keep it fresh.

    This simple addition solves chronic night sweats for a lot of people. You’ll notice the difference within one night.


    21. Build a Layered Pillow Wall with Mixed Fibers

    Multiple pillows in different natural fiber fabrics create a hotel-like backdrop and let you customize your sleeping comfort by mixing and matching nightly.

    Collect 4–6 pillows in various natural fiber covers: linen ($30–$70 each), cotton ($25–$60), hemp ($35–$75). Layer them at the headboard with larger pillows in back, smaller in front. Takes 15 minutes to arrange initially, then seconds to adjust nightly. Budget hack: Buy one quality pillow and multiple affordable cases to rotate.

    Your bed looks luxuriously styled while actually being more functional—you can pull out exactly the pillow you need for comfort.


    22. Use Linen Fitted Sheets Under Your Duvet for Grip

    Linen fitted sheets grip better under your duvet than some other materials, so your duvet stays positioned instead of sliding around all night.

    Choose 100% linen fitted sheets ($40–$80) in your bed size (measure twice) and pair with any duvet. Linen’s natural grippy texture keeps everything anchored. Takes 20 minutes to put on properly. Pro tip: Tuck excess fabric under the mattress for maximum hold.

    You’ll stop waking up with your duvet twisted to one side. This one feature improves your entire sleep experience.


    23. Mix Vintage Linen with Modern Cotton for Texture Balance

    Pairing heirloom or thrifted linen pieces with modern cotton creates a bedroom that feels collected and intentional rather than matchy-matchy.

    Combine vintage or thrifted linen sheets ($15–$40 from estate sales or Etsy) with a new cotton duvet ($80–$150). The contrast in age and texture reads as intentional design. Takes 20 minutes to style. Budget hack: Thrift stores and Facebook Marketplace are goldmines for linen at 90% off retail.

    Your room tells a story. Guests sense that you have taste and personality, not just budget.


    24. Create Summer-Ready Bedding with Lightweight Cotton Voile

    Cotton voile is the thinnest, most breathable cotton weave available. It’s perfect for hot sleepers or summer months when heavy linens feel unnecessary.

    Hunt for 100% cotton voile sheets ($60–$120 at Target, Etsy, or specialty bedding sites). They drape beautifully and feel weightless. Wash cool, hang dry if possible. Takes 15 minutes to put on. Budget hack: Buy one voile set and rotate it into your collection seasonally.

    This is the bedding you actually want to get into during summer. No more sweating through sheets by 2 a.m.


    25. Layer a Wool Mattress Topper Under Natural Fiber Sheets

    A wool topper adds cushioning and temperature regulation without replacing your entire mattress. Pair it with natural fiber sheets for maximum breathability.

    Add a 100% wool mattress topper ($150–$300 depending on thickness) under your natural fiber sheets ($100–$200). Wool naturally wicks moisture and regulates temperature year-round. Takes 15 minutes to apply. Pro tip: Wool toppers need airing out monthly—flip them and leave them uncovered for a few hours.

    You’ve essentially upgraded your sleep comfort without investing in a new mattress. The difference between sleeping hot and sleeping perfectly is often this simple addition.


    Save this post and pick one idea to try this weekend—whether it’s swapping your pillowcases, adding a throw, or upgrading your sheets. Small changes in bedding quality add up fast, and you deserve to sleep as good as your bedroom looks.

  • 25 Arched Door Frame Concepts That Add Classic Architectural Charm

    25 Arched Door Frame Concepts That Add Classic Architectural Charm

    Arched door frames do something special—they add instant architectural character that transforms an ordinary entryway into a focal point worthy of admiration. Whether you’re updating a tired entry, refreshing an interior doorway, or planning a new build, arched frames offer timeless elegance that works with nearly any design style. The good news? You don’t need a complete renovation to add this classic touch. We’ve gathered 25 achievable concepts ranging from simple trim upgrades to statement-making architectural features. Each idea includes realistic pricing, DIY options, and styling tips so you can choose what works for your space and budget. Let’s explore how to bring architectural charm into your home, one arched frame at a time.

    1. Paint Arches a Contrasting Accent Color

    A fresh coat of paint on your arch creates drama without structural work. This budget-friendly hack costs just $15–$40 for quality paint and a small brush, taking only an afternoon to complete. Choose a color that contrasts with your walls—deep forest green, charcoal, or matte black all photograph beautifully and draw the eye upward.

    Apply painter’s tape carefully along the arch curve, then use a small angled brush for precision. A second coat ensures rich color. The result? Your arch becomes an architectural statement piece that costs less than dinner out. This works beautifully for renters too—just ask about semi-permanent paint or plan a touch-up when you move.

    2. Add Decorative Crown Molding Along the Arch

    Crown molding traces your arch’s curve and adds instant sophistication. Pre-made curved molding runs $50–$150, while installation takes a weekend if you’re comfortable with basic carpentry—or hire a pro for $200–$400. The payoff? Your arch looks professionally designed and dramatically more polished.

    Measure your arch carefully and order flexible or pre-curved molding that matches your style. Paint or stain it to coordinate with your trim. The curves catch light beautifully, adding depth and visual interest. If DIY feels risky, hiring a handyperson is worth the investment for flawless results. Your entry gains a custom, high-end appearance that guests notice immediately.

    3. Install Arched Shiplap Inside the Frame

    Shiplap-lined arches create cozy, farmhouse-inspired charm with excellent texture and visual interest. Material costs run $40–$100 for a standard doorway, plus a weekend for installation. This project is moderately challenging but totally achievable for confident DIYers with basic tools.

    Cut shiplap pieces to follow your arch’s curve (a jigsaw helps here), then secure with finishing nails and wood glue. Paint everything white or a soft neutral for cohesion. The horizontal lines draw focus upward, making your entry feel intentional and styled. Light reflects off the texture beautifully in photos and real life. This works particularly well for cottage or rustic aesthetics.

    4. Create a Faux Arch with Trim and Paint

    No actual arch? Build one with clever trim work and paint. For $30–$80 in materials and a few hours of work, you can sketch an arch design, install curved trim pieces, and paint to create dimensional illusion. This hack works surprisingly well and requires only basic DIY skills.

    Use flexible trim or segment straight pieces to trace your desired arch curve. Secure with finish nails and wood filler to cover gaps. Paint the interior arch and trim a unified color to enhance the 3D effect. Highlight with subtle shadow or shading for extra depth. Guests will think it’s architectural—you’ll know it’s clever design on a budget.

    5. Frame Your Arch with Matching Sidelights

    Arched doors paired with flanking sidelights create luxury entry presence. Sidelight installations run $400–$1,200 depending on glass quality and size, plus $200–$500 for professional installation. This investment significantly boosts curb appeal and natural light. Hire a professional for accurate measurements and weatherproof sealing.

    Choose frosted or clear glass depending on privacy needs. The visual balance of an arch with symmetrical sidelights feels formal and welcoming. Your entry gains the high-end look typically seen in $500K+ homes. If budget is tight, consider this a long-term investment—potential home buyers notice quality entry features.

    6. Install Recessed Lighting Inside the Arch

    Uplighting your arch creates drama and makes the feature pop after dark. Recessed lights cost $30–$80 per fixture; plan for 2–4 depending on arch size. Professional installation runs $150–$300. The theatrical effect is absolutely worth the investment for both aesthetics and wayfinding.

    Hire an electrician to run wiring safely inside the wall cavity and position lights to graze the arch curve. LED bulbs (warm white, 2700K) provide ambiance without heat or high electric bills. Your arch glows beautifully in evening photos, and visitors feel welcomed by the intentional lighting. This elevates your entry to boutique-hotel quality.

    7. Apply Gold Leaf Detailing Along the Arch Edge

    Gold leaf adds luxury and glamour without renovation expense. Kits cost $20–$40, and the project takes 2–3 hours. Results look expensive and photograph beautifully—perfect for statement entries or formal living areas. This DIY project requires patience but no special skills beyond following instructions carefully.

    Prep your arch surface, apply adhesive sizing, then carefully apply thin gold sheets following the curve. Seal with matte varnish to prevent tarnishing. The subtle shimmer catches light and adds refinement. Your arch becomes a conversation piece that guests admire. This pairs gorgeously with matte black or navy paint.

    8. Hang Decorative Wrought Iron Over the Arch

    Wrought iron adds romantic, Old World character while staying open and airy. Decorative iron pieces run $80–$250 installed above your arch. This styling choice suits Mediterranean, Spanish Colonial, or traditional homes beautifully. Installation takes just an hour once you’ve chosen your piece.

    Search “wrought iron arch toppers” at Etsy, Home Depot, or specialty iron shops. Choose designs with scrollwork that complements your door style. The iron becomes architectural jewelry that frames your entry elegantly. Guests perceive your home as thoughtfully designed and architecturally significant.

    9. Build a Bookshelf Alcove Inside Your Arch

    Transform your arch into functional, beautiful display space. Custom alcove shelving runs $150–$400 depending on depth and materials. This moderate DIY project takes a weekend and requires basic carpentry skills. The payoff? A charming built-in that adds architectural depth and character.

    Build shallow shelves (6–8 inches deep) within or just below your arch, then style with books, plants, and meaningful objects. Paint shelves to match trim or contrast subtly. Your arch becomes a functional focal point rather than purely decorative. This works beautifully in hallways, bedrooms, or living rooms seeking more character.

    10. Add Ornamental Corbels Beneath the Arch

    Corbels add classical support and visual weight to your arch. Pairs cost $40–$120, plus $50–$150 for installation. They work whether your arch is structural or decorative, and they’re available in countless styles from ornate to minimal. Installation takes an hour or two for a confident DIYer.

    Choose corbels that echo your arch’s aesthetic—carved wood for traditional, simple geometric forms for modern, scrolled iron for romantic. Paint or stain to coordinate with existing trim. Corbels create the illusion of structural support and add Old World charm. Your entry suddenly looks like it belongs in a design magazine.

    11. Paint a Trompe-l’Oeil Shadow Beneath the Arch

    Trompe-l’oeil (fool the eye) shadow painting adds sophisticated depth using only paint. Supplies cost $15–$30, and the project takes 3–4 hours. This advanced DIY project looks professional when executed carefully and utterly transforms your arch’s presence.

    Use charcoal or soft gray paint mixed at varying opacity levels. Apply along the arch’s underside and sides to create shadow depth. Blend carefully with a dry brush for naturalistic effect. Photograph your finished arch in different lighting—the dimension is stunning. This technique works beautifully with minimalist or contemporary interiors seeking subtle refinement.

    12. Install a Curved Glass Panel Insert

    Glass inserts modernize classic arches while maintaining elegance and allowing light flow. Custom curved glass costs $200–$500, plus installation. This works beautifully for interior doors needing privacy-with-openness balance. Professional installation ensures proper sealing and safety.

    Choose clear glass for maximum light, frosted for privacy, or textured for visual interest. The glass arch catches light beautifully throughout the day. Your space feels simultaneously open and intentionally defined. This update works for contemporary, transitional, or minimalist aesthetics seeking functional beauty.

    13. Add Floating Shelves Flanking Your Arched Entry

    Flanking shelves create symmetry and functional styling space without crowding your arch. Two 24-inch shelves cost $60–$150, plus $50–$100 for installation. This easy addition takes an afternoon and instantly adds sophistication and visual interest to your entry.

    Mount shelves at matching heights on both sides of your arch, approximately 12–18 inches out from the frame. Style with personal objects, plants, and artwork that complement your aesthetic. The symmetry draws eyes to your beautiful arch while adding functionality. This works particularly well in hallways or living rooms with blank flanking walls.

    14. Frame Your Arch with Architectural Wallpaper

    Wallpaper within your arch adds pattern and personality with zero structural work. Quality wallpaper runs $20–$60 per roll, plus 2–3 hours for application. This renter-friendly update creates major visual impact and photographs beautifully. Choose patterns that complement your overall aesthetic—geometric, damask, botanical, or abstract all work.

    Prep your arch surface carefully, then apply wallpaper following the curve. Trim edges precisely. The patterned arch becomes a focal point that grounds your entire entry aesthetic. When you move, removal is straightforward (choose removable options for peace of mind). Your arch gains personality and design intentionality instantly.

    15. Install Vintage Sconces Flanking the Arch Base

    Sconces add functional light and dramatic symmetry. Pairs cost $60–$200, plus $100–$200 for electrical installation if adding new circuits. This investment adds both aesthetic and practical value. Professional installation ensures safe wiring and secure mounting.

    Choose sconces that echo your arch’s design language—traditional brass for classic arches, sleek metal for contemporary styles, ornate iron for romantic aesthetics. The symmetrical lighting frames your arch beautifully and creates welcoming ambiance. Evening photos and real-life experience both improve significantly. This feels like a luxury hotel entrance.

    16. Create a Curved Ceiling Detail Above Your Arch

    Mirroring your arch curve in the ceiling above creates architectural unity and sophistication. Custom curved drywall or soffit runs $500–$1,500 depending on complexity. This professional installation takes 3–5 days but creates stunning spatial flow and cohesion. Hire an experienced drywall contractor for best results.

    Work with a contractor to design ceiling curves that echo your arch’s proportions. Finishing and painting take additional time but complete the integration beautifully. Your entire entry feels professionally designed and architecturally considered. The ceiling curve creates visual movement and elegance that elevates your entire home’s perception.

    17. Stain Your Arch a Rich Contrasting Wood Tone

    If your arch is wood, restaining creates drama without replacement expense. Stain costs $15–$30, and the project takes one afternoon. This easy update works beautifully for transitioning from light to dark color schemes or refreshing tired existing wood. Basic DIY skills suffice—just follow stain instructions carefully.

    Sand the arch lightly to remove existing finish, apply stain in thin coats following wood grain direction, then seal with matte or satin varnish. The contrasting wood tone creates visual interest and sophistication. Your arch becomes a design anchor for the entire entry. This simple update often looks like a major renovation to guests.

    18. Mount a Statement Mirror Inside Your Arch

    An arched mirror hung within or opposite your arch creates visual drama and amplifies light. Decorative arched mirrors cost $80–$300. This renter-friendly styling choice works beautifully in entryways, hallways, or living room entry walls. No installation needed—just hang and enjoy.

    Choose a mirror that echoes your arch’s proportions for maximum visual impact. Position to reflect natural light and make spaces feel larger. The mirrored arch creates depth and elegance while serving practical purpose. Guests often comment on how bright and spacious your entry feels. This single styling choice elevates your entire space’s perception.

    19. Add Beadboard Wainscoting Around Your Arch

    Beadboard adds cottage charm and textural interest. Panels cost $40–$100, plus $75–$200 for installation. This project takes a weekend and creates authentic architectural character that works beautifully in traditional, farmhouse, or cottage-inspired homes. Basic carpentry skills help, but many DIYers accomplish this successfully.

    Measure your space carefully and cut beadboard to fit around your arch base. Secure with finish nails and wood filler, then paint. The vertical detailing makes ceilings appear taller while adding warmth and personality. Your arch becomes part of a cohesive, intentionally designed entry rather than an isolated feature.

    20. Install Decorative Tile Inside the Arch

    Decorative tilework adds Mediterranean or Spanish Colonial charm. Quality tile costs $50–$150 per linear foot, plus $100–$300 for professional installation. This moderate investment creates stunning visual impact and works beautifully for homes with ethnic or global design influences. Professional installation ensures proper setting and longevity.

    Work with a tile specialist to design your pattern and create a template matching your arch’s curve. Installation requires precision but looks absolutely professional. The patterned tile becomes a natural focal point that guests admire. Your arch gains personality and cultural design richness.

    21. Create a Neon Glow Along the Arch Interior

    Neon adds trendy, contemporary edge to classic arches. Custom neon installations cost $200–$600. This statement-making choice works beautifully in modern, eclectic, or maximalist interiors. Professional neon shops handle custom fabrication and safe installation.

    Choose warm white or subtle color (pale pink, soft blue) that complements your space without overwhelming. Neon glows beautifully in evening photos and creates unique visual interest. Your arch becomes a design conversation piece that reflects contemporary aesthetic sensibility. This works particularly well for creative homes, studios, or forward-thinking interiors.

    22. Paint a Subtle Ombré Effect Across Your Arch

    Ombré painting creates artistic, sophisticated depth without dramatic contrast. Paint costs $20–$40; project time is 4–5 hours. This moderate DIY project looks complex but follows straightforward technique and creates gallery-worthy results. Patience and careful blending create the magic.

    Choose two or three coordinating colors and blend with dry-brush technique moving gradually across your arch. Work slowly, allowing colors to merge naturally. Photograph the finished arch in different lighting—the depth is gorgeous. This artistic touch works beautifully in modern, eclectic, or creative homes seeking distinctive character.

    23. Install a Sliding Barn Door Within Your Arch

    Barn doors add rustic functionality while maintaining your arch’s visual impact. Sliding door hardware and door panel cost $150–$400, plus 3–4 hours for installation. This moderate DIY project creates stunning farmhouse-contemporary character and functional space division without major construction.

    Mount your barn door track securely above the arch opening, then hang the door panel. Choose wood grain or metal styles coordinating with your aesthetic. The door glides smoothly while your arch remains visible and beautiful. This hybrid approach combines architectural elegance with practical functionality and trendy farmhouse style.

    24. Embed Rope or Cord Lighting Along the Arch Curve

    Rope lighting adds warmth and ambiance without permanent installation. LED rope light kits cost $25–$60. This renter-friendly, plug-in option takes 30 minutes to install and creates immediate atmospheric transformation. Perfect for those hesitant about permanent upgrades.

    Clean your arch surface, apply adhesive rope light strips following the curve, then plug into nearby outlet. Warm-white bulbs (2700K) create cozy ambiance; cooler tones feel more contemporary. Your arch glows beautifully in evening hours and photographs wonderfully. This affordable update feels like intentional atmospheric design.

    25. Commission Custom Carved Wood Details for Your Arch

    Custom carvings add bespoke artistic character and luxury. Professional wooden carvers charge $400–$1,500+ depending on complexity. This investment creates truly one-of-a-kind architectural detail that increases perceived home value significantly. Commission work typically takes 4–8 weeks.

    Work with a skilled woodcarver to design custom details reflecting your aesthetic and home’s architectural period. Floral motifs suit traditional homes; geometric patterns complement contemporary spaces. Carved details catch light beautifully and become conversation pieces guests admire closely. Your arch becomes personalized architectural art.

    26. Add Architectural Plaster Molding with Historic Details

    Plaster molding recreates historic architectural grandeur beautifully. Ornamental plaster pieces cost $100–$300, plus $150–$400 for professional installation. This investment creates authentic period character for historical homes or anyone seeking sophisticated classical detail. Installation requires skilled craftspeople for best results.

    Choose molding patterns that echo your home’s architectural period—Victorian, Georgian, Greek Revival, or Neoclassical designs all work beautifully. Professional installation ensures proper placement, adhesion, and finishing. Your arch becomes a refined architectural statement that guests perceive as original to the home. Paint to match trim for seamless integration or leave natural plaster for texture and patina.


    SAVE THIS POST for your next entryway refresh. Pick just one idea from this list and tackle it this weekend—you’ll be amazed how an arched frame transforms your entire entry’s character and curb appeal. Which concept speaks to you?

  • 25 Balcony Privacy Screen Ideas for Secluded Outdoor Comfort

    25 Balcony Privacy Screen Ideas for Secluded Outdoor Comfort

    There’s something magical about claiming your balcony as your own private retreat. Whether you’re dealing with nosy neighbors, street noise, or just craving a secluded corner to breathe, privacy screens transform your outdoor space into an actual sanctuary. The good news? You don’t need to spend a fortune or live with industrial eyesores. In this guide, you’ll discover 25 creative privacy screen ideas—from budget hacks you can DIY this weekend to investment pieces that double as stunning decor. We’re talking natural materials, modern designs, renter-friendly options, and solutions that actually look beautiful. Let’s turn that exposed balcony into the peaceful oasis you deserve.

    1. Install Bamboo Screening for Instant Natural Vibes

    Bamboo screening creates an instant natural barrier that feels organic, not industrial. It filters light beautifully while keeping prying eyes out, and it works with almost any decor style—from Scandi to Riviera to modern minimal.

    Setup is straightforward: Unroll bamboo panels (typically 4–6 feet tall, $30–$60 per panel on Amazon or Home Depot) and attach them to your railing using waterproof zip ties or stainless steel brackets. Most installations take 20–30 minutes. For renters, zip ties mean zero permanent damage. Bamboo naturally weathers to a gorgeous silver-gray over time, though you can seal it to maintain the golden tone.

    Pro tip: Layer bamboo screens with climbing ivy or potted plants in front for added depth and texture.

    Your balcony immediately gains a resort-like quality. Sunlight still filters through, so you get privacy without feeling trapped in a box.

    2. Create a Living Green Wall with Vertical Planters

    A living wall isn’t just beautiful—it actually provides privacy while purifying air and creating that coveted garden aesthetic. Trailing plants like petunias, pothos, and ivy cascade naturally, blocking views while looking effortlessly elegant.

    Choose modular vertical planter systems (IKEA’s FÖRENLIG or Etsy handmade options, $40–$150 for a full wall setup) or go DIY with repurposed wooden pallets and fabric pockets ($15–$30 in materials). Mount these directly to your balcony wall or railing. Allow 1–2 hours for installation, then give plants 2–3 weeks to fill in. Water regularly—trailing plants dry out faster in high positions.

    Budget alternative: Use hanging macramé planters ($5–$15 each) staggered across a wire grid ($10–$20).

    Within weeks, you’ll have a stunning green barrier that adapts to your space and improves as it grows. Plus, you get fresh herbs or flowers right outside your door.

    3. Use Outdoor Fabric Panels on a Rod System

    Outdoor fabric panels offer style flexibility—they look contemporary, they’re removable for renters, and they cost way less than permanent installations. Think of them like curtains for your balcony.

    Hang panels using a tension rod system or track rails (adjustable rods, $20–$50; panels in outdoor-grade fabric, $30–$80 each from Wayfair or Target). Most fabric comes in 54–60-inch widths, so you’ll need 2–3 panels for standard balconies. Installation takes 30–45 minutes with basic tools. Choose weather-resistant materials (solution-dyed acrylic or polyester) that won’t fade or mildew.

    Styling bonus: Select earth tones, stripes, or subtle patterns that complement your 2025 color palette—terracotta, soft greens, or warm neutrals work beautifully.

    You get a polished, intentional look that you can swap seasonally. Open them on nice days, close them for privacy or wind protection.

    4. Build a Slatted Wood Privacy Wall

    Horizontal or vertical slats create modern visual interest while maintaining partial sightlines. They’re less “closed-off” than solid walls, so your balcony still feels open and airy.

    DIY this with pressure-treated 2x4s or cedar boards ($50–$150 in materials, depending on balcony size). Cut to length, attach to existing railings or a frame using stainless steel hardware. Plan 2–3 hours for installation, possibly longer if you’re building a supporting frame. For renters, this isn’t ideal—but it’s worth asking your landlord since it adds real property value.

    Renter alternative: Use pre-made slatted privacy screens ($80–$200) that lean against or hang from railings without permanent attachment.

    The finished screen provides real privacy while maintaining an open, Scandinavian aesthetic. Light creates beautiful geometric shadows as the sun moves.

    5. Hang Macramé Plant Dividers for Boho Charm

    Macramé isn’t just trendy—it’s functional decor that lets you create privacy and grow plants simultaneously. Each hanging becomes a privacy layer while showcasing greenery.

    Purchase macramé hangers in bulk (10–15 pieces, $40–$80 from Etsy or Amazon) and suspend them from ceiling hooks using stainless steel eye bolts ($1–$3 each). Space them 12–18 inches apart across your balcony front. Installation takes 45 minutes to 1 hour. Fill hangers with low-maintenance plants: pothos, philodendron, string of pearls, or succulents. This works great for renters if you use adhesive ceiling hooks instead of drilling.

    Cost-saver: DIY macramé using jute rope ($15–$30 for a full kit) and YouTube tutorials.

    Your balcony becomes a boho jungle that feels collected and intentional. Privacy increases as plants fill in and mature.

    6. Install Polycarbonate Panels for Weatherproof Durability

    Polycarbonate combines privacy with visibility and durability. Frosted or tinted options block sight lines while remaining weatherproof and long-lasting—ideal for balconies facing harsh sun or wind.

    Source panels from hardware stores ($20–$50 each; you’ll need 3–6 depending on balcony width). Attach using aluminum frames and stainless steel brackets ($40–$100 for hardware). Installation takes 1–2 hours. Polycarbonate resists UV damage, won’t yellow or become brittle, and cleans easily with a soft cloth and mild soap.

    Design flexibility: Choose clear (minimal privacy, maximum light), frosted (diffused light, moderate privacy), or tinted (maximum privacy and heat reduction).

    You get a semi-transparent barrier that protects from wind and weather while maintaining sightlines. Your space stays bright and open-feeling.

    7. Layer Reed or Willow Fencing Behind Your Railing

    Reed and willow fencing brings instant cottage charm while being budget-friendly and biodegradable. It weathers beautifully and pairs perfectly with climbing plants.

    Purchase pre-made panels (4–6 feet tall, $25–$40 each from garden centers or Amazon). Attach to your existing railing using galvanized wire, zip ties, or U-bolts ($15–$25 total). Takes about 30 minutes per panel. Expect the material to last 3–5 years outdoors before weathering significantly; you can extend lifespan with clear wood sealant ($20–$30).

    Planting suggestion: Grow clematis, jasmine, or honeysuckle in front for added privacy and fragrance.

    The rustic aesthetic immediately softens your space. As climbing plants grow through the gaps, you get layered privacy that looks natural, not forced.

    8. Use Artificial Ivy Panels for Maintenance-Free Greenery

    If you love the look of living walls but don’t have time for watering and plant care, high-quality artificial ivy panels deliver the aesthetic instantly—and permanently.

    Invest in UV-resistant artificial panels ($50–$150 per set of 3–4 panels, depending on quality; premium brands from Wayfair or Amazon look remarkably real). Attach directly to railings or wall panels using weather-resistant zip ties or clips. Installation is 20–30 minutes, and maintenance is literally zero. These panels hold up for 5+ years without fading if you choose UV-protected varieties.

    Styling note: Pair with real potted plants at base level for a hybrid approach that looks intentional.

    Your privacy barrier looks permanently lush and full, requiring zero green-thumb skills. Perfect if travel or work keeps you from plant care.

    9. Install a Retractable Shade Screen for Flexible Privacy

    Retractable screens give you privacy on demand without permanent installation. Roll them down when you need seclusion, roll them up to enjoy open views and sunshine.

    Purchase motorized or manual retractable screens ($150–$400 depending on balcony width and automation; brands like Lutron or basic manual versions from Wayfair). Professional installation runs $200–$500, or DIY with patience ($1–2 hours). These work beautifully for both renters (with landlord approval) and owners. Manual versions cost less but require hand-rolling; motorized options integrate with smart home systems.

    Material choice: Select outdoor-grade mesh or solid fabric depending on privacy preference.

    You get privacy without commitment. Open your space on beautiful days, secure it during wind or when strangers are around. It’s flexibility built in.

    10. Create a Slatted Metal Screen for Industrial Edge

    Metal slat screens bring urban sophistication and require zero plant maintenance. They’re durable, modern, and available in various geometric patterns.

    Source pre-made metal screens (powder-coated aluminum or steel, $100–$250 per panel) from architectural suppliers or specialized outdoor retailers (Decorpot or similar). Alternatively, DIY with metal strips and a welded frame ($80–$150 in materials if you have welding access). Attach using stainless steel bolts and brackets. Installation takes 1–2 hours. Metal screens require occasional dusting but no other care.

    Color options: Black, bronze, copper, or weathered steel all photograph beautifully.

    The result is sleek, industrial-modern privacy that feels intentional and design-forward. Your balcony looks curated, not cluttered.

    11. Layer Rattan Panels with Terracotta Pots

    Rattan brings warmth and natural texture to privacy screening. When paired with terracotta pots and geraniums, it channels that on-trend Riviera style while being budget-friendly.

    Purchase woven rattan panels ($30–$60 each, widely available on Amazon or Etsy). Lean them against your railing or attach using zip ties for a permanent setup. Arrange potted geraniums, marigolds, or petunias in front—layering creates depth and makes the rattan feel intentional rather than obvious. Setup takes 20–30 minutes. Budget $50–$100 for a mix of plants.

    Maintenance note: Rattan is natural, so it will weather. Seal it every 1–2 years to extend life.

    You get Mediterranean ease with real privacy and living color. The combination feels curated and photo-worthy—exactly what pins get saved.

    12. Build a DIY Pallet Privacy Screen

    If you have access to free or cheap pallets, this project is nearly cost-free and gives you major design control. Paint, stain, or leave natural—it’s entirely customizable.

    Collect 4–6 pallets (often free from stores, shipping companies, or Craigslist). Sand them, paint or stain with outdoor-grade finishes ($20–$40), and attach horizontally or vertically to a simple frame using bolts. Plan 4–6 hours for a weekend DIY project. Seal with polyurethane to extend life. For renters, this is tricky—it’s fairly permanent, so get landlord approval first.

    Design idea: Paint pallets in soft pastels (sage, blush, cream) for a farmhouse aesthetic.

    You get a completely custom privacy screen for minimal cost. The rustic, handmade quality feels intentional and Instagram-worthy.

    13. Hang Outdoor Curtains in Neutral Linen

    Outdoor curtains blur the line between indoor comfort and exterior living. Linen and canvas fabrics weather beautifully and add softness that screens can’t.

    Purchase outdoor-grade linen or solution-dyed acrylic panels ($40–$80 each; Wayfair, Target, or Crate and Barrel carry good options). Install a tension rod or track rail system ($20–$60) along your balcony opening or railing. Takes 30–45 minutes to hang. Linen naturally develops a patina, so light color variations over time add character rather than looking like wear.

    Bonus feature: Open during the day for light and air; draw closed for evening privacy or when the sun’s too intense.

    The space instantly becomes more intimate and intentional. Soft fabric creates a gentler aesthetic than hard screening—think relaxation rather than fortress.

    14. Plant Bamboo in Tall Planters for Living Privacy

    Living bamboo screens yourself means total control over height, density, and maintenance—plus they’re visually stunning and bring actual greenery to your space.

    Source bamboo plants from garden centers ($15–$40 each depending on size) or online nurseries. Use large terracotta or concrete planters ($30–$80 each) to contain root systems. Space planters 2–3 feet apart along your balcony edge. Setup takes 1–2 hours. Bamboo grows fast (6–12 inches per month in growing season) and reaches 6–8 feet tall naturally. Control height with annual pruning.

    Maintenance tip: Regular watering in summer; reduce in winter. Keep soil consistently moist but not waterlogged.

    You get a stunning, dynamic privacy screen that creates oxygen and brings nature inches from your daily life. Bamboo’s architectural look adds sophistication automatically.

    15. Install Horizontal Cable Railings for Minimalist Lines

    Cable railings maintain visual openness while creating psychological privacy. They’re code-compliant, ultra-modern, and photograph beautifully.

    Install stainless steel cable systems ($200–$400 in materials; hardware from Decor Pot or similar specialists). Professional installation costs $300–$600, or DIY if comfortable with basic carpentry and drilling. These systems typically include tensioners, end fittings, and cables ($150–$250 total). Cable railings add value to property, making them worth the investment if you’re staying long-term.

    Renter note: This requires permanent installation, so it’s only viable with landlord approval or if you own.

    The minimalist lines create sophistication without bulk. You maintain sightlines to trees or skyline views while defining your private space clearly.

    16. Layer Climbing Vines on a Trellis Framework

    Trellises work best as a scaffold for climbing plants. Give vines a season to establish, and you’ll have stunning natural privacy that improves each year.

    Build or purchase a wooden trellis ($40–$100 from garden centers or made yourself with 1×2 lumber, $20–$30). Attach to your railing or wall using lag bolts and brackets ($20–$30 in hardware). Plant fast-growing, climate-appropriate vines at the base: clematis, jasmine, or passion flower work beautifully and attract pollinators. Planting and setup takes 1–2 hours. Budget $15–$25 for 2–3 starter plants.

    Growing timeline: Expect significant coverage within 8–12 months as vines establish.

    The privacy develops organically over time, creating a living boundary that’s far more beautiful than any manufactured screen. Flowers add fragrance and wildlife.

    17. Use Decorative Metal Screens with Geometric Patterns

    Ornamental metal screens blur the line between art and function. They’re conversation starters that create stunning light patterns throughout the day.

    Source vintage or contemporary metal screens ($80–$250 each, depending on complexity; check Etsy, local antique shops, or specialty garden retailers). Mount using heavy-duty brackets ($30–$50) or lean against railings for easy repositioning. Installation takes 30–60 minutes. These screens often become focal points, so position them where they’ll catch light and showcase the patterns.

    Styling bonus: Paint screens in unexpected colors (emerald, mustard, navy) to personalize.

    Your space gains artistic flair alongside privacy. Geometric shadows create Instagram-worthy moments throughout the day.

    18. Install Frosted Glass Panels for Sleek Privacy

    Frosted glass maintains light flow while completely blocking direct sight lines. It’s sleek, contemporary, and works with minimalist aesthetics beautifully.

    Purchase frosted or etched glass panels ($40–$80 per panel, depending on size; Home Depot or Wayfair). Mount using aluminum frames and stainless steel hardware ($30–$60 for brackets and fasteners). Professional installation runs $200–$400; DIY takes 2–3 hours if confident with measurements and drilling. These panels last indefinitely and clean easily with glass cleaner.

    Design consideration: Pair with minimalist furnishings to maximize the contemporary feel.

    Light pours through beautifully while complete privacy is maintained. The space feels open and bright, not fortress-like.

    19. Create a Tiered Plant Wall for Green Privacy

    A tiered plant wall combines storage, greenery, and privacy in one multifunctional feature. It’s perfect for plant lovers who want both beauty and utility.

    Build or purchase a tall shelving unit (metal or wood, $60–$150 from IKEA, Home Depot, or Wayfair). Arrange dozens of small potted plants: succulents, trailing ivy, compact herbs, and flowering plants ($40–$80 for a mix). Setup takes 2–3 hours. This approach works beautifully for renters if you use a free-standing, bolt-to-wall unit (non-permanent attachment).

    Watering hack: Use a timer-based drip system ($30–$50) to automate watering.

    Your privacy increases as plants mature and fill in. You get a living, breathing art installation that’s yours to curate and adjust seasonally.

    20. Install a Motorized Privacy Roller Blind

    Motorized roller blinds offer maximum convenience—control via remote or smartphone, and they integrate with smart home systems. Perfect for those who value technology and flexibility.

    Install motorized outdoor blinds ($300–$600 depending on width; brands like Lutron, Hunter Douglas, or Somfy). Professional installation adds $200–$400. Manual versions cost $100–$200. These systems are durable, weather-resistant, and often include UV protection features. Some models have built-in sensors that adjust automatically based on sun position.

    Renter consideration: Usually requires permanent installation, so landlord approval is necessary.

    Privacy at your fingertips—literally. The space becomes effortlessly adjustable for any situation, from morning privacy to evening entertainment.

    21. Layer Sheer and Opaque Outdoor Fabrics

    Layering different fabric opacities creates depth and gives you flexibility: use sheer layers during the day for filtered light, or draw the opaque layer for complete privacy.

    Hang two separate curtain rods (staggered 6–12 inches apart, $40–$80 total) and use different fabrics on each. Sheer outdoor fabric ($25–$40 per panel) + opaque solid ($35–$60 per panel). Installation takes 1 hour. Open layers independently to adjust privacy and light throughout the day.

    Color strategy: Pair neutral sheers with deeper-toned opaques for visual interest.

    You get customizable privacy with dimensional appeal. The space feels intentional and designed, not makeshift.

    22. Build a Slatted Wooden Box Planter Screen

    Combining seating, storage, and greenery, slatted planter boxes serve multiple purposes while creating stunning visual privacy.

    Construct or purchase wooden planter boxes with slat fronts ($100–$200 per box from garden centers or build DIY for $40–$70 each in materials). Stack or arrange 2–3 boxes along your balcony edge. Fill with tall ornamental grasses, dwarf bamboo, or flowering shrubs. Setup takes 2–3 hours total. These boxes provide hidden storage for cushions or gardening supplies beneath planting areas.

    Bonus: Slatted design allows airflow and water drainage, keeping plants healthy.

    Your privacy comes with function and beauty. The space becomes more curated and garden-forward.

    23. Hang a Macramé Wall Tapestry as Decorative Screening

    Oversized macramé tapestries serve as both art and privacy screens. They’re lightweight, portable, and radiate boho charm.

    Source or handmake a large macramé tapestry ($60–$150 for handmade from Etsy; DIY with jute rope and online patterns for $25–$40 in materials). Hang from a rod using clips or attach directly to railing using soft ties. Installation takes 15–20 minutes. Macramé naturally collects dust, so plan light brushing or gentle vacuuming every month.

    Styling note: Pair with rattan seating and potted plants for cohesive boho aesthetic.

    The tapestry becomes a focal point while softly screening views. It’s portable, so you can swap seasonally for different aesthetics.

    24. Install Clear Acrylic Panels with Printed Designs

    Printed acrylic offers privacy plus personality. You can choose designs that match your aesthetic—botanical, geometric, abstract—or go custom.

    Order custom-printed acrylic panels ($80–$200 per panel depending on complexity; suppliers like Plastpro or custom printers). Mount using aluminum frames and brackets ($40–$80 for hardware). Installation takes 1–2 hours. These panels are durable, UV-resistant, and easy to clean.

    Design ideas: Botanical prints (monstera, palm leaves), geometric patterns, or artistic silhouettes all translate beautifully to acrylic.

    You get artistic privacy that reflects your personality. Sunlight showcases the printed designs throughout the day.

    25. Combine Metal Slats with Climbing Ivy for Hybrid Coverage

    Hybrid screening—mixing materials and living plants—creates the most visual interest and depth. Metal provides immediate structure; vines add organic growth and softness over time.

    Install metal slat screens ($100–$250 per panel) and plant fast-growing vines at the base (clematis, jasmine, ivy: $15–$30 total). Setup takes 2–3 hours. The vines will gradually weave through metal gaps, creating a symbiotic aesthetic that improves each season. This approach works beautifully for both renters and owners.

    Timeline: Visible vine coverage develops within 6–12 months of planting.

    You get the best of both worlds: immediate structure plus evolving organic beauty. The screen becomes more stunning each year as vines mature and fill in.


    Save this post for your next balcony project and try one idea this weekend. Whether you’re starting with something simple (like hanging fabric curtains) or planning a season-long planting project, your outdoor space is about to become so much more private—and so much more yours. Which idea will you tackle first?