Author: Clara Bennett

  • 26 Premium Upholstery Ideas That Make Furniture Look Exquisite

    26 Premium Upholstery Ideas That Make Furniture Look Exquisite

    Your furniture doesn’t need to cost a fortune to look high-end—it’s all about choosing the right upholstery and styling it strategically. Whether you’re shopping for a new sofa or refreshing what you already own, upholstery is the single biggest investment in your room’s visual impact. The good news? Small upgrades to fabric choice, texture, and care can make even budget pieces read as premium. We’ve gathered 26 upholstery ideas that range from free styling tricks to investment-worthy fabric selections, so you can pick what works for your space and budget. Let’s dive into the specific techniques designers use to make furniture look exquisite.

    1. Choose Linen for Instant Sophistication

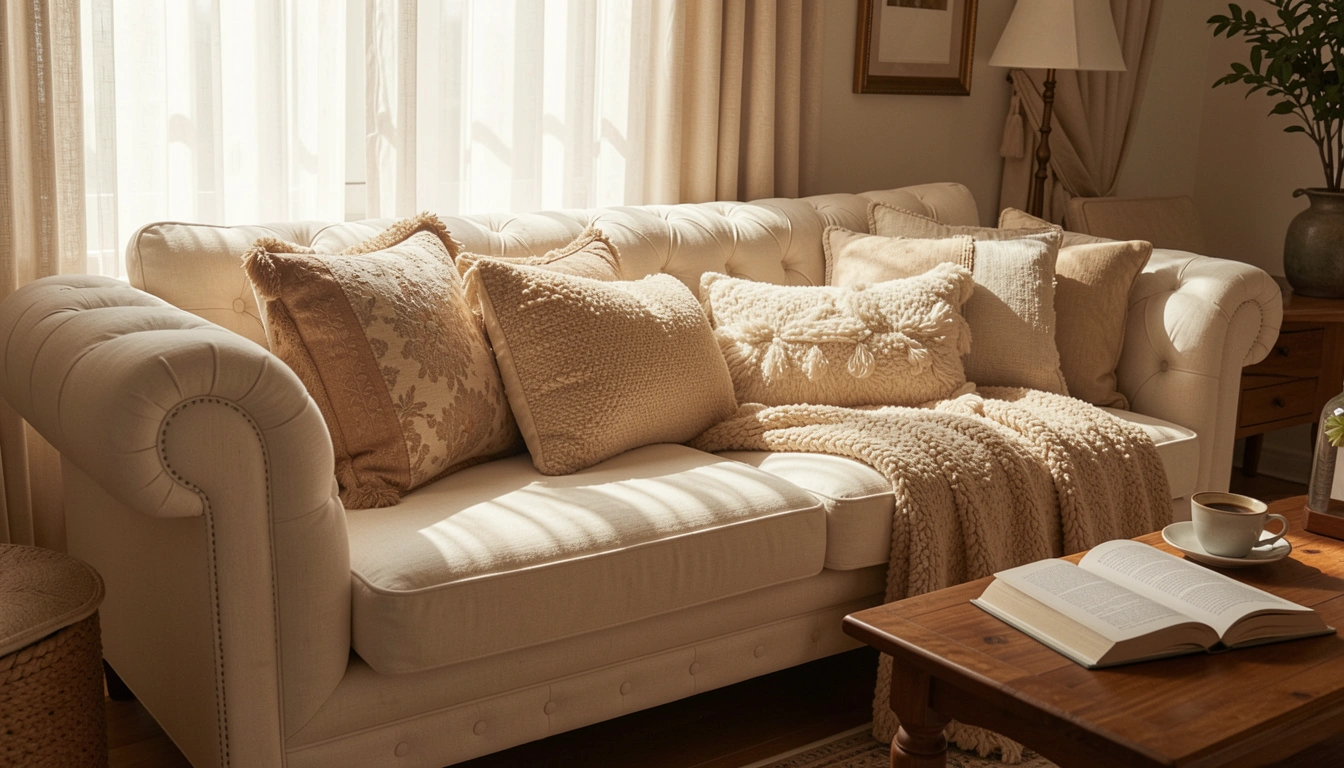
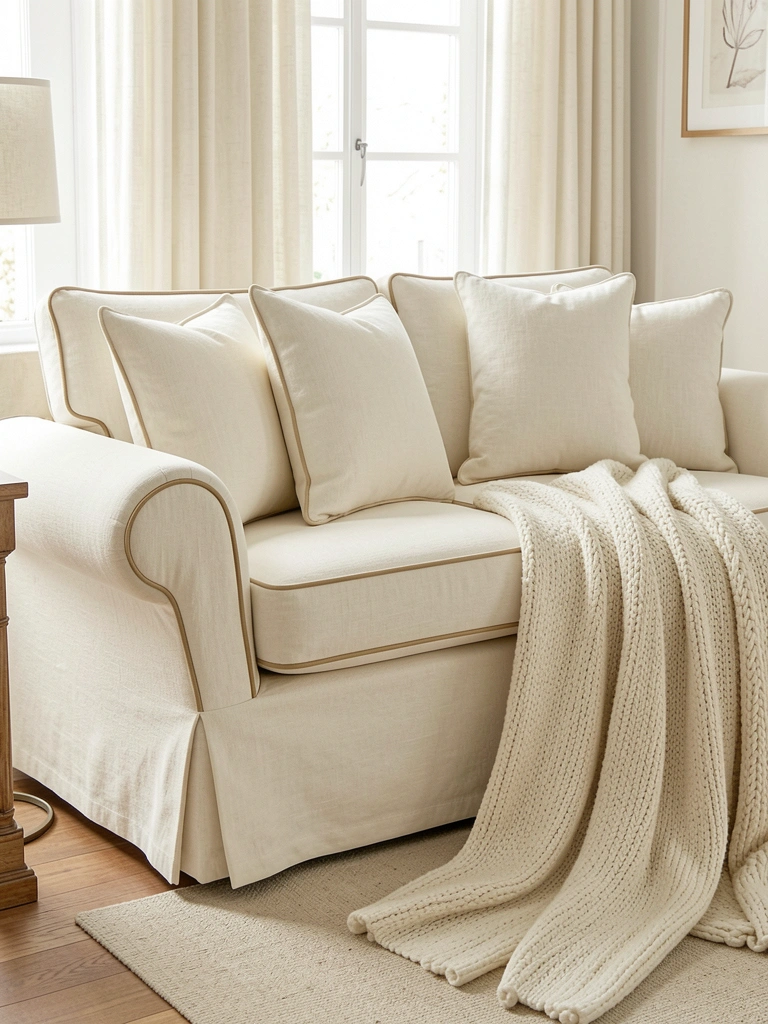
    Linen reads expensive because of its natural texture and subtle sheen, even in budget-friendly price ranges. Unlike polyester blends that look flat and plastic-y, linen has an inherent sophistication that photographs beautifully.

    Look for 100% linen or linen blends (at least 70% linen) from brands like Restoration Hardware, Article, or even IKEA’s higher-end collections ($400–$1,500 for sofas). Linen wrinkles naturally, which actually adds to its high-end appeal—it signals relaxed luxury rather than stiff formality. The fabric softens with time and washing, improving with age like a favorite sweater.

    Pro tip: If you’re renting, linen throw pillows ($30–$80 each) work just as well for testing the look before committing to a full sofa.

    Your room immediately gains that effortless, curated quality that reads expensive and comfortable at the same time.

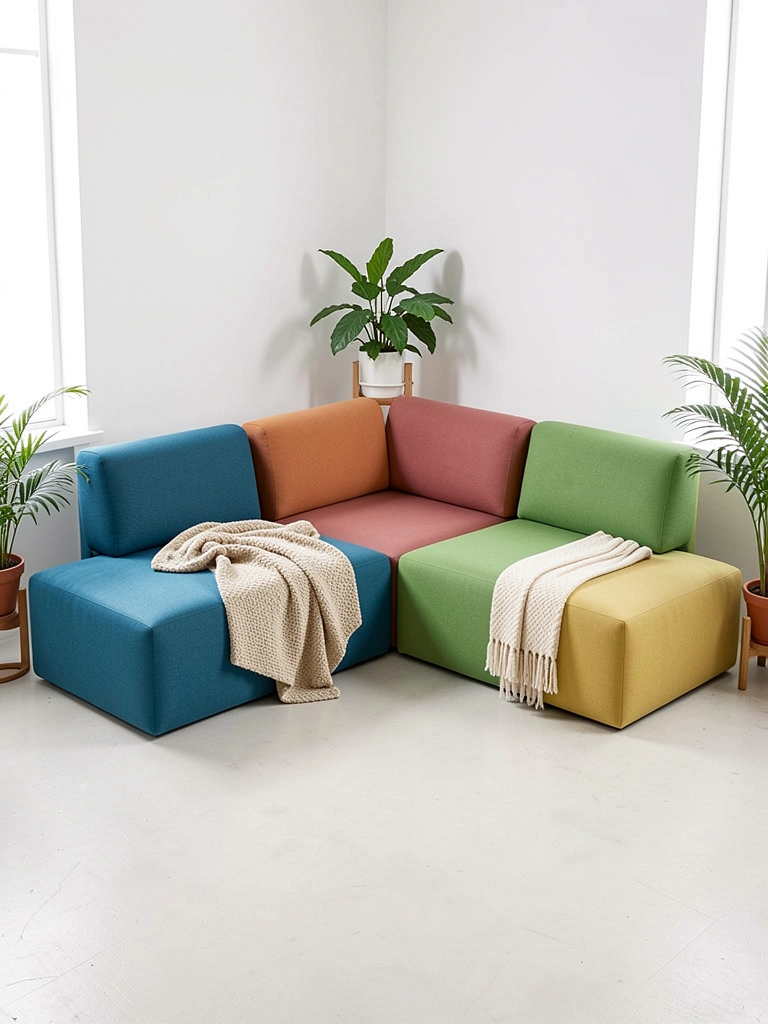
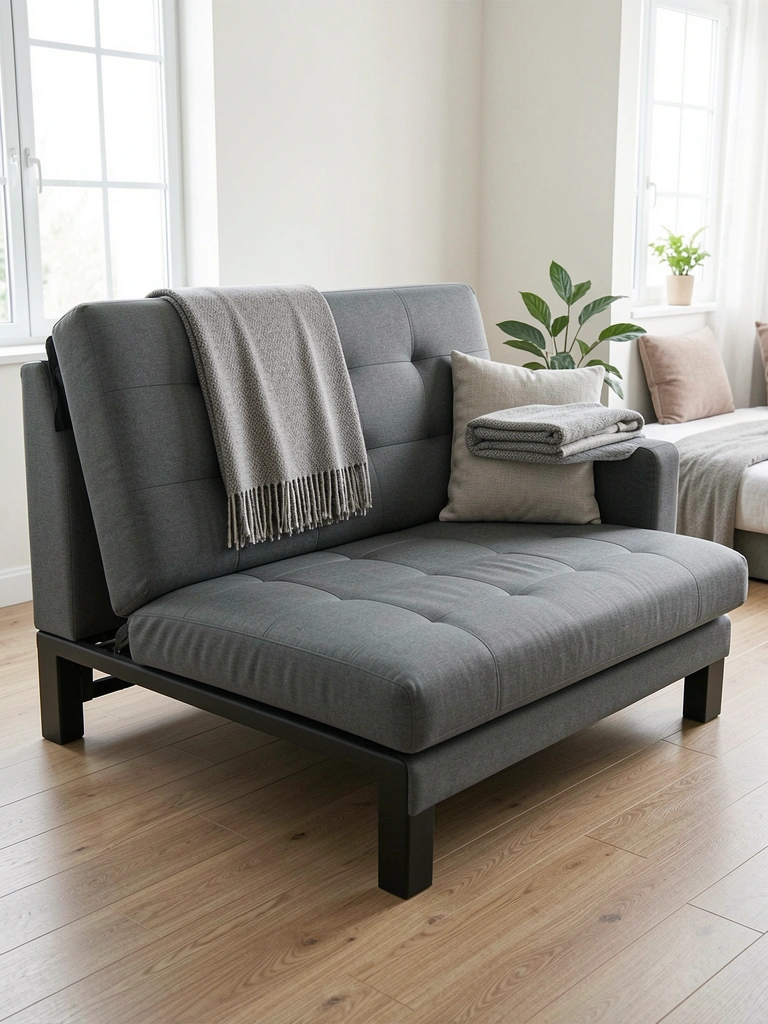
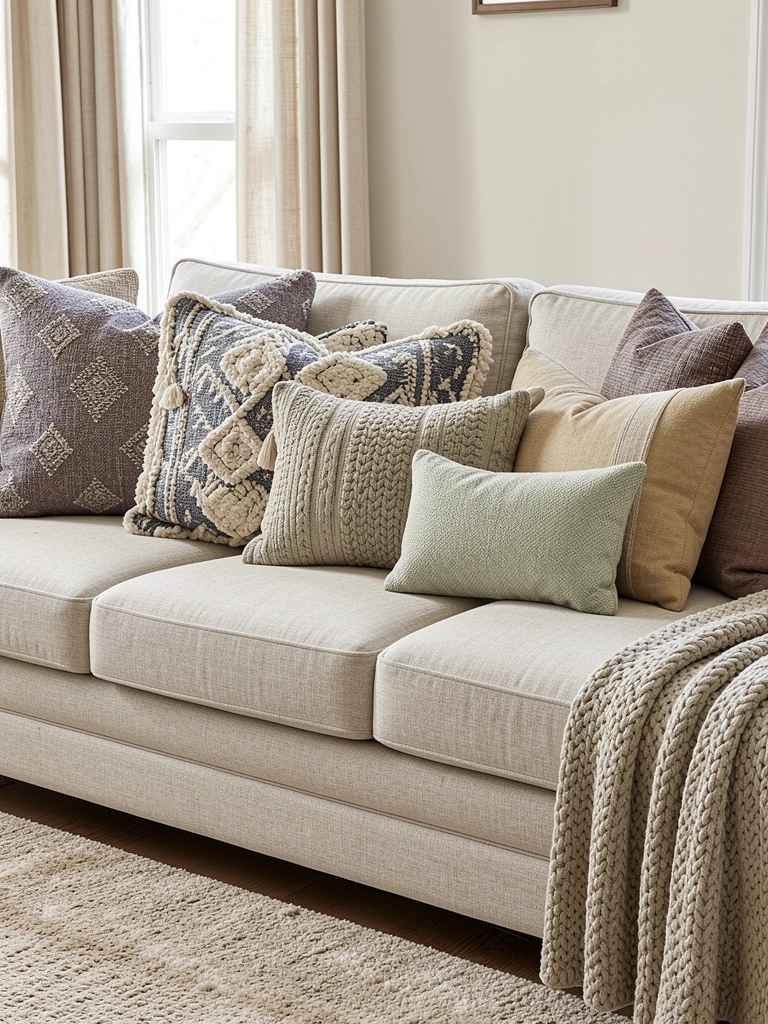
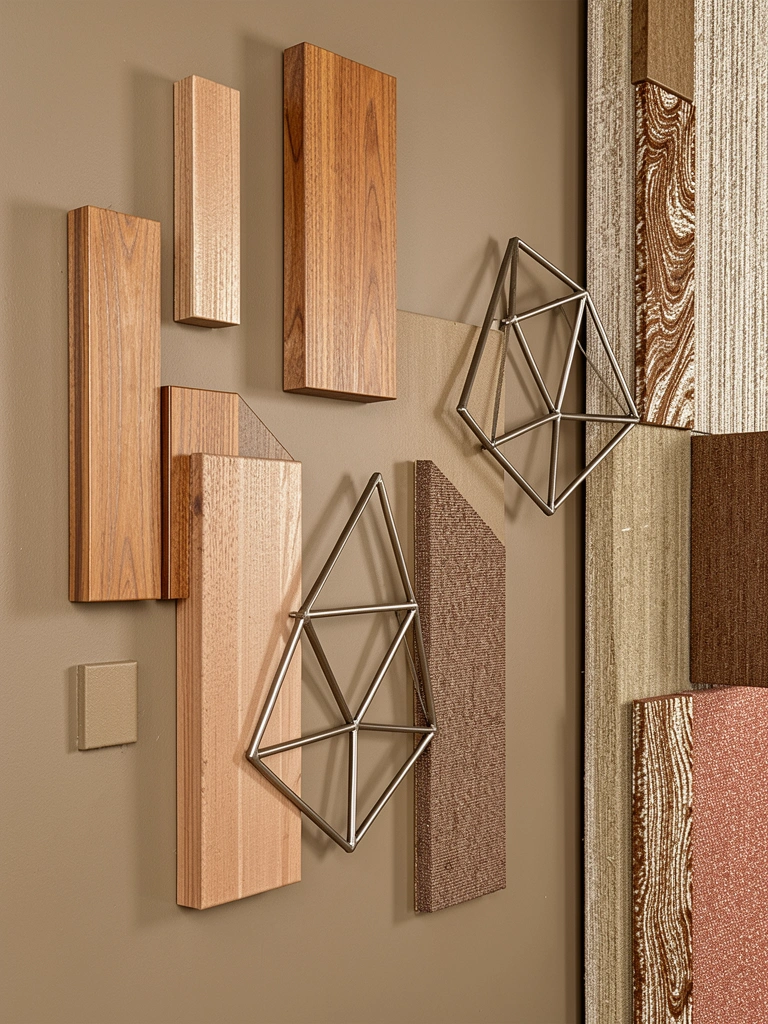
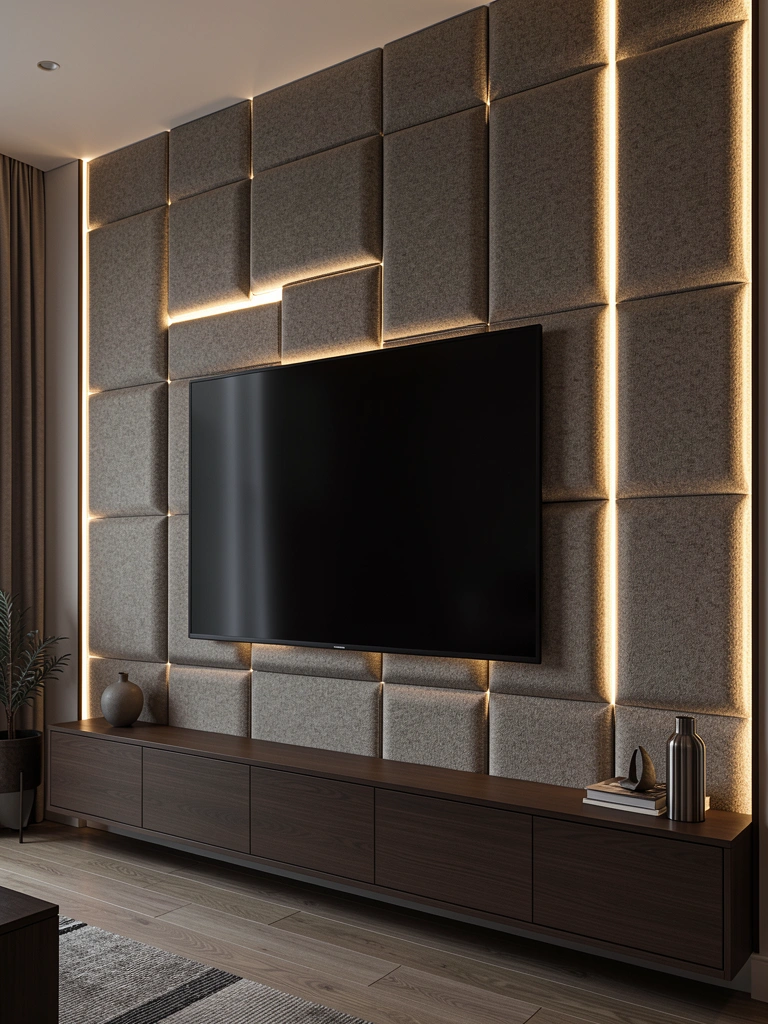
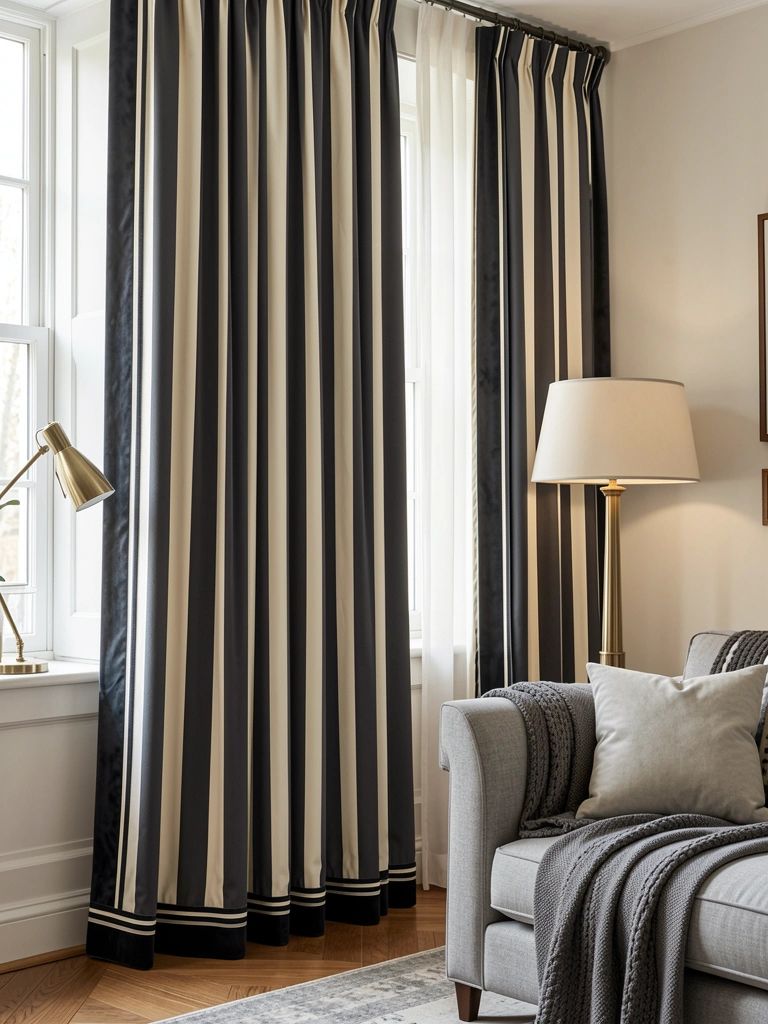
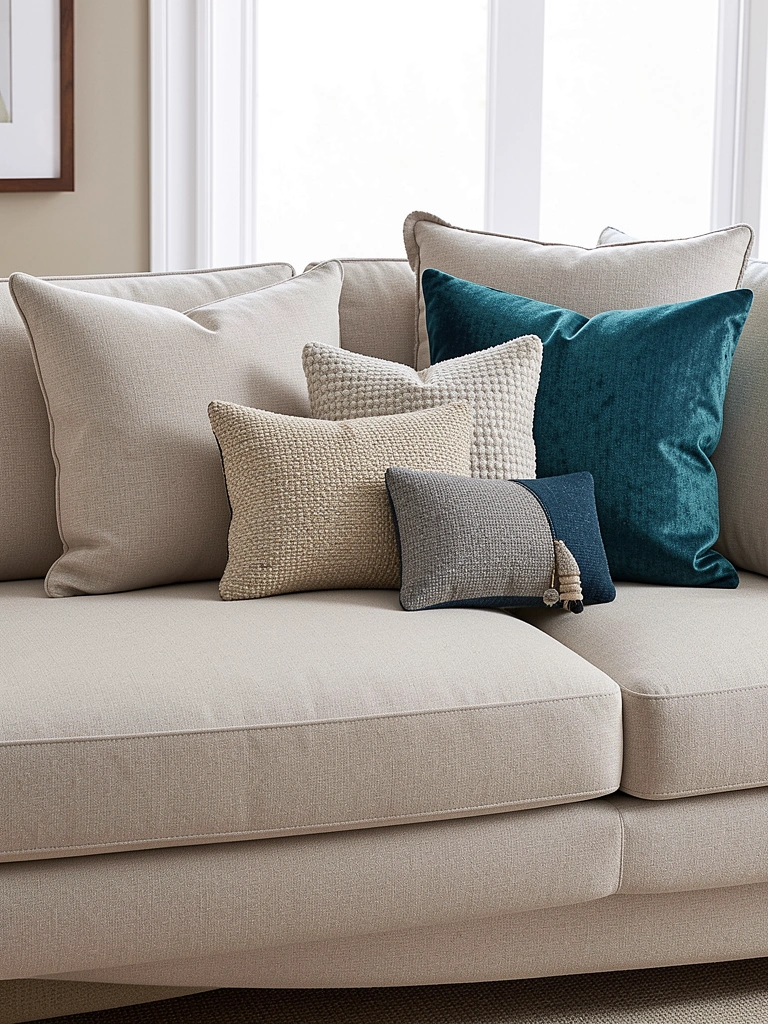
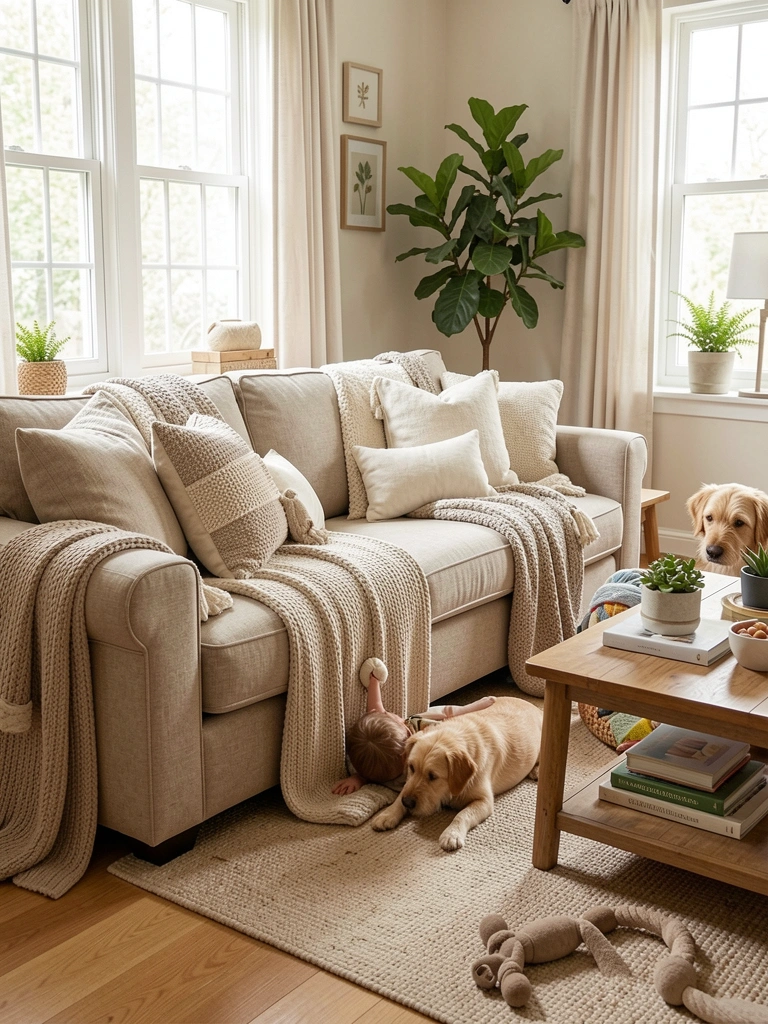
    2. Layer Textures Instead of Patterns

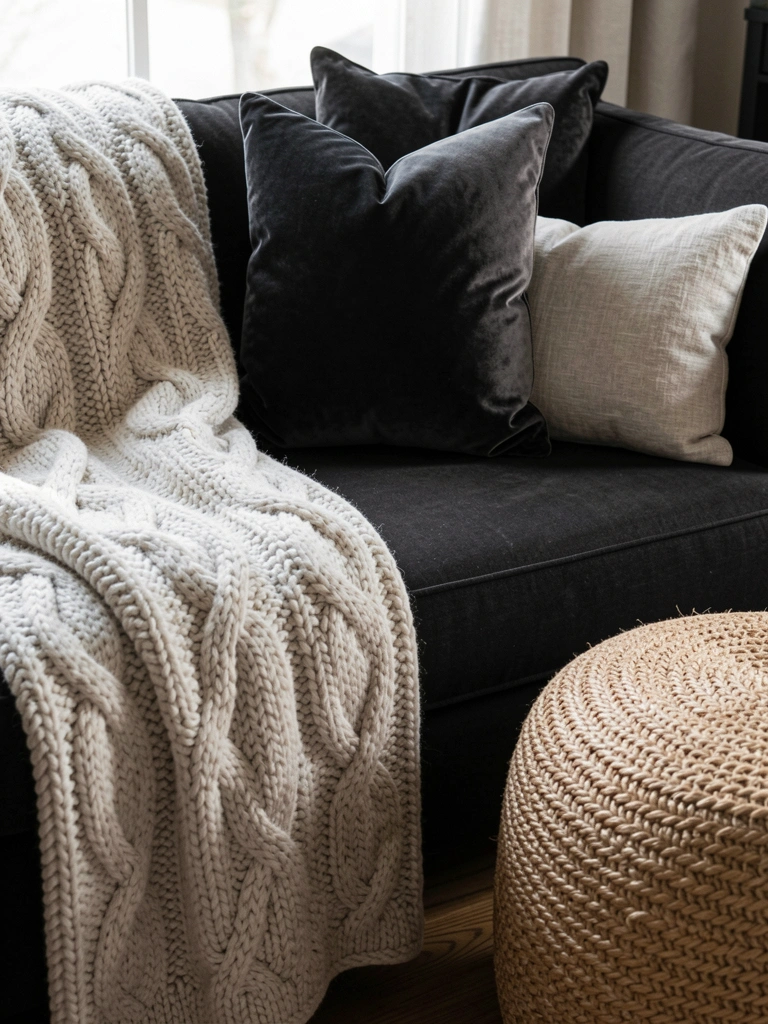
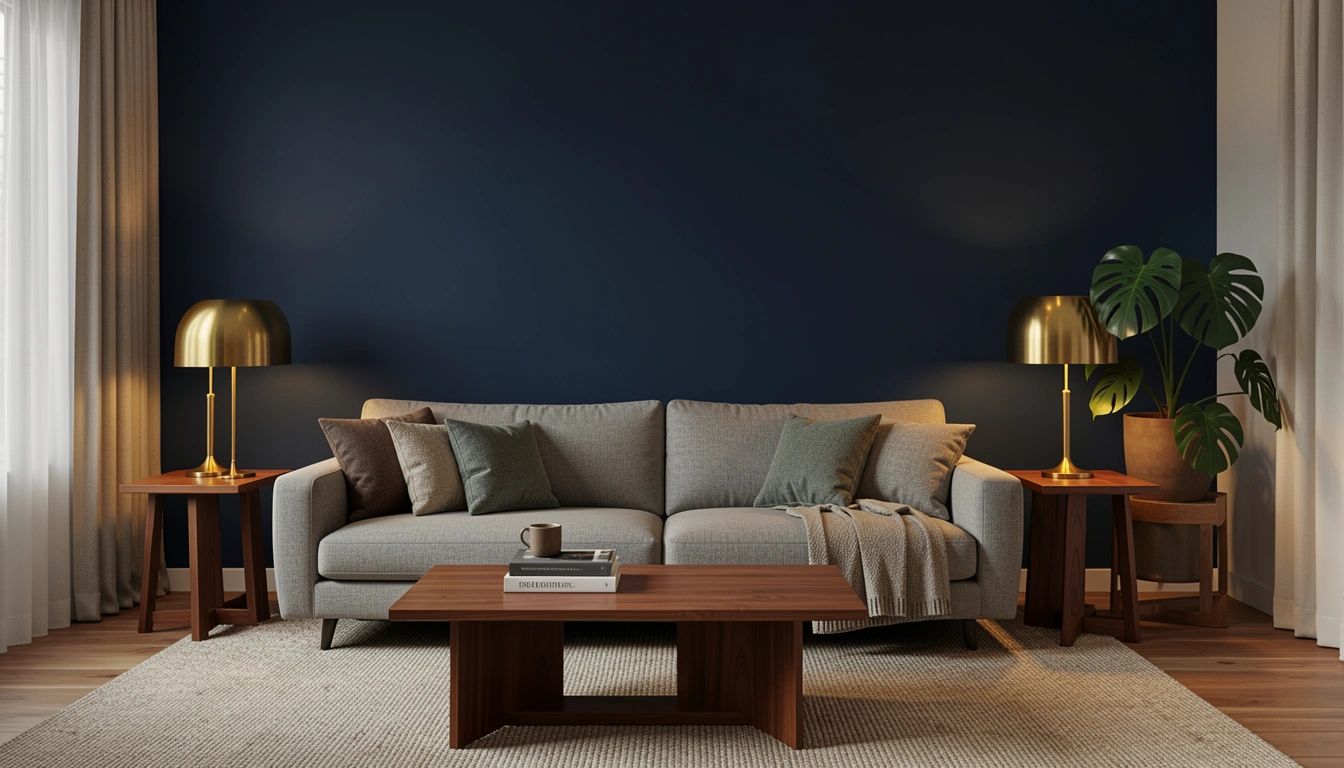
    Mixing textures—not patterns—is how luxury interiors create visual interest without looking busy. A sofa with three coordinating textures (velvet, linen, chunky knit) feels curated and expensive.

    Start with your sofa color as the base, then add pillows in coordinating shades using different fabrics: a smooth velvet ($25–$60 per pillow), a ribbed boucle ($30–$70), and a natural linen ($20–$50). The key is keeping your color palette tight (monochromatic or analogous) while varying surface finishes. Hit a home goods store like West Elm, Crate and Barrel, or Target to feel textures in person before buying.

    Pro tip: Odd numbers work best—use three or five pillows, never four. It creates a more deliberate, designer-like arrangement.

    The layered effect makes even basic sofas look intentionally styled and high-end.

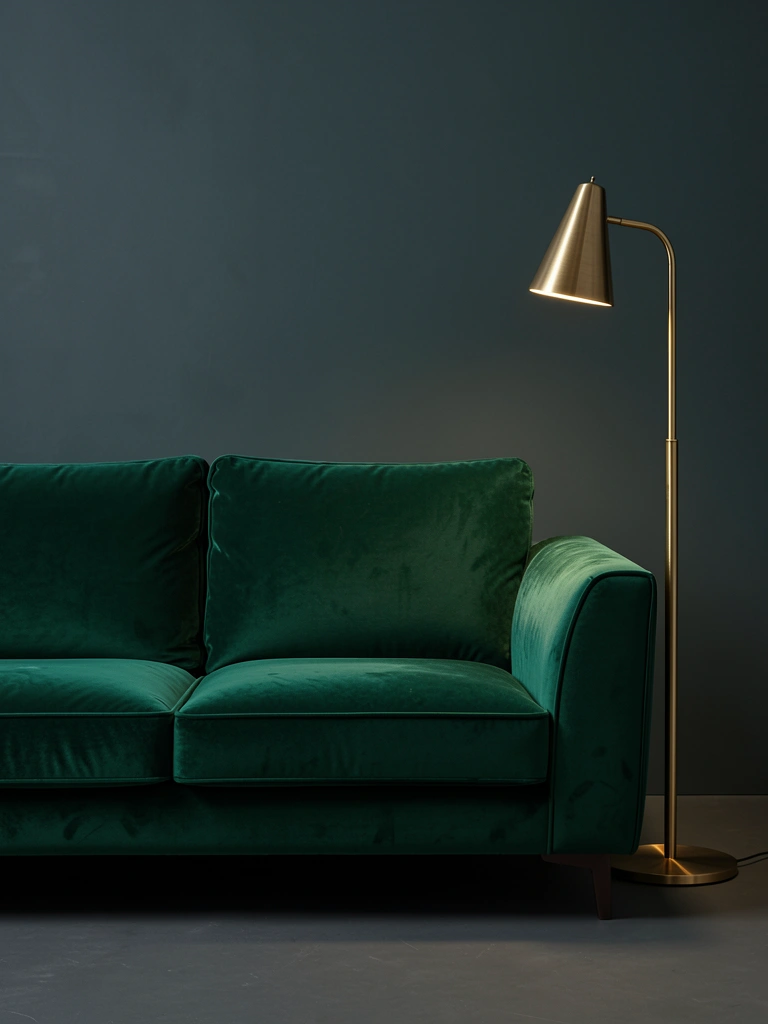
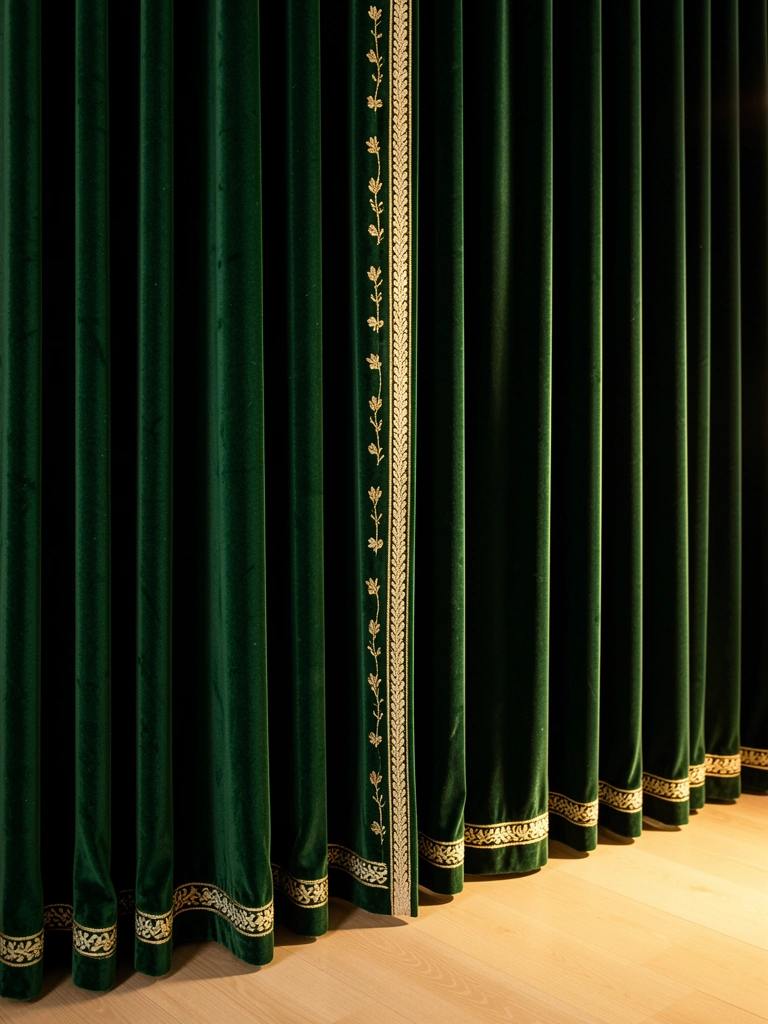
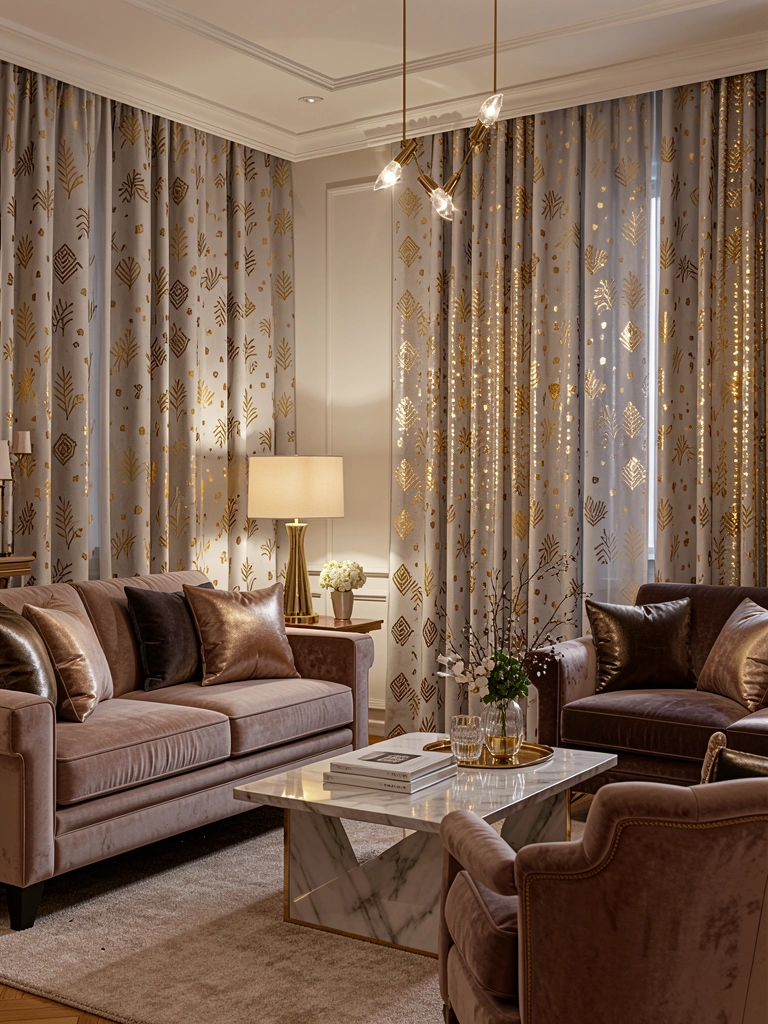
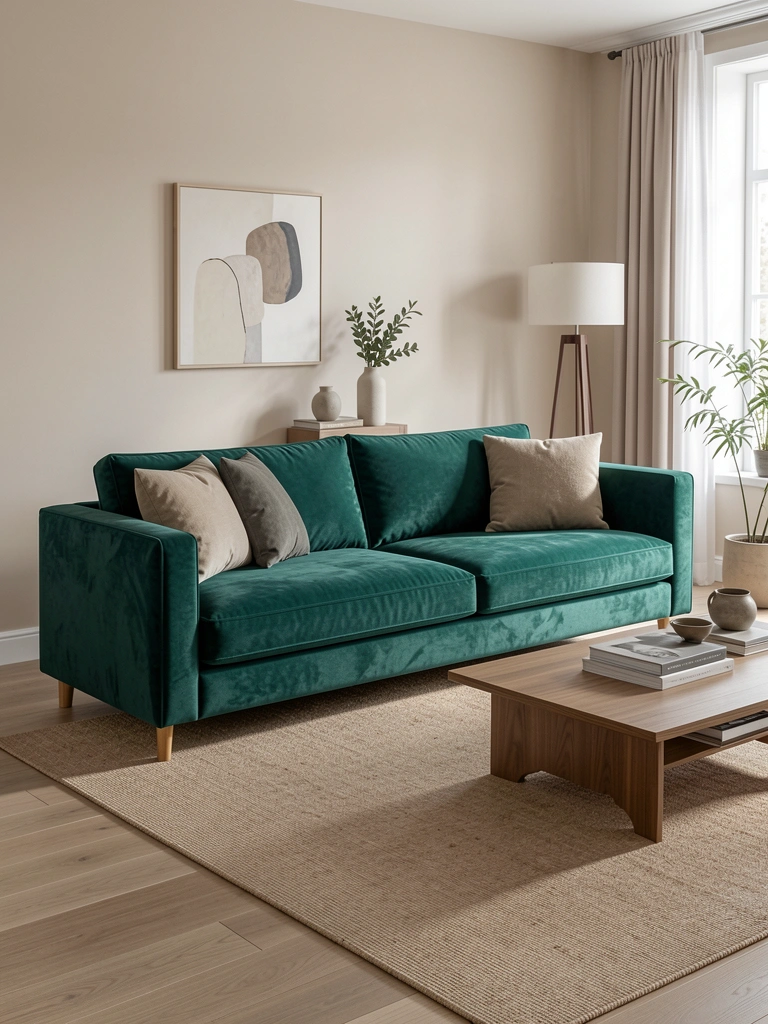
    3. Invest in Quality Velvet for Statement Pieces

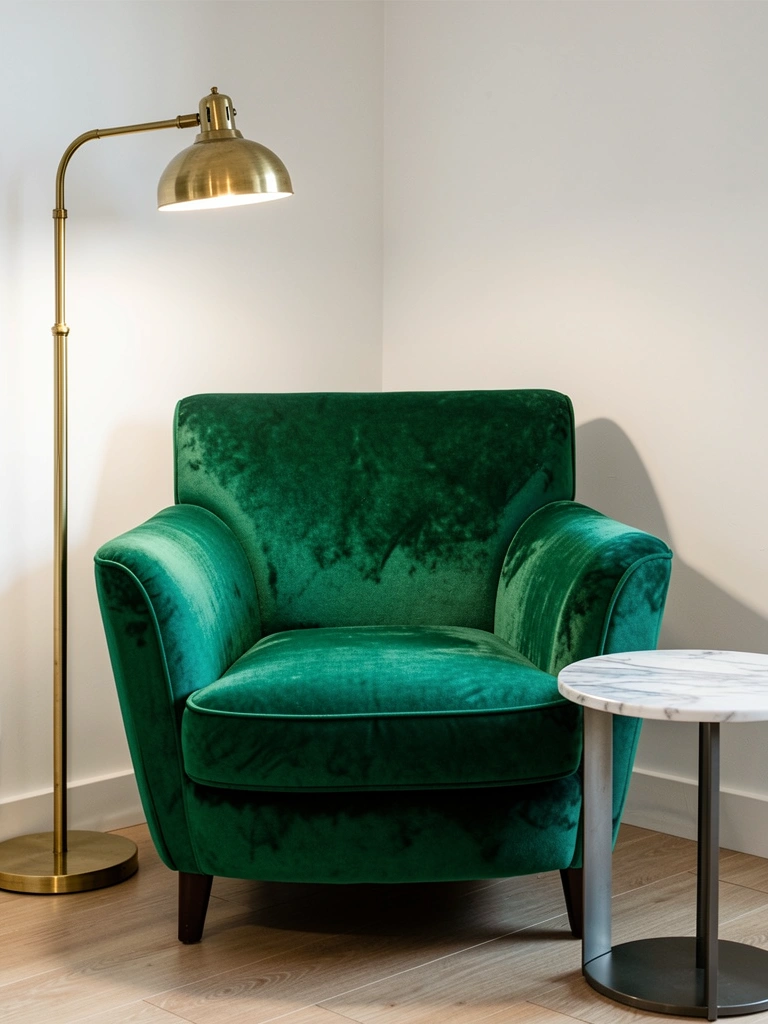
    Velvet is the upholstery equivalent of a power suit—it instantly elevates a room because of its luxurious texture and light-reflective qualities. A velvet accent chair or ottoman becomes a focal point that makes the whole space feel more refined.

    Quality velvet isn’t cheap, but one statement piece goes a long way. Look for viscose or cotton velvet blends (more durable than pure viscose) from brands like Article ($300–$600), Wayfair premium lines ($400–$800), or splurge at CB2 or Design Within Reach ($800–$2,000+). Choose jewel tones (emerald, sapphire, oxblood, or deep plum) rather than neutrals to maximize impact.

    Pro tip: Pair velvet with metal legs (brass, gold, or black steel) for a contemporary edge. Wooden legs read more traditional.

    One velvet piece anchors your room and signals that you’ve invested in quality.

    4. Use Boucle for Texture That Looks Expensive

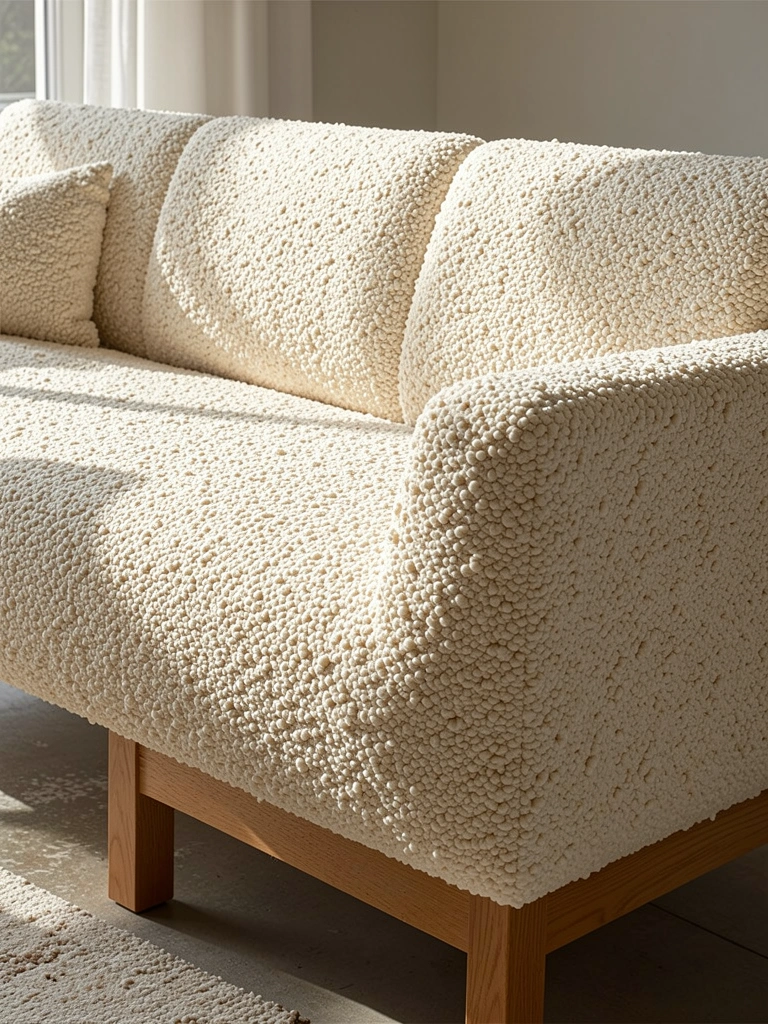
    Boucle (pronounced “boo-clay”) is having a major moment in high-end interiors because it photographs beautifully and feels soft to the touch despite its textured appearance. It reads as “thoughtfully chosen” rather than “default sofa.”

    Boucle is available at most major retailers now: West Elm ($600–$1,200), Article ($500–$1,400), and even Target’s Threshold line ($400–$700). The nubby texture hides dirt and pet hair better than smooth fabrics, and it develops a subtle patina over time that actually improves its appearance.

    Pro tip: Cream and oatmeal boucle reads most luxurious; avoid bright white as it looks harder to maintain and less sophisticated.

    The textured surface creates visual interest and depth that makes your furniture look intentionally selected.

    5. Avoid Microsuede (It Reads Cheap)

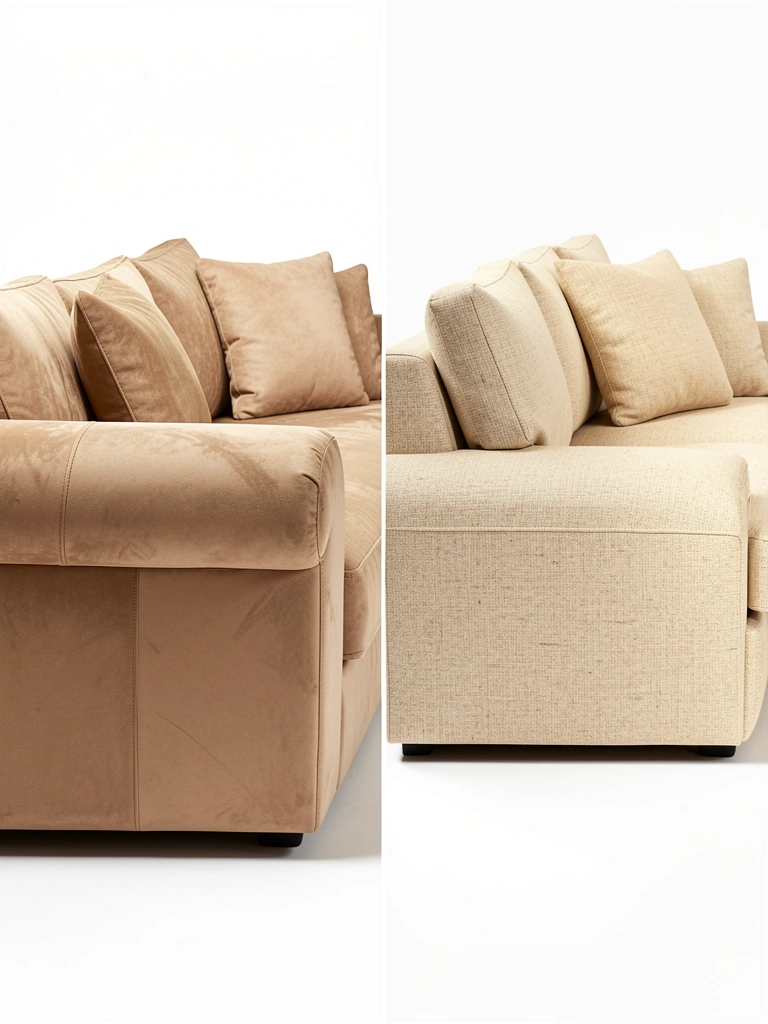
    Microsuede and microfiber sound practical, but they read cheap because they have a flat, plastic-y sheen that screams “budget furniture.” Designer homes rarely feature these fabrics, and there’s a reason why.

    If you need something durable and stain-resistant, choose performance linen blends or high-quality cotton twill instead ($500–$1,200 for sofas). Brands like Article, Crate and Barrel, and even Pottery Barn now offer genuinely nice performance fabrics that don’t feel synthetic.

    Pro tip: Pet owners and parents—upgrade to linen and protect it with a quality slipcover ($150–$300) or scotchgard treatment ($50–$100) rather than accepting cheap microfiber.

    Skipping microsuede immediately elevates your room’s perceived quality level.

    6. Add Button Tufting for Instant Luxury

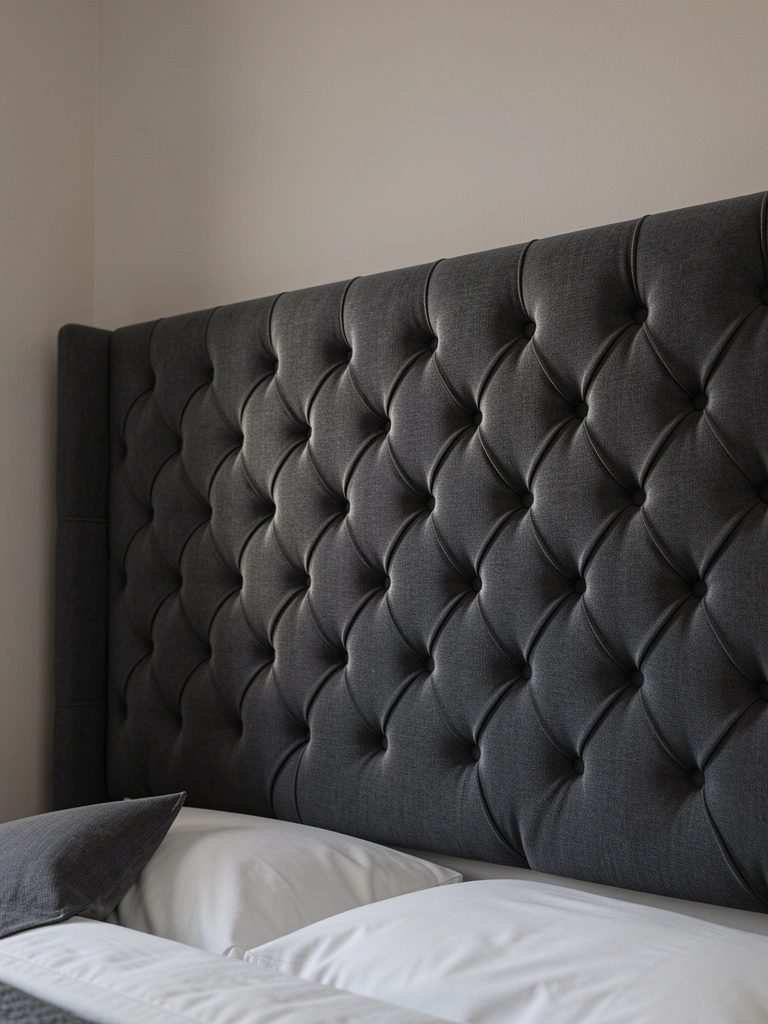
    Button tufting is a signature luxury upholstery technique that instantly makes furniture look high-end and intentional. Even a basic sofa with tufting reads more expensive than a plain, flat version.

    You have two options: buy a tufted sofa ($600–$2,500 depending on quality), or hire an upholsterer to tuft your existing sofa ($300–$800 in labor). If you’re on a tighter budget, a single tufted accent chair from Article, West Elm, or Wayfair ($400–$900) provides the same visual impact. Dark colors (charcoal, navy, oxblood) show tufting details best.

    Pro tip: Buttons should be subtle and match the fabric—avoid contrasting buttons unless going for a maximalist aesthetic.

    The dimensional detail catches light and creates depth that makes furniture look purposefully designed.

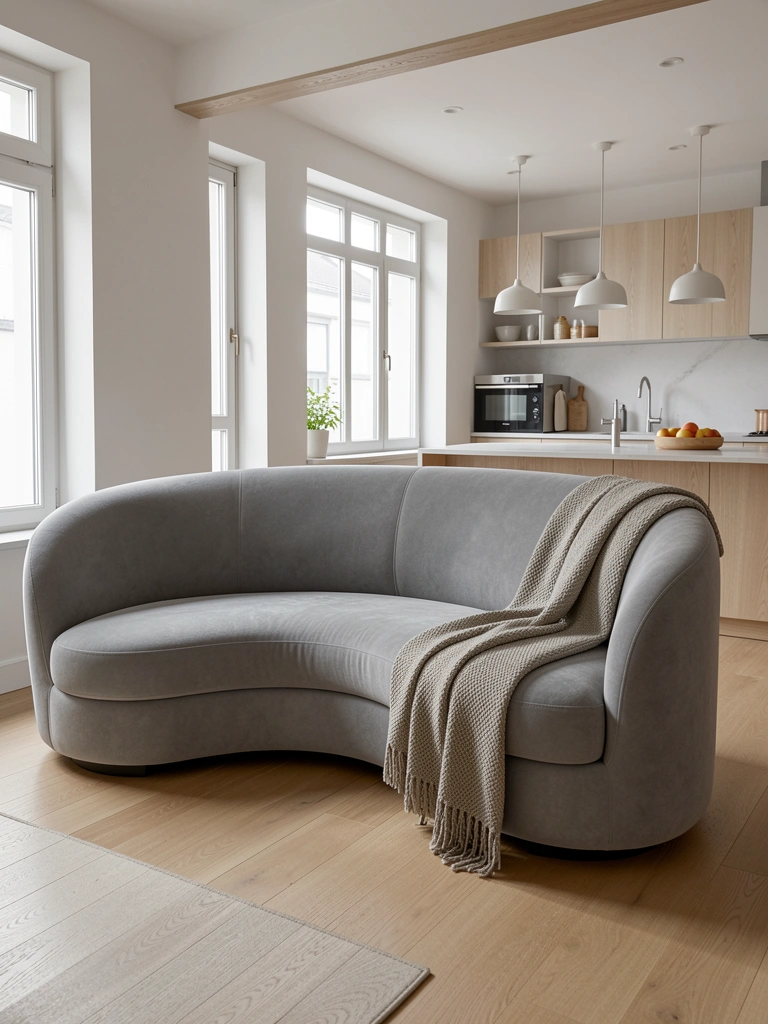
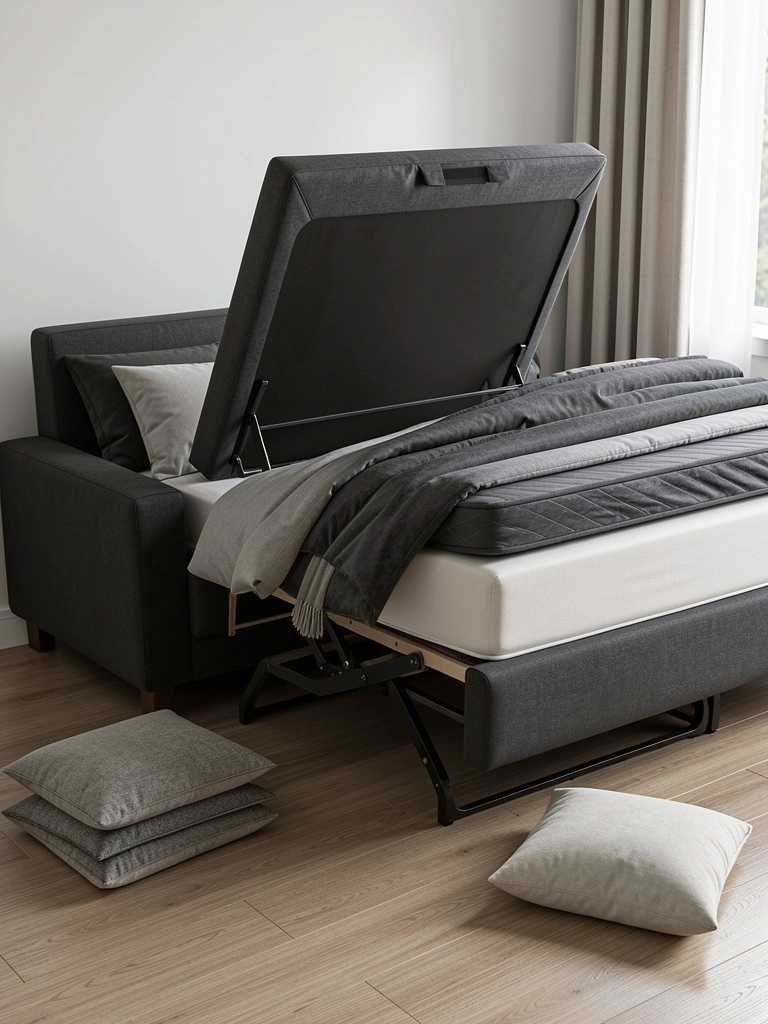
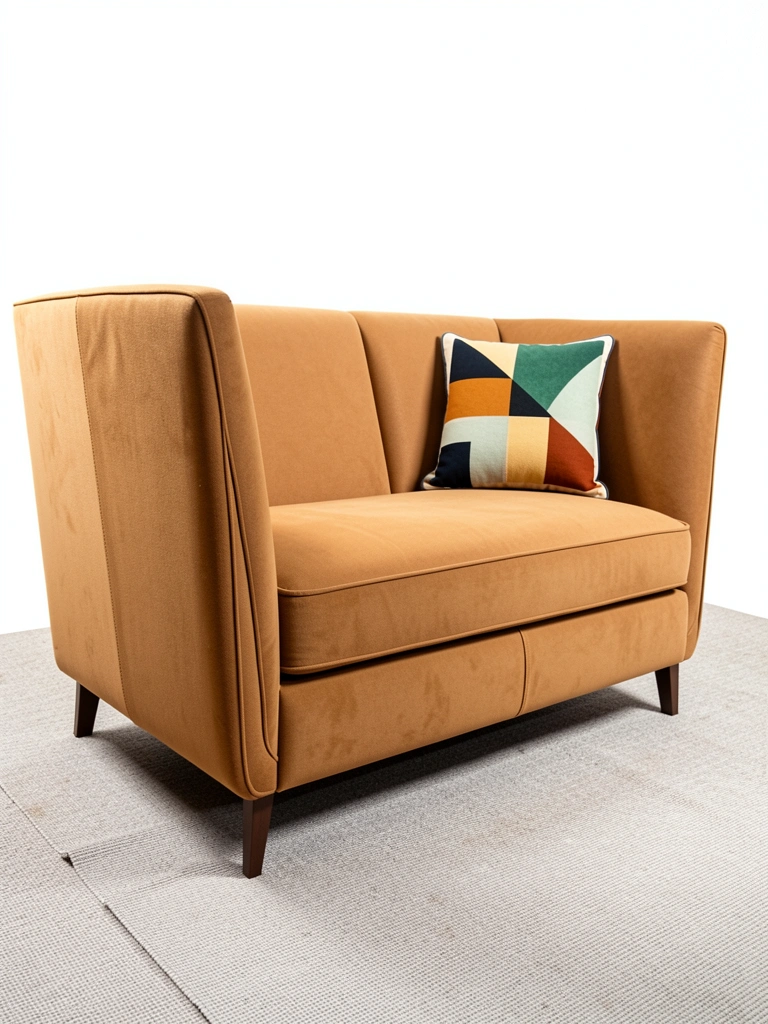
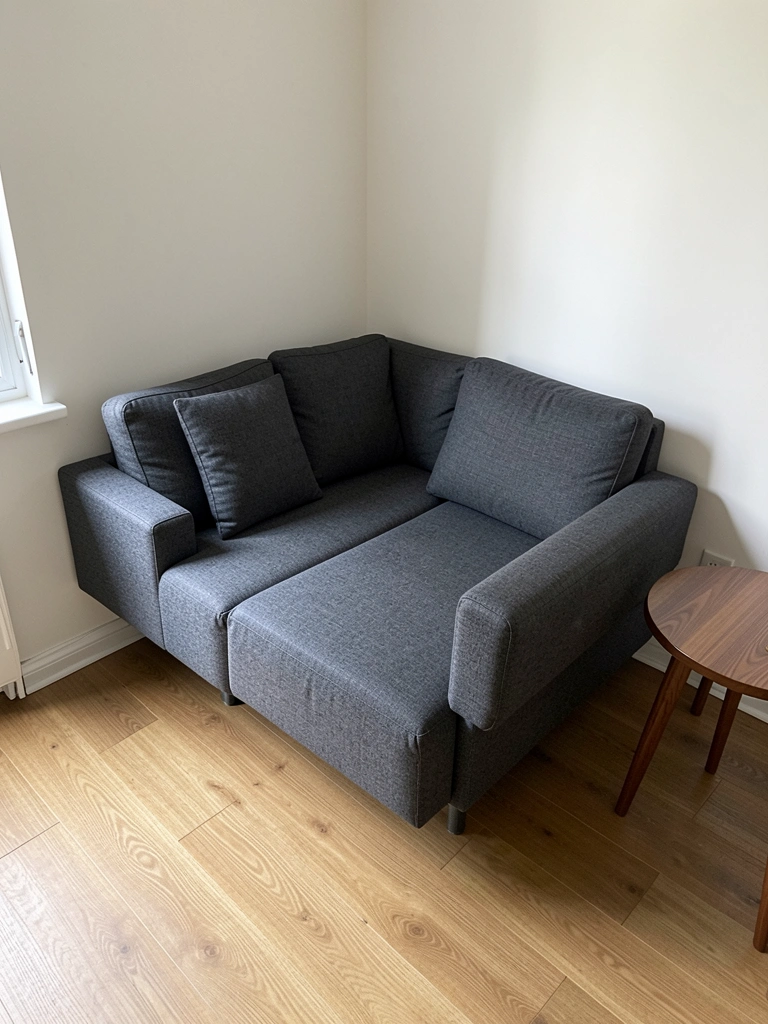
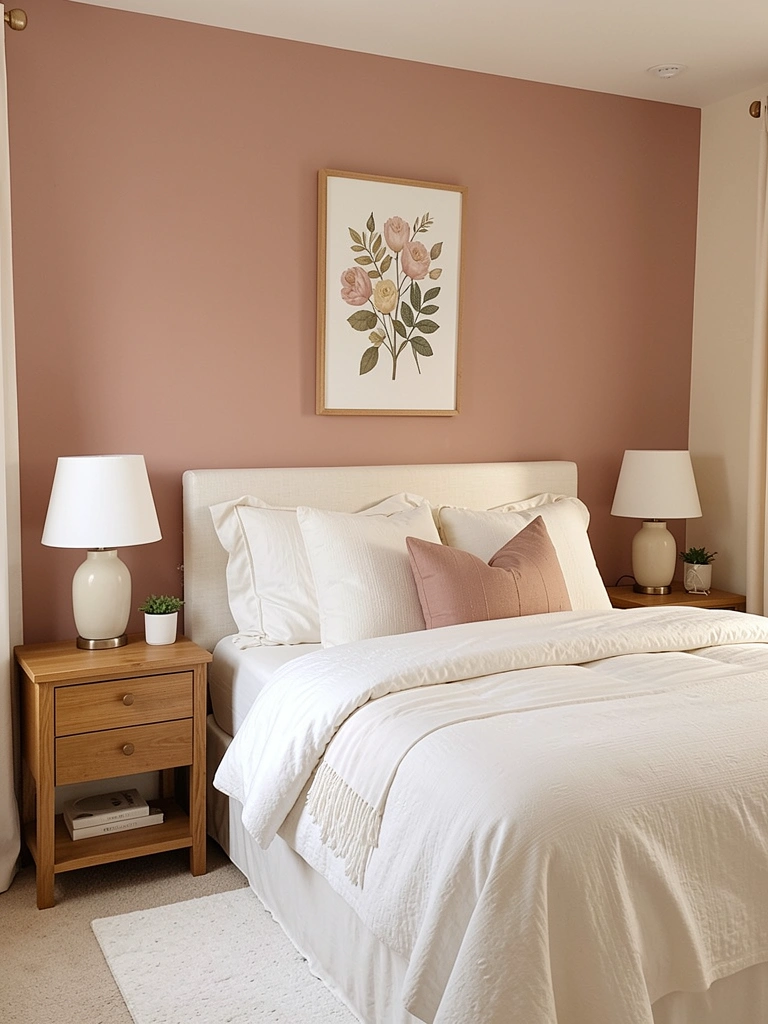
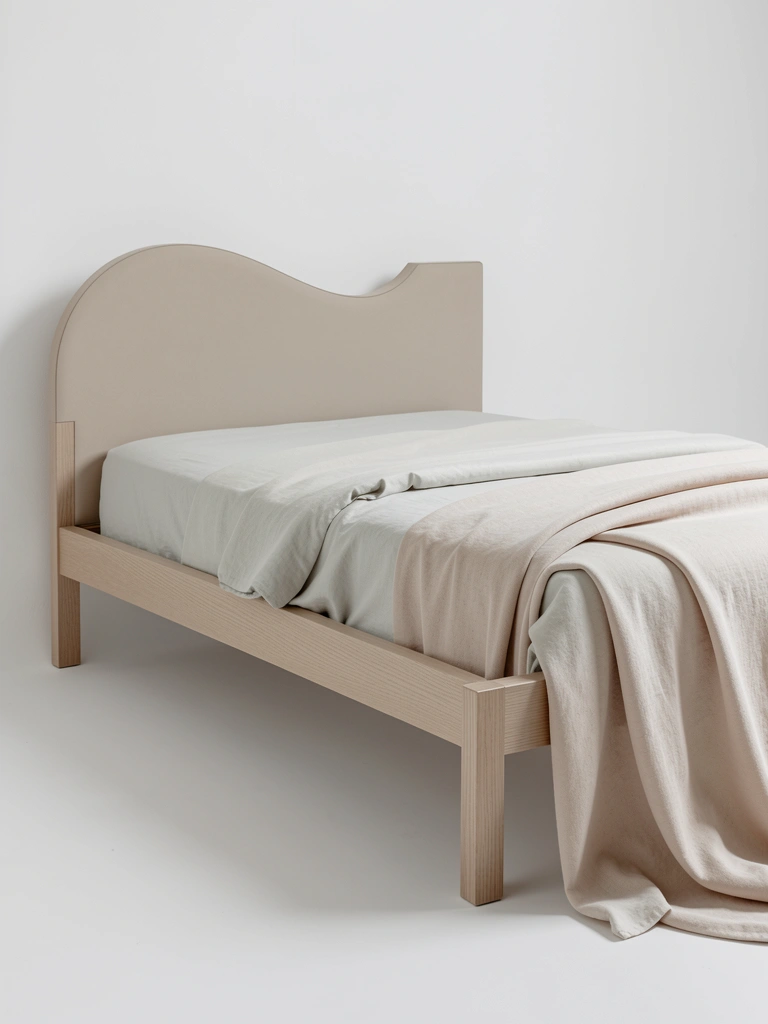
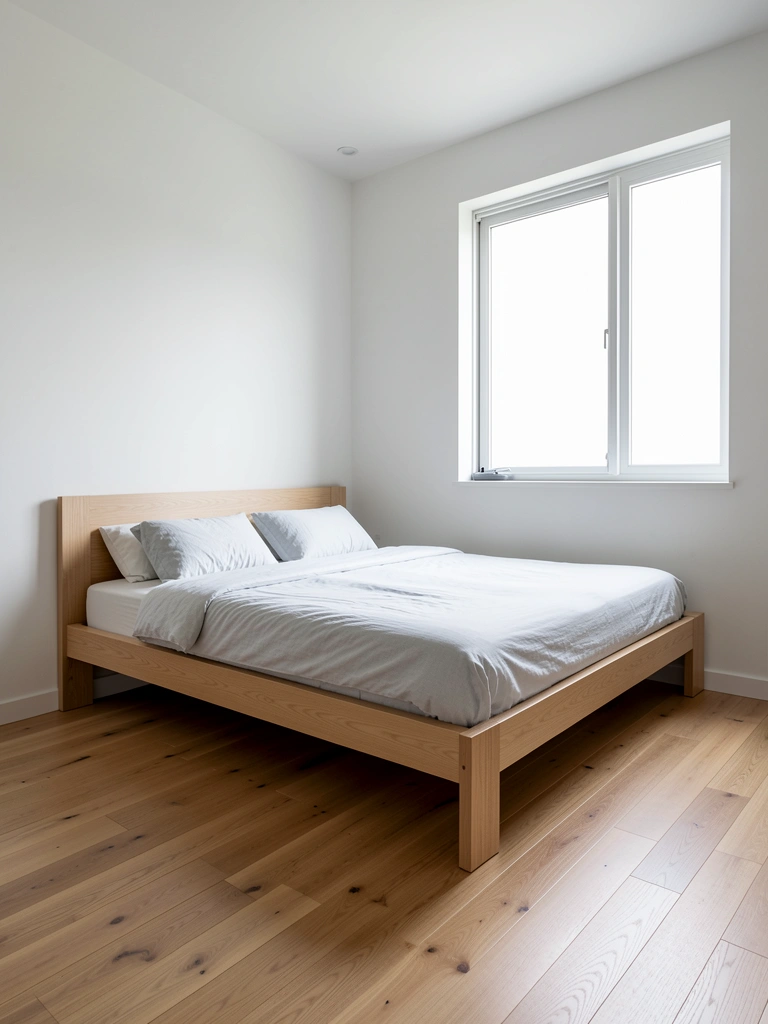
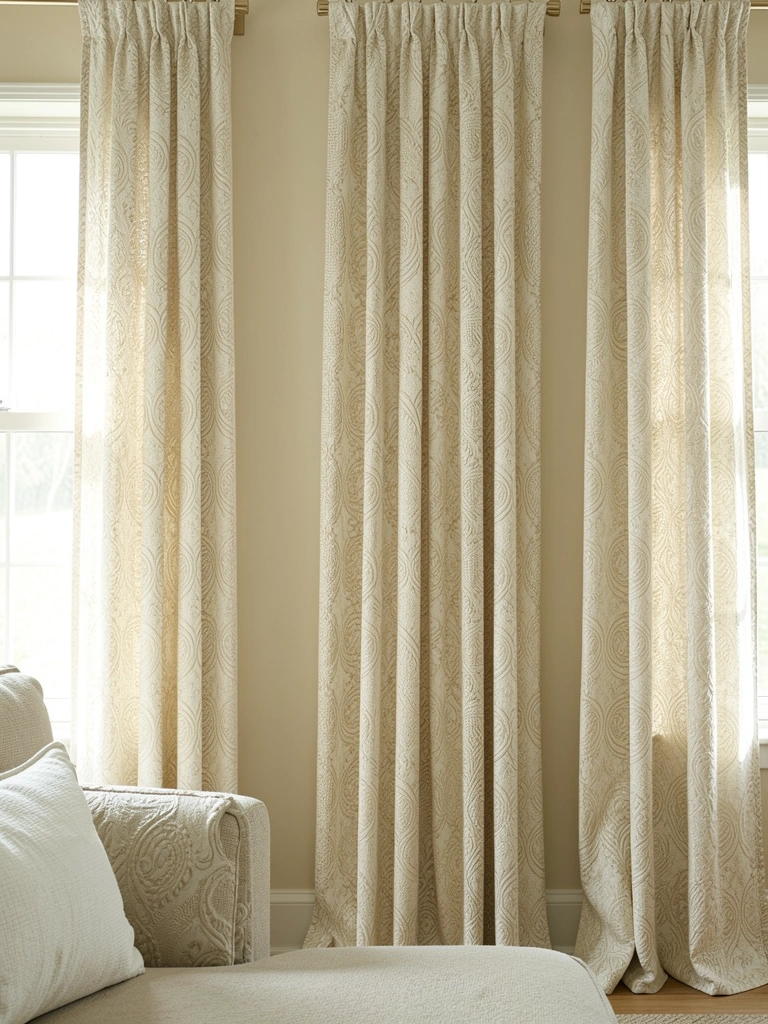
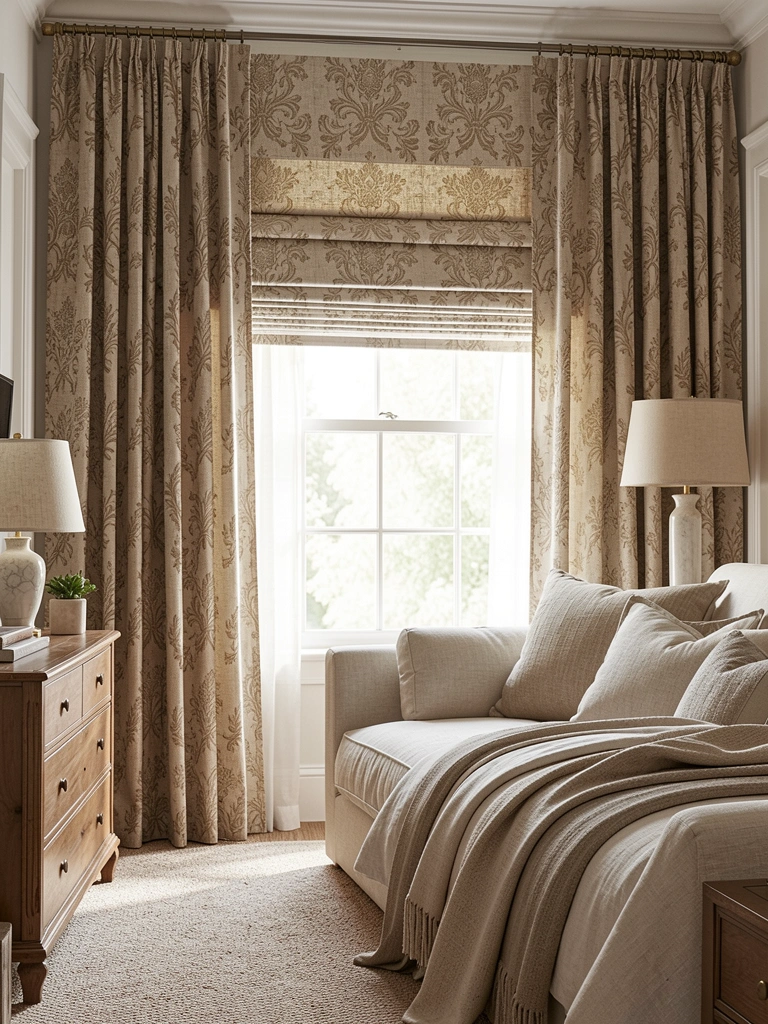
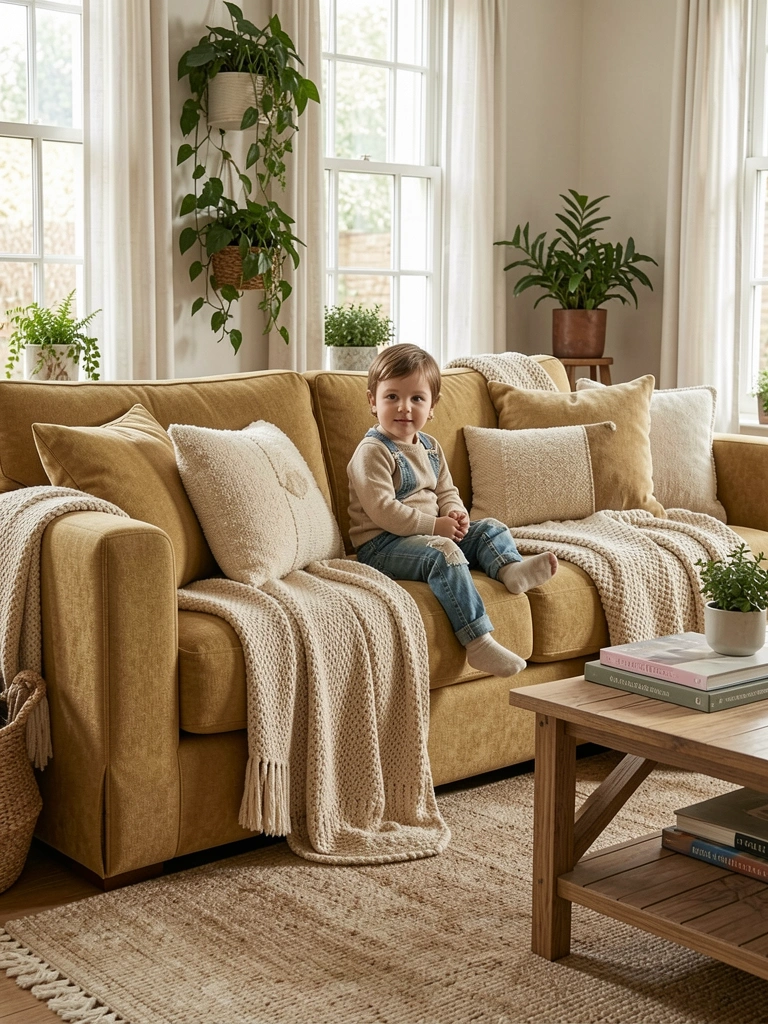
    7. Choose Warm Neutrals Over Cool Grays

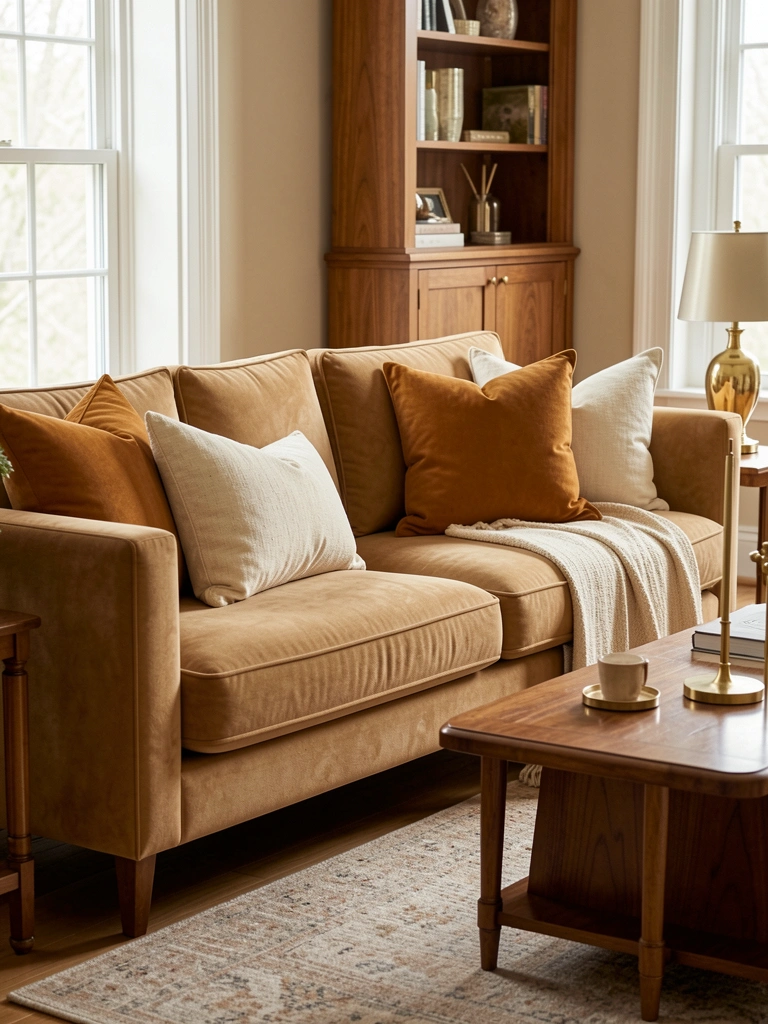
    Cool, icy grays dominated the last decade, but luxury interiors now favor warm neutrals (oatmeal, sand, caramel, warm taupe) that feel more sophisticated and less sterile. The shift signals a return to comfort-forward luxury.

    Warm neutrals photograph beautifully and work with both modern and traditional decor. Look for sofas in these tones from Article, Restoration Hardware, Crate and Barrel, or even IKEA’s premium lines ($400–$1,500). Pair your sofa with warm wood tones (walnut, oak, or natural wood frames) and brass accents to enhance the sophisticated vibe.

    Pro tip: Test fabric swatches in your actual space under your real lighting before ordering—what looks great in a showroom might feel different at home.

    Warm neutrals feel intentional and refined, making your whole room look more curated and high-end.

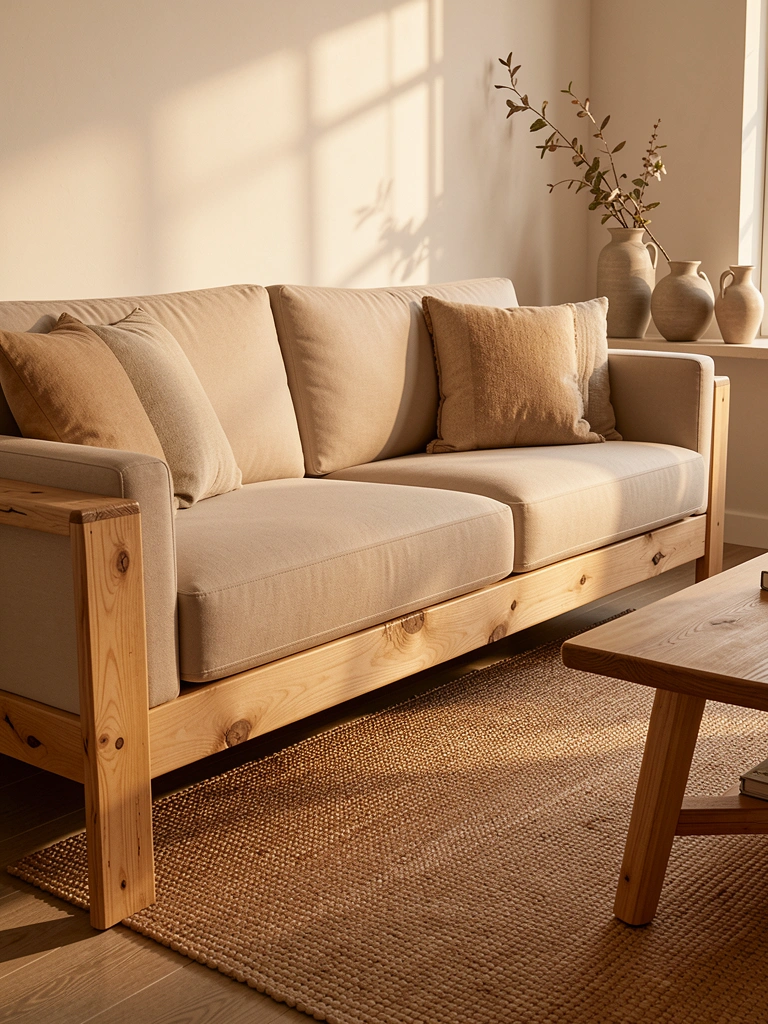
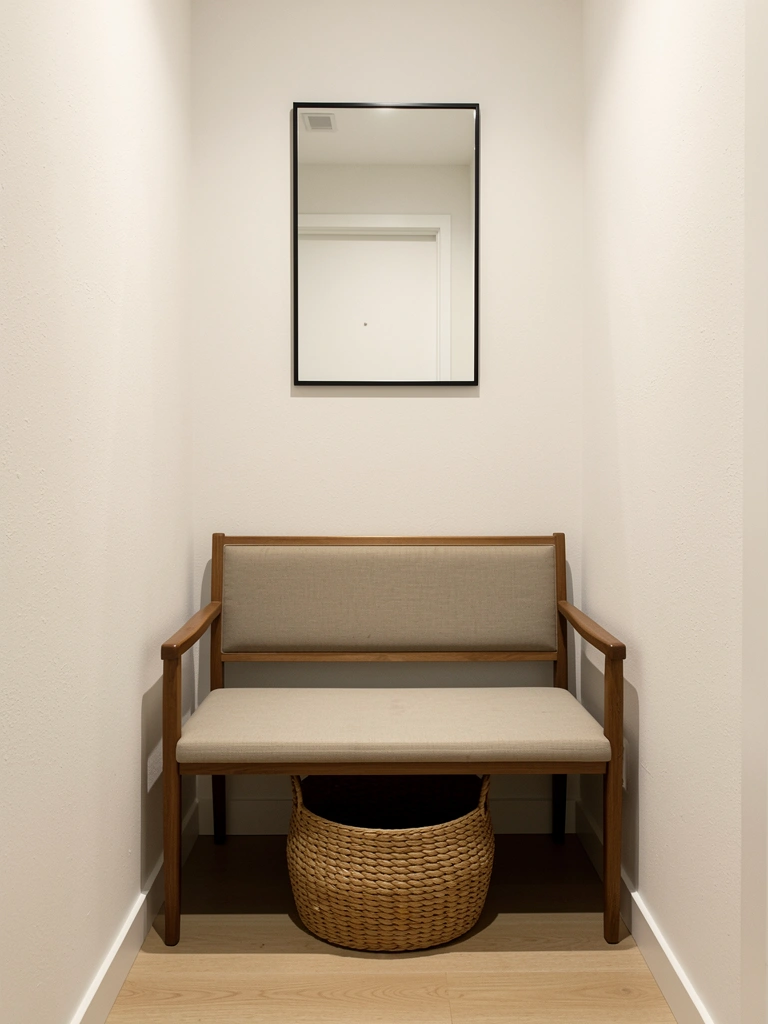
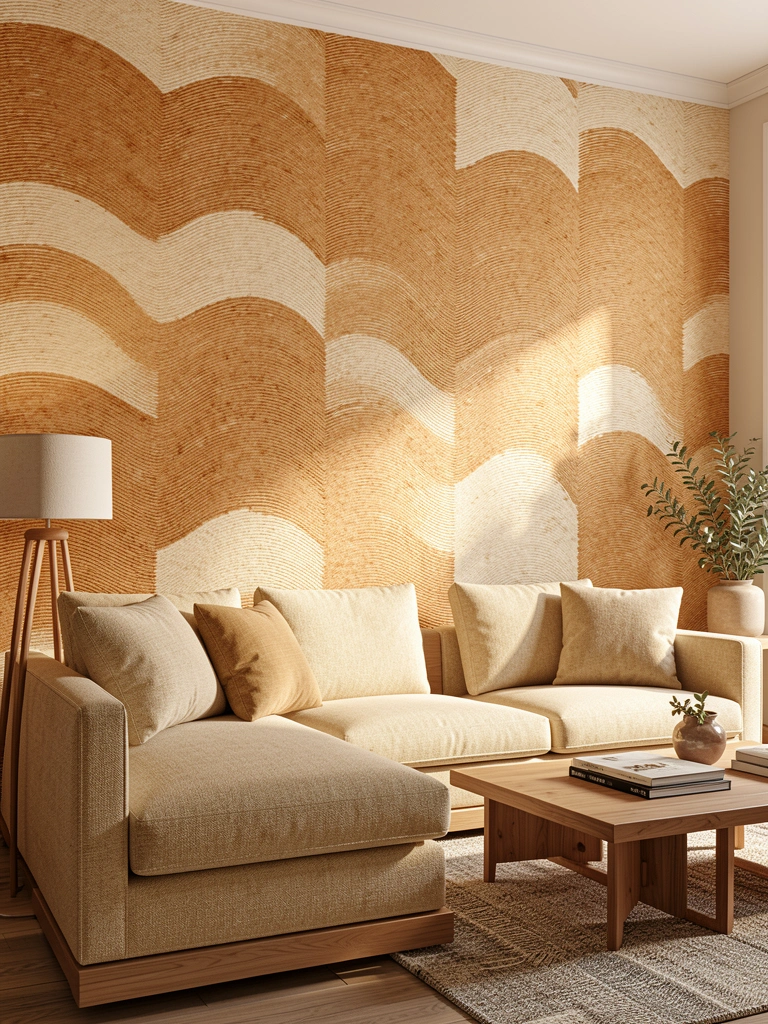
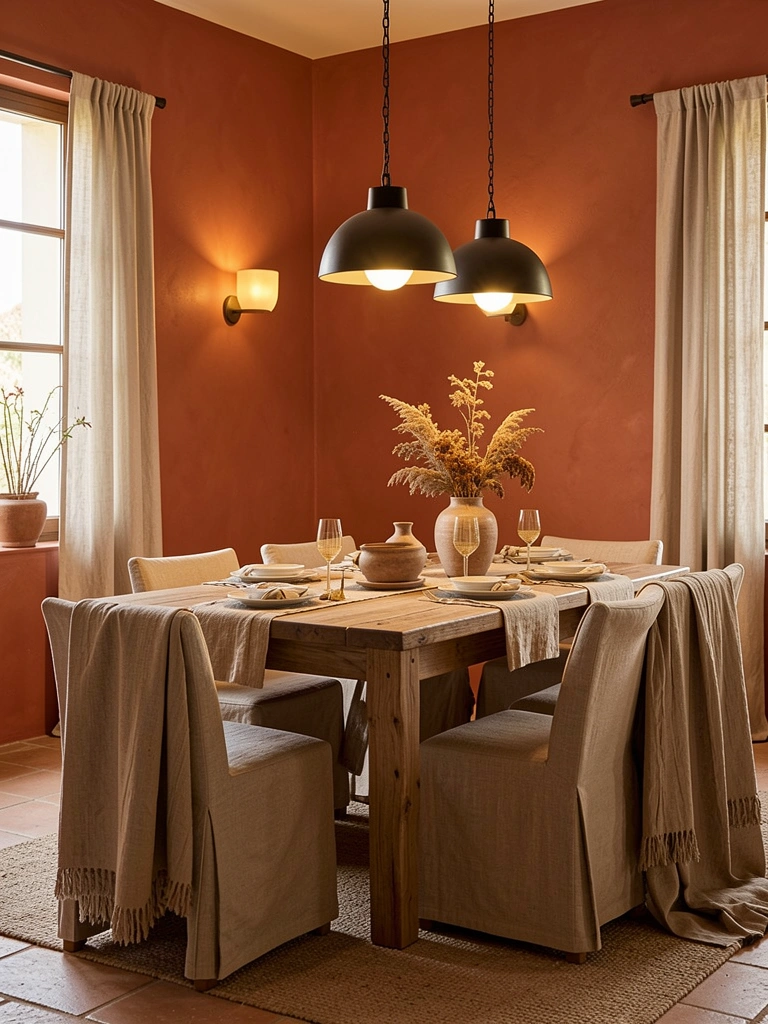
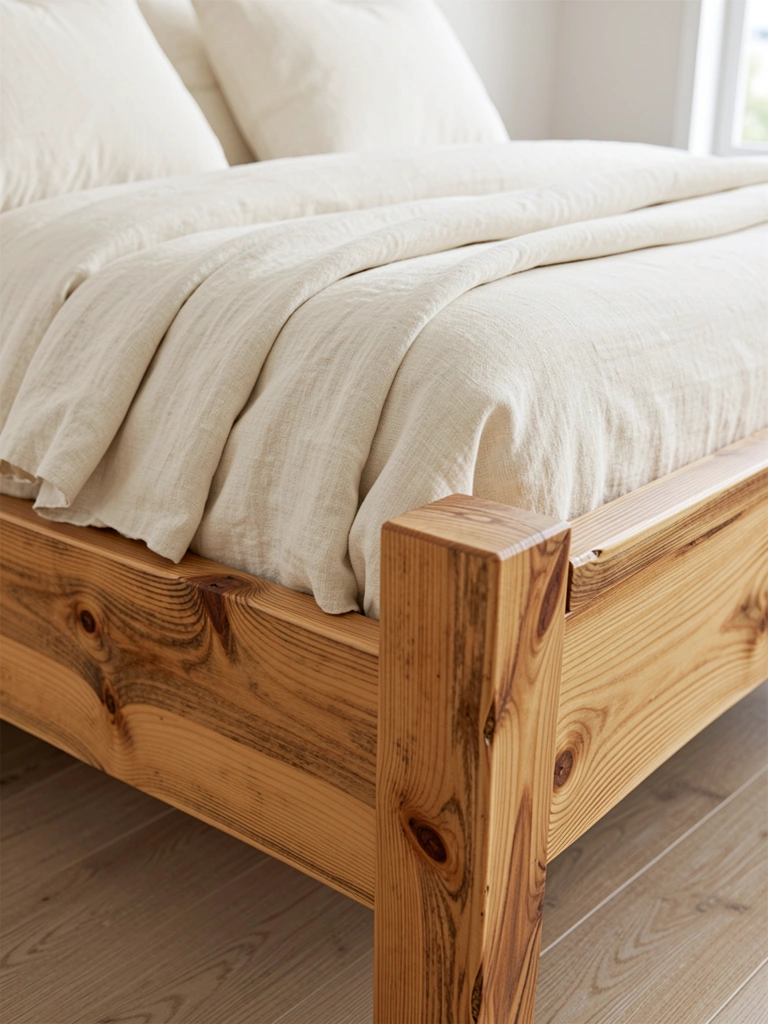
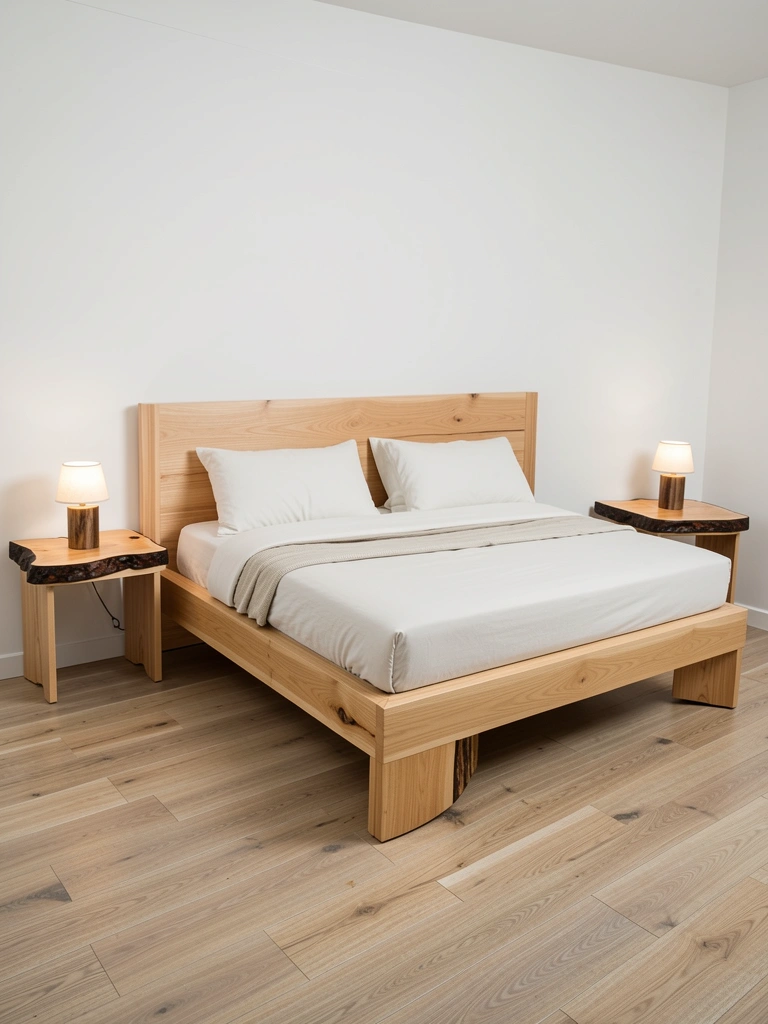
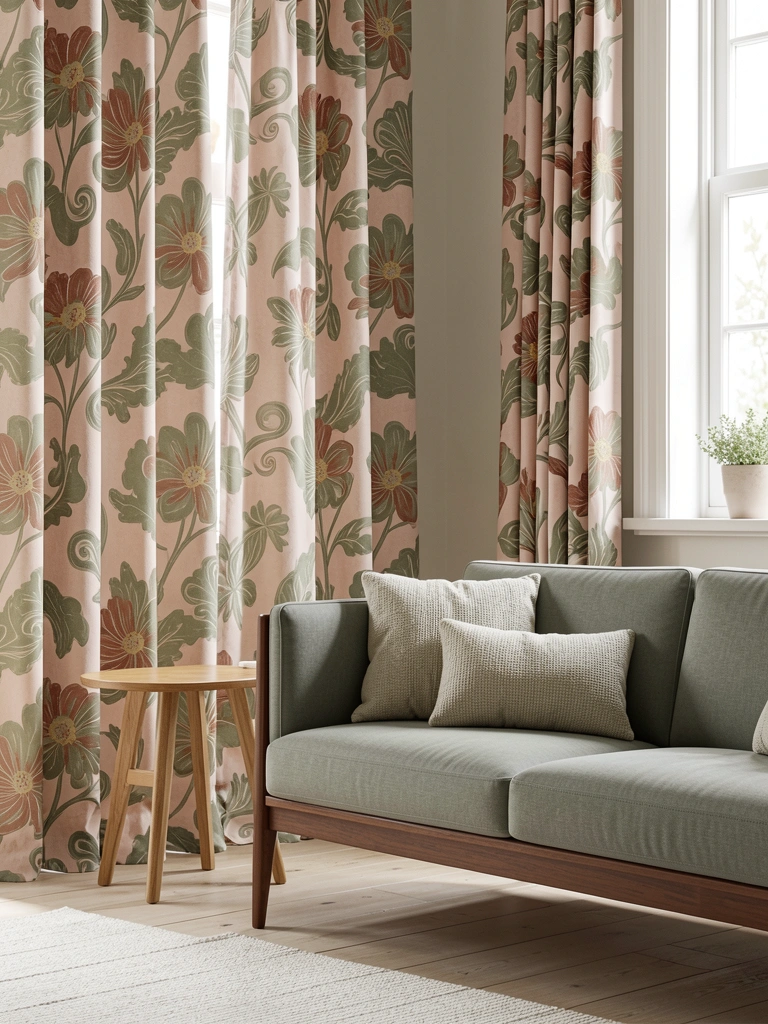
    8. Mix Natural Fibers for Organic Luxury

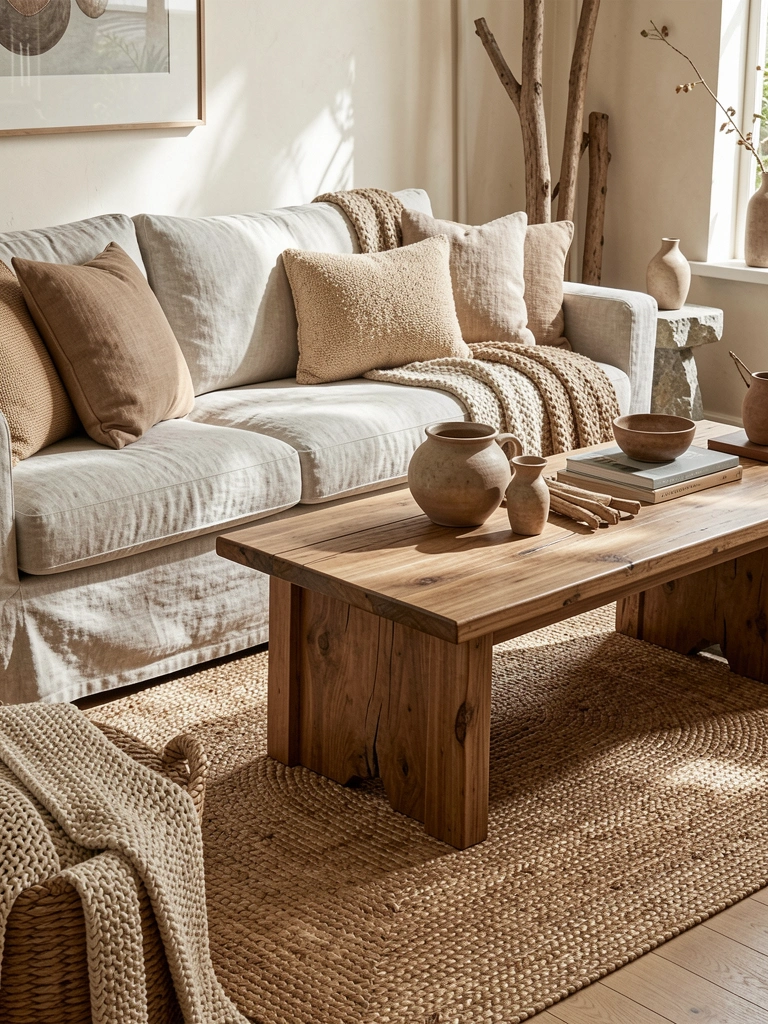
    Natural fibers—linen, cotton, jute, wool, and sisal—feel luxurious because they’re touchable, sustainable, and have visible texture. Mixing them creates a sophisticated, lived-in aesthetic that reads expensive.

    Build your scheme using natural materials: a linen or cotton sofa ($500–$1,500), paired with a wool or jute rug ($300–$1,200), wooden side tables ($150–$600), and a natural fiber throw ($50–$150). Brands like Article, Restoration Hardware, and Wayfair now specialize in natural-fiber upholstery that’s both beautiful and responsibly sourced.

    Pro tip: Natural fibers do require more maintenance (they attract dust and need regular vacuuming), but this “high-maintenance” quality signals premium materials.

    The organic material palette creates a cohesive, intentional room that feels sophisticated and grounded.

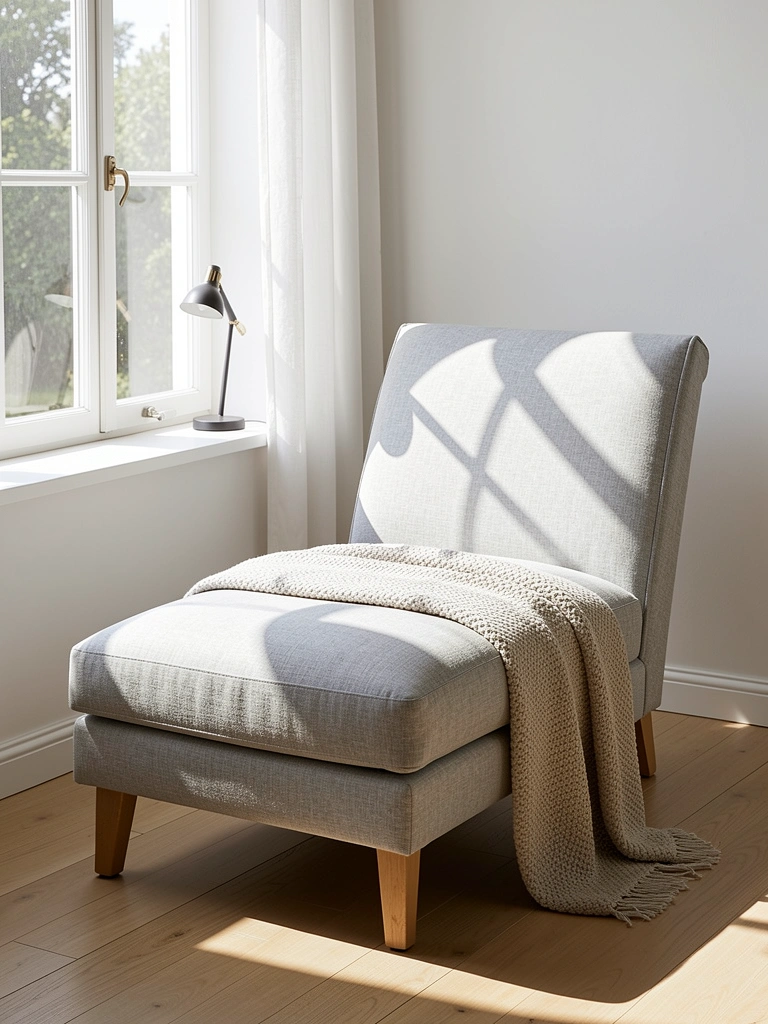
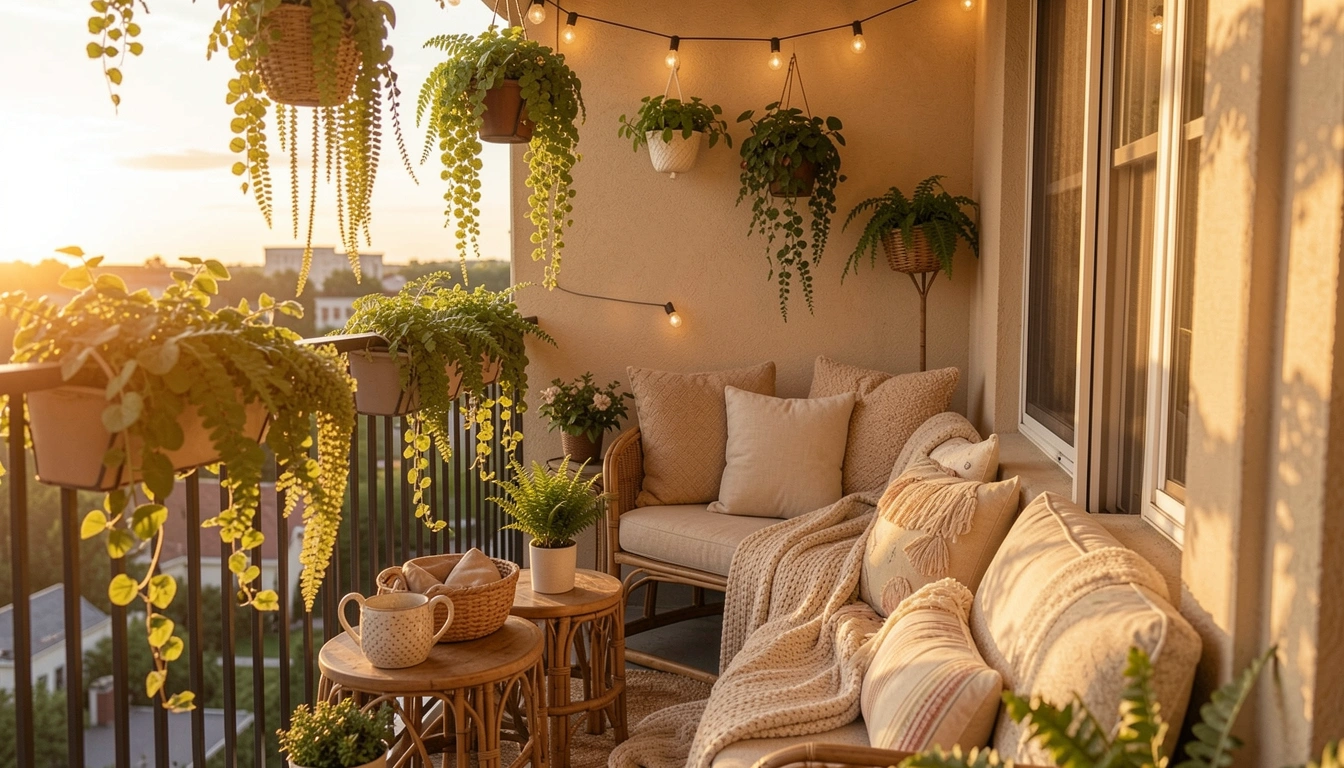
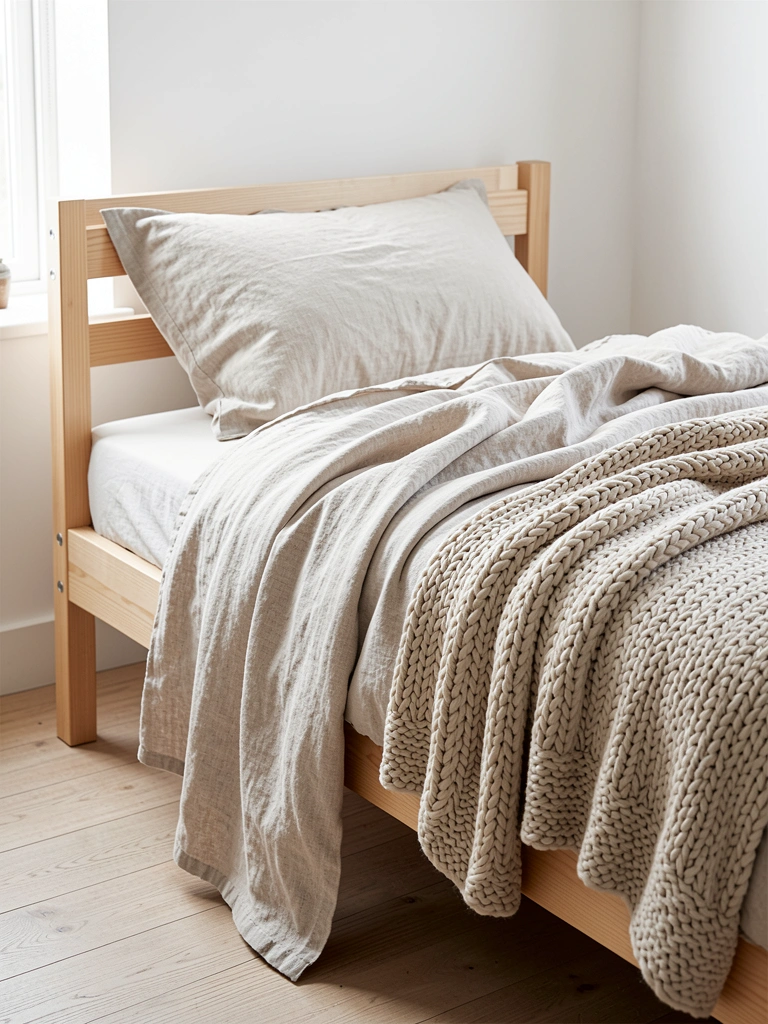
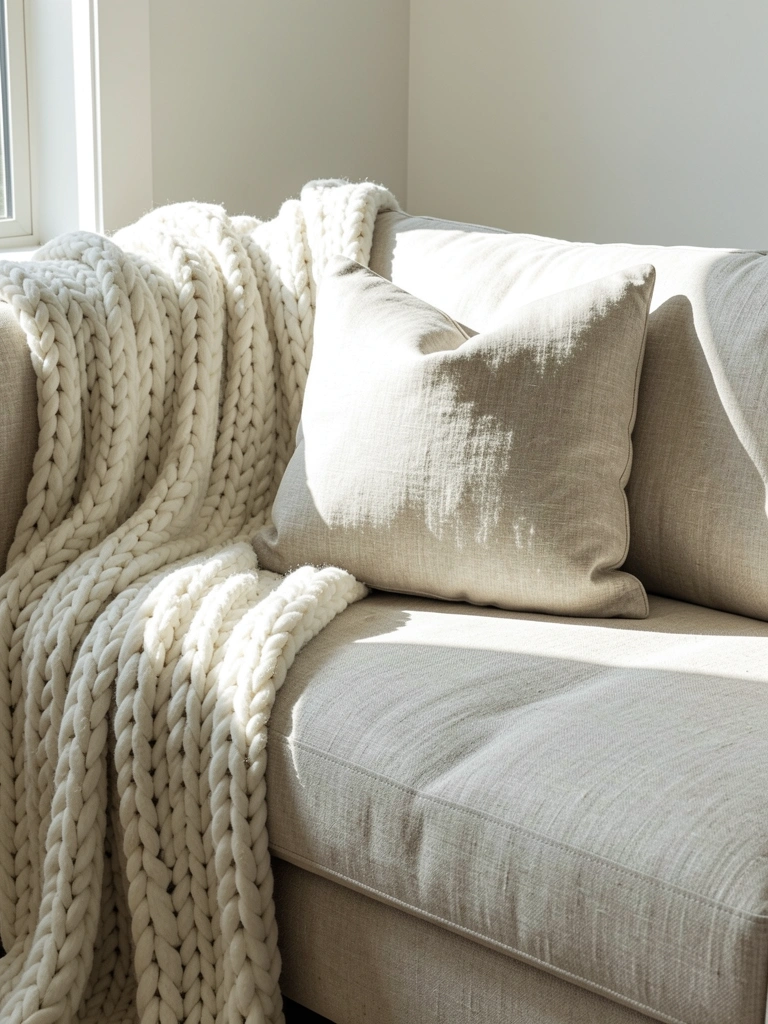
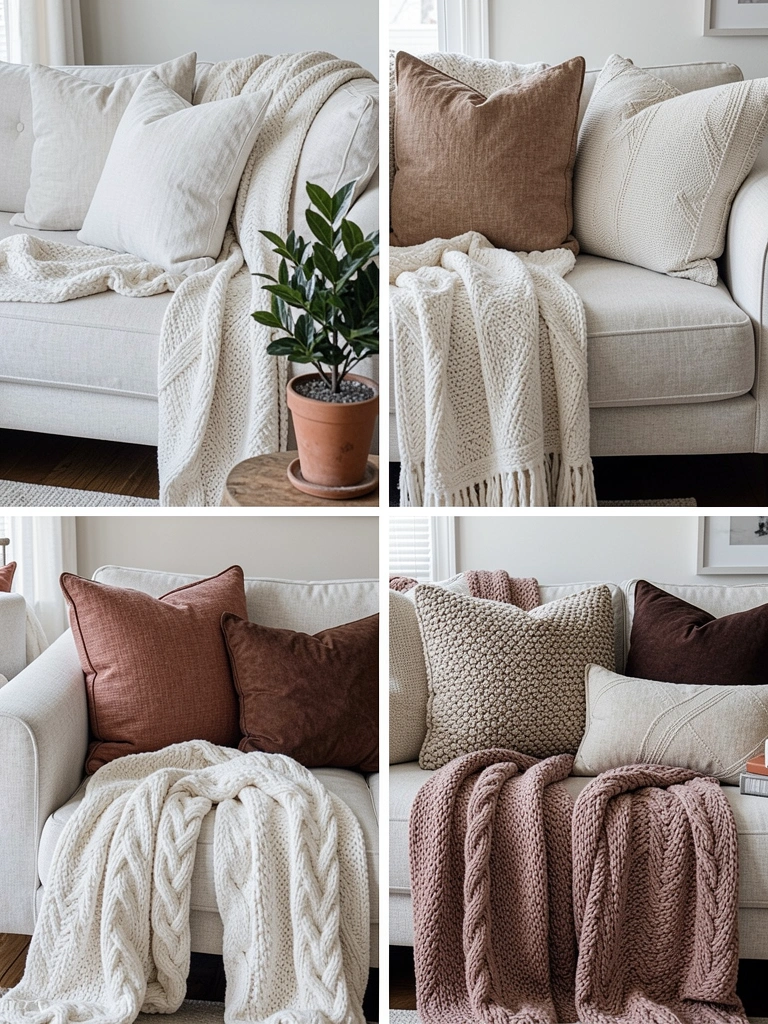
    9. Style with a Chunky Knit Throw

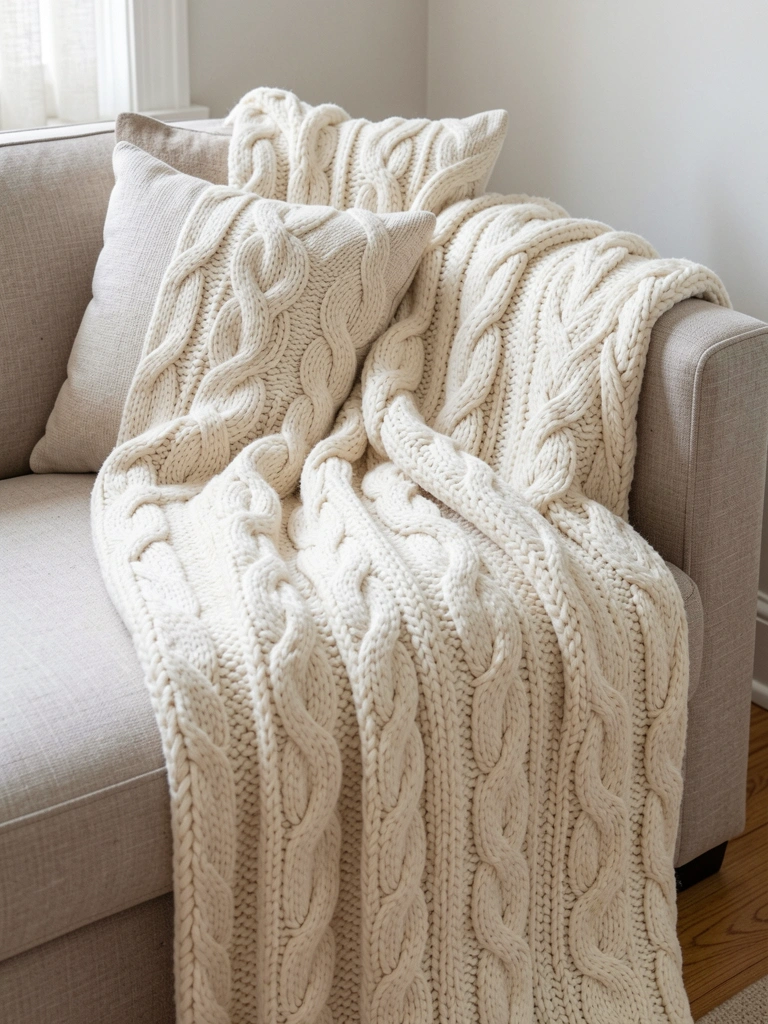
    A quality chunky knit throw ($40–$120) is one of the cheapest ways to make any sofa look more expensive and intentionally styled. It adds texture, warmth, and that “designed” aesthetic.

    Choose throws in cream, oatmeal, or warm gray from Target, West Elm, Amazon, or Etsy ($30–$100). The key is draping it casually (never perfectly folded—that looks staged) over one or two arms of your sofa. This simple styling trick adds dimension and breaks up solid-colored upholstery.

    Pro tip: Layer throws by season—lightweight linen blends in summer, chunky wool in winter. This seasonality looks curated and intentional.

    One casual throw transforms a plain sofa into a styled, inviting focal point.

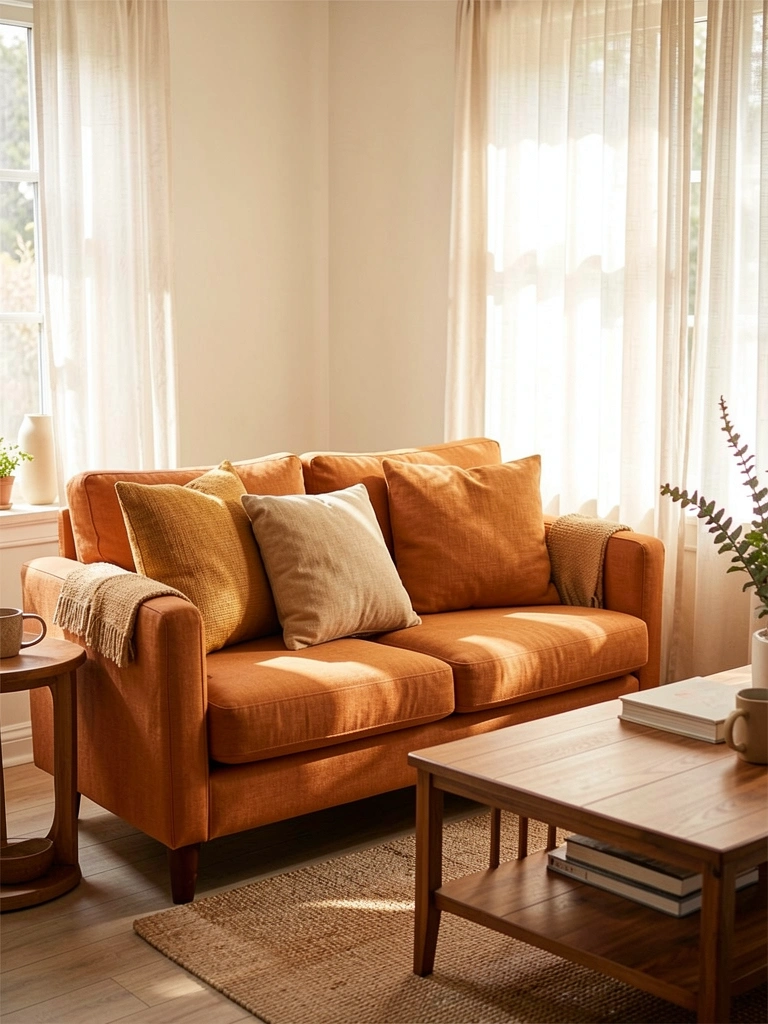
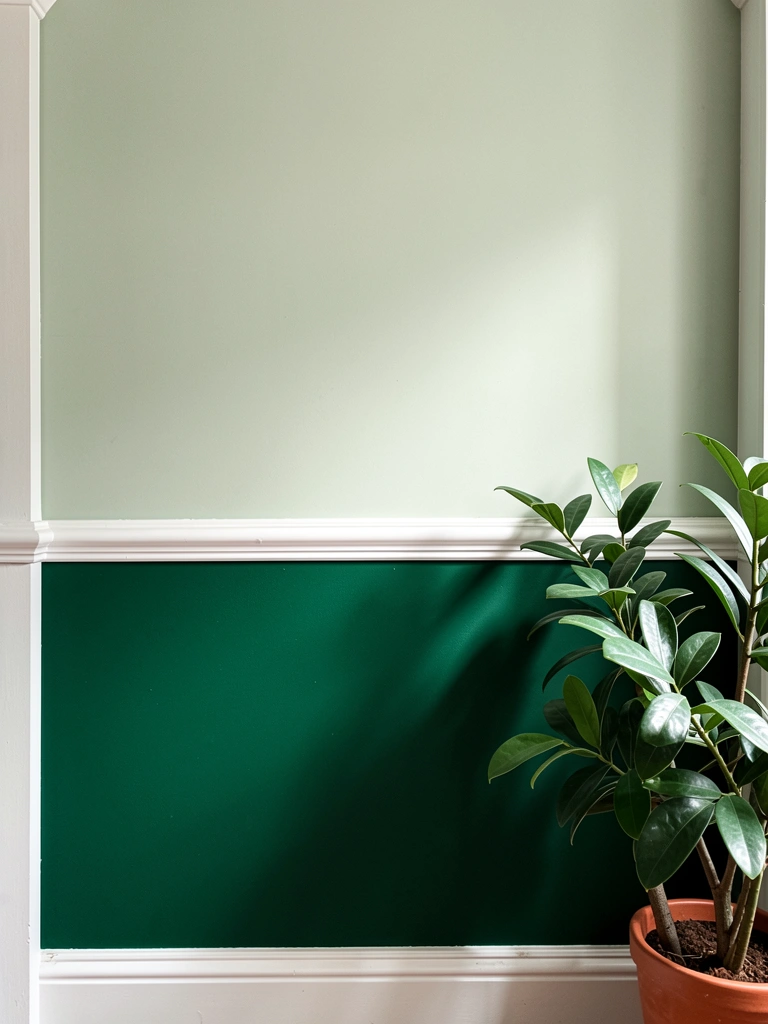
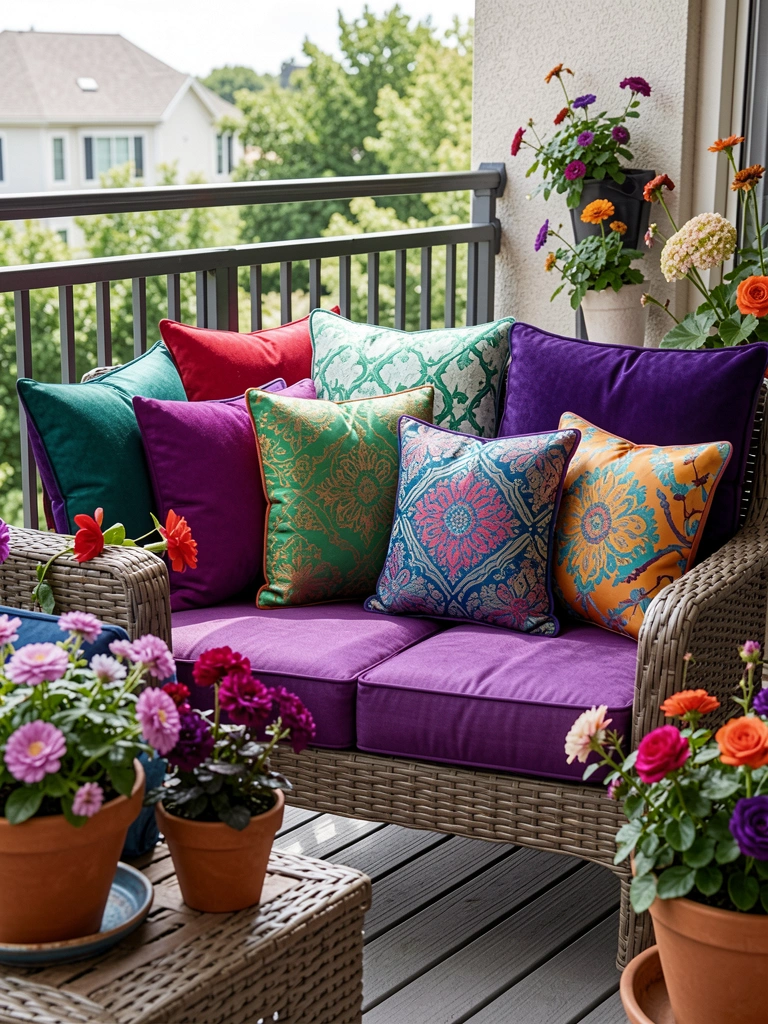
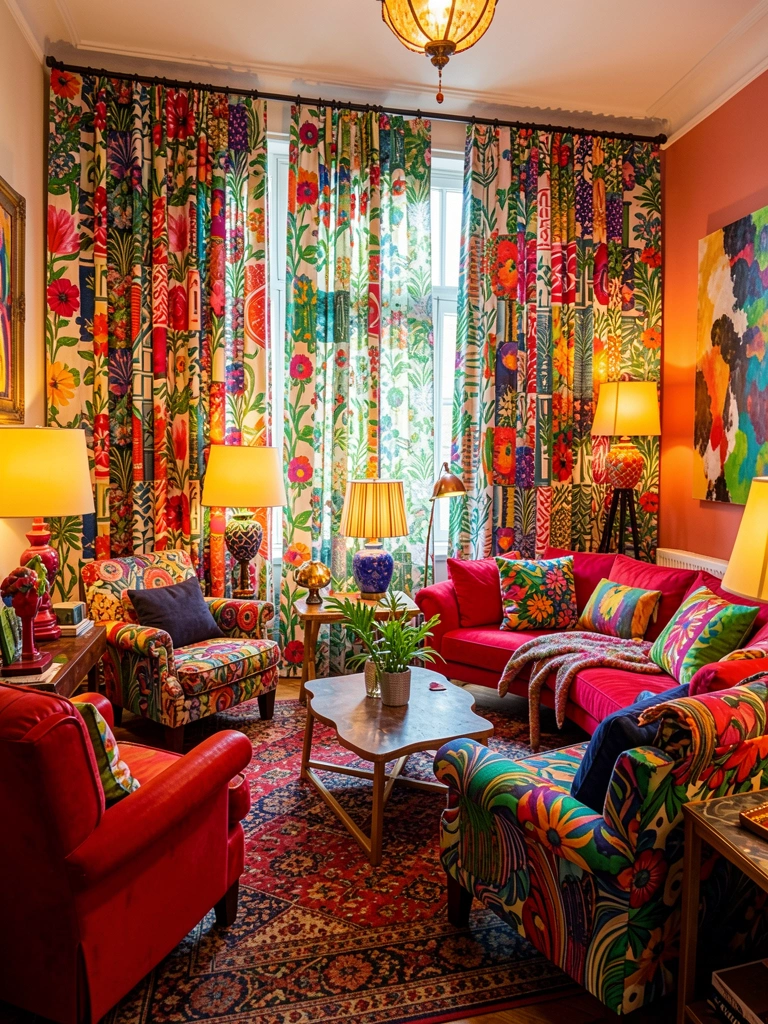
    10. Use Jewel Tones for Perceived Luxury

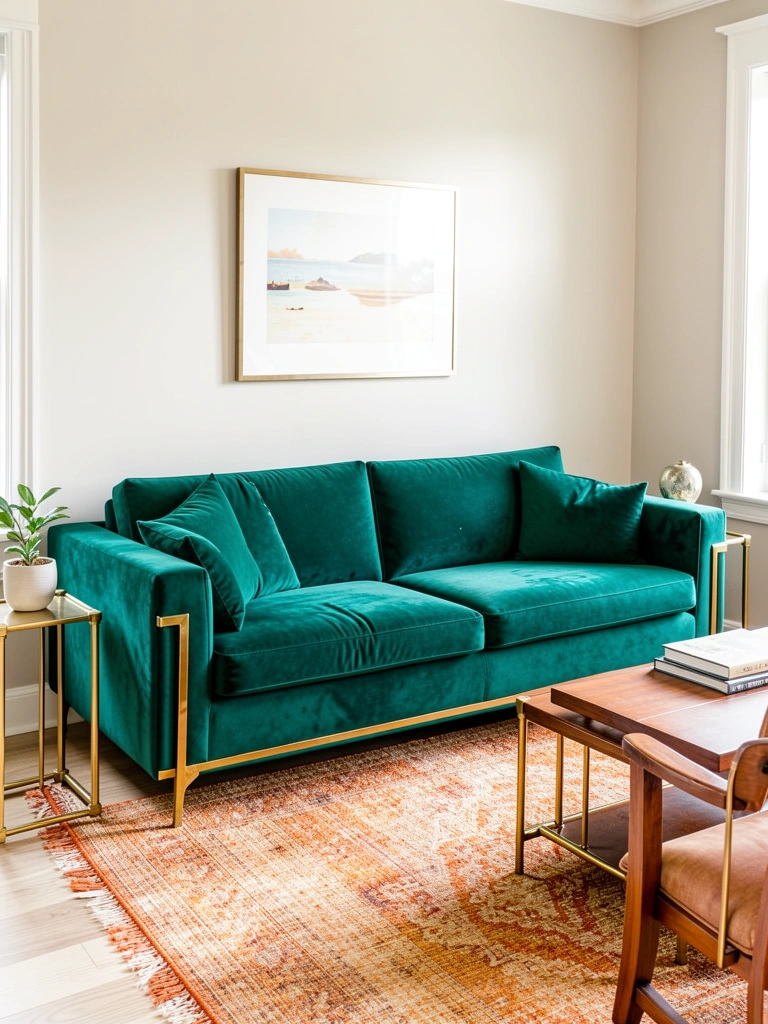
    Jewel tones (emerald, sapphire, deep plum, oxblood, rich teal) read as more luxurious than neutrals because they require confidence and intentional design choices. Neutrals are safe; jewel tones signal that someone cared about the aesthetic.

    Look for jewel-toned sofas or accent chairs from Article, Crate and Barrel, or West Elm ($500–$1,500 depending on size and material). If you already own a neutral sofa, a single jewel-toned velvet or boucle chair ($400–$900) anchors the room and elevates the whole palette.

    Pro tip: Pair jewel tones with warm metals (brass, copper, gold) and natural wood to keep the look modern rather than dated.

    A jewel-toned statement piece immediately signals thoughtful design and perceived luxury.

    11. Add Contrast Piping for a Designer Touch

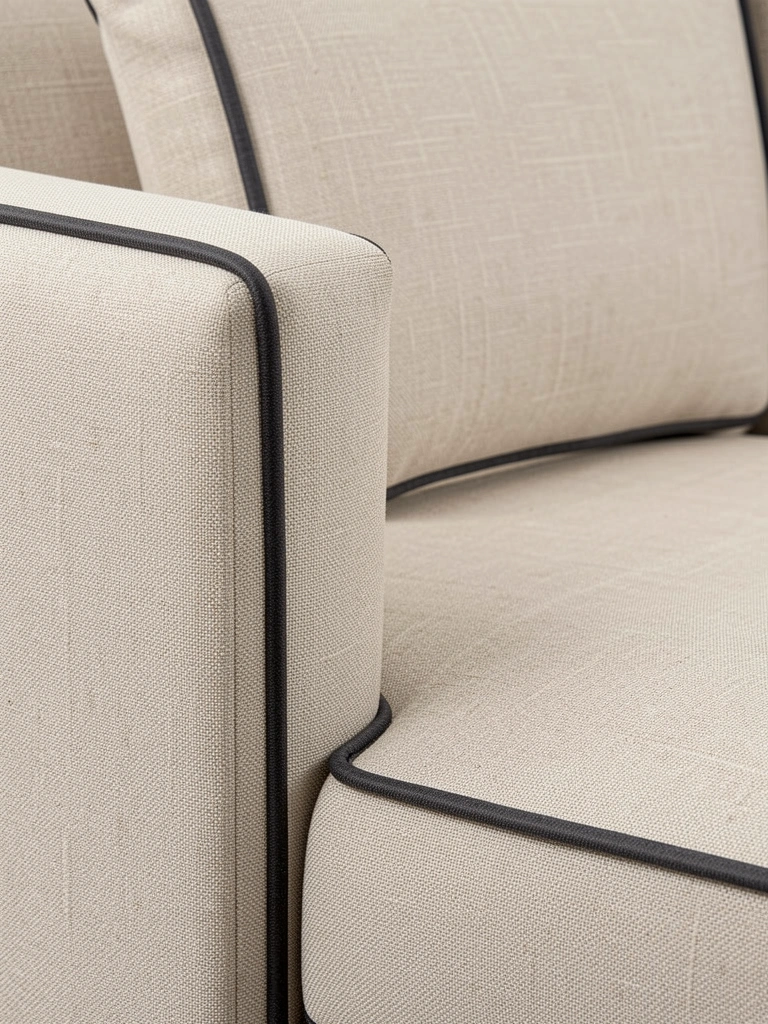
    Contrast piping (colored trim along the edges of upholstered pieces) is a designer detail that signals custom, high-end furniture even on budget pieces. It costs little but reads expensive.

    If you’re buying new, order from makers who offer piping customization: Restoration Hardware, Article, or even custom services at Wayfair. Budget an extra $100–$300 for this detail. For existing sofas, an upholsterer can add piping ($200–$400 in labor) for a dramatic upgrade.

    Pro tip: Black piping on neutral fabric, or cream piping on dark fabric, creates the most sophisticated contrast.

    The crisp trim detail instantly elevates your sofa from “basic” to “custom-designed.”

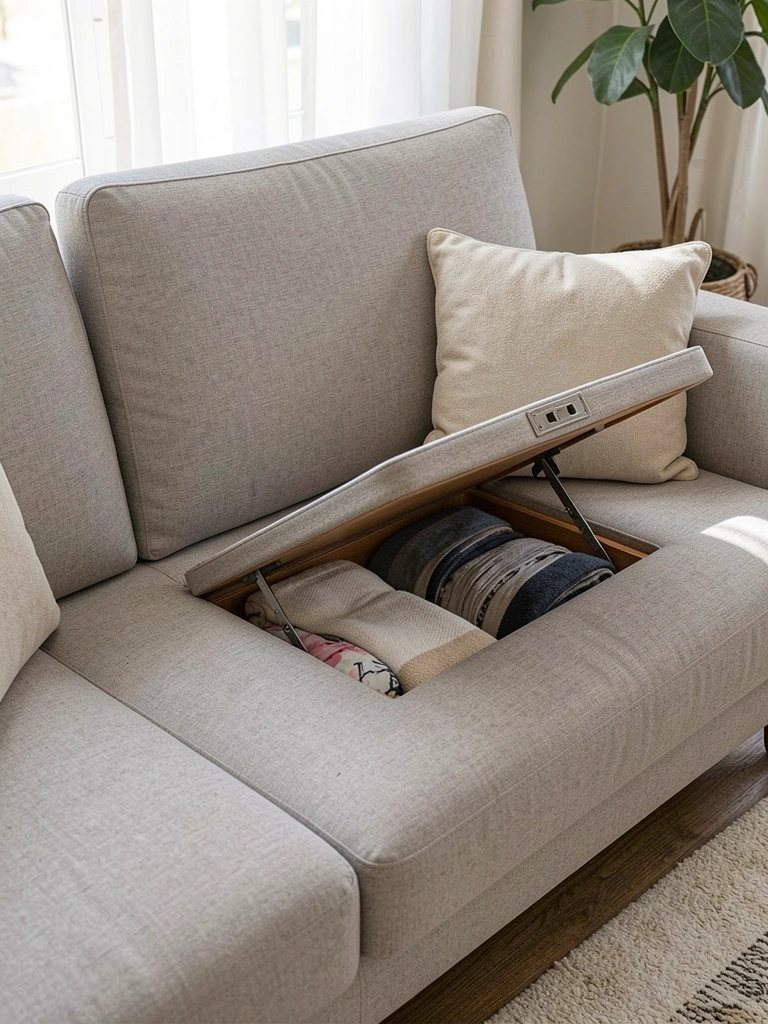
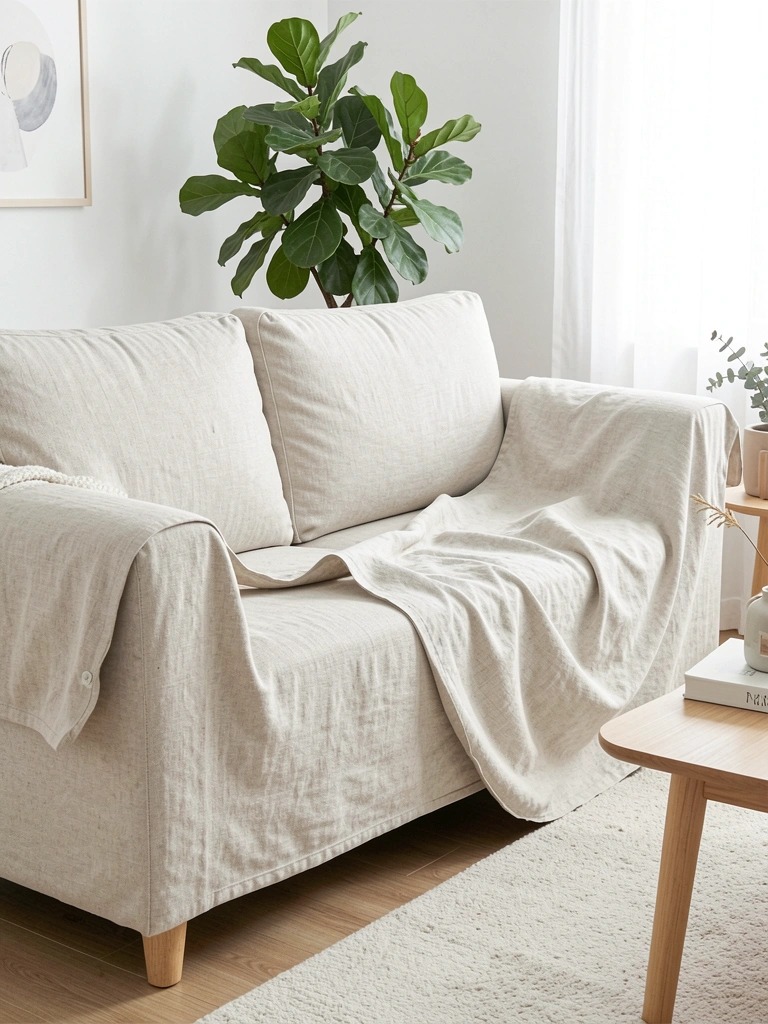
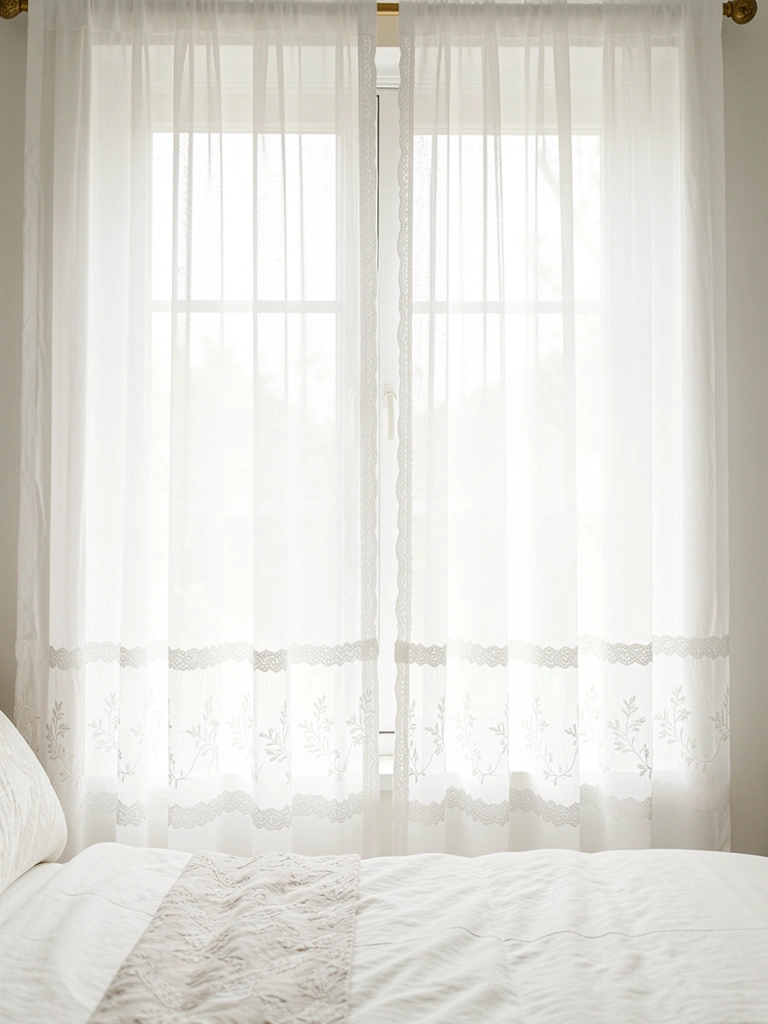
    12. Invest in Slipcovers for Protective Luxury

    High-quality slipcovers ($150–$400) protect your upholstery while looking intentional and expensive. They read as a design choice rather than damage control, especially if they’re tailored and in a premium fabric.

    Choose slipcovers in linen or linen blends (not thin cotton) from brands like Pottery Barn, Restoration Hardware, or custom makers on Etsy. Make sure they fit tightly and tailored—baggy, loose slipcovers look cheap and temporary. Contrast piping or trim details make them feel like a designer choice.

    Pro tip: Slipcovers also allow you to change your room’s color seasonally—swapping them out feels fresh and intentional.

    A well-fitted slipcover looks premium while protecting your investment.

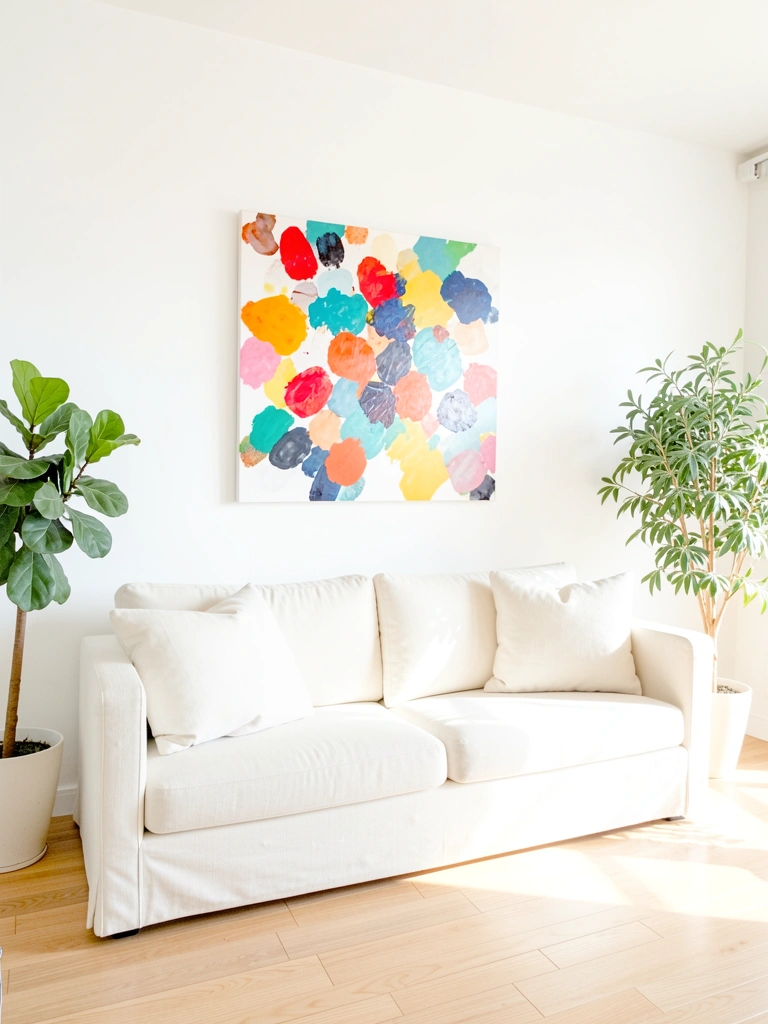
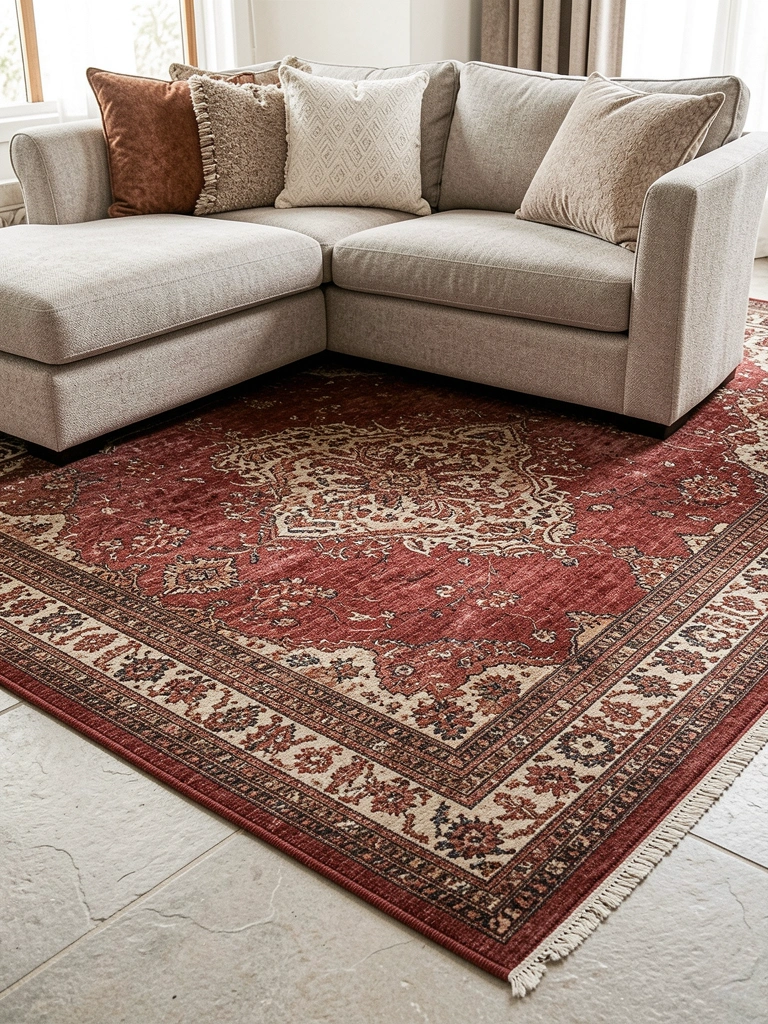
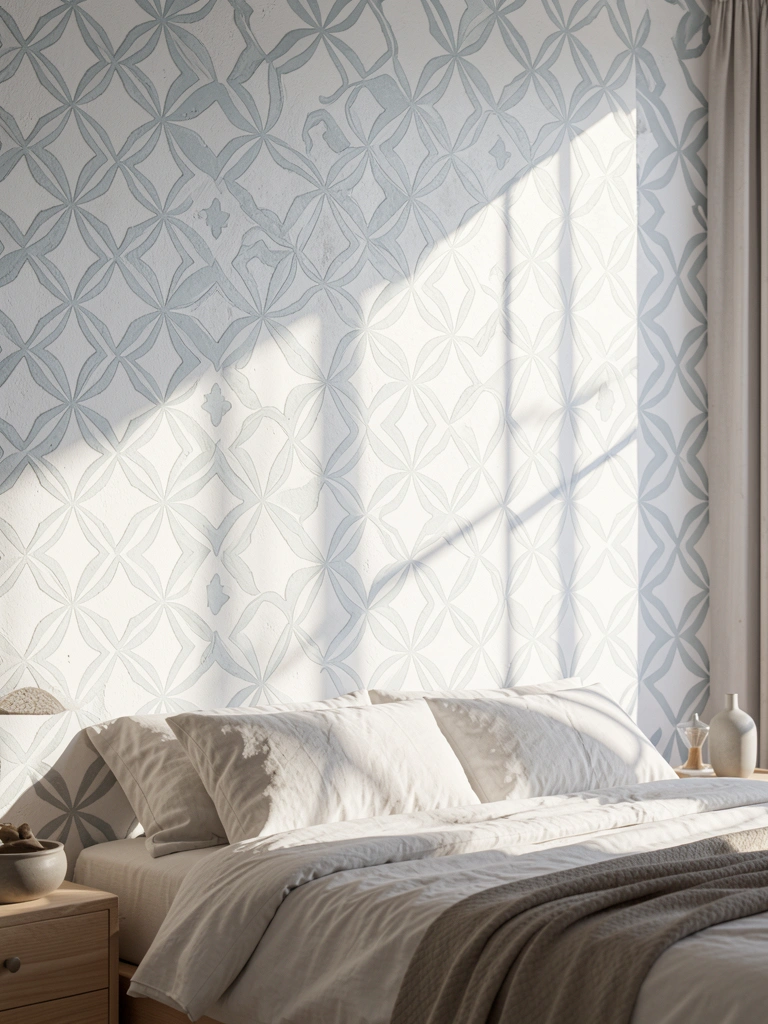
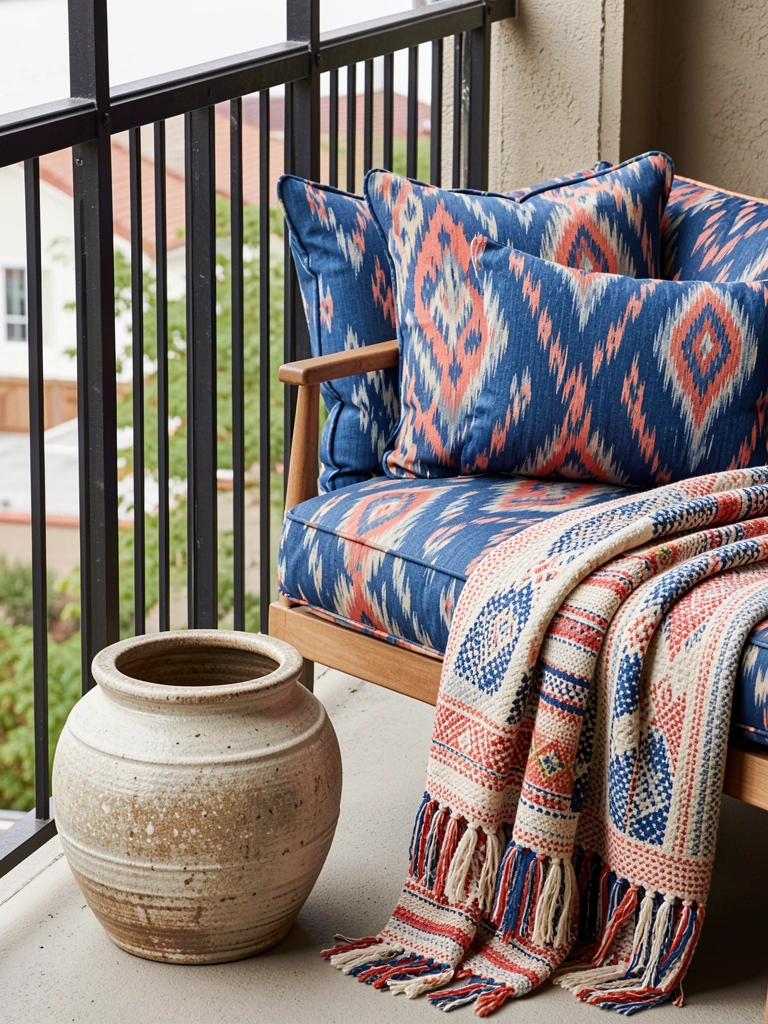
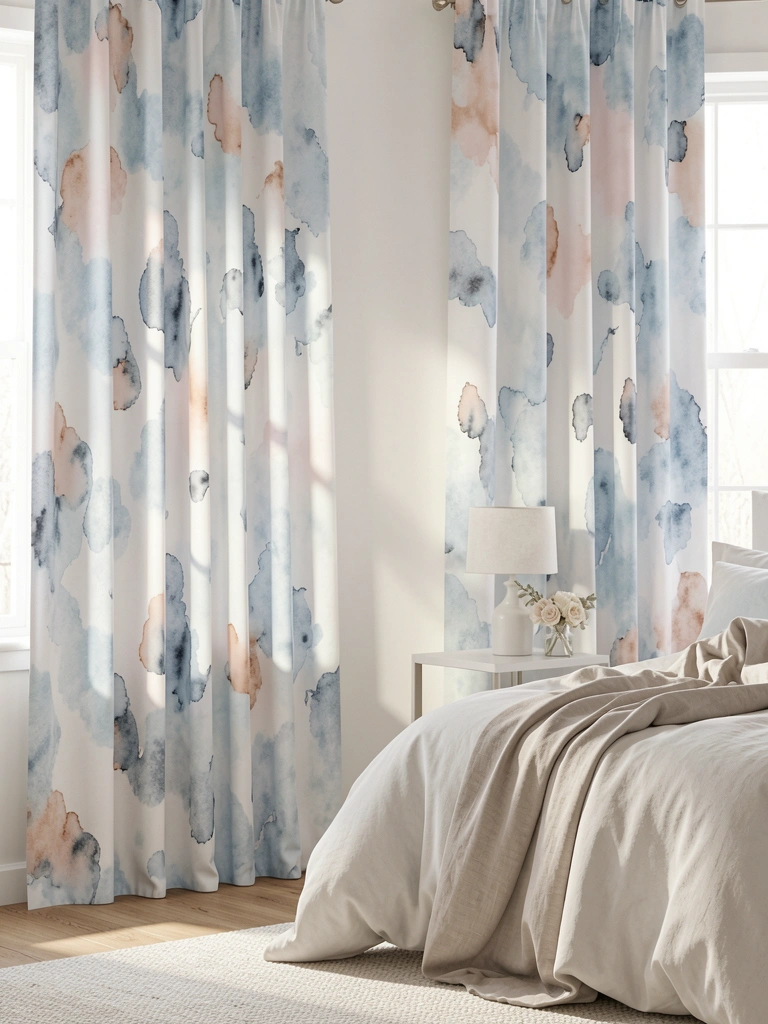
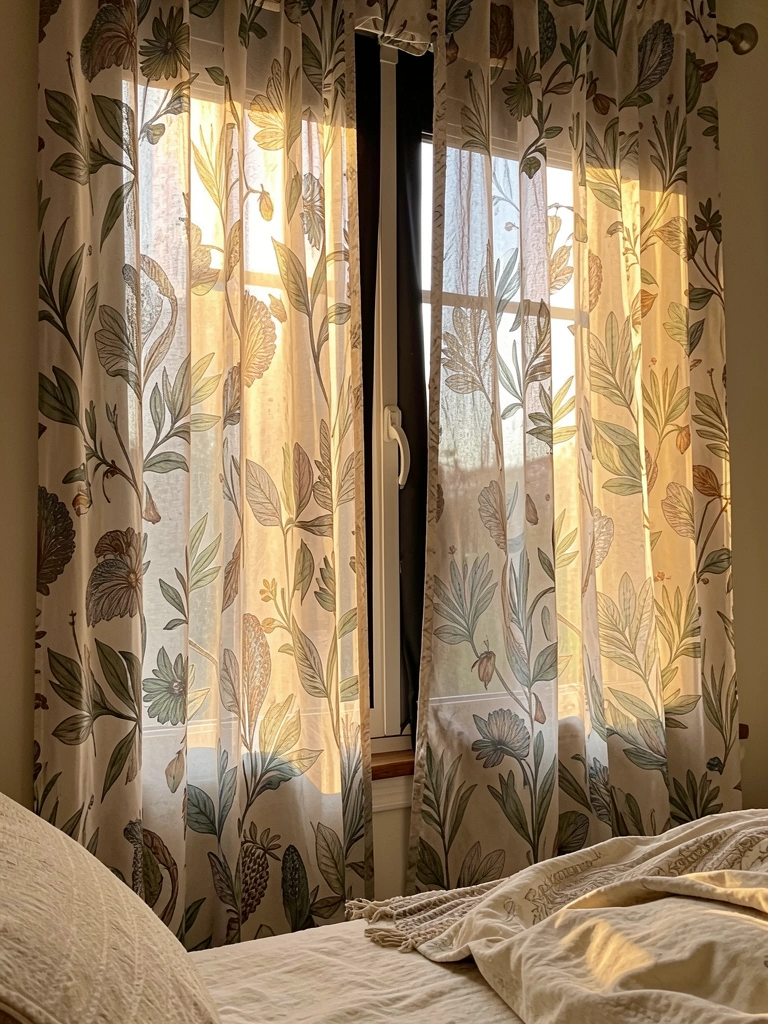
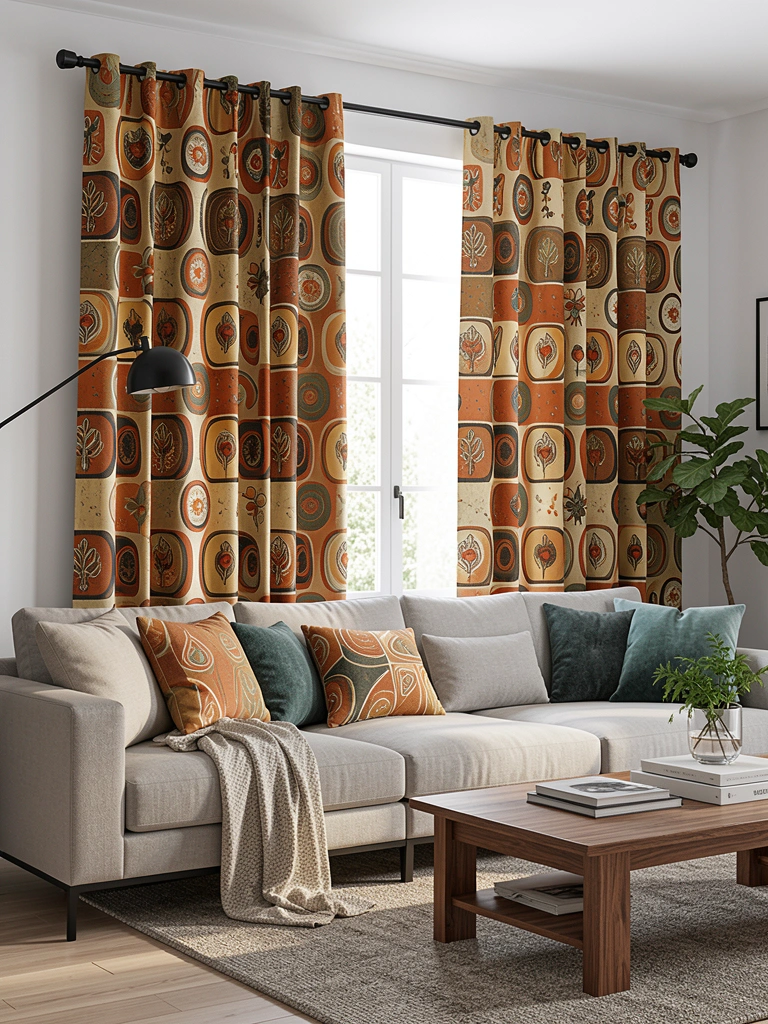
    13. Skip Patterned Upholstery (Use It in Pillows Instead)

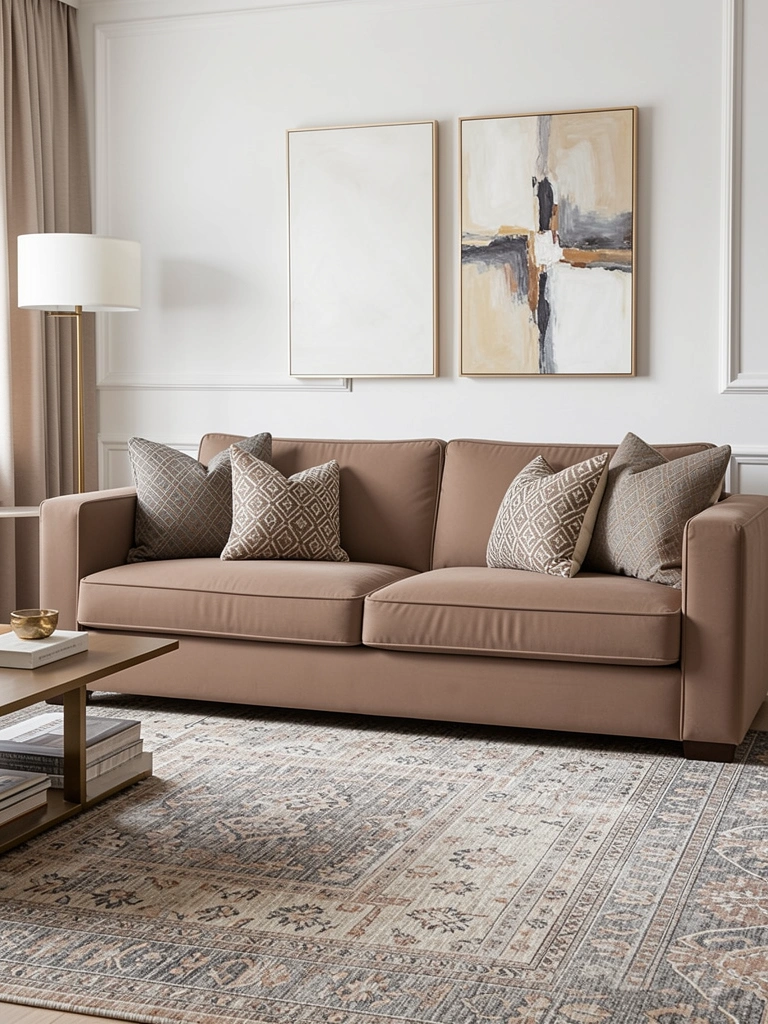
    Patterned sofa upholstery often reads busy and dated, even when the pattern is trendy. Luxury interiors favor solid-colored upholstery with pattern introduced through pillows, rugs, and art.

    Keep your sofa in a solid neutral ($500–$1,500) and express pattern through throw pillows ($25–$80 each), a patterned rug ($300–$1,000), and artwork ($100–$500+). This approach is also more practical—you can change patterns seasonally without replacing furniture.

    Pro tip: If you love pattern, a patterned accent chair ($400–$900) is less risky than a full sectional covered in pattern.

    Solid upholstery with patterned accessories reads more refined and allows your room to feel less trendy.

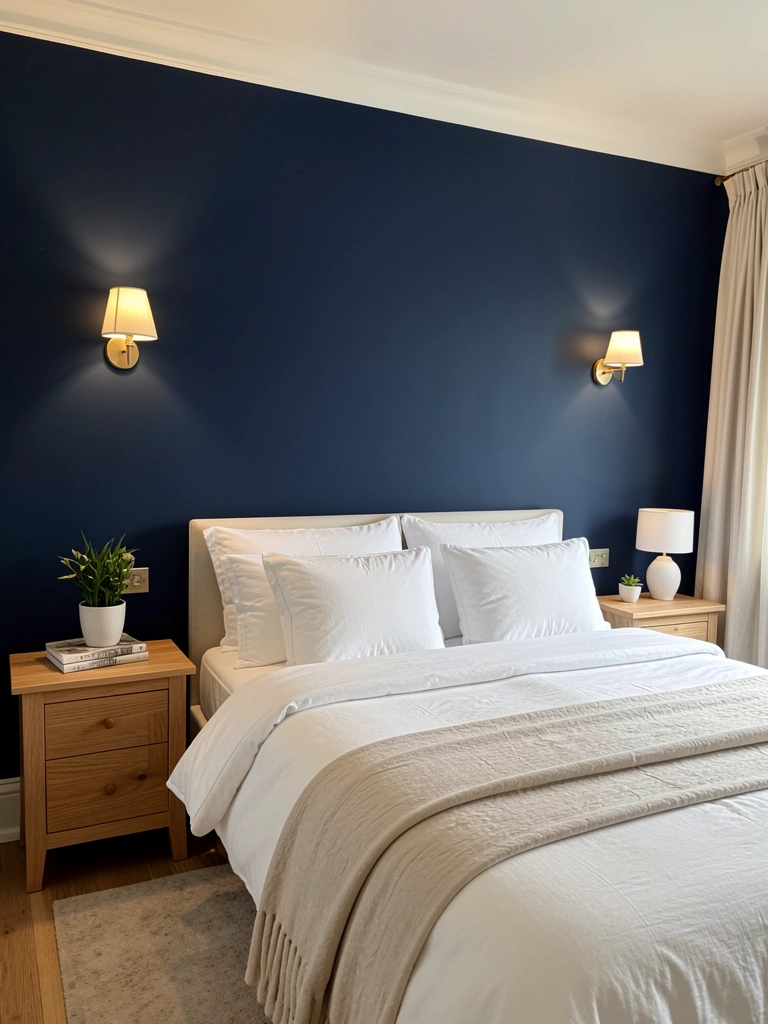
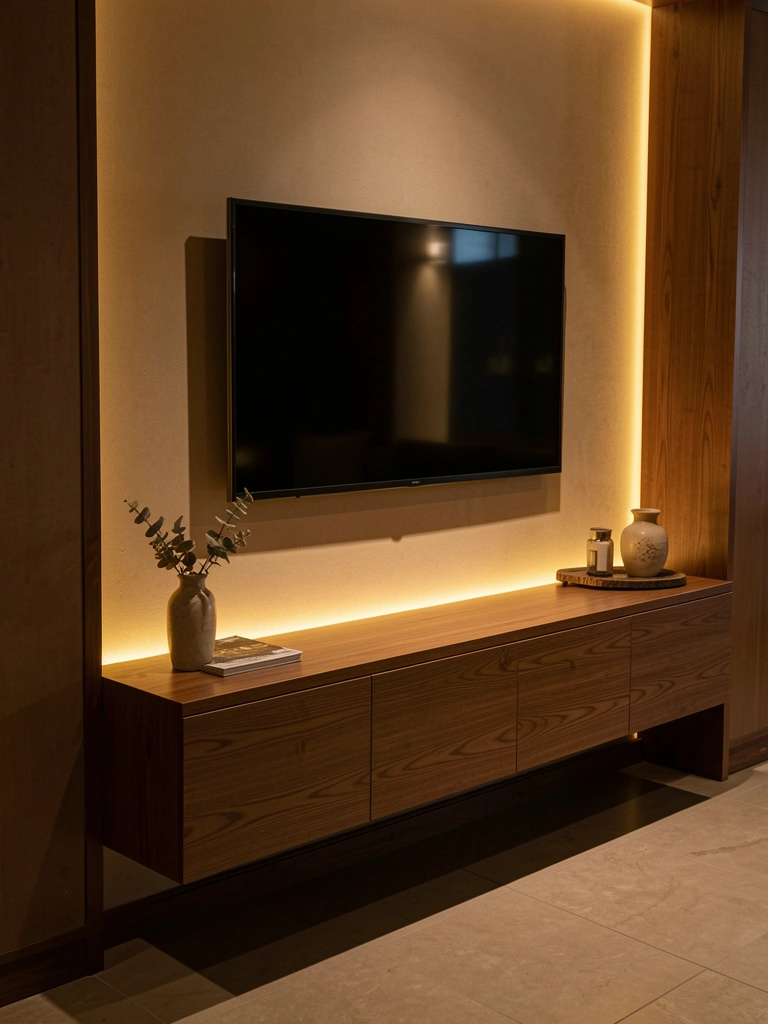
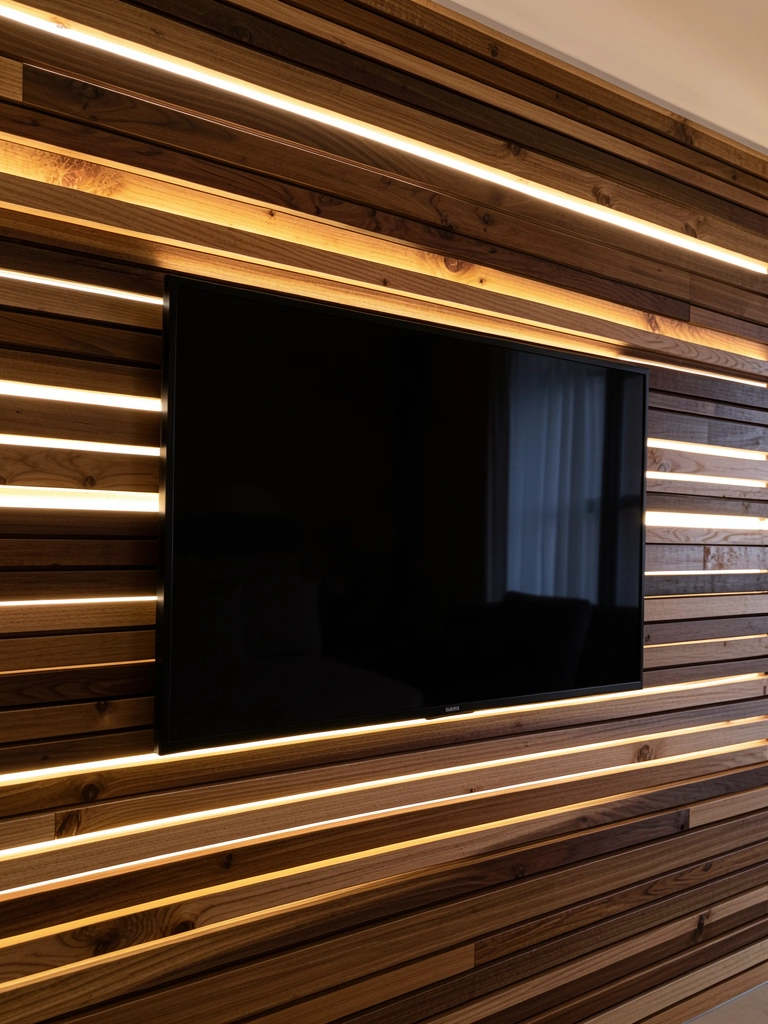
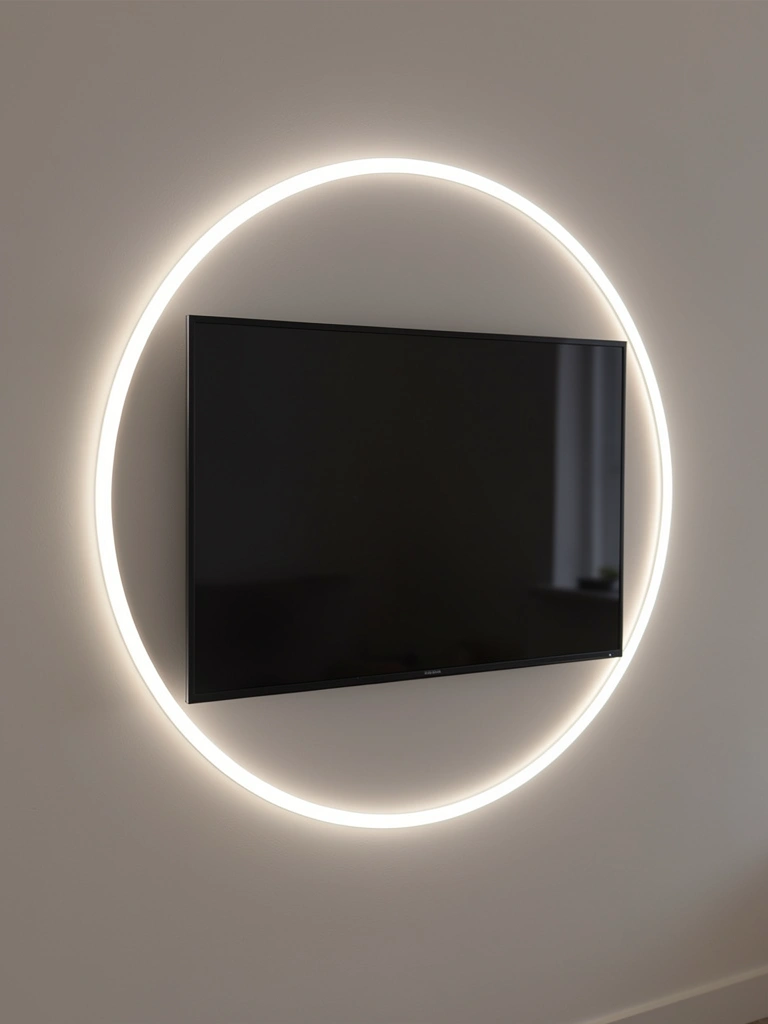
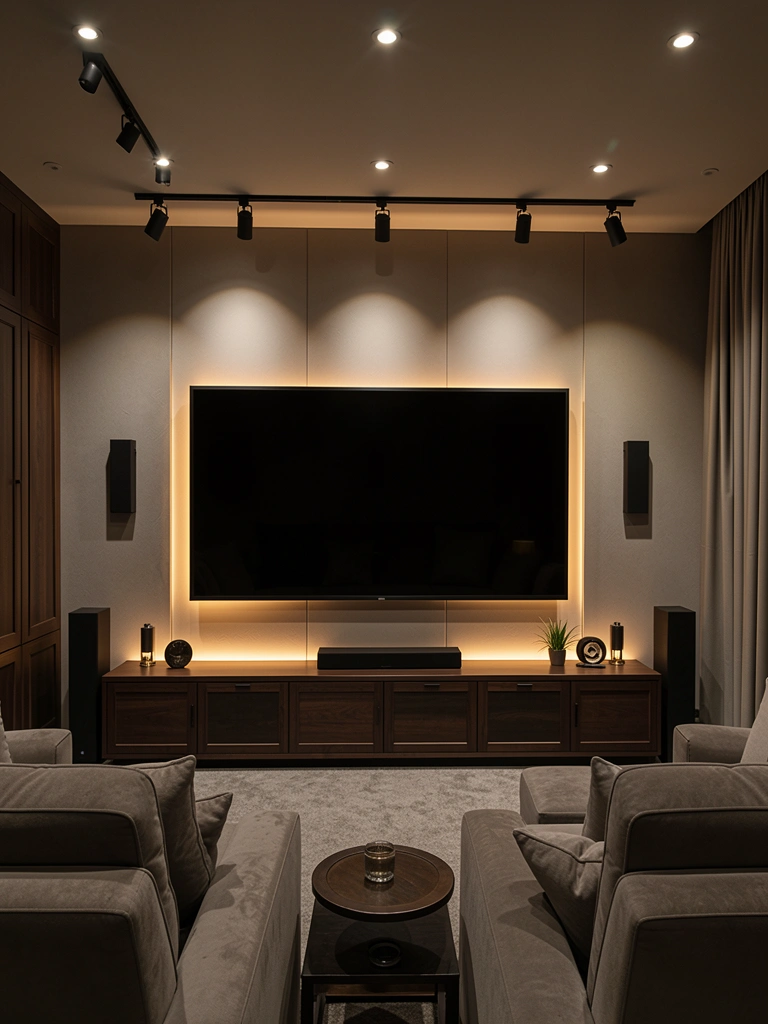
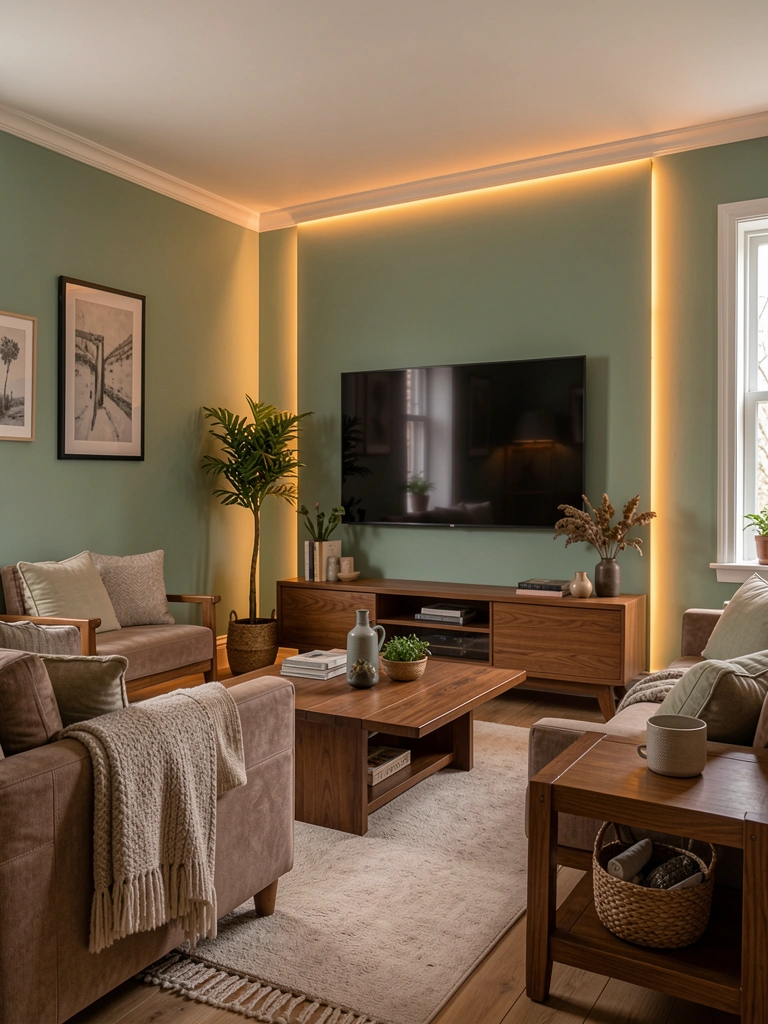
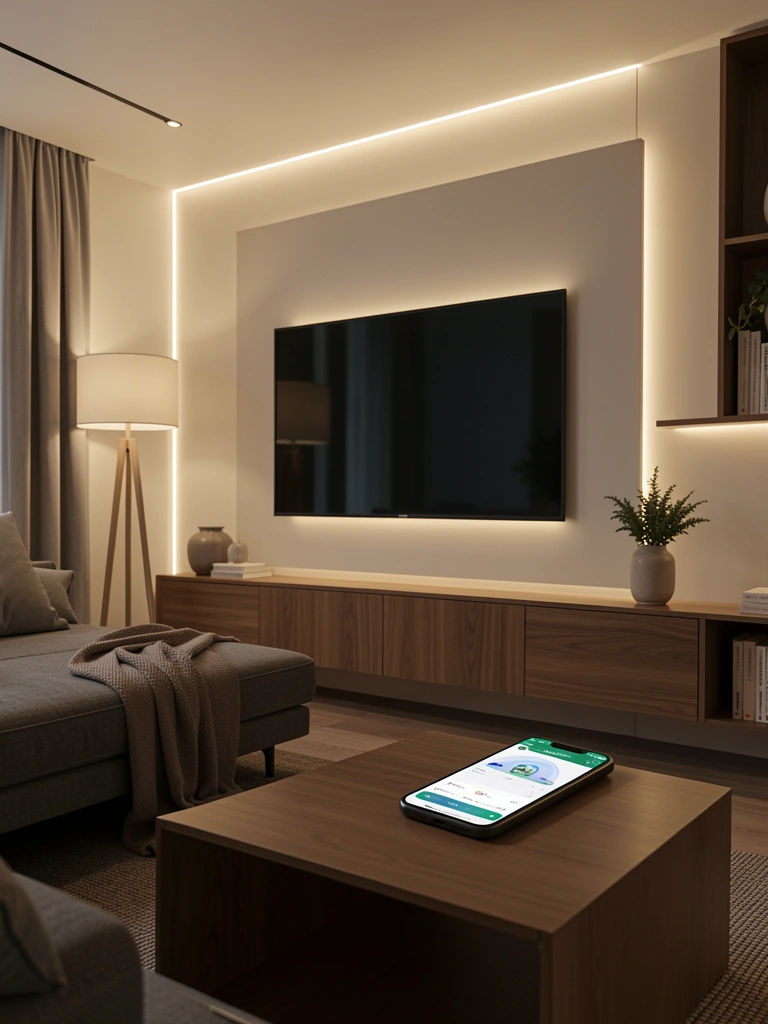
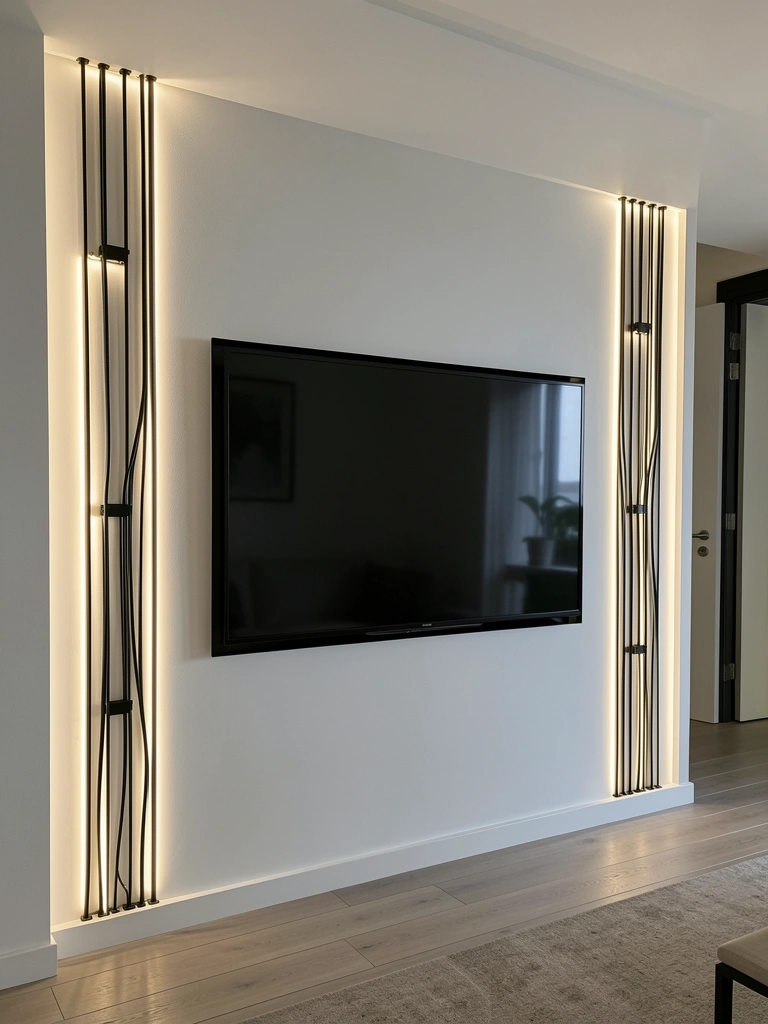
    14. Layer Lighting to Emphasize Upholstery

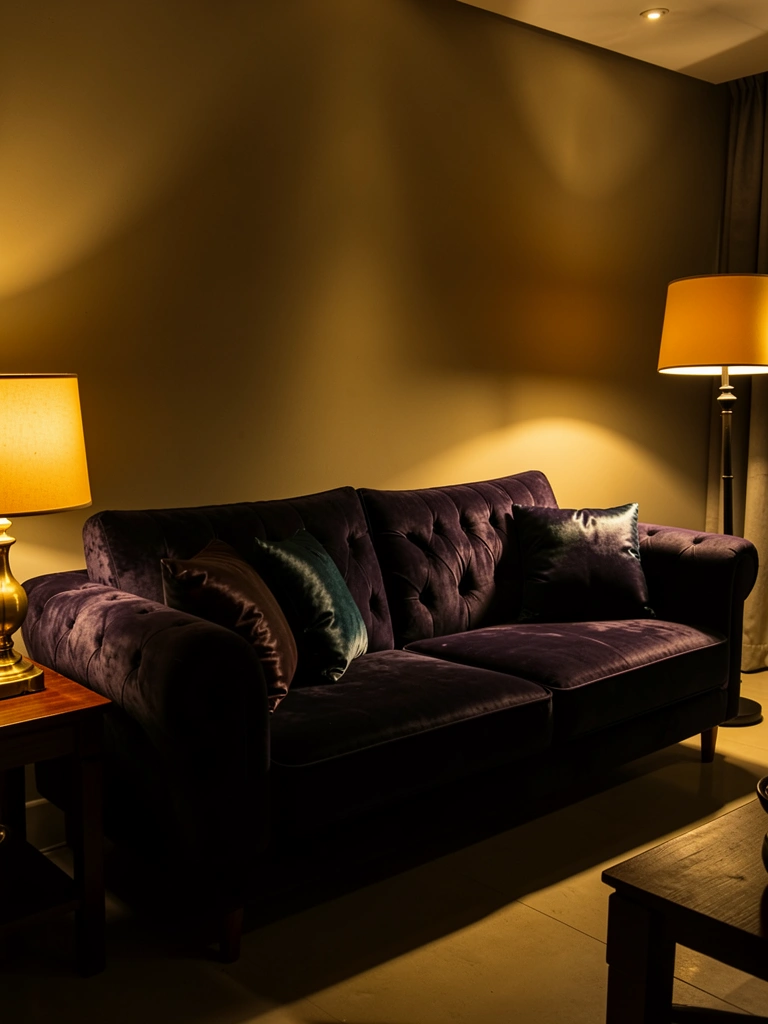
    Lighting directly affects how your upholstery reads—the right lighting makes fabrics look richer, textured, and expensive. Poor lighting flattens everything and makes nice upholstery look dull.

    Use a combination of ambient light (overhead), task lighting (table lamps), and accent lighting (floor lamps positioned to catch fabric texture). Warm-toned bulbs (2700K) are essential for luxury interiors. Brass or copper fixtures ($50–$200 per lamp) complement upholstery better than chrome or silver.

    Pro tip: Position a floor lamp or wall sconce at an angle to graze across velvet or boucle upholstery—this highlights texture and makes it glow.

    Thoughtful lighting transforms your upholstery from ordinary to exquisite.

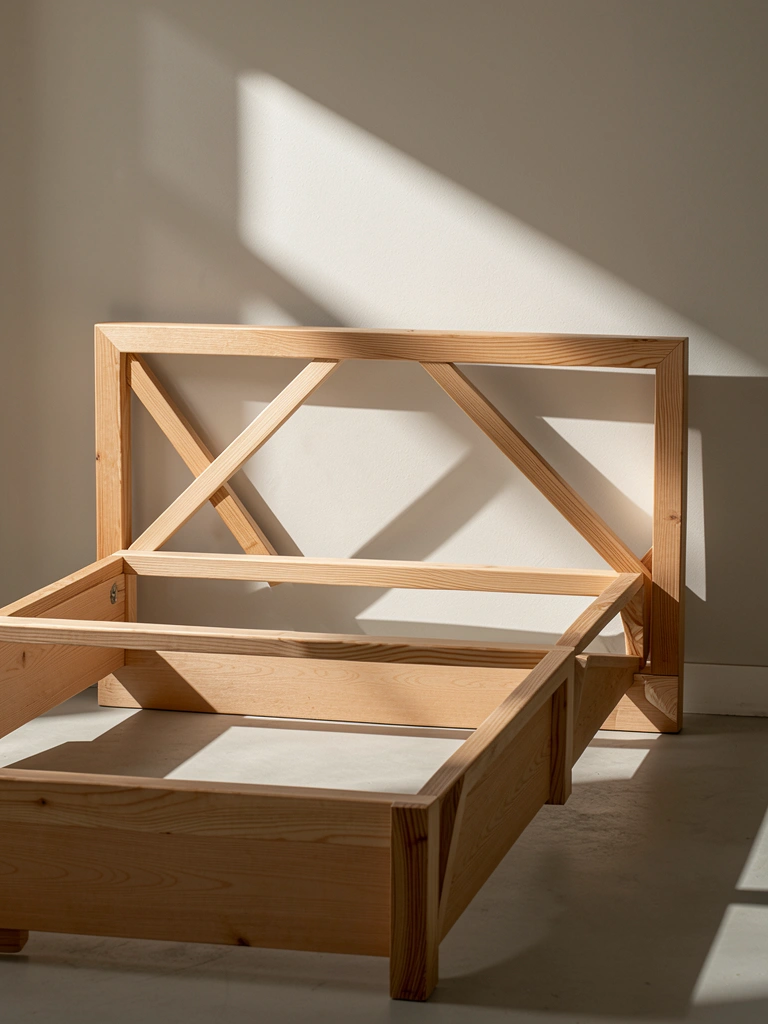
    15. Choose Quality Frame Construction

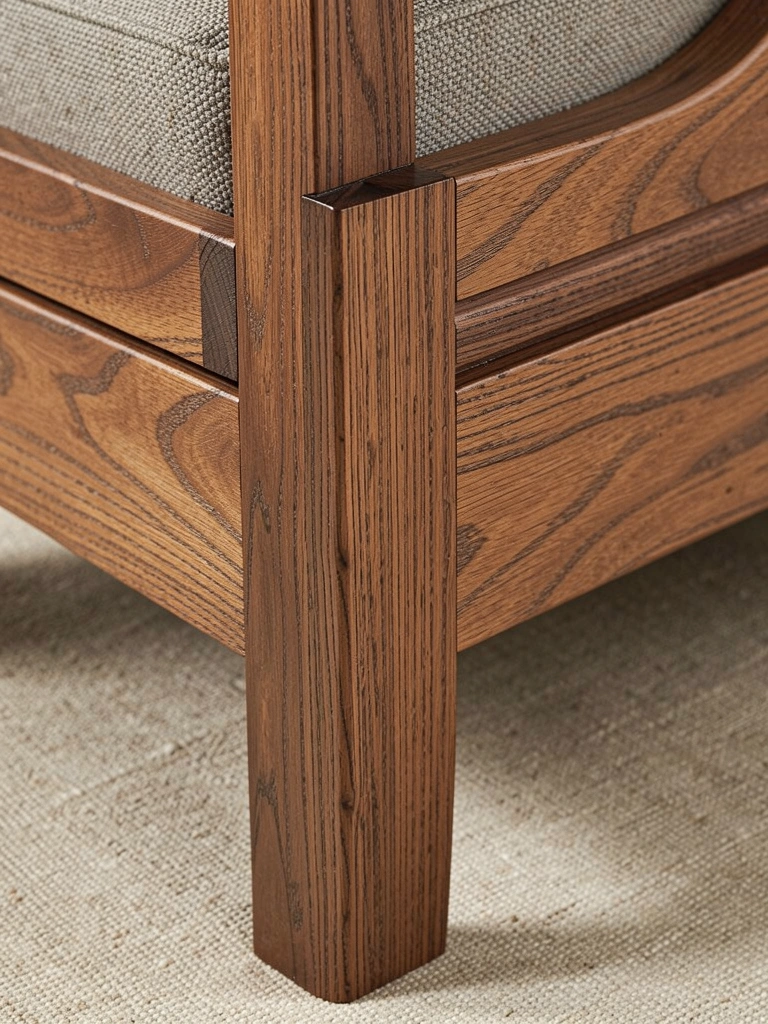
    You can’t see the frame once the sofa is upholstered, but quality construction is what separates a $400 sofa from a $2,000 one. Eight-way hand-tied springs and hardwood frames last decades; budget construction fails in 3–5 years.

    Check product specs for hardwood (not plywood) frames, eight-way springs or high-resilience foam, and solid joinery. Brands like Article, Restoration Hardware, Crate and Barrel, and even some Wayfair lines ($600–$2,000) prioritize frame quality. Avoid the cheapest big-box options—the frame won’t hold up.

    Pro tip: Read reviews specifically mentioning durability and frame quality before buying. Real users report on longevity better than manufacturers do.

    Solid construction means your investment lasts, creating real luxury (not just the appearance of it).

    16. Use Performance Fabric for Realistic Luxury

    Performance fabrics have evolved dramatically—they’re no longer plastic-feeling microfiber. Modern performance fabrics in cotton, linen blends, and proprietary materials look and feel like luxury while resisting stains and pet damage.

    Shop brands like Restoration Hardware, Article, Pottery Barn, and Wayfair for performance upholstery that actually looks good ($600–$1,500). Look for fabric names like “performance linen,” “cotton twill,” or brand-specific proprietary blends. Read reviews from actual pet and kid households for honest feedback.

    Pro tip: Even performance fabrics benefit from scotchgard treatment ($50–$100 application) for extra protection without the plastic feel.

    Realistic luxury means beautiful furniture that actually works for real life.

    17. Add Decorative Pillows Strategically

    Pillow styling is free when you repurpose what you own, but investing in quality pillows ($25–$100 each) makes a massive visual difference. Pillows introduce color, texture, and personality without commitment.

    Buy odd numbers of pillows (three, five, or seven) in complementary fabrics, all within your color palette. Layer sizes from largest (lumbar at back) to smallest (front accent). Brands like West Elm, Target, Wayfair, and Article offer quality options. Pro tip: One statement pillow in a contrasting color or texture is enough—don’t match everything.

    Pillows should look casually arranged, not perfectly lined up. This “designed but lived-in” aesthetic reads expensive.

    Strategic pillow styling is one of the fastest, cheapest ways to make your sofa look intentional and curated.

    18. Invest in Quality Cushion Fillings

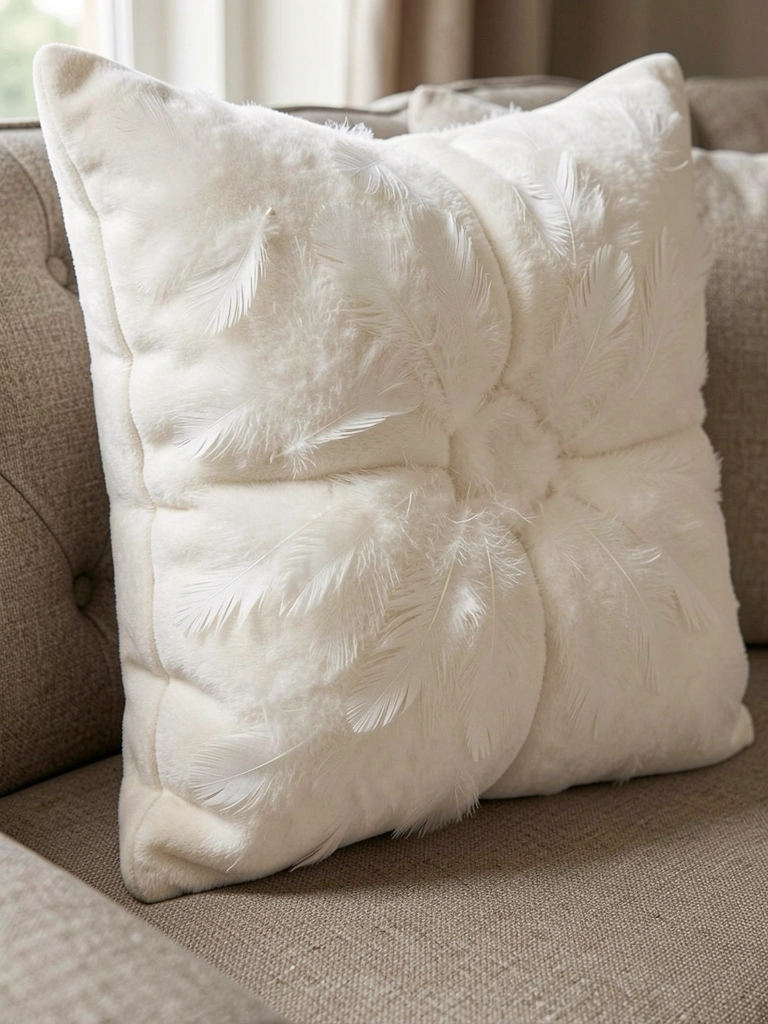
    Pillow fill quality directly affects whether your sofa looks slouchy and cheap or plump and luxurious. Down and feather blends (or high-quality foam) hold their shape and feel premium.

    High-resilience foam or down-blend fills cost more upfront but maintain their shape through years of use. When buying pillows, check that they’re filled with down, down-blend, or high-quality foam—not cheap polyester. Brands like Restoration Hardware, Article, and higher-end Crate and Barrel prioritize fill quality.

    Pro tip: Flat, saggy pillows make even expensive upholstery look worn out. Fluff and replace pillows every 2–3 years for maintained luxury.

    Quality cushion fill keeps your furniture looking plump, fresh, and expensive indefinitely.

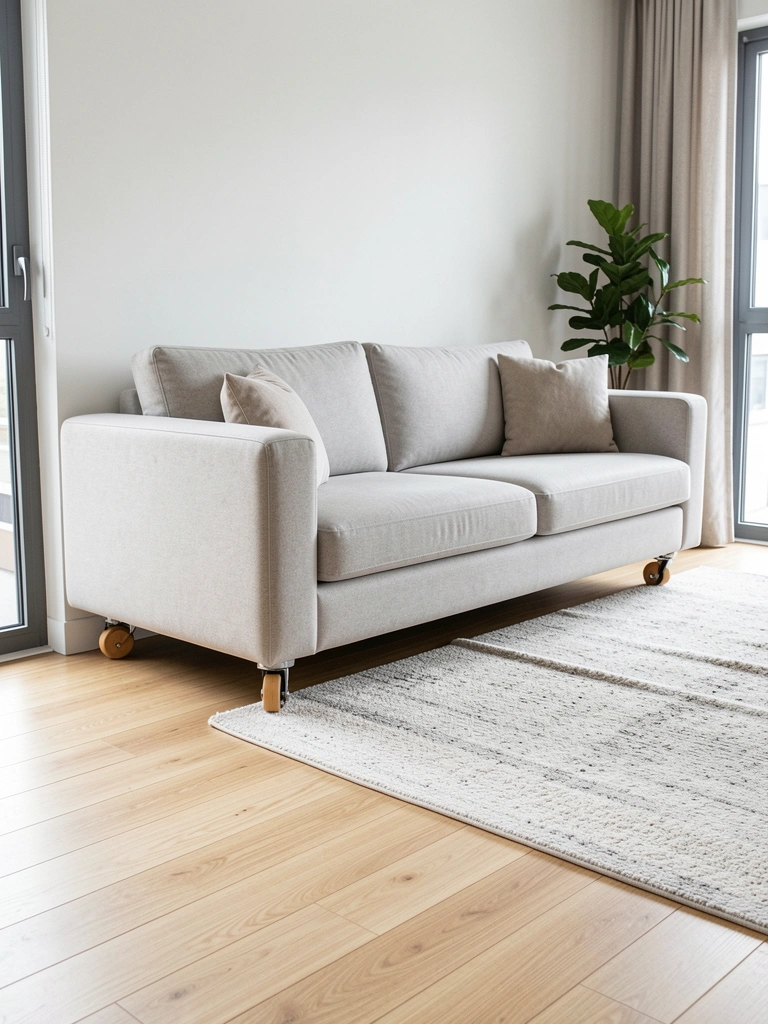
    19. Choose Sofa Legs That Match Your Aesthetic

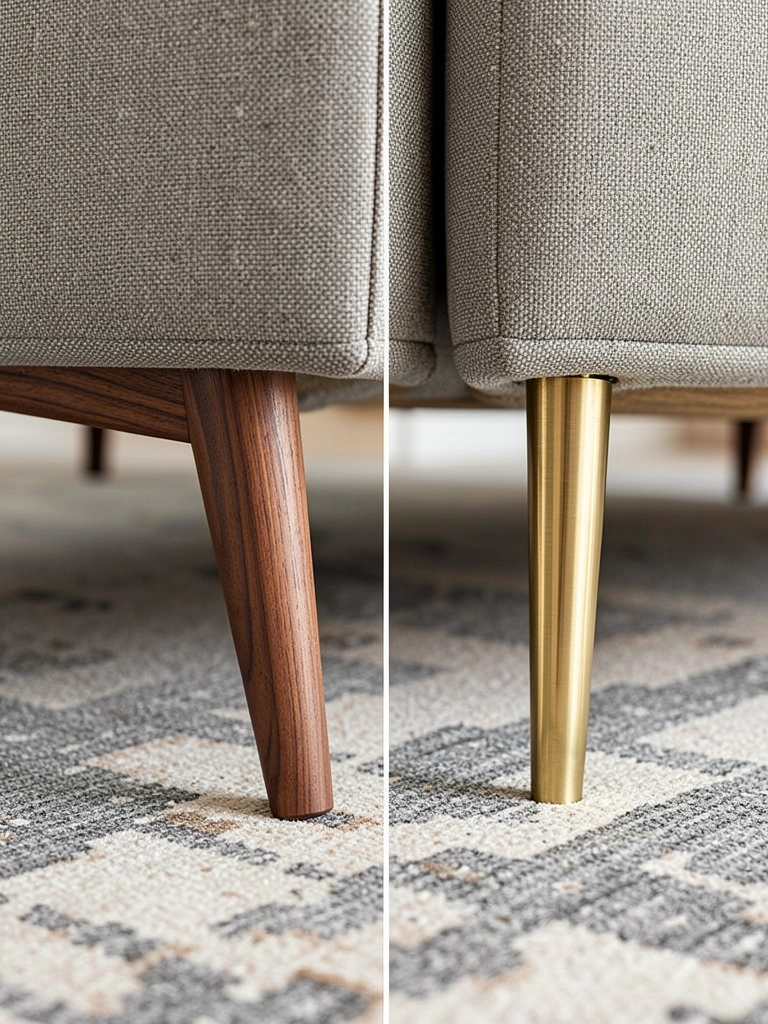
    Sofa legs (often overlooked) signal the overall design era and perceived luxury. Metal legs feel contemporary and sleek; wooden legs feel traditional or mid-century; low platform bases feel modern.

    When shopping, check the leg material and style. Brass or copper metal ($0 additional if spec’d from factory) feels luxe and contemporary. Walnut or oak wooden legs ($50–$150 upcharge) feel timeless. Avoid cheap plastic or black metal unless you’re going industrial-modern.

    Pro tip: If your sofa has basic legs you dislike, an upholsterer can replace them ($100–$300) for a design refresh.

    The right legs reinforce your room’s overall aesthetic and elevate the entire sofa’s perceived value.

    20. Care Properly to Maintain Luxury Appearance

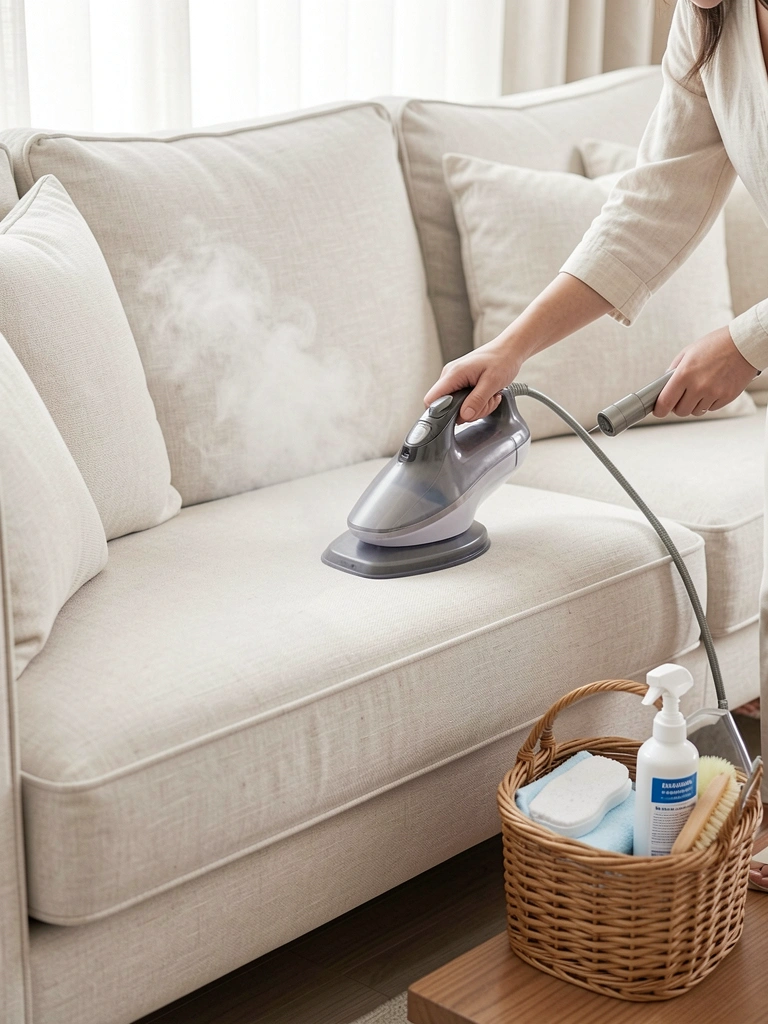
    How you maintain your upholstery determines whether it reads expensive for five years or looks worn within two. Luxury isn’t just about initial purchase—it’s about longevity and care.

    Vacuum lightly weekly to remove surface dirt, flip and rotate cushions monthly to distribute wear evenly, and address spills immediately with manufacturer-recommended cleaning. Invest in a quality fabric protectant ($50–$100) and annual professional cleaning ($150–$300). For delicate fabrics like velvet, use a soft brush rather than vacuuming.

    Pro tip: Keep your sofa manual and any fabric care instructions somewhere accessible—they’re worth referencing before DIY cleaning attempts.

    Properly maintained upholstery looks fresh, intentional, and genuinely luxurious for years.

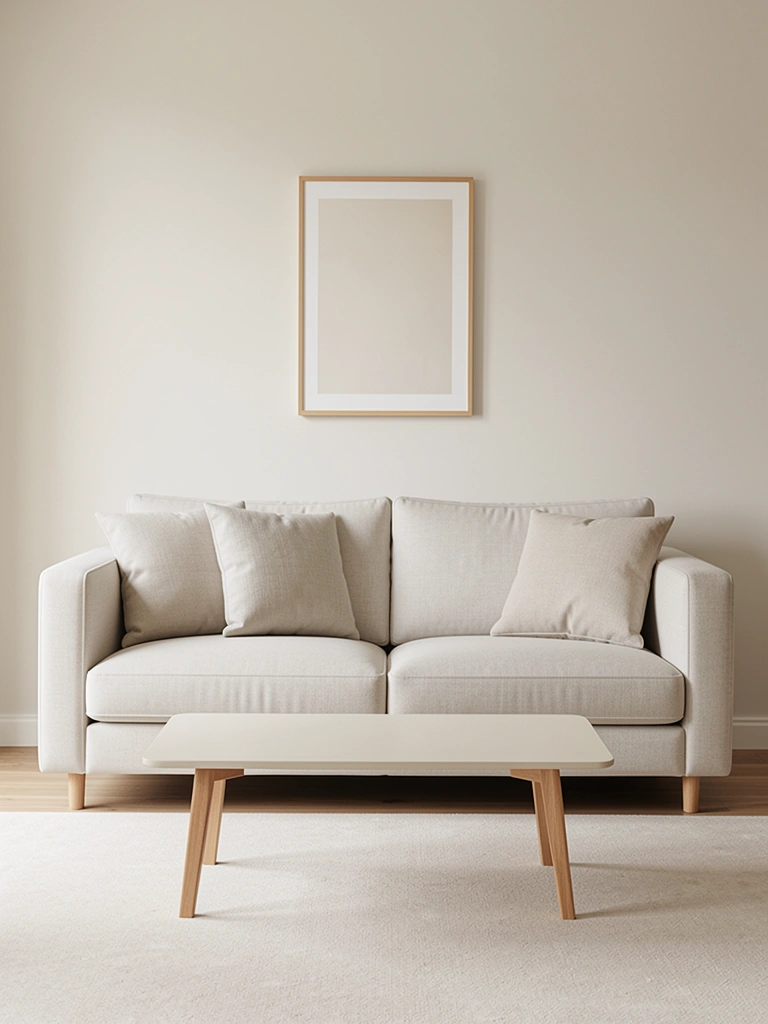
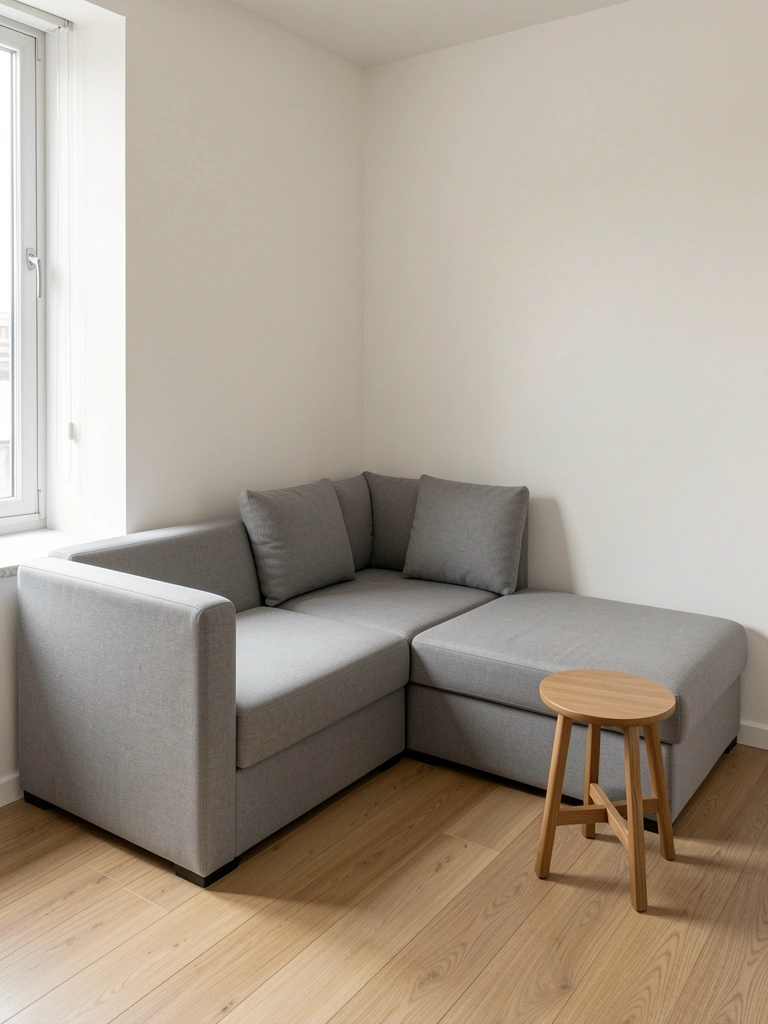
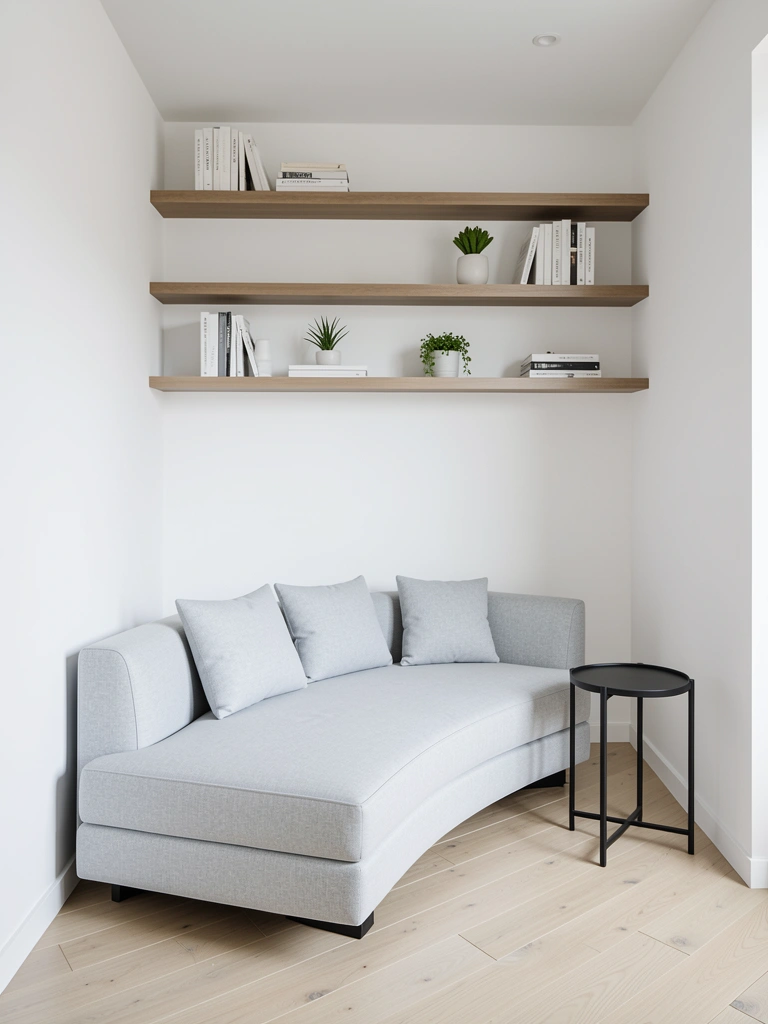
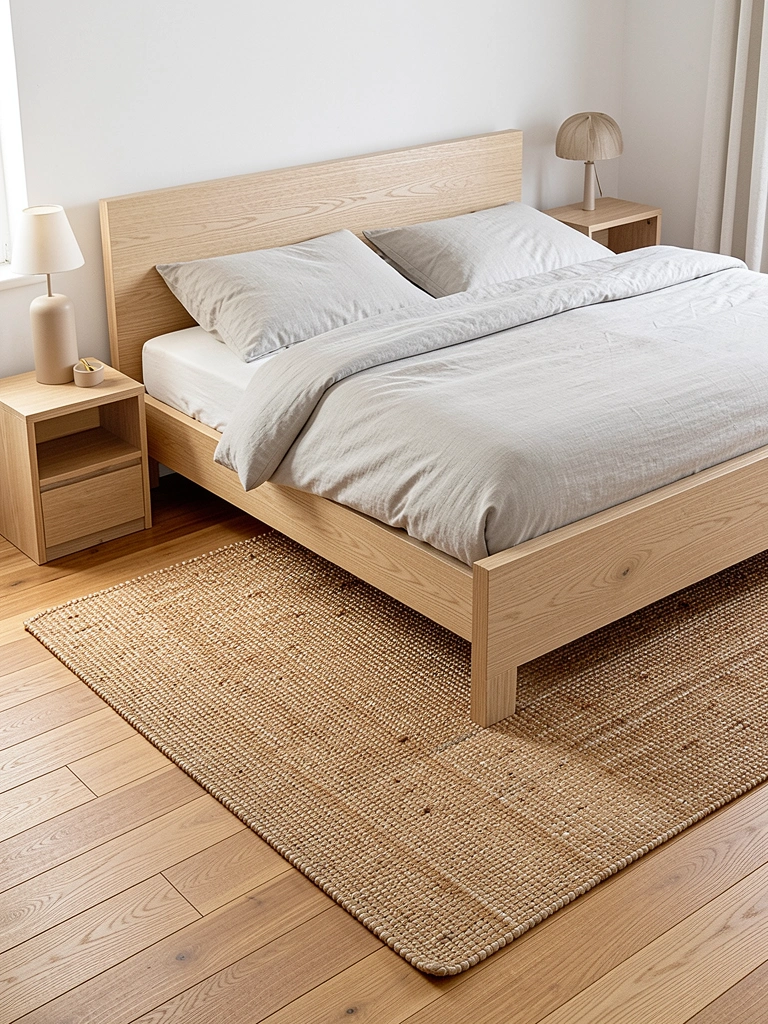
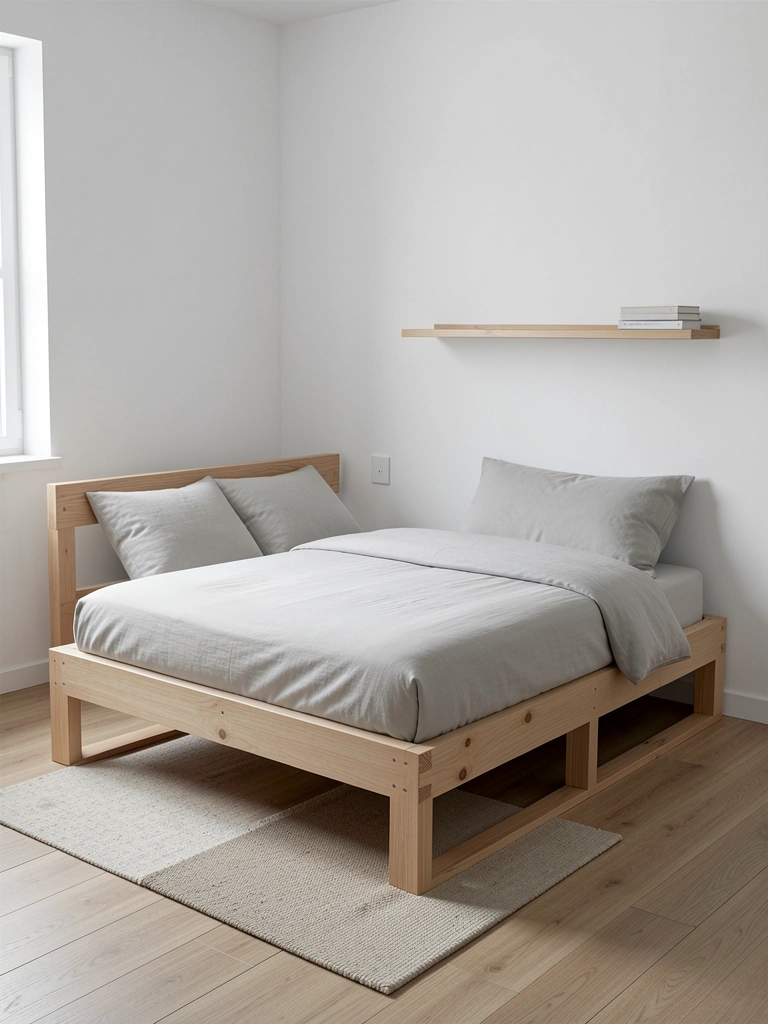
    21. Embrace Warm Minimalism with One Statement Color

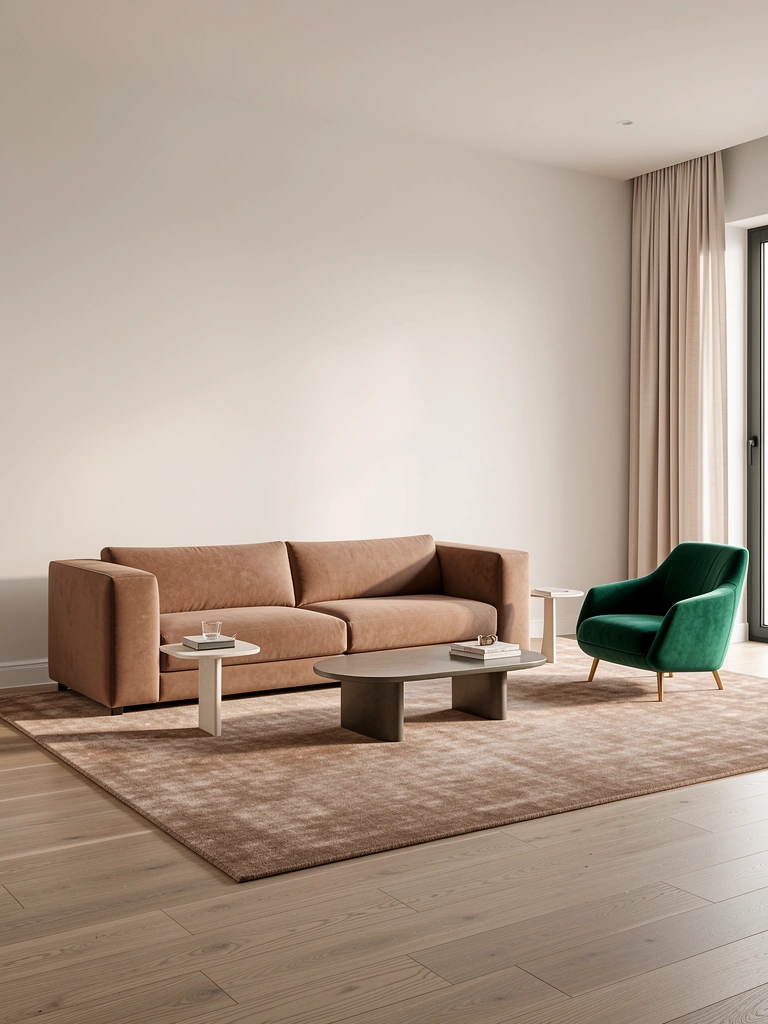
    Warm minimalism combines quality upholstery with restrained styling—a single sofa, limited pillows, and open space rather than layered clutter. This approach reads expensive because it signals confidence and intentionality.

    Choose one sofa in a warm neutral ($600–$1,500) and resist the urge to fill every space. Add one or two accent chairs and one side table for a deliberate, high-end look. Minimalist rooms photograph beautifully and feel calming rather than cold.

    Pro tip: When you have fewer pieces, each one matters more—this is why investing in quality upholstery pays off in minimalist schemes.

    Warm minimalism with quality pieces reads sophisticated, intentional, and genuinely luxurious.

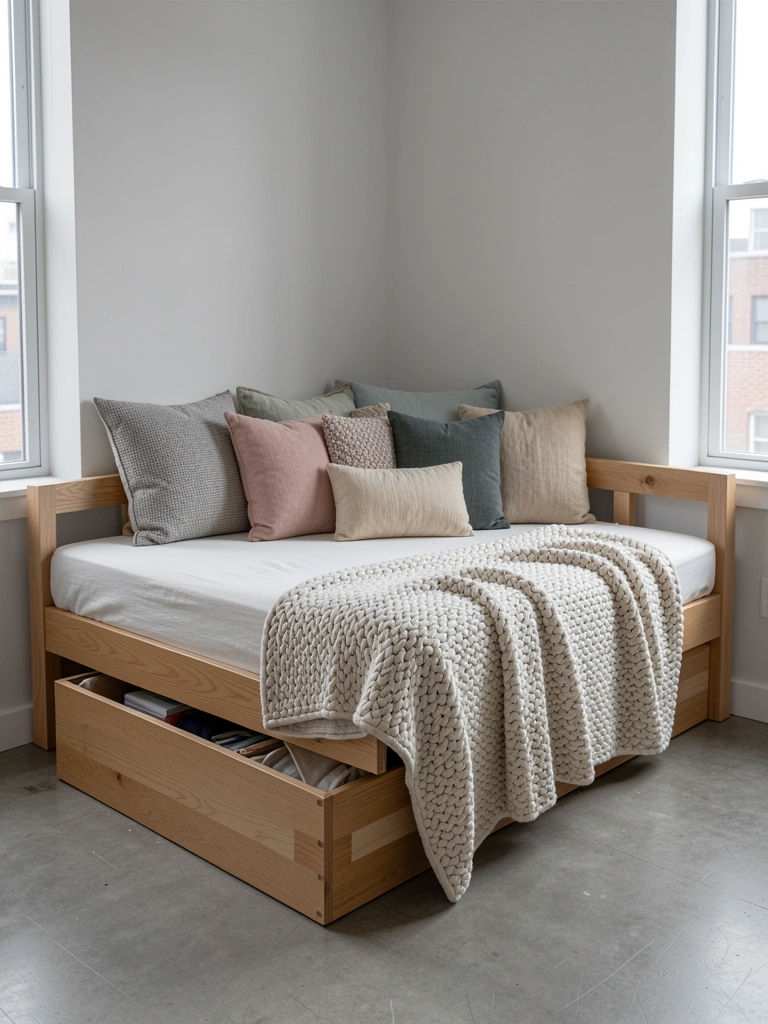
    22. Layer Textiles Seasonally for Intentional Rotation

    Changing your textile layers with seasons signals intentional design and makes your space feel fresh and curated. Summer calls for lightweight linens; winter for chunky knits and velvet.

    Keep a rotation of seasonal pillows and throws: lightweight linen/cotton blends for warm months ($30–$80 per pillow), chunky wool and velvet for cold months ($40–$120 per throw). Store off-season textiles in a clear bin ($15–$30). This investment-light strategy maximizes perceived effort and design sophistication.

    Pro tip: Summer brings pale linens and bright accents; winter brings jewel tones and rich textures. The intentional rotation is part of the luxury aesthetic.

    Seasonal textile rotation keeps your room feeling designed and prevents the stale, “never changed” aesthetic.

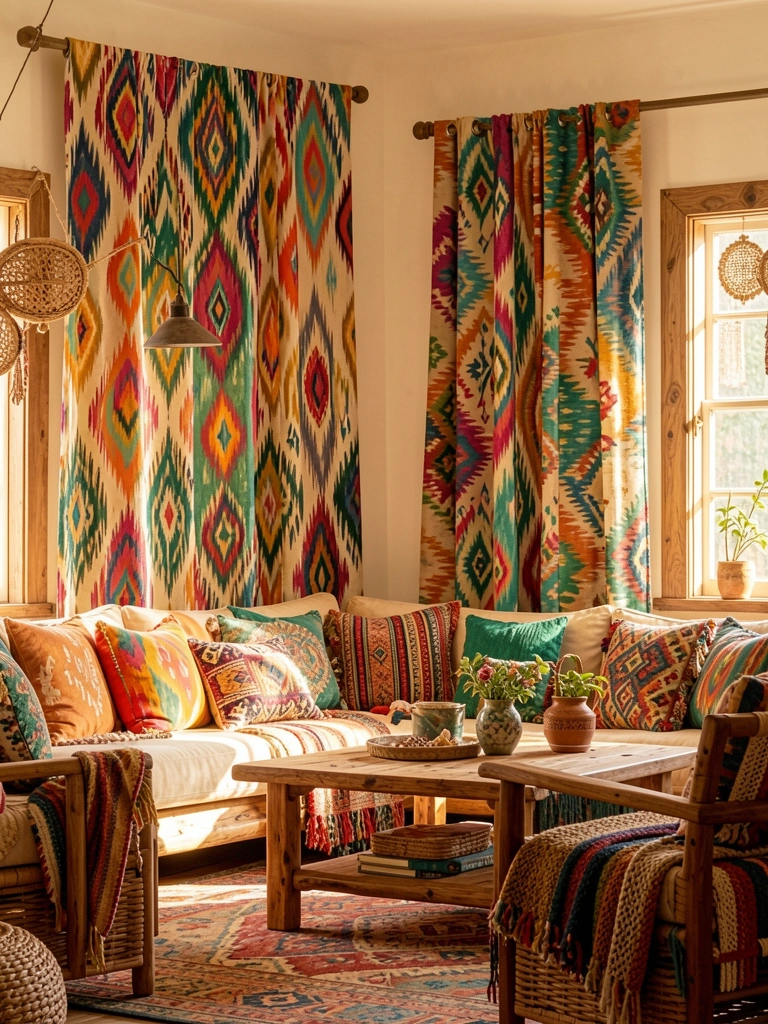
    23. Mix Upholstery Styles for Curated Eclectic Look

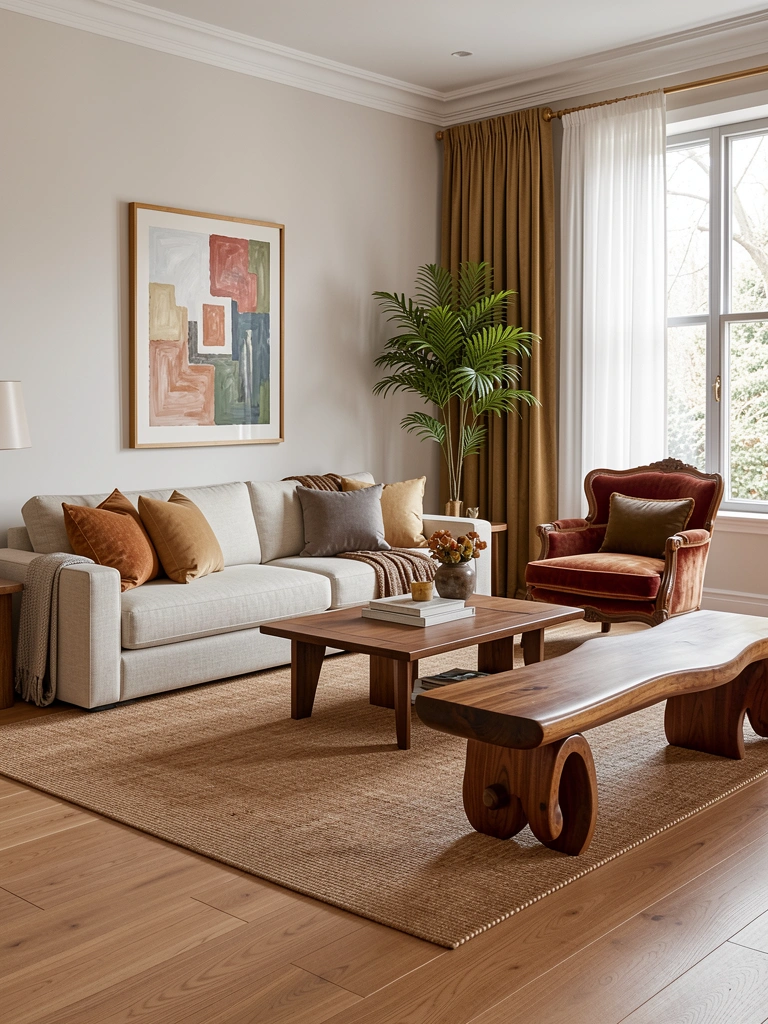
    Mixing upholstery styles (modern sofa with a vintage chair, minimalist bench with a boucle ottoman) reads as intentionally curated rather than mismatched. Designers call this “collected over time” luxury.

    Pair a modern sofa ($800–$1,500) with a vintage-inspired accent chair ($400–$900) and a sculptural bench or ottoman ($300–$700). Keep colors coordinated (all warm tones, all jewel tones) even if styles differ. This approach reads expensive because it signals personal taste and adventure.

    Pro tip: Mix eras but stay within one color story and keep quality consistent—don’t pair a high-end sofa with a cheap chair.

    Mixing styles intentionally signals confidence and creates a genuinely luxurious, personal space.

    24. Use Fringe or Trim Details Sparingly

    Small trim details—fringe, nail heads, or contrasting trim—can elevate basic upholstery to designer-level when used sparingly. The key word is sparingly; overdone trim reads themed or costume-y.

    Look for sofas with subtle nail-head trim from Restoration Hardware, Article, or Crate and Barrel ($800–$2,000) as a detail that costs only $50–$100 extra but reads expensive. Fringe works on ottomans or chairs but rarely on sofas in modern luxury. A single fringe-trimmed ottoman ($300–$600) adds personality without overwhelm.

    Pro tip: Natural materials (wood fringe, brass nails) read more expensive than plastic or shiny metal.

    Minimal trim details signal designer-level attention without visual clutter.

    25. Match Upholstery Quality to Real-Life Usage

    Luxury isn’t pretentious—it’s functional. Choosing upholstery that matches your actual lifestyle reads more genuine and sophisticated than choosing delicate fabric you’re afraid to use.

    If you have kids, pets, or an active household, choose performance fabric ($600–$1,500), not delicate silk ($1,000–$3,000 that you’ll stress over). If you live alone and entertain formally, delicate velvet or silk works. The “luxury” is choosing what genuinely works for you, not compromising comfort for image.

    Pro tip: High-end designers match fabric to lifestyle first, aesthetics second. That’s why their interiors look both beautiful and lived-in.

    Matching upholstery to your reality creates genuinely luxurious spaces that feel comfortable and intentional.

    26. Invest in One Statement Sofa Over Many Cheap Pieces

    The single best upholstery investment you can make is one high-quality sofa rather than three cheap ones. A $1,500–$2,500 sofa in quality materials outperforms three $500 sofas that fall apart in 5 years.

    Put your budget into a single hero piece: a sofa in linen, velvet, or boucle from a maker you trust (Restoration Hardware, Article, high-end Crate and Barrel, or even custom makers). Style around it minimally. This approach signals confidence, quality, and genuine luxury more powerfully than quantity.

    Pro tip: Quality sofas come with better warranties, better frames, and better support. You’re not just buying fabric—you’re buying longevity.

    One statement piece in quality materials reads more expensive and luxurious than multiple cheaper pieces combined.

    Ready to elevate your space? Save this post and pick one upholstery idea to test this month. Whether it’s swapping pillows, trying a new texture, or investing in a statement sofa, small upholstery changes create big luxury vibes. Share this with anyone ready to make their furniture actually feel as good as it looks.

  • 25 Stylish Door Ideas That Instantly Upgrade Your Home’s Look

    25 Stylish Door Ideas That Instantly Upgrade Your Home’s Look

    Your front door is the first thing people see—and the first thing you see every morning. But here’s the thing: small tweaks to your entryway, interior doors, and hardware can completely shift how your entire home feels. Whether you’re renting, own a cozy apartment, or have a sprawling house, there are door upgrades that work for your space and budget. From bold color choices to smart hardware swaps to clever glass solutions, we’ve rounded up 25 actionable ideas that range from free styling tricks to investment pieces worth every penny. Pick one, try it this weekend, and watch how much difference one small element can make. Let’s dive in.

    1. Paint Your Front Door Matte Black for Sleek Drama

    Matte black doors deliver instant sophistication without screaming “look at me.” The finish absorbs light rather than reflecting it, creating depth and making your entryway feel intentional.

    Start with a quality exterior paint like Sherwin-Williams Urbane Bronze or Benjamin Moore Black Panther—these are formulated to resist fading and weathering. Prep your existing door by cleaning, sanding lightly, and priming if needed. Budget: $30–$60 for paint and primer. The application takes 2–3 hours (including drying between coats), and it’s totally doable as a weekend DIY. If your door has ornate detailing you want to preserve, matte black shows off texture beautifully.

    The payoff is huge—suddenly your entrance looks curated and modern, and it works with nearly any home style. Your guests will notice the refinement immediately.

    2. Swap Standard Hardware for Brushed Gold Handles

    Hardware is jewelry for your door—and brushed gold is having a major moment. It’s warm, unexpected, and feels more expensive than it actually is.

    Replace your builder-grade brass or chrome knobs with brushed gold versions from Wayfair, Amazon, or specialty brands like Rejuvenation (prices range $25–$80 per handle). For renters, adhesive-backed hardware switchers exist, though permanent installation is stronger. Installation takes 15 minutes with a screwdriver; just unscrew the old handle and screw in the new one. The trick is matching your door style—lever handles work for contemporary doors, while knobs suit traditional spaces.

    This single swap makes your door look intentional and designer-approved. Visitors will assume you’ve done way more to your space than you actually have.

    3. Go Bold with Forest Green or Navy Statement Doors

    Dark jewel tones like forest green or navy create drama without the heaviness of black. They photograph beautifully and signal that you have taste.

    Benjamin Moore’s “Calico Green” or “Gentleman’s Gray” (which leans navy) are Pinterest darlings. Paint runs $25–$40, and the application is identical to matte black: 2–3 hours plus drying time. Jewel tones work especially well on homes with classic architecture—they feel timeless rather than trendy. Pair with brass or bronze hardware to amplify the luxury feel.

    Your entryway becomes a focal point that makes people stop and actually see your home. It’s the kind of decision that feels brave but reads as design-forward.

    4. Install Minimalist Frameless Glass Doors for Clean Separation

    Frameless glass doors look like they’re floating—they blend into walls while creating clear spatial division. Perfect for open-concept homes that need subtle room breaks.

    Glass door kits from IKEA ($150–$250) or specialized glass door suppliers are renter-friendly options that bolt to existing frames. Permanent installation runs $400–$800 and requires a professional. The magic is in the lack of visible frame—it maximizes light and views while maintaining privacy through frosted or textured glass options. Cleaning is easy with a microfiber cloth and glass cleaner.

    You get spatial definition without closing off your home. Rooms feel bigger, light flows freely, and the effect is undeniably modern.

    5. Add Sidelights to Oversized Doors for Symmetrical Grandeur

    Sidelights transform an ordinary entry into something memorable. They flood your hallway with natural light while framing the door beautifully.

    Retrofit sidelights require professional installation ($800–$2,000) and aren’t renter-friendly, but the investment is worth it if you own. For renters, decorative sidelight decals ($15–$30) mimic the look. The real upgrade comes from pairing sidelights with an oversized single-slab door—it’s the modern luxury entry that costs less than you’d think if you DIY the door and hire a pro for glass work.

    Your entrance becomes architectural. Guests feel welcomed the moment they approach, and your hallway gets a brightness boost all day long.

    6. Use Textured Metal Finishes for Tactile Luxury

    Textured finishes—brushed metal, hammered brass, embossed surfaces—add depth that smooth finishes can’t match. They’re tactile, photogenic, and feel intentional.

    Seek out brushed stainless steel, hammered bronze, or powder-coated metal handles from Design Within Reach, Schoolhouse Electric, or Anthropologie ($40–$120 per handle). Installation is 15 minutes with basic tools. The texture catches light differently depending on time of day, so your door literally changes throughout the day. Pair with matte finishes on the door itself to avoid competing shines.

    You get visual interest and a sensory experience every time you touch the hardware. It’s a small detail that reads as high-end craftsmanship.

    7. Paint Interior Doors in Jewel Tones for Unexpected Drama

    Interior doors are forgotten real estate. Painting them in jewel tones creates visual intrigue without major renovation.

    Choose Benjamin Moore, Farrow & Ball, or Sherwin-Williams jewel-tone options like “Calypso Green” or “Gentleman’s Gray” ($25–$40 per can). Interior paint dries faster than exterior, so 1–2 hours per door is realistic. Prep is key: clean, sand, and prime for best adhesion. A single door takes one can; multiple doors might need two depending on coverage.

    Suddenly your hallway feels curated and intentional. Visitors notice the confidence in your color choices, and it costs virtually nothing compared to replacing doors.

    8. Choose Reclaimed Wood Doors for Eco-Luxury

    Reclaimed wood doors combine sustainability with undeniable character. No two are identical, and they often feature hardware salvaged from their original use.

    Search Etsy, local salvage yards, or specialty reclaimed wood retailers for authentic pieces ($300–$1,200+). Installation typically requires professional help ($200–$400). The payoff: a door with history, lower manufacturing emissions (reclaimed wood reduces production impact by nearly 40%), and conversation-starting beauty. Pair with modern hardware to bridge rustic and contemporary styles.

    You’re investing in something genuinely unique that gets better with age. It’s also a climate-conscious choice that feels anything but preachy.

    9. Install Crittall-Style Glass Doors for Industrial Charm

    Crittall-style doors—slim metal frames with large glass panels—maximize light while channeling industrial sophistication. They’re the sweet spot between privacy and openness.

    Authentic Crittall doors run $800–$2,000+, but excellent reproductions from Wayfair or specialist suppliers cost $300–$700. Installation depends on whether you’re retrofitting (professional only, $400–$800) or using a kit for existing frames. The appeal is the contrast: delicate frames against bold glass. Works beautifully for home offices, room dividers, or creating visual connection between spaces.

    Light flows through effortlessly while you maintain privacy. It’s the kind of choice that makes a rental or modest home look intentionally designed.

    10. Apply Frosted Glass Film for Privacy Without Losing Light

    Frosted film gives you privacy and light simultaneously—and it’s totally removable for renters. It’s one of the smartest budget hacks available.

    Buy frosted glass film from Amazon, Home Depot, or Etsy ($15–$40 per roll) and apply it to existing glass doors following the included instructions. Installation takes 20–30 minutes and requires only a spray bottle and squeegee. No permanent adhesive; it peels off cleanly. For maximum impact, apply to interior doors or bathroom/bedroom windows where privacy matters most.

    You get bathroom-level privacy on any glass door for less than a coffee subscription. It’s renter-friendly, reversible, and honestly one of the best small investments you can make.

    11. Paint Double Doors for Maximum Impact Entry

    Double doors double the drama. Painting both in a cohesive color creates an architectural moment that reads as luxury.

    Choose a color and execute as you would a single door, but apply to both panels for visual impact ($40–$60 total for paint, 3–4 hours). Symmetrical hardware matters here—matching handles on each door is essential. The trick is committing to the color on both doors; if you’re nervous, test on one door first.

    Your entryway becomes gallery-quality. The symmetry is inherently satisfying, and visitors feel the intentionality immediately.

    12. Upgrade to Energy-Efficient Glass Doors and Windows

    Energy-efficient glass reduces your heating and cooling costs while cutting your home’s carbon footprint. It’s an investment that pays for itself over time.

    Quality energy-efficient doors from Andersen, Pella, or Marvin run $800–$2,000 installed, but rental-friendly thermal door inserts ($50–$150) work too. Professional installation takes one day, and the payoff is measurable: expect 15–25% energy savings depending on your climate. Look for “Low-E” coatings and dual-pane glass.

    Your utility bills drop, your home stays more comfortable, and you’re making a climate-smart choice. Long-term owners see ROI within 5–10 years.

    13. Use Geometric Handle Designs for Bold Personalization

    Geometric handles inject personality without being loud. They’re sculptural, modern, and surprisingly affordable.

    Hunt for geometric designs on Wayfair, DWR, or independent designers on Etsy ($30–$100 per handle). Installation is standard screwdriver work (15 minutes). Geometric pieces work best on minimalist doors—too much competing pattern reads as chaotic. Pair with solid-color doors in black, white, or jewel tones for maximum impact.

    Your door becomes a subtle design statement. It’s the kind of detail that makes people realize you’ve thought about every element.

    14. Paint Interior Doors White for Clean Minimalism

    White doors create seamless flow and make spaces feel larger. It’s minimalism at its simplest and most effective.

    Use Benjamin Moore Swiss Coffee or Sherwin-Williams Alabaster (soft whites that don’t look sterile) in a semi-gloss or satin finish for easy cleaning. Budget $20–$35 per door for paint, 1–2 hours per door. Semi-gloss hides imperfections while remaining practical for high-traffic areas. Apply two coats for even coverage.

    Your hallway gains visual spaciousness. Rooms feel connected rather than compartmentalized, and the effect is effortlessly curated.

    15. Install Powder-Coated Metal Doors for Coastal Durability

    Powder-coated metal resists rust, salt spray, and moisture—essential for coastal living or humid climates. It’s the practical choice that doesn’t compromise on style.

    Specialty coastal door suppliers offer powder-coated options ($600–$1,500). Installation is professional work ($300–$600). The coating creates a hard, durable finish that lasts decades without chipping or fading. Colors range from soft grays to deeper tones. Maintenance is virtually nonexistent—just rinse with fresh water occasionally.

    Your door stands up to harsh conditions while looking intentional. Coastal homeowners especially see the payoff in longevity and zero rust concerns.

    16. Add Monochrome Black & White Design for Timeless Appeal

    Monochrome schemes—black doors on white trim or vice versa—never feel dated. The contrast is visually striking and works with any home style.

    Paint your door in one color and ensure trim is the opposite. Use Benjamin Moore Chantilly Lace (white) with Black Panther (black) or similar high-contrast pairs ($30–$50 total, 2–3 hours). The key is crisp, clean lines; any fuzziness between colors reads as unfinished. Use painter’s tape for precise edges.

    Your entryway gains architectural clarity. The simplicity is sophisticated, and it photographs beautifully from any angle.

    17. Choose Pastel-Toned Doors for Soft Contemporary Vibes

    Pastel doors like dusty pink, sage green, or soft blue are having a major moment. They’re bold without being aggressive, offering personality while maintaining calm.

    Popular pastels include Farrow & Ball “Calluna” (mauve), “Book Room Blue,” or “Pigeon” ($25–$40). Pastels show imperfections more than darker colors, so prep your surface carefully. Budget 3–4 hours including drying time. Pair with white or cream trim to let the pastel breathe.

    Your entry becomes a personality beacon. It signals confidence in color without commanding the room—a subtle form of self-expression.

    18. Install Smart Locks for Tech-Forward Security

    Smart locks offer convenience and peace of mind. Keyless entry means no fumbling for keys, and remote access is genuinely useful.

    Brands like Level Lock, August, or Yale run $100–$300, and most are easy DIY installs (20–30 minutes with an electric drill). Some integrate with your phone or voice assistants. Renter note: some models retrofit into existing locks without permanent changes. The security features—activity logs, temporary codes for guests—are surprisingly comforting.

    You never wonder if you locked the door. The convenience becomes addictive, and the security layer is substantial.

    19. Layer Textured Wallpaper Around Entry Doors for Subtle Drama

    Wallpaper around doorways creates an unexpected design moment. It frames the door while adding dimension to flat walls.

    Removable wallpaper from Spoonflower, Peel & Stick sites, or traditional wallpaper runs $30–$80 per roll. Focus on one accent wall or doorway to avoid overwhelming the space. Application takes 1–2 hours and doesn’t require primer if using peel-and-stick. Choose textured patterns like grasscloth or embossed botanicals for visual interest that photographs beautifully.

    Your hallway gains gallery-quality detail. It’s the kind of layered thinking that makes spaces feel intentionally designed rather than default.

    20. Use Barn Doors for Rustic-Modern Charm

    Barn doors slide rather than swing, saving space while adding farmhouse-meets-modern appeal. They’re conversation starters with genuine functionality.

    DIY barn door kits from IKEA, Home Depot, or specialty shops cost $150–$400 installed yourself. Professional installation runs $300–$600. The hardware does most of the visual heavy lifting—choose matte black for modern appeal or aged brass for traditional. Ensure your wall can support the weight before committing.

    Your bedroom or closet gains architectural interest. The sliding motion is satisfying, and it’s often more practical than swinging doors in tight spaces.

    21. Paint Doors in High-Gloss Finish for Luxury Shine

    High-gloss doors amplify luxury and create visual interest through reflection. They’re bold but undeniably striking.

    Use premium gloss paint like Benjamin Moore or Sherwin-Williams Emerald line ($40–$60). Preparation is critical—sand the surface smooth, apply primer, and use quality brushes to avoid brush strokes. Budget 3–4 hours plus extra drying time for glossy finishes. The shine intensifies jewel tones and creates depth that matte finishes can’t achieve.

    Your door becomes art. Light dances across it throughout the day, and the shine signals deliberate design choices.

    22. Install Brass or Copper Hardware for Warm Vintage Appeal

    Brass and copper hardware bring warmth and a cottage-core sensibility. Vintage-inspired handles feel timeless without being dated.

    Find authentic or reproduction brass/copper hardware on Etsy, Anthropologie, or specialty hardware sites ($30–$100 per handle). Installation is standard (15 minutes). These metals develop patina over time—some people love the aged look, others prefer shiny. Choose based on your desired aesthetic and maintenance preferences.

    Your door gains warmth and character. Brass works especially well with natural wood doors or vintage-inspired interiors, creating a cohesive, intentional look.

    23. Use Bamboo Doors for Sustainable, Contemporary Appeal

    Bamboo is a genuinely sustainable material—it’s fast-growing, captures carbon, and looks undeniably modern. It’s eco-friendly without sacrificing style.

    Bamboo doors from suppliers like Architectural Depot or specialty eco-brands run $300–$800. Installation typically requires professional work ($200–$400). The appeal is environmental credibility combined with visual warmth. Bamboo has visible grain that’s more interesting than many hardwoods, and it’s surprisingly durable.

    You’re making a climate-conscious choice that reads as design-forward. Bamboo brings natural warmth and authenticity to modern spaces.

    24. Create Contrast with Solid Doors Against Glass Walls

    Solid doors paired with glass walls create visual drama through contrast. One anchors the space while the other maintains airiness.

    Paint or stain a solid wood door in a bold color ($25–$40 for paint, or solid doors run $200–$600), then frame it with glass walls or Crittall-style dividers. The contrast is inherently photogenic and creates clear spatial definition. Installation varies by situation, but the principle is about deliberate visual balance.

    Your space gains sophisticated composition. The eye moves across the mix of solid and transparent surfaces, creating depth and intentionality.

    25. Use Leather or Fabric-Wrapped Hardware for Ultra-Personalization

    Leather or fabric-wrapped handles offer ultra-personalized tactile luxury. They’re rare, custom, and genuinely luxe-feeling.

    Commission custom wrapped handles from independent makers on Etsy or specialist metalworkers ($80–$200 per handle, custom). Alternatively, wrap existing handles with leather strips or linen using contact adhesive (DIY: $10–$20, 30 minutes per handle). The wrapped texture feels expensive and personal—no two are quite identical if hand-wrapped.

    Your door becomes genuinely one-of-a-kind. Every time you touch it, you feel the quality and intentionality. It’s a subtle luxury that only you and close visitors will appreciate—but that’s part of the appeal.

    26. Paint Exterior Door Frames in Contrasting Colors for Graphic Impact

    Painted door frames create graphic depth and frame your door like art. It’s a detail most people miss but that completely transforms your entry.

    Paint your door frame in a complementary or contrasting color to your door using exterior-grade paint ($25–$40). White frame + black door or sage frame + cream door are popular combinations. Application takes 2–3 hours and requires careful edging with painter’s tape. This works whether your door is painted or stained wood.

    Your entry becomes architectural and intentional. The framed effect makes your door feel like a deliberate design moment rather than a default building element.


    Save this post and pick one idea to tackle this weekend. Whether you go bold with color or subtle with hardware, you’ll be amazed at how much a single door detail elevates your entire space. Which upgrade are you trying first?

  • 25 Handmade Bookshelf Ideas for Rustic & Artistic Homes

    25 Handmade Bookshelf Ideas for Rustic & Artistic Homes


    If you’re drawn to handmade bookshelves that tell a story, you’re not alone. Rustic and artistic homes are moving away from mass-produced shelving toward personalized, character-filled designs that reflect who you actually are. Whether you’re renting, own your home, or fall somewhere in between, these 25 handmade bookshelf ideas range from zero-cost styling tricks to investment pieces that last decades. You’ll discover DIY projects you can finish in an afternoon, creative upcycling hacks using materials you might already have, and sourcing tips for finding authentic rustic pieces. By the end, you’ll have everything you need to build a shelf that works as hard as it looks good.


    1. Stack and Style with Ladder Shelving

    A ladder shelf is basically a bookshelf that doubles as wall art. The open design keeps any room from feeling cramped, and it’s totally renter-friendly since you’re not drilling into walls.

    Find old wooden ladders at estate sales, Facebook Marketplace, or thrift stores ($15–$60). Lean it against your wall at a slight angle and load up each rung with books, plants, and decorative objects. No wall hardware needed—just stabilize it with a nail or adhesive hook if you want extra security. The key is mixing heights: stack a few books, set a small plant on the next rung, add a candle or ceramic piece higher up. This creates visual rhythm that photographs beautifully.

    Pro tip: Paint or stain the ladder to match your space if it needs freshening, or keep the weathered look for authentic rustic charm.

    You get instant storage plus a statement piece that costs way less than a traditional bookshelf and works in any room.


    2. Reclaimed Wood Wall-Mounted Shelves

    Reclaimed wood shelves are the real deal when you want rustic authenticity. They come with built-in character—visible knots, weathering, and grain patterns that new wood just can’t replicate.

    Search Etsy, local salvage yards, or architectural reclamation companies ($80–$300 per shelf depending on size). Many sellers custom-cut shelves to your exact specifications. Installation requires basic tools: a stud finder, level, and mounting brackets. Most shelves ship ready to hang, so you’re looking at a one-hour installation. If DIY drilling feels intimidating, hire a handyman ($50–$100). Reclaimed wood is dense and durable, so these shelves handle heavy books without sagging for decades.

    Pro tip: Mix shelf depths (12–18 inches) to create visual interest and leave room for larger objects like sculptures or stacks of art books.

    These shelves age beautifully and become even more handsome over time, making them an investment that genuinely pays dividends in both function and style.


    3. Crate Shelving with Industrial Vibes

    Wooden crates are cheap, modular, and adaptable to any wall configuration you dream up. Stack them in grids, staircase patterns, or random arrangements—whatever matches your style.

    Find crates at IKEA, Home Depot, Etsy, or local farmers markets ($8–$30 each). You’ll need 3–8 crates depending on how much wall space you’re working with. Mount them using heavy-duty L-brackets ($5–$10 per bracket) secured into studs. Budget 2–3 hours for installation, including drilling and leveling. Paint or stain them beforehand if you want a cohesive look, or embrace the natural wood variation for authentic rustic appeal. The open backs let you paint the wall behind in a contrasting color for extra visual pop.

    Pro tip: Renter? Use a tension rod inside each crate opening to create a subtle backing that hides wall damage without permanent installation.

    The modular nature means you can add, remove, or rearrange crates whenever your needs or décor inspiration shifts.


    4. Incorporate Woven Baskets for Texture

    Baskets break up the visual monotony of all books and create hidden storage for clutter that doesn’t deserve to be on display. Plus, they add wonderful texture that photographs incredibly well.

    Source baskets from Target, Wayfair, TJ Maxx, or thrift stores ($10–$40 per basket). Choose sizes that fit your shelf openings—measure before buying. Fill baskets with art supplies, extra books, seasonal décor, or blankets. Layer baskets of different weave styles (rattan, woven seagrass, macramé) to add depth. Alternate baskets with standing books to create rhythm. This styling trick works whether you’re using existing shelves or building custom ones.

    Pro tip: Label baskets with small chalkboard tags so you remember what’s stored inside without opening them.

    Baskets add warmth and softness to a bookshelf while concealing the less-photogenic items you still need to keep close.


    5. Create Corner Shelving from Reclaimed Doors

    A reclaimed door becomes a conversation-starting shelf with instant rustic character and way more surface area than standard shelving. The weight capacity is solid if properly installed.

    Hunt for old wooden doors at salvage yards, estate sales, or ReStore locations ($30–$100). Sand and seal if needed, then have it cut to your exact corner dimensions. Install using heavy-duty floating shelf brackets rated for 50+ pounds ($40–$80). Secure brackets into studs, then mount the door on top. Hire a handyman if you’re unsure about structural installation ($75–$150). The project takes 4–6 hours including prep and finishing.

    Pro tip: Leave the door’s original paint or weathering intact for maximum character—you’re paying for that patina.

    The oversized shelf becomes a feature wall element, perfect for displaying a large collection or creating a curated vignette that showcases your style.


    6. DIY Pipe and Wood Shelving System

    Pipe shelving merges rustic wood with industrial vibes, and you can build it yourself for a fraction of custom pricing. The modular design means you can expand or reconfigure anytime.

    Buy steel pipes (½-inch diameter), flanges, and elbows from Home Depot ($50–$120 per shelf system). Pair with weathered wood planks or reclaimed boards. Assembly requires a wrench and basic handyman skills—figure 3–4 hours for a three-shelf unit. Screw flanges into studs, thread pipes through, and rest planks on the pipe structure. Total cost: $120–$250 per full system depending on size and wood sourcing. Rental note: Some landlords okay this if you patch holes when leaving; confirm first.

    Pro tip: Choose matte black or raw steel finishes for authentic industrial appeal—shiny chrome looks dated quickly.

    The hybrid aesthetic works beautifully in eclectic homes and gives you the satisfaction of building something functional with your own hands.


    7. Floating Shelves with Book Ends and Objects

    The art of floating shelves isn’t just about installation—it’s about styling them so they don’t look cluttered or sparse. The right spacing and object placement makes all the difference.

    Install floating shelves from IKEA ($15–$40 each) or splurge on custom hardwood ($80–$200 each). Arrange books in mixed orientations: some standing, some stacked, some laid on top of others. Add bookends to anchor sections—brass, wood, or ceramic options run $15–$50 per pair. Leave about 30% negative space between items so your eye can rest. Include small decorative objects (plants, candles, framed photos) to break up book masses. This styling principle applies whether shelves are DIY or store-bought.

    Pro tip: Create small “vignettes” within each shelf—group related objects in 2–3 item clusters rather than spreading everything evenly.

    Thoughtfully styled floating shelves become the focal point of any room, proving that less really does feel like more when arranged intentionally.


    8. Repurpose Vintage Mantelpieces as Shelving

    A mantelpiece has built-in character and decorative edge detailing that adds instant sophistication. When mounted horizontally, it becomes a statement shelf that looks curated, not just functional.

    Find vintage mantelpieces at antique markets, architectural salvage yards, or Craigslist ($40–$150). Remove any fireplace-specific hardware, sand if needed, and seal with wood stain or paint. Mount using heavy-duty brackets into studs. Installation takes 2–3 hours including positioning and securing. The ornamental edges mean fewer items fit compared to flat shelves, which forces you to curate thoughtfully—exactly what you want for a rustic aesthetic.

    Pro tip: Style it like a real mantel: center a mirror or larger piece, anchor with smaller objects, and don’t overcrowd it.

    This approach transforms a vintage find into functional art that feels collected and intentional rather than hastily assembled.


    9. Build Shelves from Reclaimed Barn Beams

    Barn beams are thick, heavy-duty, and absolutely gorgeous—if you want shelves that feel architecturally significant, this is the way. They’re a real investment but last generations.

    Source beams from reclaimed timber yards or architectural salvage companies ($150–$400 per beam depending on length and thickness). You’ll need professional-grade mounting hardware and likely professional installation ($200–$400) since beams are heavy and require structural knowledge. This is an investment piece, but you’re essentially getting heirloom shelving that gains character over time. Expect to budget $400–$800 per shelf installation all-in.

    Pro tip: Use fewer, larger shelves rather than cramming multiple small ones—let the beam’s architecture shine.

    These shelves become permanent design features that anchor a room and signal that you’ve committed to quality and longevity.


    10. Open Shelving with Vintage Brackets

    Decorative brackets do heavy lifting both functionally and aesthetically—they’re hardware that becomes visible art. Pairing them with reclaimed wood is a classic rustic move.

    Choose brackets from Etsy, vintage hardware shops, or Amazon ($20–$60 per pair). Options range from ornate Victorian cast iron to minimalist industrial steel. Pair with reclaimed wood boards ($30–$80 each) or fresh wood you’ve distressed yourself. Installation requires a drill, level, and stud finder. Plan 1–2 hours per shelf. Paint brackets to match your aesthetic or let them show their natural patina. Mix bracket styles on the same wall for eclectic charm, or keep them consistent for a more refined look.

    Pro tip: Install one floating shelf without brackets for a modern interruption in an otherwise vintage wall—this creates visual balance.

    The bracket details become part of your décor story, especially when you choose unique vintage pieces that hint at their past lives.


    11. Paint Books to Match Your Color Palette

    This sounds unconventional, but painting book spines transforms a chaotic collection into a curated visual statement. It’s especially helpful if your books don’t already coordinate with your room’s color scheme.

    Use acrylic paint ($5–$10 per bottle) and paintbrushes to paint spines in shades that match your palette. Work in thin coats so text remains slightly visible underneath—this keeps the artistic, handmade quality. Paint only spines you see regularly; you don’t need to paint entire shelves. This takes 20–30 minutes per 5–10 books depending on your pace. Focus on coordinating colors: soft sage greens, dusty blues, warm taupes, ivory tones. Arrange books by color gradient for maximum impact.

    Pro tip: Keep a few original colorful covers visible to add visual interest amid the painted cohesion.

    A color-coordinated shelf looks intentional and gallery-like, making even a modest book collection feel curated and high-design.


    12. Mix Books with Framed Art and Textiles

    Books alone can feel one-note. Mixing in art, textiles, and sculptural pieces creates a dynamic display that feels like a personal collection, not a library.

    Use small frames ($10–$25 each) with artwork, botanical prints, or photographs you’ve taken. Drape lightweight textiles (scarves, small tapestries, fabric samples) across shelves or hang them from thin brass rods ($5–$15). Roll a few fabrics and stand them upright like books. Lean art at angles rather than hanging it flush—this casual approach feels more artistic. Vary object sizes and materials so your eye has texture to land on. Include small sculptures, ceramics, or found objects that matter to you.

    Pro tip: Group related items in odd numbers (three books, two frames, one sculpture) for visual balance.

    This styling approach transforms shelves from functional storage into a three-dimensional gallery that tells your story through collected objects and artistic choices.


    13. Create Height Variation with Stacked Bases

    Rather than expecting all shelves to sit at the same height, use risers underneath to create elevation variation. This architectural trick is totally DIY and costs almost nothing if you use books as risers.

    Grab wooden blocks, stacked books, or small crates ($0–$20) as risers under your existing shelf supports. This lifts sections of each shelf, creating a wave-like or tiered effect. Arrange your items so taller pieces sit on elevated sections while shorter objects ground the lower areas. The visual result feels intentional and sculptural. This works especially well on floating shelves where you can experiment without permanent installation. You can adjust riser heights as your collection evolves.

    Pro tip: Use risers that match your shelving material (wood blocks under wood shelves) so they look intentional rather than accidental.

    Height variation prevents the “everything on the same plane” flatness and creates a display that’s genuinely interesting to look at from any angle.


    14. Incorporate Live Plants for Organic Texture

    Living plants soften a bookshelf’s hard architecture and add organic movement that static objects can’t provide. They’re also basically free if you propagate from cuttings.

    Prop up small potted plants from garden centers ($5–$15 each) in stable spots between book sections. Choose trailing plants like pothos, string of pearls, or philodendron—they’ll cascade beautifully. Propagate cuttings in water on shelves for an almost-free addition (just snip from an existing plant). Include a mix of trailing, upright, and low-growing varieties for texture contrast. Ensure shelves receive enough indirect light for plants to thrive, and water occasionally so soil doesn’t dry out completely.

    Pro tip: Use small clear bottles or bud vases to root cuttings—the water and emerging roots become part of the visual display.

    The greenery brings life and movement to your shelves, plus it purifies air slightly and gives you a reason to nurture something beautiful every day.


    15. Style Books Spine-In and Cover-Out

    The mix of spine-out and cover-out arrangements creates rhythm and draws attention to specific books that deserve highlighting. It’s a curation strategy that looks deliberate and artistic.

    Keep most books spine-out for practical browsing, but select 3–5 per shelf with visually striking covers to display face-out using small book easels ($3–$8 each) or just leaning them naturally. These should be books you genuinely love or that add color/visual interest to your arrangement. Rotate these highlight books seasonally or whenever you finish one and want another cover to feature. This approach celebrates your actual favorites rather than just alphabetizing everything. Mix orientations—some standing, some stacked—to maintain visual variety.

    Pro tip: Feature books with cohesive color or subject matter so the face-out display feels curated rather than random.

    This styling method transforms book display from practical storage into a rotating gallery that celebrates your reading interests and favorite designs.


    16. Use Vintage Crates as Architectural Shelving

    Crates aren’t just storage—when arranged thoughtfully, they become architectural elements that define your wall. Stagger them at different heights for maximum impact.

    Stack and mount wooden crates ($8–$30 each) in staggered patterns using heavy-duty brackets ($5–$10 per bracket). You might create a pyramid shape, staircase, or completely asymmetrical arrangement—whatever matches your artistic vision. Paint or stain them beforehand, or embrace natural wood variation. Installation takes 3–4 hours including drilling, leveling, and mounting. The irregular arrangement means you can customize shelf dimensions: long crates below for larger items, smaller cubes above for decorative objects. This approach works beautifully for renters if you use adhesive strips instead of permanent mounting (reduced weight capacity but still functional).

    Pro tip: Leave some crates open with no backing so books are visible from multiple angles, creating a more sculptural effect.

    The modular nature means your shelving evolves with your collection, and the irregular arrangement automatically looks curated and intentional.


    17. Mount Shelves at Staggered Heights

    Symmetry is classic, but asymmetry is interesting. Staggering shelf heights creates visual movement and allows flexibility in displaying objects of different sizes.

    Install floating shelves from any source using a stud finder and level, but don’t space them evenly. Mount the first shelf at shoulder height, the next one lower (maybe 20 inches below), and the third even lower or in a completely different section of the wall. This scattered approach works beautifully in corners, along hallways, or creating a gallery wall. Mix shelf lengths: 24-inch shelves next to 36-inch ones. The irregular arrangement means each shelf can showcase different collection items without feeling crowded. Total installation time: 2–3 hours for 3 shelves.

    Pro tip: Sketch your desired layout on the wall with painter’s tape before mounting—this lets you visualize spacing before committing to drill holes.

    Staggered heights create visual interest and rhythm while allowing you to maximize wall space for displaying collections of various dimensions.


    18. Create a Floating Shelf from a Wooden Board and Hidden Brackets

    The cleanest floating shelf look comes from proper hidden brackets. When done right, the shelf appears to levitate, creating maximum visual drama with minimal visual clutter.

    Buy a solid wood board (at least 1.5 inches thick, $30–$80 depending on wood type and length) and heavy-duty concealed brackets designed to slide into pre-drilled holes ($30–$50 per bracket set). Locate studs with a stud finder, mount brackets securely, then slide the board onto the brackets. The brackets hide completely inside the board, creating the illusion of floating. This requires moderate DIY skills; takes 2–3 hours for a single shelf. Choose wood that coordinates with your room: reclaimed oak, walnut, or weathered pine.

    Pro tip: Use a thicker board (1.5–2 inches) to emphasize the floating effect—thinner boards can look flimsy even if structurally sound.

    The seamless floating effect creates a sophisticated, almost sculptural quality that elevates your entire shelf aesthetic.


    19. Style Books with Decorative Bookends and Objects

    Strategic placement of bookends and small objects breaks up long rows of books and creates mini-vignettes that feel intentional and gallery-like.

    Invest in quality bookends ($20–$60 per pair) in materials that match your aesthetic: brass, ceramic, marble, or carved wood. Position them at the outer edges of book clusters. Fill the space between bookends with a mix of books and decorative objects: small sculptures, framed photos, or plants. Space them so your eye has visual resting points. Use odd-numbered groupings (3 or 5 items per section) for visual balance. The bookends serve dual purpose: functional anchors that prevent books from toppling plus design elements that define sections.

    Pro tip: Source bookends as pairs that coordinate but don’t match perfectly—slight variation feels more artisanal than identical pieces.

    Thoughtfully placed bookends transform a simple book row into a curated display section that signals intentionality and aesthetic attention.


    20. DIY Stained Glass or Painted Glass Shelf Backing

    A decorative backing transforms a simple shelf into a statement piece. Paint or commission stained glass to create a custom backdrop that ties your entire display together.

    Find wooden shelves with backing from retailers like West Elm or Wayfair ($100–$250), or create your own by sourcing a shelf and commissioning an artist to create a stained glass or painted glass backing ($150–$400). Paint the glass yourself with glass paint ($5–$10 per bottle) if you want a budget option—simple geometric patterns or watercolor effects work beautifully. Let paint cure fully before styling the shelf. The backed shelf immediately becomes focal wall art, especially if placed where natural light hits the glass, casting colored shadows.

    Pro tip: Choose glass colors that complement your book spine colors or your room’s overall palette for cohesive design.

    A backed shelf becomes an immediate focal point and transforms basic shelving into a custom art installation that feels gallery-curated.


    21. Incorporate Rolled Textiles and Woven Elements

    Textiles add warmth, pattern, and tactile quality that books and hard objects can’t provide. Rolled scarves, fabric scraps, and small rugs create artistic visual interest.

    Roll scarves, fabric remnants, or small textiles ($0–$50 if you’re sourcing vintage pieces) and arrange them upright like books or stack them horizontally for variation. Include small woven placemats, tapestry samples, or textile art. These soften the visual weight of hard book spines and introduce pattern and color. This works especially well if your book collection includes mostly neutral tones—textiles provide visual energy. Rotate textiles seasonally to refresh the look without replacing anything.

    Pro tip: Source textiles from thrift stores, estate sales, or your own closet—vintage items always look more artisanal than new store-bought ones.

    Textiles add unexpected warmth and tactile appeal to shelves, making them feel collected and personally meaningful rather than generic or sterile.


    22. Create a Shadow Box Effect with Deep Shelving

    Deep shelves (18–24 inches) allow you to layer objects at different depths, creating a shadow box effect with incredible visual dimension and interest.

    Install deep floating shelves ($80–$200 each depending on material) or build them yourself from solid wood and concealed brackets. Arrange items in layers: place a few books near the front, position taller objects in the middle, and tuck a framed piece or mirror at the back. This creates visual depth as your eye travels through the layers. The shadows cast between items add drama and sophistication. This approach means you can display more items than a shallow shelf without it looking crowded—the depth absorbs visual complexity.

    Pro tip: Place a narrow mirror at the back to reflect light and create the illusion of even more depth.

    Layered shelving turns simple display into three-dimensional art that rewards close inspection and changes appearance based on viewing angle.


    23. Mix Vintage Books with New Publications

    The contrast between aged vintage volumes and contemporary releases is visually dynamic and tells a story about your reading range and aesthetic appreciation.

    Source vintage books ($2–$15 each) from thrift stores, estate sales, or online—look for beautiful bindings, interesting typography, or subjects that genuinely interest you. Intersperse them with your current reading. The varying thicknesses, colors, and binding styles automatically create visual interest. Stand some vintage books face-out to show off their stunning covers or embossed spines. Group new and old together rather than segregating them. This mixed approach feels collected and suggests genuine engagement with reading across time periods and genres.

    Pro tip: Prioritize older books with gorgeous bindings even if you haven’t read them—they’re decorative objects that warrant display.

    A mix of old and new suggests an intellectual curiosity that spans generations, making your shelf feel genuinely cultured rather than trend-focused.


    24. Style Shelves Around a Central Focal Point

    Anchoring your shelf around a central focal point creates visual organization and makes the entire arrangement feel intentional and curated. This principle works on a single shelf or entire wall.

    Choose a focal object ($50–$200) that matters to you: a large framed piece of art, an ornate mirror, or a significant sculpture. Mount or position this at the center of your shelf space. Arrange books and objects symmetrically on both sides, though not in rigid mirror-image fashion—think asymmetrical balance rather than perfect symmetry. This approach naturally draws the eye inward and creates visual harmony. Works beautifully whether you’re styling a single shelf or an entire wall of shelving.

    Pro tip: Your focal point should be something you genuinely love, not just something that “looks good”—personal connection shows in how people perceive spaces.

    A thoughtfully anchored shelf feels museum-quality and proves that organization and aesthetic appeal can absolutely coexist.


    25. Combine Open Shelving with Closed Cabinet Storage

    Not everything needs to be displayed. Combining open shelving with enclosed storage lets you maintain a curated look while keeping less-beautiful necessities accessible and out of sight.

    Install open floating shelves ($50–$200 each) above closed wooden cabinets or shelving with doors ($150–$400). Use the open shelves for your most beautiful books, curated collections, and display-worthy objects. Tuck less-attractive items, extras, and seasonal storage behind cabinet doors. This hybrid approach gives you maximum functionality without visual clutter. You get the open, airy feel of floating shelves combined with the clean lines and storage capacity of enclosed cabinetry. Options range from DIY construction to purchasing matching wall systems from retailers.

    Pro tip: Keep cabinet doors consistent in color and finish with your open shelves for a unified, designed look.

    This combination delivers both aesthetic pleasure and genuine storage functionality—you get the best of both worlds without compromising on either.


    26. Add Ambient Lighting Behind or Under Shelves

    Strategic lighting transforms how your shelves look, especially in evening hours. Hidden ambient lighting adds warmth and draws attention to your carefully curated display.

    Install LED strip lights ($15–$50 per set) under each shelf using the adhesive backing—no wiring required for simple plug-in options. Choose warm white light (2700K) for a cozy, rustic feel rather than cool white. Position lights so they illuminate the shelf below without creating glare. This works especially well on floating shelves where the light can create beautiful shadows on the wall. The investment is minimal, the effect is significant, and you can easily remove or upgrade lights later.

    Pro tip: Use a dimmer switch on your lights so you can adjust ambiance based on time of day or mood.

    Evening-lit shelves become a completely different focal point that invites close inspection and creates an intimate atmosphere that static daylight simply can’t match.


    Save this post for your next bookshelf project—whether you’re building from scratch or refreshing what’s already on your walls. Pick just one idea this weekend and watch how it shifts the whole vibe of your space. Which handmade approach speaks to you most?

  • 25 DIY Mirror Wall Ideas Anyone Can Create on a Budget

    25 DIY Mirror Wall Ideas Anyone Can Create on a Budget


    Mirror walls have officially replaced boring paint as the go-to accent feature for 2025, and here’s the best part: you don’t need a designer budget to pull it off. Whether you’re renting a blank apartment or own a small room that feels cramped, a mirror wall creates depth, bounces light everywhere, and honestly just looks cool. The trick? You don’t have to cover an entire wall—you can start small, mix frame styles, and build your perfect reflection setup piece by piece. We’ve rounded up 25 doable ideas that range from totally free to surprisingly affordable, all designed to work in real homes with real constraints. Pick one that matches your space and skill level, and let’s get started.


    1. Create a Mismatched Mirror Grid on Any Wall

    A mismatched mirror grid gives you a curated, intentional look without the pressure of perfection. The beauty is that no two frames have to match—that’s the whole point. Grab mirrors from thrift stores, IKEA, Target, and Amazon in sizes ranging from 8 inches to 18 inches. Prices run $8–$50 per mirror, and you can start with just 4-6 and add more over time.

    Lay them out on the floor first to plan your arrangement, then use a level and painter’s tape to mark holes before hanging. This takes about an hour for a dozen mirrors, and you only need basic nails or wall anchors. The result? A focal wall that looks designer-curated but totally budget-friendly. Renters can even use adhesive hooks rated for mirrors under 5 pounds each.

    Your wall becomes a working piece of art that reflects light and draws the eye naturally to your best features—whether that’s a pretty dresser or a cozy reading nook.


    2. Use Peel-and-Stick Mirror Tiles for Zero Commitment

    Peel-and-stick mirror tiles are the renter’s secret weapon—no nails, no damage deposits lost, and you can rearrange whenever you want. Each tile typically costs $3–$8, and a pack of 12 runs about $30–$50. Brands like Art3d, Yardwe, and Amazon basics make solid options that actually stick.

    Clean your wall with rubbing alcohol, let it dry completely, then peel and press each tile into place. You can arrange them in grids, staggered patterns, or even create waves. Takes about 20 minutes for a whole wall. The tiles come in 6×6, 12×12, or even hexagonal shapes if you want to get creative.

    You get a mirror wall that looks expensive but costs less than two dinners out. Plus, if you move or change your mind, they peel right off without leaving residue. Perfect for apartments, temporary spaces, or anyone testing the waters before committing.


    3. Frame Thrifted Mirrors with Moldable Wood Trim

    Found a gorgeous mirror at Goodwill or a yard sale but hate the frame? Buy moldable wood trim strips (about $1–$3 per strip) from Home Depot or Lowe’s and wrap them around the edge. It’s like giving your mirror a custom upgrade for pocket change. This works especially well on frameless or plastic-framed mirrors.

    Measure your mirror’s perimeter, cut the trim to size with a basic saw or ask the store to cut it, then secure it with mirror adhesive or small nails on the back. Stain or paint it to match your space—takes 30 minutes plus drying time. You can do 3-4 mirrors for under $25 total.

    The effect looks handcrafted and elevated, and you’ve essentially customized a thrifted find into something that looks like it came from a boutique. It’s the kind of detail that makes people ask where you got it.


    4. Build a Leaning Mirror Wall for Temporary Spaces

    Don’t want to commit to wall holes? Lean a collection of full-length or large mirrors against your wall in a casual cluster. This works especially well in bedrooms, entryways, or rental spaces where you want impact without permanence. Grab mirrors from IKEA, Target, or Facebook Marketplace for $30–$150 each, depending on size.

    Arrange them at slightly different angles—some upright, some tilted—to create visual interest. They’ll stay in place on their own if they’re leaning against the wall. No tools needed, no damage, and you can rearrange them whenever the mood strikes.

    You get a gallery-like statement wall that looks intentional and expensive, but you can take it with you when you leave. It’s the easiest way to test out a mirror wall before going full-install.


    5. Create a Sunburst Mirror Wall for Dramatic Impact

    A sunburst mirror does the heavy lifting all by itself—you don’t need a grid of mirrors when one statement piece delivers all the drama you need. These range from $40–$300 depending on size and material, with solid mid-range options at Target, Wayfair, and Amazon around $60–$120.

    Hang it at eye level or slightly above for maximum visual impact. This is a one-nail, one-afternoon project. The radiating pattern catches light beautifully throughout the day and photographs gorgeously, so it’s perfect if you love a room that looks good on camera.

    Position it as a focal point above a bed, sofa, or dresser, and let it become the conversation starter. One sunburst mirror can make a plain wall feel intentional and expensive without any additional styling needed.


    6. Mix Metal Frames with Natural Wood for Eclectic Style

    Combining metal and wood frames creates visual interest without looking chaotic. Grab a mix from thrift stores, IKEA, and budget retailers like Target—you’re looking at $10–$40 per frame. The key is choosing frames in complementary finishes: matte black, brushed gold, and natural wood work beautifully together.

    Stick to 2-3 metal tones maximum and keep the wall color neutral so the frames become the stars. Arrange them with roughly equal spacing—a level and tape measure take the guesswork out. Plan for about 45 minutes to an hour for a wall of 8-10 mirrors.

    The mix of materials looks collected over time rather than matchy-matchy, which reads as more thoughtfully designed. You’ve created a wall that looks like you have serious decorating taste without any of the stress.


    7. Paint Mirror Frames to Match Your Accent Color

    Have mirrors in mismatched or dated frames? Paint them all in one accent color to tie them together instantly. Use spray paint or acrylic paint designed for plastic/metal, about $2–$4 per can from hardware stores. You only need one or two cans depending on how many mirrors you’re doing.

    Remove mirrors from frames if possible, lay frames on cardboard, and spray 2-3 light coats in your chosen color. Let them dry per the paint instructions (usually 24 hours), then reinstall the mirrors. This takes 20 minutes hands-on time plus drying.

    Suddenly your budget mirrors look cohesive and intentional. The painted frames become a design feature that ties into your room’s color story, making the whole wall feel planned rather than randomly assembled.


    8. Use Adhesive-Backed Mirror Panels for Backsplash Effect

    Transform a kitchen or bathroom wall with adhesive-backed mirror panels that look like a custom backsplash but cost a fraction of tile. These run $20–$50 for a pack that covers 10-15 square feet, depending on tile size. Brands like Art3d and Mirrored offer various styles including subway, hexagon, and mosaic patterns.

    Clean and dry your wall thoroughly, then peel and stick panels in your chosen pattern. Use a level and spacers to keep lines straight. A 3×4 foot area takes about 30 minutes. You can also do partial walls—just above a sink or stove—for a budget-friendly pop of reflection.

    Your kitchen or bathroom instantly reads more polished and spa-like. Mirrors amplify light where you need it most (near sinks and cooking areas), and the effect photographs beautifully.


    9. Hang Mirrors in Matching Frames for Minimalist Impact

    Sometimes the most sophisticated look is the simplest one. Six to nine matching mirrors in identical frames create a clean, editorial aesthetic. Hunt for frames on sale at IKEA, Target, or Wayfair—look for deals on $15–$30 items that work when bought in multiples.

    Measure and mark your wall to create evenly spaced rows. Use a level and painter’s tape. This takes about an hour total and looks strikingly polished when finished. The uniformity is calming and reads as intentionally designed.

    Your wall becomes a study in minimalist elegance—no visual chaos, just clean lines and reflected light. This approach works especially well in small spaces because it emphasizes order rather than clutter.


    10. Add Vintage Ornate Frames for Maximalist Flair

    For the maximalist at heart, layer ornate frames in mixed metals and finishes for a luxe, collected-over-time vibe. Hunt thrift stores and Facebook Marketplace for vintage frames—you’ll find ornate options for $3–$15 each. The hunt is half the fun.

    Arrange them in a loose salon style (asymmetrical but balanced). Don’t worry about perfect spacing—the point is abundance and personality. Hang 12-15 frames in a 4×5 foot area for maximum impact. Takes 1-2 hours but creates an incredible focal point.

    Your wall looks like you’ve been collecting beautiful frames forever, even if you actually found them in one weekend. The mix of golds, silvers, and patinas catches light differently throughout the day, creating depth and movement.


    11. Frame Mirrors with Rope or Jute for Coastal Vibes

    Give any basic mirror instant coastal charm by wrapping the edge with natural rope or jute cord. Grab rope at any hardware store for $2–$5 per mirror, plus fabric glue or hot glue (about $3). This works on any size mirror—8 inches to 24 inches.

    Measure the perimeter, cut rope to length, then hot glue it around the mirror’s edge in one smooth layer or a coiled pattern. Let glue dry completely (15 minutes) before hanging. Takes about 10 minutes per mirror.

    You’ve taken a plain mirror and given it personality and texture for less than $10. Rope-wrapped mirrors feel summery and relaxed, perfect for bedrooms, bathrooms, or entryways that need a breezy aesthetic.


    12. Hang Mirrors at Varying Heights for Visual Movement

    Rather than aligning mirrors in neat rows, stagger them at different heights for a more dynamic, interesting composition. This arrangement actually draws more light around the room and creates visual interest that makes spaces feel larger.

    Plan your layout by marking heights on painter’s tape first—the highest mirror might be 6-8 inches below the ceiling, the lowest around 5 feet up. Space them about 4-6 inches apart. Hang with a level to keep individual mirrors straight even though the arrangement is asymmetrical.

    The varying heights create movement and sophistication. Your eye travels across the wall rather than getting stuck in one spot, which makes the space feel more dynamic and deliberately curated.


    13. Use Mirrored Shelves to Double as Display and Reflection

    Mirrored shelves are like getting two design features in one—functional storage plus light-bouncing reflection. These run $25–$80 per shelf from Target, Wayfair, or Amazon. Mount them at different heights (one at 48 inches, one at 60 inches) for visual interest.

    Install according to package instructions using a level and wall studs. Takes about 30-45 minutes for two shelves. Fill with plants, books, and small decor pieces that’ll look even more interesting with their reflections behind them.

    You’ve created a mini gallery wall that’s also genuinely useful. The mirrored backing makes your small collection of objects appear doubled, which makes open storage feel less bare and more intentional.


    14. Create a Mirror Accent Wall Behind Your Bed

    Make your bed the ultimate focal point by creating a full mirror wall behind it. This is the most dramatic version of the mirror wall idea and works especially well in smaller bedrooms where it makes the space feel twice as large. Budget $200–$500 for a full wall, depending on whether you use adhesive tiles or individual framed mirrors.

    If using tiles: Install a grid of adhesive-backed mirror panels following the manufacturer’s instructions. If using individual mirrors: Plan your arrangement carefully, then hang with a mix of methods (nails for sturdy frames, adhesive strips for lighter options). Budget 2-3 hours for a full wall.

    Your bedroom becomes a sanctuary that feels open, bright, and spacious. You’ll notice the difference immediately—more light, more perceived space, and a wow factor that doesn’t come from expensive bedding.


    15. Mount Mirrors Inside a Gallery Wall Grid

    If you want structure without commitment, use a gallery wall hanging system (like the Command Gallery Wall Kit, $15–$30). These systems use adjustable templates so you can arrange and rearrange mirrors and art without re-measuring constantly.

    Lay out your design using the template, mark holes with painter’s tape, then install all pieces at once. Takes about an hour for an 8-10 piece wall. The best part? You can swap pieces in and out whenever you want without new holes.

    You get a polished, curated look that’s also flexible. If you want to swap a mirror for art or rearrange things seasonally, just pop them out and rearrange. It’s the gallery wall for people who like options.


    16. Paint a Bold Frame Color to Make Mirrors Pop

    Forget natural wood or gold—a bold frame color makes mirrors into actual art installations. Paint frames in jewel tones (navy, emerald, terracotta) or moody neutrals (charcoal, chocolate) using spray paint or brush-on acrylics. Cost: $2–$5 per frame.

    Remove mirrors from frames, paint frames in 2-3 coats, then reinstall. Drying time is 24 hours between coats. Hands-on time is minimal. The result looks sophisticated and intentional without being trendy.

    You’ve turned simple mirrors into statement pieces that complement your room’s color palette. The bold frame color does the heavy lifting design-wise, so you can keep your wall arrangement simple and let color do the talking.


    17. Use Mirror Film on Existing Frames for Easy Upgrades

    Have a beautiful frame but damaged or dull mirror glass? Reflective mirror film ($15–$25 per roll) lets you upgrade the reflective surface without replacing the whole mirror. Brands like Gila and 3M make high-quality options.

    Clean the glass thoroughly, measure your mirror, then carefully apply the film following package directions. Takes about 15-20 minutes per mirror. Trim excess with a utility knife. The result looks brand new.

    You’ve revived an old mirror without replacing it—perfect for frame lovers who just need to refresh the reflective surface. It’s a waste-conscious upgrade that costs pennies compared to buying new.


    18. Hang Mirrors with Decorative Chains for Hardware Details

    Skip basic picture hooks and hang mirrors from decorative chains for an extra design detail that costs almost nothing. Grab chains at hardware stores for $1–$3 per foot. Brass, gold, and matte black chains work well with most decor.

    Attach chains to ceiling-mounted hooks (rated for your mirror’s weight), then attach the mirror to the chain’s hook using wire or chain links. Takes about 10 minutes per mirror. The chains become a design feature rather than invisible hardware.

    The suspended effect makes mirrors feel like intentional art installations rather than just decorative objects. It’s a tiny detail that reads as thoughtfully designed and adds verticality to your wall arrangement.


    19. Create a Tileable Mirror Wall in Rental Bathrooms

    Bathrooms are the perfect testing ground for mirror walls, and adhesive tiles make them renter-friendly. A small bathroom wall (about 3 feet wide by 4 feet tall) needs roughly $40–$60 in adhesive mirror tiles (about 12-15 tiles at 12×12 inches each).

    Clean the wall, dry completely, then stick tiles in a grid pattern using a level as you go. Takes about 30 minutes. If you ever move, they peel right off without damage.

    Your bathroom instantly looks larger, brighter, and more spa-like. The reflected light bounces around the small space, making it feel less cramped. You also get practical benefits—more light around the sink for grooming and a cleaner aesthetic than plain paint.


    20. Use Oversized Mirrors to Make Small Rooms Feel Bigger

    One gigantic mirror does what a dozen small mirrors can’t—it makes a small room feel genuinely spacious. Oversized mirrors start around $80–$150 at IKEA, Target, and Wayfair, with premium options at $150–$300 from furniture stores. Leaning them against the wall (no hanging needed) is the easiest approach for renters.

    Position your oversized mirror opposite the window or a light source so it bounces natural light around. The reflection should capture the best parts of your room—artwork, good seating, or the view. Even if you only lean one large mirror against a wall, it makes an immediate difference in perceived space.

    Suddenly your small bedroom or apartment feels airy and light. You’ve essentially doubled your visual square footage without any renovation, and the effect is immediate and noticeable the moment you enter the room.


    21. Add LED-Framed Mirrors for Subtle Ambient Light

    LED mirror frames add ambient light without the commitment of a full backlit mirror. These frame kits run $15–$40 and attach to your existing mirror with adhesive strips. Brands like GKLIGHTING and LED-Strip-Light make quality affordable options.

    Measure your mirror’s perimeter, apply the adhesive strip around the edge, plug into any outlet (or battery-powered for portability), and adjust brightness with a remote. Takes 10 minutes. Choose warm white for bedrooms or cool white for bathrooms.

    You’ve added functional lighting plus a subtle, modern design element. The warm glow makes your space feel intentional and spa-like, especially in bedrooms or entryways. It’s affordable and totally reversible for renters.


    22. Arrange Mirrors in Asymmetrical Salon Style

    Salon-style (asymmetrical) arrangements look more artistic and personal than grids. This works especially well when you have mirrors in different sizes and styles that you want to celebrate rather than coordinate. Mix shapes—round, rectangular, oval—and frame styles freely.

    Plan your layout on the floor first, taking a photo to reference as you hang. Use painter’s tape to mark where each piece goes. Trust your eye for balance rather than perfect spacing. Takes 1-2 hours to hang a full wall but looks incredibly curated.

    The asymmetrical arrangement feels like you’ve collected these pieces thoughtfully over time. It’s more forgiving of imperfect spacing and actually celebrates the variety rather than hiding it—perfect if your mirrors came from different stores or thrift shops.


    23. Use Mirrored Wallpaper for Quick Impact

    Mirrored wallpaper gives you a mirror wall without actual mirrors—it’s reflective but has surface texture that’s easier on the eyes than solid glass. Costs $30–$60 per roll depending on quality, and covers about 50-60 square feet. Brands like Muriva and Holden make beautiful options.

    Apply using standard wallpaper paste and a roller. If you’re not comfortable with wallpaper application, ask a local handyman—costs usually run $100–$200 in labor for a small wall. Takes 2-3 hours DIY or 1-2 hours with professional help.

    You get a mirror wall aesthetic with less glare and easier maintenance than real mirrors. The subtle pattern makes the reflective effect more sophisticated and less clinical-feeling.


    24. Frame Your Existing Mirror with Decorative Trim

    If you have a plain, builder-basic bathroom or bedroom mirror, frame it with decorative trim (shiplap, beadboard, or trim molding) for architectural interest. Materials cost $20–$50 depending on mirror size and trim style, from Home Depot or Lowe’s.

    Measure around your mirror, cut trim pieces to fit, then secure with nails or adhesive. Caulk gaps, paint to match your wall, and you’re done. Takes about 1-2 hours for a standard bathroom mirror. The effect is immediate and high-impact.

    Your plain mirror now looks like a designed feature rather than a basic builder install. The frame gives it weight and importance—suddenly that mirror is part of your room’s design rather than just functional glass.


    25. Layer Mirrors with Wood Shelving for Styled Walls

    Combine mirrors with open shelving for a wall that’s both reflective and functional. Install a simple 3-shelf unit ($40–$100 from IKEA or Target) and arrange small mirrors alongside books, plants, and decor. The mix of materials and objects creates visual interest while the mirrors keep the wall feeling light.

    Position mirrors to reflect light toward dark corners. Vary the sizes of mirrors and objects for an organic, curated look. This arrangement works especially well in bedrooms, living rooms, or home offices where you want storage plus design impact. Takes about 1 hour to install shelves plus 30 minutes to style.

    You’ve created a wall that’s beautiful, functional, and reflects light strategically. The combination of mirrors and objects feels intentional and collected rather than random, and you actually have useful storage.


    26. Paint Your Wall a Light Color to Amplify Mirror Reflections

    Here’s an underrated trick: the color of your wall directly affects how effectively mirrors work. Paint walls in soft, light colors (cream, pale gray, soft sage, light blue) and mirrors bounce light around beautifully. Darker walls absorb light and reduce the mirror effect.

    If you’re painting anyway, choose a pale, cool-toned color that’ll work as your backdrop. One gallon of paint costs $25–$40 and covers most rooms. Takes an afternoon to paint. The difference mirrors make when the wall is light versus dark is genuinely noticeable.

    By pairing mirrors with a thoughtful wall color, you amplify the light-bouncing effect and create a brighter, airier room. It’s a small decision that has a major impact on how well your mirror wall actually performs.


    Save this post and try just one idea this weekend. Whether you start with adhesive tiles, a single oversized mirror, or a mismatched grid, you’ll see the difference immediately. Pick the approach that feels most achievable for your space and skill level—budget-friendly mirror walls don’t require perfection, just intention.

  • 26 Compact Sofa Styles Perfect for Tight Apartments

    26 Compact Sofa Styles Perfect for Tight Apartments


    Small spaces don’t mean you have to sacrifice style or comfort. Whether you’re in a studio, a one-bedroom, or just dealing with a cramped living room, the right sofa can anchor your entire apartment and make everything feel bigger. We’ve gathered 26 compact sofa styles and smart solutions that maximize comfort without overwhelming your floor plan. From budget-friendly finds to investment pieces that’ll last years, you’ll discover exactly what works for tight quarters—and how to style it so your space feels intentional and cozy, not cluttered.


    1. Choose a Curved Sofa to Define Your Layout

    Curved sofas are perfect for small apartments because they create visual interest without eating up floor space the way boxy sectionals do. A curved silhouette guides the eye around the room and naturally defines your living zone without requiring walls or dividers.

    Look for options at IKEA, Article, or West Elm—expect to pay $600–$1,200 for quality curves. Measure your space carefully; curved sofas typically need 7–8 feet of wall length. Installation takes 30 minutes with help. The trick? Position it perpendicular to your TV or window to maximize sightlines.

    Pro tip: Pair a curved sofa with floating shelves above to keep walls open and airy. You’ll be amazed how much architectural interest one good curve adds to a studio or one-bedroom.


    2. Opt for a Loveseat Instead of a Full Sectional

    A loveseat (roughly 60 inches wide) gives you seating for two without the sprawl of a traditional three-seater or sectional. It’s the Goldilocks furniture piece for apartments where space is premium.

    Budget picks: Target or Wayfair offer basic loveseats for $300–$500. Mid-range options from Article or CB2 run $600–$900. Splurge-worthy picks (Article, West Elm) are $1,000–$1,400. Delivery typically takes 1–3 weeks. Measure your doorway before ordering—some loveseats are trickier to move than others.

    Pro tip: Choose a removable, washable cover if you have pets or rent. The best part? A loveseat leaves room for a poufs, side tables, or plants without making your apartment feel packed.


    3. Pick a Low-Profile Frame for a Grounded Look

    Low-profile sofas (with shorter legs or tight frames) visually expand small rooms by creating uninterrupted sight lines. They also feel more modern and less bulky than traditional high-leg furniture.

    Search “low-profile sofa” on Wayfair, Article, or Room & Board. Budget range: $400–$700; mid-range: $800–$1,200; premium: $1,200+. Pay attention to seat depth—many low-profile styles have deeper seats for comfort. Assembly takes 30–45 minutes depending on leg attachment.

    Alternative: If you love the look but need storage, consider a low platform bed with built-in shelving underneath—you get grounded aesthetics plus function. You’ll notice how much taller your ceilings appear when furniture stays low.


    4. Go Modular for Rearrangement Flexibility

    Modular sofas let you swap, rotate, and reconfigure as your life changes—perfect if you move frequently or think your apartment layout might shift. You buy individual sections and connect them however you want.

    Top picks: Article’s Sven collection, CB2’s modular options, or IKEA’s sectional components. Budget: $500–$1,500 depending on size and quality. Installation takes 45 minutes to an hour. The beauty? If one section wears, you replace just that piece instead of the whole sofa.

    Pro tip: Mix and match fabric colors slightly for visual depth, or keep everything neutral for a seamless blend. This approach makes your apartment feel purposeful and gives you the freedom to refresh without major purchases.


    5. Invest in a Sleeper Sofa for Dual Function

    In a tight apartment, a sleeper sofa does heavy lifting—it’s your couch by day and a guest bed by night. Modern designs have come a long way from the uncomfortable couches of the past.

    Look for memory foam or gel-infused mattress options at Article, West Elm, or Wayfair; expect $800–$1,500. Test the pull mechanism in-store if possible—smooth, quiet mechanisms are worth the extra cost. Some models have storage underneath for bedding or linens.

    Pro tip: Pair with a few throw pillows and a chunky knit throw; nobody will guess it’s a bed. You’ll save hundreds of dollars on a guest room, and your visitors will appreciate the comfortable sleeping surface.


    6. Select a Sofa in Warm Earthy Tones

    Warm, earthy colors like camel, clay, sand, and warm greige work magic in small spaces—they feel bigger and more cohesive than bright or cold tones. These shades also hide wear better than white or pale gray.

    Budget loveseats in earthy tones run $300–$600 (Target, Wayfair); mid-range sofas are $700–$1,000 (Article, CB2); premium pieces cost $1,000+ (Article, Design Within Reach). Fabric samples ship free from most retailers—get them before committing. Warm tones pair beautifully with wood, rattan, and natural textiles, so your whole room comes together instantly.

    Pro tip: Avoid pure white or stark gray if you’re a renter with pets—earthy tones forgive life better. You’ll find that neutral warm tones make even a cramped studio feel like a retreat.


    7. Layer Textures with Boucle or Linen

    A single-color sofa becomes visually interesting when you add textural layers—boucle pillows, linen throws, or knit blankets. This strategy makes compact sofas feel more expensive and considered.

    A neutral linen or cotton sofa costs $500–$1,200, then invest $150–$300 in quality throw pillows and blankets. IKEA, Target, and H&M Home offer budget throws ($30–$80); splurge options (Anthropologie, West Elm) run $100–$250. Mix at least three different textures—smooth linen, chunky knit, soft velvet. The result? Your sofa looks styled and intentional without requiring a color overhaul.

    Pro tip: Rotate throws seasonally to refresh the look for free. Adding texture makes a tight space feel designed, not cramped.


    8. Use an Apartment-Sized Sectional (72 Inches or Less)

    A “apartment sectional” is smaller than standard sectionals—usually 72 inches or less—and fits snugly into corners without overwhelming a small room. It gives you the lounge feel without the footprint of a full L-shaped set.

    Budget options (IKEA, Wayfair): $400–$800; mid-range (Article, CB2): $900–$1,400; investment pieces (West Elm, Design Within Reach): $1,500+. Measure corner clearance carefully—you need space to open the door and move through your apartment. Delivery and setup typically take 1–2 hours.

    Pro tip: Choose a chaise on the shorter end (60 inches instead of 80 inches). You’ll get that luxe recline without eating your living room alive.


    9. Pick Stain-Resistant Fabric for Real Life

    Performance fabrics repel stains, resist pilling, and handle pets or messy roommates without showing wear. They’re not as silky as traditional upholstery, but they’re practical for apartment living.

    Brands like Crypton, solution-dyed polyester, and microfiber are your friends. Expect to pay $700–$1,200 for a quality performance-fabric sofa at Article, Wayfair, or Article. Test swatch first—some feel plasticky, while others are surprisingly soft. Cleaning is easy: most stains wipe off with a damp cloth.

    Pro tip: If you’re renting or have kids, performance fabric is non-negotiable. You get years of durability without the stress of permanent damage. The investment pays for itself in peace of mind.


    10. Try a Settee for Narrow Entryways

    A settee (a smaller bench-style sofa with a back and arms) fits in hallways, nooks, or narrow living areas where a full sofa won’t squeeze. It provides seating and visual interest without bulk.

    Budget settees: Target or Wayfair, $300–$500; mid-range: Article or CB2, $600–$900; splurge options: West Elm or Design Within Reach, $900–$1,400. Measure your space precisely—most settees are 48–60 inches wide. Assembly is minimal, usually 15–20 minutes. Pair with a small side table and a throw pillow for instant hotel-lobby vibes.

    Alternative: Use it as a bench at the foot of your bed if your bedroom is the only spare space. You’ll be surprised how much character one settee adds to a tiny apartment.


    11. Go Velvet in Jewel Tones (Go Bold, Strategically)

    A velvet sofa in a rich jewel tone—emerald, navy, or burgundy—becomes a statement piece that makes a small apartment feel designed and intentional. It’s bold without being chaotic.

    Splurge range: $1,000–$1,800 for quality velvet at Article, West Elm, or Design Within Reach. Velvet shows dust and pet hair more than other fabrics, so factor in vacuuming weekly. Keep it simple around it—let the sofa be the star. Pro tip: Pair with brass or wood accents and neutral walls to ground the boldness.

    The payoff? You’ll own a sofa that photographs beautifully and makes your apartment feel like a curated design magazine spread. Just commit fully—half-measures with bold color read as uncertain.


    12. Consider a Chaise Lounge as Your “Sofa”

    If you live alone or don’t entertain much, a chaise lounge replaces a full sofa and takes up far less space. You get that luxe recline without the commitment or footprint of a traditional couch.

    Budget: $300–$600 (IKEA, Target, Wayfair); mid-range: $700–$1,100 (Article, CB2); premium: $1,200+ (West Elm, Design Within Reach). Most chaise lounges are 60–72 inches long but only 30–36 inches deep. Perfect for a studio or one-bedroom where you want to maximize open floor space.

    Pro tip: Pair with a small ottoman to create a makeshift bed for guests—it’s more space-efficient than a sleeper sofa. You’ll love having a dedicated nap or reading spot that doesn’t eat your entire living room.


    13. Use a Daybed as a Sofa-Bed Hybrid

    A daybed (a bed-style frame with a trundle or pull-out mattress) works as a sofa during the day and a full bed at night. It’s especially smart if you’re sleeping and living in one room.

    Budget daybeds: IKEA or Wayfair, $300–$600; mid-range: Article or Pottery Barn Teen, $700–$1,200; quality pieces: Restoration Hardware or Design Within Reach, $1,200–$2,000. Many include under-bed storage for linens or off-season items. Style it with a bolster pillow and throw to make it feel intentional during daytime hours.

    Pro tip: Pair with a low coffee table in front for a living-room setup that doesn’t scream “I sleep on my sofa.” You’ll get functionality that adapts to real apartment living.


    14. Choose an Armless Design to Save Space

    Armless sofas or ultra-low-arm options save precious inches on each side and make tight rooms feel more open. Without bulky armrests, you get more seating surface in the same footprint.

    Budget options: $350–$650 (Target, IKEA, Wayfair); mid-range: $700–$1,000 (Article, CB2); investment pieces: $1,000–$1,500 (West Elm, Article). Assembly takes 20–30 minutes. Trade-off: You lose the armrest lounging comfort, so pair with a few throw pillows for arm support. The upside? Your apartment feels significantly more spacious and modern.

    Pro tip: Measure corner-to-corner and side-to-side before ordering—armless sofas are easier to move and fit through doors than traditional frames. You’ll gain back at least 12–18 inches of usable floor space.


    15. Try a Tuxedo Sofa for Structured Style

    A tuxedo sofa (with high, squared-off arms) looks compact and tailored, perfect for a small space. The clean lines make apartments feel curated rather than cramped, and there’s built-in visual structure.

    Price range: $700–$1,200 for quality tuxedo styles at Article, West Elm, or CB2. The structured design photographs beautifully, so it’s ideal if you like the space to feel Instagram-worthy. Pair with a geometric rug and minimal wall art to amplify that intentional aesthetic.

    Pro tip: Tuxedo sofas feel heavier visually despite taking up similar floor space, so pair with light-colored walls and floating shelves to keep the room airy. The result? Your apartment looks deliberately designed, not makeshift.


    16. Go for a Sofa with Built-In Storage

    A sofa with built-in storage under the seat is a game-changer for studios and one-bedrooms. Stash off-season clothes, extra blankets, or linens without eating closet space.

    Budget options: $500–$900 (IKEA, Wayfair); mid-range: $1,000–$1,400 (Article, Wayfair); higher-end: $1,400–$1,800 (Article, West Elm). Lift-top designs are easier to access than models where you remove the whole cushion. Test the lid mechanism before buying—it should open smoothly and not pinch fingers.

    Pro tip: Use vacuum storage bags for bulky items like winter coats or spare pillows. This simple feature doubles your storage without visible clutter. You’ll never run out of places to stash things again.


    17. Pick a Sofa on Casters for Easy Rearrangement

    A sofa on casters (rolling wheels) lets you shift furniture around without help—essential if you like to refresh your layout seasonally or whenever you feel like it.

    Look for “sofa on wheels” at Article, Wayfair, or Design Within Reach. Budget range: $600–$1,100. Most quality casters are smooth and quiet. Casters also slightly raise the sofa off the ground, making the space feel more open. Make sure your flooring can handle wheels; hard surfaces work best, though felt pads protect wood.

    Pro tip: Use casters as an excuse to rearrange monthly—it keeps the space feeling fresh without spending money. You’ll love having the flexibility to reconfigure your living area anytime the mood strikes.


    18. Select a Sectional with a Chaise for One-Sided Lounging

    A compact sectional with a chaise (one short end that extends for leg-up lounging) gives you lounge comfort in a smaller footprint than a full sectional. You get seating for two plus a recline space.

    Budget: $600–$1,000 (IKEA, Wayfair); mid-range: $1,100–$1,600 (Article, CB2); investment: $1,700–$2,200 (West Elm, Design Within Reach). Measure your corner space carefully—chaise sectionals need more depth on one side. This option works best if you have a defined corner rather than open wall space.

    Pro tip: Pair with a small side table at the non-chaise end for drinks and remotes. You’ll feel like you have a luxury lounging setup without the bulk of a full sectional.


    19. Go with a Futon-Style Sofa Bed for Flexibility

    Modern futons are nothing like your college-dorm days. Today’s futon sofas fold flat into a comfortable mattress and offer maximum flexibility in a small footprint.

    Budget futons: $350–$600 (IKEA, Target, Wayfair); mid-range: $700–$1,100 (Article, Wayfair); quality pieces: $1,200–$1,600 (DlandHonor, modern brands). The fold mechanism takes 5 seconds, and many come with storage drawers underneath. Test the fold-back angle before committing—some sit too upright to feel like a couch.

    Pro tip: Add a high-quality mattress pad on top (around $80–$150) to make the bed sleeping surface more comfortable. You’ll get a legitimate sofa-bed hybrid that actually feels good for both functions.


    20. Try a Sofa with Removable, Washable Covers

    Removable slipcovers mean you can wash or swap fabric seasonally—perfect if you’re renting, have pets, or like to refresh without buying new furniture. It’s the renter’s secret weapon.

    Budget pieces with covers: $400–$800 (IKEA, Target, Wayfair); mid-range: $900–$1,400 (Article, CB2); premium slipcover sofas: $1,500–$2,000 (Article, West Elm). Check wash instructions before buying—some are hand-wash only, others are machine-washable. Buy an extra cover in a coordinating color for rotation.

    Pro tip: Removable covers mean you’re not locked into one look forever. Refresh the vibe for $100–$300 instead of buying a whole new sofa. You’ll have control over your space’s personality and longevity.


    21. Position Your Sofa at an Angle for Visual Interest

    Instead of pushing your sofa flat against a wall, angle it slightly into the room. This creates visual interest and can make a small space feel more intentional and bigger.

    This costs nothing—just rearrange what you have. The angle creates implied corners and zones without needing walls or dividers. Pair with a coffee table aligned with the angle, and suddenly your cramped apartment feels designed. Make sure you still have walkway space; the goal is visual interest, not tripping hazards.

    Pro tip: Angled furniture works best with floating side tables and a coordinated rug underneath. You’ll notice how much more dynamic your living room feels with just a slight rotation.


    22. Choose a Compact Sofa in a Light Color for Spaciousness

    Light-colored sofas (white, cream, pale gray, pale yellow) visually expand a room by reflecting light and blending with walls. In a small apartment, this makes everything feel bigger.

    Light-colored sofas are widely available: budget ($400–$700), mid-range ($800–$1,200), premium ($1,300+) across IKEA, Target, Article, West Elm, and more. The trade-off is stain visibility—go with a performance fabric if you have pets or kids. Pair with colorful throw pillows and art to add personality without visual weight.

    Pro tip: Add a light rug underneath to anchor the space while maintaining that airy feeling. You’ll find that a light, minimal sofa makes even a 400-square-foot studio feel like a loft.


    23. Invest in a High-Quality Frame Over Everything Else

    If you’re buying one sofa that’ll last 5+ years, invest in the frame quality first. A solid hardwood frame outlasts cheap particle board by decades, even if the fabric needs replacing.

    Brands known for solid frames: Article (Italian frames), Design Within Reach (high-end construction), Room & Board (American-made), and Blu Dot. Expect to pay $1,000–$2,000+ for genuinely quality construction. Ask sellers about frame material—hardwood or kiln-dried hardwood is best. Softwood or plywood won’t hold up to apartment wear and tear.

    Pro tip: A great frame with basic upholstery beats a trendy sofa with a flimsy particle-board base. You can always reupholster good bones. You cannot save a bent particle-board frame. This is the investment that matters most.


    24. Use a Sofa Bed as Your Primary Bed (Studio Sleeper Setup)

    If you’re in a true studio with no separate bedroom, a quality sofa bed becomes your primary bed—not just a guest backup. Choose one designed for comfort over style (or both, if budget allows).

    Comfort-first sleeper sofas: Article, West Elm, and Restoration Hardware offer models with quality mattresses for $1,200–$2,000+. Test the mattress before committing—it should support 200+ pounds without sagging. Some have gel or memory foam toppers for added comfort. Budget 10 minutes each morning to convert it back to a couch.

    Pro tip: Pair with high-quality bedding (good sheets and a mattress pad). You’re sleeping on it 8+ hours nightly, so comfort isn’t negotiable. You’ll spend more upfront but gain years of better sleep in a tiny apartment.


    25. Layer Your Sofa with Strategic Throw Pillows

    Throw pillows instantly update a basic sofa and make it feel intentional. Use a mix of sizes, textures, and one bold pattern to add depth without chaos.

    Budget pillows: Target, IKEA, Wayfair, $20–$50 each; mid-range: Article, CB2, H&M Home, $60–$120 each; premium: Anthropologie, West Elm, $100–$200+ each. Start with three pillows (two neutral, one pattern), then add more as budget allows. Mix square, rectangular, and lumbar shapes for visual interest.

    Pro tip: Vary heights and depths—lean one pillow against the back, lay one flat, stand one upright. This layered approach makes even a budget sofa look styled and magazine-ready. Your apartment will feel 10 times more curated with minimal effort.


    26. Pair Your Sofa with a Coordinating Area Rug

    An area rug underneath and in front of your sofa ties the seating area together and makes a small space feel intentionally designed. It also defines the living zone in open-plan apartments.

    Budget rugs: IKEA, Wayfair, Target, $100–$250; mid-range: Article, Rugs USA, $300–$600; premium: West Elm, Anthropologie, $600–$1,200+. Choose a size that extends 12 inches beyond your sofa on at least three sides. A rug slightly smaller than your sofa-plus-coffee-table footprint works best for compact spaces.

    Pro tip: Layer a small patterned rug on top of a neutral base rug for visual depth without overwhelming the space. This approach grounds your seating and makes your apartment feel intentionally styled rather than randomly furnished. You’ll notice how much more composed the space feels with a rug anchoring everything.


    Save this post for your next apartment refresh and bookmark your favorite style. Try one configuration this weekend—whether it’s moving your sofa to a new angle or adding throw pillows—and see how much impact one small change makes.

  • 26 Wall Painting Designs That Make a Bold Artistic Statement

    26 Wall Painting Designs That Make a Bold Artistic Statement

    Your walls are begging for a personality upgrade. Whether you’re renting a bland apartment or tired of the same builder-grade beige, bold wall designs don’t have to mean permanent changes or expensive renovations. The best part? Most of these ideas work in small spaces, tight budgets, and rental properties. From clever stenciling hacks to show-stopping color combos, we’ve rounded up 26 wall painting designs that make genuine artistic statements—without the commitment or the price tag. Some take 15 minutes. Others require a weekend and a paintbrush. All of them deserve to be saved and tried.


    1. Paint a Feature Wall Deep Navy for Instant Drama

    Deep navy creates an anchor for any room without feeling dark or heavy. It works as a moody backdrop for light furniture, and it photographs beautifully. The trick is lighting—position a lamp or sconce nearby to catch the depth.

    How to do it: Prep your wall like normal (tape, prime, two coats). Use a quality paint like Sherwin-Williams Naval or Benjamin Moore Hale Navy. Cost: $30–$60 for paint and supplies. Time: 3–4 hours, including drying time between coats. The results make your room feel curated and intentional without looking trendy.

    Pro tip: Pair navy with warm wood tones and brass accents to prevent the space from feeling cold. Renters can use removable peel-and-stick wallpaper in navy if painting isn’t allowed—brands like Peel & Stick Wallpaper Co. offer similar shades.


    2. Create an Ombré Wall Using One Paint Color

    An ombré wall creates visual interest using just one paint color diluted to different strengths. It’s easier than it sounds, and the effect feels both artistic and calming.

    How to do it: Buy one gallon of your chosen color. Divide it into three containers and dilute with white paint—25% color and 75% white for the lightest section, 50/50 for the middle, and full-strength at the bottom. Use wide foam brushes and blend where sections meet. Cost: $35–$50 for paint and supplies. Time: 2–3 hours depending on wall size. The gradient effect makes the room feel more spacious and draws the eye upward.

    Apply soft, overlapping strokes in the blend zones—perfection isn’t the goal. This technique works especially well in bedrooms, bathrooms, and small hallways where a single moody tone might feel too heavy.


    3. Use Metallic Paint for Glam Accent Details

    Metallic finishes reflect light and add luxury without covering entire walls. Target trim, a single geometric stripe, or a accent feature instead of all-over color.

    How to do it: Choose gold, silver, or copper metallic paint. Apply to trim, baseboards, or paint a 12–18-inch vertical stripe accent. Use a high-quality metallic paint like Rust-Oleum Metallic or Sherwin-Williams Metallic. Cost: $25–$40 for specialty paint. Time: 2 hours for detail work. Position a lamp or sconce nearby to catch the shimmer.

    Pro tip: Metallic finishes show imperfections, so prep surfaces thoroughly and use a brush designed for smooth finishes. In high-traffic areas, choose satin finish over gloss for easier maintenance and durability.


    4. Apply Stenciled Geometric Patterns for Texture

    Stenciled walls add texture and pattern without the commitment of wallpaper or the cost of muralists. Geometric designs feel contemporary, while florals add whimsy.

    How to do it: Purchase reusable stencils (Etsy or Michaels have thousands). Tape stencil to wall, use a foam roller or sponge brush to apply paint, and carefully lift away. Work in sections and use a level to keep patterns aligned. Cost: $20–$50 for stencils and paint. Time: 4–6 hours depending on pattern complexity and wall size. The effect looks like a custom design without the designer price tag.

    Let each layer dry before moving to the next stencil placement. This technique works beautifully in nurseries, bathrooms, or accent walls in living rooms.


    5. Mix Textures with Venetian Plaster for Luxury Finishes

    Venetian plaster creates depth and movement that flat paint can’t achieve. It’s a premium finish that makes rooms feel curated and expensive.

    How to do it: Venetian plaster requires technique—consider hiring a professional for best results, though DIY kits exist. Application involves spreading thin layers with specialized trowels, burnishing, and sometimes sealing. Cost: $300–$800 for a professional finish on one accent wall; $50–$100 for DIY kits if you’re willing to practice. Time: Professional = 1 day; DIY = 2–3 days plus drying time.

    Pro tip: This investment-level finish works best in dining rooms, entryways, or master bedrooms where guests notice detail. Pair with soft lighting to showcase the texture’s beauty. Not ideal for renters unless landlord approves permanent finishes.


    6. Paint Walls in Soft Pastel for Calming Spaces

    Muted pastels (blush, sage, powder blue, soft peach) work in modern spaces without feeling juvenile. They create calm and pair beautifully with natural materials.

    How to do it: Choose a quality pastel paint from Benjamin Moore, Sherwin-Williams, or Farrow & Ball’s softer palettes. Apply primer first, then two coats of your chosen shade. Cost: $40–$70 for paint and supplies. Time: 3–4 hours. Soft pastels make small spaces feel airy and create a retreat-like atmosphere in bedrooms and bathrooms.

    Pro tip: Pair pastels with warmer wood tones and natural fibers to prevent the space from feeling cold or sterile. Test paint samples on your wall and observe them in natural and artificial light before committing.


    7. Hand-Paint a Mural or Accent Mural Section

    A mural transforms a wall into art. You can hire an artist, commission one remotely, or paint it yourself if you have confidence with a brush.

    How to do it: Sketch your design lightly in pencil first. Use acrylic paint applied with brushes, sponges, or spray techniques. Or hire a local muralist ($500–$2,000+ depending on size and complexity). DIY time: 4–8 hours; Professional: 1–2 days. A mural becomes a focal point and tells your personal story.

    Pro tip: If you’re not confident painting, use a projector to trace your design onto the wall first—it removes the guesswork. Start with a smaller section (3×3 feet) to build skills before tackling an entire wall.


    8. Create a Two-Tone Wall Split with Horizontal Line

    A horizontal paint line divides walls and adds visual interest without complexity. This works in rooms with high or standard ceilings and creates a built-in sense of proportion.

    How to do it: Measure the midpoint or desired line height (typically 48–54 inches). Use painter’s tape and a level to mark a crisp line. Paint the bottom section one color, top another. Cost: $30–$60 for paint. Time: 3–4 hours. The result feels intentional and modern while making rooms feel wider or taller depending on color placement.

    Pro tip: Pair complementary colors (soft white on top with sage or forest tones below) for a grounded, balanced look. This technique works beautifully in entryways, bedrooms, and dining rooms.


    9. Use Washable Paint in High-Traffic Kids’ Rooms

    Washable paint stands up to handprints, crayon marks, and spills—a lifesaver for rooms with young children. It’s not just for nurseries; it works in playrooms and kids’ bathrooms too.

    How to do it: Brands like Benjamin Moore’s Advance or Sherwin-Williams ProClassic offer washable finishes. They cost slightly more but clean easily with soap and water. Cost: $45–$75 for premium washable paint. Time: 3–4 hours to paint. You’ll spend the next five years actually appreciating this choice every time your kid’s marker finds the wall.

    Pro tip: Use this in rooms where durability matters most, then pair with wipeable wallpaper or paint in other areas if budget allows. This is a smart investment for active families and renters with kids.


    10. Paint Walls in Forest Green for Moody Sophistication

    Forest green feels current and creates a nature-inspired backdrop without being trendy or dated. It pairs with nearly any design style—modern, bohemian, eclectic, or classic.

    How to do it: Benjamin Moore’s HC-133 Green Gables or Sherwin-Williams Tricorn Black mixed into green offer deep, sophisticated options. Prime well and apply two coats. Cost: $40–$65 for paint and supplies. Time: 3–4 hours. The room immediately feels more curated and connected to natural elements.

    Pro tip: Balance deep green with light furniture and plenty of white space. This color works as an accent wall or full-room background depending on room size and natural light. Pair with warm wood and brass accents for maximum impact.


    11. Stencil a Subtle Pattern at Chair-Rail Height

    A stenciled border at chair-rail height (about 36–48 inches up) adds pattern without overwhelming. This technique works in dining rooms, hallways, and bedrooms.

    How to do it: Use a thin repeating stencil in a complementary color to your wall. Measure and mark with a pencil and level before beginning. Cost: $20–$40 for stencils and paint. Time: 2–3 hours depending on room perimeter. The effect feels like a custom design and adds visual interest at eye level.

    Pro tip: Choose stencils with 2–3 inch repeats for sophisticated results. Paint in 3–4 foot sections, checking alignment frequently. This works especially well in spaces with chair-rail molding or where you want to add architectural detail.


    12. Apply Sponge-Painting Texture for Organic Depth

    Sponge painting creates organic texture that mimics aged plaster or natural stone. It’s forgiving (imperfection is the point) and costs nearly nothing.

    How to do it: Dampen a natural sea sponge, dip into paint, and dab onto walls in random patterns. Layer colors for depth. Use one color over another for richer effects. Cost: $20–$35 for sponges and paint. Time: 2–3 hours. The result feels handcrafted and hides imperfect wall surfaces beautifully.

    Pro tip: Practice on cardboard first to understand pressure and pattern. Work in small sections and step back frequently to assess balance. This technique works beautifully in entryways, powder rooms, and accent walls.


    13. Paint Walls in Charcoal Gray for Modern Edge

    Charcoal gray feels current and works as both an accent or full-room color. It’s less dramatic than black but more sophisticated than lighter grays.

    How to do it: Choose Sherwin-Williams SW 7066 Graphite Gray or Benjamin Moore HC-172 Kendall Charcoal. Prime first, apply two coats. Cost: $35–$60 for paint and supplies. Time: 3–4 hours. Gray creates a calm backdrop for artwork and lets furniture stand out, especially in office spaces or creative rooms.

    Pro tip: Balance charcoal with plenty of natural light and light-colored furniture. In smaller rooms, use it as an accent wall only. Pair with warm wood tones and white trim to prevent the space from feeling cold.


    14. Create Rag-Rolling Texture for Dimensional Finish

    Rag rolling uses bunched fabric to create a subtle, dimensional pattern. It’s less formal than sponging but equally forgiving for beginners.

    How to do it: Apply a base coat, let dry. Bunch an old cotton rag or plastic bag, dip into a second paint color thinned with glaze, and roll across the wall in random patterns. Cost: $25–$45 for paint and supplies (use materials you have at home). Time: 2–3 hours. The texture hides imperfections and adds movement to flat walls.

    Pro tip: Work in manageable sections (4×4 feet) and maintain consistent pressure for even texture. Vary your pattern direction to avoid obvious lines. This technique works beautifully in living rooms, dining rooms, and bedrooms.


    15. Paint a Color-Block Wall in Complementary Hues

    Color-blocking divides walls into distinct sections of complementary colors. It’s graphic, modern, and works beautifully in kids’ rooms or creative spaces.

    How to do it: Choose 2–4 complementary colors (use a color wheel or Pinterest). Sketch sections lightly in pencil and use painter’s tape to create clean lines. Paint each section fully. Cost: $40–$70 for paint and supplies. Time: 4–5 hours including tape application and drying. The result feels intentional and can be adapted as tastes evolve.

    Pro tip: Use soft, muted versions of multiple colors rather than bright primaries for a sophisticated look. Horizontal blocks feel modern; vertical sections feel artistic. This technique works in bedrooms, playrooms, and home offices.


    16. Install Removable Peel-and-Stick Wallpaper Murals

    Wallpaper murals create impact without paint commitment—perfect for renters or those hesitant about permanent changes. Quality has improved dramatically in recent years.

    How to do it: Measure your wall, search for murals on Amazon, Etsy, or Wayfair (brands like Peel & Stick Wallpaper Co., Tempaper). Clean wall thoroughly, apply the adhesive-backed paper carefully, working out air bubbles as you go. Cost: $30–$150 depending on size and design. Time: 1–2 hours for application. Remove cleanly without damaging walls when you move.

    Pro tip: Start with a smaller wall or section to build confidence. Use a squeegee or credit card to smooth bubbles. Peel-and-stick murals now come in botanical, geometric, abstract, and photorealistic styles.


    17. Paint a Geometric Accent Wall with Tape and Stripes

    Geometric stripes created with painter’s tape offer clean lines and modern impact. Vary stripe width for visual interest.

    How to do it: Paint a base coat, let dry completely. Use painter’s tape to create stripe patterns (measure and mark with pencil first). Paint the second color, carefully remove tape while paint is slightly tacky for clean lines. Cost: $30–$50 for paint and supplies. Time: 4–5 hours including tape application and drying. Geometric patterns feel contemporary and personalized.

    Pro tip: Make stripes horizontal for a calming effect, vertical for height, or diagonal for movement. Keep tape lines thin (1–2 inches) for a refined look. This works beautifully in bedrooms, hallways, and home offices.


    18. Use Eco-Friendly, Low-VOC Paint for Healthier Spaces

    Low-VOC (volatile organic compound) paints are better for air quality and health. They smell less and off-gas less over time—important in bedrooms and nurseries.

    How to do it: Choose certified low-VOC options from Sherwin-Williams (Harmony line), Benjamin Moore (Natura), or Behr (Premium Plus Ultra). Apply per instructions (usually takes slightly longer to dry). Cost: $50–$85 per gallon (slightly more than standard paint). Time: 3–4 hours plus extended drying. Enjoy peace of mind about indoor air quality.

    Pro tip: Eco-paints come in all colors and finishes. They’re especially worth the investment in children’s rooms, bedrooms, and spaces where people spend lots of time. Store according to instructions to ensure longevity.


    19. Paint Interior Trim and Doors in Contrasting Color

    Painting trim or doors a contrasting color to walls adds definition and architectural interest without major effort.

    How to do it: Choose white, black, charcoal, navy, or a complementary bold color. Use semi-gloss or satin finish for durability and easy cleaning. Tape wall edges carefully. Cost: $30–$60 depending on amount of trim and paint quality. Time: 3–4 hours to tape, prime, and paint doors/trim. The contrast creates visual interest and frames spaces beautifully.

    Pro tip: Use premium semi-gloss or satin paint on trim for durability and easier cleaning than matte. This technique works beautifully with minimal effort and maximum impact, especially in entryways, bathrooms, and bedrooms.


    20. Create a Matte Finish with Low-Sheen Paint for Elegance

    Matte finishes feel velvety and sophisticated—they hide imperfections and feel expensive compared to flat finishes.

    How to do it: Choose matte or eggshell finishes (not flat, which doesn’t clean well). Brands like Sherwin-Williams Duration or Benjamin Moore Advance offer excellent matte options. Apply primer and two coats. Cost: $45–$75 for quality matte paint. Time: 3–4 hours. The finish feels refined and works beautifully in living rooms, bedrooms, and dining rooms.

    Pro tip: Matte finishes are more challenging to clean than glossy ones, so avoid in high-traffic or moisture-heavy areas. They work best in living spaces where walls won’t encounter frequent touch-ups. Pair with warm lighting to enhance the velvety quality.


    21. Paint Walls Soft White or Cream for Spacious Feel

    Soft white and cream make small spaces feel larger and lighter while remaining warm and inviting. Not all whites are created equal—choose carefully.

    How to do it: Sample paint chips in natural and artificial light. Benjamin Moore’s Cloud White or Sherwin-Williams Alabaster offer warmth without harshness. Apply primer and two coats. Cost: $40–$65 for quality paint. Time: 3–4 hours. Your space feels open, clean, and calm—the ultimate blank canvas for furniture and artwork.

    Pro tip: Choose whites with subtle warm undertones (cream, ivory) rather than stark bright white, which can feel sterile. In rooms without natural light, slightly warmer creams prevent a cold, institutional feel.


    22. Apply Gloss Paint to Walls for Reflective Luxury

    High-gloss or semi-gloss paint reflects light and creates a luxury, sculptural feel. Use strategically in small spaces for maximum impact.

    How to do it: Choose high-gloss or semi-gloss finishes in smaller spaces (powder rooms, closets, accent walls). Prep surfaces meticulously since gloss shows every imperfection. Cost: $50–$80 for quality gloss paint. Time: 4–5 hours with careful application and drying between coats. The reflective finish makes rooms feel more glamorous and spacious.

    Pro tip: Gloss finishes are easier to clean but require perfect prep work. They work beautifully in small, well-lit spaces. Combine with soft lighting for elegance rather than shine. Not ideal for large rooms or casual spaces.


    23. Paint Ceilings in Soft Color to Define Space

    Painting ceilings a soft color (pale blue, warm gray, light green) adds dimension and surprises guests. It’s overlooked but impactful.

    How to do it: Choose a soft tint of your wall color or a complementary pale shade. Use ceiling paint (which has less gloss than wall paint) and a roller with extension pole. Cost: $30–$50 for paint and basic supplies. Time: 2–3 hours. The ceiling becomes part of your design story instead of an afterthought.

    Pro tip: Pale blue skies feel airy and calm; soft gray feels modern; warm creams feel cozy. Avoid dark ceiling colors unless you have very high ceilings—they make rooms feel smaller. This technique works beautifully in bedrooms, home offices, and creative spaces.


    24. Create Mixed-Media Wall Art with Paint and 3D Elements

    Combine paint with 3D elements—wood panels, metal accents, fabric, or plaster—for sculptural walls that feel gallery-like.

    How to do it: Paint a base coat, then mount wooden blocks, metal sheets, or fabric panels using appropriate adhesives or hardware. Arrange in a cohesive pattern (geometric, organic, random). Cost: $75–$200+ depending on materials and complexity. Time: 1 full weekend plus drying time. The result becomes interactive wall art that guests notice and remember.

    Pro tip: Source reclaimed wood, metal, or fabric from thrift stores, scrap yards, or online for budget-friendly options. This technique works beautifully in entryways, home offices, and creative spaces. Renters can use removable adhesives for less-permanent installations.


    25. Paint Walls in Warm Terracotta for Earthy Elegance

    Terracotta (warm, earthy orange-red tones) feels natural and grounded. It’s gaining popularity in natural, bohemian, and eclectic spaces.

    How to do it: Choose warm terracotta tones like Sherwin-Williams Cavern Clay or Benjamin Moore HC-70 Reddish Brown. Prime well (warm colors sometimes need primer), apply two coats. Cost: $45–$70 for paint and supplies. Time: 3–4 hours. The warmth wraps the room in a cozy, sophisticated embrace.

    Pro tip: Terracotta pairs beautifully with natural materials (wood, woven textiles, clay) and warm metals (copper, bronze). It works especially well in dining rooms, living spaces, and bedrooms. Balance with plenty of neutral accessories to prevent a heavy feel.


    26. Paint an Accent Wall in Soft Blush for Romance and Warmth

    Soft blush (muted pink-mauve tones) feels romantic and modern simultaneously. It works across design styles and photographs beautifully.

    How to do it: Choose muted blush tones like Benjamin Moore HC-60 First Blush or Sherwin-Williams SW 6302 Rosy Outlook. Test samples in natural and artificial light first. Cost: $40–$65 for paint and supplies. Time: 3–4 hours. The result feels both soothing and intentional without trending too heavily toward nursery or princess aesthetic.

    Pro tip: Balance blush with plenty of white or cream trim, natural wood, and greenery. This color works beautifully in bedrooms, bathrooms, and smaller spaces. Pair with black-and-white photography or botanical art for sophisticated contrast.


    SOFT CTA:

    Save this post and pick one idea to start this weekend—even the simplest paint refresh makes a noticeable difference in how your space feels. Whether you choose deep navy for drama, soft pastels for calm, or geometric patterns for personality, your walls are ready for their artistic moment. Share this with a friend who needs a room update.

  • 27 Cozy Balcony Ideas That Make Small Spaces Feel Relaxing

    27 Cozy Balcony Ideas That Make Small Spaces Feel Relaxing

    Your balcony doesn’t need to be huge to feel like your favorite escape. Whether you’re working with a tiny fire escape or a modest 4×6 space, these 27 ideas prove that cozy always beats spacious. You’ll discover budget-friendly hacks that cost under $50, smart layouts that maximize every inch, and styling tricks that turn cramped corners into relaxation zones. Some ideas take 15 minutes; others are weekend projects. All of them are renter-approved and beginner-friendly. By the end, you’ll have a personal outdoor retreat that actually gets used—the kind of space where you want to spend your mornings with coffee and your evenings with friends.

    1. Hang a Vertical Garden on Your Railing

    Vertical gardening solves the “I want plants but have no floor space” problem instantly. Instead of taking up precious square footage, your garden climbs up the railing or a wall-mounted frame, giving you triple the greenery in half the space.

    Pick a foldable metal plant stand ($25–$45 on Amazon) or a railing planter system ($30–$60 on Wayfair). Fill with low-maintenance plants like trailing petunias, ivy, or creeping jenny. Water twice weekly in summer, and you’re done. Renters: use tension rods between railings to hang small baskets instead of drilling.

    Your balcony becomes an actual garden without eating into your seating area. The trailing plants create a green wall that’s Instagram-worthy and genuinely relaxing to sit beside.

    2. Layer Your Lighting for Evening Magic

    Single overhead light? Boring. Layered lighting transforms your balcony from daytime-only to a place you’ll actually use at sunset. Multiple light sources at different heights create ambiance and make the space feel intentional.

    Install warm-white string lights ($15–$40, Amazon) in a zigzag overhead. Add a solar stake light ($10–$25 per piece, Target) near plants for accent lighting. Finish with a clip-on wall sconce ($20–$35, IKEA) for task lighting. All solar options are renter-friendly—no wiring required. Avoid cool-white LEDs; warm tones feel more inviting.

    Evening entertaining becomes effortless. People naturally linger longer in well-lit, cozy spaces. You’ll find yourself out here after dark instead of retreating inside.

    3. Swap Heavy Furniture for Foldable Pieces

    Small spaces demand furniture that adapts to your needs—not the other way around. Foldable furniture shrinks your footprint when you need to move around, then unfolds when you want to sit.

    Choose a metal folding chair ($25–$50, IKEA or Home Depot) and a narrow folding table ($30–$70, Target or Amazon). Store behind the door or flat against the wall when not in use. Pair with cushions for comfort without bulk. If you’re renting, these are perfect—no permanent fixtures required.

    You get a functional seating area without constantly tripping over furniture. The flexibility means you can host two friends or practice yoga alone—same space, different purpose.

    4. Create a Railing Bar for Entertaining

    A railing bar table sounds fancy but it’s just a small folding surface that clips to your railing—perfect for drinks, snacks, or morning coffee without stealing floor space.

    Buy a railing-mounted drop-leaf table ($40–$80, Wayfair or Amazon) or a clamp-on bistro-style shelf ($35–$60, Home Depot). Installation takes 10 minutes with basic tools. It works on wooden or metal railings. Even renters can use ones with suction cups instead of bolts.

    Entertaining becomes possible on a 3×4 balcony. Guests have a surface for drinks while standing, and you maintain walking room. It’s the difference between “come see my place” and “let’s actually hang out.”

    5. Add a Hanging Chair for One-Person Bliss

    If you want to actually use your balcony, a hanging chair transforms it from decoration to your favorite sitting spot. It’s cozy, space-efficient, and surprisingly affordable.

    Install a hanging wicker chair ($80–$180, Wayfair) or a rope swing chair ($50–$120, Amazon) using a wall-mounted bracket and carabiners. You’ll need a stud finder and 20 minutes to install. Weight limit is usually 250+ pounds—check specs. Not renting permanently? Many models can be stored flat.

    You now have a dedicated reading nook or meditation spot. It’s the kind of detail that makes people jealous of your balcony. Your mornings (or evenings) become noticeably calmer.

    6. Use Terracotta Pots as Your Design Anchor

    Terracotta isn’t just practical—it’s a design statement. These classic pots tie your space together while actually working hard for plant growth and drainage.

    Grab assorted terracotta pots ($5–$20 each, Home Depot or local garden centers) in three to five sizes. Arrange by height in a corner or along the railing edge. Fill with geraniums ($3–$8 each, local nursery), which tolerate sun and neglect beautifully. Water when soil is dry to the touch.

    Your balcony immediately looks curated, not random. Visitors notice the intentional grouping. Terracotta also photographs exceptionally well—perfect if you want Instagram-worthy spaces without trying too hard.

    7. Paint the Wall Behind Your Balcony Light

    A boring concrete or dingy wall shrinks your perception of the whole space. Paint changes everything—and on a rental, removable wallpaper works too.

    If you own, paint the back wall with exterior-grade paint in a light color: soft sage, pale blue, or warm white ($20–$35 per gallon, Home Depot). Two coats take a weekend. Renters: try peel-and-stick wallpaper ($15–$30, Amazon) or fabric wall hangings ($20–$50, Etsy) to add color without commitment. Light colors make spaces feel bigger; dark colors make them cozy.

    The entire balcony suddenly feels more polished. You’ve essentially added a backdrop that makes every photo better and makes the space feel intentional instead of neglected.

    8. Bring in Textured Outdoor Rugs

    An outdoor rug defines your space, adds warmth underfoot, and pulls your whole design together—even if you’re renting.

    Choose a weather-resistant outdoor rug in a pattern you love ($30–$80, Target, Wayfair, or Amazon). Size it so the front legs of your seating sit on it—this anchors the space visually. Polypropylene rugs are durable, affordable, and machine-washable. Avoid rugs that feel plasticky; go for ones with texture instead.

    The seating area suddenly feels like an actual room instead of random furniture on a balcony. Comfort underfoot matters more than you’d expect. Plus, the right pattern adds personality without taking up any space.

    9. Install Railing Planters for Instant Green

    Railing planters are the secret weapon for small balconies—they add greenery without using a single floor square inch.

    Buy railing planter boxes ($12–$30 each, Amazon or Home Depot) designed to clamp or hook over your specific railing type. Install them in a staggered pattern for visual interest. Fill with succulents ($2–$5 each), trailing ivy, or low-maintenance petunias. Water weekly in summer.

    Your balcony edge becomes a living wall of color and texture. Guests immediately notice the vertical gardening. It’s also the easiest way to make a tiny space feel lush without crowding the floor.

    10. Create Zones with Lightweight Furniture Groupings

    Cramped spaces actually feel bigger when you define zones—a corner for reading, a spot for plants, an area for entertaining. It’s all psychology, but it works.

    Arrange your furniture in intentional clusters rather than spreading it out. Use a small side table ($25–$50, IKEA) to mark one zone and a low floor cushion ($15–$35, Target) for another. Keep walkways open. Even a 4×6 space can feel like two distinct mini-rooms.

    Your balcony transforms from “cluttered corner” to “thoughtfully arranged retreat.” Visitors notice the intentional layout. You also actually use different spots instead of everything feeling cramped into one area.

    11. Add Privacy with a Budget Bamboo Screen

    Nosy neighbors or a street view? A privacy screen blocks the eyesores while adding visual interest to your space.

    Get a bamboo privacy screen ($40–$80, Amazon or Home Depot) or a foldable outdoor screen ($30–$70, Wayfair). Lean it against a corner or secure it with basic L-brackets. Renters can use free-standing screens that need no drilling. Bonus: drape climbing ivy or clematis vines alongside it for natural greenery.

    You instantly feel more secluded without soundproofing equipment. The screen also becomes a design feature—it’s not just functional, it looks intentional. Your balcony finally feels like a private retreat instead of a shared alley.

    12. Choose Low-Maintenance Plants by Light Exposure

    Dead plants feel like failure. The secret? Match plants to your actual light conditions instead of guessing.

    Full sun (6+ hours): geraniums, petunias, lavender, sedums ($3–$8 each). Partial sun (3–5 hours): impatiens, begonias, ivy ($3–$8 each). Shade (less than 3 hours): hostas, ferns, creeping jenny ($3–$8 each). Check your balcony’s light patterns for a full day before buying. Most garden centers have staff who can advise based on photos.

    You finally have plants that actually thrive instead of slowly withering. Your balcony looks cared-for and intentional. Watering becomes a pleasant routine instead of a guilt trigger.

    13. Repurpose Old Wooden Pallets as Seating

    Wooden pallets are free or $5–$15 at garden centers, and they’re incredibly versatile for small-space seating.

    Grab 2–3 clean pallets and stack them with wooden pallets perpendicular as a base. Top with outdoor cushions ($20–$50 total). Sand and seal the wood for longevity. Takes about 2–3 hours. Check Craigslist or Facebook Marketplace for free pallets. Make sure they’re marked “HT” (heat-treated), not “MB” (methyl bromide).

    You have low seating that costs under $50 total. It’s more conversation-starting than store-bought furniture. Renters: just stack the pallets without sealing, then unstake when you move.

    14. Use String Lights in a Geometric Pattern

    Random string lights are cute, but a deliberate pattern elevates your whole setup and creates visual interest overhead.

    Buy 20–30 feet of warm-white string lights ($20–$40, Amazon). Plan a geometric pattern—diamonds, a grid, or triangles—before installing. Use adhesive hooks (renters rejoice!) or sturdy nails. Step back and adjust before powering on. Battery-operated versions are simpler than wiring ($25–$45).

    Your ceiling becomes a design feature instead of blank space. The pattern creates rhythm and makes the space feel curated. Overhead lighting also makes evening use feel like an occasion instead of “just hanging outside.”

    15. Mix Budget and Investment Pieces for Balance

    You don’t need to spend big money everywhere. Smart mixing means you can afford the pieces that matter while staying budget-conscious overall.

    Invest in durable items you’ll use daily: a good cushion ($50–$100), quality outdoor furniture ($100–$300), or a solid planter set ($60–$120). Go cheap on accessories: throw pillows ($10–$25), string lights ($15–$30), decor items ($5–$20). The ratio should be roughly 60% budget items, 40% quality pieces.

    Your space looks intentional and well-designed, not like you overspent or undershopped. The mix actually feels more sophisticated than all-cheap or all-expensive. You’re strategic, not wasteful.

    16. Paint Pots in Summer Colors for Visual Pop

    Plain terracotta is beautiful, but painted pots in vibrant colors instantly energize your space and cost almost nothing.

    Grab terra cotta pots ($5–$15 per pot) and exterior acrylic paint ($3–$8 per color, Home Depot). Paint in solid colors or simple patterns—stripes, polka dots, geometric shapes. Two coats, dried between. Seal with exterior clear coat ($8–$12) for longevity. Takes 1–2 hours active work plus drying time.

    Your balcony becomes noticeably more vibrant and personal. Painted pots photograph beautifully. It’s a craft project that serves a purpose, not just decoration. Visitors remember your space specifically because of the colorful pots.

    17. Create a Coffee Corner with a Small Table

    A dedicated coffee spot makes your morning routine feel like a mini retreat instead of something you rush through.

    Grab a narrow side table ($25–$50, IKEA or Target) just large enough for a mug and a book. Position it next to your seating with a comfortable chair or cushion. Add a small plant ($5–$15) to one corner. Keep it minimal—this space is for sitting quietly, not storage.

    Your mornings change. You actually use your balcony instead of just looking at it. There’s something powerful about claiming a specific corner as your morning ritual spot. Visitors see that you’ve thoughtfully designed your space.

    18. Use Weatherproof Fabrics That Actually Last

    Cheap outdoor fabric fades, cracks, and mildews within one season. Investing in true outdoor-grade textiles means your cushions survive multiple years.

    Choose solution-dyed polypropylene fabrics or Sunbrella-brand textiles ($40–$80 for cushions, $15–$30 for pillows, Wayfair or Amazon). These resist fading, mold, and moisture. Machine wash when needed. Avoid “indoor fabric rated for outdoor use”—it won’t survive. Check product reviews for mildew resistance if you’re in a humid climate.

    Your cushions look fresh year after year. The cost per use becomes reasonable when fabrics last 3–5 years instead of one season. Your balcony maintains its appeal instead of looking worn and sad by August.

    19. Hang a Trellis for Climbing Vines

    A trellis with climbing vines creates height, privacy, and a garden-like atmosphere without taking up much floor space.

    Install a expandable wooden trellis ($15–$40, Home Depot) with brackets against your wall or railing. Plant a climbing vine—ivy ($8–$12), clematis ($12–$20), or morning glories ($5–$10)—at the base. Water consistently; most vines establish within a season. Renters can use leaning trellises instead of wall-mounted ones.

    Within weeks, your balcony gains height and greenery. It creates natural privacy and a romantic, garden-like feel. Vines also provide afternoon shade on sunny balconies. Your space becomes noticeably lush.

    20. Accessorize with Ikat Pillows and Textured Ceramics

    High-impact accessories don’t require structural changes—just textiles and small decor pieces that cost $10–$50 each.

    Layer ikat-patterned pillows ($20–$40, Target or Wayfair), add a textured ceramic planter ($15–$35, local shop or Etsy), drape a chunky knit throw ($25–$50, IKEA). Mix patterns and colors—jewel tones with warm earth tones work beautifully. Avoid matching; curated mismatches look intentional.

    Your balcony immediately looks like you hired a designer. Small accessories create the biggest visual impact. The layering of textures and patterns makes the space feel rich and inviting instead of sparse. Accessories are also easy to swap seasonally.

    21. Install Decking Tiles for an Instant Floor Upgrade

    Concrete balcony floors are depressing. Interlocking deck tiles transform them instantly—and renters can take them when you move.

    Buy interlocking deck tiles ($15–$30 per tile, Home Depot or Amazon). You’ll need roughly 15–25 tiles depending on your square footage. Just lay them down—no tools, no installation required. They click together like puzzle pieces. Choose wood-look finishes for warmth or modern composite for contemporary feel.

    Your balcony instantly looks finished and polished instead of like bare concrete. The upgrade takes 30 minutes. Renters remove them when moving and take them to the next place. The difference in “feel” is dramatic—your feet appreciate the change immediately.

    22. Create a Seasonal Plant Rotation System

    Instead of the same plants year-round, rotate seasonal flowers and greenery to keep your balcony fresh and interesting.

    Spring: pansies, snapdragons ($5–$10 each). Summer: petunias, marigolds, geraniums ($3–$8 each). Fall: mums, ornamental kale ($5–$10 each). Winter: evergreens, decorative cabbage ($8–$15 each). Compost old plants and replant seasonally. Costs $15–$40 per swap but your space never feels stale.

    Your balcony evolves with the seasons instead of looking the same all year. It gives you a reason to refresh and reimagine your space quarterly. Visitors notice your balcony always looks intentional and seasonal.

    23. Add a Small Side Table for Function and Style

    Even tiny balconies need a surface for a drink, a phone, or a book. A small side table solves this without blocking walkways.

    Choose a slim metal side table ($25–$50, IKEA) or a nesting table set ($35–$70, Target) so you can adjust based on need. Position it right next to seating. If space is extremely tight, try a folding wall-mounted table ($30–$60, Amazon) that drops down when needed and folds flat when not.

    You have a spot for your morning coffee. Guests have somewhere to set a drink. It’s the tiny infrastructure that makes a space actually functional. Without it, balconies feel like display spaces you can’t actually use.

    24. Use Mirrors to Visually Expand Your Space

    A mirror creates the optical illusion of depth and bounces light around, making cramped spaces feel bigger.

    Install an outdoor-rated mirror ($30–$80, Wayfair or Amazon) against the back wall or leaned in a corner. Weatherproof mirrors resist rust and moisture. Position it to reflect greenery or light, not the neighbor’s laundry. Renters can lean lightweight mirrors instead of mounting.

    Your balcony visually expands. The reflected light makes it brighter and more inviting. Guests often comment on how “bigger” the space feels. It’s architectural magic that costs less than moving to a larger place.

    25. Build a DIY Vertical Herb Garden

    Fresh herbs on your balcony mean you can grab basil or thyme while cooking—no store runs. It’s practical and looks intentional.

    Use a hanging shoe organizer with pockets ($10–$15, Target) or a vertical wall planter ($20–$35, Amazon). Fill each pocket with potting soil ($5 per bag) and plant herb seedlings: basil, rosemary, thyme, oregano ($2–$4 each, local nursery). Water when soil is dry. Most herbs thrive with 6+ hours of sun.

    You have fresh herbs steps away. It’s a tiny garden that’s actually useful. Visitors find it charming and practical. Harvesting herbs becomes a pleasant routine instead of something you buy pre-packaged.

    26. Incorporate Wind Chimes or Water Features for Ambiance

    Sound adds another dimension to your balcony—gentle background music that makes you want to linger.

    Hang a wind chime ($15–$40, Amazon) from the ceiling or railing for calming background sound. Add a tabletop water fountain ($25–$60, Target) for a moving water element. Both are renter-friendly (no permanent installation). Choose sounds that appeal to you—some people prefer chimes, others want water sounds.

    Your balcony becomes multisensory. You’re engaging sight, sound, and touch instead of just looking at a pretty corner. The ambient sound naturally relaxes you. It’s why sitting outside suddenly feels less like “sitting on my balcony” and more like “I’m in a little retreat.”

    27. Designate One Corner as Your Relaxation Zone

    Finally, the simplest idea: claim one corner as your dedicated relaxation zone where you retreat when you need to decompress.

    Arrange your best chair or cushion in a corner. Surround it with your favorite plants ($5–$20 total). Add soft lighting ($15–$40). Keep a throw blanket ($25–$50) nearby. Protect this corner from becoming storage—resist the urge to pile things there. This is sacred space.

    You finally have a legitimate retreat within your home. Instead of stress, that corner triggers calm. It becomes the place you naturally migrate to when you need to think, read, or simply breathe. Your balcony transforms from unused space to essential space.

    Save this post for your next balcony refresh and try one idea this weekend. Small changes compound fast—pick your favorite corner and start there. Your future self will thank you for carving out this little escape.

  • 23 Minimal Joinery Bed Ideas for Clean, Architectural Style

    23 Minimal Joinery Bed Ideas for Clean, Architectural Style


    If you’re drawn to Scandinavian calm and architectural design, minimal joinery beds might be exactly what your bedroom needs. These pieces celebrate honest construction—visible joints, natural wood grain, and structural beauty instead of fussy details. The result? A bedroom that feels intentionally curated, timeless, and genuinely relaxing. Whether you’re a maximalist looking to scale back or someone who loves clean aesthetics, these 23 ideas show you how to choose, style, and live with a minimal joinery bed that becomes the focal point your space deserves. Let’s explore options for every budget and space.

    1. Choose Exposed Mortise-and-Tenon Joinery Frame

    A mortise-and-tenon joint is the gold standard of visible woodworking—where one piece slots perfectly into another. You see the craftsmanship, not hidden hardware. This traditional technique creates a bed that looks architectural and honest, reminding you daily that quality construction matters.

    Look for beds labeled “mortise-and-tenon joinery” from makers like Muuto, Blu Dot, or West Elm’s mid-century line. Expect to invest $800–$2,500 depending on wood type and size. If budget’s tight, scan Facebook Marketplace or estate sales for solid wood vintage frames you can refinish yourself. The beauty of this style is it never feels trendy—it’s timeless. Assembly takes about 2–3 hours with a partner and basic tools.

    You’ll notice how the visible joints make the bed feel substantial and real. No mystery, no wobble, just honest joinery you can trust.

    2. Opt for a Low-Profile Platform Bed

    Platform beds sit close to the ground, eliminating the frame-and-box-spring combo. This minimal approach saves visual clutter and makes small rooms feel bigger. The joinery work is highlighted because there’s nowhere to hide—every detail matters.

    Hunt for platform beds at Article, CB2, or IKEA’s better ranges ($300–$1,200). Japanese-inspired designs often nail this aesthetic with simple slat construction visible underneath. If you’re handy, plans for DIY platform beds with visible joinery are free on Etsy and Instructables—budget $200–$400 in materials and a weekend. The lower profile creates an immediate sense of calm and makes bedmaking easier since you’re not reaching over a high frame.

    Your bedroom feels more spacious and serene. Plus, platform beds are renter-friendly if your frame breaks down into modular pieces.

    3. Combine Walnut and White Oak for Contrast

    Using two complementary wood tones in one bed frame creates subtle visual interest without clashing. Dark walnut legs with lighter oak rails, for example, showcase the joinery differences and draw the eye to the construction details.

    Custom makers on Etsy create this combo starting around $1,200–$2,500, or order from studios like Artifact Home or Norm Architects-inspired retailers ($1,800–$3,200). If you’re commissioning a custom piece, this is where you control every detail. Ready-made options with mixed wood tones pop up at Article and Design Within Reach ($1,500–$2,800). The mixed tones highlight the different wood properties and make the joinery feel like intentional design, not accident.

    This approach brings warmth and sophistication without requiring a decorator’s touch.

    4. Install a Floating Headboard Separately

    Floating headboards mounted to wall studs rather than attached to the bed frame create an illusion of weightlessness. This works especially well with minimal joinery since the joints become a focal point against the wall.

    Purchase a floating headboard panel from Etsy ($200–$600 depending on size and wood), IKEA’s Malm headboards ($80–$150), or commission a custom piece from a local woodworker. Installation takes a handyperson 1–2 hours and costs nothing if you DIY. The visual effect makes your bed feel sculptural and intentional. Bonus: floating headboards are renter-friendly if you use toggle bolts and patch afterward.

    Your room gains architectural interest without the bed feeling heavy or bulky.

    5. Select a Slatted Headboard with Visible Joins

    Slatted headboards—horizontal or vertical wood strips joined together—celebrate construction. Every visible join tells a story of the craftsmanship. This style pairs beautifully with minimal joinery beds since it extends the architectural language.

    Find slatted options at West Elm ($400–$900), Muuto ($600–$1,200), or DIY with 1×4 pine boards, wood glue, and dowels (materials: $100–$200, time: one weekend). The slats can be mounted directly to wall studs or attached to your bed frame. Pro tip: Sand and stain the slats yourself to save $300–$500 on custom finishing. The DIY route teaches you exactly how the joinery works and lets you customize spacing and width.

    You end up with a genuinely unique headboard that becomes a conversation piece.

    6. Go Minimalist with a Bed Rail Only (No Headboard)

    The ultimate minimal approach: a bed that’s just a frame with visible joinery and no headboard at all. This works if your bedroom has strong wall color or art that becomes the visual anchor instead.

    Japanese platform bed frames or Scandinavian designs from Muuto and String often offer headboard-free options ($600–$1,500). IKEA’s Fjellse beds are budget-friendly alternatives ($150–$300). This approach requires your bedroom wall styling to pull weight—consider one piece of large art or a textured paint finish. Renter note: This is incredibly easy to move when you relocate. The frame alone tells the design story through joinery, not decoration.

    Your bed becomes pure function and form. Everything else in the room matters more visually.

    7. Add Tapered Legs for Visual Lightness

    Tapered legs (narrower at the bottom, wider at the top) create an optical illusion that the bed weighs less than it does. Paired with visible joinery at the frame, tapered legs become an elegant design detail that anchors the whole aesthetic.

    Most mid-century modern style beds feature tapered legs—look at West Elm’s Mid-Century collection ($800–$1,600), Article ($700–$1,400), or Blu Dot ($900–$1,800). If your current bed has bulky legs, a woodworker can reshape them (cost: $300–$600, time: 2–3 weeks). The angle of the taper matters: even subtle angles (3–5 degrees) change how the bed reads visually. No taper requirement means your space feels lighter and more refined.

    The room gains breathing room and sophistication from this single detail.

    8. Incorporate Visible Wood Pegs or Dowels

    Traditional joinery often uses wooden pegs or dowels through joints for both function and beauty. Leaving these pegs visible turns technical construction into intentional design. This detail says “handmade” and “built to last.”

    Most custom makers include visible pegs in their designs ($1,200–$2,800). Ready-made options at Etsy sellers specializing in Arts and Crafts or Mission-style beds ($900–$2,200) showcase this feature. If you’re commissioning work, specifically request visible pegs in contrasting wood (walnut pegs in oak, for example). The pegs are functional—they lock the joints—and aesthetic simultaneously. Pro tip: Measure peg diameter and spacing before ordering to ensure they photograph well and feel intentional, not random.

    Those pegs become focal points that celebrate the construction process.

    9. Use Natural Wood Finish (No Stain or Paint)

    Skipping stain or paint lets the wood’s true character shine. Minimal joinery looks best in natural finish where grain patterns and color variations become the visual interest. You see exactly what you’re getting—honest materials, honest design.

    Natural finish beds are increasingly common at sustainable brands like Bloom & Blossom ($1,200–$2,400), Pottery Barn’s better lines ($800–$1,600), or custom makers (since natural finish reduces production time, often $100–$300 less than stained versions). Maintenance is simple: dust regularly, use touch-up oil annually. A natural finish shows wear beautifully—scratches and patina become character. Renter note: Natural wood is your friend since it hides marks better than light stain.

    Your bedroom feels grounded and organic. The wood’s natural evolution becomes part of the bed’s story.

    10. Layer Minimal Joinery with Curved Headboard

    Mixing minimal joinery’s angular geometry with a curved headboard element creates sophisticated tension. The frame stays pure and structural while the headboard adds one organic, softer note.

    Designers like HAY and String excel at this combination ($1,400–$2,600). Another option: commission a curved headboard from a woodworker to pair with your existing minimal frame ($400–$1,000 for custom piece). The curves should be gradual, not dramatic—this isn’t about drama, it’s about nuance. Assembly is straightforward since the frame and headboard are separate. Time: 2–3 hours with help. The contrast between linear and curved elements feels intentional and modern while honoring craftsmanship.

    You get visual interest without compromising the minimal aesthetic you love.

    11. Choose a Bed with Angled Joinery Details

    Some contemporary minimal beds use slight angles in their joinery—not traditional right angles. Think subtle bracing or angled leg-to-frame connections. This keeps the minimal vibe while adding unexpected architectural character.

    Sculptural bed designers like Jonas Wagell for String or contemporary makers on Etsy ($1,300–$2,500) play with these angles. Look for beds described as having “angled frame construction” or “diagonal bracing.” These beds cost slightly more because the angles require precision joinery. The payoff: your bed becomes a mini-sculpture that engages from different viewing angles. Pro tip: Angle placement affects how the bed photographs on social media—subtle angles create interesting shadow play.

    People notice the thoughtful engineering even if they can’t quite name what makes it distinctive.

    12. Match Bed Joinery Style to Your Flooring Material

    If your flooring is wood, selecting a bed in a complementary (not identical) tone creates harmony. Minimal joinery emphasizes the wood itself, so coherence between bed and floor matters visually.

    If you have walnut floors, choose a walnut bed or light oak for contrast. Pine or light oak floors pair beautifully with white oak or ash beds. Test samples at home before committing. Most makers will send wood samples (usually free). The alignment between flooring and bed joinery creates a sense of intentional design and makes rooms feel larger. No need to match perfectly—thoughtful coordination is enough. Time to plan: 30 minutes studying samples. Cost of samples: $0–$25.

    The room reads as purposefully designed rather than randomly assembled.

    13. Add a Minimal Wood Bench at the Foot

    A bench at the bed’s foot extends the joinery language and adds functional storage for extra blankets or morning clothes. Keep the bench as minimal as the bed—same wood tone, visible joinery, clean lines.

    Find benches from the same makers as your bed—Article, West Elm, Muuto often sell coordinating pieces ($300–$700). DIY option: have a woodworker create a matching bench from leftover materials of your bed frame (cost: $200–$500, timeline: 2–3 weeks). The bench should be approximately 15–18 inches tall and the bed’s width minus a few inches. Pro tip: Choose a bench with visible joinery matching your bed’s style—if your bed has mortise-and-tenon joints, the bench should too.

    Functionality and aesthetics merge. Your bedroom gains storage and visual continuity.

    14. Incorporate a Wooden Slat Support System Visibly

    Most beds hide their support structure with a dust skirt or platform. Minimal joinery celebrates honesty, so leaving slats visible makes engineering a feature. This works best with platform beds or ones with low frames.

    Slat-visible designs appear at Blu Dot ($1,200–$1,800), Artifact Home ($1,400–$2,200), and custom makers (proportionally less expensive since they’re skipping the skirt: $800–$1,500). The slats should be finished as carefully as the frame—sanded smooth, stained or natural, no rough edges. Space them evenly (typically 2–4 inches apart depending on mattress). The slat system becomes part of the design vocabulary, not a hidden shame. Renter note: Visible slats let air circulate better, reducing moisture under the mattress.

    The bed reads as completely transparent in its construction—no mysteries, no hiding.

    15. Select a Bed Frame That’s Renter-Friendly and Modular

    Minimal joinery often means simpler construction, which makes modular beds more feasible. If you rent or anticipate moving, a bed that breaks into pieces is a game-changer. The joinery should allow for easy disassembly and reassembly without tools beyond an Allen wrench.

    IKEA’s higher-end frames ($400–$800) break down relatively easily. Blu Dot’s modular options ($1,200–$1,600) are engineered for moves. Check reviews specifically for “disassembly ease.” Better yet, watch assembly videos before buying to confirm. Time to disassemble and reassemble: typically 1–2 hours with a friend. The advantage: you can take this bed through multiple moves or apartments without guilt or damage concerns.

    Moving day becomes less stressful. Your bed adapts to your life, not the other way around.

    16. Paint the Bed Frame a Soft, Neutral Tone

    While natural wood is classic, painting a minimal joinery bed in soft white, warm gray, or barely-there cream keeps the joinery visible while creating a softer aesthetic. The joints read clearly against the paint.

    Start with an unfinished bed frame ($600–$1,400 for quality unfinished pieces) or refinish an existing bed yourself. Use sanded wood primer and two coats of water-based paint like Benjamin Moore’s Chantilly Lace or Farrow & Ball’s Off-White ($40–$80 total paint cost). Time: 8–10 hours spread over 2–3 days for drying. The joinery remains visible and gains a sculptural quality against the neutral backdrop. Pro tip: Slightly uneven paint application makes the piece feel less factory-perfect, more handmade.

    The painted frame feels both minimalist and approachable—less austere than natural wood.

    17. Create a Platform Bed with Internal Storage Joinery

    Internal storage drawers within the bed frame maximize function while keeping joinery honest. Drawers become part of the construction story rather than hidden afterthoughts.

    Custom makers excel at this ($1,500–$2,800). Etsy sellers specializing in Japanese-inspired storage beds ($1,200–$2,000) often include this feature. Ready-made options at West Elm’s storage platform beds ($1,100–$1,600) provide budget-friendly alternatives. The drawers should glide smoothly and be finished identically to the frame. Measure your under-bed storage needs first—decide if you want one large drawer or several small ones. Time to spec custom: 1–2 hours of planning. The payoff: bedroom clutter disappears and your frame’s joinery tells a functional story.

    Hidden storage stops being hidden—it becomes part of the design’s integrity.

    18. Combine Minimal Joinery Bed with Live-Edge Nightstands

    Minimal joinery beds pair gorgeously with live-edge wood nightstands—where the tree’s natural irregular edge is preserved. The contrast between your bed’s structured joinery and the nightstand’s organic edge creates sophisticated visual balance.

    Find live-edge nightstands from Etsy woodworkers ($200–$400 each), West Elm ($300–$600), or Article ($250–$500). Make sure the wood tone complements your bed frame. DIY option: source a live-edge slab from a local sawmill ($80–$150), mount it on simple wooden legs ($40–$80, time: 3–4 hours). The pairing says your bedroom aesthetic is thoughtful, not accidental. One live-edge piece balances multiple pairs perfectly.

    The juxtaposition between structured and organic becomes the room’s design story.

    19. Use Minimal Joinery Bed as Anchor, Everything Else Flexible

    Here’s a strategy: invest in a beautiful minimal joinery bed and then keep everything else simple. Let the bed be the statement while nightstands, decor, and bedding stay neutral and understated.

    Choose your bed investment ($1,000–$2,500), then budget $500–$1,000 for everything else. This approach works because the joinery bed doesn’t compete with other visual noise. Your eye goes straight to the craftsmanship. Bedding: cream linen, one throw. Nightstands: simple, minimal. Wall art: one piece or none. The restraint amplifies the bed’s impact. Time to plan: 1–2 hours styling. Renter note: This strategy is affordable since you’re not buying expensive matching sets.

    The bedroom becomes calming because it’s focused. Your bed leads the design conversation.

    20. Layer Minimal Joinery with Soft Textiles Strategically

    Minimal joinery reads cold without softness. Layer one or two quality textiles—a chunky knit throw, linen bedding, a sheepskin accent—to warm the aesthetic without compromising the clean lines.

    Invest in one quality linen duvet ($150–$300) and one throw blanket ($80–$150). Brands like Parachute, Brooklinen, and Etsy sellers create beautiful pieces with visible texture. Drape the throw intentionally—across one corner or folded at the foot—not everywhere. The idea is strategic warmth, not coverage. Styling time: 10 minutes. Pro tip: Natural fiber textiles (linen, cotton, wool) photograph beautifully and improve with age.

    Texture softens the bed’s architectural lines while maintaining integrity and intentionality.

    21. Install a Minimal Joinery Bed in a Small Space Strategically

    Minimal joinery beds work brilliantly in small spaces because they don’t visually bulk up the room. Clean lines and visible structure create an illusion of spaciousness rather than crowding.

    Choose platform or low-profile designs ($600–$1,200) for small rooms—they float rather than anchor. Position the bed where it opens up the rest of the space (usually against the longest wall). Measure your room before committing—this bed only works if there’s walking room. Time to position: 30 minutes of planning. Pro tip: Paint walls light neutral colors to amplify the spacious feeling. Renter note: This bed style works in dorms, small apartments, and tiny homes equally well.

    Small spaces gain breathing room. The bed disappears slightly, making the room feel larger.

    22. Commission a Custom Minimal Joinery Bed from a Local Maker

    Working with a local woodworker lets you specify every detail—wood species, joinery style, dimensions, finish. This is the ultimate way to own a bed that’s truly yours.

    Find woodworkers through local maker communities, Etsy, or Instagram. Budget $1,500–$3,500 depending on complexity and materials. Timeline: typically 6–12 weeks. Set clear expectations: provide photos of styles you love, discuss wood samples, and be specific about dimensions and joinery preferences. Pro tip: Start the conversation with a clear budget—a good maker will work within it. The emotional payoff of a custom bed is enormous. You know exactly how it was made and who made it.

    You’ll sleep better knowing the story behind your bed. Commissioning becomes an investment in craft and relationship.

    23. Pair Minimal Joinery Bed with Architectural Lighting

    Minimal joinery pairs beautifully with sculptural lighting that echoes the bed’s clean lines and construction honesty. Choose fixtures with visible components and interesting geometry.

    Pendant lights with exposed elements from brands like Muuto ($200–$400), Apparatus Studio ($300–$600), or Etsy ($100–$250) work perfectly. Wall sconces with visible brass or metal details also enhance the aesthetic. Installation time: 1–2 hours if electrical runs exist, more if rewiring is needed. Budget for professional installation if you’re uncertain: $150–$300. The lighting becomes another design layer that speaks to craftsmanship and intentionality. Pro tip: Choose warm bulbs (2700K) to soften the geometric lines slightly.

    The lighting transforms your bed into a genuine focal point. Shadows and geometry create depth and interest nightly.


    Save this post and pick one or two ideas to start with—whether it’s researching makers, visiting a showroom, or measuring your space. One thoughtful bed choice changes how you feel every single morning.

  • 25 LED Backlit TV Wall Designs That Make Your Space Glow

    25 LED Backlit TV Wall Designs That Make Your Space Glow


    LED backlighting is the easiest way to make your TV wall feel like a designer showstopper—and you don’t need to hire anyone or spend a fortune to pull it off. Whether you’re renting or own your home, adding glow behind your screen instantly elevates your entire living room. The right lighting hides cables, creates mood, and makes binge-watching feel like an experience instead of just staring at a screen. In this guide, you’ll discover 25 specific LED setups you can recreate, from simple plug-and-play kits to permanent installations that rival high-end media rooms. We’ll cover every budget level, walk you through setup steps, and show you which options work best for renters versus homeowners. Let’s make your TV wall the focal point your space deserves.


    1. Warm Amber Strips Behind a Floating Console

    Warm amber LEDs behind your console create an instant spa-like glow that makes your seating area feel more inviting. This setup is perfect for living rooms because the light bounces off the wall and softens the entire space without being too bright for TV watching.

    Use adhesive-backed LED strip lights (around $20–$40 from Amazon or Home Depot) and run them along the back edge of your floating console, then continue up the wall behind your TV. Most strips plug into a USB port or standard outlet, so installation takes 10–15 minutes—just peel, stick, and plug in. If your console doesn’t have access to an outlet, use battery-powered strips instead ($15–$30).

    Pro tip: Choose dimmable LED kits so you can adjust the brightness depending on whether you’re watching during the day or settling in for evening shows. The ability to dim makes a huge difference in comfort and prevents eye strain.

    Your TV wall becomes the warm, welcoming anchor of your room—the kind of space that makes guests ask, “How did you make this look so good?”


    2. Recessed Lighting Behind a Wall-Mounted TV

    Recessed lighting behind a wall-mounted TV is the most permanent, polished solution—this is what high-end media rooms use. The light sits hidden inside the wall itself, creating an almost invisible halo effect that appears to float your screen.

    This requires opening up your drywall and installing recessed light cans during construction or renovation—so it’s best for homeowners planning a major update (cost: $200–$500+ including materials and professional installation). If you’re comfortable with basic drywall work, you can DIY this over a weekend, but most people hire an electrician for safety.

    The payoff? Your TV literally glows without any visible hardware, and you get adjustable brightness via a dimmer switch. Recessed lights also run cooler than strip lights, so they won’t damage wall paint or finishes.

    This approach is not renter-friendly, but if you own your home and want a permanent, luxury-level finish, recessed lighting is worth the investment.


    3. Colorful RGB Strips for Entertainment Spaces

    RGB (color-changing) LED strips let you shift your entire TV wall’s mood in seconds—purple for gaming, cool blue for movie nights, warm amber for relaxing. These are perfect if you want flexibility and fun without committing to one color.

    Buy an RGB LED strip kit with a remote control ($30–$60 from Amazon, Best Buy, or Walmart) and install it the same way you’d use warm strips. Most remote-controlled RGB kits let you pick from hundreds of colors and set them to music or ambience modes. Setup takes 10–15 minutes.

    Pro tip: If you’re using this in a bedroom or living room, stick with subtle, muted tones (soft purples, cool grays) rather than neon brights, so the lighting complements your room instead of overwhelming it. Save the bright colors for game rooms or entertainment spaces where intensity feels natural.

    Your TV wall becomes a dynamic, interactive focal point that adapts to your mood—whether you’re concentrating, relaxing, or just having fun.


    4. Floating Shelves with Built-In LED Edges

    Floating shelves with LED edges create a gallery-wall effect—your TV becomes part of a curated display rather than the only thing on the wall. This works beautifully in smaller spaces where you want style and storage combined.

    Install 3–4 floating shelves around your TV using standard brackets ($40–$80 per shelf), then run adhesive LED strips along the front or bottom edge of each shelf ($40–$80 total for all strips. Set books, small plants, or decorative objects on the shelves—the LED backlighting highlights these items and draws the eye around the entire wall. Total installation time: 1–2 hours (longer if you’re drilling into studs yourself; faster if you use toggle bolts for renters).

    Pro tip: Leave the shelves minimal—3–4 items per shelf maximum—so the lighting is the real star. Too much clutter makes the space feel chaotic instead of curated.

    Your TV wall now feels like a thoughtfully designed display rather than just a screen on a blank wall—way more interesting and intentional.


    5. Accent Wall Paint + Strip Lights for Drama

    A dark-colored accent wall makes LED backlighting pop dramatically—the light creates contrast and makes your TV literally stand out. Pair this with a fresh paint color and inexpensive LED strips for a total refresh.

    Paint your TV wall a deep charcoal, forest green, or navy ($30–$60 for paint and supplies; 1–2 days of drying time). Once dry, add warm or white LED strips along the top edge of the wall and behind your console ($40–$80). The dark wall absorbs light during the day but glows beautifully at night. This combo costs $70–$140 total and takes 1–2 weekends (including drying time).

    Pro tip: Pair a dark wall with a light-colored console (natural wood or white) so the TV area doesn’t feel too heavy. The contrast keeps the space balanced.

    Your living room gains instant sophistication—the dark wall makes your TV the hero, and the backlight adds upscale resort vibes.


    6. Under-Console LED Lighting for Nighttime Navigation

    Under-console LED lighting serves double duty: it looks sophisticated and lets you safely navigate your living room at night without tripping over furniture or stubbing your toe on the console leg.

    Install LED strips along the bottom front edge of your console or directly on the floor below it ($20–$40 for adhesive strips). Choose cool white or soft blue tones for nighttime navigation—these don’t create glare if you’re watching TV. Set the strips to a low brightness level and you’re done in 10 minutes.

    Pro tip: Motion-sensor LED strips ($35–$50) turn on automatically when you walk past, so you’re not paying power for lighting that’s on 24/7. Renters love this option because it’s completely removable.

    Your space becomes both more functional and more stylish—plus you’ll never stub your toe on that console leg again.


    7. Corner Lighting for Small Spaces

    If your TV sits in a corner (common in small apartments or studios), corner-specific LED placement makes the space feel bigger instead of cramped. Running lights up both walls behind the TV creates dimension.

    Install vertical LED strips on both walls meeting at the corner ($40–$80 total), positioned 2–3 inches behind where your TV will mount. This takes 20–30 minutes and doesn’t require any permanent installation if you use adhesive strips. Choose warm white for a cozy feel or cool white for a modern vibe.

    Pro tip: Use a corner-specific mounting bracket for your TV so the screen sits flush against both walls, and let the LED glow frame it from behind. This makes even a small corner look intentional and designed.

    Your corner transforms from awkward dead space into a welcoming, intentional focal point.


    8. Backlighting Behind Textured Wall Panels

    Textured wall panels (fluted wood, 3D geometric tiles, micro cement) behind a TV create visual interest, and LED backlighting behind them adds another layer entirely—the light plays off the texture and creates moving shadows.

    Install 3D wall panels behind your TV ($80–$200 for panels covering a 6–8 ft section; see Home Depot, Wayfair, or Amazon). Once the panels are secure, run LED strips behind them if possible (often there’s a small gap between the panel and wall), or position strips to graze across the panel surface from the side. Setup time: 1–2 hours if you’re comfortable with basic wall installation; otherwise, hire a handyman ($100–$200 labor).

    Pro tip: Choose warm amber LEDs for this setup—the light bouncing off textured surfaces looks richest when it’s warm-toned.

    Your TV wall gains architectural detail and personality—it’s no longer flat, it’s truly dimensional.


    9. Smart LED Strips Controlled by Your Phone

    Smart LED strips sync with apps on your phone, meaning you can change brightness and color from your couch—or set them to turn on automatically when you press play on your TV.

    Buy a smart LED strip kit (Google Home or Alexa-compatible) from brands like Wyze, Nanoleaf, or LIFX ($40–$80). Download the app, connect to WiFi, and control everything from your phone. Many smart strips also integrate with voice assistants, so you can say “Alexa, dim the TV lights” without reaching for a remote. Installation takes 15 minutes.

    Pro tip: Set a schedule so your LED lights gradually brighten in the morning or dim at night—a nice ambient touch if you use your TV area for more than just watching shows.

    Your TV wall becomes part of your smart home ecosystem—convenience meets style.


    10. Fireplace Mantel-Style Lighting Above Your TV

    If your TV is mounted high on the wall, add a decorative ledge or faux mantel shelf directly above it, then backlight the shelf so the glow frames your screen like a piece of art.

    Install a floating shelf or faux mantel beam above your TV ($40–$100, depending on material; use strong brackets rated for the weight). Run warm LED strips along the underside so light cascades down. This setup takes 1–2 hours and costs $80–$150 total. It’s not renter-friendly since it requires wall drilling, but it’s stunning for homeowners.

    Pro tip: Add small decorative objects (candles, a small plant) on top of the shelf so your TV wall feels like an intentional art display.

    Your TV wall now has the presence of a fireplace mantel—warm, inviting, and genuinely beautiful.


    11. Color-Changing Strips That Match Your Mood Ring

    Some newer LED strips have “circadian” or mood-matching modes that gradually shift color throughout the day, mimicking natural sunlight—great for keeping your energy aligned with your body’s clock.

    Look for advanced LED kits from Philips Hue, Nanoleaf Aurora, or LIFX Color A19 ($60–$100+). These kits offer preset scenes that shift from cool morning tones to warm evening tones automatically. Setup takes 15 minutes and they’re smartphone-controlled.

    Pro tip: Use the “sunrise simulation” mode in the morning to help you wake up, and the “sunset” mode in the evening to signal your body it’s time to relax. This is especially helpful if your living room lacks natural light.

    Your TV wall becomes biologically aligned with your natural rhythms—subtle but genuinely transformative for how you feel in your space.


    12. LED Strips Behind Floating Media Consoles with Cable Clips

    Floating consoles look best when cables are hidden—but if you need to run cables visually, pairing them with backlighting makes the setup feel intentional instead of messy. Backlit cable clips become a design feature.

    Mount a floating console ($100–$250), then run adhesive cable clips down the front in a vertical or zigzag pattern ($15–$25). Thread your cables through the clips, then add LED strips behind the console so the glow highlights the clean cable management ($30–$50). Total setup: 1–2 hours.

    Pro tip: Use matte black or white cable clips that match your console color, so they read as design elements rather than functional clutter. The backlight will make them feel intentional.

    Your floating console now looks professionally installed—cable management becomes part of your aesthetic.


    13. Two-Tone Backlighting for Depth

    Using two different LED colors on opposite sides of your TV creates stunning visual depth—the contrast makes your wall feel less flat and one-dimensional.

    Install warm white LED strips on one side of your TV and cool white on the opposite side ($60–$100 total). If you’re using two separate kits, each can have its own dimmer switch, so you can adjust one side independently. This takes 30 minutes and creates a gallery-lighting effect similar to what you’d see in a high-end art installation.

    Pro tip: Stick with subtle warm and cool tones (not neon brights) unless you’re going for a full “entertainment space” vibe. Nuance looks more sophisticated.

    Your TV wall gains museum-quality lighting—it feels curated and carefully thought through.


    14. LED Strips Inside Glass or Lucite Shelving

    Glass or lucite shelves with internal LED backlighting create an ultra-modern, almost jewelry-box effect—especially stunning if you’re displaying collectibles, books, or decorative objects.

    Install glass floating shelves ($60–$120 each) on either side of your TV using specialty glass-shelf brackets. Run slim LED strips horizontally inside each shelf ($40–$80 total). The light glows through the glass and highlights whatever objects sit on the shelves. Setup time: 2 hours (install shelves, then carefully position LED strips inside, then arrange items). This option works best for homeowners because permanent installation is needed.

    Pro tip: Keep displayed items minimal—5–7 pieces per shelf—so the light and items feel curated rather than cluttered.

    Your TV wall becomes a modern art installation—functional display meets ambient lighting.


    15. Warm Strips Behind a Slatted Wood Accent Wall

    Slatted wood is one of the hottest TV wall trends right now, and adding backlighting makes it even better—the glow highlights the texture and depth of the wood.

    Install slatted wood panels across your TV wall ($150–$300 for panels covering a 6–8 ft section; see brands like shiplap kits on Amazon or Home Depot). Position LED strips behind the slats so light filters through the gaps ($40–$80. Installation takes 2–4 hours depending on your comfort level with wall work; renters can use peel-and-stick slatted panels ($100–$200) that stick directly to the wall and pull off cleanly.

    Pro tip: Choose warm amber or warm white LEDs to complement natural wood tones. Cool white can make wood look washed out.

    Your TV wall gains the warmth and texture of a luxury cabin or resort—instantly more inviting and design-forward.


    16. Circular or Oval Backlighting for Modern Mounted TVs

    Instead of traditional rectangular backlighting, create a circular or oval “halo” behind your TV—this is trending in ultra-modern homes and media rooms.

    Use flexible LED strips to create a geometric shape behind your TV: measure your TV dimensions, then apply strips in a circular or oval pattern directly behind the screen ($50–$100 for premium flexible strips). Alternatively, use pre-made circular LED panels from brands like Nanoleaf ($80–$200) that create the halo effect without custom bending. Setup time: 30 minutes to an hour.

    Pro tip: Keep the rest of your wall minimal so the circular light becomes the focal point. A solid-colored wall (white, soft gray) works best.

    Your TV wall gains an artistic, forward-thinking vibe—it looks like something straight out of a design magazine.


    17. Budget-Friendly $15 LED Kit for Renters

    Not ready to spend big? A basic $15–$20 adhesive LED strip kit from Amazon or Walmart gives you the glow effect without commitment—perfect for renters or anyone testing the waters.

    Buy a basic plug-in LED strip (warm white or cool white), peel the adhesive backing, and stick it directly behind your TV or along your console edge (15 minutes). These cheap kits aren’t dimmable or color-changing, but they do exactly what they’re supposed to: add ambient glow. If you decide you want something fancier later, you can peel it off without damage.

    Pro tip: Cheap LED strips often run warm, so placement matters—don’t stick them anywhere heat-sensitive like near wooden cabinets directly.

    You get professional-looking backlighting for the price of two coffee runs—it’s the fastest, cheapest way to elevate your TV wall.


    18. Layered Lighting: LEDs + Track Lights + Recessed Ceiling Lights

    For the ultimate TV wall experience, layer multiple light sources: backlighting, overhead track lights, and recessed ceiling fixtures working together. This is what luxury media rooms use.

    Start with LED backlighting behind your TV ($40–$80). Add track lights mounted on the ceiling ($80–$150) to provide accent lighting. Install recessed ceiling lights ($200–$400+ professional installation) for ambient fill light. You’ll need a dimmer switch that controls all three sources ($30–$50) so you can adjust mood. Total cost: $350–$680+ and professional installation is worth it here ($300–$500 labor).

    This is a major project best suited for homeowners planning a media room refresh, but the payoff is a genuinely luxury lighting experience.

    Your TV wall becomes a professional theater experience—every lighting layer serves a purpose, and mood control is total.


    19. Minimalist Single-Line LED Strip (Floating Wall Effect)

    If you want backlighting that’s barely noticeable and super-minimalist, use a single thin LED strip running horizontally at the TV’s center point instead of framing the entire perimeter.

    Buy a slim, single-line LED strip ($20–$30) and position it horizontally directly behind your TV (or just above where the console meets the wall). The single line creates a subtle halo effect without overwhelming the space. Setup time: 10 minutes.

    Pro tip: This works beautifully if your TV is mounted on a plain, light-colored wall where a subtle glow reads as intentional rather than an accident.

    Your TV wall gains a whisper of light rather than a shout—refined and modern, not trying too hard.


    20. Color-Coded LEDs Matching Your Room’s Palette

    Instead of choosing LED color randomly, pick a tone that echoes your room’s existing palette—this creates cohesion rather than feeling like a random addition.

    If your room uses warm neutrals and wood, choose warm amber or golden LEDs ($40–$60). If your room is cool-toned (grays, blues), choose cool white or soft blue LEDs ($40–$60). The key is intentionality: your backlighting should feel like part of your room’s design, not an afterthought. Setup: 15 minutes.

    Pro tip: Grab a paint chip or fabric swatch of your room’s dominant color and bring it to the store when shopping for LED strips so you can match tones.

    Your TV wall feels like it was always meant to be part of your room’s design—coordinated and thoughtful.


    21. LED Strips on Shelves Around the TV (Not Behind It)

    Instead of backlighting just the TV, light up shelves around it—this approach makes your TV part of a larger lit display rather than the solo focus.

    Install 4–6 floating shelves around your TV ($150–$300 total), then run LED strips along the front edge of each shelf ($60–$100 total for all strips). Add books, plants, and small decorative objects to each shelf. The LEDs highlight the entire wall rather than just the screen. Setup time: 3–4 hours (drilling, mounting shelves, positioning lights).

    Pro tip: Keep shelf styling minimal and don’t match every shelf—vary heights and object types so it feels curated, not matchy-matchy.

    Your entire TV wall becomes a lit art installation—way more interesting than backlighting the screen alone.


    22. Dimmable LEDs That Match Your Room’s Smart Home Setup

    If you already have smart home tech (Alexa, Google Home), get LED strips that integrate so you can control them with the same app and voice commands as your other devices.

    Buy LED strips compatible with your existing smart home system ($50–$100 for Alexa or Google Home-compatible options from brands like Wyze, LIFX, or Nanoleaf). Link them to your smart home hub during setup (15 minutes), then add them to automation routines—for example, “Movie mode” dims your LEDs while turning off other lights.

    Pro tip: Set up voice commands like “Alexa, TV time” to automatically adjust all your room’s lighting to your preferred movie-watching brightness.

    Your TV wall lighting becomes part of your overall smart home experience—one less thing to manually adjust.


    23. Backlit Acoustic Panels (Function + Light)

    Acoustic panels serve double duty in a media room: they control sound and they look good. Adding LED backlighting behind them makes them even more of a statement.

    Install acoustic panels across your TV wall ($100–$250 for several panels; see brands like GIK Acoustics or Amazon basics options). Position LED strips behind the panels so light glows around the edges ($50–$80). This works best if there’s a small gap between panels and the wall. Setup time: 2–3 hours for installation and light positioning.

    Pro tip: Choose neutral panel colors (white, gray, beige) so the backlighting pops visually without color clash.

    Your TV wall becomes a sound studio meets luxury lounge—it actually works harder than it looks.


    24. Vertical LED Channels for Wall-Mounted TV Cables

    If you have multiple cables running down your wall to a console or wall outlet, use vertical LED channels that hide cables while adding architectural lighting interest.

    Install aluminum cable channels vertically along your wall ($30–$60 for channels from Amazon or Home Depot), then run your cables through the channels. Position LED strips inside the channels so light illuminates the cable paths ($40–$70). This transforms functional cable management into a design feature. Setup time: 1–2 hours.

    Pro tip: Use matte black or white channels that match your wall color—the LED backlighting inside them becomes the visual feature, not the channel itself.

    Your cable management transforms into architectural lighting—practical and genuinely stunning.


    25. Warm LEDs Behind Dark Marble or Stone Accent Wall

    If you’ve invested in a high-end stone or marble accent wall, backlighting showcases the material’s natural beauty—warm LEDs highlight texture and veining.

    Install a stone or marble veneer accent wall ($300–$800 depending on material quality and wall size; professional installation recommended). Position warm LED strips behind or below the stone ($50–$80) so light grazes across the stone’s surface. The backlighting will highlight every texture and vein, making the material feel even more luxurious. Setup time: 4–6 hours if hiring a professional.

    Pro tip: Warm amber LEDs are best for stone—they enhance natural warmth and make even cool-toned marble look sophisticated.

    Your TV wall becomes a legitimate luxury focal point—the backlit stone is worth lingering on.


    26. DIY Edison Bulb String Lights + LED Strips Combo

    Mix aesthetics by combining Edison bulb string lights (trendy, vintage-inspired) with modern LED backlighting—great for eclectic or industrial-style spaces.

    Buy Edison bulb string lights ($30–$50 from Target, IKEA, or Amazon) and hang them horizontally above your TV using hooks or nails (15 minutes setup). Layer in warm LED strips behind your screen or console ($40–$80). The combination feels intentional—like you’re mixing vintage and modern on purpose. This option is renter-friendly if you use adhesive hooks and plug-in lights.

    Pro tip: Keep the rest of your wall minimal so the dual lighting sources feel like a choice, not visual chaos.

    Your TV wall gains character and warmth—it looks collected, eclectic, and genuinely personal.


    Save this post for your next TV wall refresh—pick one idea and tackle it this weekend. You’ll be amazed how much better your space feels with just a little glow behind your screen. Which setup is calling your name?

  • 25 Patterned Curtain Designs That Add Personality to Any Room

    25 Patterned Curtain Designs That Add Personality to Any Room

    Plain curtains are missing an opportunity. Your windows are the largest “wall” in any room, and right now they’re probably blending into the background instead of telling your story. Patterned curtains do more than block light—they anchor a room’s personality, break up neutral spaces, and give your eyes something beautiful to land on. Whether you’re renting, redecorating, or just ready for a refresh, we’ve pulled together 25 specific pattern ideas you can actually execute. You’ll find everything from bold geometric prints to subtle textures, affordable finds under $100, and investment pieces worth splurging on. Let’s turn your windows into the focal point your room deserves.

    1. Layer Bold Geometric Prints Over Sheers

    Geometric prints feel contemporary without being trendy or dated. Pair a bold pattern in front with a simple sheer layer behind to keep light flexible while maintaining the statement.

    Start with sheer voile panels (under $30 from IKEA or Target), then layer your patterned curtain in front. Look for medium-weight cotton blends with grid, chevron, or abstract prints—Wayfair’s Threshold collection runs $40-$80 per panel. Installation takes 20 minutes if you already have a rod. The genius here is flexibility: close the pattern for drama, open it for ambient light, or pull sheers only for privacy without sacrificing the print.

    Pro tip: Measure your window three times before ordering—geometric patterns need straight, even hanging or the design will look off-kilter.

    Your windows now have dimension and visual interest while you maintain control over privacy and light. It’s the best of both worlds.

    2. Mix Retro Florals with Modern Furnishings

    Retro florals are having a moment because they feel nostalgic without looking dated—especially when you pair them with contemporary furniture. This contradiction works.

    Hunt for vintage-inspired prints on Etsy ($50-$150 per panel), Crate & Barrel ($60-$120), or Wayfair’s sale section. Look for small-scale florals in muted palettes: blush, sage, terracotta, or dusty blue. Hang them floor-to-ceiling with simple rods to let the pattern speak. Pair the florals with modern pieces—clean-lined sofa, metal accents, minimal decor—so the vintage feel stays fun, not themed.

    Installation takes about 30 minutes. If you’re renting, use tension rods or temporary hardware.

    The contrast between old-school charm and new-school minimalism creates a space that feels curated and intentional, not stuck in time. Your guests will actually comment on how well thought-out your room feels.

    3. Go Monochromatic with Tone-on-Tone Textures

    Tone-on-tone patterns read as elegant simplicity, but they’re actually doing heavy lifting. A cream wall with a cream patterned curtain in slightly different values creates depth without visual noise.

    Choose linen or linen-blend curtains with woven or embossed texture ($80-$180 from Crate & Barrel, Restoration Hardware, or Wayfair). Look for subtle patterns: crosshatch, subtle damask, or botanical embossing. The pattern should be visible when light hits it but not immediately obvious. Mount floor-to-ceiling to emphasize height.

    Installation: 25 minutes. Linen requires occasional steaming but rewards you with natural fabric beauty.

    Your space feels cohesive and calming, with a sophistication that comes from restraint rather than decoration. The pattern gives texture without competing for attention.

    4. Embrace Jewel-Tone Velvet With Embroidered Details

    Velvet is back, and embroidered details make it feel special instead of heavy-handed. This is an investment piece, but it rewires how your entire room feels.

    Look for velvet curtain panels with embroidered borders or subtle all-over embroidery ($200-$400 from IXA Curtains, Etsy luxury sellers, or boutique home stores). Emerald, sapphire, or burgundy read richest. Pair with brass or gold hardware to lean into the luxury. You’ll need professional hanging for velvet—it’s heavy—so budget $100-$200 for installation. This is worth it. Total cost: $300-$600 for a pair of panels.

    Linen-lined velvet is easier to care for than raw velvet.

    Your room instantly becomes a retreat. Guests notice. The fabric catches light differently depending on the hour, so you get different moods throughout the day.

    5. Use Abstract Watercolor Prints for Artistic Flair

    Abstract watercolor prints feel like you hung original art on your windows. They work in any room because they’re not literal—there’s nothing to “match.”

    Search Etsy, Society6, or Redbubble for abstract watercolor prints ($60-$140 per panel), or check Target’s Threshold or West Elm ($70-$130). Look for pieces with 3-4 colors maximum so they read as cohesive rather than chaotic. Print on cotton linen blend for durability. Custom printing through Spoonflower ($70-$120 per panel) is worth exploring if you have a specific color palette.

    Hanging takes 20 minutes. These photos sell like hotcakes on Pinterest, so expect interest from visitors.

    Your windows become a conversation piece. The room feels thoughtfully decorated without looking overdone or trendy. Abstract art is inherently timeless.

    6. Create Drama with Bold Stripes and Contrasting Trim

    Bold stripes feel formal and designer-worthy, especially when you add contrasting trim down the edges. This detail costs pennies but looks expensive.

    Start with striped curtain fabric from Wayfair or Crate & Barrel ($40-$100 per panel). Add contrasting grosgrain or velvet trim ($10-$20 per panel, available at Joann Fabrics or Amazon). Either sew it yourself (takes 45 minutes with a basic machine) or have a seamstress attach it ($30-$50 total). Mount with simple black or brushed brass rods to keep focus on the pattern and trim detail.

    This project feels fancy but is actually accessible to beginners.

    The trim detail elevates an ordinary striped pattern into something that looks custom-made. Your windows look intentionally styled, not like you grabbed whatever was on sale.

    7. Layer Botanical Prints With Solid Blackout Linings

    Botanical prints are soothing and on-trend, but you need blackout protection for sleeping. Layer a pretty print over blackout fabric so you get both benefits without compromise.

    Purchase botanical print curtains ($50-$120 from Wayfair, West Elm, or Amazon) and have blackout liners sewn to the back ($40-$80 with a seamstress, or $15-$25 DIY from Joann’s if you have a machine). Alternatively, buy pre-lined botanical curtains from Overstock or Target ($80-$150 per panel). Mount floor-to-ceiling for maximum visual impact. This takes 30 minutes to hang.

    Renter hack: Temporary adhesive hooks work if your landlord allows.

    You get beautiful botanical views by day and total darkness at night. The layering adds professional depth that single-layer curtains can’t match. Sleep improves when your room truly blackens out.

    8. Try Subtle Damask for Traditional Spaces

    Damask feels timeless because it’s been around for centuries. Modern takes on damask are subtle and sophisticated, not over-the-top.

    Shop Ballard Designs, Etsy, or Wayfair for modern damask prints ($60-$140 per panel). Look for small-scale patterns in two colors maximum—taupe-cream, gray-white, or navy-ivory work best. Pair with silk or grosgrain tiebacks ($15-$30) to anchor the traditional aesthetic. Hang with simple wooden or brass rods to keep the look refined. Installation takes 20 minutes.

    Damask reads expensive immediately, even in affordable fabrics.

    Your room feels pulled together and intentional, like you’ve been collecting beautiful things forever. Traditional never goes out of style—it just takes on modern styling.

    9. Mix Ethnic Prints (Ikat, Kilim, Suzani) for Global Appeal

    Ethnic patterns like ikat, kilim, and suzani add worldly character. They photograph beautifully and work in eclectic or maximalist spaces.

    Search Etsy ($70-$150), Wayfair ($60-$140), or specialty sites like World Market ($50-$120) for authentic-feeling prints. Look for ikat’s irregular tie-dye quality, kilim’s geometric boldness, or suzani’s embroidery-inspired patterns. Pair with neutral walls so the curtains stand out as the statement piece. Custom printing through Spoonflower ($80-$130) is excellent if you want to scale up a smaller pattern you love. Mounting takes 25 minutes.

    These patterns are inherently unique—no two are identical—so your space feels one-of-a-kind.

    Your room instantly feels collected and traveled. The pattern tells a story. Even with affordable fabrics, the print quality makes everything look intentional and special.

    10. Layer Sheer Voile With Embroidered Accents

    Embroidered voile is delicate and pretty—perfect if you want pattern without heaviness. Layer it for depth and flexibility.

    Find embroidered voile curtains ($40-$100 from Target, IKEA, Amazon, or specialty sites) and pair with plain sheers underneath ($15-$30). The embroidery could be an all-over pattern or just a border. Hang the plain sheer as your base layer, then add embroidered panels on top. Use simple tension rods or basic hardware—let the embroidery shine. Installation takes 20 minutes.

    Renter-approved: Tension rods mean zero wall damage.

    The layering creates an airy, dimensional look. Embroidery catches light beautifully and changes how the room feels throughout the day. This approach feels romantic without being overly precious.

    11. Go Bold With Statement Plaid or Tartan

    Plaid and tartan feel unexpected in formal living spaces, which is exactly why they work. They’re bold without being trendy.

    Look for wool-blend plaid curtains ($80-$150 from Crate & Barrel, Etsy, or specialty fabric shops) in jewel tones: navy-burgundy, forest-cream, or grey-charcoal. Hang them full-length and keep the rest of the room relatively simple so the pattern leads. These heavier fabrics provide insulation and sound dampening as bonuses. Installation takes 30 minutes; these panels are heavier, so use sturdy rods.

    Plaid works in bedrooms, dens, libraries—anywhere you want coziness with edge.

    Your room develops character instantly. Plaid is underrated for contemporary spaces. The pattern feels collected and intentional, not costume-y.

    12. Create Contrast With Opposite-Color Blocks or Color-Blocking

    Color-blocking means large sections of two contrasting colors with clean dividing lines. It’s contemporary and graphic without being fussy.

    Commission custom color-blocked curtains through Spoonflower ($100-$180 per panel) or find ready-made versions on Etsy ($80-$150). Choose two colors with high contrast: navy-cream, charcoal-white, or terracotta-ivory. Mount floor-to-ceiling with a simple rod so the graphic geometry reads clearly. This takes 25 minutes to hang and makes an immediate visual statement.

    Go bolder than you think—tentative color-blocking reads weak.

    Your room looks designed by a professional. The graphic quality works in modern, minimalist, or eclectic spaces. It’s one of the few patterns where simplicity equals sophistication.

    13. Soften Spaces With Pastel Geometric Patterns

    Pastels work for every design style because they’re inherently soothing. Geometric patterns in pastel tones keep things contemporary without feeling childish.

    Search Target ($50-$100), IKEA ($40-$80), or Wayfair ($60-$120) for pastel geometric options. Look for patterns that aren’t too tiny—medium-scale triangles, hexagons, or abstract shapes read better from a distance. Pair with white or cream walls to let the soft colors shine. Hang floor-to-ceiling with simple white or light wood rods. Installation takes 20 minutes.

    Pastels in geometric patterns are trendy right now, but they’ll stay pretty because the pattern gives them substance.

    Your space feels calm and collected. Pastels reflect light beautifully, so your room stays bright even with curtains drawn. The pattern provides interest without adding visual weight.

    14. Mix Neutral Tones With Textured Weave Patterns

    Textured weaves are patterns you feel as much as see. They work in minimalist spaces because they’re subtle but substantial.

    Hunt for textured linen or linen-blend curtains ($70-$150 from Crate & Barrel, Restoration Hardware, West Elm, or Etsy). Look for weaves like herringbone, basket weave, or diagonal patterns. The texture should be visible in person but reads more as “interesting solid” from a distance. Mount floor-to-ceiling with minimal hardware to keep focus on the fabric itself. Installation takes 25 minutes.

    These fabrics age beautifully—slight fading actually improves how they look.

    Your space feels thoughtfully curated. The subtle texture adds dimension without introducing multiple colors. This approach works in transitional, modern, or traditional spaces equally well.

    15. Make a Statement With Large-Scale Florals in Modern Colorways

    Large-scale florals in unexpected color combinations—think navy with coral flowers, or charcoal with white blooms—feel both botanical and graphic.

    Find contemporary floral prints on Etsy ($80-$150 per panel) or high-end retailers like CB2, West Elm, or Terrain ($100-$200). Look for oversized blooms with negative space rather than tiny repeating patterns. Mount with brushed brass or matte black rods to keep the aesthetic modern. Pair with solid furniture so the pattern doesn’t compete. Hanging takes 20 minutes.

    This pattern choice feels artistic. People notice it and remember it.

    Your windows become the room’s focal point. Large-scale patterns have confidence—they say you’re not afraid of color and design. The room feels curated by someone with a specific vision.

    16. Layer Fine Stripes With Subtle Pattern Overlay

    Mixing two patterns of different scales is a designer trick: fine stripes under delicate overlay patterns create complexity without chaos.

    Purchase striped base curtains ($40-$80 from IKEA, Target, or Wayfair) and semi-sheer patterned overlay panels ($30-$70) that you layer on top. The overlay could be botanical, geometric, or abstract. Mount both layers on the same rod with the overlay in front. Use simple brushed nickel or brass hardware. Installation takes 30 minutes. The genius is that you can swap overlay panels seasonally for a completely different look.

    Renter hack: Use temporary hooks for the overlay layer.

    You get pattern complexity with flexibility. The layering creates depth that single-layer curtains can’t match. This setup photographs beautifully and reads as high-design.

    17. Go Retro With Bold Mid-Century Modern Prints

    Mid-century modern prints—atomic starbursts, boomerangs, geometric rays—have permanent staying power because the aesthetic feels both vintage and timeless.

    Search Etsy ($70-$150), Wayfair vintage sections ($60-$140), or specialty sites like Modcloth ($80-$150). Look for bold, saturated colors: teal-orange, yellow-black, or red-gray combinations. The prints should feel graphic and geometric, not overly detailed. Pair with simple furniture and minimal accessories to let the pattern speak. Mount with simple wooden or metal rods. Hanging takes 20 minutes.

    These patterns are nostalgic without feeling dated because the design language is inherently timeless.

    Your room feels playful and confident. Mid-century modern is collectible, which means your choice feels thoughtful, not random. The bold colors energize spaces without feeling chaotic.

    18. Soften Rooms With Ombré or Gradient Patterns

    Ombré or gradient patterns are inherently soothing because they suggest movement and flow. They work in any color combination.

    Look for ombré curtains on Etsy ($90-$170 per panel) or commission through Spoonflower ($80-$160). Popular gradients: deep teal to white, charcoal to cream, or burgundy to blush. The color shift should be gradual enough to feel natural, not like harsh stripes. Pair with neutral walls and simple furniture. Mount floor-to-ceiling to showcase the full gradient. Installation takes 25 minutes.

    Renter note: Ombré photos look spectacular, so expect Pinterest saves.

    Your room feels contemporary and calm. The gradient creates visual interest without pattern “noise.” Light plays differently across the gradient throughout the day, so the curtains change mood with the sun.

    19. Mix Pattern Scales—Tiny All-Over Print With Striped Trim

    Mixing pattern scales—a small repeat with a contrasting stripe trim—looks intentional and tailored without being fussy.

    Start with small-print curtains ($50-$120 from Target, IKEA, or Wayfair) and add coordinating or contrasting striped trim ($12-$25 per panel from Joann Fabrics). Sew or have a seamstress attach the trim down both leading edges and along the bottom hem (DIY takes 1 hour, professional takes 1 hour at $30-$50). The trim should complement but not match exactly—think pairing a tiny blue floral with white-blue striped trim.

    This trick reads expensive immediately.

    Your curtains look like they came from a luxury store. The trim detail stops the eye and adds polish. This works especially well in traditional, transitional, or classic spaces.

    20. Create Depth With Layered Sheers in Different Opacities

    Layer three or more sheer panels in the same pattern but different weights. This creates visual depth and adjustable light control that’s impossible with single layers.

    Purchase sheer curtain panels in your chosen pattern ($20-$50 per panel from IKEA, Target, Amazon) and hang two to four layers on the same rod or adjacent rods. Vary the opacity: transparent, semi-sheer, translucent. The pattern repeats but the light filters differently through each layer. Installation takes 30 minutes. This approach works beautifully with botanical, geometric, or abstract prints.

    This creates that expensive, layered look without heavy fabric.

    Your windows become sculptural. Light interacts with the layers throughout the day, changing the room’s mood. From outside, the effect is impressively professional. The multiple layers also provide soft privacy without sacrificing light.

    21. Go Unexpected With Metallic or Foil Prints

    Metallic or foil-printed patterns catch light unexpectedly and add glamour to any space. The metallic element transforms simple patterns into something special.

    Search Etsy ($80-$160 per panel), Wayfair specialty sections ($90-$170), or Spoonflower custom printing ($100-$180) for metallic options. Look for modest patterns with gold, silver, or copper foil accents—these should shimmer when light hits them, not be overwhelming. Pair with solid walls and furniture so the shimmer stands out. Mount with brass or gold hardware to echo the metallic theme. Hanging takes 20 minutes.

    Metallic accents add luxury without the luxury price tag.

    Your room catches light in unexpected ways. The pattern feels elevated and special. Even affordable fabrics with metallic printing read expensive. This works beautifully in contemporary, transitional, or eclectic spaces.

    22. Layer Solid Velvet Behind Patterned Sheers

    Layer delicate patterned sheers over solid jewel-tone velvet. You get pattern elegance with luxurious depth and insulation benefits.

    Start with solid velvet base panels ($100-$180 per panel from Crate & Barrel, West Elm, or specialty sites) in emerald, sapphire, or burgundy. Layer patterned sheer panels ($40-$80) in front featuring botanical, geometric, or abstract prints. Use brass or gold double rods to hang both layers separately. This creates dimension and allows flexibility—close sheers for gentle pattern light, open for rich velvet richness. Installation takes 45 minutes.

    This layering trick is luxe-looking.

    You get the best of both worlds: pattern and richness. The velvet provides insulation and luxury while the sheers add visual lightness. Light plays dramatically through the layers, changing the effect throughout the day.

    23. Make a Bold Statement With Maximalist Patterns (Busy, Colorful, Layered)

    Maximalist patterns are unapologetically busy and colorful—perfect if you want your windows to absolutely lead the design. These bold choices make a confident statement.

    Search Etsy ($80-$160), independent sellers, or specialty boutique sites for intentionally busy patterns. Look for multi-color combinations with layered or overlapping motifs—think dense florals mixed with geometric accents. Keep the rest of your room relatively balanced so the curtains shine as the star. Pair with simple solid-colored furniture to avoid visual overload. Mount floor-to-ceiling with simple hardware. Hanging takes 20 minutes.

    Maximalist patterns require confidence but reward boldness immediately.

    Your room becomes a visual experience. Busy patterns tell stories—they suggest travel, artistry, and intentional design choices. The room feels curated by someone with genuine taste, not trendy design.

    24. Blend Retro Prints With Contemporary Minimalist Hardware

    Pair retro prints with ultra-minimalist hardware and styling for a bridged aesthetic that feels intentionally curated. The hardware choice modernizes vintage patterns.

    Find retro-print curtains ($60-$140 per panel from Etsy, Wayfair, or specialty vintage home sites) in 1950s-70s inspired patterns: atomic prints, geometric abstracts, or bold color-blocks. Mount with minimal black, brushed brass, or stainless steel rods with no rings, tassels, or embellishment. Keep walls neutral and furniture contemporary. The minimal hardware grounds the pattern in modern sensibility. Installation takes 25 minutes.

    This contrast feels intentional and designer-aware.

    Your space reads as thoughtfully styled. The minimalist hardware prevents retro patterns from feeling costumey—instead, they feel collected. This approach works beautifully in mid-century modern, transitional, or contemporary interiors.

    25. Layer Patterned Linen Curtains With Matching Roman Shades

    Layer patterned linen curtains with matching roman shades for a coordinated, high-design window treatment that reads intentional and expert.

    Choose a pattern you love and source it in both curtain and shade fabric ($150-$280 total from Crate & Barrel, Restoration Hardware, Etsy, or custom upholsterers). Linen naturally coordinates beautifully when matched. Hang floor-length linen panels with a patterned roman shade inside them. The shade handles light control while the curtains add drama and fullness. Professional installation recommended ($150-$250) to ensure proper alignment.

    This treatment reads expensive immediately.

    Your window becomes a designed focal point. The coordinated pattern creates sophistication and intentionality. Linen’s natural texture pairs beautifully with the pattern. This approach works in any design aesthetic from traditional to contemporary.

    Save this guide and bookmark your top three ideas for your next room refresh. Which pattern speaks to your style? The best window project is the one you actually start this weekend—pick one idea and make it real.