Author: Clara Bennett

  • 23 Hidden TV Wall Concepts That Make Tech Disappear Beautifully

    23 Hidden TV Wall Concepts That Make Tech Disappear Beautifully

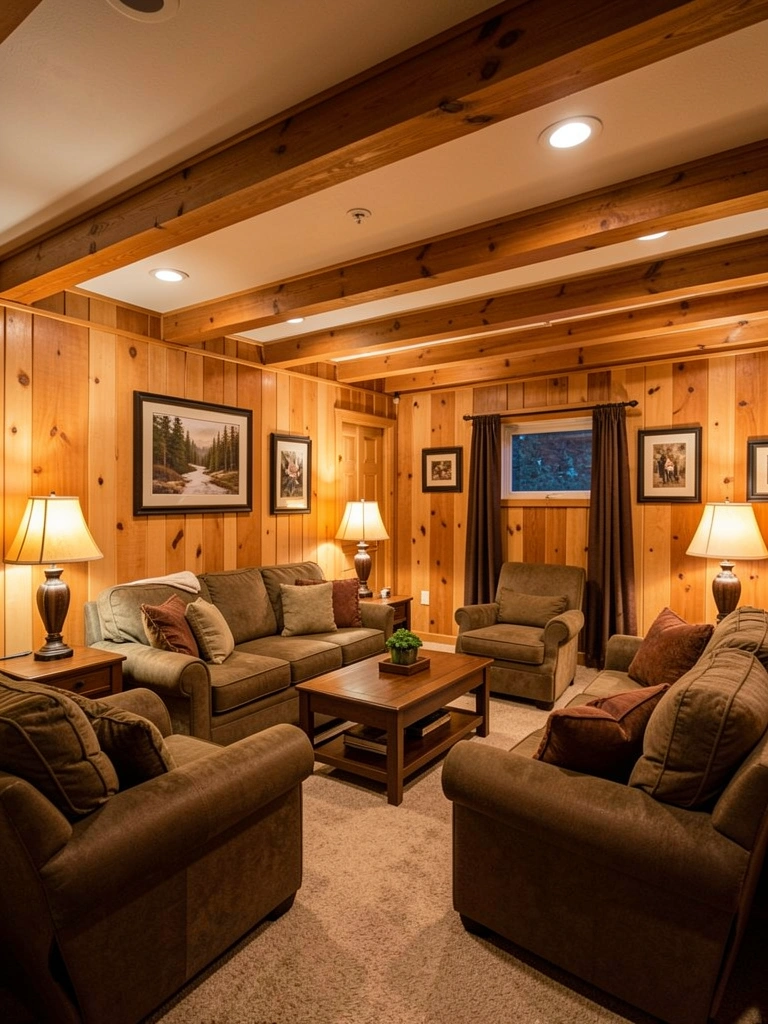
    You know that feeling when you walk into a room and your eyes immediately land on a tangle of wires, clunky cables, and a boxy TV stand? It kills the whole vibe. What if your TV could blend seamlessly into your space instead of screaming for attention? The best TV walls don’t announce themselves—they disappear into beautifully designed focal points that make you forget you’re looking at technology at all. Whether you’re working with a tiny apartment, a rental, or just tired of the eyesore behind your screen, these 23 ideas show you how to hide your tech while creating walls that actually deserve to be on your camera roll. Ready to make your TV vanish?

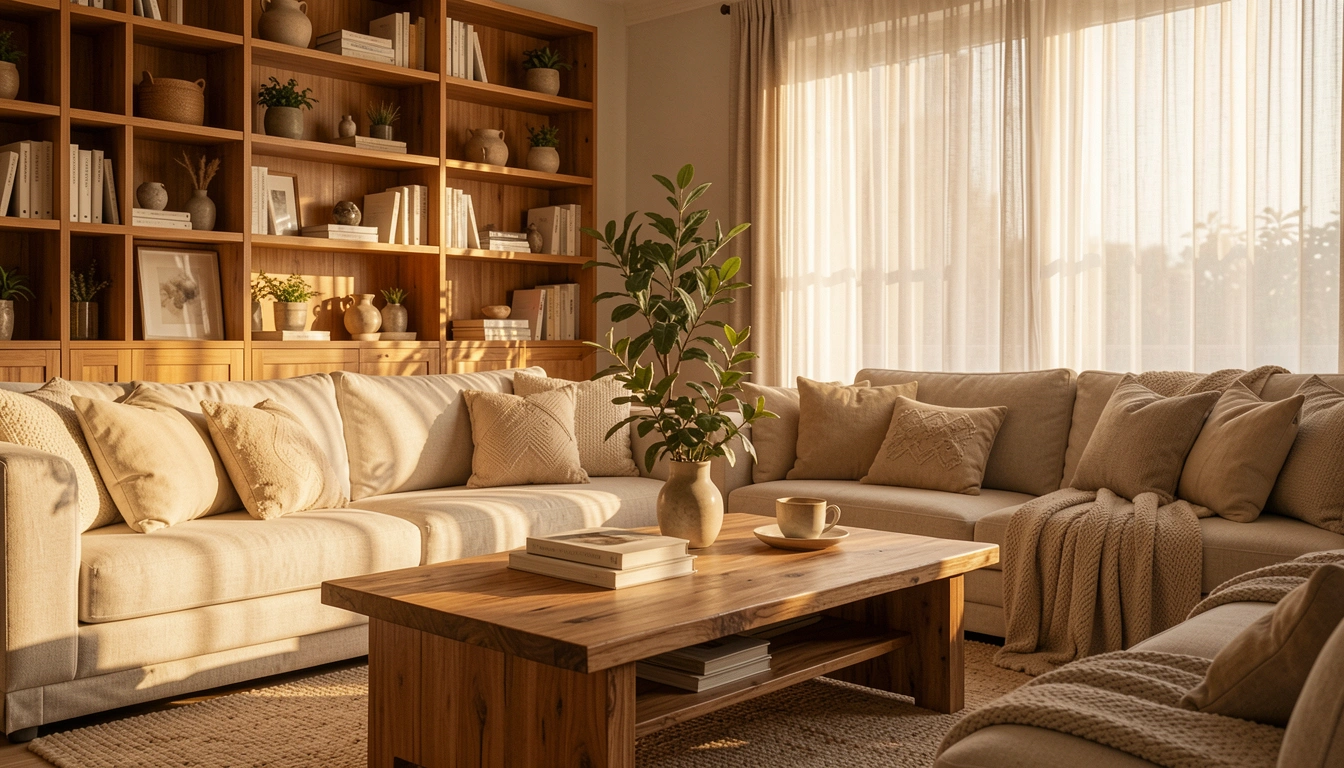
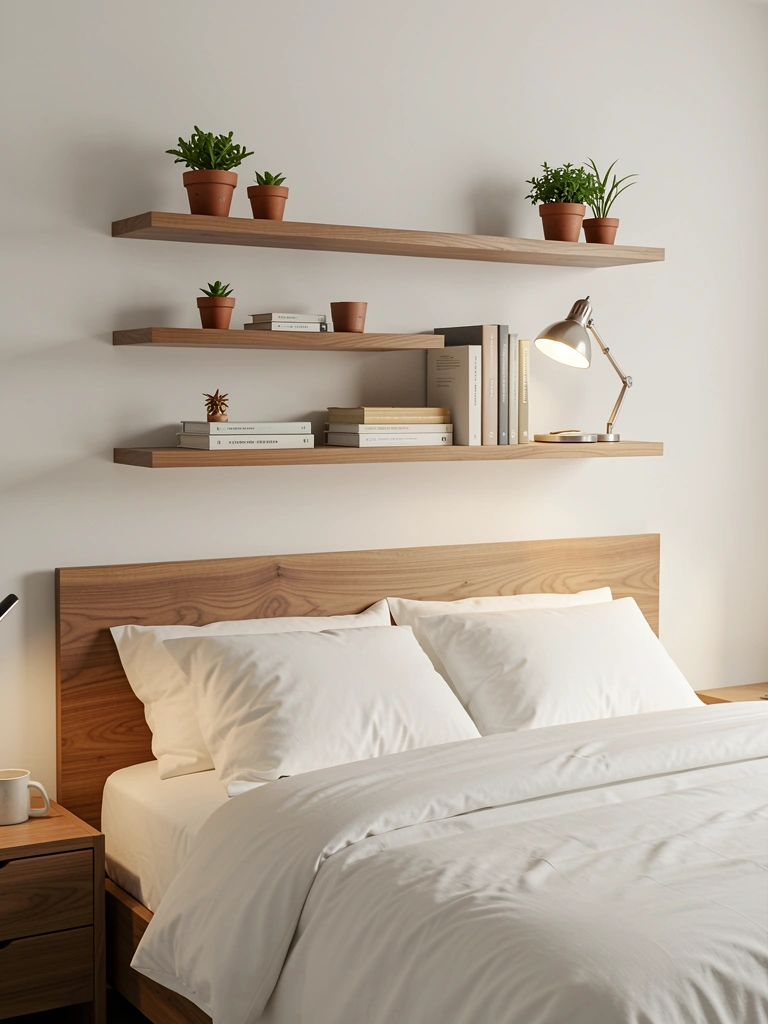
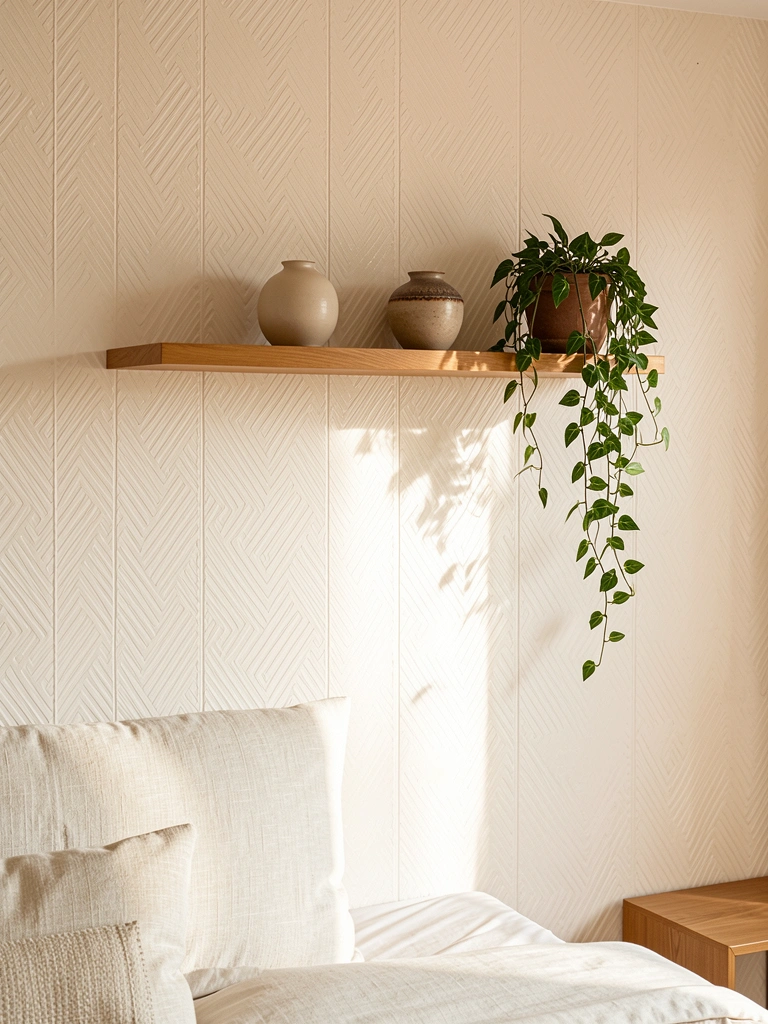
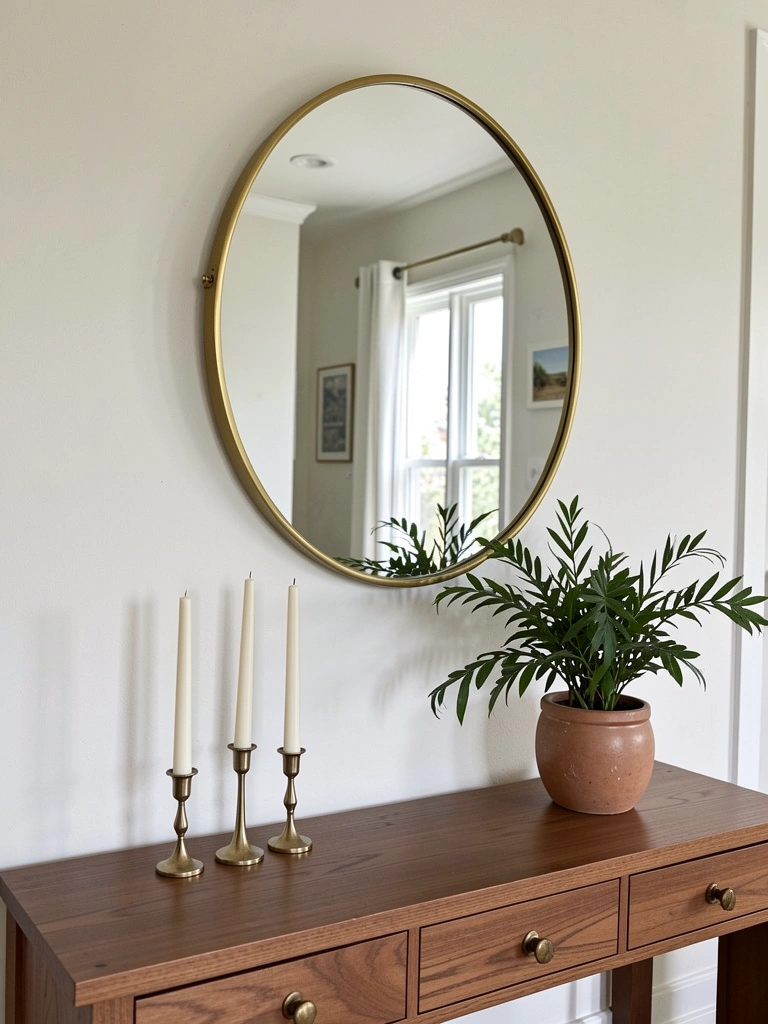
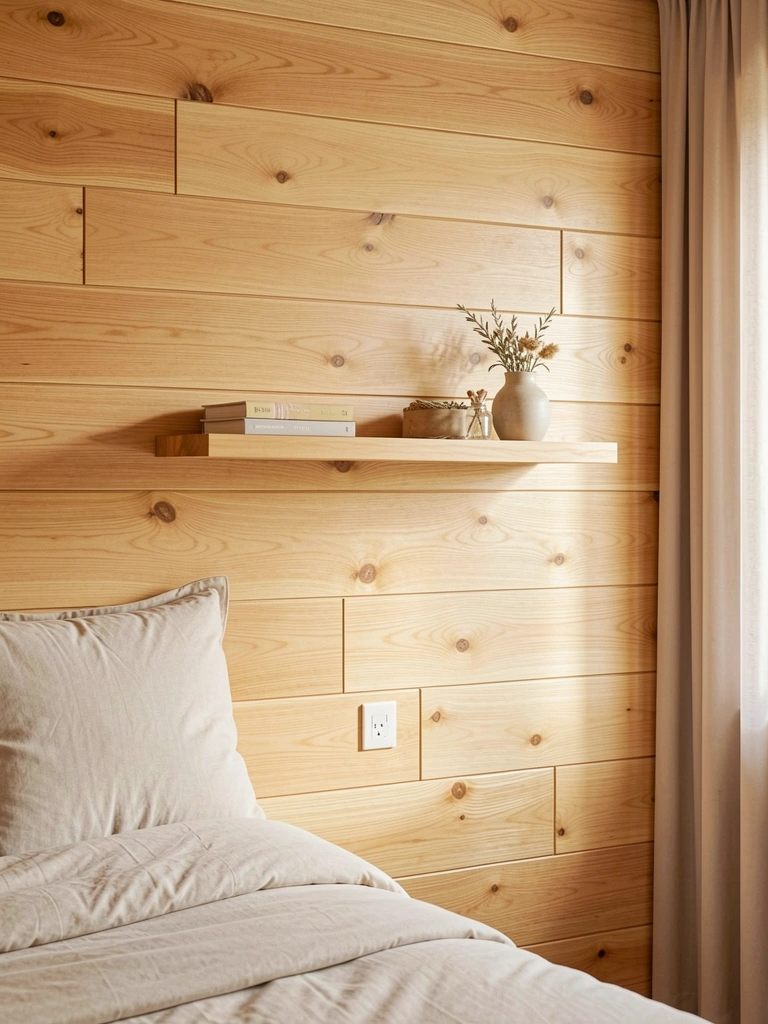
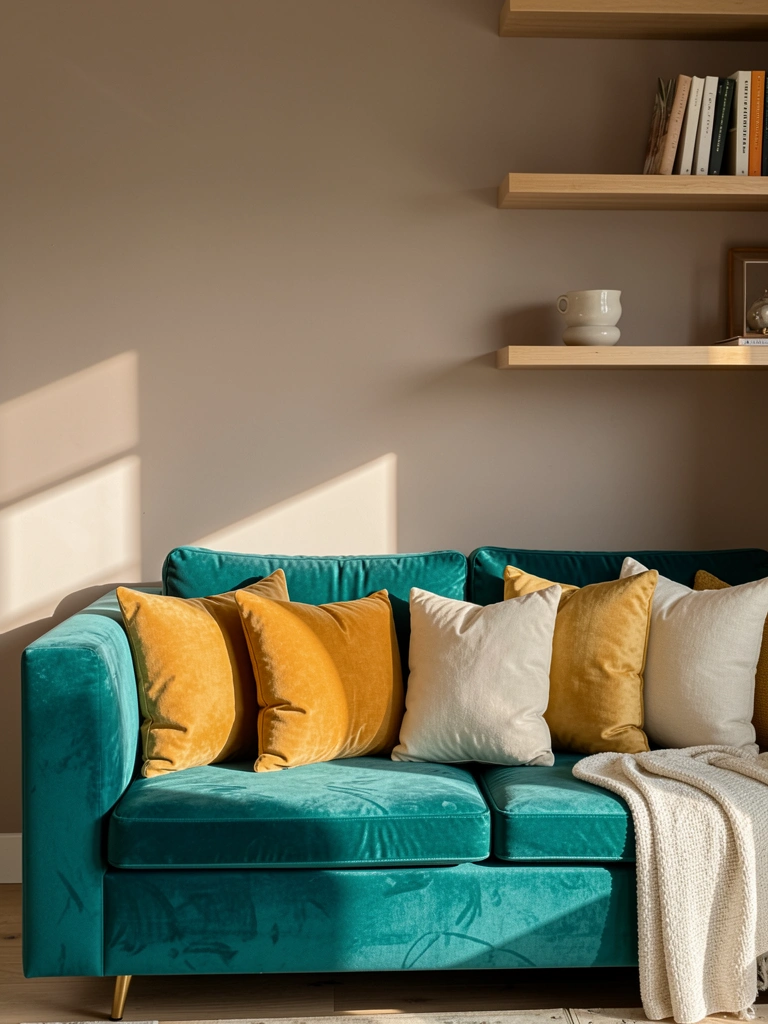
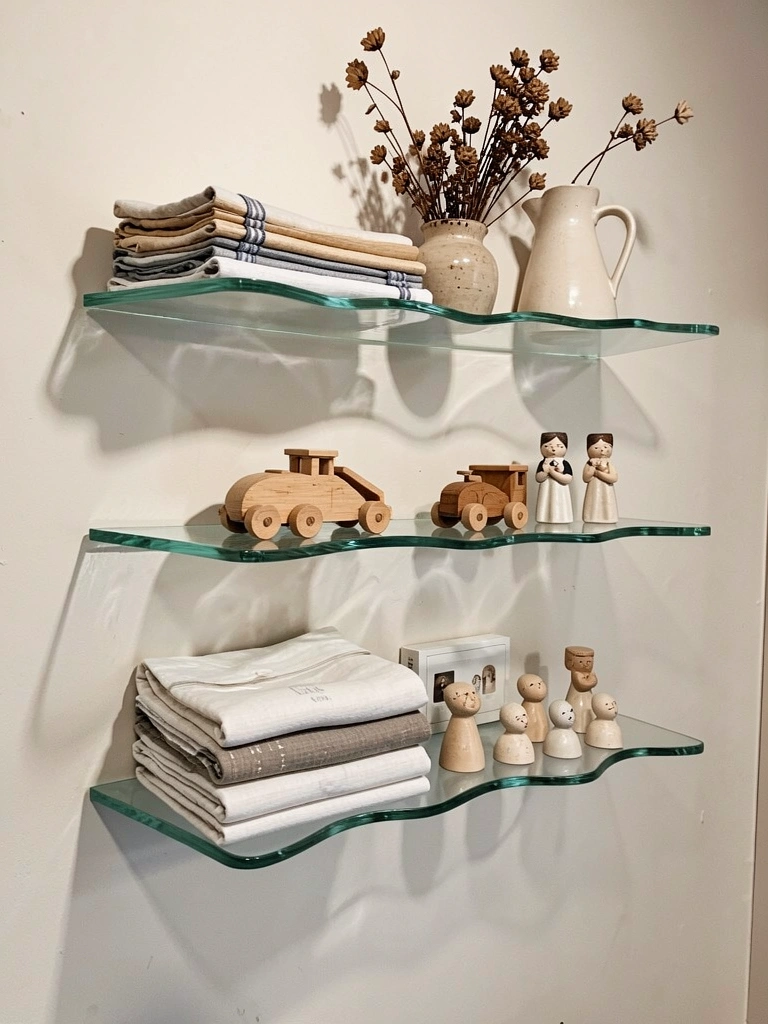
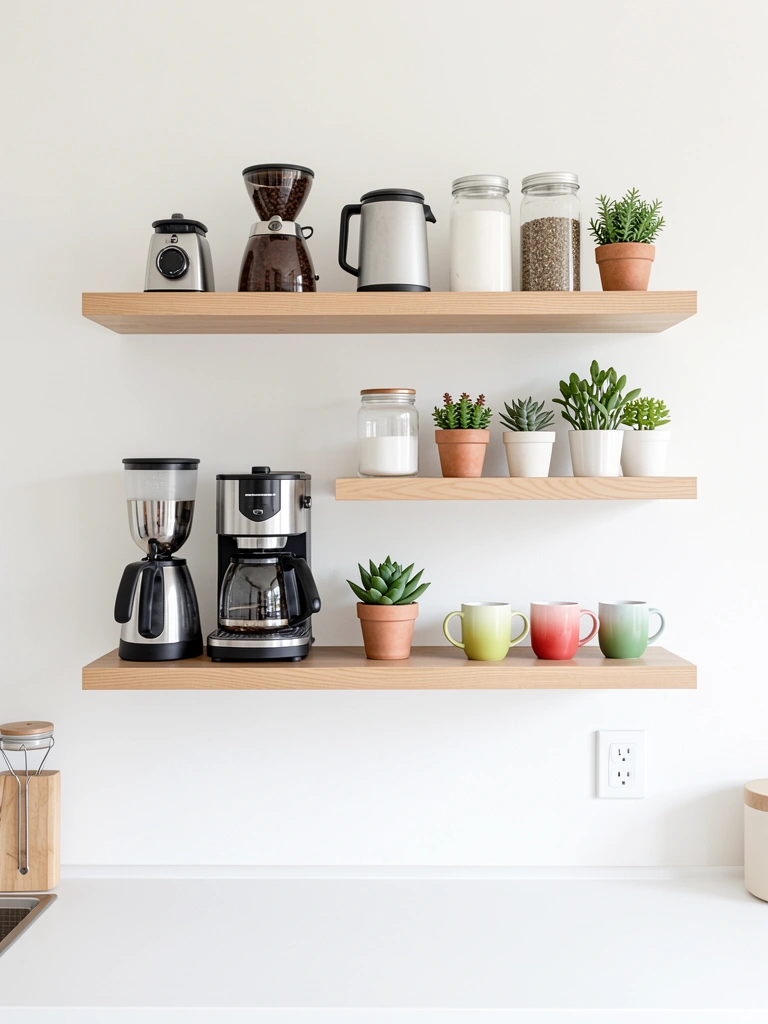
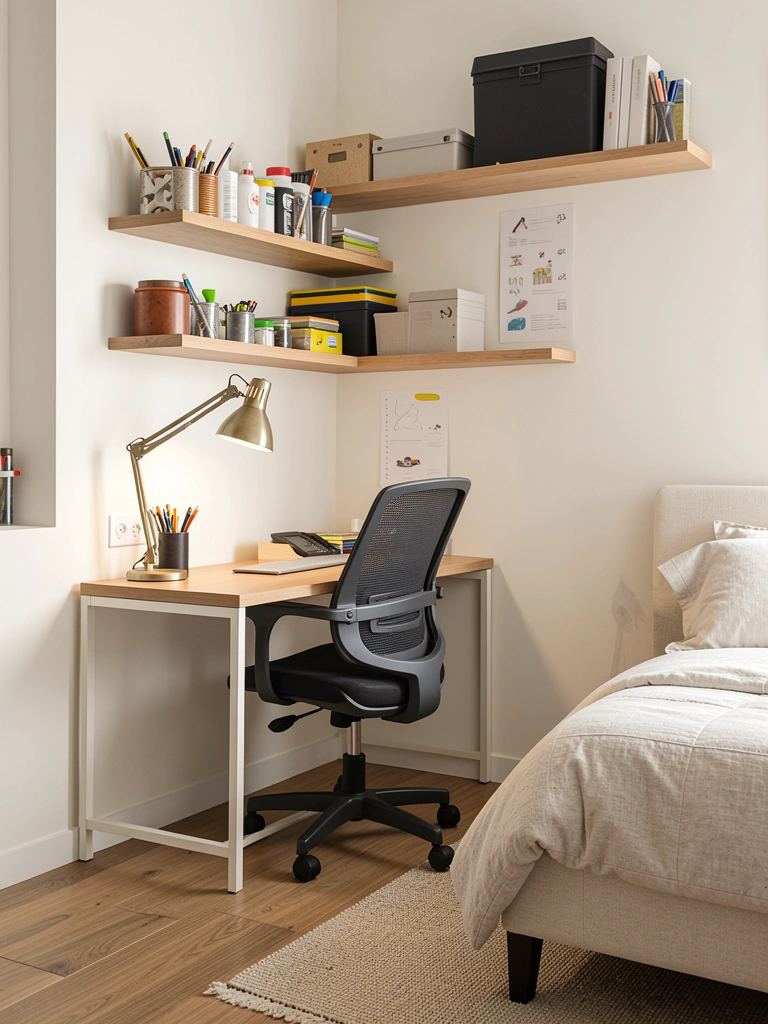
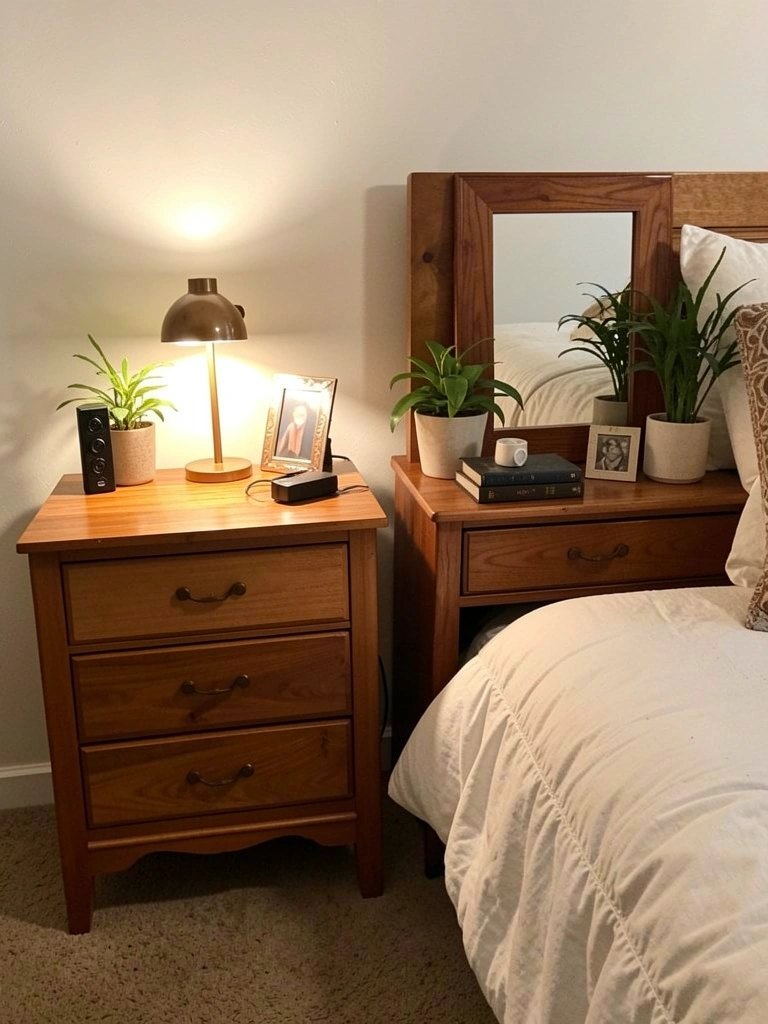
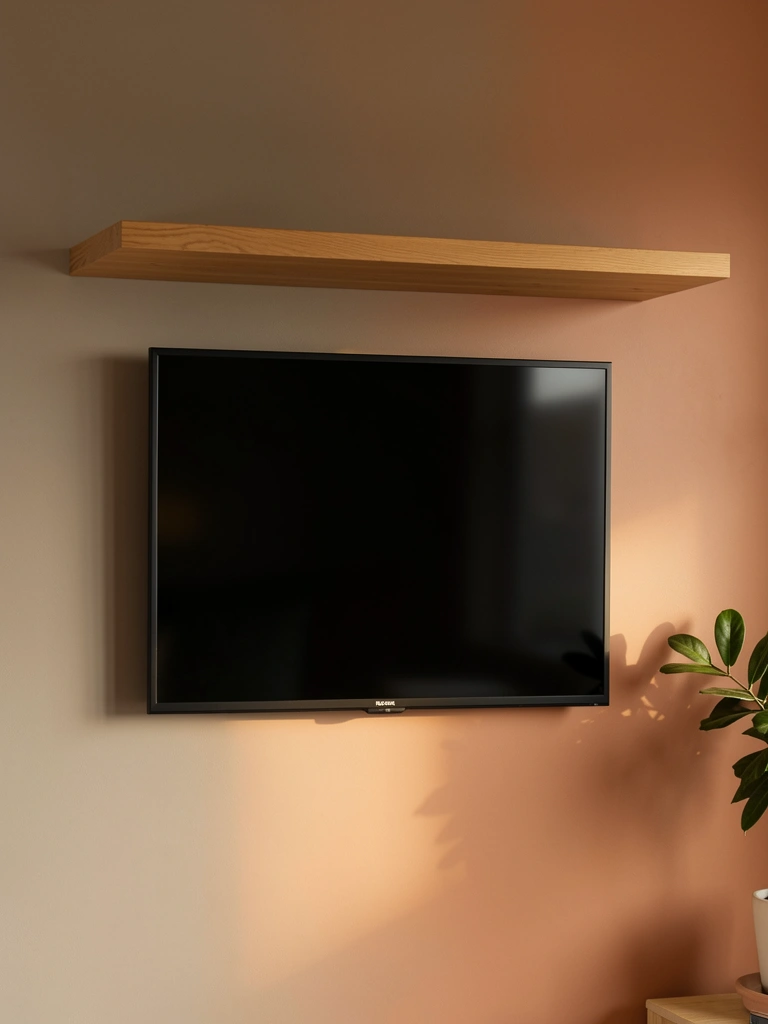
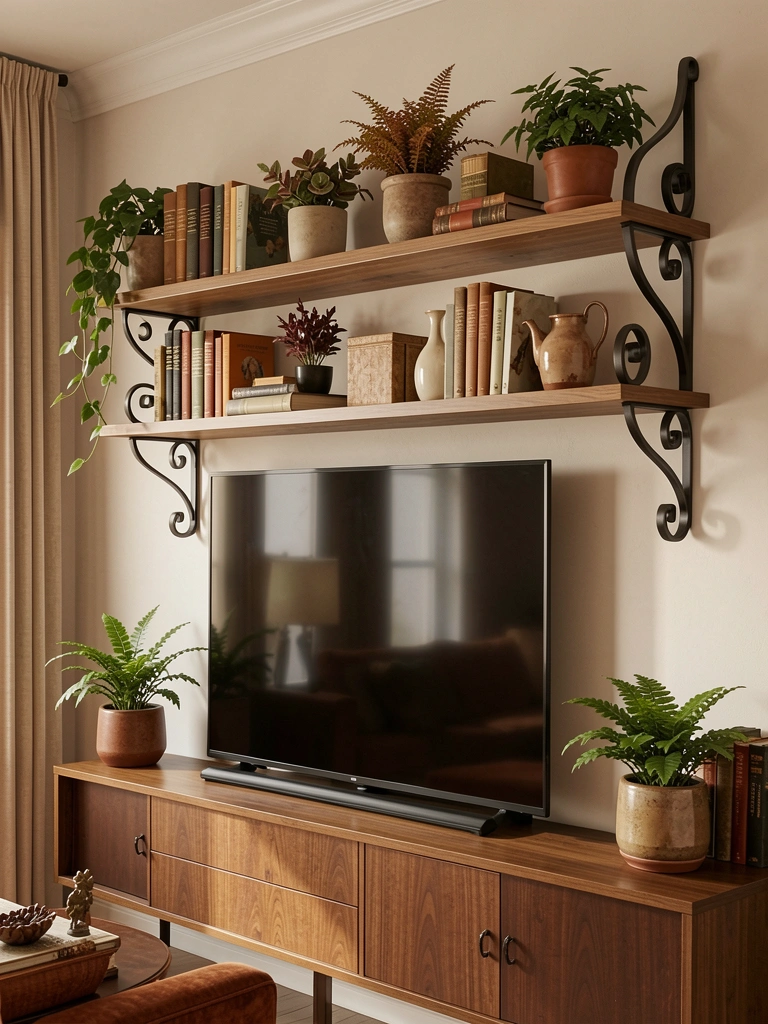
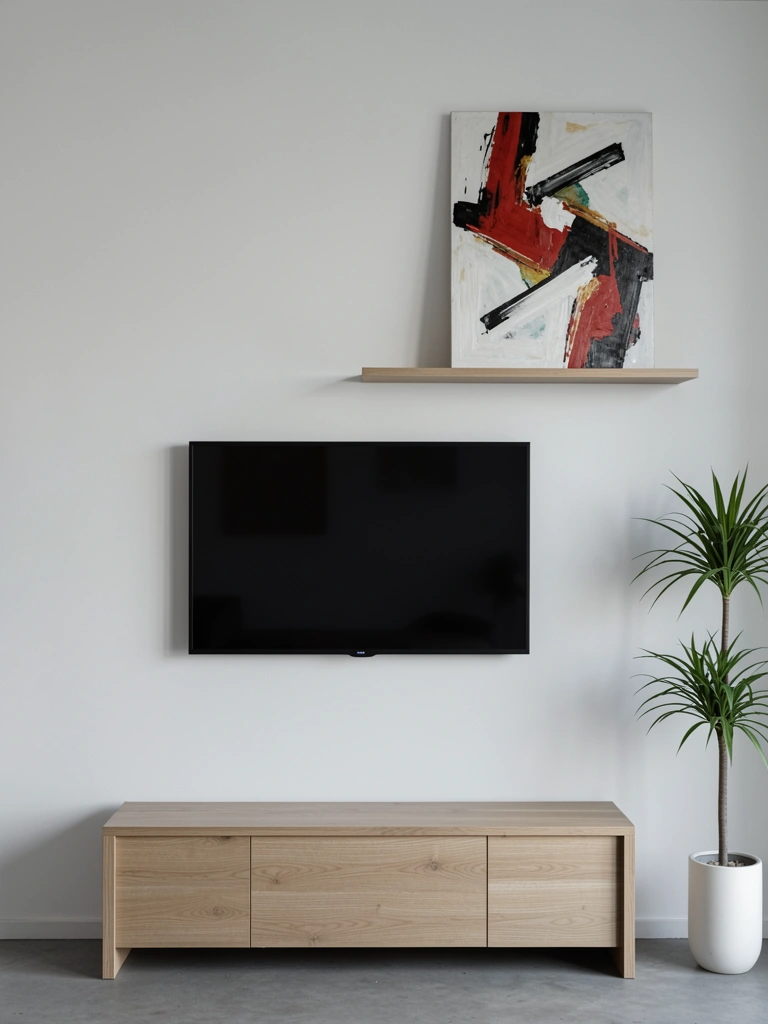
    1. Install Floating Media Shelves Around the TV

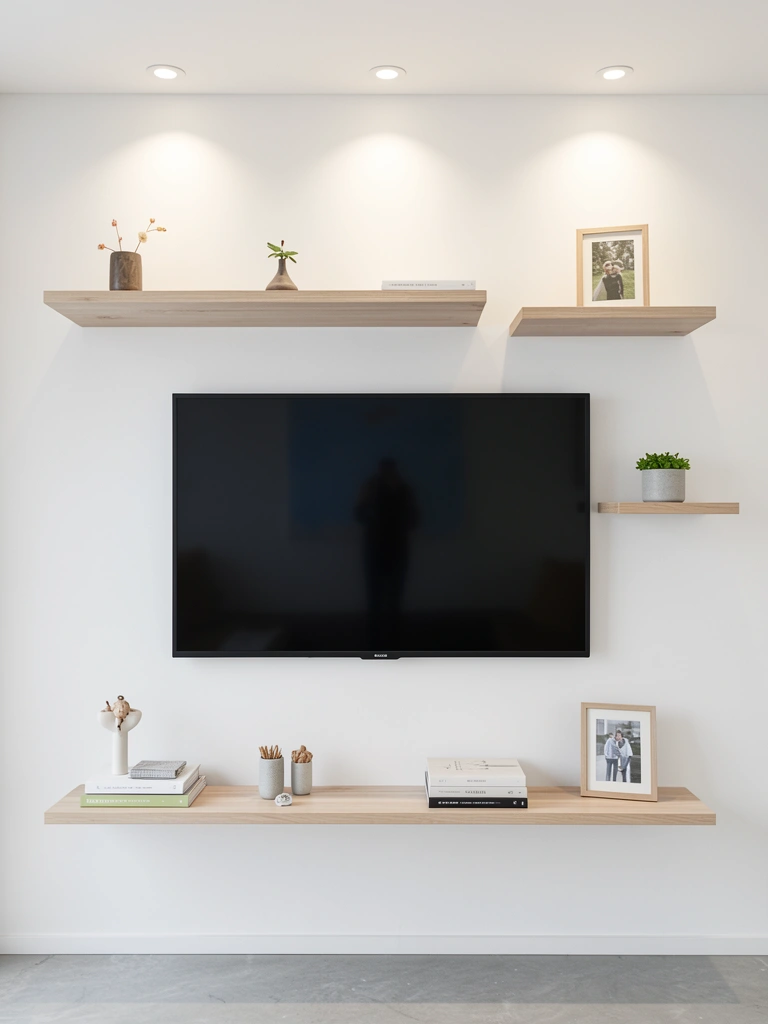
    Floating shelves create the illusion that your entertainment setup is weightless and less intrusive. They draw the eye away from the TV itself and up to your curated display, making the technology feel like just one part of a larger design story.

    Mount 2-3 floating shelves on either side of your TV using heavy-duty brackets rated for at least 25 lbs each. Space them 12-18 inches apart for balanced proportions. Cost: $30–$80 per shelf at IKEA, Target, or Home Depot. Installation takes about one hour with a level and drill. Fill shelves sparingly—three to five items per shelf creates breathing room and prevents visual clutter.

    Pro tip: Leave the middle of each shelf empty to keep sightlines clean and let the wall texture show through.

    Your wall instantly becomes a gallery rather than just a TV holder, and guests will focus on your styling choices first.

    2. Hide Cables with Cord Covers That Match Your Wall

    Visible cables are the biggest visual culprit—they make even a beautiful setup look chaotic. Matching cord covers aren’t just functional; they’re invisible design helpers that instantly clean up your wall’s appearance.

    Use fabric-wrapped or paintable cable raceways ($15–$40 at Amazon or Home Depot) that let you paint them to match your wall color. Run cables vertically down the center of your TV wall if possible—horizontal runs catch the eye more easily. Use cable ties or velcro straps ($5–$10) to bundle wires before covering them. If your wall is textured, opt for corner-mounted raceways that hug the edges instead. Time estimate: 30–45 minutes.

    Bonus: Label cables at both ends before hiding them so troubleshooting later doesn’t require untangling everything.

    Your wall becomes immediately calmer, and you’ve bought yourself peace of mind when equipment needs adjustment.

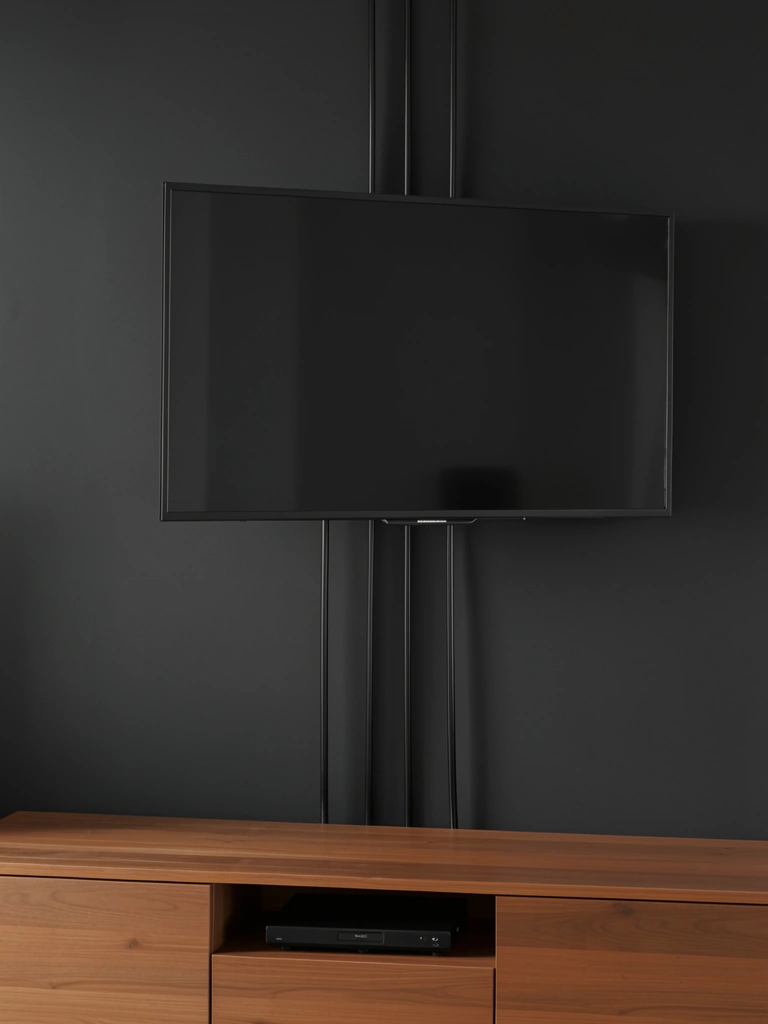
    3. Create a Disappearing TV with Smoked Glass Framing

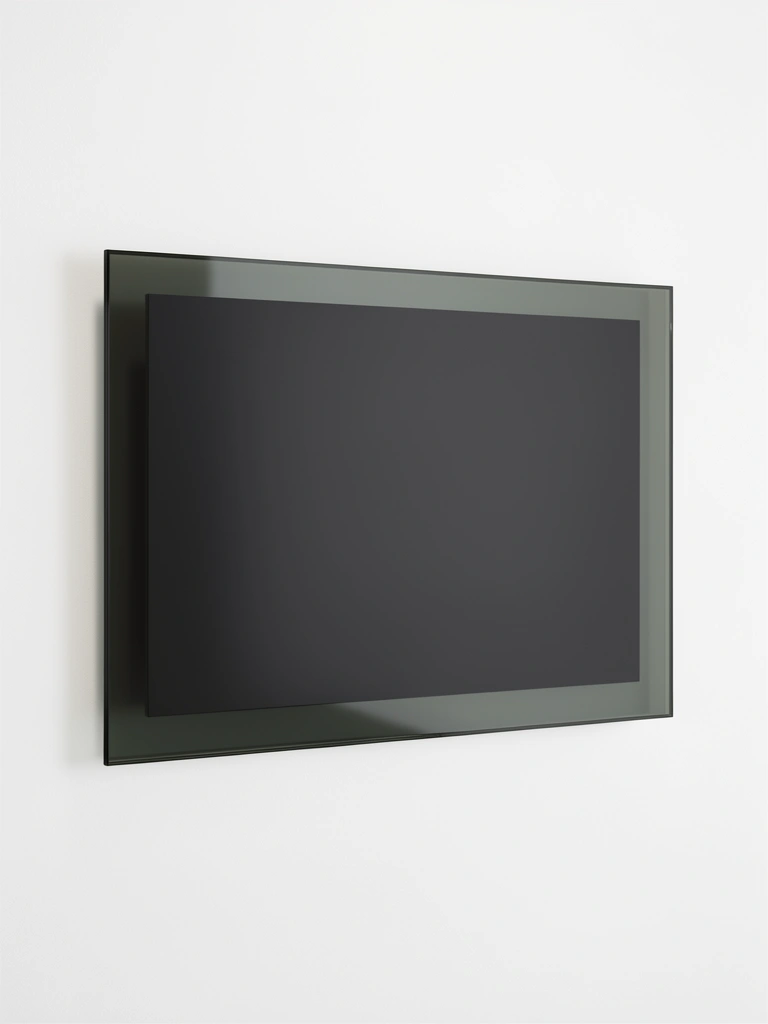
    A smoked glass frame makes your TV essentially vanish when it’s not in use. The reflective finish camouflages the black screen and makes the whole unit read as a subtle architectural detail rather than an appliance.

    Order a custom-cut smoked or dark-tinted glass frame ($120–$250 from Etsy makers or local framing shops) sized to fit around your TV bezel. Install it with mounting clips ($10–$20) that attach to your wall studs. The glass should sit 1–2 inches from the screen to avoid heat trapping. Alternatively, use a manual TV lift mechanism ($300–$600) to motorize the TV into a recessed wall cavity when not in use—this is the ultimate disappearing act.

    Pro tip: Pair this with a dark accent wall (charcoal, navy, or black) to maximize the disappearing effect.

    When your TV is off, your wall looks intentionally designed instead of appliance-heavy, which changes how the entire room feels.

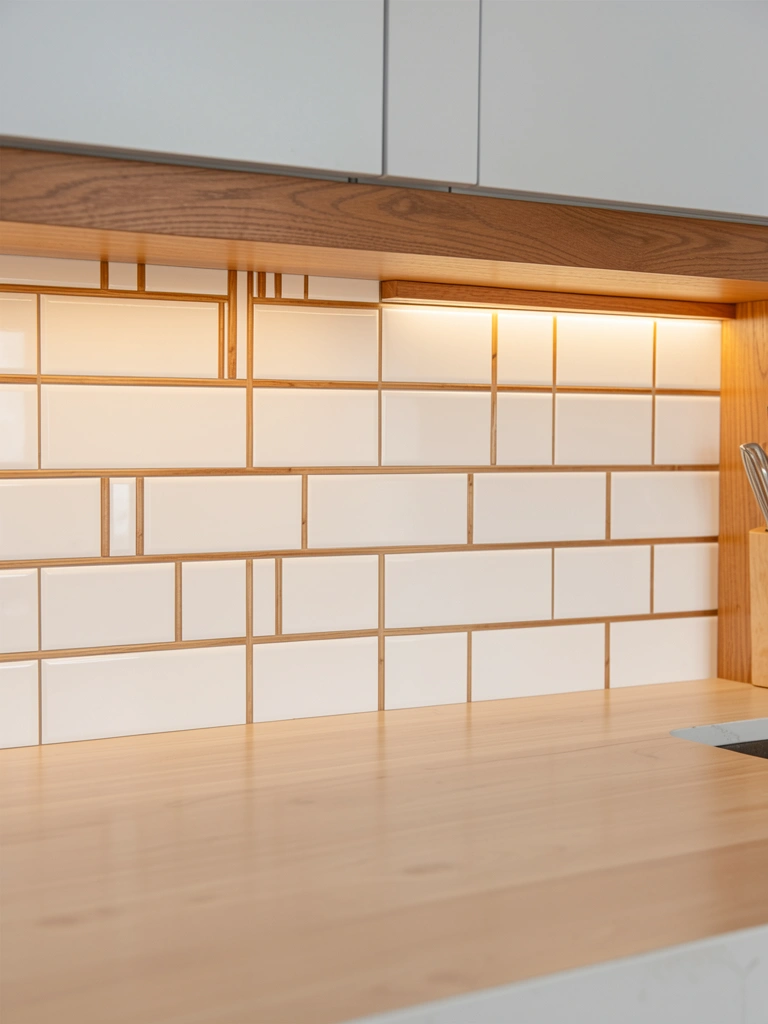
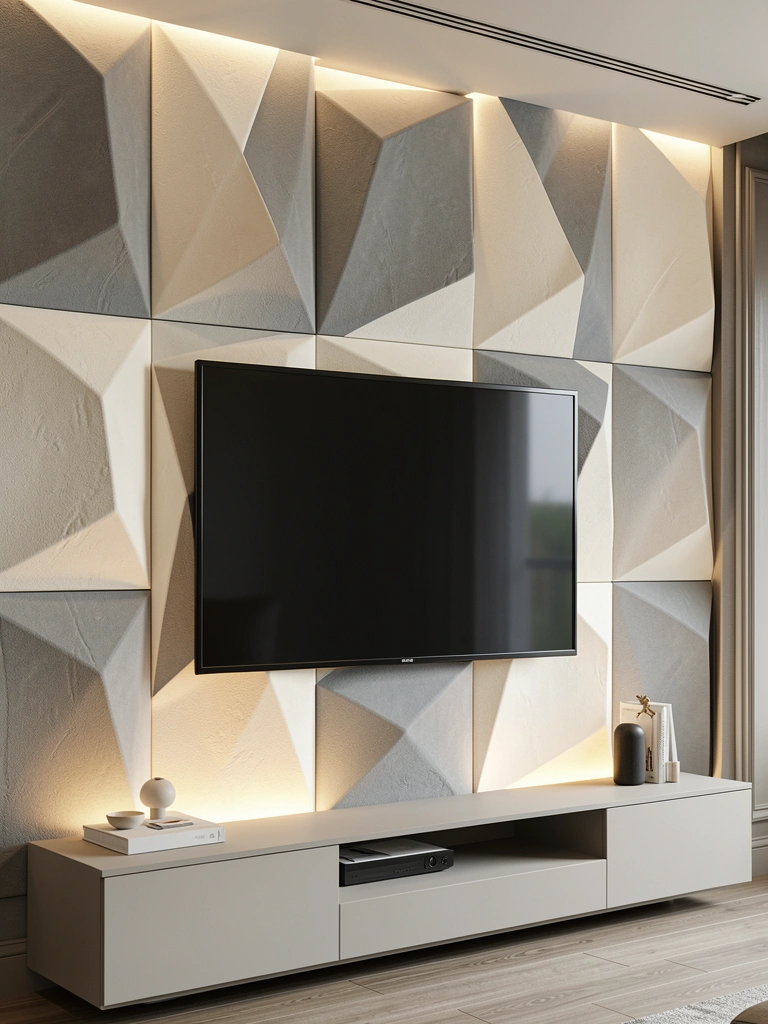
    4. Use Fluted or Slatted Wood Panels Behind the TV

    Fluted or slatted wood creates visual interest that gives your eye something to explore beyond the TV screen. The grooves add dimensionality and warmth, making the TV feel like part of a intentional design scheme rather than a bolt-on afterthought.

    Install pre-made slat wall panels ($50–$150 from IKEA, Wayfair, or Etsy) using construction adhesive or mounting brackets. You can cover just the area directly behind the TV or extend panels floor-to-ceiling for maximum impact. Time: 2–4 hours depending on wall prep. Sand and stain unfinished wood ($20–$40 extra) to match your décor. Renter option: Use adhesive-backed slat panels ($40–$100) for a damage-free alternative.

    Styling tip: Paint the slats a soft neutral (cream, greige, light gray) to keep the focus on texture rather than color.

    Your TV wall becomes a design feature that guests comment on instead of stare past, and the wood warmth makes the tech feel less cold and industrial.

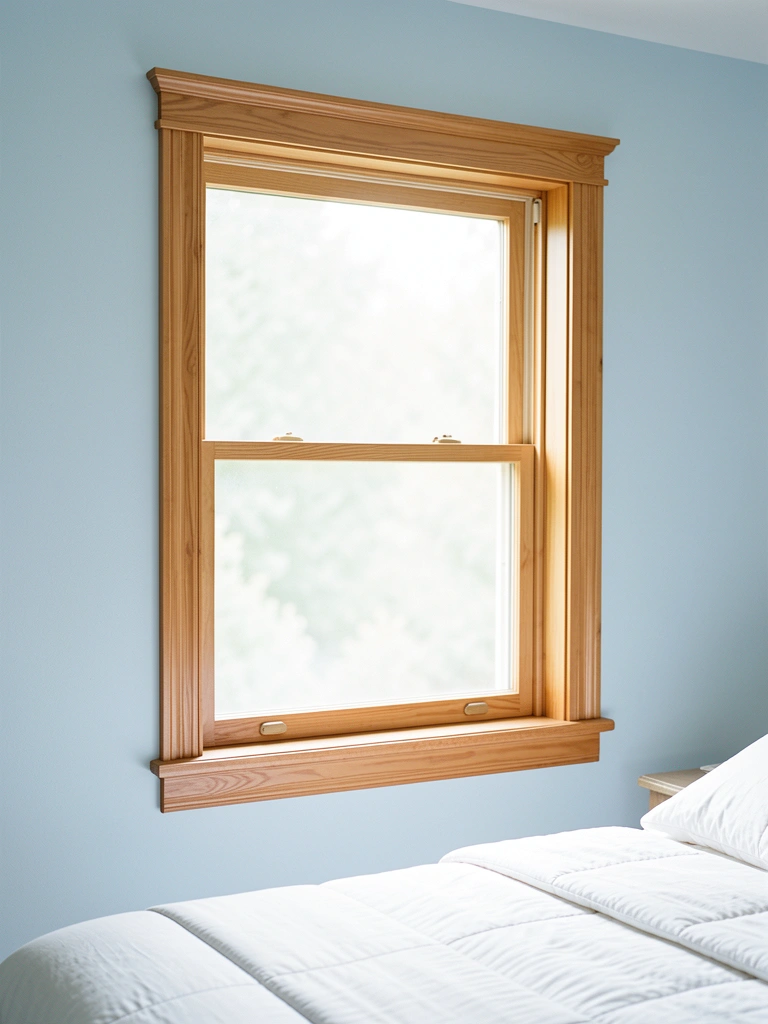
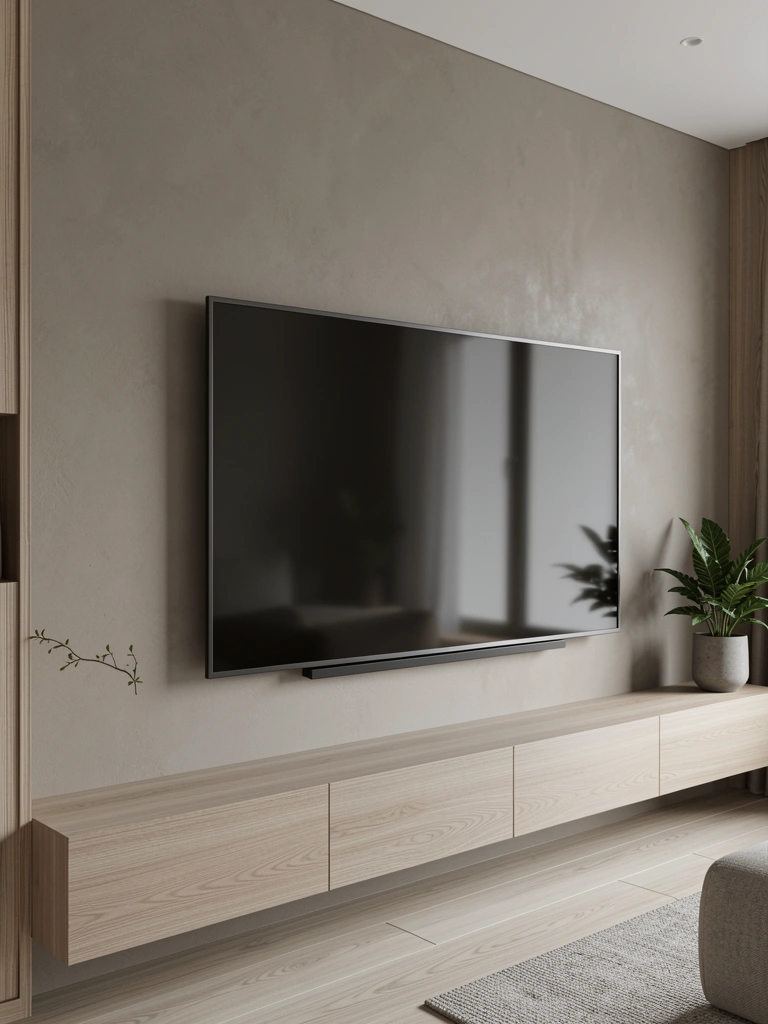
    5. Mount the TV Higher on the Wall with a Tilting Bracket

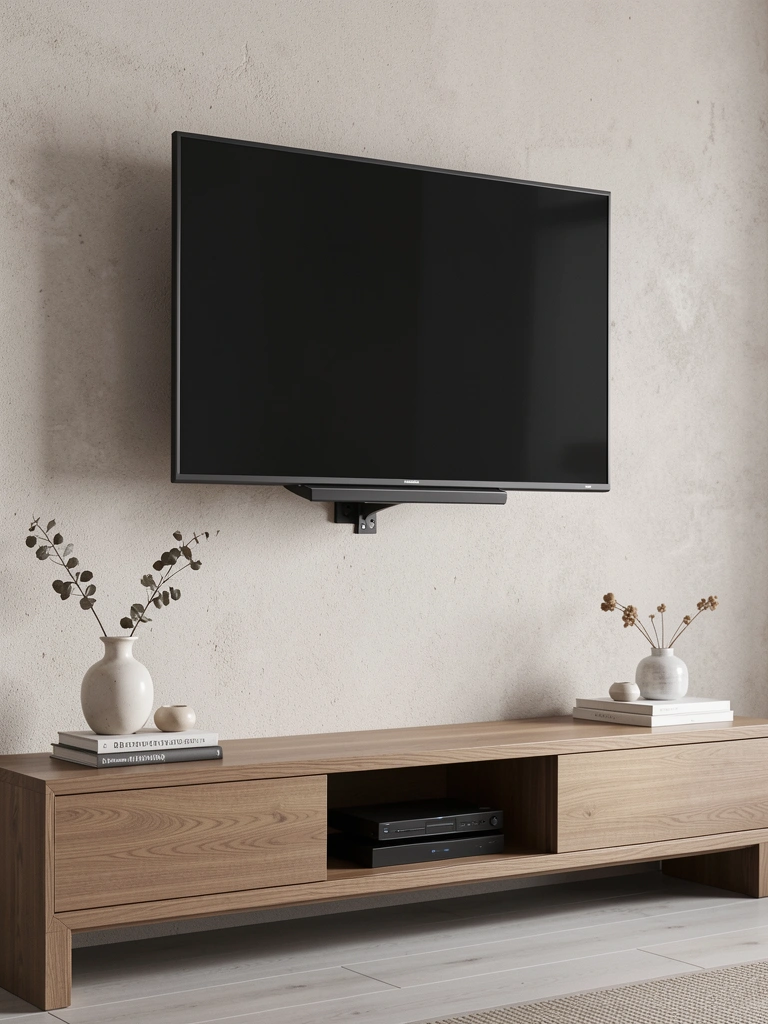
    Mounting your TV slightly higher than standard eye level lets you tuck a full-length console below it without the TV sitting directly on top of furniture. This vertical separation makes both elements feel separate and less “blocky.”

    Use a tilting articulating bracket ($40–$100 from Amazon, Best Buy, or Home Depot) to angle the TV down slightly for comfortable viewing. Install studs at 60–65 inches from the floor (higher than the typical 55 inches) to create visual separation from the console. Ensure your TV supports the bracket weight and test with a stud finder ($10–$15) before drilling.

    Pro tip: The tilting feature lets you adjust viewing angles if your seating isn’t directly facing the wall—bonus functionality hidden in good design.

    This setup makes your room feel more spacious because the open space between TV and furniture reads as intentional breathing room rather than just “there’s stuff here.”

    6. Install an Acoustic Panel Wall for Sound + Style

    Acoustic panels serve double duty—they absorb sound and add stunning visual texture while doing so. Your guests won’t realize you’ve hidden sound-dampening tech right in the design.

    Choose decorative acoustic panels in fabric-wrapped or felt varieties ($30–$80 each from Amazon, Wayfair, or specialty acoustic shops). Arrange them in a grid, chevron, or staggered pattern across your TV wall. Cost for a 8×10 area: $150–$400 depending on coverage. Use acoustic panel adhesive ($15) for permanent mounting, or 3M picture hangers ($5–$10) for renters. Installation time: 1–2 hours.

    Pro styling: Mix two complementary colors (soft gray + cream, or taupe + white) to create visual interest while keeping the palette cohesive.

    Your TV space becomes visually sophisticated while secretly improving your room’s acoustics—conversations stay crisp and TV audio sounds cleaner without bouncing off hard surfaces.

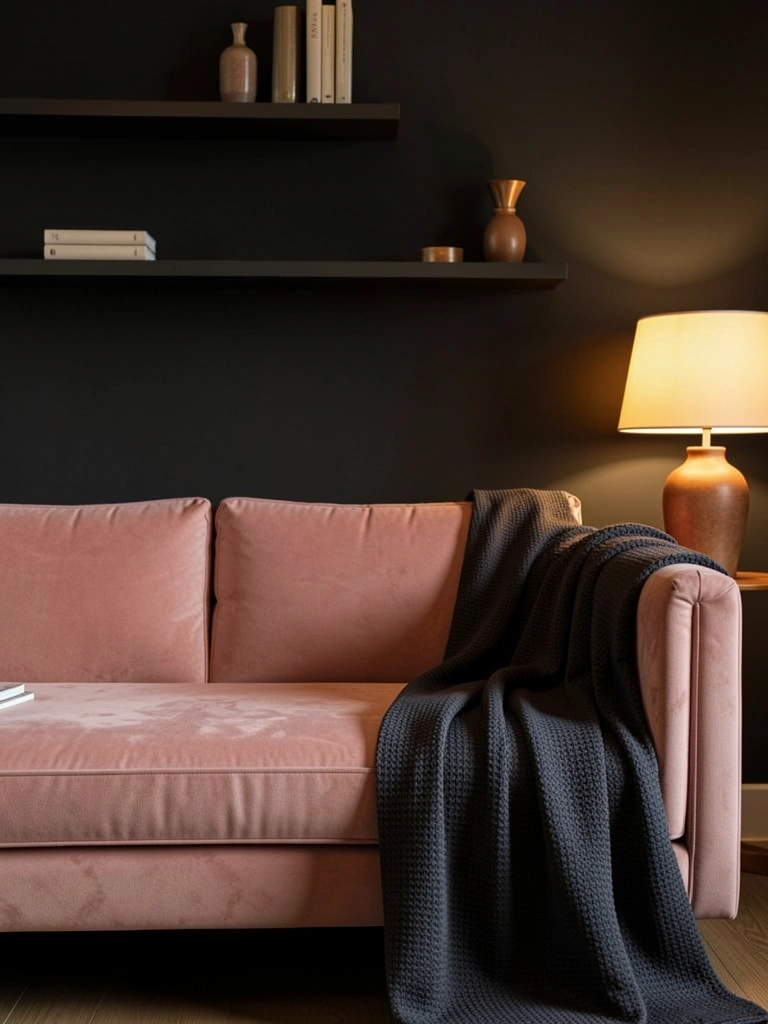
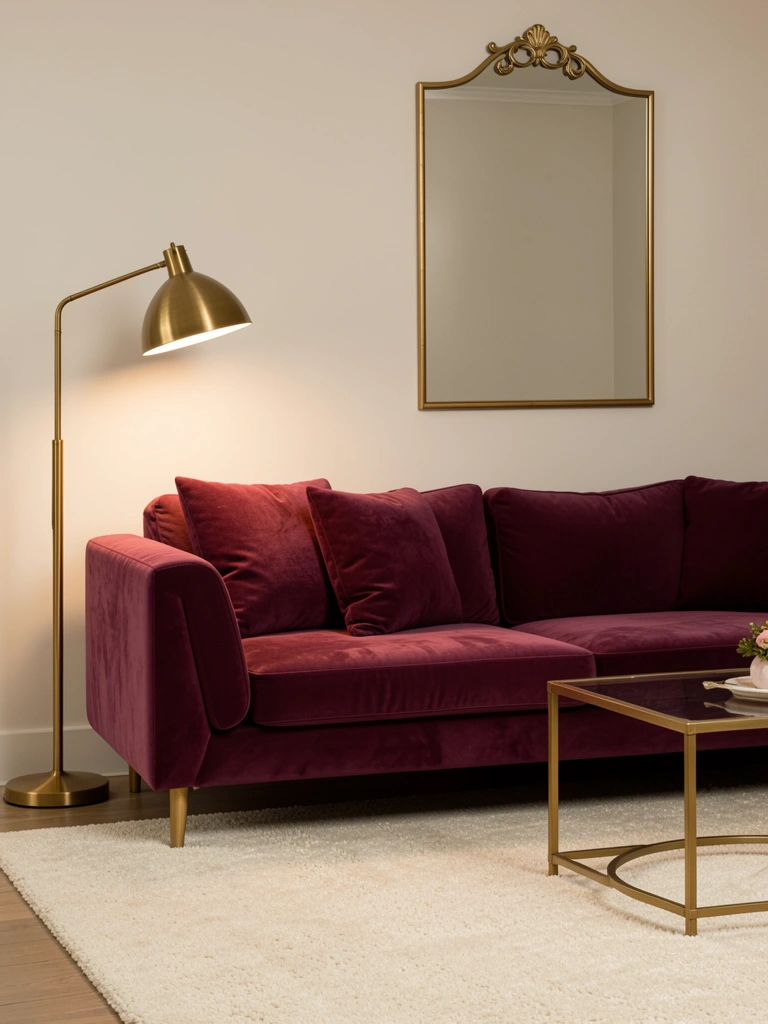
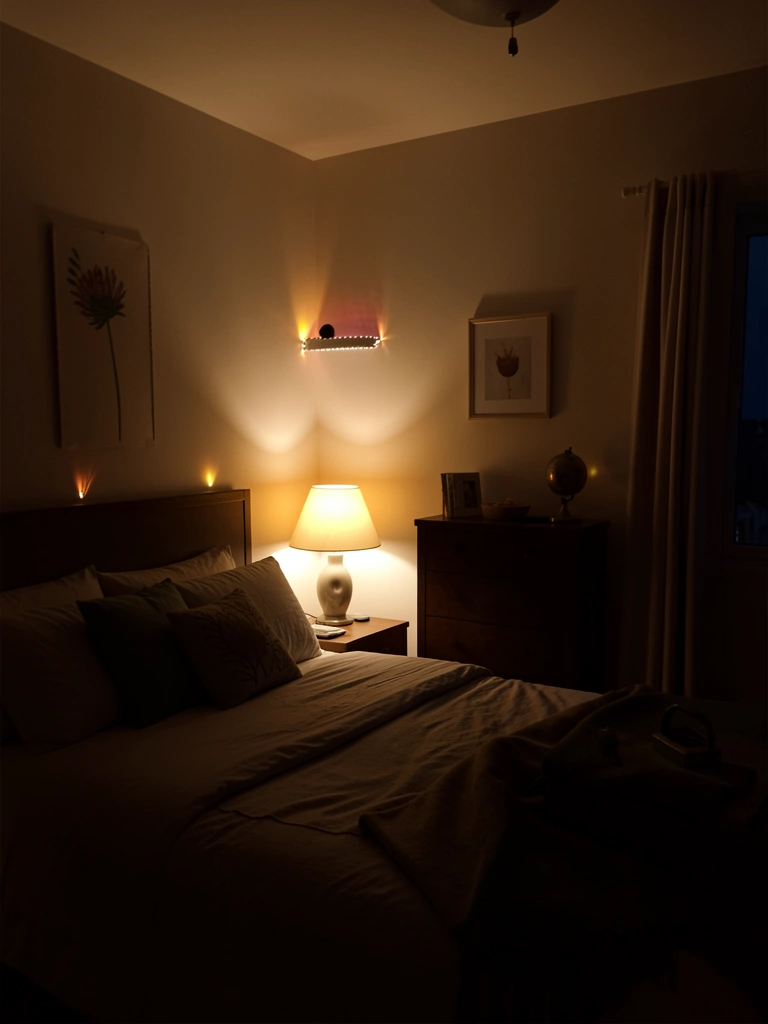
    7. Paint Your TV Wall a Dark Color to Fade the Screen

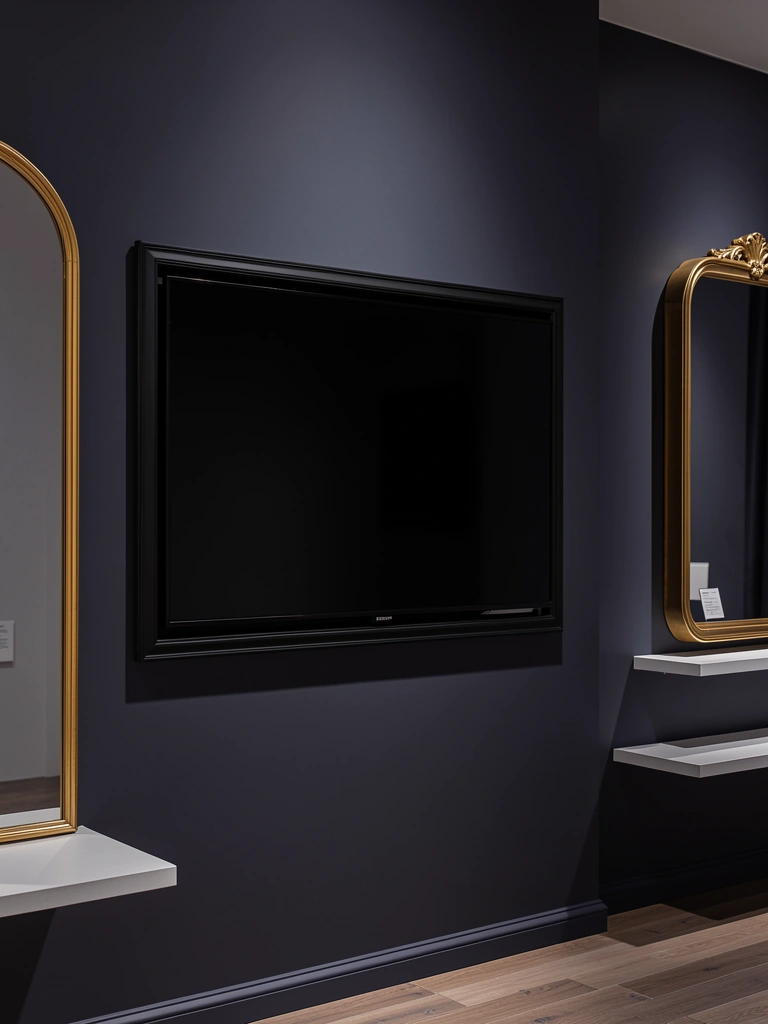
    Painting your TV wall dark (charcoal, navy, deep gray) makes the TV naturally recede into the background. The TV becomes less of a visual shouter because it harmonizes with the surrounding color instead of contrasting sharply.

    Choose a deep, matte finish paint ($20–$40 per gallon) from Benjamin Moore, Sherwin-Williams, or Behr. Test a large patch first—dark colors photograph differently in natural vs. artificial light. Apply two coats for even coverage. Time: 4–6 hours including drying. Pair with warm white LED backlighting ($20–$50) behind the TV to prevent the wall from feeling like a black hole.

    Lighting hack: Use recessed or flush-mount fixtures in the same dark tone to keep the “fading” effect intact.

    Your room instantly reads as more intentional and spa-like, and the TV becomes background ambiance rather than the room’s obvious focal point.

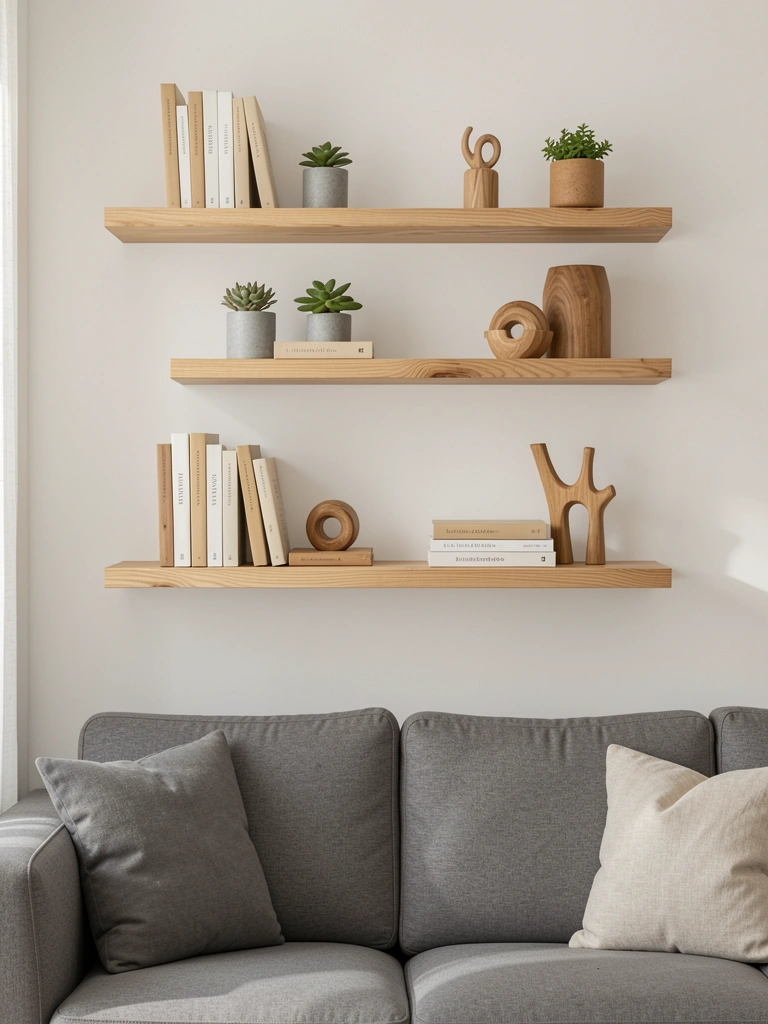
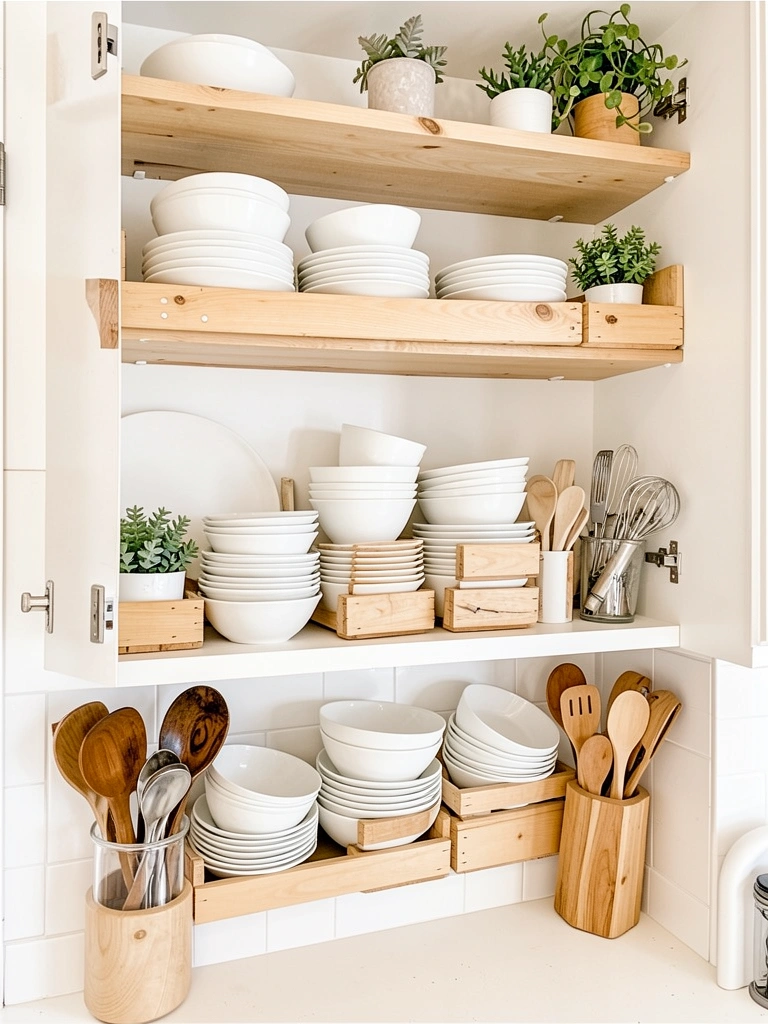
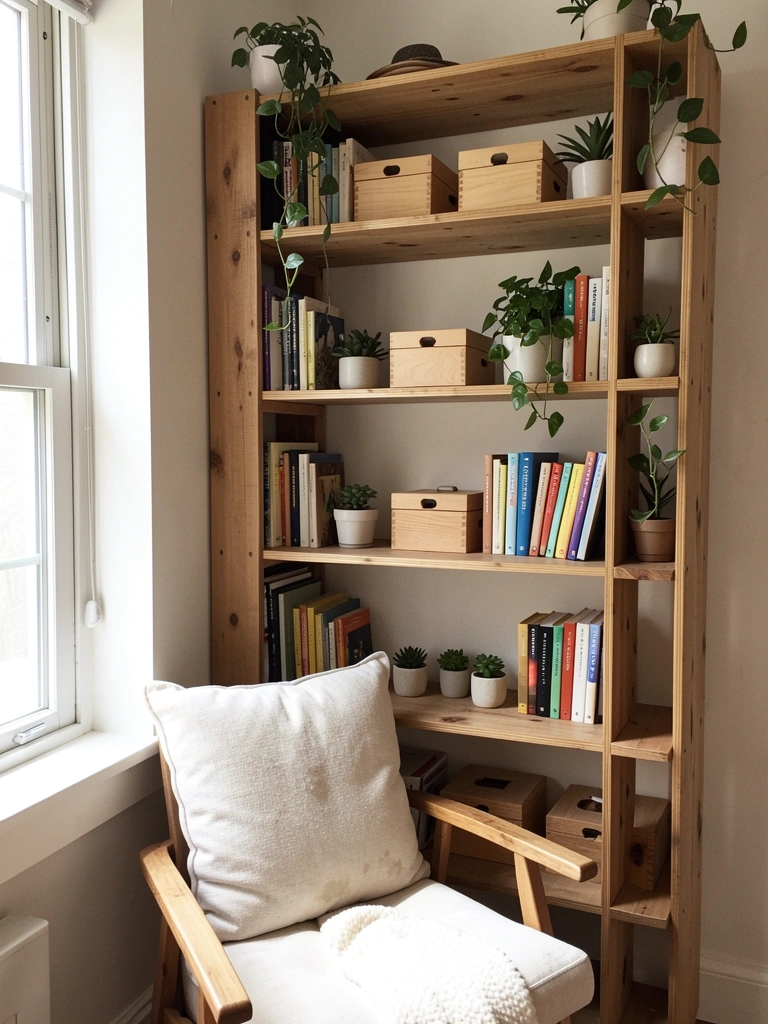
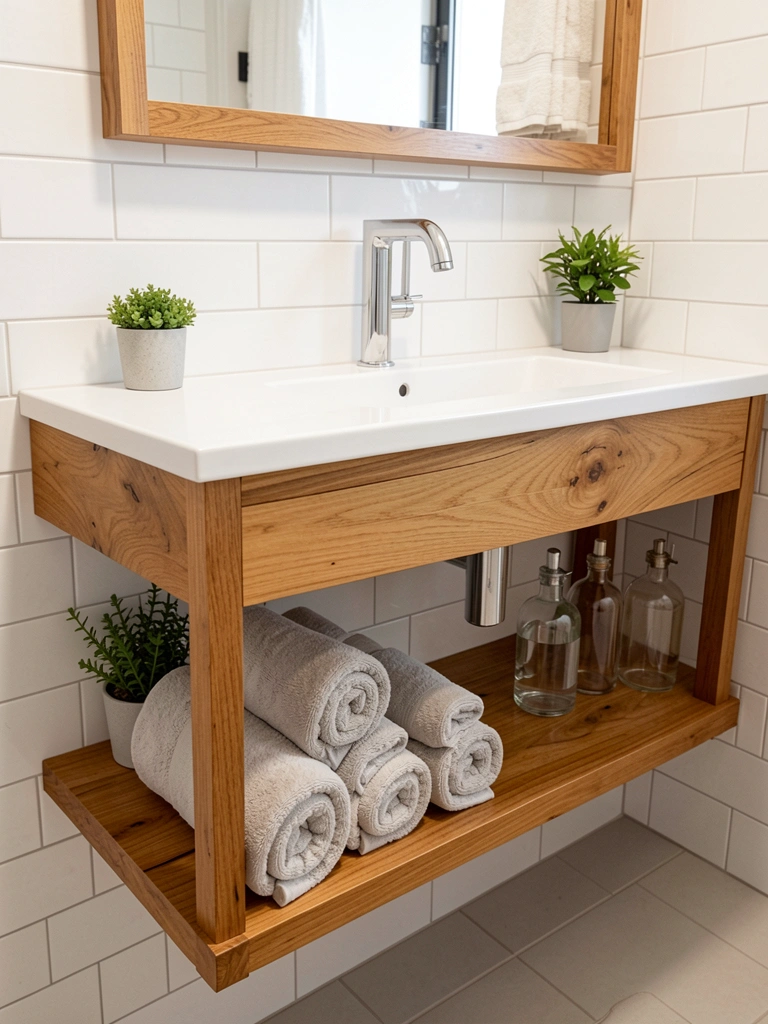
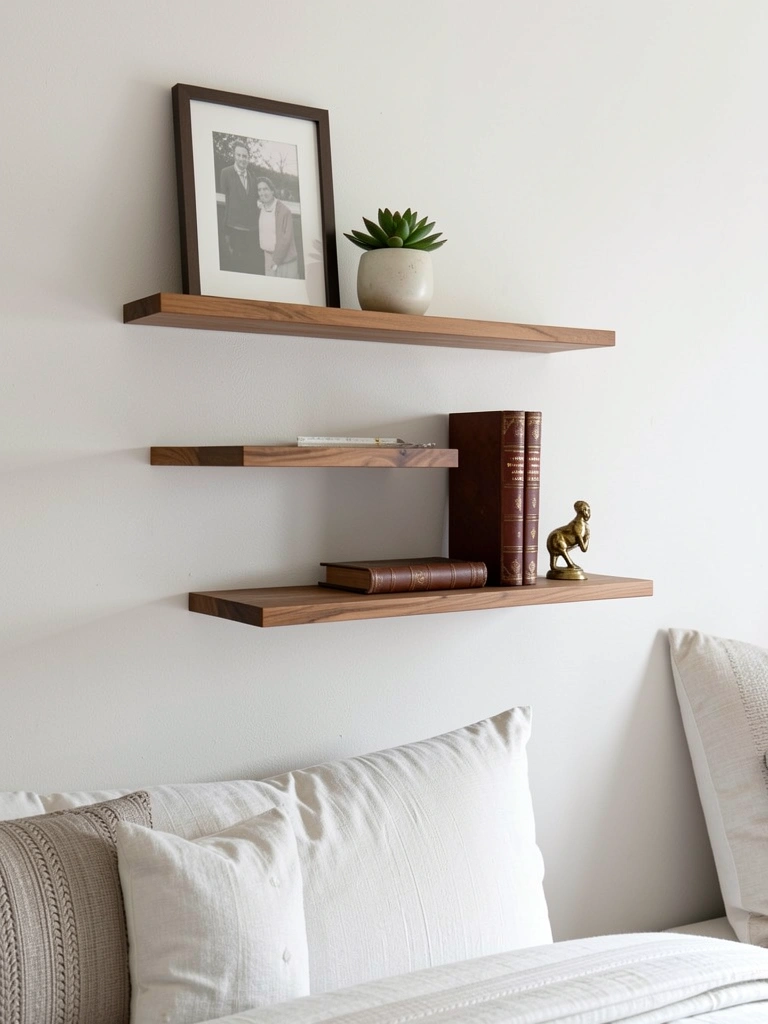
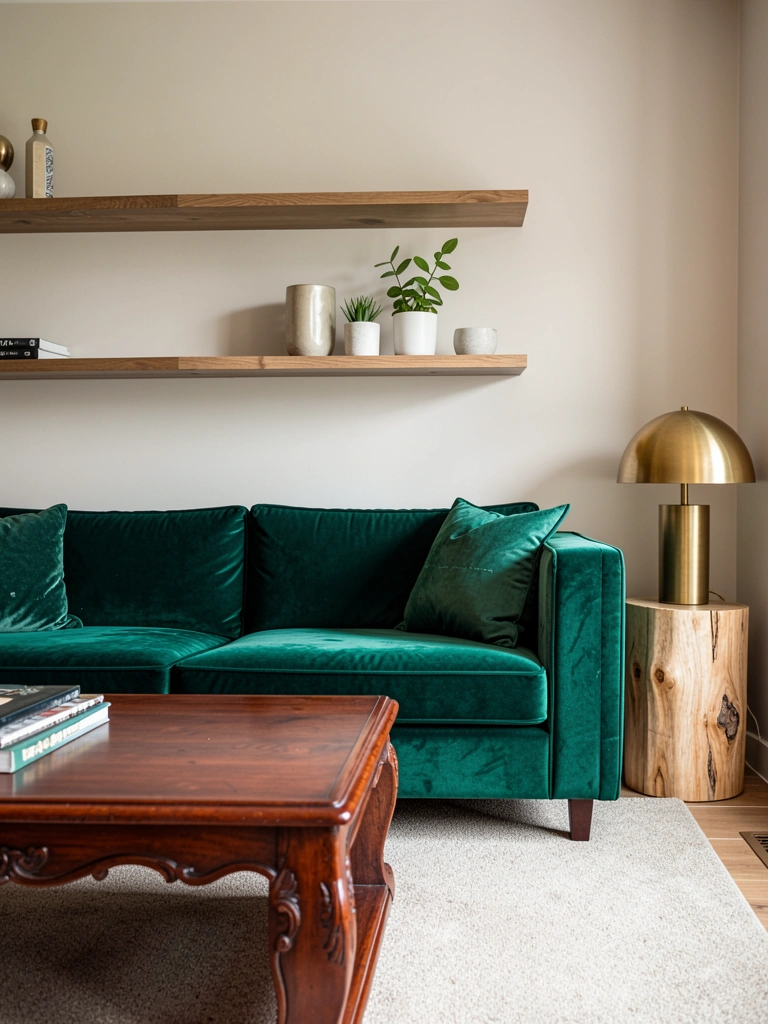
    8. Add Open Shelving with Books and Decor Around the TV

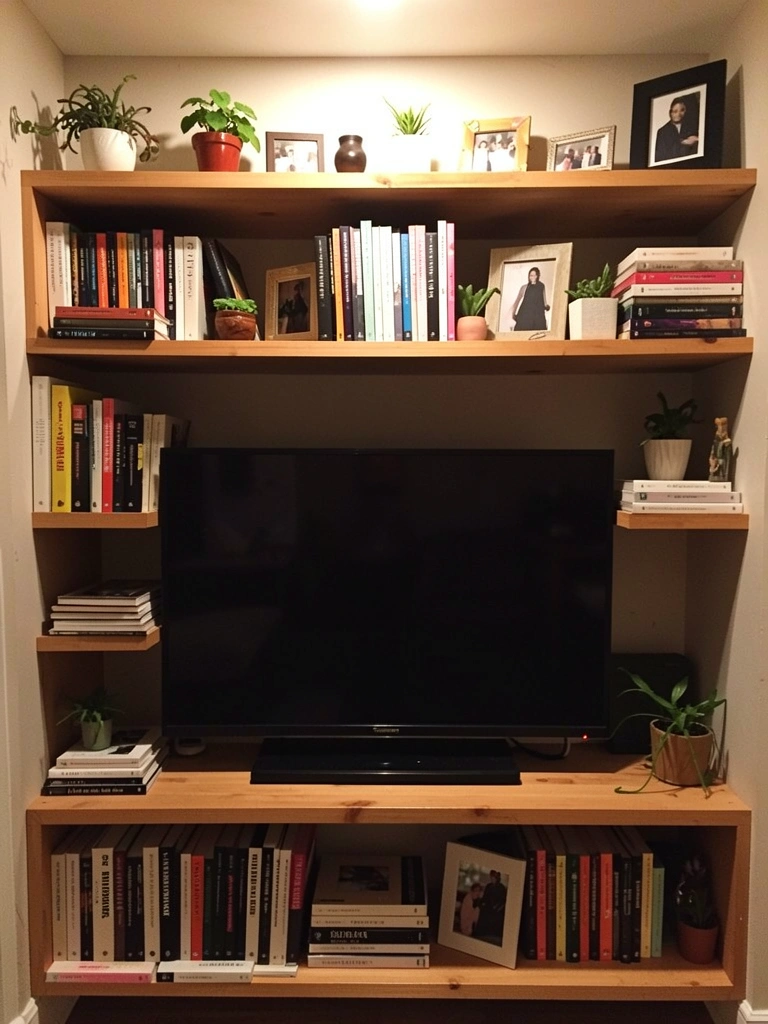
    Open shelving with intentional styling makes your TV feel like it’s part of a larger curated collection rather than a standalone piece of equipment. It’s a visual sleight of hand that makes tech disappear into lifestyle design.

    Install 2–4 open floating shelves ($25–$80 each) on either side or above the TV using sturdy brackets. Layer books horizontally and vertically ($0—use what you own), add small plants ($5–$15 each), and group framed photos in 3–5 frames per shelf. Leave 20–30% of shelf space empty to avoid looking cluttered. Use risers or small decorative boxes ($10–$20) to create height variation.

    Styling rule: Follow a color theme—a palette of whites, naturals, and one accent color keeps visual chaos at bay.

    Your wall now tells a personal story instead of advertising your screen size, and people will naturally discuss your book collection before mentioning the TV.

    9. Install a Recessed Media Cabinet with Pocket Doors

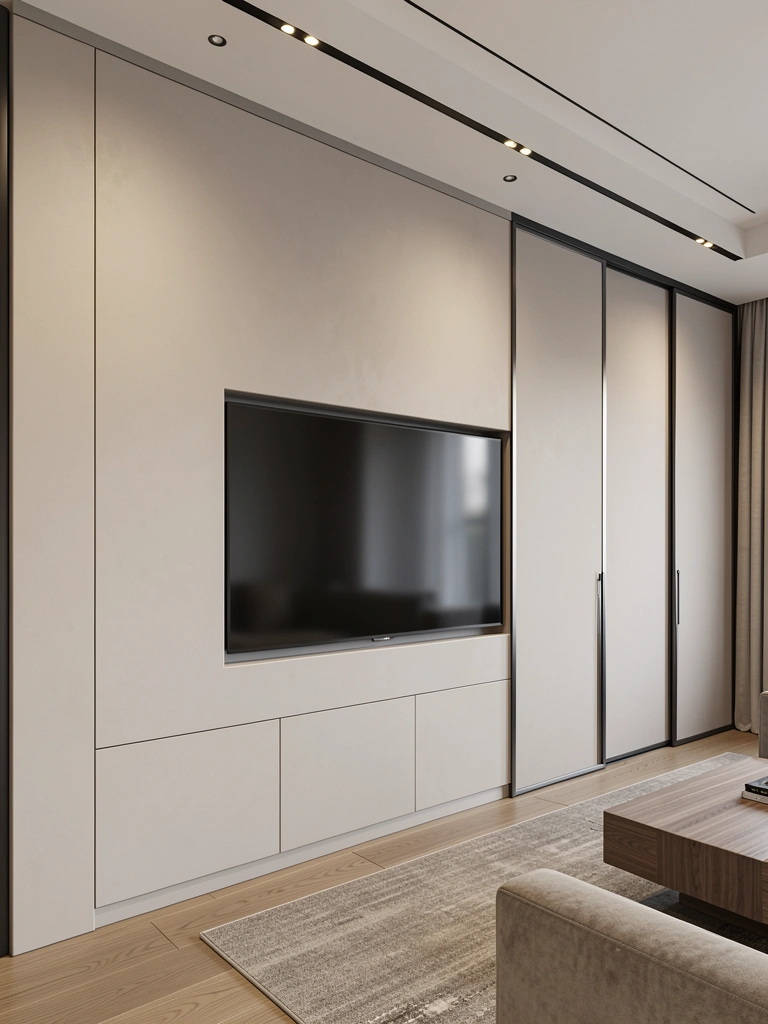
    A recessed cabinet with pocket doors is the ultimate hiding trick—your TV and all its associated equipment simply vanish behind architectural elements when you’re not using them.

    This is a bigger project: Cost: $400–$1,500 depending on whether you DIY or hire a handyperson. You’ll need to cut into your wall, add framing, and install pocket door hardware. Time: 8–16 hours for installation. Measure your TV and all components beforehand. Hire a local carpenter or contractor for this one—it’s worth the investment in clean execution.

    Pro tip: Add interior LED lighting ($30–$60) inside the cabinet so the TV is perfectly lit when doors are closed.

    When the doors slide shut, your wall becomes a complete blank canvas, transforming your room into entertainment-free space instantly—perfect for Zoom calls or when you just want a clean aesthetic.

    10. Use Micro Cement for a Seamless, Texture-Rich Surface

    Micro cement creates a ultra-smooth, almost concrete-like finish that makes your TV wall read as one unified architectural surface rather than wall plus TV. It’s trendy, tactile, and luxurious-looking.

    Hire a professional for micro cement application ($300–$800 depending on wall size). DIY kits exist ($50–$100) but application requires skill—mistakes are expensive. The material itself is durable and easy to clean. Once applied, simply mount your TV directly onto the finished surface. Turnaround: 3–5 days including curing time.

    Alternative: Use textured plaster ($100–$400 professionally applied) for a similar effect at a lower price point with a slightly more organic finish.

    Pro styling: The neutral surface acts as a perfect backdrop for a single piece of floating art or a sculptural shelf—let the wall breathe.

    Your TV wall becomes a statement architectural feature that looks intentionally designed rather than “here’s where the screen goes,” and the surface’s subtle depth adds sophistication that plain drywall simply can’t match.

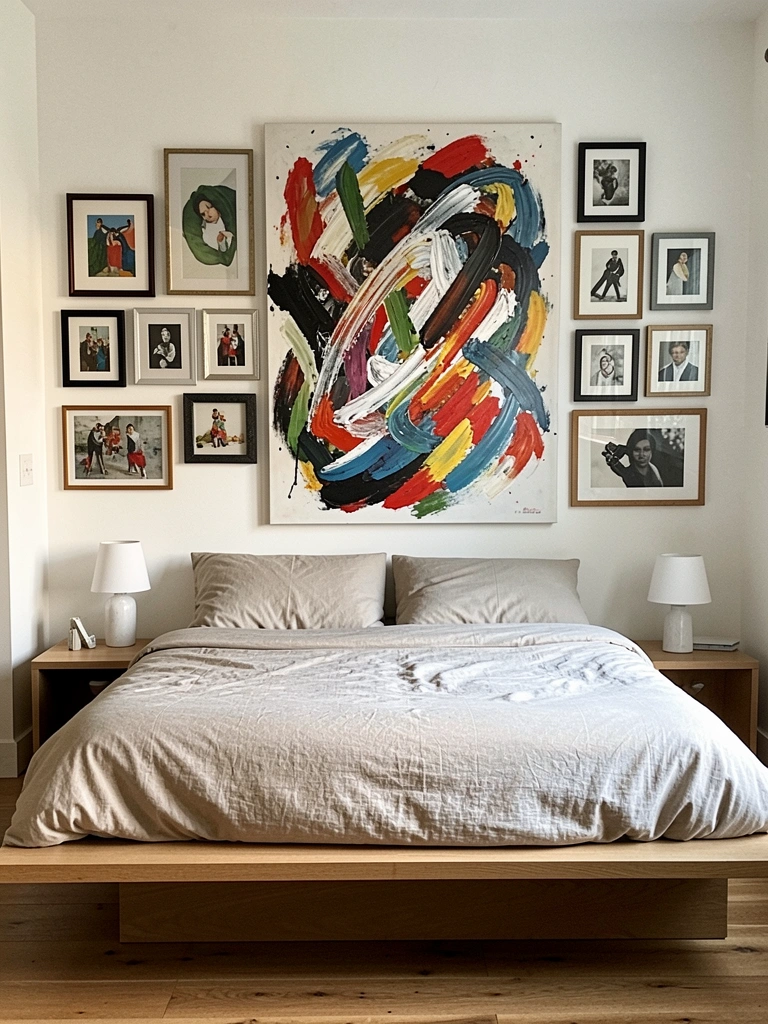
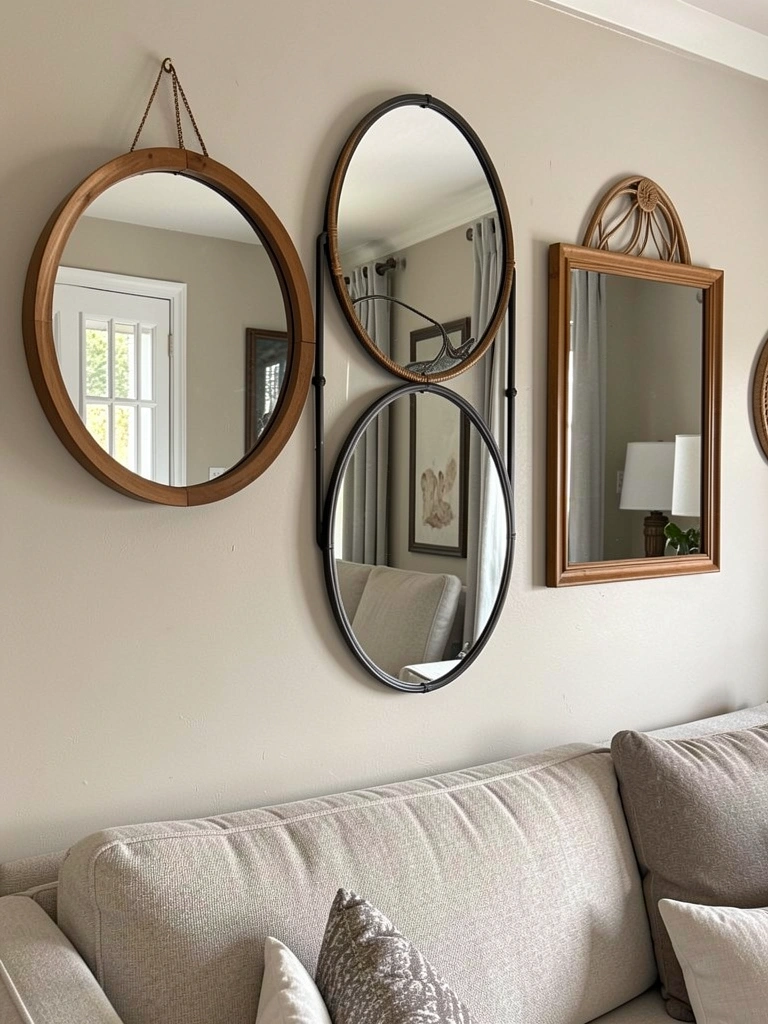
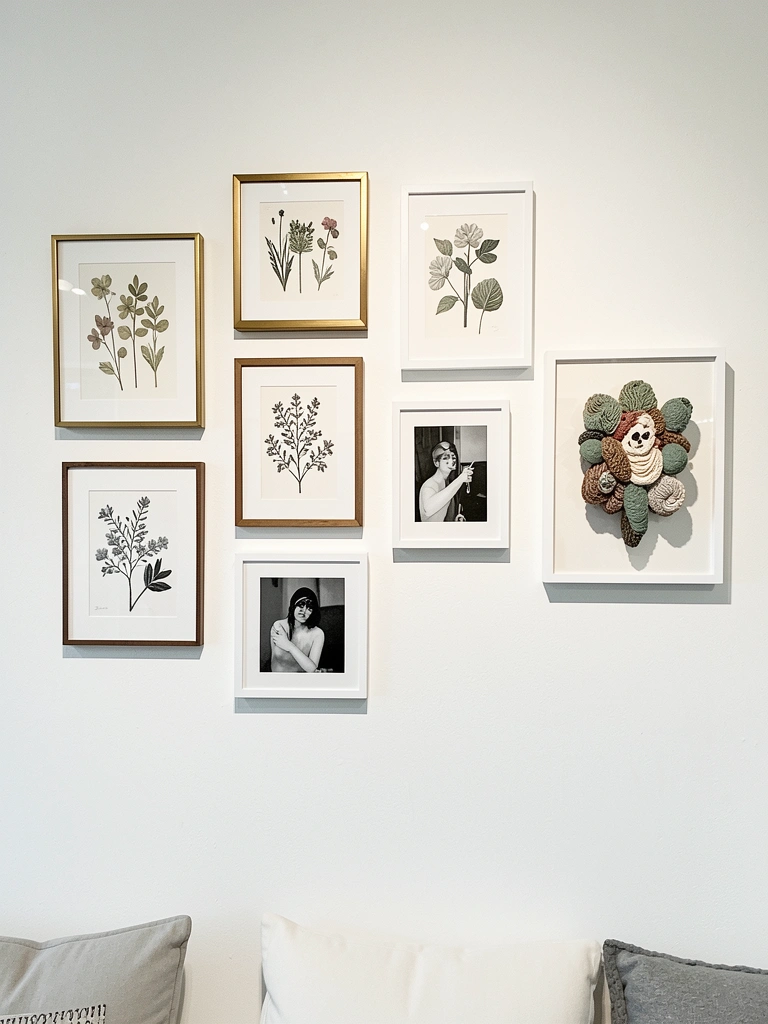
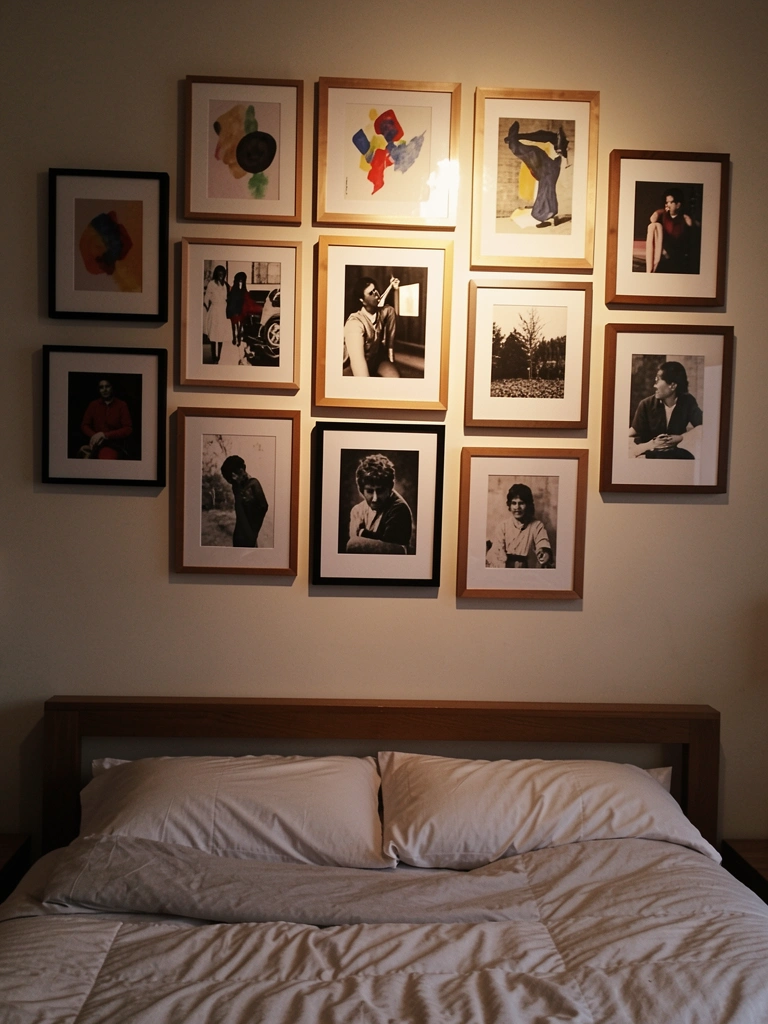
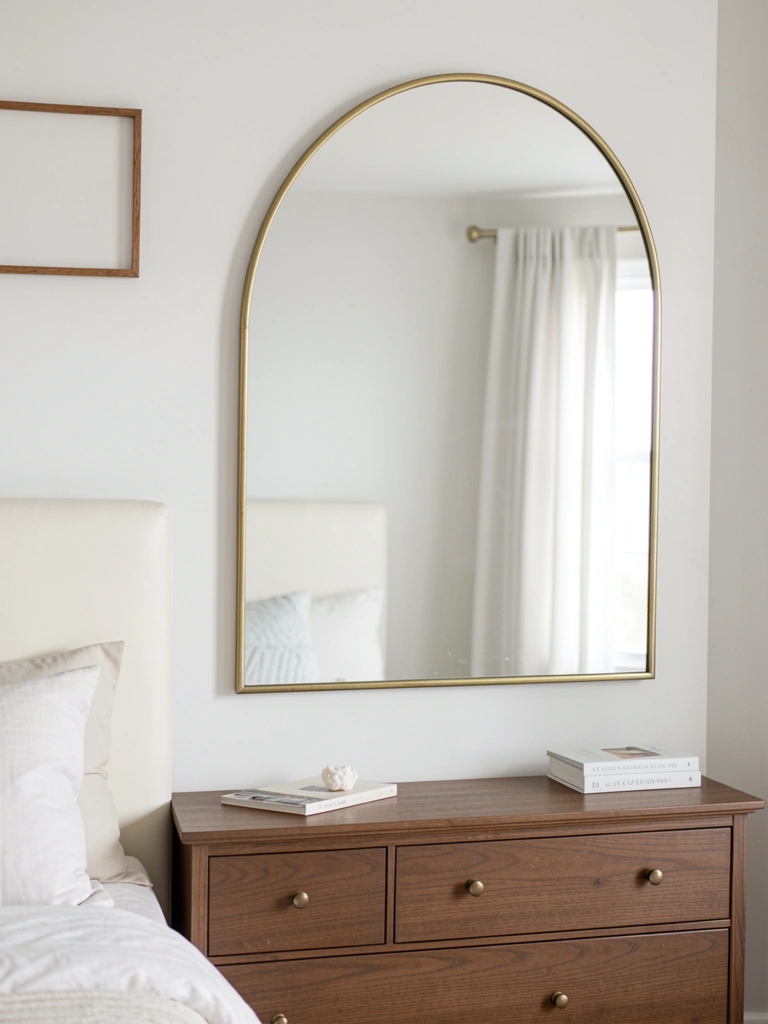
    11. Create a Gallery Wall Around the TV as the Centerpiece

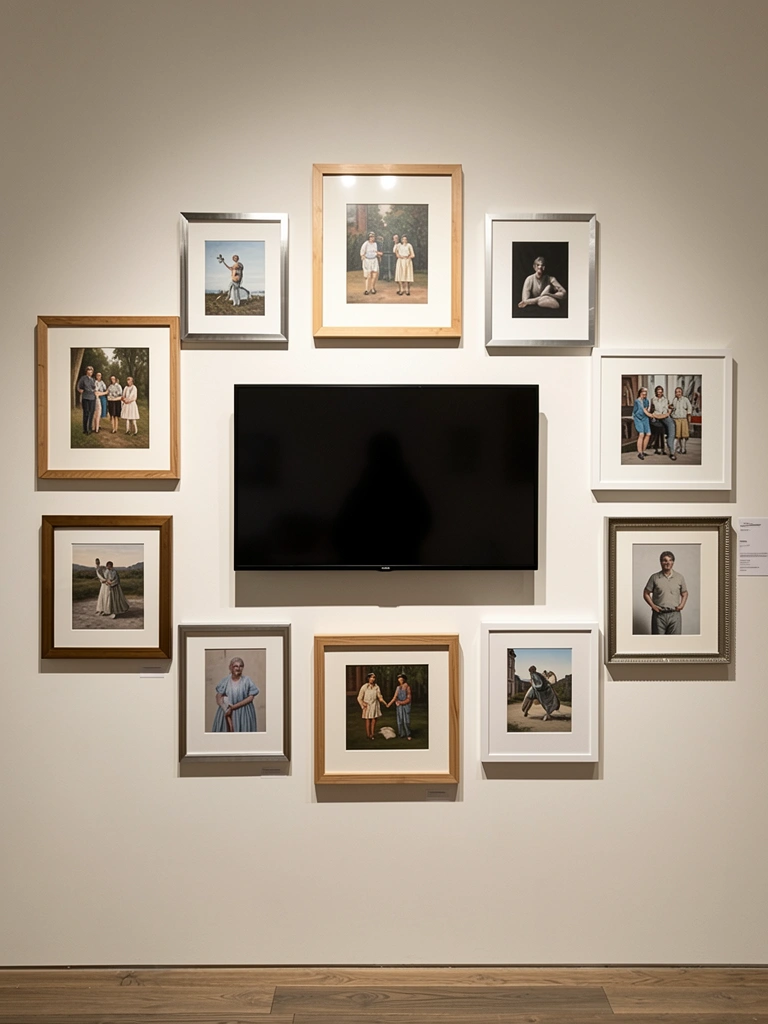
    Making your TV the heart of a gallery wall—not the main attraction—reframes it as one element in a curated collection. Suddenly, the tech becomes secondary to your taste in art.

    Gather 8–15 frames ($3–$20 each from Target, IKEA, or thrift stores) in complementary colors (all white, mixed natural wood, or black). Fill with art, prints ($5–$15 online), family photos, or inspirational quotes. Arrange frames around the TV using painter’s tape as a template ($3) to plan layout before hanging. Use picture hangers ($5–$15 for a set) and mount everything at once. Time: 2–3 hours.

    Budget hack: Print affordable art ($1–$5 per print) from Etsy, Society6, or Unsplash and frame them yourself.

    Your TV becomes a supporting actor in a larger visual story, and the gallery effect makes your space feel intentional and curated.

    12. Mount the TV on an Adjustable Articulating Arm

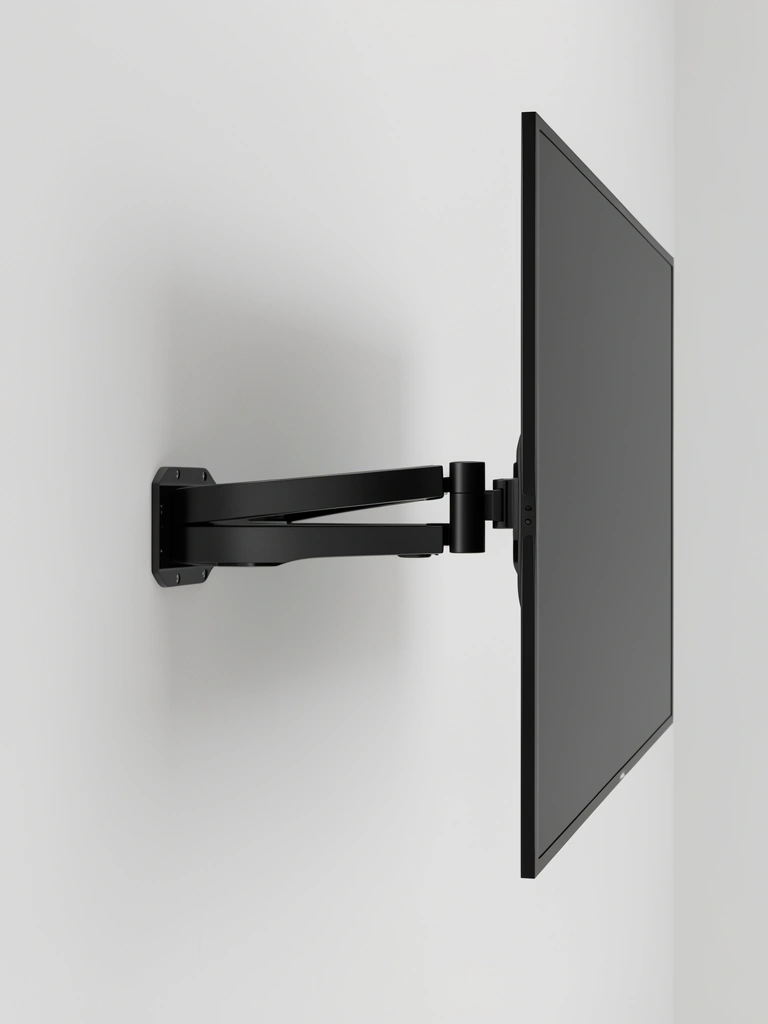
    An articulating arm lets your TV move out of the sightline when not in use. This isn’t hiding—it’s active vanishing, and it works brilliantly in studios or multipurpose rooms where your TV shouldn’t dominate.

    Choose a full-motion articulating arm ($50–$150 from Amazon, Best Buy, or Costco) that supports your TV’s weight. Mount to wall studs using the provided hardware. The arm swivels fully, so the TV can rotate up to 180 degrees—point it toward your bedroom, tuck it against the wall, or swing it out to face different seating. Installation: 45–90 minutes.

    Pro tip: Pair with cord wrapping clips ($5–$10) so cables move smoothly as the TV articulates without tangling.

    You get maximum flexibility—your TV becomes a tool you use when needed, not a permanent fixture that defines the room.

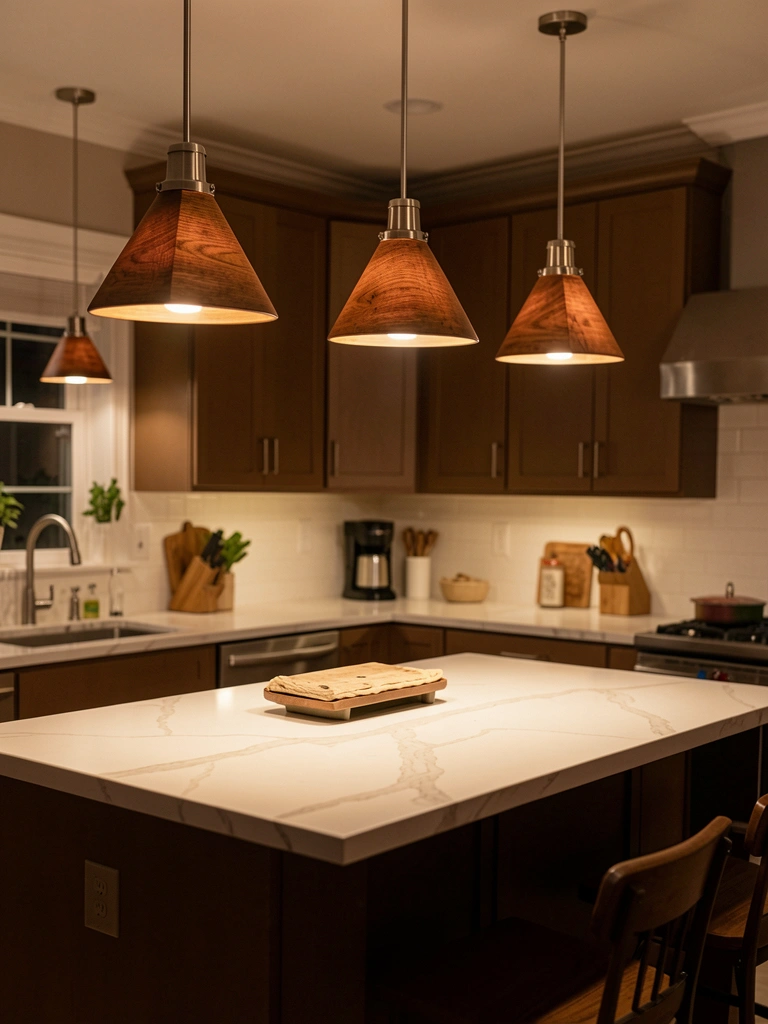
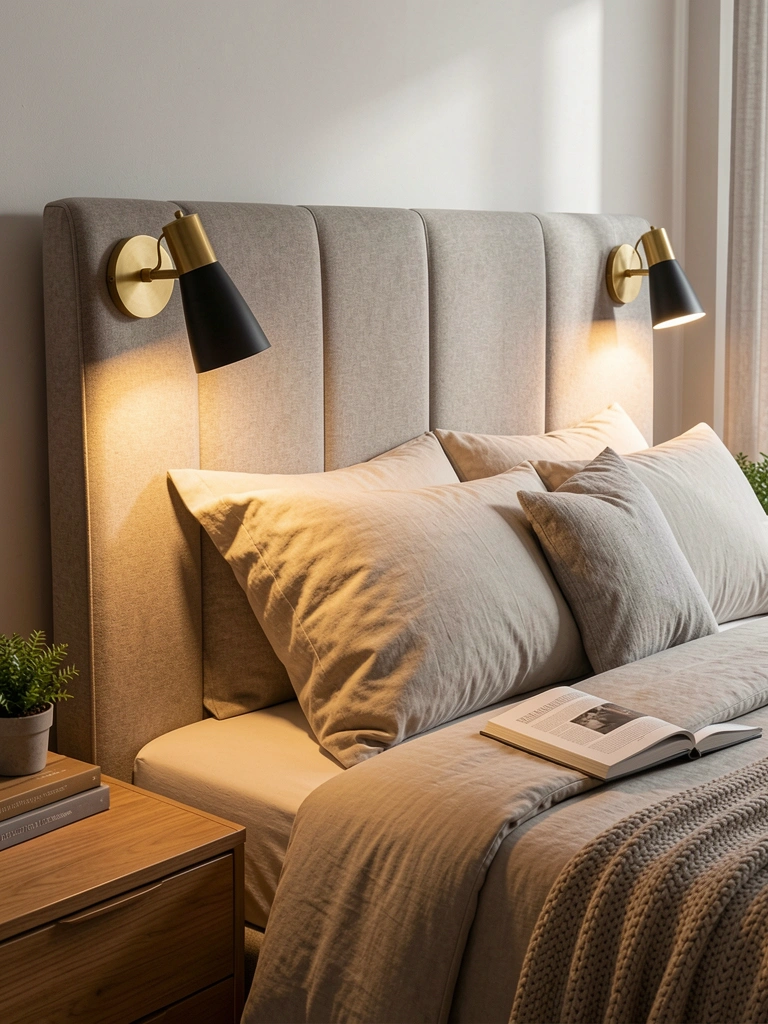
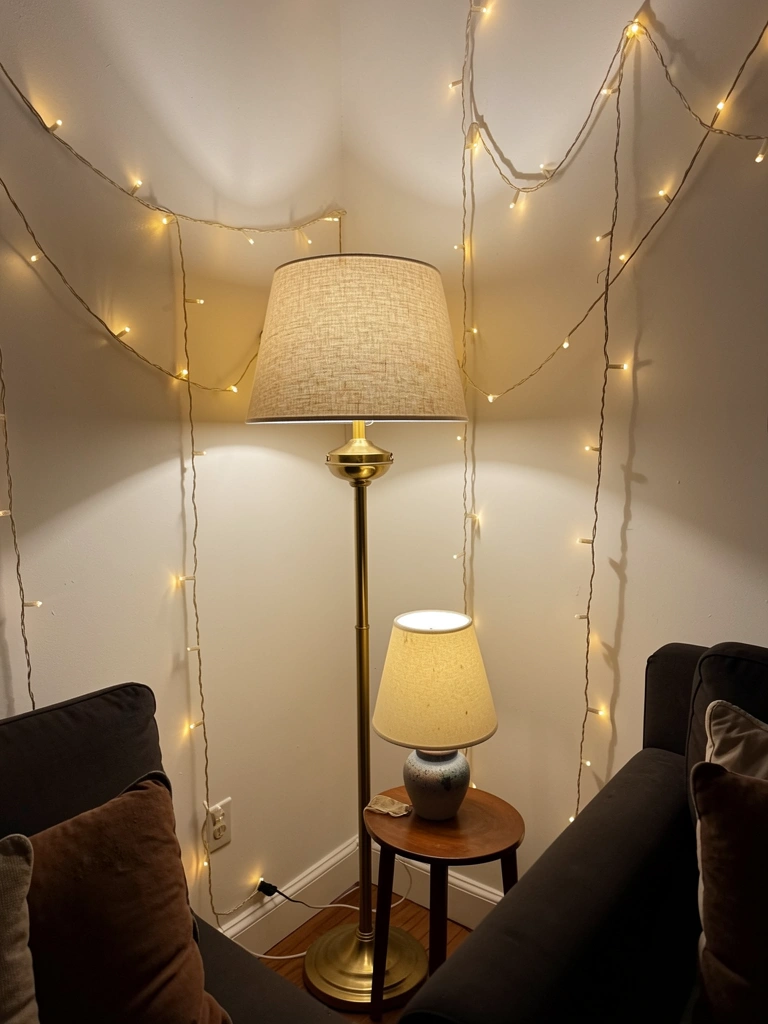
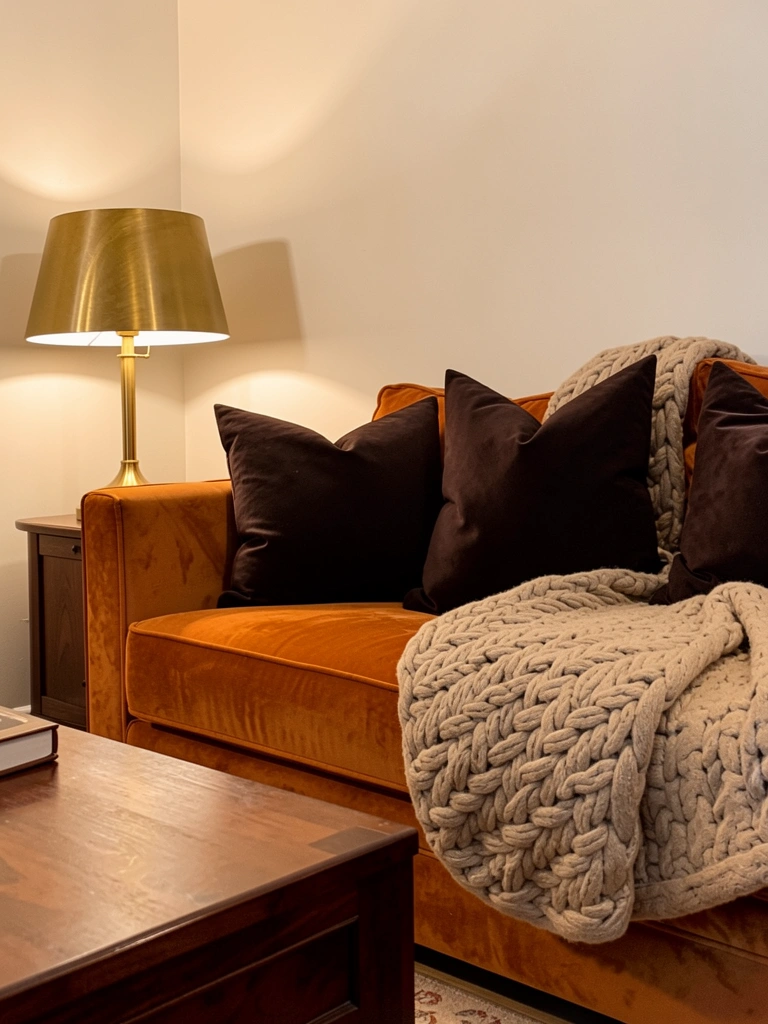
    13. Install LED Strip Lighting Behind the TV for a Halo Effect

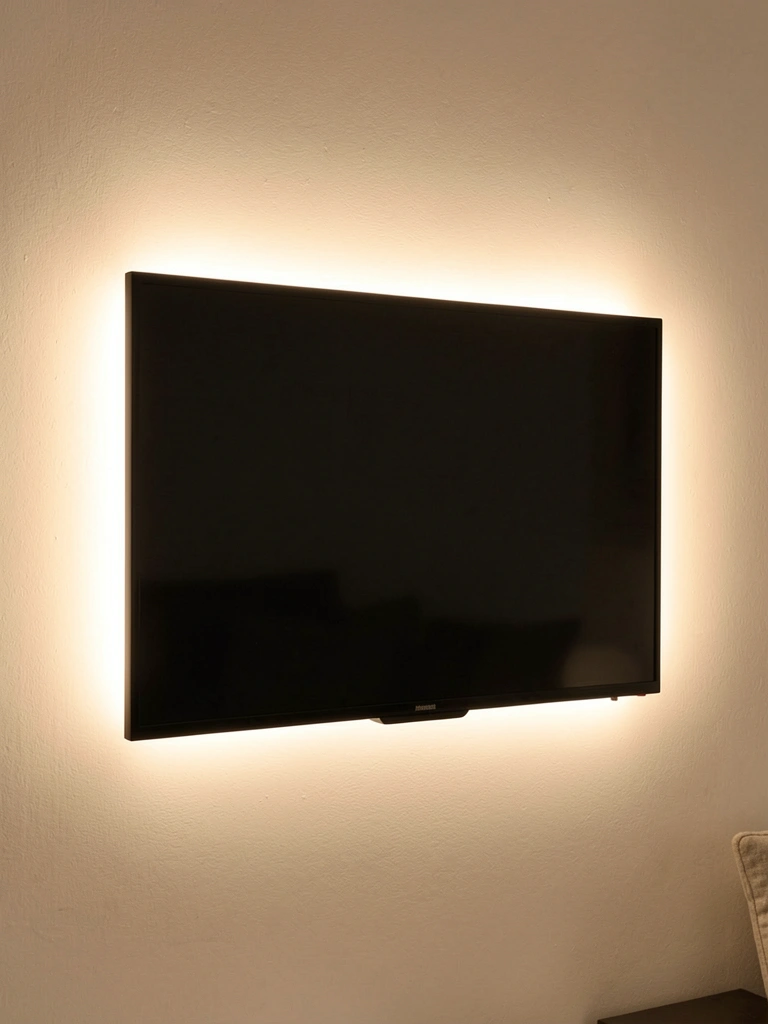
    LED backlighting creates an ambient glow that makes your TV feel like it’s floating and draws light toward the wall rather than from the screen. It’s both beautiful and functional—it reduces eye strain during evening viewing.

    Install smart LED strip lights ($20–$50 from Amazon, IKEA, or Target). Mount the strips 2–3 inches behind your TV using the adhesive backing provided. Route wires down through a cord channel ($10–$20). Choose warm white (2700K) for cozy feel or cool white (4000K) for modern spaces. Connect to a smart plug ($10–$15) so you can schedule the lights separately from your TV. Installation: 30 minutes.

    Bonus: Many strips sync to on-screen colors if you want a tech-forward look, but soft white is more timeless.

    Your viewing experience becomes noticeably more comfortable—less eye fatigue—and your wall glows with intentional purpose instead of just blasting screen light into the room.

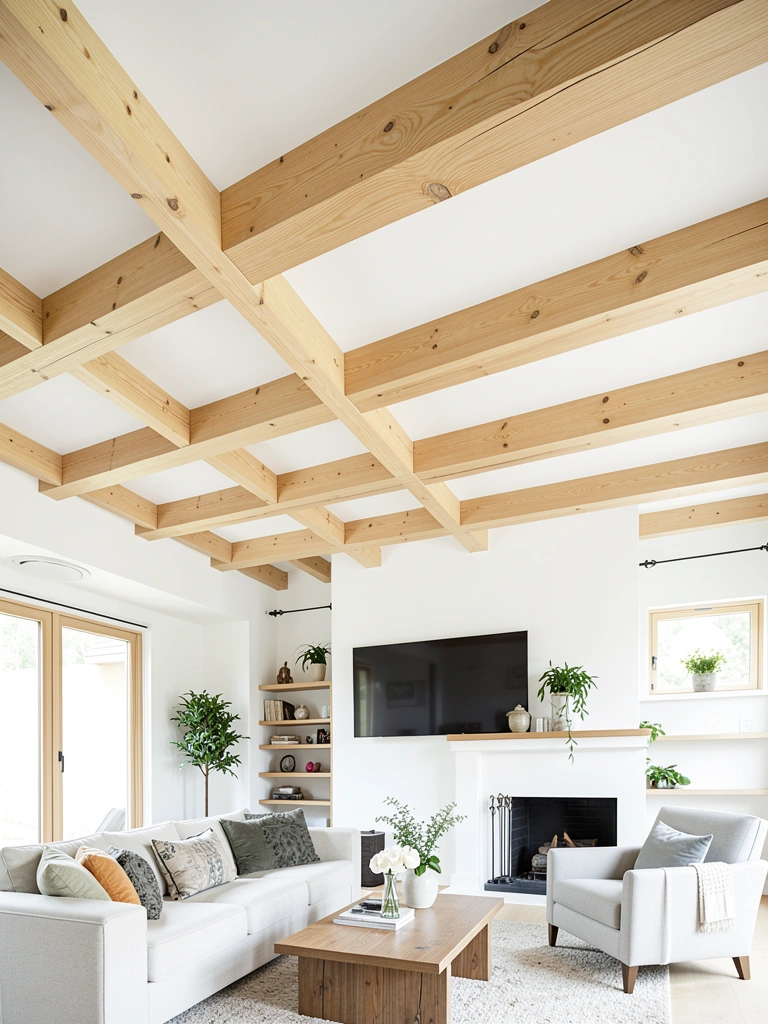
    14. Build a Floor-to-Ceiling Feature Wall to Frame the TV

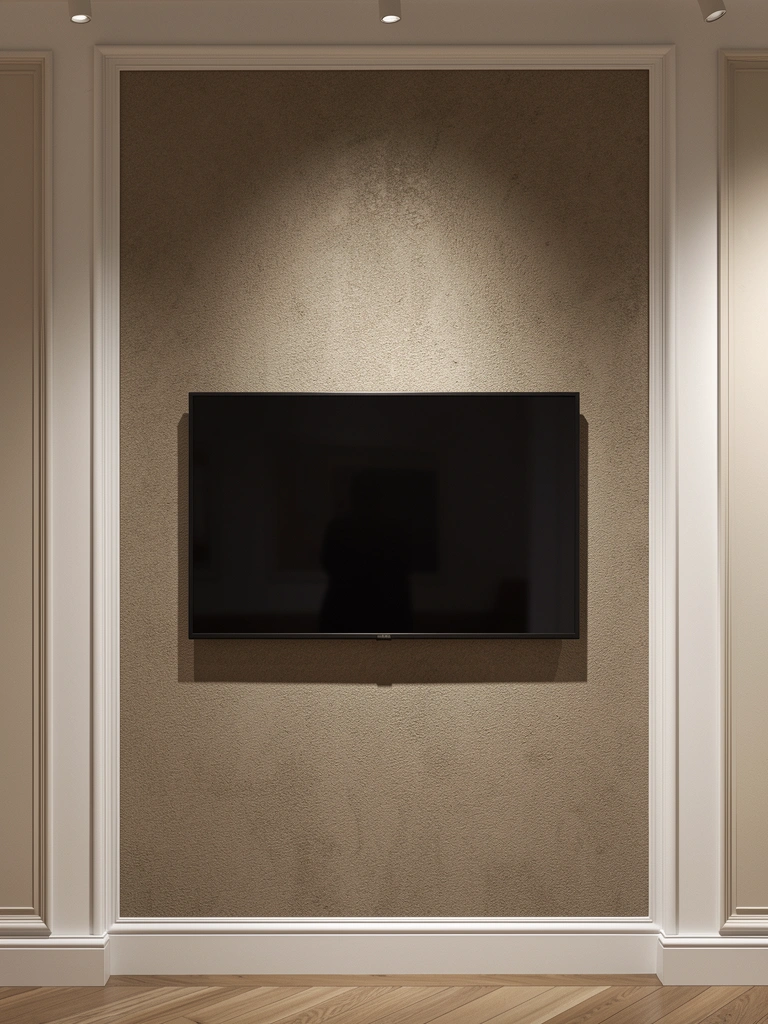
    A floor-to-ceiling feature wall (even if it’s just a different color or finish) architecturally defines your TV as the focal point while making the frame feel intentional rather than accidental. It’s a visual boundary that says “this is a designed space.”

    Paint or add texture to your chosen wall in one solid color or pattern. Use paintable wallpaper ($15–$30 per roll) for texture without commitment, or paint with 2 coats ($20–$50 per gallon). Add trim work ($50–$150 professionally or $10–$20 DIY) to create a finished frame around the feature wall. Total time: 1–2 days including drying.

    Renter hack: Use removable wallpaper ($20–$40) or paint a large removable backdrop ($30–$60) pinned or mounted to create the illusion of a feature wall.

    Your room instantly feels more designed, and the TV looks like it belongs on that wall rather than just being stuck there.

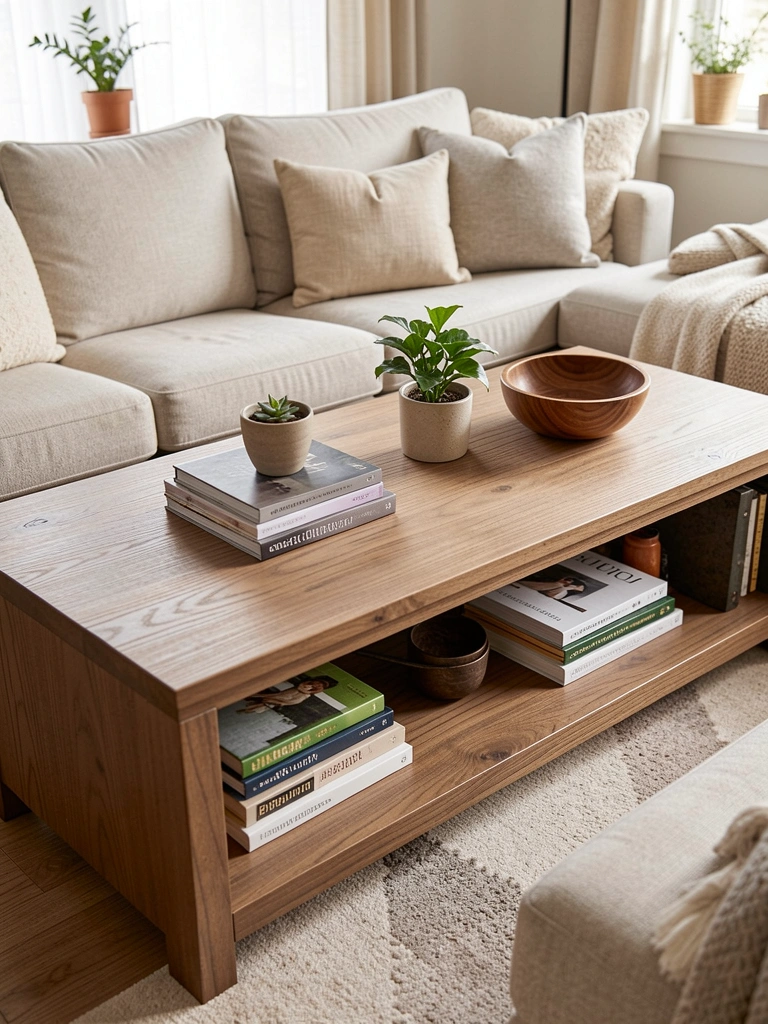
    15. Use a Rolling Media Cart to Make Your Setup Flexible

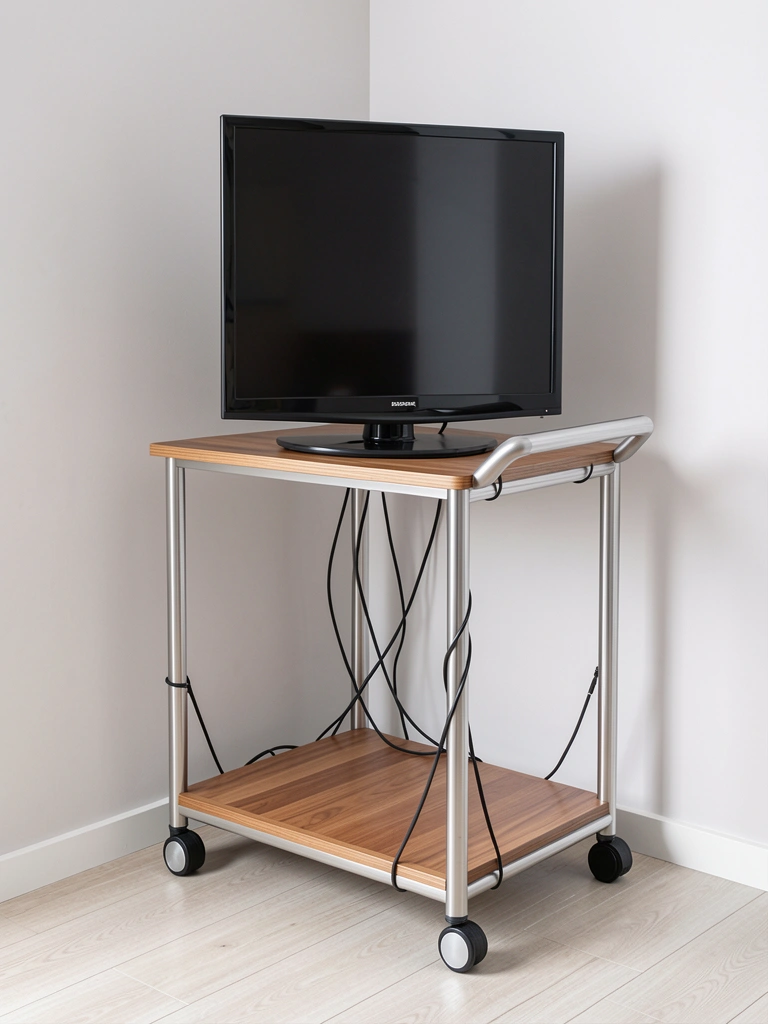
    A rolling cart lets your TV physically move—not a disappearing act, but a flexibility act. Perfect for renters, small spaces, or anyone who wants the option to reconfigure their room instantly.

    Find a rolling media cart or AV stand ($80–$250 from Target, Wayfair, or IKEA). Look for one with a shelf for components and built-in cable management. Mount your TV securely using a tilt/swivel bracket ($30–$50). Keep cables organized with velcro wraps ($5–$10). Anchor the cart to the wall when stationary to prevent tipping. Cost: $150–$350 total setup.

    Pro move: Style the lower shelf with decorative storage boxes ($10–$20 each) to hide devices while keeping the cart visually light.

    Your setup becomes a multipurpose design element that works hard and plays nicely—wheels make adaptation effortless when your needs change.

    16. Paint an Accent Wall in Earthy Neutrals to Soften the TV

    Warm neutral wall colors (greige, taupe, warm gray, soft terracotta) make a TV feel cozier and less industrial. The wall absorbs the black frame instead of contrasting sharply, creating visual softness.

    Choose a warm neutral from Sherwin-Williams (Accessible Beige, Urbane Bronze), Benjamin Moore (Revere Pewter, HC-172), or Behr (Eggshell, PPU18-08). Test a large swatch first because lighting changes how neutrals read. Apply two coats ($25–$50 total). Pair with wood or rattan accents ($0—repurpose what you own) to enhance warmth. Time: 4–6 hours.

    Budget tip: Match your wall color to a paint chip from a fabric or artwork you already love to create cohesion.

    Your TV wall becomes part of the room’s design story rather than a visual interruption, and the whole space feels calmer and more intentional.

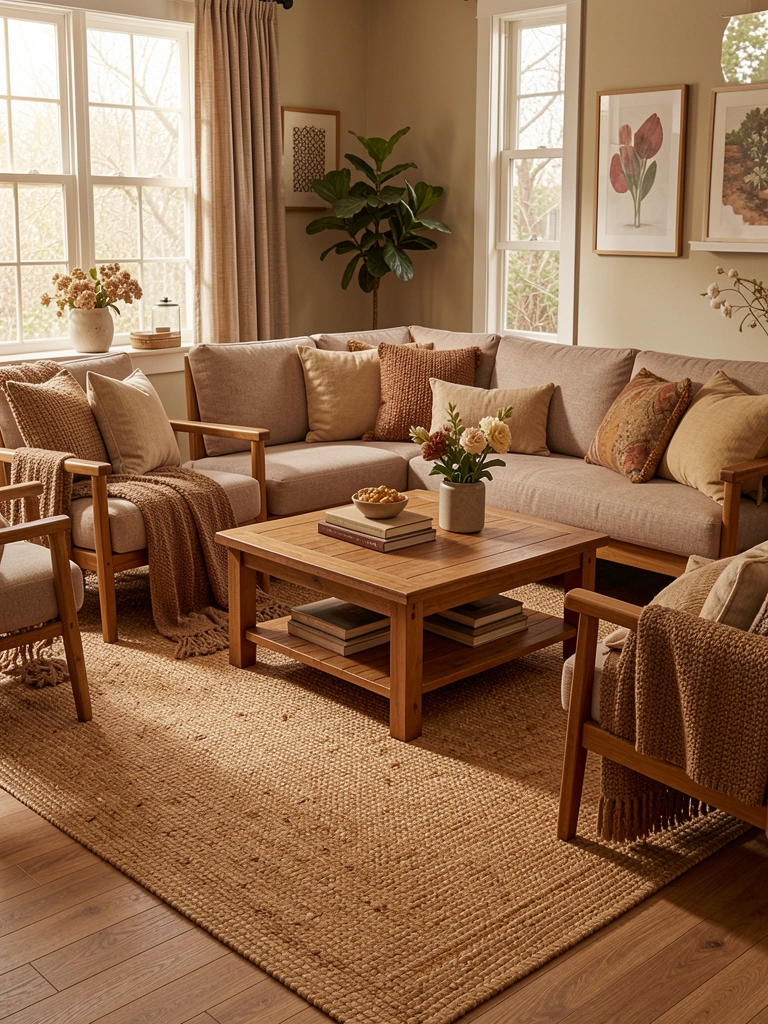
    17. Incorporate Rattan or Woven Textures Around the TV

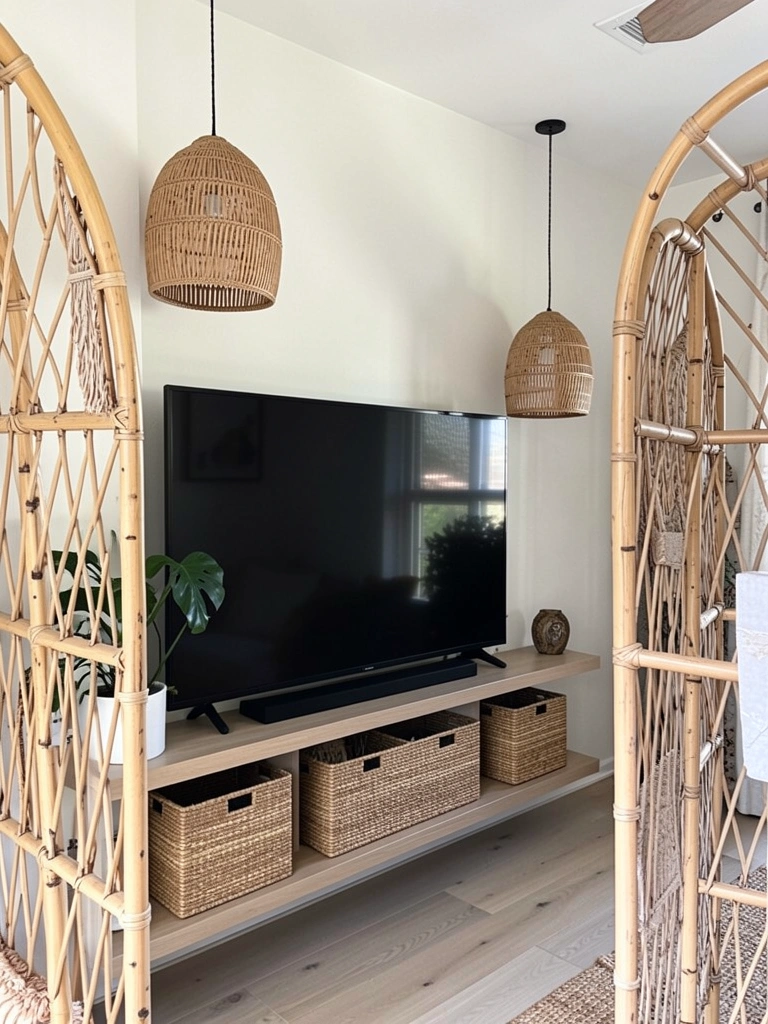
    Rattan and woven textures bring organic warmth that makes a TV wall feel less tech-forward and more lifestyle-focused. The natural materials soften technology’s hard edges visually.

    Add rattan or woven pendant lights ($20–$60 each from Target, Wayfair, or World Market) flanking the TV. Place woven storage baskets ($15–$50 each) on shelves to store remotes, cables, and devices. Use a rattan room divider ($40–$100) partially behind or beside the TV setup. Mix styles slightly—mix light and dark rattan for visual interest. Installation: mostly styling, 30 minutes.

    Styling rule: Limit rattan to 3–4 pieces or it feels cluttered; less is more.

    Your TV setup becomes a design moment in a naturally beautiful room instead of just “where the screen lives,” and the warmth makes tech feel intentional rather than cold.

    18. Create a Corner TV Setup with Angled Wall Paneling

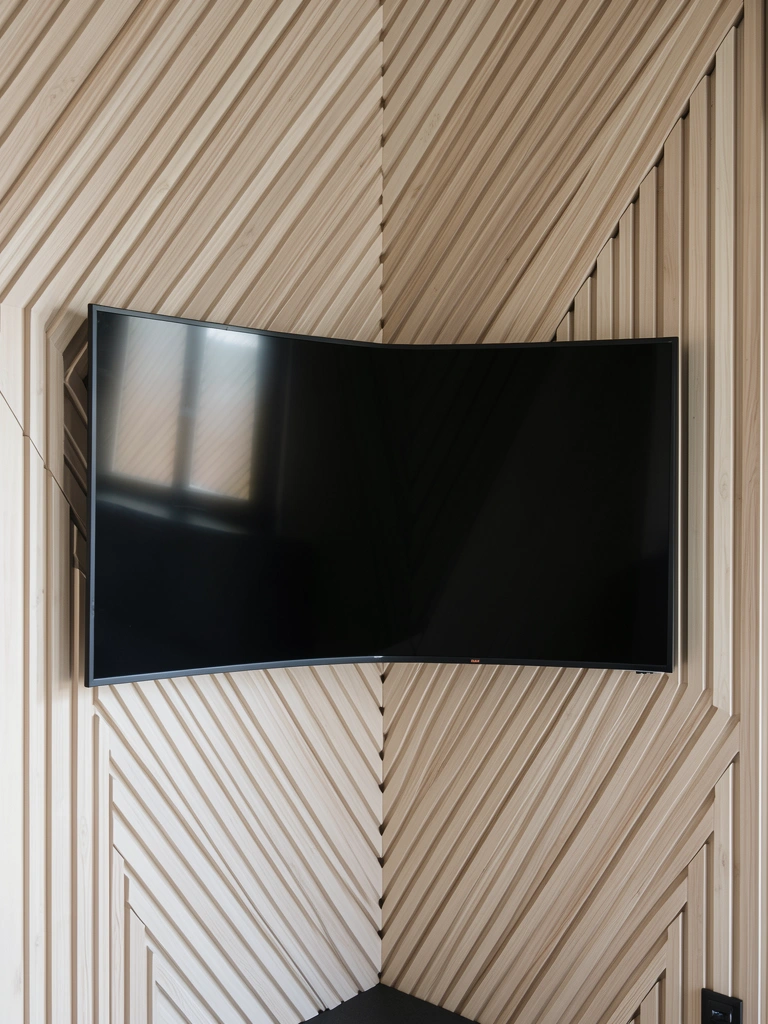
    A corner TV with angled or chevron-patterned wall paneling feels architecturally intentional. The angled lines guide your eye to the TV without making the setup feel like an afterthought squeezed into unused space.

    Mount your TV on the corner wall using a corner TV bracket ($30–$60). Add angled wood paneling or slat walls ($100–$300) arranged in a chevron or arrow pattern pointing toward the TV. The angle makes the TV feel like the destination rather than just the thing in the corner. Use a level and stud finder ($10–$15 each) for precise installation. Time: 3–5 hours.

    Renter option: Use removable angled slat panels ($50–$150) adhered to the corner to create the same effect without damage.

    Your corner becomes a design feature instead of wasted space, and the geometry makes viewers feel like they’re sitting exactly where the room intends them to.

    19. Install Shelving with Curved or Arched Brackets for Softness

    Curved or arched shelf brackets add visual softness that softens technology’s rigid geometry. They’re a small detail that signals intentional design rather than standard installation.

    Choose decorative curved brackets ($20–$50 each from Etsy, Home Depot, or specialty hardware shops). Mount shelves at varying heights ($20–$50 per shelf from IKEA or Wayfair) using these brackets. The curves instantly make the setup feel less industrial and more curated. Installation: 1–2 hours with basic tools.

    Pro styling: Paint brackets to match wall or shelves ($5 for paint) or choose them in a complementary metal finish (brass, copper, matte black).

    Your shelving becomes a design statement instead of functional overhead, and the curved lines make your TV wall feel graceful rather than angular.

    20. Use a Textured Wallpaper Behind the TV for Depth

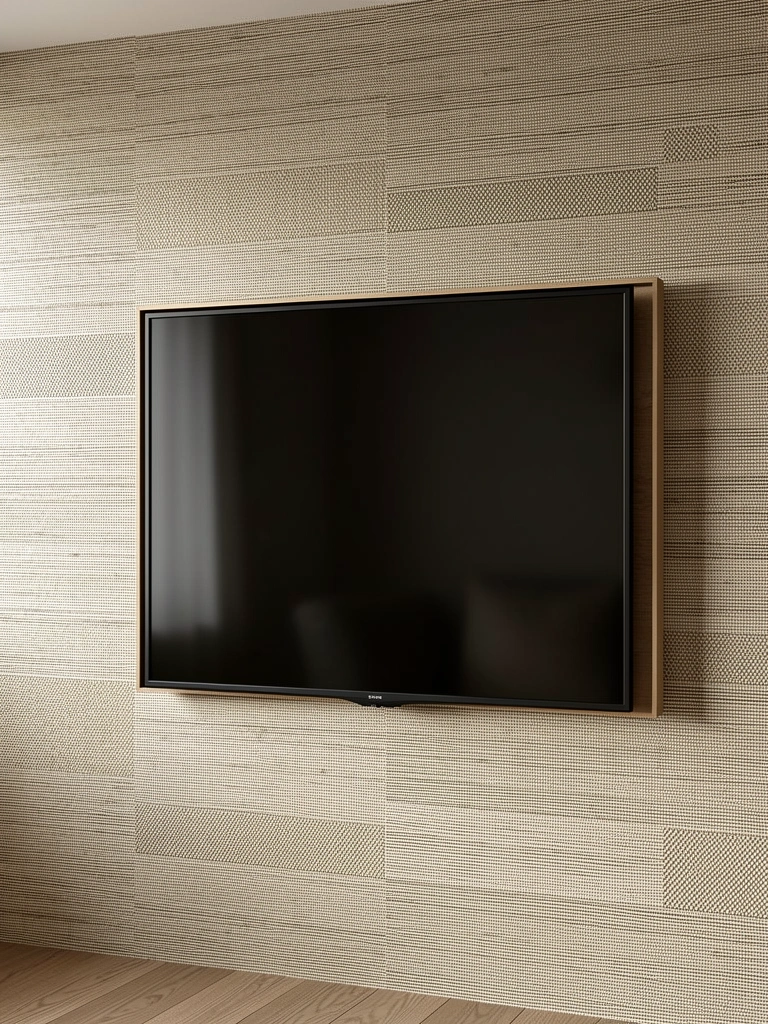
    Textured or patterned wallpaper adds visual depth and makes your TV wall feel like part of a larger design scheme. The pattern gives the eye something to explore beyond just the screen.

    Choose textured or subtly patterned wallpaper ($15–$40 per roll) from Wayfair, Target, or specialty wallpaper shops. Look for horizontal lines, geometric patterns, or woven textures that complement your room. Apply wallpaper to just the TV wall for impact without overwhelming the room. Time: 2–4 hours with wallpaper paste and a smoothing tool ($5–$10). Removable wallpaper ($20–$40 per roll) works for renters.

    Pattern tip: Choose a pattern with 1–2 main colors to keep it cohesive with your furniture.

    Your TV wall becomes visually interesting even when the screen is off, and the texture makes the whole setup feel more considered than plain paint alone.

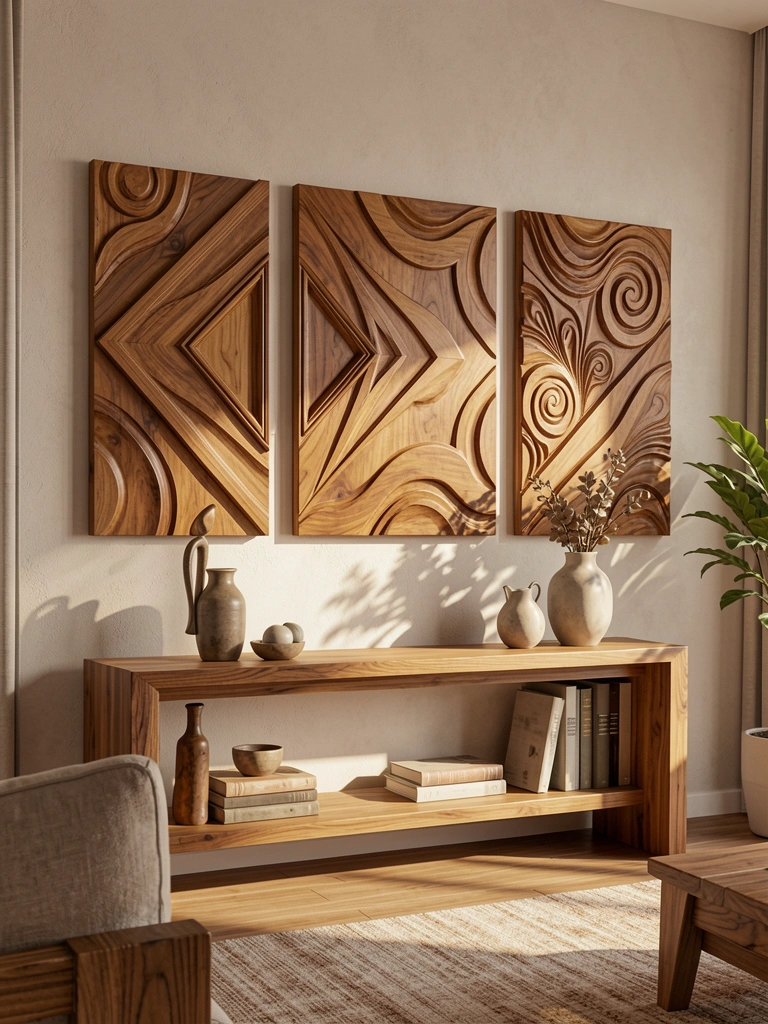
    21. Add a Sculptural Art Piece Flanking the TV

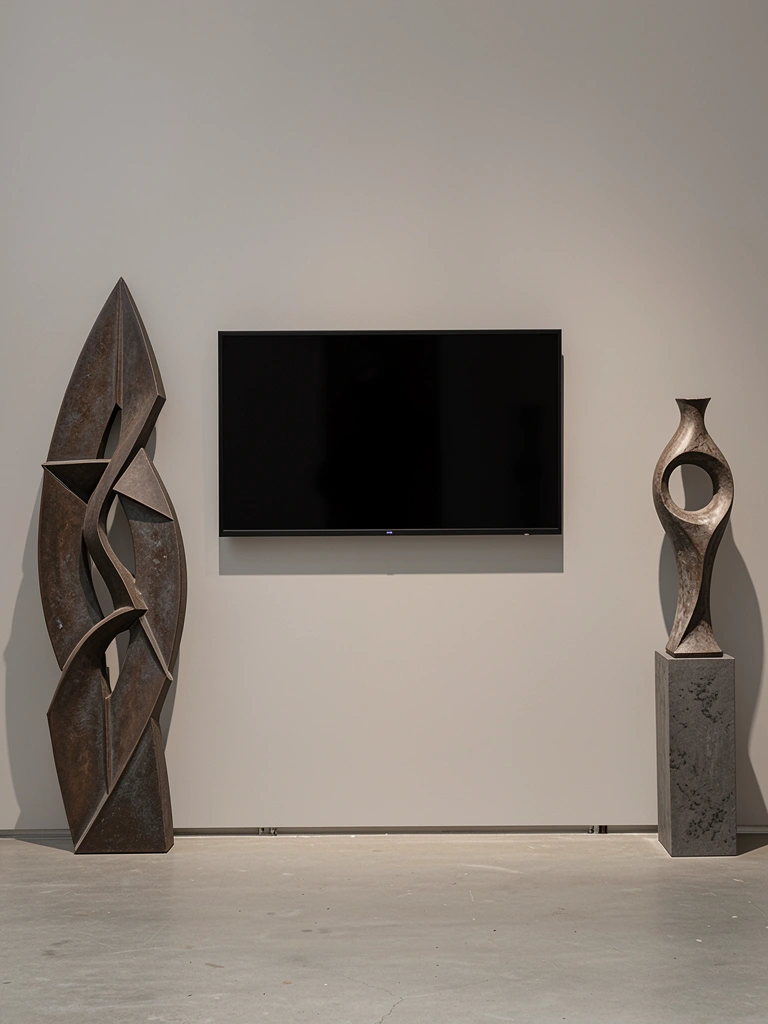
    Large sculptural pieces flanking your TV shift the focus to art rather than technology. Your eye travels to the sculpture first, making the TV feel secondary to the curated aesthetic.

    Find a large sculptural piece ($50–$300 depending on artist and material—try local makers on Etsy, Facebook Marketplace, or thrift stores) and lean it against the wall beside your TV. Balance with a tall vase, statue, or second sculpture on the opposite side. Anchor heavy pieces to prevent tipping ($5–$10 in museum putty). Styling: 30 minutes.

    Budget hack: Abstract wooden pieces from thrift stores ($5–$20) work beautifully and feel intentional when styled thoughtfully.

    Your TV wall becomes an art gallery focal point, and visitors’ first impression becomes “what a thoughtfully designed space” rather than “nice TV.”

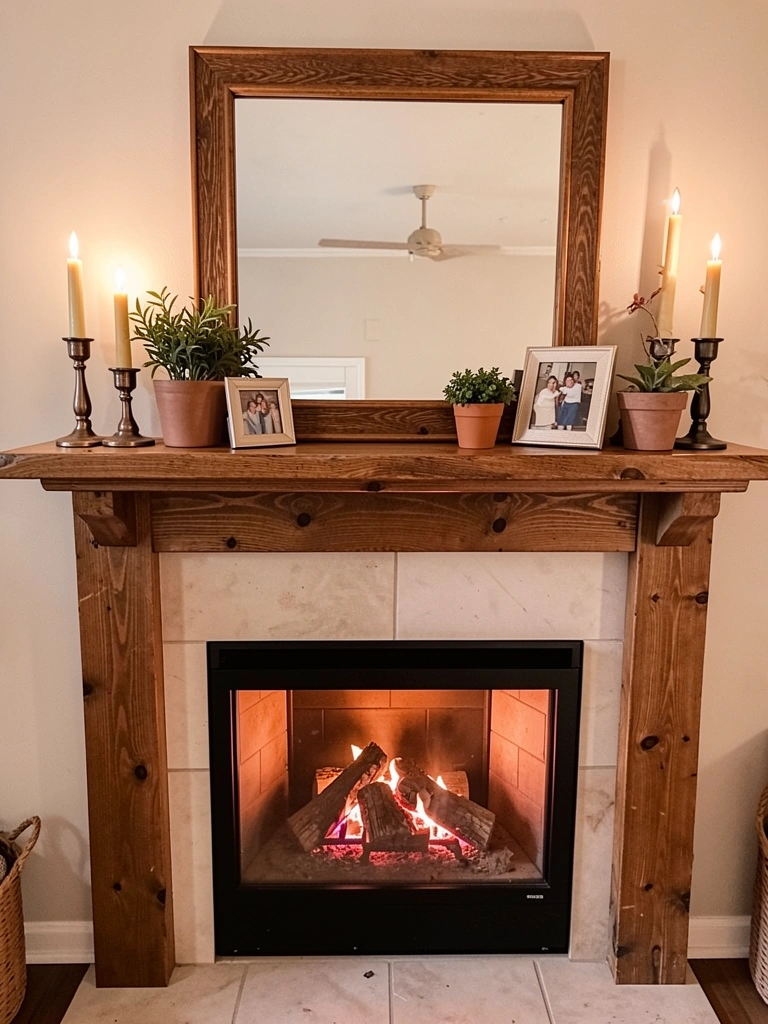
    22. Combine Your TV with a Built-In Fireplace Below

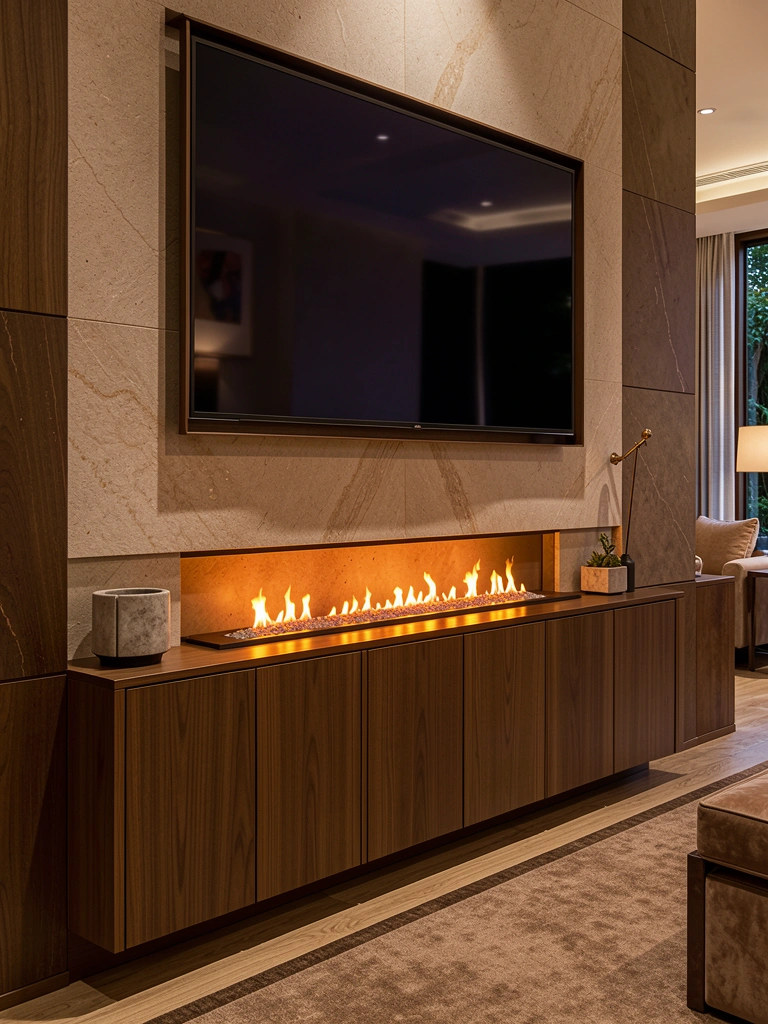
    An electric fireplace below your TV creates a designed focal point that makes the tech feel intentional and elevated. The fireplace adds warmth (both visual and physical) that makes the whole setup feel cozier than just a bare screen.

    Install a flush-mount linear electric fireplace ($200–$600 from Wayfair, Lowe’s, or specialty appliance shops) into a recessed cavity or media console. Mount the TV 24–30 inches above it on the wall. Ensure proper spacing for heat circulation (check manufacturer specs). Electrical work may require a professional—budget $50–$150 for installation if DIY feels risky. Total setup: 4–8 hours.

    Styling: The fireplace is the design hero; keep surrounding décor minimal so it has breathing room.

    Your living room becomes instantly more upscale and inviting—the fireplace glow creates ambiance that makes sitting and watching feel intentional rather than just “I’m staring at a screen.”

    23. Style Empty Wall Space as Your TV’s “Frame”

    Leaving most wall space blank around your TV is its own design move. The emptiness becomes intentional breathing room that makes the TV feel like a designed choice rather than clutter-filling necessity.

    Mount your TV centered on a blank wall. Add just one large-scale art piece ($50–$200) above or below, one tall plant ($20–$60), and a simple console ($100–$300). Keep everything else off the wall—no shelving, cables, or other décor. The whitespace becomes part of the design. Installation: 1–2 hours for mounting.

    Mindset shift: Empty space is a luxury in design; resist the urge to fill every gap.

    Your TV wall feels calm, intentional, and curated in a way that overfilled shelving never can. The simplicity makes your space feel intentionally minimalist rather than just bare.


    Save this guide for your next living room refresh. Try one idea this weekend—whether it’s hiding cables, adding texture, or just letting your wall breathe—and notice how much a single change shifts your entire room’s energy.

  • 26 Natural Wood Interior Design Ideas That Add Warmth & Texture

    26 Natural Wood Interior Design Ideas That Add Warmth & Texture

    There’s something about natural wood that makes a space feel like home. Whether you’re renting a small apartment or own a sprawling house, adding wood elements creates instant warmth and grounds your design in something real and tactile. The best part? You don’t need to overhaul your entire space. Small touches—a wooden shelf, a reclaimed beam accent, or even wood-look wallpaper—shift the whole vibe of a room. In this guide, you’ll discover 26 achievable ways to bring natural wood warmth into your home, from budget-friendly hacks to investment pieces that last decades. Each idea works for renters and homeowners alike, and most can be done without professional help. Let’s get started.

    1. Install Floating Wood Shelves Above Your Sofa

    Floating shelves add visual warmth while solving storage problems. They draw the eye upward, making rooms feel taller and more open, and they give you space to display books, plants, and personal objects that tell your story.

    Install shelves 12–18 inches apart at arm’s reach height, which makes styling and cleaning easier. Use quality brackets rated for the weight you’ll add. Most shelves run $30–$80 per shelf plus installation (DIY takes 1–2 hours with a level and drill). IKEA, Home Depot, and Wayfair have solid options. Add books, plants, and a few wooden bowls to create visual depth without cluttering the space.

    Renters: use removable adhesive strips or ask your landlord about temporary mounting. The result is a gallery-like focal point that brings organic texture to blank walls and makes your space feel curated and intentional.

    2. Layer a Wood-Topped Console Table in Your Entryway

    An entryway console table anchors your home’s first impression and creates a landing spot for keys, mail, and daily essentials. Wood tops add warmth that metal or glass can’t match, and the raised surface keeps clutter off the floor.

    Look for console tables between $80–$200 at IKEA, Target, or Facebook Marketplace. Reclaimed wood tables cost more ($200–$400) but last a lifetime and feel unique. Pair your console with a narrow mirror above it to bounce light and visually expand the space. Add a table runner and a small plant to soften the look. Installation is instant—just position and style. Your guests see a thoughtful, organized entryway instead of chaos, and you gain a functional surface that’s beautiful to look at.

    3. Add a Wood-Accent Wall with Shiplap or Paneling

    Shiplap and wood paneling create dramatic texture and depth without feeling heavy. A single accent wall behind your bed, above a fireplace, or in a dining space immediately elevates the room and becomes a statement feature that photographs beautifully.

    Budget option ($30–$80): Use peel-and-stick wood wallpaper (easy removal for renters). Mid-range ($150–$400): Install lightweight shiplap boards yourself (one weekend project with a nail gun and saw). Investment ($400–$1,000+): Hire a pro for seamless installation. Paint shiplap white, soft gray, or natural wood tones depending on your style. The texture catches light differently throughout the day, creating visual interest without extra furniture or decor.

    Your room gains depth and character, and the focal point naturally draws attention and conversation.

    4. Use Wooden Ladder Shelves for Open Storage

    Ladder shelves are renter-approved, portable, and work in any room. They add vertical storage without wall mounting, making them perfect for apartments and small spaces. The angled design is visually interesting and takes up less floor space than traditional shelving.

    Find wooden ladder shelves for $40–$120 at Target, Wayfair, or Amazon. Arrange rolled blankets, plants, and books to create a styled look rather than a storage dump. This project takes zero installation time—just position it and style. The ladder-style design feels modern and organic, adding a design element that feels thoughtful.

    Your corner transforms from empty and awkward into a styled focal point that actually serves a purpose.

    5. Swap Bedroom Hardware for Wooden Drawer Pulls

    Small hardware swaps create big visual shifts. Replacing metal drawer pulls with wooden knobs or handles instantly warms up a dresser, nightstand, or bathroom vanity. It’s a micro-investment that feels like a larger refresh.

    Buy wooden pulls for $2–$6 each at hardware stores or Etsy. You’ll need a screwdriver and 10–15 minutes per drawer. Mix wood tones for an eclectic look, or keep them uniform for clean, minimalist style. Brass-and-wood combos are trending and add upscale warmth. The small change makes you notice your furniture more and feel proud of your space every time you open a drawer.

    6. Introduce a Wooden Bed Frame as Your Anchor Piece

    Your bed is the largest furniture piece in the bedroom, so choosing wood naturally anchors the entire room in warmth and texture. A wooden frame becomes the design centerpiece that everything else coordinates around, from bedding to lighting to wall color.

    Solid wood frames cost $300–$800 depending on wood type and quality. Mid-range options from IKEA, West Elm, or Article offer durability and style. Reclaimed or antique frames ($500–$1,500) become heirloom pieces. Skip the bed frame, and your bedroom feels incomplete; add one, and suddenly the entire room feels intentional and pulled together. Pair with natural fiber bedding (linen, cotton) to amplify the organic feel.

    Your bedroom becomes a retreat that looks like a styled magazine page, and you’ll actually want to spend time there.

    7. Create a Wood-Framed Mirror Gallery Wall

    Mirror gallery walls multiply light and make spaces feel larger, but wooden frames add warmth and texture that plain glass can’t deliver. Mix different frame styles and sizes for an eclectic, collected-over-time look, or match frames for a cohesive, modern vibe.

    Source frames from thrift stores ($3–$15 each), Target ($15–$50), or Etsy ($20–$100). You can even make your own frames with reclaimed wood scraps if you’re feeling crafty. Hang 5–9 mirrors in a loose cluster on an accent wall. Reflect a window, plant, or artwork to bounce visual interest around the room. Installation takes 1–2 hours with a level and anchors.

    The space instantly feels larger, brighter, and more curated. Every time you pass by, you see light and reflected beauty instead of a flat, empty wall.

    8. Place a Wooden Ladder Blanket Rack in the Bedroom

    A leaning ladder rack holds blankets, throws, and textiles while adding sculptural warmth to your bedroom or living room. It’s functional art that looks intentional whether you rent or own, and it keeps cozy blankets within reach for cold nights.

    Buy or DIY a wooden ladder rack for $50–$150 (or make one from reclaimed wood for under $30). Drape 2–3 lightweight throws in cream, gray, or natural fibers. The open design doesn’t make your room feel cluttered; instead, it looks styled and intentional. You avoid the “blankets shoved in a closet” problem and create a textured focal point.

    Your bedroom gains coziness and visual interest, and throws are actually accessible instead of hidden away.

    9. Add Wood Trim Around Door and Window Frames

    Wooden trim and molding warm up doorways and windows while creating architectural definition. Even simple, flat-profile trim adds dimension and draws the eye. This works especially well in modern, farmhouse, or transitional spaces.

    Budget DIY ($50–$150): Install simple, primed wood trim yourself with a nail gun and basic tools (one weekend project). Professional installation ($200–$600): Hire a carpenter for seamless, paint-grade results. Use natural wood finishes, paint trim white or soft gray for contrast, or stain darker for drama. Your windows and doors become architectural features instead of plain openings.

    The room gains structure and polish, and visitors notice the thoughtful details even if they can’t quite articulate why your space feels more expensive.

    10. Style Open Kitchen Shelving with Wooden Crates

    Open shelving can look chaotic, but wooden crates create structure and visual breaks that organize your display. They add texture and warmth to modern kitchens while keeping items grouped and intentional.

    Find wooden crates for $10–$30 at hardware stores, storage shops, or online. Stack crates horizontally or vertically depending on your shelf space. Group plates, bowls, and kitchen items by color and type inside the crates, then add small plants or cookbooks to fill gaps. The result looks styled instead of cluttered, and you keep frequently used items accessible.

    Your kitchen feels organized, warm, and intentionally designed—not like everything is on display by accident.

    11. Hang Wooden Pendant Lights Above Kitchen Island

    Pendant lighting serves a practical purpose while setting the mood of your kitchen. Wooden shades or frames add warmth compared to all-metal or glass options, and they create an inviting gathering spot.

    Quality wooden pendant lights range from $60–$200 per pendant (Mid Century Modern style from Article or West Elm) to splurge options at $300–$500 each. Budget alternatives from IKEA start around $20–$50. Hang 2–3 pendants 28–30 inches above your counter for proper task lighting and visual impact. Installation requires basic electrical work or hire an electrician ($100–$200).

    Your kitchen becomes a warm, welcoming hub instead of just a functional space. The lighting sets a mood that makes cooking and gathering feel intentional.

    12. Layer a Jute or Wood-Toned Area Rug Underneath Furniture

    Area rugs ground a space and define zones, especially in open-plan homes. Natural fiber rugs in jute, sisal, or wool complement wooden furniture and create visual warmth without adding bulk.

    Choose a rug that’s 4×6 feet or larger ($80–$300 from Wayfair, Rugs USA, or Target). Natural fibers in cream, tan, or light brown coordinate beautifully with wood furniture. Layer a smaller patterned rug on top for added texture if you like more visual interest. The rug anchors your furniture arrangement and prevents the space from feeling cold or disconnected.

    Your room gains cohesion and coziness. The defined zone makes the space feel intentional, and the natural fibers complement wood beautifully.

    13. Build a DIY Wood Bookshelf for a Reading Nook

    A dedicated bookshelf in a reading nook celebrates your love of books and creates a focal point that feels purposeful. Wooden shelves and frames make the space feel warm and literary without feeling like a library—more like a sanctuary.

    DIY shelving ($100–$250): Build simple shelves from reclaimed wood and brackets using a drill and level (weekend project). Ready-made bookcases ($150–$400): IKEA, Target, and Wayfair have solid options. Fill shelves with books, small plants, wooden boxes, and meaningful objects. Leave some breathing room (don’t pack shelves tight). Add a cushioned chair or floor pillow in front.

    You create a personal retreat that doubles as decor. Your reading nook becomes the most inviting corner of your home, and guests immediately understand what you value.

    14. Install a Wooden Mantel Above a Fireplace (Or Fake Fireplace)

    A wooden mantel is the ultimate focal point, whether you have a real fireplace or a decorative insert. It creates a natural gathering spot and displays your favorite objects beautifully. The wood adds warmth and character instantly.

    Install a mantel for $150–$400 DIY (1–2 days with basic carpentry skills) or $300–$700 professional installation. Source reclaimed wood for unique character, or use new wood stained to match your aesthetic. Style the mantel with candles, plants, art, and meaningful objects. The horizontal lines draw the eye and create a moment of stillness in your room.

    Your living room gains a sophisticated focal point, and the mantel becomes the heart of the space where people naturally gather.

    15. Bring in a Wooden Coffee Table with Storage

    Coffee tables are conversation starters and often the first piece people touch in your living room. A wooden table with storage solves clutter while grounding your seating area in warmth and function.

    Look for tables with open shelving ($150–$400) or drawers ($200–$600) to keep remotes, books, and blankets organized. Reclaimed wood tables ($300–$800) feel unique and age beautifully. Style the lower shelf with books standing upright, a small plant, and a decorative basket. The table becomes a functional display piece that reflects your style.

    Your living room feels intentional and organized instead of chaotic. Guests see a curated space, and you have easy access to everyday items without clutter on top.

    16. Wrap a Wood-Look Wallpaper Around One Wall

    Wood wallpaper gives you the look and feel of real wood without installation hassle or cost. Peel-and-stick options are renter-friendly, removable, and available in countless finishes from rustic to modern.

    Peel-and-stick wood wallpaper ($25–$60 per roll) covers approximately 25–30 square feet. Measure your wall, order extra rolls for pattern matching, and apply over clean, flat surfaces. Removal is simple if you need to change things later. The effect is surprisingly realistic, and the cost is minimal compared to real wood installation.

    Your space gains character and texture instantly. Renters get the wood look they want without losing their security deposit, and homeowners get a quick refresh that’s easy to update later.

    17. Style Wooden Nesting Tables for Function and Form

    Nesting tables are space-efficient and create a sculptural moment when styled together. They move easily, work in any room, and add warm, geometric interest without bulk.

    Find nesting tables for $60–$150 at IKEA, Target, or Wayfair. Mix wood tones for eclectic style, or keep them uniform for clean lines. Place them in a corner, beside your sofa, or in a bedroom. Style with plants, books, and small objects that make you happy. Pull out individual tables as needed for extra surface space. The design looks intentional while staying practical.

    Your space gains visual interest and clever storage that works as hard as it looks good. The tables serve multiple purposes without taking up much room.

    18. Create a Wood-Framed Bulletin Board or Memo Wall

    A bulletin board keeps your life organized while serving as a personal gallery. Wooden frames warm up what could feel like a cold, utilitarian piece of office equipment, and it becomes part of your decor.

    Build a DIY board with cork or burlap for $20–$50 and frame it with reclaimed wood, or buy framed boards for $30–$80 at Target or online. Mount at eye level in your office, kitchen, or bedroom. Pin photos, quotes, sketches, and important reminders. The board becomes a reflection of what matters to you and keeps you organized.

    Your workspace becomes personal and motivating. The visual jumble of photos and ideas feels curated instead of chaotic, and you have a functional display that’s also beautiful to look at.

    19. Install Wooden Ceiling Beams (Real or Faux)

    Ceiling beams create drama and visual interest while drawing the eye upward and making rooms feel taller. Real or faux beams both deliver the same impact, and installation is simpler than you’d expect.

    Faux beams ($50–$150 each) are lightweight, hollow, and can be glued or attached to existing ceilings in 1–2 days DIY. Real beams ($200–$500+) require professional installation but become heirlooms. Stain beams to match your aesthetic or leave them natural. The linear elements organize a room visually and add architectural sophistication.

    Your space gains dimension and feels intentionally designed. The eye travels up instead of stopping at walls, making rooms feel grander and more polished.

    20. Design a Wooden Headboard for Visual Impact

    A headboard is prime real estate for making a design statement. Wooden headboards create a focal point and anchor your bed visually within the room. They’re both functional (something to lean against) and decorative.

    DIY wood slat headboard ($60–$150): Cut wood planks to size, arrange them horizontally or vertically, and attach to the wall with screws (weekend project). Reclaimed or artisan headboards ($300–$1,000): Buy unique statement pieces from Etsy or local makers. Ready-made options ($150–$400): IKEA and West Elm offer designed headboards. Paint, stain, or leave natural depending on your vibe.

    Your bedroom becomes a room you actually want to spend time in. The headboard draws the eye and immediately signals that this space was thoughtfully designed.

    21. Add Wooden Accents to a Bathroom Vanity

    Bathroom vanities often feel cold with all-white or all-metal finishes. Adding wooden open shelving or replacing the vanity entirely with a wood option brings warmth and spa-like texture to a utilitarian space.

    Replace the vanity ($200–$600): Choose a wooden cabinet from IKEA, Wayfair, or local reclaimed suppliers. Add wooden shelving ($50–$150): Install open shelves below the sink for storage and style. DIY wooden shelf risers ($20–$40): Elevate your existing vanity with wooden legs or frame. Style shelves with rolled towels, small plants, and glass bottles. Avoid cluttering—leave space for the wood to breathe.

    Your bathroom transforms from purely functional into a mini retreat. The warmth makes self-care routines feel more intentional and luxe.

    22. Incorporate Wood Into Kitchen Backsplash or Accents

    Mixing wood with traditional backsplash tiles adds unexpected warmth and texture. Thin wooden strips create patterns and visual interest while keeping the space modern and sophisticated.

    Install a mixed backsplash with subway tiles ($3–$8 per square foot) and wooden strips ($1–$3 per linear foot) through a pro installer ($400–$800 labor) or DIY if experienced with tiling. Create geometric patterns, horizontal accents, or herringbone arrangements. Seal wood properly in a kitchen environment to protect from moisture.

    Your kitchen gains personality and craftsmanship feel. The backsplash becomes a feature people comment on instead of overlooking, and the wood warmth softens the kitchen’s coldest zone.

    23. Hang Wooden Wall Art or Carved Panels

    Wooden wall art and carved panels create three-dimensional interest and warmth that flat artwork can’t match. The wood grain and carved texture catch light beautifully and become conversation pieces.

    Find carved wooden panels for $30–$100 each at home decor shops, Etsy, or World Market, or commission custom pieces from local artisans ($100–$300+). Arrange 3–5 pieces in a gallery wall or place a single large panel as a focal point. Leave negative space so pieces don’t overwhelm the wall.

    Your walls gain depth and personality. The carved details create shadows that shift throughout the day, making your art literally change as light moves.

    24. Build a Wooden Window Seat with Storage

    A window seat is the ultimate hygge moment and perfect for small spaces. Wood construction creates warmth, and built-in storage keeps the space organized. It’s the coziest spot in your home.

    DIY wooden window seat ($150–$400): Build a simple frame with plywood and 2x4s, add a cushion, and install drawers (1–2 week project). Professional installation ($800–$2,000): Hire a carpenter for seamless built-in aesthetic. Add cushions, throw pillows, and blankets. Place a small bookshelf nearby for the complete reading-nook vibe.

    You create an intentional retreat within your home. That window seat becomes the most coveted spot for reading, journaling, or simply sitting with tea.

    25. Finish Your Basement with Wooden Paneling and Beams

    Basements feel cold and unfinished without wood warmth. Wooden paneling and beams transform a basement into a cozy den, bar area, or guest retreat—somewhere people actually want to spend time.

    Wood paneling ($30–$100 per sheet, 32 sq ft each): Covers walls quickly and affordably. Installation cost runs $200–$500 DIY or $600–$1,200 professional. Pair with faux beams for added impact. Paint paneling soft colors or leave natural depending on your aesthetic. Add recessed lighting, comfortable furniture, and area rugs to complete the transformation.

    Your basement becomes a living space instead of storage. Guests see an intentional, finished room, and your home’s usable square footage effectively doubles.

    26. Layer Wooden Boxes and Baskets for Hidden Storage

    Wooden boxes and woven baskets hide clutter while adding texture and warmth to shelves and under furniture. They’re affordable, moveable, and work in any room for keeping life organized without visible mess.

    Find wooden boxes for $10–$40 each and woven baskets for $15–$60 at Target, IKEA, Wayfair, or thrift stores. Label boxes with wood tags or labels so you remember what’s inside. Stack on shelves, under tables, or in closets. The effect is immediately tidier and more intentional.

    Your space feels organized and calm. The wooden textures add warmth, and everything has a home instead of creating visual chaos.


    Save this post and pick one idea to tackle this weekend. Whether you choose floating shelves, a headboard, or just wooden accents, you’ll be amazed at how much warmth a little natural wood brings to your space. Which idea resonates most with you?

  • 26 Headboard Ideas That Add Style, Texture & Impact

    26 Headboard Ideas That Add Style, Texture & Impact

    Your headboard sets the tone for your entire bedroom—it’s the first thing you see when you wake up and the focal point when you’re scrolling through your phone before bed. But a great headboard does more than just look good; it can add texture, define your space, and make a small room feel intentional or a plain bedroom feel like a sanctuary. Whether you’re renting, working with a tight budget, or ready to invest in a statement piece, there’s a headboard idea here that fits your style and your situation. Let’s explore 26 creative ways to frame your bed and turn it into the focal point your bedroom deserves.

    1. Layer Natural Wood for Warmth and Texture

    A wooden headboard brings instant warmth and visual interest to any bedroom. Real wood—whether reclaimed, live-edge, or simple planks—catches light beautifully and creates a grounding, biophilic backdrop that makes you want to stay in bed longer.

    The easiest approach is to install shiplap or tongue-and-groove boards directly behind your bed. You can use pre-finished boards from Home Depot or Lowe’s ($50–$300 depending on coverage) and attach them with a stud finder and wood screws—a weekend DIY project. For a softer look, opt for painted shiplap in warm white or soft gray. If full installation feels daunting, floating a single live-edge wood slab above your headboard creates the same visual impact with zero commitment. Pair it with warm brass sconces on either side to highlight the grain.

    The texture and natural tones make even a simple bed frame feel curated and expensive. Your bedroom instantly becomes a retreat rather than just a sleeping space.

    2. Paint an Accent Wall Behind Your Bed

    An accent wall is the quickest way to anchor your bed as a focal point without spending a lot or committing to permanent changes. Bold color—emerald, navy, terracotta, or even deep charcoal—creates drama and makes your headboard zone feel intentional.

    Choose a quality paint (Benjamin Moore, Sherwin-Williams, or budget-friendly Valspar from Lowe’s run $25–$40 per gallon). You’ll need roughly 1–2 gallons for most bedrooms. Tape off the wall carefully, apply two coats, and you’re done in a day. Renters: check your lease, but removable wallpaper or peel-and-stick paint alternatives exist—though they’re pricier ($30–$60 per roll). The key is picking a color you genuinely love, not something trendy you’ll tire of in six months.

    A bold backdrop makes even a basic bed feel curated and stylish. You get maximum impact for minimal effort and cost.

    3. Upholster a DIY Headboard for Comfort and Style

    An upholstered headboard adds softness, sound absorption, and a high-end feel—perfect if you sit up in bed to read or watch shows. DIY upholstery is more approachable than you’d think.

    Buy a basic plywood base (4×8 sheet, ~$25) and cut it to your desired headboard height. Wrap it in batting ($10–$15), then stretch your chosen fabric taut over top and staple the back using a heavy-duty stapler ($15 for the tool, or borrow one). Fabrics range from budget linen ($8–$12/yard) to luxury velvet ($20–$40/yard); aim for 5–8 yards depending on size. Add brass nail head trim for $15–$30 for a designer touch. Total cost: $100–$250 and 3–4 hours of work. Alternatively, buy a pre-made upholstered headboard from IKEA, Wayfair, or West Elm ($150–$400).

    Sitting up in bed now feels intentional and supported. The soft texture invites you to linger, and guests instantly notice the upgrade.

    4. Mount a Floating Shelf Headboard for Practical Style

    A floating shelf headboard combines storage, display space, and style—perfect for small bedrooms or renters who want impact without permanent fixtures. It’s functional art.

    Mount two to four shelves (walnut, white oak, or painted MDF) at varying heights above your bed using heavy-duty brackets rated for 25+ pounds each. IKEA’s Lack shelves run $10–$25 each; high-end options from Wayfair run $40–$80. Secure with wall anchors if you can’t hit studs. Dress the shelves with small plants, a table lamp, stacked books, and a few framed photos—nothing too cluttered. Installation takes 1–2 hours with basic tools (drill, level, stud finder). Renters can remove these easily.

    Your bed area now functions as both sleeping space and bedroom library. It feels open, airy, and infinitely more interesting than blank wall.

    5. Hang Fabric or Macramé as a Soft, Renter-Friendly Backdrop

    Fabric and macramé hangings offer instant bohemian style with zero commitment. They’re renter-friendly, movable, and add organic texture that photographs beautifully.

    Source a large fabric tapestry, macramé wall hanging, or woven textile from Urban Outfitters, Free People, Amazon, or local makers on Etsy. Sizes run 4×6 feet and up; prices range from $30–$150 depending on craftsmanship. Hang using a tension rod, removable adhesive hooks, or a basic curtain rod mounted just below ceiling height behind your bed. Layer a smaller hanging or two to the side for asymmetrical interest. The beauty is you can swap these seasonally or when you want a refresh.

    Your bedroom gains a cozy, collected feel without feeling cluttered. Macramé especially catches light and shadow, creating texture that shifts throughout the day.

    6. Create a Curved Headboard for Soft, Modern Impact

    Curved headboards dominate 2025 design trends—and for good reason. The soft, rounded shape softens hard bedroom edges and creates a focal point that reads as intentional and contemporary.

    You can DIY a curved headboard using bendable plywood (Home Depot, $40–$60), batting, and your chosen fabric, then upholster as described above. Alternatively, invest in a pre-made curved headboard bed frame from Article, West Elm, or Wayfair ($400–$800 for the full bed). If budget is tight, try a curved headboard panel that attaches to an existing frame—IKEA and Amazon offer options for $100–$250. The key is choosing a subtle curve (not too extreme) and pairing it with minimalist bedding so the shape stays the star.

    The curved silhouette makes your bed feel like a design statement rather than just furniture. Your bedroom immediately reads as thoughtfully styled.

    7. Use Sheer Curtains to Frame Your Bed Like a Canopy

    Canopy-style curtains create an enclosed, intimate feeling without the visual heaviness of a full four-poster frame. Sheer fabrics especially feel contemporary and airy.

    Mount a sturdy curtain rod (or two perpendicular rods for a full frame) from the ceiling above your bed using heavy-duty brackets rated for fabric and rod weight. Hang floor-length sheer curtains (linen or cotton voile, $8–$15/yard from Joann Fabrics, Etsy, or Amazon) from the rod. You’ll need roughly 10–15 yards depending on fullness and ceiling height. Total cost: $50–$150 plus 2 hours for installation. The effect is romantic yet modern—especially if you keep bedding and surrounding decor minimal and neutral.

    Your bed becomes an intentional retreat within your room. Light filters through the fabric beautifully, and you get a sense of enclosure that’s deeply comforting.

    8. Install a Statement Mirror as a Headboard Focal Point

    A large mirror behind your bed serves double duty: it expands the visual space of your bedroom and reflects light beautifully. Plus, it’s a functional, stylish alternative to traditional headboards.

    Choose an oversized mirror (36 inches or larger) in a frame that matches your style—brass, wood, black metal, or ornate. Hunt on Wayfair, Article, or local vintage shops for $80–$400 depending on size and materials. Hang it securely with heavy-duty wall anchors or by hitting studs. The mirror will reflect your bedding and lighting, making the bed feel more open and curated. Layer a smaller mirror or two to the side for asymmetry, or keep it singular and centered for maximum impact.

    Your bedroom feels larger and brighter instantly. Morning light bounces around the room, and the mirror becomes a beautiful architectural element.

    9. Mix Wallpaper with Paint for a Patterned Accent

    Wallpaper on just the headboard wall (or even just a smaller area framing the bed) gives you pattern without overwhelming the room. It’s bold, temporary, and surprisingly affordable now.

    Peel-and-stick wallpaper (removable, renter-friendly) runs $25–$50 per roll and covers roughly 27–30 square feet. Brands like Spoonflower, Etsy, and Amazon offer thousands of designs. Traditional wallpaper ($15–$35/roll) requires paste and removal later but lasts longer. Choose a pattern that complements your bedding—botanical prints, geometric shapes, or subtle damask all work well. Installation takes 2–4 hours depending on your patience and the wall’s smoothness.

    Your headboard wall becomes a design moment. Even from across the room, pattern adds personality and makes your bed feel curated rather than default.

    10. Combine Textured Wallpaper with Minimalist Bedding

    Textured wallpaper—grasscloth, linen-look, or embossed finishes—adds depth and visual interest without bold color or pattern. It’s sophisticated and works in any style.

    Textured wallpaper runs $20–$60 per roll and pairs beautifully with neutral bedding for a calm, intentional look. The texture catches light differently throughout the day, creating subtle visual movement. Brands like Schoolhouse Electric, Anthropologie, and traditional wallpaper shops carry beautiful options. Installation is similar to standard wallpaper and takes 2–3 hours. For renters, high-quality peel-and-stick textured options exist ($40–$70/roll) from Spoonflower and Etsy.

    Your bed area gains dimension and sophistication. Guests notice the subtle texture before realizing what makes the space feel so thoughtfully designed.

    11. Paint Your Headboard a Rich, Deep Color While Walls Stay Light

    Instead of an accent wall, paint just the headboard area—perhaps 3–4 feet high or in a defined rectangular frame around the bed. This creates bold impact without committing to an entire wall and keeps the rest of the room feeling open.

    Using quality paint ($25–$40/gallon), mask off a clean rectangle or arch shape above your bed, then apply two coats. This is a half-day DIY project. Choose a color that’s 2–3 shades deeper than your wall color for definition. Paired with neutral bedding and brass or brass-toned lighting, a deep color reads as luxurious rather than heavy.

    Your bed becomes the room’s anchor without overwhelming it. The technique works in tiny studios and sprawling master bedrooms alike.

    12. Layer Quilts and Throws Behind Your Bed for Soft Texture

    Instead of a traditional headboard, use textiles as your backdrop. Layer quilts, throws, and decorative blankets for an abundant, cottage-core feel that’s deeply inviting.

    Source vintage quilts from flea markets, estate sales, or Etsy ($15–$80 each), along with new throws from Schoolhouse Electric, Etsy, or Woolroom ($40–$150). Drape them casually over a simple headboard frame or hang them loosely from a tension rod behind the bed. The beauty is layers—mix patterns, textures, and tones. Include at least one handmade or secondhand piece for character. This approach also solves the “what to do with all my favorite throws” problem.

    Your bed feels intentional and abundantly cozy. Guests see personality and craftsmanship rather than a generic furniture piece.

    13. Install a Geometric Wooden Slat Headboard

    Wooden slat headboards create a modern, architectural look. Geometric patterns (chevron, starburst, or simple lines) add visual interest while remaining clean and contemporary.

    You can DIY this using 1×2 or 1×3 boards ($2–$5 each), cutting them to angles and mounting to a plywood base or directly to the wall. Plan your pattern on graph paper first, then cut and install—a full weekend project requiring a miter saw. Alternatively, order a pre-made slat headboard from Etsy makers or Article ($300–$600). Sand and finish in natural wood, white, or paint a moody color for contrast.

    The geometric pattern adds architectural interest without weight. Your bedroom feels designed and contemporary.

    14. Hang Floating Plants Above Your Bed for Living Texture

    Live plants suspended above your bed create a living headboard that’s beautiful, air-purifying, and deeply biophilic. It’s an unexpected, nature-forward approach.

    Mount sturdy hooks into ceiling studs or use removable adhesive hooks (rated for 10+ pounds each). Hang pothos, string of pearls, monstera, or other trailing plants in simple macramé hangers ($10–$30 each from Urban Outfitters, Free People, or Etsy) or small pots. Start with 3–5 plants and add more as your confidence grows. Water weekly and rotate for even growth. Total investment: $50–$150 for plants and hangers. The effect is serene and distinctly your style.

    Your bedroom becomes a peaceful retreat filled with living energy. Morning light filtering through leaves is unmatched for mood and well-being.

    15. Create a Tufted Statement Headboard for Vintage Glamour

    Button tufting is the ultimate high-end detail. It’s romantic, vintage, and makes any headboard feel curated and expensive—even budget versions work beautifully.

    Upholster a plywood base as described in item #3, but add button tufting by marking diamond or grid patterns and pulling thread through the fabric and foam, securing buttons on the back of the headboard. This requires patience but isn’t technically difficult—YouTube tutorials abound. Alternatively, order a pre-made tufted headboard from Wayfair, Article, or specialty furniture makers ($300–$800). Pair with a jewel-tone velvet or linen for maximum impact.

    The tufted detail instantly elevates your bedroom to luxury hotel status. It becomes a statement piece guests notice and admire.

    16. Use Leather or Faux Leather for a Modern, Streamlined Look

    Leather or faux leather headboards feel expensive, contemporary, and effortlessly chic. The material is durable, easy to clean, and works in modern, eclectic, and maximalist spaces alike.

    Upholster a plywood base in faux leather (no fuss, still looks premium) using contact cement or staples. Faux leather runs $10–$25/yard from fabric retailers or Etsy, and you’ll need 5–8 yards. The seam-free appearance is especially sleek. Alternatively, buy a pre-made leather headboard from West Elm or Article ($250–$500). The neutral tone pairs beautifully with colorful bedding and bold art above the bed.

    Your headboard reads as designer and intentional. The smooth material invites touch, and the clean lines keep the room feeling open.

    17. Frame Your Bed with Floating Brass Rods and Sheer Fabric

    Brass framing with sheer fabric is minimalist, architectural, and surprisingly elegant. It’s a modern take on the canopy without the full-coverage feeling.

    Mount two sturdy brass rods (or stainless steel for a different vibe) vertically on either side of your bed using heavy-duty ceiling and floor mounts. Drape lightweight linen or cotton fabric loosely from rods—fabric doesn’t need to be sewn, just gracefully arranged. Brass rods run $50–$150 per rod from Etsy or specialty hardware stores; fabric costs $8–$15/yard. Total project: 2–3 hours and $150–$300. The effect is gallery-like and unexpectedly luxe.

    Your bed becomes an architectural focal point. The simplicity makes the space feel curated and intentional.

    18. Stencil a Pattern Directly Onto Your Wall

    Stenciling is an affordable, renter-friendly way to add pattern without wallpaper. It’s also deeply customizable and makes you feel like an artist.

    Purchase stencils from Etsy, Amazon, or craft stores ($10–$30 each) or print your own from templates online. Secure the stencil to your wall with painter’s tape, then apply paint using a stencil brush and stippling motions (don’t drag the brush). Multiple passes create depth. Test on cardboard first. Choose a pattern—geometric, botanical, or abstract—that complements your bedding. The whole project takes a day and costs $30–$80. Mistakes are part of the charm; the imperfection reads as handmade and intentional.

    Your headboard wall becomes a personal art installation. Visitors instantly notice the craftsmanship and care you’ve taken.

    19. Install a Headboard with Built-in Reading Light

    A headboard with integrated reading lights is the ultimate fusion of form and function. No bedside table needed, and your lighting is built into your design.

    Some pre-made headboards come with this feature—check Wayfair, Article, or specialty bedframe brands. Alternatively, commission a DIY version by having an electrician install wall sconces directly into an upholstered headboard frame. This is a project for someone with electrical experience or a hired pro (call an electrician, $200–$400 plus fixture cost). Standard wall sconces run $30–$100 each from Target, IKEA, or design retailers. The result feels custom and expensive.

    Your bed becomes a complete sleep and reading sanctuary. You’ll actually use the lighting, and it becomes a cherished detail of your daily routine.

    20. Layer a Wall Hanging with Paint for Dual-Texture Impact

    Combine two headboard ideas by painting an accent wall and layering a textile or wall hanging on top. The combination creates depth and visual interest that feels collected and curated.

    Paint your accent wall (tutorial in item #2), then mount a large woven tapestry, macramé, or fabric hanging using hooks or a tension rod. This layering technique works beautifully and feels effortlessly high-end. The textile breaks up the expanse of color and adds dimension. Pair with simple bedding in the same color family for cohesion.

    Your headboard zone reads as a carefully curated gallery wall. The layering makes the space feel more thoughtful and intentional.

    21. Use Large-Format Artwork or a Gallery Wall as Your Headboard Backdrop

    Oversized art or a gallery wall is an unconventional headboard choice that works beautifully—especially if you love collecting art and want your bedroom to feel like a personal gallery.

    Commission a large abstract painting from a local artist (Etsy or Instagram), order an oversized print from Minted or Society6 ($50–$150), or curate a gallery wall using mismatched frames from IKEA, Target, or thrift stores and prints from Unsplash or your own photography. Frame prices run $5–$30 depending on quality. Gallery walls take time to arrange but feel deeply personal and visually dynamic.

    Your bedroom becomes an expression of your taste and personality. Guests see art and intentionality rather than a generic bedroom setup.

    22. Install Wood Paneling or Shiplap in a Single Color for Cohesion

    Instead of painting just behind the bed, extend shiplap or wood paneling floor-to-ceiling for a fully integrated, high-end effect. The cohesion reads as intentional design.

    Use pre-finished shiplap boards ($50–$300 depending on coverage), paint them in your chosen color (or leave natural), and install using a stud finder and screws—a weekend DIY project if you’re handy. For full-wall coverage, budget 8–16 hours depending on room size. Renters: this one’s permanent, so check your lease first. The monochromatic, seamless look is deeply calming and makes the room feel intentionally designed rather than decorated.

    Your bedroom becomes a serene retreat. The unified texture and color create a cohesive space that’s restful and sophisticated.

    23. Hang a Swing or Hanging Chair Over Your Bed for Unexpected Whimsy

    A hanging chair or swing suspended behind or above your bed adds unexpected whimsy and functionality. It’s a conversation starter and actually useful for lounging.

    Rattan egg chairs run $150–$400 from Wayfair, Article, or IKEA; fabric swings run $100–$250. You’ll need to install a heavy-duty ceiling mount (hire an electrician if you’re unsure about hitting studs—$150–$200). The chair becomes a reading nook, meditation spot, and visual anchor. It works especially well in eclectic, bohemian, or maximalist bedrooms.

    Your bedroom gains unexpected character and function. Visitors always comment on the chair, and you gain a cozy spot for morning coffee or evening reading.

    24. Create a Geometric Headboard Using Tape and Paint

    Painter’s tape and two paint colors can create a graphic geometric headboard—perfect for renters and budget-conscious designers. The effect is modern and surprisingly sophisticated.

    Sketch your pattern lightly on the wall with pencil, then apply painter’s tape along the design lines. Paint one section with your first color (one coat), let dry, then carefully remove that tape and paint the next sections with your second color. Take your time with tape application—crisp lines make the difference. This takes 4–6 hours but costs only $30–$50 in paint and tape. Geometric patterns work best—stripes, triangles, hexagons, or abstract asymmetry.

    Your headboard looks designed and intentional. Guests won’t believe you didn’t hire someone to paint it.

    25. Install a Headboard with Open Shelving for Display and Storage

    A headboard with integrated shelving merges form and function beautifully. It’s perfect for displaying collections, storing bedside necessities, and adding visual interest all at once.

    Order a headboard with built-in shelves from IKEA, Wayfair, or custom makers ($200–$600 depending on size and materials), or DIY by building a simple wooden frame with shelves using 2×4s and shelf brackets. Stock the shelves intentionally: books you actually read, small plants, framed photos, candles, and a few decorative objects. Keep about 60% of the shelf space open for breathing room. The curated collection tells a story about who you are.

    Your bed area becomes both functional and deeply personal. Guests see a curated collection rather than random objects, and you have easy access to everything you need while in bed.

    26. Use Reclaimed Architectural Elements for One-of-a-Kind Character

    Repurposed architectural salvage creates a truly one-of-a-kind headboard that’s impossible to find anywhere else. Every piece has history and character baked in.

    Hunt architectural salvage shops, vintage markets, estate sales, or Facebook Marketplace for doors, gates, wrought iron railings, ornate mantels, or decorative trim ($50–$300 depending on size and materials). Mount securely to wall studs using appropriate hardware. The asymmetry and imperfection are the point—your bedroom becomes a gallery for your finds. This works beautifully in eclectic, maximalist, or bohemian spaces.

    Your headboard becomes a conversation starter with genuine history. It’s proof that thoughtful design comes from imagination, not just buying matching sets.


    Ready to frame your bed in style? Save this post and pick one headboard idea that speaks to you—or try combining two ideas for a hybrid approach. Your bed is too important to be boring, and your bedroom deserves to feel like a retreat that’s entirely you.

  • 27 Mirror Decorating Ideas That Add Depth, Light & Style to Any Space

    27 Mirror Decorating Ideas That Add Depth, Light & Style to Any Space


    Mirrors do more than show your reflection—they’re your secret weapon for making any space feel bigger, brighter, and more intentional. Whether you’re working with a tiny apartment, a dark hallway, or a bathroom that needs serious style, the right mirror can completely change how a room feels. The trick isn’t just hanging any mirror on the wall; it’s choosing the shape, size, and placement that works for your specific space. In this guide, you’ll discover 27 specific mirror ideas—from zero-cost styling tricks to investment pieces that become focal points—so you can finally create a room that feels as open and polished as the ones you’ve been pinning. Let’s get started.


    1. Lean an Oversized Round Mirror for Instant Depth

    Leaning an oversized mirror against the wall creates the illusion of a much larger room without any commitment or wall damage. This works especially well in living rooms, bedrooms, and entryways where you want impact without permanent installation.

    Look for mirrors 24–36 inches in diameter from retailers like Target ($80–$150), IKEA ($40–$100), or Wayfair ($100–$300). Modern round mirrors with minimal frames work best for this approach. Place it in a corner or against a wall where it reflects light from a window or light fixture. The lean-and-style method takes 5 minutes and works beautifully with a console table or bench below. Pro tip: Use a furniture pad underneath the mirror’s base to protect your floors and keep it stable.

    You’ll immediately notice how much lighter and more open the space feels. The reflected light bounces around the room, making it appear 20–30% larger without any structural changes.


    2. Hang Frameless Mirrors Side-by-Side for a Gallery Wall

    Frameless mirrors stacked together create a sophisticated gallery wall that multiplies your light and makes compact spaces feel airy without the visual weight of frames. This trick works in narrow hallways, small bedrooms, and entryways where space is tight.

    Choose 3–5 frameless mirrors in complementary sizes (mix rectangles and squares). Installation takes 1–2 hours using toggle bolts or studs for secure hanging. Look at Wayfair ($30–$150 per mirror), CB2 ($60–$200), or West Elm ($100–$250) for clean frameless options. Stagger them with small gaps for visual interest. Use a level and painter’s tape to plan your layout before drilling. Pro tip: If you rent, use damage-free adhesive strips rated for mirror weight, though mounting securely to studs is always safer.

    This arrangement bounces light throughout your entire entryway or hallway. The gaps between mirrors add modern flair while the reflective surfaces multiply your natural light, making the path feel less cramped.


    3. Paint Your Wall Light to Make Mirrors Reflect More

    Before buying a bigger mirror, try changing your wall color. Light, neutral walls maximize mirror reflection and brightness—a free or ultra-cheap change that compounds the depth effect.

    Paint walls in soft whites, warm creams, pale grays, or gentle blues (the backdrop matters as much as the mirror itself). Benjamin Moore ($35–$50/gallon) and Sherwin-Williams ($40–$60/gallon) offer excellent sample sizes to test. One gallon covers approximately 350 square feet. DIY painting takes 3–4 hours depending on room size; hire a painter for $800–$1,500 if preferred. Light walls reflect existing light (and mirror reflections) better than dark walls. Pro tip: Use semi-gloss or satin finishes in bathrooms for easier cleaning and subtle shine.

    Suddenly, your mirrors work harder. The reflected light bounces around the room more effectively, creating a genuinely brighter, more spacious feeling without any mirror upgrades needed.


    4. Install a Lit Vanity Mirror for Grooming Perfection

    LED and lit mirrors solve two problems at once: they provide task lighting for grooming while reflecting your face evenly without harsh shadows. Perfect for bathrooms where natural light is limited or inconsistent.

    Choose from wall-mounted lit mirrors ($150–$400) or tabletop vanity mirrors ($80–$200). Top brands include Kosmonia ($120–$280), Anthropologie ($200–$350), West Elm ($180–$320), and budget-friendly Amazon options ($60–$150). Look for 3000K–4000K color temperature for warm, flattering light. Installation takes 30–60 minutes for wall-mounted; tabletop versions need zero installation. Choose dimmable options if possible for flexibility. Pro tip: LED bulbs last 10–50 years and use 75% less energy than traditional bulbs.

    You’ll get flawless makeup application and skincare visibility every single time. The even, shadow-free lighting makes your bathroom feel like a professional spa rather than a rushed morning routine space.


    5. Use an Arched Mirror to Soften Hard Edges

    Arched mirrors bring elegance and softness to rooms with lots of hard angles and right angles. They work particularly well in bedrooms, bathrooms, and feminine-leaning spaces where you want to reduce visual harshness.

    Search for arched or curved-top mirrors (18–36 inches wide, $80–$300) on Wayfair, CB2, Target, or West Elm. Metal frames in gold, brass, or black work beautifully. Installation is straightforward: mark studs, use heavy-duty wall anchors ($10–$20), and hang with picture-hanging wire or D-rings. Takes 20–30 minutes. The arch naturally draws the eye upward, making ceilings feel higher. Pro tip: Pair with an arched window or doorway nearby for a cohesive, intentional look.

    The curved silhouette makes your bedroom feel more refined and restful. Instead of boxy mirror-on-wall, you get a piece that looks purposefully chosen and contributes to a calm, well-designed aesthetic.


    6. Mount a Hexagon Mirror for Geometric Interest

    Geometric mirrors—especially hexagons—add modern flair and playful sophistication without being too bold. They work as statement pieces in entryways, hallways, and modern living rooms.

    Hunt for hexagon mirrors (16–30 inches, $60–$250) on IKEA ($40–$80), Target ($50–$120), Amazon ($60–$180), or Wayfair ($80–$300). Matte black and natural wood finishes are trending. Installation takes 15–20 minutes with a level and stud finder. Position it as a solo statement piece (don’t clutter around it). The geometric shape creates visual rhythm and draws attention, so choose a spot where you want focus. Pro tip: For renters, lean a hexagon mirror against a console table instead of hanging it.

    This one change elevates your space from basic to design-forward. The reflections bounce off the geometric shape, creating visual interest while still multiplying your light and perceived space.


    7. Create a Sunburst Mirror Moment for Living Room Drama

    Sunburst mirrors are 2025’s statement piece. They work as the focal point of an entire room, creating architectural drama and instantly elevating your space from dated to gallery-worthy.

    Look for sunburst mirrors (28–48 inches, $120–$500+) at West Elm ($250–$400), Wayfair ($150–$350), CB2 ($200–$450), or Anthropologie ($300–$600). Brass, gold, and black finishes dominate. Hang as a solo focal point above a sofa, console, or bed—no competing decor nearby. Installation takes 30–45 minutes; use a stud and heavy-duty anchors. The rays can be adjustable or fixed. Pro tip: Position one to catch morning or afternoon light for dramatic shadow play on surrounding walls.

    This mirror becomes the hero of your room. Guests notice it immediately, and the architectural design makes your space look intentionally curated and magazine-worthy.


    8. Use Anti-Fog Bathroom Mirrors for Luxury Functionality

    Anti-fog mirrors combine practical functionality with subtle luxury—they stay clear during and after hot showers without the squeegee routine. Perfect for families and frequent shower-takers.

    Anti-fog mirrors range from $80–$400 depending on size and brand. Kosmonia ($100–$250), Amazon ($60–$150), and Home Depot ($100–$300) have solid options. The fog-free coating lasts 5–10 years. Installation is standard mirror hanging with wall anchors ($15–$30) and takes 20–30 minutes. Some models include heated elements that activate humidity sensors automatically. Pro tip: DIY anti-fog spray ($10–$15) works for existing mirrors if replacing isn’t in the budget.

    No more wiping your mirror before skincare or shaving. The consistent clarity transforms your shower routine from rushed to relaxed, and the mirror stays functional even in high-humidity bathrooms.


    9. Lean an Arched Mirror in Your Bedroom for Effortless Style

    Leaning an arched mirror creates a slower, more intimate feel than hanging it—perfect for bedrooms where you want calm over drama. The arch adds softness without being fussy.

    Find arched mirrors (24–36 inches tall, $100–$350) to lean against bedroom walls. Target ($60–$150), West Elm ($150–$300), and IKEA ($50–$120) all have options. Use a felt furniture pad underneath ($5–$10) for floor protection and slight angle adjustment. Position near your bed or against a wall beside a chair. This zero-commitment installation takes literally 2 minutes, making it perfect if you’re renting or like changing your layout seasonally. Pro tip: Lean it at a slight angle (ask a friend to check) to avoid a too-perfect, artificial appearance.

    Your bedroom immediately feels more relaxed and lived-in. The curved mirror adds softness while still opening up the space and reflecting light—without the permanent commitment of wall hanging.


    10. Hang Multiple Small Mirrors for a Scattered Gallery Effect

    Small mirrors clustered together create a collected, curated feel while multiplying reflections and light throughout the room. Perfect for small bathrooms, powder rooms, and bohemian-style spaces.

    Source small mirrors (4–12 inches, $10–$80 each) from IKEA, Target, Wayfair, thrift stores, and vintage shops. Mix shapes and finishes for personality (don’t match them). Plan your layout on paper first or use painter’s tape on the wall. Installation takes 1–2 hours depending on quantity. Use picture-hanging hooks rated for mirror weight ($5–$15 per hook). The staggered arrangement is forgiving and charming—perfection is the opposite of the goal here. Pro tip: Include one larger mirror as an anchor point to ground the gallery.

    Instead of one boring mirror, you get a dynamic, artistic installation that reflects light from multiple angles. Your space looks collected, intentional, and way more interesting than standard bathroom mirrors.


    11. Add a Floor-to-Ceiling Mirror to Transform Tiny Spaces

    Full-height mirrors create the maximum illusion of space and are worth the investment if you’re dealing with a genuinely cramped room. They completely reshape how small spaces feel.

    Floor-to-ceiling mirrors cost $300–$800 for DIY installation or $800–$2,000 with professional hanging. Retailers like Wayfair ($400–$1,200), IKEA ($250–$500 for modular panels), and custom glass suppliers ($600–$2,000) all offer options. Modular panel systems are renter-friendly; permanent installations require professional help and wall studs. Installation takes 2–4 hours for DIY or half a day for professionals. Ensure your walls are level before ordering. Pro tip: Use mirror panels in one accent wall rather than all four to avoid an overwhelming funhouse effect.

    This is the nuclear option for small-space transformation. Your tiny apartment, hallway, or bedroom suddenly appears drastically larger and brighter—you’ve essentially doubled your perceived square footage.


    12. Style a Mirror with Scalloped Edges for Feminine Elegance

    Scalloped mirrors balance elegance with playfulness—they’re sophisticated enough for adults but still feel fun and slightly whimsical. Perfect for bedrooms, bathrooms, and dressing areas.

    Search for scalloped mirrors (20–32 inches, $80–$300) at Anthropologie ($150–$300), Urban Outfitters ($100–$200), Wayfair ($80–$250), or Amazon ($60–$180). White, cream, and soft pastels are trending, though brass and gold finishes add glam. Installation takes 20–30 minutes with standard wall anchors and a level. The curved edges catch and reflect light beautifully from different angles. Pro tip: Pair with a vintage vanity table or modern dresser depending on your overall style.

    The undulating edge softens your space and adds personality. Instead of feeling like just a functional mirror, it becomes a decorative statement that makes your bedroom or bathroom feel more curated and intentional.


    13. Install a Black-Framed Mirror for Modern Edge

    Black-framed mirrors add instant modernity and edge to any space without being trendy or temporary-feeling. They ground a room and work with nearly every style.

    Look for black-framed mirrors (16–40 inches, $80–$400) at CB2 ($150–$300), IKEA ($40–$120), Target ($50–$150), West Elm ($120–$280), or Wayfair ($100–$350). Matte black resists fingerprints better than glossy finishes. Rectangular and square frames are most versatile. Installation takes 20–30 minutes with a level and stud-mounted hangers or heavy-duty anchors. Black frames work in minimalist, industrial, and even bohemian spaces—they’re quietly adaptable. Pro tip: Use multiple smaller black-framed mirrors in a grid for visual impact.

    The black frame makes a statement without shouting. Your space instantly reads as more design-conscious and modern, and the high contrast helps the mirror become a focal point rather than blending into the wall.


    14. Choose a Rattan-Framed Mirror for Coastal Calm

    Rattan mirrors bring coastal, relaxed vibes without looking kitschy. The woven texture adds depth and visual interest while keeping spaces feeling airy and organic.

    Find rattan-framed mirrors (18–36 inches, $60–$250) at Target ($50–$120), IKEA ($40–$100), West Elm ($100–$220), Wayfair ($70–$300), or Amazon ($50–$150). Natural woven finishes work best; stained or painted rattan often looks cheap. Pair with light, neutral backgrounds. Installation takes 15–20 minutes with standard hangers. Rattan is durable and lightweight, making it easy to hang even on less-than-perfect walls. Pro tip: For renters, lean a rattan mirror against a console table for a curated entryway look.

    The organic texture makes your space feel warm and welcoming. Instead of a sterile glass-and-frame mirror, you get a piece that looks intentionally chosen and contributes to a calm, beach-house-inspired aesthetic.


    15. Add a Gold or Brass Mirror for Instant Glam

    Gold and brass mirrors add warmth and luxury without being overdone if chosen thoughtfully. They work as focal points in entryways, bathrooms, and bedrooms.

    Search for gold/brass mirrors (20–36 inches, $100–$500+) at Anthropologie ($200–$450), West Elm ($150–$350), CB2 ($120–$400), Wayfair ($80–$400), or high-end retailers ($300–$1,000+). Look for warm brass or antique gold finishes rather than bright yellow gold, which can feel dated. Installation takes 20–30 minutes. Gold frames reflect warm light beautifully and work with both traditional and modern spaces. Pro tip: Choose matte or antiqued finishes over shiny brass—they age beautifully and hide fingerprints.

    The warmth of the metal elevates your entire room. Where a simple mirror might disappear into the wall, a gold-framed mirror becomes a piece guests notice and admire—it signals thoughtful design choices.


    16. Hang a Beveled-Edge Mirror for Seamless Minimalism

    Beveled-edge mirrors create subtle prismatic reflections and look more refined than standard flat mirrors. They’re the choice for minimalist and modern spaces where you want sophistication without visible frames.

    Look for beveled mirrors (16–40 inches, $100–$300) at IKEA ($60–$150), Home Depot ($80–$250), Wayfair ($100–$350), or custom glass suppliers ($150–$500). The beveled edge is subtle—about ¼ inch—so it catches light without being flashy. Installation takes 20–30 minutes with mirror hangers rated for glass weight. Beveled mirrors weigh slightly more than standard mirrors, so use appropriate hardware. Pro tip: This works beautifully in minimalist spaces but might feel too subtle in eclectic rooms where you want personality.

    Your mirror looks intentionally chosen and architectural. The subtle beveled reflections add refinement and depth, making your space read as well-designed rather than simply decorated.


    17. Create a Focal Point Wall With an Oversized Sunburst Mirror

    If you want your mirror to be the conversation piece in your home, go oversized sunburst. This is an investment, but it completely redefines the room.

    Sunburst mirrors in this size range cost $300–$800+ depending on materials and finish. Check West Elm ($400–$600), Anthropologie ($350–$550), CB2 ($300–$500), Etsy ($250–$1,000 for artisan pieces), or custom metal workers ($500–$1,500). Brass and gold finishes are most popular, though black offers modern edge. Professional installation recommended ($150–$300) due to weight; DIY takes 45–60 minutes with two people. Position where it catches natural light for shadow play. Pro tip: Hang it alone on a focal wall—competing decor diminishes its impact.

    This mirror becomes art. It’s the first thing people notice when they enter your home, and it creates a sophisticated, intentional aesthetic that feels expensive and collected.


    18. Use a Mirror With Built-In Shelving for Functional Style

    Mirrors with integrated shelving solve the storage problem while keeping your space visually calm. Perfect for small bathrooms and bedrooms with limited wall space.

    Find mirror with shelving ($150–$400) at West Elm ($200–$350), CB2 ($180–$300), Wayfair ($100–$350), IKEA ($80–$200), or Amazon ($120–$250). Materials range from wood to metal to floating glass shelves. Installation takes 45 minutes to 1.5 hours and requires stud mounting for stability (don’t use anchors for weight-bearing shelves). This multitasking piece replaces both a mirror and floating shelves, saving money and wall space. Pro tip: Keep shelves organized with matching containers and minimal decor for a clean, intentional look.

    You get mirroring, reflection, light-bouncing, and functional storage in one piece. Your bathroom or bedroom stays organized without cramped countertops, and the integrated design looks intentional and designed rather than like you’re just storing things on a shelf.


    19. Mount a Mirror Across From a Light Source to Double Brightness

    Strategic mirror placement is free and multiplies the effectiveness of your existing light. Mounting a mirror opposite a window or light fixture is the smartest design move you can make in a dark room.

    No product needed—just intelligent placement. Measure and mark where direct light hits your window or lamp. Mount a mirror directly opposite (any size, $40–$300+) to catch and reflect that light throughout the room. Use a level and stud finder for secure installation. Takes 20–30 minutes. This works for both natural and artificial light. In dim north-facing bedrooms or dark hallways, this change is transformative. Pro tip: Use a large mirror for maximum light reflection; even a small 18-inch mirror makes a difference.

    The room immediately becomes noticeably brighter without installing new light fixtures or increasing your electric bill. Morning light bounces around twice as effectively, and dark corners suddenly feel approachable and warm.


    20. Choose a Geometric Petal Mirror for 3D Visual Interest

    Geometric petal mirrors (think mandala patterns or layered designs) add artistic depth without being maximalist. They read as sophisticated modern art rather than just a functional mirror.

    Hunt for geometric petal mirrors (24–36 inches, $100–$400) at Wayfair ($120–$350), Etsy ($100–$500 for artisan pieces), Amazon ($80–$300), or specialty home decor shops ($150–$600). These often have a slight 3D element, so they’re not flat like standard mirrors. Installation takes 20–30 minutes. Position as a solo focal point to let the pattern shine. The petal design works with both modern and eclectic spaces. Pro tip: These are investment pieces—choose one you’ll love long-term since they’re less trendy than sunbursts.

    Your mirror becomes art. The dimensional petal pattern adds sophistication and visual interest, making your space feel curated and intentional rather than just decorated.


    21. Install a Corner Mirror to Open Up Tight Spaces

    Corner mirrors are a secret weapon for tight spaces. Positioned at an angle in a corner, they reflect the room back on itself, creating the illusion of openness where claustrophobia exists.

    Look for tall rectangular mirrors (28–40 inches tall, $80–$250) to position at a 45-degree angle in corners. IKEA, Target, Wayfair, and Amazon all have affordable options ($50–$150). Installation is 25–35 minutes with a level—you’re essentially hanging a mirror at an angle using standard hardware. This works in bedrooms, home offices, entryways, and small bathrooms. Pro tip: Use furniture sliders or felt pads underneath if you’re leaning it rather than hanging it, to keep it stable and protected.

    A cramped corner suddenly feels open. The angled mirror multiplies your perceived space and makes tight rooms feel genuinely larger without any renovation needed.


    22. Add a Decorative Mirror to Your Entryway Console

    Pairing a mirror with an entryway console creates a complete, intentional-looking vignette that says “I have my life together.” It’s styling, not just decoration.

    Choose a mirror that echoes your console style (18–28 inches, $60–$200) from retailers matching your aesthetic. Target ($40–$100), IKEA ($30–$80), West Elm ($100–$250), or thrift stores ($10–$50) all have options. The mirror should complement (not match) your console in materials and finish. Lean it casually against the wall rather than hanging for flexibility. Arrange the console with a tray, bowl, decorative object, and mirror cleaning cloth. Pro tip: Keep it minimal—three to four items max—so it looks intentional, not cluttered.

    Your entryway transforms into a magazine-worthy vignette. You’ve created a purposeful first impression that makes guests think you’re more organized and design-minded than you might actually be.


    23. Use a Tall Leaning Mirror to Fill Empty Wall Space

    Tall leaning mirrors fill awkward empty wall spaces (corners, between furniture, beside doors) while maintaining a casual, renter-friendly aesthetic. No holes, no damage, completely flexible.

    Find tall standing mirrors (48–72 inches, $100–$300) at IKEA ($80–$200), Target ($100–$180), Wayfair ($120–$350), West Elm ($200–$400), or Amazon ($80–$250). Modern, mid-century, or minimal frames all work. Installation: literally 3 minutes—just lean it against the wall on a felt pad for stability and floor protection. The weight keeps it secure (no tipping hazard if positioned against a wall). This is perfect for renters since there’s zero commitment. Pro tip: Use a furniture pad underneath to protect both the mirror and your flooring.

    You’ve filled dead wall space with style and function. The leaning mirror looks intentional, bounces light around the room, and works beautifully whether your space is minimal or eclectic.


    24. Paint a Wooden Frame for a Custom, Budget-Friendly Look

    Painting an existing mirror frame is the cheapest way to customize a mirror to your space. Buy any basic frame and paint it to match your aesthetic.

    Start with a basic framed mirror ($30–$80) from IKEA, Target, or Wayfair. Choose high-quality paint ($15–$25) in your desired color—try Benjamin Moore, Sherwin-Williams, or Behr. Lightly sand the frame first, apply 2–3 coats of paint (30 minutes wait time between coats), then seal with matte or satin polyurethane ($10–$15). Total project time: 2–3 hours, mostly drying time. This works beautifully with wood frames; metal frames need primer. Pro tip: This is perfect for renters—you’re customizing an affordable piece rather than buying something expensive.

    For under $80, you’ve got a custom mirror that looks like you invested in something designer. The painted frame coordinates perfectly with your room, and you’ll feel proud knowing you made it happen.


    25. Layer Mirrors of Different Sizes for Curated Depth

    Layering mirrors of different sizes and finishes creates visual interest and depth. This approach looks more collected and curated than matching sets.

    Gather 3–5 mirrors in various sizes ($50–$200 total depending on quality) from thrift stores, IKEA, Target, Wayfair, and vintage shops. Mix shapes and frames (don’t overthink matching). Plan your layout with painter’s tape before hanging. Installation takes 1–2 hours. Hang at slightly different heights with 6–8 inches of space between pieces. This forgiving approach allows for “mistakes”—asymmetry is actually the point. Pro tip: Include one larger anchor mirror to ground the arrangement.

    Instead of one boring mirror, you’ve created an artistic installation that looks collected over time. The varied reflections add dimension and visual complexity—your space reads as curated and design-forward.


    26. Mount a Mirror on Your Bedroom Closet Door for Space Maximization

    Mounting a mirror on your closet door serves double duty: you get a full-length view for outfit checking, and it reflects light into the closet while opening up your bedroom visually.

    Install a full-length mirror (24–30 inches wide, 60–72 inches tall, $60–$200) using adhesive-backed mirror strips or heavy-duty double-sided tape ($15–$30) for damage-free hanging on closet doors, or standard hangers if you own. Installation takes 15–20 minutes. Measure your closet door first to ensure the mirror fits. For apartments, damage-free tape works beautifully; homeowners can use permanent mounting. The reflected light makes your bedroom feel significantly larger. Pro tip: A full-length mirror maximizes outfit visibility without taking up floor space like a leaning mirror would.

    Getting dressed becomes easier—you see your entire outfit at once. Bonus: your bedroom feels airier and brighter because the mirror reflects window light and room illumination, essentially expanding your visual square footage for free.


    27. Install Mirrors in a Powder Room for Maximum Impact

    Powder rooms are where you can go bold with mirrors. A single statement mirror in a small, guest-facing space makes an outsized impact and signals thoughtful design.

    Choose a statement mirror (24–32 inches, $100–$300) that reflects your personal style—brass, black, rattan, or scalloped edges all work beautifully in powder rooms. Anthropologie ($150–$300), CB2 ($100–$250), West Elm ($120–$280), Wayfair ($80–$300) all have elevated options. Installation takes 20–30 minutes. Position it above your sink or vanity as the focal point. In such a small space, one elevated piece is better than multiple mirrors. Pair with a sconce on either side (optional but powerful). Pro tip: Add fresh flowers or a single decorative object to complete the refined vignette.

    Your tiny powder room becomes the most sophisticated room in your home. Guests notice the thoughtfulness and intentionality—it’s the perfect place to make a bold design statement without the commitment of larger rooms.


    Save this post for your next room refresh and try at least one idea this weekend. Whether it’s moving a mirror to catch better light or leaning an oversized statement piece in an empty corner, even one small change shifts how your entire space feels. Pick the idea that speaks to you and go from there.

  • 27 Vibey Apartment Decor Ideas That Create a Mood-Boosting Space

    27 Vibey Apartment Decor Ideas That Create a Mood-Boosting Space


    Your apartment might feel like a generic rental right now—beige walls, harsh overhead lighting, furniture that came with the place. But your space doesn’t have to feel temporary or impersonal. The best part? You don’t need a massive budget or landlord permission to create a mood-boosting apartment that actually reflects who you are.

    We’ve pulled together 27 specific, actionable ideas that range from zero-dollar styling tweaks to smart investment pieces. You’ll find DIY projects for renters, color strategies backed by design trends, and practical hacks that work in tiny studios or sprawling lofts. Whether you want cozy layers, bold color pops, or calming natural vibes, there’s something here to shift your space from “meh” to a place you actually want to spend time in.

    Let’s get started.


    1. Layer Your Walls with Textured Wallpaper or Paneling

    Textured walls create depth without requiring you to paint—they’re the 2025 solution to boring, flat apartment walls. If painting feels permanent, removable textured wallpaper works great for renters, and it actually photographs better than you’d expect.

    Try peel-and-stick options from Spoonflower or Removable Wallpaper Co (around $40–$80 per roll). Measure your wall carefully and apply on a weekend—takes about 2–3 hours for a standard accent wall. Not ready to commit? Stick a temporary cork or linen panel behind floating shelves for similar visual interest at half the cost. The texture catches light differently throughout the day, making your space feel more intentional and layered than flat paint alone.

    You’ll notice the walls suddenly have personality, and the room feels less like a sterile box. Photos look better too—texture adds character that comes through in pictures.

    2. Install Floor-to-Ceiling Curtains for Drama and Light Control

    Floor-to-ceiling curtains make any window—even a small rental one—feel architectural and intentional. They control light way better than standard curtain rods and add vertical drama instantly.

    Measure from your highest wall point to the floor (not your window frame). Hang a tension rod or simple metal rod high on the wall using removable adhesive strips (like Command brand, $10–$15). Grab fabric from IKEA ($20–$40 per panel) or Amazon in linen, cotton, or a linen blend. If you sew, even a basic straight seam works; if not, fabric glue or a no-sew hem tape takes 30 minutes. Renter hack: use removable adhesive hooks instead of drilling.

    Your bedroom or living room gains an instant sense of scale and luxury. Plus, you control natural light and glare without plastic blinds—a real upgrade in how the space feels.

    3. Choose a Saturated Statement Color for One Accent Wall

    Flat neutrals drain energy from a room, but a single bold wall doesn’t require commitment or perfect execution. Cherry reds, forest greens, and aubergine are trending because they feel intentional without overwhelming.

    Pick one wall you see first when entering—usually behind a bed or sofa. Use quality interior paint from Sherwin-Williams or Benjamin Moore (around $40–$60 per quart). Primer plus two coats takes a weekend afternoon. Test the color in your actual lighting first—buy a sample pot ($8–$12). If you rent, check your lease; if paint’s not allowed, removable wallpaper in that color works just as well.

    The shift is immediate: your space gains mood and personality. That one wall anchors the entire room and makes everything else feel curated.

    4. Layer Bedding with Organic Materials for Tactile Comfort

    One flat sheet isn’t cozy. Real comfort comes from mixing textures—linen, cotton, wool, and velvet all in one bed. This isn’t excessive; it’s how luxury hotels do it, and it works in apartments too.

    Start with a quality linen duvet (around $150–$250 from Brooklinen, Parachute, or even Target). Add a chunky knit throw ($60–$120), then layer in two to three pillows of different fabrics—silk, linen, and maybe one textured knit. Mix solid and patterned pillows for visual interest. You can do this gradually; start with one upgrade per month. The key is ensuring everything feels good to touch, not just look at.

    Your bed becomes an actual retreat instead of just functional sleeping space. You’ll find yourself spending more time there reading or relaxing because it genuinely feels good.

    5. Add Plants to Create Biophilic Calm Without Trying Hard

    Plants shift the entire mood of an apartment from sterile to living. You don’t need a green thumb or rare species—hardy plants work great and actually improve air quality.

    Start with three low-maintenance plants: Pothos (trailing), Snake Plant (upright), and ZZ Plant (sculptural). Grab them from a local nursery or big box store for $15–$30 each. Group them at different heights using shelves, plant stands ($20–$50), or even stacked books. Water every 7–10 days and rotate toward light. If you travel, these plants forgive you. Place them near windows or under grow lights ($30–$60) if natural light is limited.

    Your apartment immediately feels less like a temporary rental and more like a place where life actually happens. The psychological benefit of greenery is real—people noticeably relax around plants.

    6. Swap Overhead Lighting for Layered, Warm Light Sources

    Harsh overhead lights are the enemy of mood. Replace them with a combination of floor lamps, table lamps, and accent lighting. This actually costs less than you’d think and changes everything.

    Grab a simple brass or black floor lamp from IKEA or Target ($30–$60), a table lamp ($25–$50), and one string light option—either plug-in Edison bulbs ($20–$40) or soft LED strips ($15–$30). Install in 30 minutes. Keep overhead lights off most of the time; use lamps instead. Warm-toned bulbs (2700K color temperature) feel way more relaxing than cool white. Layer different light sources so you can adjust the mood throughout the day.

    Your apartment instantly feels more like a sanctuary than an office. People actually want to hang out there, and you’ll probably find yourself more relaxed at home.

    7. Create a Textured Gallery Wall with Intentional Spacing

    Gallery walls feel curated and personal, but only if you space things thoughtfully. Random clustering looks scattered; intentional spacing looks collected and intentional.

    Gather your frames and art—use a mix of sizes (8×10, 11×14, 5×7, etc.), finishes (brass, wood, white), and mediums (prints, original art, 3D pieces). Lay everything on the floor first to plan spacing. Frames should be 1–3 inches apart. Mark holes lightly with pencil, then hang using basic nails or removable hooks (Command strips, $10 for a pack). Budget $80–$200 for framed art if buying new; thrifting reduces cost dramatically. Takes 2–3 hours to plan and execute properly.

    You’ve just created a focal point that anchors your space and tells your story. It’s the difference between an apartment and a curated home.

    8. Use Curved Furniture to Replace Sharp Angles

    Sharp furniture lines create visual tension and make small spaces feel cramped. Curved edges—sofas, mirrors, side tables, shelving—make apartments feel calmer and more intentional. This is backed by real design research on how our brains respond to angles versus curves.

    Swap a basic rectangular nightstand for a rounded side table (around $80–$150 from West Elm, Article, or even IKEA’s curved options). Look for a curved mirror instead of rectangular ($50–$120). If replacing the sofa isn’t in budget, add a curved accent chair ($200–$400) or look for curved shelving ($100–$200). Even small swaps matter. Renter hack: curved furniture is easy to move if you relocate.

    Everything feels softer and more approachable. Your space becomes somewhere you actually want to relax instead of just pass through.

    9. Paint Kitchen Cabinets or Add Peel-and-Stick Finishes

    Kitchen cabinets take up massive visual real estate. Changing their color completely shifts your entire apartment’s mood without major renovation.

    If you own, paint cabinets yourself using cabinet-grade paint ($40–$80) and primer ($15–$20). Takes a full weekend—remove doors, prime, paint twice, rehang. For renters, peel-and-stick cabinet film ($30–$60 from Amazon) mimics painted finishes without commitment. Colors like forest green, deep cherry, or charcoal feel current and grounding. Add new hardware ($20–$50 for ten pulls) for polished impact. Simple formula: paint + hardware upgrade = instant personality.

    Your kitchen goes from builder-basic to design-forward. You’ll photograph your space differently and feel the shift every time you make coffee.

    10. Hang a Large Textile or Quilt as Instant Wall Art

    Textiles are one of the most underrated apartment hacks. A vintage quilt, woven wall hanging, or large fabric piece costs $20–$80 (thrifted) or $60–$200 (new) and adds warmth and story instantly.

    Hunt thrift stores, Etsy, or online marketplaces for vintage textiles with colors and patterns that match your space. Mount using a simple wooden or metal hanging rod ($15–$40) and basic hardware. No drilling needed if you use removable hooks. Fabric hangs better than posters or prints because it has dimension and catches light. A 4×6-foot textile takes 15 minutes to hang and costs way less than framed art.

    You’ve added texture, color, and personality in one move. It feels collected and intentional—like you’ve actually lived in your apartment.

    11. Create a Cozy Reading Nook with Layered Lighting and Soft Seating

    Reading nooks make apartments feel bigger by creating designated zones for different activities. Even a tiny corner transforms into a retreat space.

    Find one corner with natural light if possible. Place a comfortable chair ($150–$400) or bean bag ($60–$150) there. Add a small side table ($40–$100), one floor lamp or clip lamp ($30–$60), and layers of blankets and pillows. Toss a small rug ($40–$80) to define the space. This corner costs $300–$700 total but feels like intentional design. In a studio or one-bedroom, it visually separates your relaxation zone from your sleeping zone.

    Suddenly you have a “reading corner” instead of just a chair in the corner. The small act of creating this space makes you actually use it.

    12. Mix Vintage and New Furniture for Eclectic Character

    Buying all new furniture from one store creates a showroom feel. Mixing vintage finds with current pieces gives apartments authenticity and tells a story.

    Hit thrift stores and Facebook Marketplace for mid-century dressers ($50–$150), vintage brass lamps ($15–$40), and interesting side tables ($30–$100). Pair with new bedding or curtains from target or IKEA. The key is a cohesive color story—everything doesn’t match, but it lives in the same palette (warm woods + brass + cream, for example). Takes time to hunt but costs way less than all-new furniture and looks infinitely more interesting.

    Your apartment looks like it belongs to an actual person with taste and history, not a catalog. Guests notice and ask where things are from.

    13. Use Removable Wallpaper with Floral or Geometric Patterns

    Patterned removable wallpaper adds visual interest without the commitment or rental-lease drama. Florals, small geometrics, or subtle stripes work in any room.

    Order sample rolls from Removable Wallpaper Co, Spoonflower, or Etsy (samples are $5–$10). Apply to one accent wall or even one cabinet face. Each standard roll covers roughly 28 square feet and costs $40–$80. Prep your wall (clean, smooth), measure twice, apply slowly with a squeegee or credit card. Takes 2–3 hours for a standard accent wall. If you mess up, just peel and restart—that’s the whole point.

    One patterned wall makes your space feel designed and intentional. It’s the fastest personality boost for renters who can’t paint.

    14. Style Open Shelving with a Color and Texture Theme

    Open shelving looks styled or cluttered depending on how you arrange it. A simple color story turns it into design.

    Limit your shelf palette to three colors maximum (try: white, natural wood, and one accent color like black or sage green). Group similar items together (all plates in one section, glasses in another). Add a plant or two for life. Mix heights and textures—tall glass jars, stacked plates, woven baskets. Everyday items look intentional when arranged this way. Takes 30 minutes to restyle what you already own; no spending required unless you want to add new serving pieces ($20–$50).

    Your kitchen looks intentional and styled, not chaotic. You’ll actually enjoy using the space.

    15. Add a Statement Mirror to Reflect Light and Expand Space

    Mirrors are the oldest apartment hack because they work. A large, statement mirror makes small spaces feel bigger, bounces light around, and adds style.

    Hunt for a large brass, wood, or black-frame mirror ($60–$200) at Wayfair, Article, or thrift stores. Position opposite a window to maximize light reflection. Hang with heavy-duty anchors or mount above furniture. Size matters—go larger than you think (like 36-48 inches). Unexpected placement looks more designed; try over a console table instead of above a sofa.

    Your apartment literally feels more spacious, and natural light spreads throughout. Plus, a statement mirror functions as art.

    16. Create Mood with Scented Candles and Diffusers Strategically Placed

    Scent is the most underrated mood booster. Quality candles and diffusers don’t just smell good—they cue your brain to relax.

    Invest in quality candles ($25–$50 each from Jo Malone, Diptyque, or Homesick) instead of cheap ones; they burn cleaner and smell exponentially better. Add a wood diffuser ($20–$40). Place one in your bedroom, one in the living area. Scents like cedarwood, lavender, or vanilla create different moods—pick based on how you want to feel. A single good candle lasts 30+ hours and is worth the cost.

    Lighting a candle becomes a ritual that signals your brain it’s time to relax. The difference in how your apartment feels is surprising.

    17. Hang Floating Shelves to Display Collections Without Clutter

    Floating shelves display collections beautifully without cluttering a room. The key is spacing and knowing what actually deserves shelf real estate.

    Install three shelves at varying heights ($60–$150 total) using proper anchors (not drywall anchors alone). Follow the rule of negative space—don’t pack them full. Display items that tell your story: plants, meaningful books, a few ceramics, a framed photo. Takes 1–2 hours to install properly. Renter hack: use removable adhesive hooks if drilling isn’t allowed, though they’re less stable for heavy items.

    You’ve created a personal gallery that makes your space feel curated. Each shelf becomes a small art installation.

    18. Paint a Ceiling to Add Unexpected Drama

    Painting a ceiling seems bold but actually adds major visual interest. A colored ceiling makes rooms feel intentional and pulls the eye upward, making spaces feel taller.

    Choose a soft, desaturated color (avoid pure bright hues; they feel overwhelming overhead). Try sage, soft blue, warm gray, or even pale blush. Use ceiling paint (it’s thicker than regular paint, around $25–$40). Pop painter’s tape around trim and paint with a roller ($15–$25)—takes 2–4 hours for a standard room. The payoff is huge for minimal cost.

    Your apartment gains architectural interest just by looking up. It’s the kind of detail guests notice and ask about.

    19. Layer Area Rugs for Coziness and Visual Interest

    A single rug is fine; layered rugs create coziness and visually define separate areas in open spaces.

    Start with a neutral base rug ($80–$200, jute or wool), then layer a smaller patterned or textured rug on top ($50–$150). The pattern adds interest while the base anchors the space. Works beautifully in studios to separate sleeping and living zones without walls. Position under furniture to define the seating area. Takes 15 minutes to lay down and adjust; you can swap rugs easily if you move.

    Your space gains depth and feels intentionally zoned. Plus, layered rugs are cozy—literally and visually.

    20. Swap Plastic Command Hooks for Brass or Ceramic Alternatives

    This is a tiny swap with outsized impact. Plastic hooks feel temporary; brass or ceramic hooks feel intentional.

    Replace your plastic Command hooks with brass or ceramic versions ($2–$8 each from Target, IKEA, or online). Takes 5 minutes. Suddenly your bedroom wall looks styled, not chaotic. Group them vertically or in a cluster for maximum visual impact. This works in entryways too—hang a jacket and bag on brass hooks and it looks like design, not just organization.

    Such a small change, but visitors notice. It’s the difference between a rental and a thoughtfully decorated space.

    21. Create a Capsule Color Palette and Stick to It

    Having a clear color story makes decorating decisions easier and makes small spaces feel more intentional and less chaotic.

    Pick three main colors (like warm white, forest green, and brass) and one accent color (maybe coral or deep burgundy). Write them down. When shopping for new items, ask: “Does this fit my palette?” This stops impulse buys that clash. It takes 30 minutes to define your palette, but it saves money and creates coherence. Everything doesn’t have to match perfectly, but it should live in the same emotional family.

    Your apartment feels designed, not randomly decorated. Cohesion is what separates “nice apartment” from “intentional home.”

    22. Install Sheer Curtains for Softened Natural Light

    Sheer curtains filter harsh light while maintaining brightness. They’re renter-friendly and immediately soften a room’s energy.

    Hang simple sheer curtains on a basic tension rod ($15–$30)** using removable adhesive hooks or Command strips ($10–$15). Fabric from IKEA, Target, or Amazon costs $15–$40 per panel. No sewing required if you buy ready-made panels. Takes 30 minutes to hang. Layer under heavier curtains for light control, or use alone for a soft, airy feel.

    Your apartment gains a gentle, filtered quality. Morning light becomes beautiful instead of harsh, and the entire mood shifts.

    23. Display Books Spine-Out and Color-Blocked for Visual Interest

    Organizing books by color turns them into intentional décor instead of just clutter. This takes minutes and completely changes how your space reads.

    Gather all your books and arrange them by color (warm tones, cool tones, neutrals). Intersperse with small objects—ceramic pieces, plants, framed photos (about one object per 12 inches of shelf). Leave some breathing room; packed-full shelves feel chaotic. Rearrange takes 30 minutes maximum. No shopping needed; you’re just reimagining what you own.

    Your books become design elements. Suddenly you have a gallery-like bookshelf that feels intentional and styled.

    24. Create a Feature Wall with Warm Wood Paneling or Shiplap

    Wood paneling (real or faux) adds warmth and architectural interest without being as permanent as paint.

    Install removable peel-and-stick shiplap ($30–$80 per panel from Amazon) or commit to real wood paneling ($100–$300 for materials, plus installation). Even wallpaper designed to look like wood works beautifully ($40–$80 per roll). A single accent wall takes 2–4 hours. This adds warmth and texture that paint alone can’t achieve.

    Your apartment gains richness and architectural detail. It’s the kind of update that makes people think you did major renovations.

    25. Invest in Quality Bedding and Swap Out Cheap Sheets

    You spend a third of your life in bed. Cheap sheets make that third of your life feel cheap. Quality linen or cotton bedding is genuinely life-changing.

    Splurge on quality sheets—Egyptian cotton or linen ($80–$150 for a set from Parachute, Brooklinen, or even Target’s Threshold line). Higher thread count (400–600) feels noticeably softer. Add a quilted or linen duvet ($100–$200)** and quality pillows ($50–$100 each). Budget $300–$400 total for a complete upgrade. The difference in sleep quality is immediate.

    You’ll actually look forward to bedtime. Quality bedding makes getting into bed feel like a treat, and you sleep better as a result.

    26. Add Brass or Gold Accents to Warm Up Your Space

    Brass and gold hardware warm up a space in seconds. They’re affordable and immediately feel more elevated than silver.

    Swap light fixtures, mirror frames, curtain rods, and drawer pulls to brass or gold ($15–$40 each from hardware stores or online). Start with one or two items (like a lamp and mirror) and expand gradually. Brass costs about the same as chrome but feels warmer and more current. Even small swaps like brass picture frames ($10–$25) shift the entire mood.

    Your apartment gains warmth and sophistication. Brass catches light beautifully and makes everything feel more intentional.

    27. Define Your Space with a Cohesive Throw Pillow Collection

    Throw pillows are the easiest way to test color and pattern without commitment. A thoughtful collection makes any seating area look styled.

    Choose three to five pillows in related colors but different textures: solid linen, patterned fabric, maybe velvet ($20–$50 each). Mix sizes—some 18-inch, some smaller accent pillows. Arrange with one point forward and one on its side for visual interest. This costs $75–$200 total but transforms a plain sofa. Swap covers seasonally if you want to refresh without replacing.

    Your seating area looks intentional and inviting. People actually want to sit down, and it photographs beautifully.


    SOFT CTA:

    Save this post and pick one or two ideas to try this weekend—even small changes add up fast. Your apartment deserves to feel like a thoughtful space that reflects who you actually are. Share this with anyone looking to refresh their rental or bring more personality home.

  • 25 Aesthetic Bathroom Ideas That Boost Your Home’s Style

    25 Aesthetic Bathroom Ideas That Boost Your Home’s Style


    Your bathroom probably doesn’t feel like a retreat right now. Maybe it’s cramped, outdated, or just… uninspiring. The good news? You don’t need a massive renovation to change that. Whether you’re renting, working with a small space, or simply ready for a refresh, these 25 ideas range from zero-budget styling tricks to splurge-worthy upgrades that’ll make your daily routine feel less like a chore and more like self-care. You’ll discover which changes give you the biggest impact for your time and money, plus renter-friendly options that won’t get your deposit dinged. Let’s get started.


    1. Install a Rainfall Showerhead for Spa Mornings

    A rainfall showerhead transforms your shower from purely functional to genuinely relaxing. The oversized head distributes water evenly and creates that luxe spa feeling you’re paying for at hotels—except now it’s in your own home.

    Look for models with 8-12 inch diameters at retailers like Home Depot or Amazon (expect $40–$150 depending on finish and pressure settings). Installation takes about 30 minutes if you have basic plumbing comfort; otherwise, hire a plumber for $100–$200. Pro tip: pair it with a handheld secondary showerhead for rinsing efficiency. Renter-friendly alternative: some rainfall heads screw directly onto existing pipes without permanent changes.

    You’ll notice the difference the first morning—showers feel indulgent instead of rushed, and the wider coverage means easier rinsing without that harsh water pressure.


    2. Add Floating Shelves for Open Storage That Feels Airy

    Floating shelves eliminate the visual weight of bulky cabinets while giving you actual storage. They make small bathrooms feel bigger because you can see wall space behind them.

    Install 2–3 shelves using a wall stud finder and heavy-duty brackets ($30–$60 at IKEA, Target, or Home Depot). The whole project takes one hour with a drill and level. Paint them to match your wall for seamless blending, or choose contrasting wood for warmth. Renter tip: removable adhesive shelves exist but won’t handle heavy items—stick to decor and light towels.

    The result is bathroom walls that look curated instead of cramped, plus instant access to everyday items without digging through drawers.


    3. Paint Your Walls a Soft, Spa-Inspired Color

    Pale blues, seafoam greens, and warm creams make bathrooms feel larger and calmer instantly. Color is the cheapest way to reset a room’s entire vibe.

    Buy 2–3 gallons of bathroom-safe paint (mildew-resistant is crucial) from Benjamin Moore, Sherwin-Williams, or budget brands like Behr ($40–$60 per gallon). Prep takes a few hours; painting takes one full day. Choose eggshell or semi-gloss finishes for moisture protection. If you’re renting, use peel-and-stick wallpaper in similar tones instead—removable and just as impactful.

    Your bathroom stops feeling dingy and starts feeling intentional. Even a small shift in color affects your mood every single time you walk in.


    4. Swap Out Hardware for Instant Modernity

    Cabinet hardware is the jewelry of bathroom design. Changing it out takes 30 minutes and costs almost nothing, yet it completely updates your space.

    Find replacement pulls and knobs at Wayfair, Amazon, or Home Depot in finishes like matte black, brushed gold, or polished chrome ($2–$8 per piece). Remove old hardware with a screwdriver and replace it—no special skills needed. Buy extras for future touch-ups. Pro tip: coordinate hardware across faucets, lights, and cabinet knobs for cohesion.

    Old, dated hardware disappears, and suddenly your vanity looks contemporary and intentional.


    5. Use a Peel-and-Stick Backsplash for Renter-Friendly Updates

    If you can’t commit to permanent tile, peel-and-stick backsplash is your secret weapon. It looks high-end, costs under $50, and leaves no damage when you move.

    Find options at Home Depot, Wayfair, or Amazon (subway tiles, geometric, marble-look—$20–$45 for coverage). Clean your wall thoroughly, measure twice, then apply slowly from the center outward (45 minutes). Trim excess with a utility knife. The adhesive holds for years but removes cleanly.

    Your backsplash becomes a design focal point instead of blank wall, and the grout-free aesthetic reads as modern and fresh.


    6. Invest in a Low-Flow Toilet to Save Water and Money

    Older toilets waste up to 7 gallons per flush. Modern low-flow models use 1.28 gallons and look better too—a win for your water bill and the planet.

    Replace your toilet with a dual-flush model from Kohler, American Standard, or budget brands like Glacier Bay ($150–$500 installed). Hire a plumber for the swap ($200–$400 labor), or DIY if you’re handy with a wrench (1–2 hours). Rebate programs in many regions cut the cost further.

    Your water bill drops noticeably, and you get the bonus of a sleek, updated bathroom fixture that works harder and looks cleaner.


    7. Layer Lighting for Functionality and Ambiance

    Bathroom lighting that’s too bright creates harsh shadows; too dim feels cave-like. Layering overhead, mirror, and accent lights lets you adjust to your mood.

    Install a dimmer switch (Home Depot, $15–$30, 30 minutes) and swap bulbs for warm LED options ($8–$15 per bulb). Add a small wall sconce or lit mirror ($50–$200) for task lighting. Use 2700K color temperature bulbs for flattering, spa-like warmth. Renter tip: some wireless LED strips stick on and power from batteries.

    You’ll have lighting for getting ready efficiently and lighting for soaking in the tub. The same bathroom works for both now.


    8. Declutter with Smart Under-Sink Organization

    Everything under your sink probably lives in chaotic piles. Smart bins and shelves make it accessible and protect pipes from splash damage.

    Buy a shelf riser ($20–$40, IKEA or Target) to double your vertical space, then add matching storage bins ($30–$50 for a set). Label everything with a label maker ($12–$25). Use a tension rod to hang cleaning spray bottles (Home Depot, $5–$10). This project takes one hour and requires zero tools.

    Opening your cabinet stops being embarrassing. You know where everything is, and it actually stays organized because each item has a designated spot.


    9. Replace Your Shower Curtain with a Glass Door

    Shower curtains trap humidity, collect mildew, and feel cramped. A glass door opens up your bathroom visually and feels more spa-like.

    Frameless glass doors cost $400–$1,500 installed depending on your shower size and customization. Semi-frameless and framed options run $300–$700. Hire professionals for measurement and installation (1–2 days). Renter alternative: a high-quality, mildew-resistant curtain liner and track rod can look intentional if styled well.

    Your bathroom instantly feels larger, more luxurious, and easier to clean—no more moldy corners hiding in fabric folds.


    10. Add a Statement Mirror to Anchor the Space

    Your basic builder’s mirror doesn’t have to stay. A statement mirror becomes the room’s anchor point and changes the whole aesthetic.

    Shop for 24–36 inch statement mirrors at Wayfair, West Elm, CB2, or Target ($80–$300). Choose from ornate, modern, arched, or geometric shapes. Mount securely with appropriate hardware for your wall type (30 minutes, $10 in hardware). Pro tip: oversized mirrors reflect light and make small bathrooms feel twice as big.

    Your bathroom stops looking generic. That one focal point sets the tone for everything else in the room.


    11. Switch to Organic Towels and Linens for a Luxury Feel

    Scratchy, synthetic towels downgrade your entire bathroom experience. Organic cotton towels feel genuinely luxe and last longer—better for the planet too.

    Find organic towels from Parachute ($35–$60 per towel), Brooklinen ($40–$70), or budget-friendly Target organic lines ($20–$35). Buy in a cohesive neutral color. Wash in cold water and hang dry to preserve softness. Even two or three premium towels draped visibly elevates the whole space.

    Every time you grab a towel, you notice the quality. That small sensory upgrade makes your routine feel more thoughtful.


    12. Install Heated Flooring for Winter Comfort

    Cold tile on bare feet is one of winter’s small annoyances. Heated flooring costs way less than you’d think and feels genuinely luxurious.

    Electric heated floor mats (non-permanent) cost $200–$600 and plug into an outlet—perfect for renters. Permanent radiant heating systems run $1,500–$2,500 installed but last decades. Warm up your floor with a mat under a bath rug for an instant upgrade (one hour install). Thermostats let you set exact temps.

    Your morning bathroom routine loses that jarring cold shock. Even a small heated patch under your sink makes a noticeable difference in comfort.


    13. Create a Spa Nook with Plants and Greenery

    Live plants thrive in humid bathrooms and instantly create a retreat feel. They’re budget-friendly, renter-approved, and air-purifying.

    Buy 3–5 low-maintenance plants like pothos, snake plant, or eucalyptus from Home Depot, Lowe’s, or a local nursery ($10–$30 each). Place them on shelves, hang them from hooks, or set them on the floor. Water weekly and enjoy their humidity-loving nature. Pro tip: eucalyptus in the shower creates an aromatherapy effect as steam releases its scent.

    Your bathroom stops feeling sterile and starts feeling alive. Plants add color, oxygen, and a genuine spa-like quality that’s free to maintain.


    14. Upgrade to a Double Vanity (or Split Shelving for Renters)

    Sharing one sink creates morning friction. A double vanity (or split shelving system) gives everyone their own space without morning arguments.

    A double vanity costs $400–$1,500 installed (labor included). If you’re renting, create a “split” using two narrow shelves ($40–$80 each) with separate storage containers ($20–$50 per set). Paint the middle section differently to define each side visually. Installation takes 2–3 hours for a full vanity, 30 minutes for shelf approach.

    Your bathroom becomes functional for two people. No more negotiating counter space during peak hours.


    15. Paint Your Vanity for a Custom Look

    Your basic builder vanity can look custom with quality paint. It’s a weekend project with massive visual payoff.

    Use bathroom-safe, semi-gloss paint in colors like deep blue, forest green, or soft gray ($30–$50). Prime the vanity first (primer costs $10–$15). Sand lightly between coats. Two coats take full day plus 24 hours drying. Pair new paint with updated hardware for maximum impact. Renter tip: this works on rental vanities if you document before/after and restore it when moving.

    Your dated vanity becomes the bathroom’s focal point. That color update makes everything feel intentional and designer-chosen.


    16. Install a Soaking Tub as Your Wellness Centerpiece

    A soaking tub says “self-care” louder than any other fixture. It doesn’t need a huge bathroom—even small spaces can fit one with smart placement.

    Freestanding soaking tubs cost $400–$2,000 depending on material and finish. Installation requires plumbing adjustments ($500–$1,500 labor). If you can’t commit, alcove tubs work in existing spaces ($300–$800). A smaller, Japanese-style soaking tub fits tight spaces ($300–$600). Position it by a window if possible for natural light.

    You have an actual escape within your home. Soaking becomes a ritual, not just cleaning yourself quickly before bed.


    17. Use Textured Wallpaper for Depth Without Clutter

    Flat paint gets boring. Textured wallpaper adds dimension and interest without needing accessories cluttering your shelves.

    Peel-and-stick textured wallpaper is $15–$40 per roll (Wayfair, Amazon, Home Depot). You need 2–4 rolls for an accent wall (one hour application). Choose subtle textures like linen, grasscloth, or soft geometric prints. Pair with one accent wall painted a different color for impact. This removes cleanly when you move.

    Your walls have visual interest now. The texture catches light throughout the day and feels intentional without being loud.


    18. Organize with Vertical Baskets and Wall Hooks

    Vertical storage keeps floors clear and makes your bathroom feel organized instead of cramped. Woven baskets add warmth too.

    Install wall hooks ($1–$5 each, Home Depot) and mount 3–5 woven baskets ($15–$40 each at Target, IKEA, Wayfair). Use baskets for towels, under-sink backups, and cleaning supplies. Label each basket so everyone knows what goes where. Installation takes one hour with a drill.

    Your bathroom functions better and looks intentional. Everything has a home, so it actually stays organized instead of slowly descending into chaos.


    19. Install Thermostatic Shower Controls for Consistent Comfort

    Surprise scalding water mid-shower is dangerous and jarring. Thermostatic controls maintain your set temperature no matter what.

    Thermostatic mixers cost $200–$500 installed (professional installation recommended, $150–$300 labor). They prevent temperature fluctuations and protect against sudden hot water spikes—crucial if you have kids or elderly family. Brands like Hansgrohe and Moen offer reliable options. Installation typically takes 2–3 hours.

    You shower safely and comfortably, knowing the temperature will stay exactly where you set it. No more dramatic yelps when someone flushes.


    20. Use a Color-Blocked Wall for Visual Impact

    Paint doesn’t have to be one flat color. A color-blocked wall creates visual interest and modern sophistication.

    Choose two complementary colors (one deep, one neutral) and paint a clean horizontal line at roughly mid-wall height or three-quarter height. Use painter’s tape for sharp edges. Primer, two coats, plus tape removal takes one full day. Paint costs $40–$80 total. This technique works great in small bathrooms because it breaks up wall space strategically.

    Your bathroom stops looking boring and reads as intentionally designed. That one graphic wall becomes a conversation piece.


    21. Add a Rainfall Effect with a Ceiling-Mounted Showerhead

    Ceiling-mounted rainfall heads create a completely different shower experience than standard wall mounts. You feel like you’re under actual rain.

    Install a 12+ inch rainfall head ($80–$250, Home Depot, Amazon) with ceiling plumbing work ($200–$400 labor). This requires a plumber—not a DIY project. Pair it with a handheld secondary head if you want flexibility. The whole installation takes half a day.

    Your shower becomes genuinely luxurious. That first moment under overhead rainfall makes you feel like you’re at a resort, not your own bathroom.


    22. Create Low-Maintenance Surfaces with Sealed Concrete or Polished Tiles

    High-maintenance finishes (porous stone, unfinished wood) create constant cleaning stress. Sealed concrete or polished tiles stay pristine with minimal effort.

    Polished concrete costs $3–$12 per square foot installed (DIY sealers run $30–$60). Large polished porcelain tiles are $5–$15 per square foot installed. Both resist staining, moisture, and mildew. Sealing takes one day and lasts 2–3 years. Maintenance is literally just regular mopping.

    Your bathroom stays beautiful without constant vigilance. Cleaning becomes a quick task instead of a deep-scrubbing nightmare.


    23. Brighten with LED Bulbs and Smart Lighting

    Incandescent and old CFL bulbs eat energy and cast unflattering light. LED bulbs save money, last longer, and look warmer or cooler as you choose.

    Swap your existing bulbs for LED equivalents ($8–$15 per bulb) in warm white (2700K) or daylight (5000K). Smart bulbs add app control and scheduling ($20–$50 each). A full bathroom bulb swap costs $40–$100 and saves you $10–$15 monthly on energy. No installation needed—just swap and twist.

    Your bathroom looks better lit immediately, your electric bill drops, and you’re not changing bulbs every six months anymore.


    24. Build Custom Shelving Around Your Toilet Tank

    The wall above your toilet is prime real estate. Custom shelving turns wasted space into display and storage.

    Build or install 3–5 shelves around your toilet ($100–$300 for materials and hardware if DIY, $400–$800 if hiring help). Use space for rolled towels, plants, candles, and books. Install within one weekend if comfortable with basic carpentry—otherwise hire a handyman (4–6 hours labor). Make shelves deep enough for baskets to hide clutter behind.

    You double your storage instantly without eating floor space. That once-blank wall becomes functional and stylish.


    25. Install a Heated Towel Rack for Luxury Warmth

    Warm towels elevate your post-shower experience from okay to genuinely luxurious. Modern racks are efficient and affordable.

    Plug-in heated towel racks cost $60–$150 (plug into outlet, no wiring needed). Hardwired models run $150–$400 with installation. Both heat towels in 20–30 minutes. Choose from chrome, matte black, or brass finishes to match your hardware. Even renters can use a plug-in model without commitment.

    Stepping out of the shower wrapping yourself in a warm towel feels like a spa day. This one upgrade changes how your whole routine feels.


    26. Design an Open-Shelving “Spa Shelf” as Visual Anchor

    Instead of hiding everything in cabinets, style one open shelf as your bathroom’s visual anchor. It’s both functional and gorgeous.

    Use a floating shelf ($40–$80) or your existing shelving. Style it with rolled towels in your color palette, 3–5 small plants, candles, glass jars with bath salts ($10–$20 for a set), and one small decorative object. Leave breathing room—don’t cram it full. Refresh seasonally. This takes 30 minutes to set up, then maintain by rotating items monthly.

    Your bathroom looks curated and intentional, like someone stylish lives here. That one beautiful shelf becomes Instagram-worthy, and you actually enjoy looking at it.


    Save this post and try one idea this weekend—you’ll be shocked how much a single update changes how your bathroom feels. Which one are you tackling first?

  • 25 Velvet Color Palette Ideas That Feel Plush & Sophisticated

    25 Velvet Color Palette Ideas That Feel Plush & Sophisticated

    Velvet is having a major moment, and for good reason—it’s the ultimate way to add richness and sophistication to any room without trying too hard. But choosing the right color is where the magic happens. Whether you’re drawn to jewel tones that feel cozy or warm neutrals that whisper luxury, velvet color palettes can completely shift the energy of your space. The challenge? Finding combinations that feel cohesive, not chaotic. That’s where these 25 color pairings come in. Each one is designed to work in real homes (not just magazine spreads), mixing velvet with complementary textures and accents so you actually want to spend time there. From bold-and-moody to soft-and-serene, you’ll find ideas that match your style and budget. Let’s dive into palettes that feel as good as they look.

    1. Pair Deep Oxblood Velvet With Cream Accents

    Deep oxblood velvet creates instant drama, but it doesn’t have to feel heavy or oppressive. Pairing it with cream keeps the vibe sophisticated rather than dark and cave-like.

    Start with an oxblood velvet statement piece—a sofa, chair, or headboard works perfectly. Balance it immediately with cream-colored textiles: throw pillows, a linen area rug, or a chunky knit blanket. Add a marble or light wood side table to break up the color weight. The cream acts as a visual rest, making your eyes relax while the oxblood creates impact. You can find deep velvet pieces at West Elm ($800-$1,500), Article ($600-$1,200), or budget-friendly options at IKEA ($300-$500). Cream accents are usually free if you repurpose what you own, or grab inexpensive throws from Target ($25-$60).

    The result? A room that feels both moody and inviting, like a sophisticated retreat you can actually relax in.

    2. Mix Teal Velvet With Warm Taupe Walls

    Teal velvet is bold but needs the right background to shine. Warm taupe walls create a gentle container for the jewel tone without competing for attention.

    Paint your walls a warm taupe (try Benjamin Moore’s Accessible Beige or Sherwin-Williams Urbane Bronze in a lighter version). Let that warm neutral be your anchor. Then bring in a teal velvet sofa or sectional as your star. Layer with mustard yellow and cream pillows to echo the warmth of the walls. Add natural wood pieces like a coffee table or console to ground everything. Paint costs around $30-$100 for supplies; a teal velvet sofa runs $600-$1,500 depending on the brand. This combo works because the warm taupe keeps teal from feeling cold or corporate—instead, it feels like a designer’s intentional choice.

    Your space transforms into a gallery of color that actually works, not a mismatched attempt.

    3. Layer Dusty Rose With Deep Charcoal

    This pairing is all about contrast without clashing. Dusty rose (soft, muted pink) against charcoal (deep gray-black) creates visual tension that feels sophisticated rather than jarring.

    Choose a dusty rose velvet piece—a chair, ottoman, or sofa works beautifully here. Paint one accent wall a matte charcoal or use charcoal wallpaper with a subtle texture (Spoonflower has amazing designs, $5-$15 per roll). Add charcoal linen pillows and a throw to echo the wall. Keep other textiles neutral—cream, ivory, or soft gray. The contrast makes each color pop without overwhelming the space. A dusty rose velvet chair runs $400-$800; charcoal paint costs $30-$50 for a gallon.

    This look reads as intentional and modern, not like you grabbed whatever was on sale.

    4. Combine Ochre Velvet With Black Metal Accents

    Ochre is the warm jewel tone everyone’s discovering, and black metal keeps it from feeling too earthy or retro-stuck. This combo feels both vintage-inspired and current.

    Find an ochre velvet chair or small sofa—Article, Wayfair, and Etsy sellers have excellent options ($300-$900). Pair it with black metal furniture: side tables, shelving units, or a bed frame. The black creates definition and prevents ochre from blending into beige. Add a rust or terracotta accent pillow and a wool area rug in caramel or charcoal to tie it together. This is a great intermediate investment ($400-$1,200 total for a starter setup). The beauty? Black metal is timeless, so even if you get tired of ochre, swapping out velvet pillows keeps the frame fresh.

    You end up with a room that feels curated and intentional, like you actually studied color theory.

    5. Blend Burgundy Velvet With Sage Green Accessories

    Burgundy and sage sound like they shouldn’t work, but they’re actually nature’s best friends—wine and herbs. The muted green softens the intensity of deep burgundy beautifully.

    Start with your burgundy velvet anchor piece (sofa, chair, or headboard). Layer in sage green through textiles: pillows, throws, or a small accent chair. Keep walls neutral (cream, soft white, or light taupe) so the colors remain the stars. Add natural wood furniture to echo the organic connection between burgundy (berry) and sage (herb). A burgundy sofa runs $600-$1,500; sage green pillows cost $20-$50 each. This palette works especially well if you’re drawn to nature-inspired, earthy palettes without going full “cabin lodge.”

    The combination creates a room that feels both rich and peaceful—moody without being dark.

    6. Pair Plum Velvet With Brass Everywhere

    Plum velvet is jewel-toned sophistication, and brass brings warmth and glamour. Together, they’re classic but not stuffy—more “chic collector” than “grandmother’s parlor.”

    Choose a plum velvet statement piece and then go intentionally brass-heavy: a floor lamp, mirror frame, side table frame, or wall sconces. The repetition of brass makes it feel designed rather than random. Anchor with a cream or beige area rug to keep the space from feeling heavy. Add cream or ivory pillows to break up the purple. This is a great splurge palette—plum sofas run $800-$2,000; brass accents add $100-$400 depending on how many you layer in. Start with just a lamp and mirror, then add more brass pieces over time.

    Your space develops this warm, collected-over-time elegance that makes you look way more design-savvy than you actually are.

    7. Mix Navy Velvet With Mustard Yellow Accents

    Navy is the safe choice, but mustard transforms it from boring to bold. This combination is energetic and warm, perfect for rooms that need personality without chaos.

    Bring in a navy velvet sofa, chair, or sectional as your base (navy doesn’t show stains and works with almost everything). Layer mustard yellow through pillows, a small chair, or a throw blanket. Keep walls white or cream so the colors don’t compete. Add natural wood or rattan furniture to warm up the navy-mustard combo. A navy velvet sofa costs $600-$1,500; mustard pillows are $15-$40 each. This palette works in any room—living rooms, bedrooms, home offices—because navy reads “calm” while mustard adds just enough zip.

    You get a room that’s energetic but not chaotic, welcoming without being trendy.

    8. Blend Chocolate Velvet With Ivory And Gold

    Chocolate velvet is underrated—it’s warmer than black, richer than gray, and endlessly sophisticated. Ivory and gold elevate it to genuine luxury without breaking the bank.

    Start with a chocolate velvet seating piece. Layer in ivory through pillows, throws, and area rugs—ivory is the perfect foil for deep brown. Add gold accents: a small mirror, picture frames, or a table base. The gold doesn’t have to match exactly; mixed metallics (brass, gold, warm copper) actually feel more intentional. Paint walls a warm white or keep them neutral. Chocolate velvet runs $500-$1,500; ivory and gold accents are budget-friendly at $25-$150 total. This combo works in any style home and won’t look dated in five years.

    The result feels inherently warm and collected, like the room belongs in a shelter magazine.

    9. Pair Emerald Velvet With Warm Wood Everything

    Emerald is the most luxe jewel tone, and surrounding it with warm wood keeps it grounded and natural rather than costume-jewelry flashy. This is elevated without trying.

    Choose emerald velvet as your anchor (sofa, chair, or bed headboard). Then commit to warm wood: furniture, shelving, picture frames, even a wooden mirror frame. The wood prevents emerald from feeling cold or overly formal. Keep walls neutral (cream, warm white, soft gray) so the jewel tone and wood are the focus. Add cream or gold accents to echo warmth. An emerald velvet sofa runs $700-$1,800; warm wood pieces can be found at IKEA, West Elm, and Wayfair for $100-$500 each. This palette is perfect if you want luxury that doesn’t scream “I’m trying.”

    Your room develops this sense of understated richness—the kind people can’t quite put their finger on but definitely notice.

    10. Layer Mauve Velvet With Black And Cream

    Mauve sits between pink and purple, making it the Goldilocks of velvet colors. Black and cream give it structure and prevent mauve from feeling too soft or babyish.

    Select a mauve velvet chair, small sofa, or ottoman as your focal point. Pair with black-framed furniture—a side table, bookshelf, or bed frame adds graphic punch. Layer in cream through pillows, throws, and a neutral area rug. You can introduce a subtle pattern (cream and black stripes or dots) through a throw pillow to add visual interest. Mauve velvet pieces run $300-$900; black furniture is available at every price point from IKEA ($100-$400) to Article ($400-$800). This combo works beautifully in bedrooms or smaller spaces where you want color without overwhelming.

    The combination creates a room that feels both playful and intentional—soft enough to relax in, structured enough to look polished.

    11. Combine Charcoal Velvet With Blush Pink Details

    This is the anti-matchy pairing: deep and moody charcoal against delicate blush pink. Together, they’re modern and surprisingly warm—like a sophisticated room with a soft heart.

    Bring in a charcoal velvet sofa or sectional as your anchor. Layer blush pink through pillows, a small accent chair, or throws. Keep walls light (white, cream, light gray) to prevent the space from feeling cave-like. Add a light gray area rug to bridge the charcoal and blush. Metal accents in brushed gold or chrome add freshness. A charcoal velvet sofa runs $600-$1,500; blush pillows and throws cost $20-$60 each. This palette skews modern and works especially well in apartments where you want impact without looking like you tried too hard.

    You achieve a room that’s both moody and welcoming—a rare balance that makes people want to linger.

    12. Mix Terracotta Velvet With Slate Blue Walls

    Terracotta and slate blue sound like they’d clash, but they’re actually complementary—one warm, one cool, both earthy. The result is sophisticated without being matchy-matchy.

    Paint one accent wall (or all walls, depending on your boldness) a soft slate blue—try Farrow & Ball’s Stone Blue or Benjamin Moore’s Hale Navy diluted. Bring in a terracotta velvet chair or sofa. The warm orange-brown of terracotta pops beautifully against blue. Keep other textiles neutral (cream, ivory, light gray) to let the wall and velvet breathe. Add natural wood or rattan for organic warmth. Paint costs $30-$50 per gallon; a terracotta velvet chair runs $400-$900. This combo is perfect for living rooms or bedrooms where you want intentional color without it reading as “trendy.”

    The pairing reads as thoughtfully designed—like you actually considered how colors relate to each other.

    13. Pair Olive Velvet With Warm Neutrals And Natural Light

    Olive is the sophisticated cousin of green—less bright, more muted, with serious staying power. Surrounding it with warm neutrals and natural light makes it feel calming and timeless.

    Choose an olive velvet sofa or sectional (these are increasingly common as designers embrace earthy tones). Layer in warm neutrals: cream pillows, an oatmeal throw, a light wood coffee table. The key is natural light—olive reads differently depending on how it’s lit. Make sure your seating area gets good daylight, or use warm bulbs (2700K) in your lighting. Add a jute or sisal area rug to echo natural textures. An olive velvet sofa runs $600-$1,500; warm neutral accents are budget-friendly at $50-$150. This palette is perfect if you want color that feels organic rather than intentional-seeming.

    Your space becomes this calm, grounded retreat where you actually want to spend quiet time—no Instagram-highlight energy required.

    14. Blend Coral Velvet With Soft Gray Everything Else

    Coral velvet is joyful without being juvenile, and soft gray is the perfect temperance—cool enough to balance coral’s warmth, neutral enough to let the velvet shine. This is cheerful sophistication.

    Select a coral velvet chair, ottoman, or small sofa as your statement piece. Paint walls a soft, muted gray (avoid taupe; go for true cool gray like Benjamin Moore’s Agreeable Gray). Layer in soft gray textiles: pillows, throws, area rugs. Keep everything else neutral and simple—let the coral velvet be the color story. Add natural wood to warm up the gray-coral combo. A coral velvet chair costs $400-$900; gray textiles and paint are budget-friendly at $30-$100 total. This palette works beautifully in any room and appeals to people who want color but worry about commitment.

    The result is a space that feels energetic but calm—bright without being chaotic or exhausting.

    15. Layer Deep Indigo Velvet With Cream, Brass, And Books

    Deep indigo (near-black blue) with cream and brass is the palette of libraries and refined retreats. This is a palette that gets better the more personal touches you add.

    Start with an indigo velvet sofa or chair. Add brass accents—a lamp, mirror, or bookshelf brackets—to bring warmth. Layer cream textiles generously: pillows, throws, area rug. Then personalize with books, plants, and collected objects. The beauty of this palette is that it becomes a backdrop for your life and interests. Paint walls warm white or cream to keep everything harmonious. An indigo velvet sofa runs $600-$1,500; brass and cream accents cost $50-$200 depending on how many pieces you add. This combo works in living rooms, bedrooms, and especially home offices.

    Over time, your room develops this collected, lived-in luxury—the kind that makes people assume you have excellent taste and don’t just have good Pinterest boards.

    16. Combine Rust Velvet With Cream And Warm Wood Floors

    Rust velvet is having a major moment, and it’s because it works in almost any home style. Cream and warm wood make it feel naturally luxe rather than trendy.

    Choose a rust velvet sofa or sectional—this color works beautifully in smaller spaces because it draws the eye in rather than pushing it out. Layer a cream area rug partially under the sofa to anchor it and add lightness. Keep pillows in cream and a complementary rust pattern (stripes, small geometric print). Warm wood furniture (coffee table, side table, bookshelf) completes the palette. A rust velvet sofa runs $600-$1,500; rugs and pillows cost $50-$150. If you have light wood or natural floors, rust velvet is your color—they’re made for each other.

    You get a warm, inviting room that feels both intentional and effortlessly settled—like it’s been perfect for years, not just trendy this season.

    17. Mix Deep Plum With Soft Pink And Gold Accents

    Deep plum is dramatic, but soft pink and gold soften it into something genuinely romantic—sophisticated rather than gothic. This is the palette for people who want color with nuance.

    Select a deep plum velvet chair, ottoman, or accent wall. Layer in soft pink through pillows, throws, or a small accent chair. Add gold through lighting, mirrors, and frames—mixed metallics (warm gold, champagne, rose gold) feel more intentional than matching everything. Keep walls neutral or pair with soft gray. Add cream or ivory textiles to create breathing room. A plum velvet chair runs $400-$900; pink and gold accents cost $50-$200. This combo is surprisingly renter-friendly if you use removable wallpaper for an accent wall instead of paint.

    Your space becomes this intimate, colorful retreat—the kind of room where you actually want to spend time with a book or your favorite people.

    18. Pair Caramel Velvet With Chocolate Accents And Brass

    Caramel and chocolate sound like dessert, and honestly, that’s exactly what this palette feels like. Warm, comforting, and genuinely welcoming. This is luxury that doesn’t feel like you’re trying.

    Choose a caramel velvet sofa or sectional (this warm tan-brown is increasingly available as brands embrace warm neutrals). Layer chocolate through pillows and a chunky throw. Add brass lighting and frames to bring in glamour without coldness. Keep walls neutral (warm white, cream, soft taupe). Add a natural wood coffee table to echo the warm tones. A caramel velvet sofa runs $600-$1,500; chocolate and brass accents cost $50-$150. This palette works in any room and with almost any decor style—it’s that versatile.

    The result is a room that feels warm and sophisticated—like you’ve unlocked some secret design formula where everything just works together.

    19. Layer Sage Green Velvet With Warm Beige And Natural Textures

    Sage green is the new neutral, and when you layer it with warm beige and natural textures, it becomes this calm, grounded palette that reads as intentionally organic. This is nature-inspired without being campy.

    Choose a sage green velvet sofa or sectional—this color is increasingly easy to find. Layer warm beige through pillows, throws, and an area rug. Add natural textures: jute, rattan, macramé, natural wood. Keep walls warm white or add soft beige. The palette works because it’s all in the same temperature family (warm, natural), so even with multiple colors, it feels cohesive. A sage velvet sofa runs $600-$1,500; beige and natural accents cost $50-$200. This combo is perfect if you want color that feels peaceful rather than bold.

    Your space becomes this sanctuary feeling—the kind of room where you naturally relax without having to remind yourself to.

    20. Combine Burgundy Velvet With Emerald Green Details

    Two jewel tones together sound risky, but burgundy and emerald are the royal pairing—sophisticated, bold, and undeniably glamorous. This is for people ready to commit to color.

    Start with a burgundy velvet sofa as your anchor. Add emerald through pillows, a small chair, or throws. The two colors are from opposite sides of the color wheel, so they create visual excitement without clashing. Add gold accents (lamp, mirror, frames) to bring warmth and tie them together. Keep walls neutral (cream, soft gray, warm white) so the jewel tones shine. Paint walls yourself ($30-$50) or hire help ($150-$300). A burgundy velvet sofa runs $600-$1,500; emerald and gold accents cost $100-$250. This palette is statement-making—it says you’re confident and intentional.

    You end up with a genuinely memorable room that makes people pause when they walk in—the good kind of pause, where they feel like they’ve entered somewhere special.

    21. Blend Blush Velvet With Deep Charcoal And Warm Metals

    Blush velvet is soft and approachable, but pairing it with charcoal and warm metals keeps it from feeling saccharine. This is romantic without being girly—sophisticated without being cold.

    Select a blush velvet sofa or accent chair. Layer charcoal through pillows, a throw, or a second accent chair. Add warm metals (brass, gold, copper, rose gold) through lighting, frames, and decorative objects. Keep walls warm white or soft pink-white to support the blush without overwhelming. A blush velvet sofa runs $600-$1,500; charcoal and metal accents cost $75-$200. This palette works beautifully in master bedrooms, guest rooms, or living rooms where you want a bit of personality without bold color.

    The combination creates a room that feels polished and personal—warm enough to relax in, defined enough to feel intentional.

    22. Layer Navy Velvet With Warm Cream And Subtle Patterns

    Navy with cream is a timeless pairing, but adding subtle patterns (stripes, small geometrics, tone-on-tone) elevates it from safe to sophisticated. This is classic that doesn’t feel boring.

    Choose a navy velvet sofa as your anchor. Layer cream pillows, but choose ones with subtle patterns—small stripes, checks, or geometric prints add visual interest without chaos. Add a cream area rug with a navy border or pattern. Keep walls white or warm cream. Add natural wood furniture to warm the navy-cream combo. A navy velvet sofa runs $600-$1,500; patterned pillows and a bordered rug cost $100-$250 total. This combo works in any room and won’t feel dated in five years—it’s that timeless.

    Your space reads as thoughtfully styled but not try-hard—the kind of room that makes people assume you have excellent taste and calm aesthetics.

    23. Pair Chocolate Velvet With Mustard Yellow And Cream

    Chocolate and mustard sound retro, but they’re experiencing a genuine design renaissance—and for good reason. Together with cream, they create this warm, inviting palette that feels both vintage and current.

    Choose a chocolate velvet seating piece. Layer mustard through pillows and throws—mustard is warm enough to complement chocolate without clashing. Add cream to soften the intensity. Include a natural wood side table and warm lighting. Walls should be neutral (warm white, cream, soft beige) to let the colors shine. A chocolate velvet chair runs $400-$900; mustard and cream accents cost $50-$150. This palette works in living rooms, bedrooms, and home offices—anywhere you want warmth and personality.

    Your space becomes this naturally welcoming room—the kind where people actually want to settle in and get comfortable.

    24. Mix Olive Velvet With Rust Accents And Gold Details

    Olive and rust are the earthy power couple—both grounded, both warm, both naturally sophisticated. Add gold and you have luxury that doesn’t feel flashy or new-money.

    Select an olive velvet sofa or sectional. Layer rust through pillows, throws, or a small accent chair. Add gold through frames, a lamp, or mirror—this brings in shine without coldness. Include natural textures (jute rug, woven baskets, wood furniture) to echo the organic palette. Keep walls warm neutral (cream, warm white, soft beige). An olive velvet sofa runs $600-$1,500; rust and gold accents cost $100-$250. This palette is perfect if you want color that feels like it belongs in your home naturally, not like you followed a Pinterest board.

    Over time, your room develops this collected, sophisticated warmth—like each piece was chosen with intention and brought together by someone with genuine taste.

    25. Combine Deep Teal Velvet With Warm Taupe And Brass Lighting

    Teal demands the right setting, and warm taupe is its perfect partner—cool enough to let the teal shine, warm enough to prevent the room from feeling corporate or cold. Add brass and you have genuine luxury.

    Paint walls a warm taupe (try Sherwin-Williams Urbane Bronze in a lighter version or Benjamin Moore’s Balanced Beige). Choose a teal velvet sofa as your star. Add brass through a floor lamp, wall sconces, or a mirror frame—the warm metal is essential to keeping the palette from feeling icy. Layer cream textiles and natural wood to round out the warmth. Paint costs $30-$50 per gallon; a teal velvet sofa runs $600-$1,500; brass accents cost $100-$250. This palette is sophisticated without being stuffy—perfect for people who want color with refinement.

    The combination creates a room that looks intentionally designed—like you studied color theory and understood exactly what you were doing, even if you just got lucky.


    Save this post and try one palette this weekend. Start with the velvet color that speaks to you first—that’s usually the right choice. Your room is waiting for this upgrade.

  • 25 Cottage Core Nursery Ideas Full of Whimsy & Warmth

    25 Cottage Core Nursery Ideas Full of Whimsy & Warmth

    Introduction

    Creating a cottage core nursery means filling your little one’s room with warmth, whimsy, and the kind of cozy charm that makes you want to linger in the space. It’s about mixing vintage finds with soft textures, natural materials, and just enough playful detail to spark imagination—without going overboard or breaking the bank. If you’re drawn to pastoral prints, hand-me-down furniture, and rooms that feel like they belong in a storybook, you’re in the right place. This guide covers 25 achievable ideas that range from free styling tweaks to thoughtful investment pieces, all designed to help you build a nursery that feels both timeless and deeply personal. Whether you’re starting from scratch or refreshing an existing space, you’ll find concrete solutions that work for renters and homeowners alike.


    1. Layer Soft Textures on the Changing Table

    A changing table doesn’t have to feel clinical—layering different fabrics makes it cozier and more inviting for both you and baby. Start with a quality changing pad, then add a chunky knit throw or quilted blanket draped casually over one edge, and tuck a wicker basket of soft cloths and wipes underneath for easy access.

    You can source a vintage wooden changing table from Facebook Marketplace or estate sales for $40–$120, or repurpose a sturdy dresser with a changing pad on top (under $30 for the pad alone). The throws and blankets can be thrifted or found at Target and West Elm for $25–$80. This setup takes about 10 minutes to arrange once everything’s in place.

    The real benefit? Your changing station becomes a calming focal point that invites you to slow down during diaper changes instead of rushing through them.


    2. Use Vintage Botanical Prints as Wall Art

    Botanical prints capture the cottage core spirit perfectly and give your walls a thoughtful, collected-over-time feel. Mix and match frame styles (wood, painted metal, natural wicker) and sizes to create an eclectic gallery that tells a story rather than looking too polished.

    Hunt for original prints on Etsy ($15–$50 each) or print high-quality reproductions from sites like Minted or Rifle Paper Co. ($8–$25 per print). Frames from IKEA, thrift stores, or antique shops run $5–$30 each. Renter tip: use removable picture-hanging strips so you can take the gallery with you. Arranging takes about an hour but feels like decorating magic once it’s done.

    This approach teaches your child about plants and nature from day one while creating a room that grows with them—the art works just as well for a toddler’s room or an older kid’s bedroom later.


    3. Choose a Wooden Crib Instead of White Metal

    A wooden crib immediately sets a cottage tone and feels warmer than industrial metal frames. Look for simple spindle designs in natural or warm finishes that complement your existing furniture and create visual cohesion in the room.

    Budget-friendly options exist at stores like IKEA ($150–$300) or Wayfair ($200–$500). Higher-end pieces from brands like Restoration Hardware or specialty nursery shops run $600+, but vintage wooden cribs from estate sales or Facebook Marketplace offer character for $80–$250. Check safety certifications before buying used.

    Once your baby graduates to a toddler bed, many wooden cribs convert or can be repurposed as a plant stand or decorative piece in another room—making it a piece you’ll treasure long after the nursery phase ends.


    4. Add Wavy Glass Shelving for Styling

    Wavy or curved glass shelves add playful movement to your walls and give you space to display (and rotate) small cottage core treasures without taking up floor space. The wavy edges feel more organic and less severe than straight shelving.

    Shelves with wavy edges run $20–$50 each from Urban Outfitters, Etsy, or Amazon. Installation takes about 20 minutes if you’re comfortable with a drill; otherwise budget $50–$100 for a handyperson. Use them to display folded linen, small ceramic pieces, dried flowers, or wooden toys that match your palette.

    The beauty here is flexibility—you can refresh the shelves seasonally or as your child grows, keeping the room feeling fresh without major redecoration work.


    5. Hang Gauzy Curtains for Softness and Light Control

    Gauzy, semi-sheer curtains create that quintessential cottage core bedroom feeling while still allowing light to filter through during the day. Layer them with blackout curtains on a second rod for nap time and nighttime sleep.

    Affordable gauze options are available at IKEA ($15–$30 per panel), Target ($20–$40), or Etsy ($30–$60). Blackout curtains run $25–$50 per panel. If your windows don’t have existing rods, a simple wooden or metal rod costs $15–$40. Hanging curtains takes about 30 minutes and no special tools—just a level and a power drill.

    Your nursery transforms instantly with the right lighting, and gauzy layers give you both beauty and function without looking overly designed or trendy.


    6. Display Vintage Children’s Books on Open Shelving

    Cottage core spaces celebrate storytelling and nostalgia, so fill your shelves with a mix of vintage and new children’s books that become both décor and reading material. Hunt for editions with beautiful illustrated covers that double as wall art.

    Thrift stores and library sales offer books for $1–$3 each. Invest in a few special editions from Etsy or independent bookstores ($15–$40) to mix with your budget finds. Open wooden shelving units run $30–$150 depending on size and source. Arranging books artfully takes about an hour but creates an heirloom-quality focal point.

    Your child grows up surrounded by stories and illustration, and visitors immediately sense the thoughtfulness of the space—not to mention you’ve built a library you’ll actually use and love.


    7. Incorporate a Rocking Chair with a Quilted Cushion

    A rocking chair becomes your anchor for nighttime routines and daytime cuddles. Choose wood tones that match your crib and other furniture, and add a quilted or patchwork cushion for that handmade cottage feel.

    Vintage rocking chairs from estate sales or thrift stores run $30–$100; new solid wood options at Wayfair or West Elm cost $150–$400. Custom cushions are pricey ($60–$150), but you can buy or make a quilted throw blanket ($25–$80) to drape instead. Setting up your chair takes 10 minutes and instantly makes night wakings feel more peaceful.

    This one piece transforms your mindset during late-night feedings—you’re no longer just managing a task; you’re settling into a ritual that feels intentional and grounded.


    8. Create a Woven Wall Hanging as a Focal Point

    A statement wall hanging adds handcrafted charm and creates a focal point that draws the eye without being too busy or overstimulating for baby. Choose natural fiber pieces in cream, ivory, or soft greens that echo the cottage core palette.

    Etsy offers stunning woven hangings for $40–$120; HomeGoods and Urban Outfitters carry mid-range options for $35–$80. If you have weaving skills or want to try macramé, DIY kits cost $15–$40 and take a weekend to complete. Hanging takes 15 minutes with a nail and level.

    This textile becomes a conversation piece and a touchstone in the room—something you’ll photograph and remember as part of your baby’s earliest memories.


    9. Use Linen Bedding in Cream or Soft Sage

    High-quality linen breathes beautifully, ages gracefully, and feels authentically cottage core. Cream, ivory, or soft sage greens work best and coordinate with almost any secondary color you choose for the room.

    Target and West Elm offer quality linen sheets for $50–$120 per set. Splurge-worthy options from Parachute or Etsy reach $150–$200, but they last for years through multiple kids. Budget options at IKEA run $25–$40. Quality linen actually improves with washing, so this is money well spent.

    The texture of real linen teaches your child to appreciate natural materials from day one, and the neutral color palette means you can easily swap accent pieces to refresh the room without replacing everything.


    10. Paint an Accent Wall in Soft Sage or Dusty Yellow

    A single accent wall in a soft, muted tone adds color and personality without overwhelming the space. Pale sage, dusty yellow, or soft blush all work beautifully for cottage core rooms and won’t overstimulate a sleeping baby.

    Paint costs $30–$50 per gallon; you’ll likely need one gallon for a nursery. If you’re renting, peel-and-stick wallpaper in similar tones ($25–$60 per roll) offers a no-commitment alternative. Professional painting runs $150–$400, but DIY application takes a Saturday afternoon if you’re comfortable with a roller and tape.

    One accent wall changes the entire room’s energy and creates a natural backdrop for photography and memories—plus, you’ve limited your commitment to just one wall if you want to pivot the design later.


    11. Layer Different Rug Textures for Softness

    Layering rugs adds depth, defines different zones in the nursery, and creates a wonderfully tactile space. Combine natural fiber base layers (jute or sisal) with softer wool or cotton rugs on top for comfort and visual interest.

    A jute rug runs $30–$80 for a 5×7 size; wool rugs cost $60–$150. Mix high and low—thrift a vintage rug for $15–$40 and pair it with an affordable new rug from Wayfair or Target. Layering takes 10 minutes and costs nothing beyond the rugs themselves.

    Walking barefoot in this cozy layering becomes a small daily pleasure, and the softness underfoot makes tummy time more inviting for your baby.


    12. Install Floating Shelves at Different Heights

    Floating shelves (without visible brackets) create a streamlined look while giving you practical storage and display space. Vary the heights and depths to keep things visually interesting without fussy styling.

    Wooden floating shelves from IKEA run $20–$40 each; nicer options from West Elm or Etsy cost $50–$150. Installation takes about 30 minutes per shelf if you’re comfortable with a drill and stud finder; hire help for $50–$100 if needed. Renter tip: look for command-brand adhesive shelves ($15–$30) that come off cleanly.

    This smart storage keeps necessities accessible while keeping the floor clear and the room feeling open—essential in smaller nurseries where floor space is at a premium.


    13. Add Dried Flowers and Greenery in Glass Vases

    Dried botanicals bring life to your space without requiring care, and they capture the cottage core essence perfectly. Vary your vessel types—glass bottles, ceramic pitchers, even vintage milk bottles—for collected charm.

    Dried flowers cost $5–$15 per bunch at farmers markets or Whole Foods; online options run $8–$20 per bundle. Vases from thrift stores run $2–$10 each; splurge on one or two special ceramic pieces for $15–$40. Arranging takes 20 minutes and requires zero maintenance.

    These arrangements become a peaceful focal point that teaches your child to appreciate natural beauty, and dried botanicals last for months without wilting or needing water.


    14. Repurpose Vintage Wooden Boxes for Storage

    Vintage wooden boxes and crates provide beautiful, functional storage that looks intentional rather than cluttered. Stack them, mount them on walls, or group them on the floor to corral supplies while adding visual interest.

    Wooden crates from hardware stores or Etsy cost $10–$30 each. Estate sales and thrift stores often have vintage wooden boxes for $3–$15. You can leave them natural, paint them in soft colors ($5–$15 for paint), or stain them to match your crib ($8–$20). No installation needed if you’re stacking them; wall mounting takes about 30 minutes.

    This approach kills two birds with one stone—you get practical storage and decorative pieces that earn their space in your room’s design.


    15. Hand-Embroider or Commission a Custom Birth Announcement

    A personalized embroidered hoop becomes an heirloom keepsake and adds handcrafted soul to your nursery. Commission an artist on Etsy or learn embroidery yourself for a meditative project during pregnancy or the fourth trimester.

    Commissioned embroidered hoops cost $40–$80 from Etsy artists. DIY embroidery kits and thread run $15–$30, and a hoop costs $5–$10. If you’re new to embroidery, it takes about 5–10 hours over several sessions; if you hire it out, turnaround is typically 1–2 weeks.

    This piece marks your child’s arrival in a permanent, tangible way and becomes something you’ll treasure as they grow and eventually pass down.


    16. Stencil a Simple Pattern onto Wooden Furniture

    Stenciling a simple pattern onto a thrifted dresser or crib elevates it from basic to bespoke. Choose subtle designs—vines, wildflowers, or geometric patterns—in muted colors that complement your palette.

    Stencils cost $5–$15 from craft stores; acrylic paint runs $3–$8 per color. A thrifted dresser to paint costs $20–$60. The project takes 2–4 hours depending on complexity and how many coats you apply. Practice on cardboard first if you’re new to stenciling.

    Your painted piece becomes a conversation starter and shows your child that you put thought and care into their space—something they’ll notice and appreciate as they grow.


    17. Hang a Fabric Canopy Over the Crib

    A fabric canopy transforms your crib into a cozy nest and adds instant whimsy without being fussy. Drape cream, ivory, or soft blush linen or cotton from the ceiling to frame the crib and create a sense of enclosure.

    Sheer fabric by the yard costs $8–$15 at fabric stores; you’ll need about 2–3 yards. Canopy rods or rings run $15–$40 from hardware or craft stores. Installation takes 30 minutes to an hour and requires hooks in the ceiling or a tension rod system. Renter tip: use adhesive ceiling hooks ($10 for a set) that remove cleanly.

    This simple addition becomes a visual anchor in the room and creates a peaceful, protected space for your baby to rest—psychologically powerful for both child and parent.


    18. Decorate with Handmade Ceramic Pieces

    Display handmade ceramics from local artists or craft fairs on shelves and surfaces throughout the room. Each piece tells a story and adds authentic, unrepeatable charm that mass-produced décor can’t match.

    Handmade ceramics at craft fairs or from local artists run $15–$50 per piece. Support small makers on Etsy, where prices range $20–$100 depending on complexity. Budget-friendly options exist at HomeGoods or target stores for $8–$25. No installation needed—just place them where they make you smile.

    These pieces become part of your child’s sensory world and teach them to value handcrafted, imperfect beauty from the very beginning.


    19. Build a Mobile from Natural Materials

    A mobile made from natural materials—wood, felt, dried flowers, and soft string—feels cohesive with cottage core aesthetics and engages your baby without overstimulation. Avoid bright plastics in favor of muted, natural tones.

    DIY mobile kits cost $20–$40 on Etsy; ready-made options run $50–$150. If you’re crafty, you can make one with wood pieces ($10–$20), felt ($5–$10), and string ($3–$8) in about 2–3 hours. Hanging from the ceiling takes 15 minutes with an adhesive hook or ceiling bracket.

    A handmade mobile becomes a conversation starter and a gentle, ever-moving focal point that calms both baby and caregivers during late-night hours.


    20. Use Vintage Wooden Toy Baskets for Organization

    Woven baskets provide open storage that keeps essentials accessible while maintaining the room’s aesthetic. Vintage wooden baskets have more character than plastic storage and integrate seamlessly into your design.

    Thrift store baskets cost $5–$15 each; Etsy artisan baskets run $25–$60. Target and IKEA offer quality woven options for $10–$30. Filling them with rolled linens and toys takes 15 minutes and requires no installation—just placement on shelves or the floor.

    The ease of grabbing what you need without searching through drawers makes late-night changes and diaper emergencies feel less frantic, while visitors see an organized, beautiful space.


    21. Apply Peel-and-Stick Wallpaper to One Wall

    Peel-and-stick wallpaper lets renters and hesitant homeowners add pattern and texture without permanent commitment. Choose vintage florals, subtle botanicals, or gingham patterns in soft, muted palettes.

    Quality peel-and-stick wallpaper runs $25–$60 per roll from Etsy, Spoonflower, or Amazon. One accent wall typically needs 2–3 rolls. Application takes 1–2 hours and requires only a squeegee and sharp knife. Removal leaves no damage when done carefully.

    This update makes the biggest visual impact for minimal effort and cost, and you can swap it out seasonally or when you want a refresh without guilt or damage.


    22. Frame and Display Handwritten Baby Milestone Cards

    Frame handwritten milestone cards to document your baby’s growth in a cottage core way. DIY cards with calligraphy or simple handwriting feel more authentic and memorable than printed versions.

    Blank cardstock costs $5–$10 for a pack; wooden frames from thrift stores or craft stores run $2–$10 each. If you want calligraphy, hire a local artist for $25–$50, or practice the lettering yourself (it’s easier than you think). Displaying takes 20 minutes and costs nearly nothing.

    Over time, these cards become a visual record of your baby’s first year and transform your wall into a deeply personal family archive.


    23. Install a Small Wooden Ladder Shelf for Blanket Display

    A wooden ladder shelf serves double duty as storage and display, showing off beautiful blankets and quilts while keeping them accessible for diaper changes and bedtime. The rustic aesthetic fits perfectly with cottage core design.

    Wooden ladder shelves run $50–$150 from West Elm, Wayfair, or Target. Thrift store finds cost $15–$40. Blankets to drape range from $25–$100 depending on quality and source. Placement takes five minutes—just lean it against the wall.

    This piece becomes a textural focal point and solves the practical problem of where to keep blankets while making them part of your décor rather than hidden in a closet.


    24. Create a Vision Board with Fabric Scraps and Swatches

    A small vision board lets you see how colors and patterns work together and gives you flexibility to adjust your vision as your child grows. Pin fabric swatches, paint samples, magazine cutouts, and inspirational quotes.

    Cork board costs $10–$20; pushpins run $3–$8. Fabric swatches are free or cheap from fabric stores; paint samples from hardware stores are free. Assembling takes 30 minutes and gives you an evolving, personalized piece that represents your design journey.

    This tactile, visible inspiration keeps your design cohesive and reminds you why you chose each piece—helpful when second-guessing design decisions at 3 a.m.


    25. Sew or Commission a Patchwork Crib Quilt

    A patchwork quilt becomes an heirloom that your child can pass to their own kids. Commission from an Etsy artist or make it yourself during pregnancy as a meditative project—each square tells a story.

    Commissioned quilts from artisans cost $150–$400 depending on size and complexity. DIY kits run $30–$60, and fabric scraps from thrift stores cost $10–$20. Making it takes 20–40 hours over several weeks. Professional machine quilting adds $50–$150 if you want that finish.

    This piece evolves from nursery décor to a tangible connection to your love and care—something your child will treasure as a physical reminder of their earliest days.


    26. Add a Small Side Table for Nighttime Essentials

    A small wooden table beside your rocking chair or changing area becomes command central for nighttime—easy access to water, a lamp, wipes, and whatever else you need without stumbling in the dark.

    Thrift store side tables cost $10–$30; new options from IKEA or Target run $40–$100. A simple cloth or lamp costs $15–$50. Setting up takes 10 minutes and makes a shocking difference in your comfort during late-night routines.

    This simple addition transforms your nighttime experience from rushed and stressful to managed and calm—one of the most underrated nursery upgrades possible.


    Pin this post and bookmark it for your next nursery refresh. Start with just one or two ideas that resonate most—you don’t need to do everything at once. Small, thoughtful touches add up to create a room that feels like a storybook, and that’s the whole point.

  • 25 Coffee Station Ideas That Turn Mornings Into a Ritual

    25 Coffee Station Ideas That Turn Mornings Into a Ritual

    Your mornings don’t have to be rushed and chaotic. A thoughtfully designed coffee station transforms those first moments of your day into something you actually look forward to—a quiet ritual that sets a calm, intentional tone before the world gets loud. Whether you have a sprawling kitchen or a tiny apartment corner, these 25 ideas show you how to build a coffee space that’s both functional and beautiful. You’ll find free solutions, budget-friendly hacks under $50, and investment pieces worth splurging on. By the end, you’ll have everything you need to create a morning ritual that makes you actually want to wake up and brew.

    1. Create a Dedicated Coffee Cart on Wheels

    A rolling cart gives you flexibility and looks intentional without requiring permanent installation. This works especially well in small spaces or open-concept homes where you might want to move your setup around.

    Find a three-tier metal or wood cart at IKEA ($50-$80) or Target ($40-$70). Stock the top shelf with your coffee maker and grinder, the middle with mugs and supplies, and the bottom with beans and filters. The beauty here is mobility—when you’re not using it, roll it to a corner or bedroom for a quiet morning vibe away from the kitchen hustle.

    This option is perfect for renters since it doesn’t require any mounting or permanent changes. You get the full coffee bar experience without commitment.

    2. Install Open Shelving Above Your Counter

    Open shelves make your coffee station an intentional focal point rather than something hidden in a cabinet. Your setup becomes part of your kitchen’s style, not just functional storage.

    Install floating shelves ($20-$40 per shelf at Home Depot) at eye level using a stud finder and wall anchors. Mount shelves about 12-18 inches apart. Arrange your coffee maker on the middle shelf, mugs on one side, and supplies on the other. Add a small plant or candle for visual balance. This takes about an hour with basic tools.

    If you’re renting, use damage-free adhesive shelves ($15-$25) instead—they hold surprisingly well for light coffee equipment. The result feels curated and organized, and guests will notice your attention to detail.

    3. Use a Coffee Bar Cart with a Marble Top

    Marble instantly elevates any setup, even if it’s just a cart. It photographs beautifully and feels like you’ve invested in something special, even on a budget.

    Look for marble-top carts at Wayfair ($80-$150), West Elm ($120-$200), or vintage finds at local thrift stores ($30-$60). Position it near your kitchen’s most-used area. Keep three essentials on top: your coffee maker, grinder, and a small tray for mugs. Store beans and filters in the drawer below.

    The marble wipes clean easily and resists stains, making maintenance simple. Your coffee station becomes a conversation piece that actually looks expensive without breaking the bank.

    4. Display Mugs on a Wall-Mounted Pegboard

    A pegboard lets you show off a mug collection while keeping everything accessible and organized. Plus, it’s endlessly customizable—change the layout whenever you want.

    Install a pegboard ($20-$40 at Home Depot) with a drill and wall anchors. Add peg hooks ($1-$3 each) in whatever pattern feels right. Hang your favorite mugs, add small baskets for filters and sugar packets, and clip a small notepad for daily coffee notes. This takes 30 minutes to set up.

    Renter tip: Use damage-free pegboard alternatives ($25-$50) that adhere to walls temporarily. You’ll have a functional gallery for your mugs that looks intentional and fun.

    5. Add a Vintage Coffee Tin for Dry Storage

    Vintage coffee tins combine storage with style—they’re functional and photograph beautifully. Plus, coffee beans stay fresher in airtight metal containers than in bags.

    Hunt for vintage tins at thrift stores ($3-$8 each) or new reproductions at Urban Outfitters ($15-$25). Pour beans into airtight tins and label them with masking tape and a marker—or leave the vintage labels visible for charm. Group three tins together for visual interest. This costs almost nothing and adds instant character.

    Your coffee station immediately looks collected and intentional, like you’ve curated it over time rather than thrown it together last week.

    6. Style a Console Table as Your Coffee Bar

    If you have a blank wall or awkward kitchen corner, a console table transforms wasted space into a dedicated coffee zone. It’s more intentional than a kitchen counter setup.

    Find a slim console table ($60-$150 at Target, IKEA, or Wayfair). Position it against your wall, add your coffee maker and grinder on top, and stack a small shelf unit or basket beneath for storage. Top the whole thing with a mirror or artwork behind it for visual impact. This takes an hour to style.

    The benefit is clear zones—your coffee ritual stays separate from meal prep, giving you a defined “start your day here” moment.

    7. Use Glass Jars for Visible Ingredient Storage

    Clear glass jars show off what you have while keeping things fresh and organized. You’ll never run out of supplies because you can see levels at a glance.

    Buy glass storage jars ($2-$5 each at Target, IKEA, or Amazon). Transfer coffee beans, sugar, cocoa powder, or instant oatmeal into jars. Label each with a waterproof sticker or chalk marker. Arrange them in size order on your coffee bar shelf. This costs $15-$25 total.

    Your setup looks intentional and clean, plus everything is instantly accessible. No rummaging through cabinets while you’re still half-asleep.

    8. Install a Small Sink Dedicated to Coffee Cleanup

    If you have the budget and space, a small prep sink near your coffee station keeps your main kitchen sink free and adds a wow factor. This is more of an investment idea but changes your whole coffee ritual.

    A compact undermount sink runs $150-$400 with installation costs of $200-$500 if you hire a plumber. DIY installation is possible but requires plumbing knowledge. Position it right next to your coffee maker for quick rinsing and cleanup without walking across the kitchen.

    This idea works best for homeowners with dedicated kitchen space, but the payoff is huge: you can rinse your French press immediately and have everything clean before breakfast. The functionality makes a real difference in your daily rhythm.

    9. Create a Chalkboard Menu for Daily Coffee Specials

    Add a playful element that makes your coffee ritual feel like a café experience. It’s silly but effective for creating a special-feeling morning.

    Get a small framed chalkboard ($10-$20 at Target or World Market). Write your daily coffee blend, origin, or a motivational message each morning. Prop it on your counter or hang it above your coffee bar. Update it daily—this 30-second task becomes part of your ritual.

    Your setup stops feeling functional and starts feeling intentional. You’re not just grabbing coffee; you’re choosing your brew for the day.

    10. Use Floating Shelves with Integrated Lighting

    Under-shelf lighting makes your coffee station feel luxe and photograph beautifully. It also makes early mornings feel less harsh when overhead lights are too bright.

    Install LED strip lighting ($15-$30 on Amazon) beneath floating shelves using command strips or permanent adhesive. Pair with wooden floating shelves ($30-$60 each at Home Depot or Wayfair). The warm glow highlights your setup and creates mood lighting without any effort.

    Set the lights on a timer so they come on automatically at your usual wake-up time. Your coffee ritual instantly feels special, and you’re setting a calm tone before the day starts.

    11. Build a DIY Coffee Bar from Reclaimed Wood

    Reclaimed wood adds warmth and character that new materials can’t match. Building your own bar saves money and makes it feel uniquely yours.

    Score reclaimed wood from local salvage yards ($2-$5 per board) or Craigslist. Sand it smooth, seal it with food-safe finish ($15-$25), then mount it on brackets ($10-$20 per pair at Home Depot). This is a weekend DIY project taking 4-6 hours if you’re comfortable with basic tools.

    The result looks collected and intentional, like something from a design magazine—except you built it yourself for a fraction of the cost of premade options.

    12. Add a Monstera or Pothos Plant for Greenery

    A plant adds life to your space and makes morning coffee feel less like a chore and more like self-care. It’s the easiest way to make any setup feel intentional.

    Buy a low-maintenance Monstera or Pothos at any garden center ($15-$40). Position it next to your coffee station where it gets medium indirect light. Water weekly. The plant’s presence softens the space and makes everything feel more organic and less sterile.

    This single addition changes the whole vibe—suddenly your coffee bar feels like a wellness ritual instead of just grabbing caffeine.

    13. Use Woven Baskets for Fabric and Supply Storage

    Baskets hide supplies while adding texture and warmth to your space. They keep things organized without looking overly styled or sterile.

    Find woven baskets ($15-$40 each at Target, IKEA, or HomeGoods). Label the front with waterproof stickers or a label maker: Napkins, Filters, Towels, Supplies. Tuck them under your coffee bar table or on lower shelves. This costs $30-$60 total and takes 15 minutes to set up.

    Your coffee station looks curated rather than cluttered, and everything stays accessible without being visible.

    14. Install a Coffee Maker Shelf Directly Above Your Sink

    Installing your coffee maker above the sink is genius—drips go straight down the drain, and you have instant access to water without reaching across the counter.

    Mount a sturdy shelf ($30-$50) directly above your sink using heavy-duty brackets ($20-$40). Position your coffee maker so it drips naturally into the sink. This requires 45 minutes and basic drilling skills. Alternatively, hire a handyman for $50-$100.

    This setup saves counter space while making the coffee-making process more efficient. Plus, cleanup is literally built into the system.

    15. Create a “Coffee Only” Drawer with Custom Dividers

    If you don’t have counter space, dedicate one deep drawer to coffee equipment. Custom dividers keep everything accessible and prevent the “junk drawer” problem.

    Use a drawer divider system ($20-$30 at The Container Store or Amazon) to create sections for beans, filters, sweeteners, and equipment. Label each section with a vinyl sticker or tape. This takes 20 minutes to set up and costs under $40 total.

    Open the drawer each morning and have everything you need right there. It’s hidden from view but instantly accessible—perfect for small kitchens or minimalist aesthetics.

    16. Add a Vintage Coffee Grinder as Décor

    A beautiful grinder isn’t just functional—it’s a sculptural piece that elevates your entire setup. Vintage grinders often work better than new plastic ones anyway.

    Find a vintage coffee grinder at thrift stores ($5-$20), Etsy ($30-$80), or 1stDibs ($100-$300) depending on rarity. Clean and restore it if needed—oil any rusty parts and polish the wood. Position it prominently on your coffee bar where you can see it daily.

    This piece becomes a conversation starter and makes your coffee ritual feel elevated. It’s functional art that improves your morning experience while looking intentional.

    17. Use a Tiered Dessert Stand to Display Mugs

    A tiered stand solves vertical space challenges while displaying your mug collection beautifully. It’s especially useful for small kitchens or apartments.

    Find a tiered stand at HomeGoods ($20-$40), Target ($25-$50), or thrift stores ($5-$15). Arrange mugs by color or pattern on each tier, tucking small supplies or coffee beans between levels. This costs $20-$40 and takes 10 minutes to style.

    Your mug collection becomes a visual focal point rather than hidden in a cabinet. Small space, maximum impact.

    18. Install a Narrow Wall-Mounted Shelf for Linear Spacing

    A shallow, long shelf keeps your coffee setup narrow and organized. It works beautifully in kitchens where counter space is premium real estate.

    Mount a narrow floating shelf ($30-$60) using heavy-duty brackets. Keep only essentials on it: coffee maker, grinder, three mugs, and a small container for supplies. Everything stays visible and accessible without crowding.

    The linear arrangement feels modern and intentional. It’s the opposite of chaotic—clean geometry that makes your morning feel calm and organized.

    19. Create a Coffee and Tea Hybrid Station

    If you’re not coffee-only, a hybrid station serves both preferences without looking cluttered. It’s like having a personal café in your kitchen.

    Dedicate half your bar to coffee and half to tea equipment. Use matching storage jars for both beverages, a shared mug rack, and a central honey/sweetener station. Invest in a gooseneck kettle ($30-$60) that works for both coffee and tea prep.

    This approach feels complete and intentional, like you’ve thought through all your morning beverage needs. Guests appreciate the hospitality.

    20. Use a Decorative Tray to Corral Everything

    A tray pulls your coffee setup together visually and makes everything portable. You can grab the whole setup and move it anywhere if needed.

    Find a decorative tray ($20-$50 at Target, West Elm, or HomeGoods). Arrange your coffee maker, favorite mug, and supplies on it. Everything stays organized and cohesive, and you can easily move the whole setup if you want to reconfigure your space.

    This small touch makes your station feel more intentional, like you styled it for a magazine shoot. It’s an easy upgrade that costs almost nothing.

    21. Install a Commercial-Style Coffee Station with a Backboard

    If you’re passionate about coffee, go full café-style at home. This is an investment but transforms your entire kitchen aesthetic.

    Install a countertop ($200-$500), professional shelving ($150-$300), and a quality espresso machine ($300-$1000+). Add a backboard in marble, subway tile, or stainless steel ($100-$400). Hire a contractor or DIY if skilled. This is a 1-2 week project but totally customizable to your style.

    The result feels like bringing a café into your home. Every morning becomes a ritual worth waking up for.

    22. Add Brass or Gold Accents for Warmth

    Metallic accents elevate your station instantly. Brass and gold feel premium without being flashy or cold-looking like chrome.

    Add brass shelf brackets ($15-$30 per pair), a gold-framed mirror ($40-$80), or gold pour-over equipment ($30-$60) to warm up your space. These small touches tie everything together and make it feel intentional.

    The effect is subtle but noticeable—suddenly your coffee bar feels elevated and thought-through.

    23. Use a Vintage Coffee Scoops as Hanging Decoration

    Vintage scoops are functional and decorative—they’re practical tools that look beautiful when displayed. This is a low-cost way to add personality.

    Collect vintage scoops at thrift stores ($1-$3 each) or Etsy ($5-$15 each). Install small hooks ($2-$5 each) above your coffee station and hang them. Create a little gallery of scoops in different styles, eras, and materials.

    This detail makes your setup feel personal and collected. It tells a story about your love of coffee and design.

    24. Create a Coffee Station Window Shelf

    If you have a window ledge, use it as a coffee bar. Natural light makes mornings feel better and creates beautiful photo opportunities.

    Install a weather-resistant shelf ($20-$40) directly in your window or use a tiered plant stand ($25-$50) on your existing windowsill. Position your coffee maker to catch morning light. Morning sun will naturally highlight your setup and make the whole ritual feel brighter.

    Plus, gazing out the window while your coffee brews becomes part of the ritual. You’re combining caffeine with natural light, which actually wakes you up better than staring at your phone.

    25. Build a Sliding Barn Door Coffee Cabinet

    A barn door conceals your coffee setup when you want a clean look but reveals everything instantly when you open it. This is design meeting function beautifully.

    Install a small cabinet ($100-$200) with barn door hardware ($30-$60) from Amazon or Home Depot. Stock it with your coffee maker, mugs, and supplies. Close it for a clean kitchen aesthetic, open it to access your ritual. This takes 2-3 hours to install if you’re handy or hire help for $100-$200.

    Your kitchen can look sleek and minimal when the door is closed, but you have a complete café setup hidden inside. It’s the best of both worlds.


    Save this post and try one idea this weekend—even a tiny change makes your mornings feel intentional and special. Which setup speaks to you?

  • 28 Bedroom Design Styles That Transform Your Home

    28 Bedroom Design Styles That Transform Your Home

    Your bedroom should be the one room where you feel completely at home—a sanctuary that reflects your style and actually supports better sleep and relaxation. Whether you’re renting, working with a small space, or ready to invest in a complete refresh, there are bedroom design styles that fit every budget, aesthetic, and lifestyle.

    This guide walks you through 28 distinct bedroom design approaches, from free styling tricks to investment pieces. You’ll find budget-friendly hacks you can do this weekend, mid-range upgrades that make an instant impact, and aspirational styles that inspire bigger changes. Each idea is actionable, renter-friendly when possible, and designed to help you create a bedroom you actually love waking up in.


    1. Go Bold with Cherry Red Accents

    Cherry red is having a major moment, and you don’t need to paint your entire room to tap into this trend. Instead, use deep cherry tones in one accent wall, bedding, or large furniture piece to create visual impact without overwhelming your space.

    Start by testing the color on sample boards or with temporary wallpaper before committing. A single accent wall behind your headboard costs $30–$80 in paint and takes one weekend. Alternatively, invest in a cherry-velvet headboard ($200–$600) or layer the color through throw pillows and a blanket ($50–$150 total). You can also find cherry-wood nightstands or a statement dresser at thrift stores for $40–$120. The key is repeating the color in at least two other places—perhaps in artwork or a rug—so it feels intentional rather than random.

    This bold choice signals personality and sophistication. Your bedroom instantly becomes a retreat that feels purposeful and curated, not bland or sterile.


    2. Layer Textures for Maximum Coziness

    Texture is what separates a bedroom that looks nice from one that feels amazing. Mixing velvet, linen, high-pile rugs, woven throws, and natural wood creates depth and makes your space feel intentional and lived-in.

    Start with your foundation: organic cotton or linen sheets ($60–$150). Add a velvet or corduroy throw ($40–$100), then layer in at least two different pillow textures—maybe a chunky knit cover paired with a smooth linen one. Include a high-pile or jute rug ($80–$250) and consider a textured wall treatment like mineral plaster ($150–$400 installed) or peel-and-stick textured wallpaper ($30–$60). Mix in wooden furniture with natural grain and one woven basket for storage. The combination should feel rich but never cluttered.

    You’ll notice the difference the moment you walk in—the space feels inviting and sensory-rich, like somewhere you actually want to spend time.


    3. Adopt Grandmillennial Style (Modern Meets Vintage)

    Grandmillennial design merges your grandmother’s vintage charm with modern minimalism—think collected antiques and heirloom pieces paired with clean lines and contemporary art. It’s personal, cozy, and surprisingly accessible.

    Hunt for vintage pieces at thrift stores, Facebook Marketplace, or estate sales ($20–$150 per piece). Mix in one or two statement vintage items—a carved wood headboard, a brass mirror, or an ornate dresser—with modern bedding (white or soft neutrals) and a few contemporary touches like a sleek nightstand or minimalist wall art. Keep your color palette cohesive: choose a base of creams, warm whites, and soft grays, then repeat one vintage color (sage, dusty blue, or terracotta) in textiles. Add botanical prints, old books stacked on nightstands, and quilts or embroidered pillows for authenticity.

    This style tells a visual story and makes your bedroom feel curated and unique. You’re not following a trend—you’re building something that’s entirely yours.


    4. Create a Curved Headboard Focal Point

    A curved headboard is the easiest way to soften your bedroom and create a design anchor point. Curved and organic shapes are dominating 2025 bedroom trends, and a headboard is the perfect place to invest.

    Look for curved headboards in fabric ($150–$400), wood ($200–$600), or upholstered options at IKEA, Wayfair, Article, or West Elm. If you’re renting or want to DIY, you can create a curved headboard using adhesive velvet or linen fabric ($40–$80) applied to plywood or cardboard. Alternatively, hang a large curved mirror or piece of curved wall art for visual interest without furniture. Pair your curved headboard with a simple bed frame (to let the headboard be the star) and minimal nightstands.

    The curve immediately softens the room’s visual energy. Even a small bedroom feels more sophisticated and intentional when anchored by this one strong design choice.


    5. Paint Walls Light to Expand a Small Space

    If your bedroom feels cramped, the wall color matters more than square footage. Light, warm neutrals make rooms feel bigger and more restful—two wins for the bedroom.

    Choose soft whites, warm creams, or pale gray ($20–$40 for quality paint). Avoid stark white, which can feel cold; instead, look for whites with warm undertones (often labeled “ivory,” “cream,” or “warm white”). One gallon typically covers a small bedroom. Paint yourself ($0 labor) or hire pros ($300–$600). You can also test colors with peel-and-stick wallpaper ($15–$30) before committing to paint. Keep trim and doors the same color to maximize the expansive effect.

    Your small bedroom immediately feels airier and more peaceful. Better lighting reflection means you’ll actually spend time there without feeling boxed in.


    6. Add Biophilic Design with Plants and Natural Light

    Biophilic design—bringing nature into your interior—is proven to reduce stress and improve sleep quality. It’s not just about plants; it’s about natural materials, light, and a connection to the outdoors.

    Start with 3–5 low-maintenance plants like pothos, snake plants, or monstera ($10–$30 each). Add natural-fiber baskets for storage ($30–$80), swap synthetic curtains for linen ($50–$150), and incorporate wood furniture or reclaimed-wood accents ($100–$400). Place plants on floating shelves or in the corner to draw the eye upward. Use natural light whenever possible—opt for sheer curtains that filter light rather than block it. Add one or two pieces of nature-inspired wall art to anchor the theme.

    This approach creates a calm, restorative environment that actively supports better sleep and mental clarity. You’ll feel the difference within days.


    7. Install Floating Shelves for Style and Storage

    Floating shelves give you storage without visual weight and work in any bedroom style. They’re affordable, renter-friendly (with removable options), and instantly make your space feel more curated.

    Install shelves 12–18 inches apart at eye level using wall anchors ($40–$80 for three shelves plus installation hardware). Wood shelves in various finishes are available at IKEA ($20–$50 each), Home Depot, or Amazon. Renter option: use no-damage adhesive shelves ($15–$30) that leave no marks. Style them with a mix of books, plants, framed photos, and small decorative objects, keeping each shelf about 60 percent empty so it doesn’t feel cluttered. This layering adds personality without overwhelming the space.

    Suddenly you have a focal point that’s both functional and beautiful. Your bedroom goes from basic to thoughtfully designed in one afternoon.


    8. Invest in Quality Organic Bedding for Better Sleep

    Quality bedding is the one investment in your bedroom that directly affects your sleep—and your sleep affects everything. Organic materials like linen and cotton are breathable, durable, and worth the splurge.

    Organic cotton or linen sheets run $80–$200 (brands like Parachute, Brooklinen, or Boll & Branch). Add an organic cotton quilt or duvet ($150–$300) and organic wool blankets for temperature regulation ($80–$150). Yes, it’s pricier than synthetic options, but these sheets last 5+ years and actually feel better on your skin. Look for certifications like GOTS (Global Organic Textile Standard) or OEKO-TEX to verify authenticity. Mid-range options from Target or Amazon start around $40–$60 for decent organic basics.

    You’ll fall asleep faster and wake up more refreshed. The texture difference is real, and your skin will thank you.


    9. Design a Work Nook in Your Bedroom

    If your bedroom doubles as a workspace, creating a visual boundary between sleep and work zones helps your brain shift gears. A small, thoughtfully designed work nook keeps you productive without sacrificing the room’s tranquil vibe.

    Choose a corner away from your bed (if possible) and add a slim desk ($80–$250), a comfortable chair ($100–$300), and a small area rug underneath to define the zone ($40–$100). Use a floating shelf or wall-mounted storage ($30–$80) to keep supplies out of sight. Add task lighting ($20–$60) separate from bedroom ambient lighting. Use a room divider, curtain, or tall plant to physically separate the zones if space allows. Keep the work area minimal—a pen holder, desk pad, and one small plant only.

    You’ll find it easier to focus during work hours and to actually relax when you’re off the clock. The visual separation matters more than the physical distance.


    10. Hang Statement Wallpaper on One Accent Wall

    Wallpaper is back, and you don’t need to cover every wall. One bold, patterned accent wall behind your bed creates personality and visual interest without the commitment or cost of full coverage.

    Peel-and-stick wallpaper runs $30–$80 per roll and is renter-approved (removable). Traditional wallpaper costs $40–$150 per roll plus installation ($200–$500). Choose florals, geometric patterns, or vintage-inspired prints that complement your color scheme. Measure your wall carefully and order slightly more than you think you’ll need. Apply to a smooth, clean wall surface (or hire a pro for best results). Keep other walls neutral so the pattern stays the focal point rather than overwhelming the space.

    One patterned wall transforms your bedroom from generic to distinctive. It’s a bold choice that absolutely works—especially when everything else stays calm and minimal.


    11. Swap Sharp Furniture for Rounded Silhouettes

    Minimalism is softening. Angular, sharp furniture is being replaced by curved and rounded shapes that feel more welcoming and visually gentle. This shift affects everything from headboards to nightstands to mirrors.

    Look for rounded dressers ($300–$800), curved nightstands ($150–$400), and circular or arched mirrors ($60–$200) at Article, Wayfair, or mid-century modern shops. Round off your space with curved shelving units ($200–$500) or a round side table ($80–$150). Even simple swaps matter—replace sharp-edged wall art with arched frames or add a rounded pouf ($40–$100). The cumulative effect of multiple curved pieces creates a cohesive, softened aesthetic.

    This furniture style makes your bedroom feel warmer and more approachable. The organic lines create visual flow and a sense of calm that sharp angles simply can’t match.


    12. Layer Deep Jewel Tones Using the Three-Point Rule

    Deep jewel tones—forest green, aubergine, navy, or midnight blue—are having a major moment. The secret to pulling off bold color without it feeling overwhelming is the three-point rule: repeat your chosen color in at least three distinct places.

    Choose one jewel tone and repeat it in: (1) a wall or large furniture piece ($0–$400), (2) bedding like a duvet or throw ($60–$150), and (3) a smaller accent like a pillow, artwork, or rug ($20–$100). This creates visual harmony and makes the color feel intentional rather than accidental. Keep the rest of your palette neutral—creams, warm whites, or soft grays—so the jewel tone is the star. Use samples or temporary wallpaper ($15–$30) to test before committing.

    Your bedroom becomes a sophisticated jewel box. The repeating color ties the room together and signals thoughtful design choices.


    13. Use Textured Walls to Add Depth

    Smooth drywall is fine, but textured finishes add tactile interest and hide imperfections. Textured walls have moved beyond popcorn ceilings and now include sophisticated options like mineral plaster, limewash, and specialty finishes.

    Mineral plaster ($150–$400 installed, or $50–$100 DIY) creates an organic, spa-like feel. Textured peel-and-stick wallpaper ($30–$80) mimics the look without commitment. Limewash ($100–$300 installed) offers a matte, earthy aesthetic. If you’re handy, you can apply texture yourself using troweling techniques or add a textured primer. Start with one accent wall behind your bed to test the effect before expanding.

    The subtle texture makes your walls feel alive and sophisticated. Lighting plays off the surface, creating depth and visual interest that flat paint simply can’t provide.


    14. Create Ambient Lighting Layers

    Bedroom lighting matters more than most people realize. Layered lighting with dimmers, bedside lamps, and ambient fixtures helps you set the mood and supports better sleep.

    Install a dimmer switch ($20–$60) on your overhead light so you can adjust brightness. Add two bedside lamps ($30–$100 each) with warm bulbs (2700K color temperature). Include ambient lighting like LED strip lights behind shelves ($20–$40) or a statement floor lamp ($80–$200). Use warm white bulbs throughout, never cool white or harsh LED. Position lights so they create pools of warm glow rather than flat, all-over brightness. This combination takes 15 minutes to set up but dramatically changes how the room feels, especially after dark.

    You’ll fall asleep easier and wake more gently. The warm, layered light actively supports better sleep and makes your bedroom feel like a sanctuary even on stressful days.


    15. Mix Vintage Art Deco with Modern Bedding

    Art Deco is resurging in 2025, and mixing it with modern pieces creates a visually interesting, curated aesthetic. The key is balance—let one bold vintage piece anchor the room, then keep everything else simple.

    Invest in one statement Art Deco piece: a patterned headboard, a geometric mirror with brass framing ($80–$200), or a geometric wall art print ($30–$80). Pair it with contemporary bedding in neutrals—crisp white sheets, a soft gray duvet, minimal pillows. Add one or two brass or gold accents (a lamp, mirror frame, or drawer pulls) to tie the Art Deco element together. Keep walls and other furniture minimal and modern so the vintage piece stands out as intentional rather than cluttered.

    This layering creates visual interest and shows your design sensibility. Your bedroom looks collected and thoughtful rather than matchy or boring.


    16. Build a Gallery Wall Above Your Bed

    A gallery wall above your bed is an instant personality injection. It’s affordable, renter-friendly, and completely customizable to your aesthetic.

    Start by collecting 6–12 frames ($8–$25 each from IKEA, Target, or thrift stores) and choosing artwork—prints from Etsy ($5–$30), thrifted art, your own photography, or posters. Plan your layout on the floor first, then use painter’s tape on the wall to map placement before hanging. Use command strips ($1–$5) for renter-friendly hanging. Mix frame colors and sizes for visual interest—black, white, wood, and brass tones all work together. Vary your artwork: include abstract, photography, typography, and botanical prints for diversity.

    Your bedroom instantly transforms from blank walls to a curated space that tells your story. This one project might be the most visible change you make.


    17. Add a Statement Dresser for Storage and Style

    A beautiful dresser serves double duty: it’s essential storage and a design anchor. Choosing the right one instantly elevates your entire bedroom.

    Look for dressers with interesting details: curved edges ($400–$800), interesting wood grain or finishes ($300–$700), or brass/gold hardware ($200–$600). IKEA offers budget options ($100–$300), while Wayfair, Article, and Facebook Marketplace have mid-range and vintage finds ($150–$500). Mix thrifted dressers ($50–$200) with fresh hardware for a custom look. Style the top with a mirror, table lamp, and 3–5 decorative objects (avoid clutter). Place it where it becomes a focal point—opposite the bed or anchoring one wall.

    Your dresser becomes more than storage—it’s a design statement. This one piece often determines whether your bedroom feels intentional or haphazard.


    18. Layer Your Bedding for Better Sleep and Looks

    Layered bedding looks luxe and actually improves sleep by letting you adjust warmth throughout the night. This is one of those ideas that’s simple but makes a real difference.

    Start with quality sheets ($60–$150), add a fitted duvet ($100–$250), then layer in a cotton throw blanket ($40–$100). Include 2–3 decorative pillows in varied textures ($20–$60 each). Use white, cream, or soft grays as your base, then add one color or pattern through the throw or pillows. The key is leaving the throw slightly rumpled at the foot of the bed—it should look lived-in, not stiff. This takes 5 minutes to arrange but photographs beautifully and feels intentional.

    You’ll sleep better and your bed becomes an inviting focal point. The layering creates visual richness and practical comfort in one move.


    19. Install a Fabric Headboard for Softness

    An upholstered headboard softens your bedroom instantly and adds luxury that feels achievable. Unlike hard wood or metal, fabric feels inviting and works in almost any style.

    Upholstered headboards range from $150–$600 depending on size and material. Linen is soft and casual ($200–$400), while velvet is more luxe ($250–$500). DIY option: cover a piece of plywood with fabric, add padding underneath ($100–$200 total). Mount it directly to the wall using French cleats ($20–$40). Choose a neutral like cream, gray, or soft taupe for versatility, or go bold with a jewel tone. Pair with minimal bed frame styling to let the headboard shine.

    The moment you lean against a soft headboard, your bedroom feels spa-like and intentional. It’s a small luxury that changes how you experience your space.


    20. Create a Vintage-Sourced Nightstand Pairing

    Matching nightstands are predictable. Mixing two vintage pieces in different styles, woods, and finishes creates visual interest and tells a personal story.

    Hunt for nightstands at thrift stores ($20–$60 each), Facebook Marketplace ($30–$80), or estate sales ($25–$100). Look for pieces in different woods (one oak, one walnut, for example) or different heights. Refinish or paint if needed ($0–$100 in supplies). The mismatch should feel intentional, so stick to a cohesive color palette—both in warm tones, or both with brass hardware, for example. Add matching lamps ($30–$80 each) to tie them together visually.

    This approach creates a collected, thoughtful aesthetic that reads as design-forward rather than accidental. Your nightstands become conversation pieces instead of just functional pieces.


    21. Use Curved Mirrors to Reflect Light and Soften Angles

    Mirrors serve two purposes: they make spaces feel bigger and more open, and curved frames follow the 2025 trend toward organic shapes. A large curved mirror is an investment that pays dividends.

    Arched or circular mirrors range from $80–$300 depending on size and material. Position it opposite a window to reflect natural light and maximize the expansive effect. A 36–48 inch mirror works for most bedrooms. Brass frames feel luxe ($150–$250), while wood frames feel warmer ($100–$200). Budget option: a simple circular mirror from IKEA or Target ($40–$80). Hang it at eye level above a dresser, console, or against a feature wall.

    Your bedroom immediately feels brighter and larger. The curved shape adds softness while the reflective surface opens up the space.


    22. Swap Heavy Curtains for Sheer Linen

    Heavy blackout curtains are practical for sleep, but they make bedrooms feel dark and cave-like during the day. Sheer linen allows light while maintaining privacy and creates a softer, more open feeling.

    Linen curtains in cream or soft white run $50–$150 per panel from Etsy, Parachute, or Amazon. Install a curtain rod ($30–$60) and hang panels on either side of your window. If you need blackout privacy, layer sheer linen with a lightweight roman shade ($40–$100) behind it. The combination lets you control light while keeping the daytime aesthetic airy. Linen wrinkles slightly, which adds to the relaxed, intentional vibe.

    Your bedroom feels fresher and more open. The natural light filtering through soft fabric changes the entire mood of the space without sacrificing privacy.


    23. Add a Woven Wall Hanging or Macramé Accent

    Textile wall hangings add bohemian warmth without demanding too much visual attention. A single large piece feels more intentional than a gallery of smaller items.

    Woven wall hangings range from $40–$200 depending on size and complexity. Macramé pieces ($30–$150) add a handmade feel. Look on Etsy, Anthropologie, or local artisan markets for one-of-a-kind pieces. Choose neutral tones like cream, tan, or soft gray to blend with most bedrooms. Position above a dresser, nightstand, or as a focal point behind your bed. Pair with one or two smaller pieces if you want layering, but keep it minimal.

    This textile adds warmth and visual interest without screaming for attention. It signals that you care about your space while maintaining the calm, restful vibe a bedroom requires.


    24. Design a Dressing Nook with Open Shelving

    If you have a corner or wall space, a dressing nook with open shelving turns storage into a design feature. It works especially well in small bedrooms where a full closet isn’t feasible.

    Install 3–4 floating shelves ($80–$200 installed) at varying heights. Keep to a strict color palette—fold clothes neatly in similar tones (whites, creams, grays, blacks). Store shoes on lower shelves and smaller items in woven baskets ($15–$40 each) on upper shelves. Add a simple mirror ($40–$100) and task lighting ($25–$60) for functionality. This works best if you naturally gravitate toward minimalist wardrobes, as open storage only works when it’s tidy.

    You create dedicated, curated storage that actually looks like part of your design rather than cluttered. Every item visible is one you genuinely use and love.


    25. Invest in a Quality Bedside Table Lamp

    A good bedside lamp is one of the easiest ways to improve your bedroom’s nighttime vibe. Quality lighting matters more than most people realize for both aesthetics and sleep quality.

    Bedside lamps start at $30–$60 for basic options, but investing $80–$150 gets you better design and functionality. Look for warm brass finishes, ceramic bases, or sculptural shapes that complement your aesthetic. Choose linen shades ($20–$50) over plastic, and make sure the bulb is warm white (2700K). Position lamps on both sides of your bed if possible—this creates balanced, cozy light and eliminates harsh shadows. Pair with a simple nightstand ($80–$150) styled with 2–3 small objects only.

    Your nighttime routine becomes more pleasant immediately. Warm, gentle bedside lighting actually supports better sleep while making your bedroom feel like a luxury hotel.


    26. Layer Rugs to Define Zones and Add Warmth

    Layering rugs (yes, really) adds depth, defines zones in open-concept bedrooms, and creates visual interest. It’s an unexpected design trick that actually works beautifully.

    Start with a large base rug ($80–$300) in a neutral tone—jute, sisal, or light gray. Layer a smaller patterned or textured rug ($40–$150) on top, offset slightly for an intentional look. This works best in rooms where you want to define the bed area without furniture walls. Choose rugs in complementary colors or let one pattern and one neutral balance each other. This setup takes 10 minutes but makes your bedroom feel more designed and intentional.

    The layered approach creates visual depth and makes small bedrooms feel more defined. It’s a design-forward choice that adds sophistication without major expense or effort.


    27. Install Floating Nightstands for Small Spaces

    Floating nightstands save floor space and make tiny bedrooms feel larger. They’re renter-friendly (removable options exist) and work in minimalist, modern, or transitional styles.

    Wall-mounted nightstands cost $60–$200 from Wayfair, IKEA, or specialty retailers. Installation requires studs or heavy-duty wall anchors ($20–$40). Renter option: command-strip mounted shelves ($15–$30) do the job temporarily. Keep floating nightstands minimal—a lamp, small plant, and maybe a book. The sparse styling keeps the space from feeling cluttered and maintains the open, airy vibe. Paint them the same color as your wall ($0 if already painted) or choose a contrasting finish for visual pop.

    Your tiny bedroom suddenly feels less cramped. Without nightstand legs taking up floor space, the room breathes and feels larger than it actually is.


    28. Curate a Secondhand Bedroom for Style and Sustainability

    Building your bedroom from thrifted and secondhand pieces is budget-friendly, sustainable, and results in a truly unique space that reflects your personality rather than a design catalog.

    Hunt thrift stores, Facebook Marketplace, estate sales, and local vintage shops for unique pieces. Aim for 60–70 percent of major furniture from secondhand sources ($200–$600 total if patient and selective). Choose one or two investment pieces—a beautiful wooden dresser or vintage mirror—and fill in with smaller items. Keep a cohesive color palette so pieces feel intentional rather than random. Refinish or repaint pieces if needed ($20–$100 in supplies and time). This approach takes longer but results in a one-of-a-kind space and costs 40–50 percent less than buying new.

    Your bedroom becomes a true reflection of your taste and values. Every piece has history and character, and you’re creating something beautiful while supporting sustainability.


    Save this post for your next bedroom refresh. Pick one idea this weekend—even a small change like better lighting or a new pillow arrangement makes a tangible difference. Which style speaks to you?