Author: Clara Bennett

  • 25 Small Laundry Room Design Ideas That Maximize Efficiency

    25 Small Laundry Room Design Ideas That Maximize Efficiency


    Your laundry room doesn’t have to be cramped, cluttered, or an afterthought. Whether you’re working with a closet-sized space, an awkward corner, or a basement room that feels cold and uninviting, smart design choices can make laundry day faster, easier, and even enjoyable. We’ve gathered 25 proven ideas that work in real homes—from free organizational hacks to budget-friendly upgrades and investment pieces that’ll last years. You’ll discover how to maximize vertical space, add storage without renovation, choose calming colors that make you want to linger, and blend functionality with style. Let’s turn your laundry room into a space that actually works for you.


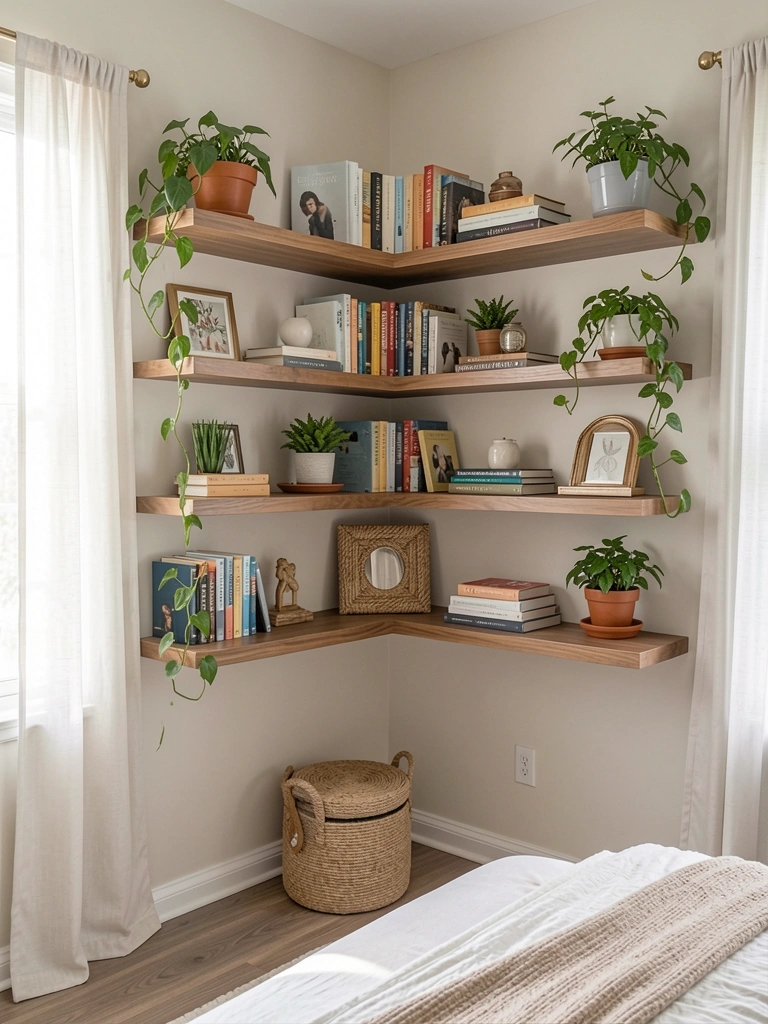
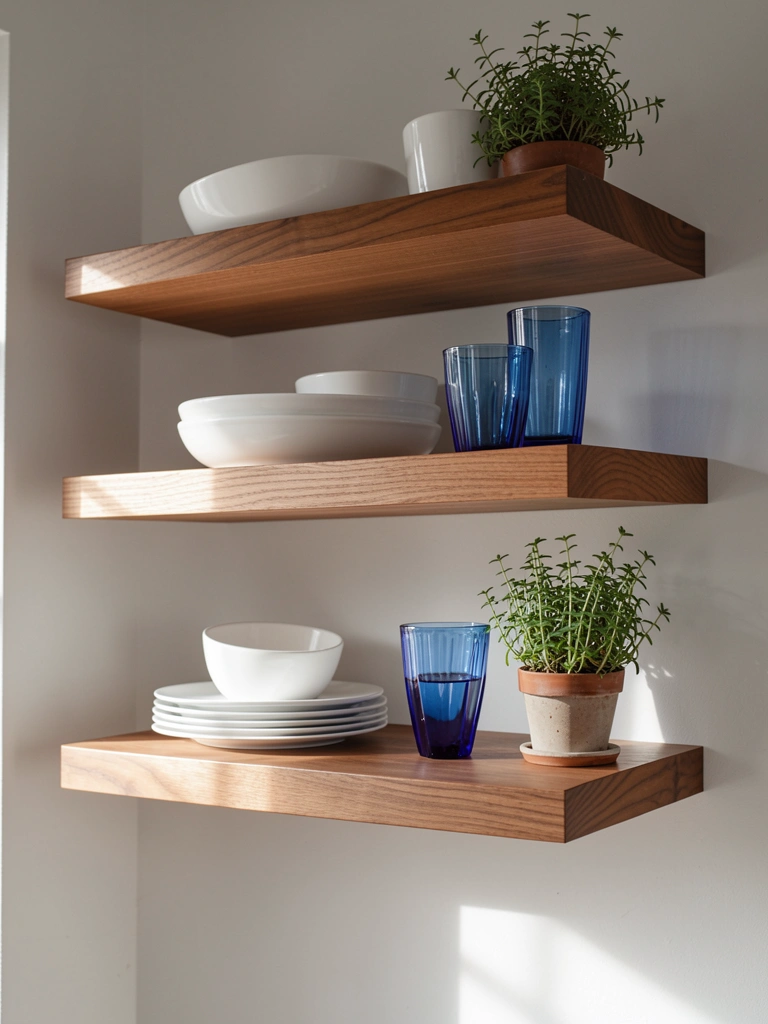
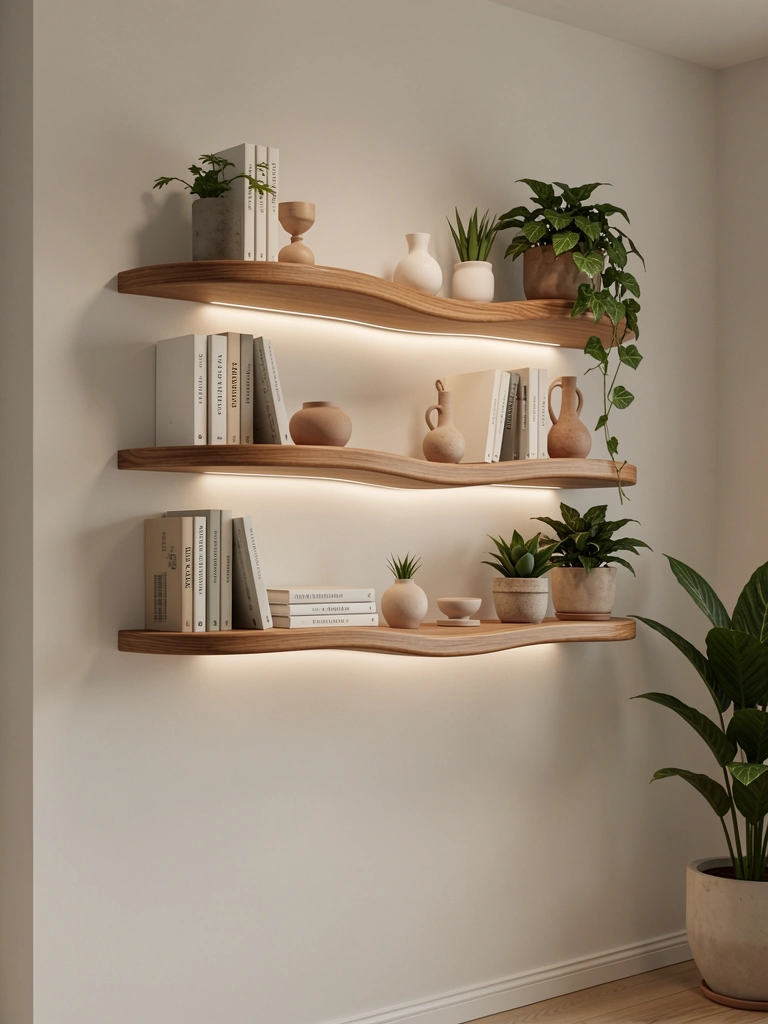
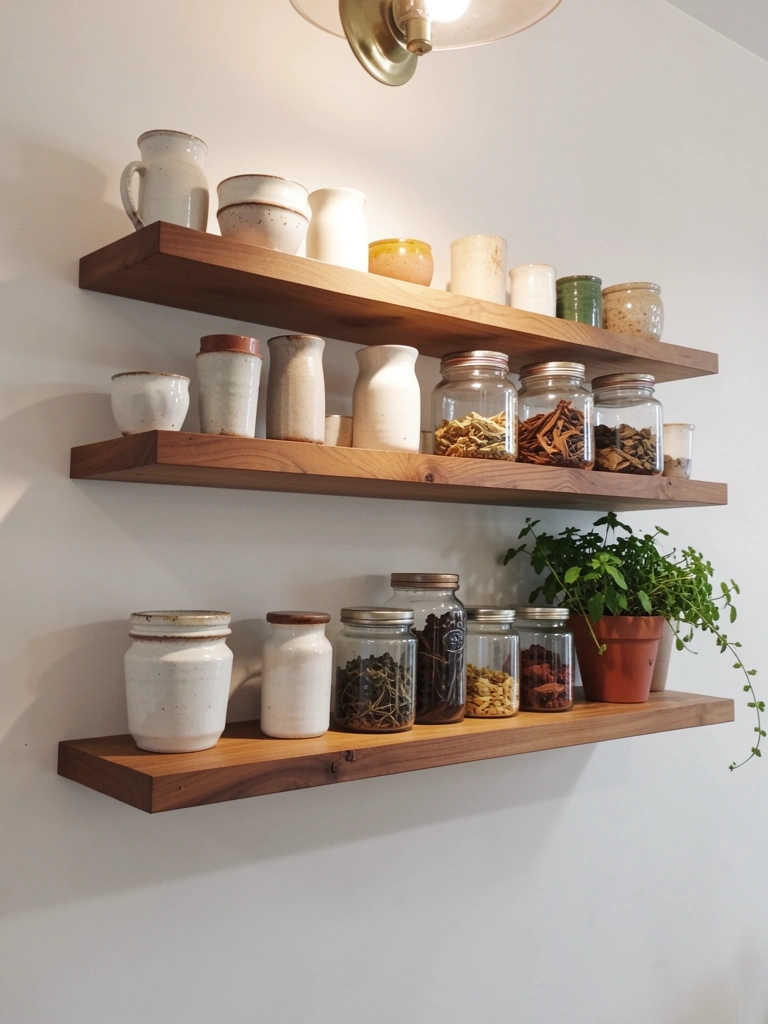
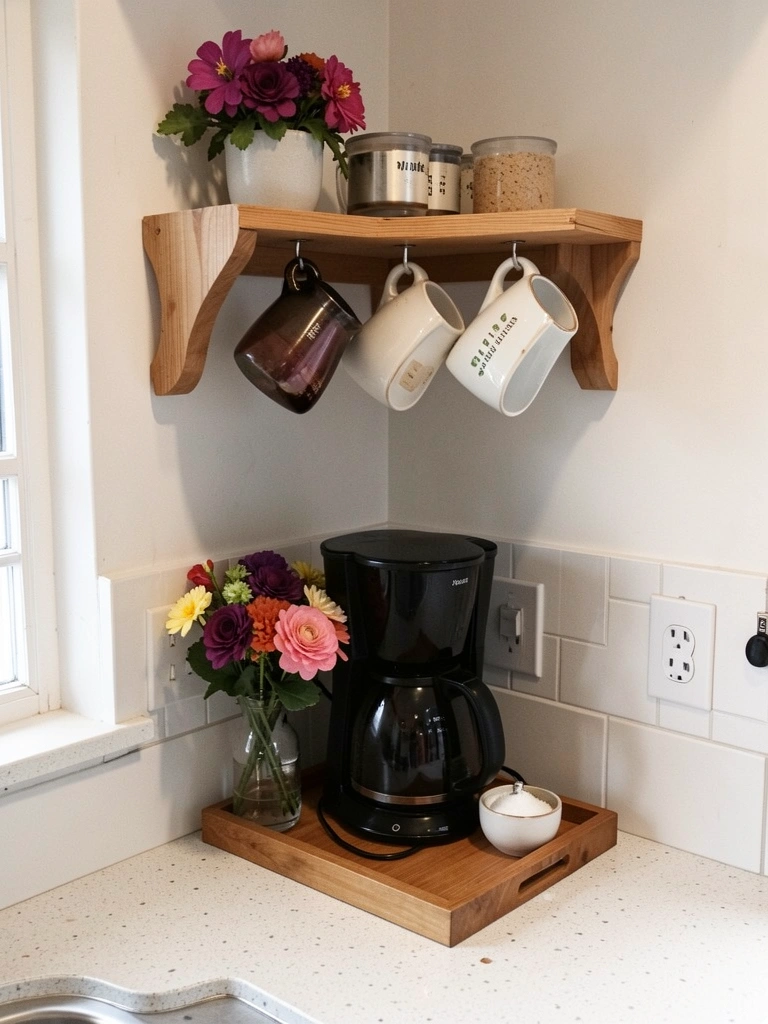
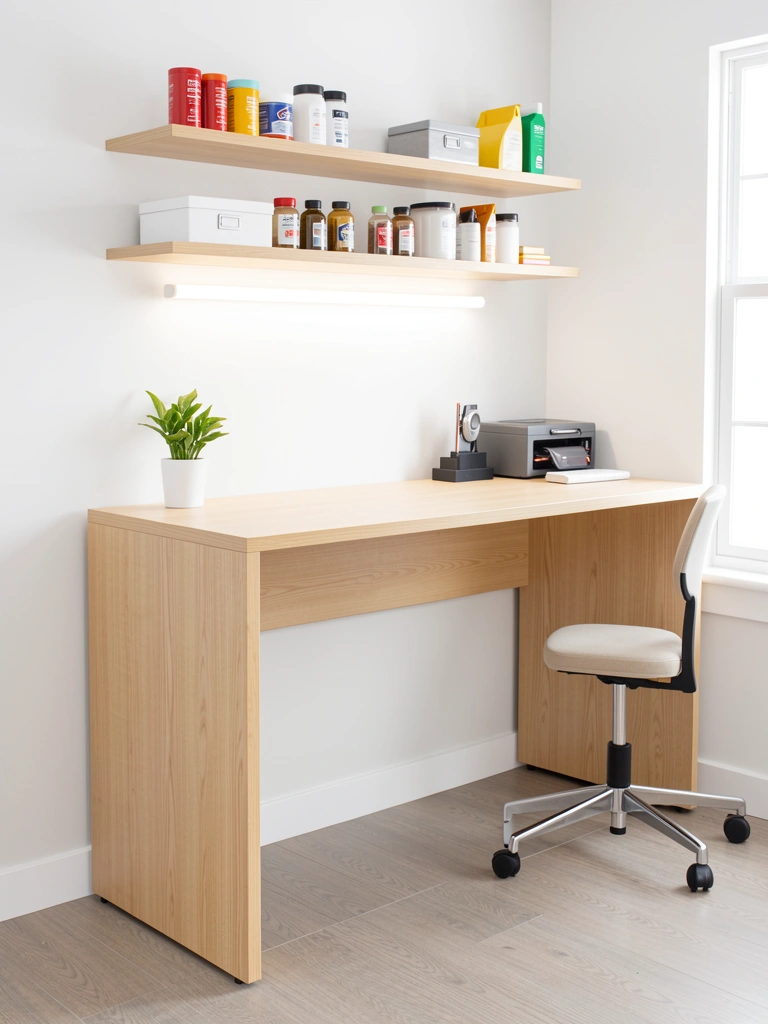
    1. Go Vertical With Floating Shelves

    Floating shelves are one of the easiest ways to gain storage in a cramped laundry room without eating up floor space. They work beautifully above washers, dryers, or along unused walls, and they cost far less than built-in cabinetry.

    Install shelves $30–$80 per shelf depending on depth and material (Home Depot and IKEA have solid options). A basic installation takes about an hour if you’re comfortable with a drill; hire a handyman for $50–$100 if you’d rather skip this step. Pair shelves with matching bins or baskets to keep supplies hidden and organized. The key is leaving a bit of breathing room between items—a cluttered shelf defeats the purpose.

    You can rearrange items as your needs change, and floating shelves look clean and intentional without demanding space.


    2. Add a Utility Sink for Pre-Treating Stains

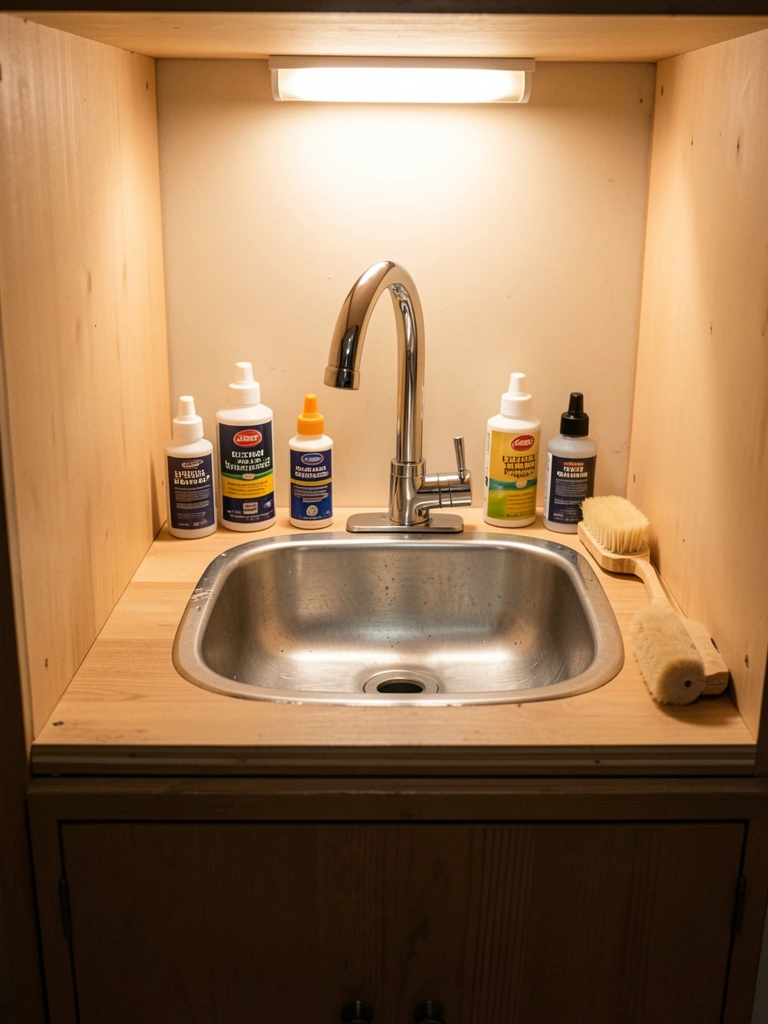
    A utility sink is a game-changer for families who deal with dirt, grass, or stubborn stains before the wash cycle. It gives you a dedicated spot to soak, scrub, and rinse without tying up your kitchen sink.

    Compact utility sinks (18–24 inches wide) run $150–$400 installed, and many homeowners tackle the plumbing themselves if they’re comfortable with PVC connections. Renters can opt for portable, countertop versions ($50–$150) that sit on a small table. Stock it with stain remover, a soft brush, and a few washcloths within arm’s reach. Positioning it near your washer saves steps and creates a logical workflow.

    The result? Fewer stubborn stains make it to the dryer, clothes last longer, and you spend less time troubleshooting laundry disasters.


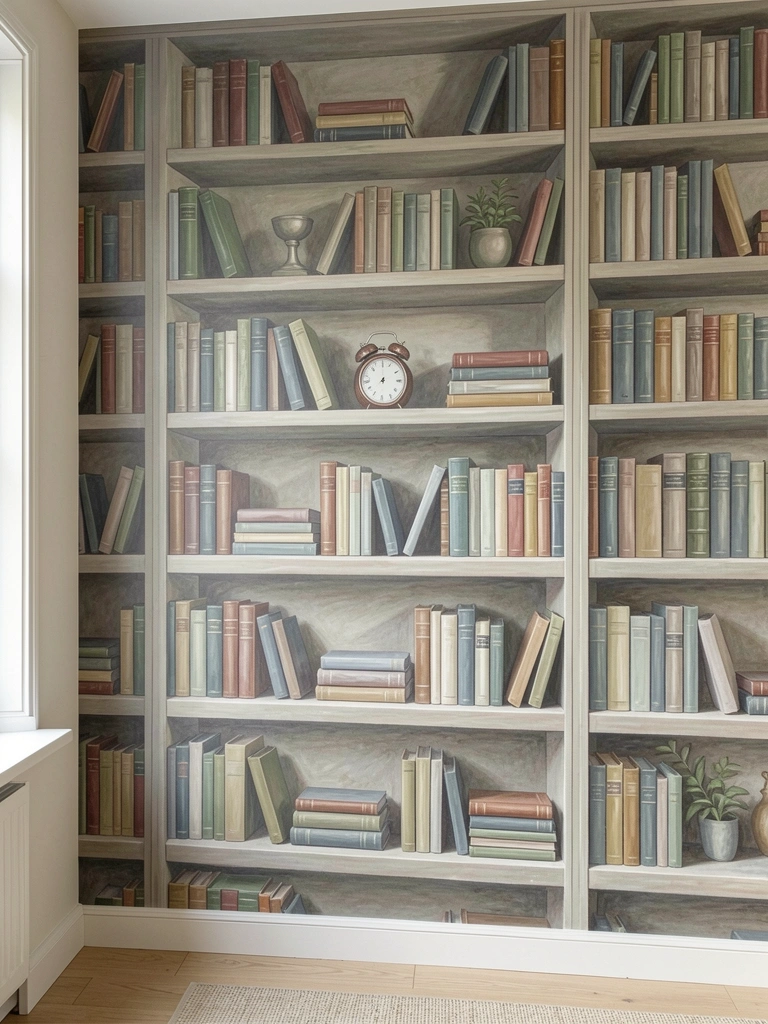
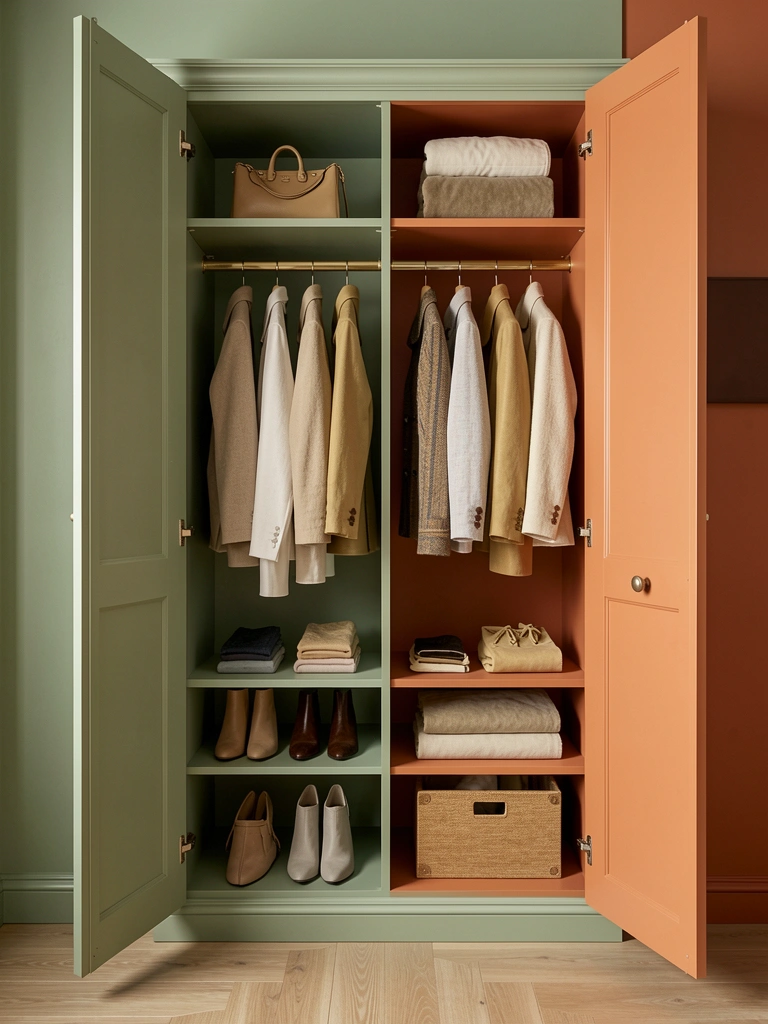
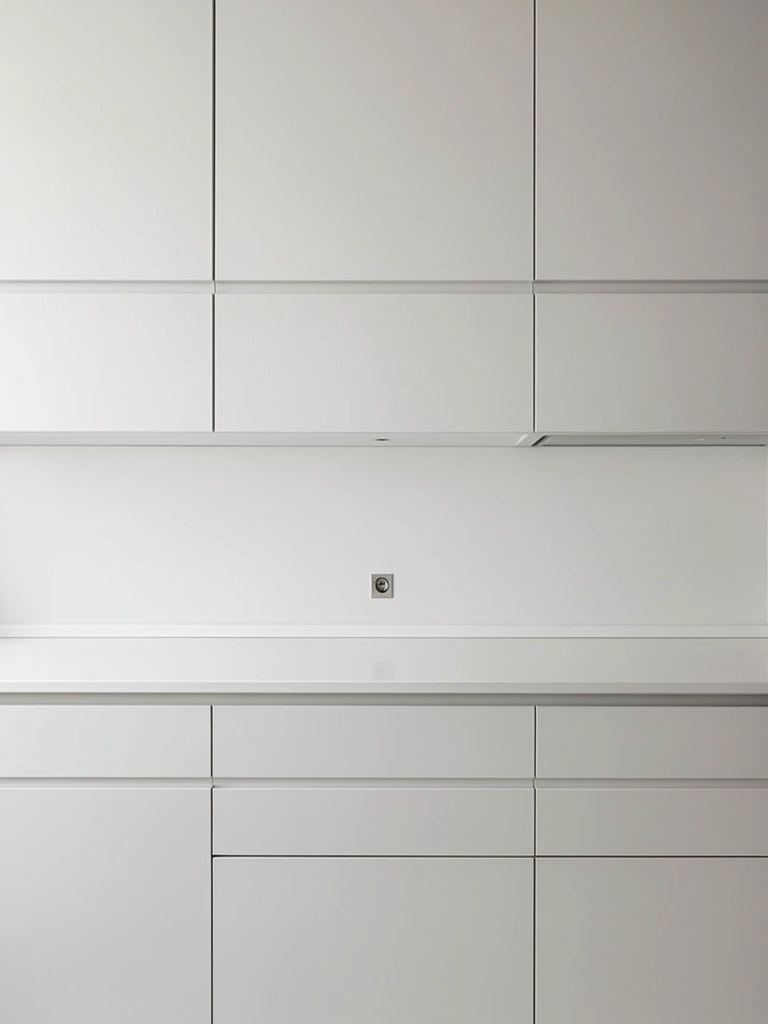
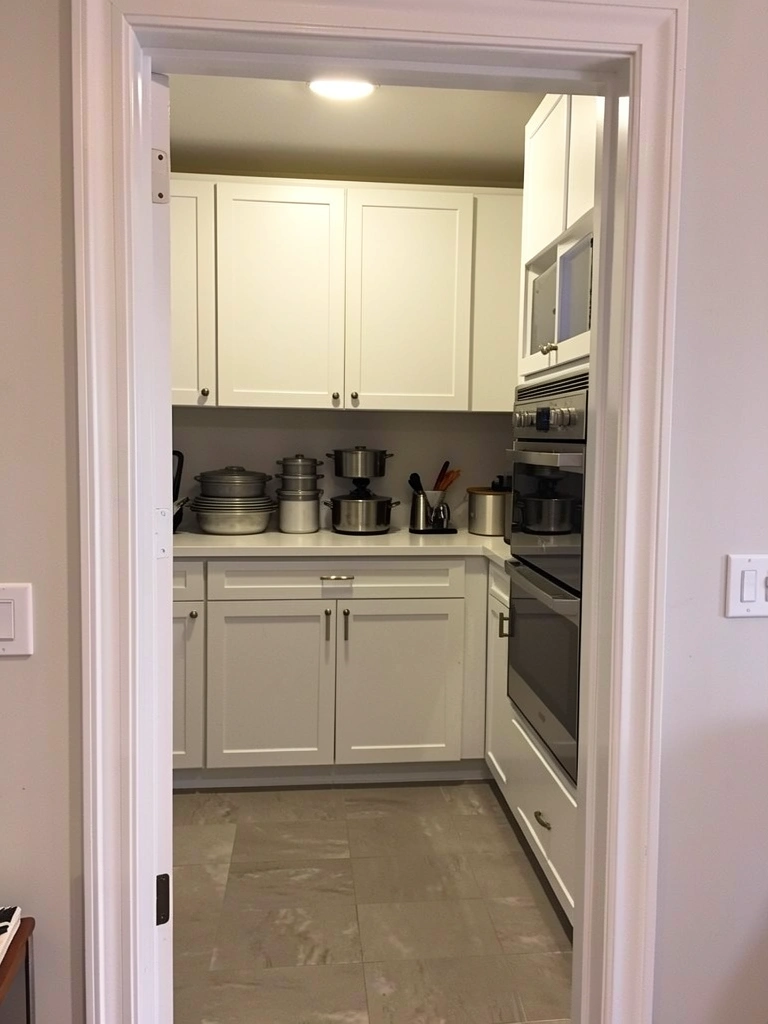
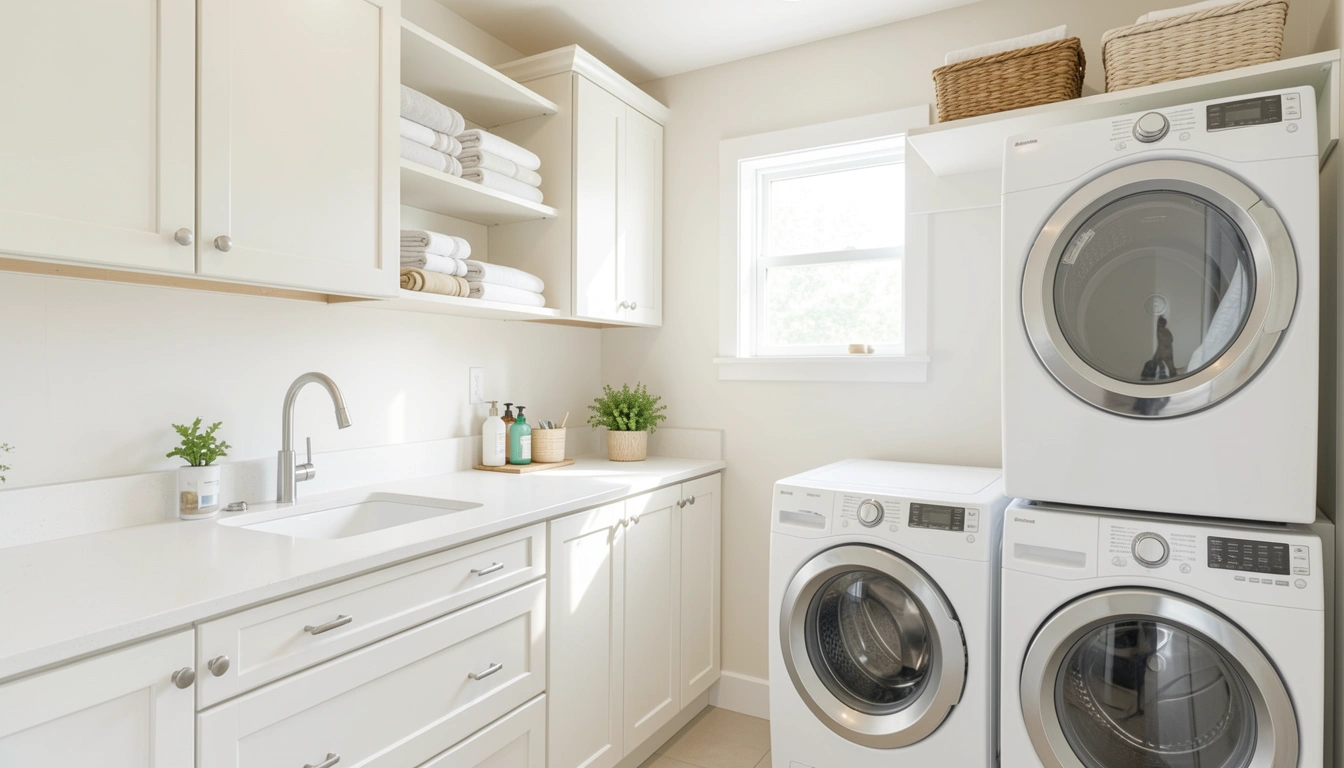
    3. Install Ceiling-Height Cabinetry for Maximum Storage

    Ceiling-height cabinets make even a small laundry room feel larger and store nearly triple what standard wall cabinets do. Going vertical tricks the eye into perceiving more space while stashing supplies out of sight.

    Custom cabinetry costs $1,500–$3,500+, but semi-custom options from IKEA, Wayfair, or Home Depot run $400–$1,200. If custom feels out of reach, stack two standard cabinet units and cap them with trim for a built-in effect ($300–$600). Choose bold colors like deep forest green, warm taupe, or charcoal gray—these feel more refined than sterile white and make the room feel intentional. Leave the top shelf open for decorative baskets or plants to soften the look.

    Your supplies stay organized and accessible, and the room feels polished rather than purely utilitarian.


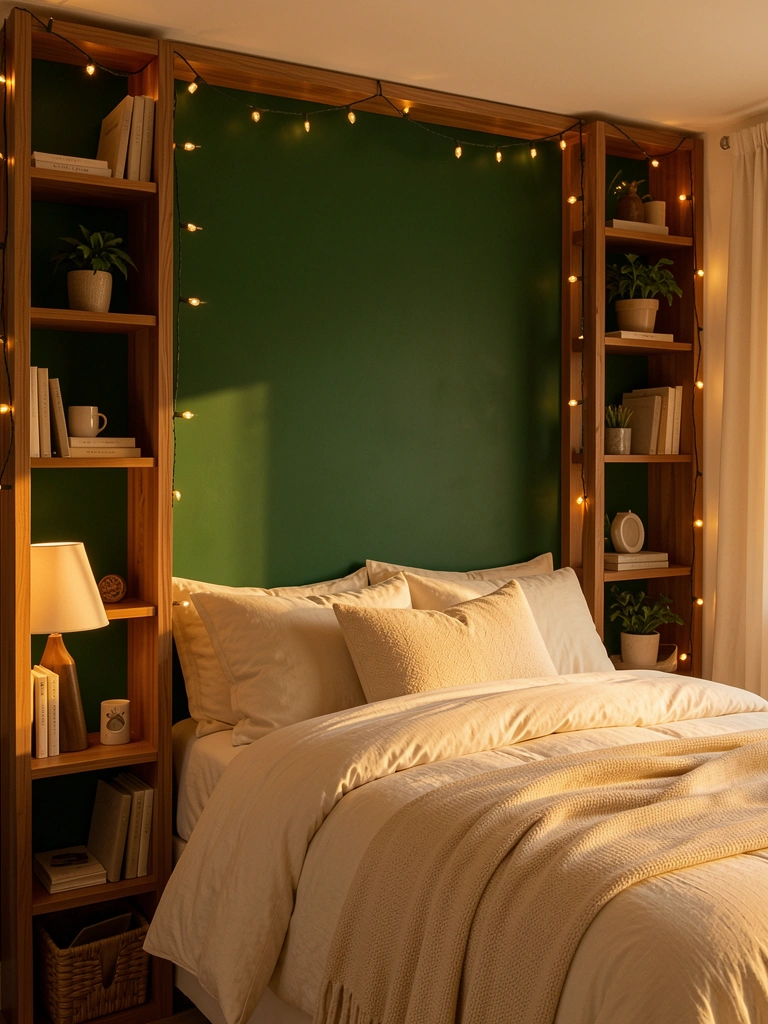
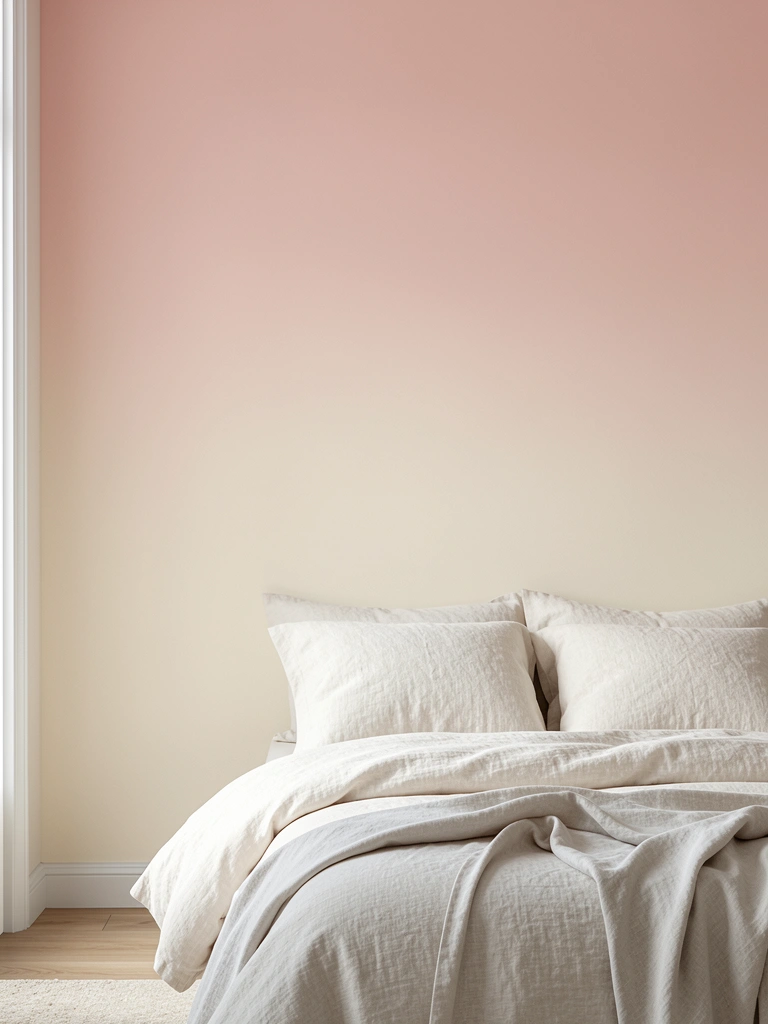
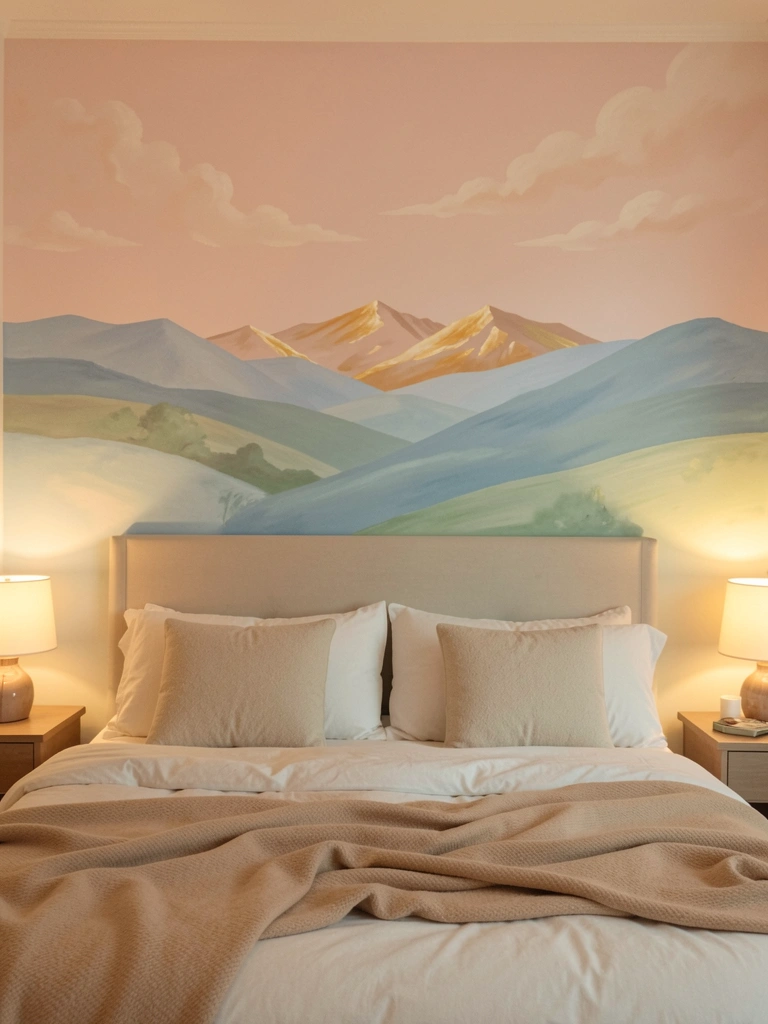
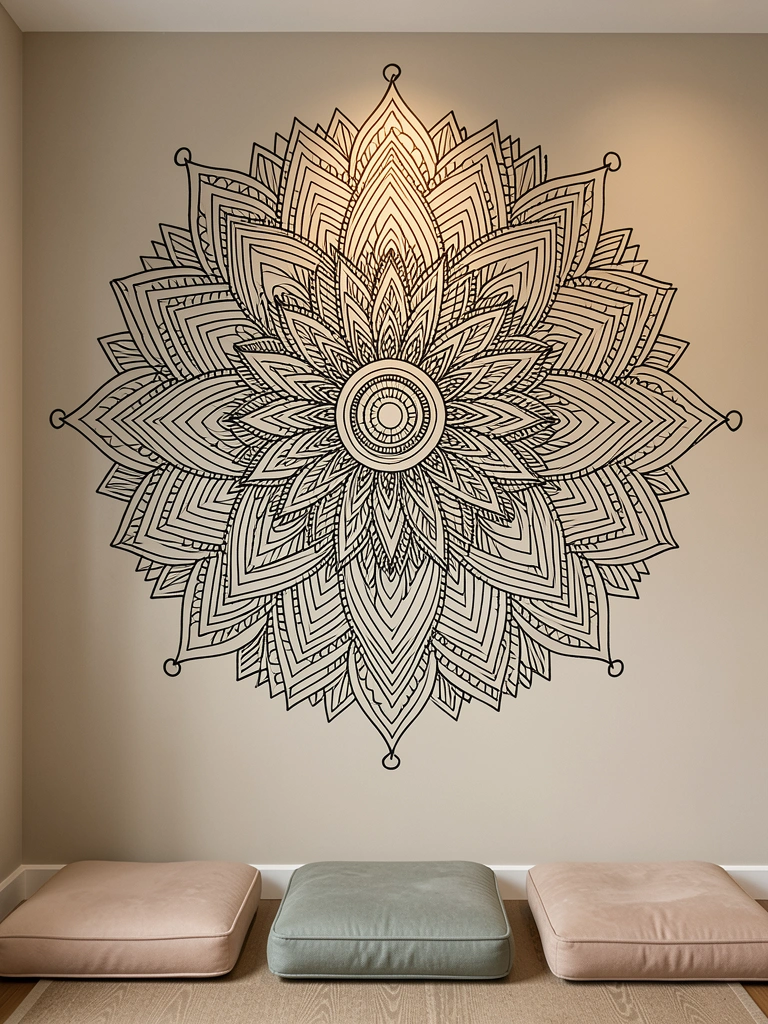
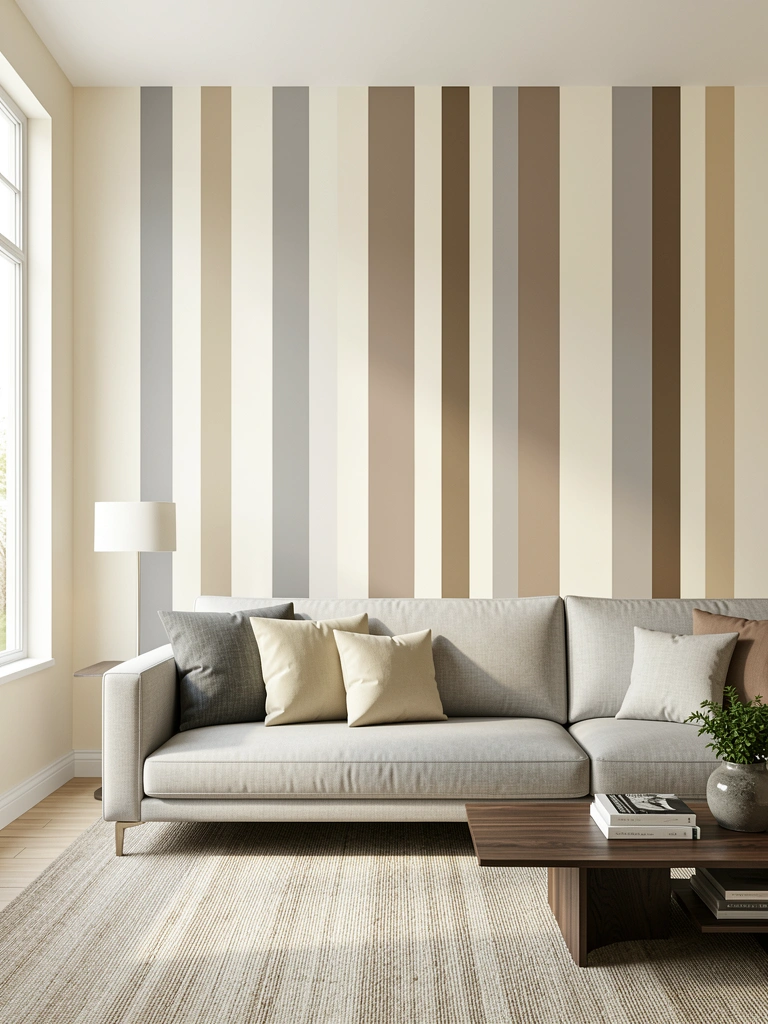
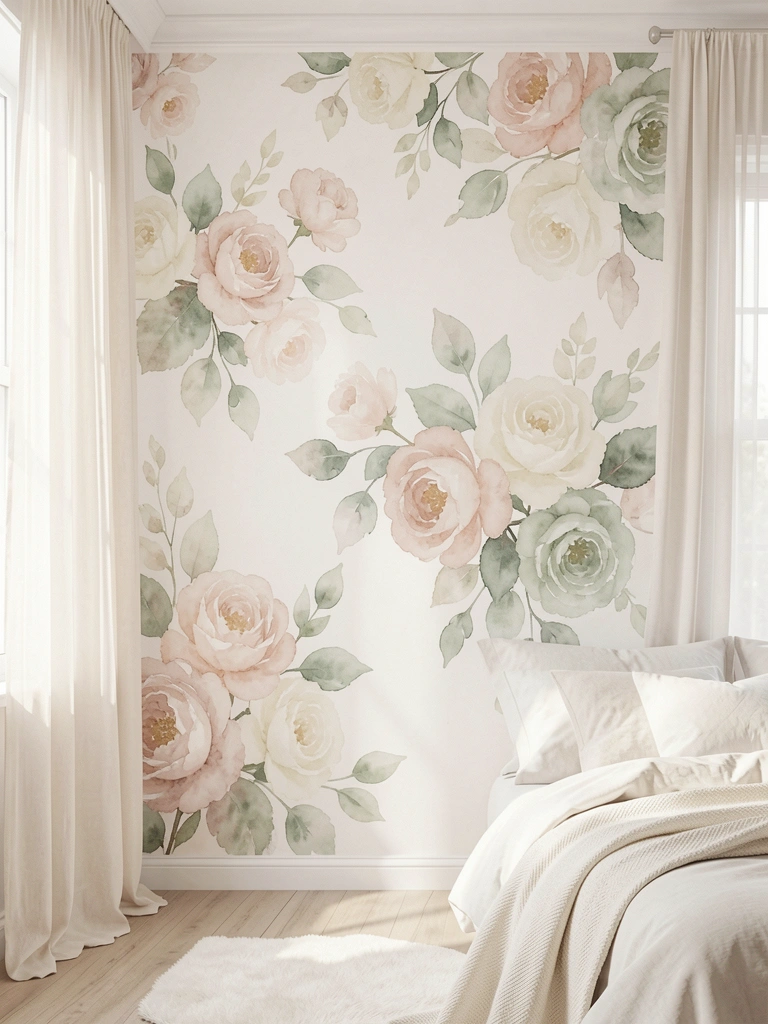
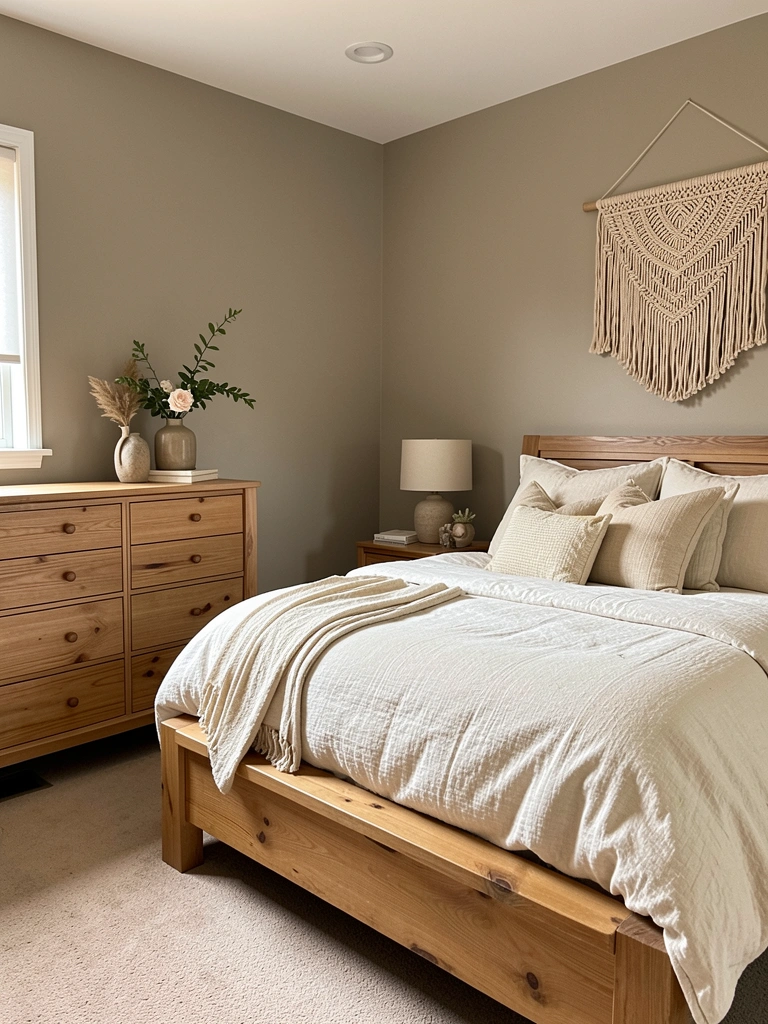
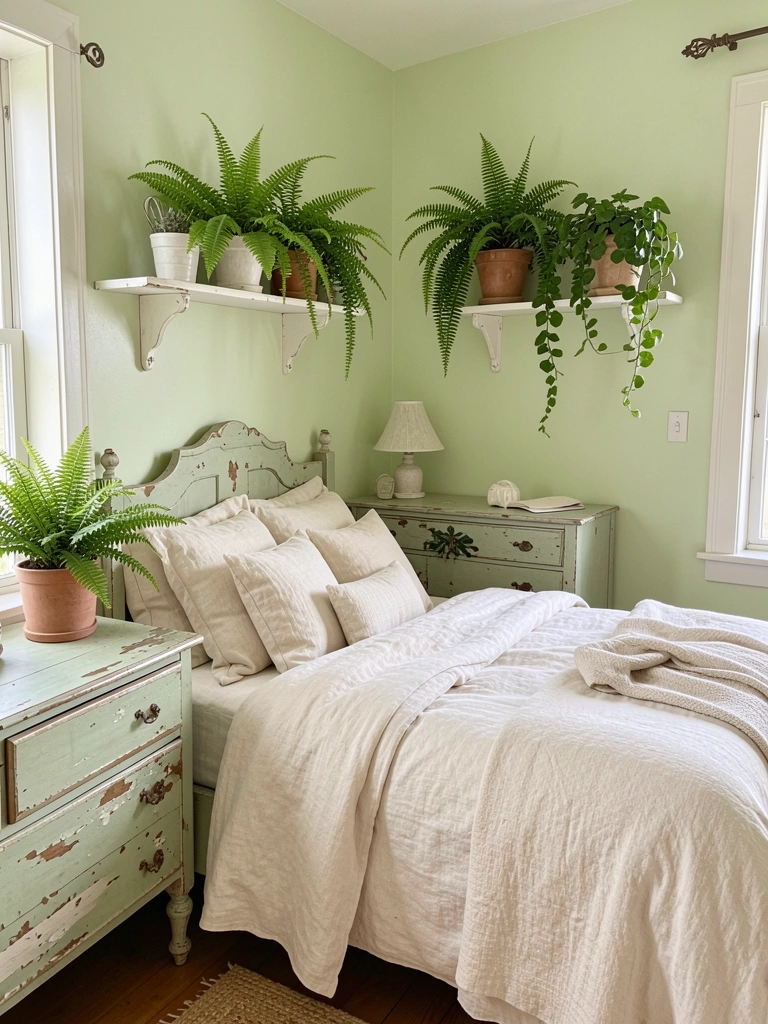
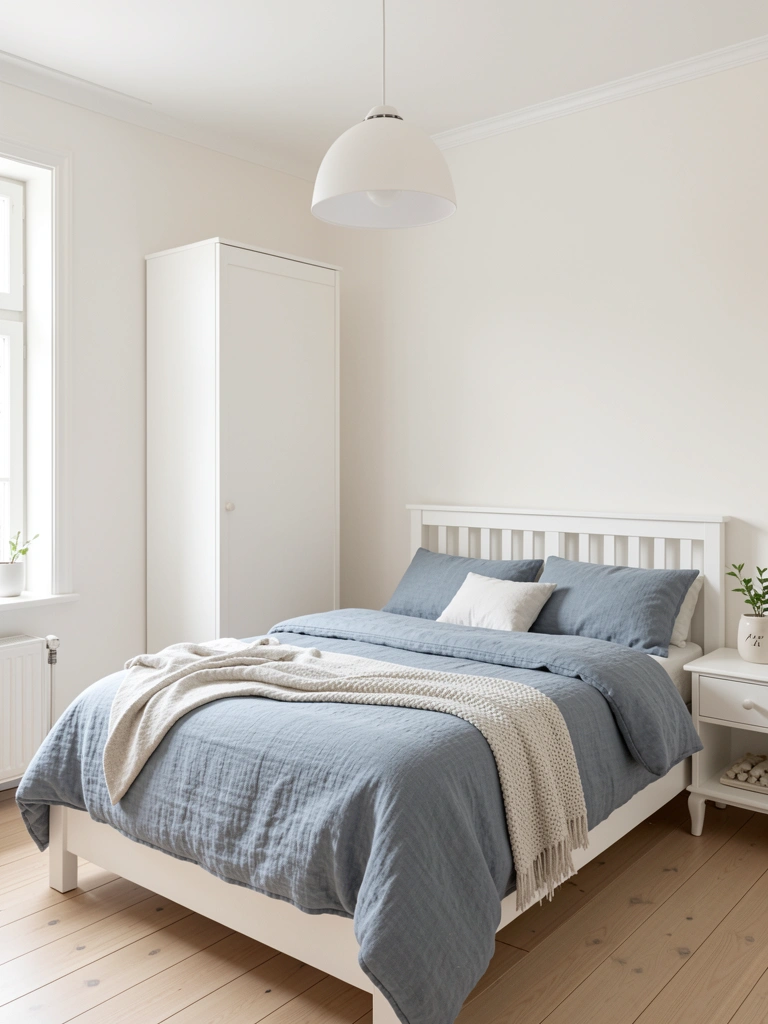
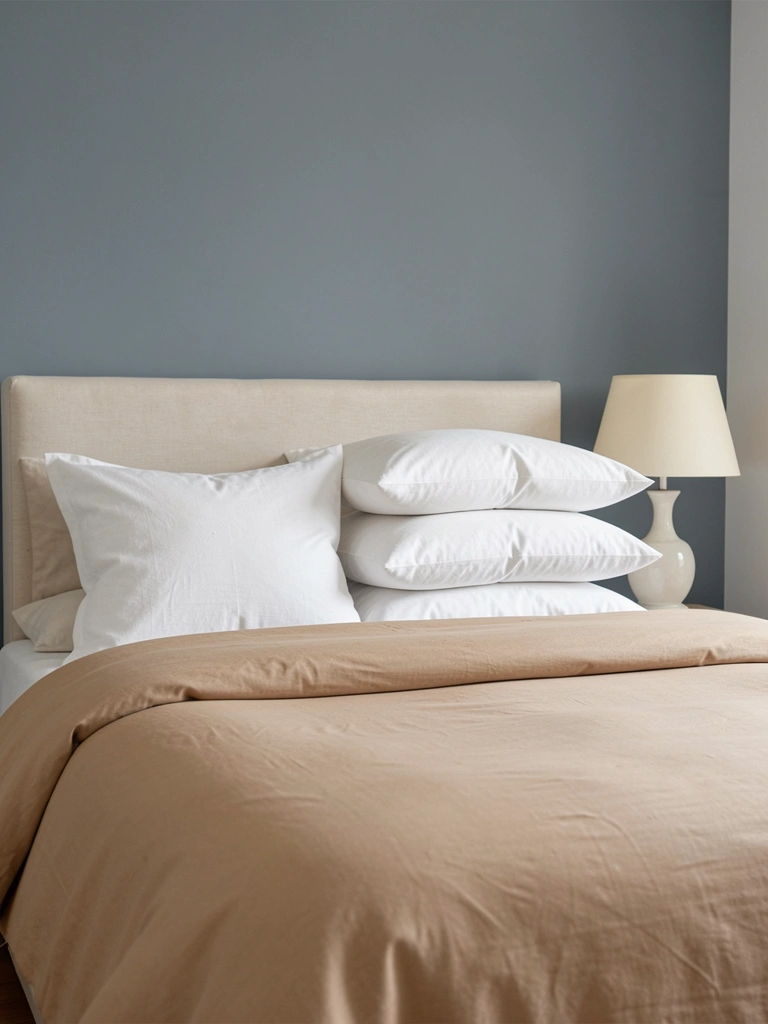
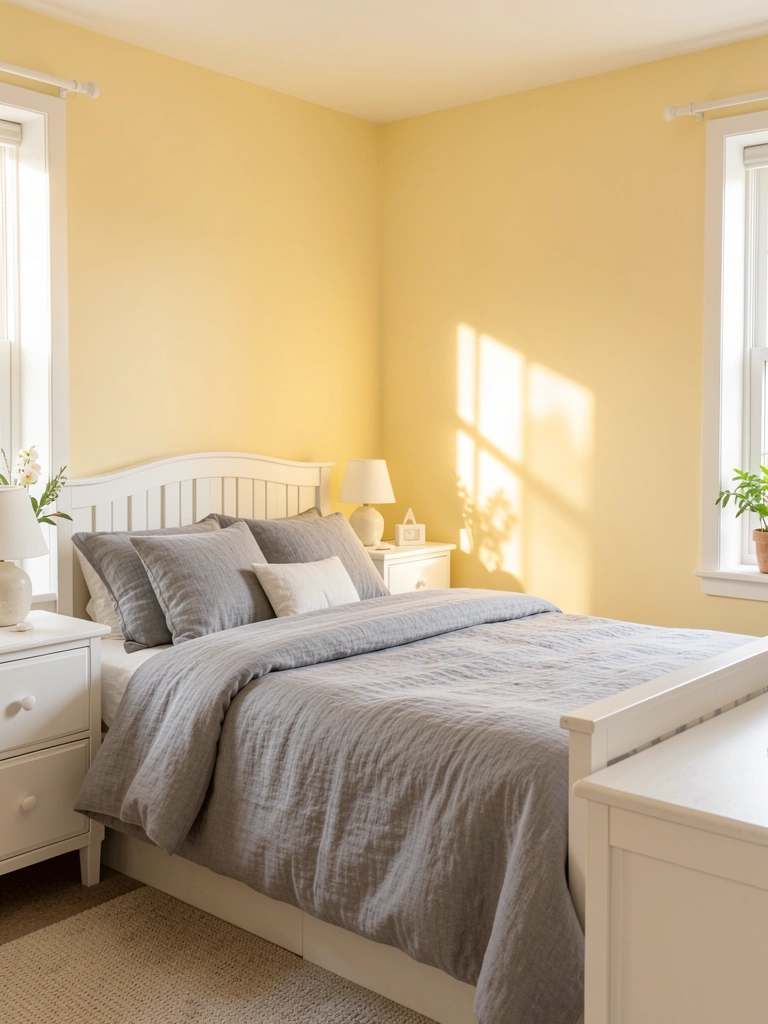
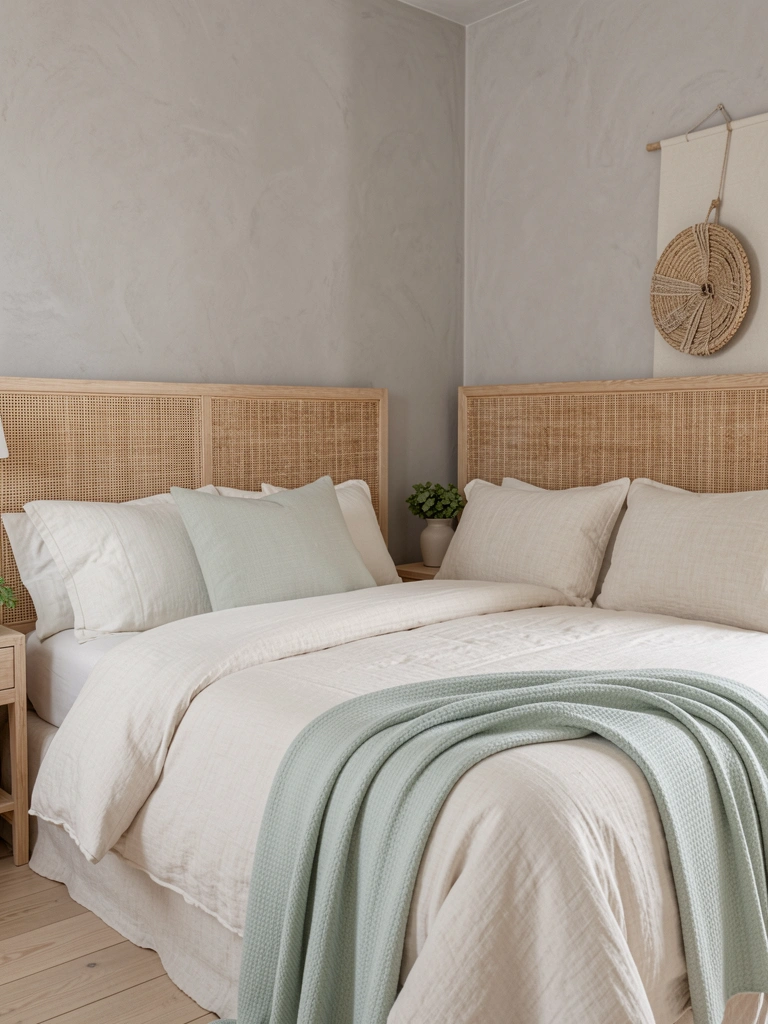
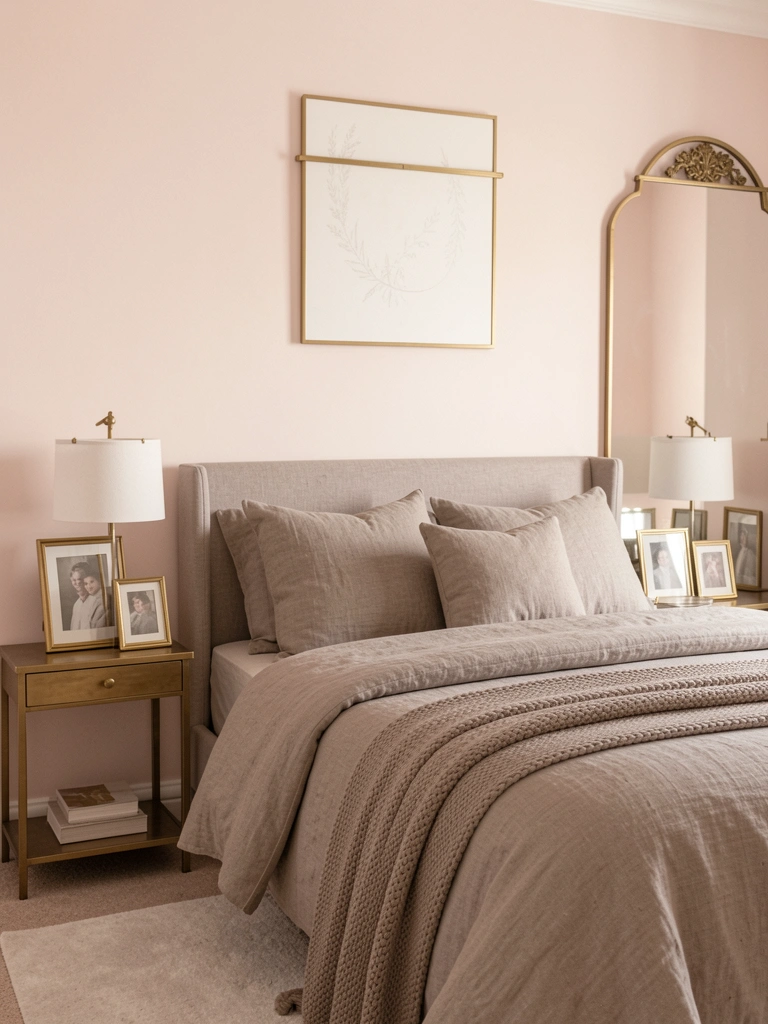
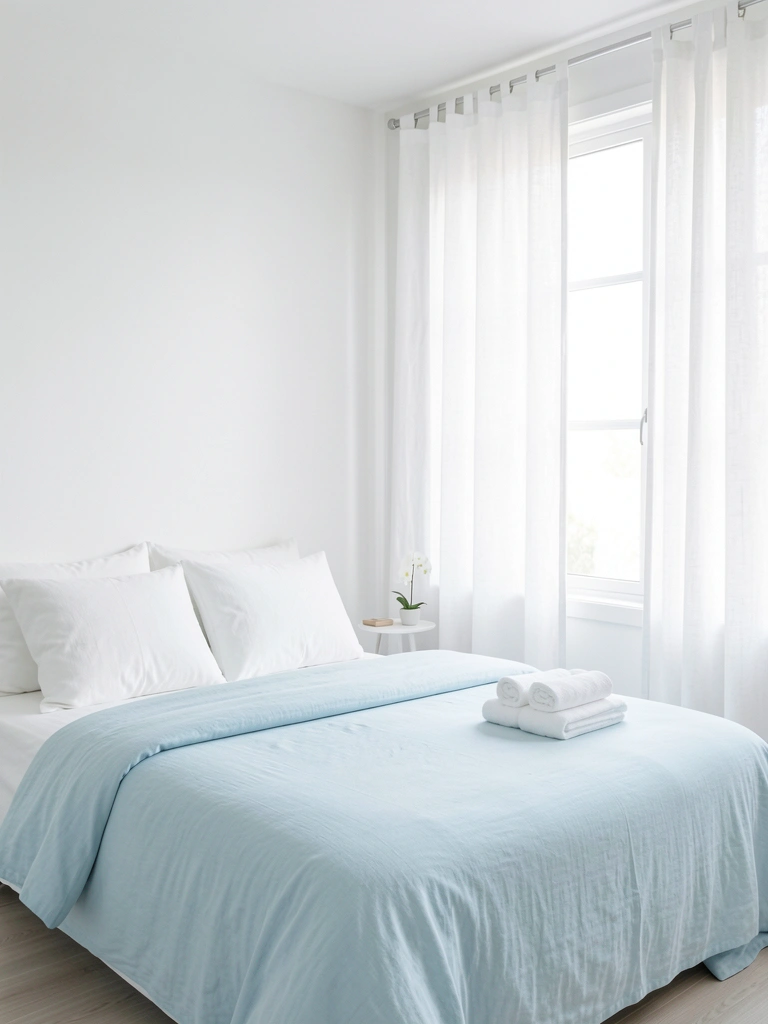
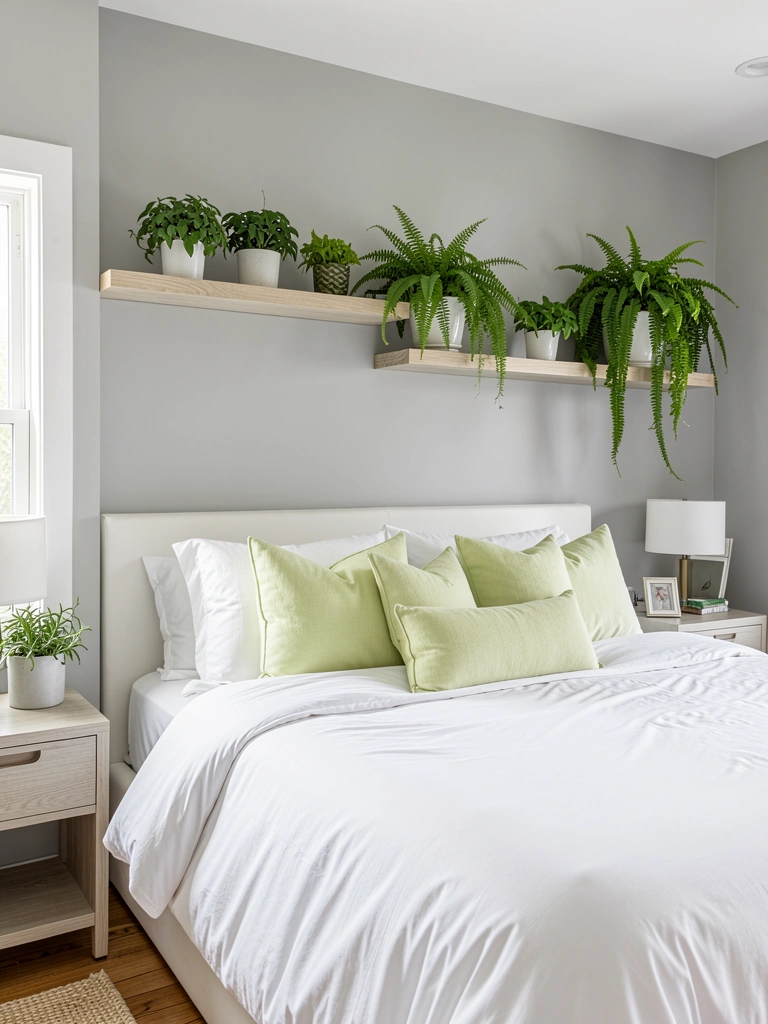
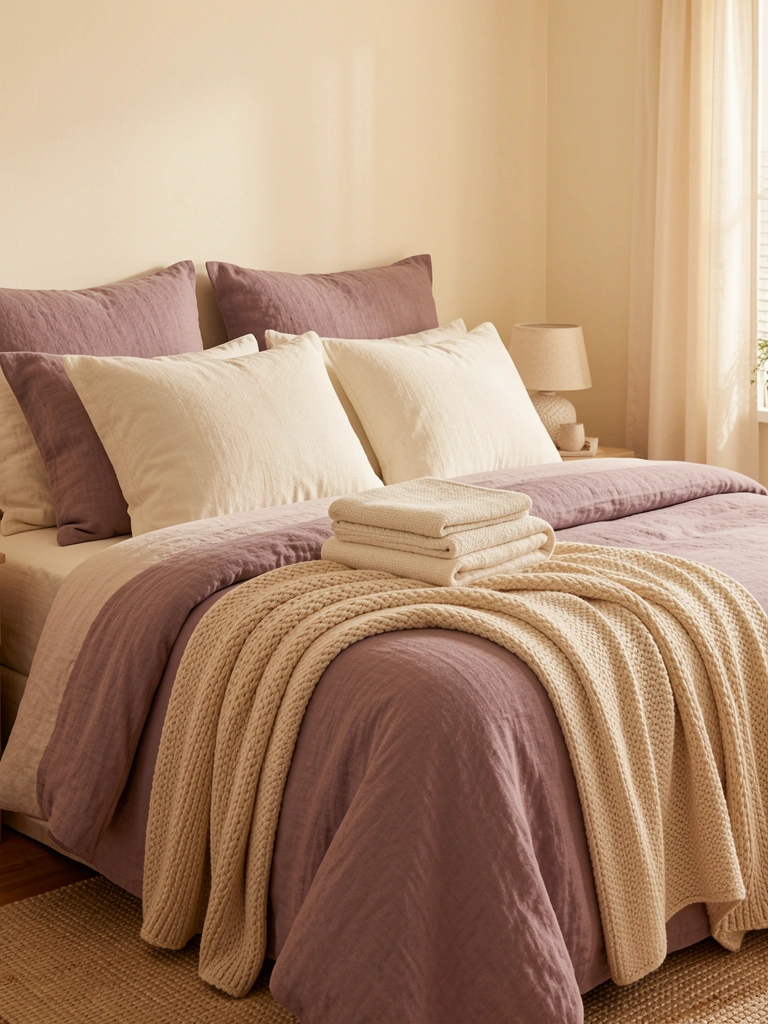
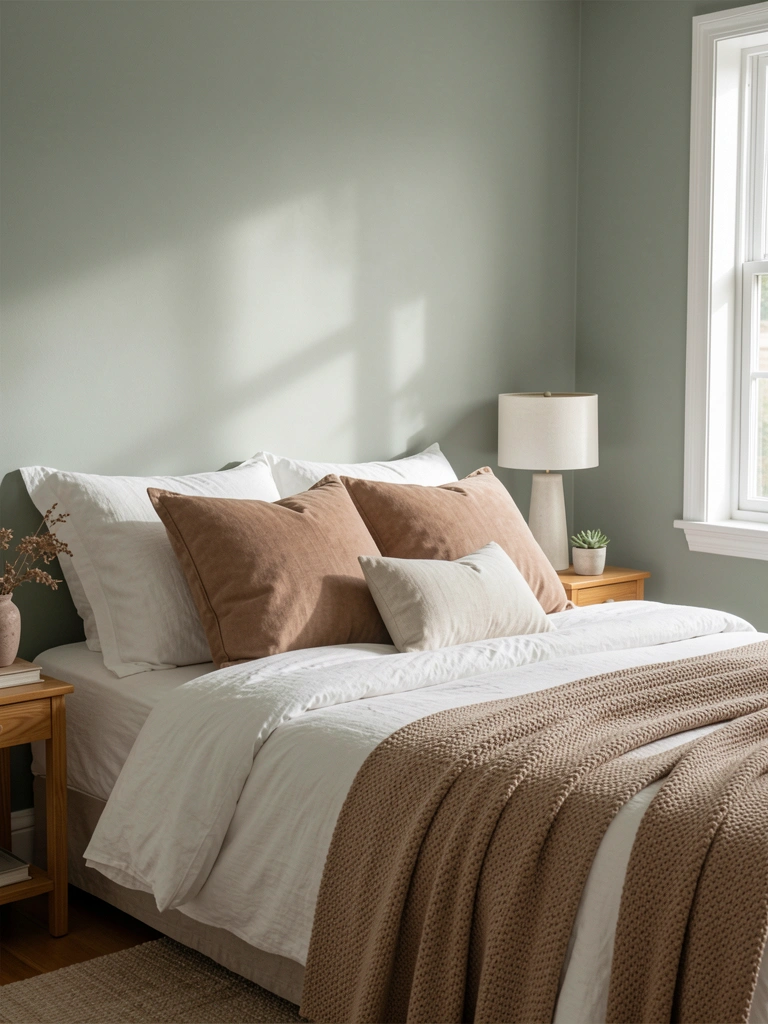
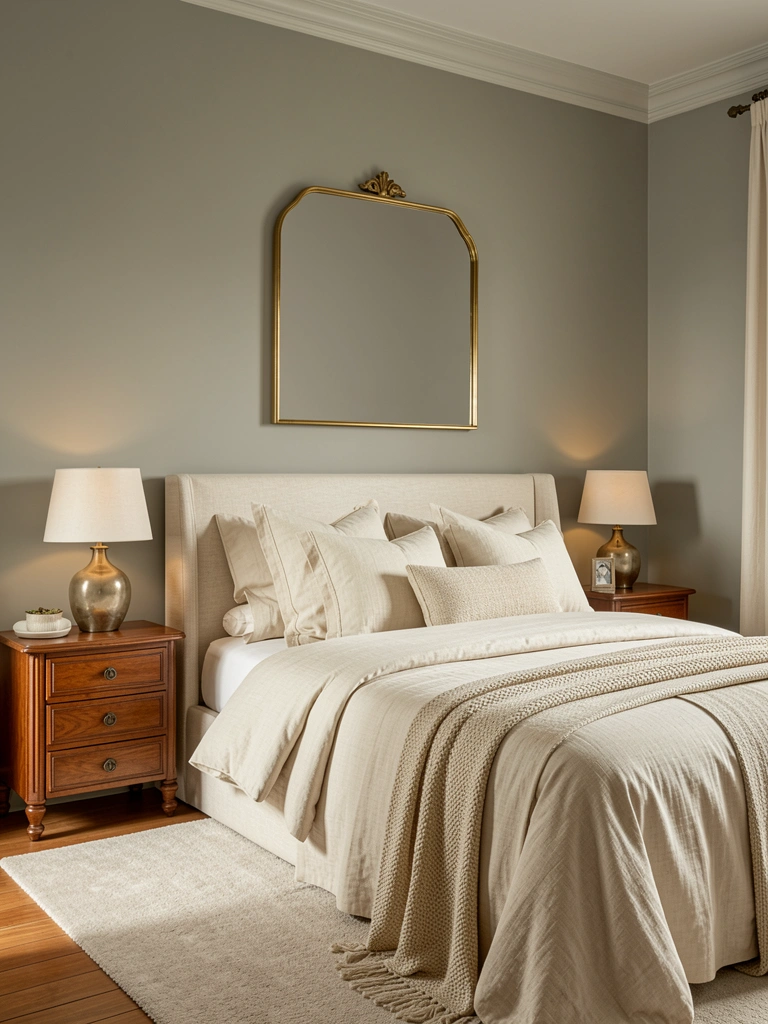
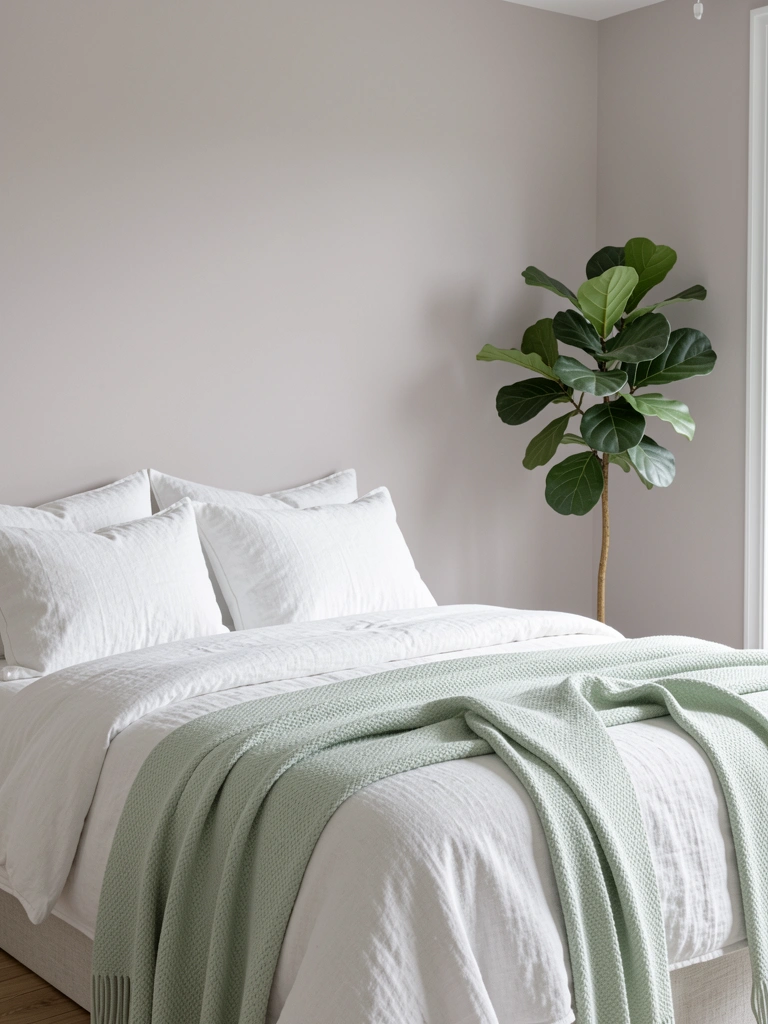
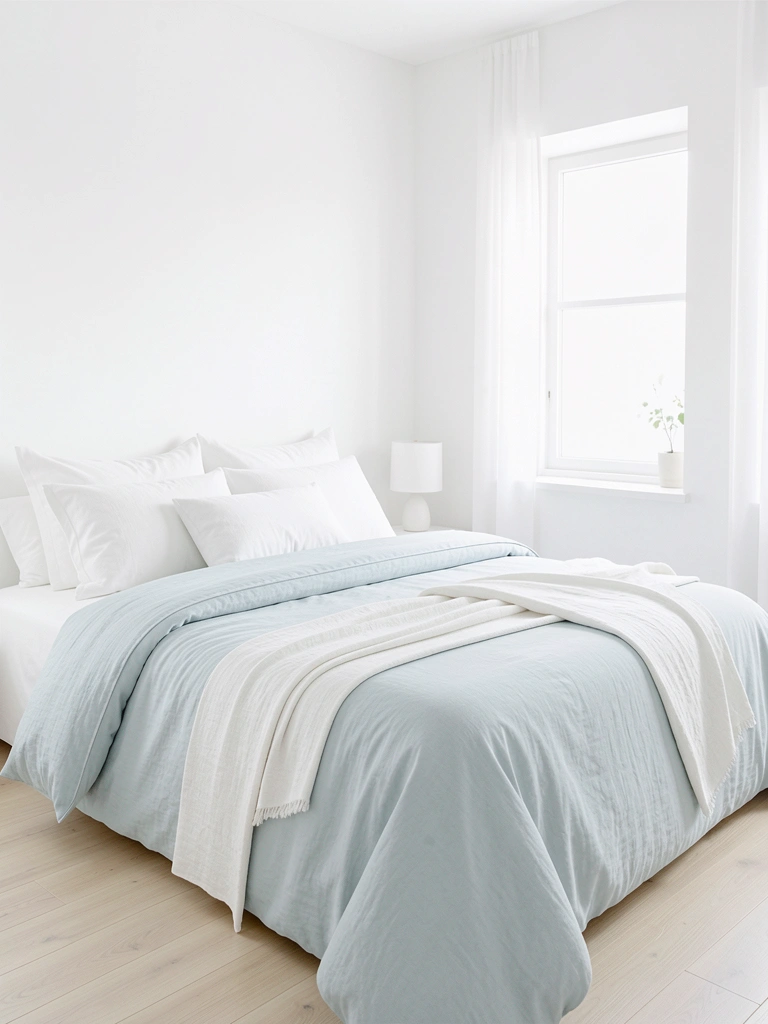
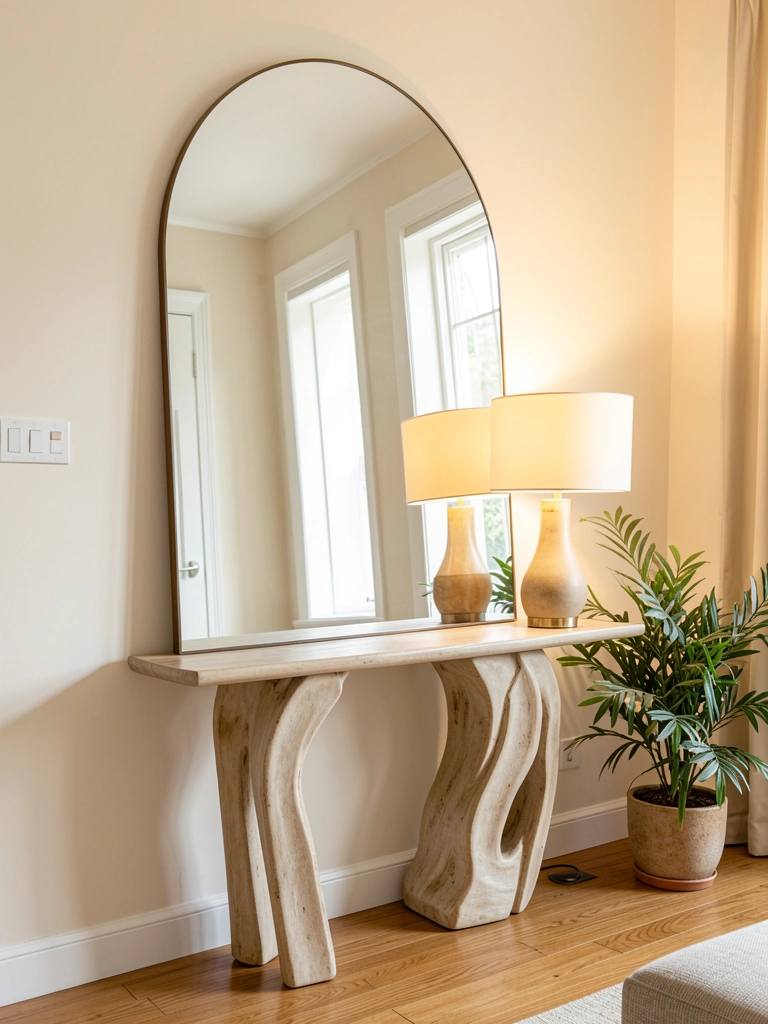
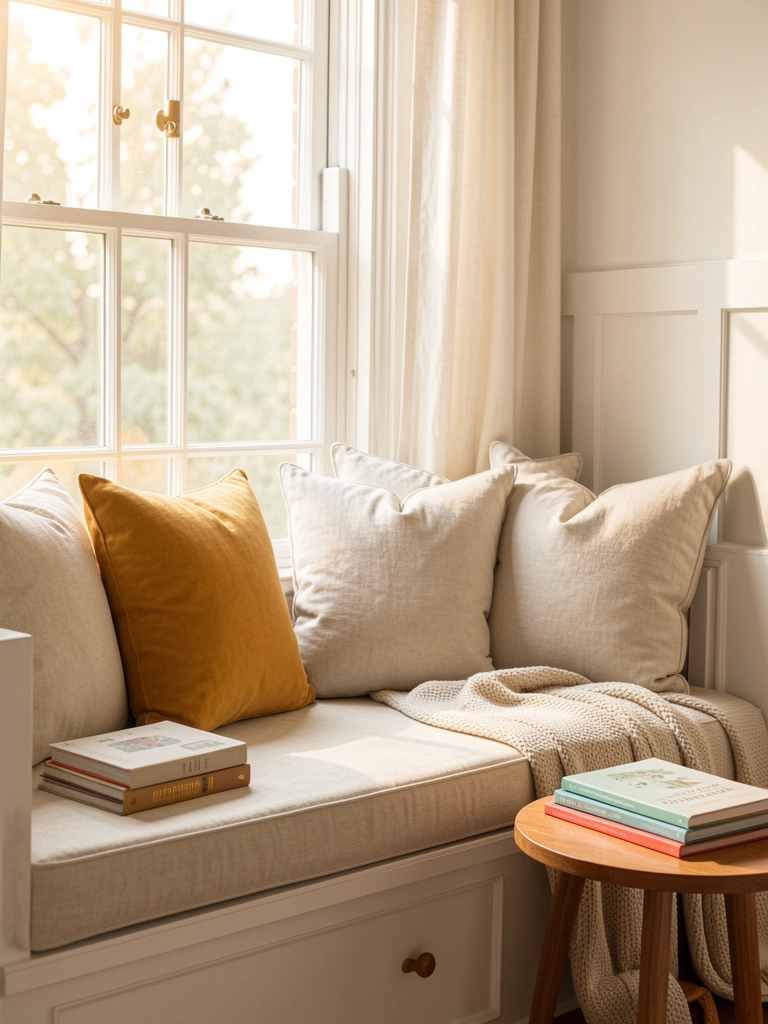
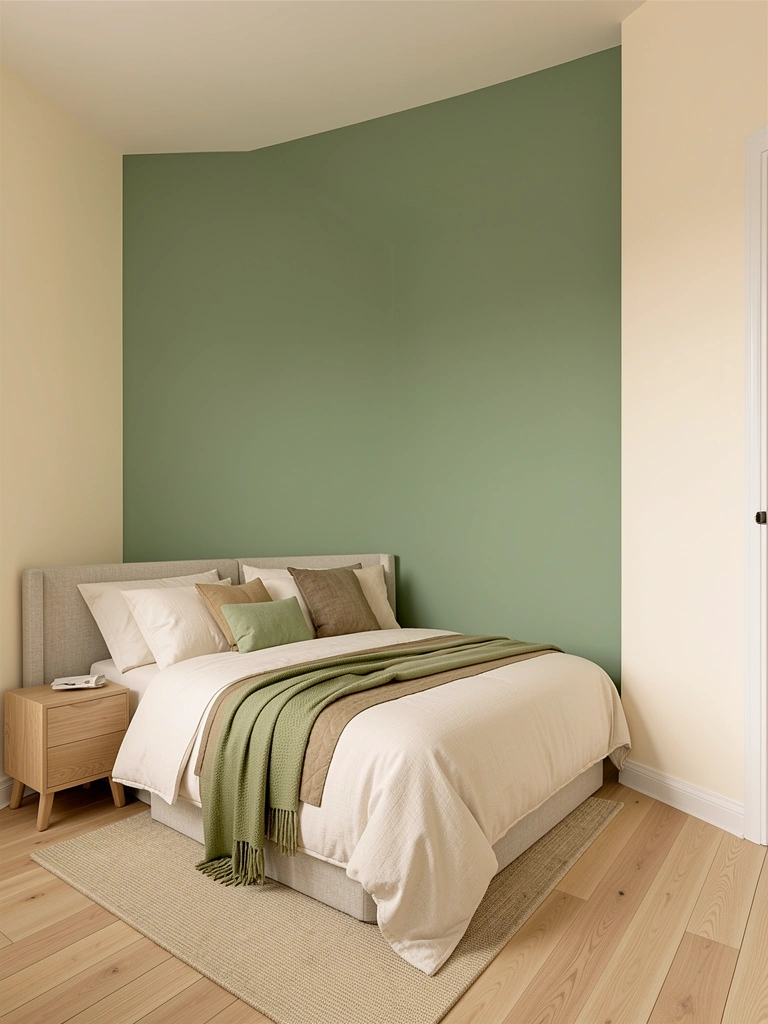
    4. Paint Walls in Soft, Calming Colors

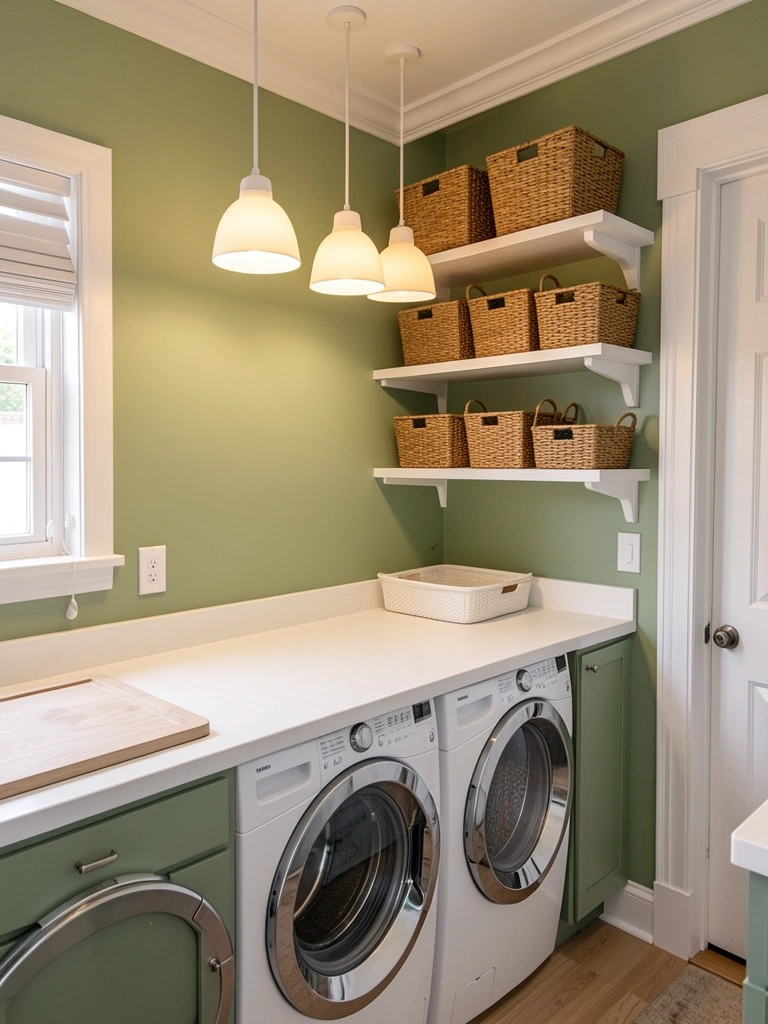
    The typical sterile white laundry room doesn’t have to be your reality. Soft greens, warm taupes, pale blues, and buttery creams turn the space into a room you’ll actually want to spend time in.

    A gallon of quality paint costs $25–$50 and covers a small laundry room in a few hours of DIY work. Benjamin Moore, Sherwin-Williams, and Behr all offer calming palettes specifically designed for utility spaces. Pair a soft wall color with crisp white or light gray trim to keep things fresh and clean-looking. Test your color choice with a sample pot first—lighting changes how colors look throughout the day.

    You’ll be surprised how much a new paint color shifts the whole vibe from “chore station” to “peaceful routine.”


    5. Use Pull-Out Hampers to Hide Clutter

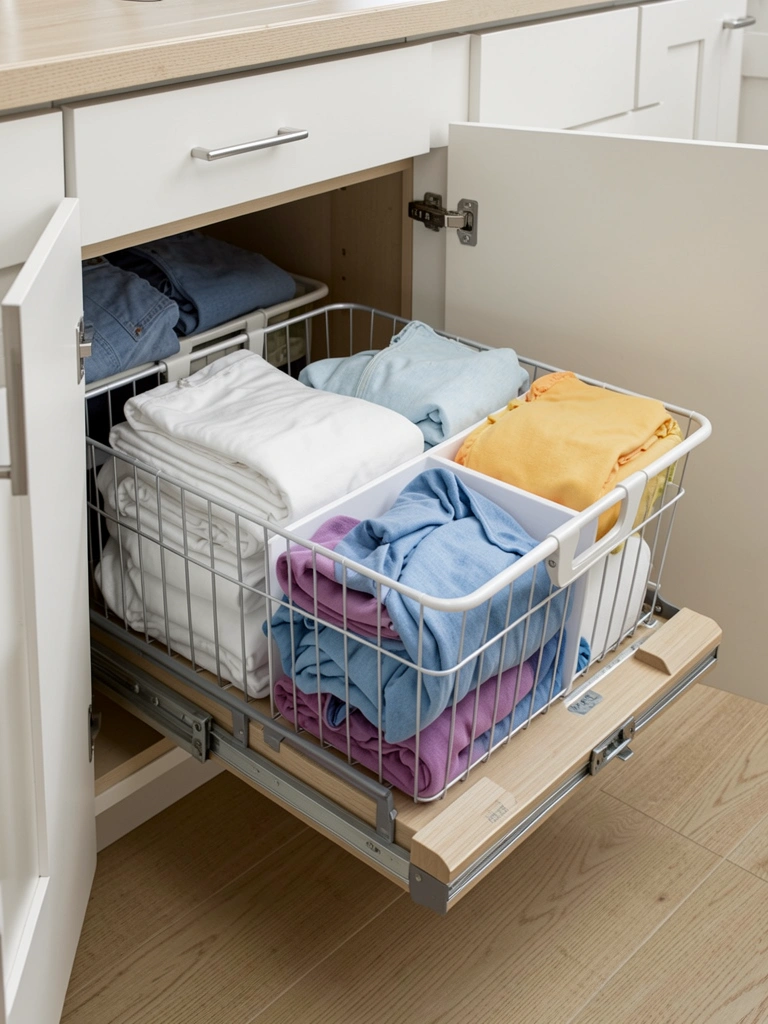
    Pull-out hampers keep dirty laundry sorted and invisible until wash day, eliminating floor clutter and sorting headaches.

    Most pull-out hampers fit inside standard 18-inch cabinets and cost $80–$250 depending on material and quality. Brands like Rev-A-Shelf and Closet Factory offer durable options; IKEA has budget-friendly versions ($40–$80). Install one under your folding counter or beside your washer. If you have multiple household members, choose a model with 2–3 sections so towels, darks, and colors stay separated before you wash.

    Laundry practically organizes itself, and your room stays visually clean even when hampers are full.


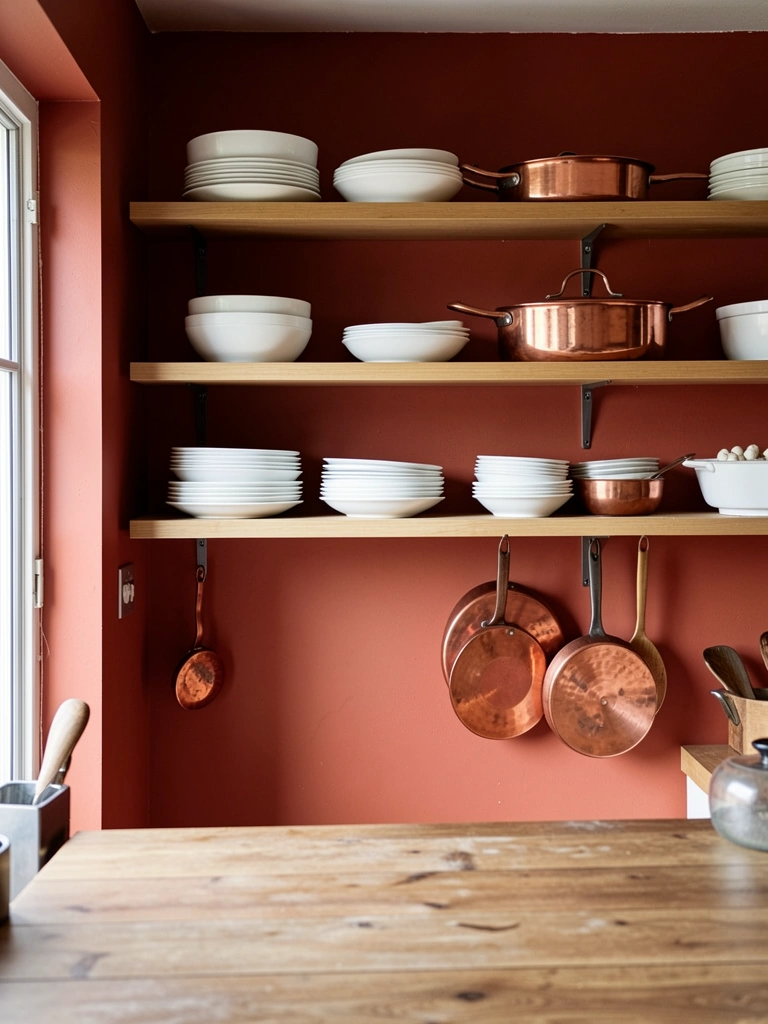
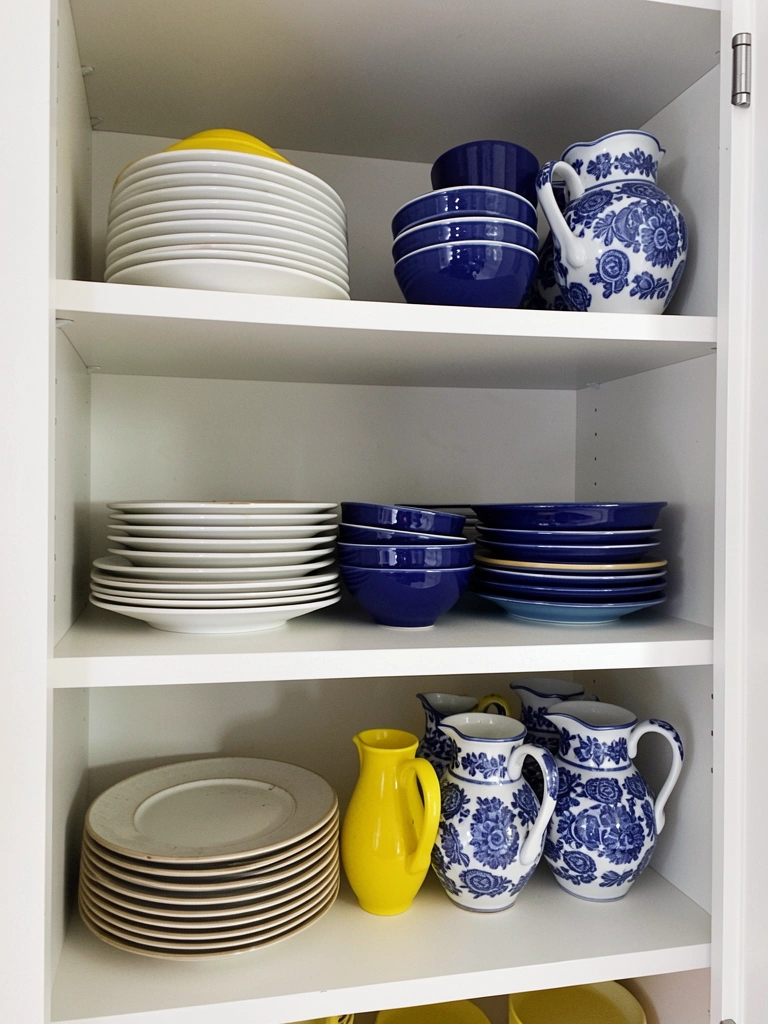
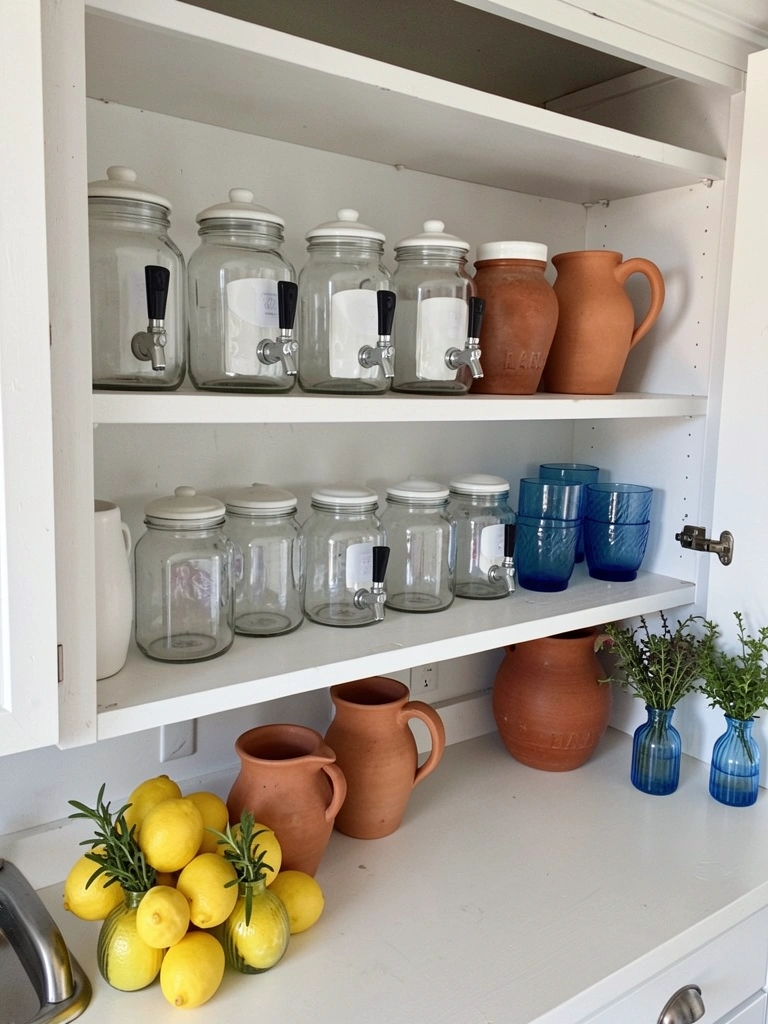
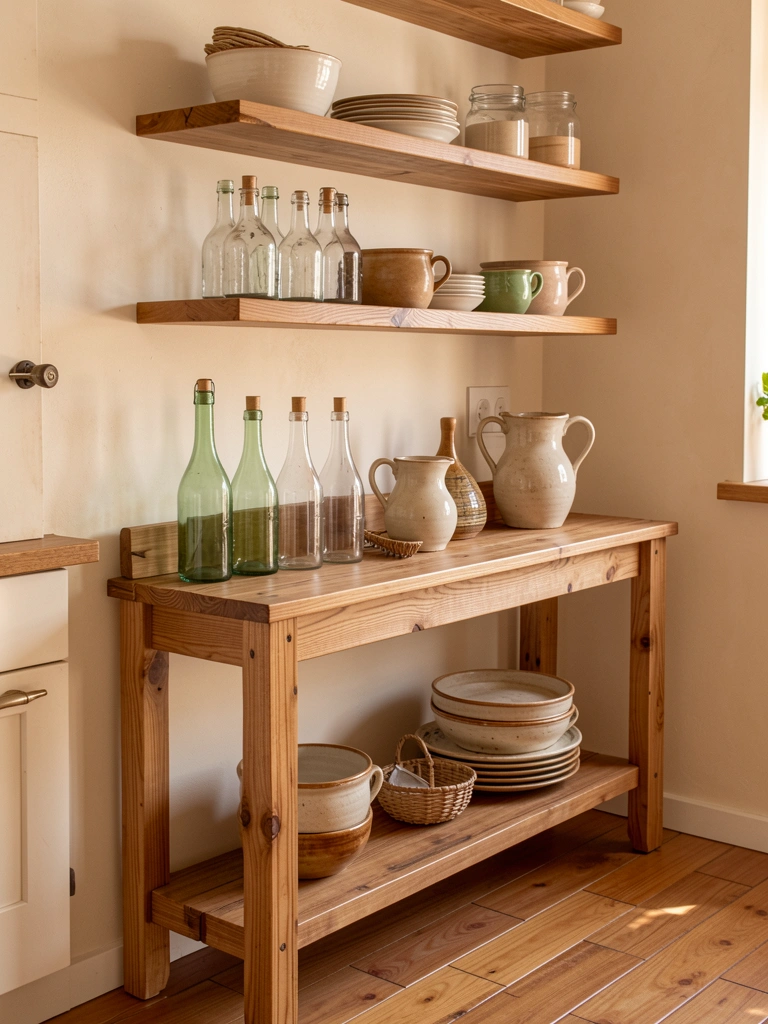
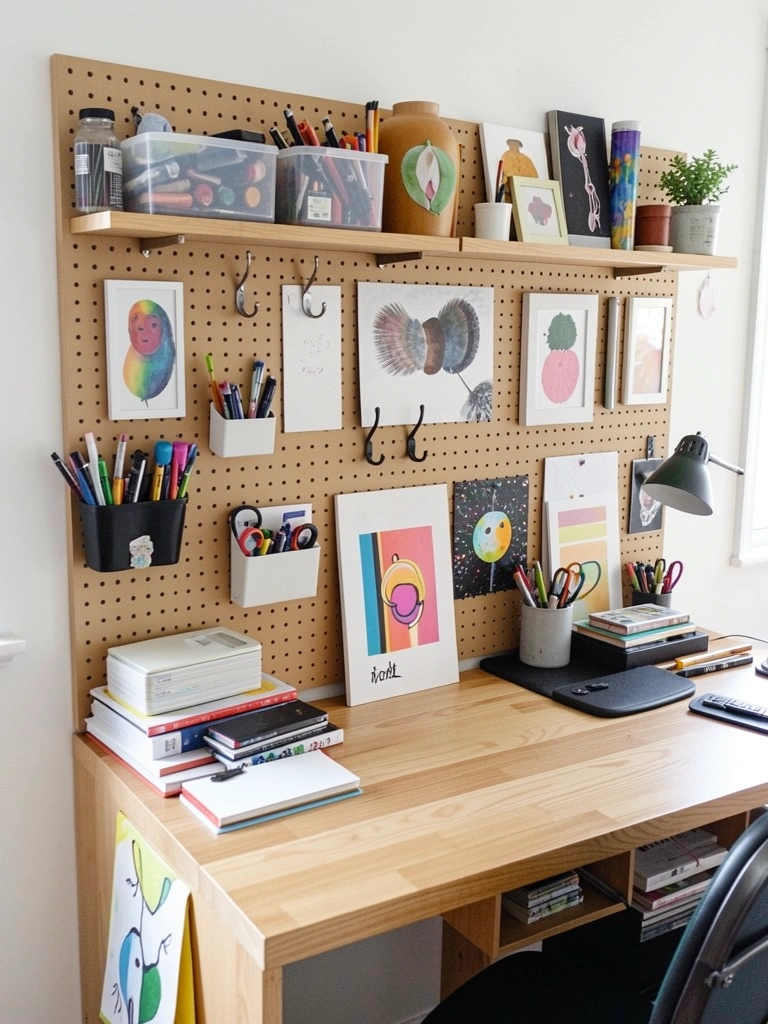
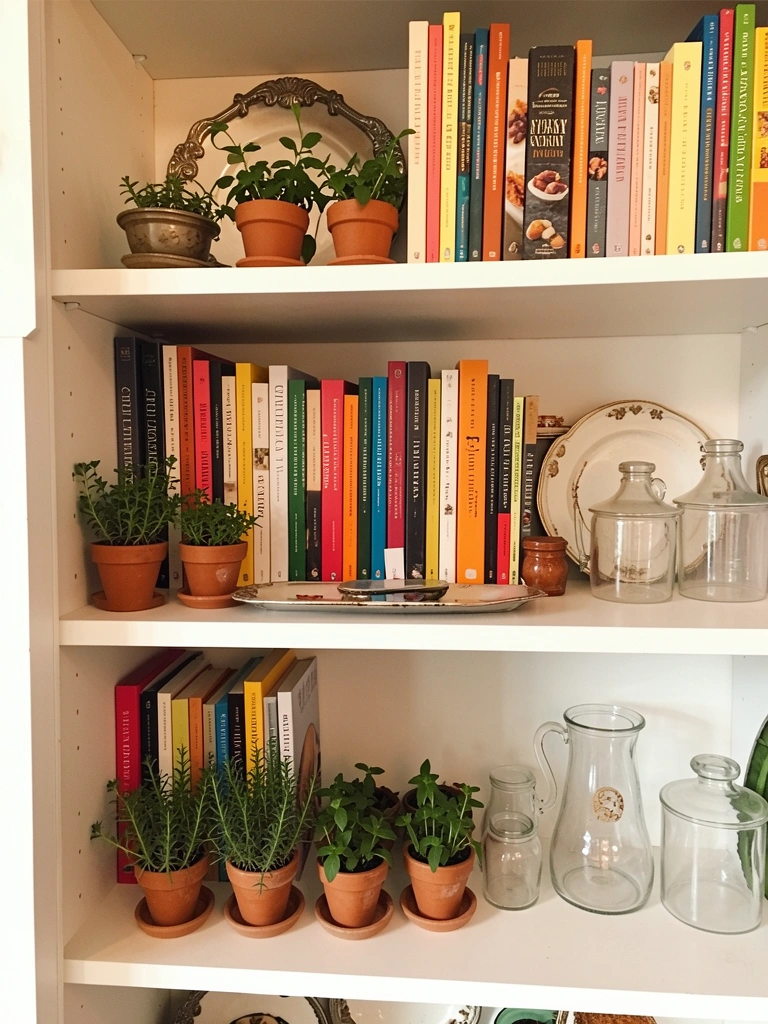
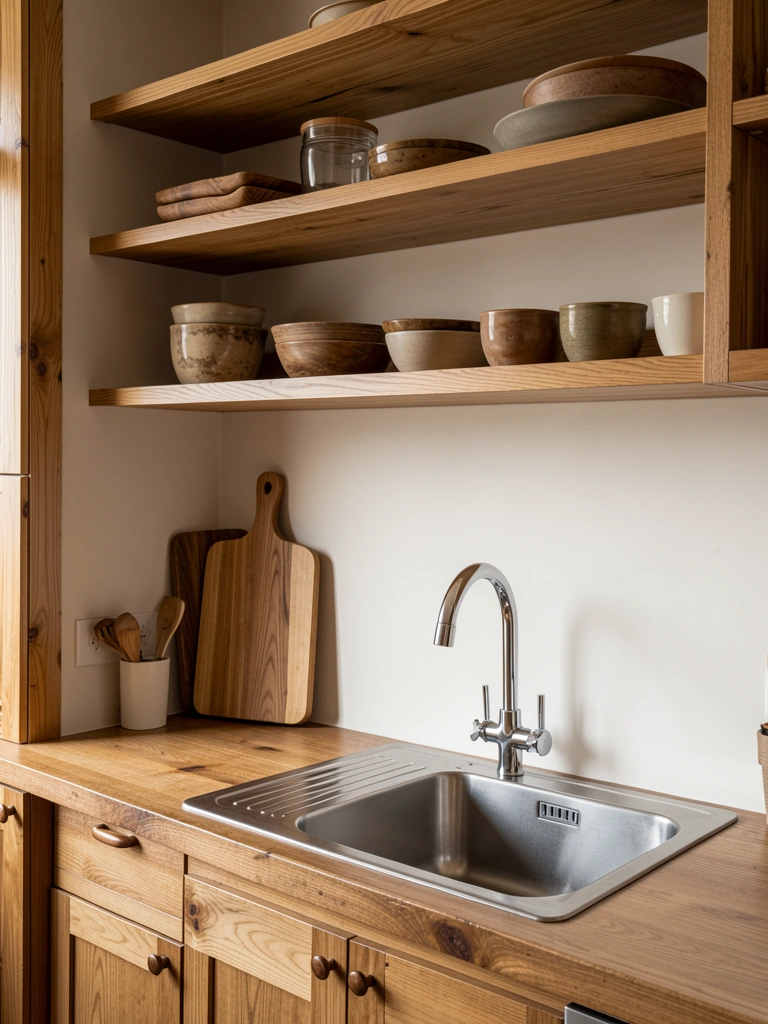
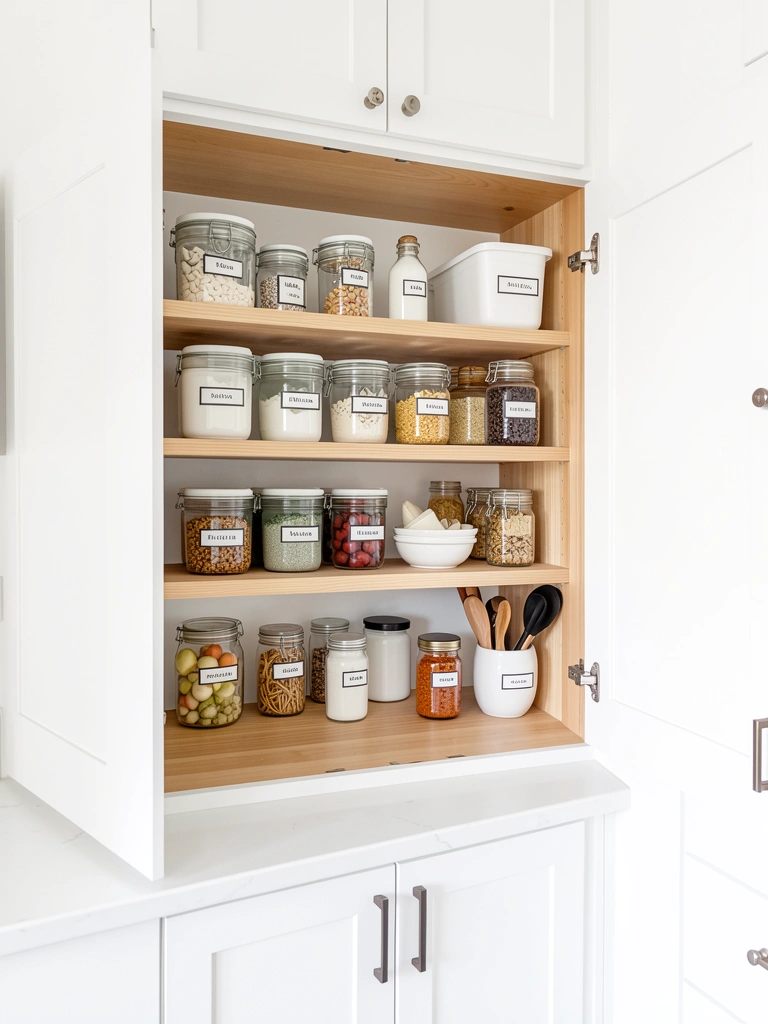
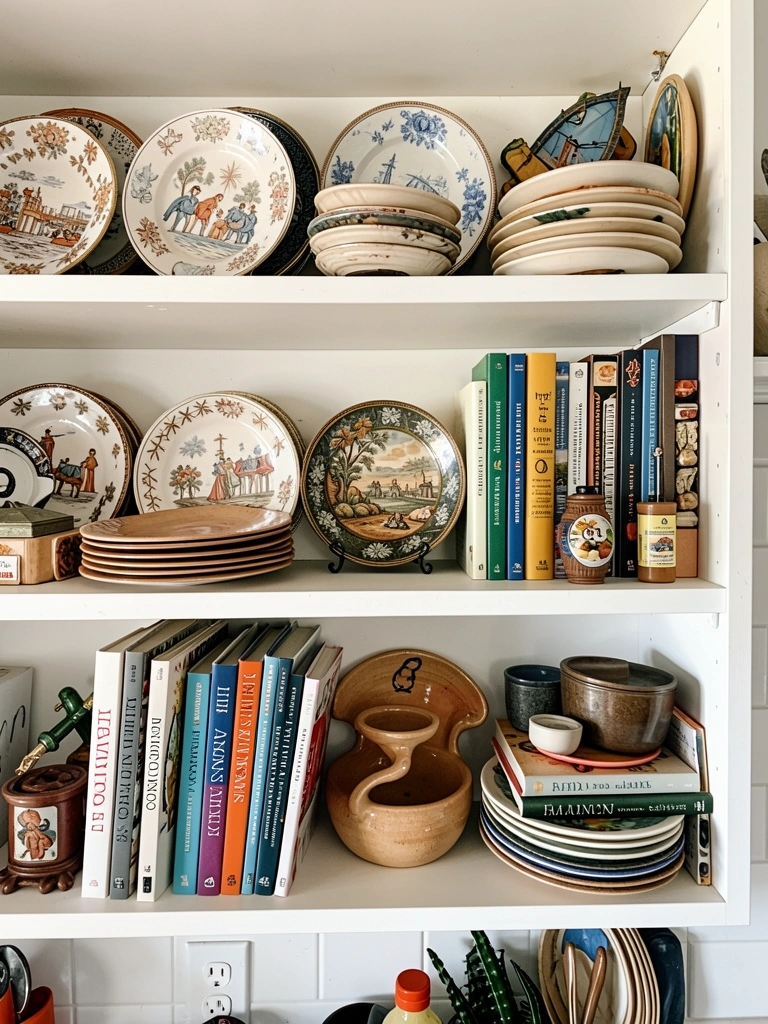
    6. Install Open Shelving With Decorative Baskets

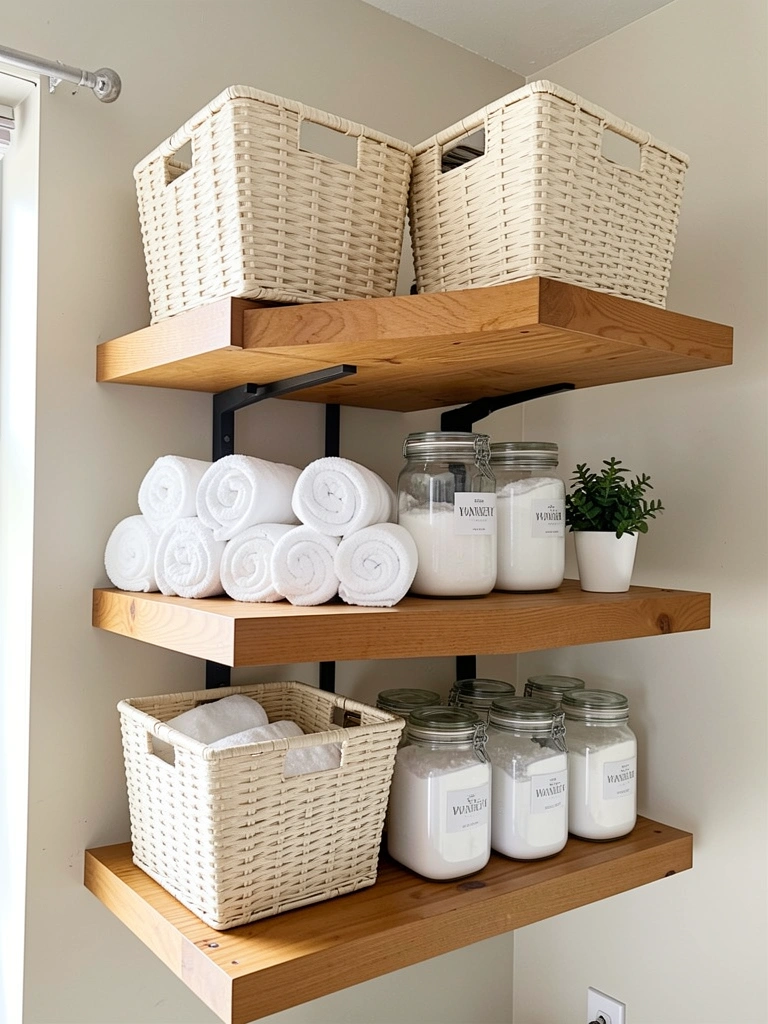
    Open shelving makes a laundry room feel airy and lets you display pretty items alongside functional supplies. The key is mixing open storage (for attractive things) with closed baskets (for the messier stuff).

    Shelves alone cost $30–$100 each; add wicker baskets ($15–$50 each) or fabric bins ($10–$40) for catchall storage. Group similar items together—all cleaning products on one shelf, linens on another—and use jars or labeled canisters for powders and pods. Leave a bit of white space (empty shelf space) so the room doesn’t feel cramped. This works especially well for renters since shelves mount with damage-free hardware.

    Your laundry room becomes Instagram-worthy, and you can easily grab what you need without hunting through closed cabinets.


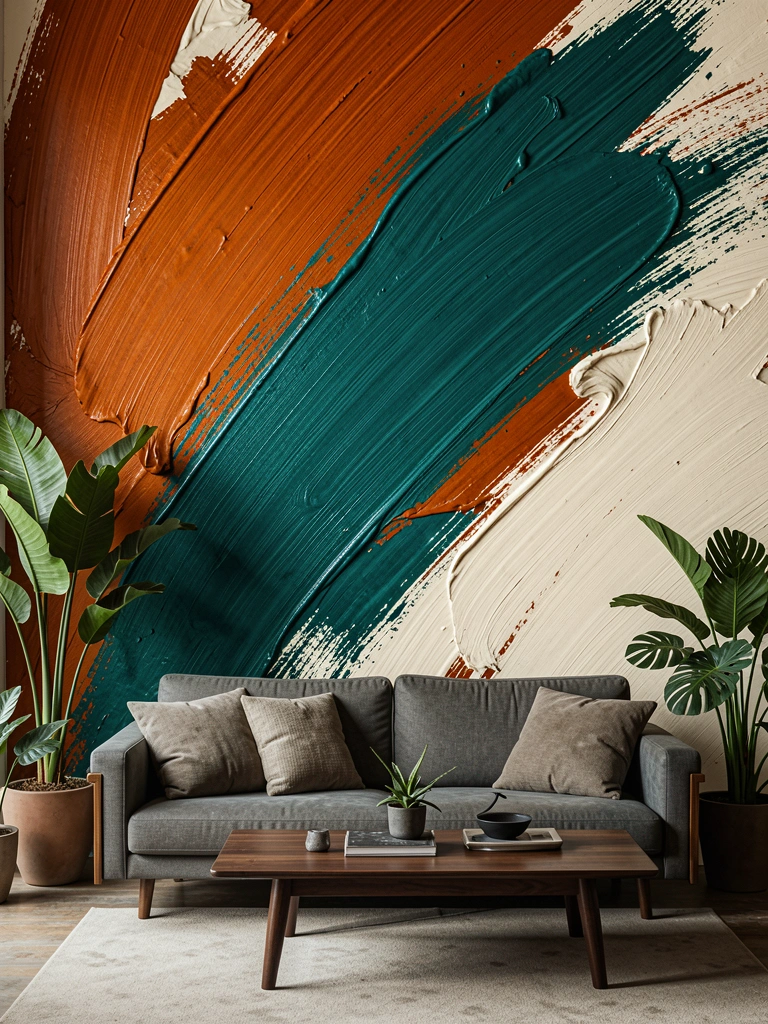
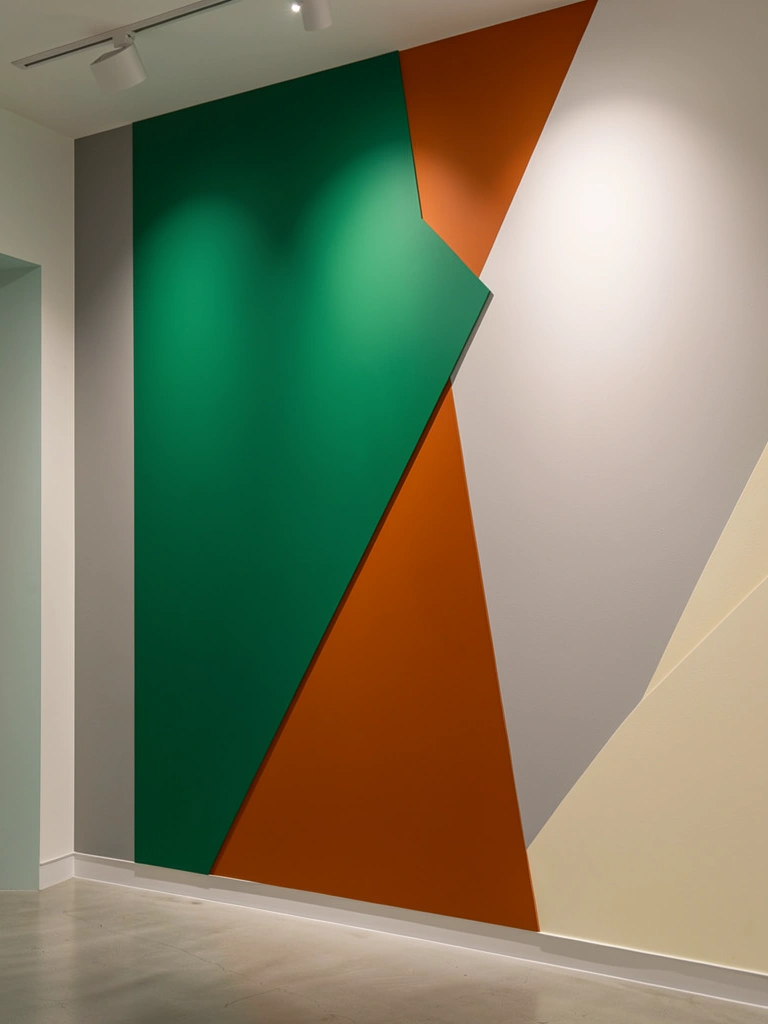
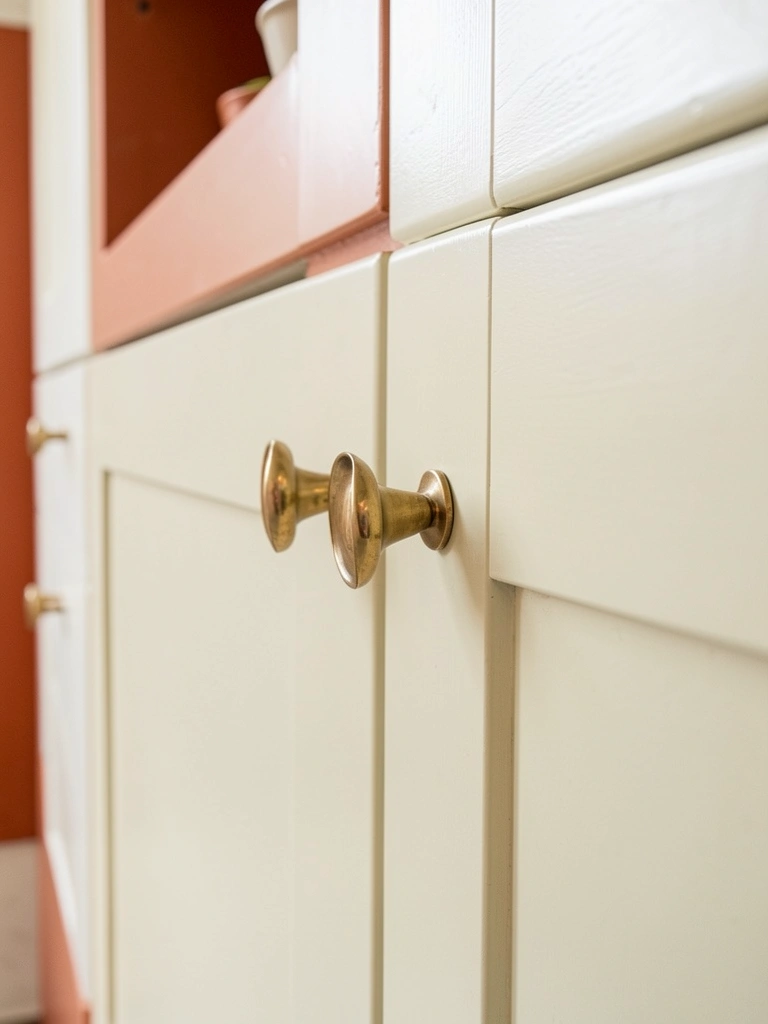
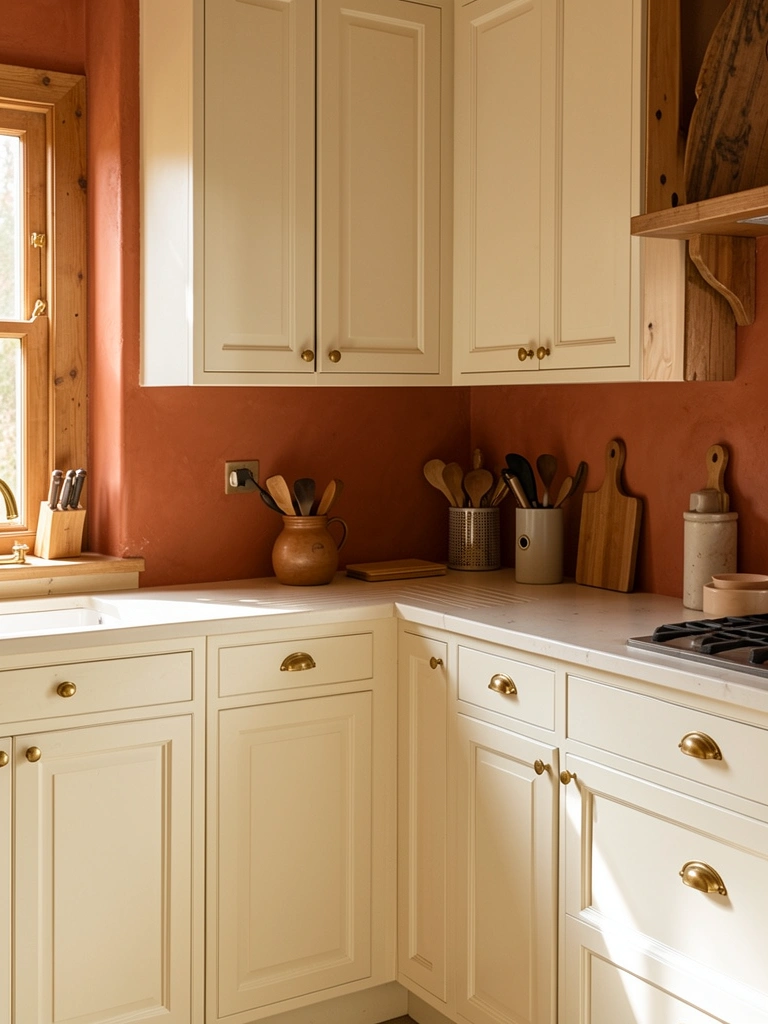
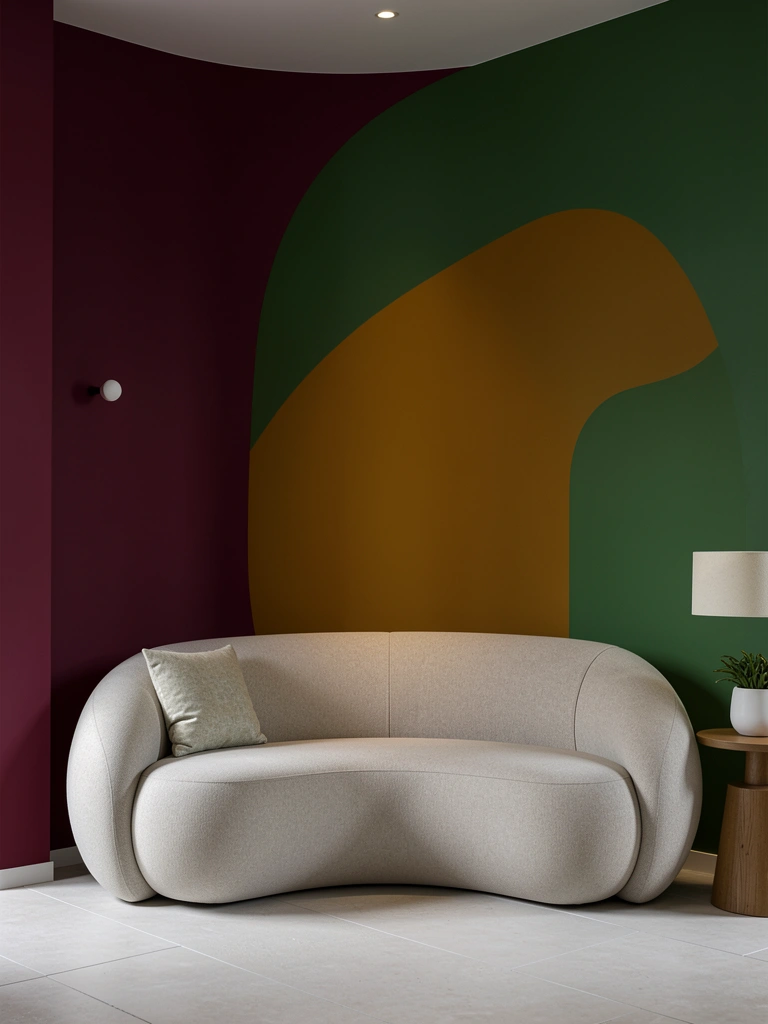
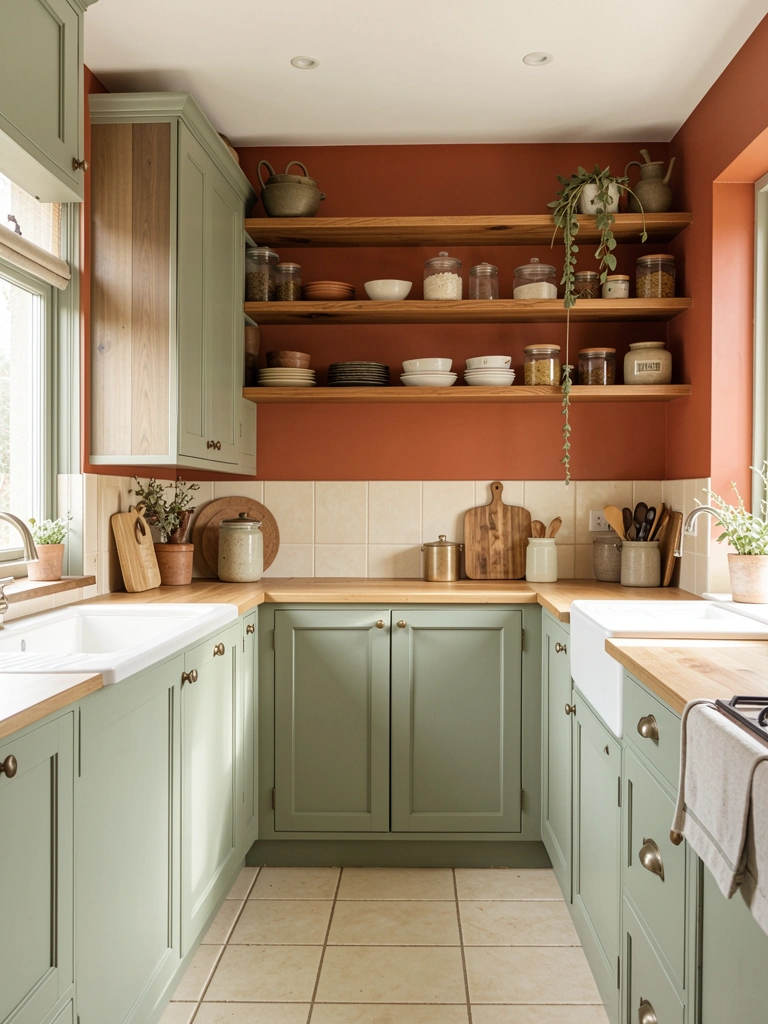
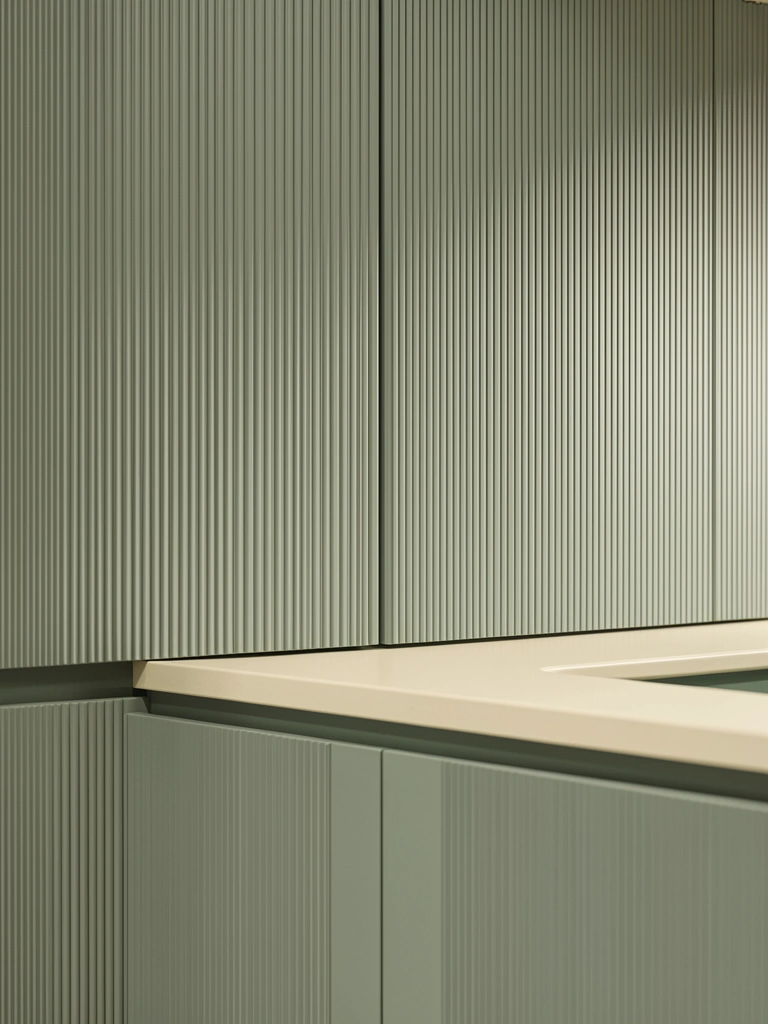
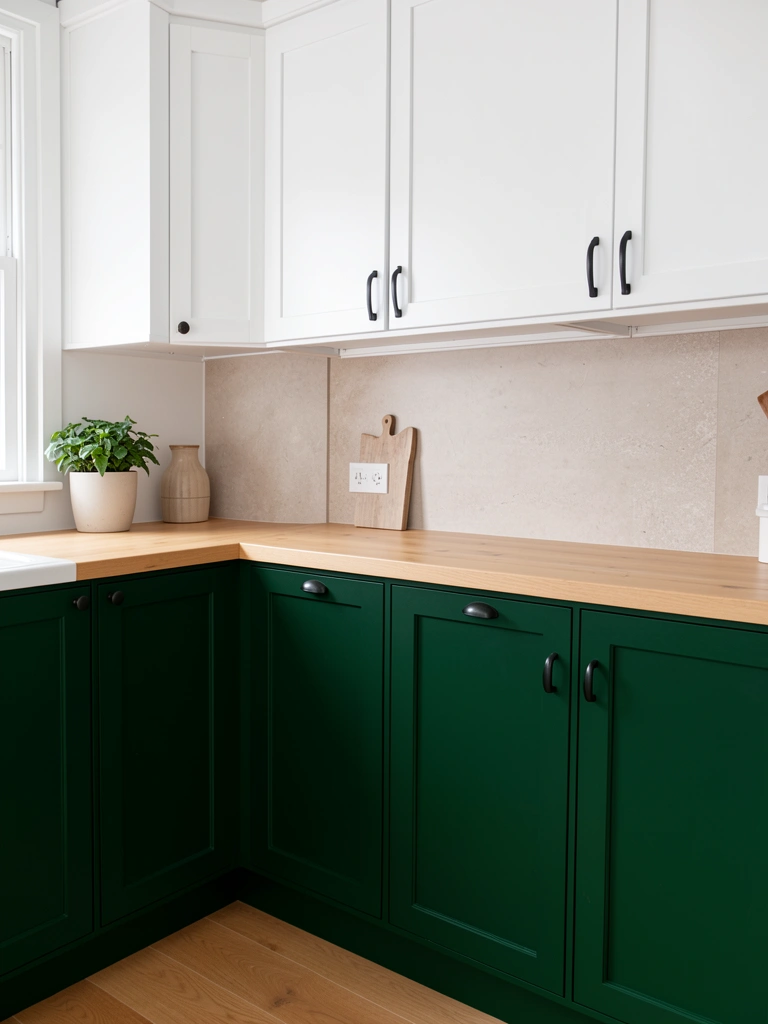
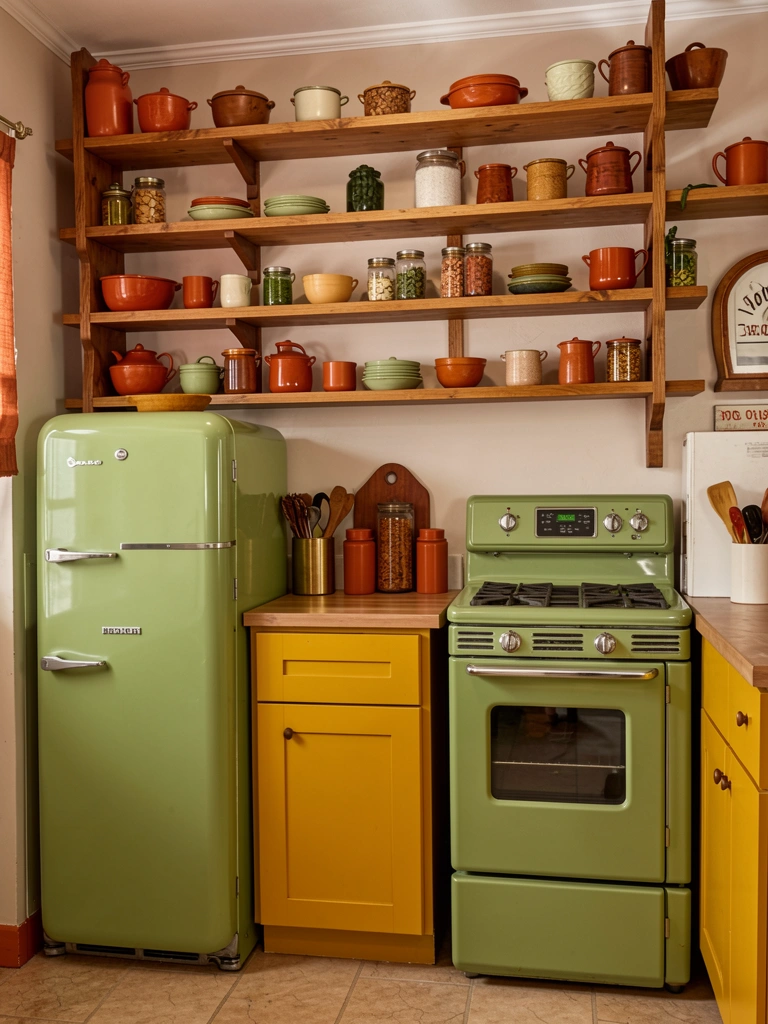
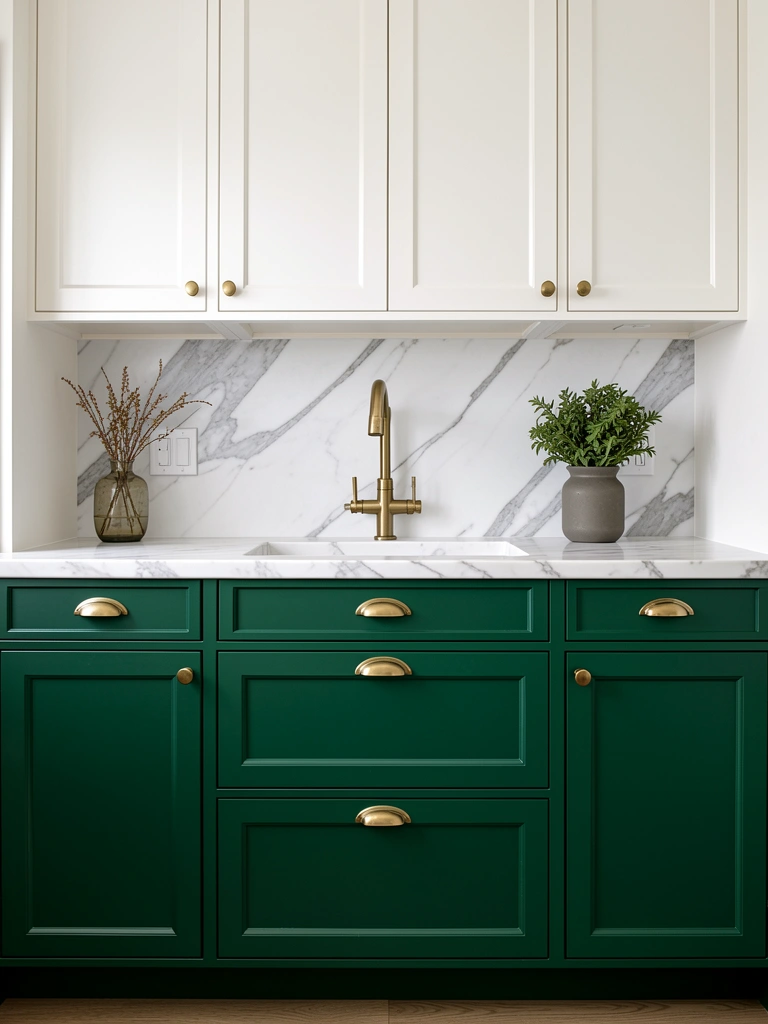
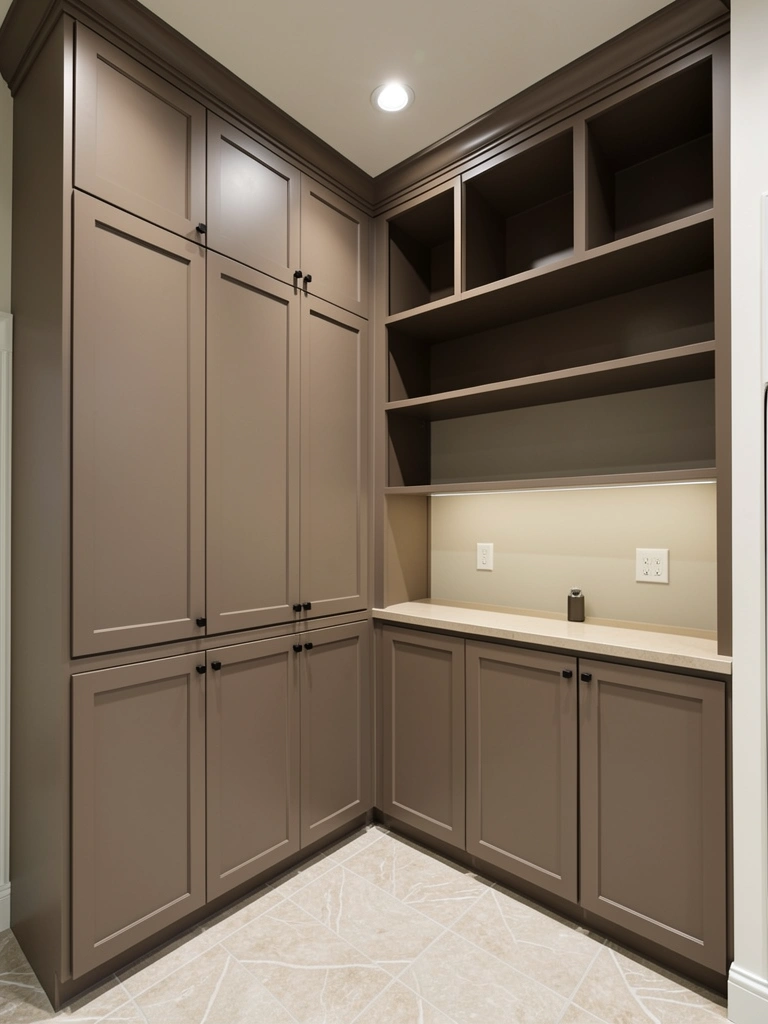
    7. Choose Bold Cabinet Colors for Character

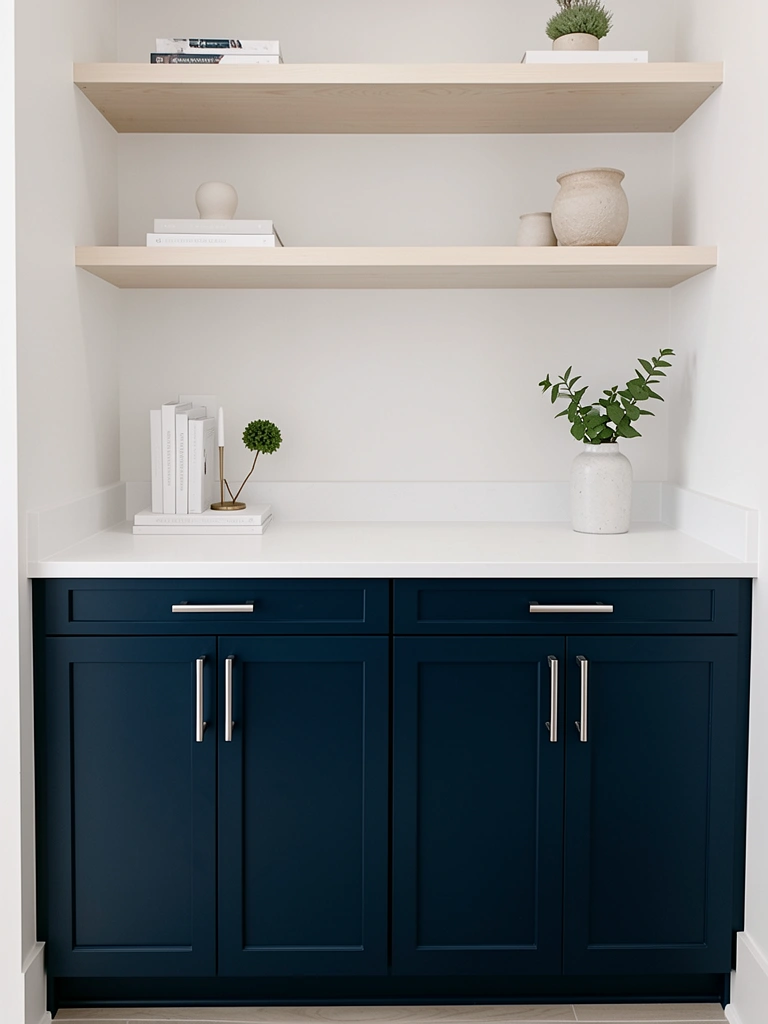
    Boring beige cabinets have had their day. Deep navy, forest green, charcoal gray, or even warm terracotta make small laundry rooms feel intentional and sophisticated.

    Cabinet paint or refinishing costs $300–$800 if you hire professionals, or $30–$100 in materials if you DIY. Use high-quality cabinet paint designed to withstand moisture and frequent cleaning. Pair bold cabinet colors with stainless steel or matte black hardware for a cohesive, modern look. If you’re renting or unsure about commitment, apply removable contact paper in bold colors ($15–$40) to existing cabinets for a temporary refresh.

    A bold cabinet color elevates your entire laundry room and signals that this space matters as much as any other room in your home.


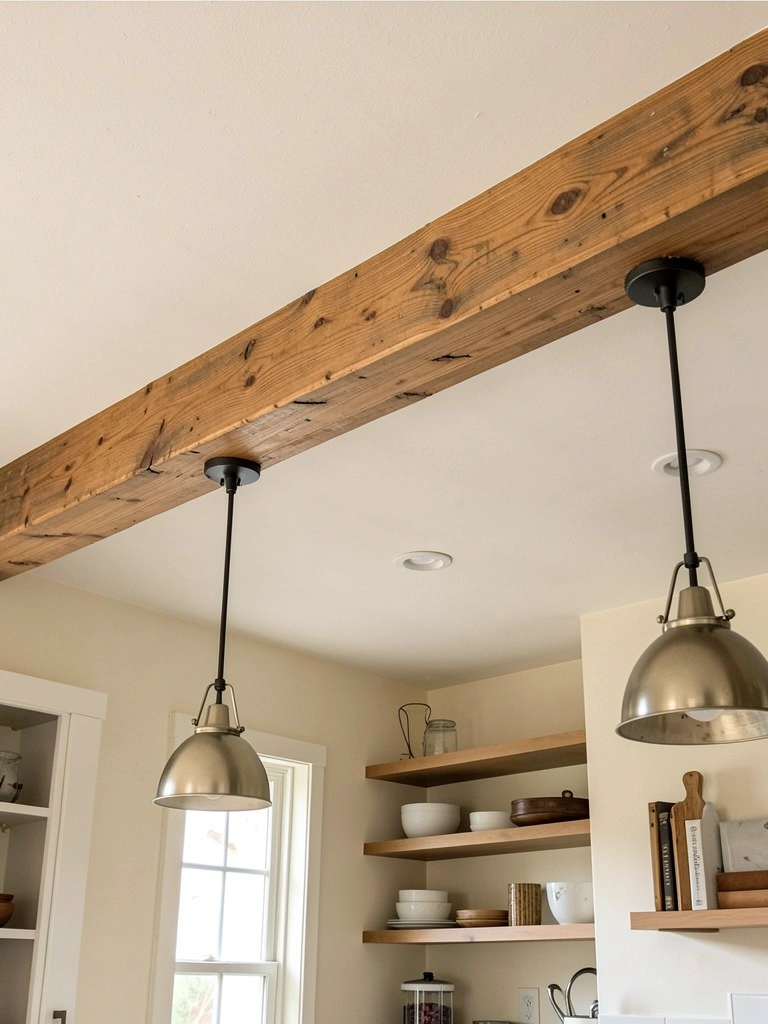
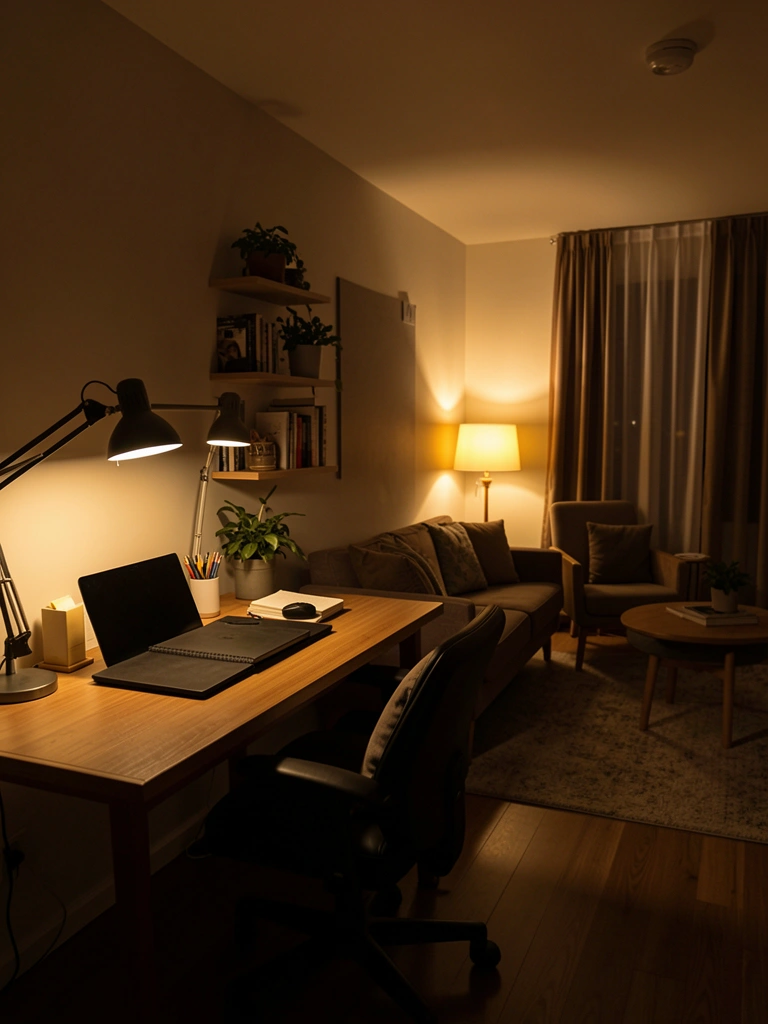
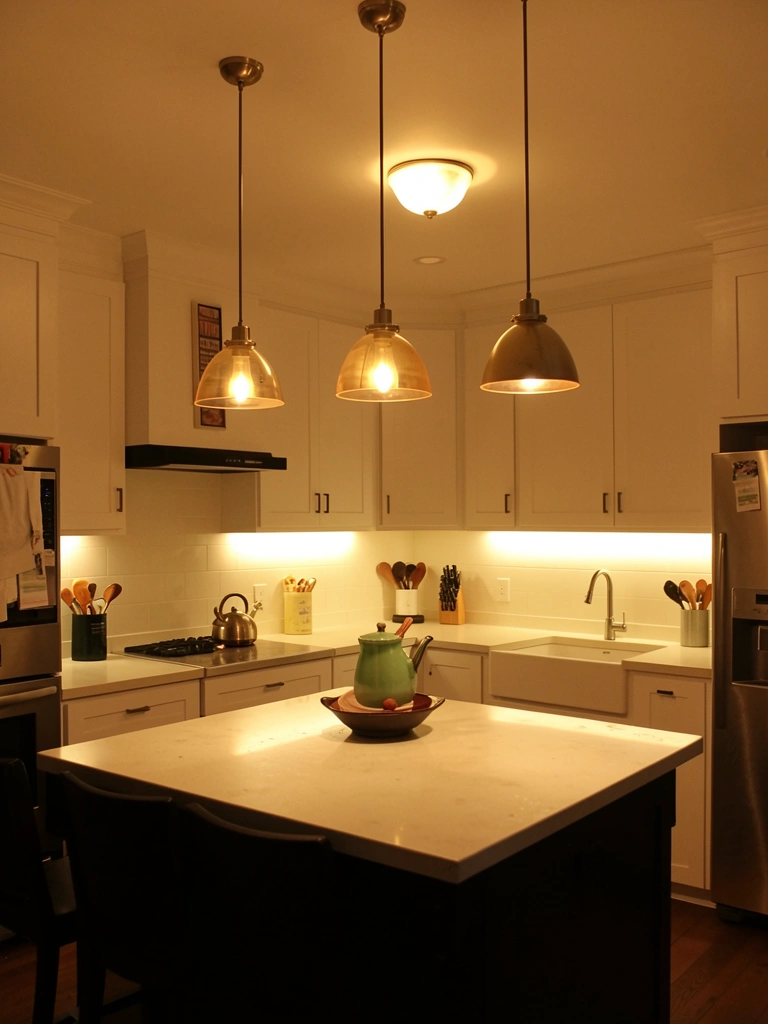
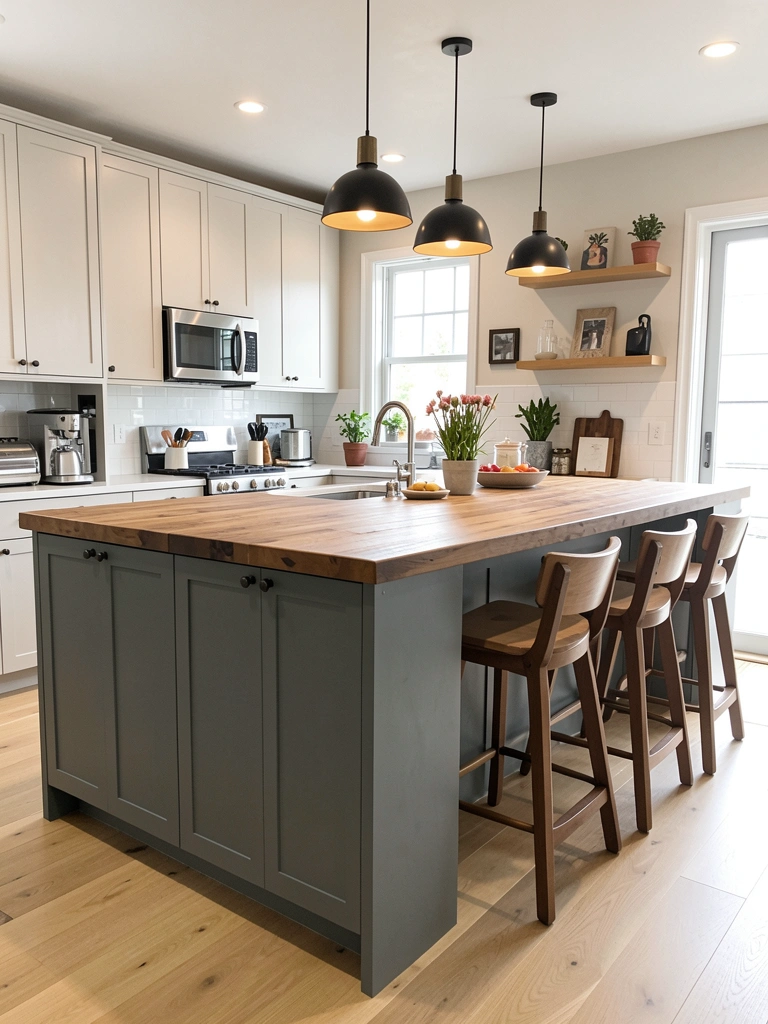
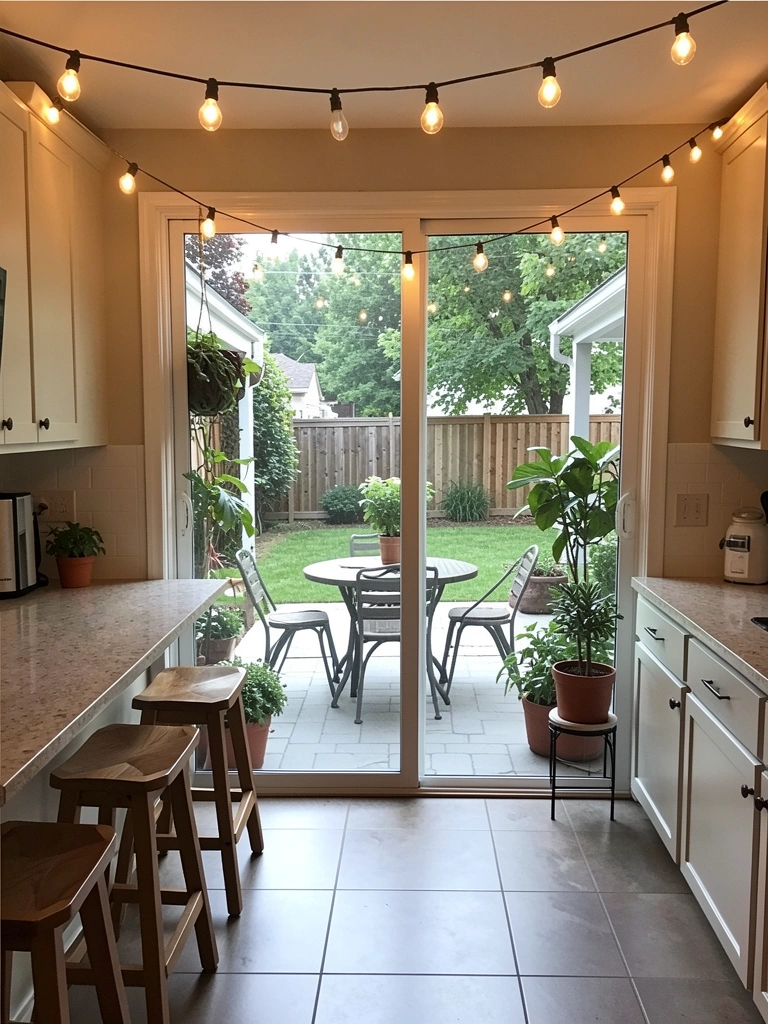
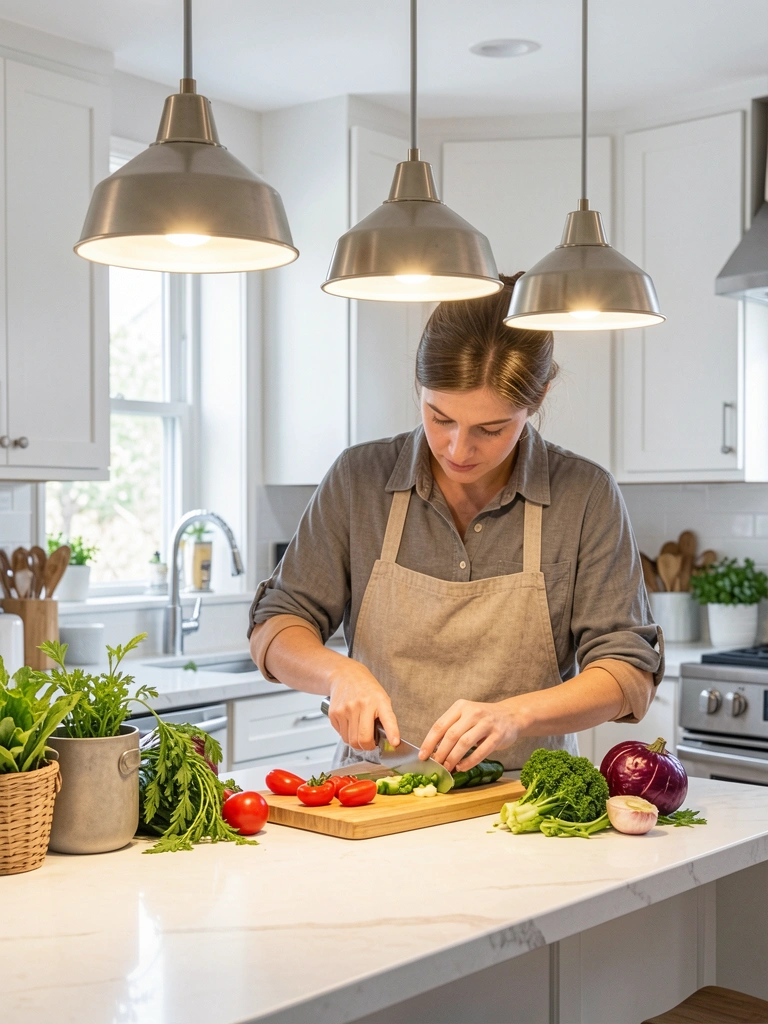
    8. Add Luxury Pendant Lighting Over Work Zones

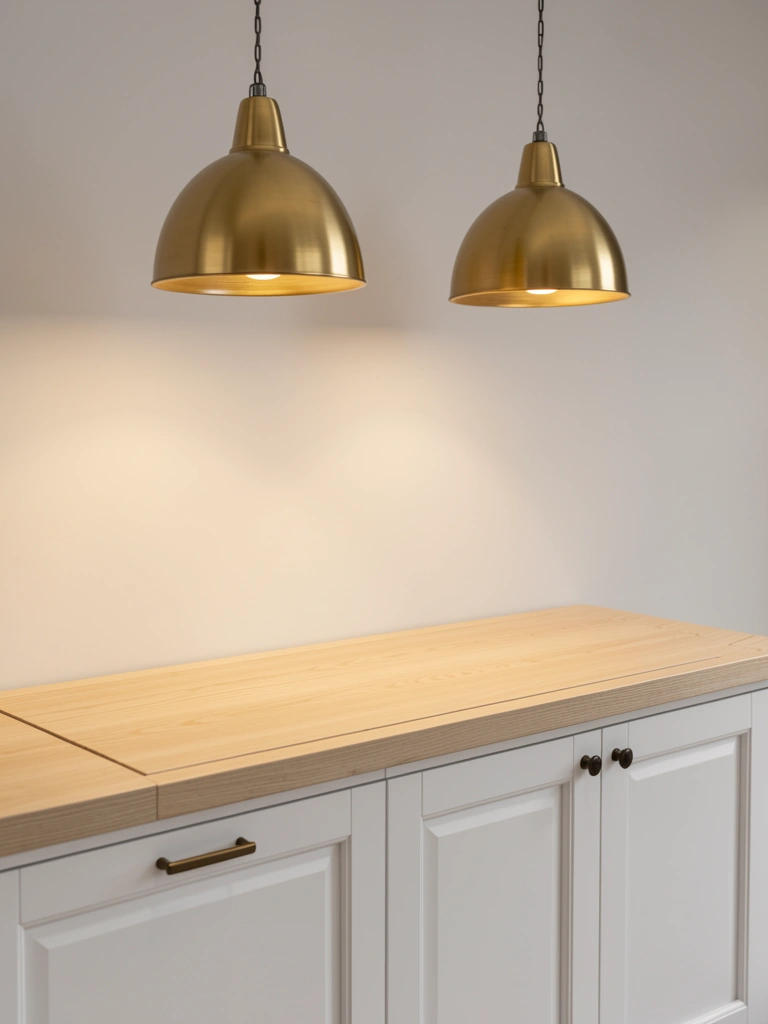
    Harsh overhead lighting is the enemy of a welcoming laundry room. Pendant lights or LED strips over your folding area create task lighting while adding style and warmth.

    Pendant lights run $30–$150 each from stores like West Elm, IKEA, or Target; hire an electrician ($100–$200) if wiring doesn’t exist. Alternatively, peel-and-stick LED strip lights cost $15–$40 and require zero installation—just stick them under shelves or cabinets for accent lighting. Choose warm white bulbs (2700K color temperature) to avoid the cold, clinical feel of standard laundry room lighting. Position lights directly over your folding counter or sink to reduce eye strain and make tasks easier.

    Better lighting makes laundry feel less like a chore and more like intentional work.


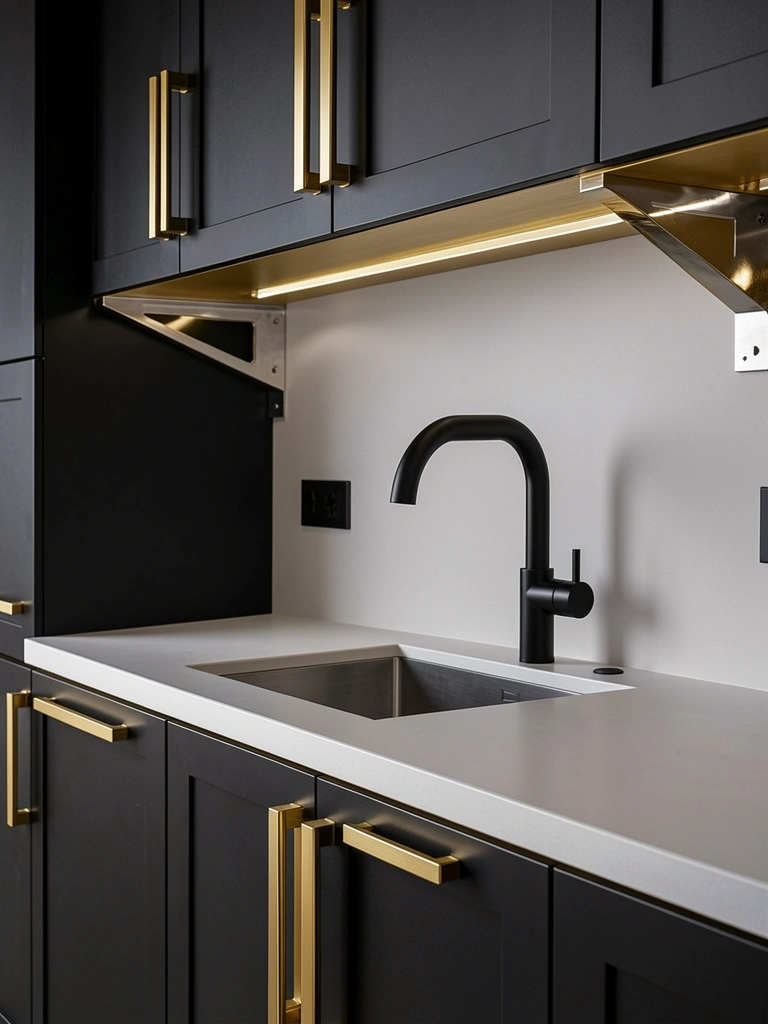
    9. Install Matte Black Fixtures for Modern Edge

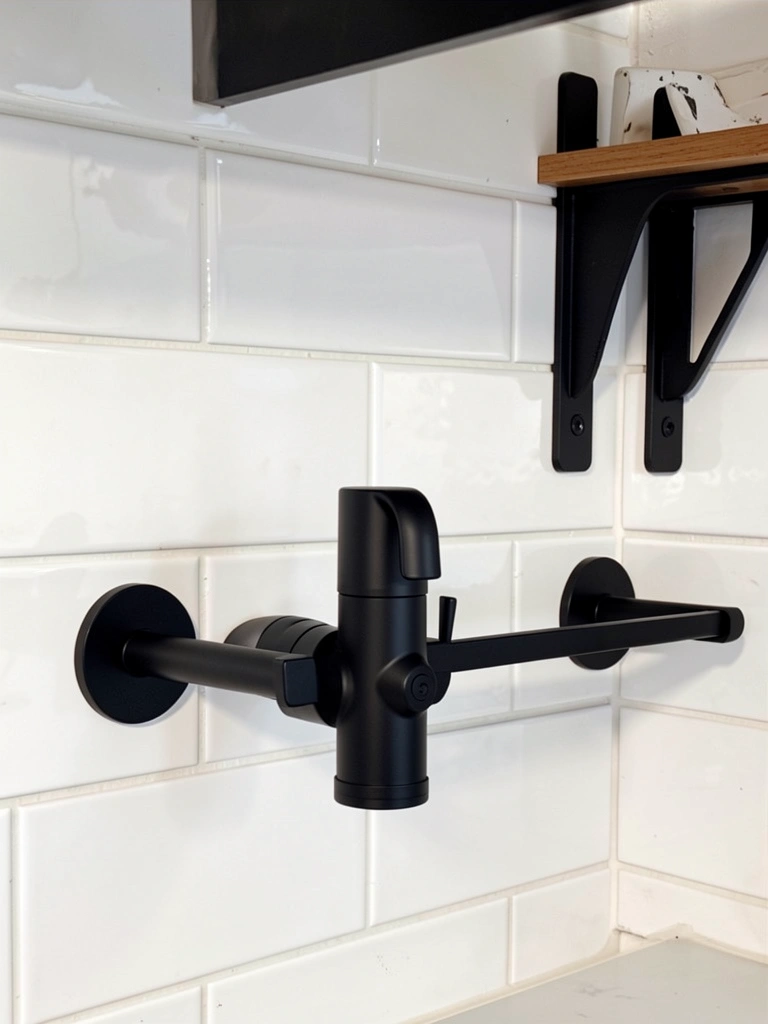
    Matte black fixtures instantly modernize a laundry room and pair beautifully with warm wood, natural stone, or neutral cabinetry.

    Matte black faucets cost $40–$120 (Amazon, Home Depot, and Wayfair have options); towel bars and hardware range $10–$40 each. The matte finish hides water spots and fingerprints better than shiny chrome, making maintenance easier. Mix matte black with warm brass or brushed nickel accents (one on faucet, one on hardware) for a curated, high-end look. This works even in small spaces—the dark tone recedes visually, making walls feel taller.

    Your laundry room looks intentionally designed rather than assembled from whatever was available.


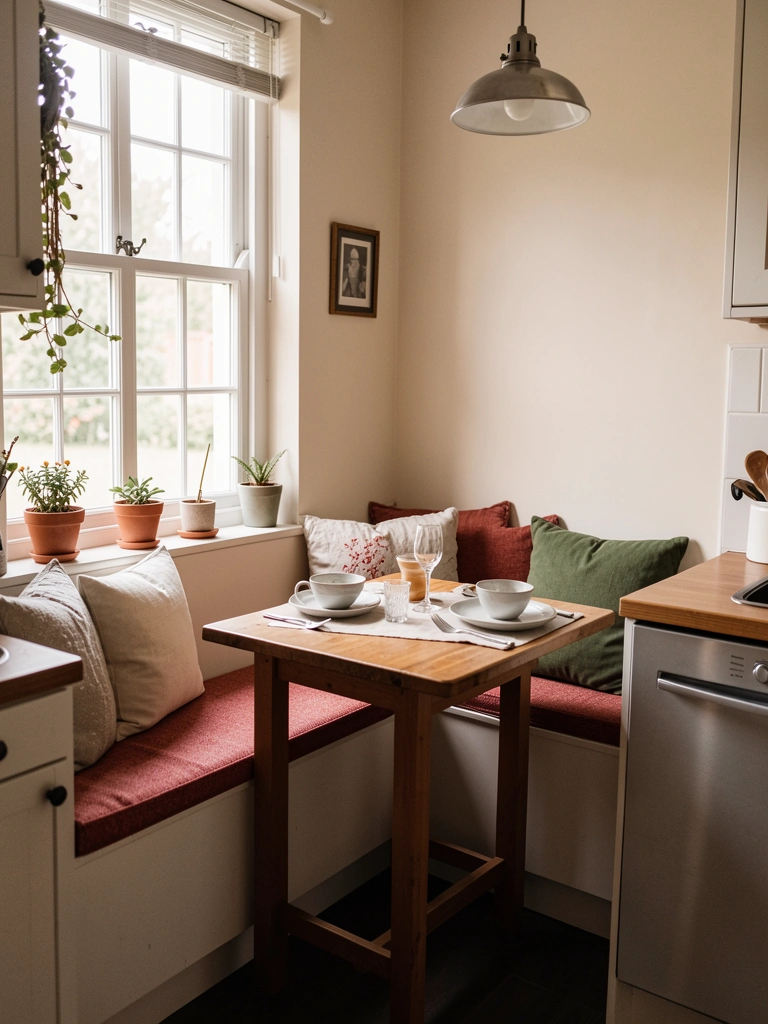
    10. Create a Mudroom-Laundry Hybrid Space

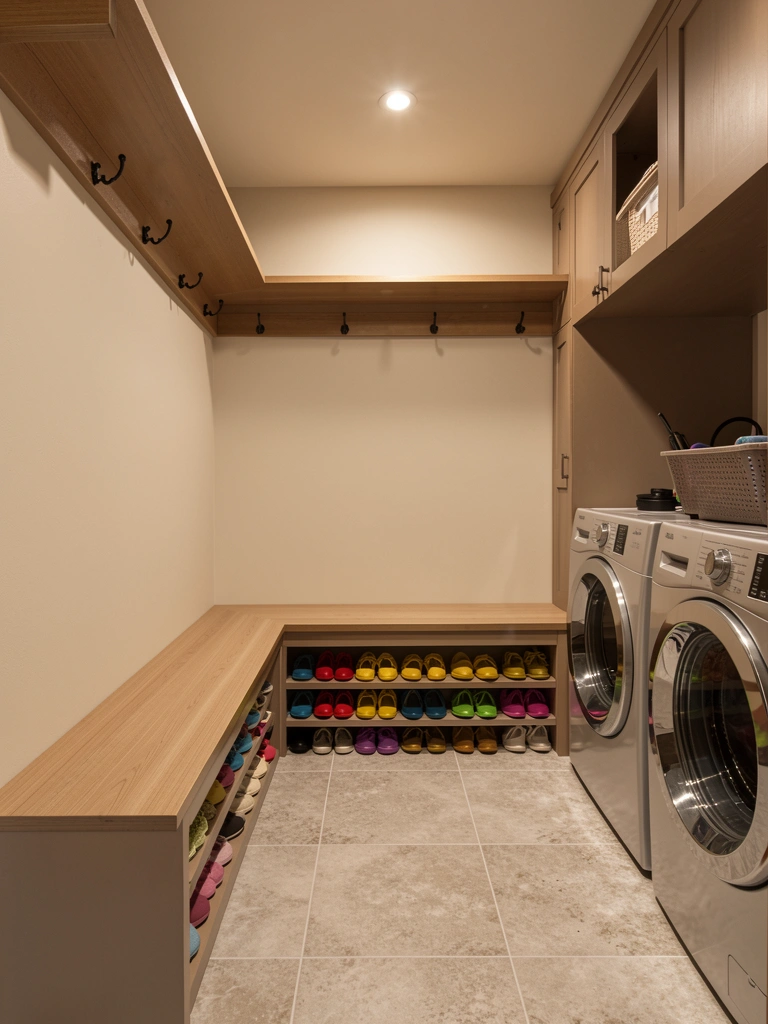
    If you have a spare closet, hallway, or basement corner, combining laundry with mudroom functions maximizes the space and consolidates household chores to one zone.

    This concept costs $500–$2,000+ depending on what you add (built-in bench, hooks, cubbies, appliances). Start simple: mount a rod and hooks for jackets and wet clothes, add a low bench with storage underneath, and position your washer nearby. Label each family member’s cubby or hook so items get washed and returned to the right place immediately. This setup works beautifully in homes with kids or active families who track in dirt.

    Everyone’s dirty shoes, jackets, and workout clothes have a landing zone, and laundry moves straight from hamper to wash to storage.


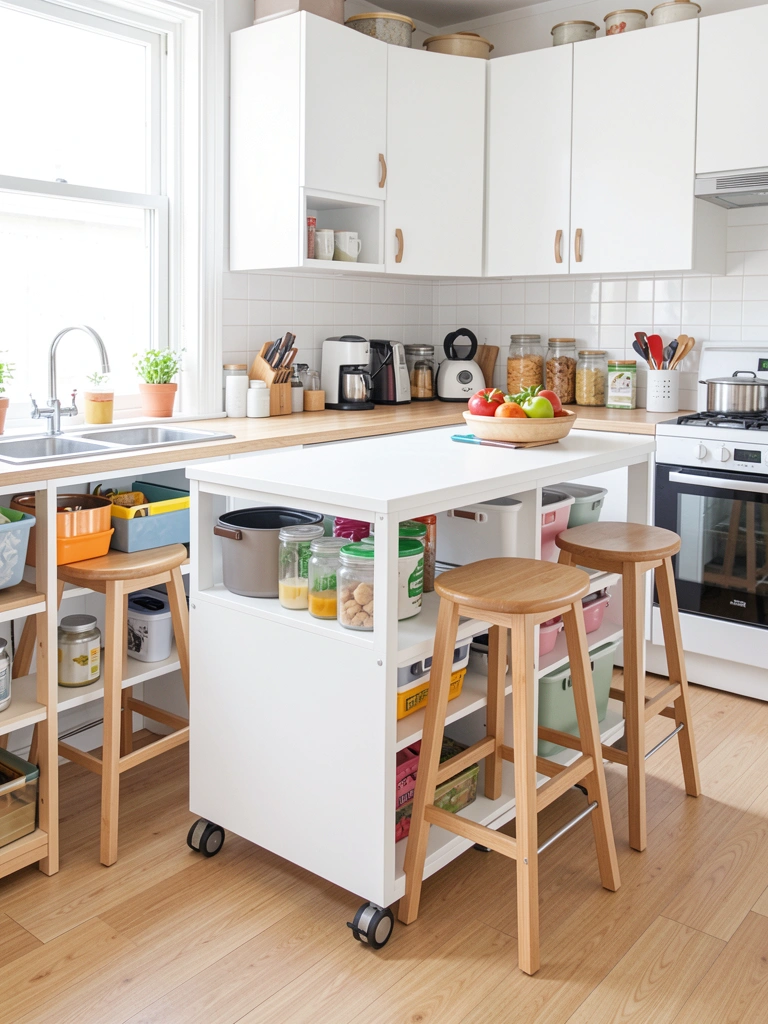
    11. Use Stackable or Compact Appliances to Free Up Floor Space

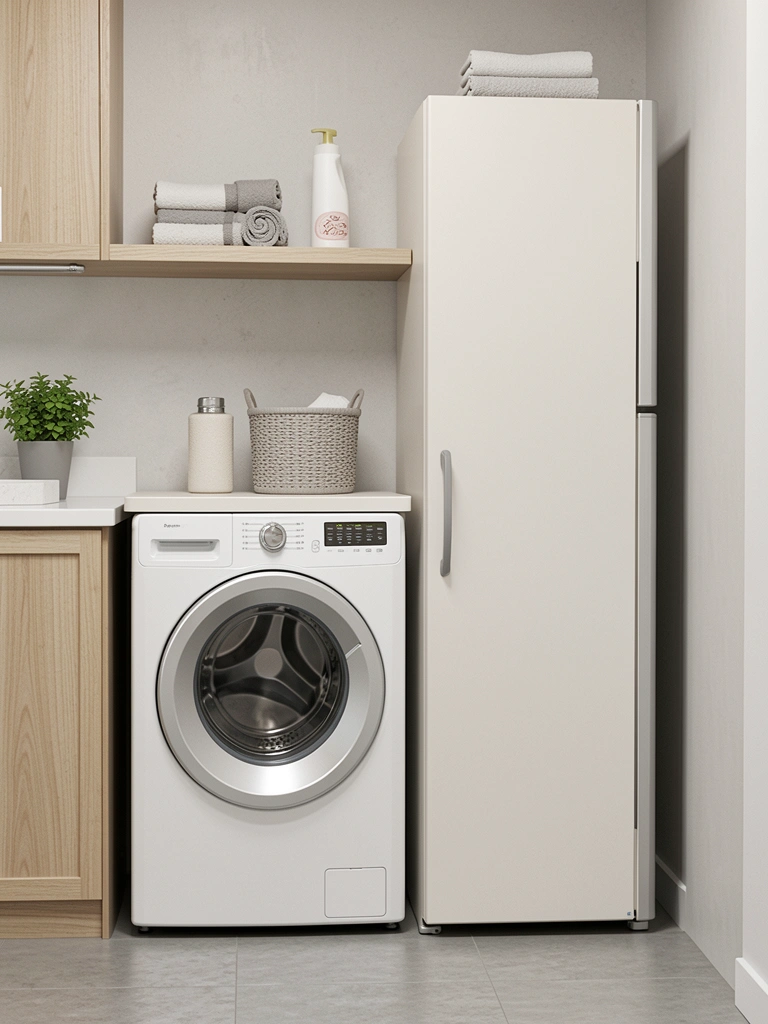
    If your laundry room is tiny, stackable or slimline appliances free up floor space for a folding counter or utility sink without sacrificing function.

    Compact washers and dryers cost $400–$900 each (LG, Electrolux, and Grundig make quality models); stacking kits run $50–$150. Some all-in-one washer-dryer combos ($700–$1,500) fit in a closet-sized space but take longer to dry. Check your space measurements carefully before purchasing, and verify water and electrical hookups align with your chosen unit. These work brilliantly for apartments, studios, and multi-story homes where basement space isn’t available.

    You gain precious floor space for movement, folding, or future upgrades without sacrificing laundry capability.


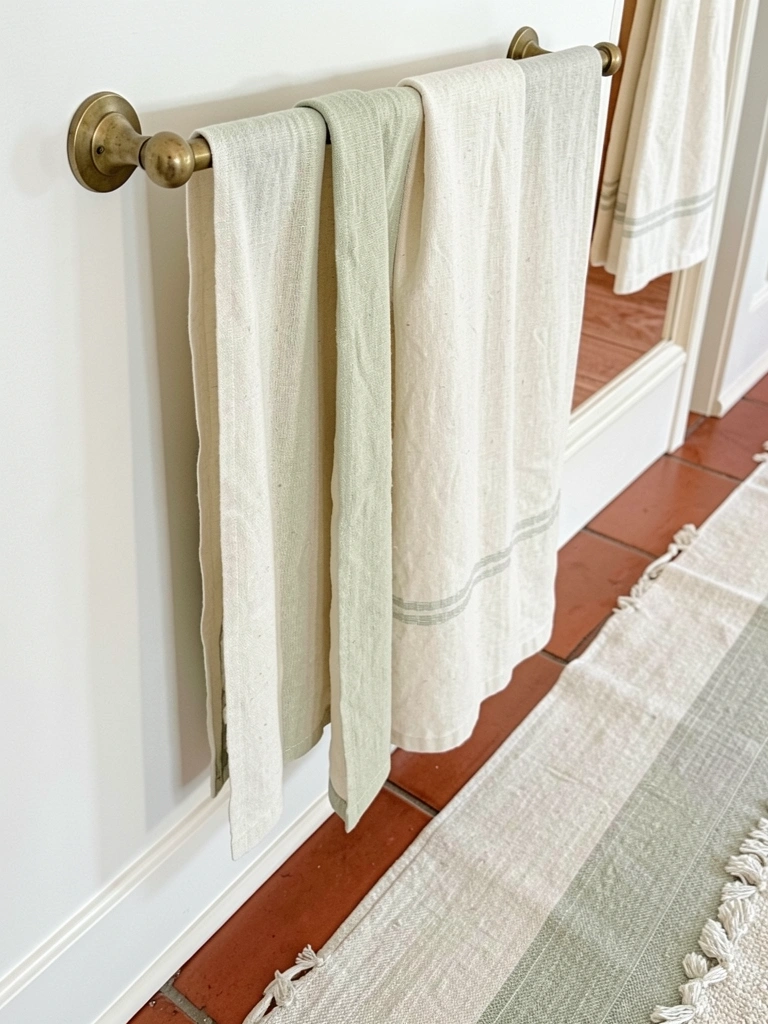
    12. Install Wall-Mounted Drying Racks to Save Floor Space

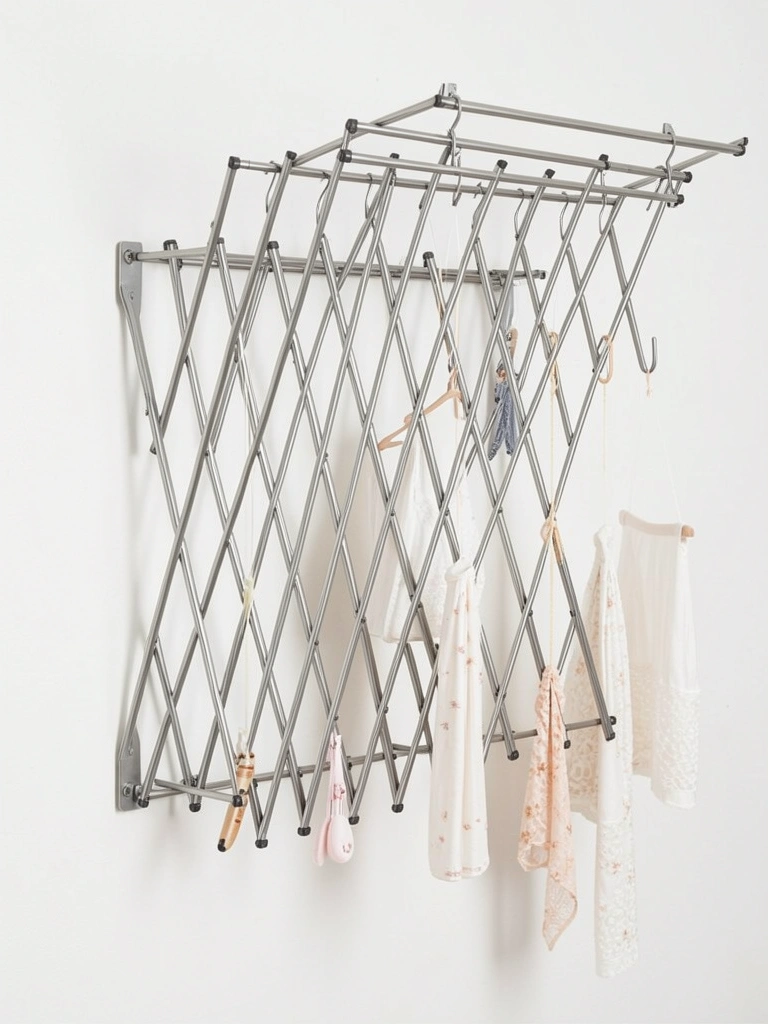
    Wall-mounted drying racks eliminate the need for a bulky standalone rack and work beautifully for delicates, air-dry items, or families wanting to reduce dryer use.

    Accordion-style wall racks cost $30–$80 and take 20 minutes to install; over-the-door racks ($15–$40) are renter-friendly with zero drilling. Position your rack near a window or vent if possible for air circulation. This setup pairs perfectly with a sustainability goal—air-drying cuts energy bills and extends fabric life. You’ll use your rack daily for delicates, workout gear, and sweaters, so place it somewhere accessible rather than in a back corner.

    Wet items dry without eating floor space, and your energy bills drop noticeably each month.


    13. Install Touchless Faucets for Hands-Free Convenience

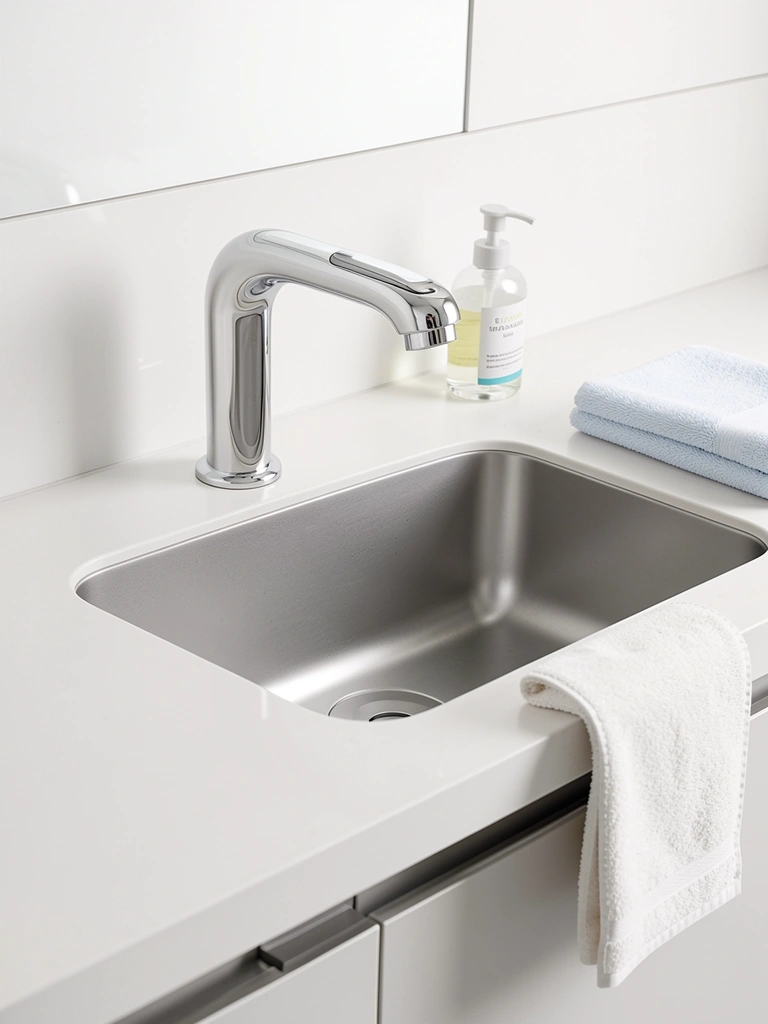
    Touchless faucets prevent cross-contamination, reduce water waste, and feel incredibly convenient—you’re not touching a grimy faucet handle after handling dirty laundry.

    Sensor faucets cost $50–$150 depending on quality and finish; installation is straightforward if plumbing exists ($0 DIY or $50–$100 with a plumber). Choose models designed for utility sinks, which handle lower water pressure better than kitchen faucets. Battery-operated versions work if hardwiring seems complicated. Once you try a hands-free faucet, you’ll wonder how you lived without one.

    Grabbing water without touching the faucet feels like a small luxury that actually saves time and promotes hygiene.


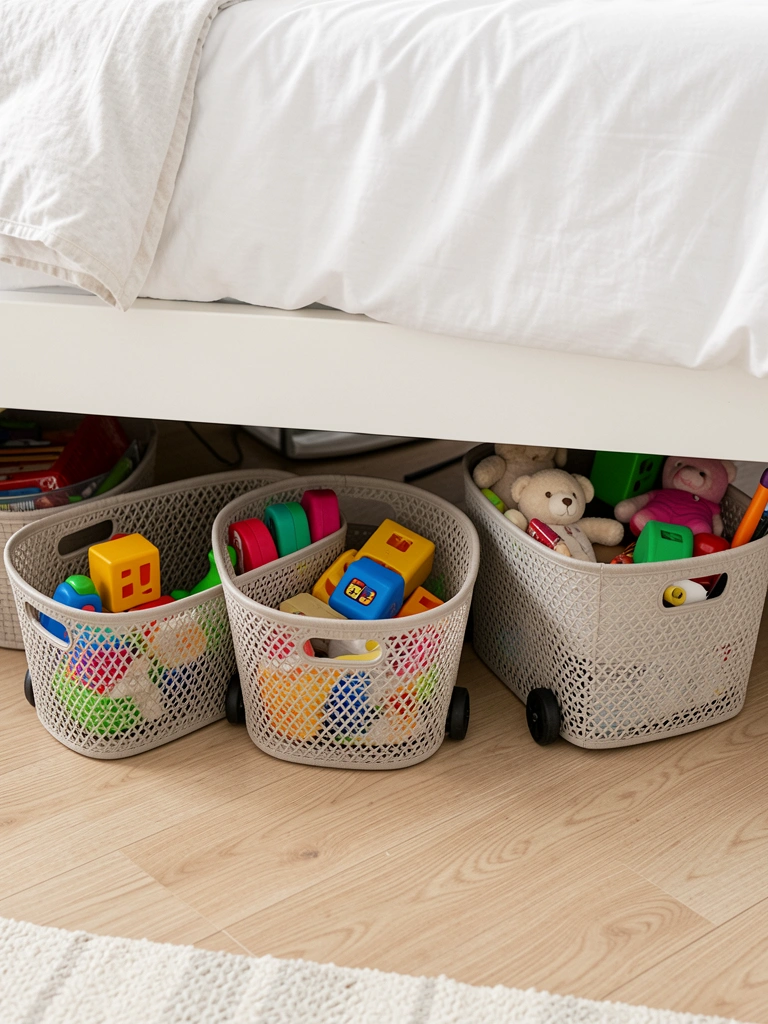
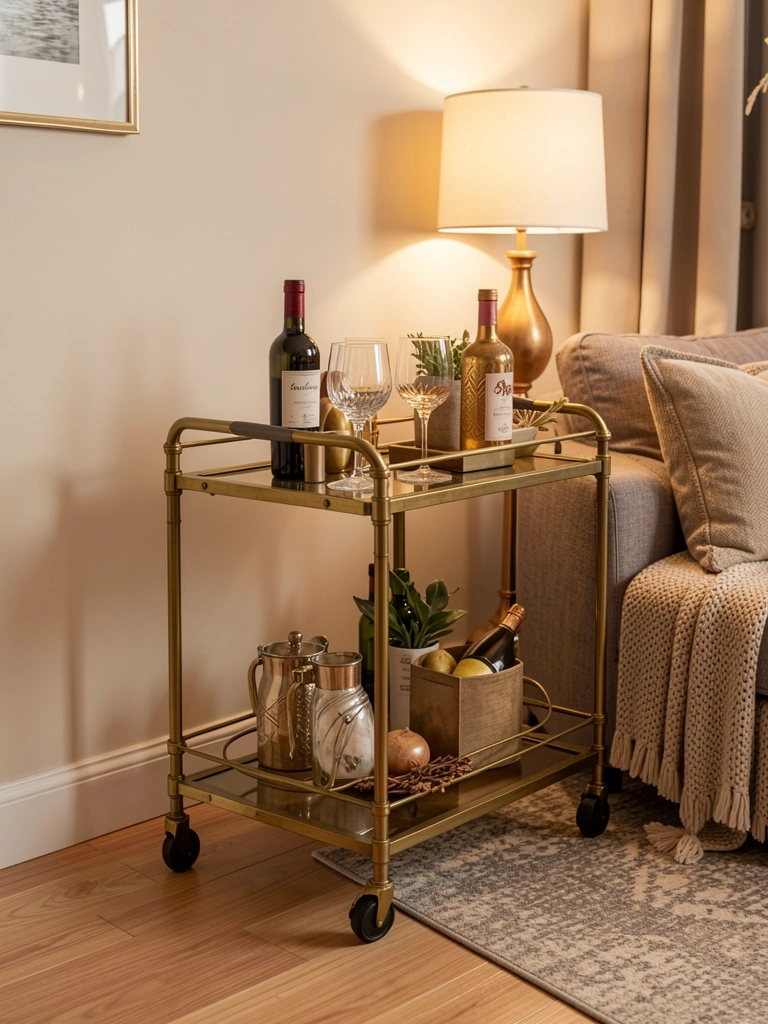
    14. Add a Rolling Utility Cart for Mobile Storage

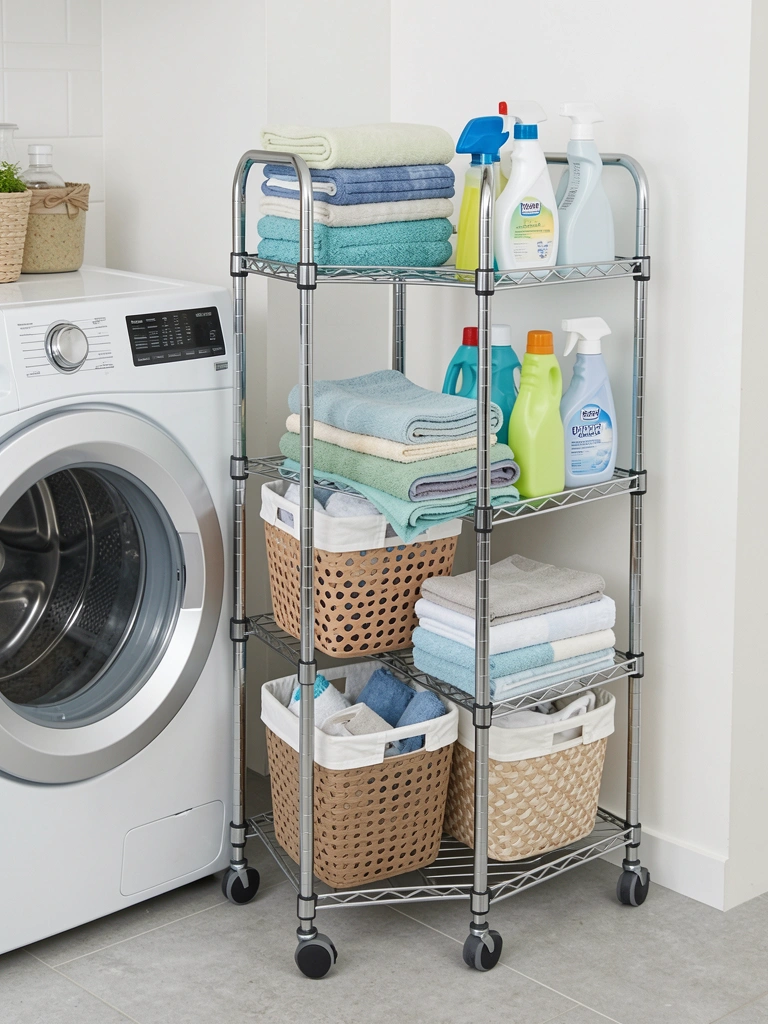
    A rolling cart slides into tight spaces and moves with you as your laundry room layout evolves—perfect for renters or anyone who doesn’t want permanent fixtures.

    Utility carts cost $40–$120 from IKEA, Target, or Amazon; look for models with deep shelves and sturdy wheels. Stock the top tier with frequently used items (stain remover, fabric softener), middle with supplies (detergent pods, bleach), and bottom with bulky items (clothesline, lint trap cleaner). Roll it to your folding counter during use, then tuck it into a corner or closet when you need floor space. Three-tier carts are deep enough to prevent items sliding off but narrow enough to fit between appliances.

    Your supplies stay organized and portable, and you can reconfigure your space in seconds.


    15. Install Custom Cabinetry Tailored to Your Lifestyle

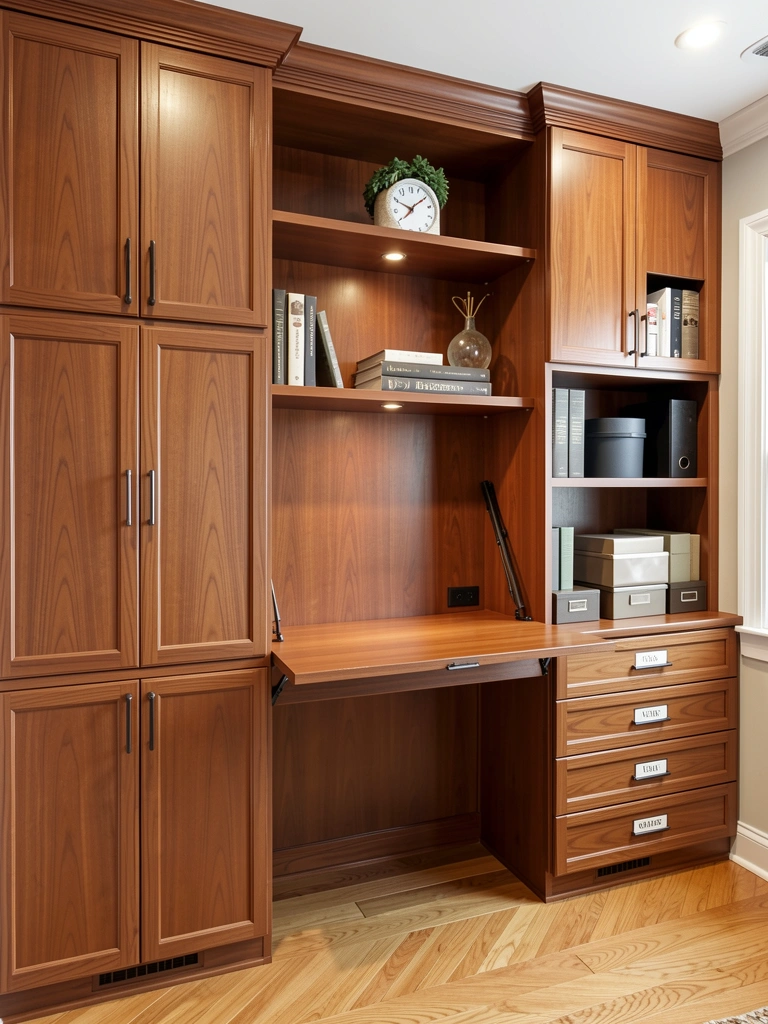
    If you spend enough time in your laundry room to justify the investment, custom cabinetry solves layout challenges and creates exactly what you need.

    Custom cabinetry costs $1,500–$4,000+ but lasts decades and often increases home value. Work with a designer to map out your workflow: Where does laundry arrive? Where does it get sorted? Where do you fold? Where do supplies live? Custom builders solve these questions with precision. Semi-custom options from Wayfair, Semihandmade, or local woodworkers run $500–$1,500 and offer flexibility. Include pull-out hampers, ironing board storage, and a dedicated spot for each family member’s folded laundry if your household is large.

    Every inch of your laundry room works for you, and the space feels as curated as your kitchen or bedroom.


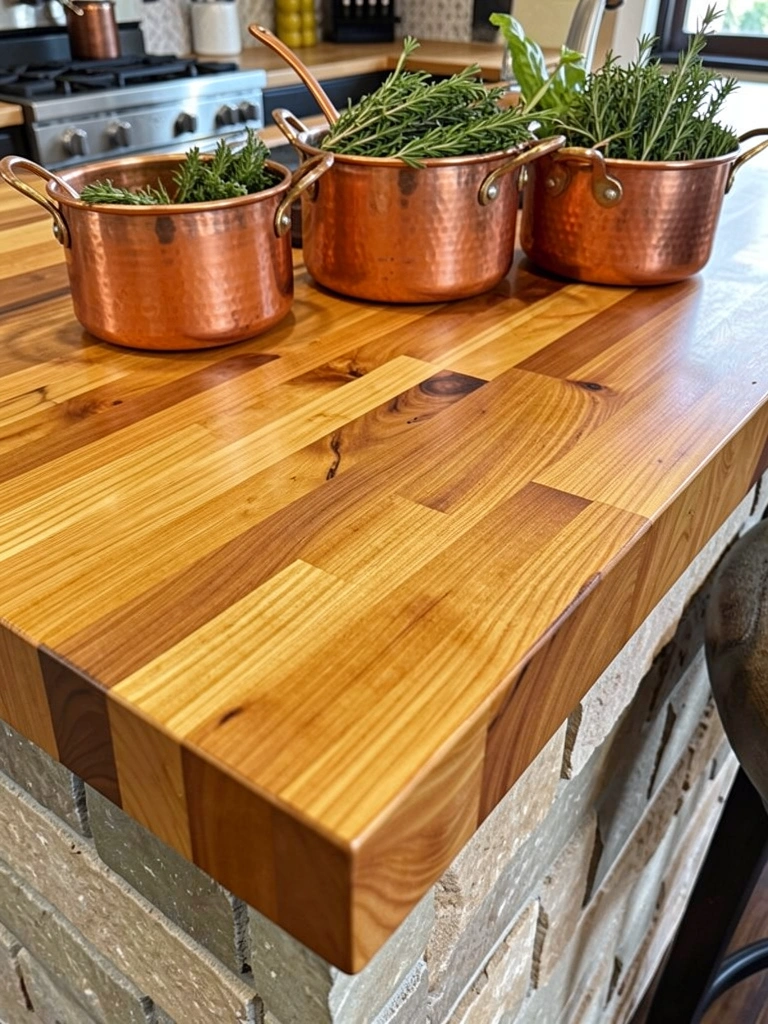
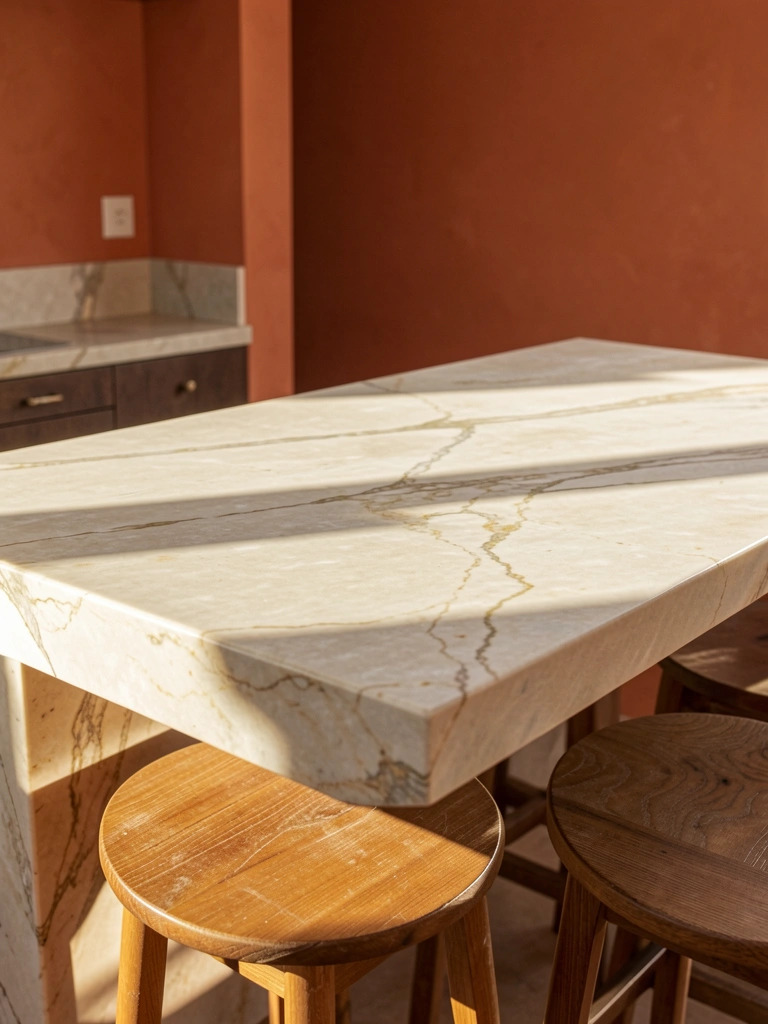
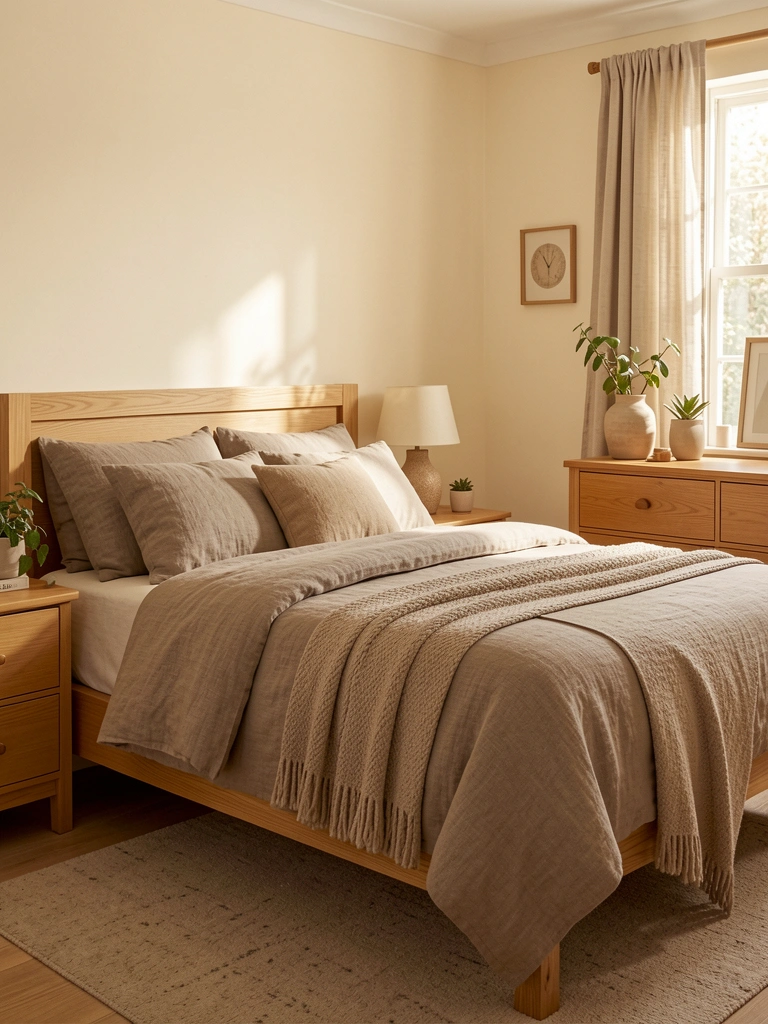
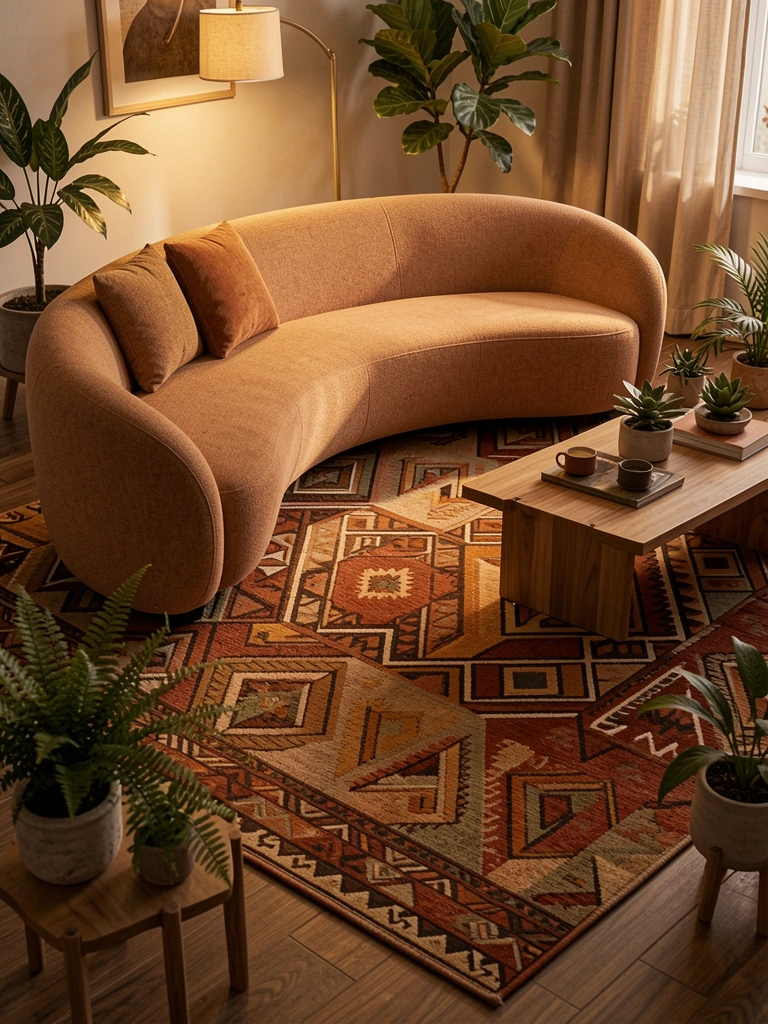
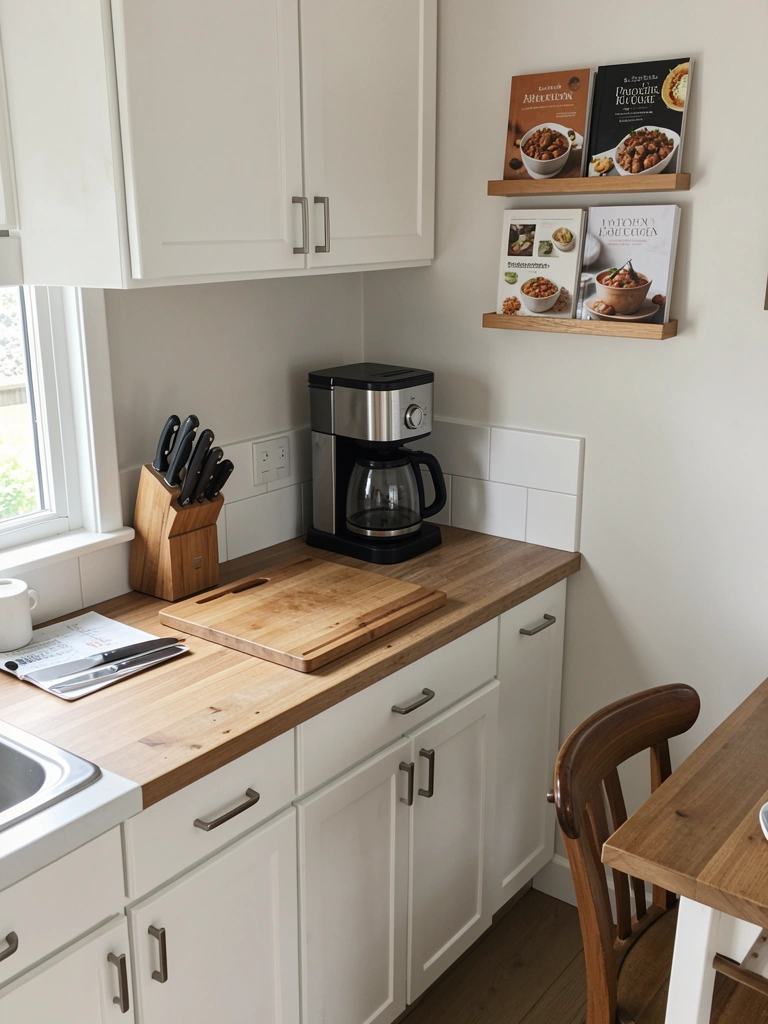
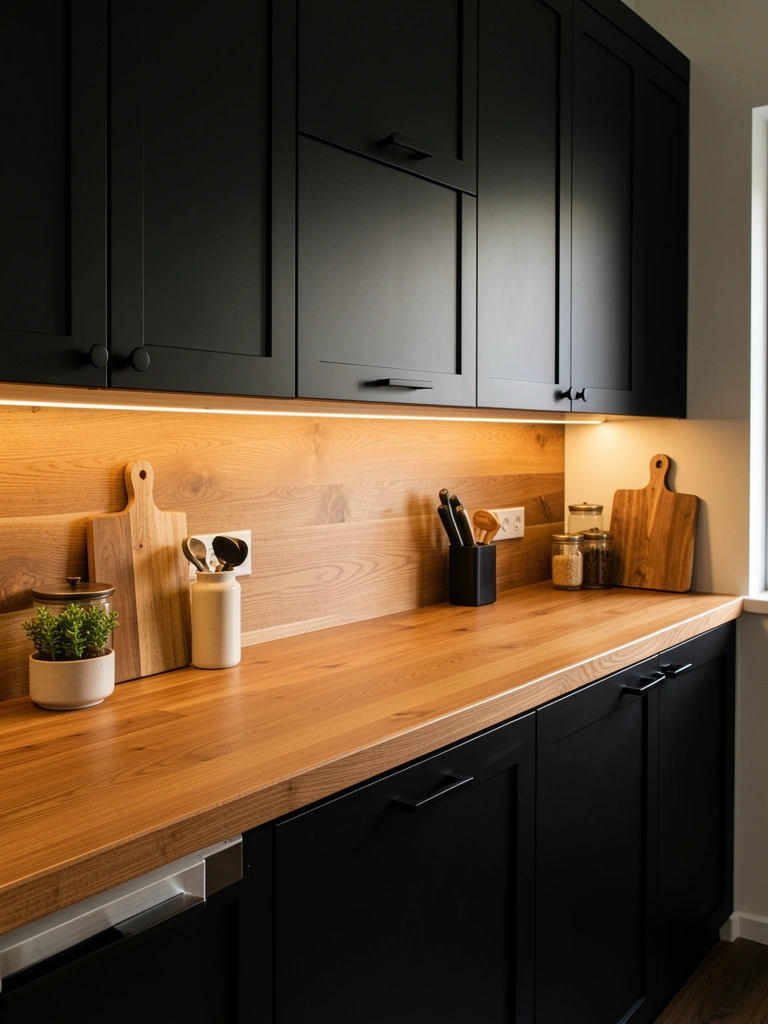
    16. Use Reclaimed Wood or Stone for Textural Warmth

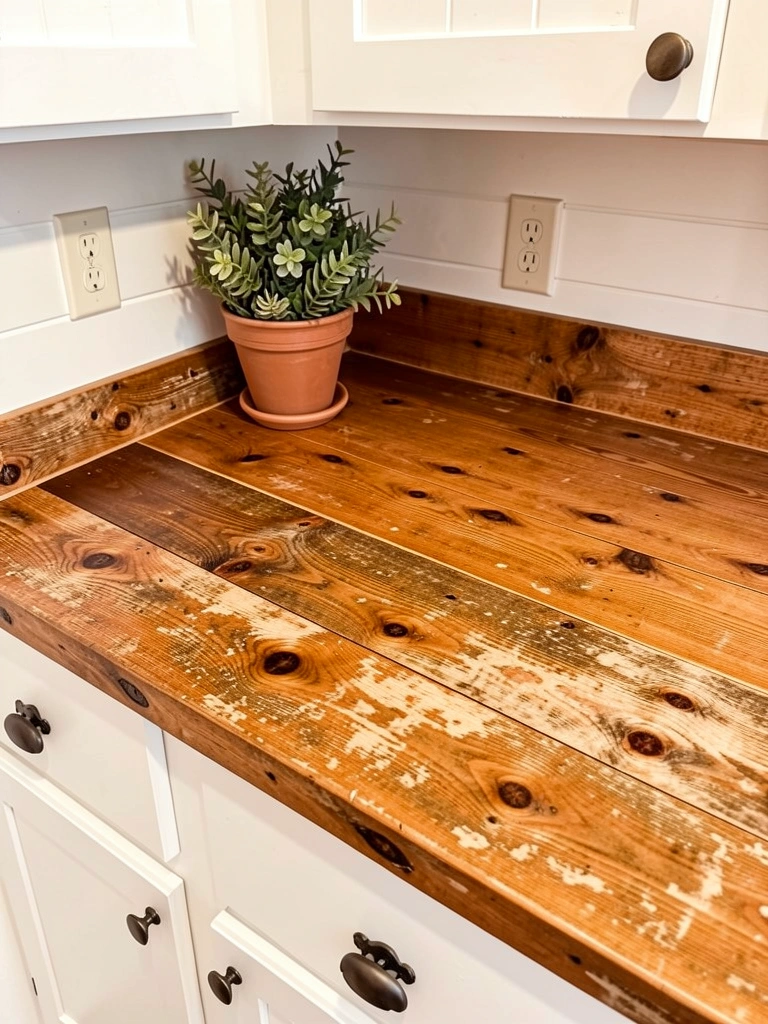
    Reclaimed wood or stone countertops add character and warmth that new laminate can’t match, making your laundry room feel like a real room rather than a utility closet.

    Reclaimed wood runs $60–$150 per linear foot installed; salvage shops and Etsy have beautiful pieces. Engineered wood ($30–$80 per foot) mimics the look for less. Stone or quartz countertops cost $80–$150 per foot but are extremely durable and low-maintenance. Even a small 4-foot countertop makes a dramatic difference. Seal wood properly to handle moisture and cleaning products. If cost is prohibitive, peel-and-stick wood-look contact paper ($20–$40) gives the aesthetic for temporary renewal.

    Your laundry room gains warmth and visual interest, and you genuinely enjoy the space.


    17. Create a Pet Washing Station Alongside Laundry

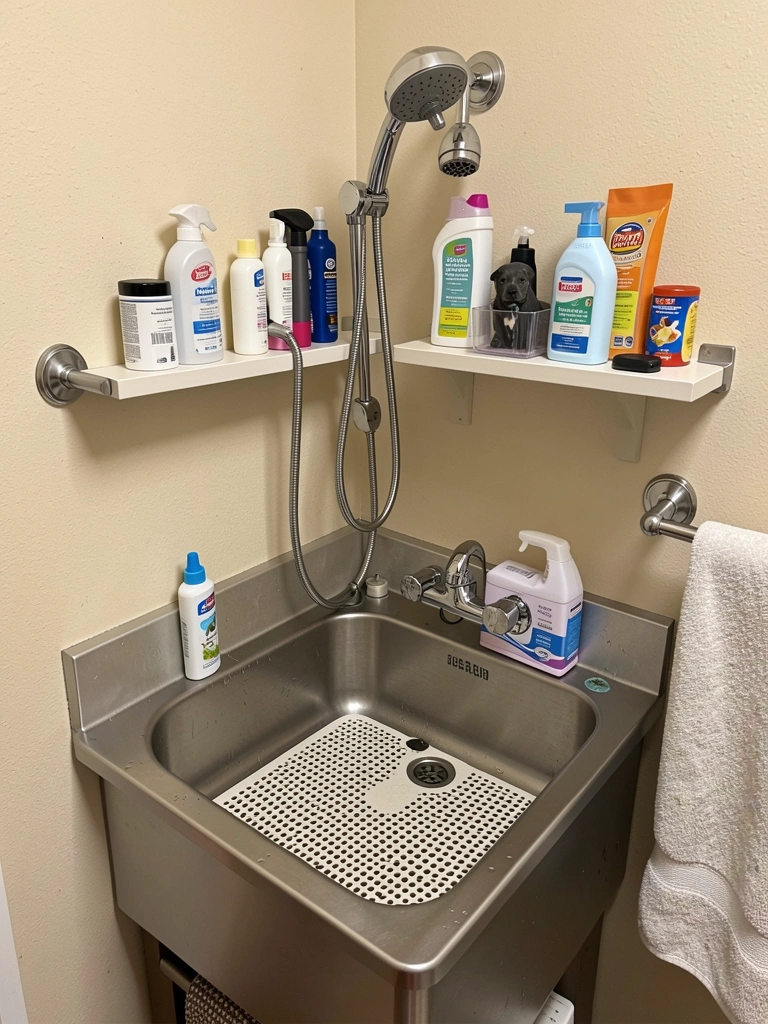
    If you have pets, combining a dog washing station with your laundry room consolidates cleanup, saves water, and keeps pet messes contained in one space.

    Install a pedestal sink with a high-arc or handheld faucet ($200–$500), or retrofit your existing utility sink with a handheld showerhead attachment ($30–$80). Place a non-slip mat in the basin to prevent slipping, and store grooming supplies—shampoo, brushes, towels—on a nearby shelf. Position the sink away from your laundry appliances to prevent water splashing on electronics. This works wonderfully in homes with muddy dogs or frequently-bathed pets since you’re already prepared with towels and water access nearby.

    Muddy paw prints go straight to the wash station, and your bathroom stays pristine.


    18. Mount Shelves Above Your Washer and Dryer

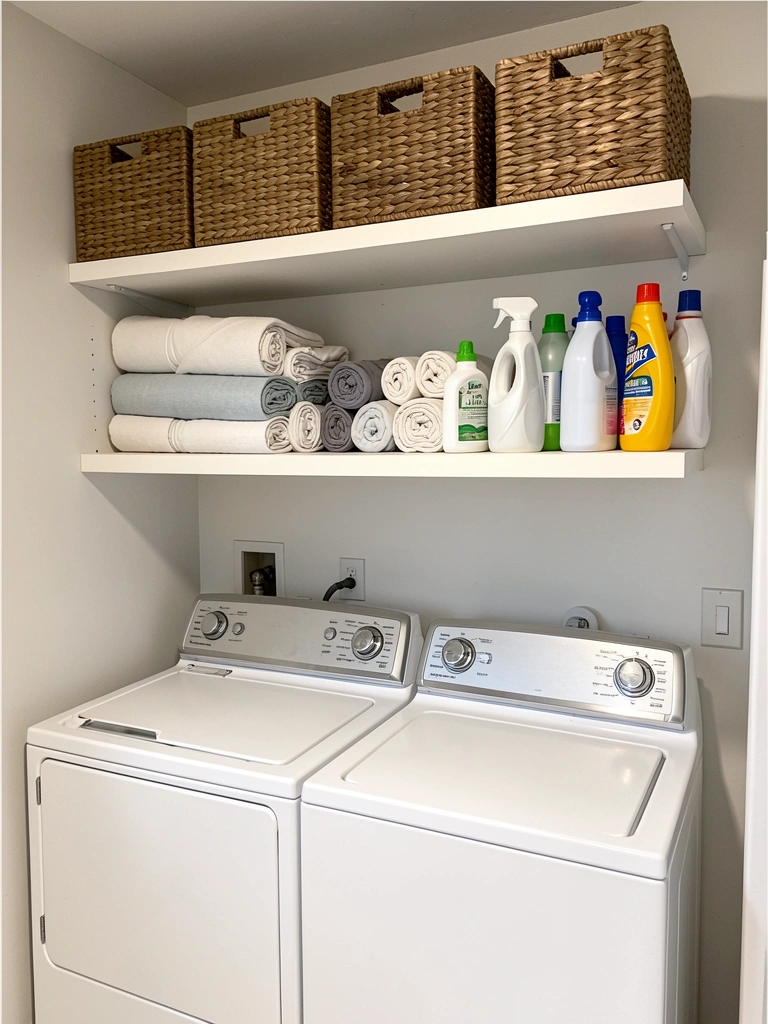
    The wall space above your appliances is prime real estate. Shelves mounted securely above your washer and dryer add storage without taking floor space.

    Shelves cost $30–$100 each; installation takes an hour if you’re comfortable with a drill or stud finder. Make sure shelves are installed per manufacturer specs and can handle weight safely (you don’t want supplies tumbling during a spin cycle). Avoid hanging anything directly above the washer opening where vibration could cause problems. Use this space for supplies you grab constantly: detergent, fabric softener, stain remover. Keep heavier items on lower shelves and lighter items higher up.

    You gain significant storage without sacrificing floor space or mobility around your appliances.


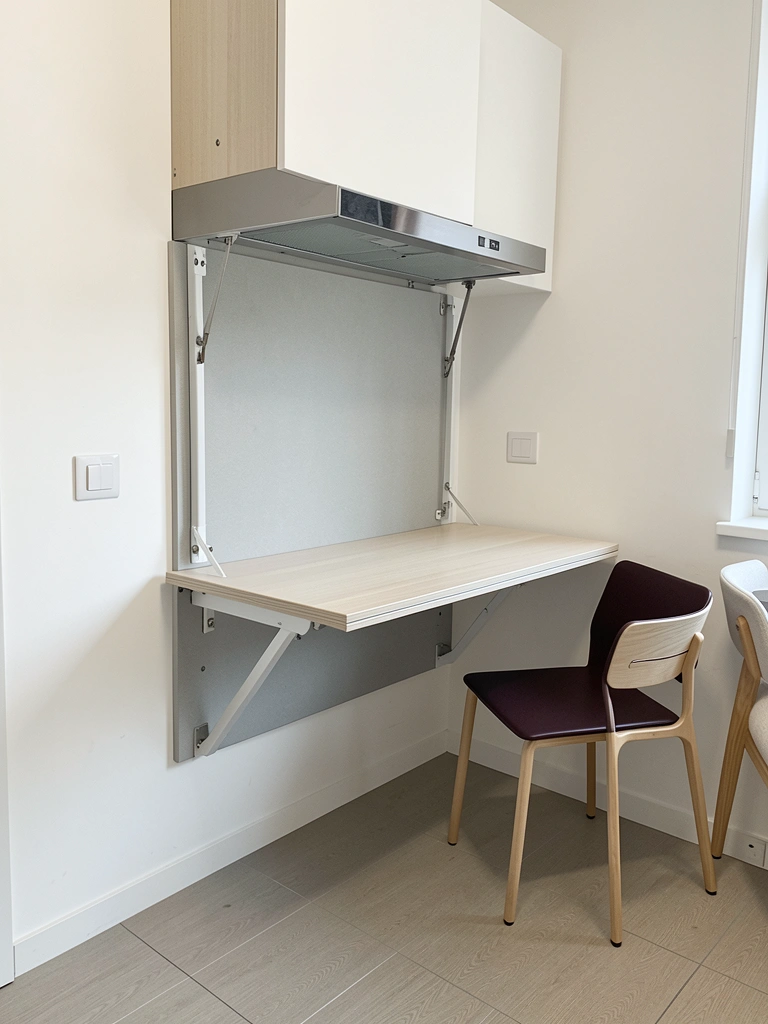
    19. Add an Ironing Station That Folds Up or Away

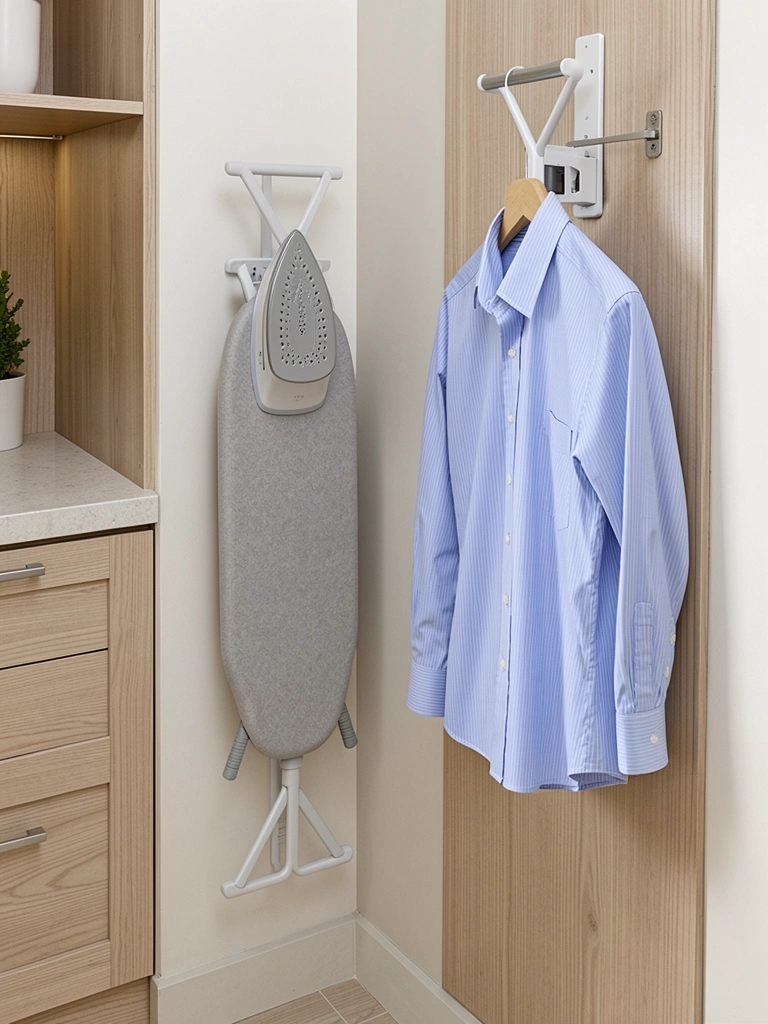
    A fold-down ironing board means you never sacrifice laundry room real estate to an unwieldy ironing setup gathering dust in the corner.

    Wall-mounted ironing boards cost $40–$120 and take 30 minutes to install; over-the-door models ($20–$50) work for renters. Position yours near a power outlet for an iron, and add a small shelf above for starch, spray bottles, and a pressing cloth. Some models include a small fabric catch or even hanging space for just-pressed items. When not in use, it flips flush against the wall. Pair this with a quality iron ($50–$150) with a temperature dial and steam function for wrinkle-free results without a professional pressing service.

    Ironing becomes less of a project and more of a quick refresh you can do while folding other laundry.


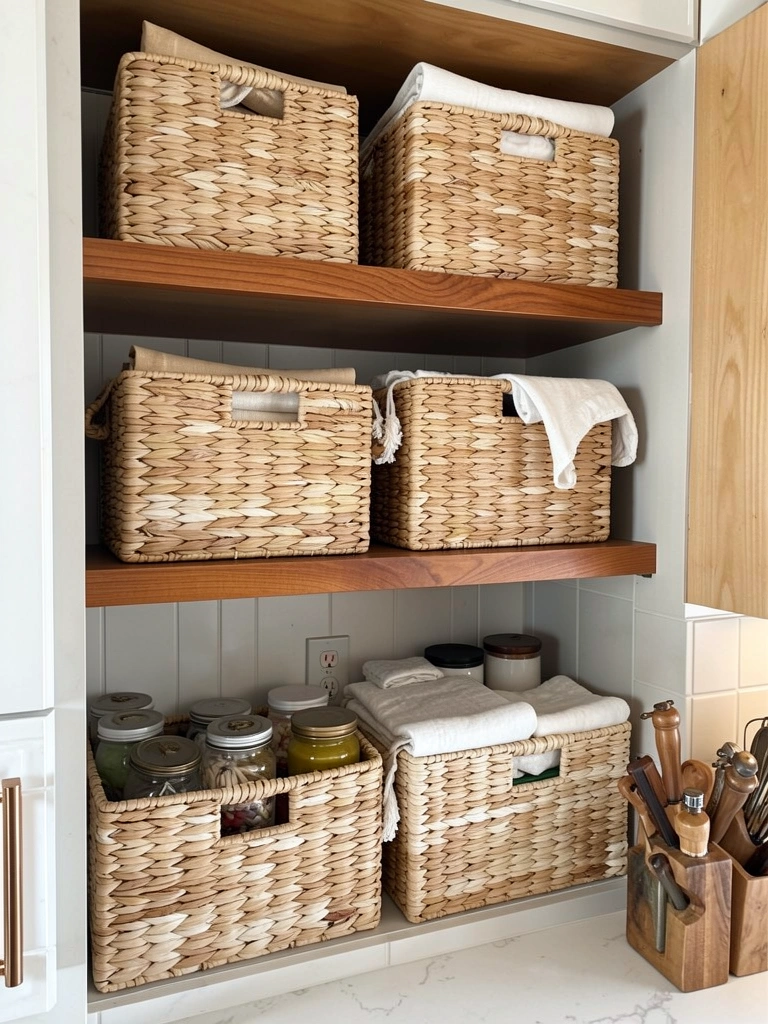
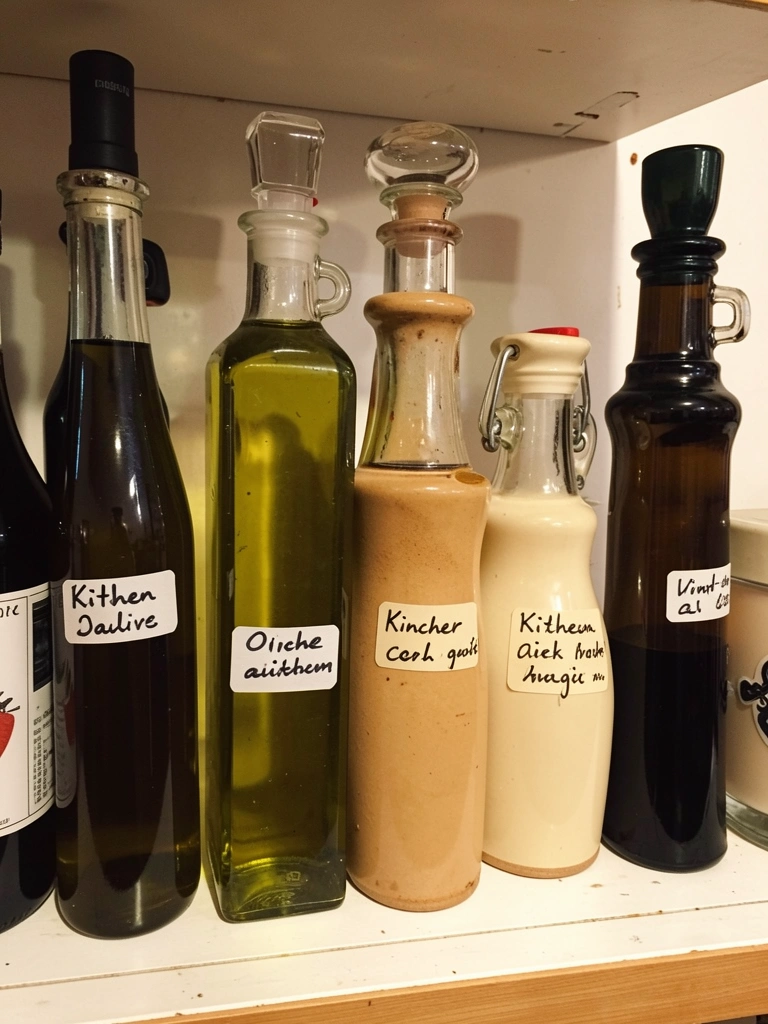
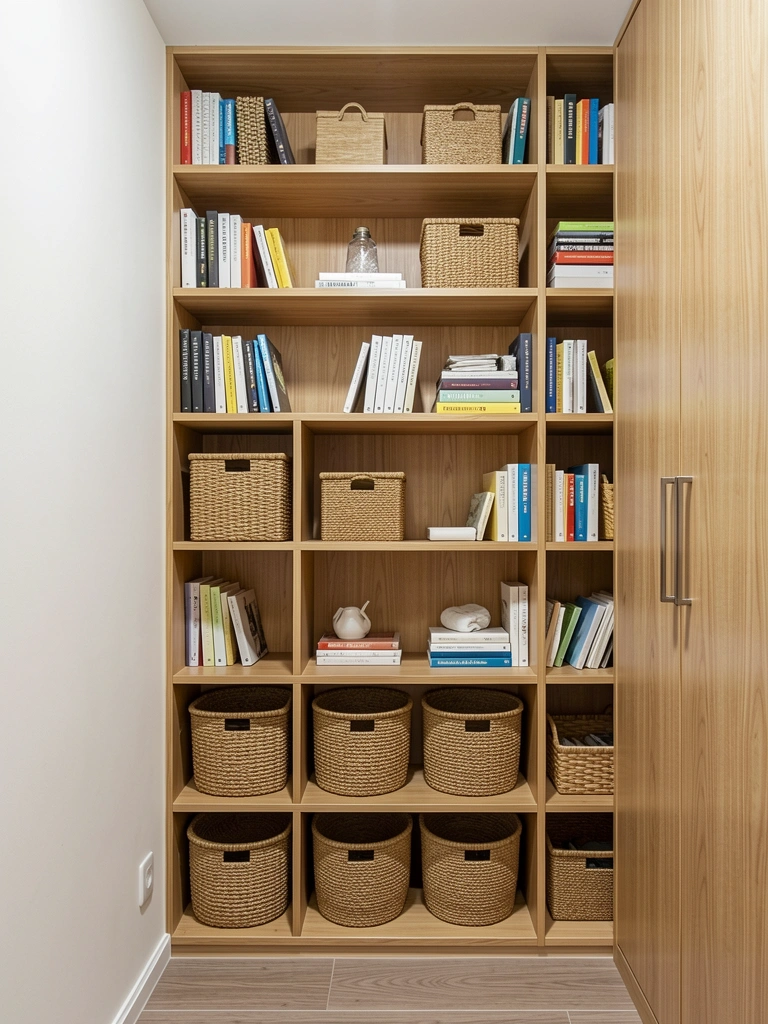
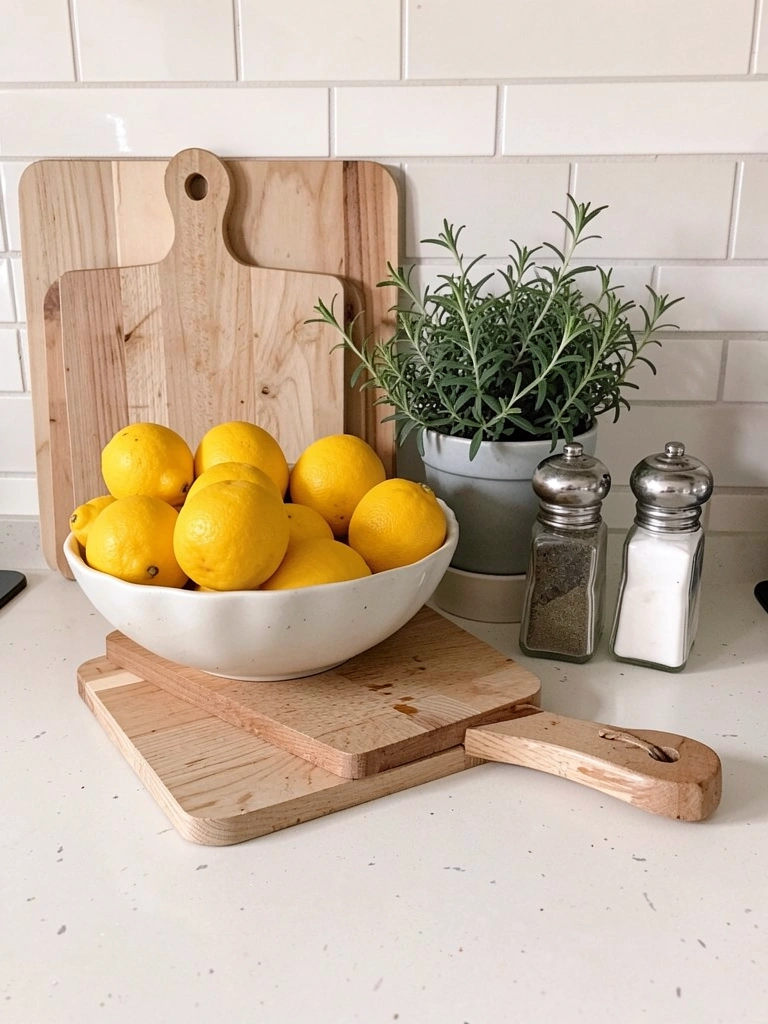
    20. Use Woven Baskets for Decorative and Functional Storage

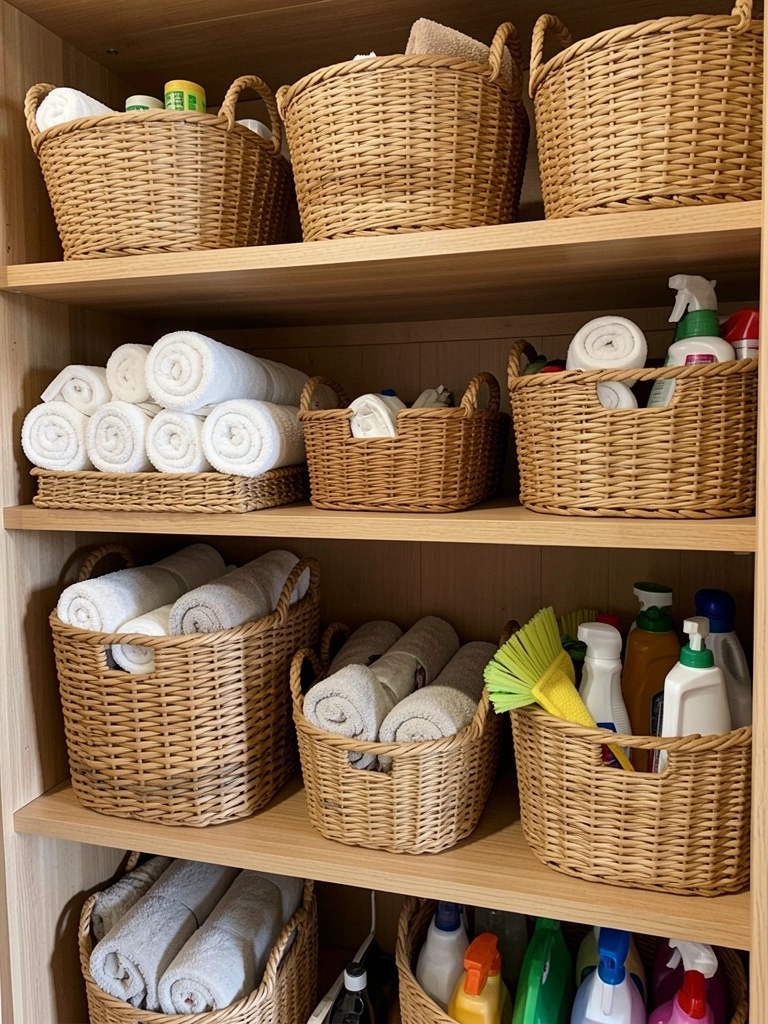
    Woven baskets add texture and warmth while hiding clutter on open shelves—they make your laundry room feel intentional and designed rather than chaotic.

    Wicker and rattan baskets range $15–$60 each depending on size and quality (IKEA, Target, and West Elm have excellent selections). Group baskets by size for visual cohesion, and label each one (even small labels make a difference): “Stain Removers,” “Softeners,” “Pet Supplies.” Mix basket colors slightly for depth—cream, light gray, and natural woven together feels more curated than all identical baskets. Baskets also protect open shelves from looking dusty since items stay partially hidden.

    Your shelves look like a styled Instagram photo rather than a storage overflow zone.


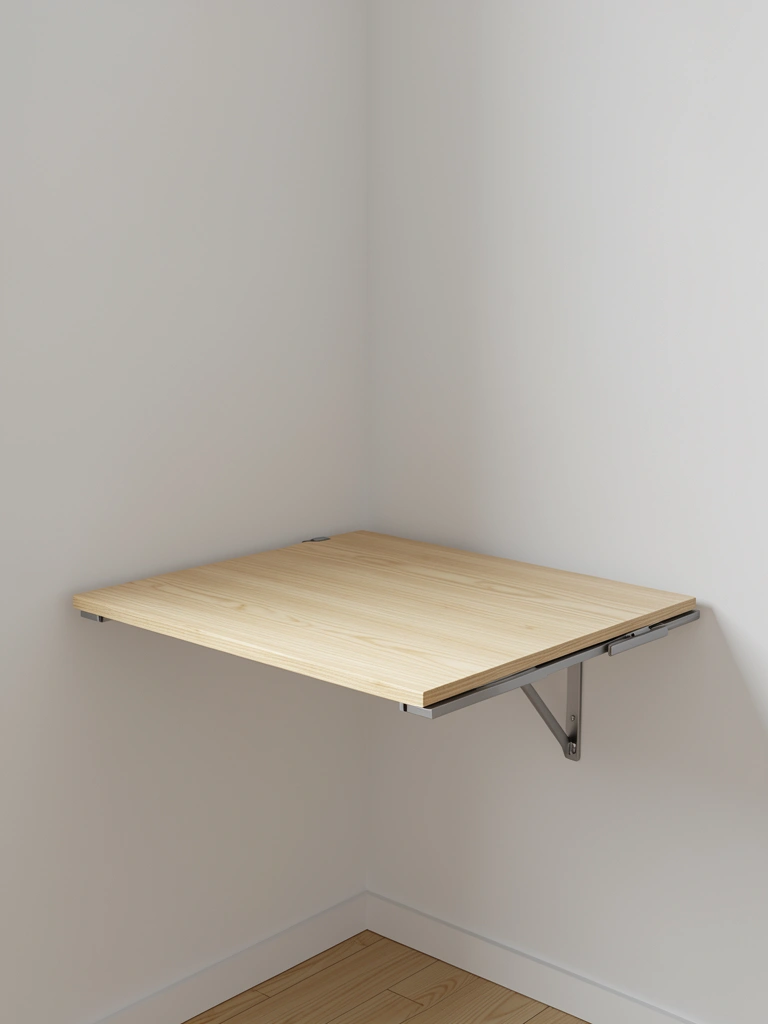
    21. Install Ergonomic Folding Counters to Reduce Strain

    An ergonomic folding counter at the right height saves your back and makes laundry day significantly less physically taxing, especially if you fold large loads regularly.

    A built-in folding counter costs $400–$1,200, but IKEA and Wayfair sell prefab options ($150–$400). Mount it at a height between 32–36 inches (roughly elbow-level when standing comfortably). Ensure the counter is at least 24 inches deep so you have room to work. Add task lighting directly above so you can see what you’re doing without shadow. If you have a small space, a pull-down or fold-away countertop ($100–$250) gives you work surface only when needed.

    Folding clothes stops feeling like a back-breaking chore and becomes manageable routine work.


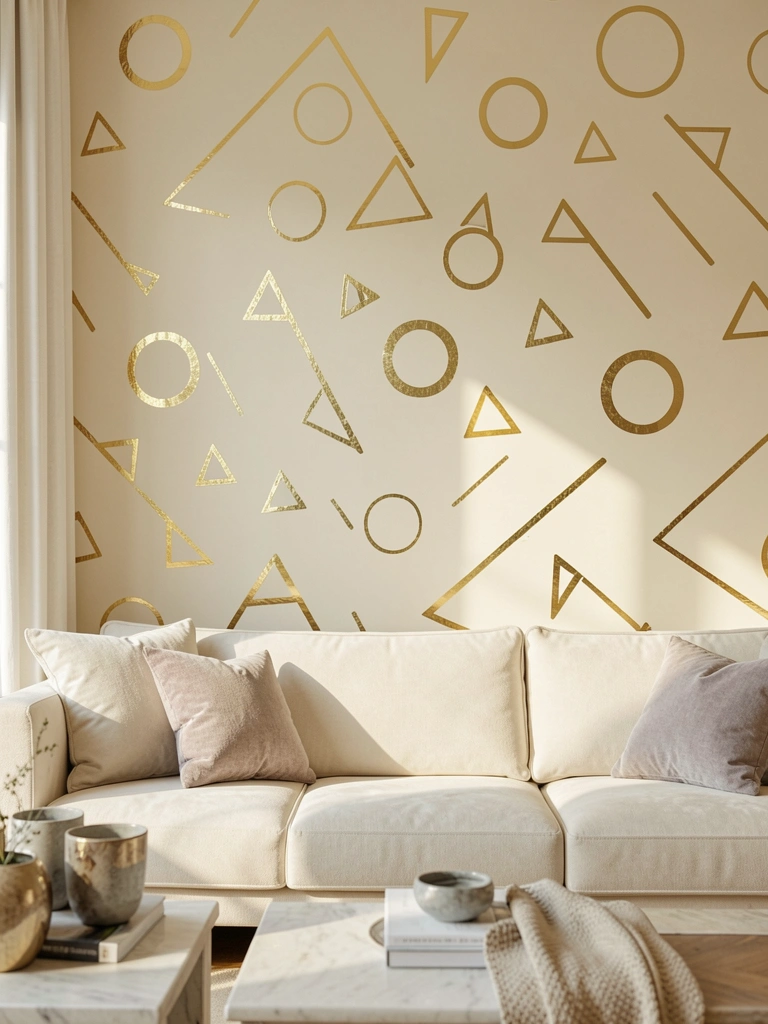
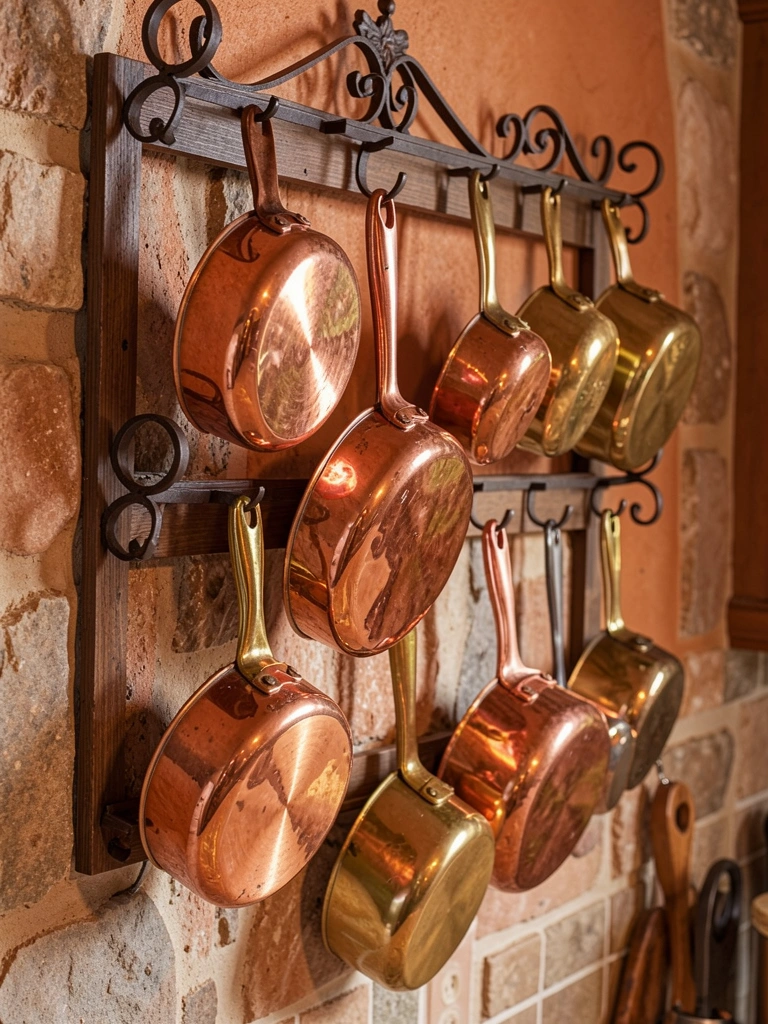
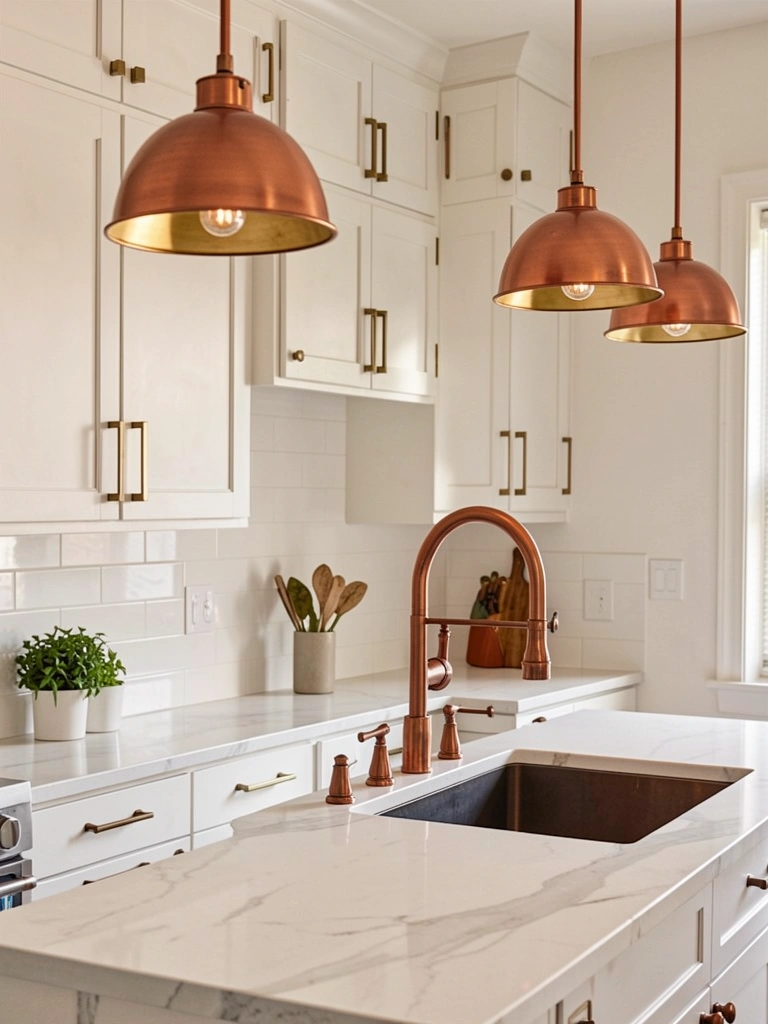
    22. Incorporate Mixed Metal Finishes for Upscale Appeal

    Mixing metal finishes (matte black, brushed gold, stainless steel) creates visual interest and a curated, expensive-looking aesthetic without premium pricing.

    Mix two or three metals maximum to avoid looking chaotic. Choose one dominant finish (say, stainless steel) and accent with a secondary metal (brushed gold or matte black). Consistent finish on handles, faucets, and hardware is all you need. This approach works especially well if you’re updating hardware gradually—buy a few gold handles now, a black faucet later, and they’ll look intentional together. Mixing metals signals intentional design choices rather than “whatever was available.”

    Your laundry room looks like you hired a designer even though you assembled it on your own timeline and budget.


    23. Add Smart Washers and Dryers With App Control

    Smart appliances with app control, cycle notifications, and remote start transform laundry day—you can start a load from anywhere and get alerts when cycles finish.

    Smart washers and dryers cost $900–$2,000+ per unit but often include energy-efficiency features that offset higher upfront costs. Brands like LG, Samsung, and GE offer app-controlled models with cycles customizable for fabric type and soil level. The real benefit? Start laundry before you leave work, get an alert when it’s done, and fold within minutes of arriving home. Some models diagnose issues remotely so you know whether to call a repair person. Smart dryers track energy use, helping you identify opportunities to line-dry instead.

    The convenience of controlling laundry from your phone feels like a small luxury that saves time daily.


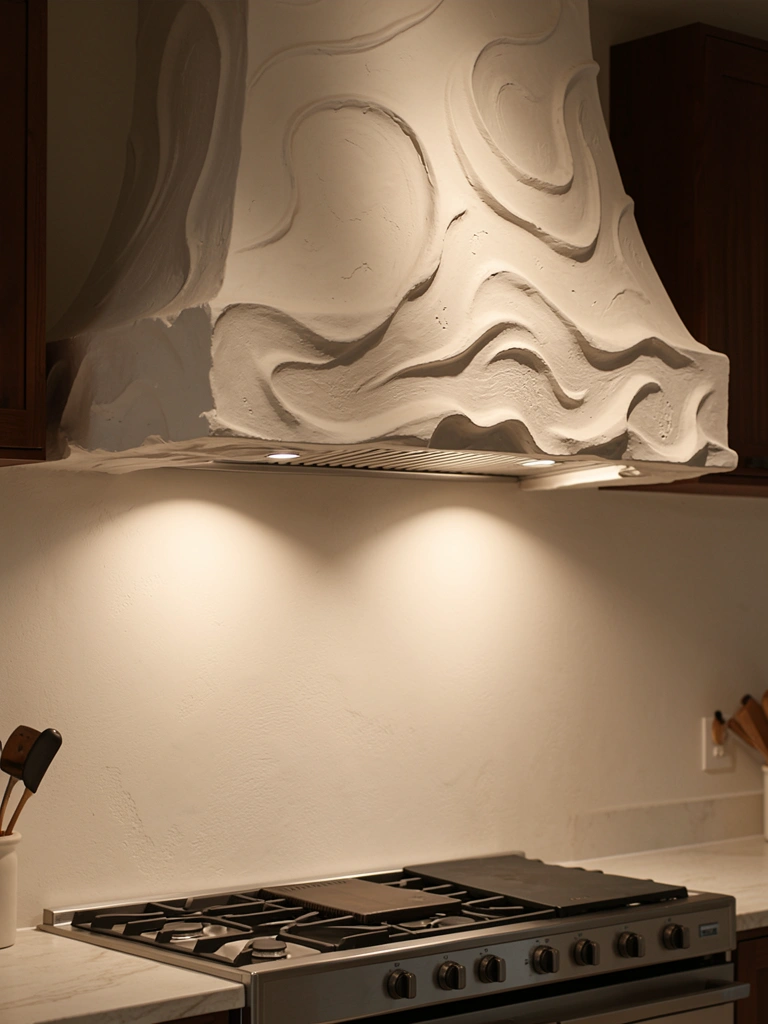
    24. Install Under-Shelf LED Lighting for Accent Illumination

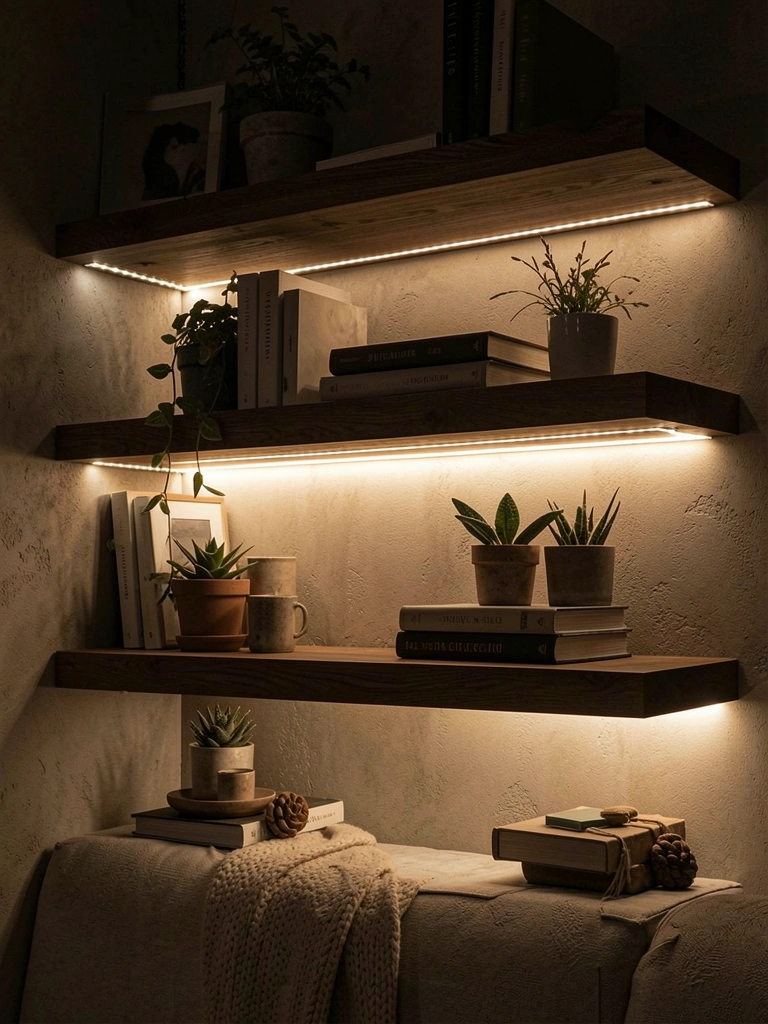
    Under-shelf LED strips create layered lighting that’s both functional and atmospheric—tasks become easier while the space feels warm and welcoming.

    Peel-and-stick LED strips cost $15–$40 and require zero installation expertise or wiring. Look for warm white lights (2700K) to match the cozy feeling you want. Measure your shelf width before ordering, cut strips to size if needed, and simply stick them underneath your shelves near the front edge. Battery-operated models work anywhere; plug-in versions need nearby outlets. A dimmer remote ($20–$40) lets you adjust brightness throughout the day.

    Your laundry room becomes a space where you actually want to spend time rather than a fluorescent-lit utility zone.


    25. Create Labeled Storage Zones for Each Family Member

    Assigning each household member their own laundry zone—whether a basket, shelf, or cubby—eliminates confusion and ensures everyone grabs their own clean clothes without piles migrating around the house.

    Set up zones using $50–$200 worth of baskets, labels, and small shelving, depending on your family size and existing storage. Label each zone clearly with a name, color, or number so items get returned to the right place every time. Kids learn responsibility when they know exactly where their clothes live. This system prevents “laundry mountains” on bedrooms because clothes have a designated landing zone. Include a “returns” basket for items that got lost or mixed up during sorting.

    Everyone knows where their laundry belongs, and clean clothes actually make it to closets instead of living in baskets.


    26. Invest in Energy-Efficient Appliances for Sustainability

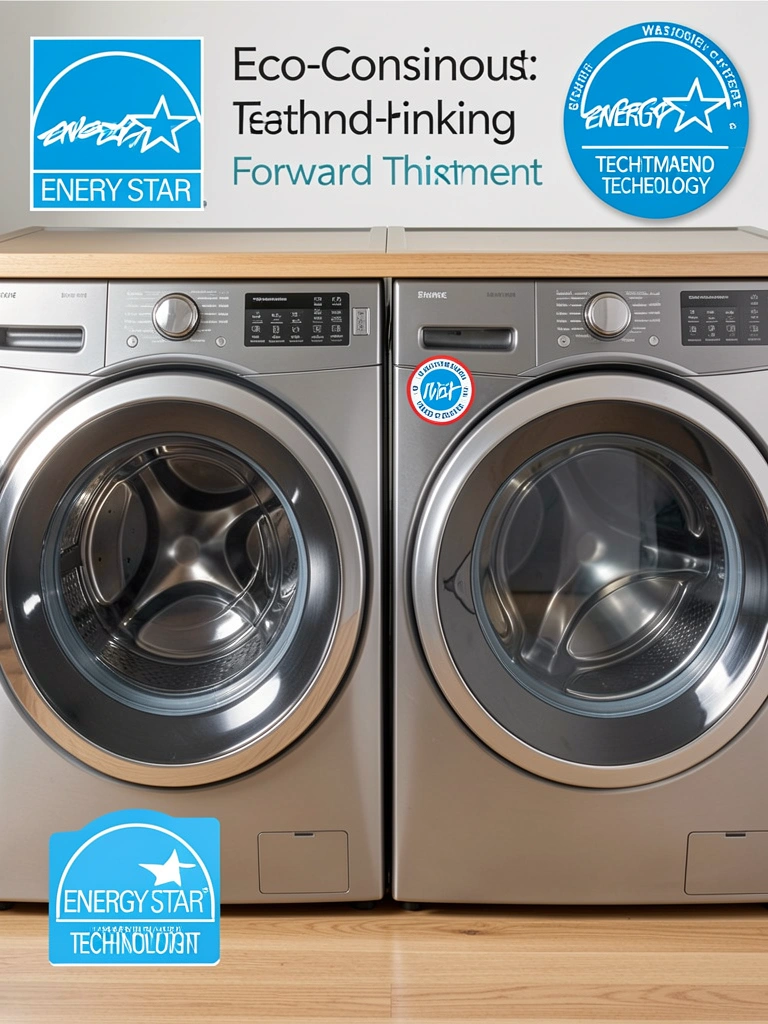
    Energy-efficient washers and dryers use significantly less water and electricity while cleaning clothes just as well—small choices add up to meaningful savings and environmental impact.

    ENERGY STAR-certified washers use 40% less water and 25% less energy than standard models. Front-loaders outperform top-loaders in efficiency. Upgrading from older appliances to efficient models costs $800–$2,000+ but reduces utility bills by $10–$25 monthly, paying for itself in 5–7 years. Look for models with multiple water level settings, temperature controls, and cycle options so you can adjust for each load. Some utilities offer rebates for efficient appliance purchases, further offsetting cost.

    You save money long-term while reducing water and energy consumption—sustainability and budget-consciousness work hand-in-hand.


    Save this post and try one idea this weekend. Whether you start with a simple color refresh or splurge on new appliances, every upgrade moves you closer to a laundry room you actually enjoy. Pick one solution that solves your biggest pain point first—then come back for the next.

  • 26 Artistic Bed Frame Ideas That Turn Furniture Into Art

    26 Artistic Bed Frame Ideas That Turn Furniture Into Art

    Your bed frame doesn’t have to be boring. It’s the biggest piece of furniture in your bedroom—the one thing you see every morning and night—so why not make it a statement? Whether you’re renting, redecorating on a budget, or ready to invest in something special, there’s an artistic bed frame idea that fits your style and space. We’ve gathered 26 creative approaches that turn your bed from basic to beautiful. You’ll find DIY hacks, affordable finds under $100, and investment pieces that’ll last years. From curved headboards to reclaimed wood designs, sculptural metal frames to upholstered masterpieces, each idea brings personality and intentionality to your sanctuary. Let’s explore how to make your bed the artwork your bedroom deserves.

    1. Curved Headboard With Soft Upholstery

    Curved headboards are having a major moment—47% of furniture lovers are choosing organic shapes over sharp angles. A rounded, upholstered headboard instantly makes your bedroom feel more inviting and visually softer.

    Hunt on Wayfair, Article, or Facebook Marketplace for curved headboard frames ($150–$500). If you’re handy, purchase a curved plywood form and upholster it yourself with batting and fabric ($50–$100 in materials, 3–4 hours). Alternatively, find mid-century pieces at antique shops. Pair it with layered bedding and pendant lights on either side.

    The rounded silhouette catches light beautifully in photos and photographs, making your bed look like a design magazine spread. You’ll notice how much softer your whole bedroom feels.

    2. Live-Edge Wood Frame for Natural Drama

    Live-edge wood bed frames celebrate nature’s imperfections—no two are alike. The irregular edge becomes the focal point, turning raw material into refined furniture.

    Source reclaimed or sustainably harvested live-edge slabs from Etsy, local woodworkers, or lumber yards ($400–$1,200 for a complete frame). Craftspeople will route the edges smooth and add support legs. For renters, smaller live-edge accent pieces like a shelf above your bed work beautifully. Finish with natural oils to enhance the grain.

    This design makes your bedroom feel intentional and grounded. Visitors always comment on the artistry—it’s a conversation starter that cost less than a traditional designer frame.

    3. Macramé Woven Headboard for Boho Texture

    Macramé brings handmade warmth and texture—especially if you weave it yourself. The knotted pattern adds depth without taking up floor space.

    Find pre-made macramé headpieces on Etsy, Urban Outfitters, or Amazon ($60–$200). Mounting is simple: attach a wooden dowel or driftwood rod to the wall above your bed, then hang the macramé using hooks. Want to DIY? Grab cotton rope, paracord, or jute from a craft store ($20–$40) and follow a YouTube tutorial (2–4 hours). Beginners do best with simple square-knot patterns.

    The texture creates visual interest and softens harsh bedroom corners. Plus, it’s totally renter-friendly—you can take it with you or gift it forward.

    4. Metal Frame With Geometric Patterns

    Metal bed frames with geometric cutouts bring architectural interest and an industrial-meets-modern edge. The negative space becomes part of the design.

    Look for geometric metal frames on Wayfair, Article, CB2, or West Elm ($300–$800). If you can weld or know someone who can, commission a custom piece from a local metalworker ($200–$600). Pre-made options include hexagon, triangle, and wave patterns. Pair with crisp linens to let the frame shine.

    The geometric details cast interesting shadows on your wall as light changes throughout the day. Your bedroom becomes more sophisticated without feeling cold or impersonal.

    5. Floating Platform Bed for Minimalist Impact

    Floating beds appear to levitate—creating visual lightness and making small rooms feel bigger. They’re bold, modern, and surprisingly accessible.

    Install a floating bed frame kit from IKEA, Wayfair, or Amazon ($150–$400 for a queen). You’ll need wall studs and basic tools. The installation takes 2–3 hours. Alternatively, hire a handyman ($50–$150). Ensure you install into solid structural supports—don’t skip this step. The gap underneath creates storage for under-bed bins.

    The floating effect makes your bedroom look like a boutique hotel. You’ll instantly feel the airiness, and cleaning under the bed becomes effortless. Renter-friendly wall-mounted versions also exist.

    6. Upholstered Headboard With Nailhead Trim

    Nailhead trim adds a designer touch—sophisticated without being fussy. It draws the eye upward and adds subtle sparkle.

    Purchase a nailhead-trimmed headboard from Wayfair, Article, or Pottery Barn ($250–$600). DIY option: buy an unupholstered headboard and upholster it yourself with fabric and nailheads ($80–$150, 4–5 hours using a staple gun and hammer). Brass, bronze, and nickel finishes are all trending. Pair with traditional or eclectic bedding.

    The nailhead detail photographs beautifully and adds a touch of luxury to any bedroom style. You’ll feel more put-together every morning.

    7. Reclaimed Barn Door Headboard

    Barn doors tell stories—weathered wood with genuine patina becomes stunning artwork above your bed. This works beautifully in farmhouse, rustic, or even eclectic modern spaces.

    Source reclaimed barn doors from architectural salvage yards, Etsy, or Facebook Marketplace ($150–$400). Mount securely to the wall using heavy-duty brackets and find the studs. The door doesn’t need to slide—it’s stationary art. If authentic barn doors are pricey, try faux finishes on plywood ($30–$80).

    The authenticity and character make your bedroom feel grounded and collected, like you’ve traveled to find treasure. This is a true focal point that sparks conversation.

    8. Tall Canopy Frame With Flowing Fabric

    Canopy beds create an instant focal point and define your sleep space. The fabric softens hard lines and adds texture and movement.

    Shop canopy frames on Wayfair, Article, or Amazon ($200–$700). Pair with flowing linen or gauzy curtain fabric ($20–$60 per panel from IKEA, Target, or fabric stores). Tie fabric at corner posts with ribbons or leather straps. For renters, tension-rod canopies work just as well. Drape and secure without permanent installation.

    The fabric billows gently and catches light beautifully—it’s like sleeping in a boutique hotel. You’ll feel transported every night, and the visual drama makes bedroom photos stunning.

    9. Stacked Stone or Brick Accent Wall Bed

    Stone and brick add massive visual interest and anchor your bed as a true focal point. The texture catches light beautifully and never goes out of style.

    Install peel-and-stick faux stone tiles ($40–$120 from Amazon, Home Depot, or Wayfair)—renters, this is your best friend. Real stonework runs $300–$1,000+ but lasts forever. Both options take 6–8 hours of prep and application. Prepare the wall surface carefully for best results.

    The texture transforms your entire bedroom instantly. Photos pop with dimension, and the space feels intentional and high-end. It’s a game-changer for making your bed truly special.

    10. Sculptural Metal Headboard With Art Deco Details

    Art Deco is making a major comeback—geometric patterns, metalwork, and glamorous details are everywhere. A sculptural metal headboard channels this perfectly.

    Find art deco headboards on Etsy, 1stDibs, or vintage marketplaces ($250–$800). Modern reproductions from Article or Wayfair offer similar vibes ($150–$500). Pair with jewel-toned bedding (emerald, sapphire, or burgundy). The metalwork catches and reflects light for extra dimension.

    The geometric patterns make your bedroom feel collected and curated. You’ll love how sophisticated it looks—like you have a personal designer on your team.

    11. Upholstered Platform Bed With Built-In Shelving

    Built-in storage in your headboard combines beauty and function. Every book and plant becomes part of the design.

    Commission a custom upholstered platform with shelving from a carpenter or furniture maker ($600–$1,500). Pre-made versions exist on Wayfair and Article ($300–$700). The shelves should be sturdy and anchored to wall studs. Keep styling minimal—choose 3–5 objects per shelf max for a curated look.

    This setup gives you nightstand storage without extra furniture cluttering your floor. Your bedroom becomes more organized and visually open while staying totally personal.

    12. Rattan or Woven Headboard for Warmth

    Woven rattan or wicker headboards bring organic warmth and a relaxed, collected vibe. The natural material softens the room instantly.

    Find rattan headboards on Etsy, West Elm, or Wayfair ($150–$400). Alternatively, purchase a rattan privacy screen and repurpose it as a headboard ($80–$200). Installation is simple—mount to the wall with L-brackets. The material is lightweight and won’t damage walls if you’re careful.

    The warm, natural texture makes your bedroom feel like a retreat. The woven pattern creates beautiful shadows throughout the day, adding visual depth without extra clutter.

    13. Tufted Velvet Headboard for Luxury Feel

    Velvet tufting screams high-end—the soft fabric and button details create depth and invite touch. It’s indulgent without being over the top.

    Shop tufted velvet headboards on Wayfair, Article, or Restoration Hardware ($300–$1,200). Budget options from Amazon or IKEA ($100–$250) still look beautiful. DIY upholstering a pre-made frame ($60–$100 base + $50–$100 fabric) takes patience but is doable. Jewel tones (navy, emerald, burgundy) photograph best.

    The tufted pattern catches light and shadow, making your bed look like museum-quality design. You’ll feel pampered every time you climb into bed.

    14. Driftwood Frame for Coastal Artistry

    Driftwood is nature’s sculpture—each piece is one-of-a-kind. Arranging it as a headboard or frame becomes art installation.

    Collect driftwood from beaches or buy pre-curated pieces from Etsy or specialty shops ($150–$500 for a headboard). Mount pieces to the wall using industrial adhesive and brackets. Alternatively, commission a woodworker to construct a frame ($300–$800). Seal with clear finish to protect the natural patina.

    The organic shapes and weathered finish make your bedroom feel like a sanctuary. It’s a true conversation starter—people always ask where you found it.

    15. Upholstered Wingback Headboard for Drama

    Wingback headboards command attention—the curved wings draw eyes upward and create a cozy alcove effect. They’re particularly stunning in jewel tones or textured fabrics.

    Find wingback headboards on Wayfair, Article, or Pottery Barn ($400–$900). Budget options from Amazon ($150–$300) work well too. Look for versions with nailhead trim or tufting for extra character. Pair with traditional or transitional bedding.

    The wings frame your pillows like artwork and make the bed feel like a retreat within your room. You’ll feel like royalty every time you settle in.

    16. Ladder-Style Frame for Industrial Edge

    Ladder frames are architectural, unexpected, and totally modern. The open design keeps the room visually light while making a bold statement.

    Shop ladder headboards on Wayfair, Article, or CB2 ($200–$600). DIY with wooden dowels or metal pipes ($40–$80 in materials, 3–4 hours). Mount securely to the wall—this isn’t a decorative lean. Industrial black or natural wood finishes work best. Layer neutral bedding for balance.

    The geometric ladder pattern photographs beautifully and gives your bedroom an art-gallery feel. It’s unexpected enough to be memorable—visitors notice immediately.

    17. Quilted Textile Art Headboard

    Displaying a quilted textile as headboard art celebrates handmade craft and brings nostalgia. It’s deeply personal and conversation-starting.

    Hang a treasured family quilt or hunt Etsy, antique shops, or thrift stores for vintage quilts ($30–$150). Mount on a wooden dowel or quilt rack ($20–$60) using picture hanging hardware. A professional framing shop can seal and preserve valuable pieces ($100–$300). Position it centered or asymmetrically for different vibes.

    This approach honors the quilt-maker’s work and becomes a focal point of warmth in your bedroom. It adds soul to your space in a way mass-produced furniture cannot.

    18. Curved Plywood Frame With Geometric Cutouts

    Plywood isn’t just for DIY—it can be sculpted into curves and cutouts that rival expensive designer pieces. It’s affordable and lightweight.

    Purchase birch plywood ($30–$50 per sheet) and work with a local carpenter or furniture maker to design custom curves and patterns ($200–$500 labor). Alternatively, find pre-made plywood bed frames on Wayfair or Article ($150–$400). Finish with natural oil or paint to match your palette.

    The smooth curves and negative space create visual softness. Plywood pieces often cost half as much as traditional frames while looking equally artistic.

    19. Staggered Wood Slat Art Arrangement

    Staggered wood slats create rhythmic pattern and visual movement. Each slat catches light differently, creating shadow play throughout the day.

    Buy wooden slats or dowels from a hardware store ($20–$40) and arrange them yourself on a wooden backing board ($30–$50), then mount to the wall. Hire a carpenter to cut and arrange ($100–$300). Pre-made versions exist on Etsy and Wayfair ($200–$600). Natural wood or painted finishes both work beautifully.

    The rhythm of the slats is visually soothing and creates depth without bulk. Your bedroom feels modern and intentional while staying peaceful.

    20. Mirror-Paneled Headboard for Light Reflection

    Mirror panels multiply light and make rooms feel bigger. The reflective surface adds glamour and visual interest without adding weight.

    Find mirror-paneled headboards on Wayfair, Article, or CB2 ($300–$700). DIY with mirror tiles ($20–$60 from hardware stores) and strong adhesive or frame backing. Hire a handyman for installation ($50–$150). Choose brass, black, or rose-gold frames for contemporary style, or skip frames for seamless mirrors.

    The reflections bounce light around your room, making it appear larger and brighter. You’ll notice improved lighting instantly, plus the glamorous touch feels special without being overdone.

    21. Cork or Leather Textured Panel Headboard

    Cork and leather bring luxury tactile interest—plus cork is sustainable and soundproof. These materials age beautifully and tell a story over time.

    Source cork or leather panels from upholstery suppliers ($100–$300 for materials). Mount to a plywood backing and attach to the wall ($150–$400 installation). Pre-made versions from high-end retailers run $500–$1,200. Cork is eco-friendly; leather adds warmth and patina.

    The texture invites touch—you’ll run your hand across it daily. These materials improve with age, so your headboard becomes more beautiful and distinctive over time.

    22. Arched Entry Bed Frame for Romantic Impact

    Arched frames create architectural drama—they frame your bed like it’s displayed in a gallery. The shape is unexpected and utterly romantic.

    Commission a custom arched frame from a metalworker ($400–$1,000) or find pre-made versions on 1stDibs or luxury furniture sites ($600–$1,500). Metal is most common, but wood arches work too. Pair with flowing bedding or sheer curtains draped within the arch for extra romance.

    The arched silhouette photographs beautifully and transforms your bedroom into a design showpiece. It’s a bold choice that pays off big in visual impact.

    23. Pegboard Headboard for Creative Flexibility

    Pegboards offer gallery-style flexibility—you can rearrange styling endlessly. It’s practical art that evolves with your mood.

    Install a pegboard sheet ($30–$60 from hardware stores) and paint it ($20–$40) in a color matching your palette. Add hooks, pegs, and shelves ($40–$80). Total cost: under $200. Hire help for mounting ($50–$100). Keep styling minimal—choose 5–7 pieces max to avoid clutter. Swap items seasonally.

    The flexibility means your bedroom never feels stale. You can refresh the look without buying new furniture, and it photographs differently each season—perfect for content creators.

    24. Velvet Rope or Macramé Wall Hanging

    Thick velvet rope or oversized macramé brings sculptural drama. The texture is contemporary-bohemian and deeply tactile.

    Find velvet rope on Amazon or fabric suppliers ($30–$80 per coil). Loop, knot, and suspend from a dowel mounted above your bed. Alternatively, purchase chunky macramé ($60–$200) from Etsy or home stores. Both installations take 30 minutes to 2 hours. Super renter-friendly—just unmount the dowel.

    The knotted texture catches light and shadow beautifully. Your bedroom gains bohemian warmth without feeling precious or overdone.

    25. 3D Geometric Wood Wall Behind Bed

    3D wood installations bring museum-quality design home. The geometric shapes create ever-changing shadows as light shifts throughout the day.

    Source pre-made 3D wall panels on Amazon, Wayfair, or design specialty sites ($150–$400). Commission a custom installation from a carpenter ($300–$800). Installation takes 4–6 hours. Use natural wood or stain in contrasting colors for more drama. Ensure wall studs support the weight.

    The sculptural quality makes your bedroom feel like a design gallery. Visitors are always impressed—it’s unexpected and memorable in the best way.

    26. Upholstered Curved Bench Base With Floating Shelves

    A curved bench at the bed’s foot adds seating and sculptural interest—especially when paired with floating shelves. It’s both functional and beautiful.

    Upholstered benches start at $200–$400 from Article, Wayfair, or IKEA. Pair with floating shelves in matching wood ($60–$150 from IKEA or Home Depot). Mount everything into wall studs for safety. Style shelves with books, plants, and artwork—aim for 70% functional, 30% decorative.

    The curved shapes soften your bedroom while the shelves add personality. You gain extra storage and seating without crowding the floor, and the display area becomes a styling opportunity.


    Save this post and pick your favorite idea this weekend. Whether you go sculptural, minimalist, or bohemian, your bed deserves to be the star of your bedroom. Which artistic frame speaks to you?

  • 25 Wall Drawing Ideas Anyone Can Try for Creative Interiors

    25 Wall Drawing Ideas Anyone Can Try for Creative Interiors

    Your walls don’t have to be blank canvases anymore. Whether you’re renting, own your home, or just want to shake things up without a full paint job, wall drawing offers a creative outlet that feels way more personal than store-bought art. We’re talking murals, stencils, hand-painted accents, and mixed-media designs that turn your spaces into conversation starters. You don’t need to be an artist—most of these ideas work for absolute beginners, and we’ve included budget options for every skill level. Ready to give your rooms some personality? Let’s dive into 25 creative wall drawing ideas that anyone can actually try.

    1. Paint a Watercolor Wash Mural in Muted Tones

    A watercolor wash is one of the most forgiving mural styles because perfection isn’t the goal—organic and dreamy is. This technique involves loosely painting diluted acrylic or latex paint directly onto your wall with large brushes or sponges, letting colors blend and bleed into each other naturally.

    Grab basic acrylic paint ($8–$15 per color), water, sponges, and large brushes from any hardware or craft store. Start with a light base coat, then layer your chosen palette (try soft sage, dusty rose, and cream for calming vibes). This is a one-afternoon project that takes roughly two to three hours. The beauty? Mistakes just look intentional. Renters can test this on a foam board first, then hang it as art.

    Your walls instantly feel curated and calm. This approach works especially well in bedrooms or home offices where you want visual interest without the busy feeling of bold patterns.

    2. Create a Geometric Mountain Range with Painter’s Tape

    Geometric mountains are striking, deceptively simple to execute, and look incredible in photos. You’ll use painter’s tape to create clean lines, then fill each section with different colors or finishes.

    Buy painter’s tape ($5), acrylic paint in your chosen palette ($15–$25), rollers, and brushes. Sketch your mountain outline lightly in pencil first, then tape along the lines and paint each section. This full-day project takes four to five hours including drying time between layers. For renters, paint on removable wallpaper or a canvas panel instead.

    The payoff is a striking focal wall that photographs beautifully and makes small spaces feel more intentional. Plus, geometric designs feel modern without dating quickly.

    3. Hand-Letter a Motivational Quote or Song Lyric

    Hand-lettered text adds personality and serves as daily inspiration without being cheesy. This works best in home offices, bedrooms, or entryways where you want a personal touch.

    You’ll need chalk markers ($8–$12), acrylic paint pens ($10–$15), or traditional paintbrushes. Lightly sketch your lettering in pencil first using references from Pinterest or hand-lettering guides (no artistic skill required—just tracing). This takes one to two hours depending on the size and detail. If perfectionism creeps in, chalk markers let you erase and retry.

    Your space now has intentional messaging that motivates you every time you walk by. It’s like having a personalized affirmation right on your wall.

    4. Stencil a Repeating Botanical Pattern

    Stenciling eliminates the need to freehand—patterns repeat perfectly, and it’s nearly foolproof. Botanical designs (ferns, leaves, eucalyptus) bring nature inside and feel calming in any room.

    Purchase stencil sheets ($8–$15 each) from craft stores or online, grab acrylic paint ($6–$12), a stencil brush ($5), and painter’s tape. Map out your pattern spacing lightly in pencil, secure the stencil with tape, and apply paint with a dabbing motion. One wall takes three to four hours. For renters, this sticks to walls temporarily without damage.

    The final result feels like a curated, designer moment—but you made it. Repeating patterns create visual rhythm that makes rooms feel more polished.

    5. Paint a Moody Accent Wall in Deep Forest Green

    Sometimes the boldest move is embracing a single moody color. Deep greens pair with so many styles and create instant coziness without feeling heavy.

    Grab quality matte paint in a deep forest green ($25–$40 per gallon) from Benjamin Moore (try “HC-175 Caliente”) or Sherwin-Williams. You’ll need primer, rollers, brushes, and painter’s tape. One accent wall takes three to four hours for one person. Matte finishes hide imperfections better than glossy, so this is beginner-friendly.

    The room immediately feels more sophisticated and grounded. Moody greens work in bedrooms, offices, and living rooms—they’re one of those rare bold choices that actually make spaces feel more relaxing, not chaotic.

    6. Draw a Minimalist Line Art Portrait or Face

    Minimalist line art is trending because it’s sophisticated, forgiving, and deeply personal. One continuous line creates an entire face—no shading, no pressure.

    Using a ruler, pencil, and black paint marker ($4–$8), sketch your design lightly first, then trace over it with confident, flowing lines. Reference photos help tremendously. This takes one to two hours for a piece the size of an iPad or larger. It’s also incredibly renter-friendly (marker washes off easily or sticks to removable wallpaper).

    You’ve created gallery-quality wall art in an afternoon. Minimalist line work feels current and collected, not amateur.

    7. Create an Ombré Gradient Wall with Paint

    Ombré walls create depth and visual interest without bold patterns. The gradient draws the eye upward and can make ceilings feel higher.

    Buy two colors of paint ($25–$40 each) in the same tone family, one light and one darker. Grab sponges, a spray bottle with water, and mixing containers. Paint horizontal sections, then blend the seams with a damp sponge before the paint dries. This takes four to five hours for one wall. The key is working in sections so you catch the paint before it dries completely.

    Your wall becomes a subtle work of art that photographs beautifully and feels more expensive than it is. Ombré is especially effective in small bedrooms or powder rooms.

    8. Stencil Gold or Silver Metallic Accents Over Neutral Walls

    Metallic accents add instant glam without committing to a full metallic wall. Stenciling lets you control placement and scale perfectly.

    Use metallic acrylic paint in gold or bronze ($8–$15), small geometric stencils ($5–$10), a stencil brush, and painter’s tape. Arrange stencils asymmetrically on your wall for a modern, uncluttered look. This takes two to three hours depending on how many accents you add. Metallic paint catches light beautifully and photographs incredibly well for social media.

    Your neutral walls suddenly feel curated and upscale. Metallic accents work in bedrooms, dining rooms, and entryways—anywhere you want a touch of subtle luxury.

    9. Paint a Sunset or Landscape Mural Behind Your Bed

    A landscape mural becomes your focal point and sets the mood for the entire room. Sunsets, mountain ranges, and ocean horizons work beautifully in bedrooms.

    Start with quality paint in your palette ($30–$50), brushes of various sizes, and a spray bottle for blending. Sketch your landscape lightly in pencil first (grids help scale reference photos). Work top to bottom, starting with the sky. This full-day project takes six to eight hours, but you can break it into multiple sessions. No previous painting experience necessary—soft, blended landscapes are forgiving.

    Your bedroom transforms into a peaceful retreat. Every morning you wake up to a view you created yourself.

    10. Create a Marble or Stone Effect Using Sponging Techniques

    Faux marble adds elegance without the cost or permanent commitment of real stone. The sponging technique creates realistic veining that feels high-end.

    Grab two to three coordinating paint colors ($25–$40 total), natural sponges ($3–$5), a spray bottle, and glaze medium ($8–$12). Paint your base coat first, then use damp sponges to dab and blend the other colors, creating veining by dragging a sponge lightly across wet sections. One wall takes five to six hours. This technique is very forgiving—each sponge mark looks like natural stone variation.

    Your walls look like they belong in a boutique hotel. Faux marble works especially well in bathrooms, bedrooms, and entryways.

    11. Hand-Paint Botanical Illustrations for a Gallery Wall Effect

    Instead of one large mural, paint smaller botanical pieces on canvas or directly on the wall, arranged salon-style. This approach is less intimidating than a full mural and creates a collected, intentional look.

    Buy canvas panels ($10–$20 each), acrylic paint ($15–$25 for a botanical palette), and fine brushes ($5–$10). Work from photo references—simple line drawings of plants are easiest. Each piece takes one to two hours. You can paint these on a table, then hang them, which means zero wall-based pressure.

    You’ve created a personal gallery that feels expensive and thoughtfully curated. Botanical art works everywhere and never feels dated.

    12. Paint a Geometric Hexagon or Tile Pattern

    Geometric patterns feel contemporary and structured. Hexagons, tiles, and interlocking shapes create visual interest without being chaotic.

    Use painter’s tape, a ruler, and acrylic paint in two to three colors ($20–$35). Map out your pattern lightly first, then tape and paint section by section. This takes six to eight hours for a full wall, but the payoff is striking. Work with a friend to speed things up and enjoy the process.

    Your wall looks professionally designed and intentional. Geometric patterns photograph beautifully and work in kitchens, living rooms, and even bathrooms.

    13. Create a Chalk Wall Mural You Can Update Seasonally

    Chalkboard paint lets you draw, erase, and redraw endlessly. Perfect for seasonal designs, rotating quotes, or testing mural ideas before committing to paint.

    Paint an accent wall with chalkboard paint ($20–$30), then season it with chalk markers ($8–$15). Draw designs freehand or use stencils underneath the chalkboard paint before applying it. One wall takes three to four hours to paint the base. The drawing part? Totally flexible—you can change it whenever you want.

    Your walls become interactive and seasonal. Chalkboard walls work brilliantly in kitchens, dining rooms, and kids’ rooms (or home offices for brainstorming).

    14. Paint a Celestial Theme with Moons, Stars, and Constellations

    A celestial theme brings magic and wonder to any space, especially bedrooms and nurseries. Stars and moons in metallic paint feel whimsical yet sophisticated.

    Use deep blue or navy paint as your base ($25–$35), then add metallic gold and silver paint ($10–$15 each), fine brushes, and white paint pens for constellation lines. Paint moons and stars freehand or use stencils for consistency. This takes four to six hours. You can reference actual constellation maps for accuracy if you want.

    Your room becomes a peaceful, dreamy sanctuary. Celestial themes never feel childish when done with metallic accents and a quality color palette.

    15. Hand-Draw a Mandala or Intricate Geometric Centerpiece

    A mandala becomes a meditation focal point and creates symmetry without needing a stencil. This is more advanced but totally achievable with patience and a good reference image.

    Use a pencil, ruler, compass ($5–$10), black paint markers ($8–$15), and optional metallic markers for accents. Lightly sketch concentric circles using a compass, then fill in geometric patterns section by section. This takes six to ten hours depending on complexity, but you can work in sessions. Print a reference image at the size you want, then scale it up using a grid method if free-handing feels daunting.

    Your focal wall becomes a piece of functional art that grounds the room. Mandalas work beautifully in meditation spaces, bedrooms, or yoga rooms.

    16. Create a Speckled or Terrazzo Effect with Spray Paint

    Terrazzo brings playful texture and a contemporary feel without requiring precision. A spray paint technique creates this effect quickly and looks intentional.

    Buy spray paint in your chosen colors ($3–$8 each), a base coat of matte paint ($25–$35), painter’s tape, and protective coverings. Lightly spray paint across your wall in a random, speckled pattern—hold the can at varying distances for different speckle sizes. One wall takes two to three hours including setup and drying. Ventilate well and work outside if possible. This technique is forgiving because imperfect looks better.

    Your wall has an artisanal, modern feel that’s also surprisingly calming. Terrazzo works in bedrooms, living rooms, and even entryways.

    17. Paint a Striped Accent Wall in Varying Widths and Colors

    Stripes feel contemporary and structured without being overwhelming. Varying widths add visual interest and prevent a formal, corporate vibe.

    Use painter’s tape, a ruler, two to three coordinating paint colors ($20–$35), and rollers. Measure and tape your stripe widths (try alternating 4-inch and 6-inch widths), then roll on color section by section. One wall takes four to five hours. The key is sharp tape lines and a steady hand, but slight imperfections add character.

    Your wall looks modern and intentional without feeling too corporate. Striped walls work in bedrooms, home offices, living rooms, and hallways.

    18. Draw a Nature-Inspired Mural with Birds, Branches, or Trees

    A nature mural brings life and movement to walls. Birds, branches, and trees feel organic and peaceful without requiring photorealistic skill.

    Grab black acrylic paint ($8–$12), sage or green accent paint ($8–$12), fine brushes, and a pencil. Sketch your design lightly first using references from nature photos or botanical illustrations. Work freehand or use a projector to scale up a reference image. This takes four to eight hours depending on scale and detail. The beauty of nature designs? Slightly imperfect looks authentic and charming.

    Your walls feel peaceful and grounded. Nature murals work in bedrooms, living rooms, bathrooms, and even kitchens—they’re universally soothing.

    19. Create a Multi-Material Mixed-Media Accent Using Paint, Wood, and Metal

    Combine painting with other materials for a gallery-quality, three-dimensional effect. This is more advanced but creates stunning focal walls.

    Purchase acrylic paint ($15–$25), reclaimed wood slats or peel-and-stick wood panels ($30–$60), copper or brass sheet metal or trim ($15–$30), and adhesive suitable for your wall type. Plan your composition on paper first, then install materials section by section. This takes one full day to two days depending on complexity. Renters should focus on adhesive-backed materials that remove cleanly.

    Your wall becomes a conversation starter—it looks like professional mixed-media art. This approach works beautifully in living rooms, bedrooms, or entryways where you want maximum visual impact.

    20. Paint a Large-Scale Abstract or Expressionist Piece

    Abstract art doesn’t require representation—just confident brushstrokes and color confidence. Expressionist styles are forgiving because imperfection is the point.

    Choose two to three bold paint colors ($25–$40), large brushes or paint rollers, and maybe palette knives for texture. Work without overthinking—let colors blend, overlap, and create movement. This takes three to five hours and is incredibly liberating because there’s no “wrong.” Play music, invite a friend, and enjoy the process.

    You’ve created unique, confident wall art that reflects your personality. Abstract walls become conversation starters and work in any room where you want energy and personality.

    21. Stencil a Repeating Pattern of Your Favorite Shapes or Symbols

    Choose shapes with personal meaning—whether that’s diamonds, crescents, or custom symbols—and create a pattern that feels uniquely yours. Stenciling ensures consistency and precision.

    Buy or make custom stencils ($10–$25), grab acrylic paint in your chosen colors ($10–$20), a stencil brush, and painter’s tape. Map out spacing lightly in pencil, then stencil row by row. One wall takes four to five hours. Custom stencils (order online) let you personalize this completely.

    Your wall becomes a reflection of your taste. Patterned stencil walls feel intentional and collected, like you curated every detail.

    22. Hand-Paint Watercolor Florals for a Soft, Romantic Accent

    Watercolor florals feel romantic and artistic without requiring botanical accuracy. Loose, flowing brushwork is actually the goal.

    Use watercolor or diluted acrylic paint ($10–$20 per color), large soft brushes, water, and a spray bottle. Paint loose flower shapes with minimal detail, letting colors blend naturally. This takes three to five hours. Watercolor is forgiving because overworking just adds more character. No experience necessary—imperfect is beautiful here.

    Your space feels like a boutique hotel room—calm, romantic, and thoughtfully designed. Watercolor florals work in bedrooms, bathrooms, and entryways.

    23. Create a Colorblock Wall Mural with Bold, Intersecting Shapes

    Colorblocking uses bold shapes and solid colors to create modern, graphic art. It’s less fussy than detailed designs but equally impactful.

    Map out your shapes with painter’s tape and pencil, then grab bold paint colors ($25–$40) in shades that excite you. Paint each block with solid color using rollers for even coverage. One wall takes four to six hours. Let paint dry completely between layers for crisp edges.

    Your wall looks like intentional modern art—gallery-quality without the gallery price tag. Colorblock walls work everywhere: entryways, bedrooms, home offices, and living rooms.

    24. Paint a Trompe-l’œil or Optical Illusion Mural

    A trompe-l’œil (meaning “deceive the eye”) creates the illusion of depth or realistic objects. Painted bookshelves are popular and surprisingly achievable.

    Use reference photos, grid scaling, acrylic paint ($30–$50), and fine brushes for detail work. Start with perspective lines in pencil, then build up shapes and shading. This takes eight to twelve hours and requires patience, but watching the illusion come together is magical. Lots of YouTube tutorials make this accessible.

    You’ve created jaw-dropping wall art that surprises visitors. Trompe-l’œil works in studies, living rooms, or bedrooms—anywhere you want a stunning focal point.

    25. Hand-Draw a Map or Travel-Inspired Mural

    A travel map becomes both art and inspiration. Personalize it with routes you’ve taken, places you want to visit, or meaningful destinations marked in special ways.

    Sketch your map outline lightly in pencil, then use black markers ($5–$8), watercolors ($10–$15), and metallic pens ($8–$12) to add detail and routes. Work freehand or use a projector to scale a reference map. This takes four to eight hours depending on detail level. You can mark routes in different colors or highlight cities with watercolor washes for visual interest.

    Your wall tells your travel story and sparks conversation. Travel maps work beautifully in home offices, bedrooms, living rooms, or anywhere you need daily inspiration.


    Save this post for your next creative weekend, and pick just one idea to start with. You’ll be amazed at how personal your walls feel once you’ve added your own hand and creativity to them.

  • 28 Children’s Bedroom Ideas That Spark Creativity & Comfort

    28 Children’s Bedroom Ideas That Spark Creativity & Comfort


    Your child’s bedroom should be more than just a place to sleep—it’s their creative sanctuary, their quiet retreat, and their personal expression all rolled into one. Finding that balance between playful inspiration and calm comfort can feel overwhelming, especially when you’re juggling budgets and your kid’s ever-changing interests. The good news? You don’t need a complete overhaul to make their space feel special. We’ve gathered 28 practical ideas that work for renters and homeowners alike, from quick DIY projects to statement pieces that grow with your child. Whether you’re starting from scratch or refreshing a tired room, you’ll find actionable solutions that actually fit your life—and your wallet.


    1. Create a Reading Nook with Layered Textures

    A dedicated reading corner becomes an instant retreat that sparks imagination and gives your child a sanctuary within their bedroom. This works in any room size—even a small corner transforms into something magical.

    Start with a low bench, floor cushion, or beanbag chair as your base. Layer on pillows and throws in varied textures: velvet, linen, corduroy. Add a small side table for books or hot chocolate. A woven basket nearby keeps supplies organized. You can source pieces from IKEA ($20-$100), Target, or thrift stores ($5-$30 per item). This takes about an hour to set up, zero installation required—perfect for renters. A standing lamp or clip-on light adds function without taking up space.

    Kids naturally gravitate to cozy corners, and you’ll notice reading time increasing without any nagging required.


    2. Paint an Accent Wall in a Warm Earth Tone

    One accent wall in a warm earth tone—think terracotta, sage, or warm taupe—creates depth and personality without overwhelming the space. This simple change shifts the whole room’s energy from flat to intentional.

    Choose one wall (ideally the one behind the bed or facing the door) and pick a calming, warm color. Paint runs $15-$40 per gallon at hardware stores. A basic room takes one gallon and one weekend of work. Test the color on poster board first to see it in different light. Warm earth tones feel less institutional than cool grays and actually boost mood—perfect for a creative space. If you rent, try removable wallpaper in similar shades instead ($20-$60).

    The payoff? The room feels intentionally designed rather than hastily decorated, and your child gets a backdrop that works with almost any decor.


    3. Install Floating Shelves for Display and Storage

    Floating shelves give kids a place to display treasures, organize books, and show off their growing collection of interests. They’re functional art that makes a small room feel more spacious.

    Install 2-3 shelves using basic brackets ($15-$50 per shelf from Home Depot or IKEA). They’re sturdy enough for kids’ typical items and take about 30 minutes per shelf with a drill and level. If you rent, adhesive shelves work too, though they hold less weight. Arrange books vertically and horizontally, mix in small plants, add framed photos or artwork. The key is balancing “display” with “breathing room”—don’t overcrowd.

    Kids feel proud seeing their things arranged thoughtfully, and you get a solution that grows and changes as their interests do.


    4. Layer Bedding for Comfort and Visual Interest

    Layered bedding creates that “hotel luxury” feel kids love while keeping them comfortable through temperature changes. It’s also a great way to mix patterns and textures without chaos.

    Start with a fitted sheet (quality matters here—cotton or linen feels better than polyester). Add a patterned duvet or quilt, then layer on 2-3 throw pillows in coordinating fabrics. Drape a chunky knit blanket over the foot or side of the bed. Budget: $40-$100 for a complete refresh from Target, Wayfair, or IKEA. Set it up in under an hour—no tools needed. Switch out seasonal blankets and pillows to refresh the look without spending much.

    You get a bed that’s actually inviting to climb into, and it photographs beautifully for those Instagram-worthy moments parents love.


    5. Add a Growth Chart on the Wall

    A growth chart turns a practical measurement tool into a keepsake that kids love and makes them feel seen and celebrated in their own space.

    Choose from wooden wall-mounted charts ($25-$60), fabric banners ($15-$40), or DIY versions using painter’s tape and markers ($0-$5). Installation takes 10 minutes with a level and pencil. Mark their height monthly in a colored marker—let them choose the color. They’ll love tracking their progress, and years later you’ll treasure the record. It works on renters’ walls if you use removable adhesive.

    This simple addition transforms a bare wall into a celebration of your child’s growth and makes them feel like the room is truly theirs.


    6. Hang Floor-to-Ceiling Sheer Curtains

    Floor-to-ceiling sheer curtains create an enveloping, cozy atmosphere that makes kids feel nestled and protected while letting light filter through softly.

    Mount a curtain rod as high as possible on the wall—even higher than the window frame looks more intentional. Hang lightweight sheer fabric in white, cream, or pale linen. Budget: $20-$60 for rods and panels from IKEA or Amazon. Installation takes about 20 minutes. Pair these with blackout curtains underneath for sleep time. The sheers stay up year-round, creating a dreamy, calming backdrop. If you rent, use tension rods that don’t require wall anchors.

    The room instantly feels more sophisticated and spa-like, and the soft light becomes a constant mood booster.


    7. Build a DIY Headboard with Peel-and-Stick Wallpaper

    A headboard draws the eye upward and makes the bed feel like the focal point of the room. Peel-and-stick wallpaper lets you create this effect without permanent damage.

    Measure the width of the bed and decide how tall you want the headboard (typically 3-4 feet works well). Choose peel-and-stick wallpaper in kid-friendly patterns ($20-$50 per roll from Amazon, Wayfair, or Target). Apply directly to the wall—no tools needed, takes 30-45 minutes. The pattern choice matters: geometric, botanical, or subtle textures all work. For renters, this is the perfect solution since it removes cleanly. If your child’s taste changes, so can the wallpaper.

    The bed becomes a real design statement, and your child gets a personal backdrop that makes their space feel curated and special.


    8. Install a Pendant Light for Task Lighting

    Good lighting matters more than most parents realize—it helps with homework, reading, and making the space feel intentional rather than relying on harsh overhead lights.

    Install a pendant light over the desk or reading area ($30-$100 from IKEA, Home Depot, or Wayfair). This requires basic electrical work or hiring a professional ($100-$200 labor). Choose a fixture in a material that fits the room—wood, metal, or fabric all work. Plug-in pendant lights are also available if you want to avoid installation ($20-$50). Set it on a dimmer if possible so your child can adjust brightness for homework versus wind-down time.

    The room gains functional, layered lighting that actually makes studying easier and the space feel more grown-up.


    9. Create a Vision Board Wall

    A vision board gives your child a dedicated creative space to collect and display things that inspire them—it’s a living mood board that changes with their interests.

    Use a large cork board ($20-$40), fabric-covered bulletin board ($30-$60), or create a DIY version with cork wallpaper ($15-$25 per roll). Mount it at eye level so your child can easily add and rearrange. Provide pushpins, magnetic pins, or fabric strips for hanging items. Let them collect magazine cutouts, photos, drawings, quotes, color swatches—whatever speaks to them. This takes 20 minutes to set up and becomes an ongoing project.

    You’ll watch your child’s interests and creativity unfold on that wall, and they get a judgment-free space to dream and explore.


    10. Add Plants for Air Quality and Calm

    Low-maintenance plants brighten the space, improve air quality, and teach kids responsibility without requiring a green thumb. They’re also incredibly good for well-being.

    Choose kid-proof, hard-to-kill plants: pothos, snake plant, spider plant, or ZZ plant ($5-$15 each from local nurseries or big-box stores). Place them on windowsills, shelves, or hang them in macramé holders ($5-$20 each). Teach your child the watering schedule—many kids love this responsibility. Start with 2-3 plants and add more as they prove their care skills. Set reminders on their phone or yours for watering days.

    The room gains natural color and oxygen, and your child learns that living things need care and attention.


    11. Install a Pegboard for Organization and Display

    A pegboard is the ultimate flexible storage solution that grows with your child and keeps supplies visible and accessible without cluttering surfaces.

    Mount a wooden pegboard ($30-$80 from IKEA, Home Depot, or Amazon) using basic brackets—takes about 20 minutes. Add hooks, shelves, and baskets as needed ($2-$5 per piece). Let your child arrange and rearrange items however they want. Use it for art supplies, small toys, headphones, or photos. Pegboards work in small spaces and renter-friendly situations. Paint it to match the room if desired ($5-$15 for paint).

    Organization becomes visual and easy, and kids actually use the system because they designed it themselves.


    12. Hang Fabric Remnants as a Canopy

    A fabric canopy creates an instant “fort” feeling that kids adore—it’s intimate, cozy, and easy to change without permanent installation.

    Buy lightweight fabric remnants ($10-$30 from fabric stores or online) or use lightweight curtain fabric. Attach to ceiling using removable adhesive hooks ($5-$10 for several) or tension rods. Drape it asymmetrically or evenly depending on preference. This takes 15 minutes to set up and zero permanent damage. Swap fabrics seasonally for a quick refresh. Combine with string lights inside for extra magic ($10-$20).

    Your child gets a cozy fort that makes bedtime feel special, and you haven’t drilled a single hole in the wall.


    13. Create a Chalkboard Wall or Panel

    A chalkboard surface lets your child express creativity daily and changes infinitely without waste. It’s also great for practical notes and lists.

    Paint one wall or a large panel with chalkboard paint ($20-$40 per quart from hardware stores). Requires basic painting skills, takes 2-3 hours including drying time. Alternatively, buy pre-made chalkboard panels ($30-$100). Stock colorful chalk ($5-$10 for a set). This works brilliantly for renters if you use a removable chalkboard wallpaper ($20-$50 per roll). Your child can draw, write, play games, or leave themselves reminders.

    The wall becomes interactive and alive, and your child’s creativity gets a judgment-free outlet.


    14. Use a Rug to Define Spaces

    A quality rug anchors the room, defines separate zones (play area, reading nook), and makes the space feel intentional and finished.

    Choose a rug in 5×7 or 6×8 size ($40-$150 from Target, IKEA, Wayfair, or thrift stores). Natural materials like jute or wool feel better than synthetic and last longer. Consider washable rugs if you have young kids ($50-$120). Place it under the bed or in a designated play area. Layer a smaller accent rug on top for visual interest ($20-$60). This anchors the room without requiring any installation.

    The space instantly feels more cohesive and comfortable, and you get a soft landing spot for bare feet.


    15. Install Adjustable Task Lighting on Desks

    Adjustable desk lighting keeps your child’s workspace functional and reduces eye strain during homework or creative projects.

    Install a clip-on lamp ($15-$40 from IKEA, Target, or Amazon) or a small desk lamp with an adjustable arm ($25-$60). No installation required—just plug in. Dimmable options are ideal for switching between focus and wind-down modes. Choose warm white bulbs that don’t feel harsh. Position it to the side of the workspace to avoid glare on screens. This takes literally two minutes to set up.

    Homework becomes less of a battle when the lighting actually supports focus, and the desk area feels like a real workspace.


    16. Add Soft Velvet or Corduroy Pillows

    Tactile textures matter more than people realize—soft pillows and fabrics create comfort and make kids want to spend time in their room.

    Source velvet or corduroy pillows in various sizes ($15-$40 each from Target, IKEA, Wayfair, or thrift stores). Mix textures with linen and chunky knit to create visual interest. Arrange on the bed and reading nook. Most are machine-washable, making them practical for kids’ spaces. Start with 3-4 pillows and add more as budget allows. This takes 10 minutes to arrange and zero installation.

    The room becomes a textural experience that kids actually love touching and spending time in.


    17. Create a Photo Display Wall

    A photo wall celebrates memories, makes the space feel personal, and creates an anchor of what matters most to your child.

    Use matching frames ($2-$8 each from IKEA, Target, or thrift stores) or create a cohesive look with coordinated styles. Print photos from your phone ($0.25-$0.50 each at drugstores or online). Plan the layout on the floor first, then hang using painter’s tape to find the right arrangement. Use removable hooks or adhesive strips for easy rearrangement. This takes about an hour depending on frame count and looks best with 9-16 photos.

    Your child sees the people and moments that matter most every day, and the room feels like it belongs to them, not just to “a kid.”


    18. Install String Lights or Fairy Lights

    Soft, warm string lights create instant ambiance and make bedtime feel special without being harsh or overstimulating.

    Choose warm white LED string lights ($10-$30 from Amazon, Target, or IKEA) that won’t heat up. Drape them above the bed, around a reading nook, or along a shelf. Battery-powered options ($15-$25) work great for renters. String about 20-30 feet of lights for best effect. Set them on a timer so they turn on automatically at dusk. This takes 15 minutes to hang using removable hooks or painter’s tape.

    The room transforms into a cozy retreat at night, and your child gets a gentle, beautiful light source for wind-down time.


    19. Use Magazine Holders for Magazine and Book Storage

    Magazine holders keep books, magazines, and supplies visible and organized while taking up minimal space. They’re also cheap and renter-friendly.

    Buy plastic or cardboard magazine holders in fun colors ($3-$8 each from IKEA, Target, or office supply stores) and label them by category: art supplies, books, magazines, markers. Line them up on shelves or in a closet. Your child can easily find what they want and put things back. This costs $15-$30 for 5-6 holders and takes 10 minutes to organize. It’s also a great way to teach categorization.

    You get an instant organizational system that looks intentional, stays functional, and teaches your child how to maintain order.


    20. Paint Furniture with Removable Chalk Paint

    Updating old furniture with chalk paint gives your child a chance to customize pieces and make them feel new and personal.

    Buy chalk paint ($15-$25 per quart from hardware stores or Joann’s) and paint a dresser, nightstand, or desk. Requires a few coats and basic brush skills—takes a weekend. Choose a color that complements the room. Your child can help with painting, which makes them feel ownership. Add a matte topcoat for durability ($10-$15). If you don’t want permanence, use removable furniture paint for renters.

    The room gains a custom, thoughtful piece of furniture, and your child participated in creating it.


    21. Install a Wall-Mounted Desk

    A wall-mounted desk solves space issues and creates a dedicated work area without bulky furniture taking over the room.

    Install a wall-mounted drop-down desk ($50-$150 from IKEA, Amazon, or Wayfair) using basic brackets and a level—takes about 45 minutes. Choose one that folds up when not in use, ideal for smaller bedrooms. Alternatively, a simple floating shelf as a desk ($20-$50) works for lightweight tasks. Pair with a comfortable chair ($40-$100). This frees up floor space for play or storage.

    Your child gets a real workspace for homework and projects without the room feeling cramped or overstuffed.


    22. Hang Artwork in a Cohesive Grid

    Artwork arranged thoughtfully becomes a design statement that reflects your child’s personality and interests while elevating the entire room.

    Choose 3-9 pieces of art in coordinating frames ($2-$10 each from IKEA, Etsy, or thrift stores). Lay them on the floor first to plan the grid. Use painter’s tape or cardboard templates to mark where nails go. Space them consistently (about 2-3 inches apart works well). Hang using lightweight picture-hanging hooks ($1-$3 each). This takes 30-45 minutes total. Mix original artwork your child created with prints or posters for a personal feel.

    The wall becomes a design focal point that celebrates what your child loves, and they feel seen and celebrated in their space.


    23. Create Storage Baskets Under the Bed

    Under-bed storage keeps toys and supplies organized while using otherwise wasted space. Rolling baskets make items easy for kids to access independently.

    Buy under-bed storage bins with rolling wheels ($20-$50 for 2-3 from Target, IKEA, or Amazon) or use stackable storage containers ($10-$30 each). Label each basket by category (toys, art supplies, seasonal clothes) so your child knows what goes where. This costs about $30-$60 and takes 10 minutes to set up. It teaches organization and gives your child a system they can maintain.

    Clutter disappears instantly, the floor looks clean, and your child actually knows where to find things because the system makes sense.


    24. Paint Closet Interior Walls

    Painting the inside of a closet is an easy way to add personality that only gets revealed when the door opens—a fun design detail kids love.

    Choose a color slightly different from the main wall—softer or richer ($15-$40 per quart of paint). Paint the closet interior with basic brushes—takes about 1-2 hours. This small detail makes a big impact when the door’s open and is especially fun if it’s a walk-in or large closet. It also makes hanging clothes in there feel special. Low commitment, high visual reward.

    The closet becomes a designed space, not just a catch-all, and your child notices the intentional detail.


    25. Install Floating Corner Shelves

    Corner shelves capture unused wall space and create display areas that draw the eye upward and make the room feel more spacious.

    Install floating corner shelves ($15-$40 per shelf from hardware stores or Amazon) in upper corners or low corners depending on what you want to display. Requires a drill and level—takes about 20 minutes per shelf. They’re perfect for books, plants, or rotating displays of artwork. Pair with small items to avoid visual clutter. This is a permanent solution but renter-friendly adhesive options exist ($20-$35 per shelf).

    You gain usable space without eating floor area, and the room gains visual interest in areas that previously felt empty.


    26. Add a Removable Wall Decal or Mural

    Removable wall decals add personality and visual interest while staying completely renter-friendly and changeable as your child’s taste evolves.

    Search for wall decals on Amazon, Etsy, or Wayfair ($15-$50 depending on size and complexity). Choose designs that match your room’s theme—nature, space, geometric, animals, etc. Application takes 20-30 minutes and requires a smooth wall surface. These last 5+ years and peel off cleanly. Update them whenever your child wants a change—unlike permanent wall art, you’re not locked in.

    The walls gain dimension and personality, and your child can change it whenever they’re ready for something new.


    27. Create a Homework/Project Station with Supply Organization

    A well-organized supply station encourages creativity and homework completion by making materials easy to find and put away.

    Set up a small cart with drawers ($30-$60 from IKEA or Target) or use a rolling cabinet with compartments. Stock with basics: pencils, erasers, scissors, glue, markers, notepads, rulers, tape. Use drawer dividers ($5-$10) and clear containers ($2-$5 each) so your child can see what’s available. Label everything. Keep it stocked and teach your child to tidy after each use. This costs $50-$80 total and takes 30 minutes to set up.

    You’ll notice homework gets done faster when supplies are right there, and projects happen more frequently because the friction of finding materials disappears.


    28. Layer Blankets for Seasonal Comfort and Design

    Rotating blankets by season keeps the room looking fresh, gives your child cozy options year-round, and lets you refresh the design without major changes.

    Invest in 2-3 quality blankets in different weights ($20-$50 each from Target, IKEA, Wayfair, or thrift stores). A chunky knit, a lightweight linen throw, and a fleece blanket cover all seasons. Store off-season blankets in a closet bin ($5-$15). Swap them out with the seasons—it takes five minutes and transforms the room’s visual feel. Kids enjoy having “new” options without you buying anything expensive.

    The room feels intentionally designed for each season, and your child enjoys the tactile variety without requiring budget investment each quarter.


    SOFT CTA:

    Save this post and pick just one idea to tackle this weekend—we recommend starting with something quick like string lights or a vision board. Your child’s space doesn’t need a complete overhaul; small, thoughtful changes add up fast and make their room feel uniquely theirs. Share this with any friend redesigning a kid’s bedroom!

  • 25 Mediterranean Kitchen Ideas Full of Warm Colors & Texture

    25 Mediterranean Kitchen Ideas Full of Warm Colors & Texture

    If you’re craving a kitchen that feels like a European getaway, Mediterranean design is your answer. This style celebrates warmth, natural materials, and colors inspired by the sea and sun—think warm terracottas, ocean blues, sunny yellows, and creamy neutrals. The best part? You don’t need a major renovation to capture this vibe. Whether you’re renting or own your home, these 25 ideas range from quick styling tweaks to weekend projects and investment upgrades. Let’s dive into the specific, actionable ways to bring that relaxed, warm Mediterranean feel into your kitchen right now.

    1. Paint an Accent Wall in Warm Terracotta

    Terracotta isn’t just a color—it’s a mood. One accent wall instantly grounds your space in Mediterranean warmth and creates a backdrop that makes white cabinetry and copper accents pop. Choose a warm terracotta in the yellow-orange range (avoid muddy reds).

    Pick a wall behind your sink or stove as your focal point. Benjamin Moore “Moroccan Red” ($35–$50 per gallon) or Sherwin-Williams “Cavern Clay” ($40–$55) work beautifully for Mediterranean vibes. You’ll need about one gallon for most kitchen walls. Pair with white trim to keep it fresh. Rental? Use peel-and-stick removable wallpaper in terracotta for $25–$40. Pro tip: Paint a test swatch and view it in morning and evening light before committing.

    This single change makes your kitchen feel intentional and grounded without overwhelming the space.

    2. Swap Cabinet Hardware for Brass or Copper Handles

    Hardware is the jewelry of your kitchen. Brass and copper handles instantly age up standard cabinets and anchor the Mediterranean aesthetic. They catch light beautifully and warm up any neutral cabinet color.

    Replace existing knobs or handles with brass cup handles (IKEA “PINNIG,” $1.99 each) or vintage-style leather-wrapped handles ($3–$8 per handle at Etsy or Anthropologie). A kitchen with 15–20 cabinet doors needs about 20–30 handles, totaling $30–$240 depending on quality. Swap them yourself in 1–2 hours with just a drill and screwdriver—no plumber needed. Renters: skip this and hang removable copper towel hooks on cabinet edges instead.

    You get that elevated, curated feel that completely changes how your kitchen reads.

    3. Add Open Shelving with Warm Wood Floating Shelves

    Open shelving is quintessentially Mediterranean—it shows off your beautiful dishware and makes the kitchen feel airy. Warm wood shelves especially ground the look and break up cabinetry visually.

    Install reclaimed wood or new wood floating shelves in walnut or medium oak ($30–$80 per 36″ shelf from Home Depot or Wayfair). Bracket hardware costs $15–$30. Plan for 2–3 shelves depending on your wall space. This is a one-weekend DIY with a level, drill, and stud finder—or hire a handyperson for $100–$200. Style with white dishes, blue glassware, potted herbs, and a few cookbooks. Keep items grouped in threes for visual balance.

    The result? A kitchen that feels curated and inviting rather than closed-off and sterile.

    4. Display Blue and White Ceramic Dishes

    Blue and white ceramics are the color signature of Mediterranean kitchens. When displayed on open shelves or hanging on walls, they become instant decor—no art required.

    Hunt for blue and white ceramics at HomeGoods ($8–$30 per piece), Etsy vintage sellers ($5–$50), TJMaxx, or local thrift stores ($1–$5). Start with 6–8 pieces: bowls, plates, a pitcher, and a serving platter. Arrange on open shelves or hang small plates on adhesive wall hooks (renters love this). Group by size or pattern for impact. Mix new affordable pieces with one or two invested vintage finds.

    Display becomes your decor, and you get functional, beautiful dishware that makes every meal feel special.

    5. Hang Dried Herbs and Garlic Braids as Wall Decor

    Dried herbs aren’t just practical—they’re beautiful wall art that smells incredible and screams Mediterranean. This is a free or nearly-free decor hack that adds instant texture and authenticity.

    Dry your own herbs by bundling sprigs with twine and hanging upside-down in a cool, dark place for 1–2 weeks. Or buy pre-dried herbs from farmers’ markets ($3–$8 per bunch) or online from specialty food sites ($5–$15). Garlic braids run $4–$10. Hang on simple wood hooks ($2–$5 at hardware stores). Cluster 3–5 bunches together for visual impact. This takes 10 minutes to hang and adds incredible charm.

    Your kitchen becomes a working, edible garden that looks intentional and warm.

    6. Install Warm Lighting with Pendant Lights in Glass or Brass

    Lighting sets the mood in Mediterranean kitchens. Soft, warm brass or glass pendants over your island or counter create that golden-hour glow that makes the space feel luxe and inviting.

    Replace builder-grade overhead fixtures with pendant lights in brass, bronze, or seeded glass ($40–$120 per pendant from IKEA, Wayfair, or Amazon). A set of three 36″ above a standard island works perfectly. Hire an electrician ($200–$400 total) unless you’re experienced with wiring. Choose warm color temperature bulbs (2700K) for that honey-toned glow. Renters: use plug-in pendant alternatives ($30–$60) that hang from ceiling hooks.

    The lighting alone makes your kitchen feel like a Mediterranean trattoria instead of a standard kitchen.

    7. Incorporate a Wooden Beam or Faux Beam Accent

    Wooden ceiling beams are a hallmark of Mediterranean and rustic European kitchens. They add instant character and age. Real beams are expensive; faux beams are a budget-friendly, renter-okay alternative.

    Install faux wood beams (polyurethane, lightweight) at $60–$150 per 12-foot beam from Home Depot or Amazon. They install with construction adhesive and a few nails—totally DIY-able in an afternoon. Real reclaimed beams run $300–$800+ but offer unmatched authenticity and value. Either way, stain them honey, walnut, or weathered gray. This is a statement piece that changes the entire room’s architecture and warmth.

    You get that “old European villa” feeling without the construction costs or commitment.

    8. Add a Rustic Wood Countertop or Butcher Block Island

    Warm wood counters are essential to Mediterranean kitchens. Butcher block especially brings that European farmhouse texture and warmth. This is a moderate-to-big investment but pays off in daily pleasure.

    Butcher block countertops run $40–$80 per linear foot installed (IKEA’s KARLBY is budget-friendly at $100–$200 for an island top). If your kitchen has laminate, you can install a new countertop or wrap an island in butcher block ($500–$2000 depending on size and installer). Walnut and honey oak tones are most Mediterranean. Seal and maintain with food-grade mineral oil. Renters: add a removable butcher block cutting board or small dining table ($80–$200) for the vibe.

    The warmth underfoot (and underhand) transforms your daily kitchen experience.

    9. Bring in Potted Herbs for Fresh, Living Decor

    Mediterranean kitchens are alive with herbs. Fresh potted herbs on your windowsill or countertop add greenery, fragrance, and the authentic farm-to-table vibe. Plus, you’ve got fresh herbs at arm’s reach.

    Plant or buy starter herbs (basil, rosemary, oregano, thyme) at nurseries or grocery stores ($3–$8 per pot). Pot them in terracotta or ceramic pots ($2–$10 each). Cluster 3–5 pots on a sunny windowsill or corner shelf. Water regularly and pinch off leaves as you cook. Swap out seasonally. This costs $30–$60 to start and requires only sunlight and weekly watering.

    You get fresh herbs, beautiful living decor, and that sensory Mediterranean experience every time you cook.

    10. Create a Tile Backsplash in Blue, White, or Geometric Patterns

    A tile backsplash is the art wall of your kitchen. Mediterranean backsplashes often feature hand-painted blue and white tiles, Moroccan patterns, or simple subway tiles in cream and blue.

    Subway tiles run $1–$3 per tile; hand-painted artisan tiles are $5–$15+ each from Etsy or specialty tile shops. A standard backsplash (30 sq ft) costs $300–$1000 in materials. DIY installation is doable if you’re patient; hire a tiler for $800–$2000 labor. Renters: use peel-and-stick removable backsplash tiles ($50–$150 for full coverage) or a removable tile wall panel. Install over your stove or sink for maximum impact and minimal damage.

    This one feature becomes your kitchen’s signature—the thing guests comment on first.

    11. Use Terracotta Tiles or Warm Stone for Flooring Accents

    Terracotta or warm stone floors anchor Mediterranean kitchens in authenticity. If full flooring replacement isn’t in the budget, even a small rug or runner creates the vibe.

    Full terracotta tile flooring costs $8–$15 per square foot installed ($2000–$5000+ for a full kitchen). Easier option: add a terracotta or warm stone-look rug ($60–$200 from Ruggable, which is washable) under your island or sink. This gives you the visual and textural warmth without commitment. Renters: this rug trick is perfect and moves with you. Pair with simple grout-colored or cream lines for that authentic Mediterranean feel.

    The floor grounds the entire space and makes the kitchen feel intentional and cohesive.

    12. Hang a Large Ceramic Platter or Bowl as Wall Art

    One large ceramic piece becomes an instant focal point and art installation. It’s functional, beautiful, and deeply Mediterranean. No paintings required.

    Find large serving platters or bowls at Etsy ($30–$80), HomeGoods ($15–$40), or local ceramic shops. Look for hand-painted blue and white or warm terracotta tones. Hang on simple wood or brass hooks ($5–$10). Place it at eye level on a blank wall space. This takes 5 minutes and costs $40–$100 total.

    Your kitchen immediately reads as curated and intentional.

    13. Paint Lower Cabinets a Deep Sage or Soft Blue

    While terracotta is bold, soft sage or muted blue-green is a more subtle Mediterranean approach. These colors evoke the sea and Mediterranean landscape without overwhelming a smaller space.

    Paint lower cabinets (or your island) with Benjamin Moore “Aegean Teal” ($40–$50) or “HC-143 Aganthus Green” ($35–$55) for a soft, sophisticated look. Pair with cream or white upper cabinets and light countertops. Use quality cabinet paint and primer-in-one for durability. This is a two-day DIY (one coat + one night drying) or hire for $500–$1200. Renters: use removable adhesive contact paper on cabinet faces ($30–$50).

    The color brings Mediterranean sophistication without the boldness of terracotta.

    14. Install a Wooden Plate Rack or Shelving Unit

    Plate racks are functional decor that display your best dishware while freeing up cabinet space. They’re deeply Mediterranean and cottage-core in the best way.

    Buy a wooden plate rack (wall-mounted, $80–$200 from Etsy, Anthropologie, or specialty shops) or build your own with stacked wood strips and supports ($30–$60 in materials). Install on a prominent wall near your dining area or kitchen entry. Style with 6–12 plates in blue, white, and cream tones. This is a 1–2 hour DIY install with a level and drill.

    Your best dishes become visible art, and you get conversation-starting decor.

    15. Add Warm Linen or Linen-Look Kitchen Towels and Runners

    Soft, natural linen in cream, sage, or muted blue is the textile backbone of Mediterranean kitchens. Layer towels and runners for warmth and texture.

    Invest in quality linen kitchen towels ($12–$25 per towel from Schoolhouse Electric, Etsy, or Anthropologie). Add a linen runner or kitchen mat ($40–$100 from Rugs USA or Wayfair). Mix 2–3 neutral tones—cream, sage, and warm white. Drape towels casually over a brass or wood bar for that lived-in warmth. This costs $100–$250 total but layers in texture beautifully.

    Your kitchen becomes touchably warm and inviting.

    16. Create a Beverage Station with Glass Jars and Ceramic Dispensers

    A beverage station feels special, functional, and deeply European. It’s a gathering point and a styling opportunity. Plus, guests love the detail.

    Set up a low shelf or corner with glass beverage dispensers with taps ($30–$80 from Anthropologie, Williams Sonoma, or Amazon). Add ceramic pitchers ($15–$40), small glasses ($2–$5 each), and fresh lemons and herbs in small vases. Total investment: $100–$200. This takes 1 hour to style and creates a café-like moment in your kitchen. Renters: this works perfectly on a cart or low shelf and moves with you.

    You get a functional, photogenic spot that makes hospitality feel intentional.

    17. Hang Copper or Brass Cookware on a Wall-Mounted Rack

    Displayed cookware is decor. Copper and brass pans are beautiful functional art that warms up your kitchen visually and actually (no really—you’ll reach for them more).

    Install a wall-mounted pot rack ($60–$150 from IKEA, Wayfair, or specialty kitchen shops). Invest in quality copper or stainless steel pans with brass handles ($30–$80 per pan). Hang 5–8 pieces in graduated sizes for visual interest. This is a one-afternoon DIY install into studs and instantly makes your kitchen feel professional and intentional.

    Your cookware becomes your kitchen’s visual centerpiece.

    18. Use Woven Baskets for Open Storage and Texture

    Woven baskets add organic texture, hide clutter on open shelves, and feel beach-house Mediterranean. They’re functional and photogenic.

    Source woven baskets from IKEA ($10–$30), Serena & Lily ($30–$100), or thrift stores ($3–$10). Choose natural rattan, seagrass, or woven wood in cream and tan tones. Stack 2–4 on open shelves or under an island. Use for linens, cookbooks, pantry overflow, or craft supplies. This costs $50–$150 total and takes an hour to style beautifully.

    Your open shelves look intentional, organized, and warmly curated.

    19. Paint Cabinetry in Cream or Off-White with Warm Undertones

    While neutral, warm cream and off-white reads completely different from sterile white. It’s the foundational color that makes Mediterranean kitchens feel inviting rather than cold.

    Paint cabinets with Benjamin Moore “Chantilly Lace” ($40–$50) or “HC-172 Moonlight White” ($35–$55)—these have warm undertones that feel luxurious. Use quality cabinet paint (Sherwin-Williams Pro Classic, $60–$80 per gallon) for durability. This is a multi-day project (prep, prime, two coats) DIY or hire a painter for $1200–$2500. The investment pays off daily in how your kitchen feels.

    Your space instantly becomes warmer and more European-feeling.

    20. Add a Narrow Console or Sideboard for Beverage and Serveware Storage

    A narrow console or vintage sideboard becomes a functional serving station and styling opportunity. It’s a way to add furniture and personality to your kitchen.

    Find a narrow console at Etsy ($150–$400), vintage shops ($50–$300), or new from Wayfair ($200–$600). Position along an open wall. Style the top with glassware, serving pieces, and a small plant. Keep items grouped in threes for visual balance. This is a quick install (just place it) and changes how your kitchen functions and looks.

    You get a beautiful, functional focal point that feels like intentional curation.

    21. Incorporate Stone or Marble Countertop Accents

    Stone or marble counters are the luxury anchor of Mediterranean kitchens. If a full replacement isn’t feasible, even one accent section (island, beverage bar) elevates the entire space.

    Marble or limestone countertops cost $50–$100+ per linear foot installed ($2000–$5000+ for a full kitchen). Smaller option: install marble on your island top only ($400–$1500). Or add a marble cutting board or small slab on your counter ($80–$200) for the look and function. Seal and maintain regularly to prevent staining. This investment pays dividends in how premium your kitchen feels.

    The stone grounds your space in Mediterranean authenticity.

    22. Hang Vintage or Artisan Mirrors with Ornate Frames

    Mirrors amplify light and warmth in Mediterranean kitchens. An ornate or vintage-framed mirror becomes art that also makes your space feel bigger and brighter.

    Find vintage mirrors at thrift stores ($10–$40), Etsy ($30–$150), or new ornate mirrors from Anthropologie ($80–$200). Hang on an open wall space at eye level. The frame (wood, metal, or ornate) matters as much as the mirror itself. This takes 10 minutes to install and costs $30–$150 depending on where you source.

    The mirror brings light, reflects your warm accents, and adds architectural interest.

    23. Display Olive Oil Bottles and Glass Decanters as Decor

    Displayed bottles and decanters are functional decor that screams Mediterranean and practicality at once. You get beautiful objects and easy cooking access.

    Collect glass bottles and ceramic decanters from HomeGoods ($8–$20), Etsy ($10–$40), or thrift stores ($2–$5). Fill with olive oil, vinegar, or kitchen staples. Add handwritten or printed labels for authenticity. Arrange on open shelving or a kitchen counter in a grouping. This costs $50–$100 total and takes 30 minutes to style.

    Your cooking becomes more intentional, and your kitchen looks purposefully styled.

    24. Create a Small Dining Nook with a Wooden Table and Woven Seating

    A small dining moment in or near your kitchen extends Mediterranean warmth and creates a gathering space. This is especially valuable in open-concept kitchens.

    Find a small wooden table ($150–$400 from Wayfair, Etsy, or vintage sources) and pair with 2–4 woven or wooden chairs ($80–$200 each). Squeeze into a corner, under a window, or at the end of your kitchen. Hang a pendant light above ($40–$120) for ambiance. Total investment: $400–$900. This transforms how your kitchen functions as a social space.

    You get a dedicated gathering spot that feels European café-like.

    25. Layer Rugs in Complementary Warm Tones

    Layered rugs add warmth, define space, and are deeply Mediterranean. Mixing textures and tones creates visual depth and coziness.

    Start with a neutral base rug ($80–$200 from Ruggable or Wayfair), then layer a smaller patterned or colored rug on top ($60–$150). Opt for warm tones: cream, terracotta, soft blue, sage. This works especially well in open kitchens to define the cooking zone. Washable, durable rugs (like Ruggable) are practical for kitchens. Total cost: $150–$350 for two rugs.

    Your kitchen feels grounded, warm, and intentionally layered.


    Save this post and try one or two ideas this week—even small shifts toward warm tones, natural textures, and displayed ceramics bring that Mediterranean magic into your daily kitchen life. Which idea speaks to you first?

  • 26 Soft Bedroom Color Palettes That Feel Serene & Airy

    26 Soft Bedroom Color Palettes That Feel Serene & Airy

    Your bedroom should feel like a sanctuary—a place where stress melts away the moment you step inside. But if your walls are too bold, your colors too mismatched, or your space feels chaotic instead of calm, you’re not alone. The good news? A serene color palette is one of the easiest ways to create that peaceful retreat you’re craving. We’ve gathered 26 soft bedroom color combinations that work together beautifully, whether you’re starting from scratch or refreshing what you already have. Each palette includes specific paint colors, fabric tones, and accent options you can actually find at your local store. Ready to create a bedroom that helps you sleep better and wake up happier? Let’s go.

    1. Cream Walls with Soft Taupe Bedding

    Cream and taupe together create an effortlessly elegant foundation that feels both warm and restful. This pairing works because cream brightens the space while taupe adds subtle depth without visual noise.

    Paint your walls a warm cream like Benjamin Moore’s Swiss Coffee or Sherwin-Williams Alabaster ($30-$40 per gallon). Layer with a taupe linen duvet from Target or IKEA ($80-$150). Add a cream throw blanket for texture. This combo takes about an hour to style and costs under $250 to implement fully.

    The beauty of this palette is its flexibility—you can add whites, grays, or even soft greens as accents without the scheme feeling disjointed. Your room becomes a calm backdrop for real life instead of demanding visual attention.

    2. Pale Blue Walls with White Bedding

    Pale blue has been scientifically linked to relaxation—it mimics a clear sky and calm water, both naturally soothing environments. Pair it with crisp white bedding for a bedroom that feels fresh without being sterile.

    Choose a soft blue like Sherwin-Williams Sea Salt, Behr’s Cloud Blue, or Benjamin Moore’s Aegean Teal (all pale versions, $30-$40). Keep bedding bright white using Egyptian cotton sheets from Amazon or Pottery Barn ($60-$120). Add white wooden furniture or a white dresser to echo the bedding.

    This palette takes 2-3 hours to paint and style. The time investment pays off because you’ll notice yourself relaxing more quickly at bedtime. The high contrast between walls and bedding also makes the space feel larger and more open.

    3. Warm Gray with Soft Sage Green Accents

    Gray often feels cold, but when you choose a warm gray and add sage green accents, you get sophistication with genuine warmth. This combo brings nature indoors without being overly botanical.

    Paint walls Sherwin-Williams Urbane Bronze (lighter version) or Behr’s Wheat Bread ($30-$40). Source a sage green upholstered headboard from Wayfair or Article ($150-$300) or DIY one by draping fabric over a simple frame. Layer white bedding with sage throw pillows from Target or H&M Home ($15-$30 each).

    The project takes a weekend if you’re painting, or just 1-2 hours if you’re using existing furniture. Place potted plants around the room to echo the sage—this reinforces the palette and costs $10-$40 for plants. You’ll notice the space feels grounded yet peaceful.

    4. Blush Pink Walls with Greige Bedding

    Blush pink is having a major moment because it’s soft without being juvenile, and it pairs beautifully with greige (the gray-beige hybrid that’s more forgiving than either alone). Together, they create a bedroom that feels romantic and mature.

    Paint walls a dusty rose like Benjamin Moore’s Aegean Teal (pink version, though try Sherwin-Williams Accessible Beige in a pink undertone or Behr’s Dusty Rose) for $30-$40. Layer greige bedding from Lands’ End or Parachute ($150-$250). Add brass or gold accents through a mirror, lamp, or picture frames ($20-$80) to warm the palette further.

    This takes about 3 hours to paint and style. The result is a bedroom that photographs beautifully and feels sophisticated rather than trendy. You’ll sleep better knowing your space reflects your actual taste.

    5. Soft Ivory with Warm Taupe and Linen Layers

    Ivory and taupe are near-neutrals that let you focus on texture rather than color—and texture is what makes a bedroom feel genuinely restful. This palette prioritizes how things feel to the touch, not just how they look.

    Paint walls a soft ivory like Sherwin-Williams Alabaster or Benjamin Moore’s White Dove ($30-$40). Choose natural linen bedding in warm taupe from Parachute, Cultiver, or Etsy shops ($200-$400 for quality sheets and duvet). Layer with a chunky knit throw from Target or IKEA ($30-$60).

    The styling takes 1-2 hours, and the investment in quality linen pays dividends—linen gets softer with every wash and lasts years. Your bedroom becomes a place where you actually want to spend time, even beyond sleep.

    6. Pale Lavender Walls with White and Gray Bedding

    Lavender has been used in sleep sanctuaries for centuries because the color promotes relaxation and is linked to reduced anxiety. A pale version—barely-there lavender—gives you those benefits without the overpowering floral vibe.

    Paint walls an extremely pale lavender like Benjamin Moore’s Lavender Mist or Sherwin-Williams Potentially Purple (very light) ($30-$40). Keep bedding mostly white with a gray striped throw to ground the palette. Add a few pillows in soft gray ($15-$25 each).

    This paint-and-style project takes about 2 hours. The subtle color shift makes a bigger impact than you’d expect—visitors often can’t identify the wall color but notice the room feels calm. You’ll find yourself sleeping more deeply.

    7. Soft Greige with Warm White Bedding and Wood Tones

    Greige (gray-beige) is the chameleon of bedroom colors—it looks different depending on your lighting and what you pair it with. Add warm white bedding and natural wood for a palette that feels like home, no matter your decorating style.

    Choose a greige like Sherwin-Williams Urbane Bronze (very light), Behr’s Accessible Beige, or Benjamin Moore’s Revere Pewter ($30-$40). Keep bedding in warm white or ivory, and make sure your wood furniture has honey or warm undertones rather than gray-tinted wood.

    This takes 2-3 hours to paint and style. The genius of this palette is that it works with almost any accessories you already own—artwork, books, plants, and textiles all look good against greige. You can change your bedding seasonally without the whole room feeling off.

    8. Pale Celery Green with Cream Bedding

    Pale celery green brings the calming benefits of nature indoors without being dramatic. It’s a color that whispers instead of shouts, making it perfect for restful sleep.

    Paint walls a very pale celery like Sherwin-Williams Sea Salt (green undertone), Behr’s Soft Fern, or Benjamin Moore’s Pale Oak ($30-$40). Layer cream bedding from IKEA, Target, or Parachute ($80-$180). Add potted plants in corners or on shelves to echo the wall color ($10-$50 total).

    The project takes 2-3 hours to paint and 1 hour to style. This palette works especially well if you want your bedroom to feel connected to nature and outdoor spaces. You’ll notice you breathe more deeply in this room.

    9. Warm White Walls with Soft Blue-Gray Bedding

    Warm white walls are the safest backdrop because they reflect light and let your bedding be the hero. A soft blue-gray duvet adds visual interest without overwhelming a restful space.

    Paint walls a warm white like Benjamin Moore’s Swiss Coffee, Sherwin-Williams Alabaster, or Behr’s Ultra Pure White ($30-$40). Choose a blue-gray duvet from Target, H&M Home, or Wayfair ($60-$150). Stick with white or very pale gray for secondary textiles to keep the palette cohesive.

    This takes 1-2 hours to paint and style. The beauty is that if you ever want to change your bedding color, the walls won’t fight it. Warm white also bounces natural light around the room, making it feel airier even if it’s small.

    10. Soft Gray-Blue with Warm Beige Bedding

    Gray-blue (sometimes called dusty blue or slate blue in very pale versions) splits the difference between the coolness of blue and the neutrality of gray. Warm beige bedding keeps it from feeling cold or institutional.

    Paint walls a dusty gray-blue like Sherwin-Williams Sea Salt, Behr’s Blue Whisper, or Benjamin Moore’s Kensington Blue (all very pale, $30-$40). Layer warm beige bedding from Pottery Barn, Target, or Amazon ($80-$160). Add white or cream throw pillows for visual softness.

    This takes 2-3 hours to paint and style. The color combo works year-round and never looks dated. You’ll notice the room feels both grounded and airy—a rare combination that promotes genuine relaxation.

    11. Butter Yellow Walls with Soft Gray Bedding

    Pale butter yellow sounds risky for a bedroom, but here’s the secret: very soft yellow promotes happiness and energy without causing anxiety—and gray bedding anchors the cheerfulness so it feels restful instead of stimulating.

    Paint walls an extremely pale yellow like Benjamin Moore’s Pale Oak (yellow version), Sherwin-Williams Butter Cream, or Behr’s Pale Sun ($30-$40). Choose a cool gray duvet from IKEA, Target, or Wayfair ($60-$150). Use white or cream for pillows and throws to keep the palette balanced.

    This paint-and-style project takes 2-3 hours. The payoff? You’ll wake up feeling more positive, and you’ll sleep restfully because the gray bedding creates a calm focal point. This palette works especially well for north-facing rooms that get cooler light.

    12. Pale Stone Gray with Warm White and Soft Green

    Stone gray is warmer than typical gray and more sophisticated than beige, making it the perfect backdrop for a palette centered on natural textures and soft accent colors.

    Paint walls a soft stone gray like Sherwin-Williams Urbane Bronze (very light), Benjamin Moore’s Revere Pewter, or Behr’s Dove Gray ($30-$40). Keep bedding in cream-white, and add a soft sage or pale green throw ($30-$60). Include wooden or woven accents to warm the palette.

    The project takes 2-3 hours. This palette is particularly effective because it doesn’t demand attention—your brain recognizes it as safe and calm immediately. You’ll fall asleep faster and sleep more soundly.

    13. Pale Blush with Warm Taupe and Brass Accents

    Pale blush brings femininity without fussiness when you ground it with taupe and add brass accents that introduce warmth and subtle glamour.

    Paint walls an extremely pale blush like Benjamin Moore’s Pink Damask (very diluted), Sherwin-Williams Accessible Beige (with pink undertone), or Behr’s Ballet Pink ($30-$40). Layer taupe bedding from Lands’ End, Parachute, or Target ($100-$200). Add 2-3 brass picture frames or a brass mirror from Target, Wayfair, or Home Depot ($20-$80 total).

    This takes 3-4 hours if you’re painting, or 1-2 hours if you’re working with existing walls. The brass accents catch light in a way that feels warm and sophisticated without requiring additional decor. Your bedroom becomes a personal retreat that reflects your taste.

    14. Cool White Walls with Pale Blue Bedding and White Layers

    Cool white with pale blue creates an almost-Scandinavian simplicity that’s inherently calming. The palette relies on clean lines and minimal visual noise rather than color drama.

    Paint walls a cool white like Sherwin-Williams Alabaster, Benjamin Moore’s Super White, or Behr’s Ultra Pure White ($30-$40). Choose a pale blue duvet from IKEA, Target, or H&M Home ($60-$120). Keep all other bedding white or cream for visual cohesion.

    This takes 1-2 hours to paint and style. The minimalist approach means you’ll notice any clutter more, which naturally encourages tidiness and supports deeper relaxation. This palette works beautifully in small bedrooms because the light colors create an airy feel.

    15. Warm Greige with Ivory Bedding and Woven Textures

    Warm greige with ivory bedding creates a neutral palette that invites you to focus on texture—and texture is what makes a bedroom feel genuinely comfortable and inviting.

    Paint walls a warm greige like Sherwin-Williams Urbane Bronze (very light), Benjamin Moore’s Nimbus Gray, or Behr’s Accessible Beige ($30-$40). Choose ivory bedding with a slight sheen or texture from Parachute, Cultiver, or Etsy ($150-$300). Add woven accents—a jute headboard or rattan baskets—to ground the palette ($40-$150 total).

    This takes 3-4 hours including painting and styling. The focus on natural, woven materials creates a bedroom that feels both luxe and livable. You’ll sleep better knowing your space celebrates craftsmanship and natural materials.

    16. Pale Sage Green with Cream and Natural Wood

    Pale sage green pairs beautifully with cream and natural wood to create a bedroom that feels like a peaceful retreat in nature—without being themed or overdone.

    Paint walls a very pale sage like Sherwin-Williams Sea Salt (green undertone), Benjamin Moore’s Wythe Blue, or Behr’s Soft Fern ($30-$40). Choose cream bedding from Target, IKEA, or Parachute ($80-$180). Make sure furniture has warm, honey-toned wood rather than gray or white-washed finishes.

    The project takes 2-3 hours to paint and style. This palette works year-round and complements both modern and traditional furniture styles. The soft green has been shown to reduce stress and promote emotional calm—benefits you’ll feel each time you enter the room.

    17. Soft Taupe Walls with White and Pale Gray Layering

    Soft taupe is sophisticated enough to feel intentional but neutral enough to work with almost any furniture or accessories. Layer it with white and pale gray for visual depth in a low-key way.

    Paint walls a soft taupe like Sherwin-Williams Urbane Bronze (very light), Benjamin Moore’s Revere Pewter, or Behr’s Shiitake ($30-$40). Start with white bedding, then layer pale gray throw pillows and a taupe linen throw ($50-$100 total for textiles). Keep curtains in a matching taupe for cohesion ($40-$100).

    This takes 2-3 hours to paint and 1-2 hours to style. The monochromatic approach sounds boring but actually feels incredibly sophisticated—and the eye finds the different textures more interesting than different colors. You’ll sleep in a space that feels curated and calm.

    18. Pale Peachy-Pink with Warm Gray Bedding

    Pale peachy-pink is warmer than blush and less dated than coral—it’s a Goldilocks color that works beautifully with warm gray bedding and wood tones.

    Paint walls a pale peachy-pink like Benjamin Moore’s Caliente (very diluted), Sherwin-Williams Cavern Clay (very light), or Behr’s Peach Fuzz ($30-$40). Choose warm gray bedding from Target, H&M Home, or Wayfair ($80-$160). Add white or cream throw pillows to create visual softness and brightness.

    The paint-and-style project takes 2-3 hours. This palette works especially well if your bedroom gets warm afternoon light—the peachy tone glows beautifully and creates a sense of warmth even in cooler weather. You’ll feel embraced by the color rather than overwhelmed.

    19. Ivory Walls with Soft Blue-Toned Gray Bedding and Linen

    Ivory walls with blue-toned gray bedding create a palette that feels clean without being stark, and peaceful without being bland. The blue undertones add subtle sophistication.

    Paint walls a warm ivory like Benjamin Moore’s Swiss Coffee, Sherwin-Williams Alabaster, or Behr’s Wheat Bread ($30-$40). Choose a blue-gray duvet from Parachute, Lands’ End, or Target ($80-$180). Add white or cream throw blankets and pillows to echo the walls.

    This takes 1-2 hours to paint and 30 minutes to style. The palette works beautifully with natural light—ivory bounces light around while the blue-gray bedding grounds it. You’ll notice the room feels both spacious and cozy.

    20. Soft Gray with White Bedding and Pale Yellow-Green Accents

    Soft gray with white bedding is a proven calm combination, and pale yellow-green accents bring just enough life and energy without disturbing rest.

    Paint walls a soft warm gray like Sherwin-Williams Urbane Bronze (very light), Behr’s Dove Gray, or Benjamin Moore’s Gray Cloud ($30-$40). Keep bedding white for clean brightness. Add 2-3 chartreuse or pale green throw pillows from Target or H&M Home ($15-$30 each), and include potted plants ($10-$40) to echo the accent color.

    This takes 2-3 hours total. The beauty of this palette is that the accent color is easy to change—if you get tired of pale green, swap it for a soft blue or blush without repainting. Your bedroom feels fresh and current without requiring major renovation.

    21. Warm Cream with Soft Mauve Bedding and Ivory Layering

    Warm cream walls with soft mauve bedding create a palette inspired by vintage linens and heirloom textiles—calming without feeling dated because the colors are pale and modern in tone.

    Paint walls a warm cream like Benjamin Moore’s Cream, Sherwin-Williams Popcorn, or Behr’s Wheat Bread ($30-$40). Choose a soft mauve duvet from Etsy vintage sellers, Parachute, or even your grandmother’s linen closet if you’re lucky ($100-$250). Layer ivory pillows and a cream throw ($30-$60 total).

    This paint-and-style project takes 2-3 hours. The result is a bedroom that feels personal and storied rather than decorated-from-a-catalog. You’ll sleep deeply because the palette is genuinely restful rather than trend-focused.

    22. Pale Gray-Green with White and Warm Taupe

    Pale gray-green (the sweet spot between cool and warm) with white and taupe creates a palette that feels both contemporary and timeless—calm without being cold.

    Paint walls a soft gray-green like Sherwin-Williams Sea Salt, Benjamin Moore’s Palladian Blue (green version), or Behr’s Soft Fern ($30-$40). Keep bedding white for freshness and brightness. Layer taupe throw pillows ($20-$40) to add warmth without visual heaviness.

    This takes 2-3 hours to paint and 1 hour to style. The gray-green is a mood booster—research shows this color range reduces anxiety while promoting clarity. You’ll feel the difference in your sleep quality.

    23. Soft Putty Gray with Ivory Bedding and Warm Accents

    Putty gray (a slightly warmer, softer version of standard gray) is sophisticated without being cold, especially when paired with ivory bedding and warm metal accents like brass or copper.

    Paint walls a soft putty gray like Sherwin-Williams Urbane Bronze (very light), Benjamin Moore’s Nimbus Gray, or Behr’s Accessible Beige (with gray undertone) ($30-$40). Choose ivory bedding from Target, IKEA, or Pottery Barn ($80-$180). Add a brass mirror or warm metal picture frames ($30-$80).

    The project takes 2-3 hours total. This palette feels grown-up and intentional—you’re choosing restraint over chaos, which is deeply relaxing. Your bedroom becomes a haven from the visual noise of the rest of your life.

    24. Pale Blush-Gray with White Bedding and Green Touches

    Pale blush-gray is the neutral that doesn’t feel boring—it’s warm enough to feel inviting but cool enough to feel calm. White bedding keeps it fresh, and soft green accents add life.

    Paint walls an extremely pale blush-gray like Benjamin Moore’s Swiss Coffee (with pink undertone), Sherwin-Williams Accessible Beige (rosy version), or Behr’s Pale Petal ($30-$40). Keep bedding bright white, and add a soft green throw ($30-$60). Include 1-2 potted plants ($10-$30 total).

    This takes 2-3 hours to paint and style. The combination of blush, white, and green feels effortlessly curated—like you didn’t try too hard but got it exactly right. You’ll sleep knowing your space reflects both your taste and your need for calm.

    25. Soft White with Barely-There Gray-Blue Bedding

    Pale white walls with barely-there blue-gray bedding create an almost-monochromatic palette that’s deeply calming. The color is so subtle that the focus stays on rest, not decoration.

    Paint walls a soft white like Benjamin Moore’s Swiss Coffee, Sherwin-Williams Alabaster, or Behr’s Ultra Pure White ($30-$40). Choose a duvet so pale it’s nearly white but with cool blue-gray undertones from IKEA, Target, or Etsy ($60-$140). Keep all other bedding white for visual simplicity.

    This takes 1-2 hours to paint and 30 minutes to style. The minimalist approach works especially well if you struggle with racing thoughts at bedtime—fewer visual stimuli = fewer mental tangents. You’ll notice yourself relaxing faster.

    26. Warm Cream Walls with Soft Taupe-Beige Bedding and Wood

    Warm cream with taupe-beige bedding and natural wood creates a palette that feels like home the moment you walk in. It’s fundamentally comfortable because it incorporates natural materials and warm tones that our brains recognize as safe.

    Paint walls a warm cream like Benjamin Moore’s Cream, Sherwin-Williams Alabaster (warm version), or Behr’s Wheat Bread ($30-$40). Choose taupe-beige bedding from Parachute, Target, or Lands’ End ($100-$200). Prioritize furniture with warm, visible wood grain rather than modern finishes ($200+ depending on what you already own).

    This takes 2-3 hours to paint and style. The payoff is massive—this palette works with almost any decorating style, accepts furniture additions easily, and genuinely makes you want to spend time in the room. You’ll sleep more soundly and wake more rested.


    Save this for your next bedroom refresh and try one palette this weekend. Pick the one that matches your natural light and existing furniture—small tweaks make surprisingly big differences in how rested you feel.

  • 23 Sculptural Furniture Ideas That Turn Seating Into Art

    23 Sculptural Furniture Ideas That Turn Seating Into Art


    Introduction

    Your living room seating doesn’t have to be a boring rectangle. Sculptural furniture—pieces with curves, artistic forms, and eye-catching silhouettes—turns functional seating into gallery-worthy art that makes people pause when they walk in. The best part? These aren’t museum-only investments anymore. Whether you’re working with $50 or $500, there’s a way to bring organic, fluid shapes into your space. In this guide, you’ll discover 23 ways to swap rigid furniture for pieces that flow, inspire, and actually feel better to sit in. From bold curved sofas to unexpected seating vignettes, these ideas work in small apartments, sprawling living rooms, and everything in between.


    1. Choose a Curved Sofa as Your Main Anchor

    A curved sofa immediately signals that your space prioritizes comfort and style over convention. Instead of fighting against your furniture, let it work with the natural flow of how people move through your room.

    Look for curved sectionals or serpentine sofas at retailers like West Elm, Article, or CB2 (usually $800–$2,500 for quality pieces). If that’s out of budget, check IKEA’s curved options ($400–$700) or hunt Facebook Marketplace and Craigslist for mid-century finds. Measure your doorways first—curved pieces can be tricky to move. Set aside a weekend for delivery and placement.

    Pro tip: If you rent or want to test the trend, curved accent chairs ($150–$400) deliver the same artistic vibe without the commitment of a full sofa.

    Your room instantly feels more intentional and inviting when seating flows instead of sits in sharp corners.


    2. Add a Sculptural Coffee Table Under $500

    Coffee tables are the unsung heroes of room design. A sculptural one stops people mid-conversation because they’re visually interesting enough to notice, but functional enough to use daily.

    Hunt for curved, organic tables at Target ($150–$300), IKEA ($100–$250), Etsy ($200–$400 for handmade stone or wood), or Article ($300–$500). Materials like curved wood, sculpted concrete, or curved metal frames work best. Wood tables age beautifully and hide scratches; concrete reads more modern. Measure your sofa depth beforehand—ideally 16–18 inches away from seating.

    Alternative: DIY a sculptural look by placing a marble or wood slab on sculptural metal legs ($120–$250 total).

    The conversation starter factor alone makes this worth the upgrade. Plus, a shaped table actually guides eye movement around your room better than rectangular ones do.


    3. Invest in a Curved Accent Chair for Reading Nooks

    One sculptural accent chair in a quiet corner transforms how you use your living room. Suddenly, you have a retreat spot that feels separate from the main seating area.

    Curved barrel chairs or papasan-style seats ($200–$600) work well from Article, West Elm, Wayfair, or IKEA. Look for forms that cradle your body—egg chairs, cocoon shapes, or swooping backs feel more luxe than standard armchairs. Upholstery in jewel tones like emerald, burgundy, or ochre pairs beautifully with sculptural forms. This is a one-weekend placement project.

    Budget option: Vintage curved chairs from estate sales or Facebook Marketplace ($50–$150) often have better bones than new budget pieces.

    You’ll find yourself actually using this corner because the chair itself becomes a reason to sit down, not just functional seating filler.


    4. Layer Banquettes for Intimate Gathering Zones

    Banquettes create conversation islands within larger rooms. They signal “this is a special zone” without needing walls, which designers like Rita Konig have championed for years.

    Custom banquettes ($1,500–$3,500) take 6–8 weeks but feel permanent and luxe. For faster results, buy modular seating or curved bench seats ($400–$1,200 each from West Elm, CB2, or Wayfair) and arrange two facing each other. Add coordinating cushions ($50–$200 per cushion) in complementary colors. Layer in a low coffee table ($150–$400) between them. This weekend project transforms your room’s functionality.

    Renter-friendly: Curved outdoor benches moved indoors ($200–$500) create the same effect without permanent installation.

    Your living room becomes a destination within your home—the place where real conversations happen, not just where people sit to watch TV.


    5. Mix Curved and Linear Forms for Balance

    Too many curves feel chaotic; too many straight lines feel cold. The magic happens when you pair them intentionally.

    Start with your curved seating as the hero, then ground it with linear elements: a straight console table ($150–$400), angular bookshelves ($200–$600), or a rectangular rug ($100–$300). This mix—what designers call “organic modernism”—feels curated and intentional. Use mixed metals and wood tones to tie them together. No special tools needed; this is pure styling over one afternoon.

    Pro tip: A round mirror ($80–$200) echoes your sofa’s curves while adding that linear geometry through its frame.

    The result feels sophisticated and balanced, like you’ve studied design rather than randomly purchasing items.


    6. Float Your Seating Away From Walls

    Floating furniture—especially sculptural pieces—makes rooms feel bigger and allows the piece’s form to shine. It’s a simple shift with massive impact.

    Pull your curved sofa or seating away from walls by at least 12–18 inches. This works best in rooms 14×16 feet or larger; smaller spaces might feel cramped. Anchor the floating area with a large area rug ($150–$400) to define the zone. Add a console table behind the sofa ($150–$300) for visual separation. No renovations needed—just one afternoon rearranging.

    This trick works in open-concept homes where it creates an implied wall without blocking sightlines.

    Suddenly your room feels like a curated display, not just filled with furniture. The sculptural shapes get the attention they deserve.


    7. Choose Low-Profile Seating to Emphasize Height

    Low-profile sculptural seating—pieces with exposed legs and minimal height—makes rooms feel taller and more open. It’s especially powerful in apartments with standard 9-foot ceilings.

    Look for sofas 28–32 inches tall (instead of standard 34–38 inches) from IKEA ($300–$600), Article ($500–$1,200), or Wayfair ($400–$1,000). Exposed wooden or metal legs ($0 extra—just part of the design) let light travel underneath. Pair with tall standing plants ($20–$80 each) and floor lamps ($80–$200) to draw eyes upward. Installation is just unboxing and arranging—one Saturday project.

    Budget hack: DIY legs ($15–$30 per set) onto an existing sectional if you’re handy with a drill.

    Your room breathes easier with low furniture. It’s especially noticeable when guests walk in—they’ll comment on how spacious it feels.


    8. Create a Curved Sectional Dialogue With Your Space

    A substantial curved sectional doesn’t need a lot of additional furniture because the piece itself becomes the room’s conversation. It’s sculptural furniture as architecture.

    Invest in a custom curved sectional ($2,000–$4,500) from Design Within Reach, Restoration Hardware, or Article for statement-making impact. Ready-made curved sectionals are cheaper ($800–$1,800) but less flexible on size. Pair with minimal additional seating—just one sculptural accent chair—to let the sofa shine. Plan 6–8 weeks for custom; ready-made ships in 2–3 weeks. Budget for professional delivery ($200–$400).

    Alternative: Modular curved seating ($1,200–$2,000) you arrange yourself offers flexibility if your space changes.

    This investment transforms your living room into a designed space, not just a furnished room.


    9. Mix Sculptural Forms in Your Seating Lineup

    Matching furniture sets feel corporate. Mixing sculptural forms—different shapes that somehow work together—feels intentional and collected.

    Start with your main curved seating, then add a barrel chair ($300–$700), a papasan ($150–$400), or an asymmetrical ottoman ($200–$600) from different designers. Tie them together with color harmony (choose 2–3 colors and repeat across pieces) rather than matching. Shop Wayfair, Article, West Elm, and local vintage furniture stores for variety. This styling takes one afternoon once pieces arrive.

    Pro tip: Keep upholstery colors cohesive while varying shapes. Your eye reads harmony through color, not form.

    Your room looks like you’ve collected thoughtfully over time, not like you shopped one store in one afternoon.


    10. Use Curved Coffee Tables as Sculptural Anchors

    While you’re thinking about seating, don’t forget the table. A curved coffee table echoes your sofa’s form and becomes artwork when not in use.

    Hunt for curved coffee tables in materials like live-edge wood ($150–$600), cast concrete ($200–$500), or curved metal frames ($100–$300) from Etsy, Article, local wood craftspeople, or CB2. Organic materials ground luxury feels, especially in jewel-tone or moody earth-tone rooms. Measure your space before ordering—oversized tables ($1,000+) work in spacious living rooms; smaller ones ($150–$400) suit apartments. Delivery and placement takes one evening.

    DIY option: Commission a local artisan through Etsy ($300–$800) for a truly one-of-a-kind piece.

    A sculptural table does double duty: functional surface and art installation.


    11. Add Curved Side Tables for Layered Interest

    Side tables are the unsung supporting actors in a sculptural room. Curved ones echo your sofa’s form without adding visual weight.

    Place curved or organic side tables ($100–$400 each from IKEA, Target, Wayfair, or West Elm) beside seating. Mix heights (28–32 inches) and materials—one glass and metal, one wood, for instance—to add texture and interest. Use different tables (rather than matching pairs) for a more collected aesthetic. Styling takes 10 minutes once tables arrive.

    Budget option: Thrifted side tables ($20–$80) spray-painted or refinished ($0–$50 in supplies) save money while adding personality.

    These small details make your room feel professionally designed because you’ve thought about every corner, not just the main seating.


    12. Incorporate Curved Storage for Function and Form

    Storage doesn’t have to be boxy. Curved storage cabinets blend function with the sculptural aesthetic you’re building.

    Choose a curved credenza or sideboard ($400–$1,200 from West Elm, Article, Wayfair, or local furniture makers) in warm woods or soft grays to ground your color palette. Curved edges and tapered legs keep it feeling light despite its size. Use it to store books, media equipment, or tableware. Display decorative objects on top for visual interest. Installation is one weekend—measure doorways first for delivery concerns.

    Budget-friendly: Paint a straight cabinet with curved details ($50–$100 in paint and hardware) or drape a curved frame with fabric ($80–$150) for a softer, sculptural illusion.

    Now your storage becomes part of your room’s visual story, not an afterthought piece shoved in a corner.


    13. Layer Curved Mirrors to Amplify Space and Light

    Curved mirrors multiply light and make rooms feel larger. They’re also sculptural objects themselves.

    Hang or lean a large curved mirror ($80–$300) behind seating to amplify natural light and create depth. Arched mirrors ($100–$400) add art deco flair if you’re leaning into geometric drama. Position to catch windows so reflections bounce around. Installation is a one-hour project with basic wall hardware ($10–$20). Renter option: lean it against the wall for zero installation stress.

    Pro tip: Choose a mirror with a sculptural frame ($150–$500)—carved wood, curved metal, or plaster—so it reads as art even when reflecting nothing special.

    Mirrored walls used to feel 80s, but one strategic curved mirror feels contemporary and luxury.


    14. Pair Curved Seating With Geometric Rugs

    Rugs ground seating and create visual anchors. Geometric rugs (even angular ones) work beautifully with curved furniture if color ties them together.

    Place a large area rug (8×10 feet, $150–$500) from Wayfair, Article, or local rug shops beneath your curved seating. Choose geometric patterns in jewel tones or warm earth tones. The rug doesn’t need to match your sofa’s curves—instead, let color harmony do the work. Ensure at least the front legs of seating sit on the rug for visual grounding. Styling takes 15 minutes.

    Budget option: Layer a smaller patterned rug ($80–$200) over a neutral base rug for texture and interest without the price tag.

    Your room’s visual weight shifts downward, creating a complete, designed look rather than floating furniture on bare floors.


    15. Install Curved Shelving for Sculptural Storage Display

    Curved shelving on walls brings sculptural interest to the upper half of your room and works especially well in small spaces.

    Mount curved shelves ($80–$300 each from Etsy, West Elm, or local makers) on feature walls above seating. Wavy or bowed shelves read as artwork while functioning as storage. Space shelves 10–12 inches apart for books and decor. Installation takes 1–2 hours with a drill and level; hire a handyperson ($75–$150) if you’re not comfortable with wall drilling. Styling happens over an afternoon as you arrange items.

    Renter-friendly: Floating curved shelves with adhesive anchors ($50–$150) avoid permanent wall damage.

    Suddenly your vertical space becomes part of the room’s design, not wasted wall. Books and objects feel like an art installation.


    16. Create Curved Accent Walls for Moody Depth

    Paint creates depth and drama without adding physical furniture. A curved (or simply strategically placed) accent wall in jewel or earth tones works beautifully behind sculptural seating.

    Choose one wall opposite your main seating and paint it in moody colors: deep burgundy ($30–$50 in paint, $100–$200 for professional application), forest green, or warm ochre. Test patches first—colors shift dramatically in different lights. Hire a painter ($200–$400 for one wall) or DIY over a weekend ($0–$50 if you already have supplies). Paint in matte or eggshell finishes for luxe, soft looks.

    Alternative: Peel-and-stick wallpaper ($30–$100) offers color without permanent commitment.

    One moody wall behind your furniture instantly makes everything look more intentional and gallery-like.


    17. Mix Curved Seating With Sculptural Wooden Accents

    Organic modernism blends metals and woods with soft upholstery. Sculptural wooden pieces echo seating curves and ground the space with natural warmth.

    Seek out live-edge wood tables and shelving ($150–$600) from local makers, Etsy, or West Elm. Mix wood tones (one dark, one medium, one light) for visual interest without matching. Pair with brass or brushed gold metal accents ($20–$100 for hardware updates) to add luxury shimmer. Styling happens as pieces arrive—arrange over an evening to see what works. Pro tip: Sand and refinish thrifted wood pieces ($0–$50 in supplies) for budget-friendly sculptural upgrades.

    Your space reads as warm, intentional, and connected to nature—that “quiet luxury” feeling everyone craves.


    18. Layer Curved Lighting for Atmosphere and Function

    Lighting transforms curved furniture from functional to magical. Sculptural light fixtures—arched floor lamps, curved sconces, organic table lamps—amplify your design intentionality.

    Install arched floor lamps ($80–$250 from Target, CB2, or Article) beside seating for ambient glow. Add table lamps with curved or organic bases ($50–$150 each). Layer in wall sconces with curved arms ($60–$200) if you want permanent fixtures. Vary light temperatures: warm white (2700K) for evenings, brighter white (4000K) for daytime. Plan one weekend for installation; hire an electrician ($100–$200) for hardwired sconces. Budget option: battery-operated LED uplights ($20–$50) create atmosphere without installation.

    Lighting is the final touch that makes your room feel finished and intentional.


    19. Add Sculptural Planters and Biophilic Elements

    Plants and sculptural planters create organic movement around your seating area. Biophilic design—bringing nature indoors—pairs beautifully with curved furniture forms.

    Place 3–5 sculptural planters ($30–$150 each from Target, West Elm, CB2, or local ceramicists) around your seating. Choose curved or organic planter shapes in warm earth tones. Fill with low-maintenance plants: fiddle leaf figs, monstera, pothos, snake plants ($15–$40 each). Tall planters (28–36 inches) go in corners; smaller ones flank seating. Watering happens weekly; styling happens in an afternoon. Pro tip: Group planters in odd numbers (3, 5, 7) for visual harmony.

    Budget option: Thrifted planters ($5–$20) refreshed with paint ($10 in supplies) add personality affordably.

    Suddenly your room feels alive and intentional, like someone actually lives here thoughtfully—not just filled a space with furniture.


    20. Combine Curved Seating With Pattern-Drenched Walls

    Pattern drenching—applying one pattern across all walls—creates immersive, gallery-like rooms. It sounds bold but feels intimate when paired with organic seating.

    Choose one pattern you love (botanical, geometric, or abstract) from wallpaper collections ($20–$50 per roll from Wayfair, Spoonflower, or Etsy). Apply to all four walls for impact. Pair with a neutral curved sofa ($600–$1,500) so the sofa recedes and the pattern becomes the star. Hire a wallpaper installer ($300–$600) or DIY over 2–3 weekends ($0 if you’re patient). Peel-and-stick options ($15–$40 per roll) avoid permanent commitment.

    Alternative: Paint one pattern yourself using stencils ($20–$80) for a more budget-friendly approach.

    Your room becomes a complete sensory experience—wrapped in a pattern that feels chosen and intentional.


    21. Use Curved Ottomans as Multipurpose Sculptural Pieces

    Ottomans are the overlooked heroes of sculptural seating. A curved, sculptural ottoman adds seating flexibility, footrest functionality, and visual interest.

    Choose a curved or rounded ottoman ($200–$600 from Article, West Elm, CB2, or local makers) with exposed wooden or metal legs. Look for ones slightly lower than your sofa seat height (12–16 inches) so they serve as proper footrests. Upholster in jewel tones or textured fabrics to ground your palette. One delivery and placement is a one-hour project. Pro tip: Look for ottomans with storage inside ($300–$700) for hidden functionality.

    Budget hack: Curved vintage wooden stools ($50–$150) refinished with new upholstery ($100–$200) cost less than new pieces.

    Now you have seating flexibility—extra surface area for guests, footrest for lounging, or side surface for beverages.


    22. Layer Sculptural Throw Pillows for Texture Without Clutter

    Throw pillows on curved seating showcase texture and personality without overwhelming your design. Sculptural pillow shapes (round, barrel, lumbar) echo seating curves.

    Place 4–6 pillows ($20–$80 each from Target, West Elm, Article, or Etsy) in varying shapes and textures on your curved sofa. Mix velvet, linen, wool, and boucle for tactile interest. Stick to 2–3 colors (choose jewel tones or warm earth tones) repeated across pillows. Layer heights—some upright, some reclined—for dynamic styling. Update one evening; rearrange whenever you want fresh variety. Budget option: DIY pillow covers ($5–$15 per cover in fabric) for trendy patterns at a fraction of retail cost.

    Your sofa becomes an inviting nest, not just a place to sit.


    23. Design a Multi-Use Vignette With Curved Seating

    Your final sculptural idea: create a complete vignette—a mini-room within your room—using curved seating as the centerpiece. This works especially well in open-concept spaces.

    Arrange a curved bench or banquette ($400–$1,200) with 2–3 sculptural accent chairs ($200–$700 each) in a conversational arrangement. Add a round or curved low table ($150–$400) between them. Define the zone with a small area rug ($80–$200) and layered lighting ($100–$300 total). Use plants ($15–$50 each) to create visual boundaries. This multi-hour project transforms a corner into a destination. Pro tip: Position your vignette perpendicular to your main seating for maximum visual interest and defined zones.

    Your living room suddenly has rooms within it—a main gathering space and an intimate retreat area. Guests feel the intentionality the moment they walk in.


    Ready to bring sculptural seating into your home? Pick one idea this weekend and start small—maybe a curved accent chair or sculptural coffee table. These pieces aren’t just furniture; they’re how you show up for yourself in your own space. Save this post and share it with anyone else ready to ditch the boring rectangles.

  • 27 Small Home Layout Ideas That Boost Function & Flow

    27 Small Home Layout Ideas That Boost Function & Flow

    Small spaces don’t have to feel cramped or chaotic—they just need smarter layouts. Whether you’re working with a studio apartment, a tiny bedroom, or an open-concept living area, the right arrangement can make your home feel bigger, more organized, and genuinely enjoyable to live in. These 27 ideas focus on flow, functionality, and creating distinct zones that make each area serve multiple purposes without looking cluttered. You’ll discover free rearrangement tricks, budget-friendly furniture hacks, and strategic design moves that actually work in real homes. Let’s find the layout that transforms how you move through your space.

    1. Define Zones Without Walls Using Area Rugs

    Area rugs are the cheapest way to create visual boundaries and make separate zones feel intentional. Instead of an open room feeling like everything blends together, a rug under your seating area and another under your bed or desk signals “this is living space” and “this is work space.”

    Layer rugs strategically to define function without building walls. A 8×10 rug runs $40–$150 from Target or Wayfair; budget-friendly options start at $20–$30. This takes zero minutes to implement—just unroll and arrange furniture on top. Pro tip: slightly overlapping rugs in neutral tones (cream, warm gray, natural jute) tie zones together visually while keeping them distinct.

    Your layout instantly becomes organized and your eyes rest in each area. Plus, rugs soften hard floors and add warmth that makes small spaces feel less sterile.

    2. Angle Furniture to Open Up Sightlines

    Pushing furniture flush against walls feels logical in tiny rooms, but it actually makes spaces feel smaller and more cramped. Floating or angling key pieces creates diagonal sightlines that make your room appear longer and wider.

    Position your sofa at a 45-degree angle to the wall, or float your bed away from the headboard wall. This works best when you have at least 2–3 feet of clearance. You’re not moving furniture far—just 12–18 inches out. It takes 10 minutes to try and costs nothing. The trade-off: you lose a tiny bit of walkable floor space, but you gain psychological openness that’s worth it.

    The room feels spacious and less like furniture was shoved in. You’ll notice the difference the moment you sit down—there’s breathing room.

    3. Use Vertical Storage to Reclaim Floor Space

    Floor space is precious in small homes, so stop storing things horizontally. Wall-mounted shelves, tall bookcases, and vertical organizers pull clutter off the ground and give your room breathing room.

    Install floating shelves ($15–$50 per shelf at Home Depot or IKEA) or invest in a tall, narrow bookcase ($80–$200 from Target or Wayfair). Add matching baskets ($10–$30 each) to keep items hidden but accessible. Installation takes 1–2 hours for shelves if you’re handy, or hire help for $50–$100. Renter-friendly: lean tall bookcases against walls and style with lightweight decorative baskets.

    You’ll see 30% more usable floor space, and your room looks intentionally organized rather than chaotic. Plus, everything you need is visible and within reach.

    4. Choose Furniture with Built-In Storage

    Every piece of furniture should earn its place in a small home. Beds with drawers, ottomans with hidden storage, and console tables with shelves combine function and style without taking up extra square footage.

    A bed frame with storage drawers costs $200–$500 (IKEA, Wayfair, Amazon) versus $150–$300 for a basic frame—a small premium that gives you an extra closet’s worth of space. An ottoman with storage runs $80–$250 and works as seating, footrest, or hidden storage. Assembly takes 1–2 hours and is usually a weekend project. Budget hack: thrift a wooden trunk ($20–$60) and use it as a coffee table and storage combo.

    You eliminate the need for a separate dresser or shelving unit. Your bedroom looks simpler while storing significantly more, and daily tidying becomes faster because everything has a designated place.

    5. Create a Multipurpose Zone with a Folding Desk

    Working from home in a small space doesn’t mean sacrificing your living area to a permanent desk. A folding desk mounts to the wall and closes flat when not in use, giving you a workspace that disappears.

    A wall-mounted folding desk costs $60–$150 and takes 30 minutes to install (drill two holes, mount brackets). When folded down, it looks like a slim shelf; when open, it’s a full work surface. Pair it with a rolling chair ($50–$120) that tucks under a table or in a closet. Renter note: some floating desks come with adhesive strips instead of wall damage.

    You reclaim your living space and maintain a dedicated work zone without cramping your room. The boundary between “work hours” and “rest time” becomes visual and psychological—a real win for small-space remote workers.

    6. Arrange Seating in a Conversation Layout

    In tight living rooms, traditional seating—sofa facing a TV—eats up precious space and creates a one-directional layout. Arranging chairs to face each other encourages conversation and makes the space feel intentional and social.

    Skip the large sectional and use two armchairs ($150–$300 each from Target, IKEA, or Wayfair) facing each other with a small round table between them. This “conversation pit” layout uses 30% less floor space than a sofa-plus-chairs setup and works beautifully in studios or one-bedrooms. Rearrange in 20 minutes; no assembly required. Pro tip: choose chairs with curved arms (2025 trend alert!) to soften the geometry and add visual softness.

    Your space becomes a living room for actual living—reading, chatting, relaxing—not just watching. Plus, two modest chairs look cleaner and more design-forward than one oversized sectional wedged into a corner.

    7. Use Curved Furniture to Soften Space and Improve Flow

    Sharp-cornered furniture creates visual tension and makes small rooms feel more cramped. Curved sofas, round tables, and bulbous shapes soften geometry and improve how you move through your space.

    A curved sofa costs $400–$1,000 (Wayfair, Article, West Elm) and takes up similar footprint to a straight sofa while feeling more spacious. Pair it with round side tables ($80–$200) and curved mirrors ($40–$120). Swap angular floor lamps for ones with gentle curves. You’re not buying more—just choosing softer shapes. This takes 1–2 hours to rearrange and style. Budget hack: use curved storage baskets instead of boxy shelving units ($20–$50 each).

    The room feels bigger and more inviting because your eye moves smoothly instead of stopping at sharp angles. Walking and sitting become more comfortable, and the space reads as intentionally designed.

    8. Mount a TV on the Wall to Free Up Floor Space

    TV stands are floor-space killers—especially the ones that take up 2–3 feet of width. Wall-mounting your TV saves significant square footage and creates a cleaner aesthetic that makes rooms feel bigger.

    A wall mount costs $20–$60 and installation takes 30 minutes if you have basic tools (or hire a handyman for $75–$150). You’ll need to run cables behind the wall or use a cable concealer ($10–$20). If you’re renting, use an adhesive-backed mount or rent-friendly stand. Skip the furniture-style console and use floating shelves ($30–$80) below the TV for streaming devices and decor.

    Your floor opens up instantly and the room feels modern and spacious. Plus, you can rearrange your furniture freely without planning around a bulky stand—a game-changer for small-space flexibility.

    9. Install Floating Nightstands Instead of Full Dressers

    A full bedroom dresser can consume 15% of a tiny room’s usable floor space. Floating nightstands give you bedside storage and surface space without eating floor area or blocking sight lines.

    Floating nightstands cost $40–$100 each and mount to the wall using brackets (30 minutes per shelf to install). They typically offer 1–2 small drawers for essentials. For hanging storage, add a narrow wall-mounted cabinet ($50–$150) or pegboard system ($30–$80) to handle the items a dresser would hold. Renter-friendly: lean a small dresser against the wall or use rolling drawer carts that tuck under the bed.

    Your bedroom floor opens up and the space reads as intentionally designed rather than packed. The bed becomes the focal point, and the room feels larger because furniture isn’t grounded to the floor.

    10. Create a Reading Nook in an Unused Corner

    Unused corners are missed opportunities. A small reading nook uses dead space and gives your home a functional, intentional zone that makes it feel complete.

    Choose an armchair or lounge chair ($120–$300) that fits your corner. Add a curved floor lamp ($60–$150) for task lighting and a floating shelf ($20–$50) above for books. Layer a throw blanket ($20–$60) and a small side table ($30–$80). This entire setup takes 2–3 hours to assemble and style. Budget option: use a vintage chair from a thrift store ($20–$60) and a lamp you already own.

    You’ve created a retreat within your home that encourages rest and separates your space into functional zones. Plus, it’s Instagram-worthy, which means you’re more likely to use and enjoy it.

    11. Use Pocket Doors or Curtains to Hide Clutter Zones

    Not all your small space needs to look perfect all the time. A simple curtain rod and fabric panel or pocket door can hide a work area, storage zone, or clutter corner when you need it to.

    A tension rod and fabric panel costs $15–$40 and installs in 5 minutes with zero tools needed. Alternatively, a pocket door retrofit costs $500–$1,500 if you’re upgrading your actual door hardware (professional installation). For renters, stick-on track systems ($20–$50) offer a damage-free alternative. Pair with a neutral linen or cotton panel ($15–$40) that matches your decor.

    You get the flexibility to “close off” your workspace or storage area instantly when guests arrive or you want to mentally reset. This psychological boundary is powerful for small spaces and costs almost nothing to implement.

    12. Position Your Bed as a Room Divider

    In studios or open-concept spaces, your bed can do double duty as a room divider that separates your sleeping area from your living area without using square footage for walls.

    Position your bed perpendicular to the wall or use a bed with a tall headboard ($300–$800) that creates a visual barrier. For budget builds, attach a curtain rod above your bed ($15–$30) and hang lightweight fabric ($15–$40) to create a soft partition. Arrange seating on the other side to define the living zone. This rearrangement takes 1–2 hours and costs $0 if you’re moving existing pieces.

    Your studio feels like two separate rooms even though it’s one open space. The psychological separation between sleeping and living areas improves rest and makes your home feel intentionally zoned.

    13. Invest in a Murphy Bed for Maximum Flexibility

    If you’re serious about small-space living and want maximum flexibility, a Murphy bed folds into your wall and reveals your entire floor during the day—essentially giving you two rooms in one space.

    A Murphy bed frame costs $500–$2,500 depending on quality and customization (IKEA, Resource Furniture, Wayfair). Installation takes 4–8 hours professional time ($200–$500 labor). Some models include built-in storage and desks. This is an investment piece but gives you genuinely usable space. Renter note: some companies make non-permanent options ($200–$600).

    You reclaim your entire living space during the day and have a full bed at night. This is the single best layout hack for studios or micro-apartments where you’re sacrificing a room to sleeping space.

    14. Choose Furniture at Human Scale, Not Oversized

    Oversized furniture is the #1 layout mistake in small spaces. Cramming a sectional designed for a living room into a studio makes everything feel cramped and awkward. Right-sized furniture makes your space feel larger and allows actual flow.

    Measure your space first. A loveseat ($200–$500) instead of a sectional, a slim coffee table ($60–$150) instead of a chunky one, and a narrow console ($100–$300) instead of a wide dresser keep proportions balanced. Shopping at IKEA, Article, and West Elm helps because they offer compact-scale pieces built for apartments. Spend 30 minutes measuring and sketching before buying anything. Pro tip: take photos of your space and overlay furniture to scale using apps like MagicPlan (free).

    Your room feels spacious and intentional because furniture matches the space, not fights it. You’ll have actual room to walk, and the layout reads as designed rather than squeezed.

    15. Float Your Bed Away from Walls for Airflow

    Pushing your bed into a corner or against a wall is logical for tiny rooms but creates dead space and makes the room feel static and cramped. Floating your bed creates visual balance and actually opens up sightlines.

    Position your bed 18–24 inches from the walls if you have the footprint. Add matching nightstands on each side ($50–$150 each) to balance the composition. Ensure at least 2 feet of walking space on all sides for safety and comfort. This rearrangement takes 20 minutes and costs nothing. Pro tip: a low platform bed ($300–$600) works better for floating because it sits lower visually and doesn’t block sightlines.

    The room feels symmetrical and spacious even though you’re using the same footprint. Plus, floating your bed makes the space feel like a designed bedroom rather than a bedroom that’s been crammed into an apartment.

    16. Use Vertical Dividers Like Tall Plants or Bookcases

    A tall but narrow divider—a bookcase, plant wall, or curtain rod—separates zones without blocking light or making the space feel segmented. It’s the “soft wall” for small spaces.

    A tall narrow bookcase ($100–$250) or plant shelf ($80–$200) placed strategically creates a visual boundary. Alternatively, use a large potted plant or fiddle leaf fig ($30–$80) to mark a zone change. Install in 30 minutes for lightweight pieces; heavier bookcases take 1–2 hours. Renter-friendly: lean bookcases and skip wall mounting entirely. Budget hack: use PVC pipe and shelves ($50–$100 total) to DIY a tall divider.

    Light filters through, so your space doesn’t feel divided—just intentionally zoned. The divider becomes a design feature and a functional tool for separating activities without sacrificing openness.

    17. Add a Console Table Behind Floating Furniture

    When you float furniture in a small room, the back of your sofa or chair faces the room awkwardly. A slim console table behind floated seating gives you storage, display, and hides the back of the furniture.

    A narrow console table ($80–$250) fits in the 12–18 inch gap behind your sofa. Look for one with shelves for storage ($100–$300) or a sleek design that reads as intentional. This setup takes 10 minutes to arrange once your furniture is positioned. Budget option: use a floating shelf ($30–$50) and style it with plants, books, and decor. Pro tip: a console behind your sofa creates a natural entryway and visual boundary between zones.

    You’ve turned awkward dead space into functional storage and display. The back of your room now looks designed rather than unfinished, and you’ve gained accessible storage.

    18. Install a Fold-Down Dining Table for Flexible Entertaining

    Dedicated dining tables consume precious real estate in small homes. A wall-mounted fold-down table offers dining functionality when you need it and disappears when you don’t.

    A wall-mounted fold-down table costs $80–$250 (IKEA, Wayfair, Amazon) and installs in 30 minutes. You’ll need folding chairs ($40–$100 each, 2–4 of them) that stack or hang on wall hooks ($5–$15). When not in use, fold everything flat against the wall and use that space for movement or display. Storage: hang chairs on wall pegs to keep them out of the way.

    You have a full dining surface for cooking projects, homework, or entertaining without sacrificing daily living space. It’s a flexible solution that adapts to how you actually use your home instead of forcing you into a single layout.

    19. Create Activity Zones with Distinct Lighting

    Identical bright lighting makes small spaces feel flat and undifferentiated. Distinct lighting for different zones—work area, sleeping area, living area—creates visual separation and helps your brain recognize functional boundaries.

    Layer your lighting: task lighting ($30–$80) over your desk, overhead lights ($40–$120) in the main living area, and accent lamps ($50–$150) near seating. Dimmers ($15–$40 per switch) let you adjust brightness by zone and mood. Installation depends on fixtures—simple clips take 5 minutes; hardwired lights take longer. Budget hack: use string lights ($15–$30) and battery-operated LED candles ($10–$20) to layer soft ambiance.

    Different zones feel like separate spaces even though you’re in one room. Plus, the ability to adjust lighting affects your mood and productivity—a psychological shift that’s powerful in small spaces.

    20. Arrange Furniture in an “L” Shape to Define Corners

    In tiny living rooms, arranging seating in an L-shape along two walls maximizes space and creates a cozy, intimate corner for activities. It’s more efficient than floating furniture when you lack floor space.

    Position a sofa or loveseat along one wall ($200–$600) and a chair or second seating piece along an adjacent wall ($100–$300). Add a small corner coffee table ($60–$150) at the intersection. This layout takes 30 minutes to arrange and creates a natural conversation area. Pro tip: ensure you maintain 2–3 feet of walkway to bedroom and kitchen so traffic flow doesn’t get blocked.

    You’ve created a defined, intimate seating zone that uses corners efficiently and makes the room feel purposeful. The L-shape is inherently balanced and looks intentional without taking up a lot of visual real estate.

    21. Use Narrow Shelving to Store Without Protruding

    Wall-mounted shelving that’s only 8–10 inches deep projects less into your room than bookcases or dressers. Narrow shelving lets you maximize vertical storage without eating precious floor and walking space.

    Install narrow floating shelves ($20–$50 each) in sets of 3–5 running floor-to-ceiling. Space them 12–15 inches apart. Add matching storage baskets ($15–$30 each) to keep items hidden. Installation takes 2–3 hours if drilling into studs yourself or 1–2 hours for a handyman ($50–$150 labor). Renter-friendly: use tension-rod shelves ($30–$80) that don’t require wall holes.

    You’ve created an entire closet’s worth of storage without using an inch of floor space. Your room stays open and walkable while storing everything you need within arm’s reach.

    22. Position a Bar Cart as a Mobile Storage & Bar Unit

    A bar cart serves multiple purposes in tiny homes: it’s mobile storage, a display piece, a beverage station, and an easy way to tidy up by corralling small items. It takes up minimal floor space and looks designed rather than cluttered.

    A bar cart costs $40–$150 (Target, Wayfair, Amazon, or thrift stores $15–$40) and has 3–4 tiers for stacking bottles, glasses, books, or decor. Wheels make it mobile—roll it into the living area when entertaining and back to the bedroom when storing. No assembly required (most come ready-to-use). Pro tip: style it with just 3–5 items to avoid looking cluttered; less is more in small spaces.

    You’ve added functionality and style without sacrificing precious square footage. It’s a design statement that actually serves your daily life, plus you can rearrange it instantly depending on your needs.

    23. Install Sliding Barn Doors to Hide Storage

    Sliding barn doors are trendy and functional—they hide storage without swinging open and eating floor space like traditional hinged doors. Plus, they’re a design statement that makes small spaces feel intentional.

    A barn door retrofit costs $150–$400 for hardware and door ($75–$250 from Etsy, Amazon, or hardware stores). Installation takes 2–3 hours if DIY or $150–$300 with professional help. Renter-friendly: removable adhesive door systems ($100–$200) exist but require a more structured setup. Pro tip: white or natural wood barn doors are timeless and pair with any decor style.

    Your storage looks like a design feature, not a cramped closet. Plus, the sliding mechanism is satisfying and adds a touch of personality to your layout.

    24. Use a Kitchen Island on Wheels for Flexibility

    In tiny kitchens, a mobile island adds counter space and storage without permanently eating floor space. You can roll it out when you need extra prep space and tuck it into a corner otherwise.

    A rolling kitchen island costs $150–$400 (IKEA, Wayfair, Target) and typically includes storage below and counter space on top. Some have bar seating for 2–3 people. Assembly takes 1–2 hours. Budget hack: use a rolling cart ($30–$80) as a beverage station or produce storage. Pro tip: choose one with locking wheels so it doesn’t slide when you’re working on it.

    Your kitchen becomes flexible—you gain counter space on-demand without losing the ability to move through the space. Plus, it’s perfect for small entertaining where you want guests to perch while you cook.

    25. Arrange a Seating Nook Under a Window

    Windows are natural gathering spots. A seating nook under a window uses a space that might otherwise feel empty and creates an inviting, functional zone that’s perfect for reading or working.

    Use an **existing window sill or add a *cushioned bench ($150–$400)* or low storage bench ($100–$250). Layer with throw pillows ($15–$40 each), a throw blanket ($20–$60), and a small side table ($40–$100). Assembly takes 30 minutes to 1 hour. Budget option: stack cushions on the sill without buying a bench ($30–$60 for quality cushions). Natural light is free and makes this zone feel special.

    You’ve created a retreat that uses existing architecture and daylight. This zone becomes your favorite spot in the home—a win for both function and mental health in a small space.

    26. Hang a Pegboard Wall to Organize Vertical Space

    A pegboard wall is the ultimate small-space organizational hack. Every item is visible, accessible, and the pegboard itself becomes a design feature. It’s flexible (you can rearrange hooks instantly) and uses pure vertical space.

    A pegboard sheet costs $10–$30 and you’ll need hooks ($0.50–$2 each). Installation takes 1–2 hours into studs. Paint it a color that matches your decor ($10–$20 for paint) to make it feel intentional rather than utilitarian. Use it for art supplies, kitchen tools, keys, headphones—anything you need close. Renter-friendly: adhesive pegboards ($20–$50) skip the drilling.

    Your small space becomes organized and you’re not hunting for items anymore. Plus, a styled pegboard looks creative and intentional, turning practical storage into a design moment.

    27. Define Activity Zones with Paint Color or Wallpaper

    Color is the cheapest way to visually separate zones without building walls or taking up space. Painting one wall in a deeper or different tone creates a subtle but powerful visual boundary between areas.

    Paint one wall in a complementary color ($20–$50 for paint) in your sleeping area or accent wall—forest green, warm terracotta, dusty blue, or rich cream. Alternatively, use removable wallpaper ($20–$40 per roll) which is renter-friendly. This takes 3–4 hours and zero furniture. Pro tip: choose warm, earthy tones (2025 trend!) that make spaces feel intentional rather than cold.

    Your space reads as two distinct zones even though you’ve only changed the color. The psychology of this shift is huge—your brain recognizes functional separation and you feel more organized despite the same square footage.


    Save this post and pick one layout idea to try this weekend. Small spaces respond instantly to intentional arrangement—you’ll feel the difference the moment you shift furniture or add a single divider. Share this with anyone living small or renting; these hacks work in any home regardless of ownership.

  • 27 Cozy Kitchen Ideas That Make Cooking Feel Warm & Inviting

    27 Cozy Kitchen Ideas That Make Cooking Feel Warm & Inviting

    Introduction

    There’s nothing worse than cooking in a kitchen that feels cold, sterile, or unwelcoming. You spend so much time there—prepping meals, making coffee, gathering with loved ones—and yet so many kitchens feel more like showrooms than homes. The good news? You don’t need a full renovation to make your kitchen feel warm and inviting. Whether you’re renting, working with a tight budget, or ready to invest in your space, these 27 ideas will help you create a kitchen where you actually want to spend time. From simple styling tricks to smart storage solutions, you’ll discover ways to add texture, color, personality, and function—all while keeping your kitchen cozy and practical. Let’s make your kitchen a place you love.


    1. Layer Warm Earth Tones for Instant Comfort

    Earth tones create an immediate sense of calm and warmth that white or gray kitchens simply can’t match. You’re moving away from that cold, clinical feel and toward something that feels like home.

    Paint a feature wall in warm terracotta, sage green, or soft ochre ($30-$60 for quality paint). Pair it with wood-toned cabinets or stain existing ones to deepen their color. If you rent, removable peel-and-stick wallpaper in earth tones offers the same impact with zero commitment. The beauty of these colors is that they age gracefully and hide everyday wear better than white.

    Pro tip: Choose matte finishes over glossy—they feel more sophisticated and hide fingerprints better.

    The result? Your kitchen instantly becomes a space that feels settled and welcoming, like somewhere you’d linger over breakfast.


    2. Add Open Shelving to Display Personality

    Open shelving breaks up heavy cabinet lines and lets you showcase things you actually love instead of hiding everything away. It’s the kitchen equivalent of displaying your personality on your sleeve.

    Install floating shelves using a level and wall anchors ($20-$50 for three shelves plus hardware; YouTube tutorials make this DIY-friendly). Style with a mix of cookbooks, ceramic dishes, small plants, and practical items like oil bottles. Keep one or two shelves for everyday dishes you use often—this prevents the “museum display” trap.

    Real talk: Open shelving requires regular tidying, so only go this route if you’re okay with light maintenance.

    You’ll notice how much lighter your space feels when some wall space breathes, and visitors immediately see the real, lived-in version of your home.


    3. Swap Handles for Fingerpull Simplicity

    Handle-free cabinets have gone mainstream because they actually make your kitchen feel less cluttered, even when storage is full. The streamlined look creates visual calm.

    Replace hardware with integrated fingerpull handles ($200-$400 for a full kitchen restock) or invest in cabinets with built-in push-to-open mechanisms. Brands like Lioher offer ergonomic solutions that feel natural to use. For renters, adhesive fingerpull handles work temporarily on cabinet faces without damaging them.

    This update takes 1-2 hours if you’re replacing existing hardware, or you can do it gradually over time.

    Your kitchen immediately looks more refined, and the simplified lines make the space feel larger and more intentional.


    4. Introduce Textured Materials Like Fluted Cabinets

    Flat, uniform finishes make kitchens feel impersonal. Texture adds dimension, visual interest, and a sensory quality that makes your space feel more sophisticated and welcoming.

    Choose fluted cabinet fronts for lower cabinets ($150-$300 per cabinet face for custom versions, or $80-$150 for pre-made fluted panel inserts). Mix textures by pairing fluted cabinets with smooth counters or textured backsplash. Plaster-finish range hoods are another trending option ($400-$800) that add organic movement.

    Not ready to commit? Removable textured wallpaper or contact paper on one wall tests the look risk-free ($15-$30).

    The depth and light-play from textured surfaces makes your kitchen look professionally designed without feeling sterile or cold.


    5. Create a Hidden Scullery for Open-Plan Mess Control

    Open-plan kitchens are beautiful until dirty dishes and food prep chaos become visible from the living room. A hidden scullery or butler’s pantry solves this while maintaining the open aesthetic.

    If you have a hallway, closet, or small adjacent room, install cabinetry to create a prep and cleanup zone ($800-$2,000 for basic built-ins, or use a tall cabinet system for $300-$600). This hides the blender, food processor, and pile of cookware while keeping your main kitchen looking serene. Renters can achieve this with a rolling utility cart behind a decorative screen.

    A few days project with proper planning or one afternoon if you’re using ready-made solutions.

    Your guests see a calm, curated kitchen while you have functional space for actual cooking behind the scenes.


    6. Mix Bold Cabinet Colors with Neutral Counters

    The days of all-white kitchens are done—71% of design professionals report clients now want color that reflects their personality. Bold cabinets make a statement while neutral counters keep the overall effect balanced.

    Paint or refinish lower cabinets in deep jewel tones like forest green, navy, or terracotta ($200-$600 including primer and labor if DIY, or $800-$1,500 with professional help). Keep uppers white or natural wood, and choose a timeless countertop like light granite or butcher block ($30-$100+ per square foot). Cabinet paint lasts 3-5 years before touch-ups; consider semi-gloss or satin finishes for durability.

    Weekend project for DIY painters; 3-5 days if hiring help.

    Your kitchen becomes the room people actually want to hang out in—bold enough to have character but balanced enough to stay timeless.


    7. Install Warm Lighting in Layers

    Single overhead lighting creates harsh shadows and cold energy. Layered lighting (ambient, task, accent) makes your kitchen feel like a welcoming retreat you actually want to spend time in.

    Add under-cabinet LED strips ($30-$80 for a kit, super easy to install), hang pendant lights over islands or counters ($60-$300 per fixture), and install a dimmer switch on overhead lights ($15-$40). Use warm white bulbs (2700K color temperature) instead of cool white for instant coziness. This combination takes 2-3 hours if you’re comfortable with basic wiring, or hire an electrician ($150-$400).

    Pro tip: Battery-operated puck lights work for renters with zero installation stress.

    The warmth of layered lighting makes your kitchen feel like a restaurant-quality space rather than a utilitarian work zone.


    8. Embrace Retro Earth Tones and 1970s Vibes

    Retro styles are making a major comeback—52% of design professionals predict a 1970s bright, earthy tone revival. Embracing these tones feels personal and intentional rather than trendy.

    Choose one vintage-inspired element like an avocado-green stove ($300-$800 for new vintage-style appliances, or hunt used models for $50-$300), mustard or olive cabinet paint ($150-$400 to refinish), or a warm wood backsplash ($200-$600). Mix with modern elements like stainless steel hardware or contemporary countertops to keep it feeling current rather than campy.

    Start with paint or smaller accents before committing to appliances.

    This approach celebrates warmth and personality while avoiding the feeling of being stuck in a time warp.


    9. Add a Combination Island with Built-In Seating

    Islands that combine 50-60% closed storage with open seating solve the dual problem of needing storage and gathering space without turning your kitchen into a warehouse.

    Install or upgrade to a combination island with bottom cabinets for cookware and pantry items plus an open side for barstool seating ($1,000-$3,000 for mid-range options, or $300-$800 for a simple base kit to customize). This gives you functional storage hidden from view plus a social hub for entertaining. Pair with 2-3 comfortable bar stools ($80-$200 each).

    A weekend project with a pre-made base, or 2-3 days with custom building.

    Now your kitchen serves triple duty: cooking, storage, and gathering place—all without visual clutter.


    10. Style Open Shelves with Cookbooks and Plants

    Open shelves are only cold and sterile if they’re empty or perfectly styled like a showroom. Real personality comes from mixing function with beautiful objects you actually use and love.

    Arrange cookbooks by color or size, add 2-3 potted herbs or small plants per shelf, and include dishes or serving pieces you use regularly. Layer in books, ceramics, and greenery so shelves look curated but lived-in. This styling costs just the price of plants ($5-$15 each) and maybe a few new ceramics if you want them ($10-$40 per piece).

    Pro tip: Group items in odd numbers (3s and 5s) for a more sophisticated look than perfect pairs.

    Your shelves become a visual story of who you are, making your kitchen feel personal rather than prescriptive.


    11. Install a Range Hood That Doubles as Decor

    Traditional metal hoods are purely functional and often visually heavy. A textured or sculptural hood becomes the kitchen’s focal point and adds that organic warmth trend is calling for.

    Invest in a plaster-finish or textured range hood ($400-$1,200) or opt for a painted steel hood in a bold color ($200-$600). These statement pieces add architectural interest without sacrificing ventilation. If you rent or want flexibility, a removable wood or plaster-look wall treatment above your stove creates a similar effect ($80-$200).

    Installation requires professional help for ventilation work ($300-$600 in labor).

    Your kitchen gains a sculptural element that catches light and creates visual warmth while handling the practical job of removing cooking odors.


    12. Create a Coffee or Beverage Station

    A dedicated coffee or beverage station creates a moment of ritual and gives that area of your kitchen distinct personality and purpose. It’s the first thing people see in the morning and sets the tone for your whole day.

    Dedicate one shelf, small table, or corner counter to coffee supplies ($0 if you’re repurposing existing furniture). Add a simple wooden tray ($15-$40), a few matching mugs ($30-$60 for a set), and fresh flowers or greenery ($5-$15 weekly). Group everything in one small zone so it feels intentional rather than chaotic.

    Free with items you already have, or $60-$120 to refresh it properly.

    This tiny ritual space makes your kitchen feel like a café you genuinely want to visit rather than just a place to grab things quickly.


    13. Paint Lower Cabinets in Jewel Tones

    Two-tone cabinetry with bold lower tones and lighter uppers feels both modern and warm. It creates visual interest without overwhelming your entire space with color.

    Paint lower cabinets in emerald, sapphire, or deep navy ($200-$400 for quality paint and primer, or $800-$1,500 with professional application). Keep uppers white or natural wood. Add brass or gold hardware ($2-$8 per knob, around $50-$200 total) to tie the color together. Satin or semi-gloss finishes are more durable than matte for high-traffic cabinet doors.

    A weekend DIY project or 2-3 days with professional help.

    Your kitchen instantly looks elevated and intentional, with enough visual contrast to feel dynamic rather than flat.


    14. Add Warm Wood Accents and Shelving

    Wood softens modern or minimalist kitchens and adds natural warmth that no paint color can replicate. It ties your space to nature and feels inherently welcoming.

    Install warm wood floating shelves ($60-$150 for one shelf), upgrade to wood cabinet faces ($300-$800 depending on size), or add a wood beam range hood backing ($200-$600). Choose oak, walnut, or cedar in medium to warm tones rather than bleached white. Mix wood tones gently—two complementary woods are fine, three or more can feel chaotic.

    DIY floating shelves take 1-2 hours; cabinet upgrades take a weekend or professional installation.

    Wood brings organic texture and warmth that makes your kitchen feel less like an appliance showroom and more like a home.


    15. Style Your Countertops as Display Space

    Rather than clearing everything off counters (which feels cold and sterile), curate what you keep visible for a lived-in aesthetic that’s still organized.

    Keep 3-4 beautiful items on your counter: a wooden cutting board, a potted herb, a bowl of seasonal fruit, and maybe a small ceramic dish. Group them on one side to preserve workspace. Everything else stays in drawers or cabinets. Switch seasonal items to keep it fresh ($0 if you’re rotating things you own, $15-$30 for seasonal decor).

    Takes 15 minutes to style and 5 minutes to maintain daily.

    Your counters become a small gallery of intentional style rather than either a cluttered mess or a barren workspace.


    16. Install Wallpaper or Peel-and-Stick Accents

    Wallpaper is the fastest way to add color and pattern without commitment (especially removable versions). It instantly makes a kitchen feel designed rather than generic.

    Apply peel-and-stick wallpaper to one accent wall ($20-$60 for a roll covering about 28 sq ft). Choose warm botanical, geometric, or subtle patterns rather than loud designs. Removal is as simple as peeling when you want a change. Alternatively, hire a professional wallpaper hanger for $300-$800 if you’re doing traditional wallpaper.

    DIY peel-and-stick takes 1-2 hours; traditional wallpaper takes 4-6 hours professionally.

    One patterned wall completely shifts your kitchen’s energy from blank and cold to warm and designed.


    17. Create a Dining Nook for Gathering

    A dining nook transforms an awkward corner into a cozy gathering spot and gives your kitchen more purpose than just cooking. It’s where memories get made over breakfast.

    Use a window corner to install a built-in bench ($400-$1,200 with professional building, or $100-$300 for a simple DIY frame) plus a small table ($100-$400) and cushions ($30-$80). If space is tight, a café-style table and two chairs ($150-$400 total) creates the same effect. This works even in tiny kitchens—just 4×4 feet is enough.

    DIY simple benches over a weekend; professional builds take 2-3 days.

    Suddenly your kitchen feels like an experience—a place where you linger and connect rather than just pass through.


    18. Layer in Greenery and Live Plants

    Plants soften hard lines and connect your kitchen to nature while serving practical purposes like fresh herbs for cooking. The visual effect is instantly warmer and more alive.

    Place potted herbs on sunny windowsills ($3-$8 per plant), add trailing plants to shelves ($5-$15 each), and use a rolling plant stand in a corner ($40-$100) for multiple greenery. Choose low-maintenance plants like snake plants, pothos, or actual herbs you’ll use. Water on a simple schedule (most herbs need water 2-3 times weekly).

    Free if you propagate from cuttings; $30-$60 to populate several spots properly.

    Green instantly makes your kitchen look alive, intentional, and warmer—plus you get fresh herbs for cooking.


    19. Use Warm Metallic Hardware and Fixtures

    Hardware is a small detail with outsized impact. Warm metals like brass, copper, and rose gold feel infinitely cozier than cold stainless steel or chrome.

    Replace cabinet knobs and pulls with warm brass or copper hardware ($2-$8 per piece, $50-$300 for a full kitchen). Upgrade faucet trim if possible ($100-$400 for a new fixture), or add matching pendant lights ($80-$300 each) to tie everything together. This subtle shift creates visual warmth throughout your space.

    Hardware replacement takes 1-2 hours and requires just a screwdriver.

    These small warm-metal touches create a cohesive, intentional aesthetic that feels both sophisticated and inviting.


    20. Build Textured Backsplash Variety

    A uniform, flat backsplash feels sterile. Mixing textures creates depth and makes your kitchen feel designed and considered rather than generic.

    Combine matte and glossy tiles ($5-$15 per square foot), add relief or raised patterns ($10-$20 per square foot), or mix ceramic styles ($8-$25 per square foot). A 3×6 foot backsplash costs $150-$600 in materials plus $400-$800 in installation. Go bold with color or pattern here—this is the perfect place to take risks since it’s just one wall.

    2-3 day professional project, or a long weekend for ambitious DIYers.

    A textured, interesting backsplash becomes a focal point that elevates your entire kitchen aesthetic.


    21. Organize with Beautiful, Functional Storage

    Functional storage doesn’t have to be boring. Beautiful organization systems make you actually want to open your cabinets and keep things tidy.

    Invest in matching storage containers for pantry items ($30-$80 for a set of 5-6), labeled glass jars for dry goods ($20-$50 for a set), and drawer dividers ($15-$40). Choose warm wood, ceramic, or warm-toned glass rather than clear plastic or chrome. Label everything with a label maker ($15-$30) for a polished look. This creates visual calm when cabinet doors open and makes cooking more efficient.

    One weekend afternoon to implement across your kitchen.

    Organization suddenly feels aspirational rather than chore-like, and your kitchen runs more smoothly because everything has a home.


    22. Integrate Outdoor Spaces for Extended Living

    Blending indoor and outdoor kitchens extends your living space and creates flexibility for cooking, entertaining, and gathering. Your kitchen becomes a gateway to larger experiences.

    Install a pass-through window or sliding door ($200-$600 for new doors, or style existing ones with matching outdoor furniture) that connects to a covered patio or deck. Place matching bar stools or a small table just outside to blur the line between spaces. Use durable outdoor materials that coordinate with your indoor kitchen aesthetic ($200-$600 for quality outdoor furniture).

    A weekend styling project or 2-3 days if adding new doors.

    Your kitchen visually and functionally expands, creating more room for gathering and entertaining without actually expanding the building.


    23. Add Task Lighting Over Work Zones

    Proper lighting over your prep and sink areas is essential for safety and mood. Good task lighting makes cooking feel less like a chore and more like an experience.

    Hang focused pendant lights directly over your prep counter or sink (18-24 inches above the surface) using pendant kits ($60-$200 each) or a professional electrician’s help ($150-$300). Space them 24-30 inches apart. Choose warm white bulbs (2700K) and adjustable brightness for flexibility. This is separate from ambient lighting and serves purely functional purposes.

    DIY takes 2-3 hours if you’re comfortable with wiring; hire help if unsure.

    When you can actually see what you’re doing without shadows, cooking becomes more enjoyable and your kitchen feels less like a dark dungeon.


    24. Design Multifunctional Zones for Flexibility

    Modern life demands kitchens that do multiple jobs. Creating defined zones for different activities makes your space feel organized and functional rather than chaotic.

    Dedicate corner zones for: prep work (with cutting board and knife storage, $50-$150), beverages (coffee/tea station, $0-$80), recipes (cookbook display, $0-$30), and quick dining (bar or nook, $100-$400). Use open shelving or small tables to physically separate zones while keeping everything visible. Lighting and storage define each zone without needing walls.

    Takes 1-2 hours to rearrange and style existing items; $200-$400 if adding furniture.

    Your kitchen becomes a responsive space that adapts to what you need rather than forcing one rigid use pattern.


    25. Layer Textures with Fabric and Soft Materials

    Hard materials and flat surfaces make kitchens feel cold. Layering in soft textures like textiles, linens, and woven elements creates surprising warmth in a typically hard space.

    Add a kitchen runner rug in warm tones ($40-$120), hang linen curtains over windows ($50-$150), and layer seat cushions on bar stools ($20-$50 each). Choose natural fibers like cotton, linen, and wool that age beautifully and feel good to touch. Opt for warm neutrals or earth tones that complement your cabinet colors.

    Takes 1-2 hours to hang and style.

    These soft touches make your kitchen feel less like a surgical space and more like a cozy, lived-in room you want to spend time in.


    26. Create Contrast with Matte Black Accents

    Matte black isn’t cold when paired with warm wood and earth tones—it adds sophistication and visual contrast that elevates your entire kitchen aesthetic.

    Paint upper cabinets or an island in matte black ($150-$400 for high-quality finish), add matte black hardware ($50-$200), or install a matte black range hood ($300-$800). Pair this boldness with warm wood countertops, honey-toned open shelving, or copper accents to prevent the space from feeling too dark. Matte finishes hide fingerprints and dust better than glossy alternatives.

    A weekend painting project or $800-$1,500 with professional application.

    The contrast between warm wood and sophisticated matte black makes your kitchen look intentionally designed and gallery-quality.


    27. Personalize with Collected Objects and Meaning

    The warmest kitchens aren’t the most expensive or perfectly styled—they’re the ones filled with objects and memories that mean something to you. Personalization is what transforms a house into a home.

    Display items you’ve collected, inherited, or made: vintage serving dishes ($10-$50 at thrift stores), family cookbooks, handmade ceramics from artists you love, or souvenirs from meaningful trips. Arrange them thoughtfully on open shelves or in a small gallery wall. Rotate pieces seasonally or when your mood shifts. This costs whatever you want to spend on items you genuinely love.

    10 minutes to rearrange; ongoing joy.

    Your kitchen tells the story of who you are and what you value, making it the most beautiful and inviting room in your home—not despite its imperfections, but because of them.


    Save this post and try just one idea this weekend—you’ll be surprised how much personality a single small change brings to your kitchen. Which idea resonates with you most?

  • 25 Terrace Decor Ideas That Transform Outdoor Living

    25 Terrace Decor Ideas That Transform Outdoor Living

    Your terrace doesn’t need to be huge to feel like a personal oasis. Whether you’re working with a postage-stamp balcony or sprawling rooftop space, the right decor choices can transform it into somewhere you actually want to spend time. We’re talking cozy seating nooks, smart storage solutions, and styling tricks that make your outdoor space feel intentional and lived-in. The best part? Most of these ideas work whether you rent or own, and plenty fit any budget. Let’s explore 25 real, actionable ways to make your terrace a place you’ll love.

    1. Layer Your Lighting for Evening Ambience

    Good lighting makes or breaks an outdoor space, especially once the sun sets. String lights are the obvious choice, but they work best when paired with task lighting like a small table lamp or sconces for reading.

    Combine warm white string lights ($15–40 from Amazon or Target) with solar pathway lights along edges ($20–50 for a set). If you want permanent fixtures, adhesive solar sconces ($30–80) work without drilling. Install string lights by using renter-friendly adhesive hooks or, if you own, small screws into trim. Time it right: about 30 minutes to hang, and zero maintenance after.

    Solar lights charge during the day and power themselves at night—meaning free electricity and no cords to trip over. Your terrace goes from unusable at sunset to somewhere you’ll want to linger.

    2. Install Vertical Planters for Maximum Greenery

    If you love plants but hate the clutter of pots everywhere, vertical planters solve it. They maximize greenery without eating into your floor space—critical when every square inch counts.

    Choose between adhesive wall pockets ($20–40), railing planters ($15–35), or tiered ladder shelves ($40–80). Wall-mounted pockets work for renters (adhesive strips hold firm), while railing planters clip directly to your existing railings with zero tools. Fill with low-maintenance trailing plants like pothos, ivy, or creeping fig. Plant and water once a week; give them a few weeks to cascade and fill in.

    You get a living backdrop that screens neighbors’ views, requires minimal maintenance, and looks infinitely more interesting than bare walls or railings.

    3. Add a Foldable Dining Table for Flexible Space

    A foldable table gives you the option to dine outside without sacrificing walking space the rest of the time. This is a game-changer for small terraces where every inch matters.

    Look for compact bistro tables ($30–60 at IKEA or Wayfair) or wall-mounted drop-leaf styles ($50–150). Wood or aluminum both work; aluminum is lighter and more weather-resistant. Fold it flat against the wall when you’re not eating, creating an open terrace. Set it up in about one minute—literally just unfold and clip legs in place.

    You suddenly have the option to host breakfast or a small dinner party without feeling like your whole terrace is locked into dining mode. That flexibility changes how often you actually use the space.

    4. Use Outdoor Rugs to Define Seating Areas

    An outdoor rug instantly makes a space feel designed rather than haphazard. It’s also one of the cheapest ways to add color and define where you actually sit.

    Indoor/outdoor rugs in neutral tones ($30–80 at Target, Home Depot, or Amazon) are durable enough for weather and easy to hose off. Place one under your main seating area to anchor furniture and create a visual “room.” Smaller accent rugs ($20–40) work too if you want layering. Installation takes zero time—just unroll and place.

    The right rug makes a balcony feel intentional. Suddenly it’s not random furniture scattered around; it’s an actual outdoor living room. Plus, muted palettes mean you can change other decor seasonally without replacing the rug.

    5. Swap to Rattan or Synthetic Wicker Furniture

    Rattan and synthetic wicker are everywhere right now because they actually work. They’re lightweight, weather-resistant, and feel way more stylish than plastic furniture.

    Synthetic wicker chairs run $60–200 depending on quality; check Wayfair, World Market, or IKEA. Real rattan is slightly cheaper ($40–150) but requires more weather protection in harsh climates. Pair with weather-resistant cushions ($15–40 each) in neutral or jewel tones. Set up takes minutes—just position and add cushions.

    Wicker furniture creates that relaxed, resort-like vibe instantly. Unlike metal furniture, it doesn’t get scorching hot in direct sun, and it won’t rust. It’s also easy to move around if you want to rearrange seasonally.

    6. Create a Privacy Screen with Plants or Bamboo

    Neighbors are the reality of apartment living, but you don’t need to see into their space or vice versa. A privacy screen—whether plants, bamboo, or fabric—reclaims your sense of retreat.

    Bamboo screens ($40–100) are lightweight and easy to position. Living green screens using tall potted plants like bamboo palm or ornamental grasses ($20–60 per plant) look better and improve air quality. Fabric privacy screens ($50–150) are renter-friendly if mounted on removable stands. Installation is instant—just position against the railing.

    Your terrace becomes an actual private retreat instead of feeling exposed. You can relax without feeling watched, which changes how often you use the space.

    7. Paint or Stain Balcony Flooring for a Refresh

    If your terrace has wood flooring, a paint or stain refresh is one of the biggest impacts for $20–60 and a weekend of work. Yes, it’s labor-intensive, but the payoff is massive.

    Use outdoor deck paint ($30–50 per gallon at Home Depot) in light colors to make the space feel bigger. Prepare by cleaning, sanding any rough spots, and applying primer. Two coats of paint take a full day (six hours active time), but it lasts 3–5 years. Hire help ($150–300) if DIY feels daunting. Stain is similar but skips the primer step if you prefer a natural wood look.

    A refreshed floor instantly makes your terrace look maintained and intentional. It also protects the wood underneath, extending its life.

    8. Mix Textures with Outdoor Cushions and Throws

    Cushions and throws do the heavy lifting when it comes to making a terrace feel cozy and lived-in. Layering different textures creates visual interest and physical comfort.

    Start with a seat cushion ($20–50), add a back pillow ($15–30), and drape a lightweight throw ($25–60) over the armrest or chair back. Mix materials—combine a chunky knit with a smooth linen or add a patterned accent pillow next to solids. Rotate seasonally: heavier throws in fall/winter, lighter linens in summer. Budget $100–150 to fully dress one chair.

    Cushions make sitting outside feel less like roughing it and more like treating yourself. Your terrace goes from bare and uncomfortable to a place where you actually want to lounge for hours.

    9. Install a Railing Planter Box for Herbs or Flowers

    A railing planter serves double duty—it’s decorative and functional. If you choose herbs, you get a kitchen garden steps from your door. If you choose flowers, you soften the view of the railing while staying out of your walking space.

    Railing planters ($20–50) come in wood, plastic, or metal and clip directly to your railing. Fill with potting soil and your choice of herbs (basil, mint, rosemary thrive in sun) or flowers (petunias and geraniums are tough). Plant and water regularly; herbs especially appreciate consistent moisture. Setup is five minutes, and it changes your view instantly.

    You get fresh herbs for cooking, curb appeal, and greenery without any floor space used. Plus, a functioning herb garden makes your terrace feel genuinely practical, not just decorative.

    10. Swap Out Your Current Seating with Lightweight Poufs

    Poufs are the unsung MVP of small-space seating. They’re lightweight, multipurpose (seat, footrest, side table), and take up way less visual weight than traditional chairs.

    Look for weather-resistant poufs at Target, World Market, or Amazon ($30–80 each). Natural fiber poufs are most durable; plastic or synthetic ones are cheaper and work too. Buy two or three and arrange in a loose circle—they’re easy to move around for rearranging. Keep a few cushions nearby for back support since poufs lack that built-in.

    Poufs give you seating flexibility without making the terrace feel packed with furniture. You can easily move them around for different configurations, and they’re genuinely comfortable for sitting outside.

    11. Add String Lights with Battery Backup for Flexibility

    Battery-powered string lights are underrated because they give you the ambience of traditional string lights without running extension cords or needing an outdoor outlet nearby.

    Battery-operated string lights ($25–60 on Amazon or at Target) come in 20–50 light sets and run for 6–12 hours on fresh batteries. Warm white looks most intentional; color-changing options exist but feel gimmicky for most terrace styles. Drape them in swags across your railing or overhead, securing with adhesive hooks. Battery replacement every 2–4 months is the only maintenance.

    You get professional ambience anywhere on your terrace without infrastructure or technical installation. They’re especially useful for renters who can’t install permanent fixtures.

    12. Create an Outdoor Bar Cart for Small Entertaining

    A bar cart sounds fancy but it’s just a rolling cart with bottles and glassware—and it makes hosting feel elevated without being complicated.

    Find a compact cart ($40–100 at IKEA, Target, or Wayfair) with two or three tiers. Stock the top with glasses and a pitcher, the middle with bottles (wine, spirits, mixers), and the bottom with bar tools and napkins. Position in a corner or against the railing so it’s not in the middle of your walking path. Setup takes 10 minutes, and it rolls away easily when you want the space back.

    A bar cart signals to guests that you’re ready to entertain, even if it’s just two people with drinks. It’s also genuinely practical—everything you need in one spot.

    13. Use Tiered Shelving to Display Plants and Decor

    Tiered shelving is brilliant for small terraces because it goes vertical—maximizing storage and display without eating floor space. It also breaks up the monotony of bare railings or walls.

    Ladder shelves ($40–100 at IKEA, Target, or Amazon) have three to five tiers and are easy to position against a wall or corner. Fill with a mix of potted plants, lanterns, small decor, and books. Keep the arrangement airy rather than packed; it reads better and doesn’t create a cluttered feel. Setup takes 15 minutes, and you can move it anytime.

    Shelving creates visual interest and gives you space to display things that matter. It transforms a plain corner into a designed vignette that makes your whole terrace feel more intentional.

    14. Install Wall-Mounted Seating to Save Floor Space

    Wall-mounted benches or seats are next-level space-saving—they’re comfortable seating that doesn’t require any floor space.

    Metal wall-mounted benches ($60–150 at Wayfair or Amazon) can handle your weight and install with basic hardware. Add a couple of cushions ($20–40 each) for comfort. Installation requires either drilling (if you own) or, for renters, a sturdy free-standing frame alternative ($80–200). You get real seating in a footprint that’s barely visible.

    Wall-mounted seating opens up your entire terrace floor. What felt cramped with traditional chairs now feels spacious and intentional.

    15. Layer Different Sized Planters for Visual Depth

    Instead of uniform planters scattered around, grouping different sizes together creates a garden-like display that looks curated and takes up less visual space.

    Mix pot sizes from 6-inch to 18-inch ($5–20 per pot depending on material) and arrange in clusters of three to five. Vary heights by using pot stands or stacked books underneath shorter plants. Choose plants with different foliage—some trailing, some upright, some textured. Repotting takes about 30 minutes, and watering stays consistent afterward.

    A grouped planter display feels way more designed than pots scattered around. It also makes small spaces feel intentional rather than chaotic.

    16. Paint or Stain Your Railing for a Quick Refresh

    If your railing is looking tired or mismatched, a fresh coat of paint or stain is one of the quickest upgrades. It changes the entire vibe of your terrace.

    Exterior paint or stain ($20–40 per quart at Home Depot) in soft neutrals like warm gray or weathered wood looks intentional. Prep by cleaning, light sanding, and primer application. One or two coats take a full day (four to six hours active time). Renter alternative: freestanding privacy panels ($50–150) in matching colors.

    A refreshed railing instantly looks maintained and intentional. It also makes the entire terrace feel cared-for, which influences how often you use it.

    17. Add a Small Water Feature for Soothing Ambience

    A small tabletop fountain adds moving water and gentle sound, creating a spa-like atmosphere that costs surprisingly little.

    Compact tabletop fountains ($25–80 at Target, Wayfair, or Home Depot) plug into a standard outlet or run on batteries. They’re self-contained and need refilling every few days; minimal maintenance. Position on a corner table where you can hear the gentle water sounds while sitting. Setup is literally plugging it in.

    Water features create a sensory upgrade that makes your terrace feel more retreat-like. The gentle sound is especially lovely in quieter evenings.

    18. Use Outdoor Rugs to Define Multiple Zones

    If you have a bigger terrace, layering multiple rugs is a sneaky way to create distinct zones without walls—like a dining area and a lounge area—that feel separate.

    Use two complementary outdoor rugs ($30–80 each) in coordinating colors or patterns. Place one under your seating group and another under a dining table or bar cart. They should overlap slightly or sit next to each other, not on top. Arrange furniture accordingly so each zone feels intentional. Setup takes 15 minutes.

    Multiple zones make your terrace feel larger and more thoughtfully organized. You’re not just sitting in one corner; you have distinct areas for different activities.

    19. Hang Weatherproof Artwork or Mirrors

    Outdoor artwork and mirrors do what they do inside—add personality and make spaces feel bigger. The key is choosing pieces rated for exterior weather.

    Weatherproof metal art ($30–150 at Wayfair, Target, or specialty outdoor stores) or outdoor mirrors ($40–120) are worth the splurge. Hang with weather-resistant hardware; adhesive is often easier for renters than drilling. A mirror especially makes a small terrace feel bigger by reflecting light and greenery. Installation takes 20 minutes.

    Artwork makes your terrace feel like a real outdoor room rather than just a balcony extension of your apartment. It’s a personal touch that changes the vibe completely.

    20. Choose Low-Maintenance Plants for Busy People

    If you love greenery but kill plants regularly, low-maintenance varieties are your answer. They thrive on neglect and still look beautiful.

    Ornamental grasses, succulents, ivy, and herbs like rosemary or lavender ($10–25 per plant) need water only once a week or less. Plant in quality potting soil ($10–20 per bag) and position in whatever light you have. Watering once weekly takes 10 minutes; that’s your only real maintenance.

    Low-maintenance plants let you enjoy greenery without guilt. You actually use your terrace because you’re not stressed about keeping plants alive.

    21. Install a Compact Bistro Set for Two

    If you don’t want a full dining setup, a bistro set for two is perfect for mornings with coffee or casual dinners. It’s space-efficient and surprisingly comfortable.

    Metal bistro sets ($60–150 at IKEA, Target, or Wayfair) fold completely or have minimal footprint. Choose between round (which feels less formal) or square options. Two-person sets fit even tiny balconies because they’re genuinely small. Setup is assembly only—usually 30 minutes with a screwdriver.

    A bistro set gives you an actual dining surface without making the terrace feel packed with furniture. You use it regularly for breakfast or casual meals.

    22. Layer Lighting Heights for Functional Ambience

    Professional designers layer lighting at different heights, and you can too. It’s the difference between harsh single lighting and a space that feels genuinely inviting.

    Combine overhead string lights ($25–50), a task lamp on a side table ($30–80), and ground-level solar lights ($20–50). Turn on all three for entertaining, just overhead lights for ambience, or just task lighting for reading. Wiring takes 45 minutes; battery and solar options mean zero complexity.

    Multi-level lighting lets you set the mood. Your terrace transforms from bright and functional to intimate and retreat-like depending on which lights you use.

    23. Add Moveable Screens for Flexible Privacy and Wind Control

    Freestanding screens are clever because they control privacy and wind without permanent installation—and you can move or remove them anytime.

    Decorative outdoor screens ($50–200 at Wayfair, Target, or specialty stores) come in wood lattice, metal, or fabric. Position them to block a neighbor’s direct line of sight or shield against wind that makes your terrace unusable. Installation is literally standing them up; no tools needed. Move them around seasonally based on where the sun is strongest.

    Screens solve actual problems—wind that prevents sitting outside, or feeling exposed to neighbors—without renovation. They’re also easy to store in off-season.

    24. Combine Seating and Storage with Benches

    A storage bench solves two problems at once: it gives you seating and somewhere to stash outdoor cushions, tools, or seasonal items.

    Waterproof outdoor storage benches ($80–250 at Wayfair, IKEA, or Target) come in wood or resin. Add a weather-resistant cushion ($25–50) for seating comfort. Fill the interior with off-season cushions, planters you’re not using, or cleaning supplies. Position against a wall to save walking space. Assembly takes 30–45 minutes.

    You get seating that pulls its weight functionally. Storage becomes invisible, and your terrace looks organized rather than cluttered with gear.

    25. Use Textured Wall Coverings for Softness and Interest

    If you want to add warmth and texture without commitment, outdoor woven wall coverings or light panel treatments are a stylish middle ground between bare walls and heavy renovation.

    Outdoor-rated woven panels ($40–100 at Wayfair or specialty stores) create visual interest and soften hard surfaces. Adhesive-backed options work for renters; screwed-down versions are permanent. Installation takes 30–60 minutes depending on coverage. They also help sound dampening slightly, which is a bonus benefit.

    Textured walls make a terrace feel finished and thoughtfully designed. You suddenly have visual interest where there was just blank concrete or siding.

    Pin this post for your next terrace refresh—there’s something here for every budget and skill level. Pick one or two ideas and start this weekend. Small changes add up faster than you’d think.