Category: Kitchen Decor

  • 25 Home Coffee Bar Ideas That Upgrade Your Daily Brew

    25 Home Coffee Bar Ideas That Upgrade Your Daily Brew

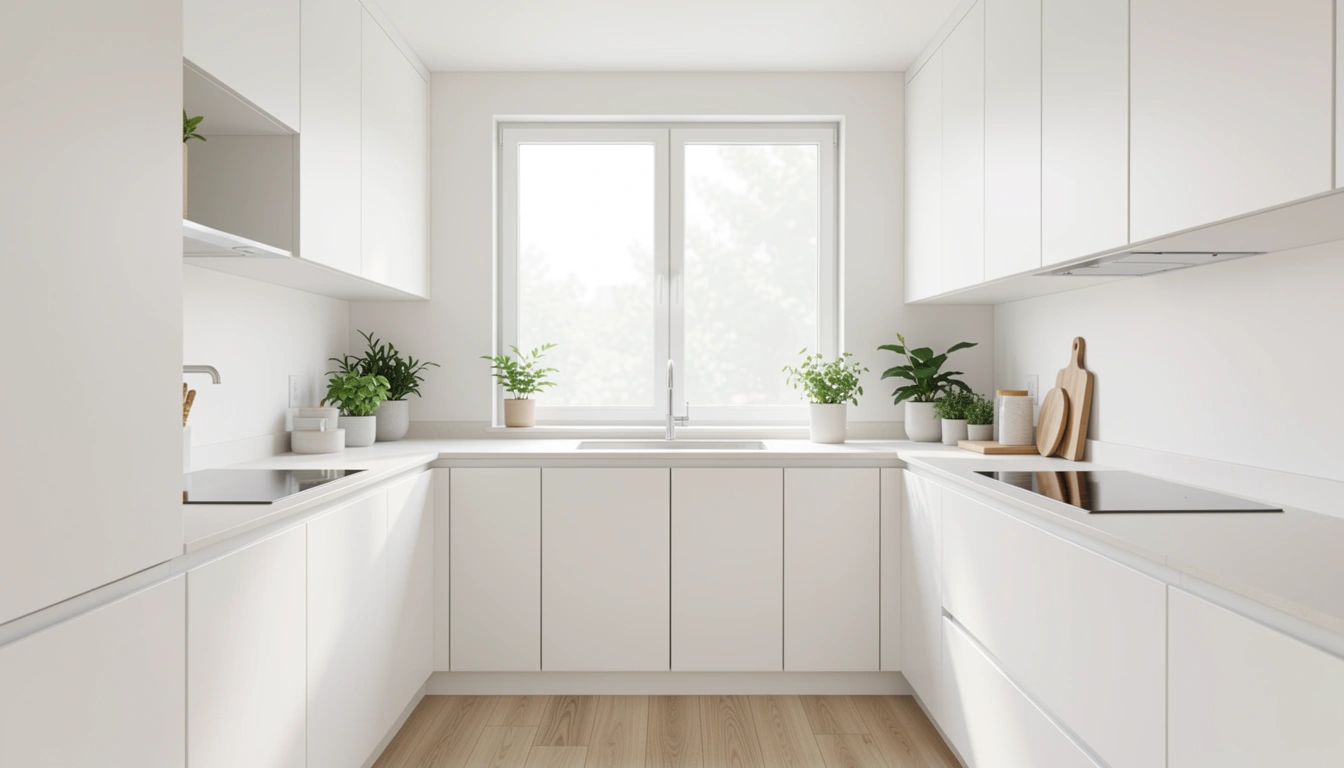
    You deserve a café-quality coffee ritual at home—not someday, but starting tomorrow morning. Whether you have a sprawling kitchen or a tiny apartment corner, a home coffee bar transforms your daily brew from rushed habit into a moment you actually look forward to. The best part? You don’t need a professional setup or a huge budget. We’ve gathered 25 achievable ideas that range from free styling tricks to thoughtful investment pieces, all designed to make your coffee corner feel like the shop experience you love. Some take 15 minutes, others a weekend. All of them work. Pick one idea this week and watch how your mornings shift.

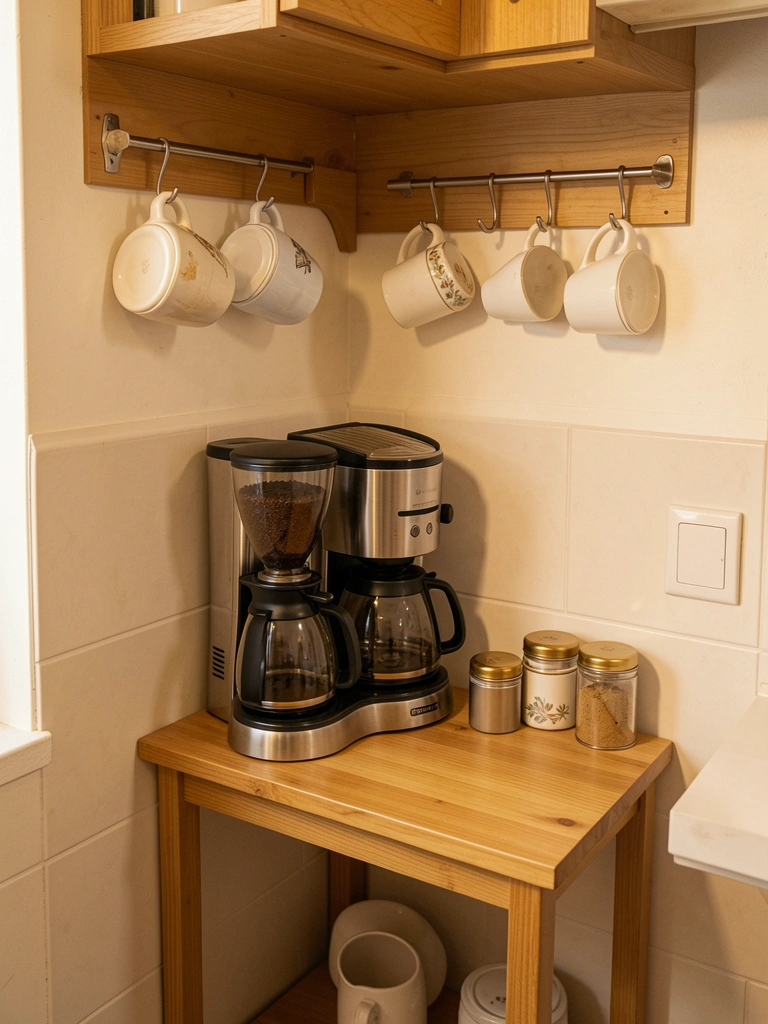
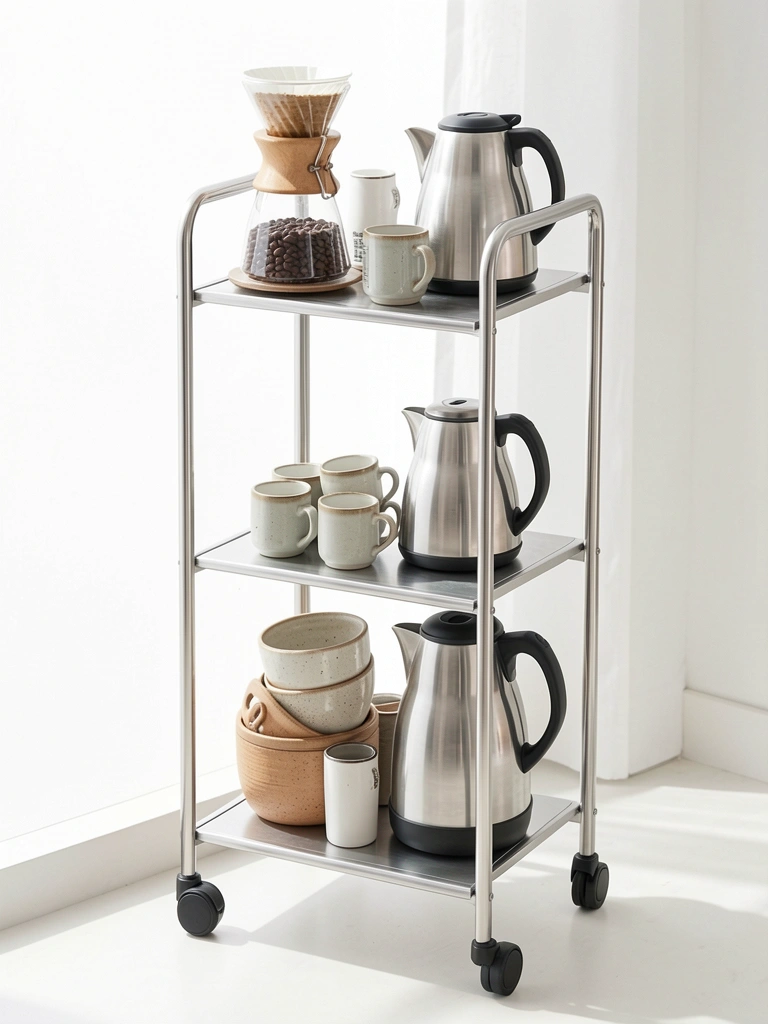
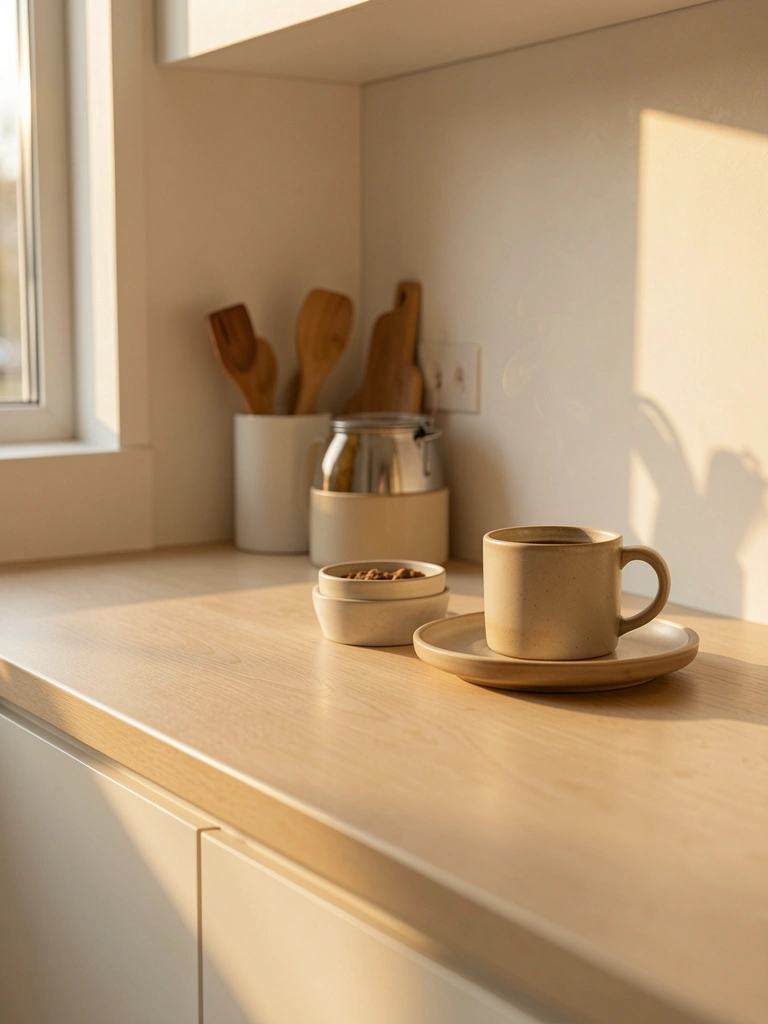
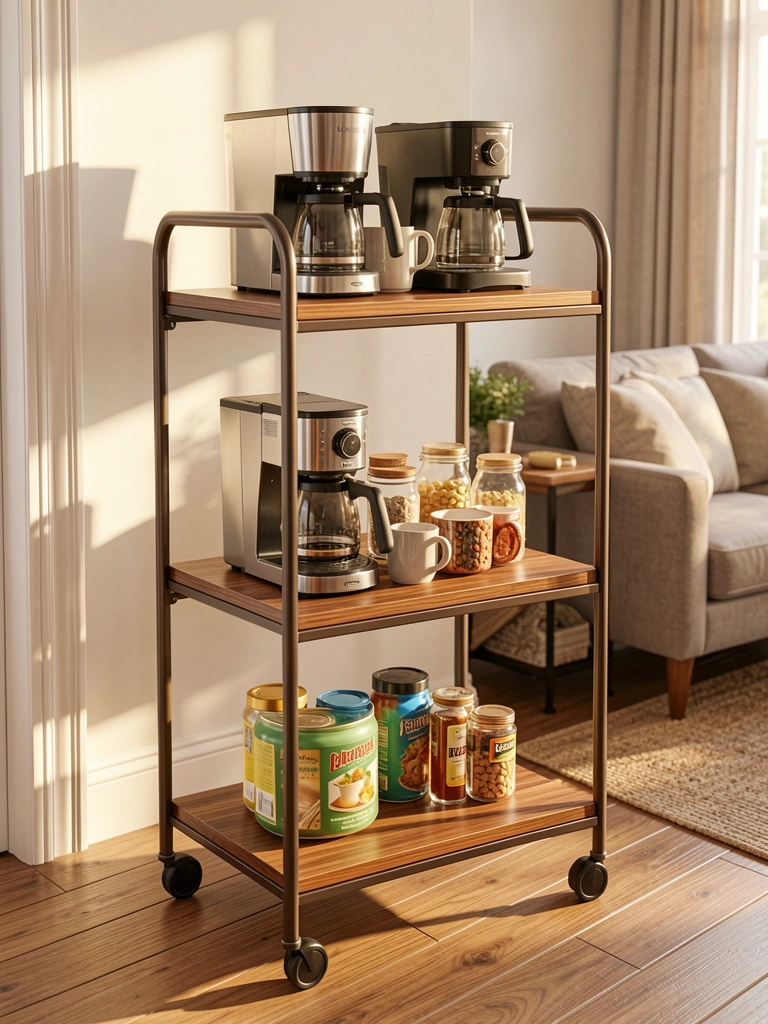
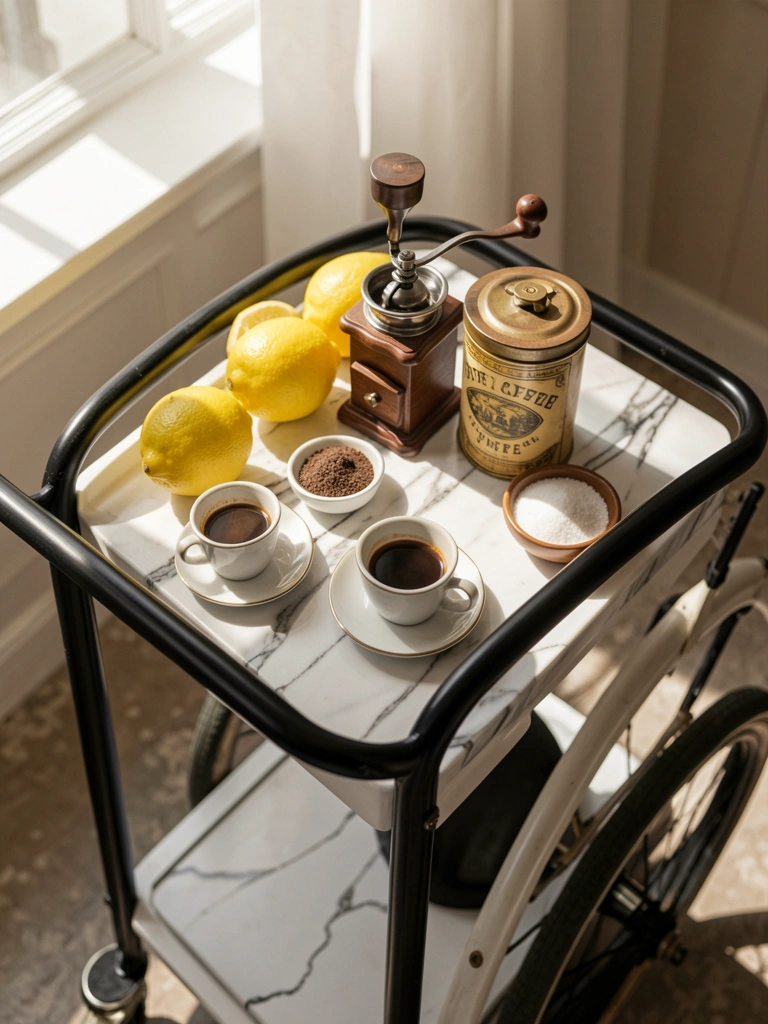
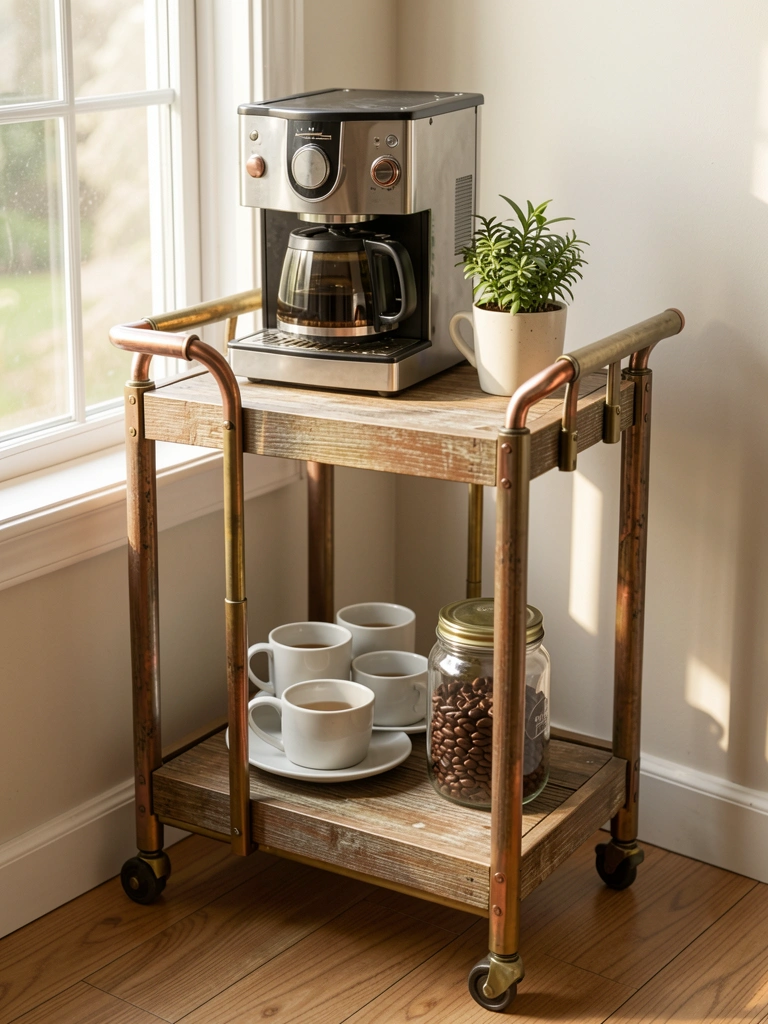
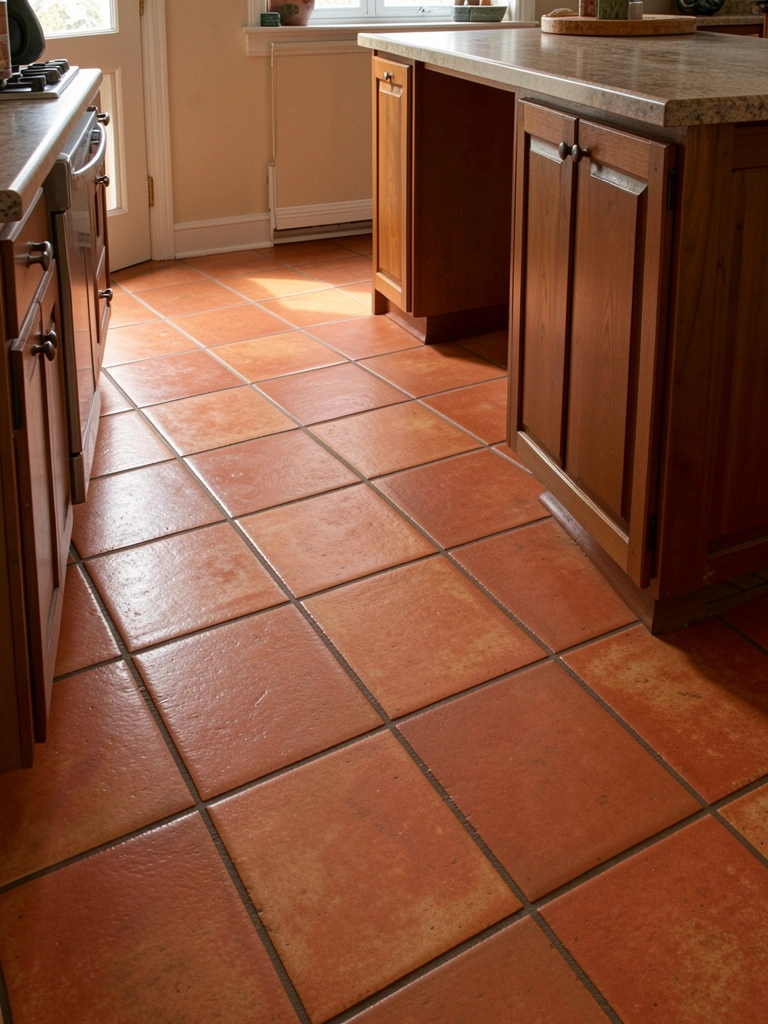
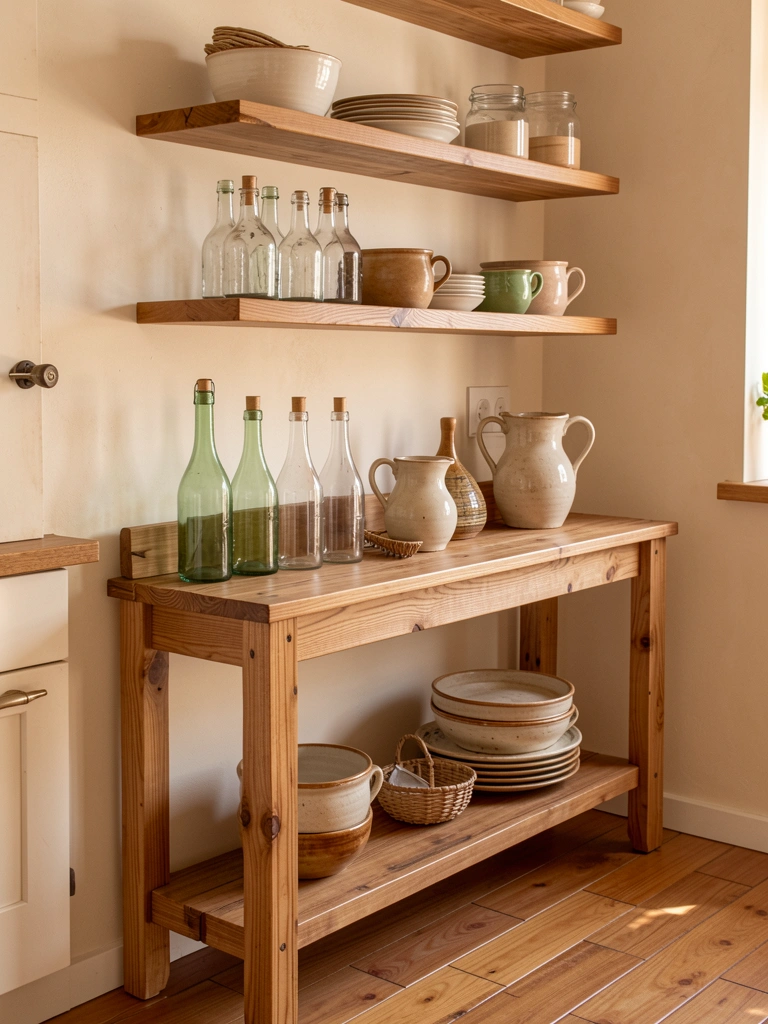
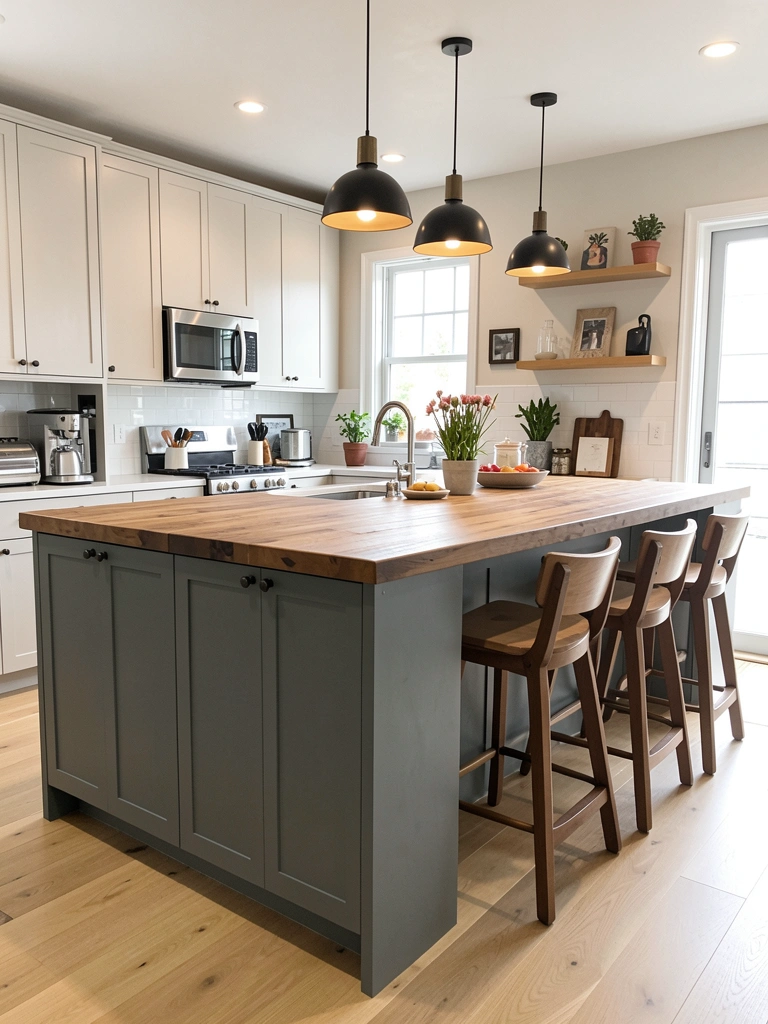
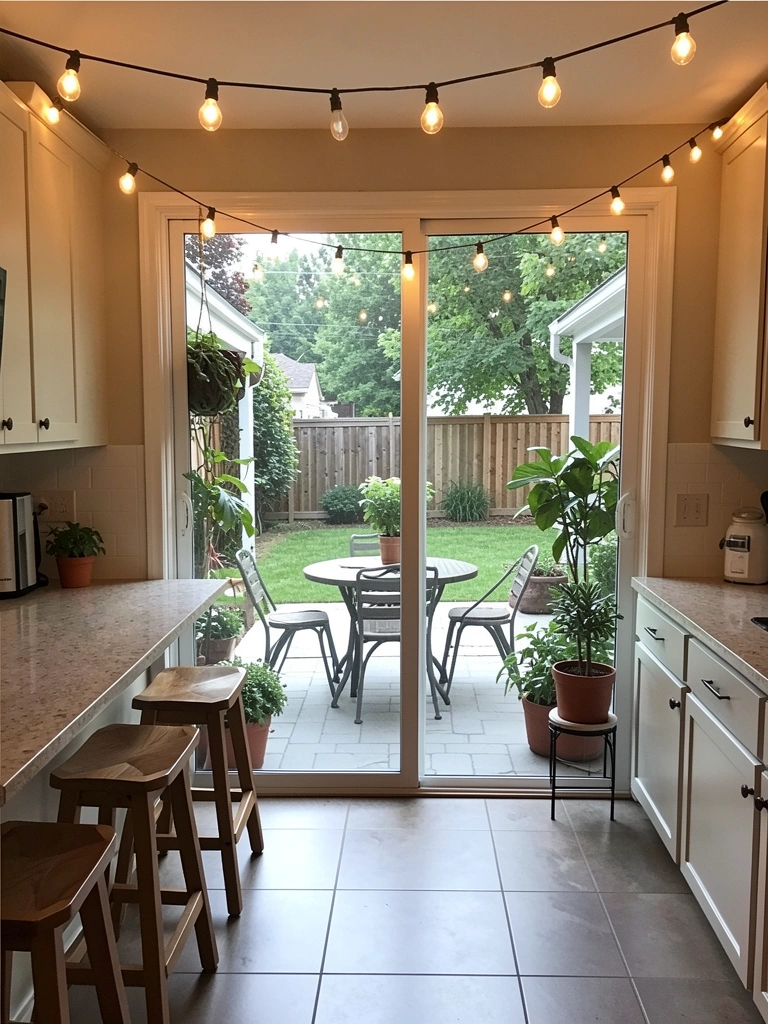
    1. Start with a Dedicated Cart or Small Table

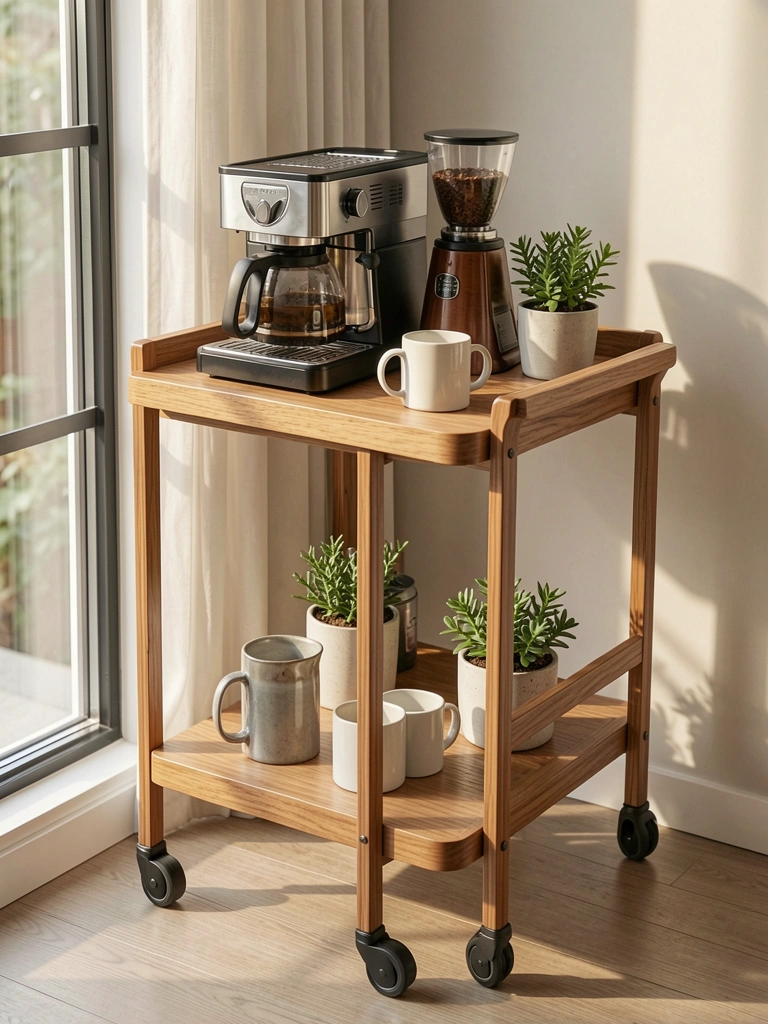
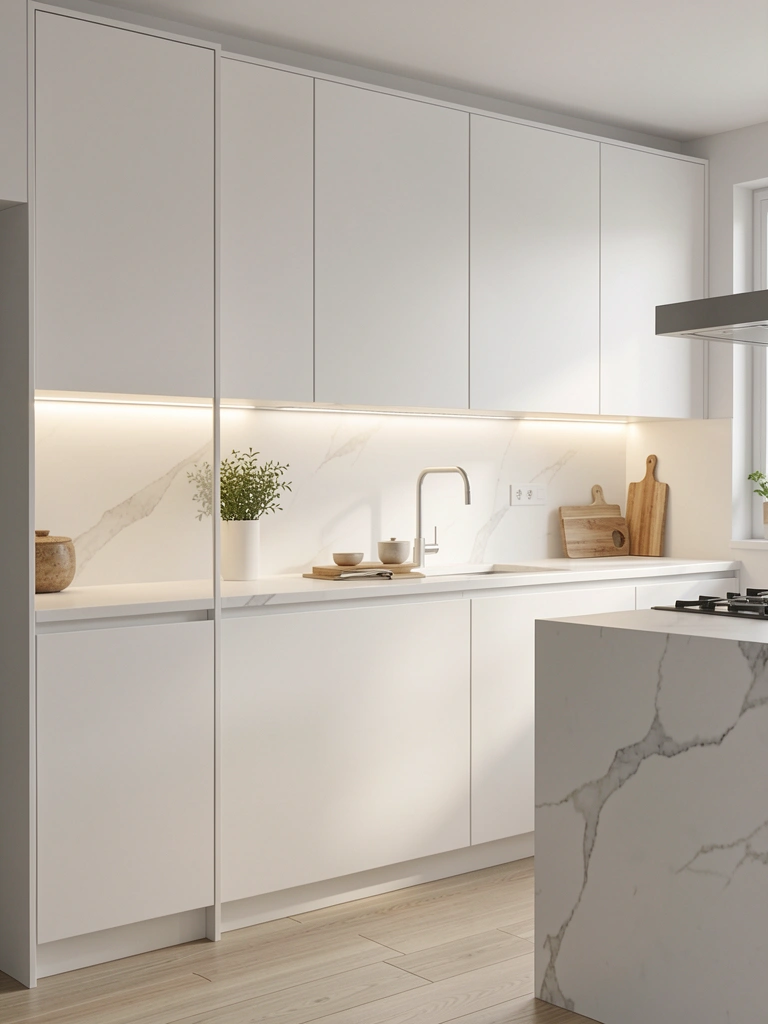
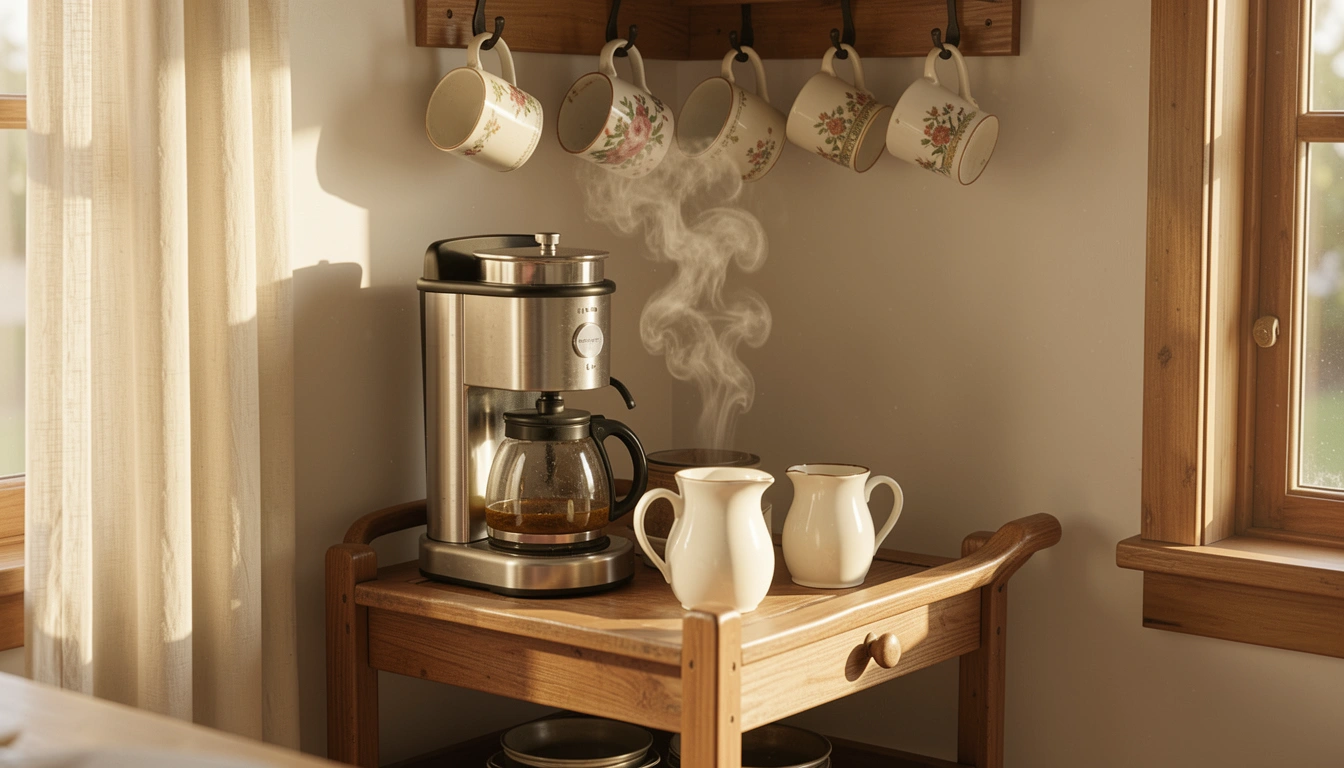
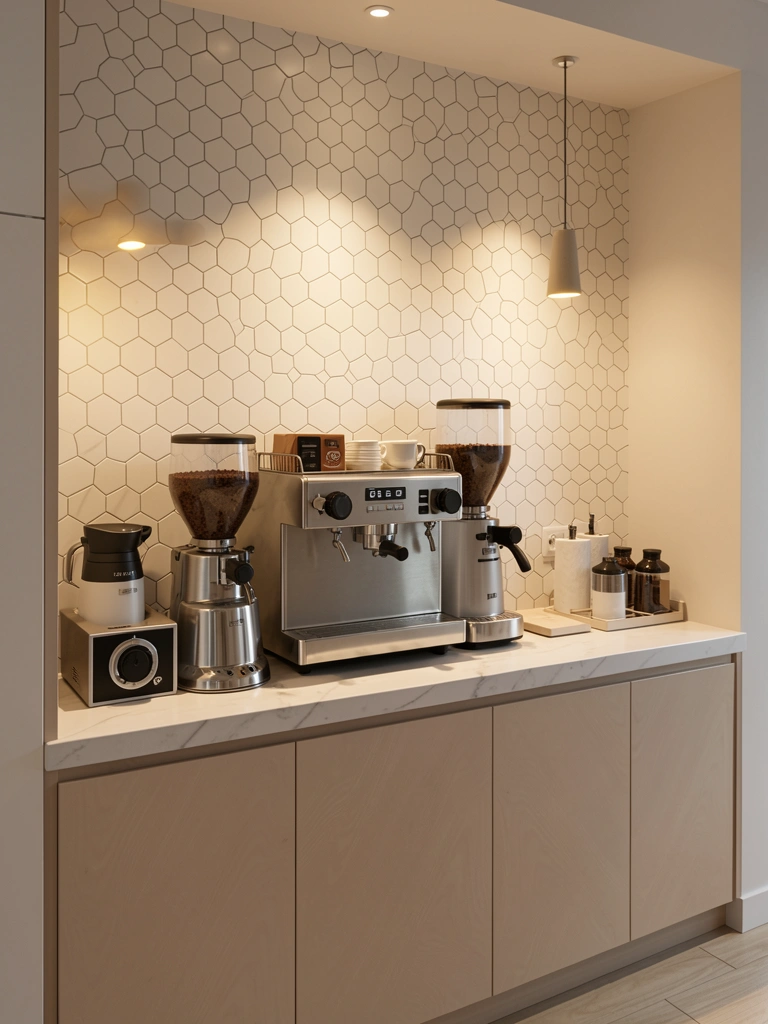
    A coffee bar needs a home base—even if it’s just one small piece of furniture. A cart or side table gives you a dedicated spot that keeps everything within arm’s reach and signals to yourself (and guests) that this space matters.

    Look for a vintage wooden cart at thrift stores ($20–$50) or a modern one from IKEA or Wayfair ($60–$120). If you’re renting or prefer minimal commitment, a small floating shelf ($30–$50 from Home Depot) works just as well. You can also repurpose a nightstand or plant stand you already own.

    Spend 10 minutes arranging your essentials—grinder, beans, mugs, milk pitcher. Leave breathing room; cluttered bars feel chaotic. Choose a spot near an outlet (for your maker), natural light, and somewhere you pass through daily.

    The difference is immediate: you’ll stop hunting for supplies and start feeling intentional about your coffee routine.

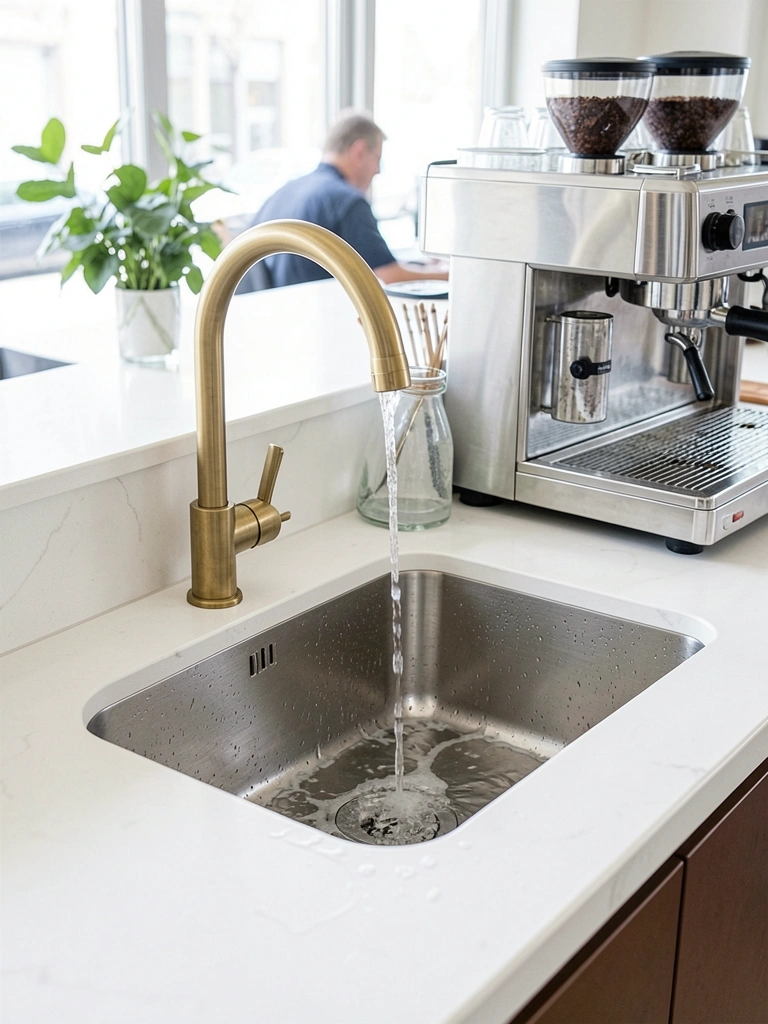
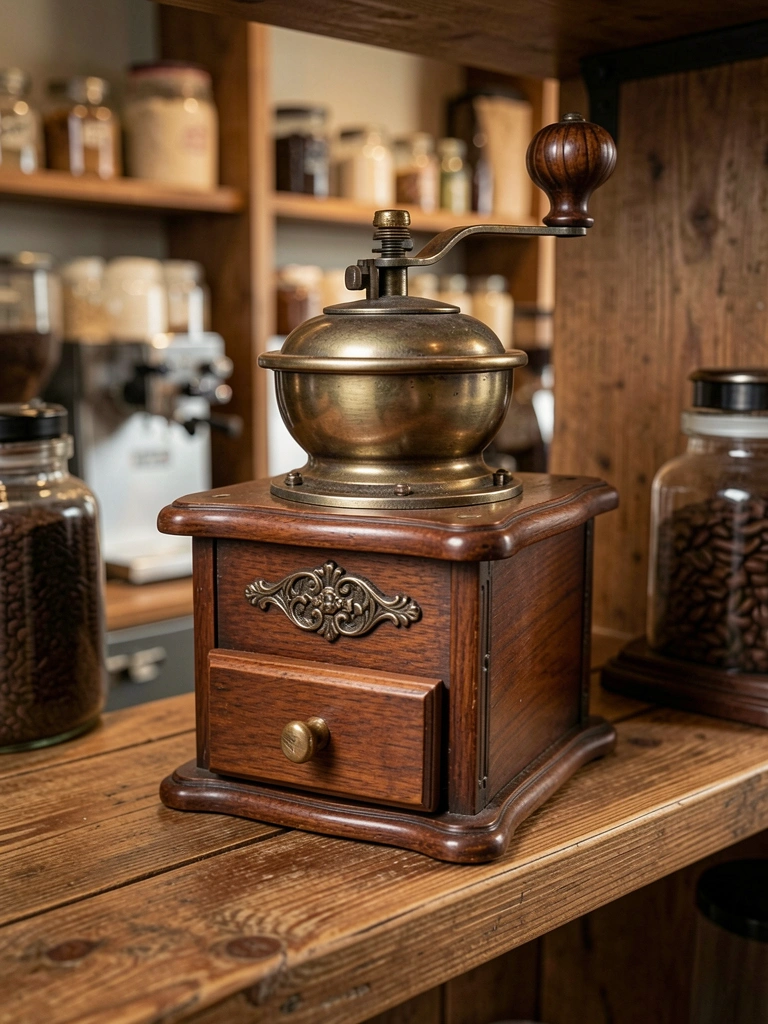
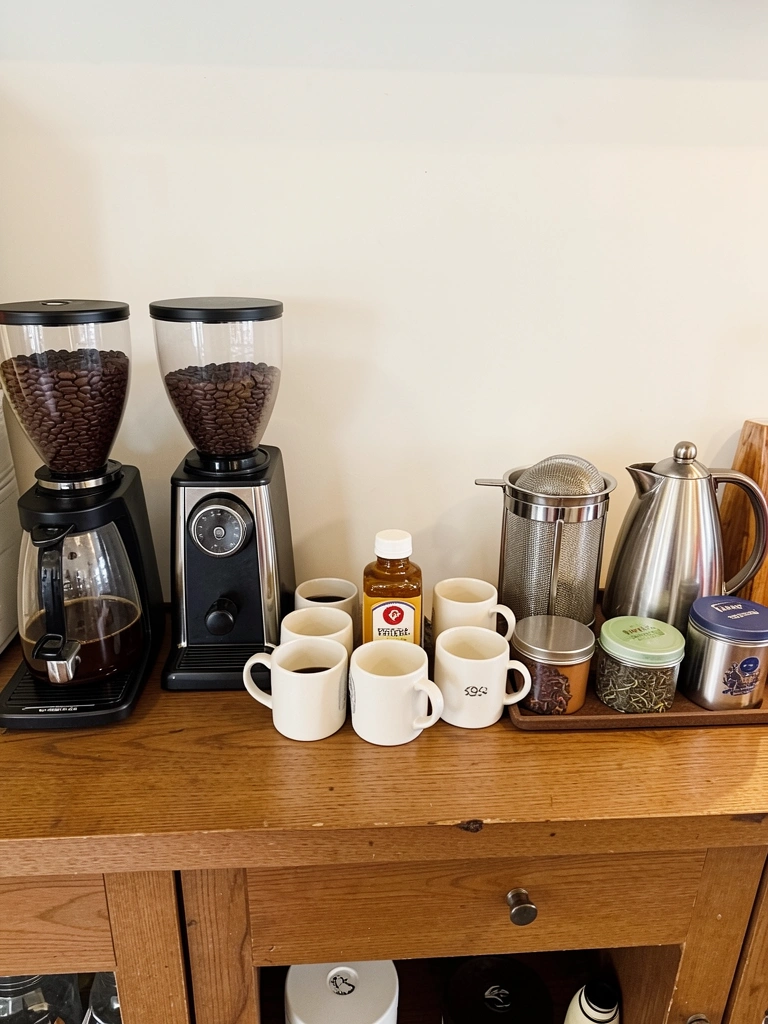
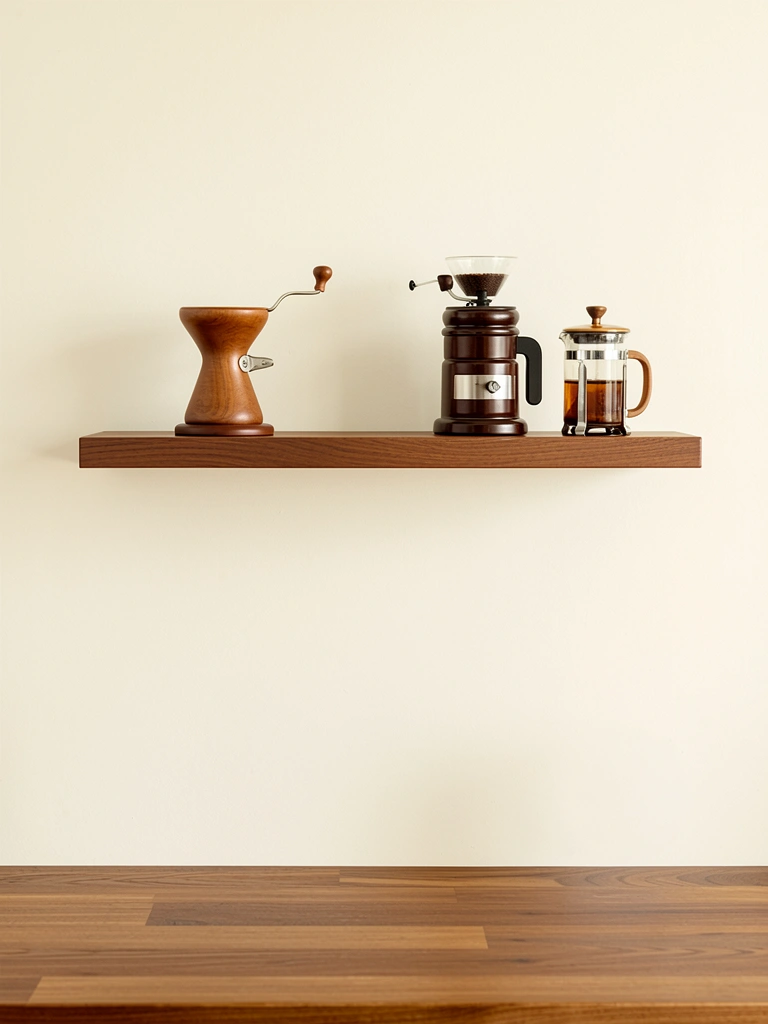
    2. Invest in a Quality Grinder You’ll Actually Use

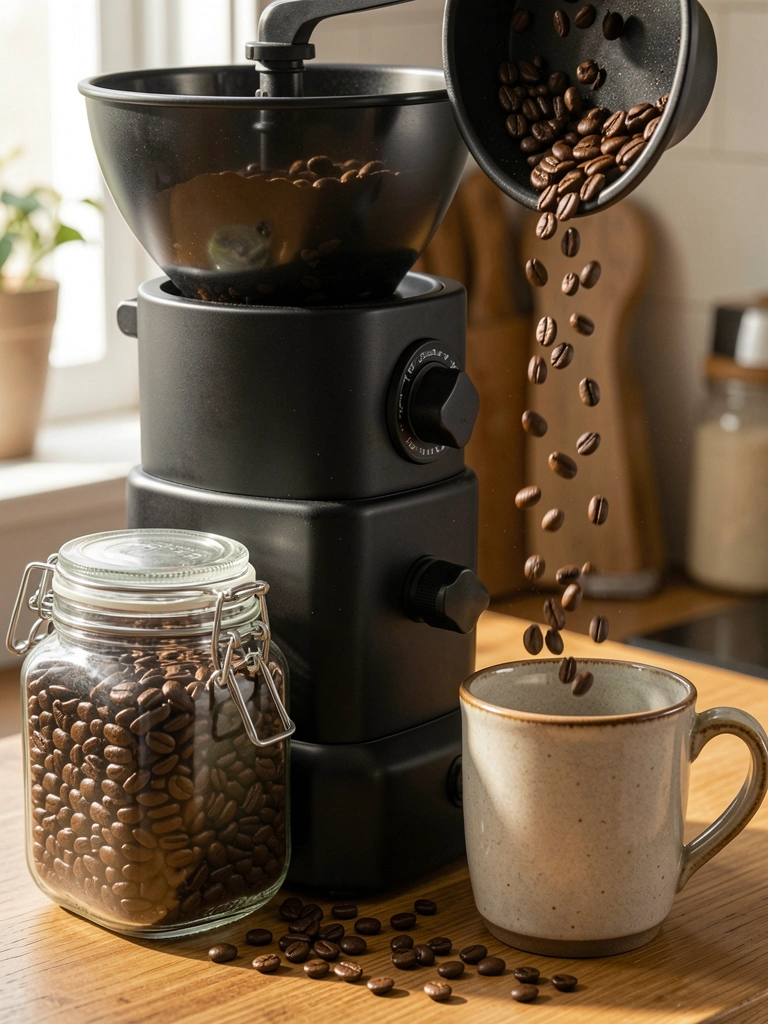
    Grinding whole beans is the single biggest upgrade for home coffee taste—and the sound and ritual of it sets the mood for your entire morning.

    A manual grinder (Comandante, Timemore; $30–$60 from Amazon) gives you full control and takes 3–5 minutes. An electric burr grinder (Baratza, Wilfa; $100–$200) does the work in 30 seconds. Avoid cheap blade grinders; they overheat beans and create uneven grinds.

    Place your grinder on a small tray or coaster to catch stray grounds. Position it where you enjoy watching and listening—this ritual is part of the appeal.

    You’ll taste the difference immediately, and suddenly your home coffee tastes like the café version.

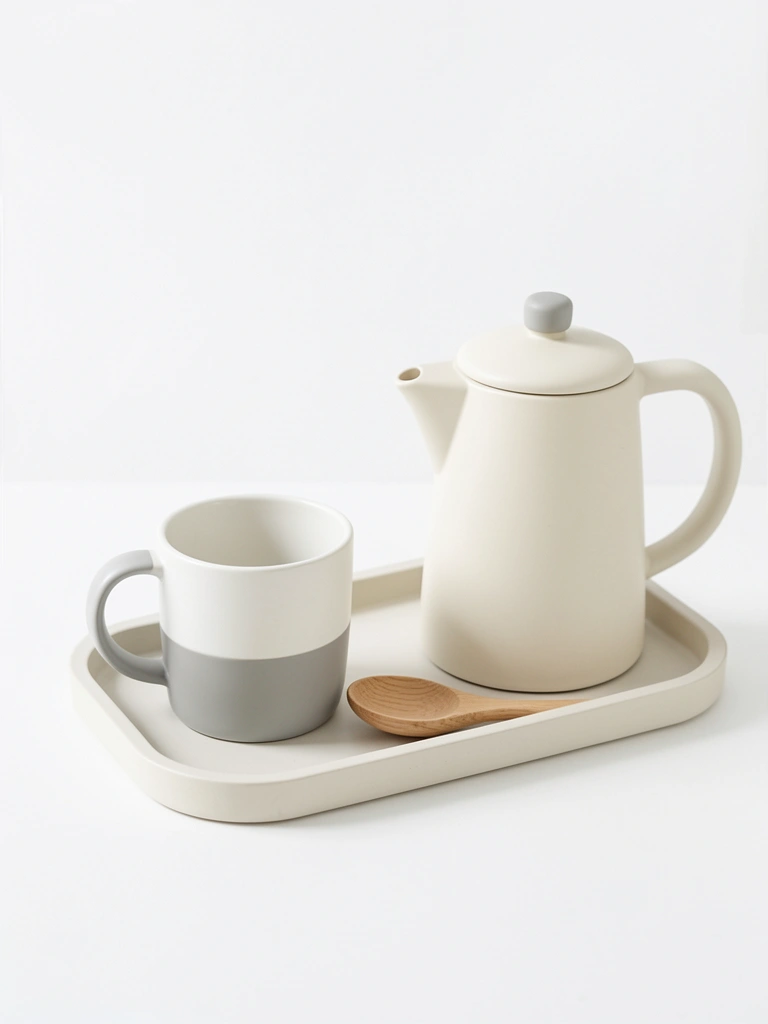
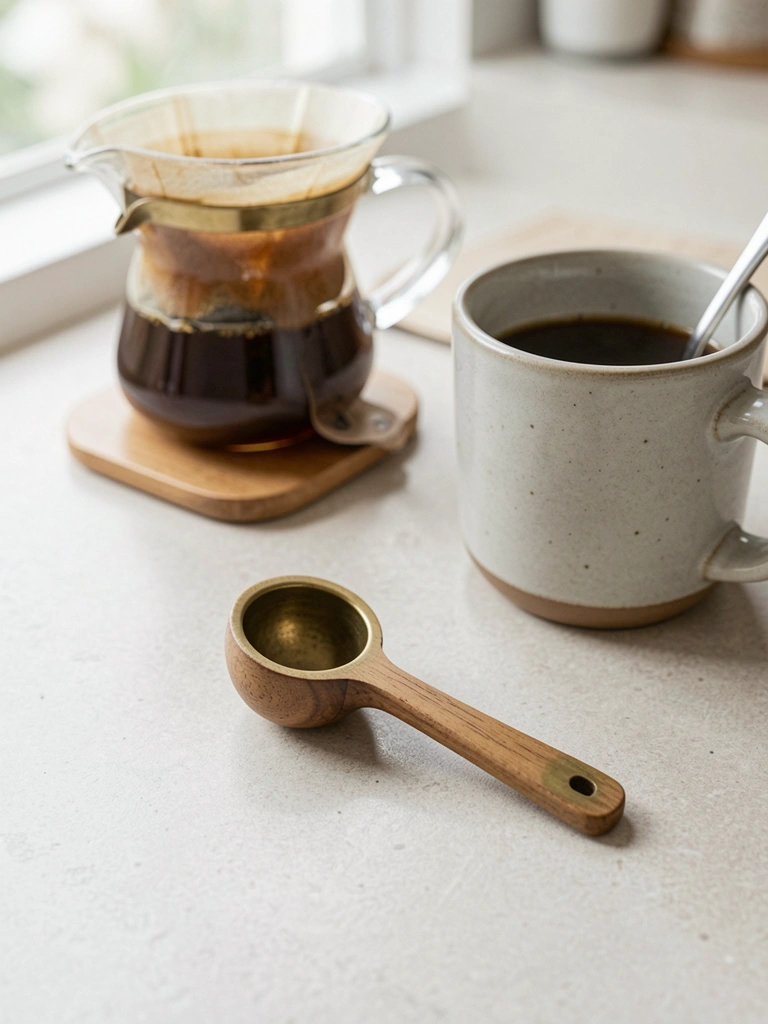
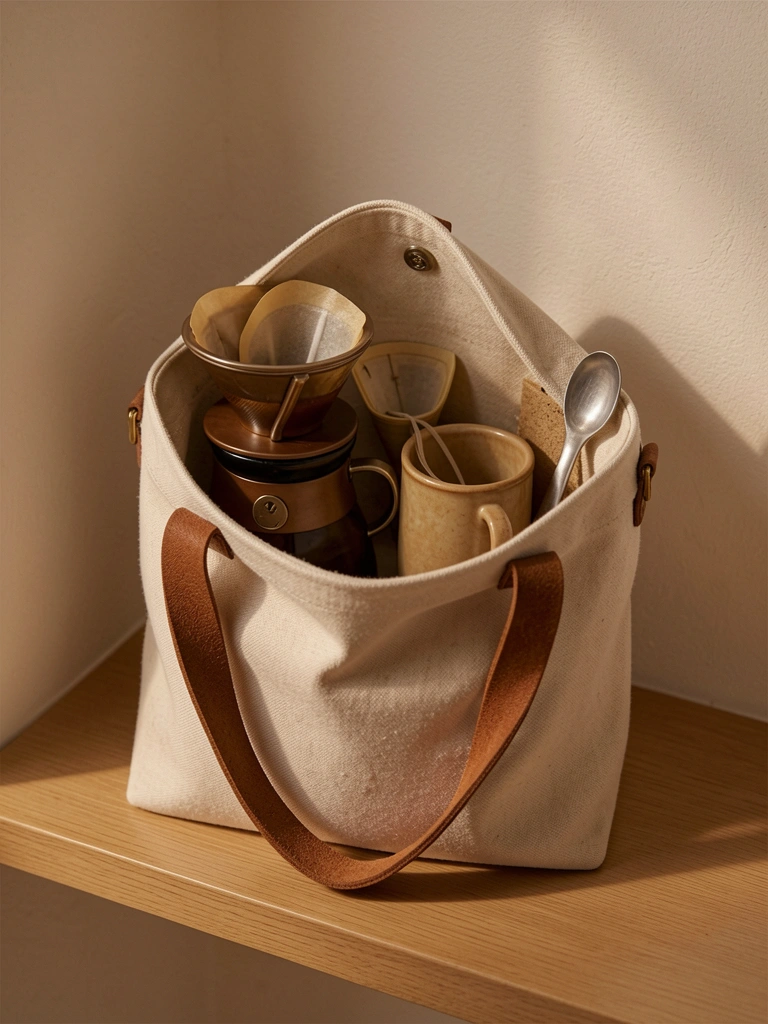
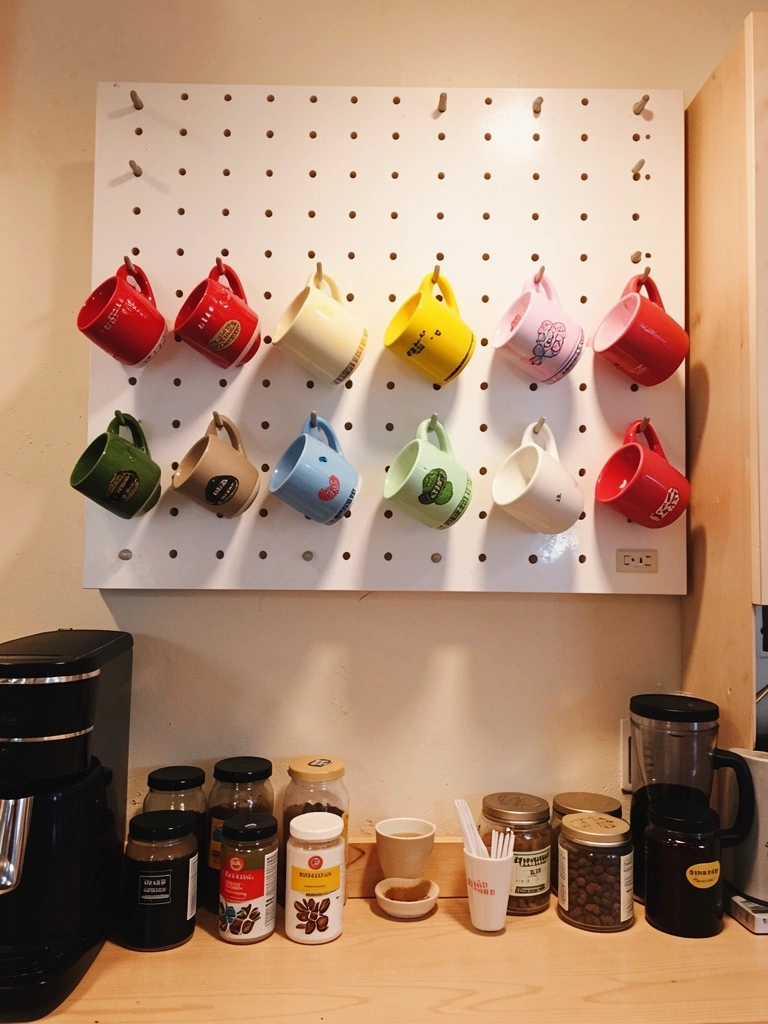
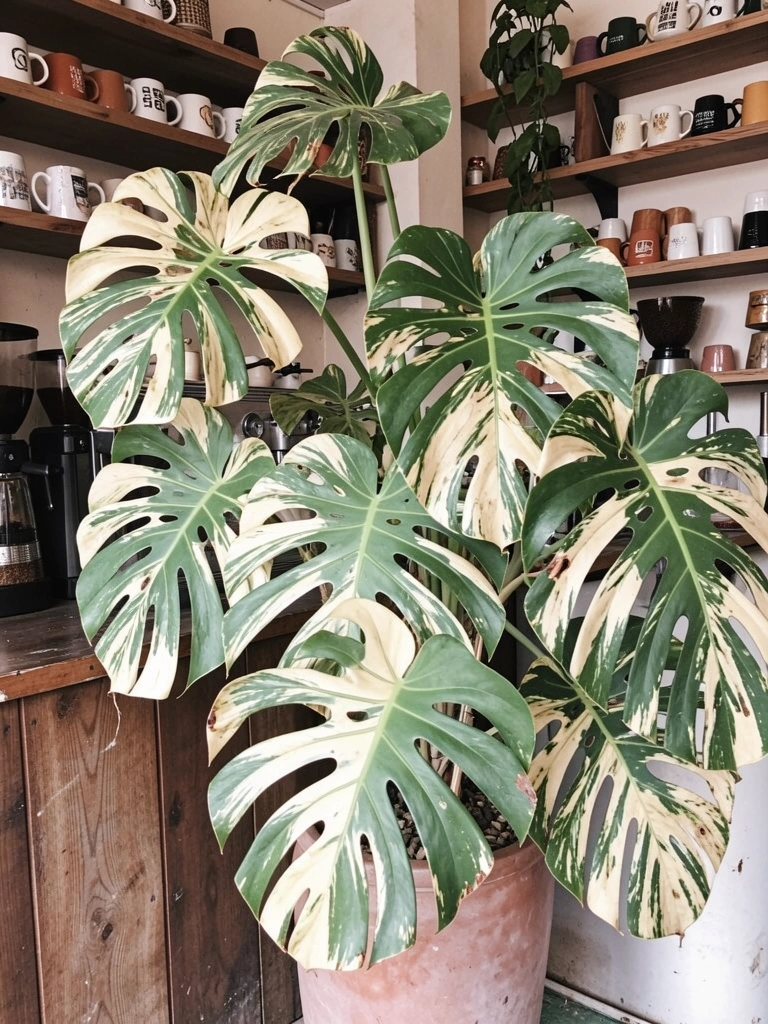
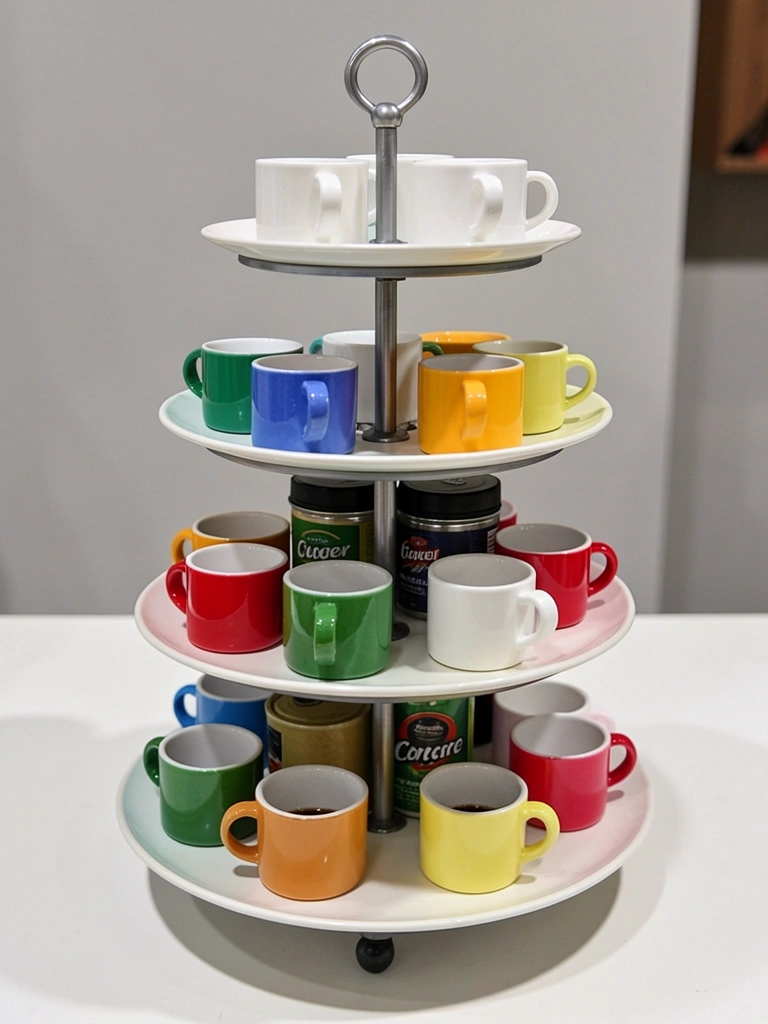
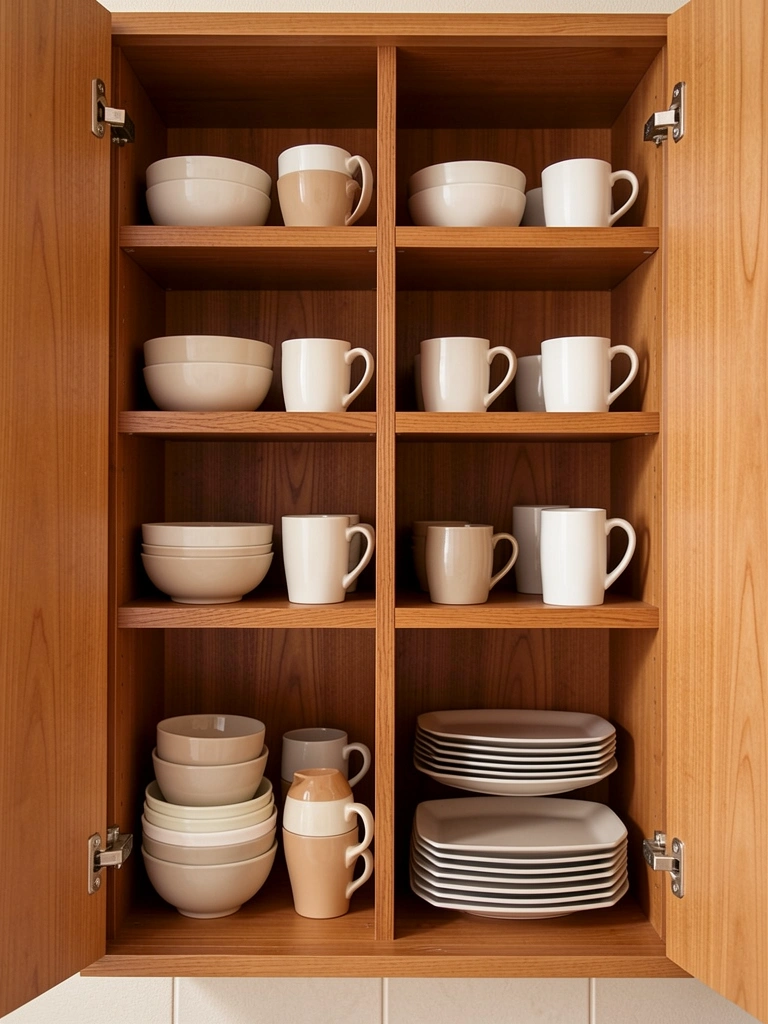
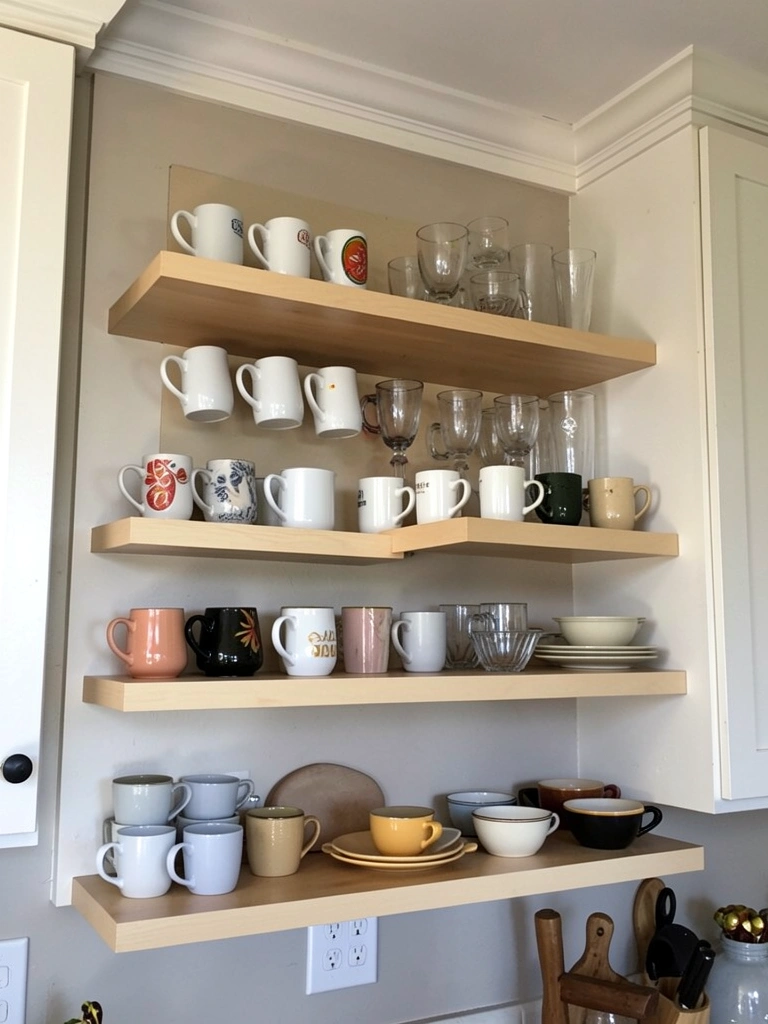
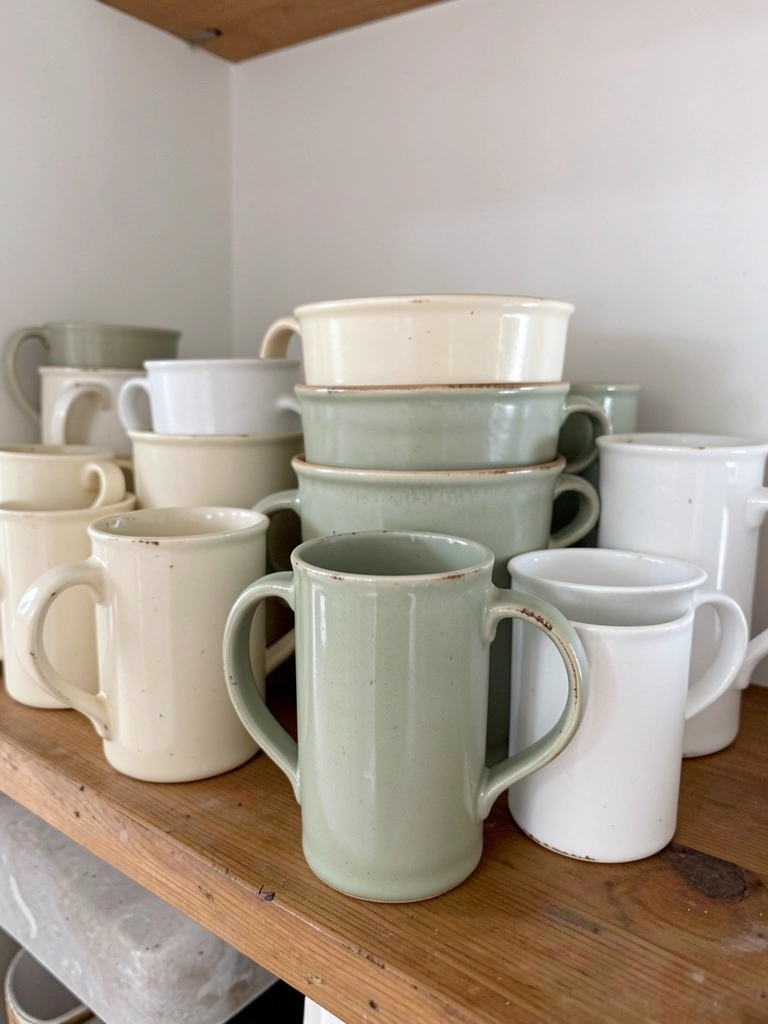
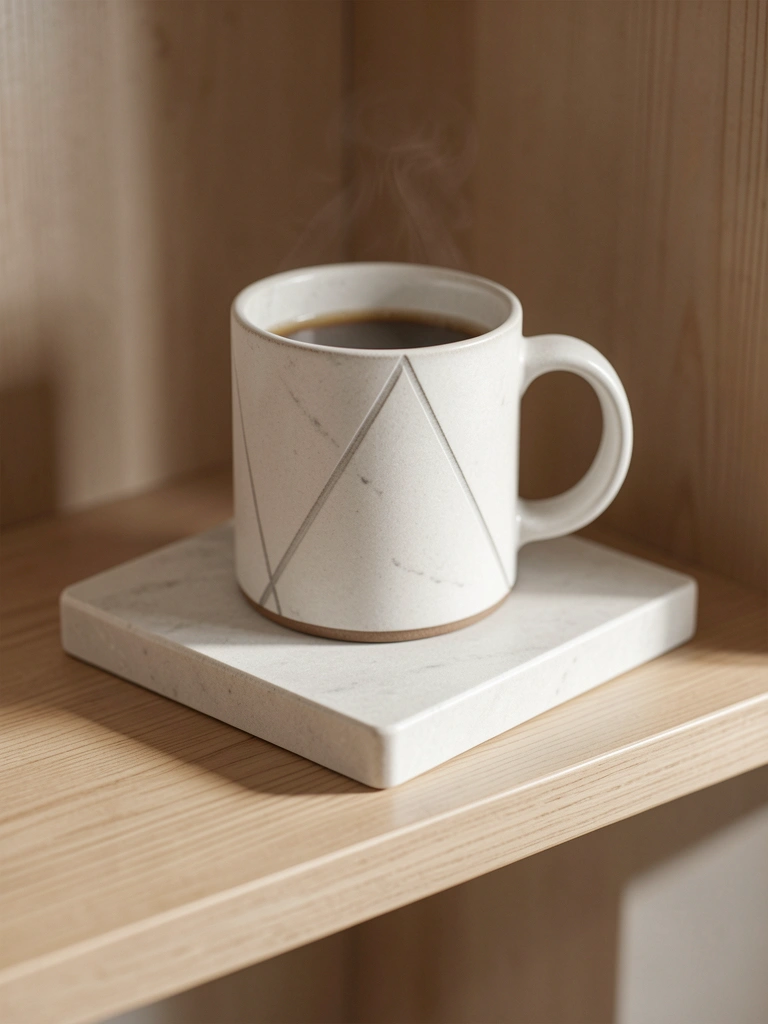
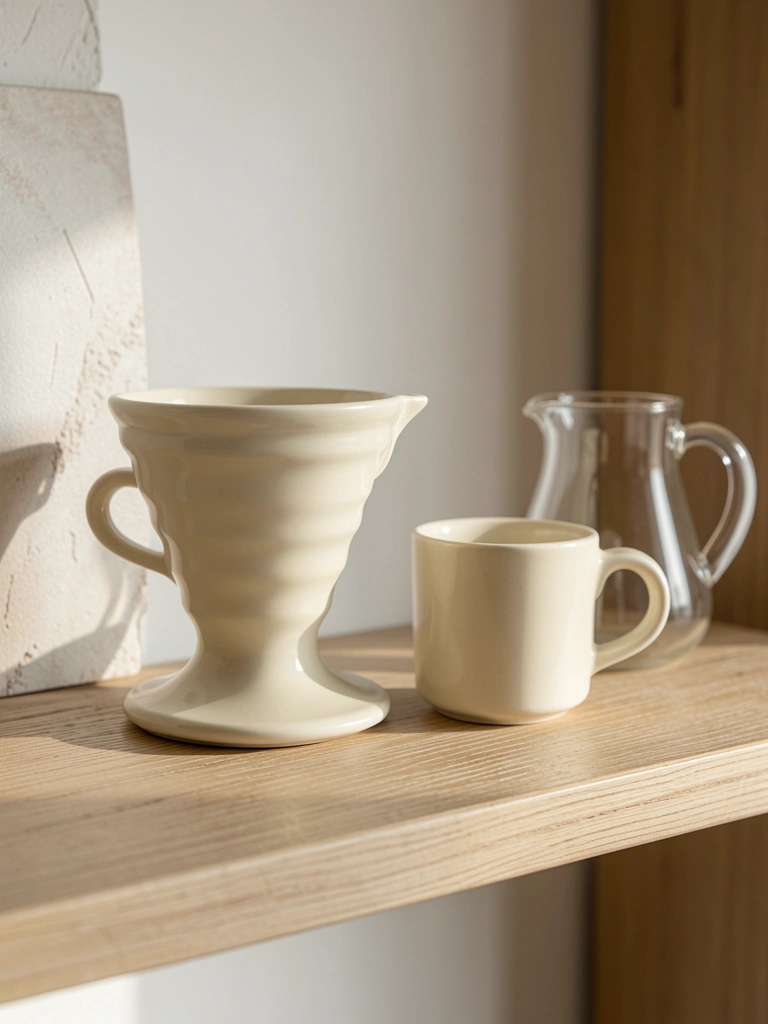
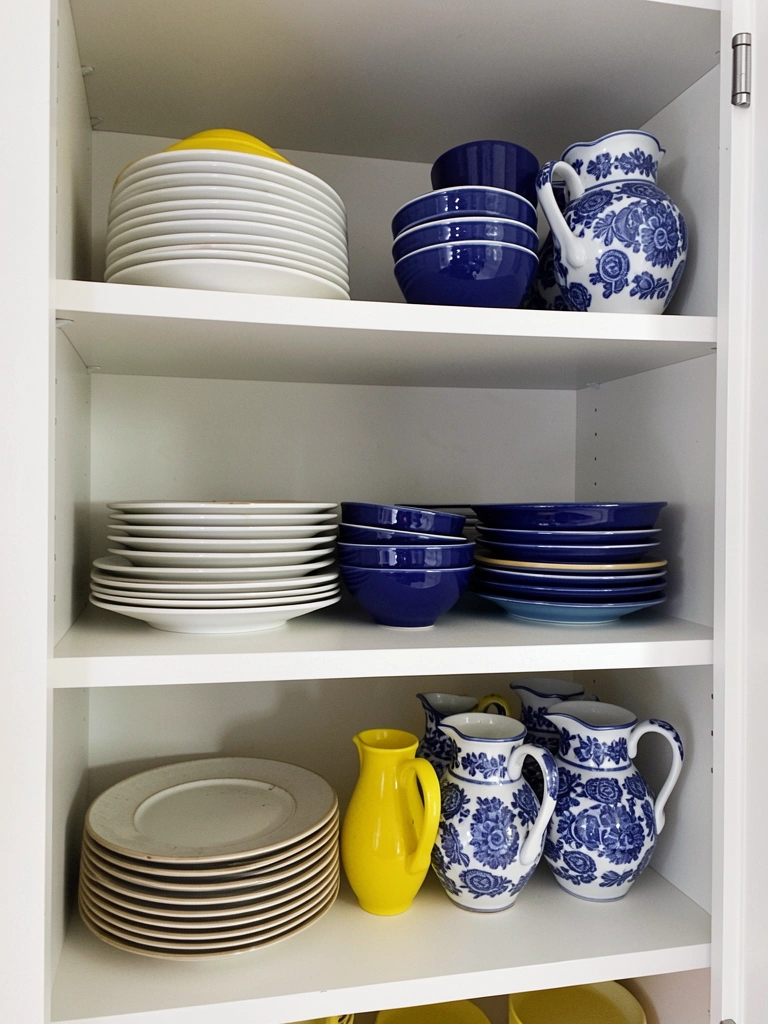
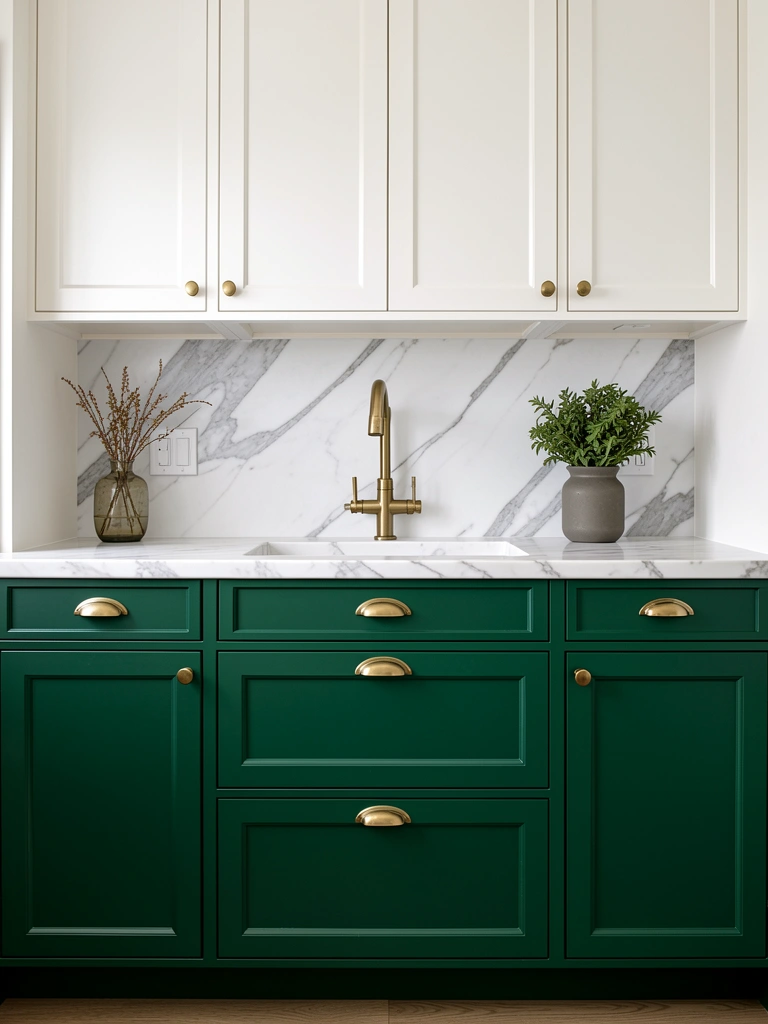
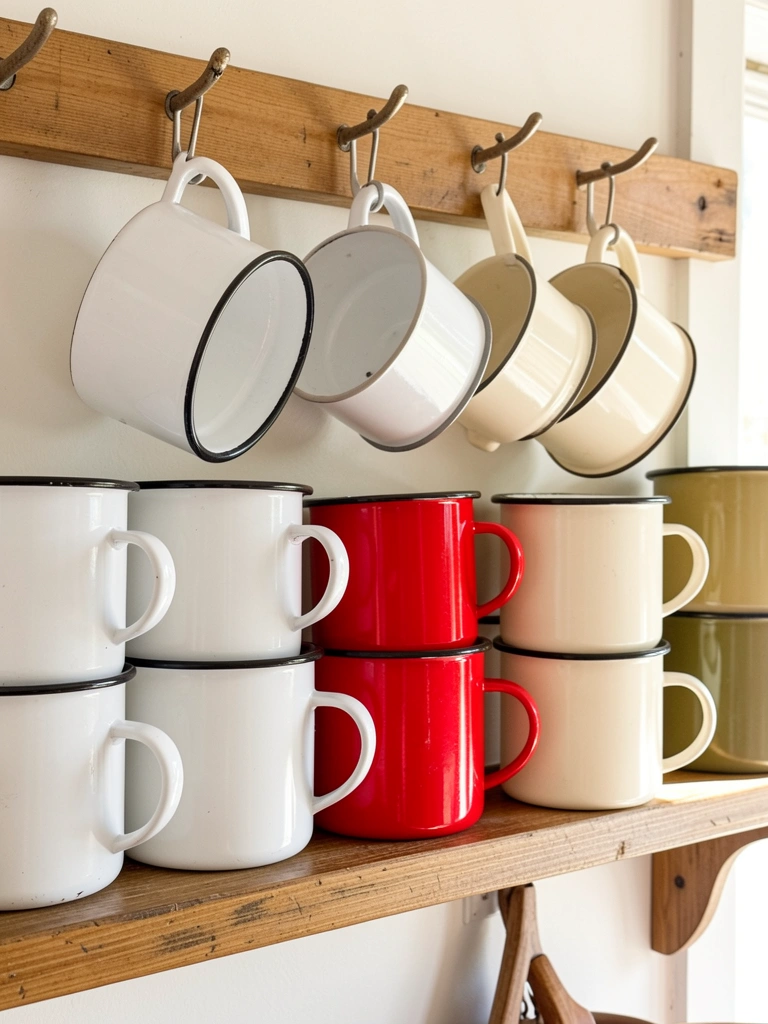
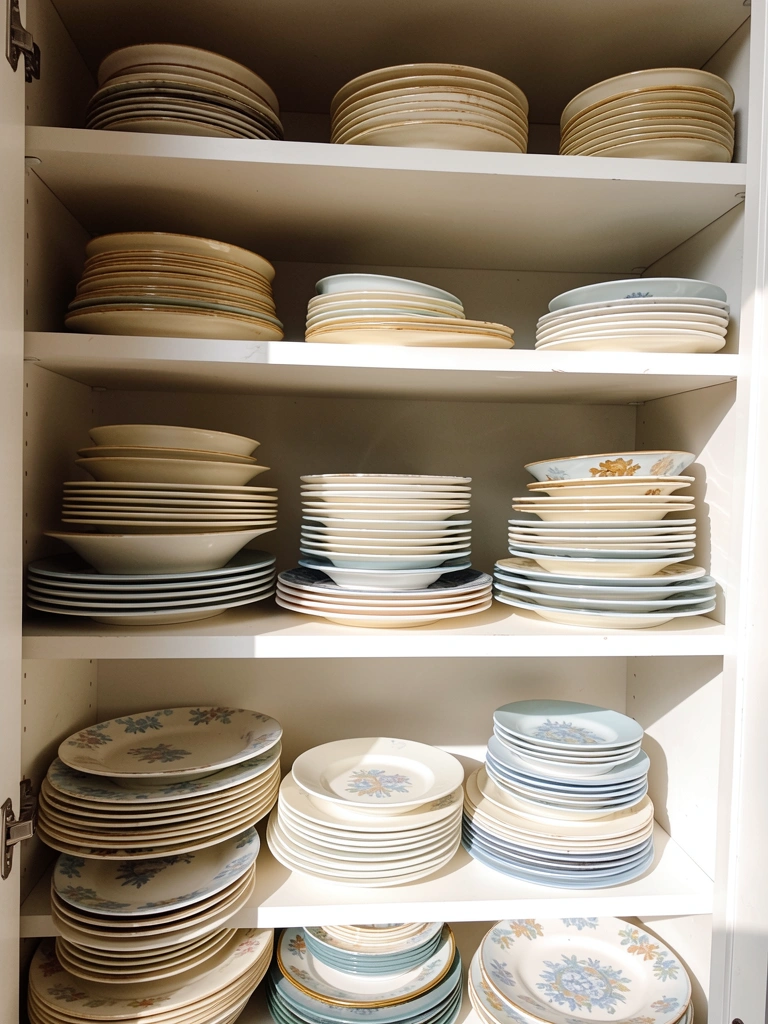
    3. Source Sustainable, Eco-Friendly Coffee Mugs

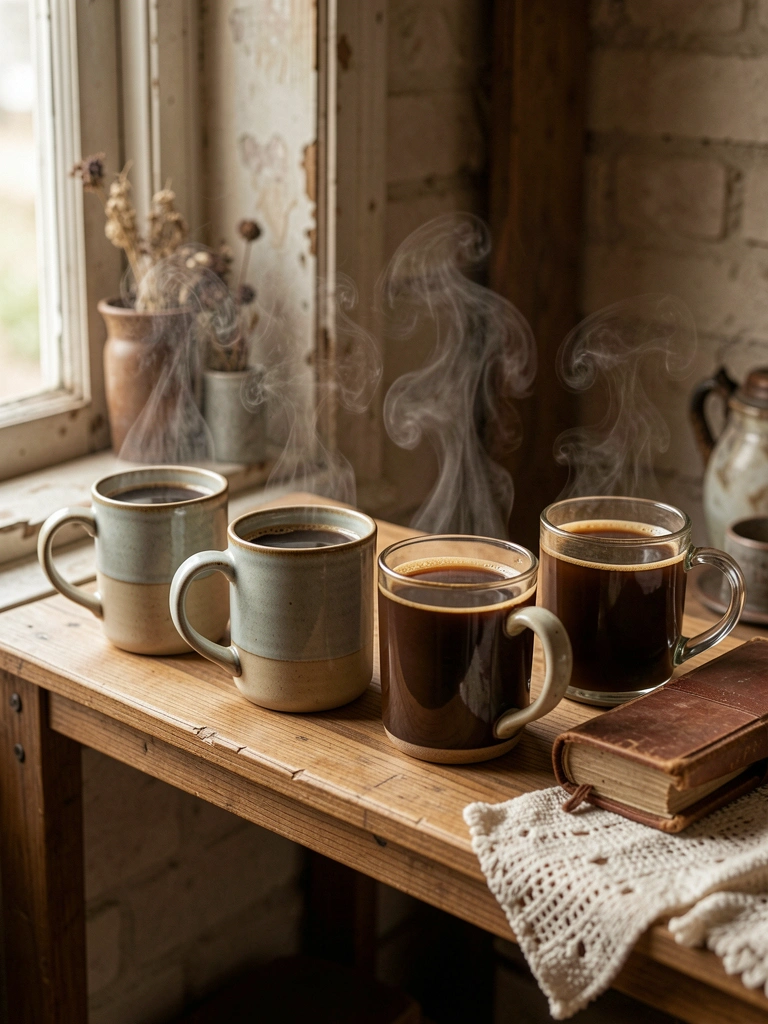
    Your mug matters more than you think—it affects how the coffee tastes, how it feels in your hand, and whether you actually linger with it.

    Hunt thrift stores (Goodwill, Facebook Marketplace; $2–$5 each) for vintage ceramic mugs with personality. Or invest in 2–3 quality pieces from small makers on Etsy ($20–$40 each). Look for 8–10 oz mugs; they keep coffee at the right temperature longer and feel elegant, not oversized.

    Mix and match—a collection of different styles feels more intentional than a matching set. Store them on open shelving or hanging hooks so they’re visible and grab-worthy.

    Your morning ritual becomes about choosing the right mug, not just grabbing what’s closest.

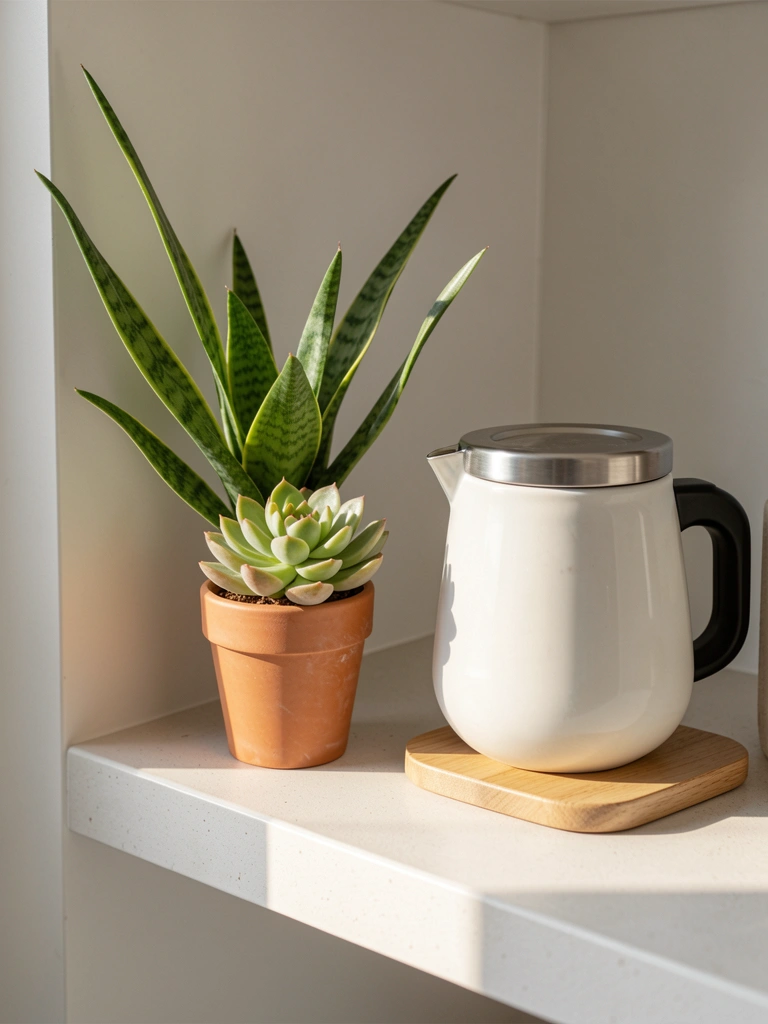
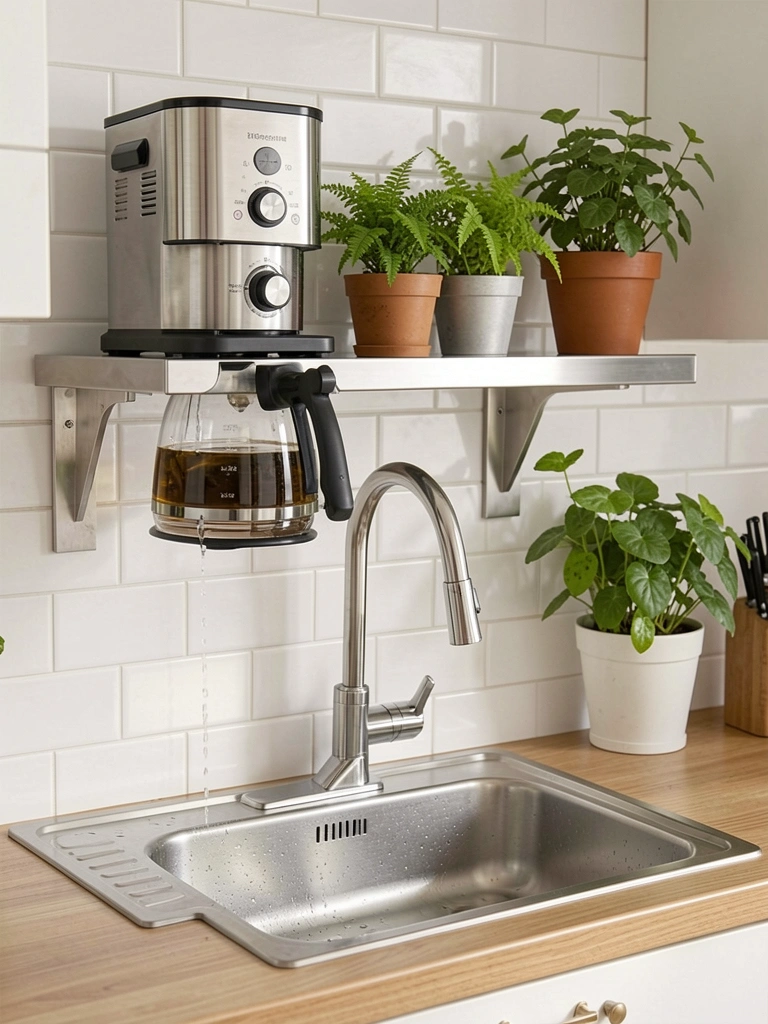
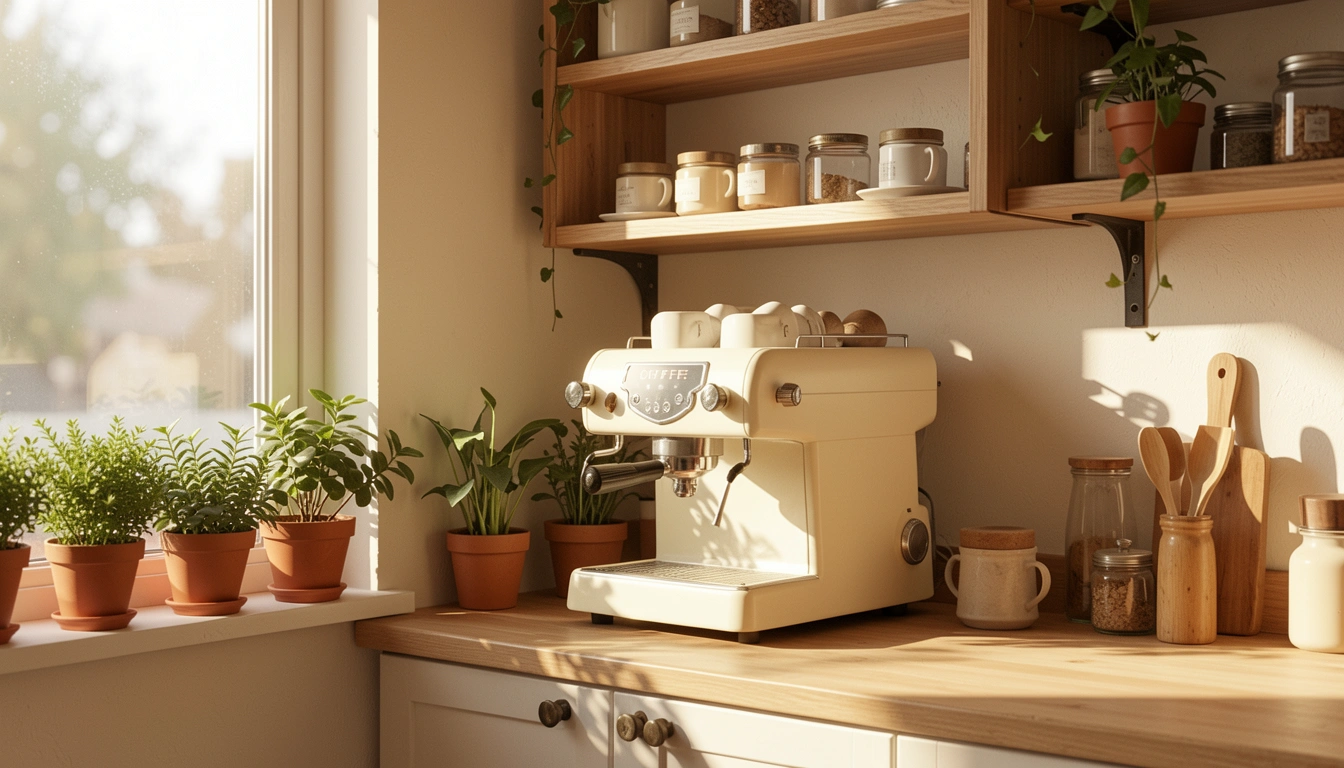
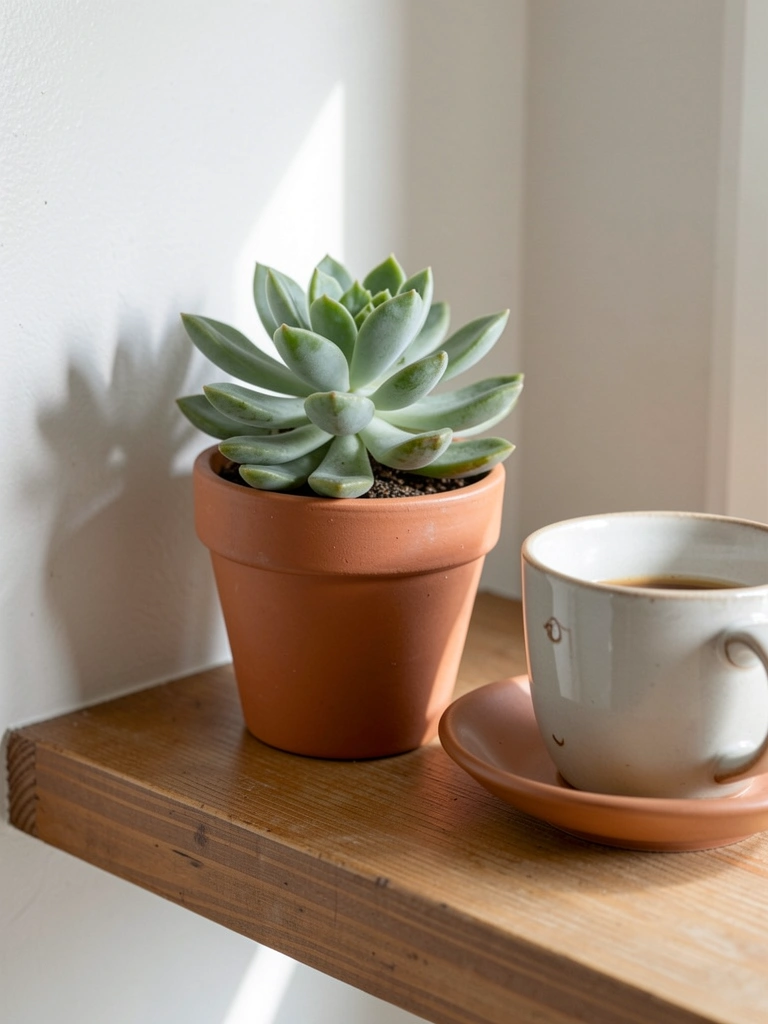
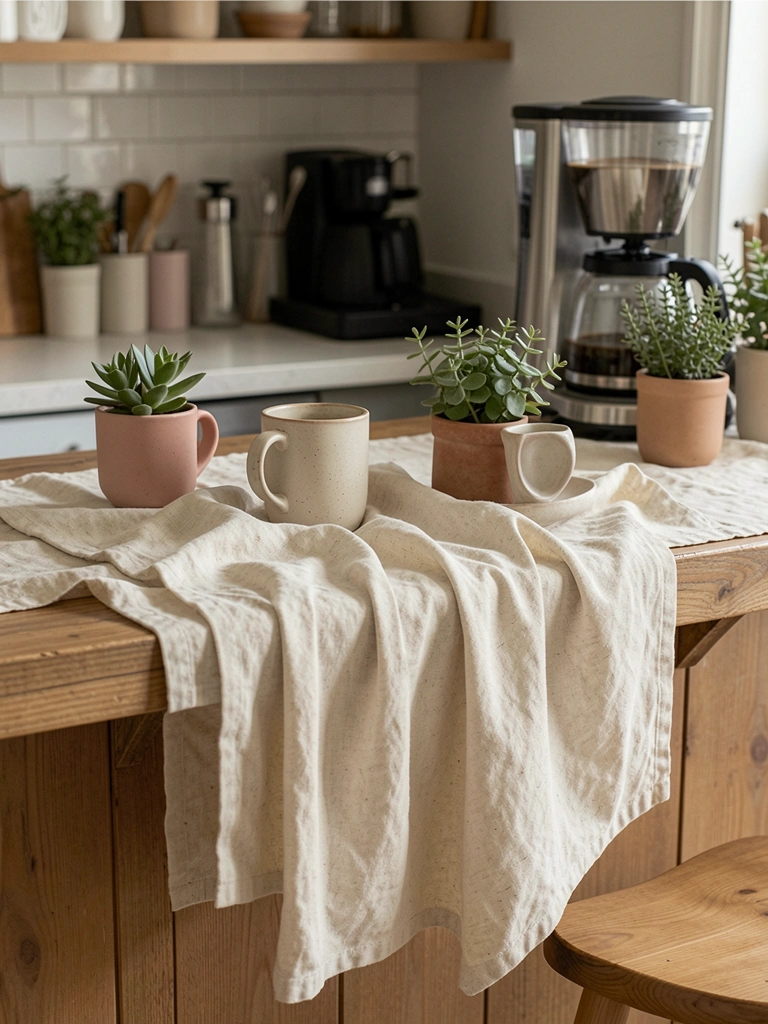
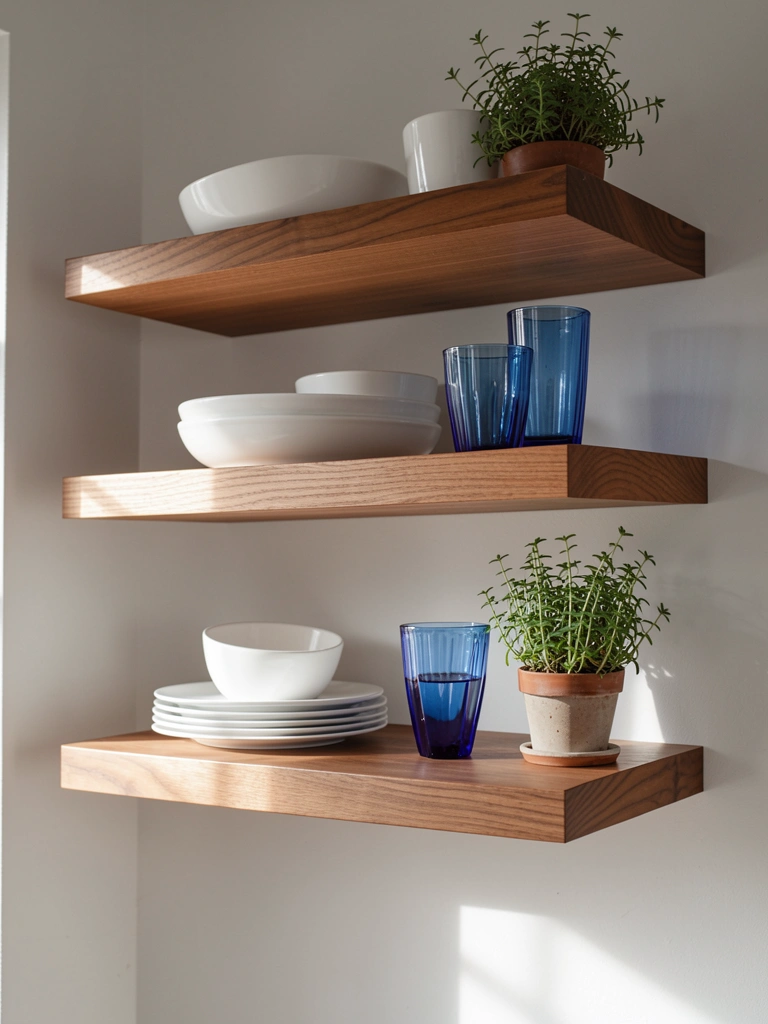
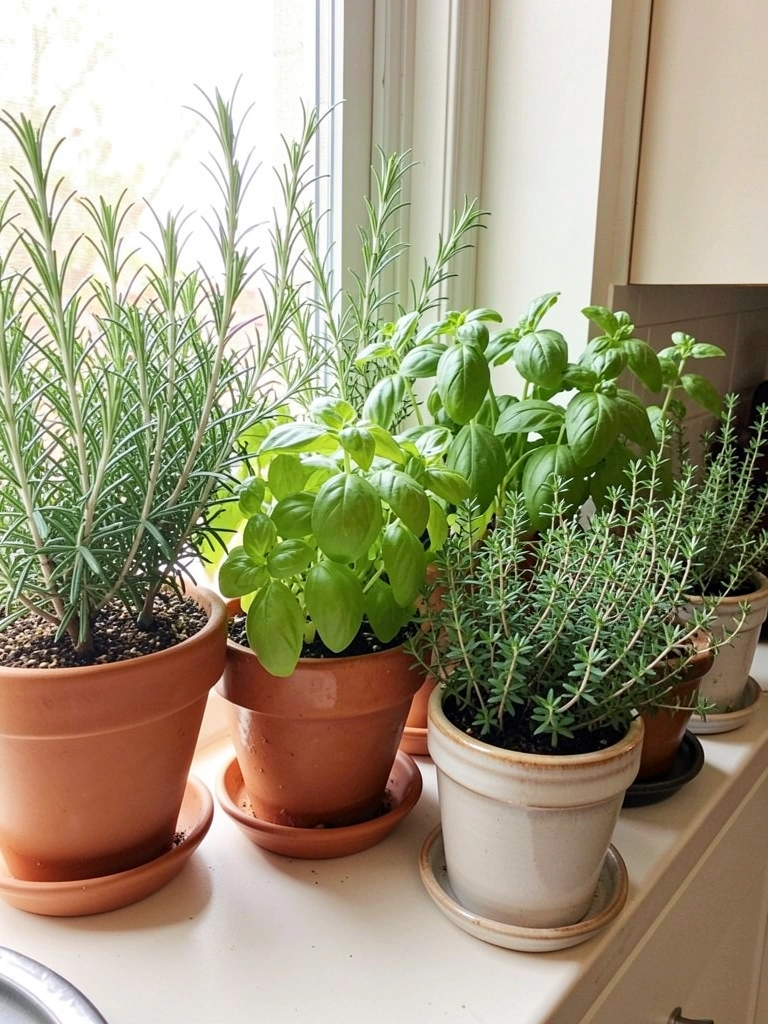
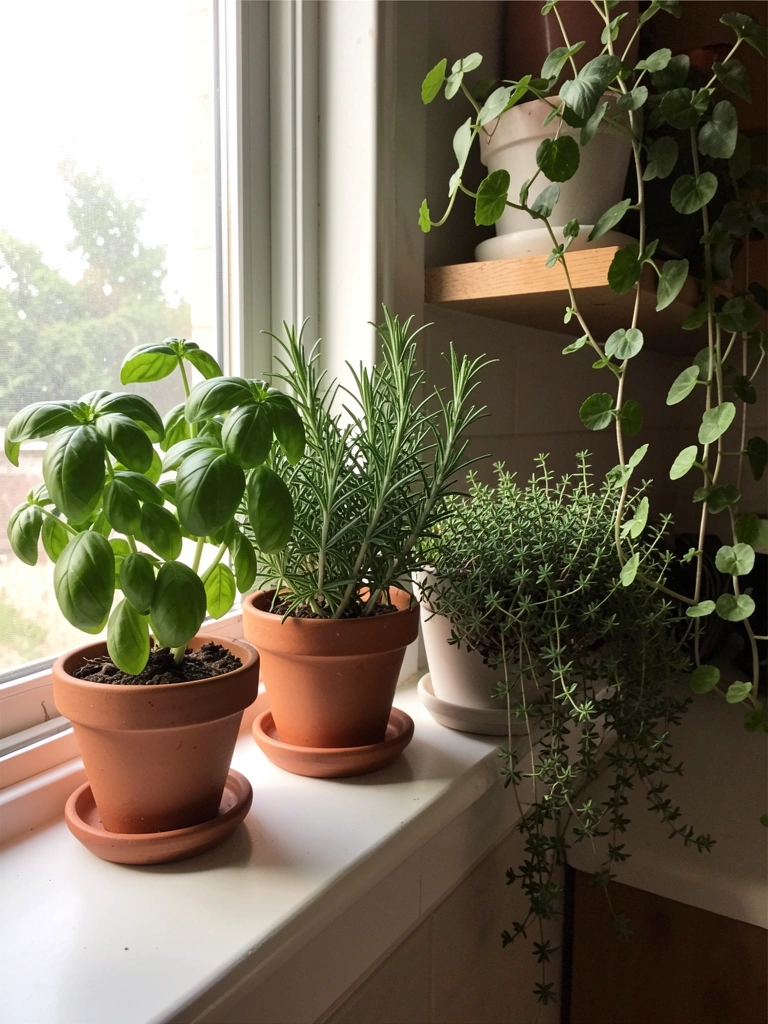
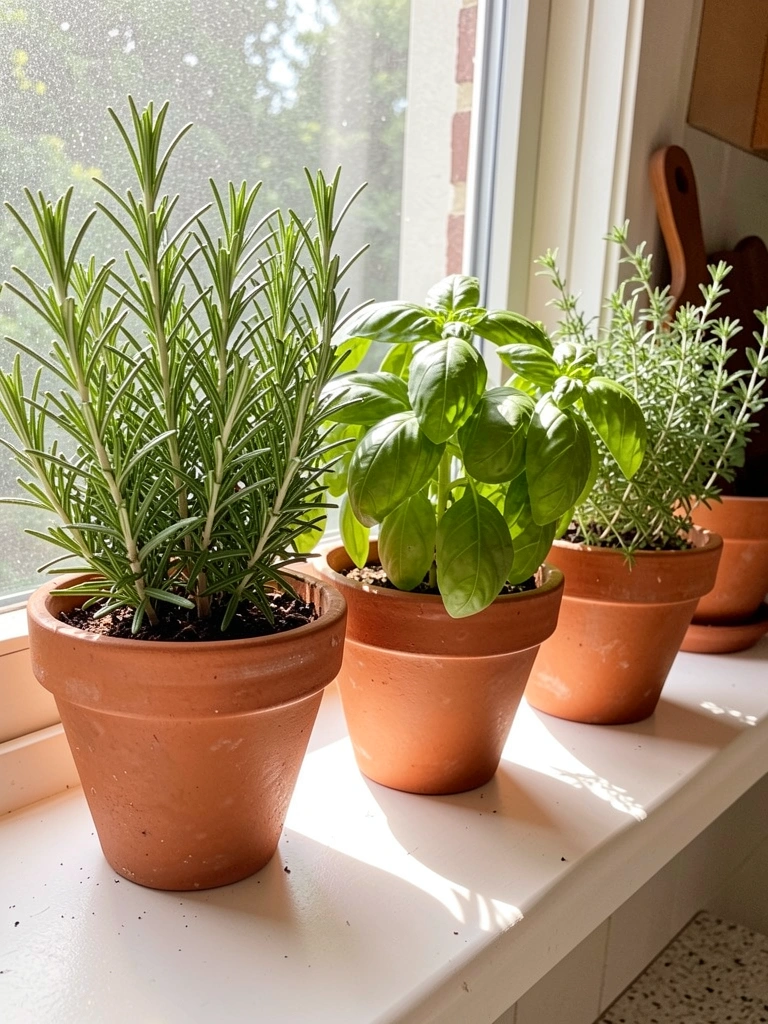
    4. Add Low-Maintenance Plants for Biophilic Vibes

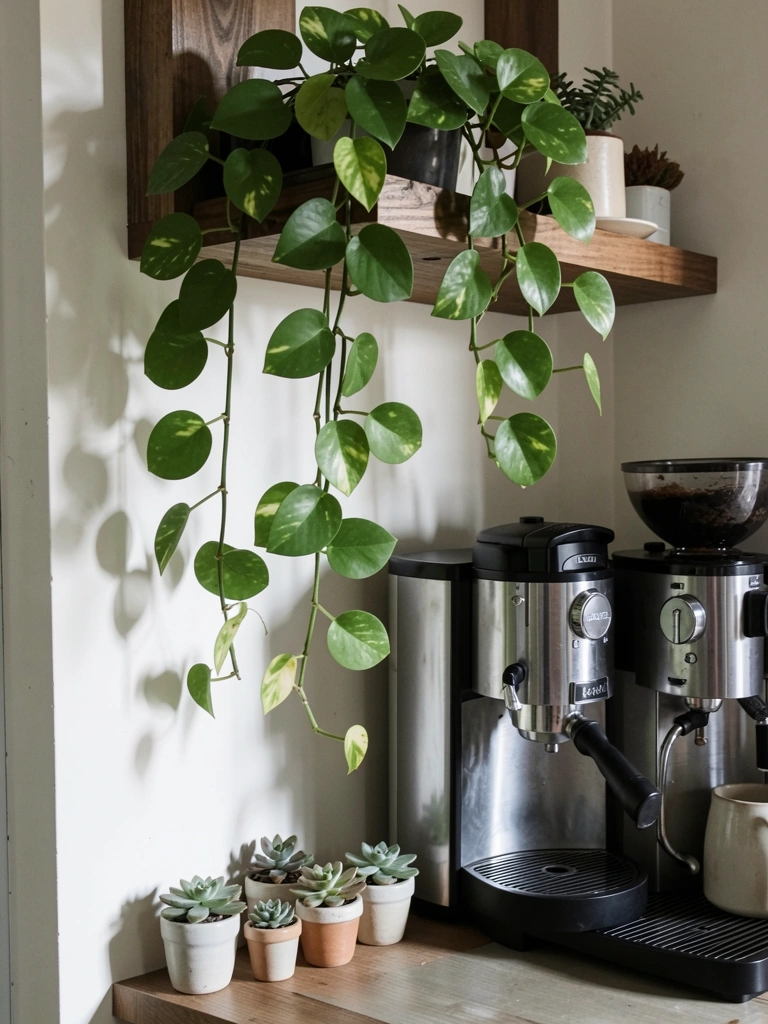
    Plants make spaces feel alive and reduce stress—science backs this up. But you don’t need a green thumb or a jungle.

    Choose low-maintenance options: pothos, snake plant, ZZ plant, or succulents ($5–$15 each from Lowe’s or local nurseries). Start with 2–3 plants to avoid overwhelm. Use lightweight hanging planters or wall-mounted shelves ($15–$30) to add greenery without taking counter space.

    Water once weekly; place in indirect sunlight. That’s it. If you kill one, buy another; it’s part of the experiment.

    Suddenly your coffee corner feels like a retreat, not just a appliance corner.

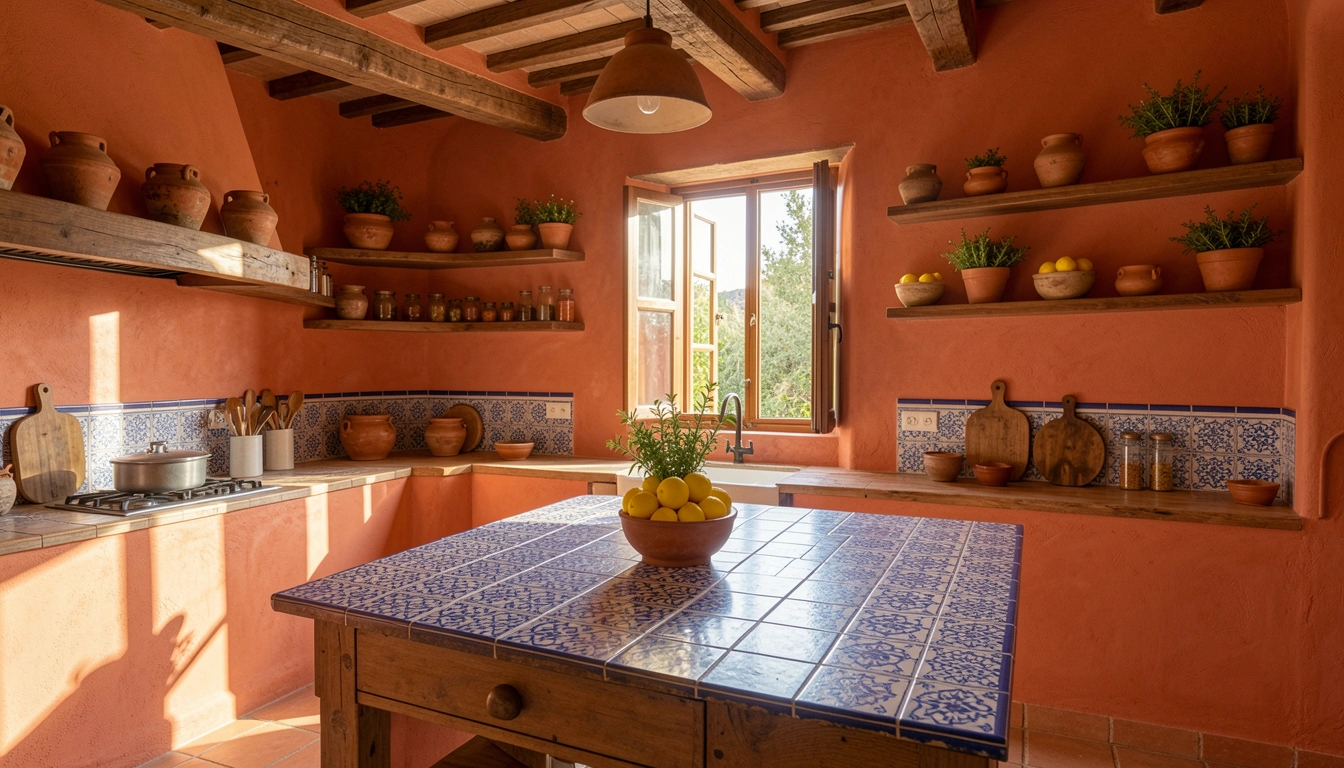
    5. Paint an Accent Wall in Soft, Calming Color

    Color psychology is real. Soft greens, dusty pinks, and warm neutrals create calm; industrial grays feel sterile.

    Choose one wall behind your coffee station. Paint it a soft sage green ($40–$60 for paint + supplies from Home Depot). If you’re renting, use removable peel-and-stick wallpaper ($30–$50 from Spoonflower or Amazon). One weekend project; zero regrets.

    Light colors expand small spaces visually; darker tones add coziness. Match your wall to your mug collection or coffee bag branding if you’re coordinating.

    Suddenly the whole corner feels curated and intentional, not like a random appliance sit.

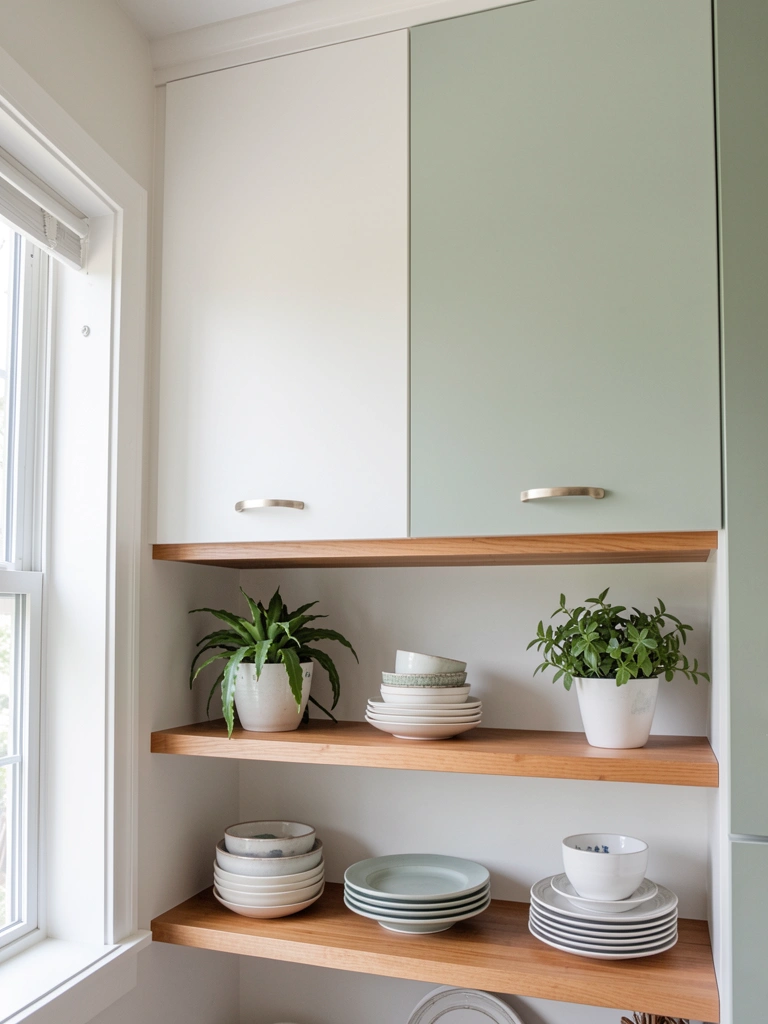
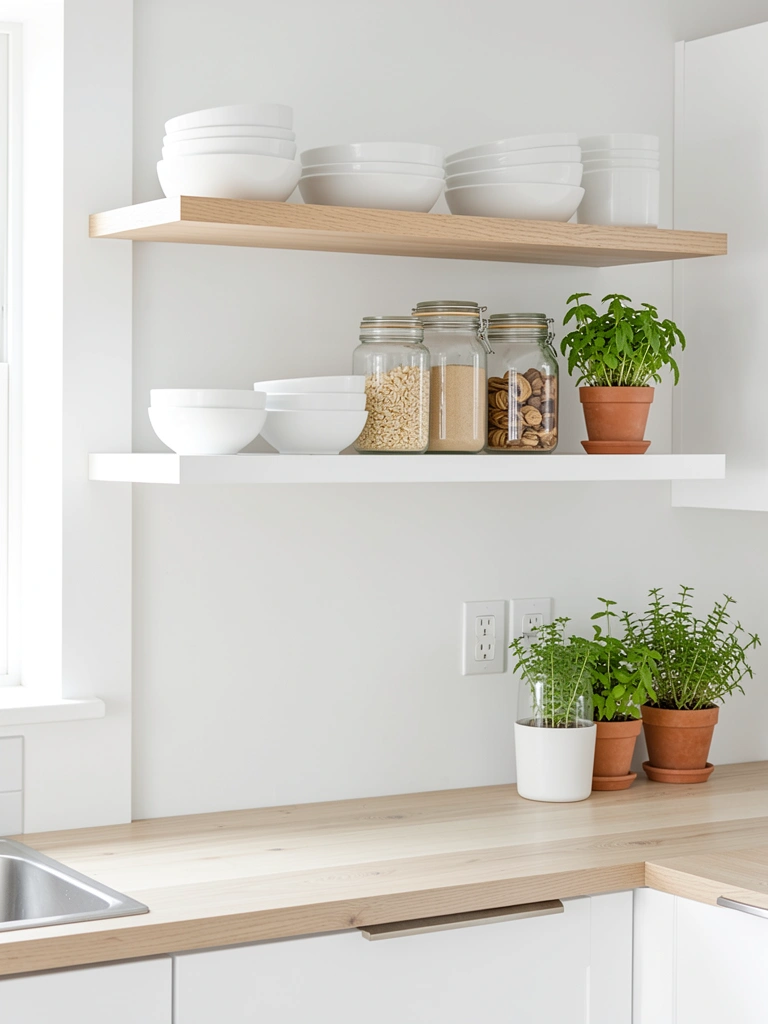
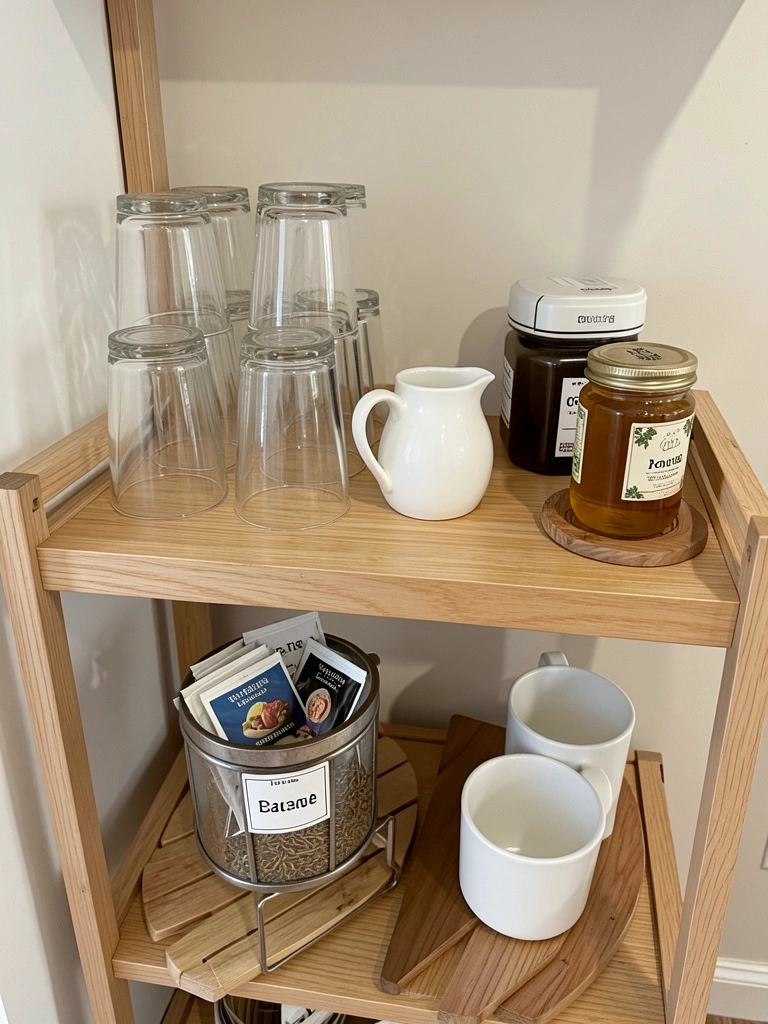
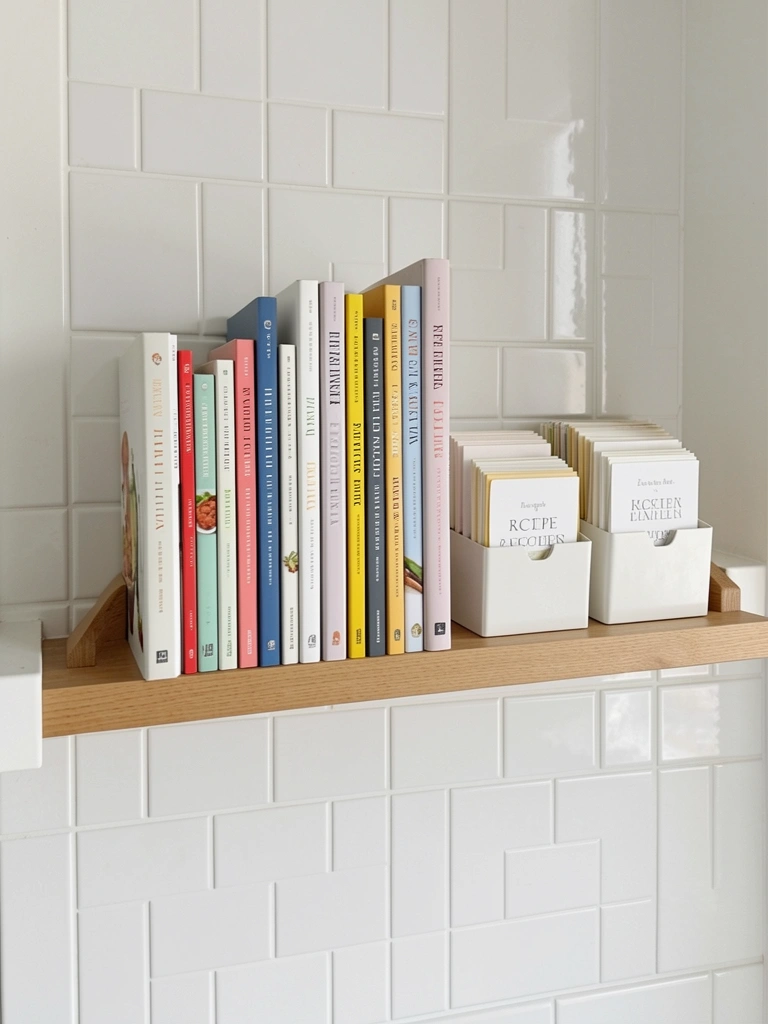
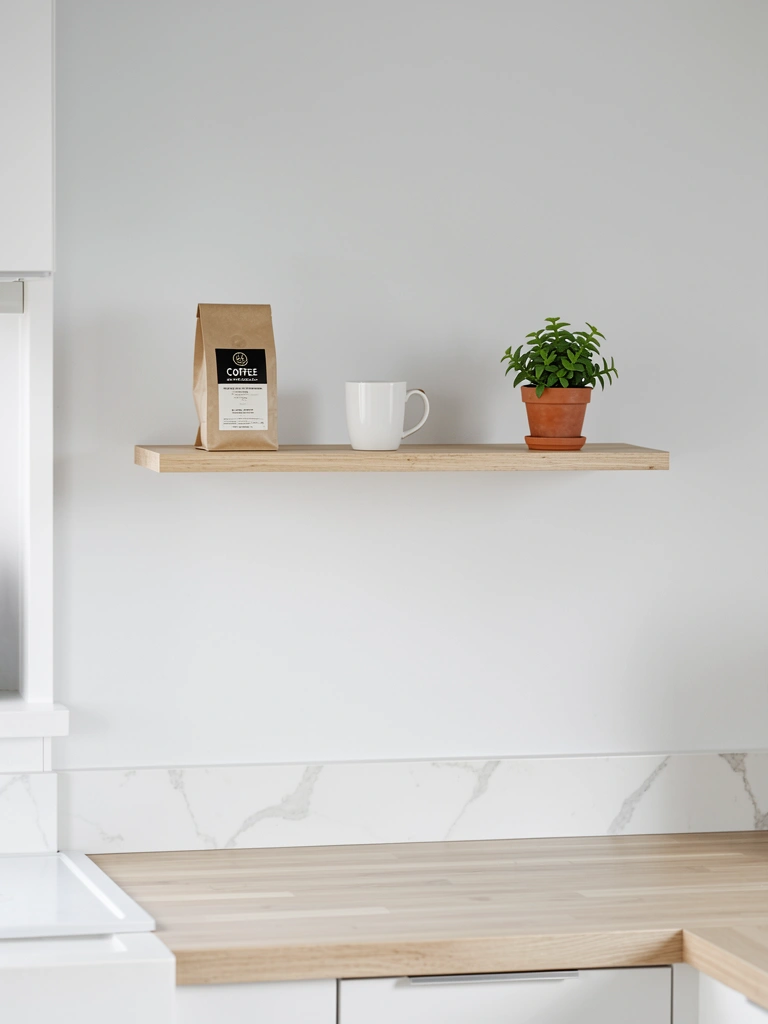
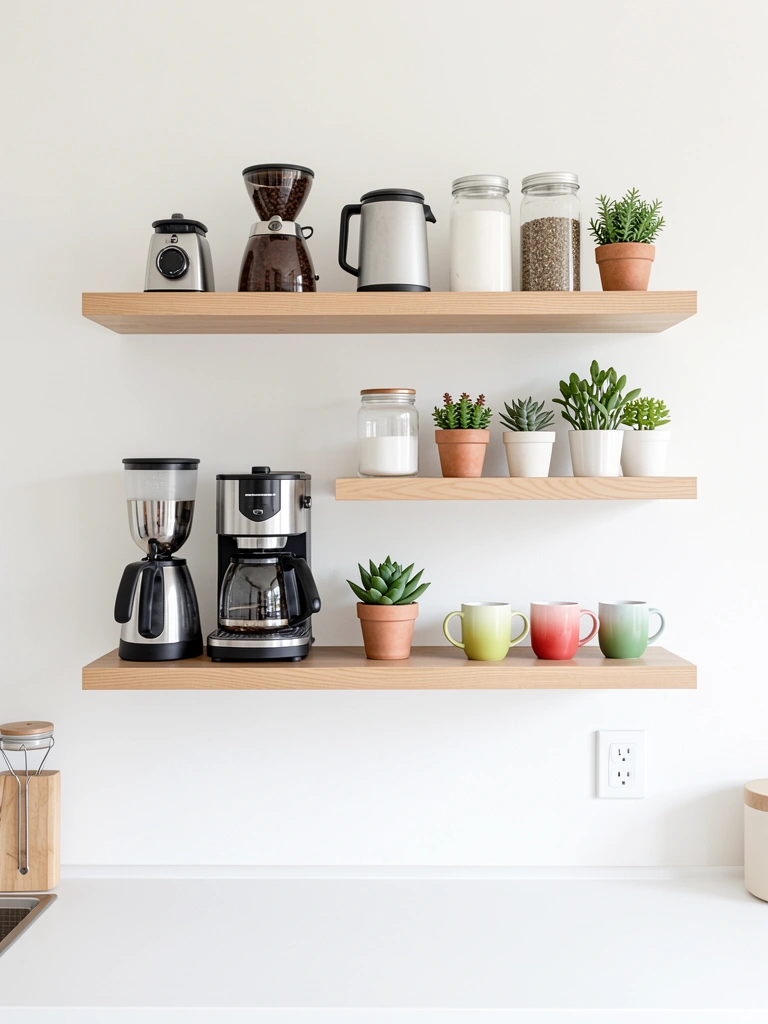
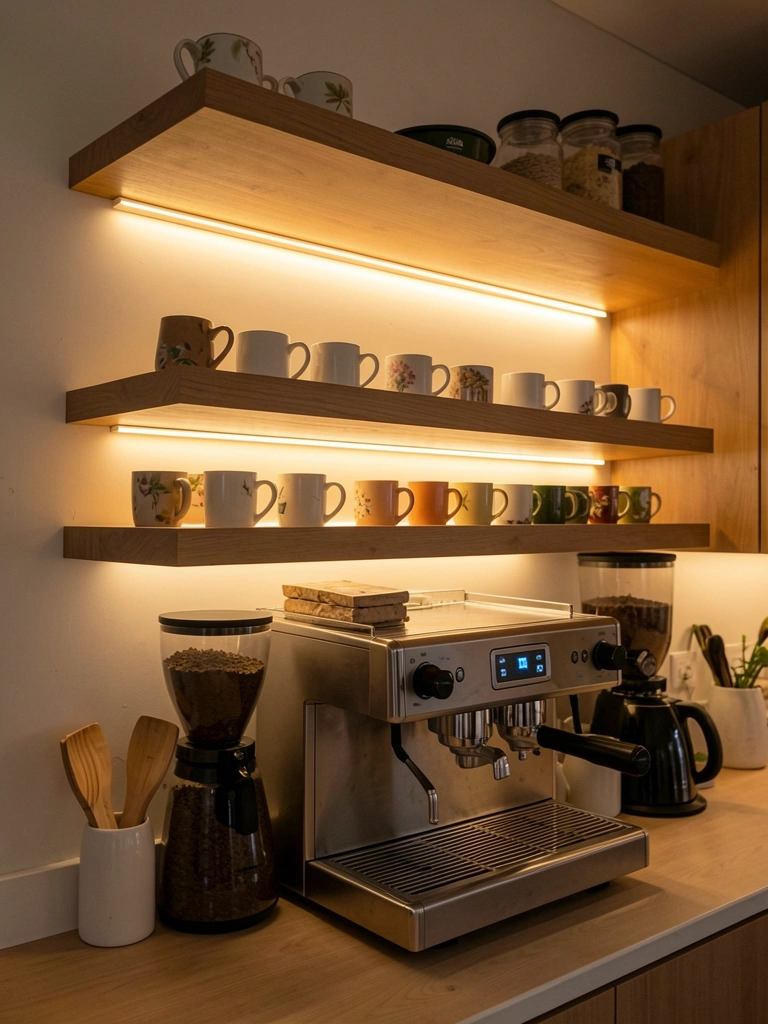
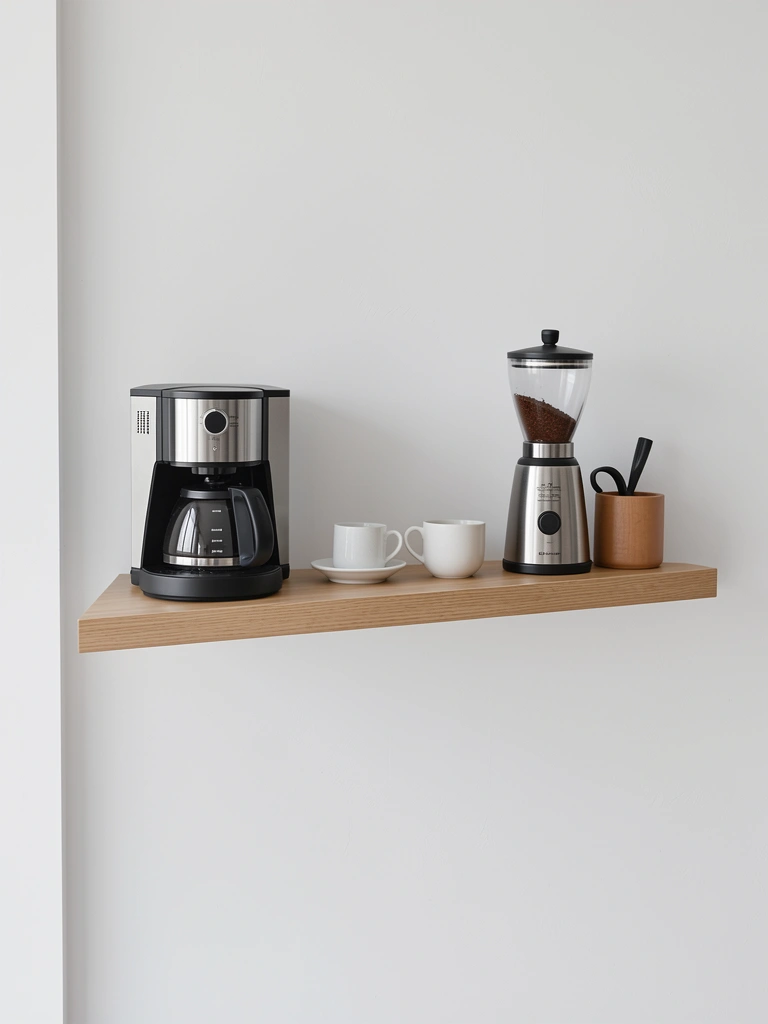
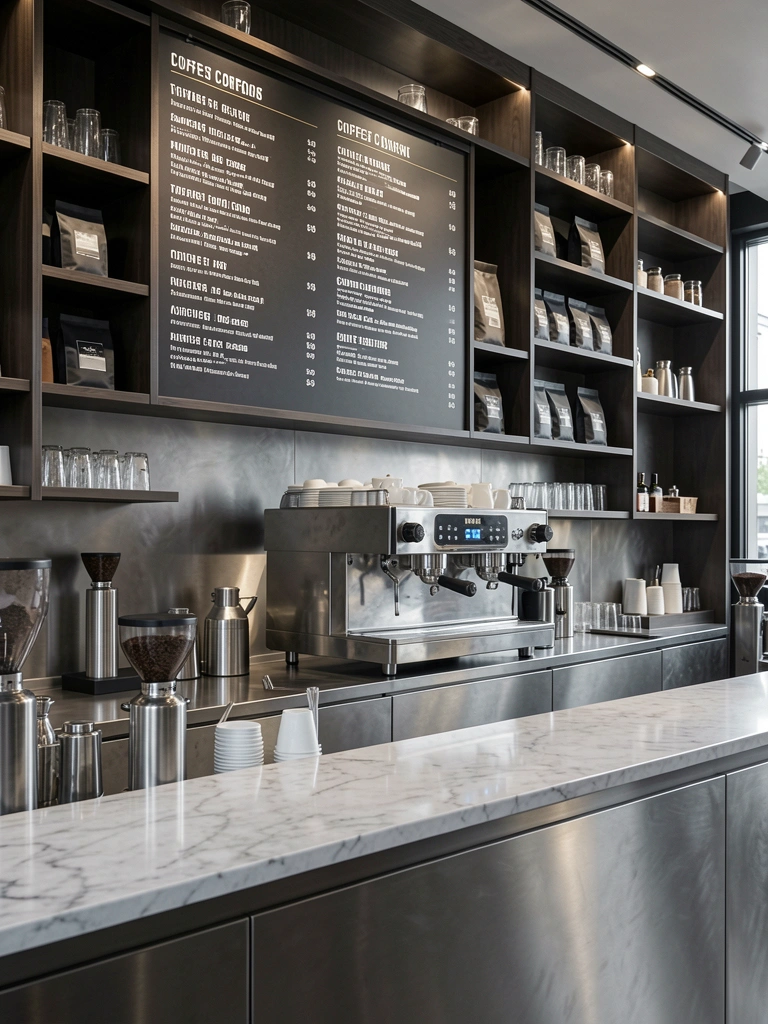
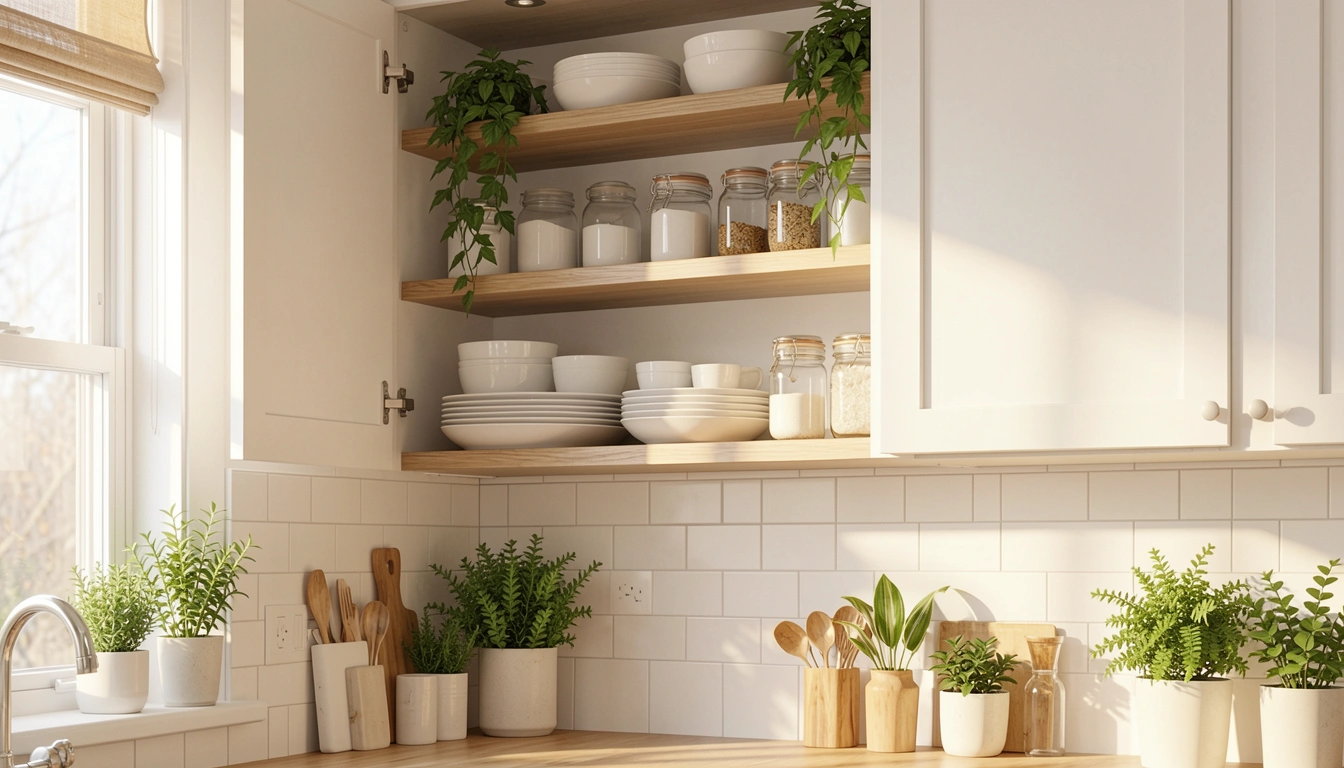
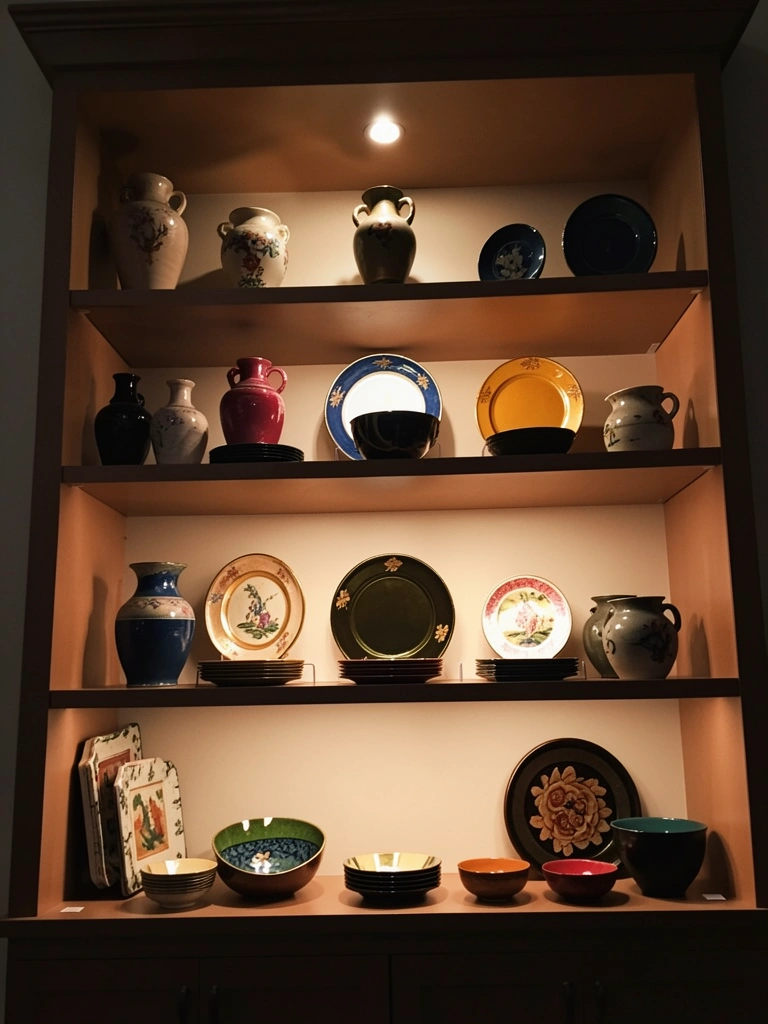
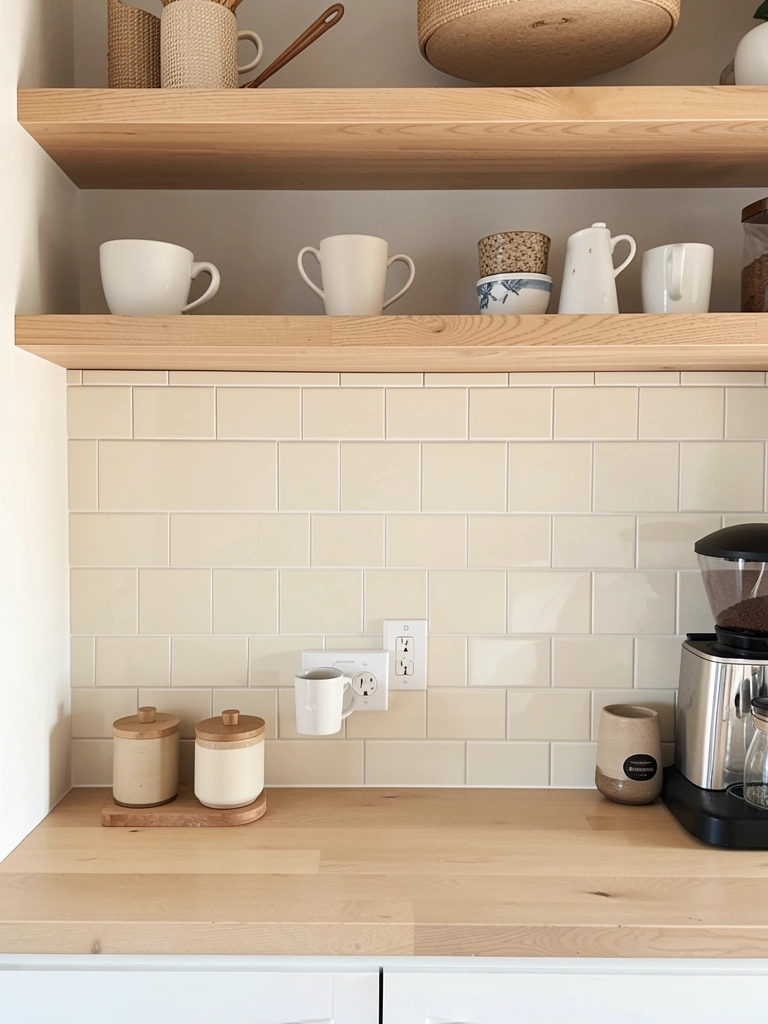
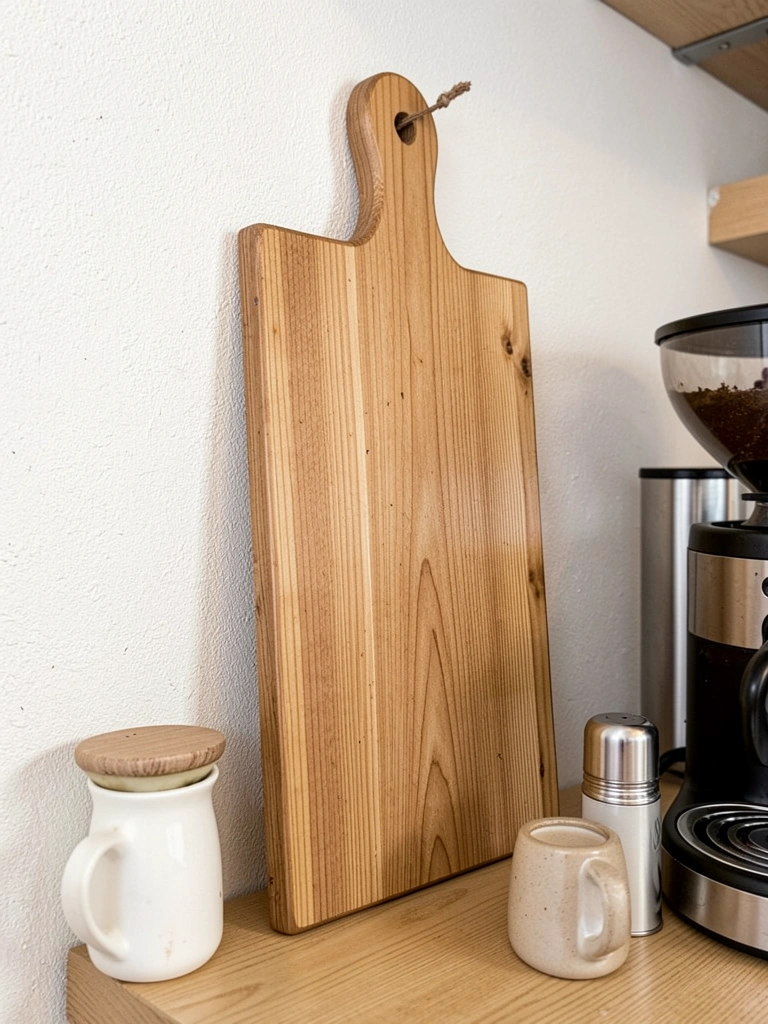
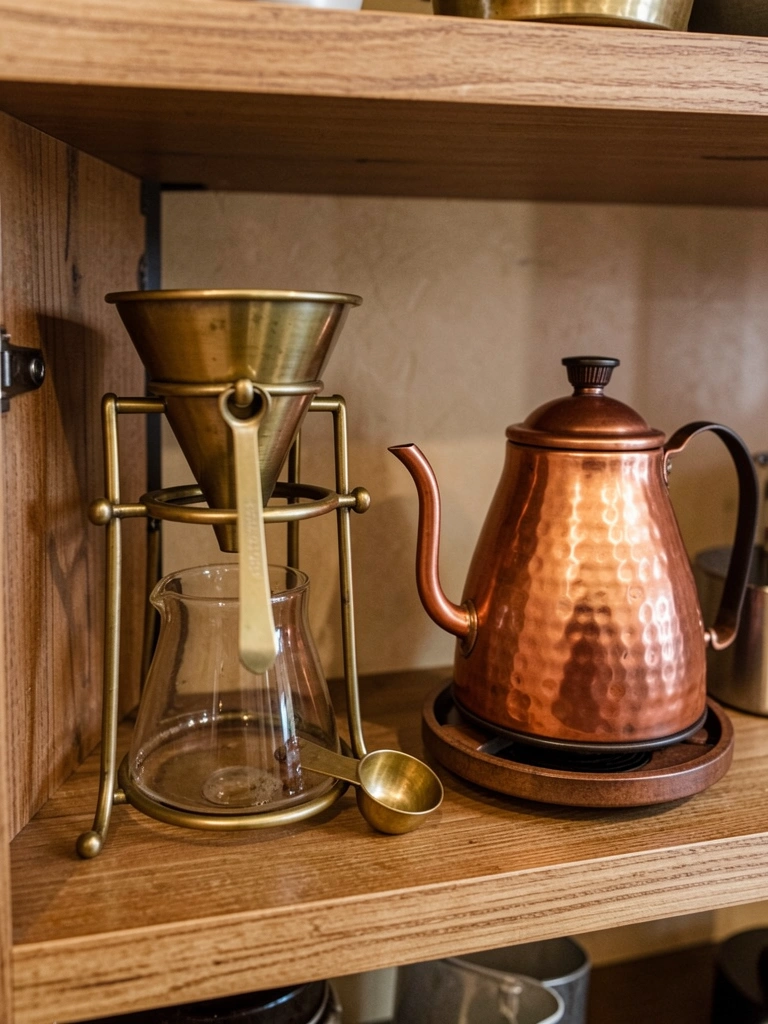
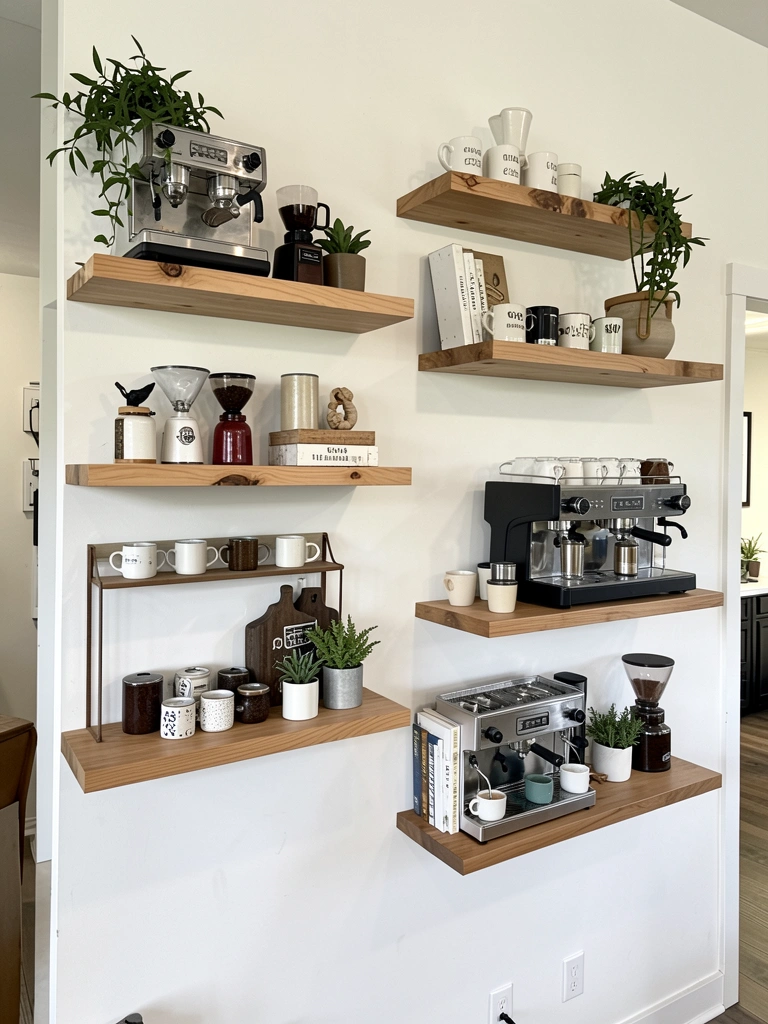
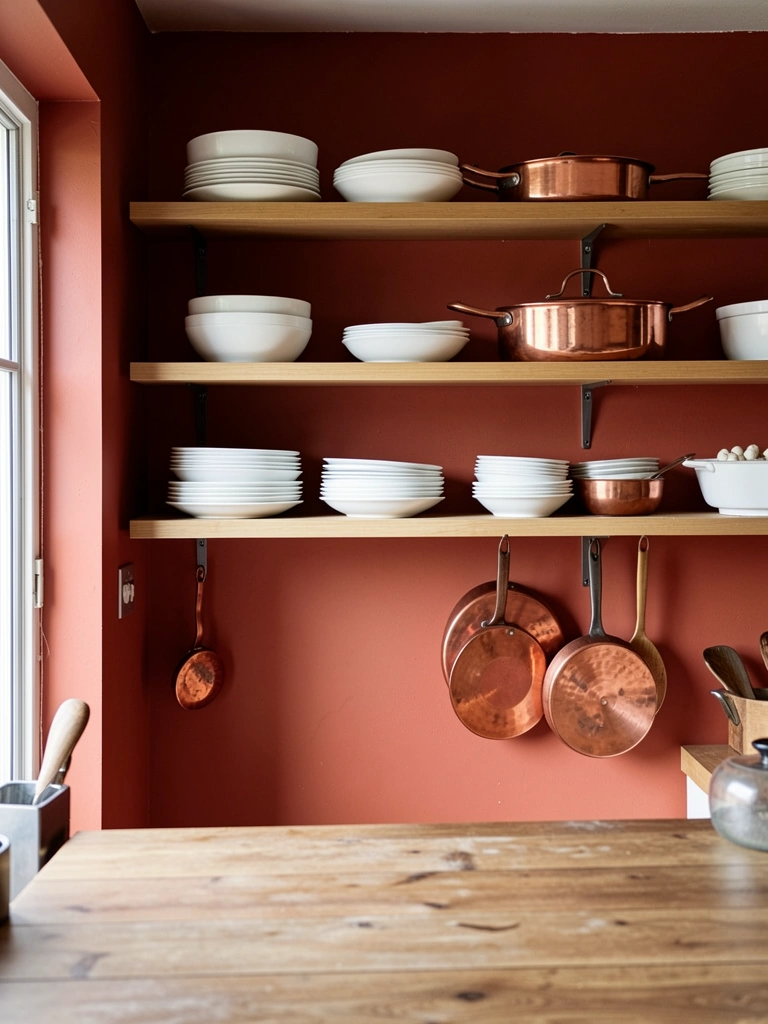
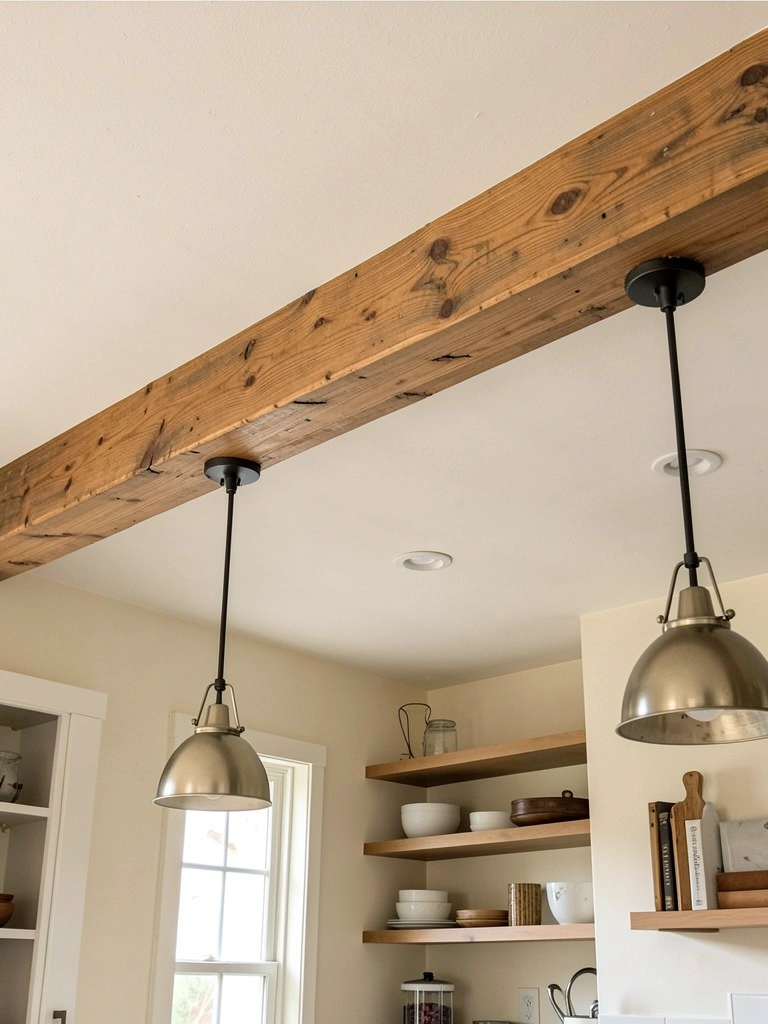
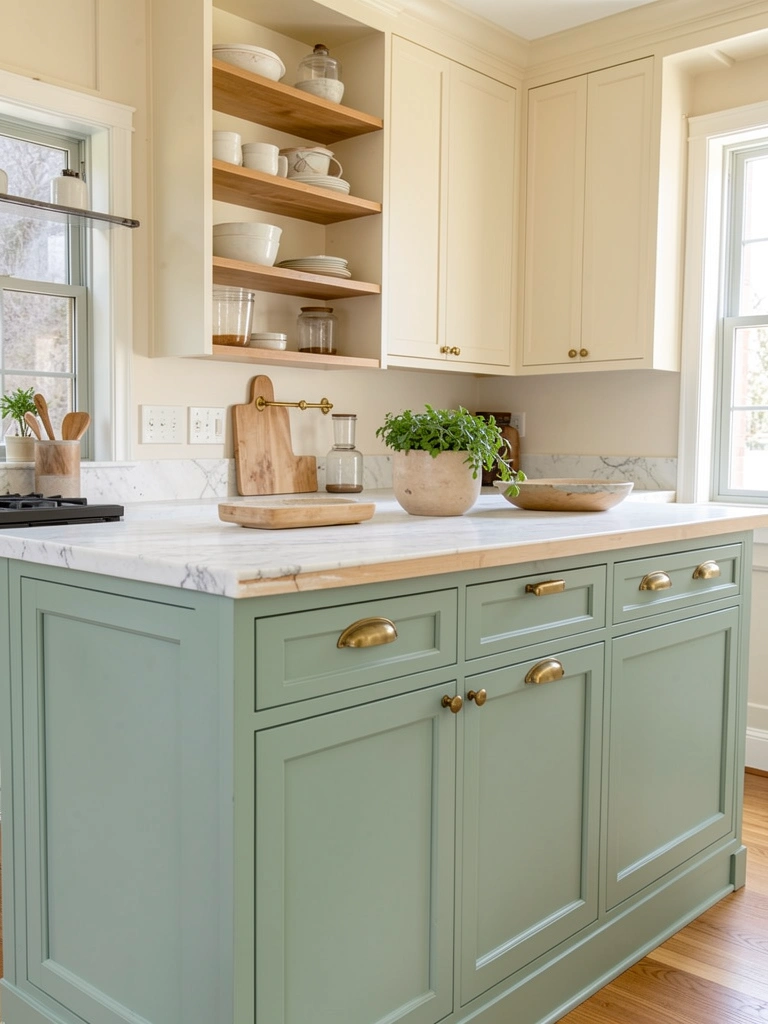
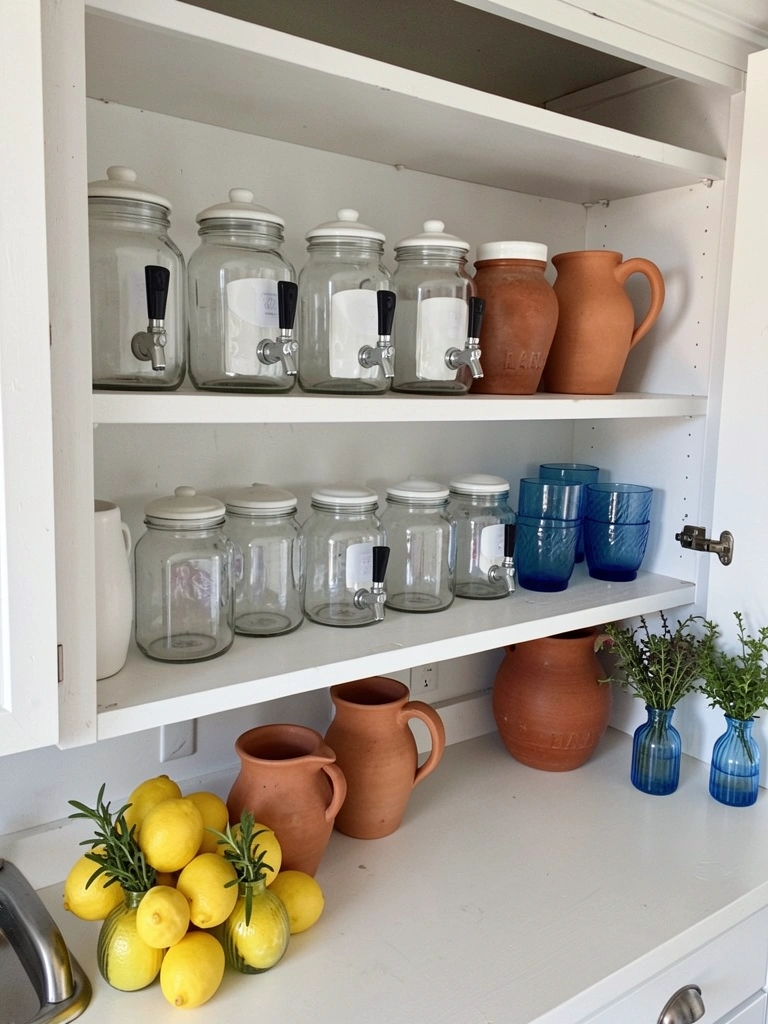
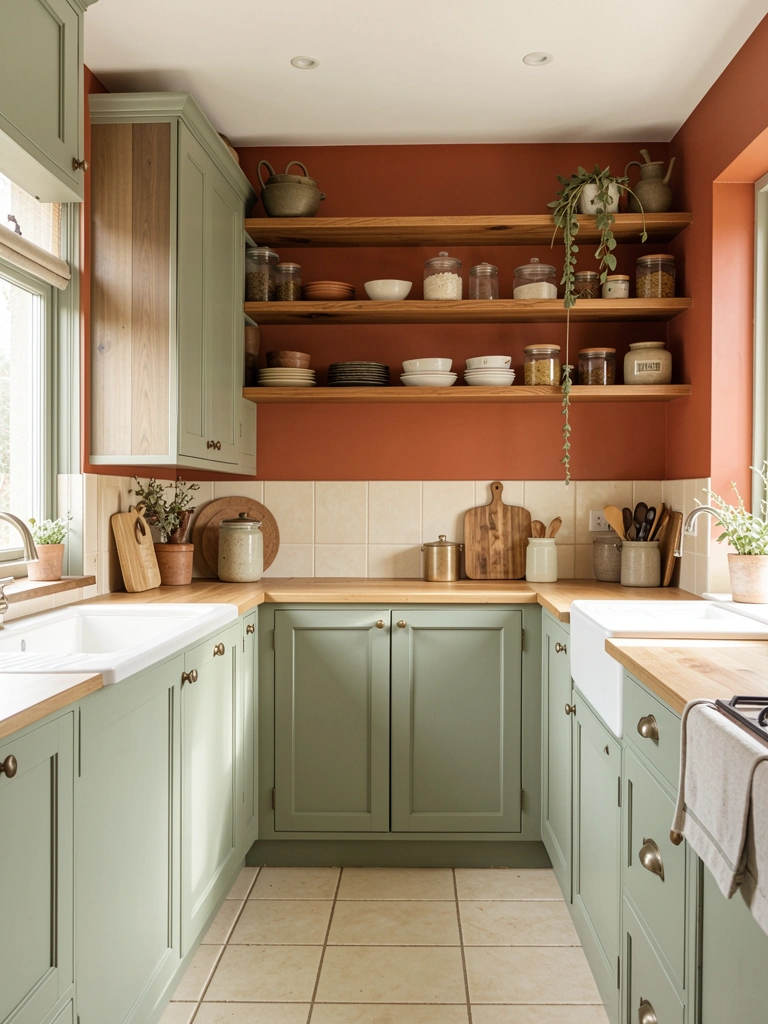
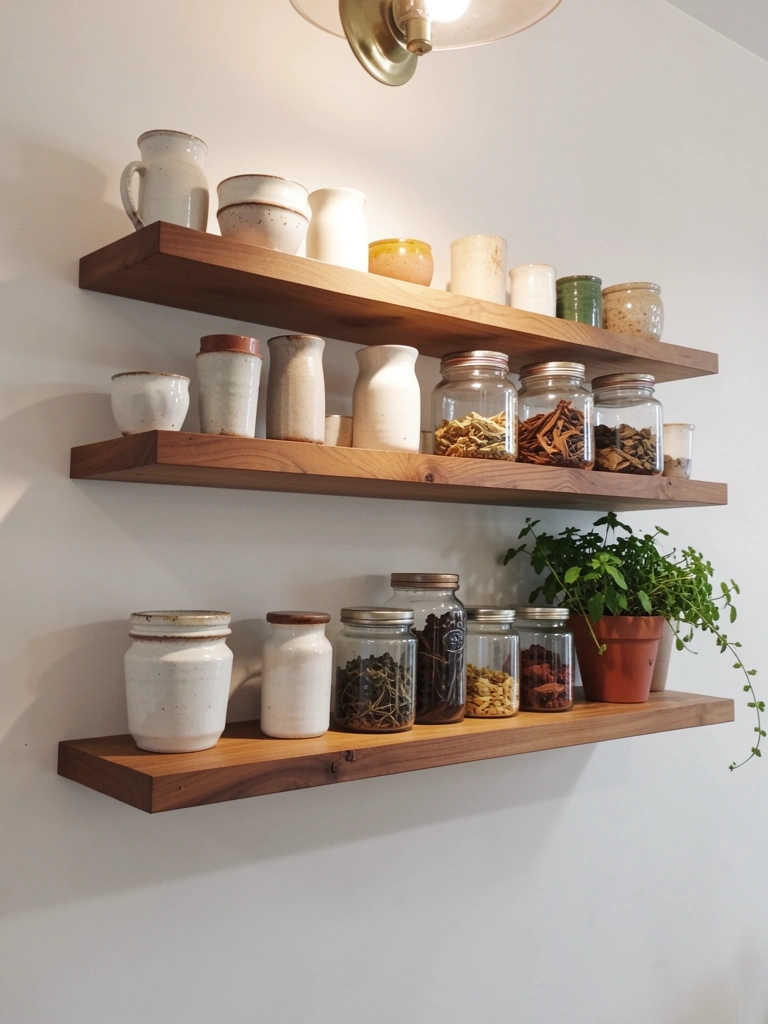
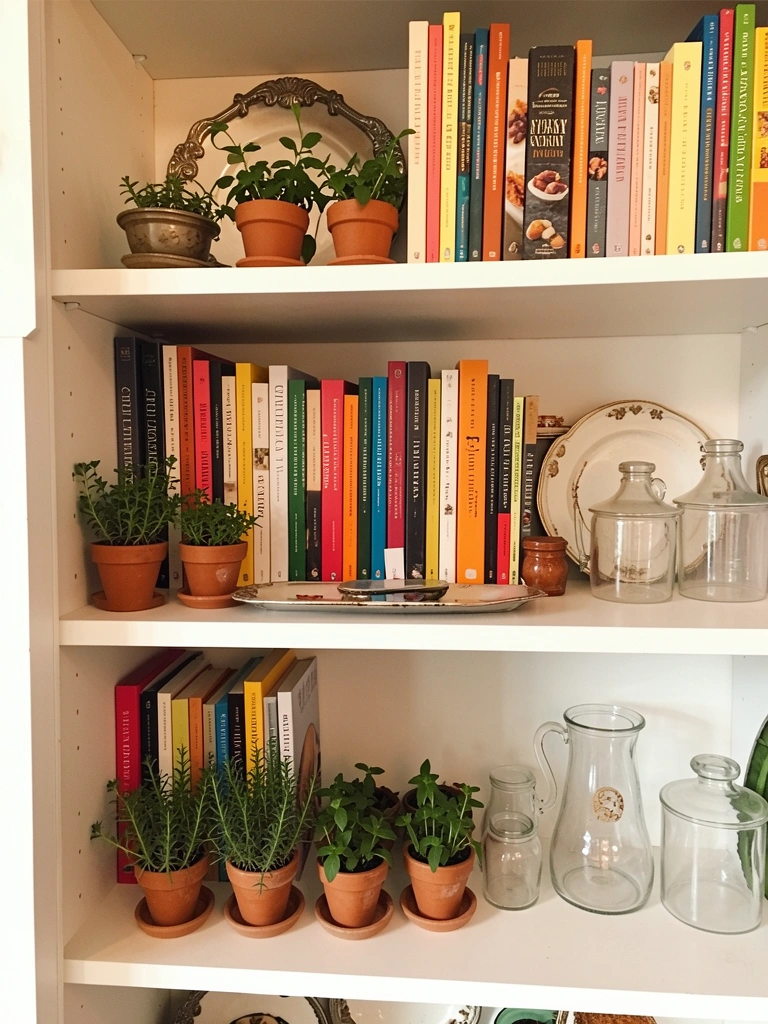
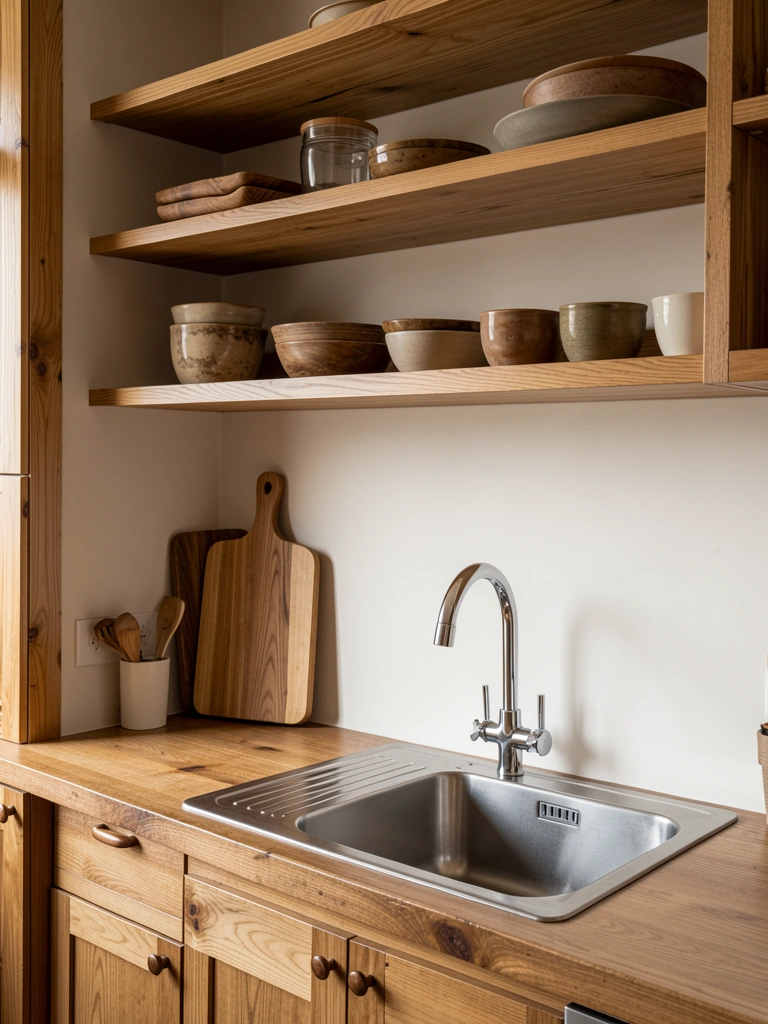
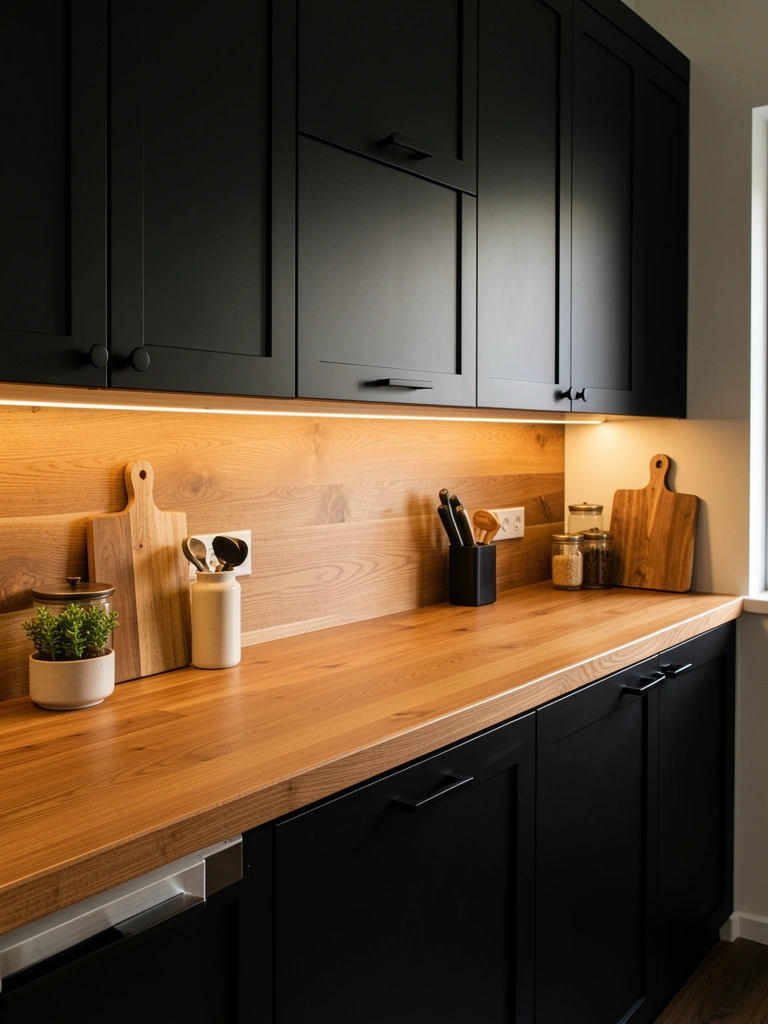
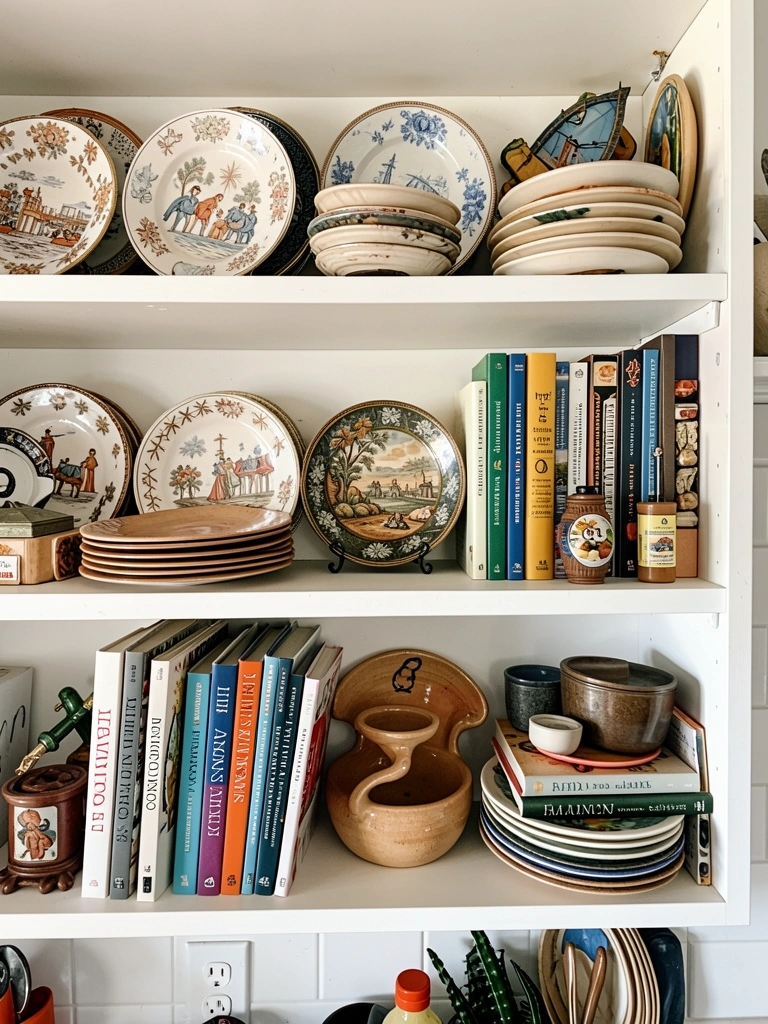
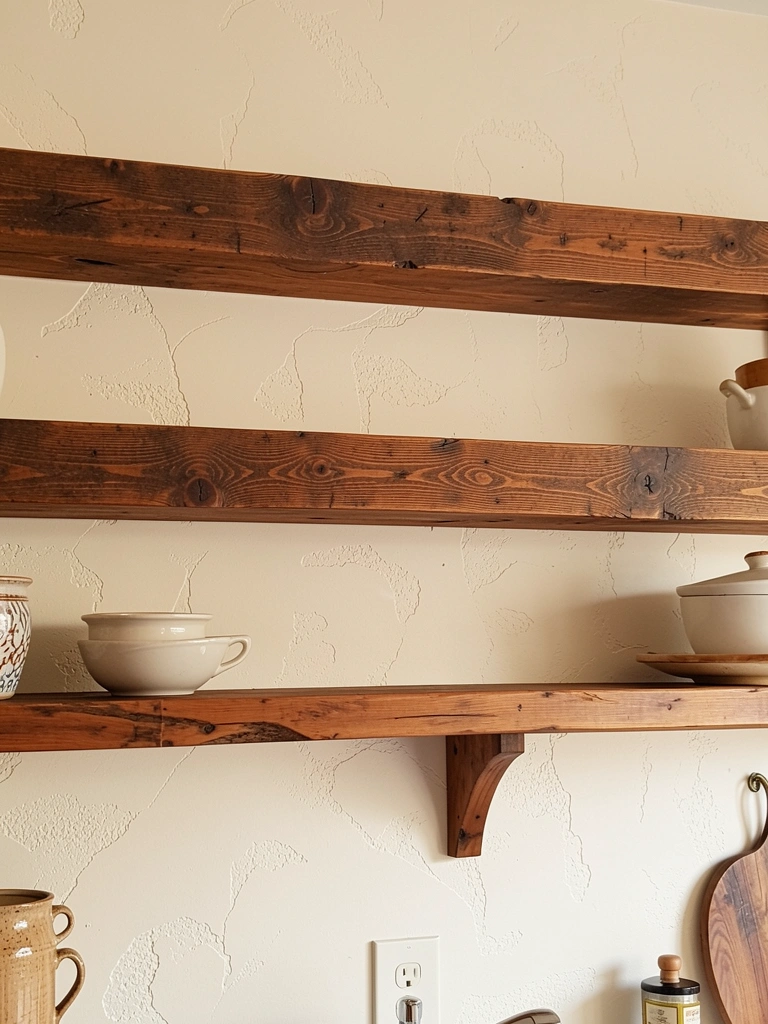
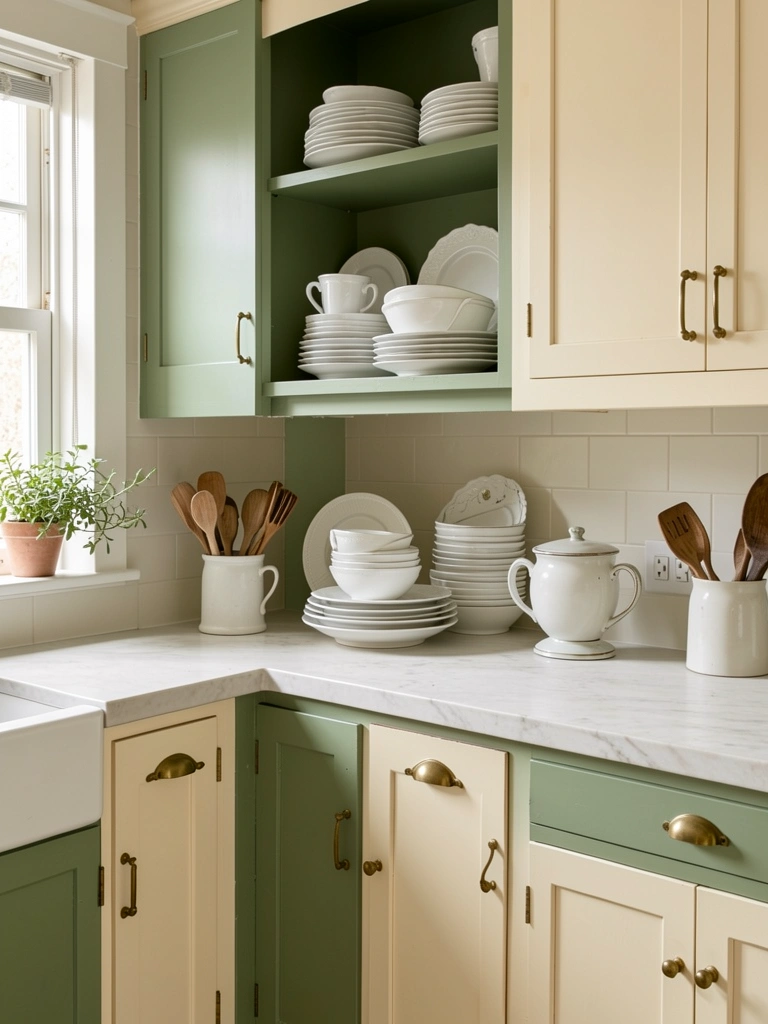
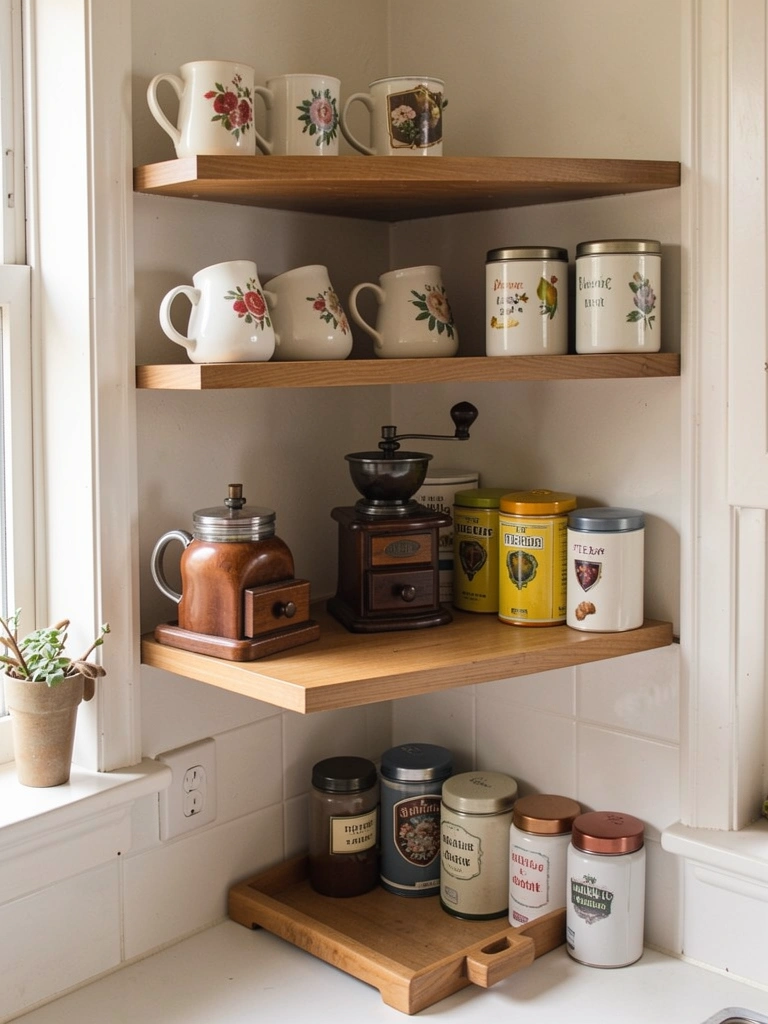
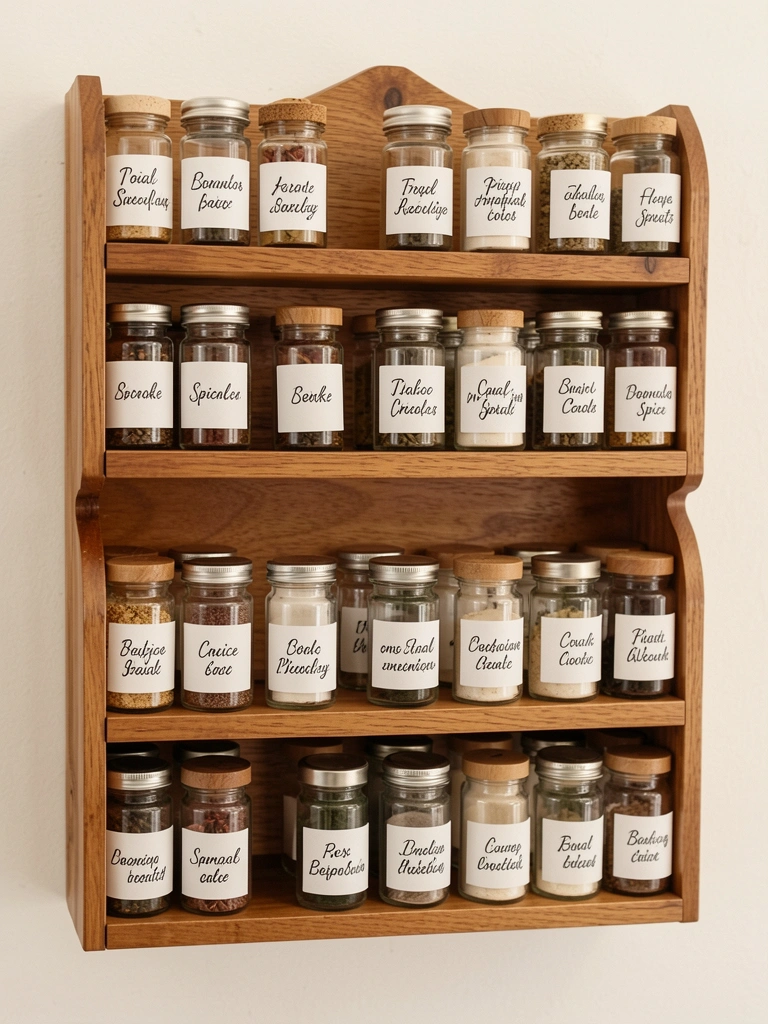
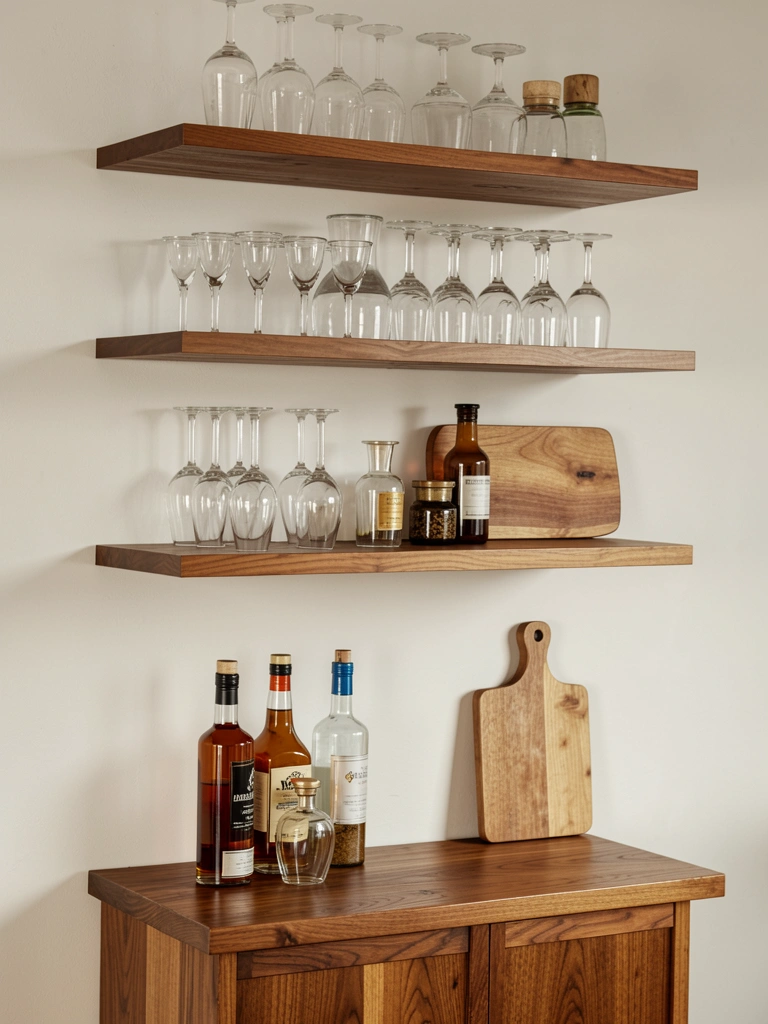
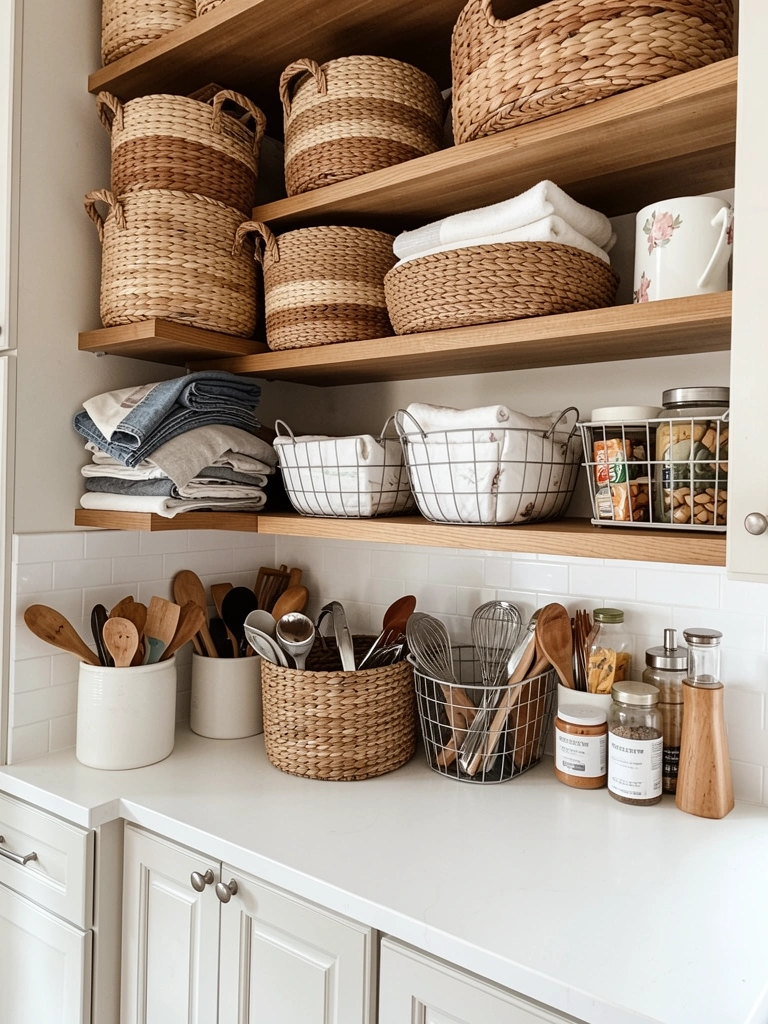
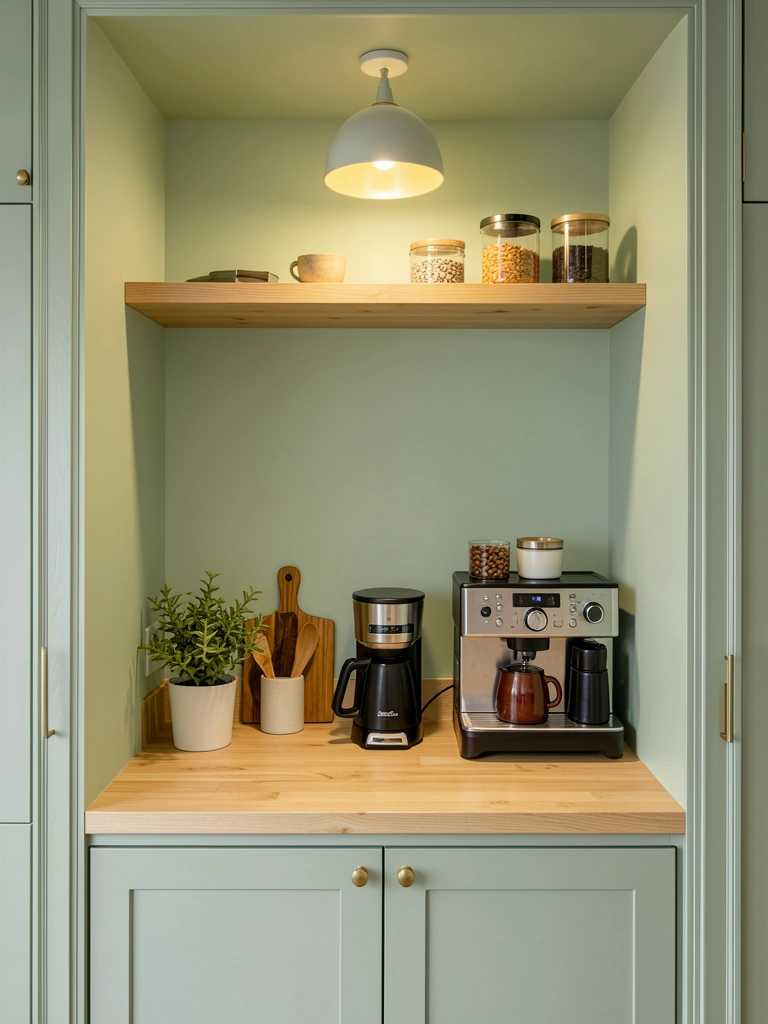
    6. Create an Open Shelving Display for Beans and Supplies

    Open shelving keeps your coffee supplies visible and turns storage into décor. It’s also renter-friendly and easier to access than cabinets.

    Install floating shelves ($15–$40 each at Home Depot) at eye level using a level and drill, or use adhesive shelves ($20–$30) if you can’t drill. Arrange supplies intentionally: glass jars for beans ($5–$15 each), matching creamers ($10–$25), and small labeled trays to corral sugar and stirrers.

    Add visual breaks with plants or books. Leave some negative space—a cluttered shelf stresses you out instead of inspiring you.

    Your coffee station becomes Instagram-worthy, and you’ll actually enjoy looking at it daily.

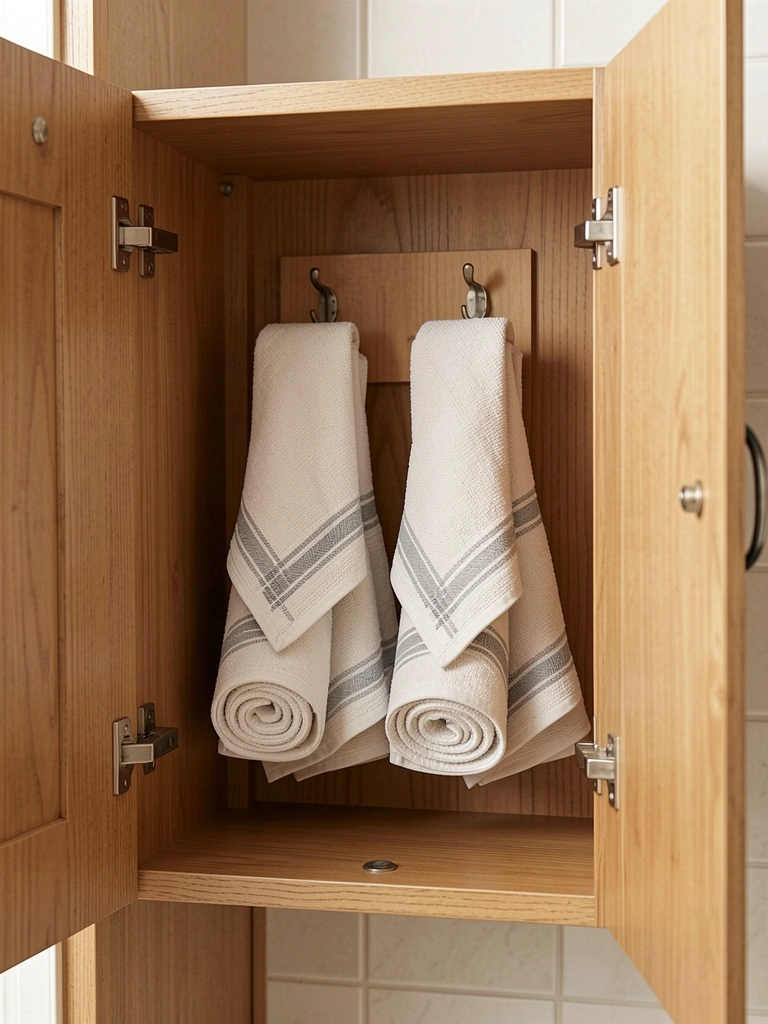
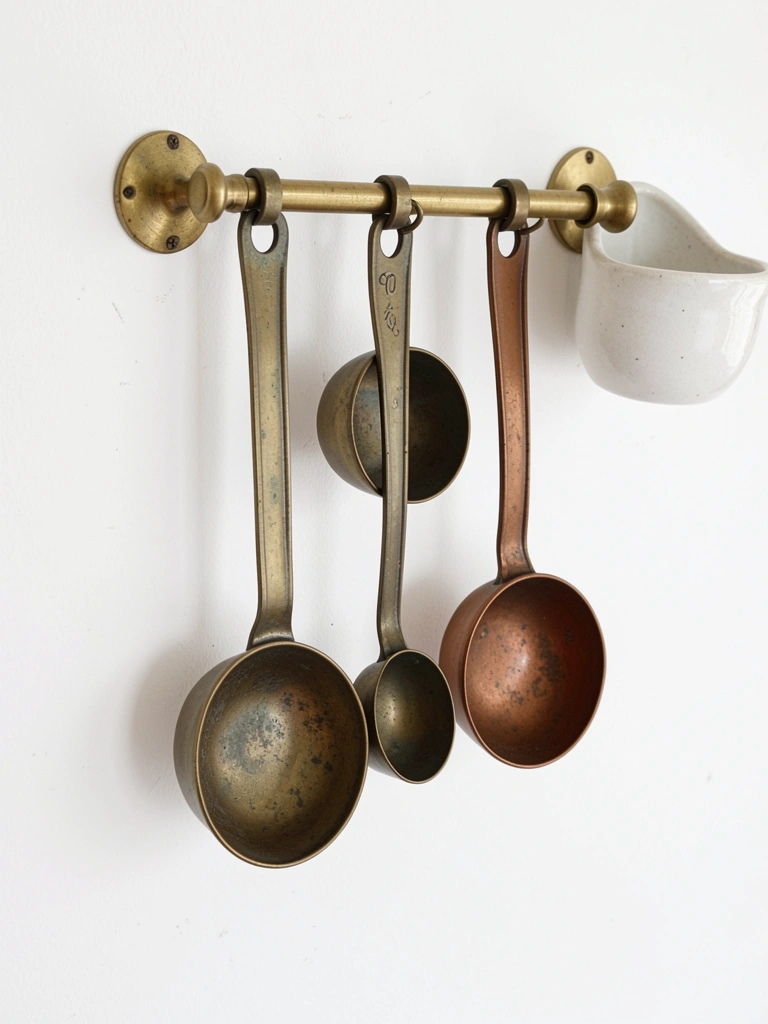
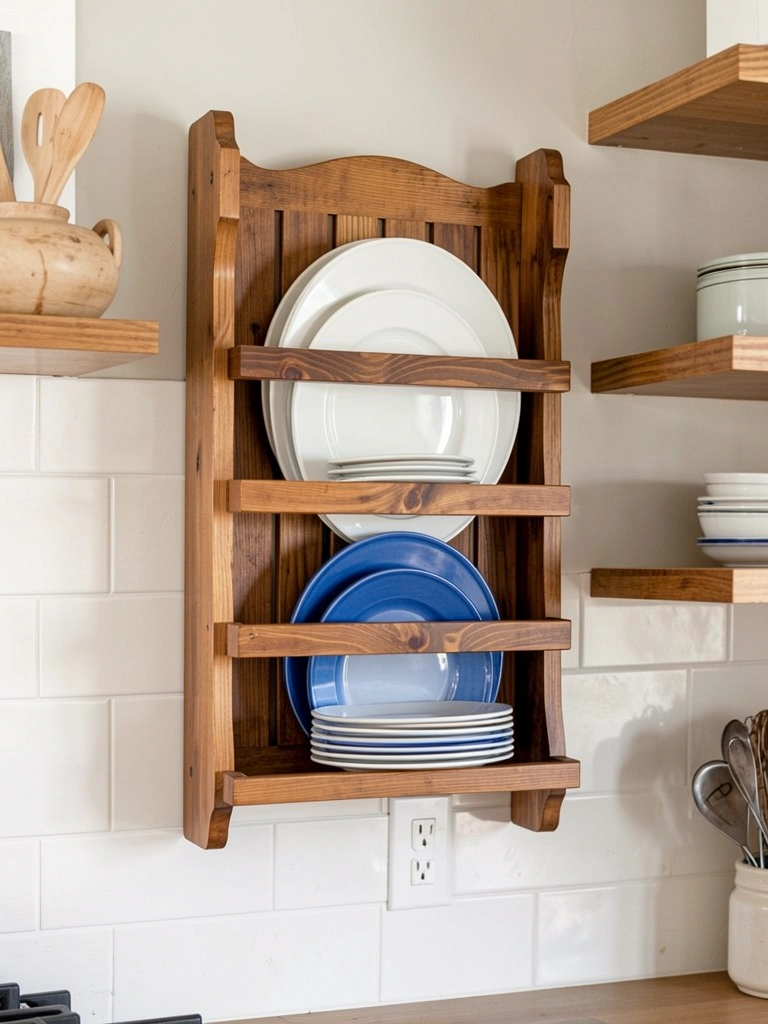
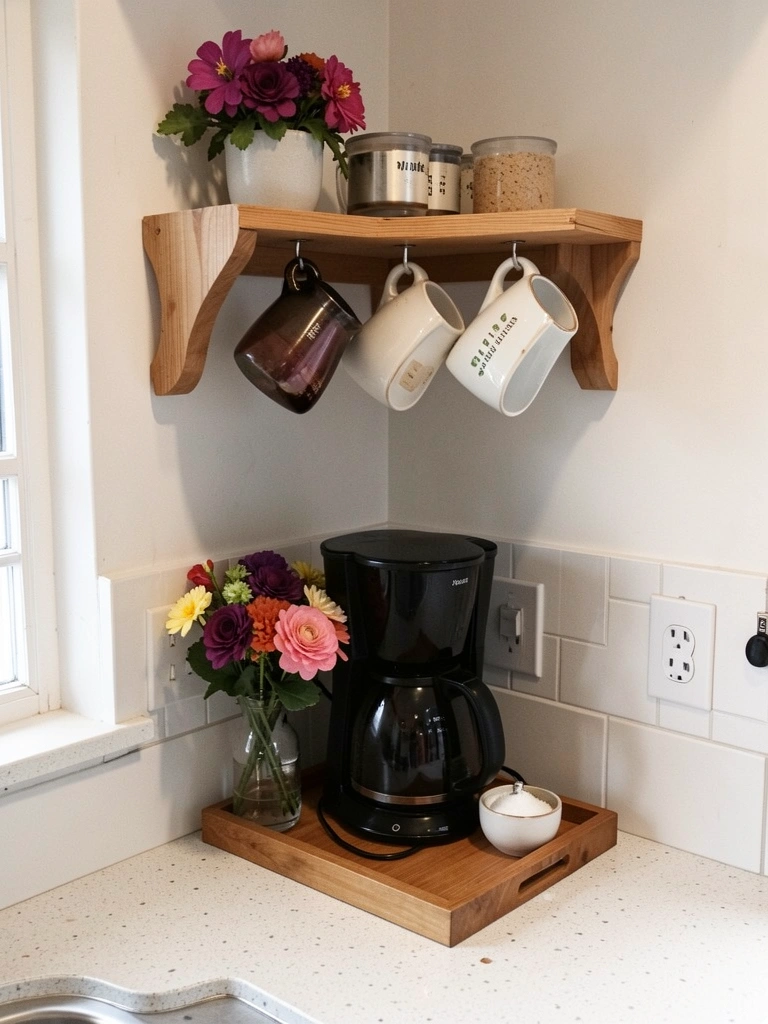
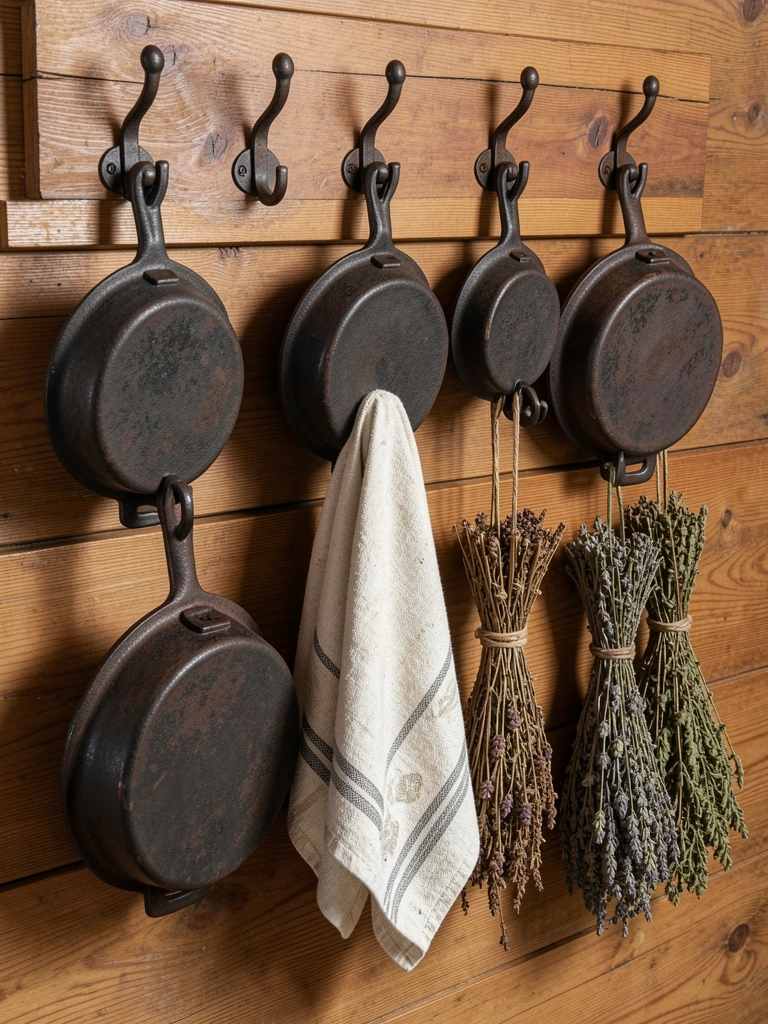
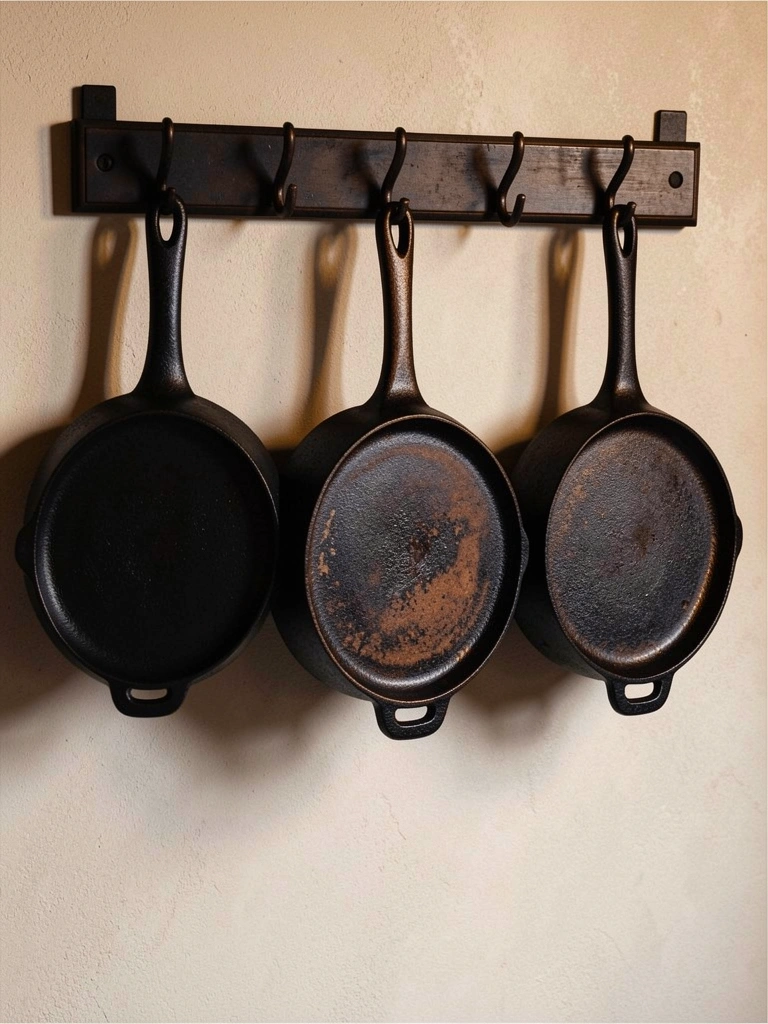
    7. Hang a Small Shelf for Mugs and Hanging Hooks

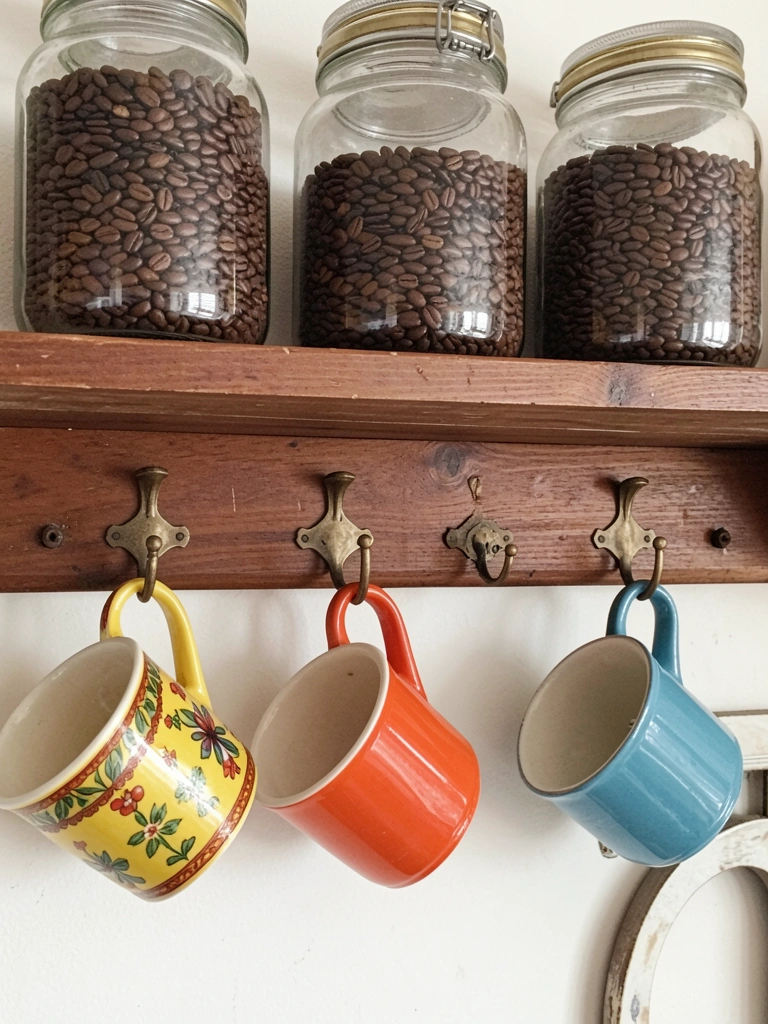
    Vertical storage is a space-saver and makes mugs part of the décor instead of hidden away.

    Mount a wooden shelf ($20–$50 from IKEA or thrift stores) 12–18 inches above your cart or table. Screw in brass or wooden hooks ($1–$3 each from hardware stores) underneath. Hang your favorite mugs and keep a few on top for everyday use.

    If you’re renting, use removable adhesive strips ($10 for a pack) rated for your shelf weight. Make sure everything is secure before hanging heavy ceramics.

    You’ve created a functional art installation that saves counter space and makes your setup feel gallery-worthy.

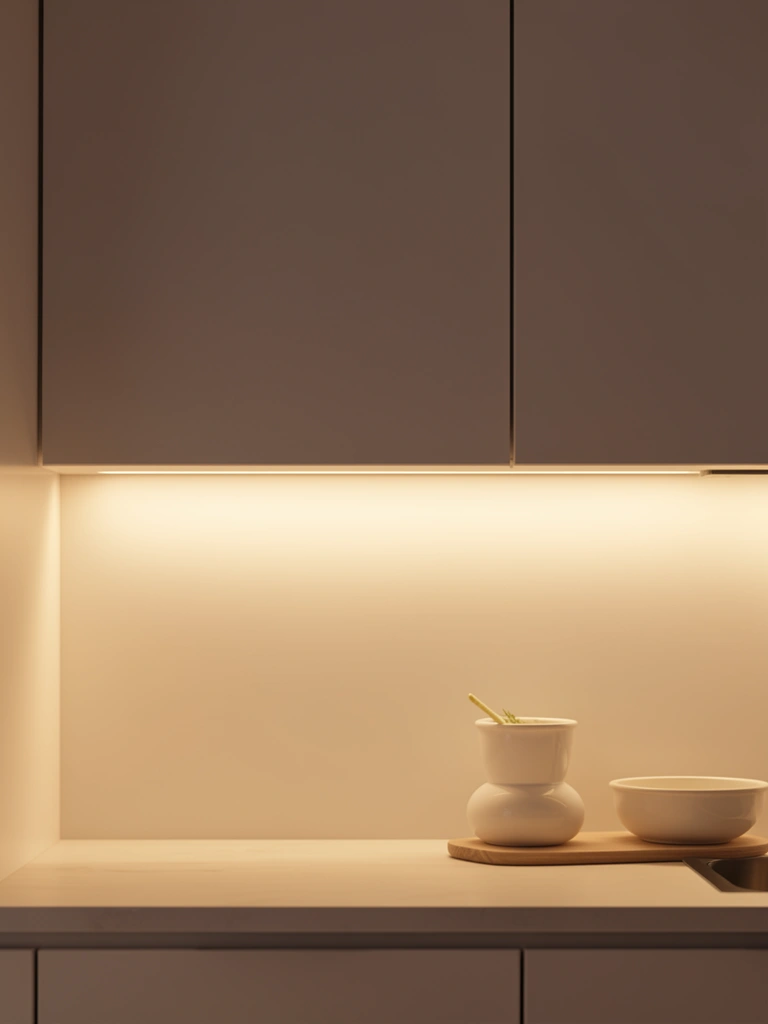
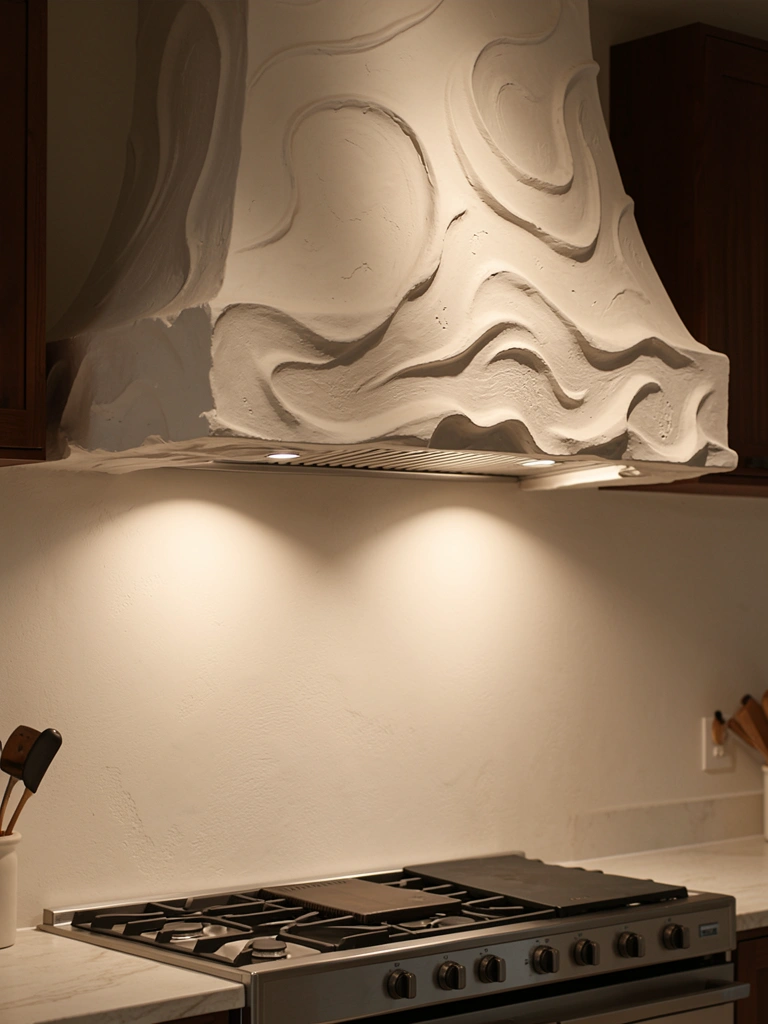
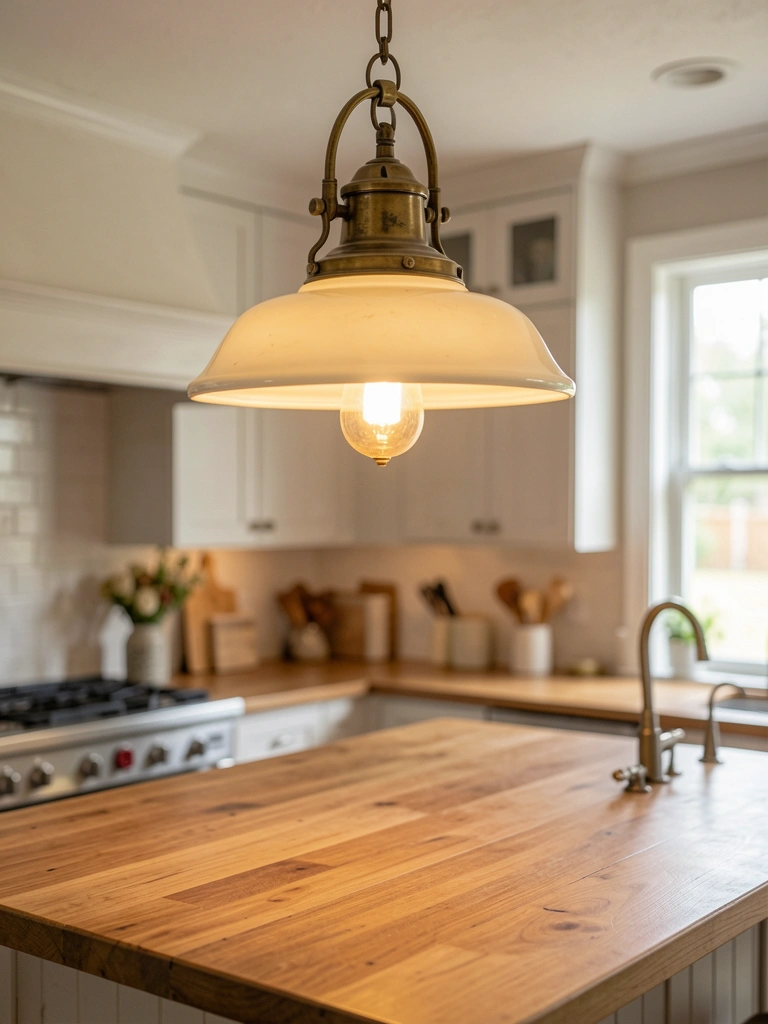
    8. Install Adjustable Lighting for Mood Setting

    Lighting affects how you feel and how your coffee tastes (yes, really—mood influences perception). Default overhead lights are often too harsh.

    Add a warm LED pendant light ($40–$80 from IKEA or Wayfair) or dimmable wall sconces ($30–$60 each). Install over your coffee station if it’s on a table or cart away from main lighting.

    Pro tip: Use warm white bulbs (2700K color temperature) instead of cool white—this creates the café ambiance you’re after. Plug into a smart bulb ($15–$25) if you want to automate morning lighting.

    Instant transformation: your space now has separate, intentional lighting that makes 6 a.m. feel civilized.

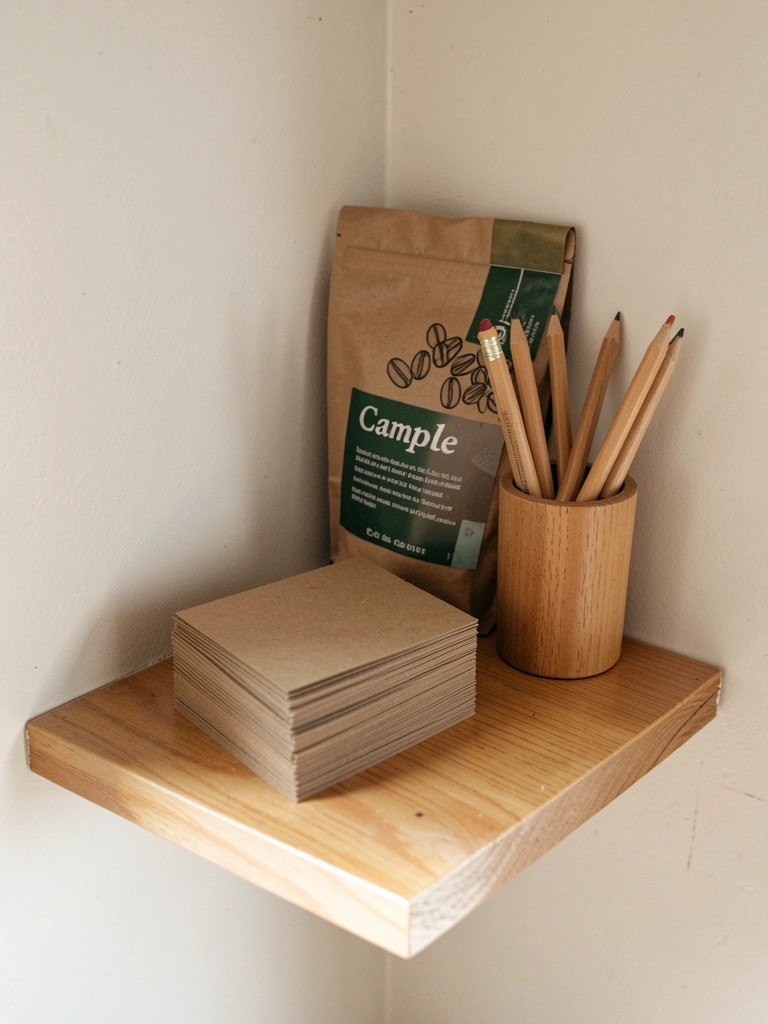
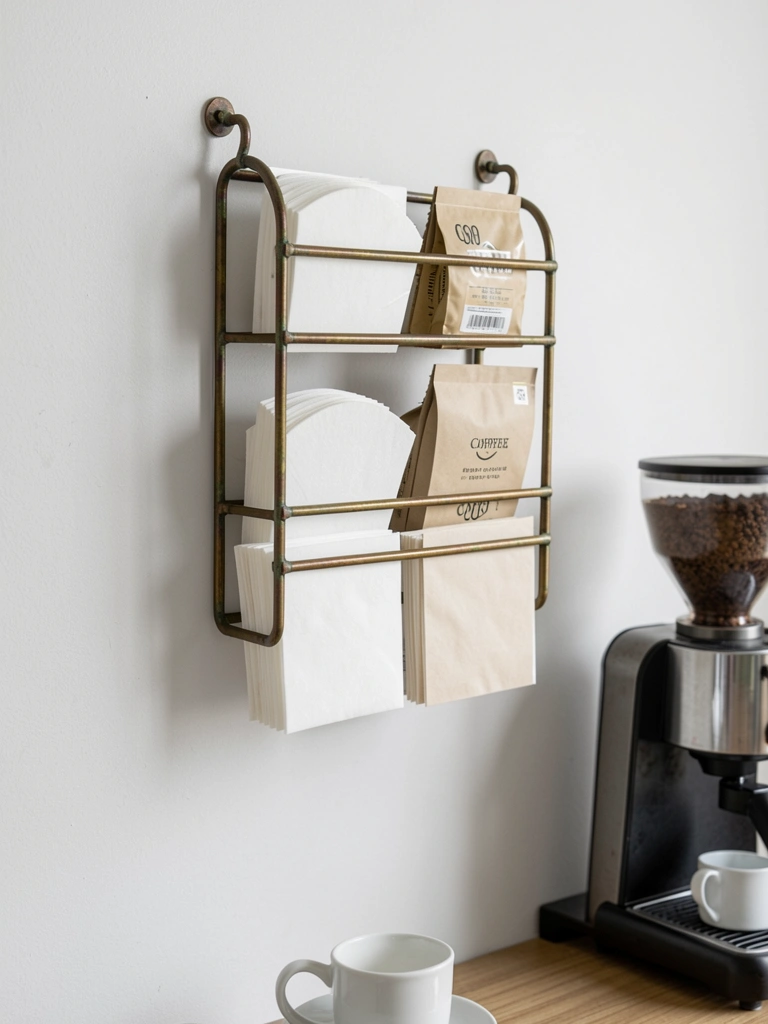
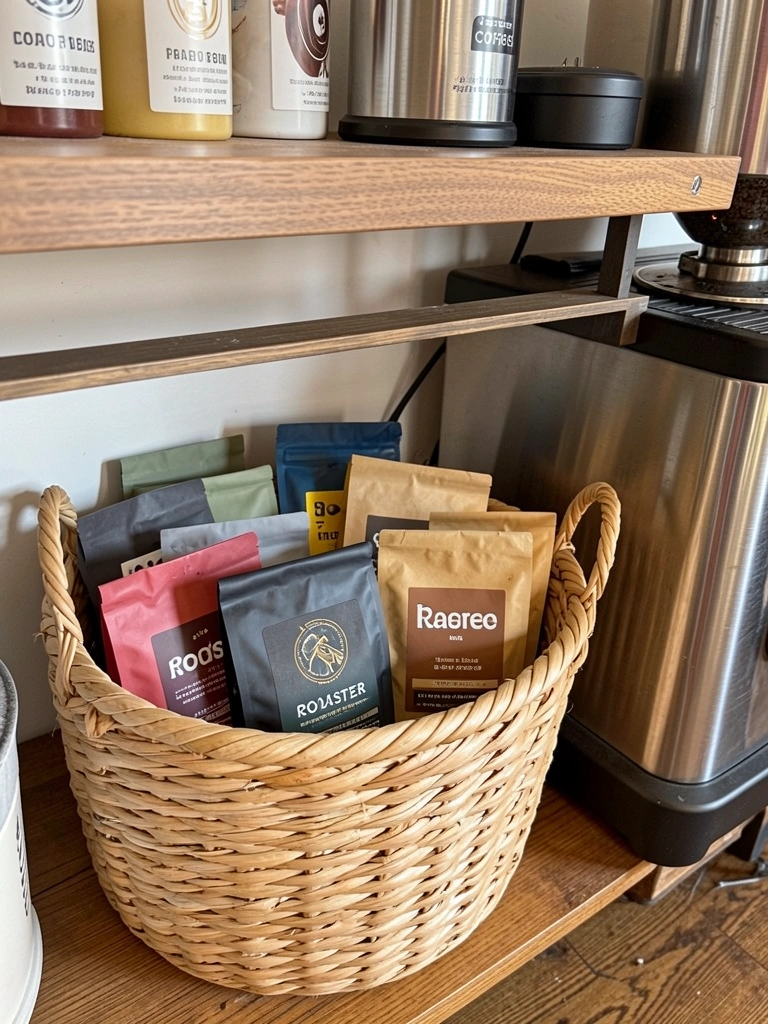
    9. Display Your Favorite Coffee Bags as Art

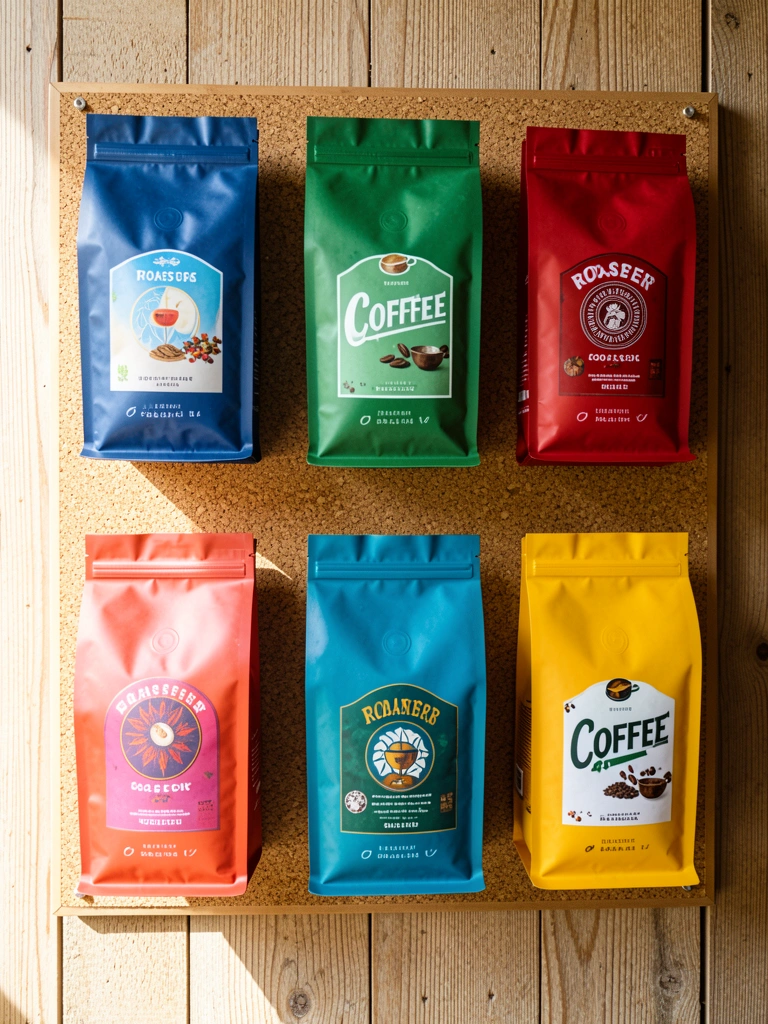
    Coffee bags are designed to be beautiful—treat them as décor instead of trash.

    Collect bags from local roasters and specialty suppliers. Display them on a cork board ($10–$20), a gallery wall using poster frames ($5–$15 each), or a magnetic strip ($15–$25). Rotate them seasonally or swap when you finish a bag.

    This doubles as a visual reminder of roasters you love and sparks conversations. Add small brass clips ($10 for a pack) to a wooden rod for a more sophisticated look.

    Your coffee corner becomes a rotating gallery that celebrates the craft and your taste.

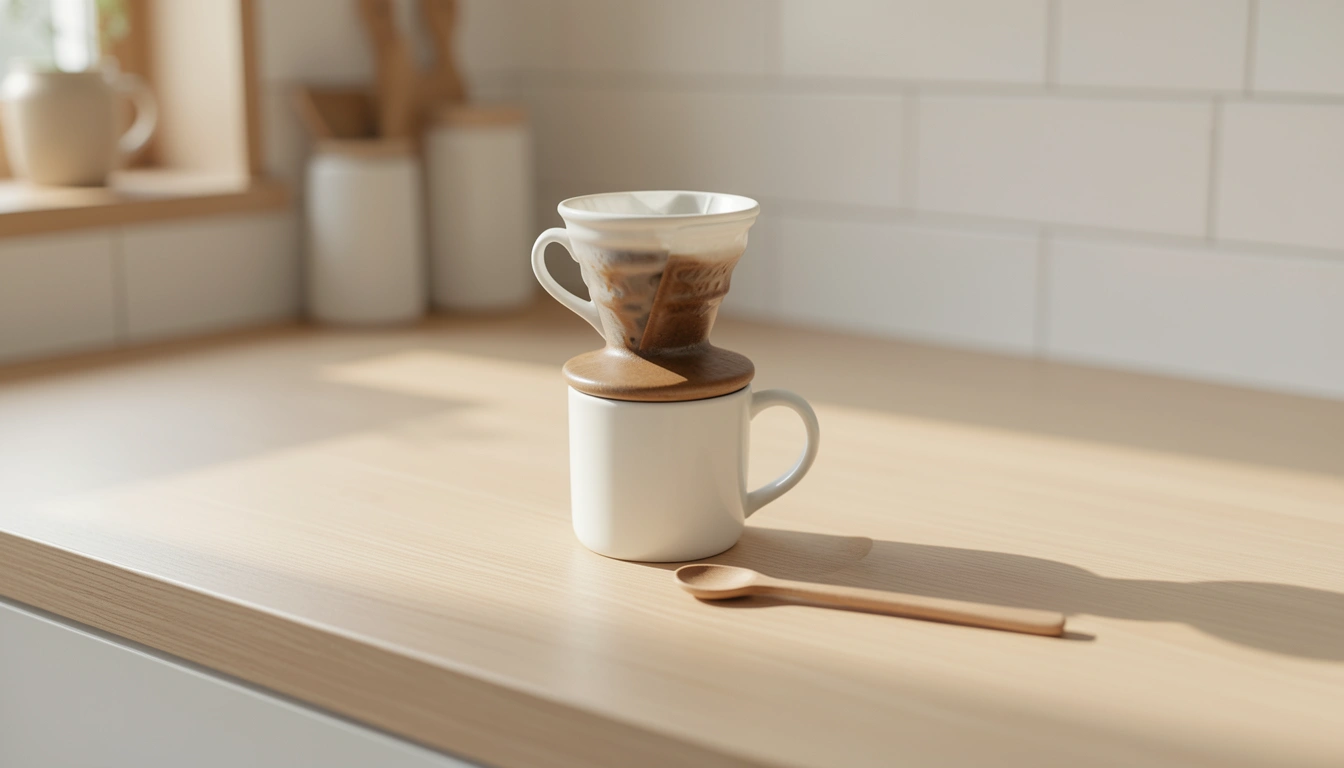
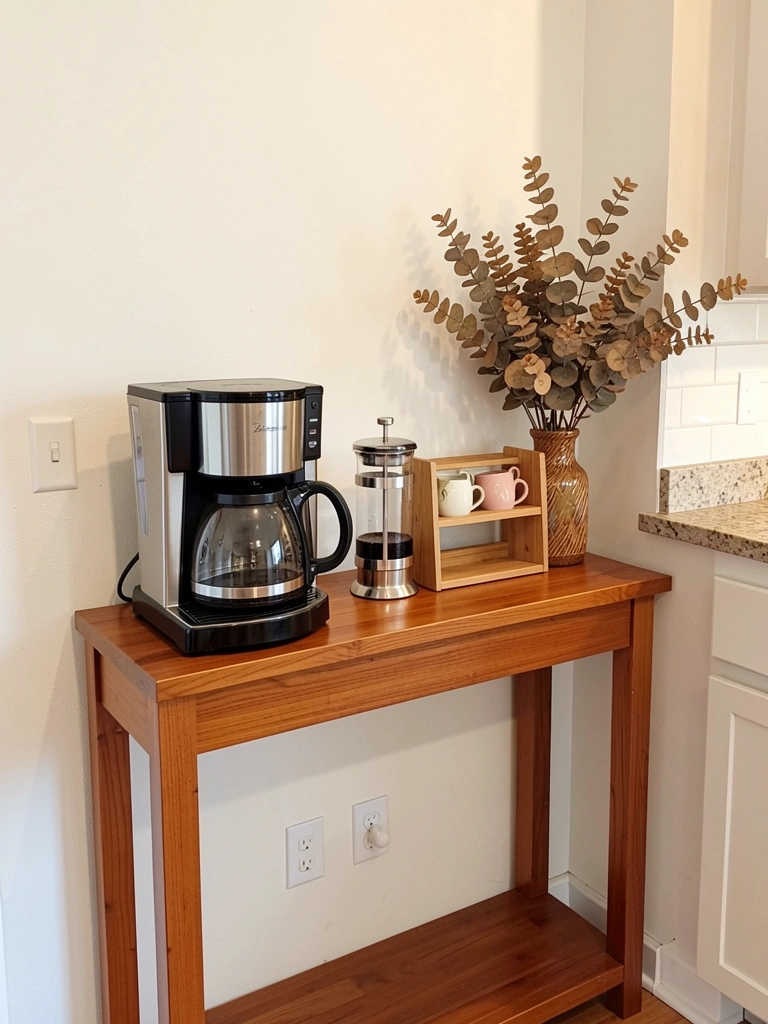
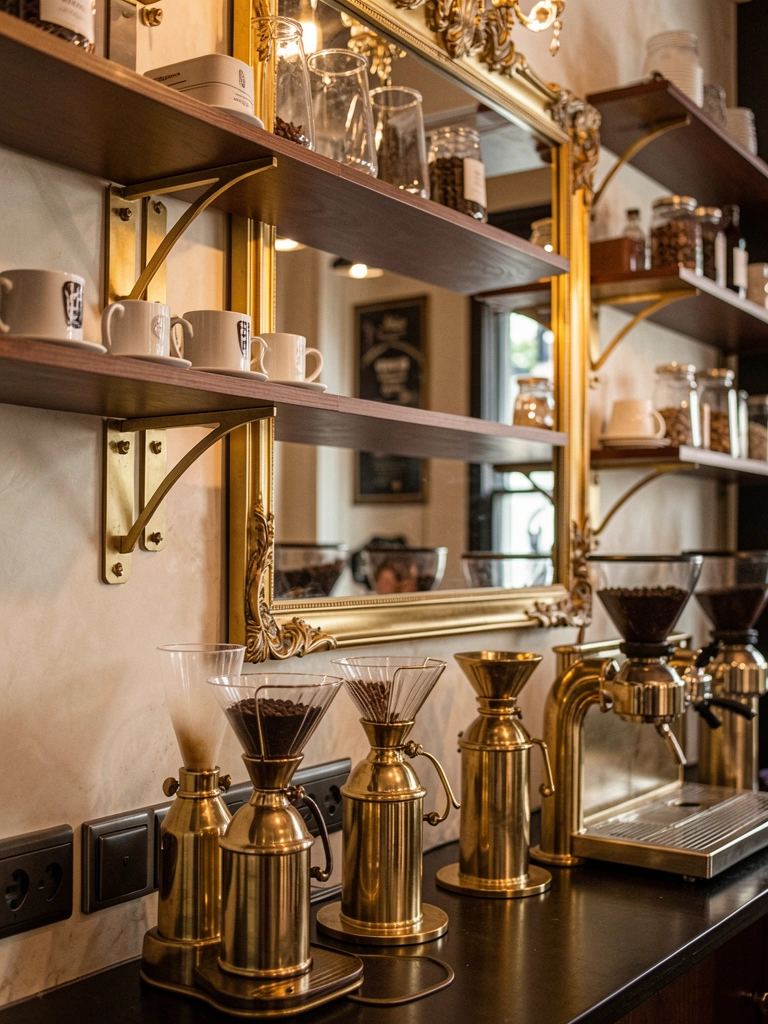
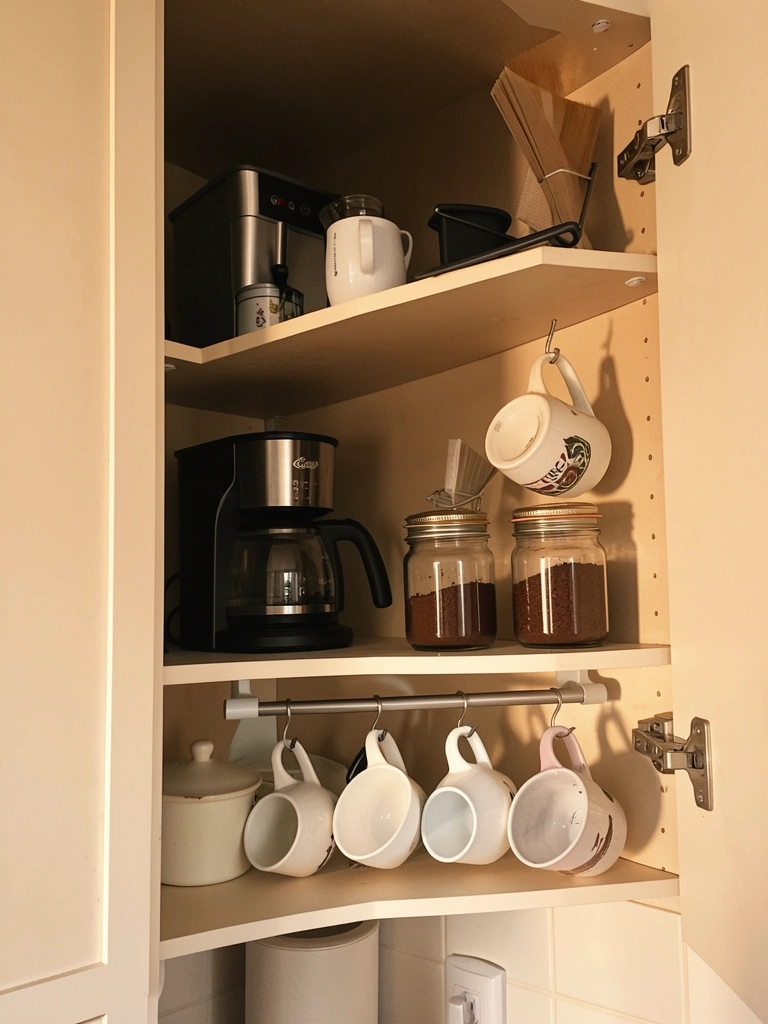
    10. Stock a Small Milk Frother for Café-Style Drinks

    Frothed milk changes everything—it’s the difference between regular home coffee and café-quality lattes and cappuccinos.

    Buy an electric milk frother ($20–$50 from Amazon or Target) or a handheld wand ($15–$30). The electric version is more user-friendly; the wand teaches you technique. Add it to your coffee station tray.

    Heat your milk to 150–155°F for the best foam. Use whole milk or oat milk (almond froths less successfully). Spend 60 seconds frothing; it’s meditative and satisfying.

    Suddenly you’re making flat whites and cappuccinos at home, which makes your morning ritual feel indulgent and special.

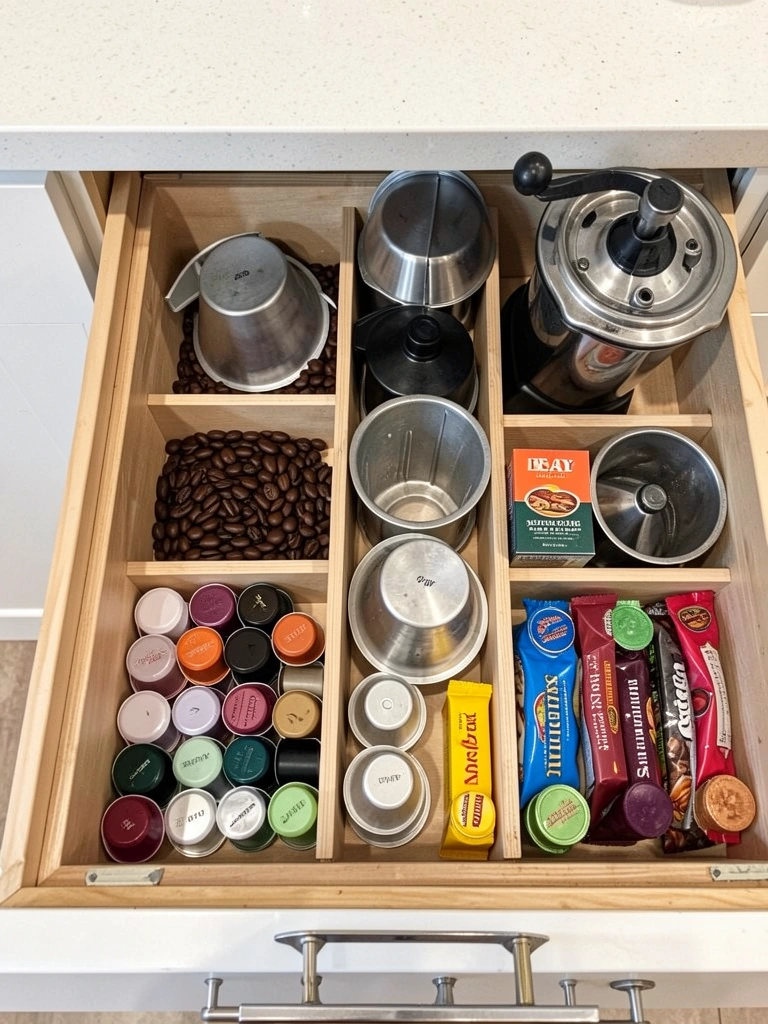
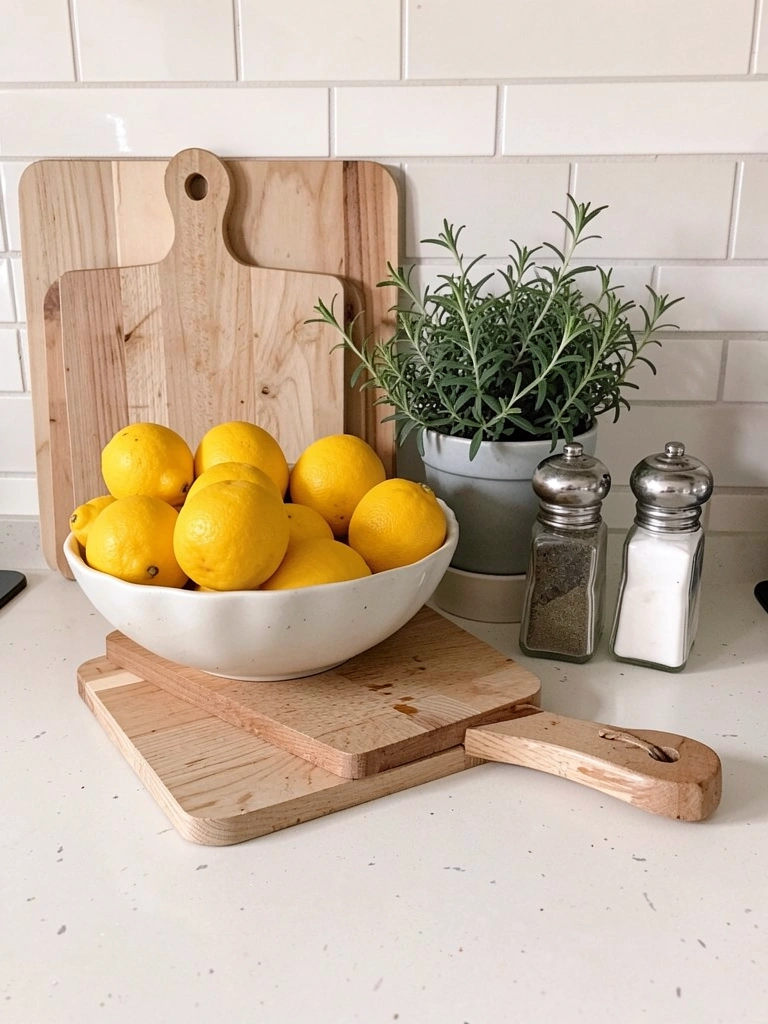
    11. Organize Sugar, Syrups, and Stirrers in Small Containers

    Loose supplies create visual chaos. Contained and labeled supplies feel intentional and café-like.

    Use small glass jars ($3–$8 from Target or Container Store) for sugar, honey, and cinnamon. Label them with adhesive labels ($5 for a pack) or hand-drawn tags tied with twine. Use a small ceramic or bamboo holder ($10–$20) for stirrers and spoons.

    Keep everything on a shallow wooden tray ($15–$30) that you can move if needed. This also prevents spills and contains the mess.

    Your station looks organized and intentional, and you spend less time hunting for supplies when you’re half-asleep.

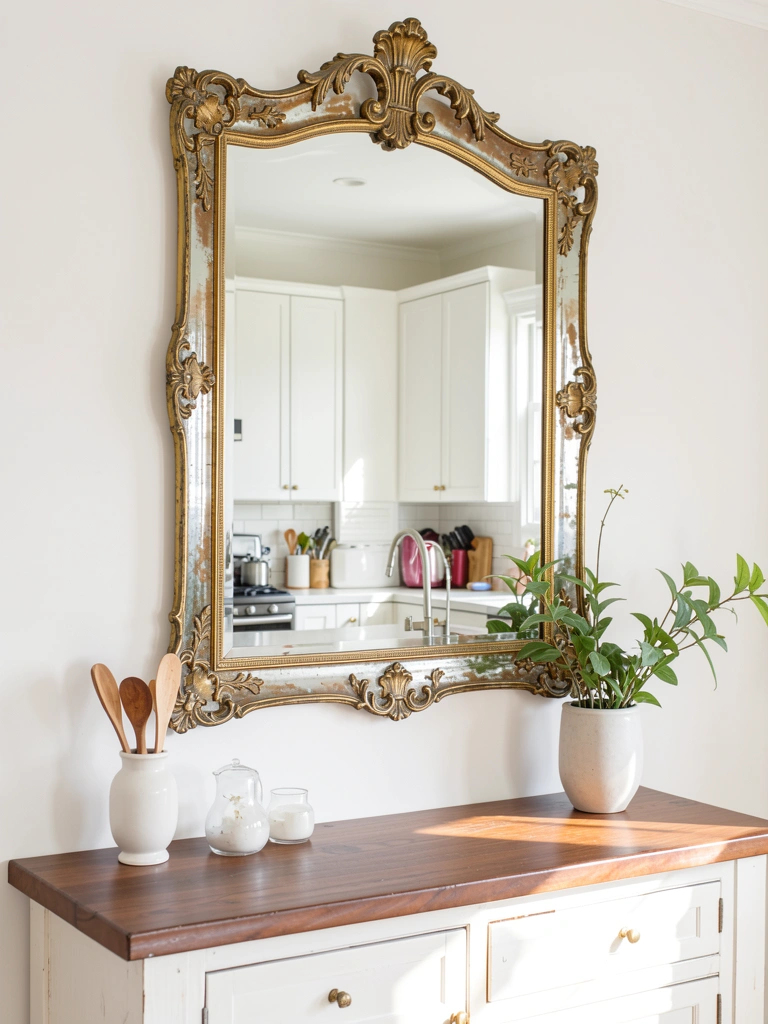
    12. Add a Small Mirror to Reflect Light and Expand Space

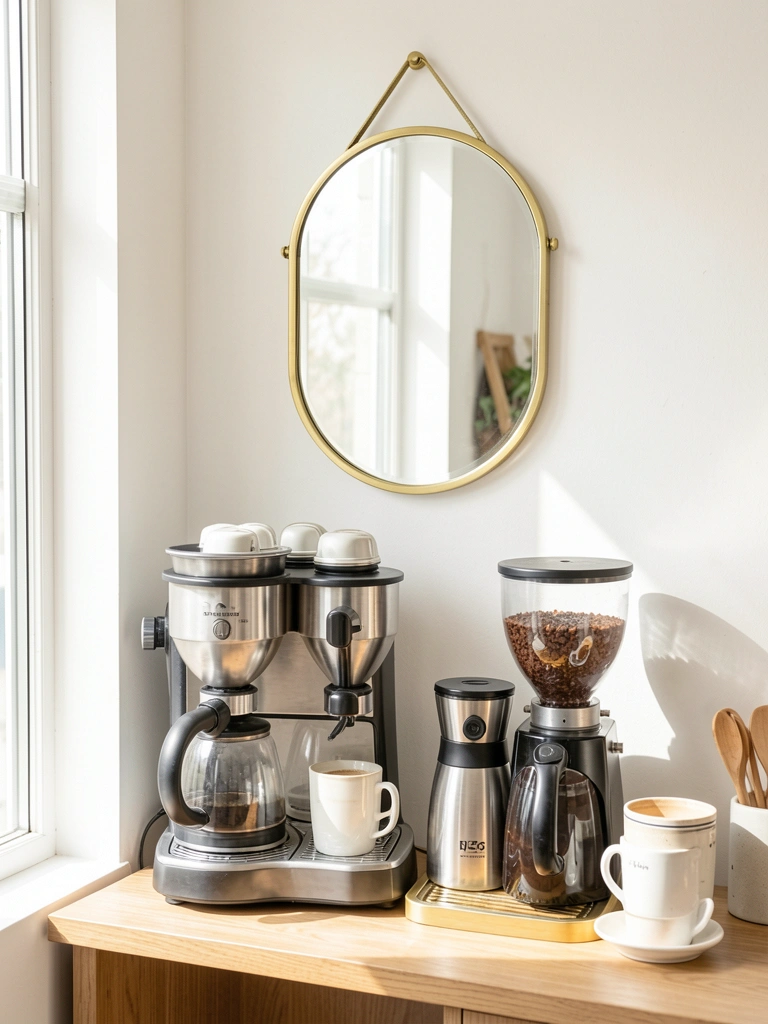
    Mirrors are a trick to make small spaces feel bigger and brighter—especially morning nooks that can feel dim.

    Hang a small decorative mirror ($20–$50 from IKEA, Wayfair, or thrift stores) on the wall behind your coffee station. Position it to reflect a window or light source if possible. Choose a frame color that matches your aesthetic—brass, wood, or painted metal.

    The mirror won’t just make space feel larger; it also bounces light onto your coffee, making it photograph better and feel more inviting.

    Suddenly your corner feels open and luminous instead of cramped and shadowy.

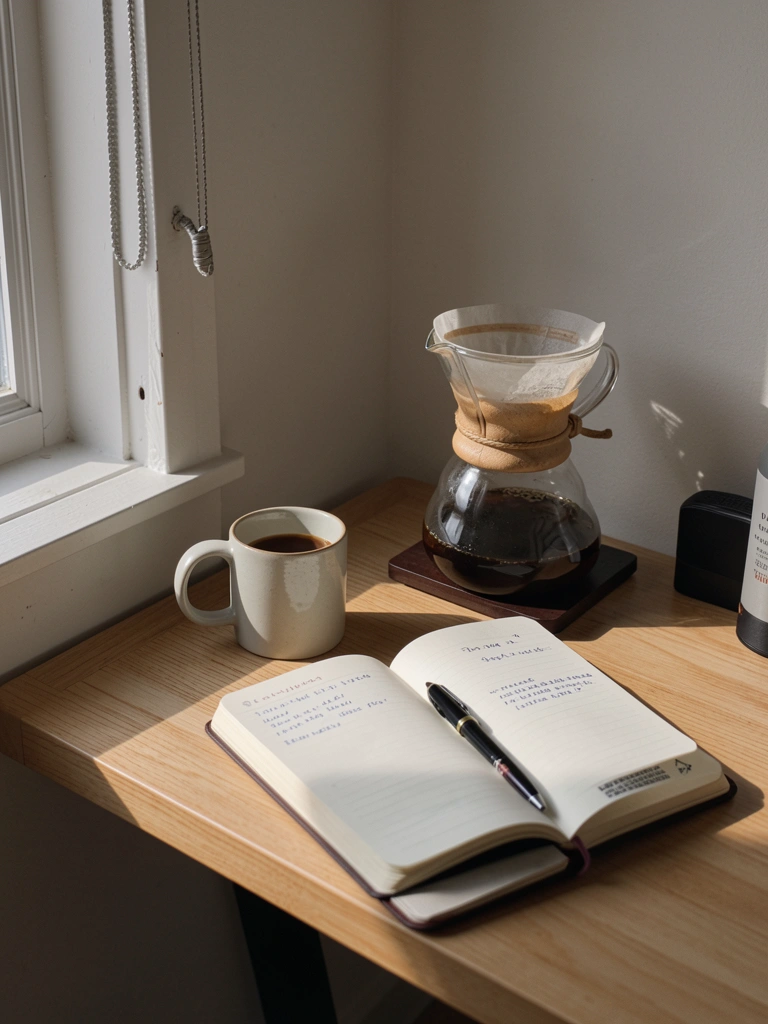
    13. Create a Reading Nook Shelf Above Your Coffee Station

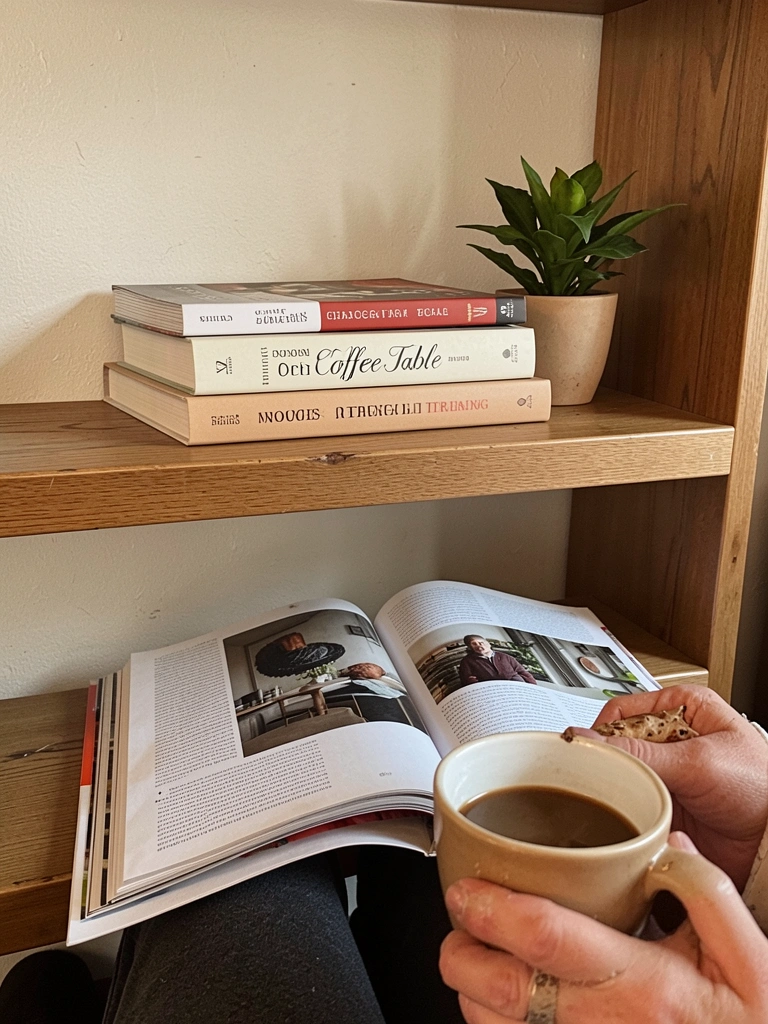
    People linger longer when there’s something to read—and reading paired with coffee is the whole vibe you’re building.

    Add a small floating shelf ($20–$40) at eye level if you’re sitting down with your coffee. Stock it with 2–3 coffee table books ($10–$25 each about coffee, travel, design) or a small magazine holder ($15–$30) with recent issues.

    Rotate books seasonally. This also serves as a subtle design element that shows thoughtfulness.

    You’ve created a reason to sit and savor instead of just grabbing and going.

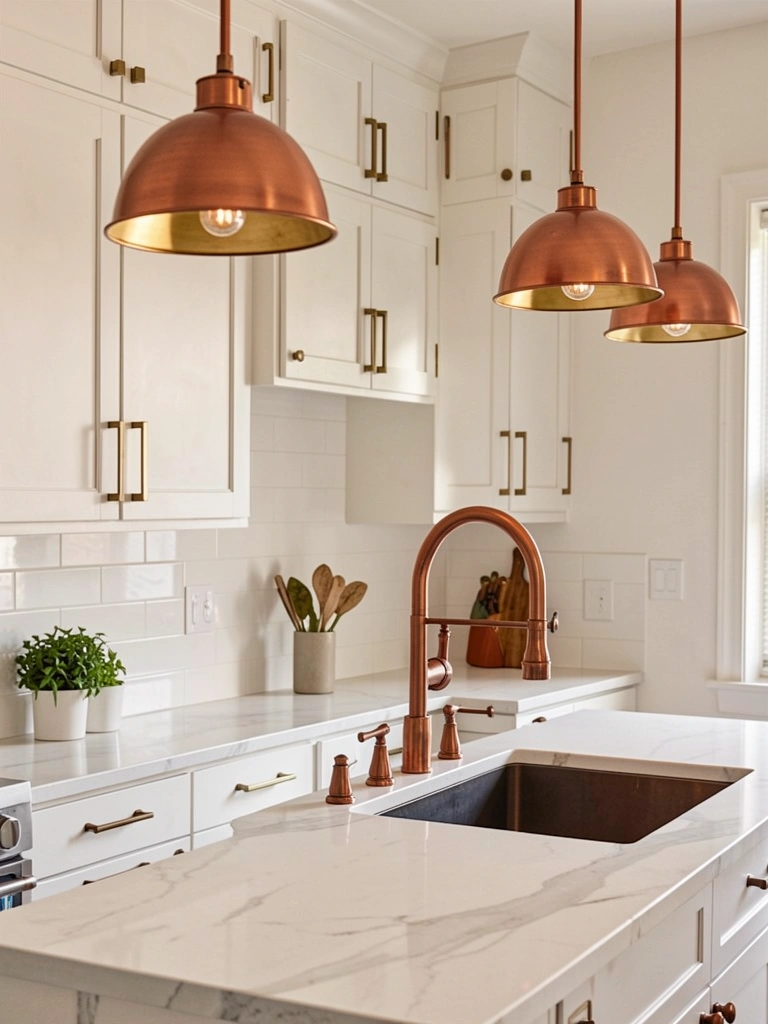
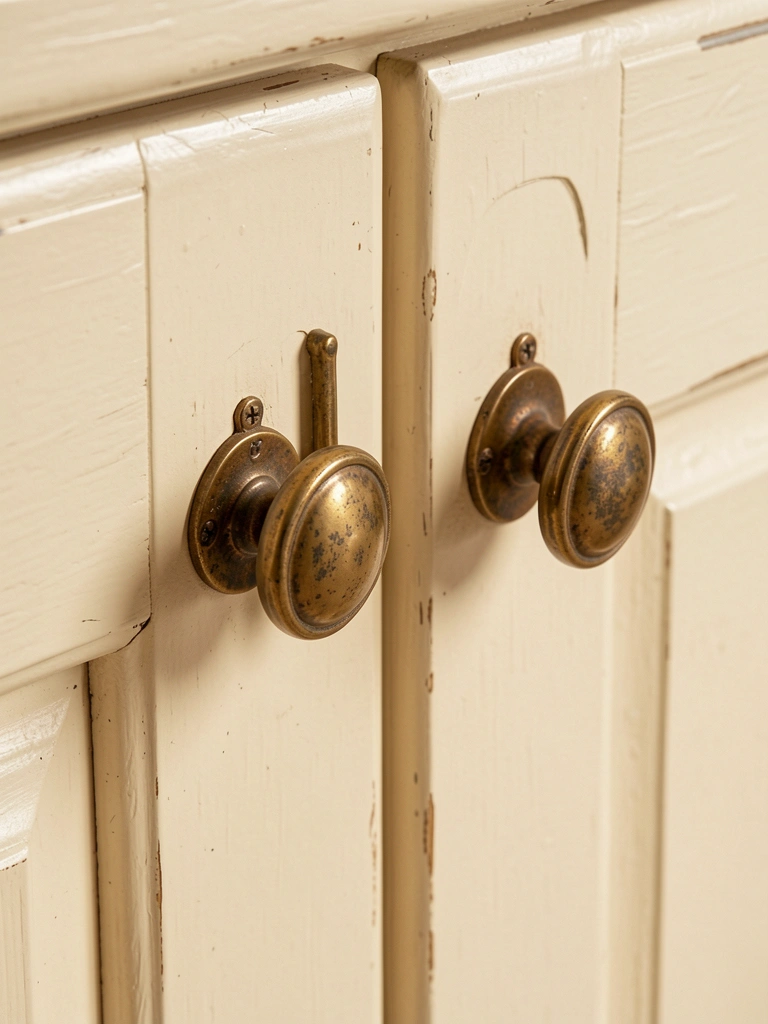
    14. Use Brass or Wood Accessories for Warm Aesthetics

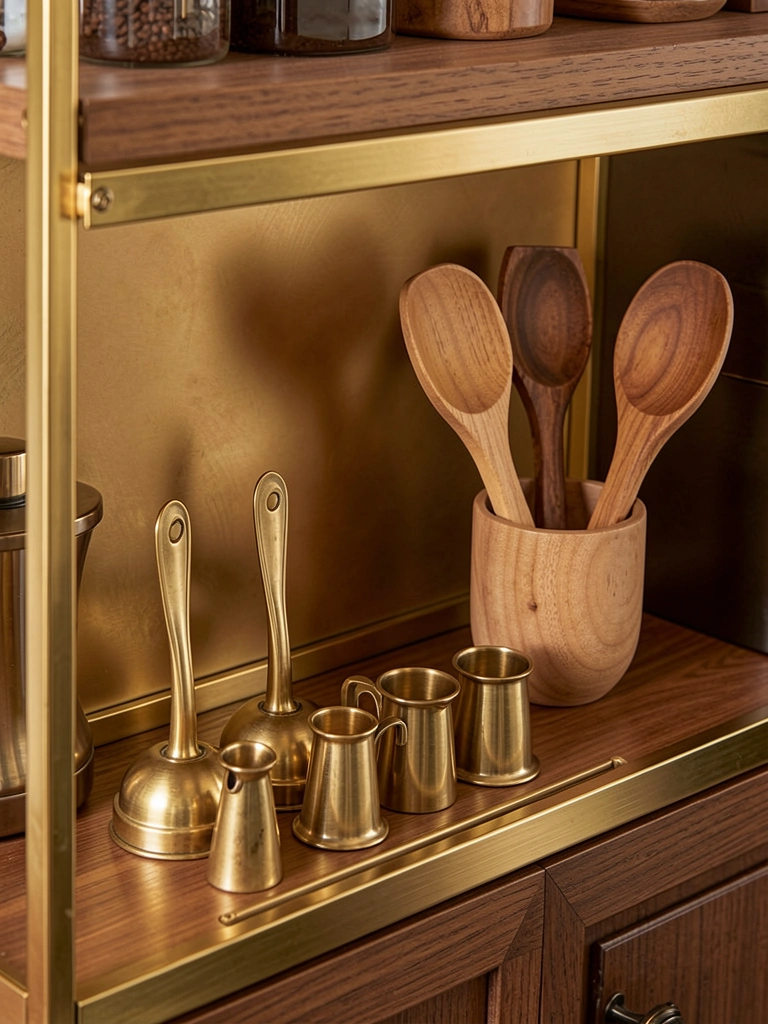
    Metal and wood choices shape your whole vibe. Brass and wood feel warm and collected; chrome feels cold and utilitarian.

    Swap out stainless steel measuring spoons for brass ($10–$15 from Anthropologie or Amazon). Use wooden utensil holders ($15–$25) instead of plastic. Choose brass hooks ($1–$3 each) for hanging mugs. These small swaps cost little but completely change the feel.

    Keep your palette consistent: choose either warm metals (brass, copper) or cool metals (silver), not mixed. Match wood tones too—light oak or dark walnut, not every shade combined.

    Suddenly your coffee station feels curated and intentional, not like a random collection of kitchen gadgets.

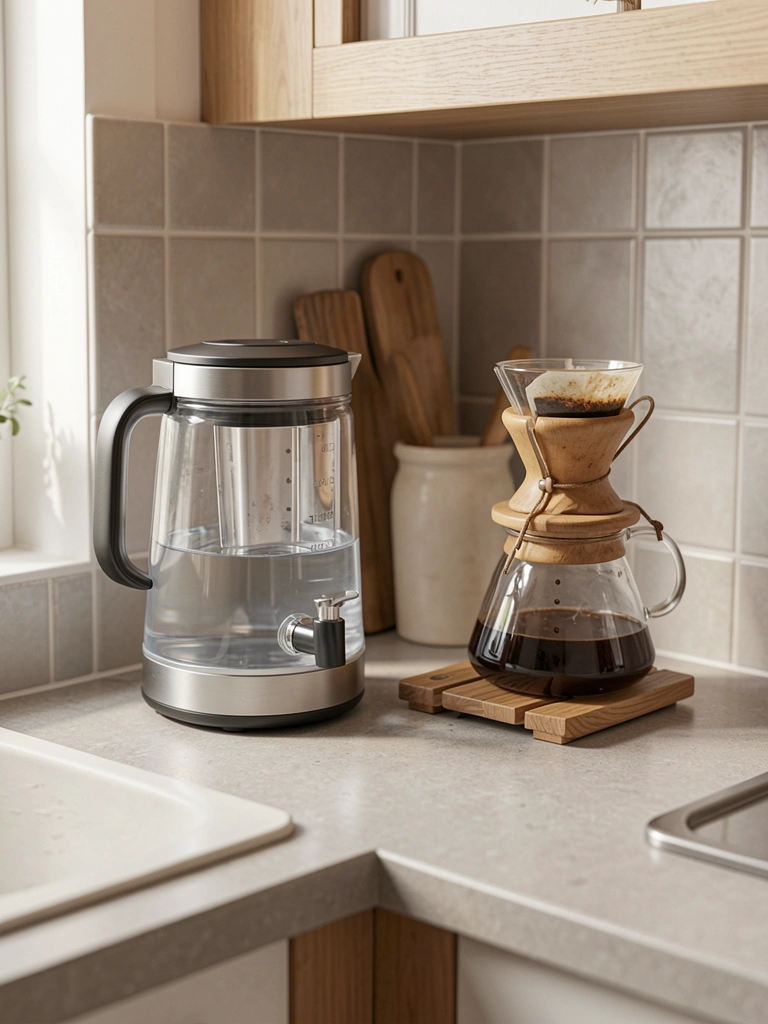
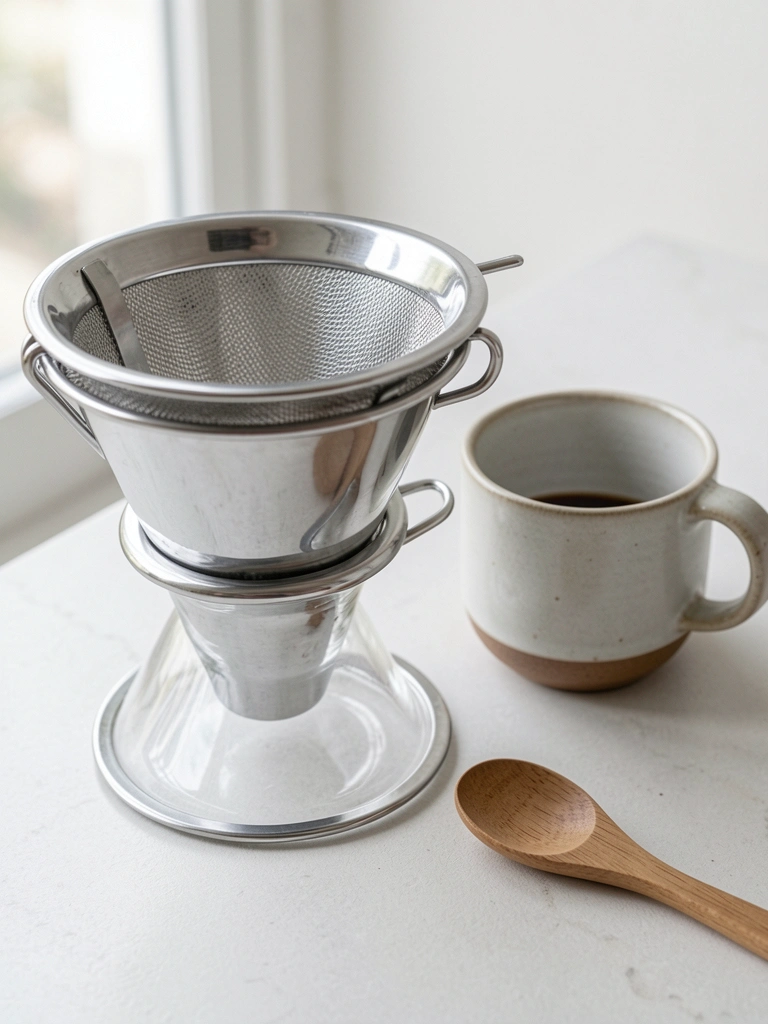
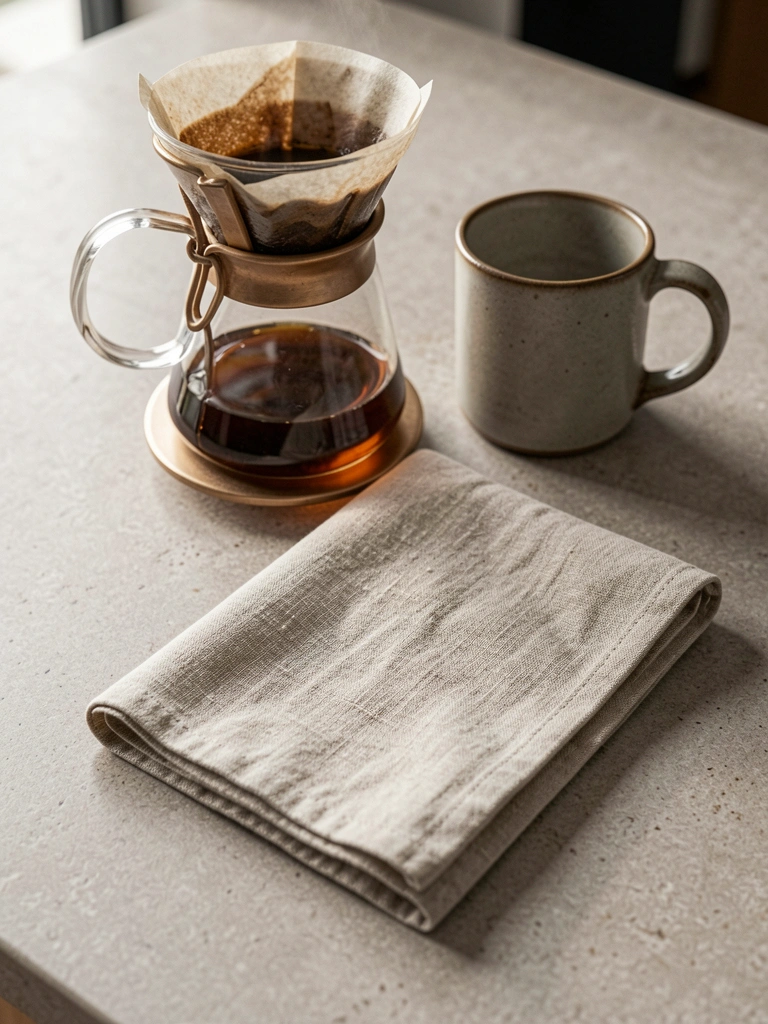
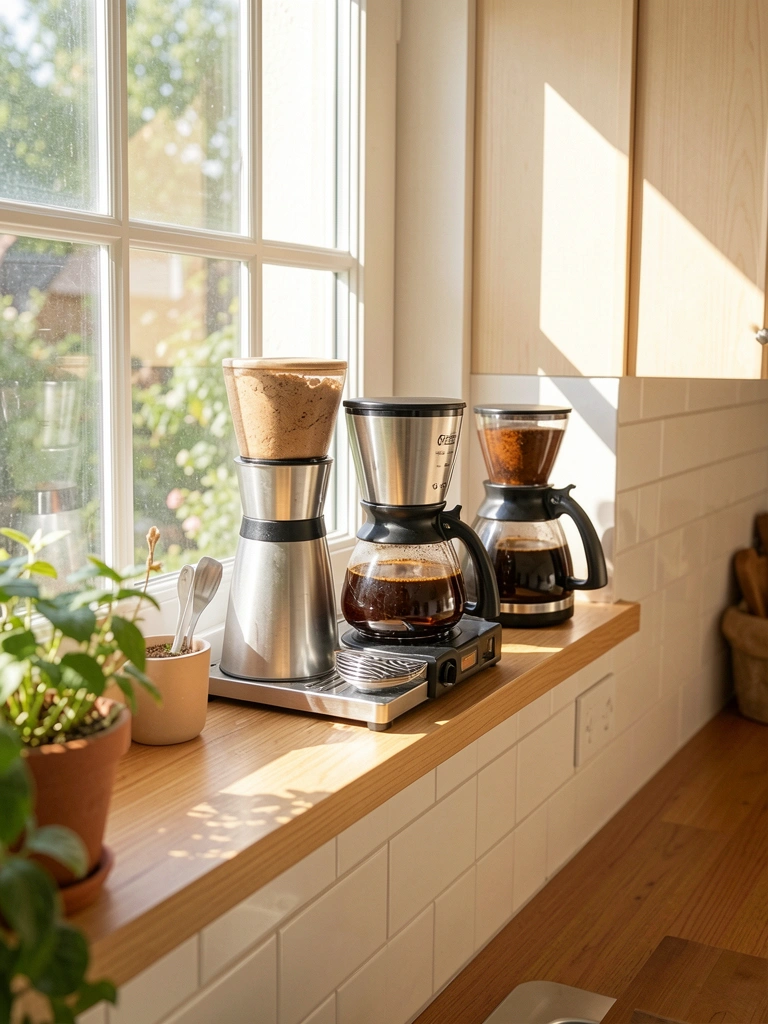
    15. Set Up a Water Station for Espresso Machine or Pour-Overs

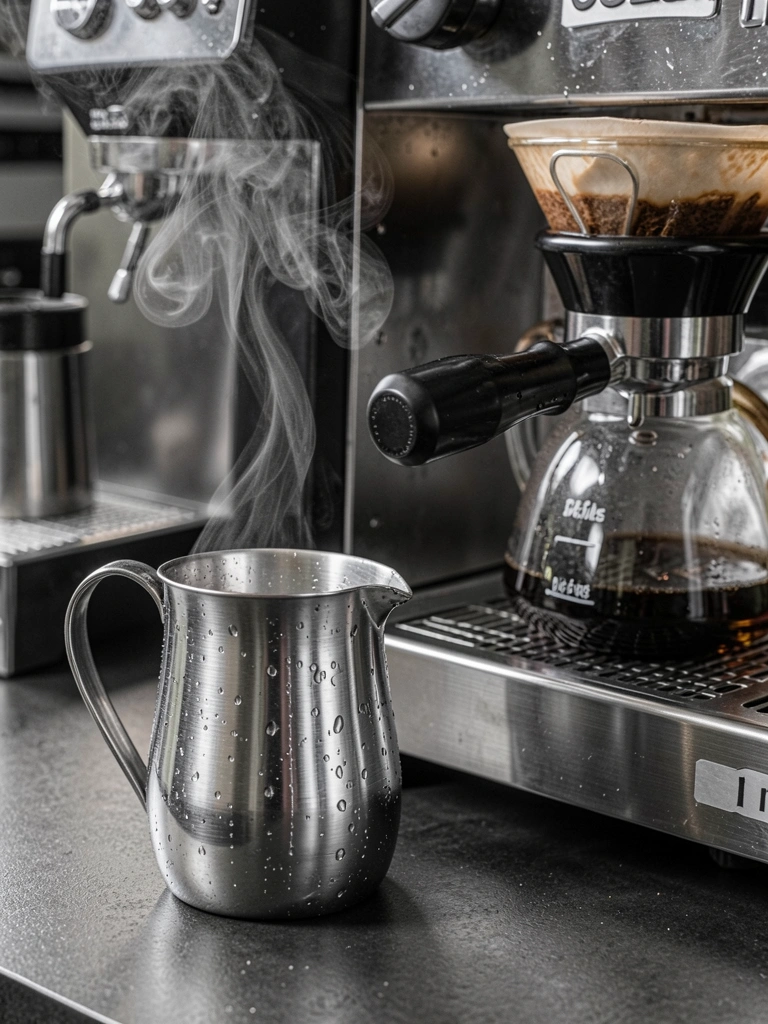
    Quality water matters for coffee taste, and having it prepped prevents fumbling in the morning.

    Keep a glass pitcher or stainless steel carafe ($15–$30) filled with filtered water next to your coffee setup. Refill it the night before. If you’re using an espresso machine, this also prevents the machine from running out of water mid-shot.

    Use a water filter pitcher like Brita ($25–$35) to reduce impurities if your tap water is hard. This is a small detail that serious coffee drinkers notice.

    You’ll stop mid-morning scramble to fill your machine, and your coffee will taste incrementally better.

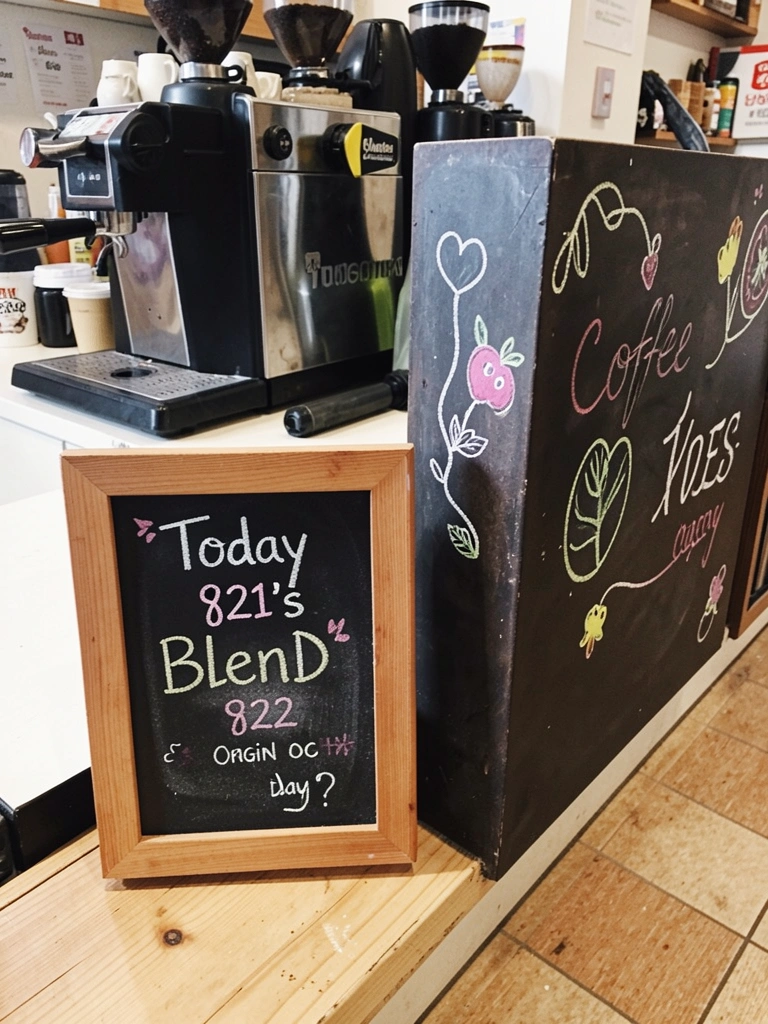
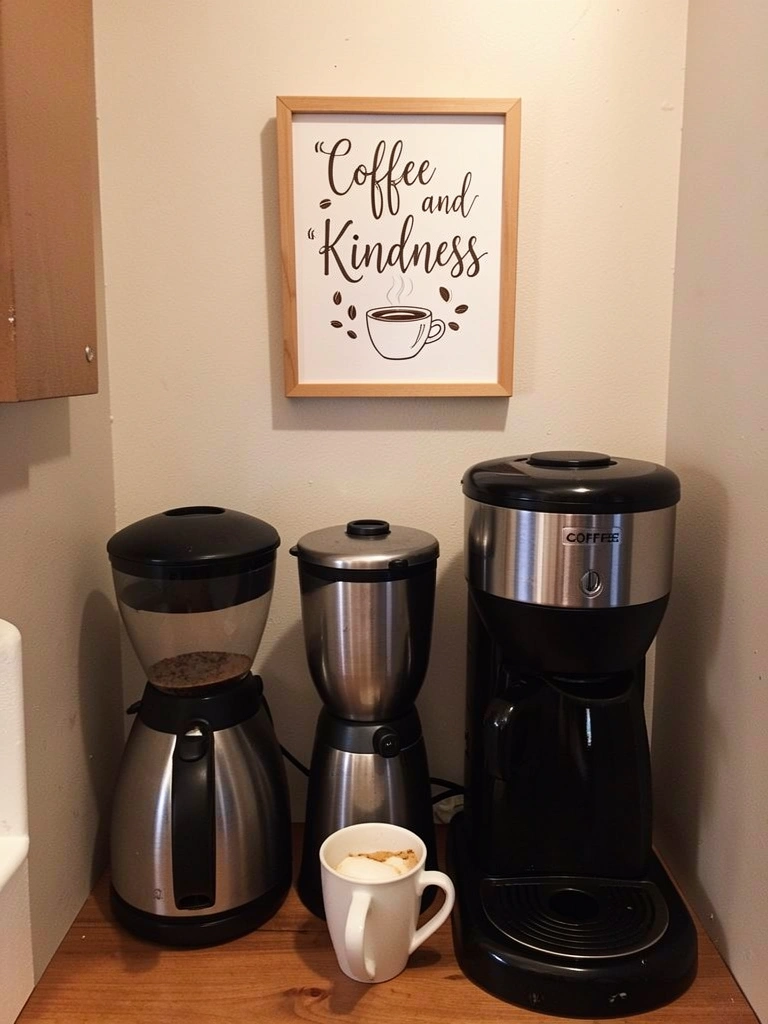
    16. Hang a Small Chalkboard for Daily Coffee Notes

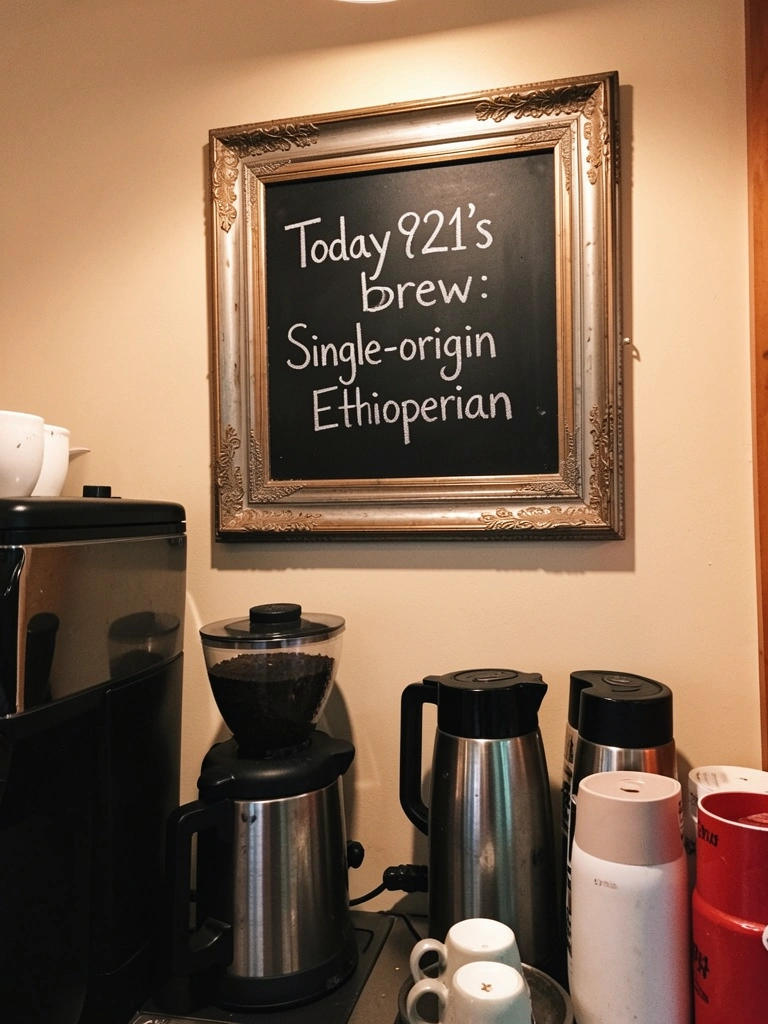
    A chalkboard is playful, personal, and gives your station character. Use it to track which beans you’re drinking or set daily intentions.

    Find a small framed chalkboard ($10–$25 from Target or Etsy) and hang it above your station. Use chalk markers ($5 for a pack) to write your daily roast, favorite pour-over method, or a coffee quote.

    Change it daily, weekly, or whenever you open a new bag. This small touch makes your space feel lived-in and intentional.

    Your coffee corner becomes a reflection of your mood and personality, not just an appliance display.

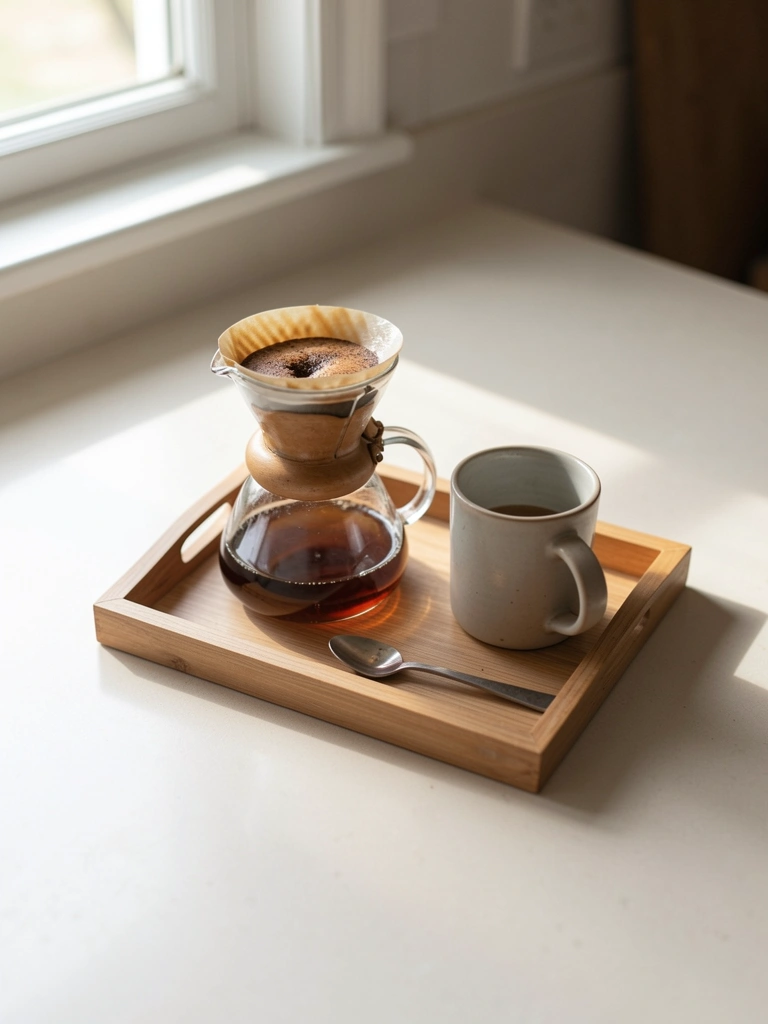
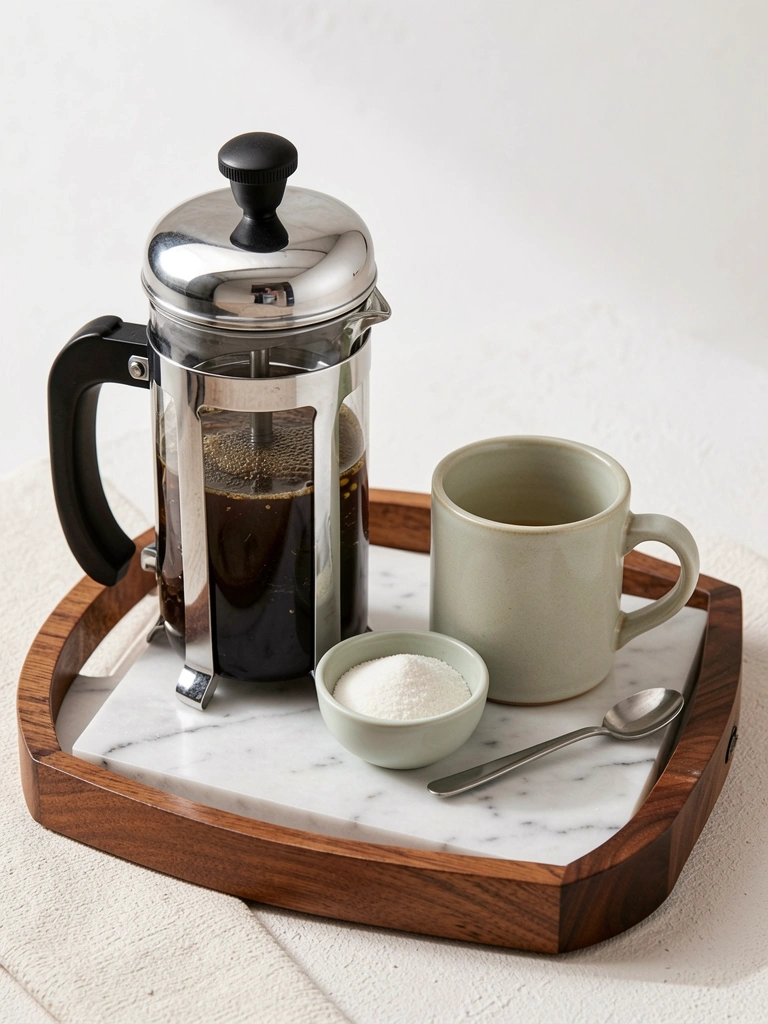
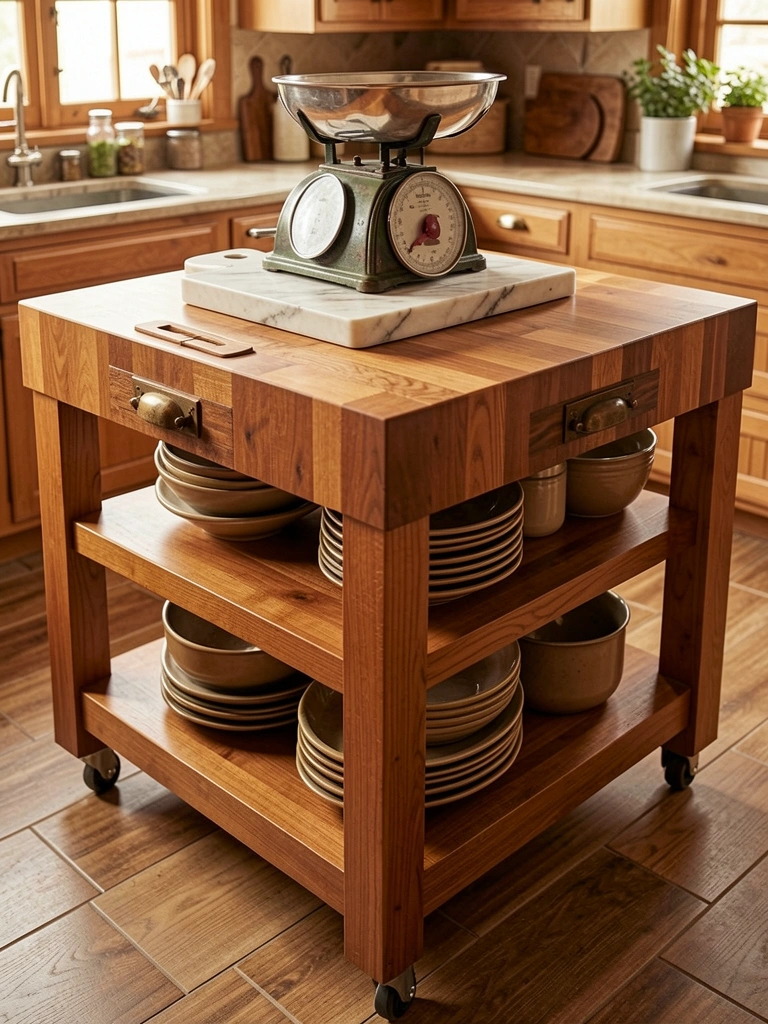
    17. Choose a Wooden Countertop Tray to Corral Everything

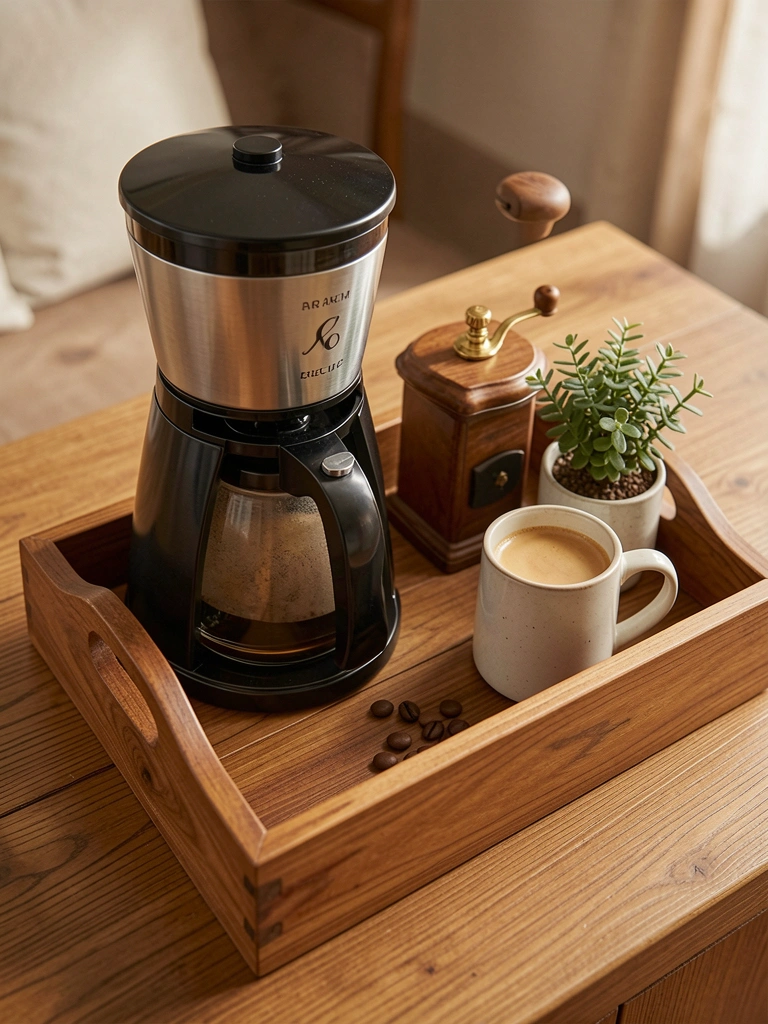
    A large wooden tray creates a visual boundary, keeps things organized, and lets you move your whole setup if needed (perfect for renters).

    Look for a wooden serving tray ($20–$50 from IKEA, Wayfair, or thrift stores) that’s 18–24 inches long. Use it to corral your grinder, maker, and daily supplies on your table or cart.

    The tray serves three purposes: it organizes, it contains spills, and it lets you grab everything to move to your patio or living room if you want a change of scenery.

    Suddenly your coffee station looks like a styled still life instead of a random collection of stuff.

    18. Add Task Lighting with a Small Desk Lamp

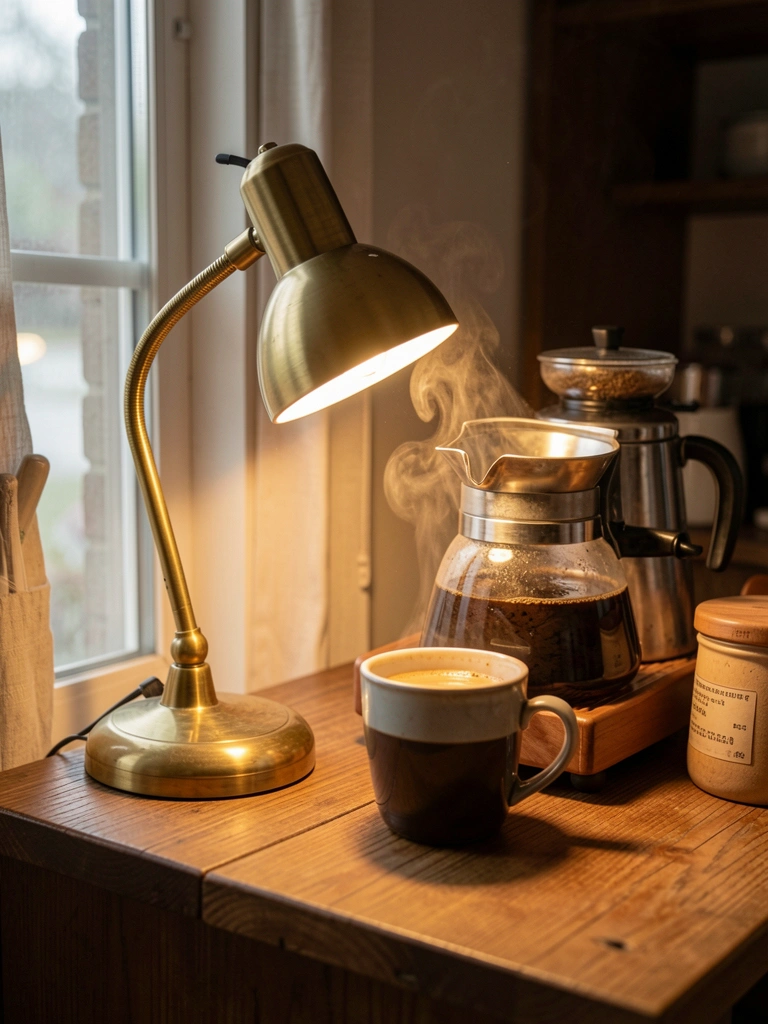
    If your coffee station doesn’t get great natural light, a small task light changes everything—especially for early mornings when main lights feel too harsh.

    Choose a small desk lamp ($25–$60 from IKEA, Target, or West Elm) with a warm bulb. Place it on your cart or table just behind your brewing area. Make sure it has a dimmer or a low-light setting for 6 a.m. mood.

    This small light also draws the eye to your setup, making it a visual focal point in your kitchen or nook.

    Your morning ritual becomes cozier and more inviting, even when it’s still dark outside.

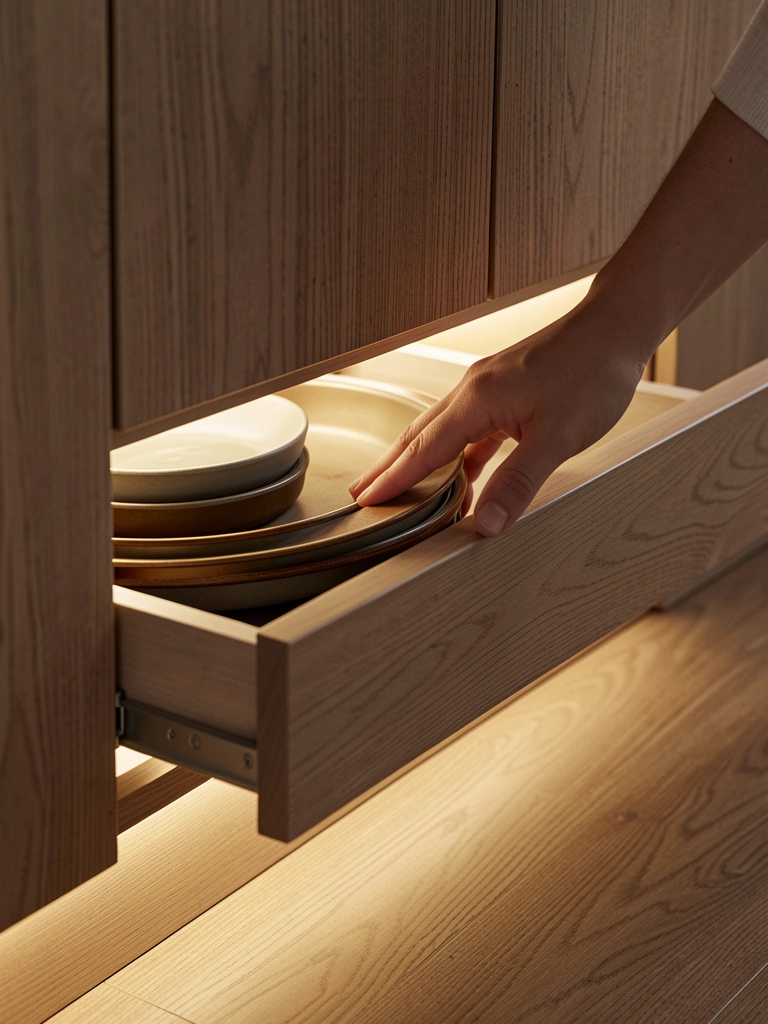
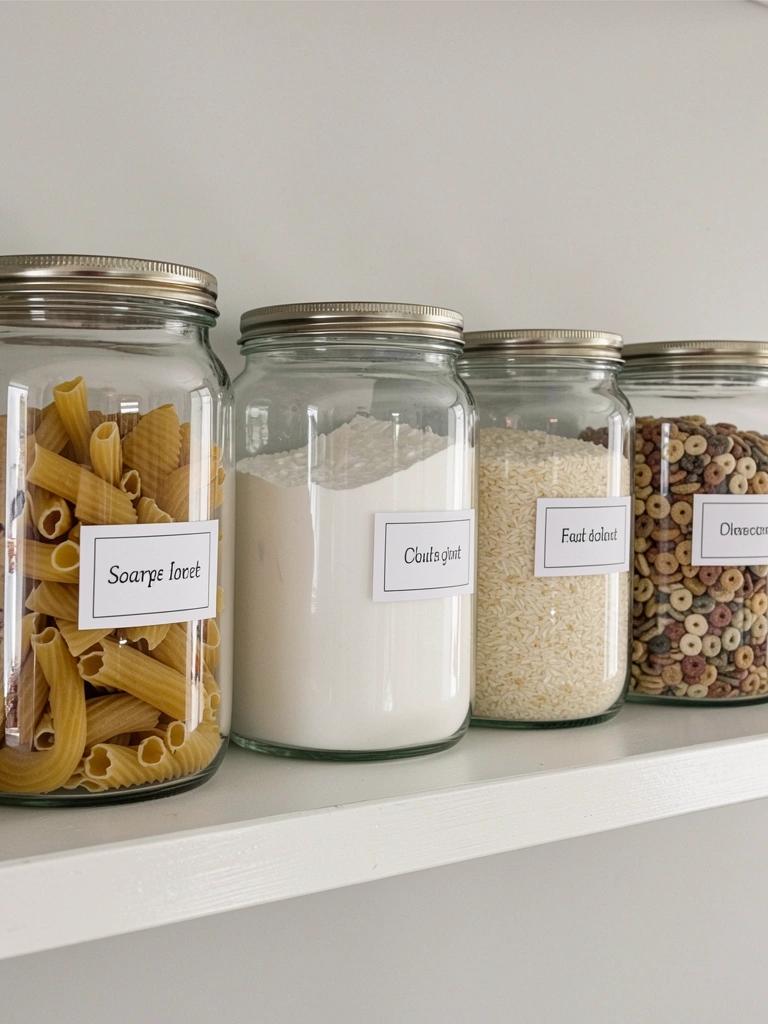
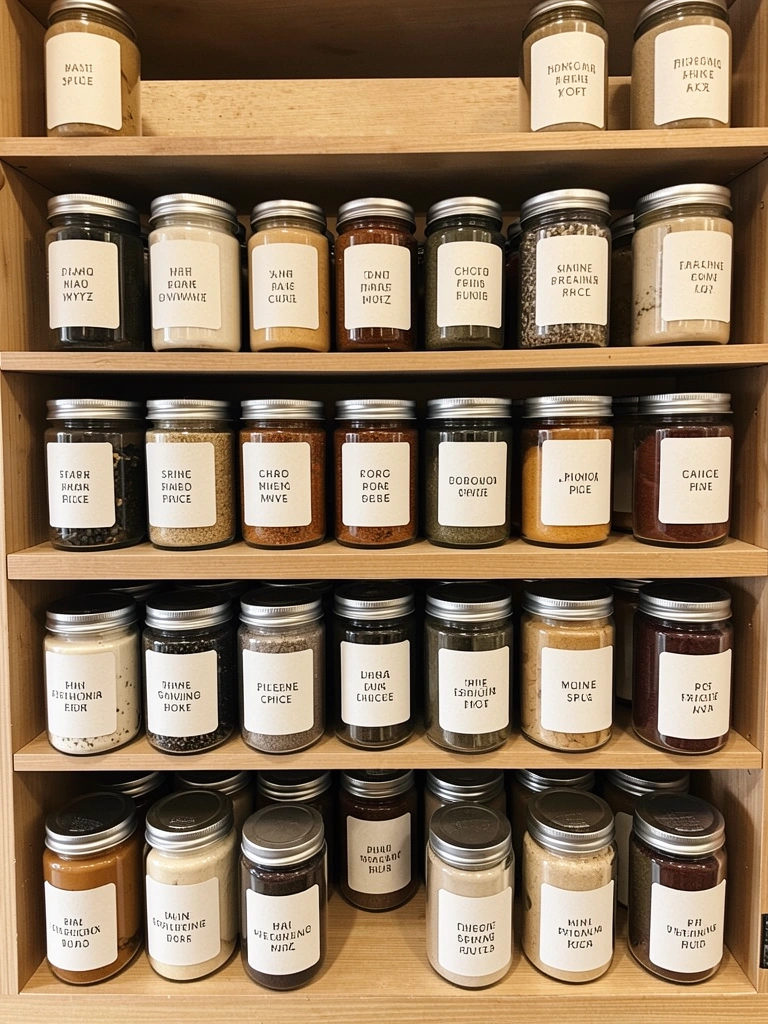
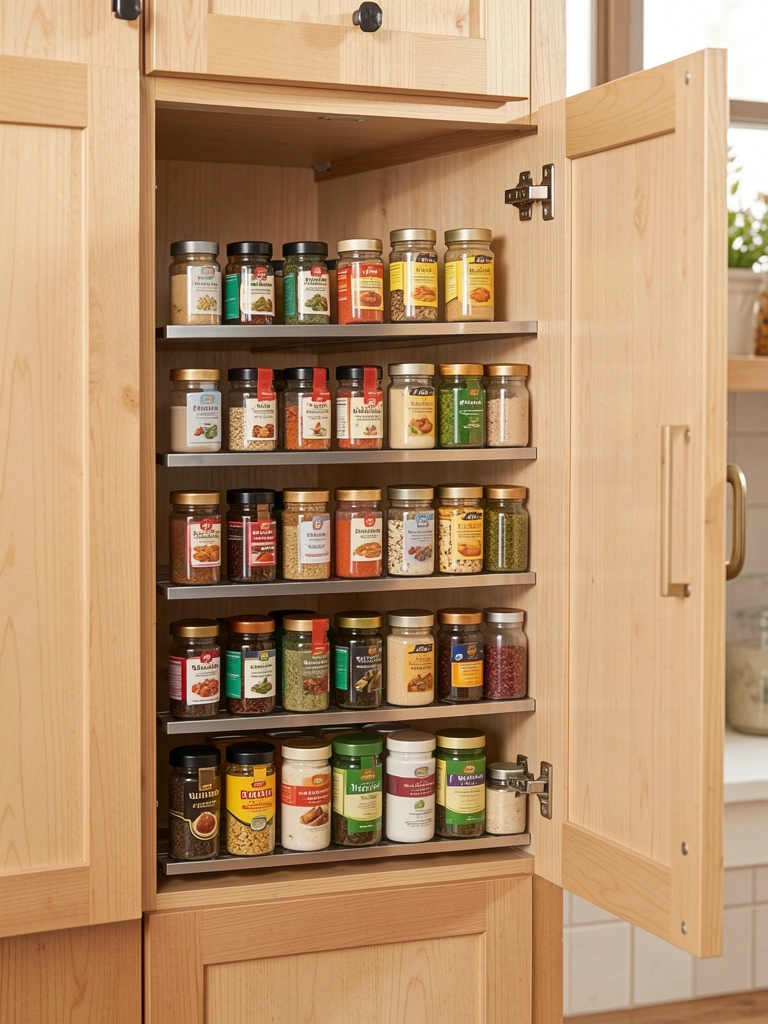
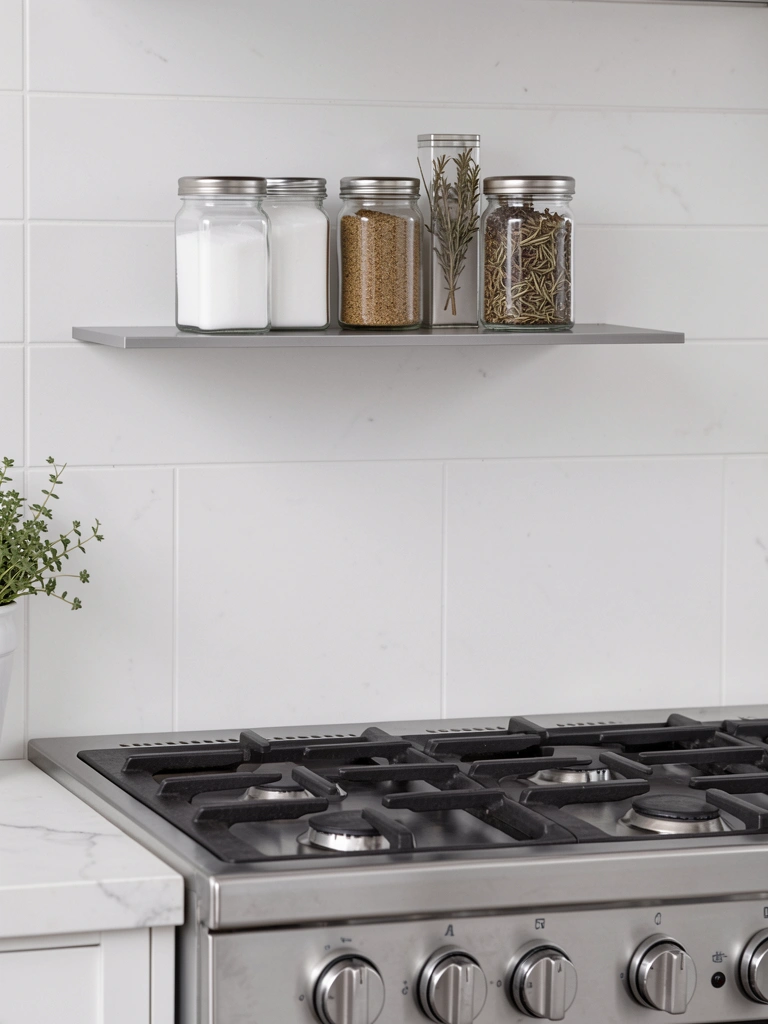
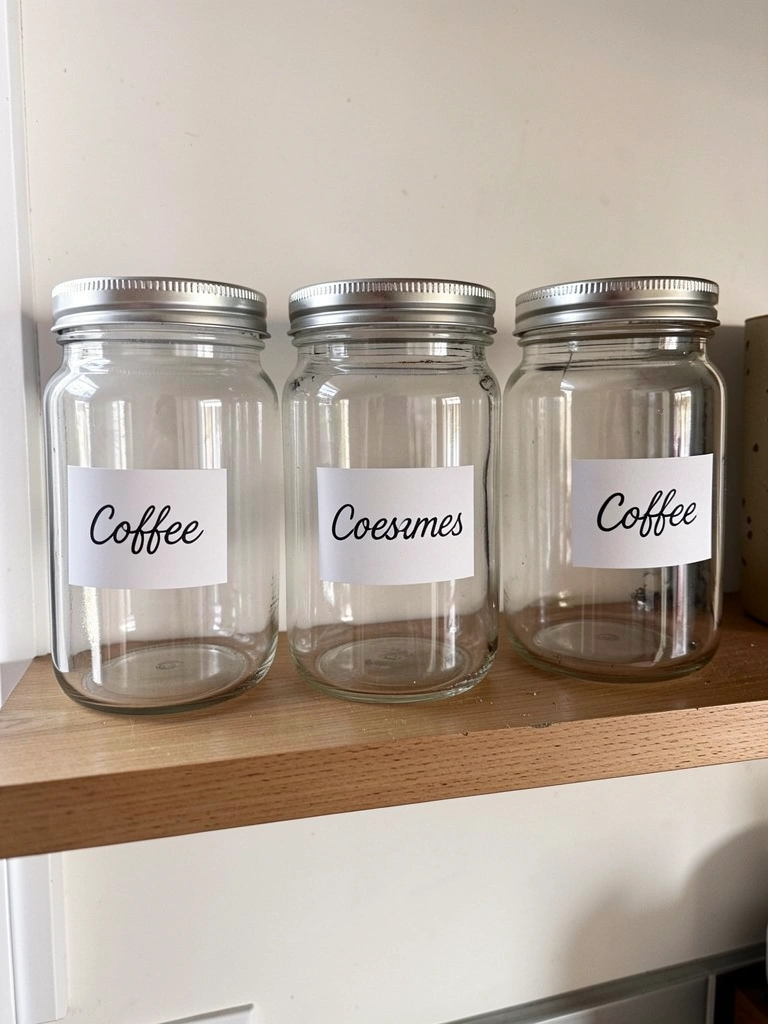
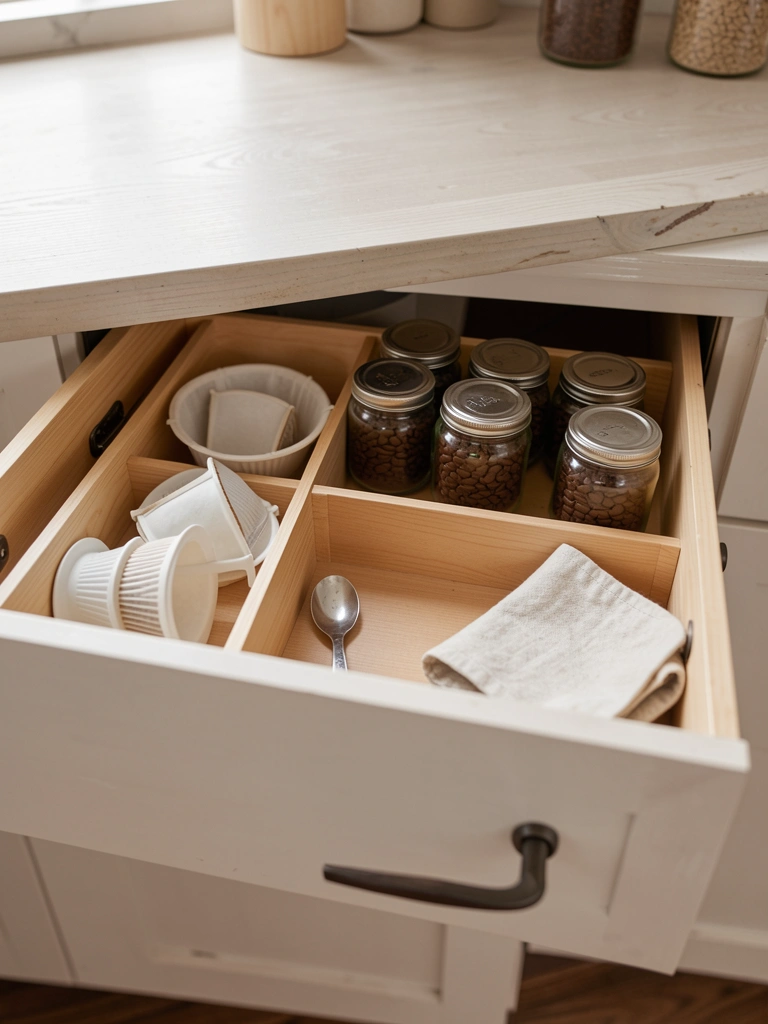
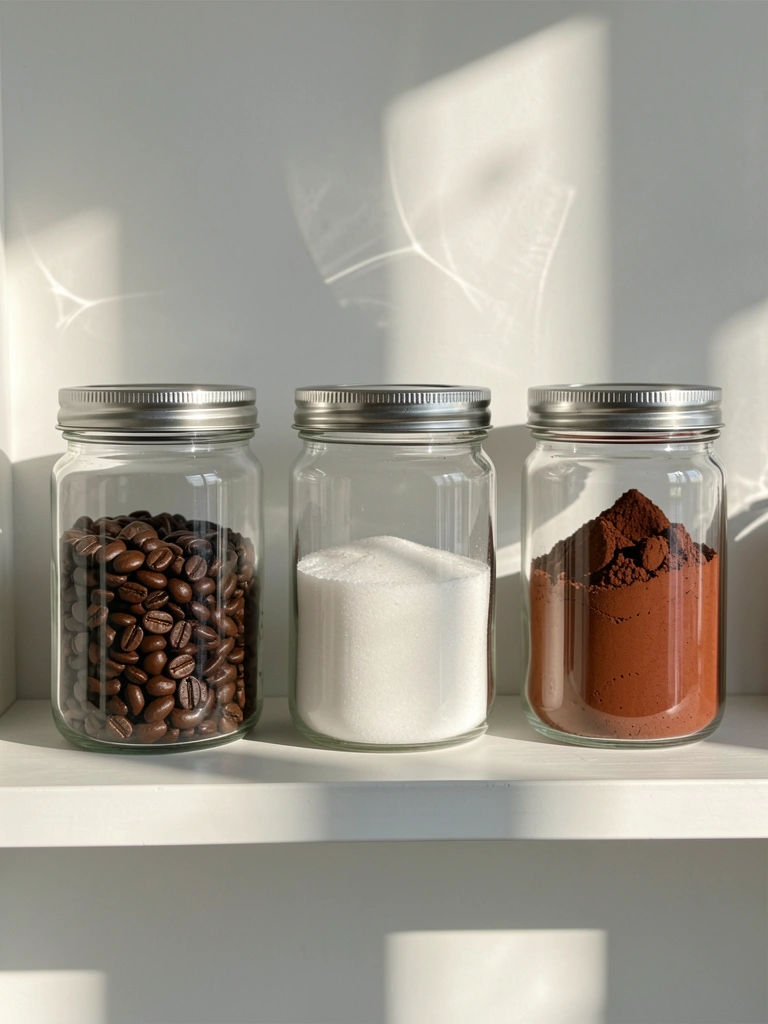
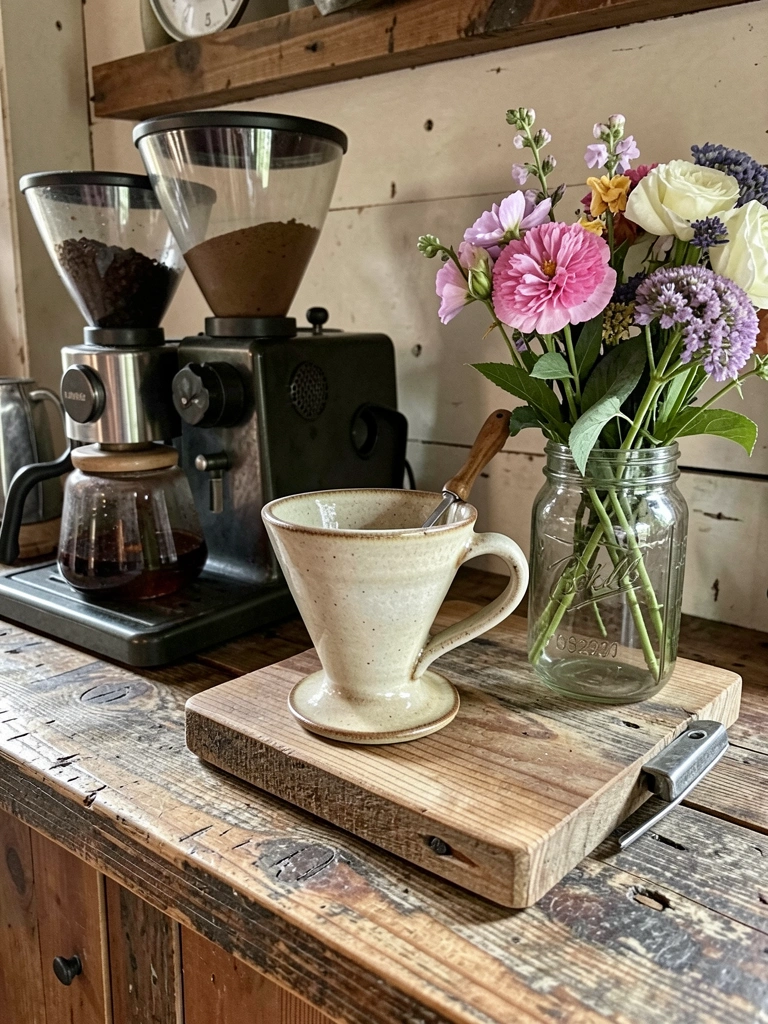
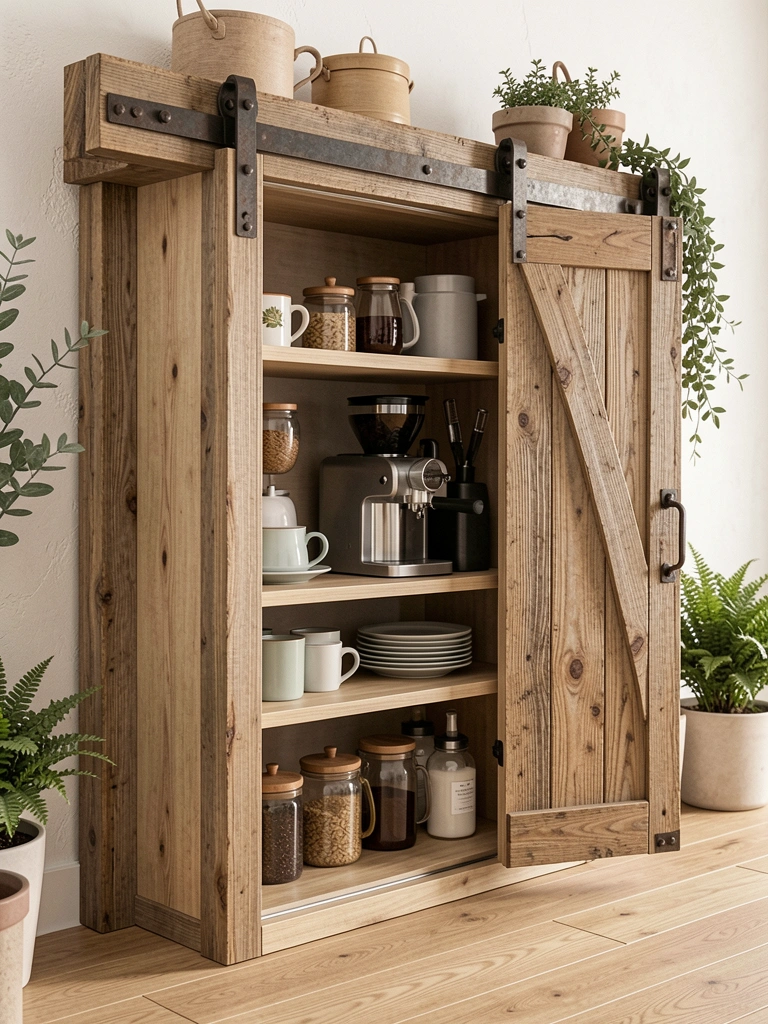
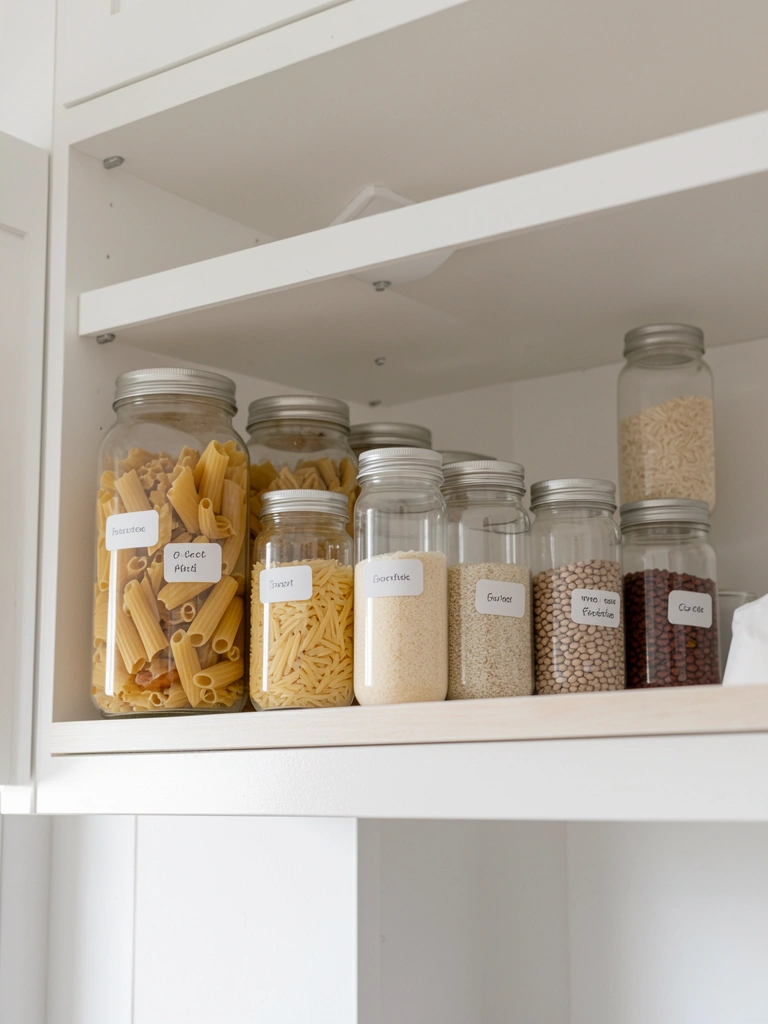
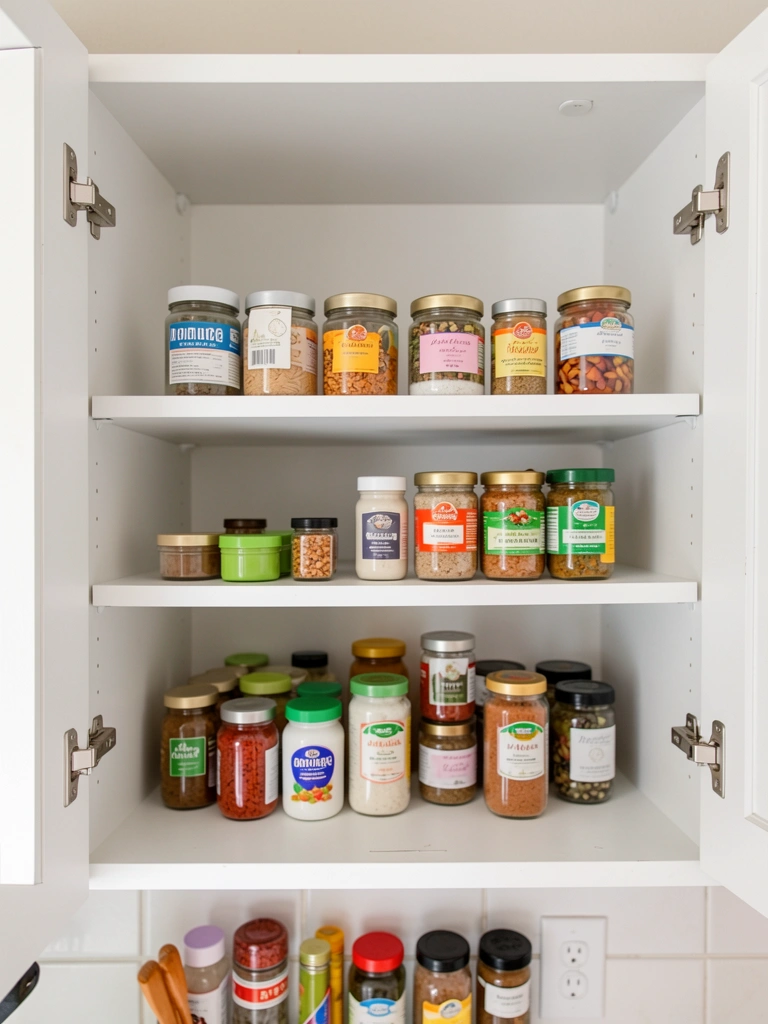
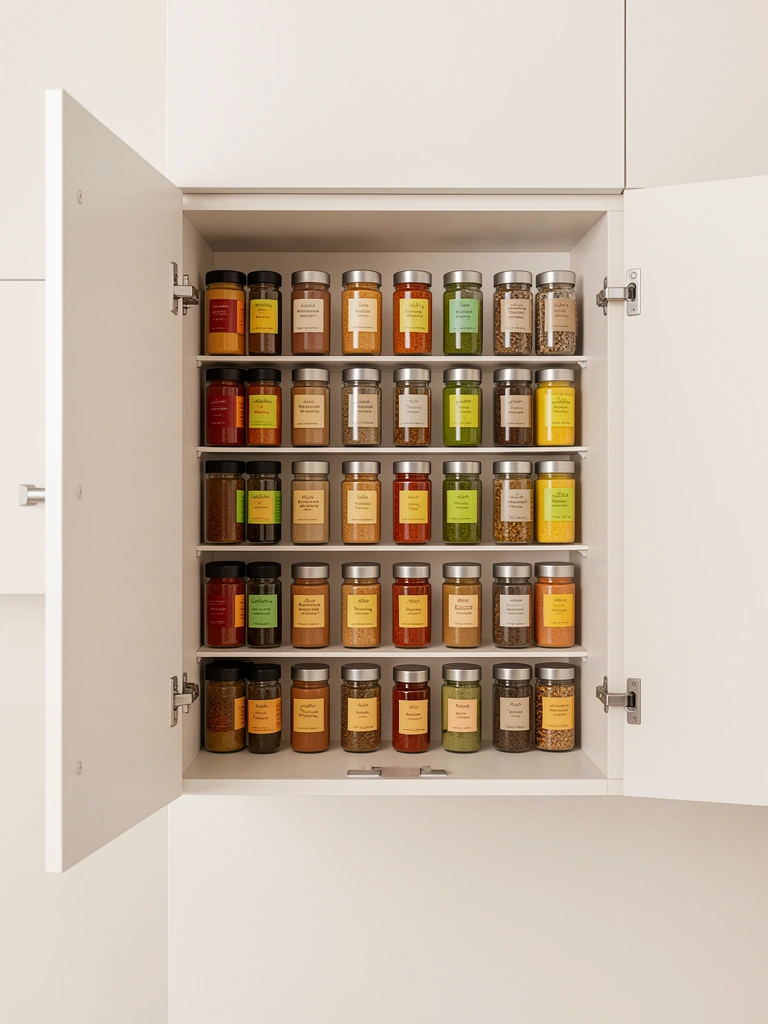
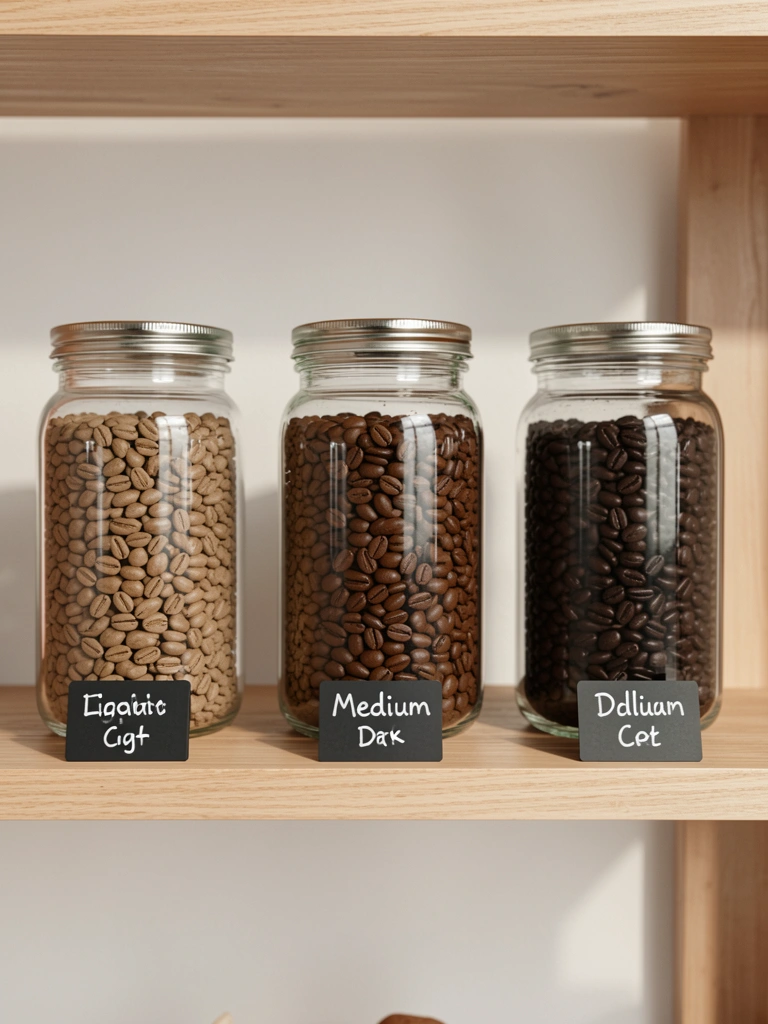
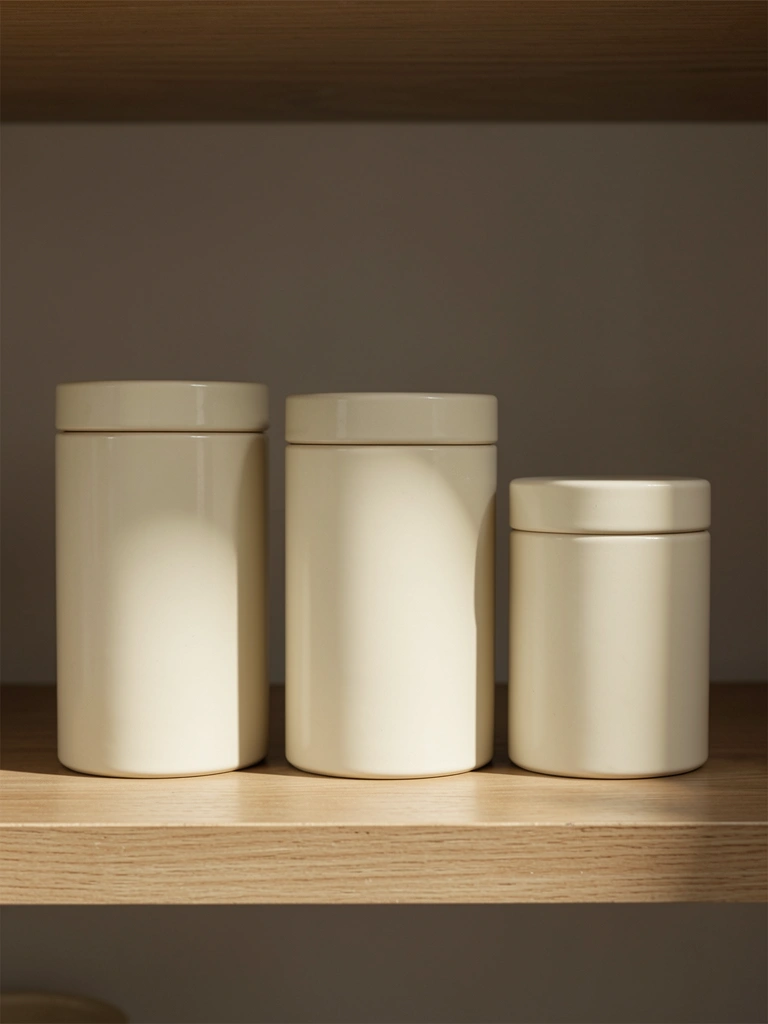
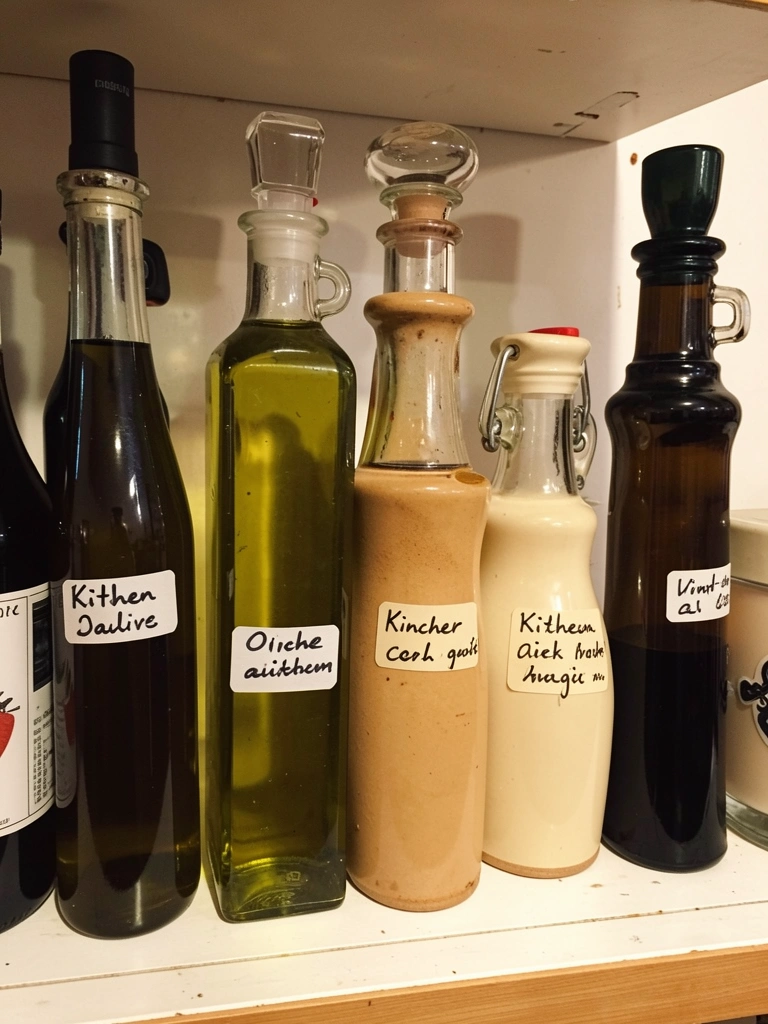
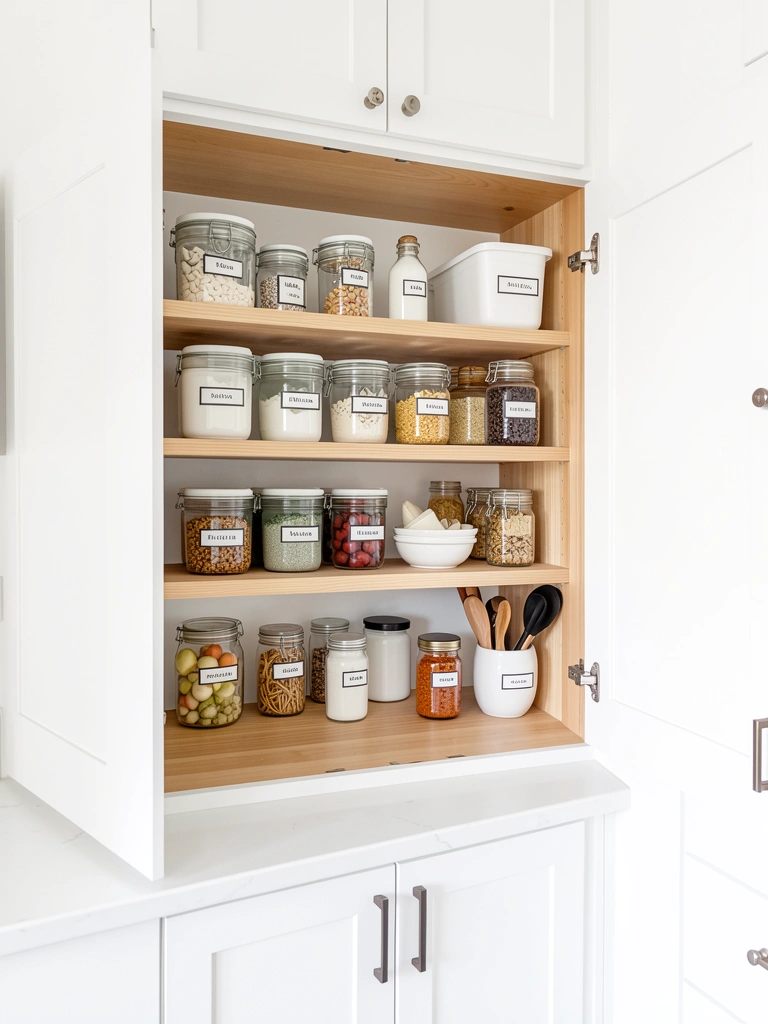
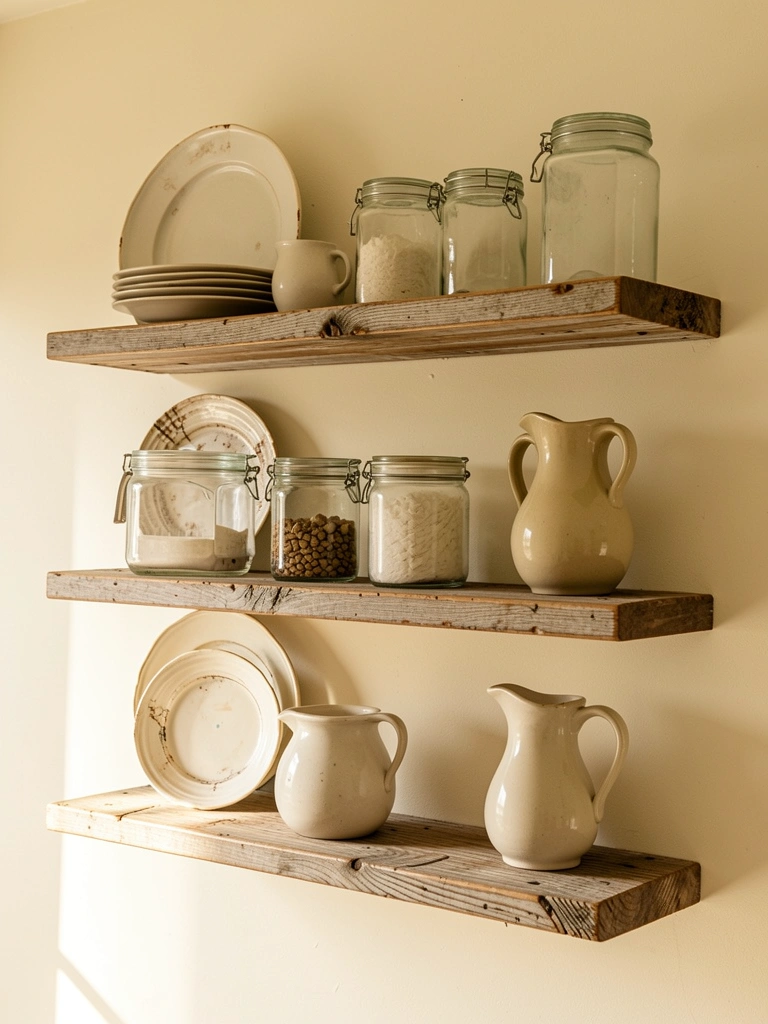
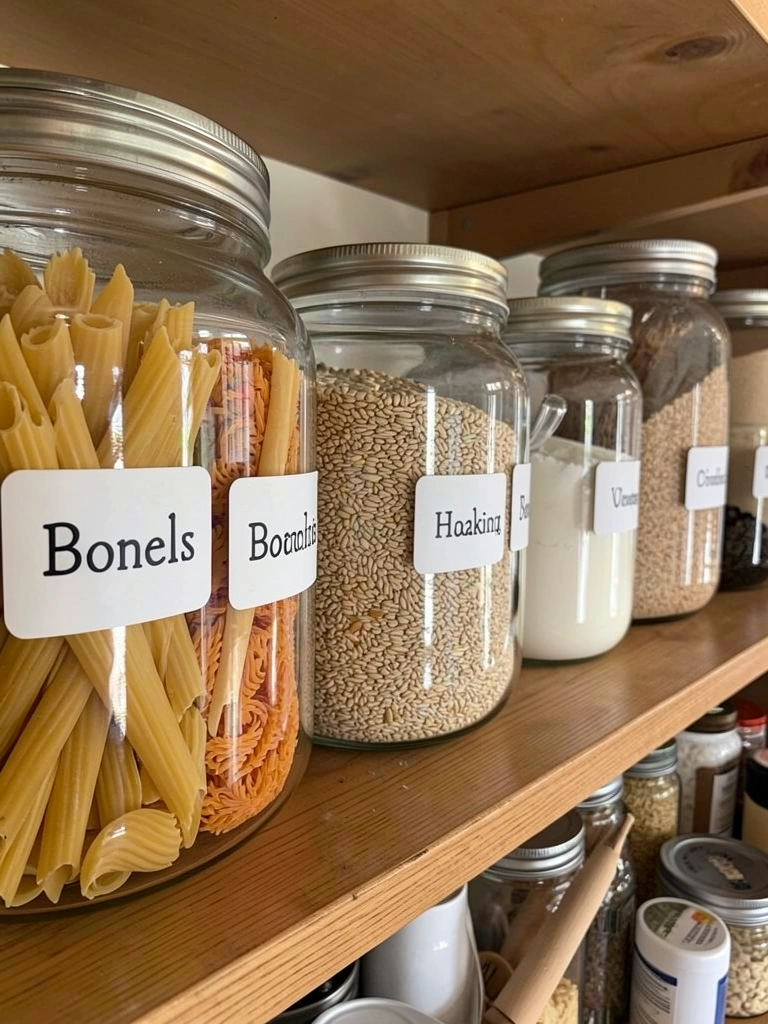
    19. Create Labeled Glass Storage for Coffee Beans and Extras

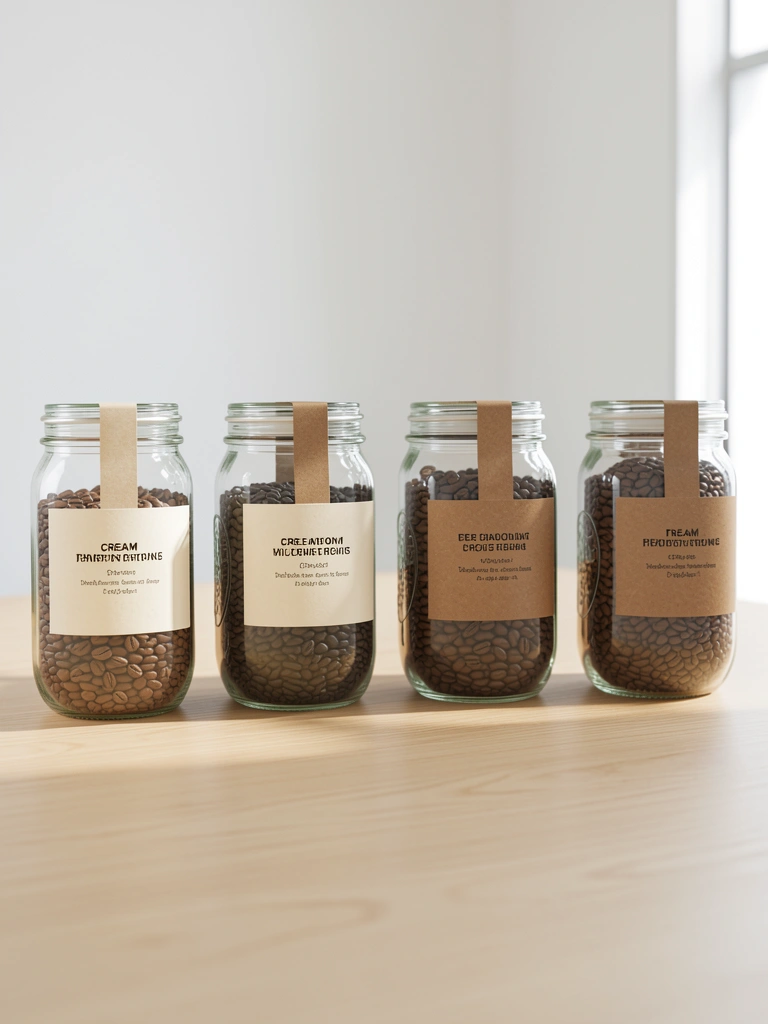
    Decant your coffee beans into glass storage jars ($3–$8 each from Target or Container Store). This keeps beans fresh, looks beautiful, and makes your station feel more intentional.

    Use kraft paper labels ($5 for a pack) and a label maker ($15–$25 from Amazon) or hand-write with watercolor pen ($8 for a pack). Include the roaster name, roast date, and notes if you’re tracking favorites.

    Store jars in a cool, dark spot—direct sunlight fades beans and flavors. Keep an extra jar for current beans and rotate through them.

    Your station becomes a mini library of coffee, and you’ll appreciate the details and origin of what you’re drinking.

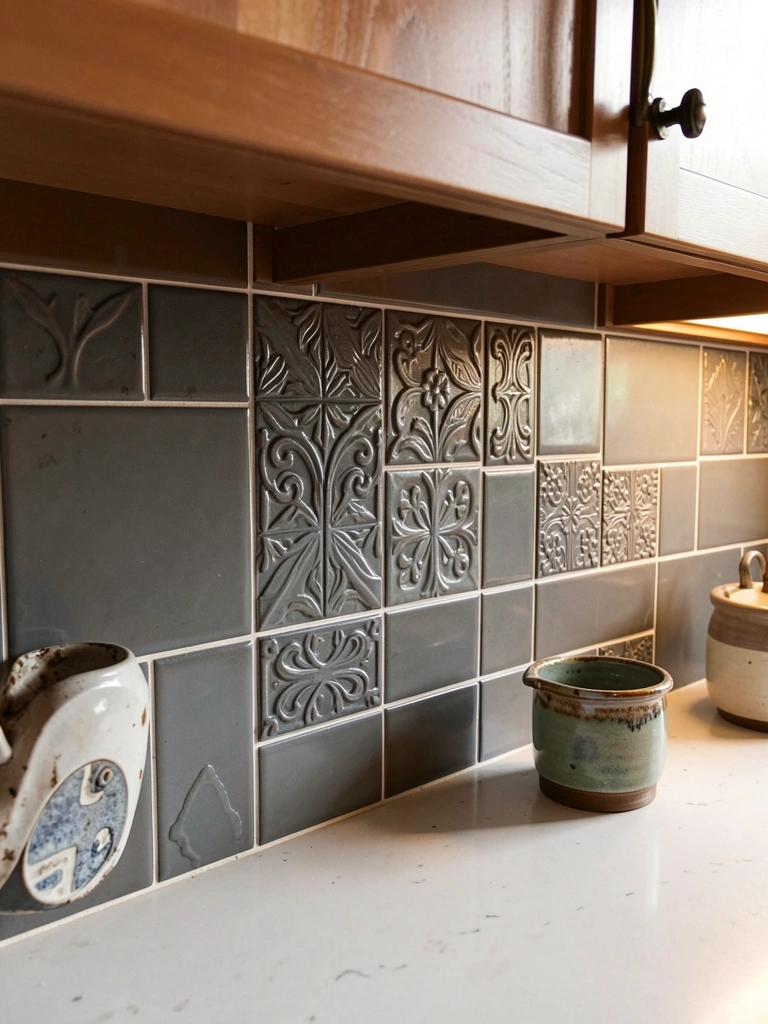
    20. Install a Small Backsplash or Peel-and-Stick Wallpaper

    A small backsplash or accent wall protects against splashes and adds instant visual interest—and it’s renter-friendly with peel-and-stick options.

    Choose peel-and-stick wallpaper ($25–$50 per roll from Spoonflower, Wayfair, or Amazon) in a pattern that matches your vibe. Or go for self-adhesive tile ($15–$30 per pack from Home Depot) for a more permanent look if you own your space.

    Measure your space, apply carefully with a level, and smooth out bubbles. Takes 1–2 hours. This becomes your station’s visual anchor and protection from splatters.

    Suddenly your coffee station looks designed and curated, not like an afterthought in your kitchen.

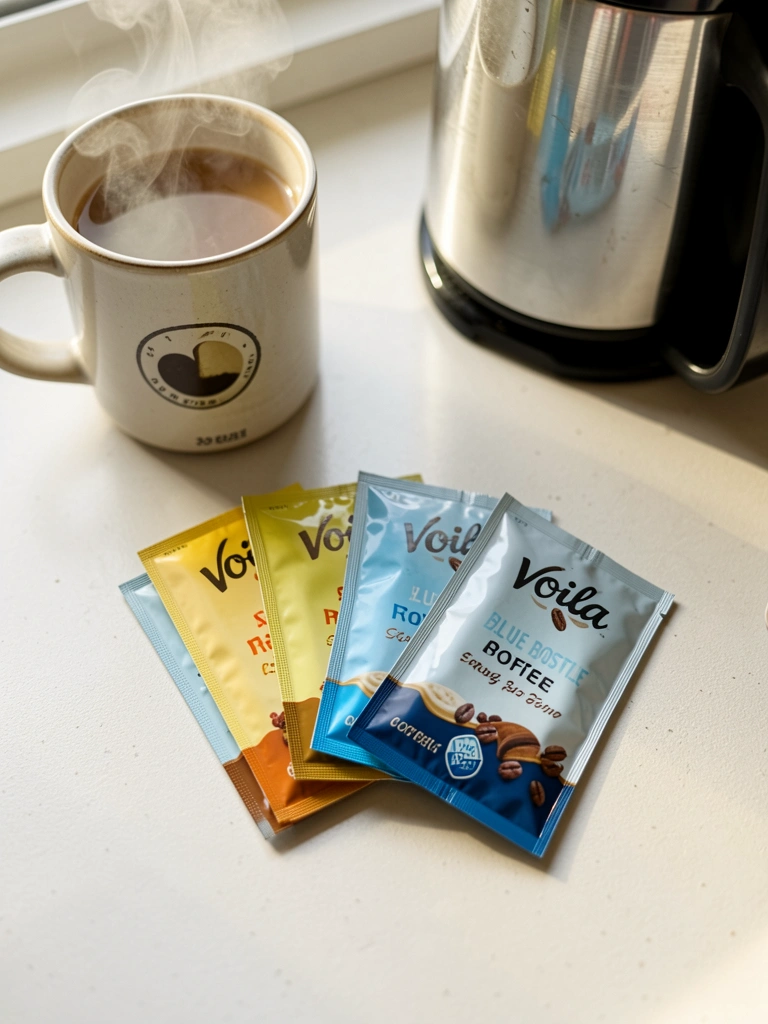
    21. Stock Specialty Syrups and Flavor Add-Ins

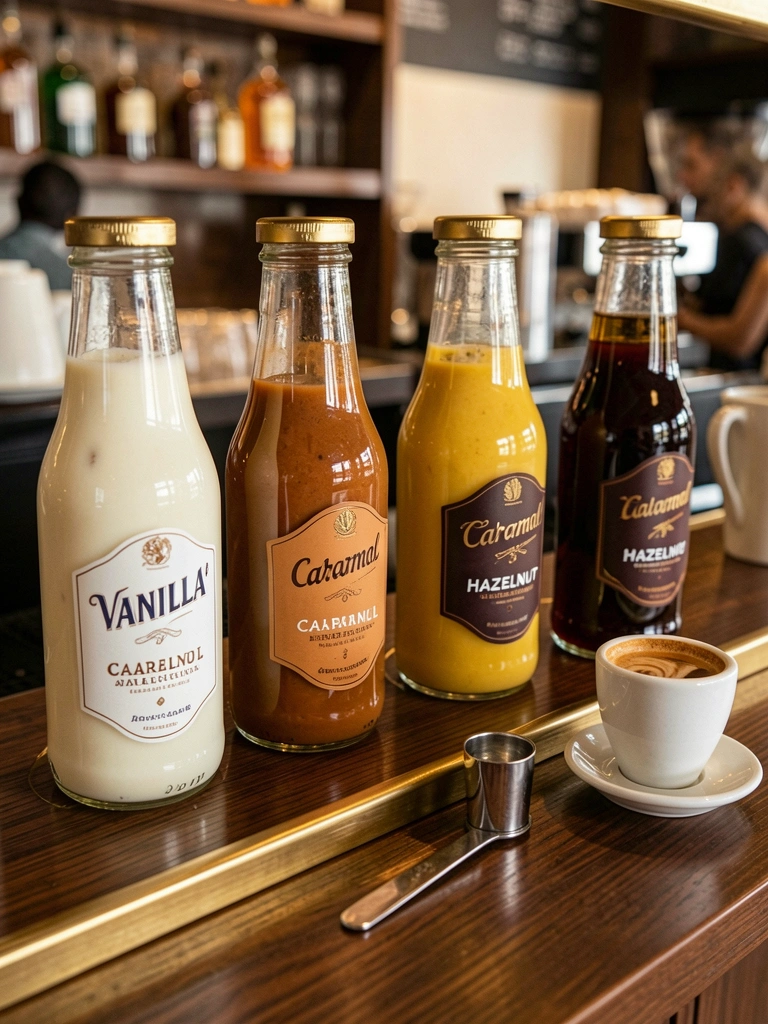
    Syrups and flavor add-ins let you recreate café drinks at home and experiment with different flavor combinations.

    Buy quality syrups from specialty coffee shops ($8–$12 per bottle) or make your own vanilla or honey syrup at home (equal parts sugar and water, heated and cooled; 10 minutes DIY). Store in glass bottles with pour spouts ($3–$5 each from Amazon).

    Keep 2–3 syrups on rotation. Vanilla and caramel are always winners. Store away from heat and light; they last 3–4 weeks.

    You’ve expanded your coffee repertoire from plain espresso to personalized, café-quality drinks—without leaving home.

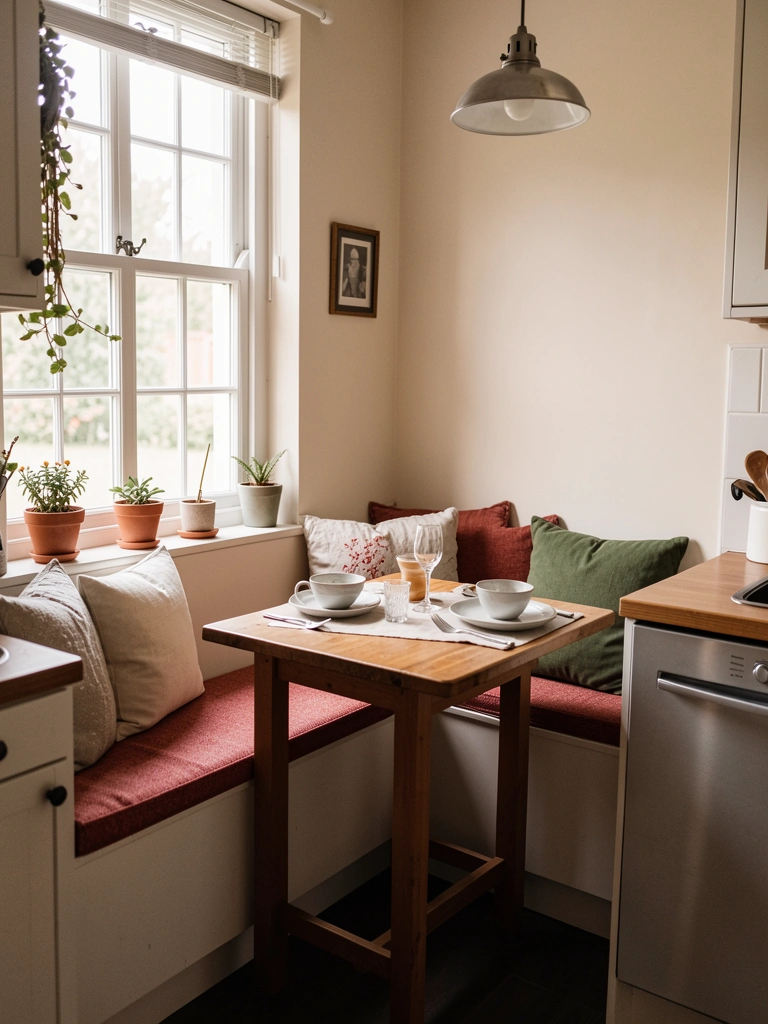
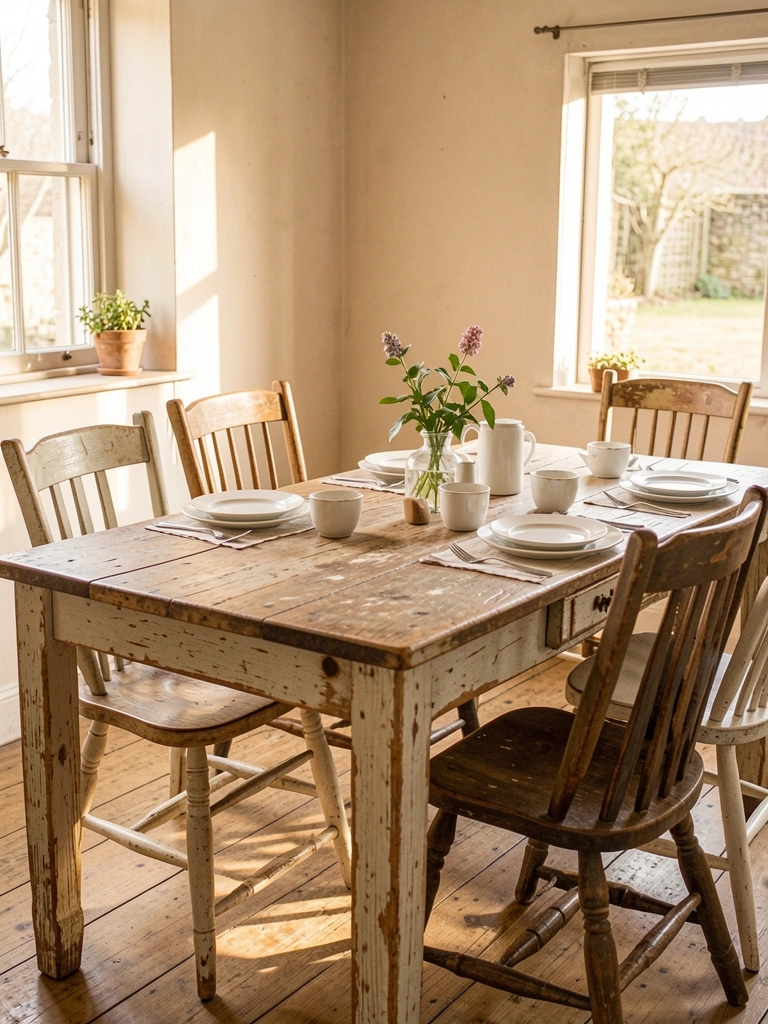
    22. Add a Small Comfy Chair or Cushion for Lingering

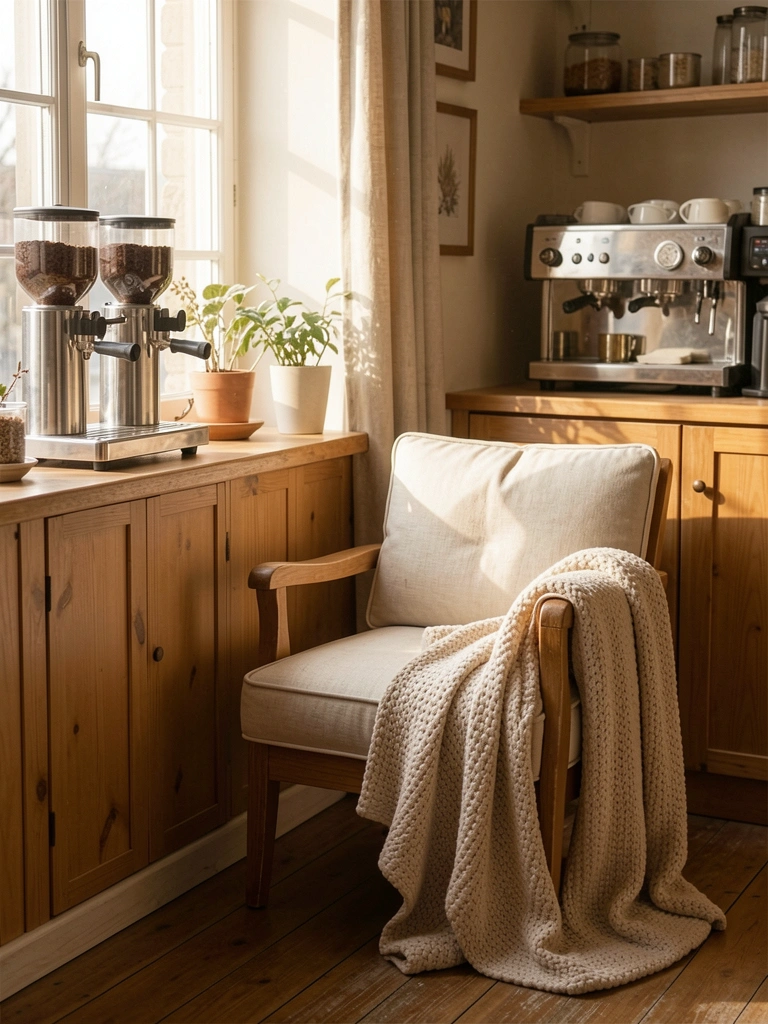
    The ritual isn’t just making coffee; it’s sitting down and enjoying it. A comfortable seat anchors that intention.

    Find a small armchair ($50–$200 from IKEA, Wayfair, or Facebook Marketplace) or even a cushioned stool ($30–$80) that fits your space. Add a soft throw blanket ($25–$60) draped over the arm for texture and warmth.

    Position it within reach of your coffee station so you can grab a cup and settle in without moving far. Swap the cushion seasonally for a visual refresh.

    You’ve created a space that invites you to stay, savor, and start your day intentionally instead of rushing.

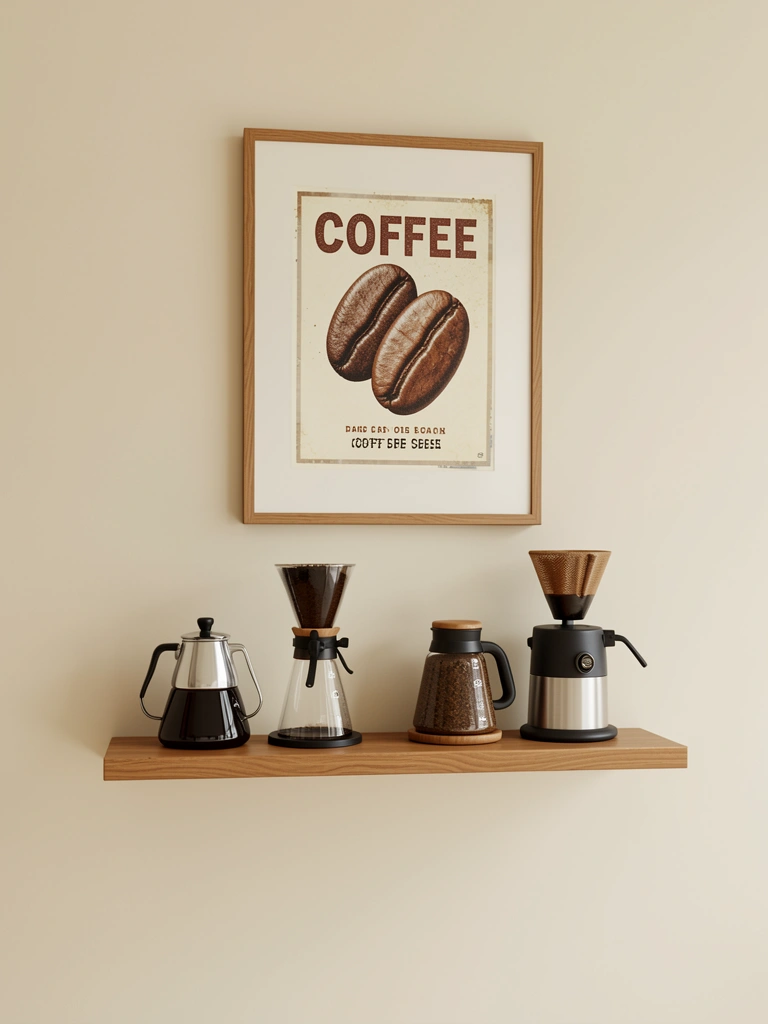
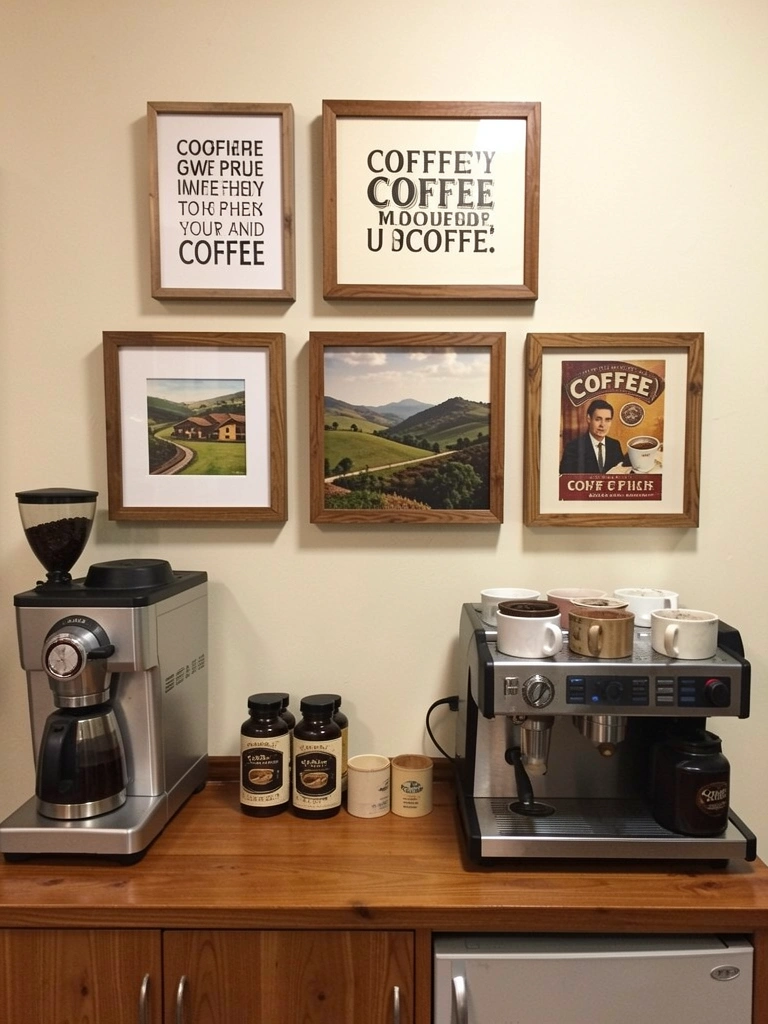
    23. Hang Inspirational Art or Coffee Quotes

    Art makes a space feel personal and intentional. Coffee-themed art or motivational quotes reinforce the ritual you’re building.

    Find affordable prints ($5–$15 from Etsy or Minted) that match your vibe. Frame them in simple wood or metal frames ($5–$20 from IKEA or Target). Hang 1–2 prints above your station at eye level.

    Alternatively, make your own print using a Canva template ($0–$5), print it at home, and frame it—total cost under $10.

    These small pieces of art remind you each morning that this moment matters and deserves your full attention.

    24. Set Up a Small Compost or Waste Bowl for Used Grounds

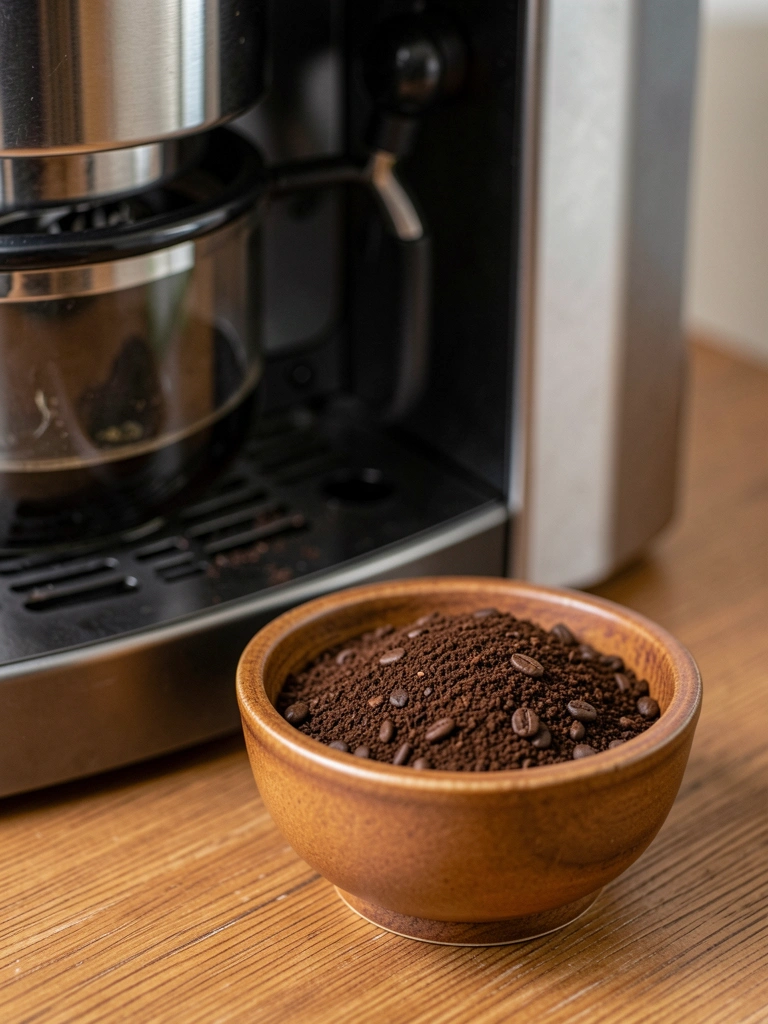
    Used grounds need somewhere to go, and a dedicated bowl makes cleanup easy while adding an eco-conscious detail to your setup.

    Use a small ceramic bowl ($10–$20) or wooden container ($15–$25) from a thrift store or online. Place it next to your brewing station. Dump used grounds into it throughout the week, then compost or discard.

    Some people add a small bamboo spoon ($5) just for this purpose, making it feel intentional rather than utilitarian.

    This detail shows you’re thinking about the full ritual, including cleanup, which makes the whole experience feel more mindful.

    25. Create a Coffee Tasting Station with Multiple Roasts

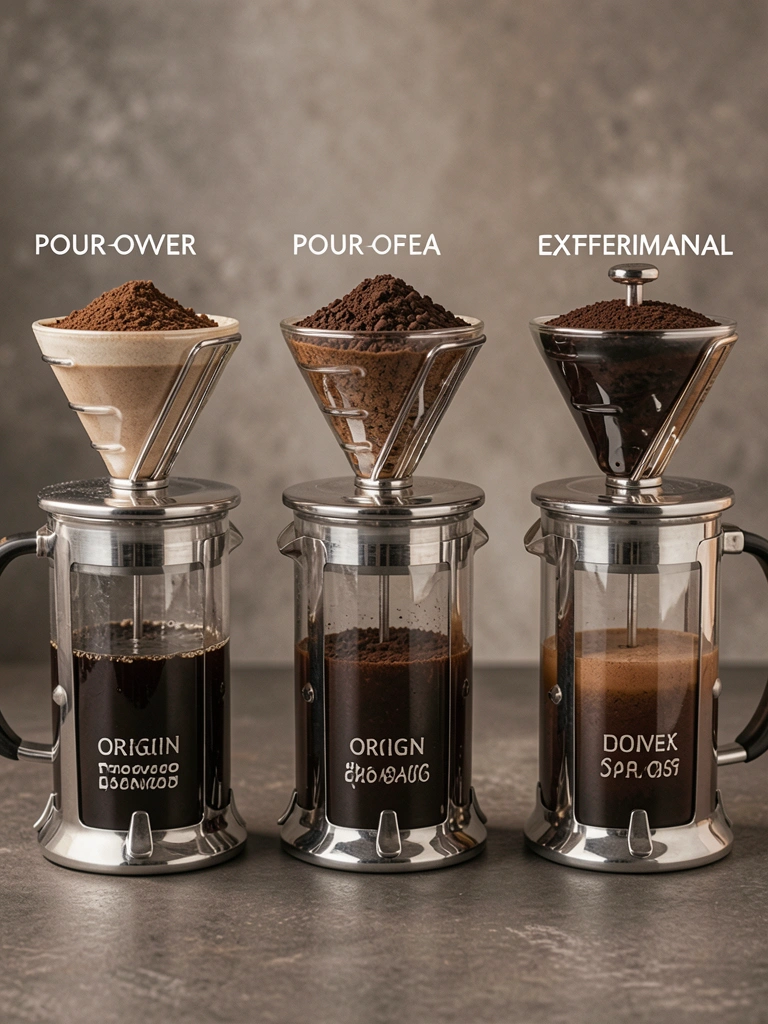
    If you’re genuinely into coffee, set up a mini tasting station where you sample different roasts or origins side by side.

    Buy small sample bags ($5–$10 each) from local roasters or specialty online retailers. Use identical brewing methods (pour-over cones or small French presses) and matching cups so variables are controlled. Brew them at the same time, taste, and note differences.

    Label each cup with the roaster, origin, roast date, and roast level. Keep a small notebook ($5–$10) to track tasting notes—it’s fun and helps you discover patterns in what you love.

    This turns your coffee station into a learning lab, and you’ll become genuinely knowledgeable about coffee while enjoying your daily ritual even more.


    Save this post for your next weekend project and try just one idea this week. Which one speaks to you first? Share this with a friend who’s been talking about upgrading their morning routine—they’ll thank you.

  • 25 Handle-Free Cabinet System Ideas for a Clean, Sleek Kitchen

    25 Handle-Free Cabinet System Ideas for a Clean, Sleek Kitchen

    Introduction

    Handleless cabinets are everywhere right now, and for good reason—they create that premium, minimalist look without the visual clutter of traditional hardware. If you’re drawn to clean lines and a kitchen that feels serene rather than busy, you’re in the right place. The best part? You don’t need a full renovation to achieve this look. Whether you’re renting, on a budget, or ready to invest in a complete refresh, we’ve rounded up 25 realistic ideas to give your kitchen that sleek, handle-free vibe. Some are free styling tweaks, others are affordable upgrades, and a few are investment pieces that’ll last for years. Let’s find your starting point.

    1. Opt for Push-to-Open Cabinet Doors

    Push-to-open mechanisms let you open cabinets with just a light touch—no handles needed. These spring-loaded hinges are hidden inside the cabinet frame, making the exterior completely smooth and seamless.

    Installation typically takes 2–4 hours per cabinet if you’re handy, or hire a professional for around $100–$300 per door. Brands like Blum and Grass make reliable mechanisms available on Amazon, Home Depot, or directly from cabinet suppliers. If you already have cabinets, retrofit kits exist for $15–$40 per door—a smart budget option.

    The result is a sophisticated, touch-activated feel without a single visible hinge or handle. Your kitchen instantly shifts toward that high-end, spa-like aesthetic.

    2. Install Recessed Grip Pulls (Nearly Invisible)

    Recessed pulls are indented directly into the cabinet edge, so you grip the groove rather than a protruding handle. They’re minimal, sculptural, and super functional.

    Buy pre-routed cabinet doors or ask a local woodworker to route grooves into existing doors for around $20–$50 per door. Ready-to-assemble options from IKEA or Wayfair start at $30–$80 per door. It’s a DIY-friendly upgrade if you’re comfortable with a router, or a weekend project for a handyperson.

    You get the handleless look with zero visible hardware, and your fingers naturally find the groove. Kitchen storage becomes tactile and intuitive rather than fussy.

    3. Paint Cabinets in a Matte Moody Color

    Matte finishes eat light and create depth—pair this with moody colors like forest green, navy, or warm charcoal, and your cabinets look curated and intentional without handles drawing the eye.

    Use high-quality cabinet paint (Sherwin-Williams ProClassic or Benjamin Moore Advance) at $60–$100 per gallon; you’ll need 2–3 gallons for a full kitchen. Hire a pro for $1,500–$2,500, or DIY over a weekend for primer, paint, and drying time. This completely eliminates the need for handles—the color becomes the focal point instead.

    The matte finish disguises fingerprints better than gloss, and your kitchen feels intentional and modern. No handles means less visual noise and more breathing room.

    4. Try Integrated Toe-Kick Drawers

    Instead of decorative toe-kicks, create shallow pull-out drawers at foot level for flat items like baking sheets, cutting boards, or serving platters. The drawer face is flush with the cabinet line—no handles required.

    Custom woodworkers or high-end cabinet retailers can build these for $150–$400 per drawer. Semi-custom options from brands like Dura Supreme or Kraftmaid start around $200–$300. DIY kits and rails are available on Amazon for $50–$100 if you want to retrofit existing cabinets.

    You reclaim often-wasted space and add hidden storage without any visual clutter. Your kitchen base feels continuous and clean rather than broken up by hardware.

    5. Use Cabinet Doors with European Horizontal Grain

    European horizontal grain (veneer grain running left-to-right rather than top-to-bottom) creates visual interest without needing handles. The grain lines become your “pull point” visually.

    Browse semi-custom brands like Kraftmaid, Dura Supreme, or Waypoint at Home Depot or Lowe’s; expect $100–$200 per door for this veneer style. Full-custom woodworkers offer bespoke grain matching for $200–$500 per door. Many are available as ready-to-assemble options on Wayfair or specialty cabinet sites for $80–$150 per door.

    The horizontal grain draws your eye across the cabinet face, making the absence of handles feel intentional. Your kitchen reads as modern and carefully designed rather than sparse.

    6. Apply Handleless Adhesive Backing Strips

    If you rent or can’t modify cabinets permanently, self-adhesive grip strips ($10–$25 per set) stick onto door edges and create a subtle pull-point. They’re thin, unobtrusive, and removable.

    Search Amazon or Wayfair for “adhesive cabinet grips” or “pull strips for cabinet doors.” Installation takes 10 minutes—just clean the surface, measure, and stick. Most adhesive strips are stainless steel or black plastic and come in 24–36 inch rolls.

    Your rented kitchen suddenly feels intentional and modern, with zero permanent changes. Landlord-approved and damage-free when you move.

    7. Combine Matte Black Cabinets with Brass Accents Elsewhere

    Go full handleless on upper cabinets but add minimal brass accents on lower drawers—this creates visual interest without cluttering the space. Matte black reads sleek; brass feels warm and intentional.

    Matte black cabinet paint runs $60–$100 per gallon; brass drawer pulls (kept small, 2–3 inches) cost $8–$20 each from Etsy, West Elm, or Hardware Hut. Professional painting + hardware installation costs around $1,500–$2,000. DIY painting takes a weekend plus drying time.

    You balance minimalism with personality. The brass catches light and adds warmth, while handleless uppers keep sightlines clean. Your kitchen feels both modern and grounded.

    8. Install Motion-Activated Cabinet Lighting

    Pair handleless cabinets with motion-activated LED strips inside—when you approach or open a door, lights automatically come on. It’s subtle, smart, and makes your kitchen feel high-tech without being fussy.

    Motion-sensor LED kits cost $20–$60 per kit and install in 30–45 minutes. Brands like GE Enbrighten, Philips Hue, or simple battery-powered options on Amazon offer reliable choices. Hire an electrician for hardwired options at $100–$200 per cabinet.

    The lighting makes your handleless cabinets feel premium and functional. Contents are visible, easy to grab, and the touchless interaction reinforces the minimalist aesthetic.

    9. Choose Frameless Cabinet Boxes with Flush Fronts

    Frameless cabinets (also called European-style) have no face frame, making doors sit directly on the box edges. Combined with handleless design, they’re the ultimate minimalist expression.

    Budget frameless options start at $150–$250 per linear foot through semi-custom retailers like Wayfair, IKEA, or home center brands. High-end custom frameless runs $400–$800+ per linear foot. A 10-foot kitchen could range from $1,500–$8,000 depending on depth.

    The flush, seamless appearance makes your kitchen feel like a luxury hotel or high-end home. Storage becomes architectural rather than furniture-like.

    10. Paint Existing Handles to Match Cabinets

    If you can’t afford new cabinets yet, paint existing handles the same color as your cabinet face. They’ll visually recede and the handleless effect happens instantly.

    Matching cabinet paint ($60–$100 per quart) covers handles in 1–2 thin coats. Preparation takes 15 minutes; drying is 2–4 hours. This is a free-to-$50 weekend project that creates immediate visual impact.

    Handles virtually disappear against the cabinet surface. Your kitchen reads as clean and cohesive, buying you time before a full renovation.

    11. Install Sleek Linear Pulls Positioned as Finger Grooves

    Linear pulls are thin, horizontal bars positioned at the door’s top or bottom edge. They’re minimalist hardware that almost reads as part of the door structure.

    Quality linear pulls from Schwinn Hardware, Etsy, or specialty sites cost $5–$15 per pull; budget $100–$300 for a full kitchen. Installation is DIY-friendly with a drill and 30 minutes per door. Hire help for $200–$400 if you want professional alignment.

    The continuous line feels architectural rather than decorative. Your eye follows the pull’s geometry rather than seeing it as “hardware,” which softens its visual impact.

    12. Opt for Lacquered Matte Finishes Over Gloss

    Lacquered matte finishes feel less corporate than glossy (which can read cheap or plastic). They’re smooth, durable, and photograph beautifully—perfect if you’re going handleless and want that high-end feel.

    Professional lacquering costs $1,200–$2,500 for a full kitchen, or DIY spray applications at $100–$200 in materials. Semi-custom lacquered doors start at $120–$200 per door through Home Depot, Lowes, or Wayfair.

    The matte sheen catches light subtly, making your cabinets feel premium without gloss’s slickness. Handleless + matte lacquer = luxury apartment vibes.

    13. Create a Hidden Pantry with Handleless Doors

    Build a floor-to-ceiling handleless cabinet door that conceals a pantry behind an otherwise smooth wall. Push-to-open mechanisms keep the front completely blank.

    Custom woodworkers or high-end cabinet shops build these for $800–$2,000 depending on size and finish. Semi-custom options through Kitchen Cabinet Depot or similar sites run $400–$800. DIY is possible if you’re handy with basic carpentry and hidden hinges.

    Your kitchen maintains minimalist sightlines while gaining serious storage. The hidden pantry feels like a design secret rather than functional necessity.

    14. Combine Handleless Upper Cabinets with Open Shelving Below

    Go handleless on upper storage (closed, keeping clutter hidden) and install open shelves below for display items. This balances minimalism with personality.

    Handleless upper cabinets cost $150–$400 per linear foot depending on finish and depth. Open shelving brackets and shelves run $30–$100 per shelf through IKEA, Wayfair, or Home Depot. Combined refresh runs $1,500–$3,500 for an average kitchen.

    You get clean, modern lines overhead with warm, collected style below. Open shelving lets you curate what’s visible—it becomes part of your décor rather than visual clutter.

    15. Use Textured or Fluted Door Surfaces

    Fluted or textured cabinet fronts add dimension without requiring visible hardware. The ridges and shadows give handleless cabinets visual interest and a handcrafted feel.

    Fluted semi-custom doors cost $150–$250 per door through Wayfair, Home Depot semi-custom lines, or Etsy woodworkers. Custom textured finishes run $200–$400 per door. Existing cabinets can be wrapped or resurfaced with textured veneers for $100–$200 per door.

    The texture makes your cabinets feel tactile and designed rather than flat and utilitarian. Your kitchen reads as intentional and curated, even without a single visible handle.

    16. Install Minimalist Touch-Latches for Soft Opening

    Touch-latches (also called push-to-latch or push-catch mechanisms) let you open cabinets with a nudge, and soft-close hinges ensure they shut quietly. It’s handleless + luxe functionality.

    Quality soft-close hinges cost $15–$30 per hinge and are available on Amazon, Home Depot, or specialty hardware sites. Touch-latch kits run $10–$25 per door. Professional installation is $300–$600 for a full kitchen, or DIY in 3–4 hours with basic tools.

    Your kitchen operates silently and smoothly. No more slamming doors or fumbling with handles—everything feels deliberately designed and premium.

    17. Paint Cabinets in Warm Natural Wood Tones

    Instead of stark white, paint handleless cabinets in warm wood tones (walnut, oak, honey, light maple). The warmth becomes your focal point; handles aren’t missed.

    Cabinet paint in warm tones runs $60–$120 per gallon; you’ll need 2–3 gallons for a full kitchen. Professional application costs $1,500–$2,500. DIY prep, paint, and cure time spans a long weekend. Pre-stained semi-custom doors are available for $120–$200 per door.

    Warm wood reads cozier and more approachable than white or stark grays. Your handleless kitchen feels inviting rather than cold—the opposite of minimalist sterility.

    18. Add Integrated Dividers and Hidden Organization

    Since handleless exteriors are so clean, maximize interior organization with custom dividers, pull-out baskets, and tiered shelving. Organization becomes invisible but game-changing.

    Custom interior dividers and pull-out organizers cost $50–$200 per cabinet through Container Store, Wayfair, or specialist woodworkers. DIY options with IKEA or Amazon basics run $20–$80 per cabinet. Professional woodshop installation is $300–$800.

    Your smooth exterior hides immaculate organization. Opening a door feels rewarding—everything has its place, making daily use effortless and meditative.

    19. Combine Handleless with Waterfall Edge Countertops

    Pair handleless cabinets with waterfall-edge countertops in matching material. The continuous line makes your kitchen feel architectural and premium—no hardware needed when the design is this cohesive.

    Waterfall edges add $30–$80 per linear foot to countertop costs (so $300–$800 for a typical kitchen island). Material costs for quartz or solid surface run $80–$150 per linear foot total. Custom work through a fabricator is typically $50–$150 per linear foot for installation and finishing.

    The continuous material flow makes your kitchen read as intentionally designed, like museum or boutique design. Minimalism feels luxe rather than bare.

    20. Install Under-Cabinet Lighting with No Visible Hardware

    Conceal LED strips under upper cabinets (recessed into the cabinet overhang or behind a slim trim). No visible wires, no visible switches, no clutter—just clean illumination.

    Recessed LED kits cost $40–$100 per run and install in 1–2 hours. Hire an electrician for hardwiring at $150–$300 per installation. Simple battery-powered options from Amazon or Home Depot start at $15–$40 and need no professional help.

    The indirect lighting makes your kitchen feel like a restaurant or boutique space. It’s handleless sophistication plus functional ambiance—your counters are always visible and beautifully lit.

    21. Choose Stainless Steel or Aluminum Cabinet Boxes

    Metal (stainless steel or aluminum) handleless cabinets give your kitchen an industrial, professional feel. They’re durable, easy to clean, and ultra-modern.

    Stainless or aluminum semi-custom cabinets cost $250–$500 per linear foot through specialty kitchen retailers or online sites like MOD or Blu Dot. Custom metal work runs $400–$800+ per linear foot. These are investment pieces, but they last decades.

    Your kitchen looks like a professional culinary space. The sleek metal finish pairs perfectly with handleless design for an ultra-modern aesthetic.

    22. Use Reclaimed or Sustainable Wood Fronts (Handleless)

    Reclaimed wood or bamboo handleless cabinets offer eco-friendly style with character. No visible handles mean the wood’s natural beauty and grain are the design story.

    Reclaimed wood cabinets run $200–$500+ per door depending on sourcing and customization. Sustainable bamboo options (also antimicrobial) cost $150–$300 per door. Semi-custom sustainable options through Wayfair or eco-focused retailers start at $120–$200 per door.

    You get handleless minimalism with warm, natural character. The wood tells a story—vintage or sustainable—making your kitchen feel thoughtful rather than sterile.

    23. Create a Seamless Pantry Wall

    Design an entire wall (or galley) of continuous handleless cabinets with no visual breaks. Everything becomes one seamless architectural feature rather than separate cabinet boxes.

    Seamless full-wall cabinetry runs $300–$600 per linear foot through high-end custom builders. Semi-custom options from specialist retailers cost $150–$300 per linear foot. This is a $3,000–$10,000+ project but the payoff is showstopping cohesion.

    Your kitchen or pantry becomes a polished, gallery-like space. The unified surface feels intentional and contemporary rather than utilitarian.

    24. Install Handleless Glass-Front Display Cabinets

    Go handleless with glass-front doors on uppers for displaying dinnerware or glassware. The glass-to-handle-free pairing feels gallery-like and curated.

    Glass-front handleless doors cost $100–$200 per door through semi-custom retailers or Wayfair, IKEA, Home Depot. Frosted glass is less finicky than clear (doesn’t show fingerprints). Installation is DIY-friendly or professional at $200–$500 for a full set.

    Your kitchen becomes a display of beautiful items rather than purely hidden storage. Handleless glass fronts create an open, museum-quality aesthetic.

    25. Pair Dark Handleless Cabinets with Bright Countertops

    Go bold with dark, moody handleless cabinets (forest green, navy, deep charcoal) and pair them with light, bright countertops. The contrast is striking without needing visible hardware to define the space.

    Dark cabinet finishes in paint or stain cost $60–$100 per gallon; full kitchen application is $1,200–$2,500 professional or DIY over a long weekend. White or light quartz countertops run $80–$150 per linear foot, so budget $1,500–$3,000 for typical kitchen.

    The high-contrast design reads modern and intentional. Your dark handleless cabinets look sophisticated rather than heavy because the bright counter balances the mood.


    Save this post for your next kitchen refresh. Whether you pick push-to-open mechanisms, paint existing handles to blend in, or dream about a full handleless renovation, there’s an idea here for your budget and skill level. Try one this weekend—your kitchen will thank you.

  • 23 Minimalist Kitchen Storage Ideas That Cut Clutter Fast

    23 Minimalist Kitchen Storage Ideas That Cut Clutter Fast

    23 Minimalist Kitchen Storage Ideas That Cut Clutter Fast

    Introduction

    If your kitchen counters look like a catch-all for every gadget, jar, and utensil you own, you’re not alone. But here’s the thing: a cluttered kitchen doesn’t just look messy—it makes cooking harder and stresses you out every time you walk in. The good news? You don’t need a complete renovation to fix it. Minimalist storage isn’t about owning less (though that helps); it’s about being smart about where everything lives and making it easy to find what you use. Whether you’re renting, renovating, or just tired of chaos, these 23 ideas will help you create a kitchen that feels spacious, functional, and genuinely yours. Let’s clear some space and get cooking.


    1. Install Floating Shelves Above Counter Space

    Floating shelves replace bulky cabinets and give you open storage that doesn’t eat up floor space. They’re perfect for displaying items you actually use daily—glassware, cookbooks, or pantry staples in glass containers.

    Mount shelves 12-18 inches above your counter at eye level for easy access and visual impact. Use $40-$150 per shelf depending on materials (wood, metal, or composite). Installation takes 1-2 hours with a drill and level; renters can use adhesive-mounted options for $20-$50. Fill them with uniform containers—white ceramic, clear glass, or natural wood—to keep the look cohesive. Group similar items together (all mugs, all grains) rather than mixing everything randomly.

    This approach opens up your counters and turns storage into part of your décor. You see what you have, so you’re less likely to buy duplicates or forget ingredients.


    2. Use Clear Glass Containers for Pantry Visibility

    Clear containers eliminate mystery items hiding in the back of your pantry and make your storage system actually visible. You’ll know exactly what you need to buy.

    Swap out boxes and bags for clear glass or plastic containers ($1-$5 each from Target, IKEA, or Amazon). Add minimalist labels using a label maker ($15-$30) or masking tape and a pen. Spend one afternoon decanting everything—it’s meditative and takes about 2-3 hours depending on how much pantry you have. Stack containers vertically or in rows so you can see everything at a glance. Pro tip: Take a photo of your labeled containers before organizing to remember what goes where.

    Your pantry becomes functional and beautiful. No more expired items lurking in mysterious packages, and restocking is a breeze.


    3. Install a Pegboard Wall for Hanging Tools

    A pegboard keeps frequently used tools off counters and within arm’s reach without taking up cabinet space. Every item has a designated spot, so you know exactly where to find (and return) things.

    Mount a pegboard ($20-$50) on any wall with stud finders and screws; adhesive-backed options work for renters ($15-$30). Add hooks, small baskets, and shelves ($10-$30 total). Takes 1-2 hours to install and style. Hang your most-used utensils, small pots, and measuring tools. Leave negative space (empty holes) intentionally—it’s part of the minimalist look and gives you room to adjust.

    Your counters stay clear, tools are visible and easy to grab, and you’ve created a functional kitchen artwork that actually works.


    4. Declutter Your Drawers with Divider Systems

    Drawer dividers transform chaotic junk drawers into organized zones where everything has a home. You’ll find things faster and actually close drawers smoothly.

    Buy a drawer divider set ($15-$40 from IKEA, Target, or Amazon—bamboo or plastic) and spend 15-30 minutes sorting and placing items. Keep only utensils and tools you use at least monthly; donate or recycle the rest. Use each section for one category: measuring tools, whisks, spatulas, etc. Vertical dividers prevent items from sliding around and maximize visible space.

    Your drawers become a satisfying system where you can find what you need without shuffling through clutter. Opening a drawer no longer feels like a small disaster.


    5. Mount a Magnetic Knife Strip to Free Up Block Space

    Knife blocks take up valuable counter space and often hold knives you never use. A magnetic strip is sleeker, takes minimal space, and looks intentional.

    Install a magnetic knife strip ($20-$60 from Amazon, Williams Sonoma, or Sur La Table) on a wall or the side of a cabinet using mounting hardware ($5-$10. Takes 30 minutes. Mount at a height where you can safely reach without stretching. Keep only knives you actually use—a chef’s knife, paring knife, and one serrated knife cover most cooking tasks. Wipe the strip occasionally to keep knives secure.

    Your counters open up, and you get a minimalist focal point that shows off quality knives. Bonus: knives stay sharper longer when they’re not rattling in a wooden block.


    6. Create a Coffee Station in One Corner

    Corralling coffee items into one area keeps supplies grouped logically and prevents them from spreading across your kitchen. Everything you need is in one spot—no hunting for filters or that one mug.

    Pick a corner with access to a plug and water source ($0 if using existing space). Use a small table, cart, or shelf ($30-$100 from IKEA, Amazon, or Target). Organize: coffee maker, grinder, and mugs on the surface; filters, beans, and sugar in a small basket or container ($10-$20). Install a small peg rail or hooks above for hanging mugs ($15-$25). Set up takes 1-2 hours.

    Your coffee ritual becomes a calm, contained moment each morning. The rest of your kitchen stays free of coffee chaos, and guests know exactly where to find cups.


    7. Use Vertical Dividers for Baking Sheets and Cutting Boards

    Stacking sheets and boards wastes space and makes it impossible to grab one without moving five others. Vertical storage means you see everything and grab what you need instantly.

    Buy a vertical divider set ($15-$30 from IKEA, Container Store, or Amazon) sized for your cabinet. Spend 20 minutes organizing. Stand baking sheets, cutting boards, and trays upright like files in a folder, one per slot. Keep only two cutting boards (wood and plastic) and two to three baking sheets—this is plenty for most cooking.

    Your cabinet becomes efficient, and you’ll actually reach for items you couldn’t find before. Less wasted cabinet space, more usable items.


    8. Consolidate Spices into Uniform Jars with Labels

    Mismatched spice containers and unclear labels waste money (you forget what you have and rebuy) and cabinet space. Uniform containers create visual calm and actually help you cook faster.

    Buy empty spice jars ($0.50-$1.50 each; bulk from Amazon, Container Store, or Specialty Bottle). Get a label maker or use kraft labels and a pen ($15-$30 for maker). Decant all spices into jars over 1-2 hours. Label each jar clearly with the spice name and ideally the date purchased. Organize alphabetically or by cuisine type (baking, Italian, Asian). Keep only spices you’ve used in the past year.

    You’ll cook more adventurously when spices are visible and easy to find. Your cabinet looks curated, not chaotic, and you’ll stop overbuyering duplicates.


    9. Install Under-Sink Pull-Out Baskets

    Under-sink space is usually a dark void where things disappear. Pull-out baskets make everything accessible and keep cleaning supplies and sponges separated from food storage.

    Get pull-out baskets ($20-$50 per basket; IKEA, Target, or Amazon). They slide right into existing cabinet space—no installation needed. Organize one for cleaning supplies, one for sponges/brushes, and leave one area clear for your trash bin if it lives there. Takes 10 minutes to sort and place. Wipe baskets monthly to prevent mildew.

    Everything under your sink becomes visible and grabbable. No more reaching to the back and disturbing a pile of mystery items. Much safer to keep cleaning products in a designated area away from food.


    10. Add a Door-Mounted Spice Rack

    Cabinet doors are wasted real estate. A door-mounted rack holds spices, extracts, or small jars without eating into cabinet shelves.

    Install a door-mounted spice rack ($15-$40 from Amazon, Target, or specialty kitchen stores). Adhesive or screw-mounted options both work. Takes 15 minutes to install and fill. Use it for frequently used spices, extracts, or small jars of nuts and dried herbs. Keep items under 5 pounds so the door isn’t weighted down.

    Your cabinet shelves free up instantly, and you’ve created a second storage layer that’s completely out of the way but easily accessible.


    11. Create a Drink Station with Labeled Containers

    Drink items scattered across multiple cabinets mean you’re constantly hunting for a mug or can’t find the tea. Grouping everything in one spot saves time and looks intentional.

    Pick a lower cabinet or shelf kids can reach (if applicable). Arrange: mugs on hooks or in a small stand ($10-$20), glasses in a contained area, tea/coffee items in labeled containers ($5-$15 for containers). Takes 30 minutes to organize. Stock only cups and glasses you actively use—keep two to three per person in your household.

    Everyone knows where to find a drink cup, and your cabinet stays organized without looking like you’re trying too hard. A functional, accessible system beats a Pinterest-perfect but inaccessible one.


    12. Use Stackable, Modular Cabinet Organizers

    Cabinets with just one shelf waste vertical space. Stackable organizers create extra levels and let you fit more without creating a precarious tower.

    Buy stackable organizers ($20-$50 per set from IKEA, Container Store, or Amazon). They’re adjustable and require zero installation—just place them on your shelf. Organize dishes, bowls, or glasses with one set per item type. Takes 20 minutes to arrange. Leave a small gap between levels for easy access and visibility.

    Your cabinet instantly feels more spacious and organized. You fit more into less space, and everything remains easy to access without unstacking items.


    13. Mount a Narrow Shelf Above the Stove

    The wall above your stove is prime real estate for oils, vinegars, or salt that you need while cooking. It keeps the counter clear and puts essentials at hand level.

    Mount a narrow shelf ($15-$40) using stud finder and brackets ($10-$15 hardware). Takes 1 hour. Place only heat-safe items here: salt, pepper, oils, and vinegars in glass containers. Keep a 6-8 inch clearance from the stovetop so nothing melts. Store heavy items lower on the shelf closer to the wall.

    Cooking becomes more fluid when essentials are right there. Your counters stay clear, and you save cabinet space. The look is functional and chic—no clutter, just what you need.


    14. Designate a Zone for Single-Use Appliances

    Small appliances scattered across cabinets and counters create visual chaos. Grouping them in one zone (ideally tucked away) keeps them accessible but contained.

    Pick a lower cabinet, shelf, or a small cart ($0 if using existing space; $30-$80 if buying a cart). Store air fryer, toaster, blender, and other single-use items here. Keep power cords in a small cable organizer ($5-$10). Takes 30 minutes to relocate and organize. Only keep appliances you use at least monthly—donate or sell the rest.

    Your counters transform instantly. You get a dedicated spot for tools you need but don’t want visible, and the rest of your kitchen stays open and breathable.


    15. Install Hooks Inside Cabinet Doors for Tea Towels

    Tea towels draped over drawer handles or stacked in a drawer wrinkle and take up space. Cabinet door hooks keep them organized, hidden, and easy to grab.

    Add adhesive hooks or screw-mounted hooks ($5-$15 per set) to the inside of a cabinet door. Takes 10 minutes. Hang tea towels neatly rolled or folded. Keep four to six towels maximum—enough for a week’s use before laundry day.

    Your drawers open up, and towels are accessible without cluttering your counters. A small-space hack that feels intentional, not like a storage hack.


    16. Create a Baking Supplies Corner

    Baking supplies scattered through three cabinets make it impossible to set up for baking. A dedicated baking zone has everything in one spot—no hunting, no excuses.

    Designate a large cabinet, shelf, or small cart ($0-$50 if buying a cart). Group: mixing bowls, measuring tools in a container ($5-$15), baking sheets standing vertically ($0 using dividers), and dry ingredients in labeled containers ($10-$20 for containers). Takes 1 hour to organize. Keep only mixing bowls you regularly use—two or three is plenty.

    Setting up to bake becomes a pleasure instead of a treasure hunt. Everything lives in one intuitive zone, and you’re more likely to actually bake when it’s this easy to access supplies.


    17. Use a Small Cart for Frequently Rotated Items

    A rolling cart gives you extra storage that can move wherever you need it. Use it for items you rotate seasonally or need fast access to without permanent shelf installation.

    Get a slim rolling cart ($40-$120 from IKEA, Target, or Amazon). Stock it with frequently used condiments, oils, or cookbooks. Takes 20 minutes to set up. Position it in a corner, next to the fridge, or anywhere it’s convenient. Use only three tiers—more gets top-heavy and looks cluttered.

    You’ve added functional storage without permanently modifying your kitchen. If you rearrange, it moves with you. Perfect for renters or anyone who likes flexibility.


    18. Install a Pull-Down Pantry System

    Deep cabinets waste space because items in the back disappear. A pull-down or pull-out system brings everything forward so you see and access everything easily.

    Install a pull-down or pull-out shelf system ($40-$100 from Amazon, Wayfair, or specialty kitchen organizers). Professional installation runs $50-$150, or DIY with hardware (30 minutes-1 hour). Organize canned goods, small jars, and packaged items in order of use (most frequent in front). Keep only items you use within three months.

    Your deep cabinet becomes usable, and you’ll stop losing food in the back. The system pays for itself in wasted groceries prevented.


    19. Organize Snacks in a Lidded Container for Kids or Shared Access

    Snacks loose in a cabinet or scattered across the pantry means constant searching and spilled crumbs. A single lidded container contains everything and teaches kids (or guests) where snacks live.

    Get a large clear container with a lid ($15-$30 from Target, Container Store, or Amazon). Fill with individual snack packs or pre-portioned items. Label it clearly if it’s for specific people (“Kids’ Snacks”). Takes 20 minutes to organize. Refill weekly or as needed.

    Everyone knows where snacks are, you reduce packaging waste, and your cabinet stays tidy. A system that actually works for families or roommates sharing space.


    20. Mount Magnetic Strips for Can Storage

    Cans roll around cabinets and take up surprising amounts of shelf space when stacked. Magnetic strips hold them safely on walls or cabinet sides, creating vertical storage.

    Install a magnetic strip ($15-$30 from Amazon; make sure it’s food-safe and rated for weight). Mount it on the side of a cabinet or a wall near your cooking zone using screws and anchors ($5). Takes 20 minutes. Use it for canned tomatoes, beans, or broth—items you use weekly. Limit to 5-8 cans so it doesn’t get too heavy.

    You’ve freed up valuable shelf space and created a visual, accessible storage system. Cans are always visible, and you never forget what you have on hand.


    21. Create a Drawer Divider System for Utensils and Gadgets

    An organized utensil drawer saves time and prevents the frustration of digging through a tangled mess. Dividers create zones where each item has a home.

    Buy a customizable drawer divider set ($20-$40 from IKEA, Target, or Amazon; bamboo or plastic). Organize by type: whisks together, spatulas together, measuring tools together. Takes 30 minutes. Keep only utensils you’ve used in the past three months—donate or recycle broken or redundant items.

    Your drawer opens smoothly, and you find what you need instantly. A small change that makes daily cooking smoother and less frustrating.


    22. Use Vacuum-Seal Bags for Seasonal or Bulky Items

    Bulky items like extra linens or seasonal decorations waste enormous cabinet space. Vacuum-seal bags compress them down to a fraction of their size and keep everything visible in one spot.

    Buy vacuum-seal bags ($1-$3 per bag from Target, Amazon, or grocery stores) and a hand pump or vacuum sealer ($15-$40; most homes already have one). Store seasonal kitchen items, table linens, or extra towels. Takes 30 minutes-1 hour to pack and seal. Stack bags vertically in a designated cabinet or closet shelf so you can see labels and grab what you need.

    You’ve dramatically freed up space without discarding anything. Perfect for storing backup supplies without creating clutter.


    23. Install a Narrow Shelf for Cookbooks and Recipes

    Cookbooks scattered through cabinets or piled on counters look chaotic. A dedicated shelf displays them beautifully and keeps them accessible for inspiration and actual cooking.

    Mount a narrow shelf ($20-$40) at eye level or slightly above counter height. Takes 1 hour with stud finder and hardware ($10-$15). Keep only cookbooks you’ve cooked from at least twice and actively reference. Store recipes in a small box or filing system ($10-$20). Stand books upright with decorative bookends ($10-$20) or lay them flat if space is tight.

    Your kitchen has a thoughtful focal point, and cookbooks become inspiration rather than clutter. The shelf adds character while staying functional and minimal.


    Ready to reclaim your kitchen? Save this post and pick one or two ideas to try this weekend. Even small changes add surprising calm to your cooking space. Share this with anyone drowning in kitchen clutter—they’ll thank you for the roadmap.

  • 23 Minimal Countertop Coffee Setup Ideas for Clean, Simple Living

    23 Minimal Countertop Coffee Setup Ideas for Clean, Simple Living


    If you’re tired of cluttered kitchen counters but can’t live without good coffee, you’re not alone. The minimal coffee setup trend proves you don’t need fancy machines or tons of gear to brew something amazing—just thoughtful choices and smart spacing. Whether you work from home, live in a small apartment, or simply crave a calming morning ritual, these 23 ideas show you exactly how to create a beautiful, functional coffee corner that takes up almost no room. You’ll discover budget-friendly hacks, DIY solutions, and smart product picks that keep your counter clean and your coffee routine simple. Let’s build your perfect minimal setup.


    1. Choose a Pour-Over Dripper Over an Espresso Machine

    A pour-over dripper is the minimalist’s best friend—it’s compact, beautiful, and requires zero electricity. Unlike bulky espresso machines that hog counter space, pour-overs like Chemex, Melitta, or ceramic cones take up roughly the same footprint as your mug.

    All you need is the dripper ($15–$40), reusable metal filters ($5–$10), and hot water. Brands like Chemex double as décor pieces, so they look intentional on display. The brewing process takes 3–4 minutes and becomes a mindful ritual. You can store everything in a small drawer or cabinet when guests come over.

    Pro tip: Pair it with a gooseneck kettle ($25–$50) for better control and a more meditative pour. The ritual itself becomes part of your morning, not just the caffeine hit.

    Your counter stays clear, your coffee tastes better, and you’ve got one fewer appliance taking up real estate.


    2. Install a Floating Shelf Above Your Counter

    Vertical storage is a game-changer for small counters—it lets you display coffee essentials without eating up surface space. A floating shelf adds functionality while keeping your counter bare and calm.

    Mount a slim wooden shelf ($20–$60) about 12–18 inches above your counter using a wall bracket kit. Store your coffee beans, a spare mug, and maybe a small plant. This takes about 30 minutes with a drill and level. Renters can use command strips and removable adhesive shelves ($15–$30) that won’t damage walls.

    Pro tip: Keep the shelf to three items max—coffee beans, one mug, one small decoration. More than that and you’ve defeated the minimalist purpose.

    Now you’ve got everything within arm’s reach but completely off your counter.


    3. Use a Narrow Wooden Tray to Define Your Coffee Zone

    A tray corrals your coffee setup and makes it feel intentional rather than scattered. It also makes cleanup faster and creates a visual boundary that makes even a small area feel organized.

    Pick a simple wooden tray ($15–$35) that fits your counter width—aim for 12–18 inches long and 6–10 inches deep. Place your dripper, mug, beans, and spoon on it. When you’re done brewing, you can slide the whole tray to the side or tuck it into a cabinet. This works especially well in kitchens where counter space blends into living areas.

    Pro tip: Choose a tray with low sides so it doesn’t feel boxy. Natural wood ($20–$30) photographs better than plastic.

    Your setup looks curated, not chaotic—and cleanup takes seconds.


    4. Store Beans in Glass Jars with Minimalist Labels

    Clear glass jars keep beans fresh, visible, and beautiful—no bulky coffee bags taking up space or looking messy. Labels add a personal touch without clutter.

    Buy food-grade glass jars ($2–$5 each at IKEA or Target) with tight-sealing lids. Print or hand-write simple labels on kraft stickers ($5 for a pack). Store beans in a cool, dark cabinet, then keep one open jar on your tray or shelf for active use. This setup takes 10 minutes.

    Pro tip: Use airtight containers rated for coffee storage if shelf life matters to you. Label with roast date so you use beans at peak freshness.

    Your coffee corner looks intentional and organized, and your beans stay fresher longer.


    5. Switch to Single-Serve Pourover Packets for Travel Days

    Some days you want even less commitment than a manual brew. Single-serve pouches attach directly to mugs and brew in 90 seconds with no extra gear.

    Brands like Voila ($0.60–$1.50 per packet), Blue Bottle, or Dripkit ($1–$2 each) take up almost no space and travel anywhere. Keep a sleeve of 5–10 in a drawer ($5–$15 per box). Great for workdays, travel, or when you’re running late.

    Pro tip: These aren’t cheap long-term, but they’re perfect for occasional use or testing new roasters before committing to bulk beans.

    On chaotic mornings, you skip the ritual but keep the quality—no extra counter clutter required.


    6. Invest in a Gooseneck Kettle That Doubles as Décor

    A gooseneck kettle is the single most useful tool for pour-over coffee—and it looks intentional enough to leave on display. The thin spout gives you precise control and makes brewing feel like a ritual.

    Pick one in matte black or stainless steel ($35–$80). Brands like Fellow, Hario, or even basic Amazon options ($25–$40) work great. The aesthetic is so clean that it becomes part of your décor, so you don’t need to hide it away. If you have limited counter space, get a small kettle (1–1.5 liter capacity) that heats faster and takes up less room.

    Pro tip: Electric gooseneck kettles ($50–$100) heat water faster than stovetop versions, saving you 2–3 minutes every morning.

    Your counter looks intentionally styled, not like you’re storing appliances.


    7. Create a “Coffee Only” Drawer for Supplies

    If you don’t have counter space or want to hide your setup when not in use, a dedicated drawer keeps everything organized and accessible.

    Use a drawer divider kit ($10–$20) to create sections: one for filters, one for beans, one for stirring spoons, and one for backup supplies. Takes 15 minutes to set up. Everything stays dust-free and ready to grab. This works perfectly if your kitchen opens onto a living room or if you prefer a completely minimal counter aesthetic.

    Pro tip: Use small glass or ceramic containers inside the drawer so you can see what you have at a glance.

    Your morning setup is literally one drawer pull away, and your counter stays completely bare when you want it to.


    8. Pair a Small Water Dispenser with Your Setup

    If you don’t want to wait for kettle water or heat the stove every morning, a filtered water dispenser (hot and cold) eliminates a step. Compact models fit anywhere.

    Look at Instant Pot Ace ($100–$150) or smaller filtration pitchers with built-in heaters ($60–$120). Some just need to be filled once and keep water at optimal brewing temperature all day. Takes 5 minutes to set up and fill. You get instant hot water without the kettle ritual—trade-off is more counter space, but it’s minimal compared to a full espresso machine.

    Pro tip: If you’re tight on space, a simple filtered water pitcher ($20–$40) still works—just keep it in the fridge and heat water traditionally.

    You shave minutes off mornings while maintaining a streamlined, modern setup.


    9. Use Neutral Color Palette for All Your Coffee Gear

    Colors that clash make a space feel chaotic—even if it’s minimal. Matching your coffee gear to a neutral palette (white, cream, gray, natural wood) makes the setup look intentionally curated rather than random.

    When shopping for mugs, kettles, trays, and dripper handles, aim for these tones. You don’t need matching sets (too sterile), but similar color families create visual calm. A white ceramic dripper, a cream mug, a gray kettle, and a natural wood spoon feel harmonious. Takes zero extra effort—just choose intentionally when you buy.

    Pro tip: Add one accent color (like a deep green plant) to break the monotony without adding clutter.

    Your coffee corner looks serene and designed, not like random kitchen tools scattered around.


    10. Mount a Slim Spice Rack for Coffee Additions

    If you like to add cinnamon, honey, or cocoa to your coffee, a slim wall-mounted spice rack keeps these extras accessible without cluttering your counter.

    Install a narrow wooden rack ($15–$30) with 3–4 shelves about 18 inches above your counter. Fill small glass jars ($1–$2 each) with your additions. Installation takes 20 minutes with basic tools. Renters can use command-strip wall organizers ($10–$15) that don’t require drilling.

    Pro tip: Label jars with small stickers so you can find everything quickly. Keep the rack to essentials only—cinnamon, honey, a sweetener, maybe cocoa.

    Now your flavor add-ons are displayed and organized, not tucked away in cabinets where you forget about them.


    11. Choose a Reusable Metal Filter Instead of Paper

    Reusable metal filters cut plastic waste, save money long-term, and look sleeker than bulky paper stacks. They’re also easier to store.

    Buy a stainless steel mesh filter ($5–$15) that fits your dripper. Rinse after each use and air-dry. No more buying boxes of paper filters ($4–$8 monthly). After 50 uses, you’ve paid for itself. Storage is simple—one small filter takes up barely any space.

    Pro tip: Metal filters let more oils through than paper, creating a slightly richer cup. Some people prefer this; others prefer paper’s cleaner taste. Try both.

    You eliminate packaging waste while simplifying your supplies to literally one reusable item.


    12. Add a Single Small Plant to Your Setup

    One small plant near your coffee area adds life and freshness without overcomplicating your space. Biophilic design (adding nature) reduces stress—perfect for a morning ritual.

    Pick a low-maintenance plant like a pothos, snake plant, or succulent ($8–$20 from a nursery or grocery store). Put it in a small ceramic pot ($5–$10) that matches your color palette. Water weekly or biweekly—barely any maintenance. One 4-inch plant takes up minimal counter or shelf real estate.

    Pro tip: Choose a plant that thrives in whatever light your kitchen gets. Succulents need bright light; pothos handle lower light.

    Your coffee corner goes from functional to calming—a plant makes even a tiny setup feel more intentional and peaceful.


    13. Build a Mobile Coffee Cart on a Slim Bar Cart

    If you want flexibility (morning kitchen vs. home office), a slim bar cart keeps your entire setup mobile. Everything stays together and off your main counter.

    Choose a narrow bar cart ($40–$100) with two or three tiers. Arrange your kettle, dripper, mugs, and beans vertically. Roll it wherever you need coffee. Takes 5 minutes to set up once. This works great if you have multiple rooms where you work or if you’re renting and want to take it with you.

    Pro tip: Pick a cart in black metal or wood to match your style. Make sure wheels lock so nothing tips over while brewing.

    Your setup is portable, organized, and completely clears your main kitchen counter when you’re not brewing.


    14. Use Minimalist Coffee Scoops and Spoons

    A proper scoop and spoon aren’t just functional—beautiful ones become part of your displayed setup rather than junk drawer items.

    Buy a single wooden coffee scoop ($5–$15) and one small brass or wood spoon ($3–$10). These double as décor and keep your setup complete. You need only one of each—no drawer full of duplicates. Quality versions last years and age beautifully.

    Pro tip: Wooden items develop character with use, while brass or copper can patina over time—both look more intentional than plastic.

    You’ve streamlined your tool count to essentials that are beautiful enough to display permanently.


    15. Install Under-Cabinet Lighting for Your Coffee Zone

    Under-cabinet LED strips add ambiance and make your setup feel like a café—all while using minimal power and taking zero counter space.

    Install self-adhesive LED strips ($15–$30) under your upper cabinet. Plug into a nearby outlet or use battery-powered strips ($20–$40). Takes 10 minutes. Warm white light (2700K) creates a café vibe; cool white (4000K) feels modern and energizing. This especially works if your coffee setup is in a kitchen-living room blend.

    Pro tip: Choose dimmable strips ($25–$50) so you can adjust mood based on time of day or your energy level.

    Your minimal coffee corner suddenly feels like a boutique café, and the soft light makes mornings more peaceful.


    16. Stock One High-Quality Mug You Actually Love

    Instead of a cabinet of mugs, own one beautiful mug you genuinely love. You’ll use it daily and it becomes part of your identity.

    Invest in a single quality mug ($25–$60) from brands like Kinto, Heath Ceramics, or local potters ($20–$80). Choose a size that fits your morning ritual—typically 10–12 oz for pour-overs. This becomes your signature mug, and you don’t need backups for looks. If guests come over, they’ll use something else; that’s fine.

    Pro tip: Pick a mug with a slight handle that fits your hand well. Test in-person if possible—grip matters more than looks.

    Your morning coffee ritual feels special, and you’ve eliminated the need for a whole drawer of mediocre mugs.


    17. Create a Coffee Menu Card on Your Counter

    A small recipe card or menu keeps brewing ratios and times visible—eliminating the need to google or remember mid-brew. It also looks intentional and adds personality.

    Write or print a card ($1–$5) with your standard brew ratio (e.g., 1:16 coffee to water), brew temperature, and time. Stick it in a small wooden stand ($3–$8) or frame it. This doubles as decor and functional reference. Takes 10 minutes to create.

    Pro tip: Use chalk markers or a dry-erase card if you like experimenting with ratios. Make it beautiful enough that it’s part of your display.

    You never fumble through brewing again—and your card becomes a small piece of art that shows visitors you take coffee seriously.


    18. Use a Cloth Napkin or Small Towel as a Workspace Mat

    A cloth napkin or small linen towel defines your coffee zone without taking permanent space. It also catches spills and adds texture to your setup.

    Place a simple linen napkin ($3–$8) or kitchen cloth under your brewing area. Choose natural fibers in cream, gray, or white to match your palette. This gives you a defined “coffee zone” within your counter and adds warmth. Easy to wash and reuse indefinitely.

    Pro tip: Look for vintage or handwoven cloths at thrift stores ($1–$3) for more character. Linen ages beautifully.

    Your setup gains a grounded, intentional feel—and you’ve got a protective layer that catches drips.


    19. Set a Daily Brew Time and Stick to It

    Consistency turns your minimal coffee setup into a ritual that anchors your whole day. Pick a brew time and protect it.

    Commit to brewing at the same time daily—8 AM, for example. Block 10 minutes on your calendar. This isn’t about rules; it’s about creating a moment of calm before chaos. Your minimal setup makes this ritual fast and enjoyable. Over time, this becomes your favorite part of the day.

    Pro tip: Prep the night before (grind beans, fill your kettle) so morning setup takes literally 60 seconds.

    Your coffee ritual becomes the most grounding part of your day, and your minimal counter supports this instead of complicating it.


    20. Combine Coffee Supplies with Morning Journaling

    If you journal, meditate, or read, pair your coffee ritual with these practices. One compact corner handles multiple morning essentials.

    Place your coffee setup next to a small journal and pen on your counter or a small table ($0 if you already have these). Brew coffee, sit for 5–10 minutes, and journal or read. This transforms coffee from fuel into a full mindfulness practice. No extra gear needed—just intentional spacing.

    Pro tip: Keep a small tray or placemat to define this zone so your morning ritual feels separated from everyday bustle.

    Your mornings shift from rushed to peaceful, and your minimal setup supports a daily practice that changes everything.


    21. Choose Biodegradable Filters (If You Use Paper)

    If you prefer paper filters, switching to unbleached or bamboo filters aligns with minimalist values—less waste, simpler supply chain, guilt-free disposal.

    Buy unbleached filters ($3–$6 per 100-pack) from brands like Melitta or full-circle. These break down naturally and feel less wasteful than bleached paper. Storage is the same as regular filters—barely any counter or cabinet space.

    Pro tip: Some people find unbleached filters slightly papery in taste. Try both and see which you prefer. If cost matters, paper (bleached or not) is cheaper than metal filters initially.

    You keep your ritual simple while knowing your coffee’s environmental footprint is minimal.


    22. Mount a Small Clock Above Your Coffee Zone

    A small clock keeps brewing time visible and adds to the “coffee zone” feel without taking counter space. It’s both functional and décor.

    Install a slim minimalist clock ($15–$40) on the wall above your coffee area. Choose a design with minimal details—simple hands, no numerals, or just dots at 12, 3, 6, 9. Keeps you on track for brew time while adding intentional style. Installation takes 5 minutes.

    Pro tip: Pick one in black, white, or brass to match your coffee setup’s color palette. A kitchen timer works too if you already have one on your phone.

    Now your brewing area feels complete and almost-café-like without adding any clutter to your counter.


    23. Keep a Backup Brewing Setup in a Compact Tote

    Travel, vacations, or impromptu coffee needs happen. A compact tote holds a complete backup setup that’s grab-and-go.

    Pack a small collapsible dripper ($20–$40), reusable cup ($8–$15), portable filters, and spoon into a canvas tote ($10–$25). Store on a shelf or in your car. When you travel or need coffee on the go, everything’s ready. Takes 10 minutes to pack.

    Pro tip: Include a small bag of your favorite beans ($5–$10 for single-origin traveler bags) so you’re never without good coffee.

    You’re prepared for coffee anywhere—and your home counter stays completely minimal because everything’s in one portable kit.


    Save this post for your next minimal setup refresh. Pick one idea this weekend—maybe it’s the mug, the tray, or the floating shelf—and watch how a single change makes your mornings calmer and your counter cleaner.

  • 25 Coffee Station Ideas That Turn Mornings Into a Ritual

    25 Coffee Station Ideas That Turn Mornings Into a Ritual

    Your mornings don’t have to be rushed and chaotic. A thoughtfully designed coffee station transforms those first moments of your day into something you actually look forward to—a quiet ritual that sets a calm, intentional tone before the world gets loud. Whether you have a sprawling kitchen or a tiny apartment corner, these 25 ideas show you how to build a coffee space that’s both functional and beautiful. You’ll find free solutions, budget-friendly hacks under $50, and investment pieces worth splurging on. By the end, you’ll have everything you need to create a morning ritual that makes you actually want to wake up and brew.

    1. Create a Dedicated Coffee Cart on Wheels

    A rolling cart gives you flexibility and looks intentional without requiring permanent installation. This works especially well in small spaces or open-concept homes where you might want to move your setup around.

    Find a three-tier metal or wood cart at IKEA ($50-$80) or Target ($40-$70). Stock the top shelf with your coffee maker and grinder, the middle with mugs and supplies, and the bottom with beans and filters. The beauty here is mobility—when you’re not using it, roll it to a corner or bedroom for a quiet morning vibe away from the kitchen hustle.

    This option is perfect for renters since it doesn’t require any mounting or permanent changes. You get the full coffee bar experience without commitment.

    2. Install Open Shelving Above Your Counter

    Open shelves make your coffee station an intentional focal point rather than something hidden in a cabinet. Your setup becomes part of your kitchen’s style, not just functional storage.

    Install floating shelves ($20-$40 per shelf at Home Depot) at eye level using a stud finder and wall anchors. Mount shelves about 12-18 inches apart. Arrange your coffee maker on the middle shelf, mugs on one side, and supplies on the other. Add a small plant or candle for visual balance. This takes about an hour with basic tools.

    If you’re renting, use damage-free adhesive shelves ($15-$25) instead—they hold surprisingly well for light coffee equipment. The result feels curated and organized, and guests will notice your attention to detail.

    3. Use a Coffee Bar Cart with a Marble Top

    Marble instantly elevates any setup, even if it’s just a cart. It photographs beautifully and feels like you’ve invested in something special, even on a budget.

    Look for marble-top carts at Wayfair ($80-$150), West Elm ($120-$200), or vintage finds at local thrift stores ($30-$60). Position it near your kitchen’s most-used area. Keep three essentials on top: your coffee maker, grinder, and a small tray for mugs. Store beans and filters in the drawer below.

    The marble wipes clean easily and resists stains, making maintenance simple. Your coffee station becomes a conversation piece that actually looks expensive without breaking the bank.

    4. Display Mugs on a Wall-Mounted Pegboard

    A pegboard lets you show off a mug collection while keeping everything accessible and organized. Plus, it’s endlessly customizable—change the layout whenever you want.

    Install a pegboard ($20-$40 at Home Depot) with a drill and wall anchors. Add peg hooks ($1-$3 each) in whatever pattern feels right. Hang your favorite mugs, add small baskets for filters and sugar packets, and clip a small notepad for daily coffee notes. This takes 30 minutes to set up.

    Renter tip: Use damage-free pegboard alternatives ($25-$50) that adhere to walls temporarily. You’ll have a functional gallery for your mugs that looks intentional and fun.

    5. Add a Vintage Coffee Tin for Dry Storage

    Vintage coffee tins combine storage with style—they’re functional and photograph beautifully. Plus, coffee beans stay fresher in airtight metal containers than in bags.

    Hunt for vintage tins at thrift stores ($3-$8 each) or new reproductions at Urban Outfitters ($15-$25). Pour beans into airtight tins and label them with masking tape and a marker—or leave the vintage labels visible for charm. Group three tins together for visual interest. This costs almost nothing and adds instant character.

    Your coffee station immediately looks collected and intentional, like you’ve curated it over time rather than thrown it together last week.

    6. Style a Console Table as Your Coffee Bar

    If you have a blank wall or awkward kitchen corner, a console table transforms wasted space into a dedicated coffee zone. It’s more intentional than a kitchen counter setup.

    Find a slim console table ($60-$150 at Target, IKEA, or Wayfair). Position it against your wall, add your coffee maker and grinder on top, and stack a small shelf unit or basket beneath for storage. Top the whole thing with a mirror or artwork behind it for visual impact. This takes an hour to style.

    The benefit is clear zones—your coffee ritual stays separate from meal prep, giving you a defined “start your day here” moment.

    7. Use Glass Jars for Visible Ingredient Storage

    Clear glass jars show off what you have while keeping things fresh and organized. You’ll never run out of supplies because you can see levels at a glance.

    Buy glass storage jars ($2-$5 each at Target, IKEA, or Amazon). Transfer coffee beans, sugar, cocoa powder, or instant oatmeal into jars. Label each with a waterproof sticker or chalk marker. Arrange them in size order on your coffee bar shelf. This costs $15-$25 total.

    Your setup looks intentional and clean, plus everything is instantly accessible. No rummaging through cabinets while you’re still half-asleep.

    8. Install a Small Sink Dedicated to Coffee Cleanup

    If you have the budget and space, a small prep sink near your coffee station keeps your main kitchen sink free and adds a wow factor. This is more of an investment idea but changes your whole coffee ritual.

    A compact undermount sink runs $150-$400 with installation costs of $200-$500 if you hire a plumber. DIY installation is possible but requires plumbing knowledge. Position it right next to your coffee maker for quick rinsing and cleanup without walking across the kitchen.

    This idea works best for homeowners with dedicated kitchen space, but the payoff is huge: you can rinse your French press immediately and have everything clean before breakfast. The functionality makes a real difference in your daily rhythm.

    9. Create a Chalkboard Menu for Daily Coffee Specials

    Add a playful element that makes your coffee ritual feel like a café experience. It’s silly but effective for creating a special-feeling morning.

    Get a small framed chalkboard ($10-$20 at Target or World Market). Write your daily coffee blend, origin, or a motivational message each morning. Prop it on your counter or hang it above your coffee bar. Update it daily—this 30-second task becomes part of your ritual.

    Your setup stops feeling functional and starts feeling intentional. You’re not just grabbing coffee; you’re choosing your brew for the day.

    10. Use Floating Shelves with Integrated Lighting

    Under-shelf lighting makes your coffee station feel luxe and photograph beautifully. It also makes early mornings feel less harsh when overhead lights are too bright.

    Install LED strip lighting ($15-$30 on Amazon) beneath floating shelves using command strips or permanent adhesive. Pair with wooden floating shelves ($30-$60 each at Home Depot or Wayfair). The warm glow highlights your setup and creates mood lighting without any effort.

    Set the lights on a timer so they come on automatically at your usual wake-up time. Your coffee ritual instantly feels special, and you’re setting a calm tone before the day starts.

    11. Build a DIY Coffee Bar from Reclaimed Wood

    Reclaimed wood adds warmth and character that new materials can’t match. Building your own bar saves money and makes it feel uniquely yours.

    Score reclaimed wood from local salvage yards ($2-$5 per board) or Craigslist. Sand it smooth, seal it with food-safe finish ($15-$25), then mount it on brackets ($10-$20 per pair at Home Depot). This is a weekend DIY project taking 4-6 hours if you’re comfortable with basic tools.

    The result looks collected and intentional, like something from a design magazine—except you built it yourself for a fraction of the cost of premade options.

    12. Add a Monstera or Pothos Plant for Greenery

    A plant adds life to your space and makes morning coffee feel less like a chore and more like self-care. It’s the easiest way to make any setup feel intentional.

    Buy a low-maintenance Monstera or Pothos at any garden center ($15-$40). Position it next to your coffee station where it gets medium indirect light. Water weekly. The plant’s presence softens the space and makes everything feel more organic and less sterile.

    This single addition changes the whole vibe—suddenly your coffee bar feels like a wellness ritual instead of just grabbing caffeine.

    13. Use Woven Baskets for Fabric and Supply Storage

    Baskets hide supplies while adding texture and warmth to your space. They keep things organized without looking overly styled or sterile.

    Find woven baskets ($15-$40 each at Target, IKEA, or HomeGoods). Label the front with waterproof stickers or a label maker: Napkins, Filters, Towels, Supplies. Tuck them under your coffee bar table or on lower shelves. This costs $30-$60 total and takes 15 minutes to set up.

    Your coffee station looks curated rather than cluttered, and everything stays accessible without being visible.

    14. Install a Coffee Maker Shelf Directly Above Your Sink

    Installing your coffee maker above the sink is genius—drips go straight down the drain, and you have instant access to water without reaching across the counter.

    Mount a sturdy shelf ($30-$50) directly above your sink using heavy-duty brackets ($20-$40). Position your coffee maker so it drips naturally into the sink. This requires 45 minutes and basic drilling skills. Alternatively, hire a handyman for $50-$100.

    This setup saves counter space while making the coffee-making process more efficient. Plus, cleanup is literally built into the system.

    15. Create a “Coffee Only” Drawer with Custom Dividers

    If you don’t have counter space, dedicate one deep drawer to coffee equipment. Custom dividers keep everything accessible and prevent the “junk drawer” problem.

    Use a drawer divider system ($20-$30 at The Container Store or Amazon) to create sections for beans, filters, sweeteners, and equipment. Label each section with a vinyl sticker or tape. This takes 20 minutes to set up and costs under $40 total.

    Open the drawer each morning and have everything you need right there. It’s hidden from view but instantly accessible—perfect for small kitchens or minimalist aesthetics.

    16. Add a Vintage Coffee Grinder as Décor

    A beautiful grinder isn’t just functional—it’s a sculptural piece that elevates your entire setup. Vintage grinders often work better than new plastic ones anyway.

    Find a vintage coffee grinder at thrift stores ($5-$20), Etsy ($30-$80), or 1stDibs ($100-$300) depending on rarity. Clean and restore it if needed—oil any rusty parts and polish the wood. Position it prominently on your coffee bar where you can see it daily.

    This piece becomes a conversation starter and makes your coffee ritual feel elevated. It’s functional art that improves your morning experience while looking intentional.

    17. Use a Tiered Dessert Stand to Display Mugs

    A tiered stand solves vertical space challenges while displaying your mug collection beautifully. It’s especially useful for small kitchens or apartments.

    Find a tiered stand at HomeGoods ($20-$40), Target ($25-$50), or thrift stores ($5-$15). Arrange mugs by color or pattern on each tier, tucking small supplies or coffee beans between levels. This costs $20-$40 and takes 10 minutes to style.

    Your mug collection becomes a visual focal point rather than hidden in a cabinet. Small space, maximum impact.

    18. Install a Narrow Wall-Mounted Shelf for Linear Spacing

    A shallow, long shelf keeps your coffee setup narrow and organized. It works beautifully in kitchens where counter space is premium real estate.

    Mount a narrow floating shelf ($30-$60) using heavy-duty brackets. Keep only essentials on it: coffee maker, grinder, three mugs, and a small container for supplies. Everything stays visible and accessible without crowding.

    The linear arrangement feels modern and intentional. It’s the opposite of chaotic—clean geometry that makes your morning feel calm and organized.

    19. Create a Coffee and Tea Hybrid Station

    If you’re not coffee-only, a hybrid station serves both preferences without looking cluttered. It’s like having a personal café in your kitchen.

    Dedicate half your bar to coffee and half to tea equipment. Use matching storage jars for both beverages, a shared mug rack, and a central honey/sweetener station. Invest in a gooseneck kettle ($30-$60) that works for both coffee and tea prep.

    This approach feels complete and intentional, like you’ve thought through all your morning beverage needs. Guests appreciate the hospitality.

    20. Use a Decorative Tray to Corral Everything

    A tray pulls your coffee setup together visually and makes everything portable. You can grab the whole setup and move it anywhere if needed.

    Find a decorative tray ($20-$50 at Target, West Elm, or HomeGoods). Arrange your coffee maker, favorite mug, and supplies on it. Everything stays organized and cohesive, and you can easily move the whole setup if you want to reconfigure your space.

    This small touch makes your station feel more intentional, like you styled it for a magazine shoot. It’s an easy upgrade that costs almost nothing.

    21. Install a Commercial-Style Coffee Station with a Backboard

    If you’re passionate about coffee, go full café-style at home. This is an investment but transforms your entire kitchen aesthetic.

    Install a countertop ($200-$500), professional shelving ($150-$300), and a quality espresso machine ($300-$1000+). Add a backboard in marble, subway tile, or stainless steel ($100-$400). Hire a contractor or DIY if skilled. This is a 1-2 week project but totally customizable to your style.

    The result feels like bringing a café into your home. Every morning becomes a ritual worth waking up for.

    22. Add Brass or Gold Accents for Warmth

    Metallic accents elevate your station instantly. Brass and gold feel premium without being flashy or cold-looking like chrome.

    Add brass shelf brackets ($15-$30 per pair), a gold-framed mirror ($40-$80), or gold pour-over equipment ($30-$60) to warm up your space. These small touches tie everything together and make it feel intentional.

    The effect is subtle but noticeable—suddenly your coffee bar feels elevated and thought-through.

    23. Use a Vintage Coffee Scoops as Hanging Decoration

    Vintage scoops are functional and decorative—they’re practical tools that look beautiful when displayed. This is a low-cost way to add personality.

    Collect vintage scoops at thrift stores ($1-$3 each) or Etsy ($5-$15 each). Install small hooks ($2-$5 each) above your coffee station and hang them. Create a little gallery of scoops in different styles, eras, and materials.

    This detail makes your setup feel personal and collected. It tells a story about your love of coffee and design.

    24. Create a Coffee Station Window Shelf

    If you have a window ledge, use it as a coffee bar. Natural light makes mornings feel better and creates beautiful photo opportunities.

    Install a weather-resistant shelf ($20-$40) directly in your window or use a tiered plant stand ($25-$50) on your existing windowsill. Position your coffee maker to catch morning light. Morning sun will naturally highlight your setup and make the whole ritual feel brighter.

    Plus, gazing out the window while your coffee brews becomes part of the ritual. You’re combining caffeine with natural light, which actually wakes you up better than staring at your phone.

    25. Build a Sliding Barn Door Coffee Cabinet

    A barn door conceals your coffee setup when you want a clean look but reveals everything instantly when you open it. This is design meeting function beautifully.

    Install a small cabinet ($100-$200) with barn door hardware ($30-$60) from Amazon or Home Depot. Stock it with your coffee maker, mugs, and supplies. Close it for a clean kitchen aesthetic, open it to access your ritual. This takes 2-3 hours to install if you’re handy or hire help for $100-$200.

    Your kitchen can look sleek and minimal when the door is closed, but you have a complete café setup hidden inside. It’s the best of both worlds.


    Save this post and try one idea this weekend—even a tiny change makes your mornings feel intentional and special. Which setup speaks to you?

  • 26 Upper Cabinet Storage Ideas That Maximize Every Inch

    26 Upper Cabinet Storage Ideas That Maximize Every Inch

    You’re staring at your upper cabinets and wondering: How do I actually use this space without it looking like chaos? Whether you’re a renter working with what you’ve got or a homeowner ready to maximize storage, upper cabinets are prime real estate that most people leave half-empty or stuffed beyond recognition. The good news? With the right strategies, you can turn those cabinets into a beautiful, functional part of your kitchen that works for you, not against you. These 26 ideas range from free organizing hacks to smart storage investments—and most take less than an hour to implement. Let’s find the ones that fit your style and space.

    1. Stack Plates Vertically in Slots

    Vertical storage lets you see every plate without digging through stacks. Instead of piling dishes flat, use a simple plate rack divider (around $15-30 from IKEA or Target) to stand plates on their edge inside an upper cabinet.

    You’ll fit nearly double the dishes in the same footprint, and grabbing what you need takes seconds instead of shuffling through a precarious stack. Installation is basically sliding the divider into place—no tools required. If you’re renting, lean the divider against the cabinet back; it stays put without damage. Bonus: this also works brilliantly for baking sheets, cutting boards, and serving platters.

    Your morning coffee routine gets faster when you’re not playing Jenga with your dishes.

    2. Use Clear Glass Containers for Dry Goods

    Clear containers let you see what you have and when you’re running low—no more mystery cabinets. Pour flour, pasta, cereal, and rice into uniform glass or plastic containers ($1-3 each, bulk at Target or Amazon) and label them with masking tape or printed labels.

    This swap takes about 20 minutes and immediately makes your cabinets look intentional and organized. You’ll use about 30% less cabinet space since these containers stack efficiently and eliminate bulky original packaging. Add a label maker (around $20-30) if you want a polished look, but tape works just fine. The real win? You’ll actually know what you have, which means less food waste and fewer duplicate purchases.

    Suddenly your upper cabinets become a pantry showcase instead of a catchall.

    3. Add Adjustable Shelf Dividers

    Dividers prevent stacks from toppling and help you designate zones for different items. Grab adjustable shelf dividers ($8-15 per set, available at Container Store, IKEA, or Wayfair) and position them to create separate sections within each shelf.

    Set up zones: bowls in one section, mugs in another, serving dishes in a third. It takes about 10 minutes to arrange, and you’ll stop knocking over stacks every time you reach for something. These work for renters too—they simply rest on the shelf with no installation. Pro tip: stagger the divider heights so you can see all items at a glance, especially in back corners.

    You’ll stop playing “cabinet Tetris” every morning and actually enjoy opening your cabinets.

    4. Install Pull-Down Shelves for Back Corners

    Dead zones in the back of deep cabinets waste space you’ve already paid for. A pull-down shelf ($40-80, available at Home Depot or Amazon) is a sliding mechanism that brings items forward when you pull a handle.

    These work best in cabinets 12+ inches deep, and installation takes about 30 minutes with basic tools (or hire someone for $50-100 labor). You’ll reclaim 20-30% more usable space just by making back items accessible. These pair perfectly with clear containers so you can actually see what’s hiding back there. Renter? Skip this one—it requires permanent installation—but homeowners should seriously consider it.

    Suddenly those forgotten items in the cabinet’s cave become part of your everyday rotation.

    5. Hang Small Shelves Inside Cabinets

    Vertical thinking: add a second layer of storage without sacrificing accessibility. Use floating shelves ($15-40 depending on size, from IKEA, Amazon, or Wayfair) mounted about 6-8 inches above your main shelf.

    Most can hold 5-10 pounds of lightweight items like spices, tea, or small jars. Installation takes 20 minutes with basic hardware; use a level and stud finder (or ask at the hardware store for help). This doubles your upper cabinet capacity and keeps frequently used items at eye level. Make sure shelves don’t block cabinet lighting if you have it, and leave enough clearance to close the door.

    You’ve essentially given yourself an extra shelf without taking up any additional cabinet space.

    6. Create a Coffee Station in One Cabinet

    Grouping related items saves time and gives you a designated space to start your day. Dedicate one upper cabinet and use small hooks or a rail ($10-20, Home Depot or Amazon) to hang mugs directly inside the cabinet.

    Store ground coffee, filters, and sweeteners on the shelf below. Plug in a small coffee maker on the counter just below this cabinet if you have the counter space, or keep a French press inside. Setup takes about 15 minutes, and every morning you walk straight to your coffee station instead of hunting through three cabinets. This works great for renters if you use adhesive hooks instead of screwing anything in.

    Your cabinet becomes your caffeine command center—organized and ready the moment you need it.

    7. Use Tiered Shelf Risers for Height Variation

    Tiered risers help you see multiple items on one shelf instead of just what’s in front. Buy shelf risers or small risers ($12-25 per set, from Container Store or Amazon) that create stepped heights.

    Arrange glassware or mugs from back to front, tallest to shortest, so you can see everything at once. This takes 10 minutes to arrange and lets you fit 40% more items while keeping everything visible and accessible. These work especially well in glass-door cabinets where the display is part of your kitchen decor. Simple risers also help prevent scratches on your shelves from frequent reaching and grabbing.

    Your upper cabinets now feel intentional and styled—like you actually planned this layout.

    8. Mount a Magnetic Spice Rack Inside Cabinet Door

    Cabinet door real estate is often wasted—use it for spices that would normally crowd your shelf. Buy magnetic spice containers ($30-50 for a set of 12-24, from Amazon, Target, or Wayfair) and stick them to the inside of your cabinet door.

    Installation takes 5 minutes (just peel and stick), and you’ll free up a shocking amount of shelf space. Make sure the door still closes fully and that spices aren’t in direct sunlight. Label each container with a permanent marker so you know what’s what. This setup works for renters since magnetic containers peel off without damage.

    You’ve reclaimed an entire shelf’s worth of space just by thinking vertically inside your cabinet door.

    9. Stack Bowls with Separators Between Layers

    Stacking bowls without protection leads to chips and makes the bottom ones impossible to reach. Use thin rubber shelf liners ($8-12 per roll, Home Depot) or small paper plates between bowl layers to separate them.

    This keeps stacks stable and lets you actually pull out a single bowl from the middle without disturbing the whole tower. Arrange by size (small to large, bottom to top) for visual balance. Takes about 10 minutes to set up and prevents expensive breakage. You can also use coffee filters or parchment paper in a pinch—completely free.

    You’ll actually be able to grab one bowl without carefully disassembling a ceramic puzzle.

    10. Install Tension Rods for Vertical Dividing

    Tension rods ($5-12 per rod, Home Depot or Amazon) create vertical dividers for flat items like baking sheets and platters—no installation or tools needed.

    Simply stretch them across your cabinet at the width you want. This keeps large flat items from sliding around and makes them easy to grab without touching everything else. Takes 5 minutes to install; works perfectly for renters. You can create multiple sections: one for baking sheets, one for platters, one for cutting boards. The rods won’t damage cabinet walls, and you can reposition them anytime.

    Flat items stay put, organized, and actually accessible instead of creating an avalanche when you reach for one.

    11. Label Everything (Even Temporary)

    Labels take 30 seconds per item but save weeks of “where is that?” frustration. Use a label maker ($20-50, Amazon or Target) or simple masking tape and a marker.

    Label containers with contents and the purchase date so you know what’s in there and when it’ll expire. This seems basic, but it’s the difference between a cabinet that looks organized and one that actually functions organized. Take a photo of your labeled setup and pin it so you can reference it when restocking. Works for both permanent installations and rental-friendly setups.

    The investment of 10 minutes labeling saves you 100 times that in searching and wasted food.

    12. Create a Drinking Glass Graduated Display

    Glasses look beautiful when arranged intentionally—and it’s actually functional. Sort glasses by size, then arrange from smallest to largest, left to right.

    If you have multiple colors, create a subtle gradient. This takes 5 minutes to arrange and makes your cabinet look curated rather than random. Your morning water grab becomes effortless because you know exactly where each glass size lives. This setup shows especially well in glass-door cabinets where the display becomes part of your kitchen’s visual story.

    You’ll want to open those cabinets just to look at them—bonus points if guests admire your organization.

    13. Use Bamboo or Wood Shelf Organizers

    Bamboo organizers align with sustainable kitchen trends and look naturally warm. Buy bamboo shelf risers or dividers ($15-35 per piece, Wayfair, Target, or Amazon) for a biophilic touch.

    They’re sturdy enough for daily use and add an earthy, organized aesthetic that photographs beautifully. Setup takes 10 minutes, and bamboo blends seamlessly with warm wood cabinet tones that are trending this year. These are sturdier than plastic options and last longer. Plus, bamboo is renewable—a bonus if you’re thinking about your kitchen’s environmental footprint.

    Your cabinets suddenly feel intentional and eco-conscious, not just efficient.

    14. Hang a Small Wire Shelf Riser

    Wire risers are lightweight and don’t take up visual space—they look almost invisible but double your storage. Grab a compact wire riser ($10-20, IKEA or Amazon) and place it on your existing shelf.

    This creates a second tier for frequently used items like mugs or glasses. It weighs almost nothing, so even delicate cabinets handle it fine. Arrange heavy items below and lighter ones above. Takes 5 minutes to place and adjust. The wire construction lets light pass through, so it doesn’t create a “cave” effect in your cabinet.

    You’ve essentially added a whole new shelf without permanent installation or extra hardware.

    15. Dedicate a Snack Shelf for Kids or Easy Access

    One easily accessible shelf for daily-use items saves reaching and searching multiple times a day. Pick a cabinet at comfortable reaching height and stock it with your most-used items: snacks, everyday dishes, coffee mugs.

    Use clear containers ($1-2 each, Target) so everyone knows what’s available. Label the shelf “Everyday Grab Zone” if you have kids, so they know this cabinet is their go-to. Reorganize once a week when items get jumbled. This prevents constant cabinet hunting and gets other household members to actually put things back in the right place.

    You’ll stop hearing “where’s the…” fifty times a day because everything they need is in one predictable spot.

    16. Add LED Strip Lighting Under Cabinet Shelves

    Lighting makes it easier to see what you have and adds a luxury feel. Install battery-operated or plug-in LED strips ($15-40, Amazon, Target, or Home Depot) under each shelf.

    These take 10-15 minutes to stick (peel-and-stick backing) or mount with small brackets. Warm white LEDs look most inviting; cool white feels more modern. The brightness helps you see back corners and makes reaching for items safer. Battery-operated strips work great for renters; plug-in strips suit homeowners with nearby outlets. Motion-activated versions ($25-35) are extra convenient if your cabinet location allows it.

    Opening your cabinet now feels special—and you can actually see what’s inside, which is a nice bonus.

    17. Use Magazine Holders for Vertical Cookbook Storage

    Cookbooks take up tons of horizontal space—stand them vertically like a library. Buy magazine holders or bookends ($3-8 each, Target, IKEA, or Dollar Tree) and arrange cookbooks upright.

    Group by category: baking in one section, quick weeknight meals in another, international cuisines together. This takes 15 minutes to organize and makes your go-to recipes instantly findable. You see all the spines at once, so you’re reminded of cookbook options you might have forgotten. This works beautifully in open shelving too.

    Your cookbooks become an accessible reference library instead of a jumbled pile you never touch.

    18. Create a Tea and Coffee Accessory Zone

    Grouping beverages and their accessories prevents searching through three cabinets. Use a small bin or container ($5-12, Target or Container Store) to corral tea infusers, filters, stirrers, and sweeteners in one cabinet.

    Label the bin and place it next to your mugs and coffee storage. Takes 10 minutes to set up. Add a small shelf riser if you want a second tier for overflow. Everyone in your household will know exactly where to find what they need, and you’ll stop having tea supplies scattered across multiple cabinets.

    Your morning beverage routine becomes streamlined because everything lives in one concentrated zone.

    19. Use Nesting Bowls and Stackable Containers

    Nesting items are space-saving genius. Buy nesting bowls ($12-25, Target or Amazon) and stackable containers ($10-20 for sets, Container Store) that fit snugly inside each other.

    This reduces the footprint of items you already own by 40-50%. Arrange them at the front of your shelf so you can easily grab one without disturbing the others. Takes 5 minutes to nest and stack. Look for light colors or transparent materials so items are easy to identify. This approach works especially well for small cabinets where every inch matters.

    You’ve freed up unexpected space just by rearranging what you already have—zero extra cost.

    20. Mount a Pegboard Inside Your Cabinet Door

    Pegboard transforms cabinet door space into a customizable storage solution. Buy a small pegboard ($8-15, Home Depot) and peg hooks ($0.50-2 each) to create a customizable grid.

    Hang small baskets, measuring spoons, whisks, or cleaning cloths—whatever works for your flow. Takes 20 minutes to mount and arrange (use small nails or adhesive strips for renters). Rearrange anytime without guilt. The best part? You can see everything at a glance, so you actually use these tools instead of forgetting you own them.

    Your cabinet door becomes a personalized organization hub that grows and changes with your needs.

    21. Designate One Cabinet as a Vase and Serving Piece Showcase

    Vases and serving pieces are too pretty to hide—display them strategically. Pick one cabinet to be your showcase and arrange pieces by height, color, or type.

    Use shelf risers to create visual interest and fit more items in the space. This takes 15 minutes to arrange but transforms your cabinet from storage into decor. Leave some breathing room so items don’t look crowded. This display actually encourages you to use serving pieces instead of letting them collect dust. Works beautifully with glass-door cabinets where the display becomes permanent kitchen art.

    Opening this cabinet feels like visiting a mini gallery in your kitchen.

    22. Add Drawer Organizers to Cabinet Shelves

    Drawer organizers aren’t just for drawers—they create instant compartments in cabinets. Buy a set of small organizers ($10-20, Target or Container Store) and place them on your shelf.

    Divide utensils, measuring spoons, kitchen twine, and other small items into sections. Takes 10 minutes to place and fill. This prevents small items from scattering around and makes everything instantly findable. Most are stackable, so you can create multiple layers if needed. Perfect for the “junk drawer” items that don’t have a home.

    Your miscellaneous items now have structure and purpose instead of chaos.

    23. Use Lazy Susan Turntables for Corner Access

    Corner cabinets are notoriously hard to reach—a lazy Susan makes back items accessible. Buy a small lazy Susan ($8-15, IKEA or Target) and place it in corner cabinets.

    Arrange bottles, jars, or containers in a circle, and spin to find what you need. This takes 5 minutes to install and reclaims dead corner space you previously couldn’t access. Works best with lighter items that spin easily. The rotation means nothing gets lost in the back, and you actually use items stored there.

    What used to be an inaccessible black hole now rotates into easy reach.

    24. Create Pantry-Style Groupings by Meal Type

    Organizing by how you cook saves time mid-meal. Group breakfast items (oats, cereal, coffee) on one shelf, baking supplies on another, snacks together using small bins ($5-10 each, Target).

    Label each section and take a photo so household members know where to restock. Takes 20 minutes to reorganize but saves you 100 times that in prep time. You’ll naturally gravitate toward the right cabinet first because items are logically grouped. This approach especially helps families because everyone knows exactly where breakfast items or snack containers live.

    Cooking becomes faster because everything you need for one task lives in one predictable zone.

    25. Use Kraft Paper Liners for Clean Shelves

    Cabinet liners protect your shelves and add a design element. Use textured kraft paper or bamboo liners ($8-15 per roll, Amazon or Target) to line your shelves.

    This takes 15 minutes to measure and cut, and it protects your cabinet finish from spills and scratches. Paper liners are renter-friendly—just peel them off without damage when you move. They also add a subtle texture that photographs beautifully, especially in open-concept kitchens. Change them seasonally if you like a quick refresh without actual rearranging.

    Your cabinet interior suddenly looks intentional and protected instead of bare wood.

    26. Invest in a Small Corner Shelf Unit for Unused Nooks

    Final level: tackle truly awkward spaces with corner-specific solutions. Buy a small corner shelf unit ($25-50, Home Depot or Wayfair) designed to fit cabinet corners.

    These are angled to maximize corner space and make back items accessible. Installation takes 20-30 minutes and requires basic tools, but you’ll reclaim 15-20% of an otherwise unusable corner. This is best for homeowners since it requires permanent mounting. If you rent, stick with removable solutions like lazy Susans or bins that fit the corner instead.

    You’ve just claimed square footage of storage you didn’t even know existed.


    Save this post for your next kitchen refresh. Pick one or two ideas and tackle them this weekend—you’ll be amazed how much calm and functionality a little cabinet strategy brings to your daily routine.

  • 25 Modern Farmhouse Coffee Corner Ideas Full of Cozy Details

    25 Modern Farmhouse Coffee Corner Ideas Full of Cozy Details

    You’ve probably scrolled through coffee shop photos and thought, “I want that feeling at home.” The good news? Creating a modern farmhouse coffee corner doesn’t require a kitchen renovation or a huge budget. Whether you have a spare corner, a kitchen nook, or even just a small shelf, you can build a cozy space that makes your morning coffee ritual feel intentional and special. We’ve pulled together 25 achievable ideas—from free styling tricks to under-$50 finds to investment pieces—that blend farmhouse warmth with modern functionality. By the end of this guide, you’ll have a menu of options to mix and match based on your space and style. Let’s make your coffee corner as inviting as your favorite café.

    1. Start With Open Shelving in Light Wood

    Open shelving is the foundation of a modern farmhouse coffee corner because it keeps your setup visible, accessible, and visually appealing. Unlike closed cabinets, open shelves let you display your favorite mugs, coffee equipment, and small plants—turning everyday tools into décor.

    Hunt for floating shelves in light oak or reclaimed wood finishes at IKEA ($20-$40), Home Depot ($30-$60), or Wayfair ($40-$80). Installation takes about 30 minutes with basic tools. If you rent, wall-mounted command shelves are renter-friendly alternatives. Arrange items thoughtfully: group mugs by color, position your coffee maker at eye level, and leave space between objects so the shelves don’t feel cluttered.

    The result? A display that functions as storage and art at the same time. Every morning, you’re greeted with a styled setup that makes you want to linger over your coffee.

    2. Layer Warm Lighting With Edison Bulbs

    Lighting sets the mood, and Edison bulbs bring that warm, vintage café feel directly into your space. Pendant lights or even a simple table lamp with an Edison bulb transforms your corner from functional to atmospheric.

    Install hanging Edison bulb fixtures ($25-$60 on Amazon) above your coffee station, or place a vintage-style desk lamp ($20-$40 at Target or IKEA) on your counter. If you can’t install fixtures, string lights draped loosely above the area work beautifully and need no wiring. The warm 2700K color temperature is key—avoid harsh white bulbs.

    You’ll notice the difference immediately when you walk into your kitchen. That golden glow makes 6 a.m. feel less rushed and more like settling into a favorite café booth.

    3. Add A Reclaimed Wood Coffee Bar Cart

    A coffee cart brings mobility and charm. You can wheel it to wherever you are in the kitchen, or tuck it into a corner when guests arrive. Reclaimed wood carts have that farmhouse authenticity without looking overly styled.

    Wayfair, Target, and Amazon stock farmhouse carts in the $60-$150 range. Look for designs with industrial metal frames paired with wood shelves. Stock the top tier with your daily brewing supplies and the lower tier with extra mugs or coffee beans. Pro tip: add casters with locks so it stays in place when you’re making coffee.

    This setup gives you flexibility you wouldn’t get with a fixed station. You’re also creating a defined “coffee zone” that feels like a mini café right in your home.

    4. Style With Mismatched Vintage Ceramic Mugs

    Mismatched vintage mugs are the heart of farmhouse aesthetic—they feel collected and intentional rather than matchy-matchy and sterile. Each mug tells a story and adds personality to your corner.

    Hunt at thrift stores like Goodwill ($1-$3 per mug), estate sales, or Etsy ($3-$8). Look for neutral tones (cream, white, sage, or soft gray) with slight imperfections that feel authentic. Mix sizes and shapes—tall ones for lattes, smaller ones for espresso. You only need 6-8 mugs to start, but the thrill is in the hunt.

    When friends see your collection, they’ll ask where each one came from. Your mugs become conversation starters, and your corner feels like a reflection of your actual taste—not a catalog page.

    5. Create A Coffee Bean Display With Glass Jars

    Displaying coffee beans in clear glass jars serves dual purposes: they look beautiful and remind you to stay stocked. The different roasts create natural color variation—light, medium, and dark browns—that’s visually interesting.

    Buy glass jars with lids at Target, IKEA, or Amazon ($10-$25 for a set of 3). Label each jar with a chalkboard sticker ($3-$5) noting the roast type and origin. Fill them with whole beans from your favorite local roaster. Stack the jars at varying heights on your shelves for visual interest.

    Pro tip: buy coffee in bulk from local roasters—you’ll save money and support small businesses. Your corner now becomes a mini coffee bar that looks intentional and curated.

    6. Mount A Simple Wooden Wall Shelf For Equipment

    A dedicated equipment shelf keeps your brewing gear organized and on display. Modern farmhouse isn’t about hiding tools—it’s about celebrating them as part of the aesthetic.

    Install one substantial wooden shelf ($40-$80) at least 12 inches deep to accommodate a grinder and other equipment. Mount it 18-24 inches above your counter so you have working space underneath. Use L-brackets ($10-$15) rated for at least 25 pounds. This is a weekend DIY project if you’re comfortable with a drill, or hire a handyman ($50-$100 labor).

    Your brewing equipment becomes décor that serves a real function. Everything you need is within arm’s reach, and the organized display makes your routine feel more intentional.

    7. Layer In A Small Potted Succulent Or Herb Plant

    Plants bring life and softness to any corner. A small succulent or fresh herb plant (basil, mint) adds color without demanding constant attention, fitting the low-maintenance farmhouse vibe.

    Pick up a potted succulent or herb plant at any garden center ($5-$12). Choose a terracotta or simple ceramic pot that matches your neutral palette. Place it on your shelf or counter where it gets bright indirect light. Succulents need water only every 2-3 weeks; herbs need regular watering but you’ll use them in cooking.

    That splash of green makes your setup feel alive and connected to nature. On tough mornings, a small green plant next to your coffee is weirdly grounding.

    8. Use Vintage Candles For Soft Ambient Scent

    Scent is an underrated part of the café experience. Vintage-looking candles in cream, white, or soft gray add ambiance and aroma that makes your space feel polished without being fussy.

    Browse Target, HomeGoods, or Etsy for farmhouse-style candles ($8-$20 each). Look for scents like “morning coffee,” “fresh linen,” or “vanilla chai”—anything that complements rather than competes with your coffee aroma. Group 2-3 candles together on your shelf and light one on weekend mornings or evenings.

    Pro tip: unscented or lightly scented candles ($5-$10 from IKEA) work beautifully as décor even when unlit. The flickering flame (when lit) adds that cozy café warmth without overpowering your coffee’s aroma.

    Your corner starts to feel like a retreat, not just a functional station. The soft light and subtle scent transform an ordinary morning.

    9. Add A Vintage Metal Coffee Scoop Or Spoon Display

    Displaying a collection of vintage coffee scoops is a charming, often-overlooked farmhouse touch. They’re functional, beautiful, and small enough not to clutter your space.

    Hunt at thrift stores ($0.50-$2 each) or Etsy ($3-$8). Look for scoops with aged brass, copper, or iron handles. Display them on a small brass rod ($10-$15 on Amazon) mounted just above your coffee station, or tuck them in a small ceramic cup on your shelf. You only need 3-4 scoops to create visual interest.

    This tiny detail signals that your corner is intentional and collected over time. Visitors notice these small, curated touches more than you’d expect.

    10. Install A Small Backsplash With Subway Tiles (Or Faux)

    A simple tile backsplash defines your coffee corner and makes it feel like an actual built-in feature, not just random items on a shelf. Subway tiles are classic farmhouse and cheap to install.

    Use peel-and-stick tile ($20-$40 for a small section) from Amazon or Home Depot. These adhere to most painted walls and require zero tools or grout—perfect for renters. Or hire a tile installer ($150-$300 total) for a permanent installation if you own your home. Stick to cream, white, or light gray tiles to keep the space airy.

    That defined “zone” makes your coffee corner feel like a deliberate design choice. It frames your setup and signals to your brain: this is a special space.

    11. Style Your Counter With A Linen Coffee Station Runner

    A runner anchors your station visually and protects your counter. Linen runners have that effortless farmhouse feel—slightly rumpled, soft, authentic.

    Buy a linen or linen-blend table runner ($15-$35 from Target, West Elm, or Amazon) in cream, oatmeal, or light gray. Lay it lengthwise across your counter space. It defines your coffee zone and softens hard countertop surfaces.

    Your counter now has intentional styling instead of looking like a cluttered catch-all. The runner pulls your entire setup together visually.

    12. Display Your Coffee Equipment As Wall Art

    Framed coffee prints or vintage coffee posters turn your corner into a mini gallery. It’s decorative art that also reinforces the “café” atmosphere.

    Search Etsy ($10-$20 for prints) or thrift stores ($2-$8 for vintage posters). Frame them in simple wood or black frames ($10-$20 from Target or IKEA). Hang one piece above your coffee station or create a small gallery wall with 2-3 pieces at varying heights.

    Pro tip: free digital prints from Etsy ($3-$5) can be printed at home on cardstock and framed cheaply. Your corner now has art that reflects your passion, making it feel curated and personal.

    13. Integrate A Small Wooden Cutting Board As A Backdrop

    A large wooden cutting board or piece of reclaimed wood makes an excellent, unexpected backsplash. It adds warmth, texture, and that authentically rustic touch farmhouse lovers crave.

    Find a wooden cutting board or scrap wood at Home Depot ($10-$25), local lumber yards, or even free on Buy Nothing groups. Lean it against the wall behind your station or mount it with simple brackets ($8-$15). The natural wood grain is décor in itself.

    This budget-friendly move creates visual interest and a natural backdrop for your shelving. It’s the kind of detail that makes guests say, “Wait, is that intentional?” (It is.)

    14. Use Neutral Ceramic Canisters For Coffee Grounds Storage

    Ceramic canisters keep used coffee grounds accessible for composting and look polished on display. Modern farmhouse storage should be both functional and beautiful.

    Buy ceramic canisters with lids at Target, IKEA, or HomeGoods ($8-$15 per canister). Look for neutral tones (cream, white, sage) with simple designs. Label them with minimal text: “Used Grounds” on one, “Fresh Grounds” on another. Group them on your shelf for visual cohesion.

    Pro tip: if you compost, keep used grounds in one canister—you’ll have a visual reminder to add them to your compost bin. Your setup now has a closed-loop, sustainable feel that fits the modern farmhouse ethos.

    15. Create A Coffee Tasting Notes Station With Kraft Paper

    Keeping tasting notes turns your coffee hobby into something mindful and interactive. Kraft paper and pencils have that collected, artisanal farmhouse feel.

    Grab kraft index cards ($5-$8 at any office supply store) and wooden pencils ($3-$5). Store them in a small cup on your shelf. After brewing each new coffee, jot down the roaster, origin, and your notes on flavor, aroma, and body. Over time, you build a personal coffee journal.

    This practice deepens your coffee appreciation and creates a tangible record of your journey. Your corner becomes a space for mindfulness, not just caffeine consumption. It’s the kind of small detail that transforms a functional station into a meaningful retreat.

    16. Mount A Simple Metal Rack For Coffee Filters

    A dedicated spot for coffee filters keeps them visible and easy to grab. A small metal rack adds industrial-farmhouse character while solving a storage problem.

    Find a small vintage-style metal wall rack ($12-$25 on Amazon or at HomeGoods). Mount it 12-18 inches above your station with simple brackets. Stock it with your favorite filters and paper towels. You’ll use this daily, so accessibility matters.

    This tiny upgrade keeps your setup organized and prevents that drawer-rummaging chaos. It’s functional décor that actually improves your morning routine.

    17. Layer In Vintage Copper Or Brass Accents

    Warm metals—especially copper and brass—are signature to modern farmhouse and add luxury without feeling overdone. They’re subtle but make a noticeable impact.

    Hunt for vintage copper or brass pieces at thrift stores ($1-$5) or splurge on a new brass pour-over stand ($20-$40 from specialty coffee retailers). Integrate a copper kettle ($25-$50) into your display. These metals develop a patina over time, which actually increases their charm.

    Pro tip: group warm metals together so they feel intentional, not scattered. That metallic warmth creates visual richness and makes your corner feel elevated.

    18. Add A Small Marble Or Soapstone Trivet For Mugs

    A stone trivet protects your wooden shelves from hot mugs and adds elegant texture. Marble or soapstone trivet are classic, work with any farmhouse palette, and last forever.

    Buy a small marble or soapstone trivet ($8-$18 from HomeGoods, Target, or Etsy). Place it on your main display shelf where you’ll set mugs after brewing. It’s both protective and decorative—exactly what farmhouse design should be.

    This small stone object adds tactile warmth and visual interest without being precious. It’s the kind of practical detail that tells guests you’ve thought about every element.

    19. Style With A Simple Ceramic Pour-Over Holder

    A ceramic pour-over is both brewing equipment and beautiful object. Cream or white ceramic blends seamlessly into farmhouse aesthetics while being entirely functional.

    Invest in a ceramic pour-over dripper ($15-$35 from specialty coffee shops or Amazon). Pair it with a matching or complementary ceramic mug and small glass carafe. Arrange them on your main shelf as a styled “brewing zone” that looks like art.

    When guests see this deliberate setup, they immediately understand that coffee isn’t just caffeine here—it’s a ritual. That shift in perception makes your corner feel special.

    20. Create A Coffee-Pairing Snack Station

    A small snack station next to your coffee area elevates the experience from “grabbing coffee” to “settling in.” It’s the hospitality touch that makes visitors (and you) feel welcomed.

    Use a small wooden box or bread basket ($10-$20) lined with a neutral linen. Stock it with biscotti, pastries, or homemade treats. Rotate them regularly—fresh treats make your corner feel intentional, not stale. Keep serving utensils (small wooden spoon, cloth napkin) nearby for a polished touch.

    Your corner now feels like a full café experience. That small addition transforms your setup from a functional appliance zone into an actual destination in your home.

    21. Install Adjustable Shelving For Flexibility

    Adjustable shelving adapts as your collection grows. You might start with 3 shelves and eventually want 5—or need to shift heights as your collection evolves.

    Invest in adjustable floating shelf systems ($50-$120 per unit from IKEA, Home Depot, or Wayfair). These use metal rods and wooden shelves that you can move up and down as needed. Installation typically takes 1-2 hours depending on wall type.

    The flexibility means your coffee corner can grow and change without looking chaotic. You’re future-proofing your design investment.

    22. Add A Small Woven Basket For Coffee Bean Storage

    A woven basket adds texture and warmth while solving the “where do I store extra coffee bags” problem. Woven materials are quintessentially farmhouse.

    Find a small woven basket ($12-$25 at Target, HomeGoods, or Amazon). Choose natural fibers (seagrass, rattan, jute) in warm neutral tones. Tuck it on a lower shelf and fill it with coffee bags from your favorite roasters. The visible branding of quality coffee becomes part of your décor.

    This storage solution is both functional and visually interesting. It also makes it easy to grab a backup bag when you’re running low.

    23. Display A Vintage Coffee Grinder (Functional Or Decorative)

    A vintage grinder—whether functional or just decorative—is pure farmhouse soul. It tells a story and adds nostalgic warmth to your corner.

    Hunt at thrift stores ($5-$20), estate sales ($8-$30), or Etsy ($20-$50). Look for manual grinders with wooden handles or vintage electric models. If it’s purely decorative, that’s fine—the aesthetics matter as much as the function in farmhouse design.

    Position your grinder front and center on your shelf. Its presence signals that you care about coffee quality and appreciate vintage craftsmanship. That object becomes a conversation starter and anchor point for your entire setup.

    24. Incorporate A Small Chalkboard For Daily Coffee Menu

    A small chalkboard makes your home coffee corner feel like an actual café. You can rotate what you’re brewing and keep things feeling fresh and intentional.

    Buy a small wooden chalkboard ($10-$20 from Target, HomeGoods, or Etsy). Lean it against the wall above your station or mount it with a simple bracket ($5-$10). Each morning, write the coffee origin, roast level, or brew method in chalk. Include a little doodle if you’re feeling creative.

    This playful touch reminds you to be intentional about what you’re brewing. It also impresses guests who appreciate the café-like attention to detail. It’s a tiny thing that signals your corner is curated and alive, not just stagnant décor.

    25. Finish With A Neutral Gallery Wall Of Coffee Inspiration

    A gallery wall ties everything together and gives your corner a curated, intentional feel. Mix coffee-specific art with neutral landscapes or typography to keep it sophisticated.

    Gather framed pieces from thrift stores ($2-$8 each), Etsy ($5-$15 each), or print your own at home ($0.50-$2). Look for vintage coffee ads, quotes like “But first, coffee,” landscapes of coffee-growing regions, or simple botanical prints. Mix frame colors and sizes—wood, black, or natural tones work best.

    Arrange on your wall at varying heights using painter’s tape first to plan your layout (takes 15 minutes). Your gallery wall becomes the visual anchor that says: I’ve created something thoughtful here. That small collection of art signals to everyone—including yourself—that this corner is special and intentional.

    Save this post for your next weekend project and start with just one or two ideas. The beauty of building a coffee corner is that you don’t need to do it all at once—small additions add up fast, and your space grows into something uniquely yours.

  • 25 Mediterranean Kitchen Ideas Full of Warm Colors & Texture

    25 Mediterranean Kitchen Ideas Full of Warm Colors & Texture

    If you’re craving a kitchen that feels like a European getaway, Mediterranean design is your answer. This style celebrates warmth, natural materials, and colors inspired by the sea and sun—think warm terracottas, ocean blues, sunny yellows, and creamy neutrals. The best part? You don’t need a major renovation to capture this vibe. Whether you’re renting or own your home, these 25 ideas range from quick styling tweaks to weekend projects and investment upgrades. Let’s dive into the specific, actionable ways to bring that relaxed, warm Mediterranean feel into your kitchen right now.

    1. Paint an Accent Wall in Warm Terracotta

    Terracotta isn’t just a color—it’s a mood. One accent wall instantly grounds your space in Mediterranean warmth and creates a backdrop that makes white cabinetry and copper accents pop. Choose a warm terracotta in the yellow-orange range (avoid muddy reds).

    Pick a wall behind your sink or stove as your focal point. Benjamin Moore “Moroccan Red” ($35–$50 per gallon) or Sherwin-Williams “Cavern Clay” ($40–$55) work beautifully for Mediterranean vibes. You’ll need about one gallon for most kitchen walls. Pair with white trim to keep it fresh. Rental? Use peel-and-stick removable wallpaper in terracotta for $25–$40. Pro tip: Paint a test swatch and view it in morning and evening light before committing.

    This single change makes your kitchen feel intentional and grounded without overwhelming the space.

    2. Swap Cabinet Hardware for Brass or Copper Handles

    Hardware is the jewelry of your kitchen. Brass and copper handles instantly age up standard cabinets and anchor the Mediterranean aesthetic. They catch light beautifully and warm up any neutral cabinet color.

    Replace existing knobs or handles with brass cup handles (IKEA “PINNIG,” $1.99 each) or vintage-style leather-wrapped handles ($3–$8 per handle at Etsy or Anthropologie). A kitchen with 15–20 cabinet doors needs about 20–30 handles, totaling $30–$240 depending on quality. Swap them yourself in 1–2 hours with just a drill and screwdriver—no plumber needed. Renters: skip this and hang removable copper towel hooks on cabinet edges instead.

    You get that elevated, curated feel that completely changes how your kitchen reads.

    3. Add Open Shelving with Warm Wood Floating Shelves

    Open shelving is quintessentially Mediterranean—it shows off your beautiful dishware and makes the kitchen feel airy. Warm wood shelves especially ground the look and break up cabinetry visually.

    Install reclaimed wood or new wood floating shelves in walnut or medium oak ($30–$80 per 36″ shelf from Home Depot or Wayfair). Bracket hardware costs $15–$30. Plan for 2–3 shelves depending on your wall space. This is a one-weekend DIY with a level, drill, and stud finder—or hire a handyperson for $100–$200. Style with white dishes, blue glassware, potted herbs, and a few cookbooks. Keep items grouped in threes for visual balance.

    The result? A kitchen that feels curated and inviting rather than closed-off and sterile.

    4. Display Blue and White Ceramic Dishes

    Blue and white ceramics are the color signature of Mediterranean kitchens. When displayed on open shelves or hanging on walls, they become instant decor—no art required.

    Hunt for blue and white ceramics at HomeGoods ($8–$30 per piece), Etsy vintage sellers ($5–$50), TJMaxx, or local thrift stores ($1–$5). Start with 6–8 pieces: bowls, plates, a pitcher, and a serving platter. Arrange on open shelves or hang small plates on adhesive wall hooks (renters love this). Group by size or pattern for impact. Mix new affordable pieces with one or two invested vintage finds.

    Display becomes your decor, and you get functional, beautiful dishware that makes every meal feel special.

    5. Hang Dried Herbs and Garlic Braids as Wall Decor

    Dried herbs aren’t just practical—they’re beautiful wall art that smells incredible and screams Mediterranean. This is a free or nearly-free decor hack that adds instant texture and authenticity.

    Dry your own herbs by bundling sprigs with twine and hanging upside-down in a cool, dark place for 1–2 weeks. Or buy pre-dried herbs from farmers’ markets ($3–$8 per bunch) or online from specialty food sites ($5–$15). Garlic braids run $4–$10. Hang on simple wood hooks ($2–$5 at hardware stores). Cluster 3–5 bunches together for visual impact. This takes 10 minutes to hang and adds incredible charm.

    Your kitchen becomes a working, edible garden that looks intentional and warm.

    6. Install Warm Lighting with Pendant Lights in Glass or Brass

    Lighting sets the mood in Mediterranean kitchens. Soft, warm brass or glass pendants over your island or counter create that golden-hour glow that makes the space feel luxe and inviting.

    Replace builder-grade overhead fixtures with pendant lights in brass, bronze, or seeded glass ($40–$120 per pendant from IKEA, Wayfair, or Amazon). A set of three 36″ above a standard island works perfectly. Hire an electrician ($200–$400 total) unless you’re experienced with wiring. Choose warm color temperature bulbs (2700K) for that honey-toned glow. Renters: use plug-in pendant alternatives ($30–$60) that hang from ceiling hooks.

    The lighting alone makes your kitchen feel like a Mediterranean trattoria instead of a standard kitchen.

    7. Incorporate a Wooden Beam or Faux Beam Accent

    Wooden ceiling beams are a hallmark of Mediterranean and rustic European kitchens. They add instant character and age. Real beams are expensive; faux beams are a budget-friendly, renter-okay alternative.

    Install faux wood beams (polyurethane, lightweight) at $60–$150 per 12-foot beam from Home Depot or Amazon. They install with construction adhesive and a few nails—totally DIY-able in an afternoon. Real reclaimed beams run $300–$800+ but offer unmatched authenticity and value. Either way, stain them honey, walnut, or weathered gray. This is a statement piece that changes the entire room’s architecture and warmth.

    You get that “old European villa” feeling without the construction costs or commitment.

    8. Add a Rustic Wood Countertop or Butcher Block Island

    Warm wood counters are essential to Mediterranean kitchens. Butcher block especially brings that European farmhouse texture and warmth. This is a moderate-to-big investment but pays off in daily pleasure.

    Butcher block countertops run $40–$80 per linear foot installed (IKEA’s KARLBY is budget-friendly at $100–$200 for an island top). If your kitchen has laminate, you can install a new countertop or wrap an island in butcher block ($500–$2000 depending on size and installer). Walnut and honey oak tones are most Mediterranean. Seal and maintain with food-grade mineral oil. Renters: add a removable butcher block cutting board or small dining table ($80–$200) for the vibe.

    The warmth underfoot (and underhand) transforms your daily kitchen experience.

    9. Bring in Potted Herbs for Fresh, Living Decor

    Mediterranean kitchens are alive with herbs. Fresh potted herbs on your windowsill or countertop add greenery, fragrance, and the authentic farm-to-table vibe. Plus, you’ve got fresh herbs at arm’s reach.

    Plant or buy starter herbs (basil, rosemary, oregano, thyme) at nurseries or grocery stores ($3–$8 per pot). Pot them in terracotta or ceramic pots ($2–$10 each). Cluster 3–5 pots on a sunny windowsill or corner shelf. Water regularly and pinch off leaves as you cook. Swap out seasonally. This costs $30–$60 to start and requires only sunlight and weekly watering.

    You get fresh herbs, beautiful living decor, and that sensory Mediterranean experience every time you cook.

    10. Create a Tile Backsplash in Blue, White, or Geometric Patterns

    A tile backsplash is the art wall of your kitchen. Mediterranean backsplashes often feature hand-painted blue and white tiles, Moroccan patterns, or simple subway tiles in cream and blue.

    Subway tiles run $1–$3 per tile; hand-painted artisan tiles are $5–$15+ each from Etsy or specialty tile shops. A standard backsplash (30 sq ft) costs $300–$1000 in materials. DIY installation is doable if you’re patient; hire a tiler for $800–$2000 labor. Renters: use peel-and-stick removable backsplash tiles ($50–$150 for full coverage) or a removable tile wall panel. Install over your stove or sink for maximum impact and minimal damage.

    This one feature becomes your kitchen’s signature—the thing guests comment on first.

    11. Use Terracotta Tiles or Warm Stone for Flooring Accents

    Terracotta or warm stone floors anchor Mediterranean kitchens in authenticity. If full flooring replacement isn’t in the budget, even a small rug or runner creates the vibe.

    Full terracotta tile flooring costs $8–$15 per square foot installed ($2000–$5000+ for a full kitchen). Easier option: add a terracotta or warm stone-look rug ($60–$200 from Ruggable, which is washable) under your island or sink. This gives you the visual and textural warmth without commitment. Renters: this rug trick is perfect and moves with you. Pair with simple grout-colored or cream lines for that authentic Mediterranean feel.

    The floor grounds the entire space and makes the kitchen feel intentional and cohesive.

    12. Hang a Large Ceramic Platter or Bowl as Wall Art

    One large ceramic piece becomes an instant focal point and art installation. It’s functional, beautiful, and deeply Mediterranean. No paintings required.

    Find large serving platters or bowls at Etsy ($30–$80), HomeGoods ($15–$40), or local ceramic shops. Look for hand-painted blue and white or warm terracotta tones. Hang on simple wood or brass hooks ($5–$10). Place it at eye level on a blank wall space. This takes 5 minutes and costs $40–$100 total.

    Your kitchen immediately reads as curated and intentional.

    13. Paint Lower Cabinets a Deep Sage or Soft Blue

    While terracotta is bold, soft sage or muted blue-green is a more subtle Mediterranean approach. These colors evoke the sea and Mediterranean landscape without overwhelming a smaller space.

    Paint lower cabinets (or your island) with Benjamin Moore “Aegean Teal” ($40–$50) or “HC-143 Aganthus Green” ($35–$55) for a soft, sophisticated look. Pair with cream or white upper cabinets and light countertops. Use quality cabinet paint and primer-in-one for durability. This is a two-day DIY (one coat + one night drying) or hire for $500–$1200. Renters: use removable adhesive contact paper on cabinet faces ($30–$50).

    The color brings Mediterranean sophistication without the boldness of terracotta.

    14. Install a Wooden Plate Rack or Shelving Unit

    Plate racks are functional decor that display your best dishware while freeing up cabinet space. They’re deeply Mediterranean and cottage-core in the best way.

    Buy a wooden plate rack (wall-mounted, $80–$200 from Etsy, Anthropologie, or specialty shops) or build your own with stacked wood strips and supports ($30–$60 in materials). Install on a prominent wall near your dining area or kitchen entry. Style with 6–12 plates in blue, white, and cream tones. This is a 1–2 hour DIY install with a level and drill.

    Your best dishes become visible art, and you get conversation-starting decor.

    15. Add Warm Linen or Linen-Look Kitchen Towels and Runners

    Soft, natural linen in cream, sage, or muted blue is the textile backbone of Mediterranean kitchens. Layer towels and runners for warmth and texture.

    Invest in quality linen kitchen towels ($12–$25 per towel from Schoolhouse Electric, Etsy, or Anthropologie). Add a linen runner or kitchen mat ($40–$100 from Rugs USA or Wayfair). Mix 2–3 neutral tones—cream, sage, and warm white. Drape towels casually over a brass or wood bar for that lived-in warmth. This costs $100–$250 total but layers in texture beautifully.

    Your kitchen becomes touchably warm and inviting.

    16. Create a Beverage Station with Glass Jars and Ceramic Dispensers

    A beverage station feels special, functional, and deeply European. It’s a gathering point and a styling opportunity. Plus, guests love the detail.

    Set up a low shelf or corner with glass beverage dispensers with taps ($30–$80 from Anthropologie, Williams Sonoma, or Amazon). Add ceramic pitchers ($15–$40), small glasses ($2–$5 each), and fresh lemons and herbs in small vases. Total investment: $100–$200. This takes 1 hour to style and creates a café-like moment in your kitchen. Renters: this works perfectly on a cart or low shelf and moves with you.

    You get a functional, photogenic spot that makes hospitality feel intentional.

    17. Hang Copper or Brass Cookware on a Wall-Mounted Rack

    Displayed cookware is decor. Copper and brass pans are beautiful functional art that warms up your kitchen visually and actually (no really—you’ll reach for them more).

    Install a wall-mounted pot rack ($60–$150 from IKEA, Wayfair, or specialty kitchen shops). Invest in quality copper or stainless steel pans with brass handles ($30–$80 per pan). Hang 5–8 pieces in graduated sizes for visual interest. This is a one-afternoon DIY install into studs and instantly makes your kitchen feel professional and intentional.

    Your cookware becomes your kitchen’s visual centerpiece.

    18. Use Woven Baskets for Open Storage and Texture

    Woven baskets add organic texture, hide clutter on open shelves, and feel beach-house Mediterranean. They’re functional and photogenic.

    Source woven baskets from IKEA ($10–$30), Serena & Lily ($30–$100), or thrift stores ($3–$10). Choose natural rattan, seagrass, or woven wood in cream and tan tones. Stack 2–4 on open shelves or under an island. Use for linens, cookbooks, pantry overflow, or craft supplies. This costs $50–$150 total and takes an hour to style beautifully.

    Your open shelves look intentional, organized, and warmly curated.

    19. Paint Cabinetry in Cream or Off-White with Warm Undertones

    While neutral, warm cream and off-white reads completely different from sterile white. It’s the foundational color that makes Mediterranean kitchens feel inviting rather than cold.

    Paint cabinets with Benjamin Moore “Chantilly Lace” ($40–$50) or “HC-172 Moonlight White” ($35–$55)—these have warm undertones that feel luxurious. Use quality cabinet paint (Sherwin-Williams Pro Classic, $60–$80 per gallon) for durability. This is a multi-day project (prep, prime, two coats) DIY or hire a painter for $1200–$2500. The investment pays off daily in how your kitchen feels.

    Your space instantly becomes warmer and more European-feeling.

    20. Add a Narrow Console or Sideboard for Beverage and Serveware Storage

    A narrow console or vintage sideboard becomes a functional serving station and styling opportunity. It’s a way to add furniture and personality to your kitchen.

    Find a narrow console at Etsy ($150–$400), vintage shops ($50–$300), or new from Wayfair ($200–$600). Position along an open wall. Style the top with glassware, serving pieces, and a small plant. Keep items grouped in threes for visual balance. This is a quick install (just place it) and changes how your kitchen functions and looks.

    You get a beautiful, functional focal point that feels like intentional curation.

    21. Incorporate Stone or Marble Countertop Accents

    Stone or marble counters are the luxury anchor of Mediterranean kitchens. If a full replacement isn’t feasible, even one accent section (island, beverage bar) elevates the entire space.

    Marble or limestone countertops cost $50–$100+ per linear foot installed ($2000–$5000+ for a full kitchen). Smaller option: install marble on your island top only ($400–$1500). Or add a marble cutting board or small slab on your counter ($80–$200) for the look and function. Seal and maintain regularly to prevent staining. This investment pays dividends in how premium your kitchen feels.

    The stone grounds your space in Mediterranean authenticity.

    22. Hang Vintage or Artisan Mirrors with Ornate Frames

    Mirrors amplify light and warmth in Mediterranean kitchens. An ornate or vintage-framed mirror becomes art that also makes your space feel bigger and brighter.

    Find vintage mirrors at thrift stores ($10–$40), Etsy ($30–$150), or new ornate mirrors from Anthropologie ($80–$200). Hang on an open wall space at eye level. The frame (wood, metal, or ornate) matters as much as the mirror itself. This takes 10 minutes to install and costs $30–$150 depending on where you source.

    The mirror brings light, reflects your warm accents, and adds architectural interest.

    23. Display Olive Oil Bottles and Glass Decanters as Decor

    Displayed bottles and decanters are functional decor that screams Mediterranean and practicality at once. You get beautiful objects and easy cooking access.

    Collect glass bottles and ceramic decanters from HomeGoods ($8–$20), Etsy ($10–$40), or thrift stores ($2–$5). Fill with olive oil, vinegar, or kitchen staples. Add handwritten or printed labels for authenticity. Arrange on open shelving or a kitchen counter in a grouping. This costs $50–$100 total and takes 30 minutes to style.

    Your cooking becomes more intentional, and your kitchen looks purposefully styled.

    24. Create a Small Dining Nook with a Wooden Table and Woven Seating

    A small dining moment in or near your kitchen extends Mediterranean warmth and creates a gathering space. This is especially valuable in open-concept kitchens.

    Find a small wooden table ($150–$400 from Wayfair, Etsy, or vintage sources) and pair with 2–4 woven or wooden chairs ($80–$200 each). Squeeze into a corner, under a window, or at the end of your kitchen. Hang a pendant light above ($40–$120) for ambiance. Total investment: $400–$900. This transforms how your kitchen functions as a social space.

    You get a dedicated gathering spot that feels European café-like.

    25. Layer Rugs in Complementary Warm Tones

    Layered rugs add warmth, define space, and are deeply Mediterranean. Mixing textures and tones creates visual depth and coziness.

    Start with a neutral base rug ($80–$200 from Ruggable or Wayfair), then layer a smaller patterned or colored rug on top ($60–$150). Opt for warm tones: cream, terracotta, soft blue, sage. This works especially well in open kitchens to define the cooking zone. Washable, durable rugs (like Ruggable) are practical for kitchens. Total cost: $150–$350 for two rugs.

    Your kitchen feels grounded, warm, and intentionally layered.


    Save this post and try one or two ideas this week—even small shifts toward warm tones, natural textures, and displayed ceramics bring that Mediterranean magic into your daily kitchen life. Which idea speaks to you first?

  • 27 Cozy Kitchen Ideas That Make Cooking Feel Warm & Inviting

    27 Cozy Kitchen Ideas That Make Cooking Feel Warm & Inviting

    Introduction

    There’s nothing worse than cooking in a kitchen that feels cold, sterile, or unwelcoming. You spend so much time there—prepping meals, making coffee, gathering with loved ones—and yet so many kitchens feel more like showrooms than homes. The good news? You don’t need a full renovation to make your kitchen feel warm and inviting. Whether you’re renting, working with a tight budget, or ready to invest in your space, these 27 ideas will help you create a kitchen where you actually want to spend time. From simple styling tricks to smart storage solutions, you’ll discover ways to add texture, color, personality, and function—all while keeping your kitchen cozy and practical. Let’s make your kitchen a place you love.


    1. Layer Warm Earth Tones for Instant Comfort

    Earth tones create an immediate sense of calm and warmth that white or gray kitchens simply can’t match. You’re moving away from that cold, clinical feel and toward something that feels like home.

    Paint a feature wall in warm terracotta, sage green, or soft ochre ($30-$60 for quality paint). Pair it with wood-toned cabinets or stain existing ones to deepen their color. If you rent, removable peel-and-stick wallpaper in earth tones offers the same impact with zero commitment. The beauty of these colors is that they age gracefully and hide everyday wear better than white.

    Pro tip: Choose matte finishes over glossy—they feel more sophisticated and hide fingerprints better.

    The result? Your kitchen instantly becomes a space that feels settled and welcoming, like somewhere you’d linger over breakfast.


    2. Add Open Shelving to Display Personality

    Open shelving breaks up heavy cabinet lines and lets you showcase things you actually love instead of hiding everything away. It’s the kitchen equivalent of displaying your personality on your sleeve.

    Install floating shelves using a level and wall anchors ($20-$50 for three shelves plus hardware; YouTube tutorials make this DIY-friendly). Style with a mix of cookbooks, ceramic dishes, small plants, and practical items like oil bottles. Keep one or two shelves for everyday dishes you use often—this prevents the “museum display” trap.

    Real talk: Open shelving requires regular tidying, so only go this route if you’re okay with light maintenance.

    You’ll notice how much lighter your space feels when some wall space breathes, and visitors immediately see the real, lived-in version of your home.


    3. Swap Handles for Fingerpull Simplicity

    Handle-free cabinets have gone mainstream because they actually make your kitchen feel less cluttered, even when storage is full. The streamlined look creates visual calm.

    Replace hardware with integrated fingerpull handles ($200-$400 for a full kitchen restock) or invest in cabinets with built-in push-to-open mechanisms. Brands like Lioher offer ergonomic solutions that feel natural to use. For renters, adhesive fingerpull handles work temporarily on cabinet faces without damaging them.

    This update takes 1-2 hours if you’re replacing existing hardware, or you can do it gradually over time.

    Your kitchen immediately looks more refined, and the simplified lines make the space feel larger and more intentional.


    4. Introduce Textured Materials Like Fluted Cabinets

    Flat, uniform finishes make kitchens feel impersonal. Texture adds dimension, visual interest, and a sensory quality that makes your space feel more sophisticated and welcoming.

    Choose fluted cabinet fronts for lower cabinets ($150-$300 per cabinet face for custom versions, or $80-$150 for pre-made fluted panel inserts). Mix textures by pairing fluted cabinets with smooth counters or textured backsplash. Plaster-finish range hoods are another trending option ($400-$800) that add organic movement.

    Not ready to commit? Removable textured wallpaper or contact paper on one wall tests the look risk-free ($15-$30).

    The depth and light-play from textured surfaces makes your kitchen look professionally designed without feeling sterile or cold.


    5. Create a Hidden Scullery for Open-Plan Mess Control

    Open-plan kitchens are beautiful until dirty dishes and food prep chaos become visible from the living room. A hidden scullery or butler’s pantry solves this while maintaining the open aesthetic.

    If you have a hallway, closet, or small adjacent room, install cabinetry to create a prep and cleanup zone ($800-$2,000 for basic built-ins, or use a tall cabinet system for $300-$600). This hides the blender, food processor, and pile of cookware while keeping your main kitchen looking serene. Renters can achieve this with a rolling utility cart behind a decorative screen.

    A few days project with proper planning or one afternoon if you’re using ready-made solutions.

    Your guests see a calm, curated kitchen while you have functional space for actual cooking behind the scenes.


    6. Mix Bold Cabinet Colors with Neutral Counters

    The days of all-white kitchens are done—71% of design professionals report clients now want color that reflects their personality. Bold cabinets make a statement while neutral counters keep the overall effect balanced.

    Paint or refinish lower cabinets in deep jewel tones like forest green, navy, or terracotta ($200-$600 including primer and labor if DIY, or $800-$1,500 with professional help). Keep uppers white or natural wood, and choose a timeless countertop like light granite or butcher block ($30-$100+ per square foot). Cabinet paint lasts 3-5 years before touch-ups; consider semi-gloss or satin finishes for durability.

    Weekend project for DIY painters; 3-5 days if hiring help.

    Your kitchen becomes the room people actually want to hang out in—bold enough to have character but balanced enough to stay timeless.


    7. Install Warm Lighting in Layers

    Single overhead lighting creates harsh shadows and cold energy. Layered lighting (ambient, task, accent) makes your kitchen feel like a welcoming retreat you actually want to spend time in.

    Add under-cabinet LED strips ($30-$80 for a kit, super easy to install), hang pendant lights over islands or counters ($60-$300 per fixture), and install a dimmer switch on overhead lights ($15-$40). Use warm white bulbs (2700K color temperature) instead of cool white for instant coziness. This combination takes 2-3 hours if you’re comfortable with basic wiring, or hire an electrician ($150-$400).

    Pro tip: Battery-operated puck lights work for renters with zero installation stress.

    The warmth of layered lighting makes your kitchen feel like a restaurant-quality space rather than a utilitarian work zone.


    8. Embrace Retro Earth Tones and 1970s Vibes

    Retro styles are making a major comeback—52% of design professionals predict a 1970s bright, earthy tone revival. Embracing these tones feels personal and intentional rather than trendy.

    Choose one vintage-inspired element like an avocado-green stove ($300-$800 for new vintage-style appliances, or hunt used models for $50-$300), mustard or olive cabinet paint ($150-$400 to refinish), or a warm wood backsplash ($200-$600). Mix with modern elements like stainless steel hardware or contemporary countertops to keep it feeling current rather than campy.

    Start with paint or smaller accents before committing to appliances.

    This approach celebrates warmth and personality while avoiding the feeling of being stuck in a time warp.


    9. Add a Combination Island with Built-In Seating

    Islands that combine 50-60% closed storage with open seating solve the dual problem of needing storage and gathering space without turning your kitchen into a warehouse.

    Install or upgrade to a combination island with bottom cabinets for cookware and pantry items plus an open side for barstool seating ($1,000-$3,000 for mid-range options, or $300-$800 for a simple base kit to customize). This gives you functional storage hidden from view plus a social hub for entertaining. Pair with 2-3 comfortable bar stools ($80-$200 each).

    A weekend project with a pre-made base, or 2-3 days with custom building.

    Now your kitchen serves triple duty: cooking, storage, and gathering place—all without visual clutter.


    10. Style Open Shelves with Cookbooks and Plants

    Open shelves are only cold and sterile if they’re empty or perfectly styled like a showroom. Real personality comes from mixing function with beautiful objects you actually use and love.

    Arrange cookbooks by color or size, add 2-3 potted herbs or small plants per shelf, and include dishes or serving pieces you use regularly. Layer in books, ceramics, and greenery so shelves look curated but lived-in. This styling costs just the price of plants ($5-$15 each) and maybe a few new ceramics if you want them ($10-$40 per piece).

    Pro tip: Group items in odd numbers (3s and 5s) for a more sophisticated look than perfect pairs.

    Your shelves become a visual story of who you are, making your kitchen feel personal rather than prescriptive.


    11. Install a Range Hood That Doubles as Decor

    Traditional metal hoods are purely functional and often visually heavy. A textured or sculptural hood becomes the kitchen’s focal point and adds that organic warmth trend is calling for.

    Invest in a plaster-finish or textured range hood ($400-$1,200) or opt for a painted steel hood in a bold color ($200-$600). These statement pieces add architectural interest without sacrificing ventilation. If you rent or want flexibility, a removable wood or plaster-look wall treatment above your stove creates a similar effect ($80-$200).

    Installation requires professional help for ventilation work ($300-$600 in labor).

    Your kitchen gains a sculptural element that catches light and creates visual warmth while handling the practical job of removing cooking odors.


    12. Create a Coffee or Beverage Station

    A dedicated coffee or beverage station creates a moment of ritual and gives that area of your kitchen distinct personality and purpose. It’s the first thing people see in the morning and sets the tone for your whole day.

    Dedicate one shelf, small table, or corner counter to coffee supplies ($0 if you’re repurposing existing furniture). Add a simple wooden tray ($15-$40), a few matching mugs ($30-$60 for a set), and fresh flowers or greenery ($5-$15 weekly). Group everything in one small zone so it feels intentional rather than chaotic.

    Free with items you already have, or $60-$120 to refresh it properly.

    This tiny ritual space makes your kitchen feel like a café you genuinely want to visit rather than just a place to grab things quickly.


    13. Paint Lower Cabinets in Jewel Tones

    Two-tone cabinetry with bold lower tones and lighter uppers feels both modern and warm. It creates visual interest without overwhelming your entire space with color.

    Paint lower cabinets in emerald, sapphire, or deep navy ($200-$400 for quality paint and primer, or $800-$1,500 with professional application). Keep uppers white or natural wood. Add brass or gold hardware ($2-$8 per knob, around $50-$200 total) to tie the color together. Satin or semi-gloss finishes are more durable than matte for high-traffic cabinet doors.

    A weekend DIY project or 2-3 days with professional help.

    Your kitchen instantly looks elevated and intentional, with enough visual contrast to feel dynamic rather than flat.


    14. Add Warm Wood Accents and Shelving

    Wood softens modern or minimalist kitchens and adds natural warmth that no paint color can replicate. It ties your space to nature and feels inherently welcoming.

    Install warm wood floating shelves ($60-$150 for one shelf), upgrade to wood cabinet faces ($300-$800 depending on size), or add a wood beam range hood backing ($200-$600). Choose oak, walnut, or cedar in medium to warm tones rather than bleached white. Mix wood tones gently—two complementary woods are fine, three or more can feel chaotic.

    DIY floating shelves take 1-2 hours; cabinet upgrades take a weekend or professional installation.

    Wood brings organic texture and warmth that makes your kitchen feel less like an appliance showroom and more like a home.


    15. Style Your Countertops as Display Space

    Rather than clearing everything off counters (which feels cold and sterile), curate what you keep visible for a lived-in aesthetic that’s still organized.

    Keep 3-4 beautiful items on your counter: a wooden cutting board, a potted herb, a bowl of seasonal fruit, and maybe a small ceramic dish. Group them on one side to preserve workspace. Everything else stays in drawers or cabinets. Switch seasonal items to keep it fresh ($0 if you’re rotating things you own, $15-$30 for seasonal decor).

    Takes 15 minutes to style and 5 minutes to maintain daily.

    Your counters become a small gallery of intentional style rather than either a cluttered mess or a barren workspace.


    16. Install Wallpaper or Peel-and-Stick Accents

    Wallpaper is the fastest way to add color and pattern without commitment (especially removable versions). It instantly makes a kitchen feel designed rather than generic.

    Apply peel-and-stick wallpaper to one accent wall ($20-$60 for a roll covering about 28 sq ft). Choose warm botanical, geometric, or subtle patterns rather than loud designs. Removal is as simple as peeling when you want a change. Alternatively, hire a professional wallpaper hanger for $300-$800 if you’re doing traditional wallpaper.

    DIY peel-and-stick takes 1-2 hours; traditional wallpaper takes 4-6 hours professionally.

    One patterned wall completely shifts your kitchen’s energy from blank and cold to warm and designed.


    17. Create a Dining Nook for Gathering

    A dining nook transforms an awkward corner into a cozy gathering spot and gives your kitchen more purpose than just cooking. It’s where memories get made over breakfast.

    Use a window corner to install a built-in bench ($400-$1,200 with professional building, or $100-$300 for a simple DIY frame) plus a small table ($100-$400) and cushions ($30-$80). If space is tight, a café-style table and two chairs ($150-$400 total) creates the same effect. This works even in tiny kitchens—just 4×4 feet is enough.

    DIY simple benches over a weekend; professional builds take 2-3 days.

    Suddenly your kitchen feels like an experience—a place where you linger and connect rather than just pass through.


    18. Layer in Greenery and Live Plants

    Plants soften hard lines and connect your kitchen to nature while serving practical purposes like fresh herbs for cooking. The visual effect is instantly warmer and more alive.

    Place potted herbs on sunny windowsills ($3-$8 per plant), add trailing plants to shelves ($5-$15 each), and use a rolling plant stand in a corner ($40-$100) for multiple greenery. Choose low-maintenance plants like snake plants, pothos, or actual herbs you’ll use. Water on a simple schedule (most herbs need water 2-3 times weekly).

    Free if you propagate from cuttings; $30-$60 to populate several spots properly.

    Green instantly makes your kitchen look alive, intentional, and warmer—plus you get fresh herbs for cooking.


    19. Use Warm Metallic Hardware and Fixtures

    Hardware is a small detail with outsized impact. Warm metals like brass, copper, and rose gold feel infinitely cozier than cold stainless steel or chrome.

    Replace cabinet knobs and pulls with warm brass or copper hardware ($2-$8 per piece, $50-$300 for a full kitchen). Upgrade faucet trim if possible ($100-$400 for a new fixture), or add matching pendant lights ($80-$300 each) to tie everything together. This subtle shift creates visual warmth throughout your space.

    Hardware replacement takes 1-2 hours and requires just a screwdriver.

    These small warm-metal touches create a cohesive, intentional aesthetic that feels both sophisticated and inviting.


    20. Build Textured Backsplash Variety

    A uniform, flat backsplash feels sterile. Mixing textures creates depth and makes your kitchen feel designed and considered rather than generic.

    Combine matte and glossy tiles ($5-$15 per square foot), add relief or raised patterns ($10-$20 per square foot), or mix ceramic styles ($8-$25 per square foot). A 3×6 foot backsplash costs $150-$600 in materials plus $400-$800 in installation. Go bold with color or pattern here—this is the perfect place to take risks since it’s just one wall.

    2-3 day professional project, or a long weekend for ambitious DIYers.

    A textured, interesting backsplash becomes a focal point that elevates your entire kitchen aesthetic.


    21. Organize with Beautiful, Functional Storage

    Functional storage doesn’t have to be boring. Beautiful organization systems make you actually want to open your cabinets and keep things tidy.

    Invest in matching storage containers for pantry items ($30-$80 for a set of 5-6), labeled glass jars for dry goods ($20-$50 for a set), and drawer dividers ($15-$40). Choose warm wood, ceramic, or warm-toned glass rather than clear plastic or chrome. Label everything with a label maker ($15-$30) for a polished look. This creates visual calm when cabinet doors open and makes cooking more efficient.

    One weekend afternoon to implement across your kitchen.

    Organization suddenly feels aspirational rather than chore-like, and your kitchen runs more smoothly because everything has a home.


    22. Integrate Outdoor Spaces for Extended Living

    Blending indoor and outdoor kitchens extends your living space and creates flexibility for cooking, entertaining, and gathering. Your kitchen becomes a gateway to larger experiences.

    Install a pass-through window or sliding door ($200-$600 for new doors, or style existing ones with matching outdoor furniture) that connects to a covered patio or deck. Place matching bar stools or a small table just outside to blur the line between spaces. Use durable outdoor materials that coordinate with your indoor kitchen aesthetic ($200-$600 for quality outdoor furniture).

    A weekend styling project or 2-3 days if adding new doors.

    Your kitchen visually and functionally expands, creating more room for gathering and entertaining without actually expanding the building.


    23. Add Task Lighting Over Work Zones

    Proper lighting over your prep and sink areas is essential for safety and mood. Good task lighting makes cooking feel less like a chore and more like an experience.

    Hang focused pendant lights directly over your prep counter or sink (18-24 inches above the surface) using pendant kits ($60-$200 each) or a professional electrician’s help ($150-$300). Space them 24-30 inches apart. Choose warm white bulbs (2700K) and adjustable brightness for flexibility. This is separate from ambient lighting and serves purely functional purposes.

    DIY takes 2-3 hours if you’re comfortable with wiring; hire help if unsure.

    When you can actually see what you’re doing without shadows, cooking becomes more enjoyable and your kitchen feels less like a dark dungeon.


    24. Design Multifunctional Zones for Flexibility

    Modern life demands kitchens that do multiple jobs. Creating defined zones for different activities makes your space feel organized and functional rather than chaotic.

    Dedicate corner zones for: prep work (with cutting board and knife storage, $50-$150), beverages (coffee/tea station, $0-$80), recipes (cookbook display, $0-$30), and quick dining (bar or nook, $100-$400). Use open shelving or small tables to physically separate zones while keeping everything visible. Lighting and storage define each zone without needing walls.

    Takes 1-2 hours to rearrange and style existing items; $200-$400 if adding furniture.

    Your kitchen becomes a responsive space that adapts to what you need rather than forcing one rigid use pattern.


    25. Layer Textures with Fabric and Soft Materials

    Hard materials and flat surfaces make kitchens feel cold. Layering in soft textures like textiles, linens, and woven elements creates surprising warmth in a typically hard space.

    Add a kitchen runner rug in warm tones ($40-$120), hang linen curtains over windows ($50-$150), and layer seat cushions on bar stools ($20-$50 each). Choose natural fibers like cotton, linen, and wool that age beautifully and feel good to touch. Opt for warm neutrals or earth tones that complement your cabinet colors.

    Takes 1-2 hours to hang and style.

    These soft touches make your kitchen feel less like a surgical space and more like a cozy, lived-in room you want to spend time in.


    26. Create Contrast with Matte Black Accents

    Matte black isn’t cold when paired with warm wood and earth tones—it adds sophistication and visual contrast that elevates your entire kitchen aesthetic.

    Paint upper cabinets or an island in matte black ($150-$400 for high-quality finish), add matte black hardware ($50-$200), or install a matte black range hood ($300-$800). Pair this boldness with warm wood countertops, honey-toned open shelving, or copper accents to prevent the space from feeling too dark. Matte finishes hide fingerprints and dust better than glossy alternatives.

    A weekend painting project or $800-$1,500 with professional application.

    The contrast between warm wood and sophisticated matte black makes your kitchen look intentionally designed and gallery-quality.


    27. Personalize with Collected Objects and Meaning

    The warmest kitchens aren’t the most expensive or perfectly styled—they’re the ones filled with objects and memories that mean something to you. Personalization is what transforms a house into a home.

    Display items you’ve collected, inherited, or made: vintage serving dishes ($10-$50 at thrift stores), family cookbooks, handmade ceramics from artists you love, or souvenirs from meaningful trips. Arrange them thoughtfully on open shelves or in a small gallery wall. Rotate pieces seasonally or when your mood shifts. This costs whatever you want to spend on items you genuinely love.

    10 minutes to rearrange; ongoing joy.

    Your kitchen tells the story of who you are and what you value, making it the most beautiful and inviting room in your home—not despite its imperfections, but because of them.


    Save this post and try just one idea this weekend—you’ll be surprised how much personality a single small change brings to your kitchen. Which idea resonates with you most?

  • 25 Rustic Kitchen Decor Ideas That Add Warm Vintage Charm

    25 Rustic Kitchen Decor Ideas That Add Warm Vintage Charm

    There’s something magical about a kitchen filled with rustic charm—the kind of space that makes you want to linger over coffee and home-cooked meals. If your kitchen feels too modern or sterile, you’re not alone. Many people crave that warm, vintage aesthetic that whispers of simpler times and handmade goodness. The good news? You don’t need a complete renovation to get there. We’ve rounded up 25 rustic kitchen decor ideas that range from free styling tweaks to meaningful upgrades, all designed to infuse your space with authentic vintage warmth. Whether you’re a renter or homeowner, on a tight budget or ready to invest, you’ll find actionable ideas you can start this weekend. Let’s bring that cozy, nostalgic feeling home.

    1. Hang Open Wooden Shelves for Display

    Open wooden shelves are the hallmark of rustic kitchens and give you an instant farmhouse vibe. They’re functional and beautiful, letting you display dishes, glassware, and vintage finds while keeping everyday items within reach.

    Install floating shelves made from reclaimed wood or new wood stained to look aged. Visit Home Depot, Lowe’s, or Wayfair for ready-made options ($40–$150 per shelf, plus hardware). For a DIY approach, use salvaged barn wood from local restoration companies or Facebook Marketplace ($20–$60). Installation takes 1–2 hours with a drill and level. If renting, look for adhesive-mount shelves that require no drilling.

    Pro tip: Style shelves by grouping items by color and height—vintage stoneware, green glassware, and small plants create visual interest without looking cluttered.

    The result? A kitchen that tells your story and draws people in. Open shelving becomes an instant conversation starter.

    2. Add a Vintage-Style Enamelware Collection

    Enamelware brings both color and authenticity to a rustic kitchen. These metal pieces with their chipped, painted finishes are genuinely vintage or vintage-inspired and look beautiful displayed or used daily.

    Hunt for enamelware at thrift stores, antique shops, and Etsy ($5–$25 per piece for authentic vintage, $10–$40 for new reproductions). Real vintage pieces show wear and patina, which adds character. Mix colors—cream, sage green, red, and blue—for a collected-over-time feel. Display on open shelves, hang from hooks, or use in your cooking.

    Pro tip: Look for brands like Falcon or Columbian Enamelware on vintage marketplaces for investment pieces that hold value.

    You’ll add pops of warm color and functional nostalgia to your kitchen. Plus, these pieces work beautifully in your everyday cooking routine.

    3. Install a Wooden Beam Accent Wall

    Exposed wooden beams instantly age a space and add architectural character. They work even in smaller kitchens when used selectively.

    Install 1–3 beams on one wall using faux beams (lightweight, $60–$150 each from Home Depot) or real reclaimed beams (premium option, $200–$500+ from specialty suppliers). Real beams require professional installation (4–8 hours, $400–$800). Faux beams are renter-friendly if you remove them carefully and patch walls afterward.

    Pro tip: Stain beams a warm honey or ebony tone to complement your cabinetry. Placing beams horizontally feels more approachable than full ceiling coverage.

    This upgrade completely changes your kitchen’s architecture and gives you an instant focal point. The depth and shadow from the beams photograph beautifully too.

    4. Paint Cabinets a Warm Earth Tone

    Move away from white or gray cabinetry with warm earth tones like sage green, soft mustard, terracotta, or warm cream. These colors embrace the rustic palette and feel infinitely cozier.

    Paint existing cabinets yourself (supplies $40–$100, 2–3 days of work including drying time) using Benjamin Moore, Sherwin-Williams, or Behr in colors like “Healing Aloe,” “Accessible Beige,” or “Urbane Bronze.” Prep is key: sand, prime, and apply two coats. For a professional finish, hire a painter ($800–$2,000). Renter-friendly: some paint colors work on cabinet doors only if you remove and reinstall them.

    Pro tip: Test paint samples on your cabinets first—lighting changes everything. Warm tones look best with natural wood accents and brass hardware.

    Your kitchen immediately feels warmer and more personal. The color grounds the space and works as your design anchor.

    5. Add Vintage Glass Jars to Open Shelves

    Vintage glass jars aren’t just functional—they’re beautiful decor that celebrate the “show your ingredients” aesthetic of rustic kitchens.

    Collect mason jars, apothecary jars, and vintage glass containers from thrift stores, Target, and Container Store ($1–$10 per jar). Fill them with pantry staples: dried beans, pasta, oats, flour, sugar, and nuts. Label with chalkboard stickers or kraft paper tags tied with twine. Budget: $30–$50 for a collection of 8–10 jars.

    Pro tip: Mix new and genuinely vintage jars for visual variety. The imperfections in old glass catch light beautifully.

    This simple styling hack makes your kitchen feel organized, intentional, and magazine-worthy. It’s also practical—you can see what you need at a glance.

    6. Install a Farmhouse Sink with Apron Front

    A farmhouse sink is the crown jewel of rustic kitchen design—that big, deep, beautiful basin screams authenticity and becomes a focal point.

    Apron-front sinks cost $300–$800 for quality ceramic or fireclay (brands: Kohler, Rohl, Native Trails). Installation runs $500–$1,500 if you need plumbing adjustments. This is an investment piece best suited for homeowners, though some rentals allow it with landlord approval. Pair with a vintage-inspired brass faucet ($150–$400).

    Pro tip: If a full sink replacement isn’t possible, swap out your faucet to a gooseneck or bridge-style fixture for farmhouse vibes on a smaller budget ($200–$300).

    A farmhouse sink becomes the heart of your kitchen and totally changes how the space feels. You’ll love the deep basin for big tasks and the aesthetic boost it gives your workflow.

    7. Hang Wrought Iron or Brass Hooks

    Hooks are practical and incredibly rustic. They display your favorite cookware, textiles, and plants while keeping things accessible.

    Buy wrought iron or brass hooks from Etsy, Anthropologie, or Home Depot ($8–$30 per hook). Install into studs or use heavy-duty anchors into drywall (15 minutes per hook). Group 4–6 hooks on one wall for impact. Budget: $50–$150 for a small collection. Renter-friendly: use adhesive hooks (Command brand) for temporary installation.

    Pro tip: Hang cast iron pans, linen towels, and string bundles of dried herbs. Layer textures for a collected feeling.

    This upgrade adds function and beauty instantly. Your kitchen becomes more organized while feeling like an intentional, styled space.

    8. Use Reclaimed Wood for Countertops or a Kitchen Island

    Reclaimed wood countertops or island tops are expensive but worth it for authentic rustic appeal. The patina and character are impossible to replicate.

    Reclaimed wood runs $3–$10+ per linear foot, with installation adding $500–$1,500. Companies like Longleaf Lumber or Elmwood Reclaimed Timber specialize in salvage. For a smaller commitment, use reclaimed wood for just an island top or a small bar section ($200–$600). Seal with food-safe matte finish.

    Pro tip: Mix reclaimed wood with a butcher block for a lower-cost hybrid approach. Budget-friendly alternative: stain new wood to look aged.

    The authenticity and texture of reclaimed materials elevate your entire kitchen aesthetic. It becomes an investment that adds real value and character.

    9. Style a Coffee or Tea Station Corner

    Create a dedicated rustic coffee or tea corner that feels like your own little café retreat. It’s both functional and visually charming.

    Use a corner shelf or small table as your base. Stock with a vintage coffee grinder ($20–$60), ceramic mugs ($5–$15 each), tea tins ($8–$20), and a small wooden tray. Add string lights or a vintage clock above ($15–$50). Total investment: $100–$250. This is renter-friendly since most pieces are movable.

    Pro tip: Collect mugs from antique shops over time. Mix sizes, colors, and patterns for authentic charm.

    Every morning becomes a mini ritual in your beautiful little corner. Guests notice and appreciate the thoughtfulness too.

    10. Add a Butcher Block Island or Cart

    A butcher block island serves as both prep space and rustic centerpiece. It’s practical and incredibly photogenic.

    Standalone butcher block islands run $300–$800 (brands: IKEA, Wayfair, Williams-Sonoma). Movable kitchen carts with butcher block tops ($150–$400) work great for renters. For a custom piece, work with a local woodworker ($800–$2,000). Pair with a vintage metal stool for seating ($80–$150 each).

    Pro tip: Choose oil-finished wood—it requires regular maintenance but develops beautiful patina over time.

    You gain precious prep space and a focal point that anchors your kitchen. The island becomes a gathering spot for family and friends.

    11. Incorporate Cast Iron Cookware as Décor

    Cast iron cookware is both genuinely useful and absolutely beautiful. Display your collection as functional art.

    Hunt for vintage cast iron at thrift stores and estate sales ($10–$40 per piece). Lodge and Le Creuset make new pieces ($40–$150). Install a hanging rod, hooks, or wall-mounted rack ($30–$80) and arrange skillets by size. Total for a 6-piece collection with display: $150–$300.

    Pro tip: Look for vintage marked pieces (they’re sought-after by collectors and look cooler). Well-seasoned pans have gorgeous dark patina.

    Your cast iron collection becomes a striking visual element while staying within arm’s reach for actual cooking. It’s style and substance combined.

    12. Install Subway Tile Backsplash

    Subway tile is the classic rustic kitchen backsplash—clean, functional, and endlessly versatile. It’s a step up from plain paint.

    Subway tiles cost $5–$15 per square foot. Installation runs $400–$1,200 depending on square footage. DIY is possible if you’re careful ($150–$300 in supplies plus time). Try brick pattern or herringbone for visual interest. Grout color matters: white for clean, gray for shadow definition.

    Pro tip: Extend tile halfway up the wall to balance visual weight. White or cream grout looks brighter than dark grout.

    A tiled backsplash grounds your design and makes the kitchen feel finished and intentional. It’s also practical and durable.

    13. Hang Dried Herbs and Flowers from Beams or Hooks

    Dried herbs and flowers add fragrance, texture, and romance to a rustic kitchen. They’re also incredibly affordable.

    Gather fresh herbs from your garden or buy from farmers markets ($2–$5 per bundle). Bundle with twine and hang in a cool, dark spot for 2–3 weeks until dry. Arrange hanging bundles from hooks, beams, or a wooden rod above your stove or window. Free to $20 depending on sourcing.

    Pro tip: Mix culinary herbs with dried flowers like lavender and eucalyptus for visual interest and fragrance.

    Your kitchen smells amazing and looks like a countryside cottage. The dried bundles last months and make a charming, ever-changing display.

    14. Use Vintage Scales and Kitchen Tools as Display

    Old kitchen scales, measuring cups, graters, and utensils are beautiful functional sculptures. Display them proudly on shelves.

    Source vintage tools from antique shops, Etsy, and flea markets ($3–$25 per piece). Group items by color, material, or function. Display on open shelves, on the wall with small hooks, or in a vintage wooden box. Budget: $50–$150 for a curated collection.

    Pro tip: Look for pieces that actually work (test scales and mechanisms). Broken items are less charming than well-functioning ones.

    These pieces add character and tell a story about your cooking life. They’re conversation starters and authentic décor all at once.

    15. Paint or Stain Wood Flooring

    Warm wood flooring is the foundation of any rustic kitchen. If you have existing hardwood, refinishing brings new life. If you have tile or concrete, staining can work wonders.

    Hardwood refinishing costs $3–$8 per square foot ($1,500–$4,000 for an average kitchen). DIY staining is possible with rentals ($200–$400). Choose warm honey, amber, or golden brown tones. Matte finish feels more rustic than glossy.

    Pro tip: If you can’t refinish, layer a large jute or wool rug in warm tones to anchor the space and add warmth.

    Beautiful flooring transforms how a room feels underfoot and visually. It’s one of the first things people notice.

    16. Add Vintage Lighting Fixtures

    Vintage or vintage-inspired lighting fixtures set the mood and complete a rustic kitchen. Brass, copper, or oil-rubbed bronze finishes feel authentic.

    Find vintage fixtures on Etsy, Craigslist, and antique websites ($30–$200 per fixture). New vintage-style pendant lights from Schoolhouse Electric, Anthropologie, or West Elm run $80–$250. Installation takes 1–2 hours if you’re comfortable with wiring (or hire an electrician, $200–$400). Budget 2–4 fixtures for an average kitchen.

    Pro tip: Mix warm Edison-style bulbs (they photograph beautifully) with brass or copper fixtures for maximum cozy vibes.

    Good lighting completely changes your kitchen’s atmosphere, especially in the evening. Your space becomes warm and inviting rather than clinical.

    17. Collect and Display Vintage Dishware

    Mix and match vintage dishware creates an authentic, collected-over-time feeling that’s way more interesting than a matching set.

    Hunt at thrift stores, estate sales, and antique malls ($1–$5 per plate, $5–$15 per serving piece). Look for patterns, colors, and makers that speak to you. Mix eras—1940s floral, 1960s geometric, 1980s stoneware—for visual richness. Budget: $75–$150 for a collection of 8–10 place settings.

    Pro tip: Mix white with soft colors (cream, blue, green) rather than bright colors for a cohesive look. Stack by size for visual drama.

    Your kitchen feels cultured and intentional. Using these dishes daily makes meals feel special.

    18. Create a Spice Rack or Apothecary Display

    A rustic spice display is both practical and gorgeous. Whether you use vintage jars or buy new ones, the look is instantly farmhouse.

    Buy small glass jars ($1–$3 each) from Container Store, Target, or IKEA. Mount a wooden rack ($20–$50) on the wall or use floating shelves. Label with chalkboard paint, kraft paper tags, or hand-written labels. Fill with your spice collection. Total investment: $40–$80.

    Pro tip: Organize alphabetically or by cuisine for practical use. The visual organization itself becomes part of the décor.

    Your spices stay organized and visible, and your kitchen looks intentional and curated. Plus, cooking becomes easier when you can see what you have.

    19. Add a Rustic Wooden Dining Table or Breakfast Nook

    A wooden farmhouse table is the heart of a rustic kitchen. It’s where people gather, eat, and connect.

    Vintage tables run $200–$600 from antique shops and online marketplaces. New farmhouse-style tables from West Elm, Wayfair, or IKEA cost $300–$1,200. Pair with mismatched vintage chairs ($30–$80 each) for authenticity. Budget: $400–$800 for a complete setup.

    Pro tip: Look for tables with character—scratches, marks, and worn finishes add authenticity. Mix chair styles for visual interest.

    Your kitchen becomes a gathering space, not just a functional room. Meals taste better at a table this beautiful.

    20. Install Floating Shelves Above a Small Bar or Beverage Station

    A small beverage station with floating shelves is perfect for rustic kitchens. It’s a refined touch that feels special.

    Install wooden floating shelves ($30–$100 each, plus installation hardware $20–$40) at varying heights. Stock with vintage glassware, small bottles, and a wooden serving tray. Keep decor minimal and intentional—3–5 items per shelf for visual breathing room. Budget: $150–$300 total.

    Pro tip: Group items by height and color. Leave negative space—less is more with rustic design.

    This small station adds sophistication and gives you a beautiful display that guests will notice. It also keeps frequently used items organized and accessible.

    21. Hang Vintage Textile Wall Hangings

    Vintage textiles add warmth and softness to rustic kitchens. They break up plain walls and add personality.

    Find vintage textiles on Etsy, Anthropologie, and antique websites ($30–$150). Look for woven blankets, tapestries, or small rugs. Hang with picture hooks or frame for a more polished look. This works beautifully above a stove, sink, or dining area.

    Pro tip: Stick to neutral, muted tones and natural fibers (wool, linen, cotton) for an authentic rustic feel.

    Your kitchen gains texture and visual warmth. Textiles soften the space and make it feel more collected and intentional.

    22. Use Open Wire or Wooden Baskets for Storage

    Baskets are practical rustic storage that keeps clutter contained while looking intentional and homey.

    Wire baskets run $10–$30 each; woven baskets $15–$50 depending on size and material. Buy from Target, World Market, IKEA, or Etsy. Use under shelves for pantry overflow, on countertops for utensils, or to corral kitchen linens. Budget: $60–$150 for 4–6 baskets.

    Pro tip: Match basket materials to your overall aesthetic—wire for industrial-rustic, woven for farmhouse-cozy.

    Baskets keep your kitchen functional and tidy while adding textural interest. Your countertops stay clutter-free and your aesthetic stays strong.

    23. Paint or Stain Wooden Cabinet Hardware

    Hardware is the jewelry of cabinetry. Vintage or antiqued hardware completely changes a kitchen’s vibe.

    Replace standard hardware with brass, copper, or oil-rubbed bronze pulls ($5–$15 per pull). Etsy and Rejuvenation have beautiful options. DIY: $50–$150 for a full kitchen. Professional installation: $200–$400. Alternatively, paint existing hardware with metallic paint ($3–$10) for a quick refresh.

    Pro tip: Mix brass and copper for an eclectic, collected feel. Mismatched hardware feels intentional in rustic design.

    This small detail creates an outsized impact. Your cabinets instantly feel more finished and vintage.

    24. Create a Small Herb Garden on the Windowsill

    A windowsill herb garden is rustic and practical. Fresh herbs for cooking plus green life on display.

    Buy terracotta pots ($2–$5 each) and potting soil ($8–$15). Start with seeds ($1–$3 per packet) or buy starter plants ($3–$8 each). Keep on a sunny south or west-facing windowsill. Budget: $30–$50 to start 6–8 herbs. Renter-friendly and movable.

    Pro tip: Choose hardy herbs like rosemary, thyme, and sage that thrive indoors. Label pots with small wooden stakes.

    Fresh herbs at your fingertips elevate your cooking and add living beauty to your kitchen. The daily green view is grounding.

    25. Add Vintage Mirrors for Light and Depth

    A vintage mirror bounces light and makes your kitchen feel bigger and brighter. It’s a stylish functional upgrade.

    Find vintage mirrors on Etsy, antique shops, and Facebook Marketplace ($20–$100 depending on size and condition). Look for brass, wood, or ornate frames. Hang in a spot where it reflects natural light. Alternatively, new vintage-style mirrors from Target or World Market run $30–$80.

    Pro tip: Group smaller mirrors for visual impact, or choose one statement piece. Hang at eye level for the best reflection.

    Mirrors brighten your kitchen and add a touch of elegance. They’re especially helpful in smaller kitchens that need a sense of openness.

    Save this post and try one of these ideas this weekend. Pick something that speaks to you—whether it’s a free styling shift or an investment piece—and watch your kitchen transform into the warm, vintage space you’ve been craving.