Category: Kitchen Decor

  • 27 Kitchen Aesthetic Ideas That Elevate Everyday Cooking

    27 Kitchen Aesthetic Ideas That Elevate Everyday Cooking

    Your kitchen doesn’t need a full renovation to feel like a space you actually want to spend time in. Whether you’re renting, saving up, or just ready for a refresh, small aesthetic changes can completely shift how your kitchen feels—and functions. The best part? Most of these ideas work for any budget, skill level, or living situation. Ahead, you’ll find 26 kitchen upgrades that range from free styling tweaks to investment pieces. Some take 15 minutes, others are weekend projects. Pick one, try it this week, and see how it changes your everyday cooking experience. Your kitchen is about to become somewhere you want to be.

    1. Paint Your Island a Bold, Unexpected Color

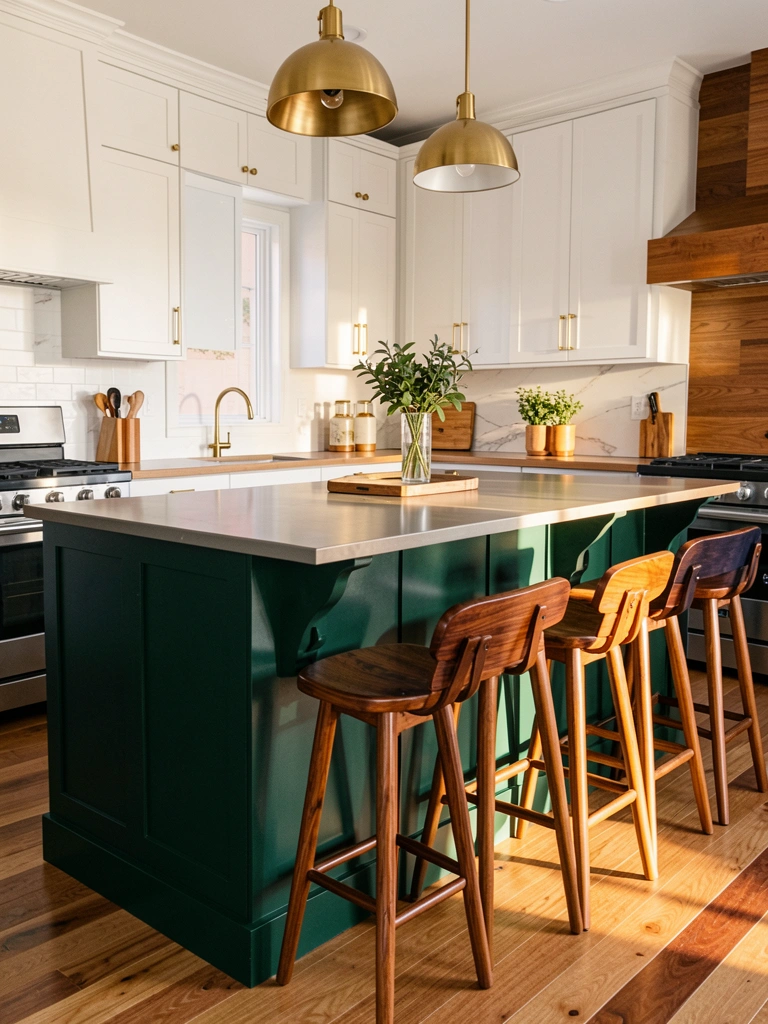
    An island painted in deep color instantly anchors your kitchen and becomes a focal point worth looking at. If your island is currently white or natural wood, this single change impacts the entire room’s energy. Choose deep greens, navy, terracotta, or warm charcoal—whatever resonates with your space’s natural light.

    Use 2-3 coats of semi-gloss or satin kitchen cabinet paint ($30-$50 for quality paint) and a foam roller for smooth coverage. This is a 1-2 day DIY project if you remove hardware first. If you’re renting or hesitant, removable peel-and-stick contact paper ($20-$30) gives the same visual impact with zero commitment. The hardware swap makes it even better: swap out knobs and pulls for brass or black options ($15-$40 total). You’ll immediately notice how much personality your kitchen gains and how much more intentional the space feels.

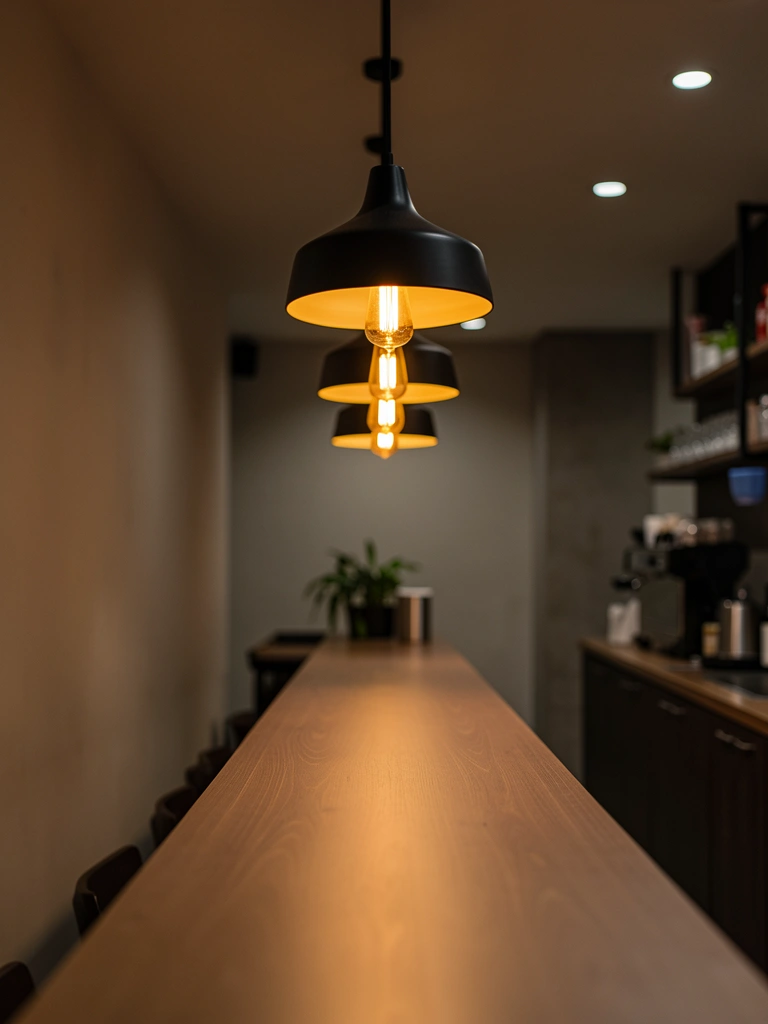
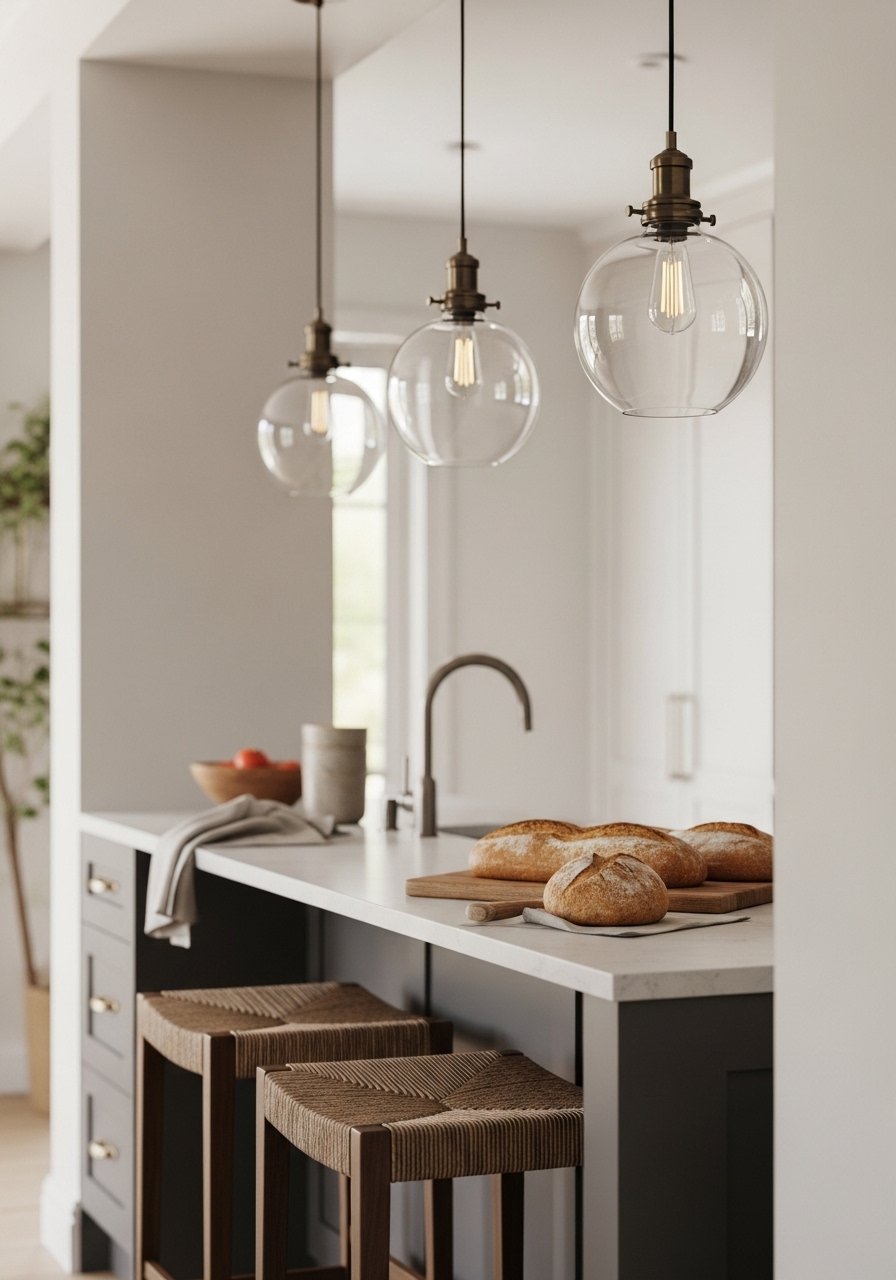
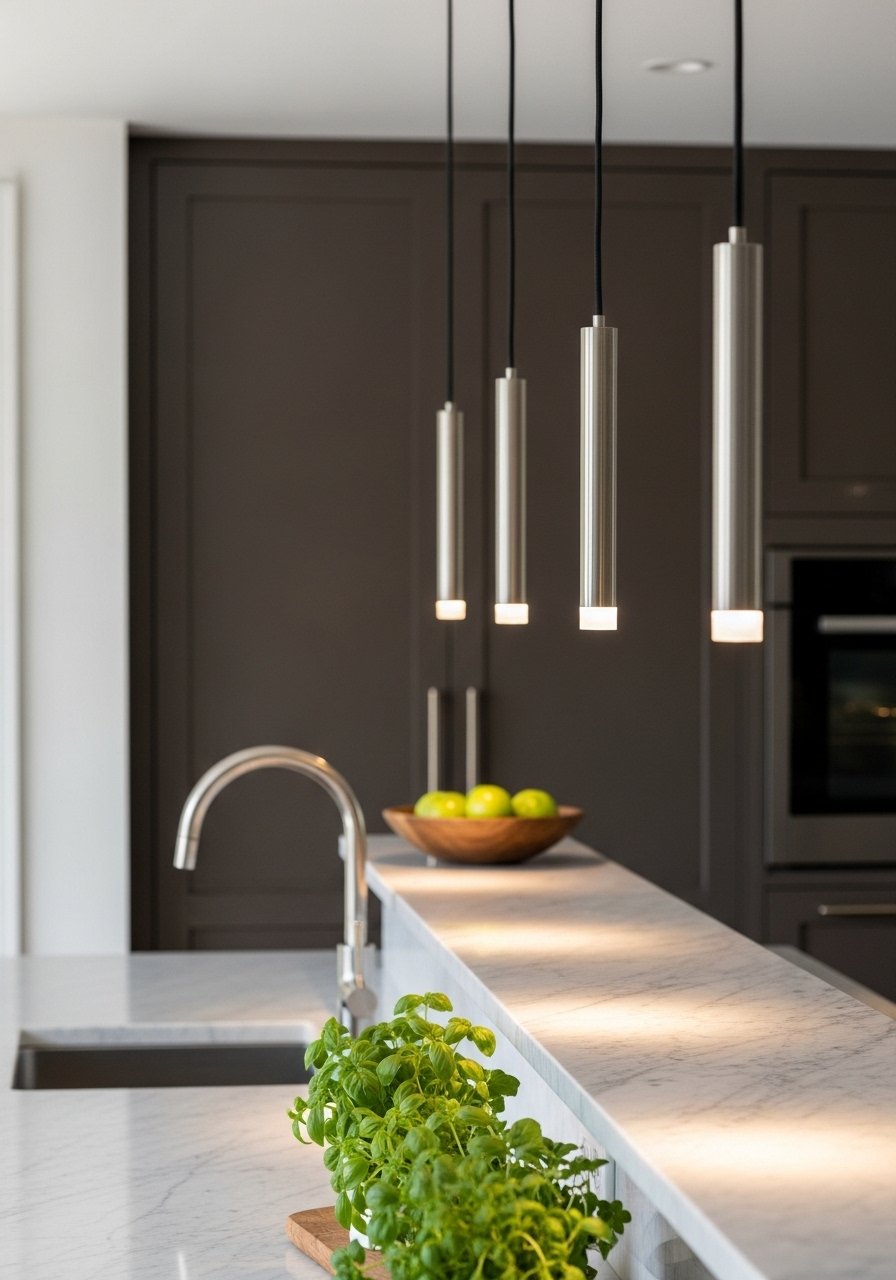
    2. Layer Your Lighting with Task, Ambient, and Accent Zones

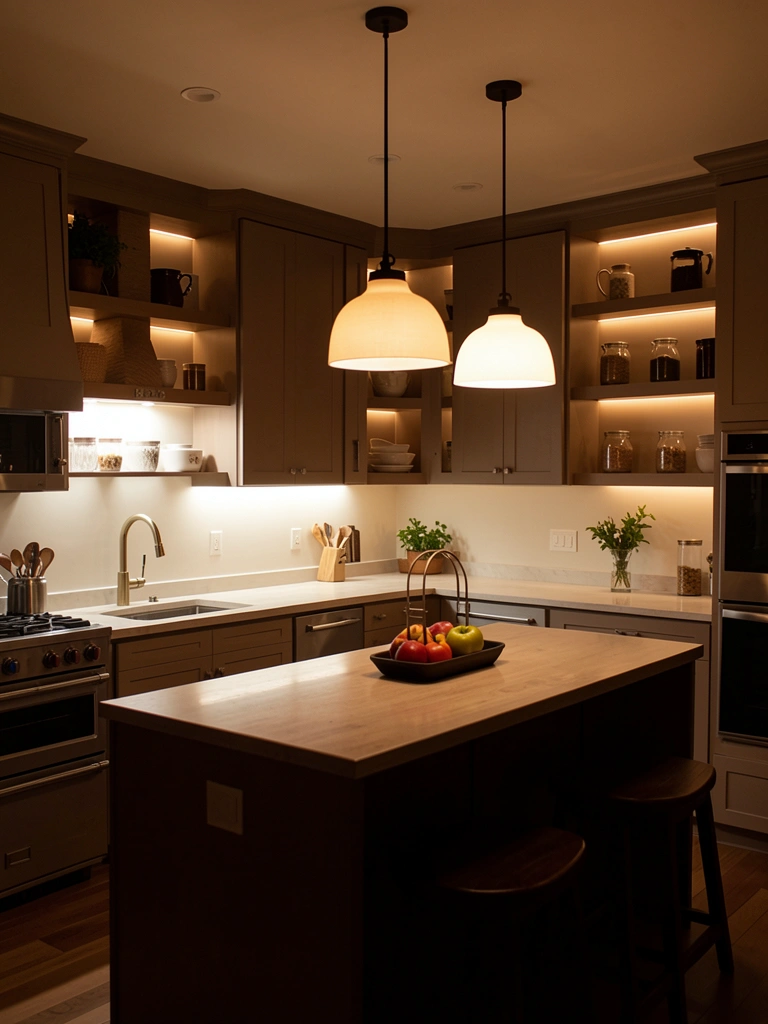
    Most kitchens rely on one or two overhead lights, which creates harsh shadows and doesn’t feel welcoming. Layering three types of lighting—task, ambient, and accent—makes your kitchen feel intentionally designed and more functional at any time of day.

    Task lighting (under cabinets or over prep areas) costs $40-$150 for LED strips from IKEA or Amazon and takes under an hour to install. Ambient lighting (overhead pendants or a dimmable fixture) runs $60-$250 depending on style. Accent lighting (along shelving or inside glass cabinets) is $20-$80 for simple LED puck lights. Download a lighting plan template online or sketch zones on paper first—it takes 20 minutes. You’ll notice the difference immediately: your kitchen feels bigger, your countertop work is easier, and the space becomes visually interesting even when you’re not cooking. Dimmers for overhead lights ($10-$20) are the cherry on top.

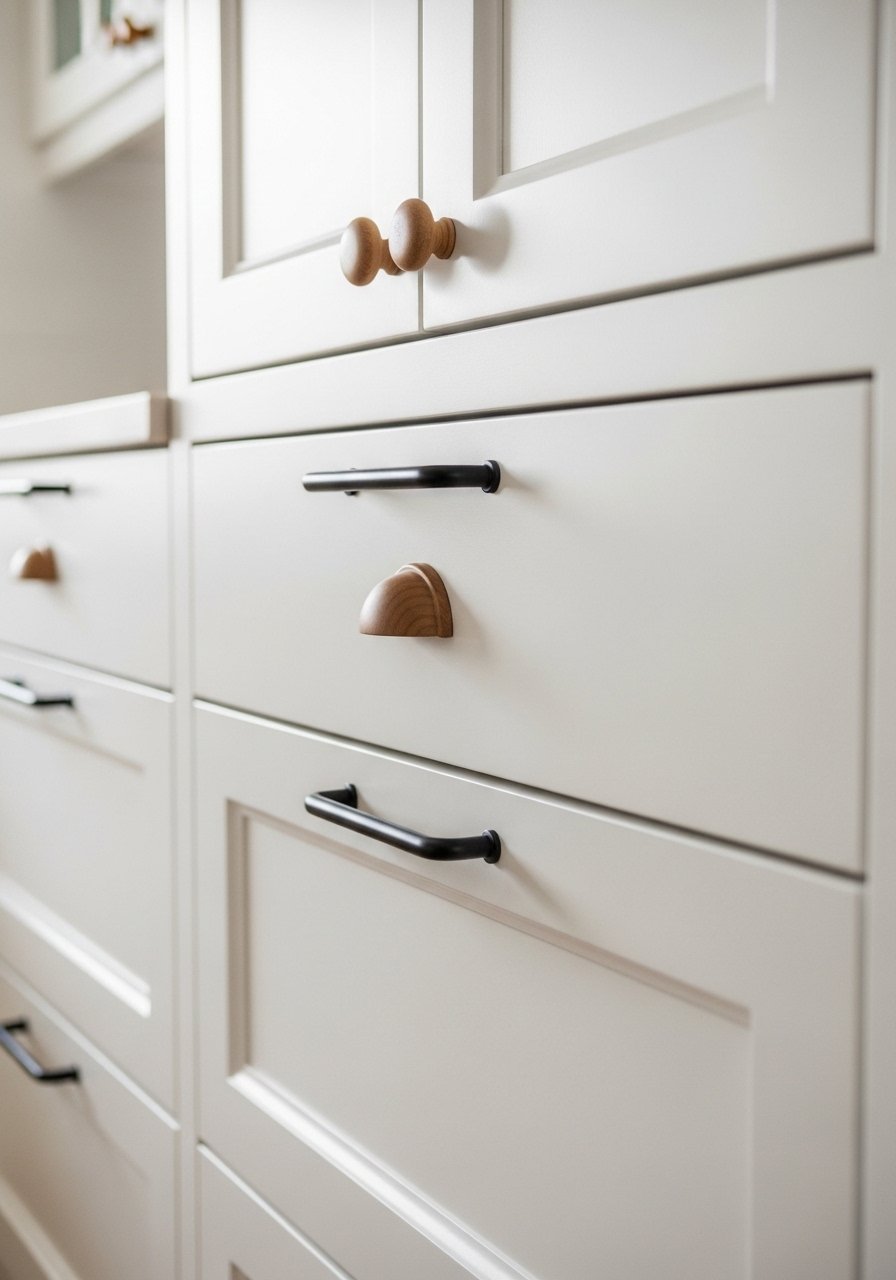
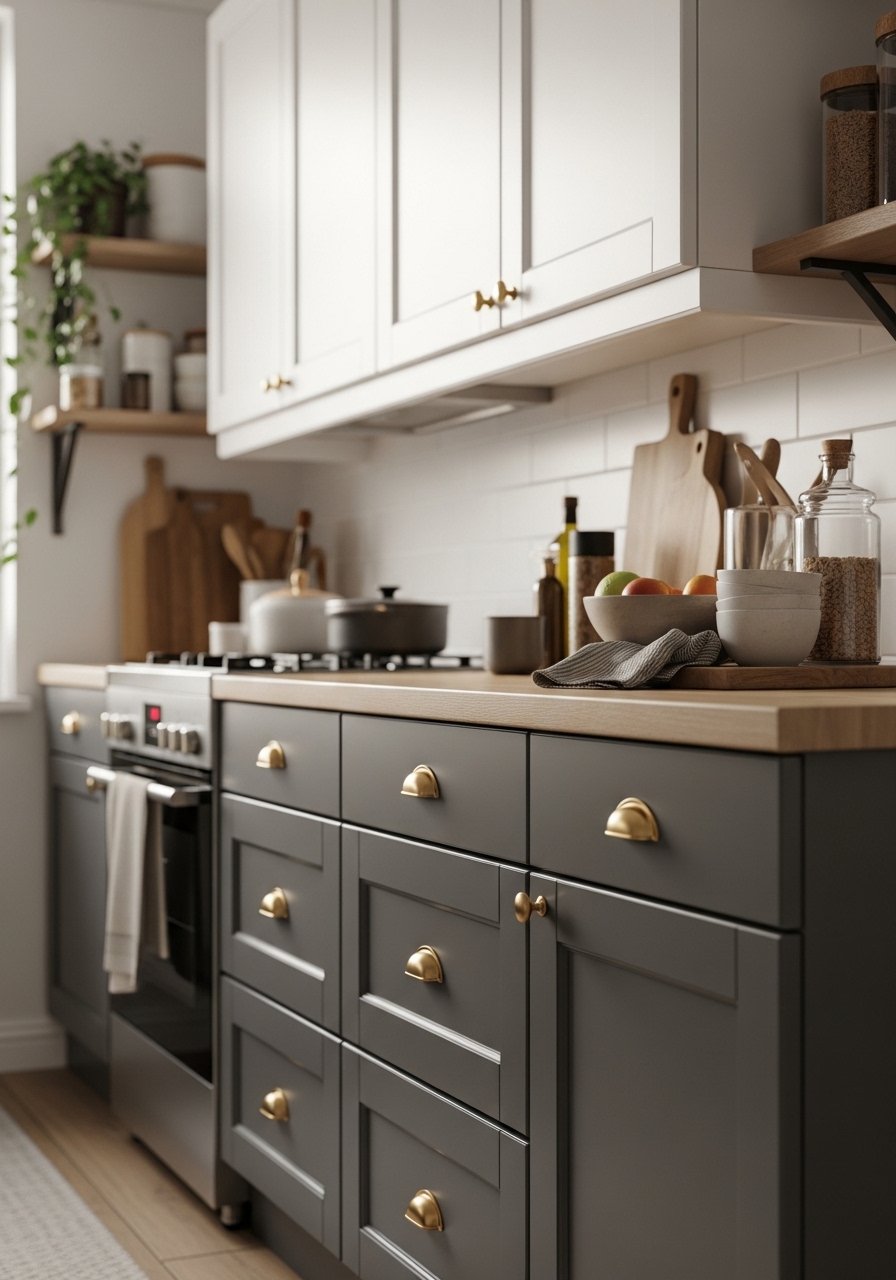
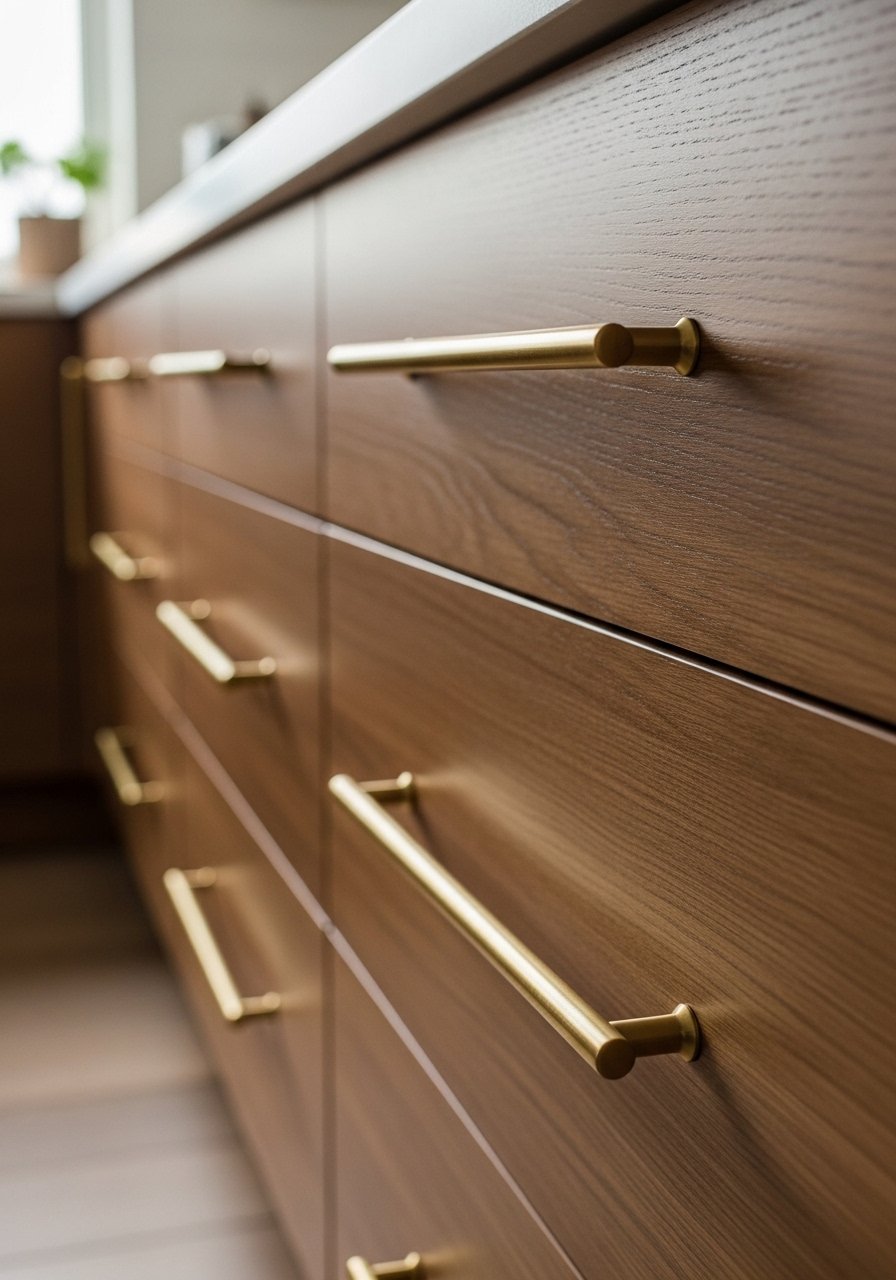
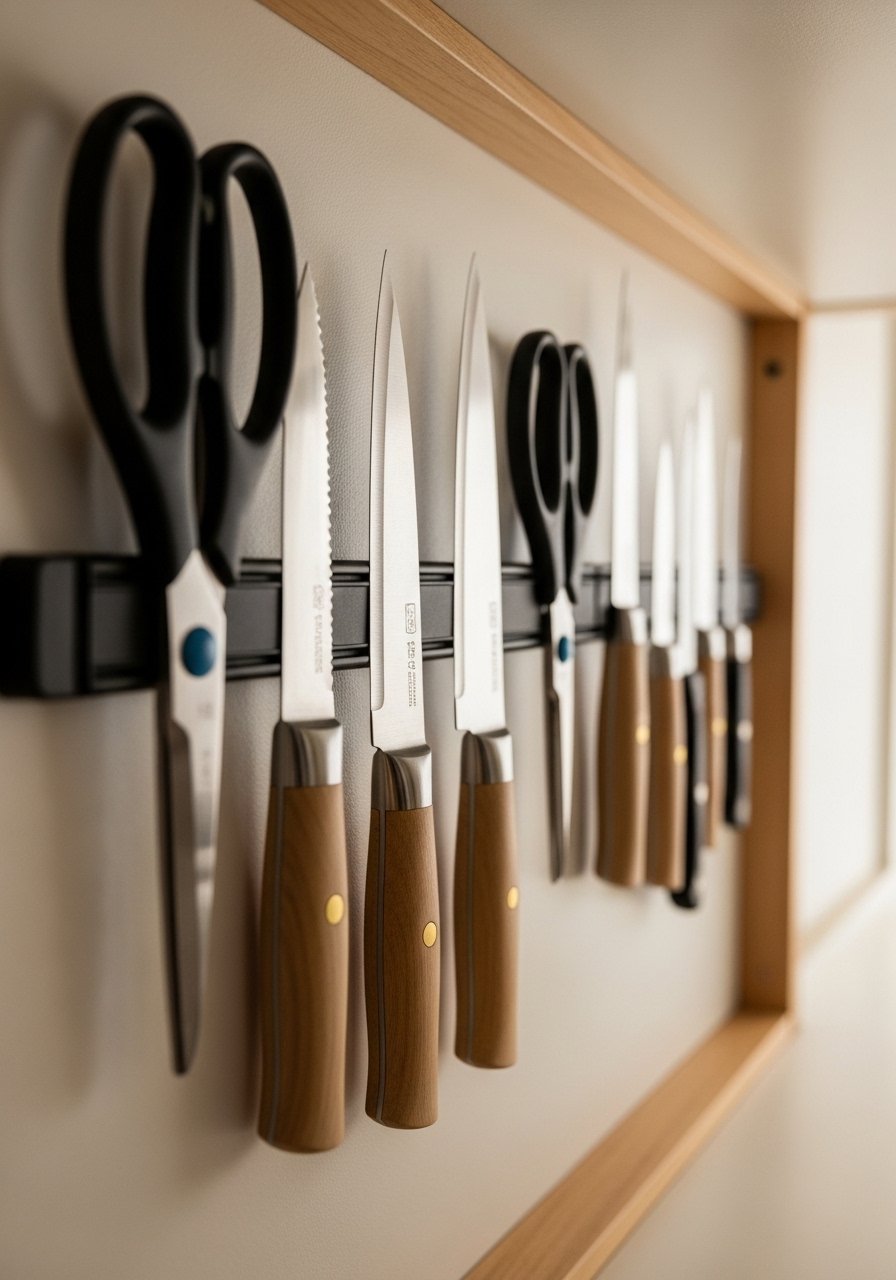
    3. Swap Out Cabinet Hardware for Instant Personality

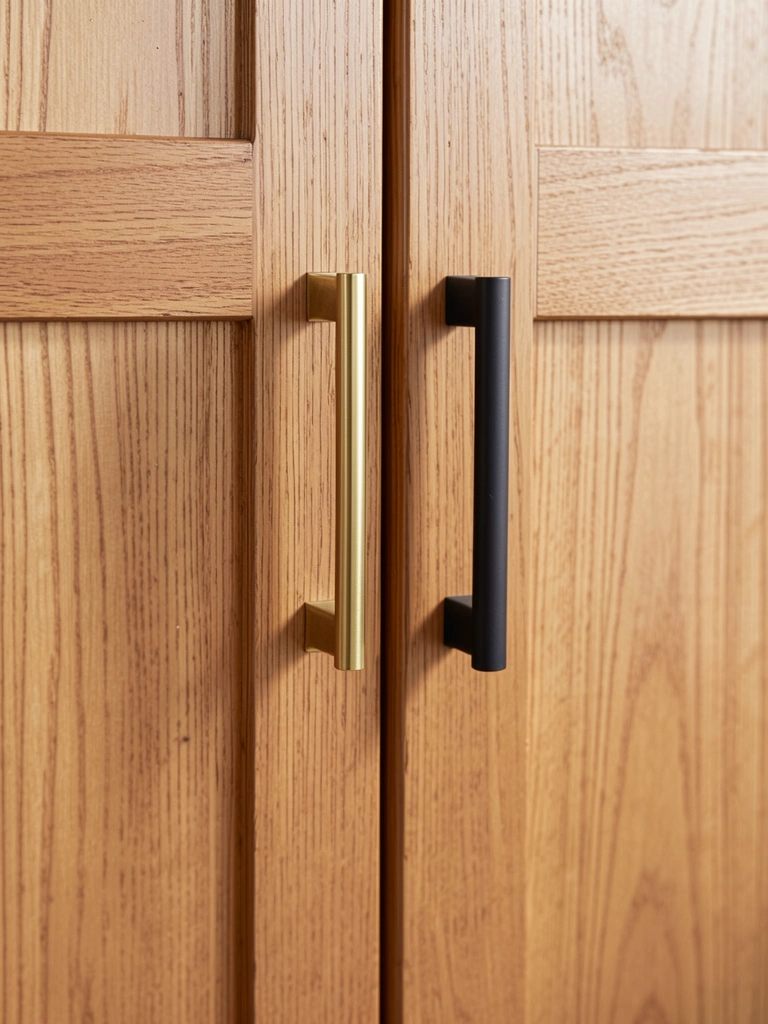
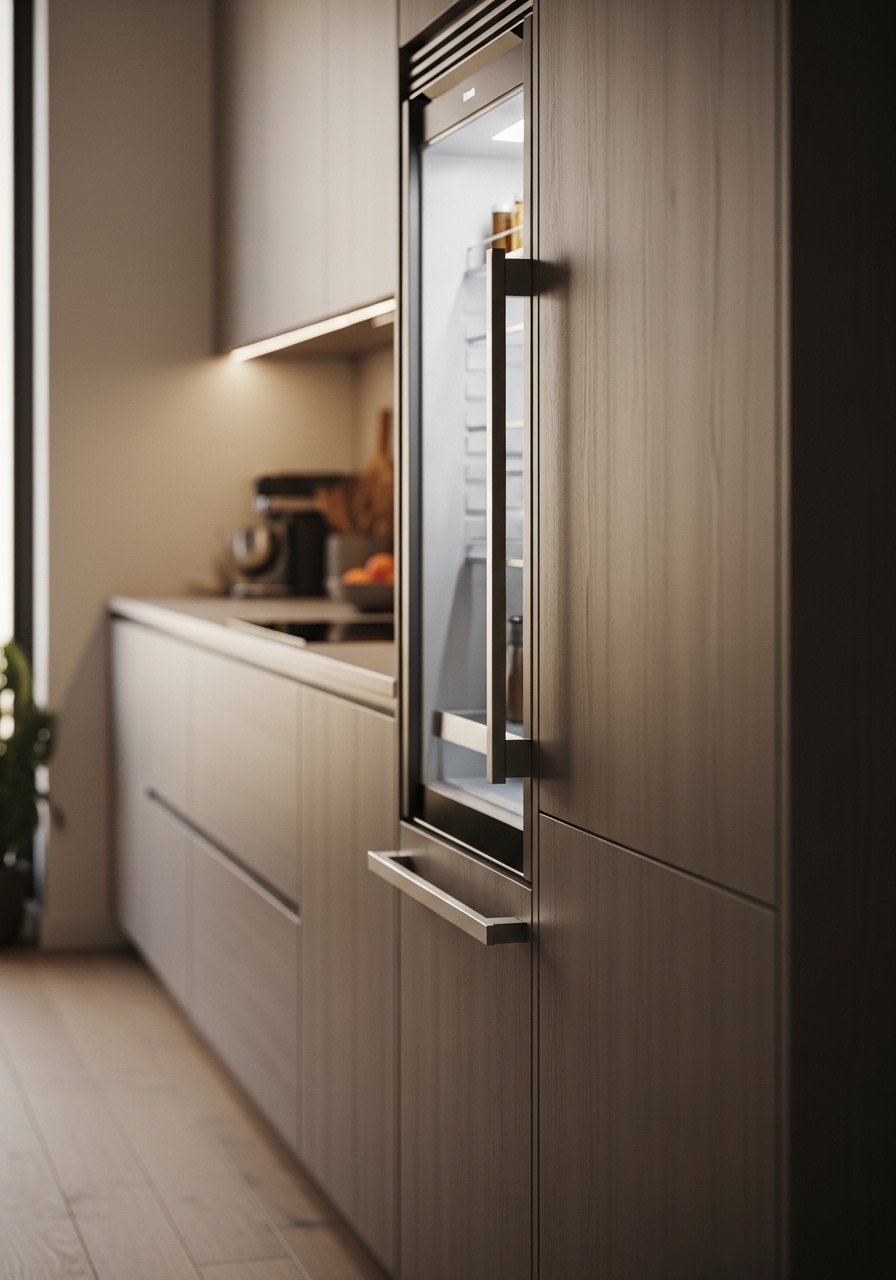
    Your cabinet hardware is jewelry for your kitchen—and changing it takes 30 minutes and costs almost nothing compared to cabinet refacing. This swap works whether you own or rent (save the original hardware to reinstall later). Brass, matte black, ceramic, woven, and gold hardware each create a completely different mood in the same space.

    Browse Anthropologie, Wayfair, Amazon, or hardware stores for options in your style. Budget $30-$100 total for a full kitchen’s worth of hardware—or splurge on statement pieces for just the island ($60-$150). Use a cordless drill if you have one, or a regular screwdriver works just fine. Match your hardware style to your overall aesthetic: minimalist matte black, warm brass, or playful ceramic. This single update signals that you’ve thought intentionally about your space, and it’s one of the cheapest ways to refresh everything. Visitors immediately notice the cohesion and care.

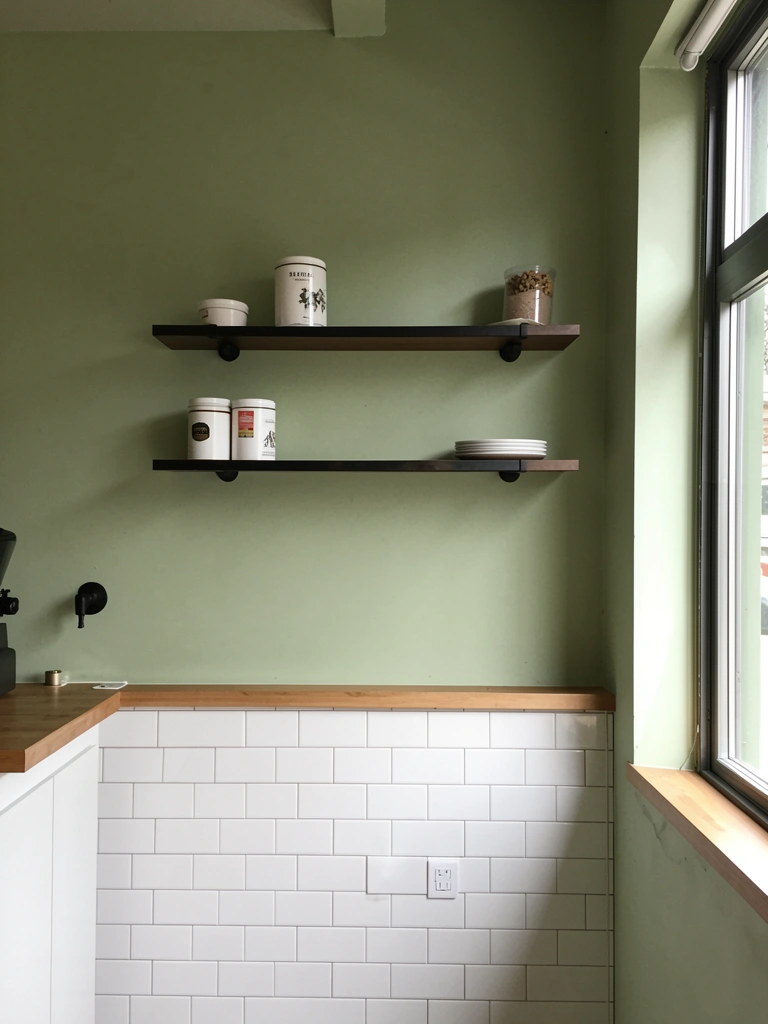
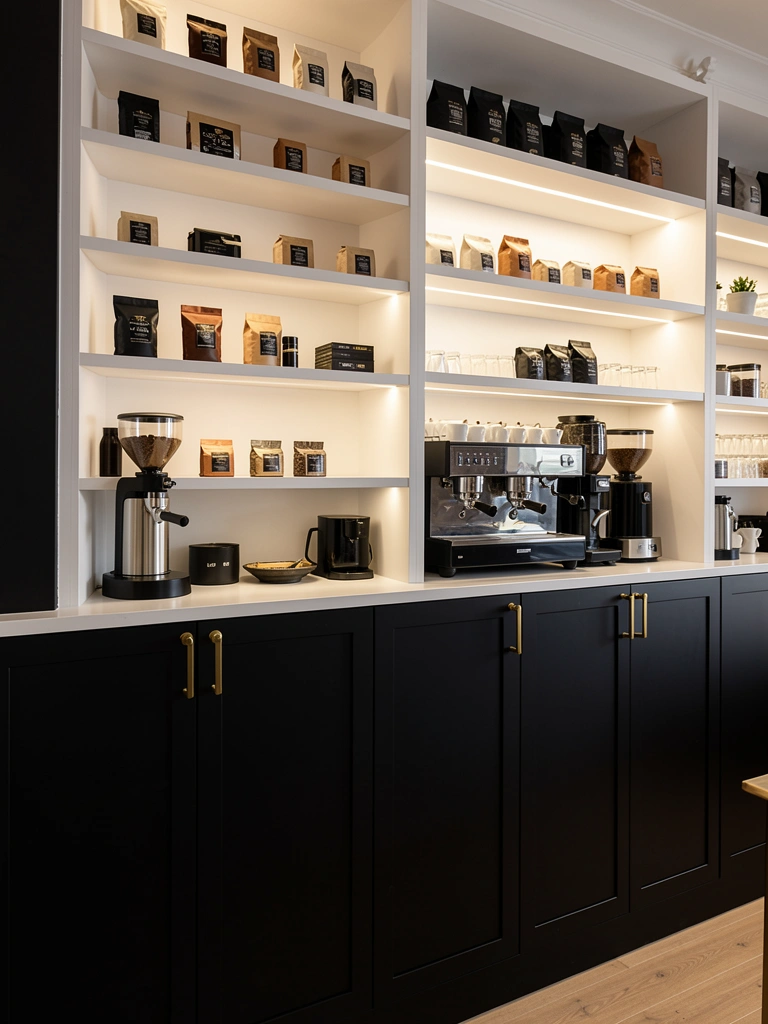
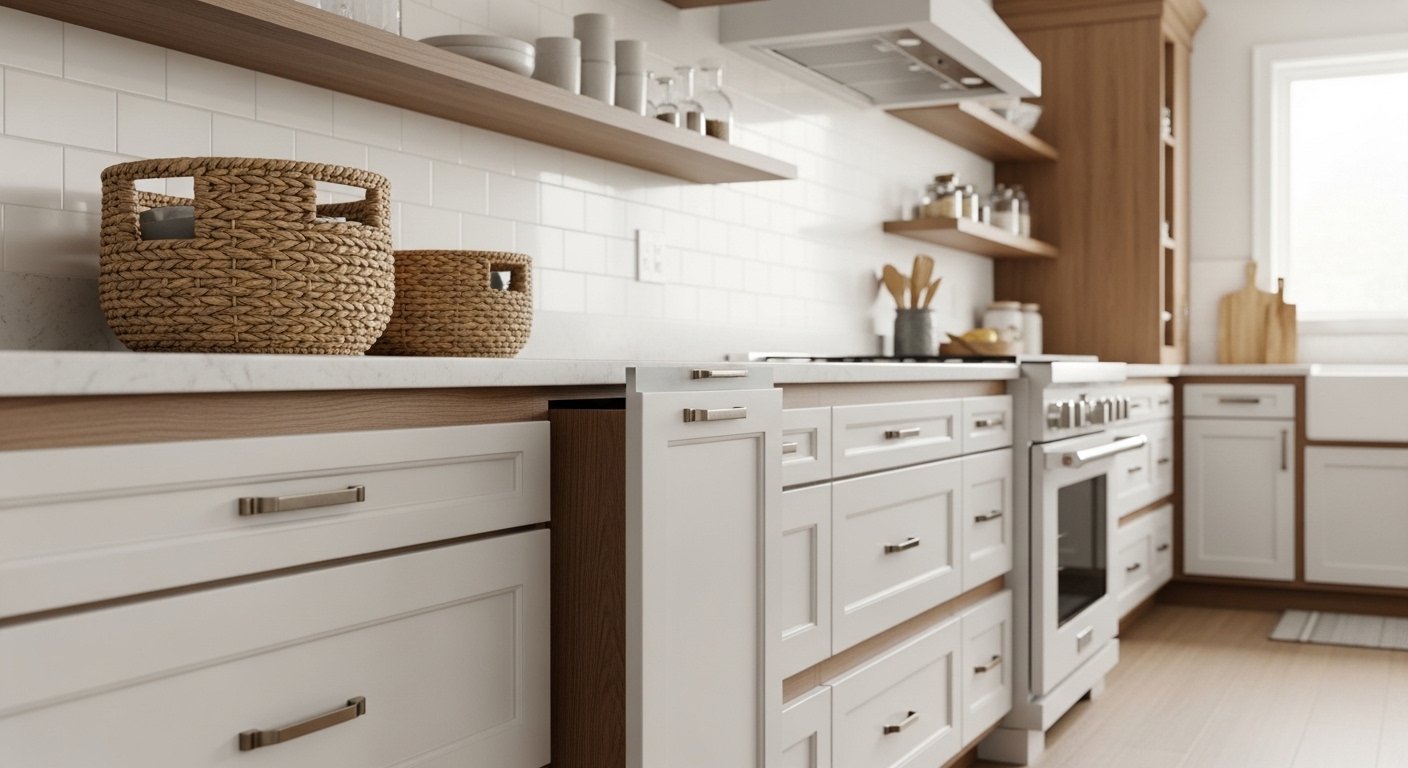
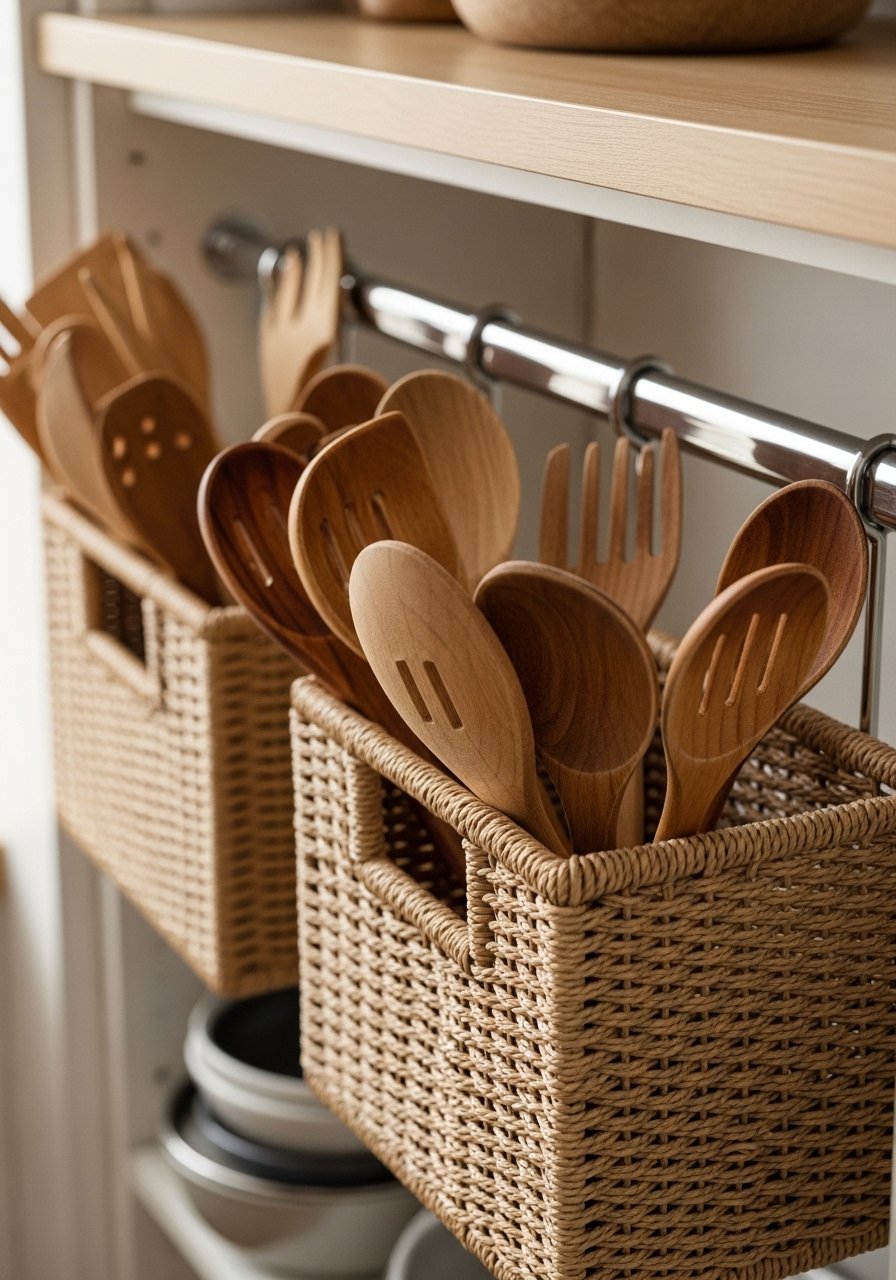
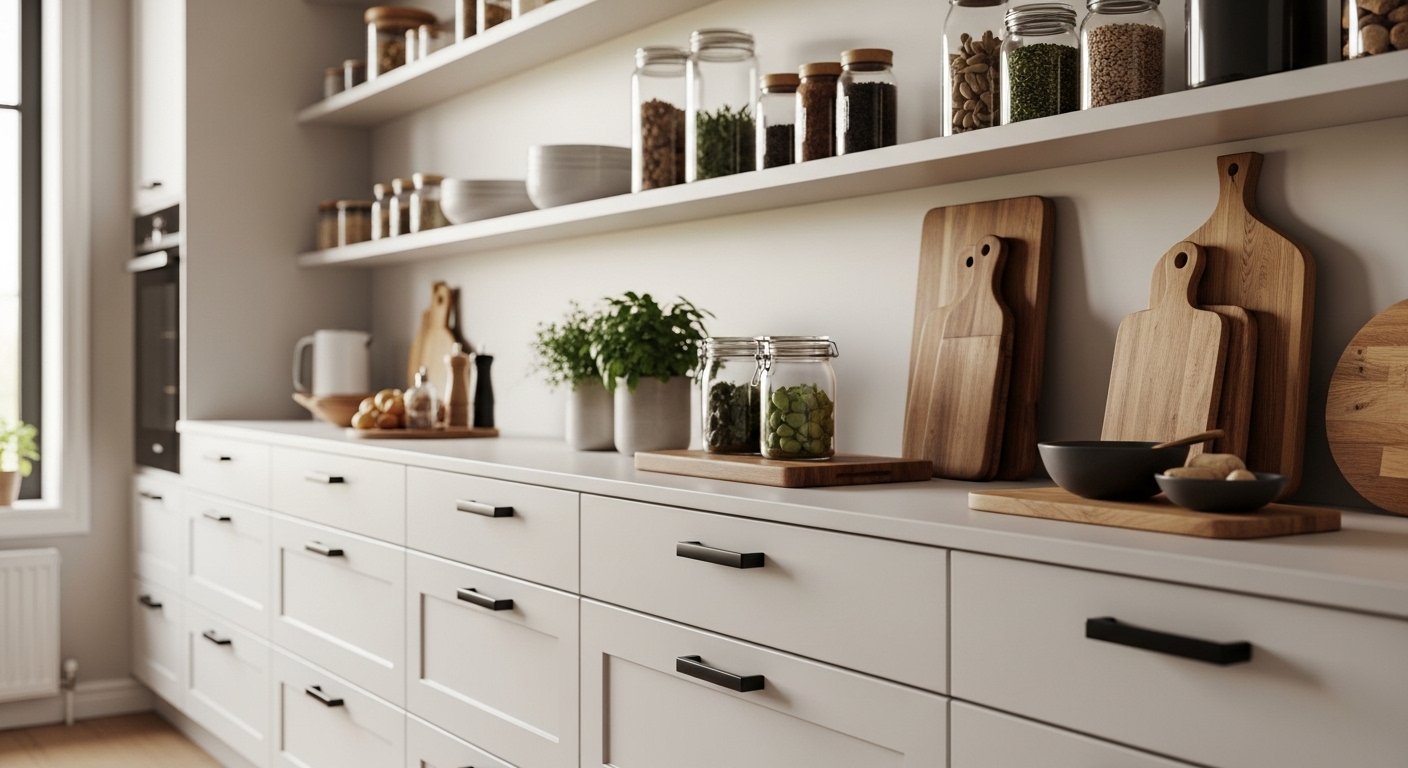
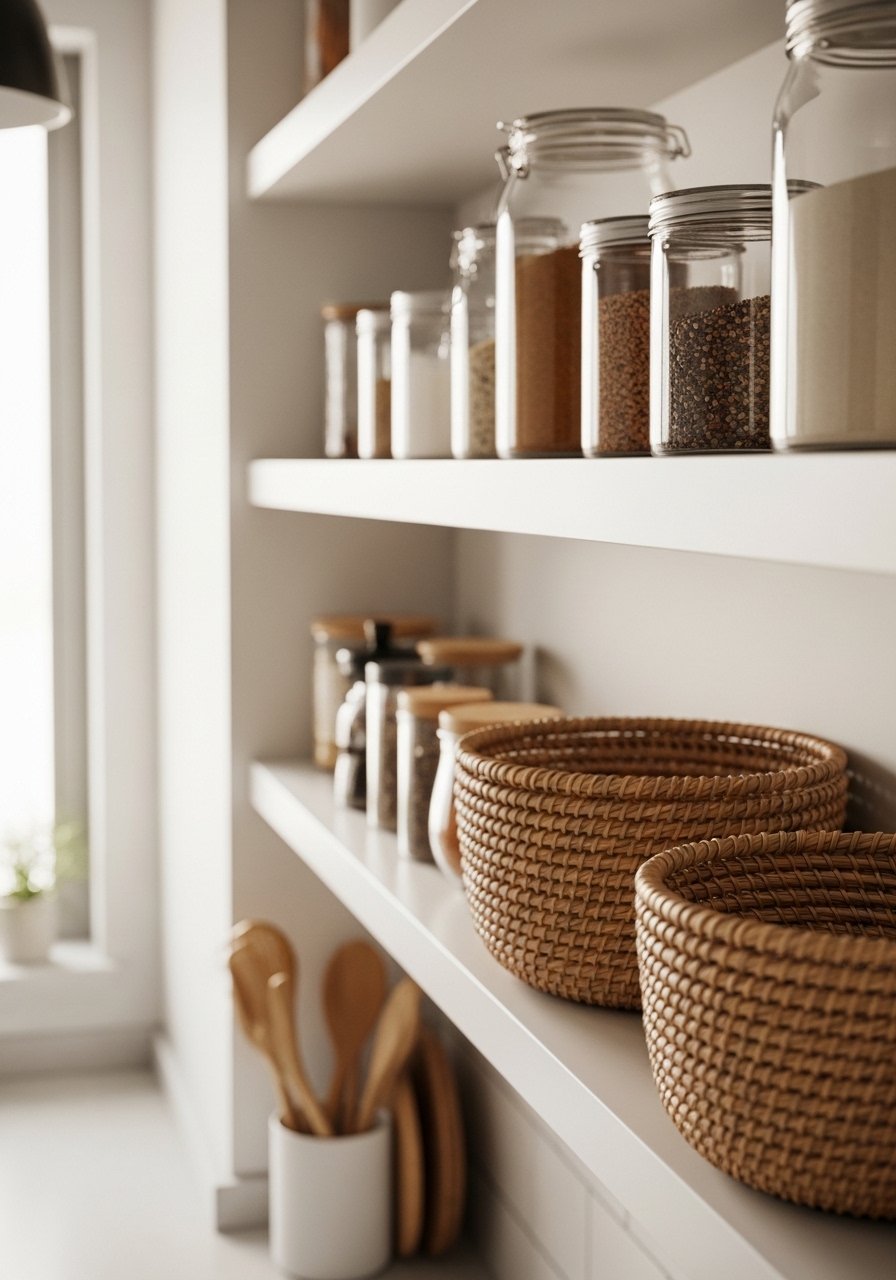
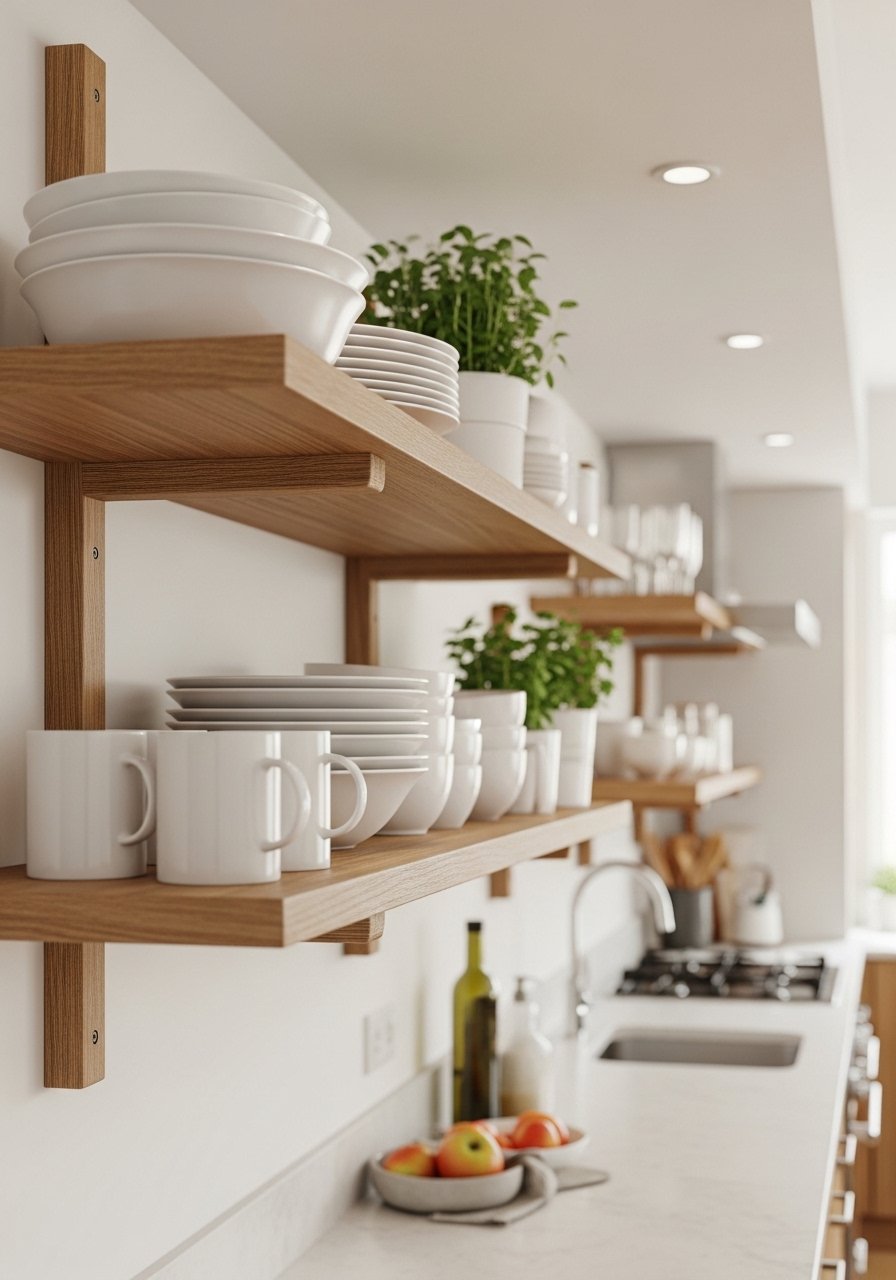
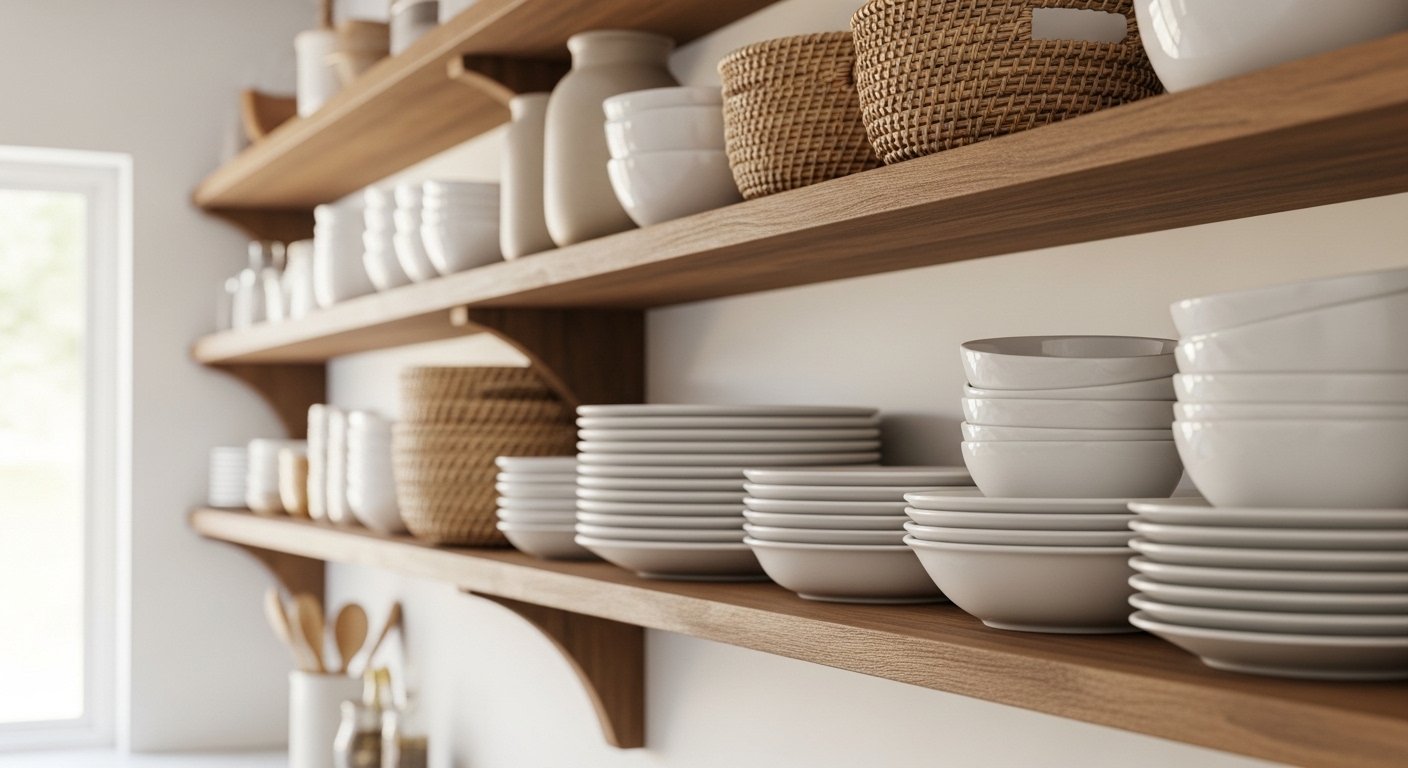
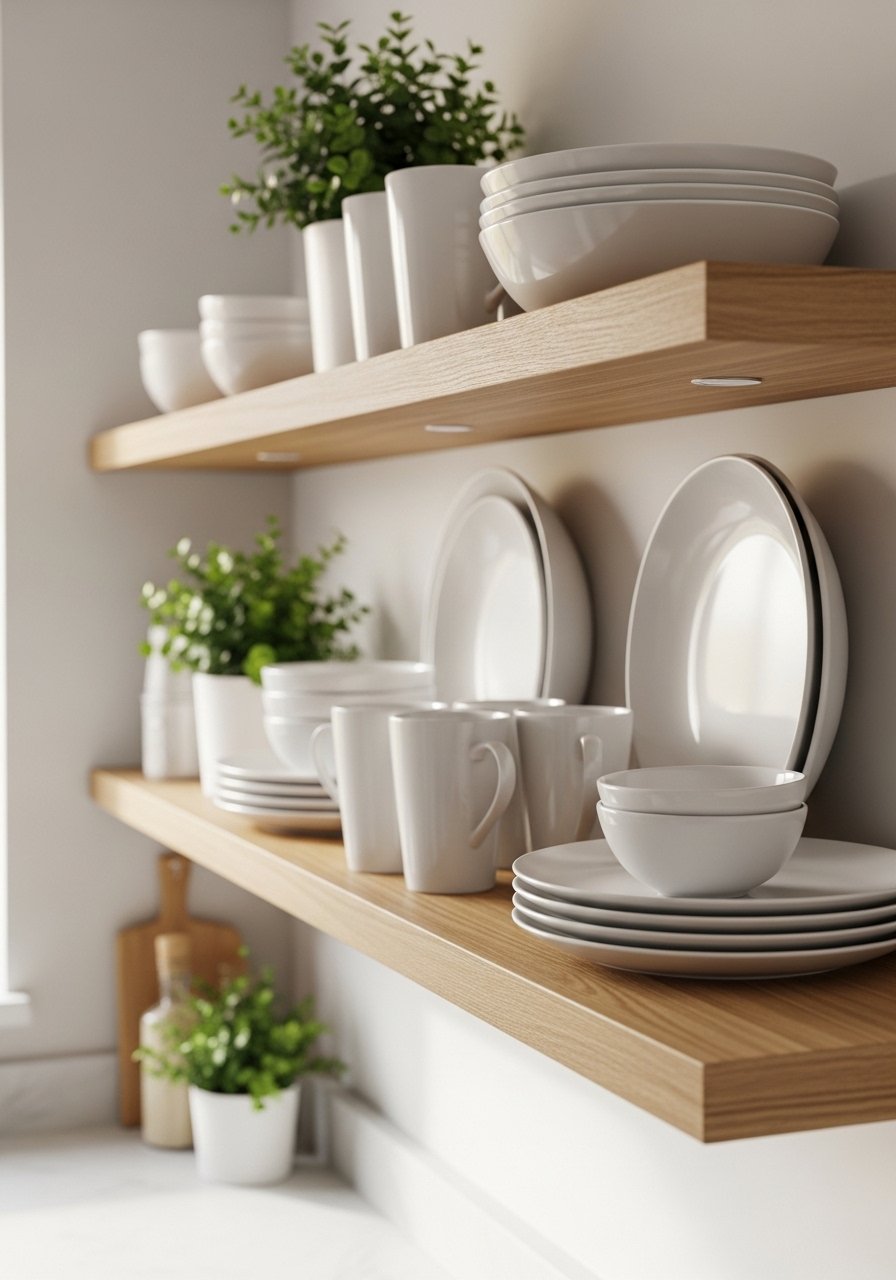
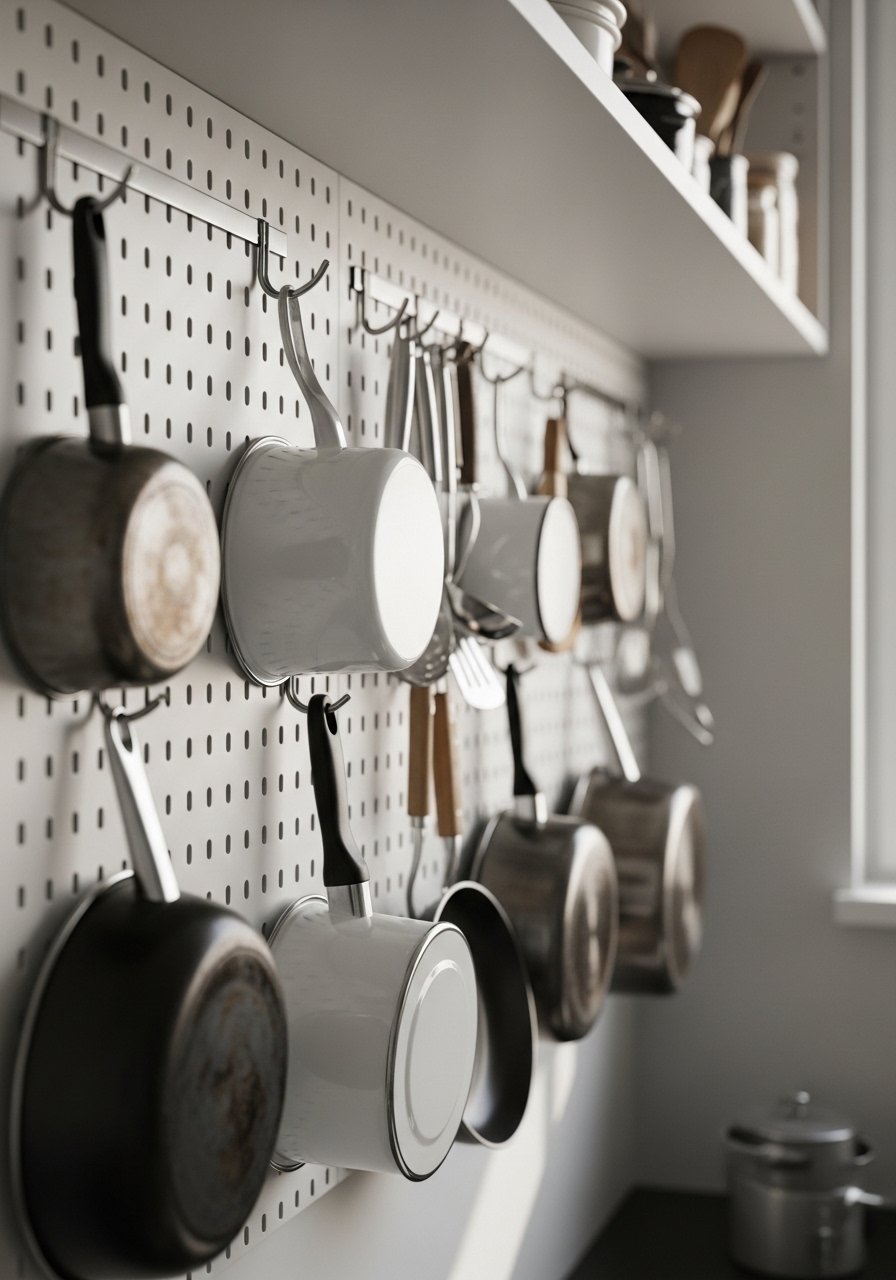
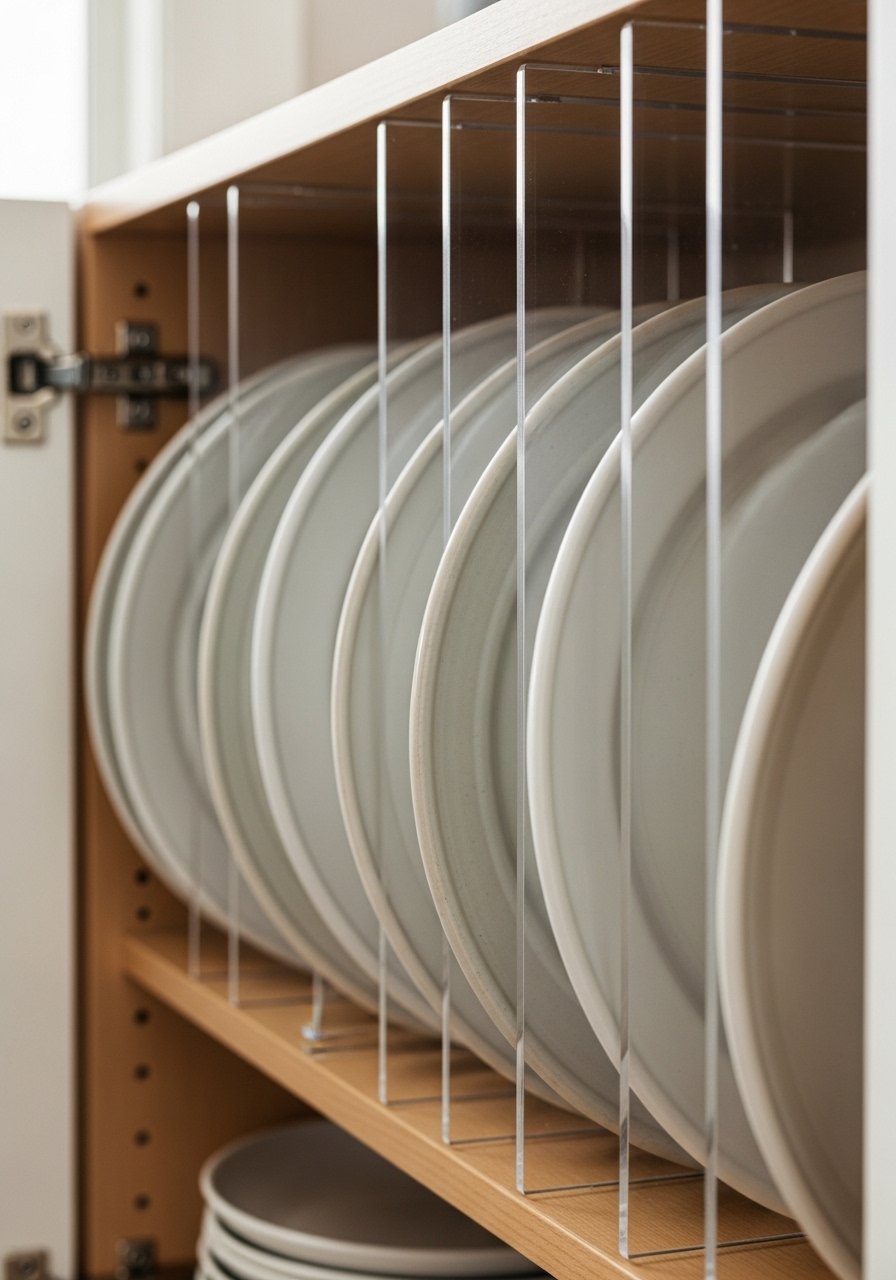
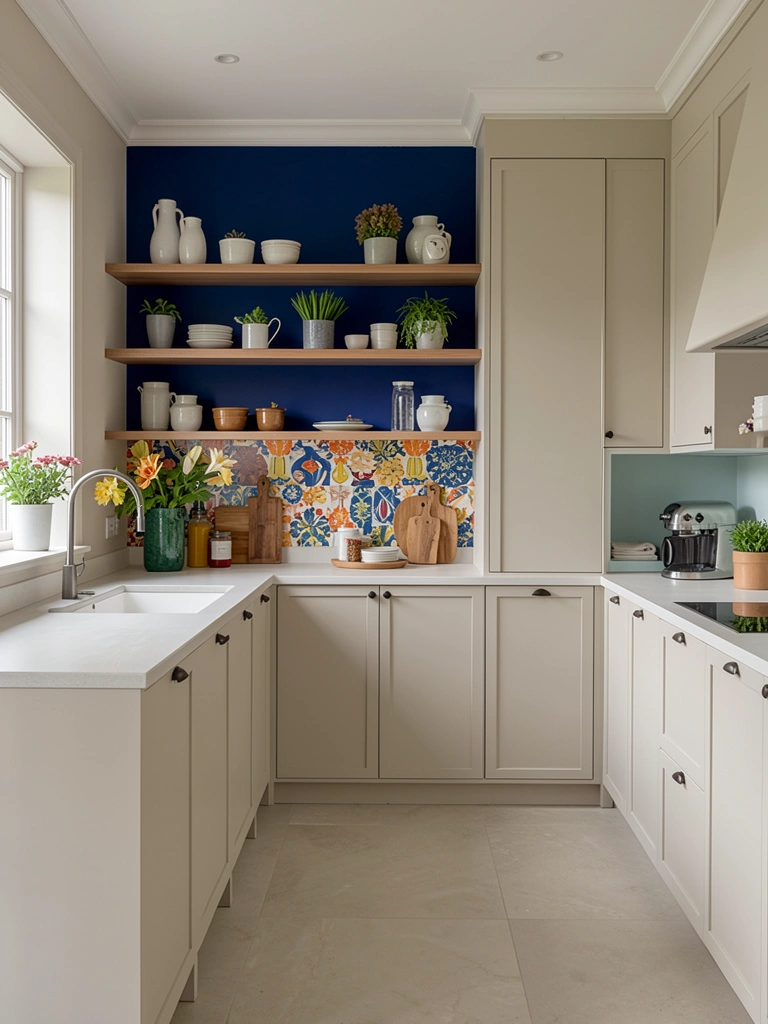
    4. Display Open Shelving Without the Visual Chaos

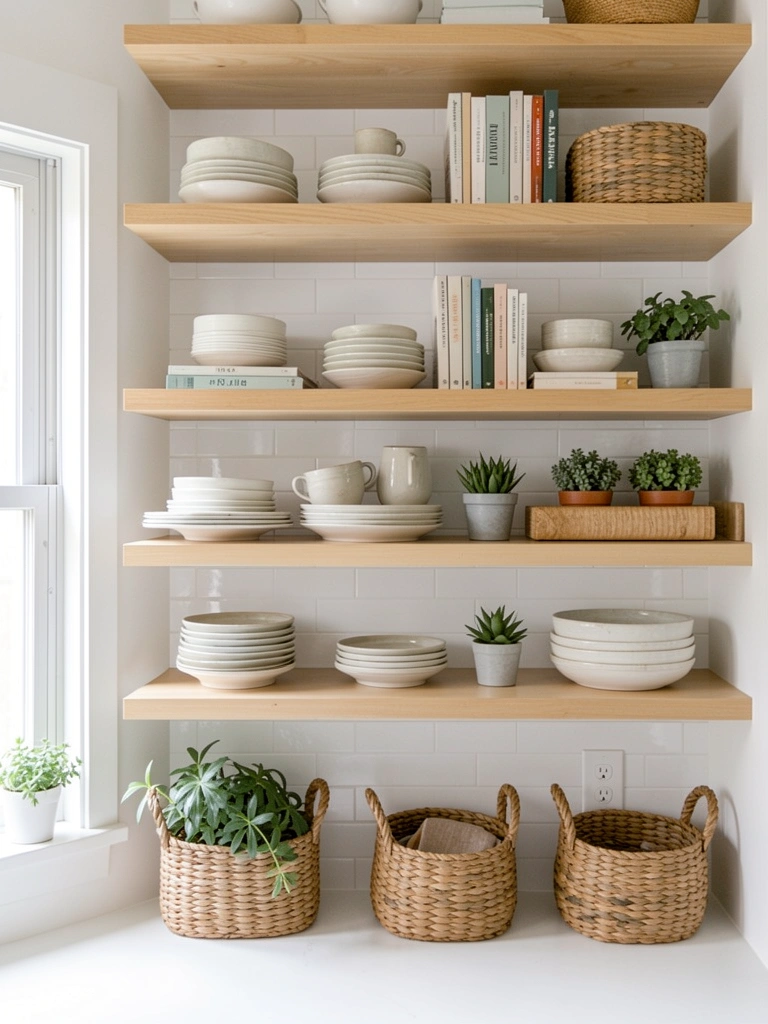
    Open shelving looks amazing in design magazines—until yours looks like a storage unit. The trick is curating ruthlessly and styling intentionally. Not everything needs to live on display; in fact, less is more.

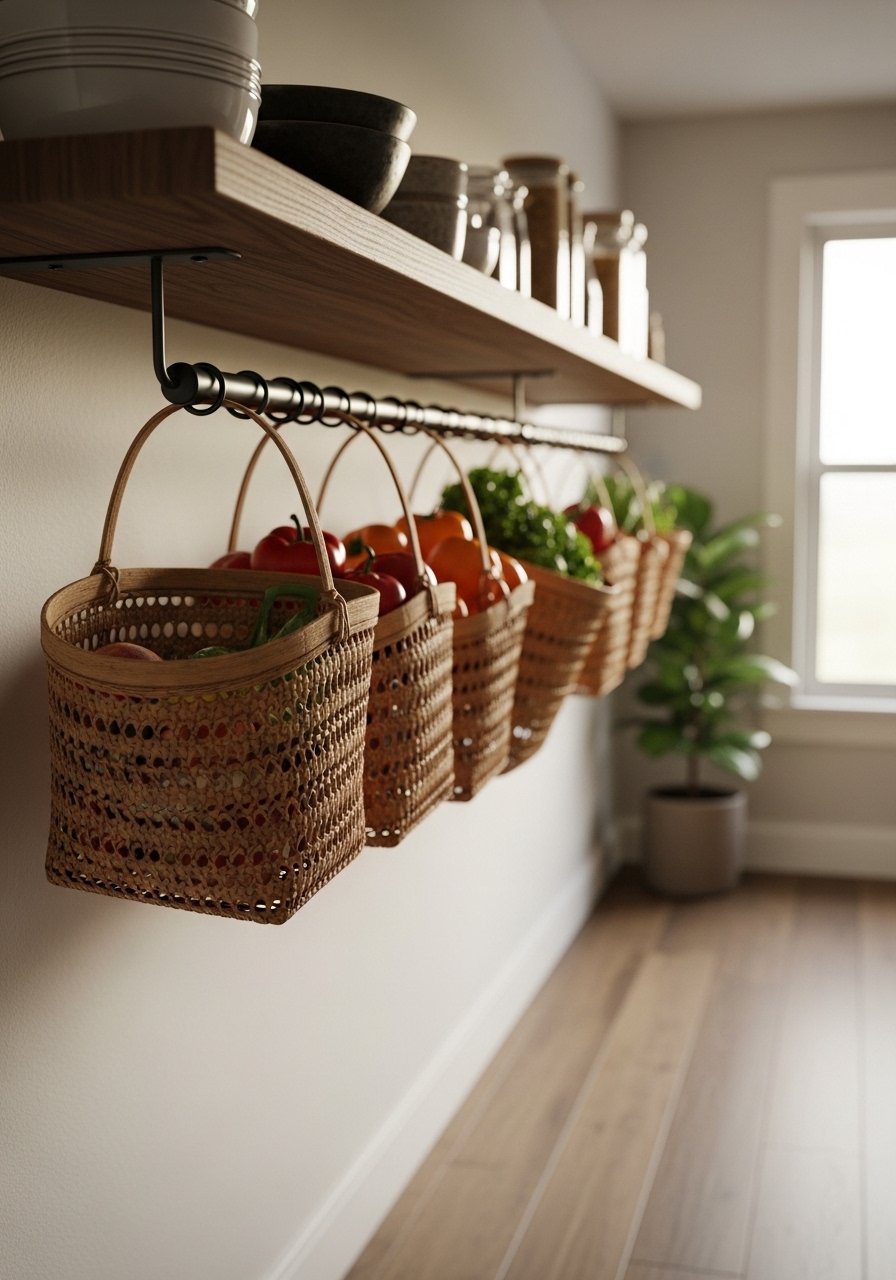
    Use the Rule of Three for styling: group items in odd numbers (3 cups, 5 bowls, 2 plants). Reserve one shelf for functional storage (everyday dishes you use), one for styled display (beautiful pieces that look great), and one for breathing room (plants, a small stack of cookbooks, empty space). Take 2-3 hours to edit: donate or relocate dishes you don’t love. Woven baskets ($10-$40 each from Target or IKEA) hide messier items. Choose a color palette (neutral with one accent color, or all warm tones) and stick to it. The key is that everything visible should either be beautiful, useful, or both. Your kitchen immediately feels more sophisticated, and you’ll actually enjoy looking at your shelves.

    5. Add a Pop of Color with Removable Wallpaper or Peel-and-Stick Backsplash

    Wallpaper and tile are permanent, but removable peel-and-stick backsplash gives you color and pattern with zero commitment. This is the renter’s dream and works beautifully for homeowners who like to change things up seasonally. Bold patterns, subtle geometrics, or classic subway-style options all work.

    Shop Spoonflower, Etsy, Amazon, or Wayfair for thousands of options ($15-$60 per sheet). Measure your backsplash area and calculate how many sheets you need. Prep your wall by wiping it clean and letting it dry completely—any dust prevents adhesion. Apply slowly, smoothing out bubbles with a credit card as you go. The entire project takes 1-2 hours and requires zero tools. If you mess up, peel it off and try again. You get instant color impact without painting or tiling, and you can swap it out whenever you want. Renter? This is your secret weapon for a personalized kitchen that landlords can’t complain about.

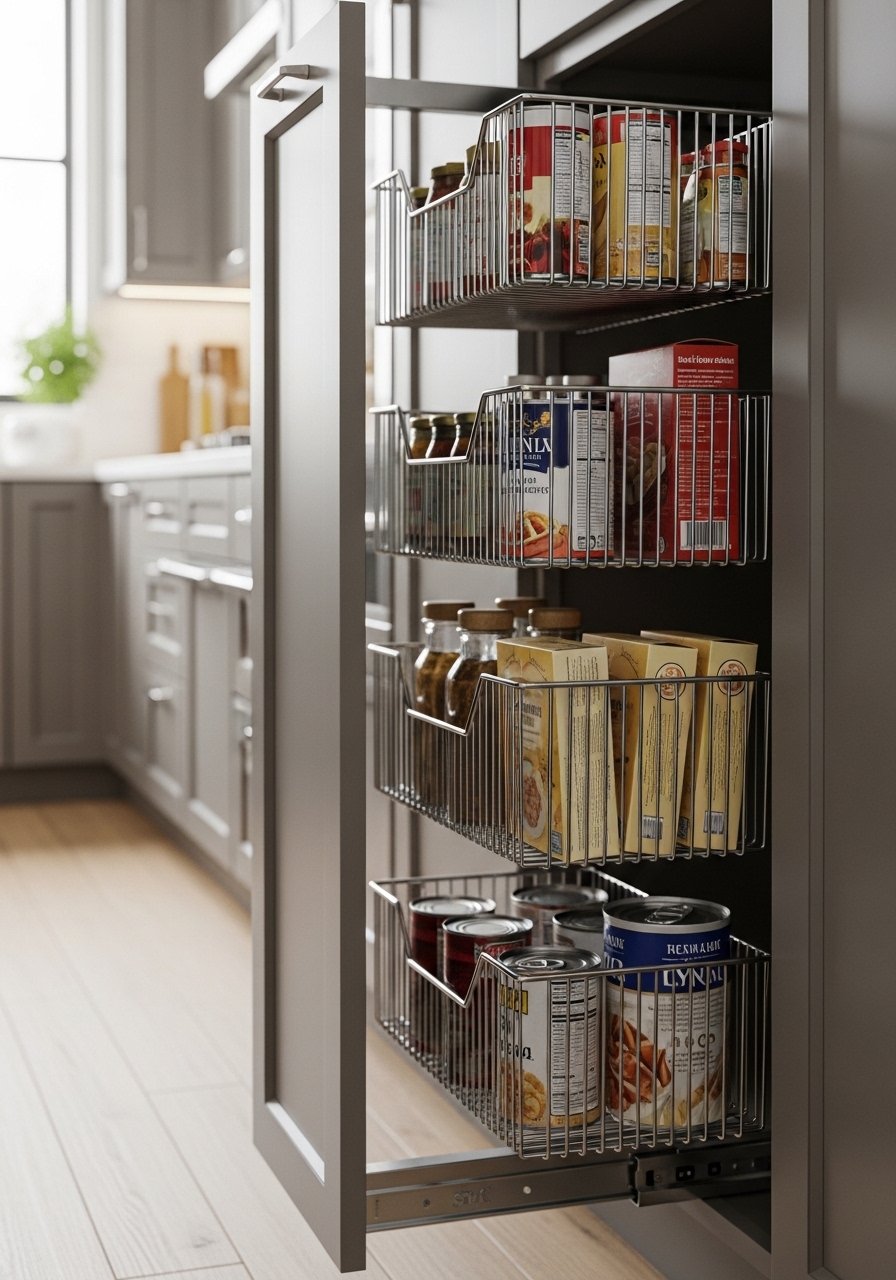
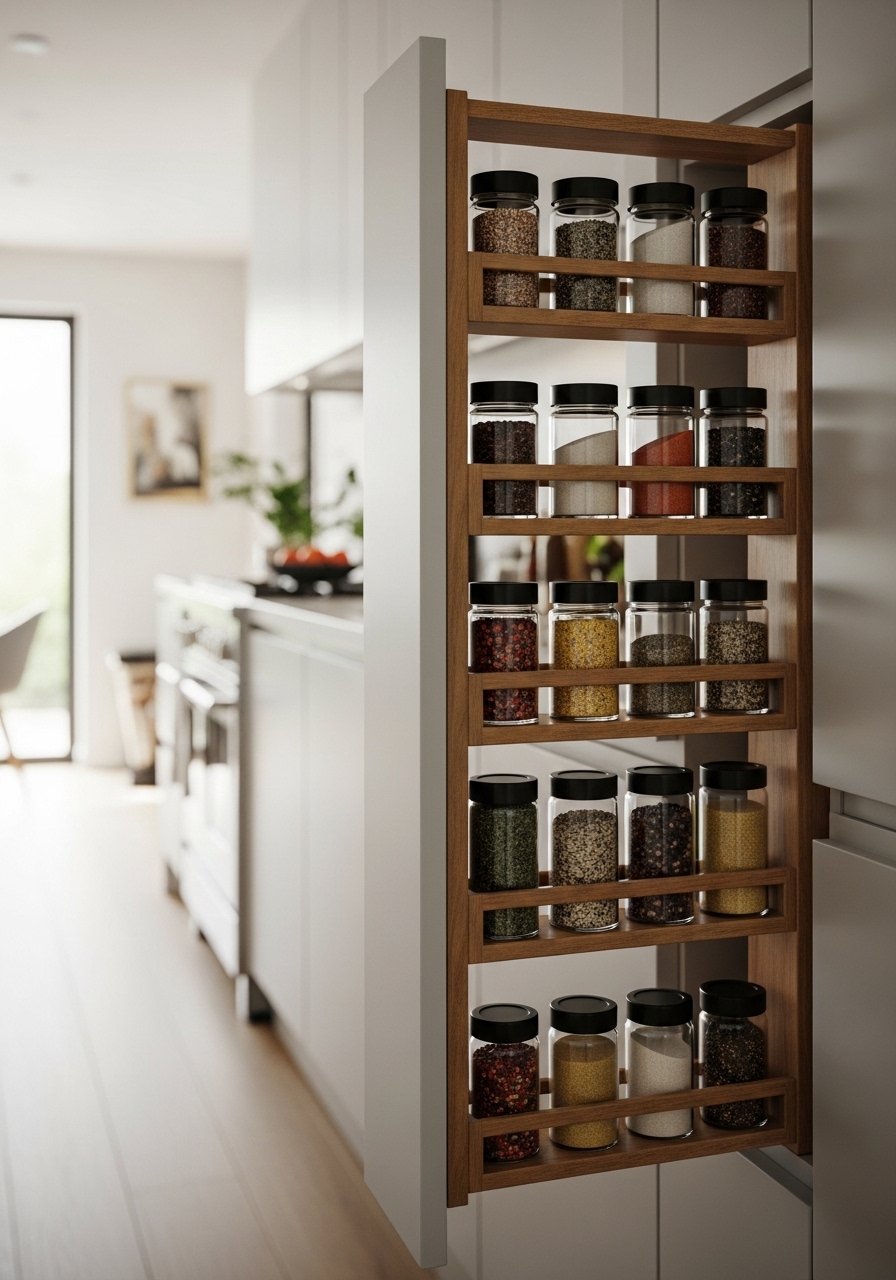
    6. Create a Scullery or Hidden Prep Zone for Entertaining

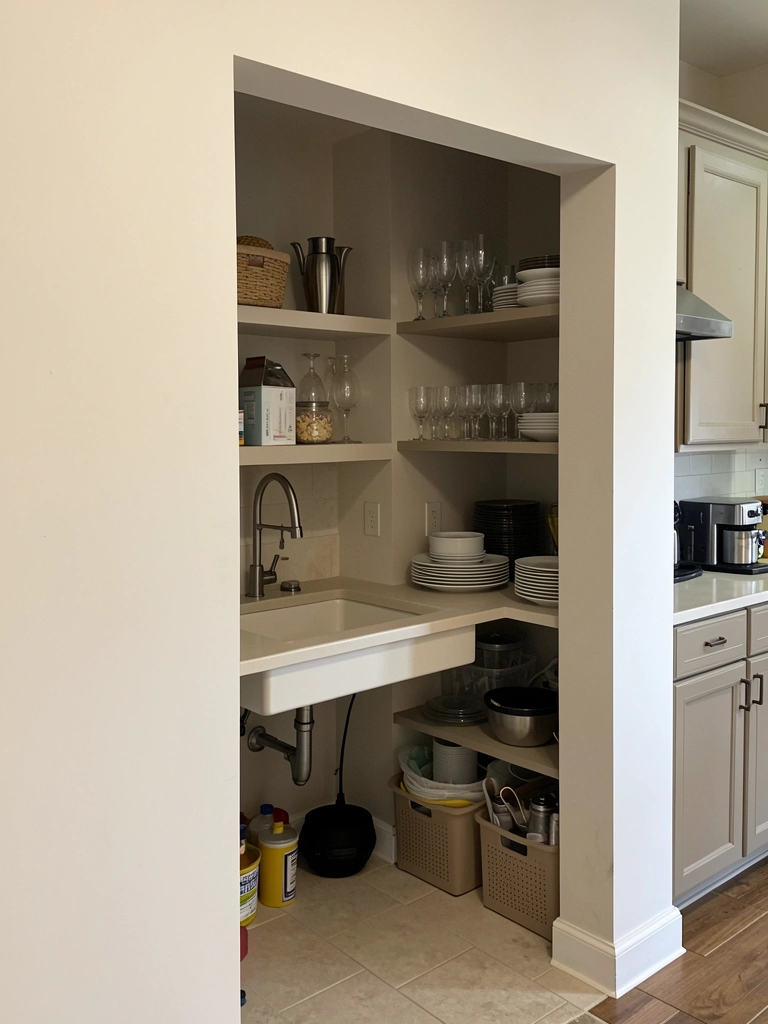
    A scullery or butler’s pantry sounds fancy, but it’s really just a hidden zone where you can stash dirty dishes, prep messy food, and store entertaining supplies while guests see your main kitchen stays pristine. You don’t need an extra room—even a closet-sized space or corner with a partial wall works.

    If you have space (even 4×6 feet), install open shelving ($50-$150 from IKEA) to store serving platters, extra glassware, and entertaining supplies. Add a prep sink if budget allows ($200-$600 plus installation), or repurpose a rolling cart as a mobile prep station ($50-$150). This setup takes a weekend to install and completely changes how you entertain. Guests see a tidy main kitchen, but you have room to work without stress. You keep your main kitchen visually calm while having all the functional space you need. If you’re not ready to commit, even a rolling cart with a curtain in front ($40-$80) creates the same “out of sight” benefit.

    7. Use Color in Small Doses Instead of Full Commitment

    Bold color in kitchens feels risky, but using it strategically feels intentional and sophisticated. Instead of painting all your cabinets or walls, apply color to one surface: a backsplash, one wall, inside glass cabinet doors, or a single accent shelf. This approach gives you color without overwhelming the space.

    Choose one bold shade (terracotta, forest green, deep navy, warm charcoal) and apply it to the highest-impact, lowest-risk spot. Paint a single cabinet interior (free if you already have paint, $15-$30 for new paint). Tile a backsplash ($30-$100 for peel-and-stick tile). Paint one accent wall ($20-$50 in paint). Add colored glass shelves ($40-$80). This takes a few hours to a weekend depending on your choice. The result? Your kitchen feels curated and personal without feeling chaotic. You get bold color confidence in bite-sized form, and if you change your mind later, you only need to fix one small area instead of your entire kitchen.

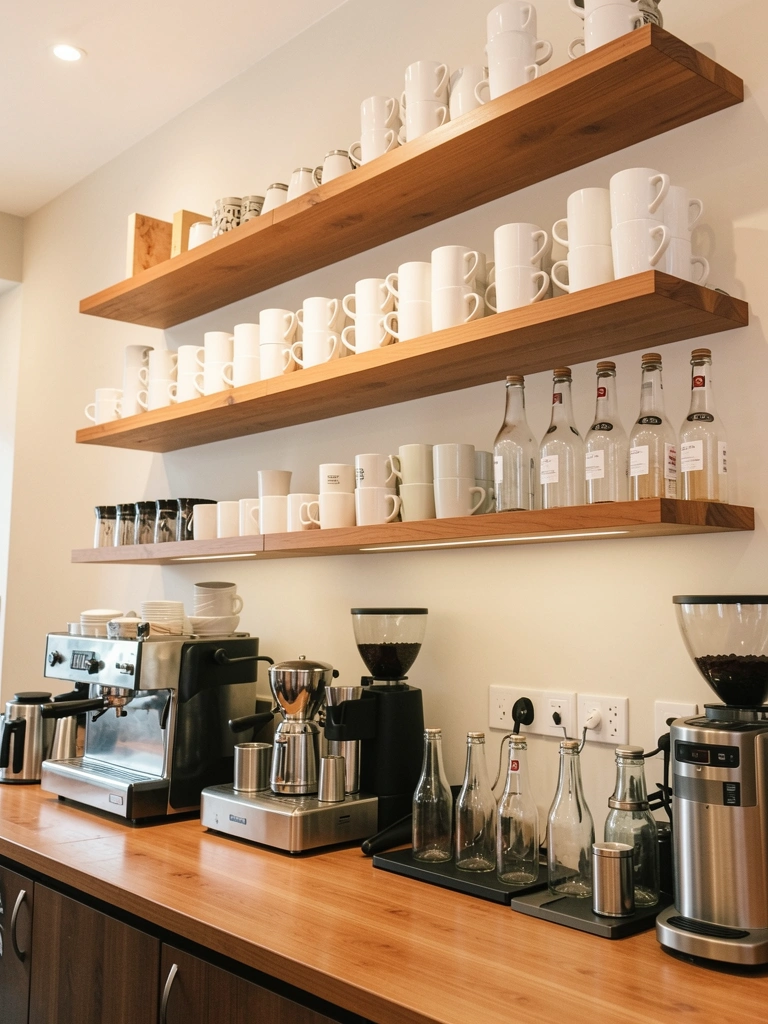
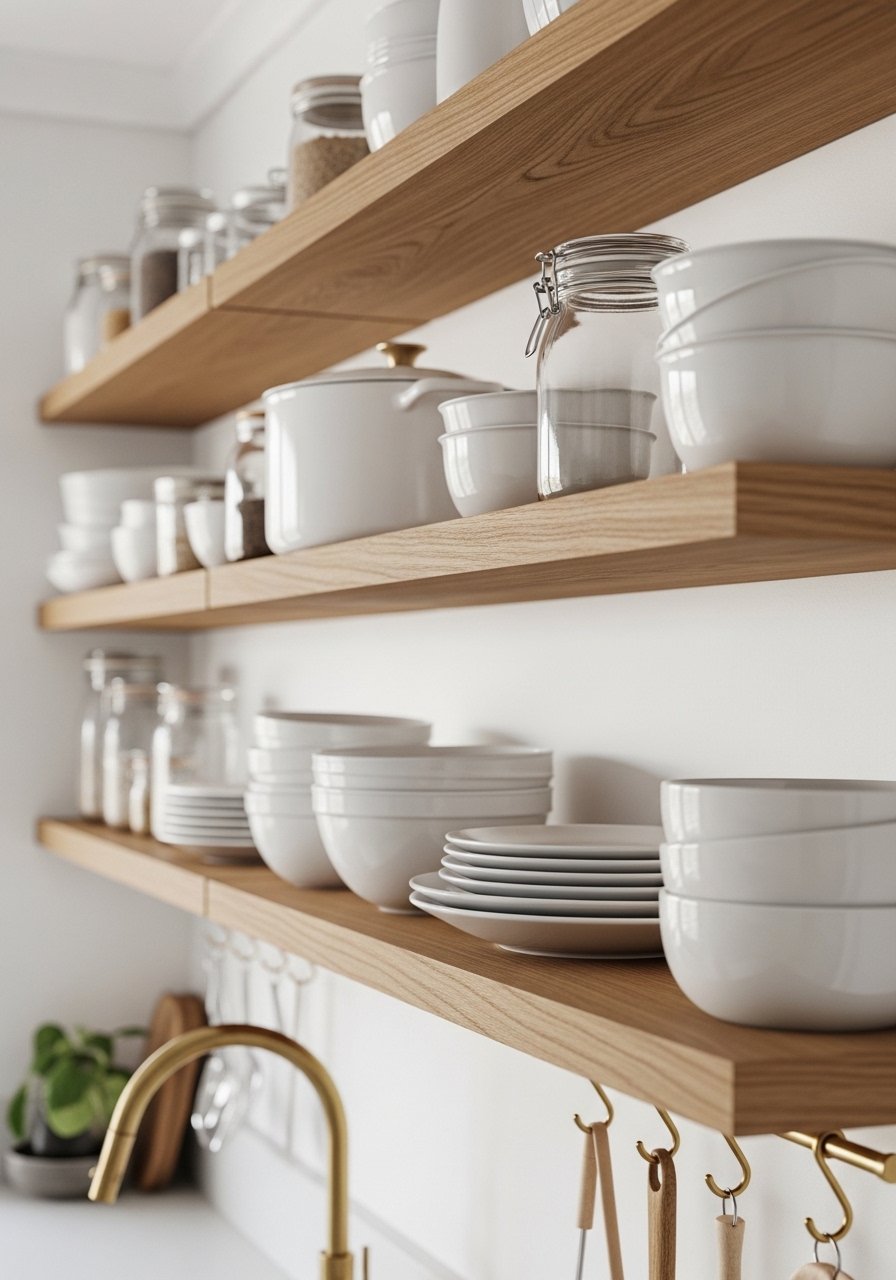
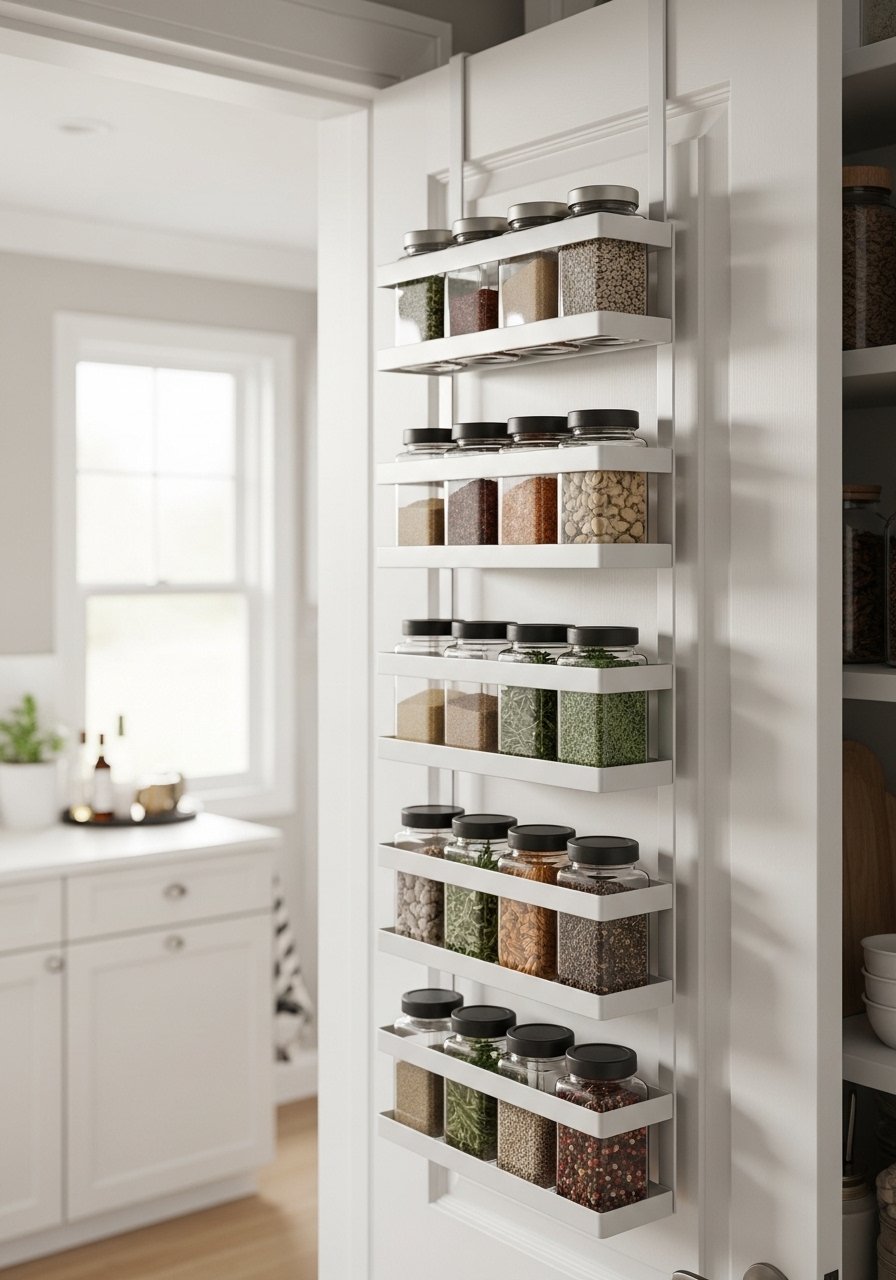
    8. Install Floating Shelves for a Modern, Minimalist Look

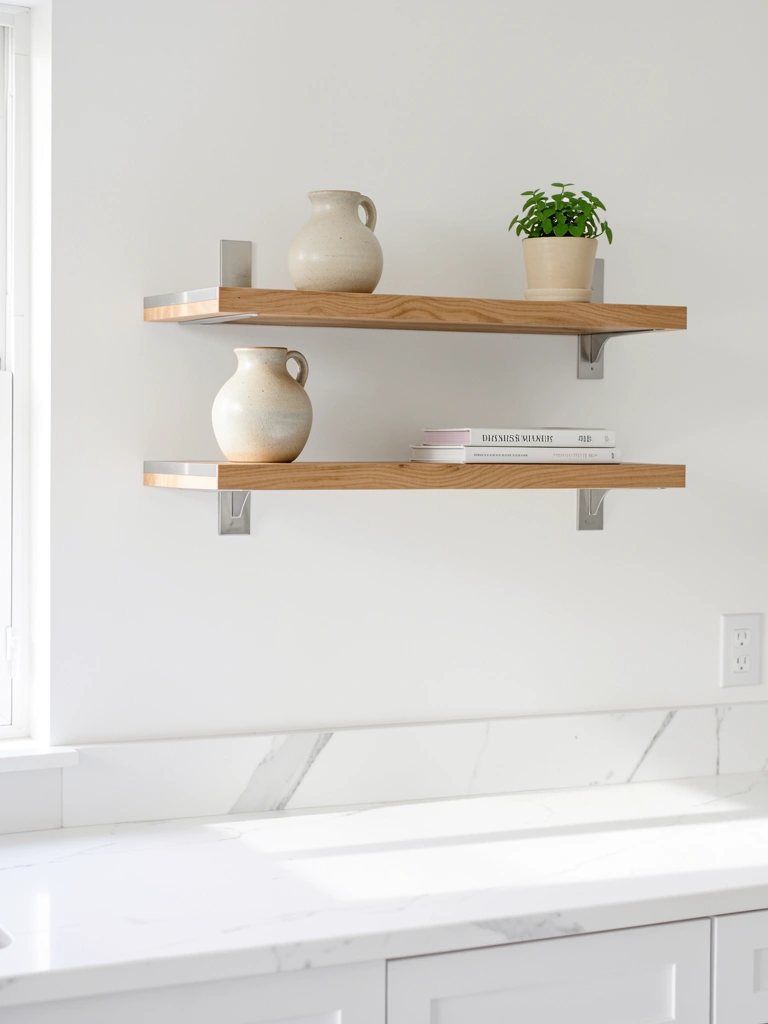
    Floating shelves are the modern kitchen upgrade that instantly makes your space feel more open and designer-like. They work in any style and take just an afternoon to install. Whether you go minimalist or styled, they’re instantly Instagram-friendly.

    Purchase floating shelves from IKEA ($15-$40 each), Amazon, or Wayfair. You’ll need a stud finder ($15-$25) and a drill if you don’t already own one. This is a 30-minute installation project per shelf—two shelves take about an hour. Start with just two shelves above your counter where you need them most (by the coffee maker or over prep space). Weight limit matters: don’t overload them. Style with a few beautiful items (a plant, a small stack of cookbooks, a ceramic piece) rather than cramming them full. Your kitchen instantly feels more open, you gain functional storage, and you create visual interest above your counters. Plus, floating shelves photograph beautifully for those kitchen refresh snapshots.

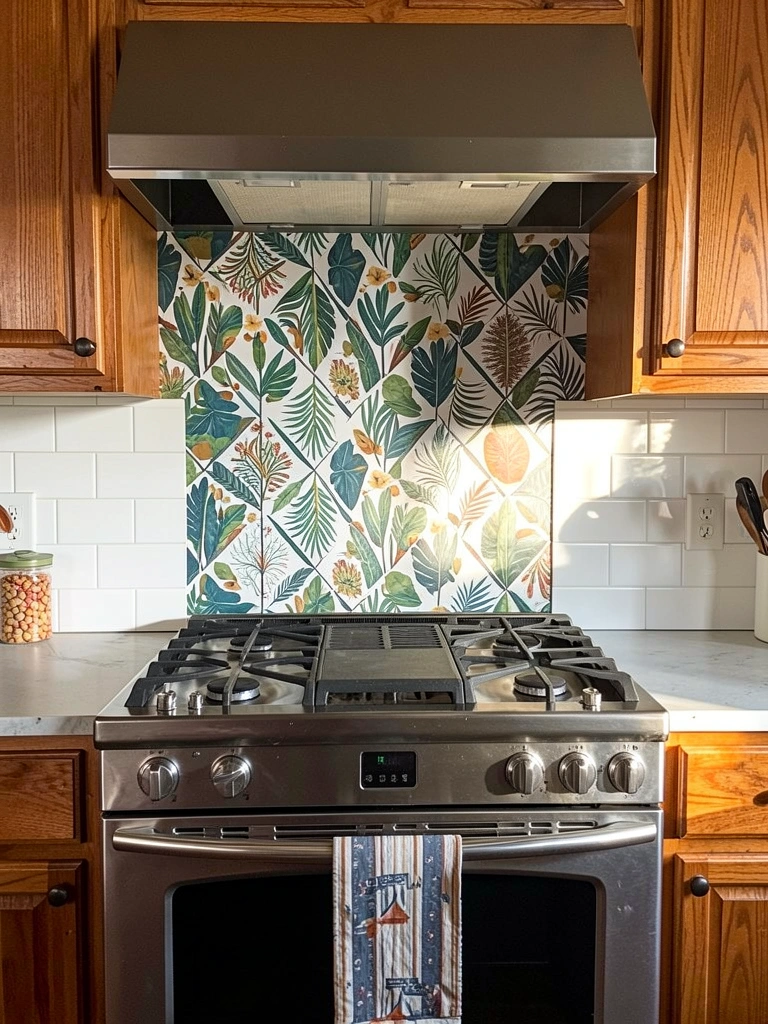
    9. Upgrade to Statement Range Hood or Add a Plaster Accent Above the Stove

    Your range hood is prime real estate for a statement piece. Most kitchens hide theirs away, but designers are increasingly using hoods as the focal point. Whether you upgrade the hood itself or add a decorative plaster or tiled accent behind it, this change commands attention.

    Replace an existing hood with a statement hood ($300-$2,000+ depending on style and material) from brands like Zephyr, Broan, or specialized retailers. Alternatively, keep your existing hood but add a textured plaster accent ($100-$300 in materials if DIY, or hire help for $500-$1,500). Install decorative tile in a bold pattern behind your stove ($50-$200 in tile plus grout, or splurge on professional installation). This is a weekend DIY project for peel-and-stick options, or hire a pro for permanent installations. Your stove area immediately becomes the room’s focal point, and suddenly your entire kitchen feels more intentional. Guests notice it, and it changes how the whole kitchen feels even if nothing else changes.

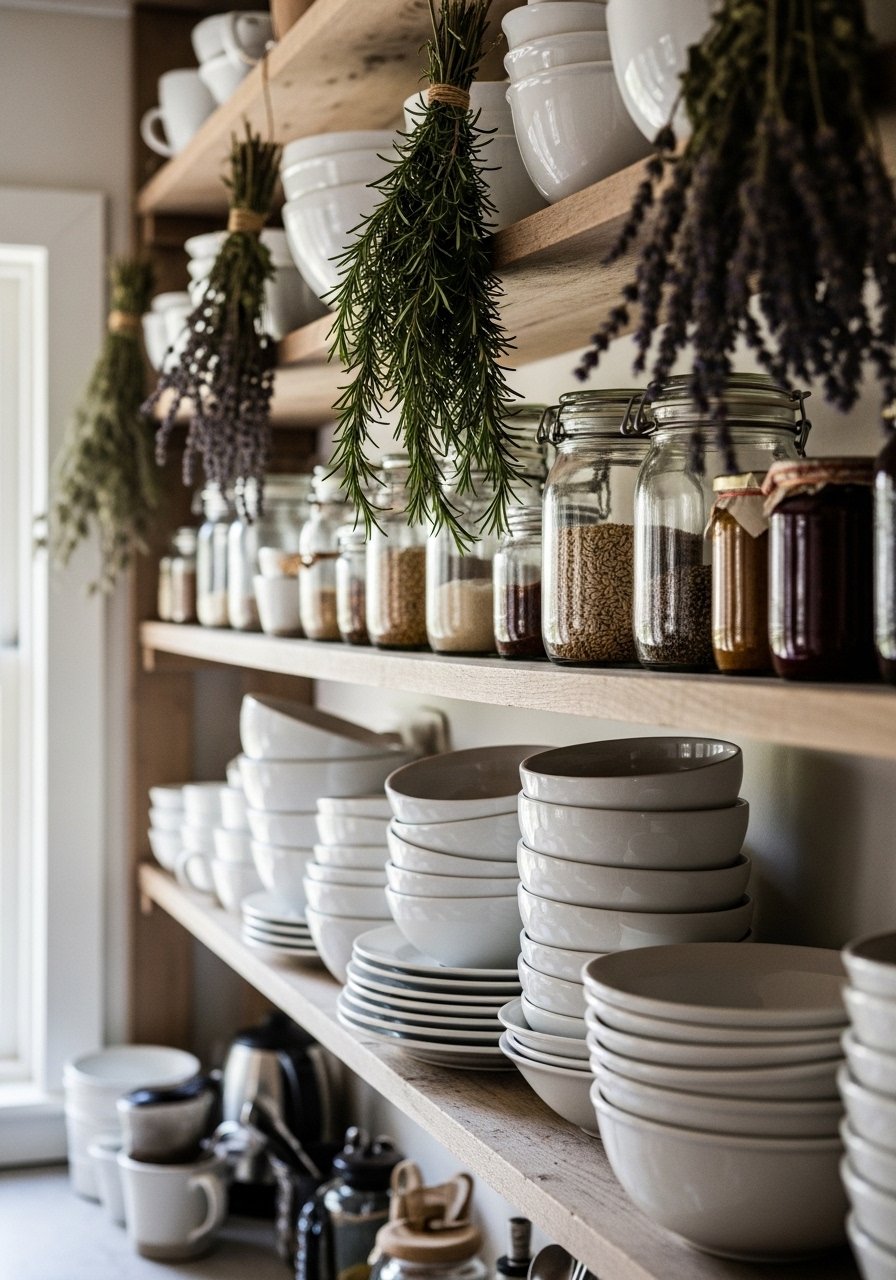
    10. Style Open Shelving with a Cohesive Color Palette

    Open shelving only works if there’s a visual thread connecting everything on display. A cohesive color palette turns random items into an intentional collection. This takes editing and patience, but it’s free if you already own dishes, or budget-friendly if you shop secondhand.

    Decide on your color family: neutrals with one accent color, warm earth tones, cool jewel tones, or black and white. Donate or relocate anything that clashes. Shop Goodwill, Facebook Marketplace, or estate sales for beautiful dishes in your palette ($1-$5 per piece). Use open shelving bins ($10-$30) in neutral colors to corral smaller items. Group similar items together instead of scattering them—all your mugs on one shelf, all your bowls on another. This takes 2-4 hours of styling, and honestly, you’ll probably need to do it in phases as you find the right pieces. The payoff? Your shelves look like they belong in a design magazine instead of a kitchen storage unit. It makes your entire space feel more polished and thought-through.

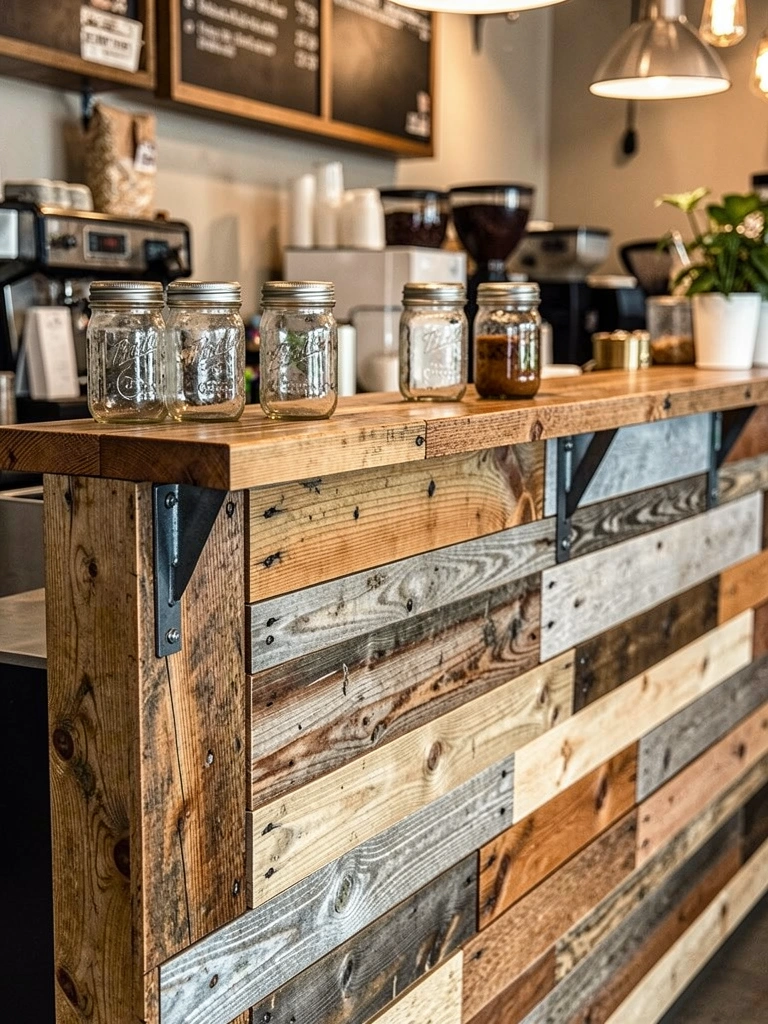
    11. Add Texture with Fluted or Ribbed Cabinet Doors

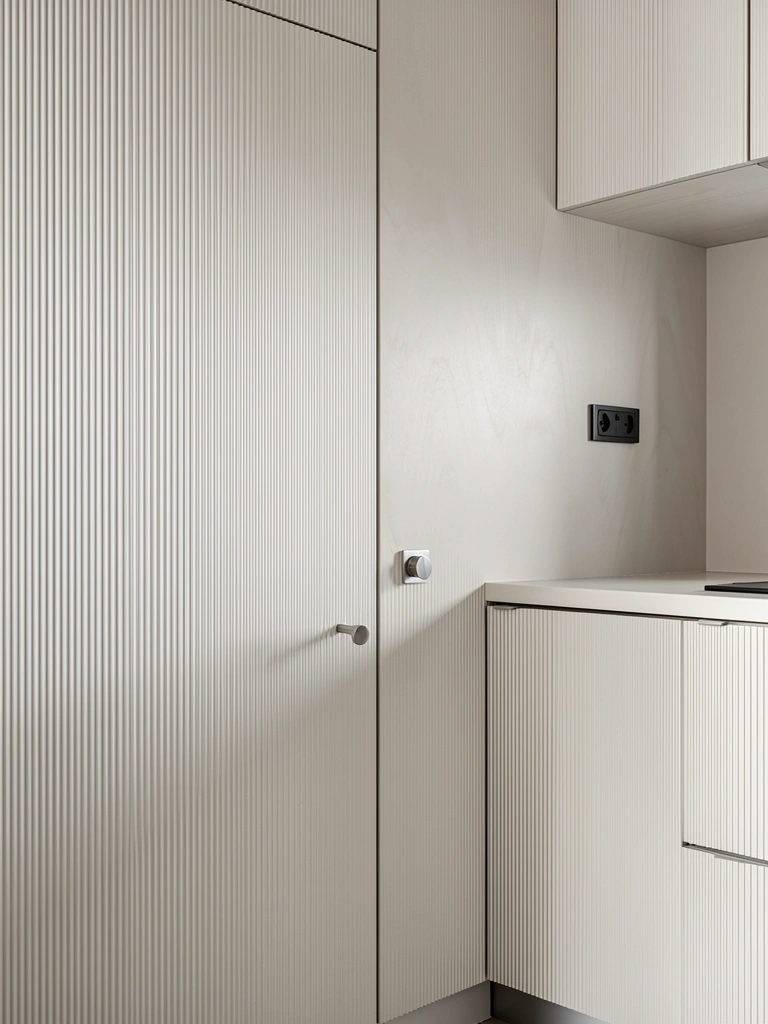
    Texture is huge right now, and fluted or ribbed cabinetry adds visual interest without changing your cabinet’s color or footprint. This works especially well if your kitchen has minimal cabinets or you want to refresh existing ones without full replacement.

    Replace just cabinet doors (not the boxes) with fluted options from IKEA, Semihandmade, or local cabinet shops ($200-$800 total depending on how many doors). Paint your existing cabinets, then add texture using plaster or wall texture compound ($30-$50 in materials, DIY-friendly, takes a weekend). Apply peel-and-stick textured film to cabinet doors ($50-$100, takes a few hours). The fluted effect creates shadow lines that make your kitchen feel more contemporary and sophisticated. Even if you just texture-upgrade a few doors (like your island or a section of upper cabinets), it instantly elevates the entire space. Texture photographs beautifully and catches light in ways solid colors can’t, making your kitchen feel more expensive and thoughtfully designed.

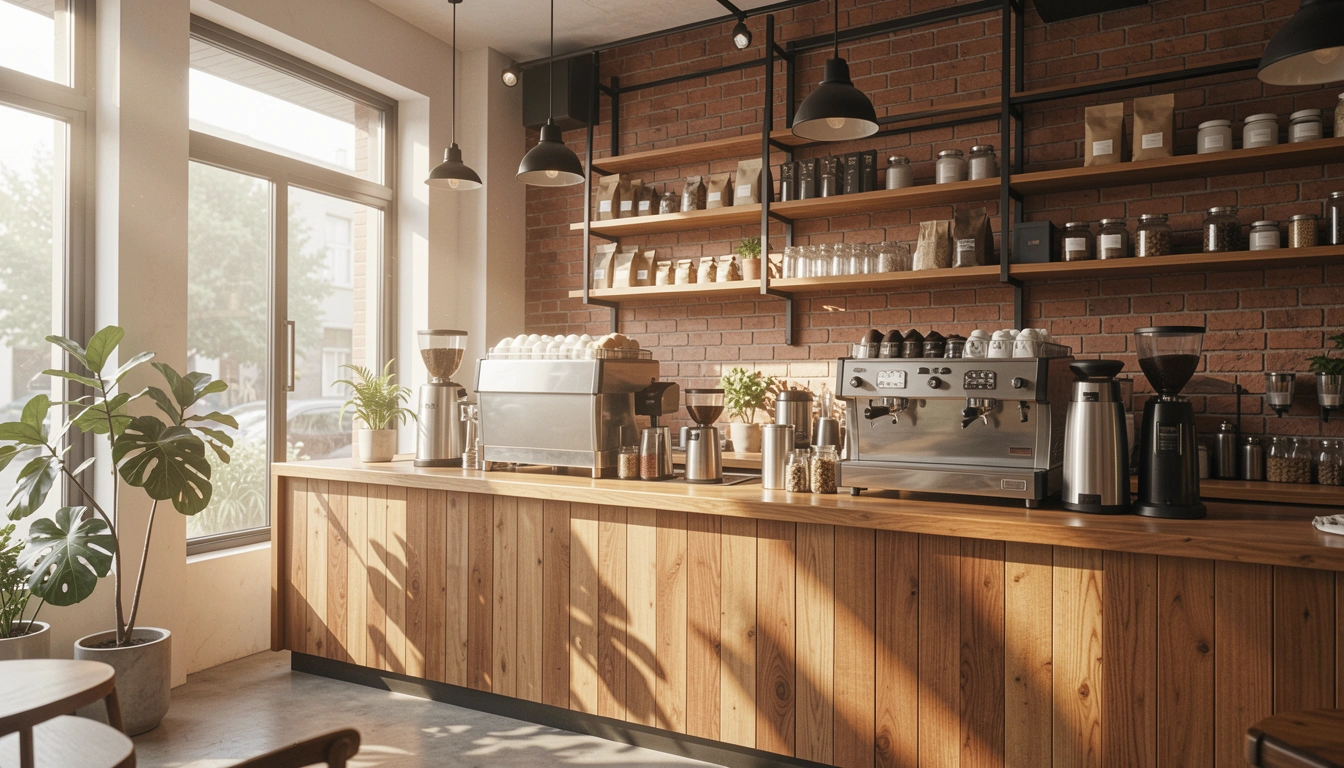
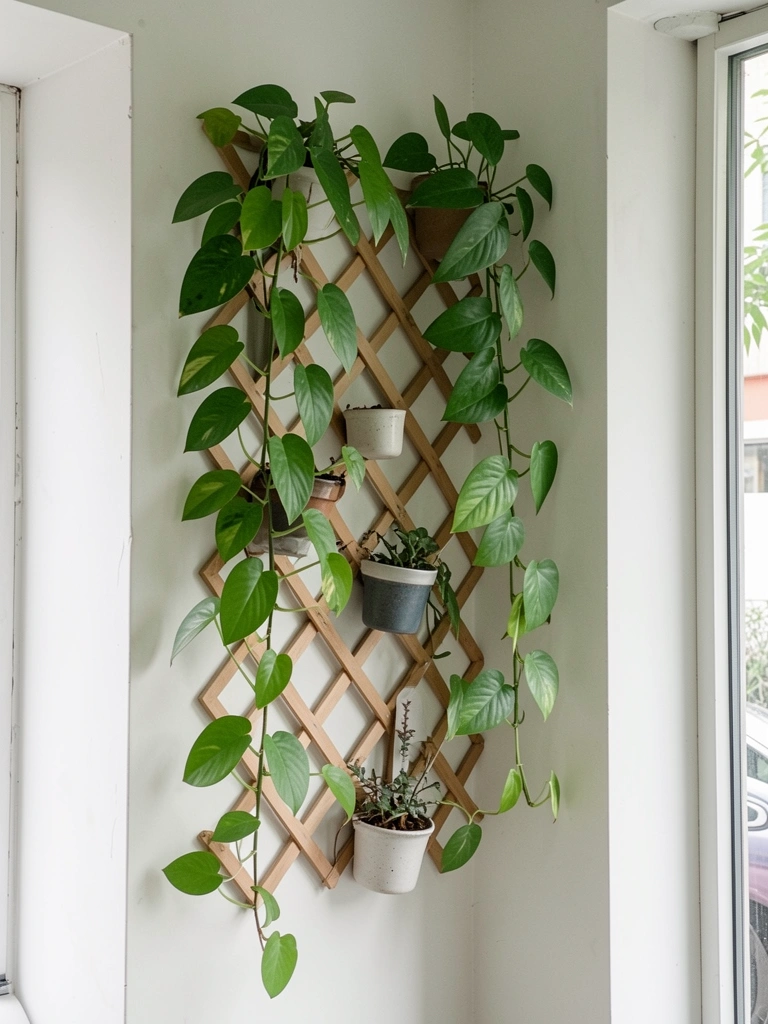
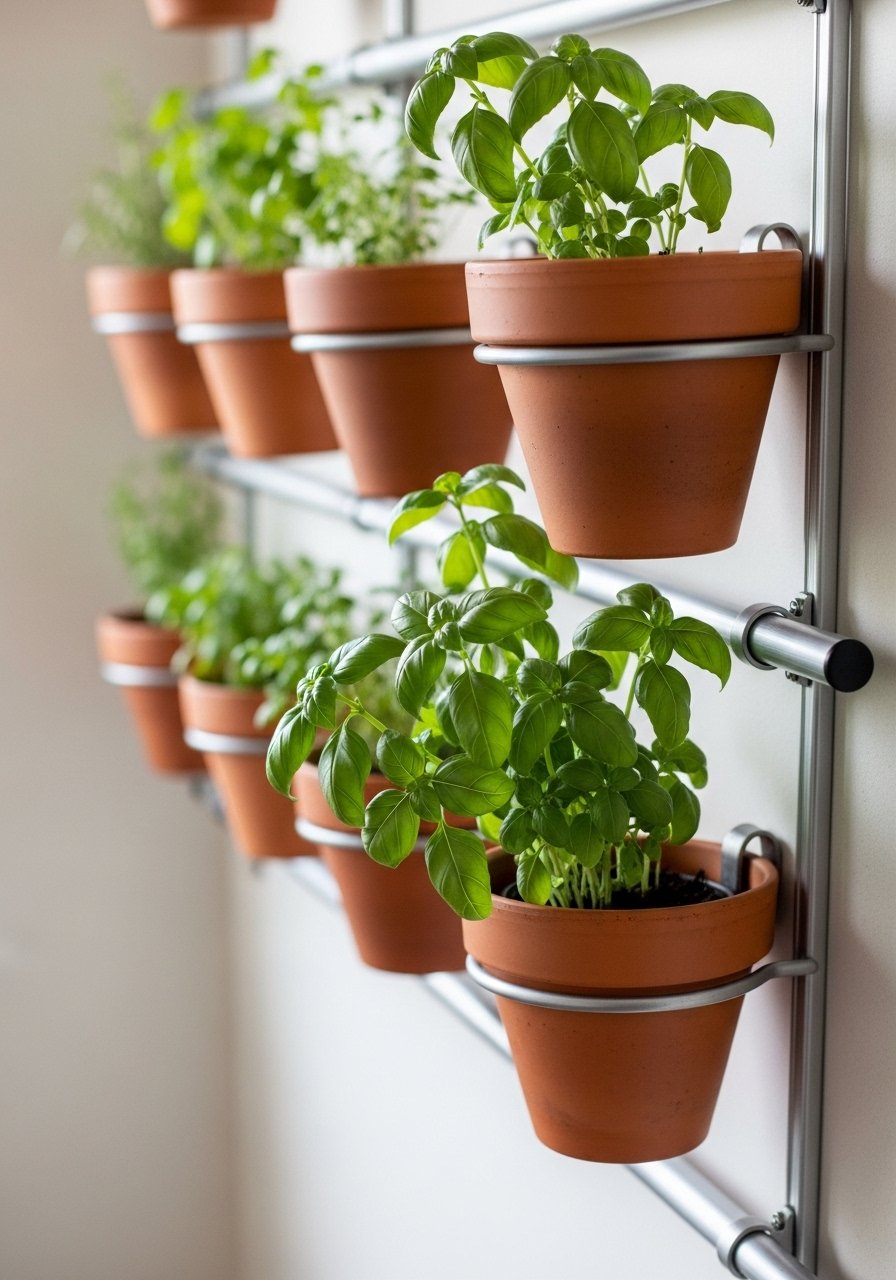
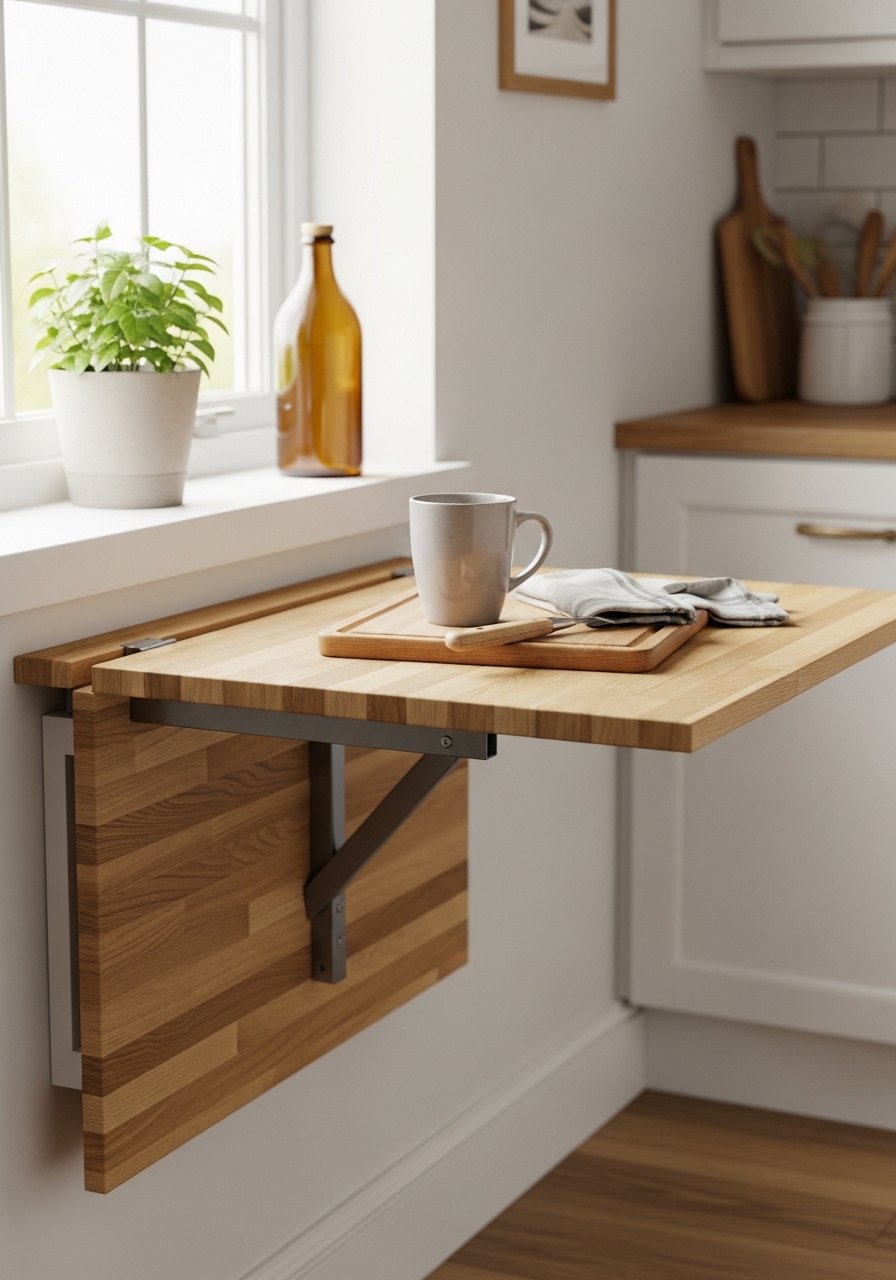
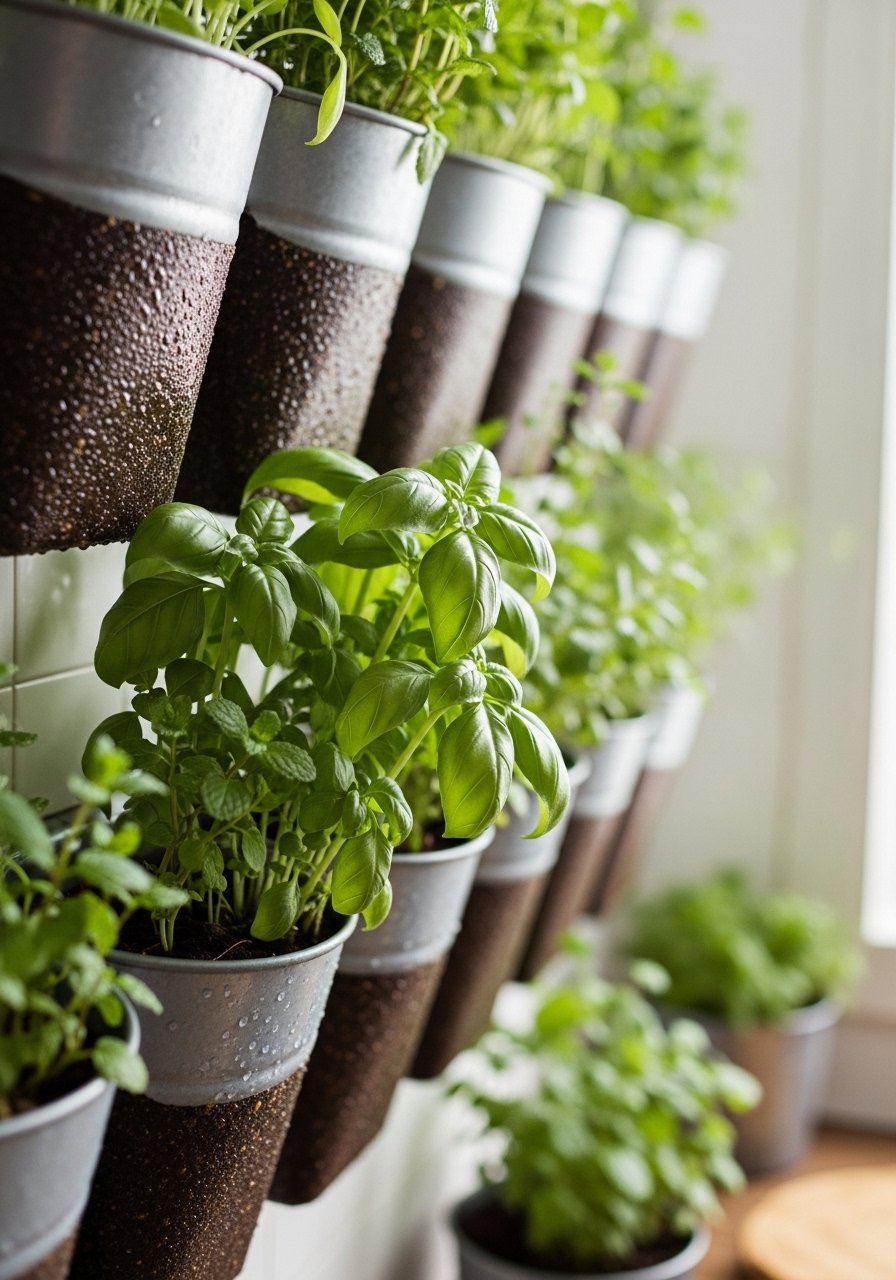
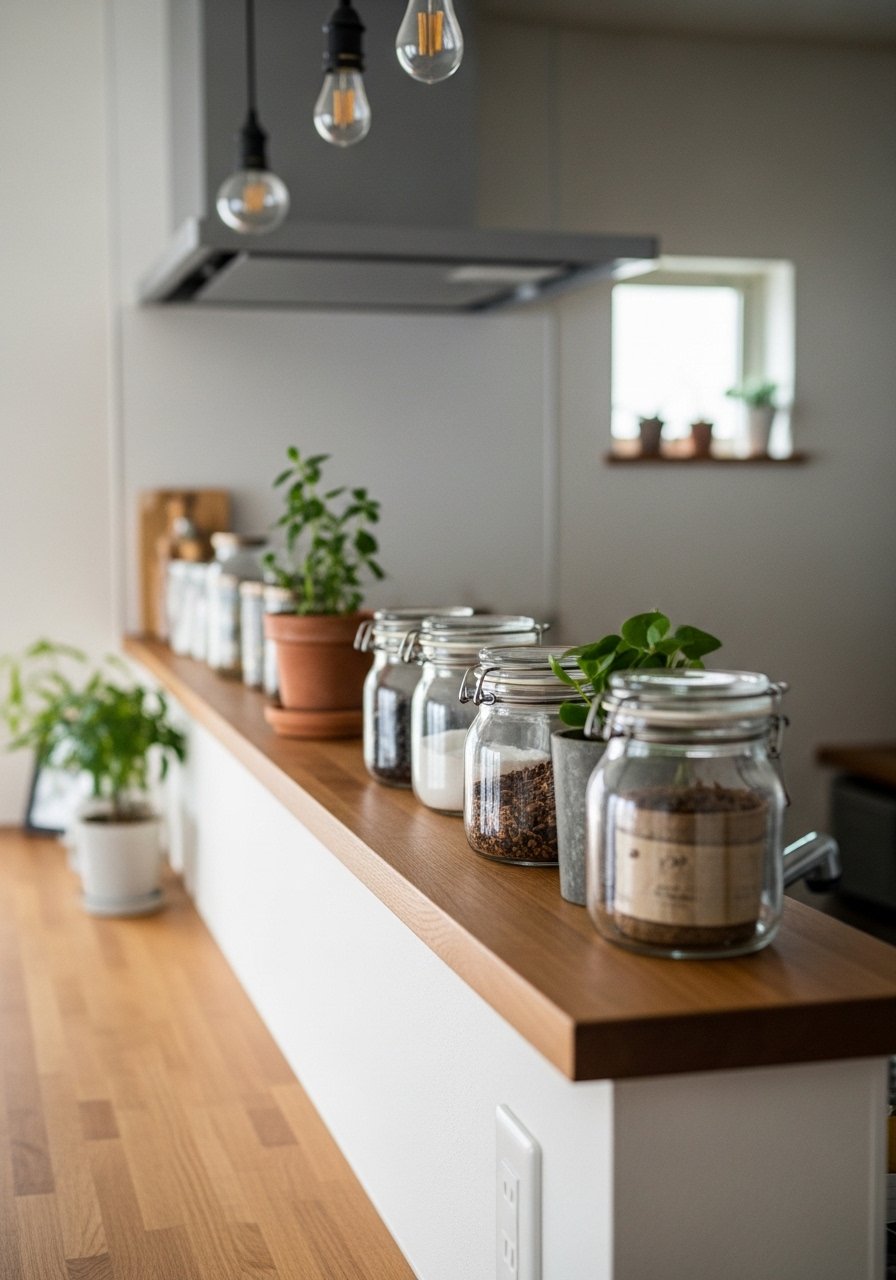
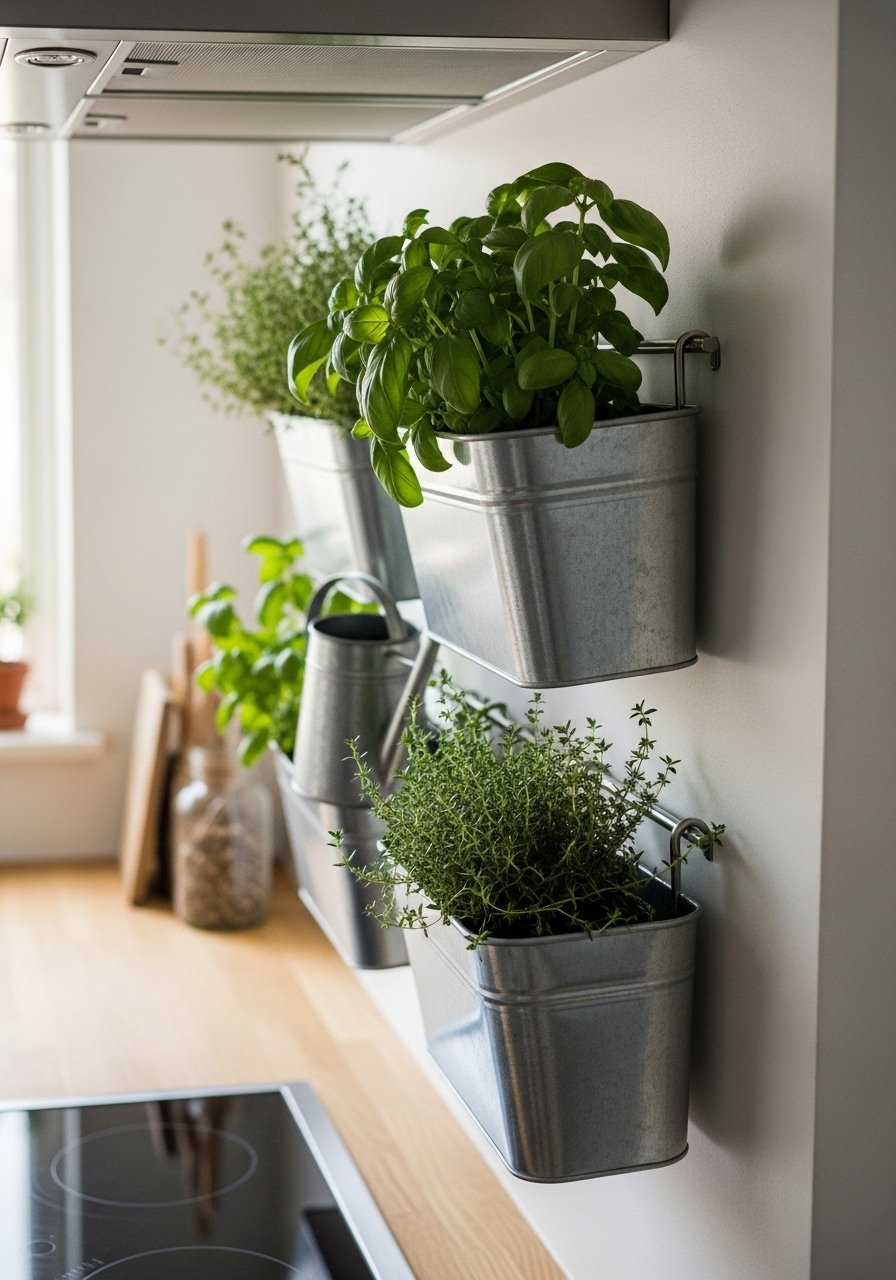
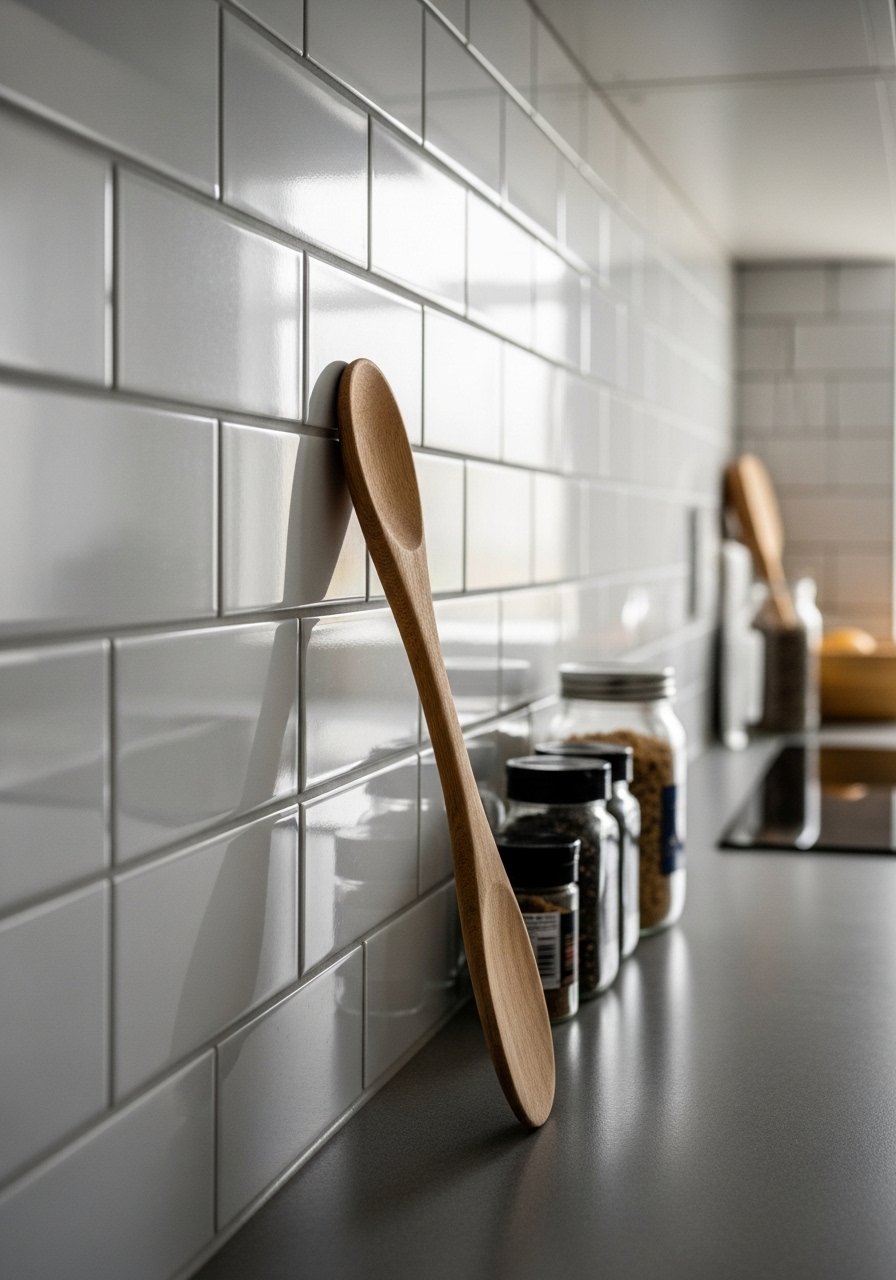
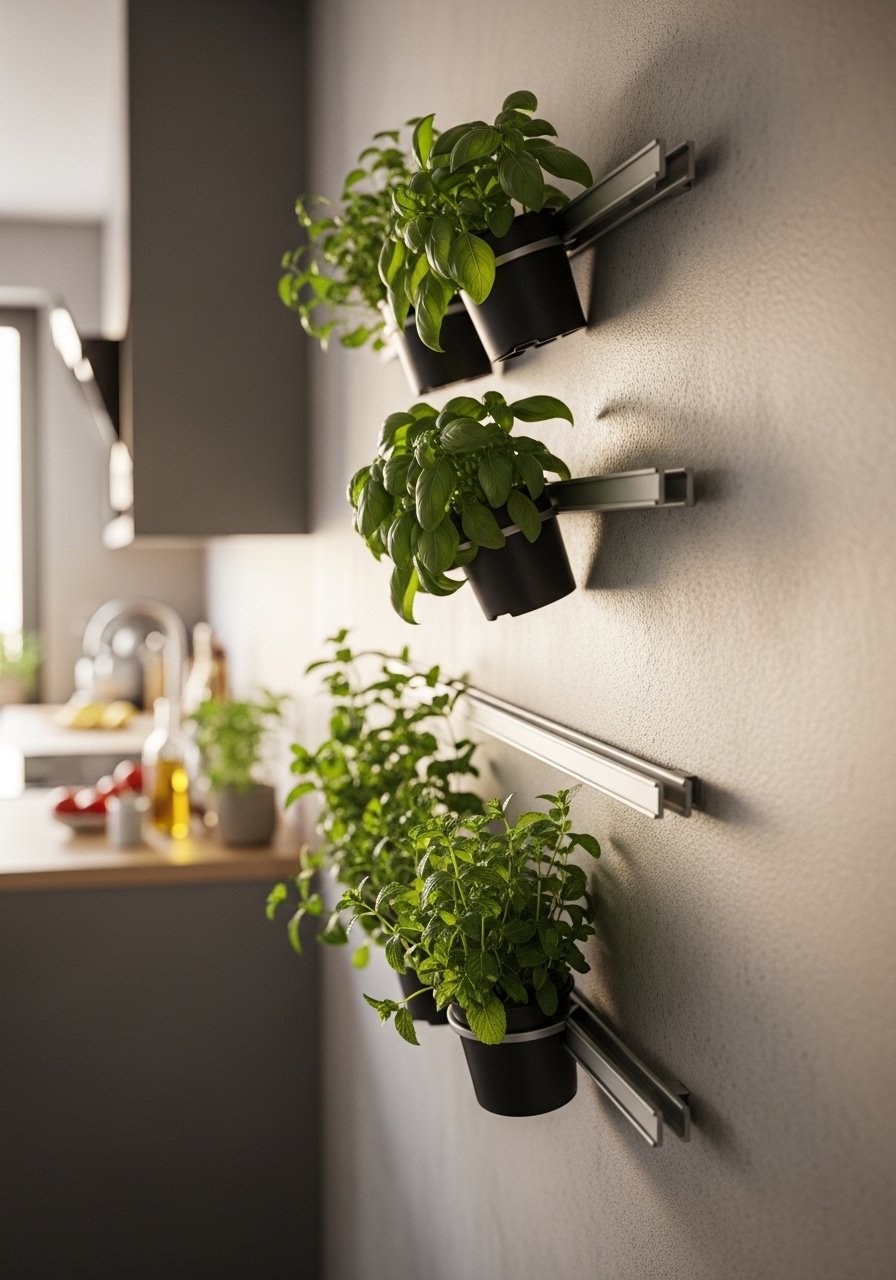
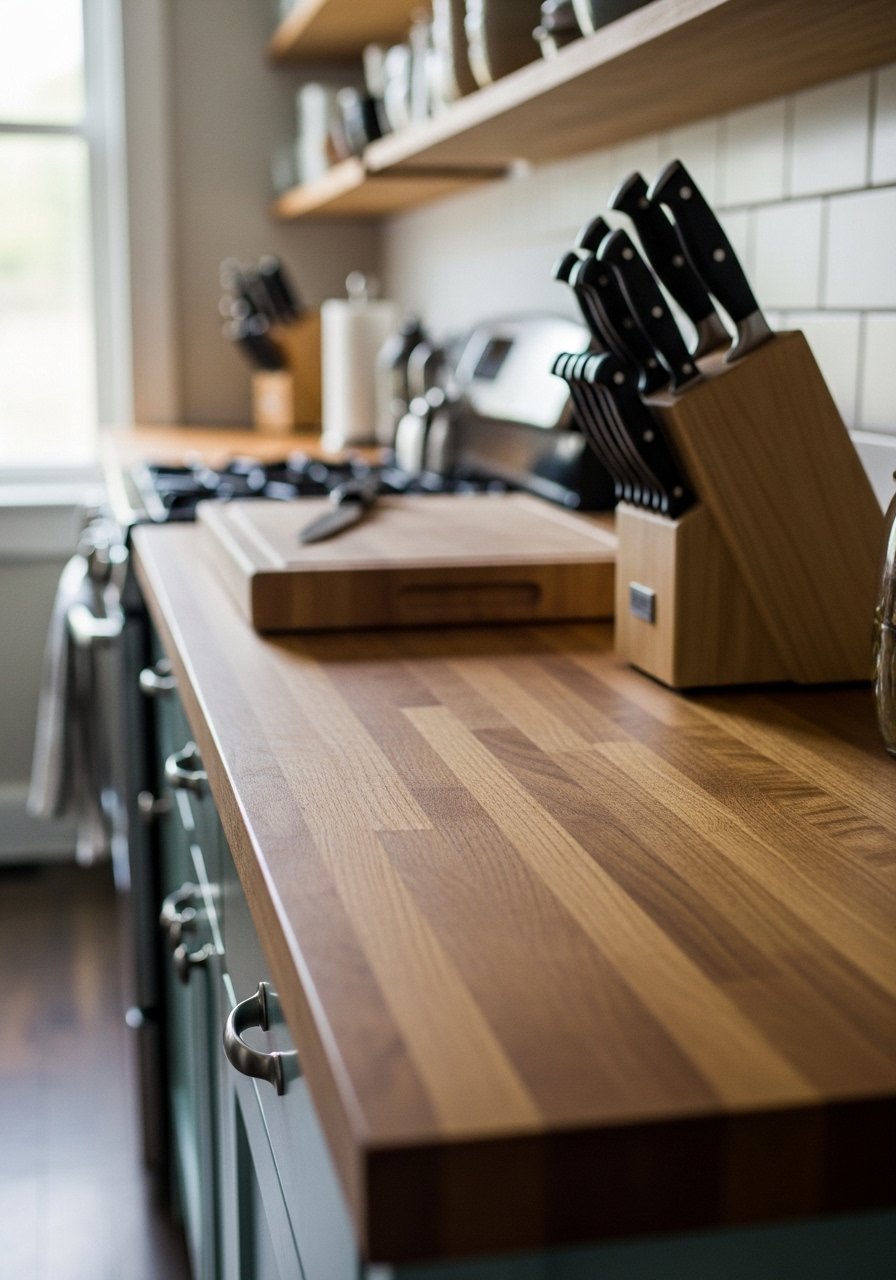
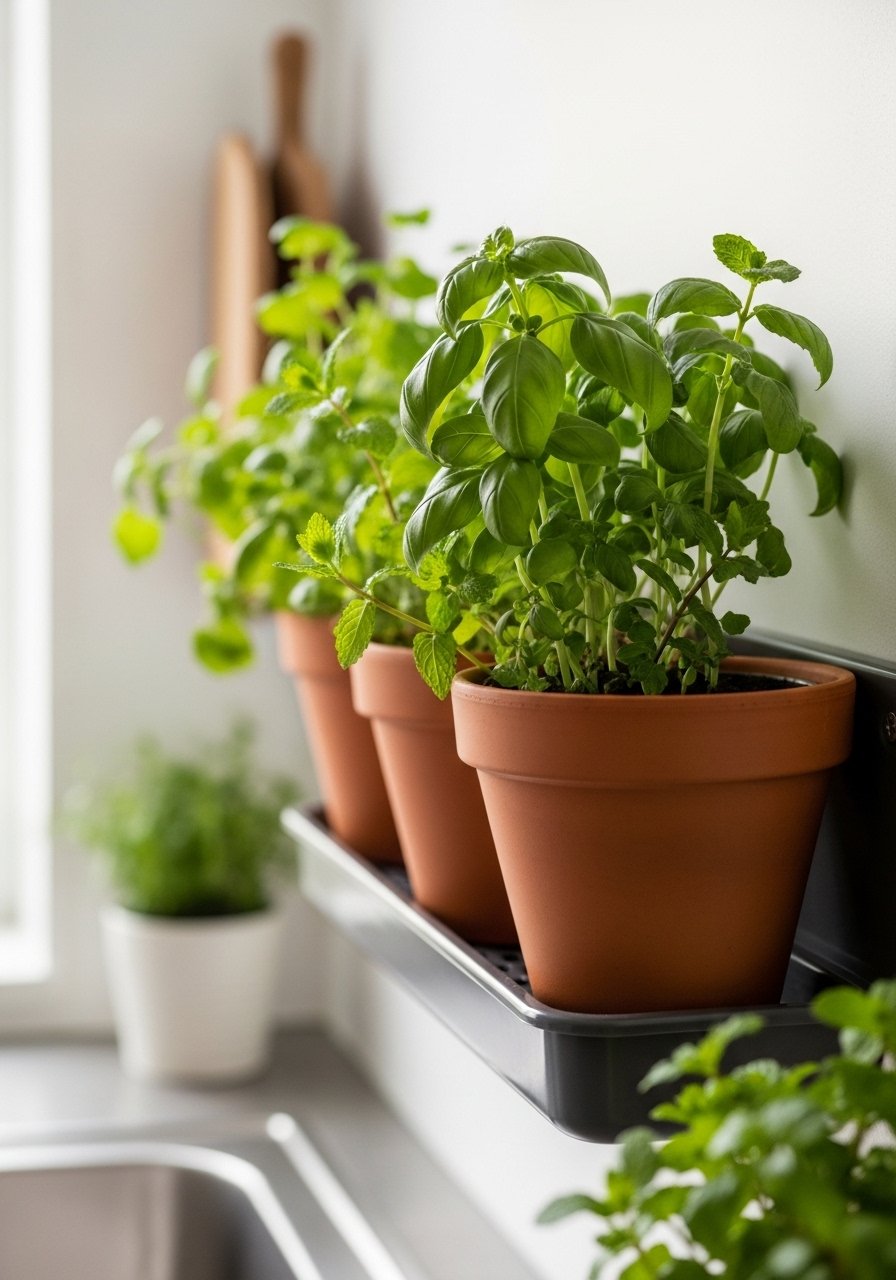
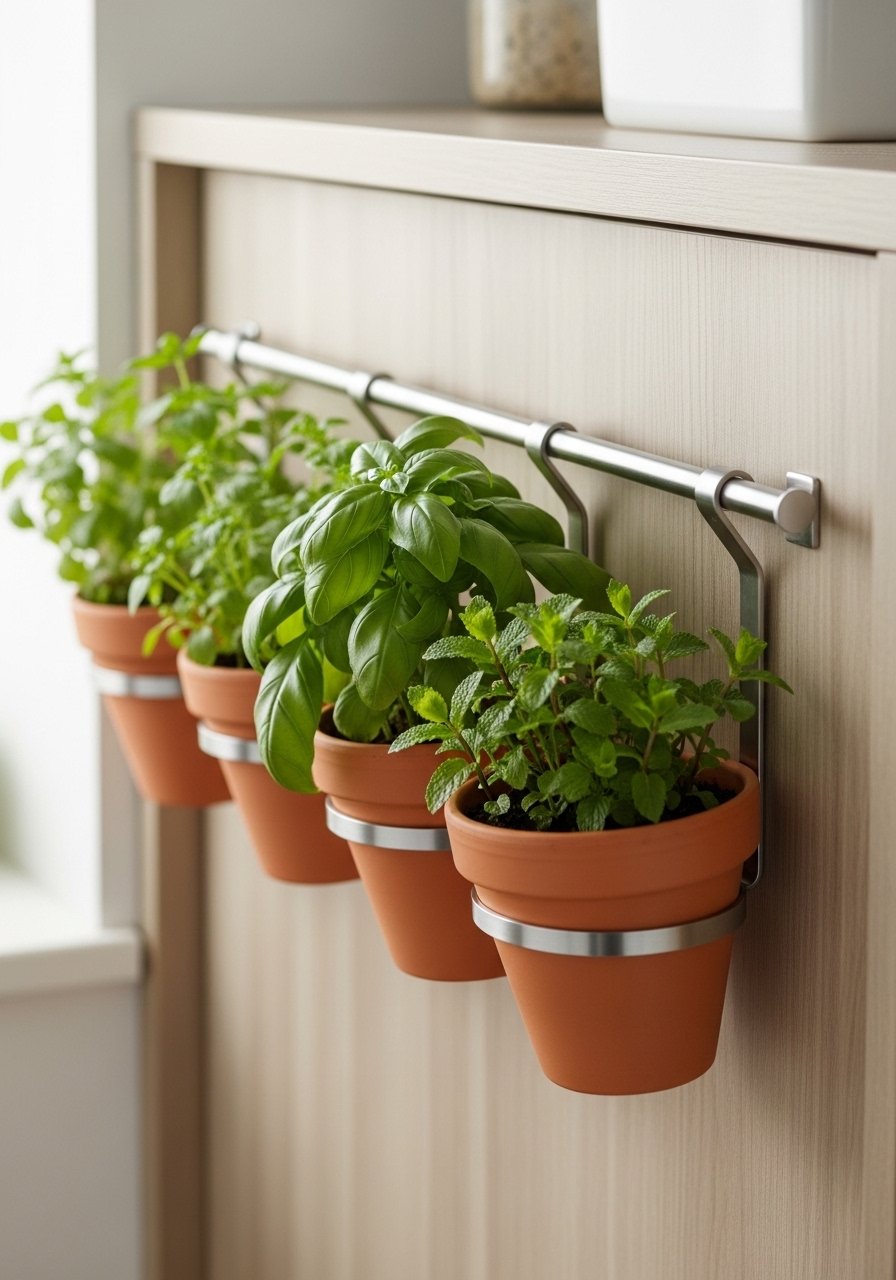
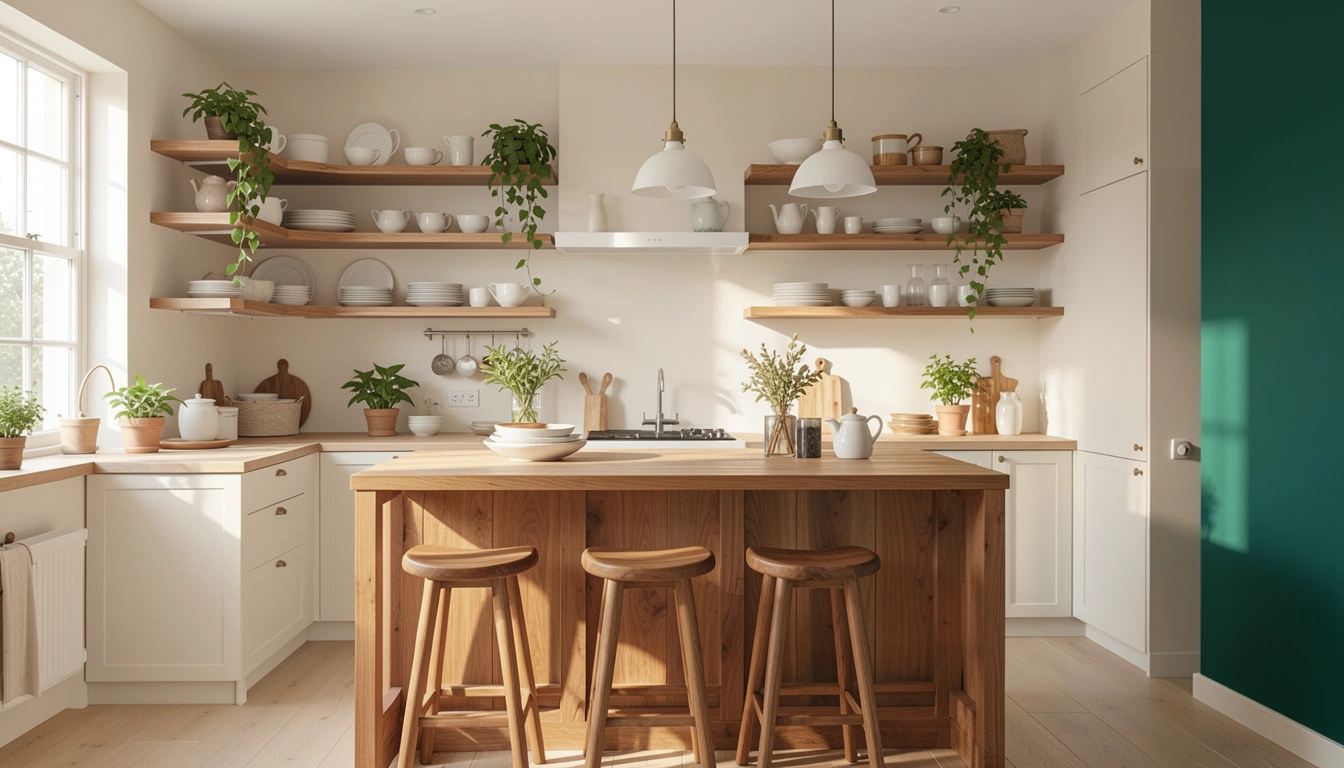
    12. Incorporate Natural Materials and Biophilic Elements

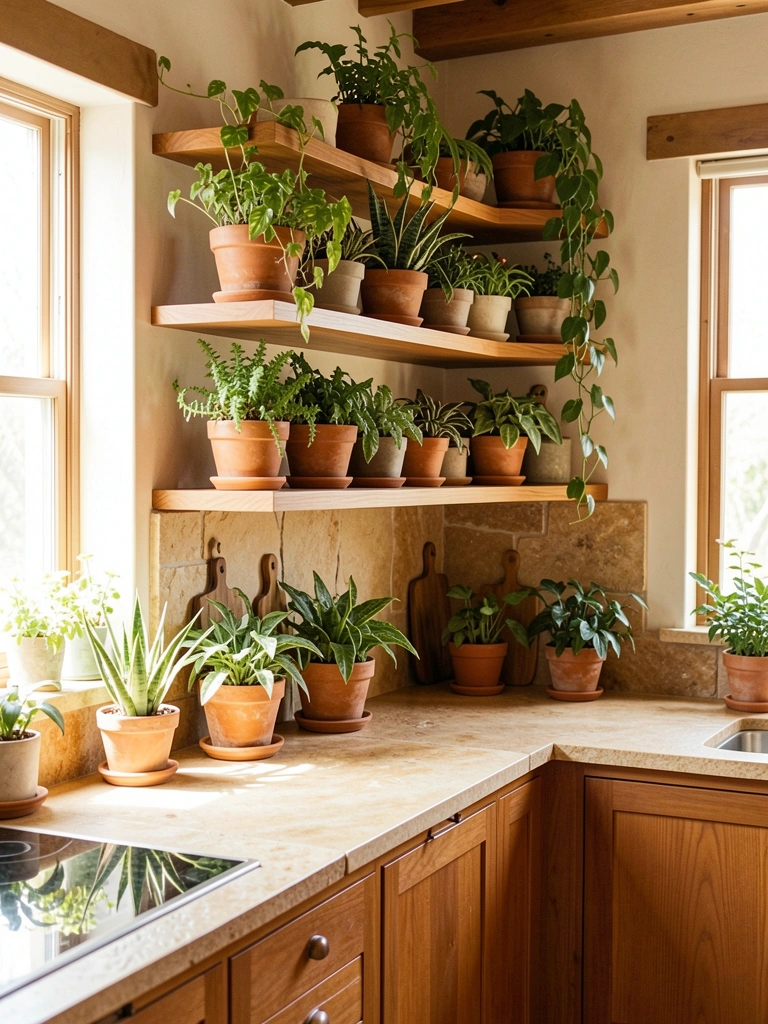
    Biophilic design—incorporating nature into your space—makes kitchens feel more relaxing and health-focused. Natural wood, stone, plants, and natural light all contribute to this feeling. This approach doesn’t require a full renovation; start small and layer elements over time.

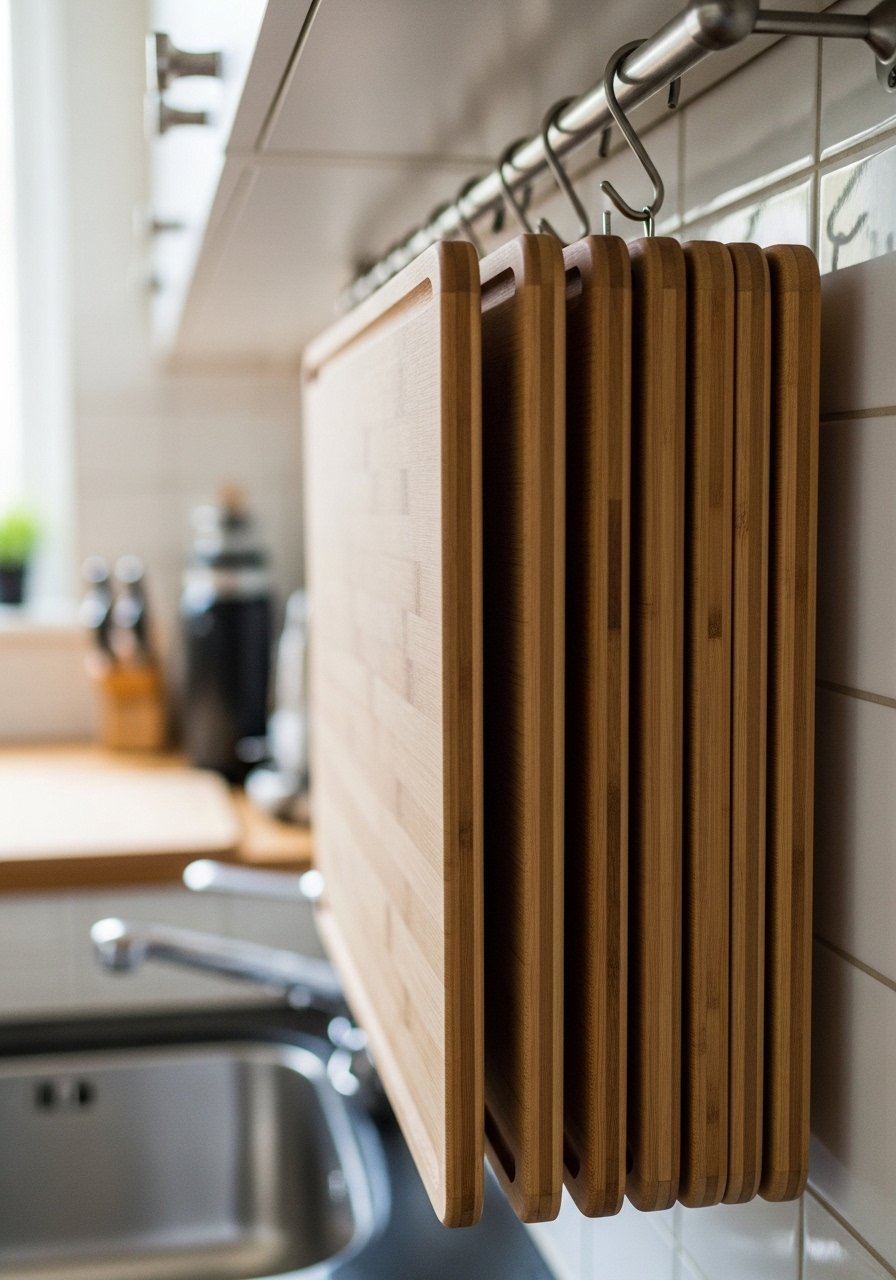
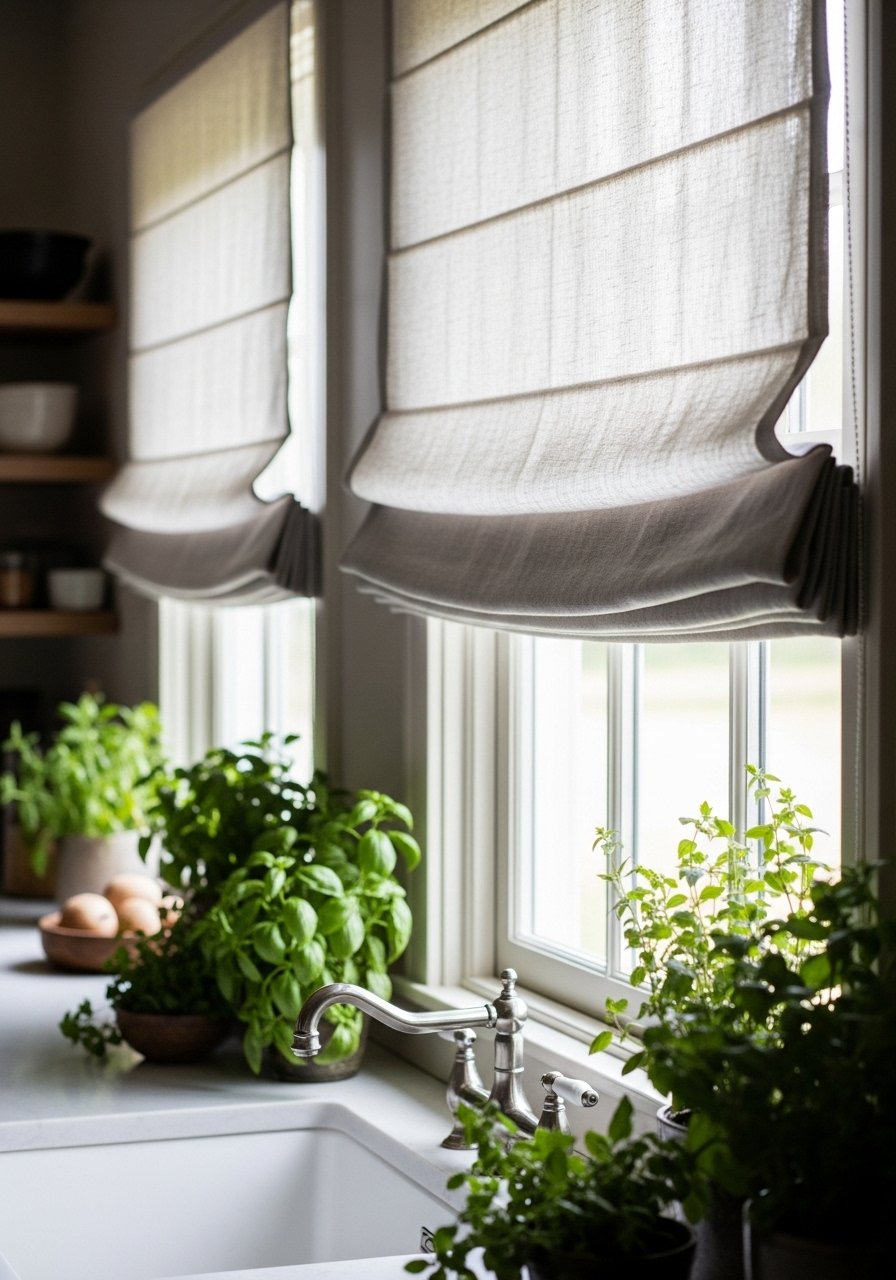
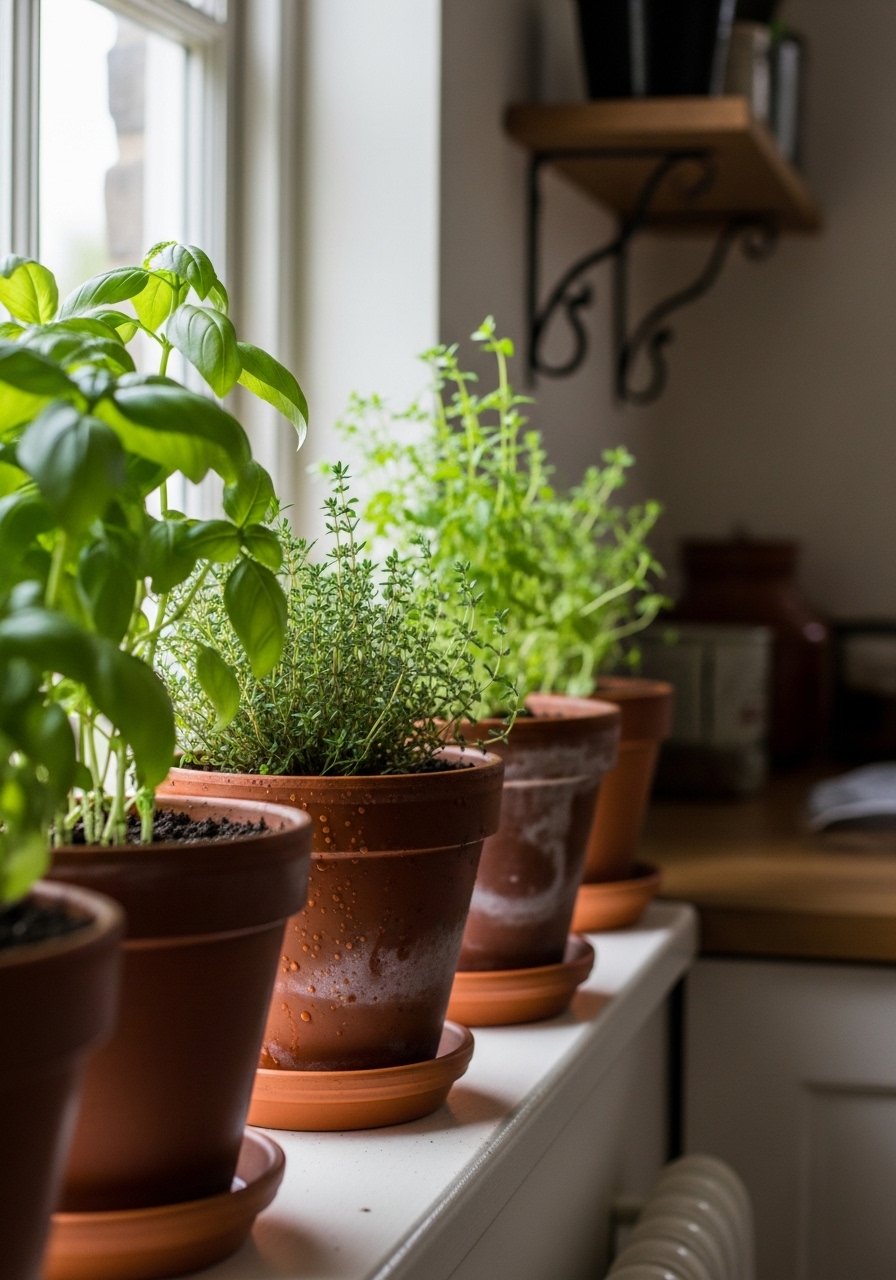
    Swap laminate countertops for butcher block, stone, or wood alternatives ($50-$200 per linear foot, or try removable countertop covers for $50-$150). Add open wooden shelving ($50-$150 per shelf) for warmth. Bring in potted herbs and plants on shelves and counters ($5-$30 per plant). Install a large window treatment that lets in maximum natural light ($50-$200). Source a wood cutting board and leave it on the counter as both decor and function ($20-$80). These elements work together to make your kitchen feel like a sanctuary rather than just a place to cook. You’ll notice yourself spending more time there, and the space feels restorative. If you’re renting, use removable wood contact paper on counters and skip permanent upgrades.

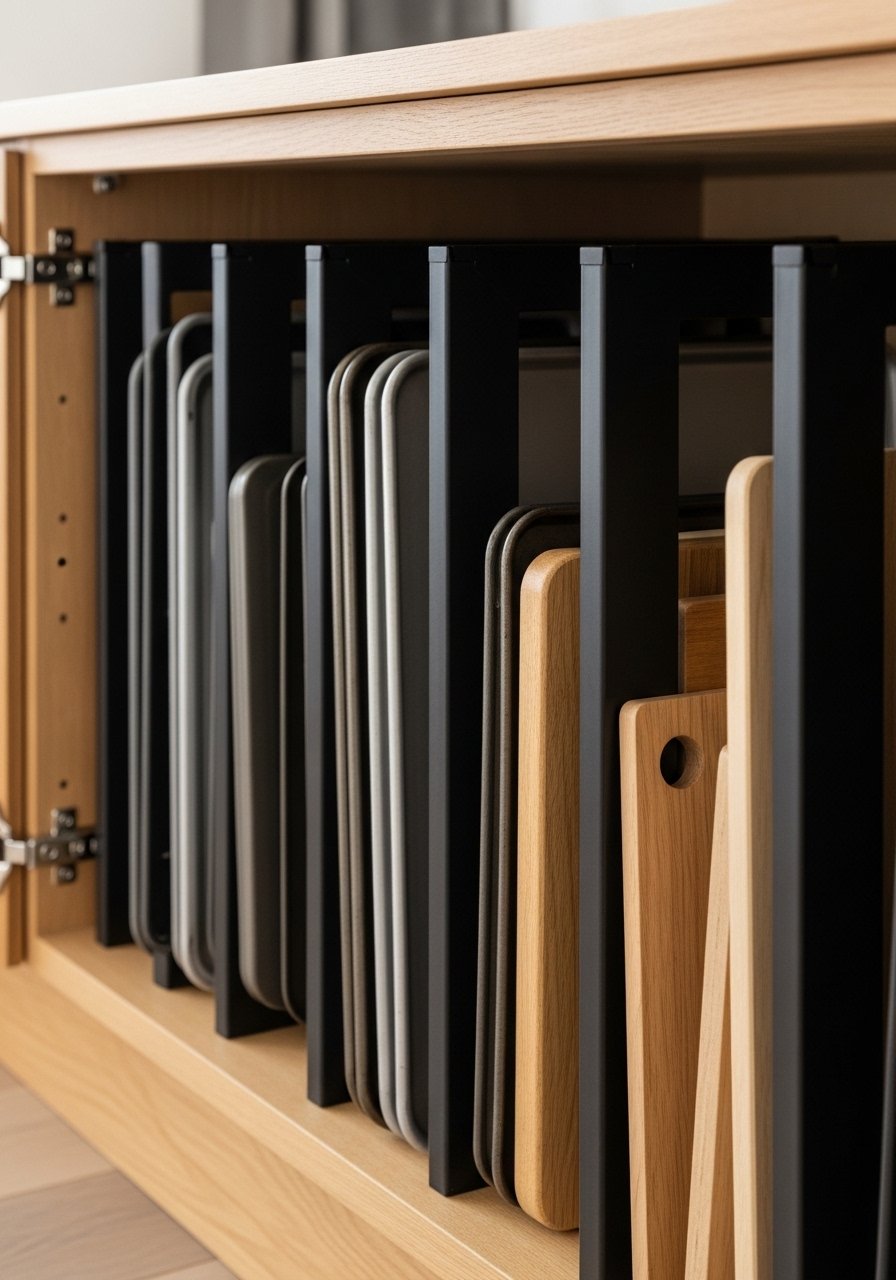
    13. Create Dedicated Zones for Multiple Functions

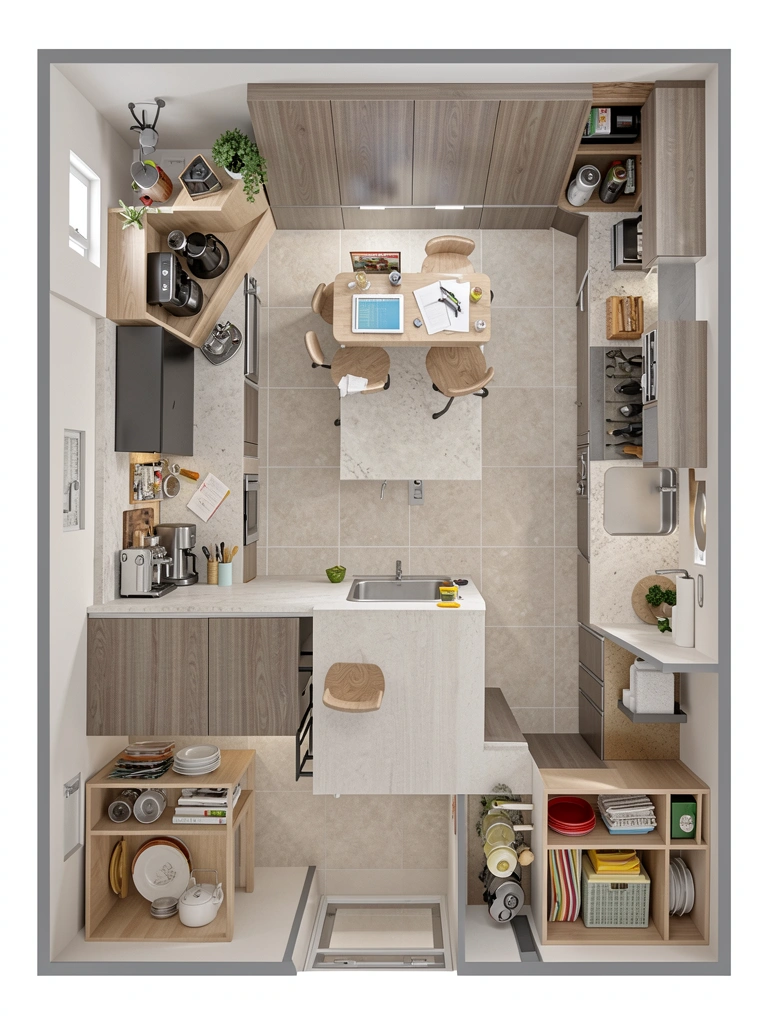
    Modern kitchens do double duty: cooking, working, learning, and entertaining all happen here. Creating distinct zones helps the space function better and feel more intentional. This is especially key if you work from home or have kids doing homework at your island.

    Coffee station zone: small shelf or cart with mugs, coffee, filters, sugar ($30-$100 for a rolling cart or floating shelf). Work/study zone: bar seating at your island with good lighting overhead ($0-$200 depending on what you already have). Prep zone: clear counter space with a cutting board storage system ($20-$50). Entertaining zone: a dedicated shelf or cabinet for platters, glassware, serving pieces ($0-$100). Label zones informally in your head and organize supplies accordingly. Takes a weekend to reorganize, and costs almost nothing if you repurpose items you own. Your kitchen immediately feels more functional and less chaotic. Family members know where to find things, and you can shift zones seasonally (more homework space in fall, more entertaining supplies in summer).

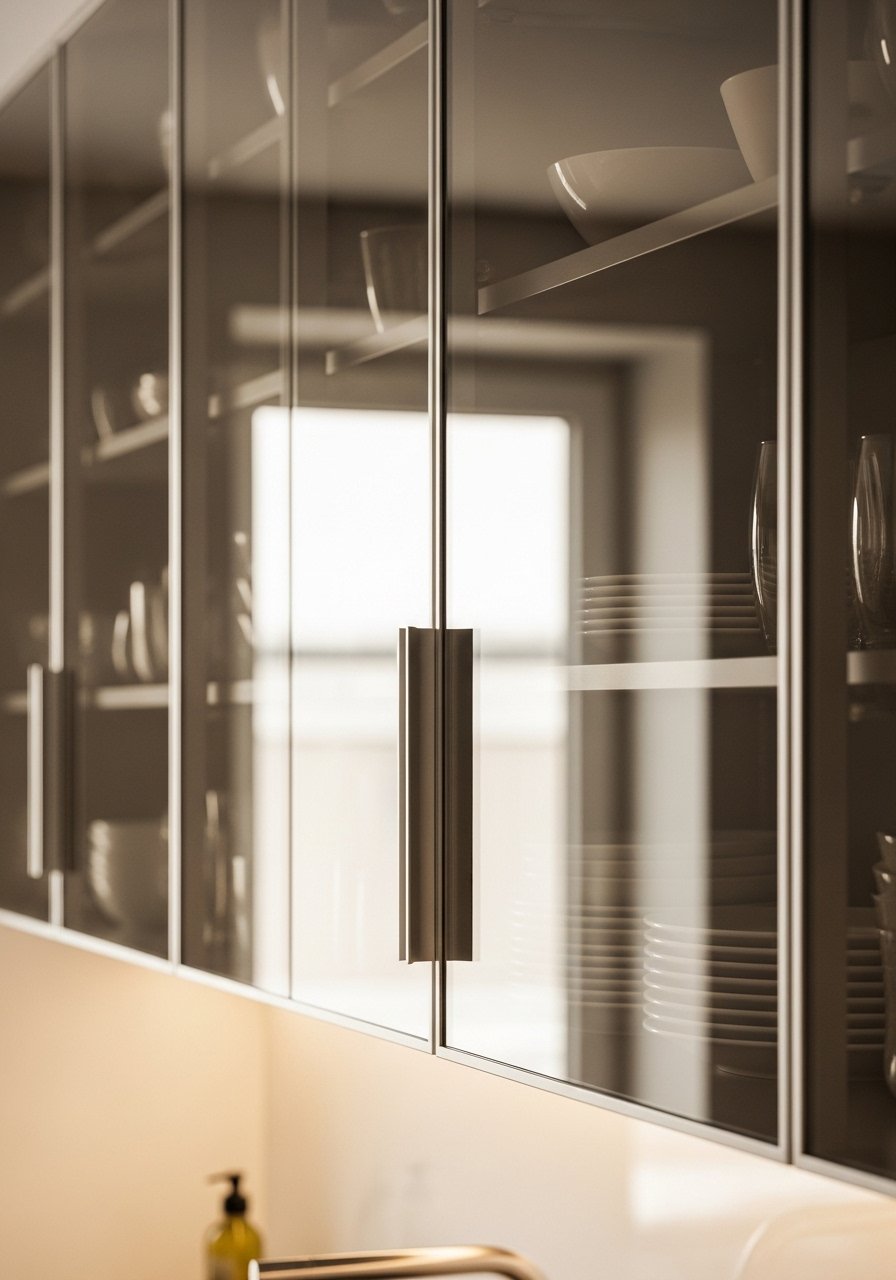
    14. Paint Cabinet Interiors with Bold Color (Visible Through Glass Doors)

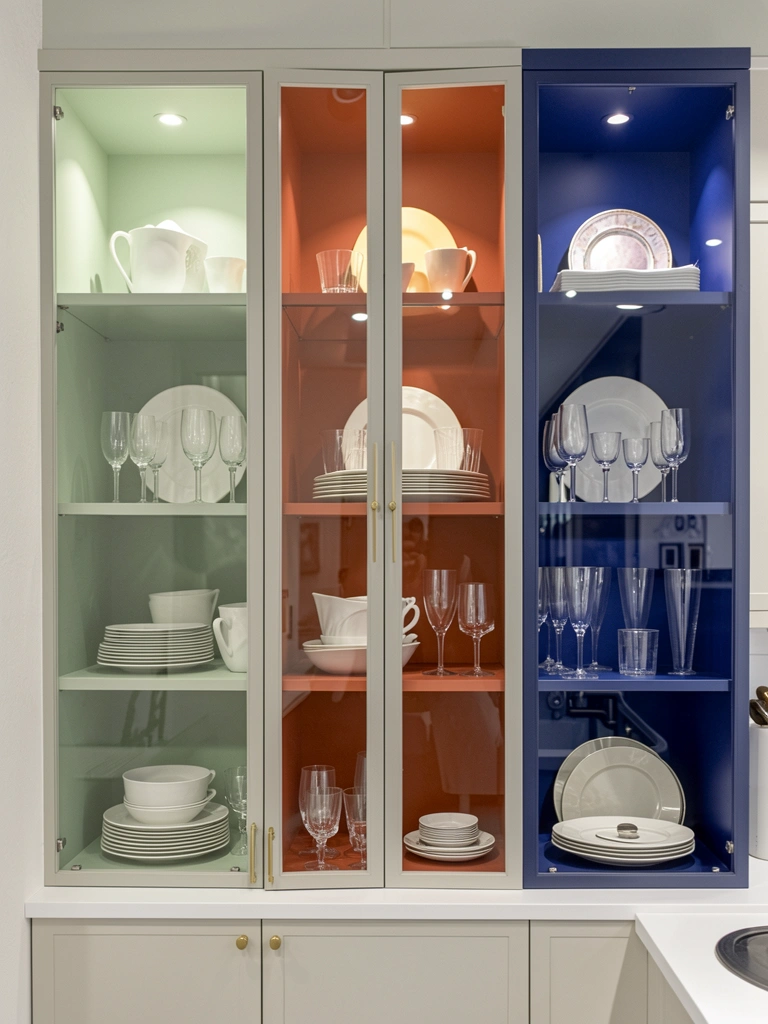
    If you have glass-front cabinets or can easily swap one door for glass, painting the interior back wall becomes an instant design statement. This is affordable, renter-friendly, and adds visual interest without touching your cabinet exterior.

    Apply 2-3 coats of semi-gloss cabinet paint in your chosen color ($15-$30) to the back wall inside your cabinet. Use a small foam brush or roller for smooth coverage. Let it dry completely before closing the door. Takes 1-2 hours of work plus drying time. This makes glass-front cabinets feel intentional and gallery-like instead of just functional. Pair with coordinated dishware and glassware inside for maximum impact. If you don’t have glass-front cabinets, swap out just one or two doors for glass-front options ($50-$150 per door) and paint the wall behind. This works even in rental apartments if you carefully remove and store the original door. Your kitchen instantly feels more designer and personalized.

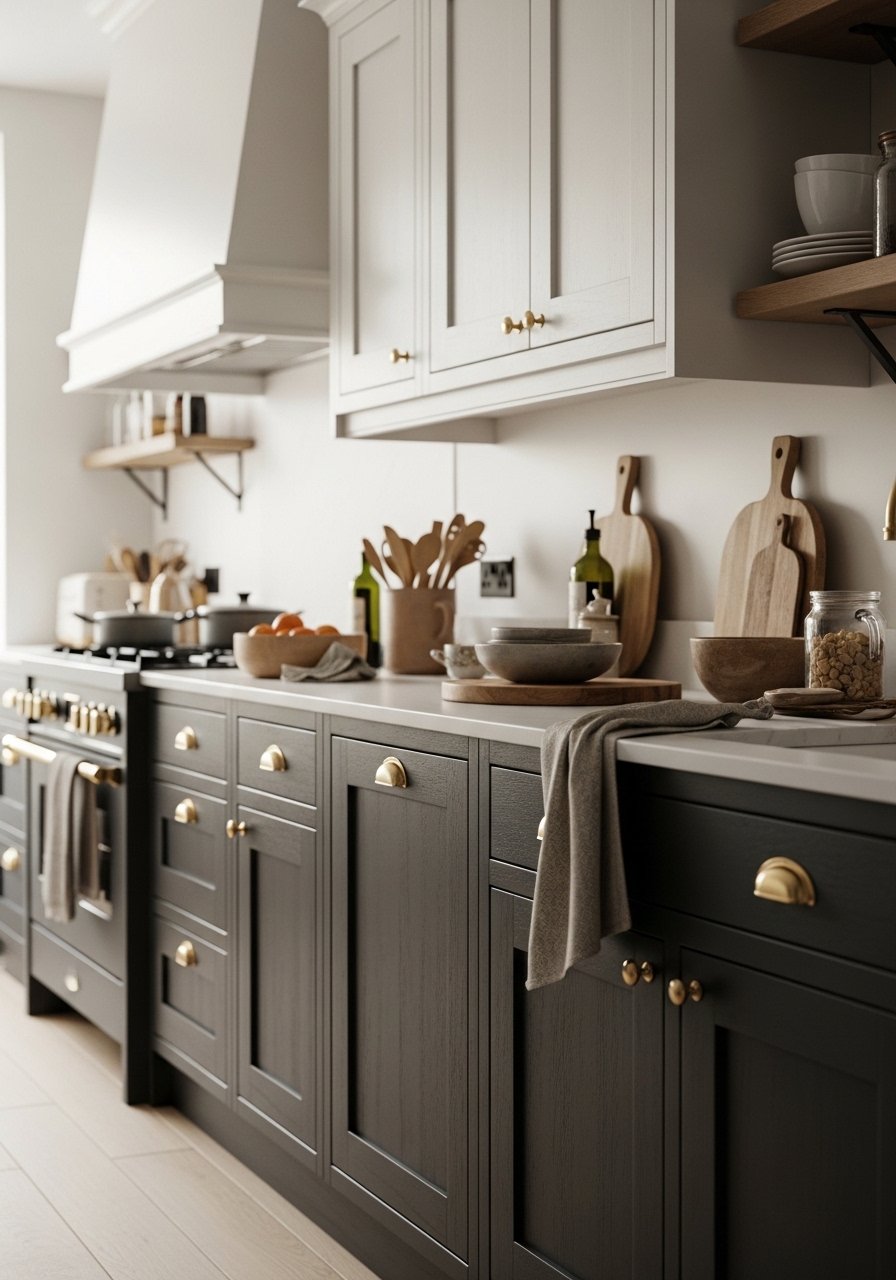
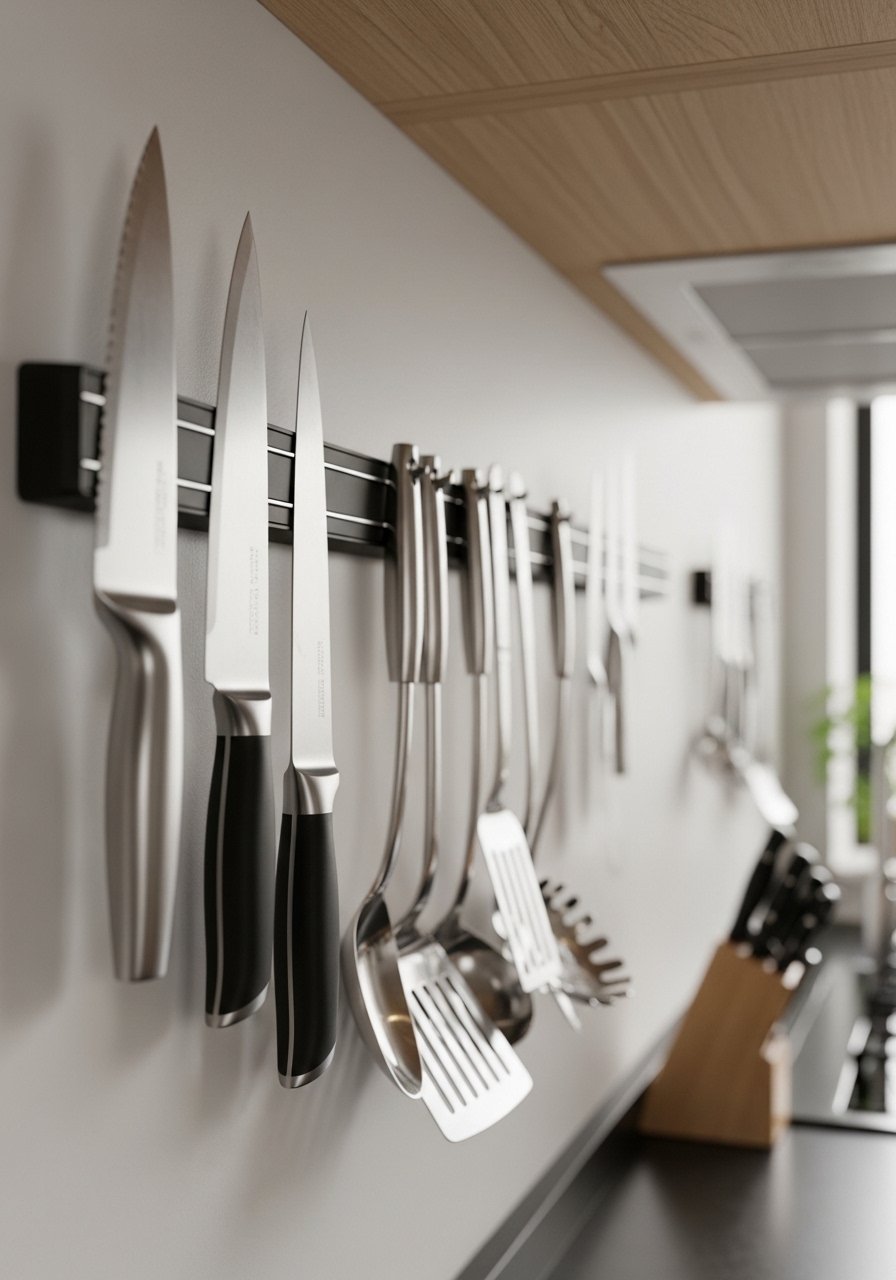
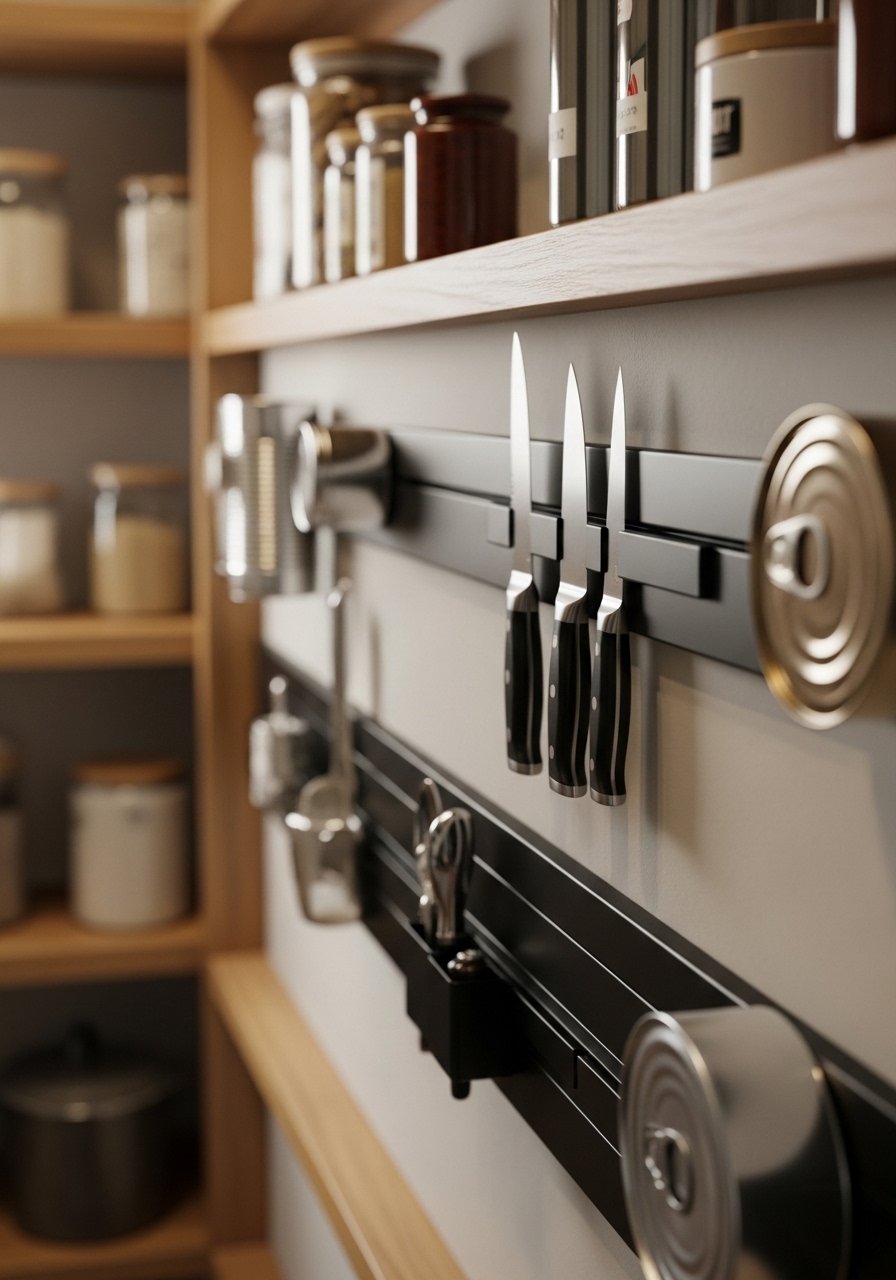
    15. Mix Metal Finishes for Layered, Modern Appeal

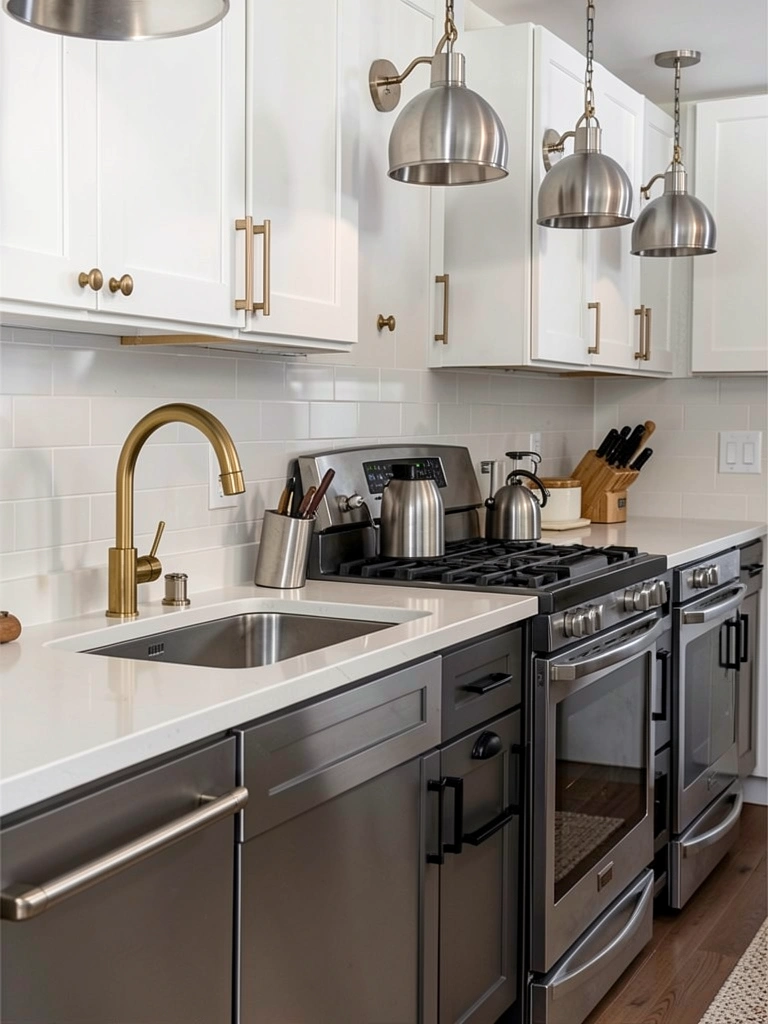
    The days of matching all your metals are over. Modern kitchens layer brass, stainless steel, matte black, and gold together for a sophisticated, collected feel. This gives your kitchen personality and visual depth. You can start mixing metals immediately with small swaps.

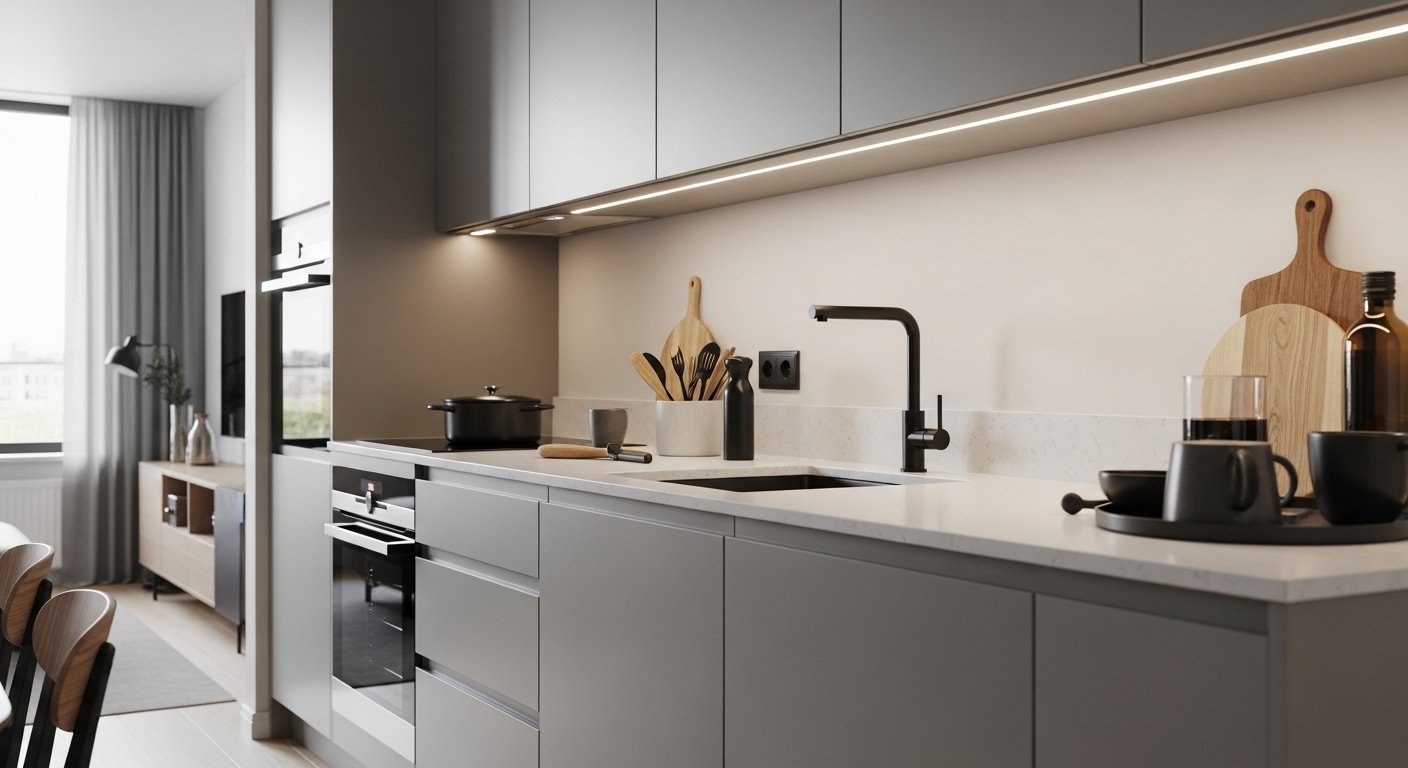
    Choose 2-3 metal finishes that complement your aesthetic. Brass + stainless is warm and modern. Black + brass is sophisticated. Brushed nickel + gold is subtle and elegant. Start by swapping cabinet hardware ($30-$100 total) to introduce your first accent metal. Next, update your faucet ($100-$400) to introduce another finish. Light fixtures ($60-$250 each) and appliance choices come later. Takes just hours to swap hardware and a weekend for larger installations. The beauty of this approach is that nothing needs to match perfectly—intentional variety feels more designed than matchy-matchy. Your kitchen immediately feels more intentional and curated. This works in modern, traditional, and eclectic spaces.

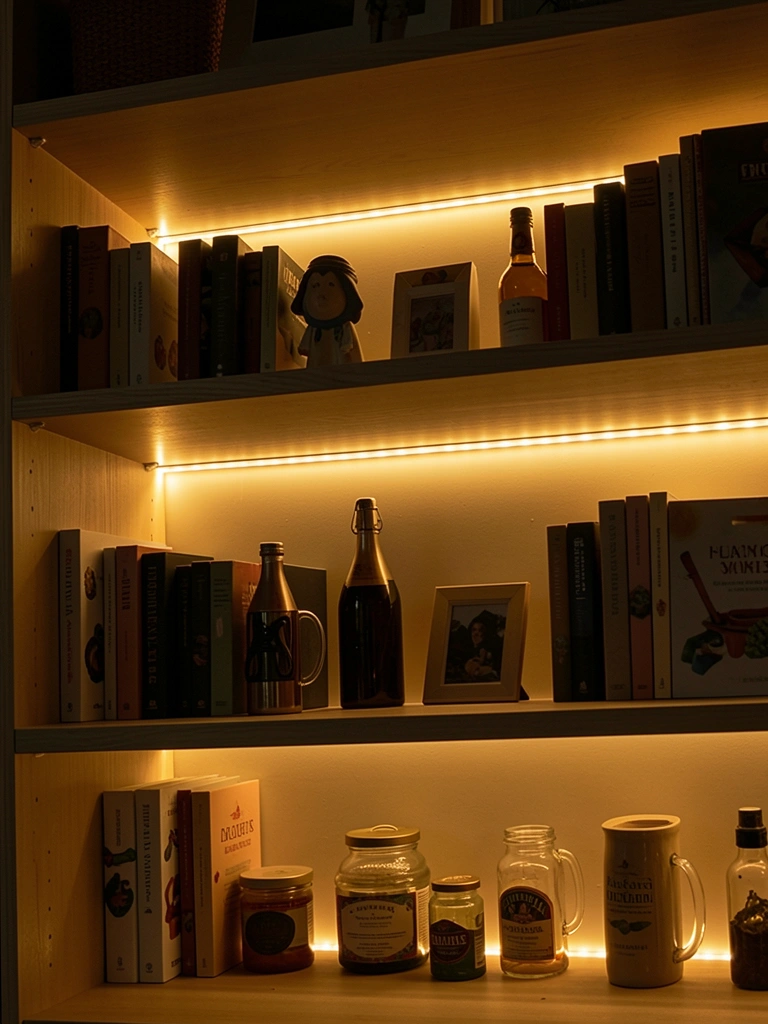
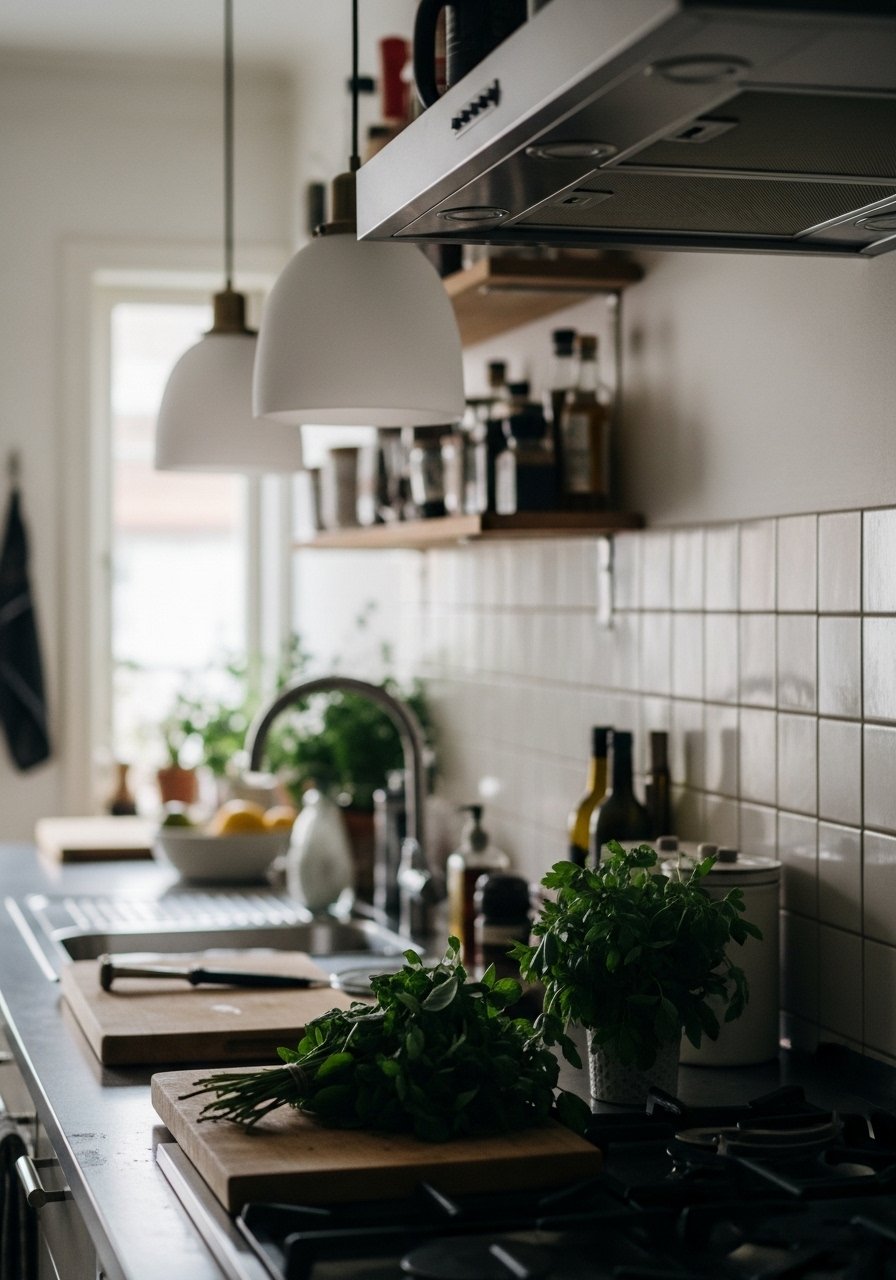
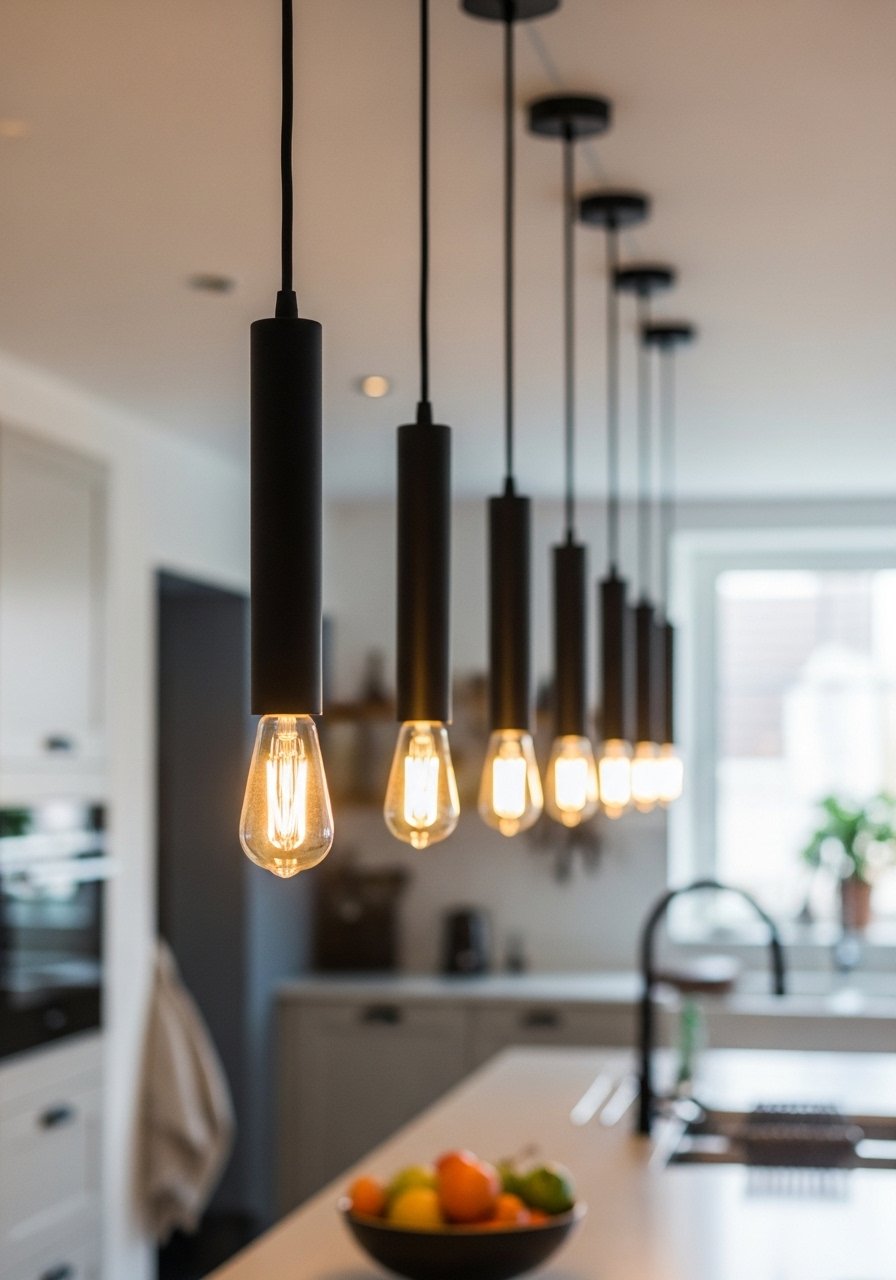
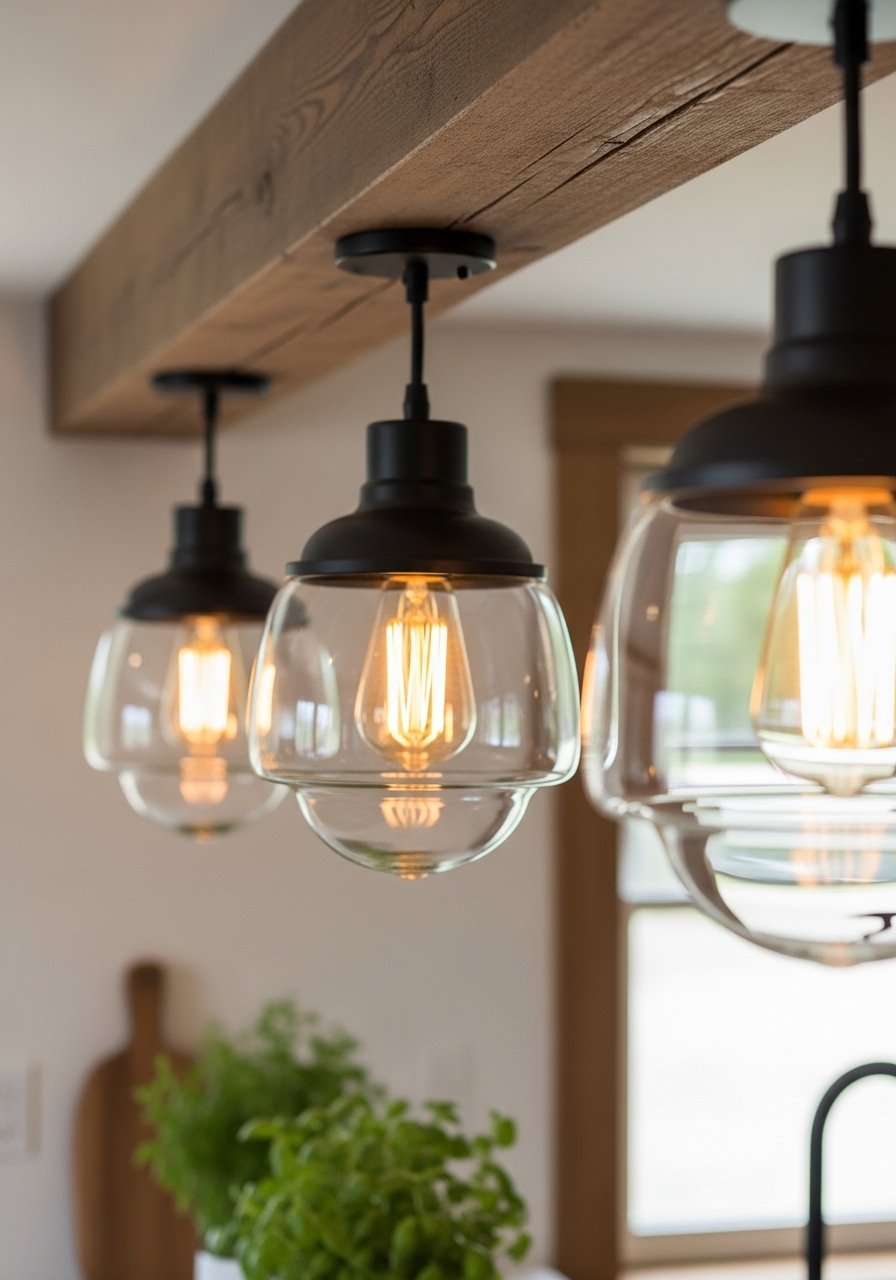
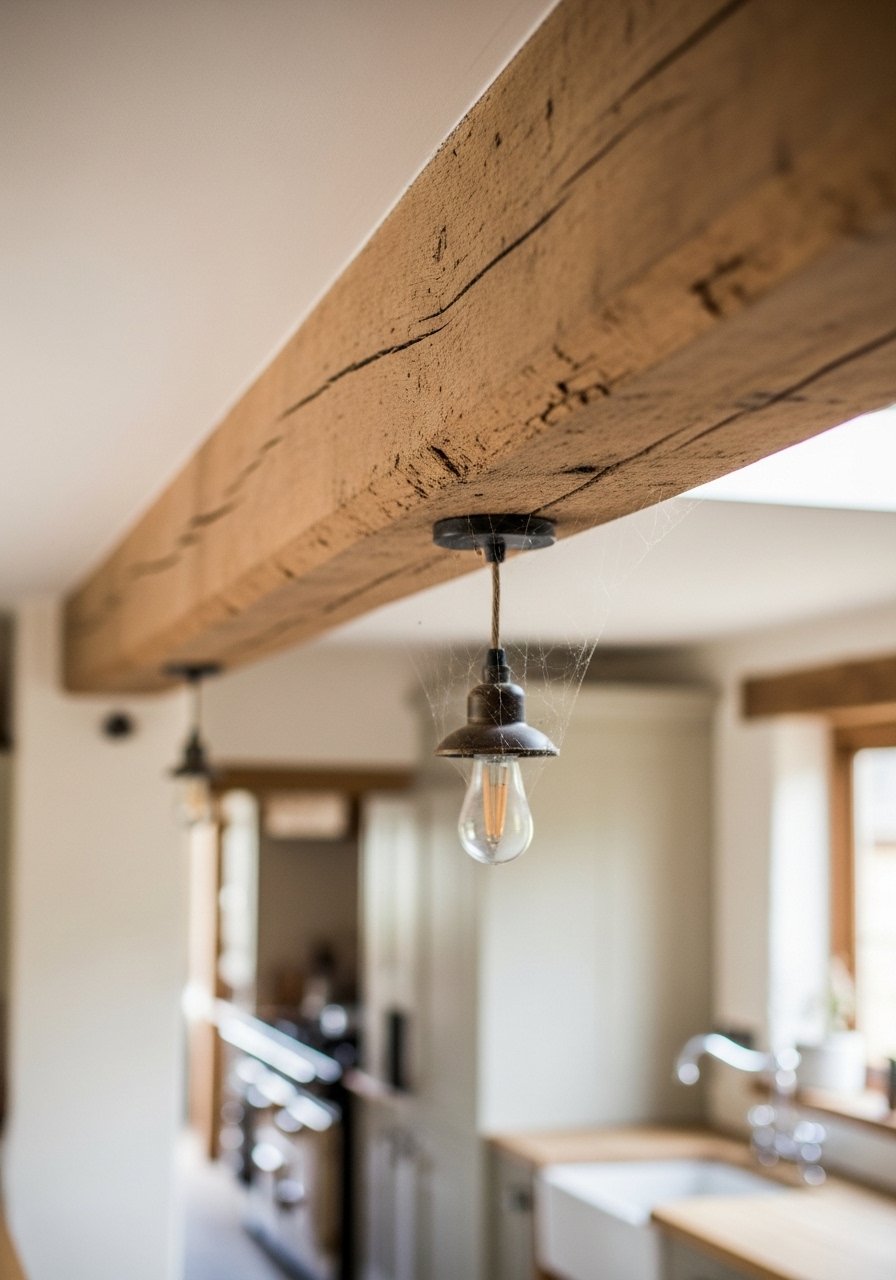
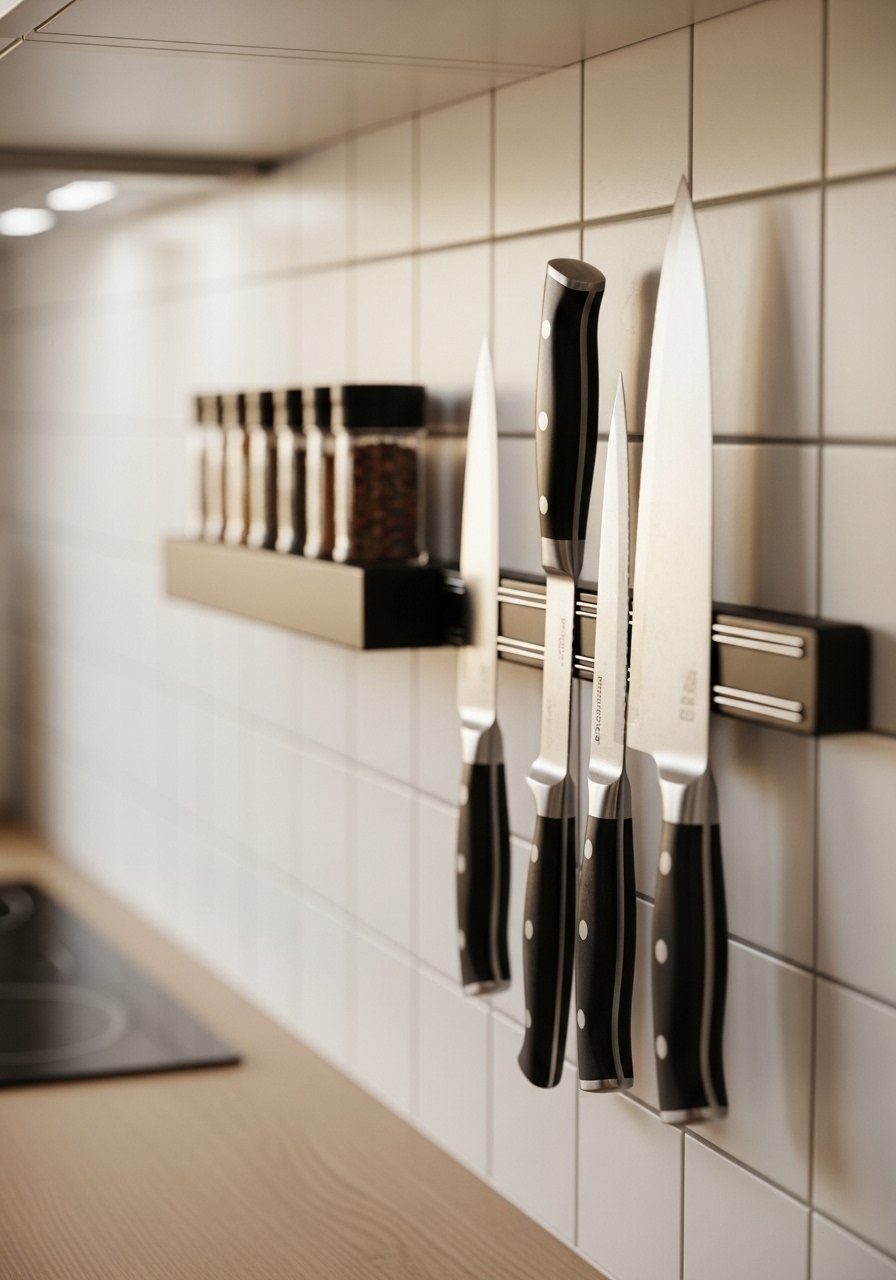
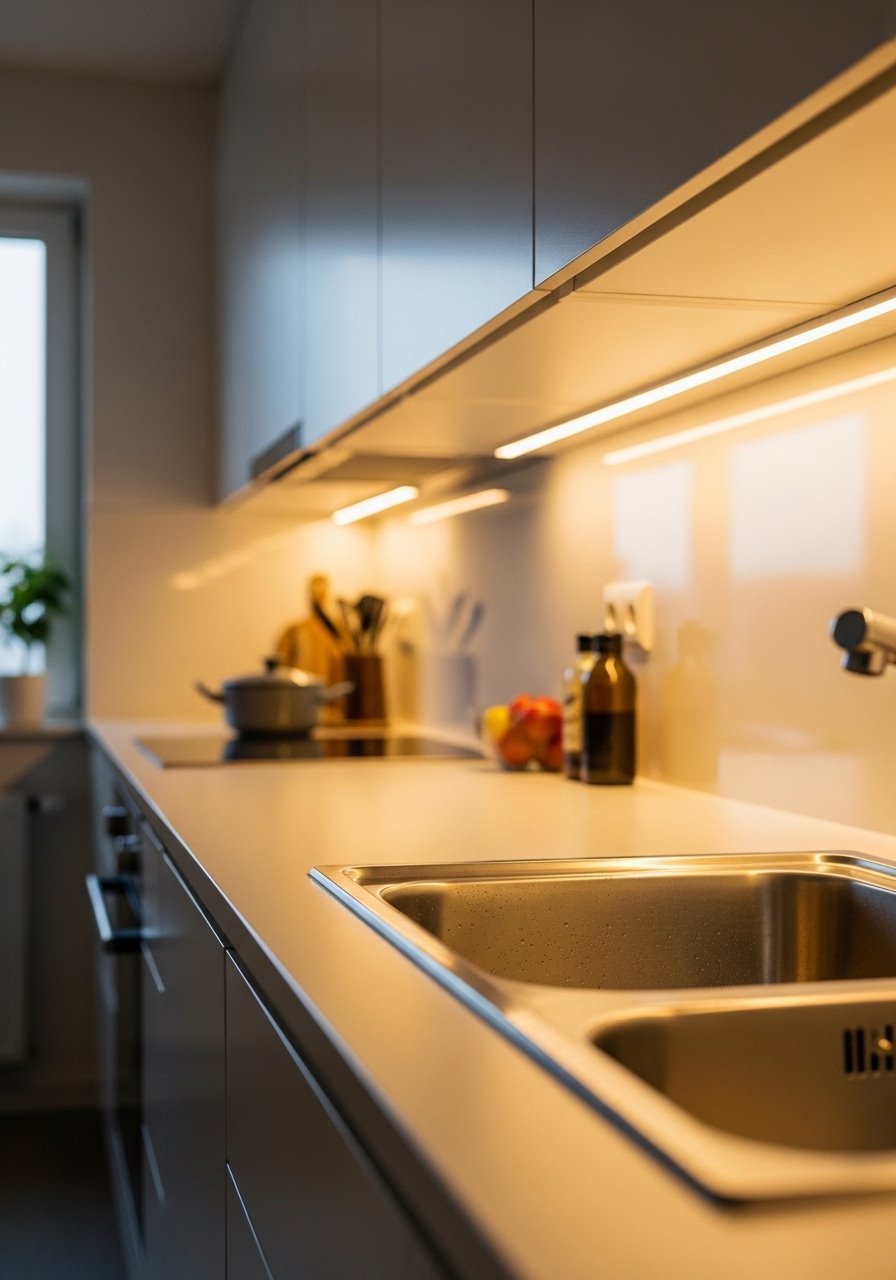
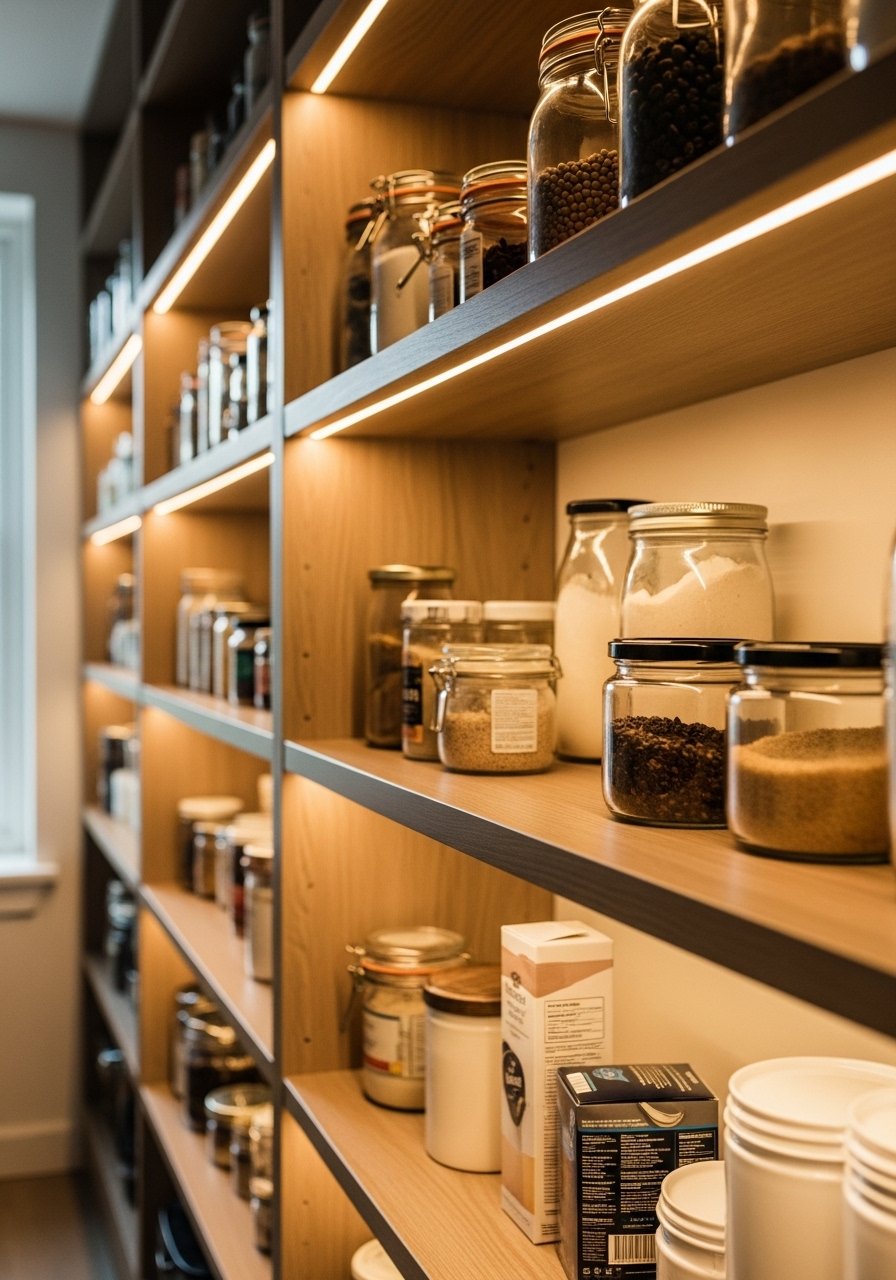
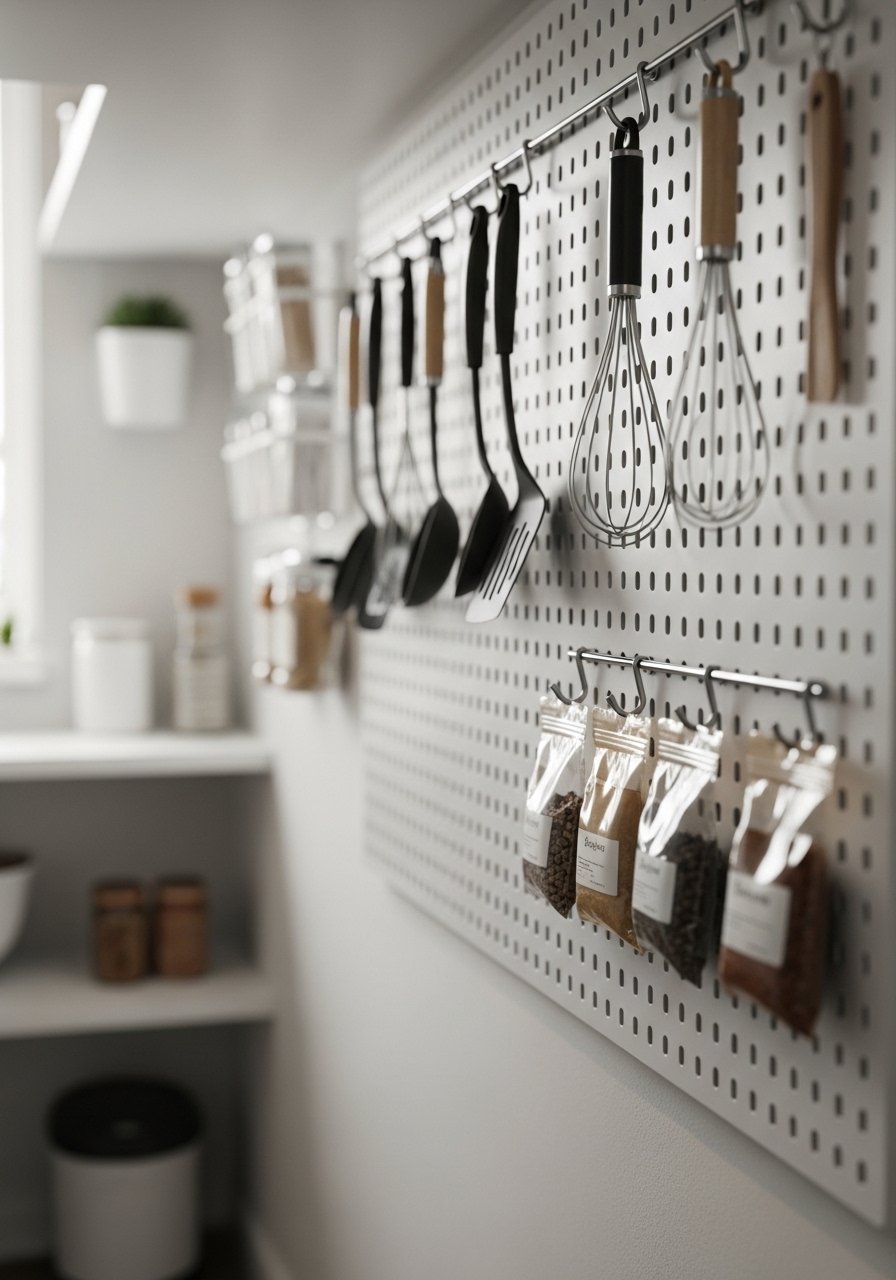
    16. Install Under-Cabinet Lighting for Function and Ambiance

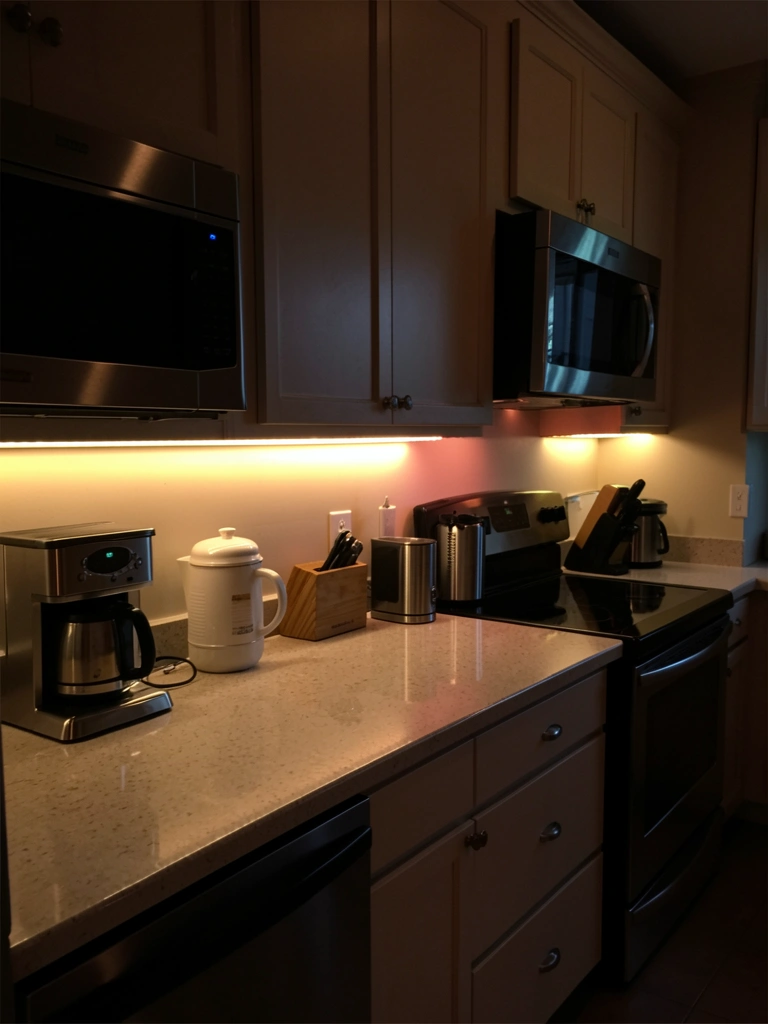
    Under-cabinet lighting serves double duty: it makes your countertop prep area easier to see, and it creates beautiful ambient light in the evening. LED strips are affordable, easy to install, and worth every dollar. Renters can use adhesive strips for zero permanent changes.

    Purchase LED strip lights from IKEA, Amazon, or Home Depot ($30-$80 total for multiple strips). Choose warm white bulbs (2700K) for cozy feel or cool white (4000K) for task lighting. Adhere strips to the underside of your upper cabinets using adhesive backing (takes 15-20 minutes for your whole kitchen). Run wires along the back of cabinets and plug into an outlet behind an appliance or under the sink. No drilling required if you use adhesive strips. This is one of the easiest upgrades, with immediate payoff. Your countertops are brighter and easier to work on, and your kitchen feels like a restaurant in the evening. Guests comment on it constantly, and it’s the kind of upgrade that signals thoughtful design.

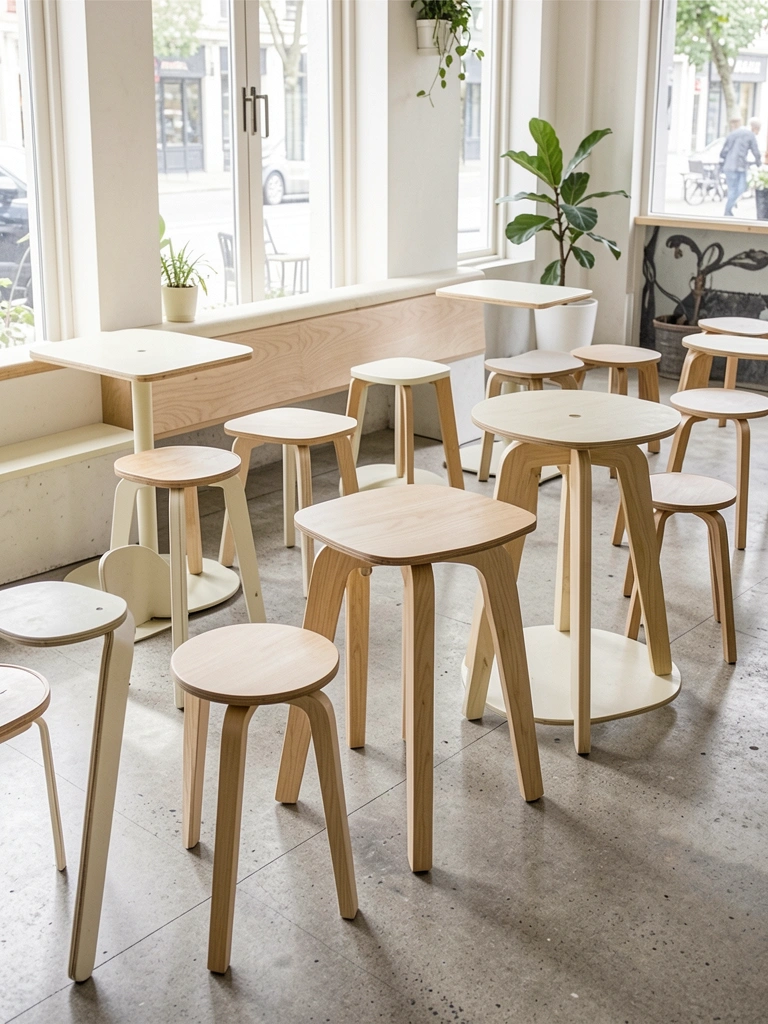
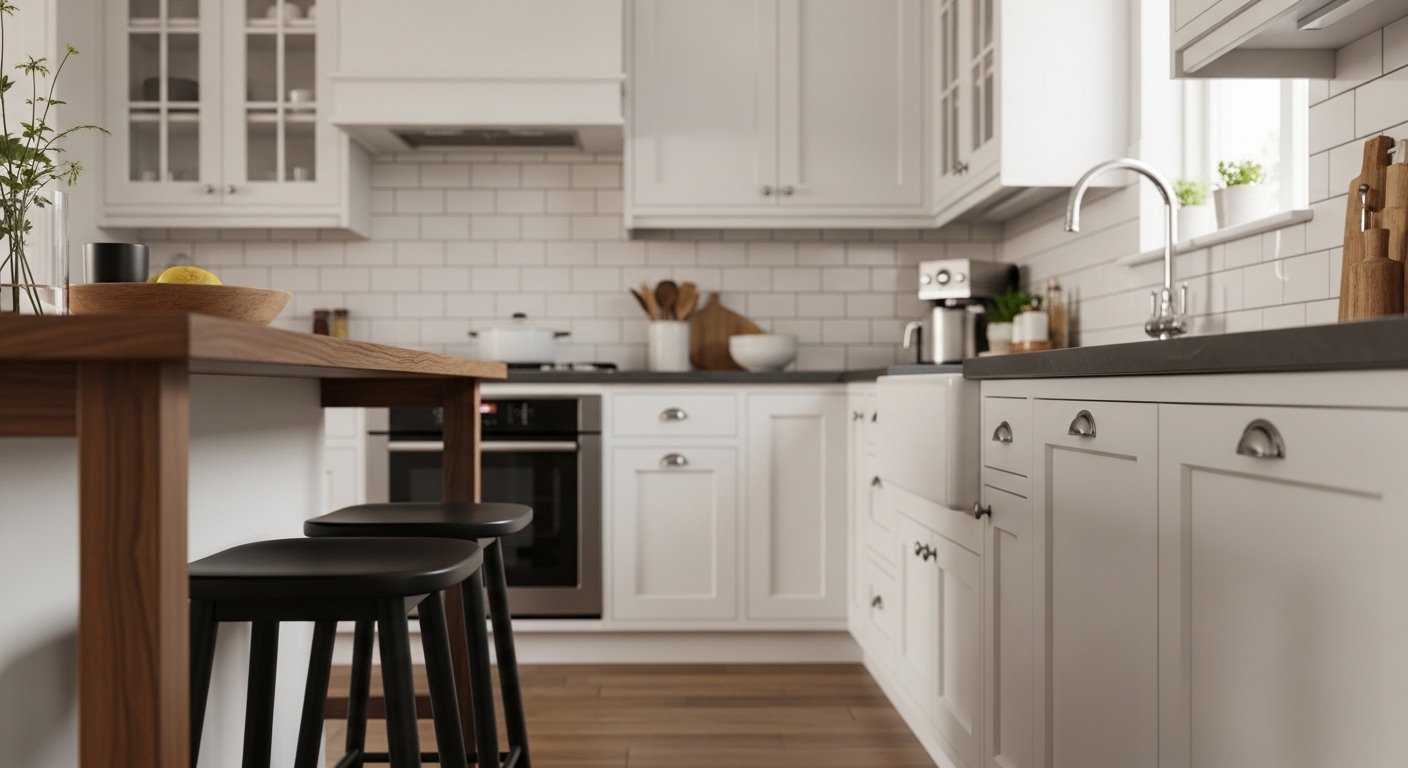
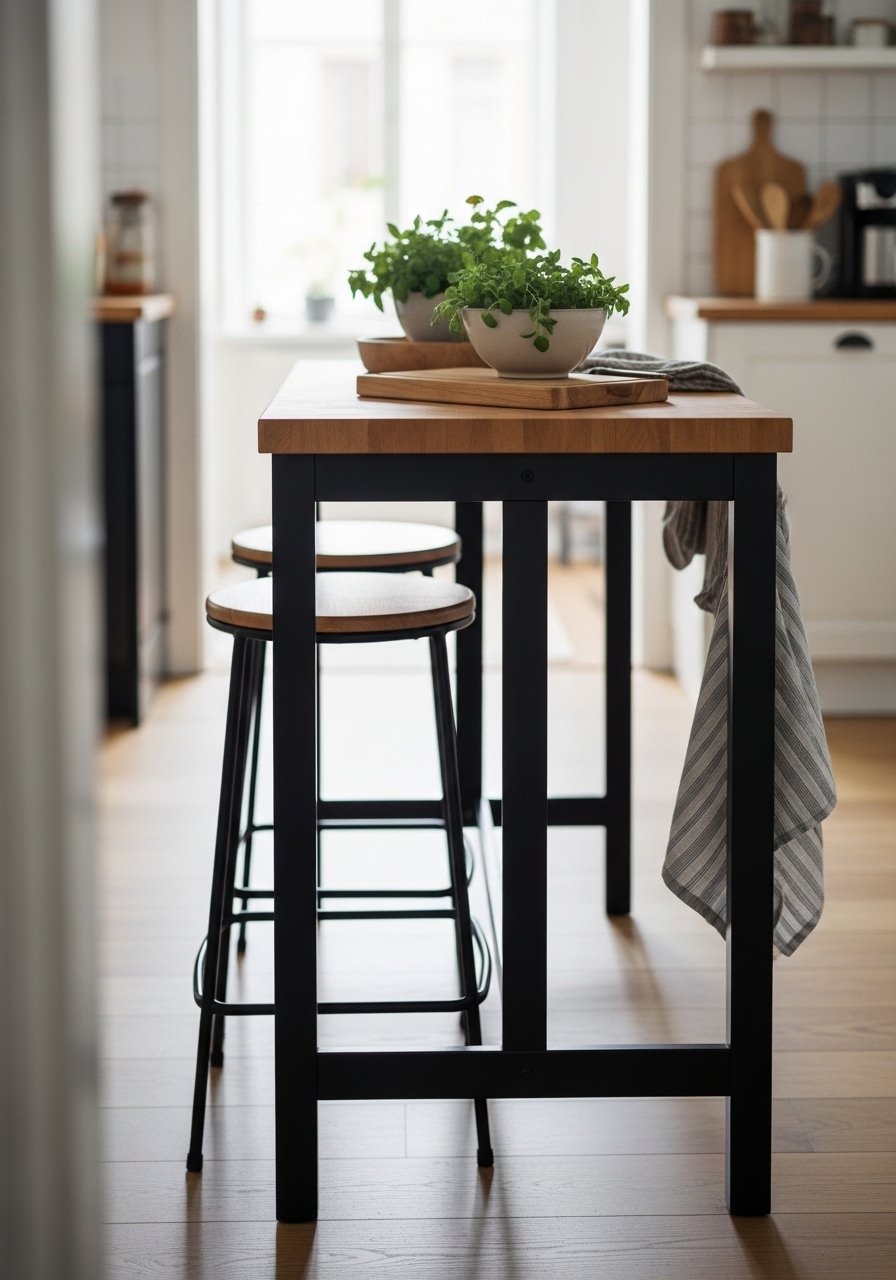
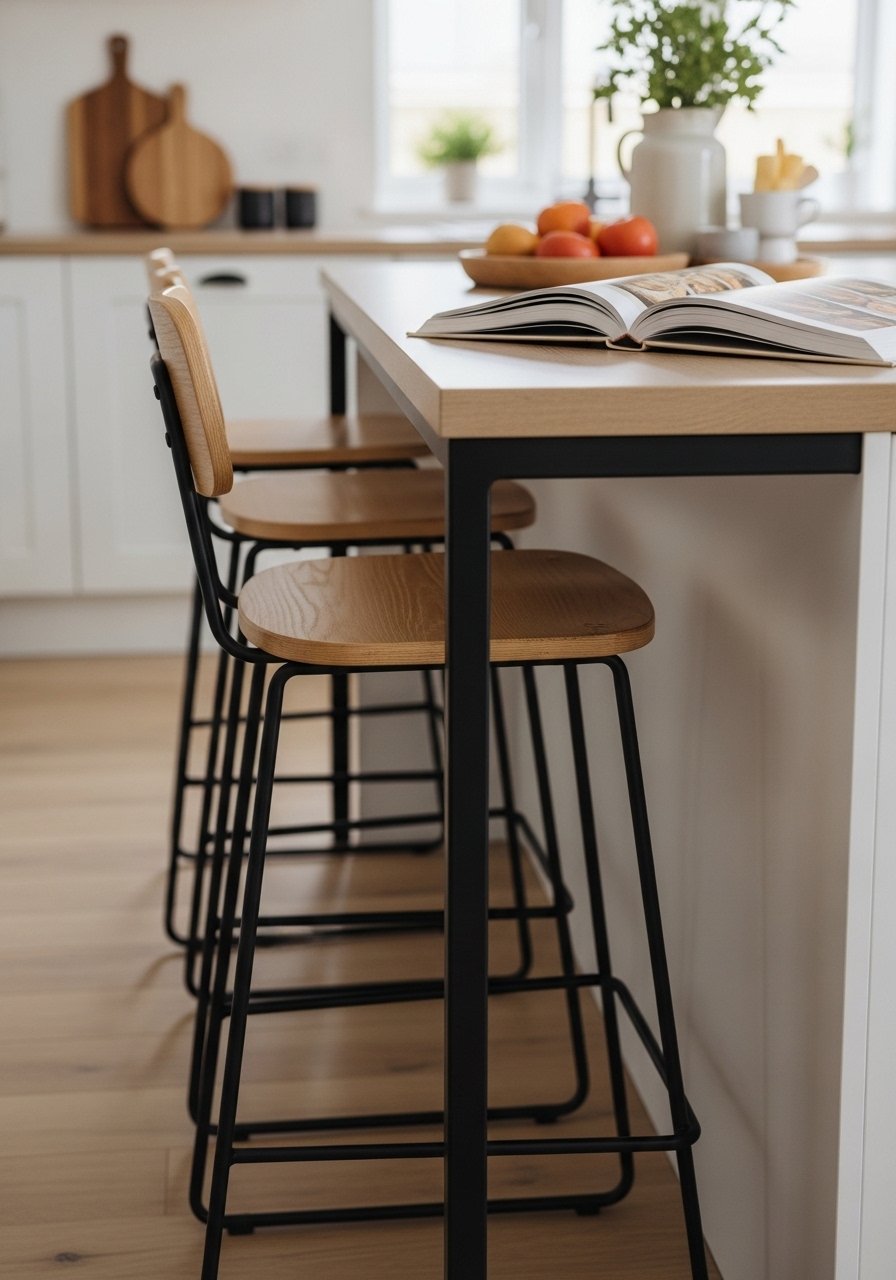
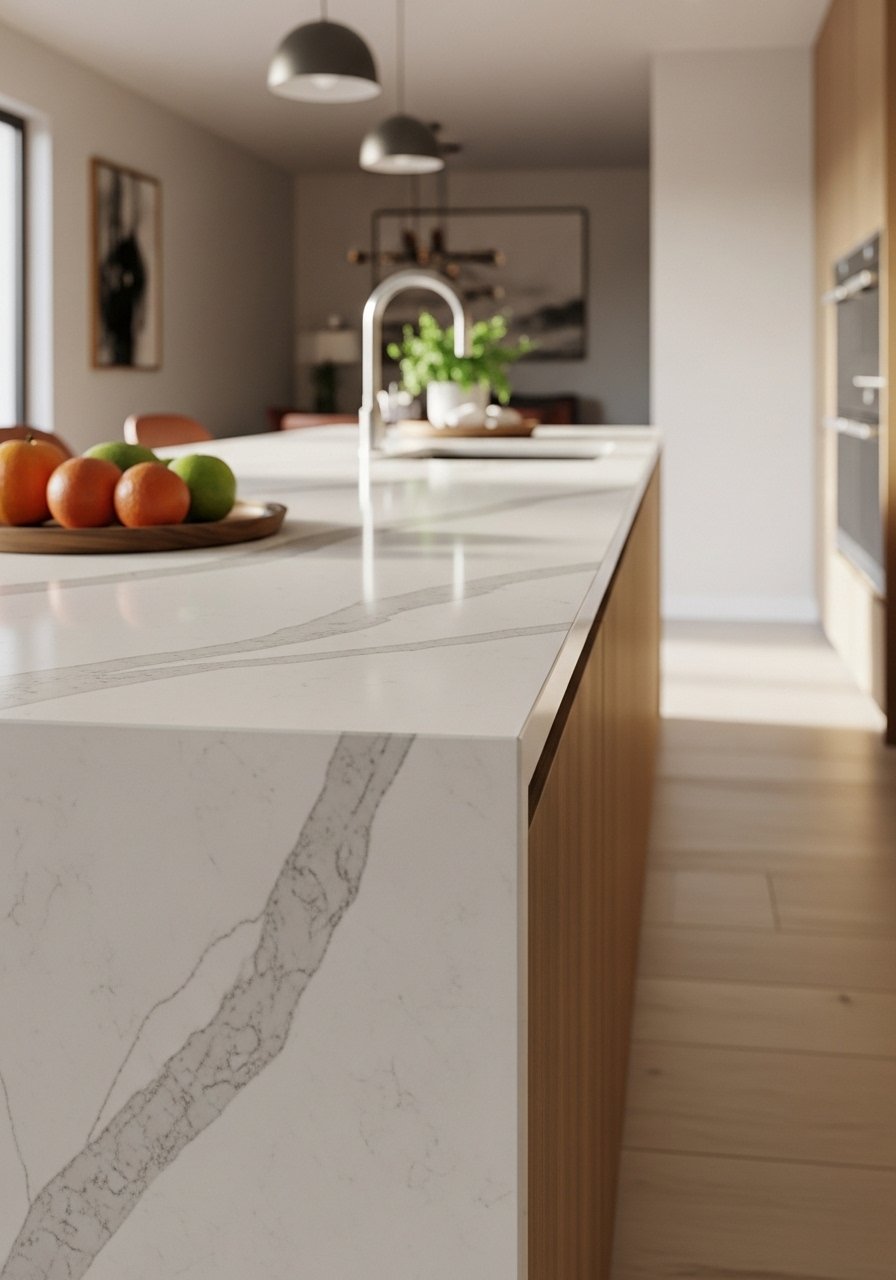
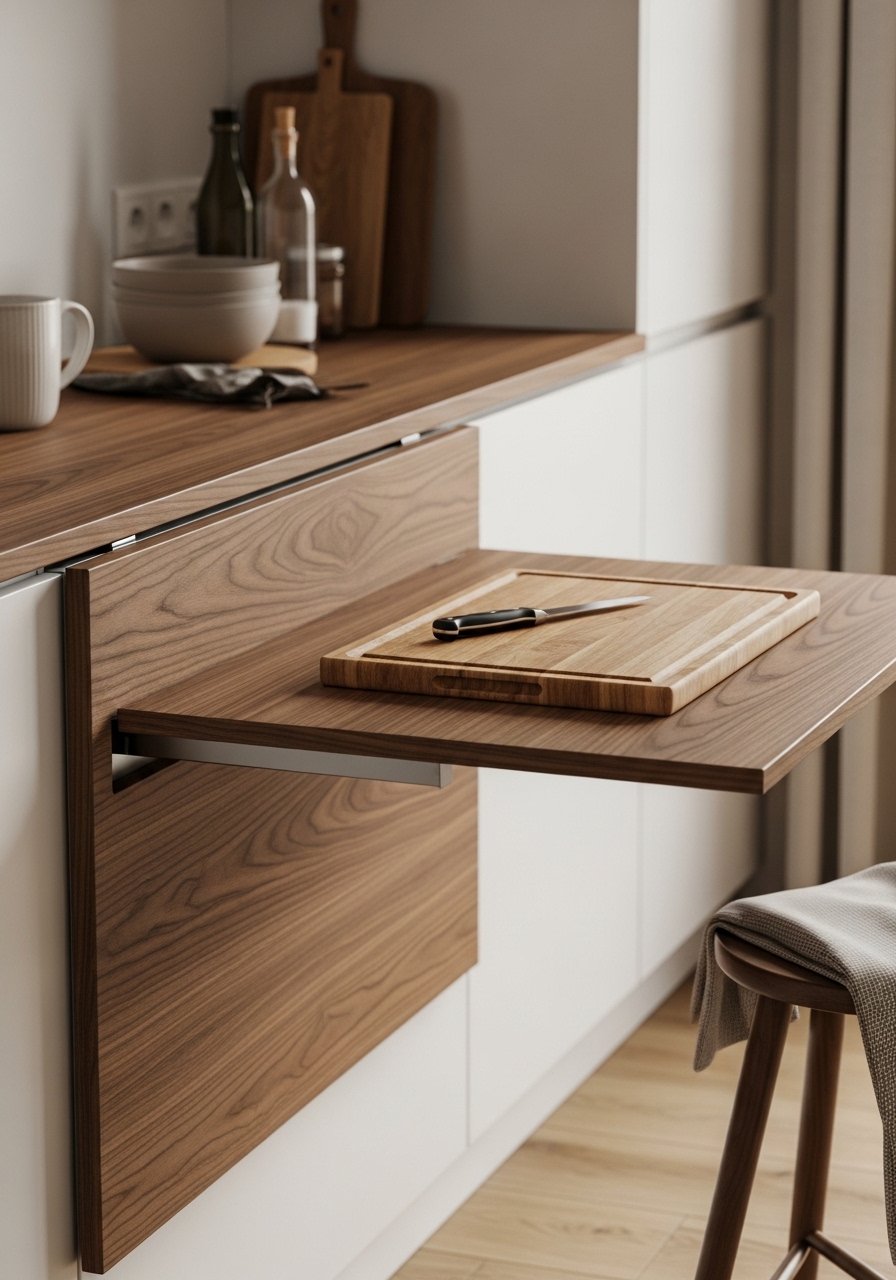
    17. Add a Kitchen Island or Upgrade Your Existing One

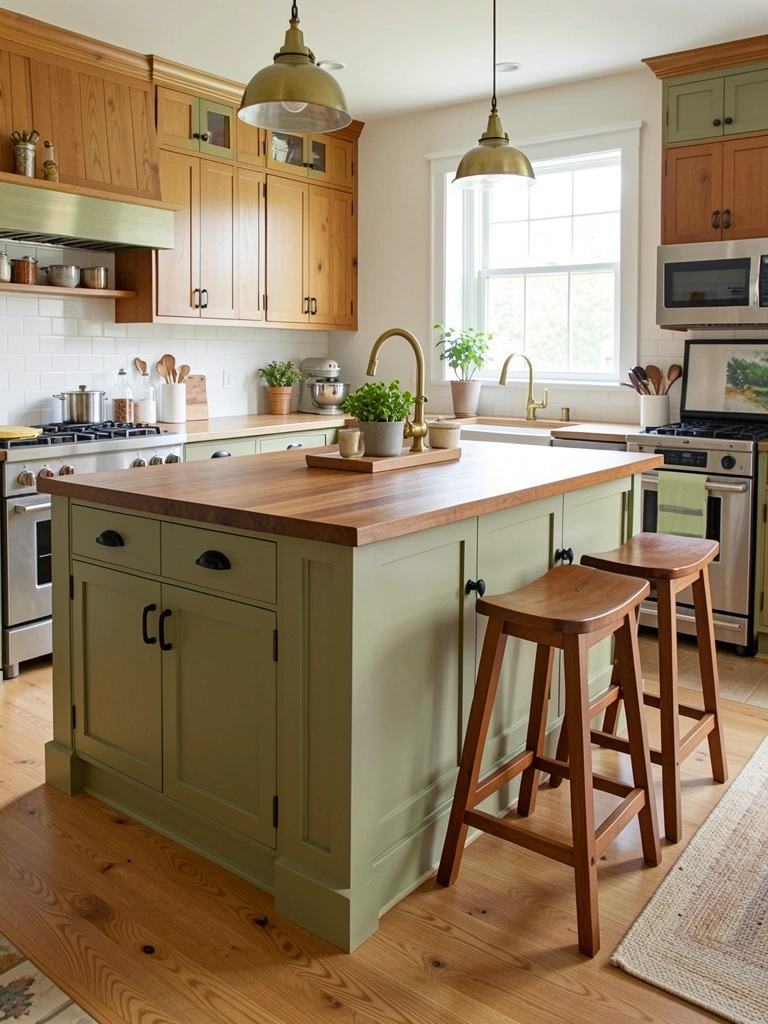
    An island transforms how your kitchen functions and feels. If you don’t have one, adding one (even a small rolling cart) creates an instant gathering spot. If you have one, upgrading it with better seating, storage, or finishes gives you more bang for your buck than almost any other single change.

    Buy a rolling kitchen cart ($50-$200 from IKEA, Target, or Wayfair) as an affordable island substitute. Upgrade an existing island with new hardware ($20-$50), a fresh coat of paint ($30-$50), or new bar stools ($100-$400). Build a small DIY island using a base cabinet and butcher block top ($150-$300 in materials, takes a weekend). Install a permanent island ($500-$3,000+ for quality construction or professional installation). Combination islands—with both closed storage and seating—maximize function. Your kitchen becomes more social (people gather here instead of a living room), you gain prep space, and your kitchen immediately feels bigger. Even a small cart positioned thoughtfully creates the same gathering-spot energy.

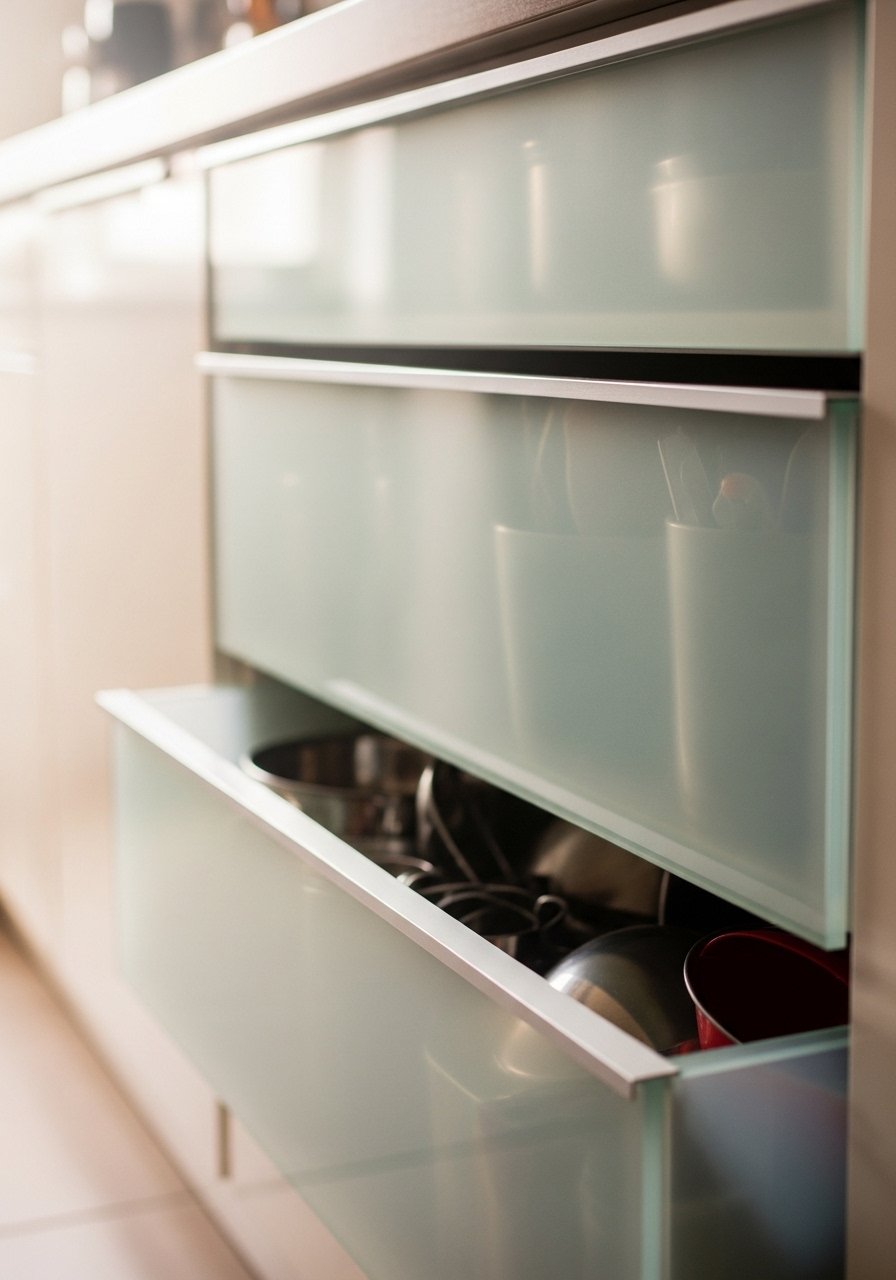
    18. Choose Handle-Free Cabinetry or Add Push-to-Open Hardware

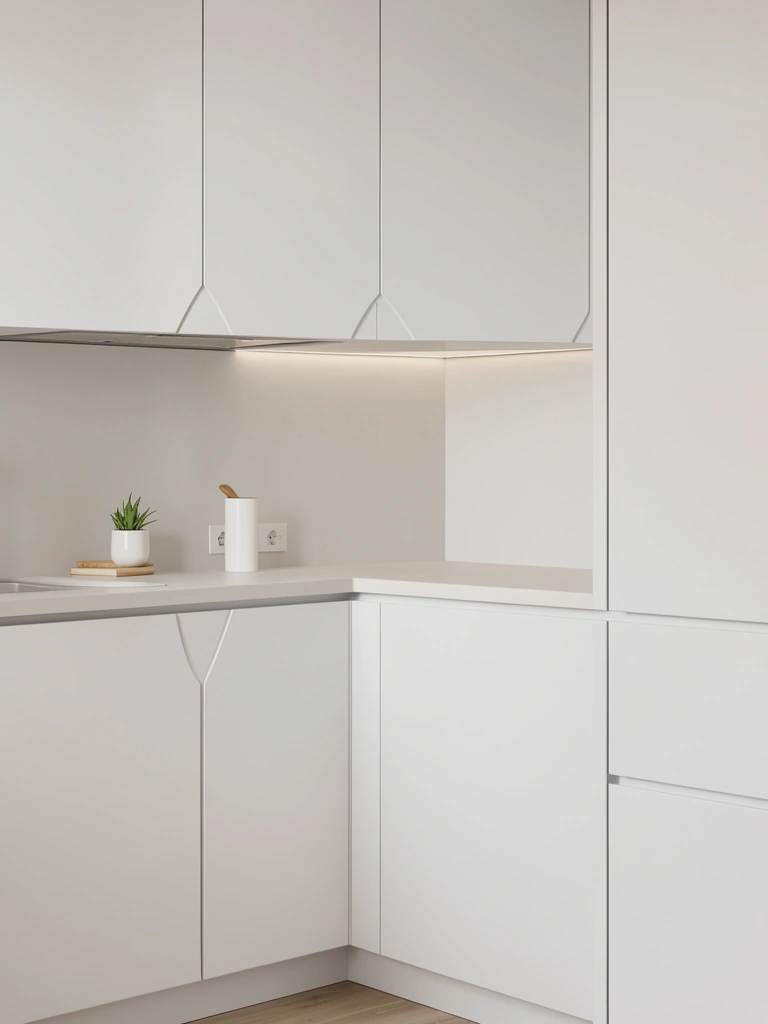
    Handle-free (or push-to-open) cabinetry creates a clean, modern look and is way easier to keep clean than traditional knobs and pulls. If you can’t replace cabinets, you can achieve the look with specific hardware and styling.

    Install finger-pull hardware ($10-$30 per pull) to create a handle-free look with your existing cabinets. Choose recessed or push-catches ($2-$5 per hinge from hardware stores) for true handle-free function. Apply edge banding or trim to existing cabinets to create subtle finger-pull grooves ($20-$50 in materials, DIY-friendly). This takes 1-2 hours to install hardware or a weekend for recessed modifications. The payoff is a minimalist, luxe look that feels intentional and sophisticated. Your cabinets stay cleaner because there’s no hardware to collect dust or fingerprints. Maintenance-wise, push-to-open hinges occasionally need adjustment, but it’s a quick fix. This works especially well in small kitchens where handle-free cabinetry makes the space feel more open.

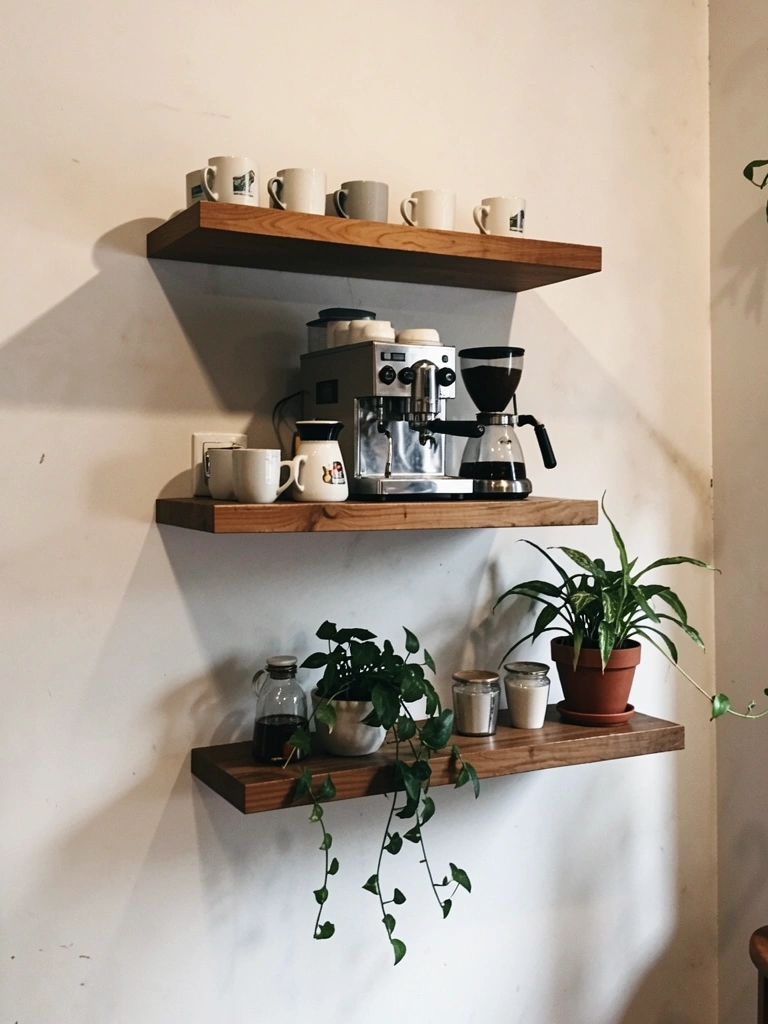
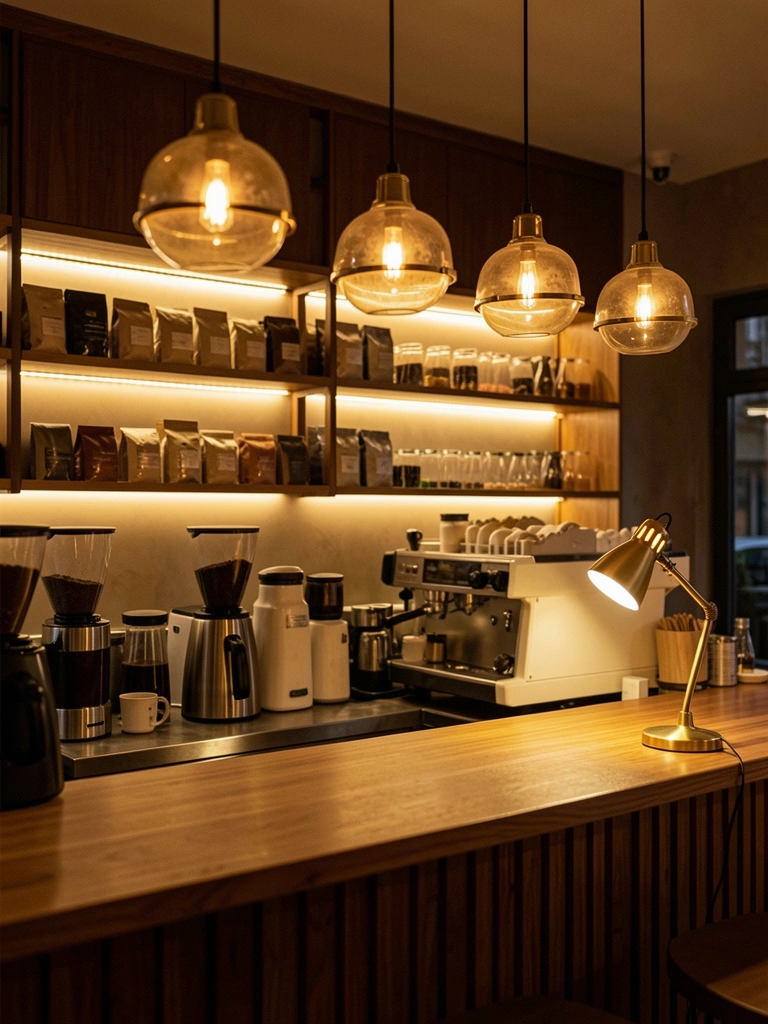
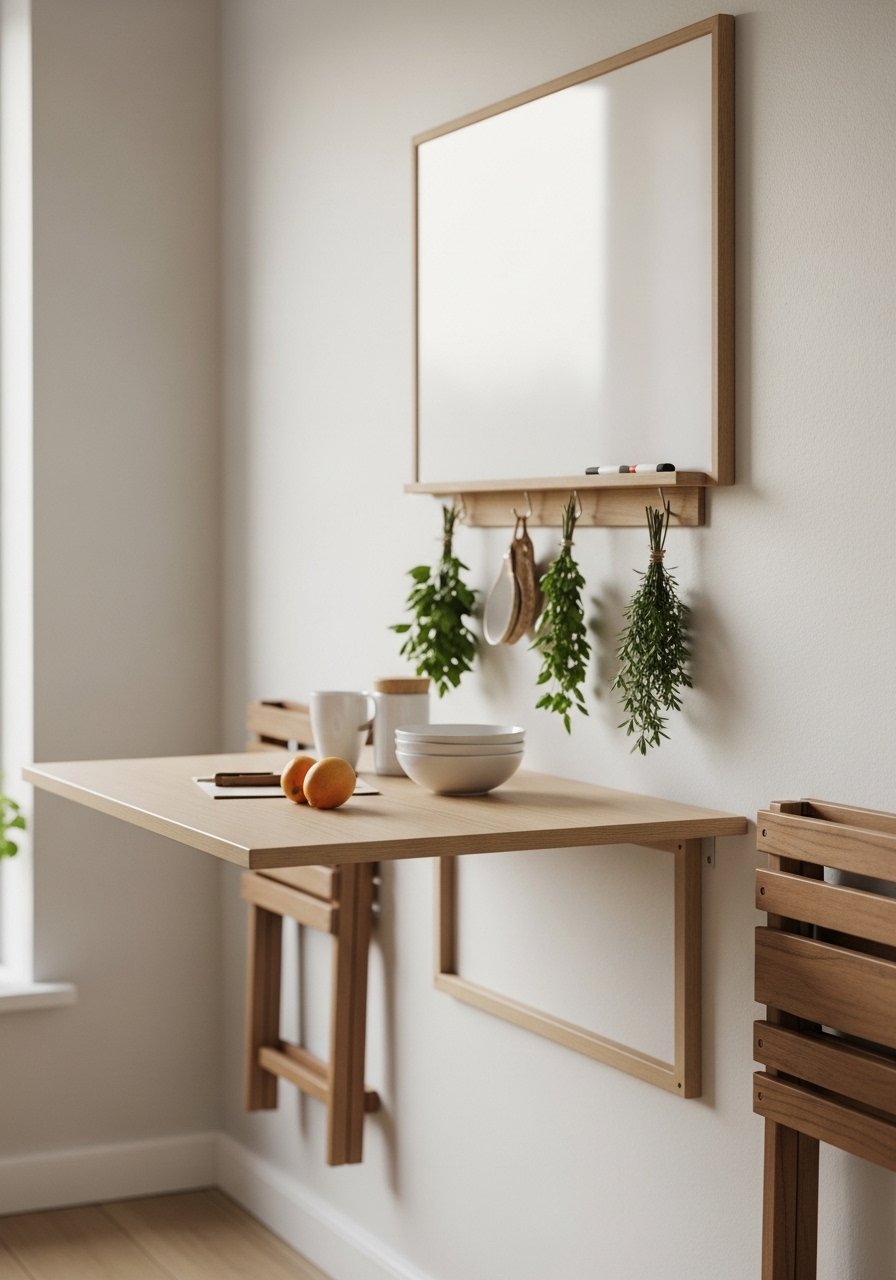
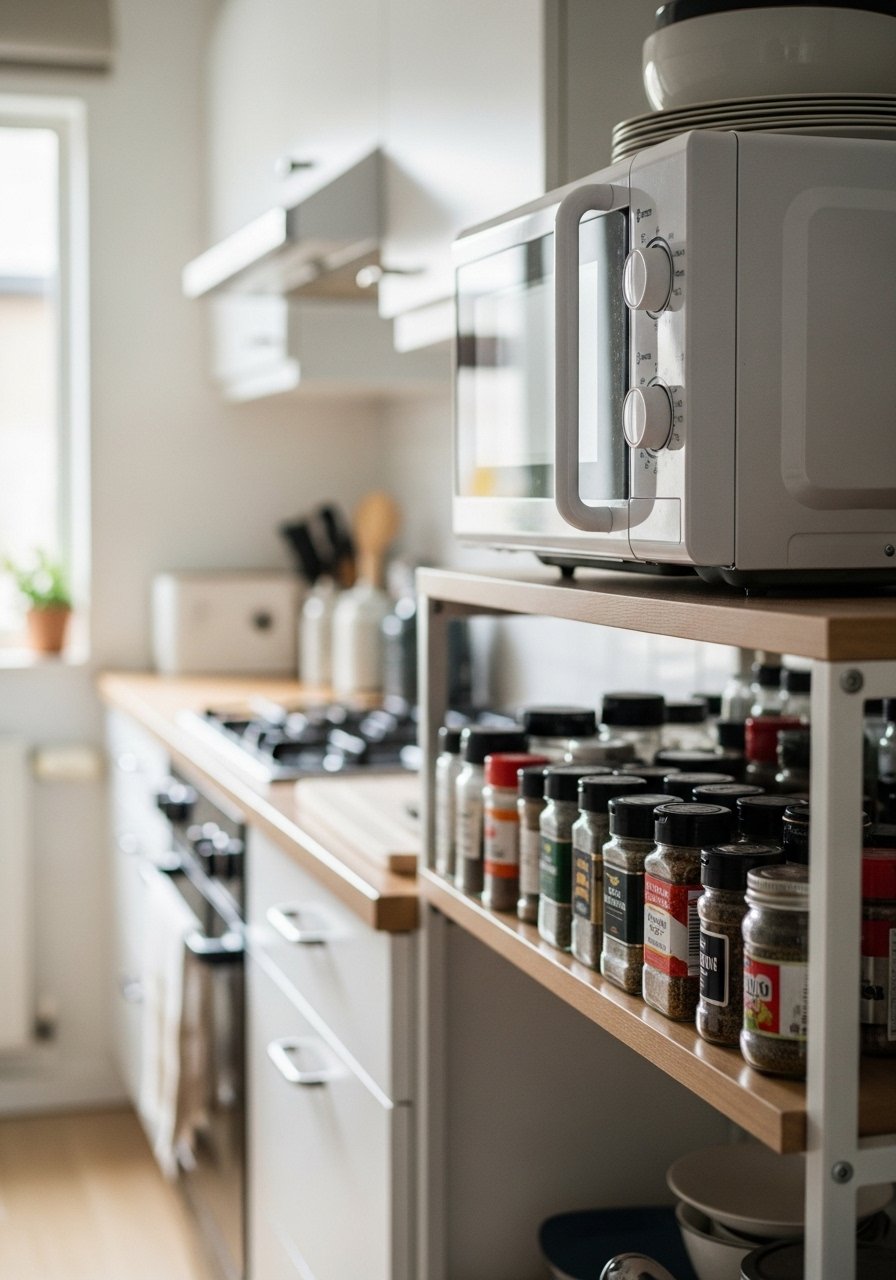
    19. Create a Beverage or Coffee Station

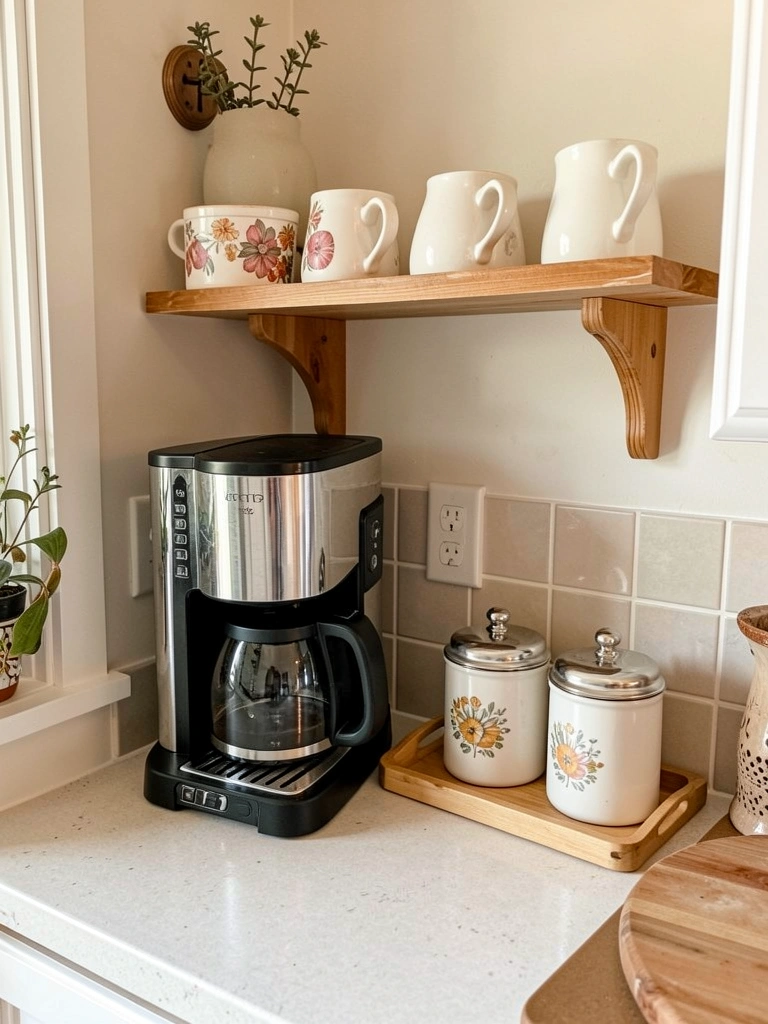
    A dedicated coffee or beverage station makes your morning routine feel special and keeps supplies contained in one spot instead of scattered across cabinets. This costs almost nothing but transforms how you start your day and how your kitchen looks.

    Choose a corner counter with electrical access. Add a small floating shelf above ($20-$40) or use a tall rolling cart ($40-$80). Group your coffee maker, mugs, coffee, sugar, and cream in one zone. Use a wooden tray ($15-$40) to corral items. Label or use matching canisters ($10-$30 for a set) for coffee, sugar, and tea. Takes 1-2 hours to set up, mostly organizing what you already own. Your mornings feel more intentional, and your kitchen looks curated instead of cluttered. Guests see this zone and immediately feel welcomed. If you’re renting or limited on space, use a rolling cart that you can tuck away or a magnetic shelf on the side of your fridge. This simple station signals that you’ve thought about your space, and it’s one of the cheapest upgrades available.

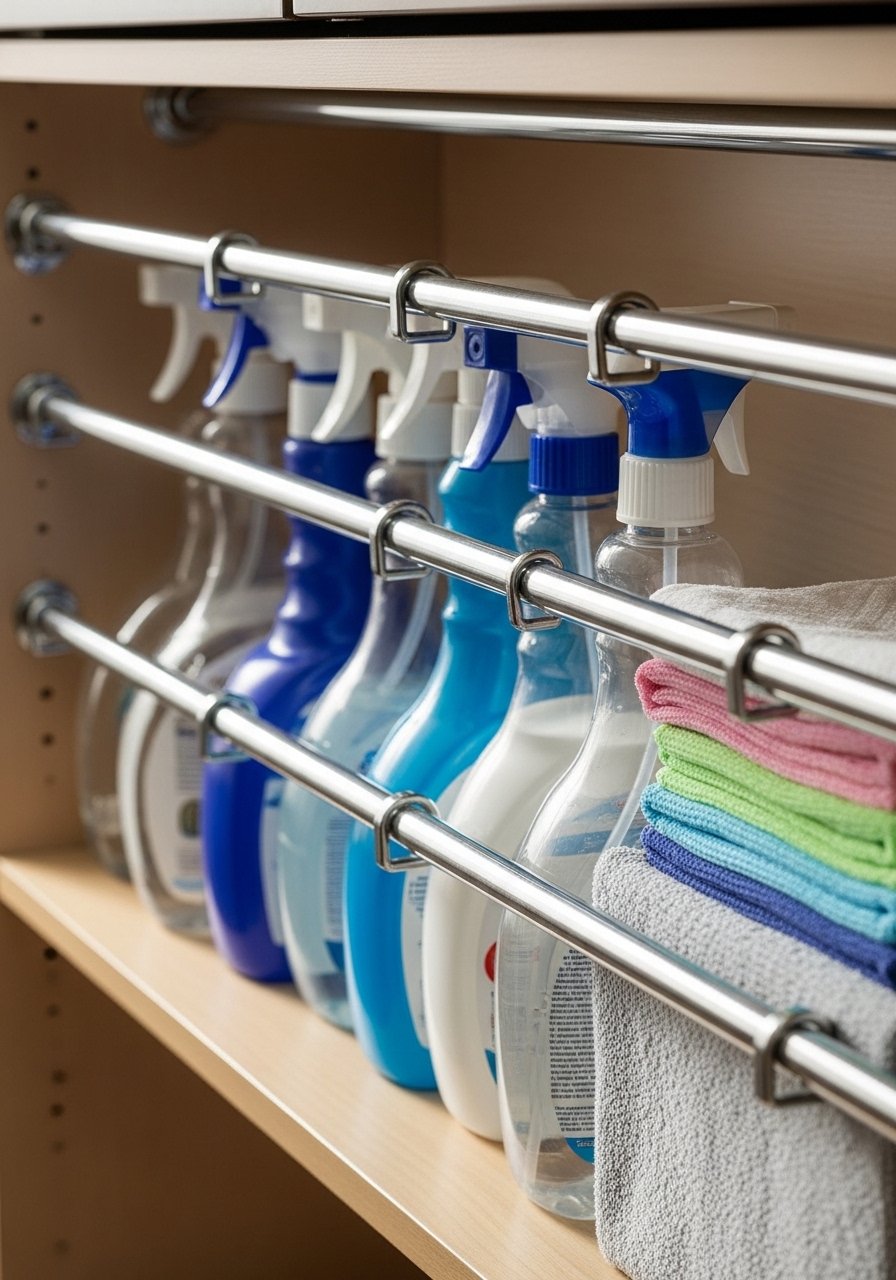
    20. Incorporate Sustainable or Recycled Materials in Key Areas

    Sustainable materials aren’t just good for the planet—they often look beautiful and feel high-quality. Recycled glass, reclaimed wood, bamboo, cork, and FSC-certified materials are increasingly affordable and available. You can make sustainable choices in one or two key areas without overhauling everything.

    Recycled glass tile for backsplash ($10-$30 per square foot, hire installation or DIY with peel-and-stick versions). Reclaimed wood shelving ($50-$150 per shelf from salvage yards or online). Bamboo cutting boards or utensil storage ($15-$50). Cork trivets, mats, or shelf liners ($10-$30). Recycled composite countertop options ($30-$100 per square foot). Research brands’ sustainability credentials before buying—not all “eco” labels are legit. Start with one element (maybe your backsplash or one shelf) and expand from there. These materials often have unique character and visual interest that makes your kitchen feel intentional. Plus, you feel good about your choices, and guests often comment on the beautiful, thoughtful materials.

    21. Use Wallpaper to Define One Wall or Create a Dining Nook

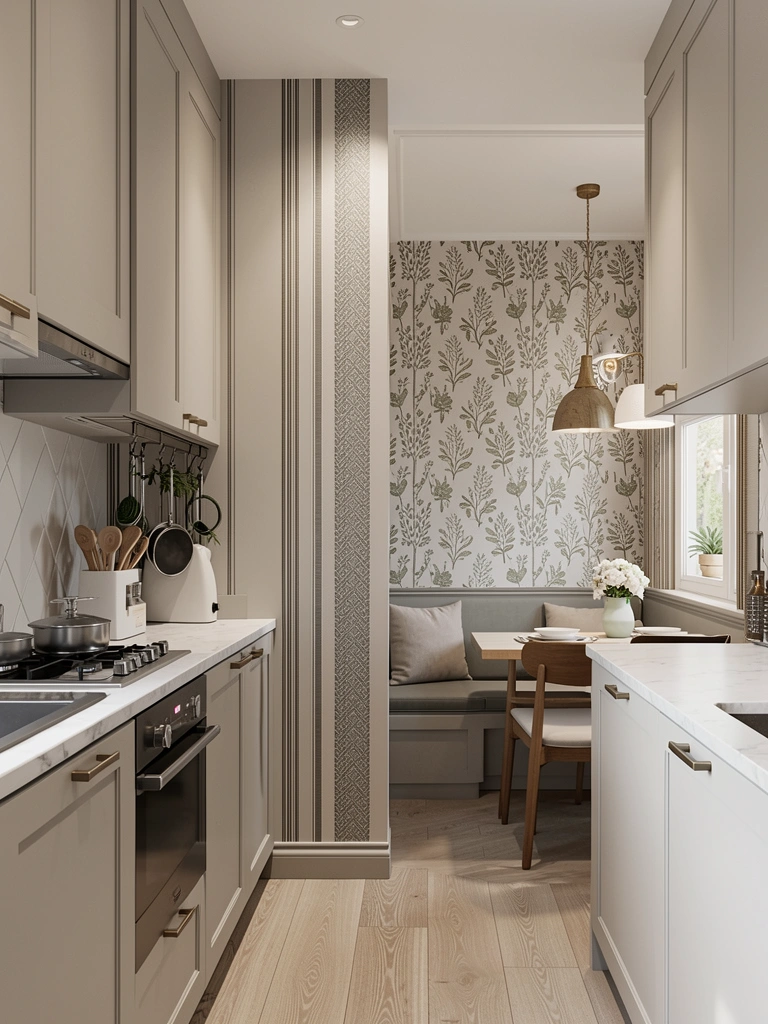
    Wallpaper used to feel dated, but modern kitchens are bringing it back in smart ways. Use peel-and-stick options to define one wall without permanent commitment. This works especially well to carve out a dining or breakfast nook.

    Choose a peel-and-stick or removable wallpaper in a pattern that coordinates with your overall kitchen ($15-$60 per roll). Apply it to one accent wall, the wall behind your dining table, or the wall above your open shelving. Measure carefully and follow application instructions ($0 in cost, takes 2-4 hours). If you make mistakes, peel it off and restart. The beauty of peel-and-stick is zero commitment—change it whenever you want. Your kitchen instantly gains character and visual interest. A patterned wall behind a dining nook makes that area feel special and distinct from the rest of the kitchen. This is perfect for renters and works beautifully in any style (traditional florals, modern geometrics, playful abstracts).

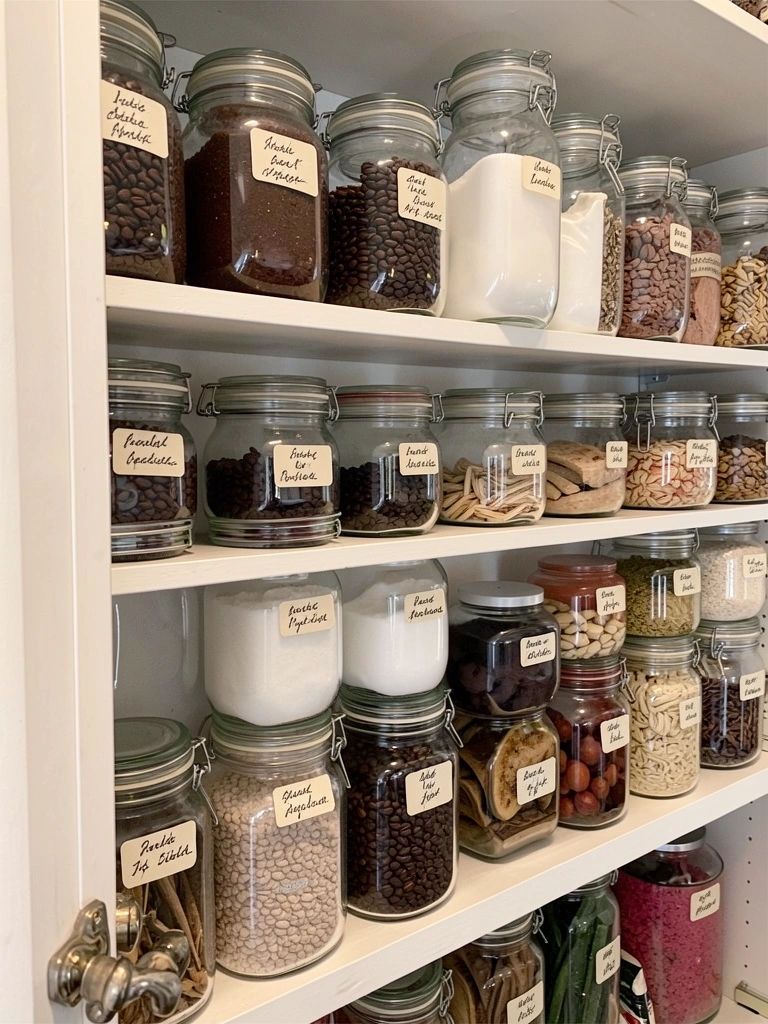
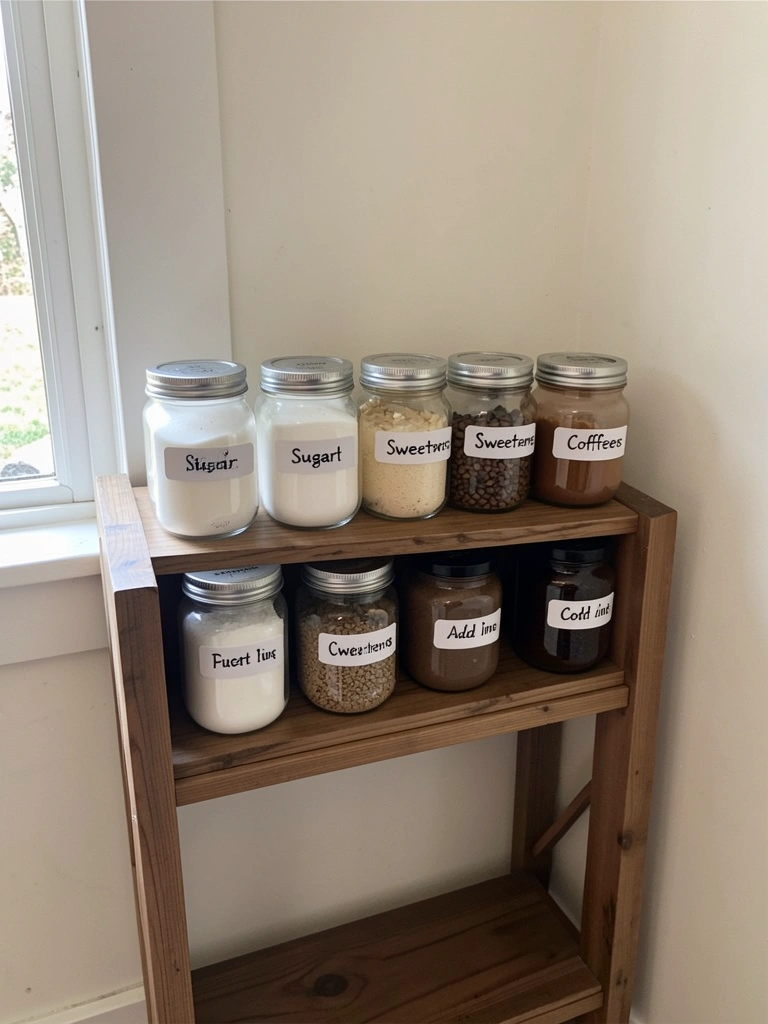
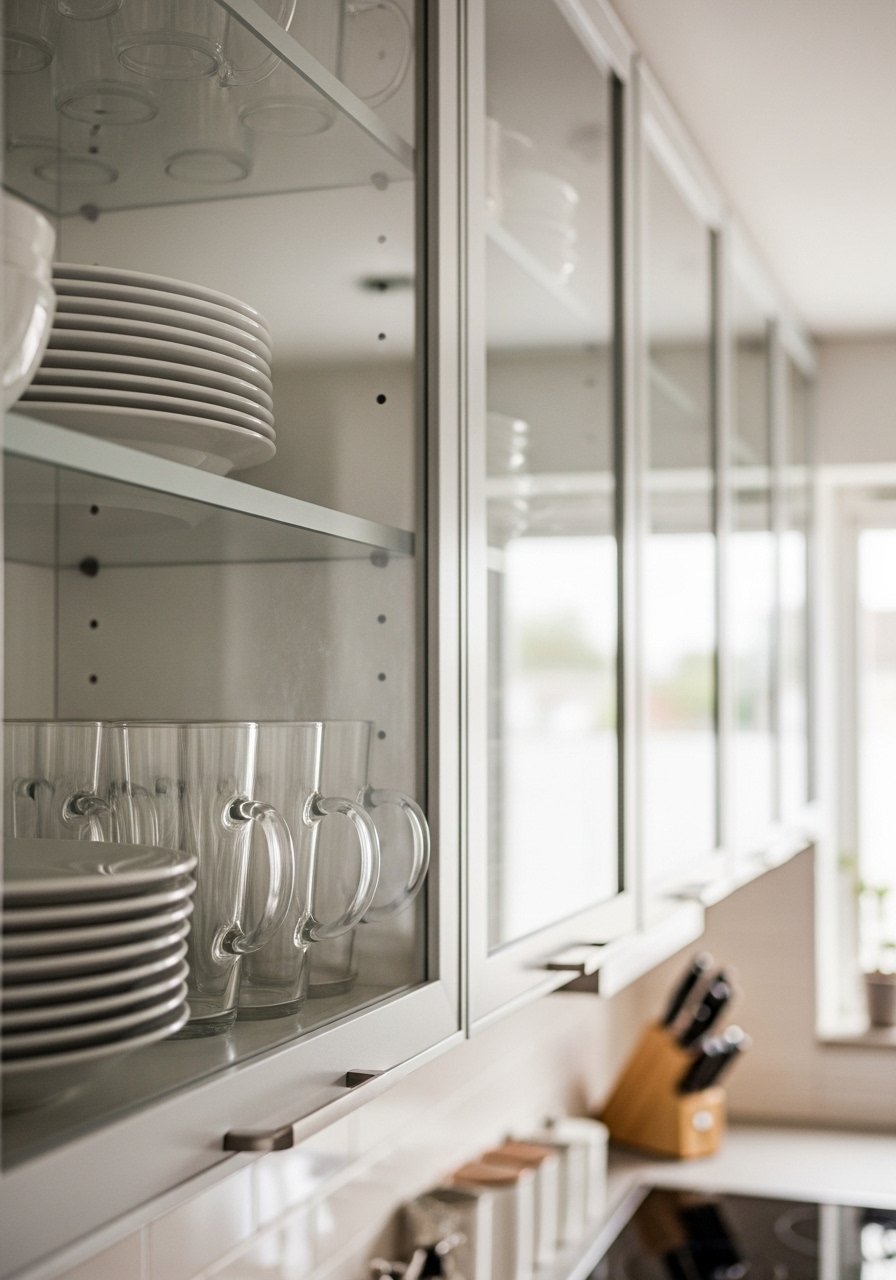
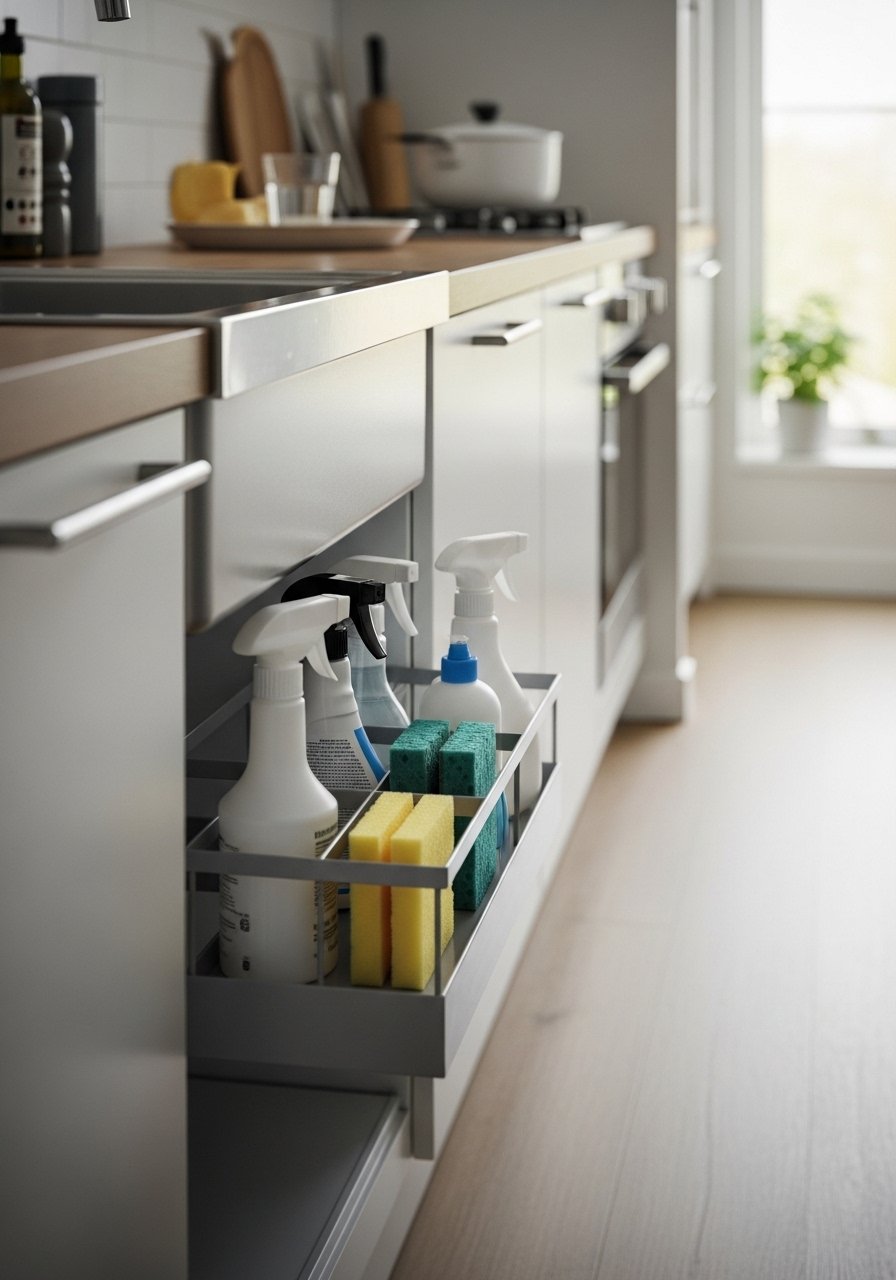
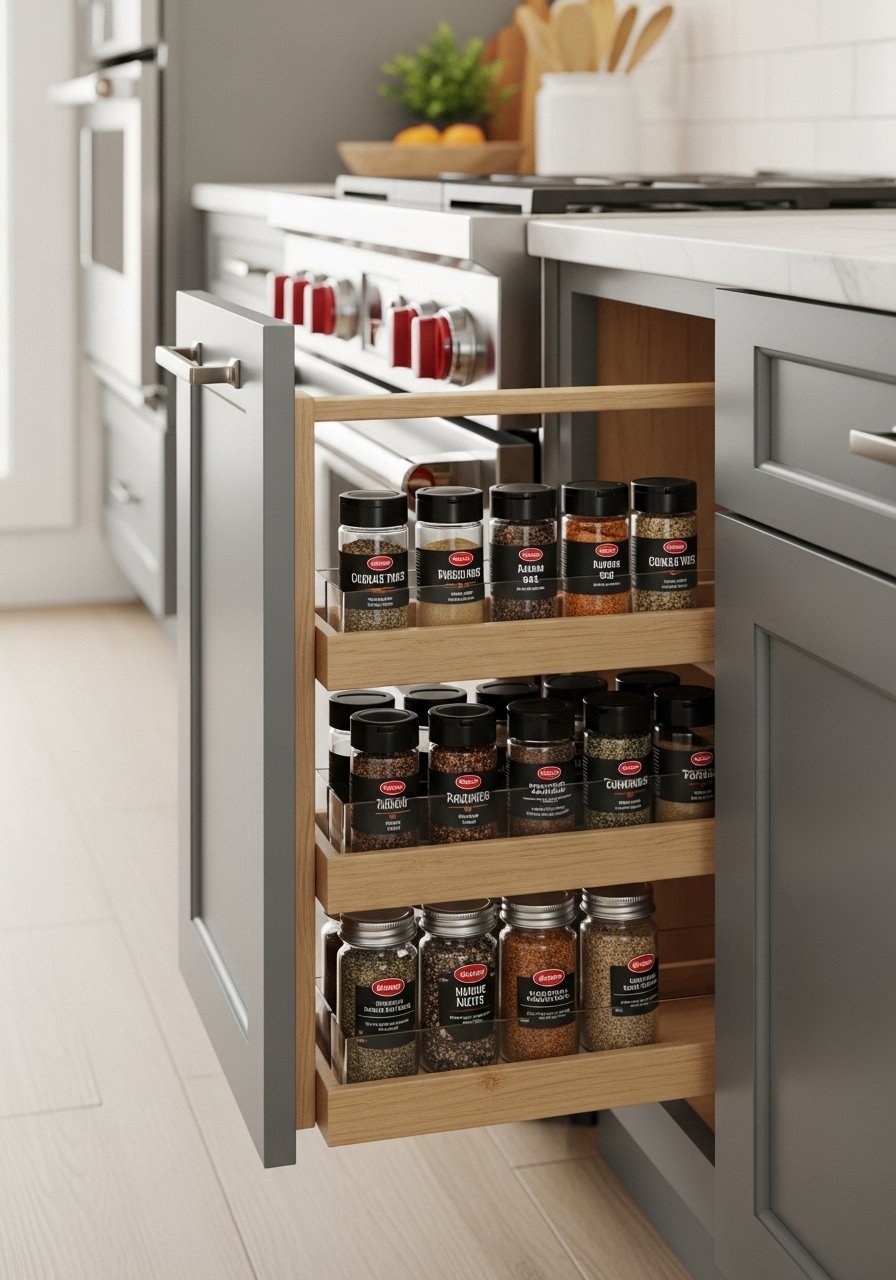
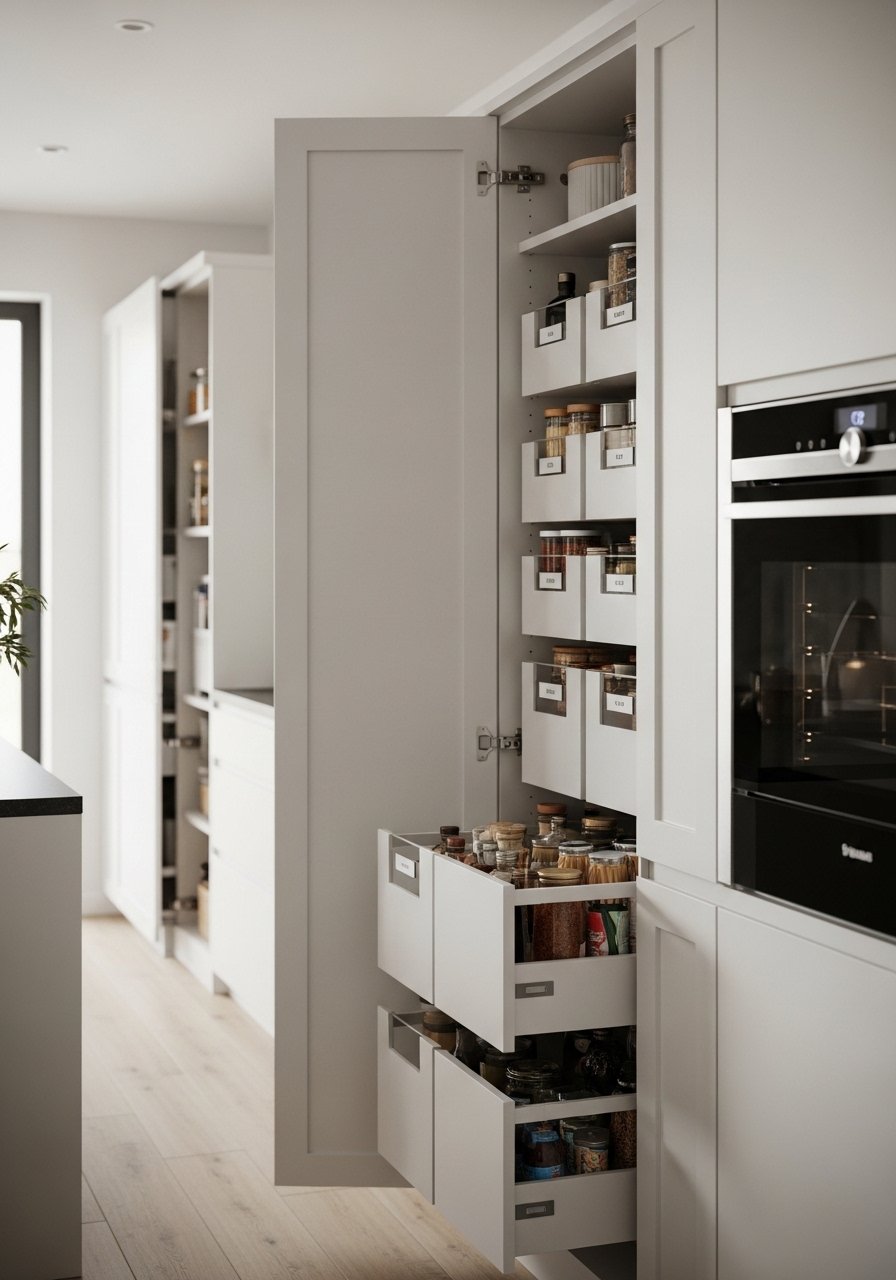
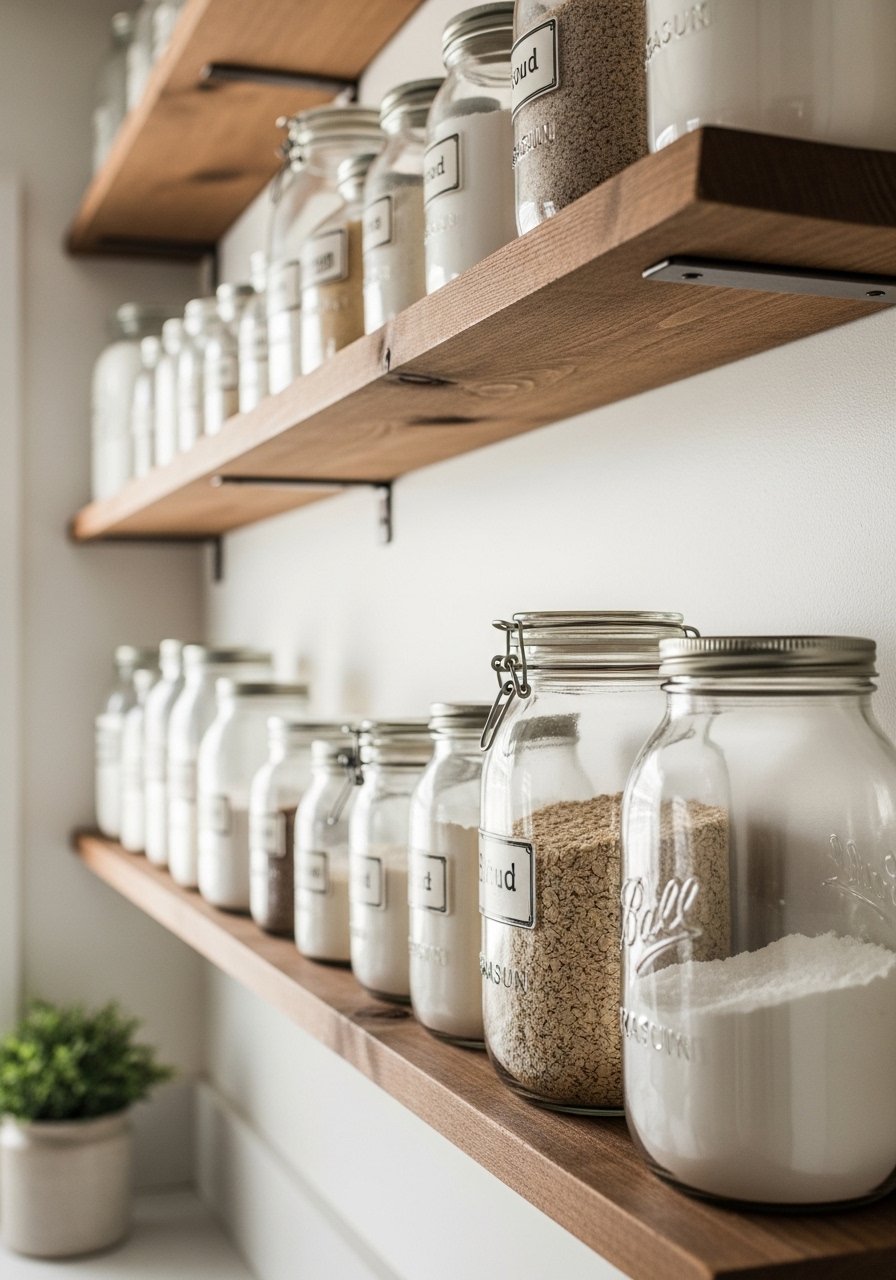
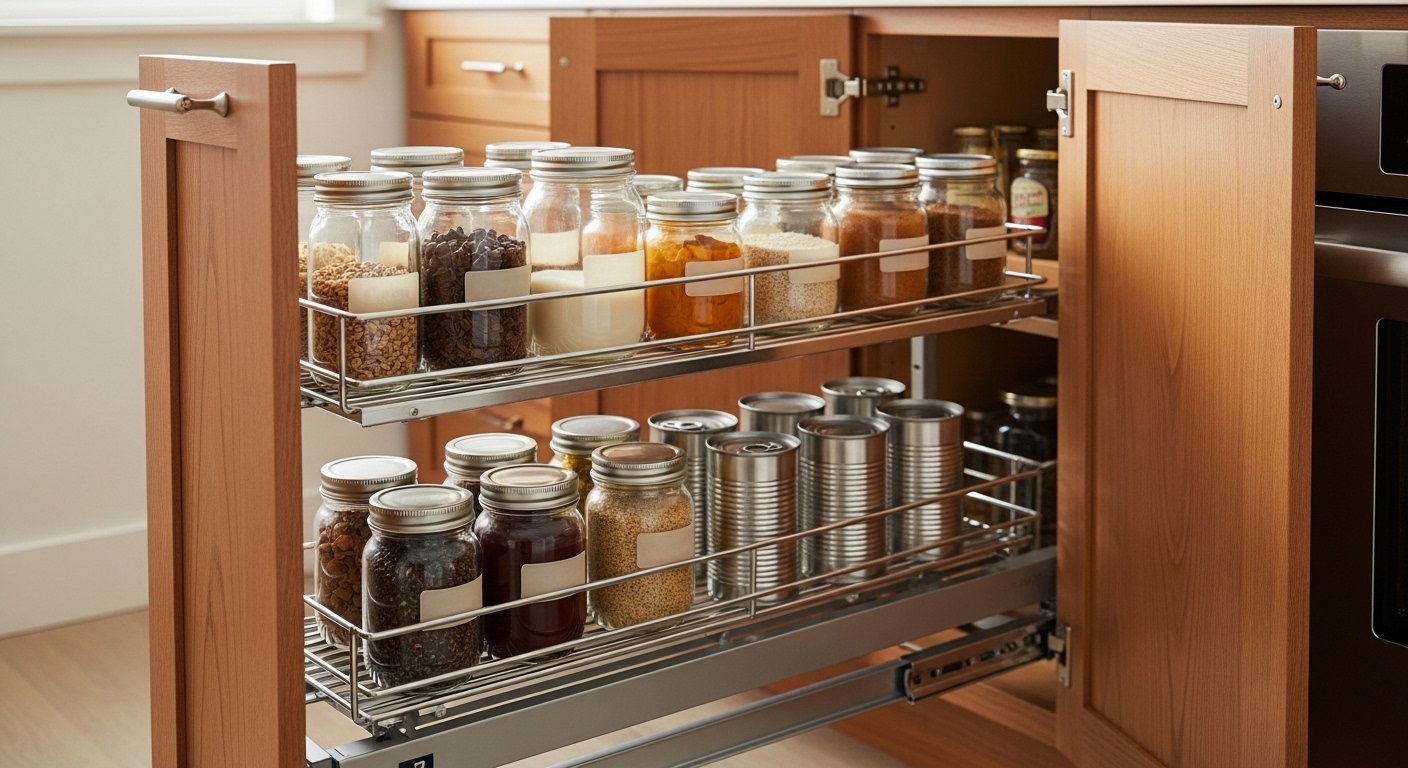
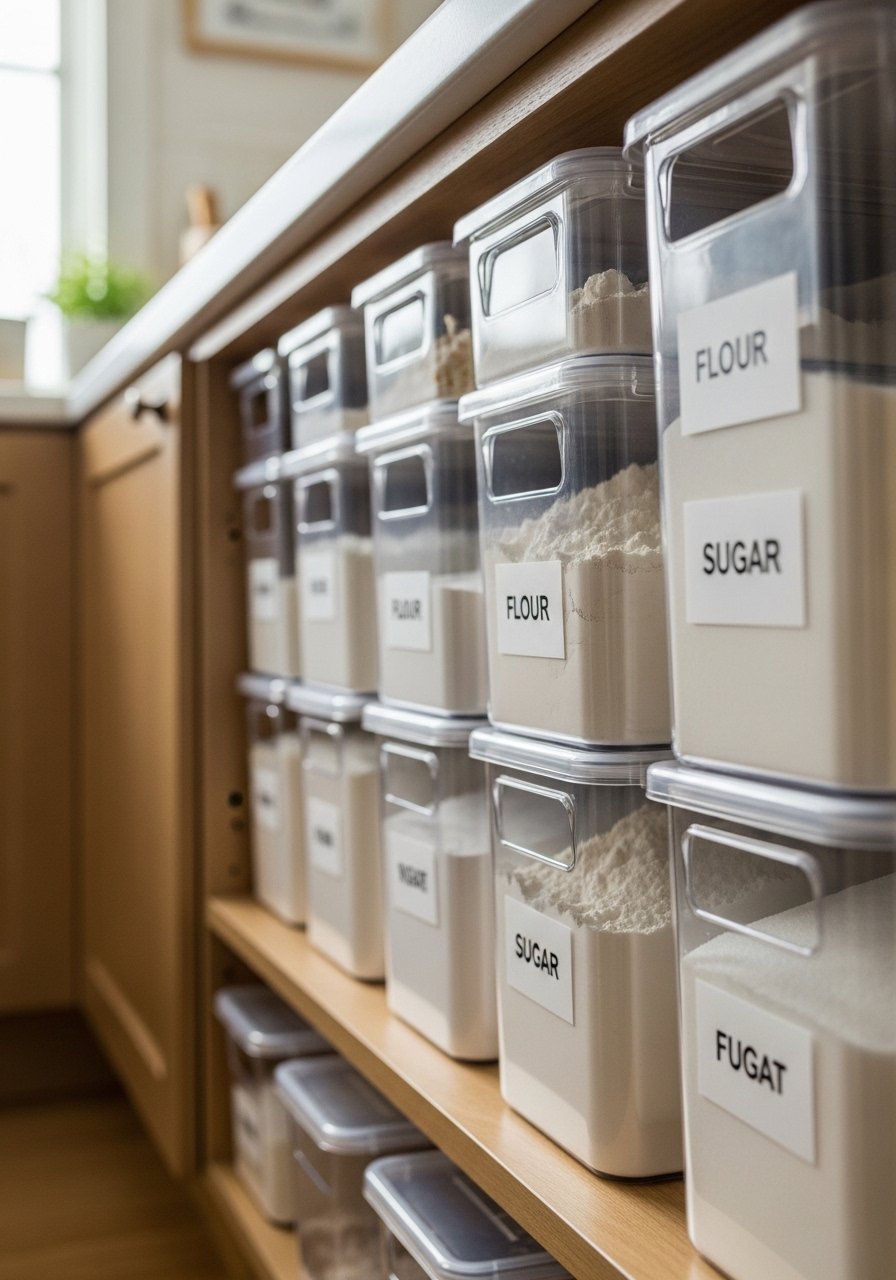
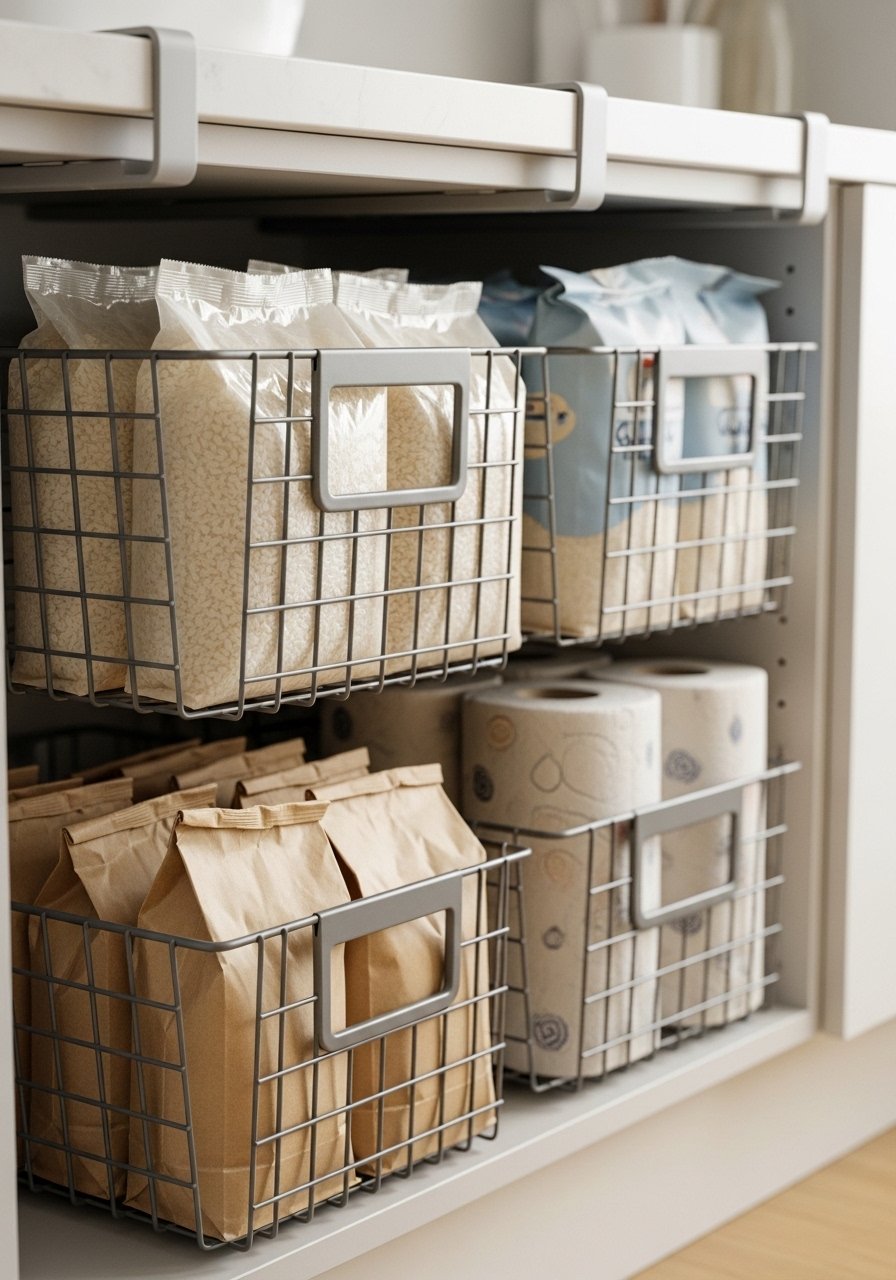
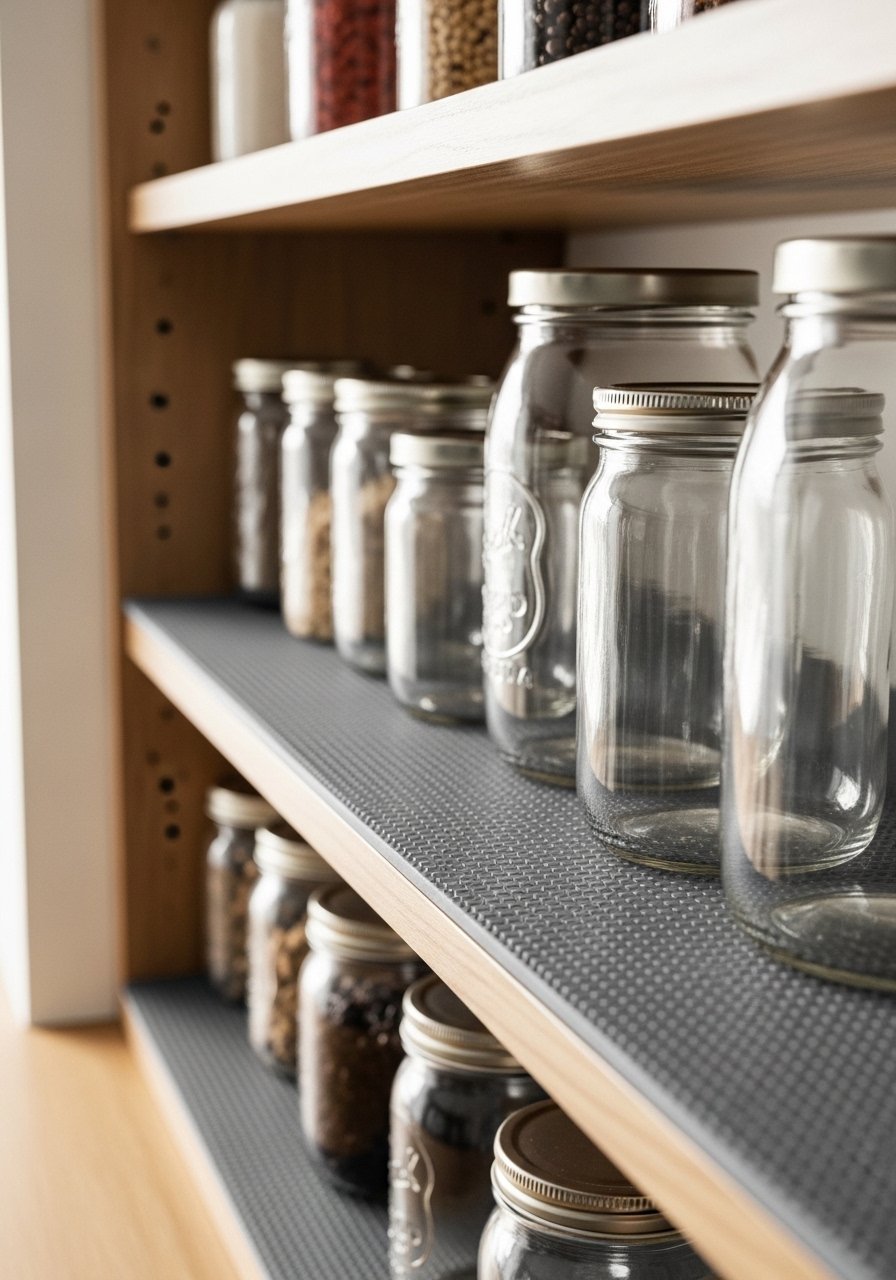
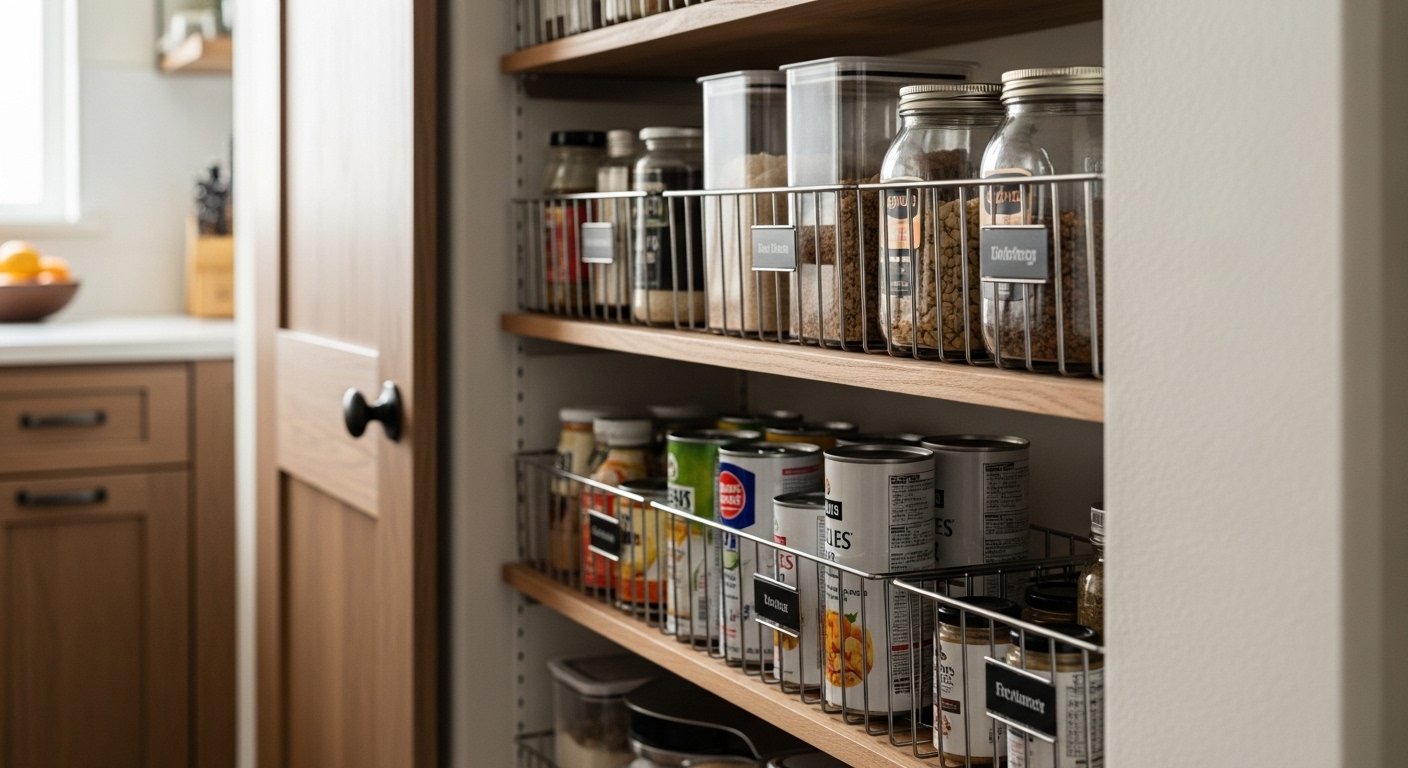
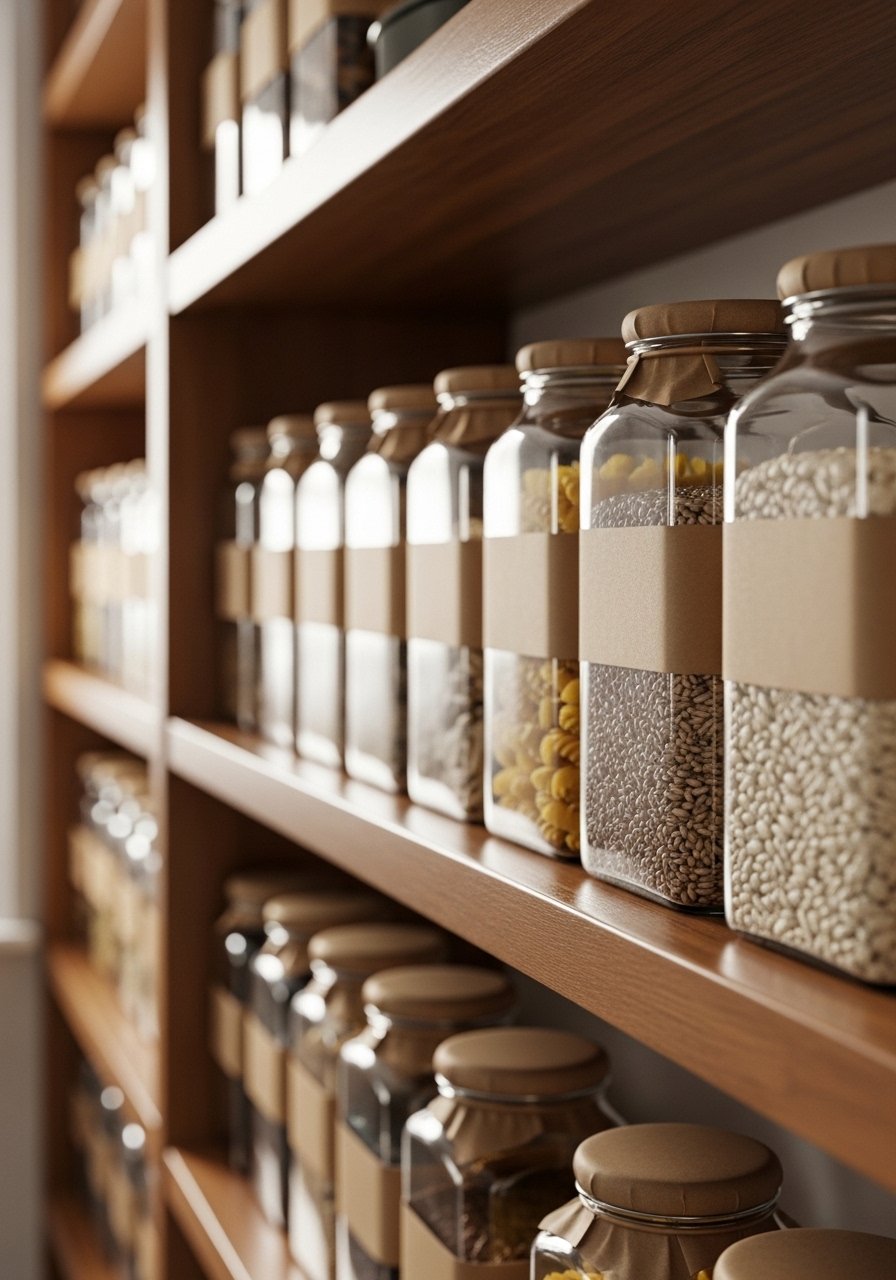
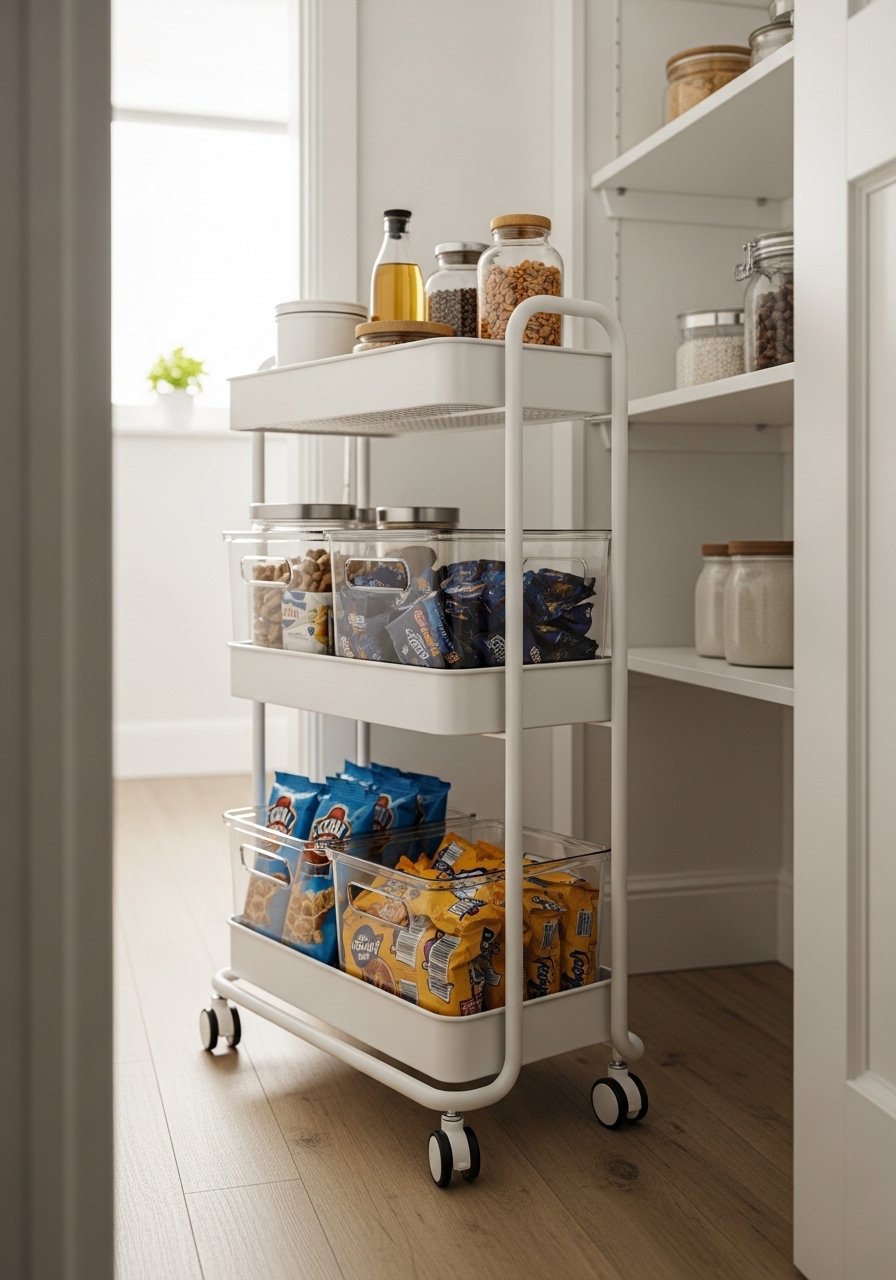
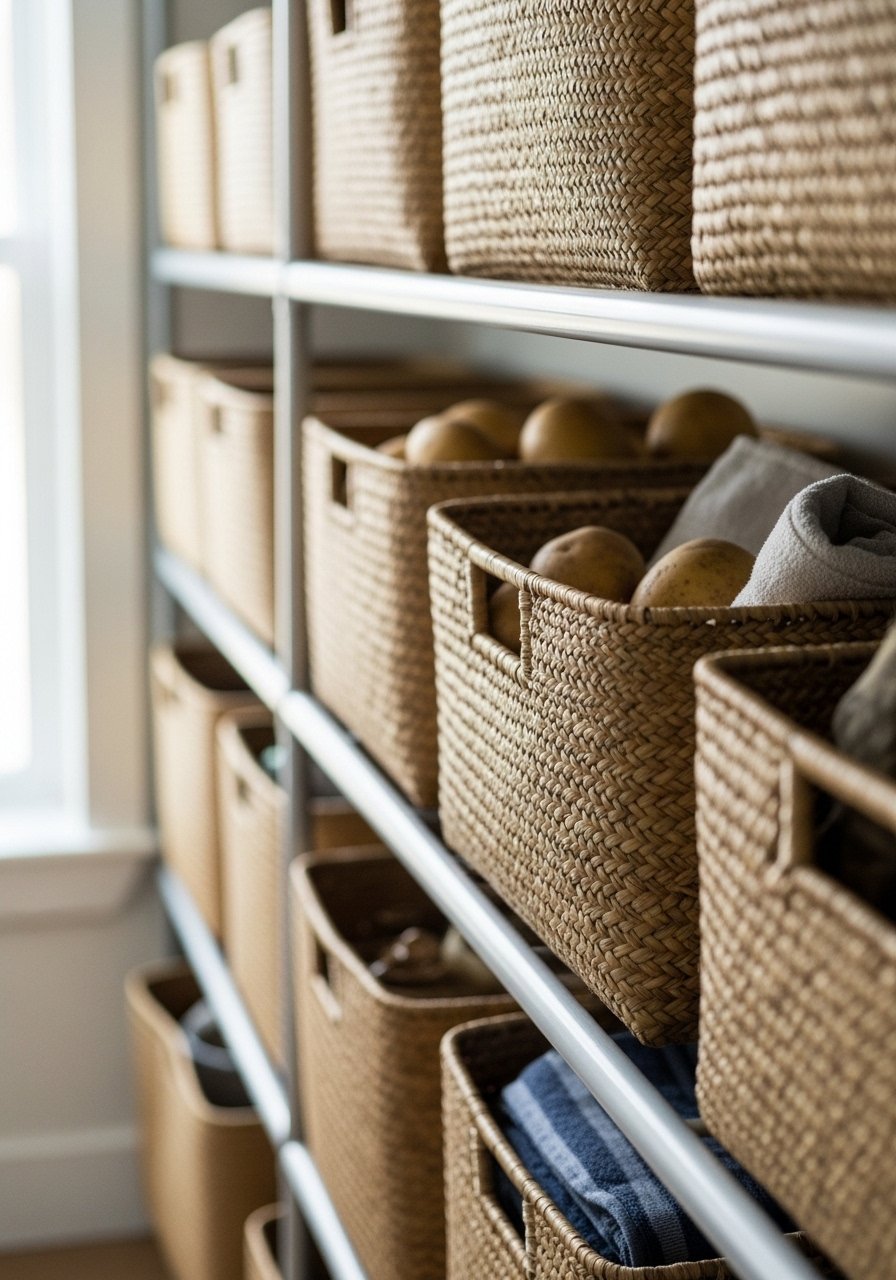
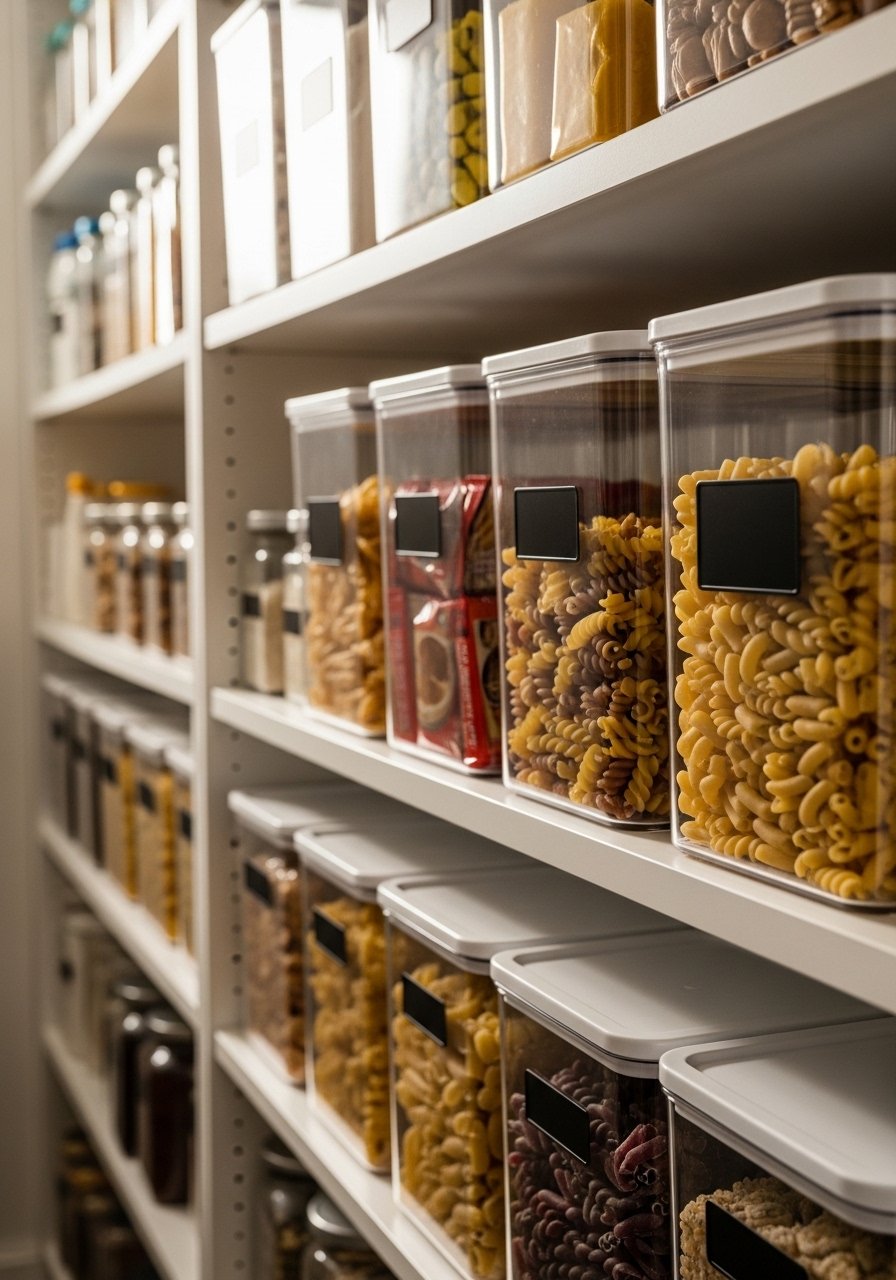
    22. Organize with Matching or Coordinating Storage Containers

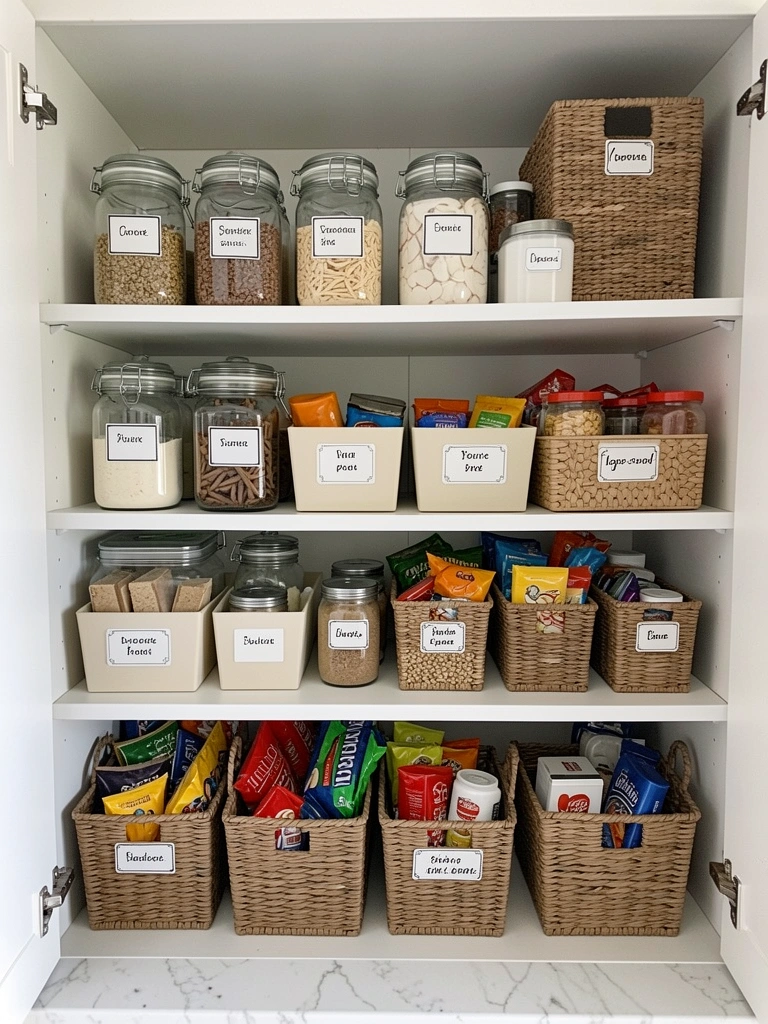
    Matching storage containers transform any kitchen instantly. When your pantry and shelves are organized with coordinated containers, the whole space feels calmer and more expensive. Plus, you can actually see what you have.

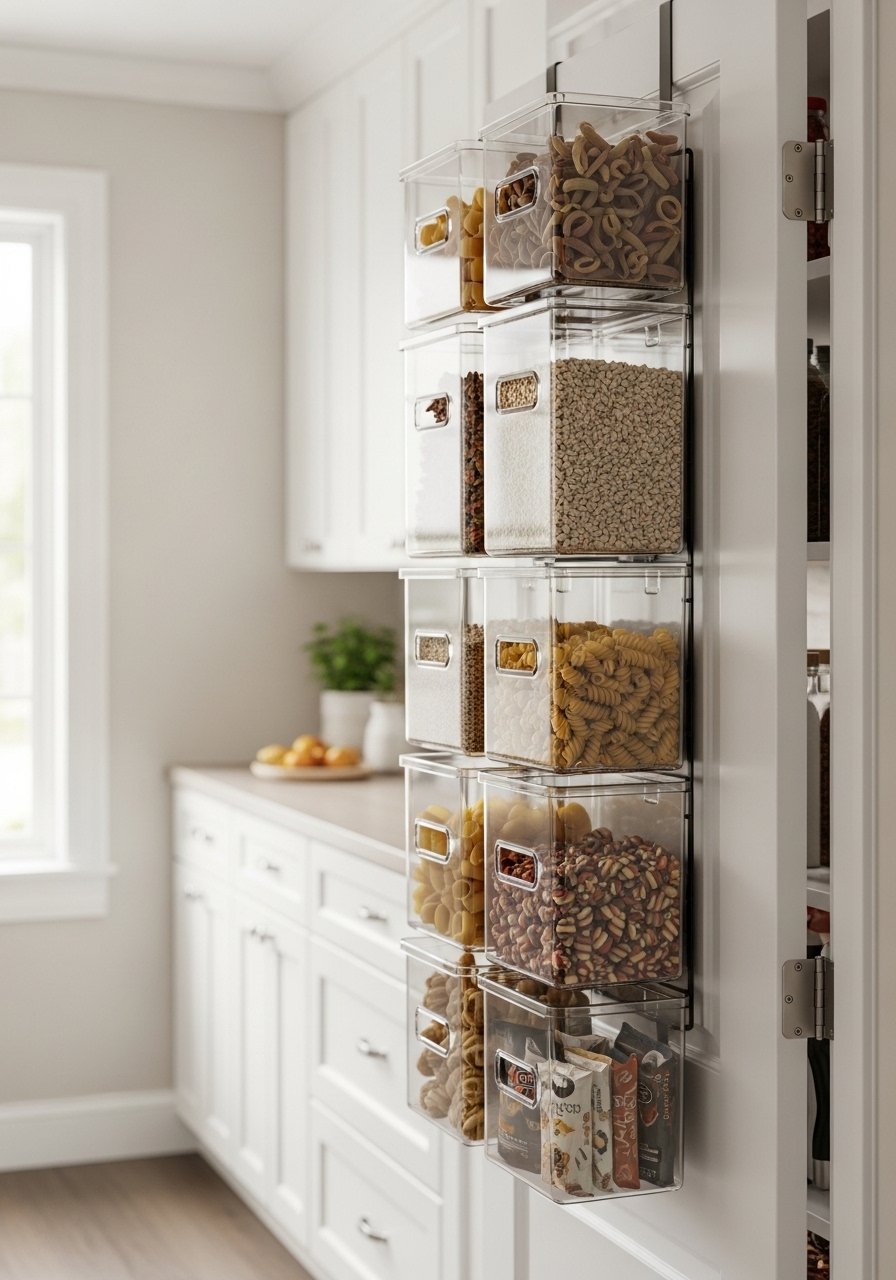
    Invest in matching glass containers with labels ($40-$100 for a full set from IKEA, Rubbermaid, or specialty retailers). Use woven baskets ($10-$30 each) for items you want to hide. Apply removable labels ($5-$15) so you can change them easily. Takes a weekend to organize, mostly editing what you keep and transferring items. You’ll use less food waste because you can see everything. Your pantry looks beautiful (which matters if you have open shelving or glass-front cabinets). This works even in small spaces and makes your kitchen feel thoughtfully organized. Start with just your dry goods and expand from there—even one shelf of matching containers signals that you care about your space.

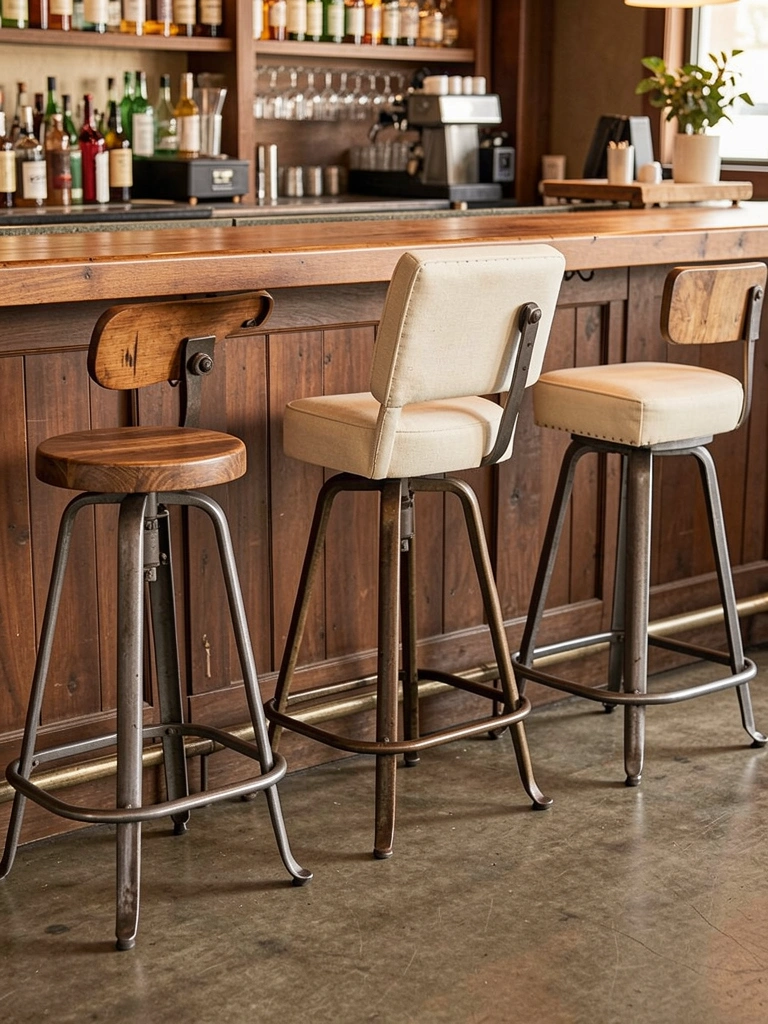
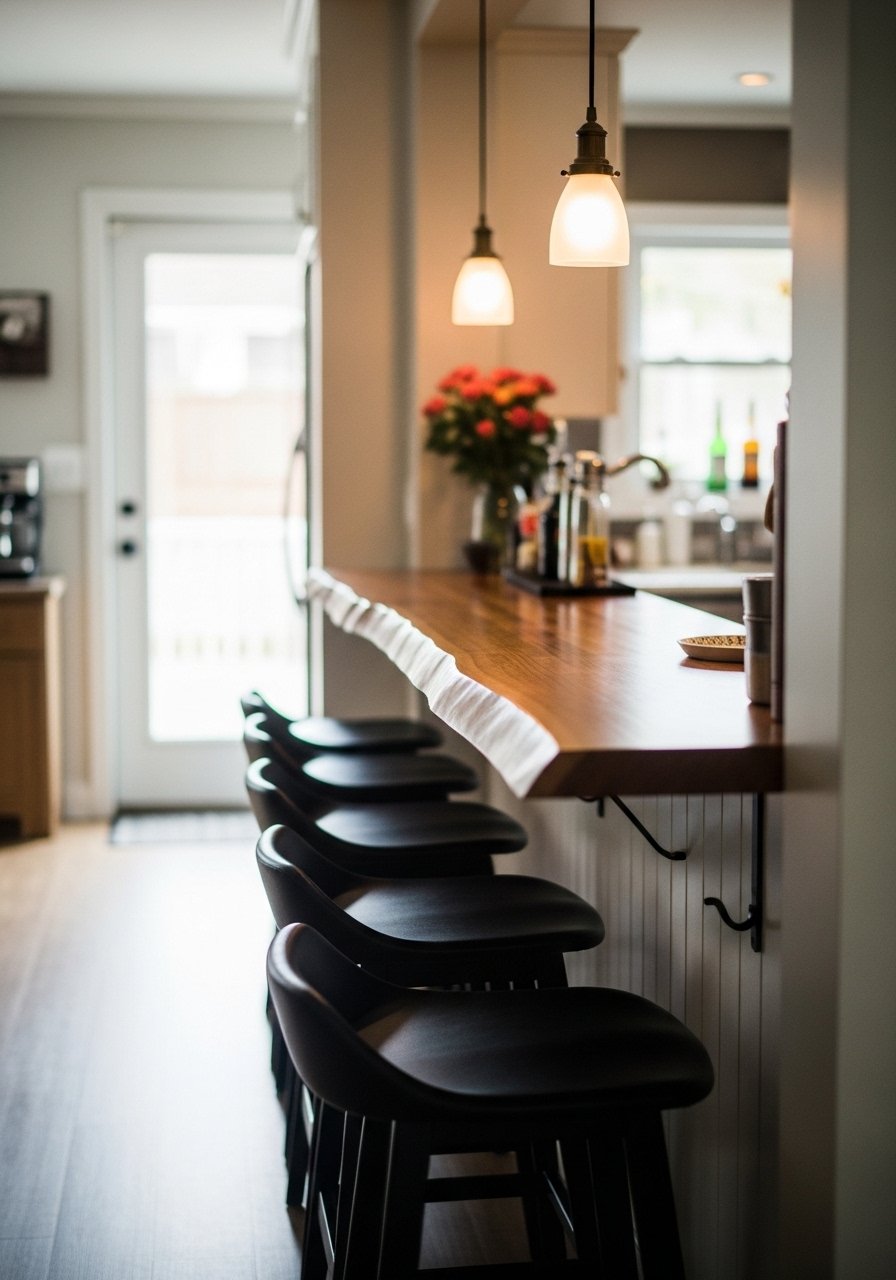
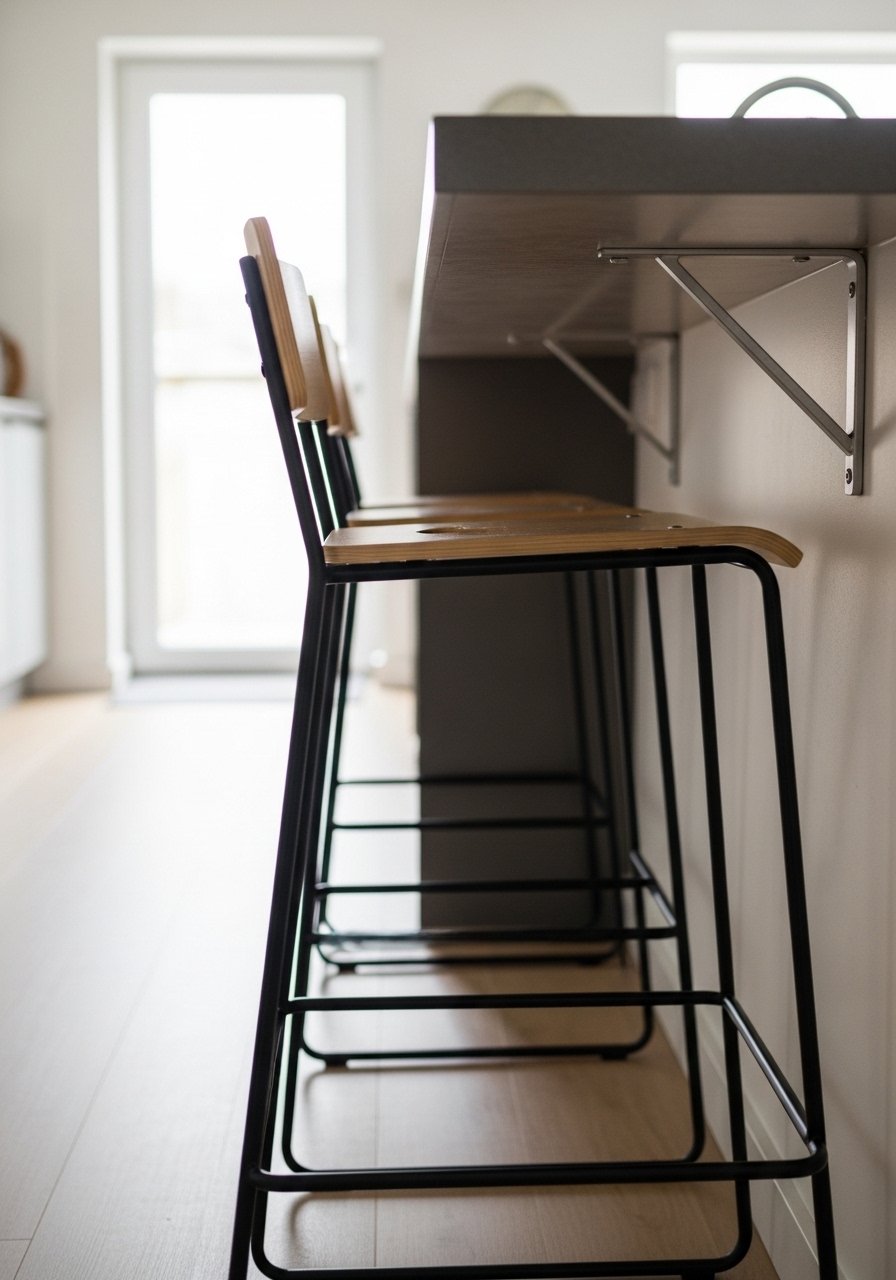
    23. Add Dining Seating with a Breakfast Nook or Bar

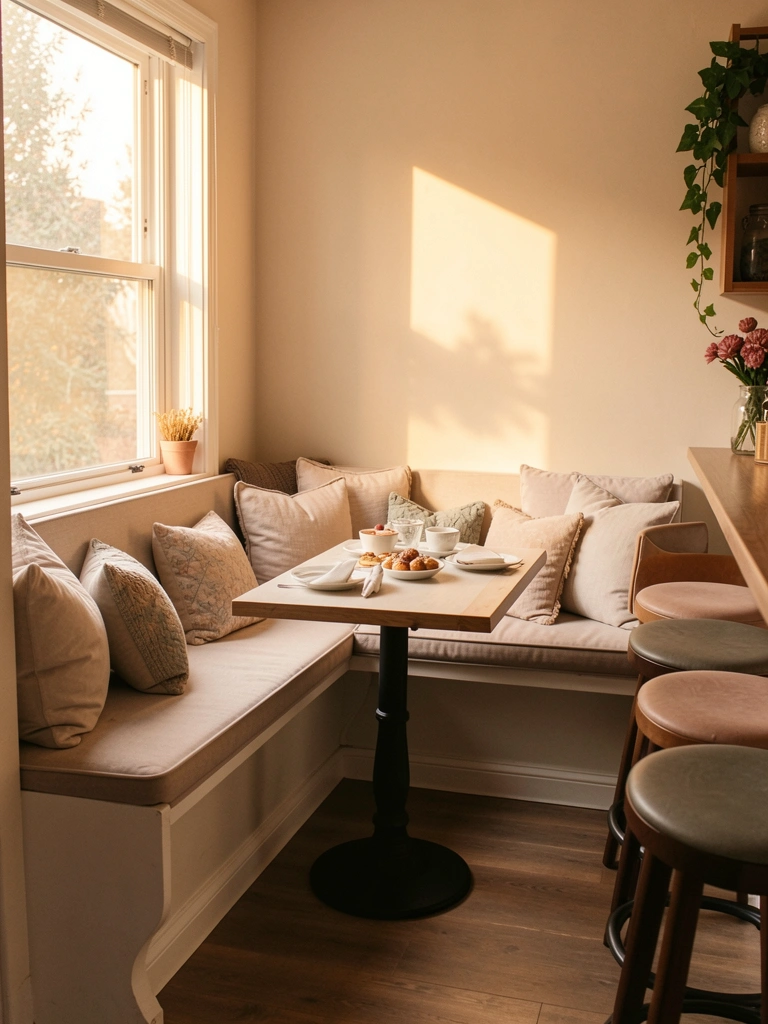
    Dedicated dining or seating in your kitchen transforms it from just functional to social. Whether it’s bar seating at your island, a breakfast nook, or a small bistro table, having a place to sit and eat changes how you use the space.

    Add bar stools to your island ($100-$400 for 2-3 quality stools from IKEA, Target, or mid-range furniture brands). Install a built-in banquette ($300-$1,500+ depending on DIY vs. professional) along one wall with a small table. Squeeze in a small bistro table ($100-$300) in a corner or near a window. Use a rolling cart as a drink station with seating nearby ($50-$150 total). Most kitchens have a little unused corner—claim it for dining. Takes a weekend to install or assemble, depending on your choice. Your kitchen becomes a destination instead of just a workstation. Family gathers here, you actually eat breakfast sitting down, and guests see a welcoming space rather than just appliances. Even a small two-person nook completely changes the room’s energy.

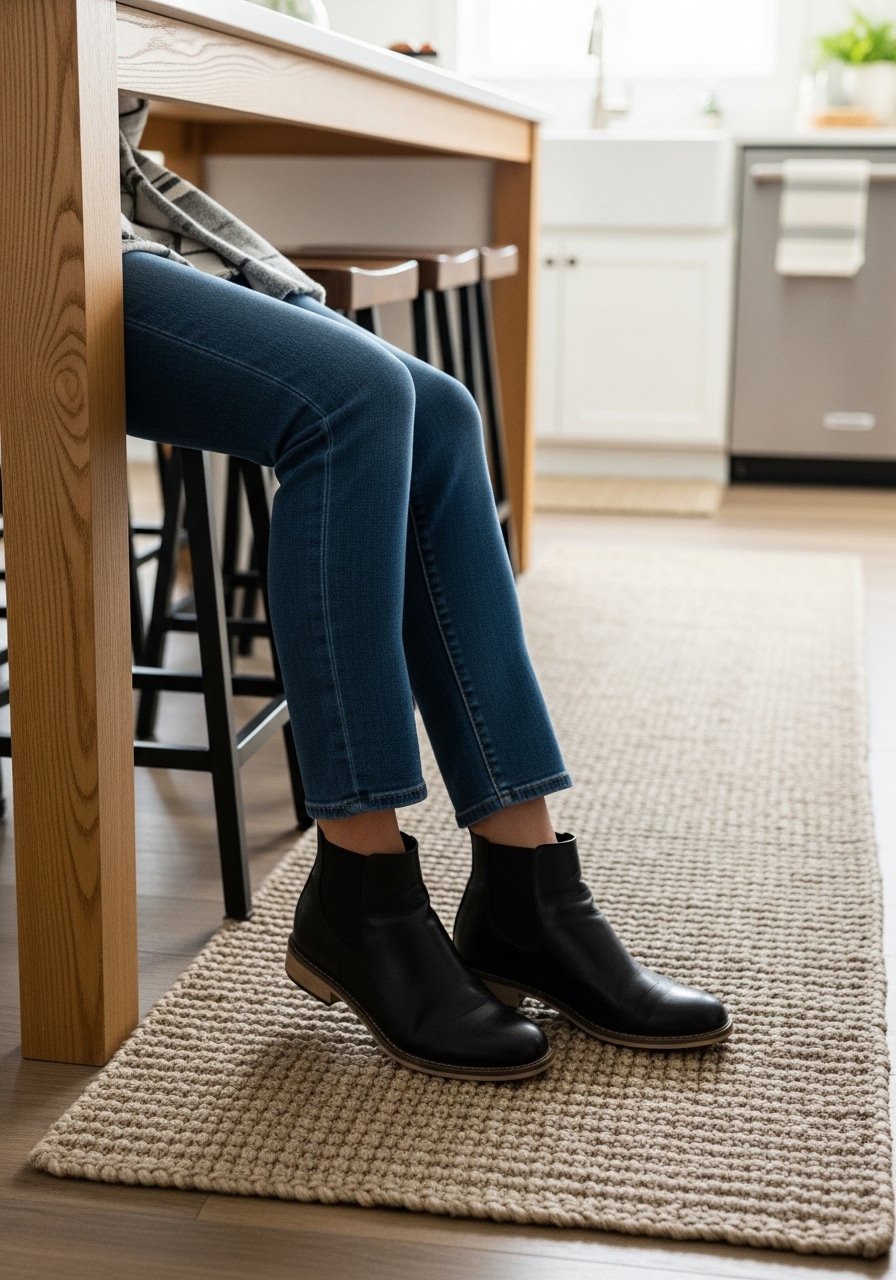
    24. Layer Textiles with Kitchen Towels, Rugs, and Cushions

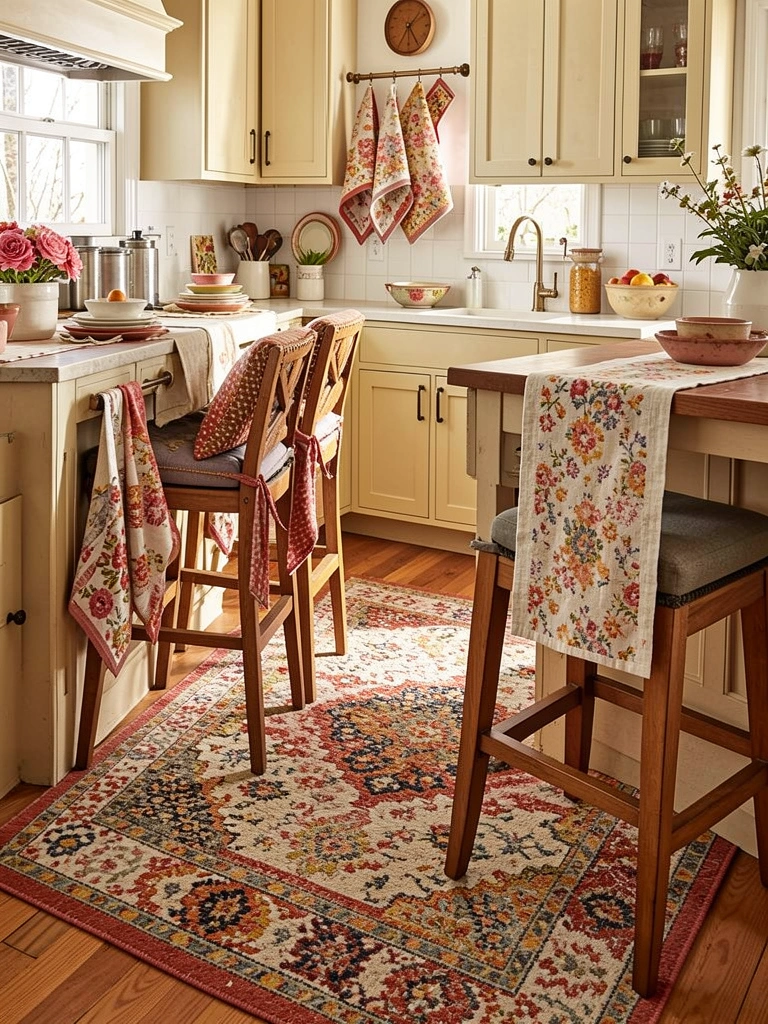
    Textiles are one of the cheapest ways to add color, pattern, and personality to your kitchen. A rug, towels, cushions, and a runner work together to make the space feel intentional and cozy. You can change them seasonally or whenever you want.

    Layer textiles in a coordinating color palette: choose one main color and one or two accent colors. Kitchen rug ($30-$150 depending on size and quality), dish towels ($5-$15 each), cushions for bar stools ($20-$50 each), table runner ($20-$40). Source from Target, IKEA, Etsy, or Anthropologie. Takes 30 minutes to arrange, and costs nothing if you already own these items. The impact is disproportionate—suddenly your kitchen feels warm, finished, and intentional. Textiles also serve function: they protect your floors, add comfort to seating, and absorb water. You can swap them seasonally (bright linens in summer, cozy knits in winter) to keep your kitchen feeling fresh without major investment.

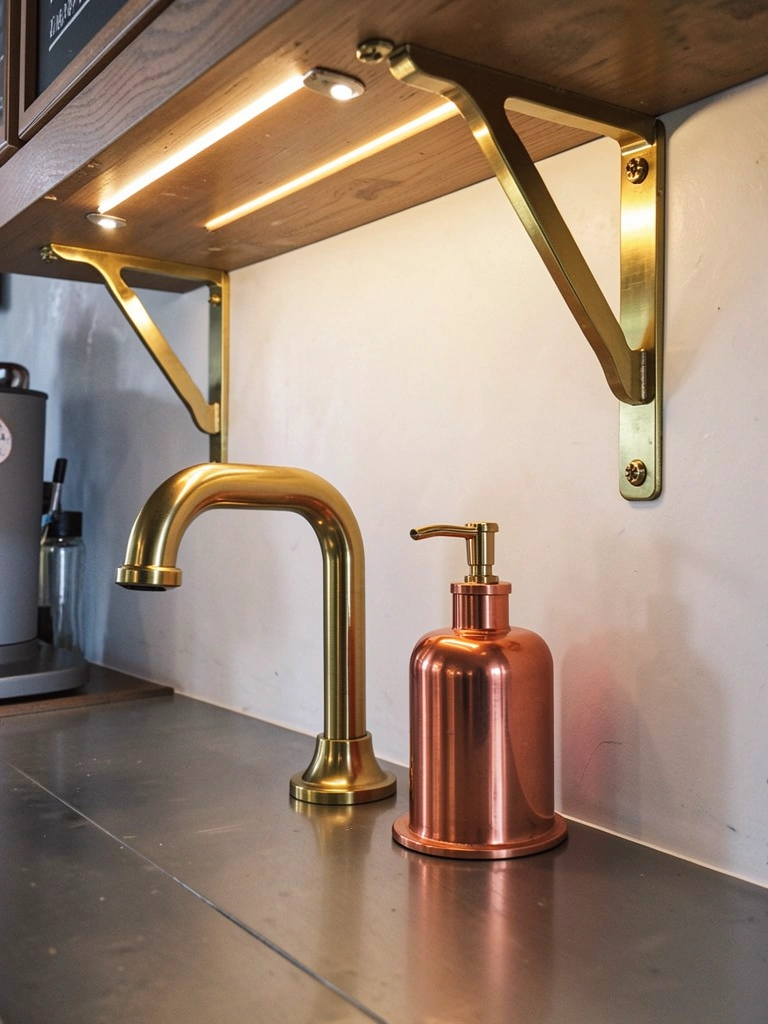
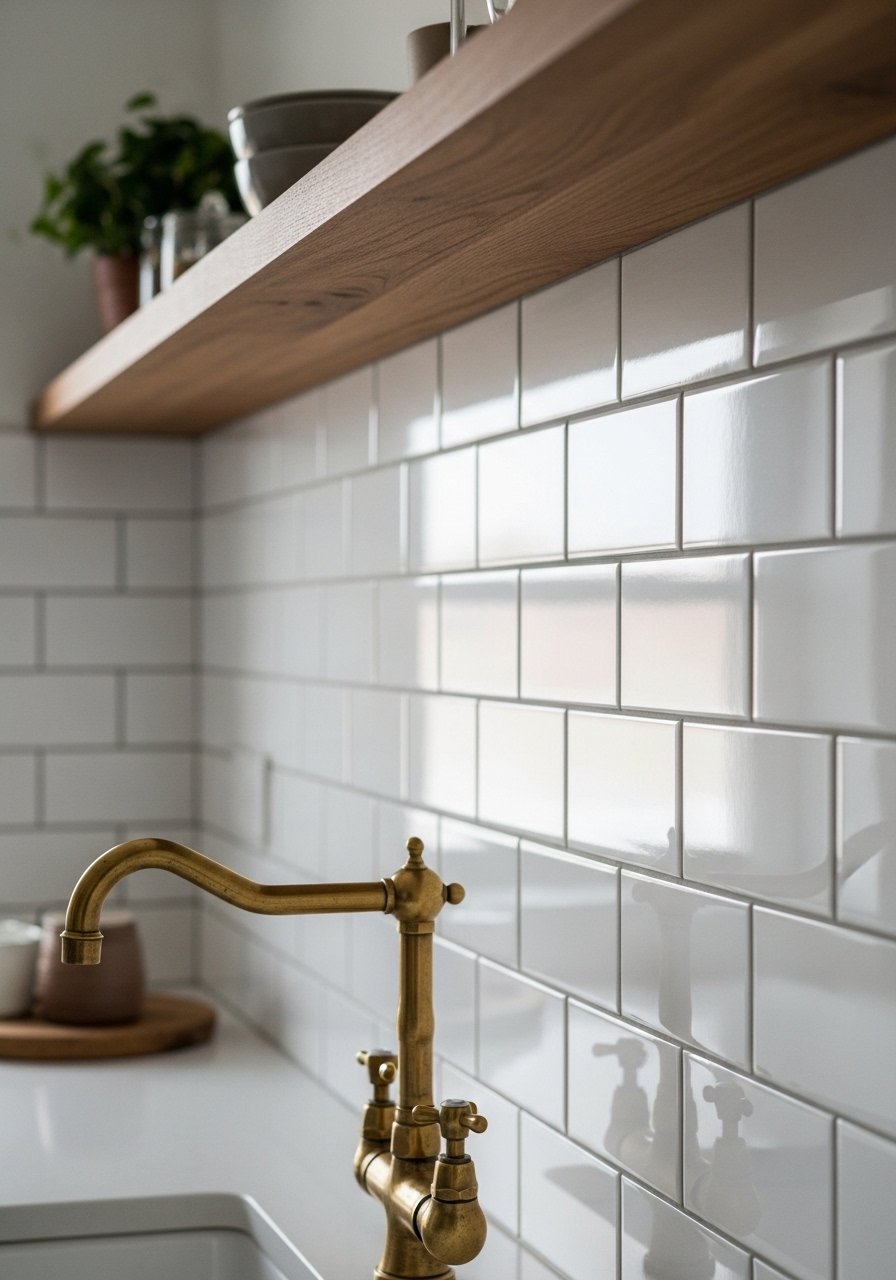
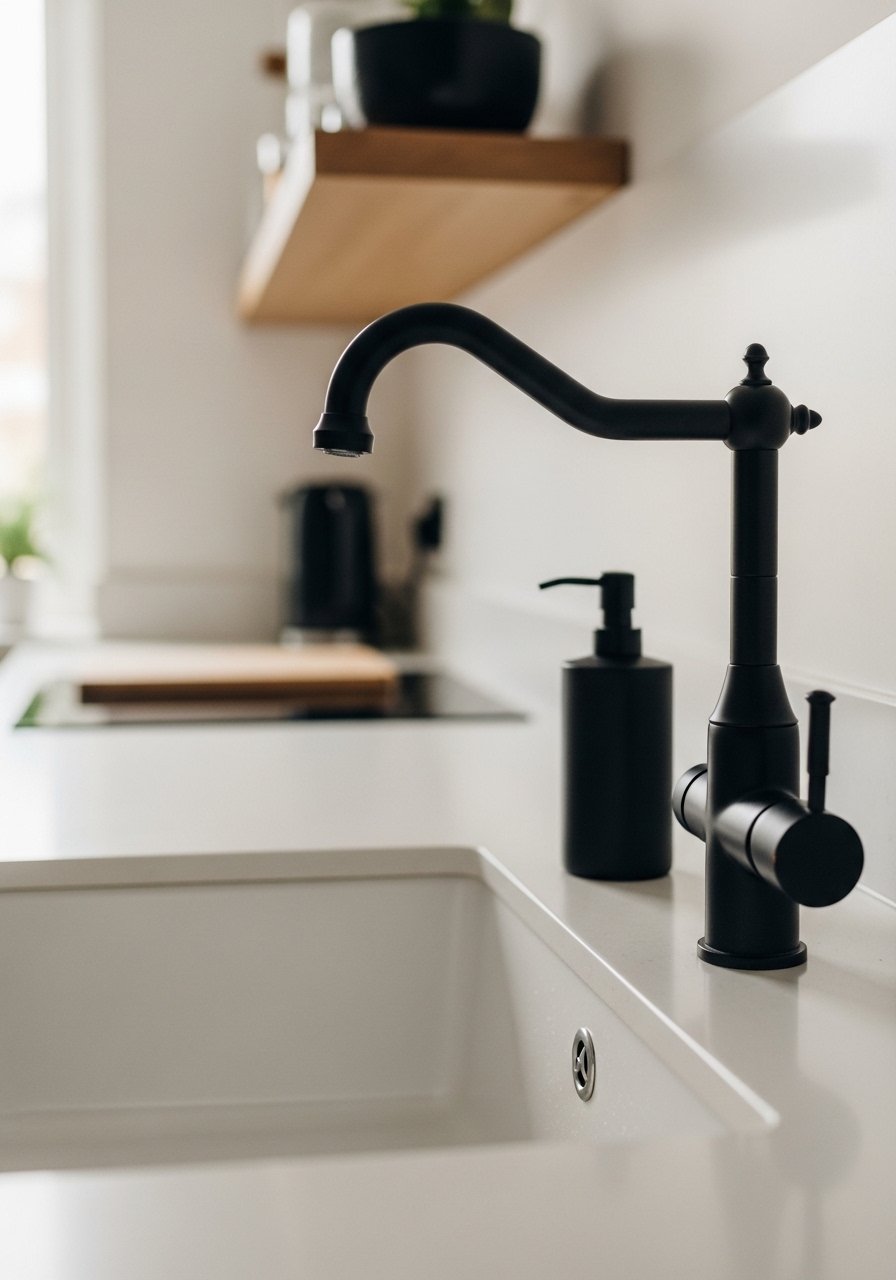
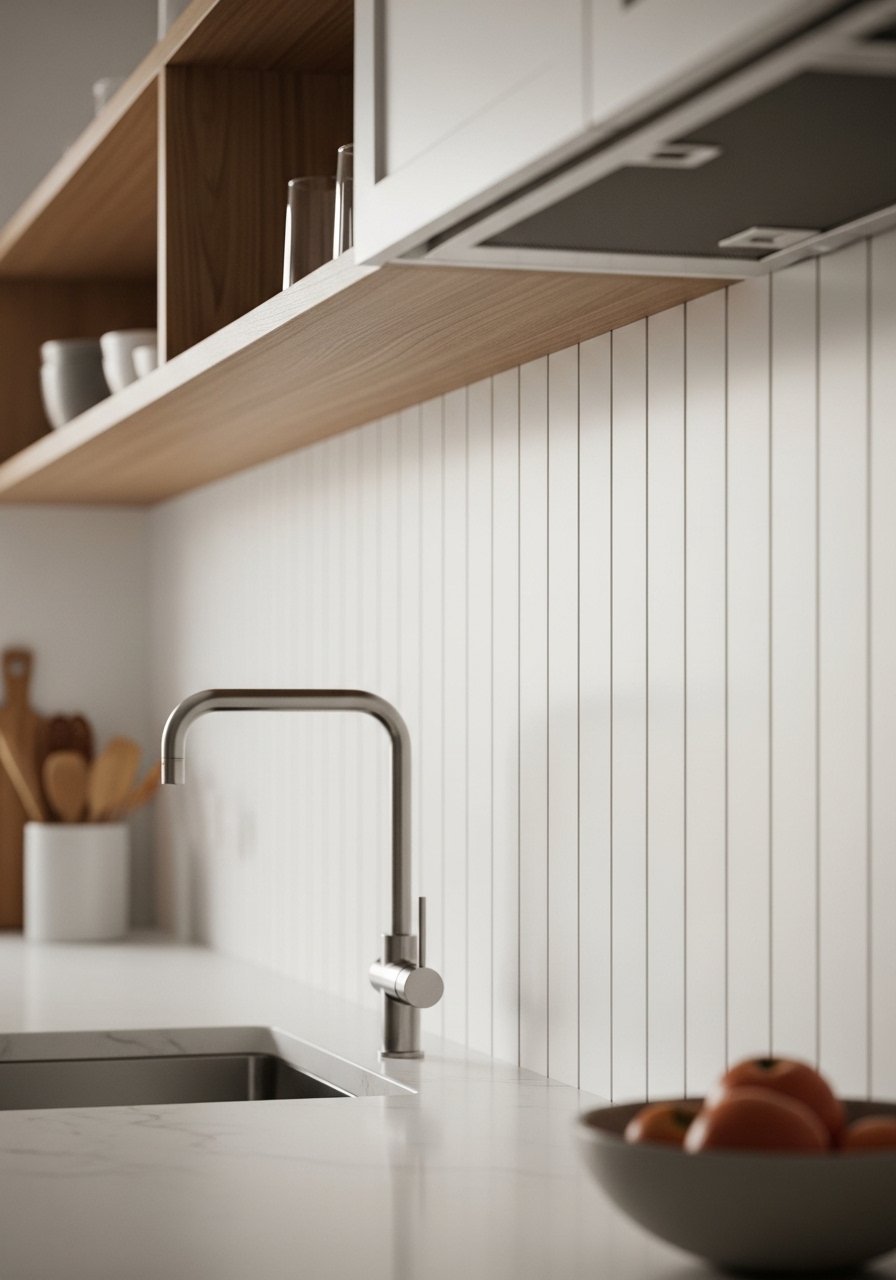
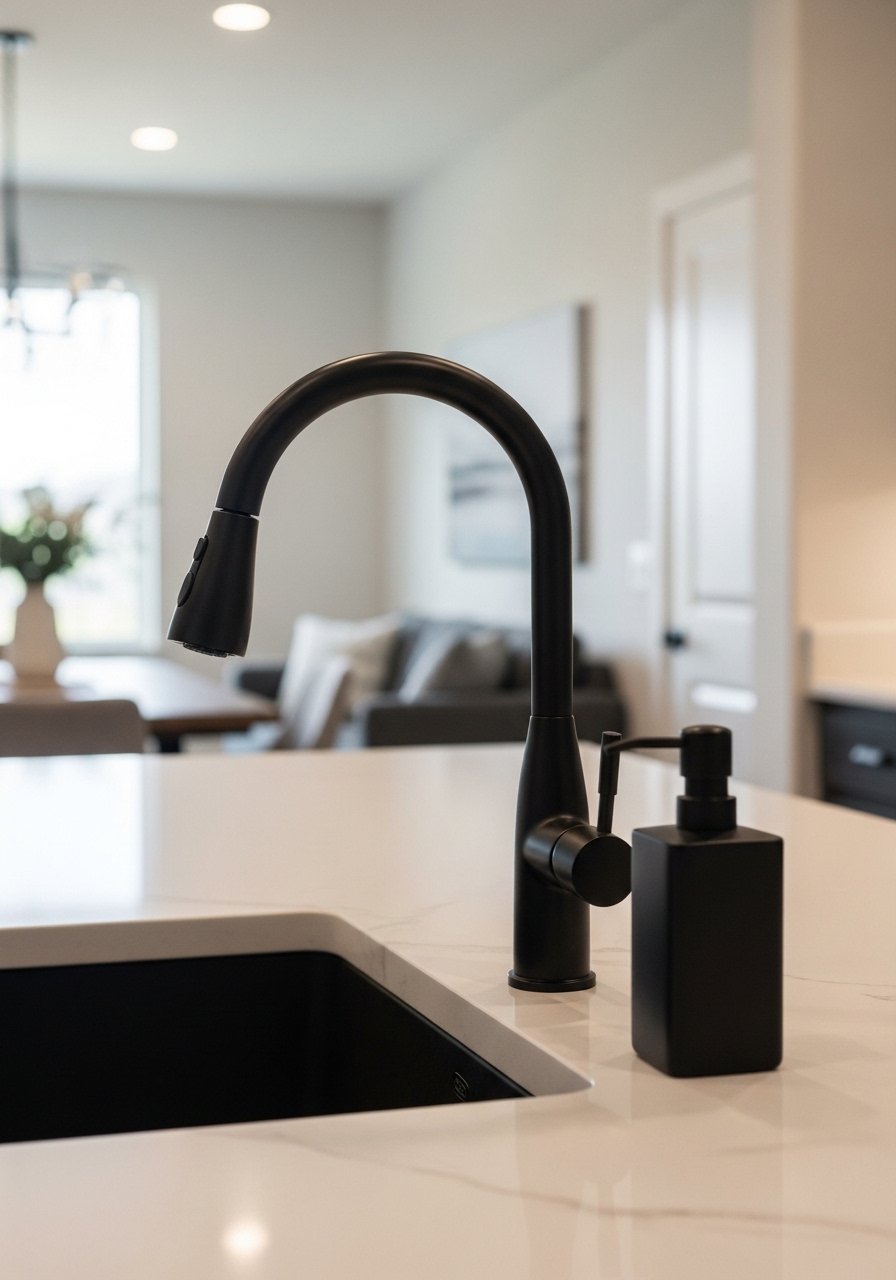
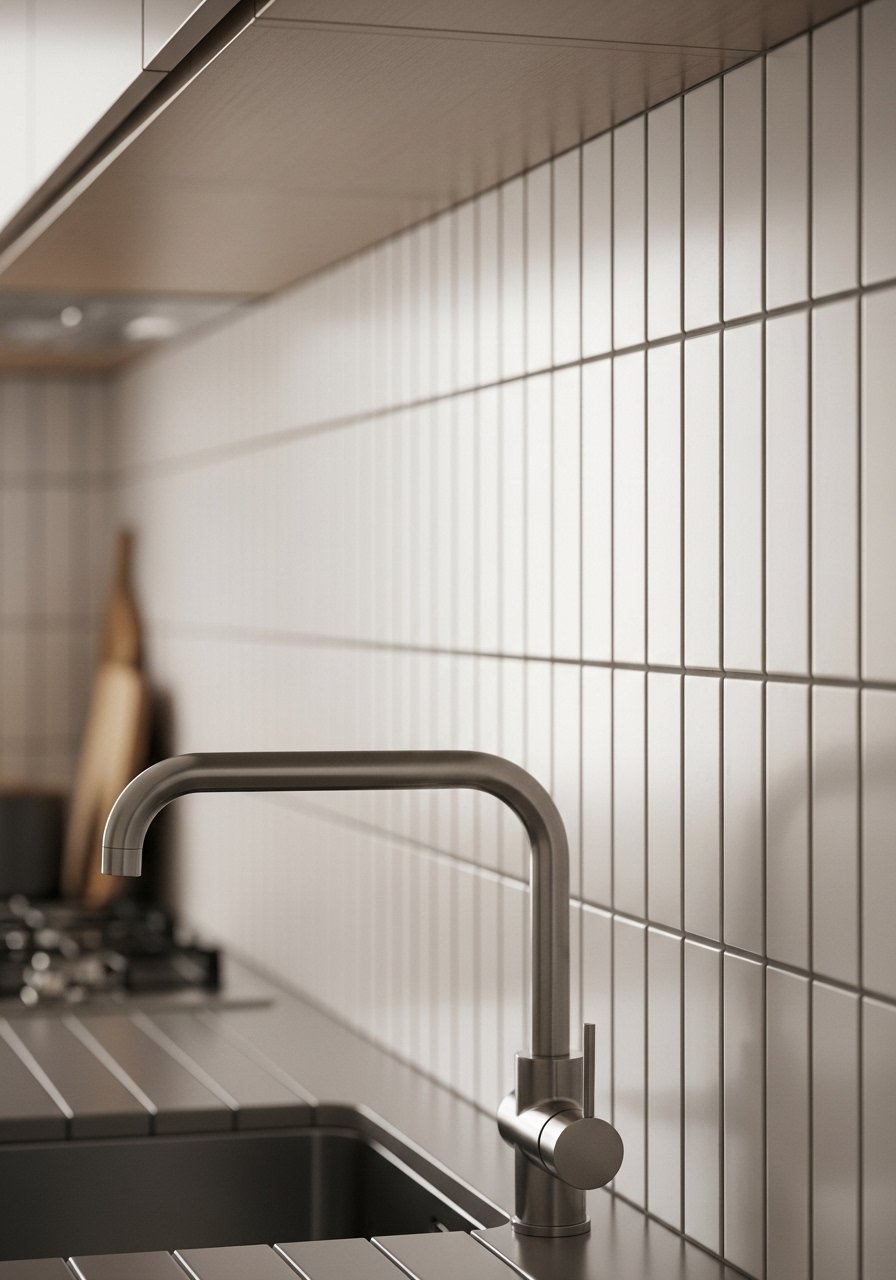
    25. Install or Upgrade Your Kitchen Faucet with a Statement Piece

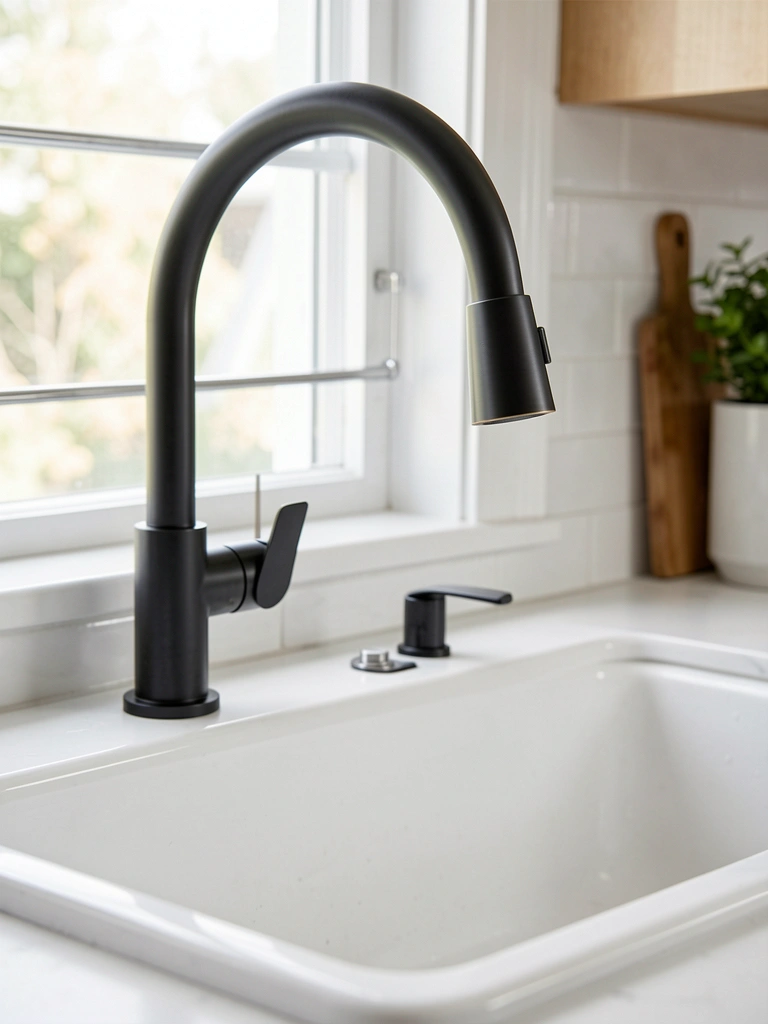
    Your kitchen faucet gets used constantly but often goes unnoticed. Upgrading to a statement faucet changes how your sink area looks and feels—plus, it’s surprisingly affordable compared to other kitchen upgrades. Choose a finish and style that anchors your overall kitchen aesthetic.

    Browse Wayfair, Amazon, Lowe’s, Home Depot, or specialty plumbing stores for options ($50-$400 depending on quality and style). Choose matte black for modern, brass for warm, or polished stainless for classic. Measure your sink to confirm compatibility. Installation takes 30 minutes to an hour if you’re handy; hire a plumber ($150-$300 labor) if you’re not. Your sink area immediately looks more intentional. A beautiful faucet signals quality and thoughtfulness to anyone who uses your kitchen. This upgrade is one of the highest-ROI kitchen changes because it’s relatively affordable, visible, and transforms how the whole sink area feels. Pair it with a coordinating soap dispenser ($10-$30) for a finished look.

    26. Create a Seasonal or Rotating Kitchen Decor System

    Keeping your kitchen feeling fresh doesn’t require constant overhauls. A rotating decor system means you’re intentionally changing small elements seasonally, which keeps the space feeling new without major effort or expense. This works beautifully with open shelving or displayed areas.

    Identify one or two spots where you’ll rotate seasonal items: a shelf, a countertop tray, or a corner of open shelving. Choose seasonal color palettes (pastels for spring, warm golds for fall, cool blues for winter). Swap out plants, small decor items, dish towels, or a runner seasonally ($0-$50 depending on whether you buy or move items you already own). Takes 30 minutes to an hour each season. Your kitchen feels intentionally curated without looking cluttered. Guests notice the thought that goes into these small touches. This approach keeps your space feeling fresh and prevents the “tired kitchen” feeling even if you’re not ready for bigger changes. Rotate with what you already own first, then gradually invest in small seasonal pieces that work across different styles.

    Save this post for your next kitchen refresh. Pick just one idea and tackle it this weekend—you’ll be amazed how much one small change shifts the entire room’s energy. Kitchen design doesn’t require a huge budget or a major project. Small, thoughtful upgrades add up fast.

  • 26 Coffee Bar Design Ideas That Feel Stylish & Functional

    26 Coffee Bar Design Ideas That Feel Stylish & Functional


    Your coffee bar doesn’t need to cost thousands to look like a professional café. Whether you’re designing a home coffee station, refreshing a small commercial space, or reimagining your favorite spot, these 26 ideas blend style with real-world function. You’ll find budget-friendly hacks, DIY projects, and investment pieces that work together to create a space that feels both Instagram-worthy and genuinely usable. These aren’t overcomplicated design theories—they’re practical solutions that work for renters, small spaces, and tight budgets. By the end, you’ll have a playbook for building a coffee bar that actually reflects how you want to spend your mornings.


    1. Use Open Shelving to Showcase Your Setup

    Open shelving makes your coffee equipment part of the décor instead of hidden away. This works especially well if you have nice mugs, grinders, or vintage coffee gear worth showing off.

    Install floating shelves using heavy-duty brackets rated for at least 50 pounds—most hardware stores carry these for $15–$40 per pair. Arrange items by category: mugs together, coffee supplies on another shelf, smaller tools in a dedicated spot. Keep only your most-used items visible; overflow goes in closed storage below. This creates visual interest while keeping your daily workflow smooth.

    Pro tip: Arrange mugs by color gradient or mix vintage and modern pieces for an intentional, collected look. If you rent, adhesive shelving strips work for lightweight displays.

    You’ll notice the space feels more open and intentional, and grabbing your morning coffee becomes part of a ritual rather than a chore.


    2. Paint an Accent Wall in Soft Concrete or Sage

    One painted wall instantly changes the whole atmosphere without major renovation. Soft, muted tones like concrete gray, sage, or warm taupe work better than bold colors in small spaces.

    Choose a high-quality interior paint (Sherwin-Williams or Benjamin Moore have excellent options in these shades, $35–$50 per gallon). Primer helps if you’re going lighter. One wall in a 10×10 space takes about 2–3 hours with basic supplies. Tape edges carefully, use a roller for even coverage, and do two coats for rich color. Pair with white or cream trim for contrast.

    Alternative: If you rent, peel-and-stick wallpaper in concrete or minimalist patterns gives the same effect with zero commitment.

    The room immediately feels more intentional and sophisticated—suddenly, your coffee station looks like it belongs in a design magazine.


    3. Add Task Lighting with Adjustable Pendant Lights

    Proper lighting transforms both function and mood. Pendants over your bar area give you bright task lighting for detail work while creating visual interest.

    Install adjustable pendant lights on a track system ($80–$200 for a quality set) or choose individual hanging fixtures ($40–$80 each). Position them 30–36 inches above your counter for optimal light without glare. Make sure your electrical outlet can handle the load, or hire an electrician ($150–$300 for a basic installation). Dimmable bulbs ($5–$15 each) let you adjust brightness throughout the day.

    Pro tip: Matte black or brushed brass finishes work with almost any aesthetic. Edison-style bulbs photograph beautifully and add vintage charm.

    Better lighting means you can actually see what you’re doing with latte art and espresso tamping—and your space looks polished at any time of day.


    4. Incorporate Reclaimed Wood for Warmth

    Wood instantly makes a space feel warmer and more human than all-metal or plastic surfaces. Reclaimed wood carries history and character while being environmentally conscious.

    Source reclaimed wood from Etsy sellers ($3–$8 per board foot), local salvage yards, or pallets ($0–$20 each if you refinish them). Build a simple shelving unit or counter topper using basic tools: drill, saw, and sander. Budget $200–$500 for a functional piece; $700+ if hiring someone to build. Allow 2–4 weekends for a DIY project.

    Alternative: New wood stained to look aged ($50–$150 at Home Depot) gives similar warmth at lower cost and zero shipping hassle.

    The wood brings organic texture and makes the space feel lived-in rather than cold or corporate.


    5. Create a Low-Maintenance Plant Wall

    Plants improve air quality and create a calming biophilic effect—but not if they’re brown and dead. Low-maintenance options thrive with neglect.

    Choose hardy plants: pothos, philodendron, snake plant, or ZZ plants ($5–$20 each). Use a simple wooden trellis or wire grid ($20–$50) and small ceramic or terracotta pots ($3–$10 each). Water only when soil is completely dry—usually every 10–14 days. Most thrive in indirect light, so they work even in dimmer corners.

    Pro tip: Group plants by watering needs so you’re not checking multiple pots. Cascade trailing plants from shelves or wall-mounted holders for visual flow.

    Your space gains a living, breathing quality that customers (or you, in a home setup) instinctively find comforting and welcoming.


    6. Install a Statement Mirror to Bounce Light

    Mirrors expand small spaces and amplify natural light without any of the work. A statement mirror also adds an intentional design touch.

    Choose a mirror with personality: ornate gold frame ($50–$150), simple black metal ($40–$100), or vintage finds from thrift stores ($10–$40). Lean it against a wall or mount it with heavy-duty hardware. For a 24×36″ mirror, expect mounting hardware to cost $15–$30. No electrician needed.

    Alternative: Affordable full-length mirrors from Target or IKEA ($25–$60) work just as well and lean against walls.

    The space immediately feels airier and brighter, and the mirror adds visual interest without taking up counter space.


    7. Organize with Glass Jars and Clear Containers

    Clear storage lets you see supplies at a glance and doubles as décor. Plus, it prevents you from accidentally buying duplicate items you forgot you had.

    Source glass jars from Costco in bulk ($15–$25 for a dozen), Target, or thrift stores ($1–$3 each). Label with adhesive stickers or chalkboard tape ($5–$10). Organize by category: beans, sweeteners, dry goods, tools. Takes about 30 minutes to set up.

    Pro tip: Choose uniform jar sizes and shapes for a cohesive look. Matching labels make it feel intentional even if jars came from different places.

    Everything you need is visible and within reach, making your morning routine faster while keeping the space looking designed, not cluttered.


    8. Build Modular Seating for Flexible Layouts

    Fixed furniture limits your options, but modular pieces let you adapt the space based on your mood or needs—solo work session today, group hangout tomorrow.

    Invest in lightweight, stackable stools ($40–$100 each from IKEA, Target, or West Elm) and a simple bench ($150–$300). You’ll spend $300–$600 total for a flexible setup that serves 4–6 people. These pieces move easily, store compactly, and won’t damage floors.

    Alternative: Pouf ottomans ($30–$80) double as seating and storage, and can shift anywhere instantly.

    You’re no longer locked into one layout. Rearrange based on whether you want solo focus time, casual meetings, or cozy hangouts—your space adapts to real life instead of the other way around.


    9. Add Vintage Coffee Posters or Prints

    Affordable art transforms walls and adds personality without committing to expensive original paintings. Vintage coffee-themed prints tie directly into your aesthetic.

    Find prints on Etsy ($5–$15 each), frame them cheaply at Michael’s ($8–$20 for simple frames, especially with coupons), and hang in a casual gallery wall arrangement. Total investment: $50–$100 for 3–4 pieces. Takes one afternoon to arrange and hang.

    Pro tip: Mix frame styles (wood, metal, painted) for intentional eclectic energy rather than matchy-matchy sterile vibes.

    The walls stop feeling blank and bare. Suddenly, the space tells a story about your love for coffee and design.


    10. Use Brass or Copper Fixtures for Warmth

    Metal finishes either make a space feel cold or luxe—it depends on the warmth of the finish. Brass and copper skew warm and vintage-modern.

    Replace basic chrome fixtures with brass or copper equivalents: faucets ($50–$150), shelf brackets ($15–$40 per pair), or even door handles ($10–$25 each). This is a renter-friendly swap if your landlord allows. If not, temporary adhesive copper accents like trays or organizers ($20–$60) add the same energy.

    Pro tip: Brushed brass feels more contemporary than polished; aged copper looks deliberately vintage.

    Suddenly everything looks thoughtfully curated rather than generic. These small metal details catch light and add unexpected luxury.


    11. Design a Coffee Bar on a Budget Using Pallets

    You don’t need expensive custom cabinetry to build a functional coffee bar. Pallets are often free or ultra-cheap and work as a sturdy foundation.

    Find free pallets from local businesses, pallet exchanges (Facebook groups), or purchase $10–$25 pallets from construction sites. Sand smooth, seal with food-safe finish ($20–$40), and stack 3–4 deep secured with lag bolts ($8–$15). Total cost: $50–$100 for a fully functional bar. DIY time: one full weekend.

    Safety note: Source pallets that haven’t held chemicals; food-service pallets are ideal.

    You’ve built something functional and industrial-cool that looks like an intentional design choice rather than a budget workaround.


    12. Install Floating Shelves at Varying Heights

    Shelves at consistent heights feel boring and institutional. Varied heights create visual interest and accommodate different-sized items naturally.

    Choose 12–18″ floating shelves ($25–$60 each) and mount at heights ranging 18–60 inches from the floor. Use sturdy brackets rated for 50+ pounds ($20–$40 per pair). Stagger placement so shelves don’t line up vertically—this creates flow. Installation takes 1–2 hours if you have basic tools.

    Pro tip: Leave some shelf space empty rather than filling everything. Breathing room makes displays feel intentional rather than crowded.

    The wall becomes a dynamic, composed display rather than a monotonous row of items.


    13. Incorporate Warm LED Strip Lighting for Ambiance

    LED strips are affordable, energy-efficient, and can completely change the mood of a space by illuminating shelves, under counters, or behind decorative elements.

    Warm-white LED strips ($15–$30 per 16-foot roll) install with adhesive backing and run on batteries or plug-in adapters. Hide them behind shelves, under counter edges, or along crown molding for indirect light. Dimmable options ($25–$50) let you adjust intensity. Installation takes under 30 minutes.

    Pro tip: Warm white (2700K color temperature) feels cozy; cool white feels too clinical for coffee spaces.

    Suddenly, your bar looks like it belongs in a sophisticated café instead of your home. The indirect lighting is both functional and atmospheric.


    14. Create a Reading Nook with Bookshelf and Seating

    People linger longer when there’s something engaging beyond coffee. A small bookshelf filled with magazines, novels, and coffee-table books extends your dwell time and adds coziness.

    Source used books from thrift stores ($1–$3 each), add a small bookshelf ($40–$150 from IKEA or secondhand), and pair with a comfortable chair ($100–$300). Arrange books by color or category for visual appeal. Budget $200–$500 for a complete reading corner.

    Alternative: Floating shelves above a window seat cost less and work in tight spaces.

    People actually want to spend time in your space now—not just grab coffee and leave. This detail transforms your bar from functional to inviting.


    15. Mix Textures with Concrete, Wood, and Metal

    Spaces with only one texture feel flat. Layering concrete, wood, and metal creates depth and visual interest that reads as sophisticated, not chaotic.

    Combine concrete countertops (DIY pour-in-place for $100–$300 or purchase precast slabs for $200–$500), wooden shelves ($50–$200), and metal brackets or fixtures ($50–$150). These elements naturally balance industrial with warm. No special installation skills needed for most combinations.

    Pro tip: Keep colors consistent—muted grays, warm wood tones, and matte or brushed metals tie it together.

    The space feels designed rather than mismatched. Each texture adds interest and the combination reads as intentionally curated.


    16. Add a Small Serving Window or Pass-Through

    A pass-through or serving window creates architectural interest while making the space feel larger. It also adds a functional design element if you’re serving clients or guests.

    Cut a rectangular opening (24×18 inches is standard) and frame with wood trim or steel pipe ($40–$100 for materials). This requires a saw, drill, and basic carpentry skills, or hire someone ($200–$500). For renters, a wooden frame around an existing opening (no cutting) works too.

    Alternative: A rolling bar cart positioned between two zones creates a similar “pass-through” effect without any construction.

    The space gains architectural character and a sense of professional café, even if you’re working with limited square footage.


    17. Organize Coffee Equipment in a Dedicated Station

    Workflow matters. Grouping all coffee-making tools in one contained station means less reaching and a faster, smoother morning routine.

    Designate one counter section roughly 2–3 feet wide. Arrange by workflow: beans/grinder on one end, espresso machine in the middle, milk and cup storage on the other. Mount a small shelf above if needed ($20–$40). Label container sections with painter’s tape so everyone knows where things go.

    Pro tip: Keep only active tools visible; store backups and occasional-use items elsewhere.

    Your morning (or your barista’s shift) becomes smoother and faster. Guests notice the intentional organization too—it reads as professional.


    18. Paint Cabinets or Bar Face a Matte Black

    A single color change can reframe your entire space. Matte black feels modern and sophisticated while remaining versatile enough for most aesthetics.

    Paint existing cabinets with furniture-grade paint (Benjamin Moore Advance or Sherwin-Williams Pro Crème, $40–$60 per quart). Use primer first ($15–$25) and apply two coats with a roller for smooth finish. DIY time: 4–6 hours spread across two days for cure time. Alternatively, peel-and-stick cabinet film ($30–$80 for a set) gives results in one afternoon with zero mess.

    Pro tip: Matte finishes hide fingerprints better than glossy. Add brass hardware to keep it from feeling too stark.

    Instantly, everything looks more intentional and designed. The dark base grounds the space while open shelving keeps it from feeling heavy.


    19. Create Contrast with Light Walls and Dark Fixtures

    High contrast makes spaces feel more dynamic and modern. Light backgrounds with dark accents prevent the space from feeling washed out or monotonous.

    Paint walls in warm white, cream, or light gray ($30–$50 per gallon). Add dark fixtures: black shelving, dark wood counter, matte black lights. The contrast should be clear but the colors should feel cohesive—avoid jarring combinations. Budget $200–$400 for paint and basic fixture upgrades.

    Alternative: If you rent, light peel-and-stick wallpaper plus dark removable fixtures achieve the same effect.

    The space immediately looks more polished and magazine-worthy. The contrast keeps things from feeling bland or all-the-same.


    20. Add Acoustic Panels Disguised as Art

    Noise control makes a huge difference in smaller spaces. Acoustic panels soften sound without looking industrial or cold if you choose the right covering.

    Fabric-wrapped acoustic panels ($40–$80 each) install on walls with adhesive or brackets. Choose neutral colors or patterns that complement your décor ($50–$150 for a set of 3–4). They genuinely reduce echo and ambient noise by 20–30% while doubling as wall art.

    Pro tip: Position them on walls opposite hard surfaces (windows, mirrors) for best sound absorption.

    Conversations are easier to hear, the space feels calmer, and nobody realizes they’re looking at acoustic panels disguised as intentional art.


    21. Use Vintage Bar Stools with Mixed Materials

    Mixing vintage and modern bar stools creates collected, curated energy. They don’t need to match to work together.

    Hunt for stools at thrift stores ($20–$60 each), mix with new ones from IKEA or Target ($40–$100), and arrange by height so they align at the counter. Budget $150–$300 for three quality stools that work together. Look for common elements: material, height range, or finish tone to tie them together.

    Pro tip: Upholstered seats ($60–$150) are more comfortable for lingering; wood or metal ($30–$80) are easier to clean.

    The mix of styles feels intentional rather than haphazard, and you get both comfort and visual interest.


    22. Install a Chalkboard or Magnetic Wall for Menus

    A menu board serves function and aesthetic—it’s useful and looks intentionally café-like. Plus, you can change it whenever you want without printing new menus.

    Paint a section of wall with chalkboard paint ($15–$25 per quart) or install a framed chalkboard ($30–$100). Alternatively, magnetic paint ($20–$30) lets you swap printed menus on metal boards daily. DIY installation takes 1–2 hours; professional install adds $100–$200.

    Pro tip: Use chalk markers for crisp, colorful writing that photographs beautifully and stays readable longer than regular chalk.

    You’ve added functional design that’s also highly Instagram-friendly. Guests instantly know what’s available, and the board becomes part of your café’s visual identity.


    23. Arrange a Condiment Station with Labeled Jars

    A dedicated condiment station keeps table space clear and looks more professional than random bottles scattered around. It’s also more functional—guests find what they need instantly.

    Group glass jars ($1–$5 each from thrift stores), label clearly with adhesive labels or printed tags ($5–$10 for materials), and arrange on a small shelf or cart ($30–$100). Include options: brown sugar, white sugar, honey, various sweeteners, cinnamon, cocoa powder. Takes 30 minutes to set up.

    Pro tip: Use uniform jar heights and sizes for visual cohesion. Arrange by type or color for easy navigation.

    The space looks organized and intentional rather than chaotic. Guests appreciate knowing exactly where everything is.


    24. Create Layered Lighting with Multiple Sources

    Relying on one light source leaves areas dark or harsh. Layering different lights—overhead, task, and ambient—gives you flexibility and makes the space feel more sophisticated.

    Combine pendant lights ($80–$200), LED strips ($20–$40), and desk lamps ($30–$80). Total investment: $150–$300 for layered lighting. Each layer should be on a separate switch or dimmer so you control intensity. Warm bulbs (2700K) throughout tie everything together.

    Pro tip: Dimmable options let you adjust mood from bright-and-energizing to soft-and-cozy throughout the day.

    You can adapt the lighting to match your needs—bright for detailed work, dim for socializing, warm for ambiance. The space transforms throughout the day without anything changing.


    25. Display Coffee Roasting Bags as Rotating Art

    Coffee bags are basically art at this point. Use rotating bags from different roasters as ever-changing décor that also tells the story of your coffee sourcing.

    Display 3–5 bags on a prominent shelf, switching them out monthly or as you try new roasters ($15–$30 per bag). Choose bags with striking designs from local or specialty roasters. Zero cost beyond your regular coffee purchases.

    Pro tip: Pair with small printed cards describing each roaster’s story or the bean origin. It sparks conversation.

    Your space tells a story about intentional coffee choices. Customers (or visitors) immediately understand that you care about quality and thoughtfulness.


    26. Layer Rugs to Define Zones and Add Warmth

    Rugs absorb sound, add warmth, and visually define different zones in an open space. Layering two creates visual depth and intentional design.

    Start with a neutral large rug ($80–$200 from Target, IKEA, or Wayfair) and layer a smaller patterned runner ($40–$100) on top. Position to define your coffee bar or seating area. Rugs add color and texture without paint or construction.

    Pro tip: Choose durable, washable materials for a coffee-centered space. Wool and synthetic blends resist stains and wear better than natural fibers.

    The space instantly feels warmer, more defined, and intentionally designed. Sound bounces less, and the layering reads as deliberate curation.


    Save this post for your next coffee bar refresh. Pick one or two ideas that match your space and timeline—you don’t need to do everything at once. Small changes add up fast, and your morning ritual deserves a setting as thoughtful as your coffee.

  • 11 Stunning Long Narrow Kitchen Ideas That Maximize Space

    11 Stunning Long Narrow Kitchen Ideas That Maximize Space

    My first kitchen was a skinny galley – fridge at one end, stove at the other, barely room to turn around. I bumped elbows with counters daily. After hauling in wrong cabinets and swapping shelves, it finally flowed. These ideas fixed that for me and clients. They make tight spaces feel generous.

    11 Stunning Long Narrow Kitchen Ideas That Maximize Space

    I've pulled together 11 ideas from my own narrow kitchens and real homes I've shaped. Each one grabs every inch without clutter. You'll see exactly how to make yours work.

    1. Floating Wood Shelves for Pots and Jars That Free Up Counters

    I hung these in my old rental because cabinets ate the walls. Suddenly, counters cleared for chopping. The wood warmed the white cabinets, pulling eyes up. It feels taller now, less like a tunnel.

    One mistake: I overloaded at first, so things wobbled. Space them 12 inches apart, load light on top.

    Grab everyday pieces that stack neat. In a client's place, it held spices too – no digging in drawers.

    What You’ll Need for This Look

    Light oak floating shelves 24-inch span

    Brass S-hooks for mugs

    Woven seagrass baskets small

    2. Slim Pull-Out Pantry Tower That Hides Bulk Staples

    That dead corner by the fridge? I added a 12-inch pull-out. Rice, pasta, all tucked away. It glides smooth, no more shoving arms in deep cabinets.

    Visually, it shortens the run without blocking light. Feels organized, calm.

    I learned to add dividers after cans tipped once. Measure your gap exact – mine was off by half an inch first try.

    What You’ll Need for This Look

    Slim wood pull-out pantry 12-inch width

    Wire basket dividers for cans

    Clear acrylic bins narrow

    Label maker refill tape white

    3. Vertical Herb Garden on Rails for Fresh Picks

    Walls begged for green in my tight space. Rails with pots slide side to side – basil right by the sink. Air smells alive, counters stay bare.

    It draws the eye up, making length feel balanced. Cozy without crowding.

    Skip heavy soil pots; I watered too much and dripped. Go self-watering.

    What You’ll Need for This Look

    Metal wall rails for pots 36-inch

    Terracotta herb pots 4-inch self-watering

    Soil pods for herbs organic

    4. Narrow Bar Counter with Tuck-Away Stools

    I built a 10-inch overhang for two. Stools nest under – eat, chat, gone. Turned walkway into spot for coffee.

    Light wood keeps it airy. Family lingers now.

    Bought stools too wide once; measure leg room. Add a rail for feet.

    What You’ll Need for This Look

    Narrow wood bar top 10-inch overhang

    Foldable black metal stools 24-inch height

    Single brass pendant light mini

    5. Two-Tone Cabinets Lower Dark Upper Light

    Dark bottoms ground my space, pale tops lift it. Breaks the long run visually – feels wider.

    Hides scuffs low, brightens high. Cozier meals.

    Painted myself; sanded wrong first. Prime well.

    What You’ll Need for This Look

    Shaker cabinet doors lower dark gray 18-inch

    Matte white upper cabinet paint quart

    Brass cabinet pulls slim

    6. Magnetic Wall Rack for Knives and Utensils

    Stuck this above the stove – knives grab easy, drawers free. No block on counters.

    Steel gleams clean. Space breathes.

    Magnets slipped once; pick strong ones.

    What You’ll Need for This Look

    Stainless magnetic knife bar 18-inch

    Wood handle knife set 6-piece

    Mini magnetic spice tins

    7. Under-Cabinet LED Strips That Wash Walls Bright

    Plugged these in – counters glow, shadows gone. Walls seem farther.

    Even at night, easy to work. Warm light soothes.

    Tape peeled; use adhesive clips.

    What You’ll Need for This Look

    Under-cabinet LED strips warm white 16-foot

    Adhesive mounting clips for LEDs

    Motion sensor plug-in switch

    8. Wall-Mounted Fold-Down Table for Extra Prep

    Folds flat against wall – chops when needed, vanishes after. Doubled my space.

    White blends in. Practical for one cook.

    Hinges squeaked; oil them yearly.

    What You’ll Need for This Look

    White fold-down wall table 24×30-inch

    Heavy-duty wall hinges brass

    Wood cutting board insert 24-inch

    9. Subway Tile Backsplash with Gloss Finish

    Glossy whites bounce light end to end. Feels deeper, cleaner.

    Wipes easy after spills. Timeless hold.

    Grout yellowed once; seal it.

    What You’ll Need for This Look

    White subway tile 3×6-inch glossy 10-pack

    Tile grout sealer spray

    Brass edge trim for backsplash

    10. Rail Baskets for Lids and Utensils

    Inside doors, baskets pull out – lids sorted. No drawer rattle.

    Keeps doors light. Order returns.

    Baskets sagged; reinforce bottom.

    What You’ll Need for This Look

    Chrome cabinet door rail basket set

    Woven nylon utensil baskets medium

    Silicone lid holders adjustable

    11. Slim Rolling Cart for Island Duties

    Wheels it where needed – prep, serve, roll away. Fits tight spots.

    Bamboo warms steel counters. Mobile freedom.

    Locks failed once; check brakes.

    What You’ll Need for This Look

    Slim bamboo rolling cart 12-inch wide

    Wire mesh drawers for cart

    Locking caster wheels set

    Final Thoughts

    Pick one or two that fit your routine – no need for all. My kitchens eased up bit by bit. Yours will too. Start small, live with it, adjust. You've got this.

  • 21 Smart Long Narrow Kitchen Layout Ideas to Copy

    21 Smart Long Narrow Kitchen Layout Ideas to Copy

    I remember staring down my own galley kitchen, just five feet wide, feeling trapped every time I cooked. Pots banged elbows, counters vanished under clutter. Then I started small tweaks. Space breathed. Light stayed longer. Now it feels open, mine.

    Years in, I've copied these in client homes too. Real ones, with kids' fingerprints and morning coffee rings.

    You can shift yours without a reno. Here's how.

    21 Smart Long Narrow Kitchen Layout Ideas to Copy

    These 21 ideas come straight from my narrow spaces. I've tested them, swapped them out when they flopped. Pick what fits your flow. Copy one, see the difference.

    1. Slim Floating Shelves That Double Storage Without Crowding

    In my last rental, upper cabinets ate the air up there. I ripped one out, added these slim oak shelves at eye level. Suddenly, everyday stuff—oils, bowls—sat pretty, easy grab. The wall felt taller, less boxed-in.

    Light bounced off the white dishes. No more digging. Mornings got quicker.

    Measure twice; mine sagged at first from heavy pans. Light stuff only, or reinforce.

    What You’ll Need for This Look

    Slim oak floating shelves, 24-inch length

    Clear glass spice jars, set of 12

    Woven seagrass baskets, small

    2. Vertical Pantry Pull-Outs That Hide the Mess

    That dead corner by the fridge? I slotted in a tall, skinny pull-out tower. Cans, rice, snacks stacked neat. Door shuts, chaos gone. Walkway stayed clear.

    Before, stuff tumbled out. Now, one pull, dinner sorted. Feels pro, not frantic.

    Pick adjustable shelves. Mine fit odd bottles after a tweak.

    What You’ll Need for This Look

    Skinny pull-out pantry tower, 6-inch width

    Wire mesh baskets, set of 4

    3. Matte Black Hardware on Light Cabinets for Depth

    White cabinets blended boring till I swapped knobs for matte black pulls. Pulls slim, modern pull. Drawer fronts popped against the pale.

    Hands found them easy. Space read deeper, less flat.

    Don't overdo size—big ones snag sleeves in tight spots.

    What You’ll Need for This Look

    Matte black cabinet pulls, 3-inch length

    Wood knobs, round 1-inch

    4. Fold-Down Wall Table for Instant Counter Space

    No room for an island? I mounted a fold-down oak table midway. Drops for chopping, folds away clean. Walk space freed up.

    Chop onions without spills piling. Feels like extra counter appeared.

    Hinge strong; cheap ones flopped on me once.

    What You’ll Need for This Look

    Fold-down wall table, oak butcher block 24×18-inch

    Heavy-duty wall hinges, brass

    5. Glass-Front Upper Cabinets to Borrow Light

    Solid doors trapped dimness. Swapped to glass-front uppers, pretty dishes visible. Light filtered through, brightened the run.

    Less stuffy. Guests peek, compliment.

    Dust shows, so edit ruthless.

    What You’ll Need for This Look

    Glass-front cabinet doors, 12×30-inch

    Clear glass mugs, set of 6

    6. Magnetic Wall Strip for Knives and Utensils

    Drawers jammed full. Stuck up a stainless mag strip on the backsplash end. Knives grip tight, out of reach from kids.

    Counter cleared. Grab fast, no rustle.

    Position mid-height; too high strains backs.

    What You’ll Need for This Look

    Stainless steel magnetic knife strip, 18-inch

    7. Slim Under-Sink Roll-Out Caddy for Cleaners

    Under-sink black hole swallowed bottles. Skinny roll-out caddy fit perfect. Pulls out, everything lined.

    No more knee crawls. Wipe down easy.

    Measure pipes first—mine missed by half-inch, returned it.

    What You’ll Need for This Look

    Slim under-sink roll-out caddy, 9-inch width

    Plastic spray bottles, set of 4

    8. Two-Tone Cabinets with Dark Base for Grounding

    All-white washed out. Painted bases dark gray, uppers stayed white. Anchored the floor, lifted the ceiling.

    Felt cozy, not cave. Feet planted better.

    Tape edges crisp; bleed happened first try.

    What You’ll Need for This Look

    Dark gray cabinet paint, matte finish quart

    Brass cabinet pulls, slim

    9. Pendant Lights Over a Narrow Prep Zone

    Overhead fluorescents flattened everything. Hung two slim pendants mid-run. Pooled warm light on counters.

    Evenings cozier. Shadows gone.

    Chain adjustable; mine dangled too low at first.

    What You’ll Need for This Look

    Matte glass pendant lights, set of 2, 10-inch

    10. Herb Wall Planter for Fresh Green Without Floor Space

    Potted herbs tripped feet. Wall-mounted metal pockets held basil, thyme. Snip fresh, no pots crowding.

    Air smelled alive. Color pop.

    Water careful; drip tray essential.

    What You’ll Need for This Look

    Metal herb wall planter pockets, set of 5

    11. Open Backsplash Pegboard for Pots

    Pots stacked cabinets full. Pegboard on end wall hooked them up. Airy, farmhouse without fake.

    Grab easy. Less clank.

    Hooks sturdy; light ones bent.

    What You’ll Need for This Look

    Pegboard sheet, white 24×48-inch

    Heavy-duty pegboard hooks, set of 20

    12. Slim Countertop Microwave Shelf

    Microwave hogged counter end. Bracket shelf lifted it up. Under space for jars now.

    Workflow smooth. No squat.

    Level it dead-on.

    What You’ll Need for This Look

    Slim microwave shelf brackets, floating white

    13. LED Under-Cabinet Strips for Task Glow

    Shadows hid spills. Taped slim LED strips under cabinets. Counters lit crisp, nights easy.

    Safe chopping. Warm, not harsh.

    Battery option if no outlet.

    What You’ll Need for This Look

    LED under-cabinet strip lights, warm white 20-foot

    14. Roll-Out Spice Drawer Inserts

    Spice avalanche in deep drawer. Tiered inserts rolled them out. All visible, one rack.

    Cooking faster. No expired surprises.

    Fit your drawer width.

    What You’ll Need for This Look

    Roll-out spice drawer inserts, tiered wood

    15. Bar Stool Nook at the End Wall

    End wall wasted. Narrow counter lip, two backless stools tucked. Breakfast perch now.

    Kids eat quick. Social spot.

    Stools stackable.

    What You’ll Need for This Look

    Slim backless wood bar stools, set of 2, 16-inch width

    16. Mirror Backsplash Tile for Illusion Width

    Walls closed in. Mirrored subway tiles on one run bounced light side to side. Wider feel instant.

    Cleaned easy. Subtle shine.

    Edges seal tight.

    What You’ll Need for This Look

    Mirrored subway backsplash tiles, 3×6-inch set

    17. Stackable Slim Cutting Boards on Rail

    Boards piled drawer-deep. Rail with slots held them upright end-wall. Neat stack, grab top one.

    Counter free. Hygienic dry.

    Bamboo light.

    What You’ll Need for This Look

    Bamboo cutting board rail holder

    Slim bamboo cutting boards, set of 3

    18. Over-Door Pantry Organizer for Extras

    Pantry door swung into path. Over-door racks held chips, paper. No floor steal.

    Accessible. Quiet swing.

    Clear bins see-through.

    What You’ll Need for This Look

    Over-door pantry organizer, clear bins

    19. Narrow Appliance Garage Cabinet

    Toaster cluttered end. Built-in garage with slide door hid it. Plug strip inside.

    Counters bare. Plug in, use, hide.

    Ventilation key.

    What You’ll Need for This Look

    Narrow appliance garage cabinet, 12-inch width

    20. Woven Basket Hanging Rack Under Shelf

    Veggies rolled counters. Hooks under shelf dangled woven baskets. Onions, garlic airy store.

    Textural warmth. Fresh longer.

    Light baskets only.

    What You’ll Need for This Look

    Woven seagrass hanging baskets, set of 3

    Shelf hooks, S-shape steel

    21. Multi-Level Counter Ledge for Layers

    Flat counters bored. Added low wood ledge midway. Prep below, jars above. Depth without width.

    Visual interest. Herbs thrive.

    Secure with brackets.

    What You’ll Need for This Look

    Wood counter ledge kit, 36-inch oak

    Matte black L-brackets, heavy duty

    Final Thoughts

    Start with two ideas that bug you most. My kitchen shifted slow, one tweak at a time. Yours will too.

    No need all 21. Feel the ease build. You've got this—your space, your pace.

  • 7 Stylish Long Narrow Kitchen Ideas with Island

    7 Stylish Long Narrow Kitchen Ideas with Island

    I remember staring at my own long, skinny kitchen, just 8 feet wide, feeling trapped every time I cooked. The island I squeezed in changed that—it became our gathering spot without crowding us.
    Years of tweaking taught me narrow spaces thrive on smart lines and breathing room.
    You can make yours feel open and yours.
    These ideas come from homes I've shaped, mistakes included.

    7 Stylish Long Narrow Kitchen Ideas with Island

    Here are 7 practical ideas for your long narrow kitchen with an island. I've tested them in tight spaces like yours. Each one adds style without the squeeze.

    1. Slim Black Metal Island Paired with Butcher Block Top

    My kitchen's 10-foot length begged for an island that wouldn't block the path. I picked a slim black metal frame with a butcher block top—only 18 inches deep. It grounded the white cabinets without overwhelming.
    Cooking felt easier; prep right there, no extra steps. Friends lean on it now during dinners.
    I learned the hard way: measure your walkway first—leave 42 inches clear. Mine almost pinched at first.
    The contrast makes the space feel taller, more modern. Wood warms the metal's edge.

    What You’ll Need for This Look

    Slim black metal kitchen island cart 48x18x36 inches

    Butcher block countertop 48×18 inches

    Matte black bar stools set of 2

    2. Three Pendant Lights Hung Low Over the Island

    In my narrow setup, harsh overheads washed everything flat. I hung three slim glass pendants in a row over the island—low enough to touch. They drew eyes down the length, making it feel purposeful.
    Evenings lit up cozy; shadows played soft on the walls. No more sterile glow.
    Measure drop carefully—28 inches from counter max, or heads bump. I adjusted mine twice.
    Simple brass pulls it together, modern but not cold.

    What You’ll Need for This Look

    Matte black pendant light glass shade 10-inch

    Brass pendant cord kit set of 3

    Woven rattan bar stool 24-inch height

    Brass dimmer switch

    3. Floating Shelves Lined with White Dinnerware

    Walls in my galley kitchen gathered dust with cabinets everywhere. I added three floating shelves above the island end—open storage for plates we use daily. White dishes catch light, pulling the eye along.
    It freed lower cabinets for pots. Mornings, coffee mugs right there—no digging.
    Style sparse; overload tips them. I returned heavy ones that sagged.
    Feels clean, intentional, like the space breathes.

    What You’ll Need for This Look

    White oak floating shelf 36×10 inches set of 3

    Matte white ceramic dinner plates 10-inch set

    Brass shelf brackets heavy duty

    4. Tall Stools with Backs That Slide Under Easily

    Seating was my narrow kitchen's weak spot—bulky chairs blocked flow. Tall stools with slim backs, 30 inches high, slide right under the island overhang. Wood seats add quiet warmth to white tones.
    Two fit perfectly; kids perch for homework, adults chat while I chop.
    Pick ones under 16 inches wide. Wider ones I tried stuck halfway.
    Space stays open when empty, inviting when full.

    What You’ll Need for This Look

    Tall wood bar stool with back 30-inch set of 2

    Slim black metal stool frame 15-inch width

    5. Vertical Herb Wall Above the Sink End

    No counter room for pots in my setup. I mounted slim metal planters vertically on the wall past the island—basil, thyme right by the sink. Greens soften the lines, fresh scent every meal.
    Snip herbs mid-cook; saves trips outside. Window light keeps them happy.
    Waterproof the wall first—drips stained mine until I sealed.
    Brings life without floor clutter.

    What You’ll Need for This Look

    Wall-mounted metal herb planter 12×6 inches set of 3

    Self-watering herb pots small

    Stainless steel watering can mini

    6. Long Runner Rug Down the Center Aisle

    Bare floors echoed in my long kitchen, cold underfoot. A 2×10-foot jute runner down the aisle warms it, leading to the island like a path. Neutral tones blend with cabinets.
    Feet feel softer; rugs muffle kid chaos. Defines zones without walls.
    Vacuum weekly—dust hides in jute. I skipped once, regretted the grit.
    Grounds the whole room quietly.

    What You’ll Need for This Look

    Jute runner rug 2×10 feet neutral

    Non-slip rug pad 2×10 feet

    7. Light Gray Subway Tile Backsplash in a Horizontal Run

    Shiny tiles fought my narrow space—too busy. Light gray subway in a long horizontal run behind the island reflects light, stretches the view. Grout subtle, clean.
    Wipes easy after spills; oil doesn't show. Feels larger, calmer.
    Stagger the pattern—straight lines chopped mine visually at first.
    Pairs simple with any island top.

    What You’ll Need for This Look

    Light gray subway tile 3×6 inches pack

    White thinset grout for backsplash

    Matte gray tile trim pieces

    Final Thoughts

    Pick one or two ideas that fit your routine—don't overhaul everything.
    My kitchen evolved slowly; yours can too.
    It'll feel like home, open and ready for meals. You've got this.

  • 15 Sleek Long Narrow Modern Kitchen Ideas You’ll Love

    15 Sleek Long Narrow Modern Kitchen Ideas You’ll Love

    I had this long, skinny kitchen in my last rental. It felt more like a corridor than a cooking spot. Clutter made it worse.

    One day, I stripped it back. Added a few smart pieces. Suddenly, it breathed.

    Now, I help friends with theirs. These ideas? Straight from that trial-and-error.

    15 Sleek Long Narrow Modern Kitchen Ideas You'll Love

    These 15 ideas are pulled from my own narrow kitchens and client fixes. They make tight spaces feel open and easy. Exactly 15 ways to get sleek modern without overwhelm.

    1. Tall Slim Pantry Along the Short Wall

    I squeezed a tall, skinny pantry against the short wall in my apartment kitchen. Before, spices and cans cluttered counters. Now, everything hides behind clean doors.

    Pull-out drawers changed the game. I grab olive oil without digging. Visually, it elongates the room—draws the eye up.

    Pay attention to depth. Mine's only 12 inches wide, fits perfectly. Mistake I made first time? Overstuffing shelves. Keep it sparse.

    What You’ll Need for This Look

    2. Floating Glass Shelves for Sparse Display

    In my client's galley kitchen, I added floating glass shelves high along the length. No heavy stuff—just a few mugs and herbs. It lightens the whole strip.

    Glass reflects light, makes the narrow feel wider. I love how it shows off clean lines without bulk.

    Mount them at eye level or above. Avoid overcrowding; two shelves max. I returned chunky wood ones—they swallowed space.

    What You’ll Need for This Look

    3. Matte Black Faucet Over Deep Slim Sink

    My own kitchen got a matte black faucet swap. Paired with a deep, narrow sink—it cut water splashes on the long counter.

    Feels modern, pulls the eye without shine. Washing veggies? Effortless now.

    Choose 30-inch undermount. I overlooked height once; too tall hit my head. Test in store if you can.

    What You’ll Need for This Look

    4. LED Strips Tucked Under Long Cabinets

    I ran LED strips under the upper cabinets in my narrow setup. Even light washes the counter—no dark corners in that skinny space.

    Nights feel cozy, not cave-like. Tasks like chopping are safer.

    Go for warm white, dimmable. I bought cool white first—too harsh, returned it. Motion sensor adds ease.

    What You’ll Need for This Look

    5. Bar Stools Tucked Under Extended Counter

    Extended the counter slightly for bar stools in a friend's long kitchen. Slim ones tuck away fully—frees the walkway.

    Seats two for coffee. Feels intentional, not squeezed.

    Pick backless, 24-inch height. Footrest helps. I chose wide seats once; blocked flow.

    What You’ll Need for This Look

    6. Full-Length Mirror Backsplash Panel

    Installed a tall mirror backsplash panel the full length. Doubles the perceived width in my tight kitchen—magic without space loss.

    Cleans easy, bounces light. Cooking feels brighter.

    Edge it slim. Avoid full wall; too busy. Fingerprints wipe quick.

    What You’ll Need for This Look

    7. Handleless Flat Panel Cabinets in Gray

    Swapped to handleless flat panels in soft gray. Seamless along the walls—makes the narrow run feel endless.

    Touch opens smooth. Cleaner wipe-downs.

    Measure precisely. I misjudged hinges; fixed with shims.

    What You’ll Need for This Look

    8. Wall-Mounted Vertical Herb Garden

    Hung a slim vertical herb rail on the end wall. Fresh picks right there—no counter hog.

    Greens add life without clutter. Snip as you cook.

    Water weekly. Overplanted mine first; trimmed back.

    What You’ll Need for This Look

    9. Long Neutral Runner Rug Down the Center

    Laid a long runner down the aisle in my kitchen. Softens hard floors, guides the eye lengthwise.

    Feet feel cozy during long prep. Anchors the space.

    2×8 feet fits. Vacuum easy; spot clean.

    What You’ll Need for This Look

    10. Magnetic Wall Strip for Knives and Utensils

    Mounted a magnetic strip horizontally above the counter. Knives stick flat—no drawer hunt in tight quarters.

    Frees drawers for other things. Sleek look.

    Strong neodymium holds heavy. Wipe monthly.

    What You’ll Need for This Look

    11. Integrated Slimline Fridge Panel

    Panel-matched a slim fridge into cabinetry. Blends away in the long run—no bulky box sticking out.

    Space flows smooth. Quieter hum too.

    24-inch width max. Level it perfect.

    What You’ll Need for This Look

    12. Frosted Glass Front Drawers for Essentials

    Added frosted glass fronts to base drawers. See contents softly—no rummaging mess.

    Light filters in, warms the lower cabinets.

    Group like items. Dust cloths inside.

    What You’ll Need for This Look

    13. Row of Slim Cylindrical Pendant Lights

    Hung three slim pendants in a row over the sink run. Focused pools—no glare in the length.

    Evenly tasks light. Adjustable height.

    12-inch spacing. Dimmable bulbs.

    What You’ll Need for This Look

    14. Waterfall Quartz Edge on Full Counter Length

    Did waterfall edges on the quartz counter end-to-end. Wraps modern, hides seams in narrow.

    Durable for daily use. Wipes clean.

    Miter corners tight. Pro install if unsure.

    What You’ll Need for This Look

    15. Pull-Out Spice Rack in Cabinet Door

    Fitted pull-out spice racks inside doors. Every jar accessible—no counter pile-up.

    Organizes chaos. Swing-out smooth.

    Label jars. Bought too many spices once; rotated them out.

    What You’ll Need for This Look

    Final Thoughts

    Pick two or three ideas that fit your routine. Start small—my kitchens improved bit by bit.

    You'll feel the shift in flow right away. Trust your eye; it works out.

    Breathe easy in that space now.

  • 13 Cozy Farmhouse Long Narrow Kitchen Design Ideas

    13 Cozy Farmhouse Long Narrow Kitchen Design Ideas

    My long narrow kitchen used to feel like a dark tunnel. Meals were rushed, no joy in it.

    I started small—wood shelves, a few plants. Air changed. Light bounced.

    Now I linger there with coffee. You can shift yours too. These ideas worked for me in real life.

    13 Cozy Farmhouse Long Narrow Kitchen Design Ideas

    These 13 cozy farmhouse long narrow kitchen design ideas draw from my own galley space. They'll open it up, add warmth. No big budget needed.

    1. Tall Shiplap Walls That Pull Your Eyes Upward

    I paneled one wall floor-to-ceiling in shiplap. It tricked the eye into seeing height, not length. The white washed tone bounced morning light down the narrow run.

    Suddenly, the space breathed. No more hallway vibe. I cook facing it now, feels taller.

    I learned to overlap planks slightly at seams—hides wonky walls from old houses. Pay attention to plank width; too wide overwhelms slim spots.

    Use it behind the sink for easy wipe-downs.

    What You’ll Need for This Look

    2. Open Shelves Stacked High with Worn Pottery

    Open shelves from counter to ceiling changed my storage game. I filled them with everyday plates and jars—nothing fussy. The vertical lines made the narrow kitchen feel airy.

    Light filters through dishes now. I grab mugs without digging cabinets. Warmer mornings.

    I once crammed too much; dust city. Now I edit to 70% full, rotate seasons.

    Space them 12 inches apart for easy reach in tight spots.

    What You’ll Need for This Look

    3. Slim Butcher Block Counter Along One Wall

    I swapped laminate for a narrow butcher block top along the long wall. At 12 inches deep, it hugs the space without crowding. The honeyed wood warms the white cabinets.

    Prep feels easy now—chop right there, no island needed. Scratches tell stories.

    Measure twice; mine hung over once, hit my hip. Seal ends heavy for water spots.

    Great for rentals—screws in from below.

    What You’ll Need for This Look

    4. Row of Matte Black Pendant Lights Overhead

    I hung three slim pendants in a line down the center. Matte black farm-style pulls focus without bulk. They wash the counters in soft glow at night.

    No more shadows in the narrow run. Evenings feel gathered.

    I spaced them 24 inches apart—too close once, bumped heads. Dimmable bulbs key for mood.

    Wire through ceiling hooks if no box.

    What You’ll Need for This Look

    5. Woven Baskets Hung from Rails for Pantry Hacks

    Wall-mounted rails with seagrass baskets hold produce off counters. In my slim kitchen, they tuck veggies out of the walkway. Natural weave adds texture without clutter.

    No more piled bags tripping me. Air circulates, lasts longer.

    Overfilled once, spilled everywhere. Half-full rule works.

    Slide easy for access in tight turns.

    What You’ll Need for This Look

    6. Vintage Metal Cart Tucked in the Corner

    A rusty market cart in the end corner holds oils and spices. Slim profile fits the narrow end perfectly. Black iron grounds the whites.

    Rolls out for cooking, pushes back. Feels like extra counter.

    Wheels locked mine once—sticky. Oil them yearly.

    Layer a wood tray on top for stability.

    What You’ll Need for This Look

    7. Linen Roman Shades on Tall Windows

    Soft linen shades on the long window soften harsh light. They puddle just right, add drape without bulk in narrow frames. Neutral beige warms the room.

    Privacy without dark. Breezes filter through.

    I hemmed too short first—gap showed. Measure full drop.

    Tie-back hooks for open look daytime.

    What You’ll Need for This Look

    8. Herb Pots Lined on Deep Windowsills

    Terracotta pots of basil and thyme run the sill end-to-end. Greenery breaks the white, scents the air in my tight kitchen.

    Snip fresh daily—cooking alive. No wilting in corners.

    Watered too much early, root rot. Porous pots dry even.

    Group by sun needs for thrive.

    What You’ll Need for This Look

    9. Long Woven Runner Down the Center Path

    A faded jute runner runs the full length. It softens cold tile, defines the walkway without widening feel. Textured fibers cozy underfoot.

    Slips less now with rug pad. Feet happy mornings.

    Bought too wide—tripped on edges. 2.5ft max for galleys.

    Vacuum weekly, shake outside.

    What You’ll Need for This Look

    10. Black Iron Backsplash Accents Behind Stove

    Iron grid panel behind the stove hangs pots flat. Saves drawer space in my slim setup. Rustic black contrasts clean whites.

    Grab tools fast, no hunt. Heat stays contained.

    Hooks too loose first—clanged. Tighten with pliers.

    Ventilation holes bonus for steam.

    What You’ll Need for This Look

    11. Floating Ledge with Vintage Jars

    Slim wood ledges at eye level hold quart jars of grains. They draw sight up, free counters below. Faded labels add patina.

    Pantry in view—grab and go. Less chaos.

    Overloaded dropped one—cracked. Light items only.

    Stagger heights for interest.

    What You’ll Need for This Look

    12. Exposed Wood Beam Along the Ceiling

    Faux beam down the ceiling midline adds depth without dropping height. Light stain keeps it bright. Ties walls together.

    Feels like a cabin now, cozy nights.

    Dust collects—feathered duster weekly. Secure brackets hidden.

    Paint match your floors.

    What You’ll Need for This Look

    13. Corner Farmhouse Sink with Apron Front

    Tucked an apron sink in the corner—maximizes counter elsewhere. White fireclay glows soft. Deep basin hides dishes.

    Washing feels less cramped. Soap suds linger.

    Plumbing shift cost me—plan ahead. Drainboard side helps.

    Matte faucet avoids prints.

    What You’ll Need for This Look

    Final Thoughts

    Try two or three ideas first. See what shifts the feel.

    Your kitchen knows its own rhythm. Layer slow.

    It'll settle into cozy soon. You've got this.

  • 17 Chic Contemporary Long Narrow Kitchen Ideas

    17 Chic Contemporary Long Narrow Kitchen Ideas

    I remember staring down my own skinny galley kitchen, feeling trapped every time I cooked. It was dark, cluttered, and just didn't flow. Then I started small tweaks—nothing fancy. Suddenly, it breathed. Space felt bigger, cooking easier. You can do this too. These ideas come from my trial-and-error in real homes, not magazines.

    17 Chic Contemporary Long Narrow Kitchen Ideas

    Here are 17 practical ideas for your contemporary long narrow kitchen. I've tested them in tight spaces like mine. Each one opens up the room without big renos. Let's make yours feel wider and calmer.

    1. Vertical Shiplap Backsplash That Pulls Your Eyes Up

    In my last rental, the walls closed in fast. I added vertical shiplap panels behind the sink—thin white planks that run floor to ceiling. It tricked the eye into thinking the room stretched taller. Light bounced better too, making mornings brighter.

    Cooking felt less squeezed. I painted them matte white to match cabinets—no shine, just clean lines.

    Grab cheap peel-and-stick if you're renting. Measure twice; I cut one wrong first time.

    What You’ll Need for This Look

    Vertical white shiplap peel-and-stick panels (12×48 inch)

    Slim matte white paint sample kit

    Utility knife for precise cuts

    2. Slim Pendant Lights Over a Narrow Prep Counter

    My counter was too slim for big lights, so I hung two thin pendants lengthwise. Brushed nickel, 12 inches wide—pools soft light exactly where I chop. No shadows, and they make the length feel intentional.

    Nights turned cozy without glare. Space looked deeper too.

    Hang them 30 inches above; I went lower once and bumped my head.

    What You’ll Need for This Look

    Slim brushed nickel pendant light (12 inch diameter)

    Adjustable ceiling mount kit

    Clear glass pendant shade

    3. Matte Black Faucet Paired with Quartz Counter

    Black fixtures felt risky in my white kitchen, but the matte black faucet grounded it. Slim pull-down style hugs the narrow sink. Quartz top in soft gray reflects light end-to-end.

    Washing dishes became a ritual—modern, not cold. Handles stayed fingerprint-free.

    Test water pressure first; mine sputtered until I swapped aerators.

    What You’ll Need for This Look

    Matte black pull-down kitchen faucet (single handle)

    Quartz countertop sample in light gray (12×12 inch)

    Aerator replacement kit for faucets

    Matte black soap dispenser

    4. Light Oak Floating Shelves for Airy Display

    Shelves cluttered my first try, so I went slim oak ones—8 inches deep. Stacked plates and jars lengthwise. Light wood warms the white cabinets without bulk.

    The wall feels open now. Grabbing spices is quicker.

    Anchor into studs; mine sagged until I did.

    What You’ll Need for This Look

    Light oak floating shelf (36 inch long, 8 inch deep)

    Heavy-duty wall anchors for shelves

    White ceramic dinner plates set (10 inch)

    5. Gray Runner Rug That Guides Foot Traffic

    Bare floors echoed in my kitchen. A 2-foot-wide gray runner softened steps and led the eye down the length. Low pile won't trip you.

    It zones the space—cooking end from eating. Feels homey, not slick.

    Vacuum weekly; mine bunched until I added rug tape.

    What You’ll Need for This Look

    Low-pile gray kitchen runner rug (2×8 foot)

    Clear rug grip tape (double-sided)

    6. Mirrored Inserts in Cabinet Doors

    Dark corners bugged me, so I swapped upper door panels for mirrors. Bounces light side-to-side, doubles the feel of width.

    Pots stay hidden below. Mornings brighter without extra lamps.

    Clean smudges daily—fingerprints show fast.

    What You’ll Need for This Look

    Mirror insert panels for cabinet doors (24×18 inch)

    Adhesive mirror tiles (12×12 inch sheets)

    Slim brushed brass cabinet pulls

    7. Two-Tone Cabinets: White Tops, Walnut Base

    All-white bored me. Painted uppers white, kept lowers walnut. Breaks the long run visually, adds depth.

    Pans in deep drawers—no clutter. Warmer than expected.

    Prime wood first; paint peeled once when I skipped.

    What You’ll Need for This Look

    Matte white cabinet paint (semi-gloss finish)

    Walnut wood stain sample kit

    High-quality primer for cabinets

    8. Magnetic Wall Strip for Knives and Utensils

    Drawers overflowed. Mounted a slim magnetic strip at eye level—knives and steel tools stick right on.

    Counter freed up. Reach easy, no rummaging.

    Strong magnets only; cheap one dropped a knife.

    What You’ll Need for This Look

    Slim stainless steel magnetic knife strip (18 inch)

    Heavy-duty mounting screws

    9. Fold-Down Walnut Table for Meal Prep

    No room for an island. Installed a fold-down table—20 inches deep, tucks away clean.

    Chop veggies without crowding the counter. Folds flat against wall.

    Wall studs essential; mine wobbled until reinforced.

    What You’ll Need for This Look

    Fold-down walnut wall table (24×20 inch)

    Wall mount bracket set (heavy duty)

    Bamboo cutting board (18×12 inch)

    10. Under-Cabinet LED Tape for Seamless Glow

    Overhead lights shadowed everything. Stuck LED tape under cabinets—warm white, dimmable.

    Counters lit perfectly for late prep. Room feels longer at night.

    Cut to fit; I wasted a strip overlapping.

    What You’ll Need for This Look

    Under-cabinet LED tape light (warm white, 16 foot)

    Dimmable power adapter

    Adhesive clips for LED strips

    11. Slim Leather Bar Stools That Tuck Away

    Bulky stools blocked my path. Swapped for 16-inch-wide leather ones with backs.

    Two fit snug, push in flush. Coffee chats comfy now.

    Leather wipes clean; fabric ones stained fast.

    What You’ll Need for This Look

    Slim cognac leather bar stool (16 inch width)

    Counter-height footrest attachment

    12. Frosted Glass Fronts on Upper Cabinets

    Solid doors hid stuff. Added frosted glass panels—peek dishes without mess show.

    Light filters through, softens the line. Organized mugs look pretty.

    Tape edges during install; glass slipped once.

    What You’ll Need for This Look

    Frosted glass cabinet inserts (24×18 inch)

    Clear silicone sealant for glass

    Slim matte black hinges

    13. Vertical Subway Tile Pattern on Backsplash

    Horizontal tiles shortened the wall. Turned them vertical—classic subway, slim grout.

    Heightens the space. Grout hides splatters well.

    Use spacers; mine shifted without.

    What You’ll Need for This Look

    White subway tile (3×6 inch, vertical install)

    Thin grout in light gray

    Tile spacers (1/8 inch)

    14. Wall-Mounted Herb Planter in Terracotta

    No windowsill. Hung slim terracotta planters on the long wall—basil thrives.

    Fresh snips daily. Green breaks up white without clutter.

    Water from bottom; top-down dripped on counter.

    What You’ll Need for This Look

    Wall-mounted terracotta herb planter (single pot holder)

    Small herb seeds kit (basil and mint)

    Drip tray for planters

    15. Butcher Block Laminate Counter Extension

    Counter too short. Added peel-on butcher block strip—warm wood contrast.

    Chopping board built-in feel. Scratches blend.

    Oil monthly; dried out fast at first.

    What You’ll Need for This Look

    Peel-and-stick butcher block laminate (24×12 inch)

    Food-grade mineral oil for wood

    16. Brass Pulls on Drawers for Quiet Shine

    Chrome dulled quick. Swapped to brushed brass pulls—slim, 5-inch bars.

    Warm glow against grays. Pulls smooth, no snags.

    Polish yearly; tarnish sneaks up.

    What You’ll Need for This Look

    Brushed brass cabinet pulls (5 inch bar)

    Screwdriver set for pulls

    Brass polish cloth

    17. Narrow Gallery Wall of Kitchen Prints

    Blank wall screamed empty. Hung slim black frames—botanicals, 8×10, spaced tight.

    Draws eye along length, distracts from narrowness. Personal touch.

    Level tool key; crooked drove me nuts.

    What You’ll Need for This Look

    Black slim picture frames (8×10 inch set of 4)

    Botanical kitchen prints (digital download)

    Mini bubble level tool

    Final Thoughts

    Pick two or three ideas that fit your routine. My kitchen changed gradually—no rush. Yours will too. Small shifts make it yours. You've got this.

  • 23 Clever Long Narrow Kitchen Cabinet Ideas for Storage

    23 Clever Long Narrow Kitchen Cabinet Ideas for Storage

    I had this long narrow cabinet wedged between the fridge and wall. It swallowed pots, spices, everything—total black hole. Mornings were a hunt.

    Then I dug in. Simple fixes made it pull its weight. No more digging.

    Now, every time I open it, I breathe easier. You can too—these ideas come from my kitchens, real life.

    23 Clever Long Narrow Kitchen Cabinet Ideas for Storage

    These 23 ideas fit right into long narrow kitchen cabinets like mine. They solve the skinny space struggle. Easy to shop for, tested in daily chaos—grab what clicks for you.

    1. Pull-Out Wire Baskets for Pantry Staples That Slide Smooth

    I'd cram cans into that narrow cabinet, then fight to grab one. Frustrating. Swapped for pull-out wire baskets—now everything glides out full view.

    The kitchen feels wider already. No more toppled soup cans. Light bounces off the wire, makes it airy.

    Measure your depth first; mine was 12 inches, perfect fit. Baskets hold 20 pounds easy.

    One tip: line bottoms with shelf liner so small stuff doesn't slip through. Saved me from rice on the floor twice.

    What You’ll Need for This Look

    2. Vertical Sheet Dividers Keeping Baking Pans Upright

    Baking sheets leaned everywhere in my slim cabinet—pulled one, avalanche. Vertical dividers fixed it. Now they stand tall, easy grab.

    Space looks taller, less jammed. I see every size at a glance.

    Cut to fit if needed; mine slot right in.

    Pro move: add rubber grips on edges. No scratches on pans.

    What You’ll Need for This Look

    3. Door-Mounted Spice Jars That Swing Out Neat

    Spices hid in the back, expired half the time. Door-mounted racks brought them front. Swing out, grab cumin—done.

    Counter stays clear, cooking flows better. Feels pro without effort.

    Test swing space first. Mine clears the fridge handle.

    Insight: buy jars with shake tops. No spills in my curry rush.

    What You’ll Need for This Look

    4. Tension Rods Gripping Spray Bottles Sideways

    Cleaning stuff tipped over constantly. Tension rods across the width hold bottles snug sideways. Pull one out, rest stay put.

    Cabinet floor frees up for rags. Cleaning feels less chaotic.

    Twist tight but not forever—easy adjust.

    Mistake I made: too short rods first. Measure twice.

    What You’ll Need for This Look

    5. Tiered Turntables Spinning Canned Goods Easy

    Cans buried deep, forgotten. Tiered turntables spin them around—front or back, instant access.

    No more heavy lifting. Kitchen runs smoother weeknights.

    Stack two if tall enough. Mine fits three layers.

    Tip: weight cans heavy bottom. Stability matters.

    What You’ll Need for This Look

    6. Magnetic Strips Catching Knives and Tools

    Drawers full, knives loose. Inside magnetic strips hold them flat against door. Safe, quick grab.

    Frees shelves for other stuff. Chopping preps faster.

    Mount high for kids' sake. Mine eye-level for me.

    Secure with strong ones—weak magnets dropped my cleaver once.

    What You’ll Need for This Look

    7. Adjustable Pegboard Panels for Custom Hooks

    Hooks pulled out of wood. Pegboard panel screws in, rearrange anytime. Pots hang neat.

    Custom to my tools. Space breathes.

    Cut to fit your height. Trial layout first.

    Great for odd shapes like my mandoline.

    What You’ll Need for This Look

    8. Fabric Bins Stacking Snacks Softly

    Kids' snacks tumbled. Canvas bins stack soft, label fronts. Pull one, grab goldfish.

    Cozy look, not plastic stark. Hides mess.

    Soft sides flex for full bags.

    Wipe clean easy—juice spill proof.

    What You’ll Need for This Look

    9. Sliding Drawer Inserts for Utensils Sorted

    Utensils tangled bad. Sliding inserts divide deep, pull smooth. Forks one side, spoons other.

    Morning coffee stir easy. No clatter.

    Fit to your drawer height. Mine 4 inches.

    Bamboo warms wood cabinets.

    What You’ll Need for This Look

    10. Slim Wine Bottle Side Rack Vertical

    Bottles rolled around base. Side wood rack holds six vertical. Steady, saves floor space.

    Dinner picks simple. Feels intentional.

    Bubble wrap extras if shaky cabinet.

    Labels face out—pretty bonus.

    What You’ll Need for This Look

    11. Clear Stackable Bins for Dry Goods See-Through

    Flour bags ripped open. Clear bins stack, see levels quick. Scoop without unpacking.

    Baking station calm. No guesswork.

    Vent holes keep fresh.

    Measure stacks—mine four high.

    What You’ll Need for This Look

    12. Over-Shelf Baskets Catching Bulky Bags

    Bags flopped everywhere. Over-shelf wire baskets hang below shelves, hold bulk.

    Doubles space. Kitchen feels roomy.

    Hook secure—no wobbles.

    Great for paper towels too.

    What You’ll Need for This Look

    13. Lid Organizers Gripping Pot Covers Flat

    Pot lids clanged loose. File-style organizer slots them flat against door. Match to pot quick.

    Cooking cleanup faster.

    Grips hold tight—tested shakes.

    Mistake: wrong size first, too wide. Size pots first.

    What You’ll Need for This Look

    14. Herb Pot Rails Along the Door Edge

    Dried herbs dusty. Door rail holds small pots—fresh basil daily.

    Kitchen smells alive. Cooking brighter.

    Water tray below catches drips.

    Sunlight spot best.

    What You’ll Need for This Look

    15. Charging Nook with Cord Clips Tucked

    Cords tangled counter. Bottom shelf nook with clips hides chargers. Phones tuck away charging.

    Counters clear magic.

    USB strip fits narrow. Label cords.

    No more lost remotes.

    What You’ll Need for This Look

    16. Wrap Dispenser Mounts Cutting Foil Clean

    Wrap rolls fought me. Wall-mounted dispensers with cutters slice perfect. No drawer hunt.

    Prep time halves.

    Mount low for easy reach.

    Saw teeth sharp—careful fingers.

    What You’ll Need for This Look

    17. Collapsible Colander Hangers Door Side

    Strainers nested messy. Door hooks hold collapsible ones flat. Drain pasta, hang dry.

    Sink area tidy.

    Strong hooks for weight.

    Folds away slim.

    What You’ll Need for This Look

    18. Tray Dividers for Serving Platters Stacked

    Platters scratched stacked. Vertical acrylic dividers keep them safe apart. Party ready.

    Entertaining easy.

    Clear lets you spot.

    Polish wood edges soft.

    What You’ll Need for This Look

    19. Narrow File Sorters for Recipe Cards

    Recipes stuffed loose. File sorters hold cards upright, labeled A-Z. Flip to find.

    Cooking inspired again.

    Slim for narrow fit.

    Laminated cards last.

    What You’ll Need for This Look

    20. Multi-Tier Spice Drawer Pulls

    Spice drawer jammed full. Multi-tier pull-out lifts back row up. All spices visible.

    Seasoning seamless.

    Soft close prevents slam.

    Group by use—savory top.

    What You’ll Need for This Look

    21. Hanging Produce Bags Mesh Breathable

    Veggies rotted hidden. Mesh hanging bags let air flow, see spoilage.

    Fresh longer. Less waste.

    Tie loose for air.

    Potatoes love dark.

    What You’ll Need for This Look

    22. Slim Appliance Lifters for Toaster Hide

    Toaster took shelf space. Lifter raises it up, stores below. Counter hides it.

    Clean lines daily.

    Cord wrap built-in.

    Weight limit check—heavy okay.

    What You’ll Need for This Look

    23. Custom Shelf Liners with Grip Zones

    Jars slid off shelves bumpy. Grippy liners cut to fit hold everything steady. No shifts.

    Peace when opening.

    Cut with scissors easy.

    Washable for spills. Mistake: plain mats slipped worse.

    What You’ll Need for This Look

    Final Thoughts

    Pick two or three ideas that bug you most. Start small—your kitchen eases up quick.

    I've lived these fixes years. They stick because real.

    You got this. Calm cabinets ahead.

  • 10 Practical Long Narrow Kitchen Pantry Ideas That Work

    10 Practical Long Narrow Kitchen Pantry Ideas That Work

    I remember staring into my old apartment's skinny pantry, frustrated because half the stuff was buried. Hands brushing dusty cans I forgot about. That changed when I started tweaking it myself.

    No big budget. Just trial and error in tight spaces. Now it feels calm, reachable.

    You can shape yours the same way. These ideas come from kitchens I've fixed.

    10 Practical Long Narrow Kitchen Pantry Ideas That Work

    I've pulled together 10 ideas that fit long narrow kitchen pantries like a glove. They're simple, tested in real homes, and make grabbing groceries feel easy.

    1. Pull-Out Wire Baskets That Reach the Back

    In my sister's galley kitchen, the pantry was a tunnel. I added pull-out wire baskets, and suddenly everything slid right to her fingertips. No more digging.

    The space opened up visually too. Air flows between items. Felt less like a closet.

    Pay attention to the track length—mine stuck once because I skimped on smooth glides. Go for heavy-duty ones.

    They hold cans, onions, whatever. Stack two levels if depth allows.

    What You’ll Need for This Look

    2. Uniform Glass Jars That Line Up Neatly

    I swapped mismatched bags for glass jars in my own pantry. Dry goods like rice and beans sat pretty, easy to spot. The uniformity calms the eye in a slim space.

    It cut waste too—saw what I had, no duplicates. Emotionally lighter.

    I overbought at first, thinking bigger was better. Stick to squat shapes for narrow shelves.

    Label with chalk pens. Wipe clean when kids smudge them.

    What You’ll Need for This Look

    3. Over-the-Door Spice Racks That Free Up Shelves

    My friend's pantry door was bare space. Hung an over-the-door spice rack, and spices moved off crowded shelves. Instant breathing room.

    Looks tidy from inside too. No dangling chains.

    Measure door thickness first—I returned one that was too loose. Tension rods hold better.

    Great for teas or small packets. Keeps the narrow depth clear.

    What You’ll Need for This Look

    4. Magnetic Strips for Knives and Metal Bits

    Tired of blocks taking shelf space, I stuck magnetic strips inside the pantry door. Knives and steel cans hang flat. Frees up so much room.

    Feels efficient, like a pro kitchen but cozy. Kids can't reach sharp stuff.

    One strip peeled after moisture—use waterproof adhesive now. Position at eye level.

    Holds tools too. Practical magic without bulk.

    What You’ll Need for This Look

    5. Slim Rolling Carts That Slide In Tight

    My rental's pantry was 10 inches wide. A slim rolling cart fit perfectly, pulling out like a drawer. Snacks and baking stuff organized.

    Rolls smooth, no wobbles. Changed how I bake—no hunting.

    Wheels snagged on uneven floor once. Pick locking casters.

    Tuck it back when done. Feels intentional.

    What You’ll Need for This Look

    6. Tiered Risers to Spot Everything Fast

    Stacked cans hid the back row in my pantry. Tiered risers brought fronts forward. Saw peanut butter without shifting piles.

    Depth feels doubled. Warmer light hits everything.

    Bought cheap plastic first—they tipped. Wood ones stay put.

    Mix heights. Fits odd shapes.

    What You’ll Need for This Look

    7. LED Strips That Light the Dark Corners

    My basement pantry was dim. Stuck LED strips under shelves, and it glowed soft. No more fumbling for sauce at night.

    Feels welcoming now. Highlights labels.

    Battery ones died fast—wired with motion sensor lasts.

    Angle them down. Subtle glow.

    What You’ll Need for This Look

    8. Woven Baskets on Sliding Rails

    Bulk potatoes tumbled in my pantry. Woven baskets on rails corralled them, sliding out smooth.

    Textural warmth against plain shelves. Cozy vibe.

    Rails sagged with weight—reinforce with brackets.

    Hide odd items. Blends natural.

    What You’ll Need for This Look

    9. Clear Bins with Simple Labels

    Kids' snacks scattered everywhere. Clear bins stacked neat, labels facing out. Grab and go.

    Sees contents at glance. Less mess.

    Overlabeled fancy—simple tape works best.

    Stack safe in narrow spots.

    What You’ll Need for This Look

    10. Adjustable Pegboard Backs for Custom Fits

    Fixed shelves wasted space. Pegboard back let me hook bags and tools custom.

    Flexible as needs change. Feels mine.

    Hooks slipped early—lockable ones stay.

    Lightweight, modern clean.

    What You’ll Need for This Look

    Final Thoughts

    Pick one or two ideas that bug you most. Start small.

    Your pantry doesn't need perfection. Just works for you.

    You'll feel that calm every time you open the door. You've got this.