Category: Kitchen Decor

  • 21 Stylish Open Shelves Concrete Kitchen Ideas

    21 Stylish Open Shelves Concrete Kitchen Ideas

    I ripped out the uppers in my concrete kitchen last year. It was stark at first—gray everywhere, nothing soft. But filling those open shelves changed it. I fumbled with clutter, returned half my dishes. Now it feels like home. You can too.

    21 Stylish Open Shelves Concrete Kitchen Ideas

    These 21 ideas come from my own concrete kitchen trials. They'll give you clear steps to style shelves that feel right, not fussy. No overwhelm—just what works.

    1. Stacked Matte White Plates Leaning Against the Wall

    I started with plain white plates from a thrift stack. Leaning them created height without effort. The concrete's gray made them pop clean. It warmed the space instantly—no more sterile vibe.

    One mistake: I centered them too perfectly. Off-center feels lived-in. Dust settles less on edges too.

    Visually, it draws the eye up. Emotionally, it's calm, like a quiet breakfast nook.

    Pay attention to spacing—two inches between stacks. Group by size: dinner on bottom, bowls above.

    What You’ll Need for This Look

    Matte white ceramic dinner plates, 10-inch

    White stoneware bowls, assorted sizes

    Wood shelf risers, 6-inch

    2. Trailing Ivy in Terracotta Pots Tucked on Corners

    Greenery softens concrete like nothing else. I tucked ivy pots in corners—trailing over edges. It broke up the hard lines, added life.

    The pots' red earth tones grounded the gray. Mornings feel fresh now.

    I overwatered once, killed a pothos. Stick to low-light ivy; it forgives.

    Watch for drips—saucers underneath. Let vines grow uneven.

    What You’ll Need for This Look

    Terracotta pots, 4-inch with saucers

    Trailing ivy plant, 6-inch pot

    Small pebble tray filler

    3. Wooden Cutting Boards Hung Horizontally for Texture

    Walnut boards add warmth to cold concrete. I hung three horizontally, overlapping slightly. The wood grain pulls focus from gray slabs.

    It feels useful, not staged. Chopping veggies there now beats the counter.

    Bought cheap ones first—warped fast. Invest in end-grain.

    Angle them 10 degrees for depth. Wipe seasoning oil yearly.

    What You’ll Need for This Look

    Walnut end-grain cutting board, 12×18-inch

    Teak wood board, 10×14-inch

    Leather hanging straps, black

    4. Vintage Glass Jars Filled with Dried Beans

    Clear jars let bean colors glow against concrete. I layered pinto, black, lentils—subtle rainbow. Practical for cooking too.

    The transparency cuts heaviness. Shelf feels airy.

    Overfilled once, spilled everywhere. Half-full max.

    Group by tone: warms on left, cools right. Cork lids seal tight.

    What You’ll Need for This Look

    Clear glass mason jars, quart size

    Dried pinto beans, 2-pound bag

    Cork lids for mason jars

    5. Black Cast Iron Skillets Propped in a Cluster

    Iron matches concrete's raw edge. Propped two skillets together—handles crossed. It grounds the space.

    Cooking smells linger nicely. Feels like a real cook's spot.

    Heaviest on bottom shelf—don't overload. I did, shelf sagged.

    Season them well; patina shines.

    What You’ll Need for This Look

    Cast iron skillet, 10-inch Lodge

    Cast iron skillet, 12-inch

    Iron shelf hooks, matte black

    6. Creamy Ceramic Mugs in Uneven Rows

    Cream mugs soften gray tones. Uneven rows—some forward, some back—feel collected over time.

    Coffee breaks here are cozy now. Concrete fades back.

    Matched sets bored me. Mix handles.

    Front ones at eye level. Rotate seasonally.

    What You’ll Need for This Look

    Creamy ceramic mugs, 12-ounce set

    Matte stoneware mug, large

    Wood mug tree, slim

    7. Woven Seagrass Baskets for Loose Storage

    Baskets hide clutter softly. Seagrass ones hold linens—texture against smooth concrete.

    Towel grabs are easy. Space breathes.

    Oversized blocked light. Medium scale.

    Nest two sizes. Line with fabric.

    What You’ll Need for This Look

    Seagrass storage basket, medium 12×12-inch

    Woven belly basket, small

    Linen kitchen towels, neutral

    8. Spice Jars Lined Up by Frequency of Use

    Glass spice jars organize chaos. Lined by dailies first—cumin, salt. Concrete backdrop highlights labels.

    Cooking flows better. No digging.

    Alphabetized once—useless. Use-based wins.

    Clear glass; avoid dark. Refill quarterly.

    What You’ll Need for This Look

    Glass spice jars with bamboo lids, 4-ounce

    Spice jar labels, chalkboard

    Wood turntable riser

    9. Copper Mugs Grouped for Subtle Shine

    Copper warms gray instantly. Grouped mugs catch light—subtle glow.

    Moscow mules taste better here. Inviting.

    Polished too much first—dulls charm. Let patina build.

    Bottom shelf for weight. Polish sparingly.

    What You’ll Need for This Look

    Hammered copper mug, 16-ounce

    Copper Moscow mule mug set

    Black metal tray, rectangular

    10. Minimal Linen Napkins Folded Flat

    Linen napkins add softness. Folded flat in a row—concrete's foil.

    Meals feel thoughtful. Easy grab.

    Ironed crisp—wrinkles fast. Embrace texture.

    Roll loosely sometimes. Wash weekly.

    What You’ll Need for This Look

    Linen napkins, 20×20-inch beige

    Neutral linen dinner napkins set

    Ceramic napkin weight, small

    11. Textured Stoneware Pitchers in Threes

    Pitchers build rhythm. Three textured ones—tall, medium, short. Concrete highlights bumps.

    Water poured here tastes better. Balanced.

    Matched heights bored. Vary scale.

    Middle one forward. Dust cloth inside.

    What You’ll Need for This Look

    Matte stoneware pitcher, 48-ounce

    Textured ceramic pitcher, small

    Wood shelf bracket accent

    12. Fresh Herbs in White Porcelain Holders

    Herbs bring scent and green. Porcelain holders keep stems fresh—concrete stays dry.

    Snip for dinner daily. Alive feel.

    Basil wilted without sun. Windowsill herbs.

    Change water twice weekly. Trim roots.

    What You’ll Need for This Look

    White porcelain herb saver

    Fresh basil plant starter

    Small herb scissors

    13. Bamboo Trays Layered with Bowls

    Bamboo trays organize bowls. Layered stack—practical warmth.

    Serving simplified. Cozy.

    Slippery surfaces slid. Grip pads underneath.

    Rotate bowls inside. Light wipe.

    What You’ll Need for This Look

    Bamboo serving tray, 14×10-inch

    White mixing bowls, nested set

    Non-slip shelf liner pads

    14. Matte Black Salt Cellars in a Row

    Cellars add edge. Matte black row with spoons—echoes concrete.

    Seasoning at hand. Sleek.

    Ceramic cracked easy. Go metal-lined.

    Spoons tucked in. Refill monthly.

    What You’ll Need for This Look

    Matte black salt cellar with spoon

    Coarse sea salt grinder refill

    Mini wooden spoon set

    15. Glass Canisters of Flour and Sugar

    Canisters keep staples visible. Flour, sugar—baking hub.

    Pancakes faster. Clean lines.

    Humidity clumped flour. Silica packs inside.

    Label fronts. Scoop leveled.

    What You’ll Need for This Look

    Glass flour canister, 1-gallon airtight

    Clear sugar canister, large

    Silica gel packets for storage

    16. Leather Coasters Stacked Neatly

    Leather coasters ground drinks. Stacked tight—rich against gray.

    No rings on counters. Warm touch.

    Faux peeled. Full grain lasts.

    Top one offset. Condition yearly.

    What You’ll Need for This Look

    Full grain leather coasters, 4-inch round set

    Brown leather drink coasters

    Leather conditioner kit small

    17. Small Sconces Wired for Ambiance

    Sconces layer light. Wall-mounted minis—softens evenings.

    Dinners glow. Concrete less harsh.

    Wiring exposed first—ugly. Cord covers.

    Battery if no outlet. Angle down.

    What You’ll Need for This Look

    Matte black wall sconce, battery operated

    Edison style bulb, warm white

    Cord cover clips, black

    18. Beeswax Candles in Brass Holders

    Candles flicker cozy. Brass holders elevate beeswax—concrete warms.

    Nights unwind. Honey scent.

    Soy melted fast. Beeswax holds.

    Trim wicks. Extinguish properly.

    What You’ll Need for This Look

    Beeswax pillar candle, 3×6-inch

    Brass candle holder, small

    Wick trimmer tool

    19. Framed Recipe Cards Leaned Casually

    Recipe cards personalize. Leaned frames—family stories.

    Inspires cooking. Memory spot.

    Glass broke easy. Acrylic fronts.

    Mix sizes. Dust frames.

    What You’ll Need for This Look

    Wood photo frame, 4×6-inch slim

    Acrylic recipe card holder

    Mini easel back stands

    20. Seasonal Fruits in Ceramic Bowls

    Fruits add color pops. Ceramic bowls hold apples—fresh against gray.

    Snacks healthy. Vibrant.

    Bananas bruised fast. Firmer picks.

    Bowl low center. Refresh twice weekly.

    What You’ll Need for This Look

    Matte ceramic fruit bowl, 10-inch

    Wood fruit bowl liner

    Organic apples, display bunch

    21. Personal Trinkets from Trips in a Tray

    Trinkets tell stories. Tray holds shells, stones—concrete canvas.

    Sparks chats. Unique.

    Cluttered without bounds. Tray contains.

    Rotate monthly. Polish gently.

    What You’ll Need for This Look

    Matte black metal tray, 12×8-inch

    Decorative seashell collection

    Small river stone set

    Final Thoughts

    Pick three ideas that fit your routine. My shelves evolved slow—start small. Concrete kitchens shine with open shelves when personal. You've got this; it'll feel like yours soon.

  • 11 Bold Modern Concrete Kitchen Ideas for Trendy Homes

    11 Bold Modern Concrete Kitchen Ideas for Trendy Homes

    I gutted my kitchen two years ago. Concrete counters went in, and I panicked—they looked cold under fluorescents. Layered in wood and plants, though, and it shifted. Now it's where we linger. Coffee tastes better on something solid. If concrete's calling your modern kitchen, these ideas make it homey without fuss.

    11 Bold Modern Concrete Kitchen Ideas for Trendy Homes

    These 11 bold modern concrete kitchen ideas come straight from kitchens I've shaped. They work in daily life, not just photos. You'll get exactly 11, with what to grab.

    1. Matte Concrete Counters Paired with Butcher Block Edges

    I poured matte concrete counters in my last project. They ground the space, but edges chipped easy at first. Switched to butcher block trim—softens the look, hides wear. Mornings feel steady now, chopping veggies without glare. Light gray tone pulls in cabinets without overwhelming.

    The combo reads modern but lived-in. No more sterile vibes. I notice guests lean on it longer.

    Pay attention to sealing—mine beaded water after two coats. Skip glossy; matte breathes.

    One tip: source local pourers. Pre-fabs scratch fast.

    What You’ll Need for This Look

    Matte concrete countertop sealer, 1 gallon
    Butcher block edge trim, oak, 8 feet
    Wood cutting board, end grain, 12×18
    Gray concrete patch kit

    2. Exposed Concrete Island with Integrated Herb Planter

    Exposed island in a client's trendy condo. Rough texture grabs light soft. Built a shallow planter right in—basil thrives, adds green punch. Kids pull up stools; feels like a hub now, not showpiece.

    Before, island floated empty. Herbs make it useful. Gray warms with soil specks.

    Watch drainage—added pebbles first, no root rot. Mistake: too deep, drowned thyme once.

    Grab low herbs; tall ones tip.

    What You’ll Need for This Look

    Exposed concrete sealer, matte, 32 oz
    Herb planter divider insert, concrete compatible
    Basil starter plants, 4-pack
    Pebble drainage stones, 5 lb bag
    Wood island stools, counter height

    3. Seamless Concrete Backsplash Tucked Behind Brass Range

    Tiled backsplash out, seamless concrete in. Poured thin, no grout lines—wipes clean after pasta nights. Brass range pops against it; steam doesn't stain if sealed right.

    Space feels taller, airier. Oil splatters? Hose off. I returned grout sealer once; wrong for concrete.

    Heat shield needed near burners—added metal strip.

    Simple joy: no scrubbing seams.

    What You’ll Need for This Look

    Seamless concrete backsplash mix, gray, 50 lb
    Brass range knobs, matte, set of 4
    Concrete heat-resistant sealer, clear
    Metal heat shield strip, 24 inches

    4. Polished Concrete Floors with Woven Rugs Under Table

    Polished floors in my flip house. Smooth underfoot, but echoey bare. Dropped woven rugs—muffles steps, warms toes. Table area cozy now; spills bead up.

    Kids slide less. Mistake: skipped polishing first layer; dust forever.

    Rugs lift color—pick low pile.

    Sweeps easy mornings.

    What You’ll Need for This Look

    Concrete floor polish, 1 gallon
    Woven kitchen rug, neutral, 5×7
    Concrete floor dust mop, microfiber
    Low pile rug pad, 5×7

    5. Floating Concrete Shelves for Pots and Jars

    Installed floating shelves over sink. Thick slabs hold heavy pots—no sag. Jars line up neat; reaches easy for olive oil. Open feel, but sturdy.

    Before, wire racks rusted. Concrete laughs at humidity.

    Bolt anchors deep—mine wobbled once.

    Dust corners weekly.

    What You’ll Need for This Look

    Floating concrete shelf brackets, heavy duty
    Concrete shelf slab, 12×36, 2-inch thick
    Glass storage jars, quart size, set of 6
    Wall anchor bolts, concrete rated

    6. Hammered Concrete Pendant Over Sink Area

    Hung hammered pendant over sink. Texture scatters light soft—no harsh shadows washing dishes. Concrete shade warms bulbs; pairs with matte fixtures.

    Glare gone evenings. Bought too small first—upgraded to 14-inch.

    Wire it low for task light.

    Fits modern without fussy.

    What You’ll Need for This Look

    Hammered concrete pendant shade, 14-inch
    Matte black cord kit, adjustable
    ED27 warm bulb, 800 lumen
    Ceiling canopy kit, concrete compatible

    7. Textured Concrete Farm Sink with Apron Front

    Textured farm sink replaced porcelain. Deep basin swallows pots; apron hides pipes. Texture grips wet hands—no slip.

    Stains tea easy, but buffs out. Sealed edges twice.

    Wood cutting board atop for prep.

    Sinks in slow—love it now.

    What You’ll Need for This Look

    Textured concrete sink mold kit
    Apron front concrete basin, 30-inch
    Matte faucet, brushed nickel
    Concrete sink sealer, food safe

    8. Charcoal Concrete Walls with Slim Metal Shelving

    Tinted walls charcoal in a small kitchen. Absorbs light, makes it cozy dark. Slim metal shelves pop—holds knives neat.

    Too dark first coat; lightened second. Wood handles balance.

    No echo; muffles clatter.

    Intimate cooking spot.

    What You’ll Need for This Look

    Charcoal concrete wall tint, 1 quart
    Slim metal wall shelves, 24-inch
    Wood knife block, magnetic

    9. Poured Concrete Breakfast Nook Table

    Poured table for nook. Smooth top wipes kids' messes; legs wood for legroom. Family huddles here mornings.

    Cracked first pour—rehydrated mix right next time.

    Pair mismatched chairs.

    Holds heat from plates.

    What You’ll Need for This Look

    Poured concrete tabletop mix, 40 lb
    Wood table legs, hairpin style, set of 4
    Concrete form mold, rectangular 36×60
    Placemats, cork, set of 4

    10. Concrete Accent Bar with Leather Stools

    Bar counter accent in open kitchen. Polished concrete gleams soft; leather stools tuck under. Weeknight drinks feel special.

    Stools scuffed—chose distressed leather.

    Overhang 12 inches exact.

    Gathers us quick.

    What You’ll Need for This Look

    Polished concrete bar top kit
    Leather counter stools, tan, set of 2
    Bar overhang brackets, heavy duty

    11. Micro-Textured Concrete Hood Over Stove

    Micro-textured hood caps stove. Fine grit hides grease; vents strong. Ties modern without bulk.

    Vent insert key—passive ones fogged.

    Warms brass pots.

    Blends seamless.

    What You’ll Need for This Look

    Micro-textured concrete hood mold
    Range hood vent insert, 30-inch
    Concrete texture additive, fine grit

    Final Thoughts

    Pick one or two ideas that fit your flow. Concrete grounds trendy kitchens without trying hard. I've lived the fixes—start small. Your space will settle in just right. You've got this.

  • 27 Budget Kitchen Upgrades Anyone Can Do in a Weekend

    27 Budget Kitchen Upgrades Anyone Can Do in a Weekend

    Your kitchen doesn’t need a $50,000 renovation to feel brand new. With 27 strategic upgrades you can tackle this weekend—many for under $100—you’ll create a space that feels refreshed, functional, and totally yours. Whether you’re renting, on a budget, or just looking for quick wins, these ideas range from zero-dollar styling tweaks to game-changing cabinet updates. Most take just a few hours, and all deliver that “wow, did you do this yourself?” reaction from guests. Let’s dig into the exact upgrades that make the biggest impact without the big price tag.

    1. Paint Your Cabinet Doors One Bold Color

    Cabinet paint is the fastest way to shift your kitchen’s entire vibe without replacing anything. One or two cans of quality cabinet-specific paint (like Benjamin Moore Advance or Rustoleum Cabinet Transformations) can refresh dated wood or white cabinetry in an afternoon.

    Choose bold earth tones like forest green, warm brown, or navy blue—these dominate 2025 trends and pair beautifully with existing countertops. Prep is key: clean cabinets thoroughly, sand lightly, and apply primer before paint. Expect to spend $30–$80 on materials and 4–6 hours on labor (including drying time between coats). If you’re renting, removable peel-and-stick cabinet film offers a non-damaging alternative for $25–$60.

    Your kitchen goes from tired to intentional instantly. The best part? One color shift changes how the entire room feels without touching anything else.

    2. Swap Out Hardware for Modern Handles

    Hardware is the jewelry of your kitchen—the fastest change you can make for maximum visual impact. Removing old brass or silver pulls and replacing them with matte black, brushed gold, or stainless steel handles completely modernizes your look.

    Order hardware from IKEA ($2–$8 per handle), Target ($3–$10), or Amazon ($5–$15), then unscrew old handles and swap them in. Keep old hardware in a labeled bag (you’ll need it if you move or rent). Budget $40–$100 for a full kitchen and plan 30–60 minutes of work. Pro tip: take a photo of your cabinet layout before you start so you remember which handles go where.

    You’ll be amazed how one small detail pulls the entire kitchen into focus. It’s a three-minute upgrade per cabinet, and your space feels current and curated.

    3. Add Open Shelving Above Counters

    Open shelving creates an airy, intentional kitchen while maximizing vertical storage. Install floating shelves ($30–$100 per shelf) from Home Depot or Wayfair, or use affordable brackets and reclaimed wood for a rustic feel.

    Style shelves with a mix of everyday items (bowls, glasses) and pretty accents (plants, cookbooks, small vases). Keep one shelf mostly empty to avoid visual clutter. Installation takes 1–2 hours if you have a stud finder and basic drill skills; rent a drill bit set for $10–$15 if needed. Renter tip: use command hooks and damage-free shelving for $15–$40.

    Your kitchen looks taller, brighter, and more intentional. Open shelving draws the eye upward, making the entire space feel larger and more curated.

    4. Install Peel-and-Stick Wallpaper on One Wall

    A statement wall adds personality without permanent commitment. Peel-and-stick wallpaper from Spoonflower ($25–$60), Wayfair ($20–$50), or Amazon ($15–$40) comes pre-cut and sticks directly to clean walls.

    Choose botanicals, geometric prints, or soft textures in earth tones to match 2025 trends. Remove your old outlet covers, measure your wall carefully, and apply slowly from top to bottom. Budget 1–2 hours and $25–$60 total. The beauty? If you hate it, you peel it off with zero damage. Renter paradise.

    One wall completely changes how your kitchen photographs and feels. You’ve added personality, pattern, and visual interest without a permanent commitment.

    5. Replace Your Kitchen Faucet

    A new faucet is one of the highest-ROI upgrades—it gets used dozens of times daily and instantly signals “updated kitchen.” Swap your old faucet for a modern pull-down or touchless model from Moen, Delta, or Kraus ($80–$250).

    Most faucets install in 30 minutes to 1 hour using basic tools (wrench, screwdriver). Turn off the water supply under the sink first. YouTube has excellent step-by-step videos if you’re DIY-ing. If you’re nervous, hire a plumber for $100–$200 in labor. Total cost: $80–$450 installed.

    Your sink becomes a focal point you actually enjoy using. That smooth, modern faucet works harder and looks infinitely better than what you had before.

    6. Paint Your Kitchen Island Base

    If you have an island, paint the base to create contrast and draw attention to your kitchen’s centerpiece. Use the same cabinet paint you’d use on cabinets—it’s durable and comes in every color.

    Paint the island base (not the countertop) in a color that contrasts with your walls. Deep green, navy, or charcoal gray work beautifully with lighter counters and backsplashes. Budget $30–$60 on paint and 2–3 hours on labor. Prep and paint in thin coats for a smooth finish.

    Your island becomes an architectural feature, not just functional counter space. The contrast grounds your kitchen and adds visual interest from every angle.

    7. Upgrade Your Kitchen Lighting Fixtures

    Lighting is the second-biggest visual impact factor after color (84% of designers prioritize it). Swap out dated ceiling fixtures or install pendant lights over your island or sink for $40–$200 per fixture.

    Shop IKEA, Target, Wayfair, or Home Depot for modern styles in brass, black, or mixed metals. Installation usually takes 1–2 hours if you’re comfortable with basic wiring, or hire an electrician for $150–$300 in labor. Layer your lighting: overhead fixtures + under-cabinet strips + pendant lights create depth and warmth.

    Your kitchen immediately looks more designed and feels more inviting. Better lighting actually makes you enjoy cooking more—you see what you’re doing and feel energized.

    8. Add Under-Cabinet LED Strip Lighting

    Under-cabinet lighting is affordable, dramatic, and totally renter-friendly. Plug-in LED strips ($25–$80 from Amazon or Home Depot) stick to the underside of your cabinets and shine down onto your counter.

    No wiring required—just peel, stick, and plug in. Choose warm white light (2700K) for coziness or cool white (4000K) for visibility. Installation takes 15 minutes. You can hide the cord behind cabinets or run it to an outlet. This upgrade literally illuminates your workspace and creates ambiance for entertaining.

    Your countertops glow, your kitchen feels like a restaurant, and you’ve actually made cooking easier. Plus, it photographs beautifully—perfect for social media if that’s your thing.

    9. Refresh Your Backsplash with Peel-and-Stick Tiles

    New backsplash tiles cost $500+ installed, but peel-and-stick versions ($30–$100 for standard kitchen size) look nearly identical and install in an afternoon.

    Choose subway tiles, geometric patterns, or textured finishes from Wayfair, Amazon, or Home Depot. Measure your backsplash area, clean the wall thoroughly, and apply tiles from left to right in straight lines. Budget 2–3 hours. If you mess up, peel tiles off and reposition—no harm done. Best part? Completely renter-approved and damage-free.

    Your kitchen instantly looks polished and intentional. A fresh backsplash ties everything together and makes the whole space feel curated.

    10. Organize Lower Cabinets with Pull-Out Drawers

    Deep lower cabinets are black holes where things get lost. Sliding pull-out drawer organizers ($30–$80 per drawer) from IKEA, Target, or Amazon let you access everything without crawling.

    Measure your cabinet width and depth, then order pull-out drawers that fit. Installation takes 30–60 minutes with basic tools—usually just screwing them to the cabinet sides. You’ll instantly know where everything is and actually use your pots and pans instead of the same three.

    Your kitchen becomes functional, not just pretty. You’ll save time cooking because you’re not digging through cabinets, and you actually use that fancy cookware gathering dust.

    11. Paint Your Kitchen Walls a Warm Earth Tone

    All-white and gray kitchens are officially out (76% of designers prefer earth tones). Painting your walls sage green, warm brown, soft blue, or taupe ($30–$60 per gallon, covers ~350 sq ft) is the biggest mood shift you can make.

    Lighter earth tones feel spacious and calming; darker tones add drama and sophistication. Use quality paint (Benjamin Moore, Sherwin-Williams) for durability. Plan 1–2 days for two coats in an average kitchen. Renter note: paint sticks are renter-friendly on most leases—confirm with your landlord first.

    Your kitchen stops feeling dated and starts feeling intentional. The right wall color makes your cabinets, counters, and fixtures all look better than before.

    12. Install Floating Corner Shelves

    Corners are wasted real estate—floating shelves maximize storage and add visual interest. Install corner shelves ($20–$60 each) in the unused corners of your kitchen.

    These work beautifully above counters or in dining areas. Style them with everyday items (cookbooks, plants, small appliances) or decorative accents. Installation takes 30–45 minutes per corner if you locate studs properly. Renter alternative: use tension rods and lightweight shelves for a damage-free option.

    You’ve solved the “I have nowhere to put anything” problem without taking up floor or counter space. Plus, styled corner shelves make your kitchen look magazine-worthy.

    13. Add a Kitchen Runner Rug

    A rug adds warmth, defines the workspace, and ties colors together. Choose a durable kitchen runner ($30–$100) in patterns or solid earth tones from IKEA, Target, or Wayfair.

    Look for low-pile, washable rugs that can handle spills and foot traffic. Place runners in high-traffic zones (in front of the sink or stove) rather than under foot traffic patterns. Most rugs are machine-washable—a huge bonus. Non-slip rug pads ($10–$20) keep it secure and protect your floor.

    Your kitchen instantly feels cozier and more intentional. A rug defines the space and makes cooking feel less utilitarian and more enjoyable.

    14. Declutter and Style Open Shelves Intentionally

    If you already have open shelving, styling it properly prevents that cluttered, chaotic look. Remove everything, then return only items that are beautiful, functional, or both.

    Group similar items (white bowls together, glass jars in a row), leave breathing room between groups, and add small plants or books for visual interest. Use matching containers for grains, pasta, and dry goods from IKEA ($2–$8 per container). Plan 1–2 hours for a full refresh. The rule: if an item doesn’t make you happy or isn’t useful, it doesn’t belong on display.

    Your shelves look intentional and curated instead of cluttered. You’ll actually enjoy looking at your kitchen, and guests will be impressed by how organized you are.

    15. Upgrade Your Kitchen Sink

    A new sink is like a fresh start for your whole workspace. Replace your old sink with a modern stainless steel or black composite sink ($150–$400) from Lowe’s, Home Depot, or Wayfair.

    Installation depends on your current setup. If you’re replacing like-for-like, it’s 2–3 hours of DIY work. If you need new plumbing, hire a plumber for $200–$400. Total cost: $150–$800 installed. Double-basin sinks offer flexibility; single-basin sinks feel more modern and spacious.

    Your sink becomes a focal point you actually enjoy using. A fresh, gleaming sink changes the entire tone of your kitchen and makes you want to keep it clean.

    16. Add Glass Shelves Above Cabinets

    The space above cabinets is unused square footage. Install clear or frosted glass shelves ($30–$80 each) to display serving pieces, cookbooks, or decorative items while keeping your workspace visually open.

    Glass shelves feel lighter than wood and work in both modern and traditional kitchens. Measure the wall width carefully, install brackets, and arrange items intentionally. Budget 45 minutes to 1 hour for installation. Keep items minimal to avoid a cluttered look—less is more here.

    You’ve maximized vertical storage without adding visual weight. Glass creates an illusion of openness while giving you functional display space.

    17. Paint Your Kitchen Door Bold

    Your kitchen entry door deserves attention. Paint it bold—forest green, navy, deep charcoal, or warm terracotta ($20–$40 in specialty paint) for instant personality.

    Remove the door from hinges, lay it flat, and paint both sides in two coats. Reinstall and swap the hardware for a coordinating color if you want extra polish. Total time: 4–6 hours spread over two days (including drying). Renter note: you can paint it back to white before moving—no landlord drama.

    One bold door completely changes how your kitchen feels when you enter. It’s a signature move that signals you care about design details.

    18. Install a Magnetic Spice Rack on the Side of Cabinets

    Spices scattered across drawers are chaos; a magnetic rack puts them at your fingertips. Use magnetic spice tins ($30–$60 for a set) and mount a magnetic strip ($10–$20) on the side of your cabinets or fridge.

    This works beautifully next to your stove for easy access while cooking. Magnetic tins keep spices fresh longer than cardboard boxes. Installation takes 15 minutes—just stick or screw the magnetic strip and pop tins on. Instantly organized and so functional.

    You can find every spice in seconds, not dig through three drawers. Your cooking becomes faster and more enjoyable.

    19. Refresh Your Drawer Pulls and Cabinet Hardware

    Drawer pulls get overlooked but they’re constantly visible. If you updated cabinet handles but missed drawers, now’s the time. Replace all drawer pulls with matching hardware ($2–$10 per pull).

    Consistency creates polish. Match new pulls to your cabinet handles for a curated look. Budget $20–$50 for a full kitchen’s drawers and 30–45 minutes of work. It’s the finishing touch that ties everything together.

    Your kitchen looks intentional from every angle. Small details add up to big design impact.

    20. Create a Mini Herb Garden on Your Windowsill

    Fresh herbs beat dried every time. Line your brightest windowsill with potted herbs ($3–$8 each from garden centers) in matching pots for an intentional, functional garden.

    Choose herbs you actually cook with: basil, rosemary, thyme, and parsley. Water regularly and snip as you cook. Investment: $20–$40 for 4–6 plants and pots. Renter note: they move with you when you leave.

    Your kitchen smells incredible, and you’re literally harvesting dinner from your window. Fresh herbs elevate your cooking instantly and add living green to your space.

    21. Swap Your Cabinet Handles for Gold or Brass

    If you want to add warmth without bold color, upgrade to brushed gold or brass hardware ($4–$12 per handle). This finish is having a major moment and pairs beautifully with wood cabinets or earth-tone paint.

    Order from IKEA, Wayfair, or restoration hardware stores and swap handles in under an hour. Brass and gold feel warm and luxe but are totally achievable on a budget. Budget $40–$100 for a full kitchen.

    Your kitchen instantly feels more elevated and warm. That single metallic upgrade signals you pay attention to thoughtful design choices.

    22. Add a Pegboard for Organized Cookware

    Open wall space is storage opportunity. Install a pegboard ($20–$50 from Home Depot) above counter or prep space with hooks ($15–$30 for a set) to hang frequently-used tools.

    Pegboards work beautifully next to your stove or in prep zones. Paint the board to match your walls or leave natural wood for farmhouse vibes. Installation takes 45 minutes to 1 hour. Arrange items functionally (utensils near the stove, rarely-used items out of the way).

    Your most-used tools are within arm’s reach, and your kitchen looks more thoughtfully organized. Pegboards work double duty: functional storage and intentional styling.

    23. Install a Small Bar Cart for Beverage Storage

    Bar carts maximize small spaces while adding mobile storage. Tuck a 3-tier cart ($40–$100 from Target, IKEA, or Wayfair) in a kitchen corner or next to the fridge.

    Stock it with glasses, beverage bottles, coffee supplies, or entertaining items. Carts roll, so you can move it wherever you need extra counter space. This is especially brilliant for smaller kitchens. Invest in a cart with wheels for maximum flexibility.

    You’ve created functional storage that doubles as a design element. When guests arrive, move it to the dining area for drinks—style and function combined.

    24. Paint Your Kitchen Ceiling a Soft Color

    Most ceilings are white—boring. Paint yours a soft, light version of your wall color ($30–$40 for ceiling paint, same coverage) for a finished, intentional look.

    Lighter ceiling colors make the room feel taller; deeper colors feel cozier but require really good lighting. For small kitchens, stick to very light creams or soft whites. Larger kitchens can handle slightly deeper tones. Budget 2–3 hours and plan for potential ladder work. This feels fancy but costs almost nothing.

    Your kitchen looks more complete and intentional. A painted ceiling signals that you’ve thought about every detail, not just the walls.

    25. Upgrade Your Kitchen Lighting with Dimmers

    Dimmers let you control the mood—bright for cooking, soft for entertaining. Install dimmer switches ($15–$30 each) in place of standard switches. This works especially well with recessed lights or pendant fixtures.

    Basic installation takes 15–20 minutes per switch if you’re comfortable with wiring. If not, a handyman charges $50–$100 per switch. Total cost: $15–$130 per switch installed. Suddenly your kitchen feels restaurant-quality—and actually more functional for different times of day.

    You control the vibe from bright and energetic to soft and welcoming. Dimmers are the secret weapon of good lighting design.

    26. Add Glass Cabinet Doors to One Section

    Glass cabinet doors replace one section of solid cabinetry to display beautiful dishes or glassware. Order glass door panels ($50–$150 each) from custom cabinet makers or IKEA for simpler styles.

    Installation depends on your cabinet style. For IKEA or simple builds, it’s DIY-friendly (30–60 minutes). For custom cabinets, hire a pro. This upgrade works beautifully for showcasing matching dishware, glass collections, or cookbooks. Keep items styled and minimal—this is display space, not storage space.

    One glass door section breaks up solid cabinetry and adds visual lightness. Your kitchen feels more curated and less utilitarian.

    27. Organize Under Your Sink with Pull-Out Organizers

    The space under your sink is typically chaos—pipes, old bottles, random supplies. Pull-out organizers ($25–$60 per set) from IKEA, Target, or Amazon maximize this awkward space.

    Install a sliding drawer caddy, tension rods to hold bottles, or tiered shelves. Everything becomes visible and accessible instead of crammed in a dark corner. Installation takes 30 minutes. Pro tip: use spray bottles and matching containers to corral cleaning supplies—it looks intentional, not random.

    You’ve reclaimed dead space and actually organized something that’s typically a disaster zone. Guests never see under your sink, but you’ll feel that calm every time you open the cabinet.


    Save this post and pick your top three upgrades—you can totally knock them out this weekend. Which idea are you tackling first? Share this with a friend who’s been wanting a kitchen refresh but thought it had to be expensive or complicated.

  • 27 Two-Tone Kitchen Cabinet Color Ideas for a Fresh, Modern Look

    27 Two-Tone Kitchen Cabinet Color Ideas for a Fresh, Modern Look

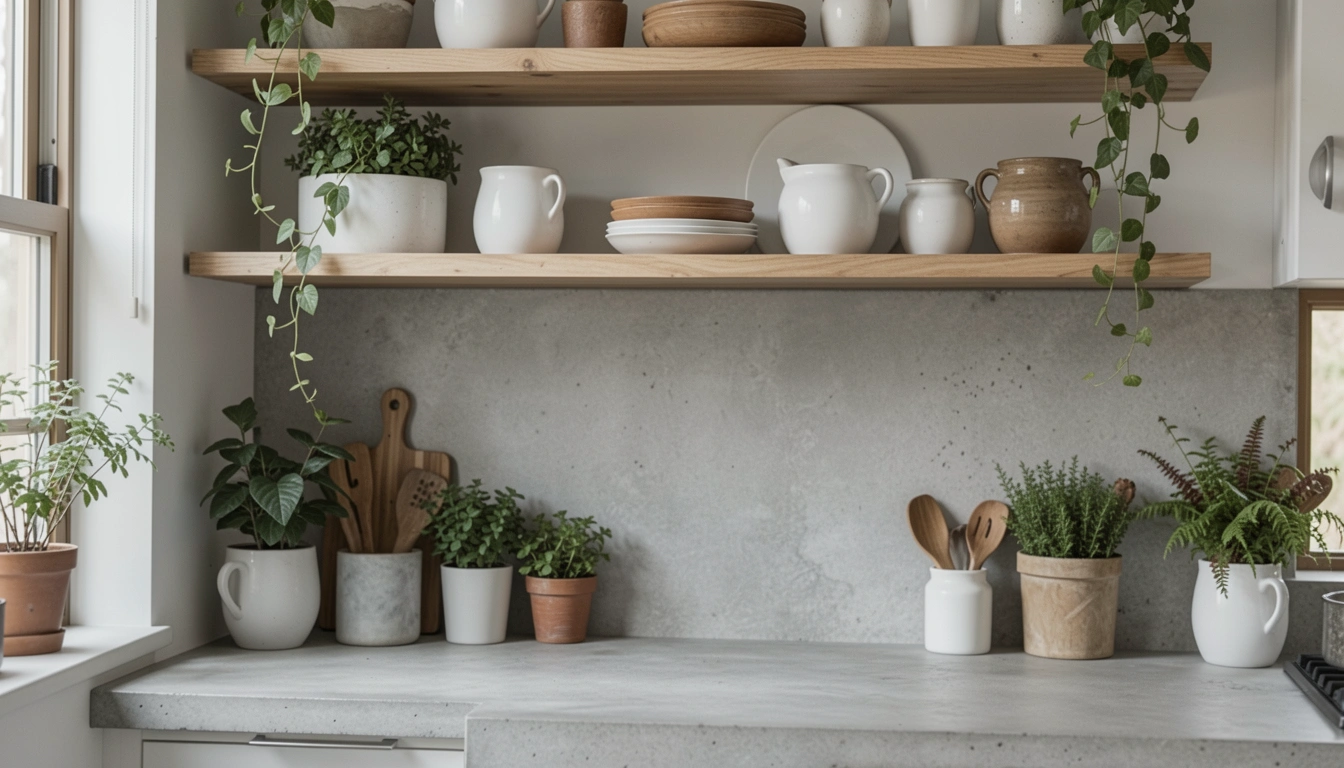
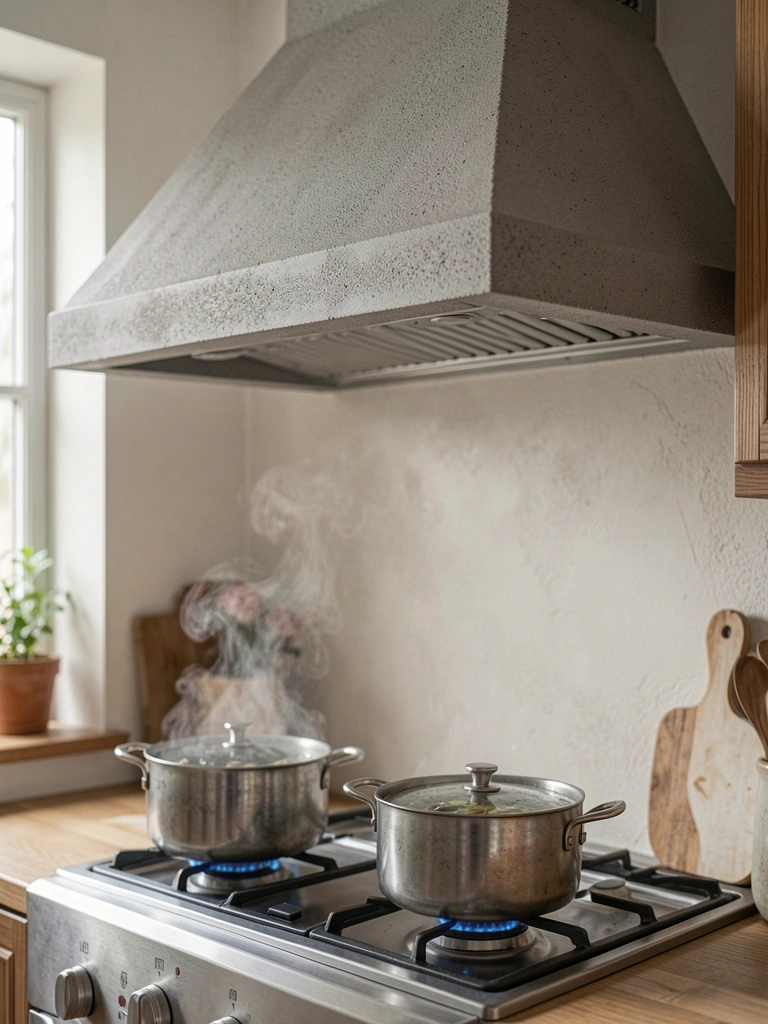
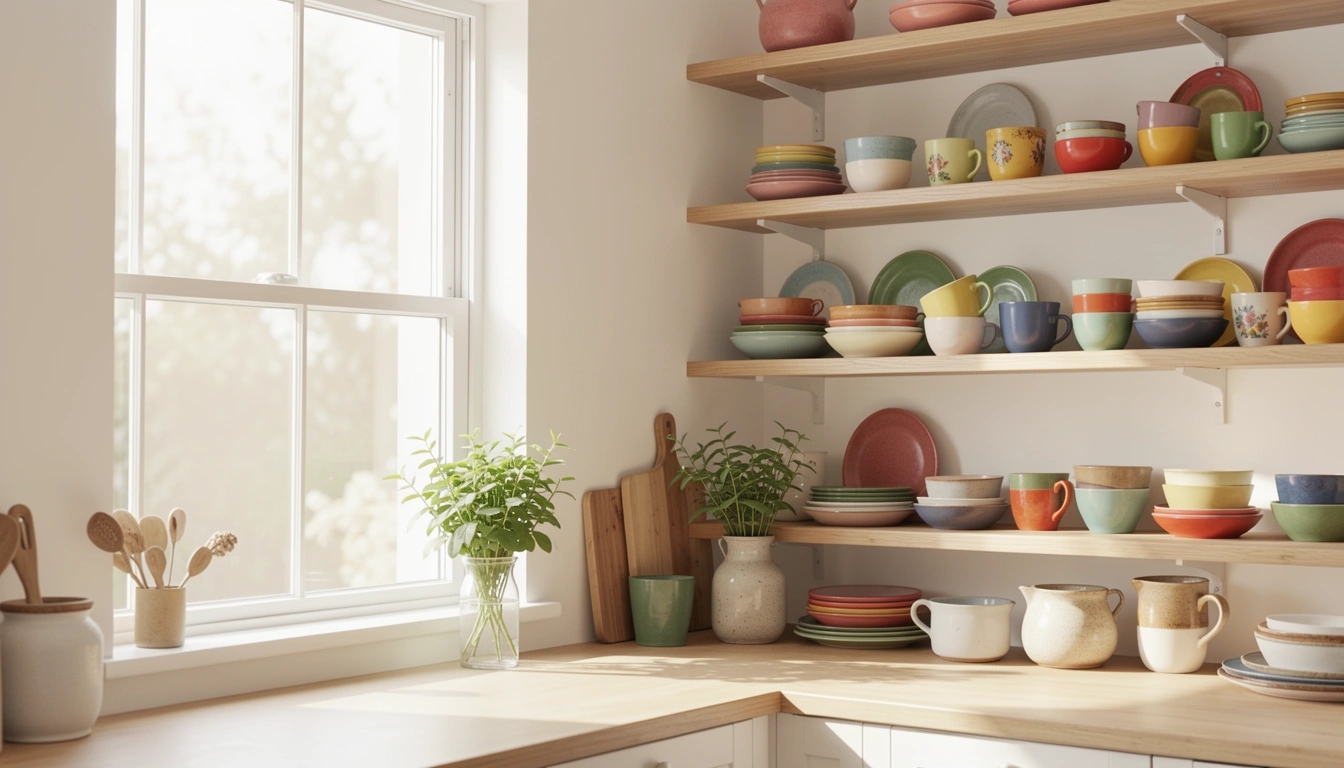
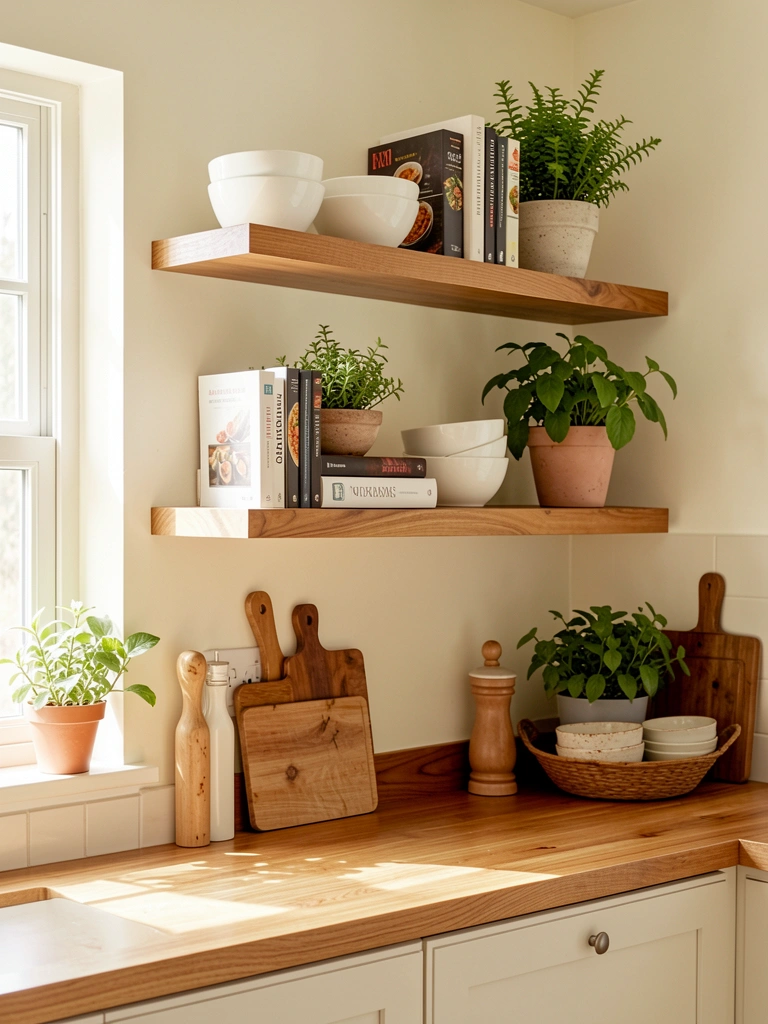
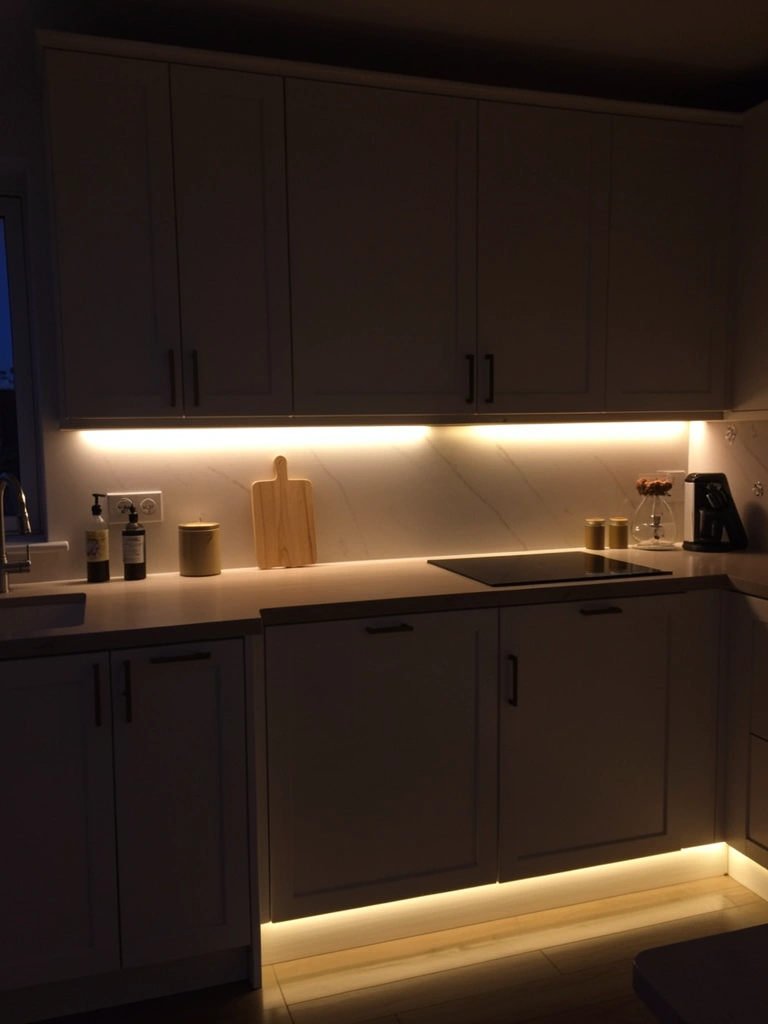
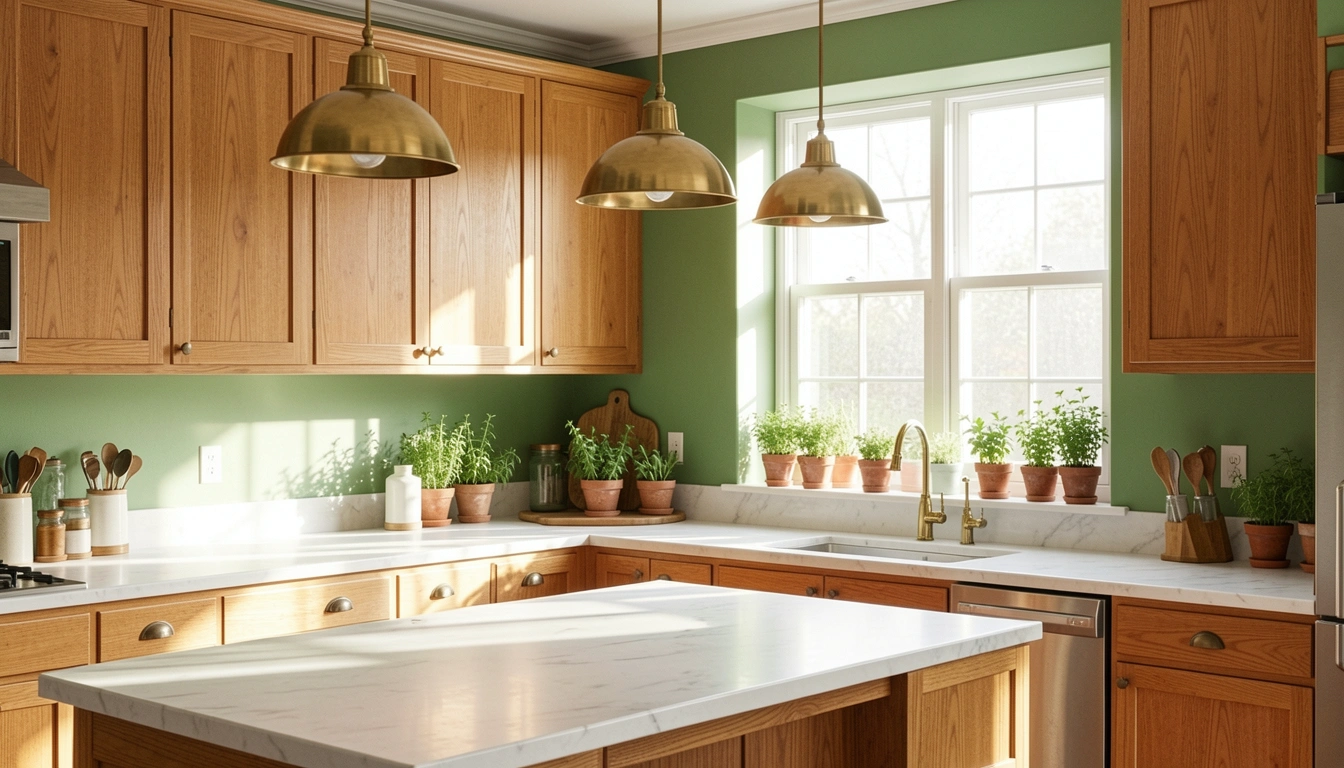
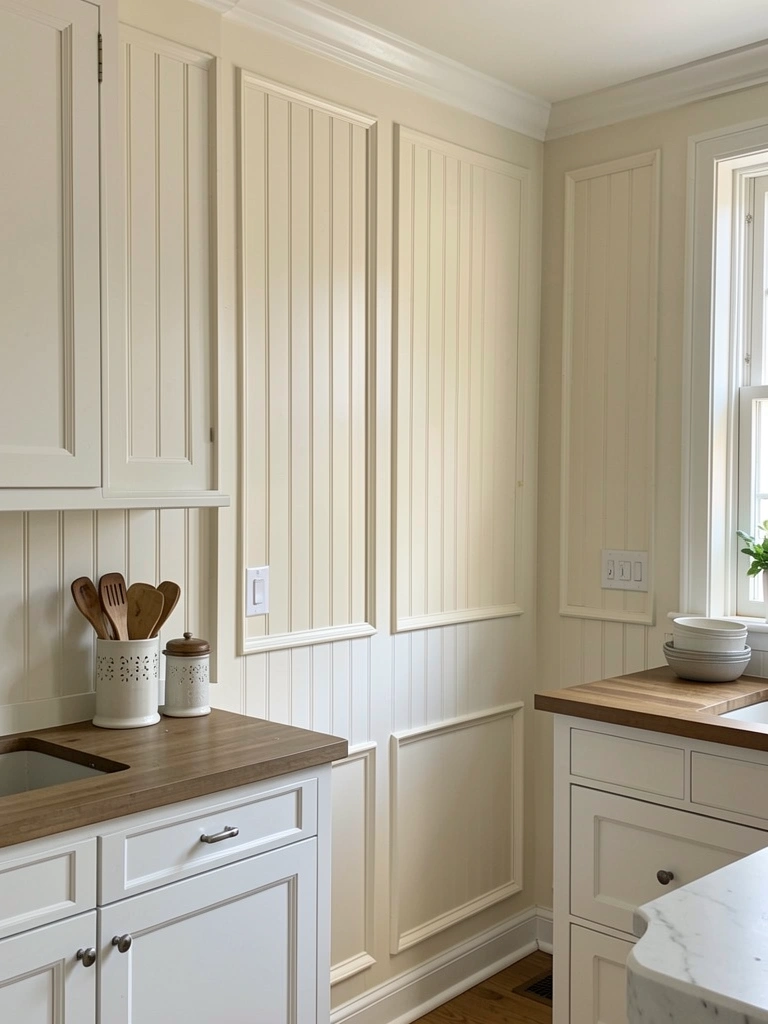
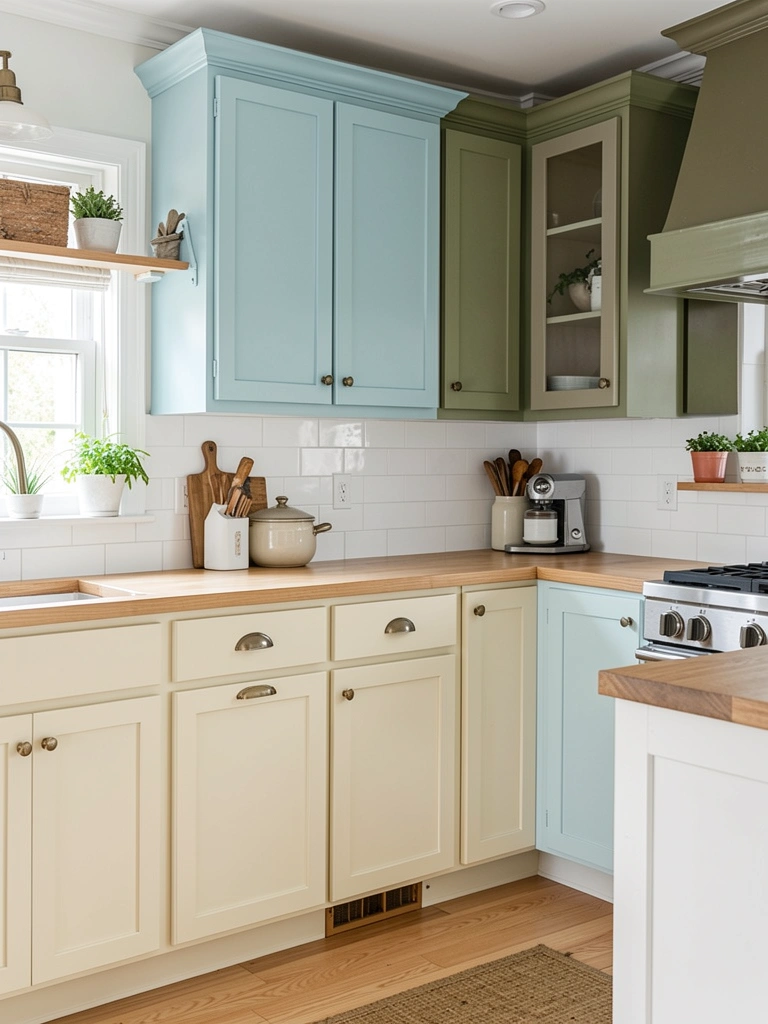
    Two-tone cabinets are having a major moment, and for good reason—they instantly add depth, personality, and that high-end feel without a full kitchen renovation. Whether you’re drawn to bold contrasts or subtle color play, the right cabinet combination can completely change how your kitchen looks and feels. The beauty of this trend is its flexibility: you can go classic, modern, moody, or playful depending on which colors you pair. In this guide, you’ll discover 27 two-tone combinations that work in real homes—from timeless navy-and-white to unexpected jewel tones. Each idea includes styling tips and realistic budget info so you can figure out which combination speaks to you. Ready to refresh your kitchen? Let’s dive into these game-changing color pairings.

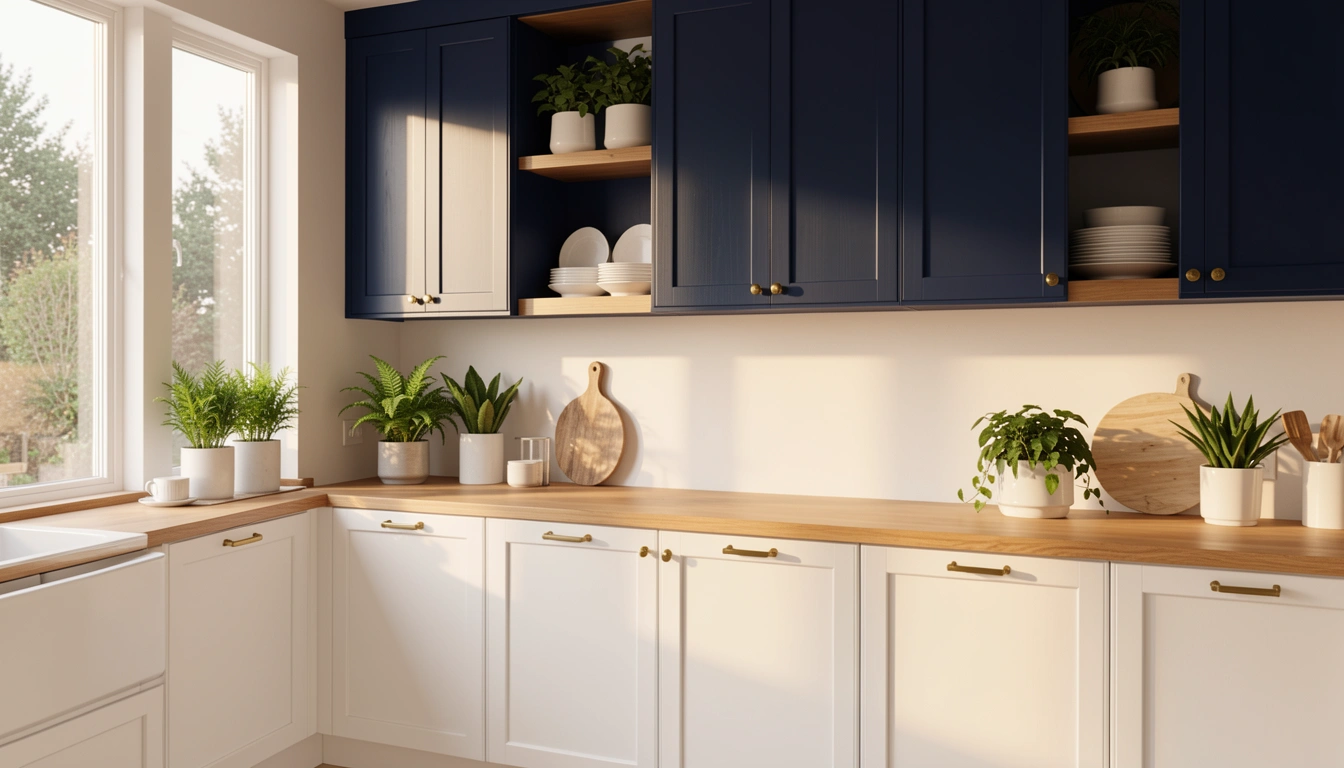
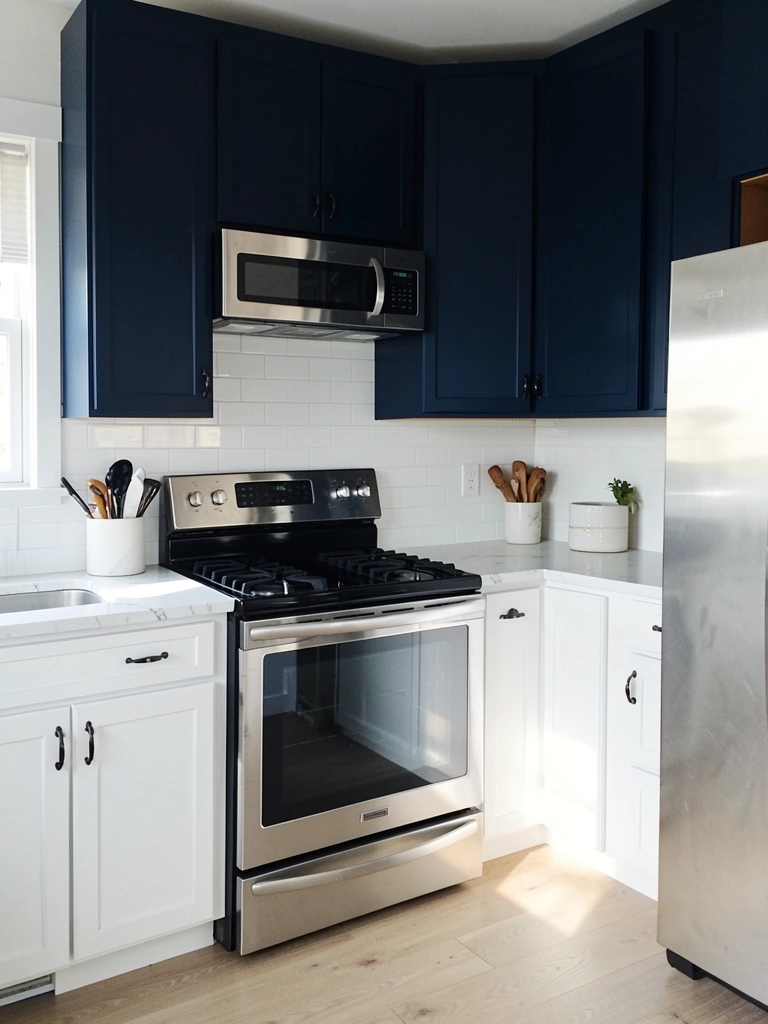
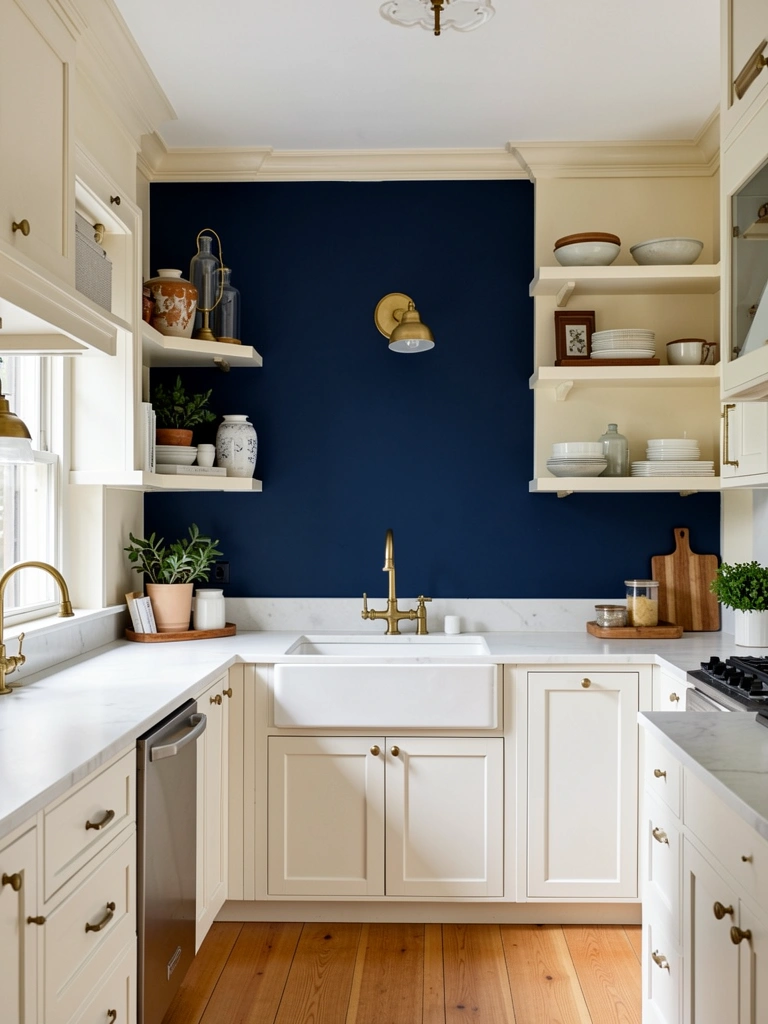
    1. Navy Blue Uppers with White Lowers

    Navy and white is the ultimate timeless pairing that works in traditional, transitional, and modern kitchens alike. The darker upper cabinets draw the eye upward and add visual weight, while white lower cabinets keep the space feeling open and airy. This combo works because it mimics the look of expensive custom cabinetry without the custom price tag.

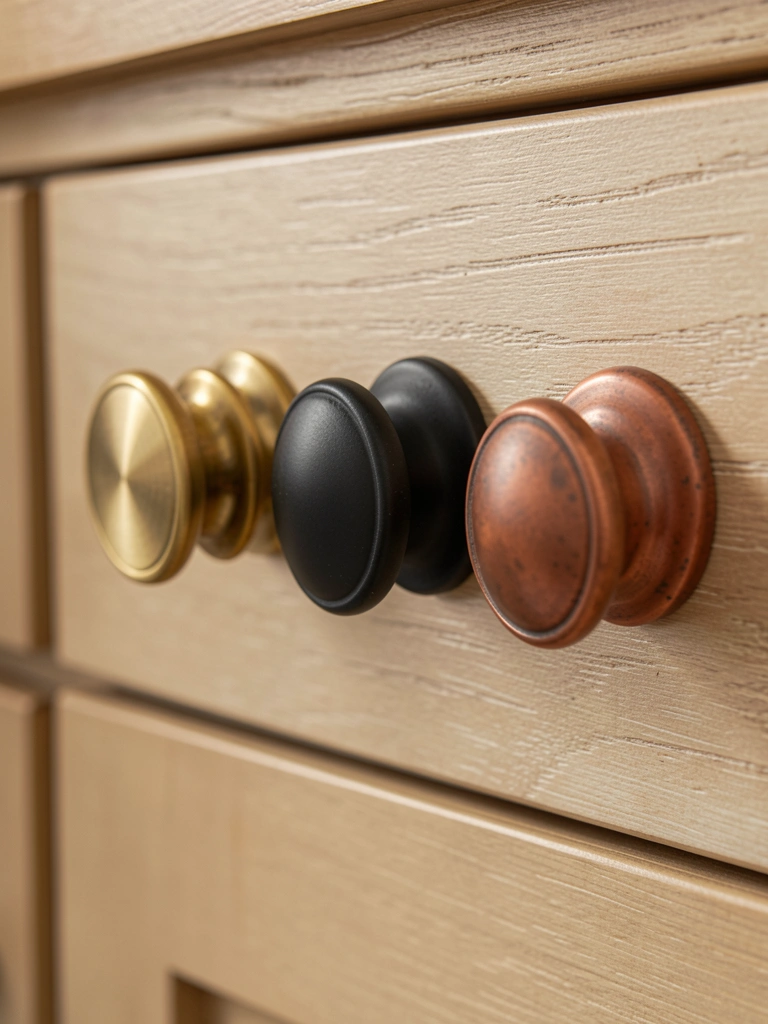
    You can achieve this look two ways: repaint existing cabinets ($200–$500 in paint and supplies if DIY) or replace uppers with new cabinet boxes ($1,500–$3,500 installed). If you already have decent cabinet structure, a fresh coat of high-quality cabinet paint gets the job done over a long weekend. Pair it with warm brass or brushed gold hardware for a softer feel, or stick with stainless steel for something crisp.

    The contrast keeps your kitchen feeling intentional and designed, while the color combo never feels dated. Your space looks both sophisticated and approachable at the same time.

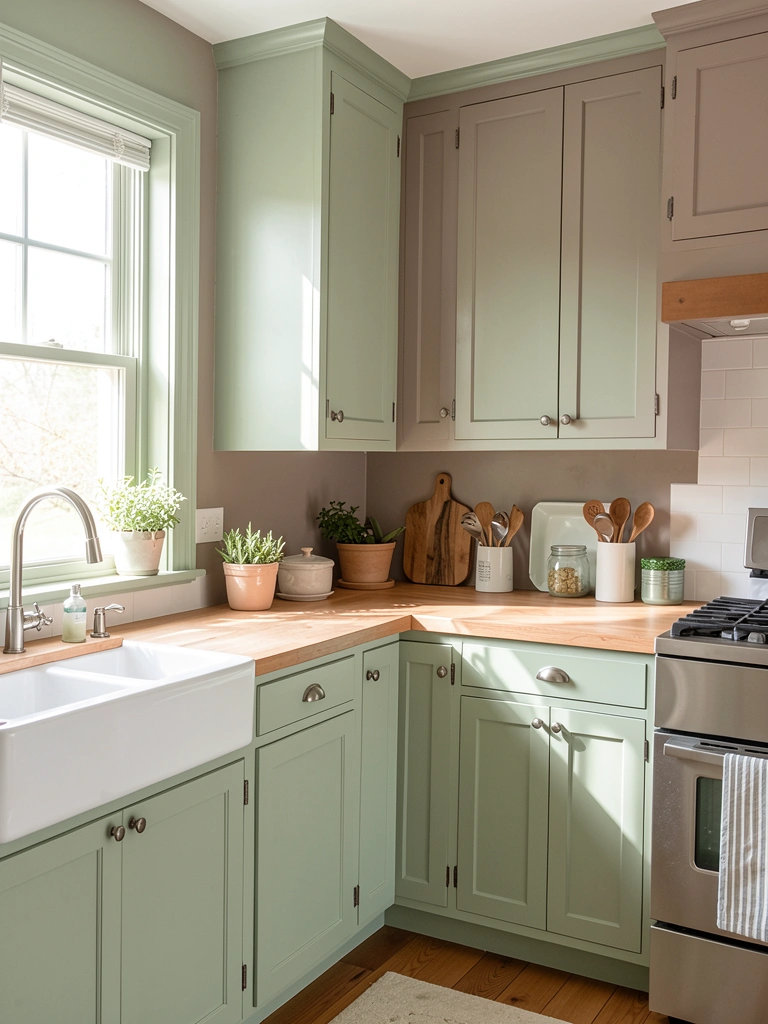
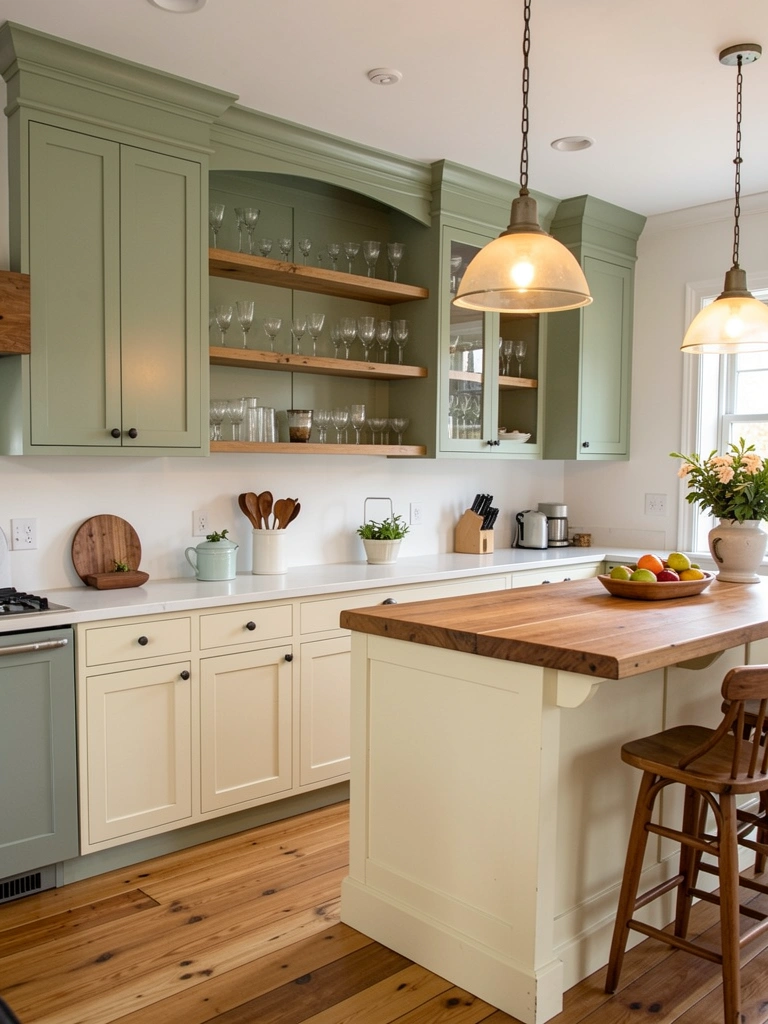
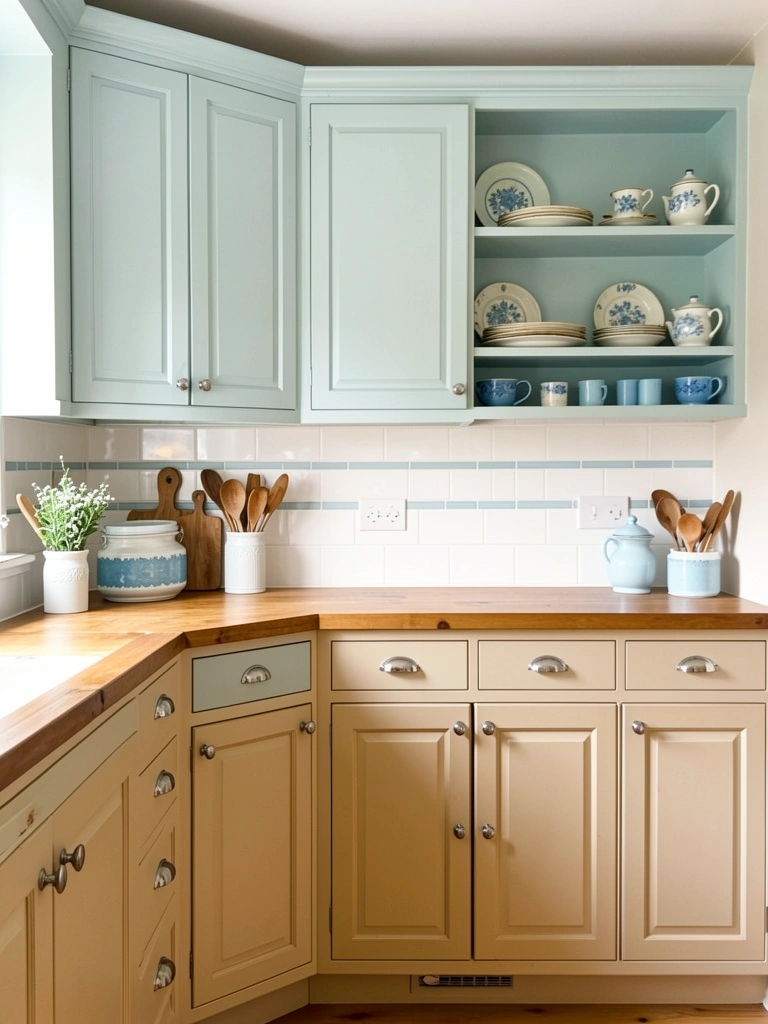
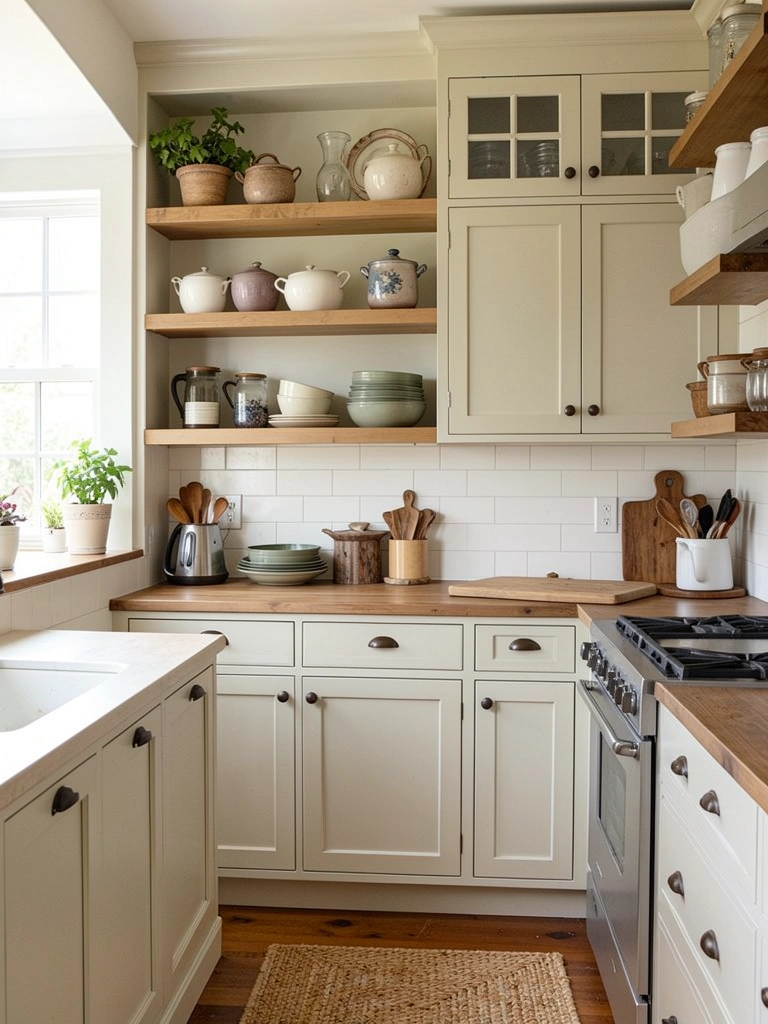
    2. Sage Green Uppers with Cream Lowers

    Sage green has completely replaced basic beige as the go-to neutral that still feels interesting. When paired with cream or ivory lowers, this combo feels organic, calming, and slightly unexpected—perfect if you want color without going bold. The soft green reads as natural and timeless rather than trendy, so it ages well.

    This pairing works especially well in farmhouse, cottage, and transitional kitchens. Paint high-quality kitchen cabinets with semi-gloss finish in sage (Benjamin Moore’s “Dried Sage” or Sherwin-Williams “Accessible Beige Green” are popular choices). Budget $300–$600 for paint if DIY, or $2,000–$4,000 if hiring pros. The beauty of this combo is that cream lowers hide stains and water marks, which means less stress about keeping things pristine.

    Your kitchen feels like a peaceful retreat where you actually want to spend time cooking. Add plants and warm wood accents to lean into this calming aesthetic.

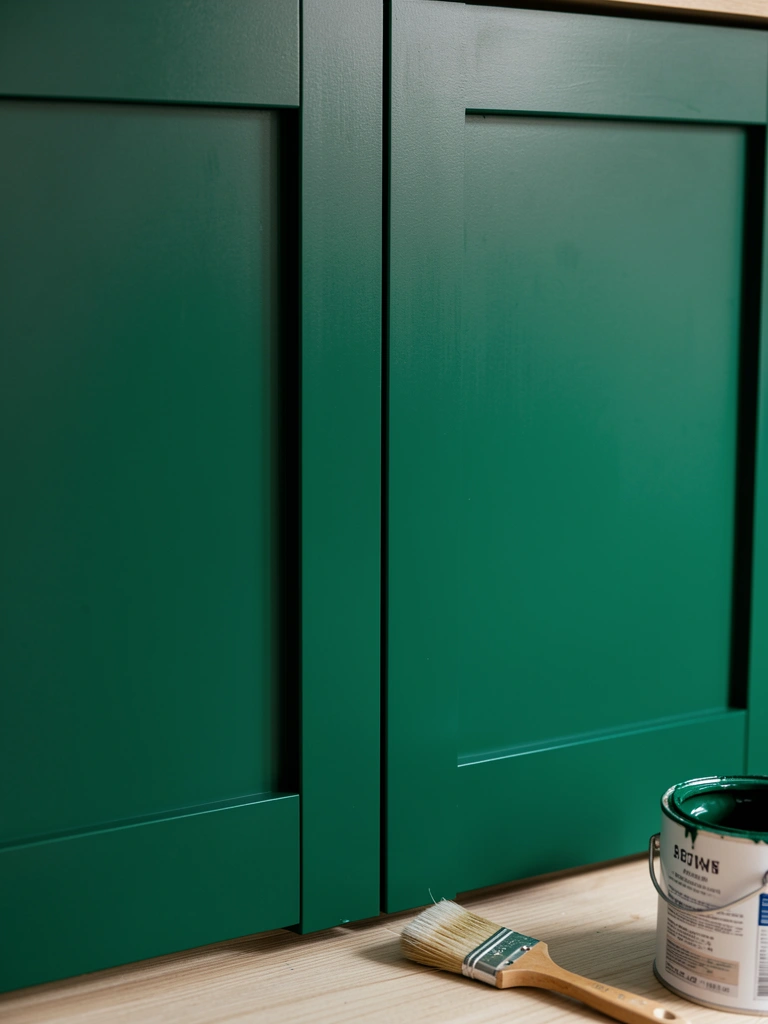
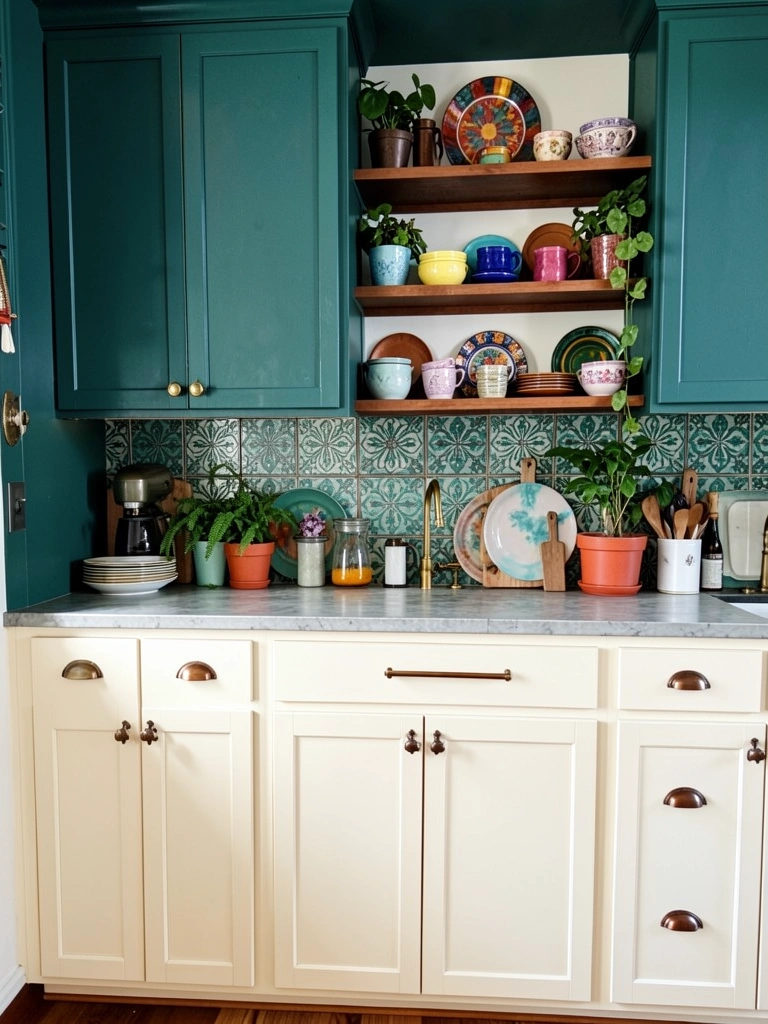
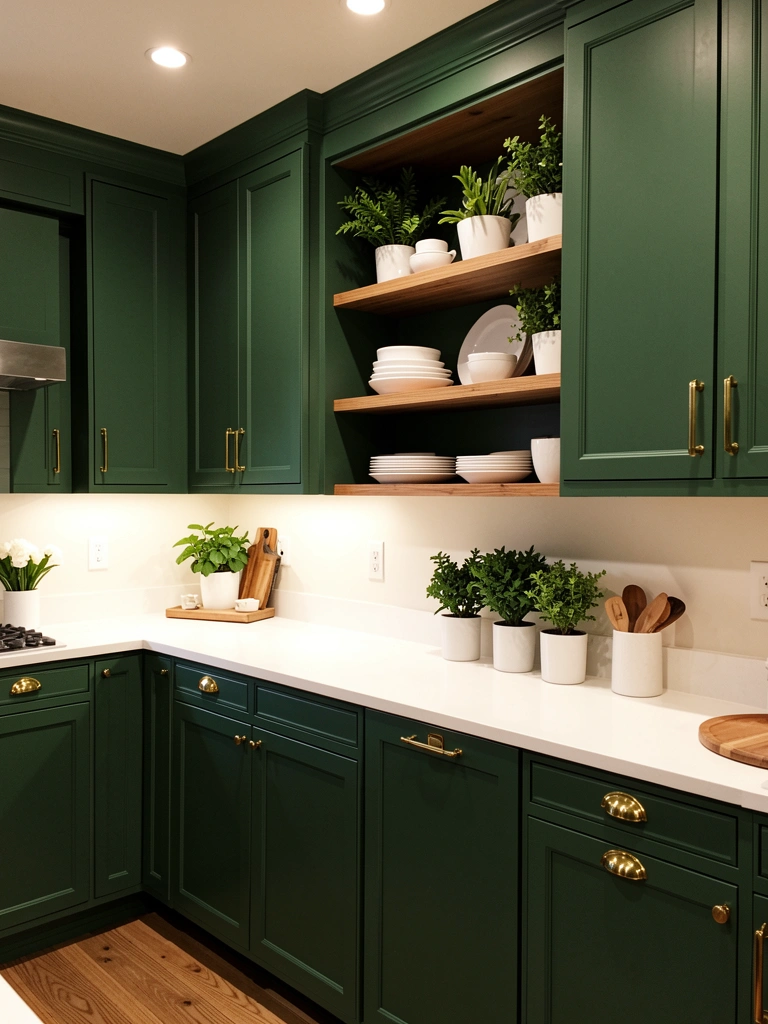
    3. Deep Forest Green Uppers with Light Oak Lowers

    Combining dark forest green with warm wood tones creates a sophisticated, earthy vibe that feels both contemporary and grounded. The deep green provides drama and personality while the warm wood keeps things from feeling too moody. This pairing is especially popular in kitchens with natural wood accents or open shelving made from reclaimed materials.

    If your lower cabinets are already light wood (oak, ash, or birch), you just need to paint the uppers in a deep forest green like Sherwin-Williams “Evergreen Fog” or Benjamin Moore “Calico Green” ($250–$400 in paint). If you’re working with different cabinets, factor in $2,500–$5,000 for new cabinet boxes or refinishing. Add bronze or antique brass hardware to tie the look together. This combo pairs beautifully with white or cream countertops and a natural backsplash like shiplap or subway tile.

    You’ll have a kitchen that feels both warm and refined—the kind of space that photographs well and never looks outdated. Guests will notice how carefully you’ve thought through the details.

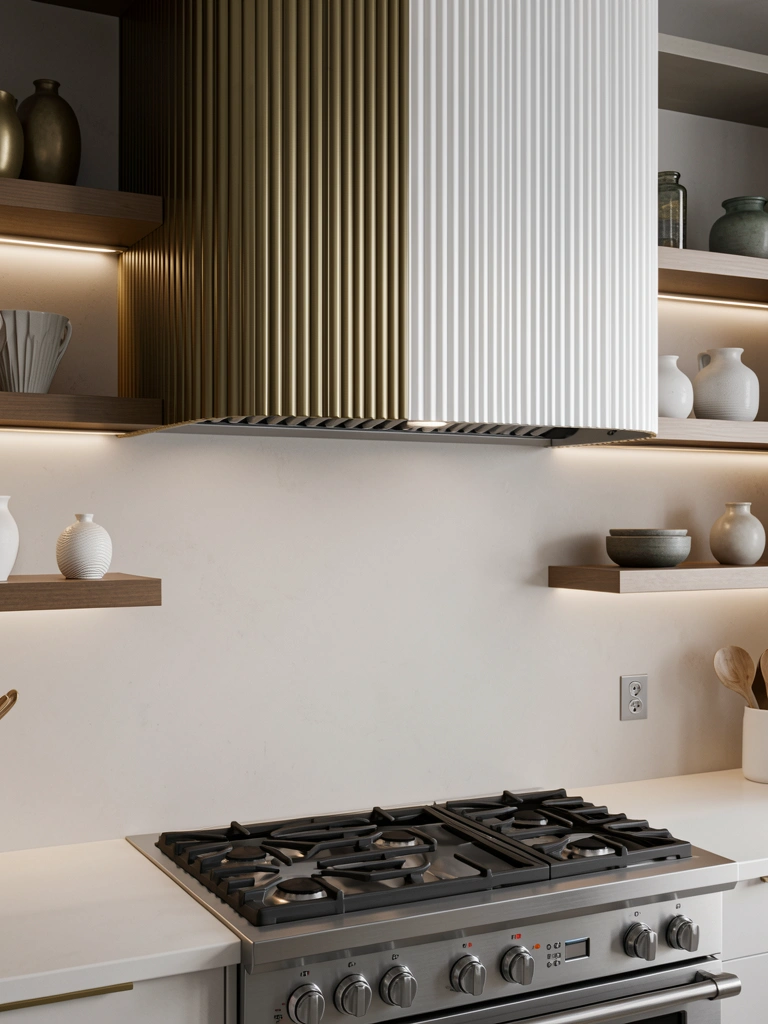
    4. Black Uppers with White Shaker-Style Lowers

    This high-contrast combo is for kitchens that lean modern or transitional with a graphic edge. Black uppers create a strong visual anchor, while white shaker-style lowers keep the look from feeling too heavy or dark. The shaker-style fronts add texture and warmth that prevents this combo from feeling cold or too contemporary.

    Paint your uppers in a true black or near-black like Benjamin Moore “Tricorn Black” ($300–$500 in paint and supplies). Shaker-style cabinet doors cost more upfront ($1,500–$3,000 for lower cabinets alone) but they’re iconic and pair beautifully with this color combination. Pair with geometric or checkered backsplash tile ($1,000–$2,500 installed) to lean into the bold aesthetic. This combo demands strong, clean hardware—think brushed nickel, polished chrome, or matte black pulls.

    Your kitchen becomes a design statement that feels curated and intentional. The contrast ensures your space photographs well and works as a beautiful backdrop for cooking and entertaining.

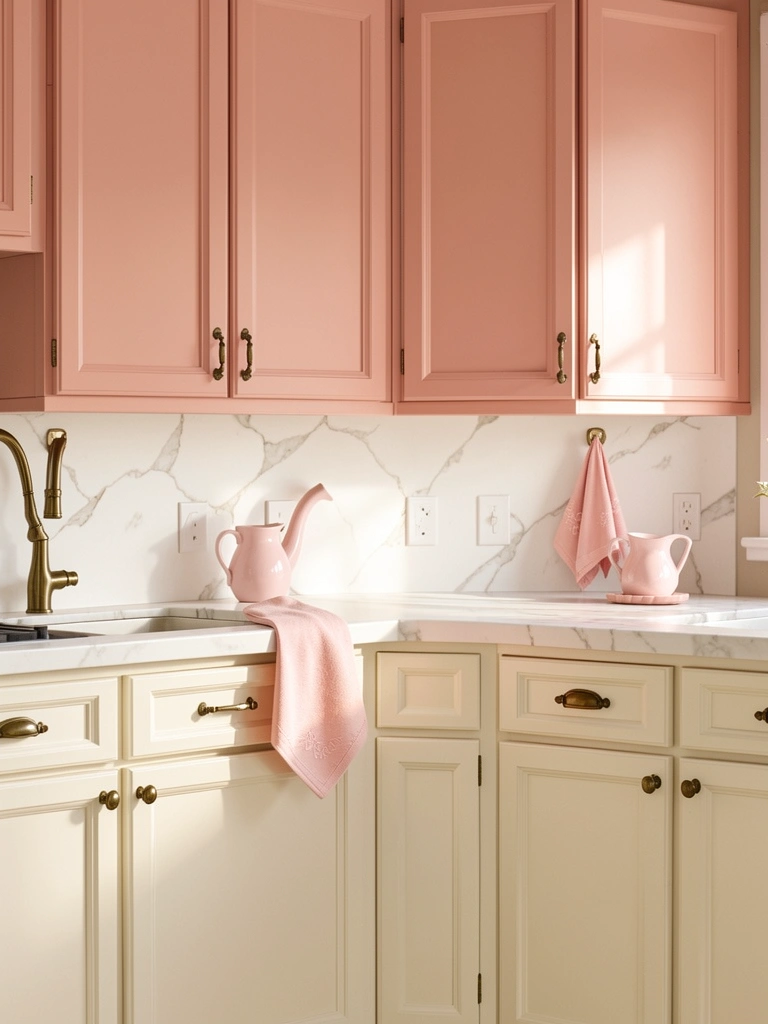
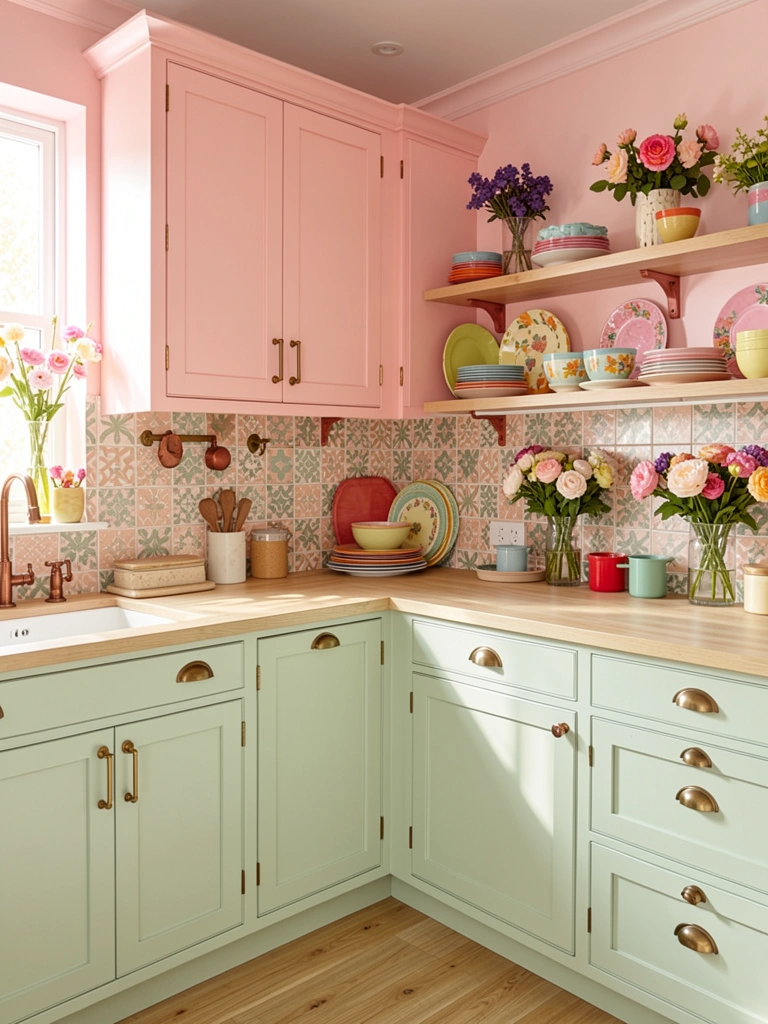
    5. Blush Pink Uppers with Soft White Lowers

    If you love color but want to keep things soft and romantic, blush pink pairs beautifully with white. This combo works in cottages, farmhouses, and contemporary spaces with a feminine touch. Blush reads as sophisticated rather than childish when you choose the right undertone and pair it with elegant hardware and finishes.

    Choose a high-quality paint in a warm blush like Sherwin-Williams “Quicksand” or Benjamin Moore “Pink Attraction” for the uppers ($250–$400). Keep lowers in crisp white to maintain visual balance. Budget $150–$300 in hardware—vintage brass or soft gold pulls enhance the romantic feel. This combo works beautifully with marble or light quartz countertops and a simple white subway or marble backsplash. Add soft pink accents through tea towels, flowers, or small appliances to tie it all together.

    Your kitchen becomes a warm, welcoming space that feels both curated and genuinely lived-in. The soft colors make the room feel larger and more open while maintaining personality and charm.

    6. Charcoal Gray Uppers with Natural Wood Lowers

    Charcoal gray + natural wood is the sophisticated answer if you want contrast without the high drama of black and white. The gray is moody and modern while the warm wood grounds the space and keeps it feeling inviting. This pairing works in contemporary, transitional, and industrial-style kitchens.

    Paint uppers in charcoal gray like Benjamin Moore “Kendall Charcoal” or Sherwin-Williams “Iron Ore” ($300–$500 in supplies). If your lowers are already natural wood, you’re set—just refinish if they need it ($500–$1,500). If you need new lower cabinets, budget $2,000–$4,500. Choose brushed nickel, matte black, or warm bronze hardware to tie the color scheme together. A white or light gray countertop keeps this combo from feeling too dark overall.

    The result is a kitchen that feels mature and design-forward without trying too hard. You get the moodiness of dark cabinets balanced by the warmth of natural wood, so the space never feels cold or uninviting.

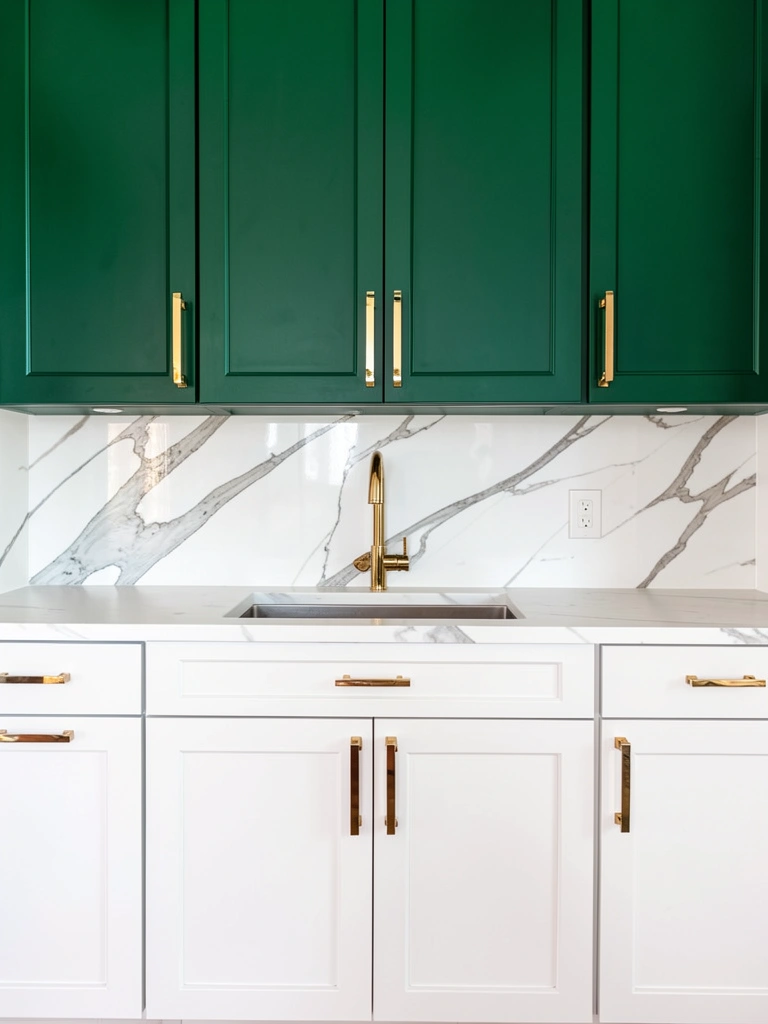
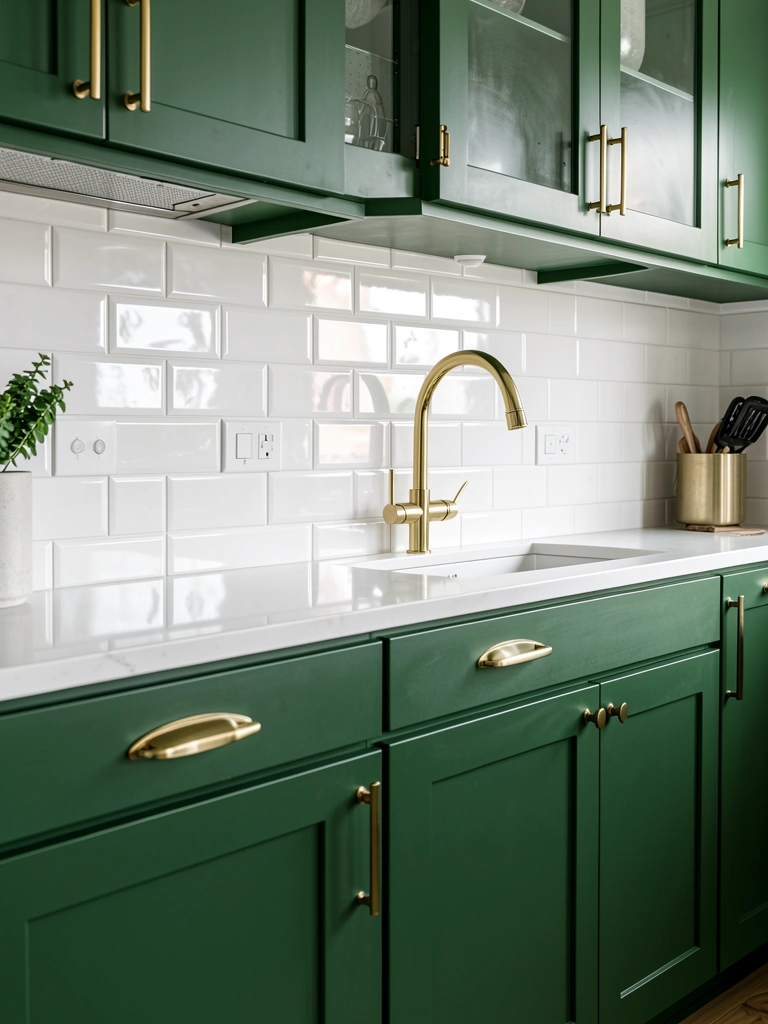
    7. Emerald Green Uppers with Gold Hardware and White Lowers

    Emerald is the jewel-tone that reads as high-end and sophisticated when paired with white and warm gold hardware. This combo works in transitional, contemporary, and even eclectic spaces where you want to make a statement. The emerald feels intentional and curated rather than random or trendy.

    Choose a true emerald or deep jade green like Benjamin Moore “Calico Green” or Sherwin-Williams “Nifty Nautical” for uppers ($250–$400 in paint). Pair with crisp white lowers and invest in quality gold or brass hardware ($150–$400 for the full set). This combo demands excellent lighting—under-cabinet LED strips or pendant lights above the island show off the color beautifully. A marble or light quartz countertop and marble backsplash complete the elevated aesthetic.

    Your kitchen feels like a luxury hotel or upscale restaurant—the kind of space where you want to show off your cooking skills. The emerald + gold combo photographs beautifully and creates instant visual interest without feeling chaotic.

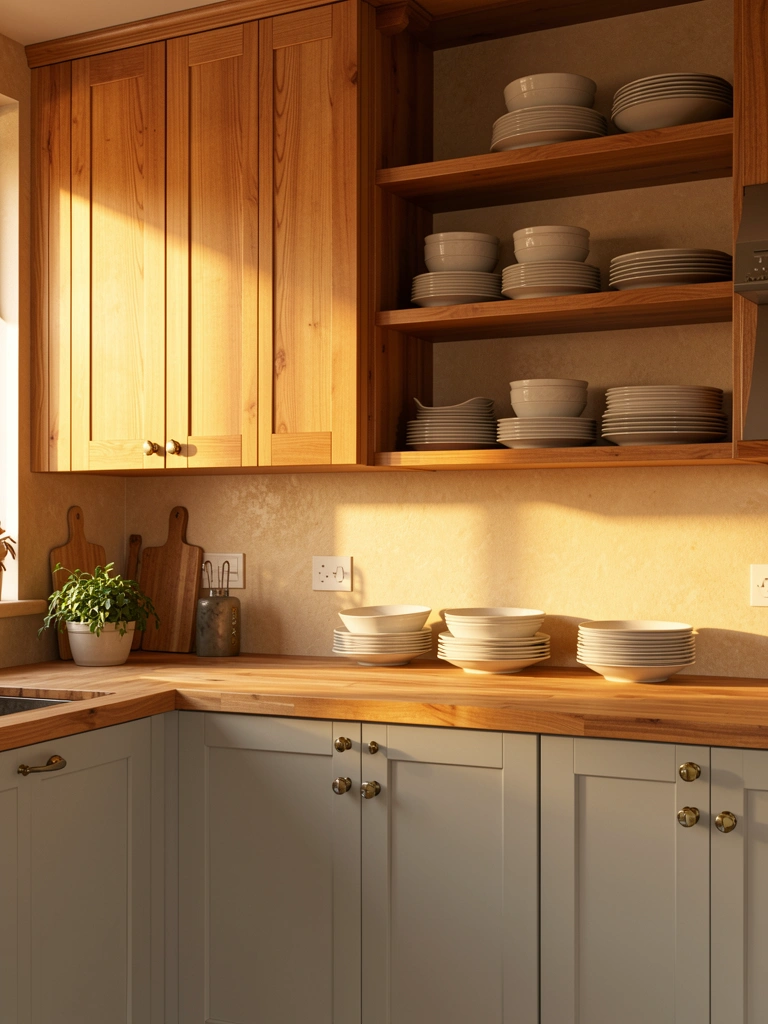
    8. Warm Honey Wood Uppers with Soft Gray Lowers

    If you love the look of natural wood but want a little bit of modern contrast, pairing warm honey wood uppers with soft gray lowers gives you the best of both worlds. This combo feels balanced and approachable rather than bold or trendy. It works beautifully in farmhouse, transitional, and contemporary cottages.

    If your uppers are already honey-toned wood, keep them as-is and paint lowers in a soft gray like Benjamin Moore “Revere Pewter” or Sherwin-Williams “Accessible Beige” ($250–$400). This combo is especially budget-friendly if you’re working with existing cabinets. If you need new pieces, budget $2,000–$4,000 for one cabinet run. Choose warm brass or bronze hardware that echoes the wood tone. A warm beige or tan backsplash ties the whole scheme together without competing for attention.

    You’ll have a kitchen that feels warm, balanced, and intentionally designed. The combo works in natural light and artificial light alike, so your space always looks inviting.

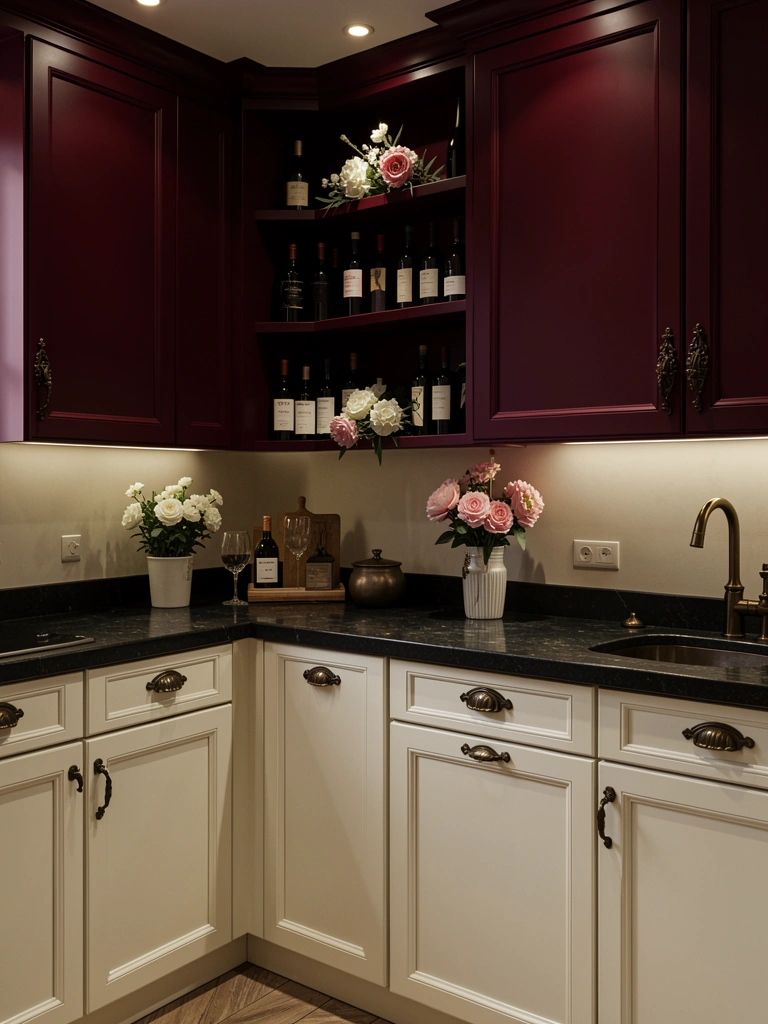
    9. Burgundy Uppers with Cream Lowers

    Burgundy is the bold jewel-tone choice for homeowners who want drama and luxury. When paired with cream lowers and warm metallics, this combo reads as sophisticated and intentional rather than risky. It works in transitional, traditional, and contemporary eclectic kitchens where color is celebrated.

    Choose a rich burgundy like Benjamin Moore “Calico Red” or Sherwin-Williams “Red Bay” for the uppers ($250–$400). Keep lowers in cream or ivory for balance and visual breathing room. This combo demands excellent hardware—oil-rubbed bronze, antique brass, or warm bronze pulls ($150–$400) tie everything together. Pair with dark countertops (black granite, dark quartz, or dark wood) to anchor the richness of the burgundy. Warm lighting is essential to prevent this combo from feeling too dark.

    Your kitchen becomes a moody, sophisticated gathering space that feels like a fine restaurant or wine bar. This color choice signals confidence and design sophistication to anyone who sees it.

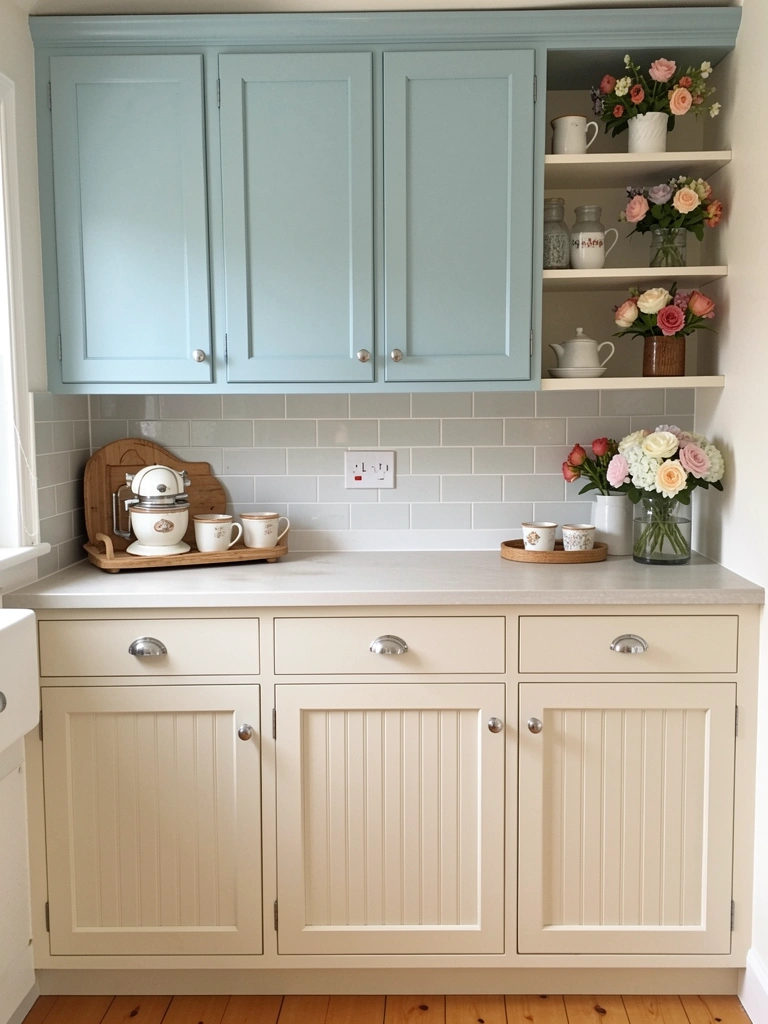
    10. Soft Blue Uppers with White Shaker Lowers

    Soft blue is the happy medium between bold navy and safe white—it adds color and personality without overwhelming the space. When paired with white shaker lowers, this combo feels fresh, classic, and endlessly stylish. It works in cottage, farmhouse, transitional, and contemporary spaces alike.

    Paint uppers in a soft blue like Benjamin melissa-Williams “Sea Salt” or Benjamin Moore “Palladian Blue” ($250–$400). Shaker-style lowers ($1,500–$3,000) provide texture and warmth. This combo pairs beautifully with a classic white subway tile backsplash and light granite or quartz countertops. Choose simple chrome, nickel, or soft brass hardware ($100–$300) to keep the look fresh and uncluttered.

    Your kitchen feels calm, collected, and timelessly beautiful. The soft blue ages gracefully and never feels dated, while the white and shaker doors keep things from feeling too trendy or temporary.

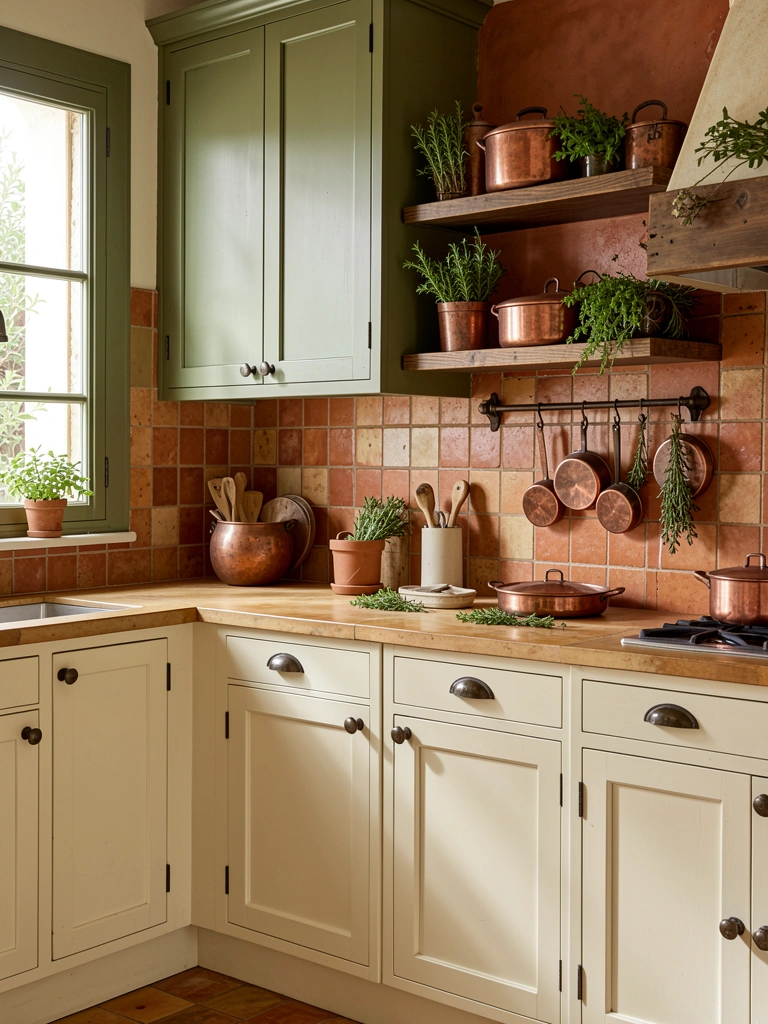
    11. Olive Green Uppers with Warm White Lowers

    Olive green is the earthy, sophisticated choice that works beautifully with warm whites and natural materials. This combo evokes Mediterranean villas or rustic farmhouses—it feels grounded and authentically styled rather than forced. Perfect for kitchens with open shelving or natural wood accents.

    Choose a muted olive green like Sherwin-Williams “Outerbanks” or Benjamin Moore “Dried Sage” for uppers ($250–$400). Pair with warm cream or off-white lowers for softness and balance. Terracotta or warm earth-tone backsplash tile ($800–$1,500 installed) enhances the Mediterranean feel. Aged bronze or copper hardware ($150–$350) completes the rustic-elegant aesthetic. Add open wooden shelves, copper cookware, and fresh herbs to lean into the warm, inviting vibe.

    You’ll create a kitchen that feels authentically styled and deliberately curated. The warm earth tones make the space feel like a retreat where cooking is a pleasure rather than a chore.

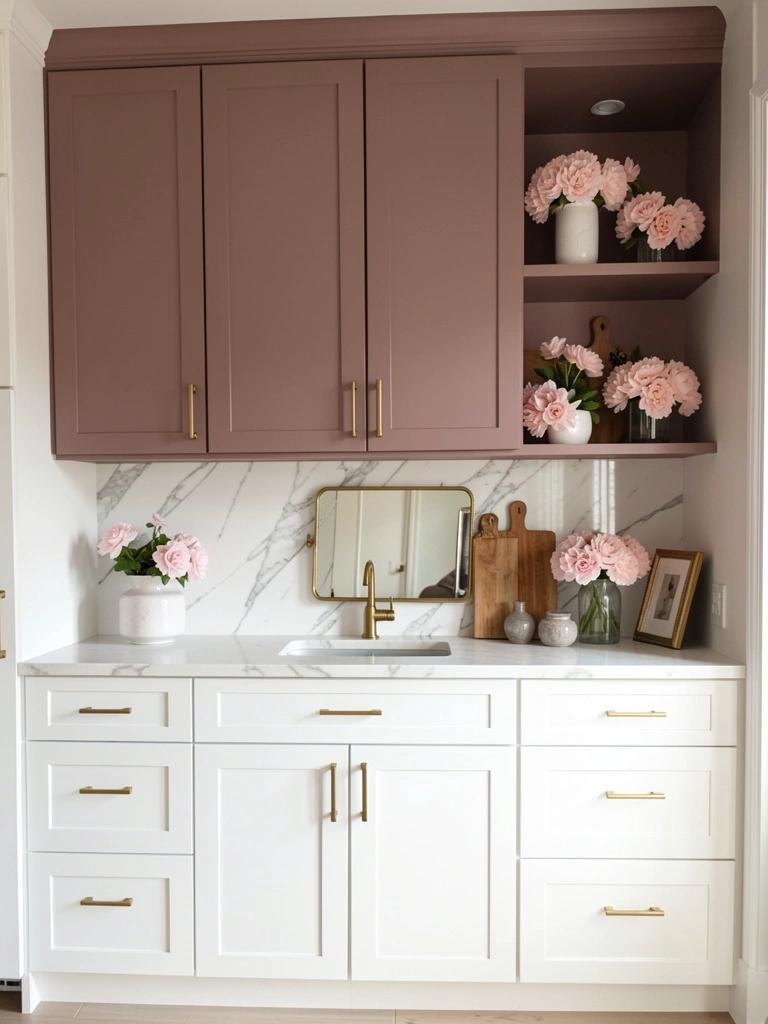
    12. Dusty Mauve Uppers with Crisp White Lowers

    Dusty mauve is having its moment as the unexpected neutral that adds color and sophistication without shouting for attention. Paired with crisp white lowers, this combo feels modern, calm, and carefully considered. It works beautifully in contemporary, eclectic, and modern farmhouse spaces.

    Choose a muted mauve like Benjamin Moore “Lilac Mist” or Sherwin-Williams “Potentially Purple” for uppers ($250–$400). Keep lowers in bright white for visual contrast and to prevent the space from feeling too muted. Brushed gold or soft brass hardware ($150–$350) adds feminine elegance. A marble or light quartz backsplash and countertop complete the elevated aesthetic. This combo benefits from good lighting—under-cabinet LEDs and pendant lights make the mauve glow beautifully.

    Your kitchen becomes a serene, sophisticated space that photographs beautifully and never feels dated. Guests will be impressed by your confident, thoughtful color choices without being able to pinpoint exactly why the space works so well.

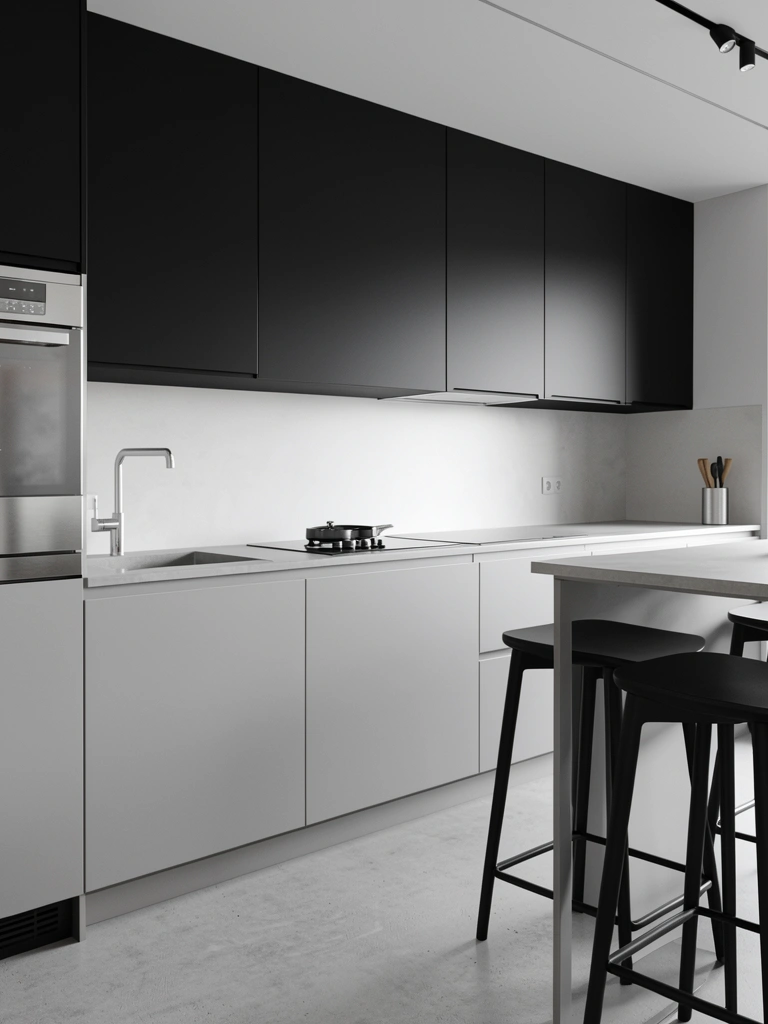
    13. Charcoal Black Uppers with Light Gray Lowers

    This is the ultimate modern pairing for minimalist kitchens where clean lines and understated elegance matter most. Black uppers create drama while light gray lowers keep the space feeling open and uncluttered. The subtle contrast feels intentional rather than bold, perfect for contemporary, industrial, or Scandinavian-inspired spaces.

    Paint uppers in true matte black like Benjamin Moore “Black Onyx” ($300–$500). Choose light gray for lowers in a shade like Sherwin-Williams “Urbane Gray” or Benjamin Moore “Gray Owl” ($250–$400). This combo works best with handleless or minimalist hardware to maintain the clean aesthetic. Pair with concrete, light gray, or light wood countertops and a minimal backsplash. Stainless steel appliances and black fixtures tie everything together seamlessly.

    Your kitchen becomes a model of understated sophistication where every element has purpose. The space feels calm and organized, and the dark uppers don’t make the room feel small because the light lowers and minimal design keep it feeling open and airy.

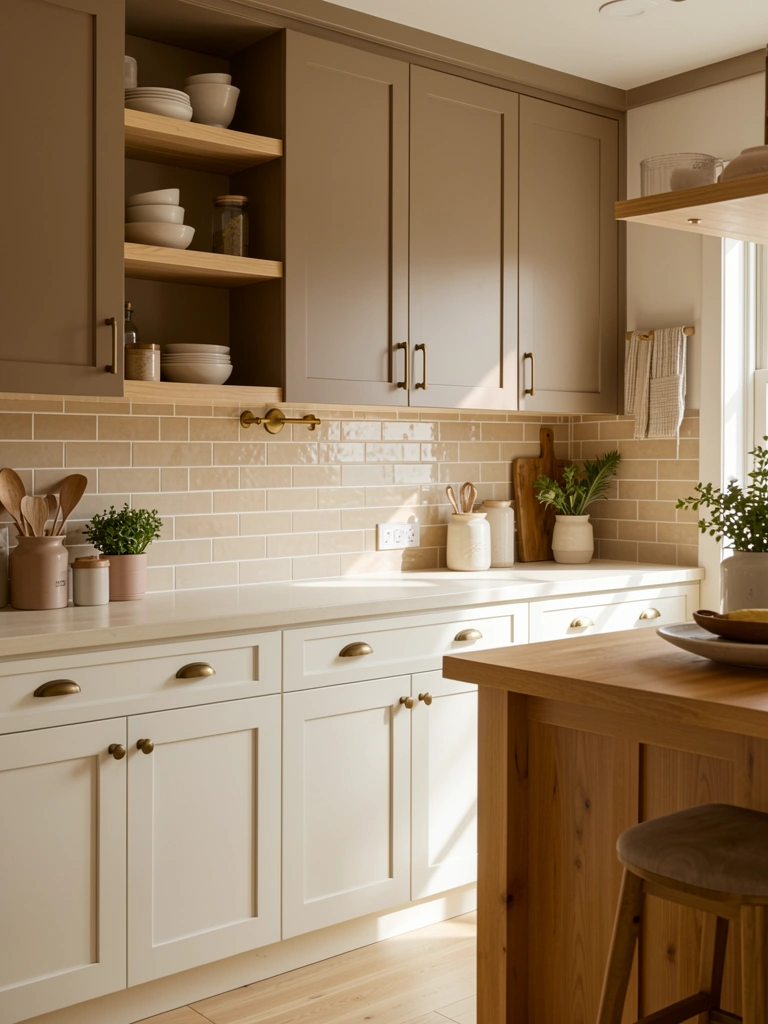
    14. Warm Taupe Uppers with Creamy White Lowers

    Taupe is the warm neutral that feels modern without being trendy, and it pairs beautifully with creamy white for subtle sophistication. This combo works in transitional, contemporary, and even modern farmhouse kitchens where warmth matters but you still want visual interest. It’s the perfect choice if you love neutrals but don’t want your kitchen to look boring.

    Choose a warm taupe like Benjamin Moore “Accessible Beige” or Sherwin-Williams “Urbane Bronze” for uppers ($250–$400). Pair with creamy white lowers for softness and warmth. Warm brass or bronze hardware ($150–$350) echoes the warm undertones. A warm beige or tan backsplash ties the scheme together without adding visual chaos. Natural wood open shelving or a wood island adds additional warmth and texture.

    You’ll have a kitchen that feels effortlessly stylish and beautifully balanced. The warm taupe works beautifully with natural light and makes the space feel inviting without requiring much styling or visual effort to maintain.

    15. Deep Teal Uppers with Soft Cream Lowers

    Teal is the adventurous jewel-tone that works beautifully for homeowners who want personality without going as bold as emerald or navy. When paired with soft cream and mixed metals, this combo feels collected and artfully eclectic. Perfect for kitchens with personality and character.

    Choose a deep teal like Benjamin Moore “Calico Blue” or Sherwin-Williams “Nifty Nautical” for uppers ($250–$400). Keep lowers in soft cream for balance and warmth. Mix metals in hardware—choose brass, copper, and bronze pulls ($150–$400) to enhance the eclectic aesthetic. A patterned tile backsplash featuring teal accents ($1,200–$2,000) adds visual interest and ties the color scheme together. Open wooden shelves displaying colorful dishes and plants complete the artistic look.

    Your kitchen becomes a reflection of your personality and style. The teal commands attention and confidence while the soft cream prevents the space from feeling too busy or chaotic.

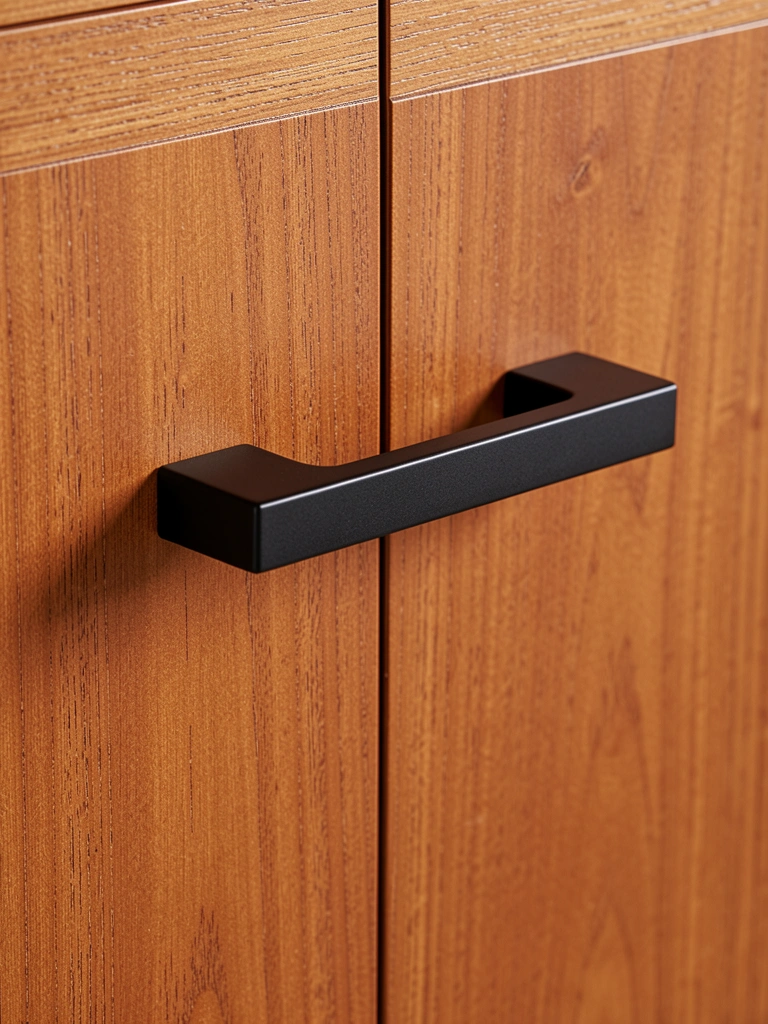
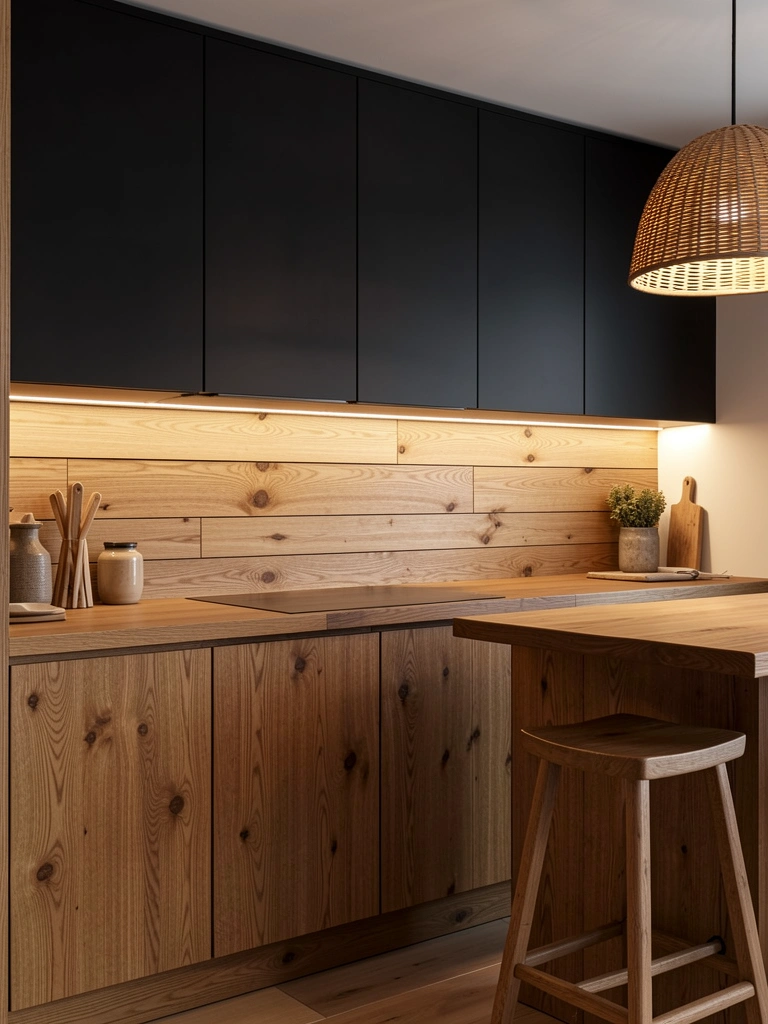
    16. Soft Black Uppers with Warm Natural Wood Lowers

    This combo bridges dark modern elegance with warm rustic charm—the result feels curated and balanced rather than clashing. Perfect for contemporary cottages, Scandinavian kitchens, or any space where you want modern sophistication with organic warmth. The dark uppers and natural wood work beautifully together when the rest of your kitchen design supports both.

    Keep or paint uppers in a very dark charcoal or soft black like Benjamin Moore “Tricorn Black” or Sherwin-Williams “Iron Ore” ($300–$500). Showcase warm natural wood lowers or refinish existing cabinets to highlight the grain ($500–$1,500). Choose simple warm brass or bronze hardware ($150–$300) that echoes the wood. A light wood or light gray countertop and simple backsplash complete the balanced look.

    Your kitchen becomes a study in modern restraint mixed with organic warmth. The dark uppers ground the space while the natural wood keeps it feeling accessible and livable rather than cold or overly designed.

    17. Powder Blue Uppers with Off-White Cottage-Style Lowers

    Powder blue is the quintessential cottage color, and when paired with off-white cottage-style cabinets, the result is irresistibly charming and timeless. This combo works beautifully in cottages, farmhouses, and traditional spaces where classic romance and livable comfort matter. It photographs beautifully and never feels outdated.

    Choose a soft powder blue like Benjamin Moore “Palladian Blue” or Sherwin-Williams “Sea Salt” for uppers ($250–$400). Invest in raised-panel or cottage-style lowers in off-white—this authentic styling costs a bit more ($1,800–$3,500) but it’s worth it for the authentic look. Chrome or nickel cup pulls ($100–$250) add vintage charm. White subway tile backsplash ($800–$1,500 installed) and light countertops complete the storybook aesthetic. Add vintage accessories, fresh flowers, and soft lighting to enhance the cozy feel.

    Your kitchen becomes a warm, inviting retreat that feels like stepping into a beloved novel. The powder blue + cottage style combo creates genuine charm that guests will immediately notice and love.

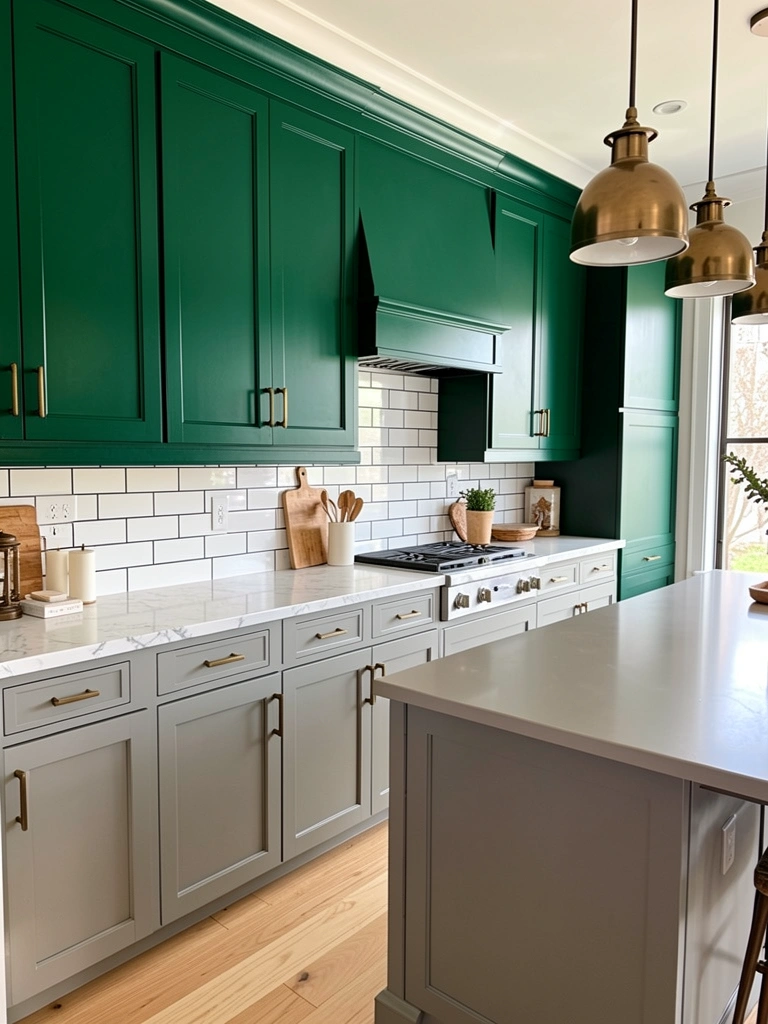
    18. Forest Green Uppers with Soft Gray Lowers

    Forest green + soft gray is the sophisticated pairing for kitchens that want color without drama. The deep green feels grounded and intentional while the soft gray keeps the space feeling open and balanced. This combo works beautifully in transitional, contemporary, and modern farmhouse kitchens with good bones.

    Paint uppers in deep forest green like Sherwin-Williams “Evergreen Fog” or Benjamin Moore “Calico Green” ($250–$400). Paint lowers in soft gray like Benjamin Moore “Revere Pewter” or Sherwin-Williams “Accessible Beige” ($250–$400). Choose warm brass or bronze hardware ($150–$350) to tie the earthy tones together. White or light marble countertops with dark grout lines create visual interest. A white subway tile backsplash with black or dark grout adds contemporary edge.

    You’ll create a kitchen that feels thoughtfully designed and beautifully balanced. The green provides personality while the gray ensures the space never feels overwhelming or too trendy.

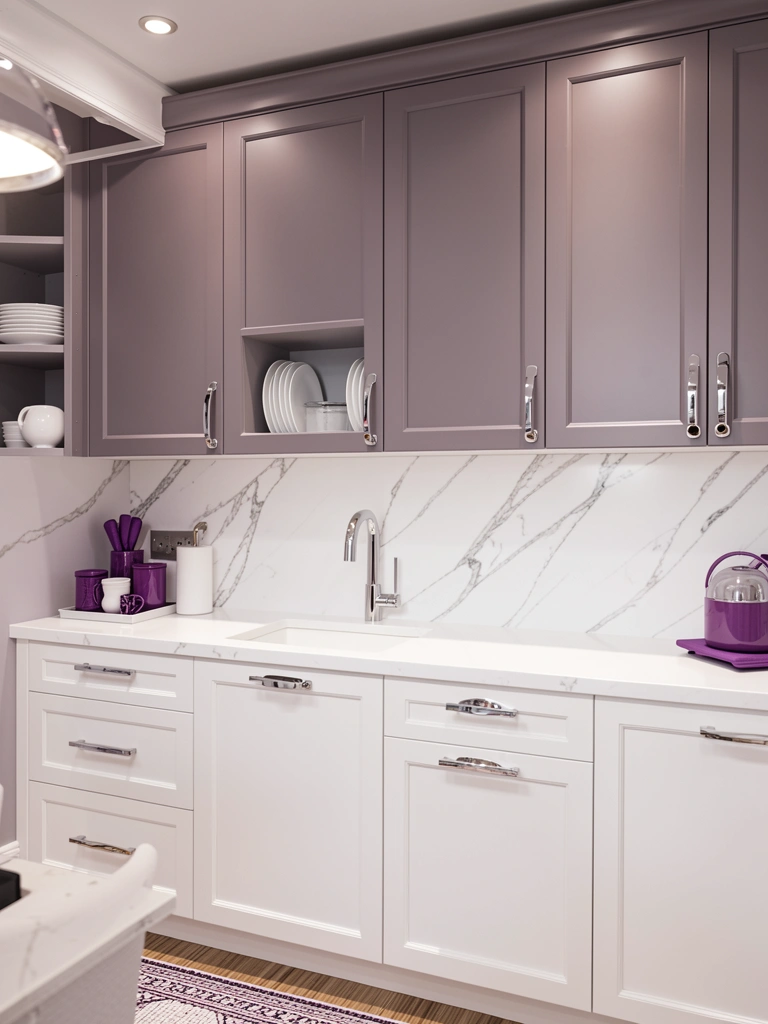
    19. Moody Purple-Gray Uppers with Bright White Lowers

    Purple-gray (or “greige”) is the unexpected color choice for homeowners who want something different but still sophisticated. When paired with bright white, this combo feels contemporary, artistic, and intentionally curated. Perfect for kitchens where personality and uniqueness matter.

    Choose a muted purple-gray like Benjamin Moore “Lilac Mist” or a custom blend of purple and gray for uppers ($250–$400). Keep lowers in crisp white for maximum contrast and balance. Chrome or polished nickel hardware ($100–$250) maintains contemporary simplicity. White marble backsplash and counters create elegance and visual harmony. This combo benefits from good lighting—under-cabinet LEDs show off the subtle color beautifully. Add purple accents through flowers, dishware, or small appliances to tie the scheme together.

    Your kitchen becomes a unique reflection of your personal style. The purple-gray is subtle enough to feel sophisticated but bold enough to signal that you’re not afraid of color and design risk.

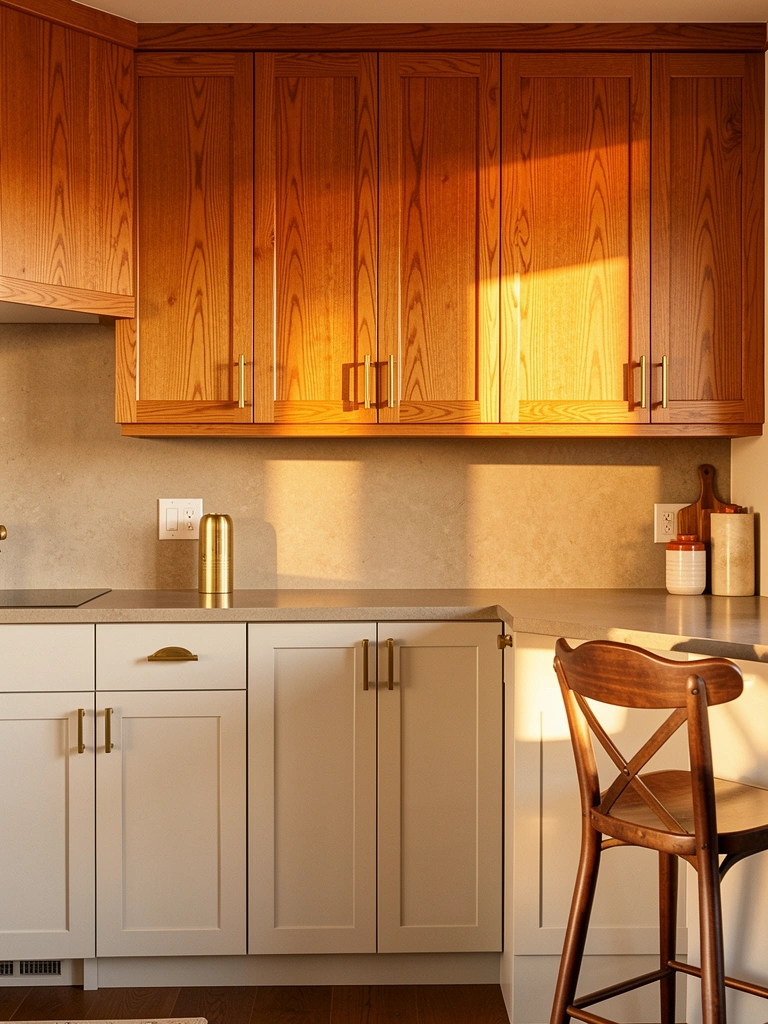
    20. Warm Cognac or Honey Uppers with Pale Gray Lowers

    Cognac or honey wood uppers paired with pale gray creates a sophisticated, warm aesthetic that feels both modern and traditional. This combo works beautifully in transitional kitchens where warmth and balance matter equally. The warm wood provides richness while the pale gray prevents the space from feeling too heavy.

    If your uppers are already honey or cognac-toned wood, keep them and paint lowers in pale gray like Benjamin Moore “Gray Owl” or Sherwin-Williams “Urbane Gray” ($250–$400). If you need new upper cabinets, budget $2,000–$4,500 for warm wood cabinetry. Warm brass or bronze hardware ($150–$350) echoes the wood warmth. A warm gray or beige countertop and matching backsplash create cohesion without visual monotony.

    Your kitchen becomes an inviting, balanced space that feels both modern and timelessly beautiful. The warm wood + pale gray combo photographs beautifully in all lighting conditions.

    21. Charcoal Blue Uppers with Creamy Off-White Lowers

    Charcoal blue is the sophisticated alternative to navy—it reads as more contemporary and artistic while still feeling elegant and grounded. When paired with creamy off-white, this combo feels balanced, moody, and intentionally curated. Perfect for kitchens with character and confidence.

    Choose a charcoal blue like Benjamin Moore “Van Deusen Blue” or Sherwin-Williams “Cyberspace” for uppers ($250–$400). Keep lowers in creamy off-white for warmth and balance. Oil-rubbed bronze or warm bronze hardware ($150–$350) completes the moody aesthetic. A dark tile or slate backsplash ($1,000–$2,000 installed) adds depth and sophistication. Warm wood countertops or a warm gray quartz enhance the cozy, intentional feel.

    Your kitchen becomes a moody, sophisticated space that photographs beautifully in warm lighting. The charcoal blue feels more artistic than navy while still maintaining classic elegance.

    22. Sage Green with Gold Accents on Uppers, White Shaker Lowers

    This variation on sage green takes it one step further by adding gold or brass accents to the upper cabinets—creating an extra layer of visual interest and luxury feel. Combined with white shaker lowers, this creates a kitchen that feels both organic and intentionally elevated. Perfect for farmhouse, cottage, or transitional spaces where personality matters.

    Paint uppers in soft sage green like Benjamin Moore “Dried Sage” ($250–$400), then add gold or brass paint accents to selected drawer fronts or panels ($50–$150 in additional supplies and labor). Shaker-style lowers in white ($1,500–$3,000) provide classic texture. Brass or gold hardware throughout ($150–$400) ties the gold accents together. A marble backsplash and countertop complete the elevated aesthetic. This combo works beautifully with open shelving and vintage-style accessories.

    Your kitchen becomes a gallery of thoughtful design details. The gold accents create luxury and intentionality without requiring a major budget increase over standard two-tone cabinetry.

    23. Warm Blush Pink Uppers with Pale Green Lowers

    If you’re confident in your color choices, blush pink paired with pale green creates a playful, artistic aesthetic that feels modern and collected. This combo works beautifully in eclectic, bohemian, or artistic kitchens where personality and individuality are celebrated. It’s bold but balanced—not overwhelming because both colors are soft.

    Choose soft blush pink for uppers like Sherwin-Williams “Quicksand” ($250–$400) and pale green or pistachio for lowers like Benjamin Moore “Palomino Tan” ($250–$400). Mix brass, copper, and bronze hardware ($150–$400) to enhance the artfully eclectic aesthetic. A patterned tile backsplash featuring both colors ($1,200–$2,000) ties the scheme together beautifully. Light wood countertops add warmth and prevent the colors from feeling too matchy.

    Your kitchen becomes a unique expression of your personal style and creativity. This combo shows you trust your instincts and aren’t afraid to celebrate color and artistic expression in your everyday spaces.

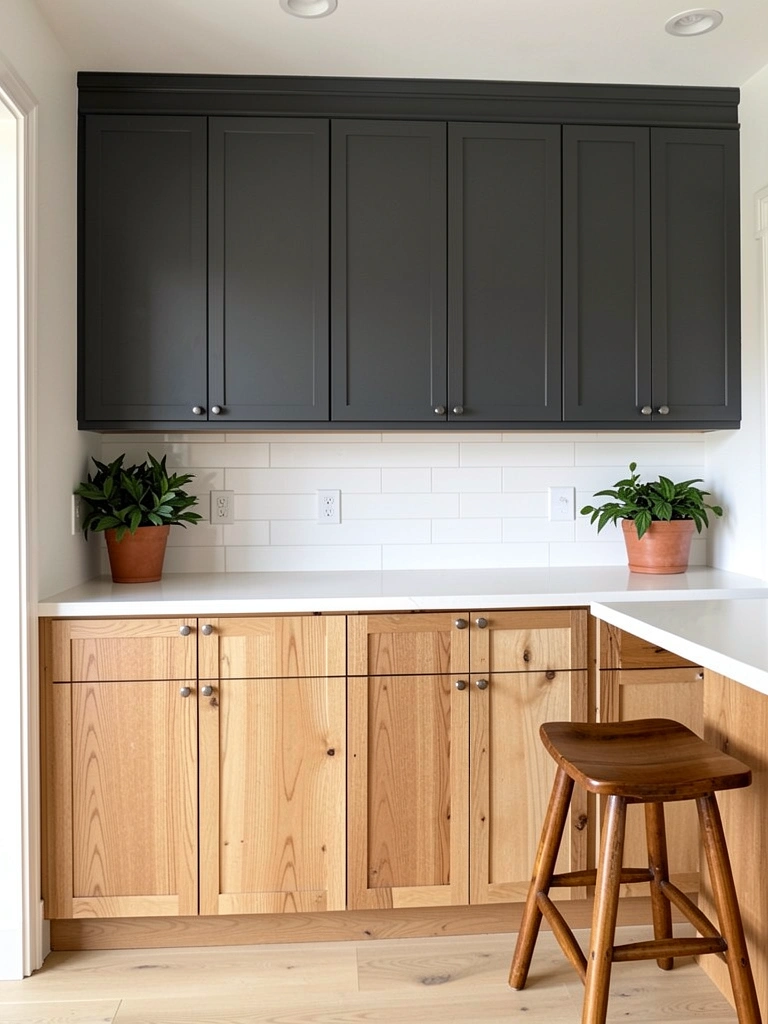
    24. Deep Charcoal Uppers with Warm Oak Lowers

    This pairing appeals to homeowners who love modern edge but aren’t ready to abandon wood warmth entirely. The deep charcoal provides contemporary sophistication and drama while warm oak lowers keep the space feeling organic and livable. Perfect for contemporary rustic, farmhouse modern, or transitional spaces.

    Keep existing uppers dark charcoal or nearly black (Benjamin Moore “Tricorn Black” for $300–$500), or invest in new cabinets ($2,000–$4,000). Showcase warm medium oak lowers with natural grain showing, refinished if needed ($500–$1,500). Simple warm bronze or brass hardware ($100–$250) completes the look. A natural wood or shiplap backsplash ($800–$1,500 installed) enhances the rustic warmth. Warm pendant lighting highlights both the dark drama and wood beauty.

    Your kitchen becomes a balanced statement of modern edge meets organic warmth. The contrast ensures visual interest while the natural wood keeps the space from feeling cold or overly designed.

    25. Pale Blue Uppers with Warm Beige Cottage Lowers

    Pale blue + warm beige creates a cozy, romantic aesthetic that feels authentically cottage without being overwrought. This combo works beautifully in traditional cottages, country kitchens, and any space where soft, warm, lived-in charm matters. It photographs beautifully and never feels dated.

    Choose pale periwinkle or powder blue for uppers like Benjamin Moore “Palladian Blue” ($250–$400). Paint cottage-style lowers in warm beige or tan like Sherwin-Williams “Accessible Beige” ($250–$400). Vintage chrome cup pulls ($100–$200) add authentic cottage charm. A white subway tile backsplash with a thin accent stripe of pale blue ($1,000–$1,500 installed) ties the colors together. Warm wood countertops complete the cozy aesthetic. Add open shelving, vintage accessories, and soft lighting to enhance the romantic charm.

    Your kitchen becomes a cozy, inviting retreat that feels authentically charming without requiring extensive styling or effort to maintain. The soft colors and vintage details create genuine warmth and character.

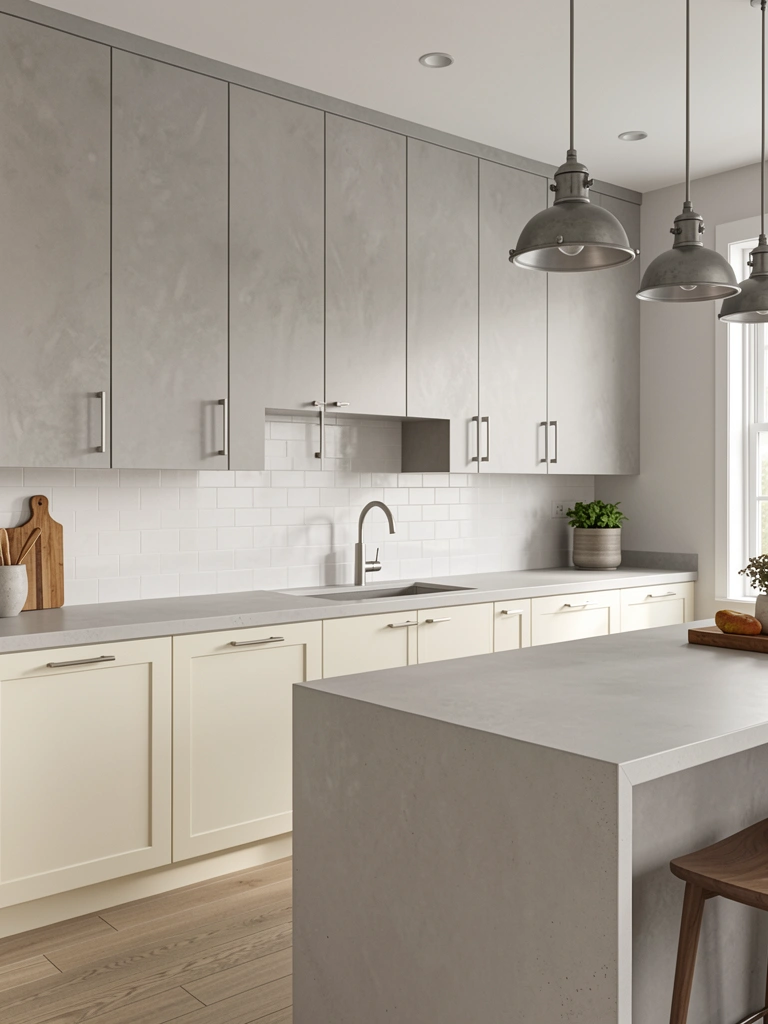
    26. Soft Concrete Gray Uppers with Warm Cream Lowers

    Concrete gray is the sophisticated modern neutral that pairs beautifully with warm cream for balance and contemporary elegance. This combo works in modern, transitional, industrial, and Scandinavian kitchens where understated sophistication matters. The gray provides modern edge while cream adds necessary warmth.

    Paint uppers in soft concrete gray like Benjamin Moore “Concrete” or Sherwin-Williams “Urbane Gray” ($250–$400). Keep lowers in warm cream like Benjamin Moore “Chantilly Lace” or Sherwin-Williams “Accessible Beige” ($250–$400). Brushed nickel or matte chrome hardware ($100–$250) maintains contemporary simplicity. Light gray quartz or concrete-look countertops ($2,000–$4,000 installed) complete the modern aesthetic. Industrial pendant lights and minimal backsplash keep the look clean and intentional.

    Your kitchen becomes a model of contemporary elegance and balanced sophistication. The concrete gray + cream combo feels timeless and modern simultaneously, aging beautifully as trends shift.

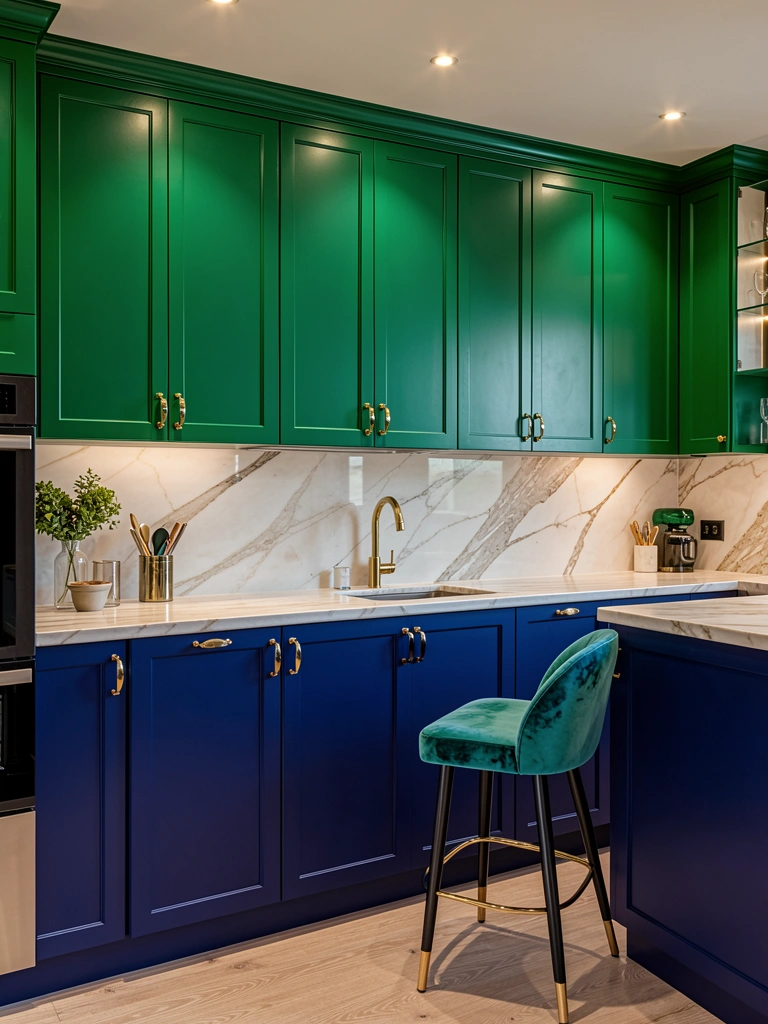
    27. Jewel Tone Mixed Two-Tone: Emerald Uppers and Sapphire Blue Lowers

    For the truly bold and confident: two jewel tones together create drama, personality, and undeniable confidence. Emerald and sapphire blue are two colors that work beautifully in conversation rather than competing—they read as intentionally artistic and collected rather than chaotic. Perfect for eclectic, artistic, or contemporary kitchens where color confidence is celebrated.

    Choose a true emerald green for uppers like Benjamin Moore “Calico Green” ($250–$400) and a deep sapphire blue for lowers like Sherwin-Williams “Nifty Nautical” ($250–$400). Invest in polished brass or gold hardware ($200–$500) that works beautifully with both colors. A light marble or light quartz countertop and backsplash ensure visual balance. This combo demands excellent lighting—recessed lights and under-cabinet LEDs show off both colors beautifully. Add a few coordinating accessories in blue-green or gold to tie the scheme together.

    Your kitchen becomes an undeniable statement of design confidence and artistic vision. This combo signals that you celebrate color, personality, and creative expression—your kitchen is a true reflection of who you are.


    Save this guide and pick your favorite pairing—or mix and match ideas to create your perfect combo. Your dream kitchen is just a couple of cans of paint away, so why wait? Start with one color this weekend and watch how it changes your whole space.

  • 26 Espresso Station Styling Ideas for Serious Coffee Lovers

    26 Espresso Station Styling Ideas for Serious Coffee Lovers

    If you’re serious about your coffee, your espresso station deserves more than just a machine shoved in the corner. This isn’t about being pretentious—it’s about creating a space that makes your morning ritual feel special and keeps everything you need within arm’s reach. Whether you’re working with a tiny apartment kitchen or a sprawling home setup, there are countless ways to style and organize your espresso corner so it looks Instagram-worthy while staying functional. We’ve gathered 26 specific ideas that blend aesthetics with practicality, from budget-friendly styling tricks to investment-worthy upgrades. You’ll find options for renters, DIY enthusiasts, and anyone looking to elevate their daily caffeine routine. Let’s dive into ways to make your espresso station a focal point you’ll actually want to show off.

    1. Mount a Floating Shelf Above Your Machine

    A floating shelf above your espresso machine gives you display space without eating up counter real estate. This keeps frequently used items visible and accessible while creating visual interest at eye level.

    Install a sturdy floating shelf (24-36 inches) in brushed brass, matte black, or walnut wood ($30-$80 from IKEA, Home Depot, or Amazon). You’ll need basic tools and about 30-45 minutes to mount it securely into wall studs. Add museum-quality adhesive strips underneath to prevent slipping. Paint your wall behind the shelf a soft sage green or pale gray to make the shelf pop against the backdrop.

    Pro tip: Keep only three to five items on display—your favorite mug, a small plant, coffee beans in a glass jar, and maybe a coffee-themed print. Overcrowding defeats the purpose.

    Your espresso corner instantly becomes a styled vignette that draws the eye every morning. Plus, you free up valuable counter space below for your machine and grinder.

    2. Invest in a Premium Espresso Machine With Sleek Design

    Your machine is the hero of your station—choose one that’s as beautiful as it is functional. A well-designed espresso machine becomes a focal point, not something you hide away.

    Look for machines with stainless steel or painted metal bodies in black, white, or brushed finishes ($300-$700+ from brands like Gaggia, Breville, or Rocket). Mid-range options ($200-$400) from Rancilio or Lelit offer excellent aesthetics without the luxury price tag. Measure your space first, then choose a compact model if counter room is tight. Pro tip: Match your machine’s finish to your other kitchen hardware (sink faucet, cabinet handles) for cohesion.

    Spend time at a specialty coffee shop to compare machines in person before buying online. This investment pays dividends every single day you use it.

    3. Create a Dedicated Grinder Station Nearby

    A separate grinder zone keeps your station organized and prevents coffee grounds from scattering everywhere. Grouping your grinder slightly away from your machine actually makes the workflow smoother.

    Choose a burr grinder (conical or flat) that matches your machine’s aesthetic—matte black, stainless, or brushed finishes ($80-$200 from Baratza, Wilfa, or Fellow). Set it on a small wooden trivet or bamboo mat ($15-$30) to define the space and protect your counter. Leave 6-8 inches between your grinder and machine for easy movement. Add a small metal scoop and a brush nearby for cleanup.

    Pro tip: Keep a damp microfiber cloth folded under your grinder to catch stray grounds during grinding.

    This dedicated zone makes grinding feel intentional rather than chaotic, and it keeps your counter cleaner overall. Your mornings become calmer when everything has its place.

    4. Install a Chalkboard Label System for Coffee Bean Varieties

    A simple labeling system keeps your coffee organized and looks charming in the process. This is especially helpful if you rotate beans regularly or experiment with different roasts.

    Grab a pack of small chalkboard labels or kraft paper labels with whiteboard markers ($10-$15 from Target or Amazon). Label your glass jars by origin, roast date, or roast level. Wipe and relabel as you rotate beans—it takes two minutes but keeps your station feeling curated. Use jars with airtight lids ($3-$8 each) to keep beans fresh longer.

    Pro tip: Write the roast date and recommended brew method on the label for reference.

    Now your coffee collection looks intentionally displayed rather than randomly stored. Visitors will notice the care you’ve taken, and you’ll actually know which bean you’re grabbing.

    5. Use Marble or Concrete Countertop Trim for Visual Impact

    A short marble or concrete piece acts as a tiny shelf accent that elevates your whole station without a full countertop replacement. This is renter-friendly if you use non-permanent mounts.

    Find a scrap marble, granite, or concrete slab (12-18 inches) at a stone supplier or Etsy ($20-$60), or use adhesive-backed marble contact paper ($15-$25 for smaller surfaces). If you own, secure it permanently; if renting, use reversible mounting tape ($10) on your current countertop. Position it under your floating shelf or behind your machine as a backsplash accent.

    Pro tip: Pair a light marble with a dark machine, or a dark concrete with white ceramics for strong visual contrast.

    This simple addition makes your station look intentionally designed, like you consulted an interior designer rather than just plugged in a machine. The contrast draws the eye and makes your space feel curated.

    6. Style Your Espresso Cups Like a Café Would

    Matching cups aren’t just for show—they make your station feel intentional and café-like. A collection of mismatched mugs looks casual; curated espresso cups look designed.

    Choose a ceramic espresso cup set (4-6 cups) in white, cream, or soft gray ($40-$80 from Anthropologie, West Elm, or specialty coffee brands). Look for cups sized specifically for espresso (2-3 ounces), not regular mugs. Stack them on your floating shelf or in an open cabinet so they’re visible and grabbable. Add a matching sugar dish and small spoon ($15-$25) for authenticity.

    Pro tip: Buy one extra set so you can cycle one into the dishwasher while using the other.

    Sipping from a proper espresso cup (instead of a regular mug) actually changes how you taste and appreciate your coffee. Your morning ritual feels less rushed, more intentional.

    7. Add Warm Ambient Lighting With a Pendant or Flush Mount

    Overhead lighting that’s too bright or cold ruins a station’s ambiance. Warm, focused light makes your morning coffee feel like a spa experience instead of a clinical task.

    Install a modern pendant light (8-12 inches diameter) in brass, matte black, or ceramic ($50-$150 from West Elm, CB2, or Amazon) directly above your station. Opt for warm white bulbs (2700K color temperature, 60-75 watts equivalent). If you rent, use a plug-in pendant with an outlet converter ($30-$60 from Amazon). Position it so light falls directly on your machine and cup area but not in your eyes.

    Pro tip: Add a dimmer switch ($15-$30) so you can adjust brightness based on time of day.

    Your station transforms from a functional corner into an inviting ritual space. The warm light makes everything look better and actually helps you appreciate the moment you’re in.

    8. Arrange a Small Succulent or Herb Garden Nearby

    Live plants soften your station and improve air quality. A tiny plant collection adds life and color without taking up serious space or requiring constant maintenance.

    Choose low-maintenance plants like succulents, pothos, or snake plants in small ceramic pots ($8-$15 each from Etsy, Home Depot, or a local nursery). Place them on your floating shelf, window sill, or on a small wooden plant stand ($20-$40) next to your machine. These plants need watering only once every 2-3 weeks. Keep them out of direct water splash from your espresso machine.

    Pro tip: Use a small brass plant mister ($8-$12) to water them—it becomes part of your station’s aesthetic.

    You get cleaner air, a splash of green that photographs beautifully, and a reminder to slow down while you’re making your coffee. Plants make spaces feel alive and welcoming.

    9. Build a Custom Wooden Base or Riser for Your Machine

    Elevating your machine on a custom base protects your counter, improves your posture, and creates visual separation that makes your station feel intentional. This is a weekend DIY project that pays aesthetic dividends.

    Build a wooden riser from walnut, oak, or bamboo using basic woodworking ($30-$80 in materials if you DIY, or $80-$200 if you commission from Etsy). Seal it with food-safe polyurethane. Mount a brass or stainless steel towel bar on one side ($15-$25) to hang your bar towels or a small cloth. The riser should be 6-8 inches tall to reduce strain when tamping.

    Pro tip: Add a water-resistant mat on top before placing your machine to protect the wood.

    Your machine sits like a piece of art on display, and your back thanks you for the ergonomic improvement. The riser also catches spills before they hit your counter.

    10. Hang a Brass or Wooden Shelf Rack for Towels and Supplies

    A wall-mounted rack keeps your supplies organized and within reach without cluttering your counter. This is both functional and provides another design element.

    Install a brass, wood, or black metal shelf with hooks ($25-$60 from Anthropologie, Wayfair, or etsy) about 12-18 inches to the right of your machine. Mount it securely (15-30 minutes with basic tools and wall anchors). Hang clean linen bar towels ($15-$30 for a set of 3) in neutral colors. Store your cleaning brush, purge bucket cloth, and spare scoops on the shelf below.

    Pro tip: Fold towels into thirds lengthwise before hanging—it looks intentional and takes up less space.

    Now your supplies are hidden from view but instantly grabable. Your station looks like a proper café corner rather than a cluttered countertop.

    11. Create a Coffee Tasting Journal Display

    Documenting your coffees adds a personal touch and genuinely improves your palate over time. A displayed journal becomes part of your station’s story.

    Buy a small leather-bound notebook or get a printable tasting journal template ($15-$30 or free online) and keep it on a small wooden stand or cookbook holder ($10-$20) next to your machine. Create simple columns: Origin, Roast Date, Roast Level, Tasting Notes, Rating. Use a nice pen ($10-$50 depending on how fancy you want to get) to encourage regular note-taking. Rotate which page is visible to create a fresh look weekly.

    Pro tip: Take a photo of interesting tasting notes and share them on Instagram—it’s surprisingly engaging.

    This simple habit deepens your appreciation for good coffee and gives your station a scholarly, intentional vibe. Visitors always ask about the notebook.

    12. Install an Open Shelving Unit for Machine Accessories

    Open shelving keeps all your accessories visible and accessible while creating a gallery-like display that showcases your equipment. This works especially well for small kitchens where you want vertical storage.

    Choose a slim open shelf unit in white, natural wood, or black metal ($50-$150 from IKEA, Target, or Amazon). Position it 12-24 inches to the side of your machine where you can easily reach accessories. Dedicate each shelf: cups on top, beans in the middle, tools and cleaning supplies on the bottom. Keep items organized by category so everything has a clear home.

    Pro tip: Use matching containers and keep the back wall clean and minimal to avoid visual clutter.

    Your accessories become part of the design instead of hidden away. Everything you need is one step away, and the display actually encourages you to maintain and organize regularly.

    13. Use a Statement Backsplash Tile or Peel-and-Stick Wallpaper

    A small backsplash behind your machine adds texture and visual interest without a major renovation. Peel-and-stick options are renter-friendly and surprisingly durable.

    Apply peel-and-stick wallpaper or tile stickers ($20-$50 for a small section from Amazon, Wayfair, or Etsy) to the wall directly behind your machine. Choose geometric patterns, soft colors (sage, cream, dusty pink), or classic subway tile designs that complement your machine’s finish. The entire project takes 15-20 minutes with just a smooth squeegee. If renting, remove it anytime without damage—it’s designed for that.

    Pro tip: Clean and dry the wall thoroughly before applying. Use a credit card or squeegee to remove air bubbles as you go.

    Suddenly your station feels like a professionally designed café corner instead of a random countertop. The backsplash frames your machine beautifully and makes the space photograph incredibly well.

    14. Curate a Small Coffee Table Book or Brewing Guide Collection

    Coffee books serve double duty—they look beautiful and actually teach you about your hobby. A small curated stack signals that you’re serious about your craft.

    Choose 2-4 coffee-focused books ($30-$60 total from Amazon, Barnes & Noble, or specialty coffee shops) such as “The Espresso Compendium” or “Coffee: A Guide to Buying, Brewing & Enjoying.” Stack them horizontally on your floating shelf or on a small wooden stand ($10-$20). Rotate the visible book every month to keep your display fresh.

    Pro tip: Visit your local library first to see which books you actually love before buying.

    These books become conversation starters and actually improve your brewing knowledge. Browsing a page while your espresso extracts adds a meditative quality to your routine.

    15. Position a Small Mirror or Reflective Surface Behind the Station

    A mirror multiplies light and makes your corner feel larger and more polished. It’s an easy design trick that professional cafés use constantly.

    Hang a simple round mirror in brass, wood, or matte black ($30-$80 from Anthropologie, West Elm, or IKEA) directly behind your machine at eye level. This bounces light around the corner and creates visual depth. Position it so your machine’s reflection looks intentional, not accidental. Paint the wall behind the mirror a soft neutral tone (cream, soft gray, pale sage) so the reflection enhances rather than clutters.

    Pro tip: A brass mirror pairs beautifully with stainless steel machines; wood frames work with all aesthetics.

    Your corner suddenly feels brighter and more expansive. The reflection creates a professional café aesthetic that’s surprisingly sophisticated.

    16. Create a Labeled Storage System for Filter Baskets and Portafilters

    Keeping your portafilters and baskets organized means you’ll always grab the right size and your station looks systematically curated. This is ideal for those who own multiple sizes.

    Build or buy a small wooden or metal organizer with hooks ($25-$60 from Etsy, Amazon, or custom woodworker) mounted 24-30 inches above your machine. Label each hook with small brass or wooden tags ($10-$20 set) identifying what hangs there. Store extra filter baskets in matching glass containers ($3-$5 each) with corresponding labels. Everything should be visible and accessible.

    Pro tip: Keep a small cheat sheet showing basket sizes and their uses—laminate it for durability ($5).

    This system looks professional and actually saves you time every morning. No more digging through drawers looking for the right basket.

    17. Incorporate a Small Water-Resistant Counter Mat Under Your Machine

    A water-resistant mat protects your counter from espresso splashes and steam, plus adds visual grounding to your station. It’s a small detail that makes everything feel more intentional.

    Choose a small woven or silicone counter mat (12×18 inches) in neutral tones like cream, gray, or black ($15-$30 from Amazon, Williams Sonoma, or CB2). Look for ones specifically labeled “water-resistant” or “easy-clean.” Wipe it down daily and hand wash weekly. The mat defines your machine’s footprint and catches small spills before they reach your counter.

    Pro tip: Match the mat’s texture to other elements in your station—if you have a woven basket, choose a similar texture for cohesion.

    Your counter stays protected and your station looks intentionally bounded, like a designated café corner rather than just a machine randomly placed. Small details like this signal attention to design.

    18. Display Espresso Extraction Guides or Brewing Charts on the Wall

    A visual guide on your wall turns your station into a learning hub. It’s both functional and shows you take your coffee seriously.

    Create or buy a printed espresso guide ($15-$40 from Etsy shops specializing in coffee infographics) and frame it in a simple black or natural wood frame ($10-$25 from IKEA or Target). Mount it 36-48 inches high, directly in your line of sight when working. Include extraction ratio guides, temperature references, and grind size suggestions. You can also find free printables online and print them at home ($5 for ink and paper).

    Pro tip: Laminate your printed guide so you can write notes on it with dry-erase markers without damaging the original.

    Now you have a constant reference that actually improves your consistency. You’ll learn faster and troubleshoot brewing problems more effectively when guidelines are literally in front of you.

    19. Style Your Station With a Color-Coordinated Ceramic Collection

    Choosing ceramics in a coordinated color palette unifies your station and makes it feel designed rather than randomly assembled. Cohesive styling photographs beautifully too.

    Select your dominant color (white, cream, soft gray) and add one or two accent colors (soft sage, dusty pink, warm terracotta) across your espresso cups, milk pitcher, sugar bowl, and saucers ($50-$150 total for a complete set from Anthropologie, Etsy, or specialty coffee retailers). Keep all pieces in this color family so they work together visually. Mix textures—glossy, matte, or textured finishes—to add interest while maintaining color cohesion.

    Pro tip: Find one beautiful set you love and build around it rather than buying random pieces.

    When everything coordinates, your station looks intentionally curated, like you’ve studied café design. It’s a small thing that makes a massive visual difference.

    20. Install a Timer or Interval Training Clock for Brewing Consistency

    A visible timer keeps you accountable to proper extraction times and adds a professional touch. It’s a small tool that genuinely improves your shots.

    Mount a wall-mounted interval timer or smartphone-sized display ($20-$50 from Amazon) within arm’s reach of your machine. Choose one in black, brass, or stainless steel to match your machine’s finish. Use it every single shot to ensure consistent 25-30 second extractions. Pro tip: Use a small digital kitchen timer ($8-$15) that clips onto a shelf if wall mounting isn’t an option.

    Over time, you’ll internalize timing, but a visible reference keeps you honest while building muscle memory. Your shots become noticeably more consistent.

    21. Create a Dedicated Milk Frothing Station With a Separate Pitcher Holder

    Having dedicated pitchers for milk work makes your workflow smoother and keeps your station organized. A small stand makes this collection look intentional rather than cluttered.

    Get a small wooden or metal pitcher rack ($20-$40 from specialty coffee retailers or Amazon) and position it 18-24 inches from your machine, ideally on the left if you’re right-handed. Store 3-4 stainless steel milk pitchers in different sizes ($15-$25 each: 12oz, 20oz, 32oz) so you match pitcher size to drink size. Add a milk thermometer holder ($5-$10) and a small folded towel rack ($8-$15) directly on or next to the stand.

    Pro tip: Only wet-wash pitchers and dry immediately—never let them sit with milk residue.

    Your milk work goes faster because you’re not hunting for the right pitcher. The dedicated station also signals that you take microfoam seriously.

    22. Add Ambient Scent With Coffee or Subtle Fragrance Candles

    Scent completes the café experience and makes your space feel welcoming. Choose fragrance thoughtfully so it enhances rather than competes with your coffee’s aroma.

    Place 1-2 soy candles ($15-$30 each from Jo Malone, Diptyque, or local coffee-scented artisans) on a shelf 18-24 inches away from your espresso machine (distance is important so fragrance doesn’t interfere with coffee aroma). Opt for subtle scents—coffee, vanilla, cedarwood, or unscented (let the coffee smell be the star). Light candles during evening shots or when you want to extend your ritual.

    Pro tip: Never put scented candles directly next to your machine—the heat will throw off the fragrance diffusion and might interfere with your tasting experience.

    Your morning or evening coffee moment becomes multi-sensory. The combination of warmth, light, and subtle scent turns a practical task into a luxurious pause.

    23. Display Your Espresso Machine Manual or Service Records in a Small Frame

    Your machine’s documentation becomes part of the design when framed thoughtfully. It shows you maintain your equipment and actually encourages regular care.

    Frame a photocopy of your machine’s manual cover or create a printed “Service Log” template ($15-$30 for framing from IKEA or local framing) and hang it 12-18 inches to the left of your machine. Use a laminated version so you can write maintenance dates directly on it with dry-erase markers. Include descaling dates, cleaning checks, and any repairs. Update it monthly.

    Pro tip: Design your own service log template using Canva (free) and print it—it’s much more personal than a basic chart.

    This simple frame keeps you accountable to maintenance and signals serious dedication to your equipment. Regular upkeep extends your machine’s life significantly.

    24. Invest in Sound-Dampening Mats or Acoustic Panels for Noise Control

    If your grinder or machine is loud, sound dampening makes your ritual feel calmer and protects your ears. This is an underrated design element that affects your actual experience.

    Install thin acoustic panels or self-adhesive sound-dampening mats ($40-$100 from Amazon or specialty audio retailers) on the wall directly behind your machine, covering about 2-3 feet of wall space. Choose neutral colors (gray, cream, charcoal) that blend with your existing wall. These reduce grinding and machine noise by 40-50% without looking institutional. Mounting takes 20-30 minutes.

    Pro tip: Acoustic panels also improve espresso machine stability by reducing vibration transfer.

    Your station becomes quieter and more peaceful. A calmer morning ritual genuinely affects your entire day’s vibe.

    25. Create a “Clean-Up Station” With Dedicated Baskets for Used Pucks and Towels

    A designated cleanup zone keeps your station tidy and signals that maintenance is built into your routine. It’s a small organizational detail that makes a real difference.

    Place two small woven or metal baskets ($15-$30 for a pair from Target, Anthropologie, or Amazon) on the floor or on a low shelf directly under your machine station. Label one “Spent Pucks” and one “Towels.” Use the pucks basket for espresso grounds (compost these daily), and the towels basket for daily cleanup cloths. Check both baskets every morning before you start.

    Pro tip: Compost your spent pucks—they’re valuable for gardens and reduce waste.

    This system keeps your station looking clean and functional. You never get overwhelmed by coffee grounds or piled dirty towels, and maintenance becomes automatic.

    26. Frame Personal Coffee Shop Photos or Travel Coffee Culture Shots

    Personal photos on your wall connect your home station to the wider coffee community and remind you why you love this ritual. It’s a final design layer that makes the space truly yours.

    Print and frame 3-4 of your favorite coffee shop photos or travel coffee culture moments ($30-$80 for printing and simple frames from Target, IKEA, or local frame shops). Arrange them in a small gallery formation directly above or to the side of your station at eye level. Mix frame styles (wood, black metal, different sizes) for visual interest. Leave 2-3 inches between frames.

    Pro tip: Include photos from coffee shops you love, latte art you’ve created, or specialty coffee regions you want to visit.

    Your station becomes a personal shrine to your coffee journey. Visitors see your passion reflected in these images, and you get daily inspiration every time you use your machine.


    Save this post for your next weekend and pick one idea to start with this weekend—even just adding a floating shelf or some matching espresso cups changes how your whole station feels. Share with anyone you know who’s serious about their coffee at home.

  • 24 Coffee Nook Ideas That Create a Warm Morning Ritual

    24 Coffee Nook Ideas That Create a Warm Morning Ritual

    There’s something magical about starting your day in a dedicated coffee nook—that one special spot where you can sip your morning brew without distractions. Whether you’re working from home, a renter in a small apartment, or just someone who deserves a peaceful morning ritual, creating a coffee nook doesn’t require much space or a big budget. We’ve gathered 24 practical, inspiring ideas to help you craft a cozy corner that makes every morning feel like a mini getaway. From simple styling tweaks to budget-friendly shopping hacks, you’ll find options for every space size and lifestyle. Get ready to claim your corner and make mornings something you actually look forward to.

    1. Choose a Light Wood Table as Your Base

    A light wood table becomes the anchor for your entire nook—it’s functional, visually calming, and works with almost any decor style. Look for compact options at IKEA, Target, or Facebook Marketplace that fit your space. A simple side table measuring 20-24 inches wide is perfect for a mug, journal, and a small plant without overwhelming a tight corner.

    Wood has a natural warmth that makes you want to linger over your coffee. Aim to spend $40-$120 for a solid option, or go thrifting for vintage pieces under $50. If you’re renting, a lightweight table is easy to move when you switch spaces.

    The best part? A good wood table works in bedrooms, living rooms, or kitchen nooks—it’s not tied to any one location. You’ll use it even after your morning coffee ritual becomes a habit.

    2. Layer Soft Textures with a Cozy Throw Blanket

    Draping a quality throw blanket over your chair or the back of a nearby shelf instantly adds coziness and visual warmth. Blankets make your nook feel like a deliberate retreat rather than just a random corner. Pick neutral tones like cream, warm gray, or soft taupe to keep the space calm and focused on your coffee ritual.

    Target, Wayfair, or Amazon carry throws in every price range—$20-$80 gets you a durable, soft option that lasts years. Chunky knit blankets photograph beautifully for Pinterest inspiration, and they’re functional when you actually want to wrap up. Rental-friendly tip: a blanket doesn’t require any installation.

    Now your nook becomes a place where you actually want to stay for 20 minutes instead of rushing through coffee. The tactile experience matters as much as the coffee itself.

    3. Add a Small Bookshelf for Reading Material

    A compact bookshelf (even just 24-36 inches tall) gives your nook purpose beyond coffee—it becomes a reading destination. You don’t need floor-to-ceiling shelving; a single small unit or wall-mounted shelves work beautifully in tight spaces. Stock it with books you actually want to read, design magazines, or even blank journals for morning thoughts.

    IKEA’s Kallax or Target’s basic shelving units run $30-$100, and thrifted wooden shelves are often cheaper. This is a one-weekend installation project, or go wall-mounted if you want to avoid drilling (use adhesive strips for renters). Pair shelves with small decorative objects and plants to avoid a stark, empty look.

    Suddenly your morning coffee ritual includes a cozy reading moment. Your brain gets a mental break before diving into the day—that’s worth the small investment of space and money.

    4. Install Warm Pendant or Clip Lighting

    Proper lighting transforms a coffee nook from feeling like a corner to feeling like the destination. Pendant lights, clip-on lamps, or even a small desk lamp create a focused, intentional space that signals “this is my time.” Warm-toned bulbs (2700K color temperature) mimic morning sunlight and feel inviting rather than harsh.

    Look for pendant lights ($25-$80) or clip lamps ($15-$40) at Target, Home Depot, or Amazon. If you’re renting or can’t drill, a tall arc floor lamp positioned behind your chair works just as well. Brass or matte black finishes fit most decor styles. Installation is usually simple—just swap out a bulb or plug in a lamp.

    The moment you turn on your dedicated light, you’re signaling to yourself (and anyone sharing your space) that this is your sacred morning time. Lighting psychology is real, and warm light actually makes you relax.

    5. Create a Low-Maintenance Plant Station

    Plants instantly make your nook feel alive and connected to nature—research shows they reduce stress and improve air quality. You don’t need a green thumb; stick with low-maintenance options like snake plants, pothos, ZZ plants, or succulents that thrive on neglect. Group 2-3 small plants (4-6 inches) together for visual impact without taking up much space.

    Small potted plants run $8-$25 each at garden centers or grocery stores. Ceramic or concrete planters add style ($5-$20 each). Water them once a week (or less for succulents), and you’re done. Pro tip: rotate them toward light monthly so they grow evenly.

    Your nook now has natural beauty and oxygen boost. Glancing at green leaves while you sip coffee literally calms your nervous system before the day gets hectic.

    6. Style with a Sleek Coffee Mug Collection

    Your coffee mug isn’t just functional—it’s part of your daily ritual and visual experience. Collect 2-3 quality mugs in complementary colors (soft greens, warm neutrals, or pastels) that make you happy to hold. Handmade or locally crafted mugs feel special and encourage you to slow down.

    Hunt at local pottery studios, etsy.com, or even HomeGoods for unique finds ($12-$30 per mug). Alternatively, minimalist ceramic mugs from IKEA or Target are affordable ($8-$15) and work beautifully displayed. The goal is having something you actually want to use, not just a generic coffee cup.

    Pouring your coffee into a mug you love is a micro-moment of intentionality. It signals that your morning matters, even if nothing else goes perfectly that day.

    7. Use a Floating Shelf for Space-Saving Storage

    Floating shelves maximize vertical space without eating into your footprint—perfect for small apartments or tight corners. A single 24-inch shelf can hold books, plants, decorative objects, and daily essentials while keeping your table surface clear. Mount it 12-18 inches above your table so it’s accessible but not claustrophobic.

    Floating shelves run $20-$60, and installation takes under 30 minutes with basic tools (or hire a handyman for $50-$100). For renters, adhesive shelves exist but work best on smooth surfaces and lighter items. Choose wood, metal, or painted finishes that match your decor style.

    Now your nook is organized and visually interesting without clutter. Everything you need is within arm’s reach, and the elevated view makes the space feel bigger than it is.

    8. Paint an Accent Wall in a Soft, Calming Color

    An accent wall in a soothing color (soft sage, dusty rose, warm cream, or pale blue) completely shifts how your nook feels. These 2025 color trends move away from harsh grays toward nature-inspired palettes that calm your mind. One wall of color is bold enough to feel intentional but contained enough to not overwhelm a small space.

    Quality paint runs $25-$40 per gallon, and one gallon covers approximately 400 square feet—more than enough for an accent wall. Behr, Sherwin-Williams, or Benjamin Moore all have excellent soft undertones to explore. Budget $100-$200 for materials and labor if you hire help, or DIY it in one afternoon for just the paint cost.

    The moment you sit down with coffee, you’re surrounded by a color that actually soothes your nervous system. Renters: ask your landlord first, but many are fine with paint if you commit to returning it to original color.

    9. Set Up a Small Bar Cart for Coffee Essentials

    A mini bar cart keeps all your coffee supplies in one mobile, stylish unit—no hunting through cabinets while half-asleep. Look for slim carts that fit 15-20 inches wide, so they don’t dominate your space. Stock the top tier with your mug, the middle with beans and sweetener, and the bottom with backup mugs or a small pitcher.

    Bar carts cost $40-$120 at Target, IKEA, Amazon, or HomeGoods. Metal or wood finishes work best in coffee nooks. The genius part? You can move it between rooms or hide it if you need the space—rental-friendly flexibility at its best.

    Everything you need is there, styled and accessible. No more “where are the coffee filters?” moments during your peaceful morning ritual.

    10. Hang Minimalist Line Art or Photography

    Simple, uncluttered wall art in 1-3 pieces creates visual interest without overwhelming your calm space. Choose prints that speak to you—botanical illustrations, abstract lines, or peaceful photography. Avoid busy gallery walls; this isn’t the time for maximalism.

    Framed prints cost $15-$40 each from Minted, Etsy, or even a local print shop. You can also frame fabric scraps or magazine covers in simple frames from IKEA ($8-$15 per frame). Hang at eye level when you’re seated so you actually enjoy them while sipping coffee.

    Your nook now has personality and visual focus. The art becomes part of your morning meditation rather than just decoration on a wall.

    11. Layer Ambient Lighting with LED String Lights

    LED string lights add warm, flattering glow that transforms a nook into a sanctuary—especially during darker months or early mornings. Warm white lights (not cool white or colored) feel calming and intentional. Drape them loosely behind your table or along a shelf edge for ambient effect rather than task lighting.

    LED string lights run $12-$30 on Amazon or Target, use minimal electricity, and plug into any outlet. They’re completely renter-friendly and removable. Combine them with your main light source for layered, flexible lighting that changes your nook’s mood.

    Now your morning coffee ritual feels like you’re sitting in a cozy cafe—all from a simple plug-in light strand. The soft glow makes everything feel slower and more intentional.

    12. Choose a Comfortable Chair with Good Back Support

    You’re going to sit here every morning, so your chair needs to support your back and feel genuinely comfortable. Look for dining chairs, accent chairs, or even recliners (depending on your space) with back support. Upholstered options in light colors feel calmer than hard wood seats.

    Comfortable chairs range $80-$300, depending on quality. Check Article, Wayfair, Target, or IKEA for mid-range options that don’t sacrifice comfort. Thrift stores often have solid wooden chairs you can reupholster or add cushions to for under $100 total. This is one place where spending a bit more matters—your back will thank you.

    You’ll actually want to linger over coffee when your chair supports you properly. Back pain doesn’t belong in your peaceful morning ritual.

    13. Add a Small Side Table for Journal Writing

    A small side table (18-20 inches) positioned right next to your chair creates a designated spot for journaling or note-taking. This extends your ritual beyond just coffee—you can jot down thoughts, gratitude, or daily intentions without reaching across your lap. Keep it simple and uncluttered so it actually invites you to write.

    Small side tables cost $30-$80 at IKEA, Target, or thrift stores. Pair it with a quality pen and a journal you love ($5-$25), and you’ve created a complete morning practice. One weekend setup, minimal money, maximum mindfulness impact.

    Now your nook is a complete ritual space—coffee, comfort, and reflection all in one corner. Your brain starts the day calmer and more grounded.

    14. Install a Magazine Rack for Reading Rotation

    A magazine rack keeps your reading material visible and easy to grab without stacking books on your table. This encourages you to actually flip through design magazines or read articles you’ve been meaning to get to. Group similar themes together (design, lifestyle, inspiration) for a thoughtful feel.

    Magazine racks run $20-$50 at Target, IKEA, or HomeGoods. Thrifted brass or wood options add vintage charm. Rotate the magazines monthly so your nook always feels fresh and gives you new material to enjoy.

    Your morning ritual now includes easy access to inspiration and ideas. You’re mentally stimulated but in a calm, intentional way that sets a positive tone for your day.

    15. Use Warm Brass or Gold Accents for Cohesion

    Brass and gold metallics create a cohesive, intentional look while adding warmth without clashing with calm color palettes. Use these tones in your lamp base, plant stand, picture frames, or decorative objects to tie your nook together. One or two brass pieces feel accidental; three or more feel designed.

    Brass accents span $10-$60 per item depending on quality. Mix thrifted brass finds ($5-$15) with new pieces for a collected, personal feel. This isn’t about matching perfectly—it’s about choosing warm metallics that complement each other.

    Your nook now has visual coherence and polish without feeling overdone. The warm tones reinforce the calming, intentional vibe you’re creating.

    16. Create a DIY Coffee Bar Under $100

    Skip the expensive espresso machine and create a simple coffee bar with essentials: a manual grinder, beans from a local roaster, a pour-over or French press, and a small cup warmer. This keeps costs low (total setup under $100) while making your ritual feel more connected to the actual coffee.

    Manual grinders ($20-$35), small pour-overs ($10-$20), and quality beans ($12-$18 per bag) are all available at grocery stores or specialty coffee shops. Pair with your favorite mug, and you have a complete setup that feels special without the $500+ machine investment.

    You’re not just having coffee—you’re participating in making it. That intentionality makes your morning ritual feel meaningful and grounded.

    17. Display Favorite Mugs on Open Shelving

    Open shelves that display your favorite mugs serve double duty: they’re functional storage and visual decor. Instead of hiding mugs in cabinets, let them be part of your nook’s design. Choose 4-6 mugs you genuinely love, arrange handles forward, and let them become part of the scenery.

    This requires just shelving and mugs you already own—it’s free styling with items you have. If you don’t have shelves yet, floating shelves run $20-$40 and take 30 minutes to install. Renters: adhesive shelves work for lightweight mugs.

    Every time you choose a mug in the morning, you’re choosing from pieces that make you happy. This small interaction sets a better emotional tone for your day.

    18. Incorporate a Small Water Feature or Fountain

    The gentle sound of running water adds a calming auditory element to your nook—it masks outside noise and creates a meditative atmosphere. Tabletop fountains are compact (often 6-12 inches), affordable, and surprisingly effective at shifting your space’s feel. Plus, they improve air humidity, which benefits plants and your skin.

    Small tabletop fountains cost $25-$60 on Amazon or HomeGoods. They’re plug-in, require minimal maintenance (just refill water every few days), and are completely renter-friendly. Choose ceramic or stone finishes that match your aesthetic.

    The gentle water sound becomes your morning’s background music. Your nervous system relaxes faster when you’re listening to nature-inspired ambiance instead of silence or street noise.

    19. Frame Motivational or Favorite Quotes Nearby

    A single framed quote or affirmation you see while sipping coffee sets your daily intention. Choose words that matter to you (not generic motivational clichés), print them on nice cardstock, and frame them simply. Change the quote seasonally if you want variety.

    Printing a quote is free to $5, and a simple frame adds $8-$15. You can also hand-letter quotes if you enjoy that practice. Alternatively, buy printed quotes from Etsy ($10-$20) if you prefer professionally designed text.

    Your brain sees these words every morning and internalizes them without effort. Over time, you’re subtly rewiring your morning mindset toward calm, gratitude, or intention—whatever matters most to you.

    20. Add a Scented Candle or Essential Oil Diffuser

    Scent is a powerful trigger for mood and memory. A quality candle or essential oil diffuser adds another sensory layer to your ritual. Choose calming scents like lavender, chamomile, or cedarwood rather than heavy florals. Light a candle when you sit down, signaling to your brain that this time is special.

    Quality candles run $15-$40 at specialty shops, and essential oil diffusers cost $20-$50. Budget-friendly option: a few drops of essential oil on a cotton ball tucked near your table works in a pinch. Both are renter-friendly and require no installation.

    The moment you smell your chosen scent, you’re in ritual mode. Your body recognizes this as your time, and your stress levels actually decrease before you’ve finished your first sip.

    21. Use a Coordinating Rug to Define Your Space

    A small rug anchors your nook and signals “this is a distinct space” without needing walls. Choose a size that fits your furniture (typically 3×5 feet or smaller for tight corners) in a neutral or warm tone. Natural fiber rugs in jute or wool feel grounded and aesthetic.

    Small rugs cost $40-$120 at Target, Wayfair, or HomeGoods. Thrifted rugs run cheaper ($15-$40). This is a one-person, five-minute setup—just lay it down, no installation needed. Renters love rugs for defining spaces without permanent changes.

    Now your nook is physically separate from the rest of your room. Your eye knows where to focus, and your brain recognizes this as your dedicated morning space.

    22. Stock a Small Tray with Sweeteners and Extras

    A tray keeps all your coffee additions in one contained spot—honey, sugar, cocoa powder, cinnamon, cream, or milk frother. It’s functional and looks intentional. Choose a tray that matches your aesthetic (wood, ceramic, or rattan), and fill it with containers you love.

    Trays run $10-$30, and small glass jars for holding items cost $5-$15 for a set. You probably have most of these items already—this is just organizing them attractively. One afternoon styling project with zero installation.

    Your morning coffee ritual becomes smoother and more pleasant when everything is organized and accessible. No hunting through cabinets or spilling things in half-asleep fumbling.

    23. Rotate Seasonal Decor to Keep Your Nook Fresh

    Switching out small decor elements (plants, candles, art prints, or color accents) seasonally keeps your nook from feeling stale while marking time and mood shifts. You don’t need to overhaul everything—just swap 2-3 items quarterly to stay engaged with your space.

    This costs nothing if you use items you already own or make minor seasonal purchases ($10-$20). Swap out candle scents, rotate which framed prints you display, or bring in seasonal plants. It’s a free way to refresh without recommitting money.

    Your nook stays psychologically fresh and connected to the actual season you’re in. You won’t get bored with your space, and you’ll notice each new season more mindfully.

    24. Create a Phone-Free Phone Holder Nearby

    The final touch: a designated phone holder where your phone does not go during your ritual. Keep it on a shelf nearby but out of reach, signaling that this time is for you, not for scrolling. A beautiful holder makes the intentional separation feel aesthetic rather than punitive.

    Phone holders cost $8-$20 and come in ceramic, wood, or metal finishes. Alternatively, use a small bowl or cup you already own. This requires no installation—just mindset and placement.

    Now your morning coffee ritual is truly unplugged time. Your brain actually gets a rest from notifications and stimulation, making the mental shift to your day more gradual and intentional.


    Save this post and try at least one idea this week—even the smallest change shifts your morning completely. Which element will you tackle first: lighting, seating, or scent?

  • 25 Kitchen Inspo Ideas That Transform Your Cooking Space

    25 Kitchen Inspo Ideas That Transform Your Cooking Space


    Your kitchen should tell your story—not whisper a forgettable one. Whether you’re renting or own, working with a tiny galley or an open floor plan, updating your cooking space doesn’t require a massive renovation or a six-figure budget. The 2025 kitchen trends are all about you: bold colors, mixed textures, smart storage, and designs that balance style with real-life function. We’ve rounded up 25 actionable ideas that range from 15-minute styling tweaks to weekend projects, so you can refresh your space at your own pace. Ready to fall in love with cooking again? Let’s dive in.


    1. Paint Your Cabinets a Deep, Moody Green

    Deep green cabinets bring personality and sophistication without feeling trendy or temporary. This color works beautifully whether your style leans modern, cottage, or eclectic—and 76% of design pros are choosing green as their top kitchen color right now.

    You can tackle this yourself with cabinet-grade paint (like Sherwin-Williams or Benjamin Moore) and a quality brush or foam roller. Most kits run $80–$150 for materials, and the project takes about one weekend. If your cabinets have a glossy finish, light sanding or a primer designed for slick surfaces is key. Alternatively, peel-and-stick cabinet wraps ($150–$300) give you the look without the commitment—perfect for renters.

    The payoff? Your kitchen instantly becomes a space you actually want to spend time in. That small color shift changes everything.


    2. Layer Open Shelving with Curated Styling

    Open shelving only works when the items on display are intentionally chosen and beautifully arranged. Group similar items (white bowls together, vintage glassware in one zone), add texture with woven baskets, and sprinkle in greenery for warmth.

    Mix dishware heights and styles—stack some plates flat, lean others vertically, nestle a small plant between groups. Baskets below shelves hide kitchen clutter while keeping your space airy. Start with one shelf if you’re unsure; swapping three shelves at a time takes about 20 minutes. Cost depends on what you already own, but if shopping, budget $50–$150 for styling pieces from Target, IKEA, or HomeGoods.

    Your kitchen looks magazine-worthy while staying functional. Plus, you’ll use your pretty dishes instead of hiding them away.


    3. Install Brass or Mixed-Metal Pendant Lights

    Lighting is the secret weapon that changes the entire mood of a kitchen. Mixing metal finishes (brass, copper, black, wood) creates depth and visual interest in a way that matchy sets can’t.

    Look for pendants at IKEA ($30–$80 each), Wayfair ($60–$150 each), or West Elm ($150–$300 each). If you’re handy with a screwdriver and your kitchen already has a junction box, installation is a 15-minute DIY job. Otherwise, budget $100–$200 for an electrician to hang them. The dramatic difference is worth it—84% of design pros cite lighting as the standout feature that elevates a kitchen.

    Your space transforms from functional to intentional. Cooking and morning coffee become experiences, not just tasks.


    4. Add a Butler’s Pantry or Scullery for Hidden Storage

    If you have an open-plan kitchen, a hidden prep zone is a game-changer for containing mess while entertaining. A butler’s pantry—even a tiny closet-sized one—hides dishes, snacks, and clutter, so your main kitchen stays show-ready.

    If you’re renting, this is trickier, but consider a rolling cart with a curtain rod and fabric panel that slides in front ($60–$120). For homeowners, consult a contractor about converting a closet or adding a pocket-door wall ($1,500–$5,000 depending on complexity). DIY enthusiasts can install open shelving in an existing space for $150–$300.

    You get the relaxed, open-kitchen feel without the stress of showing crumbs and dirty dishes. Guests see a polished space; you know exactly where everything is.


    5. Swap Neutral Walls for Warm Earth Tones

    All-white and all-gray kitchens are officially dated. Warm earth tones—terracotta, warm taupe, soft ochre, sage—make your kitchen feel grounded and personal while still staying timeless.

    Pick a test paint swatch and live with it for a few days in your actual kitchen lighting (paint changes dramatically depending on morning vs. evening light). One gallon of quality paint costs $35–$50 and covers most kitchens. Painting two walls takes about 4–6 hours; the whole room takes a weekend. Renters: try peel-and-stick wallpaper ($25–$60 per roll) for a no-commitment vibe.

    Your space feels like a cozy retreat instead of a sterile box. Food photography suddenly looks better too—the warm backdrop is chef’s kiss for Instagram.


    6. Introduce Mixed-Material Backsplashes with Texture

    Textured backsplashes—fluted tiles, plaster finishes, dimensional patterns—add visual depth without overwhelming the space. Pairing one texture with a classic subway tile creates balance.

    Browse Wayfair, Home Depot, or specialty tile shops for combinations. A simple mixed backsplash for a 30-square-foot area runs $300–$800 in materials. If you’re comfortable with basic tile work, DIY installation saves $200–$500 in labor. For first-timers, hiring a pro costs $800–$1,200 total, but takes stress off your plate and ensures a polished finish.

    The backsplash becomes a design feature instead of an afterthought. Suddenly your whole kitchen feels intentionally designed, not just functional.


    7. Create a Cozy Kitchen Dining Nook

    A dining nook transforms a corner into a gathering spot. Whether you build a full bench or use a modest bistro table and chairs, this creates coziness without eating into your main kitchen workspace.

    For renters and budget-conscious folks: a small bistro table ($80–$150) and two chairs ($40–$80 each) tucked into a corner does wonders. Homeowners can splurge on a built-in bench ($1,200–$3,000 installed) or DIY one for $300–$600. Add a simple cushion ($50–$120) and you’re done. Total project time: a weekend for DIY builds, or one week if contracting out.

    You gain a quiet spot for coffee, a casual dining space, and a reason to actually use your kitchen beyond cooking. Small spaces suddenly feel intentional, not cramped.


    8. Go Handle-Free with Push-to-Open Cabinetry

    Handle-free cabinets create a seamless, minimalist look that photographs beautifully and stays clutter-free. The mechanism catches your eye way less than hardware does.

    If you’re replacing cabinets, specify push-to-open when ordering (adds $100–$300 to your cabinet cost). For existing cabinets, adhesive-catch mechanisms retrofit onto your current doors for $50–$150 total. No tools needed; installation takes 30 minutes. This option is perfect for renters—it’s literally a sticker-on solution.

    Your kitchen looks more sophisticated instantly. The bonus? No fingerprints on hardware, and cleaning is faster.


    9. Style Your Open Shelves with a Color Palette

    Instead of random display, choose a 3-to-4 color palette (white, cream, sage, and natural wood, for example) and stick to it on your open shelves. This creates visual harmony and makes your kitchen feel designed, not chaotic.

    Go through your current dishes and dishware—you likely have enough already. If you need to add pieces, target HomeGoods, Wayfair, or TJ Maxx for affordable stoneware in your palette ($10–$30 per piece). Swap out items over one afternoon. Cost for new additions: $50–$150 depending on how much you add.

    Your kitchen looks calm and curated. Guests notice the intentionality, and you feel more in control of your space.


    10. Paint a Statement Wall in Bold Blue or Brown

    A single bold accent wall (not the whole room) gives you personality without overwhelming a small space. Deep blue and warm brown are the top choices after green; 63% of pros are using blue right now.

    Choose one wall (usually behind your sink or stove) and commit. A rich, deep shade of Benjamin Moore or Sherwin-Williams ($35–$50 per gallon) takes 3–4 hours to paint if you’re solo. Rent a paint sprayer from Home Depot ($30–$40 per day) for a flawless finish, or hire a painter ($300–$600 depending on wall size). The trick is using primer first, especially on darker shades.

    The focal point makes your kitchen feel designed and intentional. Plus, it’s reversible—if you tire of it, it’s just another coat of paint away.


    11. Install Undercabinet Lighting for Function and Mood

    Undercabinet lighting solves two problems at once: it brightens your counter workspace and creates ambient mood lighting when you’re not cooking. LED strips are affordable, energy-efficient, and come in warm tones.

    LED strip kits run $30–$80 from IKEA, Amazon, or Home Depot. Most are plug-and-play; if your cabinets have an outlet nearby, installation takes 15 minutes. No outlet? Budget $150–$300 for an electrician to run one. The difference in your daily kitchen experience is massive—no more shadowy meal prep, plus a cozier vibe come evening.

    Cooking becomes easier, and your kitchen transforms from task-only to an inviting hangout spot. This upgrade pays for itself in function alone.


    12. Incorporate Fluted or Textured Range Hood

    A textured range hood is a sculptural statement piece that grounds your kitchen. Fluting, plaster finishes, and dimensional details are trending hard right now for adding organic interest.

    Range hoods vary wildly: $500–$1,500 for mid-range brands like Zephyr or Signature, or $1,500–$4,000+ for designer options. If you’re replacing an existing hood, installation is typically included. If adding new, budget $300–$800 in labor for venting setup. Renters should skip this one—it requires permanent installation.

    Your kitchen instantly looks more curated and intentional. The range hood becomes a design feature instead of an appliance you hide.


    13. Swap Hardware for Brass or Mixed Metals

    Cabinet hardware is jewelry for your kitchen. Switching from generic silver to brass, copper, or mixed metals updates your entire vibe—and it’s one of the fastest, cheapest wins possible.

    Knobs and pulls from Schoolhouse Electric, Rejuvenation, or even Wayfair run $3–$15 each. For a full kitchen with 20 pieces of hardware, budget $60–$300 total. Changing them out takes 30–45 minutes with just a screwdriver. The old hardware might have resale value on Facebook Marketplace, so you could recoup some cost.

    Your cabinets look refreshed and intentional without any major work. This single swap elevates your whole kitchen’s design story.


    14. Create Hybrid Island with Open Legs and Hidden Storage

    Hybrid islands combine closed storage for mess-hiding with open shelving for display and flexibility. The furniture-style legs (instead of a solid base) make the space feel airier and more collected-over-time.

    A ready-made island cart like the IKEA Stenstorp ($150–$250) works for renters and small spaces. Homeowners can commission a custom build for $1,000–$3,000, or DIY using stock cabinetry and metal shelf supports ($300–$600 in materials). The open side gives you display space; the closed side hides cooking prep.

    You get flexibility for both hosting and everyday living. The space feels more designed than a basic kitchen island.


    15. Add Warm Brass Lighting to Match Your Color Palette

    Brass lighting warms up a space psychologically. Unlike cold chrome or industrial black, brass brings sophistication and coziness that pairs beautifully with bold colors and earth tones.

    Pendants in brass finishes start at $40–$80 each from IKEA or Amazon, and go up to $150–$300+ for designer pieces. Pair three over an island for $120–$900 depending on your budget. Installation is straightforward if you have an existing junction box (15–30 minutes DIY) or costs $100–$200 if hiring an electrician.

    Your kitchen feels warmer and more intentional. The lighting itself becomes part of your design story, not just utilitarian.


    16. Organize One Drawer with Drawer Dividers

    A single organized drawer is the gateway drug to a more organized kitchen. Start with one high-traffic drawer (utensils, gadgets) and add dividers to create zones. This teaches your brain the system and motivates you to maintain it.

    Drawer dividers range from $15–$50 per set at Target, IKEA, or Amazon. Bamboo or wood dividers look nicer than plastic and last longer. Customizing one drawer takes 15–20 minutes. There’s no installation required—just lay them in and arrange your items.

    You spend less time hunting for that one spatula and more time actually cooking. A small organized space makes your whole kitchen feel more controlled.


    17. Paint Kitchen Island a Different Color from Cabinets

    Your island can be a different color from your perimeter cabinets—it’s a design choice, not a mistake. This adds personality and makes the island pop as a focal point.

    Follow the same painting process as cabinet painting ($80–$150 in materials, one weekend of work). Choose a complementary or bold-contrast color: if your cabinets are cream, try forest green or deep blue. If you want less commitment, peel-and-stick cabinet film does the job for $80–$150 and peels off cleanly.

    Your kitchen looks intentionally designed instead of one-note. The island becomes a real design anchor.


    18. Add a Small Beverage Station or Coffee Bar

    A dedicated beverage zone keeps your morning routine streamlined and adds a stylish corner that guests love. It doesn’t need to be big—just intentional.

    Grab a small floating shelf ($20–$40 at IKEA or Wayfair), mount it in 15 minutes, and arrange your coffee gear on it and the counter below. Add a small wooden tray ($15–$30) to corral sugar, stirrers, and pods. If you already have most items, you’re looking at $50–$100 total investment. If you need a new coffee maker, budget an additional $30–$150 depending on the model.

    Your morning feels more intentional and luxurious. Plus, guests love having a self-serve option, and you look like you have your life together.


    19. Layer Textures with Woven Baskets and Natural Materials

    Texture creates visual and tactile interest that makes a space feel lived-in, not sterile. Mixing woven baskets, wood, ceramics, and metal gives your kitchen depth and personality.

    Woven baskets from HomeGoods, IKEA, or Etsy run $10–$40 each depending on size. Start with 2–3 in different weaves. Add a wooden cutting board or two ($15–$40 each), and sprinkle in small ceramics or wooden bowls you already own. No installation required—just arrange and play until it feels right. A complete styling session takes 30–45 minutes.

    Your kitchen looks intentionally designed and touchable. The mixed textures make your space feel warmer and more personal than perfectly matching everything.


    20. Install a Low-VOC Paint Refresh on Lower Cabinets

    Low-VOC (volatile organic compound) paint is better for you and the planet—and it smells way less harsh. This matters more when you’re painting in a kitchen you use daily.

    Low-VOC paint from Benjamin Moore, Sherwin-Williams, or Behr costs $40–$60 per gallon (slightly more than standard paint, but worth it). The process is identical to regular cabinet painting: prep, prime, two coats. For just lower cabinets, expect 4–6 hours of work. You’ll appreciate not choking on fumes while cooking over the next two weeks.

    You get a fresher kitchen without the guilt. Plus, low-VOC paint off-gases much faster, so your space smells normal within days instead of weeks.


    21. Swap Upper Cabinets for Open Shelving

    Removing upper cabinets (or replacing them with open shelving) creates the illusion of more space and forces intentional curation of what you display. This works especially well in small kitchens where visual clutter reads as physical clutter.

    If you’re renting, this isn’t an option. Homeowners should consult a contractor about load-bearing walls before making changes ($200–$500 consultation fee, then $1,000–$3,000 in labor). DIY open shelving installation on existing walls costs $200–$500 in materials. The payoff is huge—your kitchen feels twice as big.

    You gain lightness and breathing room. Plus, you’re forced to own only dishes you actually love and display, so nothing hides in the back collecting dust.


    22. Create a Multifunctional Island with Seating and Storage

    A multifunctional island serves as prep surface, casual dining spot, extra storage, and gathering hub. This is the ultimate kitchen workhorse if you have the space.

    A custom island build runs $2,000–$5,000 depending on size and finishes. IKEA’s hack-able options ($300–$800) work for renters with smaller spaces. Budget an additional $200–$600 for stools (aim for upholstered ones that tuck under the counter). The payoff? Your kitchen becomes the heart of your home.

    You gain casual dining, prep space, and storage all in one. This single addition transforms how you and your family interact with your kitchen.


    23. Display Cookbooks Vertically on Open Shelves

    Cookbooks are functional and beautiful. Standing them upright on open shelves turns them into part of your design while keeping them accessible for actual cooking.

    Gather your cookbooks (you probably have more than you realize hiding on closet shelves). If you need more, thrift them from Goodwill or estate sales for $2–$5 each. Arrange them upright alongside other curated items—small plants, serving bowls, a wooden trivet. Styling one shelf takes 10–15 minutes. This costs nothing if you use what you already own.

    Your kitchen looks intentional and cultured. Plus, you’ll actually use those recipes instead of forgetting they exist.


    24. Introduce Sustainable and Recycled Materials

    Recycled glass countertops, FSC-certified wood cabinetry, and low-VOC finishes are better for the planet and your home. They’re also increasingly affordable as sustainable options become mainstream.

    Recycled glass countertops cost $80–$150 per square foot installed (comparable to mid-range granite). FSC-certified plywood cabinetry runs 10–15% more than standard, but lasts longer and feels better ethically. If you’re painting, choose low-VOC paint ($40–$60 per gallon, $10–$15 more than standard). Small swaps—even just going low-VOC and sustainable on a refresh—add up.

    You make choices that align with your values. Your kitchen becomes a space where sustainability isn’t a compromise—it’s just how you live.


    25. Curate a Wellness-Focused Kitchen Zone

    A wellness zone in your kitchen—filtered water, herbal teas, a designated smoothie-making spot, fresh herbs—makes healthy choices feel natural, not forced. This small design choice supports your actual lifestyle.

    This might mean installing a water filter pitcher ($30–$80), dedicating one shelf or small table ($0–$100), and gathering glass tea jars ($5–$15 each). Stock it with herbal teas, dried herbs, and supplements you actually use. Total setup takes 30 minutes and costs $50–$150 if shopping for a few pieces.

    You’re more likely to reach for water instead of soda when it’s pretty and accessible. Small environmental design choices support bigger wellness goals without feeling preachy.


    26. Mix Matte and Glossy Finishes for Visual Depth

    Pairing matte and glossy finishes creates visual dimension that photographs beautifully and feels intentional. The contrast keeps your kitchen from looking flat or one-note.

    This works with paint (matte cabinet paint with glossy tile), hardware (brushed brass with polished accents), or countertops (matte wood with glossy ceramic). No extra cost—just choose finishes intentionally when selecting materials. You might spend 5–10 extra minutes making finish selections, but zero additional dollars if you’re already buying these items.

    Your kitchen looks professionally designed instead of accidentally assembled. The subtle contrast makes people notice your good taste without being able to pinpoint exactly why.


    Save this post and try just one idea this weekend—start small and build from there. Your kitchen is about to feel so much more like you. Which idea are you tackling first?

  • 23 Corner Cabinet Optimization Ideas That Solve Dead Space Issues

    23 Corner Cabinet Optimization Ideas That Solve Dead Space Issues


    Dead corner space in your kitchen? You’re not alone—those hard-to-reach cabinet corners are a common frustration, especially in older homes or galley kitchens. The good news? You don’t need a renovation to fix it. We’ve rounded up 23 practical, budget-friendly, and even stylish solutions that’ll turn wasted space into your most functional storage. From lazy Susans to pull-out drawers to creative shelving hacks, these ideas work for renters and homeowners alike. Whether you’re dealing with a single corner or an entire kitchen redesign, you’ll find something here that clicks for your space and your budget. Let’s dig in.


    1. Install a Rotating Carousel for Easy Access

    A rotating carousel (also called a lazy Susan or corner carousel) is one of the most popular fixes for corner cabinets because it lets you access items without reaching or crawling. Instead of digging to the back, you spin the carousel and grab what you need.

    These come in wire, wood, or plastic options. A basic two-tier carousel runs $25–$60 from IKEA, Amazon, or Home Depot. Installation takes about 10 minutes—just measure your corner space, place the carousel on the floor, and load it. For deeper cabinets, opt for a full-height carousel at $80–$120 that uses the vertical space better. Many come with non-slip pads to keep things steady as they spin.

    Pro tip: Use the carousel for items you grab regularly—spices, canned goods, oils, or small appliances. Leave slower-moving items for the static shelves around it.

    You’ll notice you stop avoiding that corner and actually use the space. Plus, everything stays visible and within reach—no more mystery containers lurking in the back.


    2. Add a Pull-Out Sliding Drawer Organizer

    Pull-out sliding drawers do the work for you by bringing the cabinet contents toward you instead of requiring you to reach into darkness. You literally pull, and the whole basket glides forward.

    Pull-out sliding organizers cost $40–$100 and fit most cabinet widths. Brands like Rev-A-Shelf and Hafele are solid; you can also find budget versions on Amazon. Installation requires a drill and about 30 minutes if you’re handy, or hire a handyman ($50–$100). The rails screw into the cabinet sides, and the basket slides in and out smoothly.

    This works especially well for cookware, baking sheets, small appliances, or pantry items that you don’t want to dig for.

    The difference is immediate: you’ll reach for those pot lids and mixing bowls without hesitation, and meal prep becomes faster.


    3. Use Stackable Clear Containers for Visibility

    Clear containers solve one of the biggest corner-cabinet problems: not knowing what’s actually in there. When you can see through the sides, you stop forgetting about duplicates and wasted food.

    Stackable clear containers run $15–$40 for a set of 4–8 from Target, IKEA, or The Container Store. Choose ones with tight-fitting lids to keep dry goods fresh and pests out. Labels (a roll of masking tape and a marker works; or buy label maker tape for $5–$10) take about 15 minutes to apply. The real payoff? No more opened boxes of pasta sliding around, and you can see at a glance when you’re low on staples.

    Stack vertically to maximize the dead space above and around the carousel or pull-out drawer.

    Your corner stops looking like a mystery box and becomes a place you actually enjoy opening. You’ll also waste less food because you remember what’s stashed back there.


    4. Create a Blind Corner Shelf System

    Blind corner shelves are angled to follow the corner’s natural slope, so items don’t disappear into the back shadows. They tilt or turn, giving you sight lines to everything.

    Angled blind-corner shelf systems cost $60–$150 depending on depth and material. Look for pull-out versions from Hafele or Rev-A-Shelf, which combine shelving with the pull-out feature. Installation takes 45 minutes to an hour with a drill and level. If you’re not drilling-comfortable, a handyman can install it for $75–$150.

    This option shines if you want a permanent, built-in solution that looks intentional rather than like a bandage fix.

    Items on angled shelves stay visible and accessible, and you’ll use that corner space confidently without fear of forgetting about things tucked in back.


    5. Install a Corner-Mounted Magnetic Spice Rack

    If spices are your corner-cabinet culprit, a magnetic strip is a game-changer. Mount it on the interior corner wall, and your jars hang in a compact vertical line, freeing up shelf space.

    Magnetic strips cost $10–$25, and magnetic spice jars run $30–$60 for a set of 8–12. Combined cost: $40–$85. A drill and two anchors take 10 minutes to install. This works best if your cabinet doors are wide enough to accommodate the jars without them hitting the opposite side when you close the door—measure first.

    Pro tip: If your cabinet is too tight, mount the strip on the cabinet door itself instead (same process).

    Your spice collection becomes organized, visible, and actually findable. Cooking gets faster when you’re not hunting through jars.


    6. Build a DIY Two-Tier Corner Shelf from Wood

    For a custom, permanent solution that costs less than buying pre-made systems, build a simple two-tier shelf yourself. You’ll need two pieces of wood (pine or plywood), brackets, and a saw.

    Materials cost $25–$50 (wood, brackets, screws from Home Depot). Time investment: 2–3 hours if you have basic DIY skills. The trick is cutting the wood at the right angles to fit your specific corner. YouTube has dozens of tutorials, or you can ask Home Depot to make the cuts for a small fee ($5–$10 per cut).

    If DIY isn’t your speed, a handyman can build and install this for $150–$300.

    Once it’s in, you’ve gained two extra shelves of functional storage, and it looks way more intentional than empty corner space.


    7. Add Adjustable Metal Shelving Inside the Cabinet

    Adjustable shelving gives you control over shelf height, so you can customize spacing for your actual items instead of being stuck with fixed shelves that waste space.

    Adjustable metal shelf kits run $40–$80 for a corner section. Brands like Rubbermaid and ClosetMaid sell corner kits specifically. Installation takes 30–45 minutes with a drill and level. You’re basically adding vertical pegs and resting shelves on them, which means you can move them anytime.

    Pro tip: Combine this with some of the other solutions (carousels, containers, pull-outs) for maximum customization.

    You instantly gain flexibility. Too much vertical wasted space before? Now you can compress it to fit your needs and open up room for other items.


    8. Use a Corner Cabinet Door-Mounted Organizer

    The inside of the cabinet door is prime real estate that often goes unused. A slim, door-mounted organizer captures that space without eating into your cabinet depth.

    Door-mounted organizers cost $10–$30 and come in fabric, plastic, or wire. Installation is as simple as adhesive strips (renter-friendly) or two small screws. It takes 5 minutes. These work best for lightweight items: tea packets, sponges, dish towels, aluminum foil, plastic wrap, or small bottles.

    Avoid putting heavy items on door organizers—they’ll eventually sag or pull the door off balance.

    This is a zero-commitment upgrade that gives you several extra “shelves” without any permanent changes. Renters love this because it peels right off.


    9. Install a Pull-Out Wire Basket for Deep Cabinets

    Deep cabinets are notorious for becoming black holes where things disappear. A pull-out wire basket solves this by bringing the back items forward on smooth-gliding rails.

    Wire pull-out baskets cost $30–$70 and come in various widths. You’ll need a drill, brackets, and rails. Installation takes 30–45 minutes. The payoff? You can finally see and grab the stuff in the back without doing contortions.

    These work beautifully for kitchen towels, small appliances, cookware, or pantry overflow.

    That scary blind spot in the back suddenly becomes accessible and useful space. You’ll stop buying duplicates of things you forgot you had.


    10. Create a Vertical Divider System for Baking Sheets

    Baking sheets and cutting boards are corner-cabinet nuisances because they’re flat and awkward. Stack them horizontally, and they create a tall pile; lay them flat, and they take forever to find the right one. Vertical dividers fix this by storing them upright like files.

    DIY vertical dividers cost $15–$30 (scrap wood or metal strips and brackets). Installation: 45 minutes to an hour. Alternatively, buy pre-made divider systems for $40–$60 from container stores. Some popular options are from The Container Store or IKEA’s kallax-style dividers adjusted for corner spaces.

    Everything stays visible and accessible without the frustration of restacking a whole pile.


    11. Install Corner Cabinet Lighting for Visibility

    Here’s a simple fix that makes a huge difference: if you can’t see what’s in your corner cabinet, you won’t use it. A small LED strip light solves that instantly.

    LED strip lights cost $15–$40 and come with adhesive backing—no drilling required. Installation takes 5 minutes. Choose warm white (2700K) for a cozy feel. Many run on batteries or plug into a nearby outlet. Some motion-sensor versions turn on when you open the door.

    This pairs beautifully with clear containers and pull-out organizers because now you can actually see your organized items.

    Suddenly, that dark corner becomes inviting and functional. You’ll open that cabinet without hesitation and find exactly what you need.


    12. Add a Tiered Step Shelf for Visible Display

    A tiered step shelf creates depth and visibility by staggering items at different heights. Nothing hides behind anything else—everything’s on display and accessible.

    Tiered step shelves cost $25–$50 for a plastic version, or $60–$100 for wood. Place it on the cabinet floor or an existing shelf. Installation is zero—just set it in place. These work best for items you want visible: cookbooks, decorative jars, fancy spice bottles, or dinnerware.

    The beauty is that you can move it anytime if you want to reconfigure your cabinet.

    Items stop getting lost in back rows because everything’s displayed front and center. Plus, it looks intentional and styled, which is a bonus.


    13. Use the Corner Cabinet Door for a Spice Organization Panel

    If your corner cabinet door is sturdy enough, cover the inside with a pegboard or a custom spice-rack panel. This captures dead space and keeps frequently used items within arm’s reach.

    A pegboard panel costs $20–$40; a pre-made spice rack panel runs $30–$70. Installation requires 4–6 screws and takes 15 minutes. You’ll need to drill into the door, so this isn’t renter-friendly, but it’s a permanent upgrade homeowners love.

    Pro tip: Make sure the spice jars aren’t so heavy that they pull the door out of alignment. Test with a few items first.

    Your most-used spices are always visible and organized, and they’re right there when you’re cooking. No more hunting through containers.


    14. Install Sliding Shelf Liners for Easier Cleanup

    This is a small fix with big payoff: sliding shelf liners reduce friction, so containers glide easily and cleanup is effortless. If you have a wooden shelf, jars and containers often get stuck when you try to pull them out.

    Sliding shelf liners cost $10–$20 for several yards and are available at Target, Amazon, or Home Depot. Cut to fit your shelf. Installation takes 10 minutes. These liners let items slide smoothly without scratching, and spills wipe right up.

    This works especially well with carousel systems or pull-out organizers because it reduces resistance.

    Accessing items becomes smooth and frictionless. It’s a small detail that makes daily use much more pleasant.


    15. Create a Lazy Susan Caddy for Condiments

    A lazy Susan specifically designed as a caddy gives you a compact rotating solution for oils, vinegars, sauces, and condiments without taking up much space.

    Condiment caddies cost $15–$35 and come in stainless steel, plastic, or wood. You can find them at Target, IKEA, or Williams Sonoma. Placement takes 2 minutes—just set it on the shelf. Because it’s smaller than a full carousel, it’s perfect for a single category of items rather than your entire cabinet.

    Pair multiple caddies around your corner cabinet for different item types (one for oils, one for spices, one for baking supplies).

    Everything stays organized by category and spins into reach. Your cooking rhythm speeds up because condiments are always where you expect them.


    16. Use Hanging Baskets Inside the Cabinet

    Hanging baskets from an upper shelf let you use vertical space without cluttering the shelf itself. They’re especially great for lightweight items like tea, snack packets, or dried herbs.

    Hanging baskets cost $10–$25 each and come in wire, woven, or canvas. You’ll need small hooks or S-hooks ($5–$10). Installation takes 10 minutes. Renter option: use adhesive hooks instead of drilling.

    Keep baskets lightweight. Heavy items pull on hooks and become unsafe.

    You’ve gained another storage layer without eating into your precious shelf space. Items stay organized and visible above the clutter.


    17. Install a Corner Cabinet Carousel with Adjustable Tiers

    An adjustable-tier carousel combines two solutions: rotation for access and adjustable shelves for flexibility. You get both benefits in one piece.

    Adjustable-tier carousels cost $80–$150 and take about 20 minutes to assemble and install. Brands like Rev-A-Shelf and Amazon Basics make solid versions. You can raise or lower each tier to match your item heights, reducing wasted space.

    This is more of an investment, but if you’re serious about corner optimization, it pays off.

    Every inch of your corner cabinet suddenly works for you. You’re using vertical and rotational space, so capacity jumps significantly.


    18. Create a DIY Pegboard Cabinet Organizer

    A pegboard inside your cabinet lets you customize hook and shelf placement to fit exactly what you store. It’s like a miniature version of a workshop pegboard—totally customizable.

    Pegboard costs $15–$30, plus hooks and small shelves ($20–$40 for a variety pack). Installation requires drilling 4–6 holes and takes 30 minutes. You can paint the pegboard first for a finished look (adds 1 hour plus drying time).

    This is ideal if you’re storing multiple small tools, utensils, or a mix of items that don’t fit standard organizers.

    Your corner becomes a personalized storage hub where everything hangs exactly where it should be. Accessibility becomes effortless because you designed it.


    19. Use Nesting Containers to Maximize Vertical Space

    Nesting containers are lifesavers for corner cabinets because they stack compactly but expand when you need them. You’re not wasting space on separate stacks of different sizes.

    Nesting container sets cost $20–$50 and come in plastic, glass, or ceramic. IKEA, Target, and Container Store all have good options. They take seconds to set up—just nest them and place on your shelf. This works for dry goods, leftovers, or even small kitchen tools.

    Pro tip: Use nesting bowls and measuring cups too; they serve double duty for cooking and storage.

    You’ve doubled your storage capacity because items actually collapse down instead of taking permanent space. It’s like magic.


    20. Install a Corner Cabinet Organizer with Pull-Out Baskets

    Some corner-cabinet organizers come as complete units with multiple pull-out baskets built into a single frame. It’s a one-purchase solution that handles the entire corner.

    Integrated pull-out basket systems cost $100–$200 and come in various widths and depths. Look for corner-specific versions from Rev-A-Shelf or Hafele. Installation takes 45 minutes to an hour with a drill. It’s a bigger investment, but you’re solving the corner problem completely in one shot.

    If installation feels intimidating, hire a handyman for $100–$150.

    Your entire corner cabinet suddenly functions like a dream. Every item is accessible, nothing hides in the back, and you’ll use the space consistently.


    21. Add Corner Cabinet Lighting with a Motion Sensor

    A motion-sensor LED light is like a mini version of opening the refrigerator—the light comes on automatically when you open the door and turns off when you close it. Total convenience.

    Motion-sensor LED lights cost $20–$40 and run on batteries or USB. Installation involves peeling off adhesive backing and sticking it under the top shelf (or inside the door frame). It takes 2 minutes. No wiring, no drilling—renter-friendly.

    Some models have adjustable brightness and warm or cool color options.

    You never fumble in the dark again. The moment you open that cabinet, everything’s illuminated and ready. It’s a small luxury that changes how you interact with the space.


    22. Use a Stainless Steel Corner Shelf Unit

    For a durable, commercial-grade solution, consider a stainless steel corner shelf unit. These are used in professional kitchens for a reason—they’re sturdy, easy to clean, and last forever.

    Stainless steel corner shelf units cost $80–$150 depending on height and tier count. Installation takes 45 minutes with a drill and level. These are especially great if you’re storing heavier items like cookware or small appliances.

    The trade-off? They’re more industrial-looking, which works beautifully in modern or minimalist kitchens but might not suit traditional styles.

    You gain a storage solution that’ll outlast your kitchen cabinets. Plus, it wipes clean in seconds, which is a huge win for busy cooks.


    23. Create a Corner Pantry with Labeled Bins

    If your corner cabinet is spacious and dedicated to pantry overflow, fill it strategically with matching labeled bins. Everything’s visible at a glance, categories are clear, and it looks intentional.

    A set of 6–10 matching storage bins costs $30–$60 from Target, The Container Store, or IKEA. Label maker tape ($5–$10) or a regular label gun makes identification foolproof. Setup takes 20 minutes—just organize by category, label, and stack.

    Bonus: Rotate bins that have been sitting unused to the front so you actually use what you have.

    Your corner stops being a mystery and becomes a mini pantry. You’ll shop smarter, waste less food, and find things instantly.


    Save this post and pick one idea to implement this weekend. Even a single carousel or set of clear containers makes a shocking difference in how much you actually use that corner. Which hack will you try first?

  • 26 Rustic Coffee Bar Ideas That Add Warm, Country-Chic Charm

    26 Rustic Coffee Bar Ideas That Add Warm, Country-Chic Charm


    If you’re craving that warm, lived-in café vibe at home, a rustic coffee bar is your answer. There’s something magical about walking into your own kitchen and feeling like you’ve stepped into a countryside coffee shop—where every detail tells a story and nothing feels too polished. Whether you have a sprawling kitchen or a tiny corner to work with, these 26 ideas will help you build a coffee station that feels authentically rustic and genuinely yours. You’ll discover budget-friendly solutions, thrifted finds, and simple styling tricks that don’t require any fancy skills. Let’s turn your coffee ritual into a daily escape.


    1. Reclaim Wood Shelving for Rustic Storage

    A reclaimed wood shelf instantly becomes the hero of any rustic coffee bar. These shelves bring authentic character that new materials just can’t replicate—each scratch and patina mark adds to the story.

    Hunt for reclaimed wood at salvage yards, Facebook Marketplace, or even your local barn (yes, really). You can also find pre-made rustic shelves at Home Depot or Wayfair for $40–$150 depending on length. Installation takes one weekend with basic tools and wall anchors. Arrange your coffee gear and favorite mugs on top, and suddenly you have a display that looks intentional and inviting.

    The best part? Your coffee setup becomes functional décor that doubles as a conversation starter.


    2. Mix Vintage Mugs on Open Display

    Vintage mugs are the soul of rustic coffee styling. Forget matching sets—the charm lives in the imperfections and variety.

    Start collecting from thrift stores (Goodwill, estate sales, antique shops) where you’ll find unique pieces for $0.50–$3 each. Display them on a wooden mug rack ($15–$40 at Target or Amazon) or hang them from vintage hooks on your wall. Group by color family (creams, rusts, sage greens) to create a cohesive look without losing that eclectic feel.

    Your morning coffee tastes better when it’s served in a mug with personality.


    3. Install an Open Brick or Shiplap Backsplash

    Exposed brick or shiplap gives your coffee bar that authentic farmhouse foundation. If you have it, keep it visible. If not, you can add it.

    Real exposed brick requires removing drywall (hire this out—$200–$500 for a small area). Pre-made shiplap panels are easier: peel-and-stick options run $20–$40 per sheet at Home Depot; real wood shiplap costs $60–$200 per sheet. Installation takes one weekend for a small backsplash and zero contractor fees. The payoff is enormous—suddenly your coffee corner feels grounded and architectural.

    This backdrop makes every photo of your coffee station look magazine-worthy without any extra styling.


    4. Add a Farmhouse-Style Coffee Sign

    A hand-painted or vintage coffee sign sets the rustic tone instantly. It’s both practical (tells guests where the coffee happens) and decorative.

    DIY option: grab a $5–$10 piece of reclaimed wood from a craft store, paint it with chalk paint or acrylics, and distress the edges with sandpaper. Takes 30 minutes. Pre-made options run $20–$60 on Etsy or Wayfair. Hang it with rope, wire, or vintage hooks for maximum charm.

    Every time you glance at that sign, you’ll smile at the cozy corner you’ve created.


    5. Use Mason Jars for Coffee Bean Storage

    Mason jars solve three problems at once: they keep beans fresh, look rustic, and cost next to nothing.

    Grab quart and half-gallon mason jars from any grocery store ($0.75–$2 each). Label them with kraft paper and a marker or print vintage-style labels from Etsy ($5–$10 for a set). Add a date or roast level so you remember which is which. Arrange them by color (light to dark) for a naturally organized look.

    Your coffee beans stay fresher longer and look intentionally styled at the same time.


    6. Paint Walls a Warm, Neutral Tone

    Warm, neutral walls (think cream, soft terracotta, warm gray, or soft sage) are the canvas that makes rustic coffee bars feel cozy rather than cluttered.

    A gallon of quality paint costs $30–$50 and covers about 400 square feet. A small coffee corner takes one afternoon to paint yourself, or hire help for $200–$400. Stick with matte or eggshell finishes—they feel more rustic than glossy. Brands like Benjamin Moore or Sherwin-Williams have heritage palettes perfect for farmhouse vibes.

    The right wall color makes your coffee setup feel like a destination within your own home.


    7. Install Pendant Lights Above the Counter

    Lighting transforms a coffee corner from functional to atmospheric. Pendant lights hung at 30–36 inches above counter height create the perfect café ambiance.

    Rustic pendant fixtures run $25–$100 each at Home Depot, Wayfair, or Etsy. Installation requires an electrician ($100–$300 for two fixtures) or a confident DIYer with basic wiring skills. For a renter option, use plug-in pendant lights ($40–$80 each) that hang from a ceiling hook with zero installation.

    Warm light pooling over your coffee setup instantly makes the space feel like a real café—not just a corner of your kitchen.


    8. Display Coffee Equipment as Décor

    Your coffee gear isn’t just functional—it’s the décor. A beautiful espresso machine or pour-over setup is worth showcasing.

    If you already own quality equipment, arrange it front-and-center on open shelving or counter space. Add a vintage soap stone or marble under hot equipment for heat protection ($15–$30). Group items by function: brewing tools on one shelf, storage (beans, filters) on another. This creates a visual hierarchy that feels intentional.

    Guests will actually want to ask about your setup instead of just asking for coffee.


    9. Layer Textures with Linen and Burlap

    Rustic charm lives in texture. Linen, burlap, and cotton runner fabrics add warmth without taking up much space or money.

    Grab a burlap runner ($10–$25 on Amazon or HomeGoods) or roll linen tea towels ($8–$15 each at Target) nearby for a polished touch. A small burlap or linen storage basket ($15–$40) keeps coffee filters, sugar packets, or extra napkins organized and on-theme. These soft textures make the bar feel lived-in and approachable.

    The tactile quality of natural fabrics makes your coffee ritual feel more intentional—like you’ve set aside a real moment for yourself.


    10. Create a Coffee Bean Vertical Wall Display

    A vertical bean display is art, organization, and conversation starter all at once—pure rustic genius.

    Use a shadow box frame ($15–$30 at Michaels or Amazon), line it with burlap, and arrange dried coffee beans in patterns. Or buy a wooden display shelf with compartments ($30–$60) and fill each section with a different roast, labeled with vintage tags. Installation is simple—just wall anchors and a level.

    This setup becomes a functional art installation that tells the story of your coffee obsession.


    11. Add a Vintage Coffee Grinder Centerpiece

    An old-fashioned manual coffee grinder is the ultimate rustic prop—it’s functional, beautiful, and packed with character.

    Hunt for vintage grinders at estate sales, antique shops, or Etsy ($30–$100 depending on condition and age). They don’t need to work (though some still do)—they’re as much décor as tool. Place it on a visible shelf or counter as a centerpiece that draws eyes. Pair it with a small stack of specialty coffee bags or a vintage cookbook.

    The moment someone sees that grinder, they know they’re in a space where coffee matters.


    12. Paint or Stain Wood Shelves Deep Brown

    Deep wood tones ground a rustic coffee bar and make lighter décor items pop. If your shelves are too light or new-looking, stain them darker.

    Buy wood stain at Home Depot ($10–$20 per quart)—brands like Minwax come in 20+ rustic shades. Staining takes 2–4 hours (plus drying time) and requires light sanding beforehand. If you’re renting or want zero commitment, use furniture stain markers ($5–$8 per marker) to touch up or darken existing shelves temporarily.

    Deeper wood tones instantly age your space and make everything feel more intentional and collected.


    13. Incorporate Vintage Kitchen Scale or Register

    Vintage kitchen scales and old registers are rustic gold—they’re sculptural, functional, and instantly elevate your setup.

    Find them at antique shops, flea markets, or eBay ($15–$60 depending on age and condition). A scale can hold your coffee bags (beautiful and practical). An old register is pure décor—it sits pretty and tells a story. Display one as your centerpiece with other small items grouped around it.

    These vintage finds make your coffee bar feel like it’s been a gathering spot for decades, even if you just started it.


    14. Use Kraft Paper for Labels and Signage

    Kraft paper is the rustic styling MVP—it’s cheap, versatile, and looks effortlessly charming.

    Grab a kraft paper roll ($5–$10 at craft stores) or kraft adhesive labels ($8–$12 for a pack). Write blend names, brewing instructions, or dates with a black marker or calligraphy pen. Tie labels to jars with jute twine ($3–$5). Add a small kraft chalkboard or kraft menu card to list your daily coffee offerings.

    Kraft paper transforms basic supplies into styled details that feel intentional without looking overdone.


    15. Install Open Shelving Between Wall Studs

    Built-in shelving makes your coffee bar feel permanent and purposeful. It’s a renter’s dream if you use removable brackets, or a homeowner’s investment in your space.

    Floating shelf kits run $40–$120 each at Home Depot (includes brackets and hardware). Installation takes 1–2 hours per shelf with a stud finder and level. For renters: use temporary adhesive brackets ($20–$50) that won’t damage walls. DIY enthusiasts can build custom shelves from reclaimed wood and brackets for $50–$150 per shelf.

    Custom-built shelving makes your coffee corner feel like it was always meant to be there.


    16. Group Items by Threes and Fives

    Rustic styling isn’t about perfection—it’s about intentional grouping. The “rule of three or five” creates visual harmony while keeping things authentic.

    Arrange coffee accessories in small clusters: three matching mugs together, five jars of beans displayed by color, three small plants grouped on one shelf. Leave breathing room between groups so nothing feels crowded. This works even on a small shelf because the grouping itself becomes the décor.

    Strategic spacing makes your coffee bar look styled by design, not by accident—and way more visually interesting.


    17. Add a Wooden Tray as a Corralling Tool

    A wooden tray is the secret tool that makes small coffee bars look organized and styled simultaneously. It groups related items without needing shelves.

    Hunt for wooden trays at HomeGoods, Target, or thrift stores ($10–$30). Choose one with rustic charm—worn edges, natural grain visible, maybe some worn finish. Use it to corral your daily-use items: French press, sugar bowl, spoon, cream pitcher. Swap what’s on the tray seasonally or daily depending on what you’re brewing.

    A tray instantly elevates your coffee setup from scattered to styled—and you can easily move it around.


    18. Hang Vintage Coffee Sacks or Canvas Art

    Vintage coffee sacks are rustic art—each one has a history, and they look genuine rather than mass-produced.

    Score sacks at antique shops or specialty coffee roasters ($15–$50 each). Frame them in simple wooden frames ($10–$30 each), or hang them with rope and vintage clips ($8–$15). If you can’t find authentic sacks, Etsy sells beautiful reproductions ($20–$40 for canvas art with vintage coffee logos). Hang 2–3 pieces above your main coffee display area.

    Vintage coffee sacks say “I love coffee” in the most authentic, rustic way possible.


    19. Incorporate a Small Potted Herb Garden

    A small herb garden adds freshness, greenery, and a living element that makes rustic spaces feel nurtured and real.

    Start with low-maintenance herbs: mint, basil, or rosemary in small terracotta pots ($3–$8 each). Arrange them on your coffee bar shelf where they’ll get decent light (at least 4 hours daily). Water them 2–3 times weekly. Use the herbs in your coffee setup—fresh mint in your water pitcher, basil in seasonal beverages, or just let them sit pretty.

    Fresh herbs remind you daily that this little corner is a place of care and intention.


    20. Use Vintage Bottles and Glassware for Syrups

    Vintage bottles aren’t just pretty—they’re the perfect vessels for homemade coffee syrups and add serious visual interest.

    Scout antique shops, estate sales, or Etsy for small vintage bottles ($5–$20 each). Fill them with homemade syrups (vanilla, cinnamon, hazelnut) or store-bought specialty syrups. Label each bottle with kraft paper tags and twine. Group them together so they become a mini display—the colors and shapes create natural visual appeal.

    Serving coffee from vintage bottles elevates the entire ritual and makes guests feel special.


    21. Create a Coffee Bar on a Vintage Cart

    A vintage cart gives you a portable, flexible coffee bar that looks undeniably charming—and you can move it whenever you want.

    Find vintage bar carts or kitchen carts at thrift stores ($20–$60), Facebook Marketplace, or specialty shops like Wayfair ($60–$150). Fill the shelves with your mugs, coffee equipment, and supplies. The wheels mean you can roll your setup to different rooms for gatherings or simply push it aside for extra counter space.

    A rolling coffee bar is functional, stylish, and says you’ve thought about how you actually use your space.


    22. Display a Coffee Roasting Timeline or Tasting Notes

    Sharing the story of your coffee transforms it from just a beverage into an experience—even if you’re the only one experiencing it.

    Get a small chalkboard ($8–$15 at Target) or make one from kraft paper and frame it ($10–$20 total). Write out tasting notes, roast levels, or the origin story of your current beans. Update it weekly or daily. Use chalk markers or a beautiful pen to keep it rustic and handmade-looking, not corporate.

    When you read those notes while brewing, your morning ritual becomes more intentional and mindful.


    23. Mix Metal Finishes Across Your Setup

    Rustic spaces embrace mixed metals instead of trying to match everything perfectly. It feels collected and authentic rather than coordinated.

    When shopping for equipment, hooks, brackets, or décor, don’t worry about matching metals exactly. Brass, copper, black iron, and aged silver can all live together beautifully. The “imperfection” is the whole point. Group similar metals on one shelf, then introduce a different finish on another to create rhythm.

    Mixed metals make your setup look like it’s been collected over time, not assembled all at once from a single brand.


    24. Add a Small Farmhouse Sink or Washing Station

    If you have space and resources, a dedicated washing station transforms your coffee bar from just serving to fully functional and guest-ready.

    A small farmhouse sink runs $200–$500. Installation by a plumber costs $300–$800 depending on existing plumbing. For renters: a ceramic or metal basin ($20–$50) sitting on counter space works beautifully—fill with water and keep clean mugs nearby. It’s practical and looks intentionally styled.

    A little sink turns your coffee bar into a real café-style setup instead of just a corner of your kitchen.


    25. Wrap or Frame a Coffee Quote in Vintage Style

    A rustic coffee quote frames your whole philosophy and becomes a daily reminder that this space is about more than caffeine.

    DIY: print your favorite coffee quote on kraft paper, frame it in a rustic frame ($8–$15), and hang it. Purchase option: Etsy sellers offer gorgeous hand-lettered prints ($15–$30) that come ready to frame. For zero cost: write a quote directly on kraft paper with calligraphy pen, tape it to the wall, and create an impromptu art installation.

    Every time you walk past that quote, you’re reminded to actually pause and enjoy your coffee ritual.


    26. Set Up a Coffee Tasting or Cupping Station

    A tasting station takes your coffee bar from serving-focused to experience-focused—it’s rustic café vibes at their finest.

    Grab inexpensive cupping bowls ($3–$8 each at coffee supply shops or Amazon), source 3–5 different single-origin coffees from local roasters ($10–$15 per bag), and create a simple tasting sheet (free template from sites like Blue Bottle Coffee or Intelligentsia). Arrange everything on your coffee bar with water for cleansing the palate. Invite friends or make it a solo ritual each week.

    Suddenly your coffee bar isn’t just where you grab a morning cup—it’s a destination for genuine discovery and connection.


    Ready to build your rustic coffee corner? Pick one or two ideas to start with this weekend—maybe that vintage cart or a set of reclaimed wood shelves—and watch your coffee ritual transform. Your space doesn’t need to be big or perfect to feel like a real café. Save this post and share it with any coffee lover you know who needs their own cozy corner.

  • 25 Modern Farmhouse Kitchen Ideas With Rustic Charm

    25 Modern Farmhouse Kitchen Ideas With Rustic Charm

    Introduction

    If you’re craving a kitchen that feels both welcoming and sophisticated, modern farmhouse design hits that sweet spot perfectly. It blends the warmth of rustic elements—think exposed wood and vintage touches—with the clean lines and functionality of contemporary spaces. The result? A kitchen that doesn’t feel precious or overly styled, but rather like the heart of a home where people actually gather. Whether you’re renovating from scratch or tweaking what you already have, these 25 ideas will help you create a farmhouse kitchen that’s practical, beautiful, and entirely yours. You’ll discover everything from budget-friendly styling tricks to investment pieces that anchor the whole aesthetic. Let’s get started.


    1. Install an Apron-Front Sink as Your Centerpiece

    An apron-front sink (also called a farmhouse sink) is the signature piece that defines this style. Its large, exposed front basin and deep capacity make everyday tasks easier while creating an instant focal point in your kitchen.

    You can find quality options at Home Depot ($300–$800), Wayfair ($250–$1,200), or Amazon ($200–$600). Ceramic, fireclay, and stainless steel are the most durable materials. Installation takes a professional plumber about 2–3 hours, though it’s not a DIY project for most renters. Pair it with a vintage-style bridge faucet or modern brass fixtures to complete the look.

    Position your sink in front of a window if possible—it’s not just prettier, it makes dish duty feel less like a chore. This one piece sets the tone for your entire farmhouse aesthetic.


    2. Paint Cabinets in Soft, Muted Tones

    Skip the stark white and embrace softer, personality-filled cabinet colors. Cream, pale sage green, dusty blue, or warm taupe give farmhouse kitchens that lived-in charm without feeling sterile.

    Cabinet paint runs $30–$80 per quart, plus prep work and primer. If you’re handy, this is a DIY project taking one weekend (prep, prime, paint in thin coats). For a professional job, expect $1,500–$3,500 depending on cabinet count. Use quality paint like Sherwin-Williams ProClassic or Benjamin Moore Advance—it’s worth the extra cost. Test your color in natural light before committing; what looks perfect in the store may shift dramatically at home.

    The payoff is enormous: your kitchen goes from builder-basic to designed-on-purpose in one update. Plus, these softer tones hide fingerprints better than white.


    3. Add Open Shelving for Display and Breathing Room

    Open shelving replaces upper cabinets or supplements them, creating visual lightness and space for displaying your favorite kitchenware and cookbooks. It’s the farmhouse hallmark that makes kitchens feel airy rather than enclosed.

    Floating shelves cost $15–$50 per shelf (basic wood or metal brackets), or reclaimed wood shelves run $40–$150 each. Installation is a 1–2 hour DIY project if you locate studs correctly, or hire a handyperson for $50–$100. The trick is styling intentionally: group like items (all white dishes, glass jars with dried goods), and leave negative space. Too crowded looks cluttered, not charming.

    You’ll love how much lighter your kitchen feels, and you’ll actually reach for those pretty bowls and glasses more often. Just commit to keeping shelves tidy—open storage shows everything.


    4. Install Shiplap on Accent Walls or Behind Shelves

    Shiplap—those overlapping horizontal wooden boards—is quintessential farmhouse texture. It adds visual interest without requiring a full renovation and works as a DIY project or hired labor job.

    Tongue-and-groove pine shiplap costs $1–$3 per square foot at big-box stores, plus paint ($30–$60). A 4×8-foot accent wall runs about $50–$150 in materials. Installation is manageable if you’re comfortable with a stud finder and nail gun; budget one weekend. Alternatively, hire a carpenter for $200–$600 depending on wall size. Prime and paint in your chosen farmhouse color—cream, white, or pale blue work beautifully.

    This single addition gives your kitchen that authentic farmhouse personality that’s hard to fake with decor alone. It’s an investment that pays off visually every single day.


    5. Choose Butcher Block or Wood Countertops

    Wood countertops embody farmhouse warmth in a way that cold quartz or laminate simply can’t match. Butcher block, live-edge wood, or reclaimed barn wood bring character and timelessness to your kitchen.

    Butcher block runs $1,500–$3,500 installed, while high-end walnut or hand-planed reclaimed wood costs $3,000–$6,000+. Budget options include new wood counters from Lumber Liquidators ($40–$60 per linear foot). Wood requires maintenance—monthly mineral oil conditioning, immediate water cleanup, and heat protection—but that patina and warmth are irreplaceable. Pair with a wooden cutting board for styling continuity.

    Yes, wood demands care, but it ages beautifully and develops character that makes your kitchen story-rich. Many farmhouse lovers consider maintenance a small price for authenticity.


    6. Swap Out Hardware for Vintage or Brass Pieces

    Hardware is the jewelry of kitchen design—a tiny change that makes enormous visual impact. Replacing builder-grade chrome knobs and pulls with vintage brass, oil-rubbed bronze, or wrought iron instantly boosts farmhouse credibility.

    Vintage hardware ranges from $2–$10 per piece at Etsy, eBay, or Anthropologie. New reproduction pieces cost $3–$15 each from Wayfair, Rejuvenation, or Restoration Hardware. A full cabinet refresh (20–40 pieces) runs $60–$400 total. Installation is pure DIY—just unscrew old hardware, align holes, and install new pieces. Takes 30–60 minutes for an entire kitchen.

    The transformation is disproportionate to the effort. Your cabinets go from forgettable to intentional with this one detail, and it costs less than takeout dinner.


    7. Install Black or Dark Wood Trim Around Windows

    High-contrast trim—black, charcoal, or dark stained wood framing windows and doorways—defines modern farmhouse style with unexpected graphic punch. It grounds the space and draws the eye where you want it.

    Paint-grade trim costs $1–$3 per linear foot, plus primer and paint ($30–$60 total). A standard window frame requires about 12–15 linear feet, so material costs are $15–$45. This is an achievable DIY project if you’re comfortable with tape, primer, and paint; plan one weekend. Alternatively, hire a painter for $200–$400 per window. Use quality exterior or interior trim paint like Benjamin Moore Advance to ensure durability around moisture-prone window areas.

    This architectural detail transforms your kitchen from generic to intentional. It’s especially striking against cream or pale-colored walls.


    8. Layer Lighting with Pendant Fixtures and Vintage Sconces

    Lighting in farmhouse kitchens should feel warm, welcoming, and layered. Mix statement pendants over islands, softer sconces flanking the sink, and under-cabinet task lighting to create depth and functionality.

    Pendant fixtures range from $30–$150 each at IKEA or Target, to $200–$600 from Rejuvenation or Schoolhouse Electric. Vintage sconces cost $20–$100 per pair on Etsy. Installation requires basic electrical knowledge or a licensed electrician ($100–$300 per fixture). Mix metals—brass, black iron, and ceramic—rather than matching everything perfectly. That collected-over-time quality is more farmhouse than matchy-matchy.

    Warm light fundamentally changes how your kitchen feels. Suddenly it becomes an inviting gathering space rather than just a functional room. You’ll find yourself spending more time there.


    9. Add a Large Wooden Island or Cart

    An island serves multiple roles: extra prep space, storage, casual dining, and a visual anchor. A wooden island feels more farmhouse than sleek granite—it’s warm and approachable.

    New wooden islands cost $400–$1,500 from IKEA, Wayfair, or local woodworkers. Reclaimed wood or custom builds run $1,500–$4,000+. Pair with 24–26 inch bar stools ($80–$300 each) for casual seating. If you rent or want flexibility, cart-style islands on wheels ($200–$800) work beautifully and move when needed. Size matters: ensure at least 24 inches of walking space on all sides to avoid a cramped feel.

    An island becomes the heartbeat of your kitchen—where people naturally gather, chat while you cook, and eat casual meals. It transforms a purely utilitarian space into a social hub.


    10. Install Open Shelving Above Your Sink

    The wall above your sink is prime real estate for displaying both beauty and function. Open shelves here let you corral dish towels, soap dispensers, and pretty storage while keeping essentials within arm’s reach.

    Floating shelves cost $15–$50 each, and you’ll likely need 2–3. Total material investment: $50–$150 plus installation (DIY, 1–2 hours, or $50–$100 hired help). Use the opportunity to anchor your farmhouse aesthetic: display vintage-style hand towels, glass water bottles, and creamy ceramic soap dispensers. The key is mixing function with beauty.

    This zone becomes a daily reminder of your thoughtful design. Plus, your family learns to grab what they need from pretty display rather than digging through cabinets.


    11. Use Vintage or Reproduction Tile for Backsplash

    A classic subway tile or vintage-reproduction tile backsplash is farmhouse 101. Whether white subway, soft blue, or handmade-looking glazed tiles, this backsplash style grounds the entire aesthetic.

    Subway tile costs $1–$5 per square foot, while vintage or artisanal reproduction tiles run $3–$10 per square foot. A standard kitchen backsplash (30–40 square feet) costs $100–$300 in materials, plus grout and adhesive. Professional installation runs $500–$1,500 depending on complexity. DIY is possible if you have basic tile experience; plan a full weekend. Neutral grout (white, light gray, or beige) keeps the look clean; darker grout creates more contrast and hides stains better.

    A well-designed backsplash ties the whole kitchen together and makes the space feel professionally finished, not DIY-basic.


    12. Incorporate Vintage Accessories and Collections

    Farmhouse style thrives on vintage—it’s not about matching sets but rather a curated collection of meaningful pieces gathered over time. Vintage scales, enamelware, old crocks, and inherited glassware tell your kitchen’s story.

    Vintage pieces range from free (inherited or found) to $5–$50 per item at thrift stores, estate sales, and Etsy. Budget $100–$300 to start a meaningful collection. The trick is mixing scales: a large vintage scale as a statement piece, smaller crocks and jars grouped together, vintage linens folded and displayed. Rotate pieces seasonally to keep the space feeling fresh.

    Your kitchen becomes less about perfect design and more about your actual life and history. That authenticity is what makes farmhouse kitchens feel like real homes.


    13. Paint or Stain Beams or Ceiling Elements

    If you have ceiling beams or can install faux beams, painting them in soft colors adds architectural interest and authentic farmhouse charm. Even popcorn ceilings look less aggressive when softened with paint.

    Ceiling paint costs $30–$60 per gallon. DIY painting your entire ceiling takes a weekend plus proper scaffolding or a tall ladder setup. Professional painters charge $400–$800 for a full kitchen ceiling. Faux beams (foam or polyurethane) cost $5–$15 per linear foot and require adhesive and painting. Real wood beams run $20–$50 per linear foot installed.

    This overhead element subtly elevates your entire space. Suddenly your kitchen feels more substantial, more considered—like a room worth lingering in.


    14. Choose Brass or Black Iron Faucets

    Your faucet is another hardware piece that sets the tone. Vintage-inspired brass, oil-rubbed bronze, or black matte faucets feel authentically farmhouse—far more character than shiny chrome.

    Bridge-style or gooseneck faucets in brass or black cost $150–$400 from Wayfair, Rejuvenation, or Lowe’s. Professional installation runs $100–$200. If you’re replacing an existing faucet, DIY is possible but requires plumbing confidence. Consider finishes that hide water spots—brushed finishes work better than polished.

    Your faucet becomes part of the daily ritual. Using something beautiful and intentional, rather than generic, makes ordinary tasks feel slightly more pleasant.


    15. Add Wainscoting or Beadboard Walls

    Wainscoting—paneling that runs partway up the wall—adds architectural depth and farmhouse authenticity. Beadboard (narrow tongue-and-groove boards) is the traditional choice, though modern alternatives exist.

    Beadboard costs $0.50–$2 per square foot, plus primer and paint. A full kitchen wall (200–300 square feet) runs $200–$400 in materials. Installation is moderate DIY: plan 2–3 days for a full wall, or hire help for $300–$800. Paint in cream, white, or soft colors to avoid a closed-in feeling.

    This detail anchors the farmhouse aesthetic while adding textural interest at eye level. It makes even a modest kitchen feel thoughtfully designed.


    16. Use Vintage Scales and Measuring Tools as Decor

    Farmhouse kitchens celebrate functional objects as art. Vintage kitchen scales, old measuring cups, and antique recipe boxes aren’t just practical—they’re beautiful design elements that celebrate cooking itself.

    Vintage scales typically cost $5–$30 each on Etsy or at thrift stores. Display them on open shelves, hang them on walls with hooks, or group several together for impact. Measure your space first to ensure pieces don’t overwhelm; a large scale needs breathing room. Mix metals and finishes for collected authenticity.

    These pieces do double duty: they’re actually useful while adding personality and warmth. Your kitchen becomes a celebration of cooking rather than just a place where it happens.


    17. Install a Wooden Range Hood or Build Surrounds

    A wooden range hood—or a wooden mantel-style surround around an existing hood—creates an instant focal point and anchors the farmhouse aesthetic. Wood is warmer and more character-filled than stainless steel.

    Wooden range hoods cost $500–$1,500 ready-made from Etsy or specialty retailers. Custom builds by local woodworkers run $1,500–$3,500. DIY surrounds using reclaimed wood are possible for handy folks; materials cost $200–$600. Professional installation ($200–$400) ensures proper ventilation and codes compliance.

    This centerpiece transforms your entire kitchen’s personality. Suddenly the cooking zone becomes a beautiful statement rather than just utilitarian machinery.


    18. Create a Coffee or Beverage Station

    A dedicated coffee or beverage station—even just a small corner—makes mornings feel like self-care rather than rushing. Style it with vintage accessories and pretty containers for farmhouse charm.

    Budget $30–$100 for a basic setup: a small wooden table or shelf ($20–$50), a coffee maker you already own or a small model ($30–$80), and mugs displayed on hooks or in a rack. Add pretty canisters ($5–$20 each) for sugar and coffee beans. This is pure styling with minimal cost—and you’re using pieces you already have.

    Suddenly you have a small ritual corner that feels intentional. Even when busy, taking time at your coffee station shifts your entire morning energy.


    19. Mix Open and Closed Storage for Balance

    Pure open shelving can feel cluttered; pure cabinets feel closed-off. The farmhouse sweet spot combines both—some beautiful display pieces visible, others tucked away to keep clutter hidden.

    No extra cost if you’re rearranging existing storage. The investment comes if you’re adding cabinets ($500–$2,000) or open shelving ($100–$500). The real work is styling: display items you actually use and love, store daily dishes and clutter in cabinets. Rotate what’s visible seasonally for freshness.

    This balance creates a kitchen that feels both lived-in and designed. You get the warmth of display pieces without the fatigue of managing too many visible items.


    20. Paint Cabinets Two-Tone (Upper and Lower Different Colors)

    Two-tone cabinetry adds visual interest and breaks up the visual weight of an all-one-color kitchen. Cream base with pale blue uppers, or white base with sage green uppers, feels contemporary-farmhouse.

    Paint costs $60–$120 total (two quality quarts). This is a DIY project if you already painted your cabinets; plan 3–4 days for two separate paint colors (allowing drying time). Professional painters charge $2,000–$3,500 for two-tone cabinet work. The key is choosing colors that complement rather than clash—test both colors in natural light before committing.

    This subtle variation creates sophisticated visual interest. Your kitchen feels more intentionally designed and less cookie-cutter.


    21. Add a Wooden Plate Rack or Wall-Mounted Display

    Plate racks celebrate beautiful dishware as functional art. Whether a traditional wooden plate rail or modern wall brackets, displaying plates and platters adds farmhouse character instantly.

    Wooden plate racks cost $50–$200 from Wayfair, Etsy, or local woodworkers. DIY wall-mounted display using wooden rails and plate hangers is possible for $30–$80 in materials. Installation requires stud-finding and wall anchors; plan 1–2 hours. Hang a mix of solid-colored dishes (cream, white, blue) with one or two patterned plates for visual interest.

    Displaying beautiful dishes you actually own (rather than hiding them) makes your kitchen feel like a curated collection rather than just storage. It’s personal and warming.


    22. Install or Style Open Shelving in a Corner Nook

    A corner nook with open shelving is often-wasted space. Shelves here create a charming display zone for cookbooks, frequently-used items, and styling—that collected-over-time feeling farmhouse lovers crave.

    Corner shelves cost $30–$100 per unit, plus installation of $50–$150 (DIY or hired). The key is styling depth: place larger items (cookbooks, jars) in back, smaller items in front. Add a small plant or vintage pitcher for organic texture. Keep it balanced—too much clutter defeats the purpose.

    This small investment creates a feature-worthy zone that photographs beautifully and feels intentionally designed. It transforms overlooked corner space into a showstopper.


    23. Use Vintage or Earthenware Canisters and Containers

    Vintage earthenware canisters, crocks, and ceramic jars store pantry staples while adding authentic farmhouse texture. Unlike trendy matching sets, collecting varied vintage pieces feels more genuine.

    Vintage canisters typically cost $5–$20 each from thrift stores, Etsy, or estate sales. Budget $50–$150 to start a meaningful collection. Group pieces by color family (creams and taupes, or rust and terra cotta) for cohesion without looking matchy. Fill with flour, sugar, coffee, and dried goods—both beautiful and practical.

    These everyday containers become quiet decor. When you pass them daily, they reinforce your intentional, farmhouse-loving aesthetic.


    24. Create a Windowsill Herb or Plant Station

    A kitchen windowsill is perfect for growing fresh herbs and small plants. It adds life, greenery, and the practical benefit of fresh herbs within arm’s reach while cooking.

    Terra cotta pots cost $1–$5 each, soil is $5–$10, and herb seedlings are $2–$5 each from Home Depot or nurseries. Total budget: $25–$50 for a full windowsill setup. Basil, parsley, and chives thrive on kitchen windowsills with decent light. Maintenance is minimal—water when soil is dry, pinch off leaves as needed.

    This living element brings the outdoors in while serving your daily cooking needs. Plus, herbs you grow yourself taste infinitely better than store-bought.


    25. Mix Metallics for Subtle Visual Interest

    Farmhouse style doesn’t demand perfectly matched metals. Instead, mixing brass, black iron, copper, and brushed nickel creates layered, collected-over-time authenticity that’s more interesting than uniformity.

    No additional cost if you’re already choosing fixtures and hardware—just mix finishes intentionally. Brass hardware, black sconces, stainless appliances, and copper accents work beautifully together when you view them as a palette rather than individual pieces. The key: keep one metal slightly dominant (maybe brass) so the mix feels intentional rather than chaotic.

    This approach frees you from the tyranny of “matching everything.” Your kitchen becomes more interesting, more personal, and honestly more sophisticated than cookie-cutter perfection.


    26. Layer Textiles: Kitchen Linens, Rugs, and Runners

    Textiles—linens, runners, and tea towels—add warmth and softness that make kitchens feel like homes rather than showrooms. Layering different textures in a cohesive color palette is pure farmhouse charm.

    A quality kitchen runner costs $30–$100 from Wayfair or Target. Vintage linens are free to $10 each from thrift stores or inherited collections. Natural fiber linens (linen, cotton, hemp) in creams, taupes, and soft blues layer beautifully. Drape a tea towel over a hook near the sink, lay a runner in front of the stove, and style shelves with folded linens. Budget $50–$150 to refresh your entire textile collection.

    Textiles warm up even industrial-feeling kitchens instantly. They’re also practical—linens age beautifully and gain character with use.


    Save this post for your farmhouse kitchen journey. Pick one idea that speaks to you and start there—you don’t need to overhaul everything at once. Even a single thoughtful addition shifts your entire kitchen’s personality toward warm, welcoming, and authentically yours.