Category: Kitchen Decor

  • 11 Genius Corner Storage Ideas for Long Narrow Kitchen

    11 Genius Corner Storage Ideas for Long Narrow Kitchen

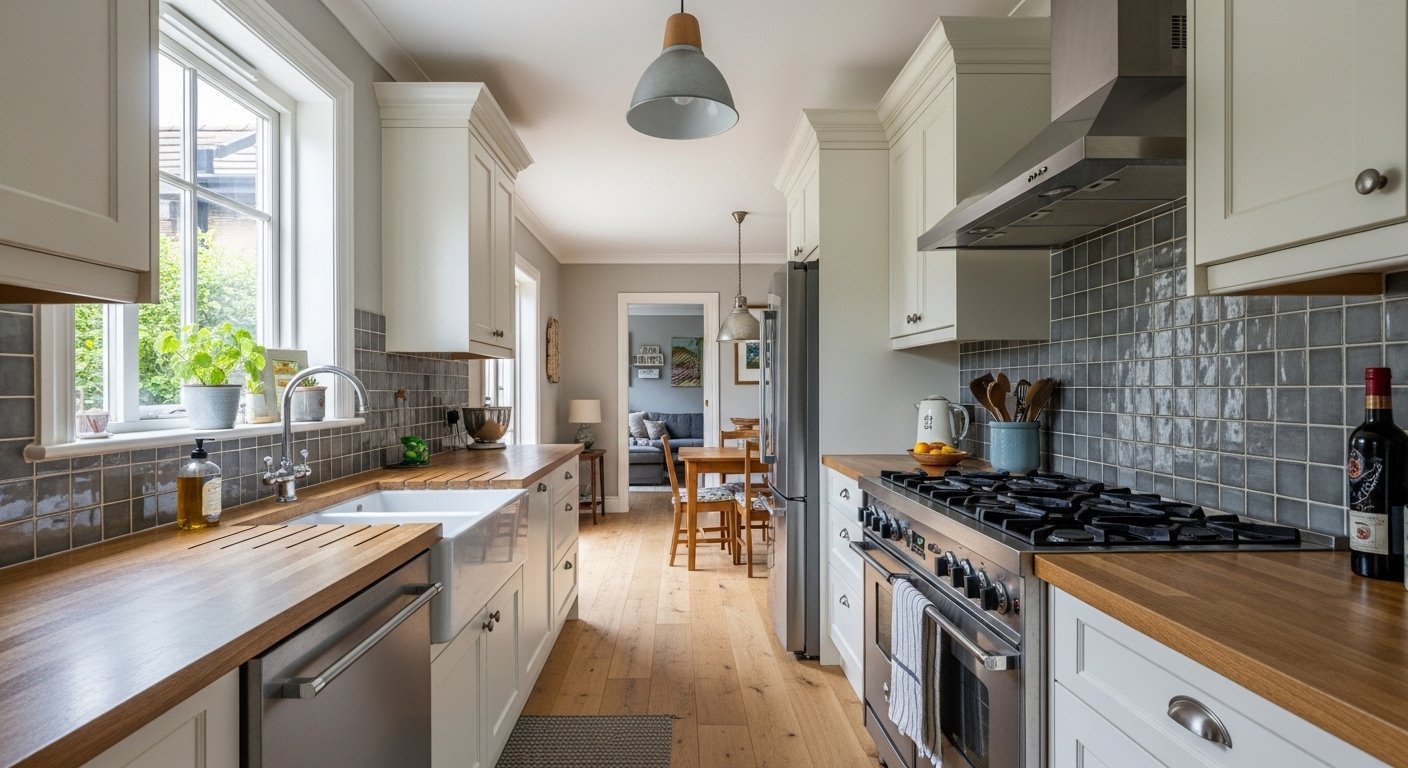
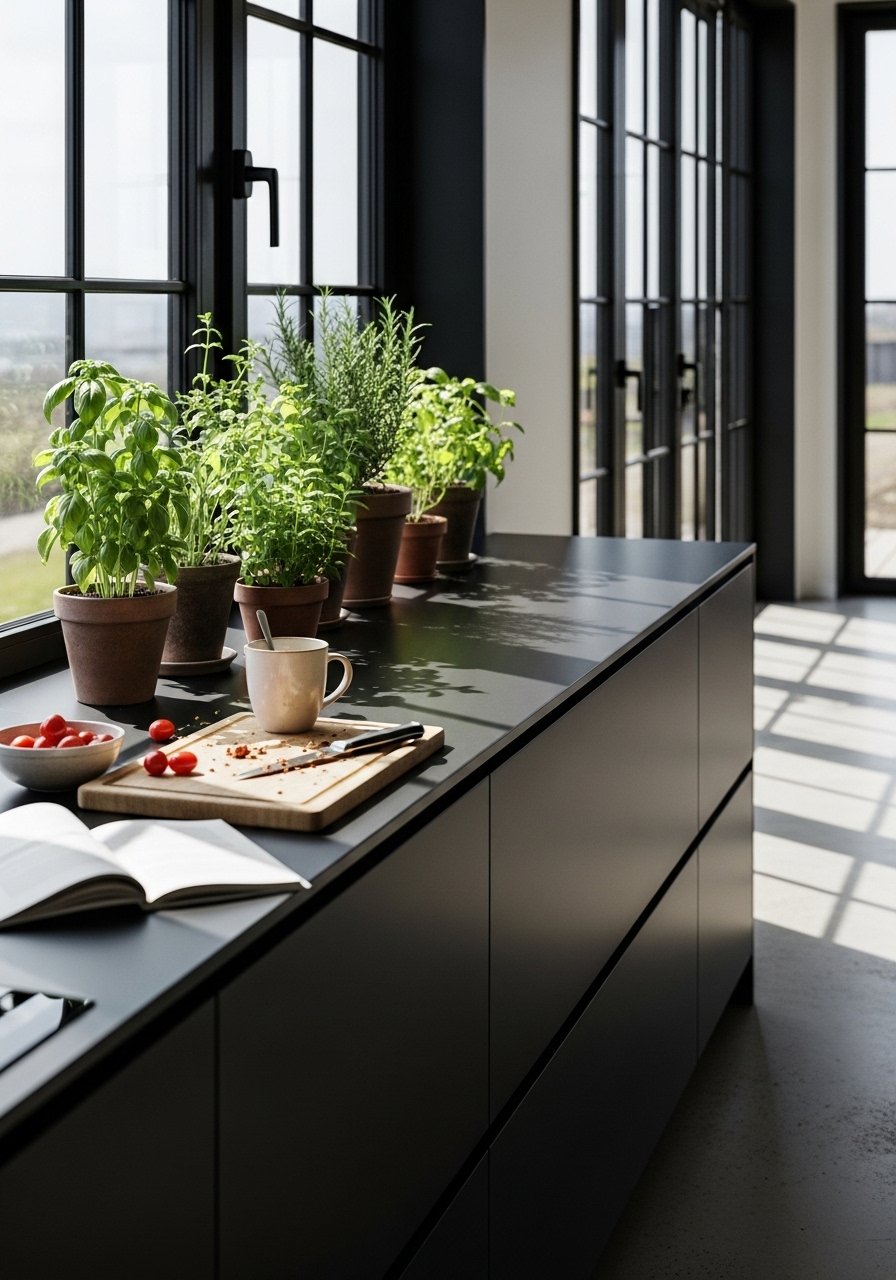
    I remember staring at that awkward corner in my galley kitchen, hands on hips, wondering why it mocked me every morning. Pots shoved in, spices tumbling out. It felt tight, frustrating.

    Then I started tweaking. One small fix led to another. Space opened up. Cooking felt easier, calmer.

    Now, those corners hold what I need without the fight. If your long narrow kitchen has dead zones like mine did, these ideas will change that.

    11 Genius Corner Storage Ideas for Long Narrow Kitchen

    These 11 ideas turned my narrow kitchen's forgotten corners into smart storage. Real fixes from my homes, no fuss. You'll see exactly what to grab and how it fits.

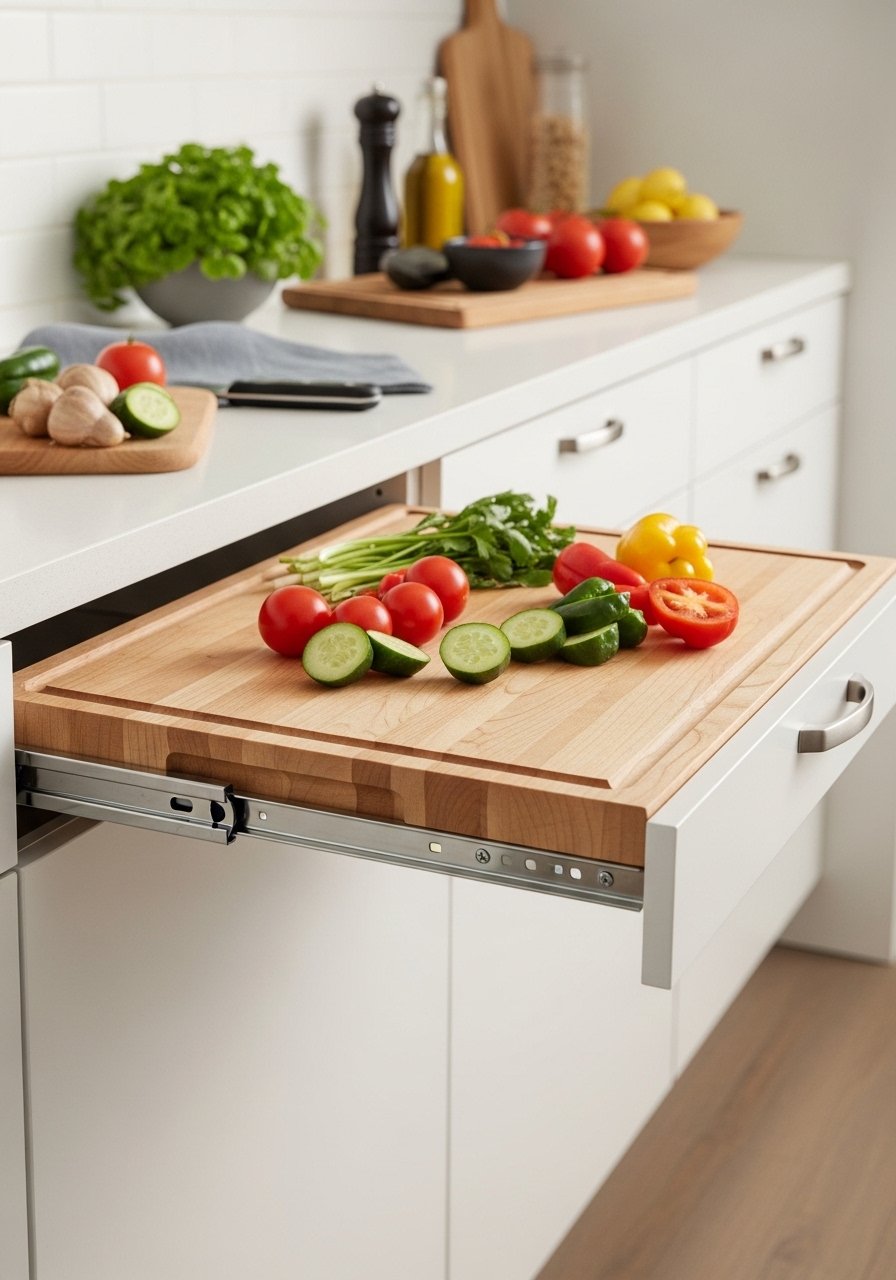
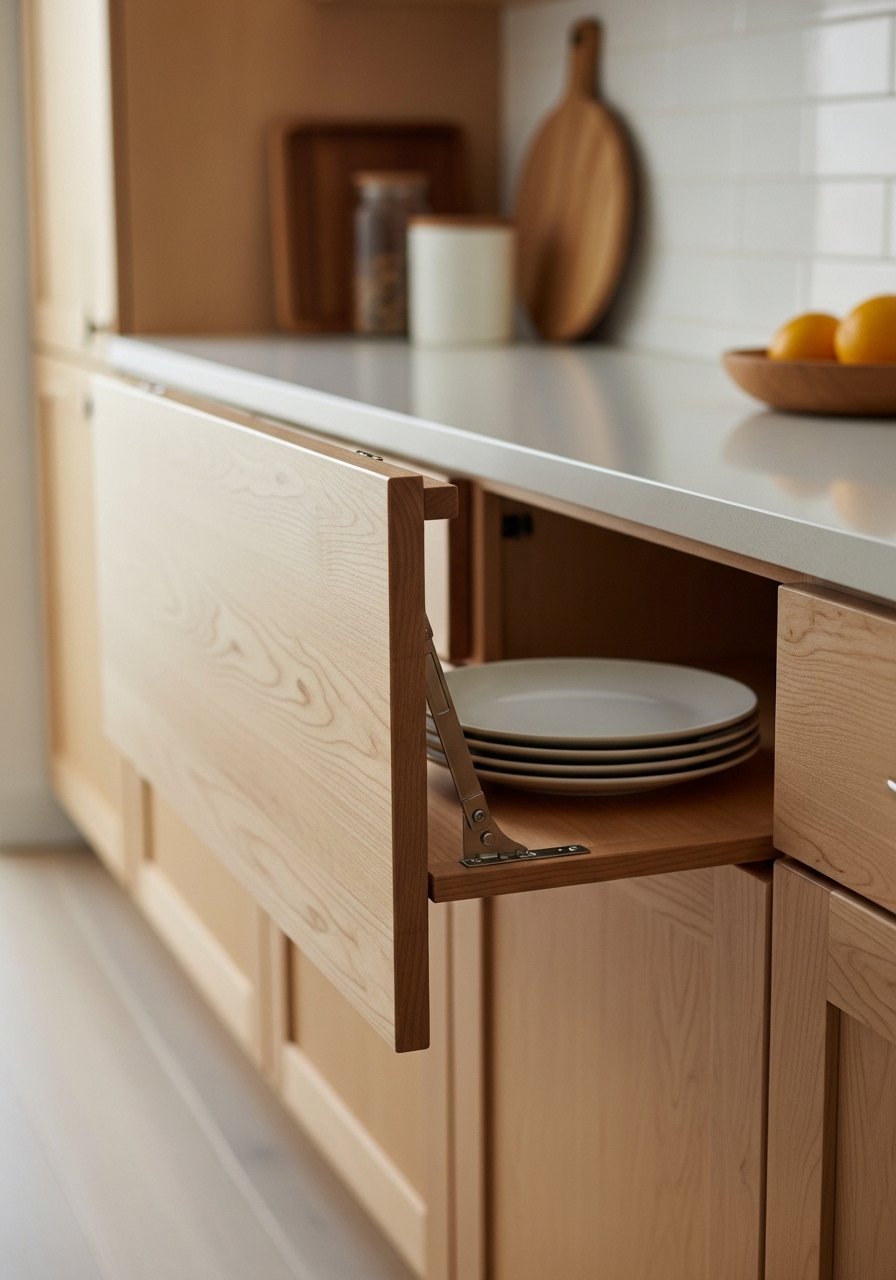
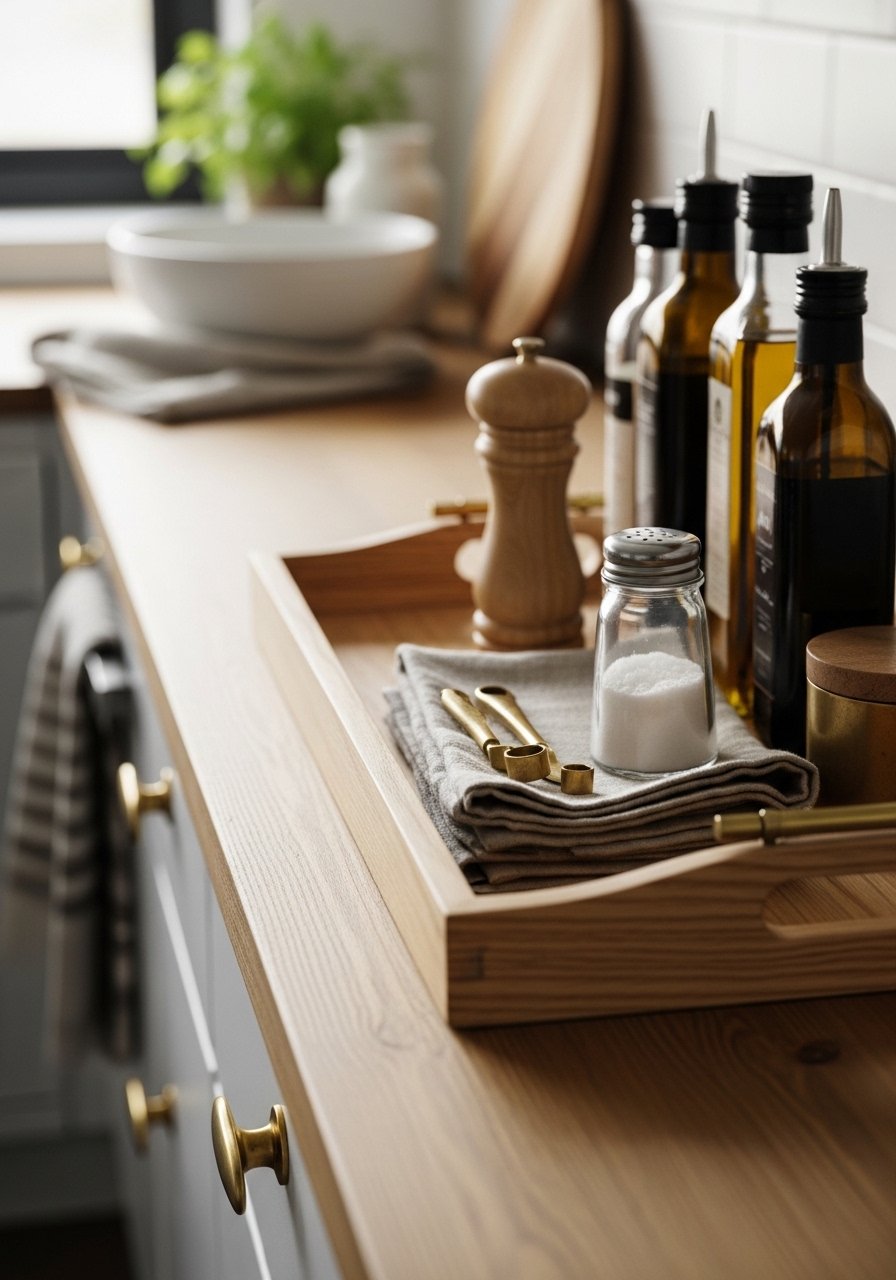
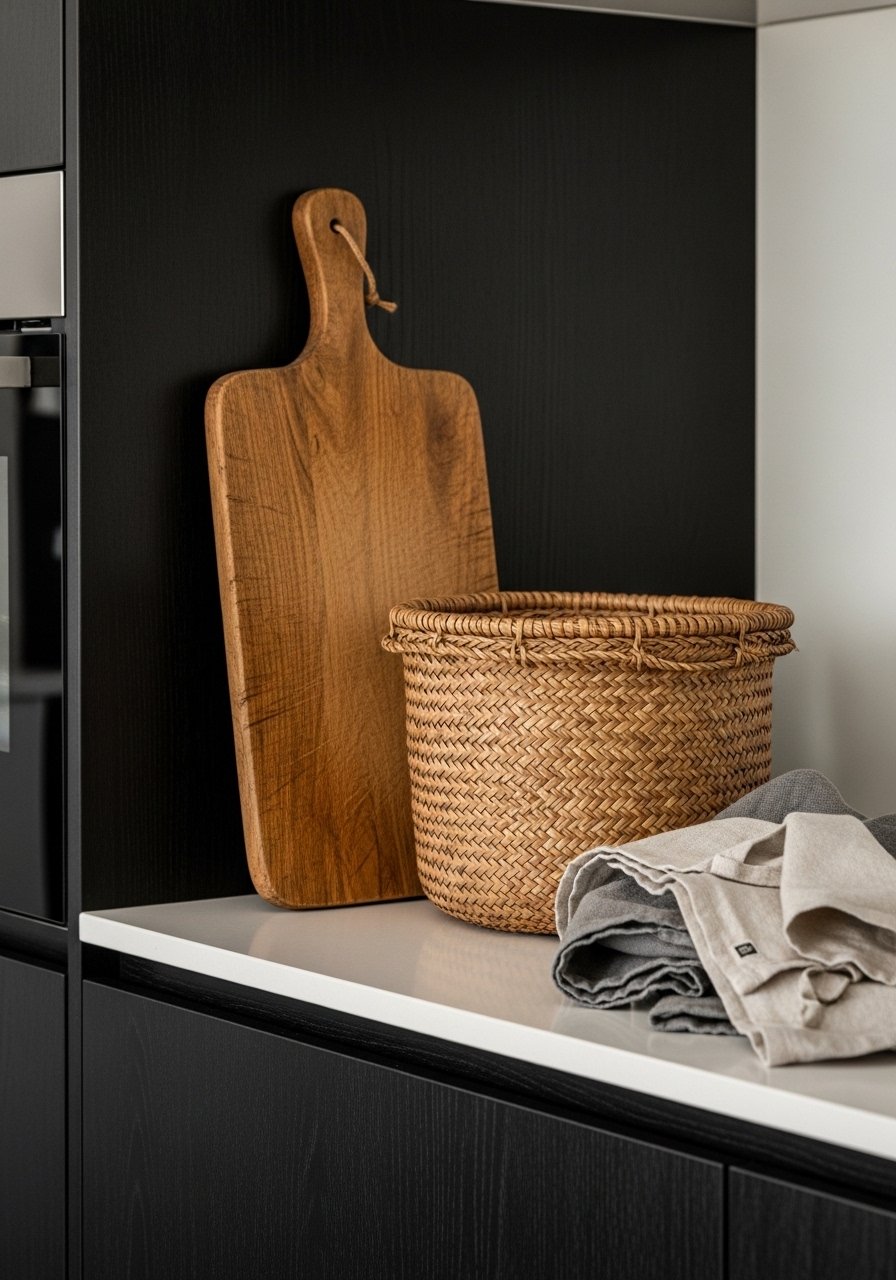
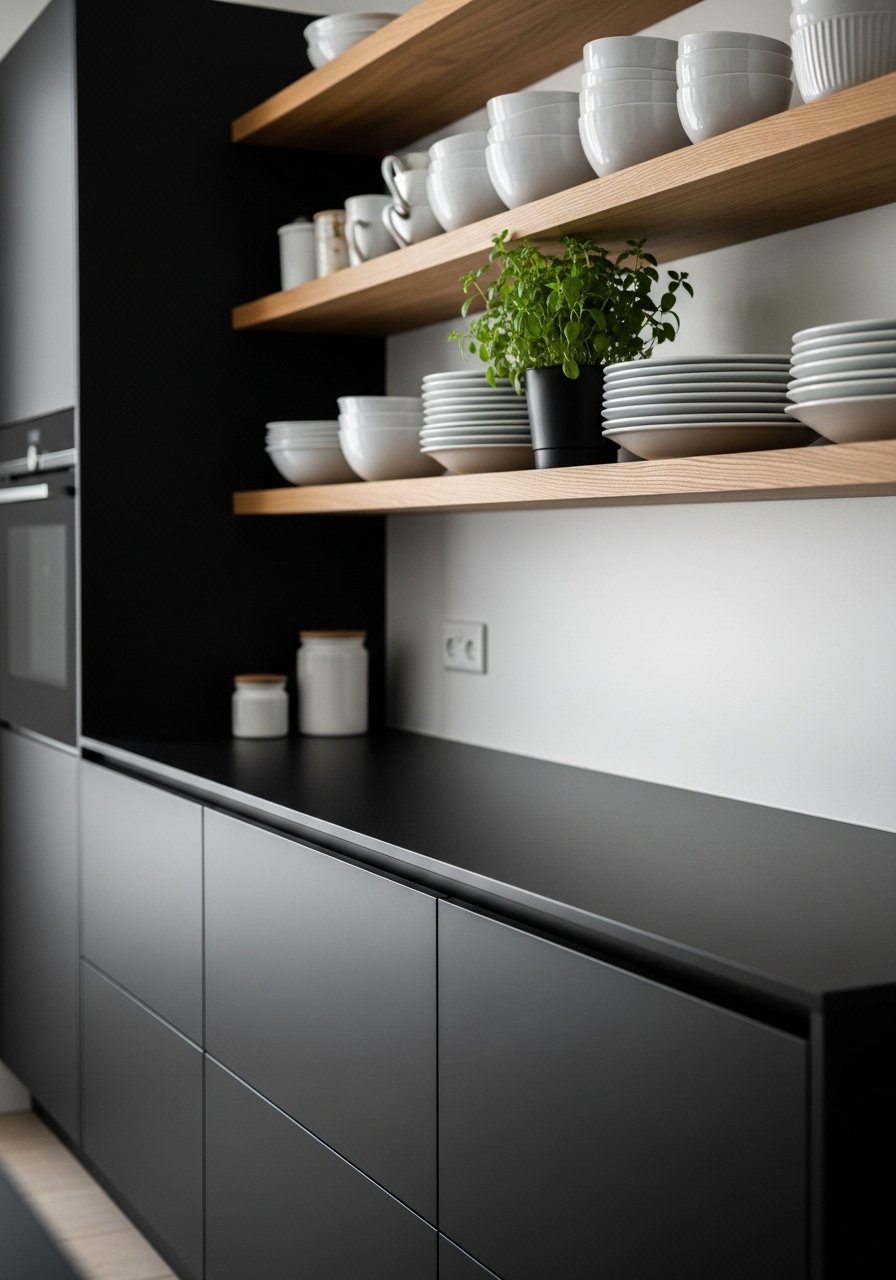
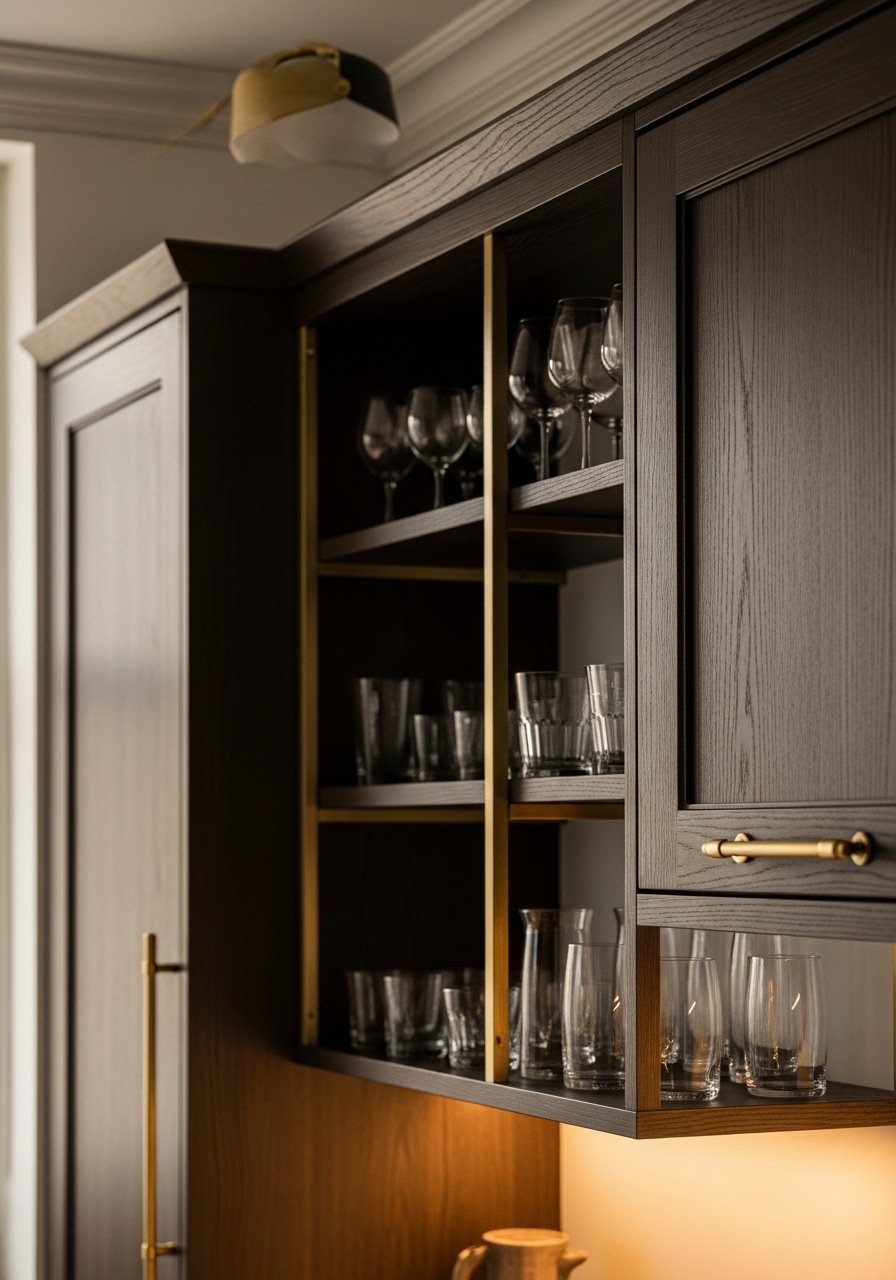
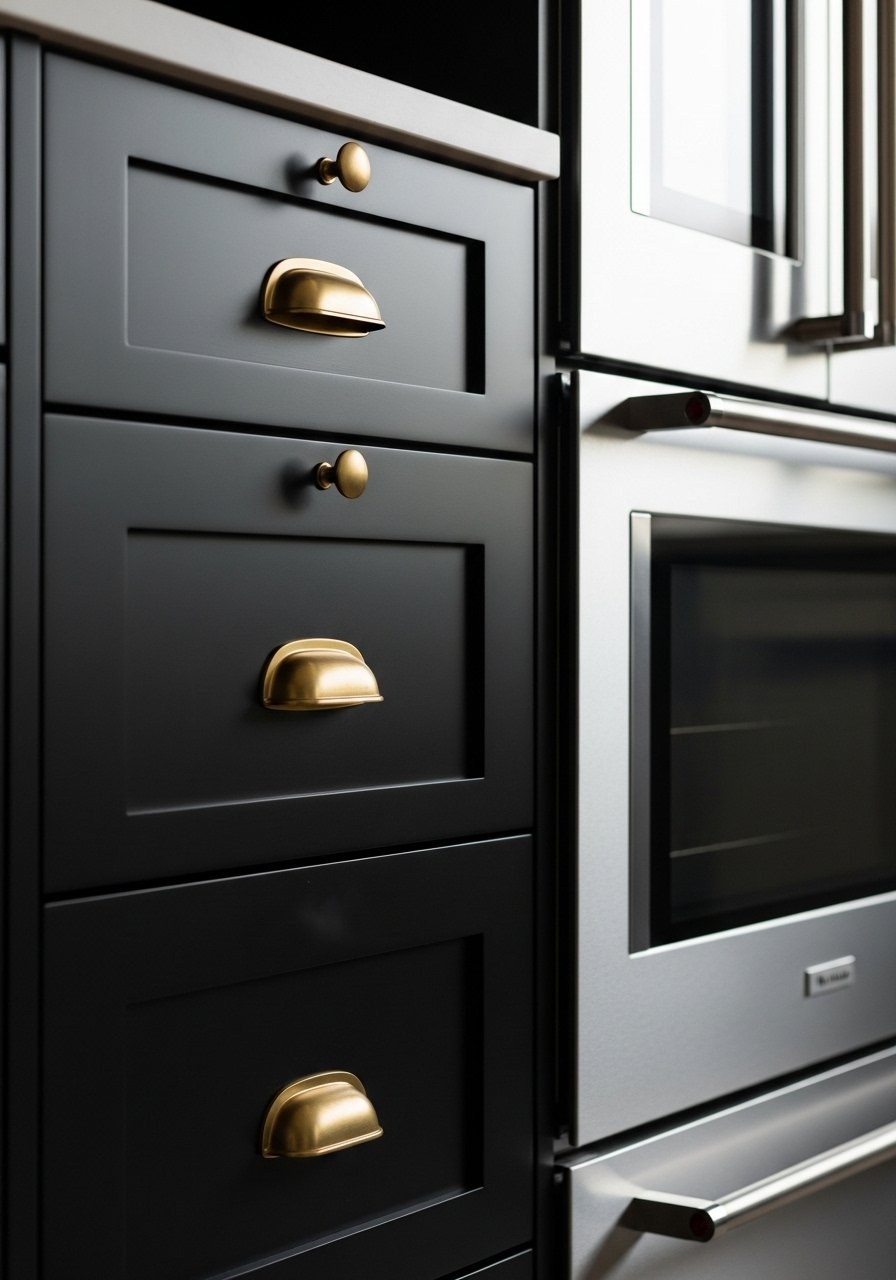
    1. Pull-Out Wood Tray That Grabs Every Pot Without Digging

    In my last rental, that deep corner swallowed lids and pans. I hated reaching blind. Then I added a pull-out tray system—smooth glide, full extension.

    Suddenly, everything sat neat, at eye level. The kitchen breathed. No more scraped knuckles.

    I learned to measure twice; mine jammed once from a bad fit. Go slim for narrow spots.

    Pick trays that lock in place. Stack pots by size, lids on hooks below. It quiets the chaos.

    What You’ll Need for This Look

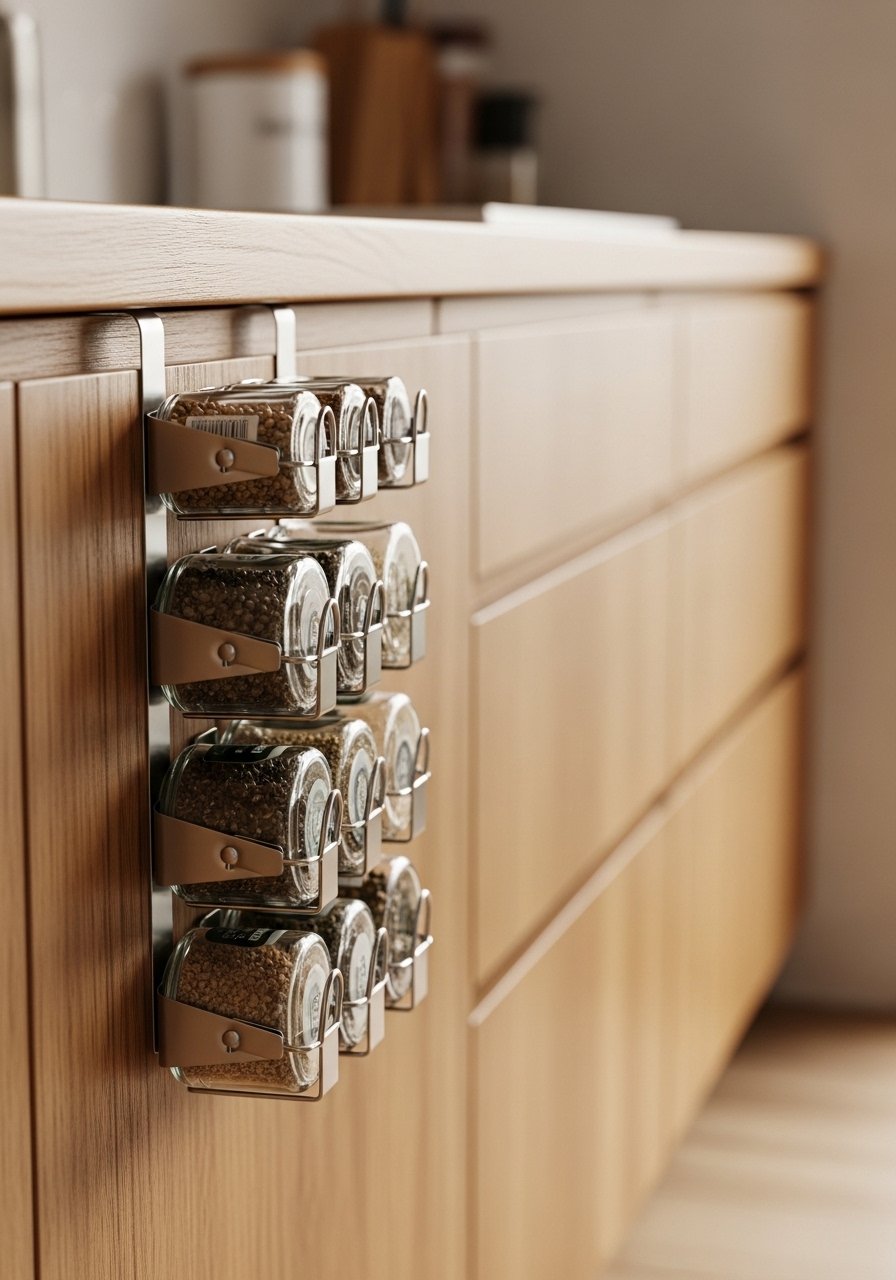
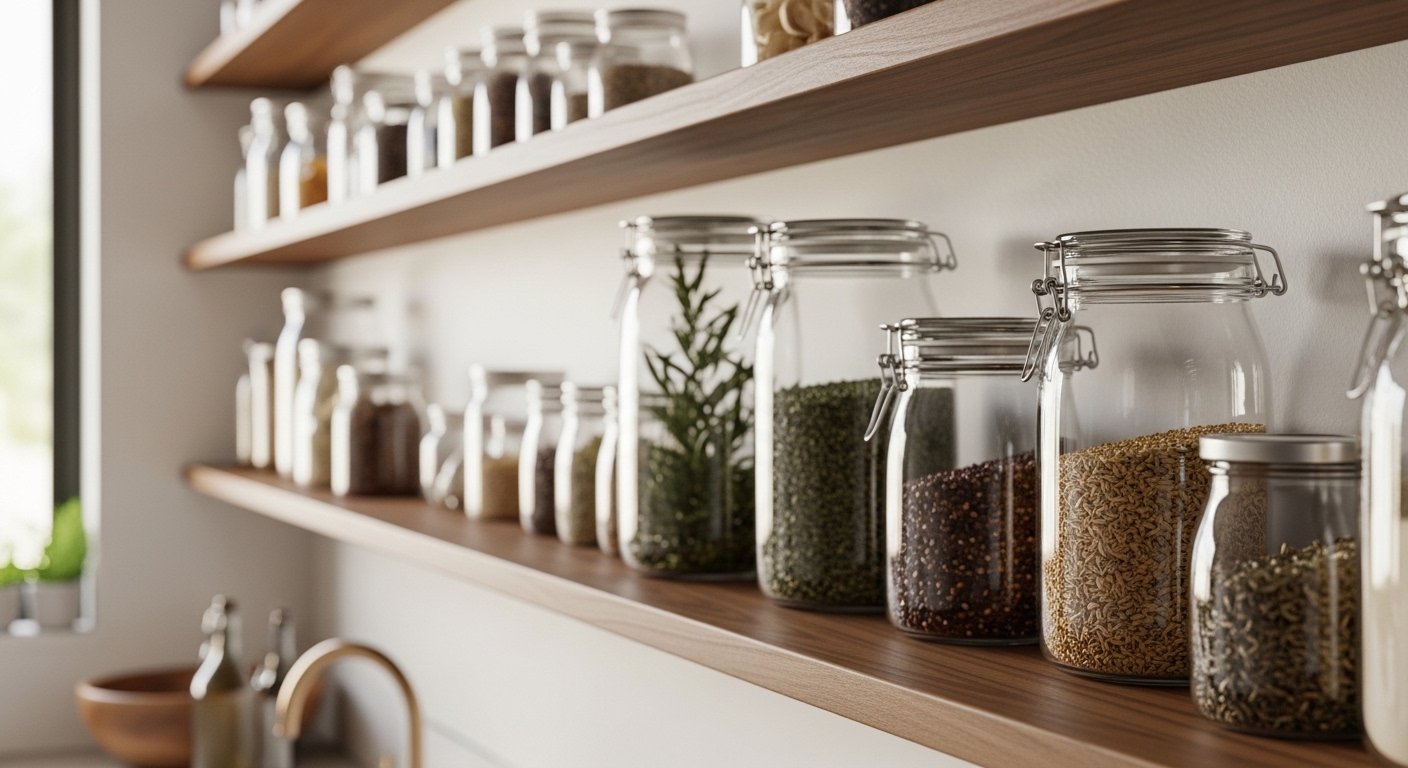
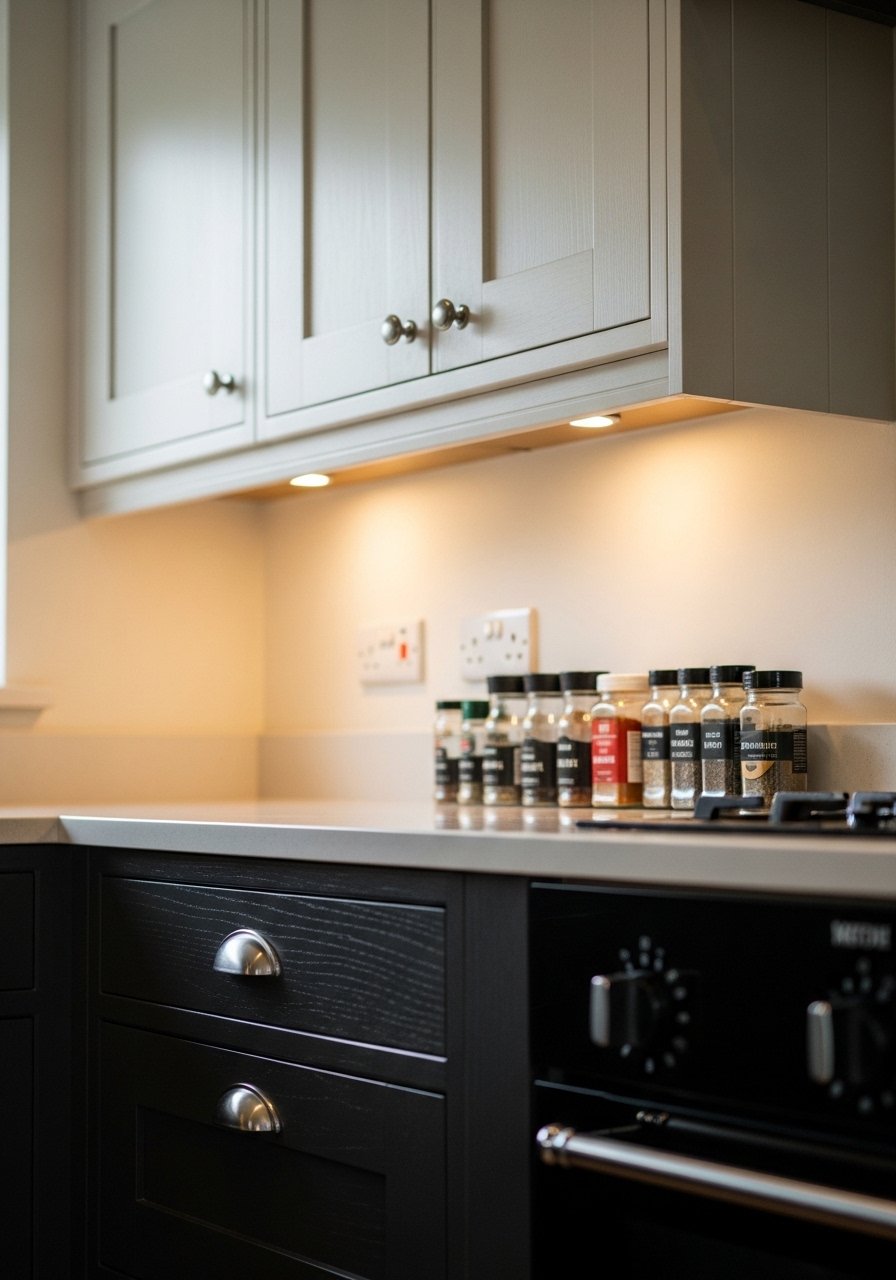
    2. Tiered Lazy Susan for Spices That Spins to You

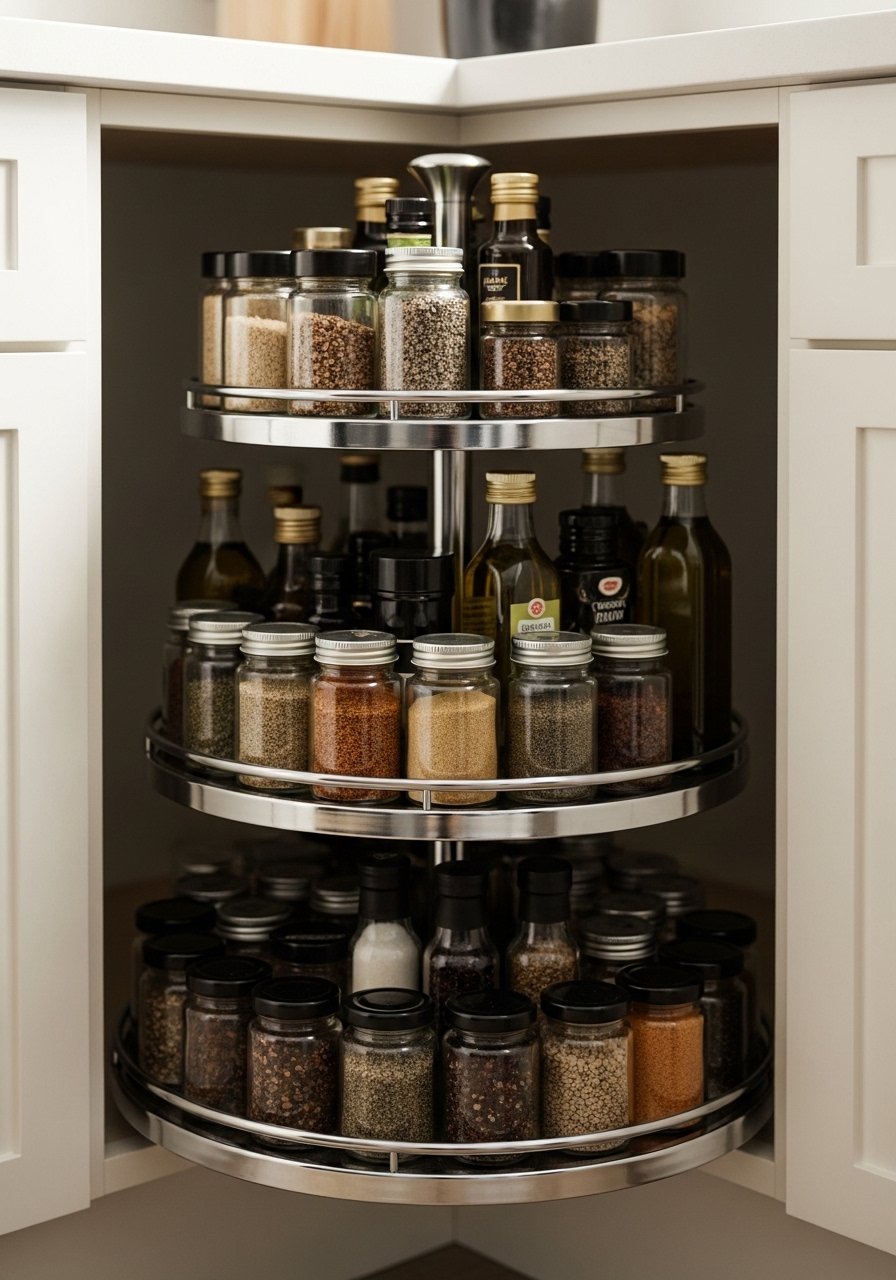
    Spices buried in my corner cabinet drove me nuts—half-empty jars, duplicates everywhere. A two-tier lazy Susan fixed it overnight.

    It spins easy, brings bottles forward. No more dumping cumin hunting paprika. The corner feels deeper now.

    I bought a too-big one first; returned it. Size matters in tight spaces—measure your cabinet depth.

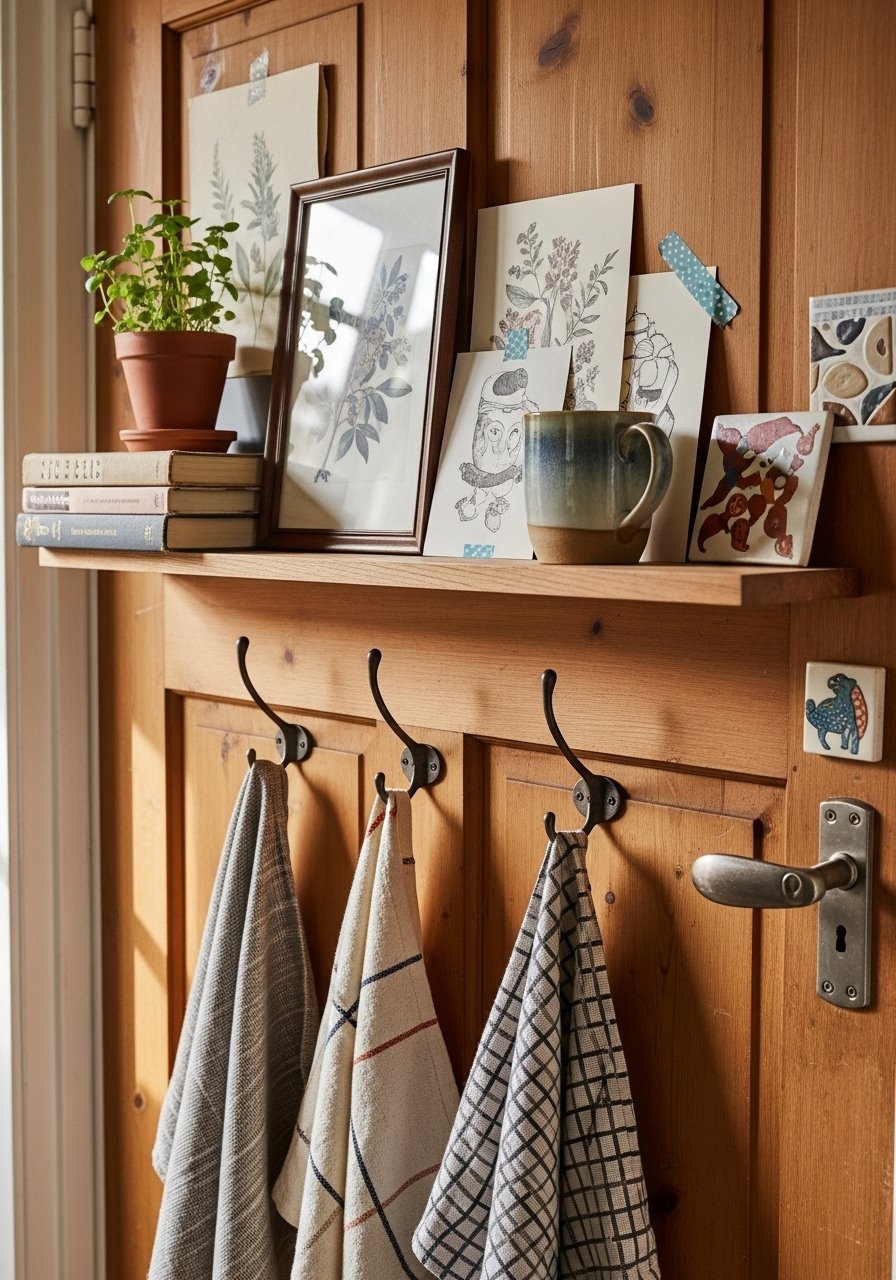
    Label jars with washi tape. Group by use: baking one side, savory the other. Mornings flow better.

    What You’ll Need for This Look

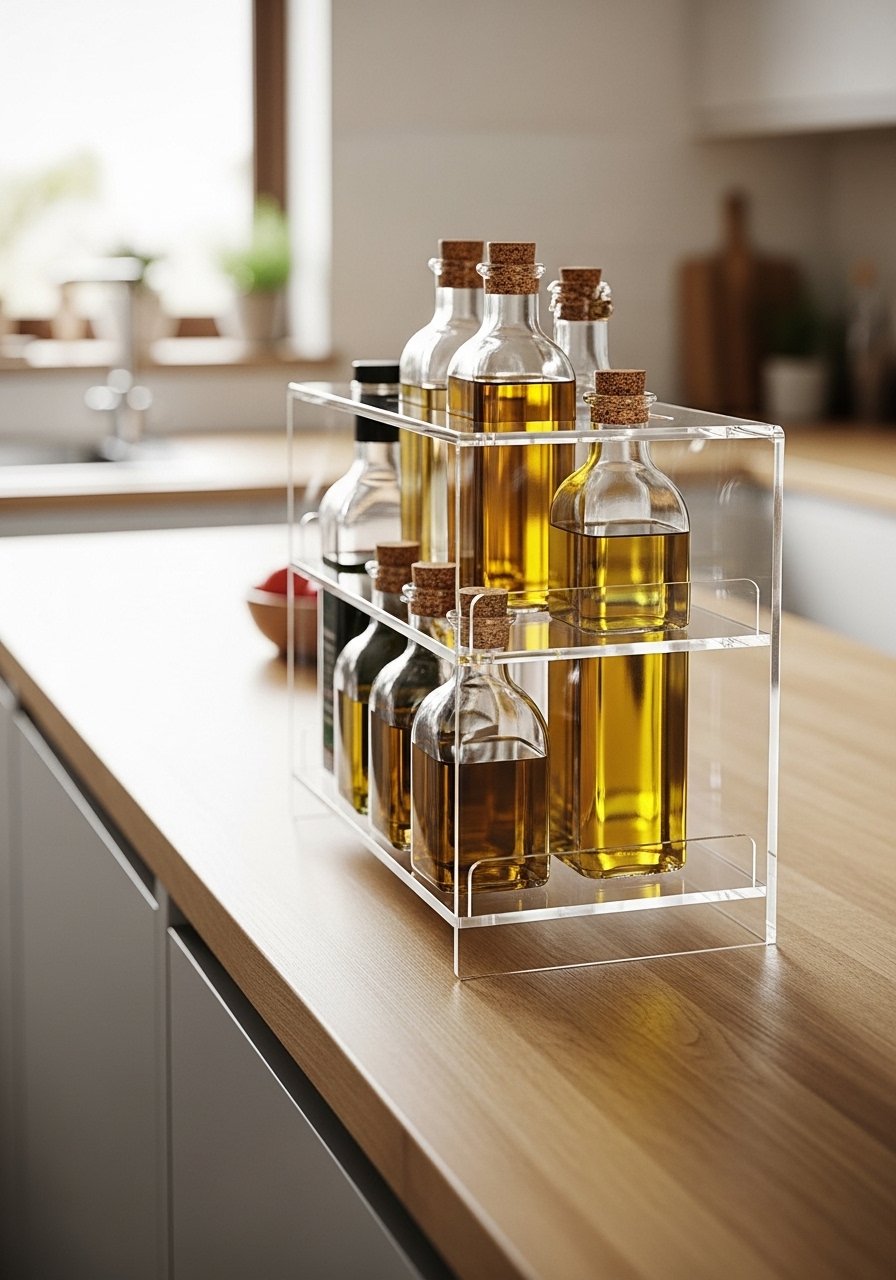
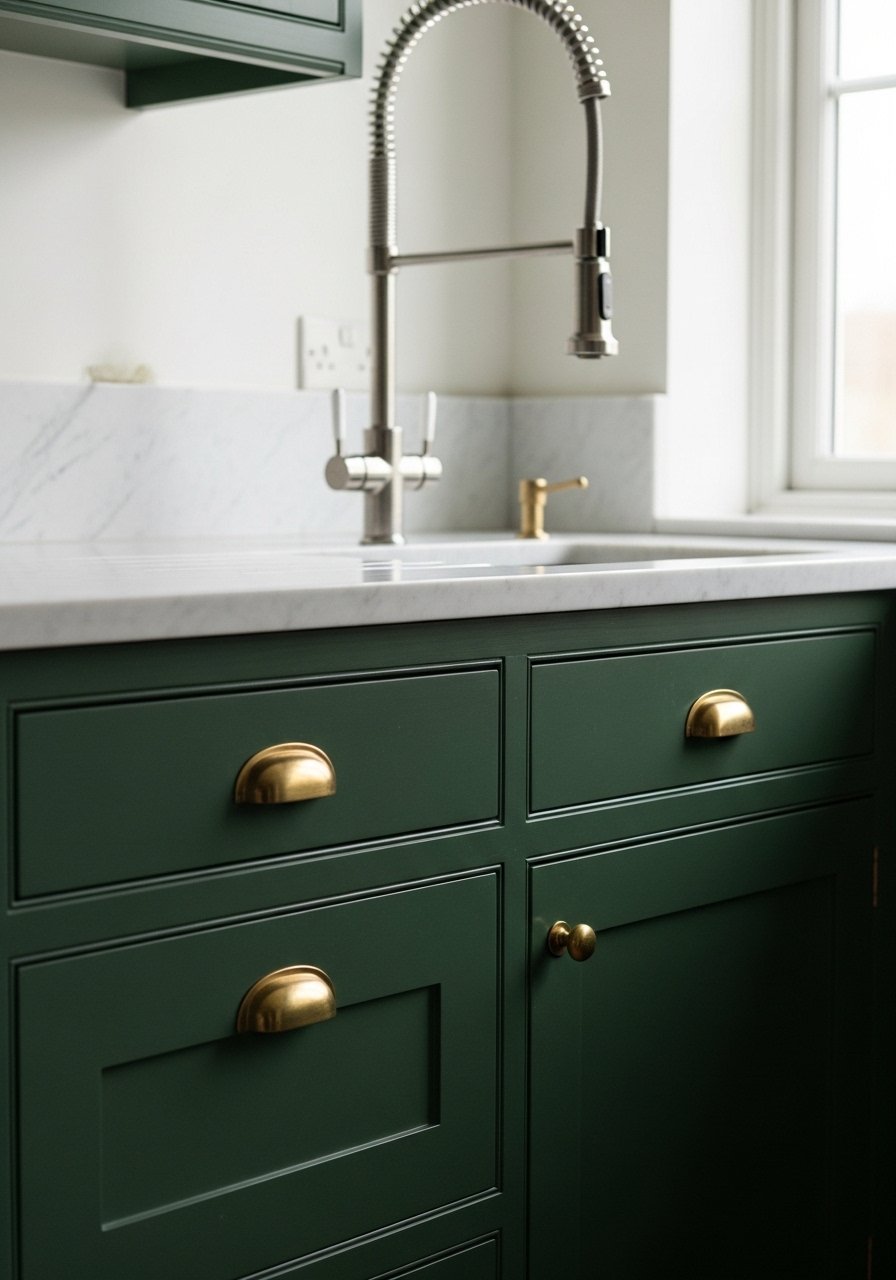
    3. Swing-Out Rack for Oils That Folds Flat When Idle

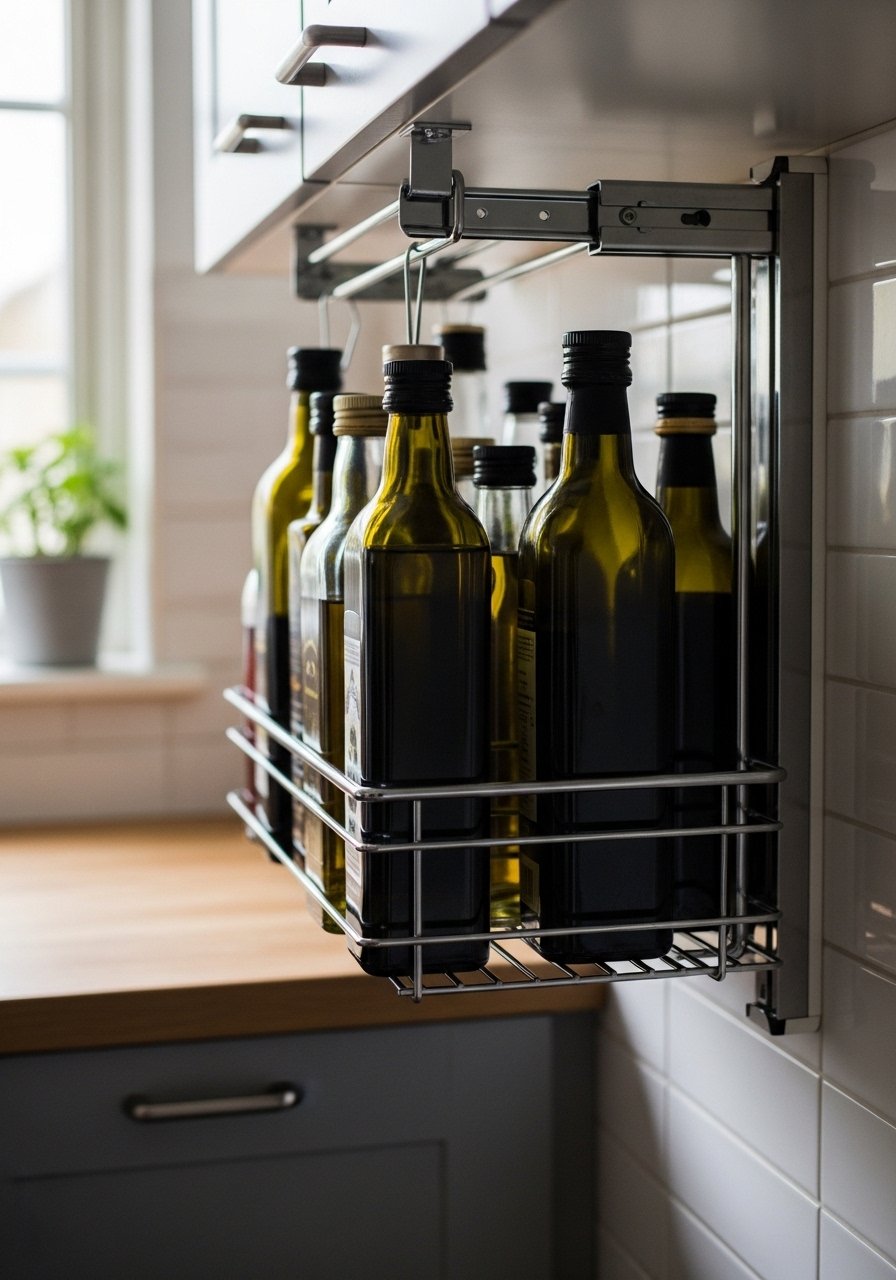
    Oils cluttered my counters in that skinny kitchen. A swing-out corner rack hugged the wall, holding six bottles secure.

    It swings out for grabs, folds away clean. Cooking station right there, no drip mess.

    Tested cheap ones—they wobbled. Sturdy metal lasts. In narrow runs, it saves counter real estate.

    Hang by size, favorites front. Wipe bottles weekly; dust hides fast.

    What You’ll Need for This Look

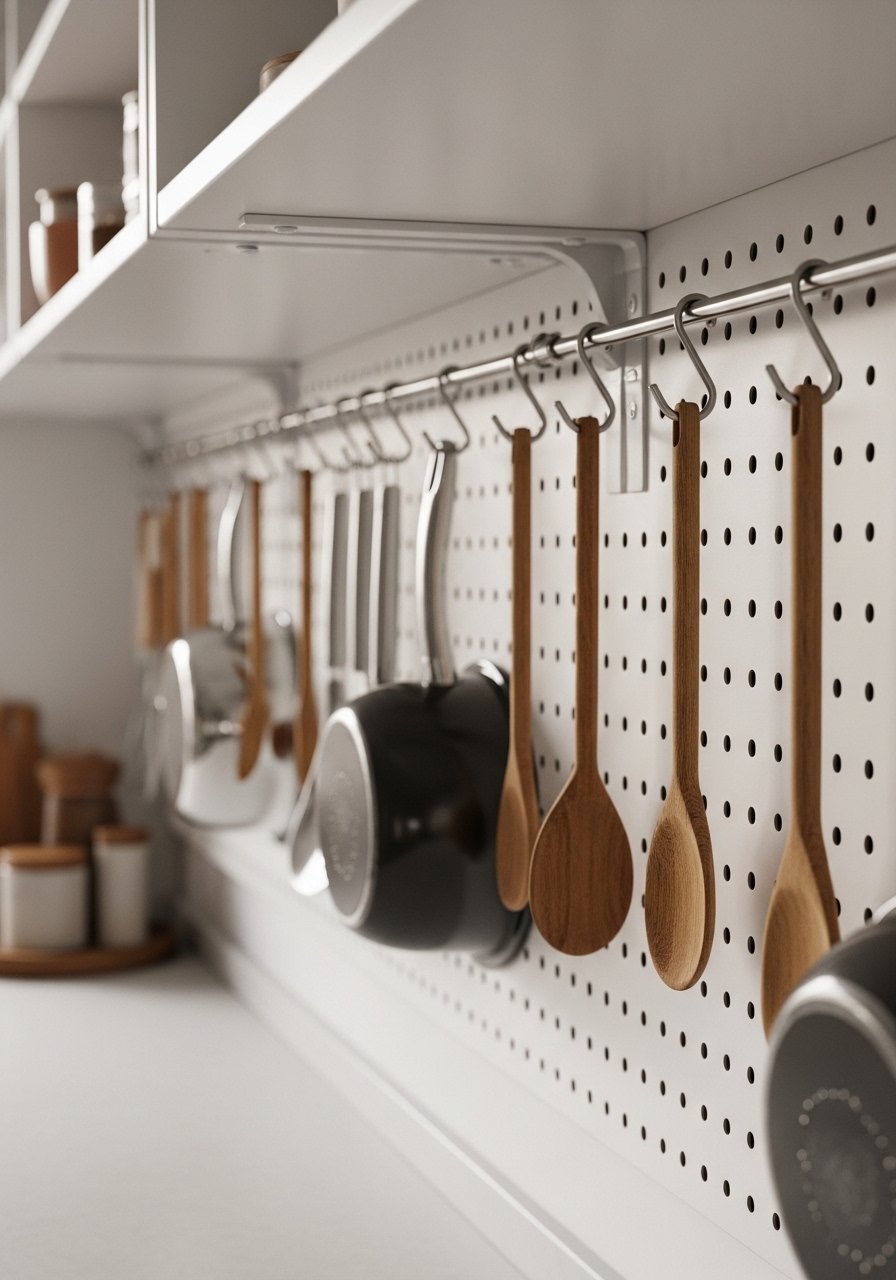
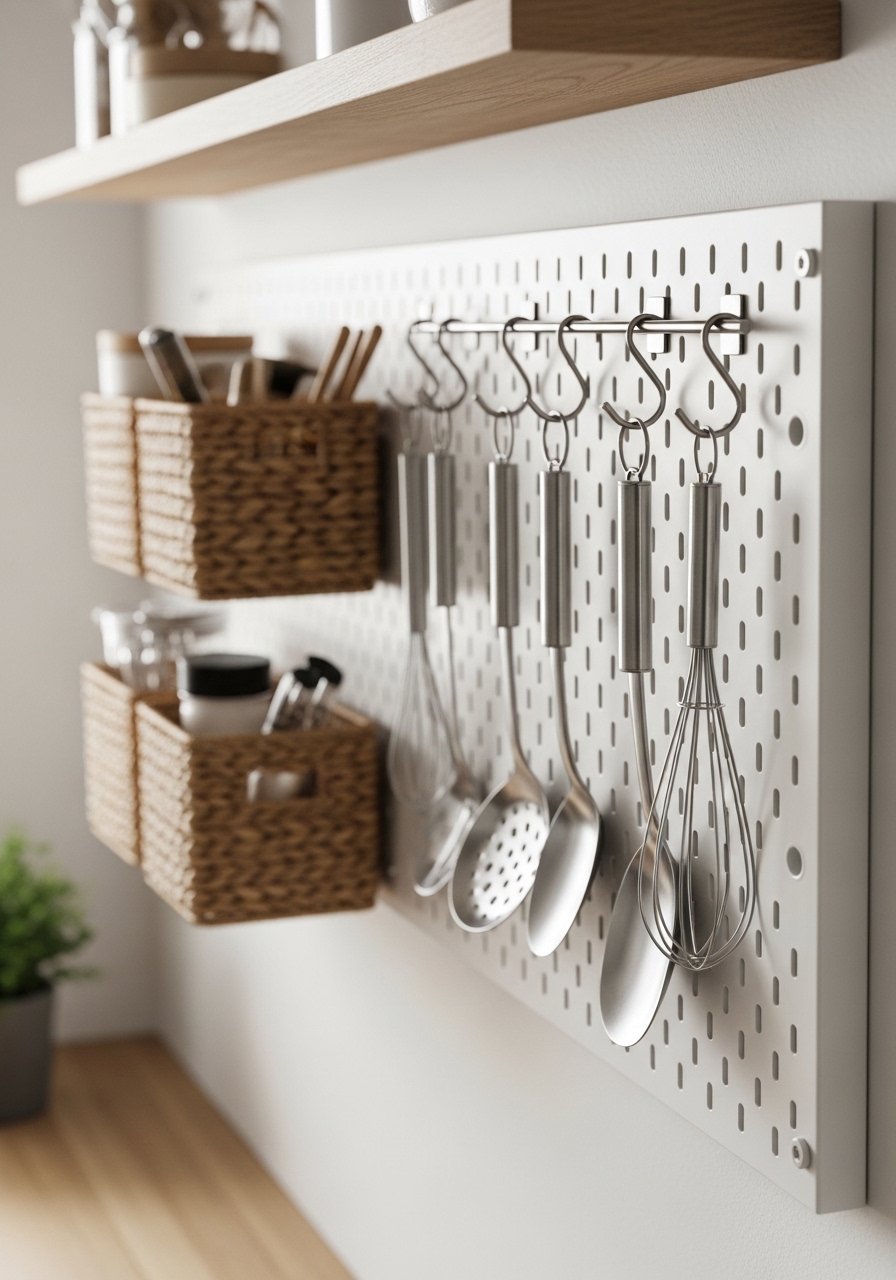
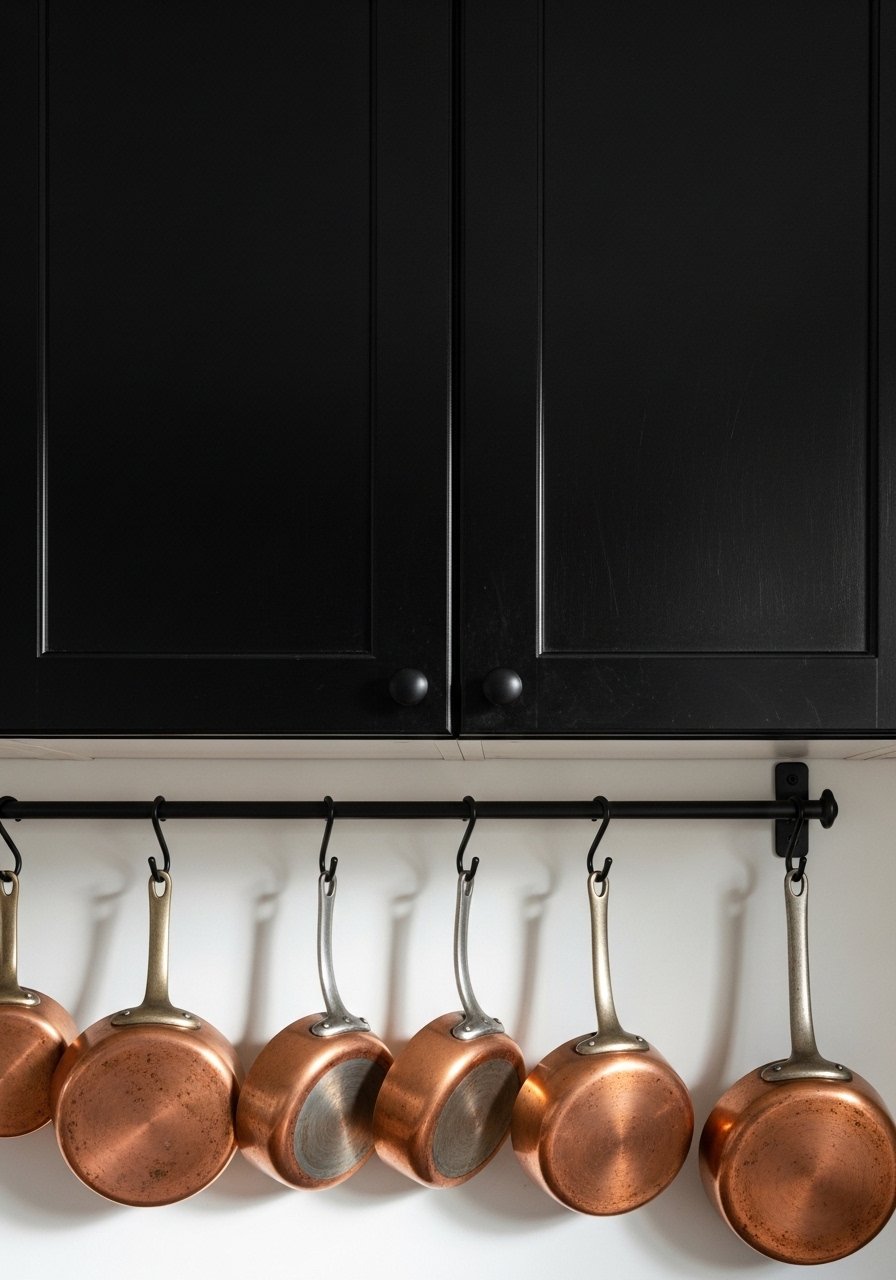
    4. Pegboard Panel That Hooks Pans Light and Easy

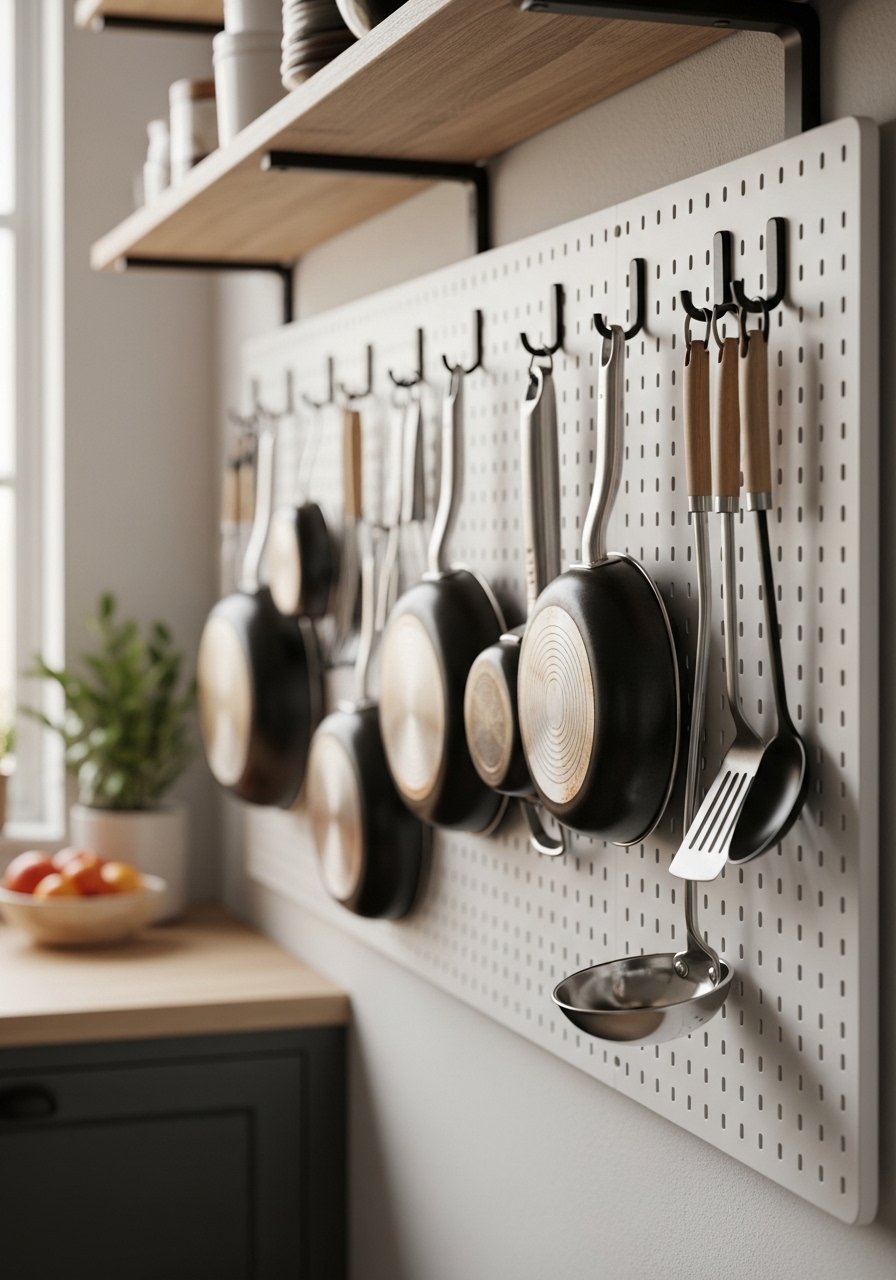
    Pans stacked crooked in my corner till pegboard went up. Custom hooks for each, vertical without bulk.

    It leans into the corner, air circulates. Lighter feel, easy wipe-down.

    Overdid hooks once—looked junky. Space them wide, use just five.

    Pans by reach: daily low, specials high. Add a shelf for lids.

    What You’ll Need for This Look

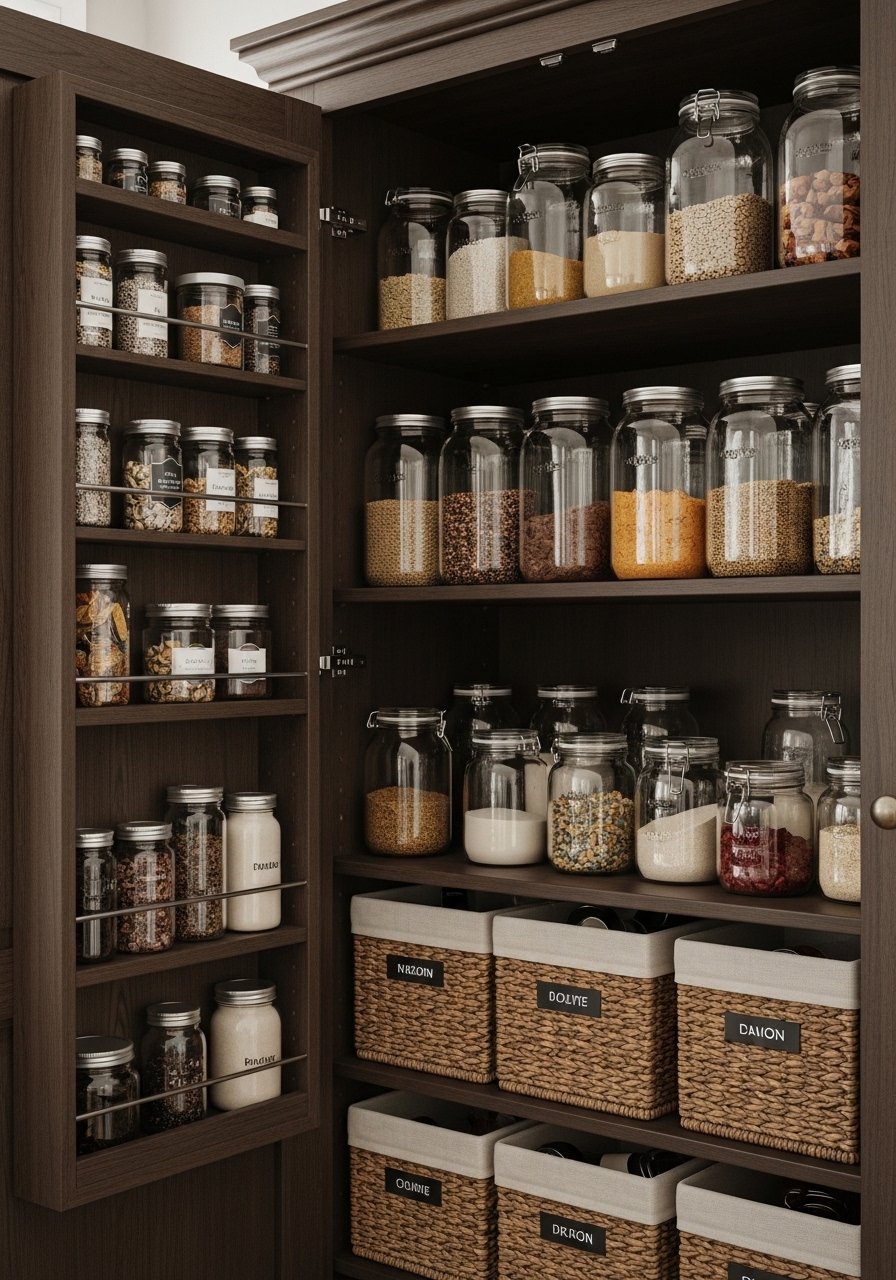
    5. Slim Vertical Drawers That Slide for Dry Goods

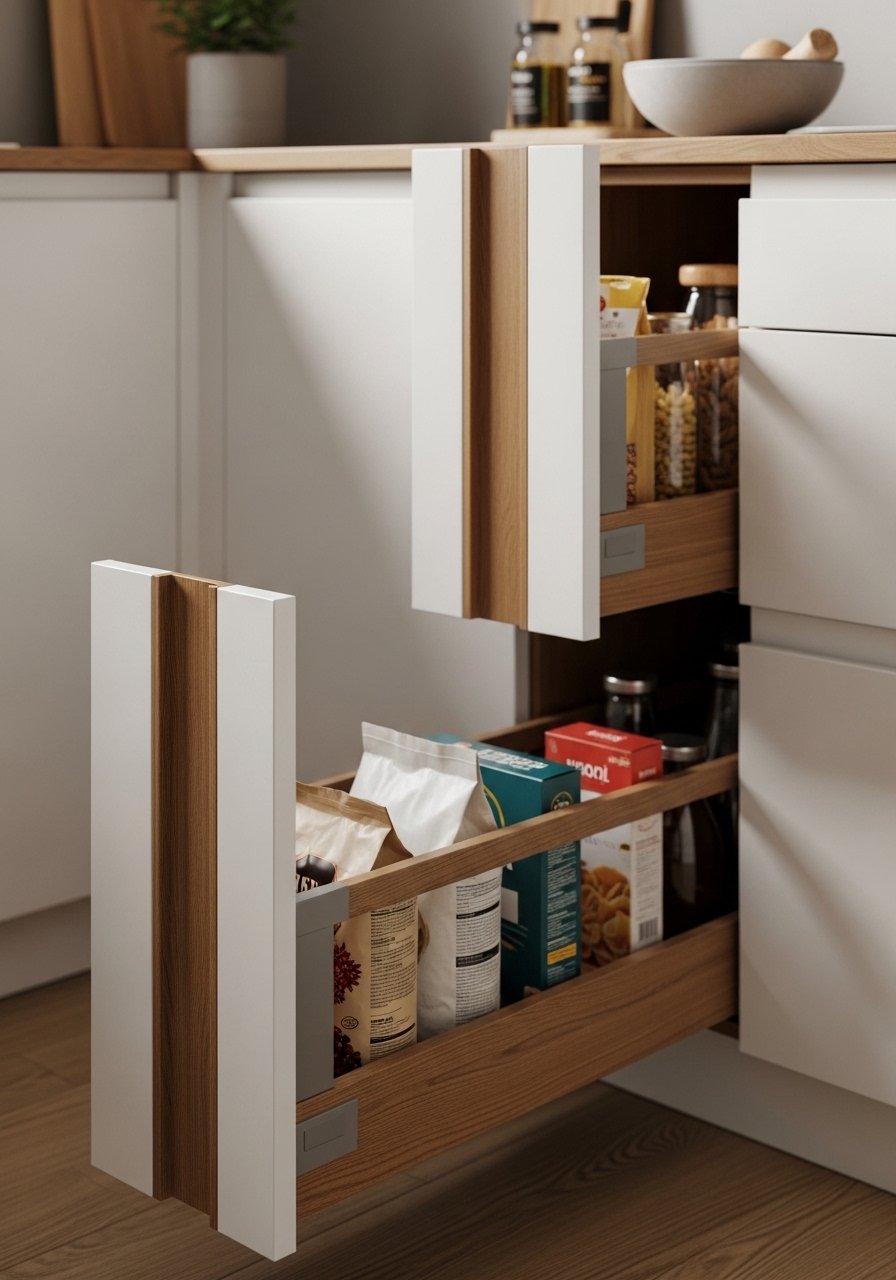
    Dry goods avalanched in my deep corner shelf. Slim vertical drawers—two inches wide—fit perfect, pull smooth.

    Bags stand tall, no tip-overs. Kitchen feels organized, less frantic.

    Wrong height drawers stuck; size to your cabinet. Label fronts clear.

    Sort by rotation: new back, old front. No waste.

    What You’ll Need for This Look

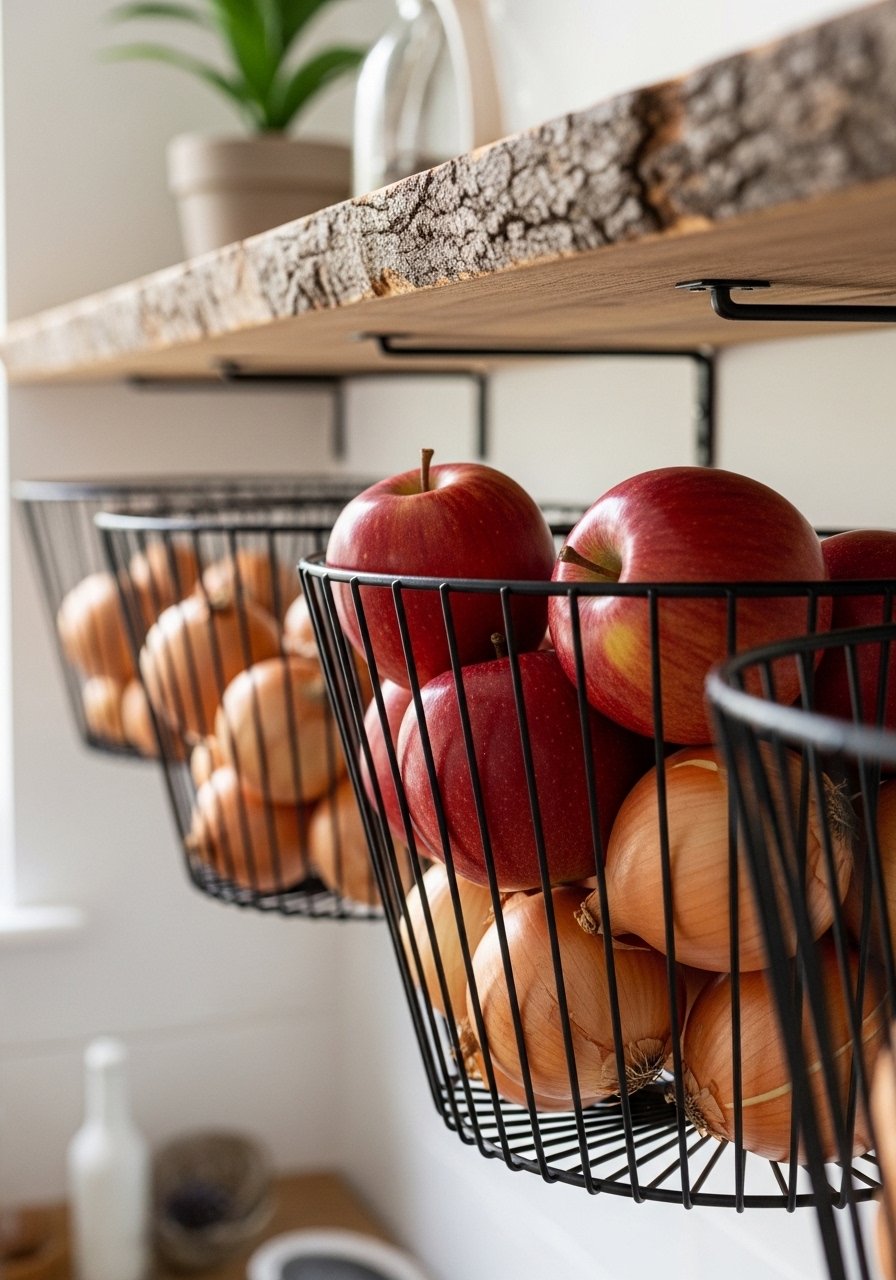
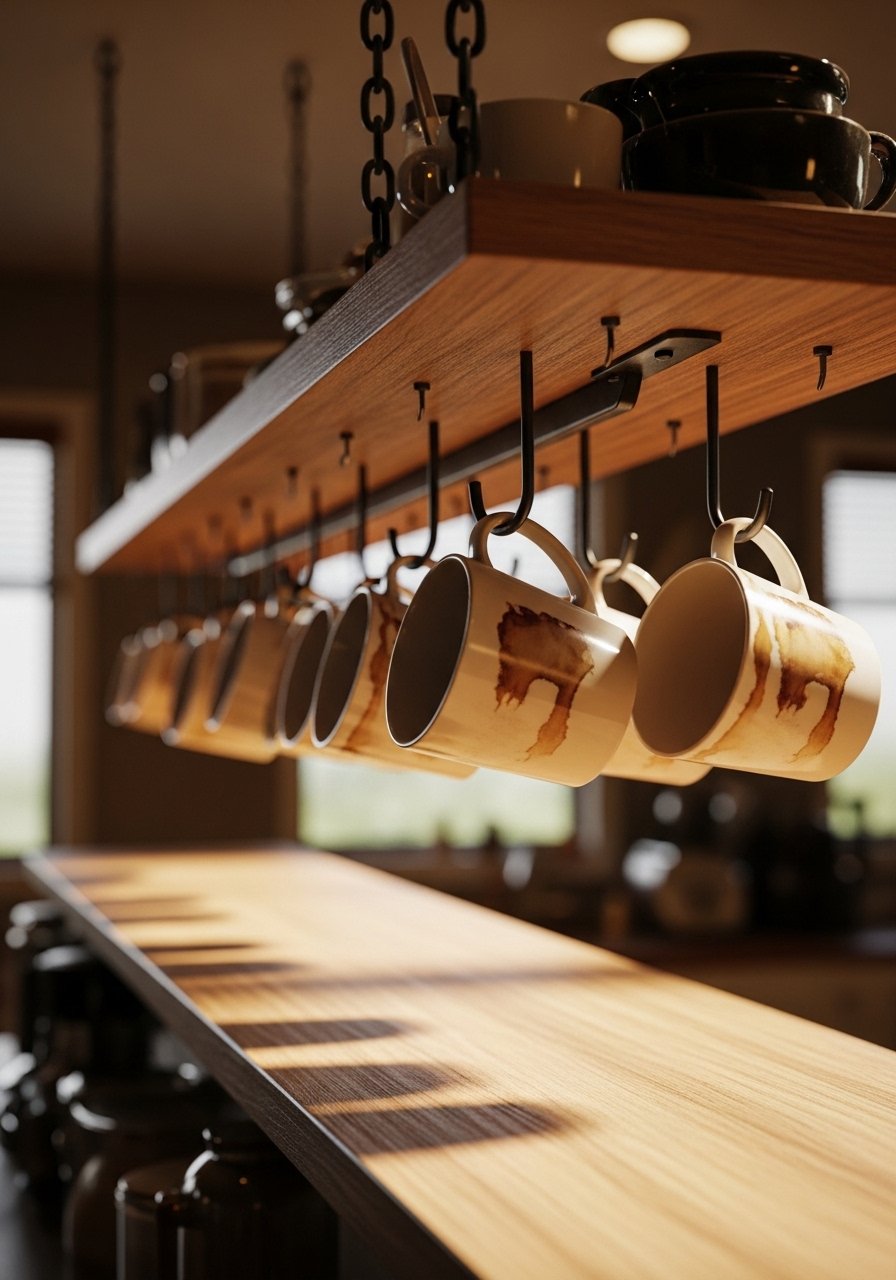
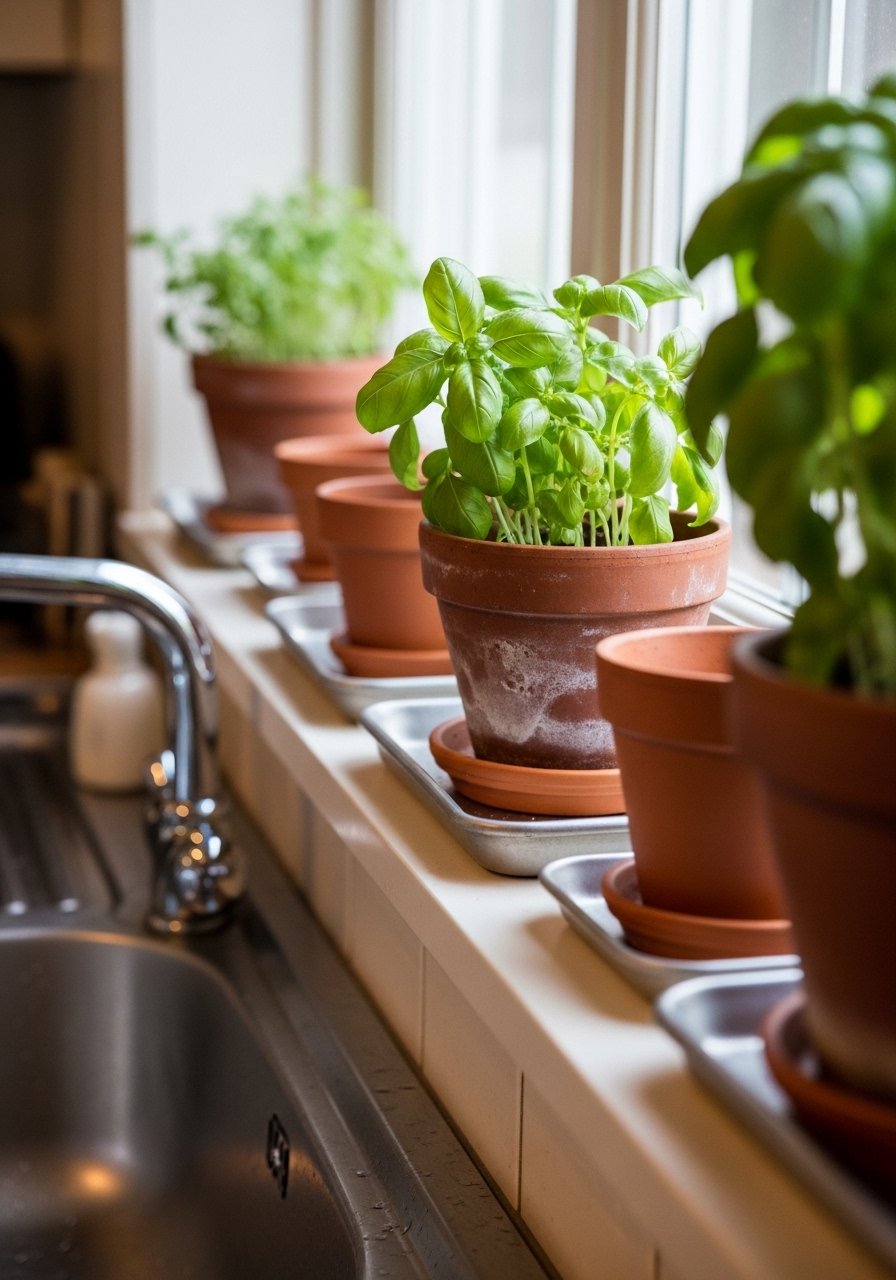
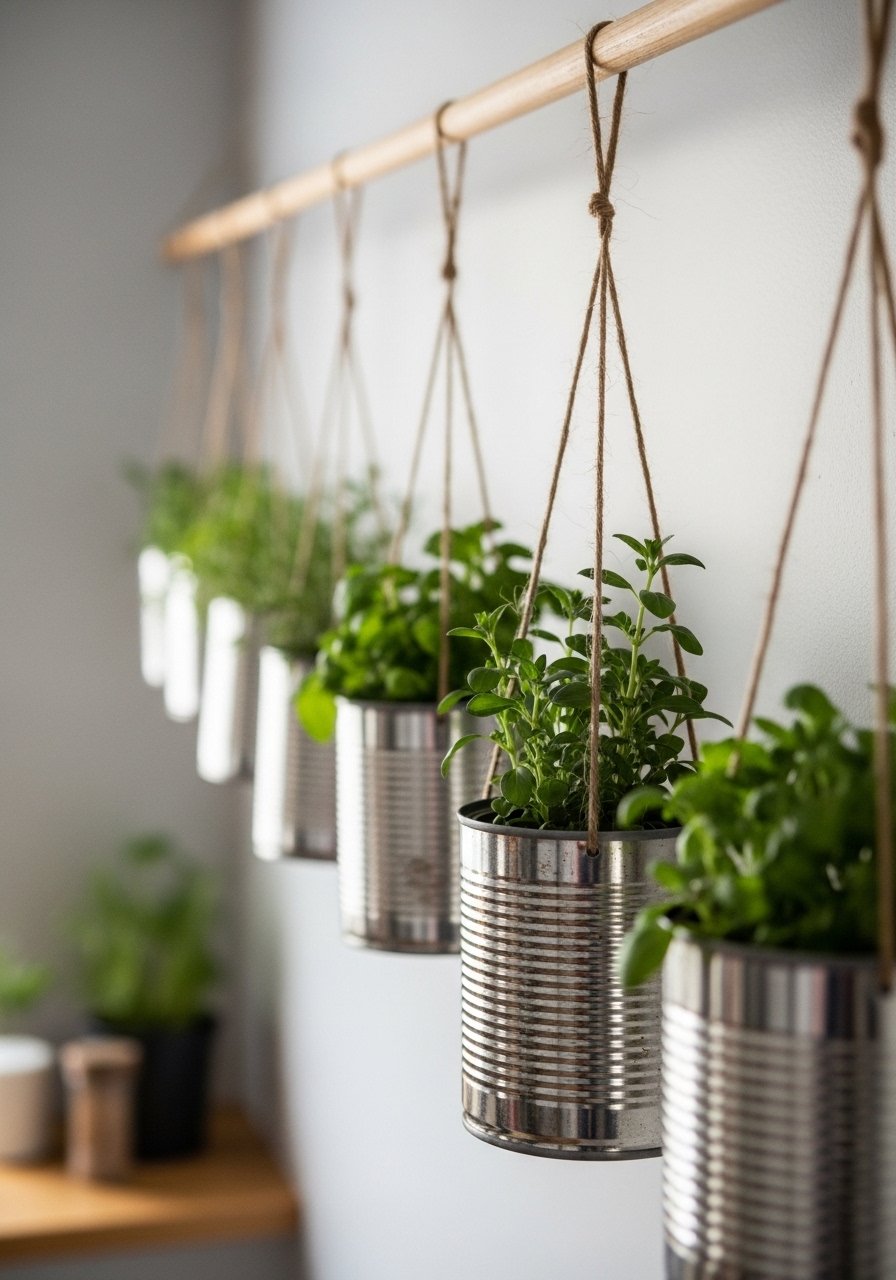
    6. Hanging Wire Baskets for Produce That Dangles Free

    Produce moldy on counters till ceiling baskets hung in the corner. Onions, garlic sway gentle, out of reach.

    Airflow keeps fresh longer. Cozy farm feel without floor space steal.

    Chain too long once—hit heads. Eye-level drop.

    Wash baskets monthly. Twist ties for small bunches.

    What You’ll Need for This Look

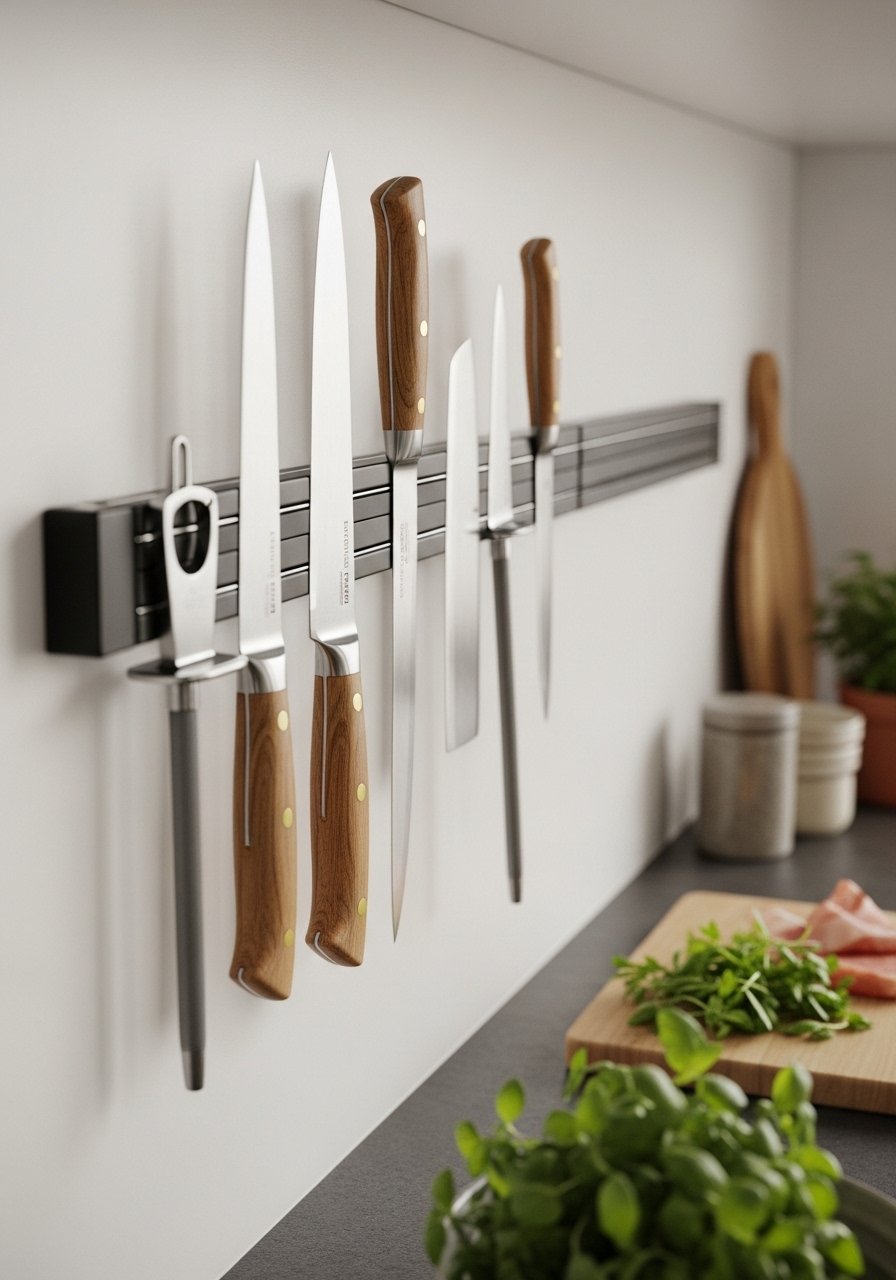
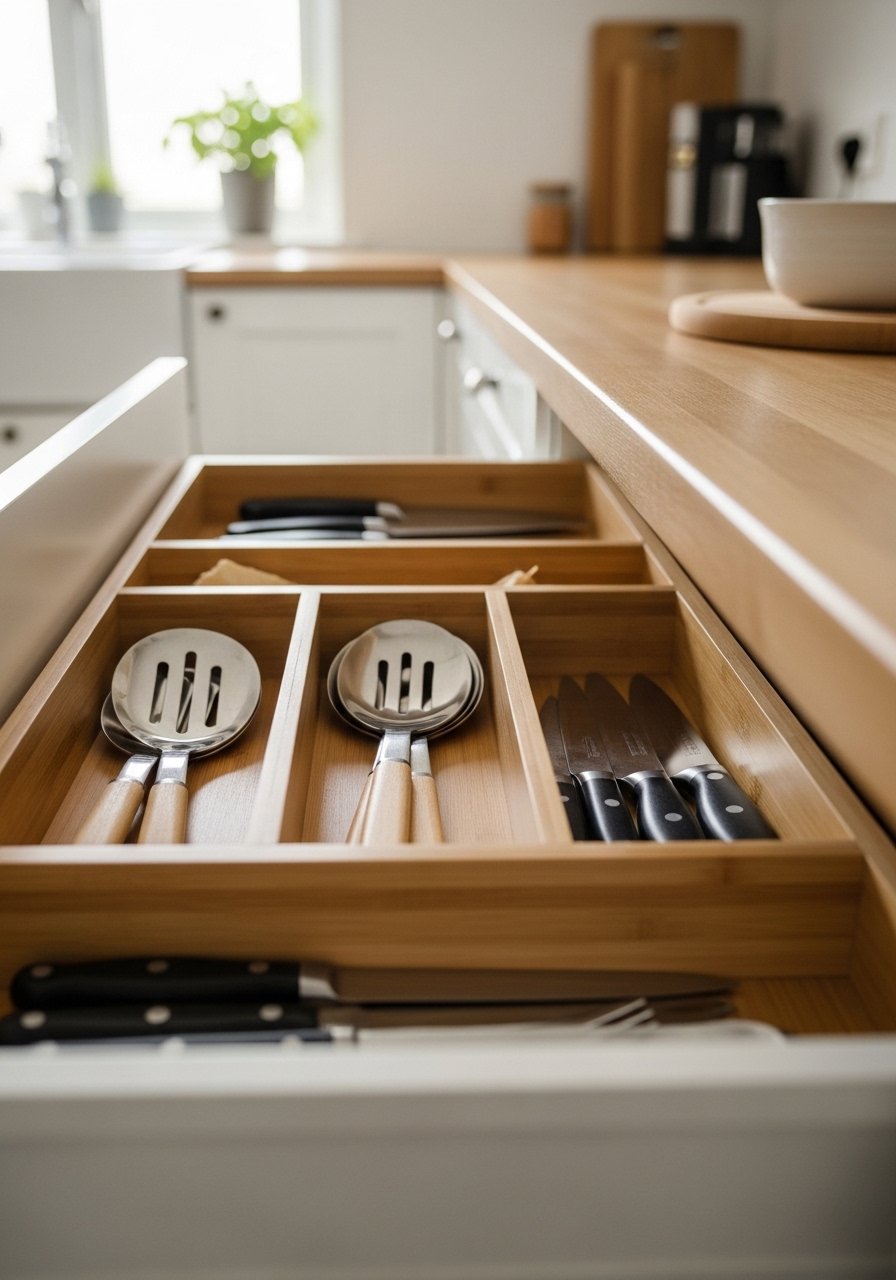
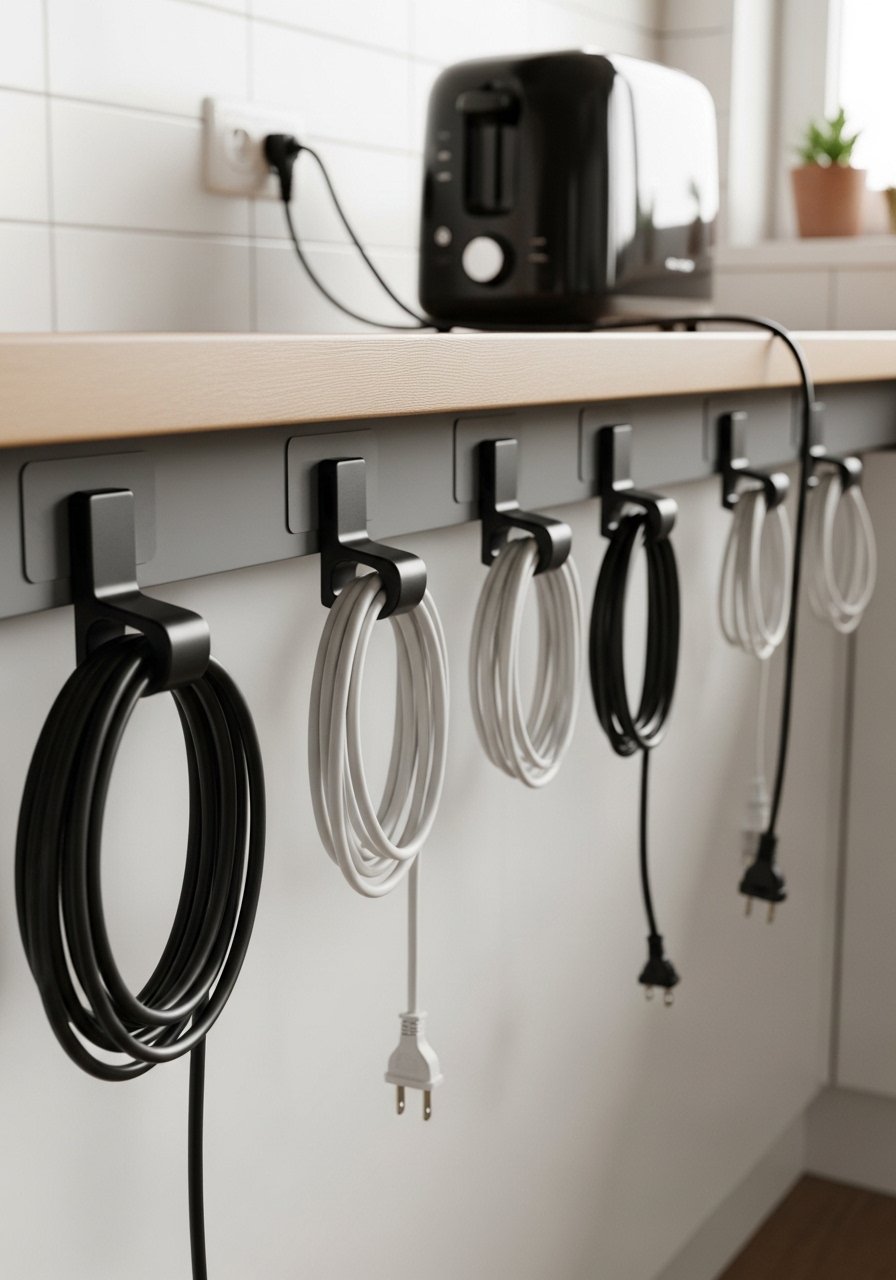
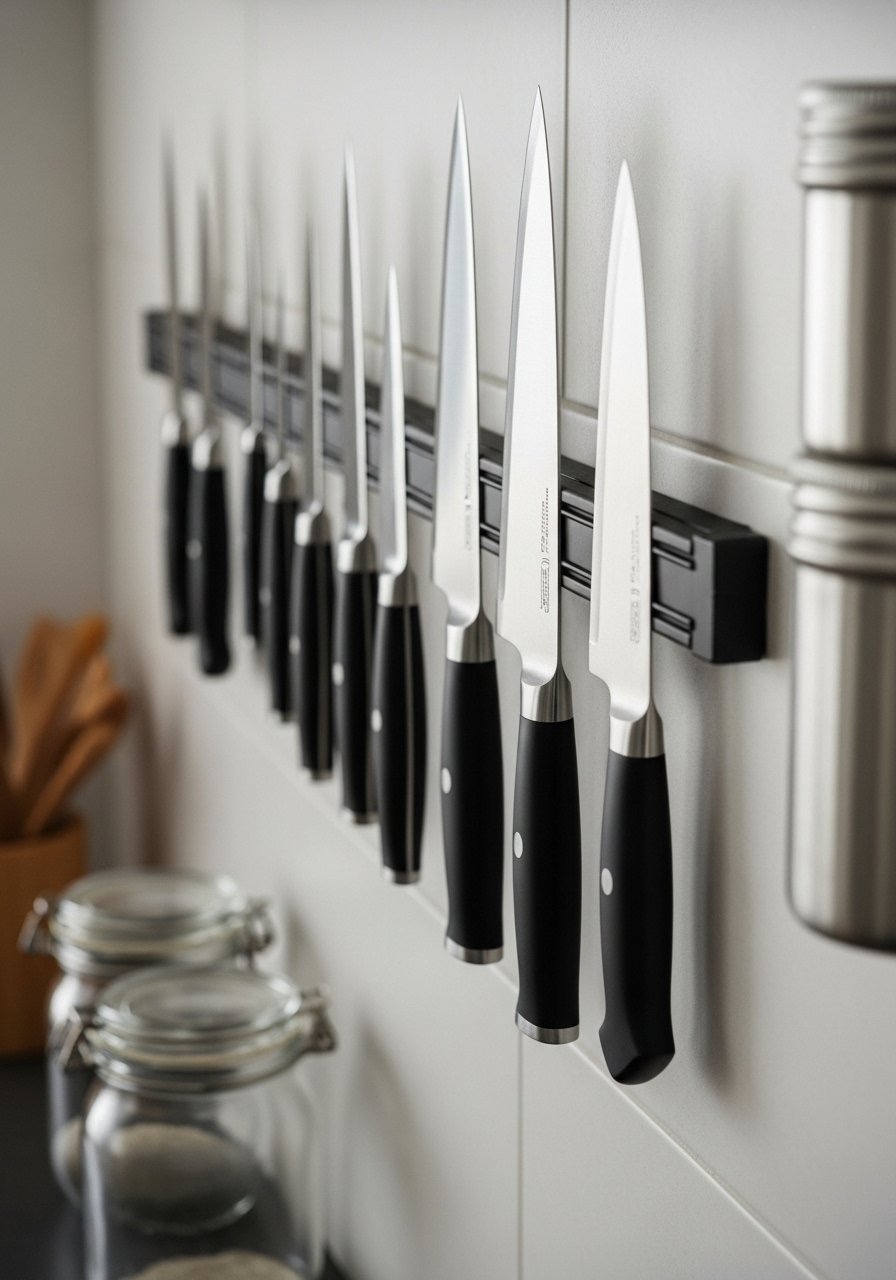
    7. Magnetic Strips for Knives Tucked Neat in Corners

    Drawers full, knives dull from jostling. Two magnetic strips in the corner hold blades flat, safe.

    Instant access, counters clear. Sharpens my mood too.

    Strong magnets or they slip—tested weak ones. Vertical for narrow walls.

    Wipe daily; oil residue sticks. Group by size.

    What You’ll Need for This Look

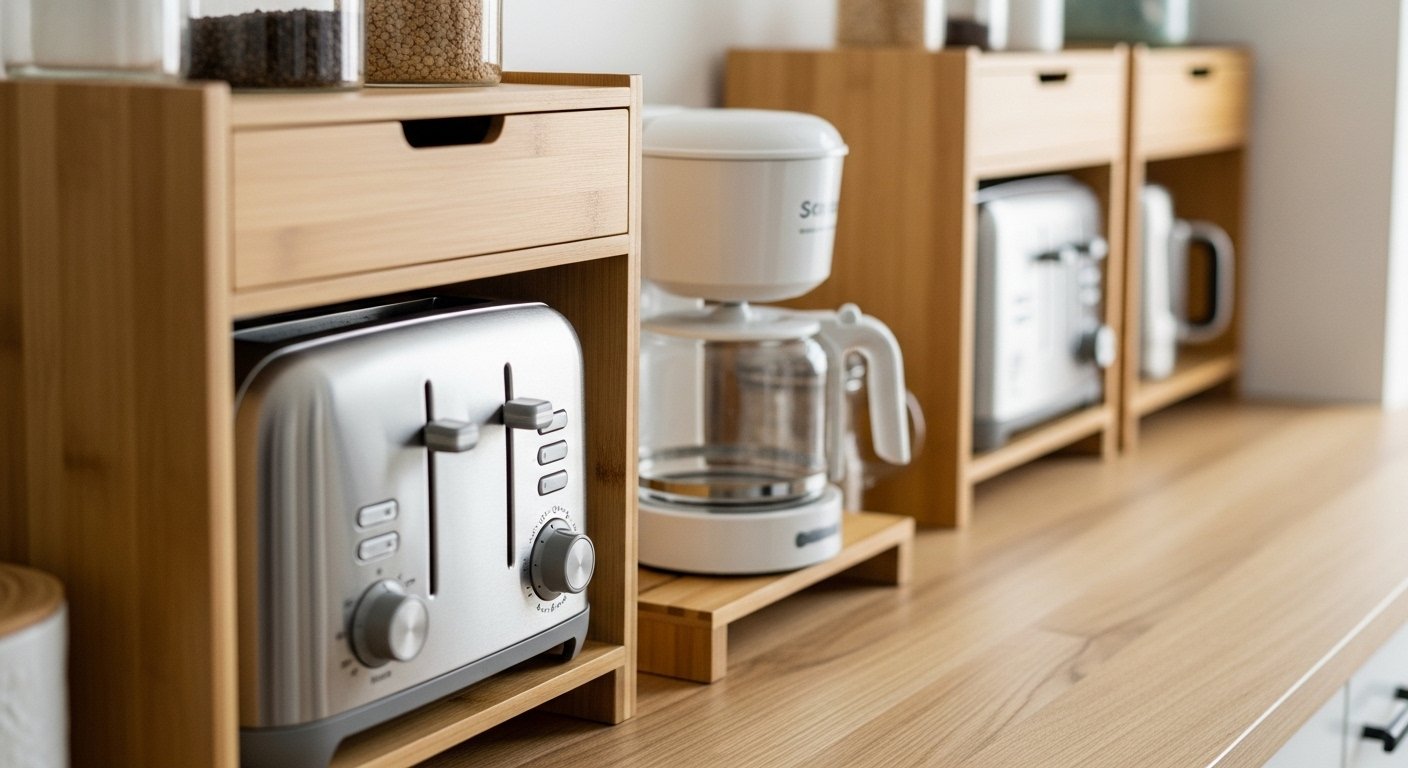
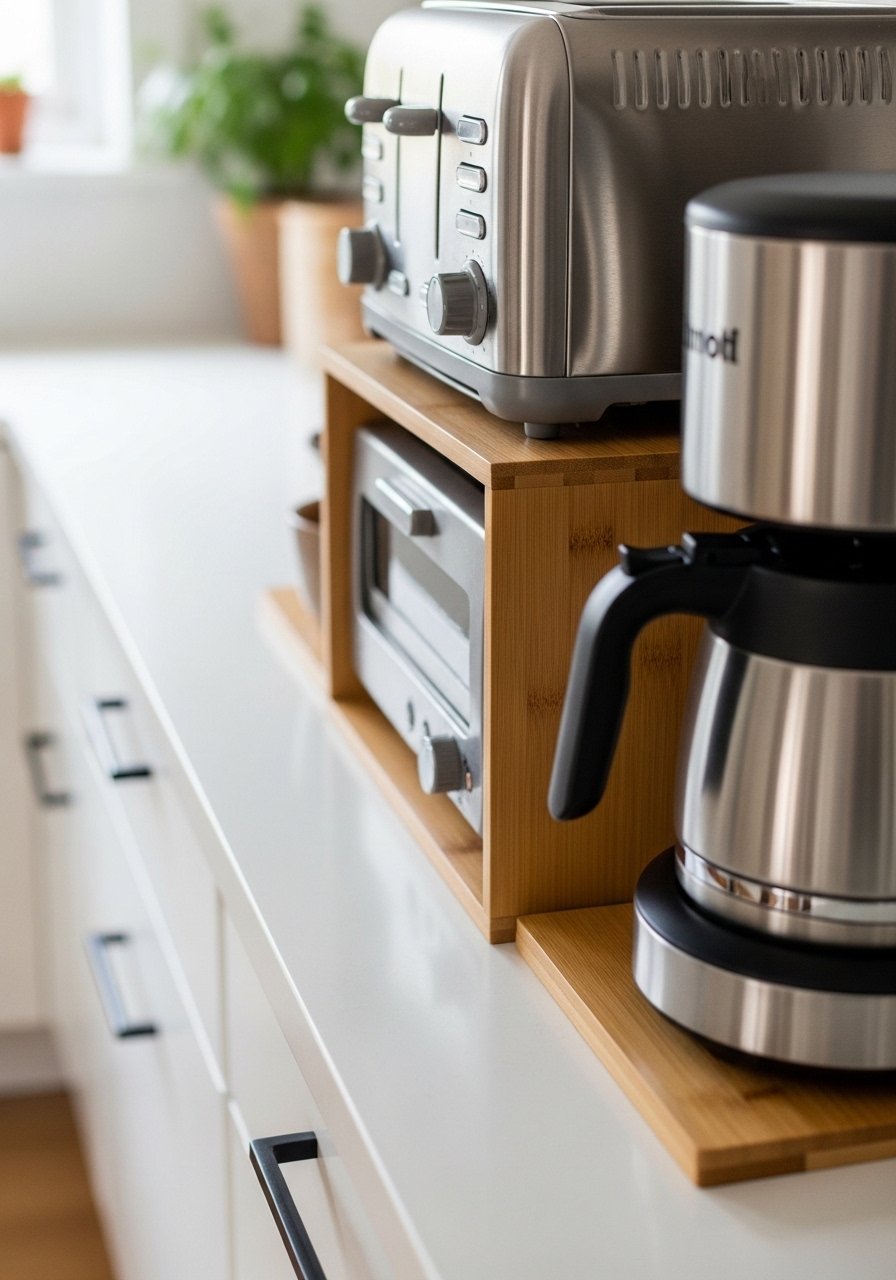
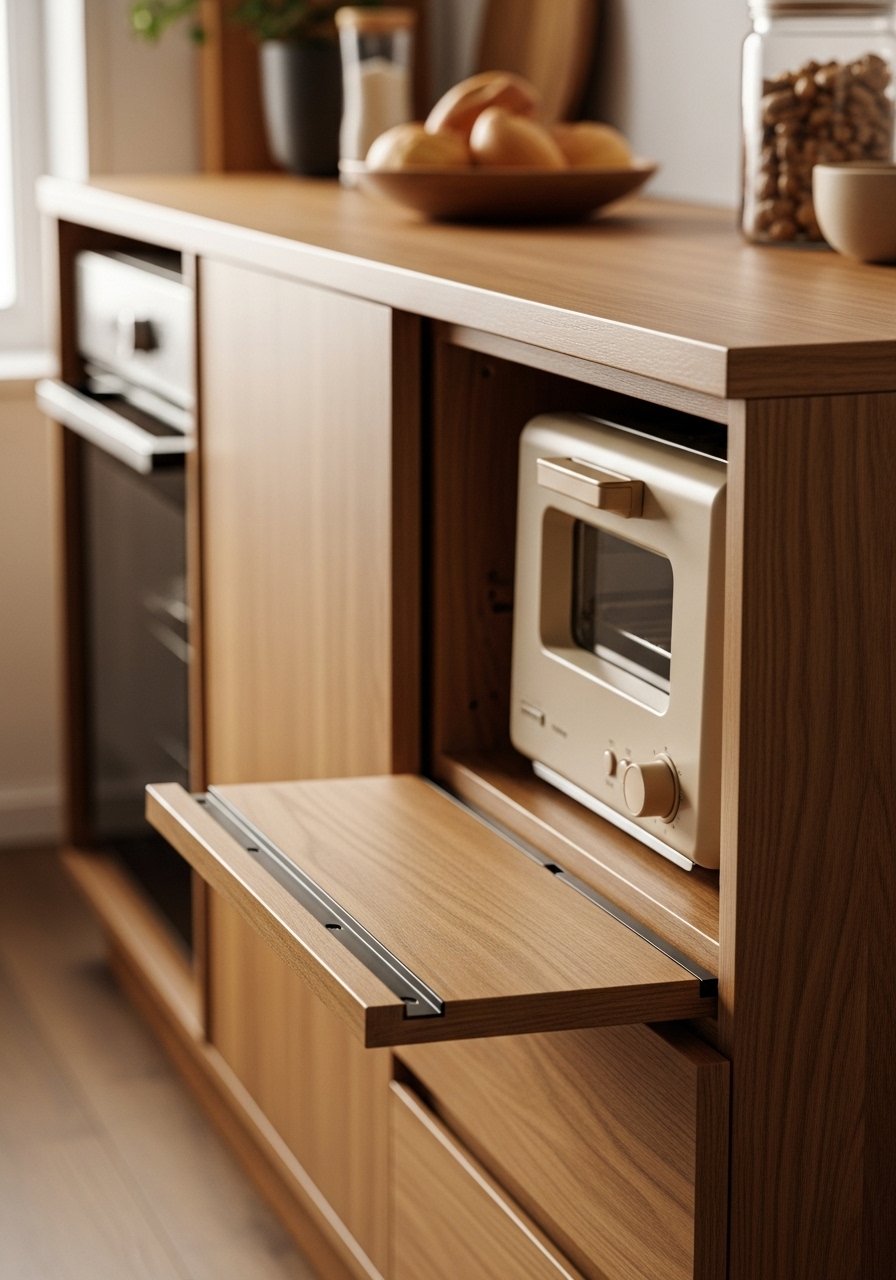
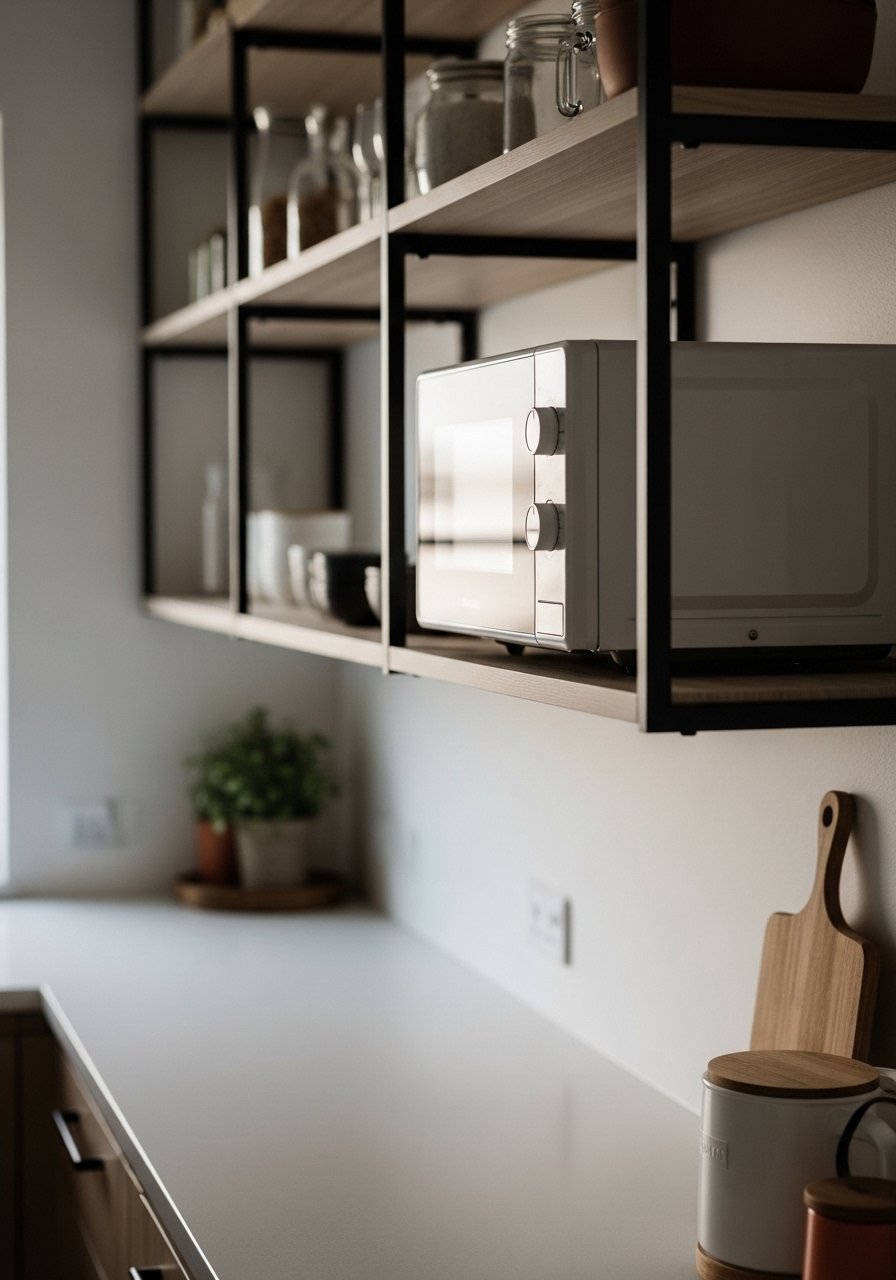
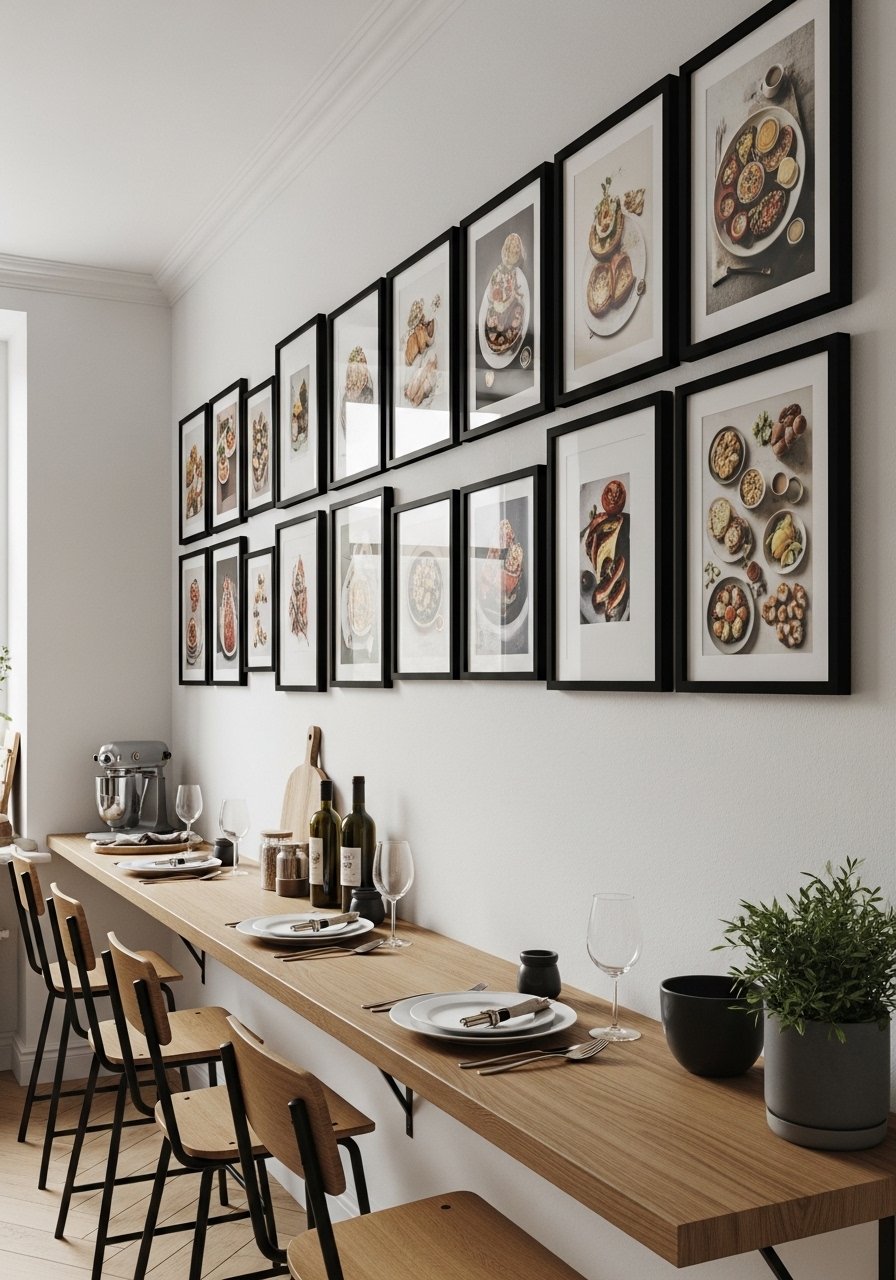
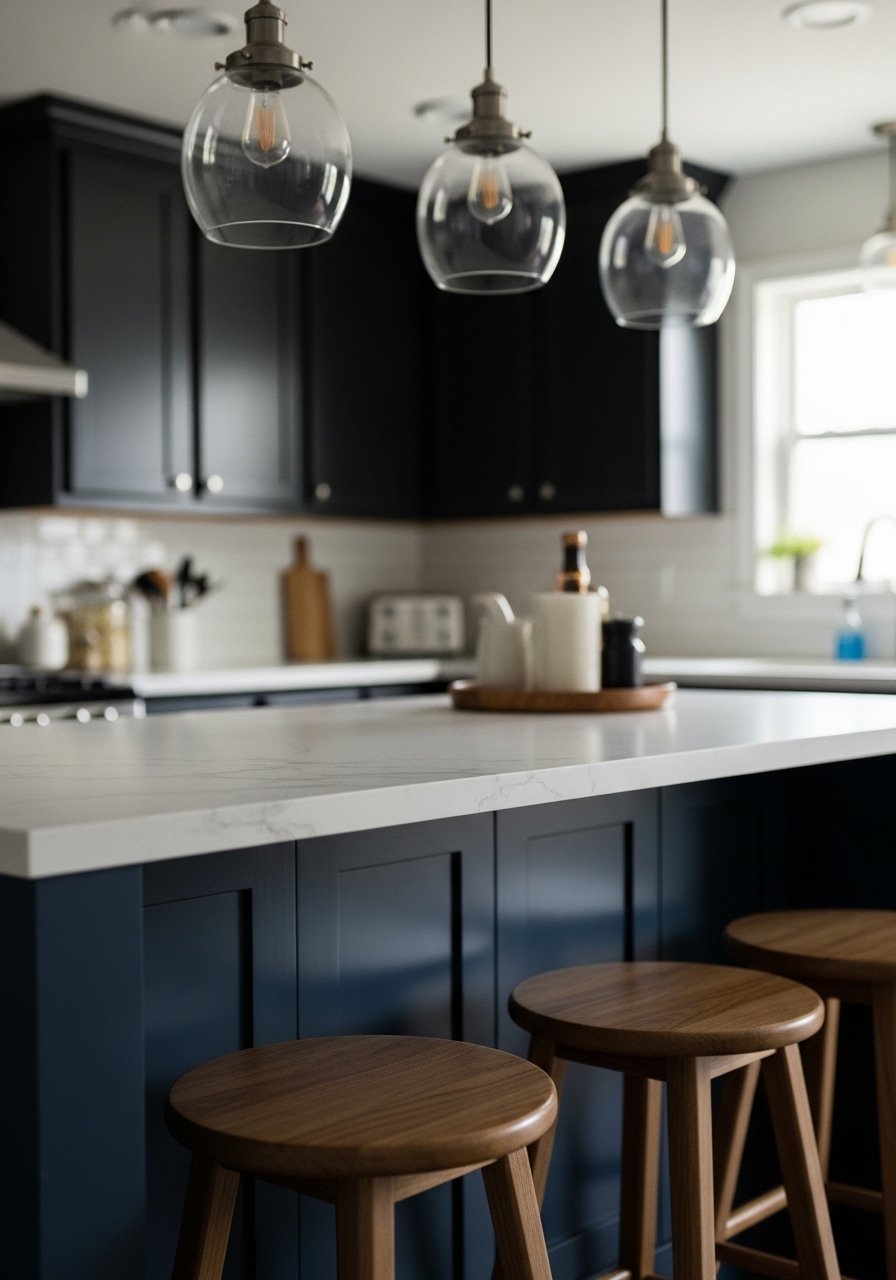
    8. Fold-Down Shelf for Mixer That Hides When Done

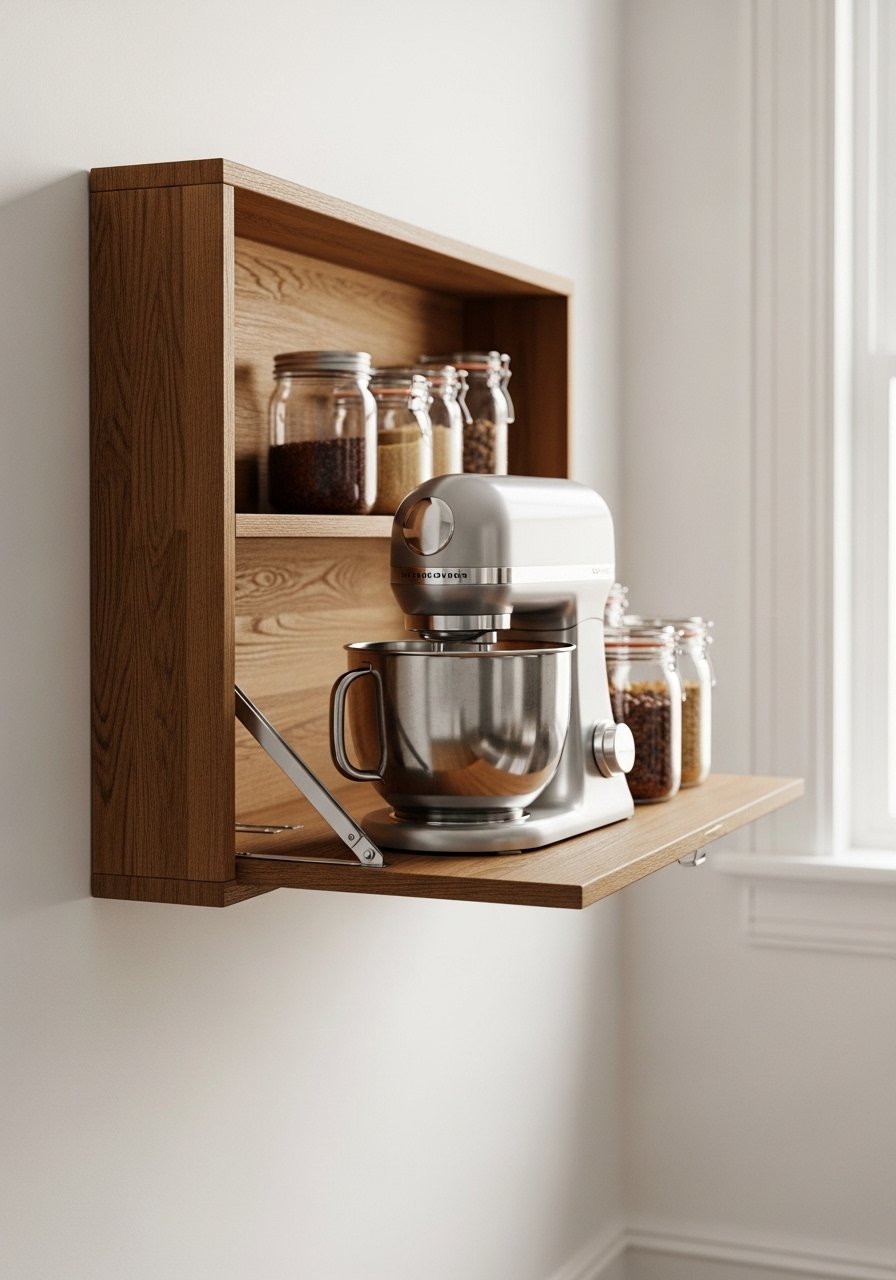
    Mixer hogged my counter forever. A fold-down corner shelf tucks it away, drops for use.

    Wall space used smart—no bulge in narrow aisle. Feels intentional.

    Hinges squeaked early; oil them. Weight limit: 20 pounds max.

    Line with grip mat. Appliances stay put.

    What You’ll Need for This Look

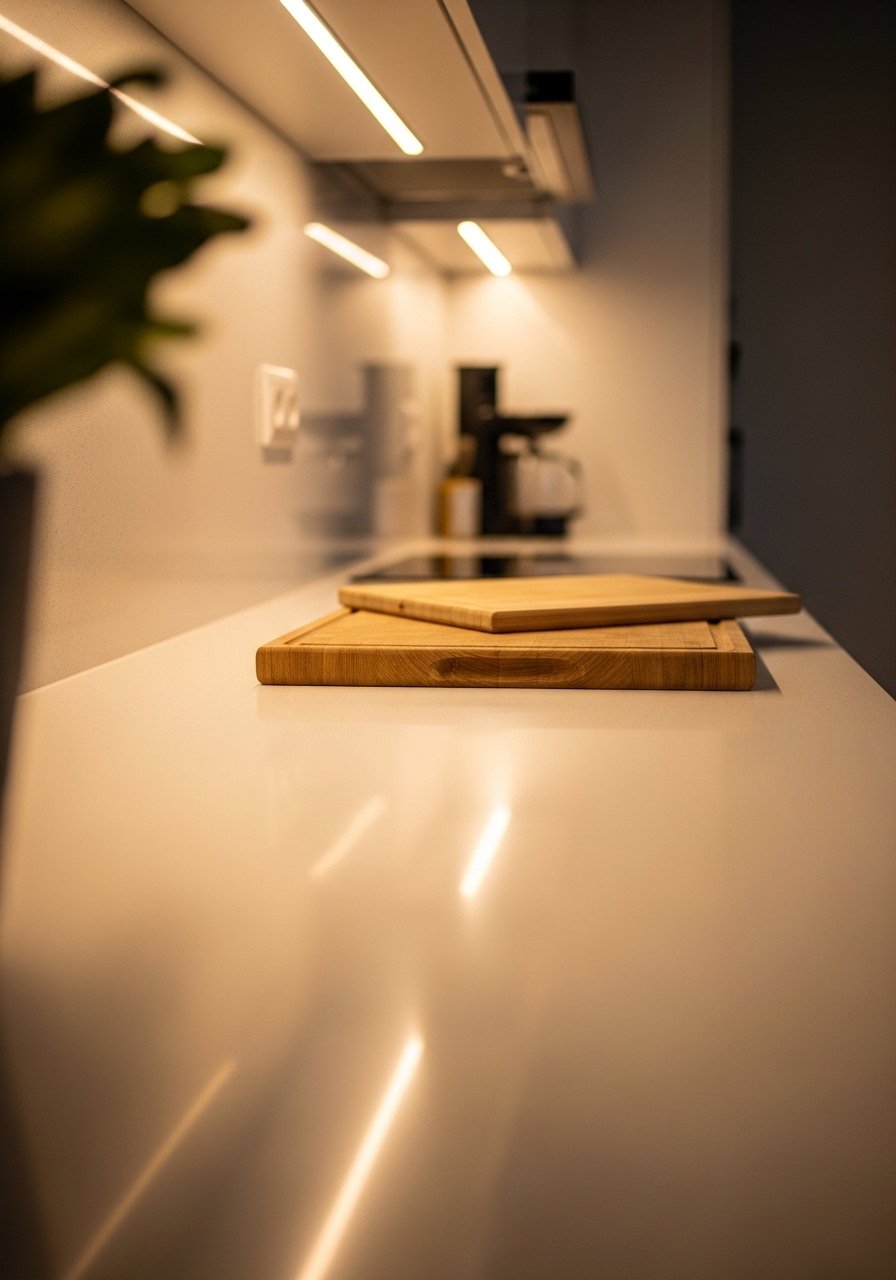
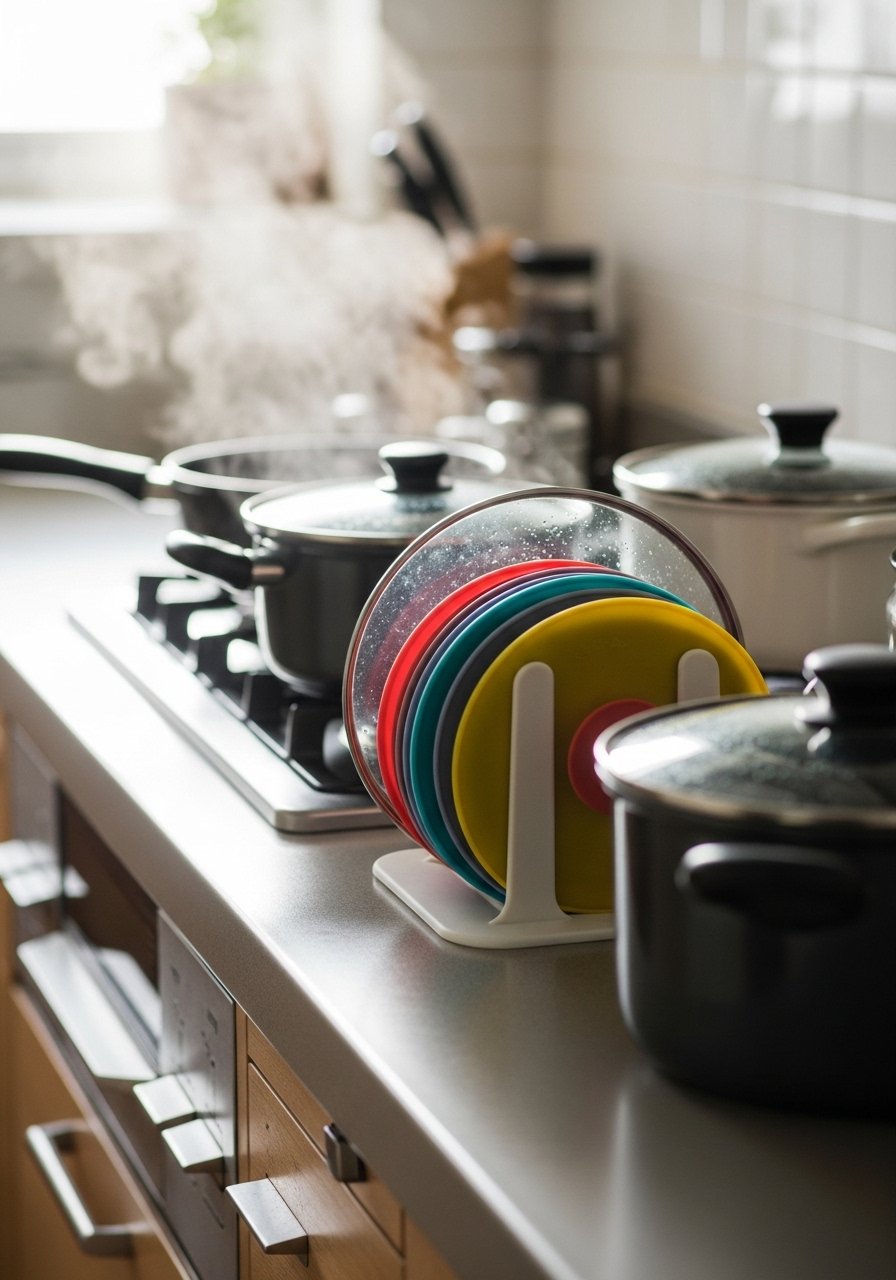
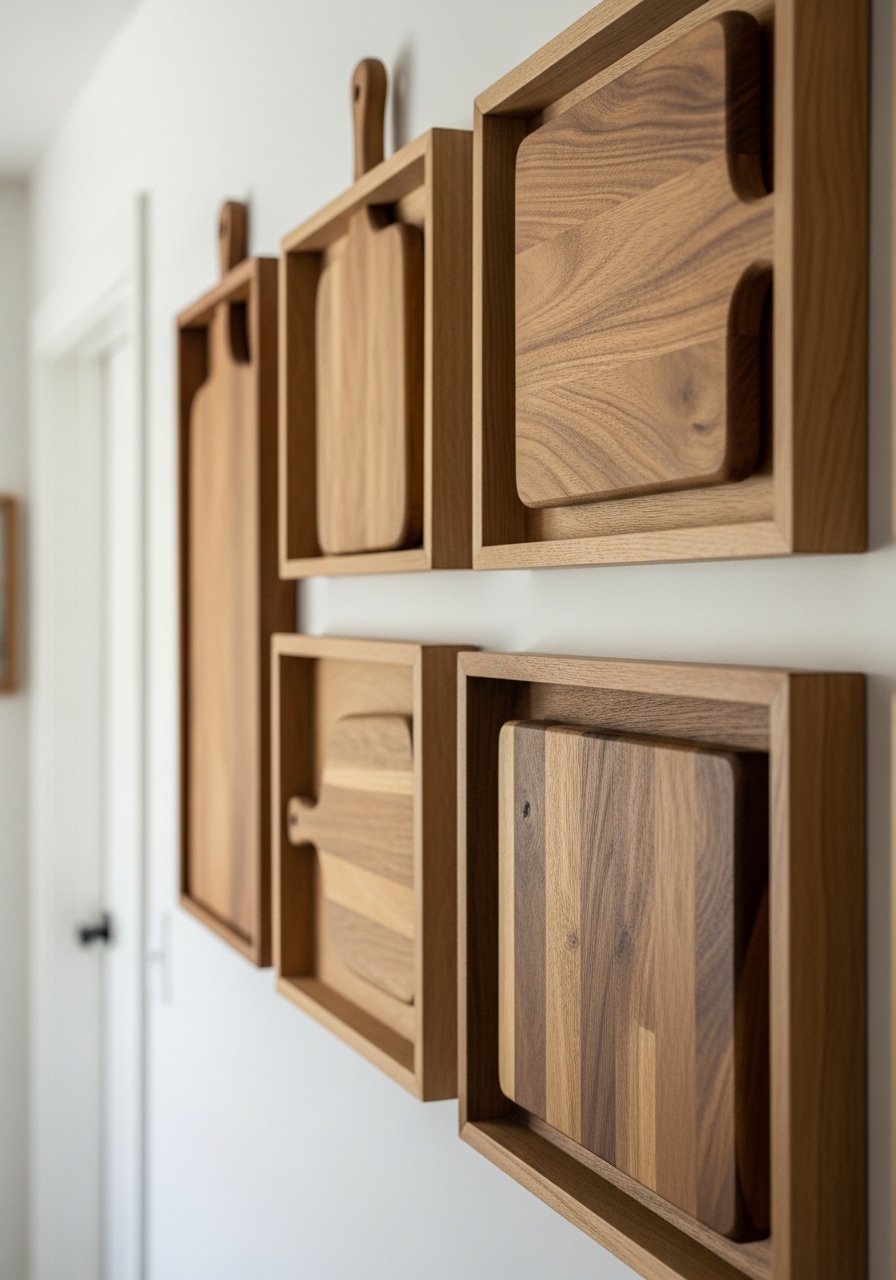
    9. Corner Carousel for Baking Sheets Sideways

    Baking sheets bent stacked wrong. A corner carousel spins them vertical, slim profile.

    Full circle access—no bending. Baking preps faster now.

    Too shallow carousel missed sheets; depth key. Fits 10-inch wide.

    Rubber grips prevent slide. Sort flatware below.

    What You’ll Need for This Look

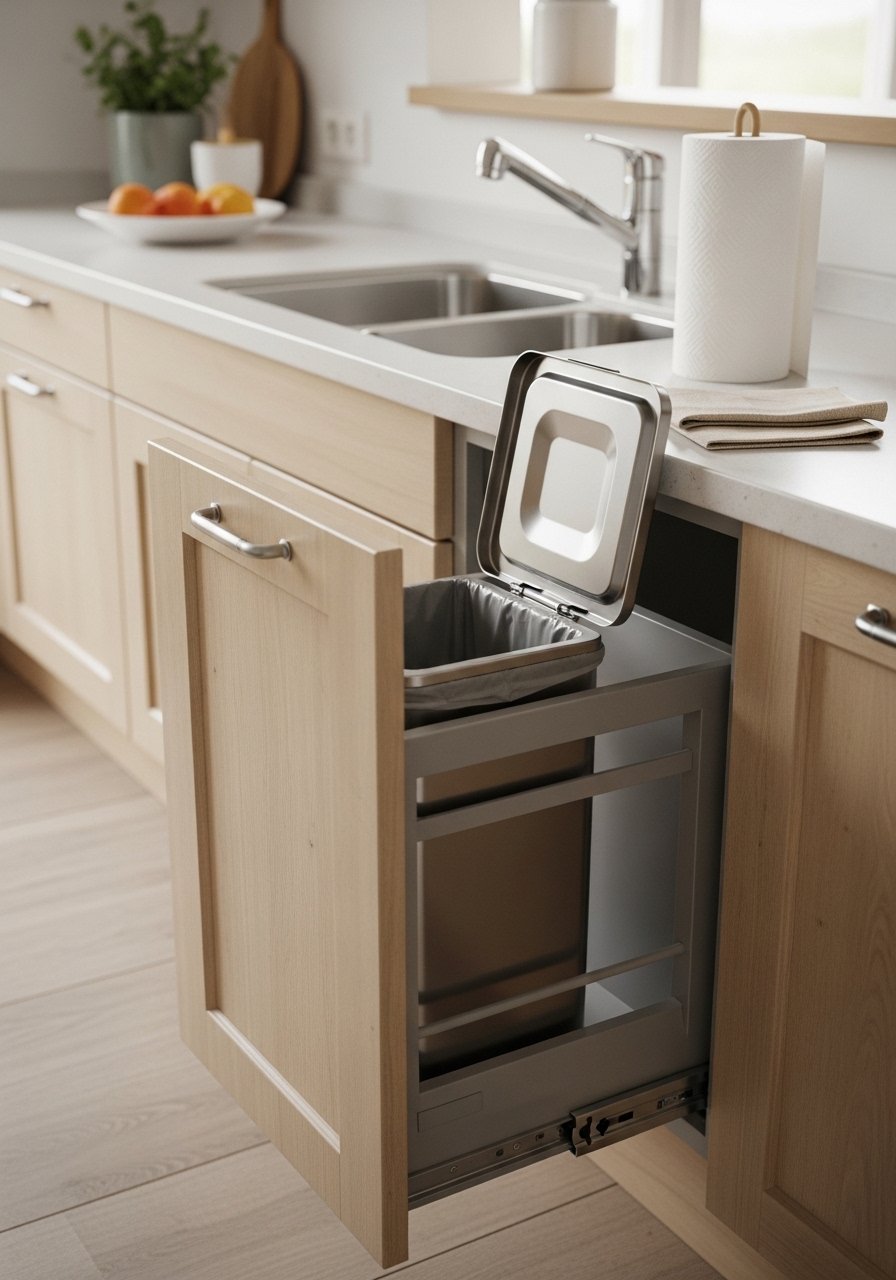
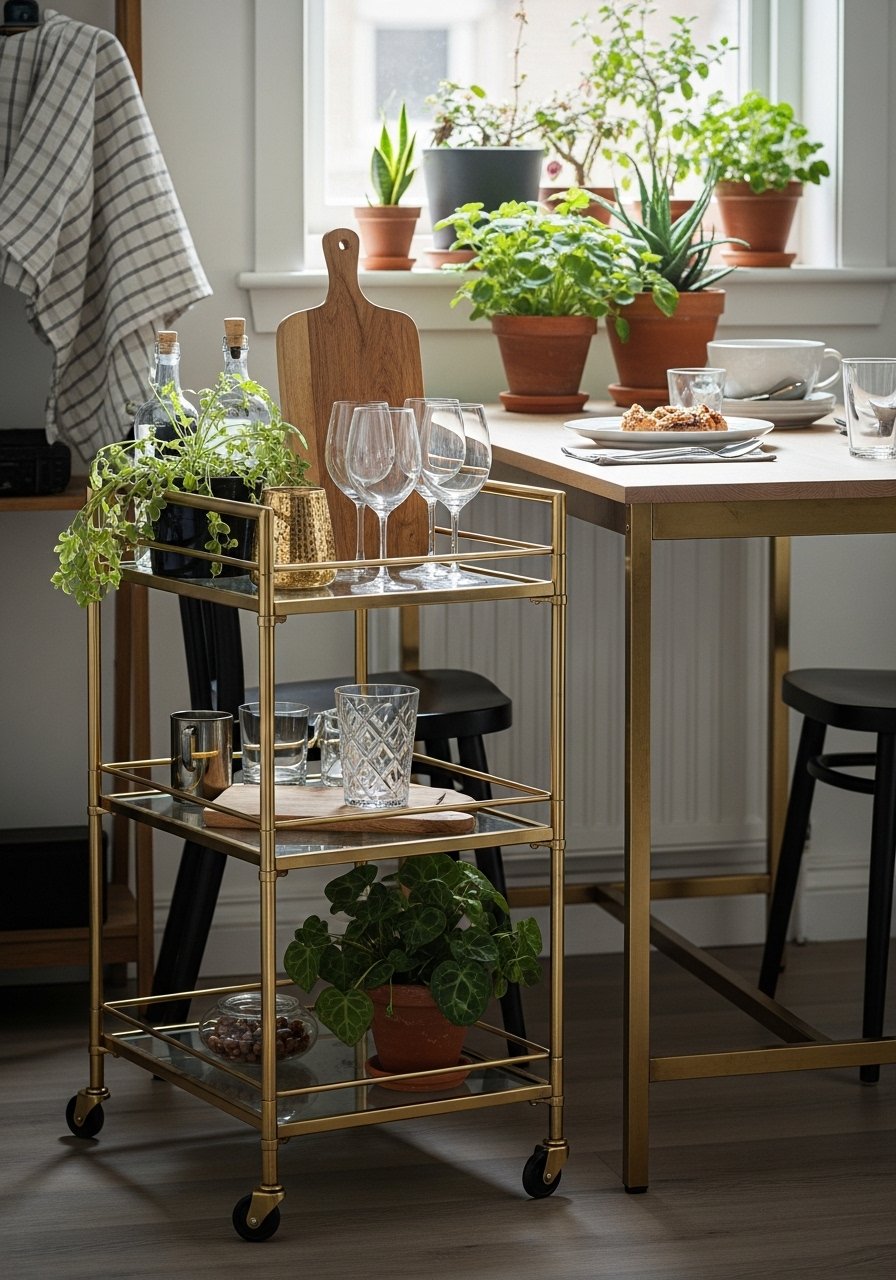
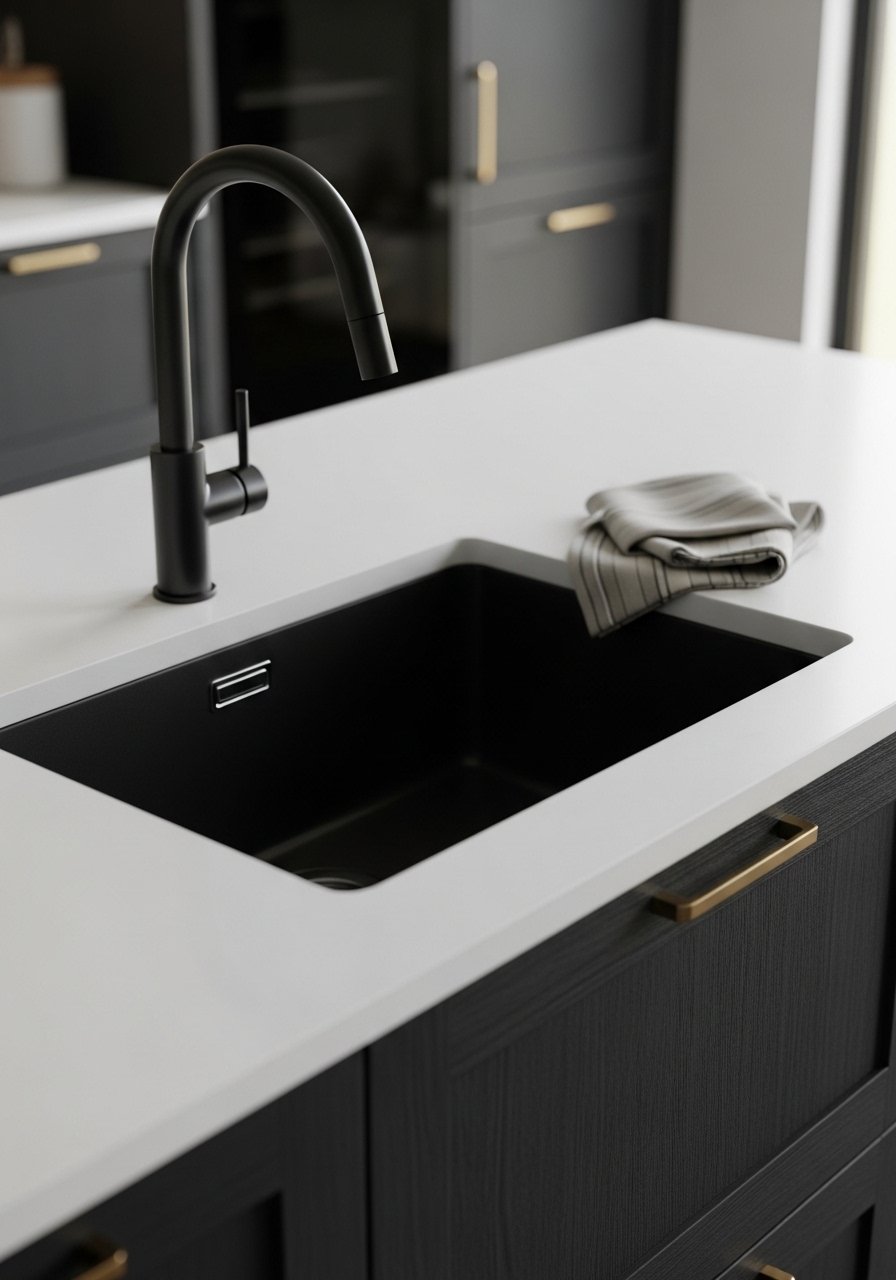
    10. Under-Corner Caddy for Cleaning Supplies

    Cleaning stuff jammed under sink corner. A pull-out caddy slides it all forward, tiered.

    Hidden but handy—wipes in seconds. No knee crawls.

    Leaky bottles ruined one; use trays. Narrow base fits tight.

    Lock when full. Group by task.

    What You’ll Need for This Look

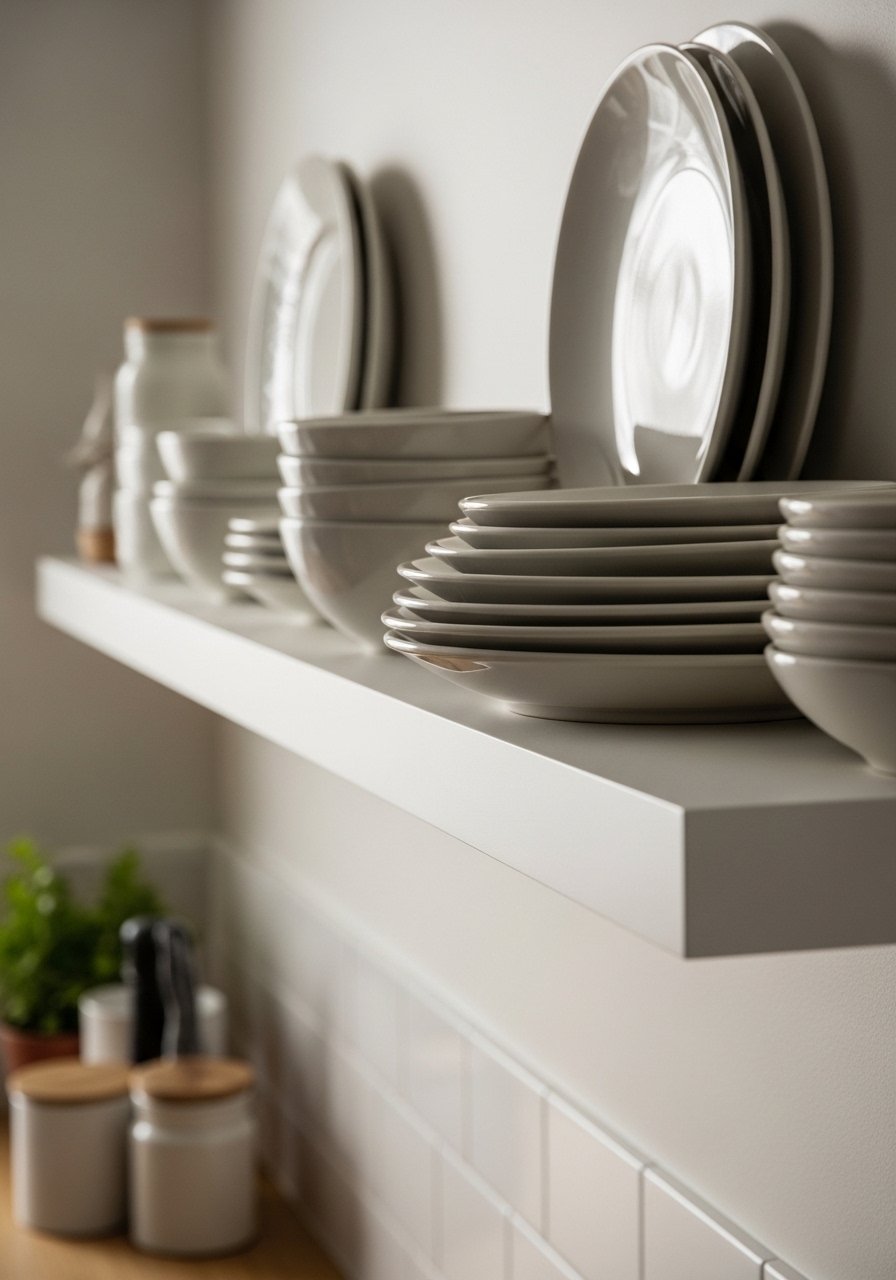
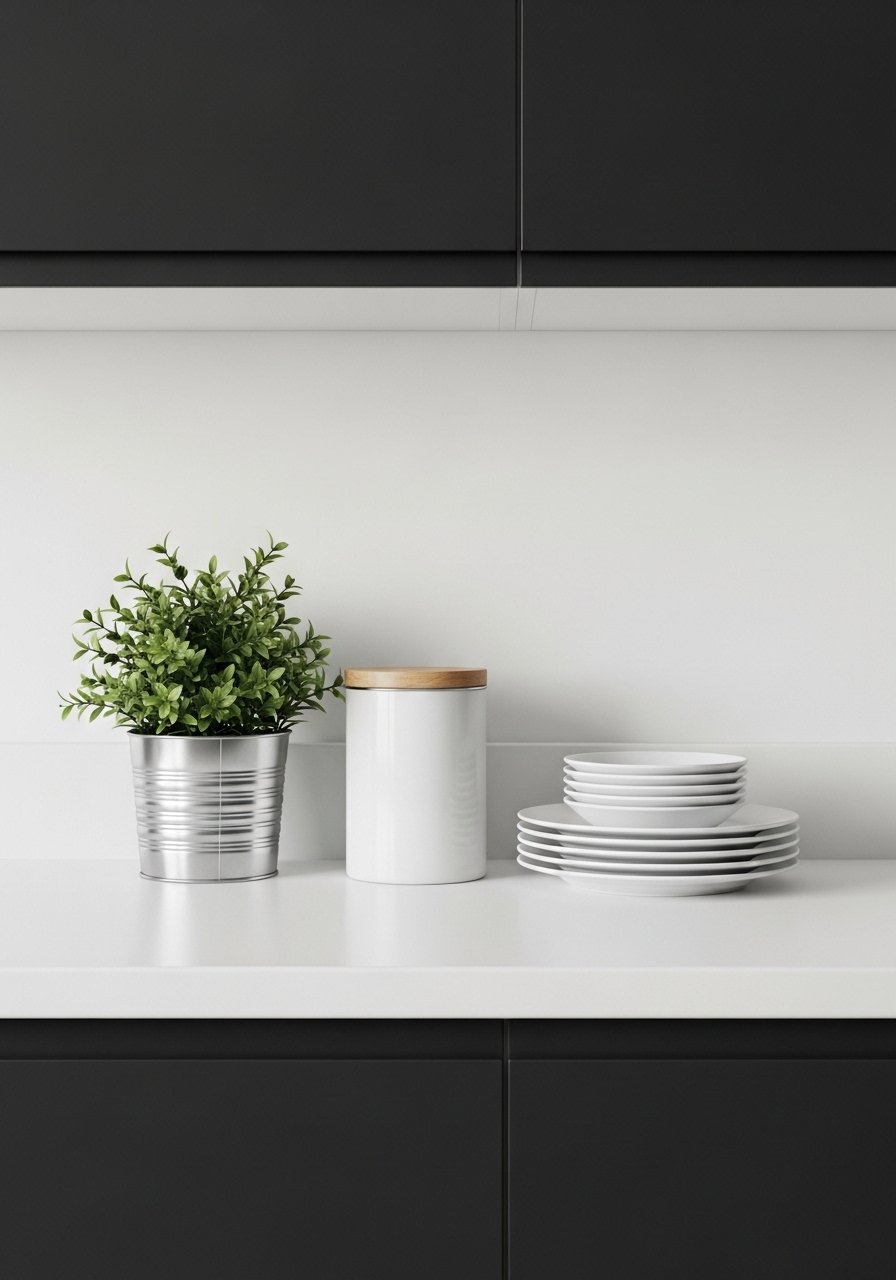
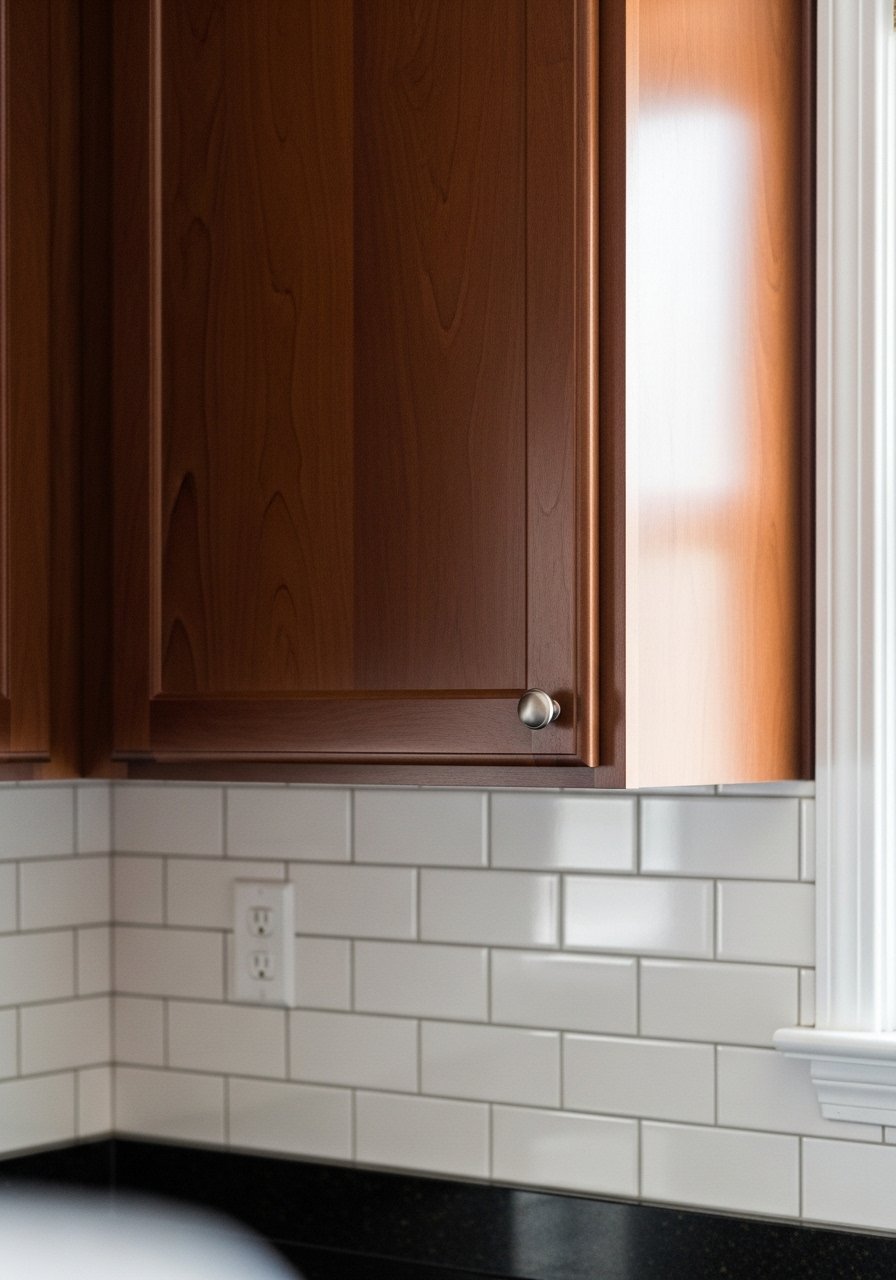
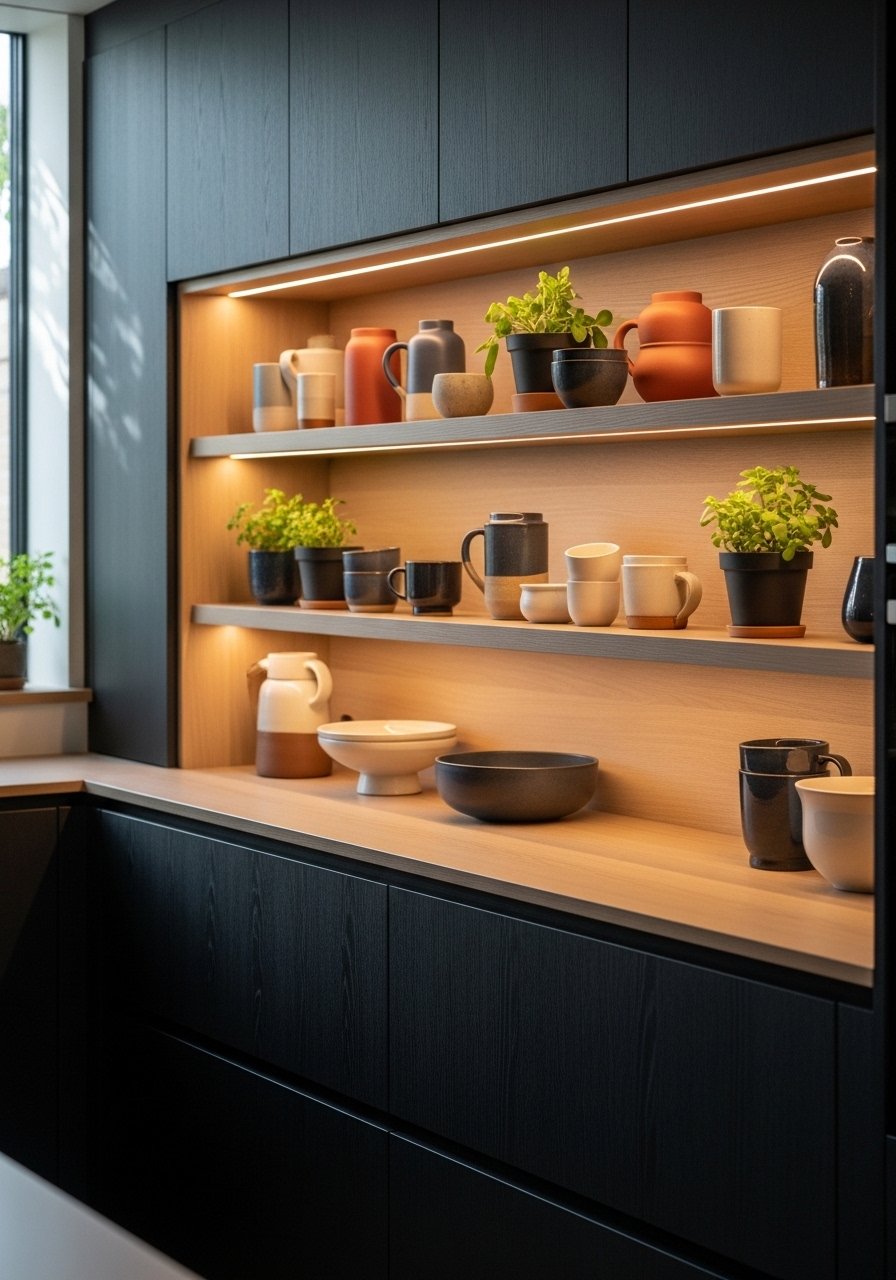
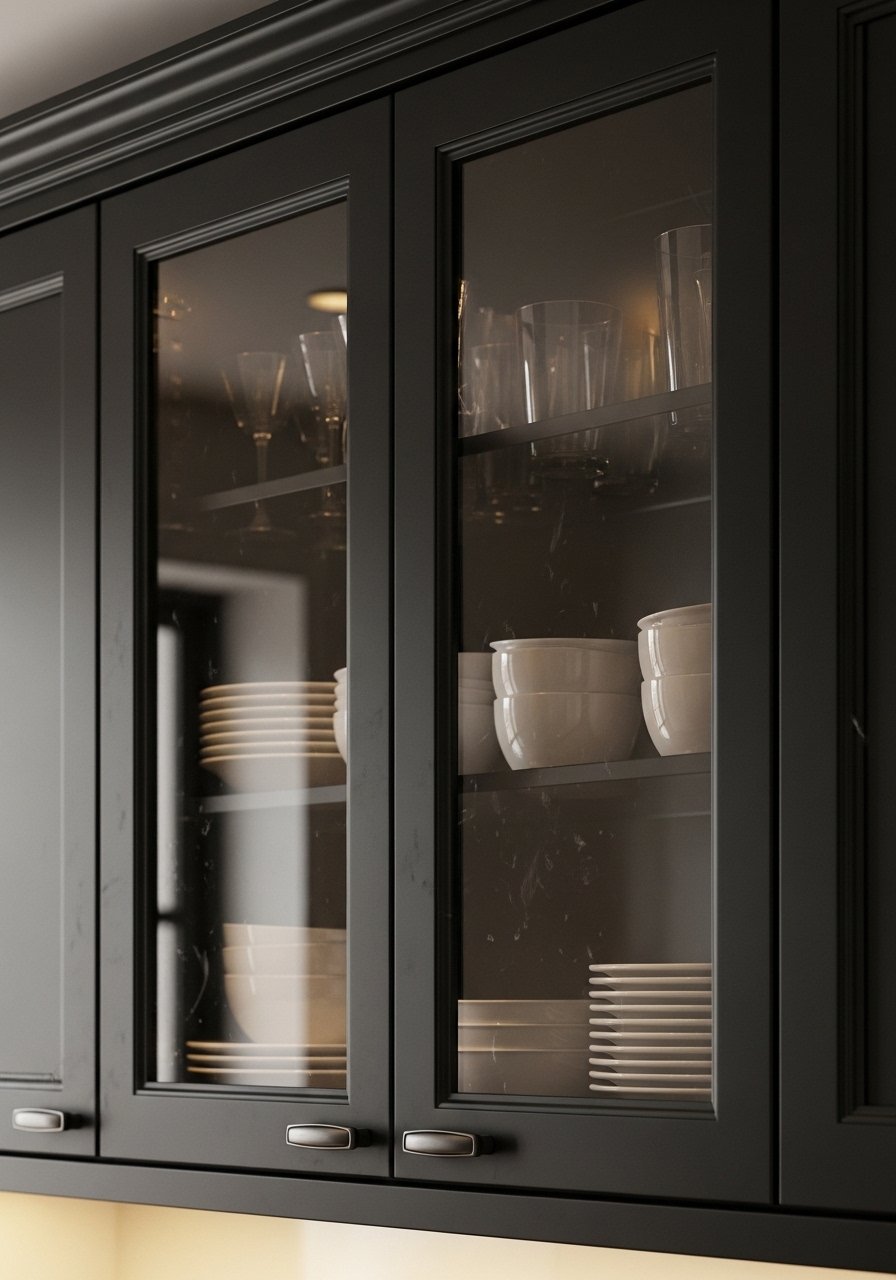
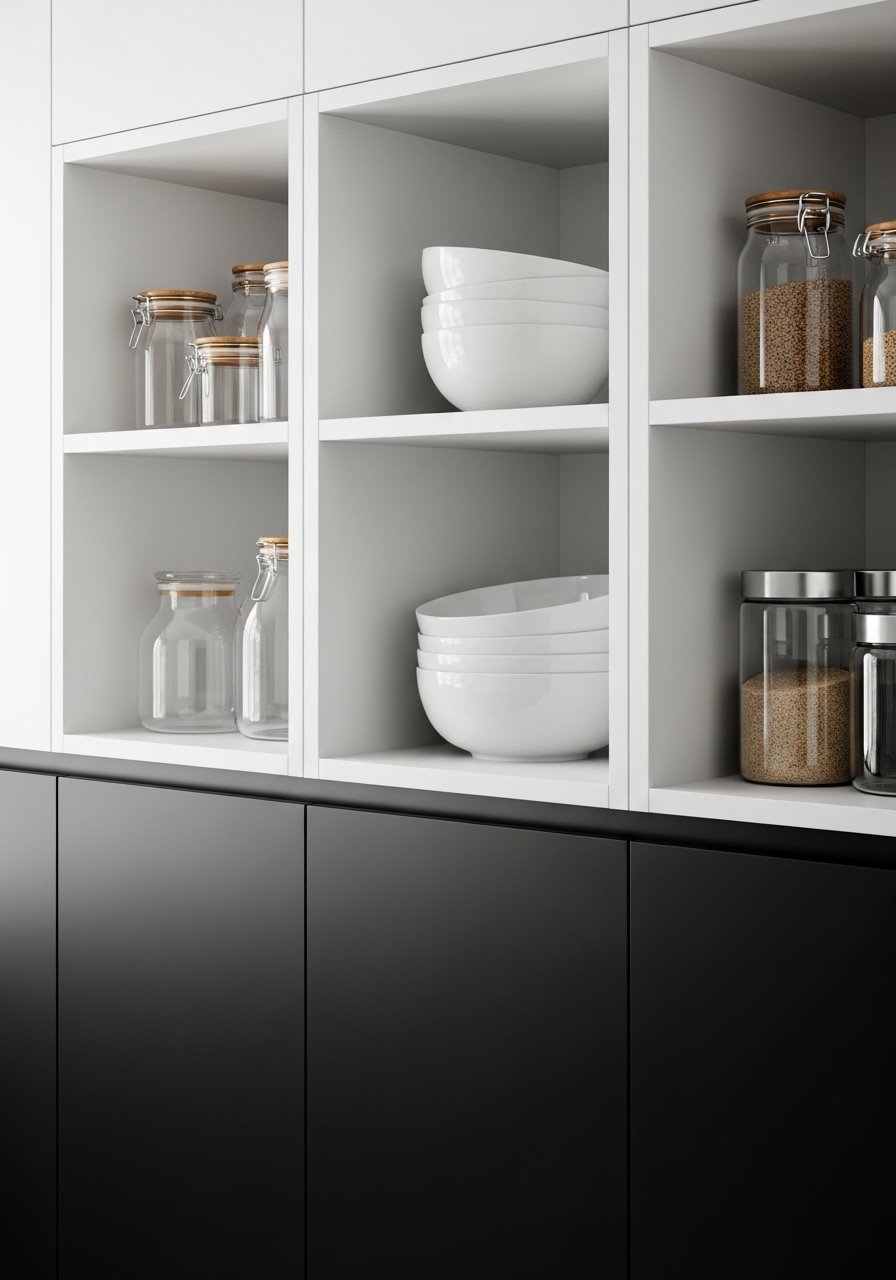
    11. Open Wire Shelves with Bins for Snacks

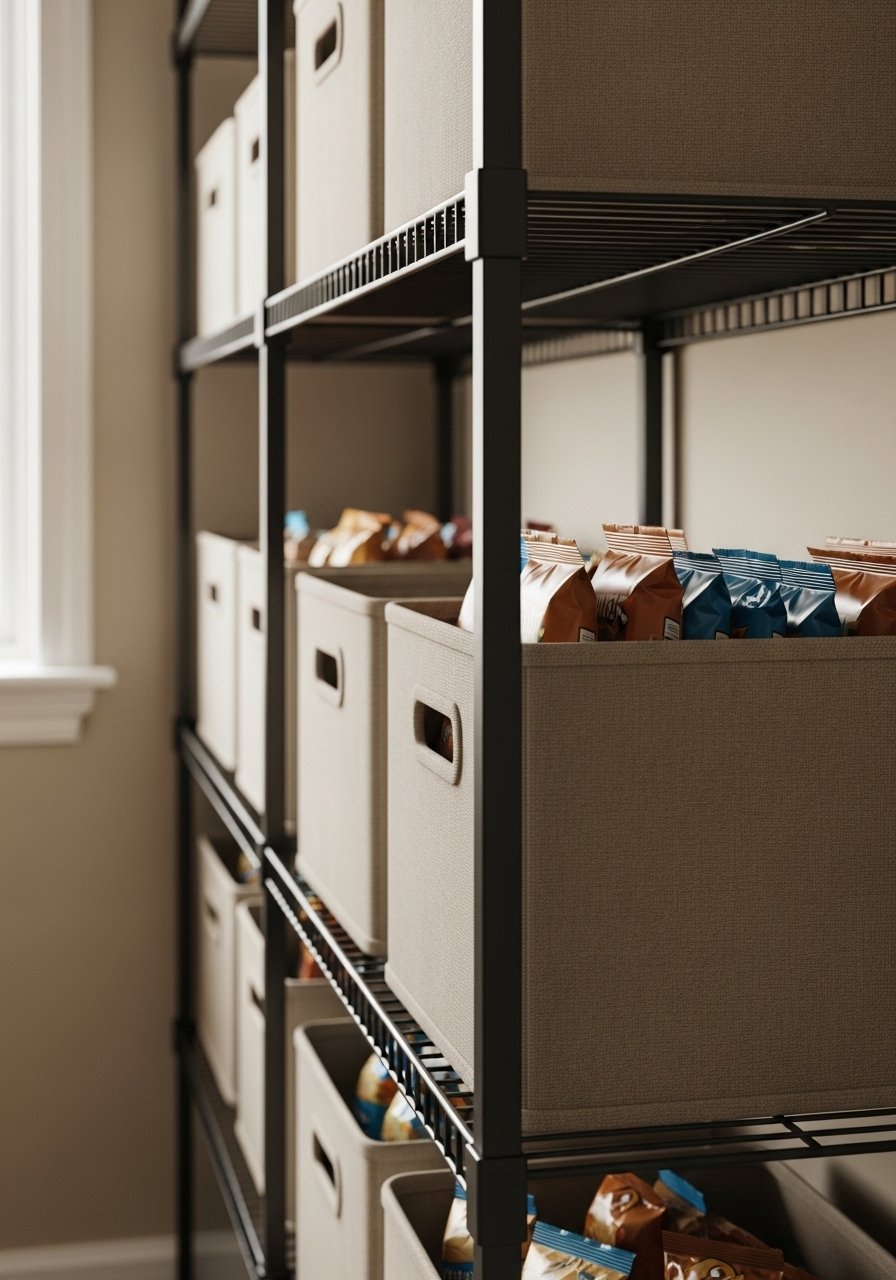
    Snacks scattered drawers. Open corner shelves with bins keep kids' grabs easy, dust-free.

    Light look, no close-ins. Warm, reachable height.

    Bins too big once—overflow. Shallow works best.

    Label kids' level. Rotate stock weekly.

    What You’ll Need for This Look

    Final Thoughts

    Pick one or two ideas that bug you most. My kitchen didn't change overnight—small swaps added up.

    Yours can too. Measure your corners, start simple. You'll cook happier, space feels right. You've got this.

  • 21 Smart Counter Space Ideas for Long Narrow Kitchen

    21 Smart Counter Space Ideas for Long Narrow Kitchen

    I squeezed into my first apartment with a kitchen so long and narrow, it felt like a hallway. Counters jammed with a toaster, blender, and coffee pot—no room left for a cutting board. I bumped elbows with cabinets just chopping veggies.

    One day, I stacked things smart. Suddenly, space breathed. I could see the wood grain again.

    Now, after years of tweaking real homes, I get what works. No showroom tricks. Just fixes that stick.

    21 Smart Counter Space Ideas for Long Narrow Kitchen

    These 21 counter space ideas for long narrow kitchens come from my own trial and error. They'll give you breathing room without buying a bigger house. Let's dive in.

    1. Slim Bamboo Risers That Stack Small Appliances Neatly

    In my old rental, the counter ran forever but barely eight inches wide. Toaster and coffee maker fought for space. I grabbed bamboo risers—two inches high, perfect lift. Stacked the toaster on top, coffee below. Now, outlets stayed free, and I had room to set a mug.

    Visually, it broke up the flat line. The wood warmed the white counters. Felt intentional, not crammed.

    Pay attention to wobble—mine tipped once with a heavy blender. Secure with rubber feet.

    One tip: Measure your tallest appliance first. Keeps everything level.

    What You’ll Need for This Look

    Slim bamboo kitchen risers 2-tier

    Compact stainless steel toaster oven

    White drip coffee maker small

    Non-slip rubber pads for shelves

    2. Pull-Out Wood Cutting Boards Tucked Under the Edge

    That endless counter begged for chopping room. I hated shoving boards aside. Installed a pull-out under the overhang—18 inches wide, slides smooth on tracks.

    It hides when done, frees the main surface. Chopping onions feels easy now, no elbow bumps.

    The wood grain matches my cabinets. Adds subtle warmth without stealing visual space.

    Test the track weight—I overloaded mine early, it jammed. Stick to food prep only.

    Pro move: Oil the board monthly. Keeps it from warping in steam.

    What You’ll Need for This Look

    Pull-out cutting board tray 18-inch wood

    Maple end grain cutting board replacement

    Heavy-duty drawer slides undermount

    3. Magnetic Strips Mounted Above for Knives and Utensils

    Knives cluttered my drawer blocks on the counter. In this skinny kitchen, every inch counted. Stuck up a magnetic strip—12 inches long, right above eye level.

    Blades grip tight, handles out for grab. Counter cleared instantly. I reach without digging.

    Brushed steel blends clean. No drawer pulls needed.

    Mounted too high once—strained my neck. Eye level is key.

    Insight: Polish monthly. Magnets stay strong.

    What You’ll Need for This Look

    Brushed stainless magnetic knife strip 12-inch

    Wood handle chef knife set

    Strong neodymium magnet bar extra

    4. Under-Counter Hanging Baskets for Fruits and Veggies

    Produce bowls ate prime counter real estate. Hung slim wire baskets below—perfect for that narrow run.

    Apples swing gentle, onions stay dry. Counter opens up, feels airy.

    Black metal fades against cabinets. Cozy touch without bulk.

    Overfilled once, sagged. Half-full max.

    Tip: Line with paper towels. Catches drips.

    What You’ll Need for This Look

    Under cabinet hanging fruit basket wire

    Black metal mesh produce basket

    Adhesive hooks heavy duty no drill

    5. Slim Appliance Garages with Sliding Doors

    Appliances screamed chaos along the length. Built a garage—10 inches deep, slides shut.

    Toaster, blender hide. Counter sleek for prep.

    Wood door warms laminate tops.

    Depth wrong first time—stuck out. Match your counter width.

    Honest: Wipe inside weekly. Dust hides.

    What You’ll Need for This Look

    Slim kitchen appliance garage wood sliding

    Bamboo sliding door panel 10-inch

    Mini track hardware for doors

    Compact blender slim profile

    6. Corner Carousel Lazy Susans for Spices

    Corner dead space collected junk. Added a carousel—spins full 360.

    Spices spin to hand. No more digging.

    Clear acrylic shows labels. Clean look.

    Spun too fast once—toppled jars. Steady spin base.

    Tip: Uniform jar heights. Balances.

    What You’ll Need for This Look

    Two-tier corner carousel lazy susan acrylic

    Glass spice jars with bamboo lids set

    Non-slip turntable base 9-inch

    7. Wall-Mounted Pegboards Over the Counter

    Counter hooks tangled everything. Pegboard above—custom hooks for pots.

    Frees surface completely. Grabs easy.

    White enamel brightens narrow run.

    Hooks slipped early—add rubber grips.

    Pro: Rearrange monthly. Fits life changes.

    What You’ll Need for This Look

    White enamel pegboard kitchen wall mount

    Assortment metal pegboard hooks

    Rubber tip hook protectors

    8. Fold-Down Counter Extensions from the Side

    Needed extra for platters. Hinged a fold-down—12 by 18 inches.

    Folds flat when not. Doubles space.

    Maple matches cabinets. Seamless.

    Installed crooked once—shimmed hinges.

    Tip: Lock in place for heavy use.

    What You’ll Need for This Look

    Fold-down counter extension wood hinge

    Heavy-duty piano hinge 18-inch brass

    Wood shims for leveling

    9. Tiered Acrylic Stands for Oils and Vinegars

    Bottles lined up like soldiers. Tiered stand lifts them—narrow footprint.

    Oils front and center. Saves hunt time.

    Clear lets light through. Feels open.

    Slid off once—no lip. Choose with edges.

    Insight: Group by use. Daily on top.

    What You’ll Need for This Look

    Three-tier acrylic oil organizer stand

    Glass olive oil dispenser set

    Bamboo corks for bottles

    10. Slim Pull-Out Trash Drawers Beside Sink

    Trash bin blocked prep. Pull-out slim—9 inches wide.

    Slides under counter. Lid hides smells.

    Stainless wipes easy.

    Fit wrong first—measure drawer space.

    Tip: Line with scented bags.

    What You’ll Need for This Look

    Slim pull-out trash can 9-inch stainless

    Undermount drawer slides soft close

    Kitchen trash bags small scented

    11. Ceiling-Hung Mug Racks Along the Length

    Mugs stacked on counter ends. Hung a rack from ceiling—hooks every six inches.

    Swings light. Instant access.

    Wood adds cozy. No shelf shadow.

    Too low once—bumped head. Eight feet up.

    Pro: Balance weight even.

    What You’ll Need for This Look

    Wooden ceiling mug rack 24-inch

    Ceramic coffee mugs matte set

    Heavy-duty ceiling hooks screw-in

    12. Over-Sink Roll-Up Drying Racks

    Dishes piled on counter post-wash. Roll-up rack over sink—fits narrow basin.

    Rolls away dry. No drip mess.

    Gray silicone grips. Modern clean.

    Rolled uneven—flatten fully.

    Tip: Hang to dry complete.

    What You’ll Need for This Look

    Roll-up dish drying rack silicone gray

    Non-slip sink mat extra large

    13. Narrow Drawer Dividers for Utensils

    Utensils jumbled in shallow drawers. Adjustable bamboo dividers—fit nine-inch depth.

    Spoons stay put. Quick grab.

    Wood warms plastic drawers.

    Overpacked—spills. Air space key.

    Insight: Label ends. Habit sticks.

    What You’ll Need for This Look

    Adjustable bamboo drawer dividers slim

    Wood utensil tray organizer

    Silicone spatula set colorful

    Label stickers clear vinyl

    14. Multi-Level Wire Baskets for Produce

    Bags of garlic tumbled. Stacked wire baskets—slim profile.

    Lemons top, roots below. Rotates easy.

    Matte black grounds space.

    Liner soaked once—choose absorbent.

    Tip: Ventilate bottom.

    What You’ll Need for This Look

    Two-level wire produce basket matte black

    Cotton fabric basket liner

    15. Under-Cabinet LED Strips to Brighten and Expand Feel

    Shadows made counters feel tighter. Stuck LED strips under cabinets—warm white glow.

    Space looks deeper. Tasks easier.

    Tape strong, no wires.

    Dimmed fast—quality matters.

    Pro: Motion sensor for hands-free.

    What You’ll Need for This Look

    Under cabinet LED strip lights warm white

    Motion sensor LED tape 16-foot

    Adhesive clips for LED strips

    16. Slim Profile Microwave Shelf Brackets

    Microwave hogged counter end. Bracket shelf above—frees full length.

    Door opens down. Counter for prep.

    Black blends walls.

    Bolted loose—use anchors.

    Tip: Weight limit check.

    What You’ll Need for This Look

    Slim microwave shelf brackets heavy duty

    Compact countertop microwave white

    Wall anchors drywall large

    17. Windowsill Herb Planters with Drip Trays

    No room for herbs. Windowsill trays—skinny pots fit sill.

    Fresh basil snips. Greens counter visually.

    Terracotta warms glass.

    Overwatered—trays save.

    Insight: Rotate weekly. Even sun.

    What You’ll Need for This Look

    Narrow windowsill herb planters terracotta

    Metal drip trays small set

    Soil pods for herbs organic

    18. Cable Management Clips Under Lip

    Cords draped everywhere. Clips under lip—tucks neat.

    No tangles. Clean lines.

    Black hides easy.

    Pulled off—clean surface first.

    Tip: Bundle with ties.

    What You’ll Need for This Look

    Adhesive cable clips under desk black

    Velcro cable ties reusable

    19. Decorative Wooden Trays for Grouping Essentials

    Salt, pepper scattered. Wood tray groups—10 by 14 inches.

    Feels collected. Easy wipe.

    Grain adds warmth.

    Too big once—scale down.

    Pro: Rotate items.

    What You’ll Need for This Look

    Light wood serving tray 10×14 rectangular

    Brass salt shaker modern

    Linen napkins neutral set

    20. Stackable Silicone Pot Lids Beside Stove

    Lids clattered in cabinets. Rail holder—slots five.

    Stacks vertical. Counter clear.

    Silicone grips.

    Slipped—add grips.

    Tip: Sort by size.

    What You’ll Need for This Look

    Stackable pot lid holder silicone rail

    Adhesive rail mount small

    21. Narrow Spice Clip Racks on Cabinet Side

    Spices buried deep. Side clips—five per strip.

    Jars clip firm. Zero counter use.

    Metal slim.

    Overclipped—space jars.

    Insight: Door mount alternate.

    What You’ll Need for This Look

    Narrow cabinet door spice clips metal

    Small glass spice jars clip top

    Adhesive mounting tape strong

    Final Thoughts

    Pick three ideas that fit your routine. Start small—my counters changed one tweak at a time.

    You'll feel the space open. No rush for perfection.

    You've got this. Your kitchen, your way.

  • 7 Cozy Breakfast Nook Ideas for Long Narrow Kitchen

    7 Cozy Breakfast Nook Ideas for Long Narrow Kitchen

    I remember staring down my long, skinny kitchen, coffee in hand, wishing for a spot to actually sit. It felt more like a runway than a home.

    One day, I pushed everything against the wall and tested a small table. Morning light hit it just right. Suddenly, breakfast wasn't gulped-and-go.

    That nook changed rushed starts to quiet moments. If your kitchen drags on forever but narrow, you can squeeze in coziness too.

    7 Cozy Breakfast Nook Ideas for Long Narrow Kitchen

    These 7 cozy breakfast nook ideas fit long narrow kitchens like mine did. I've lived with them, tweaked them. They'll give you a spot to breathe without stealing walkway space.

    1. Drop-Leaf Table Tucked Flush to the Wall

    My kitchen's just 8 feet wide, so a full table blocked everything. I mounted a drop-leaf one right by the window. Flip it up for two, fold down for passage.

    Mornings now feel open. Sun warms the wood, coffee steams without rush. Stools slide under perfectly—no stubbed toes.

    Watch the hinge strength; cheap ones sag. Mine held after a year, but I reinforced with brackets.

    It cost under $100 total. Space saver that invites lingering.

    What You’ll Need for This Look

    2. Built-In Bench with Under-Seat Drawers

    I built a bench along the longest wall using plywood and cushions. Drawers underneath hide placemats and mugs—no counter clutter.

    It hugs the space, leaves room to walk. Kids pile on now, feet up, toast crumbs forgiven.

    First try, cushions flattened fast. Switched to thicker foam—stayed comfy two years.

    Feels like an extension of the wall, not furniture fighting it.

    What You’ll Need for This Look

    3. Window-Ledge Seat with Layered Pillows

    Our window sill begged for use. I padded it with pillows, added a tiny side table. Perch here overlooks the yard—best coffee view.

    Light filters soft, no glare. Pillows in soft grays and beiges layer without bulk.

    Overdid patterns once; clashed hard. Neutrals only now—calm wins.

    Squeeze one or two; mornings slow down here.

    What You’ll Need for This Look

    4. Corner Banquette Using Dead Space

    The kitchen corner gathered junk. I framed a banquette there—L-shape for three. Round table fits tight.

    Talk flows easy now; feels tucked away yet central. Baskets store extras.

    Painted wrong color first—too stark. Warm white softened it.

    Transforms forgotten corner to heart spot.

    What You’ll Need for This Look

    5. Bar Stools at Narrow Counter Extension

    Extended the counter 12 inches—bolted stools underneath. Quick breakfast perch, no floor space lost.

    Stools tuck fully; walk by easy. Leather seats wipe clean from spills.

    Chose tall ones first—uncomfy. Backless mid-height perfect.

    Casual spot that works daily.

    What You’ll Need for This Look

    6. Pendant Light Over Slim Console Table

    Hung one pendant low over a console table—glows mornings soft. Chairs tuck side by side.

    Light pools warm, makes nook intimate. No harsh overheads.

    Cord tangled first install. Shortened it—clean now.

    Defines the spot without width.

    What You’ll Need for This Look

    7. Rattan Stools with Woven Runner

    Rattan stools under a floating shelf—light, airy. Woven runner grounds it.

    Texture warms the tile floor. Shelf holds jams—no hunt.

    Slippery runner slid once. Non-slip pad fixed.

    Breezy feel in tight space.

    What You’ll Need for This Look

    Final Thoughts

    Pick one idea that fits your mornings. Mine started simple—no need for all seven.

    Tweak as you live it. Your long narrow kitchen can hold cozy spots.

    You'll sip slower soon. You've got this.

  • 15 Stylish Long Narrow Kitchen Dining Area Ideas

    15 Stylish Long Narrow Kitchen Dining Area Ideas

    I stared down my long, skinny kitchen dining spot for months. It felt like a hallway with a table shoved in. Chairs bumped the counter. No room to breathe.

    One day, I pushed everything against the walls. Light poured in. Suddenly, it flowed. I've fixed three such spaces since. You can too—start small, live with it.

    These tweaks make narrow feel open, not squeezed.

    15 Stylish Long Narrow Kitchen Dining Area Ideas

    These 15 ideas come from my own kitchens and client homes. They fit real life—meals, kids, clutter. Each one eases that tight squeeze. Pick one or two to start.

    1. Wall-Mounted Fold-Down Table for Quick Meals

    I installed this in my first apartment kitchen. It tucks away when not in use, freeing the floor for sweeping. Mornings, I flip it down for coffee and toast. No more bulky furniture blocking the path.

    Visually, it draws the eye along the length without crowding. The wood warms the white cabinets. Friends linger longer now—space feels intentional.

    Measure your wall height first. Mine's 30 inches wide, perfect for two. Secure it sturdy; mine wobbled until I added brackets.

    In a client's rental, it hid breakfast dishes post-meal. Game for renters.

    What You’ll Need for This Look

    Wall-mounted fold-down dining table oak 30-inch

    Heavy-duty wall brackets matte black

    Woven seagrass placemats round set of 4

    2. Built-In Banquette Along the Long Wall

    My sister's galley kitchen got this banquette. I built it from plywood and foam—seats four without chairs sticking out. Cushions in linen make it comfy for homework or wine.

    The long bench follows the wall's line, making the room feel stretched, not stubby. Added storage underneath for linens. Light bounces off the pale fabric.

    Go for washable covers; spills happen. I chose earth tones to blend with cabinets.

    Now, it hosts family dinners. Narrow no longer means lonely.

    What You’ll Need for This Look

    Linen banquette cushions beige 20×20-inch set of 4

    Plywood sheet 4×8-foot for bench base

    Foam seat padding high-density 4-inch thick

    Slim wood dining table 36×72-inch

    3. Slim Console Table as Dining Extension

    I tried a full table here first—disaster. Chairs blocked the fridge. Swapped for this console, 12 inches deep. Pull up stools for two, or use as a buffet.

    It hugs the wall, leaving walkway clear. Marble top reflects light, opens the space. Feels modern, not makeshift.

    Mistake: too tall at first. Lowered legs 4 inches—perfect height now.

    What You’ll Need for This Look

    Slim console table marble top 12-inch deep 48-inch long

    Adjustable metal stools black 24-inch height pair

    Matte white ceramic serving bowls set of 3

    4. Vertical Herb Garden Above the Table

    In my current kitchen, herbs climb the wall over the table. Picked basil daily for salads. No counter clutter—everything up high.

    Greens soften the long lines, add life without floor space. Sun hits them just right, scenting meals.

    Use drip trays; water drips ruined my first setup. Mount at eye level.

    Feels like a cafe now, fresh every day.

    What You’ll Need for This Look

    Vertical wall garden pockets felt green set of 6

    Metal wall brackets for shelves small

    Self-watering herb pots terracotta 4-inch

    Wood floating shelf 24-inch long

    5. Oversized Mirror Opposite the Window

    Client's dark narrow spot got this floor mirror. Doubles window light, makes it feel twice as wide. Table reflects too—breezy illusion.

    I leaned it casual, not hung. Brass frame warms the whites.

    Angle it right; straight on distorts. Test during day.

    Breakfasts brighter now. Simple win.

    What You’ll Need for This Look

    Oversized leaning mirror brass frame 36×60-inch

    Non-slip mirror pads clear set

    6. Long Runner Rug to Guide the Flow

    Rugs ground my narrow areas. This runner runs the length, defines dining without width. Wool softens tile clicks.

    Defines the zone visually—table pops against it. Cozy underfoot for bare feet.

    Vacuum edges; mine frayed once from traffic.

    Walkway feels purposeful now.

    What You’ll Need for This Look

    Long runner rug beige wool 2.5×10-foot

    Rug pad non-slip 2.5×10-foot

    Woven jute rug accents neutral

    7. Linear Pendant Lights Over the Table

    Pendants changed my evenings. Three slim ones hover low over the table—pools light just where needed. Shadows gone.

    I spaced them 24 inches apart; too close first time, felt crowded. Adjusted, perfect now.

    Insight: Dimmable bulbs. Harsh light kills mood.

    Dinners feel special, space intimate.

    What You’ll Need for This Look

    Linear pendant lights black metal 12-inch diameter set of 3

    Dimmable LED bulbs warm white E26

    Ceiling canopy kit for pendants

    8. Floating Shelves for Everyday Dishes

    Shelves hold our plates and cups right over the table. Grab-and-go easy. White dishes against oak shelves add rhythm down the wall.

    No cabinets blocking light. Mix in a plant—greenery softens.

    Stagger heights; even ones felt flat.

    Meals feel collected, not sparse.

    What You’ll Need for This Look

    Floating wood shelves oak 24-inch long set of 3

    White ceramic dinner plates 10-inch set of 6

    Brass shelf brackets hidden pair

    9. High Stools at Extended Counter

    Extended my counter 12 inches for stools. Tall ones tuck under—no floor hogs. Quick lunches here now.

    View down the length opens it. Leather ages nice, gets better.

    Counter height key—36 inches works.

    Casual spot turns social.

    What You’ll Need for This Look

    Counter height stools leather black backless set of 2

    Wood countertop extension slab 12-inch overhang

    10. Gallery Wall of Food Prints Along the Length

    Prints of veggies and breads run the wall. Draws eye down, fills blank space without clutter.

    I overhung first—hit heads. Hung at 60 inches now, safe.

    Warm tones tie to wood table. Feels like art in a bistro.

    What You’ll Need for This Look

    Framed food prints botanical black frames 8×10-inch set of 6

    Picture hanging strips removable heavy duty

    11. Sheer Curtains on Tall Windows

    Tall windows got sheers—softens harsh sun, lets light through. Room breathes wider.

    Linen drapes floor to sill, adds texture. Tie back for cooking.

    Light colors only; dark ones shrank it.

    Mornings glow now.

    What You’ll Need for This Look

    Sheer linen curtains ivory 50×108-inch pair

    Tension rod window 48-inch adjustable

    Curtain tiebacks linen neutral

    12. Multi-Tiered Serving Cart Beside the Table

    Cart rolls in for serving, parks slim beside table. Holds extras without cabinets.

    Gold legs brighten. Wheels make it flexible.

    Lock wheels; mine rolled during dinner once.

    Prep and serve seamless.

    What You’ll Need for This Look

    Multi-tiered serving cart gold metal 24-inch wide

    Wood cutting board large with handle

    13. Pale Wood Bar Table for Two

    Bar table lifts the eye, shortens the narrow feel. Two stools fit tight.

    Ash wood lightens. Narrow top, 18 inches deep.

    Stable base matters—wobbly no good.

    Intimate spot now.

    What You’ll Need for This Look

    Pale wood bar table ash 30-inch high 36×18-inch

    Bar stools wood backless 30-inch set of 2

    14. Textured Wall Panels Behind the Seating

    Panels add depth without paint fuss. Slats behind bench hide outlets, warm the white.

    I glued too few first—bare spots. Doubled up now.

    Vertical lines elongate the room.

    Cozy backdrop.

    What You’ll Need for This Look

    Wood slat wall panels oak 12×48-inch set of 4

    Construction adhesive heavy duty tube

    15. Layered Neutral Linens on Every Surface

    Linens layer softness—runner down table, napkins ready. Fades spills, ties it cozy.

    Beiges blend cabinets. Wash often; stains show on light.

    Fills without stuff.

    Inviting daily.

    What You’ll Need for This Look

    Linen table runner beige 12×72-inch

    Linen napkins neutral set of 8 18-inch

    Seamstress scissors for hemming

    Final Thoughts

    You don't need all 15. Try one that fits your routine. Live with it a week—tweak as needed.

    My narrow spots feel homey now, not hallway-like. Yours will too. Breathe easy at that table.

  • 13 Fresh Long Narrow Kitchen Wall Ideas

    13 Fresh Long Narrow Kitchen Wall Ideas

    I remember the day I moved into my first apartment. That long, skinny kitchen wall mocked me—too narrow for cabinets, too empty to ignore. I tried a big clock first. It flopped, swallowed the light.

    Over years of fixing real homes, I learned narrow walls crave height and rhythm, not bulk. They pull your eye up, make the room breathe.

    Now, my kitchens feel taller, calmer. You can do this too. Start simple.

    13 Fresh Long Narrow Kitchen Wall Ideas

    These 13 ideas come straight from my kitchens and clients' homes. They fit tight spaces without crowding. Each one adds function or warmth you can shop and install today.

    1. Slim Floating Shelves with Everyday Jars

    I put these in my rental kitchen last year. The wall went from blank to useful overnight. Jars of rice, pasta, spices sat pretty, grabbing soft morning light. The space felt deeper, less like a hallway.

    Visually, the repetition up the wall draws eyes upward. No more dead zone. Emotionally, it settled me—everything in reach while cooking.

    Pay attention to depth: 8 inches max, or it bumps counters. I spaced them 12 inches apart for easy grab.

    One tip: mix clear glass with matte labels. Avoids that sterile look.

    What You’ll Need for This Look

    Slim floating shelves 8-inch deep white set of 3

    Clear glass kitchen storage jars 16 oz with bamboo lids

    Matte black jar labels vinyl waterproof

    2. Vertical Herb Garden in Hanging Tin Cans

    In my sister's galley kitchen, we strung old cans with herbs. Basil, mint—fresh daily. The wall turned alive, scent filling the air during dinner prep. No counter clutter.

    It softens the narrowness, adds green without width. Feels farm-like, comforting after long days.

    Choose cans 4 inches wide. Hang at eye level for water access. I learned the hard way—too low means splashes.

    Twine holds them steady. Mistake fixed: poke drainage holes twice.

    What You’ll Need for This Look

    Galvanized tin cans small set of 6

    Jute twine natural 100 ft roll

    Herb seeds basil mint thyme starter kit

    Potting soil organic small bag

    3. Narrow Picture Ledge for Rotating Plates

    My own wall got this ledge. Plates from thrift trips leaned casual, colors popping against white. Changed the feel—instant personality, like a cafe corner.

    Narrow ledges hug the wall tight. Stack three high, slide new ones in. Room breathes easier.

    Watch weight: hollow core fails. I returned one that sagged.

    Proportions matter—ledge 4 inches deep max.

    What You’ll Need for This Look

    Narrow picture ledge wood 36-inch white

    Handmade ceramic dinner plates neutral set of 4

    Brass plate hangers adhesive no damage

    4. Magnetic Strips for Knives and Spice Jars

    Tired of drawer digs, I stuck magnets up high. Knives, metal spices—right there. Kitchen felt pro, efficient. Less chaos on mornings.

    Saves drawer space in skinny kitchens. Clean lines, no visual bulk.

    Two 18-inch strips, end to end. Test magnet strength first—I grabbed weak ones once.

    Wipe easy, stays sleek.

    What You’ll Need for This Look

    Strong magnetic knife strip 18-inch black set of 2

    Mini metal spice jars magnetic lid 4 oz set

    5. Pegboard Panel with S-Hooks and Baskets

    Client's tiny kitchen transformed with pegboard. Hooks for mugs, baskets for onions. Wall worked harder, felt organized not fussy.

    Vertical lines elongate the space. Custom every week.

    Paint it wall color first. Mine peeled without primer—lesson learned.

    Hooks every 6 inches.

    What You’ll Need for This Look

    White pegboard panel 24×48 inch slim

    Woven seagrass baskets small wall mount set

    S-hooks black metal heavy duty pack of 20

    Primer spray paint white matte

    6. Slim Wall Sconces in Matte Black

    Evenings changed when I added sconces. Soft glow over counters, wall receded gently. Cozy without taking space.

    They layer light, make narrow feel intimate. Bulbs at 2700K.

    Plug-in ones first—no wiring hassle. I wired once, regretted the cost.

    Angle down 45 degrees.

    What You’ll Need for This Look

    Slim wall sconces matte black plug-in set of 2

    Edison warm white bulbs 2700K small

    7. Framed Cutting Boards in a Vertical Stack

    Stacked boards from my market hauls. Wall gained texture, warmth like a cabin. Pull one down to chop—practical art.

    Repeats shape without color overload. Feels collected over time.

    Light frames, 1-inch wide. Hung tight, 2 inches apart.

    Skip glass—fogs with steam.

    What You’ll Need for This Look

    Wooden cutting boards rectangular set of 4

    Thin wood picture frames 12×18 inch natural

    8. Removable Wallpaper in Subtle Texture

    Rental wall got linen-look paper. Added depth without pattern chaos. Kitchen felt polished, taller.

    Texture catches light softly. Pulls wall back visually.

    Measure twice—seams show on long runs. My first roll wasted half.

    Peel easy later.

    What You’ll Need for This Look

    Removable linen texture wallpaper beige 20×144 inch roll

    Smoothing tool kit for wallpaper application

    9. Rail System with Hanging Copper Mugs

    Rail in my current kitchen holds mugs. Shiny copper warms the white. Grab and go, no cabinet hunt.

    Industrial but cozy. Multi-height hangs save space.

    Short rail, 24 inches. Hooks spaced 4 inches—too close clangs.

    Polish yearly.

    What You’ll Need for This Look

    Kitchen rail system brass 24-inch with hooks

    Copper Moscow mule mugs set of 4

    10. Chalkboard Paint Stripe for Notes

    Thin stripe for grocery lists. Family uses it daily. Wall feels shared, less stark.

    Defines the zone without width. Erasable joy.

    Mask edges sharp. I smudged first try.

    Chalk markers over dust.

    What You’ll Need for This Look

    Chalkboard paint black matte pint

    Chalk markers dustless colorful set

    Painter's tape blue low tack 1-inch

    11. Narrow Mirror for Light Bounce

    One tall mirror bounced window light. Dark corner brightened, space doubled visually. Calmer mornings.

    Arched softens edges. Opposite window best.

    Secure anchors—heavy ones tip. Mine did once.

    Wipe smudges weekly.

    What You’ll Need for This Look

    Narrow vertical mirror arched wood 12×36 inch

    Wall anchors heavy duty pack

    12. Hanging Pot Rack Clips

    Clips for lids and small pots. Cabinet freed up. Wall gained rustic weight.

    Shadows add depth. Sturdy for daily.

    Pot clips only—pans too wide. Trial and error.

    What You’ll Need for This Look

    Pot lid hanging clips black metal set of 6

    Cast iron skillet small 8-inch

    13. Gallery of Small Framed Recipe Cards

    Framed family recipes in a line. Stories on the wall, cooking inspired. Intimate touch.

    Tight grid, 4×6 frames. Personal scale.

    Print matte paper. Gloss glares.

    What You’ll Need for This Look

    Small black picture frames 4×6 inch set of 6

    Matte photo paper 4×6 pack

    Final Thoughts

    Pick one or two ideas that match your routine. My walls evolved slow—no rush.

    They make narrow kitchens work harder, feel better. You've got this. Start with what you already own.

  • How to Make Long Narrow Kitchen Beautiful

    How to Make Long Narrow Kitchen Beautiful

    My long narrow kitchen always felt like a hallway. I’d cook dinner, but the space pushed us apart. No room to linger.

    I tried cabinets everywhere. It got crowded fast.

    One day, I stepped back. Cleared it out. That’s when it started feeling right.

    How to Make Long Narrow Kitchen Beautiful

    Here’s how I handle long narrow kitchens. You’ll learn to balance the length with simple placements. The result is a warm, comfortable space that flows naturally. It works in real homes, every time.

    What You’ll Need

    Step 1: Clear and Zone the Length

    I start by emptying every surface. Counters, shelves—gone. Walk the length. Feel where your body naturally stops: cooking end, eating end, pass-through middle.

    This zoning breaks the tunnel feel. Visually, it shortens the space into comfortable pockets.

    People miss how empty feels freeing first. Don’t skip it. Avoid cramming back old stuff too soon—that crowds the flow.

    Now it breathes. I mark zones with tape. Simple.

    Step 2: Layer Light from Top to Base

    Next, I hang pendants low over the eating zone. Add under-cabinet strips along one wall. Keep it warm white—no harsh glare.

    Light pulls the eye up and softens edges. The kitchen feels wider, less like a shot.

    Most forget base light matters most. It grounds everything. Don’t overload with too many fixtures; two layers balance it.

    I flick them on at dusk. The shift is immediate—cozy pockets emerge.

    Step 3: Anchor with Rug and Seating

    I roll out a slim runner down the center. Tuck slim stools under the counter edge, facing the length.

    This anchors movement. Visually, it defines paths without blocking.

    Folks overlook stool height—too tall juts out. Go counter-height. Avoid centering stools; offset them for elbow room.

    I sit there now. Coffee feels easy, not squeezed.

    Step 4: Add Vertical Balance with Shelves and Mirror

    I mount floating shelves high on the short end wall. One big mirror opposite, leaning if needed.

    Height draws eyes up, balances the pull. The mirror bounces light, shortens the view.

    People stack shelves full—miss the air. Keep 3-5 items max. Don’t hang mirror too high; eye level widens it.

    Walls feel intentional now. Space flows.

    Step 5: Finish with Layers and Green

    I place the olive tree in a far corner. Cluster vases on shelves—odd numbers, varied heights.

    Layers add depth without clutter. Green softens hard lines.

    Overlook scale—big plants overwhelm. Pick tall but slim. Avoid symmetry; group for lived-in feel.

    I step back. It’s balanced, warm. Ready for meals.

    Handling Color in Tight Spaces

    I stick to warm neutrals on walls—soft beige or light gray. It recedes, opens the length.

    Pair with wood tones on stools and shelves. Keeps it grounded.

    • Test samples in your light—morning vs. evening changes everything.
    • One accent color, like deep green in plants. No more.
    • Matte finishes hide fingerprints best.

    This mix feels clean, not cold.

    Smart Storage Without Clutter

    Vertical shelves hold daily dishes. I limit to what I grab often.

    Pull-out drawers under counters hide extras.

    • Face fronts match—simple wood pulls.
    • Baskets on bottom shelves for linens.
    • No upper cabinets if possible; they close in.

    Space stays open. Grabs are quick.

    Keeping the Flow Daily

    Wipe counters nightly. Dust shelves weekly.

    Rearrange plants monthly—keeps eyes fresh.

    • Vacuum under rug edges.
    • Swap vase fillers seasonally.
    • Check light bulbs quarterly.

    It stays comfortable, not fussy. Lives well.

    Final Thoughts

    Start with one zone. See how it shifts.

    You’ve got this—your kitchen knows its shape.

    Mine feels like home now. Balanced, simple. Yours will too.

  • How to Decor Long Narrow Kitchen Door

    How to Decor Long Narrow Kitchen Door

    I stared at that tall, skinny kitchen door every morning. It cut the room in half, making everything feel squeezed. No matter what I hung nearby, it stuck out like a blank wall.

    One day, I stepped back. The door wasn't the problem. It was how empty space pulled your eye up and down without stopping.

    I've fixed this in my own kitchen. Now it blends in, lets the room breathe.

    How to Decor Long Narrow Kitchen Door

    This shows you how to balance a long narrow kitchen door so it stops dominating the space. You'll end up with a calm flow from hall to kitchen. It's simple changes I make myself—nothing fancy, just right.

    What You’ll Need

    Step 1: Anchor the Bottom Third

    I start low, right at waist height on the door frame. Hooks go there first. Drape a couple tea towels over them. They soften the base without swinging into the path.

    This pulls your eye down, stops that empty climb up the door. Suddenly, the whole thing feels grounded.

    People miss how much the bottom sets the feel—skip it, and it looks top-heavy. Don't overload; two towels max, or it crowds the floor.

    Step 2: Layer Mid-Height with Baskets

    Next, eye level—hang one woven basket off a hook or directly on the frame. Stuff it loose with kitchen linens or dry herbs. It adds warmth right where you notice most.

    The door starts to hug the wall now, not poke out. Balance creeps in.

    Most overlook mid-space texture; smooth walls make narrow doors sharper. Avoid centering it dead-on—offset slightly for flow.

    Step 3: Add a Narrow Shelf at Chest Height

    I mount the narrow shelf just above the basket, off to one side. Set the faux ivy there, letting tendrils drape down a bit.

    Visually, it bridges low and high parts. The door recedes, room feels wider.

    Insight: shelves break vertical lines people ignore. Mistake—don't butt it against the door edge; leave a finger's gap for air.

    Step 4: Hang Vertical Art Above

    Up top, near the header, lean the vertical prints on the picture ledge. Cluster two or three, not perfectly straight.

    Now the full height reads balanced, eye travels smooth across.

    Folks forget tall art matches the door's pull—short pieces fight it. Don't nail them flush; leaning adds depth without commitment.

    Step 5: Step Back and Adjust Layers

    Walk back ten feet. Tug ivy looser, shift a print. Layers settle.

    The space flows now—door's just part of it.

    Key miss: no tweak means stiff look. Avoid even spacing; slight offsets feel lived-in.

    Common Mistakes with Narrow Doors

    I've bumped into these myself.

    • Hanging everything centered—it echoes the door's skinny line.
    • Too many colors; neutrals let the kitchen shine through.

    One tweak fixed mine: mix heights first. Test with paper cutouts. Keeps it calm.

    Pairing with Kitchen Flow

    My kitchen door leads to counters. I match tones—oak shelf with cabinets.

    Think path: nothing juts into walk space.

    • Offsets for traffic.
    • Low elements ground steps.

    It connects hall to cooking without snag.

    Quick Updates for Seasons

    Twice a year, I swap.

    Fall: dried wheat in basket.

    Summer: fresh linen colors.

    Keeps it fresh, not fussy. One swap per season max.

    Final Thoughts

    Start with just the hooks and towels. See how it grounds things.

    You've got this—small layers build quiet balance.

    My kitchen door's quiet now. Yours can be too. Just live with it a week.

  • How To Style Dark Kitchen Cabinets For A Designer Look

    How To Style Dark Kitchen Cabinets For A Designer Look

    I used to love dark cabinets until my kitchen felt heavy and gloomy. I’d stare at the room and not know where to start.

    Small choices made it look unfinished, like a missing design layer.

    This guide shows how to style dark kitchen cabinets so they read designed, not cavernous.

    How To Style Dark Kitchen Cabinets For A Designer Look

    This is the method I use every time a dark cabinet scheme feels flat. You’ll learn simple layering—contrast, metal, wood, and open space—so cabinets read intentional and designer-made, not heavy or unfinished.

    What You’ll Need

    Step 1: Add a light anchor to break up the darkness

    I start by introducing a light anchor—usually a white or marble-look tray—on the countertop. I place it where the eye rests, near the sink or stove, so the dark plane has a bright moment.

    Visually, the kitchen stops reading as one heavy block and gains a focal point. The cabinets instantly feel intentional because the eye has contrast to land on.

    People often miss scale: the tray should be proportionate to the counter run. Avoid overcrowding the tray; a plant, a small bowl, and one board is enough.

    Step 2: Choose warm metals and repeat them

    I swap or add hardware in a warm metal—brass or aged gold—so the dark surface reads warm instead of flat. I repeat that metal across pulls, faucets, and a light fixture when I can.

    What changes visually is rhythm: the metal ties disparate surfaces together and feels purposeful. It makes the cabinets look specified, not random.

    One insight I rely on is restraint: using the same metal in two or three spots is enough. Don’t mix four finishes; that’s the common mistake. Keep it simple and repeated.

    Step 3: Soften with wood and woven textures

    I layer in warm wood and a woven basket to soften the cabinets. I lean a cutting board against the backsplash, add a seagrass basket under an open shelf, and drape a linen towel over a rail.

    Visually, wood warms the composition and woven textures add a lived-in softness. The cabinets no longer dominate; they sit within a tactile story.

    People often forget scale: pick boards and baskets that echo the cabinet proportions. A mistake I see is adding too many small items—one large board reads better than three tiny ones.

    Step 4: Create breathing room with curated counters and open space

    I clear most countertops and curate small groups instead. I leave stretches of counter empty so the eye can rest. The curated group sits on the tray or a corner so it reads intentional.

    This stage visually introduces rhythm and balance. The dark cabinetry benefits from these pockets of negative space—they make the color feel deliberate instead of overwhelming.

    One insight: less is more. People often style every inch and end up cluttered. Avoid filling horizontal space just because it’s available.

    Step 5: Add layered light and a living touch

    I finish with layered light and greenery. I add a black matte or brass sconce for warmth and place a small potted plant where it catches morning light.

    Visually, the lighting brings depth and shows off the cabinet finish. The plant adds life and softens edges. Together they make the space feel comfortable and deliberate.

    Most people underestimate how lighting changes perception. The small mistake to avoid is relying solely on overhead light—layered sources give dimension.

    Mixing Metals Without Chaos

    I keep metals in a simple hierarchy: one primary metal, one supporting finish, and occasional black or chrome accents. That keeps the dark cabinets grounded.

    • Primary: pulls or faucet (choose warm or cool)
    • Supporting: light fixtures or drinkware
    • Avoid more than three finishes in sight

    Keeping It Lived-In, Not Staged

    I leave small signs of daily life: a tea towel, a well-used cutting board, a bowl of lemons. It reads finished without being brittle.

    Rotate items seasonally. Swap a plant for a bowl of oranges in winter. These tiny shifts keep the room feeling current and cozy.

    Quick Styling Refreshes That Work

    When I want a fast update, I change the hardware, swap in a lighter tray, or add one new plant. These moves give immediate impact.

    • Hardware swap: biggest visual shift
    • One new texture: linen or seagrass
    • Adjust lighting: add a small sconce or under-cabinet lamp

    Final Thoughts

    Start with one change.

    Swap the hardware or add a light countertop vignette. I find a small marble tray, a plant, and a wooden board calms the mood and makes the cabinets feel planned.

    Take it slow. You’ll end up with a kitchen that feels intentional and comfortable, not heavy or fussy.

  • 24 Stunning Dark Kitchen Cabinets Ideas For A Modern Home

    24 Stunning Dark Kitchen Cabinets Ideas For A Modern Home

    I finally stopped being afraid of dark cabinets. They made the kitchen feel anchored, not heavy.

    I learned to balance them with light counters, warm wood, and the right lighting.

    These choices grew from mistakes — wrong pulls, glossy paint, too-small rugs — and from living with what actually works.

    24 Stunning Dark Kitchen Cabinets Ideas For A Modern Home

    These 24 ideas are hands-on, lived-in approaches for dark kitchen cabinets.

    They show finishes, hardware, color pairings, and lighting that I actually used.

    Follow along — there’s a practical option for small and large kitchens alike.

    1. Matte Black Cabinets with Warm Wood Open Shelves

    I painted my lower cabinets matte black and added oak floating shelves above the sink. I love that the shelves warm the space and keep things within reach.

    At first I overstuffed them and it looked cluttered. I edited down to cookbooks, a couple of bowls, and herbs.

    Visually, the mix reads modern and cozy. Keep shelf spacing even and show a few objects at different heights.

    What You’ll Need for This Look

    2. Deep Green Cabinets with Brass Pulls and Marble Counters

    I went with a deep hunter green for all lower cabinetry and added brass pulls. The marble counters keep things light and feel luxurious without being showy.

    My first mistake was cheap drawer pulls that tarnished quickly. I replaced them with solid brass and the room felt finished.

    Pay attention to undertones — choose a green that reads warm if you have wood floors. The brass and marble brighten the palette.

    What You’ll Need for This Look

    3. Navy Islands with Black Perimeter Cabinets

    I painted my island a deep navy while keeping perimeter cabinets a matte black. The island becomes a focal point instead of everything disappearing into one dark plane.

    People assume dark equals small, but the navy breaks up the mass and adds personality.

    Use stools with lighter wood seats to create contrast. Keep the island hardware slightly different so it reads intentional.

    What You’ll Need for This Look

    4. Dark Wood Cabinets with White Subway Backsplash

    I lived with dark-stained wood cabinets for years and finally added a classic white subway backsplash. The tile gave the room instant brightness and rescued a heavy feel.

    I originally chose a high-gloss grout that looked dingy fast. Switching to a clean white matte grout made maintenance easier.

    This combo is timeless. Keep countertop edges simple and don’t over-accessorize the backsplash.

    What You’ll Need for This Look

    5. Black Cabinets with Warm Brass Lighting

    I swapped in warm brass pendants above the island and the black cabinets stopped feeling cold. The brass reflects light and adds a lived-in warmth.

    Keep the pendants proportionate—small fixtures disappear, oversized ones overpower.

    I like one warm metal as an accent; too many finishes fight. Brass worked with my wood floors and white counters.

    What You’ll Need for This Look

    6. Two-Tone Cabinets: Dark Base, Light Upper Cabinets

    I painted my lowers a charcoal and chose creamy uppers. The room immediately felt taller and less heavy.

    My mistake was matching white that clashed with older trim. I repainted the trim to a warm white and everything harmonized.

    This approach keeps drama low while keeping visual balance. Use consistent hardware to tie both colors together.

    What You’ll Need for This Look

    7. Dark Blue Cabinets with Patterned Rug Anchor

    I added a long patterned rug in front of my dark blue cabinets and it changed the kitchen’s energy. The rug adds texture and keeps my feet warm on cold mornings.

    Pick a rug that tolerates spills and has a low pile. I traded a delicate runner for an indoor-outdoor style after one too many stains.

    Let the rug pick up accent colors from towels or dishes for a cohesive look.

    What You’ll Need for This Look

    8. Black Cabinets with Brass Faucet and Accessories

    I installed a brass faucet against black lower cabinets and a white sink. The metallic accents made daily tasks feel a little nicer.

    I once bought a faucet that didn’t match my other brass. It had a different undertone and looked off. Test finishes together before buying.

    Brass warms black without making it flashy. Add a matching soap dispenser and towel ring for cohesion.

    What You’ll Need for This Look

    9. Dark Cabinets with Warm Wood Countertops

    I switched from cool stone to butcher block on my island and the dark cabinets felt friendlier overnight. Wood introduces warmth and shows less smudging.

    You do need to maintain it with oiling; I neglected it at first and learned to sand and oil annually.

    Butcher block works well with black or deep blue cabinets. Keep prep space sealed where you cut.

    What You’ll Need for This Look

    10. Integrated Open Shelving with Dark Cabinets

    I removed a couple of upper doors and installed open shelving between dark cabinets. It makes the kitchen feel lighter and gives me a place for everyday plates.

    My rookie move was over-styling the shelves. Real homes need function — I kept stackable bowls and everyday mugs front and center.

    Use a couple of baskets or bins on the lower shelf to hide clutter. Open shelving is beautiful but only if edited.

    What You’ll Need for This Look

    11. Dark Cabinets with White Shaker Uppers

    I paired dark lower cabinets with white shaker upper cabinets for a clean, modern look. It made my kitchen feel airy while keeping a grounded base.

    The contrast draws the eye up and highlights molding and trim. I added simple stainless pulls to keep it neutral.

    This combo works especially well in open-plan homes where the kitchen meets a light living room.

    What You’ll Need for This Look

    12. Dark Green Cabinets Paired with Terracotta Accents

    I loved the moody green but felt it needed earth. Terracotta pots and wooden boards did the trick.

    At first I used too many orange-toned items and it felt autumnal year-round. I swapped to muted terracotta and warm wood for balance.

    The greens read more modern with natural accents. Bring in a woven towel or clay vase and it feels collected.

    What You’ll Need for This Look

    13. Black Cabinets with White Marble and Brass Trim

    I layered black cabinetry with white marble counters and a thin brass trim on drawer edges. It looks curated but still lived-in.

    The marble brightens the surface, while brass lines feel intentional. I kept accessories minimal so the materials sing.

    If your marble has veining, let it be the star and pair with simple linens.

    What You’ll Need for This Look

    14. Dark Cabinets with Integrated Appliance Panels

    I paneled my fridge and dishwasher to match the dark cabinets. It made the kitchen read as a piece of furniture.

    My early fridge panel didn’t align perfectly and I learned to confirm hinge placement before ordering. Fit matters here.

    Integrated panels minimize visual clutter. If you entertain often, this creates a calm backdrop.

    What You’ll Need for This Look

    15. Dark Cabinets with Glass-Front Upper Cabinets

    I replaced some upper doors with glass-front ones to lighten the visual weight. It’s a chance to display favorite dishes.

    I made the mistake of showing every dish. Editing to a curated set made the space feel intentional.

    Use warm interior cabinet lighting to highlight the glass and add a glow in the evening.

    What You’ll Need for This Look

    16. Dark Cabinets with Light Grout and Tile Pattern

    I used a patterned tile with light grout behind a dark cabinet run. The tile lifts the whole wall and reads fresh.

    I once chose a grout that stained and regretted it. Picking a durable, slightly darker grout than pure white saved me headaches.

    Patterns add personality but don’t overwhelm if kept to the backsplash area only.

    What You’ll Need for This Look

    17. Dark Cabinets with Warm Wood Flooring Contrast

    I paired dark cabinets with warm oak floors and it grounded the kitchen beautifully. The wood grain keeps the space from feeling flat.

    If your floors are cool-toned, add a warm runner to bridge the temperature difference. I swapped in a rug to get the balance right.

    The contrast reads intentional and comfortable, and it hides scuffs better than pale floors.

    What You’ll Need for This Look

    18. Dark Cabinets with Brass Open Shelf Brackets

    I swapped black brackets for brass on open shelves and the tiny change made the shelving feel coordinated with my faucets and lights.

    At first I mixed finishes and it looked messy. Keeping the metal family consistent cleared visual noise.

    Brass brackets are small but punchy — they repeat the warm metal and make styling feel deliberate.

    What You’ll Need for This Look

    19. Dark Cabinets with Soft Linen Window Treatments

    I added airy linen curtains to the kitchen window near my dark cabinets. The soft fabric eased the contrast and added a domestic touch.

    Choose washable linens — kitchens are messy and I learned the hard way with dry-clean-only panels.

    Light-filtering linen gives privacy without heavy darkness. It makes the space feel edited and lived-in.

    What You’ll Need for This Look

    20. Dark Cabinets with Under-Cabinet Lighting Strips

    I installed LED under-cabinet lighting and it made dark cabinets functional at night. Tasks become easier and the countertop gains depth.

    My initial strip was too blue and made food look odd. I swapped to warm 2700K LEDs, which look natural with wood and brass.

    Choose dimmable strips so you can set the mood for evening.

    What You’ll Need for This Look

    21. Dark Cabinets with Warm Metal Mixed Accents

    I used a mix of brass and black metal accessories to layer interest against my dark cabinets. Mixing metals felt risky but looks collected when done sparingly.

    My tip: pick a dominant metal (mine was brass) and use darker metals as secondary accents.

    This keeps the look curated instead of chaotic. Small switches like a black utensil holder with brass spoons balance the scheme.

    What You’ll Need for This Look

    22. Dark Cabinets with Tall Pantry Styling

    I organized a tall pantry within dark cabinets using glass jars and labeled baskets. It feels calm and helps me shop less.

    I once tried clear plastic bins and they looked messy. Glass jars and matching labels make everything feel intentional.

    Group like items and keep daily snacks at kid-friendly height. A small step stool fits neatly inside the pantry.

    What You’ll Need for This Look

    23. Dark Cabinets with Statement Black Sink and Matte Fixtures

    I chose a matte black sink to sit against my dark lower cabinets. It reads modern and hides wear better than stainless.

    Early on I regretted a sink that scratched easily. I switched to a durable composite matte sink and it looks newer longer.

    Pair black fixtures with lighter countertops so the sink silhouette reads crisp.

    What You’ll Need for This Look

    24. Dark Cabinets with Curated Wall Art and Functional Hooks

    I used a small wall next to my dark cabinets for framed art and brass hooks for aprons. It makes the kitchen feel personal, not like a showroom.

    I once hung too many frames and it read cluttered. I pared back to two frames and a hook — simple and useful.

    Art brings warmth to dark cabinets. Pick pieces that reflect your everyday life.

    What You’ll Need for This Look

    Final Thoughts

    Dark kitchen cabinets can feel bold without being fussy. I learned to balance them with light surfaces, warm metals, and practical storage.

    You don’t need to copy everything. Pick one or two ideas here and live with them for a month.

    Start small, tweak as you go, and choose materials that will age well in real life.

  • 27 Trendy Black Kitchen Cabinet Trends To Refresh Your Space

    27 Trendy Black Kitchen Cabinet Trends To Refresh Your Space

    I finally stopped treating kitchen cabinets like a design experiment and started thinking about how we actually cook and live here.

    Painting our lower cabinets black was the turning point. It hid smudges and somehow made the whole room feel anchored.

    These ideas are from living with real pots, kids’ homework, and too much coffee. I’ll tell you what worked and what I returned.

    27 Trendy Black Kitchen Cabinet Trends To Refresh Your Space

    These 27 ideas are practical, lived-in ways to use black cabinets in real kitchens.

    I include lighting, hardware, paint, and styling tips you can actually buy and use.

    1. Matte Black Lower Cabinets with Warm Wood Island

    I painted our lower cabinets matte black and left the island in warm wood. The contrast grounded the space and hid scuffs where the kids sit.

    At first I picked satin paint and regretted it—glossier finishes show every fingerprint. Matte read as richer and more forgiving.

    Visually, the wood island keeps things cozy. The kitchen stopped feeling cold and started feeling lived-in.

    What You’ll Need for This Look

    2. Two-Tone: Black Base, White Upper Cabinets

    I switched to black lowers and white uppers to keep the room light. It’s practical—dirt we touch most is on lower cabinets.

    I underestimated how much trim paint would matter; getting a true white with warm undertones fixed a cool, sterile look.

    The result felt modern but still familiar. It’s a safe way to adopt black without losing brightness.

    What You’ll Need for This Look

    3. Black Cabinets with Brass Hardware

    I swapped cheap knobs for brass pulls and it felt like a small splurge that paid off. Brass warms black in a way chrome never did.

    I initially chose bright polished brass and it read too new. Brushed or aged brass felt more relaxed and blended with our wood tones.

    Hardware changed how I reached for drawers—it made the kitchen feel intentional, not afterthought.

    What You’ll Need for This Look

    4. Black Shaker Cabinets for a Modern-Farmhouse Feel

    I chose shaker doors in black to get a modern-farmhouse vibe without being too trendy. The paneling creates shadow and depth that flat doors don’t.

    My mistake was buying shallow shaker profiles that looked toy-like. A deeper profile reads more substantial and real.

    Shaker black feels timeless in my house. It’s clean but cozy when paired with open shelving or wood accents.

    What You’ll Need for This Look

    5. Mix Black Cabinets with Marble Countertops

    We paired our black cabinets with a marble-look countertop to keep things bright. The veining plays nicely against the dark paint.

    I chipped a slab edge by mistake and learned to handle samples carefully. Choose a honed finish if you cook a lot—less glare, fewer worries.

    Marble makes black feel elegant and intentional, not just dark.

    What You’ll Need for This Look

    6. Black Cabinets with Open Wood Shelving

    I opened up a section above the sink and installed wood shelves over black cabinets. It broke the heaviness and added everyday display space.

    I tried floating shelves too thin; they sagged under plates. Thicker, solid wood shelves were more forgiving and looked homemade in a good way.

    Open shelves forced me to tidy a bit more, but the payoff is a warmer, more personal kitchen.

    What You’ll Need for This Look

    7. Black Cabinets with Brass Faucet and Sink Fixtures

    I replaced our chrome faucet with a brass one and it instantly softened the black below. The combo feels curated and a little old-house.

    I ordered the wrong finish (too yellow) the first time. Brushed or satin brass reads better and hides water spots.

    Brass hardware and fixtures together create continuity that makes black cabinets feel warm, not stark.

    What You’ll Need for This Look

    8. Satin Black for a Slight Sheen That Cleans Easier

    I used satin black paint in our laundry-adjacent kitchen where fingerprints are constant. It hides smudges but reads richer than high-gloss.

    My early test swatches included a flat finish that showed marks. Satin was the compromise—easier to wipe but not shiny.

    Satin black feels modern and practical, especially if you’re not repainting yearly.

    What You’ll Need for This Look

    9. Black Cabinets with Patterned Tile Backsplash

    I added a patterned tile backsplash to break up the black field. Pattern brings personality and gives me something to stare at while washing dishes.

    I picked a tile with busy grout and regretted the extra scrubbing. Choosing a simple grout color made maintenance easier.

    Patterned tile made our black cabinets feel playful and intentional without changing the whole kitchen.

    What You’ll Need for This Look

    10. Black Cabinets Framed by Floor-to-Ceiling Windows

    Our kitchen has big windows and black cabinets read less heavy with all that light. Natural light is your best partner with dark finishes.

    I once painted a dark kitchen with small windows black and regretted it. Light or lighter counters prevent a cave feeling.

    If you have good light, black feels dramatic and cozy at once.

    What You’ll Need for This Look

    11. Full Black Cabinets for a Moody, Cohesive Look

    I tried full-wall black cabinets when my partner wanted moody. It can work if you keep countertops light and add warm wood or brass.

    My mistake: I used only cool materials and the room felt too cold. Bringing in wood and plants balanced it.

    Full black can read luxurious and calm if you commit to texture and warmth.

    What You’ll Need for This Look

    12. Black Cabinets with Integrated Lighting

    Adding under-cabinet lighting changed how I used the kitchen at night. Warm LEDs brought out wood tones against the black.

    I first installed cold white LEDs and hated the clinical feel. Swapping to warm temperature made everything feel like evening, not a lab.

    Integrated lighting makes black more usable and visually softer.

    What You’ll Need for This Look

    13. Black Cabinets with Glass Door Inserts

    I swapped a few upper doors for glass fronts to break up the black and give display space for favorite dishes.

    First I loaded them with mismatched mugs and it looked cluttered. Editing to a few curated pieces made the glass look intentional.

    Glass doors add depth and let light bounce around, so black feels less solid.

    What You’ll Need for This Look

    14. Black Cabinets with Brass Open Shelving Brackets

    I added brass brackets to open shelves and the hardware tied back to cabinet pulls. It felt cohesive and a little curated.

    I tried mismatched brackets and it looked scattershot. Matching metal finishes anchors the look.

    Brass brackets against black read purposeful and hand-made.

    What You’ll Need for This Look

    15. Black Cabinets with Leather Pulls for a Soft Touch

    I installed leather strap pulls on a few drawers to soften the black and add tactile warmth. They’re unexpectedly practical.

    I ordered super-thin leather and it frayed quickly. Thicker straps lasted and got better with age.

    Leather pulls make black feel approachable and worn-in, like an old favorite.

    What You’ll Need for This Look

    16. Black Cabinets Paired with Warm Terracotta Tiles

    We added terracotta floor tiles to offset black lower cabinets. The warmth is instant and hides crumbs.

    I initially tried a pale tile and it read too cool. Terracotta made the whole space feel more lived-in and cozy.

    It’s a confident pairing that feels earthy, not trendy.

    What You’ll Need for This Look

    17. Black Cabinets with Wood Slab Doors for Modern Warmth

    I used wood slab doors on the island against black perimeter cabinets for a modern yet warm mix. It felt balanced and less fussy.

    My first wood was too yellow. Choosing a medium, neutral wood tone solved the mismatch.

    Slab wood breaks up the black while keeping lines simple and modern.

    What You’ll Need for This Look

    18. Black Cabinets with Matte Black Appliances for Cohesion

    We matched matte black appliances to our cabinets to create a calm, unified wall. It’s subtle and makes the kitchen read like a piece of furniture.

    I once mixed stainless and black appliances and it felt disjointed. Consistency made the space feel intentional.

    Matte black appliances don’t scream trend—they quietly blend in.

    What You’ll Need for This Look

    19. Black Cabinets with Open Pot Racks and Hooks

    I hung pots on a rack above black cabinets. It made reaching for pans effortless and looked like the kitchen was used, not staged.

    I overpacked hooks at first and it read cluttered. Spacing matters—let pieces breathe.

    A pot rack makes black feel functional and homey.

    What You’ll Need for This Look

    20. Black Cabinets with Soft Textiles and Rugs

    I added a runner to soften the floor in front of black cabinets. Textiles warm the palette and collect crumbs where I can sweep them easily.

    I bought a delicate rug that stained. Choose a durable, washable material for a busy kitchen.

    A rug makes black cabinets feel comfortable, not formal.

    What You’ll Need for This Look

    21. Black Cabinets with Warm Pendant Lighting

    I added warm pendant lights over the island. Lighting is the jewelry for dark cabinets—it can make or break the mood.

    I installed pendants that were too small and they disappeared. Bigger scale pendants gave presence and coziness.

    Pendant lighting makes black feel curated and evening-friendly.

    What You’ll Need for This Look

    22. Black Cabinets with Minimalist Open Storage

    I pared down to a few open cubbies to keep essentials visible. Minimal open storage against black feels modern and accessible.

    I once used too many open shelves and it looked messy. Limiting what you display keeps it calm.

    Minimal open storage keeps black cabinets from visual overload.

    What You’ll Need for This Look

    23. Black Cabinets with Integrated Wine Store

    We added a wine nook into our black cabinetry and it became the room’s cozy corner. The contrast of wood racks and black fronts is quietly elegant.

    I tried vertical racks that wasted space. Horizontal racks use depth better and keep bottles accessible.

    A wine store nook makes black cabinets feel custom and personal.

    What You’ll Need for This Look

    24. Black Cabinets with Contrasting White Grout on Tile

    I used white grout with subway tile behind black cabinets for crisp contrast. It reads graphic and clean.

    At first I picked gray grout to hide dirt, but it dulled the tile. If you like graphic contrast, white grout pops.

    This look feels fresh and architectural next to dark cabinets.

    What You’ll Need for This Look

    25. Black Cabinets with Warm Open Display for Cookbooks

    I carved a little open display for cookbooks into the black run. It adds personality and a human touch to an otherwise sleek wall.

    I made the shelf too shallow at first so books leaned awkwardly. Deeper shelves solved that and handle daily use.

    A small cookbook nook makes black feel like home, not a show kitchen.

    What You’ll Need for This Look

    26. Black Cabinets with Mixed Metals for Interest

    I layered brass, black, and stainless accents across the kitchen. The mix felt risky but it created a collected look.

    I overdid shiny metals initially. Tonal finishes in matte or brushed textures read better together.

    Mixed metals keep black interesting without feeling chaotic when balanced.

    What You’ll Need for This Look

    27. Black Cabinets with Green Houseplants for Life

    I never realized how much plants soften black until I filled the sill with herbs and a trailing pothos. Green and black is simple and lively.

    I lost a few plants early from bad light and blamed the color. The plants that survived were low-light tolerant and forgiving.

    Plants bring motion and oxygen to a space; with black cabinets they read fresh and real.

    What You’ll Need for This Look

    Final Thoughts

    Black kitchen cabinet trends are flexible. You don’t need to do everything here.

    Pick one or two moves—hardware, lighting, or a wood contrast—and live with them for a while.

    Small, honest changes make a kitchen feel like yours, not a showroom.