Author: Clara Bennett

  • 27 Geometric Mirror Layout Ideas That Feel Bold & Artistic

    27 Geometric Mirror Layout Ideas That Feel Bold & Artistic


    Geometric mirrors aren’t just reflective surfaces—they’re bold art pieces that command attention and reshape how light moves through your space. Whether you’re drawn to sharp angles, perfect circles with layered details, or dramatic sunburst patterns, geometric designs work harder than traditional round or rectangular mirrors. They anchor a room’s style, amplify natural light in unexpected ways, and make small spaces feel bigger without screaming “I need help.” If you’ve felt stuck staring at the same boring mirror, these 27 ideas will show you exactly how to swap it out for something that actually reflects your personality. From budget-friendly DIY projects to investment-worthy statement pieces, you’ll find ideas you can start this weekend—no design degree required.


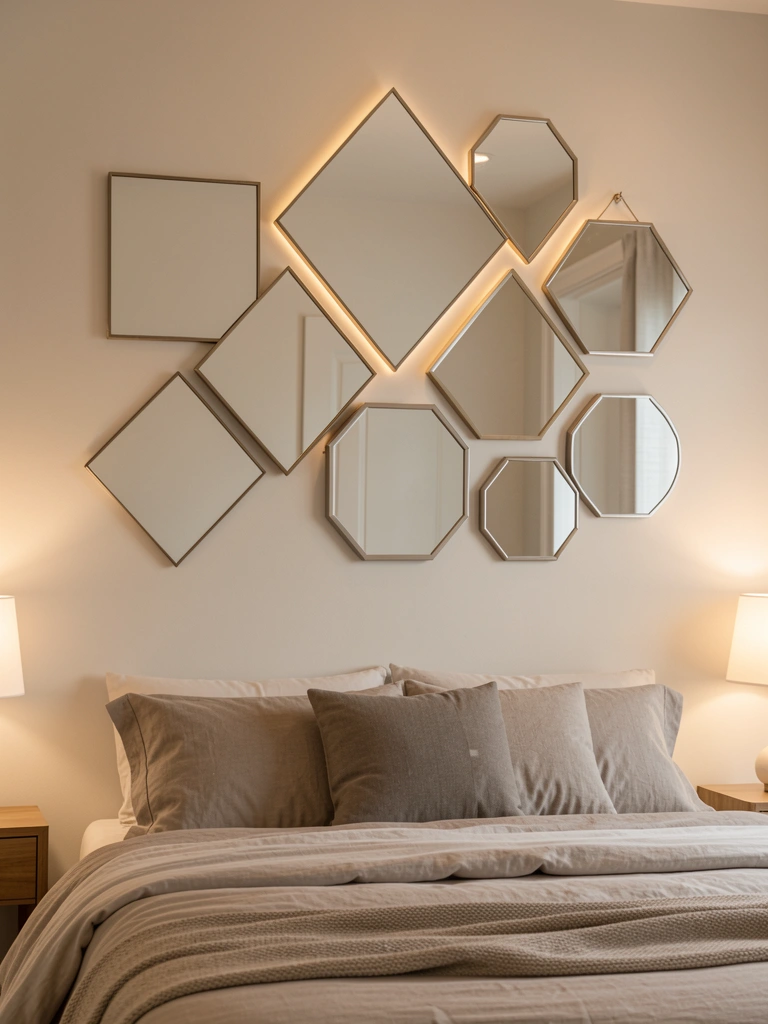
    1. Layer Geometric Mirrors in an Entryway Cluster

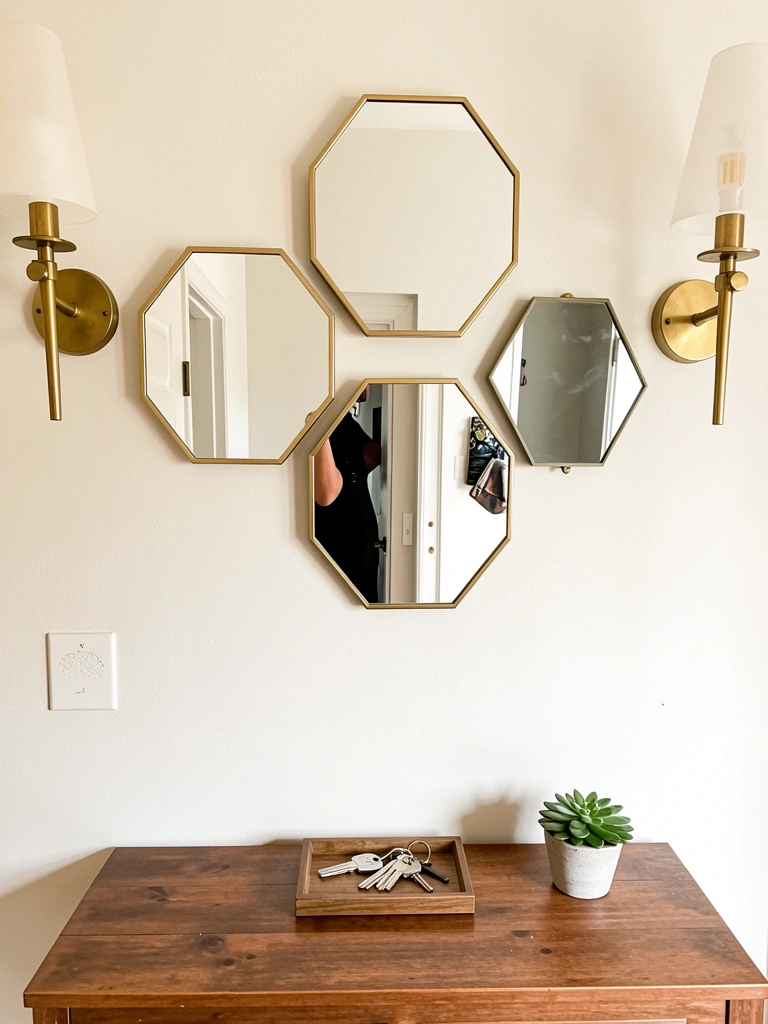
    Creating a mirror cluster in your entryway makes an immediate style statement and bounces light deeper into your home. Mix mirror shapes—hexagons, octagons, diamonds—at varied heights to create visual rhythm without feeling chaotic.

    Start by measuring your wall space and sketching positions in light pencil. Buy frameless geometric mirrors in brass or matte black ($30–$120 each from IKEA, Target, or Wayfair). Arrange them in an asymmetrical triangle pattern, leaving 3–4 inches between pieces. Use picture hanging strips or wall anchors rated for glass weight. Install hardware within 30 minutes.

    Pro tip: Use mirrors with slightly different depths to add dimension—shallower frameless mirrors mixed with beveled-edge options create a gallery feel. The best part? You get an entryway that actually serves double duty: functional (checking your appearance) and artistic (a real focal point).


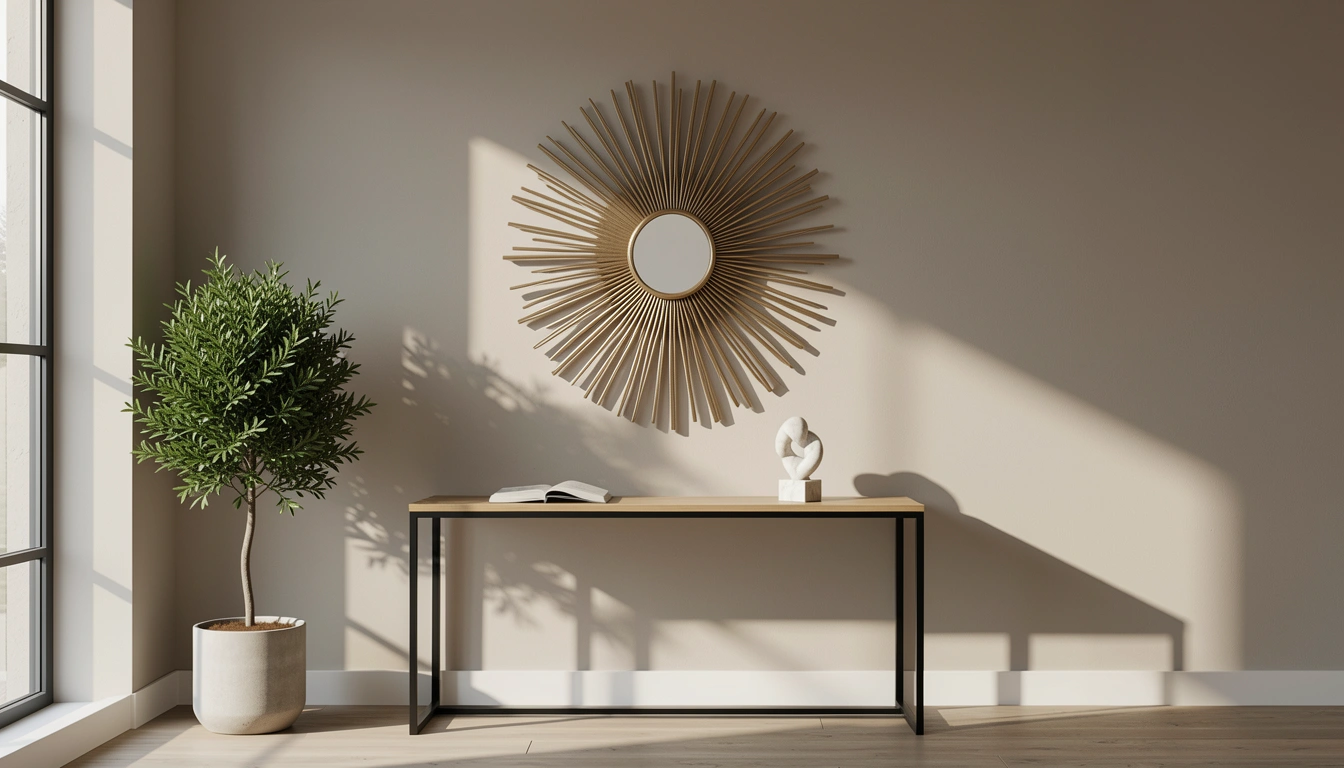
    2. Create a Sunburst Accent Wall Above a Console

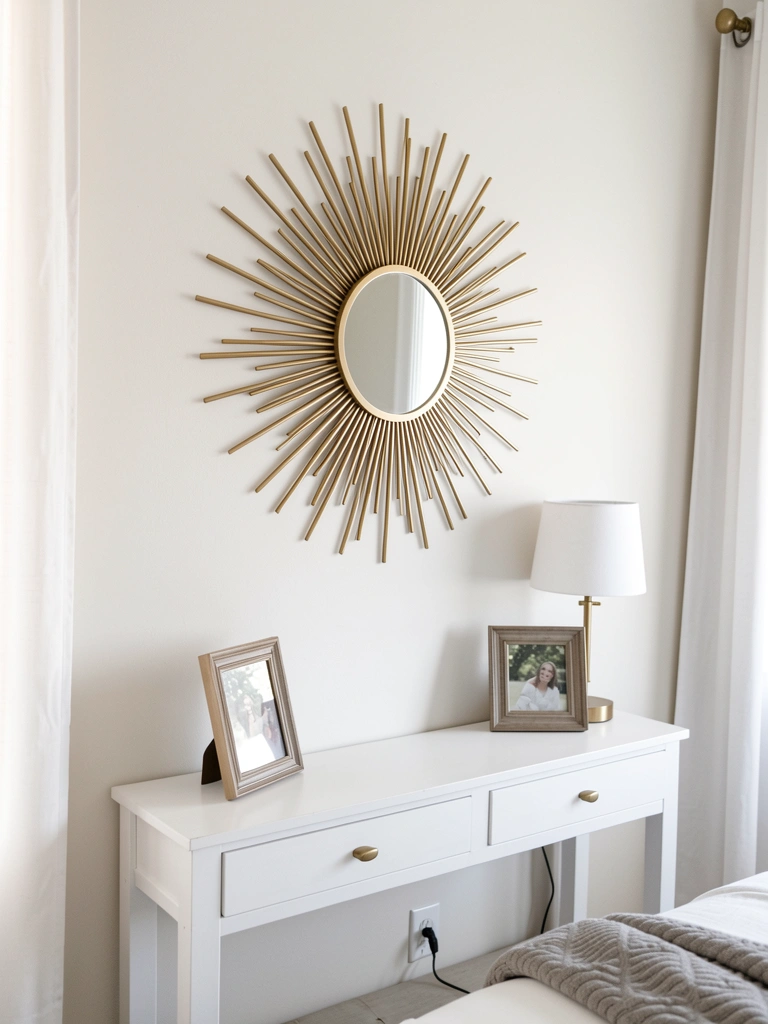
    A sunburst mirror becomes your room’s centerpiece—think of it as wall art that also reflects light. It draws the eye upward and makes ceilings feel higher.

    Purchase a sunburst mirror with trapezoid or rounded rays ($80–$300 depending on size and material; Large Sun Mirror brand offers quality options, or search Wayfair and Amazon). Position it 12–18 inches above a console, dresser, or floating shelf for proportional balance. Mount using heavy-duty picture hooks or a French cleat system. Installation takes 20–30 minutes if you’re using a stud finder first.

    The catch: these mirrors are heavy, so verify wall anchors are rated for the weight. Your space now has a focal point that photographs beautifully and catches morning or evening light, casting geometric shadows across your wall throughout the day.


    3. Use a Geometric Grid Mirror Pattern for Small Spaces

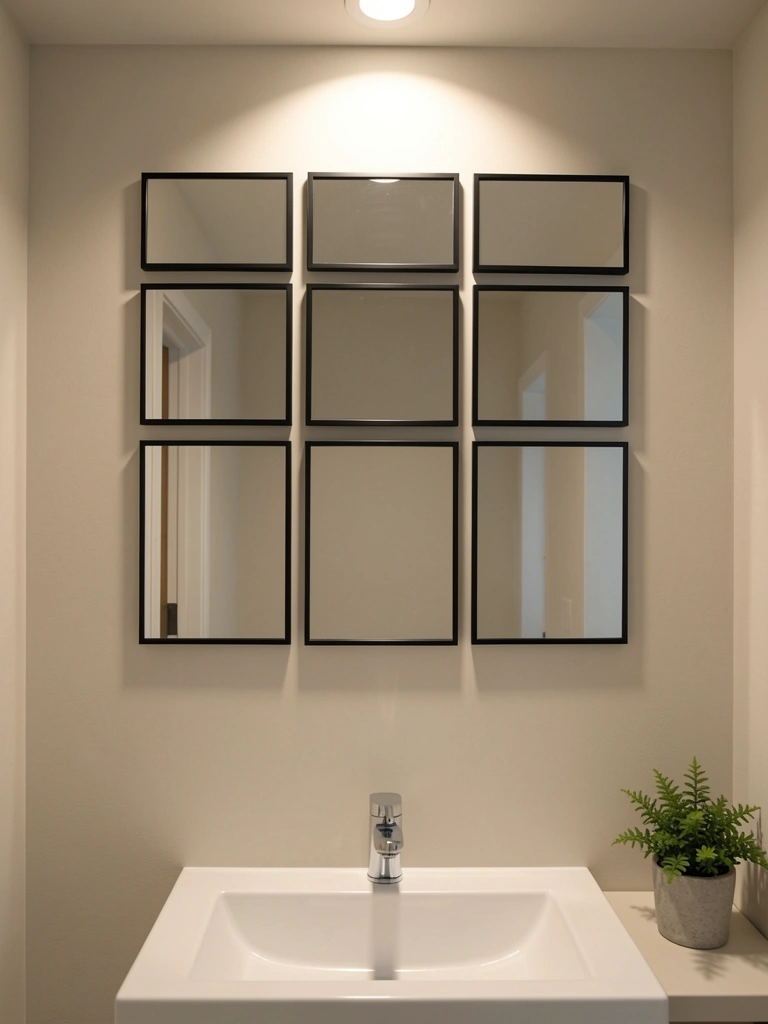
    A grid of smaller geometric mirrors creates the illusion of more space while keeping costs manageable. It’s a smart move for renters or anyone hesitant about committing to one massive piece.

    Buy 6–9 small framed geometric mirrors (squares, diamonds, or hexagons) at $15–$40 each from IKEA, Target, or affordable brands like Wayfair. Arrange them in a grid (2×3 or 3×3) with equal spacing—use painter’s tape to map positions before drilling. Install each within an hour using basic picture hangers. Leave 2–3 inches between frames for visual breathing room.

    Here’s the flexibility: you can add mirrors gradually over time or rearrange them if you redecorate. The collective reflection amplifies light and opens up tight bathrooms or narrow hallways without needing one statement piece. Small changes add up when they’re part of a unified design.


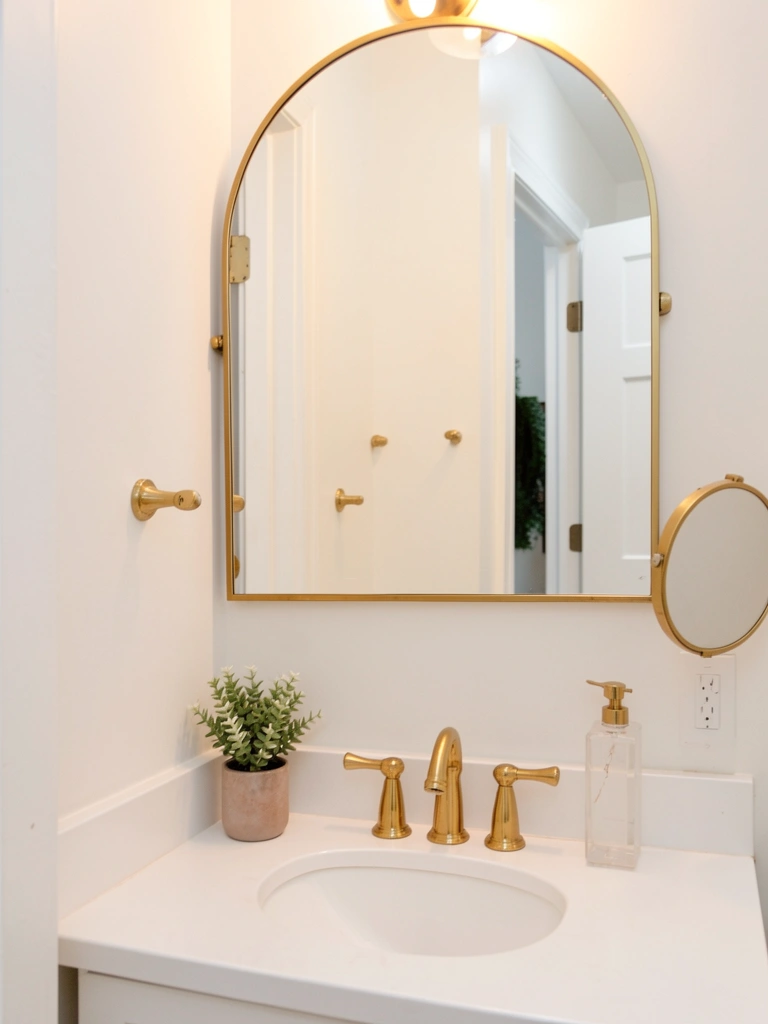
    4. Install a Trapezoidal Asymmetrical Mirror Over a Vanity

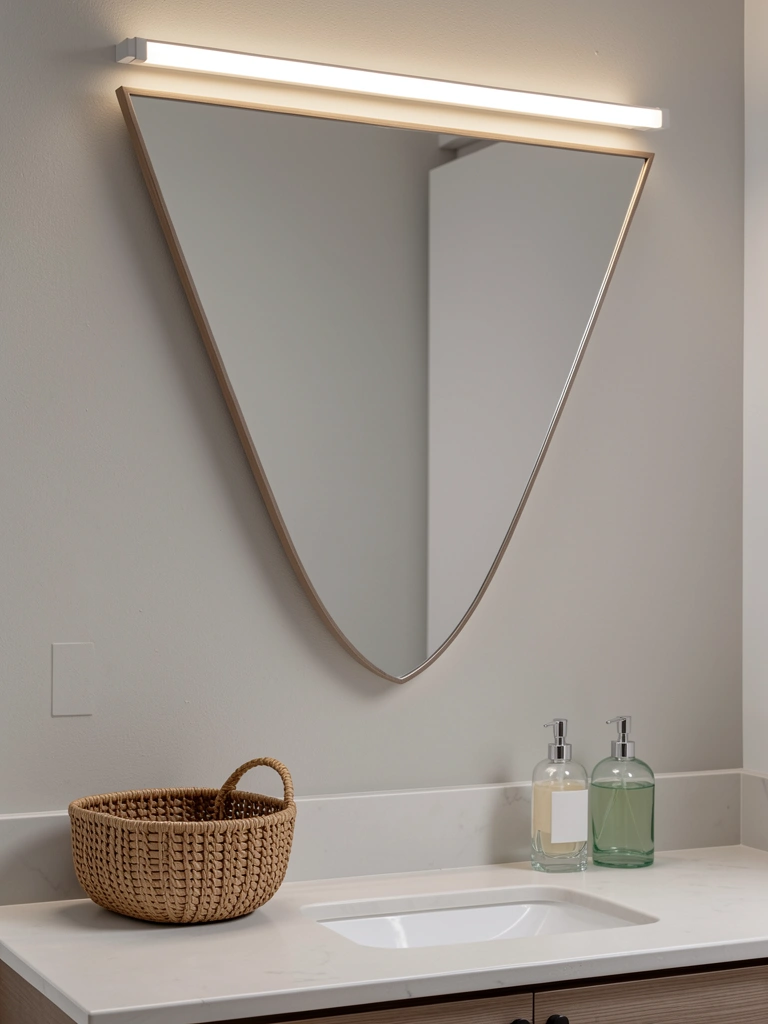
    An asymmetrical trapezoidal mirror brings modern edge to traditional vanity setups—it’s unexpected without being chaotic. The angled shape draws your eye and suits eclectic or contemporary bathrooms perfectly.

    Search for asymmetrical geometric mirrors on Wayfair, Article, or Design Within Reach ($100–$400 for quality frames). Choose matte black, brass, or natural wood finishes to match your style. Mount it 5–6 feet from the floor using a French cleat for easy adjustments. Pair it with LED strip lighting above or beside the frame for even facial illumination.

    Installation takes 30–45 minutes if you use a level and stud finder. The wider-top design reflects more of your upper face and surroundings, making the vanity area feel intentional and designer-curated. Plus, the unusual shape photographs better for your social media than predictable rectangles.


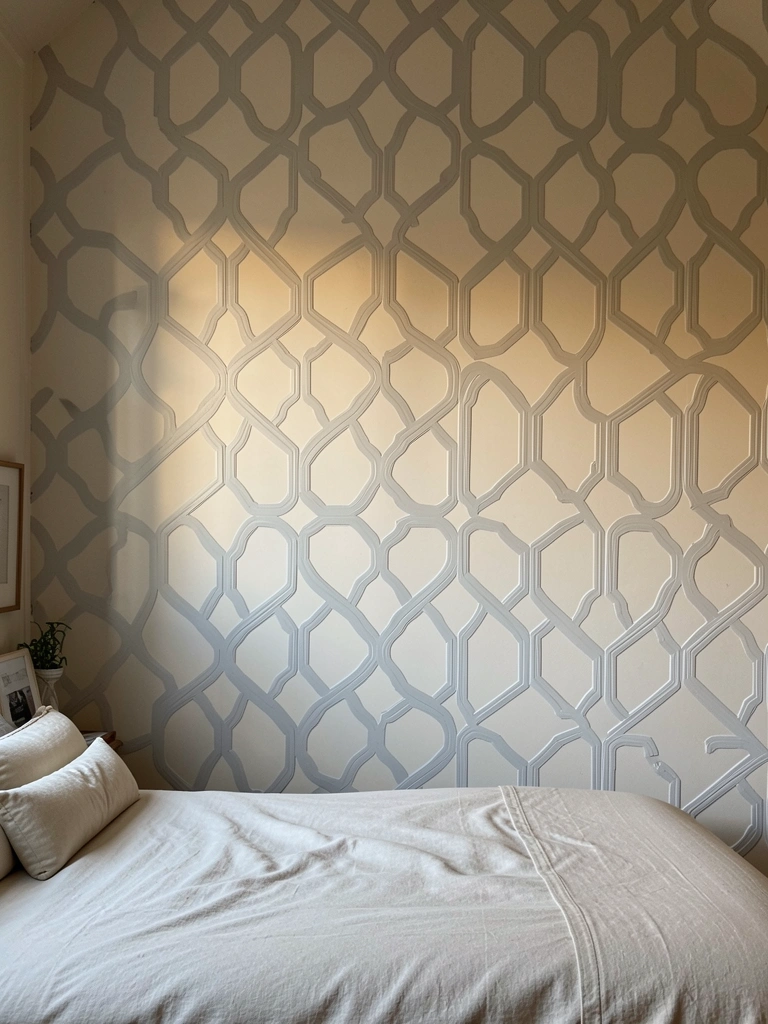
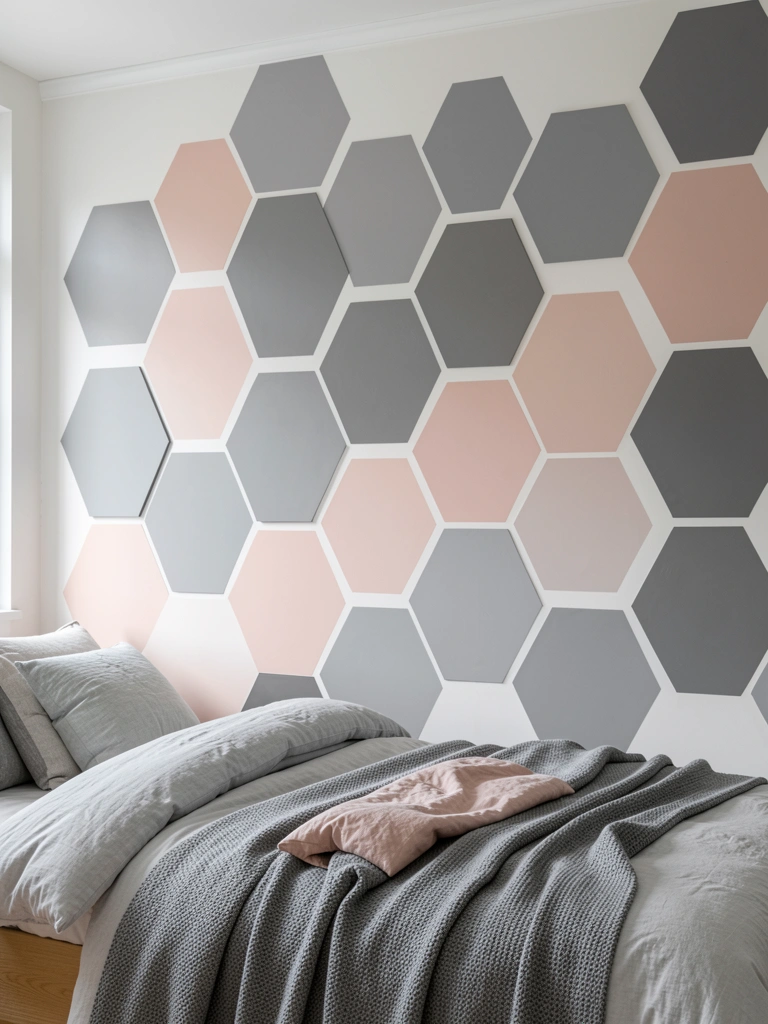
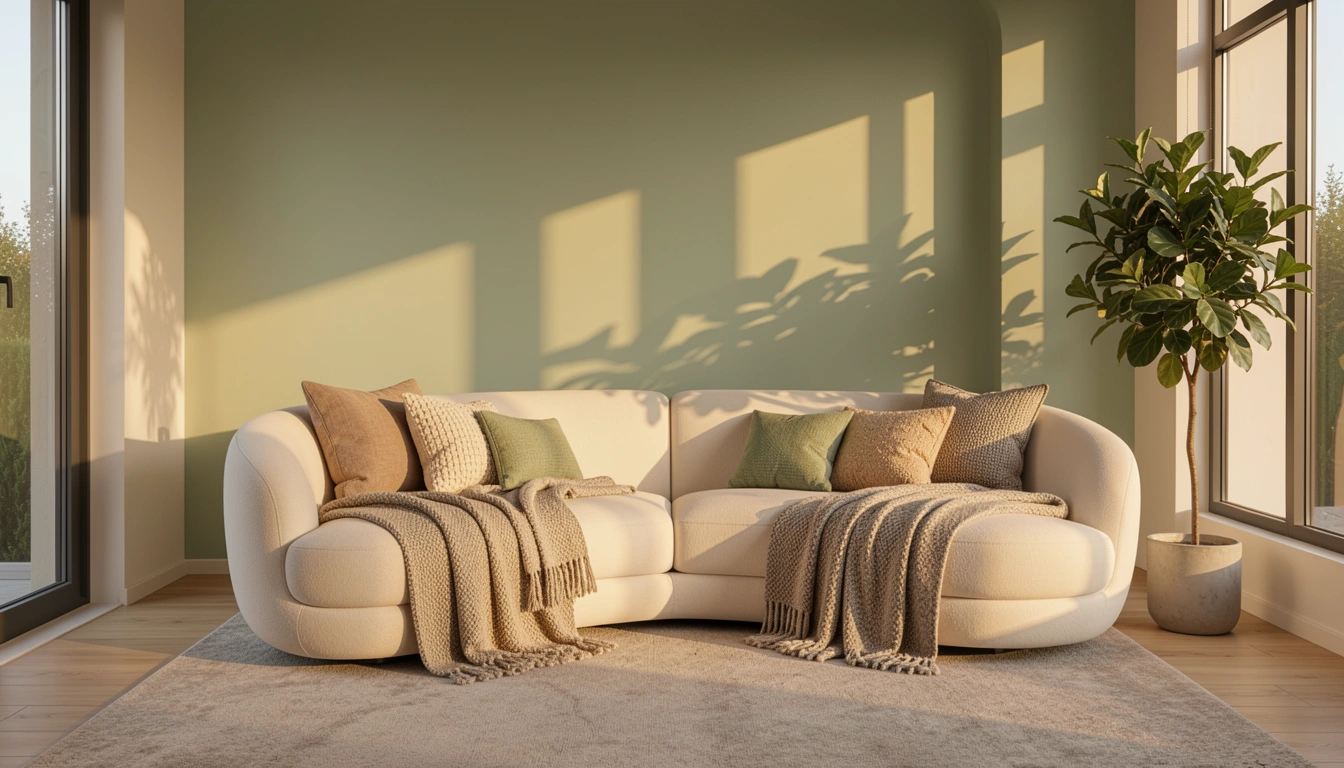
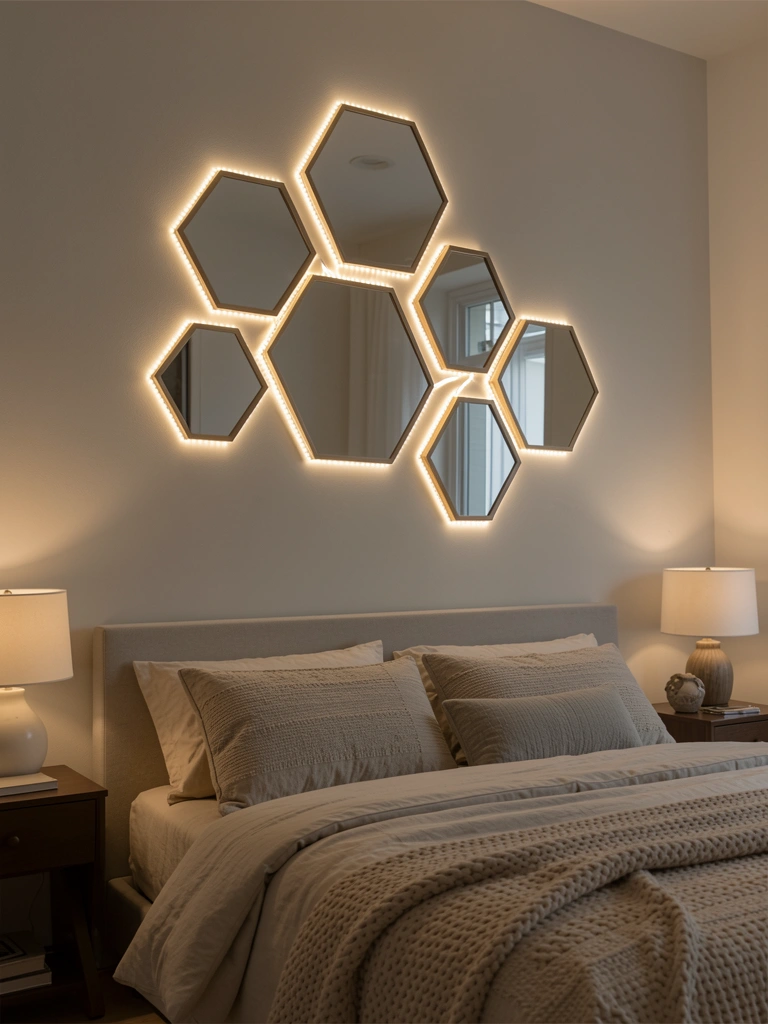
    5. Layer Hexagonal Mirrors in a Honeycomb Pattern

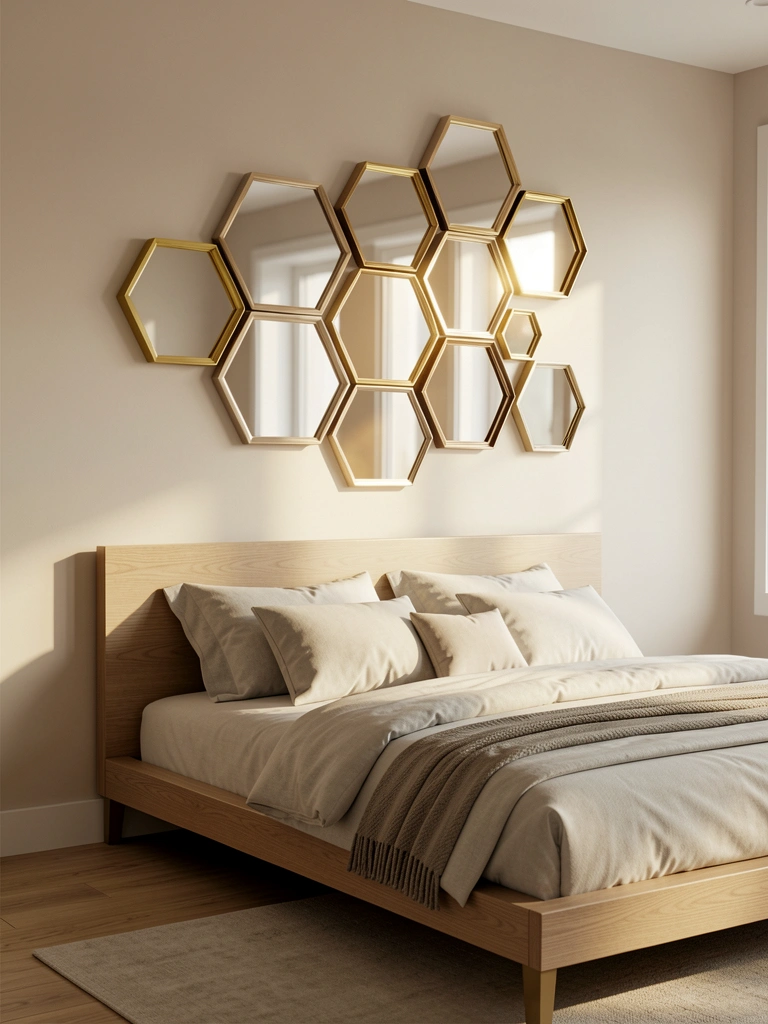
    Hexagons are trending hard in 2025, and for good reason—they’re geometric but feel organic. A honeycomb cluster works beautifully above beds, sofas, or living room walls.

    Purchase hexagonal mirrors in brushed gold or brass ($20–$60 each from target or Amazon). Arrange them in staggered rows, leaving minimal gaps to create the honeycomb effect—use painter’s tape to plan before mounting. Install 15–20 pieces within 1–2 hours using lightweight wall anchors (these mirrors are usually shallow and not heavy). Space them so they almost touch but allow a tiny shadow line between.

    Pro tip: buy 2–3 extra hexagons as backups in case of breakage. The result is a textured, dimensional accent wall that bounces light beautifully and creates visual rhythm. Your bedroom instantly gains architectural interest without needing a full wall renovation.


    6. Mount Concentric Circle Geometric Mirrors for Depth

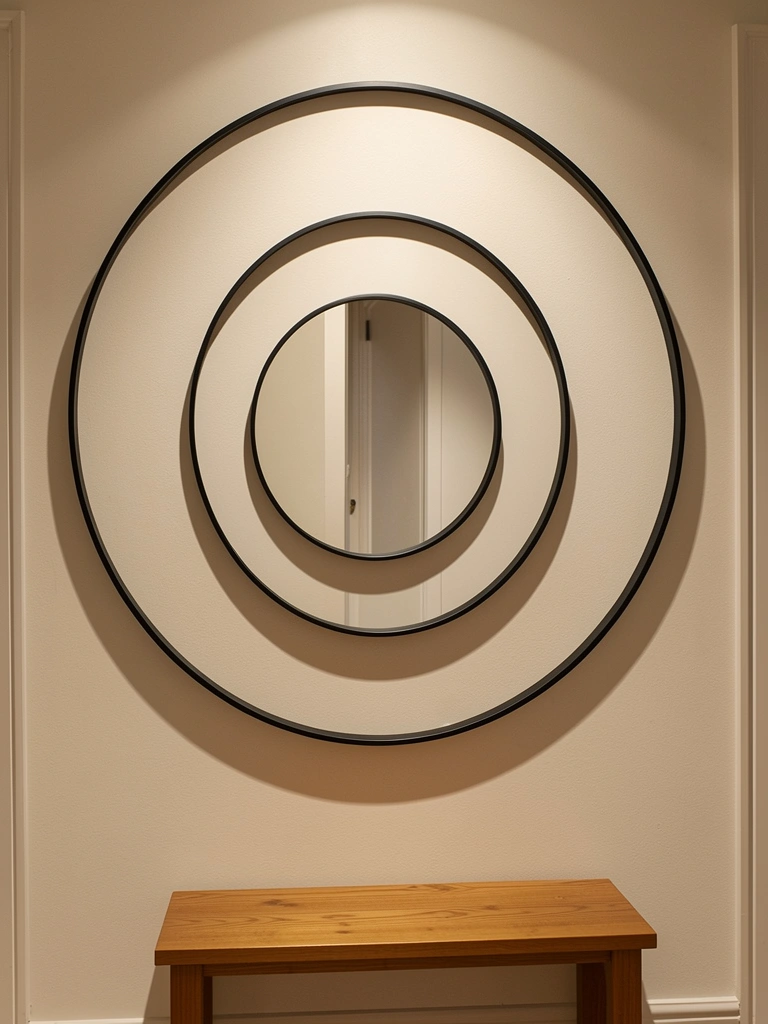
    Concentric circles create hypnotic depth—perfect for hallways, home offices, or above accent furniture. The nested effect draws viewers in and makes a statement without looking cluttered.

    Source three round geometric mirrors in graduating sizes ($40–$150 total from IKEA, Wayfair, or Article). Keep frames consistent in color and material (all matte black, all brass, or all natural wood). Mount them centered on top of each other, using painter’s tape to align first. Installation takes 30 minutes if using a level.

    The geometric repetition calms the eye while amplifying reflection. Your hallway or small bedroom wall becomes a focal point that serves dual purpose: functional reflection plus sculptural interest. The concentric pattern also photographs exceptionally well for anyone documenting their home refresh.


    7. Combine Diamond and Square Mirrors for Contrast

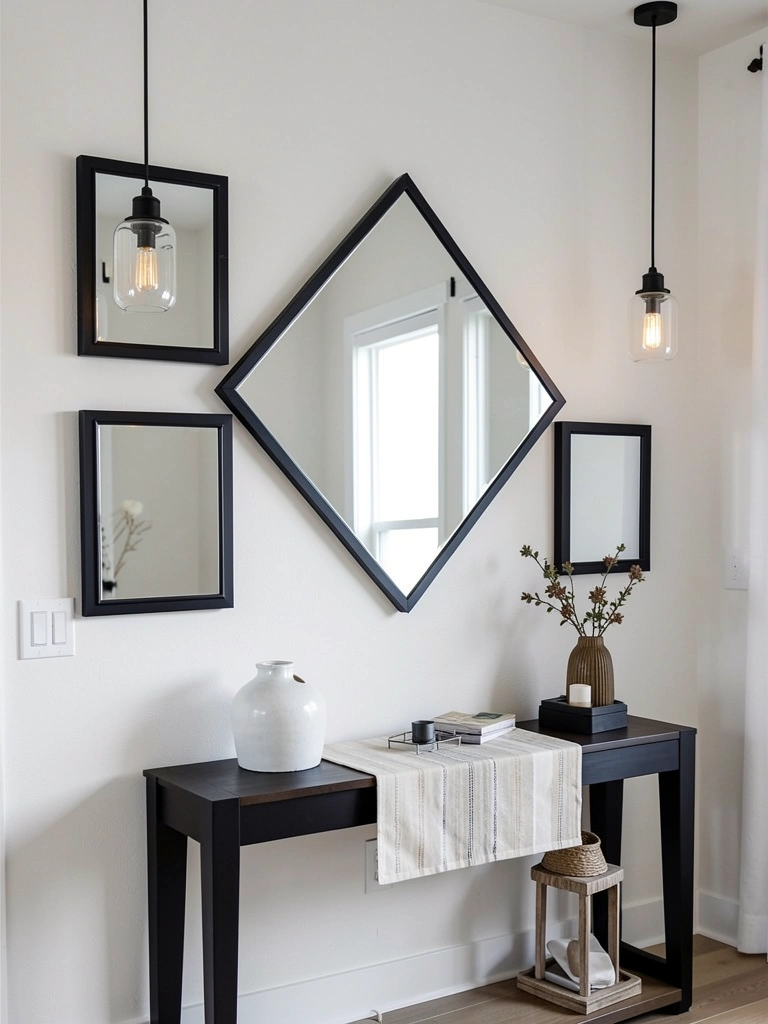
    Mixing diamond and square shapes creates dynamic tension—geometric without feeling sterile. This combo works especially well in contemporary, maximalist, or eclectic interiors.

    Buy one large diamond mirror ($60–$200) and two matching smaller squares ($30–$60 each) from Wayfair, Article, or Design Within Reach. Keep frames uniform (all matte black or all brass work best). Arrange with the diamond centered and squares flanking it at equal heights. Mount using a French cleat system for easy removal if you’re renting.

    Installation is straightforward—30 minutes max. The contrast between the rotated diamond and grounded squares creates visual movement and balance. Your entryway now feels intentional and styled, like you actually spent time thinking about proportions and composition—which you did.


    8. Create a Diagonal Mirror Line Up a Staircase

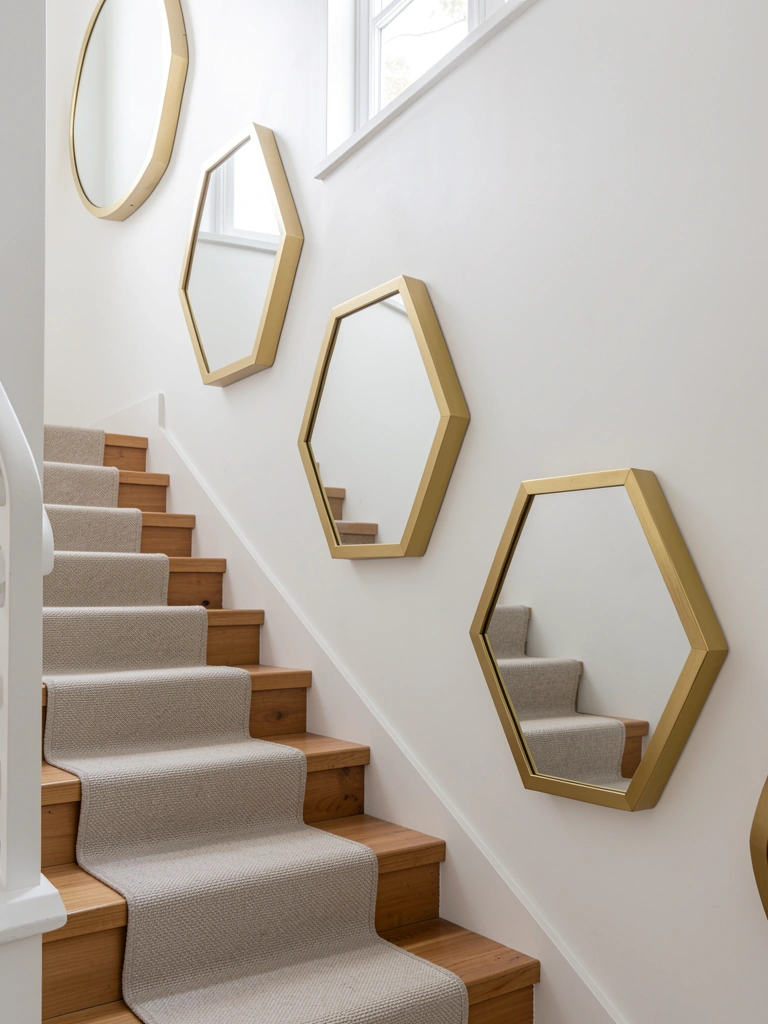
    A diagonal mirror line guides the eye upward and makes staircases feel more intentional. It’s a design move that actually improves flow through your home.

    Select 5–7 geometric mirrors in mixed shapes (circles, hexagons, octagons) with matching frames ($30–$60 each, roughly $200–$400 total). Map out the diagonal line on your staircase wall using painter’s tape before drilling. Space them 18–24 inches apart along the ascending diagonal. Use wall anchors appropriate to your wall type (drywall, plaster, brick). Mount over 1–2 hours, taking care to use a level for each placement.

    Pro tip: keep all frame colors identical even if mirror shapes vary—this creates cohesion. Your staircase transforms from a purely functional passage into a designed feature. Natural light bounces down the stairs, and the diagonal arrangement creates optical movement that mirrors actual traffic flow.


    9. Use Octagonal Mirrors for Soft Geometry in Bathrooms

    Octagons are geometric but feel less harsh than squares or diamonds—perfect for bathrooms where you want modern style without cold vibes. They’re also easier on the eyes than sharp angles.

    Purchase two octagonal mirrors with brass or warm metallic frames ($80–$200 each from Wayfair, Rejuvenation, or Article). Mount them side-by-side above a double vanity or back-to-back on adjacent walls. Space them 3–6 inches apart depending on your visual preference. Use heavy-duty picture hooks or French cleats since bathroom mirrors can be substantial. Installation takes 30–45 minutes.

    The octagonal shape softens geometry while maintaining sophistication. Your bathroom feels spa-like and intentional without needing a total renovation. The warm metal frames add a subtle luxury touch that photographs beautifully in natural light.


    10. Frame a Round Mirror with a Geometric Surrounding Border

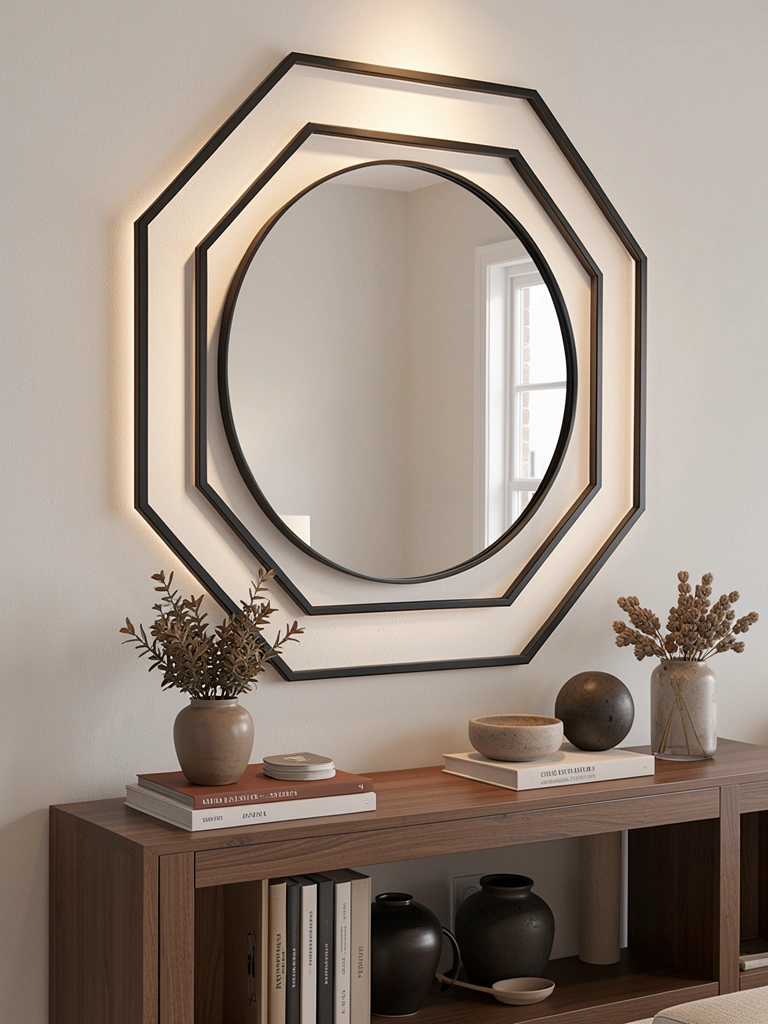
    Double-framing a round mirror with a geometric border creates dimension and architectural interest. It’s the design equivalent of matting a piece of art.

    Start with a quality round mirror ($40–$100) and commission or purchase a geometric border frame ($50–$150 extra) from custom makers on Etsy or platforms like Made to Order Mirrors. Alternatively, buy a simple round mirror and create a DIY border using metal stripping or wood frame stock. Mount the round mirror first, then attach the geometric border around it using small metal brackets or adhesive-backed spacers. Project takes 45 minutes to an hour.

    The layered effect makes your mirror look more intentional and high-end than a single-framed piece. Light reflects off both frame surfaces, adding subtlety and depth. Your wall gains architectural character that suggests you actually planned your decor—and you did.


    11. Mount Overlapping Geometric Mirrors for a Mosaic Effect

    Overlapping geometric mirrors create dynamic visual texture—like a curated gallery but more sculptural. This approach works for maximalists who want playful geometry.

    Buy 6–10 geometric mirrors in mixed shapes and sizes, keeping frames in one or two colors ($30–$100 total depending on sizes and materials). Arrange them on your wall with partial overlaps—use painter’s tape to plan the layout first. Some mirrors should sit atop others by 2–4 inches for depth. Mount using picture hangers and wall anchors appropriate to your wall type. Installation takes 1–2 hours depending on quantity.

    Pro tip: keep background wall neutral (white, soft gray, or warm beige) so mirrors stand out. The overlapping arrangement creates visual rhythm and makes a bold statement. Your space feels collected and intentional rather than randomly decorated—eclectic in the best way.


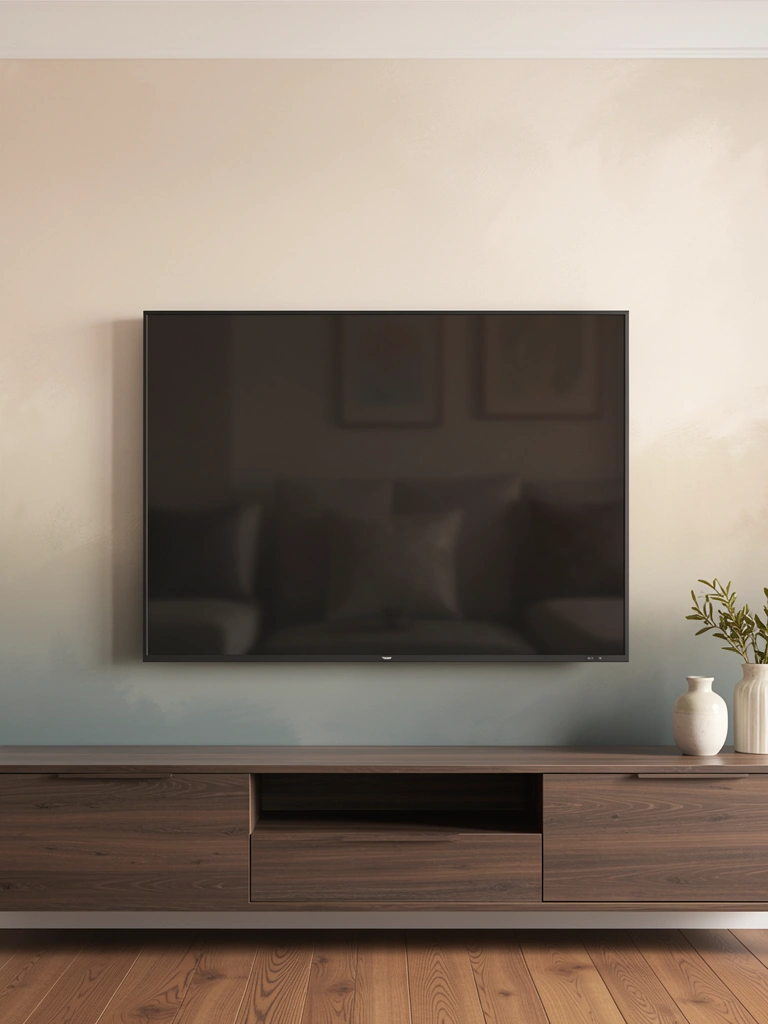
    12. Use a Large Geometric Mirror as a Console Table Backsplash

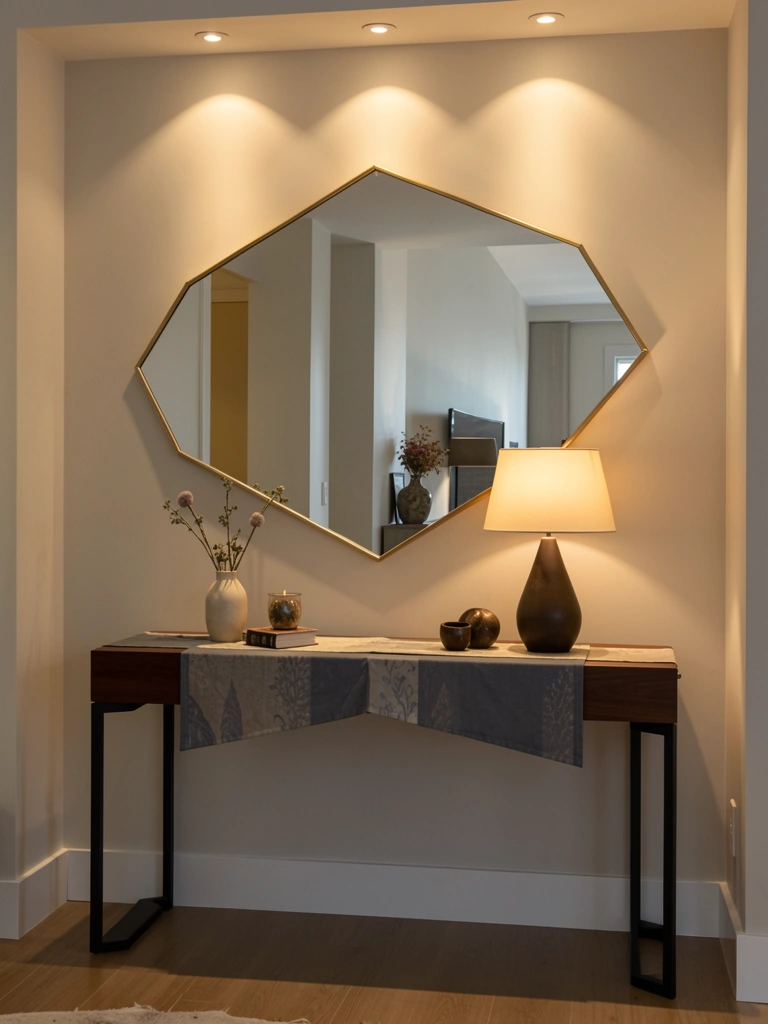
    Mounting a large geometric mirror horizontally above a console creates the illusion of extra depth and makes your entryway feel curated and intentional—like a high-end hotel lobby in miniature.

    Purchase a substantial geometric mirror ($150–$400, size 24×36 inches or larger) from Wayfair, Article, or West Elm. Mount it 12–18 inches above your console table using a French cleat system or heavy-duty wall anchors. The horizontal orientation feels grounded and contemporary.

    Installation takes 30–45 minutes with proper tools and wall preparation. Keep the console styling minimal—one table lamp, small tray, and maybe a decorative object—to let the mirror shine. This setup photographs beautifully and creates a focal point that makes your entryway feel like a designed space rather than just a walkthrough. Guests notice the intention immediately.


    13. Create a Geometric Mirror Focal Wall in Place of Paint

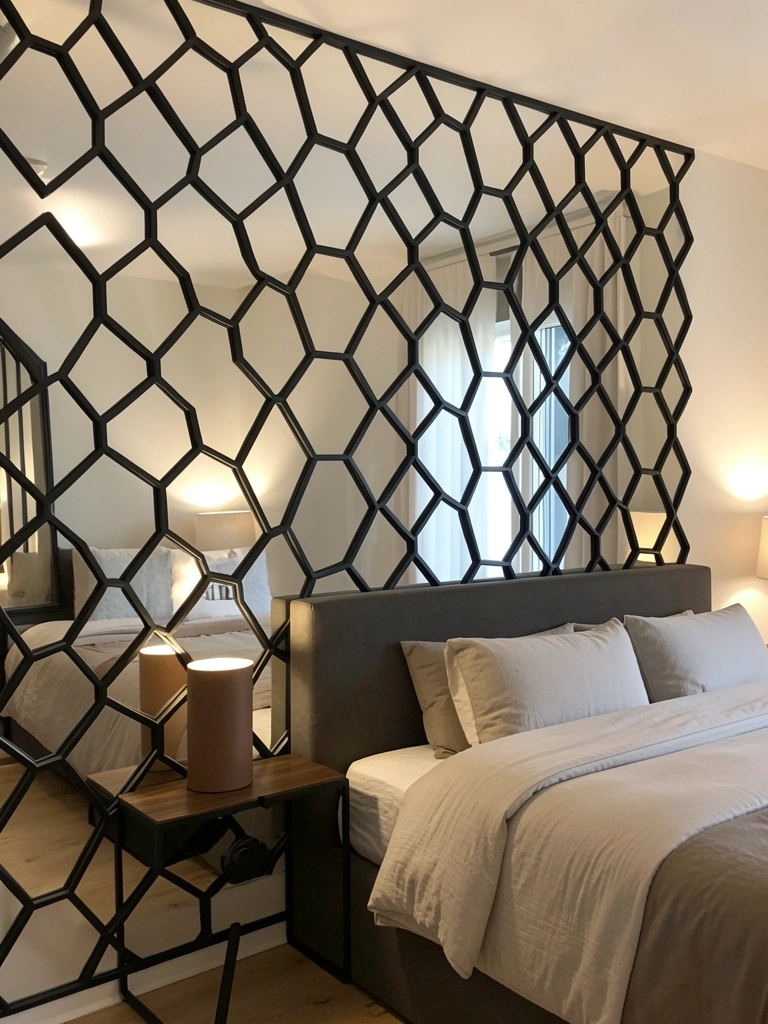
    Forget accent paint—a wall of geometric mirrors is bold, reflective, and genuinely transformative. It’s an investment piece but creates impact that paint can’t match.

    Plan to cover 50–100 square feet depending on wall size. Order interlocking geometric mirrors designed for wall installation ($200–$600 total for a full accent wall, or $30–$50 per square foot). These typically connect with hidden brackets or adhesive backing. Prepare your wall surface thoroughly—clean and prime if needed. Install over 2–4 hours, working methodically from bottom to top or one corner outward. Use a level frequently to keep alignment perfect.

    This is a longer project, but the result is architectural and stunning. Your room feels larger, brighter, and unexpectedly sophisticated. The mirrored wall catches every light source, making the room glow. It’s a statement move that design bloggers will ask to photograph.


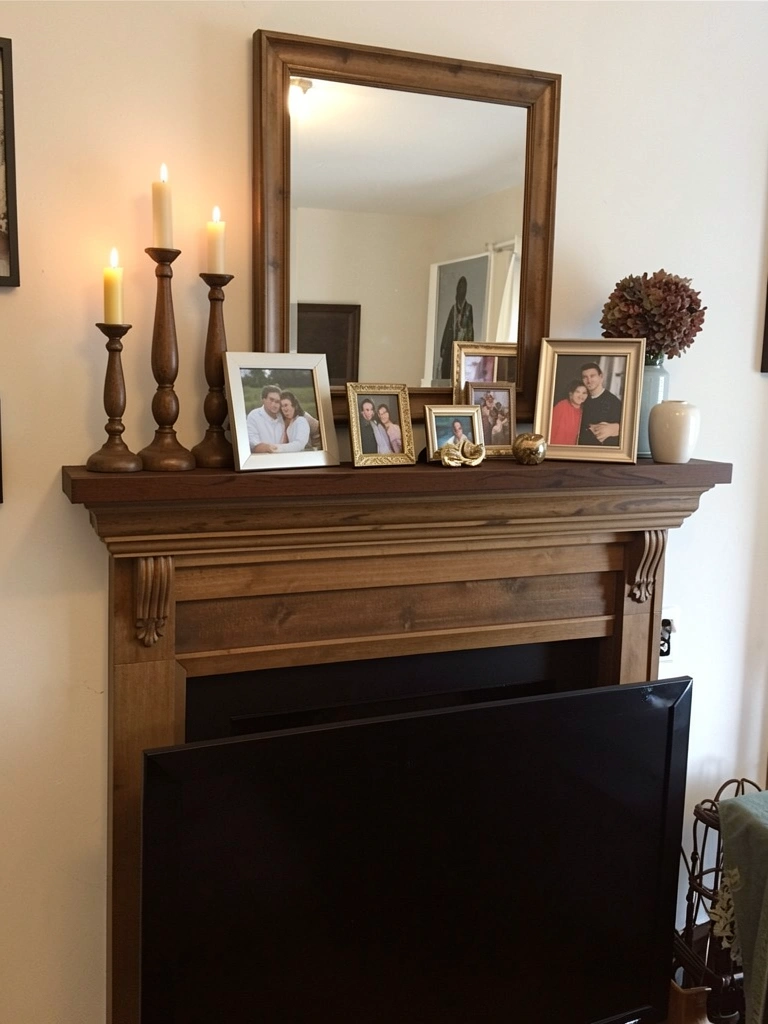
    14. Install a Geometric Star or Starburst Pattern Over Fireplace

    A geometric starburst above your fireplace creates drama and becomes the natural focal point—especially when firelight or interior lighting catches the rays.

    Source a large starburst mirror ($120–$400 depending on size and material quality; Large Sun Mirror brand or custom options from Etsy makers). Mount it 18–24 inches above your fireplace mantel using a French cleat system for security and adjustability. Ensure mounting goes into studs since these pieces are often weighty.

    Installation takes 30 minutes with proper planning. The starburst radiates outward and draws eyes upward, making your fireplace wall architecturally interesting. Light from the fireplace bounces off the mirror, multiplying ambient warmth and creating movement. Your living room becomes the kind of space where people instinctively gravitate to gather.


    15. Layer Thin Geometric Frames Over Large Mirror (Budget Hack)

    If you already have a large plain mirror but want geometric interest, overlay it with thin geometric frames—instant redesign for under $50.

    Buy 2–4 geometric frame outlines (just the frame, no glass backing) from craft stores like Michaels or online ($10–$20 each, or DIY using metal stripping). Position these frames across your existing mirror at angles, securing with mirror-safe adhesive or small suction cups designed for mirrors. Installation takes 15–20 minutes and is completely removable—perfect for renters.

    The layered effect tricks the eye into seeing geometry without replacing the whole mirror. This hack costs $30–$60 and takes minimal effort. Your boring mirror suddenly looks intentional and designed. Best part? If you change your mind, everything peels off cleanly.


    16. Mount Geometric Mirrors Around a Central Focal Point

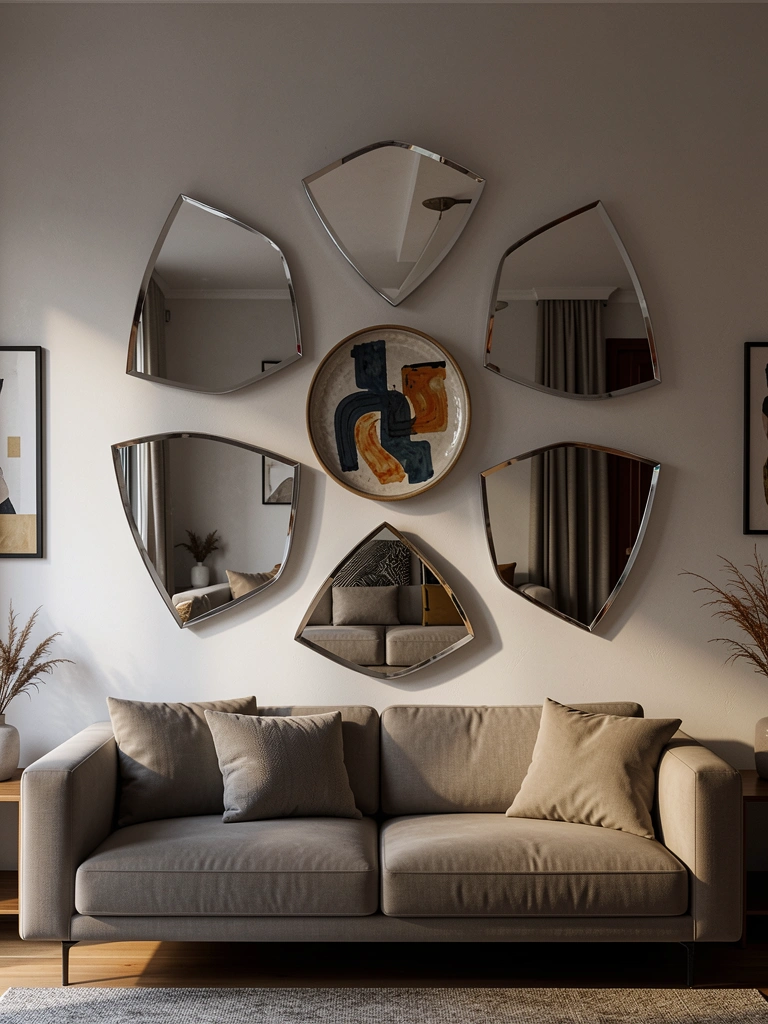
    Geometric mirrors arranged in a circular pinwheel pattern around a central focal point create movement and visual harmony—like orbiting planets around a sun.

    Choose 5 geometric mirrors in identical frames ($50–$150 each) and one central piece (art, plate, or mirror) for the middle ($40–$100). Arrange mirrors in a radial pattern around the center, each angled slightly outward. Use painter’s tape to map positions before drilling. Mount using appropriate wall anchors and hardware. Installation takes 45 minutes to an hour for precise alignment.

    Pro tip: all mirrors and the central piece should have the same frame color or material finish for cohesion. Your wall becomes a designed installation rather than random décor. The pinwheel arrangement creates optical movement—even stationary mirrors feel dynamic when positioned this way.


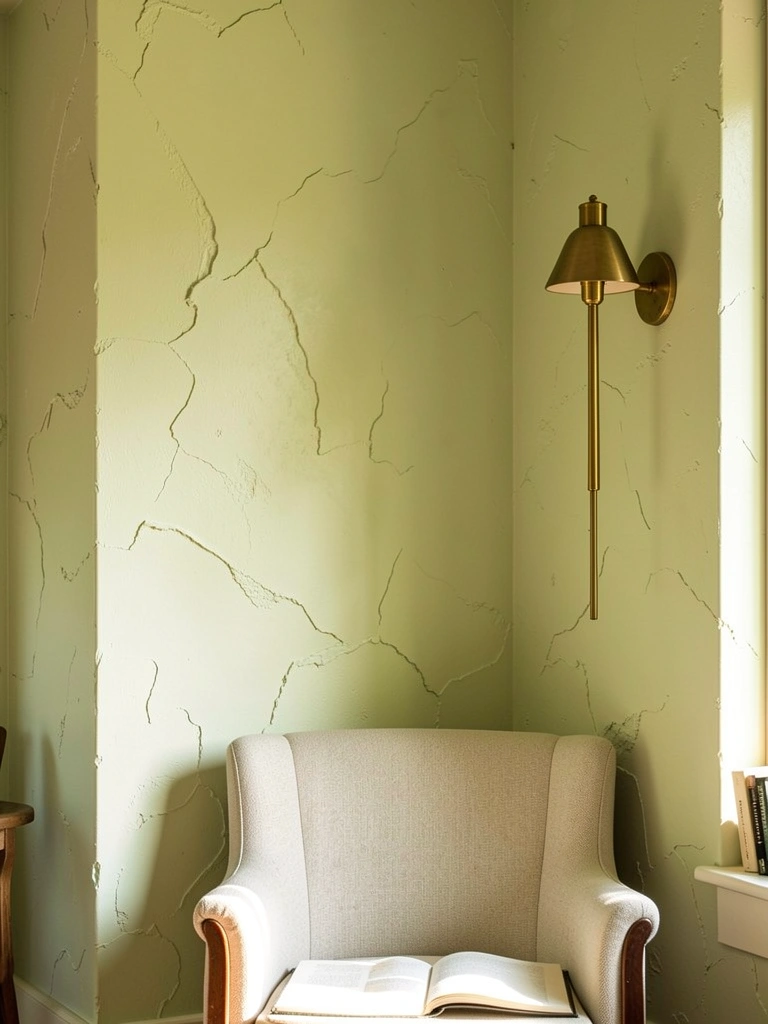
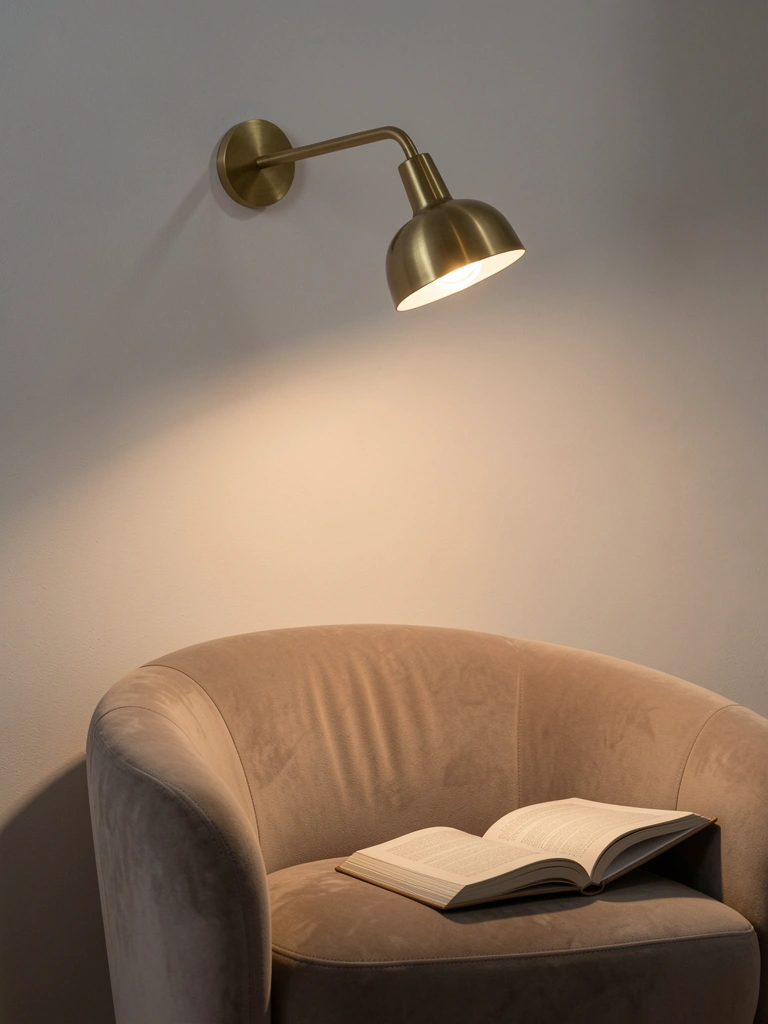
    17. Use Geometric Mirrors to Highlight Architectural Details

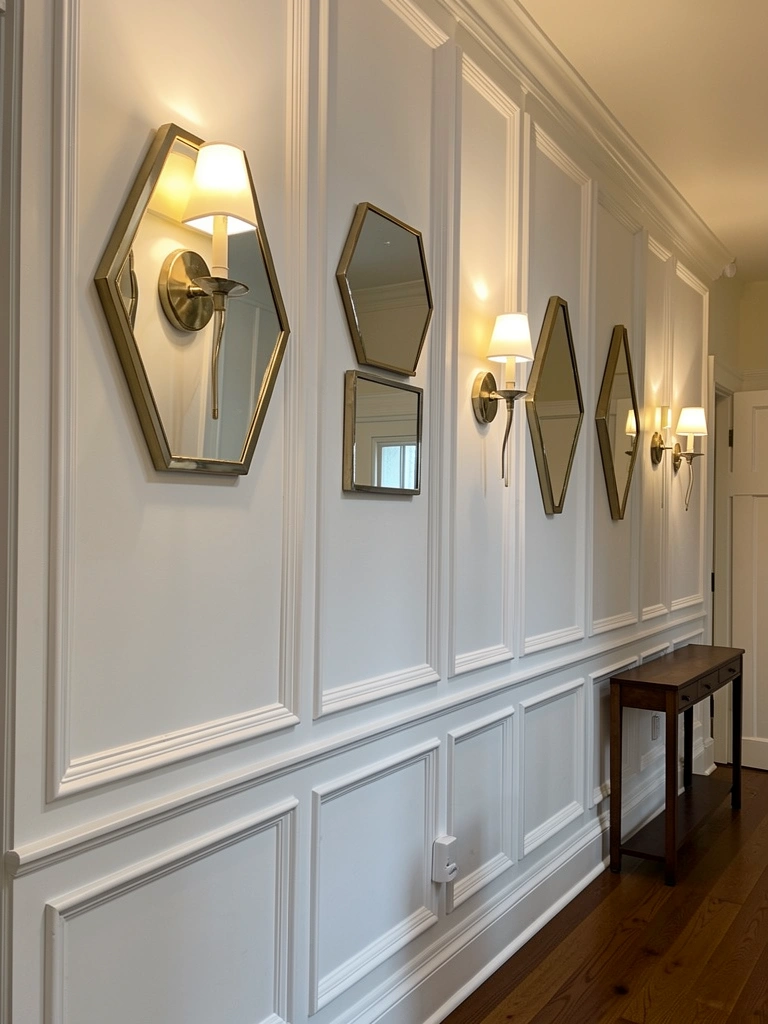
    If your home already has architectural details like wainscoting or alcoves, geometric mirrors fit into those spaces beautifully—they emphasize structure instead of fighting it.

    Measure your architectural details carefully. Order geometric mirrors in sizes and shapes that fit your specific spacing ($25–$80 each depending on size). Mount mirrors between wainscot panels or in alcove spaces using mounting hardware appropriate to your wall type. If installing between panels, use adhesive-backed hanging strips to minimize holes. Placement typically takes 30–45 minutes.

    This approach feels intentional and high-end because mirrors serve the existing architecture rather than feeling randomly placed. Your hallway or feature wall becomes more dimensional and professionally styled. Lighting, particularly sconces flanking mirrors, amplifies this elegant effect.


    18. Create a Gradient Effect with Geometric Mirrors in Varying Tints

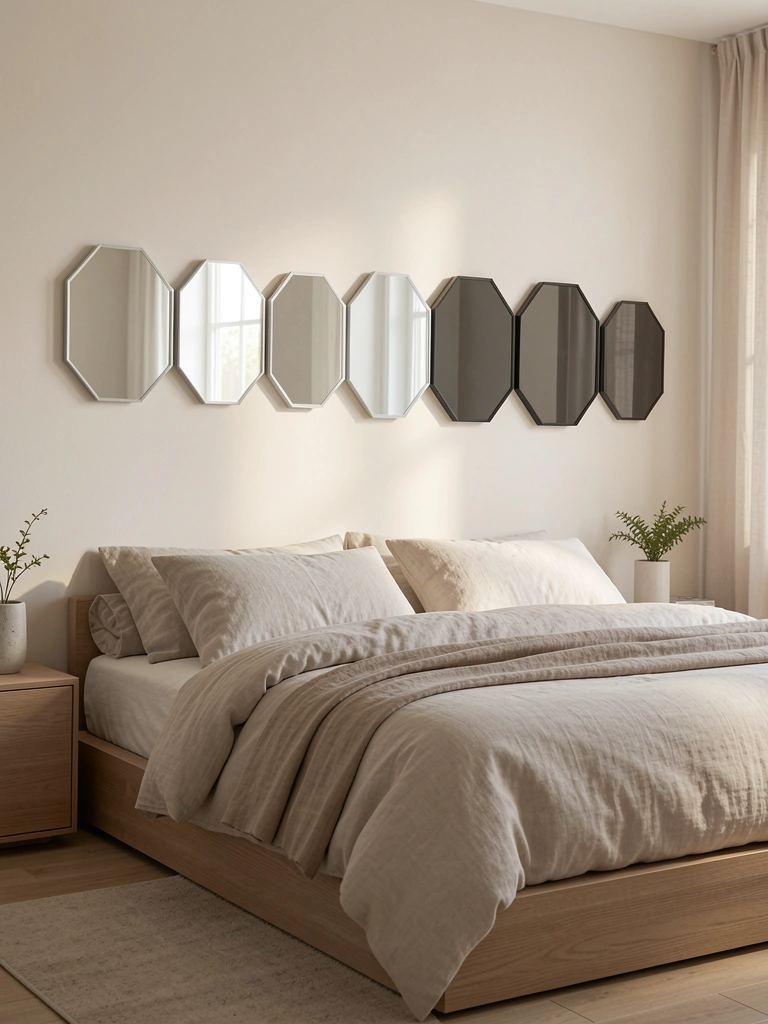
    Geometric mirrors come in various tints (clear, gray, rose, bronze). Arranging them in gradient order creates subtle visual interest—an understated design move that feels collected.

    Purchase 5–7 geometric mirrors in the same shape but graduated tints ($30–$80 each depending on size and tint darkness). Arrange from lightest to darkest or vice versa in a horizontal or vertical line. Mount at consistent heights to maintain alignment. Installation takes 30–40 minutes using standard picture hangers or wall anchors.

    The gradient creates visual rhythm without screaming for attention—it’s a quiet, sophisticated design choice. Your wall feels thoughtfully curated. Different tints also create varied light reflection depending on time of day and room lighting, adding dynamic interest to a simple arrangement. This approach particularly suits minimalist or scandinavian-inspired interiors.


    19. Install a Geometric Mirror Pendant Installation in Bedroom

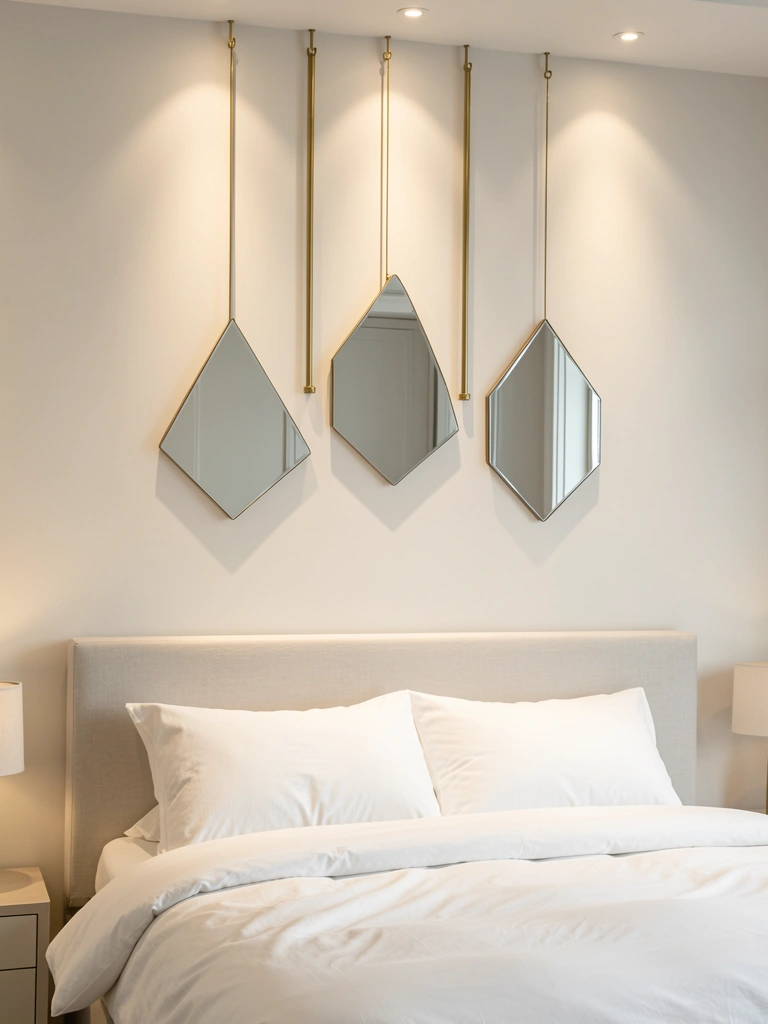
    Hanging geometric mirrors from chains or rods as “pendant installations” makes them feel like sculpture—this works especially well above beds where height matters.

    Source 3–5 small geometric mirrors with pre-drilled hanging holes ($30–$80 each). Purchase thin brass chains or slim metal rods from hardware stores ($15–$30 total). Install a ceiling-mounted rod or multiple hooks at varied heights above your bed headboard. Attach mirrors using chains or rods at staggered drops—some 12 inches below the rod, others 24 inches, creating a cascading effect. Installation takes 45 minutes to an hour.

    This approach is surprisingly removable—perfect for renters who want high-impact design. The suspended mirrors catch light beautifully and create the illusion of movement even when stationary. Your bedroom headboard becomes sculptural and gallery-like. Everyone notices this unusual installation immediately.


    20. Use Geometric Mirrors to Frame a Bedroom Headboard

    Framing your bed with a geometric mirror arrangement makes the bed feel like the room’s focal point—a subtle but effective design move.

    Choose one larger geometric mirror for above the bed ($80–$200) and four smaller matching mirrors for the sides ($30–$60 each). Mount the large mirror at least 18 inches above the bed headboard, centered. Position smaller mirrors flanking the headboard at bed-rail height, creating a frame effect. Use painter’s tape to plan placement before drilling. Installation takes 45 minutes.

    Pro tip: all mirrors should have matching frames for cohesion. The arrangement directs attention to the bed and makes your sleeping area feel intentional and designed. Natural light bounces around this arrangement, making bedrooms feel brighter and more spacious. Guests instantly notice the thoughtful layout.


    21. Mount Geometric Mirrors in Bathroom Corners for Light Multiplication

    Placing geometric mirrors on adjacent walls in corners multiplies reflection—smart for bathrooms where natural light is limited or corners feel dead.

    Buy two matching geometric mirrors ($40–$100 each) with the same frame finish. Mount one on each wall, positioned so corners nearly meet (about 3 inches apart). Use level to ensure both are perfectly straight. Installation takes 20–30 minutes.

    This corner placement sounds simple but creates surprising light amplification. Your bathroom feels brighter and more spacious—especially if you use light-tinted or clear mirrors. The corner arrangement also makes use of wall space that’s typically hard to style. Your bathroom layout becomes more balanced and intentional.


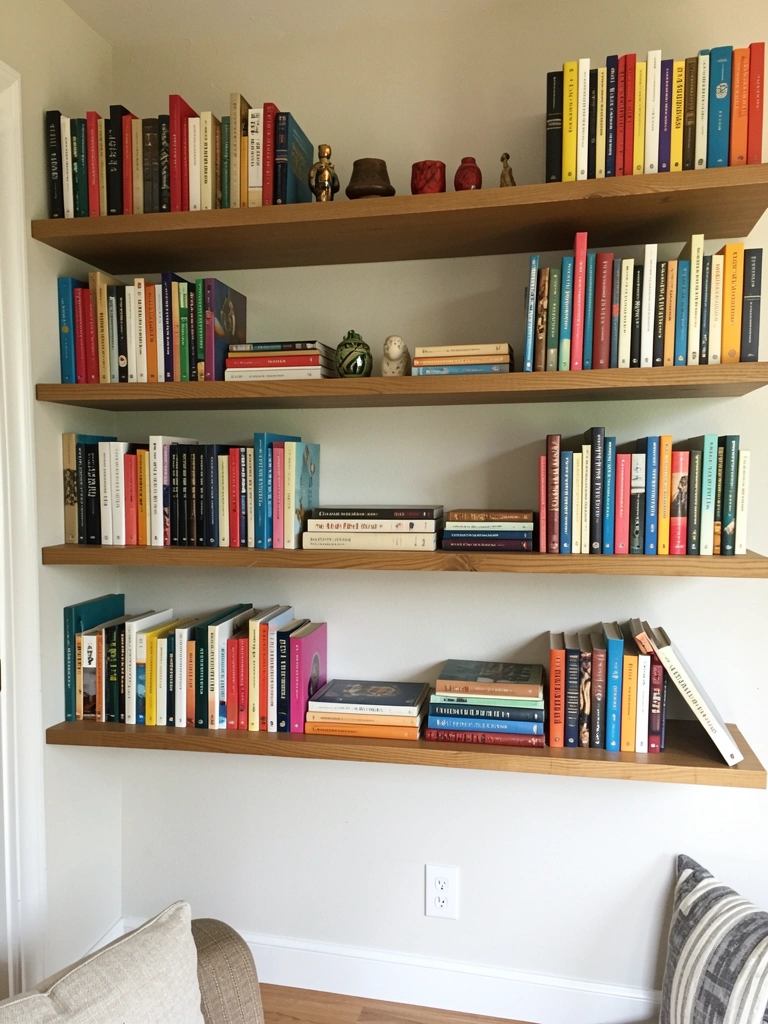
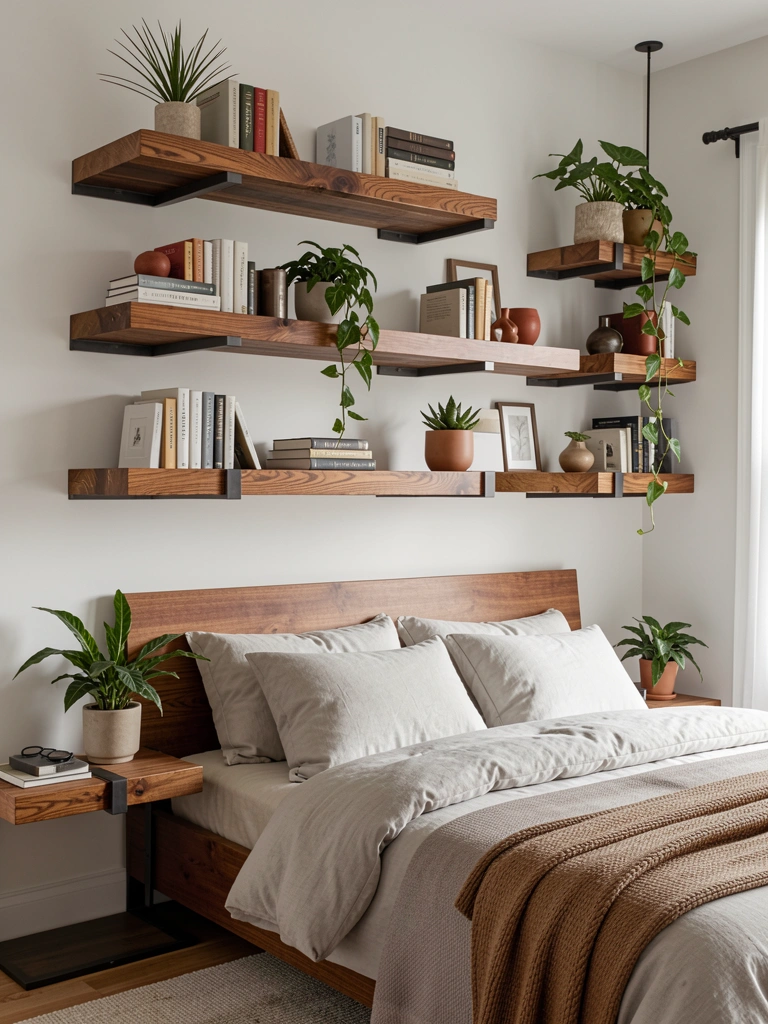
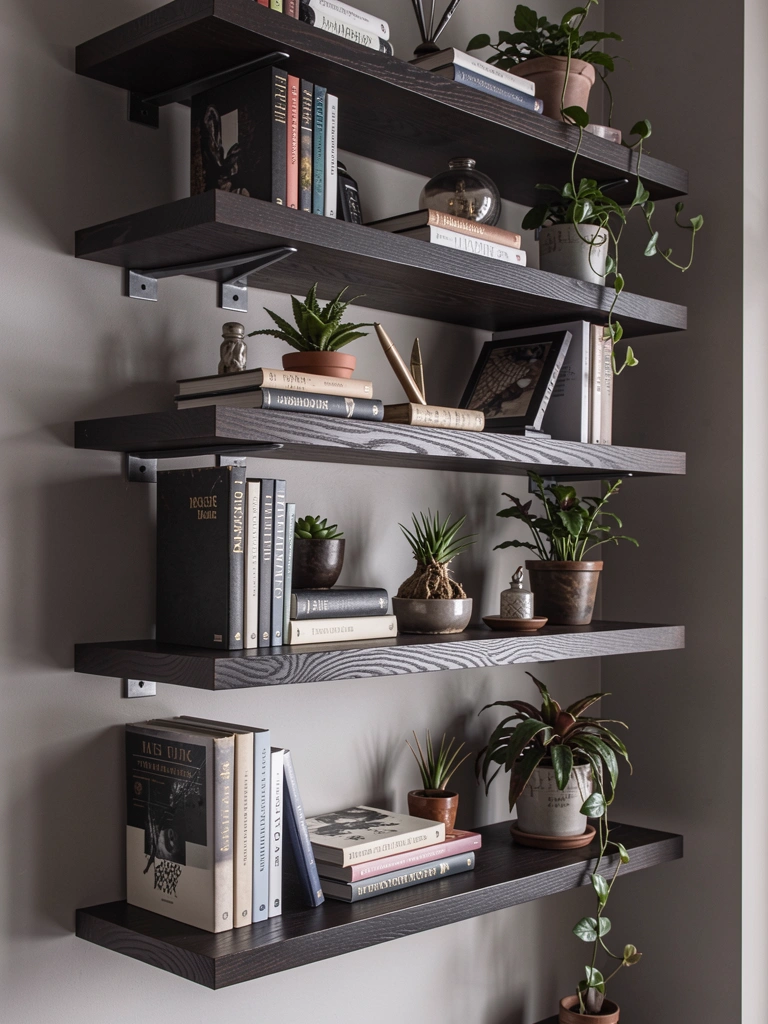
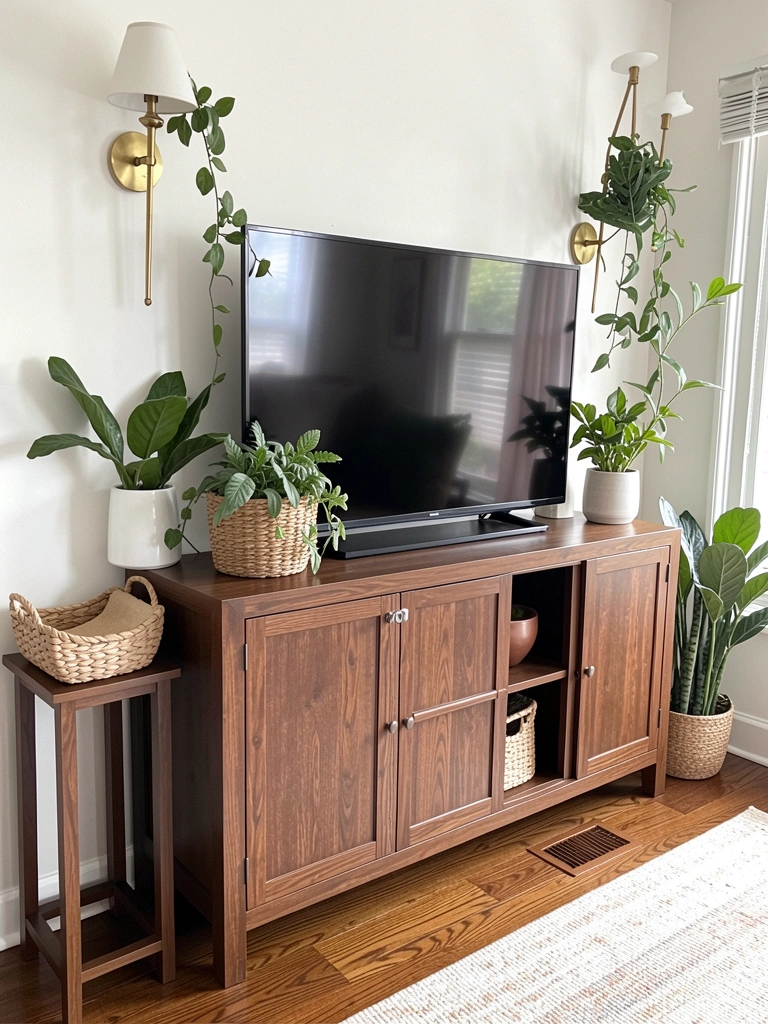
    22. Create a Mixed-Media Wall with Geometric Mirrors and Shelving

    Mixing geometric mirrors with floating shelves creates a functional art installation—practical storage meets sculptural design.

    Install 4–6 floating shelves ($25–$80 each from IKEA, Target, or specialty furniture stores) and purchase 4–6 geometric mirrors in wood or metal frames ($40–$100 each). Alternate shelves and mirrors in a vertical arrangement on your wall. Mount shelves at stud locations first, then position mirrors between and around shelves. Installation takes 2–3 hours depending on wall preparation and quantity.

    This mixed approach creates visual interest and utility. Shelves hold books, plants, and objects; mirrors bounce light and reflect room content. Your wall becomes a designed feature rather than just storage. The alternating rhythm feels intentional and contemporary—like a designed art wall that also functions practically.


    23. Use Geometric Mirrors to Create an Illusion of Window

    Mounting a large geometric mirror where light naturally pools tricks the eye—it reads as an additional window, brightening dark hallways or corners.

    Find a geometric mirror in window-like proportions—a large rectangle, trapezoid, or arched shape ($100–$300 depending on size). Position it on a wall where it catches and reflects maximum light from other rooms or windows. Mount at eye level or slightly higher, 18–24 inches above the floor. Use a French cleat for secure installation. Takes 20–30 minutes to hang.

    The best part? Dark hallways instantly feel brighter and less claustrophobic. Your brain registers the light reflection as an additional light source, making small spaces feel larger. If your hallway has sconces, position the mirror between them for even more light-catching power.


    24. Mount Geometric Mirrors as a Rug Replacement (Bold Alternative)

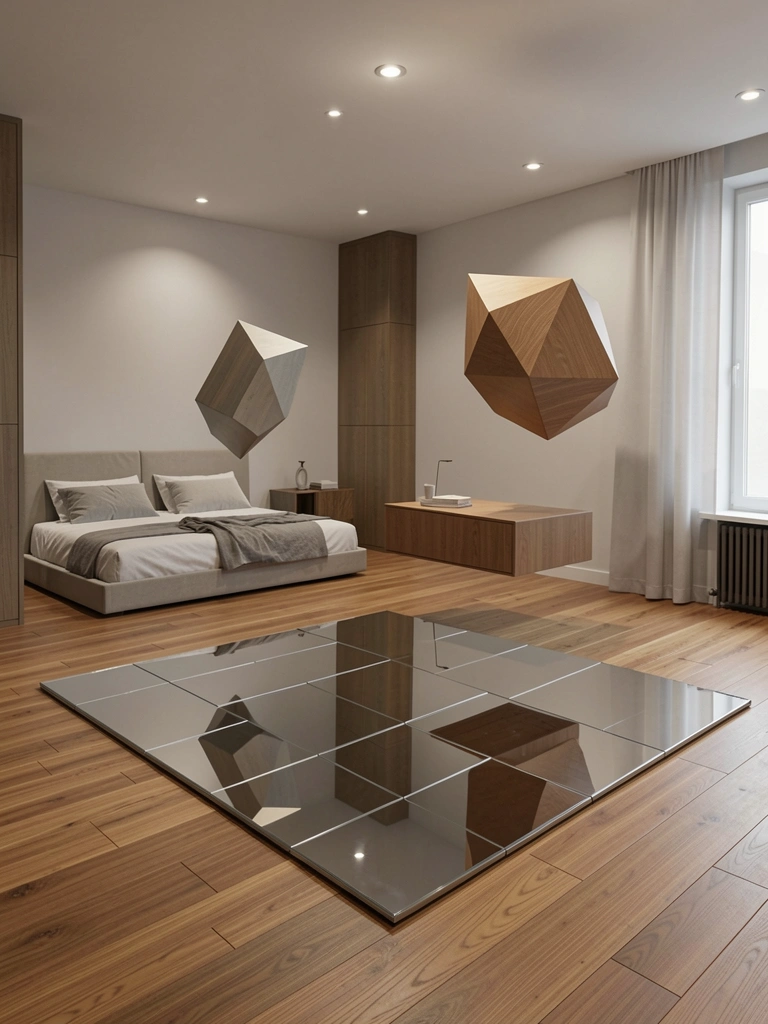
    For maximalists willing to be bold, a large geometric mirror installation on the floor creates sculptural, reflective interest—kind of a “rug” you can see through.

    This is an advanced, investment move. Work with a mirror installation specialist or use interlocking geometric mirror tiles ($40–$100 per square foot, so $500–$2,000+ for a 6×8 space). Ensure your floor can handle weight distribution and is properly leveled first. Professional installation takes 4–8 hours. Must be done by someone experienced with floor installations.

    The result is stunning and unusual—your floor becomes part of the design rather than a backdrop. This works best in minimalist, contemporary, or daring maximalist spaces. It photographs extraordinarily well and makes a memorable statement. This is definitely an investment piece, but it’s genuinely unique.


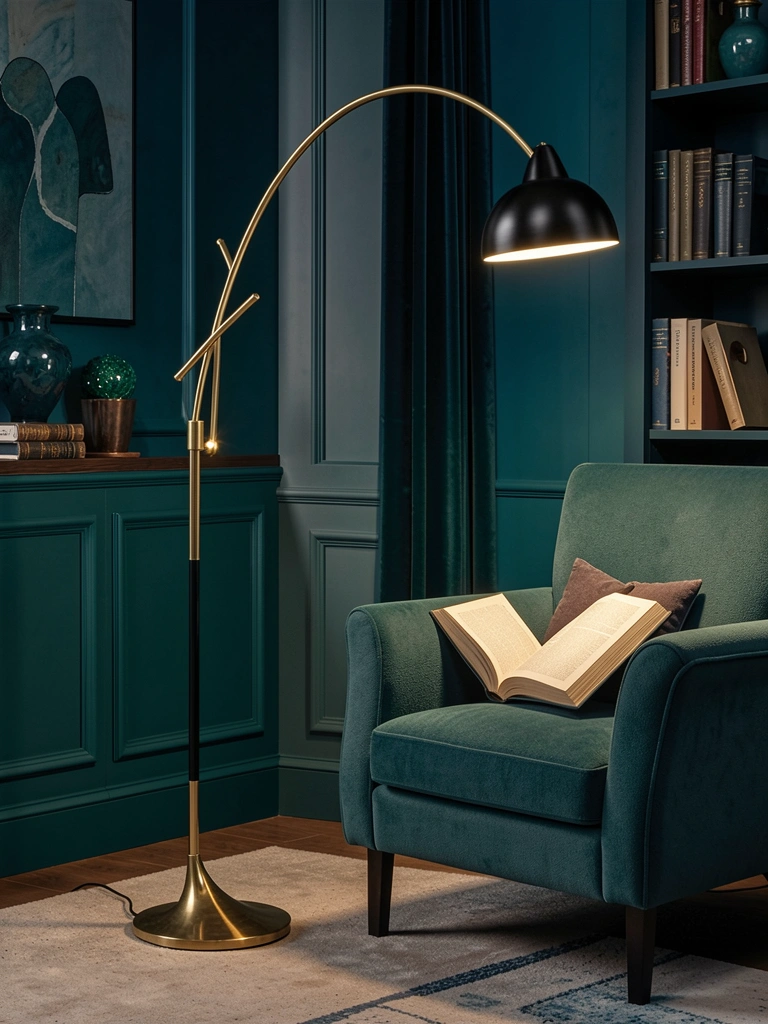
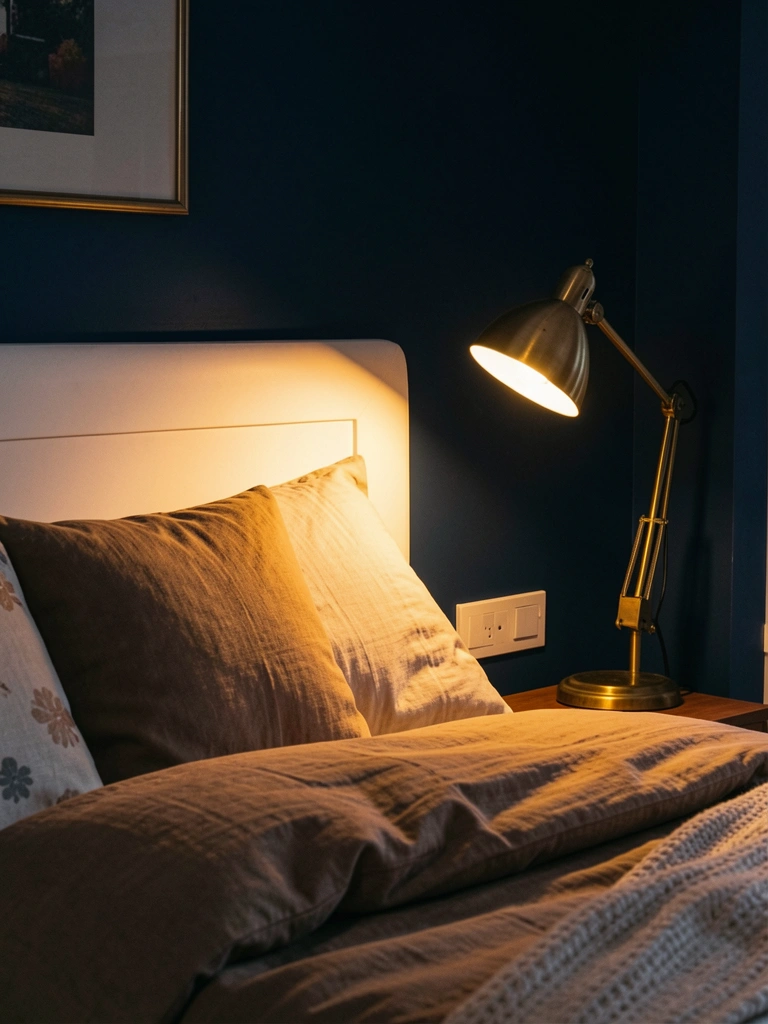
    25. Combine Geometric Mirrors with String Lights or LED Strips

    Integrating LED strips or warm string lights with geometric mirrors creates ambiance—mirrors reflect the light, multiplying the glow throughout your room.

    Install your geometric mirror cluster first ($100–$300 for 6–10 mirrors), then weave battery-operated LED strips ($20–$50) or warm string lights around and between frames. Ensure lights are warm-toned (2700K color temperature) for cozy ambiance. Installation takes 45 minutes to an hour including light placement and battery insertion.

    This hybrid approach adds functionality—your mirrors become ambient lighting sources. The reflected light bounces around the room, creating sophisticated, spa-like ambiance. Your bedroom (or living room) instantly feels more intentional and designed. Best part? Battery-operated lights mean no additional wiring or electrician needed.


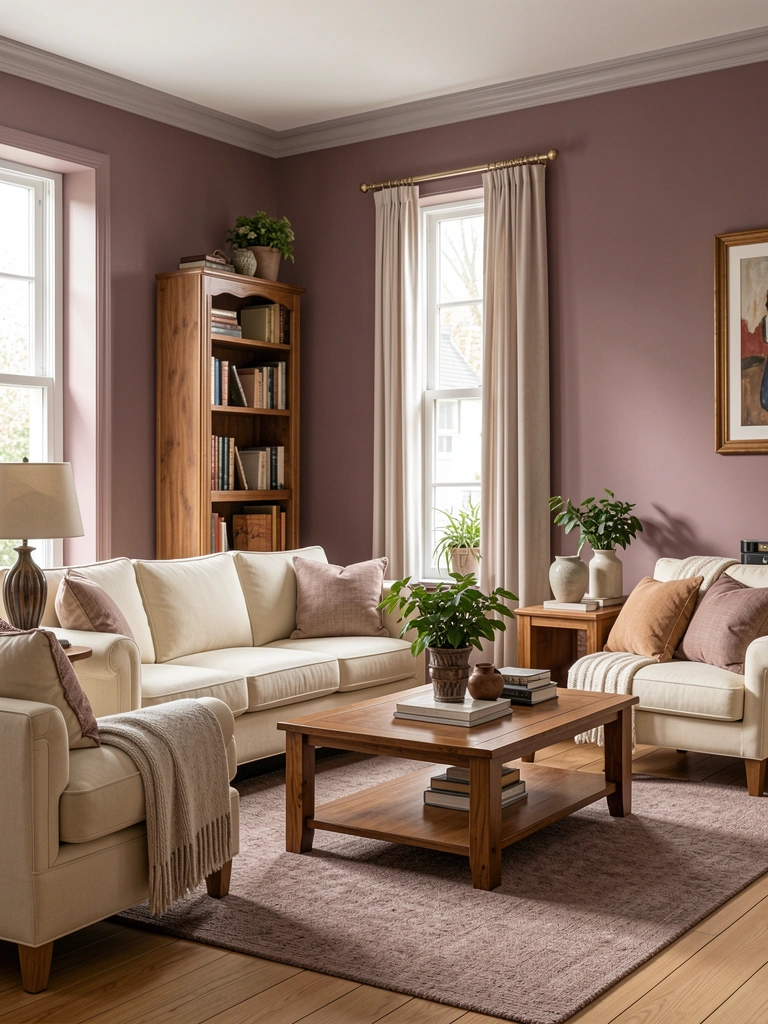
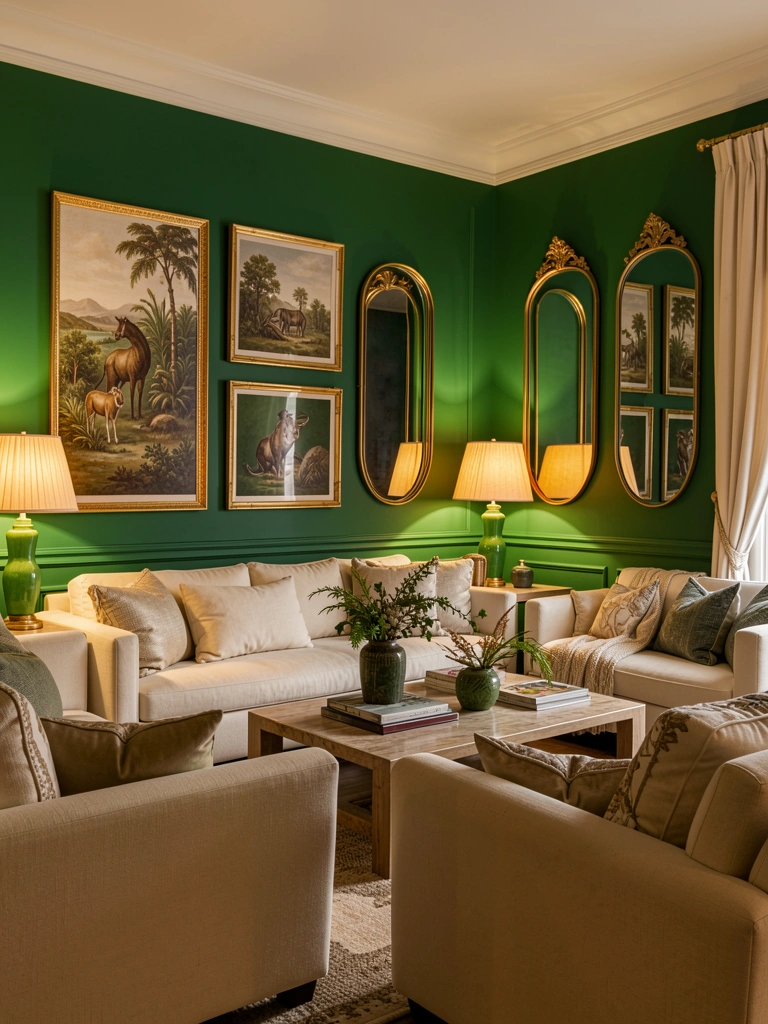
    26. Use Geometric Mirrors to Reflect Artwork or Room Features

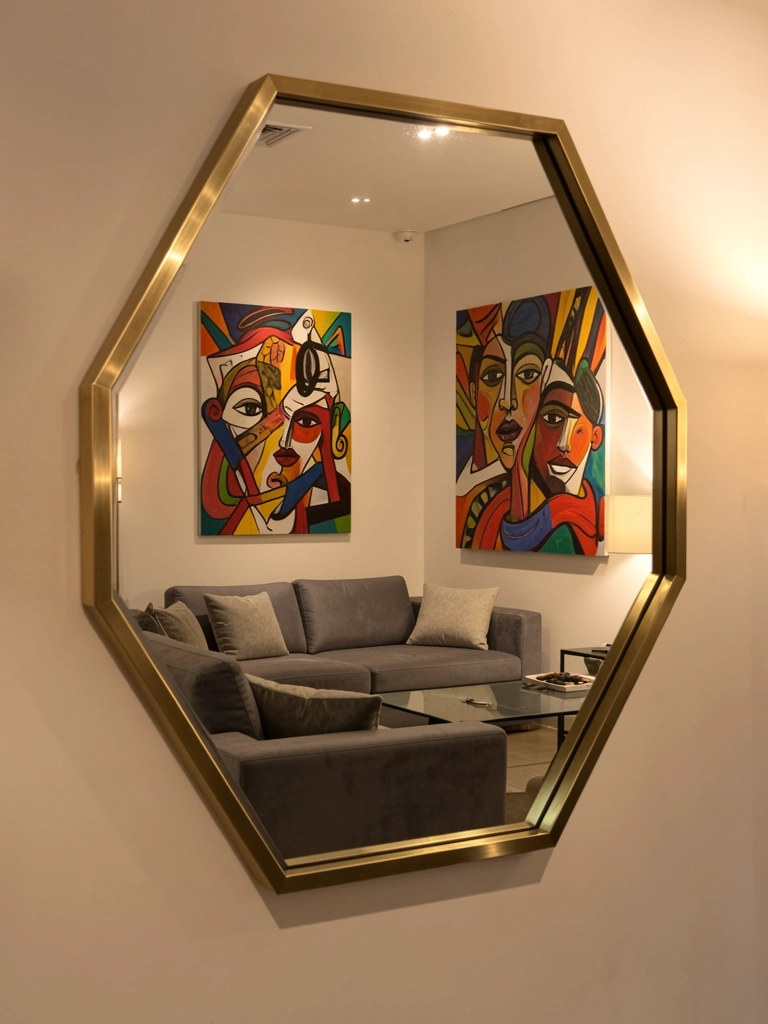
    Positioning geometric mirrors to intentionally reflect artwork, plants, or architectural features multiplies visual interest—mirrors become active design tools, not just reflective surfaces.

    Measure your room and identify key features worth reflecting—a favorite artwork, plant, sculptural object, or architectural detail. Purchase a geometric mirror sized to reflect that feature well ($50–$200). Mount it opposite or adjacent to the feature, angled if needed to optimize reflection. Use painter’s tape to experiment with positioning before drilling. Installation takes 20–30 minutes.

    This intentional placement shows sophistication—you’re using mirrors strategically, not randomly. The reflected view creates visual layering and depth. Visitors’ eyes follow the reflection, creating movement through your space. Your room feels thoughtfully composed, like you actually planned the sightlines and reflections.


    27. Create a Modular Geometric Mirror System for Future Changes

    Design a modular mirror system using universal mounting rails—you can rearrange, add, or remove geometric mirrors without re-drilling. Perfect for anyone who likes to redecorate frequently.

    Install a rail system ($60–$150 from specialized mirror companies or custom installations) that spans your desired wall space. Purchase multiple geometric mirrors with standardized mounting plates ($40–$100 each). Slide mirrors onto the rail at any position, rearranging whenever you like. Initial installation takes 1–2 hours; future rearrangement takes minutes.

    This future-proofs your design. You can change your mirror arrangement with the seasons, add mirrors as your collection grows, or reconfigure for a new style without wall damage. It’s especially smart for renters or anyone living in their space temporarily. The modular system looks intentional and contemporary—like a designed installation rather than random placement. You gain flexibility and sophistication simultaneously.


    Ready to refresh your space with geometric design? Save this post and try just one idea this weekend—start with something simple like a mirror cluster or budget overlay, and build from there. Which geometric arrangement speaks to you?

  • 24 New Door Design Ideas Trending for Modern Homes

    24 New Door Design Ideas Trending for Modern Homes

    Your front door sets the tone for everything inside—but here’s the thing: you don’t need a full renovation to make it count. Whether you’re renting, own a cozy apartment, or have a sprawling house, door design choices can completely refresh how your home looks and feels. The good news? Trending door ideas for 2025 range from free styling tricks to investment pieces that boost both curb appeal and functionality. From matte black finishes and minimalist frames to smart locks and sustainable materials, we’ve rounded up 24 actionable door design ideas you can start implementing this weekend. Some take 15 minutes, others are weekend projects—all deliver real impact. Let’s dive in and find the perfect upgrades for your space.

    1. Go Oversized with a Single-Slab Matte Black Door

    An oversized single-slab door makes a bold architectural statement that screams modern luxury. This trend works especially well on homes with traditional or farmhouse exteriors, creating an instant contrast that catches the eye and photographs beautifully.

    The matte black finish is forgiving—it hides fingerprints and wear better than glossy alternatives. Pair it with brushed gold or matte black hardware ($40–$150 for quality pulls and handles) to avoid a flat look. Installation typically requires professional help if you’re replacing an existing door ($200–$800 labor), but renting? Frame a matte black accent door in your entryway with removable wallpaper or paint. Time investment is one weekend for paint, one day for a professional door swap.

    The depth and shadow play of a matte finish creates dimension in photos and makes your entry feel intentional. Your home becomes the one neighbors actually notice.

    2. Embrace Minimalist Frames for Maximum Light

    Thin-frame doors and windows have become the gold standard for modern minimalism. These ultrathin aluminum profiles ($300–$1,200 per door) maximize glass while minimizing visual clutter, making small spaces feel larger and allowing light to flow freely between rooms.

    Brands like Technal and Enigma specialize in frames under 1 inch wide. If you’re renting, this isn’t for you—but homeowners can install these as interior room dividers in one to two days with a professional. The payoff? Your space breathes. You get better sightlines, cleaner aesthetics, and the psychological benefit of openness. Pair with frameless hardware or recessed handles to complete the minimalist look.

    These doors work in bedrooms, bathrooms, and home offices. The less frame you see, the more your interior design becomes the focus.

    3. Add Sidelights for Luxury Entrance Drama

    Sidelights instantly elevate any entry and aren’t just for fancy homes. These vertical glass panels run $150–$600 each and can be retrofitted into existing doorways without replacing the main door. They flood entryways with natural light while maintaining privacy through frosted or textured glass options.

    If you’re in a rental, this isn’t feasible—but homeowners should consider sidelights their next upgrade. A professional installation takes one day. Pair them with the oversized door trend for a high-impact combo that adds perceived value and warmth. The morning light that pours through sidelights becomes a feature you’ll actually look forward to experiencing daily.

    The bonus? Visitors see your entryway’s personality before they even walk in.

    4. Install Pocket Doors to Reclaim Floor Space

    Pocket doors slide directly into wall cavities, saving valuable floor space compared to traditional swing doors. Perfect for small bedrooms, bathrooms, or powder rooms, these cost $200–$600 installed and make rooms feel instantly more spacious.

    Brands like Enigma offer stylish options in various finishes and materials. Installation typically requires a professional ($300–$500 labor) because you need to open the wall and add a track system—generally a one-day project. Renters, this isn’t an option, but homeowners in compact homes should absolutely explore this. The accessibility boost alone (no door swing interference) changes how you move through tight spaces.

    You regain square footage without renovation. Suddenly your small bedroom or bathroom functions better and photographs larger.

    5. Choose Dark Green for Bold, Sophisticated Color

    Matte black gets all the attention, but dark forest green is the color quietly stealing the show for 2025. It pairs beautifully with any exterior and feels more timeless than trendy. A fresh coat of exterior-grade paint ($30–$80 per gallon) transforms any door in one afternoon.

    Choose a satin or matte finish to avoid shine—it looks more upscale and hides drips. Pair with warm brass or oil-rubbed bronze hardware ($20–$100) for a sophisticated look. This works for renters too (get landlord approval first), and you can always repaint before moving. The beauty of green is it complements landscaping, stone, brick, and modern siding equally well.

    Your entry becomes a talking point. Guests remember the green door more than any other detail.

    6. Install Smart Locks with Biometric Access

    Smart locks with biometric fingerprint or facial recognition ($200–$500) are no longer luxury tech—they’re practical for busy households and renters with roommates. Brands like August, Level, and Ultraloq integrate with your smartphone and home automation systems.

    These doors lock/unlock via fingerprint, PIN, or app, eliminating key fumbling. Installation takes 30 minutes (no tools needed—just unscrew your old deadbolt). The real benefit? Temporary access codes for guests, packages, or cleaners. You never hunt for keys again. Works for renters if your lease allows hardware changes (removable installation options exist).

    Security feels effortless, and you’ll catch yourself smiling at the convenience. Your morning routine gets smoother.

    7. Layer Textured Hardware for Personality

    Generic door hardware is disappearing fast. The new approach? Layered or statement hardware that combines geometric shapes, mixed metals, and textures ($40–$200 per set). Think brushed bronze pulls paired with matte black handles, or sculptural geometric knobs that double as art.

    Brands like Anthropologie, CB2, and specialty hardware shops offer designer-quality pulls starting at $20 each. Swapping hardware takes 15 minutes with a screwdriver—renter-friendly and reversible. Start with one statement pull and pair it with simpler handles elsewhere on the door. The texture and intentionality catch light differently throughout the day, adding depth to your entry.

    Your door becomes a conversation piece. That one special pull makes everything feel designed, not default.

    8. Use Crittall-Style Glass Doors for Room Division

    Industrial Crittall-style glass doors with black metal grids ($400–$1,500) are having a major moment for creating visual separation without blocking light or sound. These doors divide open-plan homes into distinct zones while maintaining that airy, connected feeling.

    Installation typically takes one day and requires a professional ($300–$600). They work best in homes with higher ceilings and modern or transitional aesthetics. Renters, unfortunately, these require wall modifications. The payoff is huge though: you get a designated office, studio, or bedroom that feels separate without losing natural light or the sense of space. The industrial-chic look pairs perfectly with matte finishes and minimal hardware.

    Your open floor plan gains purpose and flexibility. Suddenly you can close off a work area while keeping the visual openness.

    9. Paint Your Door Matte Navy for Subtle Drama

    While matte black dominates, matte navy ($30–$80 for quality exterior paint) offers similar sophistication with a slightly warmer, more approachable vibe. Navy reads as classic rather than trendy, making it ideal if you want longevity without commitment anxiety.

    Navy pairs beautifully with white trim, warm wood, or charcoal siding. Paint the door in one afternoon using high-quality exterior satin or matte finish (two coats). This works perfectly for renters—and unlike black, navy stains less noticeably between cleanings. The blue-black tone works with any hardware style, from traditional brass to modern matte black. Add a simple wreath or planter to warm up the look.

    Your entry feels polished and intentional. Navy gives you sophistication without trying too hard.

    10. Swap Out Hardware for Instant Refresh

    Sometimes you don’t need a new door—you need new hardware. Swapping your pull and deadbolt ($40–$150 for quality pieces) takes 15 minutes and delivers shocking impact. Old brass? Upgrade to brushed gold, matte black, or aged bronze for an immediate refresh.

    Shop Target, IKEA, Wayfair, or specialty brands like Rejuvenation. This is the ultimate renter hack—remove old hardware and reinstall it before you move. Pro tip: get a set that includes both handle and deadbolt for visual cohesion. Choose geometric or sculptural shapes over simple knobs for a more curated feel. The right hardware can make a $50 door look like a $500 door.

    That single change makes your entire entry feel intentional. Visitors notice—and you’ll touch that pull dozens of times daily.

    11. Install Energy-Efficient Glass Panels

    If you’re replacing your door anyway, go for energy-efficient glass with Low-E coating ($600–$1,500). This special glass reflects heat in summer and retains warmth in winter, lowering energy bills by 10–15% and cutting UV damage to interior furnishings.

    Brands like Pella, ProVia, and Marvin offer these options. Installation requires a professional ($200–$500 labor). This isn’t a quick fix, but it’s an investment that pays dividends if you live somewhere with temperature extremes. The glass looks identical to standard glass but performs dramatically better. Pair with weatherstripping for maximum efficiency.

    Your heating and cooling costs drop noticeably, and your interior colors stay vibrant longer. Energy efficiency feels good in your wallet and on the environment.

    12. Create a Sliding Barn Door Interior Feature

    Sliding barn doors ($300–$800 with hardware) have moved beyond farmhouse—they’re now a sleek space-saving solution for bedrooms, home offices, or pantries. The horizontal glide mechanism saves floor space while looking contemporary in the right setting.

    Install on a track system ($150–$400 labor) in one day. Choose wood finishes (reclaimed, weathered, or painted) or modern materials like metal. Pair black hardware with matte finishes for a refined look. Renters, some track systems mount to trim only—ask your landlord about damage-free installation. The novelty of a sliding door never gets old, and guests genuinely enjoy the functional design element.

    Your home feels more intentional. That sliding mechanism becomes a small daily pleasure.

    13. Apply Frosted or Textured Glass for Privacy

    Frosted or textured glass films and replacement panels ($50–$300) give you privacy without sacrificing light—perfect for bathrooms, bedrooms, or office doors. These create an artistic, light-diffusing effect that’s far more interesting than solid doors.

    Apply static-cling films ($15–$40 per sheet) in 30 minutes for a renter-friendly option, or upgrade to permanent etched glass ($200–$300 professionally installed). Popular patterns include geometric shapes, wavy lines, or simple frosting. The light still flows freely, but you can’t see inside. Pair with clean hardware and modern frames for a spa-like feel.

    Your private spaces stay private while feeling open. The soft light diffusing through frosted glass becomes a design feature, not a limitation.

    14. Upgrade to Sustainable Bamboo or Reclaimed Wood

    Sustainable woods like bamboo and reclaimed oak ($800–$2,000 installed) reduce manufacturing emissions by nearly 40% compared to standard materials, per the National Renewable Energy Laboratory. Reclaimed wood doors carry authentic character—each grain pattern is unique.

    These require professional installation ($200–$600 labor). The upfront cost is higher, but reclaimed wood doors often increase home value and last decades. Bamboo offers similar benefits with a lighter aesthetic. This isn’t for renters, but homeowners in eco-conscious homes should absolutely explore this. The craftsmanship and longevity mean you’re investing, not spending.

    Your entry tells a story. Every visitor comments on the authentic beauty and knows you chose sustainability.

    15. Paint Your Door Sage Green for Calm Curb Appeal

    If forest green feels too bold, soft sage green ($30–$80) brings the nature trend indoors while feeling calmer and more approachable. This muted tone works beautifully on traditional, transitional, and even modern homes.

    Apply exterior-grade satin paint in one afternoon (two coats). Pair with soft brass hardware and natural wood trim for a cohesive look. Sage reads as intentional without demanding attention, making it perfect if you want to sell later—it’s neutral enough not to feel trendy. Works great for renters too, and the soft color hides wear better than bright hues.

    Your entry feels like a peaceful retreat before you even step inside. Sage green is the color that makes people take a breath and smile.

    16. Add a Sleek Recessed Handle for Minimalist Looks

    Recessed or invisible handles ($80–$300 installed) are the ultimate minimalist move—your door essentially becomes a flat surface with no protruding hardware. These hidden handles require a custom door or professional modification but deliver stunning visual cleanliness.

    Installation takes 2–3 hours for a skilled carpenter ($150–$300 labor). Best with flat modern doors in solid colors. This won’t work for renters, but it’s the ultimate solution if you hate visible hardware breaking up clean lines. The minimalist payoff is huge—your door becomes part of your wall, not a focal point.

    Your space feels intentionally designed and uncluttered. The absence of hardware becomes a statement in itself.

    17. Install a Glass Door Partition for Home Office

    Frameless glass partitions ($400–$1,200 installed) let you create a dedicated home office without losing light or openness. These doors swing or slide and create acoustic separation without visual barriers.

    Professional installation takes one day ($300–$500 labor) and requires removing drywall sections. Perfect for remote workers who need a defined workspace but hate the boxed-in feeling of traditional office walls. Pair with matte hardware for a refined look. Renters, this requires landlord approval and wall modification—check your lease first.

    You get a professional work environment that doesn’t sacrifice your home’s openness. Focus and productivity improve when you have a dedicated space.

    18. Paint Hardware Gold for Luxury on a Budget

    Brushed gold or champagne hardware ($60–$200 for new pieces, or DIY-paint existing hardware for $10) pairs beautifully with matte black and green doors. Metallic finishes catch light and add perceived luxury without the luxury price tag.

    Paint existing hardware using specialty metallic spray paint ($8–$15 per can) in 30 minutes per piece—or buy new designer pulls. Brushed finishes hide fingerprints better than polished gold. This works for renters (you can repaint before leaving) and homeowners. The gold-against-matte contrast is incredibly sophisticated and photographs beautifully.

    Suddenly your door looks curated and expensive. That single accent color makes everything feel intentional and polished.

    19. Choose Weathered Gray for Modern Farmhouse

    Weathered gray ($30–$80 in exterior satin) splits the difference between bold and neutral—it’s sophisticated enough for modern spaces but warm enough for farmhouse aesthetics. This color trend is gaining serious traction because it works everywhere.

    Apply in one afternoon using quality exterior paint. Pair with black hardware and white trim for farmhouse vibes, or matte gold and concrete for modern looks. Weathered gray hides dirt and weathering naturally, making maintenance easier than lighter colors. Perfect for renters and homeowners alike—it’s neutral enough that future buyers won’t hate it.

    Your entry looks intentionally designed without being trendy. Weathered gray ages beautifully and becomes more charming over time.

    20. Install Aluminum French Doors for Light

    Aluminum French doors ($600–$1,500 installed) with slim frames maximize glass while providing that classic French aesthetic with modern efficiency. Perfect for creating transitions between indoor and outdoor spaces.

    Professional installation takes one day ($200–$400 labor). Choose between single or double panels depending on your space. Aluminum resists rust and weathering, making these ideal for coastal homes. Pair with energy-efficient glass for climate control benefits. Renters, these require structural modification—likely not an option.

    You gain seamless connection to outdoor spaces. That visual expansion makes even small yards feel part of your living area.

    21. Apply Protective Film to Glass Doors

    Security and protective window films ($100–$400 professionally installed) strengthen glass doors against impact while offering privacy and UV protection. These films make breaking glass much harder—a serious safety upgrade.

    DIY application costs $30–$60 but requires patience; professional installation ($200–$300) ensures bubble-free perfection. Films come in clear (protective only) or frosted (privacy + protection). This isn’t glamorous but it’s practical—especially important if you live in areas with break-ins or extreme weather. Works for renters with landlord approval.

    Your glass doors become safer without losing aesthetics. That peace of mind is worth the investment alone.

    22. Install a Geometric Pattern on Frosted Glass

    Custom geometric frosted patterns ($150–$400 for professional application) turn your frosted glass into art. Patterns like hexagons, triangles, or custom designs add visual personality without compromising privacy.

    Hire a glass specialist or apply removable vinyl stickers ($20–$50) yourself in 1–2 hours. This works perfectly for bathrooms, office doors, or bedroom entries. Renters can use removable vinyl versions. The pattern catches light beautifully throughout the day and creates a stunning visual effect from both sides of the door.

    Your bathroom or office door becomes a design feature. That geometric pattern makes a functional privacy solution feel intentional and artful.

    23. Go Frameless for Maximum Minimalism

    Completely frameless glass doors ($1,200–$2,500 installed) represent the ultimate minimalist statement—pure glass with barely visible hardware. These custom doors require structural support and expert installation but deliver unmatched visual cleanliness.

    This is a significant investment ($300–$500 labor) and only for homeowners committed to minimalism. Installation takes 1–2 days. Works best in modern homes with clean aesthetics and high-quality surrounding finishes. The wow factor is undeniable—your door becomes almost invisible, letting architecture and interior design shine.

    Your space becomes maximally open and light. Frameless doors create an almost gallery-like aesthetic that impresses everyone who enters.

    24. Add LED Strip Lighting Around Your Door Frame

    LED strip lighting ($40–$150 for quality strips, plus $100–$200 installation) installed around your door frame creates dramatic ambiance and practical nighttime visibility. Warm white LEDs add luxury without harshness.

    Install strips in a weekend using adhesive backing and connecting to a simple plug-in power source. Choose dimmable options ($80–$150) for maximum flexibility. This works beautifully on both interior and exterior doors—especially striking on frosted or glass doors. Renters can use battery-powered LED strips ($20–$50) for a temporary solution.

    Your entry becomes a focal point morning and night. That subtle glow transforms your door into an architectural feature that photographs beautifully.

    Save this post and pick one idea to tackle this weekend—whether it’s swapping hardware in 15 minutes or planning a bigger door upgrade. Your entry deserves to feel as good as it looks.

  • 23 Cozy Reading Nook Styling Ideas for Warm, Quiet Moments

    23 Cozy Reading Nook Styling Ideas for Warm, Quiet Moments

    There’s nothing quite like having a dedicated corner where you can disappear with a book and forget the world exists for a while. But creating that perfect reading sanctuary doesn’t require a complete room overhaul—it’s about layering comfort, lighting, and intentional details into one cozy spot. Whether you’re working with a corner, an alcove, or even a closet nook, these 23 ideas will help you build a reading retreat that feels like an escape without breaking the bank. From rich jewel-tone walls to vintage furniture finds and ambient lighting tricks, you’ll discover both budget-friendly hacks and investment pieces that transform an ordinary space into somewhere you actually want to spend hours. Let’s create your reading haven.

    1. Paint Walls a Deep Jewel Tone

    Dark, moody colors like emerald, burgundy, or deep teal create instant coziness and make a small nook feel like a personal sanctuary. The right wall color signals to your brain that this space is special—different from the rest of your home.

    Paint three walls in your chosen jewel tone (or just the wall behind your chair for a statement backdrop) using quality interior paint. Expect to spend $30–$60 on paint and a few hours on a weekend project. Deep jewel tones hide dust better than pastels and pair beautifully with warm lighting. If you’re renting, use removable peel-and-stick wallpaper in emerald or burgundy instead—brands like Spoonflower and Amazon have hundreds of options for $25–$50 per roll.

    The depth of color wraps around you while you’re reading, making the space feel more enclosed and intimate. You’ll notice how much more relaxing the nook becomes once you’re surrounded by richness instead of stark white.

    2. Layer Multiple Textures with Throws and Pillows

    Reading requires physical comfort, and mixing textures—chunky knits, velvet, linen, faux fur—signals luxury while giving you something to fidget with when you’re lost in thought. Texture makes a space look lived-in and inviting.

    Start with a quality throw ($40–$80 from Schoolhouse Electric or Etsy), then add 2–3 pillows in complementary textures and colors ($15–$30 each from Target, West Elm, or thrifted). Mix a knit throw with a velvet pillow and a linen cushion for contrast. Layer them generously—this isn’t about minimalism.

    Your reading chair transforms into a nest that supports your back, neck, and legs. You’ll want to sink into it every single day, and guests will notice how thoughtfully styled it is.

    3. Install a Swing or Hanging Chair

    A swing or hanging chair adds playfulness and movement to a reading space—plus it’s an instant focal point that photographs beautifully. The gentle motion while reading is surprisingly soothing.

    Hanging chairs range from $100–$400 depending on style (Wayfair, Amazon, West Elm). Installation takes 30 minutes with a stud finder and basic hardware. If your ceiling can’t support hanging hardware, consider a floor-standing reading swing for $200–$600. Add a cushion and throw for comfort.

    The slight sway creates a meditative reading experience that stationary chairs can’t match. Plus, your nook looks Instagram-worthy without feeling overdone.

    4. Create Ambient Lighting with Layered Fixtures

    Reading requires good light, but harsh overhead lighting kills coziness. Layering 2–3 light sources (floor lamp, table lamp, string lights) lets you adjust brightness and create warmth.

    Combine a dimmable floor lamp ($40–$120 from Target or CB2), a small table lamp ($25–$60), and optional string lights ($15–$30 from Amazon). Total investment: $80–$210. Install on a dimmer switch for maximum control. Position the floor lamp behind or beside your chair to avoid glare on your book.

    Soft, warm lighting (2700K color temperature) makes reading easier while creating ambiance that makes you want to linger. You’ll read longer and feel less eye strain.

    5. Add a Small Side Table for Books and Beverages

    A side table keeps your essentials within arm’s reach—tea, water, your current book, glasses—so you don’t have to abandon your cozy position. It also visually anchors the nook and provides a styling surface.

    Look for a small wooden table (18–24 inches wide) at IKEA ($30–$50), thrift stores ($10–$40), or Wayfair ($50–$150). Vintage wooden stools work too. If space is tight, a floating shelf ($20–$40) or a narrow console does the same job.

    Everything you need sits within reach, and your nook looks intentional and styled rather than cluttered. You’ll stop knocking over your mug mid-chapter.

    6. Hang Floating Shelves Above Your Chair

    Vertical storage makes a small nook feel intentional and lets you display books as decor. Floating shelves are renter-friendly and easy to install.

    Install 2–3 shelves using heavy-duty wall anchors if renting, or into studs if you own ($40–$100 for a set of three from IKEA). Takes 45 minutes. Fill with books, a few decorative objects, and candles to create a styled backdrop that feels like a personal library corner.

    Your books become part of the decor, and you always know where to grab your next read. The nook feels curated and special rather than empty or generic.

    7. Use Pattern Drenching for Immersive Coziness

    Pattern drenching—layering matching or complementary prints across walls, textiles, and furniture—creates an immersive, cocoon-like feeling perfect for a reading retreat. It signals this space is different and intentional.

    Start by choosing one dominant pattern (geometric, checks, animal print, or botanical) and incorporate it across 2–3 surfaces: wallpaper, curtains, or upholstery. Mix in one complementary solid. Use peel-and-stick wallpaper ($25–$50 per roll) on just one wall if you’re unsure. Balance busy patterns with calm lighting and one neutral furniture piece.

    Being surrounded by coordinated patterns feels luxurious and magazine-worthy. Your brain registers the space as “specially designed for me,” which triggers relaxation.

    8. Install Wallpaper on the Ceiling for Architectural Drama

    Ceiling wallpaper is an unexpected detail that adds architectural interest without cluttering the space with objects. It draws the eye upward and makes even a small nook feel intentional and designed.

    Apply peel-and-stick or traditional wallpaper to your ceiling using $30–$80 in materials and a few hours of work (or hire help for $150–$300). Geometric, botanical, or subtle check patterns work best. Avoid busy animal prints overhead—they’re visually overwhelming.

    The unexpected detail makes people notice your reading space immediately. You get architectural drama without buying a single piece of furniture.

    9. Add Contrast Trim for Definition Without Clutter

    Painting or adding trim in a contrasting color (white, cream, or a darker shade) defines the space and adds sophistication without adding objects. It creates a “frame” around your reading zone.

    Paint existing trim white or cream ($20–$40 in paint) or add wallpaper trim along baseboards and ceiling edges ($15–$30). If you’re renting, use removable wallpaper borders for $10–$25.

    The visual separation makes your nook feel like a purposefully designed room within a room. It photographs beautifully and costs almost nothing.

    10. Choose a Statement Armchair in Jewel Tones or Patterns

    Your chair is the star of a reading nook. A statement piece in a jewel tone or interesting pattern signals that this corner is special and worth investing in comfort.

    Look for vintage or new armchairs in emerald, burgundy, navy, or mustard ($200–$600) from Wayfair, Article, or local thrift stores. Upholstered chairs ($300–$800) last longer than leather. Check for good back support and deep seat depth—you’re going to spend hours here.

    A beautiful, comfortable chair is non-negotiable for a reading retreat. You’ll use it every day, and the right chair makes reading feel like a luxury rather than an afterthought.

    11. Hang Sheer Curtains with a Patterned Overlay

    Layering sheer and patterned curtains combines the softness of diffused light with visual interest. Sheers filter harsh light while patterned overlays add style without blocking the view.

    Install sheer linen curtains ($40–$80 from Target or IKEA) on a standard rod, then add a roman shade or patterned panel ($60–$150) over top. Total: $100–$230 and 30 minutes to install. This combo works in any size window.

    Soft, filtered light makes reading comfortable while the pattern gives your nook personality. You get privacy and aesthetics at once.

    12. Create a Reading Nook Using a Closet or Alcove

    If you lack floor space, transform a closet or under-stair alcove into a hidden reading cave. Closets are naturally cozy and feel like secret hideaways.

    Remove hanging rods if needed, add a low cushion or yoga mat ($30–$100), install floating shelves ($40–$80), and string lights ($15–$30). Total cost under $250 and a weekend of work. Prop the door open or leave it mostly closed for a mysterious vibe.

    The enclosed, private feeling makes this space feel like your own retreat. Kids and adults alike love the fort-like coziness of a closet nook.

    13. Use Limewashed Walls for Textured Warmth

    Limewashing creates a soft, lived-in texture that’s more interesting than flat paint while still feeling calm and cozy. The uneven finish adds character.

    Apply limewash using a kit ($30–$60 from Sherwin-Williams or Farrow & Ball) following package instructions, or hire a pro ($400–$800). DIY takes a full day and feels meditative. The finish gets more beautiful over time as it ages unevenly.

    Limewashed walls feel handcrafted and intentional—like a European countryside retreat. The texture catches light beautifully and never looks sterile or corporate.

    14. Add a Statement Floor Lamp with Sculptural Base

    A sculptural floor lamp does double duty as both functional lighting and decor. Arc lamps are especially good—they curve over your chair and don’t take up much floor space.

    Look for arc floor lamps in brass, black, or natural wood ($80–$250) from West Elm, Schoolhouse Electric, or Wayfair. Vintage options from thrift stores cost $20–$50. Pick one with a dimmable bulb for maximum coziness.

    The lamp becomes a focal point that looks intentional and designed. Brass or sculptural bases photograph beautifully and upgrade the entire nook’s aesthetic.

    15. Display Books as Decor with Spine-Out Styling

    Books are beautiful objects—show them off. Styling spines spine-out (rather than buried in storage) turns your collection into instant decor and makes choosing your next read fun.

    Arrange books on floating shelves with spines facing out, mixing vertical and horizontal stacks. Tuck in a few small objects (candles, plants, framed photos) for visual breaks. No purchase needed—just reorganize what you own.

    Your reading nook looks like a personal library rather than a blank corner. Seeing your collection makes you want to reread old favorites and curate future purchases.

    16. Invest in a High-Quality Reading Light or Gooseneck Lamp

    A dedicated reading light (not overhead lighting) is essential for comfortable reading. Gooseneck or swing-arm lamps position light exactly where you need it without shadows.

    Install a swing-arm wall lamp ($60–$150 from Rejuvenation, Etsy, or IKEA) if you own your space, or use a clip-on lamp ($30–$60) if you rent. Choose warm white bulbs (2700K) for comfort. Total cost $30–$150 depending on style.

    Proper lighting prevents eye strain and makes reading physically comfortable. You’ll notice the difference immediately—your eyes won’t tire halfway through a chapter.

    17. Layer a Vintage or Persian-Style Rug Underneath

    A rug anchors the nook visually and adds warmth (literally and figuratively). Vintage rugs in geometric or botanical patterns tie together jewel tones and create a “collected over time” aesthetic.

    Hunt for a 3×5 or 4×6 rug at thrift stores ($20–$80), estate sales ($30–$150), or Ruggable ($100–$300 for easy-to-clean modern options). Geometric patterns and deep jewel tones align with current trends and hide dirt.

    The rug defines your nook as a separate zone within a larger room. It also adds comfort underfoot and visual grounding that makes the space feel intentional.

    18. Add Cafe Curtains for Soft Vintage Charm

    Cafe curtains—covering only the lower half of a window—let in light while maintaining privacy and adding charming, vintage-inspired character. They’re perfect for reading nooks.

    Install a brass rod halfway up your window frame ($20–$40) and add cafe curtains in linen, cotton, or lace ($30–$70 from Etsy, Pottery Barn, or IKEA). Takes 20 minutes. Pair with sheers above for a layered look.

    Cafe curtains add instant cottage or European charm without feeling overdone. They’re especially perfect in bedrooms or living room corners where you want a soft, romantic vibe.

    19. Create a Book Wall with Contrasting Paint Behind Open Shelving

    Paint the wall behind open shelves in a contrasting jewel tone to make your book collection pop. The color becomes the backdrop and your books the focal point.

    Paint a feature wall in emerald, burgundy, navy, or deep teal ($30–$60 in paint, a few hours of work). Install open shelves ($40–$100 for a set). Arrange books spine-out with a few decorative objects mixed in.

    Your book collection becomes a design feature rather than clutter. Visitors immediately see that you’re a reader, and the nook feels curated and intentional.

    20. Use a Pleated or Gathered Skirt Around a Cushioned Window Seat

    A skirted window seat looks vintage and adds softness to hard lines. Gathering or pleating fabric creates movement and charm—it’s a detail that photographs beautifully.

    Add a cushion to a window seat ($50–$150 from a seamstress or Etsy) and drape it with a pleated skirt using 3–5 yards of linen ($40–$80 from fabric stores). Alternatively, buy a pre-made bedskirt and adapt it (**$30–$60 from Target). This is a weekend project or have it made for you.

    The soft detail transforms a utilitarian window seat into something that feels designed and special. It adds texture and romantic charm instantly.

    21. Incorporate Brass or Gold Metallic Accents

    Warm metallics like brass and gold tie a room together and add luxury. Repetition of the same metal creates cohesion.

    Choose either brass or gold and repeat it across fixtures: lamp base ($60–$120), side table frame ($50–$150), wall sconce ($40–$100), picture frame ($15–$40). Total coordinated investment: $165–$410. Mix metals intentionally (don’t scatter random silvers and golds).

    Brass threading throughout your nook creates a sophisticated, collected aesthetic. It costs little extra but looks intentional and high-end.

    22. Stock Your Nook with Beloved Books and Meaningful Objects

    The best reading nooks feel personal, not decorated-by-committee. Surround yourself with books you actually want to reread, objects that make you happy, and pieces with memories attached.

    Gather your favorite books (no rules on which ones), add a mug that brings you joy, a candle that smells like comfort, a plant for life, and 1–2 meaningful objects. Cost: $0–$50 depending on what you already own. Arrange on shelves and side table.

    A nook filled with your actual favorites feels like a true retreat. You’ll gravitate there naturally because it’s genuinely yours—not a Pinterest recreation.

    23. Use Tactile, Pattern-Forward Textiles for Layering

    Combining different patterns (checks, geometrics, stripes) and textures (knit, velvet, linen, fur) adds visual interest and makes your nook feel abundant rather than sparse. Tactile layering signals luxury.

    Start with a solid base throw ($40–$80), add a patterned pillow in checks or geometrics ($20–$40), layer a textured cushion ($15–$30), and include a faux fur accent ($20–$50). Mix 2–3 patterns with varying scales; let one color (like burgundy or emerald) tie them together.

    Your nook looks magazine-styled and feels irresistibly cozy. Guests will want to sink into that chair immediately, and you’ll crave reading time more often.


    Save this post and tackle one idea this week. Whether you start with paint, a new throw pillow, or a statement chair, each small addition layers into a space that truly feels like yours. Your reading retreat is just a few inspired changes away.

  • 24 Green Couch Styling Ideas That Transform Your Living Room

    24 Green Couch Styling Ideas That Transform Your Living Room

    A green couch is the perfect statement piece—bold enough to anchor your entire living room, yet surprisingly versatile to style. Whether your green leans into deep forest tones, soft sage, or vibrant emerald, the styling possibilities are endless. The challenge? Making sure it feels cohesive and intentional, not overwhelming or dated. That’s where this guide comes in. We’ve gathered 24 specific styling ideas that work with any shade of green, from renter-friendly swaps to investment-level upgrades. You’ll discover how to pair your couch with complementary colors, textures, and accessories that make it shine. By the end, you’ll have a complete roadmap for creating a living room you actually love sitting in—and one that photographs beautifully too.

    1. Layer Warm Neutrals Around Cool Greens

    Pairing a cool-toned green (like forest or sage) with warm neutrals creates instant balance and prevents the space from feeling cold or clinical. This approach lets your green couch be the star without competing with other bold colors.

    Start with a cream or beige area rug as your foundation ($50–$200 depending on size and material). Layer in throw pillows in ivory, oatmeal, or warm taupe ($20–$60 each). Add a wooden coffee table or side tables in walnut or oak ($100–$400) to warm up the space. The contrast makes the green feel more intentional and luxe.

    Pro tip: Skip pure white—warm whites and creams create a more sophisticated, lived-in look than stark white accents.

    Your green couch becomes the hero piece while the neutrals keep everything feeling calm and grounded, like a designer chose each element deliberately.

    2. Add Patterned Throw Pillows in Complementary Colors

    Throw pillows are your secret weapon for testing pattern combinations without commitment. They’re cheap to swap, renter-friendly, and completely change the vibe of your couch.

    Choose 3–4 pillows with different scales of pattern ($15–$40 each): one botanical print, one geometric, one subtle texture, and one solid-color echo of your couch. Keep all patterns in a similar color family—warm earth tones, jewel tones, or pastels work beautifully. Target, West Elm, and Wayfair have excellent options that won’t break the bank.

    Pro tip: Odd numbers of pillows (3 or 5) look more intentional than even numbers, and mixing textures (linen, velvet, knit) adds depth.

    Your couch instantly feels curated instead of bare, and visitors will think you’re a pattern-mixing expert.

    3. Hang Botanical Wall Art Above the Couch

    Wall art directly behind your couch ties the whole look together and adds a curated, intentional feel that transforms a bare wall into a focal point.

    Create a gallery wall with 3–5 framed botanical or nature prints ($30–$150 total depending on whether you frame DIY or buy pre-framed). Stick with natural wood frames or matte black for a cohesive look. Arrange them in a loose rectangle or salon-style grid centered behind your couch. IKEA frames are budget-friendly ($5–$15 each), and printable options from Etsy let you customize ($5–$20).

    Pro tip: Hang the center of your arrangement at eye level (about 57 inches from the floor) for the most pleasing visual balance.

    Your couch becomes part of a deliberate design composition instead of just floating in the room.

    4. Style a Bookshelf Behind or Beside the Couch

    A styled bookshelf beside or behind your green couch adds personality and breaks up empty wall space while keeping the focus on your sofa.

    Stack books horizontally and vertically, add 3–4 decorative objects (a woven basket, small plant, sculptural book ends, framed photo), and layer in a small accent lamp ($40–$100). Keep the color palette neutral with warm wood so the green couch stays the star. IKEA Kallax, Target, or a thrifted wooden shelf all work ($80–$300).

    Pro tip: Leave some shelves partially empty—a styled shelf crammed full looks cluttered, not curated.

    You’ve created a functional display that looks like it belongs in a magazine without needing a professional designer’s help.

    5. Add a Large-Scale Patterned Area Rug

    A statement rug grounds your furniture arrangement and pulls together multiple colors in a way that feels intentional rather than random.

    Choose a rug that’s 8×10 or larger with a pattern featuring your couch’s green plus 2–3 complementary colors like rust, cream, or gold ($150–$500 depending on material). The pattern should be bold enough to see but not so busy it competes with your couch. Wayfair, Rugs USA, and West Elm have excellent options; thrift stores and Facebook Marketplace offer designer finds at a fraction of the price.

    Pro tip: Layer a smaller solid or subtle rug on top for added texture and to define smaller seating zones if your space allows.

    The rug ties the entire room together visually and makes even a small living room feel intentionally designed.

    6. Drape a Chunky Knit Throw Across the Armrest

    A draped throw adds texture, warmth, and an instant “cozy living” vibe that makes your space feel lived-in rather than showroom-perfect.

    Pick a chunky knit throw in cream, oatmeal, or soft taupe ($40–$120). Drape it loosely over one armrest so it cascades slightly onto the seat or back. The texture contrast against the smooth upholstery creates visual interest. Target’s Threshold collection, Anthropologie, and Etsy vintage sellers all have gorgeous options.

    Pro tip: Rotate your throw seasonally—heavier knits in winter, lighter linen blends in summer keep the look fresh.

    Your couch becomes an irresistible invitation to sit down and relax, not just a piece of furniture.

    7. Style End Tables with Lamps and Accessories

    End tables flank your couch and define the seating area—styling them well anchors the whole arrangement and adds functional beauty.

    On each side table, create a small vignette: a table lamp with a neutral shade ($40–$120), a small potted plant or vase ($15–$50), and a stack of 2–3 design or coffee table books ($10–$40). Keep colors warm and muted so they don’t compete with your green couch. Wood or natural-finish tables work best ($100–$400 per table).

    Pro tip: Vary the heights of objects on each table for visual interest—don’t line everything up at the same level.

    Your seating area feels like a complete, thoughtful composition instead of random furniture pushed against walls.

    8. Paint an Accent Wall in Warm White or Cream

    A fresh coat of paint behind or beside your couch costs almost nothing and completely changes how your green sofa reads in the space.

    Choose a warm white or cream paint ($30–$50 per gallon) and paint just the wall behind your couch for impact without overwhelming the room. Prep work takes 2–3 hours; painting takes 1–2 hours. Benjamin Moore, Sherwin-Williams, or budget options like Rustoleum all have lovely warm neutrals. If you rent, ask your landlord—if they say no, peel-and-stick wallpaper ($30–$80) is an easy alternative.

    Pro tip: Paint the wall a shade lighter or darker than your existing walls for subtle visual interest, or go bold with a complementary shade like soft gold or pale sage.

    Your green couch instantly feels more intentional, and the space looks professionally designed on a tiny budget.

    9. Mix Textured Throw Pillows in Similar Color Families

    Mixing textures creates depth and makes your couch feel high-end and curated, like a designer styled it with intention.

    Layer 5–7 throw pillows in the same color family but different textures: smooth velvet, linen, chunky knit, silk, wool, or faux fur ($20–$60 each). Stick to creams, grays, warm whites, or soft accent colors to let the green couch shine. Etsy sellers, CB2, and Wayfair have excellent texture-mixing options that won’t drain your budget.

    Pro tip: Arrange pillows so smoother textures are on the outside and chunkier textures nest in the center—it photographs beautifully and feels intentional.

    Your couch becomes a tactile, inviting focal point that begs to be sat on and, yes, photographed.

    10. Add Potted Plants on Floating Shelves Nearby

    Plants echo your couch’s color and add life to the space while requiring minimal investment or styling skill.

    Install 2–3 floating shelves ($30–$80 total) and fill them with small to medium potted plants ($15–$50 each depending on variety). Opt for low-maintenance plants like pothos, snake plants, or ZZ plants if you’re new to plant parenting. Group plants in odd numbers and vary heights for visual interest. IKEA, Wayfair, or a local nursery have everything you need.

    Pro tip: Place plants on different shelves at different heights so they feel arranged, not crammed in a line.

    Your living room becomes a calming, oxygen-rich space that feels fresh and alive—literally.

    11. Layer a Vintage Runner Rug in Front of the Couch

    A vintage runner adds character and suggests you’ve collected beautiful things over time rather than buying everything at once.

    Source a vintage or antique runner rug ($60–$300) from Facebook Marketplace, Etsy, local antique shops, or estate sales. Choose one with warm earth tones—rust, gold, cream, or muted jewel tones work beautifully with green couches. Layer it perpendicular to your main area rug or in front of your couch for a collected, eclectic vibe. Condition varies, so inspect photos carefully.

    Pro tip: Vintage runners are often narrower than modern rugs—that’s intentional and adds to the charm.

    You instantly look like someone with excellent taste who knows how to hunt for treasures instead of buying everything new.

    12. Display a Large Mirror with a Wood or Metal Frame

    A leaning mirror beside your couch amplifies natural light and makes the space feel bigger and brighter while adding a design-forward element.

    Choose a large mirror (3 feet or larger) with a wooden, metal, or composite frame ($100–$400) and lean it against the wall beside your couch rather than hanging it. The size and angle create visual impact while keeping it renter-friendly. IKEA, Target, Wayfair, and thrift stores all have gorgeous options at various price points.

    Pro tip: Position the mirror to catch and reflect your window light during the day—this amplifies natural light and makes the room feel more open.

    Your living room instantly feels brighter, larger, and more sophisticated with just one large, strategically placed piece.

    13. Accessorize with Warm Metallics (Gold, Brass, Copper)

    Warm metals (gold, brass, copper) complement green beautifully and add luxury without screaming “I just bought everything yesterday.”

    Incorporate warm metallics through table lamps ($40–$120), picture frames ($15–$40), vases ($20–$80), and decorative objects scattered across your side tables and shelves. Keep metals consistent—mix brass with copper if you like, but stick to warm tones, not silver or chrome. Target, West Elm, and Amazon have affordable options.

    Pro tip: Mix matte and polished metallics for visual depth—one shiny brass lamp and one matte copper vase feel more intentional than all matching finishes.

    Your space takes on an immediate sense of warmth and sophistication without needing expensive furniture pieces.

    14. Create a Cozy Reading Nook in the Corner

    Carving out a small reading nook beside your couch doubles the functionality of your seating area and creates an intimate space within the larger room.

    Position a comfortable chair or oversized cushion ($100–$400) in a corner near your couch, add a small side table ($40–$120), a floor lamp ($40–$100), a woven basket for blankets or books ($30–$60), and a stack of your favorite books. Keep textiles and colors cohesive with your couch’s palette.

    Pro tip: If you don’t have a dedicated corner, create the illusion of one by grouping furniture and draping a throw blanket nearby.

    You’ve transformed a single sofa into a full-fledged reading destination that makes curling up with a book feel like the best way to spend an afternoon.

    15. Style Low-Profile Side Tables in Natural Wood

    Low-profile tables keep the visual weight of your seating area light and modern while maintaining that intentional, designed look.

    Choose natural wood side tables under 24 inches tall ($80–$250 each) with simple, clean lines—mid-century modern styles work beautifully with green couches. Keep styling minimal: just a lamp, small plant, and perhaps a coffee table book or candle on each. IKEA, Article, and Facebook Marketplace vintage finds all work.

    Pro tip: Mismatched tables (different heights or finishes) create a more collected, intentional vibe than matching sets.

    Your seating area feels modern and uncluttered while still having personality and purpose.

    16. Add a Sculptural Ceramic or Wood Accent Piece

    One statement accent piece adds art and sophistication without requiring wall space or additional furniture.

    Choose a large ceramic vase, wooden sculpture, or abstract art piece ($50–$300) in cream, warm tones, natural wood, or contrasting jewel tones. Position it on a side table, shelf, or the floor in a prominent spot near your couch where it can be admired. Local ceramicists, Etsy, Chairish, and galleries are great sources for one-of-a-kind pieces.

    Pro tip: Odd shapes and imperfect finishes feel more collected and interesting than perfectly symmetrical pieces.

    You’ve added museum-quality art to your living room without spending fine-art prices.

    17. Hang Sheer Curtains to Frame Windows Softly

    Soft curtains frame your windows beautifully and allow natural light to filter through while adding vertical lines that make ceilings feel taller.

    Hang floor-to-ceiling sheer curtains in white or cream ($40–$150 per panel depending on length) from a simple rod in black, gold, or natural wood ($30–$80). Install curtain rods near the ceiling, not at the window frame, to maximize height. IKEA, Target, and Amazon have budget-friendly options in various styles.

    Pro tip: Sheer curtains work beautifully with green couches because they diffuse light without competing visually—your couch stays the star.

    Sunlight now filters through your windows in the most flattering way possible, and your entire room feels brighter and more finished.

    18. Create a Gallery Wall with a Mix of Frame Styles

    A mixed-style gallery wall feels more collected and intentional than matching frames, and it’s a perfect canvas for rotating art.

    Curate 6–10 framed pieces in different frame styles and sizes ($40–$200 total for DIY options, more for pre-framed art). Mix botanical prints, abstract pieces, favorite quotes, family photos, or a combination. Arrange in a loose rectangle or salon-style grid. Etsy printables, thrifted frames, IKEA, and indie artists all provide affordable options.

    Pro tip: Use painter’s tape to map out your arrangement on the wall before hanging anything—this prevents mistakes and ensures balanced spacing.

    Your wall becomes a personal gallery that tells your story and adds depth and sophistication to your entire seating area.

    19. Layer Varying Heights of Throw Pillows

    Varied pillow heights create a luxe, layered look that screams “designed on purpose” rather than “just grabbed whatever was on sale.”

    Mix square pillows (24 inches), rectangular pillows (14×24 inches), and small accent pillows (12 inches) in coordinating colors and textures ($20–$60 each). Arrange taller pillows in the back corners, medium heights in the middle, and smaller accents in front. This creates depth and visual movement.

    Pro tip: Odd numbers feel more intentional than even—aim for 5, 7, or 9 pillows rather than 6 or 8.

    Your couch becomes impossibly plush and inviting, and visitors will assume you have a professional interior designer on speed dial.

    20. Position a Floor Lamp in a Corner for Warm Ambiance

    A strategically placed floor lamp adds functional lighting while creating a warm, intimate atmosphere that transforms your living room at night.

    Choose an arc lamp or tripod floor lamp with a linen or burlap shade ($60–$200) and position it in a corner behind or beside your couch to cast light across the seating area. Warm-toned bulbs (2700K) create the coziest effect. IKEA, West Elm, Target, and Wayfair have options for every budget.

    Pro tip: Pair your floor lamp with dimmable smart bulbs ($15–$30) so you can adjust light levels from your phone.

    Your living room now has the moody, intimate lighting that makes every evening feel like a retreat from the outside world.

    21. Add a Woven Basket for Blankets and Books

    A woven basket serves triple duty: storage, textural accent, and styling opportunity that keeps your space functional and beautiful.

    Place a large woven basket ($40–$120) beside or under your couch to store blankets, books, and throw pillows. Choose natural materials like seagrass, rattan, or woven jute in warm tones. Keep blankets and books visible and slightly overflowing for a collected, lived-in feel. IKEA, Target, West Elm, and thrift stores have excellent options.

    Pro tip: Place a decorative basket liner in a complementary color inside to frame items beautifully and prevent items from looking haphazard.

    You’ve solved the problem of where to store couch accessories while adding another layer of intentional styling.

    22. Mix Vintage and Modern Decor Pieces

    Pairing vintage finds with modern pieces creates a sophisticated, eclectic look that suggests you have excellent taste and a story behind each object.

    Combine new items from modern retailers (West Elm, CB2, Article) with vintage pieces from Etsy, thrift stores, and antique shops. Mix old mirrors, vintage rugs, antique side tables, and inherited furniture with contemporary pillows and art. The key is keeping colors cohesive so the mix feels intentional rather than random.

    Pro tip: Anchor the look with one or two high-quality vintage investment pieces—an antique mirror or side table—and fill in with affordable modern accents.

    Your space feels like it’s been curated with intention over time, not assembled in a weekend shopping spree.

    23. Style Shelving Above the Couch with Books and Objects

    Shelving above your couch maximizes vertical space and gives you a canvas for displaying books and objects that reflect your personality.

    Install 2–4 floating shelves ($40–$120 total) above your couch and style them with stacked books, small plants, framed photos, ceramic pieces, and meaningful objects. Mix vertical book stacking with horizontal arrangements for visual variety. Keep one third empty space to prevent cluttered feeling. IKEA, Wayfair, and a local carpenter can install shelves.

    Pro tip: Group objects in odd numbers and vary heights so shelves feel intentional, not haphazard.

    You’ve created a personal gallery above your couch that tells your story and turns wasted wall space into a design feature.

    24. Install Recessed Lighting or Track Lighting Nearby

    Professional lighting is an investment that completely changes how your green couch looks and how the room feels at night.

    Hire an electrician to install recessed lights or track lighting above your seating area ($300–$800 installed depending on complexity). Use warm-toned bulbs (2700K) to complement your green couch. If you rent or can’t do permanent installation, plug-in track lighting systems ($150–$300) offer an easy alternative.

    Pro tip: Position lights to highlight your couch as the focal point, not wash the entire room equally—this creates dramatic, designer-level ambiance.

    Your living room now has professional-grade lighting that makes your green couch look museum-quality and transforms the entire room after dark.

    Save this post and start with just one or two ideas this weekend—maybe add a throw blanket and a couple of new pillows, or hang that gallery wall you’ve been thinking about. Small changes stack up fast, and your green couch deserves to feel completely intentional.

  • 25 Small Walk-In Closet Ideas That Feel Bigger Than They Are

    25 Small Walk-In Closet Ideas That Feel Bigger Than They Are

    You already know that small walk-in closets don’t have to feel cramped or chaotic—but knowing it and actually making it happen are two different things. The trick isn’t magically expanding your square footage; it’s using every inch strategically so your closet feels bigger and works harder for you. In this guide, you’ll find 25 practical ideas that combine smart storage solutions, lighting upgrades, visual tricks, and styling hacks to turn your compact closet into a space that’s both functional and inviting. Whether you’re renting or planning permanent upgrades, you’ll find ideas at every budget level—from free rearrangements to investment pieces that earn their keep. Let’s dig in.

    1. Double Your Hanging Space with Slim Hangers

    Slim hangers are one of the easiest wins for small closets because they immediately reclaim wasted space. Standard plastic hangers are bulky and waste inches; velvet or non-slip slim hangers reduce thickness by up to 50%, which means you fit nearly double the clothes on the same rod.

    Swap out your existing hangers first—it costs between $15–$40 for a set of 50. Velvet hangers ($20–$35 per set) grip delicate fabrics without slipping and look polished; slim wood or plastic hangers ($15–$25) work just as well if budget is tight. The best part? This takes 30 minutes and requires zero tools or installation. You’ll immediately see how many more pieces fit without touching the walls.

    Pair this with a lightweight cascading hanger hook ($5–$10 on Amazon) to stack multiple items vertically within your closet space.

    2. Paint Walls a Light, Reflective Shade

    Light-colored walls are a free visual expansion tool—they bounce light around and make compact spaces feel airier instantly. White, soft gray, or warm cream are all smart choices for small closets because they brighten the entire room.

    A gallon of paint costs $20–$40, and a small closet typically needs just half a gallon. Self-priming paint speeds up the job. Prep time (clearing the closet, taping trim) takes 2–3 hours, and paint dries in 4–8 hours. If you’ve never painted before, it’s a gentle first project—there are no visible brush strokes in a small space, and imperfections disappear once your clothes are back. This change makes your closet feel noticeably more spacious without any structural changes.

    Skip the bold accent walls in a small closet; save those for larger rooms where they add drama without reducing perceived space.

    3. Install LED Strip Lighting Along Upper Shelves

    Overhead ceiling lights cast shadows and make small closets feel darker; LED strips mounted under shelves or along the crown create even, shadow-free lighting that makes everything visible and the space feel bigger.

    Strip lights cost $15–$50 for a motion-sensor or dimmer-enabled set from Amazon or Home Depot. Installation is simple: clean the shelf underside, peel the adhesive backing, and press the strip in place—10 minutes, no electrician needed. Warm white LEDs (2700K–3000K) feel cozier than cool white and won’t wash out your skin tone when you’re getting dressed. Motion sensors add convenience; you walk in and the closet lights automatically. The lighting becomes part of your morning ritual, and you’ll stop wasting time searching for items buried in shadows.

    Pair this with a small mirror opposite the light source to reflect illumination deeper into the closet.

    4. Add a Narrow Floating Shelf Above the Rod

    Vertical real estate is precious in a small closet. A narrow floating shelf (6–8 inches deep, 24–36 inches wide) installed 12 inches above your hanging rod stores off-season accessories, hats, rolled scarves, or small storage boxes without eating floor space.

    Floating shelves run $20–$60 for a simple wood or laminate option; brackets are often included. Installation takes 30–45 minutes with a stud finder and drill—or hire a handyman for $75–$150. Keep the shelf narrow so it doesn’t create a headbump or visual clutter. Use matching clear or white storage boxes on top to keep the look clean. You gain storage without reducing the hanging rod functionality, and the upper area becomes a secondary zone for out-of-sight organization.

    Renters: wall-mounted shelves require drilling; ask your landlord first or choose a tall freestanding shelf unit instead ($80–$200).

    5. Use Clear Acrylic Drawer Inserts for Folded Items

    Drawer dividers are a game-changer for small closets because they prevent the dreaded “dig through a pile” moment. Clear acrylic inserts let you see every folded item without disturbing the stack.

    A set of adjustable clear dividers costs $10–$25 on Amazon. Divide drawers into 3–5 sections per drawer, with one section per clothing category (t-shirts, tank tops, camis, etc.). You save time getting dressed because items are visible and separated; no more excavating. If your closet has open shelves instead of drawers, apply this same principle using small open acrylic boxes ($2–$5 each). This simple organizing system keeps folded clothes from collapsing into a jumble and saves you mental energy when choosing what to wear.

    Pair this with a labeling system: small adhesive labels on drawer fronts or box edges make it easy to return items to the right spot.

    6. Maximize Vertical Space with Double Hanging Rods

    Double hanging rods are the secret weapon for small closets because they let you hang twice as many items in the same footprint. Install one rod at standard height (5–6 feet) and a second rod 30–36 inches below it for shorter items like folded pants, t-shirts, or jackets.

    A basic double rod kit costs $20–$50 and installs with simple brackets in 1–2 hours. Make sure the upper rod holds lighter items (tanks, blouses, dresses) to avoid overweight stress; the lower rod can handle heavier pieces like jeans or sweaters. You’ll be shocked at how many more clothes fit this way. Best for one side of your closet or a corner; keep the other side single-rod for longer dresses or coats if needed.

    Some spaces work better with one full-width double rod instead of splitting left and right; test the layout before committing.

    7. Install Corner Shelving for Dead Space

    Closet corners often go unused—they’re awkward to reach and hard to fill with hanging rods. A corner shelf unit (usually L-shaped or two-shelf wall units meeting at a corner) transforms dead space into functional storage.

    Corner shelf kits run $40–$100; installation takes 1–2 hours with basic tools. Stack your sweaters, seasonal storage boxes, or shoe organizers here. The corner becomes a secondary storage zone that doesn’t compete with your hanging and shelf areas. Small wall-mounted corner baskets ($15–$30) also work well for scarves, belts, or small accessories if you want something more minimal.

    Renters: freestanding tall corner shelves ($80–$150) work too and don’t require any wall anchors or drilling.

    8. Hang a Slim Shoe Rack on the Back of the Door

    Most closet doors are prime real estate that goes unused. An over-the-door shoe rack (the slim, hanging type, not a tall bulky unit) holds 8–15 pairs without taking any floor space.

    A slim over-the-door rack costs $15–$35 and installs in 5 minutes—no tools needed, just hang it from the door frame. Choose neutral shoes (black, white, beige, gray, navy) to keep the door visually calm. Rotate seasonal shoes out quarterly to keep the display fresh. This single move frees up floor space for a small bench or additional shelving. Bonus: shoes are visible at a glance, so you’re more likely to actually wear them.

    If your closet door opens inward and crowds the space, skip this and use a wall-mounted rack on the side wall instead.

    9. Roll Sweaters Instead of Folding or Hanging

    Rolling sweaters instead of folding or hanging saves incredible space while protecting knitwear from hanger marks. This method condenses your sweater collection by about 30% compared to hanging them.

    Here’s how: fold your sweater in half lengthwise, then tightly roll from the bottom up. Store rolls standing upright in a shallow drawer or stack them on a shelf. Each roll takes about 30 seconds once you get the rhythm. You fit 4–6 rolled sweaters in the space of 2–3 hanging ones. Rolling also protects delicate fabrics because there’s no hanger pressure. Start with a weekend project to roll your entire collection; it’s meditative and takes about 1–2 hours for 15–20 sweaters.

    This method works for lightweight jackets, cardigans, and structured tops too—just avoid heavy coats that hold their shape better hanging.

    10. Add a Narrow Bench Seat for Outfit Staging

    A narrow bench (24–36 inches wide, 12–16 inches deep) at the back or side of your closet serves double duty: it stages outfits before you wear them and provides a seat to put shoes on. This becomes your personal styling station.

    A slim wooden bench costs $40–$150 depending on material. You can also DIY one by stacking a cushion on top of storage cubes. Position it where it won’t block your main walkway. Use the bench to lay out tomorrow’s outfit, style jewelry and accessories, or simply sit while getting ready. It brings a spa-like, intentional feel to your morning routine and makes your closet feel like a boutique dressing room instead of just storage.

    Renters: a cushioned stool ($30–$80) works just as well and moves with you to the next place.

    11. Install a Valet Rod for Outfit Planning

    A valet rod is a thin pull-out rod (usually 18–24 inches) mounted at shoulder height on your closet side wall. You pull it out to hang tomorrow’s outfit or three options while you decide, then slide it back in when done.

    A basic valet rod costs $25–$60 and installs with two simple brackets in 30 minutes. This tool saves decision time in the morning—you pre-stage complete outfits (top, bottom, outerwear) and grab them ready-to-go. It’s especially useful on busy weekdays or for travel. The rod stays hidden when not in use, so it doesn’t add visual clutter. If you work from home or have video calls, you’ll appreciate styling your outfit the night before instead of last-minute scrambling.

    Mount it on the side or back wall where it won’t block your main pathway—shoulder height is ideal so you don’t have to bend or reach.

    12. Use Cascading Hangers for Tanks and Camis

    Cascading hangers (also called tiered or cascade hangers) hold 4–5 lightweight items vertically on a single rod space. They’re perfect for tanks, camis, lightweight tees, or scarves that waste rod real estate when hung individually.

    A set of 3–5 cascading hangers costs $10–$20 on Amazon. Each hanger has graduated clips or hooks that let you hang multiple pieces without tangling. You can fit 15–20 tank tops in the space of 3–4 standard hangers. They work especially well for seasonal items you rotate frequently. Keep them reserved for lightweight, flexible fabrics; heavy sweaters or structured blazers should hang individually to maintain their shape.

    Pair cascading hangers with matching wooden or slim velvet hangers throughout your closet for a cohesive, polished look.

    13. Create Zones: Tops, Bottoms, Dresses, Outerwear

    Zoning your closet by clothing category is one of the most efficient organizational tactics. Your brain finds items faster when they’re logically grouped instead of randomly scattered.

    Rearrange your existing rods and shelves so that tops occupy one zone (left wall, for example), bottoms another (center), dresses a third, and outerwear a fourth. Use a small shelf divider or even a piece of painter’s tape on the rod to mark boundaries. Getting dressed becomes faster because you know exactly where to look; “I need a top” takes 10 seconds instead of 2 minutes of browsing. This also reveals what you actually own (you might discover you have 30 similar tops), which helps with future shopping decisions. Rearrange zones seasonally—winter coats take up more space in December, so give them more rod real estate.

    A clear zone system means your partner, roommate, or family member can find things too, reducing friction in shared closet spaces.

    14. Use Under-Shelf Baskets for Hidden Storage

    Under-shelf baskets hang from the bottom of existing shelves, creating a hidden storage tier without using floor space. They’re perfect for off-season clothes, undergarments, or accessories you use less frequently.

    Adhesive hooks ($5–$10 for a pack) or small brackets ($2–$3 each) attach shallow woven baskets ($8–$15 each) to your existing shelf bottoms. Install takes 10 minutes per shelf. You gain an entire hidden storage layer. The baskets stay tucked enough that they don’t catch your eye but are easy to access when you need them. Natural woven baskets look polished; plastic storage boxes ($3–$5 each) work for utilitarian storage if you hide them deeper in the closet.

    This method works best for shelves that are 12 inches or taller with at least 6 inches of clearance below.

    15. Install a Thin Over-Door Organizer for Accessories

    An over-door fabric organizer with shallow pockets (not a full shoe rack) holds belts, scarves, jewelry, tights, or small folded items without consuming any floor or shelf space.

    A slim fabric organizer costs $12–$25 and hangs in 2 minutes. Keep pockets reserved for lightweight, flexible items; heavy jewelry or solid items feel awkward in pockets. Use small zippered pouches inside pockets to organize tiny things like hair clips or earrings. This solution is especially useful if your closet lacks drawer or shelf space for accessories. Renters love this because it requires zero tools or commitment—just hang and remove when you leave.

    Choose a neutral color (beige, gray, white) so the organizer fades into the background.

    16. Fold Jeans Vertically to See Every Pair

    The KonMari-style vertical fold for jeans (and all clothes) lets you see every piece without digging through a pile. You fold each pair into a neat rectangle and stand them upright like files.

    This takes 5 minutes to learn and 1–2 hours to apply to your entire jean collection. The payoff is huge: you stop buying duplicate styles because you can actually see what you own. You fit 30% more jeans in the same drawer space. The only downside is that it requires a shallow drawer (3–4 inches deep) rather than a deep storage bin. Watch a quick tutorial on YouTube to nail the folding technique; it feels awkward the first time but becomes automatic. Once you master jeans, apply it to pants, t-shirts, and other foldable items.

    Paired with drawer dividers, the vertical fold system creates a magazine-style closet that’s both functional and beautiful.

    17. Add Soft Lighting Puck Lights Inside Shelves

    Puck lights are small, battery-operated circular lights (2–3 inches wide) that mount inside shelves. Unlike LED strips, they’re subtle and work on any shelf without installation.

    A set of 3–4 puck lights costs $15–$30. Install with adhesive strips in 10 minutes—no wiring or tools needed. Warm white or soft white LEDs feel cozier than bright white. Battery-operated puck lights last 6–12 months per battery set; rechargeable versions ($20–$40) reduce battery waste. This layered lighting approach makes your closet feel high-end and spa-like; it’s not just functional, it’s mood-setting. Perfect for closets that lack built-in shelf lighting or for renters who can’t install permanent fixtures.

    Position one puck light per 24 inches of shelf width for even illumination without hot spots.

    18. Use Shelf Dividers to Prevent Stack Collapse

    Shelf dividers (vertical separators) are simple metal or wood pieces that prevent stacks of folded clothes from sliding into one another. One divider can make the difference between organized and chaotic.

    A set of 2–4 dividers costs $8–$20. They require no installation—they simply stand upright on your shelf. Use one divider per 12–18 inches of shelf width to create separate compartments for different items. This means your sweater stack stays upright; your scarf roll doesn’t tumble into your cardigan pile. It’s a small detail that makes a huge difference in the functionality and visual calm of your closet. Metal dividers ($10–$15) look sleeker; wooden ones ($8–$12) feel warmer.

    Pair dividers with a small label on the edge of the shelf so you remember what goes in each section.

    19. Install a Low Shelf or Step Stool to Reach High Storage

    If your closet has high shelves, a small step stool makes them accessible and safe to reach. You avoid dangerous climbing or stretching that risks toppling items.

    A compact wooden or plastic step stool costs $15–$30 and stores in a closet corner or against the wall. Choose one with a wide, stable base (not a ladder). This small tool encourages you to actually use high shelves for off-season storage or less-frequently worn items instead of leaving them as dead space. Safety first: only use shelves up to 6–7 feet high; anything higher is awkward even with a stool. A step stool is a small investment that extends your vertical storage without risk.

    Foldable step stools ($20–$40) are great for renters because they collapse and travel easily.

    20. Repurpose Small Furniture: Nightstands as Shelf Units

    A small dresser, nightstand, or storage console inside your closet adds vertical storage without permanent installation. It’s a clever way to repurpose furniture you already own or find secondhand.

    Dimensions matter: a piece 24–30 inches wide and 18–20 inches deep fits most closets without blocking your pathway. Thrifted nightstands cost $30–$80; new small dressers run $80–$200. This piece holds jewelry, undergarments, accessories, or off-season items in drawers while using the top surface for decorative baskets or folded sweaters. It creates a mini lifestyle display that makes your closet feel boutique-like. Renters can move the piece with them, and homeowners can anchor it to the wall for safety.

    Source furniture from Facebook Marketplace, Craigslist, or IKEA’s affordable modular pieces ($60–$150).

    21. Color-Coordinate Your Clothes for Visual Calm

    Color coordination is both functional and visually soothing. Arranging clothes by color makes your closet feel intentional and spa-like, and it speeds up getting dressed because similar items are grouped together.

    This takes 2–4 hours depending on your collection size but requires zero money. Start with one section: arrange tops from white/cream through neutrals to black, or organize by seasonal palette. Next, tackle bottoms, then folded items. Once coordinated, it’s easy to maintain—just return items to the correct color zone. You’ll notice patterns in your wardrobe (maybe you own eight white tanks and zero green tops), which helps with future shopping. The visual payoff is huge: your closet looks curated and calm instead of chaotic.

    Pair color coordination with matching slim hangers for an even more polished, high-end appearance.

    22. Use Vacuum Storage Bags for Seasonal Off-Season Items

    Vacuum bags compress bulky off-season clothes (winter coats, sweaters, summer sundresses) down to a fraction of their size, freeing precious closet real estate for current-season wear.

    A pack of 5–10 vacuum bags costs $10–$20 on Amazon or Target. Label each bag with the contents (e.g., “Winter Coats 2024”) and season. Fold your out-of-season items, pack them in the bag, seal, and remove air with a vacuum. The bags compress by 50–75%, storing effortlessly on high shelves or under-shelf areas. Rotate them seasonally. The only downside: you need to unseal and re-seal them twice yearly, but the space savings far outweigh the minor inconvenience. This is a game-changer for small closets with no separate storage closets.

    Buy quality vacuum bags ($12–$25 for premium versions); cheaper ones sometimes leak or tear.

    23. Mount a Narrow Mirror on the Closet Wall

    A narrow mirror (12–18 inches wide) mounted on one closet wall serves two purposes: it lets you see outfit details without leaving the closet, and it reflects light, making the space feel bigger.

    A slim mirror costs $15–$40; installation with brackets takes 20 minutes. Mount it at eye level on a side wall where it won’t block your main walkway. A full-length mirror is ideal but takes more space; a half-length mirror (down to the knees) is a smart compromise for small closets. This allows you to check proportions and overall outfit cohesion without stepping into your bedroom. Bonus: the reflected light from your LED strips or puck lights bounces around, creating a brighter, more open-feeling space.

    Renters: adhesive mirror tiles ($1–$2 each) can be arranged into a custom size and removed without damage.

    24. Create a Seasonal Rotation Calendar and Checklist

    A simple seasonal rotation calendar is a low-cost organizational hack that prevents you from living out of season and keeps your closet focused on what’s current.

    Create a one-page checklist (free template via Canva or printable PDFs online) that outlines what to pack away and what to pull out each season. Print and laminate it ($2–$5), or save it as a note on your phone. The checklist includes specific items (e.g., “Pack winter coats by May 1”) and dates to do it. Check off items as you complete them. This prevents summer dresses from lingering in fall when they take up space, and it forces you to revisit your wardrobe seasonally (which helps you discover forgotten favorites or items you’ve outgrown). A simple system saves mental energy and keeps your closet intentional year-round.

    Set phone reminders for seasonal rotation dates so you don’t forget.

    25. Install a Tie/Belt Rack for Small Accessories

    A dedicated tie and belt rack keeps these small accessories untangled, visible, and easy to grab without consuming shelf space or drawer depth.

    A simple wooden or metal tie rack costs $10–$20 and installs in 15 minutes with two wall anchors. It typically holds 8–12 ties/belts/scarves. Mount it on a side wall at shoulder height where you can easily see and reach it. The alternative is drawer dividers with slots ($5–$10), which work if you prefer belts folded in a drawer. Rolled or coiled scarves also fit on a tie rack without wrinkling. This single rack prevents the “tangled belt nightmare” and ensures your accessories actually get worn instead of buried.

    Renters: adhesive hooks ($2–$3 each) can create a DIY version with simple dowel rods (free or $2–$5 from Home Depot).

    26. Use Slim Wooden Hangers to Create a Cohesive Look

    Swapping all your hangers to matching slim wooden or sleek plastic ones is a simple, inexpensive upgrade that immediately makes your closet feel cohesive and intentional. Mismatched wire, plastic, and wooden hangers read as chaotic; unified hangers feel curated.

    A set of 30–50 matching slim hangers costs $25–$50. Donate or recycle your old hangers; the upgrade takes 45 minutes. Choose natural wood (warm, timeless), matte black (sleek, modern), or natural wood with black accents. The investment is minimal, but the psychological shift is huge—your closet instantly feels like a high-end boutique instead of a storage room. This is one of the easiest ways to elevate your space without any structural changes or DIY skills. Combined with color coordination, the effect is dramatic.

    Wooden hangers also protect delicate fabrics better than wire hangers and last for years.


    Save this post and try just one idea this weekend. Whether you start with the hanger swap, the lighting, or one simple shelf hack, small changes compound fast. Your morning routine will feel calmer, you’ll actually wear more of what you own, and your small closet will function like it’s twice the size.

  • 23 Simple Wall Painting Ideas That Still Look Stunning

    23 Simple Wall Painting Ideas That Still Look Stunning


    Tired of staring at bland walls but scared bold paint will overwhelm your space? Here’s the truth: stunning walls don’t require a design degree or a massive budget. Whether you’re renting, own your home, or have zero DIY experience, these 23 ideas prove that even simple paint choices can completely shift how a room feels. From clever color combos to budget-friendly texture tricks, you’ll discover exactly how to refresh any wall without overthinking it. Let’s turn those bare surfaces into something you’ll actually love waking up to.


    1. Paint One Accent Wall in Deep Emerald

    One bold wall packed with personality doesn’t require courage—just the right shade. Deep emerald reads as sophisticated and cozy at the same time, unlike trendy colors that feel dated in two years.

    Pick a wall that won’t overwhelm the room (ideally one without a doorway competing for attention). Benjamin Moore’s Silhouette or a similar forest green runs $40–$60 per gallon. Rent a roller from Home Depot ($8/day), grab painter’s tape ($5), and you’re set. The project takes one Saturday afternoon.

    The trick? Keep the other walls neutral (soft whites, warm beiges, or pale grays). This balance prevents cave-like vibes while letting your bold wall shine.

    Your space gains instant depth and warmth without feeling risky or overdone.


    2. Use Warm Beige to Replace Tired Grays

    If your room currently sports cool grays, they probably feel dated and cold by now. Sherwin-Williams Stucco or Benjamin Moore’s Wheat Sheaf are the warm neutrals everyone’s switching to this year—they ground a space while still feeling fresh.

    These aren’t stark beiges your grandma used; they have subtle warmth that works with almost any decor style. Both are under $50 per gallon and available at major paint retailers. Two coats, one weekend, and the entire room feels updated. They pair beautifully with wood furniture, green plants, and metallic accents.

    Pro tip: Paint your trim a crisp white to let the warm walls shine without looking flat.

    Suddenly, your whole home feels intentional instead of like it was decorated by default.


    3. Create an Ombre Wall for Soft Transitions

    Ombre walls sound complicated but read beautifully in photos—plus they’re easier than you’d think. Pick two colors you love (maybe a pale blush and warm terracotta), then order a third middle shade from the paint store, or mix them yourself.

    Apply the lightest shade to the top third, medium in the middle, and deepest at the bottom. Feather the edges with a dry brush to blend. Use low-VOC paint ($35–$55 per quart) to minimize smell. The whole project takes 4–6 hours including drying time between sections.

    This works especially well in bedrooms or creative spaces where you want sophistication without screaming “look at me.”

    You’ll notice how this gentle gradient catches light differently throughout the day, making the wall feel alive.


    4. Add Metallic Gold Accents Over Neutral Walls

    You don’t need to paint your entire wall gold—just add accents—to get that luxe shimmer. Gold reflects light in small spaces and feels way more modern than it did five years ago.

    Buy metallic paint pens or spray paint ($8–$15) from craft stores and trace geometric shapes, stripes, or patterns on your neutral walls. Or invest in gold-framed floating shelves ($30–$80) and brass wall sconces ($25–$60) to add shine without paint. Both hardware stores and Amazon stock affordable options.

    Renter? Use removable gold contact paper ($12) cut into shapes and stuck directly to walls—no commitment required.

    Your bathroom or entryway suddenly feels more spa-like, and the light plays beautifully across the surfaces.


    5. Go Moody with Navy Blue in Small Bedrooms

    Darker walls in small rooms aren’t scary—they’re actually cozy when paired with good lighting. Navy blue is the moody color that works in almost any style without feeling depressing.

    Choose a soft navy with gray undertones like Sherwin-Williams Naval ($40–$55 per gallon) to avoid that artificial pool-tile look. Pair it with crisp white trim and warm bedding. Paint on a Friday evening and wake up to an entirely different room.

    Pro tip: Add warm brass lamps and light-colored furniture to keep the room from feeling cave-like. The contrast makes everything look more intentional.

    You’ll sleep better knowing you’ve created a real retreat instead of just a place to crash.


    6. Stencil Geometric Patterns for Instant Art

    Geometric stencils let you add personality without hiring an artist or committing to a full mural. Patterns are easier to execute than freehand designs and photograph beautifully on social media.

    Buy reusable stencils ($15–$40) from Amazon or Etsy, grab some paint in a contrasting shade, and tape the stencil to your wall. Use a sponge to dab paint through—it’s genuinely hard to mess up. One wall takes 3–4 hours including drying. If you hate it, paint over it; stencils are low-stakes experiments.

    Start with simple shapes (triangles, hexagons) before attempting complex patterns.

    Your wall becomes a conversation starter instead of blank space.


    7. Paint Cinnamon Slate for Quiet Confidence

    Benjamin Moore’s Cinnamon Slate 2113-40 (their 2025 Color of the Year) is a heathered plum-brown that sounds complicated but feels incredibly wearable. It’s not trendy—it’s timeless.

    This shade works in living rooms, bedrooms, and hallways without feeling heavy or dated. Cost runs $45–$65 per gallon, and you’ll need two coats for full coverage. Paint it throughout your whole home for cohesion, or choose one statement room to test it first.

    Pair it with warm wood, cream textiles, and brass accessories for maximum impact.

    The result is a sophisticated backdrop that makes everything in your room look more curated.


    8. Use Pastels to Brighten Tiny Living Rooms

    Pastels aren’t just for nurseries—they’re strategic in tiny spaces because light colors make rooms feel bigger. Soft blush, sage green, or pale blue reflect light and open up cramped areas instantly.

    Pastel paint costs $35–$50 per gallon at any paint store. Go for matte or eggshell finish so light bounces around rather than concentrating on one spot. Two coats covers most walls.

    Pair pastels with white trim and minimal, light-colored furniture to maximize the airy effect. This works especially well for renters since pale colors are easy to cover if you move.

    Your small space stops feeling claustrophobic and starts feeling like a choice rather than a constraint.


    9. Add Venetian Plaster for Luxury Texture

    Venetian plaster sounds fancy (and is), but it creates a high-end finish that looks museum-quality without the museum price tag. It’s textured, elegant, and catches light beautifully—way more interesting than flat paint.

    Venetian plaster kits cost $60–$150 depending on brand. You’ll need a trowel, patience, and a couple of hours per wall. OR hire a pro for $200–$400 per wall if DIY stresses you. Search “Venetian plaster near me” to find local installers.

    This works best in entryways, powder rooms, or accent walls where you want maximum visual interest.

    You get a high-end finish that makes your space feel carefully designed.


    10. Create a Color-Blocked Wall with Two Tones

    Color-blocking (painting sections in different colors) works in kids’ rooms, creative studios, or any space where you want structured fun. You control exactly how bold or calm it feels.

    Pick two complementary shades, measure halfway (or thirds) up your wall, use painter’s tape to mark the line, and paint each section. Two gallons of paint costs $70–$100 total. The tape ensures crisp lines without bleeding. Takes about 3 hours plus drying.

    Pro tip: Horizontal lines make rooms feel wider; vertical lines make them taller.

    The wall becomes functional art that reflects your personality and makes the room feel playful without chaos.


    11. Paint Stripes for Subtle Visual Interest

    Stripes are the upgrade to solid walls that requires minimal confidence. Thin stripes feel sophisticated; thick stripes feel retro. You pick the vibe.

    Use painter’s tape to map out your pattern (measure carefully—even spacing matters). Paint a base coat of your lighter color first, then carefully tape and paint the darker stripes on top. Two paint colors at $40–$50 each, plus tape ($5) means roughly $90–$100 total. This takes 5–6 hours including drying between coats.

    Vertical stripes work in bedrooms and hallways; horizontal stripes suit living rooms and create a calming effect.

    You get visual depth and structure that reads as intentional design rather than just picking a color.


    12. Use a Matte Finish for Sophisticated Drama

    Finish choice matters as much as color choice—matte paint absorbs light and creates drama; satin reflects it and feels livelier. For moody colors, matte wins every time.

    Matte paint costs the same as satin ($35–$55 per gallon) but creates a completely different vibe. It hides imperfections better than gloss finishes and photographs beautifully. Note: matte scuffs slightly more easily than satin, so avoid it in high-traffic areas like kitchens.

    Pair matte finishes with good lighting (lamps, sconces) so the room doesn’t feel cave-like.

    The result is a sophisticated, gallery-like quality that makes your space feel curated.


    13. Paint Your Ceiling for Unexpected Impact

    Painting the ceiling a different color than walls is a bold move that works beautifully when done right. Soft colors overhead create coziness; whites make rooms feel taller.

    This is harder than walls (hello, arm strain) so consider hiring help for $200–$400, or DIY if you’re patient. You’ll need painter’s tape, a roller on an extension pole, and realistic expectations about ladder time. One weekend minimum.

    Choose colors lighter than your walls (pale sage, soft blue, warm cream) to avoid that “inside a box” feeling.

    Your eye travels upward, making the room feel taller and more thoughtful than standard white ceilings.


    14. Add a Nature-Inspired Mural for Biophilic Vibes

    You don’t need to be an artist to add a landscape mural—simple horizons, botanical shapes, or abstract nature scenes read beautifully and cost way less than hiring someone.

    Grab acrylic paint ($3–$8 per bottle), a few brushes ($10–$20 total), and a pencil. Sketch lightly first, then paint loose, impressionistic shapes rather than photo-realistic details. Time: 6–8 hours over a weekend. Messing up? Paint over it—acrylics are forgiving on walls.

    Alternatively, buy peel-and-stick murals ($50–$150) from Etsy or Amazon and install them like wallpaper (renter-friendly, removable).

    Your space connects to nature without the maintenance of actual plants.


    15. Use Warm Neutrals as Bridge Colors

    Bridge colors (warm neutrals that work with multiple shades) solve the problem of mismatched rooms. Benjamin Moore’s Wheat Sheaf or Sherwin-Williams Urbane Bronze work everywhere without clashing.

    Paint hallways, entryways, and transition spaces in these versatile shades. They make your whole home feel cohesive instead of random. Cost: $40–$55 per gallon. Use them as your “safe color” if you’re scared to go bold in living areas.

    These shades pair with deep accent walls, pastels, and neutrals without jarring your eye as you move through rooms.

    Your home flows visually, and people notice the carefully planned-out feeling (even if you’re just using psychology).


    16. Paint Lower Walls Dark and Upper Walls Light

    This classic approach (light tops, dark bottoms) works because it mirrors nature and feels inherently balanced. Dark grounds the room; light opens it.

    Paint a chair rail line using painter’s tape at about 36–40 inches from the floor. Paint the bottom section in a rich color (deep green, navy, burgundy), the top in a pale shade. Use two gallons of paint ($80–$110 total) and a level to keep your line straight. Takes 4–5 hours.

    This technique works especially well in dining rooms and bedrooms where you want sophistication without full commitment to a dark room.

    The room gains architectural interest and visual anchoring that reads as intentional design.


    17. Combine Paint with Wood Accents for Warmth

    Paint alone feels flat when there’s nothing to contrast it against. Adding natural wood creates depth and warmth—it’s the “secret” behind photos that feel expensive.

    Paint your walls in a neutral tone ($40–$55 per gallon), then style shelves, doors, or accent pieces with visible wood. Real wood shiplap costs $150–$400 per wall; laminate shiplap peel-and-stick is $50–$100 and looks genuinely nice. Mix textures by adding wood frames, cutting boards, or salvaged wood pieces.

    Thrift stores often have cheap wood items ($5–$20) that instantly warm up a space.

    Your room shifts from looking sterile to feeling like a real home where people actually live.


    18. Use Satin Finish for Reflective, Light Rooms

    If matte feels too dark for your taste, satin finishes reflect light without being glossy or plastic-looking. Perfect for bathrooms, kitchens, and bright rooms where you want brightness without harshness.

    Satin costs the same as matte ($35–$55 per gallon) but reads more lively and is easier to clean (bonus for kitchens). Two coats ensures good coverage. Use it with lighter colors for maximum light-bouncing effect.

    The trade-off? Satin shows dust and fingerprints slightly more than matte, but it’s nothing a damp cloth won’t fix monthly.

    Your room feels bright and airy while still reading as intentionally designed.


    19. Add Botanical Wall Decals Over Solid Paint

    Wall decals (removable stickers with designs) let you add personality without paint skills or landlord drama. Botanicals, abstract shapes, and geometric patterns all work beautifully layered over solid-colored walls.

    Grab decal sets ($15–$40) from Amazon or Etsy and peel them onto your freshly painted walls. They adhere to most finishes and remove cleanly without damaging paint. Renter dream: completely non-permanent and portable.

    Arrange them symmetrically for modern vibes or scattered for organic, natural feel. Takes 30 minutes to apply.

    Your wall gains personality and visual interest with zero permanent commitment.


    20. Paint an Ombré Ceiling That Fades to White

    Gradient ceilings are the next-level version of plain painted ceilings. Instead of solid color overhead, you create a subtle fade that makes rooms feel bigger and more thoughtful.

    Start with your darkest color at the edges, gradually lightening toward the center. This requires mixing custom shades ($50–$80 total for paint and supplies) and patience. It’s physically demanding, so hire help ($300–$500) if DIY exhausts you. Takes 6–8 hours DIY or a few hours with a pro.

    The effect is subtle but absolutely noticeable when someone lies in bed and looks up.

    You get a spa-like, high-end ceiling that most people never think to try.


    21. Layer Textures with Paint and Fabric

    Combining paint with fabric (tapestries, macramé, woven wall hangings) creates depth that pure paint can’t achieve. This is the 3D trend everyone’s talking about.

    Paint your base color ($40–$55 per gallon), then layer fabric using removable adhesive strips ($8–$15) or hardware. Fabric costs $30–$150 depending on quality. Renter? Use hooks and hang pieces instead. The combination creates shadow and texture that photographs like magic.

    Mix matte paint with textured fabric for maximum visual interest.

    Your wall becomes a gallery display rather than just a surface.


    22. Create a Feature Wall with Geometric Shapes

    Geometric shapes painted directly on walls (no stencil required if you’re feeling confident) create a unique, gallery-quality feature. Hexagons, circles, and triangles all work beautifully.

    Sketch your pattern with a pencil first, then paint each shape in complementary colors. Use acrylic paint ($3–$8 per bottle) and painter’s tape ($5) to keep edges crisp. This takes 6–8 hours but is genuinely easier than it looks.

    Start on a small wall or in a lower-traffic room if you’re nervous about committing to the look.

    The result is a one-of-a-kind wall that looks professionally designed.


    23. Paint Walls in Deep Forest Green with Gold Accents

    Deep greens are the color everyone wants right now—they’re connected to nature, work with almost any decor style, and feel timeless rather than trendy. Pair them with gold accents for maximum impact.

    Forest green paint costs $40–$60 per gallon. Pick a shade like Benjamin Moore’s Silhouette or Sherwin-Williams Evergreen Fog. Add gold-framed mirrors ($50–$150), brass shelf brackets ($20–$50), and gold-trimmed pillows ($30–$80) for that cohesive luxury look.

    This works in living rooms, bedrooms, home offices—basically anywhere you want to feel grounded and sophisticated.

    You instantly feel like you’re living in an intentionally designed space instead of a standard apartment.


    Save this post for your next wall refresh. Pick just one idea this weekend and notice how a single change shifts your entire room’s energy—small moves add up faster than you’d think.

  • 25 Industrial Bedroom Ideas With Raw, Urban Charm

    25 Industrial Bedroom Ideas With Raw, Urban Charm

    Industrial style doesn’t mean cold or unwelcoming—it’s actually one of the warmest, most personable design directions right now. If you’re drawn to exposed brick, metal accents, and that authentic warehouse vibe, you’re in luck: industrial bedrooms feel like home the moment you walk in. The key is mixing raw materials with soft textures so your space looks cool and edgy without feeling like you’re sleeping in an abandoned factory. Whether you’re renting or redecorating, these 25 ideas show you exactly how to bring industrial charm into your bedroom—from big statement pieces to small touches that make a massive impact. Let’s dig in.

    1. Embrace Exposed Brick as Your Focal Wall

    Exposed brick is the holy grail of industrial design—it’s authentic, textured, and instantly cool. If you’re lucky enough to have brick already in your space, leave it visible. If not, don’t panic: you can still achieve this look by removing drywall in sections (if you rent, skip this) or using peel-and-stick brick panels that look shockingly real.

    Real brick removal: Hire a contractor for $200–$600 depending on wall size and asbestos testing (necessary in older buildings). DIY peel-and-stick option: $40–$150 for a 10-by-12 wall from Amazon or Home Depot. Installation takes 2–3 hours and requires just a utility knife and smoothing tool. For renters, removable adhesive panels are your best friend—they peel off cleanly without deposit-threatening damage.

    The texture and color variation of brick does the design heavy lifting, so keep furnishings minimal around it. Your bedroom suddenly feels like a converted loft without any actual renovation.

    2. Install Metal Pipe Shelving for Storage With Character

    Metal pipe shelving looks like authentic factory infrastructure while solving real storage problems. These aren’t just pretty—they’re functional and surprisingly affordable.

    DIY kits from Home Depot or Lowe’s run $50–$200 per shelf unit depending on size. You’ll need black metal pipes, fittings, and wooden boards (you can buy pre-cut or use reclaimed wood for extra character). Installation takes 1–2 hours with a power drill and level. Alternatively, brands like Wayfair and Article sell pre-assembled versions for $150–$400. Renters should look for wall-mounted options that don’t require permanent installation.

    Layer books, plants, and vintage metal boxes on your shelves to keep things visually interesting. The open shelving also makes your bedroom feel bigger since you’re not using a bulky dresser or cabinet.

    3. Choose a Black Metal Bed Frame for Instant Impact

    A metal bed frame is the anchor piece of any industrial bedroom. Black steel, wrought iron, or powder-coated metal instantly sets the tone for everything else.

    Budget options start at $150–$300 from IKEA, Wayfair, or Amazon. Mid-range quality frames (better welds, sturdier construction) run $300–$600 from Article or West Elm. High-end custom pieces can hit $800+, but the budget versions hold up great for most sleepers. Assembly takes 45 minutes to an hour with an Allen wrench and a partner (moving it solo is rough). Look for frames with visible bolts, welded joints, or geometric designs—these details scream industrial.

    Pair your metal frame with quality bedding in neutral tones (white, cream, gray, or soft black) to balance the industrial edge. The contrast between hard metal and soft linens is what makes industrial bedrooms feel livable.

    4. Layer Your Bedding for Depth and Warmth

    Industrial bedrooms risk feeling sterile if your bedding is thin or basic. Layer strategically to add softness without sacrificing the aesthetic.

    Start with quality cotton sheets ($40–$100 per set from Target, Brooklinen, or Parachute), add a lightweight linen blanket ($60–$120), then drape a chunky knit throw ($50–$150) over the foot. Top with 3–4 pillows mixing textures: one standard pillow, one euro sham, one textured lumbar, one decorative. Your bed should look like something from a magazine while actually being comfortable.

    The layering also provides crucial visual warmth against all that metal and concrete. When visitors see your bed, they think “cozy loft,” not “cold factory.”

    5. Add Concrete or Concrete-Look Flooring

    Concrete flooring is the ultimate industrial bedroom statement. It’s durable, easy to clean, and screams authenticity—but it’s also cold and hard underfoot.

    If you’re doing a full bedroom refresh and can pour concrete, budget $3–$12 per square foot installed (typically $900–$3,600 for a 12-by-14 bedroom). For renters or if concrete isn’t feasible, concrete-look luxury vinyl planks from Lowe’s or Home Depot cost $1–$4 per square foot installed and look genuinely convincing. You can also use large-format concrete tiles ($2–$6 per square foot) for a high-end version.

    The cold, hard surface is exactly why you need area rugs. A large jute or wool rug under your bed makes the space feel warmer and more intentional. Concrete floors also mean minimal noise and maximum durability—they’ll look good for decades.

    6. Install Edison Bulb Pendant Lights Over Your Nightstands

    Edison bulbs and pendant lighting are industrial design’s signature move. They’re nostalgic, warm, and way more interesting than a standard ceiling fixture.

    A pair of Edison bulb pendants runs $40–$80 each from Amazon, Wayfair, or Etsy. You’ll need electrical work if you’re hardwiring them ($200–$400 for a licensed electrician) or you can use battery-operated or plug-in versions for $25–$50 each (less authentic but renter-friendly). Hang them 24–30 inches above your nightstand for optimal reading light and visual balance.

    Pair them with dimmer switches if possible so you can control the mood. The warm glow of Edison bulbs softens the industrial edge and makes your bedroom feel intimate rather than stark.

    7. Use Reclaimed or Distressed Wood for Nightstands

    Reclaimed wood is the perfect counterpoint to metal and concrete in industrial bedrooms. It adds warmth, history, and authenticity—three things cold materials need.

    Hunt for reclaimed wood nightstands at thrift stores, Facebook Marketplace, or Etsy for $30–$150. Alternatively, buy new-but-distressed versions from IKEA (Mörbylånga line), West Elm, or Article for $150–$400. If you’re handy, you can age new wood with stain and strategic sanding for under $50 in materials. Reclaimed pieces typically need a weekend refresh (cleaning, light sanding, sealing) but the character is unmatched.

    Pair distressed wood with metal accents (a brass lamp, iron drawer pulls) to keep the industrial vibe cohesive. Your nightstand becomes a design feature, not just storage.

    8. Paint Walls in Moody Industrial Tones

    Industrial bedrooms don’t need to be all concrete-gray. Deep charcoal, matte black, slate blue, or even a muted sage work beautifully if you want sophistication over stark minimalism.

    Quality paint runs $35–$60 per gallon from Sherwin-Williams, Benjamin Moore, or Behr. One gallon covers about 350 square feet, so a typical bedroom needs 1.5–2 gallons ($50–$120 total). DIY painting takes a weekend; hiring a pro costs $400–$800. Consider painting all walls one moody color and keeping trim white or natural wood for contrast.

    Moody wall colors make metal fixtures pop and create depth. Your bedroom feels intentional and designed rather than plain. Bonus: darker walls hide dust better in industrial spaces where you might have more visible texture.

    9. Hang Industrial Cage Pendant Lights From the Ceiling

    If a central ceiling fixture is your only option, make it count with an industrial cage pendant. These sculptural pieces work as both lighting and art.

    Cage pendant lights start at $25–$50 from Amazon or Wayfair, mid-range options run $50–$150, and high-end designer versions hit $200+. Installation takes 30–45 minutes if you’re replacing an existing fixture. For renters, plug-in swag versions ($40–$80) hang from a hook and need no electrical work.

    Choose black metal, rust finishes, or even bare Edison bulb cages depending on your vibe. The negative space of the cage design keeps it from feeling heavy, while the geometric structure adds visual interest above your head.

    10. Add a Metal Accent Wall or Shiplap Detail

    Metal accent walls might sound extreme, but they’re surprisingly striking when done subtly. Think corrugated metal sheets, tin panels, or even metal shiplap alternatives.

    Real corrugated metal sheets cost $10–$30 per piece and require professional installation ($400–$1,200 for a feature wall). For renters and easier installation, peel-and-stick metal-look wallpaper runs $30–$80 from Amazon or Etsy and applies in a few hours. There’s also metal shiplap-look paneling ($50–$150 per panel) that’s lighter and faster to install than the real thing.

    A metal accent wall behind your bed or above a dresser creates instant drama without overwhelming the space. It reflects light and adds dimension, making your bedroom feel more designed and intentional.

    11. Incorporate Vintage Industrial Signage or Art

    Original vintage industrial signage is sculptural art that tells a story. A single large piece transforms your bedroom from decorated to genuinely designed.

    Hunt for authentic pieces at flea markets, antique shops, or Etsy for $50–$300 depending on rarity and condition. Reproduction industrial signs start at $20–$80 from Amazon, Wayfair, or Etsy. Mounting is simple: use heavy-duty picture hangers or wall anchors (rental-friendly) for lighter pieces, or lag bolts for heavier metal.

    One well-chosen sign becomes the focal point of your room. Keep other wall decor minimal so your statement piece doesn’t get lost. This is your bedroom’s personality showing.

    12. Use Steel or Metal Bars as a Headboard

    A metal bar headboard is sculptural, functional, and distinctly industrial. It doesn’t require padding or upholstery, just raw geometric beauty.

    Custom metal headboards from blacksmiths or metal fabricators run $400–$1,500 depending on complexity. For budget options, Wayfair and Article sell pre-made versions starting at $200–$600. Installation involves wall-mounting metal frames at headboard height, which takes 1–2 hours with a drill and level.

    Unlike traditional upholstered headboards, metal bars create visual interest through negative space and shadow play. They photograph beautifully and work with any bedding style. You’re investing in something that will last decades.

    13. Layer with a Large Area Rug for Warmth

    Industrial bedrooms have lots of hard surfaces (concrete, metal, brick), so a substantial area rug is essential for comfort and visual warmth.

    Quality wool rugs start at $200–$400 for a 8-by-10 from Ruggable, Wayfair, or Rugs USA. Natural fiber rugs (jute, sisal) run $150–$300 and have a more industrial aesthetic. High-end options like Restoration Hardware rugs cost $500+. Choose neutral tones (cream, gray, warm brown) that ground the space without competing with other design elements.

    Position your rug under the bed so it extends 2–3 feet on all sides. This anchors the sleeping area and makes the hard flooring feel less stark. Bonus: a good rug improves acoustics in industrial spaces, which can feel echo-y otherwise.

    14. Install Metal Grid Wall Organization System

    Metal grid wall systems are functional industrial design. Use them to display art, hang jewelry, organize books, or store small items without permanent wall damage.

    Metal grid panels run $15–$40 each from IKEA, Home Depot, or Etsy. Add hooks, baskets, and shelves ($5–$25 each depending on style). Total setup for a 4-by-4 grid system costs $60–$150. Installation is renter-friendly: use adhesive strips or simple hooks if you don’t want to drill.

    Layer different basket sizes, hang artwork, clip photos, or display small plants on your grid. It’s practical organization that doubles as wall art. Your bedroom stays tidy while looking intentional and styled.

    15. Choose Industrial-Style Lighting Fixtures Throughout

    Industrial lighting isn’t just about pendants—it’s about creating layers of light with fixtures that have visible structure, raw finishes, and honest design.

    A bedroom needs three types of light: task (bedside reading), ambient (general), and accent (mood). Mix styles: wall sconces ($30–$100 each), a ceiling pendant ($40–$150), and a floor lamp ($50–$200). Pairing different fixture styles keeps the space from feeling too matchy or sterile.

    Install dimmer switches where possible so you can shift from bright morning light to soft evening glow. Moody industrial lighting makes your bedroom feel like a sanctuary, not just a place to sleep.

    16. Add a Black Metal Clothing Rack as a Dresser Alternative

    A metal clothing rack solves storage while looking like industrial furniture design. It’s perfect for renters who can’t install built-ins or drill into walls.

    Black metal racks start at $30–$60 from IKEA, Target, or Amazon, mid-range options run $60–$150, and high-end versions hit $200+. Assembly takes 15–30 minutes. Layer it with hanging clothes, folded sweaters on the top shelf, and a basket beneath for socks and underwear.

    Your clothes become part of your decor while staying accessible. A metal rack adds vertical interest to your bedroom and actually saves floor space compared to a full dresser.

    17. Use Black Metal Hardware on Wooden Furniture

    You don’t need to replace every piece of furniture. Upgrading hardware on existing wooden pieces creates industrial style instantly.

    Replace drawer pulls, knobs, and hinges with black metal or iron hardware from Home Depot, Lowe’s, or Etsy ($2–$15 per piece). A dresser with four drawers costs $15–$60 to update. Installation takes 1–2 hours with a screwdriver and drill. This is a perfect renter hack: keep the original hardware and reinstall when you move.

    Metal hardware transforms a basic wood dresser into industrial furniture. It’s the easiest update with massive visual impact.

    18. Paint Your Ceiling Dark or Leave It Exposed

    A dark ceiling is bold but makes your bedroom feel intimate and gallery-like. Exposed structural elements (beams, pipes, ductwork) are industrial gold.

    Paint ceiling costs $200–$600 if you hire someone; DIY takes a weekend and $20–$40 in paint. If you have popcorn ceiling, professional removal runs $1–$3 per square foot ($500–$2,000 for a bedroom). For renters, this isn’t an option, but exposed structural elements you can’t change are actually a feature—work with them instead of hiding.

    A dark or exposed ceiling draws the eye upward and creates architectural drama. Your bedroom instantly feels more designed and sophisticated.

    19. Install Vintage Factory Clocks or Gauges as Wall Decor

    Oversized vintage clocks and industrial gauges are functional art that screams industrial authenticity. Find originals or reproductions that match your vibe.

    Authentic vintage clocks and gauges run $100–$500+ from flea markets, antique shops, or specialized Etsy sellers. Reproduction versions start at $30–$100 from Amazon, Wayfair, or Urban Outfitters. Mounting requires standard picture hangers ($5–$10) and takes 15 minutes.

    Layer different sizes and finishes on one wall to create a gallery-like effect. These pieces tell a story—they’re conversation starters that add personality to your industrial bedroom.

    20. Mix Textures With Concrete, Wood, Metal, and Fabric Strategically

    Industrial design thrives on contrasts. Mix hard (concrete, metal, brick) with soft (linen, wool, leather) so your bedroom feels cool and inviting.

    No specific budget—this is about intentional arrangement. Pair a metal bed frame with soft linen bedding. Position a concrete accent wall next to a wooden shelving unit. Layer metal fixtures with fabric throws and pillows. The contrast is what makes industrial design work instead of feeling cold.

    Balance is everything in industrial bedrooms. Too much hard material feels unwelcoming; too much soft material dilutes the aesthetic. Aim for 60% hard elements, 40% soft.

    21. Hang Metal or Wooden Beam Shelving Above Your Bed

    Substantial shelf systems above your bed create architectural interest while providing storage and display space. Think real wood beams or heavy metal frames, not delicate shelves.

    Reclaimed wood beam shelves (often 8–12 inches deep) run $50–$200 per shelf from reclaimed wood suppliers or Etsy. Metal frame versions with wood tops cost $80–$250 from Article or Wayfair. Installation requires wall studs and heavy-duty brackets ($20–$50 each). Professional installation costs $200–$400. This is worth hiring help—floating shelves need precision.

    Display a curated collection: books, small plants, vintage metal boxes, and a few personal items. Avoid clutter; each object should have purpose. These shelves become your bedroom’s focal point.

    22. Add Vintage or Industrial Mirrors to Reflect Light

    Industrial mirrors have heavy metal frames (iron, steel, or aged brass) and honest finishes. They reflect light, add dimension, and look like authentic factory fixtures.

    Metal-framed mirrors start at $50–$150 from Wayfair, West Elm, or Article. Vintage or custom options run $150–$500 from Etsy or antique dealers. Lean it against a wall or mount it above a dresser with simple hardware ($5–$20). Installation takes 15 minutes if you’re hanging it, instant if you’re leaning.

    A substantial mirror catches light and makes your bedroom feel bigger. The metal frame adds design detail without cluttering the space.

    23. Create Mood With Warm-Toned Lighting, Not Bright White

    Industrial style often defaults to cool lighting, but warm light is what makes your bedroom actually feel good to sleep in. Swap harsh white bulbs for warm white (2700K) or amber-tinted options.

    Warm white Edison bulbs cost $5–$15 each and work in any fixture. Philips Hue and LIFX smart bulbs ($10–$20 each) let you adjust warmth via app, perfect for shifting from task light to relaxation mode. Install throughout your bedroom—overhead fixture, pendants, lamps, and sconces.

    Warm lighting softens the industrial edge while maintaining the aesthetic. Your bedroom becomes a retreat instead of a showroom.

    24. Use Woven or Leather Accents for Softness

    Woven baskets, leather throws, and textile details humanize industrial bedrooms. They’re the softness that makes you want to actually spend time there.

    Woven baskets ($20–$80 from Target, IKEA, or Wayfair), leather throws ($50–$200 from West Elm or Etsy), and chunky-knit blankets ($40–$150) create tactile warmth. Layer these throughout your bedroom—baskets for storage, throws on your bed or chair, textured pillows on the mattress.

    These details make the difference between a bedroom that looks cool and one that feels like home. Tactile elements invite comfort.

    25. Paint or Stain Wood Shelving in Rich, Dark Tones

    Wooden shelving in rich stains (espresso, walnut, dark mahogany) adds warmth while keeping that industrial edge. The deep tones pair beautifully with metal hardware and concrete walls.

    Pre-stained wood shelves from lumber suppliers cost $15–$40 each. Staining raw wood yourself takes a weekend and $10–$30 in stain and supplies. Metal brackets ($10–$30 each) support the shelves and add industrial flair. Installation takes 2–3 hours with a drill, level, and studs.

    Dark wood shelving becomes a design feature, not just storage. It anchors your space and adds the warmth industrial bedrooms often need.


    Save this post and start with whichever idea speaks to you most—whether that’s exposed brick, metal fixtures, or textured layers. These industrial bedroom ideas work together, so pick three or five and build your space gradually. Your bedroom deserves to feel as cool as it looks.

  • 27 TV Cabinet Design Ideas That Add Style & Smart Storage

    27 TV Cabinet Design Ideas That Add Style & Smart Storage

    Your TV cabinet should be more than just a place to stash the remote. It’s the focal point of your living room, and the right design can completely change how your space looks and feels—without requiring a total renovation. Whether you’re working with a tiny apartment, an open floor plan, or you just want to ditch the visible cable chaos, there are smart solutions for every room and budget. We’ve rounded up 27 cabinet ideas that combine style with practical storage, from floating units that save floor space to textured finishes that add visual interest. You’ll find budget-friendly hacks, investment pieces, and everything in between. Ready to stop staring at that awkward blank wall? Let’s dive in.

    1. Go Floating for Maximum Floor Space

    Floating TV cabinets are the ultimate space-saver, especially in smaller rooms where every inch counts. They create the illusion of more floor space by eliminating the visual weight of a bulky stand.

    Mount a floating media unit between $80–$400 depending on size and material. Use a stud finder to locate wall studs, then install heavy-duty brackets rated for at least 50 pounds. IKEA, Wayfair, and Amazon all carry budget options; wood and metal designs are available. Installation takes one afternoon if you’re comfortable with a drill—or hire a handyman for $75–$150.

    The best part? You’ll feel like your room physically expanded, plus you gain floor space for a plant, basket, or extra seating. Renters can ask landlords about wall mounting, or use temporary adhesive strips for lighter cabinets (under 30 pounds).

    2. Hide Cables with Cord Management Behind the Unit

    Visible cables are the enemy of a clean aesthetic, but hiding them doesn’t require expensive custom builds. Strategic planning and affordable cable management tools do the job.

    Buy a cable management box ($15–$40) from Target, Amazon, or Best Buy. Mount it behind your TV or inside a cabinet shelf, then group cables by device using velvet cable ties ($5–$12 per pack)—they’re gentler on wires than plastic ties and look nicer. Label each cable with a small sticker or tag (under $5 for a pack) so you know what’s what when troubleshooting. Spend 30 minutes organizing, and the transformation is instant.

    You won’t waste time tracing mystery cables when something stops working. Your living room looks intentional and sophisticated, not like a tech graveyard. This upgrade works for renters too—no permanent changes needed.

    3. Add LED Backlighting for a Halo Effect

    LED backlighting reduces eye strain during evening viewing and creates a stunning visual frame around your TV—it’s a favorite trick in cinema design.

    Install warm-white LED strip lights ($20–$60) from Amazon, Home Depot, or Best Buy. Measure the back of your TV, then apply self-adhesive strips to the upper corners and sides. Plug into a power outlet or USB port (many strips come with adapters), then control brightness via remote or app. Installation takes 15 minutes—just clean the wall first so strips adhere properly.

    The halo effect makes your TV look like it’s floating and reduces the contrast shock when you glance away from a bright screen. Bonus: it makes your whole setup look high-end, even on a budget. Choose warm tones for cozy vibes or cool tones for a modern feel.

    4. Use Natural Wood Slats for Organic Texture

    Slatted wood finishes have dominated 2025 design for good reason—they add visual interest and make plain cabinets feel intentional and modern.

    Purchase a pre-made slatted cabinet ($200–$800) or buy a basic cabinet and add DIY slatted panels using wooden shiplap or thin slats ($50–$150). Attach with a brad nailer or construction adhesive. If DIY feels intimidating, buy adhesive-back wood panels from Amazon ($30–$100 for a set) and apply them directly. Time needed: 2–4 hours for DIY, or hire a handyperson for $100–$200.

    The texture draws the eye upward and creates sophisticated shadow play throughout the day. Your TV becomes part of a styled feature wall instead of a stark black rectangle. This works beautifully in both modern and rustic spaces.

    5. Mix Open and Closed Storage for Balance

    Open shelves look gorgeous when styled intentionally, but they also expose clutter. Combining them with closed storage gives you the best of both worlds.

    Choose a cabinet with both closed and open sections ($150–$600) from IKEA, Wayfair, or a local furniture store. Use closed cabinets below to hide cables, remotes, DVDs, and gaming consoles. Style open shelves above with 3–5 curated books, small plants, and one statement piece. Apply the “rule of three” in each shelf section—group items in odd numbers for visual balance.

    You get the styled Instagram-worthy look without dedicating your entire cabinet to decoration. Honestly, this is one of the easiest ways to feel organized and design-forward at the same time.

    6. Install Acoustic Slatted Panels for Sound Control

    If your room echoes or sounds hollow during movies, acoustic panels are a game-changer. They improve sound quality while adding texture to your wall.

    Buy acoustic slatted panels ($100–$400 for a wall set) from Amazon, Best Buy, or specialty audio stores. Mount them directly to the wall using adhesive strips or a brad nailer. Gray, white, and natural wood options blend seamlessly with most decor. Installation takes 30 minutes to 1 hour. Pair with your TV cabinet to create a cohesive media zone.

    You’ll notice dialogue becomes clearer, bass sounds richer, and the room feels less echoey. It’s a pro-level upgrade that looks like intentional design, not audio equipment. Renters: confirm with your landlord first, but adhesive-mounted panels usually don’t leave marks.

    7. Choose High-Gloss Lacquer Finishes for Small Spaces

    High-gloss finishes reflect light, making small rooms feel larger and creating a premium, sophisticated look.

    Invest in a high-gloss lacquer cabinet ($300–$1,000) from mid-range brands like Wayfair or West Elm, or upgrade an existing cabinet with high-gloss spray paint ($30–$60 per can). If spray-painting, prep the cabinet with sandpaper, primer, and 3–4 thin coats. DIY time: 4–6 hours plus drying time. Hire a pro for $150–$300 if painting feels overwhelming. Choose deep colors like navy, charcoal, or emerald for maximum impact.

    The reflective surface makes your room feel more open while adding that high-end hotel-lobby vibe. The downside? Fingerprints show easily, so keep fingerprint-resistant spray ($10–$15) on hand. Worth it for the wow factor.

    8. Mount the TV on an Articulating Arm

    Articulating arms free up cabinet space and let you adjust your TV for better viewing angles—a smart choice if you have a small room or open floor plan.

    Buy an articulating TV mount ($40–$150) from Best Buy, Amazon, or Home Depot. Choose between “full motion” (maximum flexibility) or “tilt” (up and down only) based on your needs. Mount directly to wall studs using the included hardware. Installation takes 1–2 hours. Pair with a slim floating cabinet below that’s purely for storage and styling.

    You get flexibility without the bulk of a traditional stand. Rearranging your furniture becomes easier, and your room feels more spacious. Test the range of motion before tightening everything down to make sure your viewing angle is perfect.

    9. Add Floating Shelves Beside the Cabinet for Asymmetry

    Asymmetrical floating shelves beside your TV cabinet create visual interest and display space without feeling heavy or cluttered.

    Install 3–5 floating shelves ($80–$250 total) from IKEA or Wayfair at staggered heights on one side of your cabinet. Use a level to ensure straight mounting. Vary shelf depth (8 to 12 inches) for added visual rhythm. Style with books, small plants, framed photos, and a few decorative objects. Installation takes 1–2 hours.

    The asymmetry makes your wall feel curated and modern, not rigid or corporate. You create a cohesive gallery effect that draws the eye across your entire media wall. This trick works beautifully in apartments since you’re not committing to major changes.

    10. Integrate an Electric Fireplace Below the TV

    An electric fireplace adds warmth and ambiance below your TV, transforming a media wall into a genuine focal point without needing a vented chimney.

    Buy a wall-mounted electric fireplace ($150–$600) from Amazon, Wayfair, or Best Buy. Models like Regal Flame or Real Flame are popular mid-range options. Mount it directly below your TV using the included brackets, then plug into a nearby outlet. Installation takes 30–45 minutes. Use a decorative mantel or ledge ($50–$150) above the fireplace to frame the space.

    The flickering light adds cozy ambiance while the TV stays your daytime focal point. You get double the visual interest and warmth without expensive renovation work. Renters love this option because it’s completely removable.

    11. Paint the Cabinet a Moody Accent Color

    A bold cabinet color anchors your room and makes a statement—especially effective if your walls are neutral.

    Paint your existing cabinet with high-quality furniture paint ($30–$60 per quart) in colors like forest green, navy, terracotta, or charcoal. Prep with sandpaper and primer, then apply 2–3 thin coats. DIY time: 4–6 hours plus drying. Alternatively, buy a pre-finished colored cabinet ($300–$800) from retailers like Article or CB2. Use a finish like matte or satin to hide fingerprints better than gloss.

    The moody backdrop makes your TV, plants, and decorative objects pop visually. It’s a bold move that signals you’ve thought about your space intentionally. Test your color choice by taping samples on the wall and living with them for a few days before committing.

    12. Use Micro Cement for a Luxe Textured Finish

    Micro cement creates a sophisticated, almost velvety surface that feels expensive and architectural—perfect for a statement TV wall.

    Hire a professional to apply micro cement ($800–$2,000 for a wall) or DIY with a micro cement kit ($150–$300). The DIY route requires patience—follow kit instructions carefully, as application is technique-sensitive. Professional installation takes 2–3 days including curing time. Colors range from warm taupes to cool grays to bold blacks.

    The result looks like a high-end hotel and instantly elevates your entire room. The texture catches light beautifully throughout the day, creating subtle shadow play. It’s an investment piece that’ll stay relevant for years.

    13. Create a Gallery Wall Around Your TV

    A gallery wall transforms a TV from an isolated black box into part of a larger, intentional display.

    Collect frames in varying sizes ($5–$30 each from Target, IKEA, or thrift stores) and fill with art, photos, or prints. Plan your layout using kraft paper templates ($2–$5) on the wall first—trace each frame and move pieces around until it feels balanced. Install frames using a stud finder and wall anchors. Time: 2–3 hours. Mix frame finishes (black, gold, wood) for visual interest.

    Your TV becomes part of a styled collection rather than a tech eyesore. It’s incredibly satisfying to step back and see your wall come together as a cohesive whole. This works for renters using removable adhesive strips too.

    14. Install Recessed Shelving Inside the Wall

    Recessed shelving eliminates visual clutter by creating built-in storage that sits flush with the wall.

    Hire a contractor to cut into your wall and install recessed shelves ($500–$2,000 depending on depth and number). This is a renter-unfriendly option, but for homeowners it’s a permanent upgrade worth the investment. Alternatively, use adhesive-back floating shelves ($50–$150) that create a similar appearance without wall cutting.

    Your room feels more intentional and spacious because nothing protrudes into the floor plan. It’s a premium look that works with minimalist or modern aesthetics. Best for spaces where you’re planning to stay long-term.

    15. Add Vertical Lighting with Track Lights Above

    Track lighting lets you highlight specific shelves, artwork, or design details while keeping your space from feeling flat.

    Install track lighting ($100–$400) from Home Depot or Wayfair. Choose between 2–4 adjustable lights depending on wall width. Mount to the wall or ceiling using the included bracket system. Hire an electrician ($100–$200) if wiring feels intimidating, or DIY if you’re comfortable with basic electrical work. Professional install: 2–3 hours.

    Your cabinet instantly looks gallery-quality, with specific pieces glowing rather than everything in uniform light. The adjustable heads let you change emphasis as you update your styling. It’s one of those upgrades that makes a huge difference with minimal visual bulk.

    16. Incorporate Rattan or Woven Textures

    Woven textures bring warmth and organic beauty to cabinets, especially if your style leans bohemian or earthy.

    Buy a rattan or woven panel cabinet ($250–$700) from West Elm, Article, or Amazon. Alternatively, add rattan panels to an existing cabinet ($40–$120) using adhesive or light nailing. Rattan doors hide clutter beautifully while allowing airflow for electronics. Style with plants and natural wood accessories to complete the look.

    The texture is conversation-starting and instantly makes your space feel more layered and thoughtful. Rattan works especially well in rooms with lots of natural light, where shadows play through the weaving. It’s a warm, welcoming choice that feels collected rather than decorated.

    17. Use Fluted Wood Panels for Depth and Luxury

    Fluted panels add sophisticated texture through subtle vertical grooves—a signature luxury furniture detail that’s now more accessible.

    Buy a cabinet with fluted fronts ($400–$1,200) from Wayfair, Article, or CB2, or add fluted panels to an existing unit ($100–$250). Adhesive-back fluted panels are the easiest option for renters. Mix with open shelving to show off the texture. Installation takes 1–2 hours for DIY panel additions.

    The grooves catch light beautifully and create visual depth without feeling busy or patterned. It’s a subtle luxury detail that makes your room feel intentional and expensive. Pair with warm metallics (brass, gold) for maximum impact.

    18. Mount Your TV on a Swivel Base for Corner Placement

    Swivel TV mounts let you place your cabinet in a corner and adjust the viewing angle—perfect for open floor plans.

    Invest in a swivel TV mount ($60–$200) from Best Buy, Amazon, or Home Depot. Mount to the corner wall stud, then place your cabinet directly below. Test the swivel range to ensure it captures all your seating positions. Installation: 1–2 hours.

    This setup lets you claim a corner without sacrificing viewability, and you can adjust for different rooms if you rearrange furniture. It’s especially smart for studios or open-plan apartments where the TV needs to serve multiple zones.

    19. Layer Different Materials (Wood, Metal, Plaster)

    Material layering creates visual richness and makes your space feel curated and expensive.

    Combine elements: a wooden cabinet base ($200–$500), metal shelving accents or frame ($50–$150), and a textured plaster or stucco wall finish ($300–$800 professionally). You don’t need all three—even mixing two creates impact. Style with objects in contrasting materials: ceramic, plants, brass accessories. Time varies based on complexity, but mixing store-bought and DIY pieces saves money.

    The mixed materials tell a story and prevent your wall from feeling one-note or sterile. Each texture adds personality and depth. This approach works beautifully in modern, eclectic, and industrial spaces.

    20. Install Curved or Arched Cabinet Silhouettes

    Curved cabinets soften modern spaces and feel more organic than sharp right angles—a trend that’s gaining momentum.

    Choose a curved media unit ($400–$1,500) from designers like Blu Dot, Article, or Wayfair. Curved options are often pricier than linear cabinets, but they create a statement. Alternatively, add curved shelving accents ($100–$300) to straighten a basic cabinet. Installation is standard for floating units. Allows 1–2 hours.

    The soft lines make your room feel friendlier and less corporate. Curved cabinets pair beautifully with other round elements like plants or circular artwork. It’s a subtle way to add personality without bold colors.

    21. Hide a TV Behind Smoked Glass Doors

    Smoked glass doors let your TV disappear into the wall when it’s off—the ultimate minimalist solution.

    Buy a cabinet with smoked glass fronts ($500–$1,500) from high-end retailers like Article, Design Within Reach, or custom builders, or retrofit existing doors with smoked glass film ($50–$100). When the TV’s off, it’s invisible. When it’s on, the screen shows through clearly. Installation: 30 minutes for film, 1–2 hours for full cabinet swap.

    You reclaim wall space psychologically—your room doesn’t feel dominated by a black rectangle 24/7. It’s a game-changer for people who want tech to blend into their life rather than anchor their room. This strategy works beautifully in minimalist, mid-century modern, and luxury aesthetics.

    22. Add Modular Customizable Panels for Future Changes

    Modular systems let you change your look without replacing the entire cabinet—perfect if you like experimenting.

    Invest in a modular TV wall system ($300–$1,000) from IKEA (their besta system offers tons of customization), Wayfair, or specialty retailers. Mix and match panel colors, textures, and cabinet heights. Reconfigure whenever inspiration strikes. Installation depends on customization level, typically 2–4 hours.

    You’re buying flexibility alongside storage. Test colors and layouts before committing to permanent paint or major remodels. It’s brilliant for renters or anyone who redesigns frequently. Update panels seasonally or annually to keep your space feeling fresh.

    23. Create Symmetrical Flanking Shelves for Architectural Appeal

    Symmetrical flanking shelves around your TV create a formal, architectural look that feels curated and intentional.

    Mount identical floating shelves ($80–$250 for a pair) at the same height on both sides of your TV. Use a level to ensure perfect alignment. Fill both sides with similar items—books on one side, plants on the other—to emphasize balance. Style consistently across both shelves. Installation: 1–2 hours.

    Symmetry feels inherently sophisticated and creates visual calm. Your TV becomes the centerpiece of an organized, balanced composition. This approach works especially well in traditional, mid-century modern, and minimalist spaces.

    24. Use Venetian Plaster for Subtle Drama

    Venetian plaster creates a sophisticated finish with depth and subtle sheen—expensive-looking without being loud.

    Hire a professional to apply Venetian plaster ($600–$1,500 for one wall) or DIY with a kit ($100–$200). The technique involves applying multiple thin coats and buffing to create depth. Color options include warm grays, taupes, and cream. Professional installation takes 2–3 days including curing. This is an investment, but it lasts for years.

    The subtle sheen catches light beautifully, creating a luxe, almost liquid appearance. It’s the design equivalent of whispering instead of shouting—sophisticated and understated. Best for people who want high-end impact without bold colors or busy textures.

    25. Combine Your TV Cabinet with a Mantel-Style Ledge

    A mantel-style ledge on top of your cabinet creates additional display space and anchors your TV within a larger composition.

    Install a wooden ledge ($50–$200) or buy a cabinet with a built-in ledge. Mount securely using brackets rated for the weight of your décor. Style with 5–7 carefully chosen pieces: candles, a mirror, framed photos, and a small plant. Rotate items seasonally to keep it fresh. Installation: 30 minutes.

    You instantly add visual interest above your TV without cluttering the wall. The ledge frames your TV beautifully and creates a focal point that feels intentional. It’s a designer trick that makes a huge difference with minimal effort.

    26. Paint the Wall Behind with an Ombre or Gradient Effect

    An ombre or gradient wall adds dimension and interest while keeping the overall look sophisticated and subtle.

    Paint your wall with a gradient effect using one color family in two shades ($30–$60 for paint). Apply the lighter shade first, then blend downward into the deeper tone using a damp sponge or gradient tool. Watch YouTube tutorials beforehand—the technique takes practice. DIY time: 3–4 hours. Hire a painter for $200–$400 if you want professional results.

    The subtle color shift creates depth and prevents your wall from feeling flat or one-note. It’s an artistic touch that photographs beautifully and feels intentional without being overdone. Test the effect on a large cardboard piece first to see how light plays across the gradient throughout the day.

    27. Combine Your TV Cabinet with Complementary Accent Pieces

    Styling your cabinet alongside complementary accent pieces creates a complete, intentional media zone that feels finished.

    Choose pieces in coordinating finishes: if your cabinet is natural wood, add brass sconces, woven baskets, and a wooden side table. Match metals throughout (all brass, all blackened steel, or mixed metals intentionally). Source from the same retailer or designer collection for visual cohesion ($200–$800 total for accents). Layer heights and textures to create visual rhythm.

    The result looks like a professionally designed vignette instead of random furniture scattered around. Your TV cabinet becomes part of a larger conversation about your style. This approach transforms a basic media wall into the most thoughtfully styled zone in your home.


    SAVE THIS POST for your next living room refresh. Pick one or two ideas and start this weekend—whether you’re painting, adding lighting, or rearranging, small changes add up fast. Which cabinet hack will you try first?

  • 27 Trendy Sofa Ideas That Instantly Modernize Any Home

    27 Trendy Sofa Ideas That Instantly Modernize Any Home

    Your living room deserves to feel like a retreat, not a showroom. Whether you’re working with a small apartment or a sprawling family home, the right sofa sets the tone for everything. These 27 ideas blend 2025’s biggest trends with practical, budget-friendly solutions that actually work in real life. You’ll discover how curved silhouettes, bold colors, modular layouts, and smart styling can completely refresh your space—without requiring a design degree or a massive budget. Ready to make your sofa the hero of your room? Let’s dive in.

    1. Go Curved for Softer, Organic Vibes

    Curved sofas soften rigid rooms and create an approachable focal point that encourages gathering. Unlike traditional straight sectionals, curved pieces feel sculptural and intentionally designed.

    Hunt for curved sofas on Wayfair ($800–$2,500), Article ($1,200–$3,000), or budget-friendly options at IKEA ($400–$800). If you’re renting, companies like Article and Article offer sectionals that curve subtly without screaming “expensive.” Measure your doorway and pathways before ordering—curved sofas can be tricky to maneuver.

    Look for pieces with rounded corners rather than sharp 90-degree angles. A weekend delivery and setup typically runs 1–2 hours. The payoff? A room that feels intentional and way more inviting than boxy furniture.

    2. Layer Deep-Seated Sofas for Maximum Comfort

    Deep-seated sofas let you actually sink in and lounge—no perching on the edge like a formal furniture catalog. This shift toward comfort-first design means you get extra cushion depth (usually 28–32 inches instead of standard 24 inches).

    Brands like Living Spaces ($1,500–$3,000), Article ($1,200–$2,800), and Wayfair ($700–$2,000) offer deep options. For budget shoppers, Article and IKEA’s Sectionals have decent depth starting around $400–$600. Check the measurements carefully; deeper isn’t always better if your legs dangle off the seat. Expect delivery in 2–4 weeks for custom orders.

    The result? A sofa that becomes your favorite napping spot, movie-watching perch, and conversation zone rolled into one.

    3. Choose Earthy Neutrals for Timeless Calm

    Earthy tones—camel, clay, warm beige, and soft taupe—create a soothing backdrop that pairs with almost any decor style. These colors age beautifully and hide wear better than stark whites or blacks.

    Target these hues at West Elm ($800–$2,500), Article ($600–$2,000), Living Spaces ($700–$2,200), and Wayfair ($400–$1,800). If you’re choosing fabric, ask for samples first—lighting in your home affects how colors read. Most retailers ship samples free or for $5. Paint swatches and hold them up against your walls before committing.

    This neutral foundation becomes a canvas for your personal style, making future décor updates feel fresh without replacing the sofa.

    4. Mix Modular Sections for Flexible Layouts

    Modular sofas adapt to your space as life changes. Rearrange sections, add a chaise, or swap an armrest—flexibility is the whole appeal. Perfect for open-plan homes or rooms that serve multiple purposes.

    Brands leading this space: Living Spaces ($1,200–$3,500), Article ($1,000–$3,000), Wayfair ($600–$2,500), and IKEA ($400–$1,500). Buy the base sofa first, then add pieces individually over time if budget is tight. Most modular systems let you mix configurations—no locked-in design.

    You can zone your open floor plan without walls, create cozy reading corners, or adjust for guests in just a few minutes.

    5. Invest in Performance Fabrics for Durability

    Performance fabrics resist stains, pet damage, and spills without sacrificing style or feel. They’re woven differently to repel liquids while maintaining softness.

    Look for brands like Article (performance options $900–$2,000), Wayfair (budget-friendly $500–$1,500), and Living Spaces (premium $1,200–$2,800). Check fabric codes: Crypton, Sunbrella, and Ultrasuede are trusted names. Cost is usually $100–$300 more than standard fabric, but worth it if you have kids, pets, or spill-prone households. Spot-treat stains same day; many come with cleaning kits.

    You get years longer life from your sofa without compromising on the look you actually want.

    6. Add a Rounded Sectional for Social Spaces

    Rounded edges and curved sectionals encourage face-to-face conversation instead of the awkward “staring at the TV” silence of traditional layouts. Sculptural sofas work especially well in smaller rooms where every inch matters.

    Hunt on Article ($1,200–$2,500), What A Room (custom curved options $1,500–$3,500), and Wayfair ($800–$2,000). Measure your room’s flow; curved sofas need at least 3 feet of walking space on each side. Consider semi-circular or serpentine shapes if full curves feel too bold.

    Your gatherings become more intimate and engaging because the furniture itself invites real connection.

    7. Try Low-Profile Silhouettes for Airy Rooms

    Low-profile sofas sit just 8–10 inches off the ground, making rooms feel more spacious and modern. Without visual bulk from legs and storage, your floor breathes.

    Check Decorilla’s guides, Article ($700–$1,800), IKEA’s Scandinavian range ($400–$900), and Wayfair ($500–$1,500). These work best in rooms without young kids or mobility issues (getting up requires flexibility). Dust and pet hair collect underneath more easily, so plan for regular vacuuming. Delivery: 2–3 weeks typically.

    Your space suddenly feels 20% larger, and the minimalist aesthetic creates a calm, intentional vibe.

    8. Select Muted Greens for Wellness Vibes

    Muted greens—sage, olive, and eucalyptus tones—connect your home to nature and promote calm without the harshness of pure neutrals. They’re having a major moment in wellness-focused design.

    Brands carrying green: Bellona USA (color trend authority, $1,000–$2,500), Living Spaces ($800–$2,000), Article ($700–$2,000), and Wayfair ($500–$1,800). Request fabric swatches to see how green reads in your lighting—north-facing rooms may shift the tone toward blue. Pair with warm wood and cream accents to prevent the space from feeling too cool or sterile.

    This palette creates a space that feels like a wellness retreat, boosting mood and focus during those long workdays at home.

    9. Layer Textured Throws and Cushions

    Texture makes sofas feel lived-in and luxe. Boucle, sherpa, velvet, and chunky knits add depth and make you want to sink in immediately.

    Buy throws from Target ($20–$60), IKEA ($15–$50), Wayfair ($25–$80), and Article ($40–$150). Cushions range from IKEA ($10–$40) to Article ($30–$120) depending on material. Start with 3–4 throws and 5–6 pillows; layer asymmetrically for that curated-but-casual look. Wash covers monthly to keep them fresh.

    Your basic sofa becomes a space that looks styled and feels like a cozy hug, perfect for those Netflix nights or lazy Sunday mornings.

    10. Incorporate Sustainable, Custom Designs

    Sustainable sofas use eco-friendly fabrics (organic linen, recycled polyester, FSC-certified wood) and are built to last decades, not seasons. Custom options mean you get exactly what you want without settling.

    Leaders: What A Room (custom $1,500–$4,000), Article (sustainable line $800–$2,500), and Wayfair’s eco-conscious filters ($600–$2,000). Lead times are longer (6–12 weeks), so plan ahead. Yes, upfront cost is higher, but cost-per-year drops significantly when furniture lasts 10+ years instead of 5.

    You invest in a sofa that grows with you, reduces waste, and supports ethical manufacturing—plus it becomes a family heirloom, not landfill-bound.

    11. Add Bold Accent Colors for Personality

    Skip all-neutral if your style leans bold. A rich jewel tone, peachy pink, or deep navy sofa becomes the room’s personality centerpiece and reduces the need for busy accessories.

    Hunt on Wayfair (bold colors $600–$2,000), Living Spaces ($1,000–$2,500), Article ($800–$2,000), and Designer outlets. Pair bold sofas with neutral walls and minimal accessories so they stay the focus, not visual noise. Remember: resale value may be lower, but who cares if you love it for 7 years? Pro tip: test bold colors by renting the fabric first or ordering large samples.

    Your living room becomes a confident reflection of who you are, and guests actually remember it instead of a blur of beige.

    12. Use Modular Pieces to Zone Open Spaces

    In open-plan homes, modular sofas act as architectural dividers without permanent walls. Position the angle to face your TV, then let the other end create a natural buffer between zones.

    Brands excelling here: Living Spaces (zoning layouts $1,200–$3,000) with design advice from Brynna Evans, and Wayfair ($800–$2,500). Measure your space and traffic flow before ordering. Aim for 3–4 feet of walking space between the sofa and the next zone. A designer consultation from Decorilla ($30–$60 per room) can save guesswork.

    The result is a multifunctional space that feels organized and intentional without the cost and permanence of walls.

    13. Try Velvet or Boucle Fabrics for Luxury Feel

    Velvet and boucle elevate any sofa from “fine” to “wow” without five-figure price tags. These fabrics catch light gorgeously and feel premium underhand.

    Expect to pay $100–$400 more for velvet or boucle upgrade (total sofa $900–$2,500 at retailers like Article, Wayfair, and Living Spaces). Downside: velvet shows dust and pet hair more visibly; boucle is slightly more forgiving. Dry-clean occasionally to refresh, or vacuum gently with an upholstery brush weekly. Not ideal for homes with large dogs or young kids (yet).

    This splurge gives you a sofa that looks like a magazine spread for under $2,500—way better ROI than pricier designer brands with less personality.

    14. Embrace Floral and Striped Patterns

    Designer Lucinda Sanford champions bold patterns (botanical prints, stripes, geometrics) as fun focal points. These replace the all-neutral sofa trend and inject personality without looking dated.

    Find patterned options at Wayfair ($500–$1,800), Article ($800–$2,200), Living Spaces ($1,000–$2,500), and specialist stores. Keep walls neutral and accessories minimal so the sofa stays the star. Patterns hide wear slightly better than solids. Order samples first and live with them for a week in your lighting.

    Your sofa becomes a conversation piece and a reflection of your actual style—not the “safe” version everyone else has.

    15. Choose Statement Blues or Charcoal Tones

    Deep blues and charcoals create sophisticated, drama-filled rooms that feel intentional and modern. These darker tones work especially well in minimalist spaces.

    Explore Living Spaces ($900–$2,300), Wayfair ($600–$1,800), and Article ($800–$2,200) for moody options. Pair with warm lighting (soft gold lamps, warm-white bulbs) so the space doesn’t feel dark or sterile. These colors hide stains better than lights, and they feel timeless rather than trendy.

    You get a sophisticated backdrop that makes everything else pop while creating a cocoon-like vibe that’s calming rather than cold.

    16. Invest in Multi-Functional Sleeper Sofas

    Sleeper sofas serve double duty: everyday seating plus guest bed. Modern versions are way more stylish than old pull-outs and actually comfortable enough for real sleep.

    Brands with stylish sleepers: Urban Natural ($1,200–$2,500), IKEA’s Scandinavian range ($400–$900), Article ($1,000–$2,200), and Wayfair ($500–$1,600). Check the mattress thickness—aim for 5+ inches of actual foam, not thin springs. Mechanism should be smooth and not require two people to open. Test one in-store if possible.

    Guest rooms become optional, and your living room serves as an extra bedroom that doesn’t look like a temporary cot.

    17. Pair Sofas with Warm, Layered Lighting

    The right lighting makes even an average sofa feel high-end and welcoming. Warm lighting (2700K bulbs, brass fixtures) pairs beautifully with any sofa color.

    Invest in: 1 floor lamp ($40–$150), 1 table lamp ($30–$120), and 1 pendant or overhead fixture ($50–$300). Retailers: Target, IKEA, West Elm, Wayfair. Layer three light sources to avoid harsh overhead-only situations. Dimmer switches ($15–$30) let you adjust mood throughout the day.

    Suddenly, your sofa glows and becomes the ultimate gathering spot instead of feeling exposed or washed-out.

    18. Customize Your Sofa With Build-Your-Own Options

    Many brands now offer build-your-own tools where you pick the frame, legs, fabric, cushion firmness, and size. You get exactly what you want instead of settling for in-stock limitations.

    Brands with strong customization: Article (30+ fabrics, multiple legs), What A Room ($1,500–$4,000 custom), Wayfair (some options), and Living Spaces. Lead times are 8–12 weeks. Yes, wait time is longer, but you avoid buyer’s remorse. Some brands let you visualize your choices in a 3D room preview.

    Your sofa becomes truly yours—not someone else’s design—and reflects exactly how you want to live.

    19. Go Scandinavian Minimalist for Simplicity

    Scandinavian design emphasizes multi-functional pieces, natural materials, and clean lines. These sofas prioritize comfort and longevity over trends.

    Find Scandi sofas at Urban Natural ($1,000–$2,000), IKEA ($400–$900), Article ($700–$1,800), and Wayfair ($500–$1,500). These sofas typically have: wooden legs, neutral fabrics, simple silhouettes, and hidden storage options. Perfect for renters and minimalists because they stay relevant forever. Pair with one or two quality side tables and minimal accessories.

    You get a living room that feels calm, organized, and genuinely comfortable—not a showroom pretending to be a home.

    20. Layer Organic Shapes to Soften Angular Rooms

    Curved and organic sofas soften boxy rooms. Add rounded side tables, curved mirrors, and organic plants to amplify the effect. This creates visual flow instead of static, rigid geometry.

    Start with the sofa (curved options $800–$2,500 at Article, Wayfair, Living Spaces), then layer: round side table ($100–$300), curved mirror ($80–$250), and potted plants ($20–$100 each). Budget-friendly win: repaint a rectangular table’s edges with rounded trim ($0—DIY project). Arrangement takes one afternoon.

    Your space feels intentional and high-design despite having no actual interior designer in the mix.

    21. Create Visual Warmth With Textured Layers

    Texture creates visual warmth and makes spaces feel expensive without adding clutter. Mix matte, shiny, rough, and soft elements for depth.

    Layer throws ($20–$80 from Target, IKEA, Wayfair), pillows ($15–$100 depending on material), and a woven basket ($40–$150 from West Elm, IKEA). Aim for 5–6 textural pieces total; more looks chaotic, fewer looks bare. Swap seasonal pieces monthly to refresh without spending big money.

    Your sofa becomes an Instagram moment that’s also genuinely comfortable—proof that style and coziness aren’t mutually exclusive.

    22. Position Sofas to Create Conversation Areas

    Furniture arrangement matters as much as the sofa itself. Position pieces to face each other rather than all pointing at the TV to encourage genuine interaction.

    Measure before moving: sofas should be 6–9 feet apart, with a coffee table roughly 18 inches from the sofa edge. Move one piece at a time (recruit help—it’s heavy). Rearranging takes 1–2 hours but costs nothing. Apps like Room Planner or Wayfair’s design tool let you virtually test layouts before moving furniture.

    Suddenly, your living room becomes where people actually want to hang out and talk, not just scroll their phones.

    23. Try Rattan or Cane-Accented Frame Details

    Sofas with rattan or cane accents blend modern comfort with organic, artisanal touches. These details add visual interest and feel fresh.

    Look at Article ($900–$2,200), West Elm ($1,000–$2,500), and Wayfair ($600–$1,800) for frame details. Rattan is durable but requires gentle care; dust weekly and avoid placing in direct sunlight (fades and cracks). These pieces pair beautifully with natural wood and neutral palettes.

    Your sofa becomes a design statement that feels curated and intentional, like you actually know what you’re doing.

    24. Opt for Space-Saving Apartment-Scale Sofas

    Apartment living demands proportionate furniture. A 96-inch sectional in a 200-square-foot room is chaos. Smaller scale sofas (72–84 inches) keep rooms feeling spacious.

    Apartment-friendly options: IKEA (compact $300–$600), Article’s loveseat collection ($500–$1,200), and Wayfair’s filtered “small space” section ($400–$1,500). Measure your actual space plus doorways; I’m serious about this. A sectional that doesn’t fit through your door becomes a $1,200 hallway sculpture.

    You get a sofa that fits your actual space instead of one that dominates it, leaving room for life.

    25. Mix Neutral Sofas With One Bold Accent Wall

    A neutral sofa + one painted accent wall gives you boldness without commitment. If you tire of the wall color, paint over it ($100–$300 in paint and labor). The sofa remains timeless.

    Paint costs: $100–$200 in materials, or hire pros ($300–$800). Sofa options stay accessible ($500–$2,000 across all retailers). Let paint dry completely before moving furniture (48 hours). Choose wall colors that complement your sofa’s undertones.

    This balance means you get design drama without risking thousands on a bold sofa you might regret in two years.

    26. Incorporate Throw Pillows for Easy Seasonal Swaps

    Throw pillows ($10–$50 each) let you refresh your sofa seasonally without replacing anything. Swap them monthly for new moods and trends without commitment.

    Buy from Target ($8–$25), IKEA ($10–$30), Wayfair ($12–$60), and Article ($20–$80). Aim for 3–5 pillows in different sizes (24″, 20″, 16″ squares work well). Mix textures and subtle patterns with one neutral anchor. Wash covers every 2–3 months.

    Your sofa becomes a blank canvas for creativity, and seasonal updates cost next to nothing while keeping the space feeling fresh and intentional.

    27. Select Pet-Proof Upholstery for Family Homes

    If you have pets, performance fabrics or darker microsuede absorb paw prints and hide fur better than light linen or velvet. Washable covers are a lifesaver.

    Performance fabrics add $100–$300 but save thousands in replacement costs. Brands: Article (pet-friendly fabrics), Wayfair (performance filters), Living Spaces (durable options). Microsuede ($400–$1,500 total) wipes clean and resists snags. Throw blankets ($30–$80) protect high-traffic areas. Lint rollers become your best friend.

    You finally stop stressing about every paw print and actually enjoy your sofa with the whole family.


    Save this post for your next living room refresh. Pick one or two ideas this weekend—whether it’s adding layers, rearranging to create conversation zones, or finally investing in that curved sofa you’ve been eyeing. Your living room is too important to leave to chance, and one small change makes way more difference than you’d expect.

  • 25 Modern Farmhouse Kitchen Ideas With Rustic Charm

    25 Modern Farmhouse Kitchen Ideas With Rustic Charm

    Introduction

    If you’re craving a kitchen that feels both welcoming and sophisticated, modern farmhouse design hits that sweet spot perfectly. It blends the warmth of rustic elements—think exposed wood and vintage touches—with the clean lines and functionality of contemporary spaces. The result? A kitchen that doesn’t feel precious or overly styled, but rather like the heart of a home where people actually gather. Whether you’re renovating from scratch or tweaking what you already have, these 25 ideas will help you create a farmhouse kitchen that’s practical, beautiful, and entirely yours. You’ll discover everything from budget-friendly styling tricks to investment pieces that anchor the whole aesthetic. Let’s get started.


    1. Install an Apron-Front Sink as Your Centerpiece

    An apron-front sink (also called a farmhouse sink) is the signature piece that defines this style. Its large, exposed front basin and deep capacity make everyday tasks easier while creating an instant focal point in your kitchen.

    You can find quality options at Home Depot ($300–$800), Wayfair ($250–$1,200), or Amazon ($200–$600). Ceramic, fireclay, and stainless steel are the most durable materials. Installation takes a professional plumber about 2–3 hours, though it’s not a DIY project for most renters. Pair it with a vintage-style bridge faucet or modern brass fixtures to complete the look.

    Position your sink in front of a window if possible—it’s not just prettier, it makes dish duty feel less like a chore. This one piece sets the tone for your entire farmhouse aesthetic.


    2. Paint Cabinets in Soft, Muted Tones

    Skip the stark white and embrace softer, personality-filled cabinet colors. Cream, pale sage green, dusty blue, or warm taupe give farmhouse kitchens that lived-in charm without feeling sterile.

    Cabinet paint runs $30–$80 per quart, plus prep work and primer. If you’re handy, this is a DIY project taking one weekend (prep, prime, paint in thin coats). For a professional job, expect $1,500–$3,500 depending on cabinet count. Use quality paint like Sherwin-Williams ProClassic or Benjamin Moore Advance—it’s worth the extra cost. Test your color in natural light before committing; what looks perfect in the store may shift dramatically at home.

    The payoff is enormous: your kitchen goes from builder-basic to designed-on-purpose in one update. Plus, these softer tones hide fingerprints better than white.


    3. Add Open Shelving for Display and Breathing Room

    Open shelving replaces upper cabinets or supplements them, creating visual lightness and space for displaying your favorite kitchenware and cookbooks. It’s the farmhouse hallmark that makes kitchens feel airy rather than enclosed.

    Floating shelves cost $15–$50 per shelf (basic wood or metal brackets), or reclaimed wood shelves run $40–$150 each. Installation is a 1–2 hour DIY project if you locate studs correctly, or hire a handyperson for $50–$100. The trick is styling intentionally: group like items (all white dishes, glass jars with dried goods), and leave negative space. Too crowded looks cluttered, not charming.

    You’ll love how much lighter your kitchen feels, and you’ll actually reach for those pretty bowls and glasses more often. Just commit to keeping shelves tidy—open storage shows everything.


    4. Install Shiplap on Accent Walls or Behind Shelves

    Shiplap—those overlapping horizontal wooden boards—is quintessential farmhouse texture. It adds visual interest without requiring a full renovation and works as a DIY project or hired labor job.

    Tongue-and-groove pine shiplap costs $1–$3 per square foot at big-box stores, plus paint ($30–$60). A 4×8-foot accent wall runs about $50–$150 in materials. Installation is manageable if you’re comfortable with a stud finder and nail gun; budget one weekend. Alternatively, hire a carpenter for $200–$600 depending on wall size. Prime and paint in your chosen farmhouse color—cream, white, or pale blue work beautifully.

    This single addition gives your kitchen that authentic farmhouse personality that’s hard to fake with decor alone. It’s an investment that pays off visually every single day.


    5. Choose Butcher Block or Wood Countertops

    Wood countertops embody farmhouse warmth in a way that cold quartz or laminate simply can’t match. Butcher block, live-edge wood, or reclaimed barn wood bring character and timelessness to your kitchen.

    Butcher block runs $1,500–$3,500 installed, while high-end walnut or hand-planed reclaimed wood costs $3,000–$6,000+. Budget options include new wood counters from Lumber Liquidators ($40–$60 per linear foot). Wood requires maintenance—monthly mineral oil conditioning, immediate water cleanup, and heat protection—but that patina and warmth are irreplaceable. Pair with a wooden cutting board for styling continuity.

    Yes, wood demands care, but it ages beautifully and develops character that makes your kitchen story-rich. Many farmhouse lovers consider maintenance a small price for authenticity.


    6. Swap Out Hardware for Vintage or Brass Pieces

    Hardware is the jewelry of kitchen design—a tiny change that makes enormous visual impact. Replacing builder-grade chrome knobs and pulls with vintage brass, oil-rubbed bronze, or wrought iron instantly boosts farmhouse credibility.

    Vintage hardware ranges from $2–$10 per piece at Etsy, eBay, or Anthropologie. New reproduction pieces cost $3–$15 each from Wayfair, Rejuvenation, or Restoration Hardware. A full cabinet refresh (20–40 pieces) runs $60–$400 total. Installation is pure DIY—just unscrew old hardware, align holes, and install new pieces. Takes 30–60 minutes for an entire kitchen.

    The transformation is disproportionate to the effort. Your cabinets go from forgettable to intentional with this one detail, and it costs less than takeout dinner.


    7. Install Black or Dark Wood Trim Around Windows

    High-contrast trim—black, charcoal, or dark stained wood framing windows and doorways—defines modern farmhouse style with unexpected graphic punch. It grounds the space and draws the eye where you want it.

    Paint-grade trim costs $1–$3 per linear foot, plus primer and paint ($30–$60 total). A standard window frame requires about 12–15 linear feet, so material costs are $15–$45. This is an achievable DIY project if you’re comfortable with tape, primer, and paint; plan one weekend. Alternatively, hire a painter for $200–$400 per window. Use quality exterior or interior trim paint like Benjamin Moore Advance to ensure durability around moisture-prone window areas.

    This architectural detail transforms your kitchen from generic to intentional. It’s especially striking against cream or pale-colored walls.


    8. Layer Lighting with Pendant Fixtures and Vintage Sconces

    Lighting in farmhouse kitchens should feel warm, welcoming, and layered. Mix statement pendants over islands, softer sconces flanking the sink, and under-cabinet task lighting to create depth and functionality.

    Pendant fixtures range from $30–$150 each at IKEA or Target, to $200–$600 from Rejuvenation or Schoolhouse Electric. Vintage sconces cost $20–$100 per pair on Etsy. Installation requires basic electrical knowledge or a licensed electrician ($100–$300 per fixture). Mix metals—brass, black iron, and ceramic—rather than matching everything perfectly. That collected-over-time quality is more farmhouse than matchy-matchy.

    Warm light fundamentally changes how your kitchen feels. Suddenly it becomes an inviting gathering space rather than just a functional room. You’ll find yourself spending more time there.


    9. Add a Large Wooden Island or Cart

    An island serves multiple roles: extra prep space, storage, casual dining, and a visual anchor. A wooden island feels more farmhouse than sleek granite—it’s warm and approachable.

    New wooden islands cost $400–$1,500 from IKEA, Wayfair, or local woodworkers. Reclaimed wood or custom builds run $1,500–$4,000+. Pair with 24–26 inch bar stools ($80–$300 each) for casual seating. If you rent or want flexibility, cart-style islands on wheels ($200–$800) work beautifully and move when needed. Size matters: ensure at least 24 inches of walking space on all sides to avoid a cramped feel.

    An island becomes the heartbeat of your kitchen—where people naturally gather, chat while you cook, and eat casual meals. It transforms a purely utilitarian space into a social hub.


    10. Install Open Shelving Above Your Sink

    The wall above your sink is prime real estate for displaying both beauty and function. Open shelves here let you corral dish towels, soap dispensers, and pretty storage while keeping essentials within arm’s reach.

    Floating shelves cost $15–$50 each, and you’ll likely need 2–3. Total material investment: $50–$150 plus installation (DIY, 1–2 hours, or $50–$100 hired help). Use the opportunity to anchor your farmhouse aesthetic: display vintage-style hand towels, glass water bottles, and creamy ceramic soap dispensers. The key is mixing function with beauty.

    This zone becomes a daily reminder of your thoughtful design. Plus, your family learns to grab what they need from pretty display rather than digging through cabinets.


    11. Use Vintage or Reproduction Tile for Backsplash

    A classic subway tile or vintage-reproduction tile backsplash is farmhouse 101. Whether white subway, soft blue, or handmade-looking glazed tiles, this backsplash style grounds the entire aesthetic.

    Subway tile costs $1–$5 per square foot, while vintage or artisanal reproduction tiles run $3–$10 per square foot. A standard kitchen backsplash (30–40 square feet) costs $100–$300 in materials, plus grout and adhesive. Professional installation runs $500–$1,500 depending on complexity. DIY is possible if you have basic tile experience; plan a full weekend. Neutral grout (white, light gray, or beige) keeps the look clean; darker grout creates more contrast and hides stains better.

    A well-designed backsplash ties the whole kitchen together and makes the space feel professionally finished, not DIY-basic.


    12. Incorporate Vintage Accessories and Collections

    Farmhouse style thrives on vintage—it’s not about matching sets but rather a curated collection of meaningful pieces gathered over time. Vintage scales, enamelware, old crocks, and inherited glassware tell your kitchen’s story.

    Vintage pieces range from free (inherited or found) to $5–$50 per item at thrift stores, estate sales, and Etsy. Budget $100–$300 to start a meaningful collection. The trick is mixing scales: a large vintage scale as a statement piece, smaller crocks and jars grouped together, vintage linens folded and displayed. Rotate pieces seasonally to keep the space feeling fresh.

    Your kitchen becomes less about perfect design and more about your actual life and history. That authenticity is what makes farmhouse kitchens feel like real homes.


    13. Paint or Stain Beams or Ceiling Elements

    If you have ceiling beams or can install faux beams, painting them in soft colors adds architectural interest and authentic farmhouse charm. Even popcorn ceilings look less aggressive when softened with paint.

    Ceiling paint costs $30–$60 per gallon. DIY painting your entire ceiling takes a weekend plus proper scaffolding or a tall ladder setup. Professional painters charge $400–$800 for a full kitchen ceiling. Faux beams (foam or polyurethane) cost $5–$15 per linear foot and require adhesive and painting. Real wood beams run $20–$50 per linear foot installed.

    This overhead element subtly elevates your entire space. Suddenly your kitchen feels more substantial, more considered—like a room worth lingering in.


    14. Choose Brass or Black Iron Faucets

    Your faucet is another hardware piece that sets the tone. Vintage-inspired brass, oil-rubbed bronze, or black matte faucets feel authentically farmhouse—far more character than shiny chrome.

    Bridge-style or gooseneck faucets in brass or black cost $150–$400 from Wayfair, Rejuvenation, or Lowe’s. Professional installation runs $100–$200. If you’re replacing an existing faucet, DIY is possible but requires plumbing confidence. Consider finishes that hide water spots—brushed finishes work better than polished.

    Your faucet becomes part of the daily ritual. Using something beautiful and intentional, rather than generic, makes ordinary tasks feel slightly more pleasant.


    15. Add Wainscoting or Beadboard Walls

    Wainscoting—paneling that runs partway up the wall—adds architectural depth and farmhouse authenticity. Beadboard (narrow tongue-and-groove boards) is the traditional choice, though modern alternatives exist.

    Beadboard costs $0.50–$2 per square foot, plus primer and paint. A full kitchen wall (200–300 square feet) runs $200–$400 in materials. Installation is moderate DIY: plan 2–3 days for a full wall, or hire help for $300–$800. Paint in cream, white, or soft colors to avoid a closed-in feeling.

    This detail anchors the farmhouse aesthetic while adding textural interest at eye level. It makes even a modest kitchen feel thoughtfully designed.


    16. Use Vintage Scales and Measuring Tools as Decor

    Farmhouse kitchens celebrate functional objects as art. Vintage kitchen scales, old measuring cups, and antique recipe boxes aren’t just practical—they’re beautiful design elements that celebrate cooking itself.

    Vintage scales typically cost $5–$30 each on Etsy or at thrift stores. Display them on open shelves, hang them on walls with hooks, or group several together for impact. Measure your space first to ensure pieces don’t overwhelm; a large scale needs breathing room. Mix metals and finishes for collected authenticity.

    These pieces do double duty: they’re actually useful while adding personality and warmth. Your kitchen becomes a celebration of cooking rather than just a place where it happens.


    17. Install a Wooden Range Hood or Build Surrounds

    A wooden range hood—or a wooden mantel-style surround around an existing hood—creates an instant focal point and anchors the farmhouse aesthetic. Wood is warmer and more character-filled than stainless steel.

    Wooden range hoods cost $500–$1,500 ready-made from Etsy or specialty retailers. Custom builds by local woodworkers run $1,500–$3,500. DIY surrounds using reclaimed wood are possible for handy folks; materials cost $200–$600. Professional installation ($200–$400) ensures proper ventilation and codes compliance.

    This centerpiece transforms your entire kitchen’s personality. Suddenly the cooking zone becomes a beautiful statement rather than just utilitarian machinery.


    18. Create a Coffee or Beverage Station

    A dedicated coffee or beverage station—even just a small corner—makes mornings feel like self-care rather than rushing. Style it with vintage accessories and pretty containers for farmhouse charm.

    Budget $30–$100 for a basic setup: a small wooden table or shelf ($20–$50), a coffee maker you already own or a small model ($30–$80), and mugs displayed on hooks or in a rack. Add pretty canisters ($5–$20 each) for sugar and coffee beans. This is pure styling with minimal cost—and you’re using pieces you already have.

    Suddenly you have a small ritual corner that feels intentional. Even when busy, taking time at your coffee station shifts your entire morning energy.


    19. Mix Open and Closed Storage for Balance

    Pure open shelving can feel cluttered; pure cabinets feel closed-off. The farmhouse sweet spot combines both—some beautiful display pieces visible, others tucked away to keep clutter hidden.

    No extra cost if you’re rearranging existing storage. The investment comes if you’re adding cabinets ($500–$2,000) or open shelving ($100–$500). The real work is styling: display items you actually use and love, store daily dishes and clutter in cabinets. Rotate what’s visible seasonally for freshness.

    This balance creates a kitchen that feels both lived-in and designed. You get the warmth of display pieces without the fatigue of managing too many visible items.


    20. Paint Cabinets Two-Tone (Upper and Lower Different Colors)

    Two-tone cabinetry adds visual interest and breaks up the visual weight of an all-one-color kitchen. Cream base with pale blue uppers, or white base with sage green uppers, feels contemporary-farmhouse.

    Paint costs $60–$120 total (two quality quarts). This is a DIY project if you already painted your cabinets; plan 3–4 days for two separate paint colors (allowing drying time). Professional painters charge $2,000–$3,500 for two-tone cabinet work. The key is choosing colors that complement rather than clash—test both colors in natural light before committing.

    This subtle variation creates sophisticated visual interest. Your kitchen feels more intentionally designed and less cookie-cutter.


    21. Add a Wooden Plate Rack or Wall-Mounted Display

    Plate racks celebrate beautiful dishware as functional art. Whether a traditional wooden plate rail or modern wall brackets, displaying plates and platters adds farmhouse character instantly.

    Wooden plate racks cost $50–$200 from Wayfair, Etsy, or local woodworkers. DIY wall-mounted display using wooden rails and plate hangers is possible for $30–$80 in materials. Installation requires stud-finding and wall anchors; plan 1–2 hours. Hang a mix of solid-colored dishes (cream, white, blue) with one or two patterned plates for visual interest.

    Displaying beautiful dishes you actually own (rather than hiding them) makes your kitchen feel like a curated collection rather than just storage. It’s personal and warming.


    22. Install or Style Open Shelving in a Corner Nook

    A corner nook with open shelving is often-wasted space. Shelves here create a charming display zone for cookbooks, frequently-used items, and styling—that collected-over-time feeling farmhouse lovers crave.

    Corner shelves cost $30–$100 per unit, plus installation of $50–$150 (DIY or hired). The key is styling depth: place larger items (cookbooks, jars) in back, smaller items in front. Add a small plant or vintage pitcher for organic texture. Keep it balanced—too much clutter defeats the purpose.

    This small investment creates a feature-worthy zone that photographs beautifully and feels intentionally designed. It transforms overlooked corner space into a showstopper.


    23. Use Vintage or Earthenware Canisters and Containers

    Vintage earthenware canisters, crocks, and ceramic jars store pantry staples while adding authentic farmhouse texture. Unlike trendy matching sets, collecting varied vintage pieces feels more genuine.

    Vintage canisters typically cost $5–$20 each from thrift stores, Etsy, or estate sales. Budget $50–$150 to start a meaningful collection. Group pieces by color family (creams and taupes, or rust and terra cotta) for cohesion without looking matchy. Fill with flour, sugar, coffee, and dried goods—both beautiful and practical.

    These everyday containers become quiet decor. When you pass them daily, they reinforce your intentional, farmhouse-loving aesthetic.


    24. Create a Windowsill Herb or Plant Station

    A kitchen windowsill is perfect for growing fresh herbs and small plants. It adds life, greenery, and the practical benefit of fresh herbs within arm’s reach while cooking.

    Terra cotta pots cost $1–$5 each, soil is $5–$10, and herb seedlings are $2–$5 each from Home Depot or nurseries. Total budget: $25–$50 for a full windowsill setup. Basil, parsley, and chives thrive on kitchen windowsills with decent light. Maintenance is minimal—water when soil is dry, pinch off leaves as needed.

    This living element brings the outdoors in while serving your daily cooking needs. Plus, herbs you grow yourself taste infinitely better than store-bought.


    25. Mix Metallics for Subtle Visual Interest

    Farmhouse style doesn’t demand perfectly matched metals. Instead, mixing brass, black iron, copper, and brushed nickel creates layered, collected-over-time authenticity that’s more interesting than uniformity.

    No additional cost if you’re already choosing fixtures and hardware—just mix finishes intentionally. Brass hardware, black sconces, stainless appliances, and copper accents work beautifully together when you view them as a palette rather than individual pieces. The key: keep one metal slightly dominant (maybe brass) so the mix feels intentional rather than chaotic.

    This approach frees you from the tyranny of “matching everything.” Your kitchen becomes more interesting, more personal, and honestly more sophisticated than cookie-cutter perfection.


    26. Layer Textiles: Kitchen Linens, Rugs, and Runners

    Textiles—linens, runners, and tea towels—add warmth and softness that make kitchens feel like homes rather than showrooms. Layering different textures in a cohesive color palette is pure farmhouse charm.

    A quality kitchen runner costs $30–$100 from Wayfair or Target. Vintage linens are free to $10 each from thrift stores or inherited collections. Natural fiber linens (linen, cotton, hemp) in creams, taupes, and soft blues layer beautifully. Drape a tea towel over a hook near the sink, lay a runner in front of the stove, and style shelves with folded linens. Budget $50–$150 to refresh your entire textile collection.

    Textiles warm up even industrial-feeling kitchens instantly. They’re also practical—linens age beautifully and gain character with use.


    Save this post for your farmhouse kitchen journey. Pick one idea that speaks to you and start there—you don’t need to overhaul everything at once. Even a single thoughtful addition shifts your entire kitchen’s personality toward warm, welcoming, and authentically yours.