Author: Clara Bennett

  • 26 Textured Curtain Ideas That Add Warmth & Dimension

    26 Textured Curtain Ideas That Add Warmth & Dimension

    Introduction

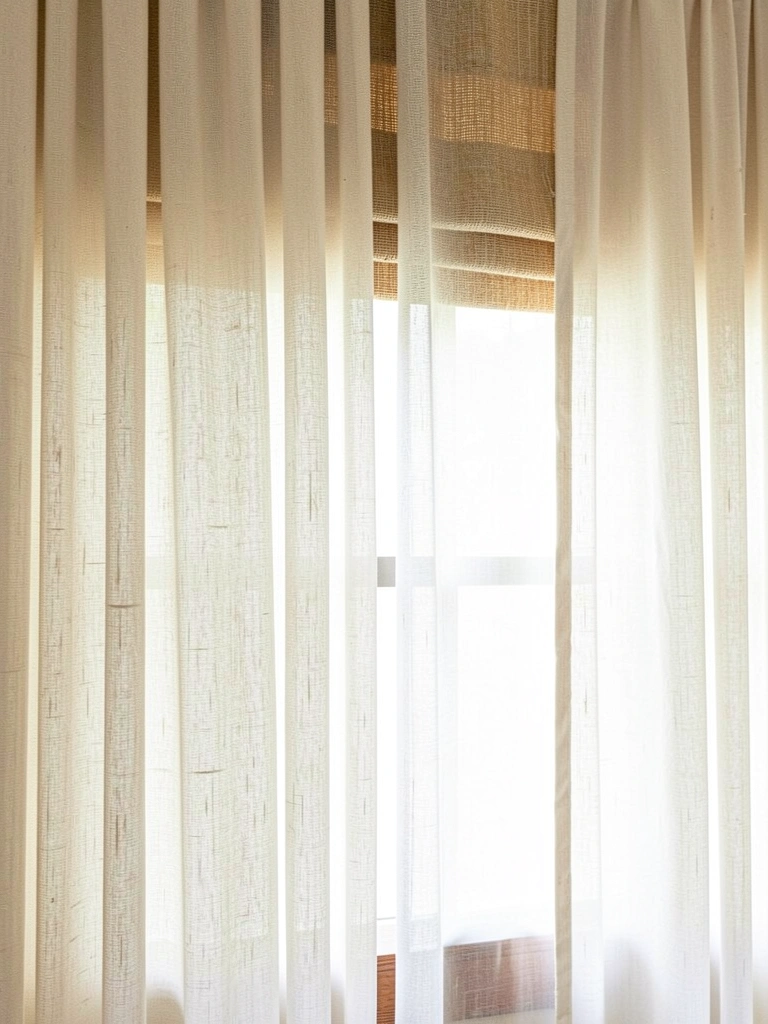
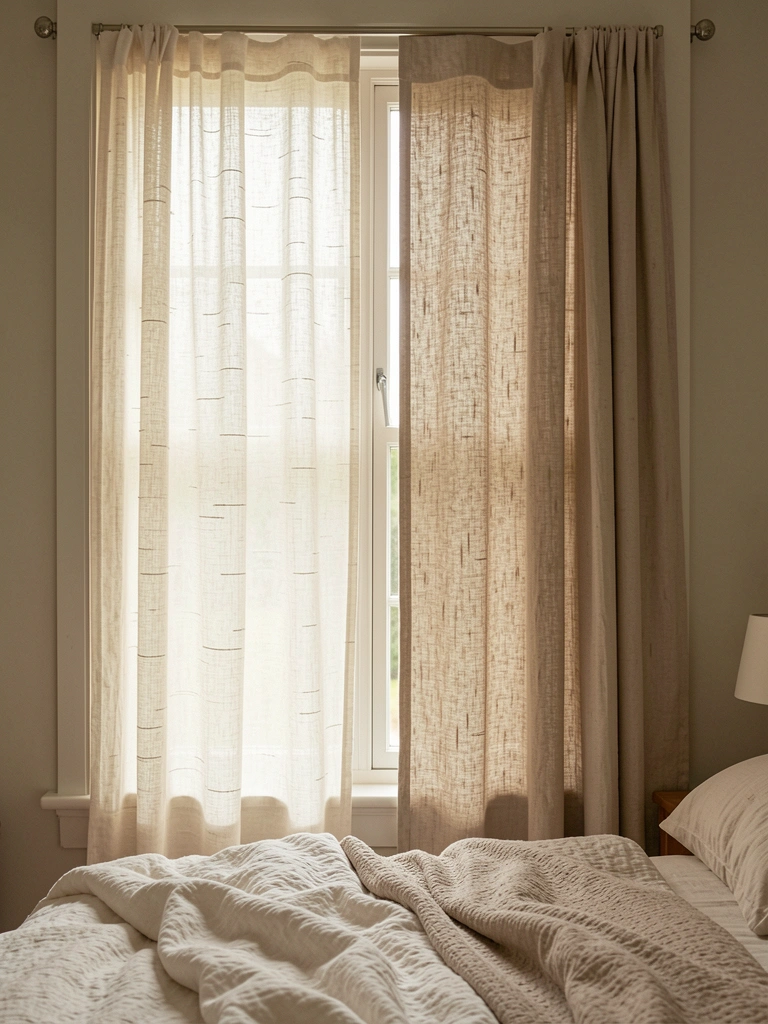
    Curtains do more than block light and provide privacy—they’re one of the easiest ways to add warmth, character, and visual depth to any room. If your windows feel flat or boring, textured fabrics are your secret weapon. They catch light differently throughout the day, create shadows that add dimension, and instantly make spaces feel more intentional and layered.

    Whether you’re renting or own your home, work with a tight budget or ready to invest, there’s a textured curtain idea here for you. We’ve gathered 26 ways to bring dimension and coziness to your windows—from no-cost styling tricks to premium fabric upgrades that’ll make you want to linger by the window. Ready to transform how your space feels? Let’s go.


    1. Layer Sheer Linen Over Blackout Panels

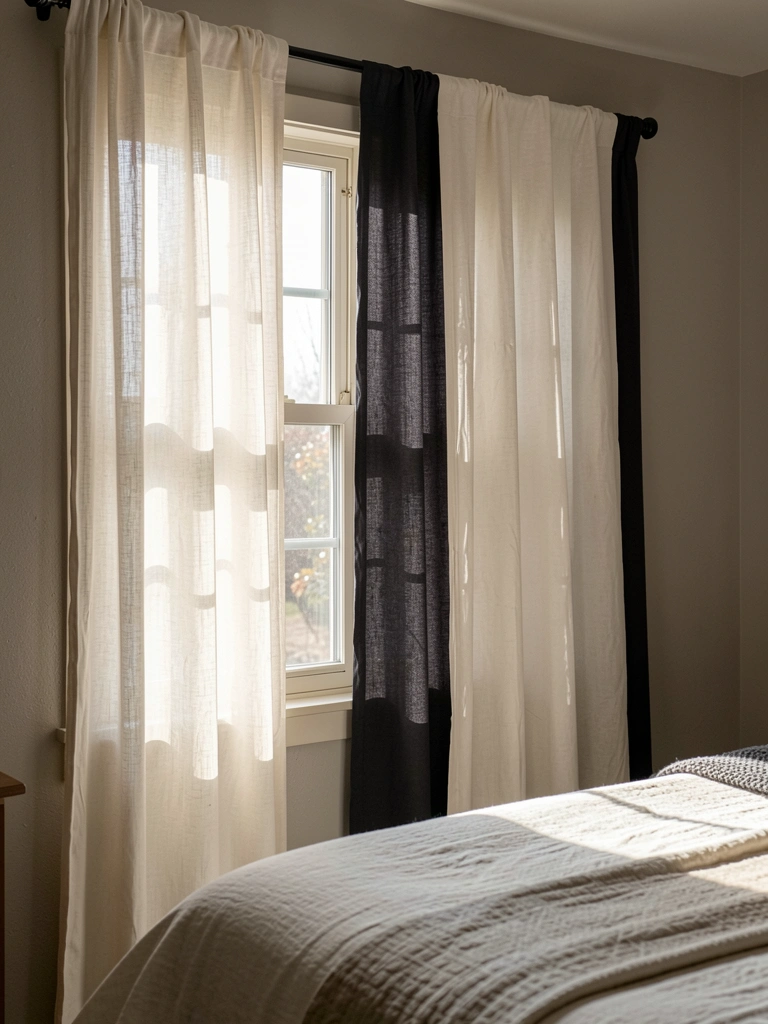
    Layering isn’t just pretty—it solves the real problem of needing light control without sacrificing natural glow. Pair a breathable linen sheer with a heavier blackout layer to get flexible light management plus instant visual depth.

    Hang your sheer linen on a lightweight tension rod close to the glass, then mount your blackout panel on a second rod in front. Sheer linen runs $20–$60 per panel at Target or Wayfair; blackout curtains are $40–$120. This takes about 30 minutes to install once your rods arrive. Pull the sheer back during the day for soft, diffused light, or close both for complete darkness.

    The beauty? You can tie the sheer to one side and let the blackout handle privacy, or close both for a cozy cave effect. Your room suddenly has options you didn’t have before.


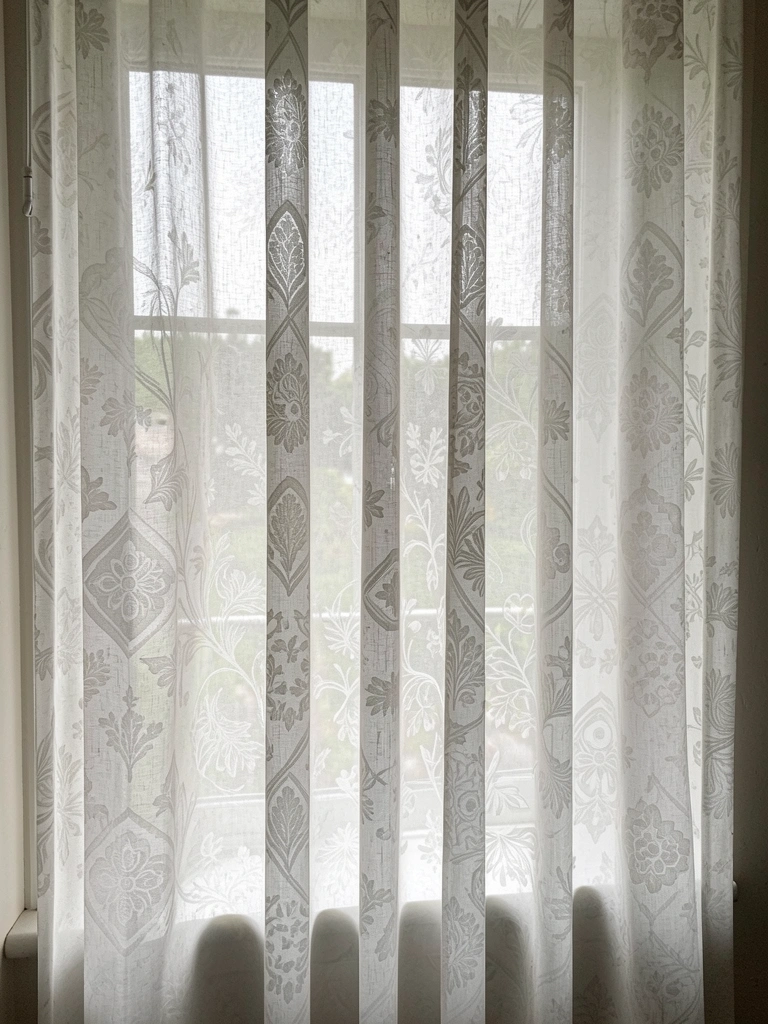
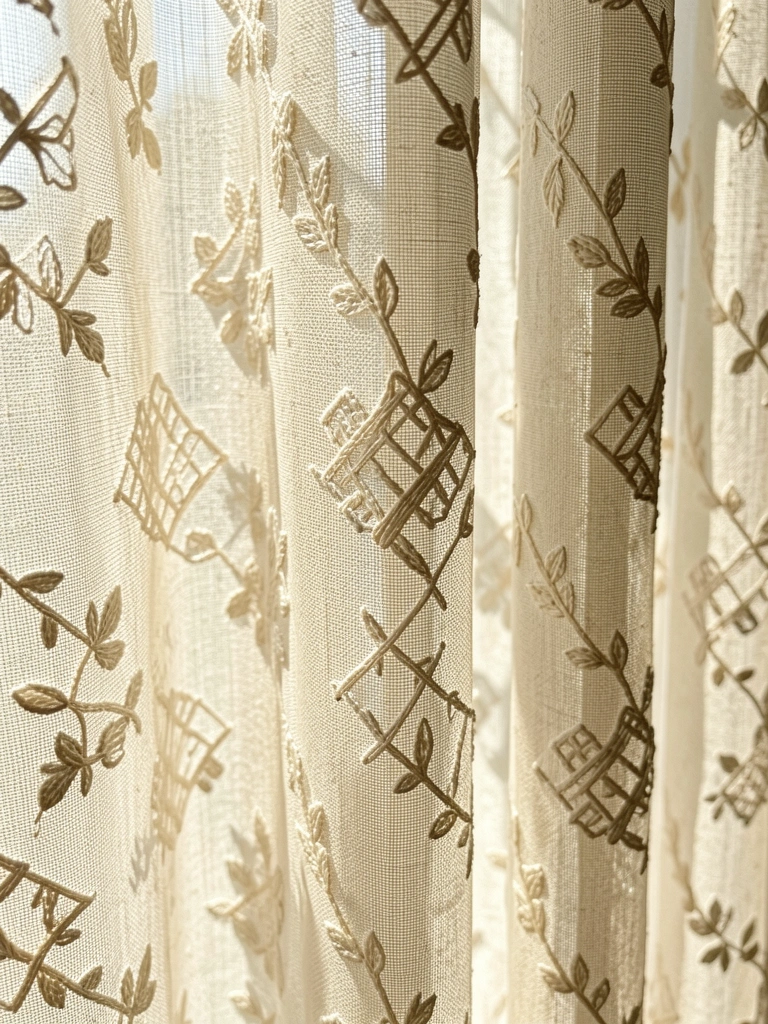
    2. Mix Linen With Subtle Geometric Embroidery

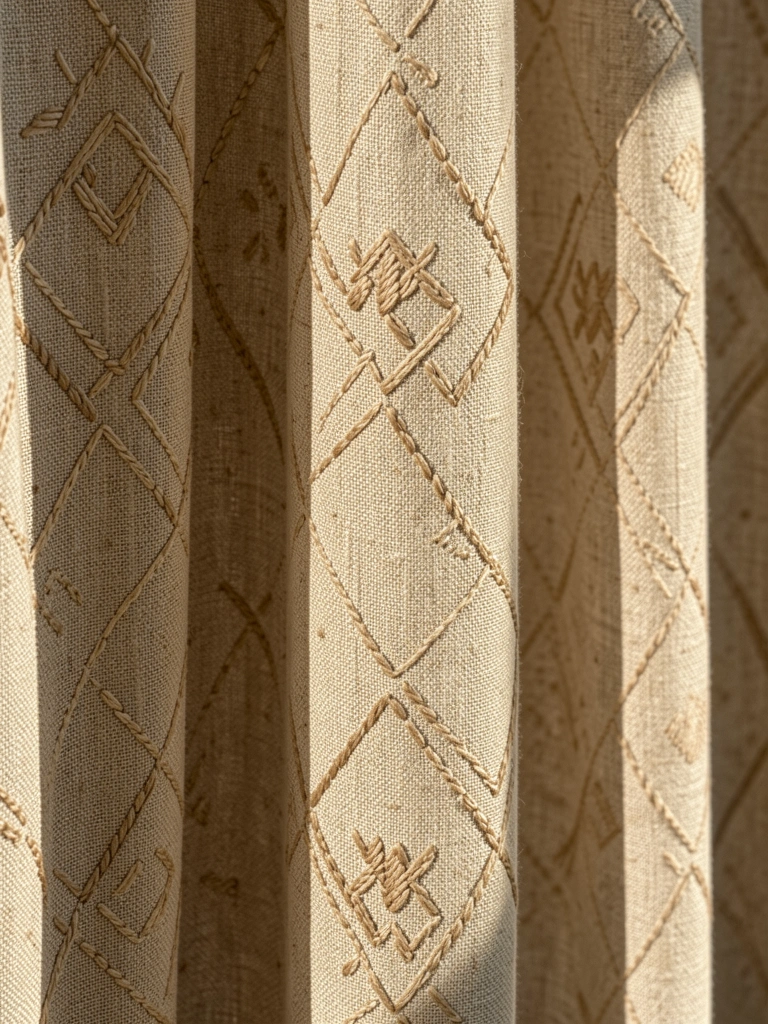
    Embroidered linen walks the line between subtle and statement-making, giving you texture without overwhelming the room. The stitched patterns catch light and cast tiny shadows, making flat fabric look dimensional and handcrafted.

    Look for linen curtains with tone-on-tone embroidery (like cream thread on cream fabric) for understated sophistication. Brands like Pottery Barn and West Elm offer embroidered linen panels at $80–$180 each; budget alternatives from Amazon run $35–$70. Hang these alone or layer with sheers. A 15-minute steam removes wrinkles; linen gets softer with every wash, so durability improves over time.

    Pro tip: If you can’t afford embroidered panels, buy plain linen and add your own simple embroidery using a needle and contrasting thread—totally optional, but it’s a meditative weekend project. The texture you create is one-of-a-kind.


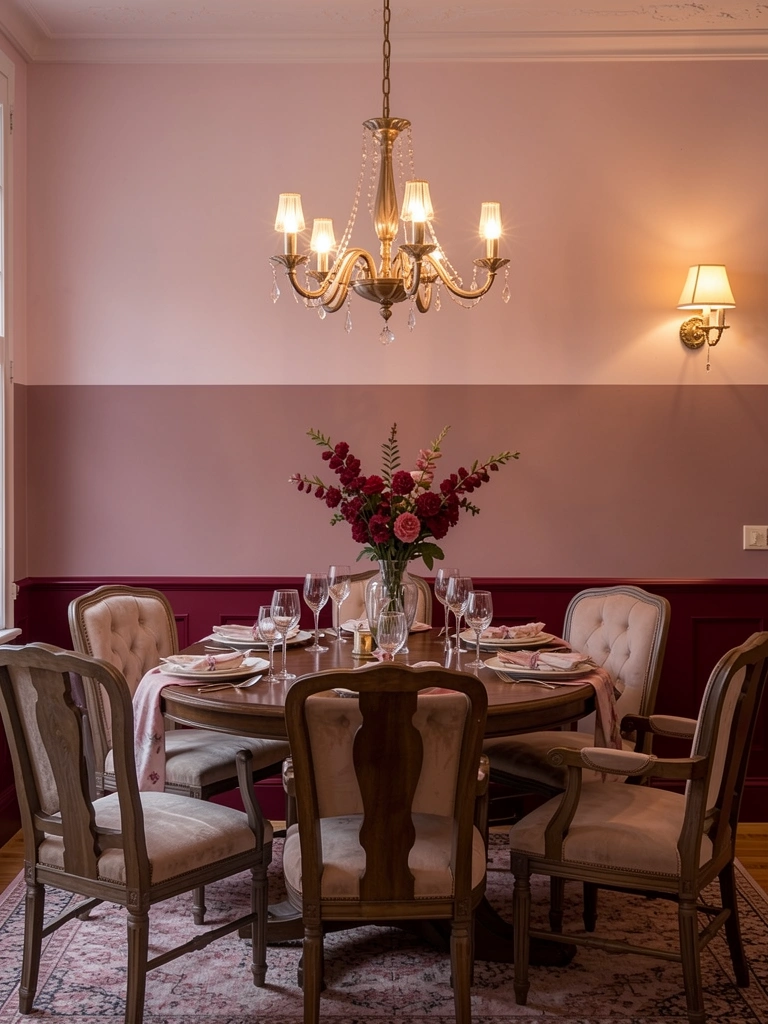
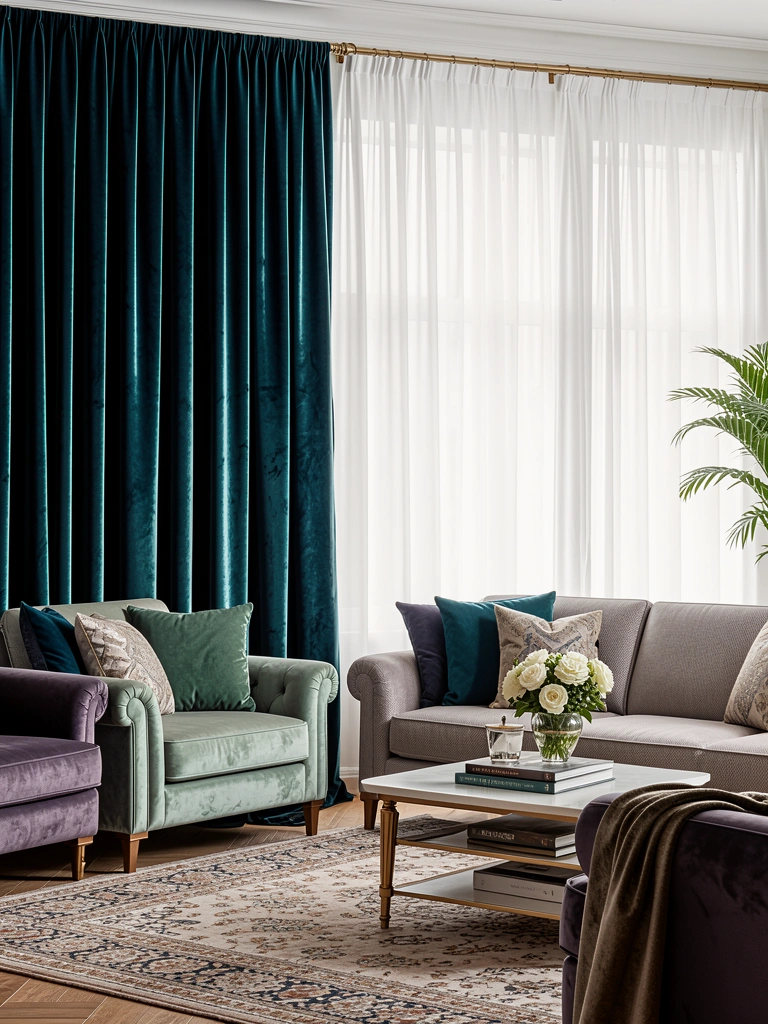
    3. Hang Velvet Panels in Jewel Tones

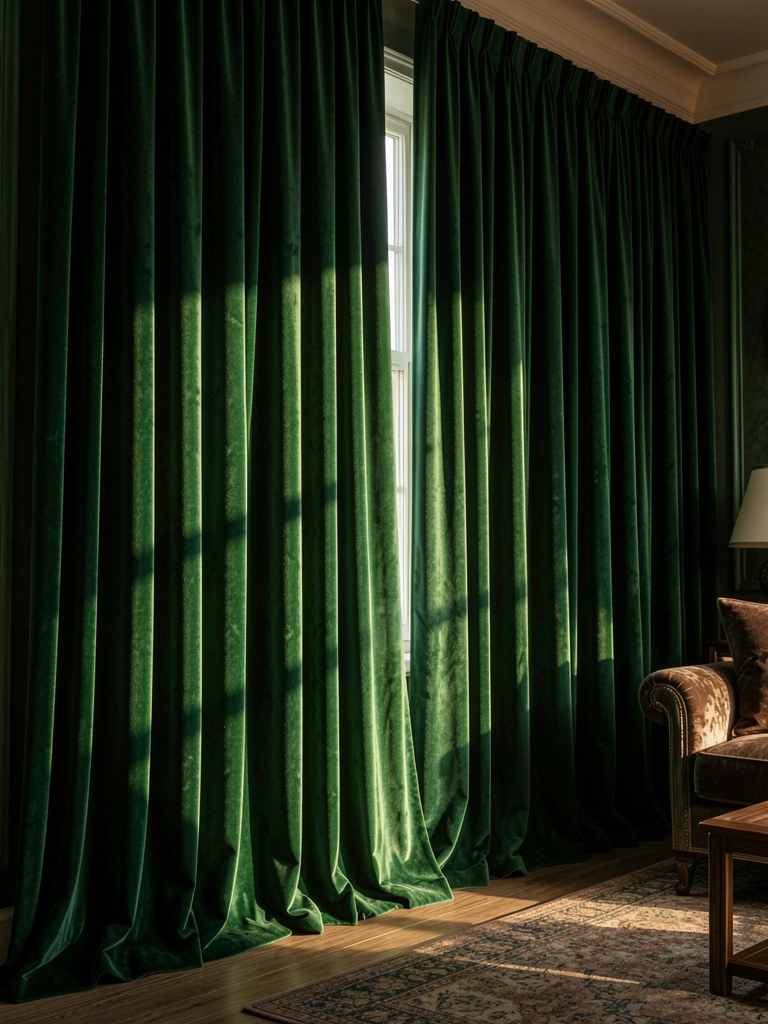
    Velvet is back, and for good reason—it absorbs light beautifully, creating depth that other fabrics can’t match. A jewel-tone velvet (emerald, sapphire, burgundy) makes any room feel intentionally styled and a little bit fancy without feeling overdone.

    Velvet panels cost $80–$250 per pair depending on weight and brand. Wayfair, Anthropologie, and online fabric retailers like Etsy sellers stock great options. Velvet works best floor-to-ceiling (see Idea #4), and it’s heavy enough that you’ll want a sturdy rod—don’t skip this detail. Dry clean only if you want to preserve the finish, or gently vacuum the nap with an upholstery brush to refresh between cleanings.

    The payoff? Your room looks like a hotel lobby designed by someone with taste. Velvet also helps with sound dampening, so bonus: quieter, cozier space.


    4. Go Floor-to-Ceiling for Instant Height

    Hanging curtains floor-to-ceiling (or close to it) is the easiest optical trick to make a room feel bigger and more luxe. This works even in rentals—use removable adhesive hooks or damage-free rods if you can’t drill.

    Mount your rod 4–6 inches below the ceiling (or as close as your trim allows), and let panels puddle 1–2 inches on the floor. A basic tension rod costs $15–$30; heavy-duty rods for velvet or thicker fabrics run $40–$80. Measure your window width and add 8–12 inches so panels hang beyond the frame. This takes 20 minutes to install and completely changes how the eye travels through the room.

    Why it works: Your eyes follow the vertical line all the way up, which makes ceilings feel higher. Paired with a textured fabric, you’ve got dimension and an illusion of space. Win-win.


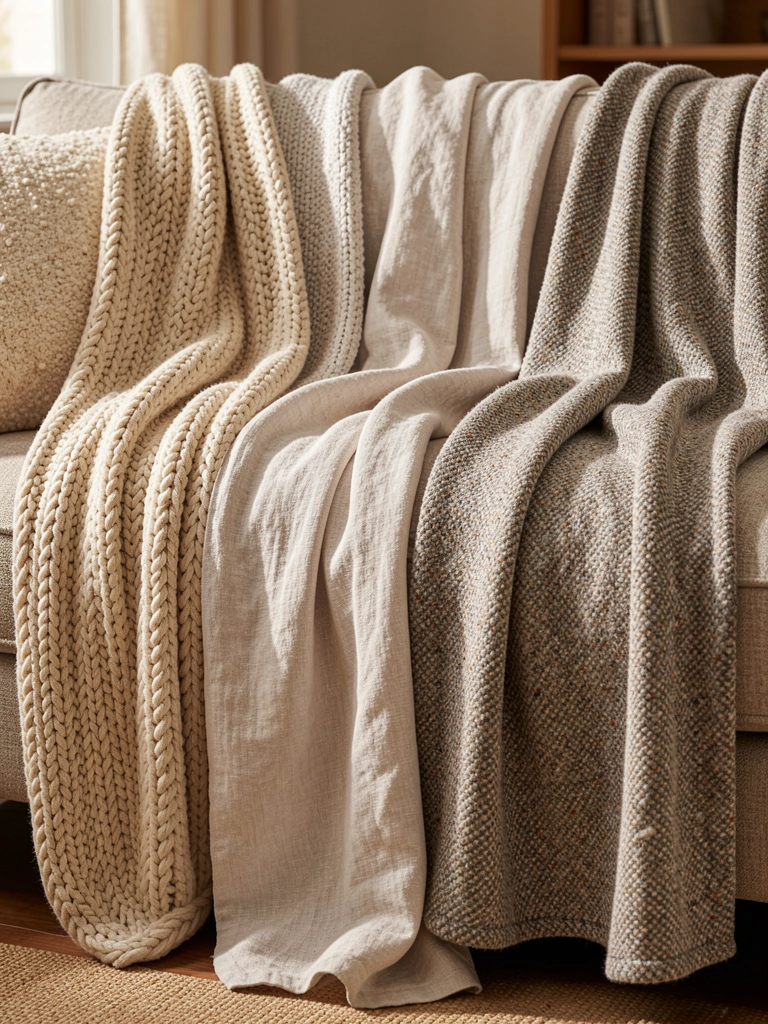
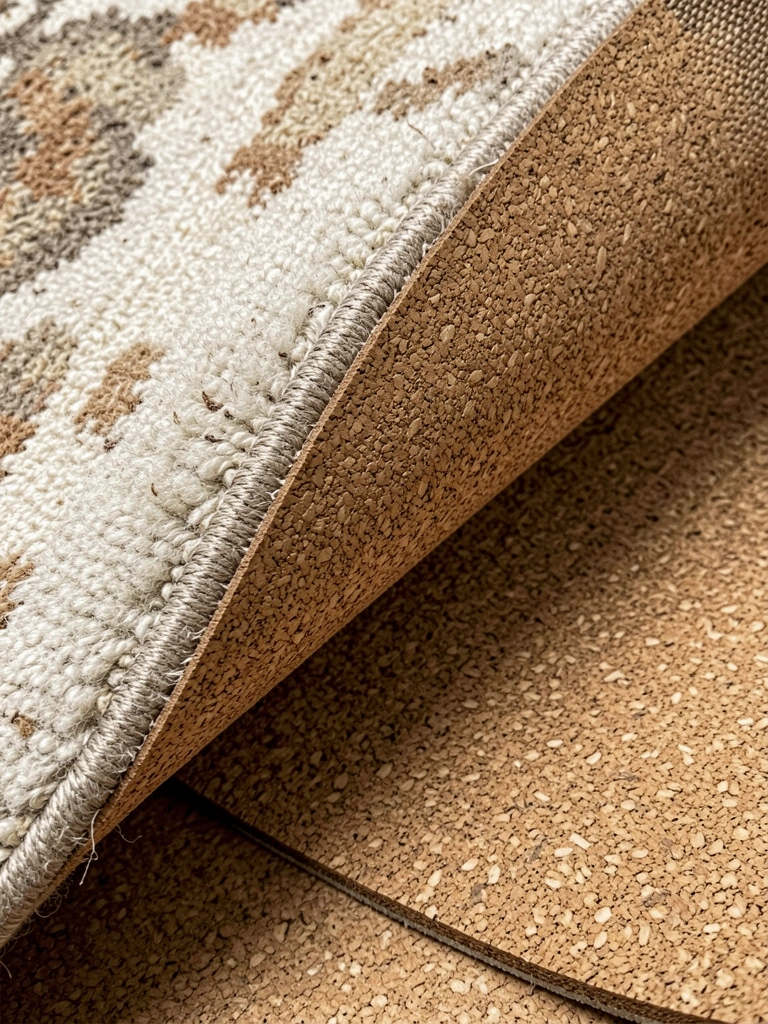
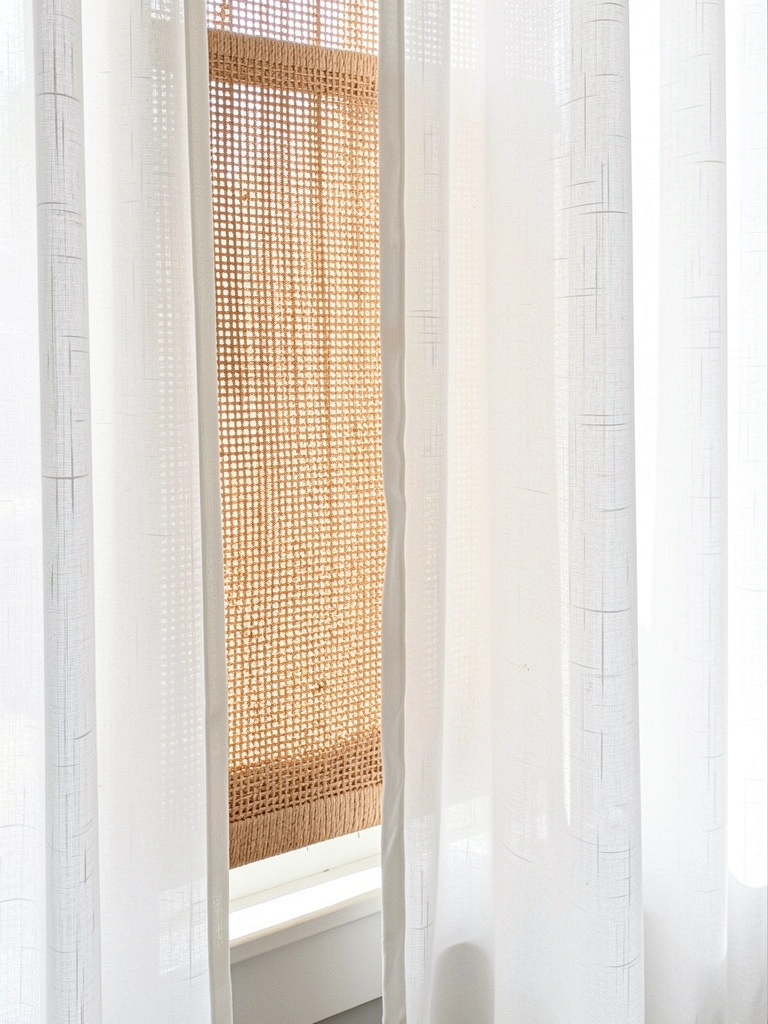
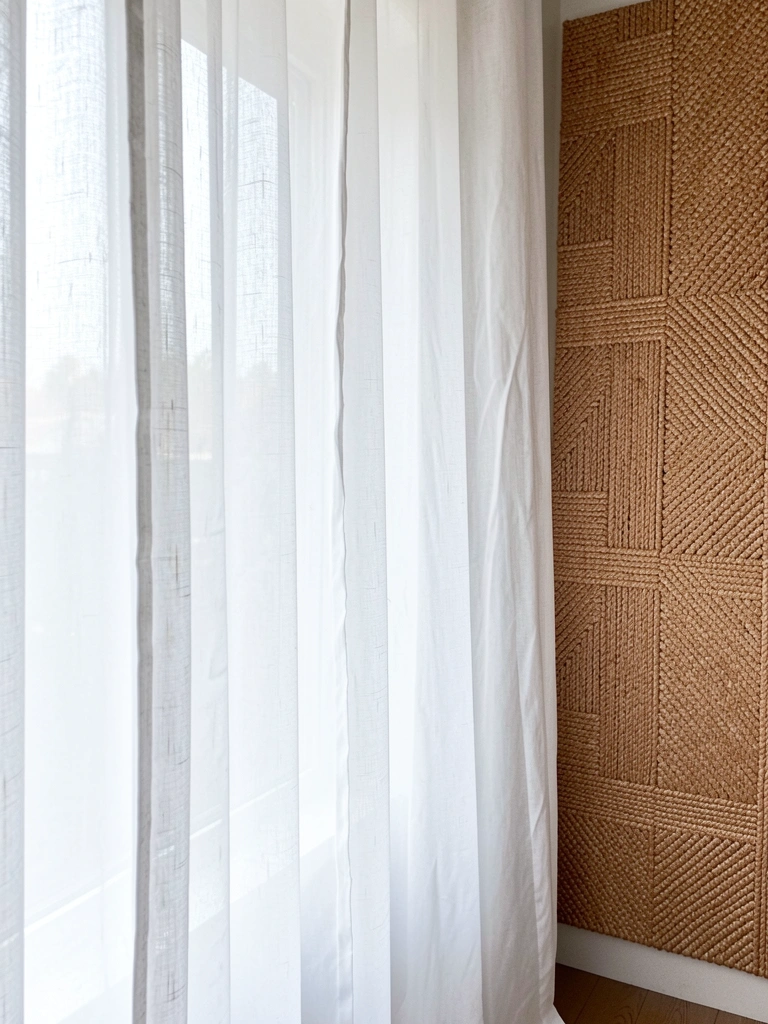
    5. Pair Jute Curtains With Linen Sheers

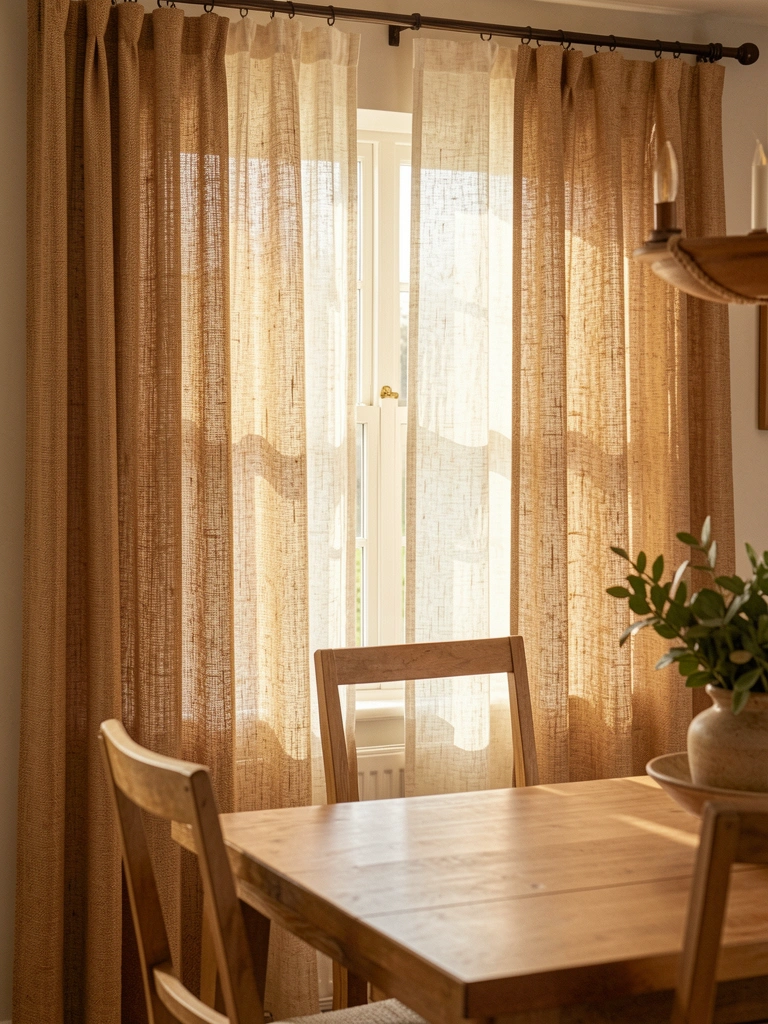
    Jute brings earthy, woven texture that linen alone can’t quite achieve. When you layer it with a soft linen sheer, you get contrast in both visual texture and light flow—rough + delicate = interesting.

    Jute is typically more affordable than high-end linen: $25–$60 per panel. Layer it over sheers hung on a secondary rod. Jute can feel stiff at first, so wash once in cool water to soften. It may pill slightly over time, but that actually adds to the rustic charm. A soft brush removes loose fibers.

    The result: Your room looks thoughtfully styled with natural materials, and the layering creates depth that photographs beautifully. Plus, jute is durable and hides dust and pet hair better than lighter fabrics.


    6. Create Custom Side Panels for Blinds

    If you love the functionality of blinds but hate how bare they look, custom side panels are the solution. This renter-friendly approach adds textured fabric without covering your view.

    Hang lightweight tension rods or use adhesive hooks on either side of your window. Mount panels with simple ties or rings so you can pull them open wide. Fabric for two side panels costs $15–$40 if you buy linen yardage and sew basic casing (or use no-sew adhesive tape). If sewing isn’t your thing, buy pre-made curtain panels and tie them off—$30–$70 for a pair.

    This gives you all the texture and warmth of curtains plus the light control of blinds. Your window becomes a focal point instead of an afterthought.


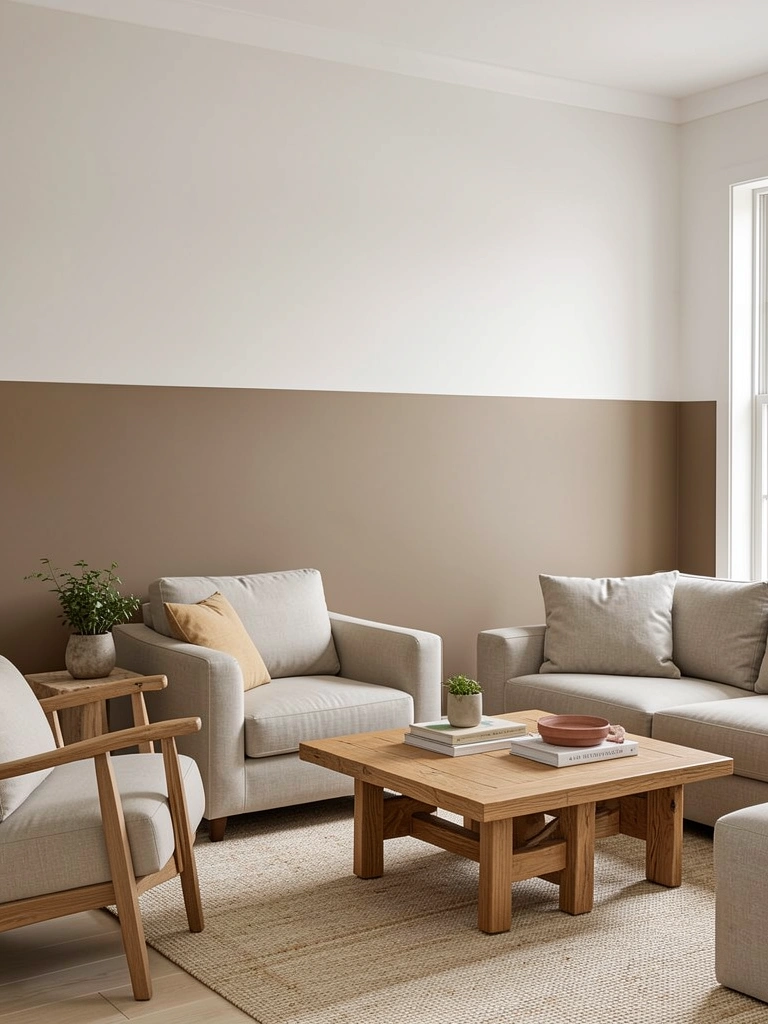
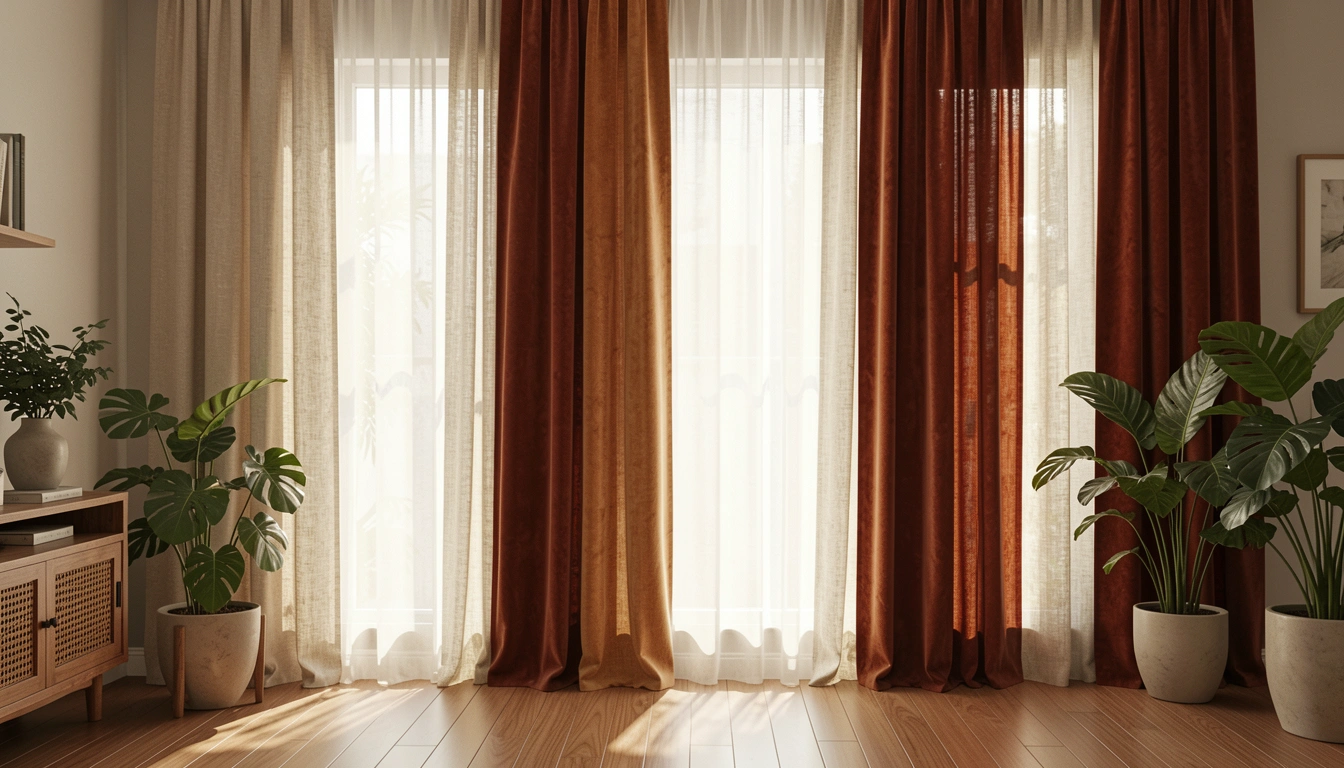
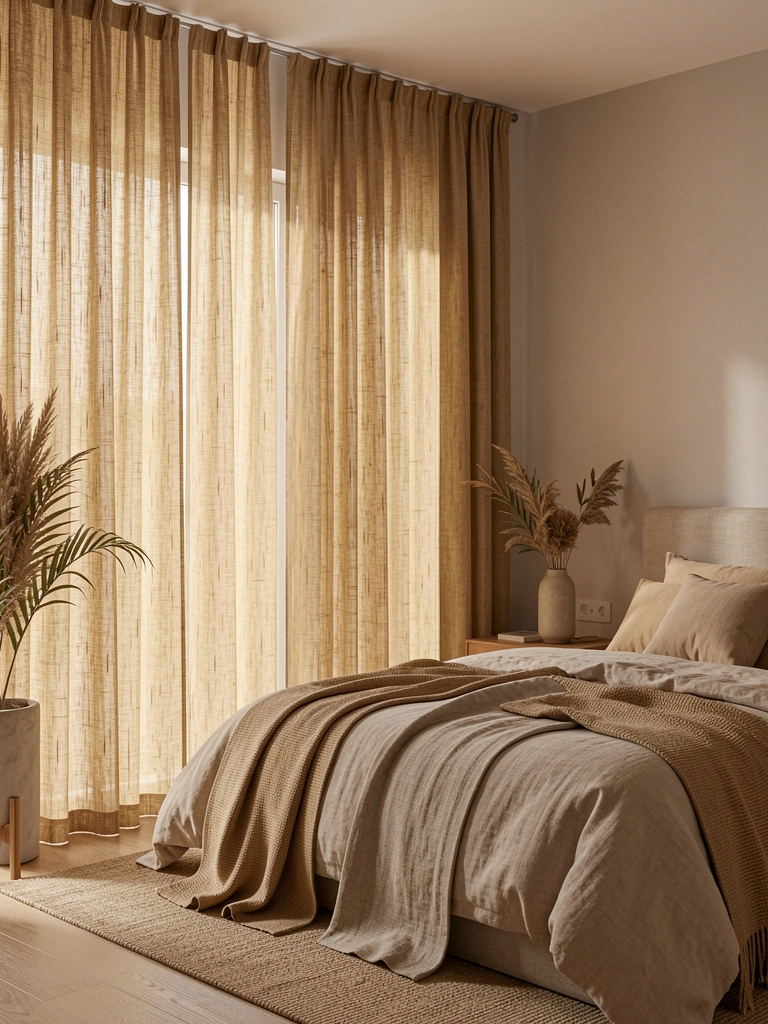
    7. Layer Sheer and Blackout Linen in Earthy Tones

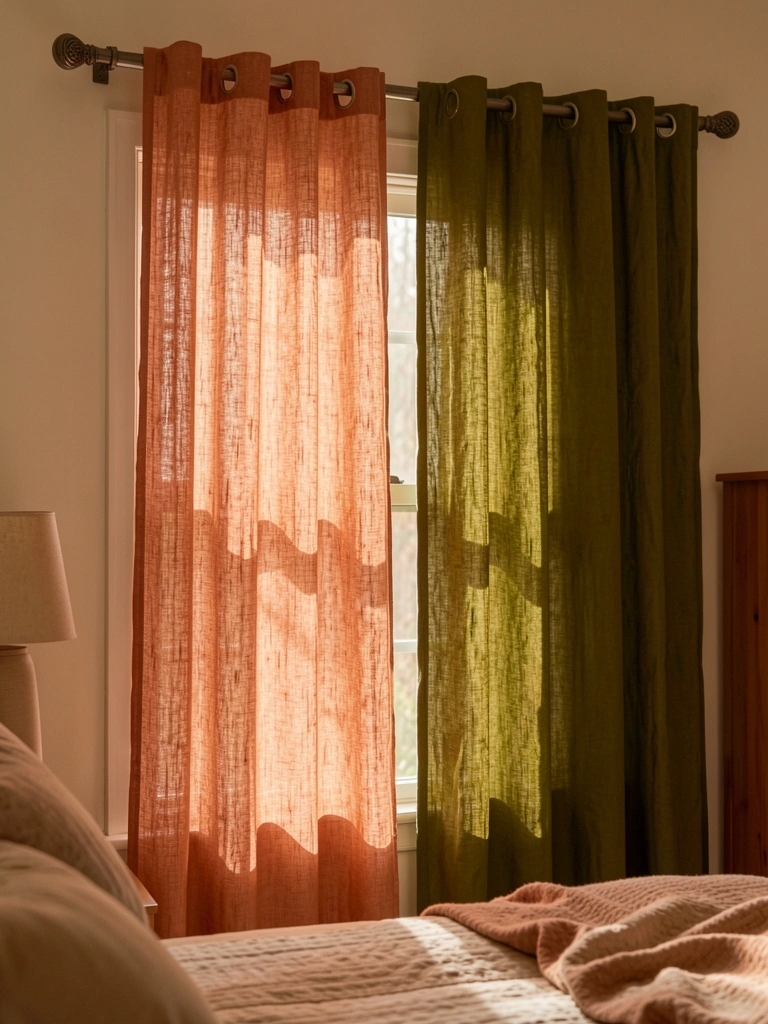
    Earthy color combinations—think terracotta, olive, warm gray, and natural linen—create a grounding effect that makes rooms feel calm and intentional. Layering two earth-toned fabrics in different weights adds visual richness.

    Sheer linen in warm tones runs $25–$50 per panel; earthy blackout linen is $50–$100. Hang the sheer closer to the window and the darker shade in front. This setup gives you incredible flexibility: open just the sheer for ambient light, close both for a cozy cave, or do one of each panel for balanced light and privacy.

    The color combination itself becomes part of your decor, so you don’t need to match it to anything else. It just works.


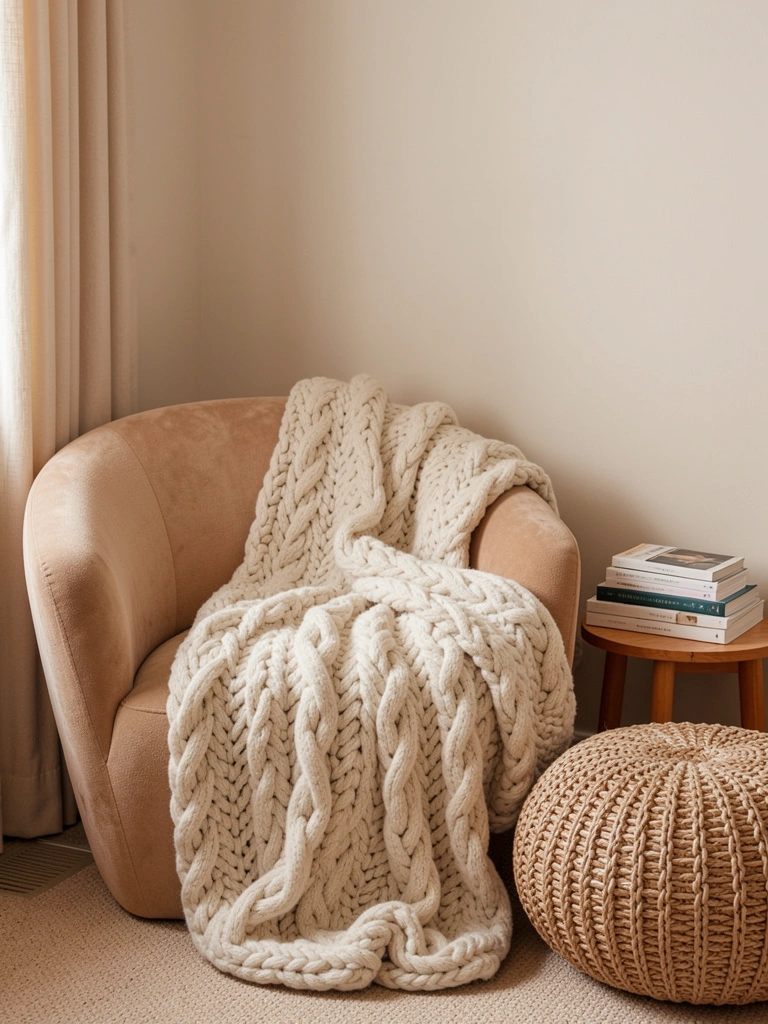
    8. Add Wool Curtains for Winter Weight and Warmth

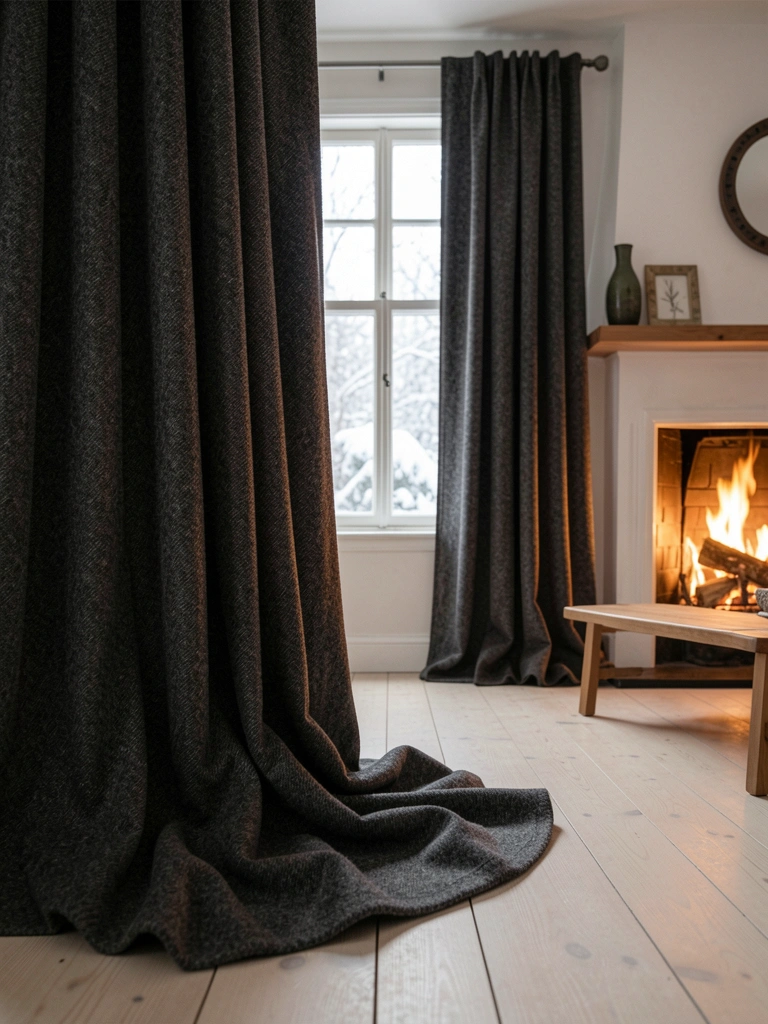
    Wool is the heavy-hitter fabric that makes rooms feel wrapped in coziness. It’s naturally textured, insulating, and so tactile that you’ll want to touch it. Switch to wool in fall and winter for instant seasonal warmth.

    Quality wool curtains run $100–$250 per panel and are an investment, but they last years. They’re naturally flame-retardant, sound-absorbing, and actually repel dust. Wool does need occasional dry cleaning, though airing outside works for light refreshing. Look for 100% wool or wool blends at high-end retailers or Etsy vintage sellers for discounts.

    Your room becomes a retreat. The texture is visible from across the room, and the weight creates natural folds that add dimension. Plus, wool actually helps insulate windows in winter, so there’s a practical benefit hiding under all that coziness.


    9. Mix Bamboo Sheer With Textured Roman Shade

    Bamboo is having a major sustainability moment, and for good reason—it grows fast, looks beautiful, and adds organic texture. Pair a bamboo Roman shade with a bamboo-blend sheer for layered visual interest and environmental points.

    Bamboo sheers cost $20–$50 per panel; bamboo Roman shades run $40–$120. Layer them so you can raise the shade and let the sheer handle privacy, or lower both for complete blackout. Bamboo has a natural loosely-woven texture that catches light differently than traditional linen. Both materials soften over time and develop character with use.

    This combo is especially good for rentals since both can hang without damage and look sophisticated. You get sustainability credentials without sacrificing style.


    10. Combine Linen With Decorative Trim or Fringe

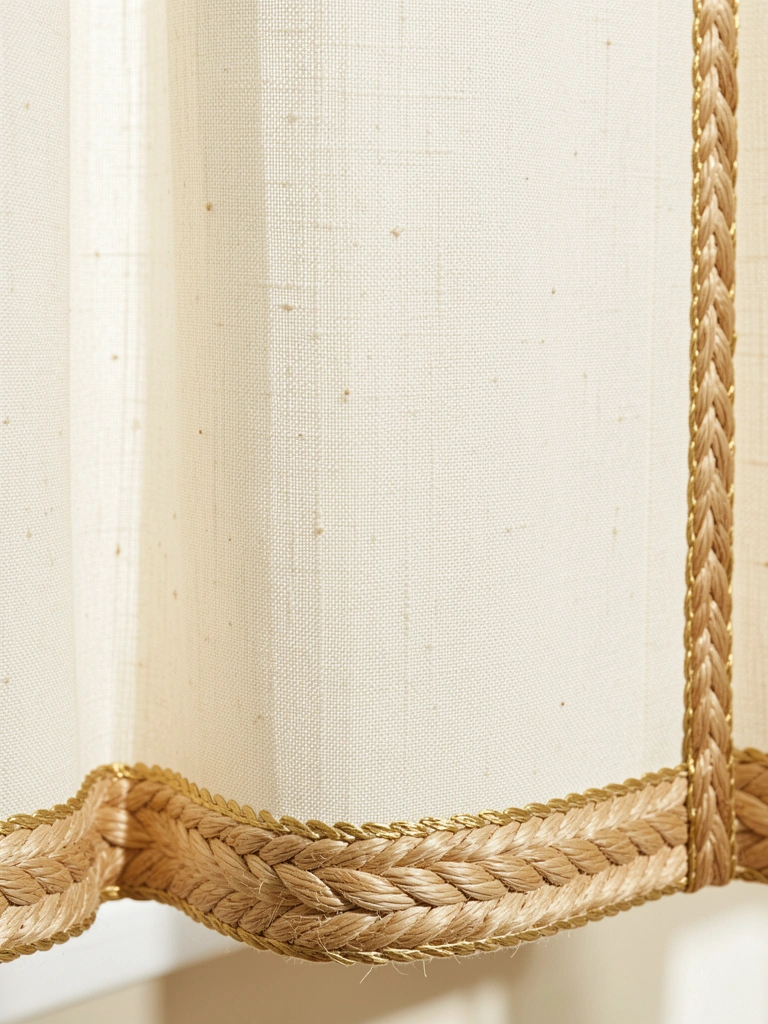
    Trim transforms plain linen from basic to boutique. A simple decorative trim or fringe sewn along edges adds texture and personality without overthinking the design.

    Buy plain linen panels ($20–$60) and have a tailor add trim ($15–$40 labor), or DIY with fabric glue and no-sew tape if you’re confident. Options include: gold trim, natural jute, macramé fringe, or pom-pom trim depending on your vibe. This takes a tailor about a week or a weekend DIY project for two panels.

    The result is custom-looking curtains that cost way less than designer versions. Your windows suddenly look intentional and crafted, not off-the-rack.


    11. Layer Sheer Gauze Over Patterned Linen

    Gauze over pattern gives you the best of both worlds: visual interest without overwhelming the space. The sheer layer softens and diffuses the pattern, creating depth and movement.

    Hang a lightweight tension rod with gauze close to the glass ($12–$25 for gauze), then your patterned linen on a second rod in front ($35–$80). The gauze catches light and creates a dreamy filter, while the pattern peeks through with subtle visual texture. Gauze is delicate but surprisingly durable, and it washes easily.

    Your window becomes a focal point without dominating the room. The combination photographs beautifully and makes any space look thoughtfully designed.


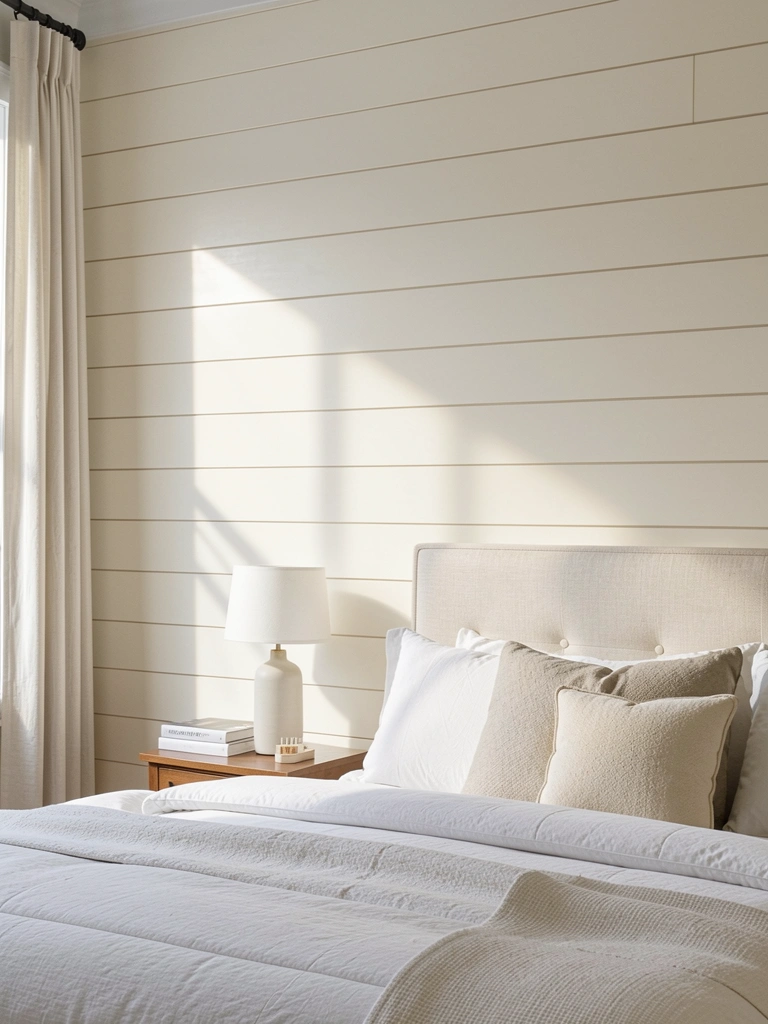
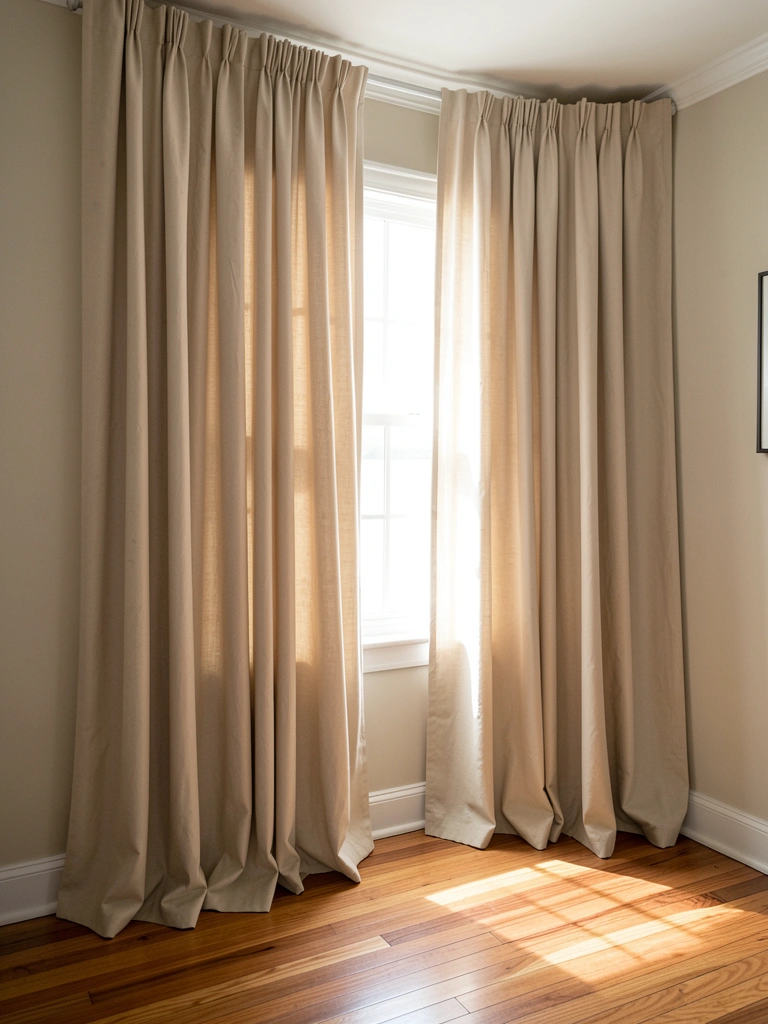
    12. Use Natural Linen for Hypoallergenic Freshness

    If allergies or sensitivities are an issue, linen is a game-changer. It’s naturally hypoallergenic, dust-resistant, and breathable—meaning allergens don’t accumulate the way they do in heavy synthetics.

    Quality natural linen runs $30–$70 per panel and is worth every penny if you struggle with allergies. Wash in cool water and hang dry for longevity. The fabric gets softer and more beautiful with every wash, so it’s an investment that improves over time. Undyed linen has a subtle cream or tan tone that works with almost any décor.

    You’ll notice the difference immediately—your bedroom feels fresher, breathing, lighter. Plus, the natural texture of linen creates visual dimension without needing patterns or heavy embellishment.


    13. Hang Velvet Alongside Cotton Sheers for Luxury Layering

    Mixing velvet with crisp sheers creates visual contrast that reads as intentional and sophisticated. The plush pile of velvet next to smooth cotton creates textural play that catches the eye.

    Mount sheers on a close-to-glass rod ($15–$30) and velvet on a front rod ($40–$80). Velvet panels run $80–$200 per pair; cotton sheers are $15–$40. This setup lets you have sheer softness during the day and luxurious velvet presence in the evening. Both can be closed for privacy or opened separately for mixed light.

    The combination feels effortlessly high-end—like a designer knows what they’re doing. It works in living rooms, bedrooms, or any space where you want visual interest without chaos.


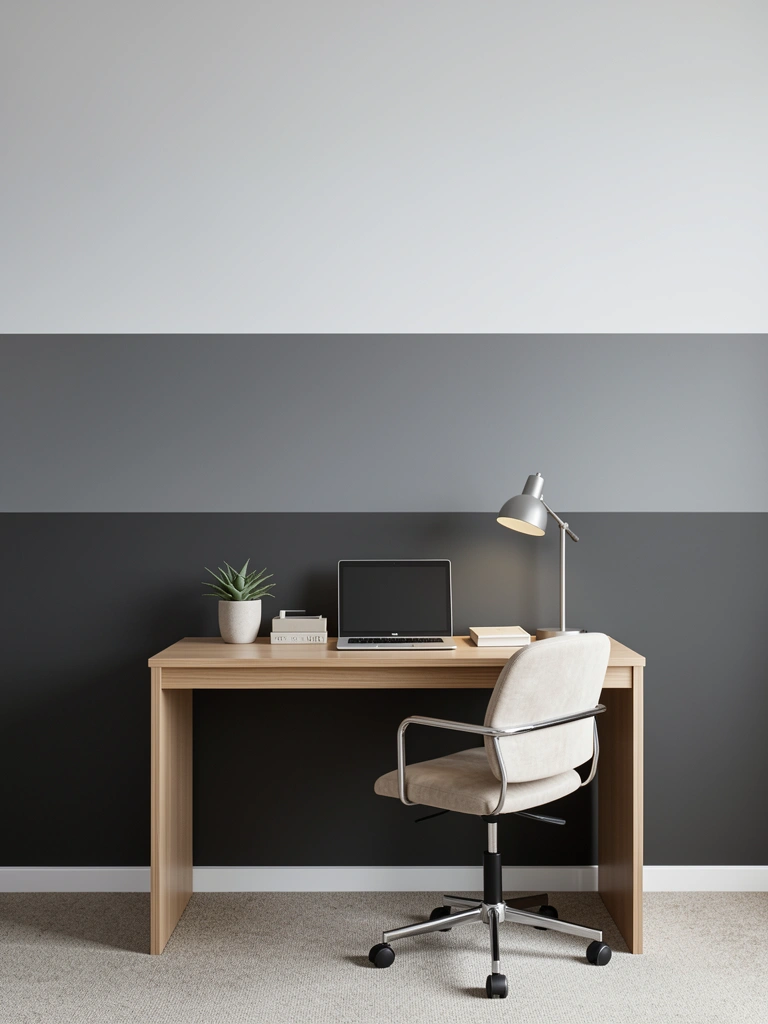
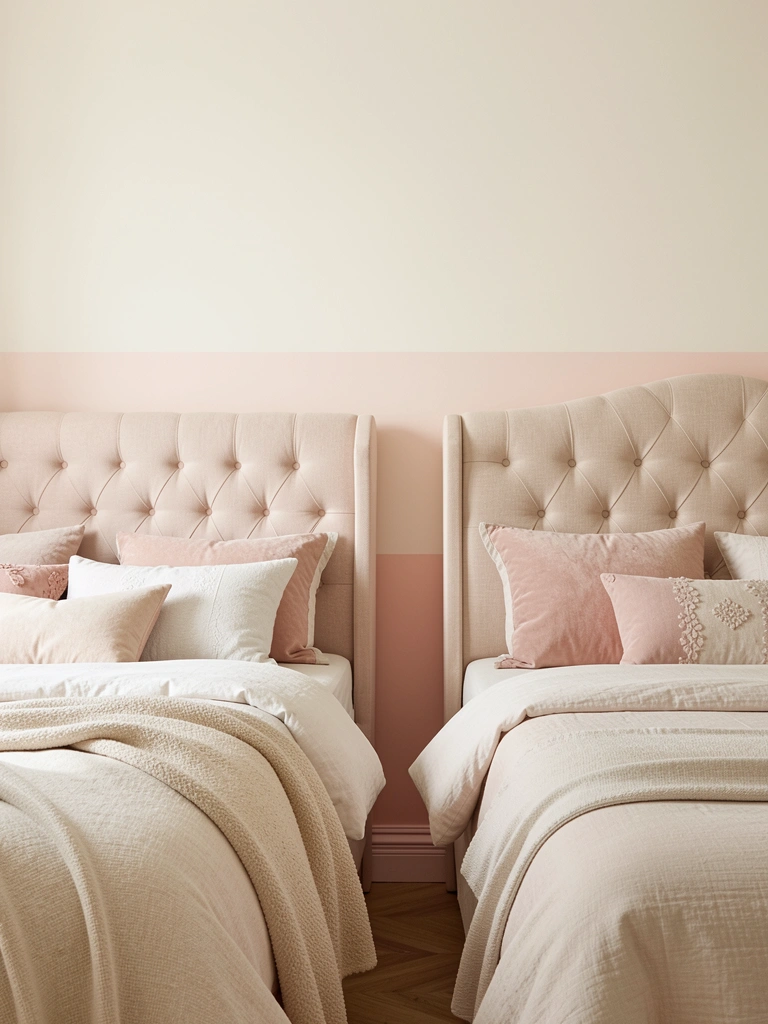
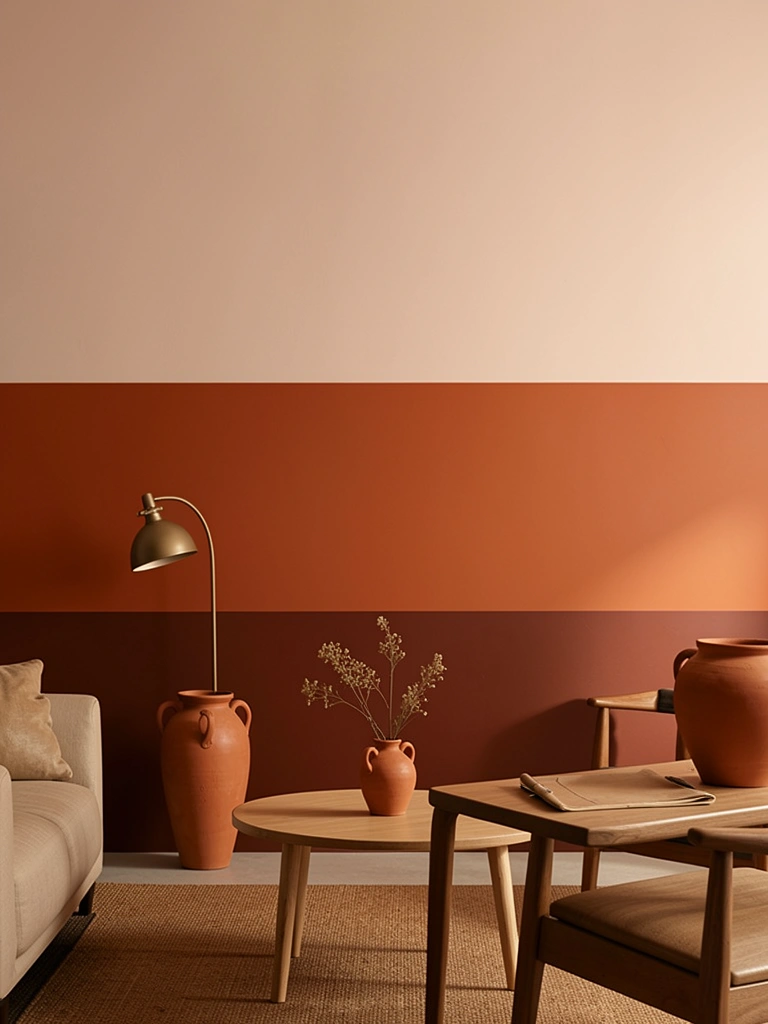
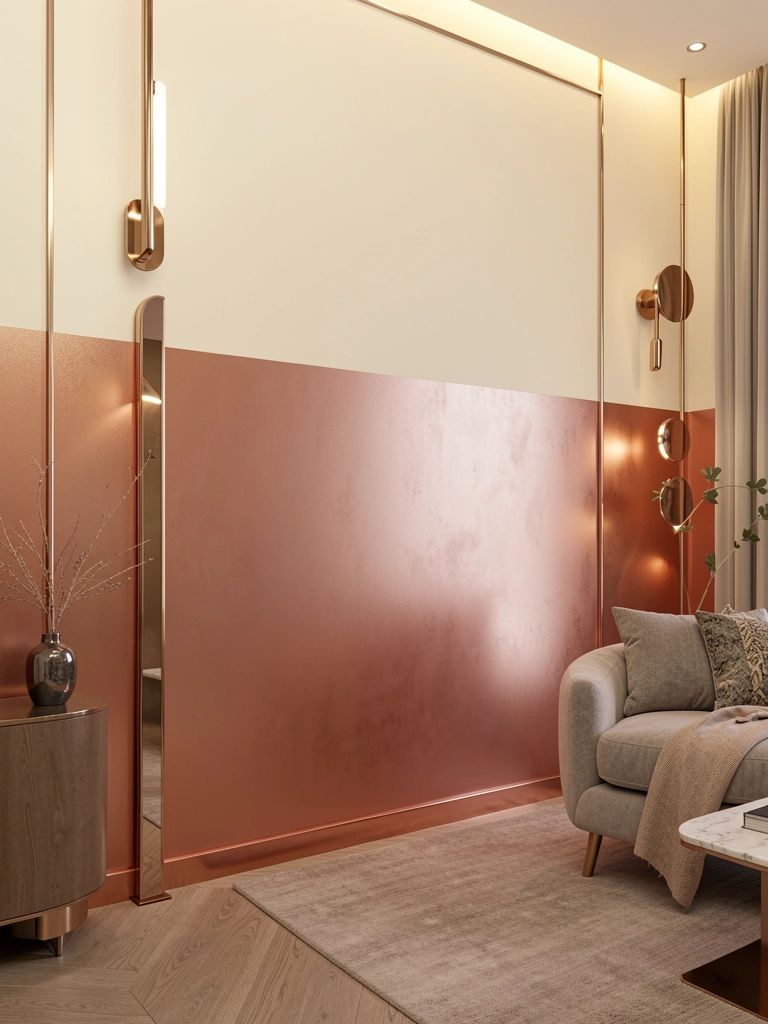
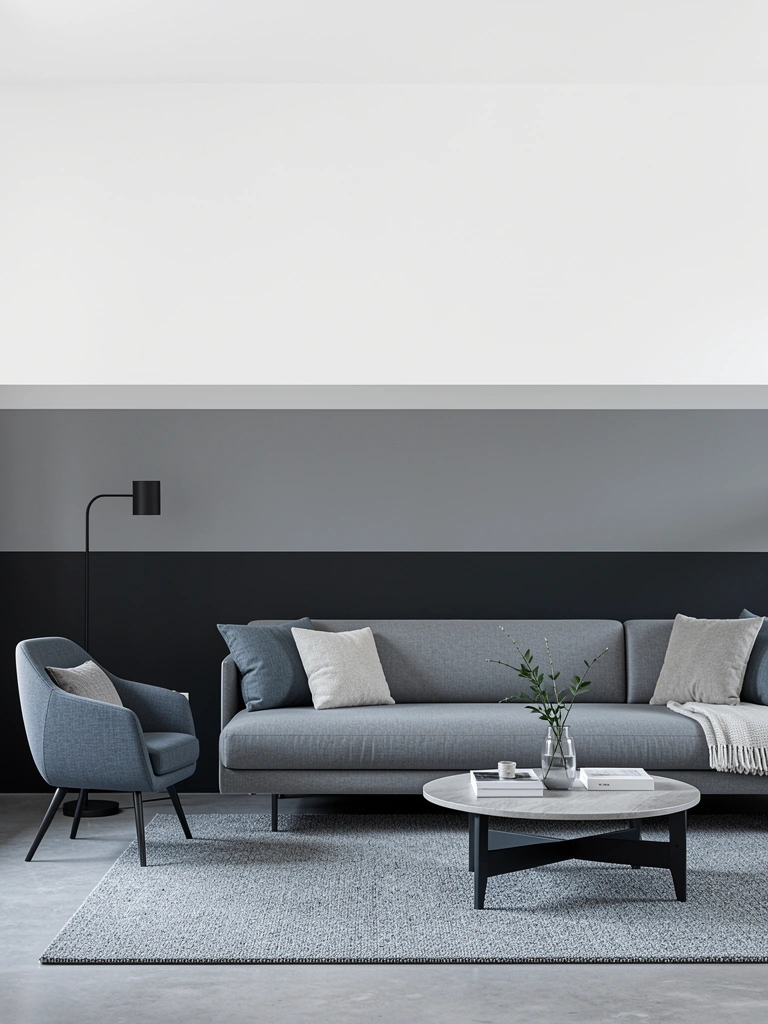
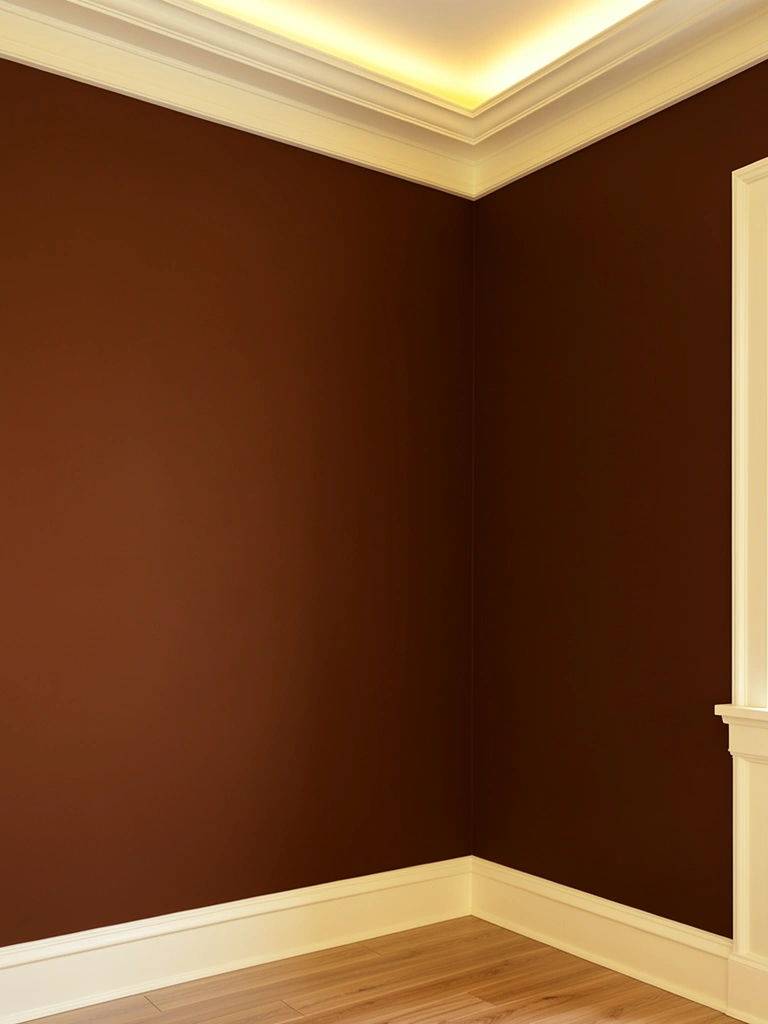
    14. Create Color-Drenched Curtains Matching Walls

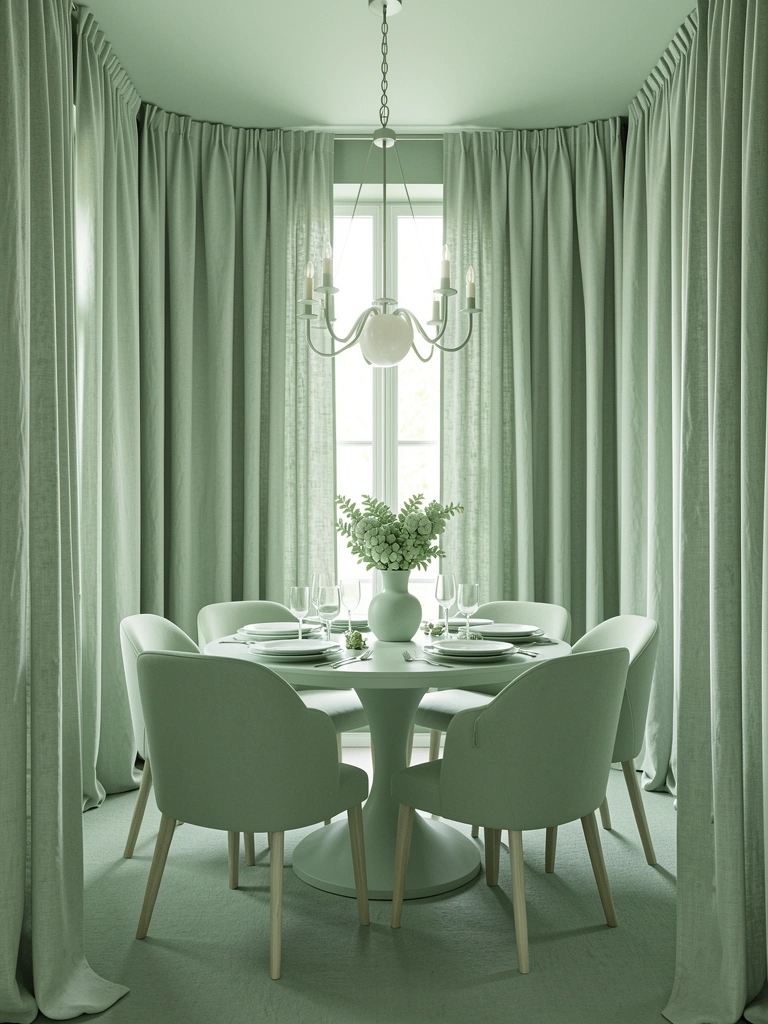
    Color drenching—using the same hue on walls and curtains—creates an immersive, spa-like effect. It’s becoming a popular design move for creating rooms that feel intentional and serene.

    Choose a soft, neutral shade like warm gray, sage green, or terracotta, then find curtains in the same color family. Paint costs $30–$50 per gallon; curtains matching that color run $30–$100 per panel. The key is using a texture in your curtains so they don’t disappear into the walls—linen slub texture or subtle embroidery keeps things dimensional.

    Your room becomes a cohesive, enveloping space. There’s something deeply calming about stepping into a room where color wraps around you. It photographs beautifully too.


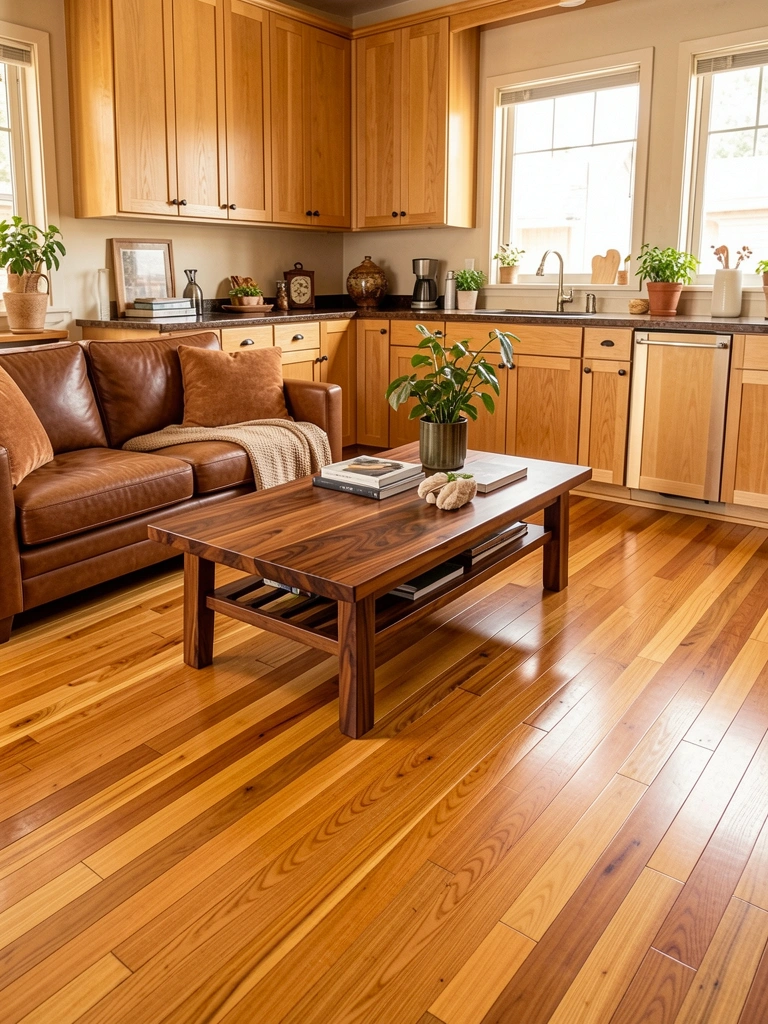
    15. Layer Textured Jute Over Smooth Linen Sheers

    The contrast between smooth sheers and rough jute creates visual texture that’s impossible to achieve with a single fabric. Smooth + rough = interesting.

    Hang linen sheers on a close rod ($20–$50) and jute on a front rod ($25–$60 per panel). The sheer diffuses light while the jute adds shadow and depth. This combination works especially well in casual spaces like kitchens or bedrooms where organic texture feels right. Jute is forgiving about wrinkles and wear, so it’s low-maintenance.

    The layering trick makes your window look designed, not accidental. Guests will notice the thoughtful combination even if they can’t name why it works.


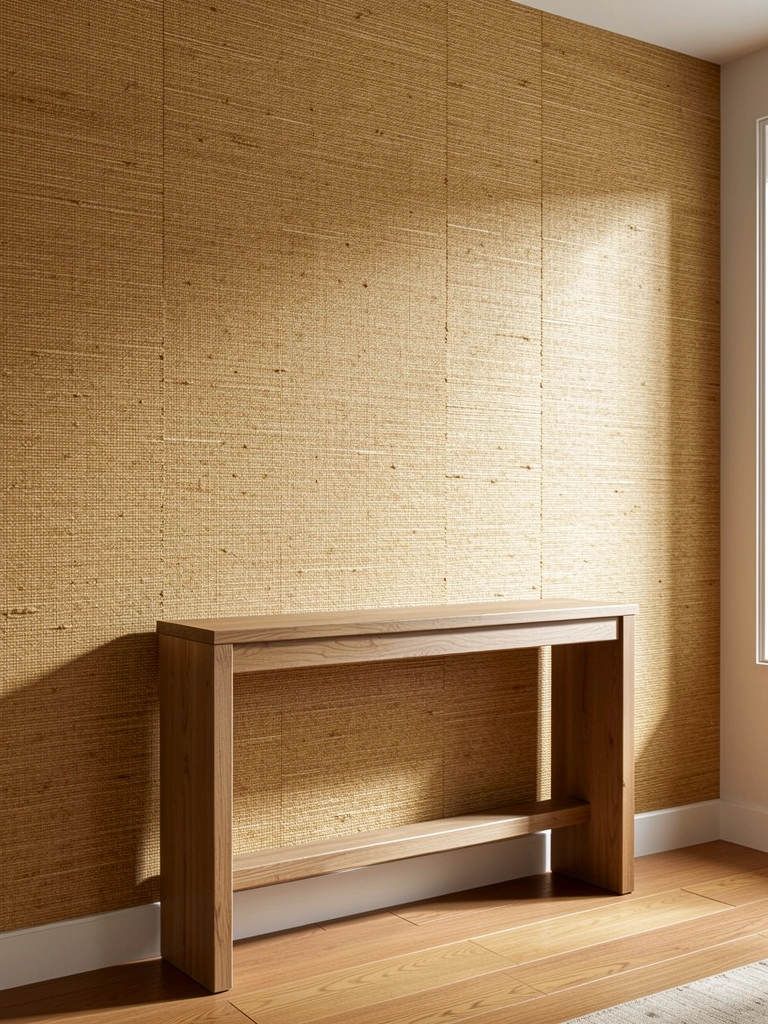
    16. Add Texture With Ribbed or Waffle-Weave Linen

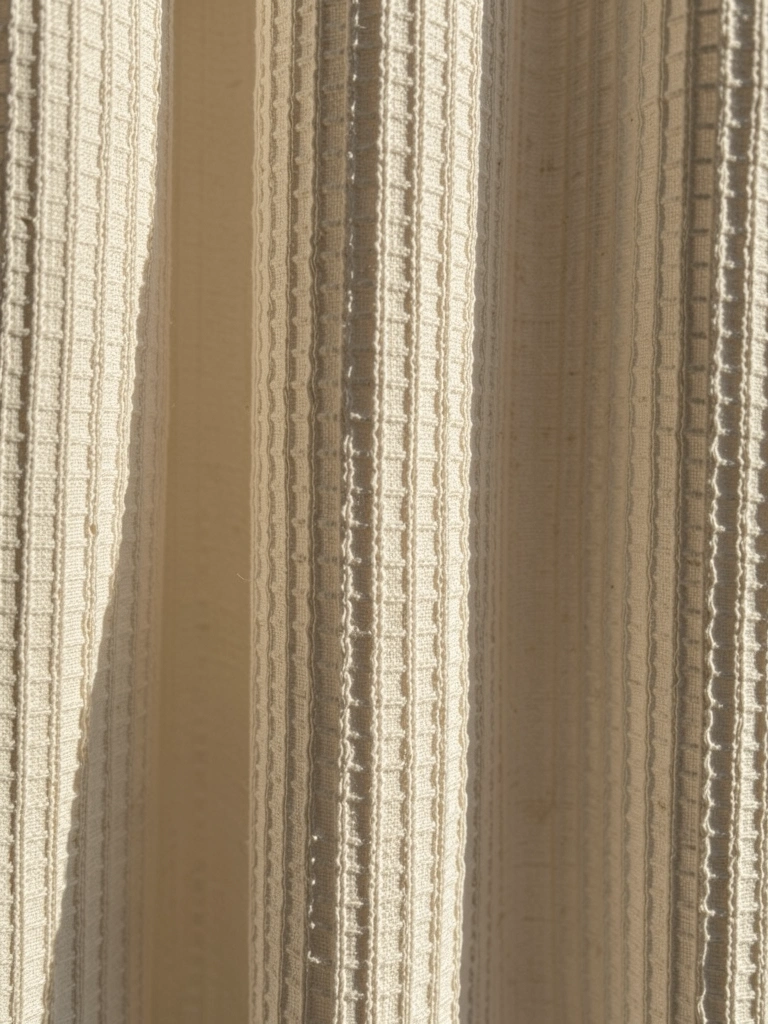
    Ribbed and waffle-weave linens aren’t smooth—they’re textured at the fabric level, which means they cast shadows and create dimension even when hung flat. The weave itself is the design.

    Waffle-weave or ribbed linen costs $35–$80 per panel and is widely available at IKEA, West Elm, and Wayfair. The texture is visible from a distance and looks significantly more interesting than plain linen. These fabrics hide wrinkles better than smooth linen, so they’re practical and pretty.

    Hang them alone without layering and let the fabric texture do all the work. The room automatically feels more designed because the fabric itself is doing the heavy lifting.


    17. Mix Metallic Trim With Natural Linen for Subtle Shine

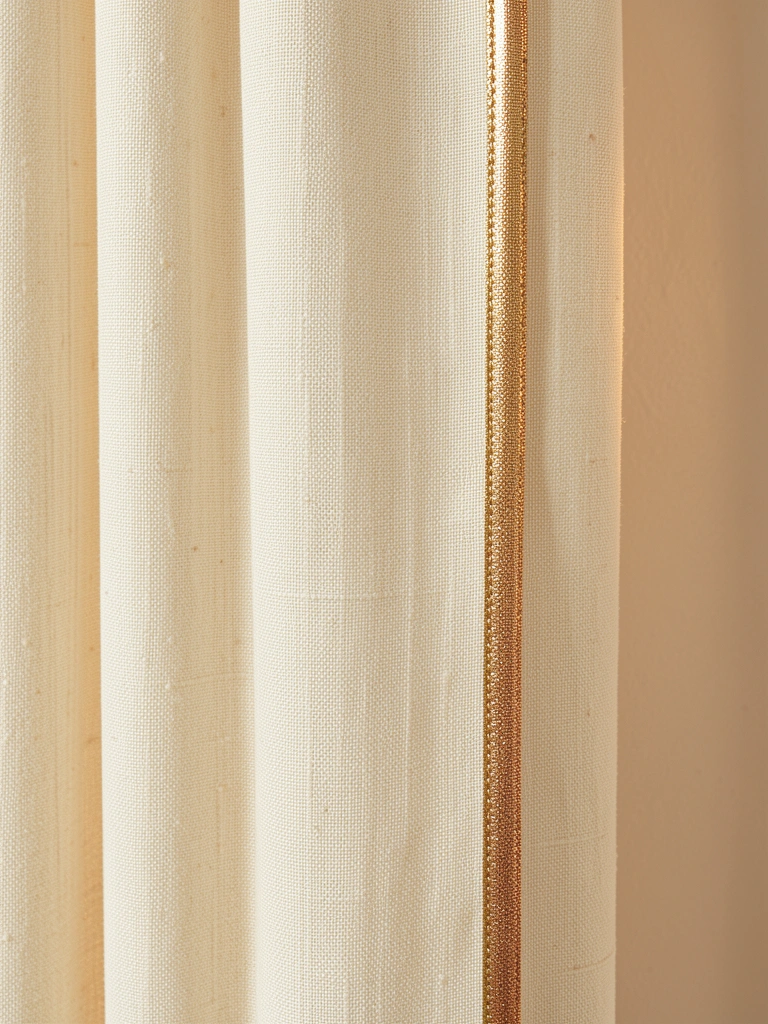
    A subtle metallic accent adds shine and sophistication without reading as over-the-top. Metallic trim on natural linen is the definition of understated elegance.

    Buy plain linen ($25–$50 per panel) and add a metallic trim using a tailor ($15–$30 labor) or fabric glue if you’re DIY-confident. Thin gold, copper, or silver trim works beautifully; use it along the leading edge or bottom hem. This takes an afternoon to DIY or a week with a tailor.

    The result looks custom and intentional. The metallic catches morning or evening light, adding a quiet shimmer that elevates the whole space.


    18. Hang Wool-Linen Blend for Weight and Softness

    A wool-linen blend gets you the best of both worlds: linen’s breathability and luster plus wool’s weight and coziness. The combination creates natural texture and movement in folds.

    Wool-linen blends run $50–$120 per panel, making them mid-range compared to pure wool or pure linen. They hang beautifully because the blend gives enough weight for volume without being heavy. These blend well with most interiors and feel more forgiving than pure wool (easier care, less expensive).

    Hang these floor-to-ceiling and let them puddle slightly for maximum impact. The fabric itself creates architectural interest, so minimal styling is needed.


    19. Layer Lightweight Linen With Heavy Linen Blackout

    Two linens in different weights create dimension because the heavier fabric casts deeper shadows and creates bolder folds. Both are linen, so they age together beautifully.

    Lightweight sheer linen runs $20–$50 per panel; heavy linen blackout is $60–$120. Hang them on two separate rods so you can operate them independently. The lightweight sheer allows filtered light and airflow; the blackout handles serious privacy and light control. Both soften and improve over time.

    This is the ultimate “both/and” solution: you get style, function, and textile interest. Your window becomes a design feature, not just a functional element.


    20. Use Subtle Embroidered Details on Sheer Fabric

    Embroidery on sheers is subtle but impactful—it adds texture and movement without blocking light. When backlit, the stitching creates shadow patterns that change throughout the day.

    Look for linen or cotton sheers with hand-embroidered details: $40–$100 per panel at boutique retailers or Etsy. DIY option: buy plain sheers ($20–$40) and add simple hand embroidery using a needle and thread (takes a weekend). Embroidered sheers work beautifully alone or layered with a solid panel.

    The embroidery becomes visible art when sunlight hits it. Your window changes throughout the day as light angles shift—it’s like having rotating wall art.


    21. Hang Bamboo-Linen Blends for Eco-Luxe Feel

    Bamboo-linen blends are having a moment because they’re eco-friendly and beautiful. Bamboo adds softness to linen while maintaining breathability and natural texture.

    Bamboo-linen blends run $35–$85 per panel and offer sustainability credentials without sacrificing style. The blend is softer than pure linen but maintains visible weave texture. Wash in cool water; the blend gets softer with every wash and develops beautiful patina over time.

    These work beautifully in modern or minimalist spaces and feel intentional. You’re getting luxury comfort with environmental responsibility built in.


    22. Layer Gauzy Cotton Over Patterned Jute for Softness

    Gauze adds a romantic, soft quality to any space, and when layered over textured jute, it creates an interesting juxtaposition: delicate meeting organic.

    Hang gauzy cotton on a close rod ($12–$30) and patterned jute on a front rod ($30–$70). The gauze softens the visual weight of jute while keeping it visible. Gauze feels and looks dreamy, but it’s surprisingly durable. This combo works especially well in bedrooms or spaces where you want a softer, more romantic feel.

    The layering creates depth and interest without feeling busy. Your window becomes a texture study.


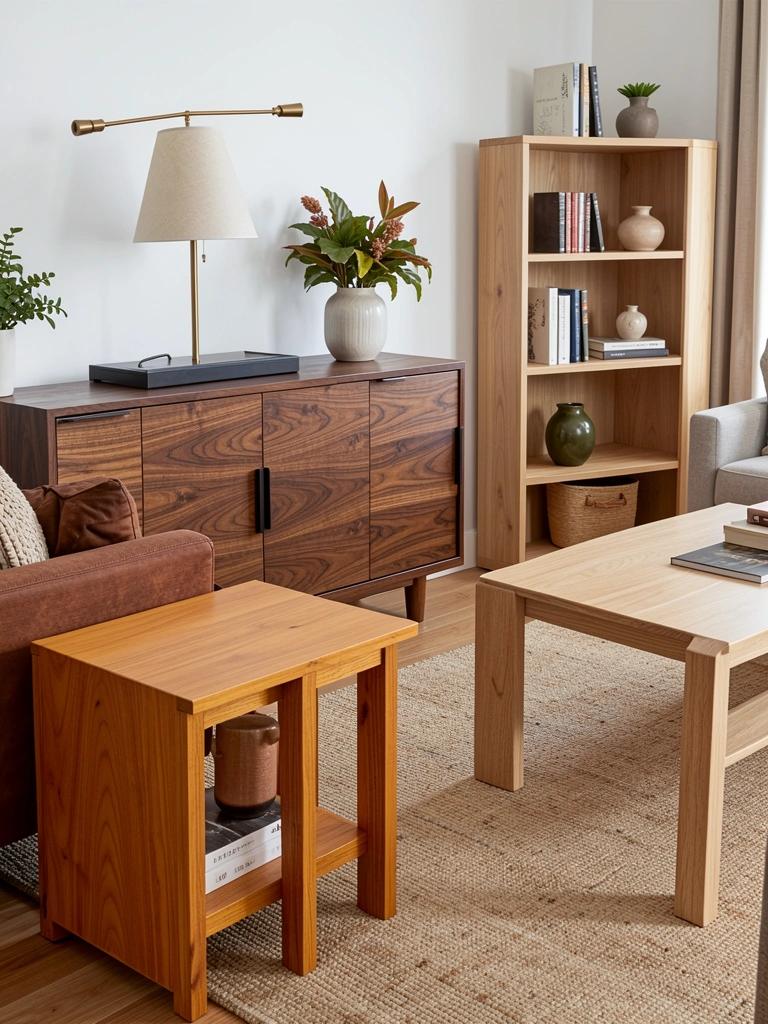
    23. Combine Textured Linen With Decorative Wooden Rings

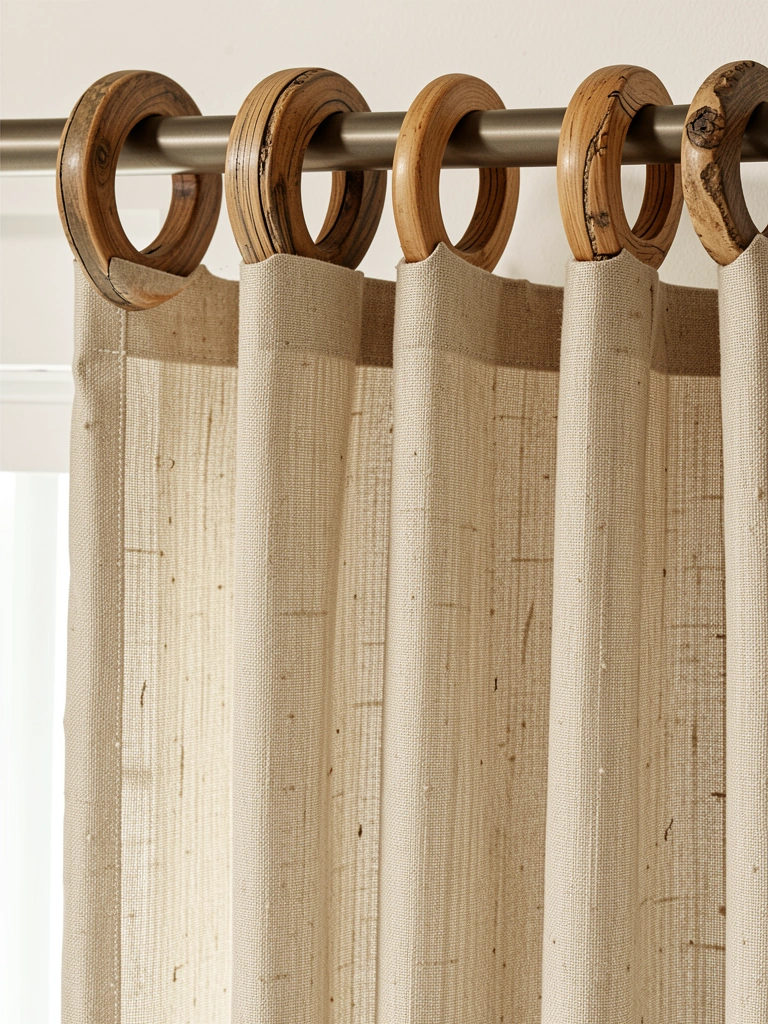
    Wooden rings aren’t just functional—they’re a design element. They add texture to the header and create visual interest even when curtains are closed.

    Buy textured linen ($25–$60 per panel) and pair with wooden rings ($10–$25 for a set of 10–12). The rings should be large enough that fabric gathers comfortably. This setup is easier to open and close than pinched headers, and the rings look intentional and crafted. Install takes 15 minutes once your rod is hung.

    Your curtains become sculptural. The rings catch light and add a rustic element that elevates basic linen into something special.


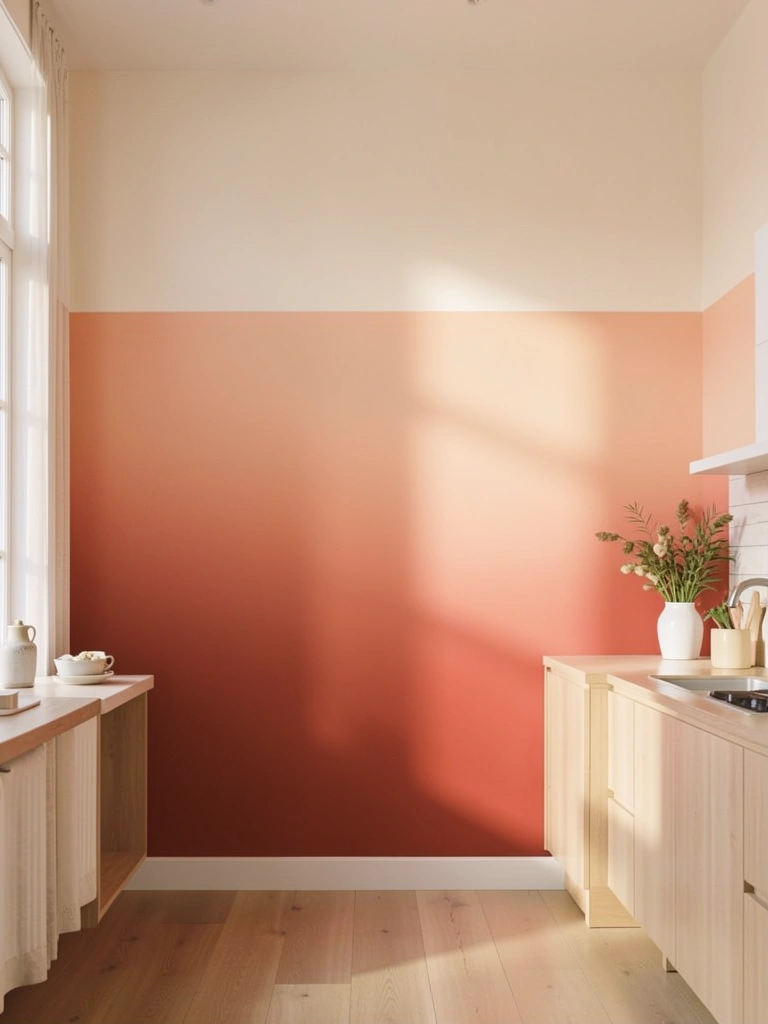
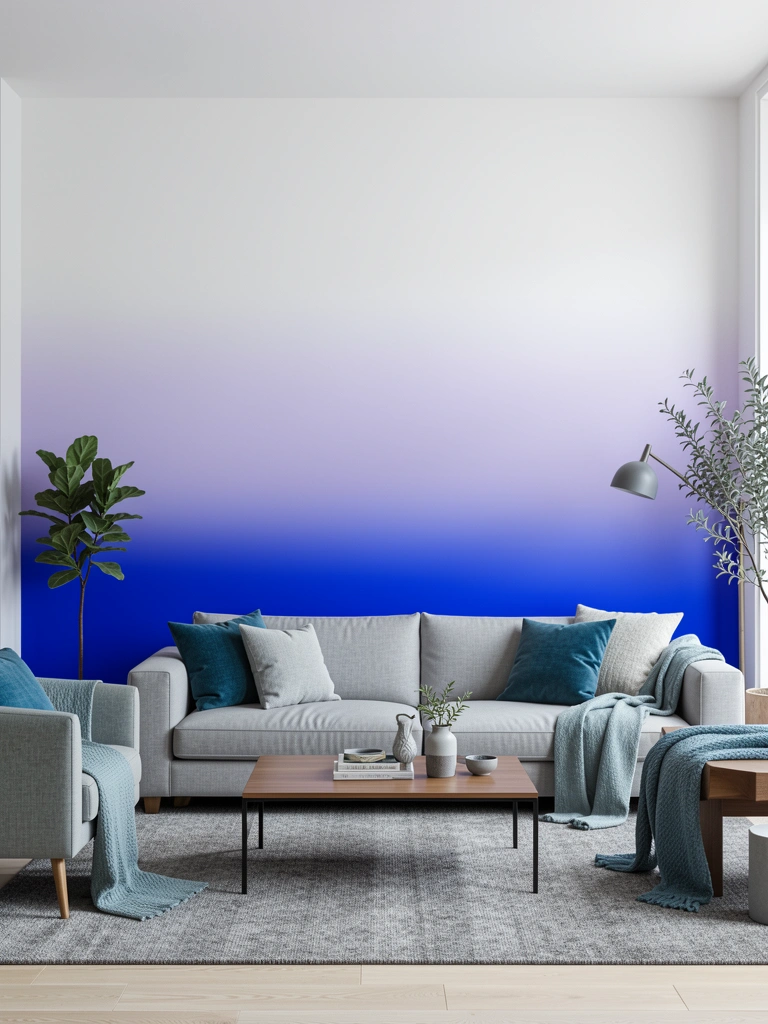
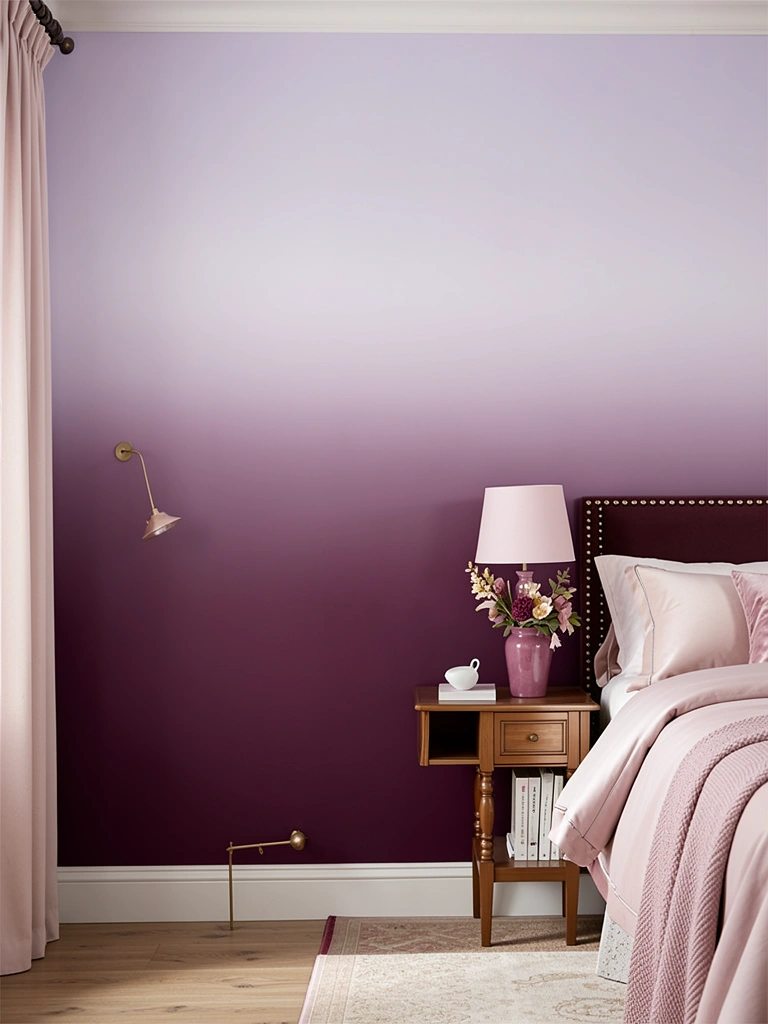
    24. Use Ombré or Gradient Linen for Subtle Color Shift

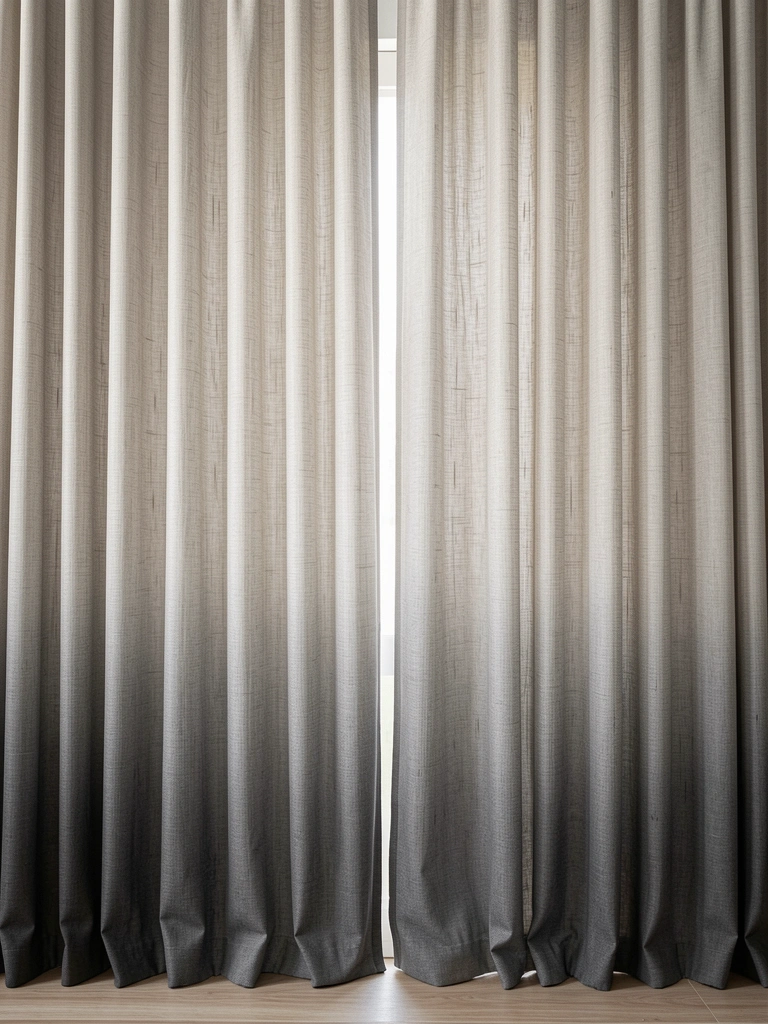
    Ombré linen creates dimension through color rather than texture, giving you the best of both worlds: subtle interest without overwhelming pattern.

    Ombré linen panels run $50–$120 per pair depending on the gradient intensity. Look for naturally dyed versions for eco-conscious options. The color shift creates visual flow from top to bottom, making the eye travel. Hang floor-to-ceiling to maximize the gradient effect.

    This approach works beautifully in spaces where you want sophistication without boldness. The room feels designed and intentional without being trendy.


    25. Layer Linen Sheers With Textured Wool For Contrast

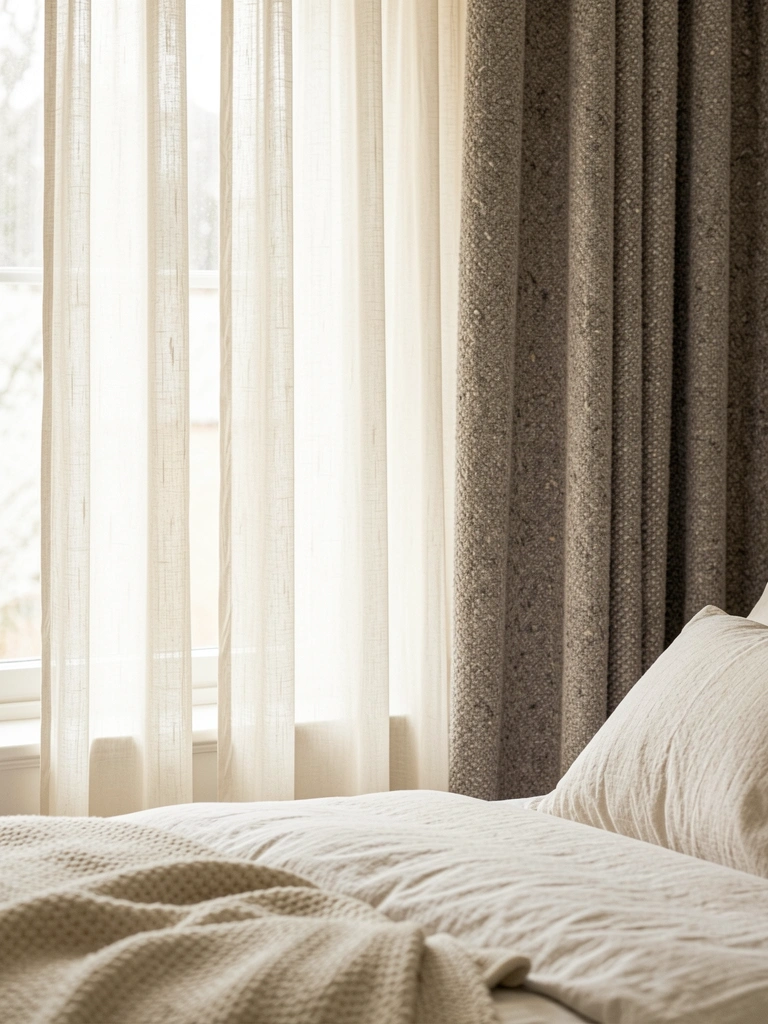
    Pairing delicate with heavy creates visual interest through fabric contrast alone. Linen’s smoothness plays beautifully against wool’s nubby texture.

    Hang linen sheers on a close rod ($20–$50) and wool on a front rod ($100–$180 per panel). The sheer diffuses harsh light while the wool creates shadow and depth. This is a splurge-worthy combo that lasts years and feels incredibly intentional. Both fabrics improve with age.

    Your window becomes a texture study in intentional contrast. This setup works in spaces where you want luxury and sophistication to be obvious.


    26. Mix Natural Linen With Subtle Hand-Dyed Accents

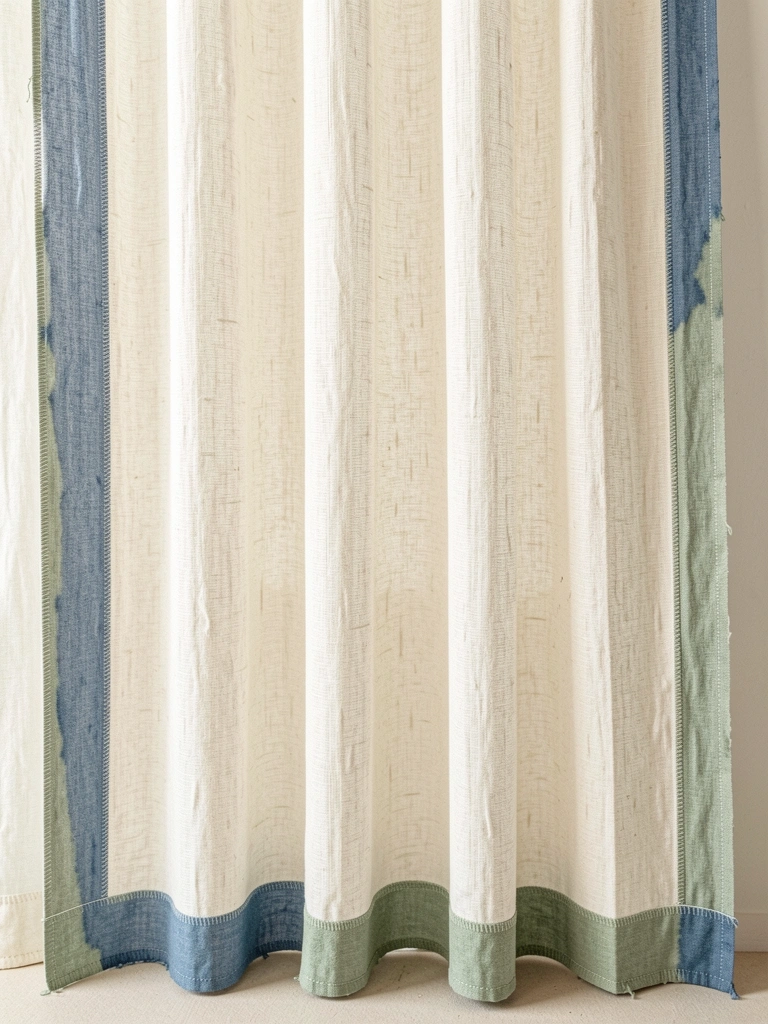
    Hand-dyed accents are a creative DIY way to personalize plain linen without committing to patterned fabric. You control the color and placement, making each curtain unique.

    Start with plain linen ($25–$50 per panel) and hand-dye edge panels using fiber dye ($5–$10). Sew or tape dyed fabric along edges as accent bands (takes an afternoon). This is a satisfying weekend project that results in one-of-a-kind curtains. No sewing skills? Use fabric adhesive tape instead of stitching.

    Your curtains become personal art. Every time you look at them, you’ll remember making them, which adds emotional texture to the space.


    Save this post and pick one idea to try this weekend—or layer a few together for next-level window drama. Which textured curtain combination speaks to you?

  • 25 Ombre Wall Painting Effects That Add Gorgeous Gradient Color

    25 Ombre Wall Painting Effects That Add Gorgeous Gradient Color

    Ombre walls are one of 2025’s most stunning paint trends—and they’re way easier to create than you’d think. If you’ve been staring at flat, one-note walls and craving something with visual interest and movement, gradient painting delivers exactly that. The beauty of ombre effects is that they work in any room, any color combo, and any budget. You can go bold with sapphire blue fading to white, or keep it cozy with earthy clay tones melting into warm beige. This guide shows you 25 specific ombre techniques, color pairings, and application methods so you can pick the style that matches your space—and your skill level. Whether you’re a first-timer or ready to tackle something ambitious, you’ll find ideas that actually work in real homes.

    1. Soft Peachy to Cream Vertical Gradient

    Vertical ombre creates height and draws the eye upward—perfect for rooms that feel cramped or low-ceilinged. Start with your darkest shade (peachy-orange) at the baseboard and gradually lighten as you move up, blending where colors meet.

    Paint the bottom third with your base color using a roller ($12–18). Mix your middle tone on a palette, then apply it roughly in the middle section using a dry brush technique—blend edges where the two colors overlap by dabbing a slightly damp brush back and forth. Finally, paint the top third with your lightest shade (or white), feathering where it meets the middle tone. Work in sections and keep blending as you go—rough transitions are actually part of the charm. This takes one afternoon and requires only basic painting supplies from Home Depot or Amazon.

    Your room feels taller, lighter, and way more intentional. The gradual color shift creates visual flow that static paint can’t match.

    2. Deep Navy to Pale Gray Horizontal Ombre

    Horizontal ombre (the classic look) makes rooms feel wider and more open—ideal for smaller spaces or areas where you want breathing room. This navy-to-gray combo is moody without feeling cave-like.

    Divide your wall into thirds with light pencil marks. Paint the bottom section with navy using a premium roller ($15–22) to avoid streaks. Mix your transitional gray shade and apply it to the middle section, using a damp sponge or brush to feather the overlap zone. Repeat with your lightest shade at the top. The key is overlapping colors while they’re still slightly wet—this creates that buttery gradient instead of harsh lines. Budget: $30–50 total for paint and supplies. Time: 2–3 hours.

    The result is sophisticated depth that photographs beautifully and makes your seating area feel like a retreat.

    3. Burnt Orange to Warm Gold Sunset Effect

    This warm color story mimics a real sunset and brings cozy energy to any room. It’s bold enough to feel intentional but grounded in earthy tones, so it never looks overwhelming.

    Start with Benjamin Moore’s Burnt Orange (or similar: Sherwin-Williams Heartthrob) at the base. Transition through a warm amber middle (mix orange + yellow paint 50/50), then finish with soft yellow or cream at the top. Use a blending brush ($8–12) specifically for ombre work—the soft bristles prevent harsh lines. Apply your base color first, then while it’s still slightly tacky, apply your transition color and use gentle circular motions to blend. Repeat with your top shade. This technique works best with warm lighting (think Edison bulbs or warm white LEDs) that enhances the gradient’s glow.

    Cost: $40–60 for quality paint. Weekend project. You’ll get compliments on how sophisticated and intentional your space feels—no one will guess you did it yourself.

    4. Emerald Green to Soft Sage Biophilic Blend

    Deep emerald fading to pale sage connects your space to nature while staying balanced—this is modern biophilic design without feeling heavy. It’s perfect if you want drama paired with calm.

    Choose deep emerald (Benjamin Moore Silhouette or Sherwin-Williams Evergreen Fog base) and soft sage (pale greens like Healing Aloe). Paint your bottom third with emerald, middle third with a medium sage created by mixing your two shades, and top with pale sage. The blend should feel organic—think of tree foliage getting lighter toward the sky. Use a soft sea sponge ($6–10) to dab and blend rather than brush stroke with precision. This creates a more natural, less “perfect” look that actually reads as higher-end. Total cost: $45–65. Time: 3–4 hours including drying between layers.

    Your space immediately feels grounded and connected to nature, even in a small apartment or urban home.

    5. Dusty Rose to Blush Pink Minimalist Gradient

    Soft pinks and roses are everywhere in 2025 design, and a subtle gradient version feels fresh instead of childish. This works beautifully in bedrooms, powder rooms, or any space where you want gentle sophistication.

    Start with a quality dusty rose base color (Benjamin Moore’s Cinnamon Slate has pink undertones—or try Sherwin-Williams Weathered Peach). Transition to blush pink, then nearly white. The trickier part is keeping the colors from looking muddy during blending. Use a dry brush blending technique with a natural-bristle brush ($10–15)—apply your colors, then use a clean, barely-damp brush to feather the edges without over-working them. Pro tip: Work in small sections (2–3 feet at a time) so you don’t dry-blend too much. Paint cost: $35–50. Weekend project, 2–3 hours.

    The finished wall feels calming and polished, like a luxury hotel or spa. Visitors will assume you hired a professional.

    6. Charcoal Gray to White High-Contrast Drama

    High-contrast ombre creates bold visual impact and works especially well in modern, industrial, or minimalist spaces. The sharp transition from dark to light makes a real design statement.

    Paint your bottom half with deep charcoal gray (Sherwin-Williams Iron Ore or similar). For the middle transition zone, mix your charcoal 50/50 with white to create medium gray. Top with pure white. Instead of soft blending, create slightly visible transitions—this is intentional and looks contemporary rather than sloppy. Use a quality angled brush ($12–18) and work horizontally in overlapping strokes. Keep your transitions fairly tight (blended over 6–12 inches rather than 2–3 feet). Budget: $40–55. Time: 2–3 hours.

    The result looks gallery-quality and adds architectural interest without any structural changes.

    7. Mustard Yellow to Cream Warm & Inviting

    Mustard is one of 2025’s hottest accent colors, and an ombre treatment keeps it from feeling too heavy in a full room. This is perfect for kitchens, dining rooms, or entryways where you want energy without overwhelm.

    Apply a base coat of mustard yellow (try Sherwin-Williams Earnest Gold or Benjamin Moore Golden Honey). Create a transitional beige by mixing mustard + white + a touch of brown, then apply to your middle section. Finish with soft cream or off-white. The key with warm colors is feathering generously—use a soft blending brush or sponge ($8–12) with light pressure. These colors blend more easily than cool tones, so avoid over-working or you’ll lose the gradient definition. Paint cost: $35–50. Afternoon project, 2–3 hours.

    Your space feels warm, welcoming, and design-forward. Guests will comment on how thoughtful and pulled-together the room feels.

    8. Cobalt Blue to Pale Blue Coastal Escape

    Cobalt ombre brings vacation vibes indoors and works in any room—bathrooms, bedrooms, kids’ spaces, or even home offices. The gradient makes it sophisticated rather than childish.

    Start with cobalt blue (Sherwin-Williams Oceanside or Benjamin Moore Hale Navy as your base). Transition through sky blue (mix cobalt + white in stages), then finish with off-white. The challenge with blues is avoiding purple undertones during mixing. Add white gradually and test your transitions on poster board before committing to the wall. Use a lint-free roller ($15–20) for smooth application—cheaper rollers leave fibers. Work in overlapping horizontal strokes, blending as you go. Total cost: $40–65. Time: 3–4 hours.

    Your bathroom or bedroom instantly feels like a coastal retreat. The ombre softens the boldness of cobalt while keeping the impact.

    9. Warm Taupe to Beige Neutral Anchor Wall

    Taupe ombre is the sophisticated alternative to boring flat beige. It reads as intentional and high-design while staying universally complementary.

    Paint your base with warm taupe (Sherwin-Williams Accessible Beige or Benjamin Moore Wheat Sheaf work beautifully). Transition through greige (warm gray-beige), then pale beige. These colors blend almost effortlessly since they’re all in the same family. Use a cheap foam roller ($5–8) to apply base color, then switch to a natural-bristle blending brush ($10–12) for transitions. Because these colors are so close in value, you’ll blend over larger areas (12–18 inches per transition zone). Paint budget: $35–50. Time: 2–3 hours, very beginner-friendly.

    You get a high-end, professionally-designed look without bold commitment. The subtle gradient adds depth while keeping your space calm and versatile.

    10. Deep Forest Green to Pale Mint Moody to Fresh

    This gradient tells a nature story—from dense forest floor to spring leaves to fresh air. It’s on-trend for 2025’s emphasis on biophilic design and works beautifully in bedrooms or creative spaces.

    Begin with deep forest green (Benjamin Moore Silhouette or Sherwin-Williams Evergreen). Mix a sage transition shade (about 40% green, 60% white), then finish with pale mint (mostly white with just a hint of green). Green is forgiving to blend because it’s easy to lighten gradually. Apply your base, then use a damp sea sponge ($6–8) to dab and feather your transition colors. Sponges create a more organic, natural feel than brushes. Total paint cost: $40–60. Weekend project, 3–4 hours.

    The finished wall brings calm and sophistication—it feels like you’ve brought the forest indoors without making the room dark.

    11. Terracotta to Peachy Sunrise Wall

    Terracotta ombre captures earthy, warm-country energy and complements both modern and rustic décor. This is 2025’s answer to the tired “coastal” look—more grounded and connected to earth tones.

    Paint your base with deep terracotta (Sherwin-Williams Red Bay or a terra-cotta craft paint if budget is tight). Create your middle tone by mixing terracotta + a touch of yellow + white, then finish with soft peachy-cream. Use a premium angled brush ($12–15) for precise blending—cheaper brushes shed bristles into terracotta, which is visible. Work in horizontal strokes, slightly overlapping each row. Blend by using very light pressure with a clean, damp brush. Budget: $40–55. Time: 3 hours.

    The wall feels warm, collected, and intentionally designed. Compliments are guaranteed, and it photographs beautifully on social media.

    12. Sapphire Blue to Periwinkle to White Three-Tone

    Three-color gradients are more forgiving than two-color ones because each transition zone is narrower, making mistakes less obvious. This sapphire-to-periwinkle combo is trendy and sophisticated.

    Paint your base with sapphire blue (Benjamin Moore Royal Entrance or Sherwin-Williams Proper Blue). Your middle tone should be periwinkle—mix your sapphire 30% with white. Top with nearly-white. The advantage here is you have two transition zones instead of one, so you can work slowly and carefully. Use a blending sponge and work in small 2-foot sections. Let each section dry slightly (10–15 minutes) before moving to the next—this prevents over-blending. Paint cost: $45–65. Time: 4–5 hours over one weekend.

    The result looks like a professional designer created it. The three-tone approach feels contemporary and intentional.

    13. Charcoal to Steel Gray Monochromatic Sophistication

    Monochromatic ombre (all one color family, different values) is the safest approach for nervous first-timers. You can’t go wrong because everything stays in harmony.

    Choose your darkest shade—charcoal gray (Sherwin-Williams Urbane Gray or Benjamin Moore Onyx). Mix progressively lighter versions: medium gray (charcoal + 50% white), light gray (charcoal + 75% white), almost-white. Paint each section and blend with a soft natural-bristle brush using very light circular motions. Monochromatic gradients blend beautifully because there’s no color shift to manage, only value. Paint budget: $30–45. Time: 2.5–3 hours.

    Your space feels calm, professional, and intentionally layered. The subtle depth adds visual interest without any risk of clashing.

    14. Blush to Ivory Romantic Bedroom Gradient

    Romantic doesn’t have to mean frilly. A blush-to-ivory gradient is sophisticated, restful, and flattering in any lighting. This is perfect for master bedrooms or guest rooms where you want calm luxury.

    Start with blush pink (Benjamin Moore Pink Attraction or Sherwin-Williams Blushing Rose). Transition through pale rose (blush + 40% white), finishing with ivory-cream. These soft colors blend almost automatically—the challenge is preventing them from looking washed out. Use a premium roller ($18–24) to apply each coat smoothly. Work in overlapping horizontal passes, then use a barely-damp blending brush to soften edges. The key is restraint—don’t over-blend or the colors blur together into beige. Paint cost: $40–55. Time: 2.5–3 hours.

    Your bedroom feels like a sanctuary. The gentle gradient promotes rest and feels hotel-quality without being impersonal.

    15. Burnt Sienna to Dusty Orange Clay Aesthetic

    Clay-inspired earth tones are 2025’s answer to bland neutrals. This burnt sienna gradient brings warmth, depth, and an intentional art direction without shouting for attention.

    Paint your base with burnt sienna (Sherwin-Williams Red Theatre or a craft-paint version). Mix your middle tone (sienna + orange + white), then transition to dusty peach (mostly white with orange undertone). These warm tones blend beautifully with a damp natural sponge ($8–10)—dab rather than stroke for an organic feel. Work in manageable sections and let each one rest 10–15 minutes before blending to the next. Budget: $35–50. Time: 3–4 hours.

    The finished wall feels warm, collected, and intentionally designed—like it belongs in a curated home magazine.

    16. Navy to Fog Gray Coastal Calm

    Navy-to-gray ombre works beautifully in smaller spaces (bathrooms, powder rooms, bedrooms) where you want drama without feeling confined. The cooler gray transition keeps it from feeling too heavy.

    Paint your base with navy blue (Benjamin Moore Hale Navy or Sherwin-Williams Naval). Your middle transition should lean gray—mix navy 40% with a cool gray. Finish with pale fog gray (cool undertones, not warm). Use a premium foam roller ($12–16) for the navy base (it requires good coverage), then switch to a blending brush for transitions. Cool colors can look muddy if overmixed, so blend carefully with light pressure. Paint cost: $45–65. Time: 3–4 hours.

    Your space feels calm and intentionally designed. Visitors will ask if you hired a professional painter.

    17. Ochre to Cream Golden Hour Glow

    Ochre is 2025’s sophisticated alternative to mustard yellow—deeper, earthier, less trendy-feeling. An ombre treatment keeps it from overwhelming a room while maximizing its warm charm.

    Start with golden ochre (Sherwin-Williams Rookwood Dark Green actually reads ochre, or mix a custom shade using yellow-brown base). Transition through light ochre (ochre + white), finishing with cream. Ochre can be tricky to blend because it has both yellow and brown undertones—mix your transition color carefully on a palette before applying. Use a soft blending brush ($10–14) with the lightest touch possible. Paint cost: $40–60. Time: 3–4 hours.

    The wall glows warmly without feeling dated. It reads as intentional and well-researched in design—not just a random wall color.

    18. Sage Green to White Airy Botanical

    Soft sage is the most renter-friendly green gradient—it’s not too bold, pairs with anything, and makes rooms feel immediately calmer. This works in any space and with any décor style.

    Paint your base with soft sage (Benjamin Moore Palladian Blue or Sherwin-Williams Sea Salt). Transition through very pale sage (sage + 70% white), finishing with near-white. Sage blends smoothly because it’s already a light, muted shade. Use a basic foam roller ($8–10) and your favorite blending brush ($8–12). Work in large overlapping sections—sage is forgiving, so don’t worry about perfect transitions. Paint budget: $30–45. Time: 2–3 hours. Beginner-friendly.

    Your space feels peaceful and intentionally designed. The gradient adds dimension while keeping the room open and airy.

    19. Deep Plum to Lavender Feminine Edge

    Plum-to-lavender is on-trend (Benjamin Moore’s 2025 Color of the Year, Cinnamon Slate, has plum undertones) and surprisingly versatile. This gradient feels sophisticated and artistic without being juvenile.

    Paint your base with deep plum (Benjamin Moore Silhouette or Sherwin-Williams Purple Passage). Mix your transition shade (plum + white + touch of pink), then finish with pale lavender. Purple can lean blue or pink depending on your mixing—test on poster board first. Use a high-quality blending sponge ($10–12)—it handles purple’s complexity better than brushes. Work slowly in small sections, feathering generously. Paint cost: $45–65. Time: 4–5 hours.

    The result is refined and artistic. Your space feels curated and thoughtfully designed—people will assume you work in interior design.

    20. Copper to Rose Gold Metallic-Inspired Gradient

    Metallic-inspired gradients are 2025’s way to add glam without full metallic paint (which can be overwhelming). This copper-to-rose-gold combo reads elegant and current.

    Use metallic copper paint (many brands make copper for crafts—or use Benjamin Moore’s copper-toned Burnt Orange as a base). Your middle tone should be rose-gold (copper + touch of pink + white). Finish with soft cream. Metallic paints apply differently than matte—use smooth, deliberate strokes with a premium roller ($18–25). Blend transitions carefully because metallics can show overlap lines. Let each section dry before moving to the next. Budget: $50–75 (metallic paint costs more). Time: 4–5 hours.

    Your accent wall looks upscale and gallery-worthy. The subtle metallic sheen catches light beautifully, adding luxury without tackiness.

    21. Slate Blue to Silver-Gray Contemporary

    Slate blue is 2025’s moody-but-not-dark choice for people who want drama without heavy feelings. The silver-gray transition feels modern and architectural.

    Paint your base with slate blue (Benjamin Moore Hale Navy mixed lighter, or Sherwin-Williams Slate talk). Your middle transition should be cool silver-gray (slate + 50% white + touch of blue to keep it cool). Finish with silver-white (white + tiny bit of gray for warmth prevention). Use a premium blending brush ($12–16) and work in careful, methodical horizontal strokes. Cool colors can look harsh if blended too sharply, so aim for 12–18-inch transition zones. Paint cost: $40–60. Time: 3–4 hours.

    Your space feels sophisticated and contemporary. The ombre adds visual interest while keeping the room calm and focused.

    22. Warm Taupe to Stone White Versatile Neutral

    This is the safe-bet gradient that works with literally any décor style and doesn’t date. Perfect for people who love subtle design changes without risk.

    Paint your base with warm taupe (Sherwin-Williams Accessible Beige or Benjamin Moore Stucco). Transition through light taupe (taupe + 60% white), finishing with stone-white. These earth-neutral tones blend almost automatically and are very forgiving. Use a basic foam roller ($8–10) and any blending brush you have—this project is hard to mess up. Work in large overlapping sections. Paint budget: $30–45. Time: 2–3 hours. Perfect for beginners.

    Your wall looks polished and intentional while staying universally complement to any furniture you add later. This is the “I can’t go wrong” option.

    23. Claret Red to Dusty Rose Moody Romance

    Deep reds intimidate people, but a claret-to-rose ombre keeps the drama while softening the intensity. This works beautifully in dining rooms, bedrooms, or powder rooms.

    Start with claret red (Benjamin Moore Caliente or Sherwin-Williams Fine Wine). Mix your transition shade (claret + white + touch of pink to prevent brownish mudiness), then finish with dusty rose. Red is the trickiest color to blend because it can turn brown or purple if overmixed. Test your transition color on poster board first. Use a soft blending brush ($10–14) with very gentle pressure. Apply your base color, then blend the middle tone while it’s still slightly wet. Paint cost: $40–55. Time: 4–5 hours.

    Your space feels refined and intentionally designed. The gradient reads as confident design choice, not a mistake.

    24. Charcoal to White Minimalist Statement

    Charcoal-to-white ombre is the most striking option if you want visual impact. The high contrast makes a real design statement in contemporary or industrial spaces.

    Paint your base with very dark charcoal (almost-black gray like Sherwin-Williams Urbane Gray mixed darker, or Benjamin Moore Black). Your middle tone is medium gray (charcoal + 50% white). Top with pure white. The high contrast means you can work with slightly sharper transitions—this reads intentional rather than sloppy. Use a quality angled brush ($12–18) and keep transitions to 8–12 inches. Each transition zone should show visible but blended color shift. Paint cost: $40–55. Time: 3–4 hours.

    The wall becomes a focal point—architectural and striking. Your space feels gallery-quality and thoughtfully designed.

    25. Golden Honey to Pale Yellow Warm Cheer

    Golden honey ombre brings sunshine indoors without the artifice of straight yellow. Perfect for kitchens, dining rooms, or any space where you want warmth and welcome.

    Paint your base with golden honey (Sherwin-Williams Earnest Gold or Benjamin Moore Golden Honey). Transition through pale yellow (honey + 60% white + touch of cream), finishing with off-white. These warm colors blend easily but can look flat if you don’t add dimension through careful lighting. Use a soft foam roller ($10–14) for the base, then blending brush ($8–12) for transitions. Work in overlapping horizontal strokes and blend while paint is still slightly tacky. Paint cost: $35–50. Time: 3–4 hours.

    Your space feels warm, welcoming, and intentionally designed. People gravitate toward rooms with this kind of golden warmth.

    26. Seafoam to White Beach House Fresh

    Seafoam ombre is the ultimate beach-house-without-commitment gradient. It’s trendy enough to feel current but timeless enough that you won’t tire of it.

    Paint your base with seafoam green (Sherwin-Williams Sea Salt or Benjamin Moore Palladian Blue with green undertone). Transition through very pale seafoam (seafoam + 70% white), finishing with nearly-white. Seafoam blends beautifully and is incredibly forgiving. Use a basic foam roller ($8–10) and any blending brush ($8–12). Work in large overlapping sections—seafoam’s pale nature means you have built-in forgiveness for imperfect blending. Paint budget: $30–45. Time: 2–3 hours. Beginner-friendly.

    Your space feels breezy, coastal, and intentionally curated. Even small rooms feel larger and more open with this soft gradient.


    SOFT CTA:

    Save this post for your next wall project and pick one gradient that speaks to you. The best part? You can start this weekend with just paint, brushes, and two hours. Which ombre style are you trying first?

  • 25 Kitchen Inspo Ideas That Transform Your Cooking Space

    25 Kitchen Inspo Ideas That Transform Your Cooking Space


    Your kitchen should tell your story—not whisper a forgettable one. Whether you’re renting or own, working with a tiny galley or an open floor plan, updating your cooking space doesn’t require a massive renovation or a six-figure budget. The 2025 kitchen trends are all about you: bold colors, mixed textures, smart storage, and designs that balance style with real-life function. We’ve rounded up 25 actionable ideas that range from 15-minute styling tweaks to weekend projects, so you can refresh your space at your own pace. Ready to fall in love with cooking again? Let’s dive in.


    1. Paint Your Cabinets a Deep, Moody Green

    Deep green cabinets bring personality and sophistication without feeling trendy or temporary. This color works beautifully whether your style leans modern, cottage, or eclectic—and 76% of design pros are choosing green as their top kitchen color right now.

    You can tackle this yourself with cabinet-grade paint (like Sherwin-Williams or Benjamin Moore) and a quality brush or foam roller. Most kits run $80–$150 for materials, and the project takes about one weekend. If your cabinets have a glossy finish, light sanding or a primer designed for slick surfaces is key. Alternatively, peel-and-stick cabinet wraps ($150–$300) give you the look without the commitment—perfect for renters.

    The payoff? Your kitchen instantly becomes a space you actually want to spend time in. That small color shift changes everything.


    2. Layer Open Shelving with Curated Styling

    Open shelving only works when the items on display are intentionally chosen and beautifully arranged. Group similar items (white bowls together, vintage glassware in one zone), add texture with woven baskets, and sprinkle in greenery for warmth.

    Mix dishware heights and styles—stack some plates flat, lean others vertically, nestle a small plant between groups. Baskets below shelves hide kitchen clutter while keeping your space airy. Start with one shelf if you’re unsure; swapping three shelves at a time takes about 20 minutes. Cost depends on what you already own, but if shopping, budget $50–$150 for styling pieces from Target, IKEA, or HomeGoods.

    Your kitchen looks magazine-worthy while staying functional. Plus, you’ll use your pretty dishes instead of hiding them away.


    3. Install Brass or Mixed-Metal Pendant Lights

    Lighting is the secret weapon that changes the entire mood of a kitchen. Mixing metal finishes (brass, copper, black, wood) creates depth and visual interest in a way that matchy sets can’t.

    Look for pendants at IKEA ($30–$80 each), Wayfair ($60–$150 each), or West Elm ($150–$300 each). If you’re handy with a screwdriver and your kitchen already has a junction box, installation is a 15-minute DIY job. Otherwise, budget $100–$200 for an electrician to hang them. The dramatic difference is worth it—84% of design pros cite lighting as the standout feature that elevates a kitchen.

    Your space transforms from functional to intentional. Cooking and morning coffee become experiences, not just tasks.


    4. Add a Butler’s Pantry or Scullery for Hidden Storage

    If you have an open-plan kitchen, a hidden prep zone is a game-changer for containing mess while entertaining. A butler’s pantry—even a tiny closet-sized one—hides dishes, snacks, and clutter, so your main kitchen stays show-ready.

    If you’re renting, this is trickier, but consider a rolling cart with a curtain rod and fabric panel that slides in front ($60–$120). For homeowners, consult a contractor about converting a closet or adding a pocket-door wall ($1,500–$5,000 depending on complexity). DIY enthusiasts can install open shelving in an existing space for $150–$300.

    You get the relaxed, open-kitchen feel without the stress of showing crumbs and dirty dishes. Guests see a polished space; you know exactly where everything is.


    5. Swap Neutral Walls for Warm Earth Tones

    All-white and all-gray kitchens are officially dated. Warm earth tones—terracotta, warm taupe, soft ochre, sage—make your kitchen feel grounded and personal while still staying timeless.

    Pick a test paint swatch and live with it for a few days in your actual kitchen lighting (paint changes dramatically depending on morning vs. evening light). One gallon of quality paint costs $35–$50 and covers most kitchens. Painting two walls takes about 4–6 hours; the whole room takes a weekend. Renters: try peel-and-stick wallpaper ($25–$60 per roll) for a no-commitment vibe.

    Your space feels like a cozy retreat instead of a sterile box. Food photography suddenly looks better too—the warm backdrop is chef’s kiss for Instagram.


    6. Introduce Mixed-Material Backsplashes with Texture

    Textured backsplashes—fluted tiles, plaster finishes, dimensional patterns—add visual depth without overwhelming the space. Pairing one texture with a classic subway tile creates balance.

    Browse Wayfair, Home Depot, or specialty tile shops for combinations. A simple mixed backsplash for a 30-square-foot area runs $300–$800 in materials. If you’re comfortable with basic tile work, DIY installation saves $200–$500 in labor. For first-timers, hiring a pro costs $800–$1,200 total, but takes stress off your plate and ensures a polished finish.

    The backsplash becomes a design feature instead of an afterthought. Suddenly your whole kitchen feels intentionally designed, not just functional.


    7. Create a Cozy Kitchen Dining Nook

    A dining nook transforms a corner into a gathering spot. Whether you build a full bench or use a modest bistro table and chairs, this creates coziness without eating into your main kitchen workspace.

    For renters and budget-conscious folks: a small bistro table ($80–$150) and two chairs ($40–$80 each) tucked into a corner does wonders. Homeowners can splurge on a built-in bench ($1,200–$3,000 installed) or DIY one for $300–$600. Add a simple cushion ($50–$120) and you’re done. Total project time: a weekend for DIY builds, or one week if contracting out.

    You gain a quiet spot for coffee, a casual dining space, and a reason to actually use your kitchen beyond cooking. Small spaces suddenly feel intentional, not cramped.


    8. Go Handle-Free with Push-to-Open Cabinetry

    Handle-free cabinets create a seamless, minimalist look that photographs beautifully and stays clutter-free. The mechanism catches your eye way less than hardware does.

    If you’re replacing cabinets, specify push-to-open when ordering (adds $100–$300 to your cabinet cost). For existing cabinets, adhesive-catch mechanisms retrofit onto your current doors for $50–$150 total. No tools needed; installation takes 30 minutes. This option is perfect for renters—it’s literally a sticker-on solution.

    Your kitchen looks more sophisticated instantly. The bonus? No fingerprints on hardware, and cleaning is faster.


    9. Style Your Open Shelves with a Color Palette

    Instead of random display, choose a 3-to-4 color palette (white, cream, sage, and natural wood, for example) and stick to it on your open shelves. This creates visual harmony and makes your kitchen feel designed, not chaotic.

    Go through your current dishes and dishware—you likely have enough already. If you need to add pieces, target HomeGoods, Wayfair, or TJ Maxx for affordable stoneware in your palette ($10–$30 per piece). Swap out items over one afternoon. Cost for new additions: $50–$150 depending on how much you add.

    Your kitchen looks calm and curated. Guests notice the intentionality, and you feel more in control of your space.


    10. Paint a Statement Wall in Bold Blue or Brown

    A single bold accent wall (not the whole room) gives you personality without overwhelming a small space. Deep blue and warm brown are the top choices after green; 63% of pros are using blue right now.

    Choose one wall (usually behind your sink or stove) and commit. A rich, deep shade of Benjamin Moore or Sherwin-Williams ($35–$50 per gallon) takes 3–4 hours to paint if you’re solo. Rent a paint sprayer from Home Depot ($30–$40 per day) for a flawless finish, or hire a painter ($300–$600 depending on wall size). The trick is using primer first, especially on darker shades.

    The focal point makes your kitchen feel designed and intentional. Plus, it’s reversible—if you tire of it, it’s just another coat of paint away.


    11. Install Undercabinet Lighting for Function and Mood

    Undercabinet lighting solves two problems at once: it brightens your counter workspace and creates ambient mood lighting when you’re not cooking. LED strips are affordable, energy-efficient, and come in warm tones.

    LED strip kits run $30–$80 from IKEA, Amazon, or Home Depot. Most are plug-and-play; if your cabinets have an outlet nearby, installation takes 15 minutes. No outlet? Budget $150–$300 for an electrician to run one. The difference in your daily kitchen experience is massive—no more shadowy meal prep, plus a cozier vibe come evening.

    Cooking becomes easier, and your kitchen transforms from task-only to an inviting hangout spot. This upgrade pays for itself in function alone.


    12. Incorporate Fluted or Textured Range Hood

    A textured range hood is a sculptural statement piece that grounds your kitchen. Fluting, plaster finishes, and dimensional details are trending hard right now for adding organic interest.

    Range hoods vary wildly: $500–$1,500 for mid-range brands like Zephyr or Signature, or $1,500–$4,000+ for designer options. If you’re replacing an existing hood, installation is typically included. If adding new, budget $300–$800 in labor for venting setup. Renters should skip this one—it requires permanent installation.

    Your kitchen instantly looks more curated and intentional. The range hood becomes a design feature instead of an appliance you hide.


    13. Swap Hardware for Brass or Mixed Metals

    Cabinet hardware is jewelry for your kitchen. Switching from generic silver to brass, copper, or mixed metals updates your entire vibe—and it’s one of the fastest, cheapest wins possible.

    Knobs and pulls from Schoolhouse Electric, Rejuvenation, or even Wayfair run $3–$15 each. For a full kitchen with 20 pieces of hardware, budget $60–$300 total. Changing them out takes 30–45 minutes with just a screwdriver. The old hardware might have resale value on Facebook Marketplace, so you could recoup some cost.

    Your cabinets look refreshed and intentional without any major work. This single swap elevates your whole kitchen’s design story.


    14. Create Hybrid Island with Open Legs and Hidden Storage

    Hybrid islands combine closed storage for mess-hiding with open shelving for display and flexibility. The furniture-style legs (instead of a solid base) make the space feel airier and more collected-over-time.

    A ready-made island cart like the IKEA Stenstorp ($150–$250) works for renters and small spaces. Homeowners can commission a custom build for $1,000–$3,000, or DIY using stock cabinetry and metal shelf supports ($300–$600 in materials). The open side gives you display space; the closed side hides cooking prep.

    You get flexibility for both hosting and everyday living. The space feels more designed than a basic kitchen island.


    15. Add Warm Brass Lighting to Match Your Color Palette

    Brass lighting warms up a space psychologically. Unlike cold chrome or industrial black, brass brings sophistication and coziness that pairs beautifully with bold colors and earth tones.

    Pendants in brass finishes start at $40–$80 each from IKEA or Amazon, and go up to $150–$300+ for designer pieces. Pair three over an island for $120–$900 depending on your budget. Installation is straightforward if you have an existing junction box (15–30 minutes DIY) or costs $100–$200 if hiring an electrician.

    Your kitchen feels warmer and more intentional. The lighting itself becomes part of your design story, not just utilitarian.


    16. Organize One Drawer with Drawer Dividers

    A single organized drawer is the gateway drug to a more organized kitchen. Start with one high-traffic drawer (utensils, gadgets) and add dividers to create zones. This teaches your brain the system and motivates you to maintain it.

    Drawer dividers range from $15–$50 per set at Target, IKEA, or Amazon. Bamboo or wood dividers look nicer than plastic and last longer. Customizing one drawer takes 15–20 minutes. There’s no installation required—just lay them in and arrange your items.

    You spend less time hunting for that one spatula and more time actually cooking. A small organized space makes your whole kitchen feel more controlled.


    17. Paint Kitchen Island a Different Color from Cabinets

    Your island can be a different color from your perimeter cabinets—it’s a design choice, not a mistake. This adds personality and makes the island pop as a focal point.

    Follow the same painting process as cabinet painting ($80–$150 in materials, one weekend of work). Choose a complementary or bold-contrast color: if your cabinets are cream, try forest green or deep blue. If you want less commitment, peel-and-stick cabinet film does the job for $80–$150 and peels off cleanly.

    Your kitchen looks intentionally designed instead of one-note. The island becomes a real design anchor.


    18. Add a Small Beverage Station or Coffee Bar

    A dedicated beverage zone keeps your morning routine streamlined and adds a stylish corner that guests love. It doesn’t need to be big—just intentional.

    Grab a small floating shelf ($20–$40 at IKEA or Wayfair), mount it in 15 minutes, and arrange your coffee gear on it and the counter below. Add a small wooden tray ($15–$30) to corral sugar, stirrers, and pods. If you already have most items, you’re looking at $50–$100 total investment. If you need a new coffee maker, budget an additional $30–$150 depending on the model.

    Your morning feels more intentional and luxurious. Plus, guests love having a self-serve option, and you look like you have your life together.


    19. Layer Textures with Woven Baskets and Natural Materials

    Texture creates visual and tactile interest that makes a space feel lived-in, not sterile. Mixing woven baskets, wood, ceramics, and metal gives your kitchen depth and personality.

    Woven baskets from HomeGoods, IKEA, or Etsy run $10–$40 each depending on size. Start with 2–3 in different weaves. Add a wooden cutting board or two ($15–$40 each), and sprinkle in small ceramics or wooden bowls you already own. No installation required—just arrange and play until it feels right. A complete styling session takes 30–45 minutes.

    Your kitchen looks intentionally designed and touchable. The mixed textures make your space feel warmer and more personal than perfectly matching everything.


    20. Install a Low-VOC Paint Refresh on Lower Cabinets

    Low-VOC (volatile organic compound) paint is better for you and the planet—and it smells way less harsh. This matters more when you’re painting in a kitchen you use daily.

    Low-VOC paint from Benjamin Moore, Sherwin-Williams, or Behr costs $40–$60 per gallon (slightly more than standard paint, but worth it). The process is identical to regular cabinet painting: prep, prime, two coats. For just lower cabinets, expect 4–6 hours of work. You’ll appreciate not choking on fumes while cooking over the next two weeks.

    You get a fresher kitchen without the guilt. Plus, low-VOC paint off-gases much faster, so your space smells normal within days instead of weeks.


    21. Swap Upper Cabinets for Open Shelving

    Removing upper cabinets (or replacing them with open shelving) creates the illusion of more space and forces intentional curation of what you display. This works especially well in small kitchens where visual clutter reads as physical clutter.

    If you’re renting, this isn’t an option. Homeowners should consult a contractor about load-bearing walls before making changes ($200–$500 consultation fee, then $1,000–$3,000 in labor). DIY open shelving installation on existing walls costs $200–$500 in materials. The payoff is huge—your kitchen feels twice as big.

    You gain lightness and breathing room. Plus, you’re forced to own only dishes you actually love and display, so nothing hides in the back collecting dust.


    22. Create a Multifunctional Island with Seating and Storage

    A multifunctional island serves as prep surface, casual dining spot, extra storage, and gathering hub. This is the ultimate kitchen workhorse if you have the space.

    A custom island build runs $2,000–$5,000 depending on size and finishes. IKEA’s hack-able options ($300–$800) work for renters with smaller spaces. Budget an additional $200–$600 for stools (aim for upholstered ones that tuck under the counter). The payoff? Your kitchen becomes the heart of your home.

    You gain casual dining, prep space, and storage all in one. This single addition transforms how you and your family interact with your kitchen.


    23. Display Cookbooks Vertically on Open Shelves

    Cookbooks are functional and beautiful. Standing them upright on open shelves turns them into part of your design while keeping them accessible for actual cooking.

    Gather your cookbooks (you probably have more than you realize hiding on closet shelves). If you need more, thrift them from Goodwill or estate sales for $2–$5 each. Arrange them upright alongside other curated items—small plants, serving bowls, a wooden trivet. Styling one shelf takes 10–15 minutes. This costs nothing if you use what you already own.

    Your kitchen looks intentional and cultured. Plus, you’ll actually use those recipes instead of forgetting they exist.


    24. Introduce Sustainable and Recycled Materials

    Recycled glass countertops, FSC-certified wood cabinetry, and low-VOC finishes are better for the planet and your home. They’re also increasingly affordable as sustainable options become mainstream.

    Recycled glass countertops cost $80–$150 per square foot installed (comparable to mid-range granite). FSC-certified plywood cabinetry runs 10–15% more than standard, but lasts longer and feels better ethically. If you’re painting, choose low-VOC paint ($40–$60 per gallon, $10–$15 more than standard). Small swaps—even just going low-VOC and sustainable on a refresh—add up.

    You make choices that align with your values. Your kitchen becomes a space where sustainability isn’t a compromise—it’s just how you live.


    25. Curate a Wellness-Focused Kitchen Zone

    A wellness zone in your kitchen—filtered water, herbal teas, a designated smoothie-making spot, fresh herbs—makes healthy choices feel natural, not forced. This small design choice supports your actual lifestyle.

    This might mean installing a water filter pitcher ($30–$80), dedicating one shelf or small table ($0–$100), and gathering glass tea jars ($5–$15 each). Stock it with herbal teas, dried herbs, and supplements you actually use. Total setup takes 30 minutes and costs $50–$150 if shopping for a few pieces.

    You’re more likely to reach for water instead of soda when it’s pretty and accessible. Small environmental design choices support bigger wellness goals without feeling preachy.


    26. Mix Matte and Glossy Finishes for Visual Depth

    Pairing matte and glossy finishes creates visual dimension that photographs beautifully and feels intentional. The contrast keeps your kitchen from looking flat or one-note.

    This works with paint (matte cabinet paint with glossy tile), hardware (brushed brass with polished accents), or countertops (matte wood with glossy ceramic). No extra cost—just choose finishes intentionally when selecting materials. You might spend 5–10 extra minutes making finish selections, but zero additional dollars if you’re already buying these items.

    Your kitchen looks professionally designed instead of accidentally assembled. The subtle contrast makes people notice your good taste without being able to pinpoint exactly why.


    Save this post and try just one idea this weekend—start small and build from there. Your kitchen is about to feel so much more like you. Which idea are you tackling first?

  • 24 Tiny Bathroom Ideas That Make Micro Spaces Look Big

    24 Tiny Bathroom Ideas That Make Micro Spaces Look Big

    Small bathrooms don’t have to feel cramped. With the right design choices and clever storage solutions, you can make even the tiniest bathroom feel spacious, functional, and beautiful. Whether you’re renting, renovating, or just tired of feeling squeezed in your current setup, these 24 ideas will help you maximize every inch. From paint colors to layout tricks to smart shopping picks, you’ll find budget-friendly hacks and investment pieces that actually work. Let’s turn your micro bathroom into a space you’ll love spending time in.

    1. Install a Floating Vanity to Open Up Floor Space

    A floating vanity instantly creates the illusion of more floor space by removing visual bulk beneath the sink. This single change makes bathrooms feel significantly larger than wall-mounted or pedestal options.

    Mount your vanity 12-15 inches off the ground using a sturdy wall-mounted bracket system (most require studs or heavy-duty anchors). Choose a 24-30 inch width to keep proportions right for small spaces. The gap below becomes extra storage for baskets or cleaning supplies. Install at 32-36 inches high for comfortable reach.

    Budget: $150-$400 for a quality floating vanity from IKEA, Wayfair, or Home Depot. DIY mounting takes 2-3 hours with basic tools. Renters can use removable adhesive backing options, though these hold less weight.

    The best part? You get an instant visual upgrade and an extra spot to stash items below. Your bathroom immediately feels airier and more modern.

    2. Go Big With Your Mirror to Reflect Light

    A oversized mirror bounces light around and creates depth, making even windowless bathrooms feel brighter and larger. The bigger the mirror, the bigger the impact on perception.

    Replace your standard medicine cabinet mirror with a frameless mirror that spans your entire vanity width, ideally 36-48 inches wide and 24-30 inches tall. Mount it 20 inches above the sink for comfortable eye level. Use D-clips or a professional mounting system for security.

    Budget: $40-$150 for a quality frameless mirror from Wayfair, Home Depot, or Amazon. Installation takes 30-45 minutes and requires basic tools. Pro tip: Position a second mirror on an adjacent wall if your layout allows to bounce light even more.

    The result? Your bathroom looks twice as spacious and receives natural light (or reflected artificial light) from unexpected angles. You’ll notice the brightness boost every morning.

    3. Paint Walls a Light, Cool Tone to Expand Perception

    Light, cool-toned paint is the cheapest way to make walls recede and space expand. Most small bathrooms benefit from staying light rather than going bold.

    Choose white, pale gray, soft greige, or barely-there blue in a semi-gloss or satin finish (moisture-resistant). These colors bounce light and make walls feel farther away than they are. Paint all four walls the same tone to avoid chunking up the space. Avoid dark or warm colors that close the room in.

    Budget: $25-$60 for quality bathroom paint (Benjamin Moore Aura, Sherwin-Williams Duration Home). DIY painting takes 3-4 hours for most small bathrooms. Professional help: $300-$600 depending on your area.

    Your walls recede visually, making the footprint feel noticeably larger. The light palette becomes a clean backdrop for fixtures and accessories.

    4. Choose a Walk-In or Corner Shower Instead of a Tub

    Ditching the tub in favor of a shower or corner unit frees up massive floor space and makes a huge visual difference in tiny bathrooms.

    Install a corner shower with glass enclosure (32-36 inches) or a walk-in shower with a low threshold or no threshold for easier access and cleaner sightlines. Use light-colored tile (white, pale gray, or soft stone tone) to keep the shower zone from feeling cramped. Add a small recessed shelf for toiletries instead of a caddy.

    Budget: $800-$2,500 for a full shower install depending on plumbing changes needed. Renter-friendly: Removable shower enclosure panels (3-wall kit) run $200-$500 and need no permanent installation.

    You gain floor space for movement and storage. The bathroom instantly feels more open and easier to navigate.

    5. Use Vertical Storage Shelves Above the Toilet

    The space above the toilet is prime real estate that most people waste. Vertical shelving transforms this area into functional storage without eating floor space.

    Mount open shelves (12-15 inches deep) directly above the toilet, spaced 12-14 inches apart vertically. Install 2-3 shelves depending on your ceiling height. Use solid wood, metal, or bamboo shelves for durability and style. Organize with baskets, small bins, or rolled towels for visual order.

    Budget: $50-$150 for three shelves with brackets from IKEA, Target, or Home Depot. Installation takes 1-2 hours with a drill and level. No plumbing required, so renters can negotiate removal deposits.

    Your hidden storage appears instantly. Towels, supplies, and decorative items move off counters and into view without cluttering the space.

    6. Add Recessed Lighting for a Cleaner Ceiling

    Recessed lights take up zero visual space and brighten rooms without the clutter of pendant or surface-mounted fixtures. In a tiny bathroom, ceiling real estate is precious.

    Install 3-4 recessed LED lights spaced 3-4 feet apart for even coverage. Use dimmable LED bulbs (3000K warm white or 4000K neutral) for flexibility. Pair with a small vanity light above the mirror for task lighting. Avoid oversized fixtures that dominate the small ceiling.

    Budget: $15-$30 per fixture (bulb + housing) from Home Depot or Amazon. DIY installation takes 2-3 hours if your ceiling has access. Renters: Skip recessed and add adjustable track lighting instead ($100-$200, rental-friendly).

    The ceiling feels higher and cleaner without bulky fixtures taking up visual space. Overhead lighting feels intentional rather than heavy.

    7. Add a Narrow Rolling Cart for Hidden Storage

    A 3-4 inch wide rolling cart slides into tight corners or next to the vanity, giving you mobile storage that can move when you need floor space.

    Choose a narrow vertical cart (8-12 inches wide) with 3-4 tiers. IKEA’s Råskog cart ($40-$50) or Target’s basic rolling cart ($30-$60) work perfectly. Stock it with rolled towels, small bins, travel supplies, or cleaning products. Keep items you use daily within reach on the middle shelf.

    Budget: $30-$80 for a quality cart from IKEA, Target, or Amazon. No installation required—just roll into place. Renters love this because it moves with you.

    You gain storage that’s both hidden and accessible. The cart pulls out when you need the corner space or stays put when stocked.

    8. Use Peel-and-Stick Tile to Add Visual Interest

    Peel-and-stick tiles add personality without the cost or permanence of real tile. Perfect for renters or anyone hesitant about commitment.

    Apply peel-and-stick tiles to one accent wall (behind the toilet, vanity, or as a shower backdrop). Choose light colors with subtle patterns (geometric, herringbone, or marble-look) to keep the space feeling open. Start at the center and work outward for best alignment. Smooth out air bubbles as you go.

    Budget: $1-$3 per tile (packs of 10-20). A standard wall needs 40-100 tiles, totaling $40-$150. Brands: Smart Tiles, Peel & Stick Plus from Amazon or Home Depot. Installation takes 1-2 hours and requires no tools—just clean walls and patience.

    Your bathroom gets instant personality and visual depth. The pattern draws the eye without overwhelming the tiny footprint.

    9. Swap Out Hardware for Slim, Modern Handles

    Oversized cabinet hardware visually crowds small bathrooms. Swapping to slim handles or recessed pulls makes everything feel less cluttered.

    Replace bulky knobs with slim bar handles (4-8 inches long) or recessed finger pulls that tuck almost invisibly into drawers. Choose brushed nickel, matte black, or natural brass to match your style. Most handles cost $5-$15 each and swap out with a simple screwdriver.

    Budget: $20-$50 total for new hardware depending on how many pieces you’re replacing. Swap takes 15-30 minutes. Keep old hardware in a drawer in case you need to switch back (great for renters).

    The vanity instantly looks less cluttered and more intentional. Slim hardware makes the whole area feel sleeker and more spacious.

    10. Install a Corner Shower Caddy or Wall Shelves Instead of Clutter

    Corner clutter shrinks bathrooms visually. A single organized shelf or caddy keeps shower supplies out of sight lines while staying accessible.

    Add a stainless steel corner caddy (tension-rod or suction-cup style) to hold shampoo, conditioner, and soap. Alternatively, install a small recessed niche (4×8 inches) if you’re renovating. Choose one small shelf rather than multiple caddies—this reads as intentional, not cluttered.

    Budget: $15-$40 for a basic tension-rod caddy from Target, IKEA, or Amazon. Recessed niche costs $150-$400 if built during renovation. Renter option: Use a suction-cup caddy ($10-$20) that sticks to tile and removes cleanly.

    Your shower looks spacious and organized. Everything has a spot, and you avoid the visual chaos of bottles scattered on the floor.

    11. Choose a Pedestal Sink or Wall-Mounted Option for Open Floor

    Pedestal sinks or slim wall-mounted options preserve floor space and sight lines compared to vanities, especially in the tightest bathrooms.

    Install a classic pedestal sink (20-24 inches wide) for the most open feel, or a compact wall-mounted sink (18-20 inches) for even more floor space. These sacrifice storage but maximize perception of space. Pair with wall-mounted faucets to keep the sink area clean and uncluttered.

    Budget: $150-$400 for a pedestal sink with faucet from Home Depot or Lowe’s. Wall-mounted sinks run $200-$500 if plumbing work is needed. A pedestal takes 2-3 hours to install (or hire a plumber for $200-$300).

    You gain precious floor space for movement and feel. Walking around the sink is easier, and the bathroom feels less compressed.

    12. Add a Small Accent Wall in Deep Color Behind the Toilet

    One small accent wall in a deeper tone draws the eye backward, creating an illusion of depth without overwhelming the tight space.

    Paint the wall directly behind the toilet (or vanity) in a deep jewel tone like navy, forest green, terracotta, or charcoal. Keep the other three walls light and neutral to prevent the space from feeling boxed in. Use high-quality bathroom paint in semi-gloss finish for durability.

    Budget: $25-$60 for quality paint. DIY application takes 2-3 hours for one wall. Professional painting: $200-$400 for the accent wall only.

    The accent wall creates visual depth and intrigue. Your eye travels backward into the space, making the bathroom feel larger than it actually is.

    13. Ditch Shower Curtain Rings and Use a Tension Rod

    Visible shower curtain rings and rods add visual clutter. A sleek tension rod or frameless enclosure keeps the eye moving without interruption.

    Install a tension rod (chrome, stainless, or matte black) mounted high and tight against the ceiling or top of the shower area. If budget allows, swap to a frameless glass enclosure to eliminate the rod entirely and open sightlines. Both options cost much less than full tile enclosures.

    Budget: $15-$40 for a quality tension rod from Amazon or Target. A basic frameless enclosure runs $200-$600 depending on size. Tension rods are renter-friendly; enclosures require professional installation.

    The overhead area feels clean and uninterrupted. Your eye moves through the shower zone without catching on hardware.

    14. Use Open Shelving Instead of a Closed Medicine Cabinet

    Open shelving lets the wall breathe instead of creating a dense medicine cabinet. When styled thoughtfully, open shelves feel curated rather than cluttered.

    Mount 2-3 shallow floating shelves (8-10 inches deep) above the vanity or toilet. Style with matching containers, rolled washcloths, plants, or a few decorative items. Keep items minimal and intentional—this is not junk storage, it’s display storage. Use woven baskets or glass jars to contain smaller items.

    Budget: $50-$120 for three shelves with brackets from IKEA, Wayfair, or Target. Installation takes 1.5-2 hours with a drill and level. Renters can use command strips for damage-free hanging (up to $40 for heavy-duty strips).

    The shelves feel purposeful and designed rather than crammed. Displayed items become part of your décor instead of hidden away.

    15. Install Slim Under-Vanity Lighting to Brighten the Sink Area

    Under-vanity lighting brightens the sink area without adding bulky fixtures. It also creates a hotel-like ambiance while being purely functional.

    Add LED strip lights (warm white, 2700K-3000K) under the floating vanity edge, running the length of the sink. Choose peel-and-stick adhesive LED strips for easy application or hire an electrician for hardwired options ($200-$400). Pair with a dimmer switch for flexibility. Position lights 2-3 inches from the edge for the best glow.

    Budget: $20-$50 for peel-and-stick LED strips from Amazon, Home Depot, or Target. DIY installation takes 30 minutes. Renters can plug into an outlet (battery versions run $30-$60).

    The sink area becomes brightly lit for grooming tasks, and the soft glow makes the space feel spa-like. Your bathroom transforms with one simple addition.

    16. Add a Narrow Towel Rack Behind the Door or on a Sidewall

    A tall, narrow towel rack stores towels without consuming floor or counter space. Mounting behind the door or on a sidewall keeps it out of the main sightline.

    Install a vertical towel rack (12-18 inches wide, 24-36 inches tall) on an empty sidewall or behind the bathroom door. Choose stainless steel, matte black, or natural wood to match your style. Space it 6-12 inches from the wall for easy towel hanging and removal. Mount with brackets rated for at least 20 pounds to support weight safely.

    Budget: $30-$80 for a quality towel rack from Target, IKEA, or Home Depot. Installation takes 30-45 minutes with basic tools. Renters: Use a leaning towel ladder ($25-$50) that doesn’t require wall mounting.

    Towels hang neatly off the floor and counter. You gain a dedicated spot that looks intentional rather than improvised.

    17. Paint Inside Cabinet Doors a Lighter Shade to Bounce Light

    Light-colored cabinet interiors bounce light deeper into storage and make open cabinets feel less like dark holes. This tiny detail has a big visual impact.

    Paint the inside surfaces of your vanity cabinet doors and interior walls with white or pale gray semi-gloss paint (moisture-resistant). Use a foam brush for even coverage and apply two coats for durability. This works whether cabinets are open for display or closed for storage—light interiors always feel more spacious.

    Budget: $15-$30 for small-batch bathroom paint. DIY painting takes 1-2 hours including drying time. No special tools needed beyond a foam brush.

    Opened cabinets reveal bright, organized interiors instead of dark compartments. The whole area feels lighter and more intentional.

    18. Choose a Compact Toilet with a Slimmer Tank

    Compact or corner toilets have slimmer profiles and leave more floor space visible. Modern designs take up noticeably less visual real estate than traditional toilets.

    Swap your standard toilet for a compact model (designed for small spaces) or a corner toilet if your layout allows. Brands like Toto Aquia, American Standard Cadet, or KOHLER San Souci make excellent compact options. These run $300-$600 installed versus standard toilets at $250-$450. Hire a plumber for removal and installation ($200-$400 labor).

    The toilet footprint shrinks by several inches, opening up floor space. Your bathroom feels less crowded and easier to navigate around.

    19. Use Mirrored Cabinet Doors to Multiply Light and Space

    Mirrored cabinet doors bounce light while providing functional storage. They’re one of the most effective visual tricks for expanding tight bathrooms.

    Install mirrored cabinet doors on your vanity (either replace existing doors or retrofit them with adhesive mirror panels). Choose frameless mirrors for a seamless look. Position at least one large mirror directly above the sink or spread smaller mirrors across cabinet fronts to catch and reflect light from multiple angles.

    Budget: $50-$150 to retrofit existing cabinet doors with adhesive mirror panels, or $200-$400 to replace doors entirely. DIY retrofit takes 1-2 hours. Professional installation: $150-$300.

    The reflected light makes the bathroom feel twice as wide. Mirrored storage becomes both functional and visually expansive.

    20. Mount a Corner Shelf for Dead Space Optimization

    Corner space is often wasted in small bathrooms. A single corner shelf transforms unused real estate into functional (or decorative) display.

    Install a corner shelf (12-16 inches per side) in any unused corner using L-brackets and wall anchors. Mount at eye level or above for best visibility. Style with small plants, candles, rolled washcloths, or decorative objects to keep it looking curated. Choose wood, metal, or glass to match your aesthetic.

    Budget: $20-$50 for a corner shelf with brackets from IKEA, Target, or Home Depot. Installation takes 45 minutes with a drill and level. Renter-friendly: Use command-strip corner shelves ($15-$30) that remove cleanly.

    Dead corner space becomes functional storage or styled display. Your bathroom uses every inch intentionally.

    21. Add a Narrow Freestanding Shelving Unit in an Unused Corner

    A slim freestanding shelving unit slides into corners and provides open storage without any wall work. It’s flexible, moveable, and instantly boosts capacity.

    Place a narrow shelving unit (12-15 inches wide, 36-48 inches tall) in a corner next to the toilet or beside the vanity. Choose bamboo, wood, or metal to match your décor. Stock shelves with rolled towels, small baskets for supplies, or decorative items. These units cost less than built-in shelves and require zero installation.

    Budget: $30-$80 from IKEA (Pinnig), Target, or Amazon. No installation needed—just place and style. Perfect for renters since it’s completely portable.

    You gain shelf space without drilling holes. The corner feels used and organized rather than empty and wasted.

    22. Use a Clear Shower Enclosure Instead of Frosted Glass

    Clear glass enclosures feel more spacious than frosted or patterned options. Sight lines extend through the shower, making the entire bathroom feel larger.

    Install a clear frameless glass shower enclosure (or replace frosted panels with clear ones) to maintain visual continuity. If privacy is a concern, add clear glass with minimal hardware or trim. The uninterrupted sightline makes the bathroom feel open even in tight quarters.

    Budget: $300-$800 for a custom frameless glass enclosure. Off-the-shelf kits run $200-$400. Installation takes 4-8 hours professionally or 8-12 hours as a complex DIY project. Hire a professional for best results.

    The shower becomes transparent rather than a visual barrier. Your eye travels through the entire space, making everything feel more open.

    23. Install Slim Sconces on Either Side of the Mirror Instead of One Overhead Light

    Two slim sconces flanking the mirror provide better task lighting than a single ceiling fixture, plus they take up way less visual space overhead.

    Mount a slim wall sconce (6-8 inches tall) on each side of your mirror, positioned 60-66 inches from the floor (eye level or slightly above). Choose modern styles with minimal bulk in chrome, brass, or matte black. Pair with dimmable LED bulbs (3000K warm white) for flexibility. This setup works beautifully in tiny bathrooms because it keeps the ceiling visually clear.

    Budget: $15-$40 per sconce from Target, Wayfair, or Amazon (total $30-$80). Electrical installation for a renter situation: plug-in swing-arm sconces run $50-$120 each and need no wiring. Professional hardwiring costs $200-$400.

    Your face gets flattering, shadow-free lighting for grooming. The overhead area stays clean and open without a bulky fixture.

    24. Declutter Counter Space and Commit to a Minimalist Vanity Setup

    An empty counter is the cheapest way to make any bathroom feel larger. Removing just a few items has an immediate, dramatic effect on how spacious the room feels.

    Keep only 3-5 essential items on your vanity: a soap or hand-wash dispenser, a small cup for toothbrushes, a hand towel, and perhaps one small plant or candle. Store everything else in drawers, cabinets, or the shelves you’ve added. Make decluttering a weekly habit to maintain the calm aesthetic.

    Budget: $0 if you already have items to move; $15-$30 if you need to buy matching containers or a soap dispenser. Decluttering takes 30 minutes to an hour the first time, then 10 minutes weekly to maintain.

    Your vanity becomes a serene, calming zone instead of a cluttered catchall. The empty counter space makes your whole bathroom feel larger and more peaceful.


    Pin this guide and try just one or two ideas this weekend. Small changes add up fast, and you might be shocked at how much bigger your tiny bathroom feels when you remove visual clutter and add smart storage. Your micro space deserves to feel intentional and calm.

  • 25 High-Texture Material Ideas That Add Depth & Rich Detail

    25 High-Texture Material Ideas That Add Depth & Rich Detail

    When you’re decorating a luxury living room on any budget, texture is your secret weapon. It’s what separates a flat, sterile space from one that feels expensive, inviting, and rich with detail. The good news? You don’t need to overhaul your entire room or spend a fortune. By strategically layering different textures—from soft bouclé and linen to natural wood and stone—you can create a space that feels intentional, layered, and absolutely worth lingering in.

    This guide gives you 25 specific material ideas you can start using this weekend. Some cost nothing (they’re styling hacks), others are small upgrades under $50, and a few are investment pieces that’ll anchor your room for years. Whether you’re renting or own, have pets or are working with minimal space, you’ll find something here to add that high-end, textured depth your living room deserves.


    1. Layer a Bouclé Accent Chair for Instant Soft Drama

    A bouclé chair is the easiest way to add luxury texture without committing to a full sofa replacement. The looped fabric catches light beautifully and reads as high-end, even at mid-range price points. Look for bouclé accent chairs between $400–$800 at Wayfair, Article, or West Elm. If that’s outside your budget, check Facebook Marketplace or local vintage shops for secondhand options—you’ll often find quality pieces for $150–$300.

    Pair your bouclé chair with a simple wooden frame (no heavy upholstery competing for attention). Position it near natural light so the texture shows off. The project takes zero time—just delivery and placement—and the result is immediate.

    Your seating area suddenly has depth and personality, plus you’ve got a comfortable reading nook that actually looks like it belongs in a design magazine.


    2. Swap Standard Throw Pillows for Linen-Look Weave Covers

    Most throw pillow covers feel cheap because they’re too smooth and synthetic-looking. Linen-look weaves—tight, natural-fiber fabrics that mimic linen without the wrinkles—read as expensive and add tactile interest to any sofa.

    Hunt for covers on Amazon ($15–$30 each), Target ($20–$25), or IKEA ($10–$15 per cover). Buy 4–5 in coordinating warm neutrals (cream, warm gray, soft olive, clay). Mix and match textures: throw in one with a subtle ribbed weave, another with a looser linen look, one in solid linen. The variety creates visual depth without clashing.

    This swap takes 10 minutes and costs $40–$75 total if you refresh four pillows. The impact is massive—suddenly your sofa looks curated and intentional instead of generic.


    3. Add Natural Stone or Slate Coasters and Catchalls

    Natural stone isn’t just beautiful—it’s a texture that whispers luxury without shouting. Stone coasters, small catchalls, and serving boards add that high-end tactile element to every surface in your living room.

    Look for natural slate or marble coasters at HomeGoods ($10–$15 for a set), Wayfair ($12–$25), or locally at tile shops (often cheaper for bulk small cuts). A simple slate catchall runs $15–$40. These pieces take up minimal visual space but add serious material richness.

    Arrange coasters in a stack on your coffee table, place the catchall near your sofa (keys, remotes), and use a slate or marble board as a base for styling a side table. Zero installation, instant upgrade.

    Your coffee table becomes a display of natural materials that feels collected and intentional, not like generic décor.


    4. Introduce Tight Chenille Upholstery Through a Bench or Ottoman

    Tight chenille is softer than bouclé but equally textured and sophisticated. It’s also durable enough for households with pets or kids. If you’re not ready to reupholster your sofa, start with a smaller piece: a bench ($300–$600) or ottoman ($200–$400) in chenille.

    Check Article, West Elm, CB2, or Restoration Hardware for options. Look specifically for “tight-weave chenille” to ensure it photographs well and feels durable. Opt for warm neutrals: taupe, warm gray, or soft cream.

    Place the piece at the end of your sofa or as a coffee table alternative. The textural contrast between chenille and your existing pieces adds depth instantly.

    You now have a functional, textured anchor that transforms your living room’s tactile richness and gives you a bonus spot to perch or rest your feet.


    5. Layer Oiled Wood Shelving and Floating Surfaces

    Oiled wood—particularly walnut or oak with a matte oil finish—adds warmth and texture that painted surfaces can’t match. The grain shows, the finish feels tactile, and it reads as intentional. If you don’t have built-in shelving, floating wooden shelves are a weekend DIY project or a one-time pro install.

    Floating shelves cost $40–$150 per shelf depending on material and length (IKEA, Wayfair, local carpentry). Installation is $50–$200 if you hire help. If you’re handy, DIY costs under $100 total with basic supplies and a drill.

    Mount 2–3 shelves at varying heights. Style them with books, plants, and ceramics to create visual interest. The oiled wood becomes a textured backdrop that doesn’t compete with your décor.

    Your wall becomes a functional gallery that feels warm and collected, and oiled wood’s longevity means this upgrade lasts for years with minimal maintenance.


    6. Use Chunky Knit Throws as Both Texture and Color Accent

    A chunky knit throw is one of the cheapest ways to add luxury texture. The looser weave catches light, feels soft, and photographs beautifully. Plus, it’s functional—warmth and comfort combined with style.

    Find chunky knit throws at Target ($30–$50), IKEA ($25–$40), Amazon ($20–$60), or splurge at Restoration Hardware ($150–$300). Look for cables, ribs, or other visible texture patterns in cream, warm gray, or your room’s accent color.

    Drape it loosely over one sofa arm rather than folding it neatly—the casual arrangement looks more expensive and intentional. Takes two seconds to style.

    Your sofa instantly feels cozier and more layered, and you’ve added a textured element that’s both beautiful and livable. This is a renter-friendly upgrade too.


    7. Introduce Natural Rattan or Woven Textures via Wall Art or Panels

    Woven natural-fiber wall art—rattan, jute, or wicker—adds dimension and warmth without requiring wall paint or major changes. These pieces are lightweight, removable, and bring organic texture to any space.

    Rattan wall hangings run $40–$150 at Wayfair, Urban Outfitters, or Etsy. Smaller woven pieces are $20–$50. You can also find great options at HomeGoods or TJ Maxx for under $40.

    Hang one statement piece above a console or sofa, or layer 2–3 smaller pieces at varying heights on an accent wall. Installation takes 10 minutes with a picture hanger.

    The woven texture adds warmth and organic interest, and because rattan is a natural material, it elevates the entire room’s perception of thoughtfulness and quality.


    8. Layer Multiple Area Rugs for Depth and Acoustic Benefit

    Layering rugs—a larger jute or natural fiber base with a smaller patterned or textured rug on top—adds both visual depth and acoustic richness. This trend reads expensive and intentional while also improving sound absorption in your room.

    Start with a large jute or sisal base rug ($100–$300 for 8×10) from IKEA, Rugs USA, or Wayfair. Layer a smaller wool or patterned rug on top ($80–$200) in a complementary tone. Total investment: $180–$500.

    Center the smaller rug on the larger one so the base rug peeks out underneath. This simple layering trick adds texture, warmth, and visual sophistication instantly.

    The result is a room that feels more grounded, acoustic-friendly, and deliberately curated. Bonus: layering rugs makes a space feel more intimate and intentional.


    9. Add Linen Upholstery Through Slipcovers or New Pieces

    Real linen—not linen-look fabric—has a distinctive weave and subtle slub texture that reads as luxury. If you’re not ready to reupholster your sofa, a linen slipcover ($150–$400) is a renter-friendly option. Alternatively, seek out linen-upholstered chairs or small sofas ($500–$1,500).

    Search for slipcovers on Wayfair, Amazon, or specialist sites like Comfort Works. For new pieces, check Article, West Elm, or Restoration Hardware. Choose warm neutrals: cream, warm gray, or soft taupe.

    Install a slipcover in 30 minutes (just tuck it around your existing sofa), or style a new linen piece as a focal point. Both work beautifully.

    Your seating instantly feels more refined and textured, and linen’s natural fiber quality conveys quality and intention without screaming “expensive.”


    10. Style Open Shelving with Mismatched Ceramics and Vessels

    Individual ceramic pieces—bowls, vases, vessels, plates—add texture and visual interest to shelving. The key is curating them thoughtfully, not just filling every inch. Mismatched pieces in coordinating tones read as collected and expensive.

    Hit thrift stores (Goodwill, estate sales) for $2–$8 per piece, HomeGoods for $8–$25 per piece, or invest in artisan ceramics from Etsy for $30–$100+ per piece. Build a collection slowly. You don’t need more than 8–12 pieces to create impact.

    Arrange pieces with breathing room between them. Vary heights and group by tone (warm grays, creams, soft earth tones). Leave at least 30% of shelf space open.

    Your shelving becomes a gallery of textured surfaces and careful curation that makes your entire room feel more intentional and collected.


    11. Incorporate Woven Wall Baskets for Storage and Texture

    Woven baskets—hung on walls—serve dual purpose: storage and visual texture. They add organic warmth and break up blank wall space while staying functional.

    Find woven wall baskets at Target ($15–$30), IKEA ($12–$25), Amazon ($10–$40), or HomeGoods ($8–$20). Choose natural fibers: seagrass, hyacinth, or rattan in cream or tan tones.

    Mount 3–4 baskets at varying heights on an accent wall or beside a sofa. Use them for blankets, magazines, or lightweight storage. Installation takes 30 minutes with basic wall anchors.

    Your wall gains dimension and warmth, plus you’ve created functional storage that actually looks good. The woven texture adds that handmade, curated quality that reads as intentional design.


    12. Layer Vintage or Antique Wood Furniture for Character

    Vintage and antique wooden furniture—side tables, credenzas, coffee tables—brings texture through age, grain, and finish variation. These pieces read as collected and intentional, not mass-produced.

    Hunt estate sales, Facebook Marketplace, and local antique shops for pieces in the $50–$400 range depending on quality. Look for solid wood with visible grain and character marks (not restoration-perfect, just honest aging).

    Mix one or two vintage wood pieces with modern minimal seating. The contrast makes both feel more intentional.

    Your room gains warmth and a sense of story. Vintage wood’s varied patina and grain creates visual richness that new furniture struggles to match, making your space feel both curated and lived-in.


    13. Add Tactile Throw Blankets in Varying Weaves

    Beyond one throw, layering multiple blankets in different weaves and textures adds richness and visual interest. Each different textile catches light differently, creating depth.

    Collect 3–4 throws in varying textures (chunky knit, linen, waffle weave, wool) from Target ($25–$50 each), IKEA ($20–$40), Amazon ($15–$60), or invest at Restoration Hardware ($80–$200). Choose warm neutrals so they coordinate without matching exactly.

    Drape them loosely over sofa arms and the back of your sofa rather than folding them neatly. Let them look casually layered.

    Your seating suddenly feels more luxurious and textured. Guests will notice the subtle variety, and you’ve added visual depth without cluttering the space.


    14. Use Natural Stone or Slate Accents as Side Table Bases

    Stone or slate bases for side tables add unexpected texture and weight without requiring a lot of visual real estate. These pieces feel sculptural and intentional.

    Look for stone-base side tables at Wayfair ($150–$400), Design Within Reach ($300–$600), or Etsy ($100–$400). If you’re handy, buy a slate or stone slab from a local tile shop ($50–$150) and pair it with a simple wooden top (DIY or professionally mounted).

    A stone base immediately reads as high-end and draws the eye downward, making your room feel more grounded and intentional.

    This single piece becomes a focal point that elevates your entire living room aesthetic. The natural material variation in stone ensures it stays visually interesting over time.


    15. Style with Vintage or Contemporary Art in Textured Frames

    Art frames themselves add texture and material interest beyond the art inside. Mix frame finishes and materials to create a curated gallery wall that feels collected.

    Buy individual frames or ready-made pieces at Target ($20–$40), IKEA ($15–$30), Wayfair ($25–$80), or invest in wood/metal frames from local framers ($50–$150 per frame). Mix materials: natural wood, blackened metal, brass accents.

    Arrange 3–5 pieces at varying sizes and heights. Leave breathing room between pieces. This takes an afternoon to hang and style.

    Your wall becomes a textured gallery that feels personally curated. The variety of frame finishes adds visual depth and makes your living room feel more intentional and sophisticated.


    16. Introduce Brass or Aged Metal Accents Throughout

    Aged or weathered metals—brass, bronze, copper—add subtle texture and warmth to a room. These materials catch light and add visual interest without dominating the space.

    Hunt for brass or aged metal pieces at Target ($15–$50), Wayfair ($20–$100), or HomeGoods ($10–$40). Look for: picture frames, lamp bases, candle holders, hardware, or decorative objects. Mix metal finishes (don’t match everything exactly—variety reads more intentional).

    Scatter these pieces throughout your room: a brass frame on a shelf, an aged metal lamp beside your sofa, bronze hardware on a vintage side table. Takes zero time—just swap out or add new pieces.

    Your room gains warmth and sophistication through metal accents. The patina and variation make everything feel more collected and less like a showroom.


    17. Layer Cork or Natural Rubber Under-Rugs for Hidden Texture

    An often-overlooked texture opportunity: the rug underlay. Cork and natural rubber underlays add texture (hidden but felt when you walk on it) while being functional and sustainable.

    Find natural rubber or cork underlays at Wayfair ($40–$100 for 8×10), Amazon ($30–$80), or IKEA ($25–$60). They’re designed to go under rugs to prevent slipping and add cushioning.

    Place the underlay under your area rug before styling on top. The added cushioning and subtle texture make stepping on your rug feel more luxurious and intentional.

    Your footsteps feel softer and your rug stays in place. This hidden detail adds quality and thoughtfulness that guests might not see but will definitely feel.


    18. Add Textured Wallpaper or Grasscloth to One Accent Wall

    Textured wallpaper—particularly grasscloth, linen-look papers, or subtle embossed designs—adds serious material richness without overwhelming your space. Pick one accent wall to avoid visual chaos.

    Look for textured wallpaper at Wayfair ($20–$60 per roll), Spoonflower ($25–$50 per roll), or local wallpaper shops ($15–$80 per roll). Calculate your wall size and buy enough rolls (usually 2–3 per accent wall). Wallpaper removal or application runs $100–$300 if you hire help or costs just time if you DIY.

    Choose one wall—often behind a sofa or console table—for maximum impact. Install or hire out (professional installation takes one day).

    The textured wall becomes an instant focal point that elevates your entire room. Even in warm neutrals, textured wallpaper reads as intentional luxury.


    19. Mix Wood Tones for Warmth and Visual Depth

    Instead of matching all wood furniture to one tone, deliberately mix warm wood finishes for texture and depth. This curated variety reads as more collected and intentional than matching sets.

    Hunt for wooden pieces in varying tones: warm honey, walnut, oak, teak, or cherry. Mix vintage finds (thrift stores, $20–$200) with new pieces (Target, IKEA, West Elm, $50–$400). Look for visible grain and natural finishes rather than highly polished pieces.

    Arrange pieces so warm and dark tones alternate around your room—not clustered together. This creates visual movement and balance.

    Your room gains warmth and dimension through wood-tone variety. The effect is more collected and sophisticated than any single matched set could achieve.


    20. Layer Textured Window Treatments for Depth and Function

    Window treatments often get overlooked for texture, but layering different fabrics creates both visual interest and practical light control. Mix opaque and sheer, smooth and textured for maximum impact.

    Start with sheer lightweight curtains ($20–$50 per panel at IKEA, Target, Amazon), add a textured roman shade or cellular shade ($40–$120 at Wayfair or Target), and finish with a linen or linen-look panel ($30–$80 per panel). Total investment: $90–$250.

    Layer the treatments from window outward: sheer closest to glass, then textured shade, then heavier panels on the outside. Install takes a weekend or $100–$200 if you hire help.

    Your windows become a textured focal point that frames natural light beautifully. The layered approach reads as intentional design while staying functional.


    21. Style Surfaces with Stacked Books and Mixed-Media Objects

    Books aren’t just for reading—stacked horizontally with sculptural objects layered on top, they create visual texture and add personality to any surface. Mixed media styling reads as collected and curated.

    Gather hardcover books from your collection or thrift stores ($1–$5 each). Add ceramic sculptures, small wooden objects, or vintage finds ($5–$40 each). Source plants from a local nursery ($8–$20).

    Arrange books in stacks of 2–3, varying heights. Layer a sculpture or object on top. Add one small plant beside the stack. Leave breathing room—don’t crowd the surface.

    Your coffee table or console becomes a styled vignette that reads more like a design magazine spread than generic home décor. The varied textures and heights keep eyes moving and interested.


    22. Incorporate Natural Fiber Floor Poufs or Ottomans

    Floor poufs in natural fibers (jute, seagrass, rattan) add flexible seating and organic texture without requiring permanent furniture placement. They’re renter-friendly and easy to move.

    Find natural fiber poufs at IKEA ($25–$50), Target ($30–$60), Wayfair ($40–$100), or splurge at Design Within Reach ($150–$300). Choose sizes and colors that coordinate with your space.

    Tuck a pouf beside your sofa, in a corner, or beside an armchair. Drape a throw loosely over one side for extra texture. Takes zero time to style.

    You now have flexible seating that adds organic texture and functions as extra storage or footrest. The natural fiber weave adds warmth and visual interest without clutter.


    23. Add Sculptural Ceramic Vessels as Standalone Art

    Instead of always putting flowers in vases, display empty ceramic vessels as sculptural art. The form, glaze texture, and clay finish become the focal point.

    Find ceramic vessels at local makers markets ($20–$80), Etsy ($15–$150), or HomeGoods ($10–$40). Look for pieces with visible glaze texture, interesting shapes (not just simple cylinders), and warm tones.

    Arrange 3–5 vessels at varying heights on a console, shelf, or side table. Leave space between each one. No flowers needed—the vessels themselves are the art.

    Your room gains a curated, gallery-like quality. The sculptural pieces add visual interest and signal thoughtful curation and intentional design choices.


    24. Layer Vintage or Contemporary Rugs with Patterns Underneath

    If you want pattern texture without overwhelming a room, layer a smaller patterned rug on a larger solid base. The technique adds visual interest while staying grounded and intentional.

    Start with a large solid base rug in jute, sisal, or neutral tone ($100–$300). Layer a smaller patterned wool or textured rug on top ($80–$250). Choose complementary color palettes so patterns feel intentional, not chaotic.

    Center the smaller rug so the base peeks out as a frame. Styling takes zero time once rugs are placed.

    Your seating area gains dimension and pattern interest through layering. The effect feels more collected and sophisticated than a single solid rug could achieve.


    25. Style with Leather Accents for Subtle Luxury Texture

    Real leather—from chairs to side tables to decorative objects—adds a tactile, luxury texture that reads as intentional investment. Leather ages beautifully and improves over time.

    Seek out quality leather accent chairs ($300–$800), leather poufs ($100–$300), or smaller leather pieces like bookends or storage boxes ($20–$100) at Article, West Elm, Restoration Hardware, or secondhand at estate sales.

    Choose warm tones: cognac, chocolate brown, or saddle brown. Pair with warm wood and neutral textiles for maximum cohesion.

    Your room gains depth and sophistication through leather’s natural grain and patina. Leather ages gracefully, so this investment improves with time.


    Save this post and tackle one texture idea this weekend. Small layering changes add up fast, and once you start mixing materials intentionally, you’ll notice how much richer your living room feels. Pick whichever idea calls to you first.

  • 26 Mudroom Ideas That Keep Your Home Organized & Welcoming

    26 Mudroom Ideas That Keep Your Home Organized & Welcoming

    26 Mudroom Ideas That Keep Your Home Organized & Welcoming

    Introduction

    Your mudroom is the first impression guests get when they enter your home—and it’s usually the most chaotic. Shoes piled by the door, jackets draped over chairs, bags tossed on the floor. But here’s the truth: a well-organized mudroom doesn’t require a complete renovation. Whether you’re working with a dedicated room, a corner of your entryway, or a tight hallway space, small changes make a huge difference in how your home functions and feels.

    In this guide, you’ll discover 26 practical ideas that work for renters and homeowners, on tight budgets and larger investments. You’ll find DIY projects you can finish in an afternoon, budget-friendly shopping solutions, and smart design choices that keep clutter hidden but everything accessible. By the end, you’ll have a mudroom that actually works for your family—not against you.


    1. Install Floating Shelves Above the Bench

    Floating shelves add storage without eating floor space and create a visual anchor for your mudroom. They’re perfect for displaying baskets, storing seasonal items, or keeping everyday necessities at eye level where you’ll actually use them.

    Install shelves 12-18 inches above your bench or seating area using wall studs and a basic drill. Shelves run $15-$40 each at IKEA, Home Depot, or Amazon, plus hardware. This takes one afternoon and requires minimal tools. Fill them with matching storage baskets ($5-$20 each) to hide clutter while keeping things organized. Pro tip: arrange heavier bins on lower shelves and lighter decorative items on top for a balanced look.

    Your entryway instantly gains storage without looking cramped. Plus, you can see everything at a glance, making it easier to grab what you need on your way out.


    2. Create a Coat Rack Wall with Mixed Hooks

    Instead of a single row of identical hooks, install a gallery-style hook wall at different heights and finishes. This approach looks intentional (like you planned it) while being flexible enough to adjust as your needs change.

    Buy hooks in sets or individually from Target, Home Depot, or West Elm. Mix metals like brass, black metal, and natural wood—they’ll look curated rather than random. Plan for $20-$60 total depending on quantity. Install at varying heights so kids can reach some, adults use others. This DIY project takes 30 minutes once you’ve marked your studs. Alternative: use adhesive hooks ($1-$3 each) if you rent and want to avoid holes.

    You get functional storage that’s also a style statement. Kids can independently hang their own jackets, and visitors immediately know this is a place where things belong.


    3. Add a Cushioned Bench Seat with Hidden Storage

    A bench does triple duty: seating to tie shoes, a landing spot for bags, and hidden storage underneath. This is one of the most practical mudroom additions, especially for families.

    You have two options: buy a ready-made storage bench ($80-$300 from IKEA, Wayfair, or Target) or build one from scratch ($100-$200 in materials). If building, use a simple frame from plywood, add hinges to the top, and cushion with foam and fabric. Line the inside with bins that slide in and out. Takes one weekend if you’re handy; hire help if plumbing or electrical work is involved. Budget-friendly renters: look for ottomans with hidden compartments ($40-$100).

    Suddenly you have a place to sit while putting on boots, and all those random items have a designated home. Your entryway feels more intentional and less like a drop zone.


    4. Organize with Clear Labeled Storage Bins

    Clear bins let you see what’s inside without opening every container, making it faster to find what you need and easier for kids to put things back. Labels ensure everything stays where it belongs.

    Buy clear plastic bins in sets at Target, Costco, or Amazon—expect $20-$40 for a pack of 4. Get a label maker ($15-$25) or use waterproof stickers ($3-$8). Spend an hour sorting current mudroom clutter: winter gear, sports equipment, bags, shoes. Label each bin clearly. This costs almost nothing and takes minimal time. Pro tip: take a photo of bin contents and tape it inside the label for visual reference—especially helpful for kids and partners.

    Your mudroom becomes instantly more functional and looks calmer. Everything has a category, so there’s no question about where things go.


    5. Hang a Pegboard for Customizable Storage

    Pegboards are endlessly adjustable—rearrange hooks and baskets as your needs change. They’re perfect for the indecisive mudroom owner who might want to switch things up seasonally.

    Pegboards cost $20-$50 depending on size, with hooks and baskets running $1-$5 each. Paint the pegboard to match your décor before hanging (takes 30 minutes, adds visual polish). Install into studs with screws for security. You can reorganize in seconds—move a hook, swap a basket, try new configurations. Renters can use adhesive-backed pegboards ($30-$40) that won’t damage walls.

    You get a mudroom that adapts to your life instead of the other way around. Seasonal storage becomes easy, and you’ll actually use the space more effectively.


    6. Install Hooks Inside Closet Doors

    Don’t overlook the inside of your mudroom closet doors—that’s prime real estate for small items, bags, and accessories that clutter shelves.

    Install 4-6 hooks on the inside of each closet door using basic screws or removable adhesive hooks ($0.50-$2 per hook). This is genuinely a 10-minute project. Use this space for reusable shopping bags, light jackets, kids’ backpacks, or items you grab frequently. The door hides everything when closed, but you’ve doubled your usable storage.

    Suddenly your mudroom feels less cluttered without losing any function. This is the kind of small change that catches people off guard—they don’t even notice how organized you are until they open that door.


    7. Use Woven Baskets for Textured Storage

    Woven baskets add texture and warmth while hiding clutter. They photograph well on Instagram and feel more intentional than plastic bins, even though they’re just as functional.

    Look for seagrass, rattan, or woven baskets at Target, Wayfair, IKEA, or thrift stores. Sizes and prices vary—$15-$50 per basket depending on size. Group them by size or color for visual harmony. Label each basket if you want (or leave labels off if you prefer a cleaner look). Refresh the look seasonally by swapping which basket holds what. This costs nothing extra and takes 15 minutes to set up.

    Your mudroom shifts from “functional clutter zone” to “designed space.” Plus, baskets hide the mess while keeping things easy to access—nobody has to be perfect inside a closed basket.


    8. Create a Shoe Rack System

    Shoes are usually the biggest mudroom clutter culprit. A dedicated shoe rack keeps them off the floor and makes it obvious when someone’s left a pair out.

    Buy a ready-made shoe rack ($30-$100 at Target, IKEA, Amazon, or Wayfair) or build one from wood pallets and shelves ($40-$80 in materials). Store only shoes currently in rotation—move seasonal boots and winter gear to higher shelves or the garage. If you have kids, assign each child their own shelf section. This project takes 30 minutes to assemble or build. Pro tip: place a small tray under each shelf to catch dirt that falls from shoes.

    Your floor becomes instantly clearer and your morning routine faster—you can see which shoes you need without searching through a pile.


    9. Mount a Narrow Console Table for Keys and Mail

    A narrow console table (12-15 inches deep) doesn’t take up much space but gives you a designated landing spot for keys, mail, wallets, and other pocket items that usually get lost.

    Find a console table at IKEA, Target, Facebook Marketplace, or Wayfair in $60-$200 range. Pair it with a small tray for keys, a letter holder for mail, and a dish for loose items. Mount a mirror above it (bonus: makes the space feel larger). This setup costs $80-$250 total and takes 30 minutes to arrange. Renters can use a thin table without mounting anything—just push it against the wall.

    Now you have a place where everyone knows to check for keys and mail instead of searching through drawers and pockets. Your morning routine becomes smoother and less stressful.


    10. Install a Coat Closet Organizer System

    If you have a dedicated mudroom closet, maximize it with a double rod system that lets you hang more coats and bags without overcrowding a single rod.

    Install a closet rod divider or double rod system ($30-$70 from Home Depot or IKEA). Place heavier coats on the top rod and lighter jackets or bags on the bottom. This is a 20-minute installation if you’re comfortable with basic tools. Alternative for renters: use a tension rod hung at half-height to create two levels without permanent installation.

    Your closet can now hold double the outerwear without looking cramped or damaged. Plus, heavier coats don’t crush lighter layers.


    11. Add an Umbrella Stand for Rainy Days

    Umbrellas usually end up wet and dripping on the floor or folded awkwardly in the corner. An umbrella stand keeps them accessible and contained so water doesn’t damage your floors.

    Buy an umbrella stand ($15-$40 at Target, Amazon, or Home Depot) in a style that matches your entryway aesthetic. Metal, ceramic, or wood options exist at every price point. Place it by the door so it’s the first thing people see when they need an umbrella. This takes five minutes to set up and costs almost nothing. Pro tip: use a removable mat underneath to catch drips on tile or hardwood.

    Rainy days become less messy and more organized. Your guests will actually use the stand instead of creating a wet pile by the door.


    12. Use a Rolling Cart for Sports Equipment

    Sports gear multiplies fast, especially in families with kids. A rolling cart keeps equipment corralled, easy to grab, and simple to move out of the way when needed.

    Get a 3-tier rolling cart ($30-$70 from Target, Amazon, or IKEA) in a size that fits your space. Label each tier: “Soccer,” “Baseball,” “Skates,” etc. Kids can easily grab what they need without digging through bins. Roll it to the garage when you want the mudroom clear. This project takes 10 minutes to assemble and organize. Budget alternative: use a sturdy storage bin ($20-$40) and label the outside—less flexible but significantly cheaper.

    Everything has a home, and kids know exactly where their gear lives. Your mudroom doesn’t become a sports equipment explosion zone.


    13. Paint an Accent Wall in Soft Neutral Tones

    A single accent wall draws the eye and makes your mudroom feel designed, not just functional. Soft neutrals like sage, soft gray, or warm taupe create a welcoming vibe without overwhelming the space.

    Choose a high-quality paint in your preferred shade ($25-$40 per gallon). One wall typically requires 1-2 gallons. This is a weekend DIY project if you’re painting yourself, or hire a pro ($150-$300 for a mudroom). The difference this makes is surprising—suddenly your entryway feels intentional and inviting. Pro tip: test paint samples on your wall first and observe how light changes throughout the day.

    You get a completely refreshed space without a full renovation budget. Plus, a painted wall makes everything else you’ve organized look even more polished.


    14. Install a Slim Bench with Shoe Storage Below

    Similar to a full storage bench, but simpler: a bench with an open shelf underneath keeps shoes visible and easily accessible while creating a place to sit and lace up.

    Look for this specific style at IKEA ($70-$150), Wayfair ($100-$200), or Target ($60-$120). Or DIY one from a simple wood frame and shelf. This takes one afternoon to build or 20 minutes to assemble if you buy ready-made. The beauty is that shoes are visible and easy to grab. Pro tip: place a basket under the shelf for shoes you’re less likely to wear regularly.

    Getting ready becomes faster—you can see your options and sit while putting on shoes. The bench becomes a visual anchor for your entire mudroom.


    15. Use Ladder Hooks for Blankets and Scarves

    A decorative ladder is a creative, space-saving way to store scarves, blankets, throws, and light layers without needing shelf or closet space.

    Find a wooden ladder at Target, Wayfair, or thrift stores for $30-$80. Lean it against a wall (no installation needed). Drape scarves, blankets, and lightweight jackets over the rungs—they stay visible and are easy to grab. This works especially well in smaller mudrooms where shelf space is limited. Rearrange seasonally by rotating what’s on display.

    Your mudroom gets bonus storage while looking more like a boutique than a dumping ground. Plus, blankets and scarves are softer décor than typical storage bins.


    16. Create a Mudroom Command Center with a Bulletin Board

    A command center keeps the family schedule, school papers, and reminders visible so nothing gets lost in coat pockets or forgotten on desks.

    Mount a cork board or fabric pinboard ($15-$40 from Target or Amazon) in a central spot in your mudroom. Add a small shelf below for pens, markers, and adhesive notes. This takes 15 minutes to hang and organize. Alternatively, use a large whiteboard ($20-$40) if you prefer easy erasing and rewriting. Set a family rule: all permission slips and schedules go here before anything else.

    Nobody misses school events or forgets permission slips. Your stress level drops because you have one central place to check instead of asking everyone repeatedly.


    17. Install Wall-Mounted Cubbies for Each Family Member

    Cubbies assigned to each person create accountability—everyone knows where their stuff goes and can take ownership of their space.

    Buy a wall-mounted cubby unit ($80-$200 at Target, IKEA, or Wayfair) or DIY from wooden boxes and shelves ($60-$120 in materials). Label each cubby with a family member’s name. Smaller items like hats and gloves go in small baskets within each cubby. This project takes one afternoon to build or 20 minutes to assemble. Pro tip: include a hook inside each cubby for bags or jackets.

    Everyone knows exactly where their own items belong, and you spend less time managing other people’s clutter. Plus, it’s easier to delegate cleanup when each person has their own defined space.


    18. Use Adhesive Hooks for Renter-Friendly Storage

    Renters often avoid installing permanent fixtures, but adhesive hooks are damage-free and can hold surprising amounts of weight when used correctly.

    Buy heavy-duty adhesive hooks ($1-$5 each) from Target, Amazon, or Home Depot. Follow installation instructions carefully: clean the wall, let adhesive cure fully, and respect weight limits. These work great for jackets, scarves, light bags, and everyday items. Start with fewer hooks and add more as you test the weight capacity. If you move, simply remove the hooks—they leave no marks if applied correctly.

    You get a fully functional mudroom without damaging your rental. When you move, you take your organization system with you.


    19. Hang a Coat Tree for Corner Spaces

    Coat trees are perfect for tight spaces where wall mounting isn’t ideal. They’re freestanding, moveable, and surprisingly spacious.

    Find a coat tree at Target ($40-$100), IKEA ($30-$70), or Wayfair ($50-$150). Look for styles with multiple branches and a sturdy base. Position in a corner or unused space. You can hold 6-10 jackets and light bags on a single tree. This costs nothing to install—just unbox and place it. Alternative: use a tall narrow shelf unit ($60-$120) if you prefer storage to hanging.

    You’ve created storage without eating into your actual floor plan. It’s also easy to move if you need to rearrange your mudroom layout.


    20. Install LED Strip Lighting Under Shelves

    Under-shelf lighting makes your mudroom feel brighter, more sophisticated, and easier to navigate during early mornings and evenings.

    Buy adhesive LED strip lighting ($15-$35 per set) from Amazon, Target, or Home Depot. Installation takes 30 minutes: clean the shelf bottom, peel and stick the strip, plug into an outlet or battery pack. Most strip lights are dimmable and warm-toned, which feels more welcoming than harsh white light. This project is renter-friendly and requires no permanent installation.

    Your mudroom feels less like a utility space and more like an intentional entry point. Plus, finding things in shadows becomes easier.


    21. Use Door-Mounted Organizers for Small Items

    Over-the-door organizers with multiple pockets maximize vertical space for small items that usually end up scattered: gloves, hats, mittens, sunglasses, and keys.

    Get an over-the-door organizer ($15-$40 at Target, Amazon, or Container Store) with compartments sized for your needs. Hang on the inside of your mudroom closet door or main entry door using the included hooks. Assign each pocket a category so everyone knows where to find things. This takes five minutes to install and organize. Budget option: hang a shoe organizer ($10-$20) instead—it works just as well.

    Small items finally have a home instead of rolling around loose in drawers or pockets. Plus, the organizer stays hidden when the door closes.


    22. Create a Family Donation Box

    Keep a dedicated donation box in your mudroom so outgrown clothes and unused items don’t accumulate—they go straight into the box and out of your space.

    Find a sturdy box or bin ($10-$25) and label it clearly. When someone outgrows a jacket, shoes don’t fit, or you’re tired of an item, it goes in the box immediately. Once full, drop it off at a donation center. This takes seconds to set up and eliminates decision paralysis. Pro tip: take photos of donations for tax records if you itemize charitable deductions.

    Your mudroom stays right-sized because things leave as naturally as they arrive. Plus, knowing outgrown items will find a good home makes decluttering feel purposeful.


    23. Paint Hooks to Match Your Décor

    Mismatched hooks can feel chaotic, but painting them all the same color creates cohesion and makes the space feel designed rather than thrown together.

    Buy basic metal hooks ($0.50-$1.50 each) and spray paint them with color-matched paint ($5-$10 per can). This takes 30 minutes of prep and drying time. Choose a color that complements your mudroom walls—soft blue, sage, warm white, or soft gray all work beautifully. Hang at varying heights for visual interest while maintaining color harmony.

    Your mudroom instantly feels more intentional and pulled-together. The hooks become a design detail instead of just functional hardware.


    24. Add a Bench Cushion and Throw Pillows

    Seating is essential, but comfort is a luxury detail that makes your mudroom feel special rather than utilitarian. A cushion and a couple of pillows make sitting to tie shoes actually pleasant.

    Get a cushion ($30-$100 depending on size and quality) and throw pillows ($15-$40 each) from Target, Wayfair, West Elm, or Amazon. Choose colors and textures that complement your overall aesthetic. This costs nothing to install—just place them on your bench. Swap seasonally to keep things fresh and interesting. Pro tip: choose machine-washable covers for easy care.

    Your mudroom becomes a space you actually enjoy spending time in. Plus, it photographs better and feels more like an extension of your home’s style.


    25. Install Shelves Above Coat Hooks for Extra Storage

    Stacking hooks and shelves vertically means you use your full wall height instead of just eye level. This is ideal for smaller mudrooms where floor space is precious.

    Install floating shelves 12-18 inches above your coat hooks using basic hardware ($50-$100 total for shelves, hooks, and installation supplies). Use the shelves for seasonal items, baskets of gloves and hats, or display pieces. This project takes an afternoon if you’re comfortable with a drill. Renters can use removable adhesive shelves ($40-$80) to avoid holes.

    Your vertical wall space becomes fully functional storage. It’s surprising how much you can fit when you think in layers instead of just horizontally.


    26. Label Everything with a Consistent System

    The final piece of any organized space is clear labeling. When everyone knows exactly where things belong, your system actually works long-term.

    Get a label maker ($15-$25) and label every basket, cubby, shelf section, and storage bin. Use the same font and size throughout for visual consistency. Spend an afternoon labeling everything in your mudroom. This costs almost nothing and takes minimal time, but it’s the difference between organization that lasts and organization that falls apart within weeks. Pro tip: include a simple icon or color alongside text labels—helpful for kids still learning to read or anyone in a morning rush.

    Your entire system becomes self-explanatory. Nobody has to ask where things go, and kids can independently put items away. Your organized mudroom actually stays organized.


    Ready to Organize?

    Pin this post and pick one or two ideas to start with this weekend—don’t try to tackle everything at once. Even a simple bench, a set of hooks, or labeled baskets will make a visible difference in how your mudroom functions. Share this with anyone who’s drowning in entryway chaos. Which idea are you trying first?

  • 23 Corner Cabinet Optimization Ideas That Solve Dead Space Issues

    23 Corner Cabinet Optimization Ideas That Solve Dead Space Issues


    Dead corner space in your kitchen? You’re not alone—those hard-to-reach cabinet corners are a common frustration, especially in older homes or galley kitchens. The good news? You don’t need a renovation to fix it. We’ve rounded up 23 practical, budget-friendly, and even stylish solutions that’ll turn wasted space into your most functional storage. From lazy Susans to pull-out drawers to creative shelving hacks, these ideas work for renters and homeowners alike. Whether you’re dealing with a single corner or an entire kitchen redesign, you’ll find something here that clicks for your space and your budget. Let’s dig in.


    1. Install a Rotating Carousel for Easy Access

    A rotating carousel (also called a lazy Susan or corner carousel) is one of the most popular fixes for corner cabinets because it lets you access items without reaching or crawling. Instead of digging to the back, you spin the carousel and grab what you need.

    These come in wire, wood, or plastic options. A basic two-tier carousel runs $25–$60 from IKEA, Amazon, or Home Depot. Installation takes about 10 minutes—just measure your corner space, place the carousel on the floor, and load it. For deeper cabinets, opt for a full-height carousel at $80–$120 that uses the vertical space better. Many come with non-slip pads to keep things steady as they spin.

    Pro tip: Use the carousel for items you grab regularly—spices, canned goods, oils, or small appliances. Leave slower-moving items for the static shelves around it.

    You’ll notice you stop avoiding that corner and actually use the space. Plus, everything stays visible and within reach—no more mystery containers lurking in the back.


    2. Add a Pull-Out Sliding Drawer Organizer

    Pull-out sliding drawers do the work for you by bringing the cabinet contents toward you instead of requiring you to reach into darkness. You literally pull, and the whole basket glides forward.

    Pull-out sliding organizers cost $40–$100 and fit most cabinet widths. Brands like Rev-A-Shelf and Hafele are solid; you can also find budget versions on Amazon. Installation requires a drill and about 30 minutes if you’re handy, or hire a handyman ($50–$100). The rails screw into the cabinet sides, and the basket slides in and out smoothly.

    This works especially well for cookware, baking sheets, small appliances, or pantry items that you don’t want to dig for.

    The difference is immediate: you’ll reach for those pot lids and mixing bowls without hesitation, and meal prep becomes faster.


    3. Use Stackable Clear Containers for Visibility

    Clear containers solve one of the biggest corner-cabinet problems: not knowing what’s actually in there. When you can see through the sides, you stop forgetting about duplicates and wasted food.

    Stackable clear containers run $15–$40 for a set of 4–8 from Target, IKEA, or The Container Store. Choose ones with tight-fitting lids to keep dry goods fresh and pests out. Labels (a roll of masking tape and a marker works; or buy label maker tape for $5–$10) take about 15 minutes to apply. The real payoff? No more opened boxes of pasta sliding around, and you can see at a glance when you’re low on staples.

    Stack vertically to maximize the dead space above and around the carousel or pull-out drawer.

    Your corner stops looking like a mystery box and becomes a place you actually enjoy opening. You’ll also waste less food because you remember what’s stashed back there.


    4. Create a Blind Corner Shelf System

    Blind corner shelves are angled to follow the corner’s natural slope, so items don’t disappear into the back shadows. They tilt or turn, giving you sight lines to everything.

    Angled blind-corner shelf systems cost $60–$150 depending on depth and material. Look for pull-out versions from Hafele or Rev-A-Shelf, which combine shelving with the pull-out feature. Installation takes 45 minutes to an hour with a drill and level. If you’re not drilling-comfortable, a handyman can install it for $75–$150.

    This option shines if you want a permanent, built-in solution that looks intentional rather than like a bandage fix.

    Items on angled shelves stay visible and accessible, and you’ll use that corner space confidently without fear of forgetting about things tucked in back.


    5. Install a Corner-Mounted Magnetic Spice Rack

    If spices are your corner-cabinet culprit, a magnetic strip is a game-changer. Mount it on the interior corner wall, and your jars hang in a compact vertical line, freeing up shelf space.

    Magnetic strips cost $10–$25, and magnetic spice jars run $30–$60 for a set of 8–12. Combined cost: $40–$85. A drill and two anchors take 10 minutes to install. This works best if your cabinet doors are wide enough to accommodate the jars without them hitting the opposite side when you close the door—measure first.

    Pro tip: If your cabinet is too tight, mount the strip on the cabinet door itself instead (same process).

    Your spice collection becomes organized, visible, and actually findable. Cooking gets faster when you’re not hunting through jars.


    6. Build a DIY Two-Tier Corner Shelf from Wood

    For a custom, permanent solution that costs less than buying pre-made systems, build a simple two-tier shelf yourself. You’ll need two pieces of wood (pine or plywood), brackets, and a saw.

    Materials cost $25–$50 (wood, brackets, screws from Home Depot). Time investment: 2–3 hours if you have basic DIY skills. The trick is cutting the wood at the right angles to fit your specific corner. YouTube has dozens of tutorials, or you can ask Home Depot to make the cuts for a small fee ($5–$10 per cut).

    If DIY isn’t your speed, a handyman can build and install this for $150–$300.

    Once it’s in, you’ve gained two extra shelves of functional storage, and it looks way more intentional than empty corner space.


    7. Add Adjustable Metal Shelving Inside the Cabinet

    Adjustable shelving gives you control over shelf height, so you can customize spacing for your actual items instead of being stuck with fixed shelves that waste space.

    Adjustable metal shelf kits run $40–$80 for a corner section. Brands like Rubbermaid and ClosetMaid sell corner kits specifically. Installation takes 30–45 minutes with a drill and level. You’re basically adding vertical pegs and resting shelves on them, which means you can move them anytime.

    Pro tip: Combine this with some of the other solutions (carousels, containers, pull-outs) for maximum customization.

    You instantly gain flexibility. Too much vertical wasted space before? Now you can compress it to fit your needs and open up room for other items.


    8. Use a Corner Cabinet Door-Mounted Organizer

    The inside of the cabinet door is prime real estate that often goes unused. A slim, door-mounted organizer captures that space without eating into your cabinet depth.

    Door-mounted organizers cost $10–$30 and come in fabric, plastic, or wire. Installation is as simple as adhesive strips (renter-friendly) or two small screws. It takes 5 minutes. These work best for lightweight items: tea packets, sponges, dish towels, aluminum foil, plastic wrap, or small bottles.

    Avoid putting heavy items on door organizers—they’ll eventually sag or pull the door off balance.

    This is a zero-commitment upgrade that gives you several extra “shelves” without any permanent changes. Renters love this because it peels right off.


    9. Install a Pull-Out Wire Basket for Deep Cabinets

    Deep cabinets are notorious for becoming black holes where things disappear. A pull-out wire basket solves this by bringing the back items forward on smooth-gliding rails.

    Wire pull-out baskets cost $30–$70 and come in various widths. You’ll need a drill, brackets, and rails. Installation takes 30–45 minutes. The payoff? You can finally see and grab the stuff in the back without doing contortions.

    These work beautifully for kitchen towels, small appliances, cookware, or pantry overflow.

    That scary blind spot in the back suddenly becomes accessible and useful space. You’ll stop buying duplicates of things you forgot you had.


    10. Create a Vertical Divider System for Baking Sheets

    Baking sheets and cutting boards are corner-cabinet nuisances because they’re flat and awkward. Stack them horizontally, and they create a tall pile; lay them flat, and they take forever to find the right one. Vertical dividers fix this by storing them upright like files.

    DIY vertical dividers cost $15–$30 (scrap wood or metal strips and brackets). Installation: 45 minutes to an hour. Alternatively, buy pre-made divider systems for $40–$60 from container stores. Some popular options are from The Container Store or IKEA’s kallax-style dividers adjusted for corner spaces.

    Everything stays visible and accessible without the frustration of restacking a whole pile.


    11. Install Corner Cabinet Lighting for Visibility

    Here’s a simple fix that makes a huge difference: if you can’t see what’s in your corner cabinet, you won’t use it. A small LED strip light solves that instantly.

    LED strip lights cost $15–$40 and come with adhesive backing—no drilling required. Installation takes 5 minutes. Choose warm white (2700K) for a cozy feel. Many run on batteries or plug into a nearby outlet. Some motion-sensor versions turn on when you open the door.

    This pairs beautifully with clear containers and pull-out organizers because now you can actually see your organized items.

    Suddenly, that dark corner becomes inviting and functional. You’ll open that cabinet without hesitation and find exactly what you need.


    12. Add a Tiered Step Shelf for Visible Display

    A tiered step shelf creates depth and visibility by staggering items at different heights. Nothing hides behind anything else—everything’s on display and accessible.

    Tiered step shelves cost $25–$50 for a plastic version, or $60–$100 for wood. Place it on the cabinet floor or an existing shelf. Installation is zero—just set it in place. These work best for items you want visible: cookbooks, decorative jars, fancy spice bottles, or dinnerware.

    The beauty is that you can move it anytime if you want to reconfigure your cabinet.

    Items stop getting lost in back rows because everything’s displayed front and center. Plus, it looks intentional and styled, which is a bonus.


    13. Use the Corner Cabinet Door for a Spice Organization Panel

    If your corner cabinet door is sturdy enough, cover the inside with a pegboard or a custom spice-rack panel. This captures dead space and keeps frequently used items within arm’s reach.

    A pegboard panel costs $20–$40; a pre-made spice rack panel runs $30–$70. Installation requires 4–6 screws and takes 15 minutes. You’ll need to drill into the door, so this isn’t renter-friendly, but it’s a permanent upgrade homeowners love.

    Pro tip: Make sure the spice jars aren’t so heavy that they pull the door out of alignment. Test with a few items first.

    Your most-used spices are always visible and organized, and they’re right there when you’re cooking. No more hunting through containers.


    14. Install Sliding Shelf Liners for Easier Cleanup

    This is a small fix with big payoff: sliding shelf liners reduce friction, so containers glide easily and cleanup is effortless. If you have a wooden shelf, jars and containers often get stuck when you try to pull them out.

    Sliding shelf liners cost $10–$20 for several yards and are available at Target, Amazon, or Home Depot. Cut to fit your shelf. Installation takes 10 minutes. These liners let items slide smoothly without scratching, and spills wipe right up.

    This works especially well with carousel systems or pull-out organizers because it reduces resistance.

    Accessing items becomes smooth and frictionless. It’s a small detail that makes daily use much more pleasant.


    15. Create a Lazy Susan Caddy for Condiments

    A lazy Susan specifically designed as a caddy gives you a compact rotating solution for oils, vinegars, sauces, and condiments without taking up much space.

    Condiment caddies cost $15–$35 and come in stainless steel, plastic, or wood. You can find them at Target, IKEA, or Williams Sonoma. Placement takes 2 minutes—just set it on the shelf. Because it’s smaller than a full carousel, it’s perfect for a single category of items rather than your entire cabinet.

    Pair multiple caddies around your corner cabinet for different item types (one for oils, one for spices, one for baking supplies).

    Everything stays organized by category and spins into reach. Your cooking rhythm speeds up because condiments are always where you expect them.


    16. Use Hanging Baskets Inside the Cabinet

    Hanging baskets from an upper shelf let you use vertical space without cluttering the shelf itself. They’re especially great for lightweight items like tea, snack packets, or dried herbs.

    Hanging baskets cost $10–$25 each and come in wire, woven, or canvas. You’ll need small hooks or S-hooks ($5–$10). Installation takes 10 minutes. Renter option: use adhesive hooks instead of drilling.

    Keep baskets lightweight. Heavy items pull on hooks and become unsafe.

    You’ve gained another storage layer without eating into your precious shelf space. Items stay organized and visible above the clutter.


    17. Install a Corner Cabinet Carousel with Adjustable Tiers

    An adjustable-tier carousel combines two solutions: rotation for access and adjustable shelves for flexibility. You get both benefits in one piece.

    Adjustable-tier carousels cost $80–$150 and take about 20 minutes to assemble and install. Brands like Rev-A-Shelf and Amazon Basics make solid versions. You can raise or lower each tier to match your item heights, reducing wasted space.

    This is more of an investment, but if you’re serious about corner optimization, it pays off.

    Every inch of your corner cabinet suddenly works for you. You’re using vertical and rotational space, so capacity jumps significantly.


    18. Create a DIY Pegboard Cabinet Organizer

    A pegboard inside your cabinet lets you customize hook and shelf placement to fit exactly what you store. It’s like a miniature version of a workshop pegboard—totally customizable.

    Pegboard costs $15–$30, plus hooks and small shelves ($20–$40 for a variety pack). Installation requires drilling 4–6 holes and takes 30 minutes. You can paint the pegboard first for a finished look (adds 1 hour plus drying time).

    This is ideal if you’re storing multiple small tools, utensils, or a mix of items that don’t fit standard organizers.

    Your corner becomes a personalized storage hub where everything hangs exactly where it should be. Accessibility becomes effortless because you designed it.


    19. Use Nesting Containers to Maximize Vertical Space

    Nesting containers are lifesavers for corner cabinets because they stack compactly but expand when you need them. You’re not wasting space on separate stacks of different sizes.

    Nesting container sets cost $20–$50 and come in plastic, glass, or ceramic. IKEA, Target, and Container Store all have good options. They take seconds to set up—just nest them and place on your shelf. This works for dry goods, leftovers, or even small kitchen tools.

    Pro tip: Use nesting bowls and measuring cups too; they serve double duty for cooking and storage.

    You’ve doubled your storage capacity because items actually collapse down instead of taking permanent space. It’s like magic.


    20. Install a Corner Cabinet Organizer with Pull-Out Baskets

    Some corner-cabinet organizers come as complete units with multiple pull-out baskets built into a single frame. It’s a one-purchase solution that handles the entire corner.

    Integrated pull-out basket systems cost $100–$200 and come in various widths and depths. Look for corner-specific versions from Rev-A-Shelf or Hafele. Installation takes 45 minutes to an hour with a drill. It’s a bigger investment, but you’re solving the corner problem completely in one shot.

    If installation feels intimidating, hire a handyman for $100–$150.

    Your entire corner cabinet suddenly functions like a dream. Every item is accessible, nothing hides in the back, and you’ll use the space consistently.


    21. Add Corner Cabinet Lighting with a Motion Sensor

    A motion-sensor LED light is like a mini version of opening the refrigerator—the light comes on automatically when you open the door and turns off when you close it. Total convenience.

    Motion-sensor LED lights cost $20–$40 and run on batteries or USB. Installation involves peeling off adhesive backing and sticking it under the top shelf (or inside the door frame). It takes 2 minutes. No wiring, no drilling—renter-friendly.

    Some models have adjustable brightness and warm or cool color options.

    You never fumble in the dark again. The moment you open that cabinet, everything’s illuminated and ready. It’s a small luxury that changes how you interact with the space.


    22. Use a Stainless Steel Corner Shelf Unit

    For a durable, commercial-grade solution, consider a stainless steel corner shelf unit. These are used in professional kitchens for a reason—they’re sturdy, easy to clean, and last forever.

    Stainless steel corner shelf units cost $80–$150 depending on height and tier count. Installation takes 45 minutes with a drill and level. These are especially great if you’re storing heavier items like cookware or small appliances.

    The trade-off? They’re more industrial-looking, which works beautifully in modern or minimalist kitchens but might not suit traditional styles.

    You gain a storage solution that’ll outlast your kitchen cabinets. Plus, it wipes clean in seconds, which is a huge win for busy cooks.


    23. Create a Corner Pantry with Labeled Bins

    If your corner cabinet is spacious and dedicated to pantry overflow, fill it strategically with matching labeled bins. Everything’s visible at a glance, categories are clear, and it looks intentional.

    A set of 6–10 matching storage bins costs $30–$60 from Target, The Container Store, or IKEA. Label maker tape ($5–$10) or a regular label gun makes identification foolproof. Setup takes 20 minutes—just organize by category, label, and stack.

    Bonus: Rotate bins that have been sitting unused to the front so you actually use what you have.

    Your corner stops being a mystery and becomes a mini pantry. You’ll shop smarter, waste less food, and find things instantly.


    Save this post and pick one idea to implement this weekend. Even a single carousel or set of clear containers makes a shocking difference in how much you actually use that corner. Which hack will you try first?

  • 24 Earth-Tone House Interior Ideas for a Warm, Organic Look

    24 Earth-Tone House Interior Ideas for a Warm, Organic Look

    If your home feels cold or sterile, you’re not alone. Stark white walls and cool gray tones have dominated design for years, leaving many spaces feeling impersonal and unwelcoming. The good news? Earth tones—think chocolate brown, sage green, terracotta, and warm taupe—are bringing back the coziness factor without sacrificing style. These 24 ideas show you exactly how to layer earthy colors, textures, and natural materials into every room of your home. Whether you’re renting or own, have a big budget or a small one, you’ll find something here that feels doable. Get ready to create a space that actually wraps around you like a warm sweater.

    1. Paint Your Bedroom Walls in Warm Chocolate Brown

    Chocolate brown walls create an intimate cocoon that cooler colors simply can’t match. This shade feels expensive and grounding without being dark or oppressive—especially when paired with plenty of light-colored bedding and natural light during the day.

    Paint all four walls or just an accent wall behind your bed. Benjamin Moore HC-172 (Borscht) or Sherwin-Williams SW 7598 (Coffee) are reliable warm browns that photograph beautifully. Budget $40–80 for quality paint and supplies. Expect a full day for one bedroom, or hire someone for $300–500. The trick? Use a warm white (like ivory or cream) for trim and ceiling to prevent the space from feeling too dark.

    Pro tip: Test paint chips on your actual walls over several days to watch how the color shifts with morning and evening light.

    You’ll feel more relaxed at bedtime, and your bedroom becomes a true retreat rather than just a place to sleep.

    2. Add Sage Green Accent Wall in the Kitchen

    Sage green is the earthy color that works everywhere—calming but not bland, natural but never boring. In a kitchen, a single sage wall draws the eye without overwhelming the space where you cook and eat.

    Paint behind your open shelving, range hood, or above the backsplash. Sherwin-Williams SW 9205 (Evergreen Fog) or Benjamin Moore HC-126 (Healing Aloe) sit perfectly between gray and green. Budget $40–80 for paint supplies; DIY over a weekend afternoon. If you’re renting, peel-and-stick wallpaper in sage gives you the same effect without commitment—search “removable sage green wallpaper” on Amazon ($20–35 for a roll).

    The best part? This color pairs with stainless steel, brass, and natural wood without clashing.

    3. Layer Warm Neutrals Through Textiles and Rugs

    Warm neutrals—cream, beige, warm gray, and taupe—create depth when you layer them instead of sticking to one shade. This approach adds visual interest while keeping the space cohesive and calming.

    Start with a neutral base paint, then layer in rugs, blankets, and pillows in slightly different warm tones. A jute rug ($50–150 from IKEA or Wayfair) topped with a wool throw ($60–120) and cream linen pillows ($20–40 each) build warmth without matchy-match feeling. The key is varying texture—smooth linen next to chunky knit, sleek wood beside woven jute.

    Swap out one textile monthly during seasons to keep the look fresh without a full redesign.

    4. Install Wood-Plank Ceiling for Architectural Warmth

    A wood-plank ceiling instantly adds character and brings organic warmth to any room. Shiplap or tongue-and-groove wood draws the eye upward and makes spaces feel both cozy and intentional—far more interesting than drywall.

    Real wood runs $200–800 depending on coverage and quality; labor is $800–2000. Peel-and-stick wood veneer ($100–300 for a room) offers a renter-friendly option that looks surprisingly real up close. Installation takes a weekend for DIY or 1–2 days professionally. Pair with soft overhead lighting to avoid harsh shadows.

    Your ceiling becomes a design feature, not forgotten space. Guests notice it immediately.

    5. Create a Feature Wall with Hand-Stenciled Patterns

    Hand stenciling beats wallpaper for customization and cost. You control the pattern, color, and placement—plus you can redo it without residue damage (renter gold).

    Buy a stencil ($10–30 from Etsy or craft stores), acrylic paint in your earth tone ($5–8), and foam rollers ($3–5). Tape off your wall section, apply paint over the stencil, let dry, repeat. Budget 4–6 hours for a 10×12 wall. YouTube has countless tutorials—search “hand stenciling wall patterns” for step-by-step guidance. Start small (above a bed or behind a sofa) before committing to a full wall.

    Your wall becomes one-of-a-kind art that reflects your taste, and you saved hundreds versus wallpaper or a mural artist.

    6. Swap Out Light Fixtures for Brass or Bronze Art Deco Chandeliers

    Lighting is jewelry for your home. Replacing a basic overhead fixture with a statement brass or bronze chandelier grounds a room in warmth and instantly reads as elevated.

    Vintage Art Deco chandeliers run $150–500 on Etsy or Wayfair; modern reproductions are $80–250 on Amazon or West Elm. Swapping fixtures takes 30 minutes if you’re comfortable with basic wiring (watch tutorials first or hire an electrician for $100–200). Install in entryways, dining rooms, or bedrooms where guests see it.

    The warm glow from brass or bronze naturally flatters skin tones and creates intimacy, even in bright daylight.

    7. Add Curved Furniture to Soften Hard Edges

    Straight lines feel modern but cold; curves feel organic and comforting. Swapping angular furniture for rounded pieces—curved sofas, scalloped chairs, circular tables—softens your entire room’s energy.

    Search “curved sofa” or “rounded armchair” on Wayfair, Article, or CB2 ($500–1500 for a sofa; $200–400 for accent chairs). Budget-friendly option: pair an angular existing sofa with one curved accent chair ($200–350). Curved furniture photographs beautifully and feels more luxe than boxy pieces, even when it’s affordable.

    The room feels less corporate and more approachable. Movement feels natural instead of rigid.

    8. Layer Patterned Rugs and Textiles Without Fear

    Maximalism is back, and it means mixing patterns without overthinking. Stripes next to florals, geometric next to abstract—when tied together by an earthy color palette, it’s intentional, not chaotic.

    Pick 3–4 patterns that share one warm tone (chocolate brown, sage, cream, terracotta). Layer a striped rug ($60–200), patterned throw pillows ($15–40 each), and a quilted or patterned blanket ($40–100). Start with items you can easily swap if they don’t work; most online retailers have free returns.

    Your space gains personality and visual depth. It stops looking like a showroom and starts looking like home.

    9. Paint Cabinetry in Earthy Jewel Tones

    Cabinet color is bold but reversible (you can always repaint). A deep sage, terracotta, or warm gray cabinet transforms a kitchen without the investment of new cabinets.

    Use cabinet-specific paint like Benjamin Moore Advance ($40–60 per quart) or hire a pro for spray-painting ($800–1500 for full kitchen). DIY takes a weekend; professional spray finish lasts longer. Replace hardware with warm brass or bronze knobs for $40–100 total. The impact? Massive—guests think you renovated.

    Pro tip: Paint lower cabinets and leave uppers white for balance and light.

    Your kitchen goes from dated to intentional in one weekend with budget flexibility.

    10. Install Arched Doorways or Curved Doorway Trim

    Arches are the softest architectural detail you can add. They break up straight lines, reference Art Deco and vintage design, and feel playful without being over-the-top.

    Real arch installation costs $500–2000 and requires professional framing. For renters or budget-conscious homeowners, curved doorway trim kits ($50–150 from specialty hardware stores) attach to existing rectangular doors and mimic the effect. Installation takes 2–3 hours. Alternatively, use a removable curved architectural frame ($80–200) that sits around existing doorways.

    Arched entries create a sense of threshold—you’re moving from one intentional space to another, which psychologically feels more luxe.

    11. Use Terracotta Pots and Planters Throughout

    Terracotta is the OG earth tone and costs almost nothing. Clustered on shelves, windowsills, or grouped on the floor, terracotta pots add warmth and immediately read as intentional styling.

    Buy pots in bulk from garden centers ($2–10 each depending on size) or HomeGoods ($5–25 for larger decorative pots). Fill with low-maintenance plants like pothos, snake plants, or succulents ($5–20 each). Group in odd numbers (3, 5, 7) at varying heights for visual interest.

    Your home gains life, warmth, and a organic vibe. Plants also improve air quality—bonus.

    12. Add Textured Wall Paneling (Shiplap or Grooved Boards)

    Paneling adds dimension and visual interest—the grooves catch light and create shadow play that flat paint can’t. It reads as high-end even on a budget.

    Real wood shiplap runs $200–600 per wall including installation; peel-and-stick shiplap ($80–200) works for renters. Grooved MDF panels ($100–300) give the look without cost. DIY shiplap takes a full weekend; hire a handyperson for $400–800 labor. Install on one accent wall for impact without overdoing it.

    Textured walls become a backdrop for art, mirrors, and decor—everything looks better against paneling than flat walls.

    13. Layer Warm Wood Tones in Furniture and Flooring

    Mixing warm wood tones (honey, walnut, oak, cherry) in the same space sounds risky but works beautifully when you commit to warm earth tones everywhere else. The variety in wood grain becomes a feature, not a mistake.

    You don’t need to replace everything—layer in one walnut piece ($200–600 for a dresser or desk) with existing honey-toned furniture. Use wood stain ($15–30) to warm up existing pieces, or refinish floors ($800–2000) if you own. Warm wood + warm paint + warm textiles = cohesive warmth.

    Your space gains richness and depth. Multiple wood tones feel collected and intentional, not mismatched.

    14. Hang Oversized Mirrors with Brass or Wood Frames

    Mirrors multiply light and space, especially when framed in warm metals or wood. An oversized brass or wooden-framed mirror becomes a statement piece, not just functional.

    Search “oversized brass mirror” or “round wood frame mirror” on Wayfair or Article ($150–500 for quality). Budget option: thrift a basic mirror frame ($5–30) and wrap it in rope or wood trim ($10–40) for a DIY upgrade. Hang at eye level or lean against a wall for flexibility.

    Pro tip: Position opposite a window to bounce natural light around the room.

    The space feels larger and brighter. Mirrors also catch and reflect the warm tones you’ve added—they become part of your earth-tone design.

    15. Switch to Warm White Paint on All Trim and Ceilings

    If your walls are earthy and rich, your trim and ceiling should be warm white (not stark white or cool gray). This balance prevents rooms from feeling dark or cave-like.

    Warm whites: Benjamin Moore OC-17 (White Dove), Sherwin-Williams SW 7005 (Pure White), or Benjamin Moore HC-172 (Pale Oak). Paint costs $40–80; labor is $300–600 if hiring out. This single change makes earth-toned walls feel intentional and elevated instead of heavy.

    The room breathes. Dark walls + dark trim feel oppressive; dark walls + warm white trim feel designed.

    16. Create a Reading Nook with Layered Textures

    Designated cozy spaces make homes feel intentional and luxe. A reading nook layers texture—soft fabrics, natural materials, warm lighting—into a small, defined zone.

    Pick a corner and add: a comfortable chair ($200–500), side table ($50–150), ottoman or pouf ($40–100), throw blanket ($40–80), and warm lighting like a brass floor lamp ($80–200). Total investment: $400–1000 depending on quality. Renter-friendly: use items you already own and layer in affordable pieces from Target or Article.

    This nook becomes your retreat. You’ll use it daily and guests immediately see your design intention.

    17. Paint Interior Doors in Contrasting Earthy Tones

    Interior doors are overlooked real estate. Painting them in a contrasting earthy tone (different from your walls) adds architectural interest and makes hallways feel intentional.

    Paint doors sage, terracotta, deep gray, or warm charcoal ($40–80 for paint). A single door takes 2–3 hours; full house is a weekend project. This costs almost nothing but creates maximum impact. Pair with warm brass or bronze door hardware ($20–50 per door) for cohesion.

    Your hallway stops being a pass-through and becomes part of your design story.

    18. Install Floating Wood Shelves for Natural Warmth

    Floating shelves combine storage, display, and architectural warmth. Wood shelves anchor a room in natural materials and let you style with plants, books, and woven baskets.

    Floating shelves run $30–80 each (IKEA, Wayfair) plus $50–150 installation if hiring help. DIY installation takes an afternoon with basic tools and a level. Walnut, oak, or honey-toned wood pairs perfectly with earth-tone palettes.

    Style with: terracotta pots, stacked books, woven baskets, and small plants for a collected, curated look.

    Your wall becomes functional decor. Shelves display your taste while adding architectural interest that flat walls can’t achieve.

    19. Layer Brass and Bronze Hardware Throughout

    Metallics matter. Swapping silver or chrome hardware for warm brass or bronze instantly upgrades a space’s vibe and ties into your warm earth-tone palette.

    Replace cabinet knobs ($3–8 each), faucet ($100–400), light switch covers ($2–5 each), and towel racks ($20–60). Budget $50–200 for a full bathroom or kitchen refresh. Most hardware swaps take an afternoon and require no special skills beyond a screwdriver.

    The cohesive warm metallic threading through your space ties everything together. It reads as intentional and expensive.

    20. Paint Your Front Door in a Bold Earthy Shade

    Your front door is your first design statement. A bold earthy shade (sage, terracotta, warm charcoal, or deep brown) signals that you have taste and intention right from the curb.

    Use exterior-grade paint in your chosen earth tone ($50–100 for paint plus primer). One door takes 3–4 hours including prep and dry time. Add brass or bronze house numbers ($30–80) and hardware ($40–100) to complete the look.

    Guests feel welcomed. Your home stands out on the street. You’ve set the tone for the warm, intentional space inside.

    21. Add a Gallery Wall with Wood and Metal Frames

    A gallery wall is art meets organization. Mix frame styles in warm woods and metals, then fill with art, prints, or photos that tie to your earth-tone palette.

    Frames run $10–40 each from IKEA, Target, or Etsy; art prints are $3–20 each from Etsy or Minted. Total budget for 9–12 pieces: $150–400. Spend an hour sketching your layout on paper before hanging, or use painter’s tape directly on the wall to test arrangement.

    Your wall becomes a reflection of your personality and aesthetic. It’s the first thing people see and remember.

    22. Use Woven Baskets for Storage and Texture

    Woven baskets do double duty: they store clutter and add organic texture. Grouped together, they’re sculptural and immediately read as intentional styling.

    Rattan or jute baskets cost $15–60 each from IKEA, HomeGoods, or Target. Buy 2–4 in varying sizes and group on the floor, on shelves, or under tables. They hide mess while adding warmth and movement to your space.

    Pro tip: Fill baskets with extra blankets, books, or off-season items—they become functional decor.

    Your room looks curated and intentional. Clutter disappears but stays accessible.

    23. Paint Your Bedroom Doors and Frames in Coordinating Tones

    Painting doors and frames in coordinating earth tones creates threshold moments—visual punctuation that says “this space is designed.” It defines rooms without walls.

    Choose a door color that echoes or contrasts with your wall color. Paint the frame in warm white or a lighter shade of the same tone. Budget $60–120 for paint; 3–4 hours DIY time. Pair with a matching interior or exterior door hardware color for visual flow.

    You create a sense of arrival and intention. Each room feels like a separate design story.

    24. Add a Decorative Throw Blanket in Earth Tones to Every Seating Area

    A throw blanket is the quickest way to add warmth (literally and visually). Draped over a sofa or chair, it signals coziness and gives you an instant styling layer.

    Quality throw blankets run $40–120 from Parachute, Etsy, or Target. Pick one in chunky knit, linen, or wool in your earth-tone palette. Layer it over a sofa or armchair, drape it asymmetrically, or fold it into a basket for casual access.

    Your seating area feels lived-in and intentional. You’ve added color, texture, and functional coziness in one move.


    Save this post for your next home refresh and try one idea this weekend—even small changes add up to big warmth. Which earth tone will you start with?

  • 24 Metal Frame Door Styles That Feel Sleek & Contemporary

    24 Metal Frame Door Styles That Feel Sleek & Contemporary

    Metal frame doors have quietly become the ultimate modern upgrade—and for good reason. They’re the sweet spot between industrial edge and refined elegance, giving any space an instant dose of contemporary style without looking cold or sterile. Whether you’re drawn to industrial chic, minimalist sophistication, or something boldly statement-making, metal frames work harder than you’d expect. They flood rooms with light, maximize visual space, and photograph beautifully. The best part? You don’t need a complete renovation to get the look. This guide walks you through 24 metal frame door styles—from budget-friendly swaps to investment pieces—so you can pick ideas that fit your home, your timeline, and your wallet.

    1. Go Ultra-Slim Aluminum for Maximum Light

    Ultra-thin aluminum profiles are the difference between a door that looks heavy and one that disappears into the background. These slender frames maximize the glass-to-frame ratio, flooding your space with natural light and making rooms feel bigger than they are.

    Look for aluminum frames under 1.5 inches wide—brands like Technal and Enigma specialize in this. You’ll pay $600–$1,200 for a quality frameless or ultra-slim glass door installed, but the light gain is worth every penny. DIY installation isn’t recommended here; hire a professional to ensure proper sealing and alignment. The payoff? Your room becomes a light box, and that openness changes everything about how a space feels.

    2. Pair Matte Black Frames with Clear Glass

    Matte black is the sleek, non-negotiable choice for contemporary homes—it doesn’t scream or demand attention, it just looks intentionally designed. Pair it with crystal-clear glass (not frosted or tinted) to let that sophisticated finish shine without blocking views.

    Matte black resists fingerprints better than glossy finishes and works equally well on entryways, interior room dividers, or cabinet fronts. Budget $400–$900 for a standard interior pocket door with matte black aluminum frames; exterior doors run $1,000–$2,000+. Pro tip: Use matte black on just the frames and keep hardware in brushed gold or aged bronze for contrast. This combination reads premium without trying too hard.

    3. Install Sliding Pocket Doors to Save Floor Space

    Pocket doors slide flat into your wall cavity, eliminating the swing space that traditional hinged doors need. In small homes or apartments, this reclaims precious square footage while keeping that sleek metal-frame aesthetic.

    Pocket door kits with aluminum frames cost $300–$700 depending on size and whether you DIY or hire help. Installation requires opening your wall to fit the track mechanism—this is a weekend project for handy people or a half-day job for professionals. Enigma makes frameless glass pocket doors that look gallery-like; basic aluminum versions work just as well. You’ll suddenly be able to fit a chair, desk, or bed in a spot that felt too cramped before.

    4. Choose Crittall-Style Frames for Industrial Romance

    Crittall-style doors have a vintage industrial soul—think 1920s factory windows refined for 2025. The grid pattern of smaller panes creates visual interest while the metal frames add character without sacrificing light or openness.

    These doors cost $800–$1,800 installed, depending on whether you want authentic vintage panes or modern reproductions. They work beautifully as room dividers between kitchens and living spaces or as dramatic home office partitions. The trade-off: multiple panes mean more surface area to clean, but many people find that payoff worth it for the architectural impact. Your space gets instant depth and a touch of urban cool.

    5. Use Brushed Gold Hardware to Warm Up Black Frames

    Black frames can read cold in the wrong light, but add brushed gold hardware and suddenly the whole door feels warm and deliberately designed. This contrast is what separates “harsh” from “intentional.”

    Upgrade your handles, locks, and hinges separately for $40–$150 per door, or choose pre-configured doors with matching hardware from brands like ProVia or high-end suppliers. Brushed gold (also called champagne bronze) works because it’s warm without being shiny. Pair it with thin geometric handles or soft rounded pulls depending on your vibe. This single detail lifts an ordinary metal-frame door into gallery-quality territory.

    6. Add Textured Metal Finishes for Visual Drama

    Smooth matte finishes are clean, but textured metal creates depth and catches light in unexpected ways. Brushed, hammered, or embossed aluminum finishes add dimensionality that reads expensive even on budget doors.

    Textured aluminum frames cost about the same as standard finishes ($400–$1,000 for interior doors), but the visual impact is outsized. Look for options at specialty door suppliers or high-end home centers. The texture hides fingerprints better than smooth finishes, making it practical for high-traffic areas. Your door becomes a subtle focal point—something people notice without consciously knowing why.

    7. Go Frameless for the Ultimate Minimalist Look

    Frameless glass doors have zero visible frame structure—just glass held by hardware at the edges and top. It’s the minimalist extreme, and it reads as seriously high-end because technically, it is.

    Frameless doors run $1,200–$2,500+ installed, making them an investment piece. The glass edges are polished smooth and beveled for safety; hinges and top hardware are minimal and usually stainless steel or aluminum. This style works best in spaces with 8-foot-plus ceilings and clean architectural lines. The payoff is almost clinical purity—your space feels open, modern, and intentionally designed.

    8. Choose Warm Steel Finishes Instead of Chrome

    Warm steels (aged bronze, gunmetal, warm gray) feel more residential than cold chrome, which tends to look institutional. This finish bridges industrial and contemporary without going full matte black.

    Doors in warm steel finish cost $500–$1,200 installed, comparable to matte black but offering a lighter, warmer vibe. They work beautifully in transitional homes or spaces mixing mid-century and modern elements. The finish naturally develops character over time as it weathers slightly, adding authenticity. This is a great option if matte black feels too dramatic but you want clear metal-frame presence.

    9. Mix Glass Panels with Solid Metal Sections

    Partial glass doors give you the view and light of full-glass options but with more privacy and acoustic control. This mixed approach is practical for kitchens, bathrooms, and bedrooms.

    Custom mixed-panel doors run $700–$1,400, though you can find simpler versions starting at $400. You could also retrofit an existing door with partial frosting or add a metal kick plate to a full-glass door for about $100–$200. This hybrid approach solves the problem of wanting openness without complete transparency. Your kitchen stays connected to the living room visually while cooking smells and noise stay contained.

    10. Install Glass Doors with Privacy Tinting

    Privacy glass (frosted, textured, or slightly tinted) keeps the visual lightness of glass doors while actually protecting privacy. You get the contemporary aesthetic without the fishbowl feeling.

    Privacy glass retrofits cost $150–$300 per door if you’re upgrading existing glass, or $600–$1,200 for new privacy-glass doors installed. Frosted looks clean and minimalist; textured privacy glass (like rain or obscure patterns) adds personality. Bathroom doors, bedroom entryways, and home offices all benefit from this approach. Light still pours through, but no one can see your morning chaos happening on the other side.

    11. Use Industrial Steel Frames in Muted Colors

    Industrial steel doesn’t have to mean harsh black. Muted steels like anthracite, warm gray, or soft graphite deliver that industrial edge while feeling more refined and livable.

    Anthracite or neutral-tone aluminum frames cost the same as matte black—$400–$1,000 for interior doors. The benefit? These softer metals pair beautifully with both cool and warm wall colors. Anthracite works especially well in minimalist homes or Scandinavian-influenced spaces. You get industrial character without the drama, making it easier to evolve your decor around.

    12. Combine Metal Frames with Wood Panel Inserts

    Metal frames around wood panels create visual interest and warmth that full-glass doors can’t achieve. This mixed-material approach feels current and layered.

    Custom wood-and-glass doors run $800–$1,600 installed, though you can find pre-made options starting at $500. Use warm woods like walnut, oak, or reclaimed timber for contrast against matte black or steel frames. Acoustic benefits are real too—the wood absorbs sound better than glass. This style shines in transitional homes or anywhere you want to blend industrial with warmth.

    13. Install Floor-to-Ceiling Metal-Frame Glass

    When metal frames run floor-to-ceiling, they create architectural drama and maximum light without making you feel exposed. This is the premium move that changes how spaces relate to each other.

    Floor-to-ceiling installations run $1,500–$3,500+ depending on wall dimensions and complexity, but the transformation justifies the investment. Hire a professional—this isn’t DIY territory. The payoff is enormous: spaces feel bigger, brighter, and more connected. Your open-plan living area becomes a light-filled showcase. This works beautifully when you have high ceilings or want to make a real design statement.

    14. Choose Geometric Hardware Shapes Over Traditional Pulls

    Geometric hardware (hexagonal, angular, minimalist shapes) reads as more contemporary than traditional round or oval pulls. Small hardware detail, massive design impact.

    Upgrade handles and knobs for $30–$100 per door at IKEA, West Elm, or specialty hardware sites like Rocky Mountain Hardware. Geometric shapes work especially well with matte black or steel frames. This is the easiest upgrade to make modern feel intentional. One small detail that signals you’ve thought about every element.

    15. Add Acoustic Considerations with Dense Frame Materials

    If you’re using metal-frame glass as a room divider, denser frame materials and insulated glass reduce noise transmission. This matters for home offices, bedrooms, and creative spaces.

    Acoustic glass and reinforced metal frames cost $700–$1,500 installed—more than standard glass doors but less than full wall soundproofing. Choose doors with thermal breaks and insulated glass if noise control is your priority. The result? Your home office stays separate from household activity, even though it looks open and connected visually.

    16. Match Metal Finishes to Existing Hardware

    Coordinating your new metal-frame door finish to existing hardware (cabinet pulls, light switches, faucets) creates flow and makes your home feel cohesively designed rather than random.

    This costs nothing—it’s a design decision, not an upgrade. Audit your existing finishes before ordering. If your hardware is brushed gold, get brushed gold hinges on your new door. If you have chrome light switches, think about whether matte black doors will clash or contrast intentionally. Matching finishes feel more professional and considered. Your eye won’t snag on conflicting metals.

    17. Use Minimal Threshold Details to Keep Lines Clean

    Minimal threshold details (or flush thresholds) keep sight lines clean and uninterrupted. This detail matters more than you’d think for making doors feel contemporary.

    Standard thresholds are necessary for sealing and safety but can be updated to slim metal versions that blend into the floor. This is a custom specification ($100–$300 extra at installation time) but worth it for a seamless look. Professional installation ensures proper water sealing and code compliance. Your eye follows the door frame and glass, not a clunky threshold bump.

    18. Explore Ultrathin Steel Cable Frames

    Steel cable hanging systems are ultra-contemporary and create an almost floating effect. The cables are nearly invisible, making glass appear suspended.

    Cable-hung glass doors are a high-end option running $1,500–$2,800+ installed because they require custom fabrication and structural consideration. This is the design statement move—something most people haven’t seen in a residential home. It photographs beautifully and reads as thoughtfully designed. Your door becomes architecture, not just functional hardware.

    19. Consider Reclaimed Metal Frames for Eco-Minded Homes

    Reclaimed metal frames combine sustainability with authentic vintage character—they’ve actually got stories to tell. This appeals to eco-conscious homeowners who don’t want to sacrifice style.

    Reclaimed and repurposed metal frames cost $500–$1,200 depending on source and customization. Check salvage yards, architectural reclamation companies, or Etsy sellers who specialize in vintage door hardware. Manufacturing emissions drop by nearly 40% when using recycled materials versus new aluminum, according to the National Renewable Energy Laboratory. Your door is unique, sustainable, and conversation-worthy.

    20. Pair Aluminum Frames with Bold Statement Glass

    Patterned or textured glass in clean metal frames creates visual interest without complexity. The frame’s simplicity lets the glass be the star.

    Decorative glass doors cost $600–$1,400 installed. Look for subtle geometric patterns, rain textures, or frosted designs rather than loud colors. The metal frame keeps the overall effect contemporary instead of ornate. This approach works beautifully for powder rooms, home bars, or anywhere you want personality without overwhelming minimalism.

    21. Install Aluminum Doors with Integrated Smart Locks

    Smart locks integrated seamlessly into metal frames eliminate visible deadbolts and make your door look forward-thinking. Biometric and app-controlled options keep the aesthetic clean.

    Smart lock retrofits cost $200–$500 for the lock itself; installation runs $100–$300. Brands like Level and August make locks that work with aluminum frames without disrupting the visual line. You get keyless entry, access logs, and remote control without changing the door’s appearance. This is the practical luxury upgrade—it looks the same but functions intelligently.

    22. Choose Doors with Thermal Breaks for Energy Efficiency

    Thermal breaks (insulating strips within metal frames) keep temperature stable and reduce condensation without visible aesthetic change. This is invisible luxury that saves money and energy.

    Thermally broken aluminum doors cost $100–$300 more than standard frames but lower your heating and cooling bills noticeably. This is especially valuable in climates with temperature swings. Look for doors labeled “thermally broken” or with insulating polyamide strips inside the aluminum. Energy-efficient glass paired with thermal breaks creates real climate control. You’re paying slightly more upfront but saving long-term.

    23. Embrace Mixed-Metal Hardware for Eclectic Edge

    Mixing metals (brushed gold with matte black, aged bronze with steel) is now considered high-design rather than a mistake. This curated eclecticism reads as intentional and creative.

    You’re already buying different hardware pieces, so mixing finishes costs nothing—it’s pure design choice. Pair warm metals (gold, bronze) with cool metals (black, gunmetal) for visual tension that feels contemporary. This works especially well in maximalist or eclectic homes. Your door becomes a design statement rather than following rules.

    24. Combine Metal Frames with Wooden Thresholds or Handles

    Pairing metal frames with natural wood handles or trim strips warms up the industrial edge and adds textural richness. This hybrid approach feels current and grounded.

    Wooden threshold accents or handle wraps cost $50–$150 to add; you can source warm walnut, oak, or reclaimed wood from local suppliers. This combination appears in contemporary Scandinavian and Japanese-inspired homes where natural and industrial elements coexist. Your door reads as modern but not cold, sleek but not sterile. The warmth makes the space feel more livable.

    Save this post and start with one style that speaks to your space—whether it’s the bold matte black pairing or the minimal frameless approach. Metal frame doors shift how light moves through your home, and that change happens faster than you’d expect. Which style will you try first?

  • 23 Mixed-Material Sofa Frame Ideas That Look Chic & High-End

    23 Mixed-Material Sofa Frame Ideas That Look Chic & High-End

    When you’re shopping for a sofa, the frame matters just as much as the fabric. Mixed-material frames—combining wood, metal, leather, and upholstery in unexpected ways—instantly elevate any living room while staying practical and affordable. The beauty? You don’t need a designer budget to get that high-end look. Whether you’re working with a small apartment or a sprawling open plan, these 23 mixed-material sofa frame ideas show you how to choose, style, and customize sofas that look like they cost way more than they do. You’ll discover specific products, price ranges, and styling tricks that make your space feel curated and intentional. Let’s explore what makes mixed-material frames the secret to chic, long-lasting sofas.

    1. Warm Wood Legs with Tapered Design

    Tapered wood legs instantly communicate quality and design sophistication. This frame style works because it lifts the sofa visually, making your room feel more open and modern.

    Look for sofas with solid walnut or oak legs from brands like West Elm ($800-$1,800), Article ($600-$1,500), or IKEA’s premium Söderhamn line ($400-$700). The taper—angling inward slightly from top to bottom—is the key detail that reads expensive. If your current sofa has chunky legs, replacing them with tapered wood feet costs $80-$150 per set from hardware stores like Etsy sellers or Wayfair.

    Pro tip: Match your leg wood tone to other furniture in the room (nightstands, shelving) for cohesion.

    The result? Your sofa suddenly looks intentional, like you curated every detail. This one change makes renters and homeowners alike feel like they’ve upgraded their entire space.

    2. Brushed Metal Frame with Exposed Details

    Exposed metal frames—brushed steel or brass—give sofas an architectural edge that photographs beautifully. This works especially well in modern, industrial, or eclectic spaces where you want the structure to be part of the design.

    Search for sofas with visible metal frames on Wayfair ($700-$2,200), Structube ($900-$2,000), or Design Within Reach ($1,200-$3,500). The brushed finish matters; it feels warmer and less clinical than polished steel. If you love a sofa but wish the frame were visible, some custom builders like What A Room can modify standard designs to expose metal legs or arm supports ($1,500-$4,000 depending on customization).

    Alternative: Adhesive metal corner brackets ($15-$30) can accent existing wooden frames if you’re renting.

    You’ll notice how the frame becomes a design statement, drawing the eye and anchoring the room. This approach works especially well in open-plan homes where the sofa is a focal point.

    3. Leather Arm Wraps on Wood Frame

    Leather wrapping on wooden frames combines luxury tactile appeal with durability. The leather protects high-wear areas while the wood underneath stays visible, creating visual contrast.

    High-end brands like Restoration Hardware ($3,000-$6,000+) and Poltrona Frau ($4,000-$8,000) specialize in this detail. More budget-friendly options exist at Article ($1,200-$2,000) and Wayfair’s curated collections ($1,000-$1,800). You can also wrap existing sofas yourself using genuine leather adhesive tape ($20-$50) from craft stores, though hiring an upholsterer ($150-$300) gives professional results.

    Pro tip: Cognac and caramel leather pairs beautifully with warm walnut or oak frames.

    The texture combination feels high-end and lived-in simultaneously. Guests notice the craftsmanship immediately, and the wrapped areas naturally soften with use and develop character.

    4. Metal Corner Brackets on Solid Wood

    Metal corner brackets—brass, copper, or steel—add vintage hardware appeal without looking fussy. This detail reads expensive because it’s structural and decorative simultaneously.

    Look for these on mid-century modern sofas from Mid-Century Modern furniture retailers ($1,200-$2,500), Maiden Home ($1,400-$2,800), or vintage finds on 1stDibs ($800-$2,000). Add brackets yourself to plain sofas using brass hardware from Anthropologie ($8-$15 per bracket) or Etsy artisan makers ($30-$80 for a set). Installation takes 20 minutes with an electric drill.

    Alternative: Leather corner guards ($20-$40) provide similar detail with more vintage charm.

    Your sofa suddenly looks like a curated vintage piece. These brackets catch light beautifully and give any room a collected, thoughtful feeling.

    5. Two-Tone Wood Frame (Light + Dark)

    Mixing light and dark wood tones on a single frame creates visual interest and works with almost any décor style. Light legs with dark arm supports (or vice versa) feel intentional and designer-level.

    Custom options at Maiden Home ($1,600-$3,000), What A Room ($1,400-$2,800), and Restoration Hardware allow full control over wood selections. More affordable options appear at Article ($900-$1,600) and IKEA’s custom services ($600-$1,200). Production typically takes 6-10 weeks.

    Pro tip: Pair light ash with dark walnut, or blonde oak with espresso for maximum contrast.

    This frame style makes your sofa look bespoke and considered. It anchors eclectic rooms and works beautifully in spaces with collected furniture from different eras.

    6. Plywood Base with Upholstered Skirt

    Upholstered skirts hide practical plywood bases while adding softness and formality. This frame style works brilliantly in traditional, transitional, or eclectic spaces where you want the sofa to feel settled and curated.

    Brands like Pottery Barn ($1,200-$2,600), Ethan Allen ($1,400-$2,800), and Room & Board ($1,100-$2,300) offer skirt options. Custom upholsterers can add skirts to existing sofas for $200-$500. Choose performance fabrics for skirts ($15-$25 per yard) so they withstand foot traffic and pet interactions.

    Alternative: Remove skirts seasonally or swap them with different fabric colors ($100-$300 each).

    The skirt grounds your sofa, making it feel intentional and designer-decorated. It also hides dust and makes cleaning underneath easier—a practical luxury.

    7. Chrome or Polished Steel Legs

    Polished chrome or steel legs read ultra-modern and work especially well in minimalist, contemporary, or industrial spaces. They reflect light, making sofas feel lighter and more sculptural.

    Find these at Modern furniture retailers like Article ($1,000-$2,000), CB2 ($800-$1,600), and Design Within Reach ($1,500-$3,000). Metal leg replacements from Etsy metalworkers ($40-$120) fit most standard sofa frames. Installation requires removing old legs and bolting on new ones (15 minutes with basic tools).

    Pro tip: Pair polished metal with neutral upholstery to let the frame shine.

    The reflective quality makes rooms feel brighter and more open. Your sofa becomes a sculptural element rather than just furniture.

    8. Reclaimed Wood Frame with Modern Upholstery

    Reclaimed wood frames combine sustainability with character. The weathered texture reads high-end and eco-conscious while staying practical.

    Custom builders like What A Room, Maiden Home, and independent upholsterers create these for $1,800-$4,000+. Sourced reclaimed wood costs more upfront but tells a story. Ready-made options with faux-reclaimed details appear on Wayfair ($1,200-$2,200) and Article ($1,400-$2,600) at lower price points.

    Sustainability note: Reclaimed frames last decades and feel better knowing they’re repurposed materials.

    Your sofa becomes a conversation starter with built-in backstory. The weathered frame pairs beautifully with modern fabrics, creating intentional contrast.

    9. Brass or Gold Metal Accents on Arms

    Metal capping on armrests—in brass, gold, or copper finishes—adds jewelry-like detail that elevates any sofa. This works because it’s subtle but undeniably luxe.

    High-end brands like Restoration Hardware ($3,500-$7,000+), Rh Modern ($2,500-$5,000), and Design Within Reach ($1,800-$4,000) feature these regularly. Budget-friendly versions appear at Article ($1,200-$2,200) and Wayfair designer collaborations ($900-$1,800). Metal trim tape ($15-$40) can be applied to existing armrests by upholsterers ($100-$250 labor).

    Alternative: Brass nail head trim ($20-$60 for decorative kits) creates similar luxury impact.

    The warm metal catches light beautifully throughout the day. Guests immediately notice these details and feel the quality.

    10. Angled Wood Frame with Splayed Legs

    Splayed legs—widening slightly outward—create a distinctive mid-century modern silhouette that reads expensive and intentional. The angle affects both aesthetics and stability.

    Search for these on vintage platforms like 1stDibs ($800-$2,000), Chairish ($600-$1,800), or specialized mid-century retailers ($1,200-$2,500). New versions with splayed frames appear at Article ($1,100-$2,000), West Elm ($1,200-$2,200), and Maiden Home ($1,400-$2,600).

    Pro tip: Splayed legs show off beautiful hardwood floors or pair gorgeously with woven rugs.

    The angle creates visual movement and makes your sofa look sculpted rather than boxy. This frame style works beautifully in rooms where you want furniture to be a focal point.

    11. Leather and Wood Combination Frame

    Leather and wood together create warmth and depth. The combination feels collected and upscale without reading cold or corporate.

    Luxury brands like Poltrona Frau ($4,000-$8,000+) and Cassina ($3,500-$7,000) excel at this pairing. Accessible mid-range options include Maiden Home ($1,600-$3,000) and What A Room ($1,400-$2,800). Leather wrapping or trim applied to existing sofas costs $150-$400 through local upholsterers.

    Pro tip: Choose leather in warm tones (cognac, caramel, chocolate) rather than cool blacks for approachability.

    The combination feels sophisticated but livable. Leather ages beautifully and darkens over time, adding character.

    12. Solid Wood Platform Base Instead of Legs

    Platform bases—continuous wood underneath instead of individual legs—create a grounded, architectural look. This style reads contemporary and works beautifully in low-profile spaces.

    Scandinavian brands like BoConcept ($1,200-$2,400), Urban Natural ($1,100-$2,200), and IKEA’s Söderhamn collection ($500-$1,000) specialize in platform designs. Custom builders create them for $1,400-$3,000+. This style suits smaller spaces and modern décor perfectly.

    Alternative: Lower platform bases make rooms feel spacious; higher bases ($8-$12 inches) hide storage.

    Your room instantly looks more intentional and design-forward. Platform bases also reduce visual clutter since nothing sits beneath.

    13. Mix Metal Types (Steel Legs + Brass Details)

    Mixing metal finishes—brushed steel with brass or copper—creates visual interest and works in contemporary, eclectic, or transitional spaces. The key is limiting yourself to two complementary metals.

    Custom builders at What A Room ($1,500-$3,500), Maiden Home ($1,400-$2,800), and independent upholsterers create these. Ready-made options with mixed metal details appear on Wayfair ($1,200-$2,200) and Design Within Reach ($1,800-$3,500).

    Pro tip: One metal should be warm (brass, copper) and one cool (steel, chrome) for maximum contrast.

    The mixed metals feel collected and intentional—like you’ve curated each element. This approach works especially well in open-plan homes where sofas are viewed from all angles.

    14. Curved Wood Frame with Organic Silhouette

    Curved wood frames—especially those following organic, serpentine lines—read expensive and feel completely unique. Curved details are harder to manufacture, so they signal quality and investment.

    Browse curved sofas at Restoration Hardware ($3,000-$7,000+), Design Within Reach ($2,000-$5,000), and Article ($1,400-$2,600). These require longer lead times (10-16 weeks typically) but feel worth the wait.

    Pro tip: Curved frames work beautifully in rooms without sharp angles; they soften traditional rectangular spaces.

    A curved sofa becomes an instant focal point. The flowing shape makes rooms feel softer and more inviting.

    15. Nail Head Trim with Contrast Wood Frame

    Nail head trim—rows of decorative metal nails—adds jewelry-like detail and instantly reads luxury. The contrast between shiny nails and wood creates sophisticated visual interest.

    Brands like Pottery Barn ($1,200-$2,600), Ethan Allen ($1,400-$2,800), and Restoration Hardware ($2,500-$6,000) offer nail head options. Add trim yourself using nail head kits ($20-$60) and an upholsterer ($150-$300 labor), or choose online from Wayfair ($900-$1,800) with trim pre-applied.

    Alternative: Faux nail head tape ($15-$30) provides the look without permanent commitment for renters.

    The trim catches light beautifully and makes your sofa look like a designer investment piece. Each detail reads intentional and collected.

    16. Solid Hardwood Construction with Visible Joinery

    Visible joinery—where wood pieces connect in joinery rather than metal brackets—signals superior craftsmanship and durability. This detail reads expensive because it demonstrates woodworking skill.

    Premium brands emphasize this: Room & Board ($1,200-$2,500), Crate and Barrel’s high-end line ($1,400-$2,800), and Ethan Allen ($1,400-$2,800). Custom woodworkers create these for $1,600-$3,500+. Ask about solid hardwood frames and visible joinery specifically.

    Pro tip: This construction lasts 15-20+ years because wood joinery distributes stress better than metal fasteners alone.

    Your sofa becomes an heirloom-quality piece. The visible craftsmanship tells a story about durability and intention.

    17. Mixed Upholstery Frame with Leather Back

    Mixing fabrics on frames—fabric front with leather back—lets you save money while maintaining luxury appearance. This works brilliantly in open-plan homes where both sides of the sofa are visible.

    Custom builders like What A Room ($1,400-$2,800), Maiden Home ($1,500-$3,000), and upholsterers offer this. Ready-made two-fabric options appear on Wayfair ($1,000-$2,200) and Article ($1,200-$2,400). The leather back is more affordable than leather overall and hides wear.

    Pro tip: Use performance fabric in front (higher traffic) and leather in back (less visible).

    You get luxury details where guests see them while staying practical. This approach maximizes visual appeal and durability simultaneously.

    18. Powder-Coated Metal Frame with Modern Lines

    Powder-coated metal frames—available in matte or satin finishes rather than polished—feel ultra-contemporary and extremely durable. This finish resists scratching better than polished metal.

    Find these at Design Within Reach ($1,600-$3,200), Article ($1,000-$2,000), and Structube ($1,200-$2,400). The matte finish is key; it photographs beautifully and reads more expensive than glossy alternatives.

    Pro tip: Pair matte metal with velvet or linen upholstery for maximum contrast.

    The matte finish feels architectural and intentional. This style works especially well in minimalist, industrial, or modern spaces.

    19. Woven Rattan or Cane Frame Details

    Rattan or cane inserts—woven into wooden frames—add texture, warmth, and visual interest. This natural material combination reads expensive and design-forward.

    Search for these on Wayfair ($1,200-$2,000), Article ($1,300-$2,300), and West Elm ($1,400-$2,400). Custom rattan inserts can be added by upholsterers ($200-$400). Rattan is durable and develops beautiful patina over time.

    Alternative: Rattan and wood appear together in sculptural mid-century modern pieces on 1stDibs ($800-$1,800).

    The natural texture makes your sofa feel organic and collected. Rattan pairs beautifully with warm wood tones and neutral upholstery.

    20. Stacked Wood Base with Negative Space

    Stacked or layered wood bases with visible negative space create architectural interest. This design-forward approach reads expensive because it’s structural and sculptural simultaneously.

    These appear primarily in custom or contemporary collections: What A Room ($1,600-$3,200), Maiden Home ($1,500-$3,000), and Design Within Reach ($2,000-$4,000+). Production takes 8-12 weeks typically.

    Pro tip: The gaps under stacked bases make cleaning easier and visually lighten the sofa’s appearance.

    Your sofa becomes a design statement. The negative space reads intentional and contemporary, making rooms feel more open.

    21. Tuxedo Frame with Upholstered Sides

    Tuxedo frames—where wood shows on top edges while sides are upholstered—create a tailored, expensive look. The frame remains visible in the places guests see most.

    This style appears at Restoration Hardware ($3,000-$6,500), Poltrona Frau ($3,500-$7,000+), and Design Within Reach ($1,800-$3,500). Semi-custom versions exist at Wayfair ($1,200-$2,200) and Article ($1,300-$2,400).

    Pro tip: Dark wood frames with light upholstery create maximum contrast and read luxury.

    The tuxedo approach feels intentional and designer-curated. You get frame detail where it matters most visually.

    22. Metal Trim with Decorative Nailing Pattern

    Metal trim arranged in patterns—rather than simple rows—adds artistic detail and craftsmanship. This custom approach reads expensive and unique.

    High-end brands offer this through custom services: Restoration Hardware ($3,000-$7,000+), Poltrona Frau ($4,000-$8,000+). Budget-friendly custom nail trim from Wayfair artisans ($1,200-$2,400) creates similar impact. Upholsterers can arrange nails in patterns for $200-$500 additional labor.

    Alternative: Pre-made patterned nail head trim kits ($30-$80) install in 2-3 hours.

    The patterned detail reads like art. Guests notice the intentionality immediately.

    23. Combination Base: Wood Frame + Metal Feet + Leather Wrapping

    Combining three materials—wood, metal, and leather—on a single frame creates ultimate visual sophistication. The layers tell a story about craftsmanship and intentional design.

    This highest-level combination appears at Restoration Hardware ($4,000-$8,000+), Poltrona Frau ($4,500-$9,000+), and custom builders. More accessible three-material combinations exist at What A Room ($1,800-$3,500), Maiden Home ($1,600-$3,200), and upholsterers offering mix-and-match customization.

    Pro tip: Choose one metal finish (warm or cool) and stick with it for cohesion.

    Your sofa reads like a collected investment piece. Each material serves both aesthetic and functional purposes, creating a heirloom-quality piece.

    Save this post and pick one mixed-material frame style that speaks to your room. These details transform sofas from generic to intentional—and the best part is you don’t need a designer budget to make it happen.