Author: Clara Bennett

  • 23 Minimalist Shower Design Ideas for Clean, Modern Living

    23 Minimalist Shower Design Ideas for Clean, Modern Living


    Tired of shower clutter and design chaos? You don’t need a complete renovation to create a calm, modern shower space—just strategic choices that eliminate visual noise while keeping functionality simple. Whether you’re renting or remodeling, these 23 minimalist ideas range from free organizational tweaks to thoughtful upgrades that make your daily shower feel intentional and peaceful. We’ve included budget-friendly hacks alongside investment pieces, so you can start small or go all-in on creating the streamlined sanctuary you deserve. Let’s build a shower that’s beautiful precisely because it isn’t trying too hard.


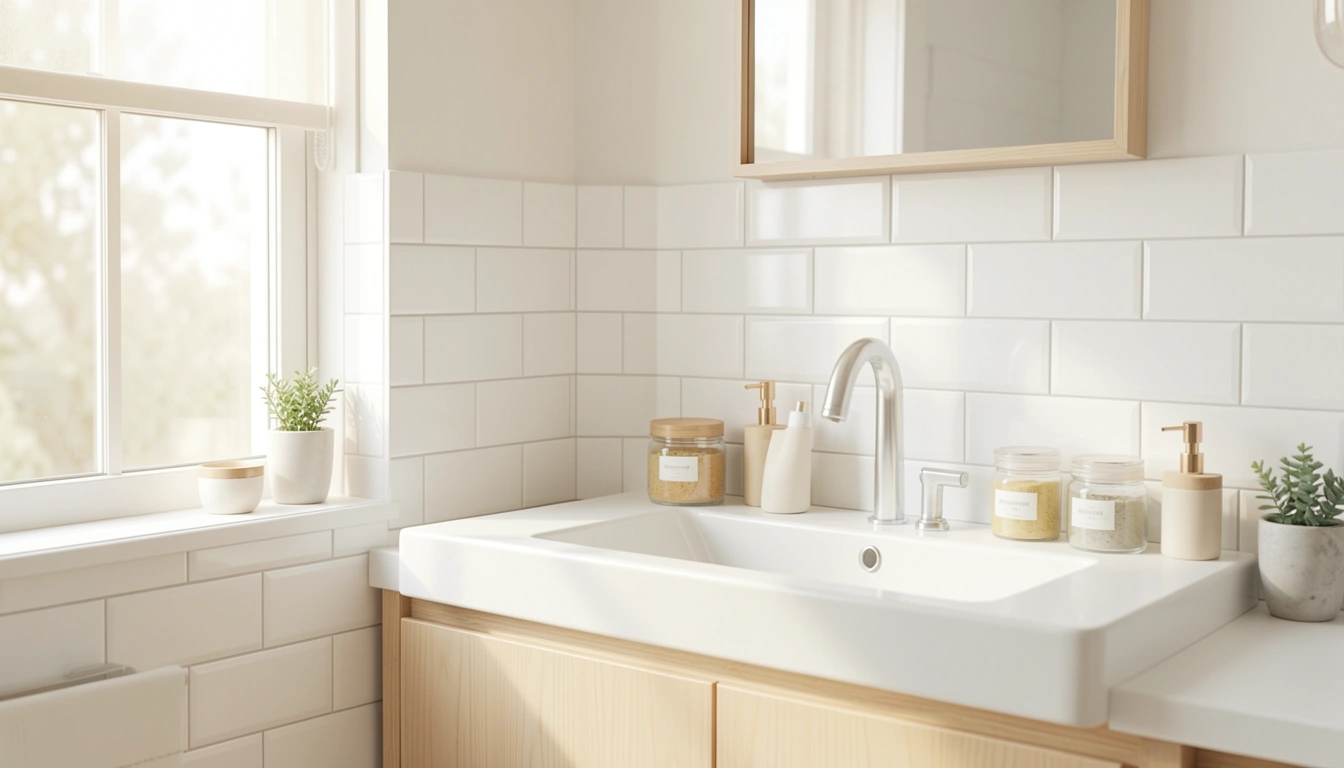
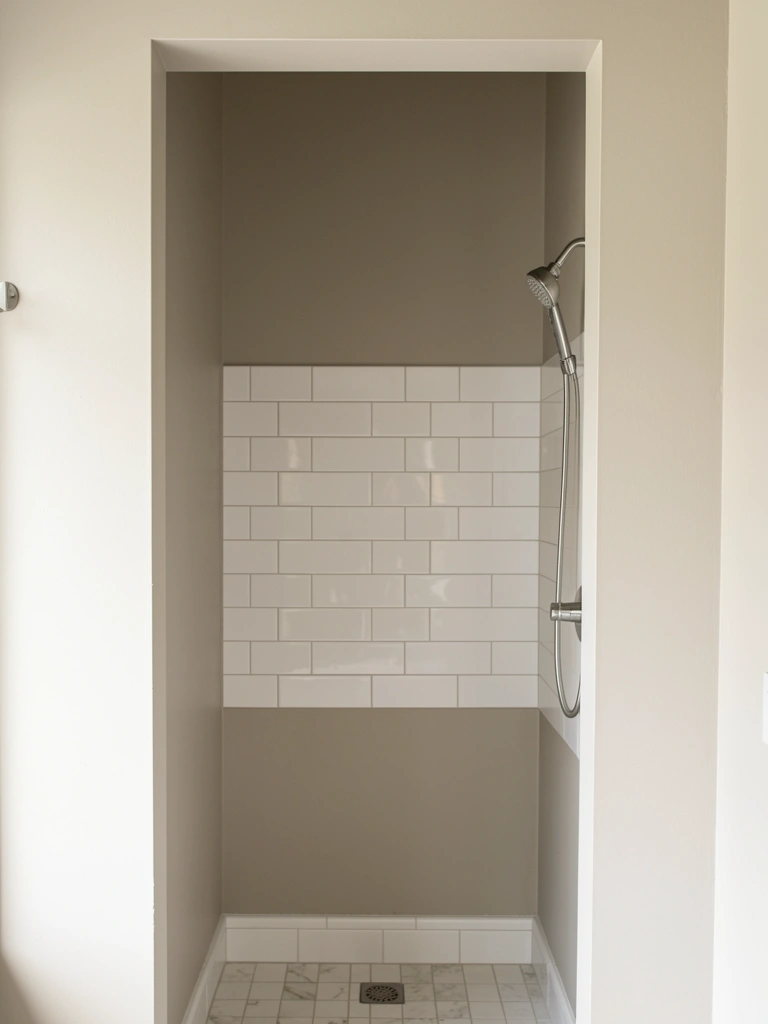
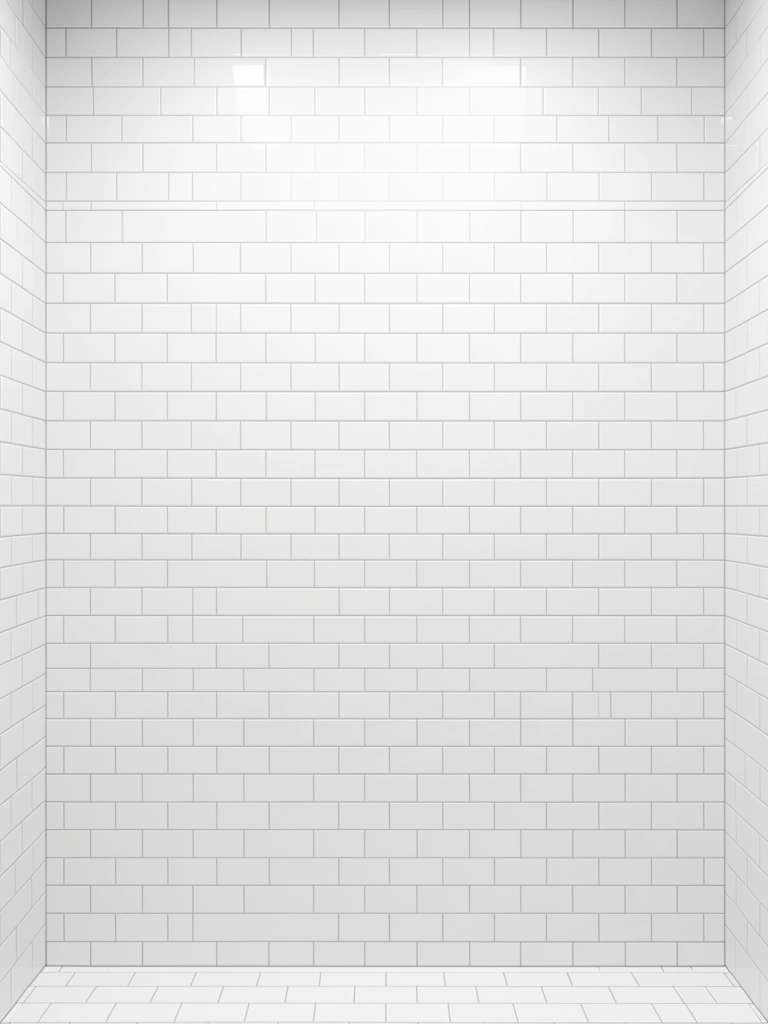
    1. Embrace White Subway Tiles for Timeless Simplicity

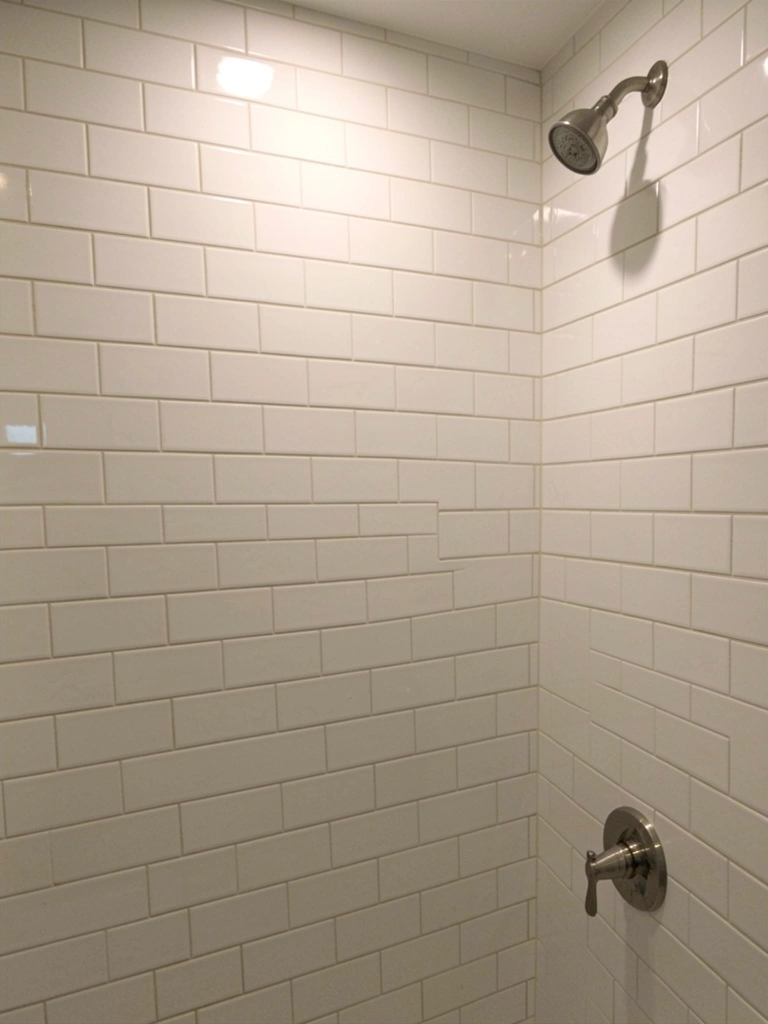
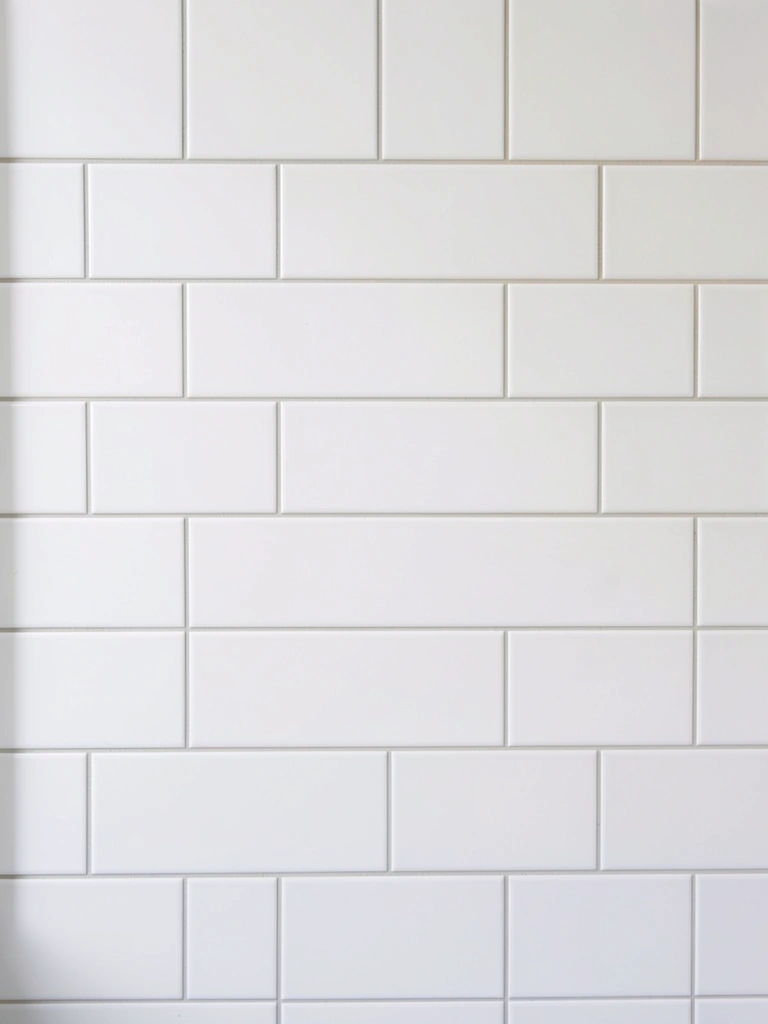
    White subway tiles are the foundation of minimalist design—they’re clean, calming, and work with any décor style. The repetitive pattern creates visual rhythm without being busy, and white expands the space visually, making even small showers feel airy.

    Install subway tiles horizontally or in a staggered brick pattern for classic minimalism. Budget $3–8 per square foot for tiles, plus $8–15 per square foot for professional installation (or DIY if experienced). Thin grout lines in white or light gray keep the look seamless. If renting, peel-and-stick subway tile sheets ($25–40 per pack) give similar impact without permanent damage.

    The result? A shower backdrop so clean and calm that you’ll actually look forward to standing under the spray each morning.


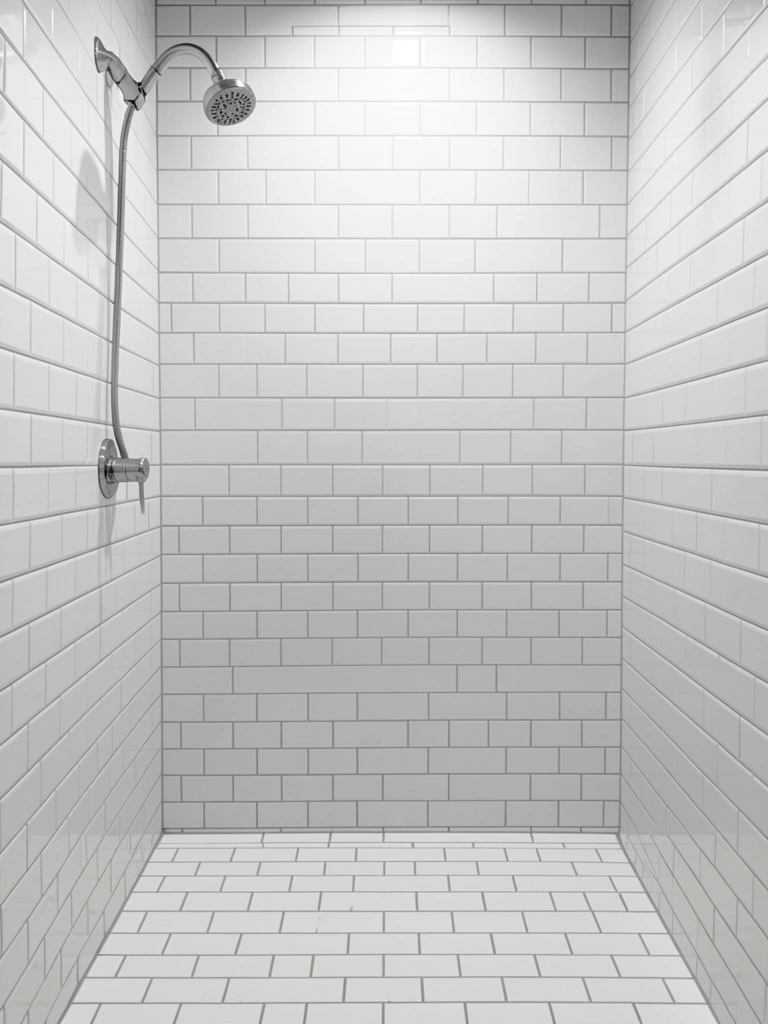
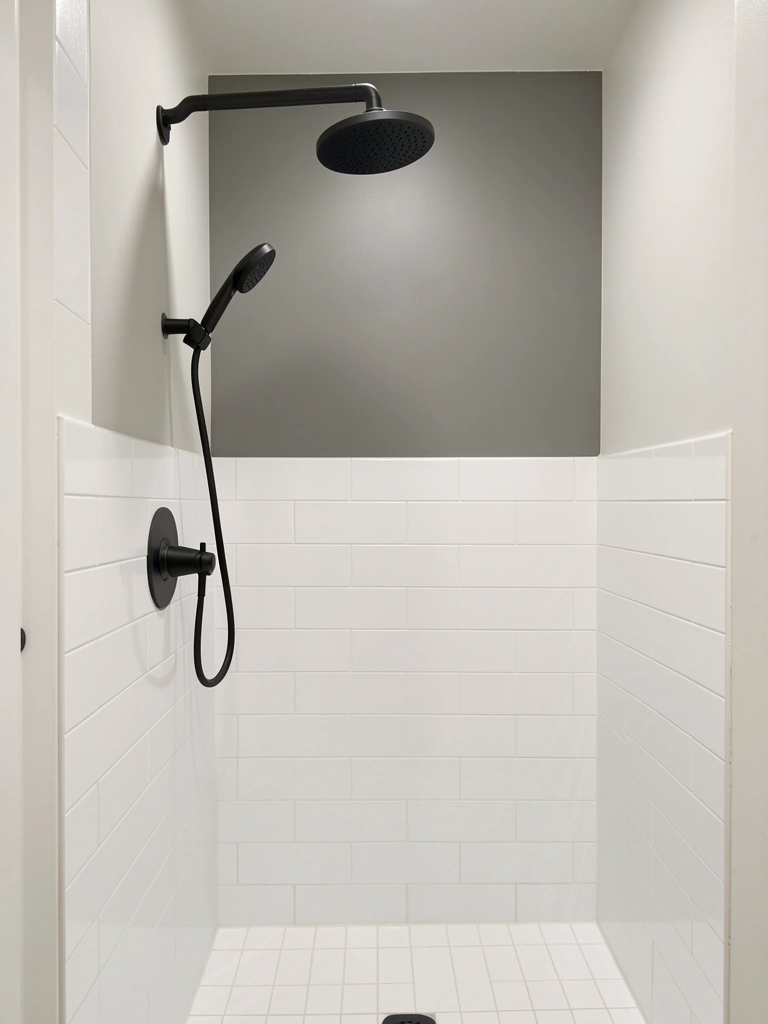
    2. Install a Single Rainfall Showerhead for Spa Calm

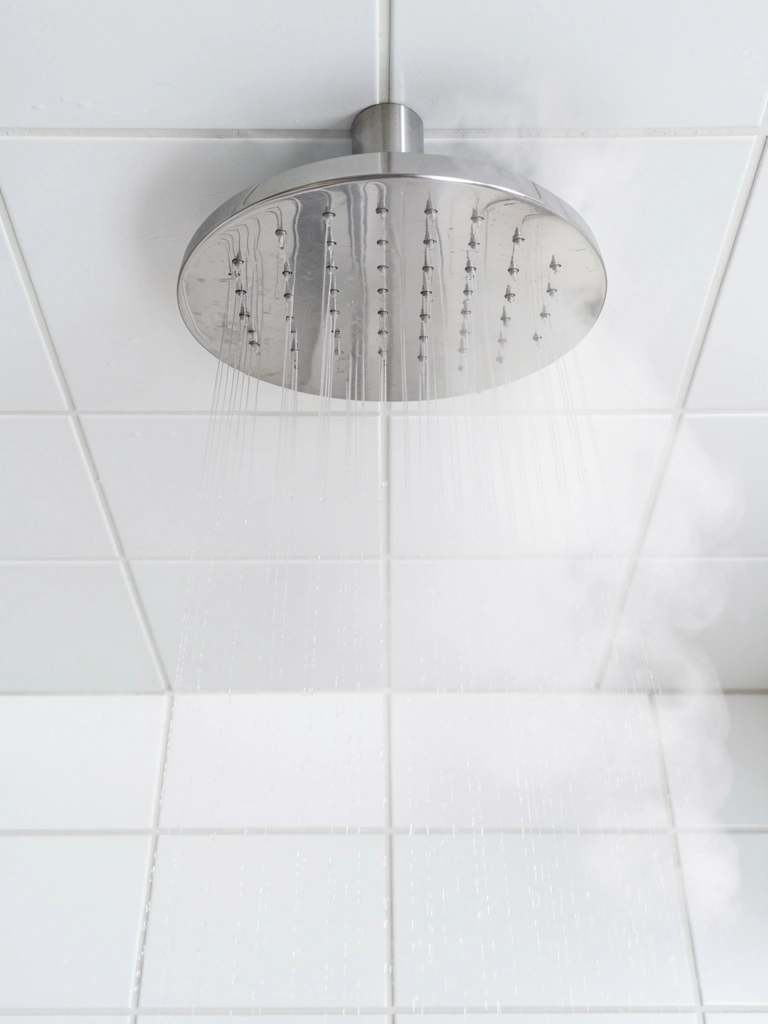
    A single, oversized rainfall showerhead replaces multiple shower controls with one unified, luxurious element. It’s the definition of minimalist luxury—fewer visual elements, more sensory calm.

    Choose a 6-10 inch stainless steel rainfall head ($80–250 depending on brand). Hansgrohe and Delta offer eco-friendly options with water-saving aerators. Installation involves redirecting supply lines to come down from above; hire a plumber ($150–300 labor) unless you’re comfortable with basic plumbing. Budget one day for a pro installation. The wall becomes clutter-free because you’ve consolidated all the hardware into one elegant element.

    You’ll notice the shower feels instantly more meditative. That simple change from nozzle spray to steady cascade genuinely shifts your whole morning routine.


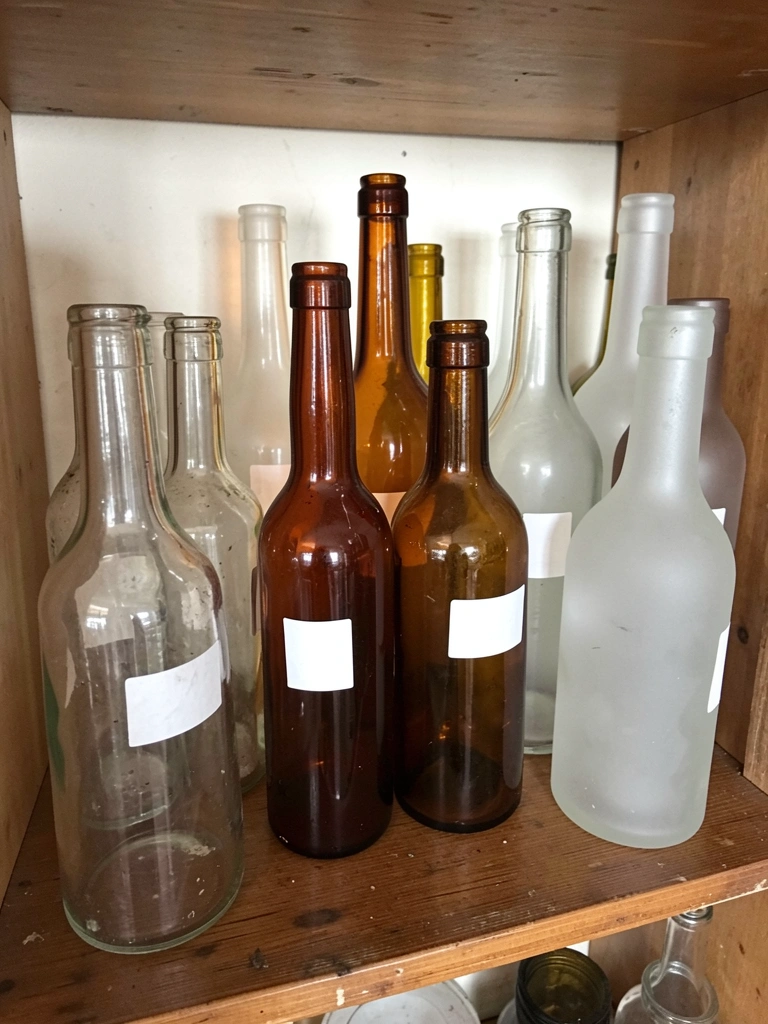
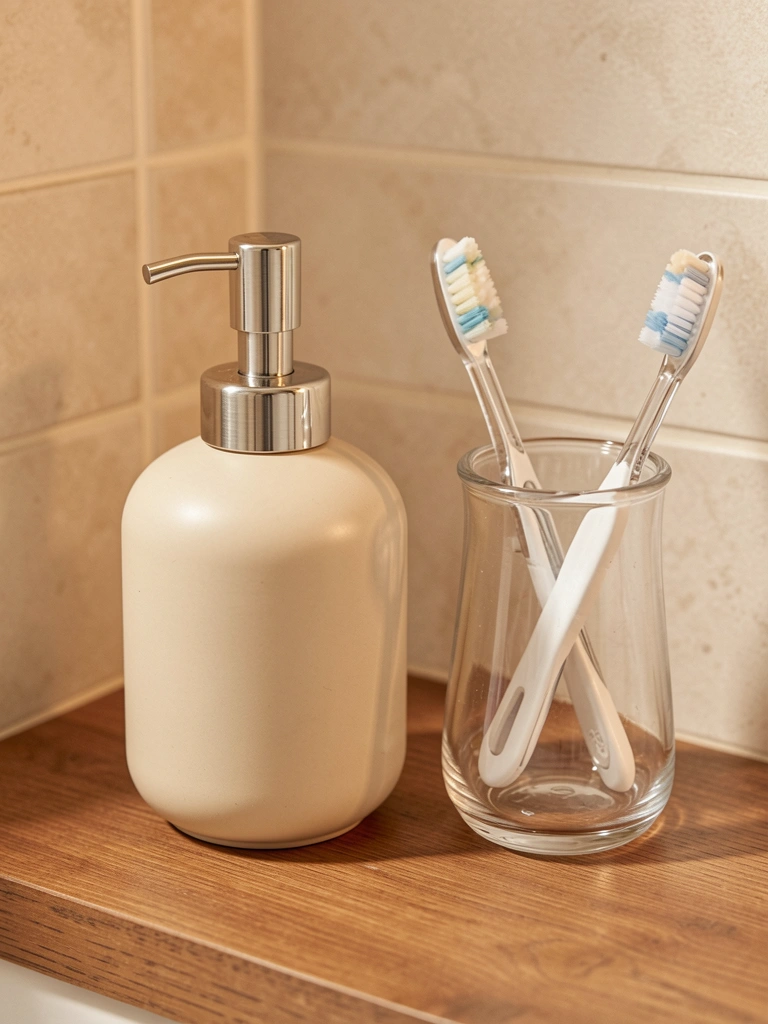
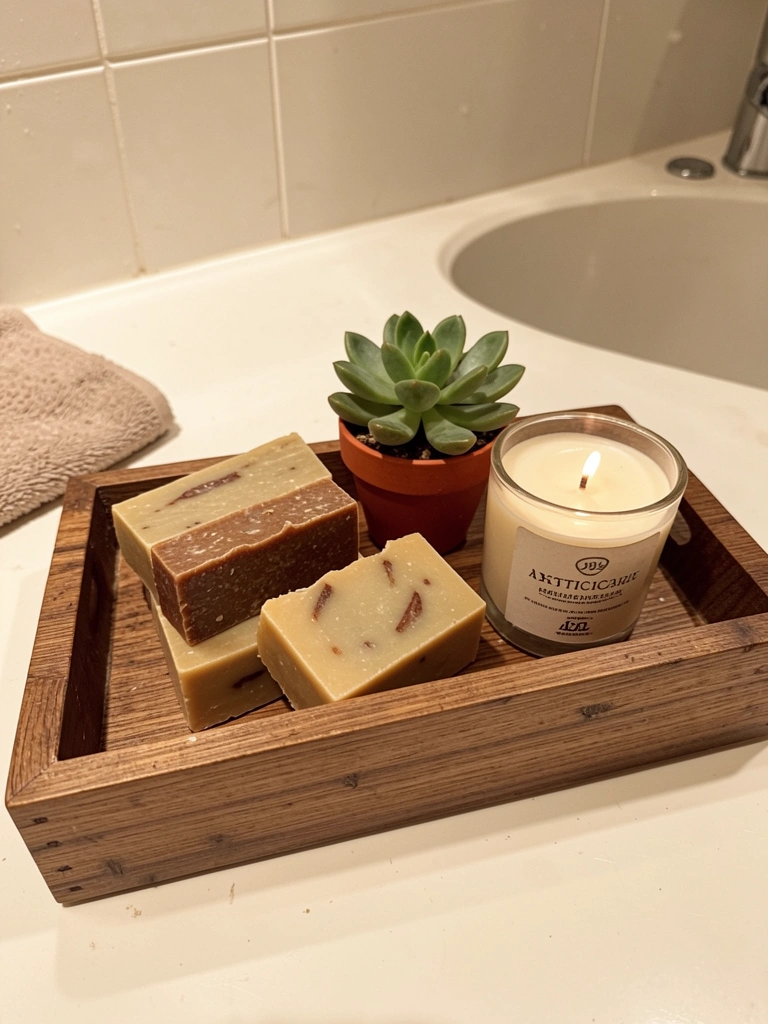
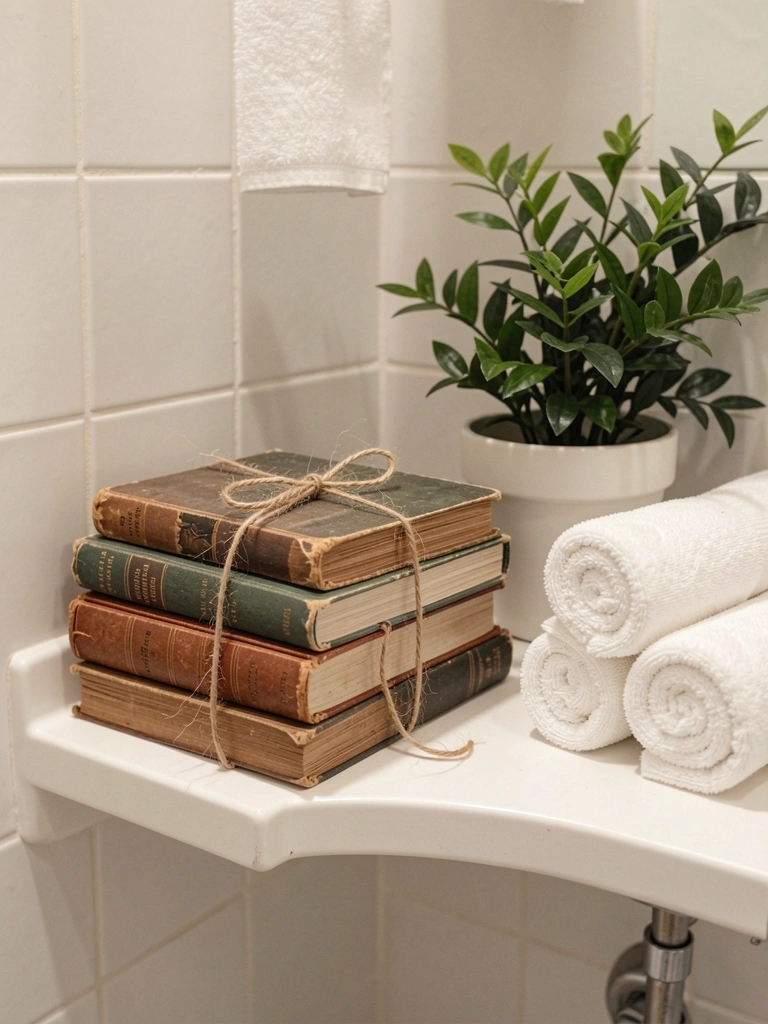
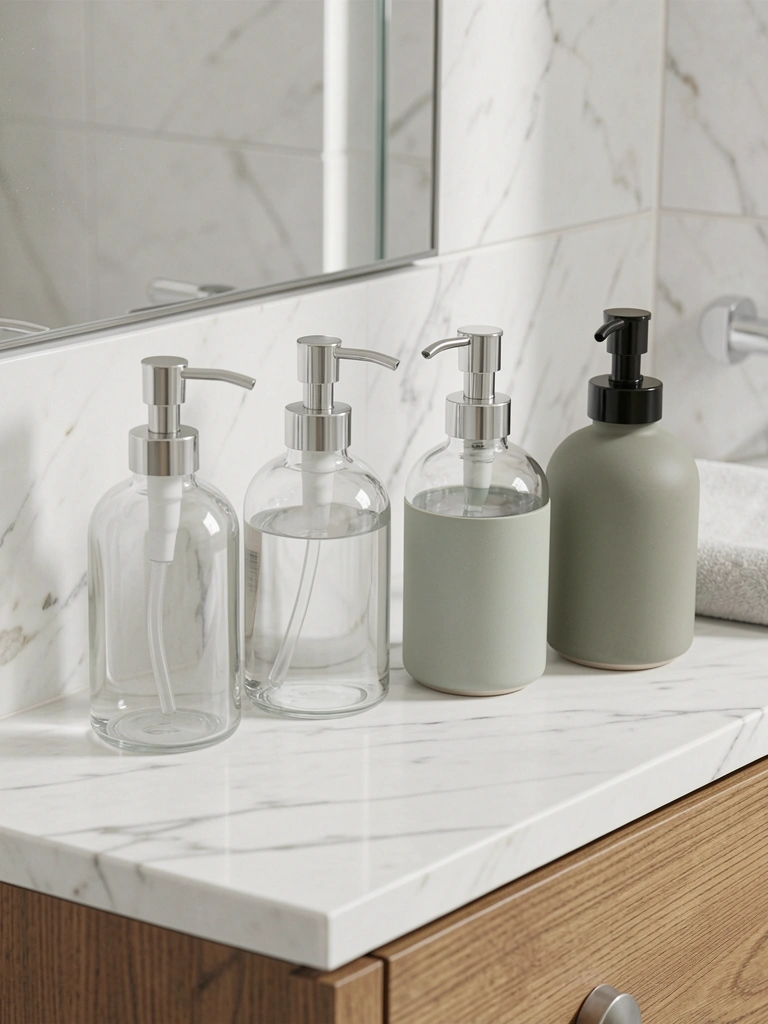
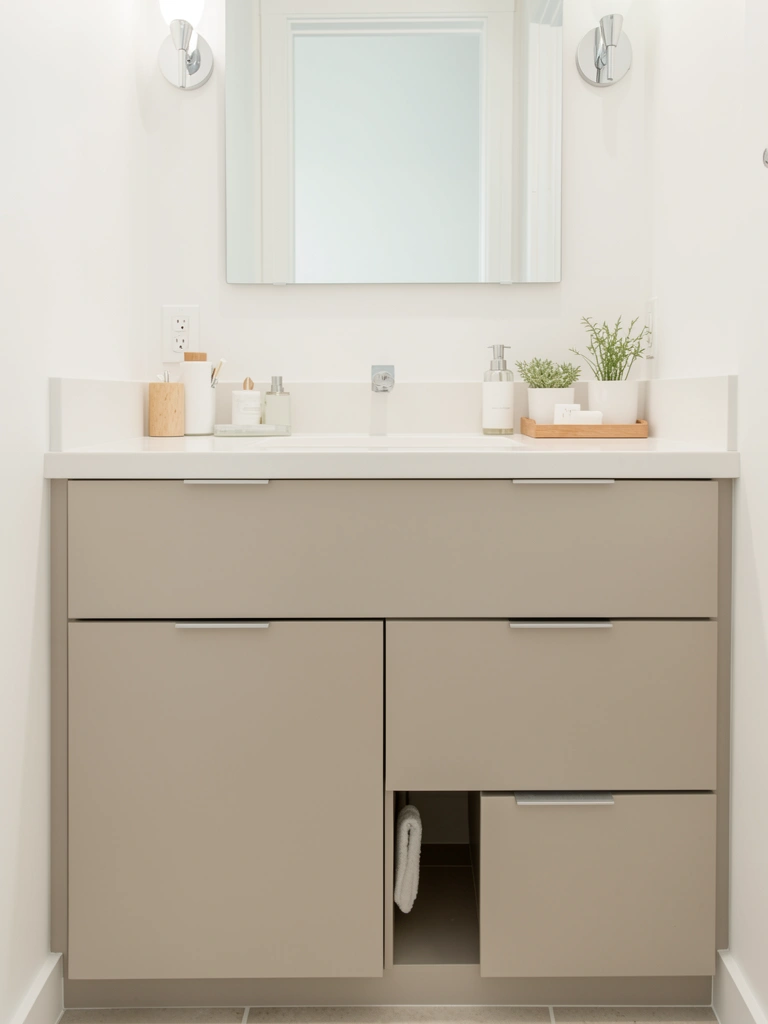
    3. Go Completely Clear of Shower Accessories

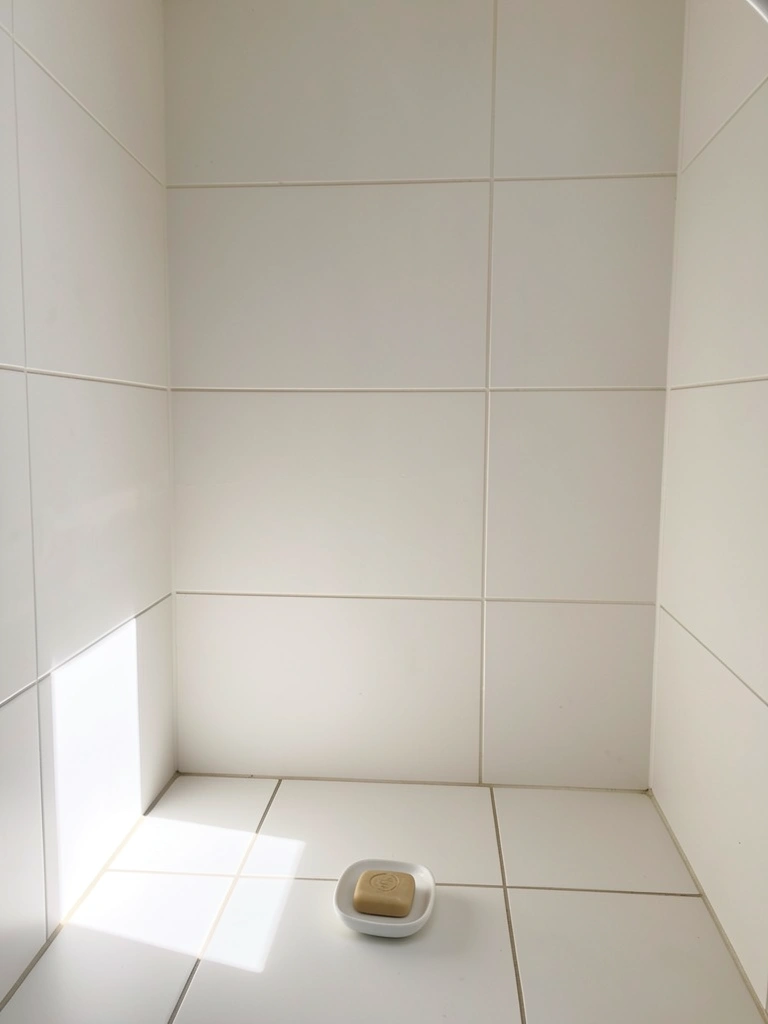
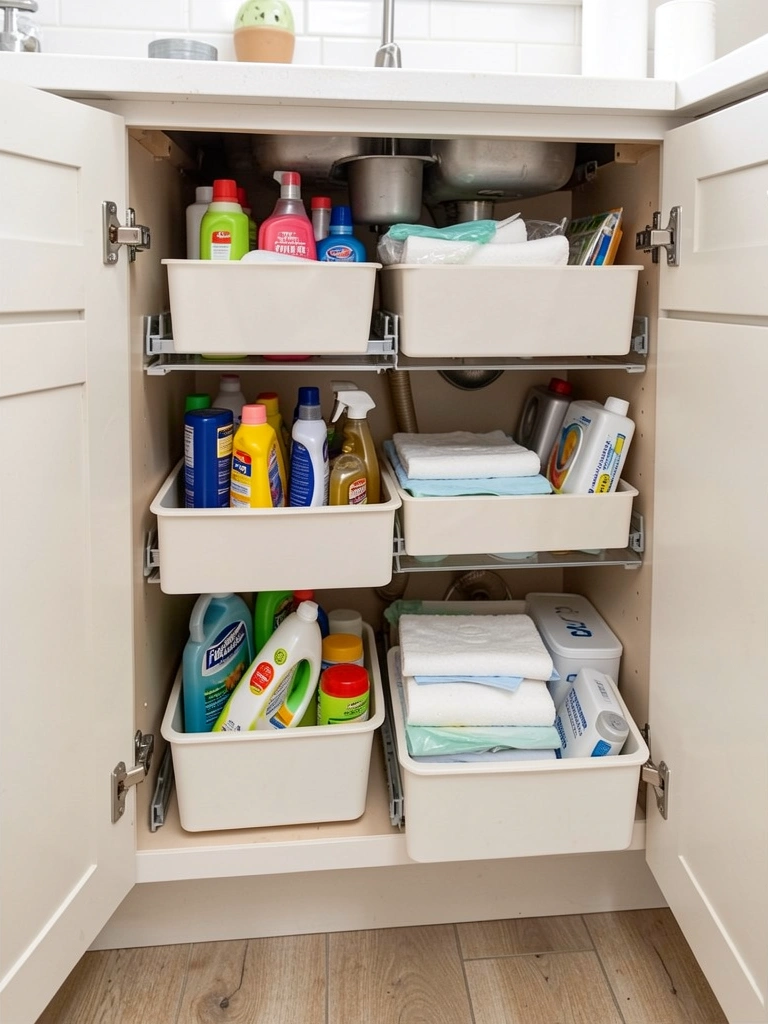
    The ultimate minimalist move: keep nothing visible in your shower except what you’re actively using. Store everything outside the shower space in a cabinet or drawer, and bring items in one at a time.

    Relocate bottles, loofahs, and razors to a pedestal cabinet or wall-mounted shelf outside the shower ($30–100 at IKEA, Target). Use a small white soap dish or magnetic soap holder ($8–15) for your only visible item. This takes 15 minutes to reorganize. It feels extreme, but it works: your shower becomes a blank canvas where your mind can actually rest instead of cataloging bottles.

    The serenity is real. Walking into an uncluttered space signals to your brain that it’s time to slow down and breathe.


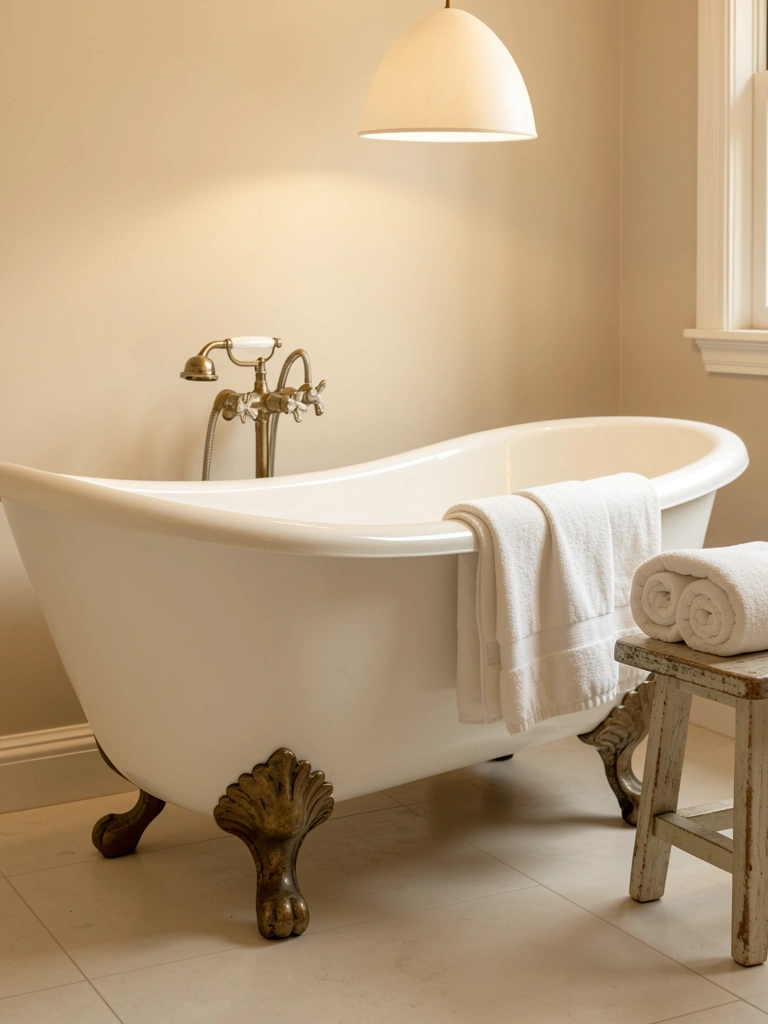
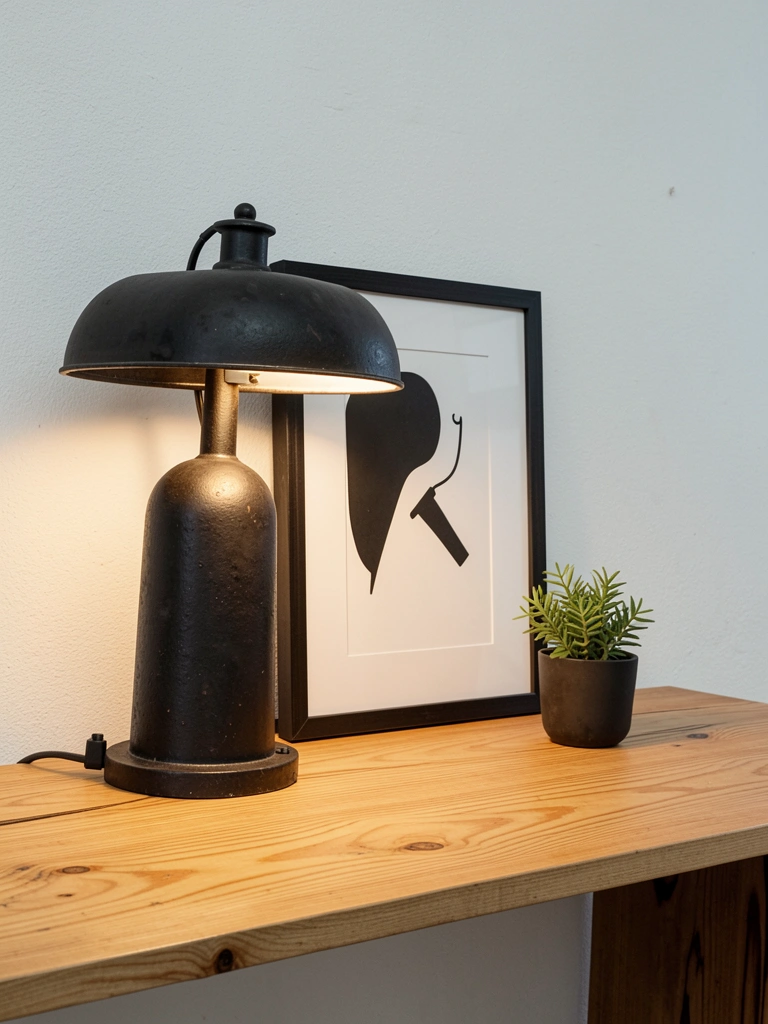
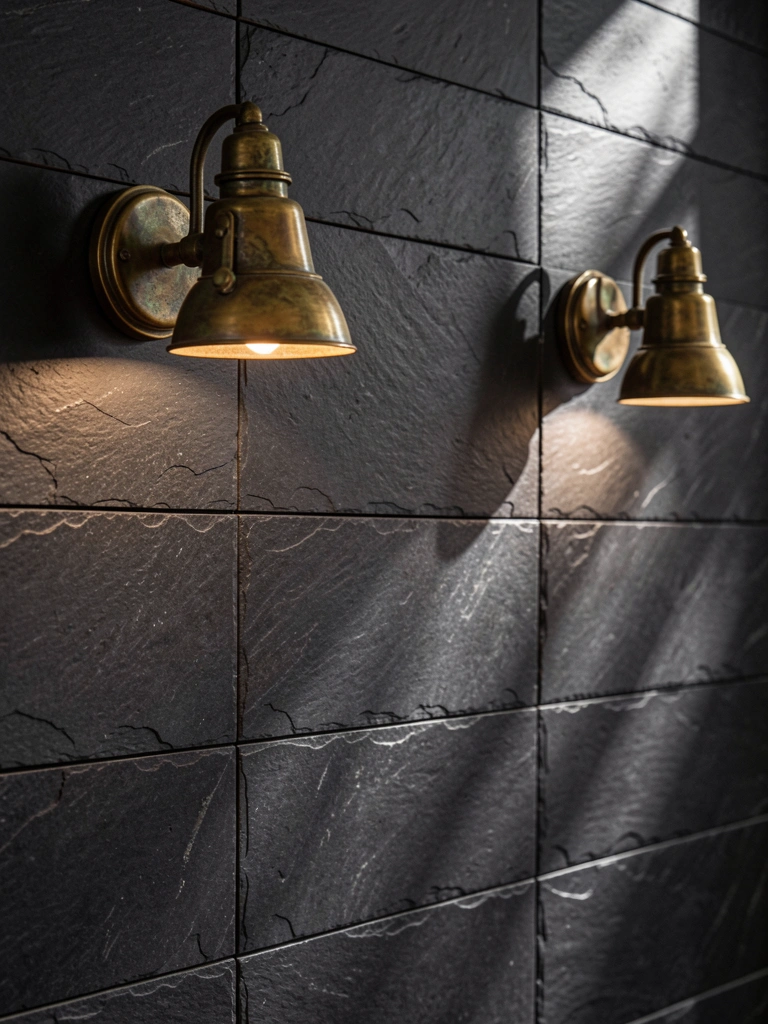
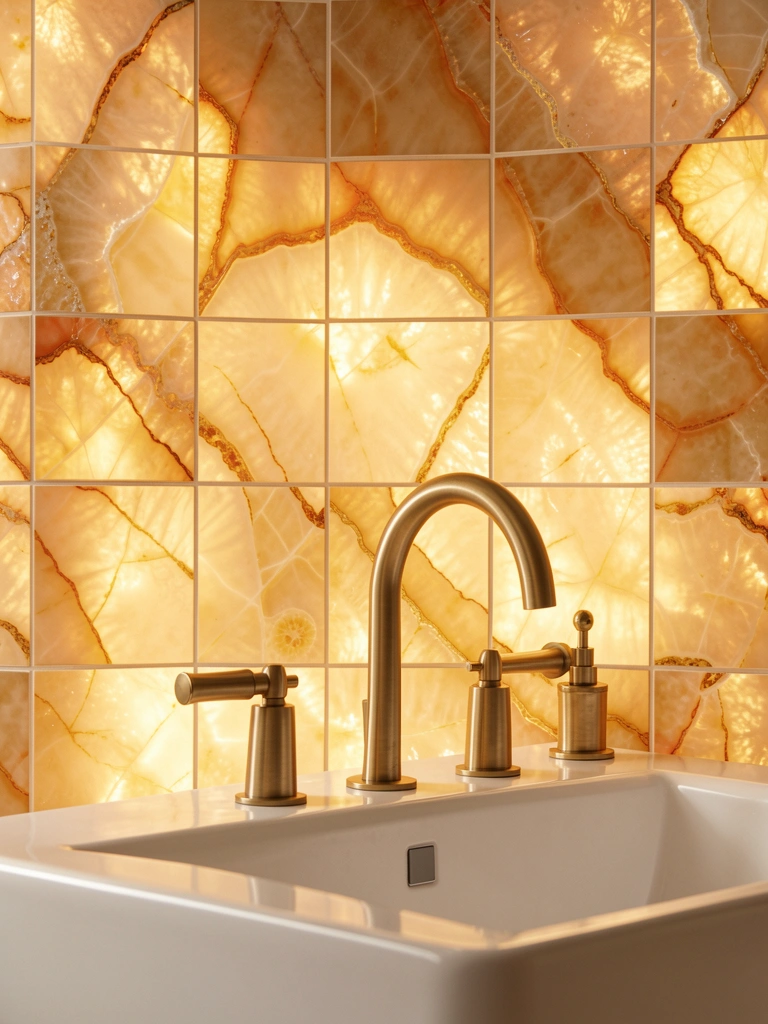
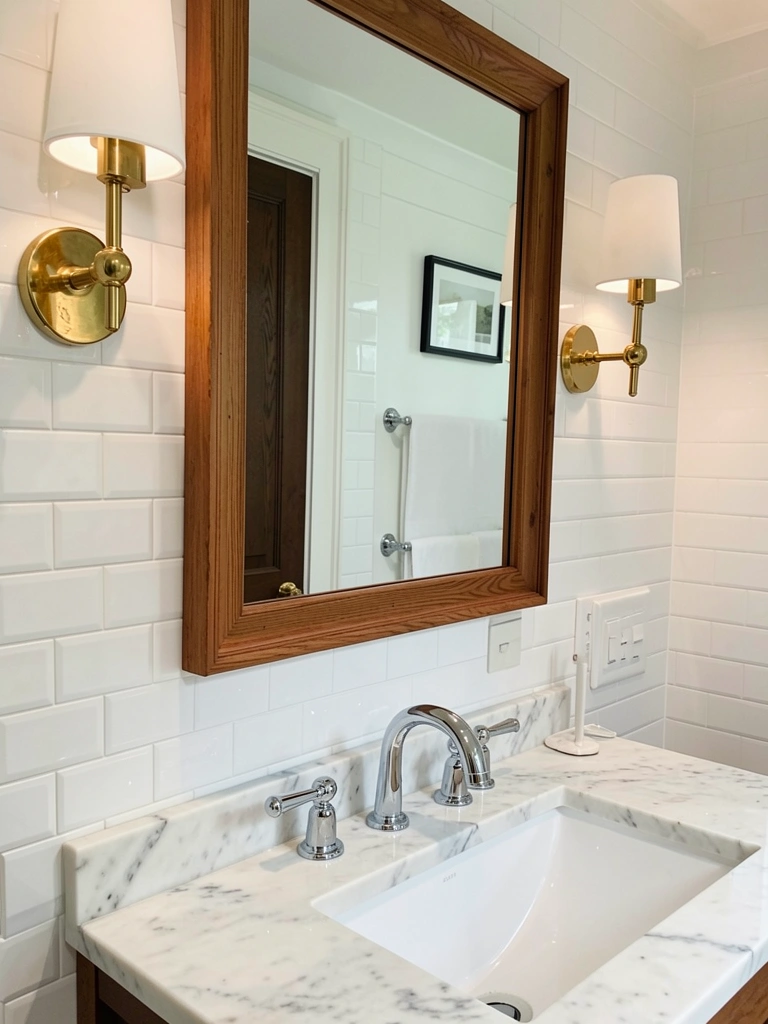
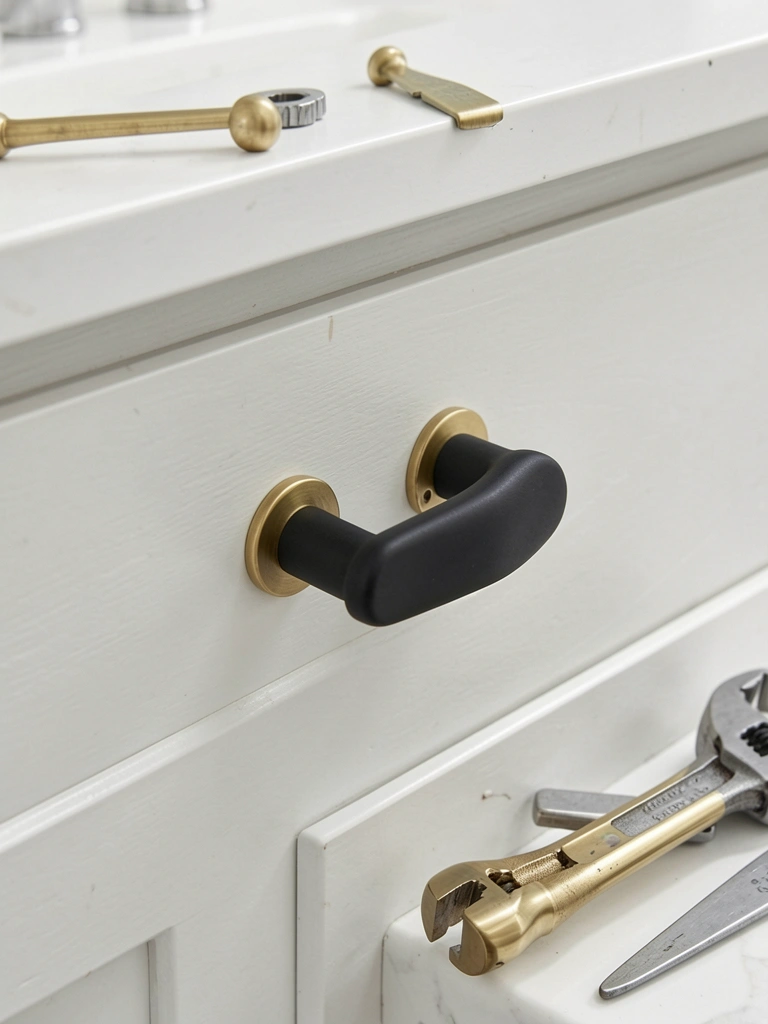
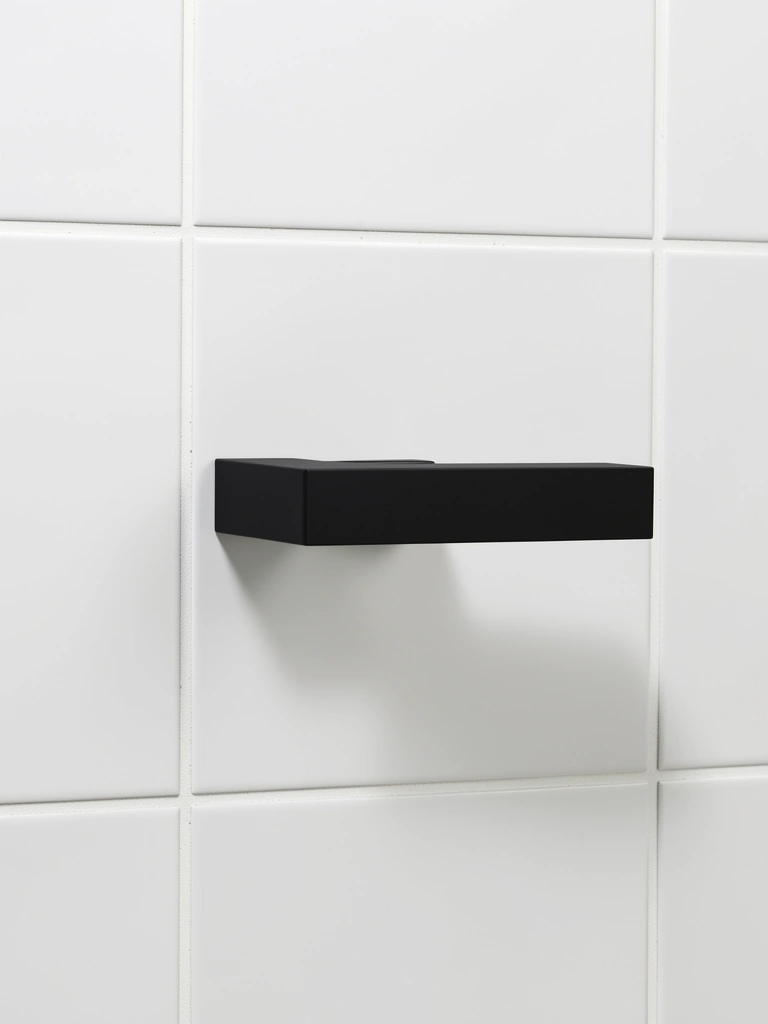
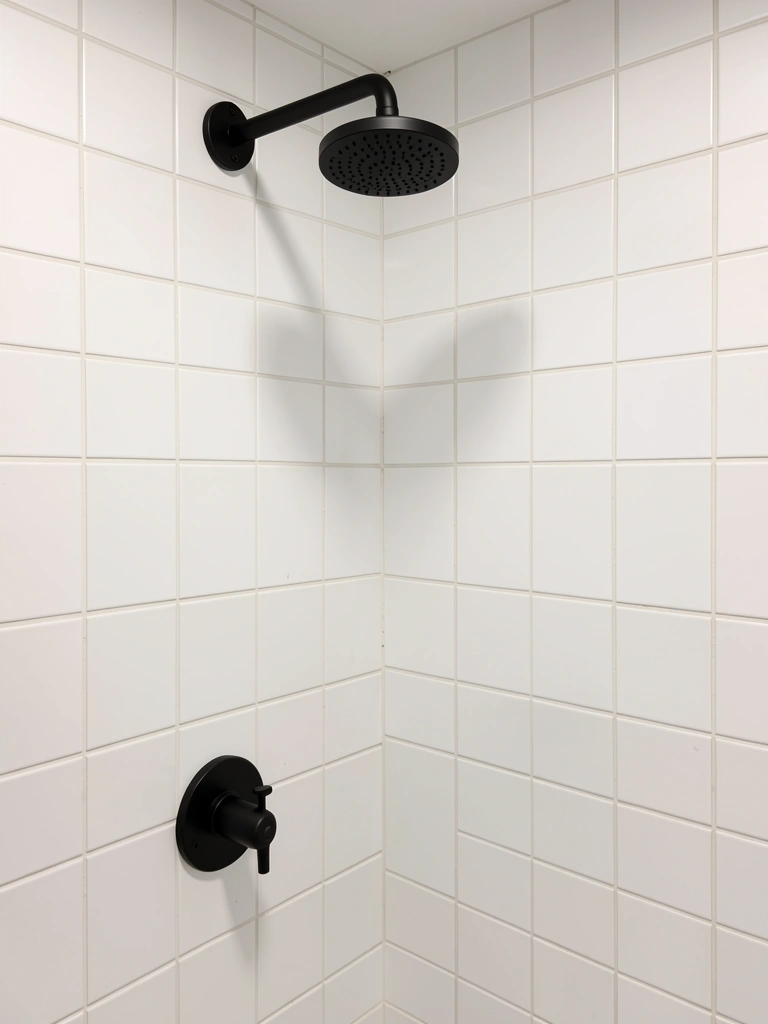
    4. Choose Matte Black Fixtures Over Chrome

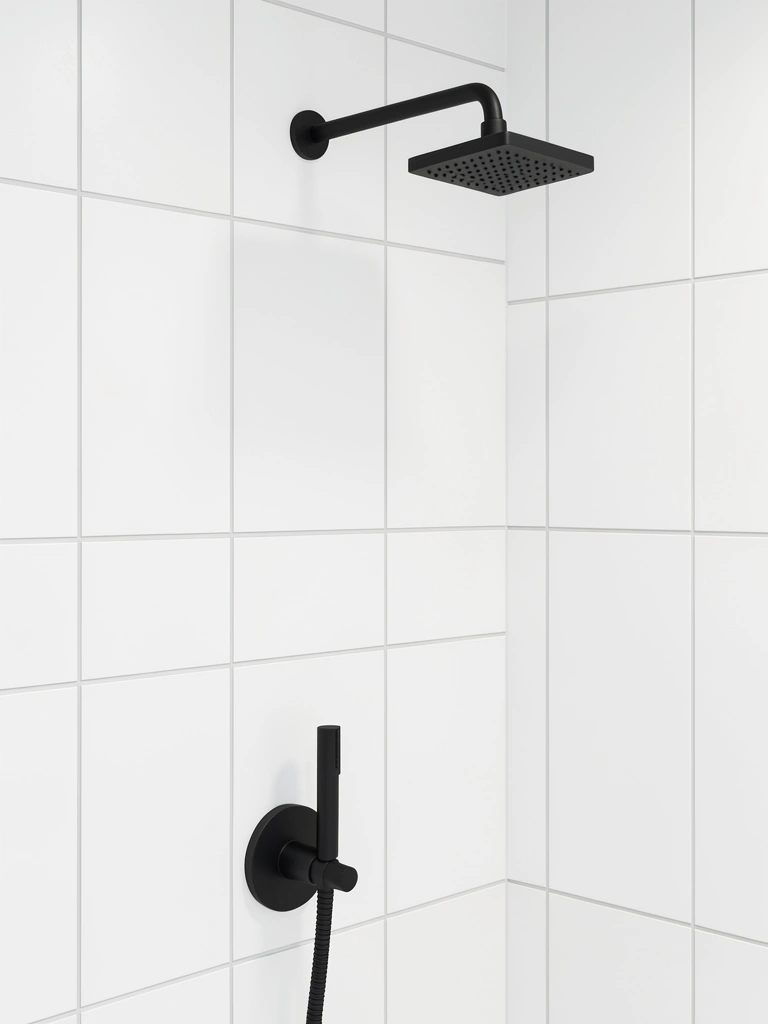
    Matte black fixtures offer modern minimalism without shine or reflection. They visually disappear into the background, letting the shower’s architecture shine instead of the hardware.

    Replace chrome fixtures with matte black stainless steel versions ($50–150 per piece). Brands like Moen and Pfister offer clean designs. Swapping handles and trim plates takes 30–45 minutes if you’re comfortable with basic tools. If not, hire a plumber ($75–150 labor). The matte finish hides water spots and fingerprints better than polished chrome, so maintenance drops significantly.

    Your shower looks intentionally designed rather than decorated. That subtle sophistication carries through your whole morning.


    5. Add a Niche Instead of Shelves or Caddies

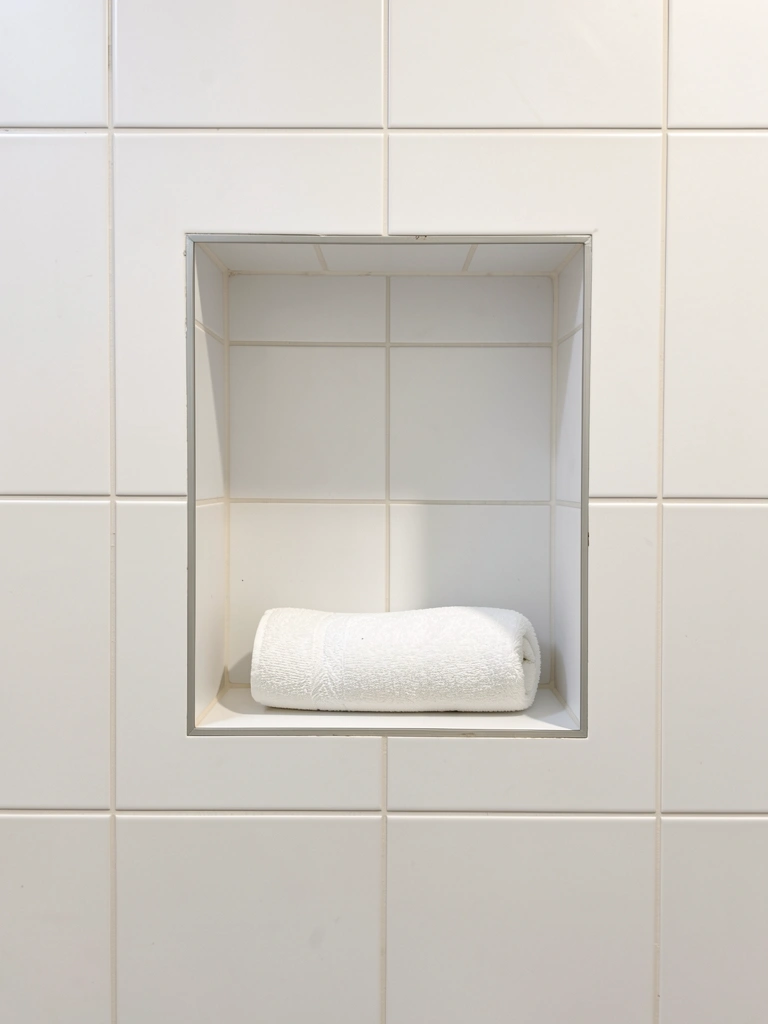
    A recessed shower niche is built-in storage that doesn’t sit on the wall—it’s part of the wall. This eliminates the visual clutter of hanging shelves while keeping essentials within reach.

    Cut a rectangular opening in the wall (between studs) during shower renovation, typically 12-18 inches wide. Tile the interior to match surrounding walls. Cost: $150–400 depending on size and tile selection. This is a contractor job. For renters, adhesive niche inserts ($40–80) stick temporarily to walls and hold one or two items.

    You get functional storage that looks intentional rather than makeshift. Everything has a designated home, so the space automatically stays organized.


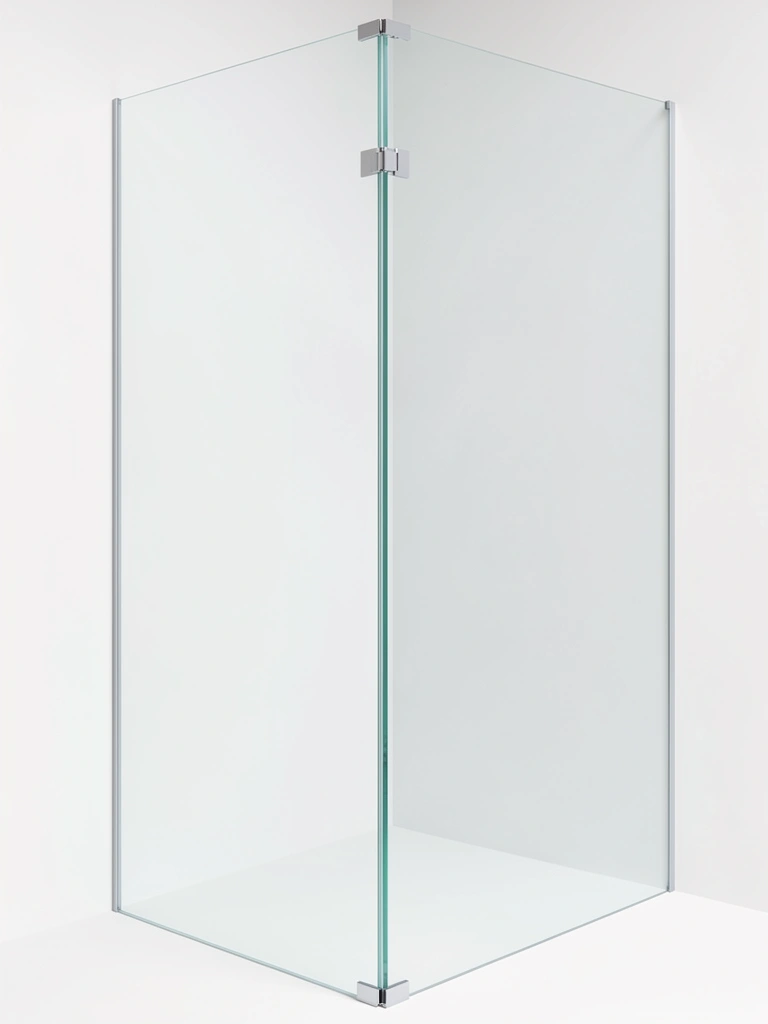
    6. Use Glass Doors Instead of Curtains

    Frameless glass doors make a small shower feel larger because you can see through to the shower space beyond. The simplicity is inherently minimalist—just glass and hinges, nothing else.

    Install 3/8-inch tempered glass frameless doors ($500–1,200 installed) or budget $200–400 for semi-frameless options with minimal hardware. Measure your opening carefully; installation takes 4–6 hours for a pro. Frameless doors require weekly squeegee-downs to prevent water spots (takes 2 minutes). If that sounds like too much maintenance, frameless with subtle silver frames ($300–700) offers a similar look with less spotting.

    The psychological effect is huge: you see into the shower, so it looks bigger and less enclosed. Plus, no mildewed curtains to replace.


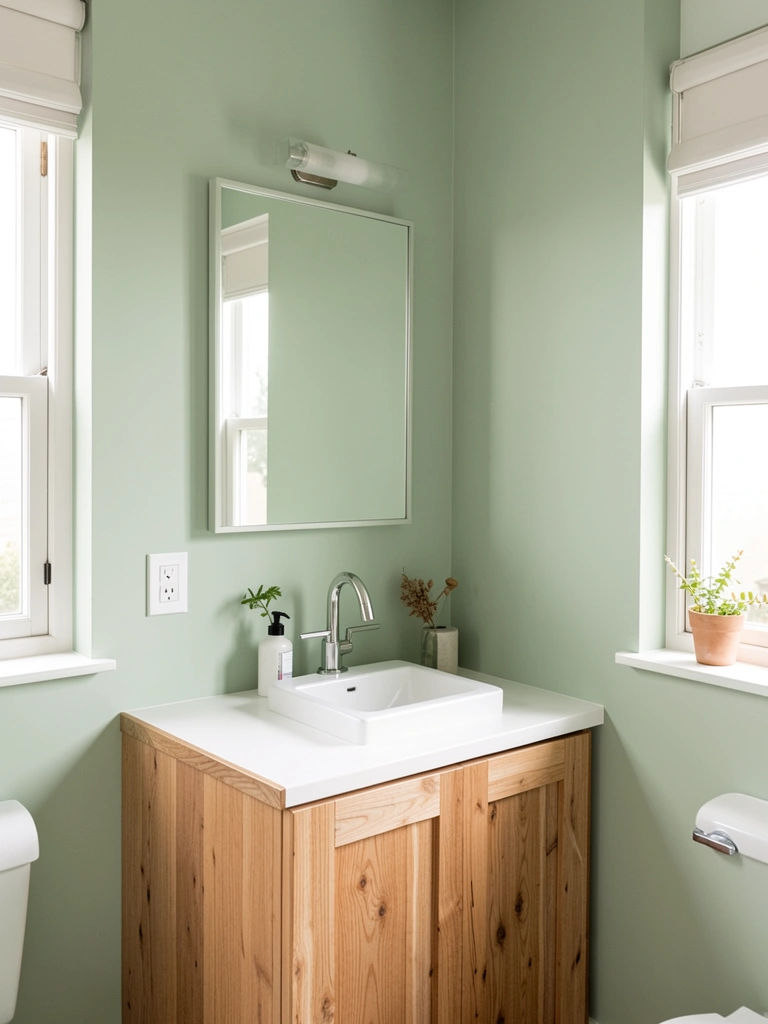
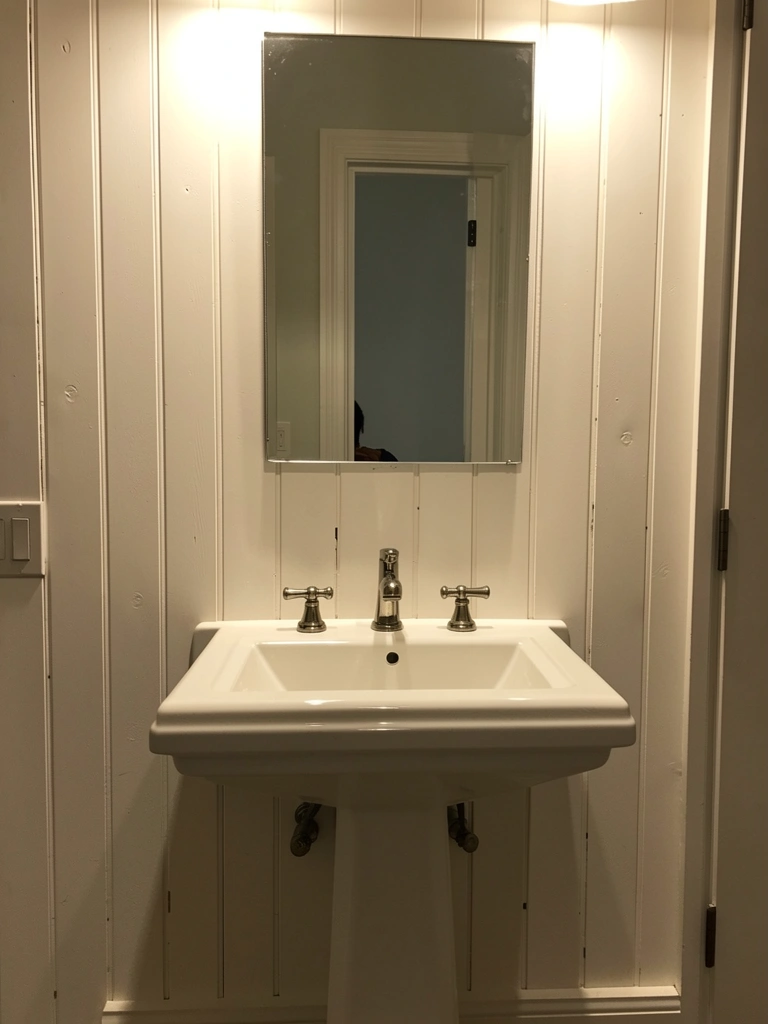
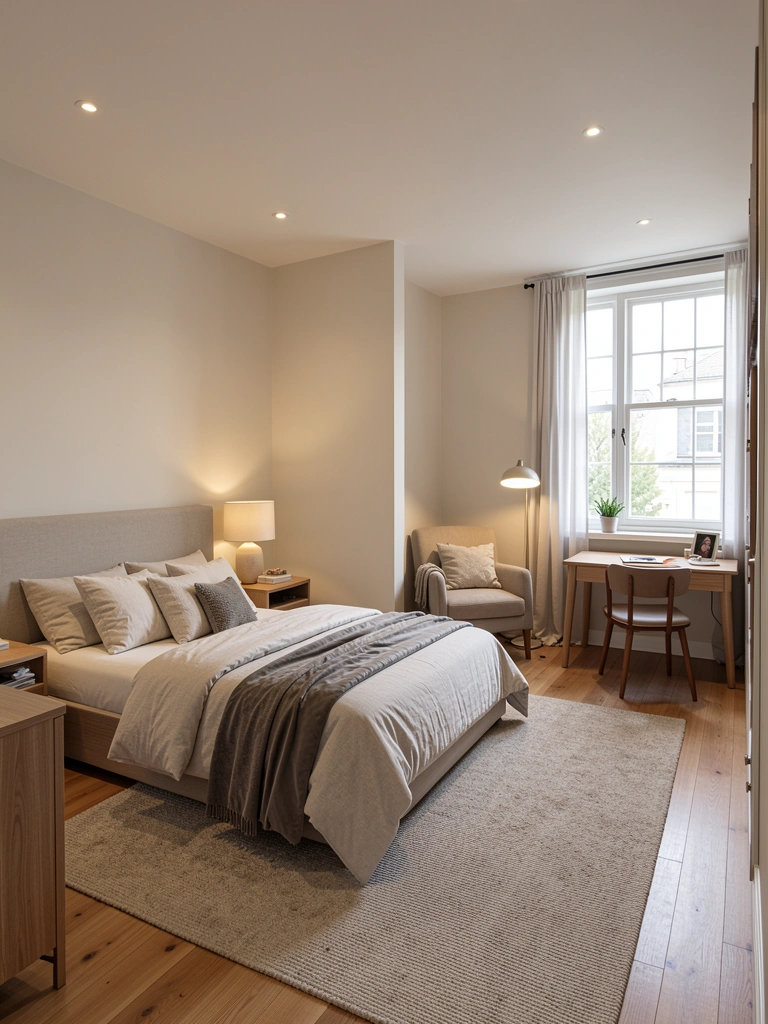
    7. Paint Walls in Soft White or Light Greige

    If your shower doesn’t have tiles, paint creates a clean backdrop with zero visual drama. Soft, neutral colors—white, greige (warm gray-beige), or pale taupe—amplify the minimalist aesthetic.

    Use semi-gloss or satin paint rated for bathrooms ($30–50 per gallon) from Benjamin Moore, Sherwin-Williams, or Behr. Prep walls with primer and paint two coats. Budget 4–6 hours DIY or $200–400 labor for a pro. Paint protects drywall in non-tiled areas while keeping the space visually unified. The cost is almost nothing compared to tiling.

    The result feels gallery-like: calm, intentional, and focused on the shower experience itself rather than visual decoration.


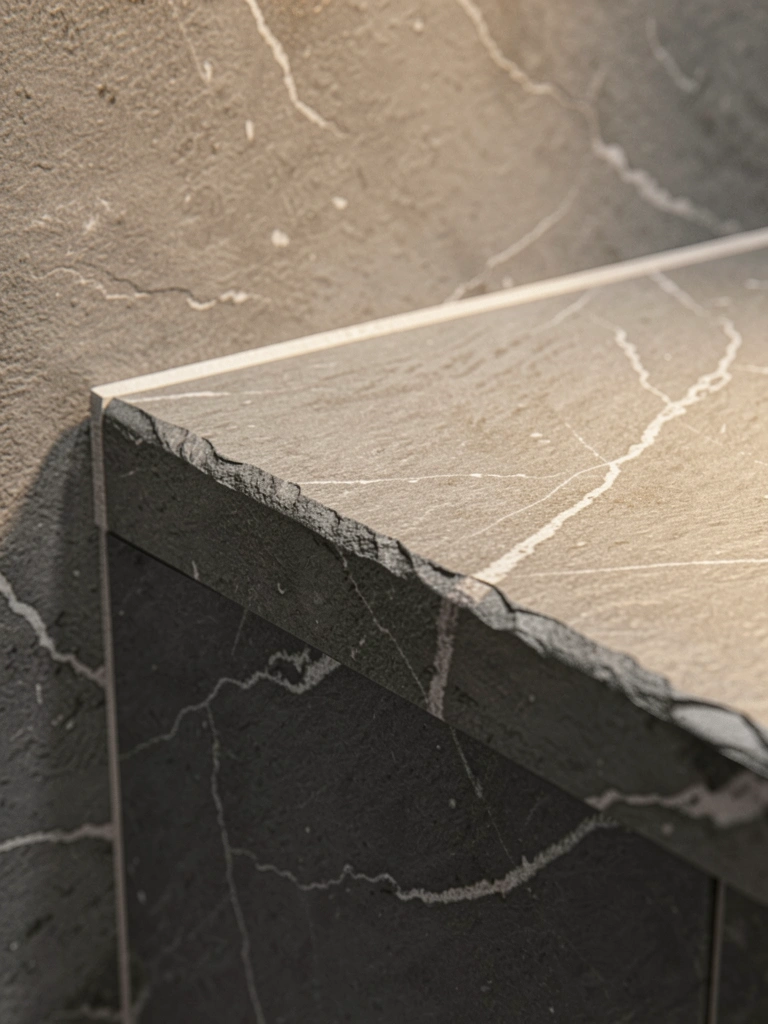
    8. Install Low-Profile Grout for Seamless Lines

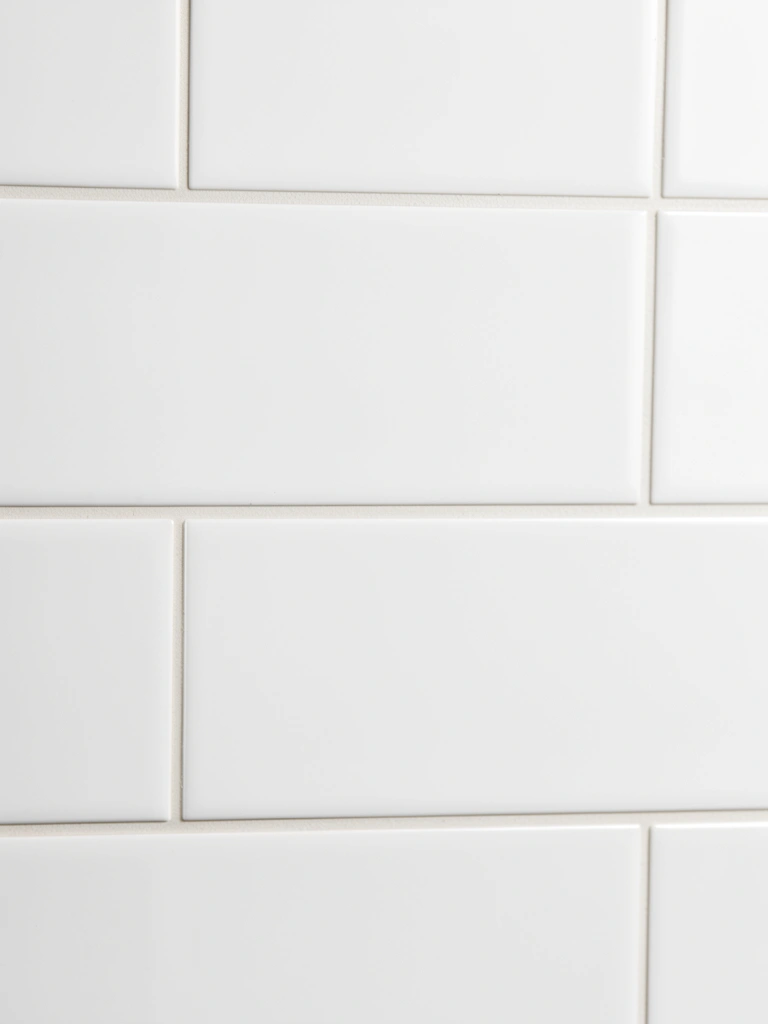
    Grout lines can either emphasize a pattern or disappear. Minimalist design favors disappearing. Use white or light gray epoxy grout and keep lines thin—as narrow as 2-3mm instead of the standard 3-4mm.

    Epoxy grout costs $15–30 per pound (more than standard grout but worth it for durability). Apply in 2-3mm lines during installation. This is a contractor detail; if DIYing, buy pre-mixed epoxy grout packs ($20–40 each). Installation takes the same time as standard grout; the difference is precision.

    Thinner, less-visible grout makes tiles appear to float as a unified surface rather than individual pieces. The visual calm is immediate.


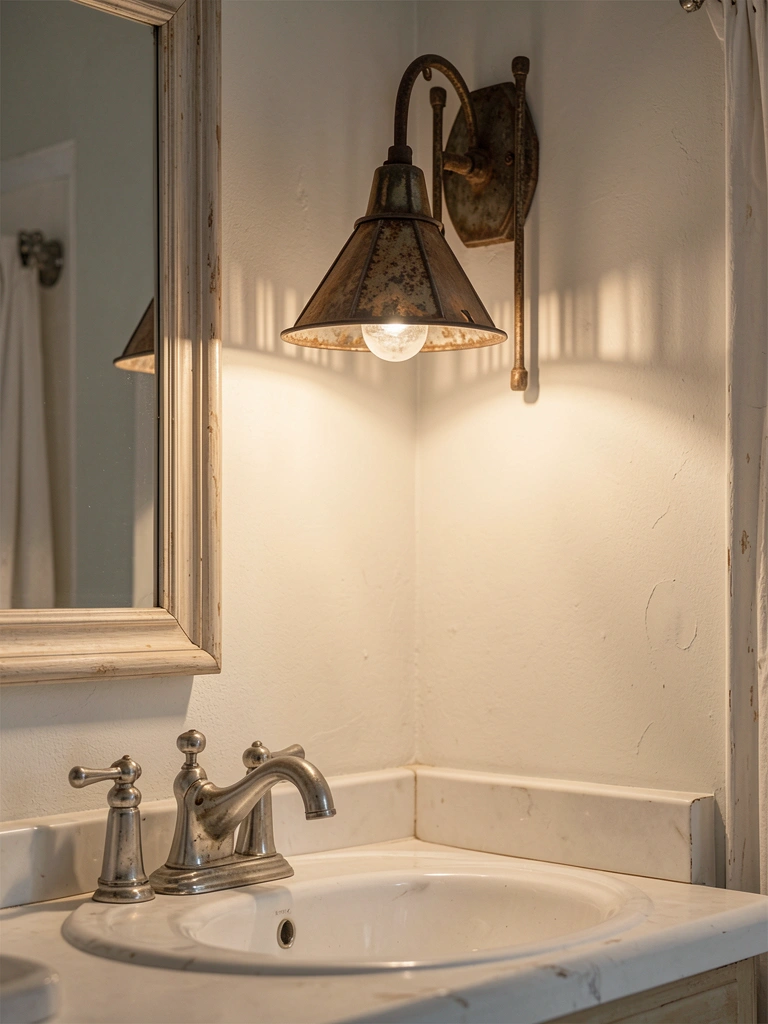
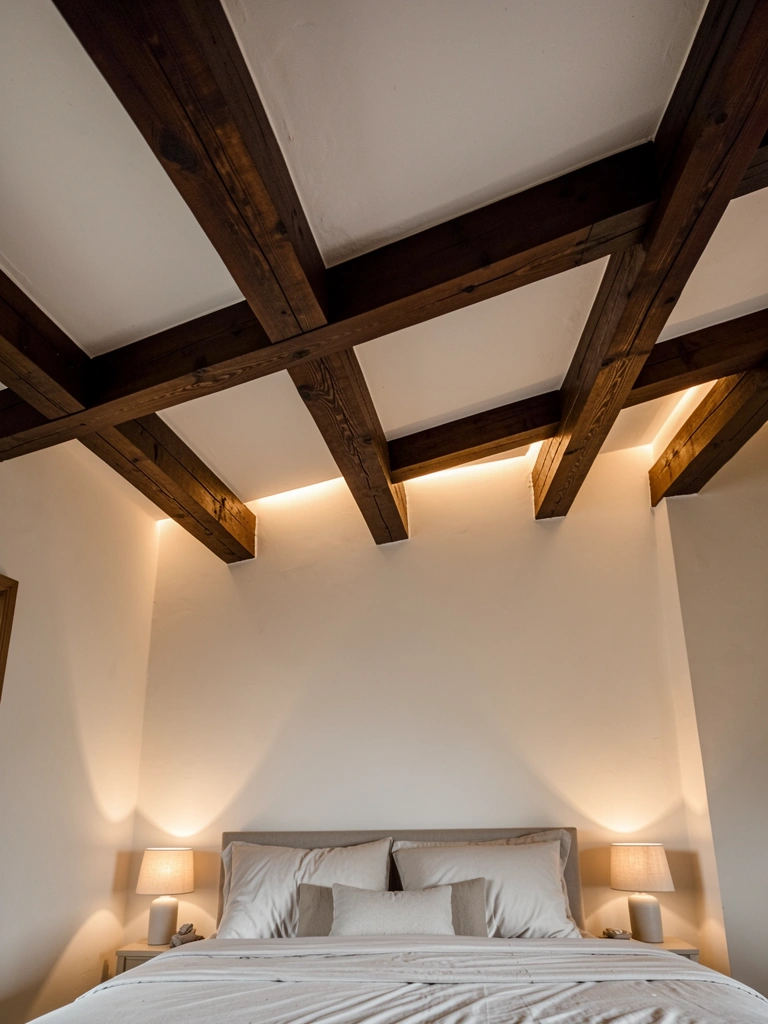
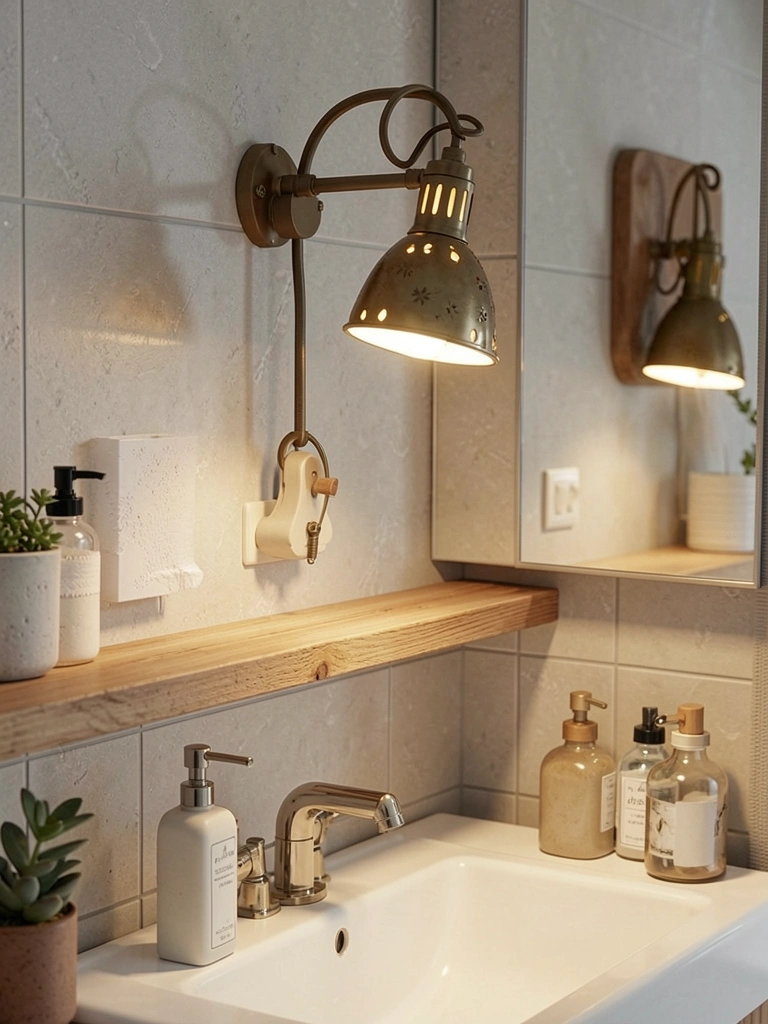
    9. Choose a Rainfall Head with Built-In LED Lighting

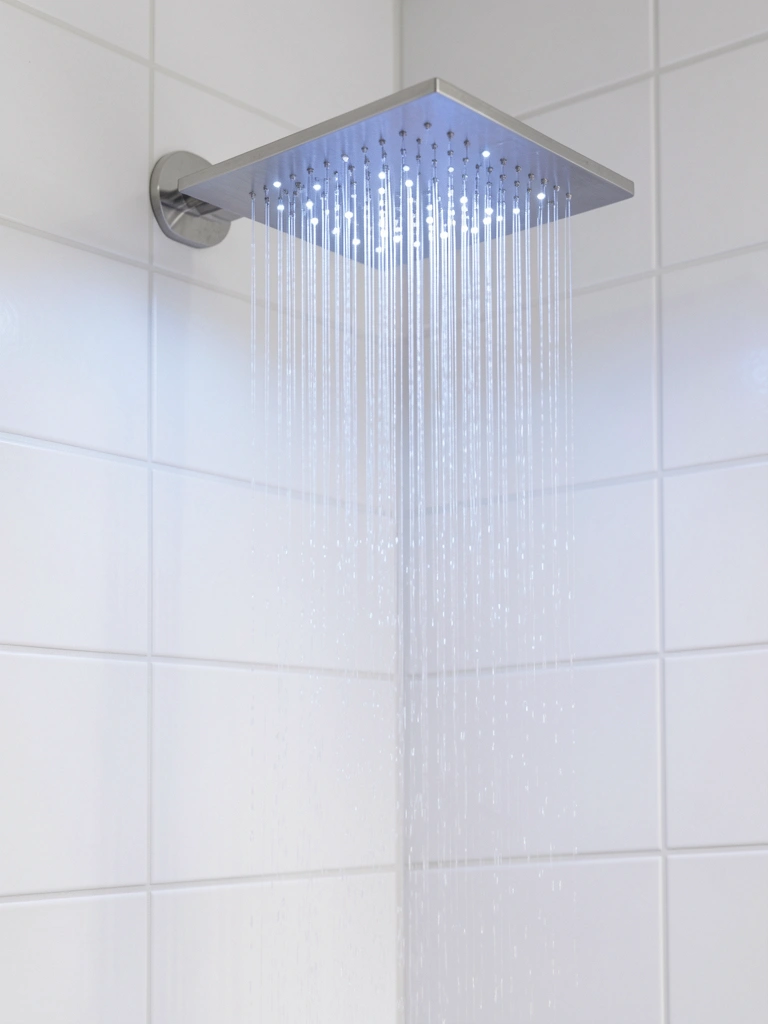
    A rainfall head with integrated LED lighting combines your shower fixture with mood lighting—eliminating separate light fixtures in the shower. It’s functional minimalism: fewer elements, more purpose.

    Search for LED rainfall showerheads ($120–300) on Amazon or Wayfair. Options include temperature-activated color changes (blue when cool, red when warm) or adjustable settings. Installation is the same as a standard rainfall head (150–300 labor). The LED uses negligible energy and typically comes with a battery lasting 2+ years.

    You get ambient lighting that doubles as a design feature. The shower becomes a calming retreat without adding another fixture to your walls.


    10. Remove Everything Below the Shower Floor

    The shower floor is prime real estate for visual clutter. Remove the caddy entirely and commit to storing everything outside the shower. It’s the most radical minimalist move, and it actually works.

    Keep one magnetic soap holder ($8-15) or wall-mounted soap dish ($10-20) for bar soap. Everything else—shampoo, conditioner, razors—lives in a cabinet outside the shower. This takes 10 minutes to clear, and you’ll spend 5 minutes daily bringing items in and out. Yes, it’s an extra step, but it keeps the shower a true sanctuary.

    The psychological shift is profound. You enter an empty, open space instead of a cluttered stall. That simplicity sets the tone for a calmer whole morning.


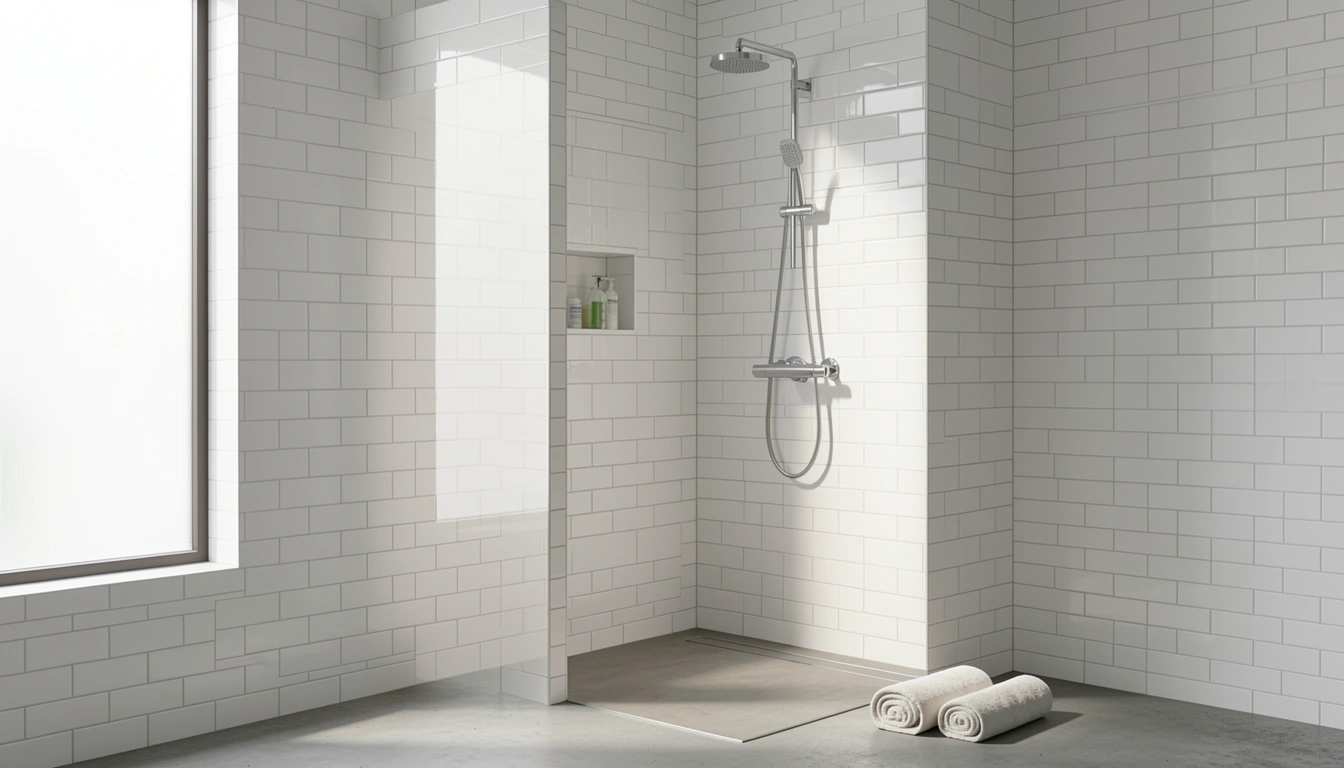
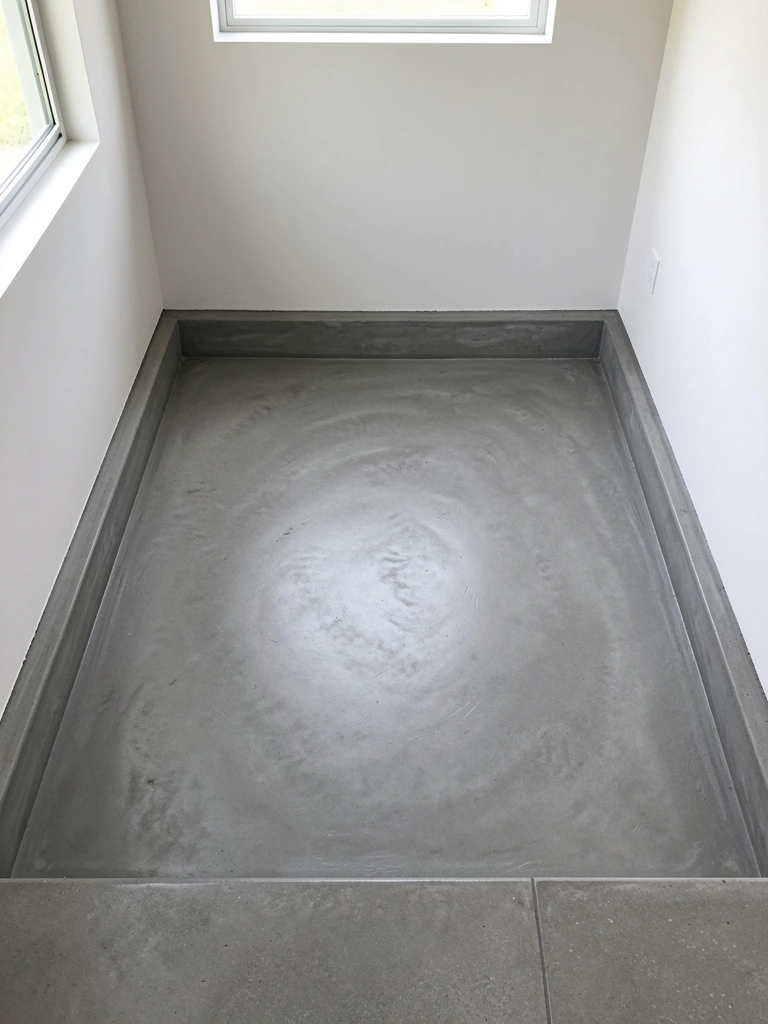
    11. Opt for a Linear Drain Instead of Center Floor Drain

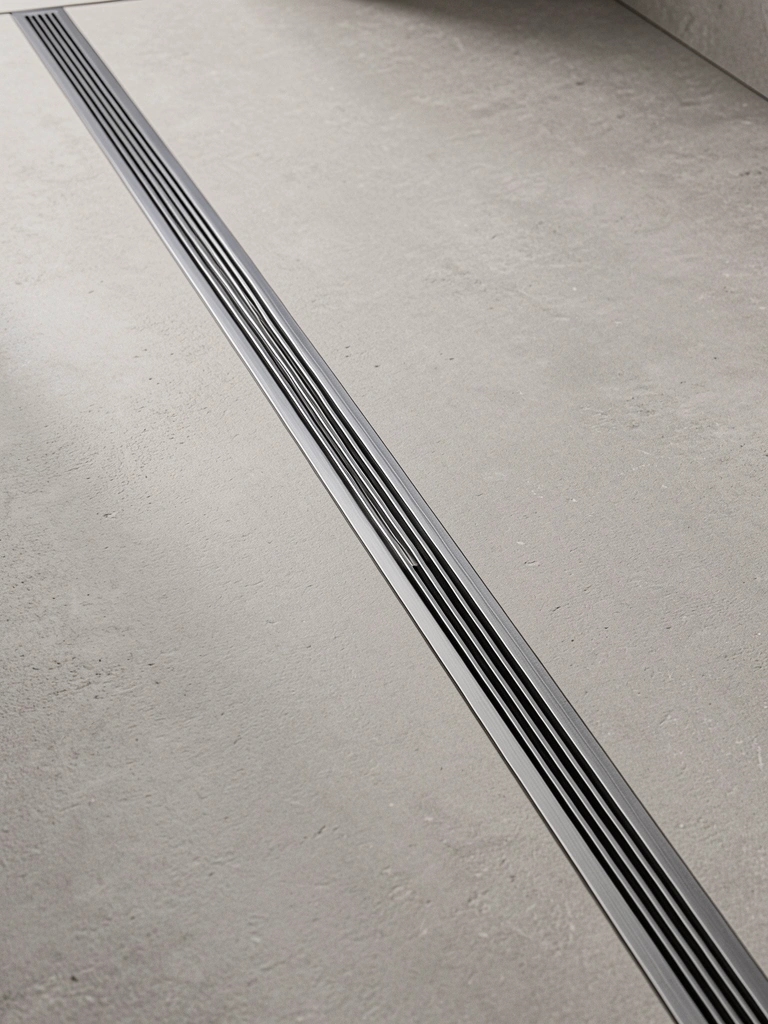
    Linear drains sit flush against the floor, creating a clean aesthetic line instead of a visible circular drain in the center. They’re modern, minimal, and they photograph beautifully.

    Install a stainless steel linear drain ($200–400 including grate) during shower renovation. Slope the floor 1/8 inch per foot toward the drain. Hire a tile pro for this ($300–600 labor). The drain is slightly more costly than standard options but worth the visual payoff. If you’re not renovating, skip this—it requires structural changes.

    Your shower floor looks sculptural and intentional. The sightline flows without interruption, making the space feel larger and more serene.


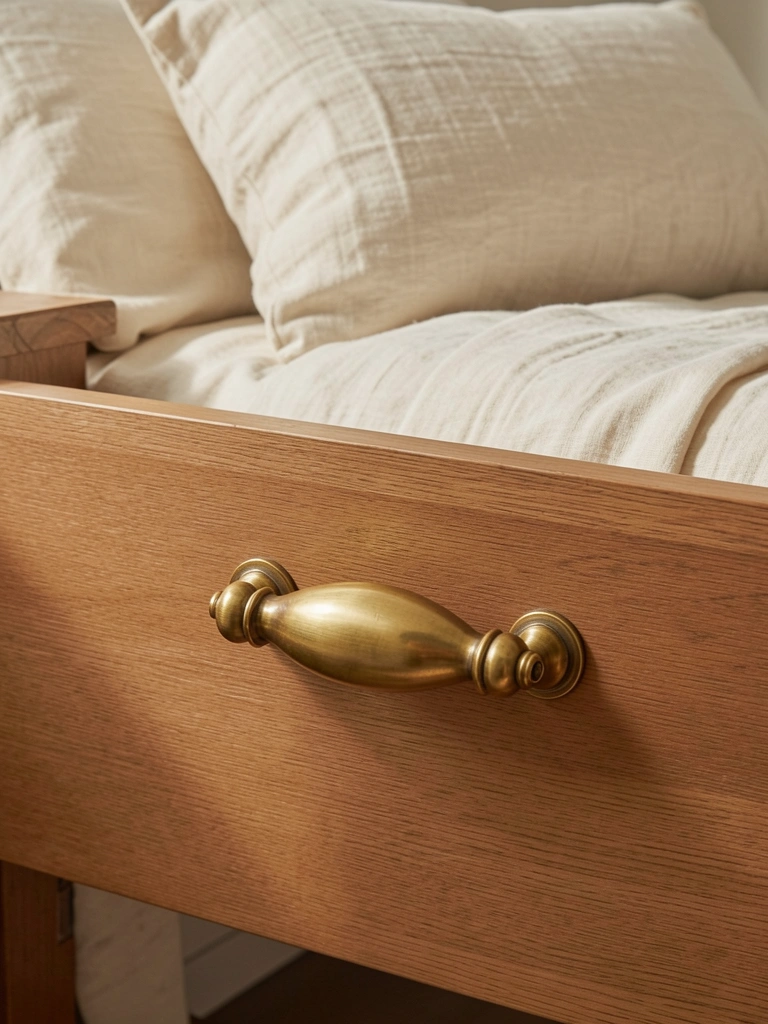
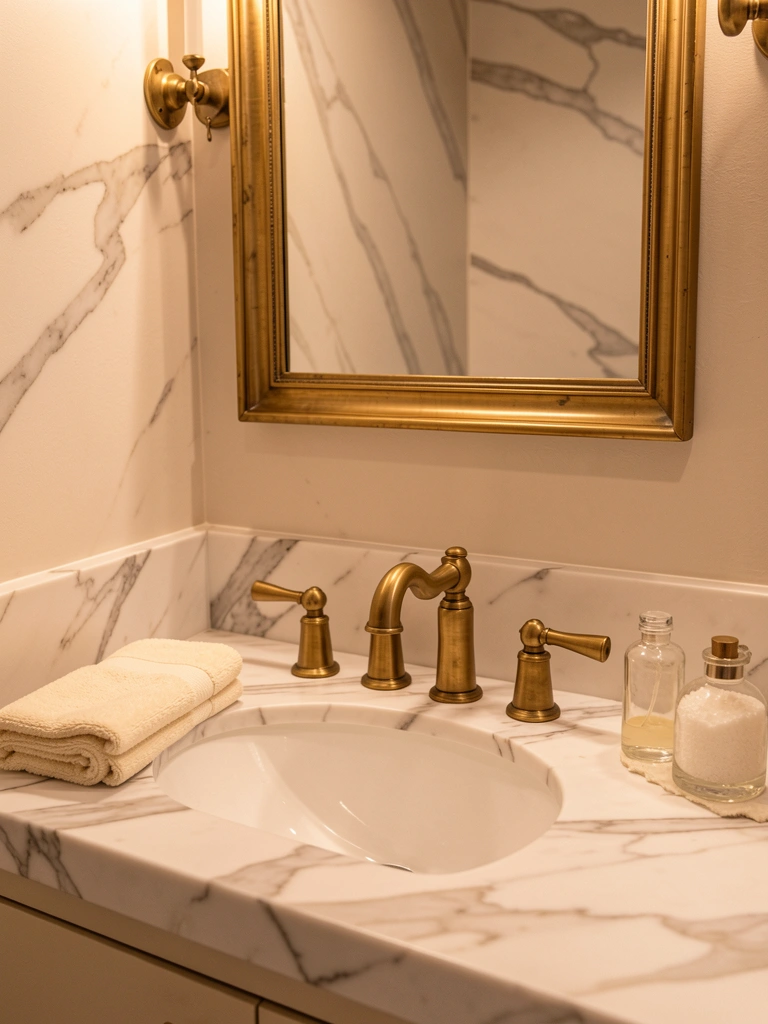
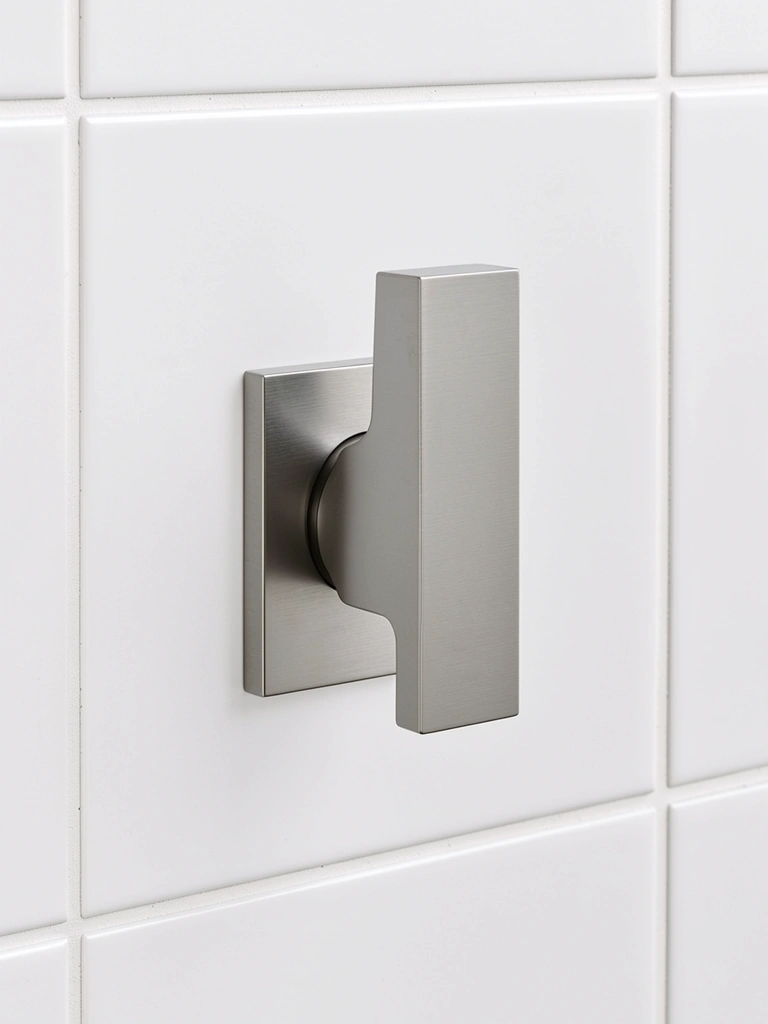
    12. Use Minimal-Hardware Handles and Controls

    Single-lever controls replace multiple handles and knobs with one unified element. No separate hot/cold knobs, no trim rings, no visual chaos—just one elegant lever that handles temperature and volume.

    Choose single-lever thermostatic handles in matte black or brushed nickel ($80–200). Brands like Hansgrohe and Kohler offer clean designs without visible trim plates. Installation involves 1-2 hours labor ($100–200). The thermostatic function also prevents sudden temperature changes, adding comfort alongside aesthetics.

    You’ve reduced hardware to its absolute minimum. The shower becomes about the water flow and experience, not the mechanism.


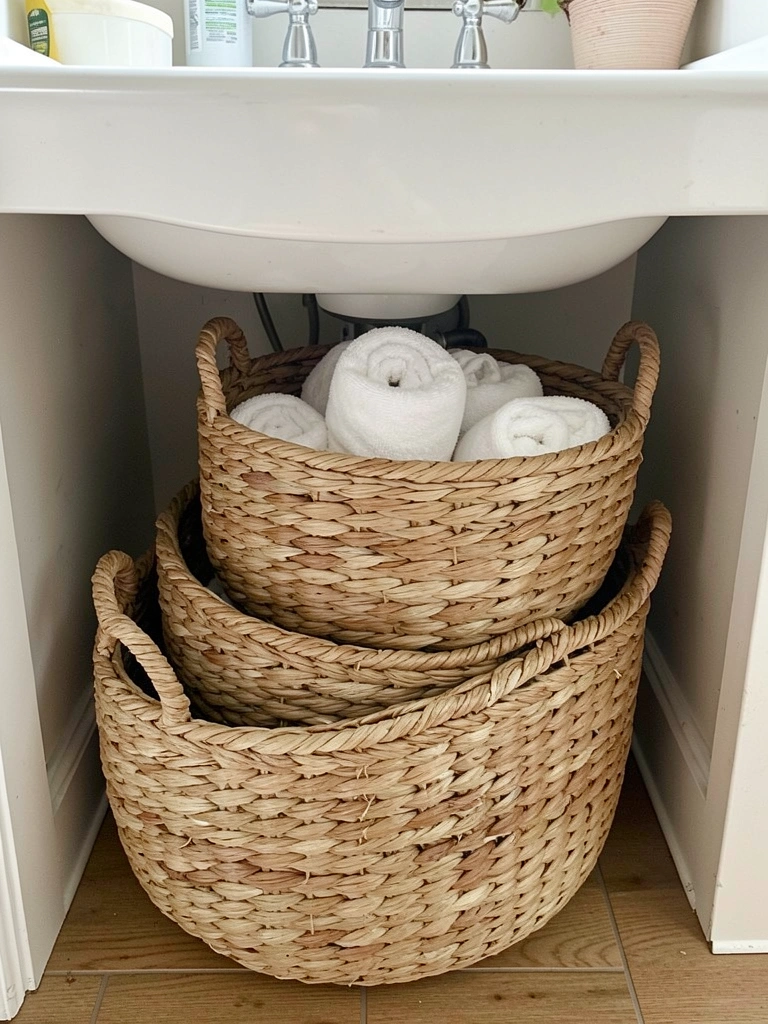
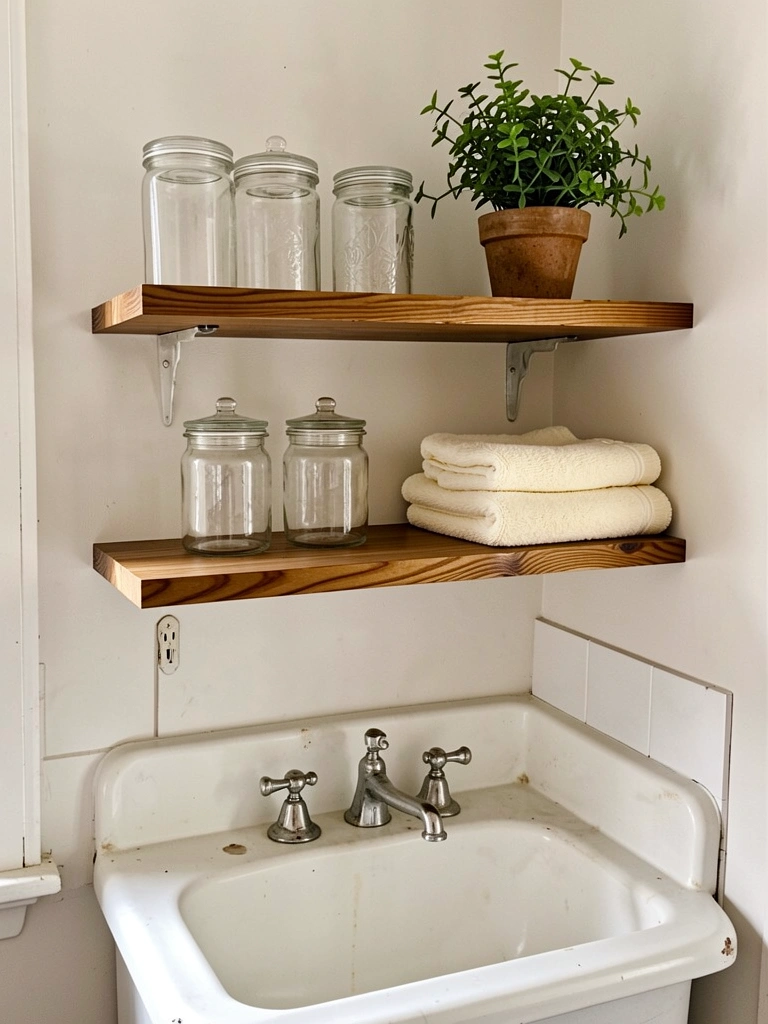
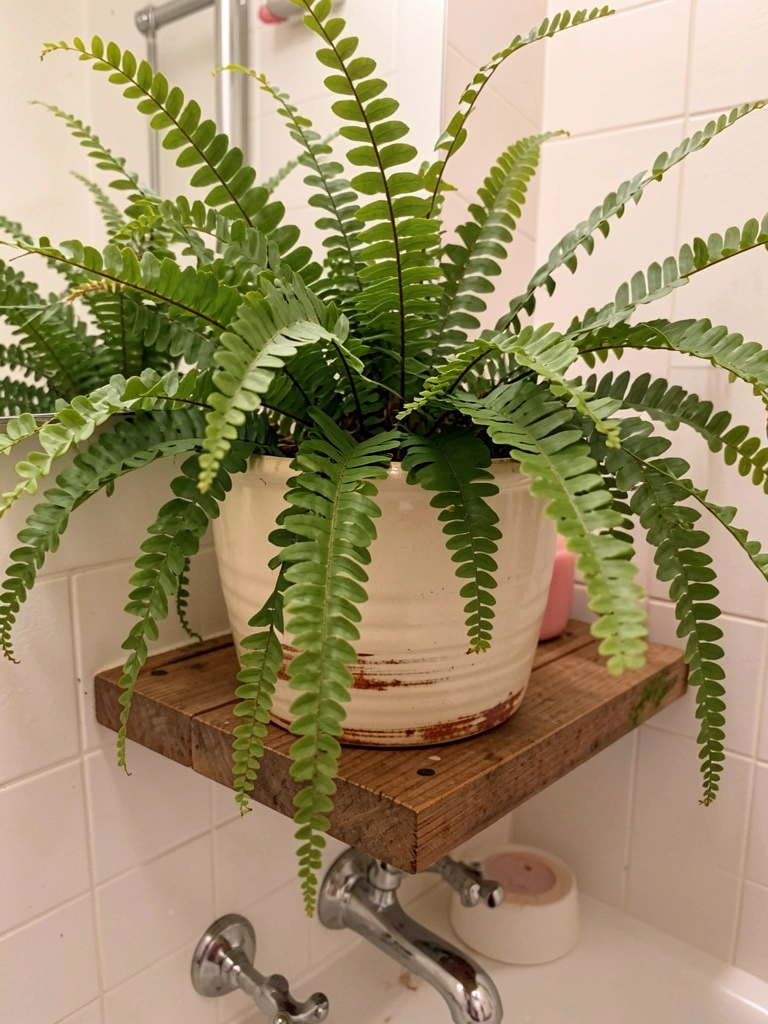
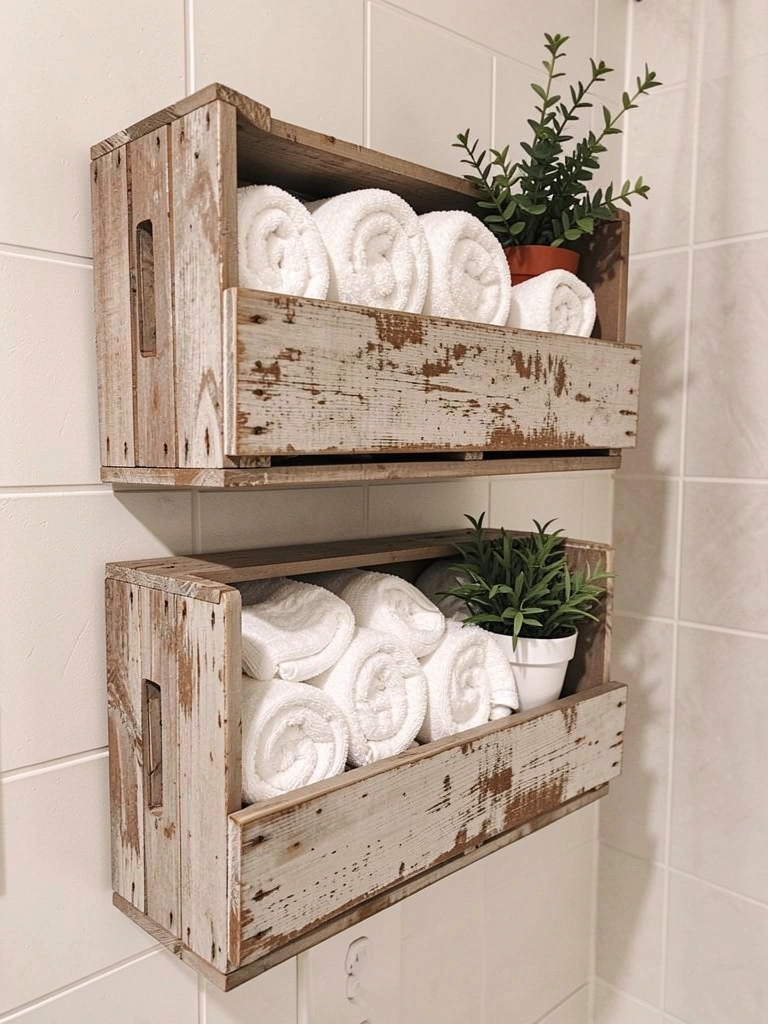
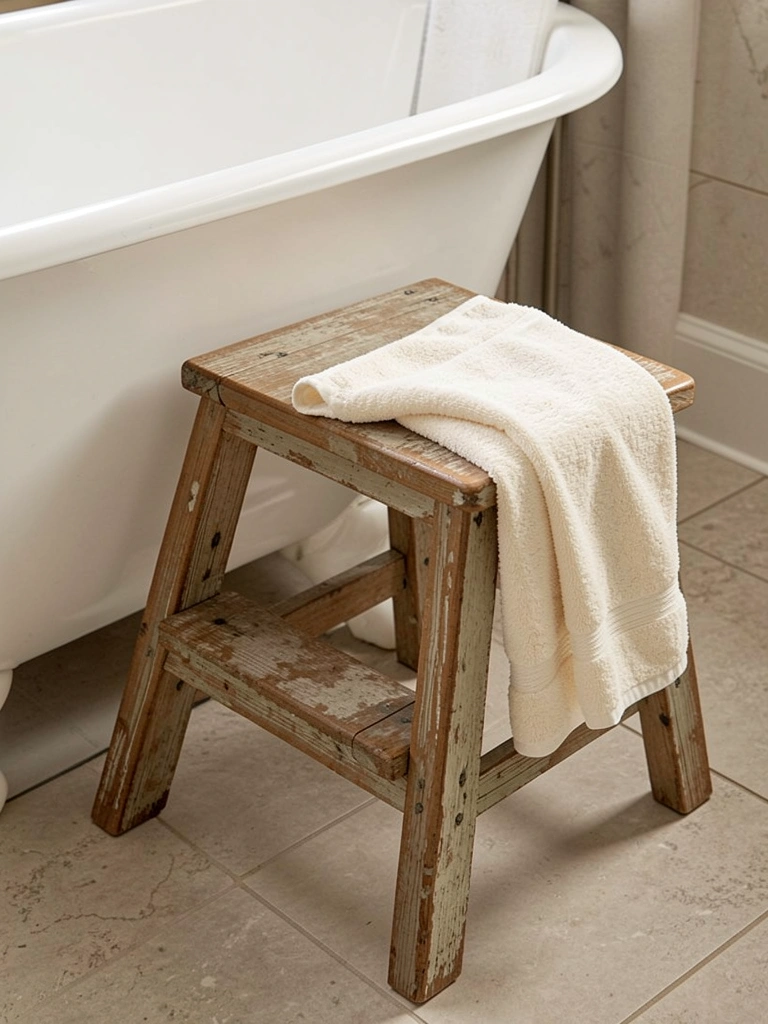
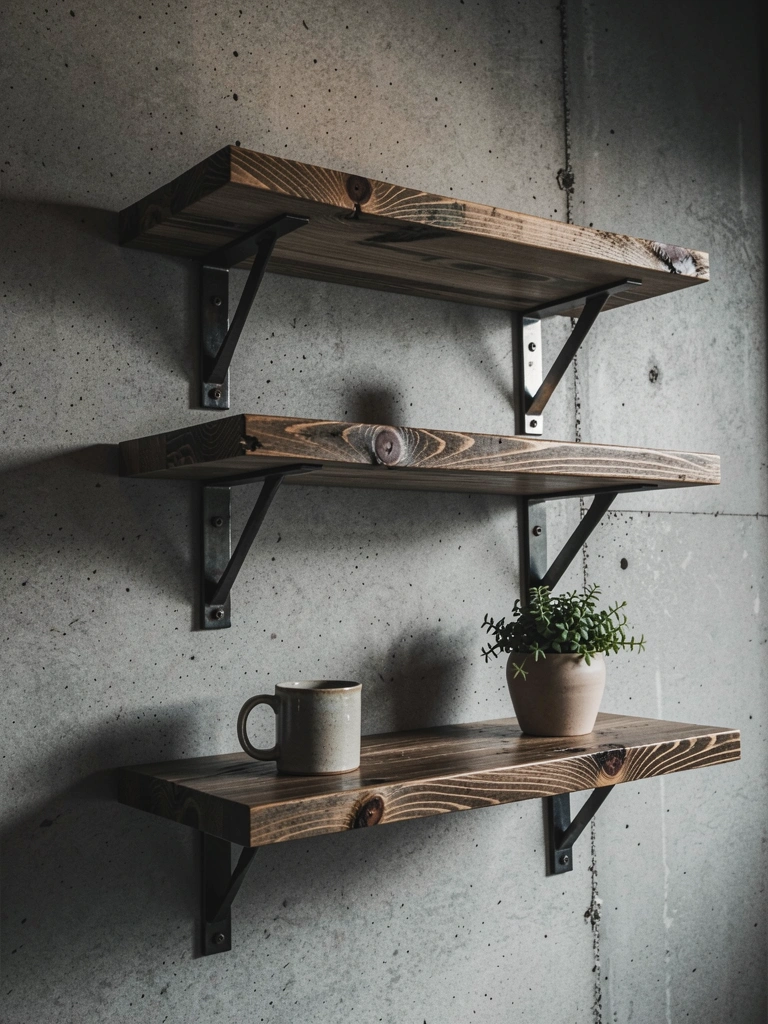
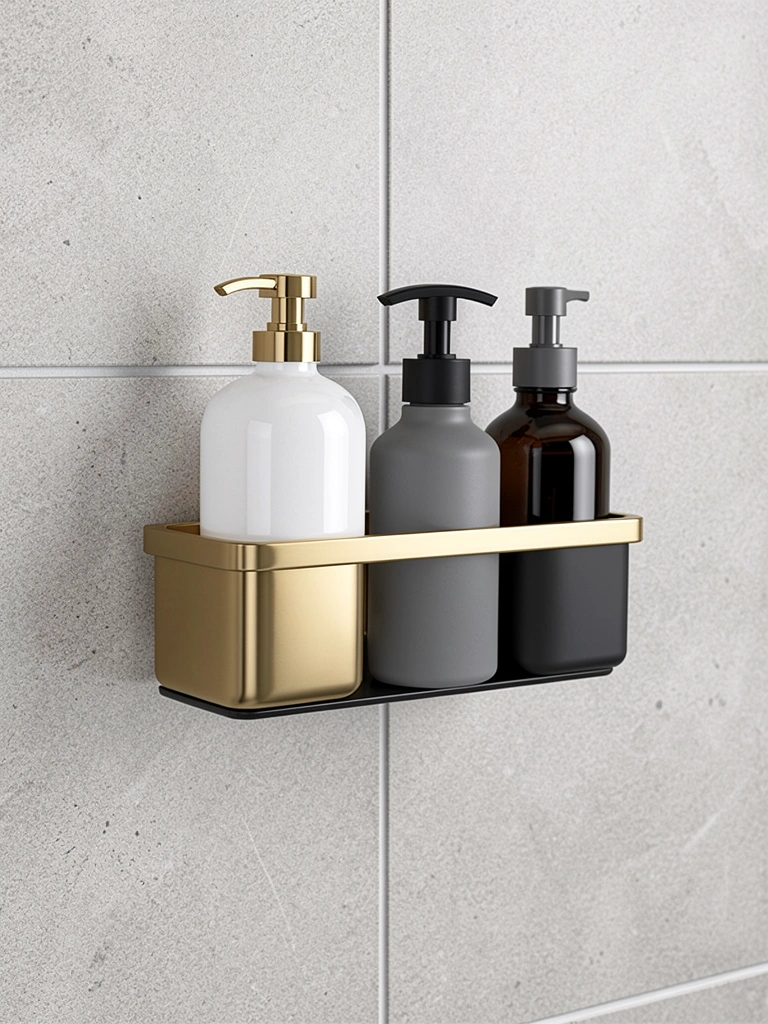
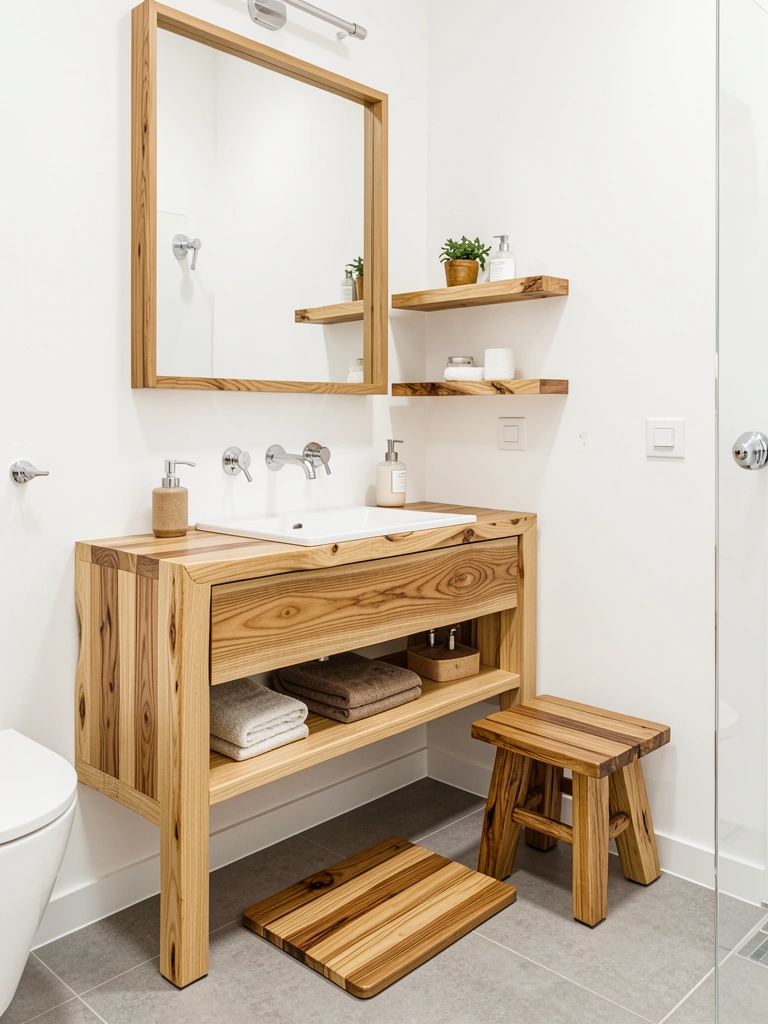
    13. Install Floating Shelves Over Towel Racks

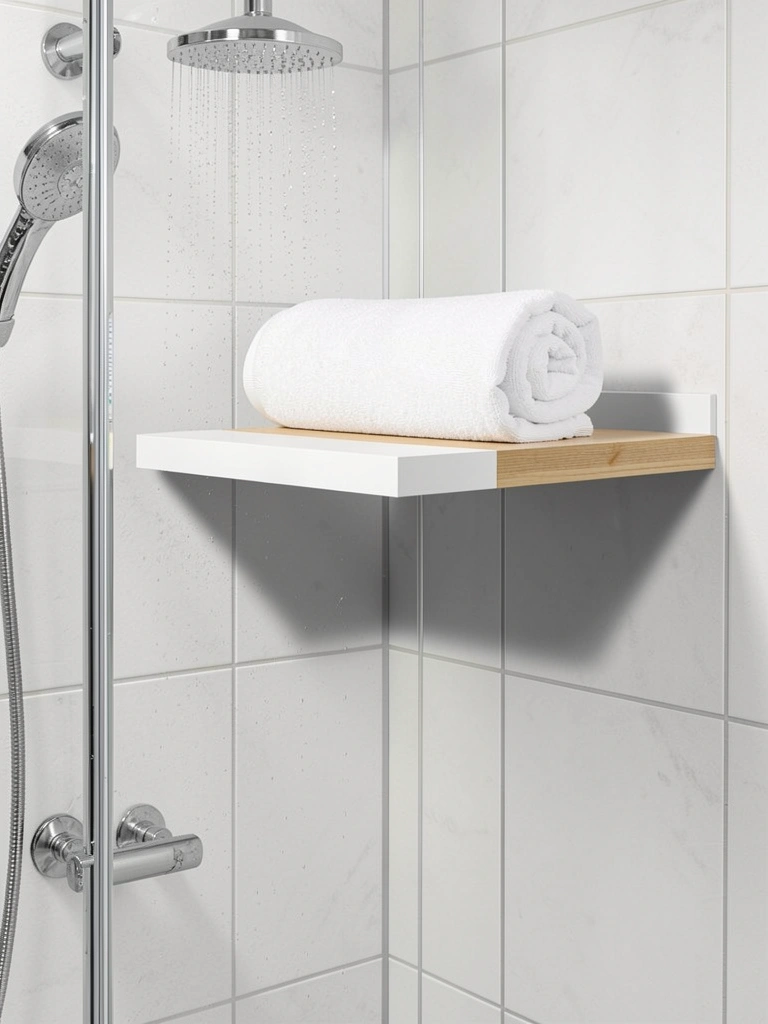
    Instead of a bulky towel rack, install one simple floating shelf at the top of your shower area (outside the spray zone). It serves the same function but looks integrated and minimal.

    Choose a 12-18 inch floating shelf in white, natural wood, or metal ($30–100 from IKEA, West Elm, or Home Depot). Mount with heavy-duty floating shelf brackets ($20–40). Installation takes 30 minutes if you locate studs. Position it at head height just outside the shower. You get functional towel storage without the visual weight of a traditional rack.

    Your bathroom feels more like a gallery and less like a utility room. Towels are stored, not decorative clutter.


    14. Keep Walls Completely Free of Shelves or Hooks

    The ultimate minimalist choice: zero wall-mounted storage inside the shower. Every bottle, razor, and washcloth lives elsewhere. Your shower walls are pure surface.

    This requires commitment. Store everything in a cabinet, drawer, or pedestal organizer outside the shower ($25–80). Bring items in one at a time as needed. Yes, it’s inconvenient—it’s also meditative and forces intention around your shower routine.

    You enter a sanctuary instead of a storage unit. The wall space becomes breathing room for your mind.


    15. Choose Compact Fixtures for Small Spaces

    In small bathrooms, oversized fixtures feel cramped. Choose compact showerheads and trim—usually 8-10 inches for heads, 4-inch valve trim—that fit proportionally without overwhelming the space.

    Look for compact rainfall heads from Moen, Delta, or Kohler ($60–150) and matching trim plate ($40–80). Installation is standard. The smaller scale prevents the shower from feeling claustrophobic and keeps the minimalist aesthetic (less hardware = more space visually).

    Your small shower looks intentionally designed rather than squeezed in. Proportion matters, and the right scale makes a tiny space feel thoughtful.


    16. Use a Continuous Tile Pattern Instead of Borders

    Accent tiles and borders add visual interest but break minimalist simplicity. Run your tile pattern continuously across all walls—no breaks, no color changes, no decorative bands.

    Choose one tile—white subway, light gray square, or pale marble—and install it uniformly across the entire shower area ($3–12 per square foot). Skip accent trim or border treatments. This keeps the visual field calm and unified.

    The result looks expensive and intentional precisely because it isn’t trying to impress. Simplicity reads as sophistication.


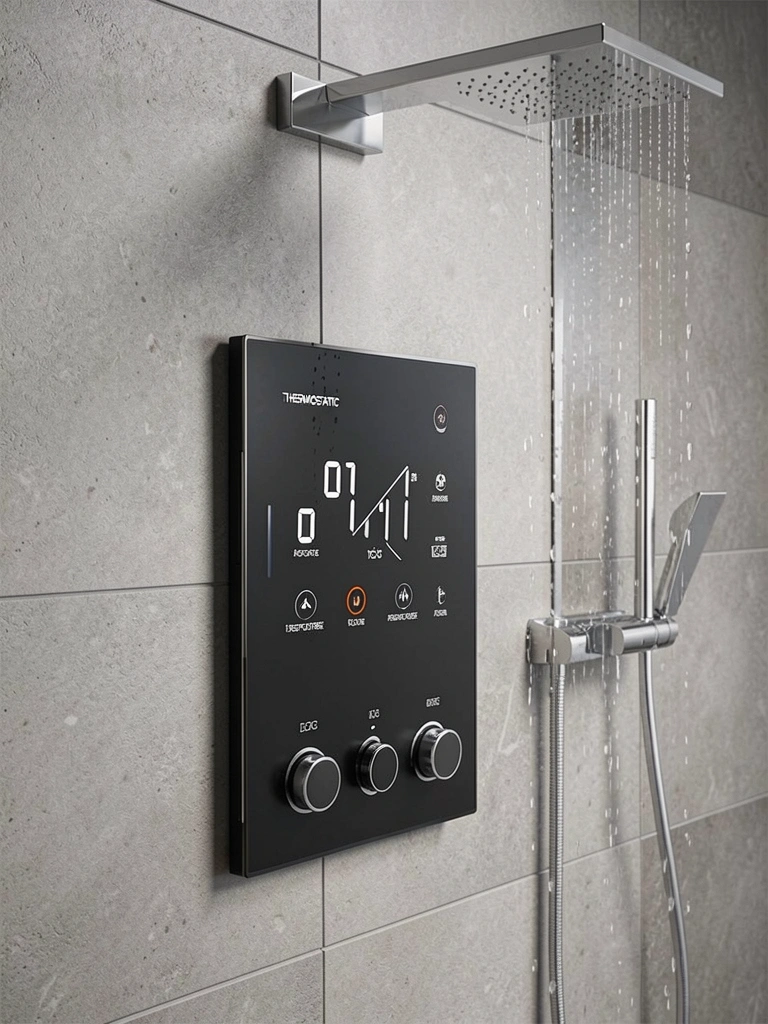
    17. Invest in a Thermostatic Shower Valve

    Thermostatic valves maintain water temperature even when other faucets run in the house. They’re a smart tech upgrade that’s invisible but makes daily showers dramatically more comfortable.

    Install a thermostatic mixing valve ($150–300 for a quality model like Hansgrohe) with professional plumbing labor ($200–300**). This is a mid-renovation install. Once set to your preferred temperature, the valve holds steady. Safety is a bonus: sudden temperature spikes can’t occur.

    Your shower becomes predictable and luxurious. You set it and forget it, which is exactly what minimalist design should do—work so seamlessly you stop thinking about it.


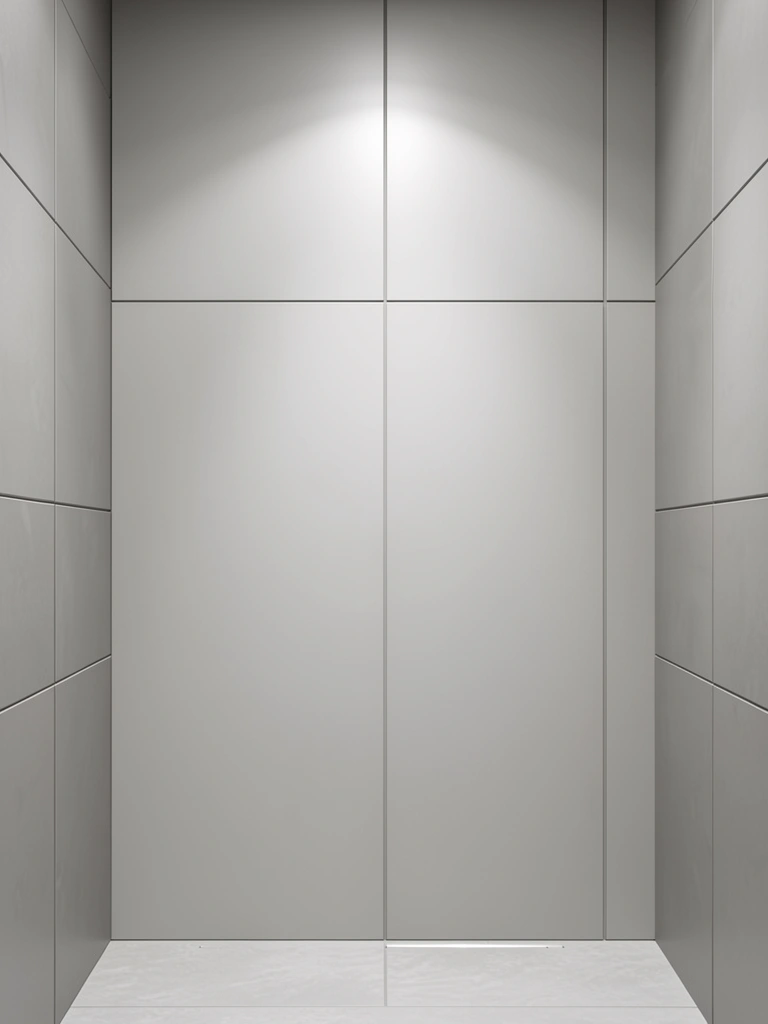
    18. Go Monochromatic: Match Tiles, Grout, and Walls

    Monochromatic design amplifies minimalism. Use the same color family for tiles, grout, painted walls, and trim. White, greige, or soft taupe throughout creates visual unity and calm.

    Select tiles in one family (all white subway, for example), match grout closely ($0 extra planning), and paint remaining walls the same neutral tone ($30–50 per gallon). This creates seamless flow instead of visual transitions. Installation and painting are standard rates.

    The space feels spa-like because there’s no visual competition. Your eye rests instead of scanning for colors and breaks.


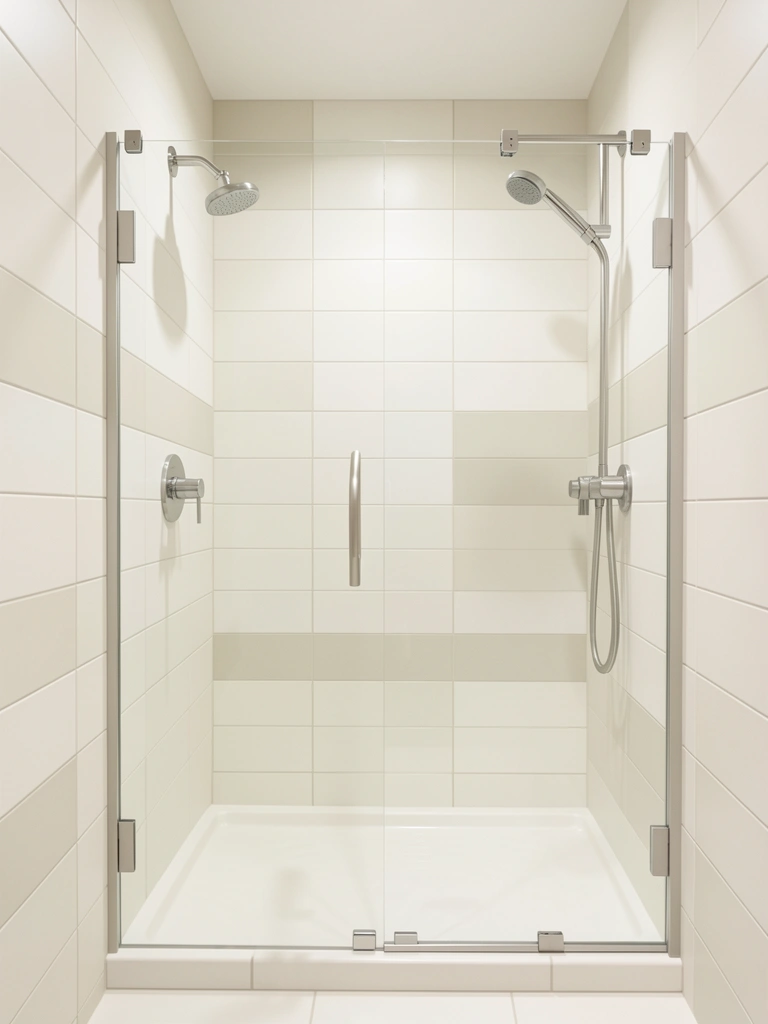
    19. Install a Frameless Enclosure With Minimal Hardware

    Frameless glass doors with minimal metal trim reduce visible hardware to almost nothing. You get an enclosure that disappears visually, letting the tile backdrop shine.

    Choose frameless doors with minimal hinges and trim ($400–900 installed). Seek out semi-frameless designs ($250–500) if full frameless is beyond budget. Installation takes 4–6 hours for a professional. The glass does require weekly squeegee maintenance to prevent spotting, but the visual payoff is worth it.

    Your shower looks like a permanent art installation rather than a bathroom fixture. The glass transparency makes even small spaces feel generous and open.


    20. Select Subtle Grout Colors That Blend With Tiles

    Matching grout to tile color is subtle but transformative. Instead of bold grout lines defining each tile, near-invisible grout lines unify the entire surface into one calm plane.

    Use epoxy or urethane grout in white or pale gray when installing white tiles ($15–30 per pound). Order grout samples alongside tile samples to verify the match. Installation technique is identical to standard grout; the visual difference is enormous.

    Tiles appear to float as a unified surface rather than individual units. This detail—barely noticeable to others—calms your brain every single time you step into the shower.


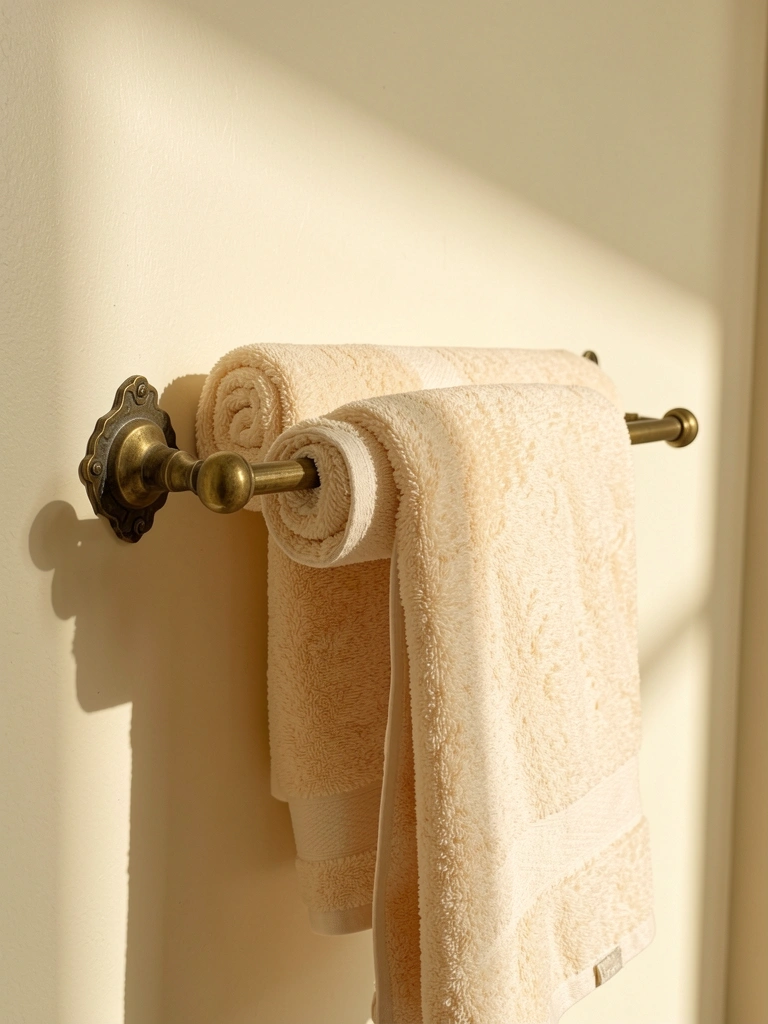
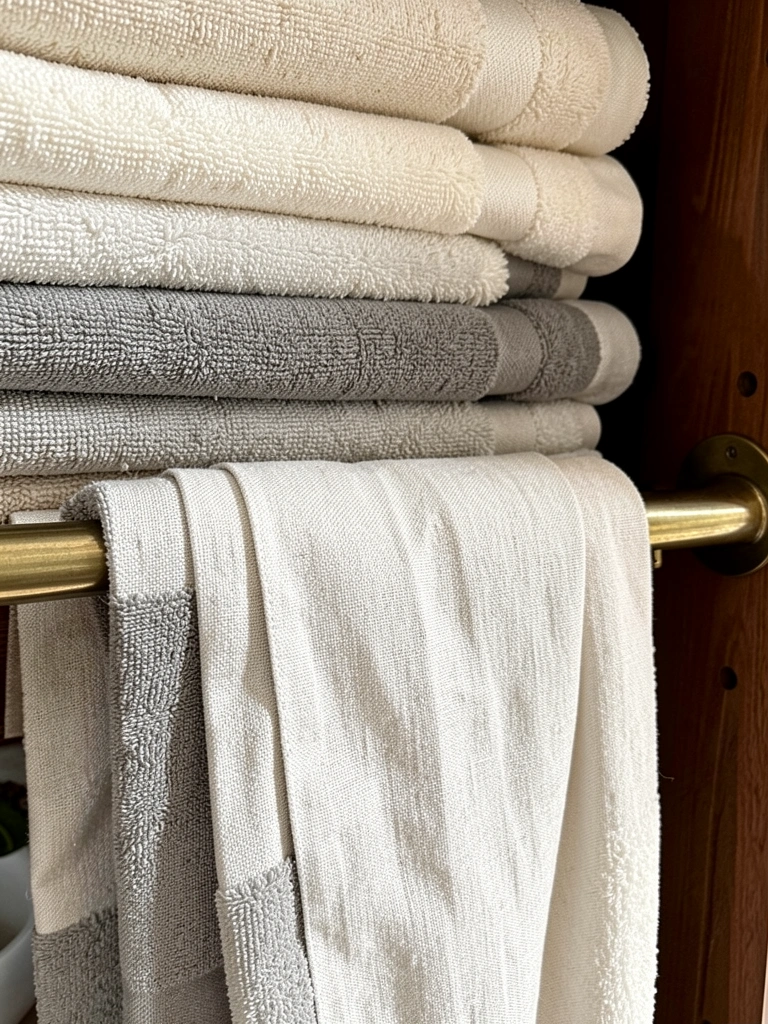
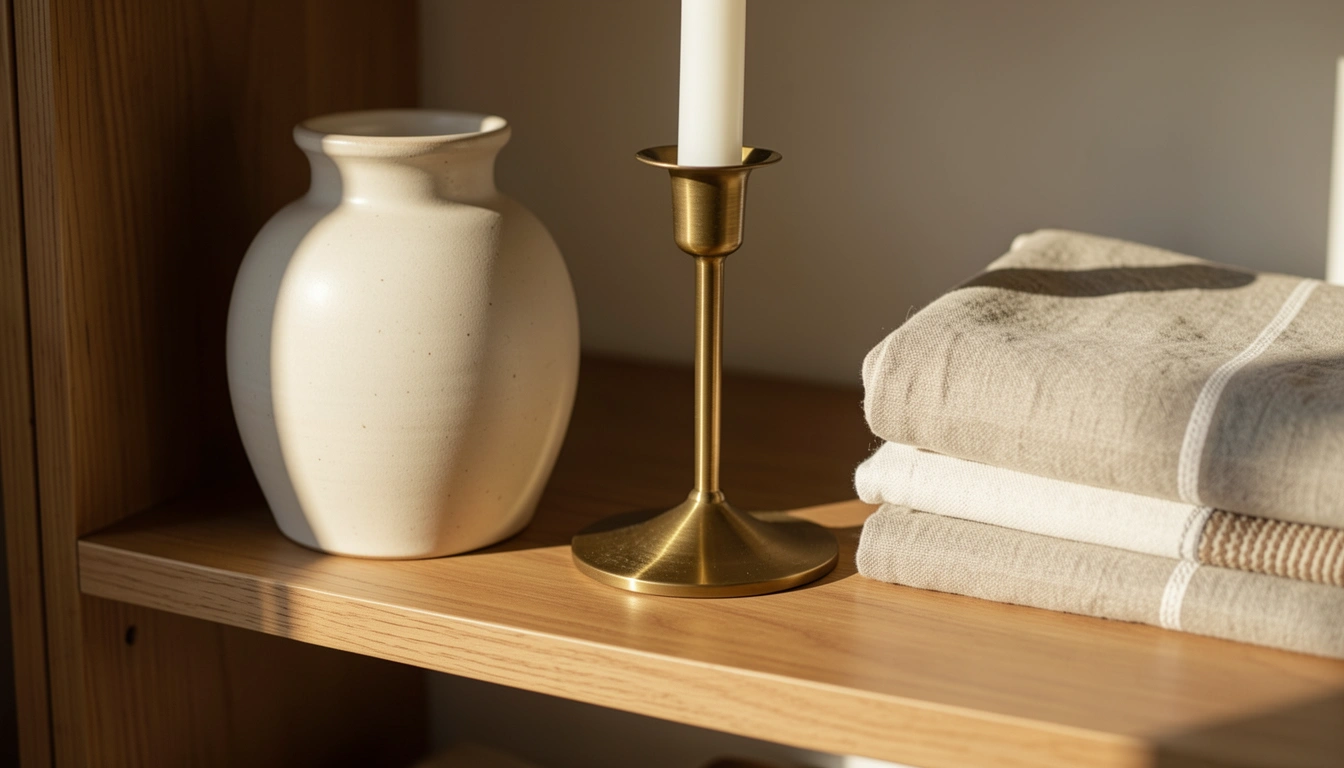
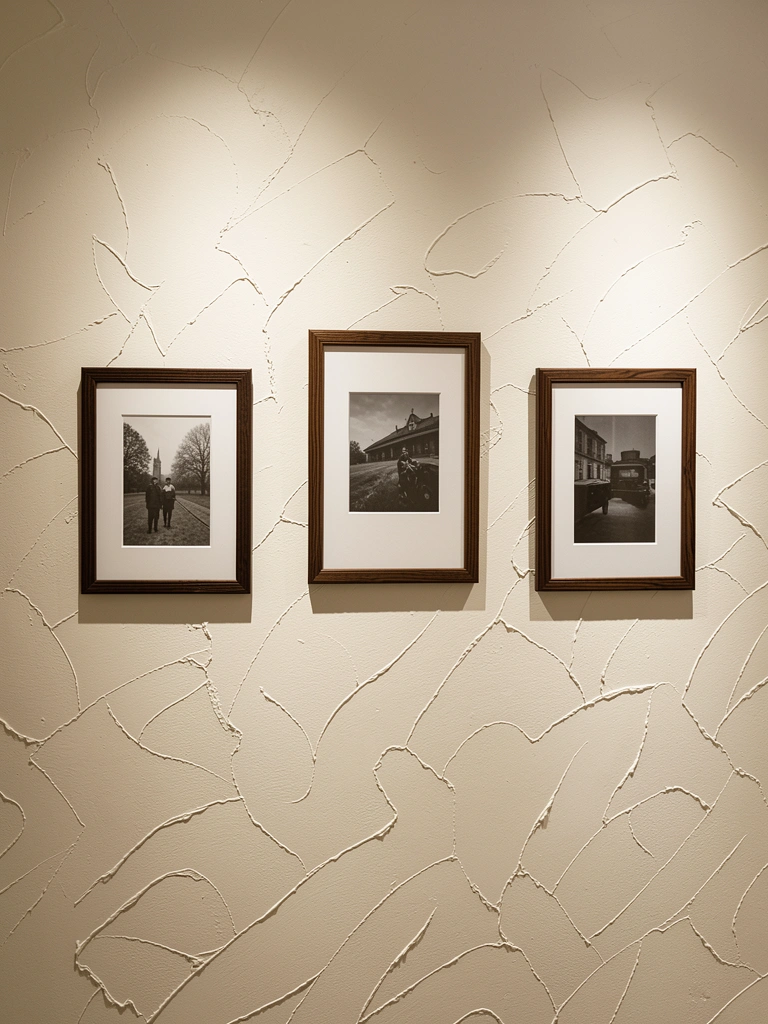
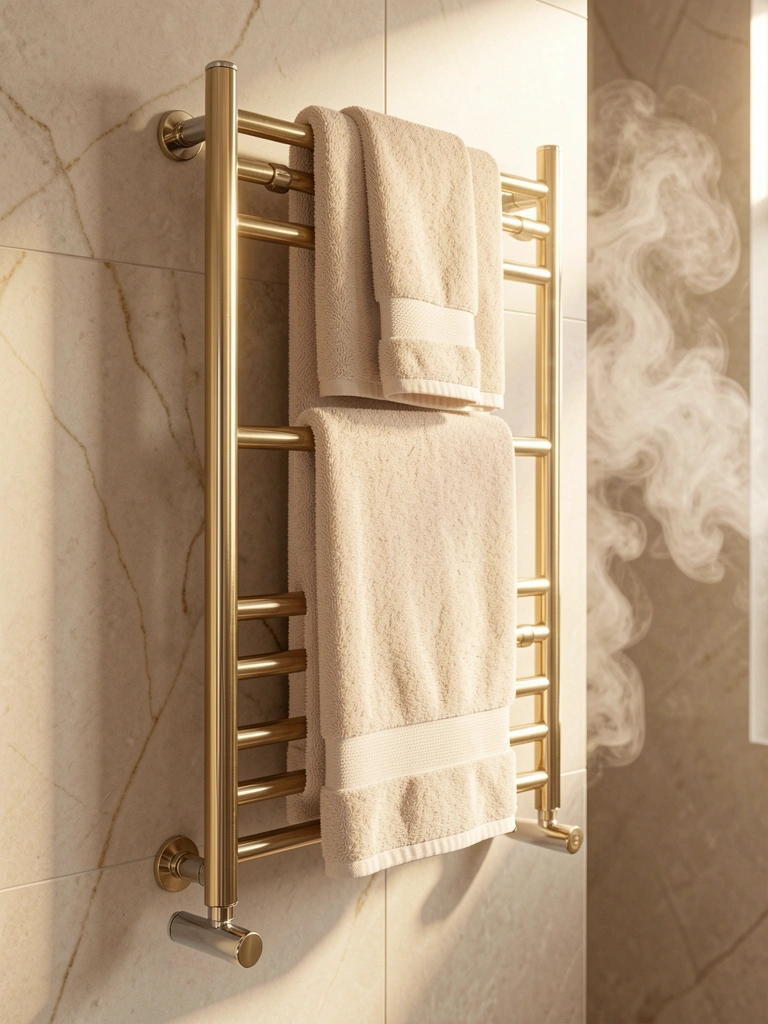
    21. Add One Statement Piece: A Modern Towel Rack

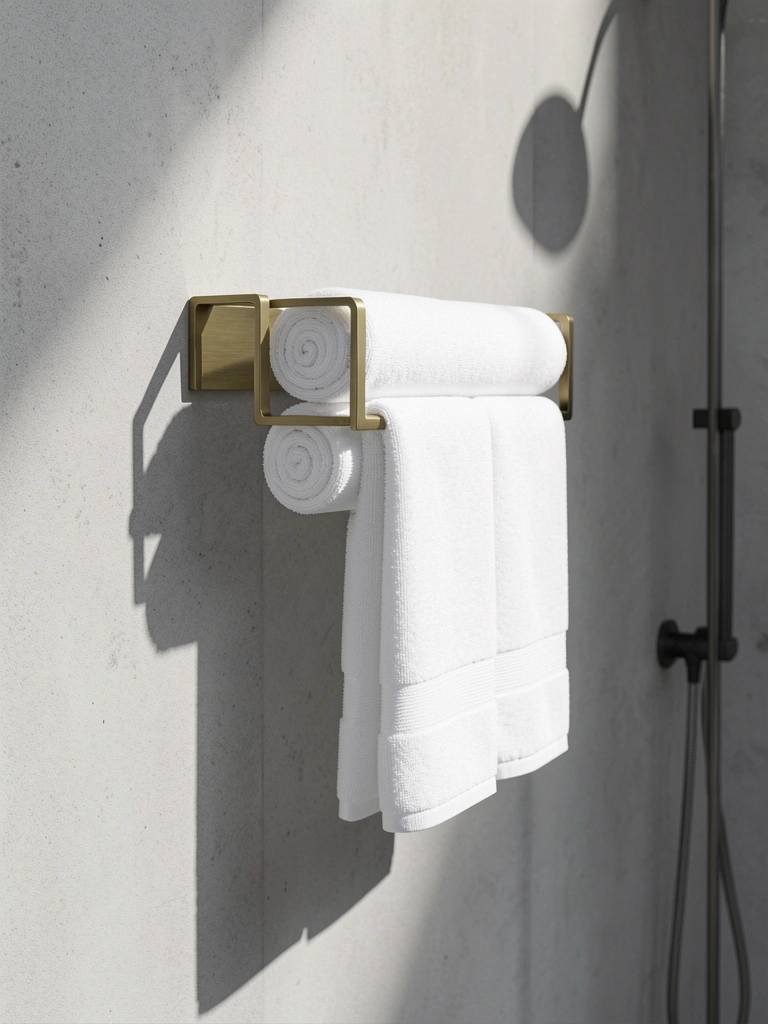
    Minimalism doesn’t mean zero personality. Include one thoughtfully chosen statement piece—a sculptural towel rack or bench—that anchors the space visually while remaining functional.

    Choose a modern towel rack in brass, stainless, or matte black ($100–300) from brands like Schoolhouse Electric, Anthropologie, or even IKEA’s minimalist lines. Position it just outside the shower as a visual focal point. Installation is straightforward (30 minutes DIY).

    This one piece signals that your bathroom is intentional, not just minimal. You get personality without clutter.


    22. Hide Plumbing Behind Walls or Cladding

    Exposed pipes (even if painted) add visual clutter. During renovation, run plumbing behind walls in walls or hide it behind minimal cladding panels. The result is an unbroken, serene surface.

    This requires structural planning during renovation. Budget varies widely ($500–2,000 depending on existing plumbing). For existing showers, minimalist chrome or matte black trim plates covering visible hardware help ($20–50 each). Not always possible in rentals or existing setups, but worth considering during renovation.

    You achieve a clean, resort-like aesthetic where the architecture feels intentional rather than patched together.


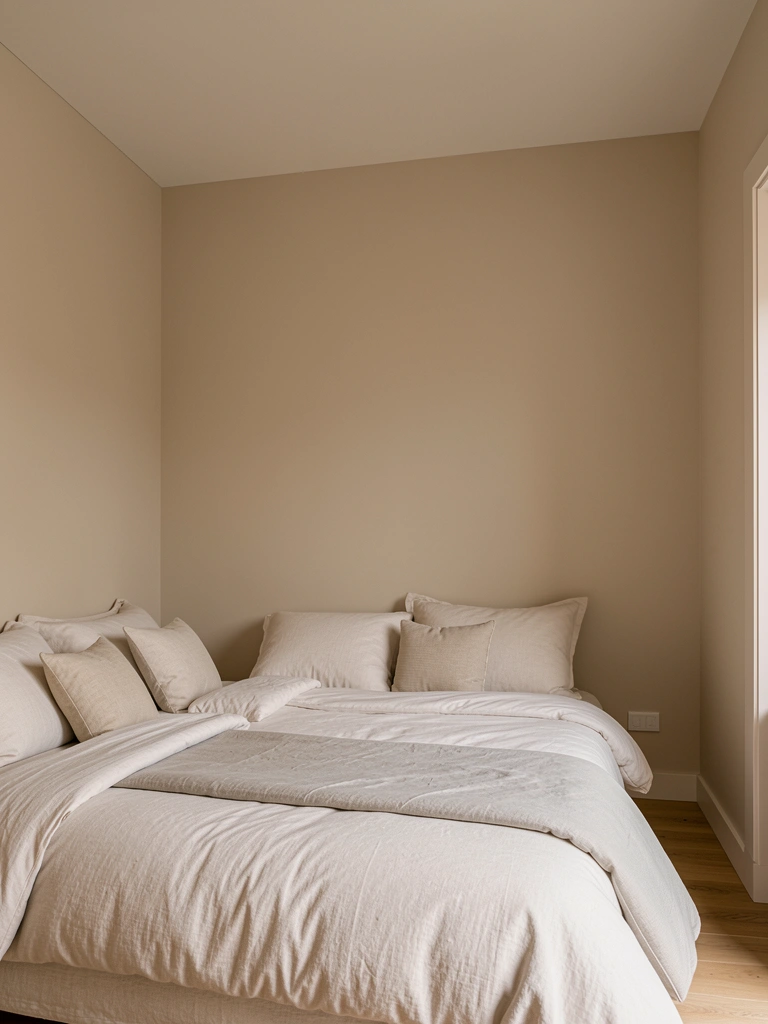
    23. Create a Cohesive Minimalist Palette: Three Colors Max

    Minimalist design thrives on color restraint. Choose three colors maximum for your shower—typically white, one neutral (greige, taupe, or pale gray), and one accent (matte black, brass, or brushed nickel).

    Plan your palette before purchasing anything. White tiles, greige paint, and black fixtures (no additional cost beyond standard selections) create visual harmony. This requires zero extra investment—just thoughtful choice during planning. The payoff is an intentional, gallery-like space.

    Limit your color choices, and the whole shower gains cohesion. The space reads as designed rather than accumulated, which is exactly what minimalism is.


    Save this post and try just one idea this weekend. Pick the easiest option first—maybe clearing your shower floor or swapping one fixture handle—and notice how much that small shift affects your whole routine. Which idea will you tackle first?

  • 27 Carved Wooden Entry Door Ideas That Bring Artistic Detail to Your Home

    27 Carved Wooden Entry Door Ideas That Bring Artistic Detail to Your Home

    27 Carved Wooden Entry Door Ideas That Bring Artistic Detail to Your Home


    Introduction

    Your front door is the first thing visitors see, and it’s also the first thing you see when you come home. If yours feels plain or outdated, you’re not alone—most standard doors lack personality. Carved wooden doors bring warmth, artistry, and an instant sense of craftsmanship that modern construction just can’t match. They catch light beautifully, create shadow play throughout the day, and signal that someone with taste lives behind them.

    The good news? You don’t need to blow your budget to add carved detail to your entry. From DIY relief-carving techniques to affordable pre-carved door panels, to splurging on a bespoke custom piece, there’s an approach for every budget and skill level. This guide walks you through 27 specific ideas—from renter-friendly panel upgrades to investment-level doors that genuinely increase curb appeal and home value.

    Let’s explore how carved wood can completely change the way your home feels.


    1. Add Carved Overlays to a Plain Door

    A carved overlay is exactly what it sounds like: a pre-made carved wooden piece attached to your existing door. This is the renter-friendly hack because you can remove it when you move. Home Depot and Wayfair sell ready-made wood appliqués in styles ranging from Victorian medallions to modern geometric patterns.

    You’ll need construction adhesive, a level, and about 30 minutes. Measure your door, choose an overlay that fits proportionally (usually $40–$120), center it, and glue it down. If you rent, use removable adhesive strips instead of permanent glue. The result? Your boring door looks custom-carved without any actual carving. You can paint the overlay to match your door or contrast it—both look stunning.

    This upgrade works especially well on solid-core doors that are already slightly textured. The overlay adds depth and shadow without requiring any carpentry skills.


    2. Commission a Custom Full-Door Carving

    If you want something truly unique, hire a local woodcarver to design and execute a one-off carved door. This is an investment ($800–$2,500+), but you’re getting an heirloom piece. Look for woodcarvers through local art councils, etsy (search “custom carved wooden door”), or architecture firms who work with artisans.

    The process typically takes 4–8 weeks. You’ll discuss design themes with the carver—maybe your family crest, a landscape that means something to you, or abstract patterns that match your home’s style. They’ll work in hardwoods like walnut, oak, or cherry that age beautifully over decades.

    Custom carvings boost curb appeal dramatically and often become neighborhood conversation starters. Friends and family will notice immediately. This is the kind of detail that says “I care about quality” before anyone even steps inside.


    3. DIY Hand-Carved Relief Designs on Wood Panels

    Want to carve yourself? Start small with a wooden door panel or even a plywood insert you can attach to your current door. Basswood and butternut are beginner-friendly because they carve cleanly without splintering. Buy a basic carving chisel set ($20–$50 from Amazon or Rockler) and a pattern.

    Choose simple designs your first time: geometric borders, floral sprigs, or abstract lines. Sketch your pattern lightly with pencil, then work with the grain using shallow cuts (about 1/4-inch deep). This takes patience—expect 8–15 hours for a small panel—but the satisfaction is real. You’re literally creating art with your hands.

    Once carved, finish it with stain or paint, then mount it on your door frame or replace an existing panel. Many DIYers find this meditative, and the results look intentional rather than mass-produced. Your door becomes a conversation about your creative side.


    4. Install Pre-Carved Door Panels from Heritage Brands

    Companies like ProVia, Therma-Tru, and Jeld-Wen offer pre-carved panel doors in dozens of styles. These aren’t cheap ($300–$800), but they’re factory-consistent, durable, and come with modern weatherproofing and energy ratings. You get carved artistry without the custom wait time.

    Popular carved styles include shell patterns (coastal feel), egg-and-dart molding (traditional), and geometric reliefs (contemporary). Browse their online galleries to see how different carvings photograph in different light conditions. Many showrooms let you touch samples—important because carving depth varies widely.

    Installation usually requires a professional unless you’re experienced with door frames. Budget $150–$300 for installation. The payoff? A door that looks like it cost thousands but functions perfectly and fits your home’s proportions exactly. These doors last 20+ years.


    5. Layer Carved Wooden Trim Around a Simple Door

    You don’t have to carve the door itself—frame it with carved trim instead. Ornamental wood trim (also called “trim blocks” or “pediments”) comes pre-carved from specialty suppliers like Architectural Depot or Home Depot’s premium sections ($60–$300 depending on complexity).

    Mix and match pieces: a carved pediment above the door, carved corner blocks where trim meets the frame, carved baseboard pieces at the bottom. Install with construction adhesive and finish nails. This approach lets you customize the “intensity” of carving—use minimal pieces for subtle detail or go full Baroque if that’s your style.

    The best part? You’re adding architectural impact to your entire entryway, not just the door. The carving frames and showcases your door rather than competing with it. Light plays beautifully across layered trim, creating shadow and depth.


    6. Use Stain and Wood-Burning to Simulate Carved Detail

    If actual carving feels too ambitious, wood-burning (pyrography) creates the illusion of carved depth with far less physical labor. A wood-burning tool costs $15–$40. You sketch your design, then carefully burn it into the wood surface with a heated tip.

    The burned lines create shading and contrast that reads as carved from a distance. Use designs with fine lines: Celtic knots, botanical details, geometric patterns. You control the depth by burn time—lighter burns read as sketch-like, darker burns look more carved.

    This takes steady hands and patience (a small panel takes 3–6 hours), but the results look professionally detailed. Finish with stain to enhance the contrast between burned and unburned wood. It’s an affordable ($50–$150 in materials) way to get custom carved-looking detail without actual woodcarving skills.


    7. Apply High-Relief Molding for Dramatic Shadow Play

    High-relief molding sits 1+ inches proud of the door surface, creating dramatic shadows that change throughout the day. This style works especially well on doors that get good natural light.

    Buy pre-made high-relief molding pieces ($40–$150 each) from specialty millwork suppliers or heritage hardware companies. Popular profiles include dentil molding (small rectangular blocks), egg-and-dart (repeating oval and dart pattern), or ogee (S-curve profile). Install with polyurethane adhesive and brad nails, then paint or stain.

    The shadow play is the real payoff here—your door looks different at sunrise than at sunset, which sounds small but genuinely adds interest to your entryway. Visitors comment on the detail more with high-relief than with subtle carving because the depth is so visible.


    8. Create a Faux-Carved Look with Paint Techniques

    An artist’s hack: use paint and shading to fake carved detail. You’ll need acrylic paints in your base color plus darker and lighter shades, plus fine brushes.

    Study carved doors online and notice how light and shadow fall. Paint deeper shadows in areas that would be recessed, lighter highlights on areas that would be raised. Use a dry-brush technique and subtle color gradations. Done well, it reads as carved from several feet away. From close range, eagle-eyed visitors might notice, but the impact is still there.

    This costs under $30 in supplies and takes a weekend of work if you have any painting background. It’s perfect for renters or anyone hesitant to commit to permanent changes. The faux technique works best on relatively simple designs (geometric patterns, single motifs) rather than complex botanical scenes.


    9. Mix Carved Wood with Modern Minimalist Frames

    Pairing carved wood with contemporary framing creates visual tension that feels current, not dated. Install your carved panel (custom, pre-made, or DIY) within minimalist aluminum frames like those used in Crittall-style glass doors.

    The carved relief reads as heirloom or artisanal, while the slim aluminum frame signals modern sensibility. Add brushed gold or matte black hardware for additional contemporary contrast. This approach appeals to people who love traditional craftsmanship but live in modern homes.

    Order aluminum frames from specialty suppliers ($100–$300) and have them cut to your panel size. Installation takes a weekend if you’re comfortable with basic tools. The result looks designed-on-purpose rather than accidental, because the contrast is so intentional. Your door becomes a statement about honoring traditional skills in a contemporary context.


    10. Combine Carved Panels with Energy-Efficient Glass Insets

    You can have light flow and carved artistry. Order a pre-carved door with glass inset options (or have a custom carver incorporate a glass panel into the design). Frosted, obscured, or textured glass maintains privacy while letting light pour through.

    The carved wood frames the glass and draws attention upward. Light hits the carving and glass differently throughout the day, creating ever-changing visual interest. ProVia and similar brands offer this option ($400–$1,000). Custom carvers can design glass insets into one-off pieces too.

    This works beautifully in homes with dark entryways or limited natural light. The glass solves the practical problem while the carving satisfies the aesthetic desire for detail and interest. It’s the best of both worlds.


    11. Source Reclaimed Carved Doors from Salvage Yards

    Architectural salvage yards, estate sales, and online marketplaces (Etsy, Craigslist, Facebook Marketplace) frequently stock authentic carved doors from historic homes. These are genuinely one-of-a-kind, often 75+ years old, and packed with character that new doors can’t replicate.

    Prices vary wildly ($150–$1,500) depending on condition, wood type, and intricacy. Inspect carefully for dry rot, deep cracks, or damaged hinges. Many salvaged doors need rehinging or hardware replacement ($50–$150). You might need professional restoration if the carving is delicate ($200–$500).

    The payoff? An authentically beautiful door with actual history, genuine craftsmanship visible in every detail, and a story to tell. Salvaged doors age gracefully and often appreciate in value. This option especially appeals to people restoring historic homes or seeking genuine vintage character.


    12. Carve a Personal Monogram or Family Crest

    Commission a carver to create a personalized monogram, family crest, or heirloom symbol on your door. This transforms your entry into a personal statement and often feels surprisingly timeless despite being completely custom.

    Work with a carver ($400–$1,200) to design something that reflects your family’s heritage, profession, or personal values. Heraldic designs, initials in Gothic script, family names with ornamental flourishes—all work beautifully in carved relief. Some carvers can incorporate meaningful dates or symbolic elements.

    The resulting door is unmistakably yours in a way nothing off-the-shelf could be. It signals that this home belongs to people who value heritage, identity, and permanence. Guests notice immediately and often ask about the story behind the carving.


    13. Install Carved Corbels and Brackets Above the Door

    Corbels and brackets are structural supports that also serve as decoration. Pre-carved versions add massive visual impact without touching the door itself. Think of them as the architectural “jewelry” for your entry.

    Hunt for salvaged corbels at architectural salvage yards ($50–$300 each depending on size and intricacy) or buy reproduction carved corbels ($40–$150) from millwork suppliers. Install them on either side of your door frame or under a pediment. Pair them with carved trim above the door for a layered, gallery-like effect.

    The visual weight these pieces add is remarkable—suddenly your entry feels substantial and intentional, like it belongs in a well-designed home. They photograph beautifully and catch light in ways that create shadow and depth.


    14. Use Painted Carved Panels in Unexpected Colors

    Carved detail doesn’t require natural wood finish. Paint carved panels in rich, saturated colors like forest green, navy, charcoal, or even deep burgundy. The carving reads more dramatically against solid color because shadow and highlight pop.

    This approach modernizes traditional carved detail and pairs perfectly with 2025 color trends (dark green and navy dominate entry design right now). Paint with quality exterior paint ($30–$60 per gallon, 1 gallon covers most doors), preferably matte finish which showcases carving detail better than gloss.

    The psychological effect is interesting: colored carving feels more intentional and designed than natural wood carving. It signals “I chose this specific color to complement my home’s aesthetic” rather than “I installed a carved door because that’s what carved doors are.”


    15. Install Floor-to-Ceiling Carved Panels for Grand Entries

    If you have a tall entryway (9+ feet), go full grandeur with floor-to-ceiling carved panels. This is an investment ($1,500–$5,000+), but the impact is unmatched. Your entry becomes the home’s defining architectural feature.

    Custom carvers can design panels that extend the full height, or you can combine multiple standard carved panels. The scale alone commands attention—friends and family will be genuinely impressed by the ambition and beauty. Natural light plays across the entire surface, creating shadows that shift throughout the day.

    This works especially well in homes with double-height entryways or grand foyers. It’s the kind of detail that increases perceived home value, makes you feel proud every time you come home, and gives guests an immediate sense that they’re entering somewhere special.


    16. Carve Botanical Motifs for a Garden-Inspired Entry

    Botanical carved doors feel warm and inviting—perfect for homes surrounded by gardens or for nature lovers. Carving techniques vary from realistic (photographic leaf detail) to stylized (flowing abstract plant forms).

    Commission a carver to design botanical-specific patterns ($600–$2,000) or search for pre-made botanical door panels on Etsy or specialty millwork sites. Ivy, acanthus leaves, ferns, flowers, vines—all read beautifully in carved relief. The natural subject matter feels timeless rather than trendy.

    This carving style pairs beautifully with natural materials elsewhere on your home (stone, brick, natural light) and creates a cohesive sense that your home honors the natural world. Visitors often comment that botanical doors feel more welcoming than purely geometric designs.


    17. Create a Geometric Art Deco Carved Pattern

    Art Deco carved doors blend artistry with graphic design sensibility. If you love 1920s-30s aesthetics, this direction offers bold personality. Patterns include stepped triangles, starburst rays, chevrons, and geometric medallions.

    Work with a carver who understands Art Deco vocabulary ($700–$1,500) or search for Art Deco reproduction doors online. The geometric nature means the carving reads cleanly even from a distance—bold shapes are readable in ways that delicate filigree sometimes aren’t.

    Paint in high-contrast colors (black and white, dark green and gold) to amplify the graphic quality. This approach especially appeals to people who appreciate design history and want their home to reflect a specific era they love. It reads as intentional curation rather than generic decoration.


    18. Combine Shallow Hand-Carved Details with Modern Materials

    Not all carved doors need to be ornate. Shallow hand-carving creates subtle detail that feels contemporary rather than traditional. Think delicate line work, abstract patterns, or minimal botanical elements rather than elaborate relief.

    Source or commission a simple carved panel ($200–$600 depending on complexity) with shallow carving (1/8-inch depth or less). This style pairs beautifully with contemporary hardware, minimalist frames, and modern colors. The carving reads more as “artistic detail” than “ornament,” which appeals to people who love design but reject ornamentation.

    Install within a slim aluminum frame for maximum contemporary impact. This approach offers carved beauty without the visual weight of traditional heavy carving. It’s for people who want craftsmanship and artistry without looking like they’re living in a museum.


    19. Install Interchangeable Carved Door Panels (Seasonal Updates)

    Some custom doormakers design frames that accept interchangeable carved panels, letting you swap designs seasonally or based on mood. This is the artsy answer to redecorating without reinstalling a door.

    Commission a framemaker to create a panel-swap system ($800–$2,000 initial setup) then order 2–4 different carved panels ($200–$500 each) in styles matching different seasons or aesthetics. Spring panels might feature flowering botanicals, autumn panels feature harvest imagery, winter panels might be geometric or snowflake-inspired.

    The payoff is creative satisfaction and the ability to refresh your entry’s look without major work. It’s like having a rotating art gallery on your front door. Friends notice when you change it, which becomes a fun conversation starter.


    20. Source Victorian-Era Carved Doors from Estate Sales

    Victorian doors are architectural jewelry—ornate, detailed, and crafted to last centuries. Estate sales and salvage yards frequently have authentic Victorian doors available for a fraction of their replacement cost.

    Expect to spend $300–$1,500 depending on condition and intricacy. Many need restoration (hinge repair, weatherproofing, refinishing) which adds $300–$800. But the craftsmanship you get is genuine—hand-carved details, real quarter-sawn oak or walnut, period-correct joinery.

    This option appeals to people restoring historic homes or those who love Victorian aesthetics. The authenticity can’t be replicated by new production doors. These doors develop character over time, showing wear in ways that feel noble rather than decrepit. They genuinely improve with age.


    21. Carve Narrative Scenes or Storytelling Elements

    Want your door to tell a story? Commission a carver to create a narrative scene. This might be a landscape meaningful to your family, a historical moment, a literary reference, or a personal story rendered in carved relief.

    This level of customization ($1,500–$3,500+) requires finding a skilled carver who can handle complex composition. Search for “narrative woodcarving” or ask local art councils for carver referrals. The process is collaborative—you describe the story, the carver creates sketches, you refine, then they carve.

    The result is genuinely one-of-a-kind—a door that expresses your family’s values, history, or imagination. It becomes a conversation piece that reveals something about who you are and what matters to you. Visitors spend time reading the carved narrative rather than just noticing “nice detail.”


    22. Install Carved Door Panels with Integrated Smart Lock Housing

    Modern security doesn’t need to clash with carved beauty. Work with a carver and smart lock installer to integrate biometric or keypad locks into carved door designs. The lock housing becomes part of the overall composition rather than a visible intrusion.

    Some custom door makers ($1,200–$2,500) can route smart lock housing into pre-carved panels so the tech feels integrated rather than bolted-on. Matte black or brushed gold smart locks complement carved wood when positioned thoughtfully. Install by professionals who understand both carpentry and tech.

    The result balances old-world craftsmanship with contemporary security. You get traditional beauty plus modern convenience, without either feeling compromised. This appeals to people who want heritage aesthetic with zero sacrifice in functionality.


    23. Use Carved Door Surrounds to Frame Glass Entry Doors

    Glass doors look modern and minimalist but can feel cold. Frame them with carved wood surrounds that add warmth and traditional architectural detail. The contrast between minimal glass and ornate carved surround creates visual interest.

    Source pre-made carved surrounds ($300–$800) from millwork suppliers or have a carver design custom framing. Install as an architectural frame around your glass door entrance. The carved wood draws the eye and softens what might otherwise feel severe.

    This approach works beautifully in contemporary homes that could use more warmth, or traditional homes adding modern glass doors. The carved surround is visually dominant, so the glass reads as a contemporary insert within a traditionally framed entry rather than vice versa.


    24. Combine Carved Wood with Visible Brick or Stone

    The combination of carved wood door + exposed brick or stone entry creates textural richness that feels intentional and designer-driven. The different materials each get more visually interesting because they’re in contrast.

    Install a carved wood door (custom, salvaged, or pre-made) within a brick or stone surround. Paint or stain the carving to either complement or contrast with the masonry color. Traditionally carved doors pair beautifully with rustic surroundings; modern carved doors look chic against clean brick.

    This material mix appeals to people who value texture and authenticity in their homes. The natural materials—real carved wood, real brick—make the entry feel grounded and substantial. It reads as carefully considered rather than decorator-picked.


    25. Hand-Carve a Minimalist Abstract Pattern in Shallow Relief

    Contemporary design often skips ornament in favor of abstraction. Hand-carve abstract patterns—flowing lines, geometric shapes, negative space—in shallow relief. This creates visual interest and artistic merit without traditional ornamentation.

    DIY this with basic carving tools ($50) or commission a carver who works in contemporary styles ($400–$1,000). The shallow depth keeps costs and time manageable while creating genuine artistic presence. Finish with stain or paint that highlights the carved shadows without adding visual noise.

    This approach appeals to minimalist aesthetics—you get artistic detail without decoration, craftsmanship without ornamentation. The carving feels intentional and contemporary rather than traditional or nostalgic.


    26. Create a Relief-Carved Landscape or Seascape

    Landscape carving lets you bring meaningful scenery to your entry. Commission a carver to render a view you love—mountain range, ocean scene, forest, desert—in relief. This creates a window-like quality even though it’s carved wood.

    Work with a carver to combine photo reference with artistic interpretation ($800–$2,000). The carving should have dimensional depth—foreground elements carved deeper, background elements shallower—to create visual recession. Light plays dramatically across landscapes, creating different moods at different times of day.

    This appeals to nature lovers and people who want their home to reflect what they value. A seascape carved door feels like you’re bringing the ocean home; a mountain landscape door signals your connection to wilderness. It’s personal without being literal.


    27. Install Multiple Carved Panels for an Accent Wall Effect

    Why stop at the door? Extend carved detail across your entire entryway by installing multiple carved panels (on walls, not just the door) in a coordinated design. This creates an accent wall effect that announces “you’re entering somewhere special.”

    Source matching or complementary carved panels ($60–$200 each) and arrange them in an intentional composition—grid pattern, asymmetrical gallery layout, or architectural arrangement. Install with adhesive and brad nails. This works beautifully with carved panels in similar styles but different sizes, creating visual rhythm.

    The effect is undeniably impressive. Your entryway becomes a gallery showcasing carved artistry. It reads as intentional curation rather than decoration. Guests immediately sense they’ve entered a home where beauty and craftsmanship matter.


    Closing

    Your entry door deserves to be more than functional—it should reflect the thoughtfulness and artistry inside your home. Whether you invest in a custom-carved masterpiece, source a salvaged treasure, DIY a personal design, or layer affordable carved trim around a simple door, you have options at every budget level. Pin this guide and pick one idea that speaks to you. Your home’s first impression will thank you.

  • 26 Rustic Bathroom Styling Ideas With Warm, Natural Charm

    26 Rustic Bathroom Styling Ideas With Warm, Natural Charm

    There’s something about a rustic bathroom that makes you want to linger a little longer. Maybe it’s the warm wood tones, the weathered textures, or the way natural materials just feel more honest than sleek modern finishes. If your bathroom feels too cold or sterile, you’re not alone—but the good news is that rustic charm doesn’t require a full renovation. In this guide, you’ll discover 26 practical styling ideas that bring warmth, character, and that sought-after farmhouse feel to any size bathroom. From budget-friendly swaps to investment pieces, these ideas work whether you’re renting or own your home. Let’s create a space that feels like a retreat instead of just a pit stop.

    1. Swap Your Mirror Frame for Reclaimed Wood

    A framed mirror instantly upgrades the whole focal point of your bathroom. Look for reclaimed or distressed wood frames at antique shops, flea markets, or online retailers like Wayfair, Etsy, or Facebook Marketplace. The weathered texture adds authenticity that new wood simply can’t match.

    You can find budget options ($30–$80), mid-range vintage frames ($80–$150), or authentic reclaimed pieces ($150–$300). If you’re renting, lean toward frame-only mirrors you can hang with adhesive strips. Installation takes 10 minutes. Pro tip: measure your mirror opening first, then shop for frames—or buy a simple mirror and build a DIY frame from barn wood ($20–$40 in materials).

    The space around your sink becomes a design statement instead of an afterthought. Your guests will notice the difference immediately.

    2. Layer in Woven Baskets for Storage and Texture

    Woven baskets do double duty—they store your clutter and add visual warmth that plastic bins never will. Look for rattan, seagrass, or wicker at Target, IKEA, Anthropologie, or HomeGoods ($15–$60 per basket depending on size).

    Place them under your sink, on a floating shelf, or beside your toilet. They work in any bathroom layout and take zero installation time. Mix textures by combining tightly woven baskets with looser, more rustic options. Swap out items seasonally to keep things fresh. Pro tip: line baskets with kraft paper for a polished finish that hides what’s inside.

    Your bathroom instantly feels more organized and intentional. Plus, you can grab what you need without staring at labeled plastic containers.

    3. Hang Vintage Brass or Iron Fixtures

    Brass, bronze, and aged iron hardware feel authentically rustic in a way that polished chrome never does. Hunt for vintage fixtures at local antique shops, eBay, or Restoration Hardware ($20–$80 for towel bars; $40–$120 for faucets if you’re replacing).

    If you’re renting, adhesive towel bars exist, though mounted fixtures look more finished. Installation typically takes 30 minutes with basic tools. Mix old and new—a vintage faucet paired with modern plumbing works beautifully. Pro tip: slightly tarnished brass looks more authentic than bright, shiny pieces; don’t over-polish it.

    Your bathroom reads as curated rather than rushed. Guests will assume you hired a designer.

    4. Add a Wooden Ladder for Towel Hanging

    A wooden ladder gives you open towel storage that looks intentional and farmhouse-ready. Search Etsy, Target, or Amazon for rustic ladder racks ($30–$80), or find an actual old ladder at a flea market ($10–$40).

    Lean it against any wall or near your tub—no installation needed for renters. If it feels unstable, secure it to the wall with brackets ($5–$10). Roll your towels in cream, white, or gray tones for that coordinated rustic look. Pro tip: rotate seasonal colors to refresh the space without buying new towels.

    Your bathroom gains vertical interest and that cozy, lived-in charm. Towels become part of the decor instead of hidden away.

    5. Install Open Shelving in Natural Wood

    Open shelving shows off your styling and makes small bathrooms feel less cramped. Buy pre-made floating shelves from Home Depot, Wayfair, or IKEA ($20–$50 per shelf), or have a carpenter cut reclaimed wood ($50–$150 per custom shelf).

    Installation requires a drill and wall anchors (30 minutes). Style shelves with grouped items—mason jars for Q-tips, a small plant, stacked towels—to avoid looking cluttered. Keep colors cohesive: whites, creams, natural wood, and greenery. Pro tip: leave the top shelf mostly empty to prevent a crowded feeling.

    You create a gallery effect that makes your bathroom feel intentional and designed. It’s the perfect place to display soap, candles, or vintage finds.

    6. Paint Walls in Warm, Muted Earth Tones

    Warm neutrals—sage, warm beige, soft taupe, or creamy white—set the rustic mood instantly. Paint is the cheapest refresh possible ($30–$60 for a gallon; takes one weekend).

    Choose low-VOC paint from Benjamin Moore, Sherwin-Williams, or Behr for better air quality. Warm greens and taupes photograph beautifully and feel calming. Skip bright whites unless your space gets tons of natural light; they can feel sterile. Pro tip: test paint samples on your wall at different times of day before committing.

    Your bathroom goes from “generic” to “retreat” with one coat. The right neutral makes every other rustic element you add look better.

    7. Add a Vintage Clawfoot Tub (or Faux Claw Feet)

    A clawfoot tub is the ultimate rustic statement piece. Real vintage tubs run $400–$1,500 (and require plumbing help). Budget-friendly option: add adhesive claw feet to your existing tub ($40–$80 from Etsy or Amazon).

    If you own your home, a plumber can install a tub in one day ($100–$300 in labor). If you’re renting, stick with claw feet accents. The impact is surprisingly dramatic—it completely changes the vibe. Pro tip: pair it with a vintage wooden tub surround or simple open shelving nearby for maximum rustic effect.

    Your bathroom transforms into a spa-like retreat that begs for long soaks. This one piece becomes the focus of the entire room.

    8. Hang Shiplap or Peel-and-Stick Paneling

    Shiplap screams rustic farmhouse and costs far less than a full remodel. Real shiplap runs $80–$200 (plus installation), but peel-and-stick options work beautifully for renters ($40–$120 for a small bathroom).

    Apply it behind your sink, above your toilet, or on an accent wall. Installation takes 2–4 hours depending on room size. Paint it white, cream, or soft gray to match your color scheme. Pro tip: real shiplap holds more resale value if you own, but peel-and-stick is honestly convincing and damage-free.

    Your bathroom gains instant texture and depth. The vertical lines also make the space feel taller and more defined.

    9. Display Vintage Glass Bottles and Apothecary Jars

    Vintage glass finds add character and work with almost any bathroom style. Hunt flea markets, thrift stores, or Etsy for old apothecary jars, medicine bottles, and vintage glassware ($2–$15 each).

    Fill some with cotton balls, bath salts, or dried flowers. Leave others empty for that collected-over-time look. Grouping similar items creates a curated gallery feel. Pro tip: clear glass makes tiny bathrooms feel less cluttered; group odd numbers (3, 5, 7) of bottles for visual balance.

    You create a rustic display that doubles as storage. Guests will think you’ve been collecting these treasures for years.

    10. Bring in Greenery and Potted Plants

    Plants soften hard bathroom surfaces and add life. Choose low-light varieties like pothos, ferns, or snake plants if your bathroom is dim ($5–$20 per plant from Lowe’s, Home Depot, or a local nursery).

    Place them on shelves, the sink corner, or a small plant stand. Repot into rustic ceramic or terracotta containers ($3–$15 each). Bathrooms are naturally humid, which many plants love—just make sure you’re not overwatering. Pro tip: group 3–5 plants of varying heights for a “plant corner” effect.

    Your bathroom goes from sterile to serene. Plants improve air quality and give you something living to care for—it’s weirdly therapeutic.

    11. Use Vintage Wooden Crates as Wall Storage

    Wooden crates are cheap rustic storage that works as decor. Find them at Target, HomeGoods, Etsy, or local pallet suppliers ($10–$30 each).

    Mount them on your wall with brackets to create open shelving. Fill with rolled towels, toilet paper, or small baskets. They work great for renters too—just lean them on a shelf or stack them in a corner. Mix and match sizes for visual interest. Pro tip: sand rough edges slightly if they’re brand-new and don’t match your rustic vibe.

    You gain functional storage that looks intentional. Stacked crates create a design feature that actually stores your stuff.

    12. Switch to Rustic Soap Dispensers and Toothbrush Holders

    Small décor swaps make a huge difference. Replace plastic dispensers with ceramic, wood, or metal versions from Target, IKEA, or Anthropologie ($8–$25 each).

    Look for matte finishes, subtle patterns, or vintage-inspired designs. These sit on your counter every day, so choose pieces you actually love. Pair a wooden soap dispenser with a ceramic toothbrush holder for mix-and-match rustic charm. Pro tip: buy a set to save money and ensure colors match.

    Your bathroom counter instantly looks more refined. What seemed like tiny details suddenly read as intentional styling.

    13. Hang a Vintage-Style Medicine Cabinet

    A vintage medicine cabinet combines storage with farmhouse character. Find reclaimed or reproduction options on Etsy, Wayfair, or at local antique shops ($50–$150).

    Installation takes 30 minutes if you’re comfortable drilling; otherwise hire a handyman ($50–$100). The weathered finish hides imperfections better than modern cabinets. Pro tip: if wall mounting feels permanent, try a leaning medicine cabinet ($80–$120) that rests against the wall.

    You consolidate bathroom clutter into one beautiful focal point. Your daily routine suddenly feels a bit more stylish.

    14. Layer Soft, Neutral Textiles

    Soft, layered textiles make bathrooms feel warm and inviting. Mix textures—linen, cotton, waffle weave—in coordinated neutrals. Buy from Target, Restoration Hardware, or local linen shops ($10–$40 per towel).

    Stick to creams, soft grays, whites, and warm taupes. Layer towels by draping some over racks and stacking others neatly. Rotate seasonal colors to keep things fresh. Pro tip: buy quality towels once; they last longer and look better than cheap replacements you buy repeatedly.

    Your bathroom feels like a boutique hotel instead of a basic space. Soft textures make the room feel more touchable and inviting.

    15. Create a Rustic Vanity with a Vintage Base

    If your vanity is tired, a new base completely transforms the space. Reclaimed wood vanities cost $300–$800, or hunt Facebook Marketplace or Craigslist for vintage furniture to convert ($50–$150).

    You can also modify an existing vanity with a DIY stain or paint job ($30–$80 in materials; weekend project). Pair it with a simple porcelain or stone sink for maximum impact. Pro tip: darker wood (aged oak, walnut) reads more rustic than light blonde wood.

    Your entire bathroom feels more curated when the vanity itself has character. It becomes the anchor piece that everything else builds off.

    16. Add Vintage Mirrors Above Floating Shelves

    A second mirror in a vintage or ornate frame adds depth and rustic character. Find options at antique shops, Etsy, or HomeGoods ($25–$80).

    Hang it above a shelf or beside your main mirror for a collected-over-time look. Smaller mirrors don’t need to be functional; they’re purely for style. Pro tip: a round or octagonal frame feels more farmhouse than square.

    You create visual interest and make the space feel intentionally designed. Mirrors bounce light around, making even small bathrooms feel brighter.

    17. Install a Vintage-Style Faucet or Faucet Covers

    Faucets are functional art in rustic bathrooms. A vintage-inspired or actual vintage brass faucet runs $40–$150 (or $200–$600 for high-end reproductions).

    If you’re renting or can’t replace your faucet, buy adhesive faucet covers ($15–$30 from Amazon or Etsy) to change the look. If you own, a plumber can swap it in one hour ($50–$100 in labor). Pro tip: aged brass and oil-rubbed bronze look more authentically rustic than shiny chrome.

    Your sink becomes a focal point rather than an afterthought. This one detail anchors the entire rustic aesthetic.

    18. Paint or Stain Wooden Beams or Trim

    Wooden trim or exposed beams add serious rustic character. If you have original trim, refinish it with stain ($20–$30) or paint ($30–$50). Takes 3–4 hours and an afternoon to dry.

    If your bathroom is beamless, you can add decorative faux beams ($50–$150 for peel-and-stick options). Stain in walnut, oak, or weathered gray for authentic rusticity. Pro tip: sanding before staining gives a more professional finish but isn’t required for rustic charm.

    Trim draws the eye upward and makes spaces feel more architecturally interesting. Your bathroom goes from plain to purposeful.

    19. Style a Small Vintage Stool or Step Ladder

    A vintage wooden step stool is functional décor that costs next to nothing. Find one at flea markets, thrift stores, or Etsy ($15–$50).

    Use it beside your tub for a decorative towel rack, or keep it functional for reaching high shelves. The weathered finish automatically reads rustic. Pro tip: if the stool feels wobbly, use it for décor only (not stepping).

    You add a design element that looks collected rather than bought yesterday. It’s the kind of thing guests notice and compliment.

    20. Create a Rustic Soap or Candle Display

    Rustic soap and candle displays feel boutique and smell amazing. Source from local makers, Etsy, or specialty shops ($5–$15 per item).

    Arrange items on a wooden tray for a cohesive look. Mix textures—rough soap, smooth glass candles, plants—for visual interest. Change seasonings with scents (lavender in spring, vanilla in fall). Pro tip: rustic bar soaps in kraft paper look more authentic than plastic-packaged alternatives.

    Your counter becomes a mini-spa setup that makes daily routines feel special. Guests will assume you splurged on a designer.

    21. Hang Vintage-Inspired Lighting Fixtures

    Lighting sets mood and style. Vintage or vintage-inspired fixtures from Home Depot, Wayfair, or antique shops run $30–$100.

    Install pendants above your sink for task lighting that looks beautiful. Pair with warm bulbs (2700K color temperature) for that cozy glow. A handyman can install in 30–60 minutes ($50–$100 labor). Pro tip: pair vintage fixtures with modern dimmers so you can adjust the vibe.

    You control both the lighting and the aesthetic. The right fixture makes your bathroom feel like a destination, not just a utility space.

    22. Use Stone or Slate Accents

    Stone adds earthy, rustic texture without major renovation. Stone tile accents run $3–$8 per square foot ($50–$200 for a small project).

    Apply as trim around mirrors, shelf edges, or as a partial backsplash behind your sink. DIY installation with adhesive works if you’re comfortable. Otherwise, a handyman charges $100–$300 for a small stone project. Pro tip: mix stone with wood for maximum rustic contrast.

    You ground the space with natural materials that feel timeless. Stone ages beautifully and never looks dated.

    23. Add a Rustic Towel Hook or Rack

    Individual hooks add rustic character and flexible storage. Find vintage or vintage-style hooks at Etsy, Anthropologie, or Home Depot ($8–$20 each).

    Mount in a row above your toilet or beside your tub. Installation takes 20 minutes per hook with a drill. Mix metals—brass, bronze, iron—for an collected-over-time look. Pro tip: odd numbers (3, 5, 7) feel more designed than even numbers.

    You gain functional storage that doubles as décor. This simple detail makes your bathroom feel thoughtfully styled.

    24. Display Vintage Metal Bathtub Caddy or Wooden Tray

    A vintage caddy or wooden tray transforms your tub into a spa setup. Find options at flea markets, Etsy, or Amazon ($25–$80).

    Place across your tub to hold towels, candles, books, or a bath pillow. Wood or aged metal reads far more rustic than modern plastic. Pro tip: fill it intentionally—a rolled towel, a candle, and a small plant look curated; random clutter looks chaotic.

    Your tub becomes a retreat rather than just a place to wash. Styling it this way makes every bath feel like a mini-vacation.

    25. Incorporate Vintage Rugs and Bath Mats

    Soft, rustic rugs ground the space and add comfort. Look for vintage or vintage-inspired options at thrift stores, Etsy, or HomeGoods ($20–$80).

    Stick to neutral tones—cream, gray, soft taupe—that complement your rustic palette. Natural fibers (cotton, wool, jute) feel more authentic than synthetic. Pro tip: layer a smaller decorative mat over a functional bath mat for a designed look.

    Your feet hit soft, warm textures instead of cold tile. This small comfort detail makes your daily routine feel cozier.

    26. Style With Vintage Books and Stacked Decor

    Vintage books add warmth and a collected aesthetic. Find them at thrift stores for $1–$3 each or search Etsy for rustic bathroom book collections ($15–$40 per bundle).

    Stack them near your tub, on shelves, or on a small table. Tie with twine for rustic flair. Pair with plants and rolled towels for a cohesive vignette. Pro tip: arrange by color (cream, brown, white spines) for a subtle, calming effect.

    You create a lived-in, intentional look that feels personal. Your bathroom reads like you’ve spent time collecting pieces you actually love.


    Ready to add some warmth to your space? Save this post and pick just one idea to tackle this weekend—whether it’s swapping out your mirror frame or hanging a new towel rack. One small rustic touch often sparks the urge to refresh the rest of the room. Share this with anyone who needs a cozy bathroom glow-up.

  • 26 Material Combination Ideas That Bring Subtle, Refined Elegance

    26 Material Combination Ideas That Bring Subtle, Refined Elegance


    The most elegant rooms aren’t about having more stuff—they’re about pairing the right materials together. When wood, metal, stone, and textiles work in harmony, your space feels curated, calm, and undeniably refined. The trick? Understanding which combinations create visual warmth without looking cluttered. Whether you’re working with a single shelf, an entire room, or just refreshing one corner, these 26 material pairings will show you how to layer depth and sophistication into every inch of your home. You don’t need an interior design degree to pull this off—just intention and a few smart swaps. Let’s explore combinations that feel collected over time, never forced.


    1. Pair Raw Wood With Blackened Metal for Modern Depth

    Raw wood and blackened metal create instant sophistication. The warmth of natural timber softens the industrial edge of matte black hardware, giving you drama without coldness.

    Find a wooden console ($150–$400) at West Elm, Article, or Facebook Marketplace. Pair it with blackened metal legs ($80–$200) from Etsy or hardware stores. If you already own a wooden table, simply swap the legs—a 30-minute job with basic tools. Add a blackened iron lamp ($60–$150) as your focal point.

    The beauty here is balance: the metal grounds the warmth, and the wood prevents the space from feeling too harsh. This combination works especially well in entryways or home offices where you want polish with personality.


    2. Combine Warm Stone With Pale Oak for Earthy Elegance

    Stone and pale oak feel naturally luxurious together. The neutral coolness of limestone or cream marble pairs beautifully with the golden warmth of light oak, creating a balanced, grounded aesthetic.

    DIY option: Buy stone peel-and-stick tiles ($30–$80) from Home Depot or Amazon to freshen a fireplace surround. Pair with wooden floating shelves in oak ($40–$120) from IKEA or local suppliers. Installation takes 2–3 hours and requires no special skills.

    Investment option: Custom stone millwork ($2,000+) designed by local fabricators (like Design Solutions in Miami) creates a statement focal point that lasts decades.

    Your space immediately reads as intentional and curated. This pairing works in living rooms, bedrooms, or bathrooms where you want the room to feel serene rather than trendy.


    3. Layer Brass Hardware With Soft Linen for Gentle Luxury

    Brass brings warmth; linen brings softness. Together they whisper luxury without shouting about it. This pairing works on dressers, cabinets, cushions, and even wall hangings.

    Swap out your existing hardware for brass pulls ($15–$50 per set) from Anthropologie, Schoolhouse Electric, or Etsy. Style with linen throw pillows ($30–$80 each) or a linen duvet ($100–$300). No tools needed beyond a screwdriver—budget 15 minutes per drawer.

    Pro tip: Don’t polish your brass to a shine. Slightly aged, matte brass looks more refined and hides fingerprints better.

    You’ll notice the combination creates a cohesive, high-end aesthetic that feels collected rather than matchy. Perfect for bedrooms, living rooms, or anywhere you want touchable luxury.


    4. Mix Reclaimed Wood With Concrete for Industrial Warmth

    Reclaimed wood softens concrete’s stark industrial feel. Concrete adds gravitas to wood’s warmth. Together they create a balanced, modern-rustic aesthetic that reads as both intentional and approachable.

    Source reclaimed wood from salvage yards ($1–$3 per board-foot) or Etsy, then commission a local carpenter to build shelving ($300–$800). Alternatively, buy pre-made reclaimed wood shelves ($100–$300 each) from Wayfair or specialty woodworkers.

    For renters: Use removable concrete peel-and-stick wallpaper ($30–$60) as your backdrop, then layer reclaimed wood shelves with command hooks.

    This pairing works in home offices, kitchens, and studios. It feels authentic and crafted, never sterile or cold.


    5. Combine Marble With Warm Brass for Timeless Contrast

    Marble feels cool and expensive; brass feels warm and approachable. When paired, they create an elegant, balanced aesthetic that never goes out of style.

    Install a marble sink countertop ($500–$1,500+) from local stone suppliers or upscale home stores. Pair with a brass faucet ($150–$400) from Waterworks, Rejuvenation, or West Elm.

    Budget option: Use marble peel-and-stick wallpaper ($40–$100) with brass-finished shelf brackets ($20–$50) for a 10th of the cost.

    Your bathroom instantly reads like a boutique hotel. This pairing works especially well in powder rooms and master baths where you want a polished, intentional focal point.


    6. Layer Cork With Natural Linen for Organic Softness

    Cork and linen are both natural, breathable, and warm to the touch. This pairing creates a grounded, approachable aesthetic that feels like home.

    Add cork coasters ($15–$30 per set) from Target, Urban Outfitters, or etsy. Layer with linen table runners ($30–$80) from H&M Home, Restoration Hardware, or Etsy. Use a cork bulletin board ($20–$50) with linen trim to create a memo station.

    Pro tip: Cork develops a beautiful patina over time, so it actually improves with age.

    Spaces with cork and linen feel inviting and real—not showroom-perfect. This works beautifully in kitchens, home offices, and casual dining areas where you want warmth over formality.


    7. Pair Textured Plaster Walls With Dark Wood Frames

    Textured plaster gives walls dimension and interest. Dark wood frames anchor that texture without competing with it. This combination feels curated and intentional.

    Apply textured plaster or limewash ($300–$800 for a room) through a local painter or try DIY peel-and-stick textured wallpaper ($40–$80) from Spoonflower or Amazon.

    Hang wood-framed art ($30–$200 per frame) from Framebridge, Artifact Uprising, or local framers. Space frames 8–10 inches apart for a gallery effect that photographs beautifully.

    Your walls become a backdrop rather than just a surface. This pairing works in living rooms, bedrooms, and hallways where you want sophistication without fussiness.


    8. Mix Natural Leather With Soft Cashmere for Tactile Luxury

    Leather is durable and sleek; cashmere is soft and warm. Together they create a space that looks expensive and feels even more so.

    Find a leather chair ($400–$1,200) from Article, West Elm, or thrift stores. Layer with a cashmere throw ($80–$300) from Everlane, Quince, or The Cashmere Shop.

    Budget option: Use a faux leather chair ($150–$400) and a wool-blend throw ($30–$80) for a similar vibe at a fraction of the cost.

    This pairing makes your living room feel like a luxury hotel lounge. It works best in bedrooms and living rooms where comfort and sophistication are equally important.


    9. Combine Raw Jute With Soft White Linen for Relaxed Contrast

    Jute’s rough texture meets linen’s soft drape. The contrast creates visual and tactile interest without feeling discordant.

    Layer a jute rug ($100–$300) from Ruggable, West Elm, or Wayfair with a linen pouf ($50–$150) from CB2 or Article. Add linen curtains ($40–$120 per panel) for cohesion.

    The beauty? Jute is durable and washable, while linen softens the room’s edges. This combination works in living rooms, bedrooms, and home offices—anywhere you want casual elegance.


    10. Pair Warm Terracotta With Natural Concrete for Earthy Grounding

    Terracotta’s earthy warmth looks stunning against cool concrete. This pairing brings outdoor elegance inside—perfect for plant-forward spaces.

    Display terracotta pots ($10–$40 each) from local nurseries or Etsy on a concrete plant stand ($50–$150) from CB2, Article, or specialty retailers. Or create a DIY concrete planter ($5–$15 in materials) using a concrete mold and cement.

    Pro tip: Terracotta improves with age, developing a beautiful weathered patina that concrete complements perfectly.

    Your plant collection becomes a design moment rather than just greenery. This works beautifully in living rooms, bathrooms, and home offices where you want nature and sophistication to coexist.


    11. Layer Aged Brass With Deep Charcoal Stone for Rich Contrast

    Aged brass feels collected and intentional. Deep charcoal stone provides the perfect moody backdrop. This pairing reads as high-end and design-forward.

    Install charcoal stone tiles ($2–$5 per sq. ft.) from tile suppliers, then mount vintage-inspired brass sconces ($80–$250 each) from Rejuvenation, Etsy, or salvage shops.

    Budget option: Use charcoal peel-and-stick tiles ($20–$50) and battery-operated brass picture lights ($30–$60) for impact without installation.

    Your space gains drama and visual depth. This combination works in entryways, powder rooms, and dining rooms where you want to make a statement.


    12. Combine Natural Woven Raffia With Warm Wood for Organic Warmth

    Woven raffia brings textural interest and natural warmth. Light wood echoes that warmth without competing. Together they create spaces that feel approachable and lived-in.

    Add woven raffia baskets ($15–$60 each) from Schoolhouse Electric, Etsy, or home stores, then style on wooden shelves ($40–$120 each) from IKEA, Article, or local woodworkers.

    Pro tip: Fill baskets with rolled blankets or textiles for a styled, magazine-ready look.

    Your shelves become functional art. This pairing works in bedrooms, living rooms, and home offices—anywhere storage needs to look intentional.


    13. Pair Soft Velvet With Polished Brass for Jewel-Tone Drama

    Velvet’s lusciousness pairs perfectly with brass’s shine. This combination screams refined luxury and works especially well with jewel tones.

    Invest in a velvet chair ($400–$1,200) from Article, Wayfair, or local furniture makers. Look for brass nail-head trim ($200–$400) as built-in detailing, or have an upholsterer add it ($150–$300).

    Budget option: Buy a velvet throw pillow ($40–$100) with brass accents instead.

    Your seating becomes a statement piece. This pairing works beautifully in living rooms and bedrooms where you want personality and polish in equal measure.


    14. Layer Cork And Ceramic For Warm, Handmade Appeal

    Cork’s warmth meets ceramic’s handmade charm. This pairing creates spaces that feel authentic and personal.

    Collect cork trivets ($10–$25 each) and handmade ceramic pieces ($20–$80 each) from local artisans, Etsy, or craft fairs. Arrange on wooden serving boards or shelves ($20–$50).

    Pro tip: Hunt for ceramics with imperfections—that’s what makes them feel real and intentional.

    Your kitchen or dining space becomes a gallery of meaningful pieces. This works beautifully where you want to celebrate handmade quality over mass production.


    15. Combine Soft Stone With Light Marble Veining and Brushed Nickel

    Soft stone provides texture; marble adds visual interest; brushed nickel keeps everything balanced and modern. This trio creates spaces that feel curated and calm.

    Use soft stone tiles ($2–$4 per sq. ft.) from tile suppliers for walls. Add a marble vanity top ($300–$800) and brushed nickel fixtures ($80–$200) from PlumbingDepot, Wayfair, or specialty retailers.

    Budget option: Use peel-and-stick stone wallpaper ($40–$80) with similar finishes for a 10th of the cost.

    Your bathroom feels like a personal spa. This pairing works best in powder rooms and master baths where relaxation is the priority.


    16. Pair Natural Hemp Rope With Warm Walnut Wood

    Hemp rope is tactile and organic; walnut wood is rich and grounding. Together they create texture without clutter.

    Create a DIY rope shelf ($30–$60 in materials) by wrapping hemp rope around walnut wood dowels, or buy pre-made hemp wall hangings ($40–$120) from Etsy or West Elm. Style on a walnut floating shelf ($80–$150).

    This takes 30 minutes if DIY, or 5 minutes to hang if you buy finished pieces.

    Your walls gain warmth and texture instantly. This pairing works in bedrooms, living rooms, and nurseries where you want organic softness.


    17. Layer Distressed White Plaster With Aged Iron for Rustic Romance

    Distressed plaster suggests history and age. Aged iron adds character without modernity. This pairing feels collected and romantic.

    Apply DIY distressed plaster ($200–$400 for a room) through a local painter, or use peel-and-stick distressed plaster wallpaper ($50–$100) from Spoonflower. Mount aged iron sconces ($60–$150 each) from Etsy, Rejuvenation, or salvage shops.

    Pro tip: The imperfections in plaster are the point—they make spaces feel authentic and lived-in.

    Your walls tell a story. This combination works beautifully in entryways, bedrooms, and dining rooms where you want romance and sophistication.


    18. Combine Smooth Alabaster With Warm Oak Accents

    Alabaster glows from within; oak provides grounding warmth. This pairing creates spaces that feel elegant and approachable.

    Display an alabaster lamp ($80–$200) on an oak side table ($100–$250) from Article, West Elm, or local furniture makers. Pair with oak wood bowls ($20–$60) or other carved pieces.

    The alabaster becomes a focal point that softens the room’s edges. This works beautifully in bedrooms and living rooms where you want subtle luxury.


    19. Pair Natural Linen With Blackened Steel Frame Details

    Linen’s softness needs grounding; blackened steel provides visual anchor. This pairing feels contemporary and refined.

    Find a linen sofa ($800–$2,000) from Article, Room & Board, or Restoration Hardware, or reupholster an existing piece ($400–$800). Look for blackened steel frame details—they’re increasingly common in modern furniture.

    Budget option: Use a linen slipcover ($200–$400) with visible steel legs.

    Your living room looks designed, not decorated. This combination works beautifully in modern minimalist spaces where every piece earns its place.


    20. Layer Warm Honey Onyx With Brushed Brass Fixtures

    Honey onyx seems to glow from within. Brushed brass warms without harshness. This pairing creates spaces that feel high-end and sensual.

    Install honey onyx accent tiles ($5–$15 per sq. ft.) from specialty tile suppliers or Wayfair. Pair with a brushed brass faucet ($150–$350) from PlumbingDepot, Waterworks, or high-end retailers.

    Budget option: Use peel-and-stick onyx-look wallpaper ($50–$100) with brass-finish fixtures ($80–$150).

    Your bathroom becomes a moment of luxury in your daily routine. This works best in powder rooms or master baths where visual impact matters.


    21. Combine Reclaimed Brick With Modern Stainless Steel Accents

    Reclaimed brick brings history and warmth. Stainless steel provides modern counterbalance. This combination reads as intentional and forward-thinking.

    Source reclaimed brick ($1–$2 per brick) from salvage yards and have walls built by a mason ($1,000–$3,000), or use peel-and-stick reclaimed brick wallpaper ($50–$100). Install stainless steel shelves ($80–$200 each) from Metal Supply or industrial suppliers.

    This pairing works beautifully in kitchens, lofts, and home offices where you want character with contemporary polish.


    22. Pair Soft Taupe Suede With Rose Gold Accents for Feminine Warmth

    Taupe suede is sophisticated and tactile. Rose gold adds warmth without coldness. This pairing feels feminine and refined.

    Layer a taupe suede chair or ottoman ($200–$600) from Article, Wayfair, or secondhand sources. Add rose gold accents ($20–$100 each): bookends, mirrors, picture frames from Urban Outfitters, Target, or specialty retailers.

    Budget option: Use a taupe suede throw pillow ($40–$80) with rose gold throw blanket clips ($15–$30).

    Your space feels curated and intentional. This works beautifully in bedrooms, reading nooks, and home offices where you want warmth with polish.


    23. Layer Weathered Cedar With Antique Copper Fixtures

    Weathered cedar has character and history. Antique copper develops a beautiful patina that complements aged wood perfectly. This pairing feels authentic and collected.

    Install weathered cedar paneling ($3–$8 per sq. ft.) on accent walls or ceilings through a carpenter ($500–$1,500), or use peel-and-stick cedar look ($40–$80) for renters. Add antique copper hardware ($20–$50 per piece) from Etsy, specialty hardware shops, or Rejuvenation.

    Your space feels like it has stories to tell. This works beautifully in cabins, farmhouse-inspired kitchens, and bedrooms where authenticity matters.


    24. Combine Soft Chenille With Antique Brass Details

    Chenille is luxuriously soft; antique brass adds vintage charm. Together they create spaces that feel collected and high-end.

    Find a chenille chair ($400–$1,000) from Article, Room & Board, or vintage furniture stores. Look for antique brass details built in, or have an upholsterer add brass nail-heads ($150–$250).

    Budget option: Buy a chenille throw pillow ($50–$120) with brass accents already included.

    Your living room reads as a curated, timeless retreat. This pairing works beautifully wherever you want comfort wrapped in sophistication.


    25. Pair Natural Slate With Warm Copper Accents for Grounded Drama

    Slate’s cool darkness needs warmth; copper provides it perfectly. This pairing feels grounded and intentional.

    Install slate flooring or tiles ($3–$8 per sq. ft.) from tile suppliers. Mount a copper pendant light ($100–$250) from Etsy, Rejuvenation, or West Elm above a key area like a kitchen island or entryway.

    Budget option: Use slate peel-and-stick tiles ($30–$60) with a copper-finish pendant light ($50–$120).

    Your space gains visual drama and sophistication. This works beautifully in kitchens, entryways, and dining rooms where you want bold, collected style.


    26. Layer Warm Terrazzo With Champagne Gold Fixtures for Modern Luxury

    Terrazzo has playful texture and warmth. Champagne gold adds approachable luxury without coldness. This pairing feels modern and collected.

    Install terrazzo tile ($4–$10 per sq. ft.) from tile suppliers like Floor & Decor, or use peel-and-stick terrazzo ($40–$100) for accent walls or backsplashes. Pair with champagne gold fixtures ($80–$200) from Wayfair, West Elm, or specialty plumbing retailers.

    Budget option: Use a terrazzo backsplash ($200–$500) with champagne gold cabinet hardware ($15–$40 per piece).

    Your kitchen or bathroom becomes a conversation starter. This combination works beautifully in contemporary spaces where personality and polish are equally important.


    Save this post for your next refresh and pick just one pairing to start with. The most refined spaces aren’t built overnight—they’re created through small, intentional choices stacked together. Which material combination speaks to you?

  • 26 Wooden Facade Ideas for a Warm, Organic Exterior Look

    26 Wooden Facade Ideas for a Warm, Organic Exterior Look

    Introduction

    Your home’s exterior tells a story before anyone steps through the door. If you’re craving that warm, organic aesthetic that feels both grounded and sophisticated, wood is your answer. Whether you’re drawn to natural cedar warmth, mixed textures with stone and metal, or the softness of wood-accented color blocking, there’s a wooden facade idea waiting for your home. The 2025 design shift favors earthy materials that age beautifully and require less maintenance than you’d think. Across 26 distinct approaches—from budget-friendly updates to investment-level renovations—you’ll find solutions for every homeowner and renter. Let’s explore how wood can become your home’s signature feature, creating curb appeal that feels authentically you.


    1. Layer Cedar Siding with Charcoal Accents

    Cedar siding brings natural warmth that actually improves with age, developing a silvery patina over time. Pairing it with charcoal accents—think window frames, doors, or trim—creates striking contrast without feeling cold or harsh.

    Install full-height cedar siding ($8–$15 per square foot installed) or upgrade existing siding by adding cedar accent panels around doors and windows ($50–$200 per section, DIY-friendly). The contrast works because warm wood naturally softens deep charcoal, creating balance. This project typically takes a weekend for smaller sections or 2–4 weeks for full-home coverage if hiring contractors.

    Pro tip: If budget is tight, add cedar accents to your porch ceiling or gable end first—maximum impact, minimal expense.

    You’ll notice how this combination makes your home feel both modern and inviting, stopping passersby mid-walk.


    2. Combine Thin Brick with Wood Cladding

    Mixing thin brick with wood creates the textured depth 2025 design is craving—and thin brick costs 40% less than full brick while delivering the same visual impact. This combo mimics high-end Bay Area design without the price tag.

    Thin brick veneers ($6–$10 per square foot) install over existing siding in roughly 3–5 days for an average home facade. Pair it with cedar or treated wood cladding on upper sections or gables. You can DIY smaller sections or hire professionals for full-scale work (expect $1,500–$5,000 depending on coverage). Home Depot and Wayfair stock lightweight options from brands like Brickwebb.

    Alternative: If brick feels too permanent, use faux brick panels ($2–$4 per square foot) on your accent wall or porch—zero installation hassle, renter-friendly if landlord approves.

    The layering creates visual interest that photographs beautifully while boosting perceived home value without breaking your budget.


    3. Paint a Bold Wood Accent Wall

    One bold-colored wooden accent wall draws the eye and feels way less commitment-heavy than painting your entire home. Deep olive, burgundy, or charcoal on wood planking creates drama without overwhelming your facade.

    Apply exterior-grade paint in earth tones ($30–$50 per gallon) to a single wood wall, gable, or porch section. Preparation matters most: power wash, sand rough spots, prime any bare wood, then apply two coats. Budget one weekend for DIY, or hire a painter ($400–$800 depending on wall size). Brands like Sherwin-Williams and Benjamin Moore offer 2025-trending earth-tone palettes specifically tested for exterior durability.

    Budget hack: Paint just your front-facing gable first—biggest visual payoff, smallest paint investment.

    This approach gives you that bold-color trend without the risk of committing your entire home to charcoal or burgundy.


    4. Add Vertical Wood Slat Privacy Screens

    Vertical wood slats soften your facade while adding function—they screen utilities, create privacy, and photograph incredibly well. This trend blends biophilic design with contemporary architecture.

    Install vertical cedar or composite slats ($15–$30 per linear foot with hardware) around your porch, entryway, or utility areas. DIY installation takes 4–6 hours for a standard porch screen; professional installation runs $800–$2,000 depending on coverage. Space slats 2–4 inches apart for visual flow without compromising privacy. Brands like Kebony and Ipe source sustainably, though pressure-treated pine works budget-friendly ($8–$12 per linear foot).

    Pro tip: Leave 3–6 inch gaps between slats and plant fast-growing vines behind—they’ll intertwine naturally over time.

    Your porch becomes an architectural feature that blurs indoor-outdoor boundaries while hiding eyesores.


    5. Install Reclaimed or Salvaged Wood Siding

    Reclaimed wood tells a story in ways new materials can’t. It carries character, authenticity, and instant curb appeal—plus it’s genuinely sustainable since you’re reusing existing material.

    Source reclaimed barn siding or salvaged wood from architectural salvage yards or Etsy ($6–$20 per board foot, often cheaper bulk-purchased). Installation typically costs $15–$25 per square foot when professionally hung. A modest porch accent (100–200 square feet) runs $1,500–$3,500 installed. The weathered gray or honey tones pair beautifully with modern metal accents and require zero staining—just seal annually with clear matte finish to protect character.

    Alternative: Buy new “reclaimed-look” composite boards ($10–$15 per board foot) if budget is tight—they mimic the aesthetic without hunting salvage markets.

    Visitors immediately sense the home’s history and intentional design choices in a way cookie-cutter siding simply can’t match.


    6. Frame Doors and Windows with Natural Wood Trim

    Sometimes the simplest change delivers maximum impact. Wrapping your entryway and windows with natural wood trim brings warmth and definition to any exterior palette.

    Replace or upgrade existing door and window frames with cedar or composite wood trim ($30–$100 per window, $80–$200 for entry doors). Paint or stain to match your aesthetic—honey, weathered gray, or natural tones work best. This is typically a one-weekend DIY for smaller homes (3–5 windows) or a 3–5 day professional project ($1,200–$2,500 for full-home updates). Home Depot stocks pre-cut wood trim options that require only sanding, staining, and installation.

    Budget option: Paint existing metal frames with premium exterior paint to mimic wood ($15–$30 total for supplies) while you save for real wood upgrades.

    This framing draws attention upward and inward, making your entryway feel like a deliberate architectural focal point rather than an afterthought.


    7. Create Wood and Stone Color Blocking

    Geometric color blocking with wood and stone creates visual harmony while preventing uniformity. This technique feels curated and intentional without requiring bold paint colors.

    Divide your facade horizontally or vertically, using cedar or wood composite for upper sections ($8–$15 per sq ft) and stacked stone veneer for lower sections ($10–$18 per sq ft). Professional installation runs $2,500–$5,000 for average homes; DIY is possible but requires careful planning. The visual split should align with architectural features (roofline, porch edge, foundation line) for maximum impact. Brands like Cultured Stone offer lightweight veneers that don’t require reinforced framing.

    Pro tip: Use a 60/40 ratio—more wood on top, less stone on bottom—for proportions that feel balanced, not choppy.

    The result feels galleries-worthy while solving the real problem: preventing your facade from looking flat or one-note.


    8. Stain Wood to Warm Beige Tones

    Moving away from cold grays toward warm beiges is the 2025 shift, and staining existing wood is the quickest way to refresh without replacement. Warm stains develop character while feeling effortlessly organic.

    Apply exterior wood stain in beige, tan, or warm gray ($20–$40 per gallon) to new or existing cedar, fir, or composite wood. DIY full-home staining takes 2–3 weekends (power wash, sand, apply 2 coats). Professional staining runs $1,500–$4,000 depending on home size. Brands like Cabot and Olympic offer 2025-trending warm palettes. Test small sections first—stain looks different as it dries and ages.

    Alternative: If your siding is paint-covered, wash, prime, then paint to match warm stain colors ($50–$100 per gallon for exterior-grade paint).

    Staining enhances wood grain visibility while developing natural patina over time, making your home look more sophisticated with each passing season.


    9. Add Wooden Pergolas or Shade Structures

    Wooden pergolas soften hard lines while creating outdoor rooms that extend your home’s interior aesthetic outward. They blur that indoor-outdoor boundary 2025 design prioritizes.

    Install cedar or composite pergolas ($1,500–$4,000 installed) over porches, patios, or entryways. DIY assembly takes one weekend for prefab kits ($800–$2,000); full custom builds run 2–3 weeks with professionals. Top it with fast-growing vines (clematis, jasmine) for natural shade and biophilic depth. Cedar requires annual sealing; composite needs minimal maintenance.

    Budget hack: Build a simple DIY pergola frame ($300–$500 materials) using pressure-treated lumber and rope lattice—it looks surprisingly polished in 10–12 hours of work.

    Visitors experience your home as an extension of nature rather than just a structure, instantly raising perceived luxury and livability.


    10. Pair Wood Siding with Metal Roofing

    The metal-and-wood pairing feels contemporary while honoring traditional farmhouse roots. Metal roofing lasts 40+ years and reflects solar heat—a sustainability win that looks sharp too.

    Replace asphalt shingles with standing-seam metal roofing in matte charcoal or bronze ($12–$18 per square foot installed). A full roof replacement for average homes costs $8,000–$15,000 but delivers decades without replacement. Pair with warm cedar siding for maximum visual contrast. Metal roofing requires professional installation (3–5 days); it’s not a DIY project. Brands like Metallic Building Components and Classic Metal Roofing Systems offer customizable finishes.

    Investment note: Metal roofing qualifies for tax credits and boosts resale value, often recouping cost within 15 years.

    This combination signals durability and intentional design, making your home look both timeless and thoroughly modern.


    11. Install Wood Beam Details on Gables

    Exposed wood beams on gables add architectural interest and warmth without requiring full-siding overhauls. This detail feels artisanal and high-end while remaining surprisingly affordable.

    Install cedar or composite faux beams ($150–$400 per 12-foot beam installed) on gable ends, porch ceilings, or entryway overhangs. Real beams run $400–$800 each but weather beautifully; faux beams ($80–$200) look nearly identical and require zero maintenance. DIY installation takes 4–6 hours per beam using heavy-duty brackets and fasteners. Align beams with architectural lines (roof peak, porch edge) for intentional placement.

    Pro tip: Pair wooden beams with black metal brackets ($30–$60 per bracket) for that modern-farmhouse-meets-industrial edge.

    The visual weight of beams draws eyes upward, making modest homes feel more substantial while adding dimension to flat facades.


    12. Wrap Your Porch with Cedar Ceiling Boards

    A wooden porch ceiling is where guests pause, notice details, and form lasting impressions. Cedar absorbs and diffuses light in ways that feel warm and welcoming.

    Install tongue-and-groove cedar boards on porch or covered entry ceilings ($4–$8 per linear foot for materials, $15–$25 per sq ft installed). Average porches (100–150 sq ft) run $1,500–$3,000 professionally or $300–$500 DIY if you’re handy with fasteners and caulk. Cedar requires annual sealing but ages beautifully to silver-gray if left natural. Paint it your accent color for drama (matches your door, trim, or shutters).

    Budget option: Use composite beadboard ($2–$4 per linear foot) and paint to match your desired aesthetic—30% savings, 95% visual impact.

    The moment guests step into your porch, they’re enveloped by warmth and craftsmanship, transforming how they perceive your entire home.


    13. Create Wood Plank Accent Doors

    Your entry door is the single most-photographed part of your home. A wooden plank door—whether solid wood or composite—makes an undeniable statement about your style and care.

    Commission a custom wood plank door ($600–$2,000) or purchase stock wooden doors ($300–$800) from brands like Simpson Door or Trustile. Installation is straightforward for pros (2–4 hours, $200–$400 labor) or manageable DIY if you have framing experience. Stain doors honey, weathered gray, or natural, then seal annually. Pair with statement hardware—matte black, oil-rubbed bronze, or forged iron—to amplify the artisanal effect.

    Budget pick: Use cedar or composite door slabs ($150–$300) and have a local carpenter build a custom frame—often cheaper than premade designer doors with similar visual impact.

    Your door becomes a conversation piece and the design anchor for your entire exterior palette.


    14. Add Natural Wood Shutters to Windows

    Wooden shutters add character and depth while improving insulation (when solid shutters) or visual layering (when purely decorative). They break up flat facades instantly.

    Install exterior wood shutters ($150–$400 per pair) or faux wooden composite shutters ($80–$200 per pair) that require zero maintenance. Professional installation takes one day ($300–$600 for full home); DIY is simple with a power drill and level. Pair shutters with window trim in contrasting colors (dark shutters, light trim, or vice versa) for architectural intention. Brands like Builders Edge offer composite options that resist weather better than real wood.

    Pro tip: Odd-numbered window pairs work best—paint shutters matte black or charcoal to frame lighter siding and draw focus upward.

    Shutters immediately age your home gracefully while adding shadow play that makes your exterior photograph richer and more dimensional.


    15. Mix Wood with Composite Stone Veneer

    Composite stone veneers bridge the gap between luxury and practicality—they look authentic, weigh 80% less than real stone, and cost substantially less while lasting equally long.

    Install lightweight composite stone veneers ($8–$15 per sq ft) alongside cedar or wood composite siding ($8–$12 per sq ft). Professional installation averages $2,000–$4,000 for accent sections; full coverage ($10,000+) makes sense as a long-term investment. DIY is possible for confident DIYers but requires careful planning. Brands like Cultured Stone and Eldorado Stone offer veneers that genuinely fool the eye without reinforced framing requirements.

    Alternative: Use stacked stone contact paper or faux panels ($3–$6 per sq ft) for temporary, renter-friendly drama.

    The combination feels high-end and intentional while requiring less maintenance than real stone would demand.


    16. Paint Wood Trim in Contrasting Colors

    Strategic trim color creates visual architecture on otherwise flat facades. White trim makes wood pop; charcoal trim adds sophistication. This costs almost nothing but impacts perception dramatically.

    Paint all wood trim—doors, windows, fascia, gable boards—in a single contrasting color using premium exterior trim paint ($30–$60 per gallon). One gallon covers 350–400 sq ft. DIY this project over one weekend using painter’s tape and a quality brush. Professional trim painting runs $800–$1,500 for full homes. Sherwin-Williams ProClassic and Benjamin Moore Exterior are industry standards for durability and finish quality.

    Budget hack: Paint just door and window trim first ($0 if you already own paint) to test impact before committing to fascia and gable trim.

    Suddenly your home looks intentionally designed rather than assembled—this single decision elevates entire exteriors.


    17. Build Wooden Raised Planter Boxes

    Wooden planters bridge hardscape and softscape, grounding your home in nature. They create layered, magazine-worthy curb appeal while supporting native plant ecosystems.

    Build or buy cedar planter boxes ($40–$150 each depending on size) and fill with native plants, grasses, or low-maintenance succulents. DIY construction takes 2–3 hours per box with basic lumber, fasteners, and a drill. Line boxes with landscape fabric, add drainage holes, and use quality potting soil. A full porch border (5–8 planters) costs $200–$600 and takes one weekend to build and plant.

    Pro tip: Match planter wood to your siding tone or paint them your accent color for visual cohesion.

    Suddenly your home looks inhabited by someone who cares about detail—planters signal design intention faster than almost any other element.


    18. Install Horizontal Wood Siding in Alternating Widths

    Varying board widths create visual interest and depth that standard single-width siding can’t achieve. This detail feels intentional and architectural.

    Install horizontal wood siding in mixed widths ($10–$18 per sq ft installed) or hire professionals for pattern-planned layouts. Varying widths add 15–20% to standard siding costs but deliver disproportionate visual impact. This is typically a professional installation (2–4 weeks for full coverage); DIY is possible for accent sections only. Plan your pattern before installing—alignment makes the difference between intentional and chaotic.

    Budget option: Mix board widths on a single accent wall or porch face ($300–$800) for dramatic impact without full-home investment.

    The alternating rhythm makes your facade feel curated by a designer, not assembled by a contractor working from standard specs.


    19. Add Wooden Deck Railings with Metal Accents

    Wooden railings anchor your home to the landscape while steel cable or metal inserts add contemporary edge. This combo feels both warm and sophisticated.

    Install cedar or composite deck railings ($50–$100 per linear foot) with steel cable or metal spindles ($30–$60 per linear foot additional). Full deck railings for standard decks run $1,500–$3,000 installed; professional installation takes 2–5 days depending on complexity. DIY is possible if you’re comfortable with post installation and spacing requirements (check local codes—spacing is regulated). Brands like Timbertech and Trex offer composite options with metal accent packages.

    Pro tip: Use 1/8-inch steel cable instead of traditional spindles for a minimalist, contemporary feel that doesn’t obscure views.

    This railing style makes your outdoor spaces feel like intentional living areas rather than afterthoughts.


    20. Paint Wood Siding in Warm Terracotta or Rust Tones

    Terracotta and rust tones feel grounded and timeless—they work beautifully in any climate and age gracefully. This color shift away from cool grays signals 2025 design evolution.

    Paint existing or new wood siding in terracotta, rust, or warm ochre using premium exterior paint ($35–$70 per gallon) rated for your climate zone. Full home: 2–3 gallons needed, costing $70–$210 plus labor ($1,500–$3,000 professional; one-weekend DIY with 2–3 people). Pair with cream, white, or charcoal trim for contrast. Benjamin Moore “Red Ochre” or Sherwin-Williams “Cavern Clay” are 2025-trending warm neutrals.

    Alternative: Stain wood to warm terracotta tones ($25–$45 per gallon) if your siding is unfinished or light-colored.

    Warm terracotta reads as both welcoming and grounded, making your home feel more substantial and intentionally placed in its landscape.


    21. Layer Wood Battens Over Existing Siding

    Wood battens are thin, applied strips that create shadow lines and texture without replacing siding. This is the renter-friendly, non-committal way to add dimension.

    Install vertical or horizontal wood battens ($8–$15 per linear foot installed) over existing siding using fasteners and outdoor caulk. A full home facade takes 3–5 days professionally ($1,500–$3,000) or one weekend DIY for confident builders. Materials cost $300–$600. Spacing matters—typical is 12–16 inches apart—plan on graph paper before measuring.

    Pro tip: Paint battens a contrasting color (charcoal, olive, burgundy) to the siding behind them for drama.

    Your home suddenly reads as layered and intentional; shadow play across battens adds dimension that photographs beautifully at any time of day.


    22. Create Wood Arched Entry Details

    Arched wooden details are experiencing a 2025 resurgence—they soften hard modernism while adding organic, biophilic appeal. This trend is extending from interiors to exteriors beautifully.

    Commission or build wooden arched entry frames or window surrounds ($400–$1,200 professionally; $100–$300 DIY for simpler arches). Work with a carpenter if custom curves intimidate—the investment pays off in how dramatically an arch transforms an entryway. Cedar and composite woods both curve well; laminated arch kits ($150–$400) exist if custom feel overwhelming.

    Alternative: Add prefab wooden arch trim kits (Etsy, Wayfair, $80–$200) to existing doors for 80% of the impact at 30% of the cost.

    Arched entries feel inviting and intentionally designed, making modest homes feel architectural and worthy of magazine features.


    23. Mix Reclaimed Wood with Modern Metal Railings

    Pairing reclaimed wood’s history with modern metal creates visual tension that feels intentional and gallery-worthy. This combination balances warmth and edge beautifully.

    Source reclaimed barn wood or salvaged siding ($8–$20 per board foot) and pair with modern metal railings or cable systems ($800–$2,000 installed). Reclaimed wood installation costs $15–$30 per sq ft professionally; DIY is possible for confident builders. The contrast—old wood meets new metal—tells a design story that feels curated and expensive despite potentially costing less than new materials.

    Budget hack: Buy new “weathered-look” siding ($6–$12 per sq ft) that mimics reclaimed appearance without hunting salvage yards.

    Visitors sense the home’s story immediately—reclaimed wood carries authenticity that new materials struggle to convey.


    24. Paint Wood Details in Your Brand Color

    Creating a “brand color” throughout your wood details ties everything together while signaling thoughtful design choices. It’s affordable, impactful, and transforms perception entirely.

    Choose one signature color—deep olive, burgundy, charcoal, or forest green—and paint all wood accents using premium exterior paint ($35–$70 per gallon). One gallon covers 350–400 sq ft. DIY application takes one weekend; professional trim painting costs $800–$1,500 full home. This single decision unifies disparate elements and makes your home instantly recognizable.

    Pro tip: Your brand color should complement your siding and metal tones—test samples on different facades before committing.

    Your home stops looking like a collection of features and becomes a cohesive design statement that neighbors notice immediately.


    25. Build Wooden Window Boxes Filled with Greenery

    Wooden window boxes add romance and greenery without structural changes. They’re affordable, highly photogenic, and instantly elevate “default” facades into something magazine-worthy.

    Build or buy cedar window boxes ($50–$120 each) and install beneath ground-floor and entry windows. DIY construction takes 1–2 hours per box; professional installation is minimal ($50–$100 per box for labor). Fill with seasonal flowers, evergreens, or cascading ivy. Total investment: 3–4 boxes, $300–$600 installed, transforms curb appeal by 40–50% in perception. Line with landscape fabric, add drainage, use quality potting soil.

    Budget option: Build simple boxes from 1×10 lumber ($15–$30 per box) and stain to match siding.

    Lush greenery spilling from wooden boxes makes passersby pause—it signals a home inhabited by someone who notices details.


    26. Combine Wood Siding with Earthy Neutral Paint

    Layering different wood textures stained in warm earth tones creates sophistication without bold color commitment. This approach feels intentionally modern-traditional.

    Pair horizontal wood siding (lower facade) with vertical wood boards (upper gable or accent sections), both stained warm beige, tan, or soft brown ($25–$45 per gallon, one gallon covers 350–400 sq ft). Professional staining and sealing: $1,500–$3,500; DIY: one full weekend plus drying time. Test samples on inconspicuous sections first—stain color shifts as it dries. Brands like Cabot and Olympic offer pre-mixed warm palettes specifically trending for 2025.

    Pro tip: Let at least one wood texture remain unstained (natural gray) for subtle contrast without color discord.

    This approach makes your home feel curated by someone understanding color theory—earthy, grounded, and thoroughly intentional.


    SOFT CTA:

    Save this post and pick one idea to tackle this month. Whether you start with paint, add planters, or plan a bigger rebuild, these wooden touches compound fast. Share this with any friends dreaming of a warmer, more organic home exterior.

  • 26 Noise-Softening Additions That Make Sleep Spaces Feel Serene

    26 Noise-Softening Additions That Make Sleep Spaces Feel Serene

    You know that feeling when you walk into a room and instantly relax? That’s what a noise-softening bedroom does for your sleep space. Whether you’re dealing with street traffic, noisy neighbors, or just want your bedroom to feel like a sanctuary, small acoustic and sensory additions make a huge difference. The best part? Most of these ideas are budget-friendly, renter-approved, and don’t require any special skills. In this guide, you’ll discover 26 specific ways to make your bedroom quieter, calmer, and more conducive to deep, restorative sleep. From textiles and plants to lighting and layout tweaks, each idea tackles noise absorption or creates psychological calm—sometimes both. Let’s start building your serene sleep space.

    1. Layer Your Curtains for Sound Dampening

    Heavy curtains are your first defense against outside noise and light pollution. A single curtain panel won’t absorb much sound, but layering multiple weights creates an air gap that traps noise and muffles outside disturbance.

    Install a sheer curtain close to the window, a medium-weight linen or cotton panel in the middle, and a blackout curtain on the outside track. This trio costs $60–$200 depending on size and quality. Most hardware stores sell tension rods (under $20) that make layering renter-friendly without permanent installation. The setup takes about 30 minutes, and you’ll immediately notice quieter mornings and faster sleep onset.

    Pro tip: Leave a small gap between layers so air can flow and prevent moisture buildup. The visual effect also photographs beautifully for inspiration feeds.

    Your window becomes a sound barrier that also controls light—the two biggest sleep disruptors. You’re not just reducing noise; you’re signaling to your brain that the bedroom is a protected space.

    2. Add an Area Rug for Acoustic Absorption

    Hard floors—wood, tile, laminate—bounce sound around your room and make every footstep and noise echo. A large area rug absorbs sound waves and dampens reflections, making the space feel quieter and warmer underfoot.

    Choose a rug at least 8×10 feet with a thick pile or textured weave (wool, jute, or wool-blend rugs perform best acoustically). Budget $100–$400 depending on material and quality. Layering a smaller rug on top adds even more absorption for $50–$150 extra. Place it so the bed sits mostly or entirely on the rug. This takes 10 minutes to lay out and requires no tools.

    Pro tip: Jute or sisal rugs are budget-friendly ($80–$150) and excellent sound absorbers, though slightly less plush than wool. Synthetic high-pile rugs offer a middle ground at $100–$250.

    The room feels less echoey and acoustically “dead” in the best way. You’ll notice your own movements sound quieter, and outside noise feels more muffled and distant.

    3. Hang Acoustic Panels or Tapestries Disguised as Decor

    Acoustic panels don’t have to look clinical. You can disguise sound-absorbing panels as decorative tapestries, macramé wall hangings, or quilted fabric art—all of which dampen sound while looking intentional and beautiful.

    Commercial acoustic panels run $30–$100 each, but DIY tapestries or heavy fabric hangings (think vintage quilts or woven textiles) cost $20–$80 and absorb sound just as well. Hang 2–4 pieces on walls where sound tends to bounce (opposite the window, behind the bed). Mount with simple adhesive hooks or tension rods for renter safety. Installation takes 20–30 minutes.

    Pro tip: Macramé wall hangings, vintage kilim tapestries, and linen wall textiles do double duty as decor and acoustic treatment. Layer different textures for visual depth and maximum sound absorption.

    Your walls stop reflecting noise back at you, and the room gains an artist’s retreat aesthetic. The space feels both quieter and more personalized.

    4. Use Thick Curtain Liners for Added Sound Blocking

    Curtain liners—especially quilted or thermal varieties—add acoustic mass to existing curtains without replacing them entirely. This is a fast upgrade for renters or anyone who already loves their current curtains.

    Thermal curtain liners cost $15–$40 per panel and hook onto your existing curtain rod using small clips or a separate rod. Quilted liners are heavier and more sound-absorbing than basic thermal options. Installation takes 15 minutes, and you don’t need to alter or change your main curtains.

    Pro tip: If you prefer a hidden solution, hang the liner on an inner rod behind your existing curtains so only the nicer fabric shows from inside the room. Measure your curtain width and length first—most liners come in standard sizes (36″–84″ wide).

    The added layer significantly dampens outside noise without changing your room’s appearance. Your current curtains now work harder at blocking both sound and light.

    5. Place Furniture Against Exterior Walls for Mass

    Mass absorbs sound. By positioning heavier furniture—dressers, bookshelves, bed frames—against exterior walls (the ones facing outside or neighbors), you create a physical barrier that weakens noise transmission.

    This costs $0 if you rearrange existing furniture. If you need to buy new pieces, a solid wood dresser runs $150–$400, and a tall bookshelf ranges $80–$300. Positioning takes 30 minutes to an hour, depending on what you’re moving. Don’t push furniture flush against the wall; leave a tiny 1–2 inch gap for air circulation and to prevent moisture issues.

    Pro tip: Fill bookshelves with books (which absorb sound) rather than leaving them empty. The mass of books plus the wooden structure creates excellent acoustic dampening.

    Your bedroom becomes quieter because sound has to travel through more material to reach you. The furniture arrangement also feels more intentional and purposeful.

    6. Install Weatherstripping Around Doors

    A huge amount of noise leaks through gaps around bedroom doors. Weatherstripping seals these gaps and stops sound (and drafts) from entering your sleep space.

    Weatherstripping foam tape costs $5–$15 per door and takes 10 minutes to install. Clean the door frame, peel and stick the foam strip along the top and both sides, and you’re done. For the bottom gap, install a door sweep (which hangs from the door and closes the gap when the door is shut) for $10–$25.

    Pro tip: If you rent and can’t install permanent weatherstripping, removable adhesive tape (like Command strips) works well. Replace it yearly as the adhesive weakens. Silicone weatherstripping is more durable than foam if you’re buying for the long term.

    The room becomes noticeably quieter because hallway noise and ambient house sounds stop seeping in. Sleep feels deeper when you’re not subconsciously processing background disturbance.

    7. Add Soft Furnishings Like Ottomans and Poufs

    Soft furnishings—ottomans, poufs, upholstered benches—absorb sound while adding comfort and style. Fabric-covered items dampen reflections and create acoustic “soft spots” throughout the room.

    A quality ottoman or pouf costs $80–$250 depending on material and size. Budget options from IKEA, Target, or Wayfair run $40–$100. Place one or two in corners or under windows. No installation required—just unbox and position.

    Pro tip: Choose dense, textured fabrics (velvet, wool, linen) over sleek ones. The more surface irregularity, the better the sound absorption. Bonus: ottomans with storage let you hide bedding and seasonal items while keeping the room calm and clutter-free.

    Your bedroom gains functional seating that also makes the space feel quieter and more grounded. The soft surfaces catch sound you didn’t even realize was bouncing around.

    8. Install a White Noise Machine or Sound-Masking App

    Sometimes the best way to deal with unavoidable noise is to mask it with consistent, neutral sound. White noise machines emit steady tones that cover up irregular noises (traffic, voices, sirens) that jolt you awake.

    Quality white noise machines cost $30–$150 (Marpac Dohm, LectroFan are popular). Free alternatives include apps like myNoise, Noisli, or YouTube videos ($0–$10 monthly for ad-free versions). Choose a machine or app with adjustable volume and multiple sound options (rain, fan, brown noise, ocean). Setup takes 5 minutes. Many machines come with sleep timers so sound turns off during deep sleep cycles.

    Pro tip: Experiment with different noise types. Some people sleep better with fan sounds, others prefer rain or white noise. What’s soothing to one person might be annoying to another, so test before investing in a pricey machine.

    Outside noise becomes unnoticeable because your brain focuses on the steady, predictable masking sound instead. You sleep through disturbances you’d normally wake to.

    9. Upgrade Your Pillow to a Thicker, Denser Style

    Beyond comfort, a high-quality pillow with denser fill contributes to acoustic dampening around your head and neck—the area most sensitive to sound disturbance during sleep. Thicker pillows also prop your head at better angles for breathing and neck support.

    A quality pillow costs $50–$150 depending on fill (memory foam, down alternative, latex). Budget options start around $25–$50. Look for pillows with 4–5 inches of fill height and medium-firm density. Two pillows create more sound-absorbing mass than one.

    Pro tip: Memory foam and down-blend pillows are denser and absorb more sound than feather pillows. Test in-store if possible, or buy from retailers with easy returns (Amazon, Costco, major department stores). The right pillow also improves sleep quality independent of sound control.

    You’re more insulated from noise because the pillow mass around your head creates a buffer. Sleep feels more supported and undisturbed because your body is properly aligned.

    10. Hang Blackout Curtains to Control Light and Reduce Perceived Noise

    Complete darkness doesn’t directly reduce sound, but it dramatically improves sleep quality—and better sleep makes you less sensitive to noise. Blackout curtains also provide acoustic benefits as a bonus.

    Blackout curtains run $40–$150 per panel depending on size and quality. Installation on an existing rod takes 15 minutes. For renters, tension rods with blackout panels cost $30–$80 total and require zero permanent installation. Consider blackout curtains in deeper colors (charcoal, navy, black) for maximum light-blocking and slight acoustic enhancement.

    Pro tip: Pair blackout curtains with a blackout window shade or film for maximum darkness, or layer them over existing curtains. If you travel or want flexibility, removable blackout panels (adhesive-backed) cost $20–$40 and peel off cleanly.

    Your body produces more melatonin in darkness, helping you fall asleep faster and stay asleep longer. This better baseline sleep means you’re naturally more resilient to ambient noise.

    11. Place Plants Around the Room for Softening and Air Quality

    Live plants add visual softness and improve air quality, which contributes to sleep-friendly atmosphere. Their soft leaves and varied textures also provide subtle acoustic absorption, though not as much as dedicated materials.

    Common bedroom plants like pothos, snake plants, and monsteras cost $10–$30 per plant at nurseries or big-box stores. A collection of 3–5 plants runs $30–$120. Pots add another $20–$50 depending on material and size. Placement takes 10 minutes, and ongoing care is just weekly watering.

    Pro tip: Choose low-maintenance plants (pothos, snake plant, ZZ plant) if you’re not confident in your plant skills. Larger plants provide more acoustic benefit because of their mass and surface area. Position them on shelves, nightstands, and corners rather than just clustered in one spot.

    Your room becomes noticeably greener and more alive, which calms your nervous system before sleep. The subtle rustling of leaves adds gentle, nature-based sound masking, and you’re breathing cleaner air throughout the night.

    12. Install a Soft Padded Headboard

    A padded headboard absorbs sound that would otherwise bounce off a hard wall behind your bed. It’s both functional and aesthetic—a win for acoustic treatment disguised as furniture.

    Upholstered headboards run $150–$600 depending on size, materials, and whether you’re buying or DIYing. Budget alternatives include wall-mounted fabric panels ($50–$150) or adhesive padded wall tiles ($30–$80). DIY enthusiasts can staple fabric over a plywood frame mounted to the wall ($40–$80 in materials). Installation takes 1–3 hours for DIY or is handled by the retailer for purchased headboards.

    Pro tip: Quilted or tufted headboards look more finished and absorb sound better than smooth padded versions. If you’re renting, adhesive fabric panels work without damaging walls.

    Sound bounces less chaotically around your sleeping area, and the room feels quieter and more enclosed. You’ve also created a visual focal point that makes the bed feel more intentional and spa-like.

    13. Switch to Heavier Bedding for Mass and Comfort

    Heavier bedding (duvets, weighted comforters, layered blankets) adds mass around your body that absorbs sound and also provides the tactile coziness that supports better sleep. The weight itself is calming.

    A quality weighted comforter costs $100–$400 depending on fill weight (15–25 lbs is typical). Standard duvets run $60–$200. Layering multiple throw blankets adds another $30–$100. The whole setup, including pillows and sheets, totals $200–$600 for a complete refresh. Swapping out bedding takes 15 minutes.

    Pro tip: Weighted comforters designed for anxiety or sensory sensitivity are worth the premium—they reduce nighttime stress. Natural materials (cotton, bamboo) sleep cooler than synthetics. If you’re sensitive to weight, even a heavier-than-normal duvet (not weighted) provides acoustic and comfort benefits.

    You feel more held and grounded, which reduces anxiety and allows deeper sleep. The room also looks more inviting and intentional, signaling to your brain that this is a space designed for rest.

    14. Reduce Echo with Soft Wall Treatments

    Echoing walls make rooms feel less cozy and amplify ambient noise. Soft wall treatments dampen reflections without requiring paint or renovations, making them renter-friendly.

    Options include adhesive fabric wall panels ($30–$80), cork tiles ($20–$60), or DIY fabric-wrapped frames ($15–$40 in materials). Install 2–3 panels on walls opposite windows or behind the bed where sound tends to bounce. Application takes 30–60 minutes depending on method.

    Pro tip: Removable peel-and-stick wall treatments (fabric, cork, or padded panels) work beautifully for renters. Neutrals and soft textures integrate seamlessly into bedroom design. Layer different treatments (one fabric panel, one cork, one tapestry) for visual interest and varied acoustic properties.

    The room stops sounding hollow or echoey. Sound feels absorbed rather than reflected, and the space acoustically shrinks to feel more intimate and enclosed.

    15. Create a Reading Nook Away from the Bedroom Window

    If your bedroom faces a loud street or neighbors, positioning your bed away from the window and creating a quiet nook on an interior wall moves you further from the noise source. This simple layout change reduces the sound reaching your sleeping body.

    This costs $0 if you rearrange existing furniture or $100–$300 if you buy a reading chair or add seating. Rearranging takes 1–2 hours. Choose interior walls facing closets, hallways, or neighboring bedrooms rather than external walls.

    Pro tip: If you can’t move your bed, at least position your headrest away from the exterior wall. Even a few feet of distance weakens noise transmission. Use your reading nook for wind-down time before bed, which also improves sleep onset.

    You’re sleeping in a quieter zone of your bedroom, and the space gains functional purpose beyond just sleeping. Wind-down time in the quiet nook naturally transitions your brain into sleep mode.

    16. Add Plush Throw Blankets Layered on Your Bed

    Layered throw blankets add mass and softness while creating visual interest. The more fabric layers on your bed, the more sound absorption happens around your sleeping body.

    Quality throw blankets cost $20–$80 each, depending on material (wool, cotton, faux fur, cable knit). Layer 2–3 throws on your bed for $40–$240 total. This setup takes 10 minutes to arrange and rearrange as needed for seasons. Buy throws that coordinate with your bedding color palette for intentional styling.

    Pro tip: Mix textures—cable knit, faux fur, linen, wool—rather than using identical blankets. The variety absorbs different sound frequencies. Fold them casually at the foot of the bed or drape them over the headboard for a styled look.

    Your bed becomes a cozy cocoon that muffles noise and makes you feel held. The visual effect is also more dynamic and inviting, encouraging you to prioritize bedtime.

    17. Seal Air Leaks Around Outlets and Light Switches

    Tiny air leaks around electrical outlets and light switches let noise (and cold air) escape. Sealing these gaps is less visible than other treatments but makes a real acoustic difference.

    Acoustic caulk or paintable sealant costs $5–$15 per tube. Foam outlet gaskets cost $3–$8 per unit. Sealing an average bedroom takes 30–45 minutes and requires basic caulking skills (or hire a pro for $100–$200). This is a long-term solution if you own your home; renters should check lease terms first.

    Pro tip: For renters, removable foam gaskets behind outlet and switch covers work without damaging walls. Just remember to remove them if you move.

    Sound transmission through walls drops noticeably because you’ve closed the small passages that leaked noise. This combines with other acoustic treatments for cumulative effect.

    18. Invest in Quality Noise-Canceling Earplugs or a Silk Sleep Mask

    Sometimes the most direct solution is personal noise protection. Quality earplugs and a sleep mask block external stimuli while signaling to your brain that it’s time to sleep.

    Foam earplugs cost $5–$15 per pair and are disposable. Reusable silicone earplugs run $10–$20. Premium noise-blocking earplugs (like Loop or Flents) cost $15–$40. Silk sleep masks run $15–$50. Together, a complete personal acoustic setup is $30–$90 and lasts months to years depending on care. Using them takes 30 seconds each night.

    Pro tip: Test different earplug styles because fit varies. Some people prefer foam, others silicone or wax. A silk mask feels softer on skin than cotton and reduces light penetration better. Use these as backup solutions on high-noise nights rather than relying on them nightly (continued earplug use can impact ear health).

    You have a personal noise barrier that blocks external disturbance completely. Combined with room treatments, this provides comprehensive sound control.

    19. Paint Walls in Soft, Matte Finishes Rather Than Glossy

    Matte paint finishes absorb sound and light better than glossy finishes, which reflect both. While the acoustic difference is subtle, the visual and sensory difference supports a calmer bedroom overall.

    Paint costs $20–$50 per gallon and covers about 350 square feet. A bedroom typically needs 1–2 gallons. Professional painting costs $200–$600 for a bedroom; DIY takes 6–10 hours depending on prep. Matte or eggshell finishes are nearly identical in cost to glossy paint, so there’s no budget trade-off.

    Pro tip: Soft, muted colors (pale grays, warm whites, soft greens, muted blues) pair beautifully with matte finishes and naturally create a calming atmosphere. Avoid bright whites or high-contrast colors in matte finish, which can look flat rather than restful.

    The room stops feeling echoey, and the matte surfaces create a softer, more forgiving visual environment. Light distributes gently rather than bouncing harshly, which calms your nervous system.

    20. Install a Door Seal or Acoustic Door

    A standard hollow bedroom door transmits noise readily. A solid core door or acoustic door blocks much more sound than hollow alternatives. This is an investment but transforms noise transmission.

    Acoustic doors cost $150–$400 depending on style and quality. Solid core doors run $100–$300. Standard hollow doors are $50–$150 (not recommended for quiet bedrooms). Professional installation adds $150–$300. Installation takes a few hours. For renters, this isn’t an option, but weatherstripping a hollow door (previous tip) helps significantly.

    Pro tip: If replacing your door, measure the frame first and ensure the new door fits the existing opening. Hollow core doors weigh 20–30 lbs; solid core doors are 40–50 lbs, so the frame needs to support extra weight.

    Outside noise transmission drops dramatically because the door no longer vibrates in response to sound. This single change might be the most impactful acoustic upgrade available.

    21. Use Acoustic Foam Panels Disguised as Art

    Acoustic foam panels don’t have to look industrial. Framing them or choosing panels with attractive finishes makes them look like intentional art while serving an acoustic purpose.

    DIY framing costs $30–$60 per panel (foam plus frame materials). Pre-framed acoustic art runs $50–$150 per piece. Install 3–5 panels for noticeable acoustic improvement at $150–$750 total. Adhesive mounting takes 30 minutes.

    Pro tip: Choose warm tones (cream, soft gray, pale tan) rather than bright colors. Thick foam (2–4 inches) absorbs sound better than thin. Varying panel sizes on a wall creates visual interest while maximizing acoustic coverage.

    Your bedroom walls stop bouncing sound around chaotically, and you’ve disguised acoustic treatment as intentional design. The room looks thoughtfully curated rather than industrial.

    22. Create Soft Zoning with Furniture Arrangement

    Defining zones within your bedroom with strategic furniture placement creates natural sound barriers and signals to your brain that different areas serve different purposes. This separation reduces noise perception in the sleeping zone.

    This costs $0 with rearrangement or $100–$400 if buying additional furniture (side table, reading chair, shelving). Planning takes 15 minutes; rearranging takes 1–2 hours. Position larger pieces (dressers, bookshelves) as dividers between zones.

    Pro tip: Use an area rug to anchor each zone visually. This creates psychological “rooms within a room” without construction, and soft rugs add acoustic benefits too.

    Your brain perceives the sleeping area as more protected and separate from activity zones. Sound seems to bounce less across the space, and you fall asleep faster because the zone signals rest mode.

    23. Invest in a Premium Mattress with Acoustic Properties

    A high-quality mattress with dense layers and good construction absorbs vibrations and reduces motion transfer, which indirectly contributes to a quieter sleep experience. You’ll sleep deeper and be less disturbed by subtle movements.

    Premium mattresses cost $800–$3,000+ depending on brand and materials. Mid-range quality runs $400–$800. Budget options start around $200–$400. A good mattress lasts 7–10 years, so cost-per-night is often reasonable. Delivery and setup usually take 1–2 hours.

    Pro tip: Memory foam and hybrid mattresses dampen vibrations better than coil-only models. Test in-store if possible, or buy from retailers with extended trial periods (100 nights). This is one of the highest-ROI investments for sleep quality, which automatically makes you more noise-resilient.

    You sleep deeper and wake less frequently because your body isn’t disturbed by minor movements or vibrations. Better sleep quality means noise affects you less.

    24. Add Soft Ambient Lighting to Reduce Stress Before Sleep

    Stress impairs sleep quality, making you more sensitive to noise. Soft, warm lighting before bed activates your parasympathetic nervous system, reducing anxiety and improving sleep resilience to disturbances.

    Dimmer switches cost $15–$30 and take 20 minutes to install (or hire an electrician for $100–$200). Bedside lamps run $30–$100. String lights or fairy lights cost $10–$40. Wall sconces run $40–$150 each. Together, a comprehensive soft lighting setup is $150–$400. Turn on soft light 1–2 hours before bed.

    Pro tip: Use warm bulbs (2700K color temperature) rather than cool white. Avoid bright overhead light after sunset. Dimmers let you adjust intensity to your preference throughout the evening.

    Your nervous system relaxes because warm light mimics sunset and cues melatonin production. You fall asleep faster and sleep deeper, so noise bothers you less.

    25. Layer Sound-Dampening Materials Under Floor Rugs

    Rug pads under area rugs add another layer of sound absorption while preventing rugs from sliding. This simple addition multiplies the acoustic benefits of your rug investment.

    Quality rug pads cost $20–$80 depending on size and material. Installation takes 10 minutes. Eco-friendly or non-slip rubber pads are worth the slightly higher cost ($30–$60) because they won’t damage hardwood floors.

    Pro tip: Use a rug pad even if you have carpet underneath. Rug pads create an air gap that improves acoustic properties. They also protect both your rug and floor from friction and wear.

    Sound vibrations passing through your floor are captured and absorbed by the pad, further reducing noise transmission. The cumulative effect of rug plus pad is noticeably quieter than rug alone.

    26. Practice Sleep Hygiene and Consistency to Build Noise Resilience

    The most underrated acoustic solution is your own sleep quality. When you maintain consistent sleep schedules, limit caffeine, and establish a wind-down routine, you sleep deeper and more soundly—making you naturally more resilient to noise disturbances.

    This costs $0 and takes commitment rather than money. Key practices: go to bed and wake at the same time daily, avoid caffeine after 2 PM, create a 30–60 minute wind-down routine, keep your bedroom temperature cool (65–68°F), and avoid screens 1 hour before bed. Start with one or two habits and build from there.

    Pro tip: Log your sleep quality for one week before implementing acoustic changes, then again after. You’ll see how much noise-resilience improves with better baseline sleep. Good sleep hygiene amplifies the benefits of every physical acoustic treatment.

    Your body becomes a better sleeper overall, and noise stops being the barrier. You’re falling asleep faster, staying asleep longer, and waking less frequently—sometimes because the noise is truly reduced, and sometimes because your sleep is simply deeper and more resilient.


    Ready to design your serene sleep space? Pick one or two ideas to start with this week—maybe weatherstripping and a throw blanket if you’re on a tight budget, or layered curtains and an area rug if you have more flexibility. Stack a few of these changes together and watch your bedroom transform into a true acoustic sanctuary. Which idea are you trying first?

  • 23 Sculptural Decor Ideas That Add Artful Flair to Your Living Room

    23 Sculptural Decor Ideas That Add Artful Flair to Your Living Room

    Your living room has so much potential—but flat, predictable furniture can make it feel forgettable. Sculptural pieces are the secret weapon designers use to add personality, visual interest, and that “wow factor” without a full renovation. Whether you’re drawn to flowing curves, geometric forms, or organic shapes that feel like art, these 23 ideas show you exactly how to bring artful flair into your space. We’ll mix high-impact statement pieces with budget-friendly options, DIY projects, and styling tricks that work for renters and homeowners alike. Ready to make your living room look like a curated gallery? Let’s explore the pieces and placements that create real magic.

    1. Invest in a Curved Statement Sofa

    A curved sofa anchors your entire room while delivering instant style and comfort. Curved silhouettes soften hard architectural lines and make spaces feel more intentional and spa-like.

    Search for curved or rounded sectionals at IKEA ($400-$800), Article ($800-$1,500), or West Elm ($1,200-$2,500). Measure your space first—curved sofas need breathing room. The investment takes one week to deliver, but you’re looking at a 5-10 year piece that defines your aesthetic. If budget is tight, try a curved loveseat instead, or layer a curved reading chair nearby for the same effect.

    The beauty of a curved frame is how it naturally draws people into conversation and makes gatherings feel cozier. You’ll notice how the space flows better once you have that organic anchor in place.

    2. Add a Sculptural Arc Floor Lamp

    Sculptural arc lamps double as functional lighting and modern art—they create visual height and movement without taking up floor space. These pieces feel like gallery installations but work hard for your reading nook.

    Budget options run $80-$150 at Target or Amazon; mid-range ($150-$400) at West Elm or Wayfair include designer finishes; investment pieces from brands like Gubi or Muuto hit $400-$800. Assembly is 10-15 minutes. Position it behind a chair or beside a side table so the curve reads as sculpture, not clutter. Look for arcs in matte black, brass, or sculptural concrete finishes for maximum impact.

    Once installed, that graceful arc becomes a focal point that anchors the corner. Guests always comment on it first—it’s the kind of piece that makes your room feel intentionally designed.

    3. Layer Abstract Sculptural Wall Art

    Three-dimensional wall art catches light and shadow differently than flat prints, adding depth and sophistication to your walls. Sculptural pieces create visual interest and give your living room that curated gallery feel.

    Mix media by pairing a metal wall sculpture ($60-$150 at Urban Outfitters or Etsy), a textured resin piece ($40-$100), and a geometric wood art installation ($50-$200). Total investment: $150-$450 for a high-impact grouping. Hang at eye level (57 inches from floor to center) and use Command strips for renter-friendly mounting. Asymmetrical layouts photograph better and feel more dynamic than symmetrical rows.

    Your eyes now have somewhere interesting to land instead of just blank walls. The play of light across these pieces changes throughout the day, keeping the room feeling fresh and alive.

    4. Style with Curved Side Tables

    Rounded side tables replace sharp corners and soften the rigid feel of modern rooms. They tuck into spaces awkwardly and add artful geometry that complements curved furniture.

    Look for options at Target ($80-$150), Article ($150-$400), or luxury brands like Norm Architects ($400-$800). Marble, wood, and sculpted metal all work beautifully. Installation is instant—just position and style your top with a plant, candle, or book stack. For renters, a $60-$120 option from Wayfair works just as well as a pricier investment.

    The moment you replace a boxy table with a curved one, the whole corner feels more intentional. It’s a small swap that reads as thoughtful design everywhere you sit.

    5. Hang a Sculptural Mirror with Organic Frame

    Sculptural mirrors multiply light, expand the visual space, and add dimensional art to your walls—they’re functional and beautiful. Organic or wavy frames feel contemporary while reflecting natural elements into your room.

    Budget option ($50-$150): IKEA’s curved wood frames or Wayfair finds. Mid-range ($150-$400): West Elm or CB2 sculptural pieces. Investment ($400-$1,000+): Artisan mirrors from independent makers on Etsy or design showrooms. Mounting takes 20 minutes with proper wall anchors. Position above a console or credenza to maximize its reflective and decorative impact.

    A sculptural mirror becomes a room’s second focal point. It bounces natural light deeper into your space and frames the room’s best angles, making everything feel larger and more curated.

    6. Display Ceramic Sculptural Vessels

    Ceramic vessels in sculptural forms bring handmade artistry and organic texture to your shelves and surfaces. They feel like gallery pieces but work as accessible home décor.

    Source from Etsy makers ($30-$150 per piece), local pottery studios ($40-$200), or retailers like Schoolhouse Electric ($60-$300). Group odd numbers (3, 5, 7) at varying heights for visual rhythm. No installation needed—just arrange on shelves, sideboards, or console tables in asymmetrical clusters. Mix textures: smooth curves with dimpled finishes, matte with glazed surfaces.

    These pieces spark conversation and give your room personality you can’t buy off-the-shelf. They age beautifully and become meaningful objects in your space.

    7. Choose a Sculptural Coffee Table Base

    Sculptural table bases draw the eye downward and keep your table from disappearing visually. A striking base adds architectural interest and becomes a design statement, not just furniture.

    Search Article, West Elm, or Wayfair for bases ($200-$600); pair with a stone or glass top. If you have an old table, consider replacing just the base for a $150-$300 refresh (available on Etsy from artisans). Installation is one afternoon. Choose forms in bronze, blackened metal, or natural wood that echo other materials in your room for cohesion.

    Now when people sit around your table, they notice the craftsmanship underneath. It’s functional sculpture that becomes a talking point and grounds your seating arrangement.

    8. Layer Sculptural Throw Pillows

    Pillows with dimensional quilting, pleats, or sculptural textures add depth and visual interest to your seating. They’re easy to swap and swap again, making them a renter-friendly way to experiment with artful layering.

    Mix textures by pairing knit pillows ($30-$80 at Target or H&M Home) with pleated linen ($40-$100 at Schoolhouse Electric) and quilted options ($35-$90 at CB2 or Etsy). Layer 4-6 pillows per sofa in a mix of sizes (24×24, 18×18, 16×16 inches). Swap them seasonally in 5 minutes—no tools needed. Play with warm neutrals, then add one bold jewel tone for personality.

    The moment you layer dimensional pillows, your seating area looks intentionally styled instead of bare. They create visual texture that photographs beautifully and makes sitting there feel more luxurious.

    9. Mount Abstract Wood Wall Panels

    Sculptural wood panels create architectural interest and natural warmth on blank walls. These dimensional pieces feel like custom millwork but cost far less and install in a day.

    Find panels at Etsy ($150-$600 per panel for artisan work), Wayfair ($100-$400), or specialty suppliers like Inhabit. Group 2-4 panels asymmetrically for maximum visual impact. Installation involves wall studs and brackets (one afternoon with a drill). Alternatively, commission a local wood artist for a custom design that reflects your aesthetic ($300-$800 for a feature wall).

    Once installed, this wall becomes the room’s anchor. The play of light across the carved wood changes throughout the day, adding movement and dimension you’ll appreciate every time you walk in.

    10. Style Open Shelves with Sculptural Objects

    Open shelves are opportunity. Curated sculptural objects make shelves feel like gallery installations instead of storage dumps.

    Collect pieces from Etsy ($20-$150 each), local galleries, thrift stores ($5-$50), and retailers like Anthropologie ($30-$200). Style using the rule of three: group objects in odd numbers at varying heights, leaving breathing room between clusters. Layer books horizontally, stack vertically, tuck plants between sculptures. Refresh your arrangement monthly—this is your creative outlet.

    Styled shelves completely change how a room reads. Instead of looking like clutter, they become the visual heart of the room. Guests notice and comment on how thoughtfully you’ve arranged everything.

    11. Hang a Sculptural Pendant Light

    Sculptural pendant lights combine illumination with art. They hang at eye level, so their form becomes a constant visual element that shapes your room’s personality.

    Budget range ($50-$150): IKEA, Target, or Wayfair sculptural shades. Mid-range ($150-$400): CB2 or West Elm designer pendants. Investment ($400-$1,000+): handblown glass or artisan metal fixtures from specialty lighting shops. Installation requires a licensed electrician (budget $200-$400) or DIY hardwiring if you’re experienced. Position over a reading chair, console, or sofa side for maximum visual impact and function.

    That sculptural pendant becomes the room’s jewelry. It catches attention, casts beautiful shadows, and functions as both task lighting and artistic statement.

    12. Display a Sculptural Plant Stand

    A sculptural plant stand elevates greenery from simple decoration to focal point. The stand’s form matters as much as the plant it holds.

    Find stands at Target ($40-$120), West Elm ($100-$300), Etsy artisan makers ($80-$250), or specialty plant retailers ($150-$400). Choose forms with curves, arches, or geometric cutouts that create negative space and visual intrigue. One weekend to assemble; position in a corner where light and form are both visible. Pair with a trailing or architectural plant to echo the stand’s sculptural vibe.

    A sculptural plant stand turns a corner into a living art installation. It’s the kind of detail that makes visitors ask where you found it, and you get to share your good taste.

    13. Arrange Sculptural Bookends

    Sculptural bookends do double duty: they organize books while adding design interest to your shelves. Treated as art, not afterthoughts, they elevate any bookcase.

    Look for sculptural options at Etsy ($30-$80 per pair), Urban Outfitters ($40-$100), CB2 ($50-$120), or Anthropologie ($60-$150). Choose forms in bronze, brass, concrete, or wood that complement your décor. Style books horizontally and vertically, framing them with your sculptural bookends. Swap them out seasonally if you like mixing styles.

    Bookends aren’t background players—they’re design statements. The right pair ties your shelves together and shows intentionality in how you curate your space.

    14. Add a Sculptural Room Divider

    A sculptural room divider creates defined zones in open living rooms while functioning as standalone art. It solves the privacy problem without committing to walls.

    Budget options ($80-$200): foldable wooden or metal dividers from IKEA or Wayfair. Mid-range ($200-$500): sculptural designs from Article or CB2. Investment ($500-$1,200): handcrafted dividers from artisan makers on Etsy or design specialists. Setup is instant—no tools or installation. Move it seasonally or when you want to refresh your layout. Choose forms with curves or cutouts so light flows through and the room doesn’t feel chopped up.

    A sculptural divider transforms your open-concept from “one big space” to “thoughtfully zoned rooms.” It blocks sightlines without blocking light, and it looks like intentional design, not a workaround.

    15. Style a Sculptural Credenza

    A credenza with sculptural proportions becomes the visual foundation of your seating area. Low-profile pieces with interesting leg forms or curved fronts feel modern and collected.

    Hunt for options at Article ($400-$1,000), West Elm ($500-$1,500), Wayfair ($250-$800), or Etsy custom makers ($600-$1,500). Look for curved edges, sculptural leg frames, or geometric front cutouts. Assembly takes one afternoon (hire someone if needed—$100-$200). Style the top minimally: 3-5 curated objects plus breathing room. Use the interior storage to keep visible surfaces clean and intentional.

    A sculptural credenza anchors your room and stores all the stuff you need to hide. It’s the kind of piece that makes people say, “Your living room is so well-designed.”

    16. Hang Sculptural Wall Sconces

    Sculptural sconces add personality to walls while providing ambient lighting. They’re smaller commitments than chandeliers but pack serious visual punch.

    Find sconces at Etsy artisan shops ($60-$200 per pair), West Elm ($150-$300 per pair), or specialty lighting retailers ($200-$500). Look for organic curves, geometric cutouts, or hand-finished brass or concrete. Professional installation ($200-$400) takes one evening; DIY with experience is possible if you’re comfortable with wiring. Position flanking a mirror, artwork, or above a console for balanced impact.

    Wall sconces in sculptural forms cast beautiful shadows and change the room’s mood entirely. They’re the detail that separates “decorated” from “thoughtfully designed.”

    17. Layer Sculptural Throw Blankets

    Textured throw blankets add dimensional warmth and visual interest to your seating. Sculptural knits and dimensional weaves feel handmade and intentional.

    Shop for chunky knit throws ($50-$100 at Target or H&M Home), linen geometric blankets ($60-$150 at Schoolhouse Electric), or designer wool ($150-$300 at Etsy or specialty retailers). Layer one throw across a sofa arm or the back of a chair—never fully cover the sofa, or it reads cluttered. Mix textures by pairing a smooth linen with a nubby knit. Wash quarterly according to fiber type.

    A beautifully draped throw becomes part of your room’s visual story. It says “this space is lived-in and cared for” and adds coziness that photographs gorgeously.

    18. Display Sculptural Vases at Varying Heights

    Empty or filled, sculptural vases function as standalone art. Their forms become visual anchors when grouped with intention.

    Collect from local pottery studios ($30-$150 each), Etsy artisan makers ($40-$200), Anthropologie ($40-$120), or specialty home shops ($50-$250). Group 3-5 vases in odd-numbered clusters at staggered heights. Fill some with dried branches, pampas grass, or fresh flowers; leave others empty to showcase their form. Refresh arrangements seasonally or monthly.

    Sculptural vases work harder than you’d expect. They fill empty corners, add color and texture to shelves, and become the kind of objects people ask about and remember from your home.

    19. Create a Sculptural Bookcase Wall

    A sculptural bookcase wall becomes a living mood board and a design investment that organizes and displays simultaneously. It’s the room’s gallery.

    Install floating shelves ($20-$50 each at IKEA, plus $200-$400 installation) or use an existing bookcase you style intentionally. Budget $300-$800 for curated objects to fill 5-7 shelves (mix thrifted finds with new purchases). Styling takes time but it’s a one-time project that evolves. Group books by color or subject, layer objects in front and back, add plants for life and movement.

    A styled bookcase wall transforms your room into a curated space that reflects who you are. It’s art, organization, and personality all at once—and the best design investment you can make.

    20. Position a Sculptural Accent Chair

    A sculptural accent chair adds seating while making a bold design statement. Curved frames and organic proportions feel like furniture as art.

    Hunt for chairs with curved armrests at Article ($400-$800), West Elm ($600-$1,200), Wayfair ($300-$700), or vintage finds ($100-$400 refurbished). Look for forms that echo other curved pieces in your room. Delivery and assembly takes one week; position in a corner or opposite your sofa for visual balance. Choose upholstery in solid colors or subtle patterns so the form reads clearly.

    A sculptural accent chair transforms an empty corner into an inviting retreat. It becomes the spot where people naturally want to sit, and it signals that your room is thoughtfully designed.

    21. Install a Sculptural Ceiling Detail

    Ceiling details draw the eye upward and add architectural interest that furniture can’t achieve. Sculptural ceilings make rooms feel intentionally designed and spacious.

    DIY options include painted coffered panels (supplies $50-$150, DIY weekend project) or removable ceiling tiles ($100-$300 for a room). Professional installation of wood beams or plaster details runs $500-$2,000 depending on complexity. Start small—a single accent beam or arched soffit creates impact without overwhelming the space. Check rental agreements before committing.

    Once you look up, you see intentional design. A sculptural ceiling transforms the whole room’s energy and makes people comment, “I love how designed this feels.”

    22. Curate a Sculptural Entryway Console

    Your console is the room’s first impression. Curated sculptural styling signals that your space is thoughtfully designed from the moment someone walks in.

    Style an existing console with collected objects ($50-$300 total: thrifted finds, Etsy pieces, plant nursery treasures). Pair with a sculptural mirror above ($60-$200) and a sculptural light fixture ($50-$150). Spend 30 minutes arranging objects at varying heights, leaving negative space. Refresh your arrangement monthly—this is your creative practice space.

    An intentionally styled console sets the tone for your whole home. It shows care and intentionality before anyone even sits down. It’s the detail that transforms an entryway from blah to boutique.

    23. Layer Sculptural Textures Through Rugs

    A sculptural rug grounds your seating area while adding tactile, visual dimension. Textured rugs feel handmade and collected rather than flat and basic.

    Shop for textured wool rugs ($200-$600 at Wayfair), designer pieces with dimensional patterns ($400-$1,200 at Article or CB2), or handwoven artisan rugs ($300-$1,000+ from Etsy). Choose natural fibers (wool, jute, cotton) in neutral tones with dimensional weaves or raised patterns. Layer a smaller sculptural rug (4×6) over a larger neutral base (8×10) for visual interest and texture play. Rotate and refresh yearly to prevent uneven wear.

    A sculptural rug becomes the foundation of your seating arrangement. When people sit, they notice the texture underfoot and comment on how thoughtfully you’ve pulled the room together.


    Ready to add artful flair to your living room? Pick one sculptural piece—whether it’s a mirror, accent chair, or layered throw pillows—and commit to it this weekend. Save this post and return to it as you refresh your space over time. Which sculptural idea speaks to you first?

  • 26 Global-Inspired Home Decor Ideas Filled With Culture & Texture

    26 Global-Inspired Home Decor Ideas Filled With Culture & Texture

    Your home doesn’t need to look like a catalog to feel intentional. The beauty of global-inspired decor is that it celebrates imperfection, storytelling, and the pieces that make you smile—whether they’re from a flea market in Morocco or your grandmother’s attic. If you’re tired of cold minimalism and craving spaces that feel lived-in and connected to the world, you’re ready for this approach. These 26 ideas blend cultural elements, natural materials, and vintage finds into rooms that feel both traveled and deeply personal. You’ll discover budget-friendly styling tricks, investment pieces worth saving for, and quick wins that work whether you’re renting or own. Let’s build a home that tells your story.

    1. Layer Vintage Rugs for Depth and Pattern

    Stacking rugs adds visual interest and lets you mix patterns without feeling chaotic. This technique works especially well in bedrooms and living rooms where you want softness underfoot and a curated, collected look.

    Start with a neutral base rug (jute or wool, $80–$200 from IKEA or Ruggable), then layer a smaller patterned rug on top (Moroccan, kilim, or Turkish styles, $50–$300 from 1stDibs, Wayfair, or Etsy). Align them so the base layer peeks out 6–8 inches on all sides. This takes 5 minutes to arrange and costs less than buying one premium rug. If you’re renting, both rugs stay with you when you move.

    The layered approach breaks up large empty floors and makes rooms feel grounded. Your space instantly gains dimension and warmth without needing a full renovation.

    2. Source One Statement Antique Piece Per Room

    One authentic antique anchors a room and gives it soul. Unlike mass-produced furniture, vintage pieces have history and character that new items can’t replicate.

    Browse 1stDibs, Chairish, or local Facebook Marketplace for pieces like carved wooden mirrors, brass side tables, or ornate frames ($80–$500). Spend time scrolling and don’t rush—the right piece will speak to you. When you find it, check condition and ask about return policies. Many sellers offer one-week trials. Position your piece where it catches light or serves as a room’s focal point.

    This single anchor piece ties together all your other decor and makes the whole room feel more intentional. Guests will ask about it, and you’ll have a real story to share instead of “I got it at Target.”

    3. Paint Kitchen Cabinets a Deep, Moody Blue or Green

    The shift from Scandi minimalism to bold cabinet colors is one of 2025’s biggest moves. Deep blues and forest greens create sophisticated, cozy kitchens that feel nothing like the stark white trend.

    Use high-quality cabinet paint (Benjamin Moore or Sherwin-Williams, $40–$80 per quart) and invest in primer. If you have 10–15 cabinet doors, the project takes a full weekend or hire a painter for $800–$2,000. Replace hardware with brass or vintage pulls ($3–$15 per knob from Anthropologie or Etsy). Pair with light countertops and warm wood accents to balance the boldness.

    Your kitchen becomes a room you actually want to spend time in. The color wraps you in warmth while still feeling modern and sophisticated—no more cold, clinical cooking space.

    4. Create a Reading Nook With Layered Textiles

    Libraries are making a comeback, and even small homes can have a cozy reading corner. Layering different textile weights and textures creates an inviting space that whispers “stay awhile.”

    Start with a bench or cushioned window seat ($150–$400 from IKEA, Article, or vintage finds), then add pillows in linen, wool, and velvet ($20–$60 each from H&M Home, Etsy, or thrifted). Drape a chunky knit blanket ($50–$150 from Anthropologie or Amazon) nearby. Add a small side table ($40–$100) and a warm light source—floor lamp or string lights ($25–$80). The whole setup takes 2–3 hours to arrange.

    This becomes your retreat space where you actually want to relax with a book. The textural mix makes it feel like a curated escape rather than just a corner of your room.

    5. Display Collections on Floating Shelves With Breathing Room

    Collections become clutter without intention. Floating shelves let you showcase what you love while leaving enough space so it feels curated, not crowded.

    Install wooden or metal floating shelves ($30–$100 each from IKEA, Home Depot, or Wayfair) at varying heights using a stud finder for security. Styling rule: one-third empty space, one-third vertical (stacked books, tall plants), one-third horizontal (ceramics, small sculptures). This takes one afternoon including installation. Group items by color or height rather than random placement.

    Your treasured pieces become the room’s focal point instead of visual noise. Visitors notice your carefully chosen collections rather than seeing a messy shelf.

    6. Incorporate Woven Wall Hangings and Macramé

    Woven and macramé pieces bring texture without taking up floor space. These global-inspired accents work in any room and feel personal, not generic.

    Browse Etsy, World Market, or local artisan markets for handmade macramé ($30–$150), woven wall tapestries ($40–$200), or rattan mirrors ($50–$180). Mount using picture hooks or adhesive strips (renter-friendly). Layer 2–3 pieces at different heights and scales—one large piece with smaller accents creates balance. Installation takes 30 minutes.

    These pieces soften hard walls and add warmth instantly. They photograph beautifully too, which means your space looks Instagram-ready without feeling staged.

    7. Mix Metals for Visual Interest (Chrome, Brass, Wood)

    Matching all your metals is outdated. Intentionally mixing chrome, brass, and wood creates sophisticated, layered spaces that feel more collected and worldly.

    Choose one metal as your primary (brass works well), then add secondary accents in chrome or copper. Update hardware ($5–$30 per piece from Wayfair or local hardware stores), add brass bathroom fixtures ($40–$150 from Rejuvenation or Amazon), and include wooden frames and shelves. This takes just swapping out a few key pieces over time, so there’s no rush.

    The mixed-metal approach feels intentional and sophisticated rather than matchy or bland. Your space reads as thoughtfully designed instead of following one trend.

    8. Layer Patterned Textiles Using Checks and Stripes

    Google searches for “checks” jumped 5,000% this season. Layering checks with stripes and solid textures creates visual interest while staying cohesive.

    Start with a solid-colored sofa (cream, gray, or neutral), then add pillows in checks ($20–$40 each), stripes ($15–$35 each), and solids ($15–$30 each) in complementary colors like forest green, navy, and cream. Use similar color palettes to tie it together. The trick: vary the scale (small checks, medium stripes, larger geometrics). Takes 30 minutes to style.

    Your seating area becomes a conversation starter instead of a blank backdrop. The pattern mix feels intentional and globally inspired rather than chaotic.

    9. Add Wood Beams or Trim for Architectural Warmth

    Wood accents ground neutral spaces and add the warmth that’s missing from minimalist homes. Even in rental apartments, removable wood solutions work.

    Install faux wood beams ($20–$80 per 10-foot beam, stick-on or adhesive from Amazon or Home Depot) or add wooden trim around doorways and windows ($1–$3 per foot). If you’re renting, use adhesive-backed solutions that peel off. For permanent installations, this takes a weekend with basic tools. Paint beams dark brown or black to contrast against white or cream walls.

    The wood instantly makes spaces feel warmer and more grounded. This single addition can make even rental apartments feel like your own retreat rather than a temporary space.

    10. Curate a Styled Bookshelf by Color and Size

    Styled bookshelves serve as functional art and reflect your interests. Organizing by color plus adding objects creates visual flow and gives the shelf breathing room.

    Group books by spine color, then add non-book objects (ceramics, small sculptures, candles) to break up the rows. Follow the rule of three: alternate between stacked books, vertical books, and objects. Leave one-third of shelf space empty. Takes 2–3 hours depending on shelf size. No special tools needed.

    Your bookshelf becomes a gallery of things you love rather than just storage. People will linger and actually want to look at it instead of overlooking it.

    11. Install Curved Mirrors for Soft Architectural Lines

    Curved and arched mirrors soften hard lines while reflecting light and making spaces feel larger. This trend is everywhere because it actually works.

    Find arched or circular mirrors ($80–$300 from Article, Wayfair, or vintage sources) with brass, wood, or rattan frames. Lean against walls or hang using appropriate wall brackets. Position near entryways or bedrooms to create visual interest. Hang or lean takes 30 minutes. Works beautifully in rentals since leaning requires no installation.

    The curved silhouette instantly makes rooms feel less boxy and more sophisticated. Light bounces off the mirror, making spaces brighter and more open.

    12. Source Locally Made Pottery and Ceramics

    Locally made ceramics support artisans and add one-of-a-kind character that mass production can’t match. Every piece has a story and slight variations that make it special.

    Visit local maker fairs, pottery studios, and craft markets or shop Etsy for regional artisans. Budget $15–$60 per piece depending on size and artist reputation. Buy pieces you’ll actually use—bowls for fruit, mugs for coffee, vases for flowers. One piece takes 30 seconds to place, but the collection grows intentionally over time.

    These handmade pieces become conversation starters. You’ll feel good supporting creators, and your kitchen or shelf reflects your values, not just a catalog aesthetic.

    13. Create Room Dividers Using Curtains or Screens

    Open-concept fatigue is real. Soft dividers like curtains or wooden screens create defined spaces without permanent walls, perfect for renters and small homes.

    Install a tension rod and linen curtain ($40–$80 from IKEA, Target, or Amazon) to create a bedroom nook, or use a wooden folding screen ($50–$150 from Article or Wayfair). Sheer curtains filter light while solid fabrics create privacy. Installation takes 15 minutes. These work in rentals and require no wall damage.

    Your space suddenly feels intentional and organized instead of one big room. You can close off your bedroom or workspace and create distinct zones without knocking down walls.

    14. Layer Candles in Different Heights and Scents

    The candle market hit $11.51B by 2025 because they work. Layering different heights, scents, and holders creates a spa-like atmosphere that’s both functional and decorative.

    Mix large 3-wick candles ($20–$40 from Jo Malone, Diptyque, or Anthropologie) with smaller single-wick candles ($8–$15 from Target or Paddywax) and unscented taper candles ($2–$5) in brass holders. Group by room—lavender and eucalyptus for bedrooms, citrus for kitchens, cedar for living rooms. 5 minutes to arrange. Rotate scents seasonally for freshness.

    Your home smells intentional and welcoming. Visitors notice the scent before they notice the candles, which creates an invisible but powerful sense of home.

    15. Hang Woven Baskets for Storage and Visual Texture

    Woven baskets solve the storage problem while adding global texture and warmth. They work in every room and transition between styles easily.

    Find handwoven baskets ($20–$80 each from World Market, Urban Outfitters, or Etsy) in jute, rattan, or seagrass. Install using wall brackets or adhesive hooks ($5–$15). Hang in clusters of 3–5 at varying heights for visual interest. One afternoon to install and style. Use for blankets, scarves, or everyday items you want hidden but accessible.

    Your walls gain texture and purpose. Baskets break up empty space while keeping clutter contained, making rooms feel both organized and artfully decorated.

    16. Style Open Shelving With Books, Objects, and Plants

    Open shelving is a commitment—everything shows, so styling matters. Mixing books, ceramics, and plants creates visual rhythm that feels organic rather than overstaged.

    Choose a color palette (whites, creams, one accent color) and repeat items (if you have 3 ceramic bowls, group them). Follow this pattern: one-third books, one-third objects, one-third plants. Vary heights by stacking books, standing objects upright, and placing plants at different levels. Takes 2–3 hours to fully style. Rearrange seasonally to keep it fresh.

    Open shelves become a reflection of your taste and lifestyle instead of looking sparse or cluttered. People see your interests displayed beautifully rather than questioning why your kitchen is so bare.

    17. Add Vintage Textiles as Wall Art or Runners

    Vintage textiles do double duty as art and bring color, pattern, and cultural storytelling to walls. They’re often cheaper than traditional art and infinitely more interesting.

    Hunt on 1stDibs, Etsy, or estate sales for vintage rugs, tapestries, or runners ($30–$200). Hang using a tension rod, wooden dowel, or picture rails (installation costs $10–$30). Layer smaller textiles on benches or chairs for added texture. 30 minutes to install, depending on your hanging method.

    Your walls become conversation starters. Visitors ask about the origin of pieces rather than barely noticing standard art. You’re supporting sustainable fashion by giving old textiles new life.

    18. Build a Scullery or Second Kitchen Space

    The guest suite trend extends to second kitchens—sculleries for entertaining or extra prep space. Even small homes can steal closet space or corners for this.

    Designate a small closet, hallway, or corner and add floating shelves ($30–$100), a small sink or beverage station ($200–$600), and storage baskets ($20–$50 each). Stock with entertaining essentials like serving pieces, extra glassware, and dry goods. Budget $400–$1,200 total depending on plumbing needs. Takes one weekend if no plumbing is involved.

    Your entertaining setup becomes seamless. Guests feel welcomed in a thoughtfully designed space, and you’re not running back and forth to your main kitchen during parties.

    19. Incorporate Deep Jewel Tones in Soft Furnishings

    Dopamine decor is here to stay, and jewel tones deliver joyful color without feeling chaotic. They add luxury to neutral spaces inexpensively.

    Swap throw pillows to jewel-tone velvet ($25–$50 each from Article, Etsy, or CB2), add a rich-colored throw ($40–$100 from Anthropologie or Wayfair), or reupholster a chair in deep blue, emerald, or burgundy ($200–$600 if hiring). Mix jewel tones with neutrals in a 2:1 ratio (two neutral pieces, one jewel). These swaps take 30 minutes and require no permanent changes.

    Your space shifts from predictable to personality-filled. Jewel tones make rooms feel sophisticated and warm while still being calming—the best of both worlds.

    20. Display a Curated Collection of World Ceramics

    Collections tell stories about where you’ve traveled or what moves you aesthetically. Displayed thoughtfully, ceramics become personal gallery rather than clutter.

    Start collecting handmade ceramics from local markets, Etsy artisans, or antique shops—budget $15–$100 per piece. Group by color, size, or origin on shelves, dressers, or windowsills. Leave space around each piece so it breathes. You’re not looking for a massive collection—5–10 beautiful pieces are plenty. Rotate seasonally.

    Your home reflects real exploration and intentionality. Guests ask about each piece, turning your collection into stories you genuinely want to share.

    21. Paint an Accent Wall in a Moody, Warm Tone

    One accent wall changes a room’s entire energy without the commitment of full repainting. Warm, moody tones (terracotta, sage, deep gray) create intimate, welcoming spaces.

    Choose a color from brands like Benjamin Moore, Sherwin-Williams, or Farrow & Ball ($30–$50 per gallon) in shades like terracotta, warm gray, or sage. Paint one wall behind your bed or sofa as a focal point. Buy quality primer ($15–$25) for better coverage. DIY takes one full day; hire a painter for $300–$800. Test paint on a large swatch first—colors look different depending on lighting.

    The room instantly feels more intentional and grounded. Your space becomes a retreat instead of a blank box, and the whole room’s aesthetic shifts with just one wall.

    22. Create a Gallery Wall of Mixed Art and Objects

    Gallery walls display personality and curated taste. Mixing frames, objects, and textiles creates visual rhythm that feels collected and intentional rather than random.

    Start with a focal point (larger piece, mirror, or textile), then add complementary items using matching or coordinating frames ($10–$40 each from IKEA, Etsy, or local framers). Vary frame colors (black, wood, metal) and sizes for interest. Lay everything out on the floor first to plan arrangement, then install using a level and nails or picture hooks ($5–$15 total). Takes one full afternoon to plan and install.

    Your wall becomes a mini gallery that reflects your aesthetic and travels. It’s a conversation starter that shows you’re thoughtful about your space rather than just throwing up whatever hangs.

    23. Mix Vintage and New Furniture for Eclectic Balance

    Mixing eras and styles creates rooms that feel personal and lived-in. The key is intentionality—each piece earns its place, not thrown together randomly.

    Balance new basics (neutral sofa, simple bed frame, practical storage) with statement vintage pieces (ornate mirror, wooden dresser, antique chair). Keep 70% neutral/minimal and 30% vintage/statement. Start with one vintage focal point, then add gradually. Budget $200–$500 total for small vintage finds; splurge $500–$2,000 on one special antique.

    Your space tells a story instead of looking like you shopped one store. Guests see a curated home rather than a catalog spread, which feels infinitely more special and real.

    24. Use Natural Light and Sheer Curtains Strategically

    Lighting transforms everything. Strategic use of natural light and sheer fabrics creates spaces that feel warm, welcoming, and naturally beautiful.

    Replace heavy curtains with lightweight linen or cotton ($20–$50 per panel from H&M Home, Anthropologie, or Target). Hang floor-to-ceiling to maximize height and light. Keep windows clear or use sheer only to filter glare. If privacy is needed, layer with roller shades ($30–$60). This change takes 30 minutes and costs under $100.

    Your rooms feel brighter and more open instantly. Light becomes part of your decor strategy, and spaces feel more welcoming without any structural changes.

    25. Accessorize With Hand-Blown Glassware and Vessels

    Hand-blown glass adds subtle color, texture, and craftsmanship without feeling heavy or fussy. These pieces catch light beautifully and feel precious.

    Shop Etsy artisans, local glass studios, or Design Within Reach for hand-blown vessels ($20–$100 each depending on artist). Group 3–5 pieces of varying sizes and colors on a shelf or windowsill where light can shine through. No installation needed—just place and enjoy. Budget $80–$300 for a meaningful collection.

    These pieces add sophistication quietly. Visitors notice the artistry, and you’ll catch yourself admiring how light plays through the glass throughout the day.

    26. Establish a Guest Suite Using Layered Textures and Warmth

    Guest suites are rising in popularity because hosting becomes a pleasure when you have a thoughtfully prepared space. Layering comfort (soft bedding, good lighting, quality pillows) makes guests feel truly welcomed.

    Start with a quality mattress ($400–$1,000), then add 100% cotton or linen sheets ($60–$150 per set), multiple pillows ($30–$80 each), and a weighted throw ($50–$150). Include a side table ($50–$150), good reading light ($40–$100), and fresh candles ($15–$30). Dedicate a drawer or shelf for extra blankets and toiletries. Budget $1,000–$2,500 total for a complete suite. Takes a full weekend to assemble and style.

    Guests feel genuinely cared for in a retreat-like space. This becomes the room people ask to come back to, and hosting becomes easier because your guests are actually comfortable and rested.


    Pin this guide and tackle one idea this weekend. Whether you start with a small ceramic collection or commit to a full accent wall, each change builds a home that feels worldly and authentically yours. Save this post and share it with anyone craving a space filled with culture and intention.

  • 27 Warm Bedroom Aesthetic Ideas That Make Winter Cozier

    27 Warm Bedroom Aesthetic Ideas That Make Winter Cozier

    Winter doesn’t have to mean sacrificing style for comfort—but honestly, that’s the best part about a cozy bedroom aesthetic. You can have both. The right mix of textures, lighting, and warmth creates a space that actually feels like a retreat on cold nights, not just somewhere you sleep. Whether you’re dealing with a tiny apartment or a sprawling master, these 27 ideas work for any budget and skill level. We’re talking free styling shifts, quick thrifted finds, and a few investment pieces that’ll make you never want to leave your bedroom. Let’s make your space feel like a warm hug.

    1. Layer Your Lighting for Instant Coziness

    Cold, bright overhead lighting is the enemy of a cozy bedroom. Layered lighting—combining bedside lamps, wall sconces, and string lights—gives you control and warmth year-round. Start by adding warm-bulb bedside lamps ($20-$60 at Target or IKEA) with dimmers if your fixtures allow it. Position them on nightstands to create pools of light rather than one harsh overhead glow.

    If you’re renting, adhesive wall sconces ($25-$50 on Amazon) work without drilling. String Edison bulbs or fairy lights around the headboard or along shelves for an extra layer of soft ambiance. The key is using warm white bulbs (2700K color temperature) instead of bright white—they genuinely feel warmer. This takes 30 minutes to set up and costs nothing if you’re switching bulbs you already own.

    You’ll notice the difference the moment you turn off the overhead light. Your room stops feeling clinical and starts feeling like a sanctuary.

    2. Add a Textured Accent Wall Without Paint

    Painting requires commitment, but textured wall treatments don’t. Removable shiplap panels, peel-and-stick wallpaper with tactile finishes, or even fabric panels create visual warmth and dimension without permanent changes. Removable shiplap ($1-$3 per square foot) comes pre-finished and installs with construction adhesive or nails.

    For renters, textured peel-and-stick wallpaper ($20-$50 per roll, 2-3 rolls cover one accent wall) mimics plaster, grasscloth, or woven textures. Apply it to one wall behind your bed for maximum impact. If you want to go budget-friendly, hang neutral-colored fabric (linen or cotton) using removable picture hangers—creates soft texture for $15-$30 and peels off without damage.

    A textured wall catches light differently than flat paint, adding depth and visual interest without requiring a weekend project. Your room instantly feels more intentional and less like a blank slate.

    3. Invest in Quality Bedding That Feels Like Heaven

    You spend a third of your life in bed—cheap sheets aren’t worth it. High-quality linen or organic cotton bedding ($80-$200 for sheets) actually costs less over time since it lasts years longer than budget alternatives. Look for 300+ thread count cotton (Egyptian or Pima) or European linen that softens with every wash.

    Brands like Brooklinen, Parachute, or even mid-range options from Target ($40-$80) work if high-end feels out of reach. Pair sheets with a weighted blanket ($80-$250) designed specifically for sleep support—they’re scientifically proven to reduce anxiety and improve rest. Layer in a quilted throw ($30-$80) at the foot of the bed for extra texture and warmth you can pull up without overheating.

    High-quality bedding doesn’t just feel luxurious when you slide in at night—it actually improves sleep quality and lasts through dozens of washes.

    4. Create a Reading Nook in the Corner

    A bedroom without a reading corner misses prime real estate for coziness. If you have even 4 feet of corner space, claim it. Start with a comfortable chair ($100-$300 for secondhand upholstered options or IKEA staples like Strandmon) or even a cushioned bench if space is tight. Layer it with pillows and a throw blanket.

    Add a narrow side table ($25-$60 at IKEA) for books and tea, and position a floor lamp with adjustable arms ($30-$80) behind the chair for task lighting. String a small shelf above for book storage ($15-$50). The beauty of this corner is that it costs nothing to use it—no one forces you to sit elsewhere.

    This becomes the most-used spot in your bedroom, especially on winter evenings. You’ll have a designated sanctuary that feels separate from sleep, giving your brain permission to actually rest in bed.

    5. Swap Harsh White for Warm Neutrals

    Bright white walls and bedding feel clinical, not cozy. Warm neutrals—cream, greige (gray-beige blend), warm taupe, or soft sand tones—make everything feel more inviting. If repainting feels too much, start by swapping bedding to warm neutrals ($40-$150 for a full set) and see how it shifts the room’s energy.

    Paint is the bigger investment ($200-$400 for one room) but worth it if you’re staying put for a while. Sherwin-Williams “Accessible Beige,” “Urbane Bronze,” or Benjamin Moore “Hale Navy” are tested warm neutrals that work year-round. If you’re renting, peel-and-stick wallpaper in warm tones ($30-$60) covers accent walls temporarily.

    The moment you move away from clinical white, your bedroom stops feeling like a hotel room and starts feeling like home. Everything—including you—looks warmer and more relaxed.

    6. Layer Multiple Throw Blankets at the Foot

    One throw blanket is practical. Three creates abundance and coziness. Layering throws in different textures—chunky knit, quilted linen, and velvet—gives your bed visual depth and lets you grab whatever feels right that day. Buy quality throws at different price points: a chunky knit ($30-$80), a quilted throw ($25-$60), and one splurge-worthy cashmere or faux fur piece ($40-$150).

    Drape or fold them loosely at the foot of the bed rather than neatly folding (more visual impact for Instagram-worthy styling). Mix textures intentionally—if one is smooth, pair it with something ribbed or chunky. Rotate them seasonally to keep your room feeling fresh.

    Your bed becomes a visual anchor that looks styled and inviting rather than bare. Plus, you have options depending on your mood and how cold the night gets.

    7. Add a Ceiling Detail That Changes Everything

    Most people ignore the ceiling, but it’s prime real estate for coziness. If you have a high ceiling, a fabric drape canopy ($20-$80 in fabric plus inexpensive hooks) creates an intimate, den-like feeling. Cream or neutral linen works best for warm vibes.

    For lower ceilings or renters, paint the ceiling in a warm color—sage green, warm gray, or soft navy ($100-$200 including materials and effort)—and keep walls lighter. This makes the room feel wrapped and contained rather than echoing and empty. If painting feels extreme, adhesive ceiling tiles ($30-$50) add texture without commitment.

    The ceiling is the fifth wall no one thinks about. Once you add detail up there, the whole room feels more intentional and designed specifically for you.

    8. Choose Rounded Furniture Over Sharp Angles

    Sharp angles feel stimulating; rounded shapes feel calming. Your brain registers the difference, even if you don’t consciously think about it. Swap rectilinear furniture for curved alternatives when possible. Start with a rounded or arched headboard ($150-$500) in upholstered fabric—it’s often the room’s focal point anyway.

    Add nightstands with curved legs ($100-$300 each) instead of box-like options, and hang an arched or round mirror ($50-$150) instead of rectangular. These swaps don’t cost significantly more but completely shift the room’s energy. You don’t need to replace everything at once; prioritize the headboard since you see it every day.

    Renter-friendly option: a peel-and-stick mural ($25-$60) of an arched window or doorway creates the illusion of curved architecture without actual furniture changes.

    The softer shapes make your brain relax the moment you enter the room. It’s psychological, but it works—cozy spaces have fewer sharp angles.

    9. Thrift Statement Art for Personal Style

    Mass-produced art from big-box stores feels generic. Thrifted or vintage pieces instantly make a space feel personal and layered. Hit local thrift stores, Goodwill, or Facebook Marketplace ($5-$50 per piece) and look for large landscape paintings, botanical prints, or abstract pieces that feel warm and inviting. Frame mismatches are intentional—they look more collected and less “designer catalog.”

    Create a gallery wall behind your bed with an odd number of pieces (3, 5, or 7) at varying heights. You’re not trying to match perfectly; you’re curating a story. Mix frame styles and painting sizes. If you find one incredible statement piece, let it stand alone and build around it with smaller framed pieces.

    Original art—even if it’s $10 thrifted—makes your room feel like it belongs to you specifically, not to a rental company or a design template.

    10. Use Warm Wood Tones in Furniture and Accents

    Cool-toned or gray wood feels cold; warm wood feels welcoming. Prioritize warm honey, oak, or walnut tones over cool grays or blacks. Start with wooden nightstands ($80-$250) in warm tones, and build from there. If you can’t replace large furniture, add warm wood shelving ($30-$100 per shelf) or a wooden accent headboard ($150-$400).

    Thrifting is your friend here—older furniture often has richer warm wood tones than new pieces. Look for mid-century wooden pieces that add both warmth and character. Even small touches like a wooden picture frame ($10-$30), wooden bowl for bedside ($15-$40), or wooden floor lamp ($40-$120) shift the room’s temperature.

    Warm wood automatically makes a room feel more grounded and less sterile. Combined with soft lighting, it’s instant coziness.

    11. Keep Your Color Palette to 3-4 Tones Maximum

    Too many colors fight for attention and create chaos. Stick to 3-4 main colors to make your room feel cohesive and calm. Start with a neutral base (cream, warm gray, or soft taupe) for walls, then choose one warm accent color (terracotta, warm caramel, or soft rust) and one cool accent color (sage, dusty blue, or soft forest green).

    Your fourth color (optional) is for pops—a deep color used sparingly in art, pillows, or throws. Map this out before buying anything. Take photos of color swatches in your lighting and compare them side by side to ensure they harmonize.

    A cohesive color palette requires zero extra money but completely changes how “finished” your room feels. Everything looks intentional instead of accidental.

    12. Install Floor-to-Ceiling Curtains or Drapes

    Floor-to-ceiling curtains create luxury and drama instantly. Hang curtain rods as close to the ceiling as possible (even 6 inches higher than the window) and let fabric reach the floor or pool slightly. Use heavyweight linen, cotton, or velvet ($15-$40 per yard) in warm neutrals or soft jewel tones.

    Budget option: Buy basic curtain panels from IKEA or Target ($20-$50 per panel) and hang them from a higher rod. Pricey investment option: custom curtains from Etsy ($100-$300) in fabrics you love. Renter hack: Use tension rods and removable adhesive hooks to install temporary curtains without drilling.

    Tall curtains visually expand the room, block light for better sleep, and add acoustic softness (a bonus for noise reduction). The payoff is worth the small investment.

    13. Create Layers with Pillows in Mixed Textures

    Pillow styling separates “made bed” from “luxury hotel vibes.” Layer 4-6 pillows of different sizes and textures for maximum coziness. Buy a standard pillow ($30-$80), add a body pillow ($40-$100), include smaller throw pillows ($15-$50 each), and vary the covers between linen, velvet, quilted cotton, and chunky knit.

    Mix colors within your palette (whites, creams, taupes, and one accent color) but ensure they coordinate. Lean pillows against the headboard at different angles rather than rigid rows—it looks more inviting and lived-in. You’ll actually use them for reading or propping yourself up, not just decoration.

    Layered pillows add visual abundance and practical comfort. Your bed becomes a place you actively want to spend time, not just somewhere you sleep.

    14. Add Plants for Air Quality and Visual Interest

    Plants improve air quality and add organic texture that screams cozy. Start with low-light tolerant varieties like pothos, snake plants, or ZZ plants if your bedroom isn’t bright ($10-$30 each). Place them on nightstands, shelves, or corners where they won’t get knocked over during sleep.

    Choose ceramic or woven pots that coordinate with your color palette ($10-$40 each) to make the display intentional. Trailing plants like pothos add movement, while upright plants like snake plants add structure. Group three plants at varying heights for impact without clutter.

    Low-maintenance plants (water monthly, tolerate neglect) are actually the coziest because you won’t stress about killing them. The greenery shifts the room’s energy from cold to organic and alive.

    15. Install Blackout Shades for Better Sleep

    External light disrupts sleep, and blackout shades solve it. Install thermal blackout shades ($40-$100 per window) that block light and regulate temperature or use removable blackout liners ($15-$30) on existing curtains if you’re renting. They’re not glamorous but absolutely functional.

    Pair them with soft fabric curtains in your chosen color—the blackout shade behind serves a purpose while your pretty curtains serve aesthetics. This combination gives you both function and style. Install shades or liners in 30 minutes per window with basic tools.

    You’ll sleep deeper and longer once light is truly blocked out. The cozy bedroom aesthetic loses all appeal if you’re exhausted.

    16. Add Warmth with a Quality Area Rug

    Cold floors are cozy’s enemy. A large area rug (at least 8×10, ideally larger) under the bed creates softness and warmth underfoot. Choose natural fiber rugs like wool, jute, or sisal ($100-$400) for longevity and texture, or budget options like plush synthetic blends ($50-$150).

    Position the rug so your feet land on it when getting out of bed—this is the only moment that matters. Neutral tones (cream, warm gray, soft taupe) let the room’s color palette shine; patterns add visual interest if your palette feels too plain. A quality rug worth having professionally cleaned will last years and actually improve over time.

    The difference between cold hardwood underfoot and warm rug is immediately felt (literally). This elevates the coziness factor more than you’d expect.

    17. Hang Fabric or String Lights for Ambient Glow

    String lights are cozy’s shortcut. Warm white Edison bulbs or fairy lights ($15-$40) create ambient glow perfect for winter evenings. Drape them around the headboard, along a shelf, or above a reading nook. Avoid bright white or cool-toned lights—warm (2700K) is essential.

    Plug-in options work for renters; hardwired is permanent for owners. Space lights 6-12 inches apart for even glow and avoid bunching. Start with one strand and add more if you want dense coverage. The key is using them as ambient lighting, not reading light.

    The moment you turn these on, your room shifts into “sanctuary mode.” String lights signal relaxation to your brain in a way other lighting can’t.

    18. Layer Your Window Treatments with Sheers and Sheers

    Single curtain panels are practical but lack sophistication. Layer sheer curtains with heavier drapes for both function and aesthetics. Hang lightweight sheer panels ($20-$50) inside and heavier curtains ($30-$80) outside to control light and privacy while looking intentional.

    This works in any space—you can use two separate rods or a double curtain rod ($25-$60). Sheers diffuse harsh daylight, and heavier curtains block it entirely. In winter, this layering also adds slight insulation. Renter-friendly: Use tension rods with one lightweight and one heavy panel for the same effect.

    Layered windows look professionally designed and give you precise control over your light and privacy.

    19. Curate a Nightstand That Serves You

    Your nightstand should be functional and beautiful, not a catch-all for random items. Keep only what you use: a reading lamp, water glass or mug, current book, and optionally a plant or candle. Curate these items intentionally rather than letting things accumulate.

    Choose matching or coordinating containers ($10-$30) for drawer organization. A small tray ($15-$40) groups items and prevents them from scattering. Rotate your current book and one or two backups rather than piling the whole collection there. The nightstand should feel calm, not cluttered.

    A curated nightstand feels intentional and restful. You reach for what you need without visual noise surrounding it.

    20. Incorporate Textured Throw Pillows Beyond the Bed

    Pillows aren’t just for beds. Add textured throw pillows ($20-$60 each) to chairs, benches, or window seats. Mix a chunky knit pillow, a quilted one, and a velvet option in coordinating colors. Vary sizes (12×12, 14×14, and a smaller accent) for visual interest.

    Thrift or buy covers from IKEA, Target, or Etsy and fill them with inexpensive pillow inserts. Swap pillows seasonally or whenever you want a refresh (costs nothing, just moving things around). Pillows are the easiest way to add texture without commitment.

    Textured pillows scattered throughout the room multiply the cozy factor. They’re also the most affordable way to add personality and warmth.

    21. Choose Velvet or Linen Upholstery for Headboards

    An upholstered headboard is the bedroom’s focal point. Choose velvet or linen upholstery ($150-$500 for a full headboard) in a warm tone or jewel color that complements your palette. Velvet feels luxurious and catches light beautifully; linen feels organic and slightly textured.

    If a full headboard investment is too much, a fabric wall hanging or tapestry ($30-$80) behind the bed creates the same focal point feel. Panel it with contrasting fabric on either side for depth. Renter option: removable fabric wall panels ($40-$100) that stick on without damage.

    An upholstered or fabric headboard instantly elevates the room from “basic bedroom” to “considered space.” It’s where your eye lands first.

    22. Create a Diffuser or Candle Station on the Dresser

    Scent is cozy’s often-overlooked element. Place a warm-scented candle ($15-$40) and an essential oil diffuser ($25-$60) on your dresser or nightstand. Scents like vanilla, sandalwood, cedar, or amber create warmth, while floral or citrus can feel cold.

    Light the candle during evening wind-down and run the diffuser while you sleep (using gentle, watery blends). Keep candles in warm-toned holders or vessels ($10-$30) to align with your aesthetic. Swap scents seasonally or when you want variety (costs minimal).

    A scented room feels cozier than an unscented one. Scent memories are powerful—over time, your bedroom’s specific scent becomes part of its identity.

    23. Add Wooden Shelving for Books and Décor

    Wooden shelves in warm tones add depth and practicality. Install floating shelves ($40-$100 per shelf, including installation materials) in honey or warm oak finishes above nightstands or along an empty wall. Style them with books, small plants, and meaningful objects.

    If you’re renting, tall bookcases ($80-$200) achieve the same effect without drilling. Style shelves with intention—alternate between stacked books, standing books, small plants, and objects in a rhythm that feels balanced, not chaotic. Leave breathing room (one-third empty space) so it doesn’t feel cluttered.

    Styled shelving adds visual interest, storage, and a sense of layered coziness. Books and plants make any space feel more personal and lived-in.

    24. Use Warm Metallics Sparingly for Glam

    Metallics add warmth and subtle glamour. Choose warm metals like brass or gold ($10-$50 per item) over cool silvers or chrome. Limit yourself to 3-5 metallized items: picture frames, lamp bases, a mirror frame, or shelf brackets. The key is sparse placement—one item per surface feels intentional; scattered everywhere feels cluttered.

    Mix metals if needed (brass and copper work together), but consistency within the warm family is safer. Thrift brass frames and lamps ($5-$20 each) from antique stores for affordable glamour. Avoid chrome or brushed nickel unless your room skews modern rather than cozy-warm.

    Warm metallics catch light and add visual richness without requiring bold statement pieces. It’s an understated way to add luxury.

    25. Create Zones Within the Room

    If you have space, divide your bedroom into functional zones. A bed zone, a reading zone, and optionally a work zone each get their own lighting and furniture. This helps your brain compartmentalize—sleep happens in one area, relaxation in another, work in a third.

    Use area rugs ($50-$150) to define each zone, different lighting for different activities, and subtle visual separators like plants or shelving. Even in smaller rooms, a chair in a corner plus a small side table creates a “reading zone” distinct from the bed.

    Zoning makes a bedroom feel larger and more multifunctional. It also signals to your brain: “Here is where I sleep,” “Here is where I relax,” preventing that weird space where everything blends together.

    26. Invest in Luxe Pillowcases for Face and Scalp

    Sleep isn’t just about comfort—it’s about reducing friction on your skin and hair. Silk or satin pillowcases ($30-$80 per pillowcase, or lower-cost sateen options at $15-$40) reduce creasing and breakage while feeling absolutely luxurious. They regulate temperature better than cotton, making them perfect for warm sleepers.

    Brands like Slip, Fishers Finery, or even budget-friendly Amazon options work. Wash on delicate or hand wash to protect the fibers. Use these for sleeping and swap them with regular cotton pillowcases if you prefer (though why would you after feeling the difference?).

    Silk pillowcases are a small investment that impacts you personally every single night. That’s cozy.

    27. Keep One Wall Intentionally Bare for Balance

    In the quest for cozy layering, resist the urge to fill every square inch. One bare wall (or mostly bare) creates visual rest and prevents overwhelm. Leave negative space intentionally rather than feeling like you need to fill it. This applies to shelves, too—leave one-third to one-half of shelving empty.

    Cozy doesn’t mean cluttered. Strategic emptiness actually enhances the coziness because your brain isn’t overstimulated. It’s like visual breathing room.

    A balanced room with intentional empty space feels more curated and restful than one where every surface is styled.


    Save this post and try just one or two ideas this weekend. Which will you start with? Whether it’s rehanging your curtains higher or swapping out one pillow, these small changes add up fast—and your bedroom deserves to feel like a retreat.

  • 27 Bathroom Aesthetic Ideas That Make Your Space Feel Fresh & Modern

    27 Bathroom Aesthetic Ideas That Make Your Space Feel Fresh & Modern


    Your bathroom doesn’t need a complete overhaul to feel fresh and modern. Sometimes it’s the small touches—better lighting, smarter storage, a fresh coat of paint, or one statement piece—that completely shift how your space feels. Whether you’re renting, working with a tight budget, or ready to invest in something special, these 27 ideas will help you create a bathroom that actually feels good to be in. From quick weekend projects to thoughtful upgrades that work with your lifestyle, you’ll find actionable solutions that fit your situation. Let’s dive into ways to make your bathroom a space you genuinely want to spend time in.


    1. Paint Your Walls a Soft, Warm Neutral

    A fresh coat of paint is one of the fastest ways to change how a room feels. Warm neutrals like taupe, soft greige, or cream create an instantly calming backdrop that makes even small bathrooms feel larger and more spa-like.

    Choose a moisture-resistant bathroom paint in a satin or semi-gloss finish to handle humidity without peeling. Brands like Benjamin Moore Aura or Sherwin-Williams Duration run $30-$50 per gallon at hardware stores. A typical bathroom needs 1-2 gallons. The project takes 4-6 hours including drying time between coats. If you’re renting, peel-and-stick removable wallpaper in similar tones works just as well.

    Pro tip: Paint the ceiling the same color as your walls to make the space feel even more cohesive and open.

    You’ll notice right away how a neutral backdrop makes your fixtures and accessories stand out while creating that calm, retreat-like vibe.


    2. Upgrade to a Rainfall Showerhead

    Rainfall showerheads deliver that hotel-quality feel without the high price tag. The gentle water flow overhead creates a completely different shower experience than standard heads—less intense but way more relaxing.

    Look for $30-$100 options from brands like Delta, Moen, or Kohler at Home Depot or Wayfair. Installation takes 20-30 minutes if you’re handy (just unscrew the old head and screw on the new one). No plumbing experience needed. Pair it with a thermostatic mixer valve if your water temperature fluctuates, which prevents those shocking hot/cold spikes while you’re showering.

    The bonus? Many rainfall heads use less water than traditional showerheads, so your water bill actually goes down.

    This single upgrade makes your morning or evening shower feel like a real escape, not just a quick necessity.


    3. Add Floating Shelves Above the Toilet

    Floating shelves give you extra storage without eating into precious floor space. They’re perfect for towels, plants, bath products, or decorative items—basically using the wall you weren’t using anyway.

    Install 2-3 shelves using shelf brackets ($15-$30 per shelf at IKEA, Target, or Amazon). The project takes 1-2 hours with a drill and level. If renting, damage-free adhesive shelf brackets exist but won’t hold heavy weight. Start with lightweight items like rolled towels and small plants for the best look.

    Keep shelves styled loosely—too-packed shelves feel cluttered rather than organized. Alternate rolled towels with a small plant or a candle to create visual rhythm.

    Now you have storage that actually looks intentional and decorative, not like a cluttered grab-bag.


    4. Switch to LED Vanity Lighting

    Poor lighting is one of the biggest reasons bathrooms feel dated or dingy. LED vanity lights are brighter, last longer, and create flattering shadows compared to old incandescent bulbs—plus they save money over time.

    Replace single overhead fixtures with LED vanity bars ($40-$150) flanking your mirror from brands like Schoolhouse Electric, Restoration Hardware, or Target. Installation is simple if you have basic electrical skills, or hire an electrician ($100-$200 labor). Look for “warm white” (2700K) LEDs for a soft, inviting glow rather than harsh clinical white.

    The energy savings add up—LEDs use 75% less power than traditional bulbs and last 25,000+ hours.

    You’ll notice how much better you look and feel with proper, even lighting, and applying makeup or skincare becomes actually pleasant.


    5. Create a Spa-Like Experience with Bath Bombs

    You don’t need expensive renovations to create spa moments. Bath bombs and fizzy tablets add aromatherapy and luxury to every soak without requiring any installation or permanent changes.

    Buy sets of quality bath bombs ($20-$40 for 4-6) from brands like Lush, Herbivore, or even Target’s Good & Gather line. Store them in a pretty jar or ceramic bowl on your tub’s edge for easy grabbing. Pro tip: pair them with Epsom salt soaks ($5-$10) for muscle relaxation, or keep a small bundle of dried eucalyptus nearby for aromatherapy.

    Light a candle, dim the lights, and let the bath bomb do the work—this ritual takes zero skill but feels indulgent.

    Now your evening bath actually feels like a treat, not just a quick rinse-off.


    6. Install a Low-Flow Toilet or Faucet Aerator

    Water conservation doesn’t mean cold showers or weak flushes. Modern low-flow fixtures deliver normal performance while cutting water usage by 20-30%, which shows up directly on your water bill.

    Add an aerator to your faucet ($3-$8) by simply unscrewing the old one and twisting on a new one—takes 2 minutes and no tools needed. For a bigger impact, replace the whole faucet ($40-$150 depending on style) or upgrade your toilet to a dual-flush model ($200-$400 installed). These changes pay for themselves within 1-2 years on water savings alone.

    Check for WaterSense labels to ensure fixtures meet EPA standards for efficiency.

    Your shower still feels great, your toilet flushes perfectly, and you’re saving money every single month.


    7. Hang a Statement Mirror with Character

    A mirror is functional, but it’s also the perfect spot to add personality and make the room feel bigger. A statement mirror instantly upgrades the vibe from boring to intentional.

    Look for framed mirrors ($50-$200+) at West Elm, Anthropologie, or even Facebook Marketplace for vintage finds. Wood frames feel warm and organic; metal frames add modern edge. Size matters—go bigger than you think. A mirror that’s roughly the same width as your vanity works best. Installation takes 15 minutes with a stud finder and level.

    Renter tip: Use a damage-free hanging strip rated for mirrors if you can’t drill into walls.

    Suddenly your bathroom has a focal point that makes the whole space feel more put-together and spacious.


    8. Roll Your Towels and Display Them in a Basket

    Rolled towels look more polished than folded stacks and take up less visual space. This simple styling trick transforms towels from storage clutter into a decorative element.

    Roll each towel by starting from one short end and rolling tightly toward the other end. Stand them upright in a woven basket ($20-$50) from IKEA, Target, or HomeGoods. Use natural fibers like seagrass or rattan to keep the aesthetic calm. Place the basket on a shelf, in a corner, or under the sink where it’s visible but not in the way.

    This works as both storage and decor, and guests notice the thoughtful touch immediately.

    Your towels become a design element rather than something you feel awkward about leaving visible.


    9. Add Plants for Life and Color

    Plants improve air quality, add life to the space, and create that calming, spa-like feel without costing much. Even low-light bathrooms can host humidity-loving plants.

    Choose humidity-loving plants like pothos, snake plants, or ferns from any garden center ($5-$20 each). Pothos thrives even in low light and just needs occasional watering. Snake plants are nearly impossible to kill. Ferns love humidity, so they actually thrive in bathrooms. Use small pots to keep plants from dominating limited space.

    Water sparingly—most bathroom plants appreciate the humidity more than constant watering.

    You’ll notice how a few green plants immediately soften the space and make it feel more like a retreat than a utility room.


    10. Replace Cabinet Hardware with Modern Knobs or Pulls

    Cabinet hardware is a micro-upgrade with outsized impact. Swapping old handles for modern knobs or pulls instantly ages up your vanity without replacing the whole thing.

    Buy new hardware ($10-$40 per set) from IKEA, Wayfair, or Anthropologie in finishes like brass, matte black, or brushed nickel. Unscrew the old hardware, fill any old screw holes with a dab of wood filler if needed, and install the new pieces—takes 30 minutes for an entire vanity. This project requires just a screwdriver and works even if your vanity is rented (just save the old hardware to reinstall when you move).

    The change is subtle but immediately makes the whole vanity look newer and more intentional.

    One small detail like this shifts the whole vibe of your bathroom without any real effort or cost.


    11. Create a Feature Wall with Peel-and-Stick Wallpaper

    Peel-and-stick wallpaper lets you add pattern and personality without commitment—perfect for renters or anyone hesitant about permanent changes. One accent wall behind your vanity or toilet completely changes the room’s energy.

    Choose from brands like Spoonflower, Chasing Paper, or Amazon’s removable wallpaper ($20-$60 per roll). Patterns like geometric shapes, botanical prints, or subtle textures work well in bathrooms. The application takes 1-2 hours, and removal is literally just peeling—no damage if you go slowly.

    Pro tip: Measure twice, cut once. Some people use a credit card to smooth out bubbles as they apply.

    One patterned wall adds so much character that guests immediately notice and ask about it.


    12. Upgrade Your Shower Curtain to a Quality Fabric Version

    Cheap plastic shower curtains feel flimsy and look dated. A quality fabric curtain feels substantial and instantly upgrades your whole shower area, plus it actually lasts longer.

    Invest in a heavyweight fabric curtain ($30-$80) from Parachute, West Elm, or even Target’s higher-end Threshold line. Pair it with a quality liner ($8-$15) so the curtain stays dry and mold-free. Fabric curtains are machine-washable, so they stay fresher longer than plastic versions.

    Choose neutral colors or subtle patterns that coordinate with your walls and vanity.

    You’ll feel the difference immediately—there’s something luxurious about a substantial fabric curtain instead of that thin plastic feel.


    13. Install a Dimmer Switch for Lighting Control

    A dimmer switch lets your bathroom shift from bright morning light to calming evening ambiance with one adjustment. This single change makes your space feel way more spa-like and functional.

    Replace your standard light switch with a dimmer switch ($15-$30 from Home Depot or Lowes). If you’re comfortable with basic electrical work, installation takes 15 minutes. If not, an electrician charges $75-$150 for installation. Pair it with LED bulbs rated as “dimmable” (most modern LEDs are, but check the label).

    Renter tip: Some adhesive-mounted smart lights offer dimming without any installation.

    Now you can set the mood for your morning routine or create that spa vibe for evening wind-down.


    14. Organize Under-Sink Storage with Tiered Shelves

    The space under your sink is usually chaos, but tiered shelves or pull-out organizers make everything visible and reachable. No more hunting through piles of bottles and sprays.

    Install tiered shelf organizers ($15-$40) from IKEA, Target, or Amazon in about 20 minutes with no tools required. Use clear containers or labels for cleaning supplies, hair tools, and extra shampoo bottles. This makes everything easy to grab and keeps the area from looking like a jumble.

    Pro tip: Keep everyday items accessible at eye level and reserve top/back areas for backup supplies.

    You’ll save time searching for things and actually enjoy opening the cabinet instead of dreading what you’ll find.


    15. Add a Small Corner Shelf Unit

    Corners are usually wasted space in bathrooms. A corner shelf unit takes advantage of this dead zone and gives you practical storage that doesn’t eat into your walking space.

    Install a corner shelving unit ($40-$100) from IKEA, Wayfair, or Target. Most are lightweight enough for renters to use command strips or damage-free adhesive. The project takes 30-45 minutes with a level and drill. Stock it with rolled towels on lower shelves and decorative items like plants or candles on upper shelves for visual balance.

    This is especially helpful in small bathrooms where every inch counts.

    Suddenly you have storage that feels intentional rather than crammed, and your whole floor area opens up.


    16. Switch to Natural or Recycled Soap and Product Bottles

    What you put on your counter matters as much as the counter itself. Consolidating products into matching dispensers and bottles instantly makes the space look more curated and intentional.

    Buy matching glass or ceramic dispensers ($8-$20 each) from Muji, The Container Store, or Amazon. Transfer your everyday soaps, lotions, and shampoos into these bottles rather than having dozens of product containers. Label them with waterproof stickers if you like. Keep this on your counter, and tuck backups under the sink.

    Pro tip: Filling fancy soap bottles with cheap soap from bulk makes everything look luxe.

    Your counter looks editorial instead of cluttered, and guests will actually compliment your setup.


    17. Paint Your Vanity Cabinet a Bold Color

    If you own your vanity, paint it in a color that makes a statement. Bold, saturated colors like deep green, navy, or charcoal immediately make a bathroom feel more designed and personal than the standard white or wood-tone options.

    Use bathroom-grade paint in a semi-gloss finish ($20-$40) from Benjamin Moore, Sherwin-Williams, or Farrow & Ball. Prep by sanding lightly and priming, then apply 2-3 coats. The project takes one full weekend with drying time, or hire a painter ($300-$600). Renter? Skip this one, but consider peel-and-stick adhesive wood finishes to cover cabinet doors instead.

    Pair the bold base with brass hardware and neutral walls to let the vanity be the star.

    This single bold move makes your bathroom feel intentional and way more personalized than cookie-cutter boring.


    18. Add Task Lighting with a Clip-On Lamp

    If overhead lighting isn’t enough, a clip-on lamp gives you targeted light exactly where you need it—perfect for makeup application, skincare routines, or just creating ambiance.

    Find clip-on lamps ($20-$50) from IKEA, Target, or Amazon. Installation takes 2 minutes—just clip it to a shelf, mirror frame, or towel rack. Use a warm-white LED bulb for a soft glow. This works great for renters since there’s zero installation required.

    The beauty of a clip-on lamp is you can move it around based on your needs or reposition it if you change your layout.

    You get professional-level task lighting without wiring anything or committing to a permanent installation.


    19. Create a Spa Vibe with Scent and Candles

    Scent is instant atmosphere. Strategic candle placement transforms your bathroom from a purely functional space into somewhere you actually want to linger.

    Stock 3-5 quality candles ($15-$40 each) from brands like Jo Malone, Diptyque, or even Target’s Opalhouse line in scents like eucalyptus, lavender, or sea salt. Keep them on a shelf away from water splashes, or use them specifically during baths and bedtime routines. Unscented candles work too—it’s really the ambient light that matters.

    Pro tip: Match your candle scent to the vibe you want—energizing scents for mornings, calming ones for evenings.

    You’ll notice how quickly a lit candle shifts your bathroom from a chore space into a retreat.


    20. Swap Your Shower Caddy for a Sleek Wall-Mounted Version

    Plastic shower caddies that hang over the showerhead feel temporary and cluttered. A wall-mounted caddy looks purposeful, keeps water from pooling, and actually lasts longer.

    Install a wall-mounted caddy ($30-$60) from brands like Waterworks, Anthropologie, or even Amazon in finishes that match your fixtures. Most require drilling into tiles (25-30 minutes of work), but adhesive-mounted versions exist for renters. Position it at chest height so items are easy to grab, not stretched overhead.

    Renter-friendly option: Use tension rods in your shower corner to create an instant basket shelf for products.

    Your shower looks exponentially cleaner and more organized without bottles scattered across the tub floor.


    21. Install Recessed Lighting or Spotlights Above the Mirror

    Recessed lighting is more subtle than vanity bars but equally effective for creating shadow-free, professional lighting around your mirror. Spotlights are small enough to feel modern rather than bulky.

    Hire an electrician to install recessed LED fixtures ($200-$400 labor plus materials) or do it yourself if you have electrical experience ($30-$50 per fixture). These are permanent upgrades best for homeowners. The payoff is clean, integrated lighting that feels luxurious without being obvious.

    Pair recessed lights with a dimmer for full control over mood.

    Your reflection looks flawless in this lighting, and the whole bathroom feels more upscale and thoughtfully designed.


    22. Use Open Shelving to Display Favorite Towels and Decor

    Open shelving works best when you actually edit what goes on it. Display only items that genuinely look good together—it becomes decor rather than storage overflow.

    Install simple floating shelves ($25-$50 each) from IKEA or Wayfair, and style them with rolled towels, a small plant, a hardcover art book, and maybe one decorative object. Leave negative space so shelves don’t feel crammed. Rearrange seasonally if you want a fresh vibe.

    Pro tip: An odd number of items looks more intentional than an even number.

    Open shelving done right looks editorial and creates that calm, retreat-like vibe instead of chaotic.


    23. Add a Heated Towel Rack for Morning Comfort

    A heated towel rack is a small luxury that makes a huge difference on cold mornings. Warm towels feel indulgent, and the rack also gently dries towels so they don’t smell musty.

    Install an electric heated towel rack ($100-$300) requiring a 120V outlet (an electrician can add one for $150-$300). Most models warm up in 10-15 minutes. There are also plug-in versions ($40-$60) that work without hardwiring, though they’re less powerful. The installation takes an electrician 1-2 hours for hardwired versions.

    Consider this a homeowner investment, not a renter move, unless you find a plug-in version.

    Stepping out of the shower into a warm towel feels genuinely spa-like and makes your morning routine feel less rushed.


    24. Tile the Floor or Add a Luxury Bath Mat

    Flooring is either a big renovation or a simple mat upgrade. If you’re not ready to retile, a high-quality mat creates that spa comfort instantly.

    Buy a luxury bath mat ($30-$80) from Parachute, Pottery Barn, or Williams-Sonoma in naturally absorbent materials like Egyptian cotton or Turkish cotton. The weight and thickness matter—this is where you’ll feel the difference. Wash regularly and air-dry to keep it soft and prevent mildew. If you’re feeling bold, luxury vinyl plank or new tile ($800-$2,000 installed) transforms the whole feel for a permanent upgrade.

    Renter tip: A quality mat is your best friend for instant comfort without commitment.

    The moment your bare feet hit a soft, thick mat instead of cold tiles, your whole morning feels more luxurious.


    25. Install a Smart Thermostatic Shower System

    Smart showers let you preset your exact temperature and water pressure, then recall it every time—no more shocking temperature swings while you’re mid-shower. It’s a game-changer for consistency and safety.

    Invest in a thermostatic mixer or smart shower system ($300-$1,000 installed) from brands like Hansgrohe, Kohler, or Moen. This requires professional installation ($200-$400 labor) since it involves plumbing adjustments. Some systems sync with apps, so you can start warming up water before you even enter the bathroom.

    This is an investment upgrade worth it if you shower multiple times daily or have family members who have different temperature preferences.

    You’ll experience the luxury of perfectly consistent water temperature every single shower without having to adjust controls mid-rinse.


    26. Create a Minimalist Aesthetic with Hidden Storage

    Minimalist bathrooms feel calm because nothing competes visually. The trick is hidden storage that lets you put everything away while keeping daily items accessible.

    Install deep drawers or pull-out cabinets ($100-$300) in your existing vanity, or replace it entirely with a design-focused cabinet ($400-$1,000+). Use drawer dividers ($10-$20) to keep everything organized by category. Keep only your absolute essentials on the counter—maybe a soap dispenser and one candle.

    Pro tip: Closed storage is your friend in minimalist design. If you see it, it counts as clutter.

    With everything hidden away, your bathroom feels like a serene retreat rather than a cluttered utility room.


    27. Bring in Warm Wood Tones Through Accessories

    Wood adds instant warmth and organic softness to bathrooms. Mixing wood with tile or marble creates balance between natural and modern elements, preventing spaces from feeling cold.

    Add wooden accessories like a bath caddy ($30-$50), shelves ($40-$100), or stool ($25-$80) from IKEA, West Elm, or Wayfair. Look for sustainably sourced options or reclaimed wood for extra character. If you’re refinishing or upgrading your vanity, opt for natural wood tones instead of white for warmth. A simple wooden bath mat ($30-$60) brings the same organic feel.

    Pro tip: Mix wood tones—don’t feel like everything has to match perfectly. Variety looks more natural.

    You’ll notice how wood immediately softens the space and creates that warm, spa-like retreat feeling instead of cold or clinical.


    Save this guide for your next refresh, and pick just one idea to tackle this weekend. Even one small change shifts how your bathroom feels, and the best part? You don’t need a huge budget to create a space that actually makes you happy.