Author: Clara Bennett

  • 26 Exterior Color Palette Ideas That Transform Your Home’s Look

    26 Exterior Color Palette Ideas That Transform Your Home’s Look

    Your home’s exterior is the first thing people notice—and the last thing you want to overthink. Whether your house feels dated, too plain, or just not you, the right color palette can change everything. The good news? You don’t need a major renovation or a huge budget to make a dramatic difference. This guide walks you through 26 exterior color palettes that work for different home styles, climates, and budgets. From earthy neutrals that whisper sophistication to bold jewel tones that command attention, you’ll find combinations that feel fresh yet timeless. Each palette includes specific color names, material pairings, and realistic pricing so you can start planning your refresh this week. Let’s find the palette that makes your home feel like home.

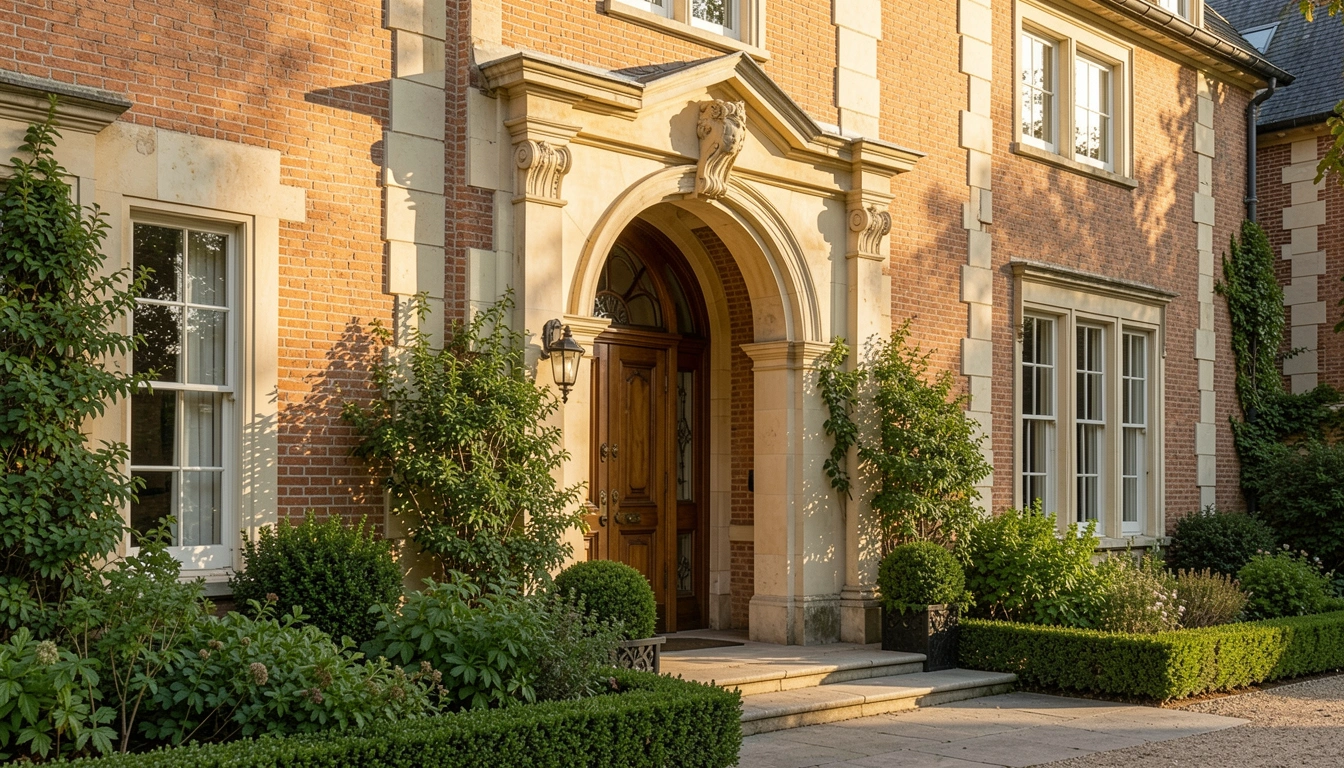
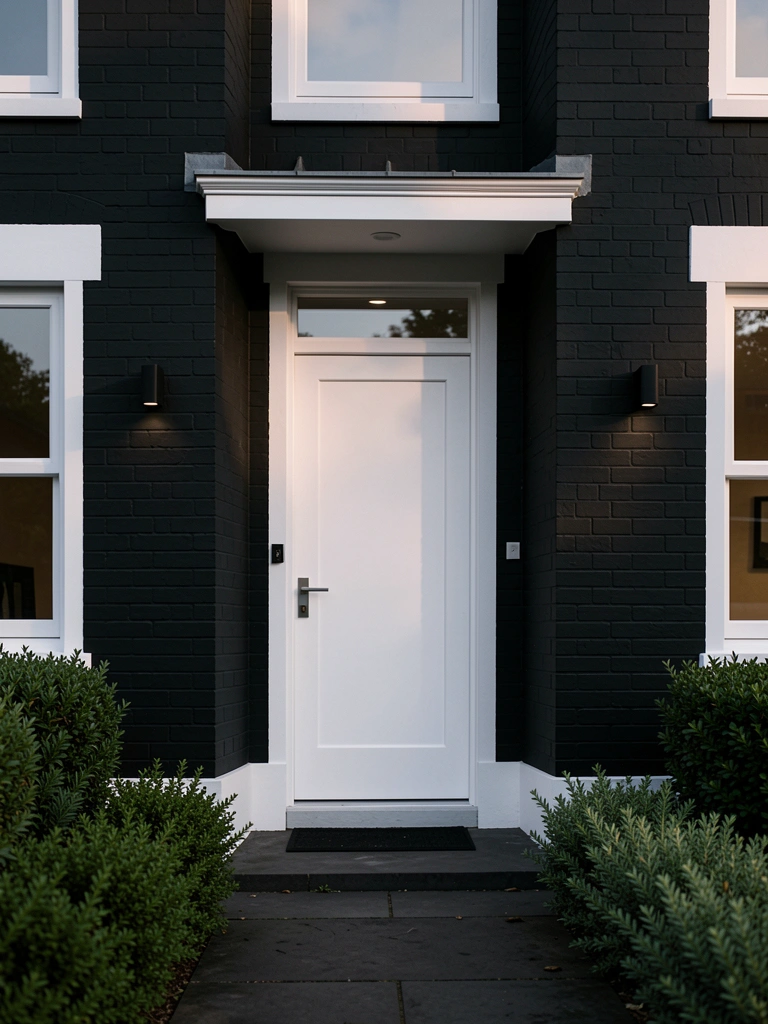
    1. Warm Cream + Deep Charcoal for Timeless Balance

    This pairing balances warmth with sophistication without feeling cold or sterile. Warm cream grounds the home while charcoal creates drama and definition, especially around doors, trim, and rooflines.

    Start by choosing a warm cream like Benjamin Moore’s “Swiss Coffee” or Sherwin-Williams’ “Accessible Beige” ($35–$50 per gallon). Paint the main walls, then select charcoal for accents—shutters, doors, or soffit ($40–$55 per gallon). The contrast takes about 2–3 weeks of planning and 3–4 days of labor if DIY-ing with a partner. Hire a pro if your home has complex trim ($1,500–$3,000 for full exterior). The payoff? A home that photographs beautifully and appeals to most buyers if you ever sell.

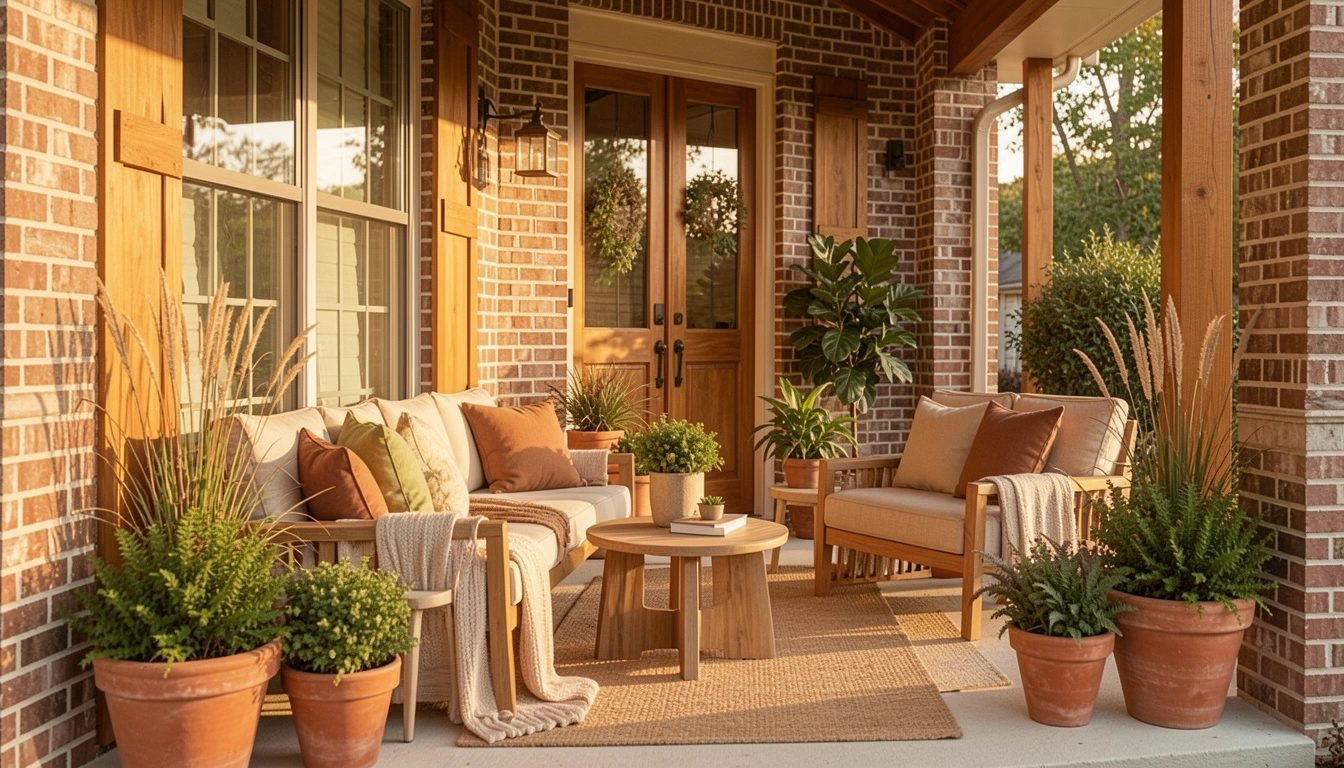
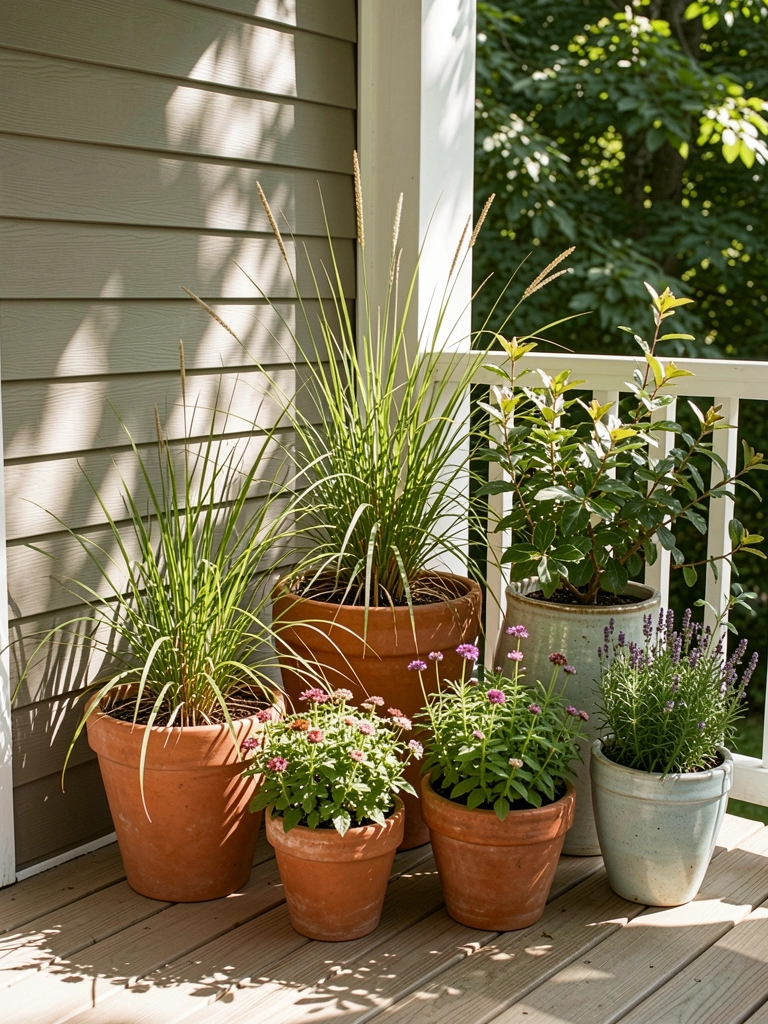
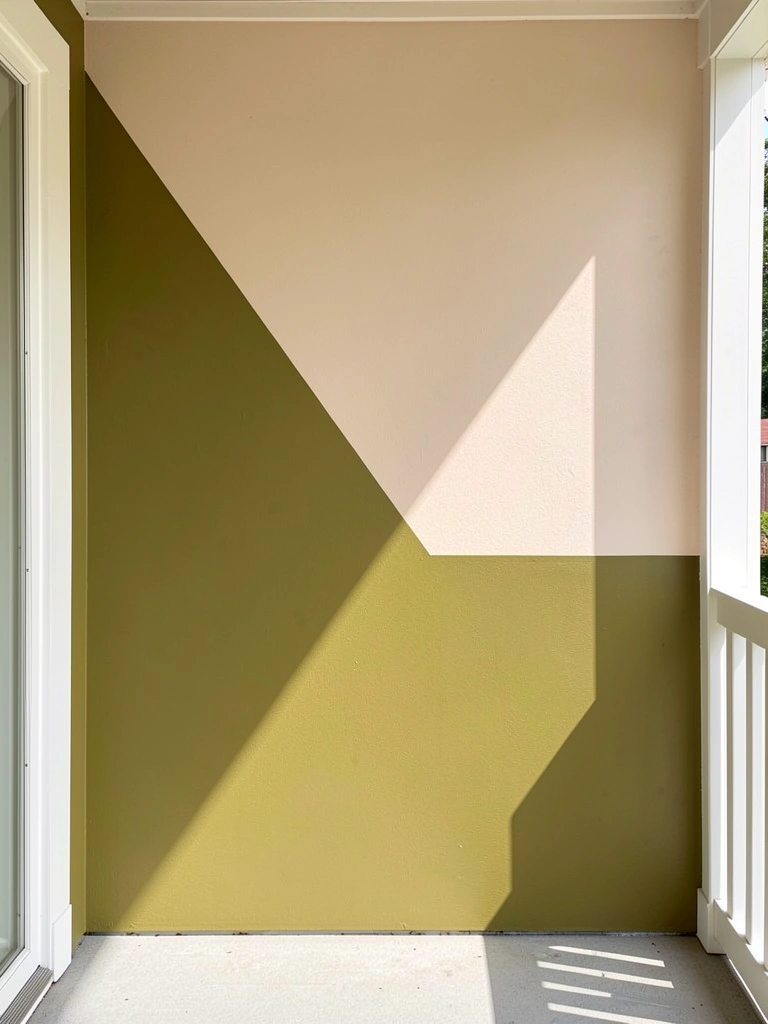
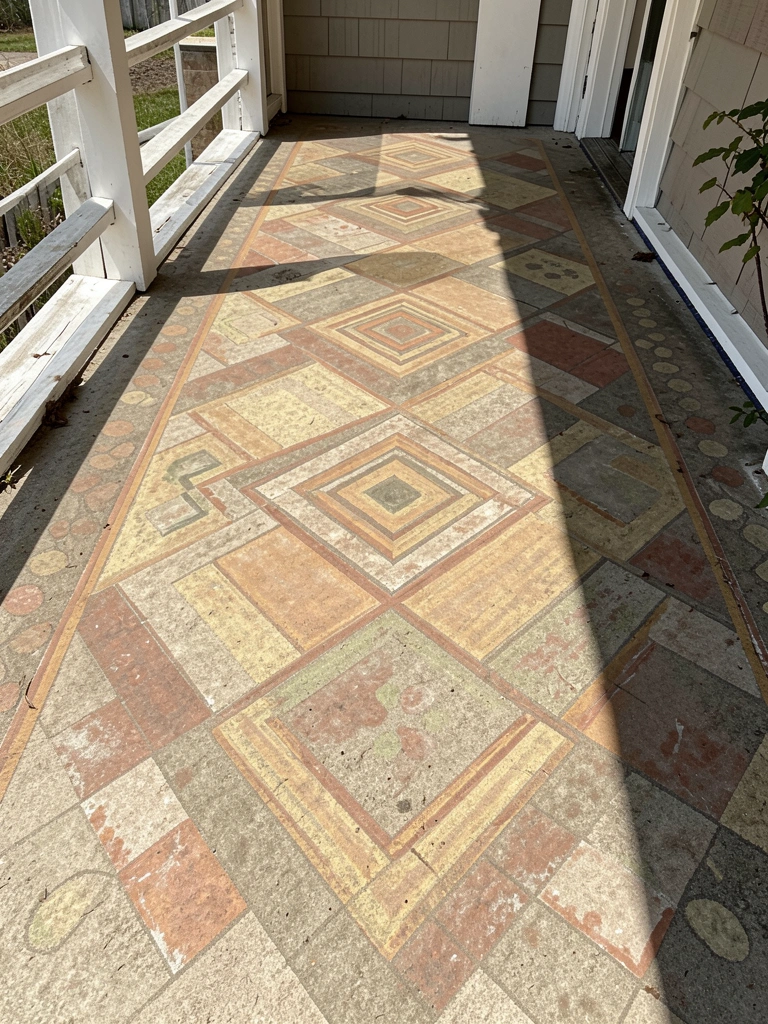
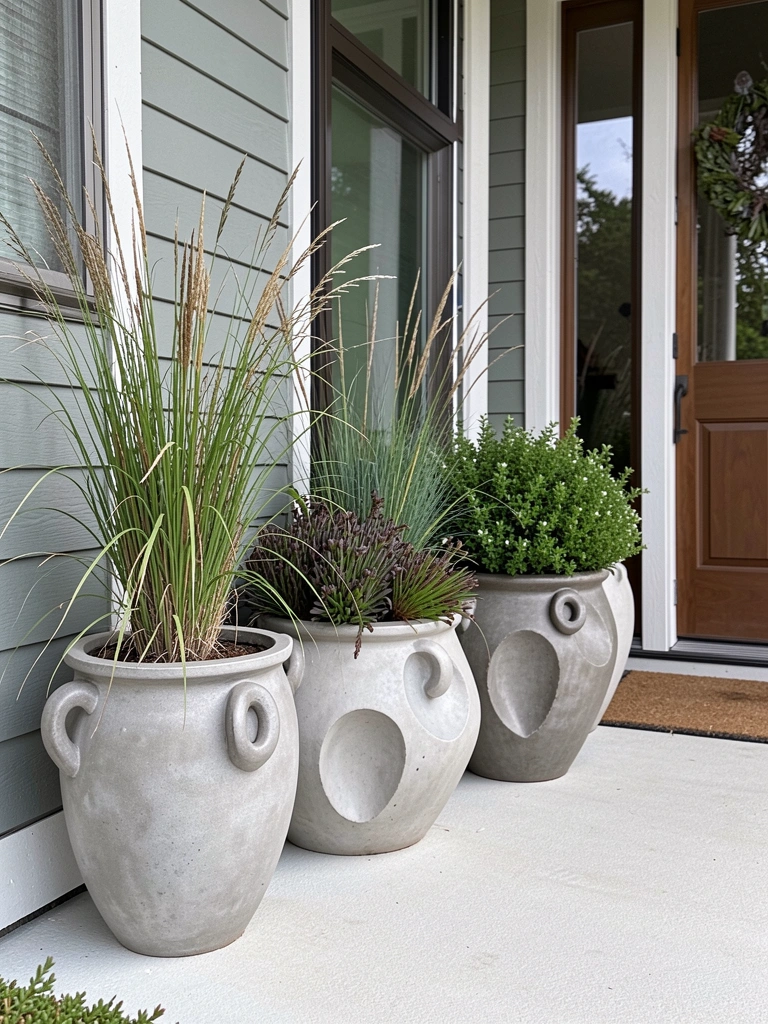
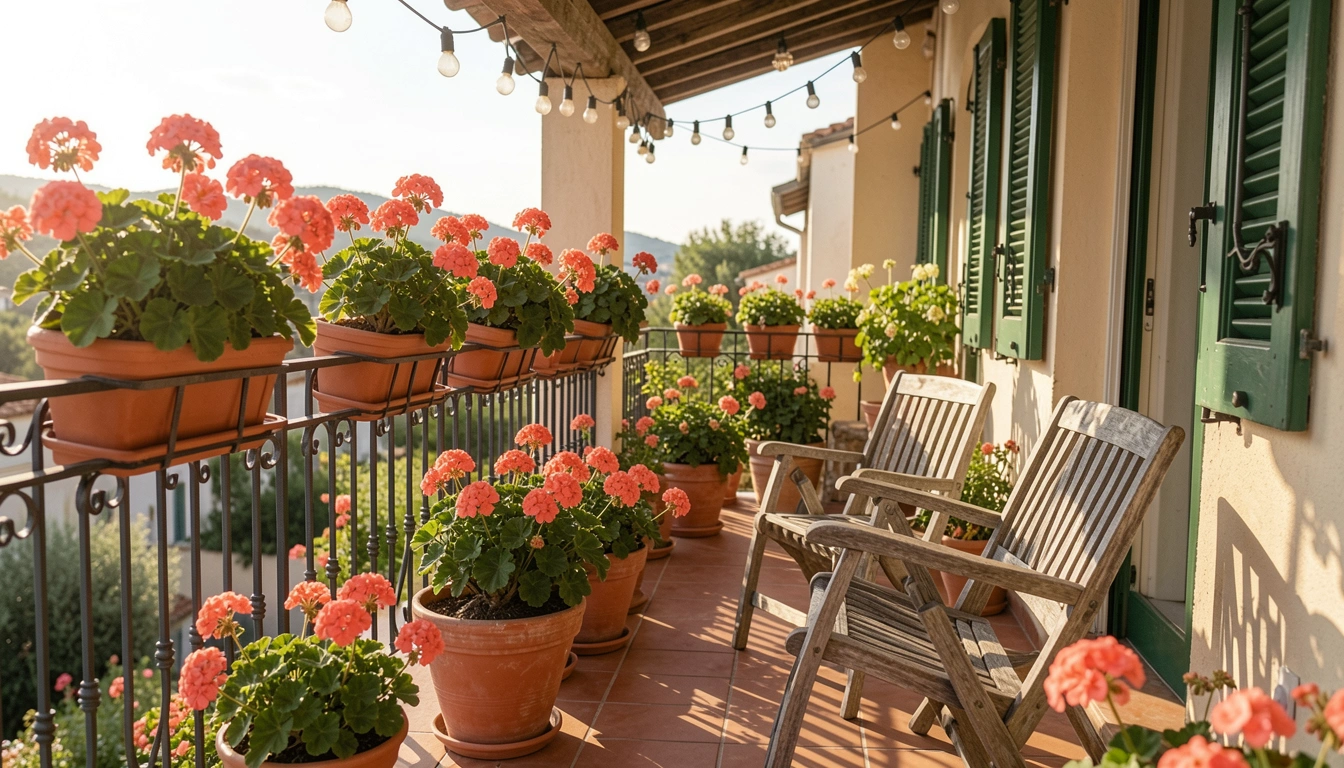
    2. Olive Green + Terracotta Clay for Mediterranean Warmth

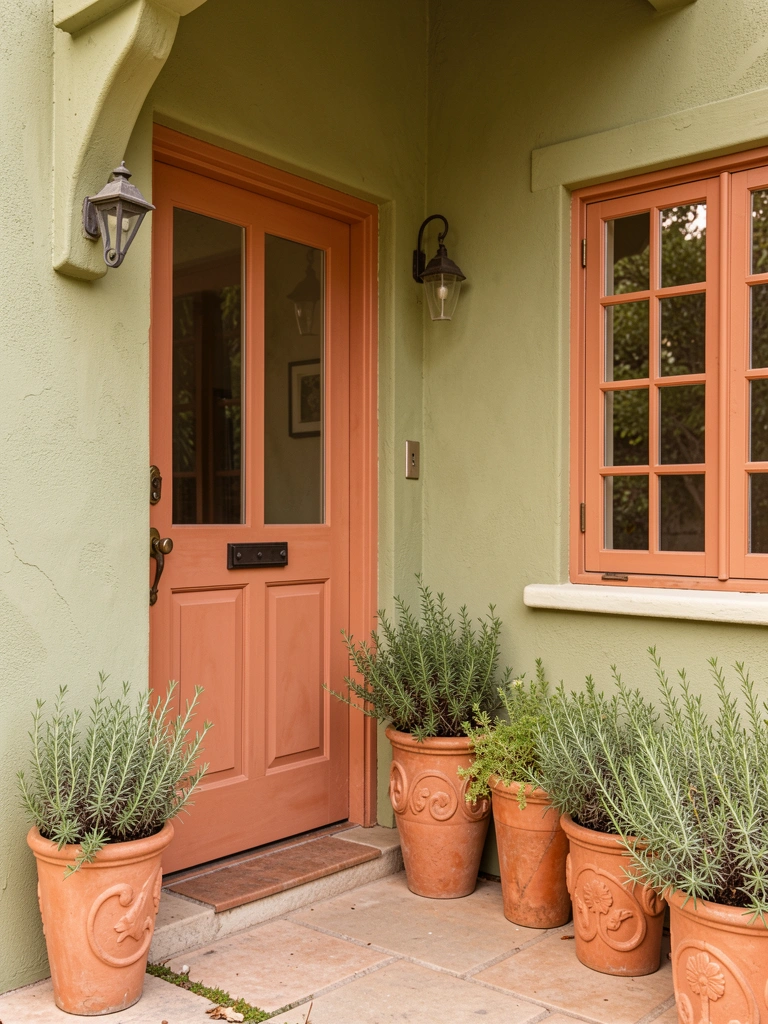
    This earthy combo brings organic modernism to life—think European countryside without the maintenance headaches. Olive green creates a nature-connected backdrop while terracotta adds warmth and cultural richness.

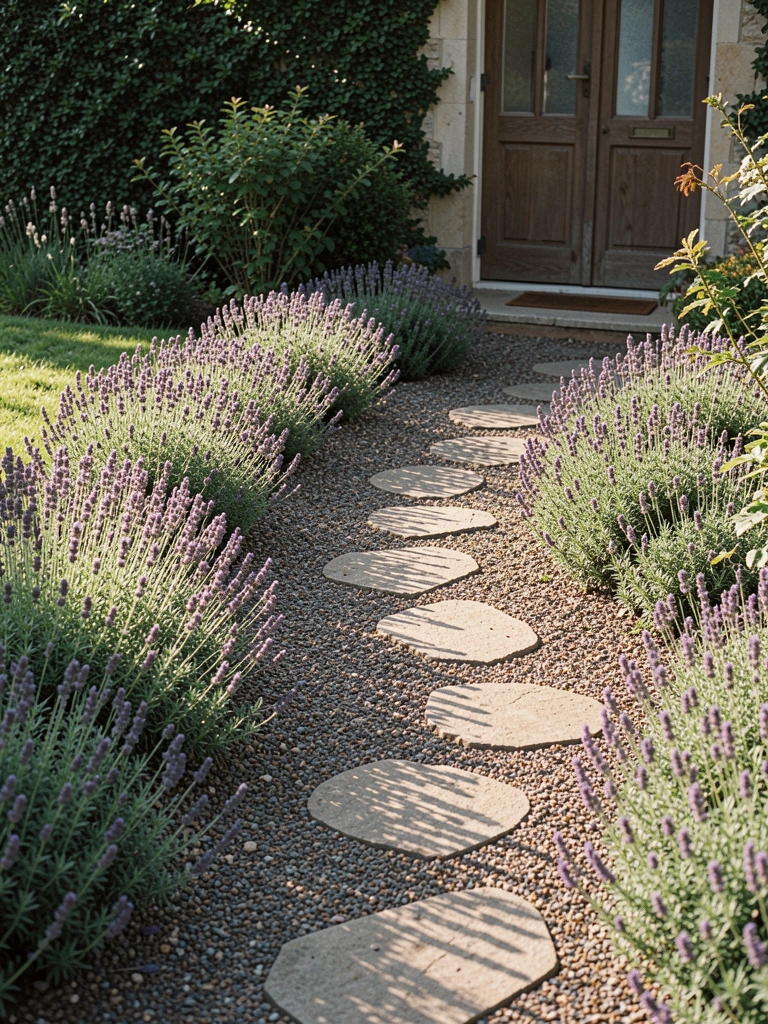
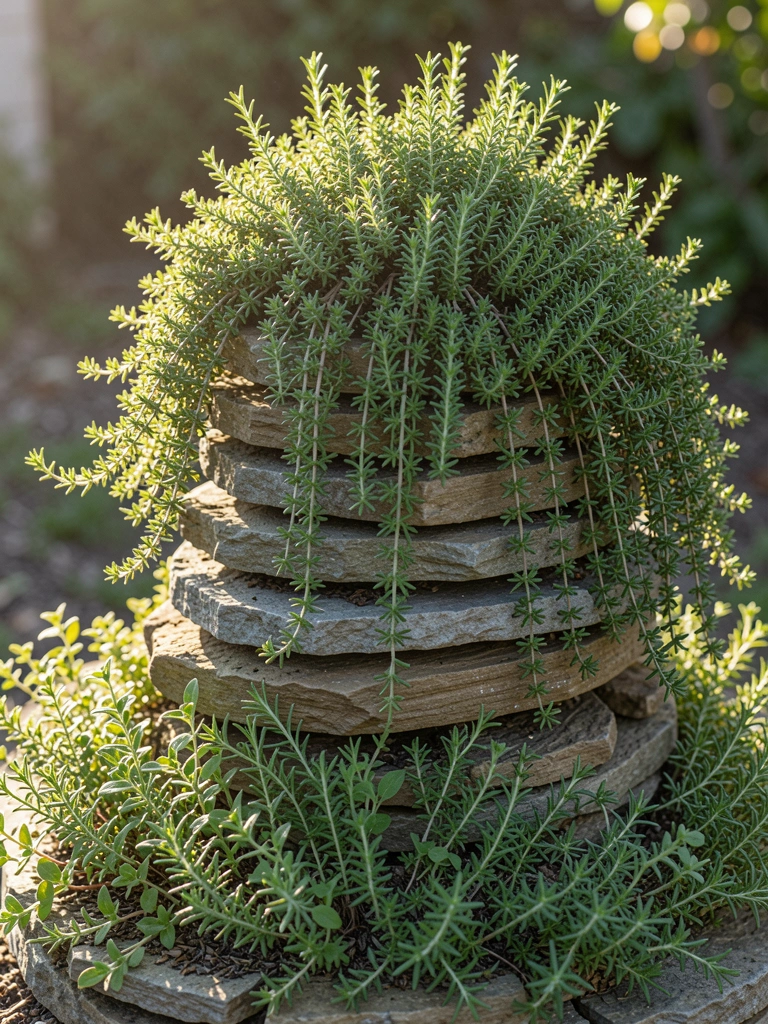
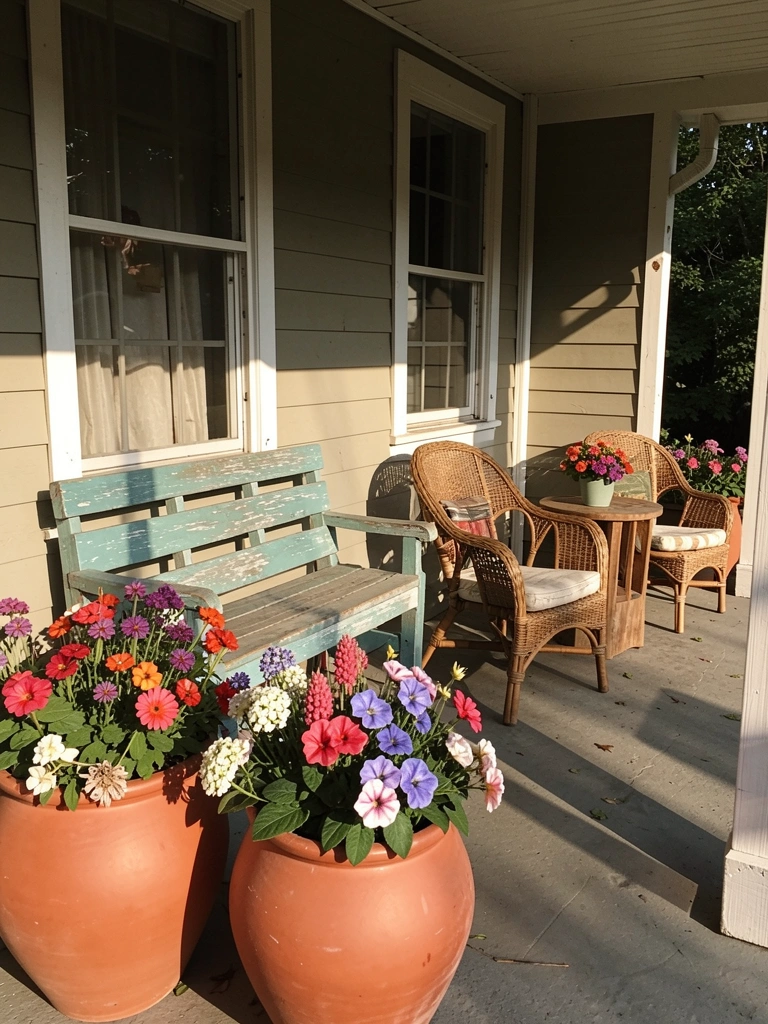
    Paint walls in Farrow & Ball’s “Olive” or similar ($60–$80 per liter; pricier but superior coverage). Add terracotta accents on doors and trim using Sherwin-Williams’ “Red Bay” ($40–$55). The two-tone effect takes a weekend for prep and 2–3 days of painting. Budget $800–$2,000 if hiring help for the application. Pro tip: Add terracotta planters near the entrance to echo the door color and ground the palette naturally.

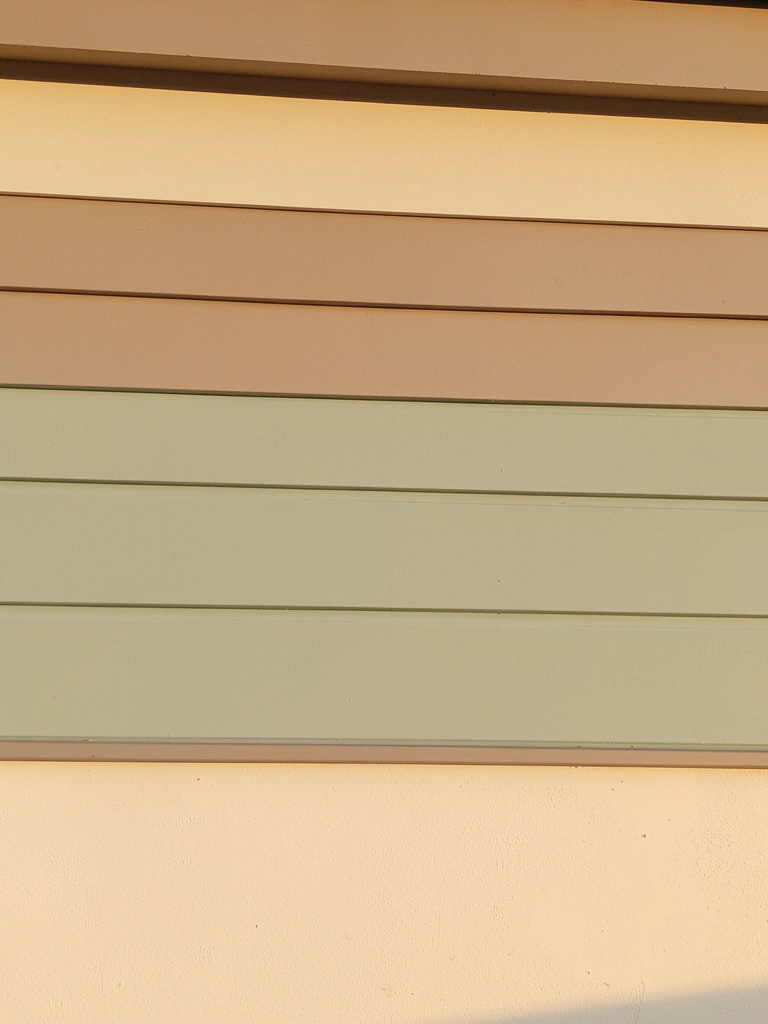
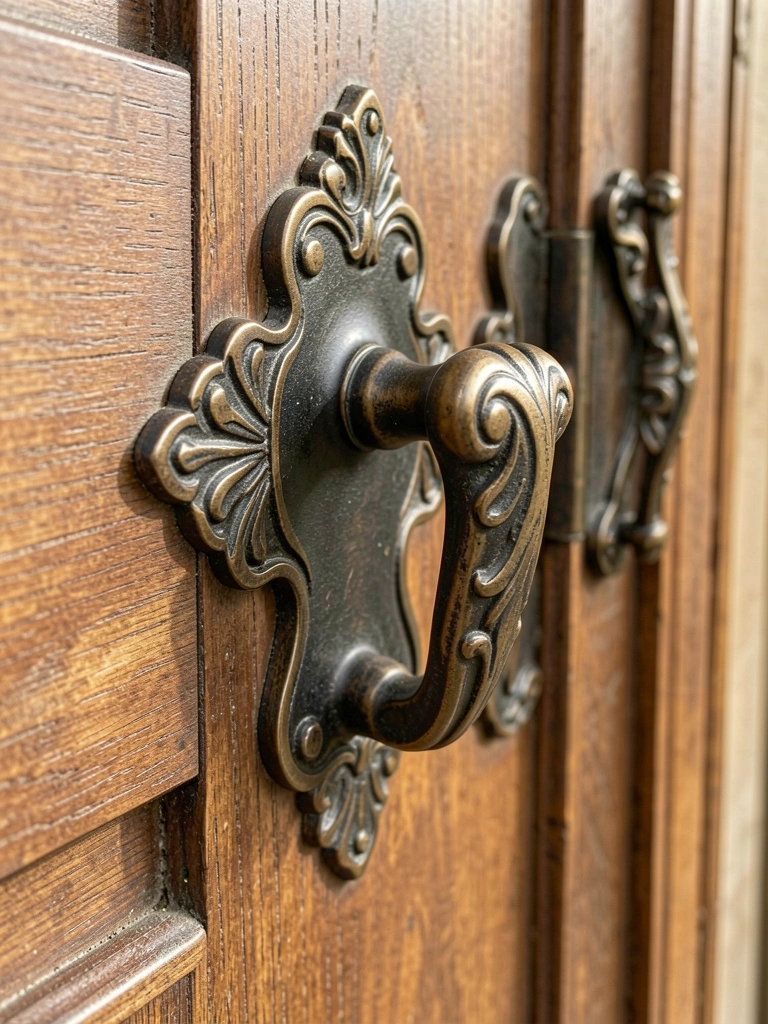
    3. Muted Peach Stucco for Subtle Spanish Revival

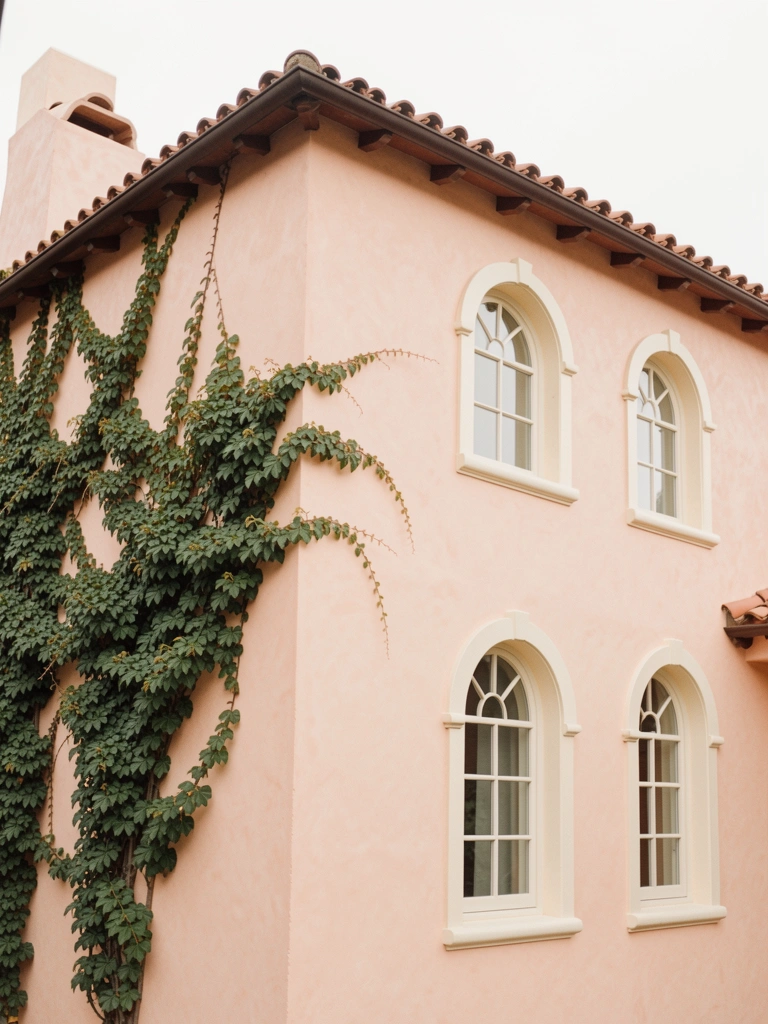
    Peach stucco updates traditional Spanish homes without looking costume-like. It’s warm, approachable, and works especially well in sunny climates where the color glows rather than overwhelms.

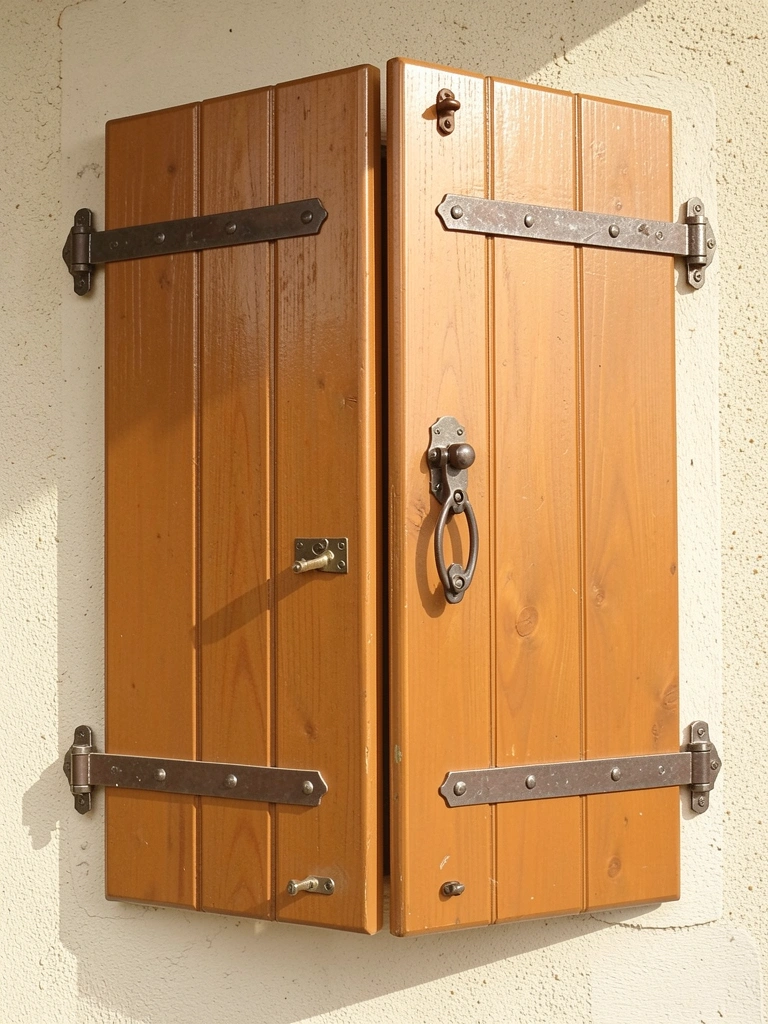
    Choose a muted peach like Allura USA’s “Soft Coral” or Sherwin-Williams’ “Cavern Clay” ($40–$60 per gallon). Stucco application requires a professional unless you’re experienced—expect $3,000–$6,000 depending on home size. The refresh takes 5–7 days with curing time. If repainting existing stucco is more feasible, budget $2,000–$4,000 for labor. This color choice pairs beautifully with aged brass hardware and clay tile details that emphasize the Spanish aesthetic.

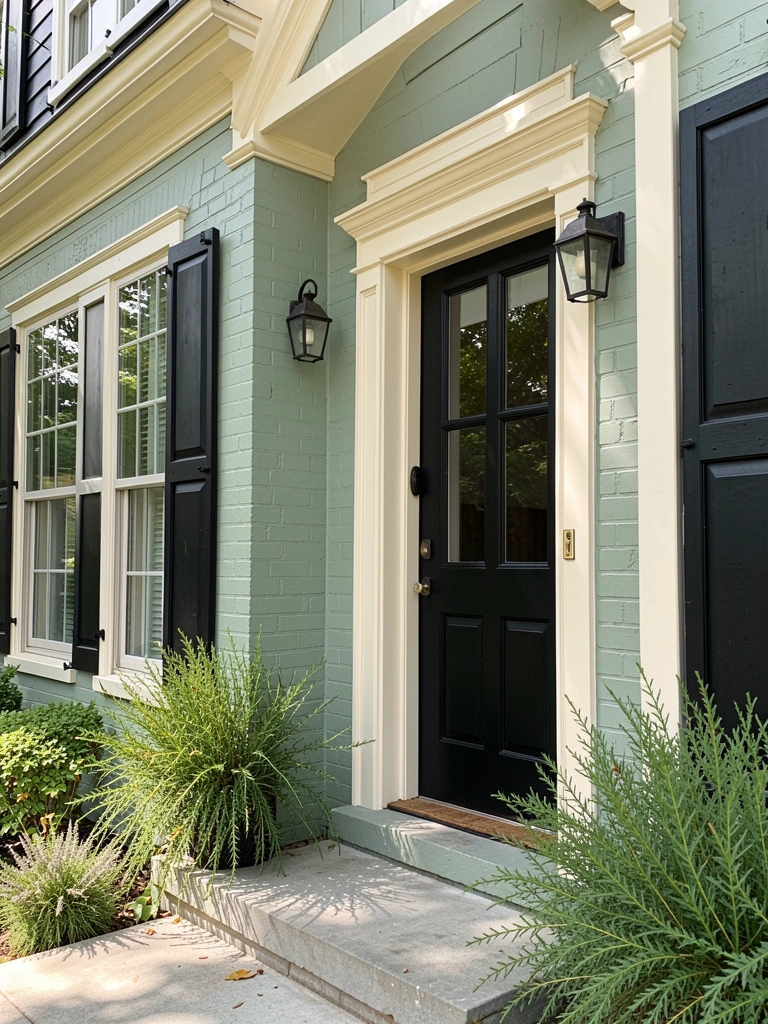
    4. Flagstone Gray + Coastal White for Seaside Serenity

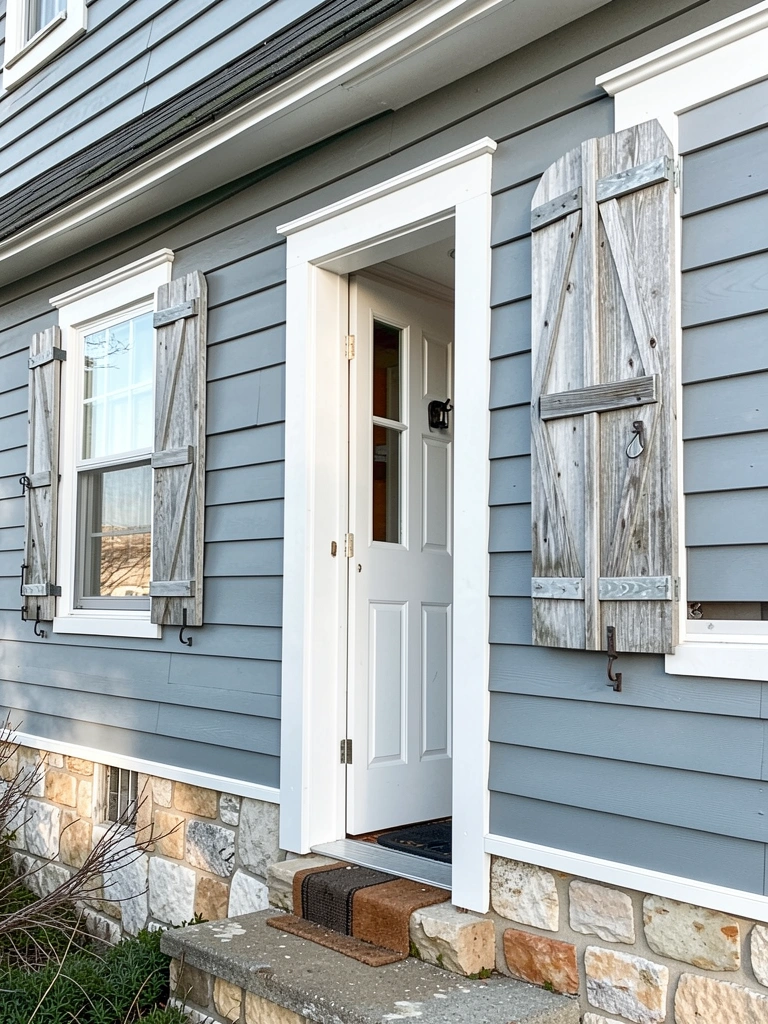
    Flagstone gray—a soft blue-gray that mimics natural stone—gives your home a peaceful, beachy vibe even if you’re landlocked. White trim keeps it fresh and prevents the gray from feeling heavy.

    Paint main walls in Allura USA’s “Flagstone Gray” or Benjamin Moore’s “Storm” ($35–$50 per gallon). Use crisp white like Sherwin-Williams’ “Alabaster” for all trim, doors, and shutters ($35–$45). This two-tone is DIY-friendly if you’re comfortable with detail work; plan 4–5 days. Professional painters charge $1,500–$2,500 for full exterior coverage. The result feels calm and collected—like a daily retreat.

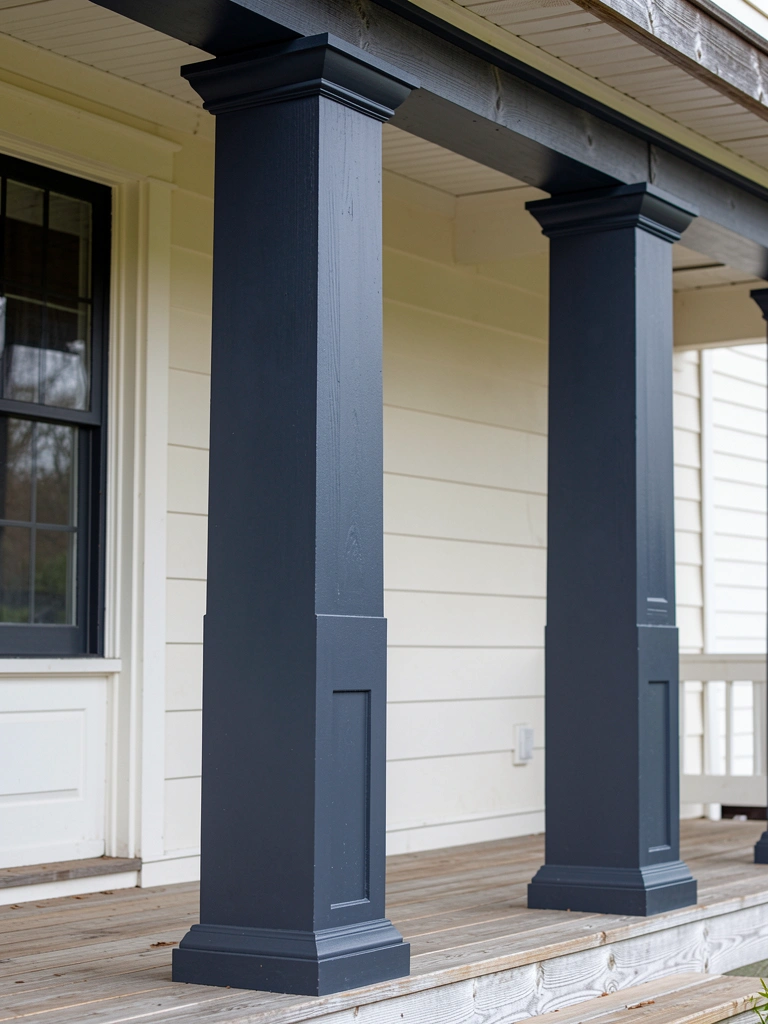
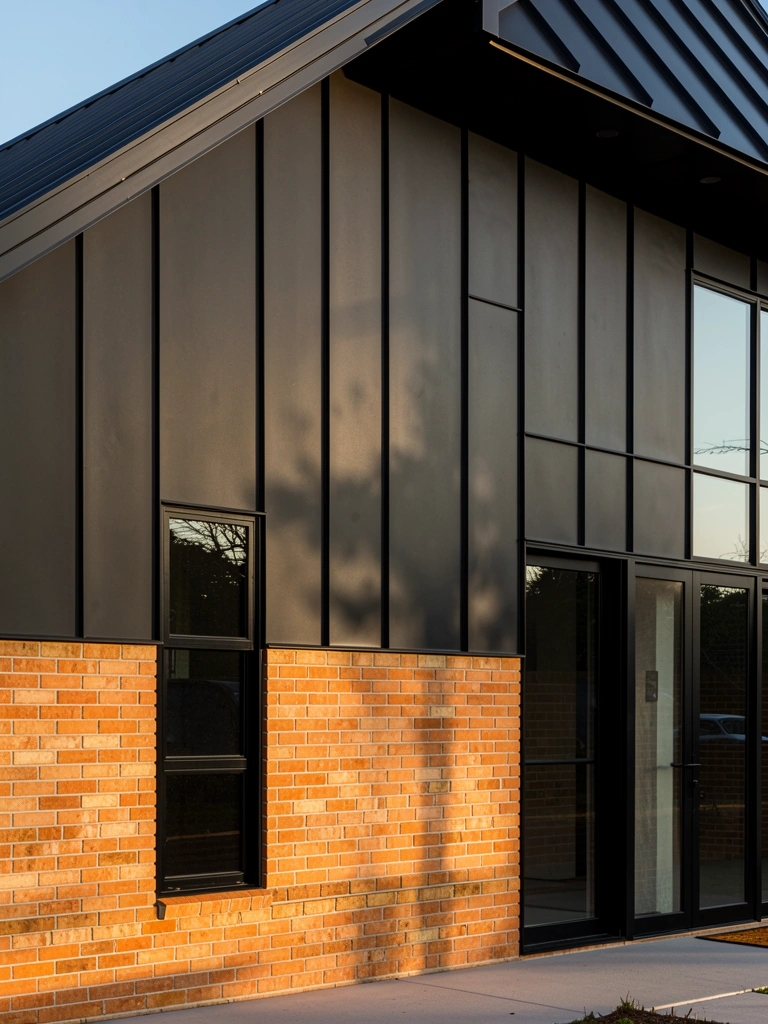
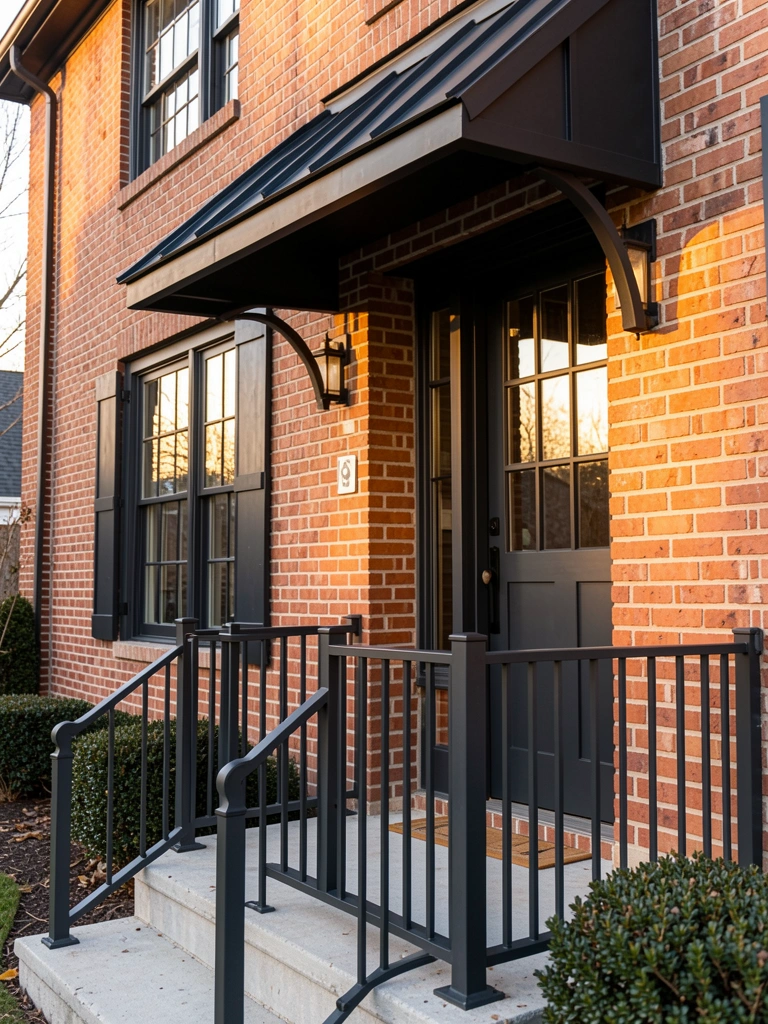
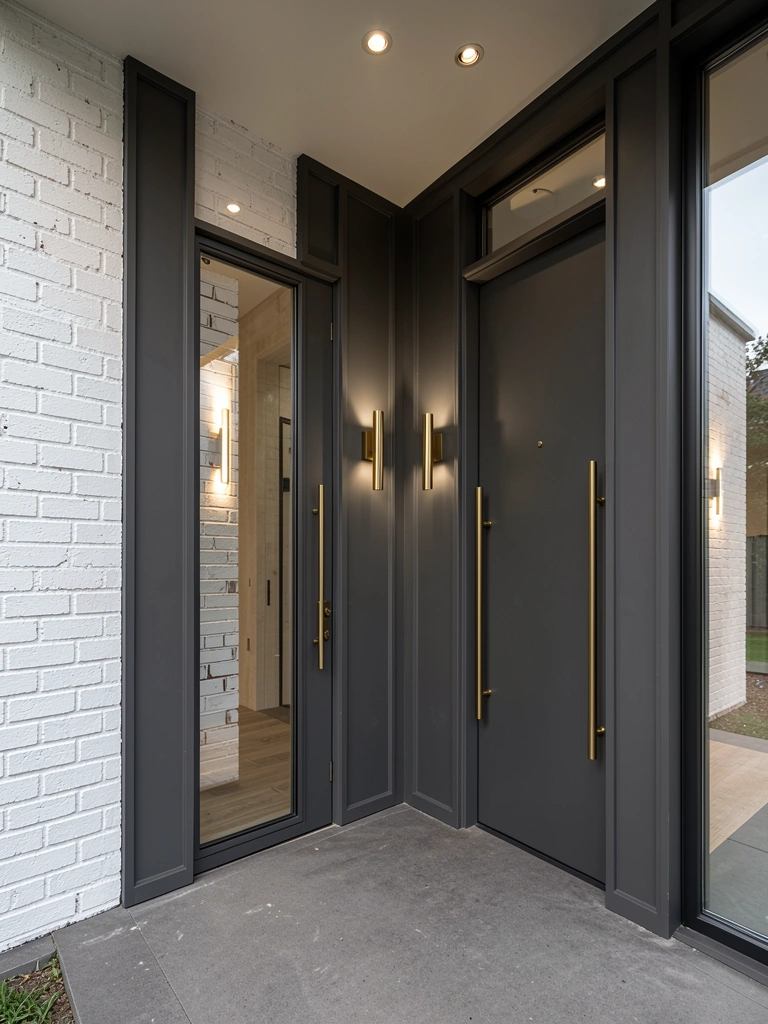
    5. Deep Charcoal + Burnt Orange Accents for Modern Contrast

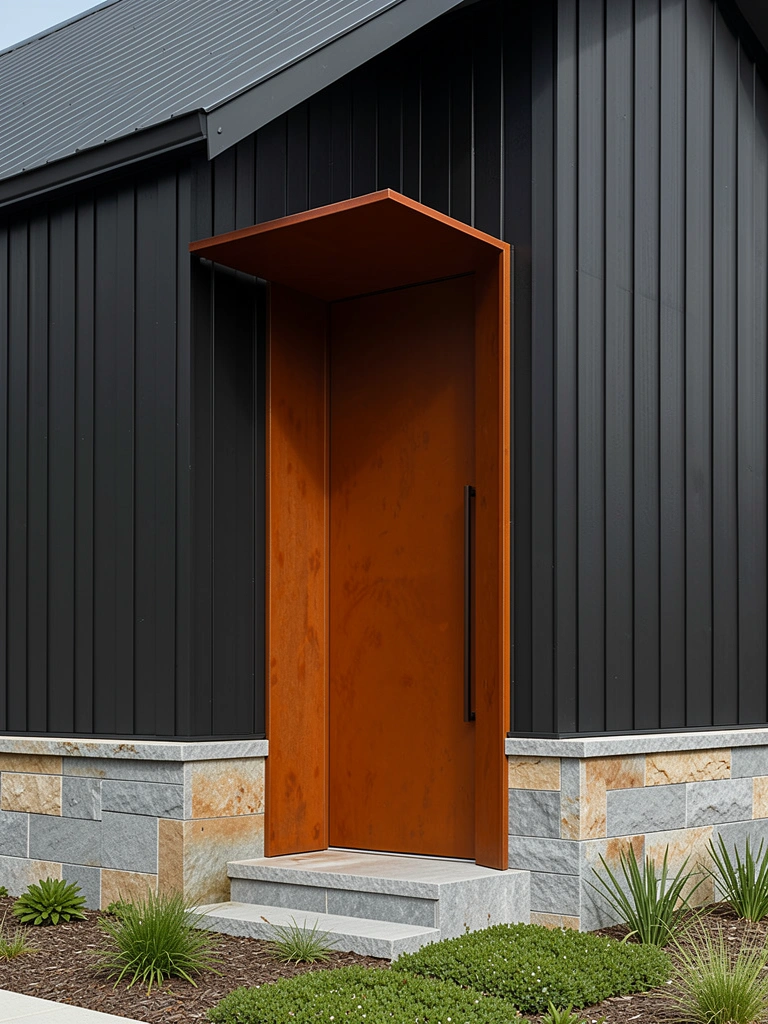
    Deep charcoal creates moody elegance while burnt orange pops as statement accents. This combo works for modern farmhouses and transitional homes that want personality without looking trendy.

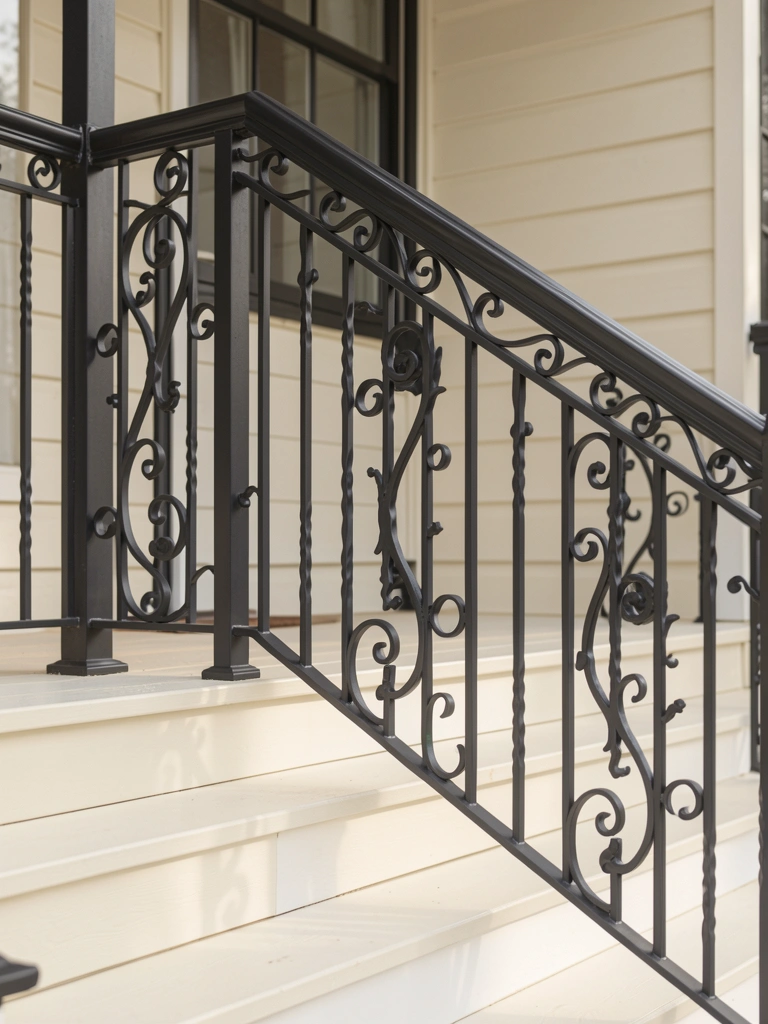
    Select charcoal paint like Sherwin-Williams’ “Iron Ore” ($40–$55 per gallon) for the main facade. Choose burnt orange like Benjamin Moore’s “Caliente” for the door frame, metal railings, or accent wall ($40–$55). Paint coverage takes a weekend; professional application runs $2,000–$3,500. The bold combo demands clean landscaping to stay balanced—think native grasses and minimal plantings. This palette appeals to homeowners who want their property to stand out.

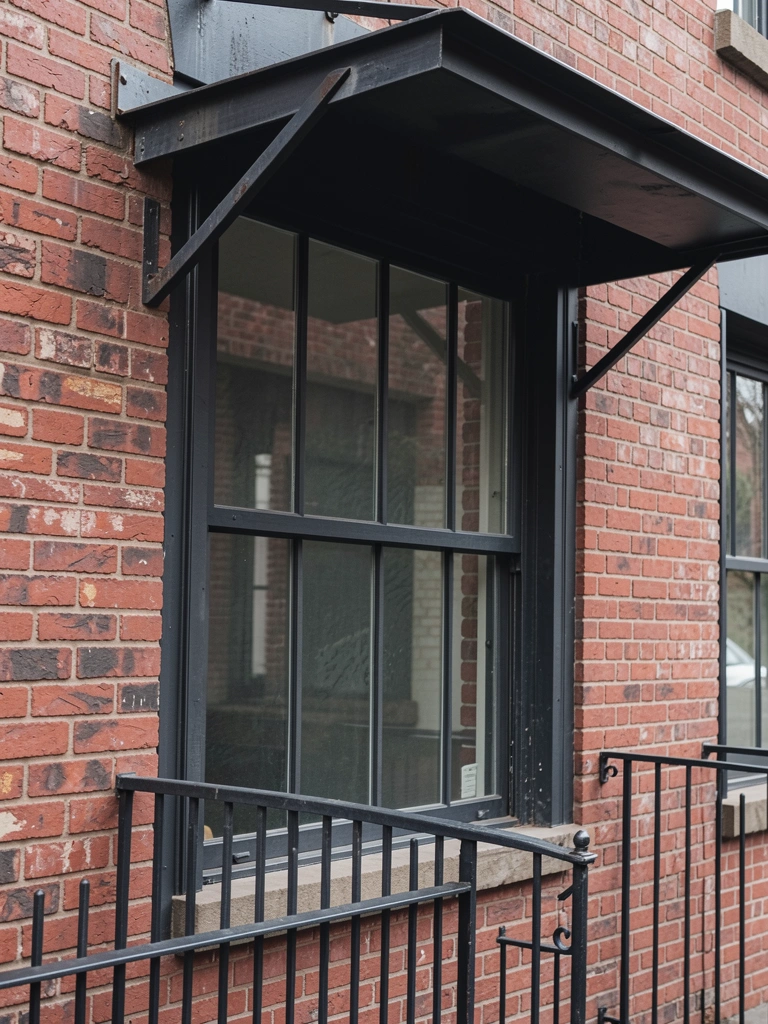
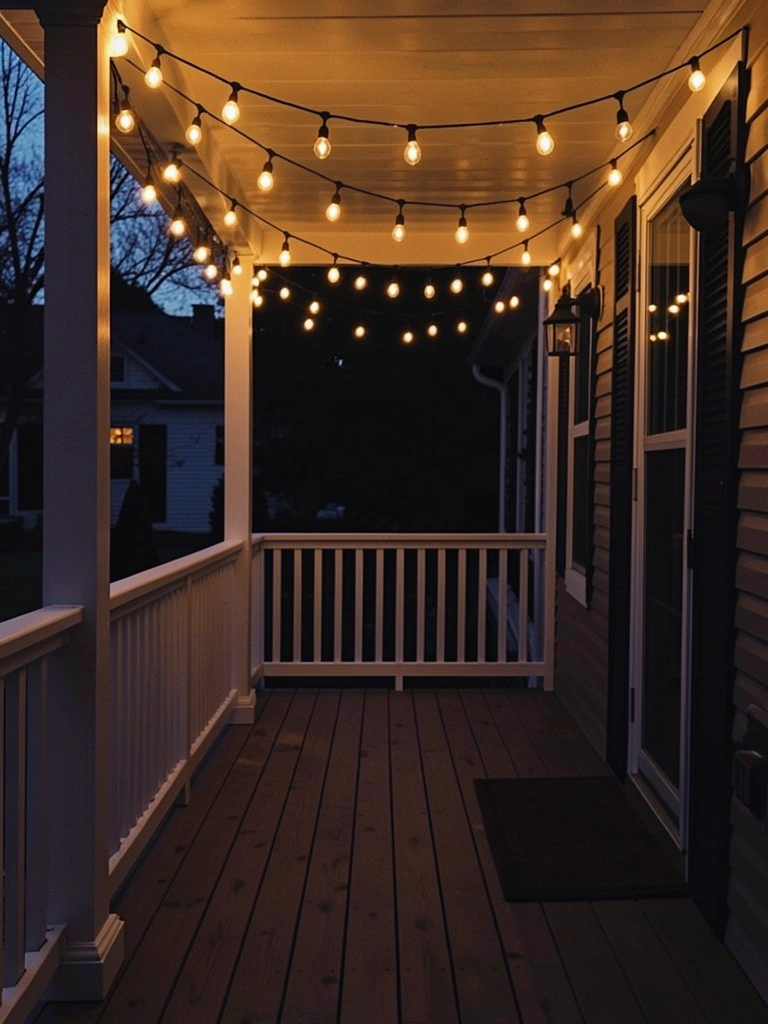
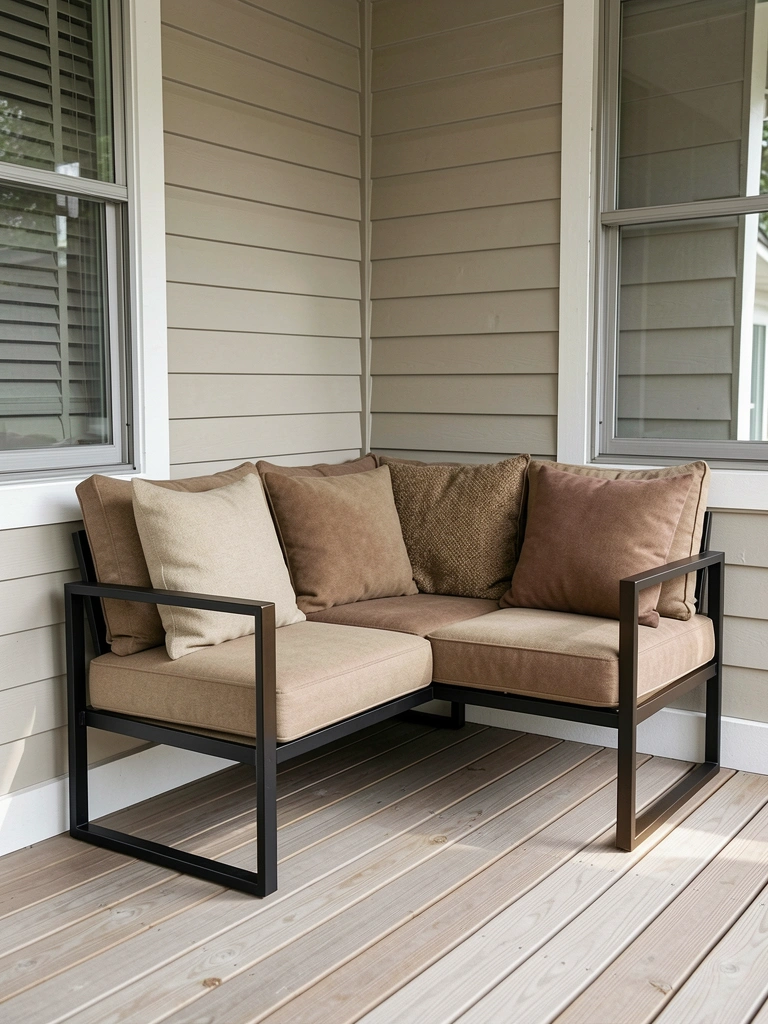
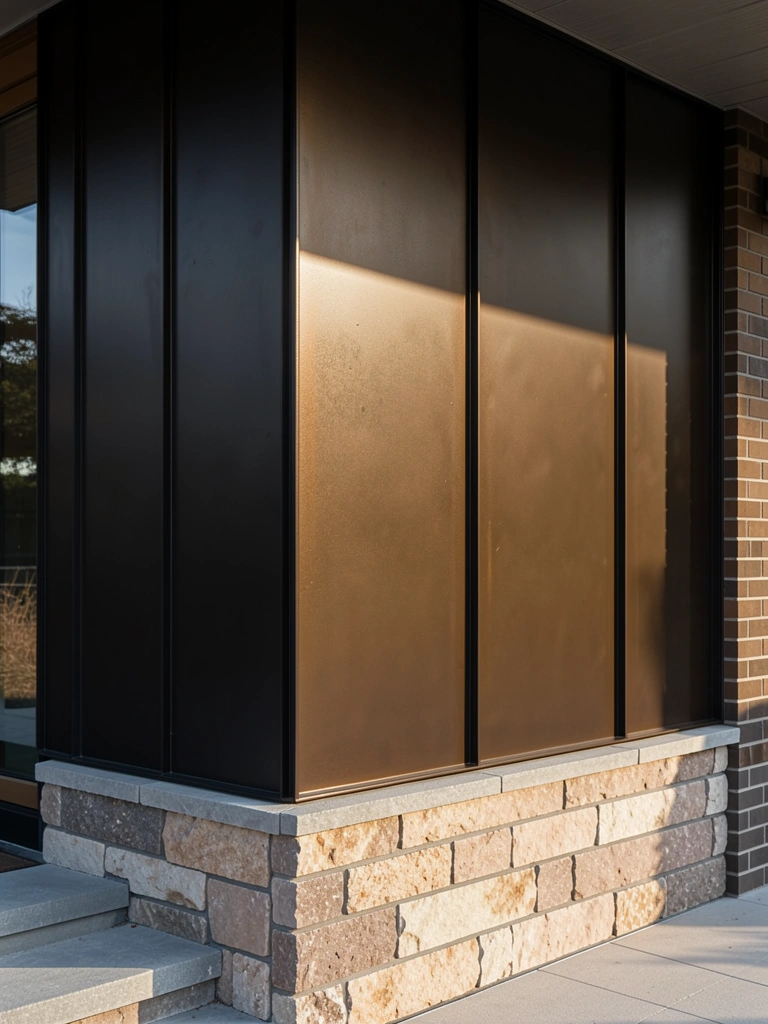
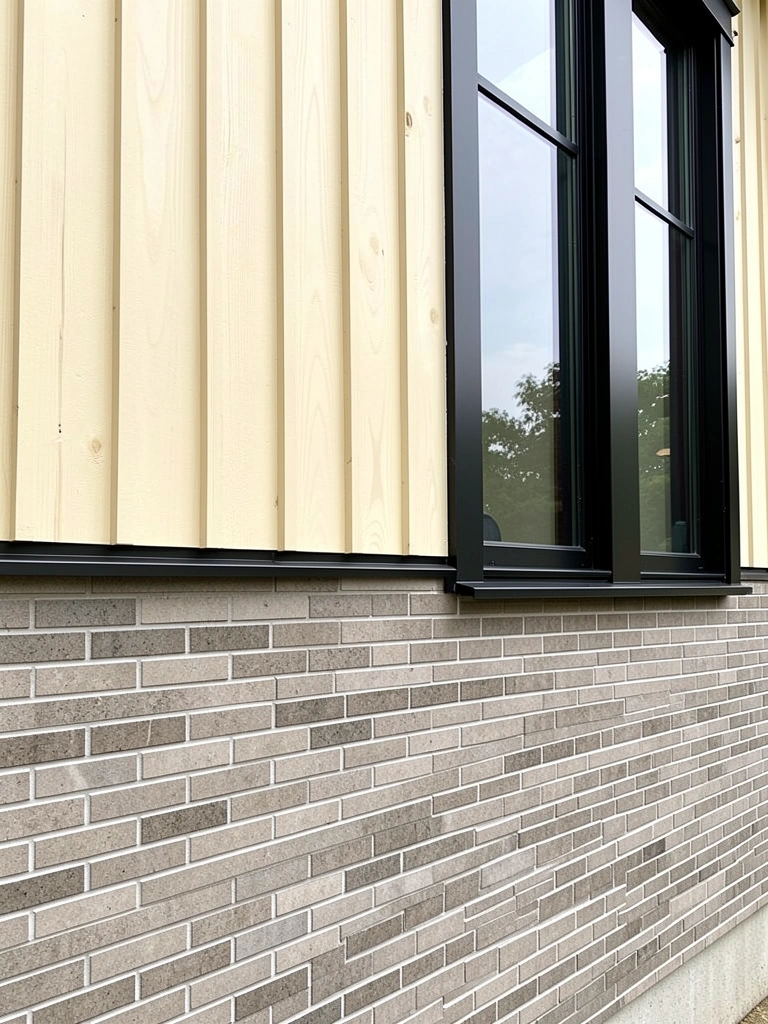
    6. Warm Gray + Black Metal Frames for Industrial-Chic

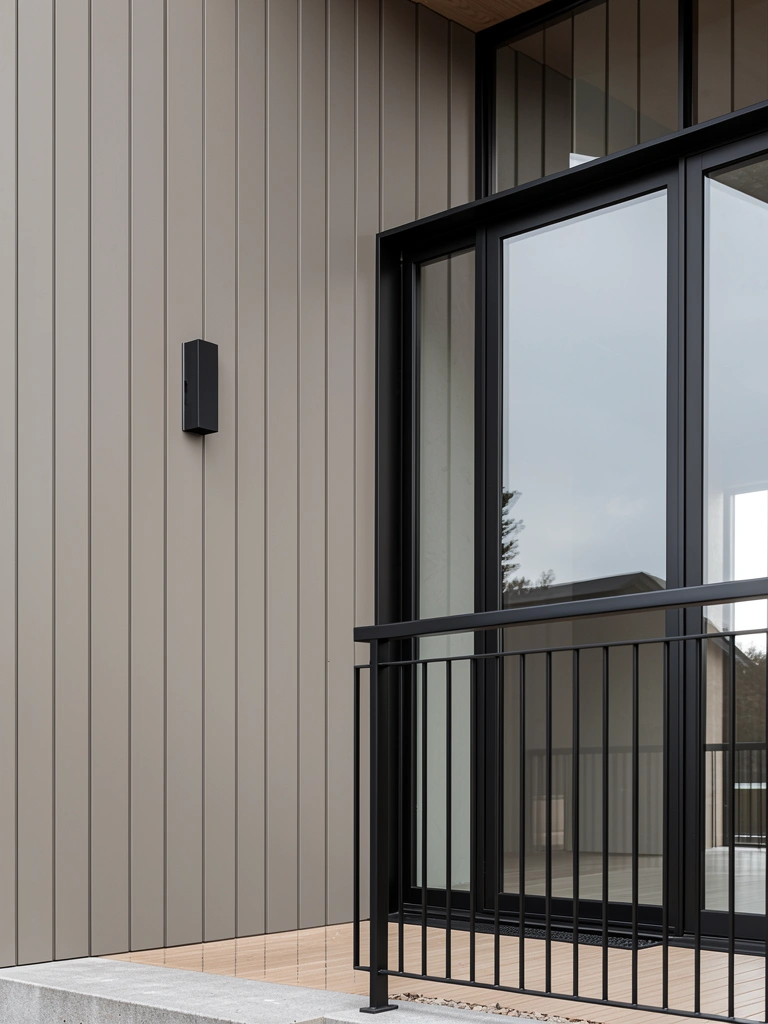
    Warm gray feels modern without being cold, and matte black metal frames add industrial edge without harshness. This pairing works for urban and suburban homes seeking contemporary appeal.

    Paint walls in Sherwin-Williams’ “Urbane Bronze” or Farrow & Ball’s “Down Pipe” ($40–$80 per gallon depending on brand). Add matte black frames using MAC Metals or powder-coated steel ($500–$2,000 for window/door frames depending on number). The result is sophisticated and photographs beautifully—especially if you pair it with minimalist landscaping. Budget 1–2 weeks for frame installation plus paint application. Renter tip: This palette works with temporary metal frame accents if your landlord approves.

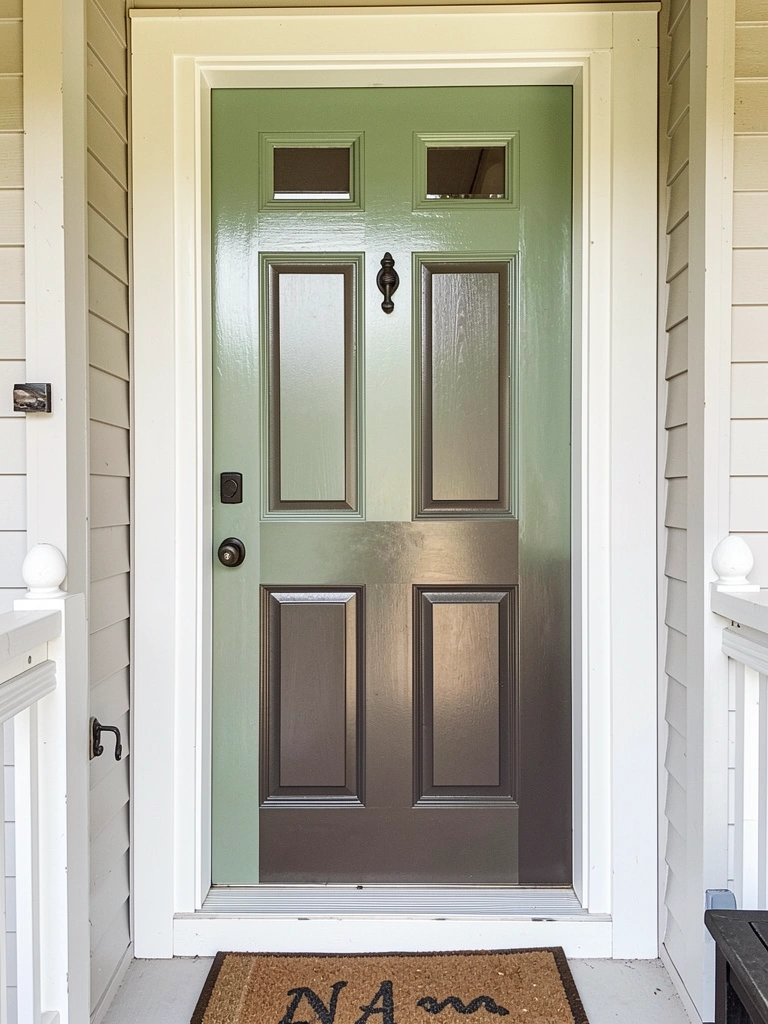
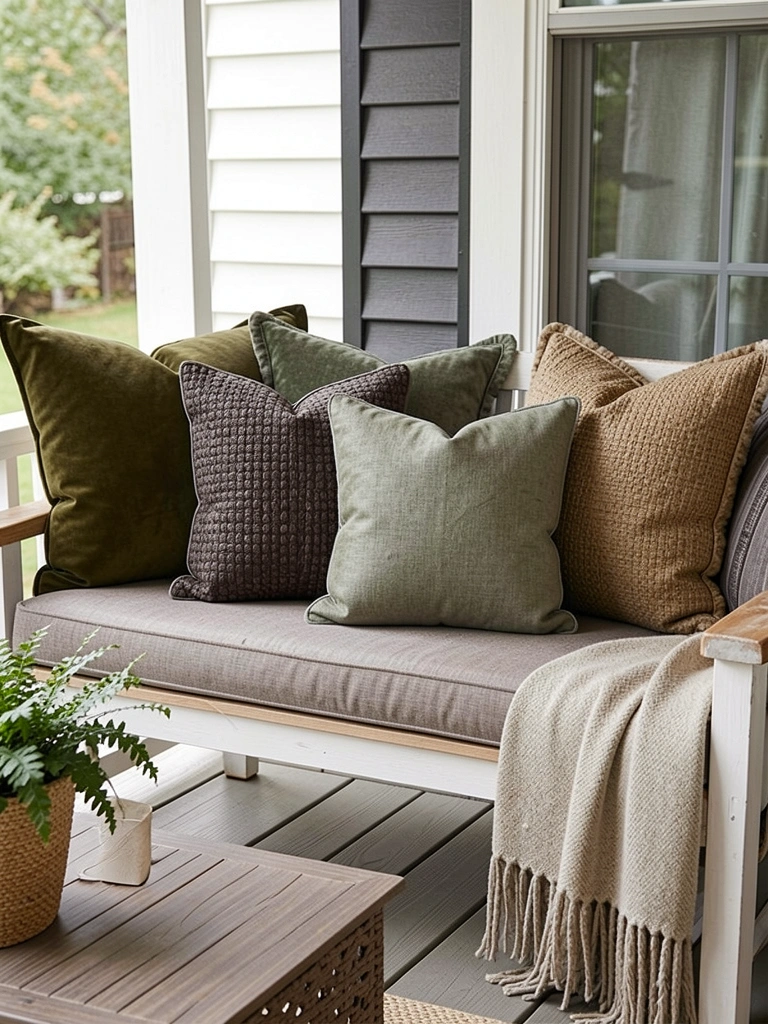
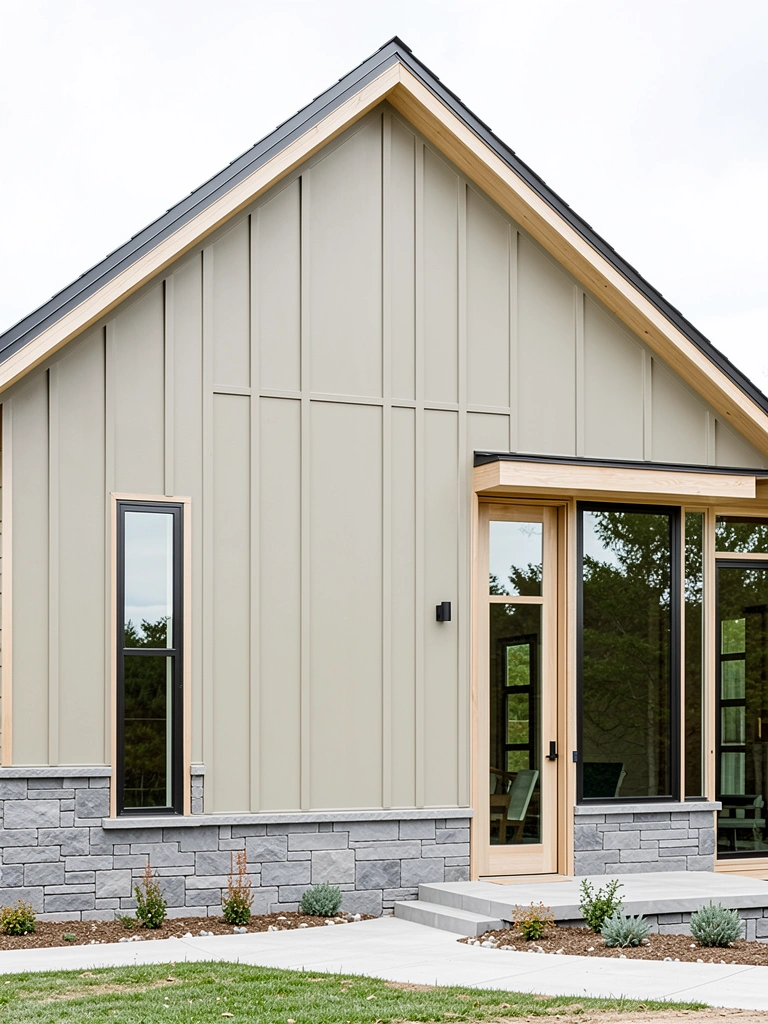
    7. Soft Taupe + Sage Green for Organic Warmth

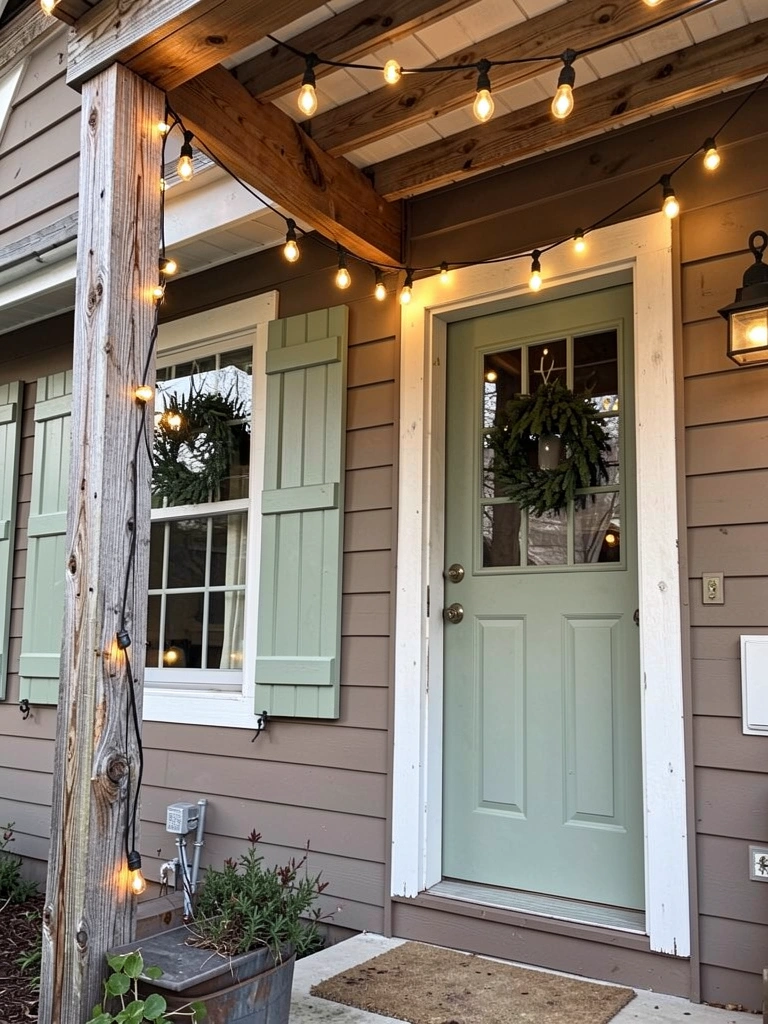
    Taupe and sage are nature-inspired siblings that create a cohesive, calming exterior. This palette suits farmhouse, cottage, and transitional styles beautifully.

    Paint main walls in Benjamin Moore’s “Balanced Beige” or Sherwin-Williams’ “Accessible Beige” ($35–$50 per gallon). Add sage green accents—shutters, door, trim—using Farrow & Ball’s “Sage Green” or Benjamin Moore’s “Healing Aloe” ($40–$80). DIY painting takes 4–5 days; professional work runs $1,800–$3,000. Pair with natural wood porch railings and weathered-metal light fixtures to amplify the organic feel. This combo appeals to buyers looking for warmth and approachability.

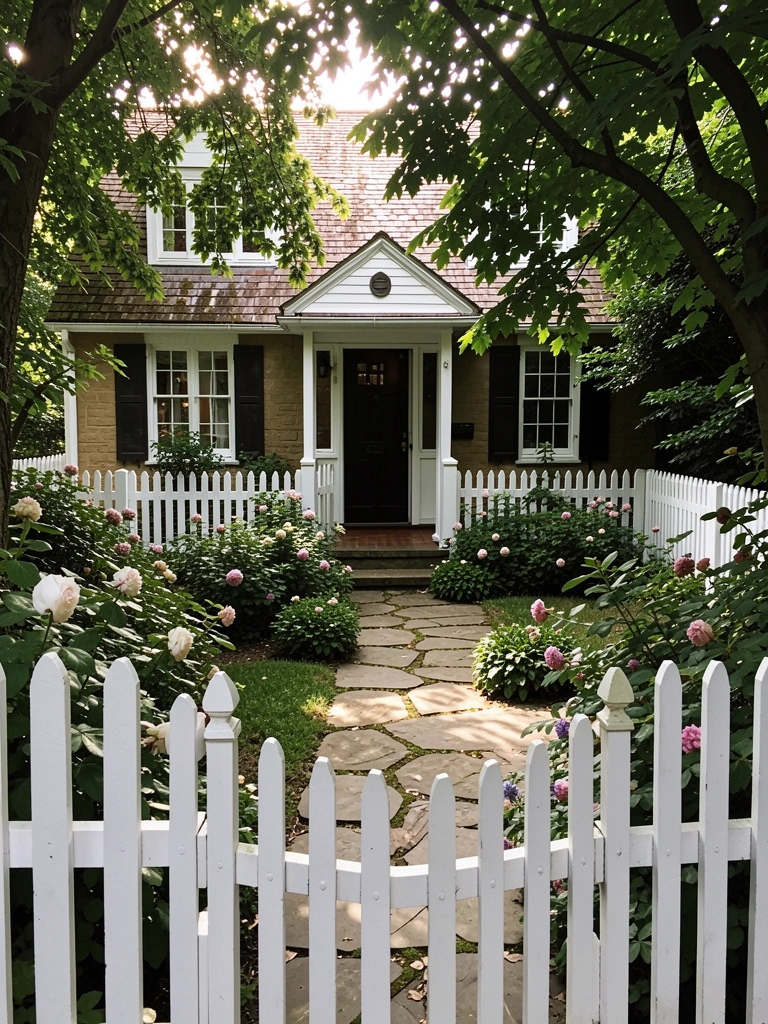
    8. Snow White + Heavenly Red for Optimistic Charm

    Classic red-and-white is timeless for good reason—it radiates optimism, charm, and American heritage. This combo works for cottages, farmhouses, and traditional colonials.

    Choose bright white like Sherwin-Williams’ “Pure White” or Benjamin Moore’s “Simply White” ($35–$50 per gallon). Select a true red like Sherwin-Williams’ “Red Bay” or Benjamin Moore’s “Caliente” for the door and shutters ($40–$55). Paint application takes 3–4 days DIY or $1,500–$2,500 with professionals. The high contrast demands sharp, well-maintained trim—so budget for caulking and detail prep. Homeowners report this palette increases curb appeal noticeably and feels welcoming to guests.

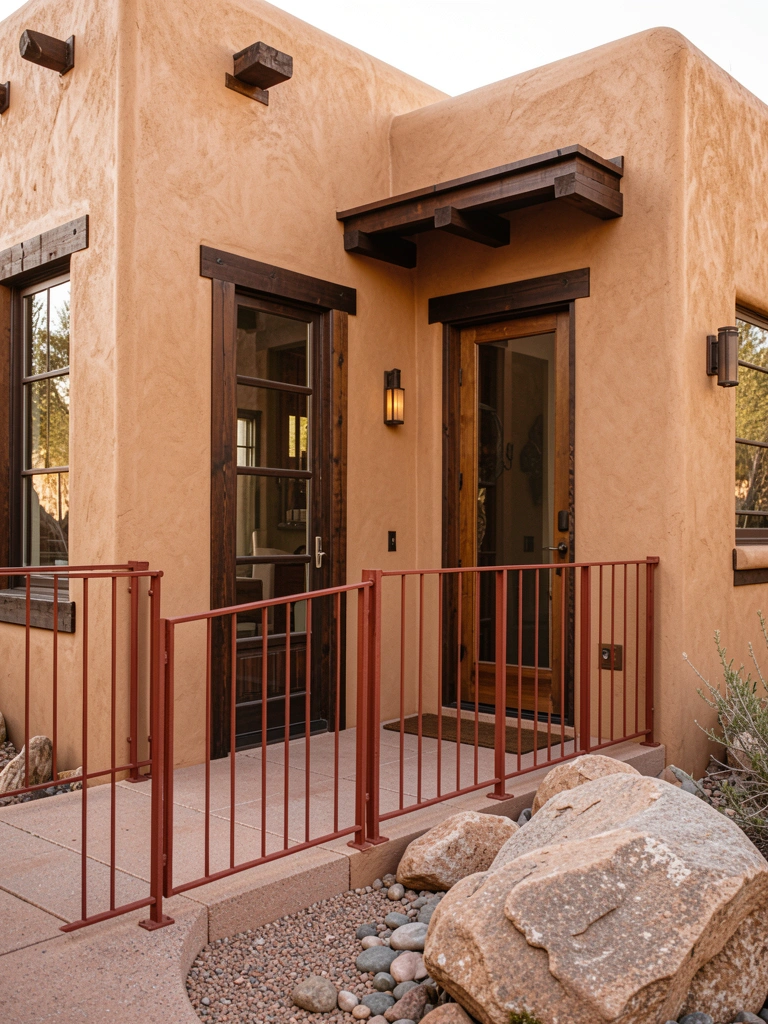
    9. Soft Brown + Warm White for Desert Southwest Appeal

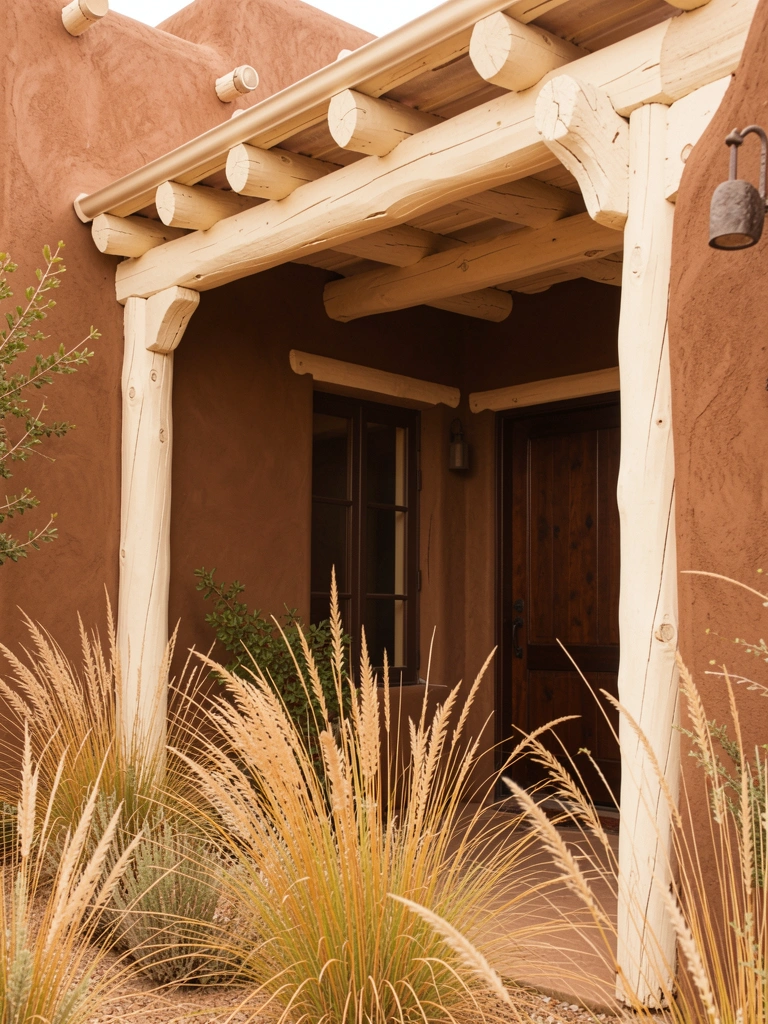
    Warm brown mimics natural adobe and clay, creating authenticity without literal adobe maintenance. Warm white trim keeps it bright and prevents it from feeling too heavy.

    Paint walls in Sherwin-Williams’ “Urbane Bronze” mixed with a warm undertone, or Benjamin Moore’s “Balboa Brown” ($40–$55 per gallon). Use warm white like Sherwin-Williams’ “Alabaster” for trim and doors ($35–$45). If you have stucco, professional painting costs $2,500–$4,000. This palette pairs beautifully with Saltillo tile accents, wrought iron hardware, and drought-resistant plants. The result feels grounded and connected to landscape.

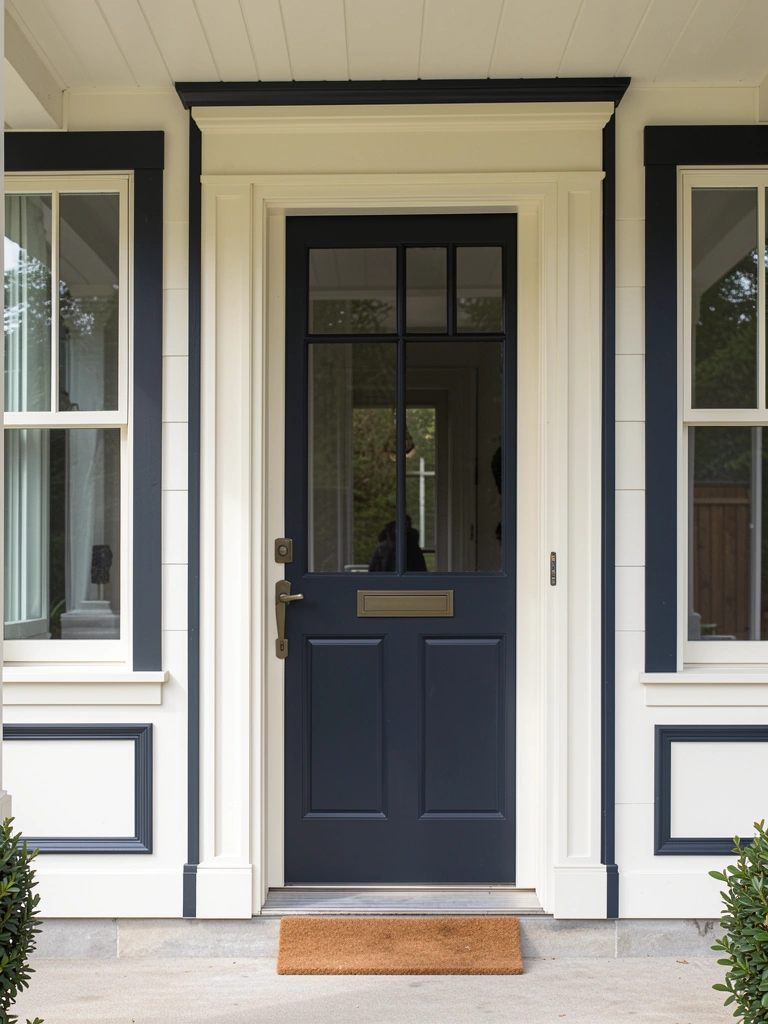
    10. Navy Blue + Crisp White + Brass Accents for Nautical Elegance

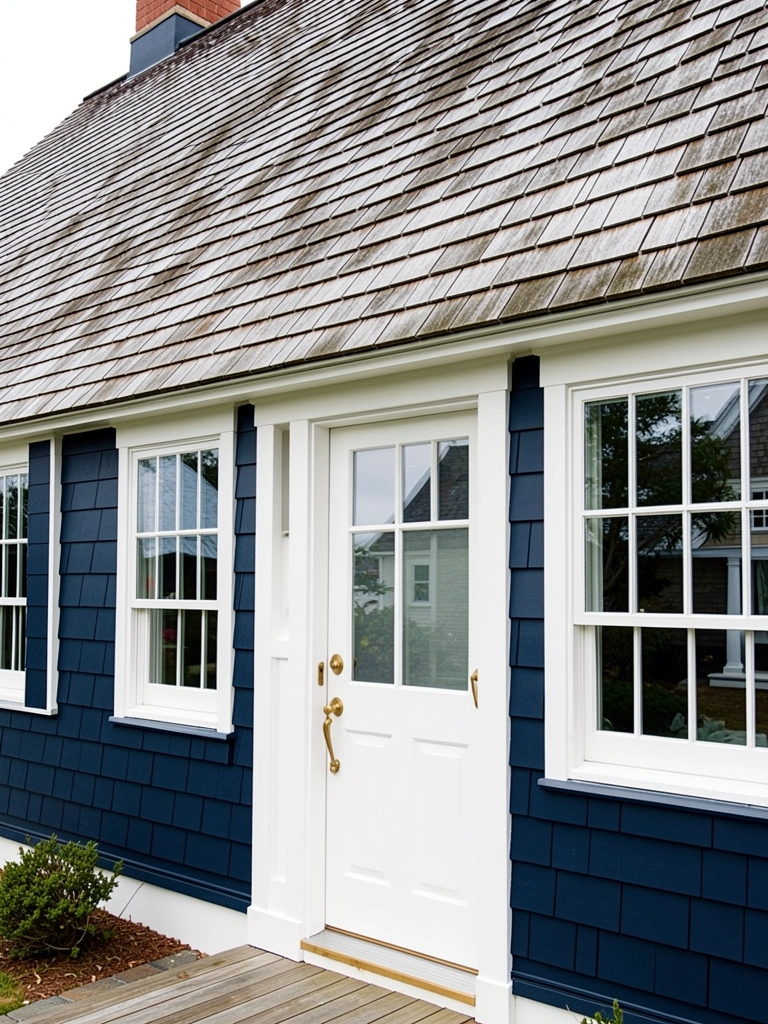
    Navy and white is nautical without being kitschy—especially when brass hardware adds refinement. This palette works for coastal, cottage, and traditional homes seeking seaside sophistication.

    Paint main walls in Sherwin-Williams’ “Naval” or Benjamin Moore’s “Hale Navy” ($40–$55 per gallon). Use bright white like Sherwin-Williams’ “Pure White” for trim, shutters, and doors ($35–$50). Add brass hinges, knockers, and light fixtures ($50–$300 depending on quantity and quality). DIY painting takes 5–6 days; professional application runs $2,000–$3,500. Pair with natural fiber doormats, potted topiaries, and weathered planters to complete the look.

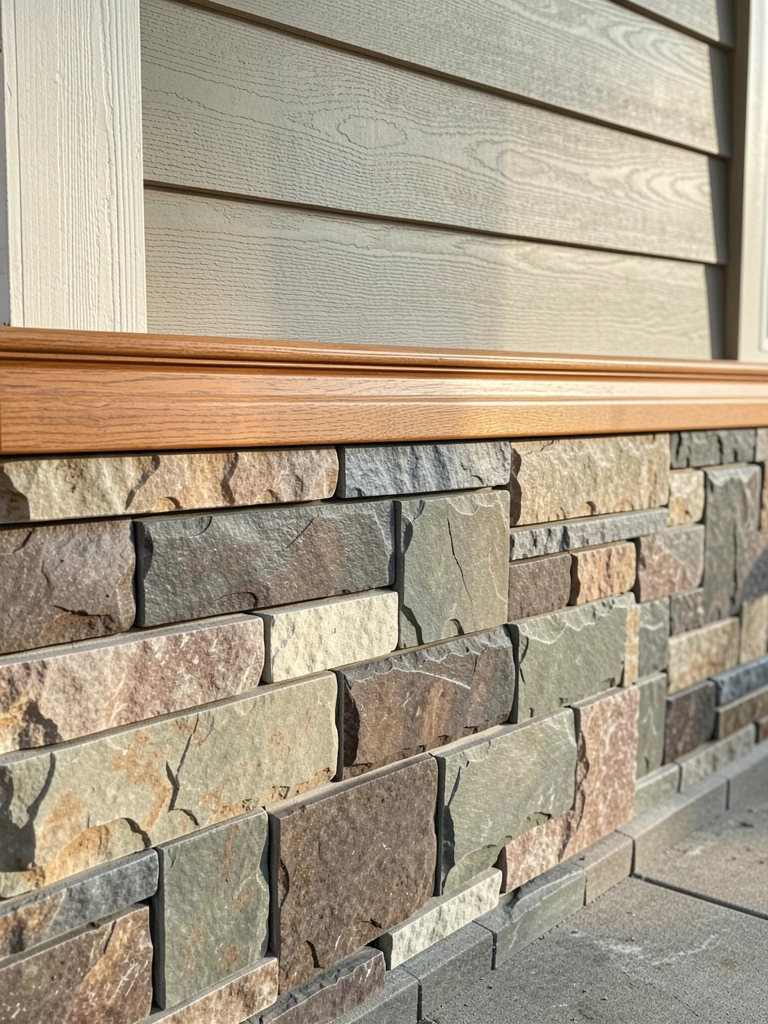
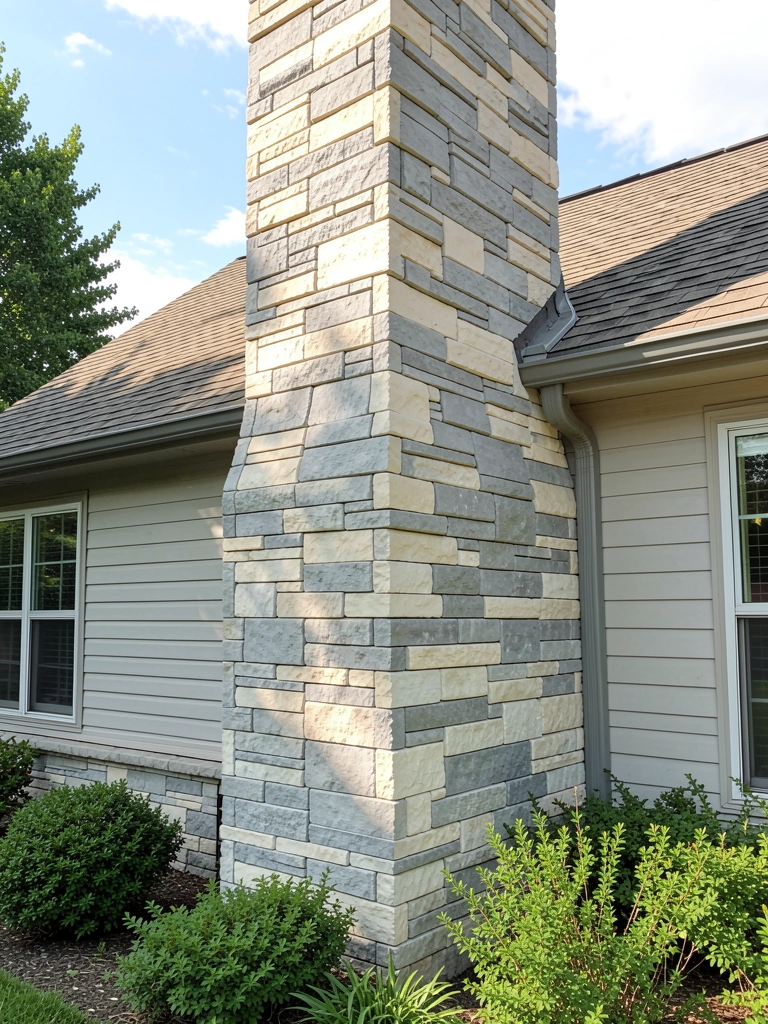
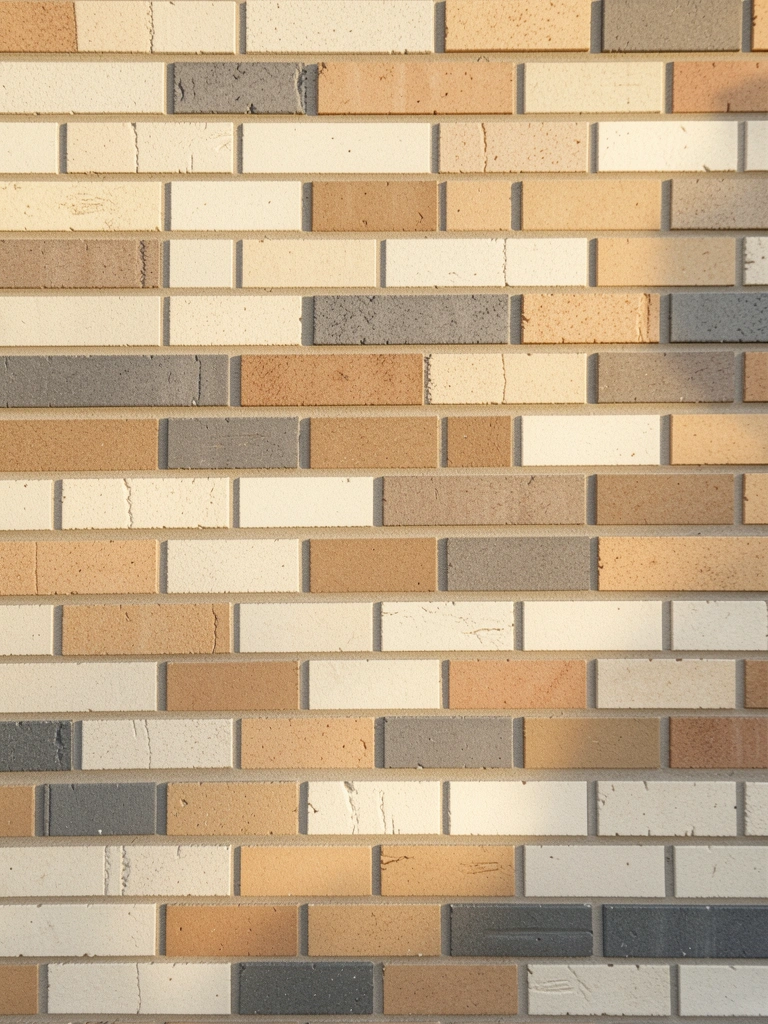
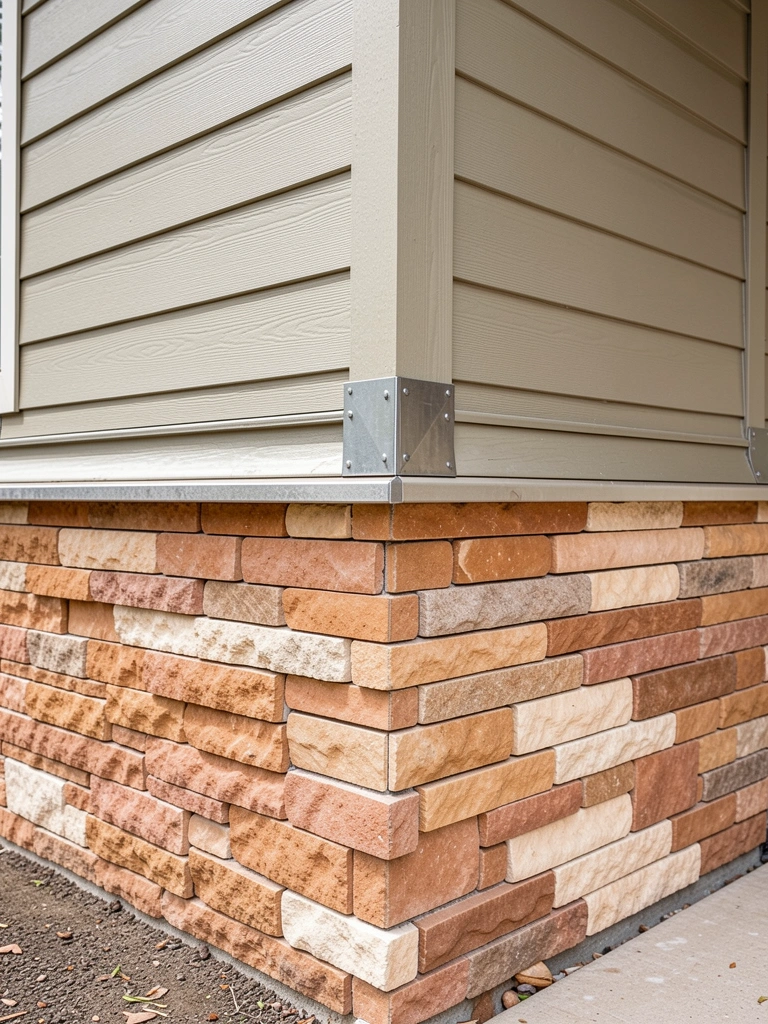
    11. Warm Greige + Stone Base for Transitional Balance

    Greige—that perfect gray-beige hybrid—bridges warm and cool tones, making it endlessly versatile. A stone base grounds it and adds texture without additional color.

    Paint walls in Sherwin-Williams’ “Accessible Beige” mixed with gray, or Benjamin Moore’s “Balanced Beige” ($35–$50 per gallon). If adding or refreshing stone, expect $1,500–$3,000 for professional installation. Paint application alone takes 3–4 days DIY or $1,200–$2,000 professionally. This neutral serves as a perfect canvas for bold door colors or metal accents. Homeowners love greige because it adapts to changing decor trends.

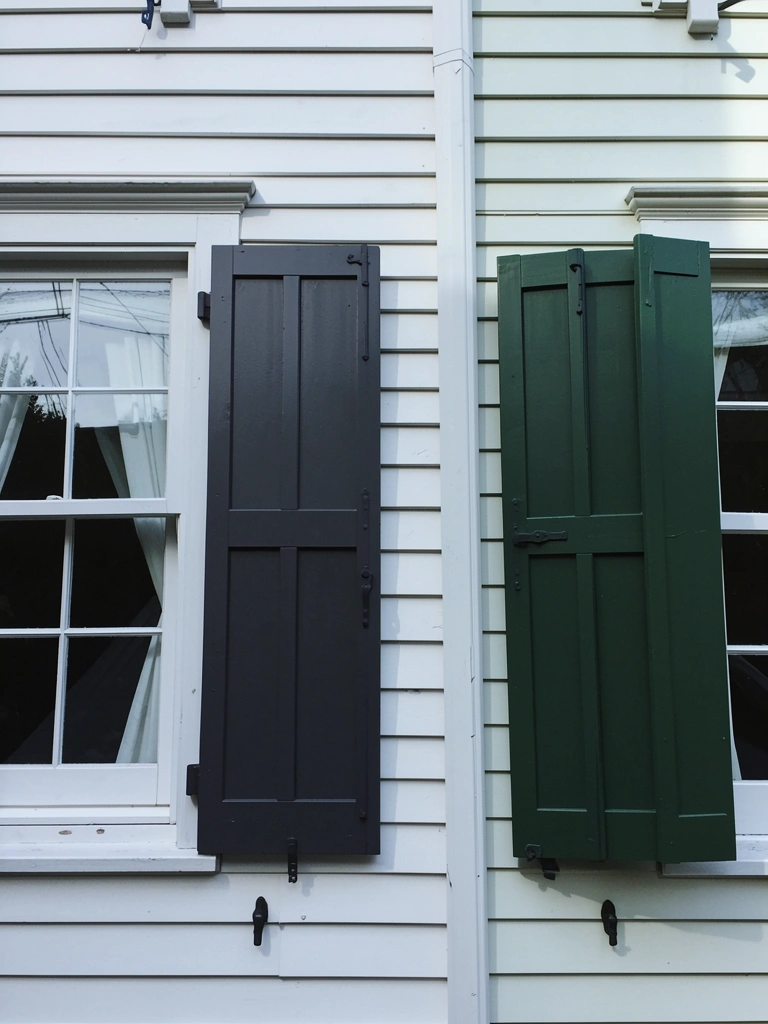
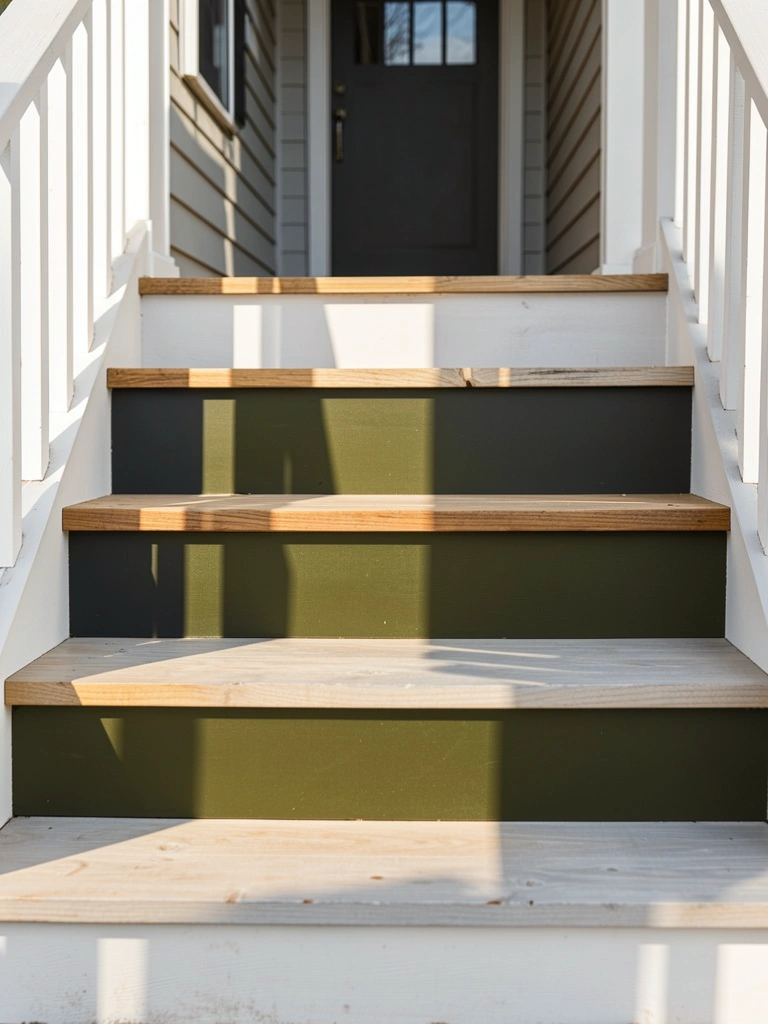
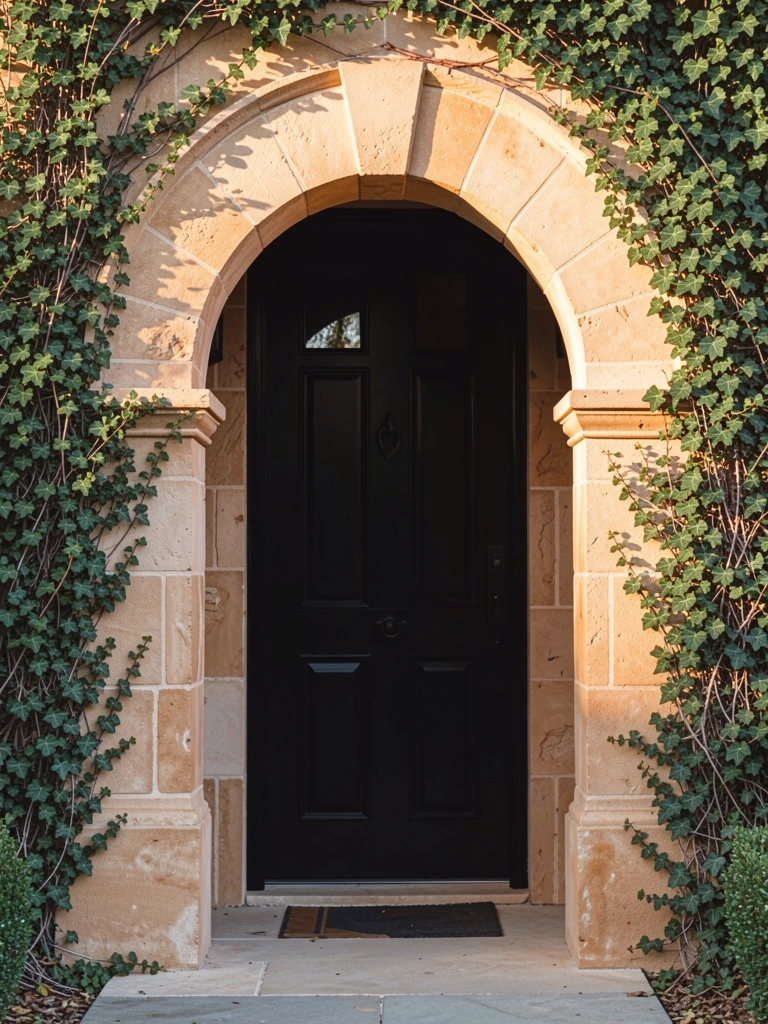
    12. Deep Olive + Black Door + Brass Light Fixtures for Moody Elegance

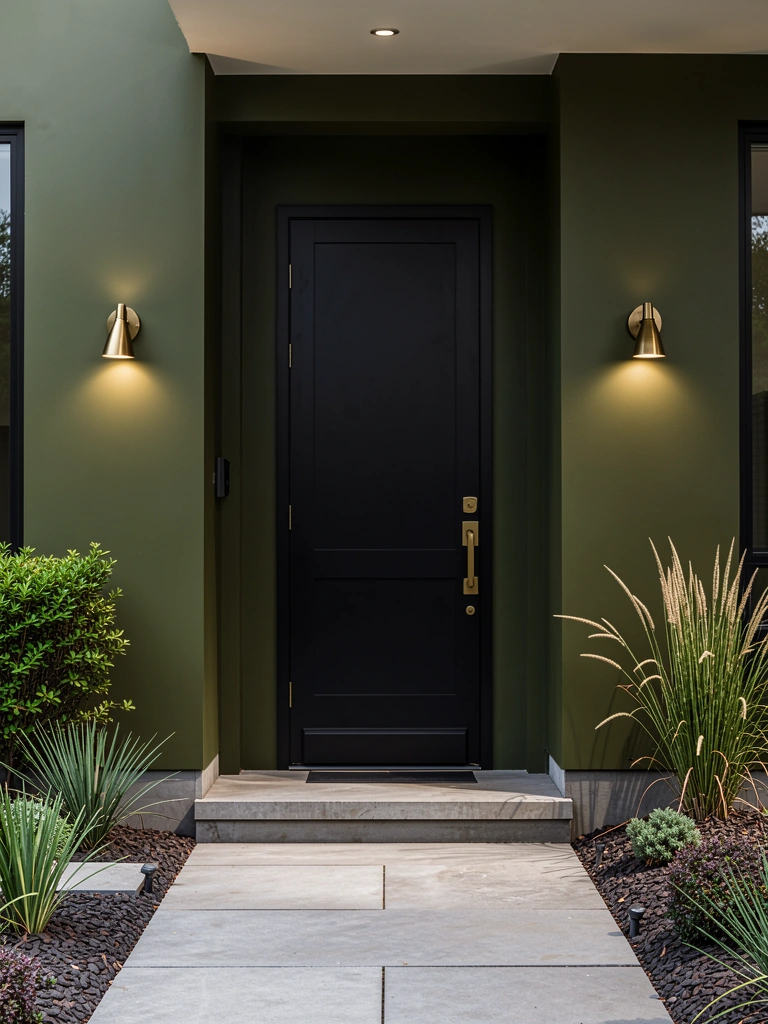
    Deep olive is the sophisticated alternative to basic gray—moody, grounded, and perfectly on-trend. Black door and brass accents elevate it to gallery-worthy status.

    Select deep olive like Sherwin-Williams’ “Evergreen Fog” or Farrow & Ball’s “Olive” ($40–$80 per gallon). Paint the door in matte black using Sherwin-Williams’ “Iron Ore” ($40–$50). Add brass light fixtures ($80–$300 per fixture). Total paint time is 4–5 days DIY or $1,800–$2,800 professionally. Pro tip: This palette demands crisp landscaping—think ferns, hostas, and clean mulch lines to prevent the exterior from feeling too dark. The result feels collected and intentional.

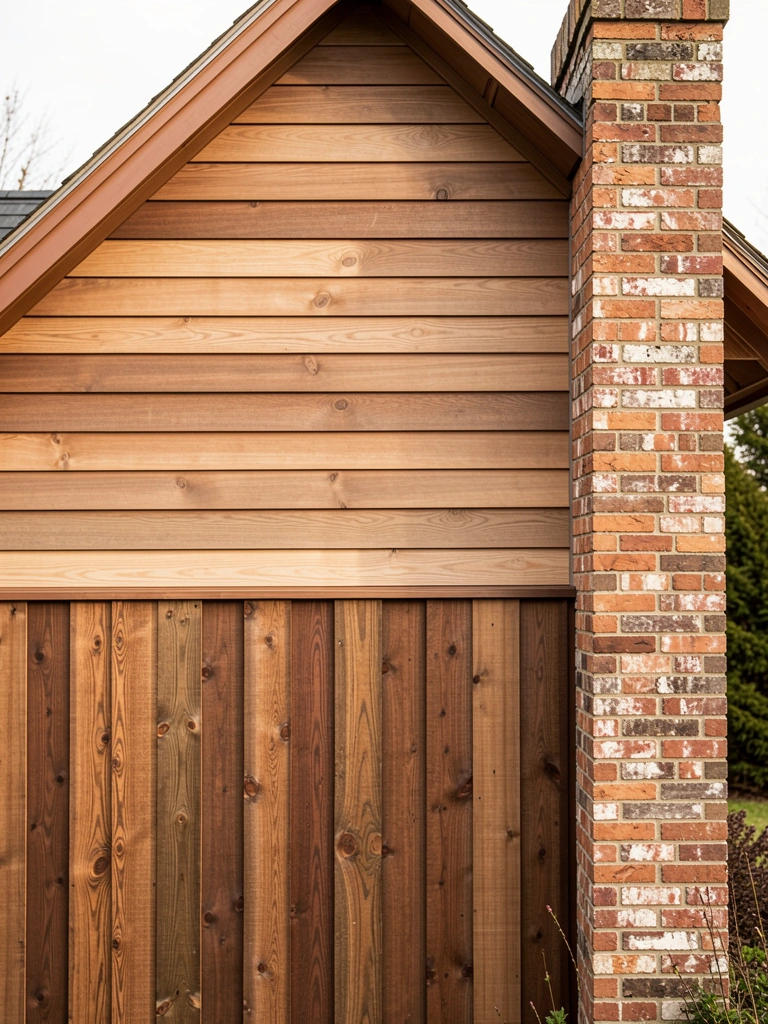
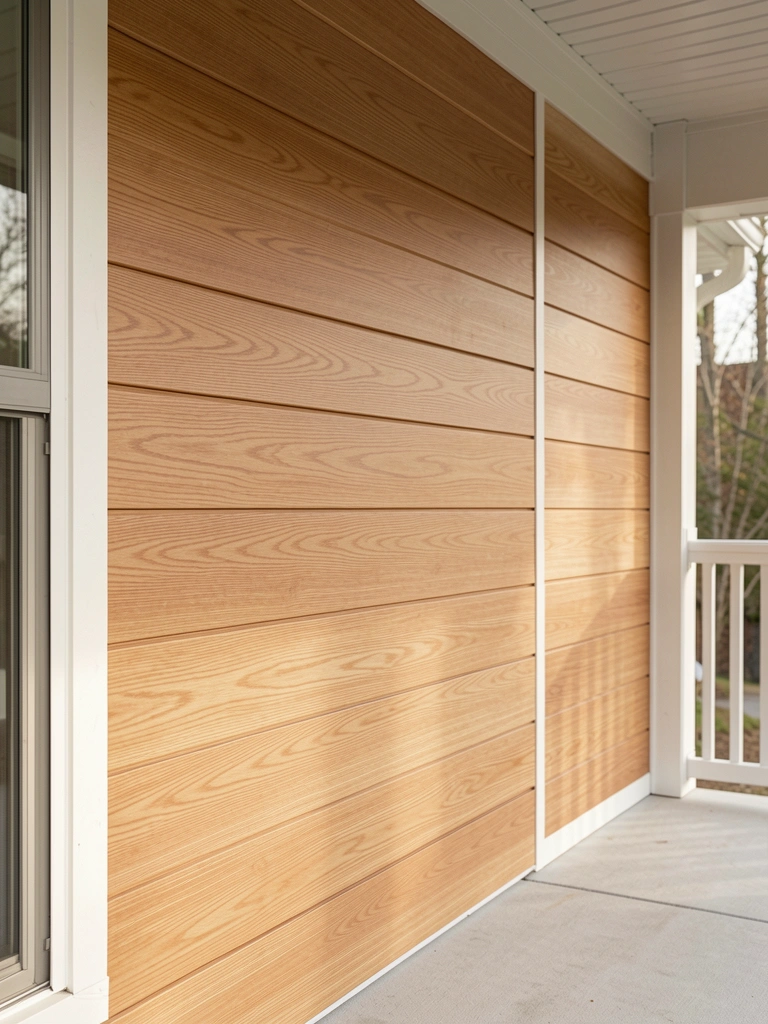
    13. Weathered Cedar + Soft Gray for Pacific Northwest Vibes

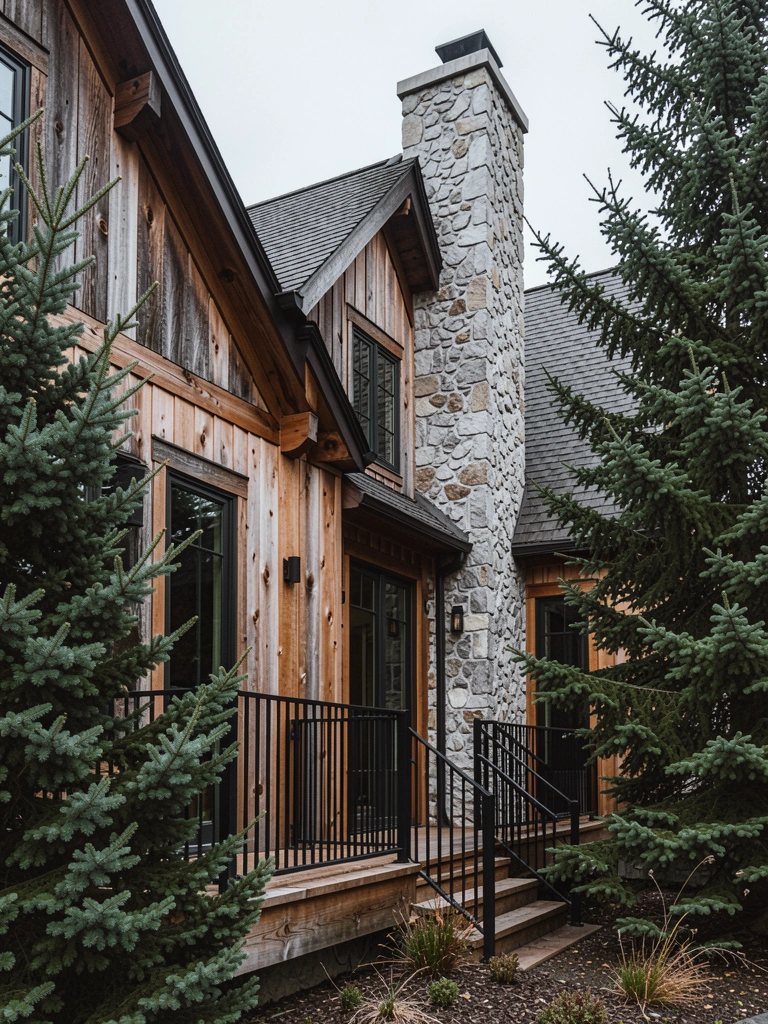
    Natural weathered cedar ages beautifully and requires no paint—just sealing every 2–3 years. Soft gray accents prevent it from feeling too rustic.

    Choose cedar siding ($6–$12 per square foot installed) and seal with a clear or slightly gray-tinted stain like Olympic Elite or Cabot ($30–$50 per gallon). Paint trim in soft gray like Benjamin Moore’s “Stonington Gray” ($40–$55). Annual maintenance involves resealing ($500–$1,200 annually). The upfront cost is higher, but the longevity is unmatched. Homeowners report cedar requires less paint maintenance than traditional siding—a bonus for anyone avoiding frequent repainting.

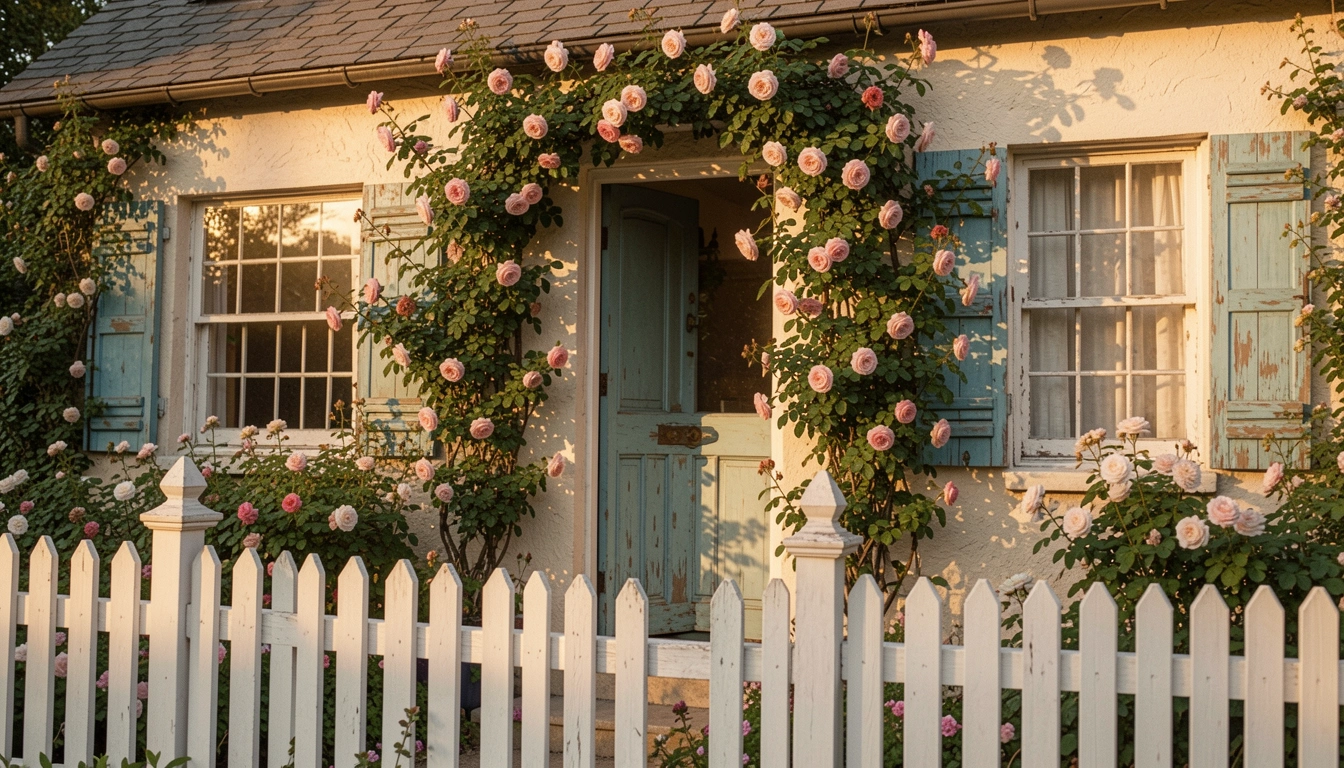
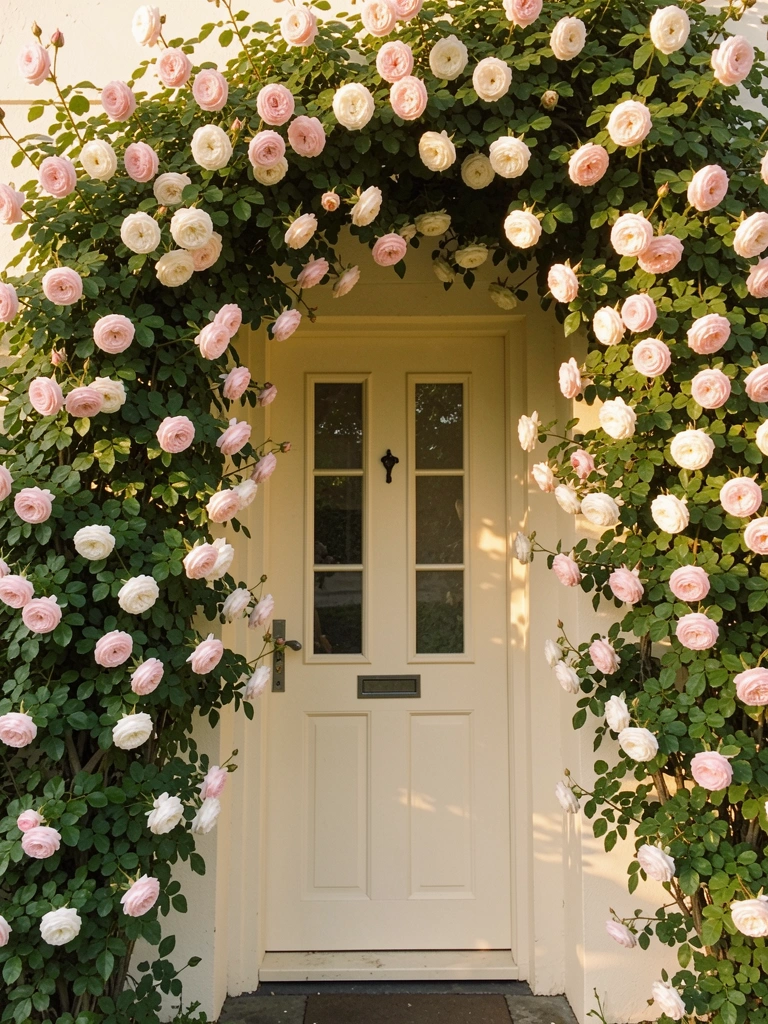
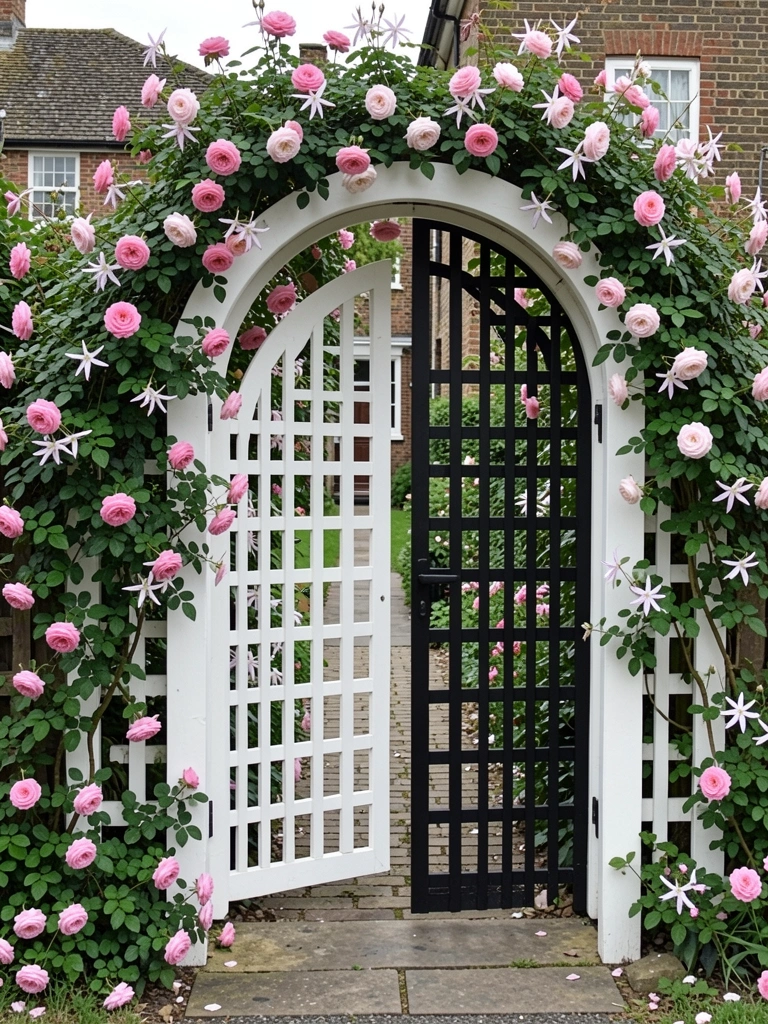
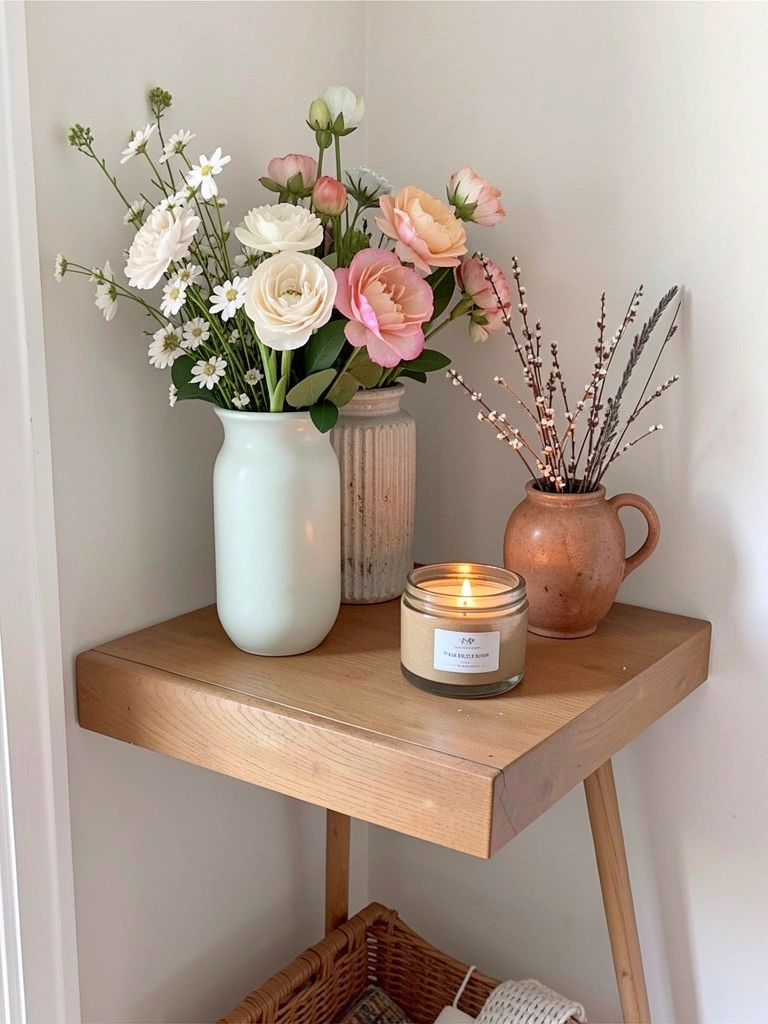
    14. Blush Pink + Sage Green + White Trim for Romantic Cottage

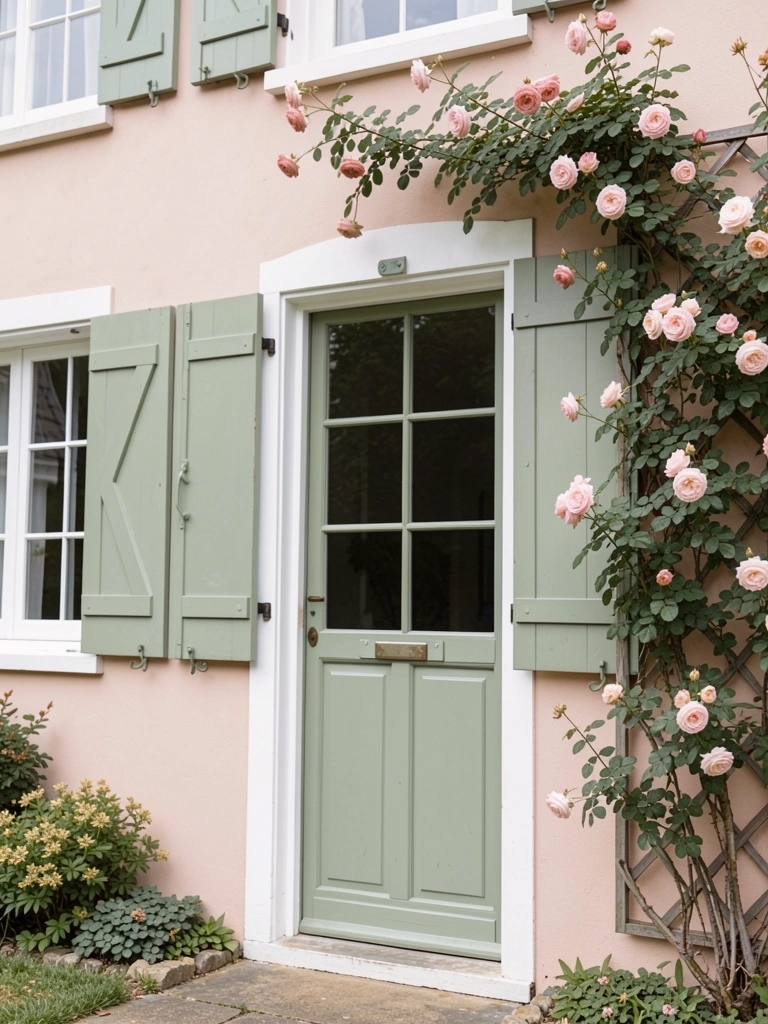
    Blush pink and sage create a dreamy, romantic aesthetic perfect for cottage-style and romantic farmhouse aesthetics. The combo feels personal without being overly trendy.

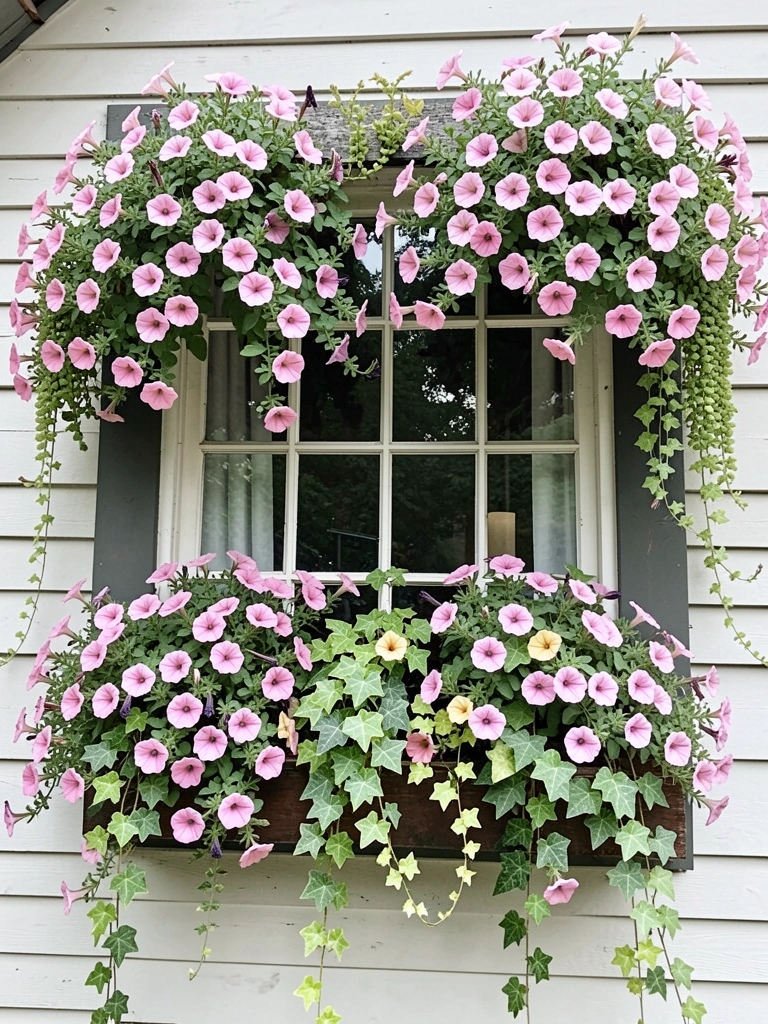
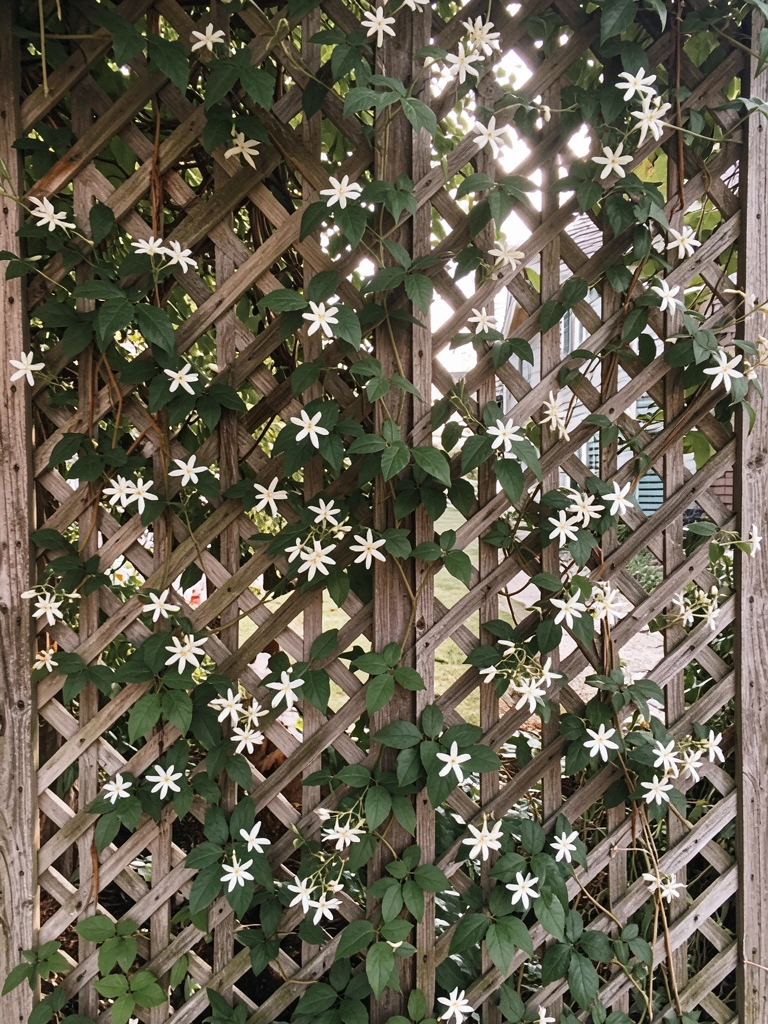
    Paint main walls in Benjamin Moore’s “Pale Oak” with pink undertones, or Sherwin-Williams’ “Pink Damask” ($40–$55 per gallon). Choose sage for shutters and door using Farrow & Ball’s “Sage Green” ($60–$80). Use white trim like Sherwin-Williams’ “Alabaster” ($35–$45). Painting takes 4–5 days DIY or $1,500–$2,500 professionally. Add climbing roses, flower boxes, and vintage hardware to amplify the romantic aesthetic. This palette appeals to homeowners seeking personality and charm.

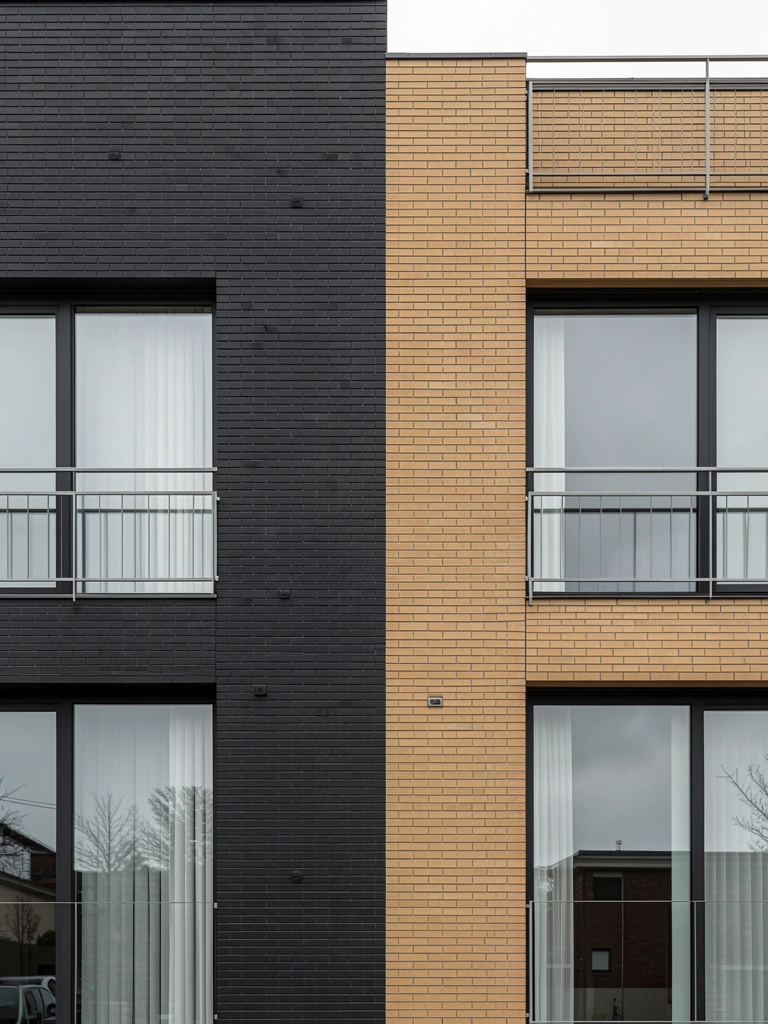
    15. Charcoal Gray + Gold Accents + White Brick for Glamorous Modern

    Charcoal and white create contrast while gold accents add luxury without fussiness. This sophisticated palette works for urban townhomes and contemporary estates.

    Paint main walls in Sherwin-Williams’ “Peppercorn” or Benjamin Moore’s “Kendall Charcoal” ($40–$55 per gallon). Install or expose white brick ($15–$30 per square foot for installation or cleaning). Add gold hardware and light fixtures ($150–$500+). Paint application takes 4–5 days DIY or $2,000–$3,500 professionally. This high-contrast palette requires clean landscaping and organized entryways to feel intentional rather than cluttered. Homeowners report it makes a bold architectural statement.

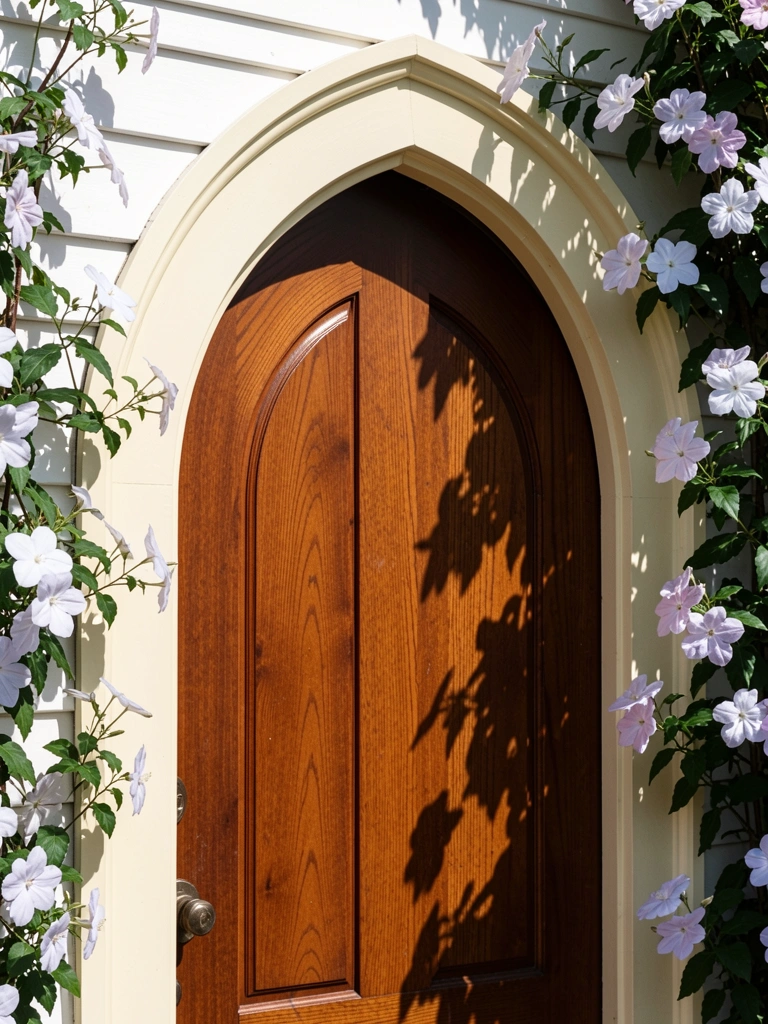
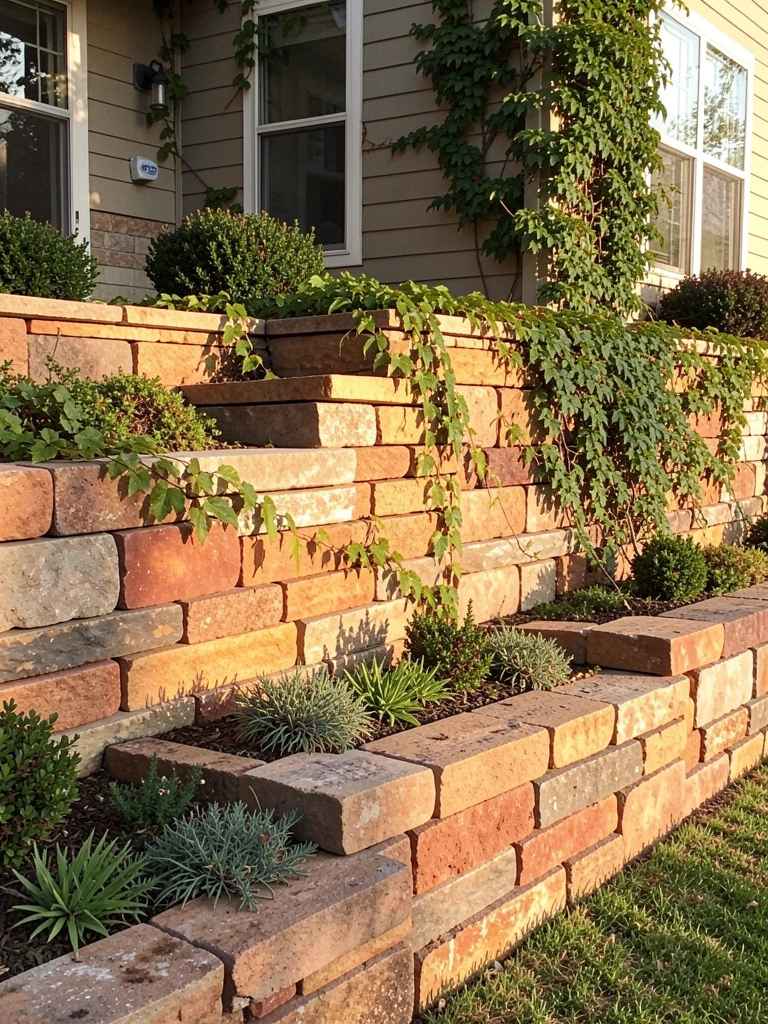
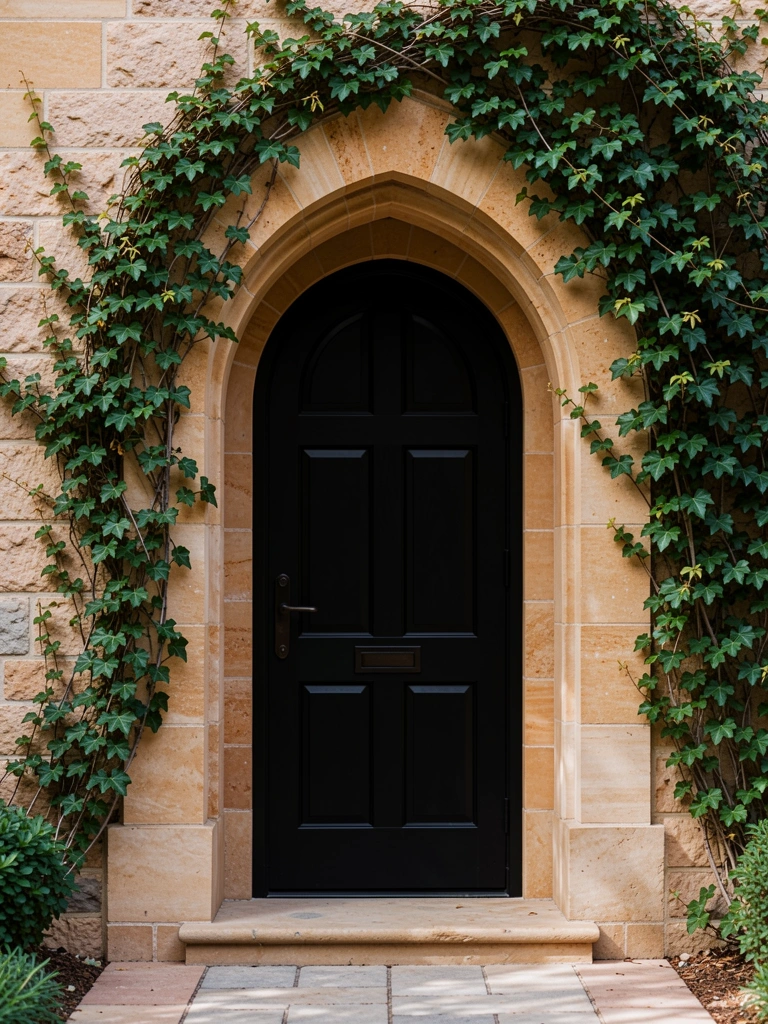
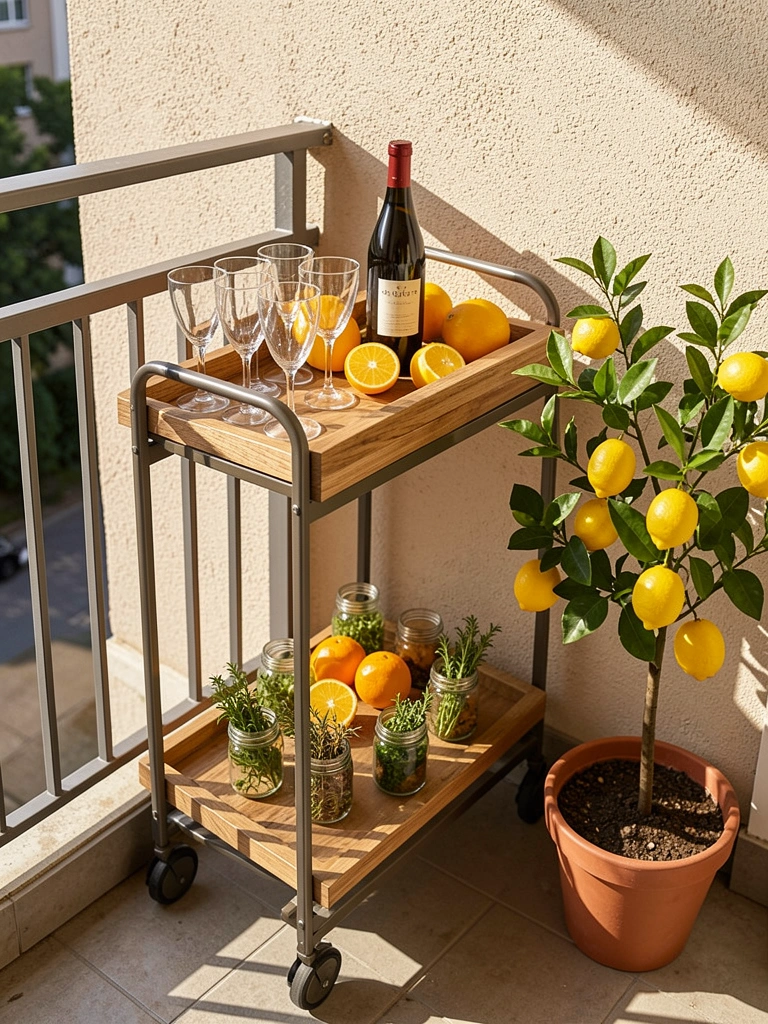
    16. Soft Cream + Terra Cotta + Natural Wood for Tuscan Warmth

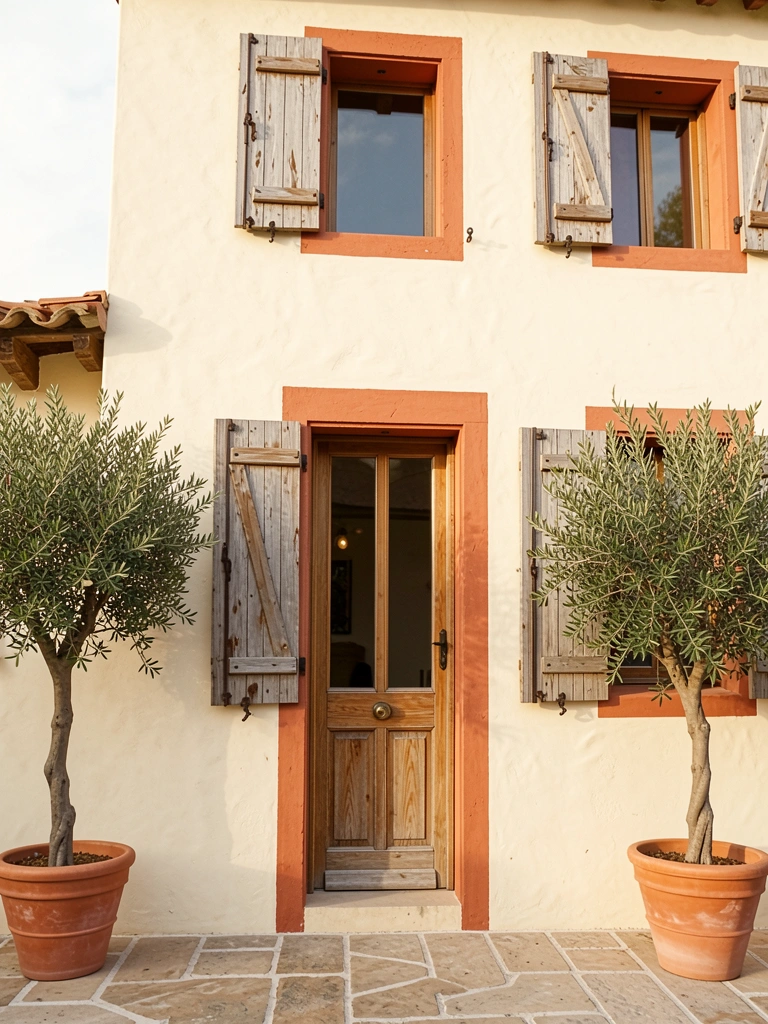
    This palette channels Tuscan countryside—warm, sun-baked, and utterly charming. It works for homes with stucco, Mediterranean, or Spanish colonial architecture.

    Paint stucco or walls in warm cream like Sherwin-Williams’ “Alabaster” with warm undertones ($40–$60 per gallon). Add terra cotta accents on window frames and door using Sherwin-Williams’ “Red Bay” ($40–$55). Stucco application or repainting costs $2,500–$4,500 professionally. Pair with weathered wood shutters, wrought iron hardware, and potted olive or citrus trees. The result feels instantly European and inviting—homeowners report it becomes a neighborhood focal point.

    17. Taupe + Deep Plum + Gold Trim for Jewel-Tone Drama

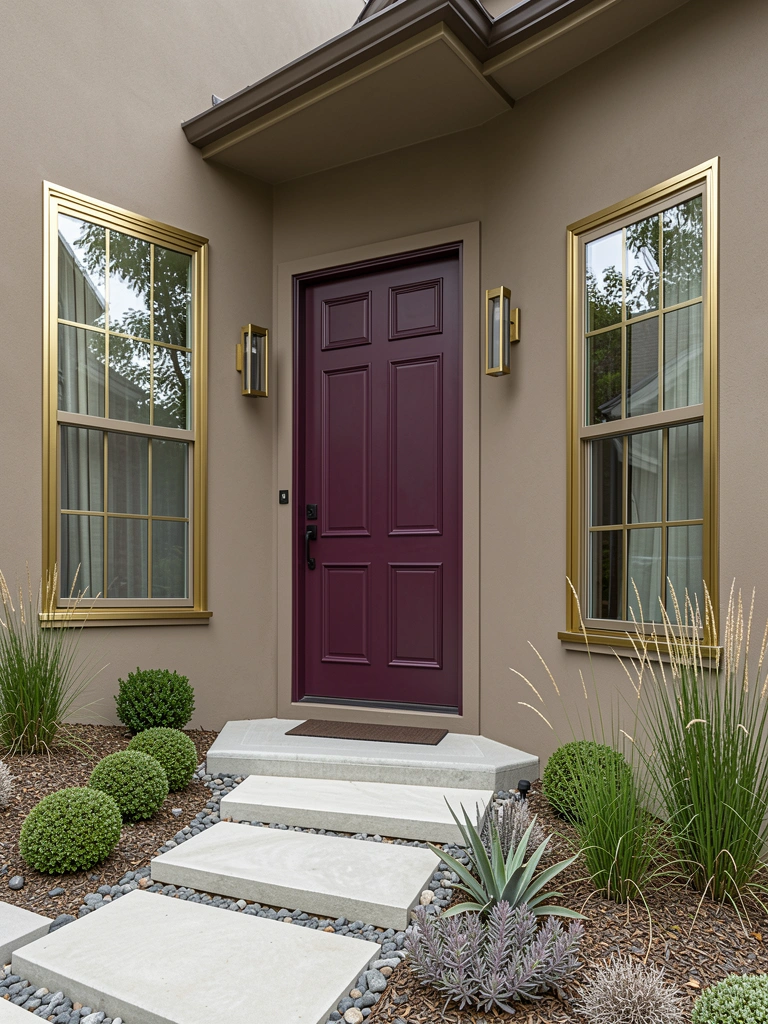
    Taupe grounds this palette while deep plum and gold accents elevate it to gallery-worthy status. This combo suits homeowners seeking bold personality without chaos.

    Paint main walls in Benjamin Moore’s “Balanced Beige” or Sherwin-Williams’ “Accessible Beige” ($35–$50 per gallon). Choose deep plum like Benjamin Moore’s “Evoking Orchid” for the door ($40–$55). Add gold trim using specialty paint or leaf ($60–$150 for professional application). Paint and trim work takes 1–2 weeks. Professional application runs $2,000–$3,500. This unexpected combo inspires confidence and makes your home memorable—guests will ask about the color immediately.

    18. Light Gray Vinyl Siding + Black Metal + Natural Landscaping for Modern Minimalist

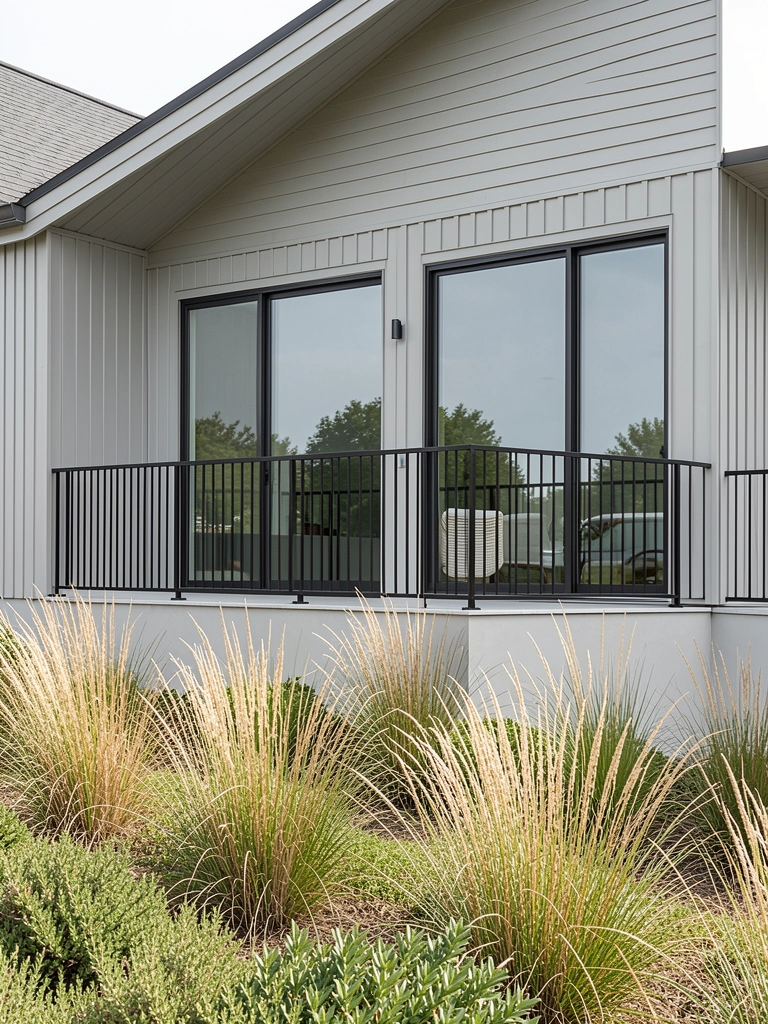
    Light gray vinyl siding is low-maintenance, affordable, and works with any accent color. Black metal creates modern definition with minimal visual weight.

    Choose light gray vinyl siding like Certainteed’s “Glacier Gray” or Hardie Board’s “Driftwood Gray” ($3–$6 per square foot installed; typically $5,000–$10,000 full home). Add black metal frames and railings ($1,000–$3,000). The vinyl requires minimal maintenance—just annual cleaning. Total project timeline is 2–3 weeks for installation. Renter-friendly alternative: Paint existing siding in similar light gray. This palette appeals to homeowners prioritizing low maintenance and clean aesthetics.

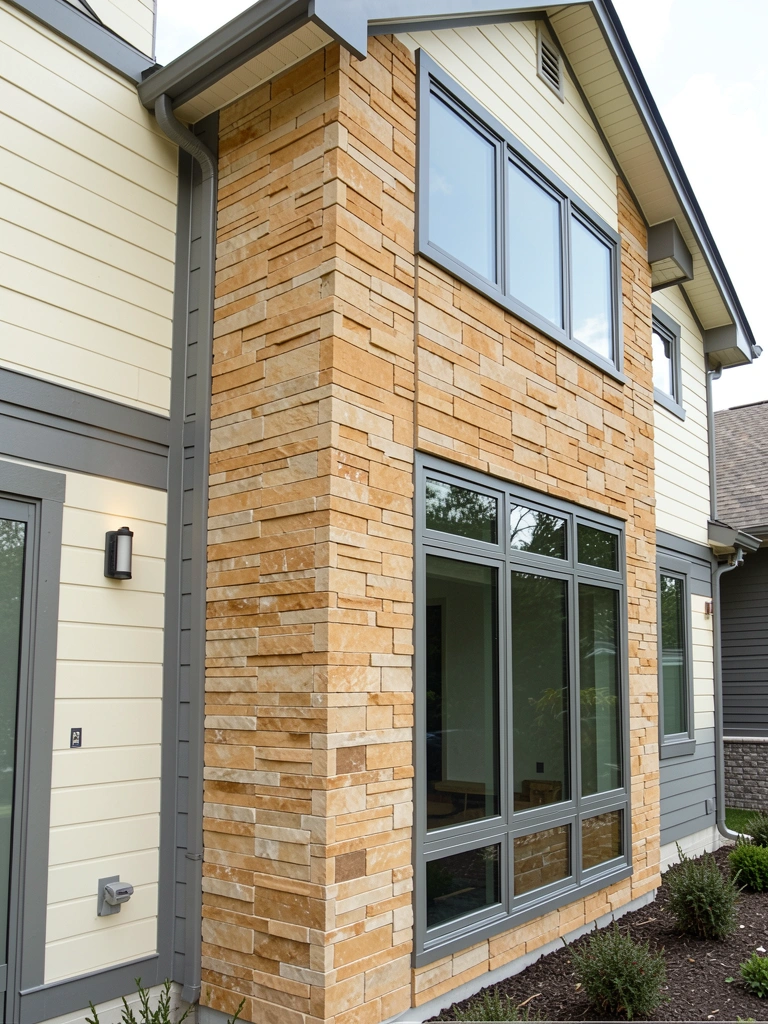
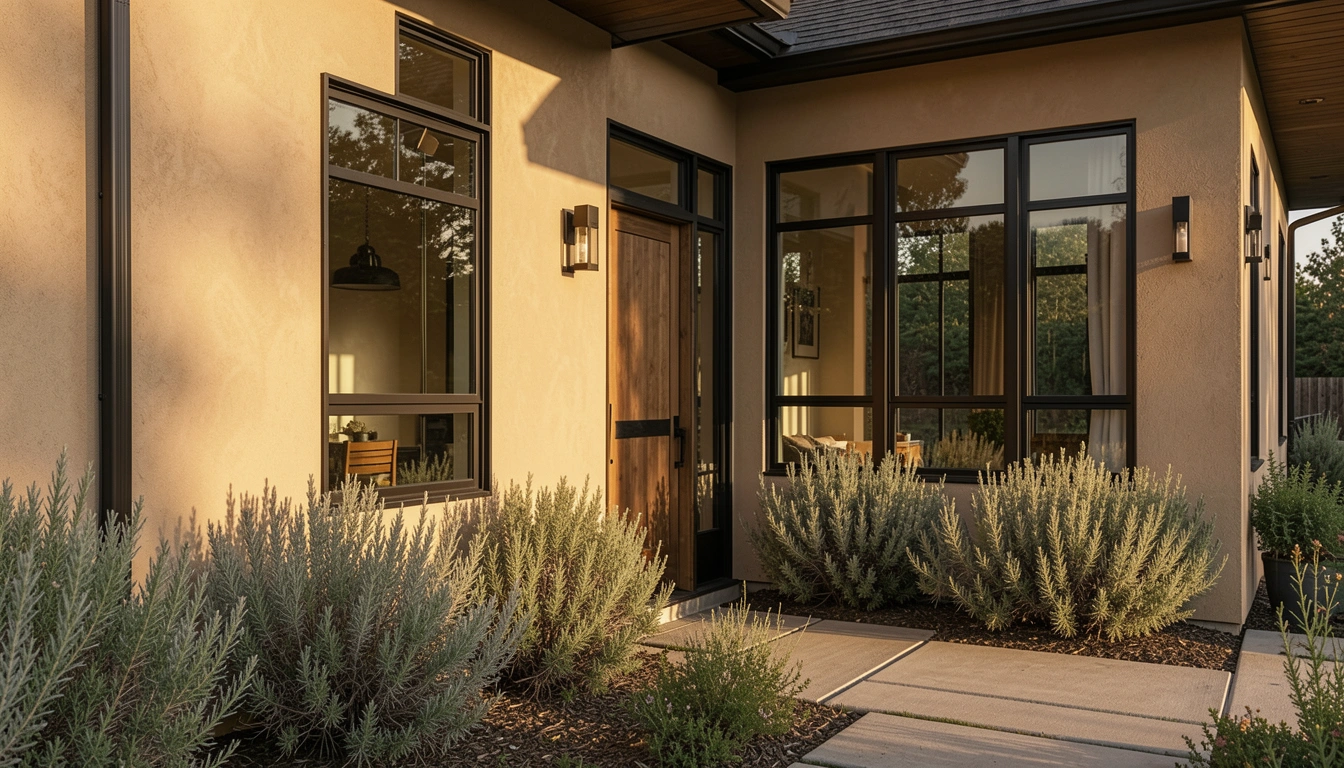
    19. Warm Sand Stucco + Rust Metal Accents for Earthy Southwest

    Warm sand stucco mimics natural terrain while rust accents echo desert minerals. This palette works beautifully in warm climates and feels grounded year-round.

    Paint or apply stucco in warm sand tones like Sherwin-Williams’ “Sand Dollar” or Benjamin Moore’s “Balanced Beige” with warm undertones ($40–$60 per gallon for paint; $3,000–$5,000 for stucco application). Add rust-colored metal accents using powder-coated steel or iron ($500–$2,000). Stucco application takes 1–2 weeks; painting takes 4–5 days. Pair with boulders, desert plants, and earth-tone mulch. The result feels timelessly connected to the landscape.

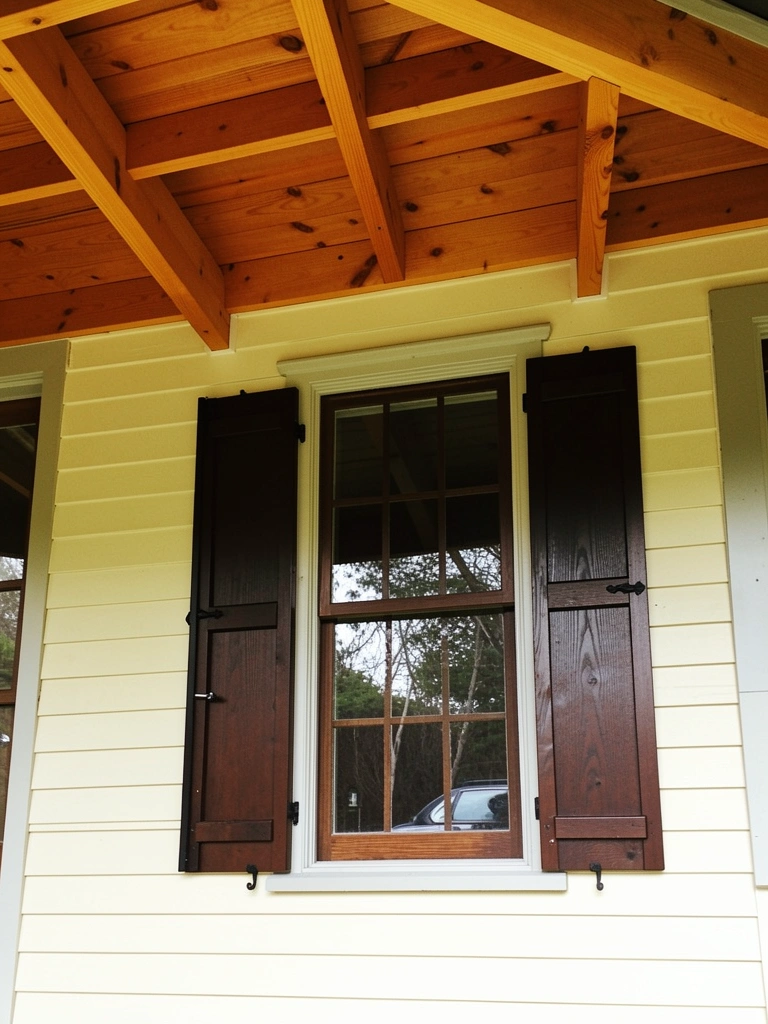
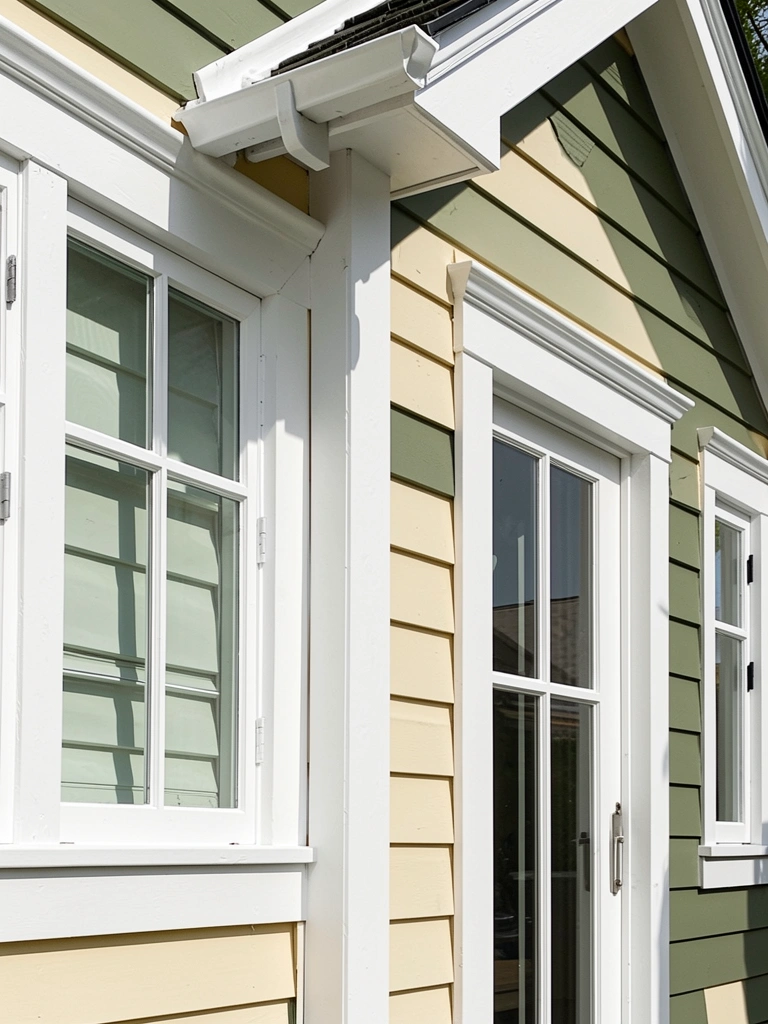
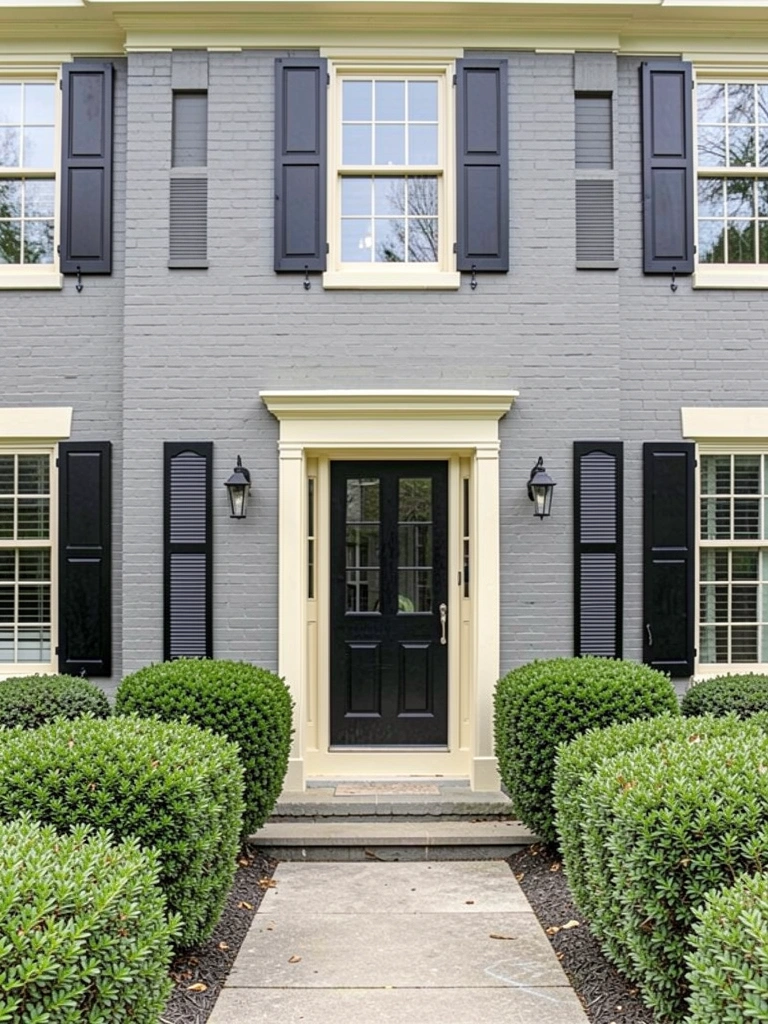
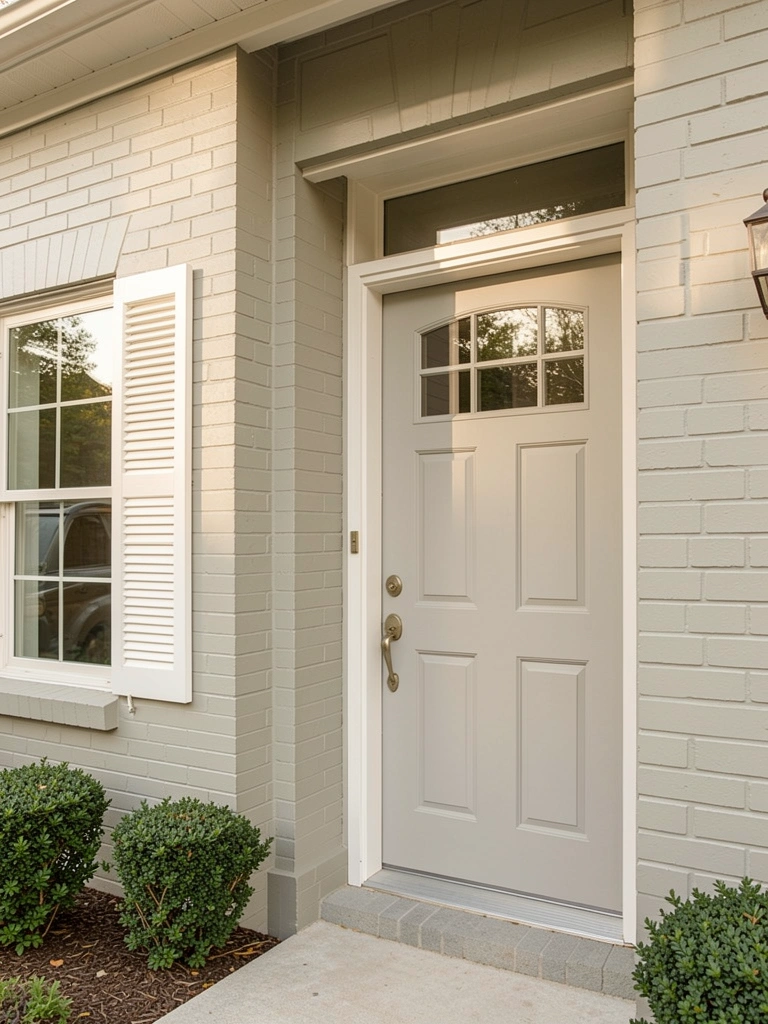
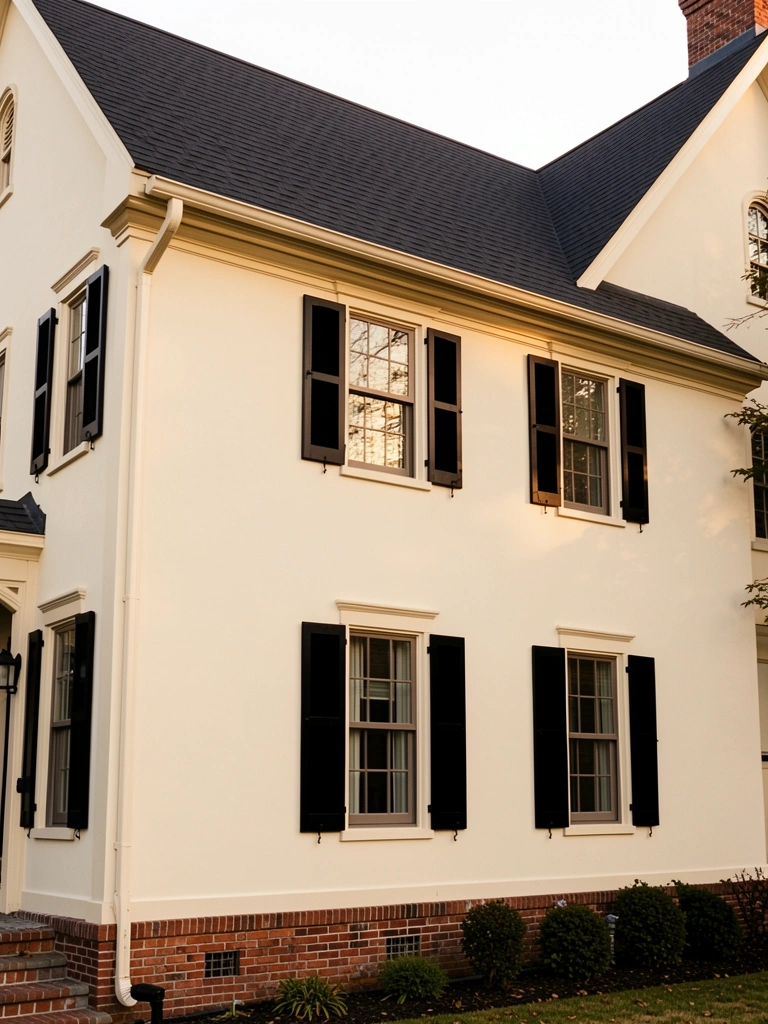
    20. Soft Yellow + Black Shutters + White Trim for Classic Cottage

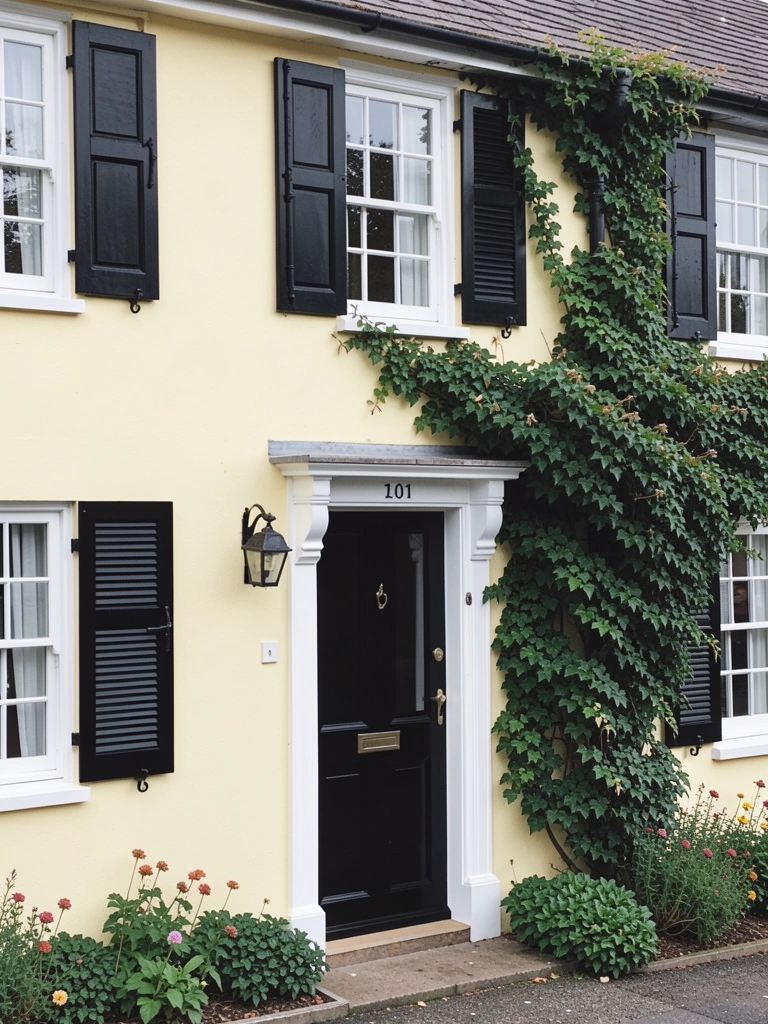
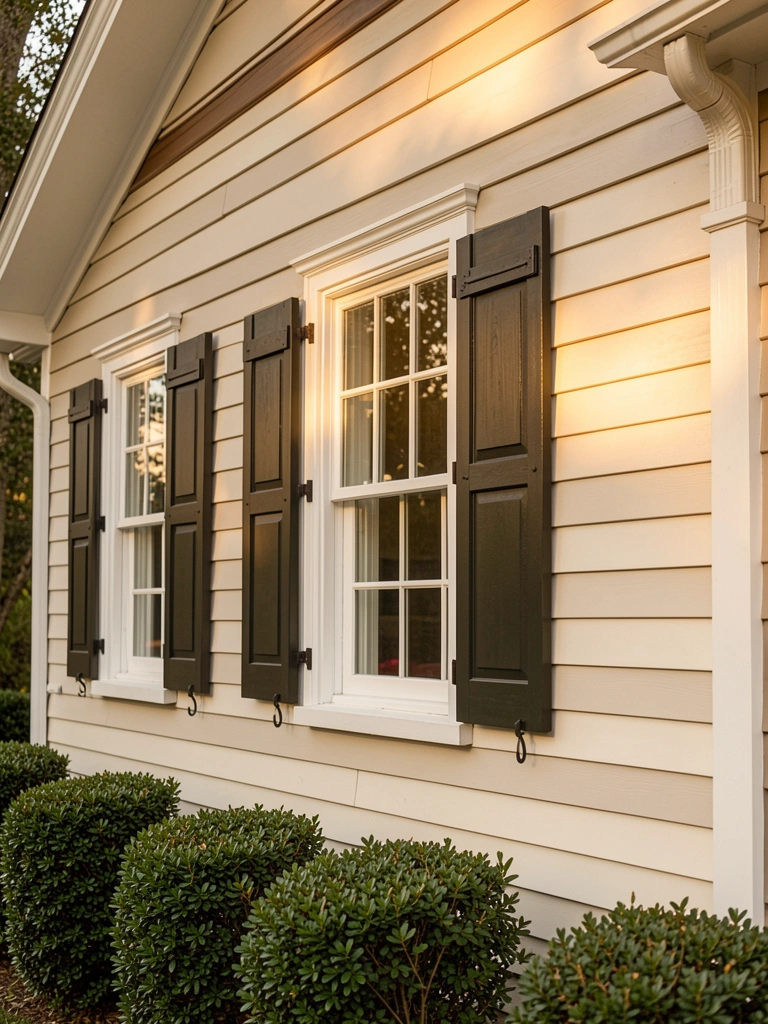
    Soft yellow is warm and welcoming without being cartoonish—especially when paired with classic black shutters. This combo works for cottages, farmhouses, and traditional homes.

    Paint main walls in Benjamin Moore’s “Pale Straw” or Sherwin-Williams’ “Sunflower” (not neon—choose soft versions, $35–$50 per gallon). Add black shutters and door using Sherwin-Williams’ “Iron Ore” ($40–$55 per gallon). Paint and hardware installation takes 3–4 days DIY or $1,200–$2,000 professionally. Pair with white trim for crisp definition and window boxes with trailing plants for charm. Homeowners report this palette lifts curb appeal noticeably and creates an instantly inviting feel.

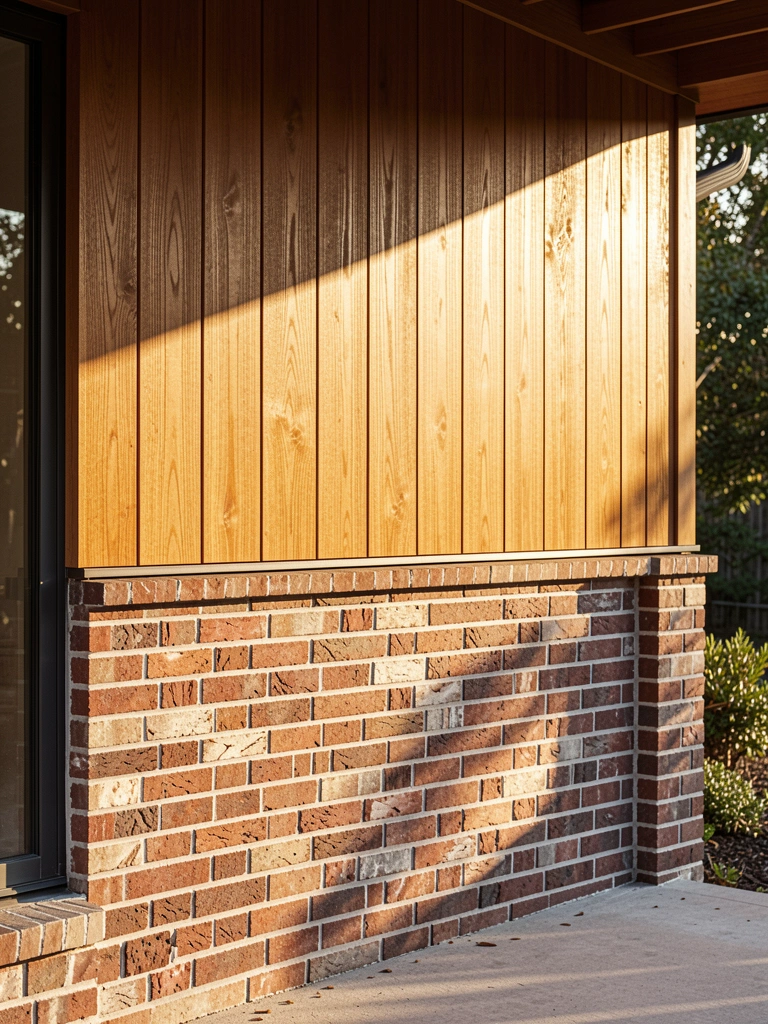
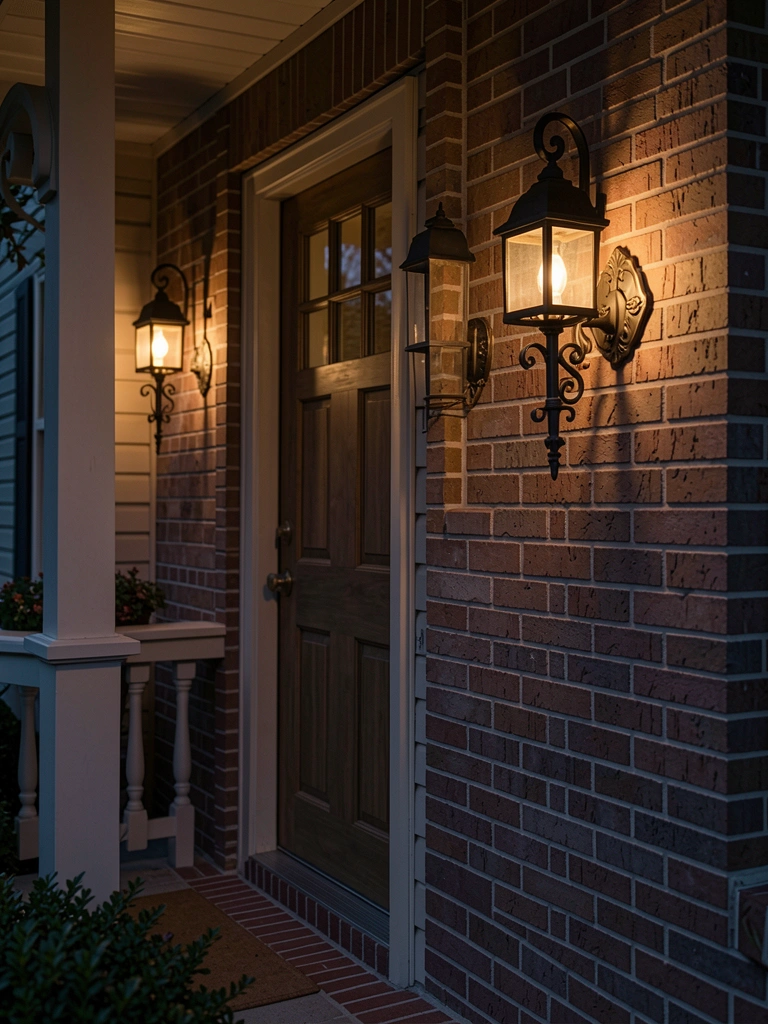
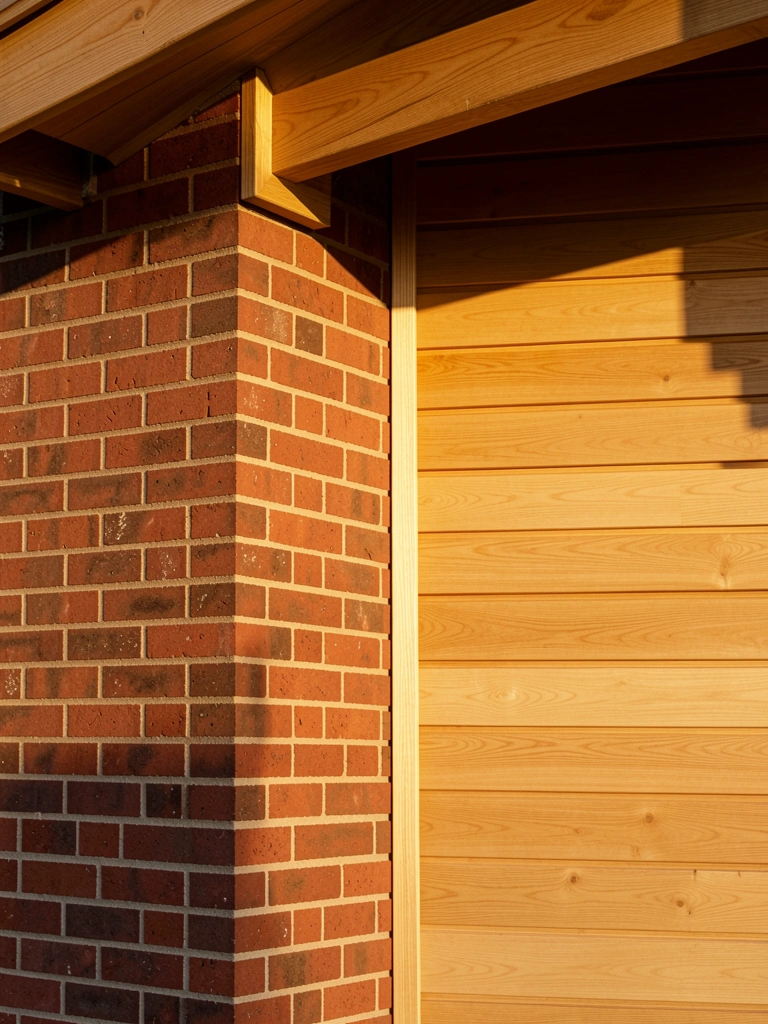
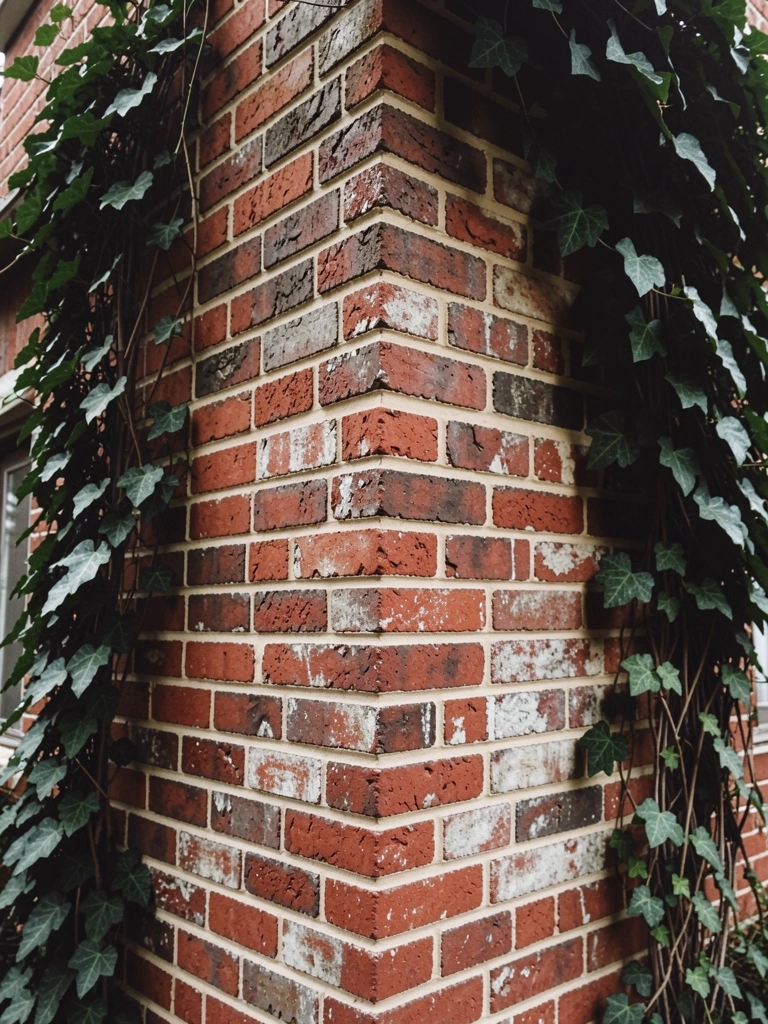
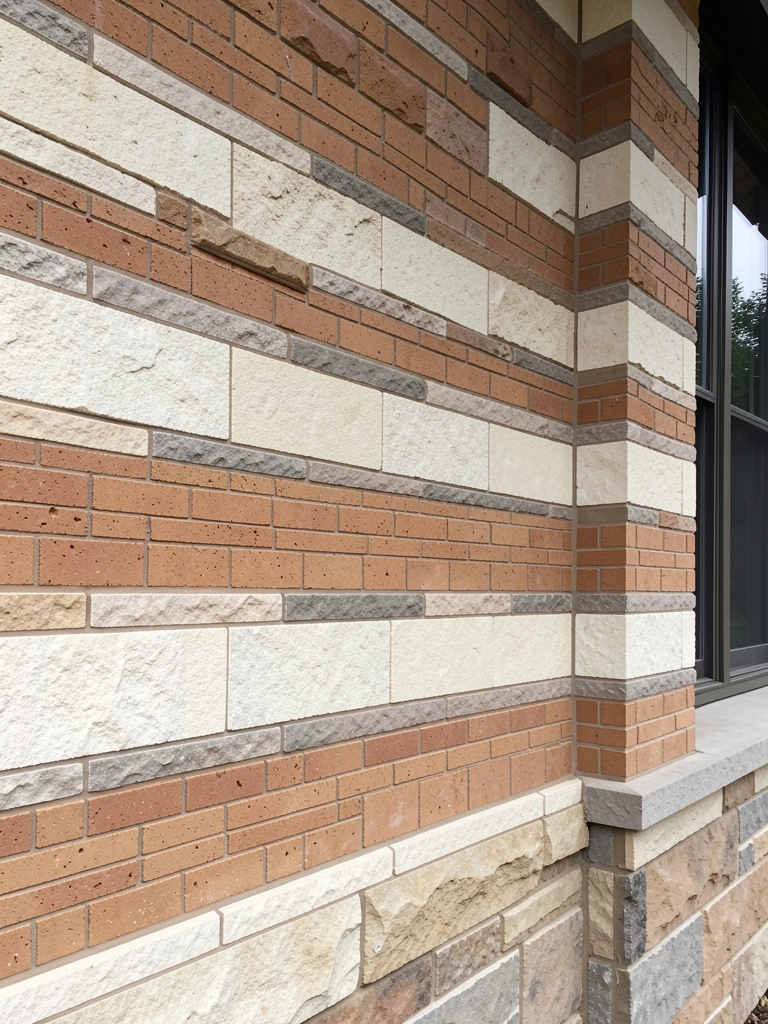
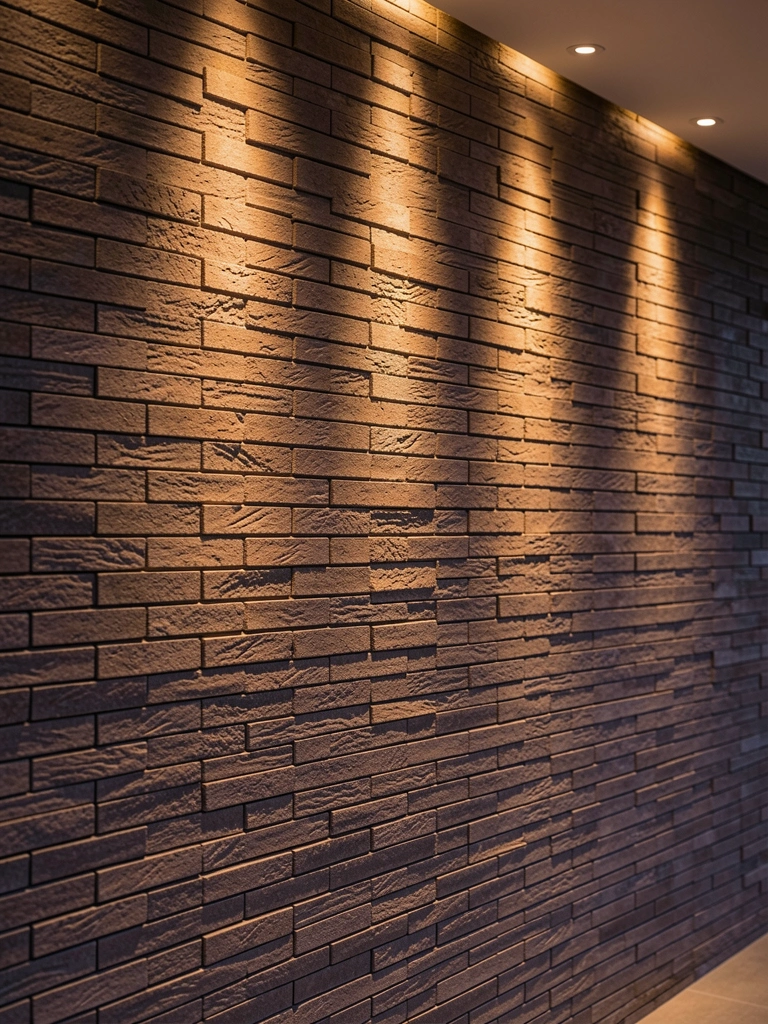
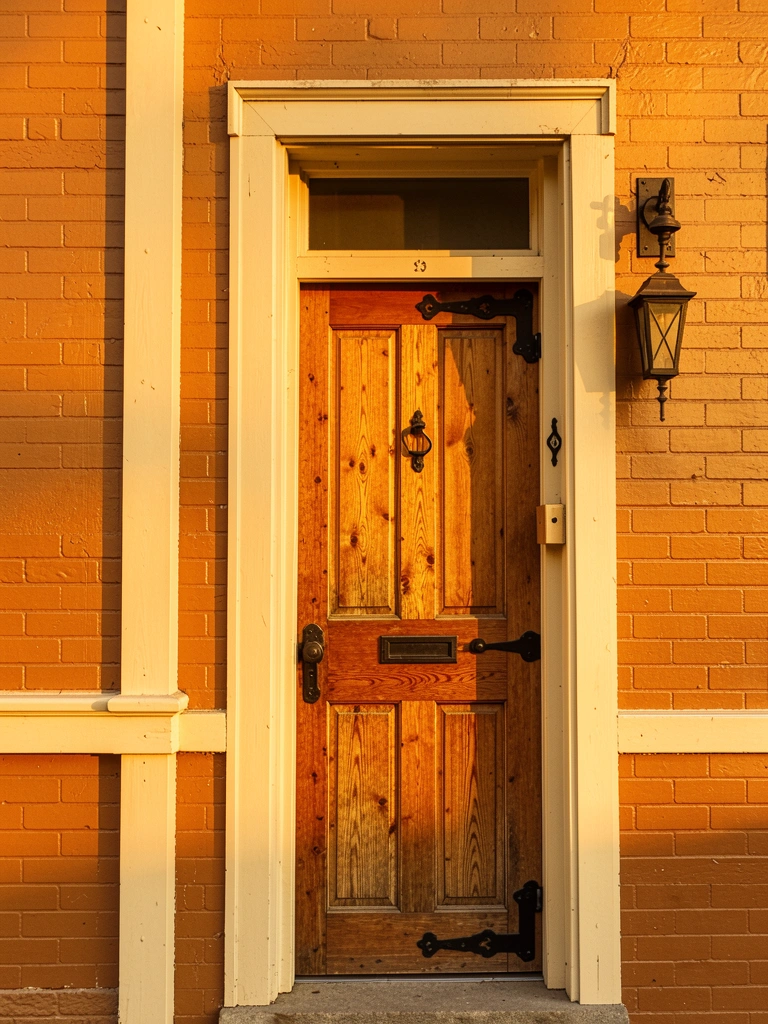
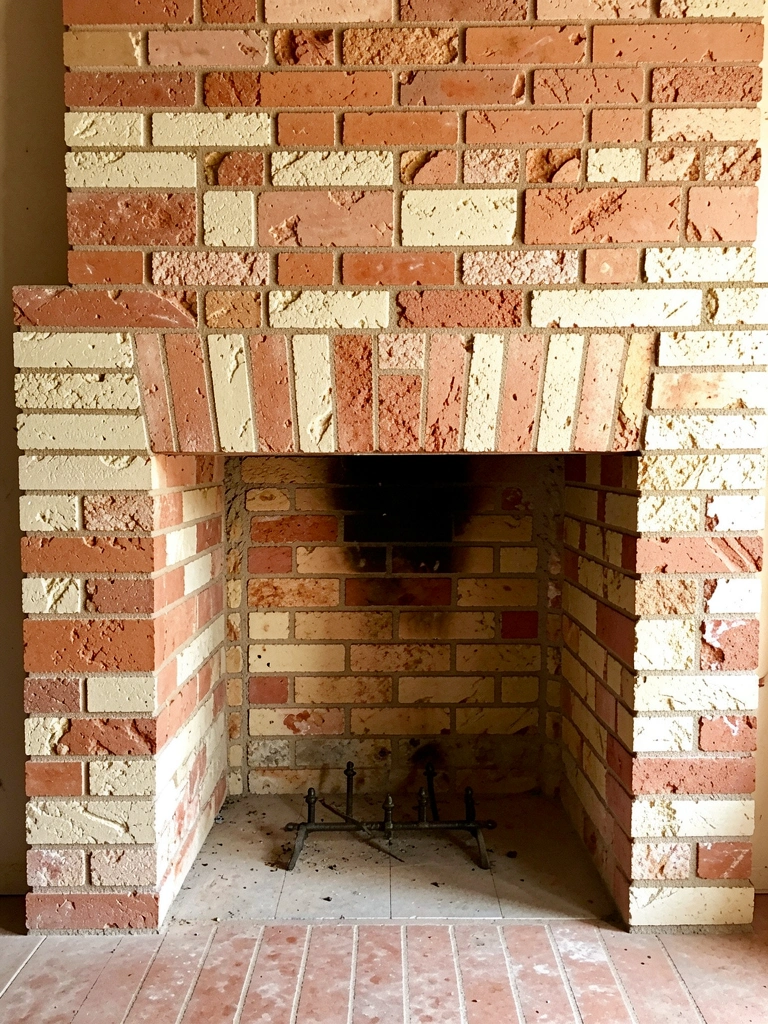
    21. Warm Brick + Wood Trim + Matte Black Hardware for Timeless Blend

    Warm brick is one of the most durable and beautiful materials—pair it with natural wood and black hardware, and you’ve achieved timeless elegance.

    If you have brick, maintain it with annual pressure washing ($200–$500) and sealing every 3–5 years ($400–$1,000). Add natural wood trim if replacing windows or doors ($50–$150 per linear foot installed). Choose matte black hardware like restoration-style hinges and knockers ($50–$200). Minimal painting required if brick is already exposed. This palette requires almost zero maintenance and ages beautifully. Homeowners report brick holds value and appeals across buyer demographics.

    22. Pale Green + Cream Trim + Weathered Copper Accents for Vintage Charm

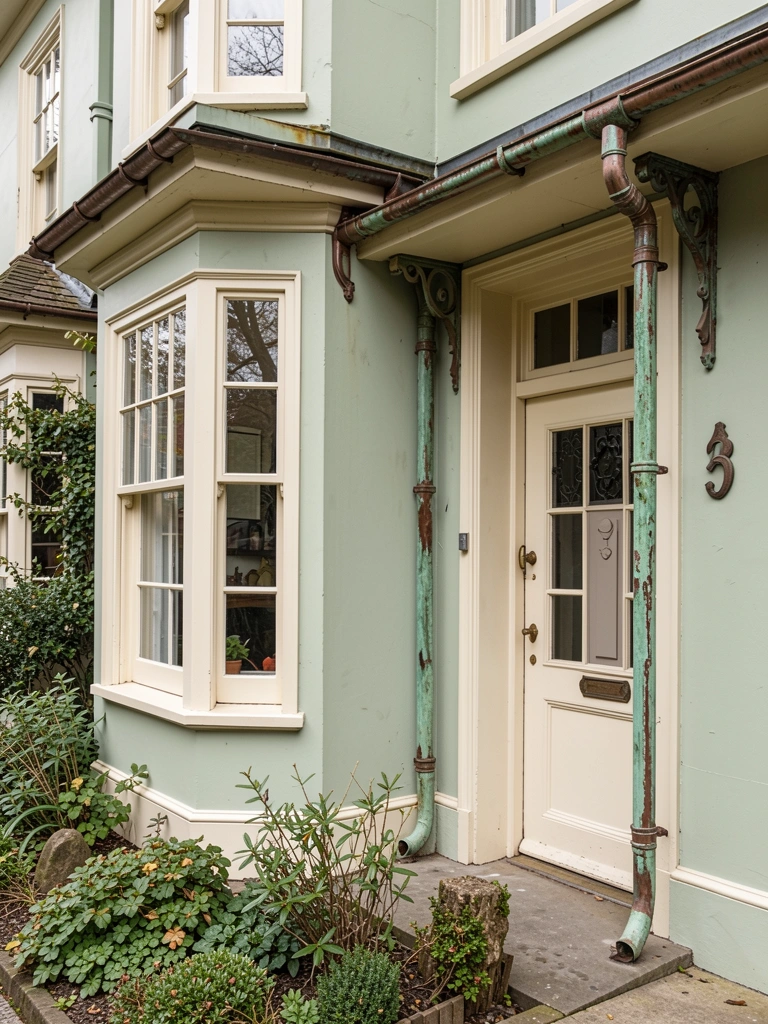
    Pale green and cream create vintage elegance, and weathered copper adds authentic heritage character. This palette suits Victorian, Queen Anne, and historic homes beautifully.

    Paint walls in Farrow & Ball’s “Pale Green” or Benjamin Moore’s “Healing Aloe” ($60–$80 per liter). Use cream trim like Sherwin-Williams’ “Alabaster” ($35–$50). Replace or restore copper gutters and downspouts; new copper costs $10–$20 per linear foot installed; existing copper patinas naturally. Painting takes 5–6 days professionally ($2,000–$3,500). Pair with heritage-appropriate plantings and vintage-style lighting. This palette commands respect and appeals to history-conscious homeowners and preservationists.

    23. Soft Mauve + Cream Accents + Natural Stone for Modern Romance

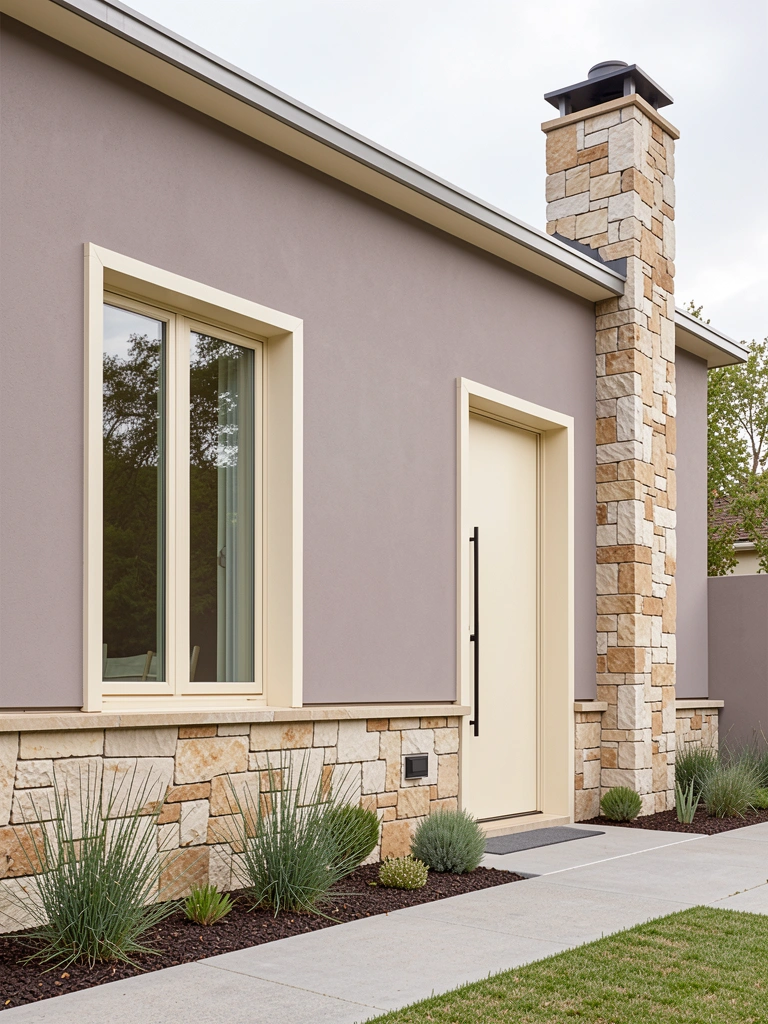
    Soft mauve—a muted purple-gray—is bold yet refined. It works for modern and transitional homes seeking personality without trend-chasing.

    Paint main walls in Benjamin Moore’s “Healing Aloe” (softer) or “Touch of Purple” ($40–$60 per gallon). Add cream accents like Sherwin-Williams’ “Alabaster” ($35–$45). Install or maintain natural stone foundation ($2,000–$5,000 depending on scope). Paint application takes 4–5 days professionally ($1,500–$2,800). This unexpected color makes your home memorable and speaks to refined taste. Homeowners report it sparks interest and admiration.

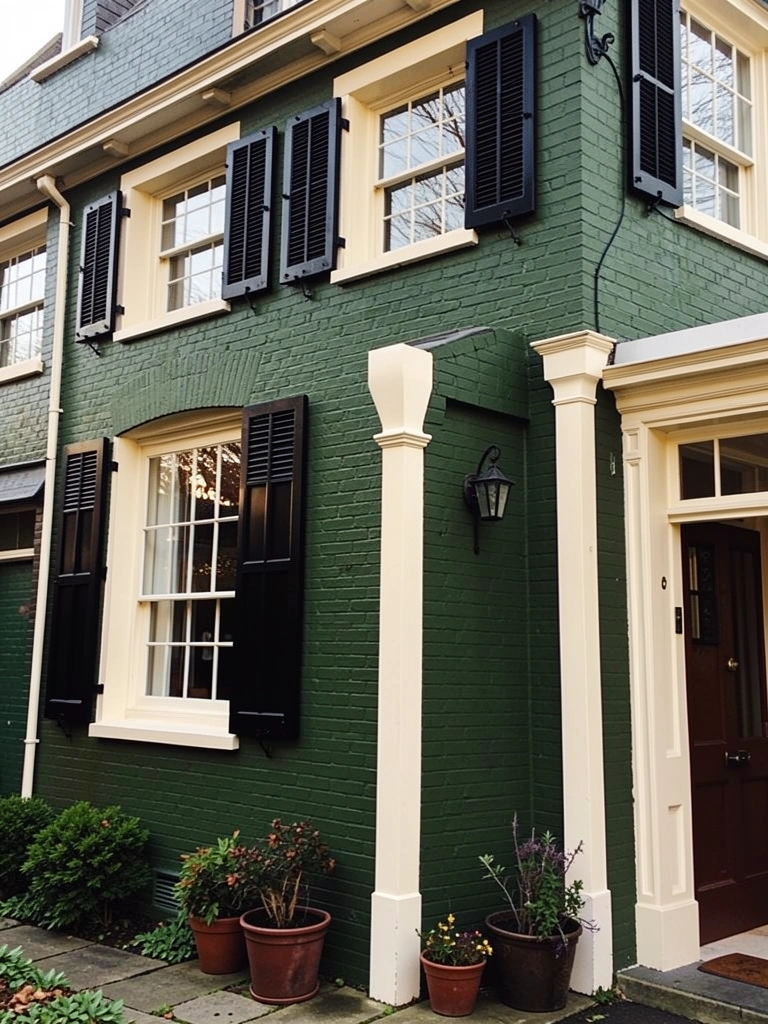
    24. Deep Forest Green + Warm White + Brass Details for Heritage Modern

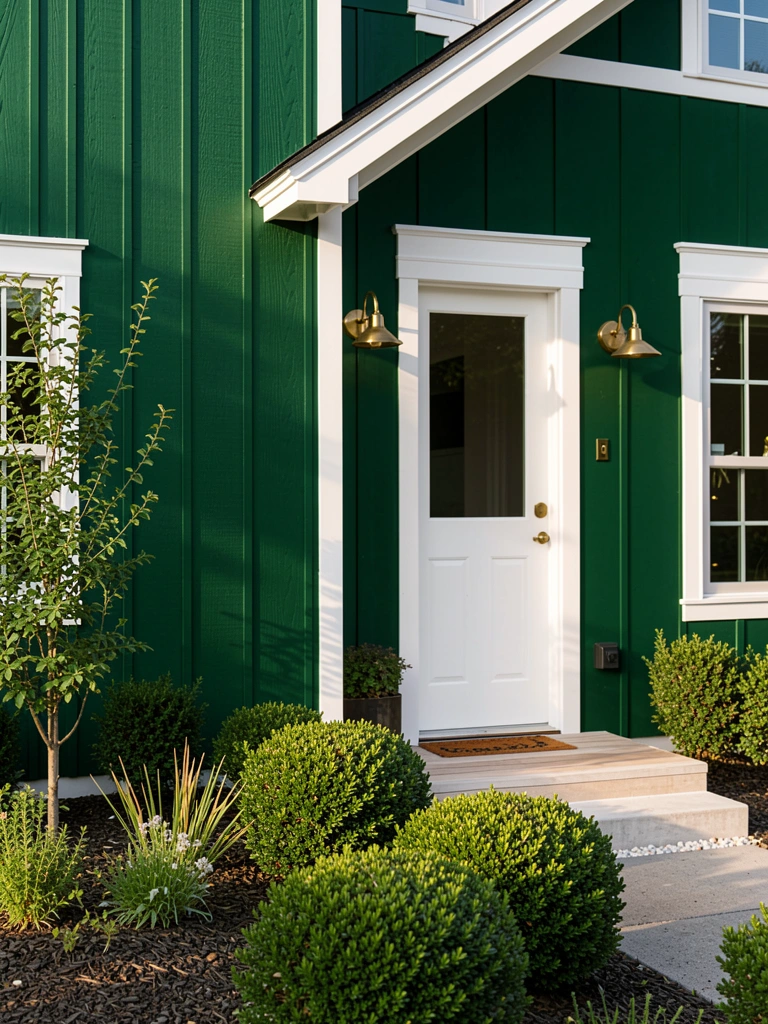
    Deep forest green is sophisticated, calming, and increasingly popular. Warm white and brass bring refinement without stuffiness.

    Paint main walls in Benjamin Moore’s “Evergreen” or Sherwin-Williams’ “Forest Green” ($40–$60 per gallon). Use warm white trim like Benjamin Moore’s “Simply White” ($35–$50). Add brass fixtures like Schoolhouse Electric or West Elm pieces ($150–$400 total). Painting takes 4–5 days DIY or $1,800–$2,800 professionally. This palette pairs beautifully with clean landscaping and structured plantings. Homeowners report it creates a sense of arrival and sophistication.

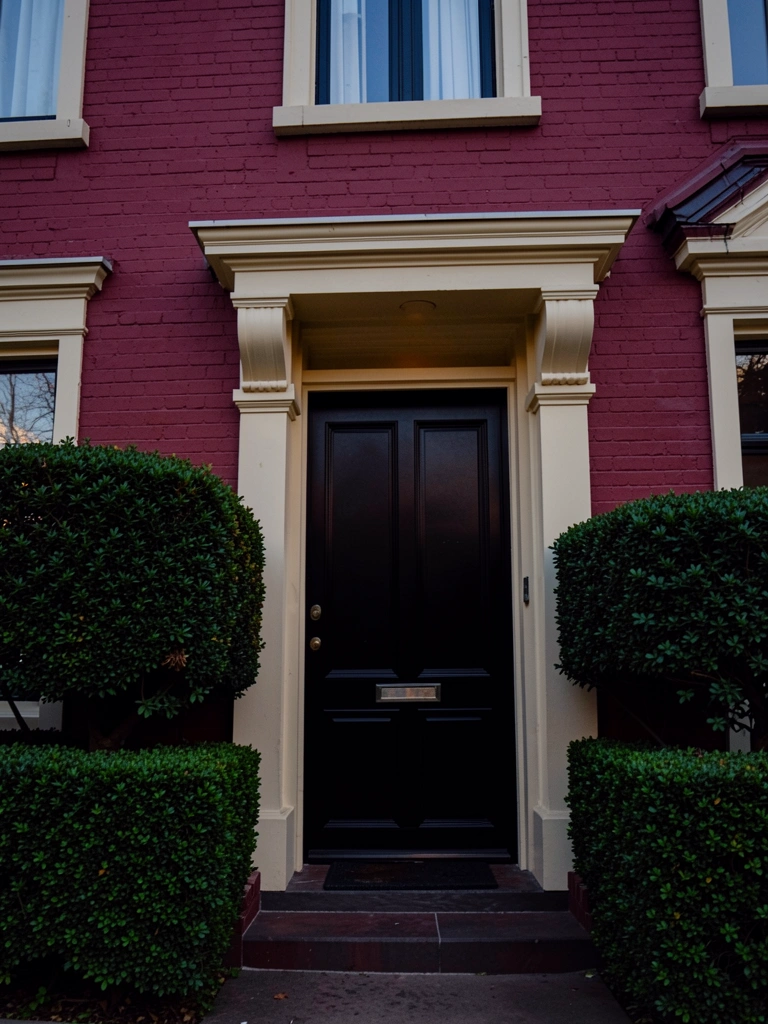
    25. Warm Taupe + Burgundy Door + Natural Wood Accents for Wine Country Style

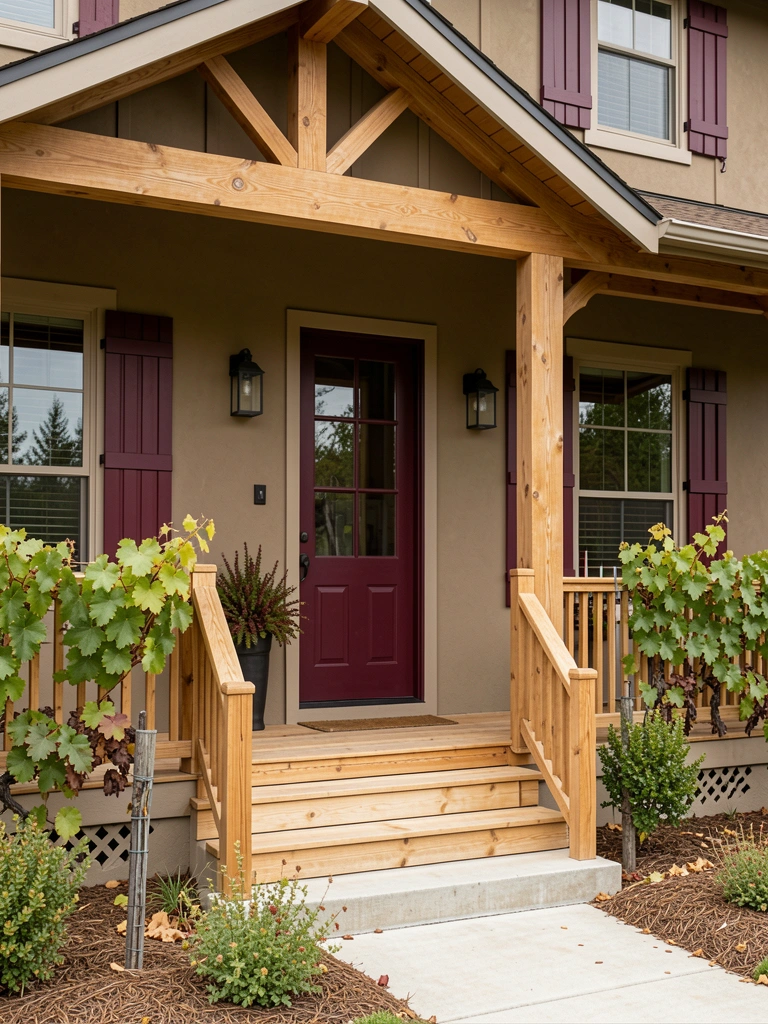
    Warm taupe and burgundy create a wine-country aesthetic—elegant without pretension. Natural wood accents ground the palette in authenticity.

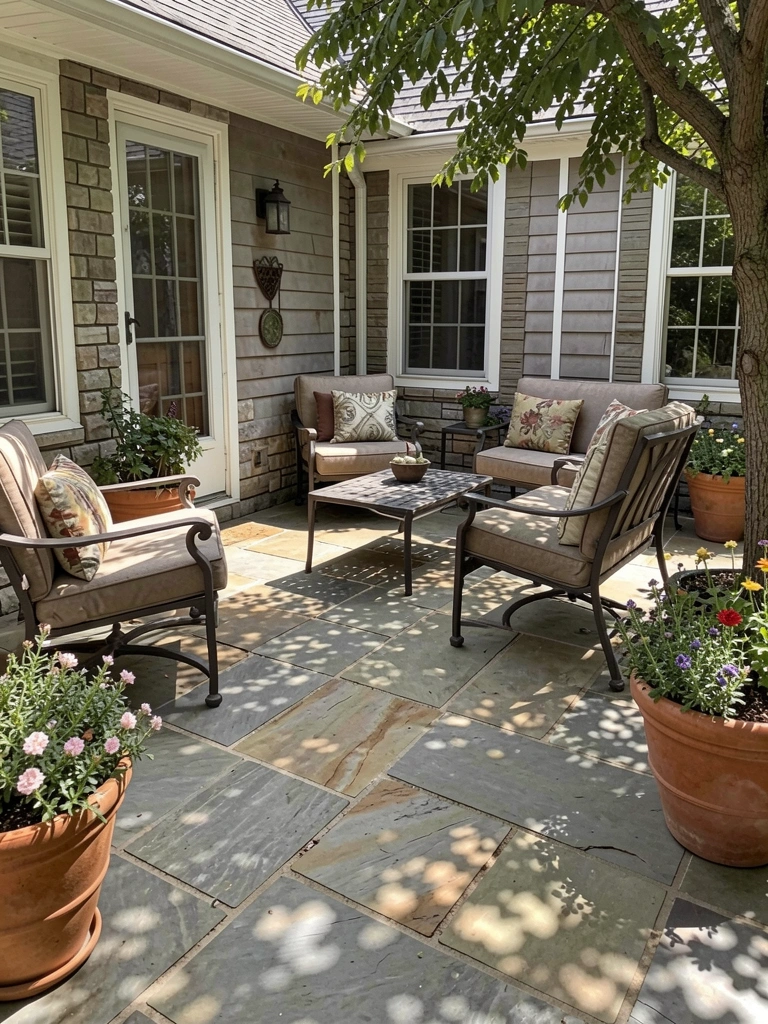
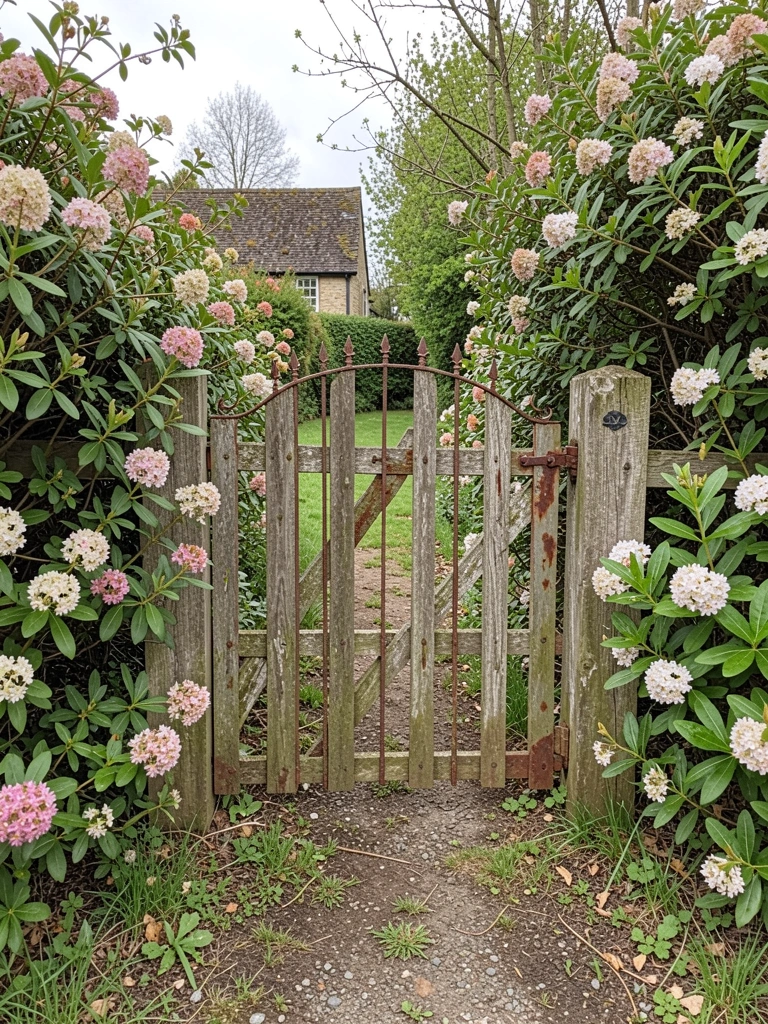
    Paint main walls in Benjamin Moore’s “Balanced Beige” with warm undertones ($40–$55 per gallon). Select burgundy like Benjamin Moore’s “Caliente” or Sherwin-Williams’ “Red Theatre” for door and shutters ($40–$55). Maintain or add natural wood railings and trim ($50–$150 per linear foot). Painting takes 4–5 days DIY or $1,500–$2,500 professionally. Pair with terracotta planters, climbing ivy, and rustic metal gates. The result feels refined and connected to landscape and season.

    26. Gray Charcoal + Soft White + Unexpected Teal Door for Contemporary Twist

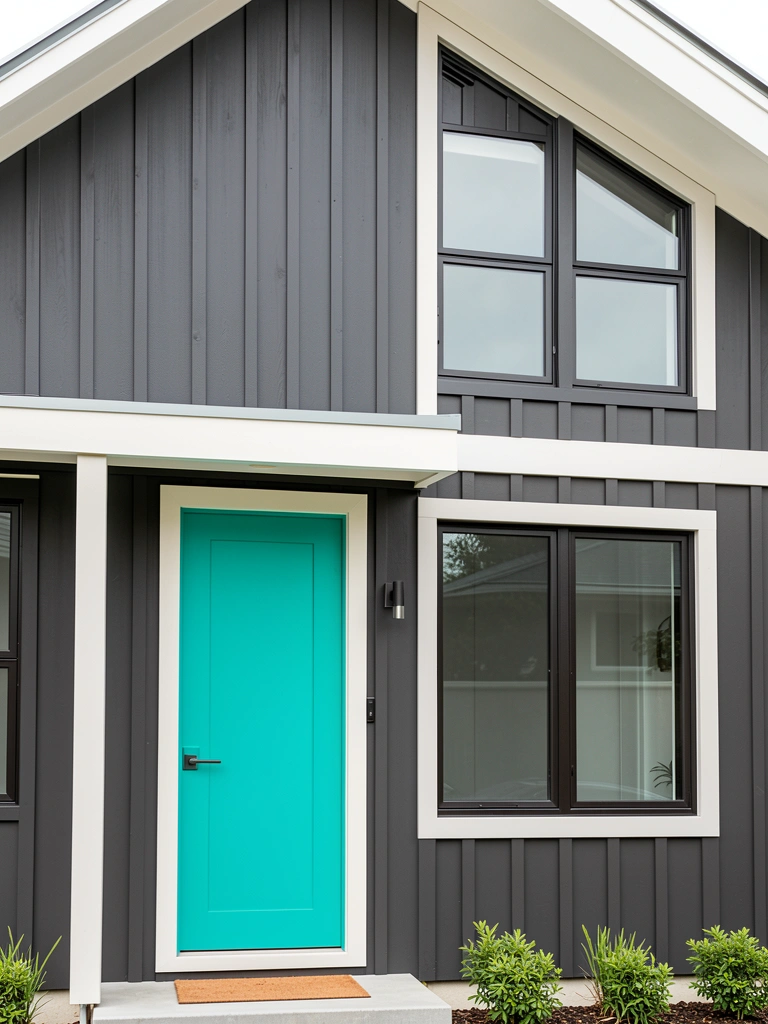
    Charcoal and white are modern staples, but a teal door creates an unexpected personality pop. This combo works for contemporary and transitional homes seeking bold but balanced design.

    Paint main walls in Sherwin-Williams’ “Peppercorn” ($40–$55 per gallon). Use soft white trim like Benjamin Moore’s “White Dove” ($35–$50). Paint door in teal like Benjamin Moore’s “Breath of Fresh Air” or Sherwin-Williams’ “Oceanside” ($40–$55). Full application takes 5–6 days professionally ($2,000–$3,500). This bold choice immediately signals personality and contemporary taste. Homeowners report the teal door becomes a beloved focal point and conversation starter.


    Save this post for your next exterior refresh, and pick one palette this weekend to research further. Color-matching apps and paint samples are free—grab a few and see how they photograph in your home’s natural light. Your curb appeal transformation starts with one small decision.

  • 27 Cottage House Exterior Ideas That Create Charming Storybook Appeal

    27 Cottage House Exterior Ideas That Create Charming Storybook Appeal

    There’s something magical about a cottage-style home—that effortless charm, the lived-in warmth, the way it makes you want to sit on the porch with a cup of tea. But creating that storybook appeal doesn’t require a complete overhaul or a designer budget. Whether you’re a homeowner ready to refresh your exterior or a renter looking to add temporary charm to your space, these 27 ideas will help you build the cozy, character-filled cottage look you’ve been craving. From paint colors and architectural details to landscaping and lighting, you’ll discover specific, actionable upgrades that work for any climate, skill level, and budget. Ready to create a home that feels like it belongs in a fairytale? Let’s get started.

    1. Paint Your Front Door a Deep, Saturated Jewel Tone

    Your front door is the first impression of your home’s personality—so why play it safe? Deep, saturated colors like forest green, charcoal, or teal instantly signal cottage charm and create dramatic curb appeal.

    Choose a high-quality exterior paint designed for doors, as it handles weathering better than standard house paint. Brands like Benjamin Moore, Sherwin-Williams, and Behr offer rich shades specifically formulated for doors ($30–$50 per gallon). Plan for two coats over one weekend—the first coat takes about 2 hours to dry. Don’t forget a primer if you’re covering a light color.

    Pro tip: Pair your jewel-tone door with cream or soft white trim for maximum contrast, or go monochromatic with darker siding for a moody, sophisticated look.

    Your entryway becomes a statement piece that draws the eye and sets the tone for everything beyond the threshold.

    2. Add Arched Doorways or Window Trim

    Arches soften a cottage’s overall aesthetic and add that curved, romantic detail that separates charming from ordinary. Even if you can’t restructure doorways, you can add arched trim molding or arch-shaped windows.

    For renters or non-permanent options, peel-and-stick arch decals ($15–$25 from Amazon or Wayfair) work temporarily. For homeowners, hire a contractor to install arched window frames ($200–$800 per opening depending on size and material) or add decorative arch trim molding above existing rectangular doors ($50–$150 in materials plus labor). Expect installation to take one to two days.

    Pro tip: Paint arches in a contrasting color—cream trim against dark siding, or white trim against weathered wood—to make them pop.

    The result is an instantly softer, more elegant facade that photographs beautifully and makes your home feel intentional and timeless.

    3. Layer Warm Neutrals with Strategic Color Blocking

    Color blocking—painting distinct horizontal or geometric sections in coordinating earth tones—creates visual interest while keeping the palette cohesive. Think cream base, soft sage or olive middle section, and warm taupe or pale beige trim.

    Select three complementary shades from Allura USA’s trending palette ($30–$50 per gallon each). Plan for three to four days of painting: one coat per section with adequate drying time between. Use painter’s tape to create clean lines—precision matters here. This approach works best with horizontal siding or a two-story layout where sections naturally divide.

    Pro tip: Use the lightest shade on the largest surface area and reserve bold earth tones for trim or smaller sections to avoid overwhelming the facade.

    You’ll get a designer-curated look that feels curated without looking overdone—pure cottage sophistication.

    4. Mix Thin Brick with Cedar Cladding

    Combining two natural materials—thin brick and cedar wood—creates organic warmth and visual depth that reads authentically cottage. This mix avoids the flat, one-note look of single-material siding.

    Thin brick veneers ($6–$15 per square foot installed) give the look of solid brick without the weight or cost. Pair with cedar cladding or shiplap ($8–$20 per square foot installed). Budget $3,000–$8,000 for a modest front facade depending on your home’s size. This is a professional installation project—expect one to two weeks for skilled contractors.

    Pro tip: Stagger where the two materials meet (mid-wall or above a porch) rather than splitting the house exactly in half for a more natural, less jarring transition.

    The textural contrast creates a facade that feels collected and organic, like it’s evolved thoughtfully over time—peak cottage energy.

    5. Install Matte Black Metal Accents Over Brick

    Matte black metal details—window frames, railings, gutters, or hardware—ground cottage style with a subtle industrial edge. This transitional approach prevents cottages from feeling too precious or saccharine.

    Source matte black metal trim and hardware from Home Depot or Wayfair ($20–$100 per piece, depending on size). A black metal awning over the front door runs $300–$800; railings cost $15–$30 per linear foot. Expect DIY installation in a weekend for hardware, but hire pros for larger pieces like awnings or railings (one day installation time).

    Pro tip: Pair with warm brick or cream trim—the contrast between cold metal and warm materials is where the magic happens.

    The juxtaposition adds sophistication and prevents your cottage from looking overly nostalgic or costume-like.

    6. Create Defined Outdoor Zones with Fencing or Hedging

    Cottages feel most charming when the exterior is divided into intimate, purposeful zones: an entry garden, a seating area, a working zone. Clear boundaries create that storybook sense of “rooms” outside.

    Picket fencing ($15–$30 per linear foot installed, or $5–$15 DIY) takes one weekend for a modest front yard. Hedging (boxwood, privet) costs $10–$25 per plant and takes seasons to mature but creates a softer boundary. Pavers or stepping stones ($3–$8 per square foot) define pathways in one day.

    Pro tip: Mix fence types—white pickets in front, hedging on sides, stone walls in back—to create visual interest while maintaining cohesion.

    Visitors instantly understand the flow of your property, and you gain both privacy and a sense of purposeful garden rooms.

    7. Plant Native Flowers and Cottage-Style Perennials

    Cottage gardens thrive on abundant, layered plantings—foxgloves, delphiniums, hydrangeas, and climbing roses create that romantic, slightly wild aesthetic. Native plants thrive locally with minimal maintenance.

    Research native perennials for your zone at native-plant societies or gardening centers ($8–$20 per plant). Plant in drifts of three to five for visual impact. A modest front planting bed costs $100–$300 in plants and takes one afternoon to dig and plant. Many will self-seed or expand naturally, reducing future costs.

    Pro tip: Layer bloom times so you have color from spring through fall—early bloomers like hellebores, mid-season perennials like coreopsis, and late bloomers like sedum.

    Your landscape becomes more lush and inviting each year, creating a self-sustaining, ever-improving garden without constant replanting.

    8. Install Warm Wood Beams or Trim Accents

    Wood brings instant coziness. Exposed beams, trim, or shutters in warm (not orange-tinted) wood tones create the backbone of cottage character. Skip orange timber stains—pale beige, honey, or darker chocolate tones feel more timeless.

    Wood shutters (real or faux) run $30–$100 per pair; exterior trim costs $1–$3 per linear foot in materials. Exposed beam installation requires professional help ($500–$2,000+ depending on scope). Paint or stain takes one weekend for shutters or trim, one to two weeks for larger beams.

    Pro tip: Choose wood stains in warm, neutral tones like honey, pale beige, or weathered gray—avoid bright orange or overly red tones that read dated.

    The result is a warm, welcoming facade that ages beautifully and feels authentically cottage rather than reproduced from a catalog.

    9. Add Climbing Roses or Ivy Around Doorways

    Climbing vines create romance and softness instantly. Roses, clematis, and ivy frame doorways, windows, and walls with living texture that no paint or trim can replicate.

    Climbing rose varieties ($15–$35 per plant) thrive in most zones; clematis ($12–$25) offers bold blooms; English ivy ($8–$15) is evergreen but slow-growing. Plant in spring or fall, position near trellises or wire supports ($20–$50), and plan for 1–3 years for full coverage. Maintenance requires annual pruning (1–2 hours).

    Pro tip: Choose disease-resistant rose varieties and ensure good air circulation to prevent mildew in humid climates.

    Your entryway transforms into a living, breathing frame that changes seasonally and adds unmistakable cottage magic that can’t be faked with paint or decor.

    10. Paint Shutters Deep Charcoal or Forest Green

    Shutters should look intentional—either functional or ornamentally styled. Deep, saturated colors (charcoal, forest green, navy) feel more sophisticated than pale or bright options and create strong visual anchors.

    Purchase real shutters ($30–$150 per pair depending on material and size) or upgrade existing faux shutters with fresh paint ($8–$15 per quart). Paint in two coats over one weekend. For added cottage charm, slightly prop them open or angle them asymmetrically to suggest they’re actually usable.

    Pro tip: Match shutter color to your front door or choose a complementary earth tone—the goal is cohesion, not contrast.

    Shutters become architectural features rather than afterthoughts, immediately elevating your home’s perceived care and intention.

    11. Create a Gravel or Stone Pathway to Your Door

    Pathways are functional and incredibly charming. Gravel offers budget-friendly texture; stepping stones add intentionality; flagstone feels more permanent and luxe. The choice sets your cottage’s tone.

    Gravel pathways ($1–$3 per square foot, $200–$500 for modest front path) take one day to install and require annual raking. Stepping stone pathways ($3–$8 per stone, plus $100–$200 base materials) take one weekend. Flagstone ($8–$20 per square foot installed) costs more but lasts indefinitely.

    Pro tip: Edge pathways with low perennials, ground covers, or dwarf boxwood to keep gravel in place and add color definition.

    Visitors instinctively follow a clear path to your door, and the journey itself becomes part of the charm—slowing them down and priming them to appreciate every detail.

    12. Install Solar-Powered Pathway or String Lights

    Lighting transforms a cottage from day to night. Warm-toned solar lights (2700K color temperature) create ambient magic without rewiring, and they’re renter-friendly.

    Solar string lights ($20–$60 for a 30-foot strand from Amazon or Target) take 15 minutes to hang. Solar pathway lights ($3–$8 each, $50–$150 for a front path) stake into ground in 30 minutes. No electrician needed; charging happens automatically during daylight. Replace batteries annually ($2–$5 per light).

    Pro tip: Layer different light types—overhead strings, ground pathway lights, and accent lights highlighting plants—for depth and ambiance.

    Your home glows warmly at dusk, creating an inviting beacon that makes evening arrivals feel like coming home to something special.

    13. Add a Rustic Mailbox or House Number Plaque

    Small details register instantly. A thoughtfully styled mailbox or house number sign signals that you care about every inch of your home—the definition of cottage charm.

    Vintage-style mailboxes ($30–$80 from Wayfair, Amazon, or specialty garden stores) and wooden or metal address plaques ($15–$50) take 10 minutes to install with basic hardware. Paint or stain house number signs yourself ($8–$15 in supplies) for personalization.

    Pro tip: Choose materials that complement your siding—aged black metal, warm wood, or painted ceramic look most cottage-appropriate.

    Visitors notice these details subconsciously, and collectively they communicate “this home is loved and cared for”—the essence of cottage appeal.

    14. Paint Your Siding in Warm Neutrals (Not Cool Grays)

    The shift toward warm neutrals over cool grays is significant: warm cream, soft taupe, pale sage, and warm whites make cottages feel inviting and timeless rather than cold and modern.

    Select exterior paint with warm undertones (Sherwin-Williams Alabaster, Benjamin Moore Cloud White, or Behr Swiss Coffee are popular warm options). Budget $30–$50 per gallon; a modest exterior needs 2–3 gallons. Two coats take 3–4 days with drying time. Hire professionals ($1,500–$3,000) or DIY with proper equipment ($500–$800 for rental and tools).

    Pro tip: Get paint samples in multiple warm shades and observe them on your siding at different times of day—afternoon light reveals true color best.

    Your home exudes welcome and warmth rather than sterile minimalism, and the effect deepens as seasons and light change.

    15. Create a Cottage Garden Herb Spiral

    An herb spiral combines function and form: you grow culinary herbs in a beautiful, space-efficient structure that photographers love and provides practical harvests.

    Build with stacked stone or reclaimed timber ($50–$150 in materials) in one afternoon. Plant with easy herbs like thyme, rosemary, sage, oregano ($3–$8 per plant, budget 8–12 plants for a modest spiral). Maintenance is minimal once established—15 minutes weekly watering in summer.

    Pro tip: Place your spiral near the kitchen door for convenient harvesting while cooking, and mulch between plants to retain moisture.

    You gain a functional, beautiful garden feature that serves dual purposes: visual interest and fresh herbs for your table throughout growing season.

    16. Install Window Boxes with Year-Round Plantings

    Window boxes are low-effort, high-impact charm. Filled with cascading flowers, trailing ivy, or seasonal plantings, they soften window lines and add instant coziness.

    Wood or metal window boxes ($20–$60 per box) mount in 15 minutes per window with brackets ($5–$10). Fill with quality potting soil ($12–$20 per bag) and seasonal plants ($5–$10 per plant, use 4–6 per box). Summer upkeep involves watering 2–3 times weekly ($0 if you use drip systems).

    Pro tip: Plant perennials and evergreens in fall (winter interest), refresh with annuals in spring, and scale back in late summer for autumn texture with ornamental grasses or preserved botanicals.

    Every glance through or at your windows frames a living picture, and passersby see abundant, cared-for plantings that telegraph cottage charm immediately.

    17. Add Decorative Metal Railings (or Paint Existing Ones)

    Metal railings—whether ornate and detailed or simple and geometric—add structure and visual weight to porches and pathways. Matte black is most cottage-appropriate.

    New ornate iron railings ($30–$60 per linear foot installed) add $1,000–$3,000+ for a porch. Paint existing metal railings with metal-specific paint ($12–$20 per quart) in one day, and they look refreshed instantly. Choose matte finishes over glossy.

    Pro tip: If you can’t replace or paint, add metal railing guards or climbers to existing wooden railings for visual interest.

    Quality metalwork becomes a focal point that catches the eye and adds architectural sophistication without overwhelming your cottage’s softness.

    18. Lay Permeable Pavers or Flagstone for Outdoor Living Spaces

    Outdoor rooms extend your cottage charm beyond the front facade. Permeable pavers (eco-friendly) and flagstone create intentional gathering spaces that feel like part of the home.

    Permeable pavers ($5–$10 per square foot installed) work well in gardens and pathways and support sustainable drainage. Flagstone ($10–$20 per square foot installed) feels more permanent and luxe. Budget $1,000–$3,000 for a modest seating area (roughly 200 square feet). Professional installation takes 2–5 days.

    Pro tip: Layer outdoor “rooms” with different paving materials—gravel for walkways, stone for seating, brick for transitions—to create visual hierarchy.

    Your exterior becomes a series of intentional spaces for living, gathering, and enjoying nature—the truest expression of cottage lifestyle.

    19. Paint Trim and Accents in Crisp White or Cream

    Trim—white or cream—creates crisp lines that define windows, doors, and rooflines. It’s architectural scaffolding that prevents cottages from feeling chaotic or flat.

    Use high-quality exterior trim paint (Benjamin Moore Advance or Sherwin-Williams ProClassic, $30–$50 per gallon) in crisp white or warm cream. Paint trim in two coats over 2–3 days. Professional trim painting costs $800–$1,500 depending on home size.

    Pro tip: Paint trim slightly more saturated or brighter than siding—the contrast creates visual definition and makes the structure read more intentionally designed.

    Crisp trim instantly elevates your home’s perceived quality and creates the architectural bones that make cottage charm feel structured and intentional rather than ramshackle.

    20. Create a Living Wall with Espalier Trees or Trained Vines

    Espalier—the art of training trees or shrubs into geometric patterns against walls—sounds fancy but creates stunning, functional living art. Fruit trees provide harvests; ivy adds texture.

    Espalier fruit trees (apple, pear, $25–$50 each) take 3–5 years to mature into full patterns but require minimal annual pruning (30 minutes). Trained ivy or clematis ($12–$25 per plant) fills space faster (1–2 years). Wire support systems cost $20–$50.

    Pro tip: Choose disease-resistant fruit trees suited to your climate, and start young trees—they train more easily than mature specimens.

    Your cottage wall becomes a dynamic, living feature that changes seasonally, provides fruit or flowers, and represents both artistry and timeless agricultural tradition.

    21. Install Arched Trellis Entry Gates

    A trellis gate is purely decorative but incredibly charming—it signals that you’re entering a special, protected space. The arch softens angles; the gate creates ritual and intention.

    Wood trellis gates ($80–$200 from garden centers or Amazon) mount in one afternoon with basic hardware. Metal arched gates ($150–$400) take a few hours to install. Paint gates to match trim or shutters ($8–$15 in paint).

    Pro tip: You don’t need an actual fence—a standalone gate creates the psychological threshold of a cottage entry without full enclosure.

    Visitors instantly sense they’re crossing into a curated, special space—architecture’s most powerful tool for shifting perception and setting mood.

    22. Add Textural Contrast with Mixed Material Siding

    Instead of uniform siding, mix materials strategically: board-and-batten paired with shiplap, brick accents on a chimney or section, or stone plinth at the base. Variation reads as thoughtful, not chaotic.

    Combination siding (mixing materials) costs $5–$20 per square foot depending on choices. Professional installation runs $3,000–$8,000+ for modest mixed-material projects. DIY shiplap installation takes one to two weekends for experienced builders.

    Pro tip: Ensure materials share warm undertones and use consistent trim color to unify the palette despite material variation.

    Textural contrast catches light beautifully, photographs gorgeously, and prevents your cottage from reading as one-dimensional or overly coordinated—instead, it feels collected and evolved.

    23. Style Your Porch with Vintage-Inspired Seating and Planters

    Porch styling completes the cottage look. Vintage furniture, overflowing planters, and collected pieces signal comfort and personality—the opposite of sterile or staged.

    Vintage or vintage-inspired furniture ($50–$300 per piece from thrift stores, Facebook Marketplace, or Wayfair) mixed with large terracotta or aged metal planters ($20–$80 each) creates layered appeal. Styling takes one to two hours of arranging. Renter-friendly: these are all portable.

    Pro tip: Odd numbers and asymmetry feel more authentic than matching pairs—a bench on one side, chairs on the other, planters in clusters of three.

    Your porch becomes an extension of your home’s personality—a place people want to linger, and a reflection of intentional, personal style rather than catalog decoration.

    24. Install Functional or Decorative Shutters with Hardware Details

    Beyond color, shutter details matter: visible hinges, functional latches, and authentic hardware make shutters feel real rather than decorative afterthoughts. This authenticity signals intentionality.

    Real functional shutters with hardware ($50–$150 per pair plus installation) take one day to install professionally. Faux shutters with detailed hardware ($30–$80 per pair) take a few hours DIY. Hardware upgrades alone ($5–$20 per set) refresh existing shutters instantly.

    Pro tip: Choose aged bronze, black, or oil-rubbed bronze hardware rather than shiny chrome or brass—it reads more cottage.

    Authentic-looking shutters, especially with visible hardware details, make your cottage feel honest and historically grounded rather than costume-like or trendy.

    25. Create Privacy Screens with Lattice and Climbing Vines

    Privacy screens are functional and beautiful. Lattice panels draped in climbing vines soften sight lines, muffle noise, and create garden room boundaries.

    Wooden lattice panels ($30–$80 per 4’x8′ panel from Home Depot) mount on posts ($100–$300 for framing) in one weekend. Plant climbing vines ($12–$25 each) and plan for 2–3 years to full coverage, or use fast-growing clematis (1–2 years). Annual maintenance is minimal—annual pruning ($0 if DIY, 30–60 minutes).

    Pro tip: Paint lattice to match trim or shutters, and choose vines with seasonal interest (flowering, autumn color, or evergreen foliage).

    You gain privacy and visual softness while maintaining the organic, garden-forward aesthetic that defines cottage charm.

    26. Add a Rustic or Vintage Gate at the Property Entry

    A property gate—whether charming wood or vintage metal—signals ownership and intentionality. It creates the final psychological threshold between public and private space.

    Wooden gates ($100–$300) or vintage metal gates ($150–$400, often found on Etsy or local salvage shops) mount on posts and hinges ($50–$150 hardware). Installation takes one to two days and requires basic carpentry or professional help.

    Pro tip: Age new gates with steel wool or vinegar for an instantly weathered look, or source genuinely vintage gates from architectural salvage yards for authentic patina.

    A functional, beautiful gate completes your cottage entrance and makes visitors feel welcomed into a deliberate, cherished space rather than casually approaching a random home.

    27. Paint Your Roof Dark (or Add Architectural Shingles)

    Your roof is 30–40% of your home’s visual impact, yet it’s often overlooked. Dark roofs (charcoal, slate, deep brown) create the structural drama that modern farmhouse and cottage styles demand.

    Roof painting ($2,000–$5,000 for modest homes) requires professionals for safety and warranty purposes; allow 3–5 days. Architectural shingles ($3–$5 per square foot installed, $3,000–$8,000 for modest roofs) last 25–30 years and replace worn shingles in 1–2 weeks.

    Pro tip: Dark roofs photograph beautifully and age gracefully while appearing intentional and architectural. Avoid orange or rust tones—they read dated quickly.

    A dark roof anchors your entire home visually, creates contrast with warm siding, and signals that your cottage is architecturally considered rather than accidentally assembled.


    Save this guide for your next exterior refresh and pick one or two ideas to tackle this month—you’ll be shocked at how quickly small updates compound into major curb appeal. Which cottage detail speaks to you most? Share this with a friend planning their own home refresh!

  • 27 Porch & Veranda Ideas That Instantly Refresh Your Exterior

    27 Porch & Veranda Ideas That Instantly Refresh Your Exterior

    Your porch or veranda might be the most underutilized space in your home—but it doesn’t have to stay that way. Whether you’re working with a tiny stoop or a sprawling wraparound, these 27 ideas will help you create an outdoor room that actually gets used. We’re mixing budget hacks, DIY projects, and design-forward upgrades that work for renters and homeowners alike. The best part? Most of these changes take just a weekend, and several are completely free. By the end, you’ll have a porch that feels like an extension of your home—a place you actually want to spend time in, morning coffee in hand.

    1. Layer Earth-Tone Seating for Warmth and Texture

    Forget matching furniture sets; layering different seating pieces creates depth and actually makes your porch feel more welcoming. Mix a wooden bench with cushions in complementary earth tones like sage, taupe, and warm gray. Add a couple of poufs or ottomans in woven materials (rattan, jute) for flexibility and texture.

    Start with what you have—even old dining chairs work great. Add cushions from Target or Wayfair ($30–$80 each). A throw blanket draped over the bench adds another texture layer. This takes about 30 minutes to arrange once pieces are gathered, and it’s completely renter-friendly if you use a removable cushion-cover system. You can swap cushions seasonally, so the investment lasts years.

    The result? Your porch goes from empty and cold to a space that makes you want to linger. People actually choose to sit there instead of inside.

    2. Add Contrast Trim Around Doors and Windows

    Bold contrast trim is one of the easiest ways to add visual interest without major construction. Paint the area around your door and porch windows a striking color—charcoal, deep navy, or even burgundy—while keeping the main wall lighter. This creates a frame effect that draws the eye and feels intentional.

    Use exterior-grade paint (like Benjamin Moore or Sherwin-Williams, $40–$70 per gallon) and a 2-inch trim brush for clean lines. Tape off with painter’s tape for precision. This is a weekend project (2–3 hours including drying time) and requires zero construction skills. Renters can often negotiate this with landlords since it’s fully reversible with primer.

    Your entrance becomes a focal point. Visitors notice. Your porch suddenly feels designed rather than default.

    3. Swap Out Your Door Hardware for Artisanal Pieces

    Small hardware changes have outsized impact. Replace basic door handles and hinges with artisanal metal pieces in bronze, brass, or matte black. Look for items with character—cast iron, handmade details, vintage-inspired designs.

    Shop Etsy, Anthropologie, or Home Depot’s premium lines for options ($20–$80 per piece). Installation takes 20–30 minutes with a basic screwdriver. No renovation required; just unscrew the old, screw in the new. This works for renters too if you keep original hardware in a safe place.

    Your door becomes a statement. Every time someone reaches for the handle, there’s a small moment of “oh, nice.” These details make a porch feel considered and personal.

    4. Install Warm-Toned Edison String Lights

    String lights shift your porch from daytime-only to evening-ready. Choose Edison-style bulbs in warm amber or soft white for that cozy farmhouse feel that pairs beautifully with earth tones.

    Install solar or plug-in Edison string lights from Target, Wayfair, or Amazon ($25–$100 depending on length). Solar options need no outlet and take 15 minutes to install—just secure the anchor posts with small clips and hang. For plug-in versions, use an outdoor extension cord hidden along the railing edge. Renters can use adhesive hooks (removable 3M outdoor hooks, $10) instead of drilling.

    Suddenly your porch is usable after sunset. That simple addition makes it feel like a destination, not just a passageway.

    5. Create a Native Plant Focal Point

    Native plants are lower-maintenance, support local ecosystems, and photograph beautifully on a porch. Cluster them in odd numbers (3 or 5 pots) at different heights for visual interest.

    Visit your local native plant nursery to find species suited to your region ($15–$40 per plant). Choose a mix of heights and textures—tall grasses, compact shrubs, delicate flowers. Pot them in terra-cotta or ceramic containers ($5–$20 each). Arrange in a corner or along one side. Setup takes 1 hour, and upkeep is minimal once established. This is fully renter-friendly if you use portable pots.

    Your porch looks more intentional and garden-like. Plus, you’re supporting pollinators and creating a small ecosystem right on your stoop.

    6. Paint Your Front Door a Bold Earth Tone

    A bold door is the quickest way to make your porch memorable. Skip all-black (it’s having a moment but trending out) and go for saturated earth tones: deep olive, sage, warm charcoal, or even terracotta.

    Use exterior-grade paint in a semi-gloss or satin finish ($30–$50 per quart) from Benjamin Moore, Sherwin-Williams, or Allura USA. Two coats with a quality brush ($8–$15) take about 4–5 hours total including drying time between coats. Remove the door hardware first for clean edges. This is a satisfying DIY that renters can usually do (check your lease).

    Your porch has instant personality. That door becomes the first thing people photograph when they visit.

    7. Mix Brick and Warm Wood Cladding Panels

    Material mixing creates depth without major renovation. Combine exposed or thin brick (lower half) with warm wood paneling or cedar cladding (upper section) for visual interest and texture.

    Thin brick ($0.50–$2 per brick, depending on source) can be applied over existing siding or drywall with construction adhesive in a weekend project. Cedar or composite wood cladding runs $1–$3 per square foot. If you’re renting, this probably isn’t an option, but if you own, it’s a high-ROI upgrade. Alternatively, use peel-and-stick brick or wood-look panels ($30–$60 per panel, removable for renters).

    The result is a porch that looks thoughtfully designed, not cookie-cutter. Texture catches light and creates visual movement even on flat surfaces.

    8. Add Geometric Color Blocking with Paint

    Geometric color blocking is an accessible way to try bold trends without committing to a full color drenching. Divide your porch wall into sections—horizontal split, diagonal, or geometric shapes—and paint each in complementary earth tones.

    Use painter’s tape and two exterior paint colors ($30–$70 each). A simple horizontal split takes 4–6 hours including tape-off and drying. Diagonal or more complex shapes take longer but are totally doable with patience. Renters can use removable mural paint or adhesive tape (though it’s trickier).

    Your porch looks modern and intentional. The geometric element makes the space feel more “designed” than a standard single color ever could.

    9. Introduce Warm Wood Beams as Visual Anchors

    Wood beams add warmth and visual structure to any porch ceiling or upper walls. They can be real heavy timber or lightweight faux beams (which look surprisingly authentic).

    Real beams are an investment ($200–$500+ installed), but faux beams from Home Depot or Amazon run $50–$200 for a porch-sized set and install in 2–3 hours with minimal tools. They’re lightweight polyurethane with realistic wood finish. Apply with construction adhesive or small brackets. Renters should check lease terms, but many are removable.

    The bones of your porch suddenly look more architectural. That simple addition creates a sense of permanence and craftsmanship.

    10. Use Arches on Entryways or Windows

    Arches soften porch architecture and add a high-design touch. Install them over doorways, above window frames, or as standalone architectural details. They can be real construction or decorative trim.

    For renters or non-invasive option, use removable arch trim kits ($30–$80 from specialty suppliers). For permanent installation, wood or polyurethane arches run $50–$300 depending on size. Installation takes 4–8 hours if basic DIY, or hire help for $300–$600 labor. This transforms how your porch looks—suddenly it feels intentional rather than accidental.

    Arches add elegance and break up harsh right angles. Your porch gains architectural sophistication.

    11. Create a Low-Maintenance Seating Nook with Metal Frames

    Metal-framed furniture is durable and easy to maintain—perfect if your porch is exposed to weather. Choose pieces with clean lines for a modern look that pairs beautifully with earth-tone cushions.

    Shop MAC Metals, Wayfair, Target, or West Elm for frames ($150–$400 for a pair). Add removable cushions in linen or performance fabric ($40–$100 each). This setup takes 30 minutes to assemble, and maintenance is just occasional wiping and cushion washing. The entire setup is renter-friendly if you buy modular pieces.

    You get a porch that’s practical and looks intentional. Metal withstands weather without looking worn, so your porch stays fresh-looking for years.

    12. Install Ambient Lighting Under Railings

    Under-railing lighting adds ambiance and functionality without taking up visual space. Install warm LED strip lights ($15–$40) along the underside of railings for a subtle glow.

    Use waterproof LED strip lights (search “outdoor LED strip” on Amazon), adhesive-backed for easy installation. Solar options eliminate wiring hassles. Setup takes 30 minutes and requires no tools beyond cleaning the railing surface. Renters can remove them later without damage.

    Evening time on your porch becomes atmospheric. That subtle lighting makes your porch feel designed and usable after dark.

    13. Layer Outdoor Rugs for Warmth and Definition

    Outdoor rugs anchor porch spaces and add coziness underfoot. Layer them in coordinating tones for depth—a larger neutral base rug with a smaller patterned rug layered on top for visual interest.

    Find weather-resistant rugs at Wayfair, Target, or Rugs USA ($40–$150 depending on size). Indoor rugs work fine if your porch is covered and dry. Placement takes 15 minutes. Renters love this hack because it’s completely portable. You can rotate rugs seasonally.

    Your porch gains definition and warmth. The layering technique makes the space feel more intentionally designed than a single flat floor.

    14. Paint Columns or Posts in Contrasting Colors

    Painting porch columns or support posts creates instant visual impact and structure. Choose a color that contrasts with your main porch color—charcoal, deep navy, or warm burgundy against light walls.

    Use exterior-grade paint ($30–$50 per gallon) and apply 2 coats with a quality brush. A single post takes 2–3 hours; multiple posts take a full day. This is a satisfying DIY that transforms the entire vibe of your porch. Renters may face restrictions, but it’s worth asking.

    Your porch goes from flat to dimensional. Those colored posts become architectural statements that tie your whole design together.

    15. Add Decorative Wall Sconces for Evening Warmth

    Wall sconces provide lighting and style simultaneously. Install them flanking your front door in materials like bronze, brass, or matte black for an artisanal feel.

    Shop Home Depot, Wayfair, or Etsy for outdoor sconces ($40–$150 each). Hardwired installation requires calling an electrician ($200–$400 labor) or DIY if you’re comfortable with electrical work. Alternatively, use plug-in sconces that require only outlet access ($60–$120). Installation takes 1–2 hours with professional help.

    Your porch lighting becomes a design feature, not just functional. Evening time feels intentional and welcoming.

    16. Mix Textures with Woven Accent Pieces

    Woven materials add organic texture that pairs beautifully with earth tones. Mix rattan, jute, wicker, and seagrass in your furniture, storage, and accessories for depth.

    Shop IKEA, Target, Wayfair, or World Market for woven pieces ($15–$100 each). Combine a rattan side table, jute baskets for storage, and woven poufs for seating flexibility. Arrangement takes 1 hour, and this works great for renters since pieces are portable. Refresh seasonally by swapping out accent colors.

    Your porch gains natural, layered sophistication. Woven textures catch light and create visual interest in a way smooth surfaces never do.

    17. Create Vertical Gardens with Hanging Planters

    Vertical gardens maximize space and create living walls that feel fresh and modern. Hang planters at varying heights for visual interest and to showcase trailing plants.

    Use macramé hangers or metal brackets ($10–$30 each) and lightweight pots ($5–$15 each). Fill with trailing succulents, herbs, or pothos plants ($5–$15 per plant). Setup takes 1–2 hours, and it’s fully renter-friendly with removable hooks. This solves space constraints beautifully on small porches.

    Your porch becomes a living, breathing space. The vertical element draws the eye upward and makes even tiny porches feel lush.

    18. Install Shiplap or Wooden Accent Walls

    Shiplap adds subtle texture and visual interest without bold color commitment. Install it on one wall or in sections for modern farmhouse vibes that stay timeless.

    Purchase pre-finished shiplap ($1–$3 per linear foot) or standard shiplap to paint yourself. Installation is a weekend DIY project (6–10 hours depending on wall size) using basic tools and adhesive or nails. Budget $200–$500 for materials on a standard porch wall. Renters can use peel-and-stick shiplap panels ($30–$50 per panel, fully removable).

    The texture catches light and creates visual depth. Your porch immediately looks more designed and intentional.

    19. Add Vintage or Artisanal Lanterns as Accessories

    Vintage or handcrafted lanterns add personality and glow. Mix sizes and finishes for a collected, curated feel rather than matching sets.

    Find lanterns at Etsy, Anthropologie, HomeGoods, or antique shops ($20–$80 each). Choose ones that hold candles (pillar candles or LED candles for safety and ease). Grouping takes 15 minutes. This is entirely renter-friendly and adds a personal touch. Update seasonally with different candle heights or colors.

    Your porch gains vintage character. Those lanterns become conversation pieces and create ambiance without requiring any installation.

    20. Paint a Mural or Geometric Pattern on Flooring

    A painted floor design adds unexpected artistry to your porch. Use geometric patterns, tile-inspired designs, or subtle mural elements in complementary earth tones.

    Use exterior-grade deck paint or concrete paint ($25–$50 per gallon) with stencils or freehand design. Seal with clear exterior polyurethane ($20–$30) for durability. This is a weekend project (4–8 hours depending on complexity and drying time). Renters should check lease terms; it’s often permissible since it’s reversible with primer and paint. It’s not permanent damage.

    Your porch becomes an unexpected design moment. That creative touch makes people pause and appreciate your space.

    21. Install Metal Siding Accents for Industrial Chic

    Metal accents bring industrial modern vibes when mixed with natural materials like stone or brick. Use panels strategically on one wall or around architectural features.

    Metal siding runs $1–$3 per square foot (brands like MAC Metals). Installation can be DIY ($200–$500 in materials) or hire help ($300–$800 labor). This is typically a permanent upgrade, so renters should skip. For non-invasive option, use peel-and-stick metal look panels ($40–$80, but less durable).

    Your porch gains contemporary edge. That industrial touch feels sophisticated and carefully designed.

    22. Create Cozy Covered Nooks with Curtains

    Lightweight outdoor curtains define space and add coziness while filtering light. Hang them from simple rods to create intimate nooks on larger porches.

    Purchase outdoor curtain panels from Target, Wayfair, or Pottery Barn ($30–$80 per panel). Install a basic tension rod or PVC rod ($15–$30). Hanging takes 30 minutes. These are often renter-friendly if hung from removable brackets. Use indoor/outdoor fabric that withstands moisture.

    That simple addition makes your porch feel like a room. The enclosed nook becomes irresistible for reading, morning coffee, or evening conversations.

    23. Update Stairs or Steps with Color and Material

    Painted or updated stairs make a bold design statement and improve safety with visual definition. Paint the risers in a contrasting color while keeping treads neutral or vice versa.

    Use exterior-grade paint ($30–$50) and two coats on risers (about 3–4 hours total). Alternatively, install thin stone veneer or composite treads ($200–$600) for a major upgrade. This DIY-friendly project is typically allowed for renters if paint is used instead of permanent changes.

    Your stairs become a design feature, not just a functional necessity. That color separation also makes stairs safer by defining each step clearly.

    24. Combine Stone Veneer with Warm Wood Trim

    Stone veneer mixed with wood trim creates sophisticated depth. Apply veneer to lower portions of your porch walls and cap with warm wood trim for a finished, intentional look.

    Stone veneer runs $2–$6 per square foot depending on type (real stone more expensive than faux). Installation is DIY-able for handy folks ($300–$800 in materials) or hire pros ($500–$1,500 labor). Warm wood trim adds $1–$2 per linear foot. This is a permanent upgrade not ideal for renters but creates lasting value.

    Your porch gains architectural sophistication. That material combination looks like professional design work and elevates the entire facade.

    25. Add Outdoor Throw Pillows in Saturated Earth Tones

    Strategic pillow placement brings comfort and color harmony. Layer pillows in deep earth tones and varied textures for a curated, coordinated look.

    Find pillows at Target, Wayfair, IKEA, or West Elm ($20–$60 each). Choose outdoor or performance fabric to withstand weather. A complete setup of 5–6 pillows runs $100–$300. Arrangement takes 15 minutes. Renters love this hack—it’s portable and seasonal. Swap out seasonally or when you need a refresh.

    Your seating area goes from sparse to inviting. That layering of texture and tone creates visual depth and makes your porch feel like a designed retreat.

    26. Install Removable Peel-and-Stick Wood Accents

    Peel-and-stick wood-look panels deliver real texture without permanent installation, perfect for renters or testing a design before committing.

    Find peel-and-stick wood panels or shiplap look from Amazon, Wayfair, or Etsy ($30–$80 per panel). Coverage depends on porch size; budget $200–$500 for most applications. Installation takes 4–6 hours and requires clean, dry surfaces. These are fully removable and reusable. The texture looks surprisingly authentic once installed.

    Your porch gains warmth and dimension instantly. You get commitment-free design experimentation with professional-looking results.

    27. Combine Native Planting with Sculptural Containers

    Oversized sculptural planters elevate native plants into design statements. Choose containers with interesting shapes, textures, or finishes to showcase your plantings as living art.

    Purchase sculptural planters from Etsy, Terrain, or high-end garden suppliers ($60–$200+ each depending on size). Fill with native plants or ornamental grasses ($15–$40 each). Arrangement and planting takes 2–3 hours. This is renter-friendly if you use portable pots. Select planters in coordinating finishes—concrete, ceramic, or matte glazed—for a cohesive look.

    Your porch entry becomes a gallery-like moment. Those sculptural elements make native plants feel like intentional art rather than just greenery.


    Pin this for your next porch refresh—pick one idea to tackle this weekend, whether it’s painting your door or layering new pillows. Small changes compound fast, and you’ll be surprised how a single update shifts the entire vibe of your outdoor space.

  • 24 Stone & Brick Exterior Concepts That Add Timeless Character

    24 Stone & Brick Exterior Concepts That Add Timeless Character

    If your home’s exterior feels flat and forgettable, you’re not alone. Many homeowners overlook the power of stone and brick to add character, depth, and timeless appeal to their curb. The good news? You don’t need a complete overhaul to make a dramatic difference. Whether you’re working with an existing brick facade, planning renovations, or simply want to refresh your home’s look, these 24 concepts show how mixing materials, playing with color, and adding strategic accents can transform an ordinary exterior into one that stops people in their tracks. From budget-friendly styling tricks to investment pieces that last decades, you’ll find ideas for every budget and skill level. Let’s explore how stone and brick can become the hero of your home’s story.

    1. Layer Thin Brick Over Existing Siding

    Thin brick veneers offer major visual impact without the weight, cost, or installation hassle of traditional full-brick renovations. This modern approach adds authentic texture and depth in weeks rather than months.

    Installation typically runs $8–15 per square foot for materials, making it accessible for mid-range budgets. Most thin brick adheres to existing siding with specialized mortar, so you’re not tearing down walls. Hire a contractor for larger projects (estimated 1–3 weeks depending on home size), or tackle small accent walls yourself if you’re handy with masonry tools.

    The payoff is stunning texture that photographs beautifully and requires minimal maintenance compared to full masonry.

    2. Paint Brick a Bold Earthy Green

    Painting brick in saturated earth tones like deep olive or forest green instantly adds personality while honoring 2025’s bold color trend. It’s one of the quickest ways to shift your home’s entire vibe.

    Use masonry-grade exterior paint (around $40–60 per gallon from Home Depot or Sherwin-Williams). Plan on 2–3 coats and budget $200–600 in paint costs depending on square footage. Prep is crucial: clean the brick thoroughly and prime first. A weekend project for DIYers, or hire a painter ($1,500–3,000 for full exterior). The color won’t fade quickly with quality paint, and you can always repaint if trends shift.

    This bold move gives your home an intentional, curated look that feels both modern and grounded.

    3. Mix Brick with Black Metal Siding Panels

    Pairing warm brick with cool matte black metal creates a striking industrial-farmhouse aesthetic that balances warmth and edge. This combination works especially well on transitional homes.

    Metal siding panels cost $6–12 per square foot (MAC Metals or similar brands), while brick stays consistent. The contrast is the star—it creates visual zones without harsh lines. Hire professionals for this ($3,000–8,000 depending on coverage), as metal installation requires precision. The result is a home that looks intentionally designed and stands out on your street without screaming “trendy.”

    This pairing ages beautifully and works across modern, farmhouse, and industrial styles.

    4. Add Stone Accents Around Doorways

    Stone archways and trim details instantly elevate any entrance, adding craftsmanship and grandeur. This accent-focused approach works for renters (if adhered temporarily) and budget-conscious homeowners.

    Natural stone accents run $30–100+ per square foot for materials and labor. For smaller projects like a single doorway ($500–2,000), you can create major impact without full facade renovation. Consider lightweight cultured stone ($15–40 per sq ft) as a budget alternative that mimics real stone. Installation is 2–5 days for a doorway accent.

    The framed entry becomes a focal point that draws eyes and adds perceived value to your home.

    5. Combine Brick with Warm Wood Siding

    Mixing brick with wood creates warmth and texture that neither material achieves alone. This pairing is having a major moment in modern farmhouse design.

    Plan your material split strategically: brick often grounds lower sections or forms corner details, while wood covers larger areas. Wood siding costs $3–10 per sq ft and breathes new life into dated facades. Budget $2,000–6,000 for material and labor depending on coverage. Choose warm honey or cedar tones to complement brick hues—avoid orange-stained wood, which reads as dated in 2025.

    The result is a layered, intentional look that photographs beautifully and feels inviting.

    6. Install Stone Veneer on Chimney or Pillar

    A single focal point like a chimney or porch pillar wrapped in stone creates architectural interest without committing to full-facade changes. This is perfect for homeowners wanting to test the stone trend.

    Stacked stone veneer costs $15–25 per sq ft installed, making a chimney project roughly $1,500–3,500. DIY installation is possible but demands precision; most homeowners hire contractors (2–3 days). The payoff is a striking vertical element that anchors your home’s exterior and looks substantially more expensive than it costs.

    Visitors notice this detail immediately, and it works as a bridge between your home’s materials.

    7. Create Geometric Color Blocking with Brick

    Two-tone brick color blocking creates visual drama and architectural interest without material mixing. This geometric approach is trending for homes seeking contemporary edge.

    Work with a brick contractor to source or paint complementary hues. Custom brick selection might add $3–8 per sq ft to standard pricing, depending on availability. Plan the split thoughtfully—vertical divisions work for narrow homes, while horizontal splits suit wider facades. Installation is the same as standard brickwork; the design is the hero.

    The bold geometry makes your home look intentionally designed and memorable.

    8. Use Reclaimed or Salvaged Brick

    Salvaged brick carries history and authenticity that new materials can’t replicate. This approach appeals to homeowners who value sustainability and one-of-a-kind character.

    Reclaimed brick costs $10–25+ per brick (roughly $15–30 per sq ft installed), making it a premium investment. Source from architectural salvage yards, online marketplaces, or local demolition sites. Installation is identical to new brick, but contractors appreciate the material’s variability—expect slightly longer timelines (3–4 weeks). The payoff is unmatched character: every brick tells a story, and your home becomes a conversation starter.

    This choice shows thoughtfulness and sustainability, appealing to design-savvy buyers.

    9. Paint Brick in Warm Neutral Tones

    If bold color feels risky, warm neutrals like soft grays, warm beiges, and greige tones deliver sophistication while staying timeless. This approach bridges traditional and contemporary styles.

    Masonry paint in warm neutrals costs $40–70 per gallon, requiring 2–3 coats. Budget $200–600 in paint alone for full coverage. Pair with dark trim—black or charcoal shutters and doors create the contrast this palette needs. A weekend DIY project or $1,500–3,000 with a professional painter. This color choice works across all home styles and resells well.

    Your home gains polish without the commitment of bold color trends.

    10. Add Matte Black Metal Accents to Brick

    Metal accents—railings, frames, awnings—create striking contrast against warm brick and add industrial sophistication. This trend works beautifully on any brick-based home.

    Custom metal work costs $50–200 per linear foot depending on complexity (railings, gates, awnings). A 10-foot porch railing runs $500–2,000; metal-framed windows are $200–400 each. Hire skilled metalworkers for quality craftsmanship. The investment is worth it: metal accents instantly modernize brick facades and photograph exceptionally well.

    These details elevate your home’s perceived value and create architectural definition.

    11. Build a Stone Retaining Wall for Landscape Drama

    A stone retaining wall adds dimension, defines outdoor spaces, and creates visual interest from the street. This landscape feature anchors your home’s architecture to its surroundings.

    Stacked stone or dry-laid walls cost $25–50 per linear foot, making a 20-foot wall roughly $500–1,000 in materials. DIY installation is manageable if you’re patient; hire contractors for 2–3 days of labor. The wall becomes a backdrop for landscaping and creates architectural continuity between house and yard.

    This addition transforms your curb appeal and increases perceived property value significantly.

    12. Paint Brick in Moody Charcoal Black

    Dark charcoal black brick is bolder than traditional red and reads as decisively modern. If you love drama, this is your color—but it requires confidence.

    Use premium exterior masonry paint in charcoal ($50–75 per gallon); expect $300–700 in paint costs for full coverage with 2–3 coats. Plan on $2,000–4,000 with a professional painter. The commitment is real—black shows dust and requires cleaning more often—but the impact is undeniable. This choice works best on larger homes where the color doesn’t overwhelm.

    Your home becomes a bold architectural statement that photographs beautifully in any light.

    13. Mix Stone and Brick for Texture Variety

    Alternating horizontal bands of brick and stone create visual rhythm and sophisticated texture. This approach is less common than single-material facades, making it distinctive.

    Work with contractors experienced in mixed masonry—precision matters here. Budget $12–20 per sq ft for materials and labor, accounting for both brick and stone. Design the pattern first (sketch or mockup on paper); installation takes 3–5 weeks depending on complexity. The result is a layered, intentional facade that looks architectural and curated.

    This choice signals thoughtful design and adds depth that reads even from a distance.

    14. Apply Mortar Matching and Color Variation

    Mortar color choice is often overlooked, but it dramatically affects how brick reads. Varying mortar shades creates movement and sophistication.

    Custom mortar mixes cost $15–30 per bag and require skilled masonry work. This is not a DIY project; hire experienced masons ($2,000–5,000 for exterior work). The technique works beautifully during new construction or when repointing aging brick. The payoff is a textured, thoughtfully designed facade that looks professionally curated.

    Visitors may not consciously notice the mortar, but they’ll sense the home’s attention to detail.

    15. Create a Focal Wall with Contrasting Stone

    A single accent wall in stone creates impact without overwhelming your facade. This budget-conscious approach lets you test the stone trend before committing fully.

    Stone accent walls cost $20–35 per sq ft installed, making a 200 sq ft wall roughly $4,000–7,000. Choose a prominent wall (entrance side or highly visible from street). Installation is 1–2 weeks. The result is an architectural focal point that adds perceived value and gives your home a designer-finished look.

    This single detail transforms your home’s visual weight and curb appeal.

    16. Paint Brick to Match Earthy Greens (Gray Heron Style)

    “Gray Heron” green—a soft, sophisticated sage-green shade—is 2025’s standout earth tone. It’s less bold than deep olive but more interesting than beige.

    Specialty exterior paint in gray-green runs $50–70 per gallon; Allura USA and similar manufacturers offer trend-forward palettes. Budget $250–650 for paint and 2–3 coats. Pair with cream or white trim and black accents for maximum impact. A weekend DIY or $1,500–3,000 with a pro painter.

    Your home gains a curated, nature-inspired aesthetic that feels both modern and timeless.

    17. Install Thin Brick Veneer with Integrated Lighting

    Combining thin brick with strategic lighting creates architectural drama and extends your home’s curb appeal into evening hours. This luxury touch elevates perceived value.

    Thin brick runs $8–15 per sq ft; integrated lighting adds $300–800 depending on the system (recessed fixtures, uplighting, or accent spots). Total project cost $2,000–6,000 for a modest accent area. Hire professionals for electrical work; this takes 2–3 weeks including permits. The result is a home that looks gallery-quality after dark.

    Evening visitors are immediately impressed by the thoughtful lighting design.

    18. Paint Brick in Warm Caramel Tones

    Warm caramel and honey-toned brick paint creates coziness without cold grays. This approach works beautifully on older homes where warmth suits the architecture.

    Warm-toned masonry paint costs $40–65 per gallon; expect $200–550 in materials for full coverage with 2–3 coats. This color photographs beautifully in natural light and pairs well with traditional-style homes. Hire a painter ($1,500–3,000) for polished results. The warmth creates an inviting, approachable aesthetic.

    Your home feels welcoming and nostalgic while remaining visually current.

    19. Create Mixed Material Cladding (Brick + Wood + Metal)

    Combining three materials—brick, wood, and metal—creates architectural complexity and visual interest that reads as thoughtfully designed. This approach requires strategic planning but delivers stunning results.

    Budget $3,000–10,000+ depending on material quality and coverage area. Work with architects or experienced contractors to plan material transitions; this isn’t a DIY project. Expect 4–6 weeks for installation. The payoff is a home that looks high-end and custom, with balanced visual weight and texture.

    Architects and designers often use this approach for luxury projects—now you can too.

    20. Paint Brick with Color-Drenched Burgundy

    Color drenching in saturated burgundy or deep wine red creates glamorous drama. This bold choice works best on larger homes and for homeowners confident in trendy color.

    Premium exterior masonry paint in burgundy costs $55–80 per gallon; budget $300–750 for full coverage with 2–3 coats. Professional installation runs $2,000–5,000. Burgundy is more forgiving than black (hides dirt better) but still requires maintenance. This color trend is having a major moment in 2025 design.

    Your home becomes an unmistakable landmark on the street and looks utterly luxe.

    21. Use Stacked Stone on Lower Exterior (Wainscot Effect)

    Cladding the lower section of your home in stacked stone (like an oversized wainscot) adds architectural depth and protects against weather damage. This approach balances stone’s visual weight with lighter materials above.

    Stacked stone costs $20–35 per sq ft installed; a typical application on a 30-foot-wide home (roughly 300 sq ft) runs $6,000–10,500. Hire experienced masons; this is 3–4 weeks of detailed work. The result is a grounded, sophisticated exterior that reads expensive and thoughtfully designed.

    This technique increases perceived property value and creates an elegant visual anchor.

    22. Paint Brick in Soft Greige (Gray + Beige Blend)

    Greige—the hybrid of gray and beige—offers sophistication for homeowners hesitant about bold colors. This warm neutral trend is replacing pure gray in 2025 design.

    Greige exterior paint costs $45–70 per gallon from brands like Sherwin-Williams or Benjamin Moore. Budget $250–650 for paint and 2–3 coats. Pair with white or cream trim and warm-toned hardware for maximum warmth. A weekend DIY or $1,500–3,000 with a professional painter.

    Your home gains contemporary polish while remaining timeless and universally appealing.

    23. Incorporate Arched Stone Details Over Doorways

    Stone archways soften facades with curves and add romantic, classical appeal. This architectural detail draws immediate attention to your entry and adds character.

    Custom stone arches cost $1,500–4,000+ depending on size and material. This is a splurge but has outsized impact on curb appeal. Installation is 1–2 weeks. The arched entry becomes the focal point of your home’s exterior and increases perceived value significantly.

    This investment-level detail signals architectural thoughtfulness and timeless elegance.

    24. Apply Limewash to Brick for Soft, Matte Finish

    Limewash creates an aged, European aesthetic on brick with a naturally soft, textured finish. This decorative technique is softer than paint and photographs beautifully.

    Limewash costs $2–4 per sq ft (roughly $300–900 for modest homes). It requires specialized application; hire experienced limewash contractors. Expect 3–5 days for completion. Limewash is not permanent like paint (it fades and mellows over 2–3 years), but many homeowners love the weathered aesthetic. Annual reapplication maintains the look.

    Your home gains a romantic, architecturally sophisticated appearance that feels intentionally vintage.

    Save this post for your next exterior refresh. Pick one or two ideas that resonate with your home’s style, and start planning your project this season—the difference one material or color choice makes will surprise you.

  • 26 Wardrobe Organisation Ideas That Make Mornings Stress-Free

    26 Wardrobe Organisation Ideas That Make Mornings Stress-Free

    Mornings don’t have to be chaotic hunts through piles of clothes. When your closet is organized thoughtfully, getting dressed becomes almost meditative—you know exactly where everything is, outfits come together effortlessly, and you’re out the door without stress. The best part? You don’t need a huge closet or a big budget to make this happen. Whether you’re working with a tiny reach-in closet or a sprawling walk-in, there are proven strategies that work for real life. This guide walks you through 26 specific, actionable ideas that range from zero-cost solutions to smart investments. Each one tackles a real morning pain point—from finding that one sweater buried in the back to preventing wrinkles before they start. Pick a few that match your space and lifestyle, and you’ll notice the difference immediately.

    1. Color-Coordinate Your Hanging Clothes

    When clothes are grouped by color, you can visually scan your closet and build outfits in seconds instead of searching through similar items. This works especially well if you have multiples of one type (like five white tees or three black sweaters).

    Hang items in this order: whites and creams, then warm tones (pinks, reds, oranges, yellows), cool tones (greens, blues, purples), then neutrals (grays, blacks, browns). This takes about an hour depending on closet size. It’s completely free and works in any closet type. You might rediscover clothes you forgot you owned because suddenly seeing everything becomes so much easier.

    Pro tip: Within each color section, arrange by item type (dresses, then blouses, then sweaters). You’ll cut your morning decision time by half.

    2. Install Pull-Out Valet Rods for Next-Day Outfits

    A valet rod is a pull-out bracket that extends from your closet wall, letting you hang tomorrow’s outfit outside so you can see it and make changes before bed. This eliminates the “what should I wear?” panic when you’re groggy.

    Install a pull-out valet rod ($25–$60 on Amazon or Home Depot) to your closet’s interior side wall using basic hardware. It takes about 20 minutes with a drill. Mount it at shoulder height so clothes hang at eye level. Alternatively, hang a simple tension rod in a corner for free. Every night, hang three complete outfits here and mix-and-match in the morning. You’ll sleep better knowing your look is already planned and ready.

    Pro tip: Take a photo of each outfit combination so you can recreate it later.

    3. Use Drawer Dividers for Folded Items

    Folded items buried in a pile become invisible and wrinkled. Dividers keep everything standing upright and visible, like a filing system for clothes. You see every option at a glance.

    Buy fabric drawer dividers or shelf dividers ($15–$30 for a set of 4–6) from IKEA, Target, or Amazon. Place them vertically in drawers or on shelves, then stand folded items inside instead of stacking them flat. This works beautifully for sweaters, tees, jeans, and leggings. Spend 30 minutes organizing once, and you’ll save minutes every single morning because you won’t have to unstack and restack. Your clothes also stay in better shape longer.

    Pro tip: Label each divider section with what it contains (e.g., “Heavy Sweaters,” “Work Tees”) so family members put things back correctly.

    4. Create a “Laundry Day” Shelf

    When laundry gets folded and immediately put away, it prevents the dreaded pile of clean clothes sitting in your closet for days. A dedicated folding and staging shelf keeps laundry moving.

    Designate one closet shelf or install a small pull-out shelf ($40–$80 at IKEA or Wayfair) about waist-height. Keep a mesh folding basket there, along with a small bin for items needing repairs or a hanger for clothes awaiting ironing. Spend just 15 minutes each morning folding yesterday’s dry cleaning and putting it away. This prevents the cascade effect where one pile becomes three. Your closet stays clean, and you always have fresh, ready-to-wear clothes.

    Renter-friendly note: Use a rolling cart instead—no installation needed, and you can move it anywhere.

    5. Label Everything for Seasonal Rotation

    Seasonal items taking up valuable closet space all year round mean less room for what you actually wear now. Storing off-season clothes overhead frees up prime real estate and makes daily choices simpler.

    Buy clear plastic storage bins ($20–$50 for a set of 4) from Target, The Container Store, or Amazon, then label each with the season and specific items (e.g., “Winter Coats,” “Summer Dresses”). Stack them on high shelves or in a separate closet corner. This takes about 45 minutes to set up. Every three months, rotate bins—pull down summer items in June, pack away winter coats. Suddenly, your hanging and shelf space feels twice as big because only current-season clothes are visible and accessible.

    Pro tip: Take a photo of bin contents and tape it to the outside so you remember what’s inside without opening it.

    6. Hang Pants Vertically on Clip Hangers

    Stacking pants or folding them flat causes permanent creases and wastes hanging space. Clip hangers let you see every pair at once and keep them wrinkle-free.

    Buy wooden clip hangers ($15–$30 for a pack of 6–8 on Amazon or at Target) and hang pants vertically by clipping the waistband. Line them up like files in a drawer. This takes 20 minutes to set up. You’ll see all your pants options at once, so you stop wearing the same three pairs. Pants stay crisp without ironing, and you get 3x more storage in the same space. This works especially well if you have limited hanging room.

    Pro tip: Group pants by color or style so similar pieces stay together and you can grab coordinating tops instantly.

    7. Add Accent Lighting to Transform the Mood

    Dark closets make it impossible to see true colors, so you grab what looks right but clashes when you step outside. Good lighting is non-negotiable for morning stress-free dressing.

    Install LED strip lights ($20–$50 from Amazon or Home Depot) along the top shelf and inside cabinets using adhesive backing—no wiring required. Add a small clip lamp ($15–$25) on an upper shelf for task lighting. This takes 30 minutes total. Natural light is ideal, but if your closet lacks windows, layered LEDs mimic daylight and let you see true fabric colors and finishes. You’ll match colors correctly every time and feel more motivated to get dressed in a bright, welcoming space.

    Renter-friendly: Use battery-operated LED pucks ($10 each) instead—zero installation.

    8. Use Shelf Dividers to Prevent Toppling Stacks

    Stacked sweaters and folded clothes start neat but then collapse, mixing everything together. Dividers act like bookends to keep stacks stable and organized throughout the week.

    Buy metal shelf dividers ($15–$30 for a pair from IKEA, Target, or Amazon) and place them on your shelf to create compartments. Use one compartment per clothing type or color group. This takes 10 minutes to set up. Stacks stay upright and don’t tumble into each other, so you can grab one item without disturbing the rest. Your closet stays tidy from Monday through the next laundry day without any effort.

    Pro tip: Use this same principle with books or magazine holders ($8–$15 each) if you want a softer, fabric look.

    9. Create a “Favorites” Section for Easy Reaching

    When your absolute favorite pieces are front and center, mornings become a quick grab instead of a 10-minute deliberation. You’re drawn to what you love wearing anyway.

    Dedicate one section of your rod or one shelf (usually eye level) to your top 10–15 most-worn pieces. Think favorite jeans, your go-to blazer, everyday tees, and basics that make you feel good. This takes 15 minutes to identify and arrange. You’ll naturally reach for these first, and they work with almost everything else in your closet. Mornings become faster, you wear clothes you actually love, and you use your closet space more efficiently because you’re not searching through pieces you rarely touch.

    Pro tip: Rotate this section seasonally—swap out winter basics for summer ones every three months.

    10. Install Adjustable Shelving to Maximize Vertical Space

    Fixed shelves waste space because you can’t adjust heights to match what you actually own. Adjustable shelving lets you use every inch efficiently.

    Install adjustable metal shelving ($60–$150 depending on size) from Home Depot, Lowes, or Amazon. Mark holes carefully, drill into studs if possible, and secure shelves at heights that match your items. This takes 1–2 hours depending on handiwork confidence. You can now store bulky winter coats higher, keep frequently worn items at arm level, and use lower shelves for heavier items. You instantly gain 20–40% more usable storage. Best of all, when your needs change (kids grow, wardrobe shifts), you adjust heights instead of replacing the whole system.

    Renter-friendly: Use tension rod shelving ($40–$80) between existing shelves—no drilling required.

    11. Organize Accessories in Clear Compartment Boxes

    Accessories get shoved in a drawer and tangled together, so you forget what you own and grab the same two belts every day. Clear compartments keep everything visible and prevent that frustrating hunt.

    Buy clear acrylic compartment organizers ($15–$40 for a set) from Target, The Container Store, or Amazon. Use them for scarves (rolled and standing), belts (coiled in sections), hats (stacked), and jewelry. Place them on a closet shelf or inside a drawer at eye level. This takes 20 minutes to organize once. You’ll see every scarf and belt option at a glance, so you actually use them instead of letting them sit forgotten. You’ll also add variety to your outfits without buying anything new.

    Pro tip: Use small tension rods on a shelf to hang scarves if you don’t have boxes—they’re even cheaper ($8–$12).

    12. Create a “Dry Clean Only” Holding Bin

    Dry clean pieces get mixed with regular laundry or forgotten, leading to washing disasters and ruined clothes. A separate bin keeps delicates safe and reminds you to actually get them cleaned.

    Place a medium woven basket ($20–$35 from IKEA, Target, or Wayfair) on a closet shelf specifically for items needing professional cleaning. When something needs dry cleaning, place it here immediately instead of tossing it back in your closet. Keep a small notebook nearby to track drop-off dates and costs. This takes zero setup time. You prevent accidental washings, remember which pieces need attention, and protect your nicer clothes. Your delicate items last longer and actually get worn instead of sitting unworn because you weren’t sure how to clean them.

    Renter-friendly note: Use any basket or bag you already have.

    13. Use Slim, Space-Saving Hangers Throughout

    Bulky wooden hangers take up excessive rod space and make your closet feel cramped. Slim hangers let you fit 40% more clothes in the same hanging space.

    Replace all your hangers with slim velvet or plastic hangers ($15–$30 for a pack of 50 from Amazon, Target, or Wayfair). They’re only ½-inch thick compared to 1+ inches for standard hangers. This takes 45 minutes if you have a full closet. You’ll instantly gain significant rod space, so you can see and access more pieces. Slim hangers also grip fabric better, so nothing slides off. Plus, uniform hangers create a streamlined, boutique-like look that makes your closet feel more intentional and calming.

    Pro tip: Choose one color (charcoal, white, or natural wood) so hangers disappear and clothes stand out.

    14. Fold Knits Using the KonMari Method to Save Space

    Rolling or bunching knits wastes space and creates wrinkles. The KonMari folding method creates uniform, space-efficient rectangles that you can see at a glance.

    Watch a KonMari folding tutorial (free on YouTube, takes 5 minutes to learn) then fold sweaters, tees, and light jackets into neat rectangles about 8×10 inches. Stand them vertically in a shelf compartment so you see every piece from above. This takes 30–45 minutes to redo your current stack but saves time forever. You’ll fit 30% more clothes in the same shelf space, and you can see every option without digging. Once you learn the method, folding laundry becomes meditative, and your closet stays consistently organized.

    Pro tip: File knits like bookends between two shelf dividers so stacks don’t topple when you pull one piece out.

    15. Install a Mirror Inside Your Closet Door

    Outfit coordination becomes instant when you can see pieces together in the mirror before stepping out. This eliminates the “does this match?” second-guessing.

    Attach a full-length adhesive mirror ($30–$60 from Amazon or Home Depot) to the inside of your closet door at eye level. Make sure the adhesive is rated for the weight and the door is sturdy enough. This takes 10 minutes to install. Now you can hold up pieces, see how they look together, and make final tweaks before leaving. You’ll make faster decisions and feel more confident in your outfit choices. This is especially valuable if you live in a cramped space where you don’t have room for a separate full-length mirror.

    Renter-friendly: Use removable adhesive strips ($10) designed for mirrors to avoid door damage.

    16. Group Clothes by Category, Then by Color

    Searching for “a blue blouse” is faster when all blouses are together, then sorted by color. This hybrid system combines category organization with quick color-scanning.

    First, group by item type: all blouses together, then all tees, then all sweaters, then all jackets, then dresses, then pants. Within each category, organize by color. This takes 1–2 hours depending on closet size but becomes automatic after the first time. You know exactly where to look for any piece in seconds. Mornings become predictable because your brain learns the system instantly. You stop grabbing the same pieces because you now see all alternatives lined up together.

    Pro tip: Use small adhesive category labels ($5–$10 for a set) to mark section dividers so family members maintain the system.

    17. Designate a “Mending & Alterations” Shelf

    Clothes with loose buttons or small tears sit in your closet for months and become forgotten. A visible “mending” shelf reminds you to fix issues before they worsen.

    Dedicate one small shelf or bin for pieces needing repairs. When you notice a loose button or small tear, place the item here immediately with a sticky note describing the issue. Keep a basic sewing kit ($10–$20) nearby. Set aside 30 minutes every two weeks to tackle the pile—most fixes take 5–10 minutes. Suddenly, pieces you thought were ruined come back into rotation. You save money, extend the life of your clothes, and stop avoiding damaged items. A well-maintained wardrobe is smaller but more wearable than a huge closet full of broken pieces.

    Pro tip: For serious alterations, photograph the item and place it in a bag ready to take to a tailor—don’t let it sit.

    18. Use a Slim Hamper or Behind-Door Hanging Hamper

    Laundry piled on the closet floor looks chaotic and makes the space feel cramped. A compact hamper keeps dirty clothes contained and hidden.

    Buy a slim hamper ($25–$50) that fits in a corner or a over-the-door hanging hamper ($20–$40 from Target, Amazon, or IKEA). The over-door option saves floor space completely. This takes 10 minutes to set up. Now dirty clothes have a dedicated home, your closet floor stays clear, and you’re reminded to do laundry when the hamper gets full. The space feels bigger immediately. If you have kids, everyone knows exactly where to put soiled clothes instead of creating random piles.

    Renter-friendly: Use a drawstring bag hung on a hook ($10–$15)—no installation needed.

    19. Create a “Try On” Section for Questionable Pieces

    .” The section is visually separated from the rest.]

    Sometimes you buy something and are unsure if it really works, or an older piece feels “off” suddenly. A visible “try on” section gives these pieces a second chance without cluttering your daily rotation.

    Create a separate rail or hanging rod section for pieces you’re testing out. Use a sticky note to write a deadline (e.g., “Try by Dec 10”). If you wear it and love it, it moves back to regular rotation. If the deadline passes without wearing it, donate it. This takes 15 minutes to set up. You stop hanging onto guilt purchases or pieces that don’t actually fit your life. Your closet becomes more intentional, and you make clearer decisions about what stays. This practice also helps you notice patterns—maybe you realize you actually don’t wear dresses, so you stop buying them.

    Pro tip: Photograph each “try on” piece and rate it after a week to make donation decisions easier.

    20. Stack and Subdivide Jeans Vertically

    Jeans stacked flat waste space and get wrinkled under the weight of other pairs. Standing them vertically means you see all options at once and grab just what you need.

    Fold each pair of jeans into a vertical rectangle about 8×10 inches (using the KonMari method), then stand them side by side on a shelf like files in a drawer. Use shelf dividers to prevent toppling. Group by wash color: lights, mediums, and darks. This takes 30 minutes to organize once. You’ll fit almost double the jeans in the same space and see every option instantly. No more digging through piles and re-stacking everything. Grab one pair without disturbing the rest. Your jeans stay in better condition, and mornings become simpler because you see every option at a glance.

    Pro tip: Create a “jeans uniform” of 5–7 pairs in similar fits so they work interchangeably with your tops.

    21. Add a Small Rolling Cart for Out-of-Closet Items

    Sometimes closet space maxes out, or you need a temporary staging area. A rolling cart provides flexible extra storage that looks intentional, not chaotic.

    Buy a slim three-tier rolling cart ($40–$80 from Target, IKEA, or Wayfair) and position it just inside or next to your closet. Use it for off-season items, a laundry staging area, or overflow folded pieces. This takes 10 minutes to set up. You gain immediate storage without installing anything permanent. It’s perfect for renters or anyone hesitant about permanent closet changes. If you need the space for something else, just roll it away. Best part? It makes great use of awkward closet entry areas or dead space beside the closet door.

    Pro tip: Use baskets or bins on each tier to keep items contained and stylish-looking.

    22. Develop a Simple Color Palette for Easier Outfit Building

    When your entire closet is random colors, nothing coordinates, so you end up wearing the same safe combinations. A intentional color palette means every piece works with multiple others.

    Choose 2–3 neutral base colors (blacks, grays, whites, navies, camel) and 2–3 accent colors (mustard, forest green, burgundy, blush) that flatter your skin tone and make you happy. When you shop, only buy pieces in this palette. This is free and takes just one honest conversation with yourself. Over time, you’ll notice that nearly everything in your closet pairs with something else. You’ll have 10x more outfit combinations from the same number of pieces. Mornings become quicker because you stop deliberating—you know the colors work together.

    Pro tip: Take a photo of your color palette and keep it in your phone so you reference it while shopping.

    23. Create a Nightstand Shelf for Bedside Outfit Display

    Hanging tomorrow’s outfit on a nearby rod or shelf means you see it throughout the evening, subconsciously get excited about it, and wake up already committed to your choice.

    If you have space next to your bed, create a small outfit display shelf or use a small wall-mounted rod ($25–$50 from Target or IKEA). Lay out or hang tomorrow’s complete outfit each evening—top, bottom, shoes, and one accessory. This takes 5 minutes nightly. You fall asleep knowing what you’re wearing and can make tweaks if needed. You wake up with zero decision fatigue. Plus, your partner or kids see your outfit and that sparks ideas for theirs. The evening ritual becomes calming, and mornings move 10 minutes faster.

    Renter-friendly: Use a tension rod ($15) or hang pieces on a standing coat rack ($30–$60).

    24. Implement a “One In, One Out” Rule to Prevent Overcrowding

    Overstuffed closets happen gradually when you add new pieces without removing old ones. An intentional “one in, one out” rule keeps your closet right-sized and forces thoughtful shopping.

    Every time you bring a new item into your closet, commit to removing one you no longer wear. Place the removed item in a donation bag. This takes 30 seconds per purchase but prevents closet creep. Over a year, you’ll have removed 52+ pieces and replaced them with things you actually want. Your closet stays curated, nothing feels buried, and you stop buying pieces you don’t absolutely love. Bonus: You’ll make faster, more intentional purchase decisions knowing you’ll have to remove something else.

    Pro tip: Keep your donation bag visible on a closet shelf as a daily reminder of this commitment.

    25. Label Your Drawers with Category Stickers

    Unlabeled drawers become a jumble where people throw things into whichever drawer has space. Clear labels ensure everything has a home and family members put things back correctly.

    Buy clear label stickers ($8–$15 for a set) from Amazon, Target, or a office supply store. Write category names with a permanent marker: “Basics & Tees,” “Sweaters,” “Socks,” “Undergarments,” “Activewear,” etc. Apply one label to each drawer front. This takes 10 minutes. Now everyone in your household knows exactly where things go, and items don’t get mixed up. Drawers stay organized longer without constant shuffling. Laundry day becomes faster because you know which drawer each clean item goes into.

    Pro tip: Take a photo of your label system and post it near the closet for reference if multiple people use it.

    26. Set a Monthly 15-Minute Maintenance Session

    Closets deteriorate when they’re organized once and then ignored. Monthly 15-minute check-ins keep everything maintained and prevent backsliding into chaos.

    Set a calendar reminder for one day each month—maybe the first Sunday. Spend 15 minutes walking through your closet and noticing: pieces that don’t fit or make you feel bad (donate), items needing repair (move to mending shelf), anything that’s shifted out of order (re-organize). This is maintenance, not a full overhaul. You’ll catch problems early before they become overwhelming. Your organizational system stays intact, and you stay aware of what you actually own. This small habit prevents the “closet explosion” where everything suddenly feels chaotic and you want to start over.

    Pro tip: While doing this, jot down gaps in your wardrobe (e.g., “need a winter white blazer”) so future shopping is intentional.


    Save this post for this weekend—pick one or two ideas to tackle, and you’ll immediately notice how much calmer your mornings feel. Start small, build the habit, and share it with anyone who needs a morning reset too.

  • 26 Farmhouse Living Room Ideas Filled With Rustic Charm

    26 Farmhouse Living Room Ideas Filled With Rustic Charm

    You’re probably scrolling through home decor feeds thinking, “I want that warm, welcoming farmhouse vibe, but I have no idea where to start.” The good news? You don’t need a complete overhaul to get there. Farmhouse style is about mixing vintage finds, natural materials, and cozy textures that make your living room feel like a retreat—not a museum. Whether you’re working with a tight budget or ready to invest in statement pieces, we’ve got 26 practical ideas that’ll bring authentic rustic charm into your space without the Pinterest-perfect pretension. From paint colors and lighting to furniture swaps and styling hacks, each idea is designed to work in real homes, with real families, on real timelines. Let’s create a living room you actually want to spend time in.

    1. Paint Walls in Soft, Warm Whites

    Farmhouse style starts with the right wall color—and it’s not stark white. Soft, warm whites and creams are the foundation of every cozy farmhouse room, creating a backdrop that lets vintage furniture and natural textures shine. These colors reflect light beautifully without feeling cold or clinical like bright white can.

    Paint all four walls in a warm white like Sherwin-Williams Alabaster or Benjamin Moore Swiss Coffee ($30–$40 per gallon). Application takes a weekend with basic supplies you probably have. The key is choosing a warm undertone rather than blue-based whites, which can feel sterile. Primer isn’t always necessary if you’re covering a similar color, but it saves paint. Test swatches on your walls and observe them at different times of day—lighting changes everything.

    Your walls become a calm canvas for everything else. This neutral backdrop makes it easier to bring in textures, patterns, and vintage finds without visual chaos.

    2. Add Exposed Ceiling Beams for Instant Texture

    Exposed beams are the signature farmhouse ceiling element—they add structure, visual interest, and that authentic rustic feel without actually needing to renovate. If your home doesn’t have real beams, faux beams are surprisingly easy to install and look equally stunning.

    You can buy faux beam kits from Home Depot or Lowe’s ($50–$150 per 10-foot beam) made from lightweight polyurethane or wood veneer. Installation takes a weekend with a level, drill, and basic tools. Apply them in parallel lines across the ceiling, spacing them 3–4 feet apart for proportion. Stain or paint them dark brown or weathered gray for that aged appearance. Real wood beams cost more ($200–$500+ per beam) but last forever and develop natural patina.

    Your ceiling suddenly has architectural character. The beams draw the eye upward and make the room feel intentionally designed rather than just default.

    3. Layer a Textured Area Rug Under Furniture

    Rugs anchor a room and add that crucial texture farmhouse style demands. A quality rug in natural fibers creates warmth and softens hard flooring—essential for that cozy, grounded feeling. Layering rugs also adds depth and makes spaces feel intentional.

    Choose a wool or jute blend in cream, gray, or soft taupe ($100–$300 from Wayfair, Ruggable, or Article). Size matters: go at least 8×10 if your living room is medium-sized, so furniture sits partially on the rug. Natural fibers like jute show texture beautifully and wear well over time. If you have pets or kids, washable rugs from Ruggable ($80–$200) are practical without sacrificing style. Layer a smaller vintage runner on top for added visual interest.

    Your living room feels grounded and cozier underfoot. The rug defines your seating area and adds the natural fiber warmth that’s central to farmhouse style.

    4. Swap Sleek Furniture for Chunky Wood Pieces

    Farmhouse furniture is substantial, sturdy, and often has visible wood grain and natural imperfections—the opposite of mass-produced, particle-board modern pieces. Solid wood furniture ages beautifully and becomes more charming over time.

    Scout for chunky wood tables and dressers at Facebook Marketplace, estate sales, or Craigslist ($50–$300 used) rather than buying new particle-board versions. If new pieces fit your budget, Pottery Barn, Arhaus, or Wayfair carry farmhouse-style wood furniture ($300–$800+). Look for visible wood grain, turned legs, and slightly distressed finishes. Mix wood tones—it’s not about matching perfection. If you find a piece you love but it’s the wrong color, refinishing or limewashing takes a weekend and costs under $50 in supplies.

    Your room instantly feels more substantial and collected. Real wood develops character and patina that makes your space look genuinely loved, not staged.

    5. Install Vintage-Style Lighting Fixtures

    Lighting sets the mood and farmhouse style thrives on warm, vintage-inspired fixtures that become focal points rather than hidden utilities. Chandelier and lantern styles feel more authentic than modern minimalist lights.

    Browse Etsy, Wayfair, or Home Depot for vintage-inspired chandeliers or pendant lights ($60–$300). Edison bulb fixtures with amber-tinted glass add instant warmth and that nostalgic glow. If you’re renting, plug-in pendant lights ($50–$150) hang from your existing ceiling fixture with minimal adjustment. Installation typically takes 30 minutes to an hour with basic tools. Choose black metal, bronze, or aged brass finishes over chrome or stainless steel for authentic farmhouse feel.

    Your space glows with character. Warm-toned lighting makes everything feel more inviting and highlights textures like wood and stone beautifully.

    6. Display Vintage Collections on Open Shelving

    Farmhouse style celebrates vintage finds and collections—they tell your story and add personality that new purchases can’t replicate. Open shelving is the perfect stage for this collected aesthetic.

    Install floating shelves ($30–$80 from IKEA or Home Depot) at varying heights on a living room wall or around a fireplace. Arrange collections with intention: group items by color or type, leave breathing room between objects, and layer different heights and depths. Mix old and new—a vintage pitcher next to a modern plant, antique books stacked with a current magazine. Thrift stores, estate sales, and Etsy are goldmines for authentic vintage pieces under $20 each. Dust monthly to keep collections looking intentional rather than cluttered.

    Your shelves become a gallery of memories and personality. Visitors see your taste and story rather than generic home decor.

    7. Bring in Woven Baskets for Hidden Storage

    Baskets solve the storage problem every cozy living room faces—where do blankets, throw pillows, and magazines live? Woven baskets add texture while keeping clutter invisible, staying true to farmhouse’s blend of function and style.

    Hunt for woven baskets at HomeGoods, Target, or TJ Maxx ($20–$80 each) in seagrass, rattan, or woven wood. Size them proportionally to your space: one large basket beside the sofa, smaller ones under a console or coffee table. Label them with hand-painted wood tags ($5–$15) for a rustic touch if you want clear organization. Mix basket styles—woven, wicker, wire—for collected-over-time authenticity. Baskets also dampen sound and soften hard flooring, making rooms feel warmer acoustically.

    Your living room looks magazine-ready even when it’s lived-in. Baskets hide the reality of family life while keeping everything within arm’s reach.

    8. Layer Throw Blankets and Pillows Generously

    The difference between a basic sofa and a farmhouse haven is layers of soft, touchable textiles. Throws and pillows add color, pattern, and that “curl up here” coziness farmhouse demands.

    Combine 5–7 pillows on your sofa in varying textures: chunky knit, linen, wool, cotton, velvet ($15–$40 each from Target, West Elm, or Wayfair). Drape one or two quilted or knit throws ($30–$80 each) casually over sofa arms or the back. Stick to a color palette of creams, grays, taupes, and one accent color like soft green or burgundy to avoid visual chaos. Natural fabrics like linen and cotton feel authentic to farmhouse style; synthetic fabrics can feel cheap. Wash throws monthly and rotate pillows to maintain shape.

    Your sofa becomes a refuge. People want to sit and stay, and your living room feels warm enough to live in, not just look at.

    9. Create a Focal Point with a Fireplace Mantel

    A fireplace mantel is prime real estate for farmhouse styling—it’s naturally a focal point where you can display collections, create seasonal arrangements, and add layers of visual interest. Even if you don’t use the fireplace, the mantel matters.

    Start with a large mirror or piece of artwork as your anchor ($50–$200). Flank it with matching brass or wooden candlesticks ($30–$60 per pair). Add height with stacked books, botanical prints, or vintage signage. Layer in smaller items like enamelware, glass bottles, or collected treasures. Keep one side of the mantel slightly more open to avoid a cluttered look. Change seasonal displays quarterly: fall leaves and pumpkins, winter garland, spring branches, summer botanicals.

    Your mantel becomes a conversation piece. Visitors stop and notice the thoughtful curation rather than just walking past a blank wall.

    10. Paint Cabinet Doors in Soft Jewel Tones

    Farmhouse style is evolving beyond all-white interiors, and cabinet doors are the perfect place to introduce rich, moody colors like emerald or burgundy. This adds depth and personality while keeping the overall aesthetic grounded and warm.

    Choose a color from the jewel tone family: deep emerald, forest green, burgundy, or even dusty navy. Sherwin-Williams Rookwood Dark Green or Benjamin Moore Hunter Green are popular choices ($30–$40 per gallon). Paint existing cabinet doors with furniture paint or chalk paint ($20–$30 per can), which requires minimal prep. Update hardware to brushed brass or vintage bronze ($5–$20 per pull) for a coordinated upgrade. Polyurethane topcoat protects the finish ($15–$25 per quart). Total project time: one weekend with drying time between coats.

    Your living room gains sophistication and visual interest. A statement cabinet becomes the room’s anchor while maintaining farmhouse warmth.

    11. Mix Wood Tones Intentionally, Not Perfectly

    Farmhouse interiors are built over years, not purchased all at once—so mixing wood tones is not just acceptable, it’s essential to the authentic aesthetic. The key is being intentional rather than randomly clashing.

    Choose a mix of at least three wood tones: one dark (walnut or dark oak), one medium (cherry or warm honey), and one light (pale oak or pine). Space them around the room so one tone doesn’t dominate one corner. Balance visual weight by placing heavier, darker pieces low and lighter pieces higher. If existing furniture is mismatched, you can unify with a common finish like limewash or stain ($20–$50 per can). Natural wood variation reads as authentic; too-perfect matching feels mass-produced.

    Your room looks collected and genuine. Guests see a curated space assembled with care rather than an Instagram aesthetic.

    12. Install a Shiplap Accent Wall

    Shiplap is the visual shorthand for farmhouse style—it adds texture, architectural interest, and that “cozy cabin” feeling instantly. You don’t need to shiplap every wall; one accent wall creates maximum impact for minimum effort.

    DIY shiplap costs $100–$300 in materials (Home Depot or Lowe’s carry prefinished shiplap boards) and takes a weekend to install with a nail gun and level. Hire a professional for $400–$800 if you’re not handy. Paint it white, cream, or soft gray for traditional farmhouse or darker colors for modern farmhouse. If you’re renting, removable peel-and-stick shiplap panels ($50–$150) exist but look less authentic—worth skipping unless you’re in a temporary space. Real shiplap holds value and stays with your home.

    Your room gets instant architectural character. Shiplap catches light and shadow beautifully, adding dimension that flat walls can’t provide.

    13. Add Vintage Mirrors for Depth and Light

    Mirrors serve double duty in farmhouse design: they bounce light around making rooms feel bigger and brighter, and vintage frames add instant character and collected authenticity.

    Scout estate sales, antique shops, and Facebook Marketplace for ornate or rustic-framed mirrors ($30–$150 used) rather than new reproductions. Lean larger mirrors casually against walls rather than hanging them—it’s more authentic and renter-friendly. Mix frame styles: wood, metal, painted finishes. Hang smaller mirrors as a gallery wall on one wall ($50–$200 for 3–5 pieces). Position mirrors opposite windows or light sources to amplify natural light. Clean mirrors monthly with vinegar and newspaper for spot-free shine.

    Your room feels brighter and more spacious. Vintage mirrors add genuine patina and character that new purchases can’t match.

    14. Create a Reading Nook with Wingback Chairs

    A dedicated reading corner turns your living room into a retreat within a retreat. Wingback chairs are quintessentially farmhouse—structured but cozy, timeless, and perfect for curling up with a book and coffee.

    Hunt for wingback chairs at estate sales, Facebook Marketplace, or thrift stores ($50–$300 used) and reupholster if needed ($200–$400 professionally, or DIY with fabric and a staple gun for $50). New wingbacks from Wayfair, Article, or Pottery Barn cost $300–$700. Pair with a small side table ($30–$80), a floor lamp ($40–$100), and a throw blanket. Position in a corner or by a window for natural light and quiet atmosphere. Add a small bookshelf nearby for easy reach.

    You create a designated sanctuary within your home. Your living room becomes more than gathering space—it’s a place for solitude and comfort.

    15. Style Floating Shelves with the Rule of Threes

    The “rule of threes” is a design principle that makes styling look intentional and prevents the “too much, too cluttered” problem many farmhouse rooms face. Grouping items in odd numbers creates visual rhythm and balance.

    Install 2–4 floating shelves at staggered heights. On each shelf, arrange 3–5 items grouped by theme or color—don’t spread items evenly. For example: one shelf gets a stack of three books, a small plant, and a single vintage bottle. Next shelf has three glass jars, a framed photo, and a woven box. Leave 30–40% of each shelf empty—negative space is as important as what you display. Vary heights and depths: tall items next to low ones, deep objects beside thin ones.

    Your shelves feel designed and thoughtful rather than randomly populated. Visitors notice intentionality and restraint, which is more sophisticated than maximalism.

    16. Incorporate Live-Edge Wood Shelving

    Live-edge wood brings organic, raw beauty to farmhouse interiors—those natural edges and wood grain variations are impossible to replicate with manufactured shelves, making them feel genuinely gathered rather than store-bought.

    Source live-edge wood slabs from Etsy, local woodworkers, or specialty lumber yards ($100–$300 per slab depending on size and wood type). Pair with industrial metal brackets from Home Depot or Etsy ($20–$50 per pair). Install at eye level where the wood’s natural beauty becomes the focal point. The irregular edges dictate shelf styling—keep items sparse and let the wood itself be the statement. Seal the wood quarterly with natural finish ($15–$25 per can) to prevent cracking.

    Your shelves become sculptural art rather than utilitarian storage. The natural wood variations tell a story that perfectly aligned manufactured shelves can’t.

    17. Hang Vintage Metal Signs or Farmhouse Art

    Vintage signs and farmhouse art anchor walls and add that nostalgic rural character that defines the style. They’re also affordable and easy to swap out seasonally.

    Hunt Etsy, estate sales, or antique shops for authentic vintage metal signs ($20–$80) or vintage agricultural prints. New farmhouse-style art from Wayfair, World Market, or HomeGoods costs $30–$100. Hang one statement piece or create a small gallery of 3–5 pieces. Leave significant white space around pieces rather than filling every inch of wall. Frame vintage posters ($20–$50 for basic frames) to elevate them. Rotate seasonal art quarterly to keep your room feeling fresh.

    Your walls become storytellers. Genuine vintage pieces carry history and character; new pieces styled well feel collected over time rather than purchased all at once.

    18. Layer Lighting with Table Lamps and Candlelight

    Farmhouse style thrives on warm, ambient lighting rather than harsh overhead lights. Layering multiple light sources creates the cozy, gathered atmosphere that makes farmhouse rooms feel like home.

    Add table lamps on side tables and consoles ($40–$80 each) in brass, bronze, or black metal with linen or burlap shades. Distribute at least 3–4 light sources around your living room for even, warm illumination. Scatter pillar candles or candlesticks ($5–$20 each) on tables and shelves—candlelight adds coziness that electric light alone can’t. Use warm-white bulbs (2700K) in all fixtures rather than cool white, which feels institutional. Dimmers on overhead lights ($20–$40) let you adjust ambiance throughout the day.

    Your room glows with natural warmth. Evening becomes your favorite time to spend in the space because it feels genuinely inviting rather than brightly lit.

    19. Add a Console Table Behind Your Sofa

    A console table behind the sofa is a farmhouse staple that serves double duty: it defines seating areas, adds display surface, and creates functional flow in open-concept living spaces.

    Look for wooden console tables with open shelves or drawers at Wayfair, Article, or thrift stores ($60–$300). Narrow depths (10–14 inches) work best for a floating-behind-sofa look. Style the top with a table lamp, framed photos, and a vase or sculptural piece. The shelf below holds baskets or decorative boxes. If you don’t have a sofa back against the wall, use a console to anchor an accent wall and create the illusion of separation in open-concept spaces. Paint or stain it to coordinate with other furniture.

    Your space gains structure and function. The console becomes a natural gathering point and display area without blocking sightlines through the room.

    20. Incorporate Stone or Brick Textures

    Stone and brick add geological weight and authenticity to farmhouse spaces—they reference farmhouse roots in rural, working landscapes where these materials were structural necessities, not design choices.

    If you have existing brick or stone, expose it by removing paint or drywall ($0 if DIY, $200–$500 professionally). Paint exposed brick in white or cream for a softer farmhouse look rather than leaving it raw. Add brick accents with removable peel-and-stick tiles ($50–$150 per section) around a fireplace or accent wall if you’re renting or reluctant to renovate. Real stone veneer costs more ($300–$800 installed) but lasts forever and develops patina. Balance stone with soft textiles and warm wood so the room doesn’t feel cold or industrial.

    Your room gains grounding and permanence. Stone and brick anchor a space and reference the authentic farmhouse structures that inspired this style.

    21. Create a Gallery Wall with Mismatched Frames

    A gallery wall of mismatched frames is quintessentially farmhouse—it celebrates imperfection and creates visual interest that a single piece can’t achieve. It also tells your personal story through collected photographs and art.

    Gather frames from thrift stores, estate sales, and IKEA ($3–$20 each) in wood, metal, white, natural, and mixed finishes. Create an asymmetrical grid rather than perfectly aligned rows. Include a mix of photographs, prints, botanical art, and even empty frames for visual interest. Lay frames on the floor first to plan arrangement, then hang. Mix frame sizes and orientations for authentic collected-over-time feel. Swap out photos seasonally or as your life evolves.

    Your wall becomes a personal timeline and conversation starter. Gallery walls feel lived-in and genuine in a way single pieces never can.

    22. Style Your Coffee Table with Layered Decorating

    Your coffee table is constantly visible, making styling intentional here pays dividends. Farmhouse coffee table styling is about balance—functional objects mixed with decorative elements, nothing too precious.

    Use the “tray trick”: place items on a small wooden or brass tray ($15–$30) to anchor the grouping. Stack 3–4 vintage books ($3–$10 each) as height variation. Add a candle, small plant, or decorative object. Leave one quarter of the table clear for actual use—holding a mug, remote, or open book. Change seasonal styling every 3 months. Don’t overstyle: a farmhouse table serves a family, not just looks pretty.

    Your coffee table becomes functional art. Visitors notice the intentional arrangement while the table remains usable for daily life.

    23. Install a Wooden Beam Mantel Over Your Fireplace

    A wooden mantel beam is the ultimate farmhouse focal point—it’s substantial, visibly aged, and creates architectural gravitas without major renovation. This is a statement piece worth investing in.

    Source reclaimed wood beams from salvage yards or specialty lumber suppliers ($200–$600 depending on length and wood type). Installation requires professional help ($300–$800) to ensure proper support and safety—this is not a DIY project. Paint the wall behind in shiplap or keep it simple. Style the mantel with symmetrical pairs of candlesticks, a centered mirror or artwork, and layered greenery. The beam itself is the statement; don’t over-style.

    Your fireplace becomes unmistakably farmhouse. A wooden beam mantel is an investment that increases perceived home value and becomes the focal point every guest notices.

    24. Add Vintage Enamelware for Color and Nostalgia

    Vintage enamelware is functional farmhouse decor: mixing bowls, colanders, pitchers, and canisters that were everyday necessities now become charming decorative objects. The worn finishes and nostalgic shapes are quintessentially farmhouse.

    Hunt Etsy, estate sales, flea markets, and antique shops for genuine vintage enamelware ($5–$25 per piece depending on age and condition). Look for chipped edges and faded paint—these signs of age add authenticity. Mix colors: white with red trim, blue and white, solid colors. Hang on open shelving, pegboard, or stack on a console. Group by type or color for visual coherence. Don’t refinish vintage pieces; the wear is the charm.

    Your space gains nostalgia and handmade character. Enamelware tells a story of everyday living better than any new purchase can.

    25. Create Contrast with Dark Wood Ceiling Beams

    Dark beams against light walls create visual contrast that makes rooms feel architecturally sophisticated while staying cozy. The contrast draws eyes upward and emphasizes ceiling height.

    If installing new beams, go dark: espresso, dark walnut, or even black for modern farmhouse ($100–$150 per faux beam from Home Depot). Paint existing beams dark if they’re currently light wood. The contrast creates drama and definition—it’s bold but reads as intentional, not accidental. Keep walls light to let beams be the focal point. This technique works especially well in open-concept living rooms where it creates visual separation without walls.

    Your room gains architectural interest and perceived height. Dark beams become a design statement rather than just structural necessity.

    26. Mix Old and New Furniture for Authentic Layering

    Farmhouse style is fundamentally about mixing periods and styles—nothing says “authentic” like a room that’s evolved over years with pieces from different eras. Too much new furniture feels sterile; too much old feels like a museum.

    Aim for a 60/40 or 70/30 mix: more vintage or antique pieces than new, but enough new pieces for comfort and function. Pair a new upholstered sofa with antique side chairs, a modern lamp with a vintage table. Let the room tell a story of different collecting moments. Don’t worry about matching perfectly; varied wood tones, finishes, and styles create authenticity that coordinated suites can’t replicate.

    Your room feels genuinely lived-in and collected rather than purchased from one catalog. Guests see a curated space that reflects real taste and patience rather than a staged advertisement.

    Save this post and try one styling idea this weekend—pick something small that excites you and see how it shifts your whole room. Which idea will you tackle first?

  • 30 Balcony Ideas to Refresh Your Outdoor Space Instantly

    30 Balcony Ideas to Refresh Your Outdoor Space Instantly

    Your balcony has so much untapped potential. Whether you’re working with a postage-stamp-sized space or a sprawling terrace, the right updates can transform how you use this outdoor room. You don’t need a massive budget or a contractor—most of these ideas take a weekend or less, and plenty cost under fifty bucks. In the next thirty tips, you’ll discover styling tricks that make small spaces feel bigger, furniture hacks that serve double duty, plant combinations that actually thrive, and lighting ideas that make evening hangs feel like a resort. Mix and match whatever fits your space and vibe, and you’ll wonder why you didn’t start sooner.

    1. Hang Vertical Planters to Free Up Floor Space

    Vertical gardens are a game-changer for tiny balconies where every square inch counts. They let you grow greenery without sacrificing walking space or seating room, and they catch the eye at eye level—making your whole balcony feel more curated.

    Grab hanging fabric planters, wooden wall pockets, or tiered metal shelves from IKEA, Target, or Amazon (typically $15–$40 per unit). Fill them with cascading plants like pothos, string of pearls, or trailing succulents. Mount them on any wall that gets a few hours of sun. Installation takes about 30 minutes—a drill and wall anchors are all you need (or use command strips for renters).

    The real win is that you get a living wall without a cluttered floor, plus the plants soften your space and add instant greenery.

    2. Invest in One Statement Rattan Chair

    A quality rattan piece anchors your whole vibe and gives you a dedicated chill-out spot that actually makes you want to hang outside.

    Look for egg chairs, woven loungers, or wingback styles from Wayfair, West Elm, or Amazon in the $150–$400 range. If that’s steep, hunt for vintage rattan on Facebook Marketplace or Craigslist for $50–$150. Toss a weatherproof cushion (around $30–$60) and a throw blanket on top.

    Rattan photographs beautifully and has a natural, relaxed aesthetic that works with almost any balcony style. You’ll use this chair constantly—for morning coffee, afternoon reading, or evening wine.

    3. Layer String Lights with Candles for Evening Magic

    Lighting transforms how your balcony feels once the sun drops, and combining two light sources creates depth and atmosphere instead of flat brightness.

    String warm-white Edison or globe lights overhead ($25–$50 from Amazon, Target, or Home Depot), then cluster small pillar or tea lights on a table or shelf. If real flames feel risky, grab battery-operated LED candles (about $10–$20 for a pack). Takes about 20 minutes to hang strings if you have a drill and hooks; no drilling needed if you use tension rods or command strips.

    The result is a layered glow that makes your balcony feel like a restaurant patio instead of just outdoor seating.

    4. Create a Mini Bar or Beverage Station

    A dedicated drink station makes entertaining feel effortless and gives your balcony a purpose-built luxury vibe, even in a tight footprint.

    Grab a slim bar cart ($40–$100 from IKEA, Wayfair, or Target) or use a narrow folding table ($20–$50). Stock it with your go-to bottles, glassware, and a small cutting board for fruit and garnishes. Keep fresh herbs nearby in tiny pots (mint, basil, rosemary work great). Set up takes 10 minutes, and there’s zero installation.

    You’ll entertain more, and your balcony becomes a real destination rather than a spot you pass through.

    5. Use Railing Planters for Flower Bursts

    Railing planters are one of the smartest small-space hacks—they add color and greenery without taking up any floor space, and they frame your view beautifully.

    Buy railing planters (hook-on or wrap styles) for $15–$40 each from Home Depot, Lowe’s, or Amazon. Fill with low-maintenance plants like petunias, ivy, marigolds, or even small geraniums. Space them every 2–3 feet for impact. Setup takes 30 minutes, and it’s purely temporary—renters can move them anytime.

    Your balcony instantly looks fuller and more intentional, plus passersby get a burst of color.

    6. Paint or Stain Your Balcony Floor

    A fresh floor color feels like a full makeover—it’s one of the biggest visual upgrades you can make, and it’s cheaper than most people think.

    Grab outdoor deck paint or stain from Home Depot or Lowe’s ($30–$80 per gallon). Light colors expand small spaces; warm tones add coziness. Plan for one full day of work, including prep and drying. Most balconies need just one gallon. If you rent, ask your landlord first, or plan on painting back when you leave (it’s usually allowed if you restore it).

    You won’t regret this one. Your whole space becomes brighter and more cohesive, and the cost-to-impact ratio is unbeatable.

    7. Mix Terracotta Pots with Low-Maintenance Plants

    Terracotta is having a major moment, and when paired with forgiving plants like geraniums, it becomes a foolproof styling anchor that feels both curated and casual.

    Pick up terracotta pots in various sizes from Home Depot, Lowe’s, or even thrift stores ($5–$20 each). Fill them with geraniums, sedums, aloe, or lavender—all super easy to maintain. Cluster three to five pots in one corner or along the railing. No installation required; just set them down. Budget $30–$80 total for a nice variety.

    Terracotta photographs beautifully and pairs with every style, from minimalist to boho to Mediterranean.

    8. Add a Folding Table for Dual-Purpose Dining and Workspaces

    Folding tables are the secret weapon for small-space multitasking—morning workspace, afternoon dining table, evening cocktail bar, all in the same footprint.

    Grab a wooden or metal folding table ($30–$80 from IKEA, Target, or Amazon) in a size that fits your balcony comfortably. Choose something sturdy-looking (not flimsy) so it feels intentional. When you’re done eating or working, fold it up and tuck it against the wall. Setup time is zero; collapse time is 30 seconds.

    You get maximum flexibility without a giant furniture footprint, which means your balcony never feels cramped.

    9. Hang Wicker or Macramé Wall Baskets for Storage

    Wall baskets kill two birds with one stone: they store your outdoor clutter (cushions, throws, gardening tools) while adding boho texture to your space.

    Pick up wicker or macramé baskets ($15–$40 each) from Target, Anthropologie, or Amazon. Hang them at different heights using hooks and wall anchors (or command strips for renters). Takes about 30 minutes total. Fill with rolled cushion covers, spare throw blankets, gardening gloves—anything you want hidden but accessible.

    Your balcony looks intentionally styled instead of cluttered, and you’ve actually solved the “where do I put this stuff” problem.

    10. Install Sconces or Pendant Lights on Walls

    Wall-mounted lights give you more control than string lights alone and feel more permanent and polished—especially if you own your place or have landlord approval.

    Look for outdoor-rated sconces or small pendants ($40–$120 each) from West Elm, Wayfair, or Home Depot. They need to be marked for outdoor use to withstand weather. Installation is one afternoon if you’re comfortable with basic wiring (or hire an electrician for $100–$200). If renting, stick with string lights and candles—safer bet.

    Combined with string lights or candles, wall sconces create restaurant-level ambiance that makes your balcony feel special.

    11. Use Artificial Turf or Wooden Decking to Refresh the Floor

    If your concrete balcony floor is stained or boring, temporary flooring solutions give the effect of a fresh makeover without permanent commitment or landlord drama.

    Grab artificial turf tiles or interlocking wooden deck tiles from Home Depot or Amazon ($0.50–$1.50 per square foot). They lay right on top of your existing floor, no tools needed. For a 6×8 balcony, expect to spend $100–$200 total. Takes about 1–2 hours to lay down. When you move, roll it up and take it with you.

    Your balcony feels brand-new, and you didn’t have to negotiate with your landlord or commit permanently.

    12. Layer Cushions in Varied Colors and Textures

    Cushions are the easiest way to add personality and color—swap them seasonally, stack them for depth, and they photograph gorgeously.

    Buy weatherproof outdoor cushions in solids and patterns ($25–$60 each) from Target, Wayfair, or Amazon. Mix textures: smooth outdoor fabric, linen, subtle patterns. Layer two or three on one chair for visual richness. No installation; just set them down. Budget $75–$150 for three quality cushions that’ll last.

    Your seating area becomes warm and inviting, and you can refresh the vibe in minutes by swapping cushions around.

    13. Create a DIY Green Wall with Peel-and-Stick Panels

    If you love the idea of a living wall but live in a space with limited sunlight or you want instant fullness, faux greenery panels bridge the gap beautifully.

    Grab peel-and-stick green wall panels ($20–$50 per panel) from Amazon or Wayfair. Cover one section of wall—usually 2–4 panels do a nice statement. They adhere in minutes, peel off cleanly, and look surprisingly real. Arrange real potted plants in front for a hybrid effect that’s even more convincing.

    You get lush greenery without the fuss, and your balcony looks like a jungle retreat in an afternoon.

    14. Set Up a Hammock or Hanging Daybed

    A hammock or hanging daybed turns your balcony into a full-fledged relaxation zone—the kind of spot where you actually want to spend time instead of just pass through.

    Look for lightweight hammocks or hanging daybeds ($50–$150) from Amazon, REI, or Wayfair. They require two solid anchor points (posts, beams, or sturdy hooks). Installation is about 30 minutes if anchors are in place. Renters: check with your landlord, but many allow temporary tension-rod hammocks that don’t damage walls.

    Once it’s up, you’ll be amazed how often you use it—morning reading, afternoon naps, evening stargazing.

    15. Add a Small Water Feature or Fountain

    A small fountain adds soothing soundscape, visual interest, and movement to your space—it makes your balcony feel like a genuine retreat rather than just a ledge.

    Pick up a tabletop fountain ($30–$80) from Amazon, Target, or HomeGoods. Plug it in (most are electric and battery-backed), add water, and let it run. No installation beyond finding the right spot. Surround it with plants to make it feel like a natural oasis. Noise level is gentle—very zen.

    The constant trickling water becomes a meditative backdrop to your balcony time, and it draws the eye when you’re looking out at your space.

    16. Hang Bamboo or Slatted Privacy Screens

    Privacy screens block out unwanted views without making your balcony feel like a box—they add structure, style, and function in one go.

    Grab bamboo screens or wooden slat panels ($50–$150 depending on size) from Home Depot, Amazon, or West Elm. Mount them to your railing or suspend them from your balcony frame using hooks and weather-resistant brackets. Installation takes 1–2 hours. If you rent, ask about temporary mounting or go with a freestanding option.

    You gain privacy and create a cozy, defined space while maintaining airflow and light. It feels intentional and design-forward, not defensive.

    17. Mix Modern and Vintage Finds for Eclectic Appeal

    Mixing eras and styles keeps your balcony from feeling cookie-cutter and gives it character—plus it’s often cheaper because you’re thrifting some pieces.

    Hunt Facebook Marketplace, Craigslist, thrift stores, and estate sales for vintage finds ($10–$50 each). Pair one or two with new pieces from IKEA or Target (which are usually neutrals). Don’t overthink it—if it fits your color palette and isn’t broken, it works. Budget $100–$300 to build an eclectic mix.

    Your space tells a story, photographs better, and feels way more personal than a matching set from one store.

    18. Paint Planters to Match Your Color Scheme

    Painting plain terracotta or plastic pots is a zero-dollar to five-dollar upgrade that makes your whole planting scheme feel curated and intentional.

    Grab outdoor spray paint or acrylic paint ($5–$10) from Home Depot or Michaels. Paint old terracotta or plastic pots in your chosen colors—pastels, jewel tones, neutrals, whatever fits your vibe. Takes about 20 minutes per batch (plus drying time). Seal with outdoor-rated clear coat if you want extra durability.

    Suddenly your plant corner looks like it’s been styled by a designer, not just a random collection.

    19. Angle Mirrors to Bounce Light and Expand Space Visually

    Mirrors are a designer trick that actually works—they bounce light around and create the illusion of more square footage without any real structural changes.

    Pick up an outdoor-rated mirror ($30–$80) from West Elm, Wayfair, or even a garden center. Lean it against your wall or mount it securely to avoid weather damage. Position it to reflect your best view or light source. Takes 10 minutes to place. For renters, just lean it against the wall—no installation needed.

    A small balcony suddenly feels airier and brighter, and if positioned right, it visually doubles your perceived space.

    20. Stock a Movable Gardening Cart for Tool Storage

    A gardening cart keeps your plant supplies organized, accessible, and off the floor—so your balcony stays tidy even when you’re in active plant-parent mode.

    Grab a compact three-tier cart ($30–$60) from Target, IKEA, or Amazon. Stock it with terracotta pots, soil, pruners, gloves, watering cans, and plant food. Takes 10 minutes to organize. Unlike a shelf, a cart is mobile—wheel it to the side when you need floor space, roll it back when you’re potting up plants.

    You save time searching for supplies, your balcony stays less cluttered, and it’s easy to move everything out of the way for entertaining.

    21. Create a Cozy Nook with a Small Daybed or Futon

    If your balcony is on the bigger side, a small daybed or futon creates a lounge zone that’s distinct from other functional areas—you get dining, seating, and a nap spot all in one space.

    Look for compact outdoor daybeds or low futon frames ($100–$250) from Wayfair, Article, or West Elm. Add weatherproof cushions ($50–$100) and throws. No installation beyond placement. If you move, futons fold down and fit in a car.

    Your balcony becomes a real retreat where you can actually lie down and relax, not just perch on a chair.

    22. Use Geraniums in Bulk for Instant Color Impact

    Geraniums are the workhorse of balcony gardening—cheap, hardy, dramatic, and they photograph like a dream. Buy them in bulk for maximum punch.

    Grab geraniums in various colors ($3–$6 each) from any garden center in spring and summer. Plant them in terracotta or simple pots and cluster them densely on your railing or in corners. Budget $30–$50 for 6–10 plants. Water every few days and deadhead spent blooms. Takes 30 minutes to pot them up.

    You get a Mediterranean vacation vibe for pocket change, and your balcony becomes the colorful focal point of your whole home.

    23. Hang Artwork or Metal Wall Sculptures

    Art on your balcony transforms it from a utility space into a real room—especially when you layer it with plants so it feels integrated, not just hung on a wall.

    Look for outdoor-rated metal sculptures, prints in weather-safe frames, or canvas art ($30–$100 each) from Wayfair, Society6, or local galleries. Make sure materials are rust-resistant and UV-stable. Mount using outdoor-rated hangers (5 minutes per piece). Arrange art at varying heights among your plants for depth.

    Your balcony becomes a gallery, and suddenly it’s somewhere you genuinely want to spend time—not just where you put your stuff.

    24. Set Up Tiered Plant Shelving for Vertical Plant Display

    Tiered shelving lets you pack a ton of plants into a small footprint—it’s the small-space equivalent of a plant jungle without eating up floor real estate.

    Buy a compact metal or wooden shelving unit ($40–$100) designed for outdoor use from Home Depot, Target, or Amazon. Fill it with small potted plants in varying sizes—succulents, herbs, trailing plants, flowering annuals. Doesn’t require installation if it’s freestanding. Budget $100–$200 total for plants and shelves.

    You create a vibrant focal point that makes your balcony feel more like a garden room than a patio.

    25. Install Motion-Sensor LED Solar Lights for Safety and Ambiance

    Solar lights serve double duty: they’re free to run, they make your balcony safer after dark, and they add atmospheric lighting that’s gentler than overhead bulbs.

    Grab a set of solar stake lights or wall-mounted solar sconces ($20–$50 for a pack) from Amazon, Home Depot, or Target. No installation beyond poking stakes into soil or mounting brackets. They charge during the day and glow at night automatically. No wiring, no electricity bill.

    You get bonus safety lighting and a soft glow that makes evening time feel special—all for free after the initial purchase.

    26. Define Zones with a Large Area Rug or Runner

    Rugs create visual boundaries and anchor spaces psychologically—they tell your brain “this corner is for sitting” or “this zone is for dining” even in a tiny footprint.

    Pick up an outdoor-rated rug in a size that fits your main seating area ($50–$150) from Wayfair, Target, or Amazon. Look for materials like polypropylene or jute that handle weather and moisture. Place it under your main seating or in your designated chill-out zone. No installation; just lay it down.

    Your balcony instantly feels more intentional and organized, with clear zones even if the actual space is compact.


    Save this post and pick one idea to tackle this weekend—even just the color cushions or a hanging planter will surprise you how much it changes your vibe. Share this with anyone you know cramped in a small balcony or dreaming of their own outdoor retreat. Which idea speaks to you most?

  • 26 Espresso Station Styling Ideas for Serious Coffee Lovers

    26 Espresso Station Styling Ideas for Serious Coffee Lovers

    If you’re serious about your coffee, your espresso station deserves more than just a machine shoved in the corner. This isn’t about being pretentious—it’s about creating a space that makes your morning ritual feel special and keeps everything you need within arm’s reach. Whether you’re working with a tiny apartment kitchen or a sprawling home setup, there are countless ways to style and organize your espresso corner so it looks Instagram-worthy while staying functional. We’ve gathered 26 specific ideas that blend aesthetics with practicality, from budget-friendly styling tricks to investment-worthy upgrades. You’ll find options for renters, DIY enthusiasts, and anyone looking to elevate their daily caffeine routine. Let’s dive into ways to make your espresso station a focal point you’ll actually want to show off.

    1. Mount a Floating Shelf Above Your Machine

    A floating shelf above your espresso machine gives you display space without eating up counter real estate. This keeps frequently used items visible and accessible while creating visual interest at eye level.

    Install a sturdy floating shelf (24-36 inches) in brushed brass, matte black, or walnut wood ($30-$80 from IKEA, Home Depot, or Amazon). You’ll need basic tools and about 30-45 minutes to mount it securely into wall studs. Add museum-quality adhesive strips underneath to prevent slipping. Paint your wall behind the shelf a soft sage green or pale gray to make the shelf pop against the backdrop.

    Pro tip: Keep only three to five items on display—your favorite mug, a small plant, coffee beans in a glass jar, and maybe a coffee-themed print. Overcrowding defeats the purpose.

    Your espresso corner instantly becomes a styled vignette that draws the eye every morning. Plus, you free up valuable counter space below for your machine and grinder.

    2. Invest in a Premium Espresso Machine With Sleek Design

    Your machine is the hero of your station—choose one that’s as beautiful as it is functional. A well-designed espresso machine becomes a focal point, not something you hide away.

    Look for machines with stainless steel or painted metal bodies in black, white, or brushed finishes ($300-$700+ from brands like Gaggia, Breville, or Rocket). Mid-range options ($200-$400) from Rancilio or Lelit offer excellent aesthetics without the luxury price tag. Measure your space first, then choose a compact model if counter room is tight. Pro tip: Match your machine’s finish to your other kitchen hardware (sink faucet, cabinet handles) for cohesion.

    Spend time at a specialty coffee shop to compare machines in person before buying online. This investment pays dividends every single day you use it.

    3. Create a Dedicated Grinder Station Nearby

    A separate grinder zone keeps your station organized and prevents coffee grounds from scattering everywhere. Grouping your grinder slightly away from your machine actually makes the workflow smoother.

    Choose a burr grinder (conical or flat) that matches your machine’s aesthetic—matte black, stainless, or brushed finishes ($80-$200 from Baratza, Wilfa, or Fellow). Set it on a small wooden trivet or bamboo mat ($15-$30) to define the space and protect your counter. Leave 6-8 inches between your grinder and machine for easy movement. Add a small metal scoop and a brush nearby for cleanup.

    Pro tip: Keep a damp microfiber cloth folded under your grinder to catch stray grounds during grinding.

    This dedicated zone makes grinding feel intentional rather than chaotic, and it keeps your counter cleaner overall. Your mornings become calmer when everything has its place.

    4. Install a Chalkboard Label System for Coffee Bean Varieties

    A simple labeling system keeps your coffee organized and looks charming in the process. This is especially helpful if you rotate beans regularly or experiment with different roasts.

    Grab a pack of small chalkboard labels or kraft paper labels with whiteboard markers ($10-$15 from Target or Amazon). Label your glass jars by origin, roast date, or roast level. Wipe and relabel as you rotate beans—it takes two minutes but keeps your station feeling curated. Use jars with airtight lids ($3-$8 each) to keep beans fresh longer.

    Pro tip: Write the roast date and recommended brew method on the label for reference.

    Now your coffee collection looks intentionally displayed rather than randomly stored. Visitors will notice the care you’ve taken, and you’ll actually know which bean you’re grabbing.

    5. Use Marble or Concrete Countertop Trim for Visual Impact

    A short marble or concrete piece acts as a tiny shelf accent that elevates your whole station without a full countertop replacement. This is renter-friendly if you use non-permanent mounts.

    Find a scrap marble, granite, or concrete slab (12-18 inches) at a stone supplier or Etsy ($20-$60), or use adhesive-backed marble contact paper ($15-$25 for smaller surfaces). If you own, secure it permanently; if renting, use reversible mounting tape ($10) on your current countertop. Position it under your floating shelf or behind your machine as a backsplash accent.

    Pro tip: Pair a light marble with a dark machine, or a dark concrete with white ceramics for strong visual contrast.

    This simple addition makes your station look intentionally designed, like you consulted an interior designer rather than just plugged in a machine. The contrast draws the eye and makes your space feel curated.

    6. Style Your Espresso Cups Like a Café Would

    Matching cups aren’t just for show—they make your station feel intentional and café-like. A collection of mismatched mugs looks casual; curated espresso cups look designed.

    Choose a ceramic espresso cup set (4-6 cups) in white, cream, or soft gray ($40-$80 from Anthropologie, West Elm, or specialty coffee brands). Look for cups sized specifically for espresso (2-3 ounces), not regular mugs. Stack them on your floating shelf or in an open cabinet so they’re visible and grabbable. Add a matching sugar dish and small spoon ($15-$25) for authenticity.

    Pro tip: Buy one extra set so you can cycle one into the dishwasher while using the other.

    Sipping from a proper espresso cup (instead of a regular mug) actually changes how you taste and appreciate your coffee. Your morning ritual feels less rushed, more intentional.

    7. Add Warm Ambient Lighting With a Pendant or Flush Mount

    Overhead lighting that’s too bright or cold ruins a station’s ambiance. Warm, focused light makes your morning coffee feel like a spa experience instead of a clinical task.

    Install a modern pendant light (8-12 inches diameter) in brass, matte black, or ceramic ($50-$150 from West Elm, CB2, or Amazon) directly above your station. Opt for warm white bulbs (2700K color temperature, 60-75 watts equivalent). If you rent, use a plug-in pendant with an outlet converter ($30-$60 from Amazon). Position it so light falls directly on your machine and cup area but not in your eyes.

    Pro tip: Add a dimmer switch ($15-$30) so you can adjust brightness based on time of day.

    Your station transforms from a functional corner into an inviting ritual space. The warm light makes everything look better and actually helps you appreciate the moment you’re in.

    8. Arrange a Small Succulent or Herb Garden Nearby

    Live plants soften your station and improve air quality. A tiny plant collection adds life and color without taking up serious space or requiring constant maintenance.

    Choose low-maintenance plants like succulents, pothos, or snake plants in small ceramic pots ($8-$15 each from Etsy, Home Depot, or a local nursery). Place them on your floating shelf, window sill, or on a small wooden plant stand ($20-$40) next to your machine. These plants need watering only once every 2-3 weeks. Keep them out of direct water splash from your espresso machine.

    Pro tip: Use a small brass plant mister ($8-$12) to water them—it becomes part of your station’s aesthetic.

    You get cleaner air, a splash of green that photographs beautifully, and a reminder to slow down while you’re making your coffee. Plants make spaces feel alive and welcoming.

    9. Build a Custom Wooden Base or Riser for Your Machine

    Elevating your machine on a custom base protects your counter, improves your posture, and creates visual separation that makes your station feel intentional. This is a weekend DIY project that pays aesthetic dividends.

    Build a wooden riser from walnut, oak, or bamboo using basic woodworking ($30-$80 in materials if you DIY, or $80-$200 if you commission from Etsy). Seal it with food-safe polyurethane. Mount a brass or stainless steel towel bar on one side ($15-$25) to hang your bar towels or a small cloth. The riser should be 6-8 inches tall to reduce strain when tamping.

    Pro tip: Add a water-resistant mat on top before placing your machine to protect the wood.

    Your machine sits like a piece of art on display, and your back thanks you for the ergonomic improvement. The riser also catches spills before they hit your counter.

    10. Hang a Brass or Wooden Shelf Rack for Towels and Supplies

    A wall-mounted rack keeps your supplies organized and within reach without cluttering your counter. This is both functional and provides another design element.

    Install a brass, wood, or black metal shelf with hooks ($25-$60 from Anthropologie, Wayfair, or etsy) about 12-18 inches to the right of your machine. Mount it securely (15-30 minutes with basic tools and wall anchors). Hang clean linen bar towels ($15-$30 for a set of 3) in neutral colors. Store your cleaning brush, purge bucket cloth, and spare scoops on the shelf below.

    Pro tip: Fold towels into thirds lengthwise before hanging—it looks intentional and takes up less space.

    Now your supplies are hidden from view but instantly grabable. Your station looks like a proper café corner rather than a cluttered countertop.

    11. Create a Coffee Tasting Journal Display

    Documenting your coffees adds a personal touch and genuinely improves your palate over time. A displayed journal becomes part of your station’s story.

    Buy a small leather-bound notebook or get a printable tasting journal template ($15-$30 or free online) and keep it on a small wooden stand or cookbook holder ($10-$20) next to your machine. Create simple columns: Origin, Roast Date, Roast Level, Tasting Notes, Rating. Use a nice pen ($10-$50 depending on how fancy you want to get) to encourage regular note-taking. Rotate which page is visible to create a fresh look weekly.

    Pro tip: Take a photo of interesting tasting notes and share them on Instagram—it’s surprisingly engaging.

    This simple habit deepens your appreciation for good coffee and gives your station a scholarly, intentional vibe. Visitors always ask about the notebook.

    12. Install an Open Shelving Unit for Machine Accessories

    Open shelving keeps all your accessories visible and accessible while creating a gallery-like display that showcases your equipment. This works especially well for small kitchens where you want vertical storage.

    Choose a slim open shelf unit in white, natural wood, or black metal ($50-$150 from IKEA, Target, or Amazon). Position it 12-24 inches to the side of your machine where you can easily reach accessories. Dedicate each shelf: cups on top, beans in the middle, tools and cleaning supplies on the bottom. Keep items organized by category so everything has a clear home.

    Pro tip: Use matching containers and keep the back wall clean and minimal to avoid visual clutter.

    Your accessories become part of the design instead of hidden away. Everything you need is one step away, and the display actually encourages you to maintain and organize regularly.

    13. Use a Statement Backsplash Tile or Peel-and-Stick Wallpaper

    A small backsplash behind your machine adds texture and visual interest without a major renovation. Peel-and-stick options are renter-friendly and surprisingly durable.

    Apply peel-and-stick wallpaper or tile stickers ($20-$50 for a small section from Amazon, Wayfair, or Etsy) to the wall directly behind your machine. Choose geometric patterns, soft colors (sage, cream, dusty pink), or classic subway tile designs that complement your machine’s finish. The entire project takes 15-20 minutes with just a smooth squeegee. If renting, remove it anytime without damage—it’s designed for that.

    Pro tip: Clean and dry the wall thoroughly before applying. Use a credit card or squeegee to remove air bubbles as you go.

    Suddenly your station feels like a professionally designed café corner instead of a random countertop. The backsplash frames your machine beautifully and makes the space photograph incredibly well.

    14. Curate a Small Coffee Table Book or Brewing Guide Collection

    Coffee books serve double duty—they look beautiful and actually teach you about your hobby. A small curated stack signals that you’re serious about your craft.

    Choose 2-4 coffee-focused books ($30-$60 total from Amazon, Barnes & Noble, or specialty coffee shops) such as “The Espresso Compendium” or “Coffee: A Guide to Buying, Brewing & Enjoying.” Stack them horizontally on your floating shelf or on a small wooden stand ($10-$20). Rotate the visible book every month to keep your display fresh.

    Pro tip: Visit your local library first to see which books you actually love before buying.

    These books become conversation starters and actually improve your brewing knowledge. Browsing a page while your espresso extracts adds a meditative quality to your routine.

    15. Position a Small Mirror or Reflective Surface Behind the Station

    A mirror multiplies light and makes your corner feel larger and more polished. It’s an easy design trick that professional cafés use constantly.

    Hang a simple round mirror in brass, wood, or matte black ($30-$80 from Anthropologie, West Elm, or IKEA) directly behind your machine at eye level. This bounces light around the corner and creates visual depth. Position it so your machine’s reflection looks intentional, not accidental. Paint the wall behind the mirror a soft neutral tone (cream, soft gray, pale sage) so the reflection enhances rather than clutters.

    Pro tip: A brass mirror pairs beautifully with stainless steel machines; wood frames work with all aesthetics.

    Your corner suddenly feels brighter and more expansive. The reflection creates a professional café aesthetic that’s surprisingly sophisticated.

    16. Create a Labeled Storage System for Filter Baskets and Portafilters

    Keeping your portafilters and baskets organized means you’ll always grab the right size and your station looks systematically curated. This is ideal for those who own multiple sizes.

    Build or buy a small wooden or metal organizer with hooks ($25-$60 from Etsy, Amazon, or custom woodworker) mounted 24-30 inches above your machine. Label each hook with small brass or wooden tags ($10-$20 set) identifying what hangs there. Store extra filter baskets in matching glass containers ($3-$5 each) with corresponding labels. Everything should be visible and accessible.

    Pro tip: Keep a small cheat sheet showing basket sizes and their uses—laminate it for durability ($5).

    This system looks professional and actually saves you time every morning. No more digging through drawers looking for the right basket.

    17. Incorporate a Small Water-Resistant Counter Mat Under Your Machine

    A water-resistant mat protects your counter from espresso splashes and steam, plus adds visual grounding to your station. It’s a small detail that makes everything feel more intentional.

    Choose a small woven or silicone counter mat (12×18 inches) in neutral tones like cream, gray, or black ($15-$30 from Amazon, Williams Sonoma, or CB2). Look for ones specifically labeled “water-resistant” or “easy-clean.” Wipe it down daily and hand wash weekly. The mat defines your machine’s footprint and catches small spills before they reach your counter.

    Pro tip: Match the mat’s texture to other elements in your station—if you have a woven basket, choose a similar texture for cohesion.

    Your counter stays protected and your station looks intentionally bounded, like a designated café corner rather than just a machine randomly placed. Small details like this signal attention to design.

    18. Display Espresso Extraction Guides or Brewing Charts on the Wall

    A visual guide on your wall turns your station into a learning hub. It’s both functional and shows you take your coffee seriously.

    Create or buy a printed espresso guide ($15-$40 from Etsy shops specializing in coffee infographics) and frame it in a simple black or natural wood frame ($10-$25 from IKEA or Target). Mount it 36-48 inches high, directly in your line of sight when working. Include extraction ratio guides, temperature references, and grind size suggestions. You can also find free printables online and print them at home ($5 for ink and paper).

    Pro tip: Laminate your printed guide so you can write notes on it with dry-erase markers without damaging the original.

    Now you have a constant reference that actually improves your consistency. You’ll learn faster and troubleshoot brewing problems more effectively when guidelines are literally in front of you.

    19. Style Your Station With a Color-Coordinated Ceramic Collection

    Choosing ceramics in a coordinated color palette unifies your station and makes it feel designed rather than randomly assembled. Cohesive styling photographs beautifully too.

    Select your dominant color (white, cream, soft gray) and add one or two accent colors (soft sage, dusty pink, warm terracotta) across your espresso cups, milk pitcher, sugar bowl, and saucers ($50-$150 total for a complete set from Anthropologie, Etsy, or specialty coffee retailers). Keep all pieces in this color family so they work together visually. Mix textures—glossy, matte, or textured finishes—to add interest while maintaining color cohesion.

    Pro tip: Find one beautiful set you love and build around it rather than buying random pieces.

    When everything coordinates, your station looks intentionally curated, like you’ve studied café design. It’s a small thing that makes a massive visual difference.

    20. Install a Timer or Interval Training Clock for Brewing Consistency

    A visible timer keeps you accountable to proper extraction times and adds a professional touch. It’s a small tool that genuinely improves your shots.

    Mount a wall-mounted interval timer or smartphone-sized display ($20-$50 from Amazon) within arm’s reach of your machine. Choose one in black, brass, or stainless steel to match your machine’s finish. Use it every single shot to ensure consistent 25-30 second extractions. Pro tip: Use a small digital kitchen timer ($8-$15) that clips onto a shelf if wall mounting isn’t an option.

    Over time, you’ll internalize timing, but a visible reference keeps you honest while building muscle memory. Your shots become noticeably more consistent.

    21. Create a Dedicated Milk Frothing Station With a Separate Pitcher Holder

    Having dedicated pitchers for milk work makes your workflow smoother and keeps your station organized. A small stand makes this collection look intentional rather than cluttered.

    Get a small wooden or metal pitcher rack ($20-$40 from specialty coffee retailers or Amazon) and position it 18-24 inches from your machine, ideally on the left if you’re right-handed. Store 3-4 stainless steel milk pitchers in different sizes ($15-$25 each: 12oz, 20oz, 32oz) so you match pitcher size to drink size. Add a milk thermometer holder ($5-$10) and a small folded towel rack ($8-$15) directly on or next to the stand.

    Pro tip: Only wet-wash pitchers and dry immediately—never let them sit with milk residue.

    Your milk work goes faster because you’re not hunting for the right pitcher. The dedicated station also signals that you take microfoam seriously.

    22. Add Ambient Scent With Coffee or Subtle Fragrance Candles

    Scent completes the café experience and makes your space feel welcoming. Choose fragrance thoughtfully so it enhances rather than competes with your coffee’s aroma.

    Place 1-2 soy candles ($15-$30 each from Jo Malone, Diptyque, or local coffee-scented artisans) on a shelf 18-24 inches away from your espresso machine (distance is important so fragrance doesn’t interfere with coffee aroma). Opt for subtle scents—coffee, vanilla, cedarwood, or unscented (let the coffee smell be the star). Light candles during evening shots or when you want to extend your ritual.

    Pro tip: Never put scented candles directly next to your machine—the heat will throw off the fragrance diffusion and might interfere with your tasting experience.

    Your morning or evening coffee moment becomes multi-sensory. The combination of warmth, light, and subtle scent turns a practical task into a luxurious pause.

    23. Display Your Espresso Machine Manual or Service Records in a Small Frame

    Your machine’s documentation becomes part of the design when framed thoughtfully. It shows you maintain your equipment and actually encourages regular care.

    Frame a photocopy of your machine’s manual cover or create a printed “Service Log” template ($15-$30 for framing from IKEA or local framing) and hang it 12-18 inches to the left of your machine. Use a laminated version so you can write maintenance dates directly on it with dry-erase markers. Include descaling dates, cleaning checks, and any repairs. Update it monthly.

    Pro tip: Design your own service log template using Canva (free) and print it—it’s much more personal than a basic chart.

    This simple frame keeps you accountable to maintenance and signals serious dedication to your equipment. Regular upkeep extends your machine’s life significantly.

    24. Invest in Sound-Dampening Mats or Acoustic Panels for Noise Control

    If your grinder or machine is loud, sound dampening makes your ritual feel calmer and protects your ears. This is an underrated design element that affects your actual experience.

    Install thin acoustic panels or self-adhesive sound-dampening mats ($40-$100 from Amazon or specialty audio retailers) on the wall directly behind your machine, covering about 2-3 feet of wall space. Choose neutral colors (gray, cream, charcoal) that blend with your existing wall. These reduce grinding and machine noise by 40-50% without looking institutional. Mounting takes 20-30 minutes.

    Pro tip: Acoustic panels also improve espresso machine stability by reducing vibration transfer.

    Your station becomes quieter and more peaceful. A calmer morning ritual genuinely affects your entire day’s vibe.

    25. Create a “Clean-Up Station” With Dedicated Baskets for Used Pucks and Towels

    A designated cleanup zone keeps your station tidy and signals that maintenance is built into your routine. It’s a small organizational detail that makes a real difference.

    Place two small woven or metal baskets ($15-$30 for a pair from Target, Anthropologie, or Amazon) on the floor or on a low shelf directly under your machine station. Label one “Spent Pucks” and one “Towels.” Use the pucks basket for espresso grounds (compost these daily), and the towels basket for daily cleanup cloths. Check both baskets every morning before you start.

    Pro tip: Compost your spent pucks—they’re valuable for gardens and reduce waste.

    This system keeps your station looking clean and functional. You never get overwhelmed by coffee grounds or piled dirty towels, and maintenance becomes automatic.

    26. Frame Personal Coffee Shop Photos or Travel Coffee Culture Shots

    Personal photos on your wall connect your home station to the wider coffee community and remind you why you love this ritual. It’s a final design layer that makes the space truly yours.

    Print and frame 3-4 of your favorite coffee shop photos or travel coffee culture moments ($30-$80 for printing and simple frames from Target, IKEA, or local frame shops). Arrange them in a small gallery formation directly above or to the side of your station at eye level. Mix frame styles (wood, black metal, different sizes) for visual interest. Leave 2-3 inches between frames.

    Pro tip: Include photos from coffee shops you love, latte art you’ve created, or specialty coffee regions you want to visit.

    Your station becomes a personal shrine to your coffee journey. Visitors see your passion reflected in these images, and you get daily inspiration every time you use your machine.


    Save this post for your next weekend and pick one idea to start with this weekend—even just adding a floating shelf or some matching espresso cups changes how your whole station feels. Share with anyone you know who’s serious about their coffee at home.

  • 24 Black Tile Bathroom Aesthetic Ideas That Look Bold & Chic

    24 Black Tile Bathroom Aesthetic Ideas That Look Bold & Chic


    Black tiles are having a major moment, and for good reason—they’re bold, sophisticated, and way more versatile than you’d think. Whether you’re working with a tiny powder room or a sprawling primary bath, black tiles can make your space feel like a high-end retreat without needing a massive budget. In this guide, you’ll find 24 specific ways to use black tiles that actually look chic (not cave-like), plus styling tricks, product recommendations, and budget hacks. From accent walls to floor patterns to unexpected details, these ideas work for renters, homeowners, and everyone in between. Let’s get into it.


    1. Create a Black Tile Accent Wall Behind Your Vanity

    An accent wall is the easiest way to bring black tiles into your bathroom without overwhelming the space. Black subway tiles behind your vanity create instant visual interest and anchor the entire room’s design.

    Subway tiles are affordable and timeless—expect to pay $3–$8 per square foot for basic black subway tiles. You’ll need about 15–30 square feet depending on your vanity width. Hire a pro (usually $15–$30 per hour labor, or $200–$400 for the whole wall), or DIY with a tile adhesive kit ($15–$25) if you’re handy. Installation takes a weekend if tackling it yourself. Shops like Home Depot, Wayfair, and Lowe’s stock tons of options in different finishes (matte, glossy, textured).

    Pro tip: Pair your black tile with light grout (white or gray) to make the grid pop and keep it feeling modern rather than heavy.

    Your bathroom instantly gains character and depth. The contrast between the black wall and light fixtures makes everything feel intentional and curated.


    2. Go Matte Black for a Softer, Less Reflective Look

    Matte black tiles feel different from glossy ones—they’re moodier, less reflective, and honestly way more forgiving of water spots and fingerprints. If you want black without the mirror-like shine, matte is your answer.

    Matte finishes cost roughly the same as glossy black tiles ($3–$8 per square foot), but the difference in how they photograph and feel in person is huge. Matte tiles hide dust, mineral deposits, and water marks better than glossy finishes, which saves you cleaning time. Look for matte finishes from brands like Daltile, Emser, or MSI at Home Depot or specialty tile shops.

    Pro tip: Matte tiles pair beautifully with brass or gold fixtures—the combination feels warm and intentional, not cold.

    You’ll get a spa-like calm that glossy tiles can’t deliver. Your space becomes easier to maintain and photographs beautifully in natural light.


    3. Mix Black and White Subway Tiles in a Checkerboard Pattern

    A checkerboard floor is playful, timeless, and instantly makes any bathroom feel intentional. Black and white subway tiles in a checkerboard layout brings personality without needing color elsewhere.

    You’ll need equal amounts of black and white subway tiles ($3–$8 per square foot each). For a 5×8-foot bathroom floor, budget around $200–$400 in tile alone plus labor or DIY time. Layout matters—have a clear floor plan before ordering to avoid waste. This is a medium DIY project or a great one to hire out ($400–$800 installed).

    Pro tip: Keep walls and fixtures neutral (white, natural wood, brass) so the floor becomes the star.

    The pattern creates movement and energy in your space. Guests will immediately notice it, and it’s totally timeless—you won’t get tired of it.


    4. Use Large-Format Black Tiles for a Seamless, Modern Look

    Large tiles (12×24, 18×36, or 24×48 inches) create clean lines with fewer grout joints, making your bathroom feel bigger and more sophisticated. Fewer grout lines also mean less cleaning.

    Large-format tiles run $5–$15 per square foot and require a skilled installer because they’re heavier and need proper substrate support. Installation labor is usually $25–$40 per hour or $500–$1,200+ for a shower enclosure. This isn’t a DIY project unless you have tile experience.

    Pro tip: Pair large black tiles with a single accent tile in a complementary color (cream, sage, terracotta) to add depth without fussiness.

    Your shower becomes a serene, minimalist statement. The seamless look feels high-end and spa-like, even in a modest bathroom.


    5. Install Black Hexagon Tiles for Geometric Interest

    Hexagon tiles add playful geometry without being over-the-top. They work beautifully on floors, in shower niches, or as accent strips.

    Black hexagon tiles cost $4–$10 per square foot, and they’re slightly trickier to install because of the angles. Budget extra labor time ($30–$45 per hour) for intricate layout. This is doable as a DIY project if you’re detail-oriented and patient.

    Pro tip: Mix matte and glossy hexagon tiles in the same area for subtle texture variation.

    The geometric pattern adds character and draws eyes down or around the room. It’s sophisticated enough for primary baths but playful enough for guest rooms.


    6. Apply Black Tiles to Just Your Shower Floor for Slip Safety and Style

    Black tiles on your shower floor serve double duty: they’re non-slip (especially textured matte varieties) and create visual separation from lighter walls. It’s practical and pretty.

    Textured black floor tiles run $4–$12 per square foot and are specifically designed for wet areas. A typical shower floor (3×3 feet) costs $40–$100 in tile plus installation. This is a moderate DIY project or a quick pro job ($200–$400 installed).

    Pro tip: Use textured tiles specifically rated for slip resistance—look for tiles marked “non-slip” or with a high coefficient of friction (COF).

    Your shower feels more intentional and safer. The textured finish adds visual interest while keeping your feet secure on wet surfaces.


    7. Frame Your Mirror with Black Tile Trim

    Instead of a framed mirror, create a custom border with thin black tiles. It’s cheaper than buying a new mirror frame and looks completely custom.

    Thin subway or pencil black tiles ($3–$6 per square foot) plus basic adhesive ($15) is all you need. Installation takes 1–2 hours if you’re comfortable with tile work. This is an easy DIY project that transforms a plain mirror into a designed feature.

    Pro tip: Grout with white or light gray to keep the border from feeling too heavy.

    Your mirror gains architectural detail and sophistication. It feels like you hired a designer, but you did it yourself for under $50.


    8. Create a Black Tile Stripe Running Around the Bathroom

    A horizontal stripe of black tiles at chair-rail height (about 36 inches up) adds structure and visual interest without committing your entire bathroom to dark tiles.

    You’ll need about 20–40 square feet of black tile depending on your room size ($60–$240 in tile). This is a medium DIY project or a quick pro install. Pair it with white subway tiles above and below for maximum impact.

    Pro tip: Run the stripe at a height that works for your space—it doesn’t have to be exactly at chair-rail height.

    The stripe gives your bathroom a finished, intentional look. It adds visual interest without feeling heavy or overwhelming.


    9. Use Black Tiles as a Wet Room Base

    Black tiles work beautifully as the foundation of a curbless, open wet room. The dark floor visually defines the shower zone and hides water spots better than light tiles.

    Black wet room tiles (textured, slip-resistant) cost $6–$12 per square foot. A complete wet room installation (including drainage, waterproofing, slope) runs $3,000–$8,000 installed depending on size and complexity. This is a professional-only project—waterproofing requires expertise.

    Pro tip: Pair black floor tiles with light walls to keep the space feeling open and bright.

    Your bathroom becomes a luxe, zero-threshold retreat. The clean lines and accessible design are both beautiful and functional.


    10. Add Black Tiles to Your Vanity Backsplash

    A backsplash behind your vanity is a low-commitment way to introduce black tiles. It’s visible, functional, and changes the whole vibe of your sink area.

    You’ll need roughly 8–12 square feet of black tile ($25–$60) plus basic adhesive. Installation is a straightforward DIY project (1–2 hours) or a quick pro job ($100–$200 installed). This is perfect if you’re renting—with permission, you can use temporary tile adhesive or peel-and-stick backsplash alternatives.

    Pro tip: Match your backsplash grout to your fixtures (white grout for a crisp look, or darker grout for cohesion).

    Your sink area instantly feels designed and spa-like. Water splashes are easier to wipe clean from tiles than painted drywall.


    11. Combine Black Tiles with Warm Wood Accents

    Black tiles paired with warm wood create balance—the darkness is offset by natural warmth. This combo feels both contemporary and inviting, not cold or industrial.

    Black tiles ($4–$10 per square foot) combined with a wood vanity ($300–$800 for a solid wood floating piece) creates a cohesive look. This mix works with both DIY and pro installation.

    Pro tip: Choose wood with warm undertones (walnut, oak, teak) rather than cool-toned wood or whitewash finishes.

    Your bathroom becomes warm and grounded. The black tiles feel less stark and more cozy, like a retreat rather than a showroom.


    12. Install Black Tiles as a Full Shower Enclosure for Ultimate Drama

    Going full black in your shower is bold but stunning when done right. It feels spa-like, hides everything, and creates a dramatic focal point.

    Full shower enclosure in black tile runs $40–$60 per square foot in materials and labor, so budget $2,000–$5,000 for a standard shower. This requires professional installation for proper waterproofing and slope. It’s a serious investment but worth it if you’re renovating anyway.

    Pro tip: Add a large window or skylight to keep the space from feeling too dark and claustrophobic.

    Your shower becomes a moody sanctuary. Stepping inside feels like entering a spa, and the all-black aesthetic is completely timeless.


    13. Mix Black Tiles with Colorful Grout for Unexpected Detail

    Your grout color matters just as much as your tile color. Bright white grout against black tiles creates graphic contrast; gray grout is more subtle; matching black grout is ultra-minimalist.

    Black tiles ($3–$8 per square foot) plus your choice of grout ($5–$15 per bag, one bag covers about 50–75 square feet). Grout color is a DIY-friendly choice—no extra labor cost, just your preference. Experiment with samples if possible.

    Pro tip: White grout photographs better and feels fresher; dark grout feels moodier and hides stains.

    The grout choice completely changes your tile’s personality. Experiment before committing to see what mood you want.


    14. Use Black Marble or Stone Look-Alike Tiles

    Black marble or stone-textured tiles feel more expensive and elegant than solid black. Veining and natural variation make them look upscale without the actual marble maintenance headache.

    Porcelain tiles that mimic black marble run $6–$15 per square foot (way cheaper than actual marble at $20–$40+). These tiles don’t stain, don’t etch from acids, and look just as good. Perfect for bathrooms.

    Pro tip: Actual black marble requires sealing and maintenance—porcelain imitations give you the look with zero fuss.

    You get a high-end, organic aesthetic without the expense and upkeep. Your bathroom feels luxurious and curated.


    15. Layer Black Tiles with Patterned or Textured Neighbors

    Mixing black tiles with patterned or textured neighbors creates an eclectic, designed look. It’s more interesting than solid black and easier to live with long-term.

    Black tiles ($4–$8 per square foot) paired with patterned tiles ($5–$12 per square foot) give you flexibility. Choose a pattern that complements without competing—geometric, terrazzo, or subtle florals work well. Installation labor is standard ($15–$30 per hour).

    Pro tip: Sketch out your pattern before ordering to avoid costly mistakes or leftover tile.

    The mix prevents your bathroom from feeling one-note. It’s interesting, personalized, and still cohesive.


    16. Create a Black Tile Niche Inside Your Shower

    A black tile niche inside your shower is perfect for storage and visual interest. It breaks up the expanse of white or light tiles beautifully.

    A small niche (12×24 inches) needs about 3–5 square feet of black tile ($15–$40). Niches built into existing showers are easier than retrofits. This is a moderate DIY project or a quick pro job ($150–$300).

    Pro tip: Make sure your niche is large enough to actually hold bottles—minimum 12 inches deep.

    Your shower gains storage and style in one move. It’s functional enough that you actually use it, but designed enough to feel intentional.


    17. Apply Black Tiles Just Inside Your Shower Entry for Visual Drama

    Black tiles right at the shower entry create a portal effect—a dramatic transition from the light bathroom into your dark, moody shower zone. It’s theatrical but works brilliantly.

    You only need 10–15 square feet of black tile ($30–$80) to create this effect. Install a thin row or two of black tiles right inside the threshold to define the shower space. DIY-friendly if you have basic tile skills.

    Pro tip: This works especially well if your shower floor is slightly raised or has a subtle step—the black tile reinforces that transition.

    Stepping into your shower feels like entering a sanctuary. The visual and psychological shift makes your daily shower feel more special.


    18. Match Black Tiles with Black Fixtures for a Minimalist, Monochromatic Look

    Go full monochromatic by matching your black tiles with matte black fixtures. It’s ultra-minimalist, cohesive, and feels like a luxury spa.

    Black matte fixtures (showerhead, towel bar, faucet) run $100–$400 each depending on quality. Tiles are your usual $4–$10 per square foot. The cohesion is what makes this work—everything feels intentional.

    Pro tip: Add one element of warmth (wood shelf, brass handle, or a plant) so the space doesn’t feel sterile.

    Your bathroom becomes a calm, monochromatic retreat. The lack of visual competition makes the space feel more spacious and serene.


    19. Use Thin Black Tile Strips to Define Different Bathroom Zones

    In an open bathroom or powder room, thin black tile strips can visually separate different zones without building walls. It’s clever spatial design that’s cheaper than construction.

    Thin black tile strips (pencil tiles or thin subway tiles, $3–$6 per square foot) are purely design elements. This is a DIY-friendly project that costs $40–$100 and takes a weekend.

    Pro tip: Vertical lines elongate spaces; horizontal lines break them up. Choose your direction based on your room’s proportions.

    Your space feels more organized and intentional. Visual boundaries make the layout feel more purposeful.


    20. Install a Black Tile Wainscot for a Classic, Upscale Look

    Wainscoting in black tiles is classic, upscale, and draws the eye down (visually enlarging the space). It’s popular in mid-century and contemporary design.

    Black tiles for wainscoting ($4–$8 per square foot) plus a metal trim piece at the rail height ($20–$50) create definition. Budget $400–$800 installed for an average bathroom. This is a moderate DIY project or a straightforward pro install.

    Pro tip: Use a metal trim at the top edge for a polished, intentional finish (not just grout and caulk).

    Your bathroom feels elevated and designed. Wainscoting adds architectural detail that reads as intentional and curated.


    21. Pair Black Tiles with Terrazzo or Speckled Countertops

    Black tiles with speckled or terrazzo countertops create harmony through echo—the counter picks up the black from the tiles, but adds warmth and movement.

    Black tiles ($4–$10 per square foot) paired with a terrazzo or quartz countertop ($60–$120 per square foot) work beautifully together. This is for people investing in their bathrooms, but it’s worth it.

    Pro tip: Choose a terrazzo or quartz with enough black speckles to echo your tiles without matching perfectly.

    The mix feels collected and intentional. Your vanity area becomes a curated, high-end focal point.


    22. Use Black Tiles in a Geometric Mosaic Pattern for Texture

    Geometric patterns (chevron, herringbone, basket weave) in black tiles add texture and movement. The offset pattern creates depth that solid black can’t achieve.

    Patterned tile layouts cost the same per square foot as standard tiles ($4–$10 per square foot) but require more skilled labor. Budget extra installation time ($25–$40 per hour). This is a project to hire out unless you’re experienced with tile.

    Pro tip: Chevron patterns are easier to DIY than herringbone—fewer complex cuts needed.

    Your bathroom gains visual interest and sophistication. The dimensional quality makes the space feel more designed and intentional.


    23. Layer Black Tiles with Warm Brass or Gold Accents

    Black tiles plus warm brass or gold fixtures create an inherently luxe combination. The warm metal prevents the black from feeling cold or industrial.

    Black tiles ($4–$10 per square foot) with brass fixtures ($150–$400 per piece) is an affordable way to add luxury vibes. Brass costs more than chrome, but it’s timeless and warm.

    Pro tip: Mix brass with matte black fixtures for a more contemporary look, or glossy black for classic elegance.

    Your bathroom reads as high-end and curated. The brass-and-black combo is sophisticated and totally timeless.


    24. Create a Ombre Effect with Black Tiles Fading Upward

    An ombre effect using black tiles fading into gray tiles is subtle, sophisticated, and adds depth without being over-the-top.

    This requires multiple gray tile shades ($4–$10 per square foot across different colors) plus careful layout planning. The labor is minimal if you’re gradual with your color transitions. This is a creative DIY project or a quick pro install ($500–$1,000 installed).

    Pro tip: Order samples in person to see how colors transition—slight variations create a smooth gradient.

    Your shower walls become a subtle art piece. The gradient adds sophistication and visual interest without feeling gimmicky or trendy.


    Save this post for your next bathroom refresh and bookmark one idea to try first. Black tiles aren’t as intimidating as they seem—start small with a single accent wall or niche, and you’ll see how transformative even one black tile element can be.

  • 24 Coffee Nook Ideas That Create a Warm Morning Ritual

    24 Coffee Nook Ideas That Create a Warm Morning Ritual

    There’s something magical about starting your day in a dedicated coffee nook—that one special spot where you can sip your morning brew without distractions. Whether you’re working from home, a renter in a small apartment, or just someone who deserves a peaceful morning ritual, creating a coffee nook doesn’t require much space or a big budget. We’ve gathered 24 practical, inspiring ideas to help you craft a cozy corner that makes every morning feel like a mini getaway. From simple styling tweaks to budget-friendly shopping hacks, you’ll find options for every space size and lifestyle. Get ready to claim your corner and make mornings something you actually look forward to.

    1. Choose a Light Wood Table as Your Base

    A light wood table becomes the anchor for your entire nook—it’s functional, visually calming, and works with almost any decor style. Look for compact options at IKEA, Target, or Facebook Marketplace that fit your space. A simple side table measuring 20-24 inches wide is perfect for a mug, journal, and a small plant without overwhelming a tight corner.

    Wood has a natural warmth that makes you want to linger over your coffee. Aim to spend $40-$120 for a solid option, or go thrifting for vintage pieces under $50. If you’re renting, a lightweight table is easy to move when you switch spaces.

    The best part? A good wood table works in bedrooms, living rooms, or kitchen nooks—it’s not tied to any one location. You’ll use it even after your morning coffee ritual becomes a habit.

    2. Layer Soft Textures with a Cozy Throw Blanket

    Draping a quality throw blanket over your chair or the back of a nearby shelf instantly adds coziness and visual warmth. Blankets make your nook feel like a deliberate retreat rather than just a random corner. Pick neutral tones like cream, warm gray, or soft taupe to keep the space calm and focused on your coffee ritual.

    Target, Wayfair, or Amazon carry throws in every price range—$20-$80 gets you a durable, soft option that lasts years. Chunky knit blankets photograph beautifully for Pinterest inspiration, and they’re functional when you actually want to wrap up. Rental-friendly tip: a blanket doesn’t require any installation.

    Now your nook becomes a place where you actually want to stay for 20 minutes instead of rushing through coffee. The tactile experience matters as much as the coffee itself.

    3. Add a Small Bookshelf for Reading Material

    A compact bookshelf (even just 24-36 inches tall) gives your nook purpose beyond coffee—it becomes a reading destination. You don’t need floor-to-ceiling shelving; a single small unit or wall-mounted shelves work beautifully in tight spaces. Stock it with books you actually want to read, design magazines, or even blank journals for morning thoughts.

    IKEA’s Kallax or Target’s basic shelving units run $30-$100, and thrifted wooden shelves are often cheaper. This is a one-weekend installation project, or go wall-mounted if you want to avoid drilling (use adhesive strips for renters). Pair shelves with small decorative objects and plants to avoid a stark, empty look.

    Suddenly your morning coffee ritual includes a cozy reading moment. Your brain gets a mental break before diving into the day—that’s worth the small investment of space and money.

    4. Install Warm Pendant or Clip Lighting

    Proper lighting transforms a coffee nook from feeling like a corner to feeling like the destination. Pendant lights, clip-on lamps, or even a small desk lamp create a focused, intentional space that signals “this is my time.” Warm-toned bulbs (2700K color temperature) mimic morning sunlight and feel inviting rather than harsh.

    Look for pendant lights ($25-$80) or clip lamps ($15-$40) at Target, Home Depot, or Amazon. If you’re renting or can’t drill, a tall arc floor lamp positioned behind your chair works just as well. Brass or matte black finishes fit most decor styles. Installation is usually simple—just swap out a bulb or plug in a lamp.

    The moment you turn on your dedicated light, you’re signaling to yourself (and anyone sharing your space) that this is your sacred morning time. Lighting psychology is real, and warm light actually makes you relax.

    5. Create a Low-Maintenance Plant Station

    Plants instantly make your nook feel alive and connected to nature—research shows they reduce stress and improve air quality. You don’t need a green thumb; stick with low-maintenance options like snake plants, pothos, ZZ plants, or succulents that thrive on neglect. Group 2-3 small plants (4-6 inches) together for visual impact without taking up much space.

    Small potted plants run $8-$25 each at garden centers or grocery stores. Ceramic or concrete planters add style ($5-$20 each). Water them once a week (or less for succulents), and you’re done. Pro tip: rotate them toward light monthly so they grow evenly.

    Your nook now has natural beauty and oxygen boost. Glancing at green leaves while you sip coffee literally calms your nervous system before the day gets hectic.

    6. Style with a Sleek Coffee Mug Collection

    Your coffee mug isn’t just functional—it’s part of your daily ritual and visual experience. Collect 2-3 quality mugs in complementary colors (soft greens, warm neutrals, or pastels) that make you happy to hold. Handmade or locally crafted mugs feel special and encourage you to slow down.

    Hunt at local pottery studios, etsy.com, or even HomeGoods for unique finds ($12-$30 per mug). Alternatively, minimalist ceramic mugs from IKEA or Target are affordable ($8-$15) and work beautifully displayed. The goal is having something you actually want to use, not just a generic coffee cup.

    Pouring your coffee into a mug you love is a micro-moment of intentionality. It signals that your morning matters, even if nothing else goes perfectly that day.

    7. Use a Floating Shelf for Space-Saving Storage

    Floating shelves maximize vertical space without eating into your footprint—perfect for small apartments or tight corners. A single 24-inch shelf can hold books, plants, decorative objects, and daily essentials while keeping your table surface clear. Mount it 12-18 inches above your table so it’s accessible but not claustrophobic.

    Floating shelves run $20-$60, and installation takes under 30 minutes with basic tools (or hire a handyman for $50-$100). For renters, adhesive shelves exist but work best on smooth surfaces and lighter items. Choose wood, metal, or painted finishes that match your decor style.

    Now your nook is organized and visually interesting without clutter. Everything you need is within arm’s reach, and the elevated view makes the space feel bigger than it is.

    8. Paint an Accent Wall in a Soft, Calming Color

    An accent wall in a soothing color (soft sage, dusty rose, warm cream, or pale blue) completely shifts how your nook feels. These 2025 color trends move away from harsh grays toward nature-inspired palettes that calm your mind. One wall of color is bold enough to feel intentional but contained enough to not overwhelm a small space.

    Quality paint runs $25-$40 per gallon, and one gallon covers approximately 400 square feet—more than enough for an accent wall. Behr, Sherwin-Williams, or Benjamin Moore all have excellent soft undertones to explore. Budget $100-$200 for materials and labor if you hire help, or DIY it in one afternoon for just the paint cost.

    The moment you sit down with coffee, you’re surrounded by a color that actually soothes your nervous system. Renters: ask your landlord first, but many are fine with paint if you commit to returning it to original color.

    9. Set Up a Small Bar Cart for Coffee Essentials

    A mini bar cart keeps all your coffee supplies in one mobile, stylish unit—no hunting through cabinets while half-asleep. Look for slim carts that fit 15-20 inches wide, so they don’t dominate your space. Stock the top tier with your mug, the middle with beans and sweetener, and the bottom with backup mugs or a small pitcher.

    Bar carts cost $40-$120 at Target, IKEA, Amazon, or HomeGoods. Metal or wood finishes work best in coffee nooks. The genius part? You can move it between rooms or hide it if you need the space—rental-friendly flexibility at its best.

    Everything you need is there, styled and accessible. No more “where are the coffee filters?” moments during your peaceful morning ritual.

    10. Hang Minimalist Line Art or Photography

    Simple, uncluttered wall art in 1-3 pieces creates visual interest without overwhelming your calm space. Choose prints that speak to you—botanical illustrations, abstract lines, or peaceful photography. Avoid busy gallery walls; this isn’t the time for maximalism.

    Framed prints cost $15-$40 each from Minted, Etsy, or even a local print shop. You can also frame fabric scraps or magazine covers in simple frames from IKEA ($8-$15 per frame). Hang at eye level when you’re seated so you actually enjoy them while sipping coffee.

    Your nook now has personality and visual focus. The art becomes part of your morning meditation rather than just decoration on a wall.

    11. Layer Ambient Lighting with LED String Lights

    LED string lights add warm, flattering glow that transforms a nook into a sanctuary—especially during darker months or early mornings. Warm white lights (not cool white or colored) feel calming and intentional. Drape them loosely behind your table or along a shelf edge for ambient effect rather than task lighting.

    LED string lights run $12-$30 on Amazon or Target, use minimal electricity, and plug into any outlet. They’re completely renter-friendly and removable. Combine them with your main light source for layered, flexible lighting that changes your nook’s mood.

    Now your morning coffee ritual feels like you’re sitting in a cozy cafe—all from a simple plug-in light strand. The soft glow makes everything feel slower and more intentional.

    12. Choose a Comfortable Chair with Good Back Support

    You’re going to sit here every morning, so your chair needs to support your back and feel genuinely comfortable. Look for dining chairs, accent chairs, or even recliners (depending on your space) with back support. Upholstered options in light colors feel calmer than hard wood seats.

    Comfortable chairs range $80-$300, depending on quality. Check Article, Wayfair, Target, or IKEA for mid-range options that don’t sacrifice comfort. Thrift stores often have solid wooden chairs you can reupholster or add cushions to for under $100 total. This is one place where spending a bit more matters—your back will thank you.

    You’ll actually want to linger over coffee when your chair supports you properly. Back pain doesn’t belong in your peaceful morning ritual.

    13. Add a Small Side Table for Journal Writing

    A small side table (18-20 inches) positioned right next to your chair creates a designated spot for journaling or note-taking. This extends your ritual beyond just coffee—you can jot down thoughts, gratitude, or daily intentions without reaching across your lap. Keep it simple and uncluttered so it actually invites you to write.

    Small side tables cost $30-$80 at IKEA, Target, or thrift stores. Pair it with a quality pen and a journal you love ($5-$25), and you’ve created a complete morning practice. One weekend setup, minimal money, maximum mindfulness impact.

    Now your nook is a complete ritual space—coffee, comfort, and reflection all in one corner. Your brain starts the day calmer and more grounded.

    14. Install a Magazine Rack for Reading Rotation

    A magazine rack keeps your reading material visible and easy to grab without stacking books on your table. This encourages you to actually flip through design magazines or read articles you’ve been meaning to get to. Group similar themes together (design, lifestyle, inspiration) for a thoughtful feel.

    Magazine racks run $20-$50 at Target, IKEA, or HomeGoods. Thrifted brass or wood options add vintage charm. Rotate the magazines monthly so your nook always feels fresh and gives you new material to enjoy.

    Your morning ritual now includes easy access to inspiration and ideas. You’re mentally stimulated but in a calm, intentional way that sets a positive tone for your day.

    15. Use Warm Brass or Gold Accents for Cohesion

    Brass and gold metallics create a cohesive, intentional look while adding warmth without clashing with calm color palettes. Use these tones in your lamp base, plant stand, picture frames, or decorative objects to tie your nook together. One or two brass pieces feel accidental; three or more feel designed.

    Brass accents span $10-$60 per item depending on quality. Mix thrifted brass finds ($5-$15) with new pieces for a collected, personal feel. This isn’t about matching perfectly—it’s about choosing warm metallics that complement each other.

    Your nook now has visual coherence and polish without feeling overdone. The warm tones reinforce the calming, intentional vibe you’re creating.

    16. Create a DIY Coffee Bar Under $100

    Skip the expensive espresso machine and create a simple coffee bar with essentials: a manual grinder, beans from a local roaster, a pour-over or French press, and a small cup warmer. This keeps costs low (total setup under $100) while making your ritual feel more connected to the actual coffee.

    Manual grinders ($20-$35), small pour-overs ($10-$20), and quality beans ($12-$18 per bag) are all available at grocery stores or specialty coffee shops. Pair with your favorite mug, and you have a complete setup that feels special without the $500+ machine investment.

    You’re not just having coffee—you’re participating in making it. That intentionality makes your morning ritual feel meaningful and grounded.

    17. Display Favorite Mugs on Open Shelving

    Open shelves that display your favorite mugs serve double duty: they’re functional storage and visual decor. Instead of hiding mugs in cabinets, let them be part of your nook’s design. Choose 4-6 mugs you genuinely love, arrange handles forward, and let them become part of the scenery.

    This requires just shelving and mugs you already own—it’s free styling with items you have. If you don’t have shelves yet, floating shelves run $20-$40 and take 30 minutes to install. Renters: adhesive shelves work for lightweight mugs.

    Every time you choose a mug in the morning, you’re choosing from pieces that make you happy. This small interaction sets a better emotional tone for your day.

    18. Incorporate a Small Water Feature or Fountain

    The gentle sound of running water adds a calming auditory element to your nook—it masks outside noise and creates a meditative atmosphere. Tabletop fountains are compact (often 6-12 inches), affordable, and surprisingly effective at shifting your space’s feel. Plus, they improve air humidity, which benefits plants and your skin.

    Small tabletop fountains cost $25-$60 on Amazon or HomeGoods. They’re plug-in, require minimal maintenance (just refill water every few days), and are completely renter-friendly. Choose ceramic or stone finishes that match your aesthetic.

    The gentle water sound becomes your morning’s background music. Your nervous system relaxes faster when you’re listening to nature-inspired ambiance instead of silence or street noise.

    19. Frame Motivational or Favorite Quotes Nearby

    A single framed quote or affirmation you see while sipping coffee sets your daily intention. Choose words that matter to you (not generic motivational clichés), print them on nice cardstock, and frame them simply. Change the quote seasonally if you want variety.

    Printing a quote is free to $5, and a simple frame adds $8-$15. You can also hand-letter quotes if you enjoy that practice. Alternatively, buy printed quotes from Etsy ($10-$20) if you prefer professionally designed text.

    Your brain sees these words every morning and internalizes them without effort. Over time, you’re subtly rewiring your morning mindset toward calm, gratitude, or intention—whatever matters most to you.

    20. Add a Scented Candle or Essential Oil Diffuser

    Scent is a powerful trigger for mood and memory. A quality candle or essential oil diffuser adds another sensory layer to your ritual. Choose calming scents like lavender, chamomile, or cedarwood rather than heavy florals. Light a candle when you sit down, signaling to your brain that this time is special.

    Quality candles run $15-$40 at specialty shops, and essential oil diffusers cost $20-$50. Budget-friendly option: a few drops of essential oil on a cotton ball tucked near your table works in a pinch. Both are renter-friendly and require no installation.

    The moment you smell your chosen scent, you’re in ritual mode. Your body recognizes this as your time, and your stress levels actually decrease before you’ve finished your first sip.

    21. Use a Coordinating Rug to Define Your Space

    A small rug anchors your nook and signals “this is a distinct space” without needing walls. Choose a size that fits your furniture (typically 3×5 feet or smaller for tight corners) in a neutral or warm tone. Natural fiber rugs in jute or wool feel grounded and aesthetic.

    Small rugs cost $40-$120 at Target, Wayfair, or HomeGoods. Thrifted rugs run cheaper ($15-$40). This is a one-person, five-minute setup—just lay it down, no installation needed. Renters love rugs for defining spaces without permanent changes.

    Now your nook is physically separate from the rest of your room. Your eye knows where to focus, and your brain recognizes this as your dedicated morning space.

    22. Stock a Small Tray with Sweeteners and Extras

    A tray keeps all your coffee additions in one contained spot—honey, sugar, cocoa powder, cinnamon, cream, or milk frother. It’s functional and looks intentional. Choose a tray that matches your aesthetic (wood, ceramic, or rattan), and fill it with containers you love.

    Trays run $10-$30, and small glass jars for holding items cost $5-$15 for a set. You probably have most of these items already—this is just organizing them attractively. One afternoon styling project with zero installation.

    Your morning coffee ritual becomes smoother and more pleasant when everything is organized and accessible. No hunting through cabinets or spilling things in half-asleep fumbling.

    23. Rotate Seasonal Decor to Keep Your Nook Fresh

    Switching out small decor elements (plants, candles, art prints, or color accents) seasonally keeps your nook from feeling stale while marking time and mood shifts. You don’t need to overhaul everything—just swap 2-3 items quarterly to stay engaged with your space.

    This costs nothing if you use items you already own or make minor seasonal purchases ($10-$20). Swap out candle scents, rotate which framed prints you display, or bring in seasonal plants. It’s a free way to refresh without recommitting money.

    Your nook stays psychologically fresh and connected to the actual season you’re in. You won’t get bored with your space, and you’ll notice each new season more mindfully.

    24. Create a Phone-Free Phone Holder Nearby

    The final touch: a designated phone holder where your phone does not go during your ritual. Keep it on a shelf nearby but out of reach, signaling that this time is for you, not for scrolling. A beautiful holder makes the intentional separation feel aesthetic rather than punitive.

    Phone holders cost $8-$20 and come in ceramic, wood, or metal finishes. Alternatively, use a small bowl or cup you already own. This requires no installation—just mindset and placement.

    Now your morning coffee ritual is truly unplugged time. Your brain actually gets a rest from notifications and stimulation, making the mental shift to your day more gradual and intentional.


    Save this post and try at least one idea this week—even the smallest change shifts your morning completely. Which element will you tackle first: lighting, seating, or scent?